Community Brag Posts
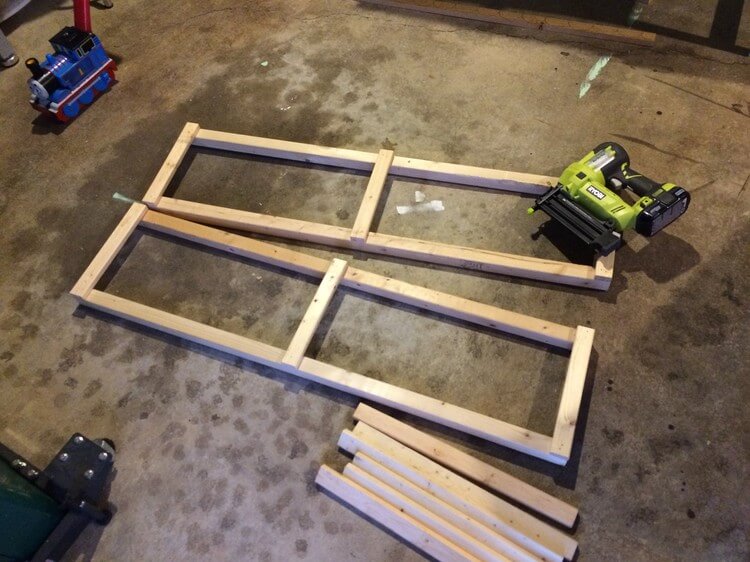
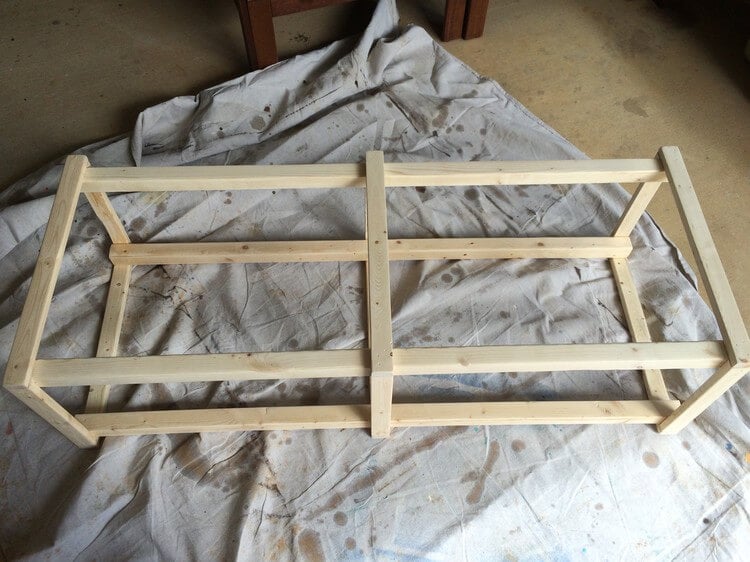
Clara Play Table
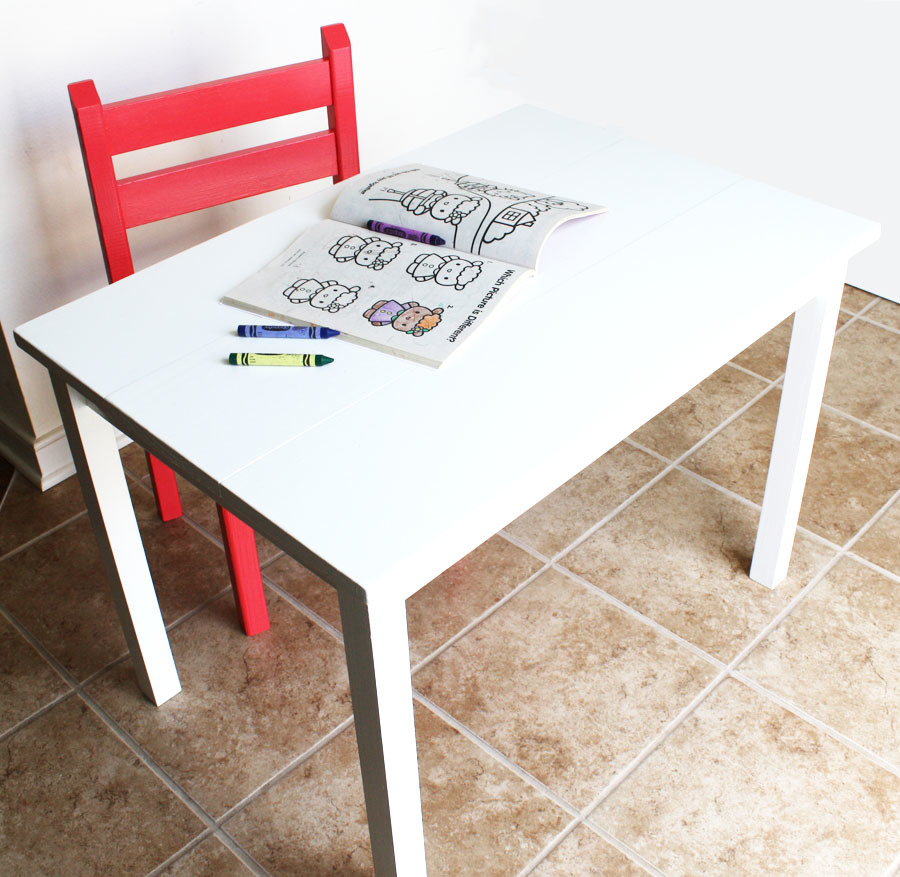
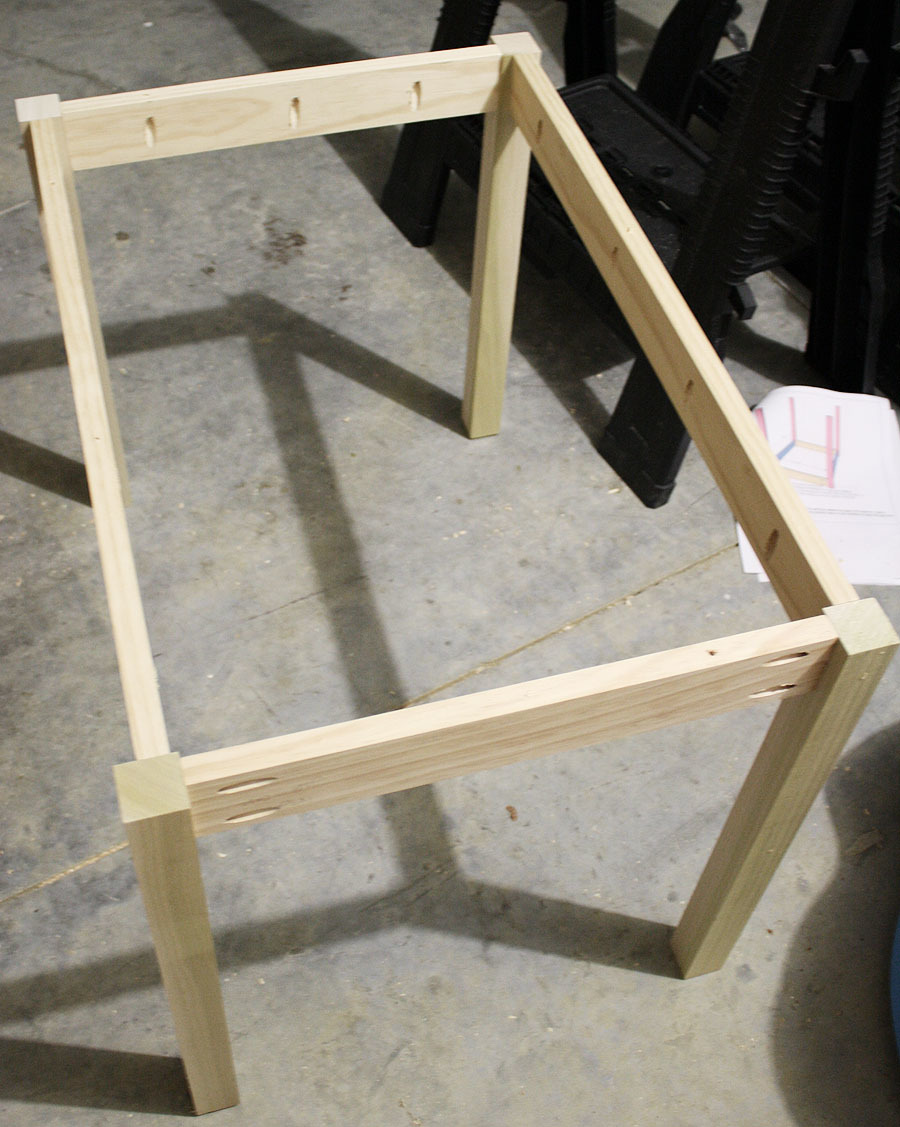
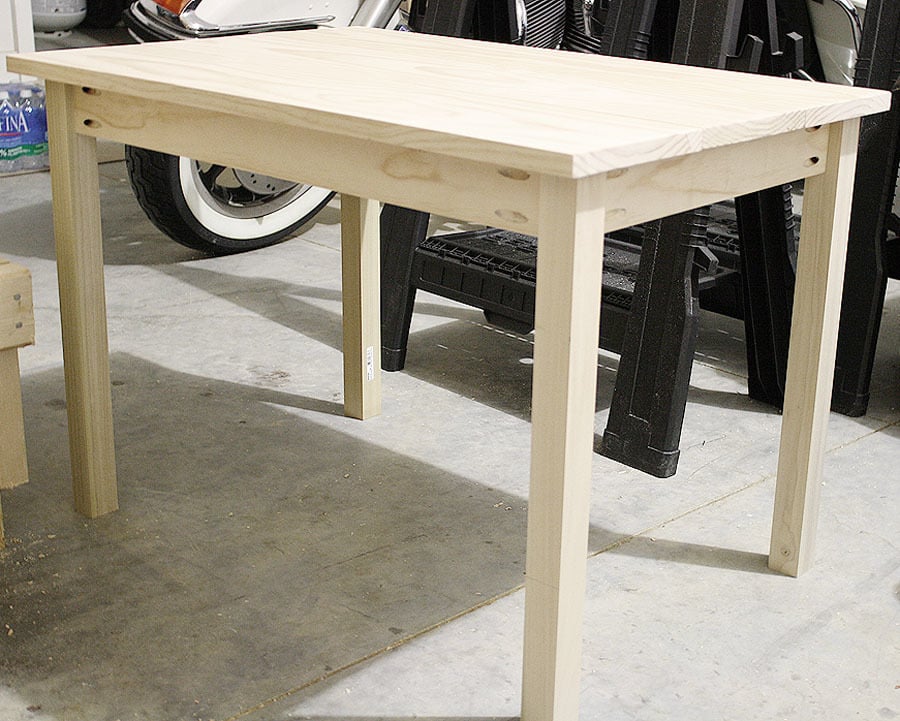
This table was super easy to build... it took me only 3 hours! I opted to use hardwood poplar 2x2s for the legs because furring strips frustrate me to no end (bowing boards, splitting wood, etc.) and the poplar also made it sturdier. Had I used furring strips, this table would have only cost me $15, but I opted for the more expensive route... but still, $35 ain't bad!
Also, I used the Kreg Jig for this project, set on 3/4" with 1 1/4" pocket hole screws - EXCEPT when I drilled the base frame onto the table top. I used 1" pocket hole screws for that, just in case the 1 1/4" screws were too long and came poking out the top of the table.
Click my blog link for the complete play-by-play!

Built from Plan(s)
Estimated Cost
$35.00
Estimated Time Investment
Afternoon Project (3-6 Hours)
Finish Used
Primed with Zinsser 3-in-1 Primer, then painted with 2 coats of glossy white.
Recommended Skill Level
Starter Project
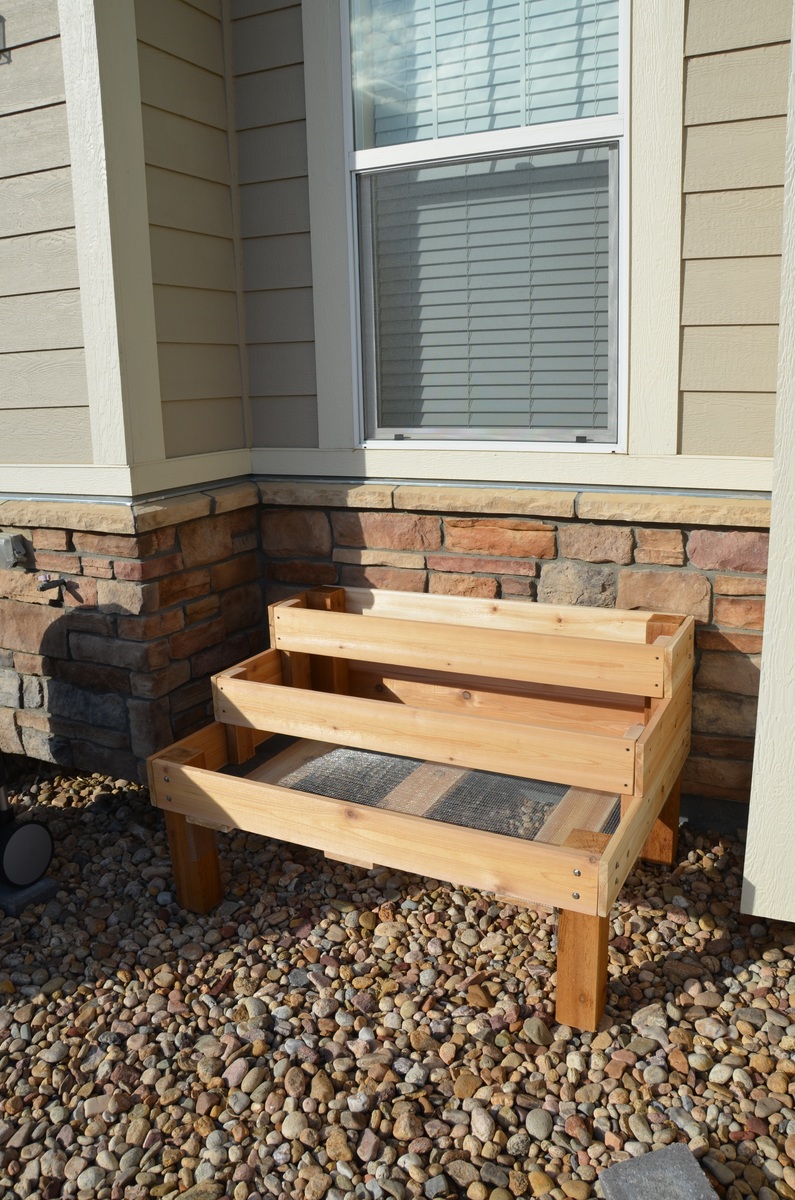
Stepped version
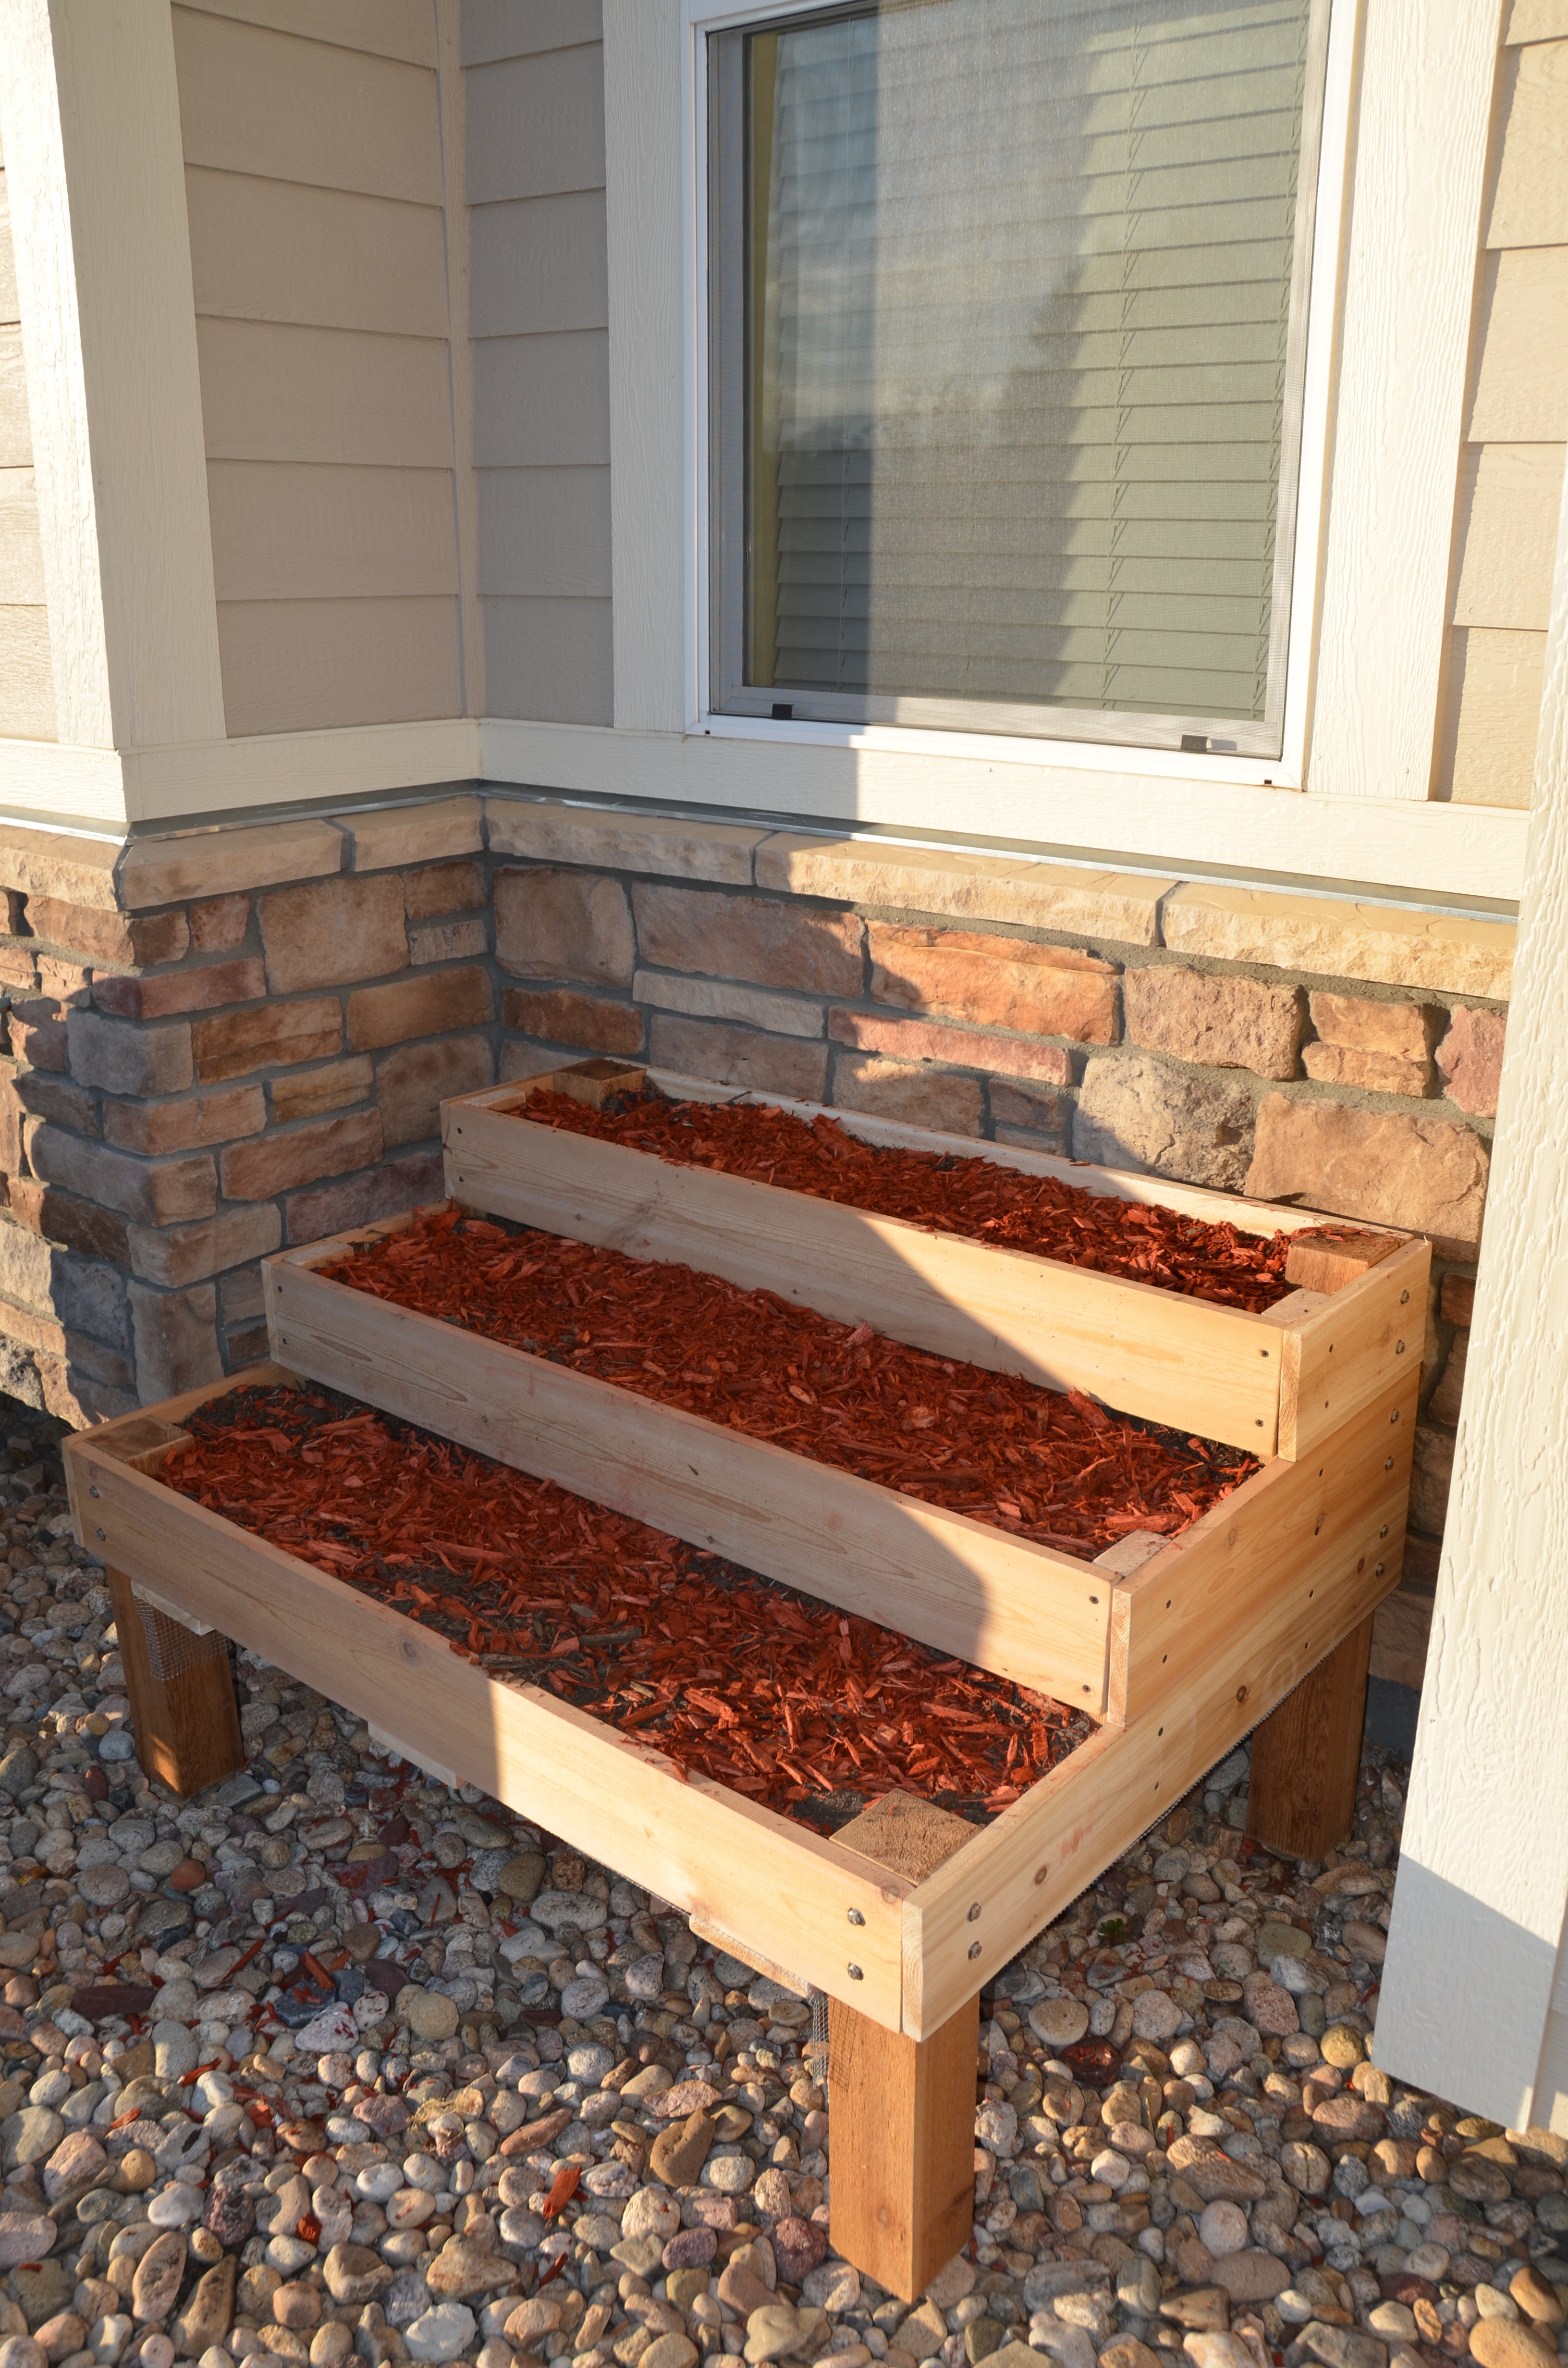
A modified version with tiered areas. 2x4's tie layers together. Happy Mother's Day!
Built from Plan(s)
Estimated Cost
150
Estimated Time Investment
Day Project (6-9 Hours)
Recommended Skill Level
Starter Project
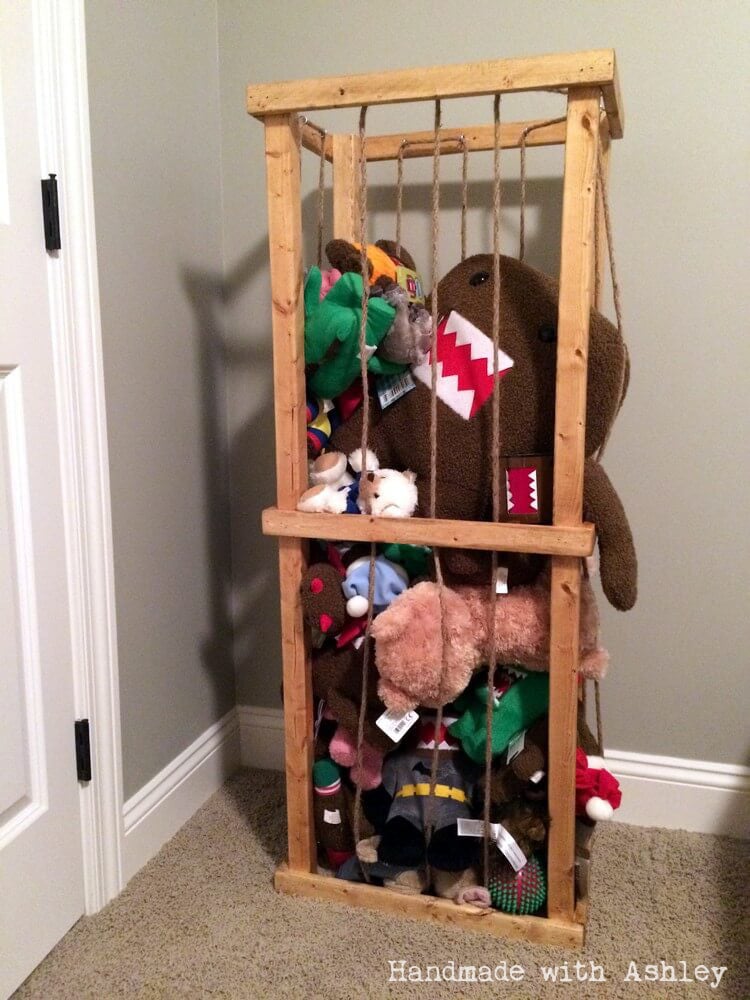
DIY Stuffed Animal Zoo Tower

This is my second stuffed animal zoo tower. This time around I used cheap 2x2 furring strips. Not the best pick of lumber, but it gets the job done well. :)
Built from Plan(s)
Estimated Cost
$30
Estimated Time Investment
Afternoon Project (3-6 Hours)
Finish Used
Watco Danish Oil (Medium Walnut)
Recommended Skill Level
Beginner
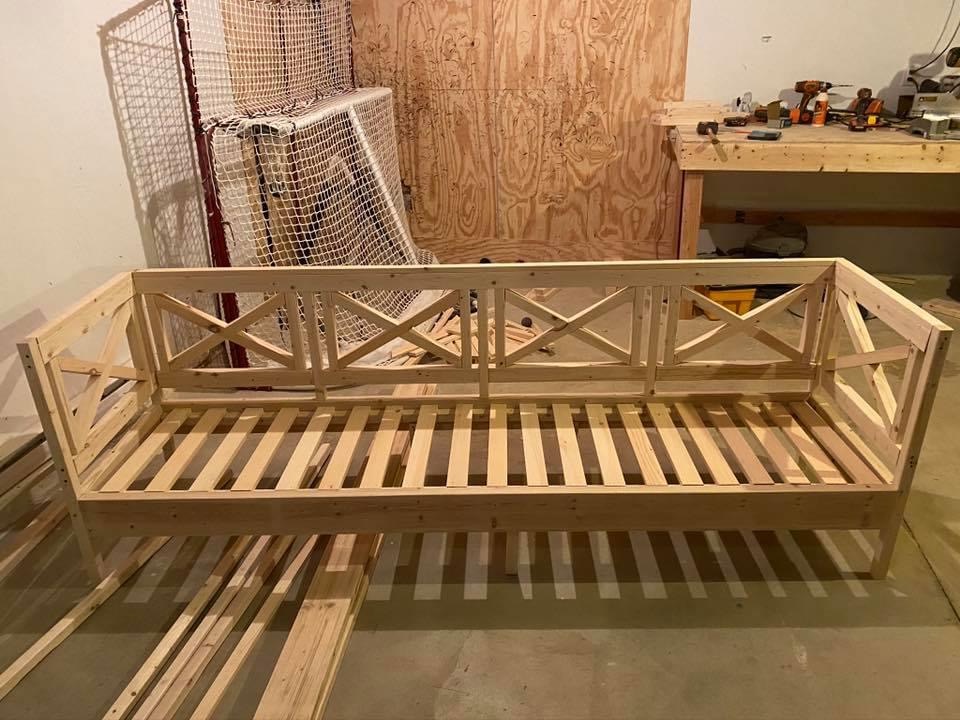
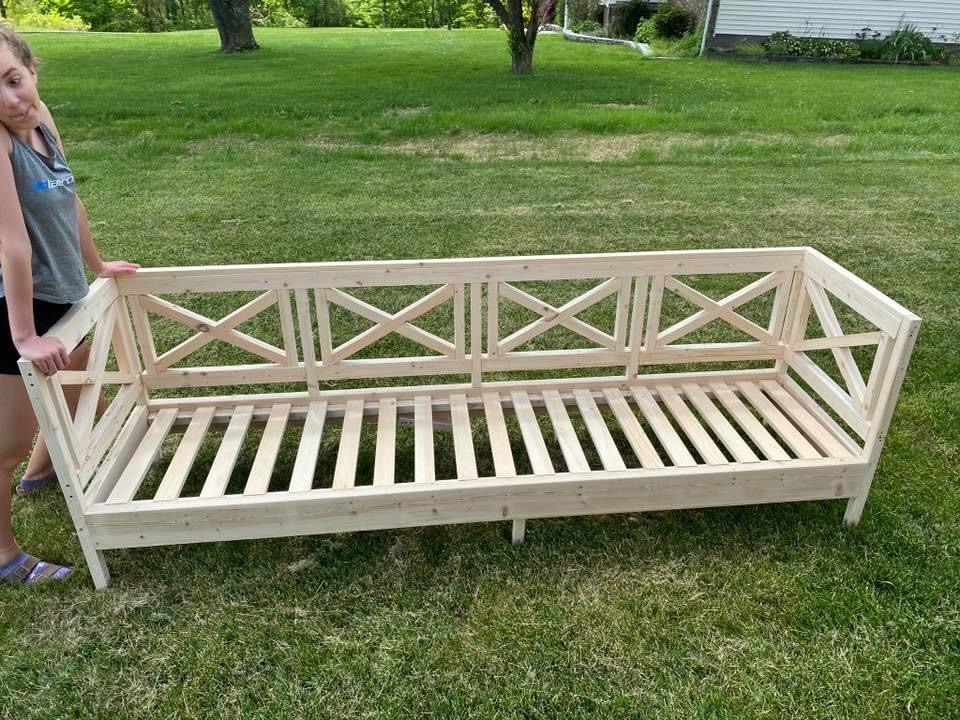
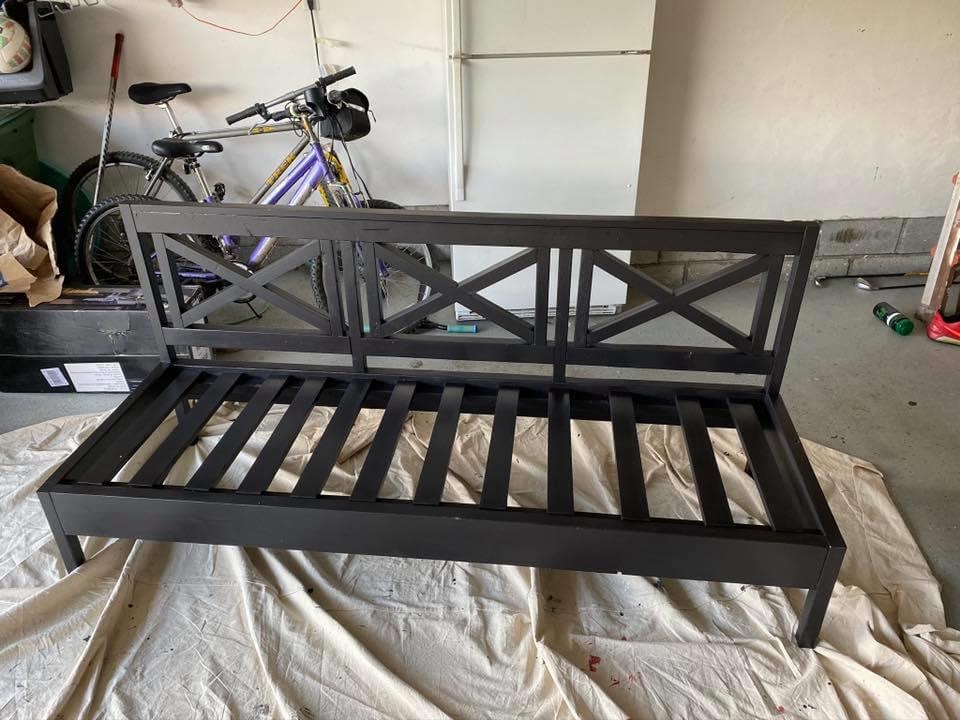
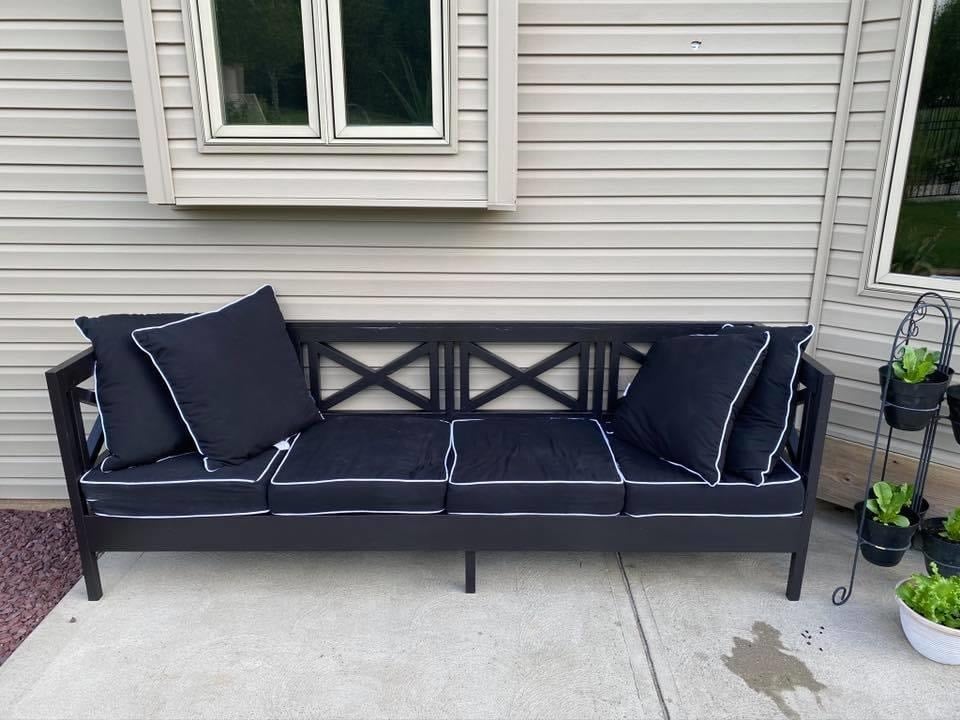
COVID 19 end of year home school project success
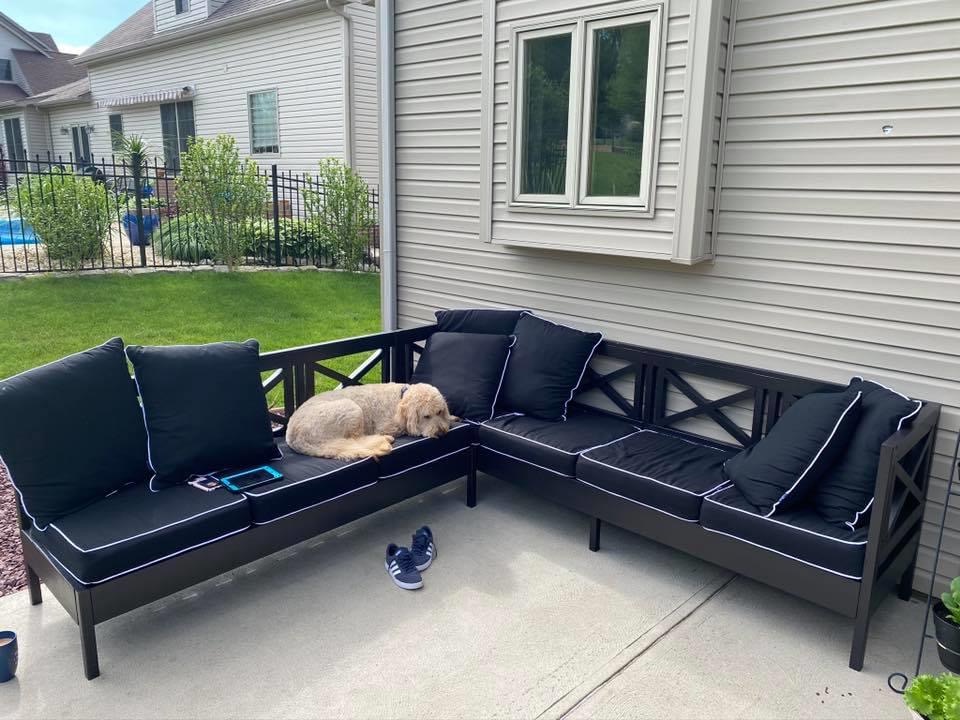
Great build. Hubbie extended to couch one seat and added legs for additional support. We painted after assembly and the x’s were a PITA to paint. Love the end result. Now to pick coffee table plans!
Built from Plan(s)
Estimated Cost
300 not including cushions
Estimated Time Investment
Weekend Project (10-20 Hours)
Finish Used
Sherwin Williams Caviar exterior paint and spray poly
Recommended Skill Level
Intermediate


American Girl Doll Trundle Day Bed

My neice wanted a bed just like hers for her American Girl Doll. I did manage to find one, but I also found plans here! Thank you!! :) So I modified the plans a little bit to add the back of the daybed. She loves it!

Estimated Time Investment
Afternoon Project (3-6 Hours)
Recommended Skill Level
Beginner
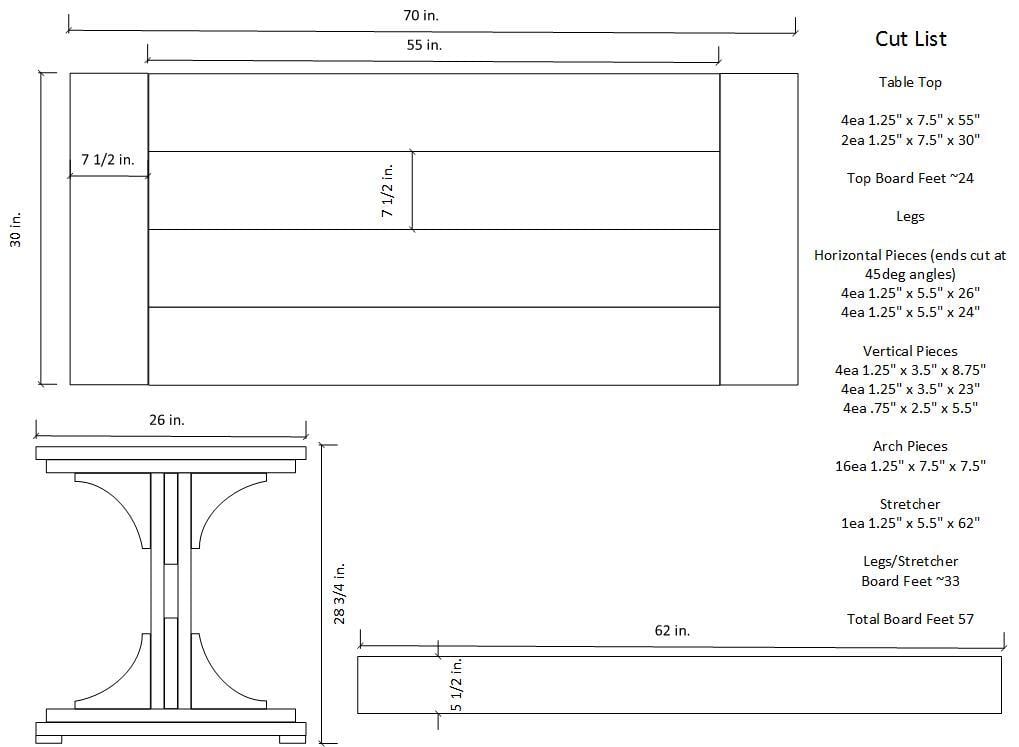
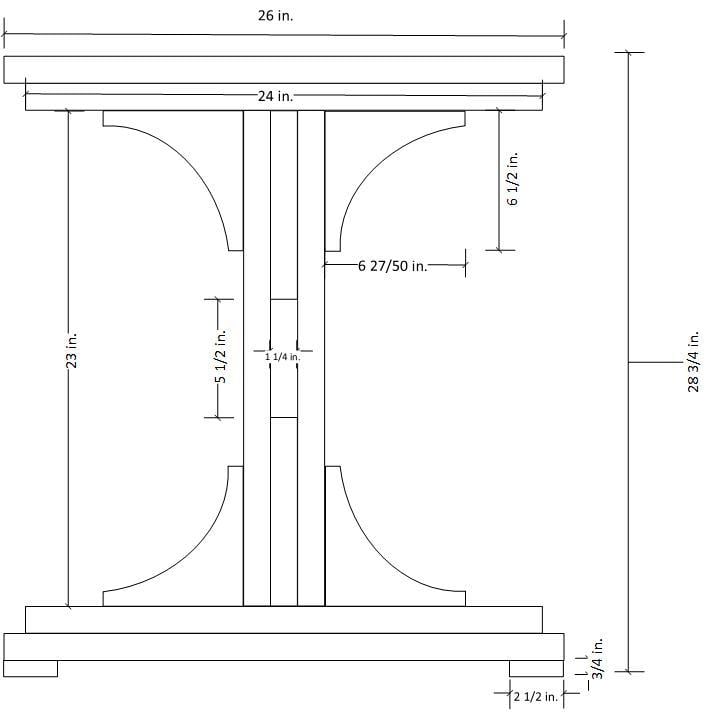
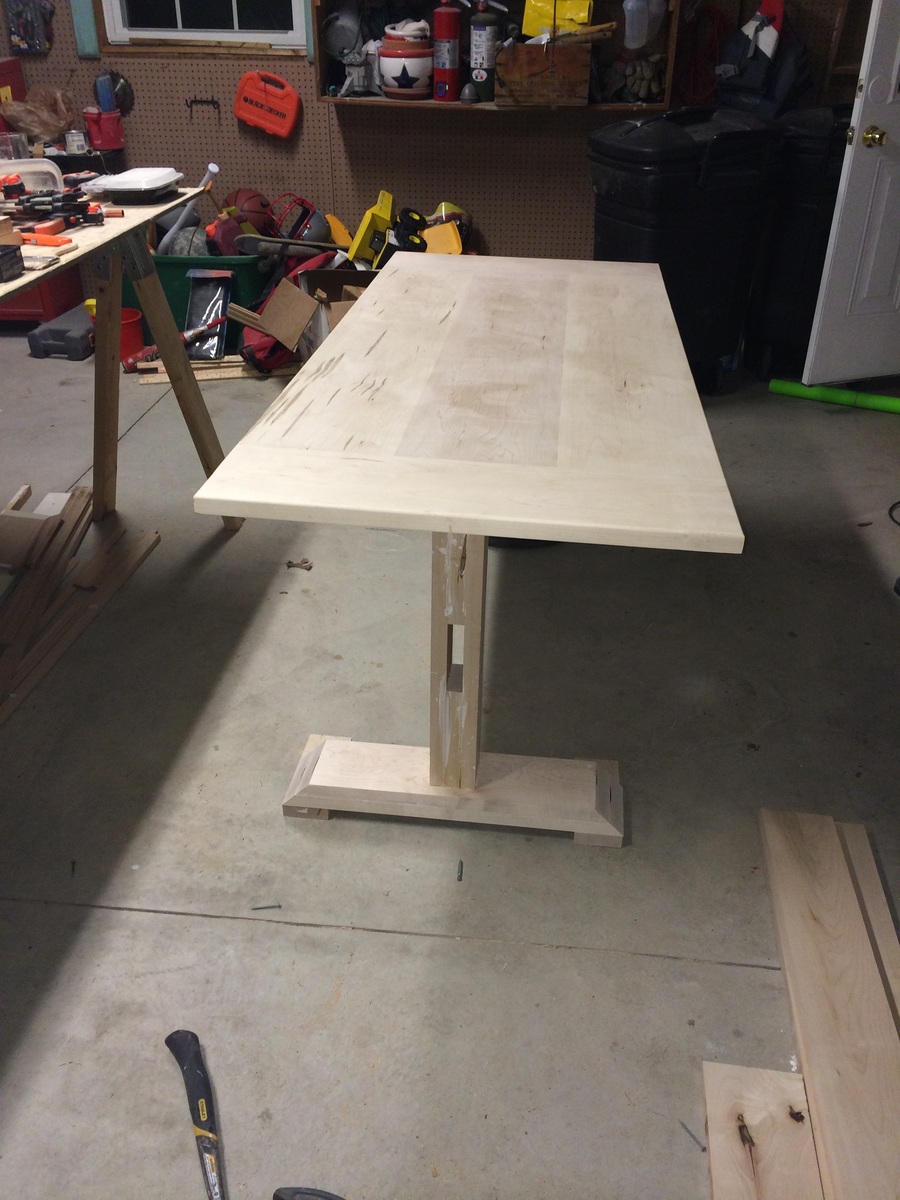
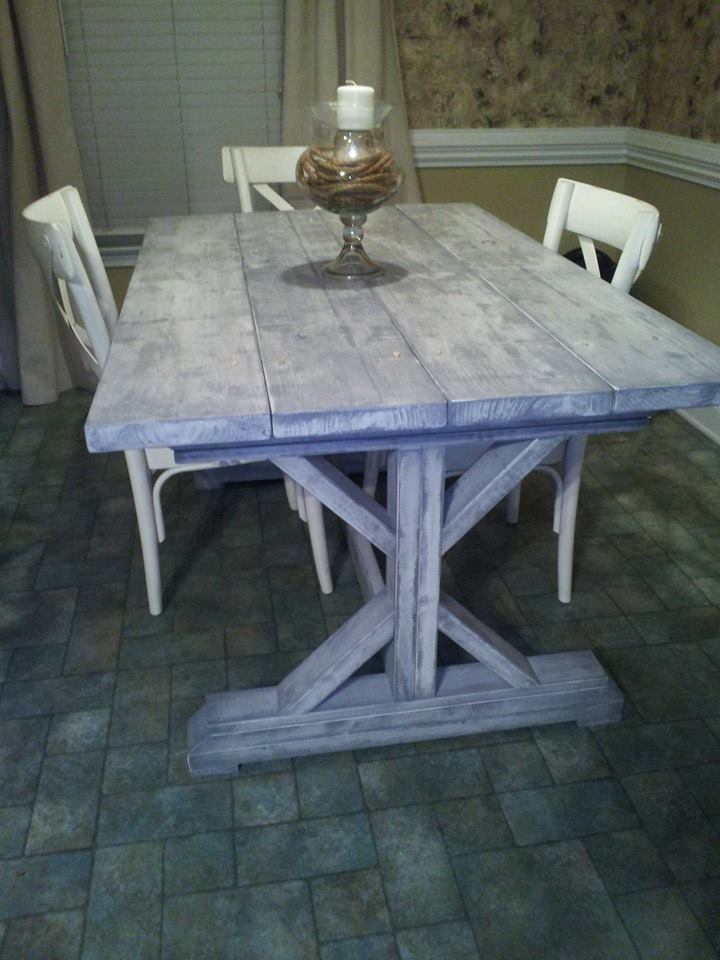
Double Pedestal 6' Farmhouse Table
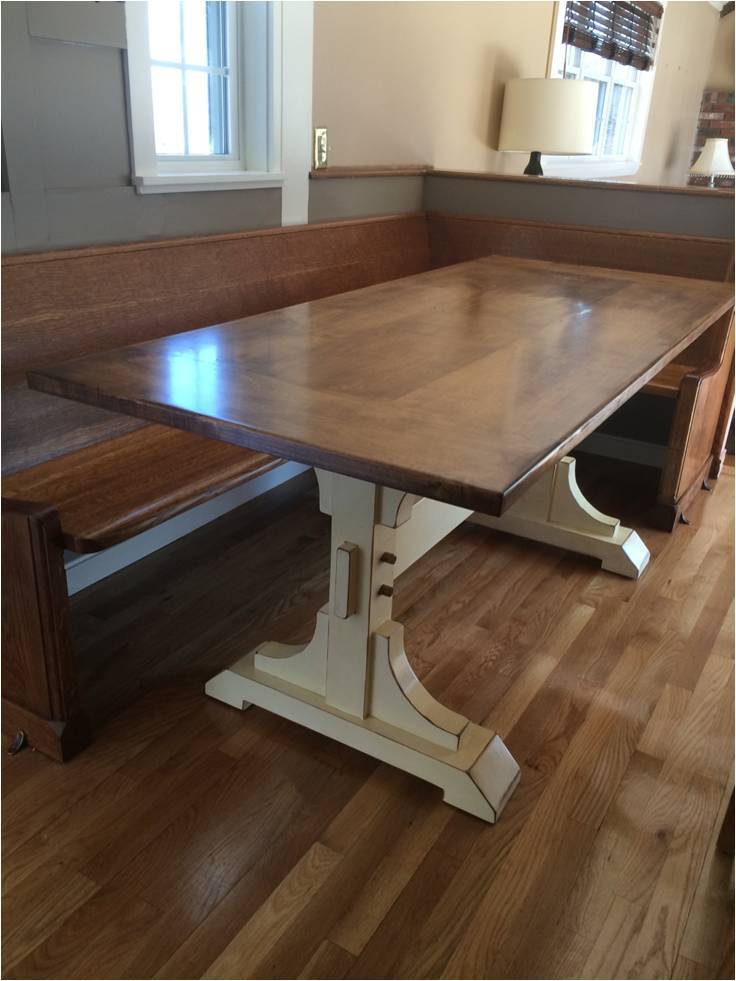
Farmhouse table made from distressed (worm hole) maple.
My neighbor was able to get me the 5/4 distressed maple for about $2/bd ft - I ended up buying 100 board feet and had plenty leftover. The finished board feet for this project was about 60 if I remember correctly. So the $200 was the bulk of the expense. The only other costs were sand paper, I bought a Kreg Jig, screws, Minwax Marker, paint, stain and urethane (much of which I already had).
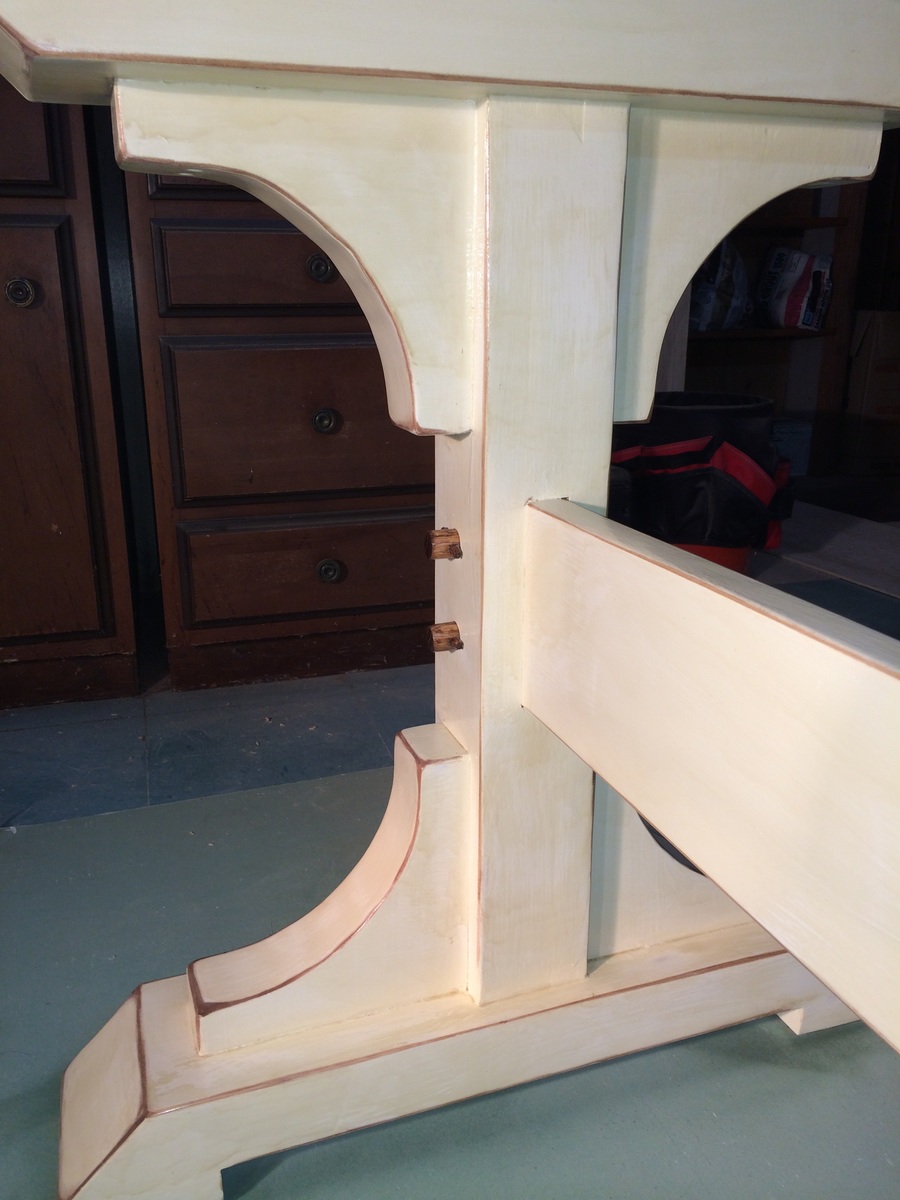
It came out better than I anticipated. The antique white finish was not difficult at all.
Tip - When following the instructions for the finish here, I applied the first coat of urethane with a brush almost immediately after applying the Minwax marker to all of the sanded edges. I did this in haste, but ended up with some unexpected results that really added a nice touch. The stain from the marker incorporated a bit into the urethane as I brushed it giving it an antique, yellow hue. At first I thought I made a big mistake, but it turned out to add a really nice look.
Built from Plan(s)
Estimated Cost
$250
Estimated Time Investment
Week Long Project (20 Hours or More)
Finish Used
Antique White using Minwax Stain Marker - http://ana-white.com/2012/09/antique-white-using-minwax-stain-marker
Recommended Skill Level
Intermediate
Comments
Mon, 05/19/2014 - 07:29
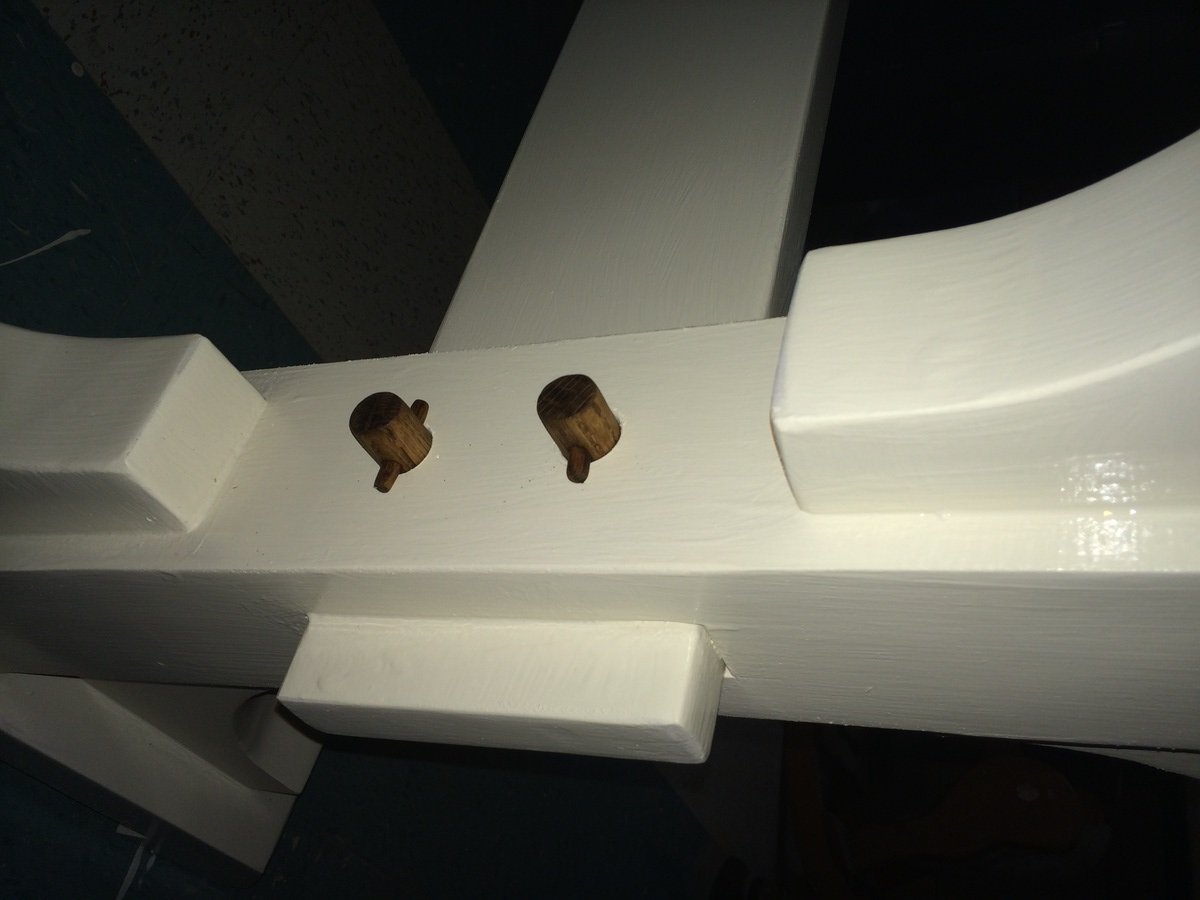
Disassembly
CSaintD - The top can be removed as I did not glue it. I set 3 dowels on top of each of the 2 legs so that the top would always lign up correctly if disassembled and reasembled. The stretcher could be removed, but would probably cause some damage to the finish as it was a tight fight when I finished it. The stretcher would be removed by removing the dowel pegs that I fabricated on each leg.

In reply to Disassembly by g82martin
Mon, 05/19/2014 - 08:21
Thanks. I really like the
Thanks. I really like the dowel pegs on the legs/stretcher. Very nice top finishing as well. Did you square the boards to get them to be so smooth when joined?
Mon, 05/19/2014 - 08:26
table top
I cheated a bit on the top. My neighbor who got me the wood works in a furniture reupholsery shop. He planed and joined the boards for me, which saved me a good amount of time. I'm confident I could have done this at home with my table saw, miter saw and hand plane, but what he did in 2 hours probably would have taken me 10.

Fri, 08/05/2016 - 20:35
Pew!
Love the dowels you added! Planning on building this exact table pretty close to your dimensions and have a very long church pew as well! Trying to decide between L-ing my pew and cutting to straigjy 6'. Do you mind sharing the dimensions of your pew? And how did you miter the pew?
Tue, 01/21/2020 - 09:40
Beautiful table. I love the…
Beautiful table. I love the pegs added to the legs and stretcher, they add a historic detail lost in a lot of today's building techniques
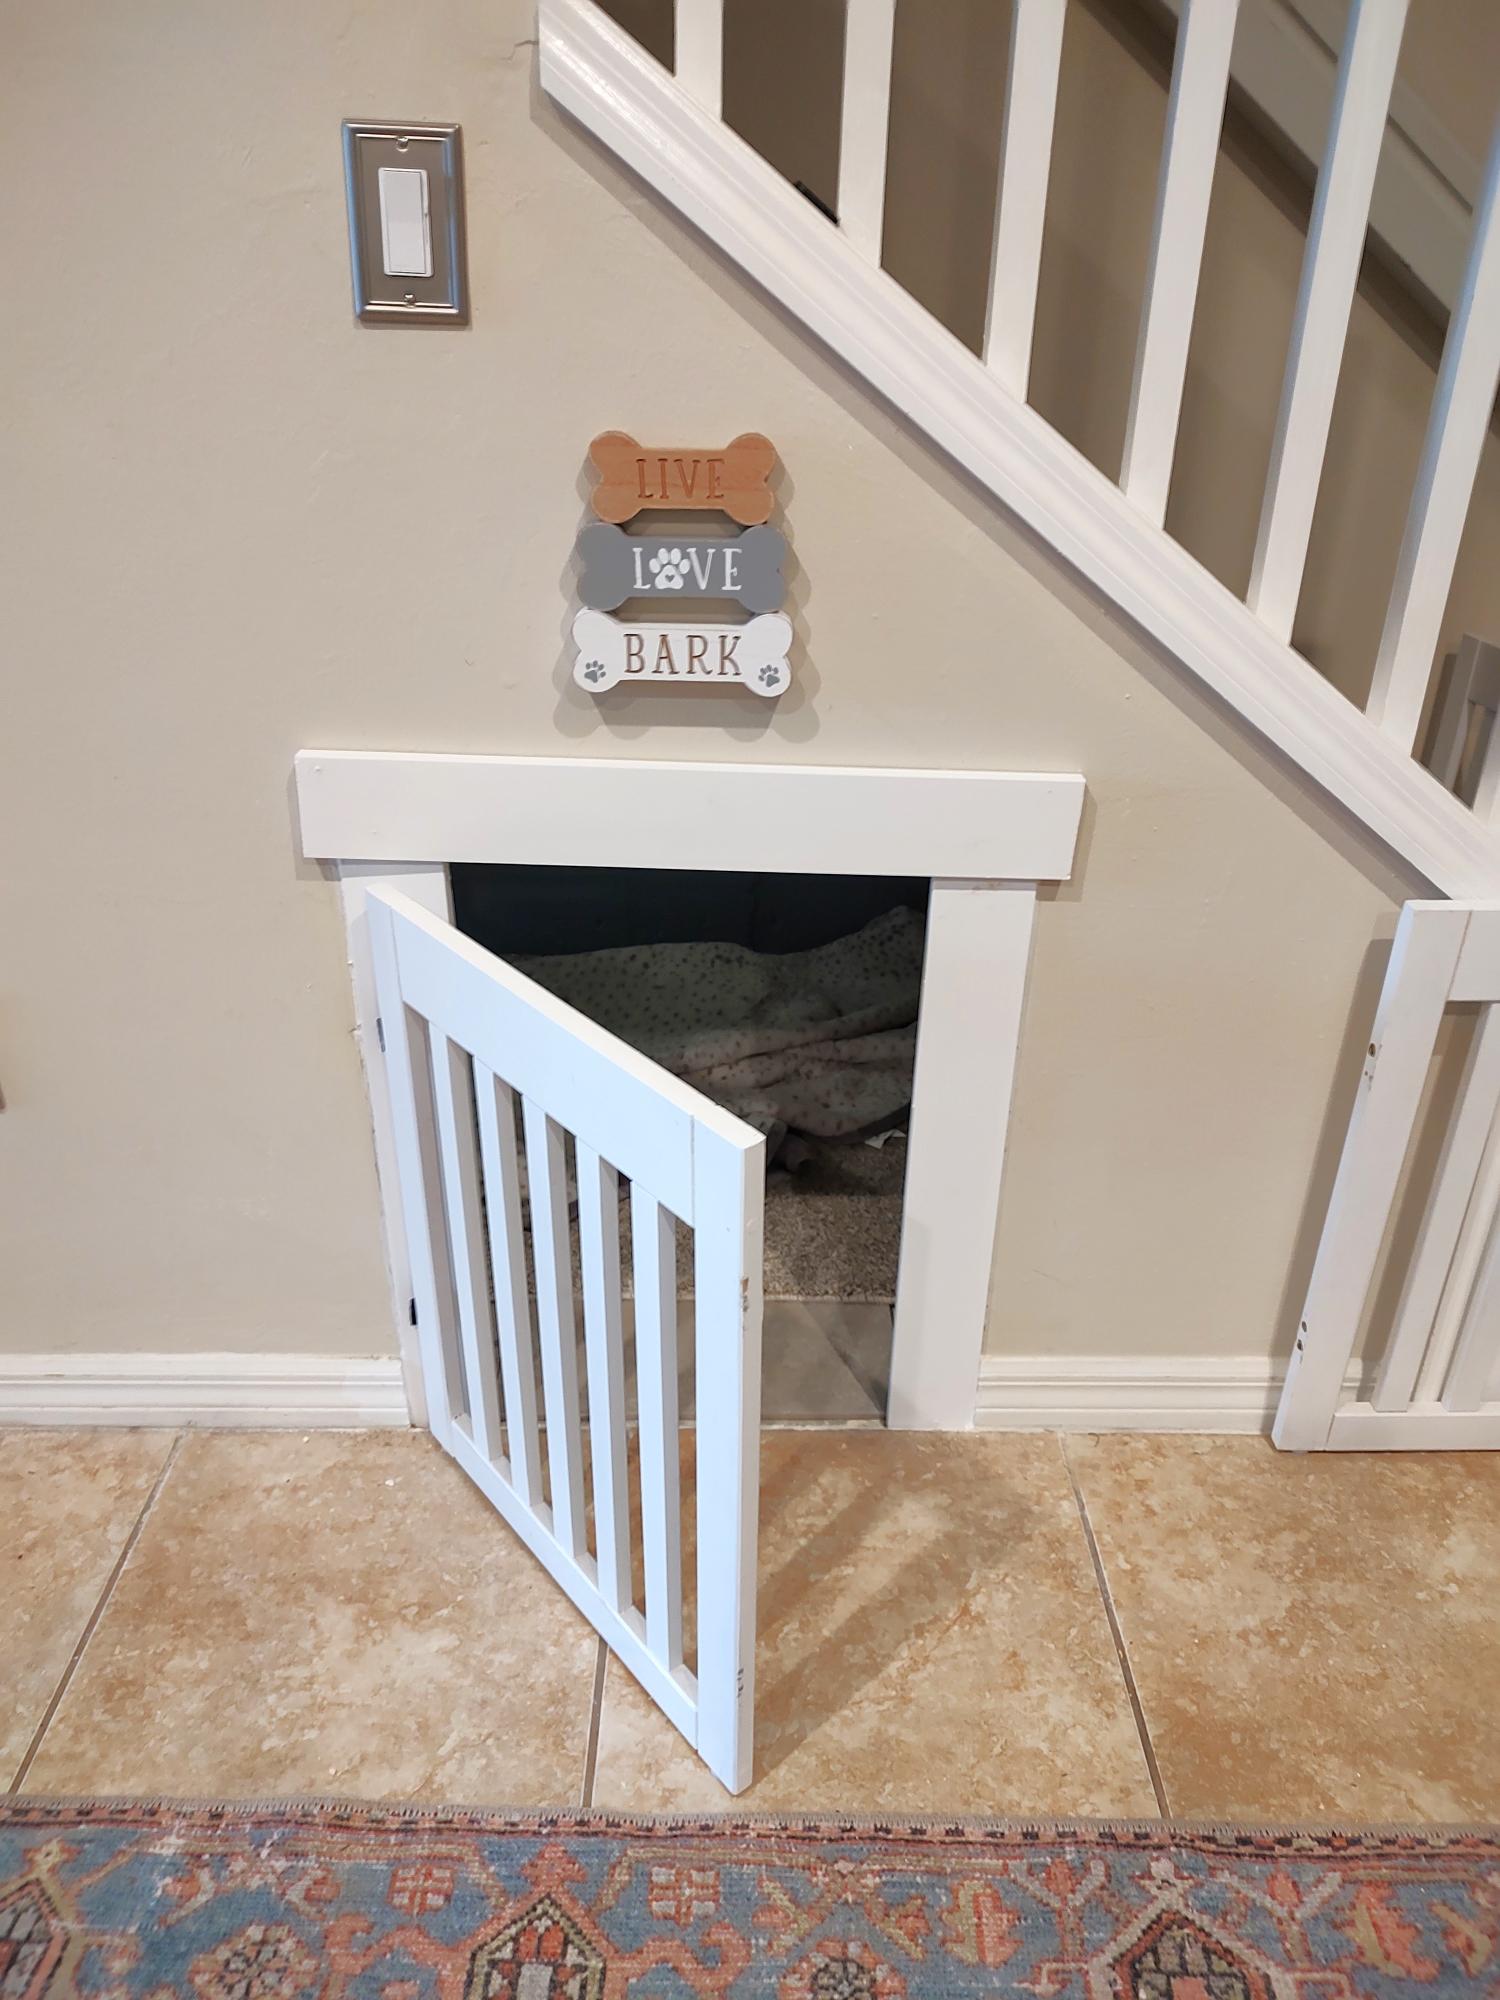
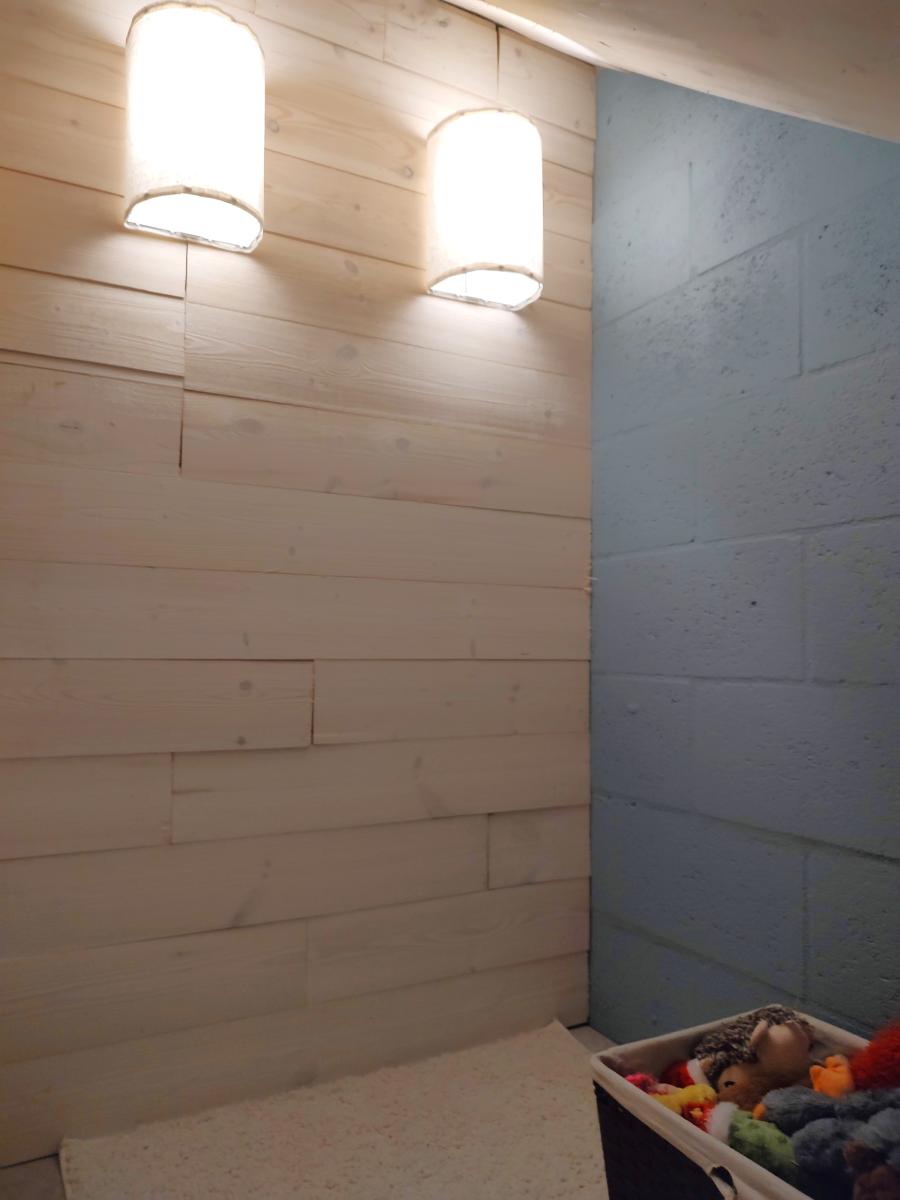
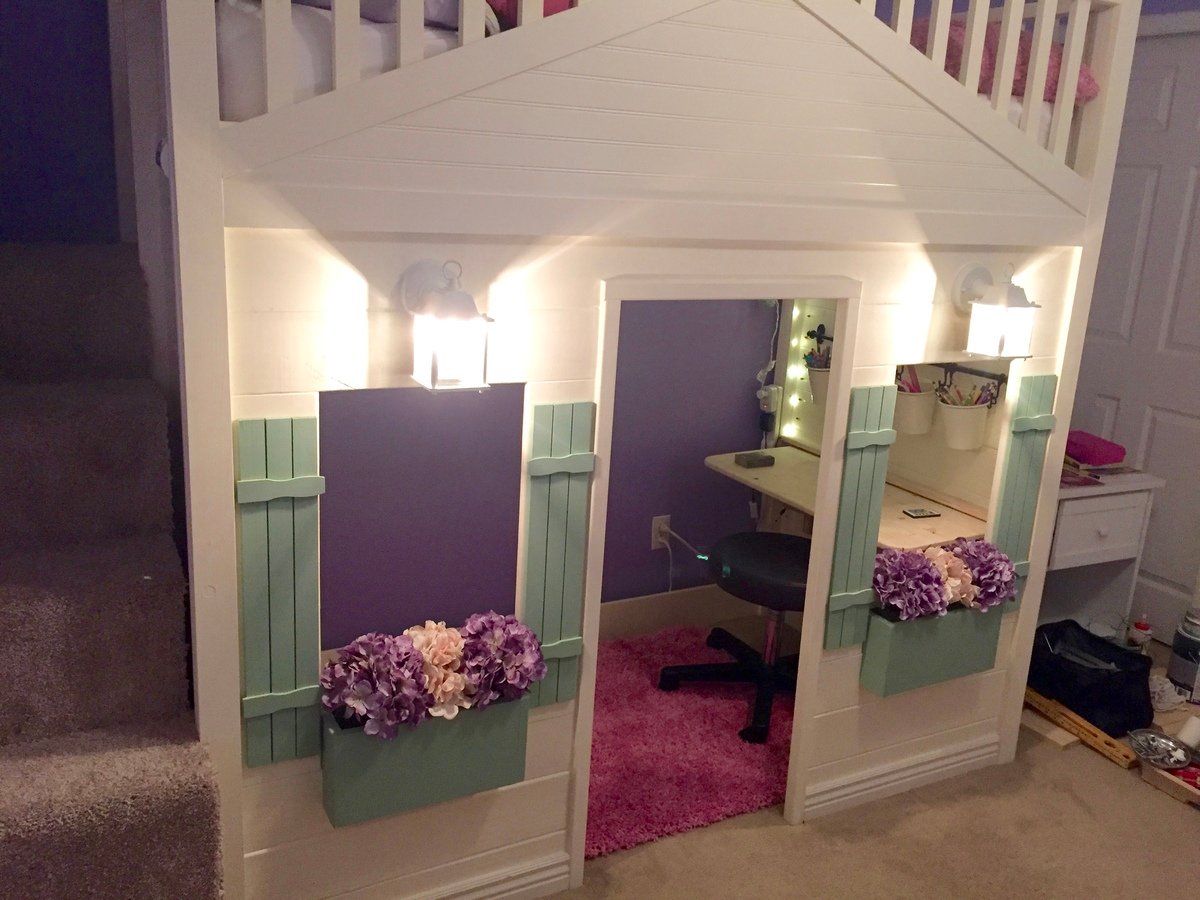
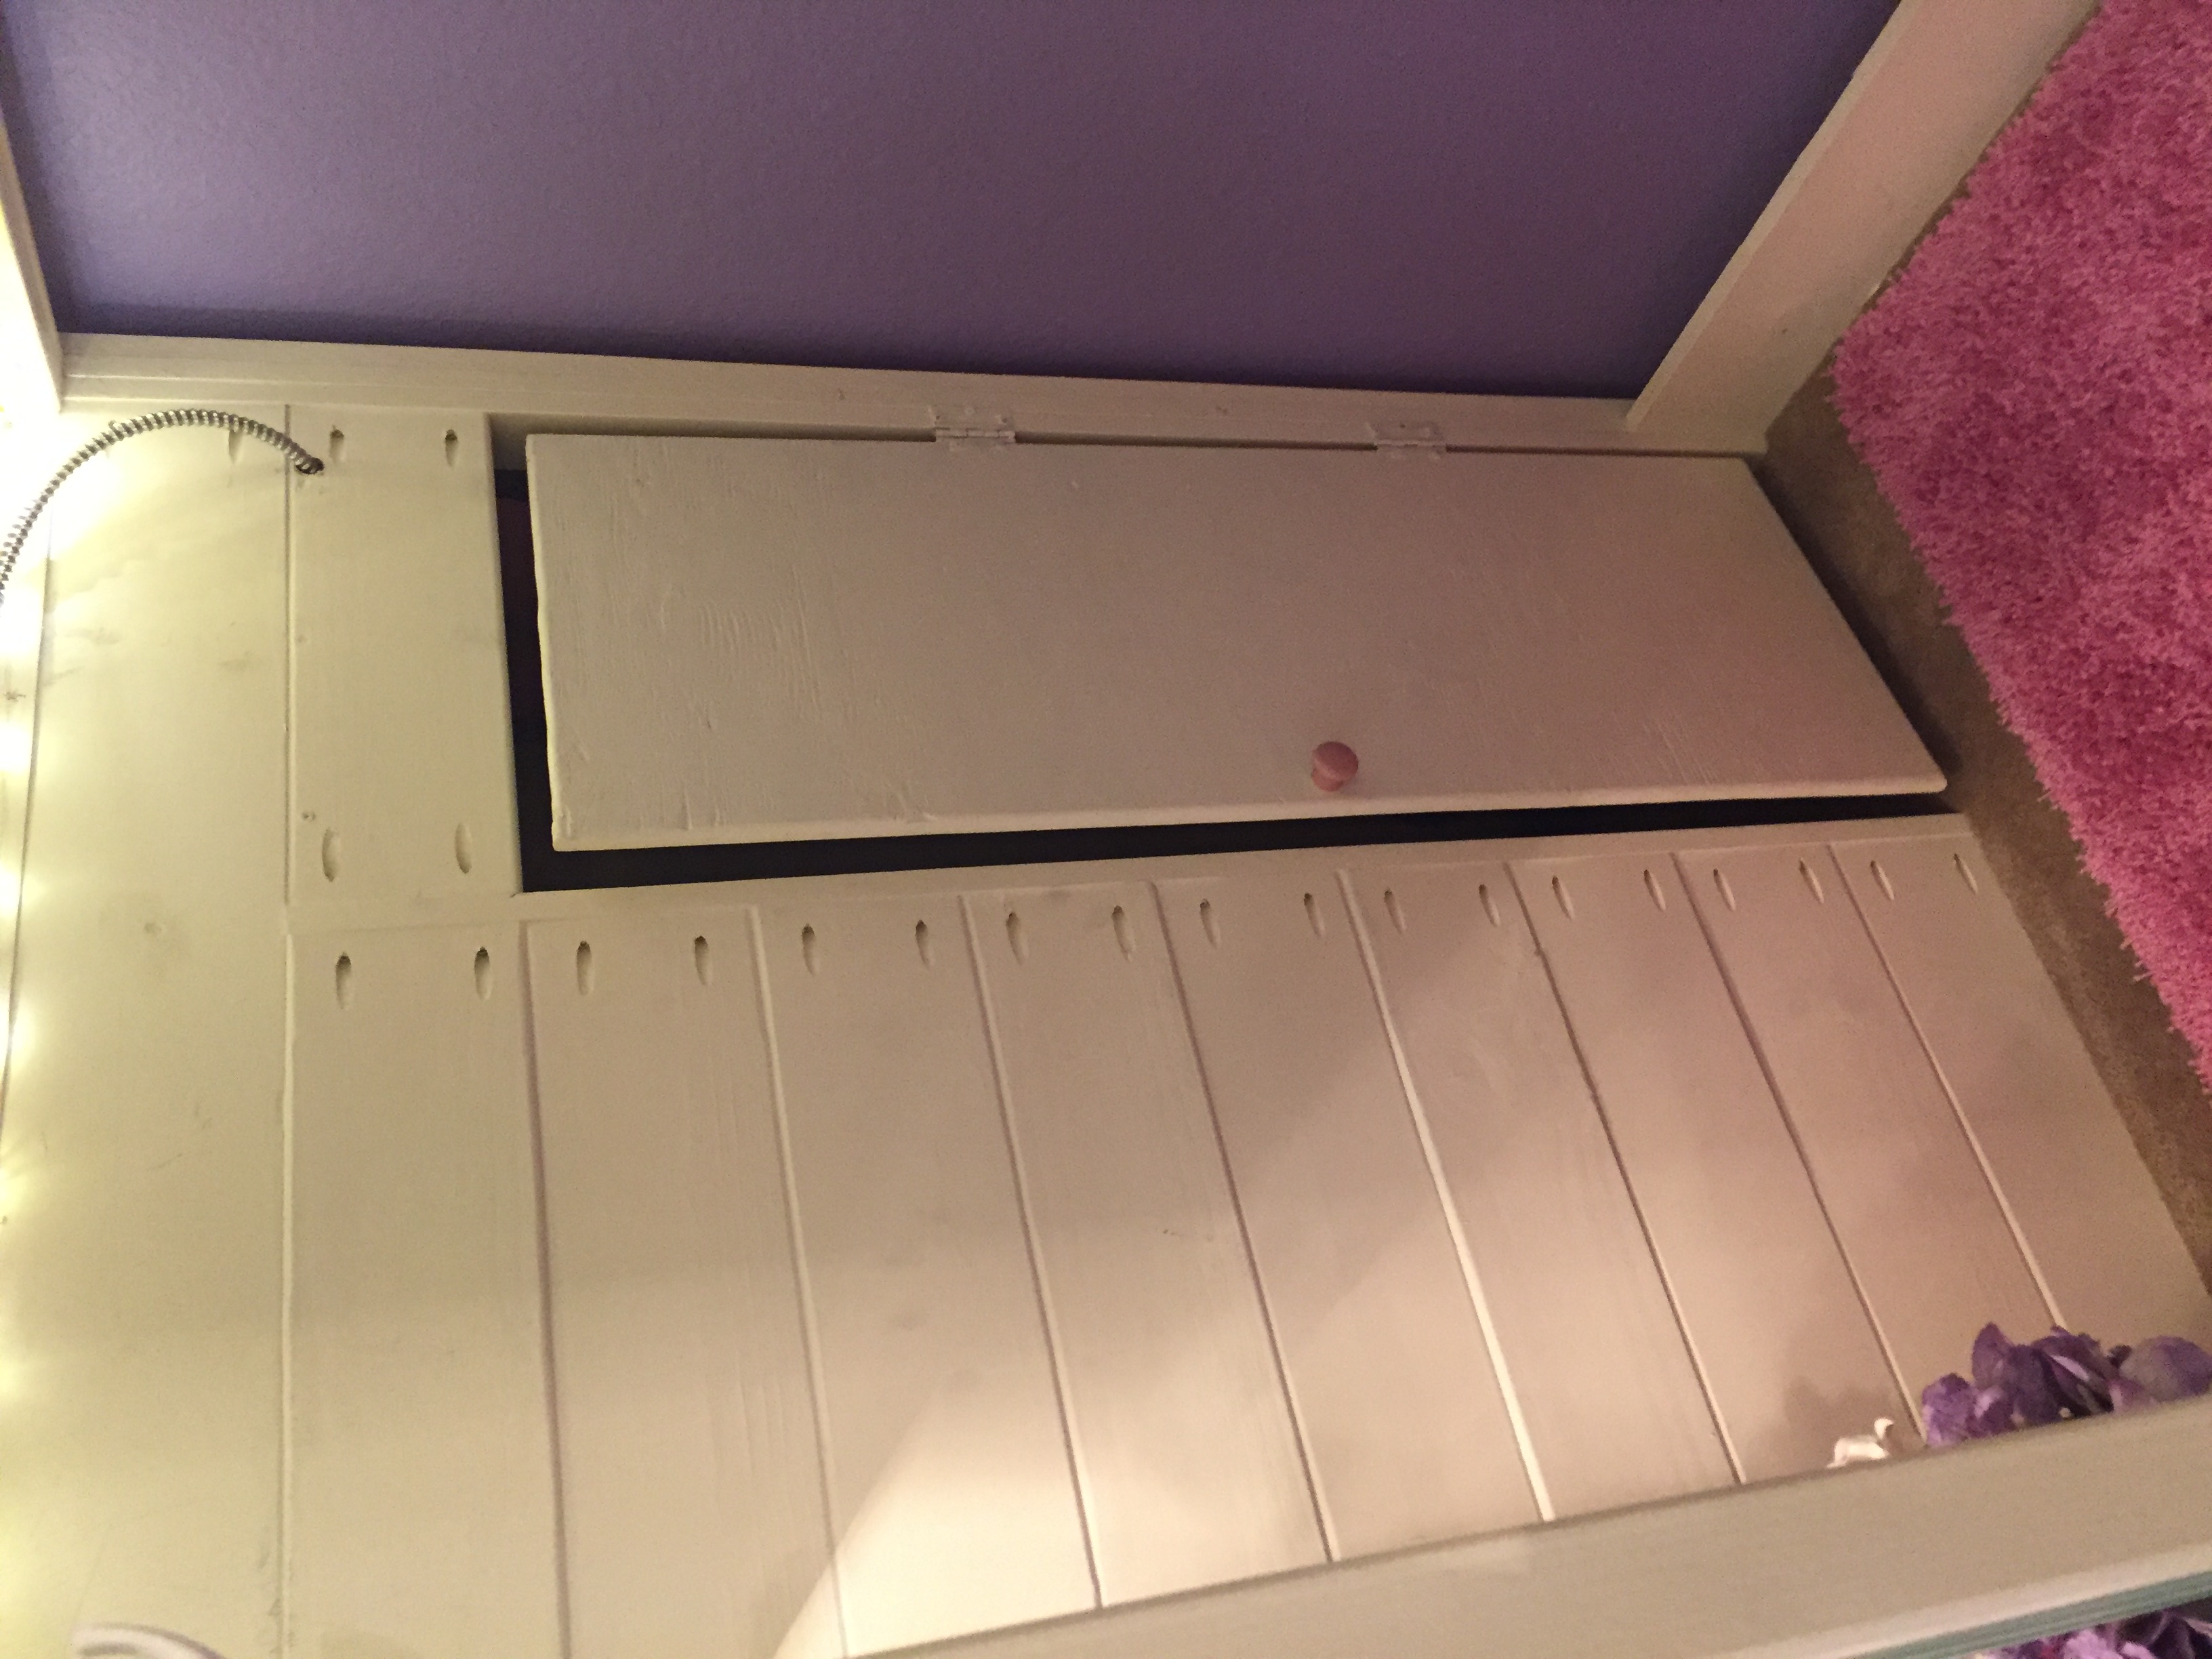
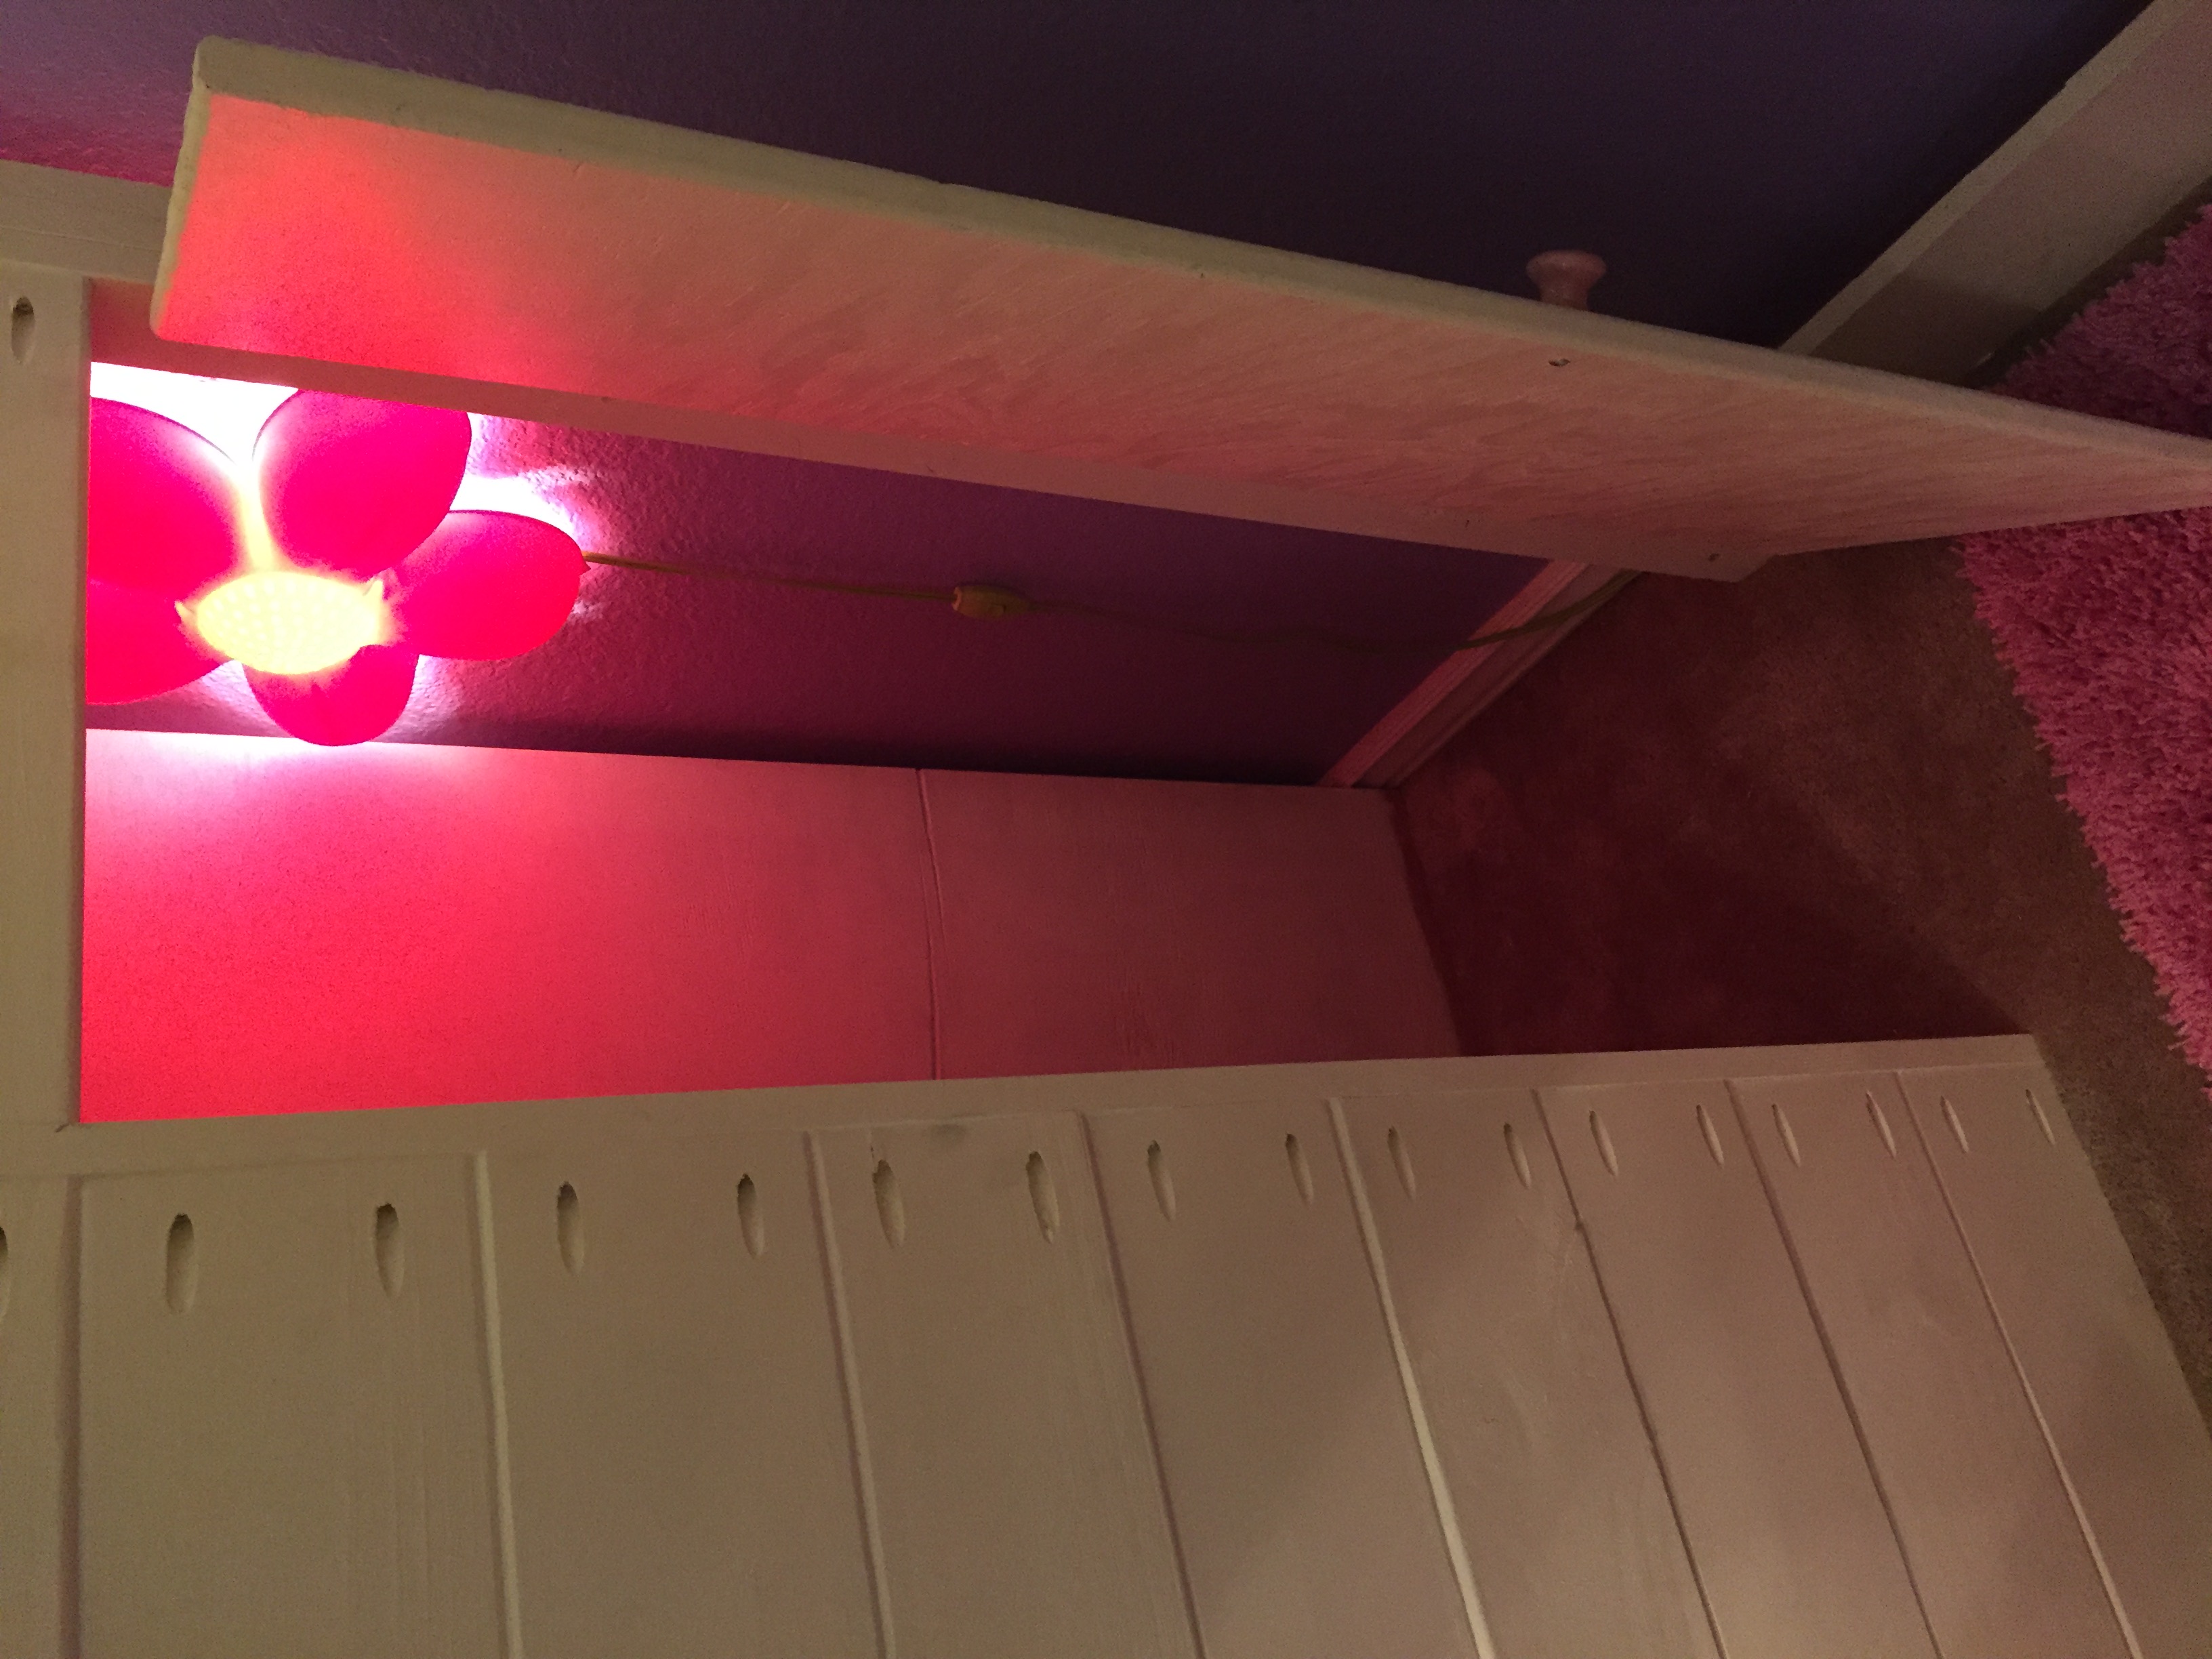
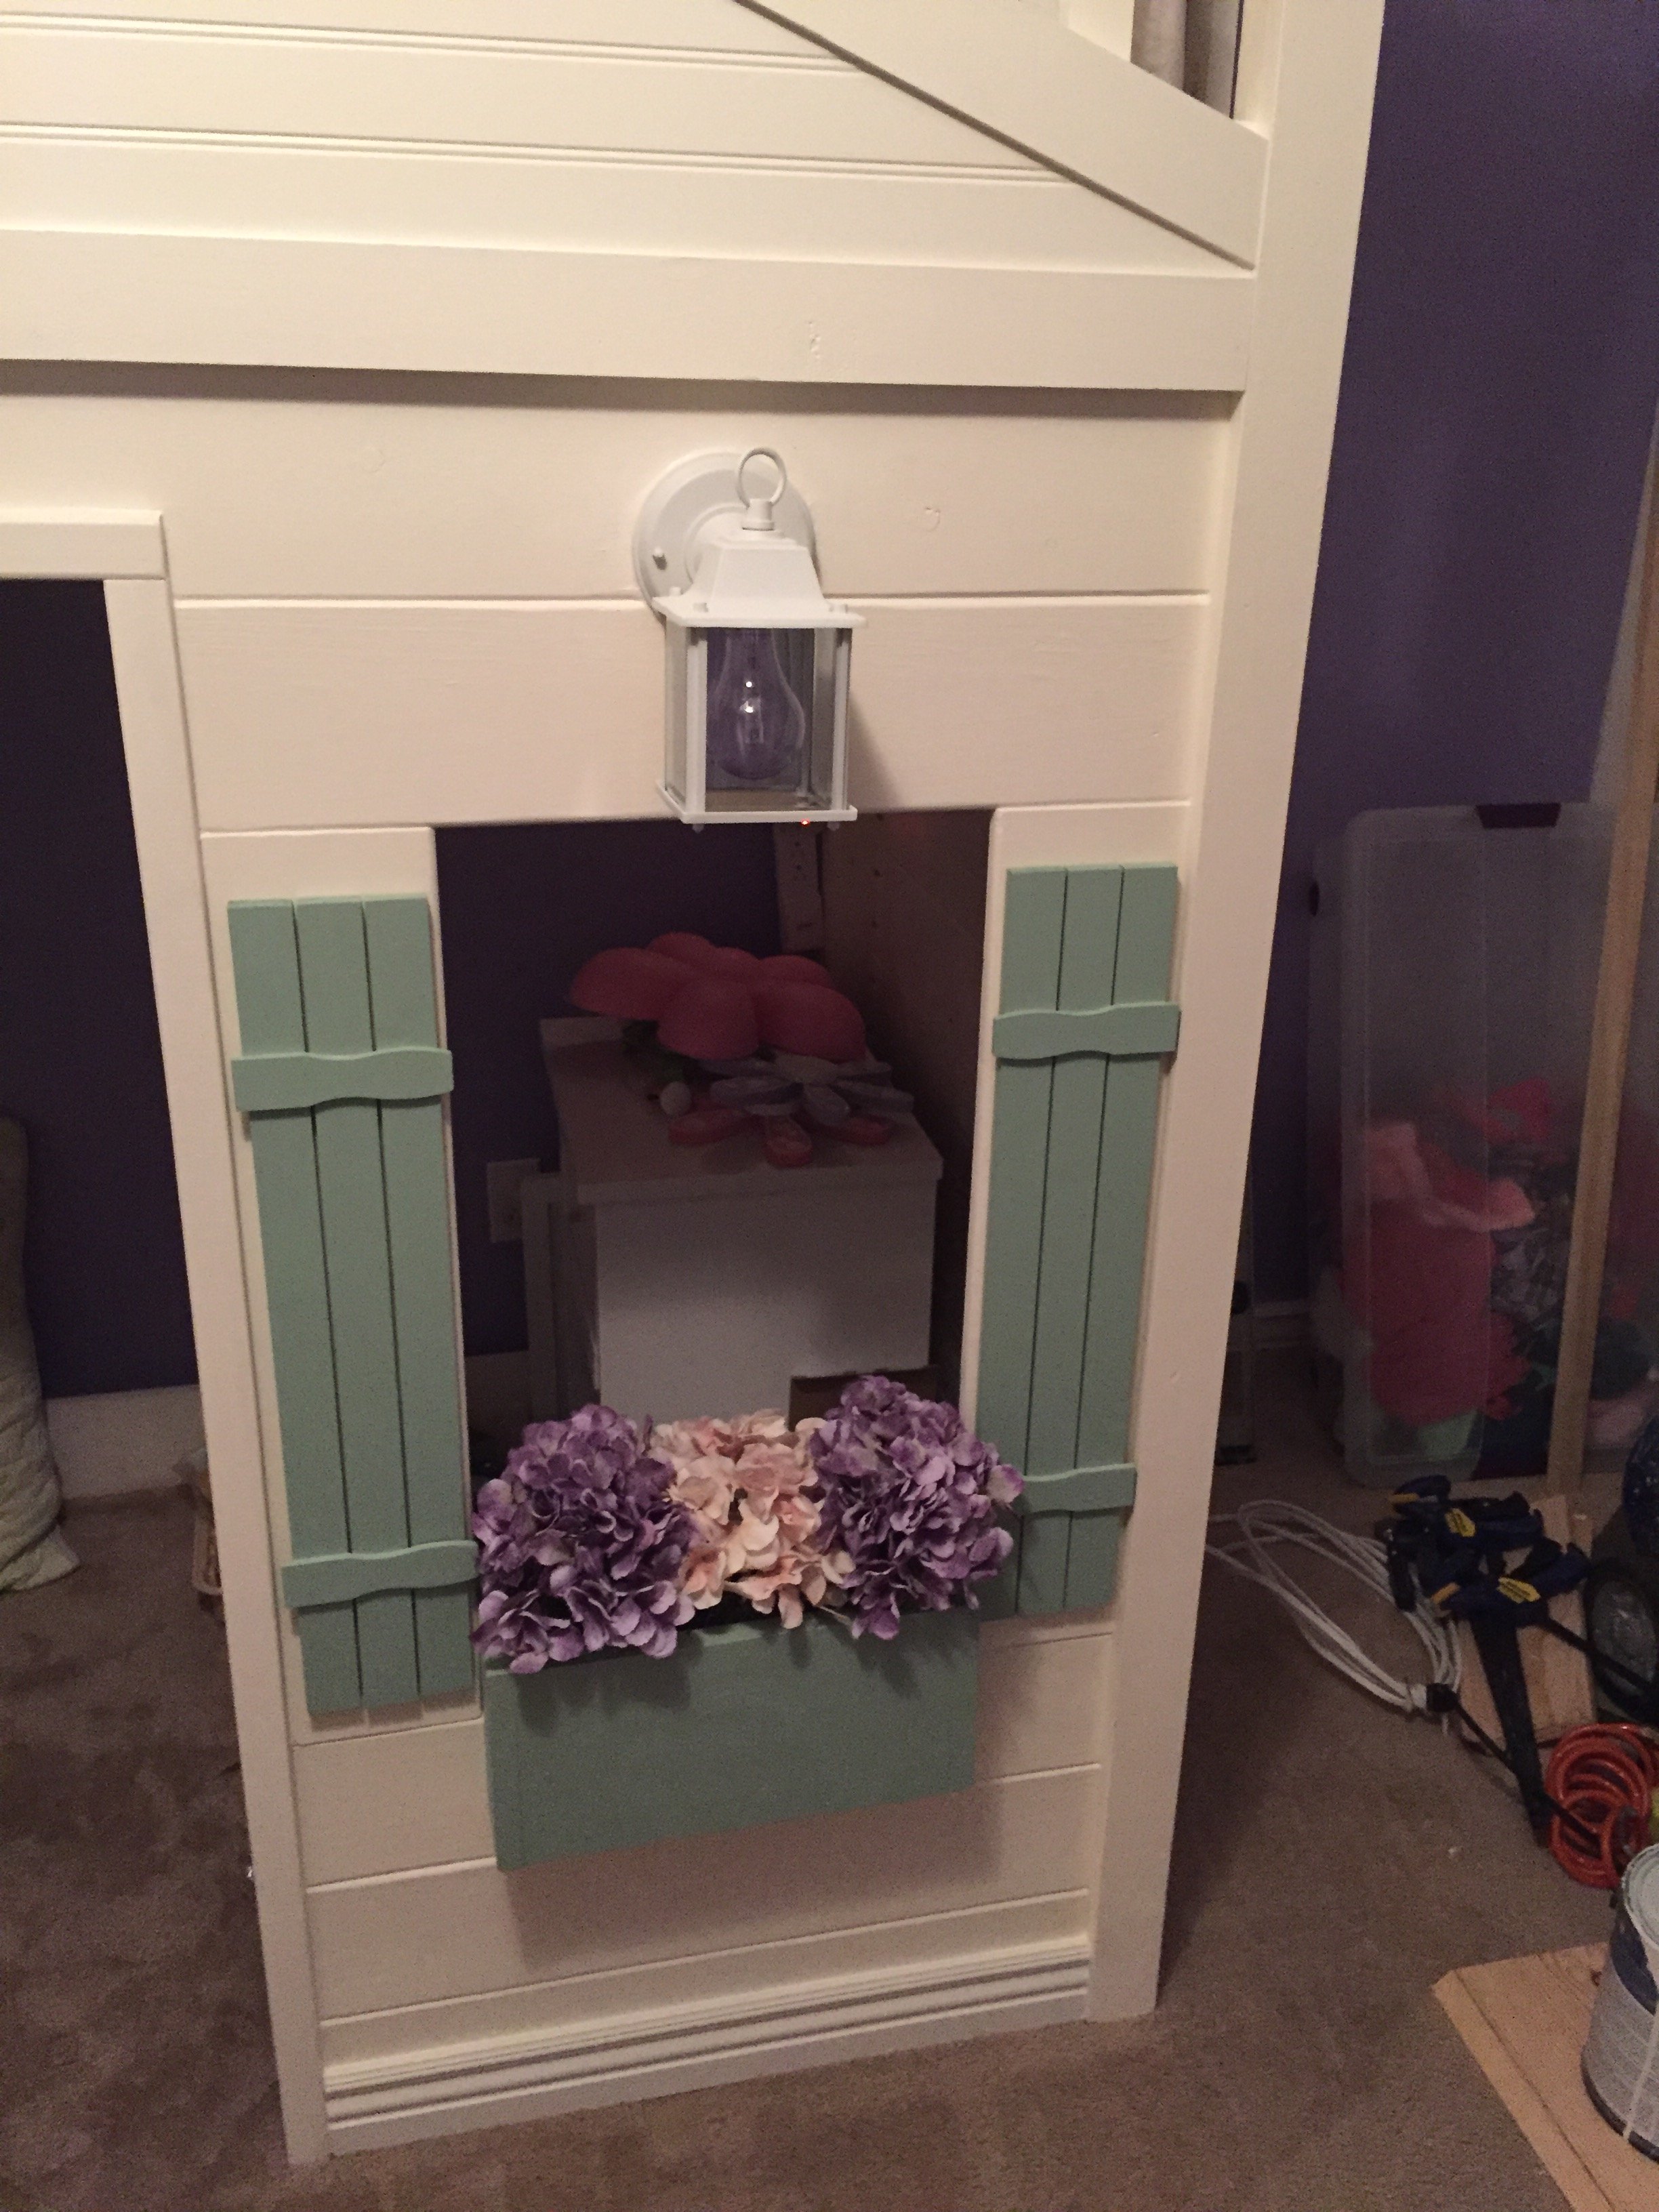
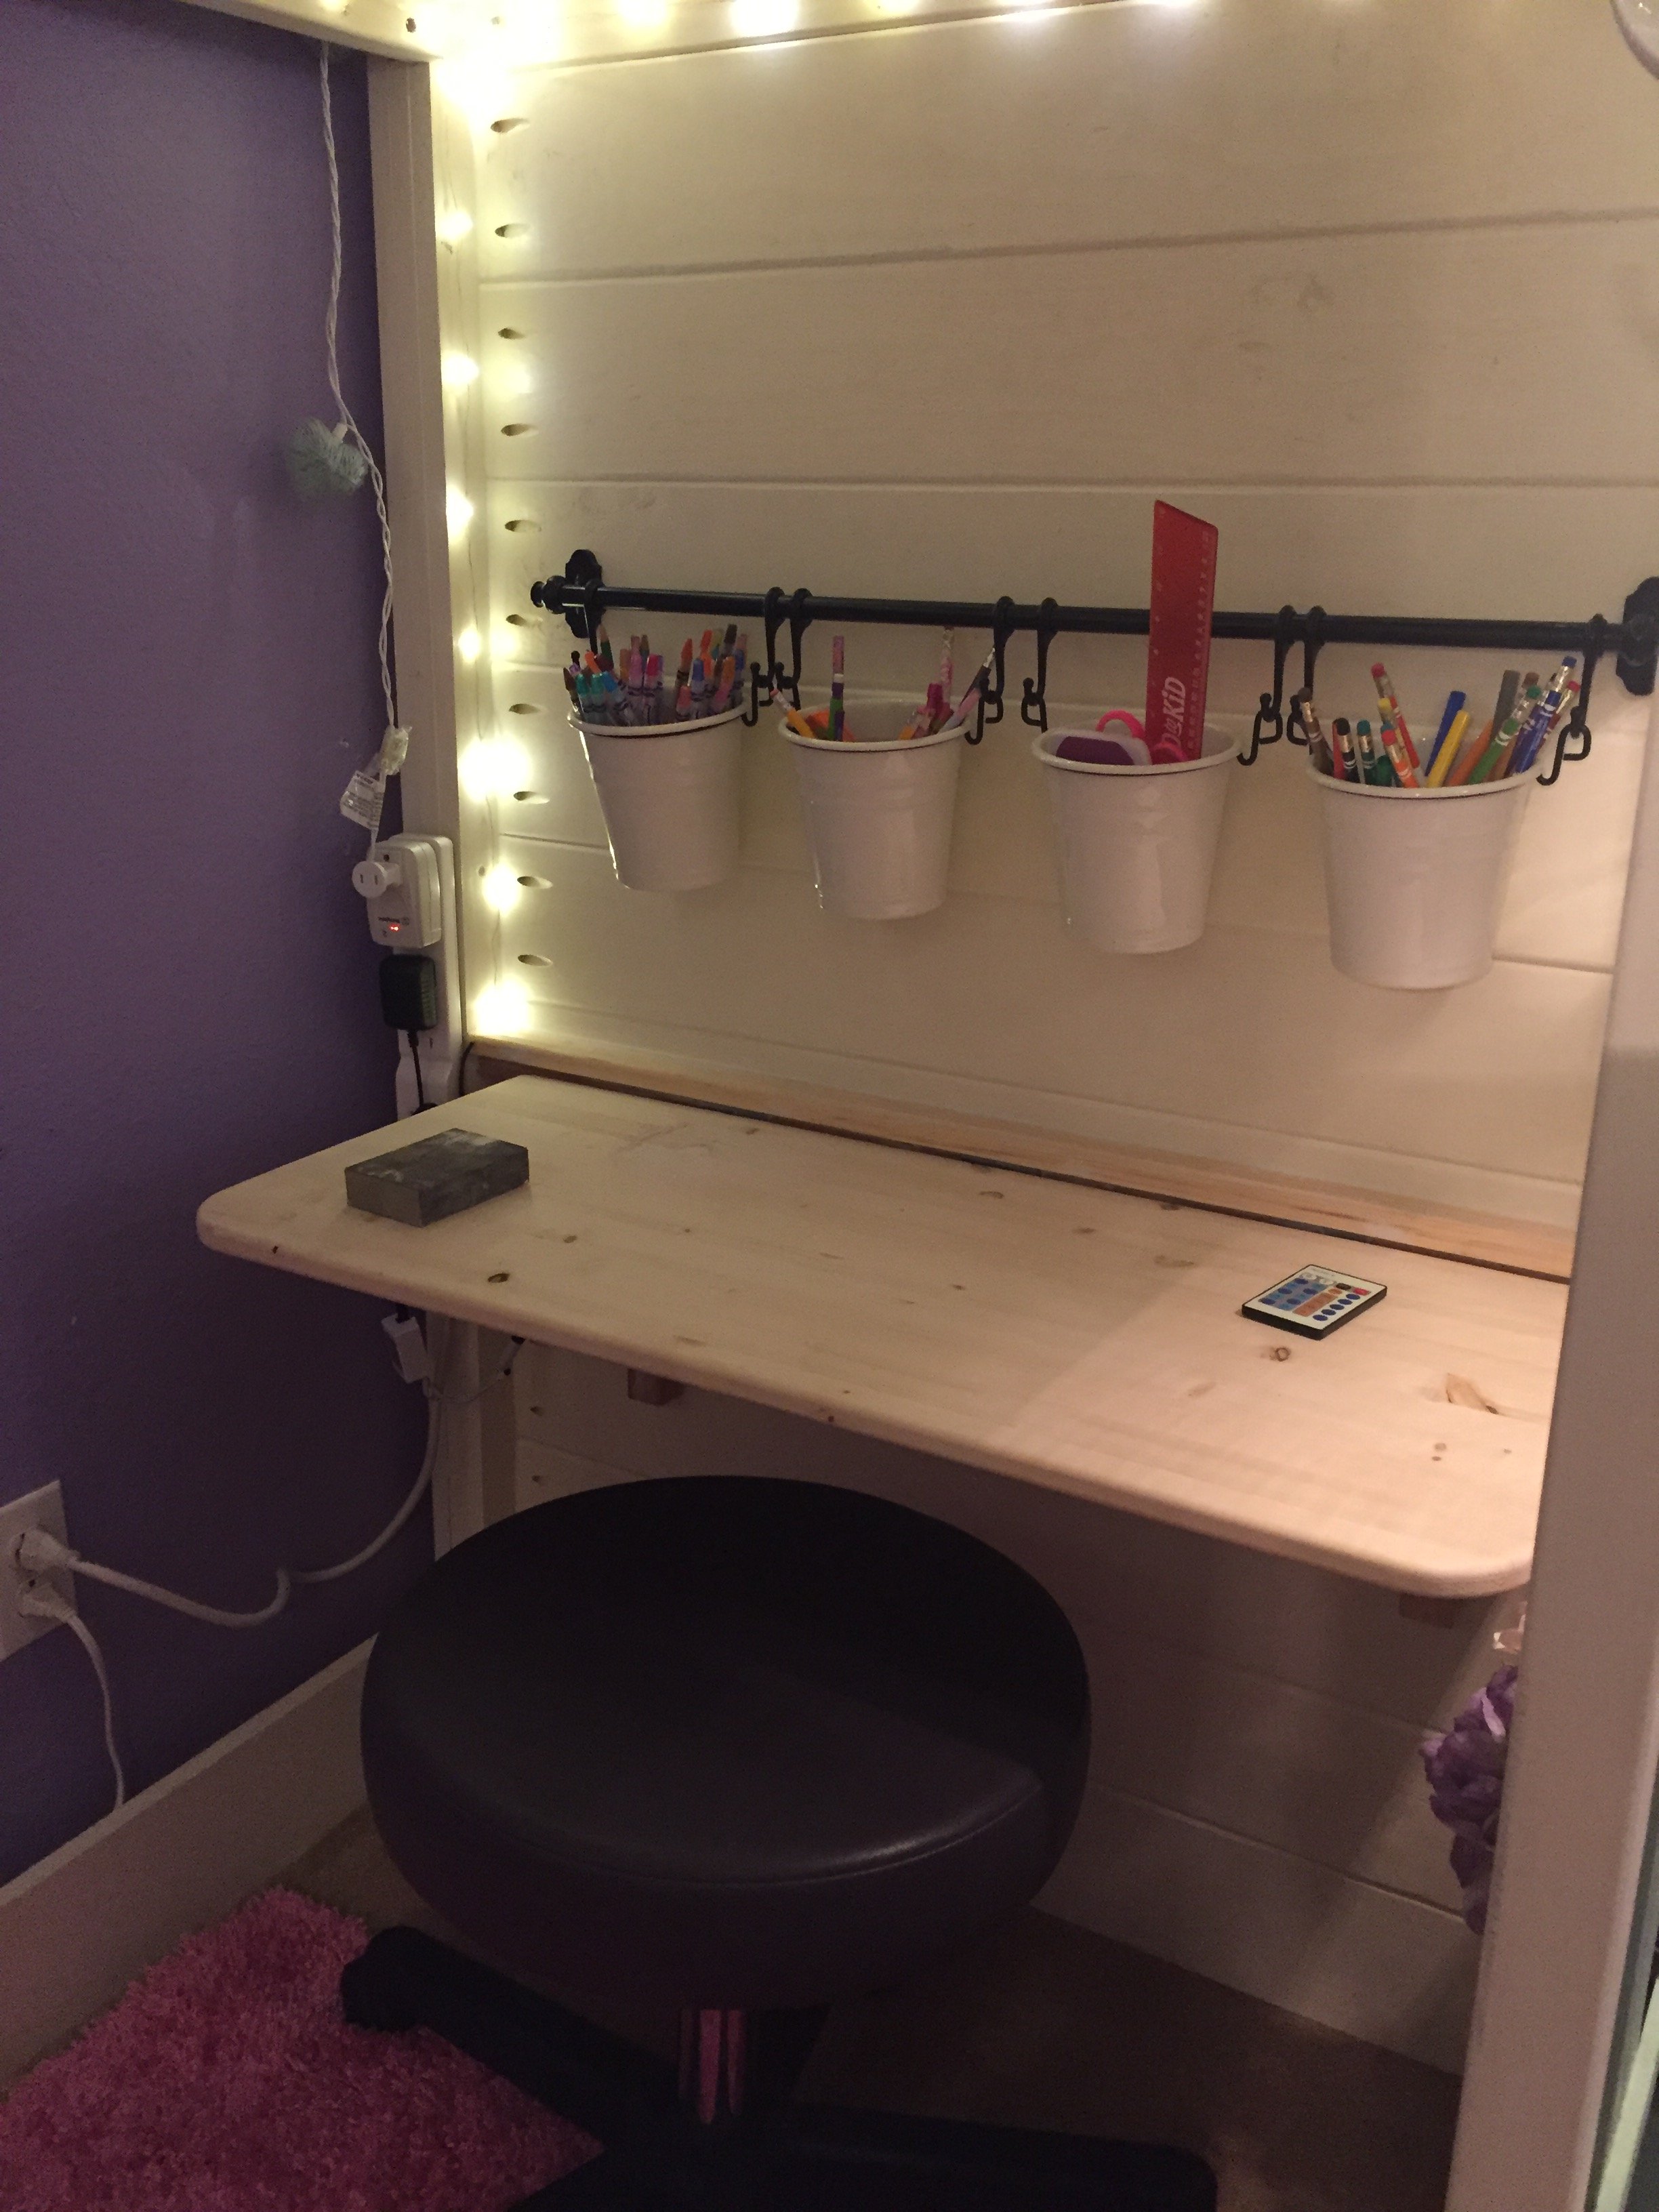
Cottage Loft bed playhouse with stairs, lights and desk
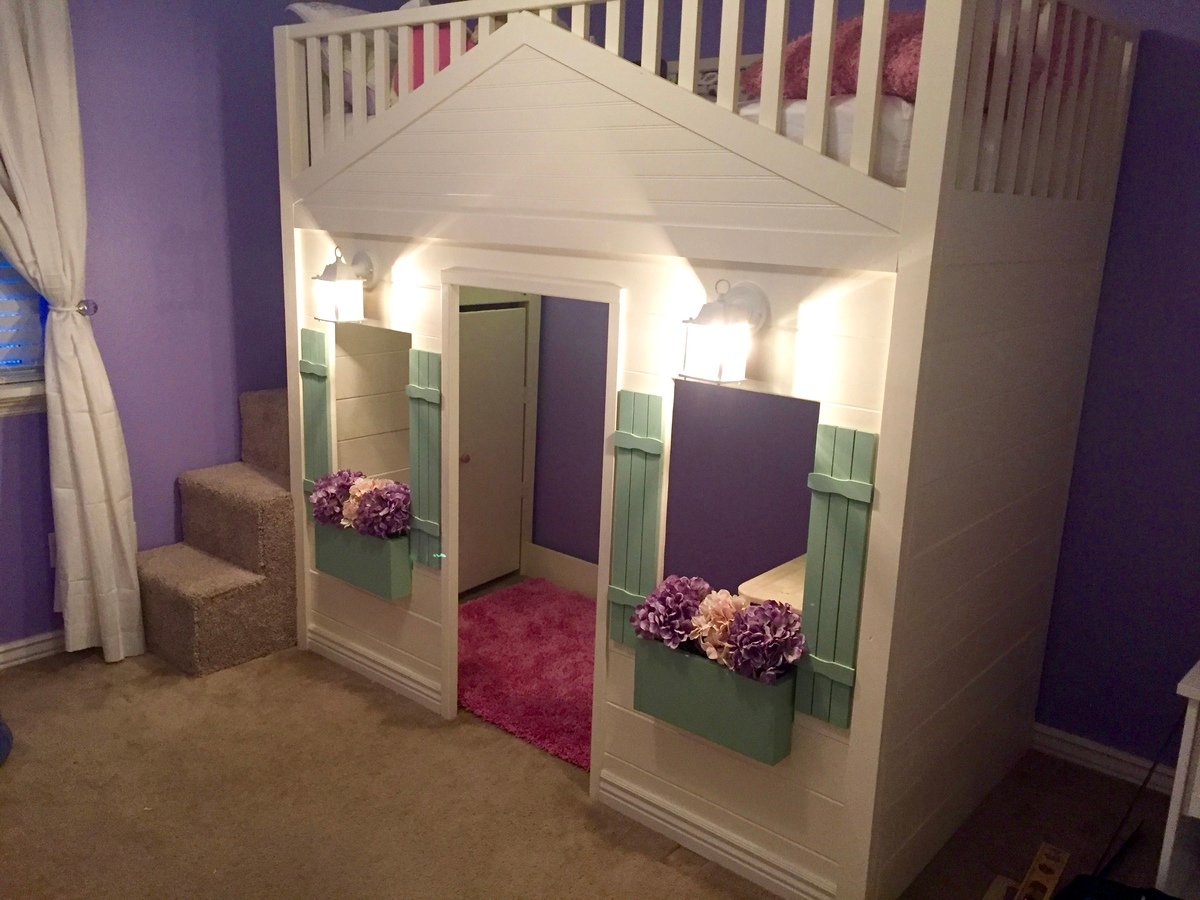
We took the loft bed plans and modified a bit for our daughters bed. We made it a little taller including the doorway. Instead of a ladder we did a set of carpeted stairs with entry to the underneath space through a door on the inside and added a light for a 'secret' hideout. Everything else were just some added features. We built flower boxes and added foam blocks with silk flowers. For the gable we used bead board. For the shutter we used small wood strips and the horizontal pieces are just the free paint sticks from lowes cut down. We then added wired in lights hooked up to her light switch. (she loves this part) Then he built a fold down desk that can be opened or closed for when they want to play in there. The school supplies we used the rod and tin buckets from Ikea kitchen area. Over it took about 6 weeks to do everything between watching the kids and working. Cost for materials and the extras came to a little over $600.
Built from Plan(s)
Estimated Cost
$600-$700
Estimated Time Investment
Week Long Project (20 Hours or More)
Finish Used
White color= Behr -Polished Pearl (we matched it to annie sloans Old White)
Green trim color- Valspar- green trellis
Green trim color- Valspar- green trellis
Recommended Skill Level
Intermediate
Modern Adirondack
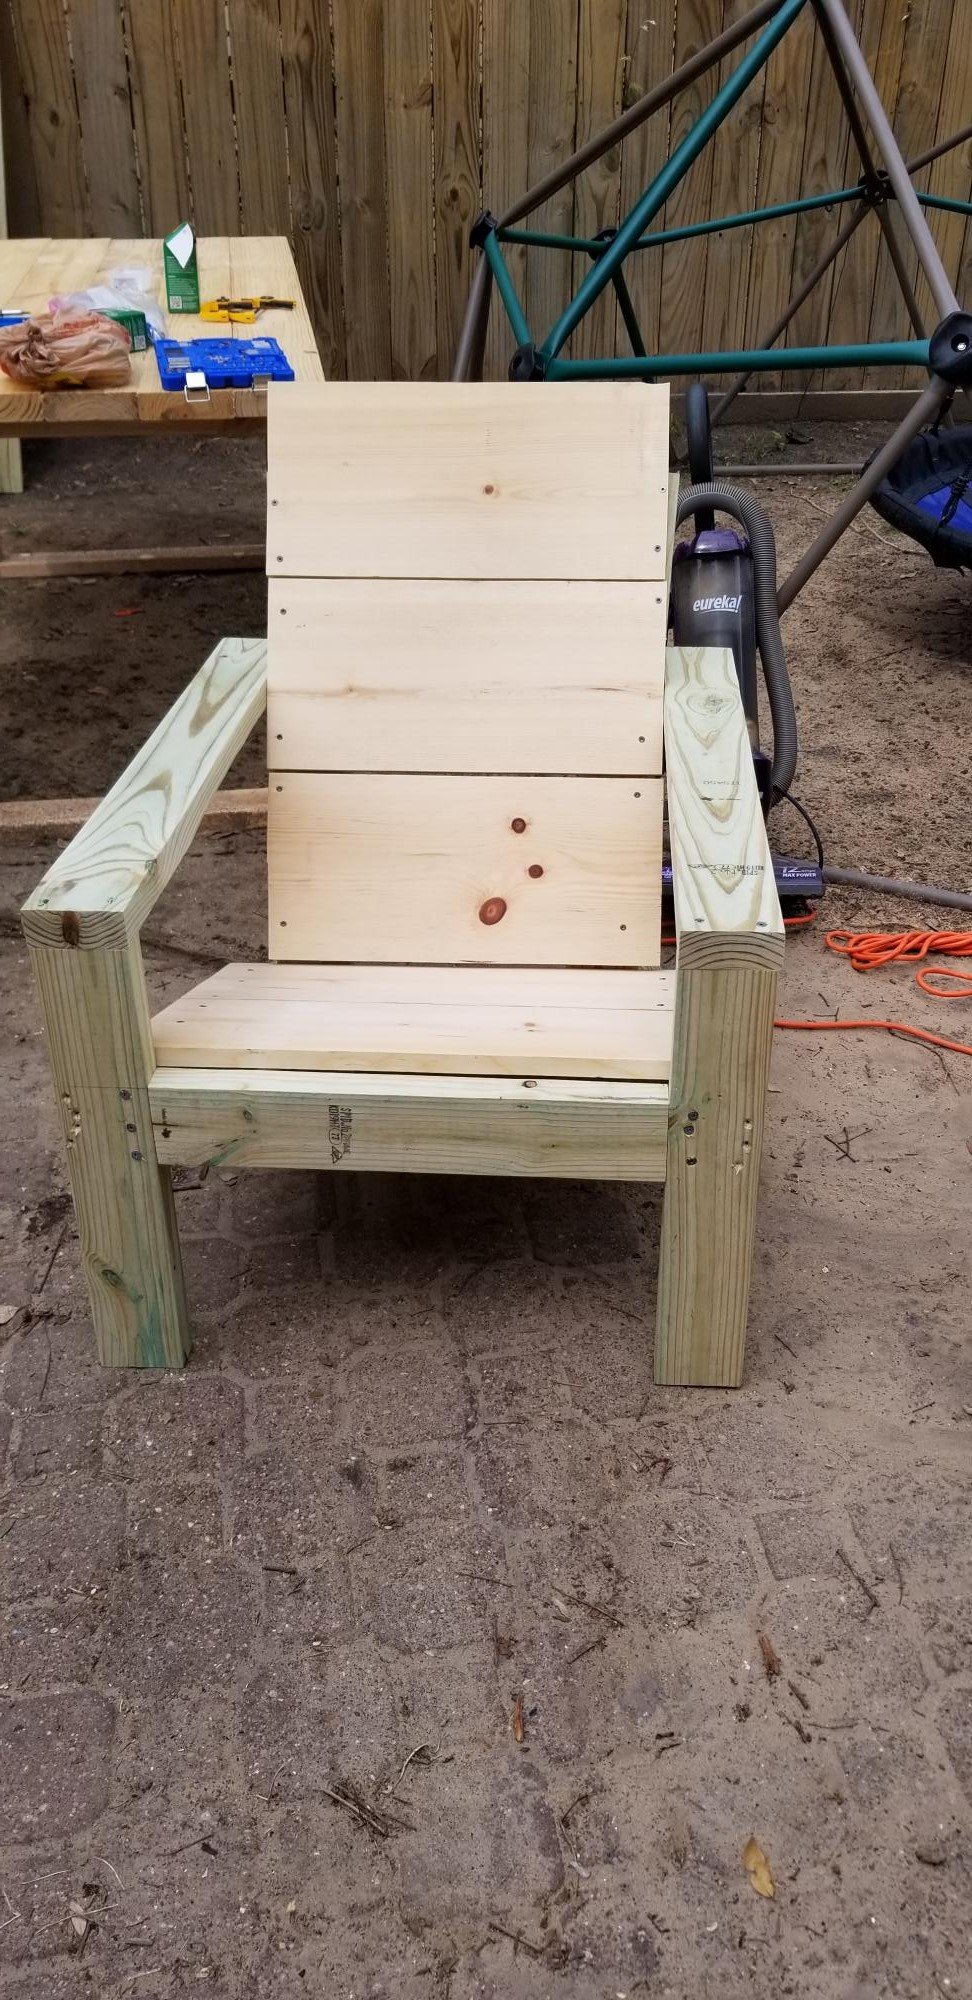
Lots of room for improvement but I'm pretty excited for my first time following plans.
Thanks, I love your videos and have learned a lot.
Built from Plan(s)
Estimated Time Investment
An Hour or Two (0-2 Hours)
Recommended Skill Level
Beginner
Modern Farm Bed
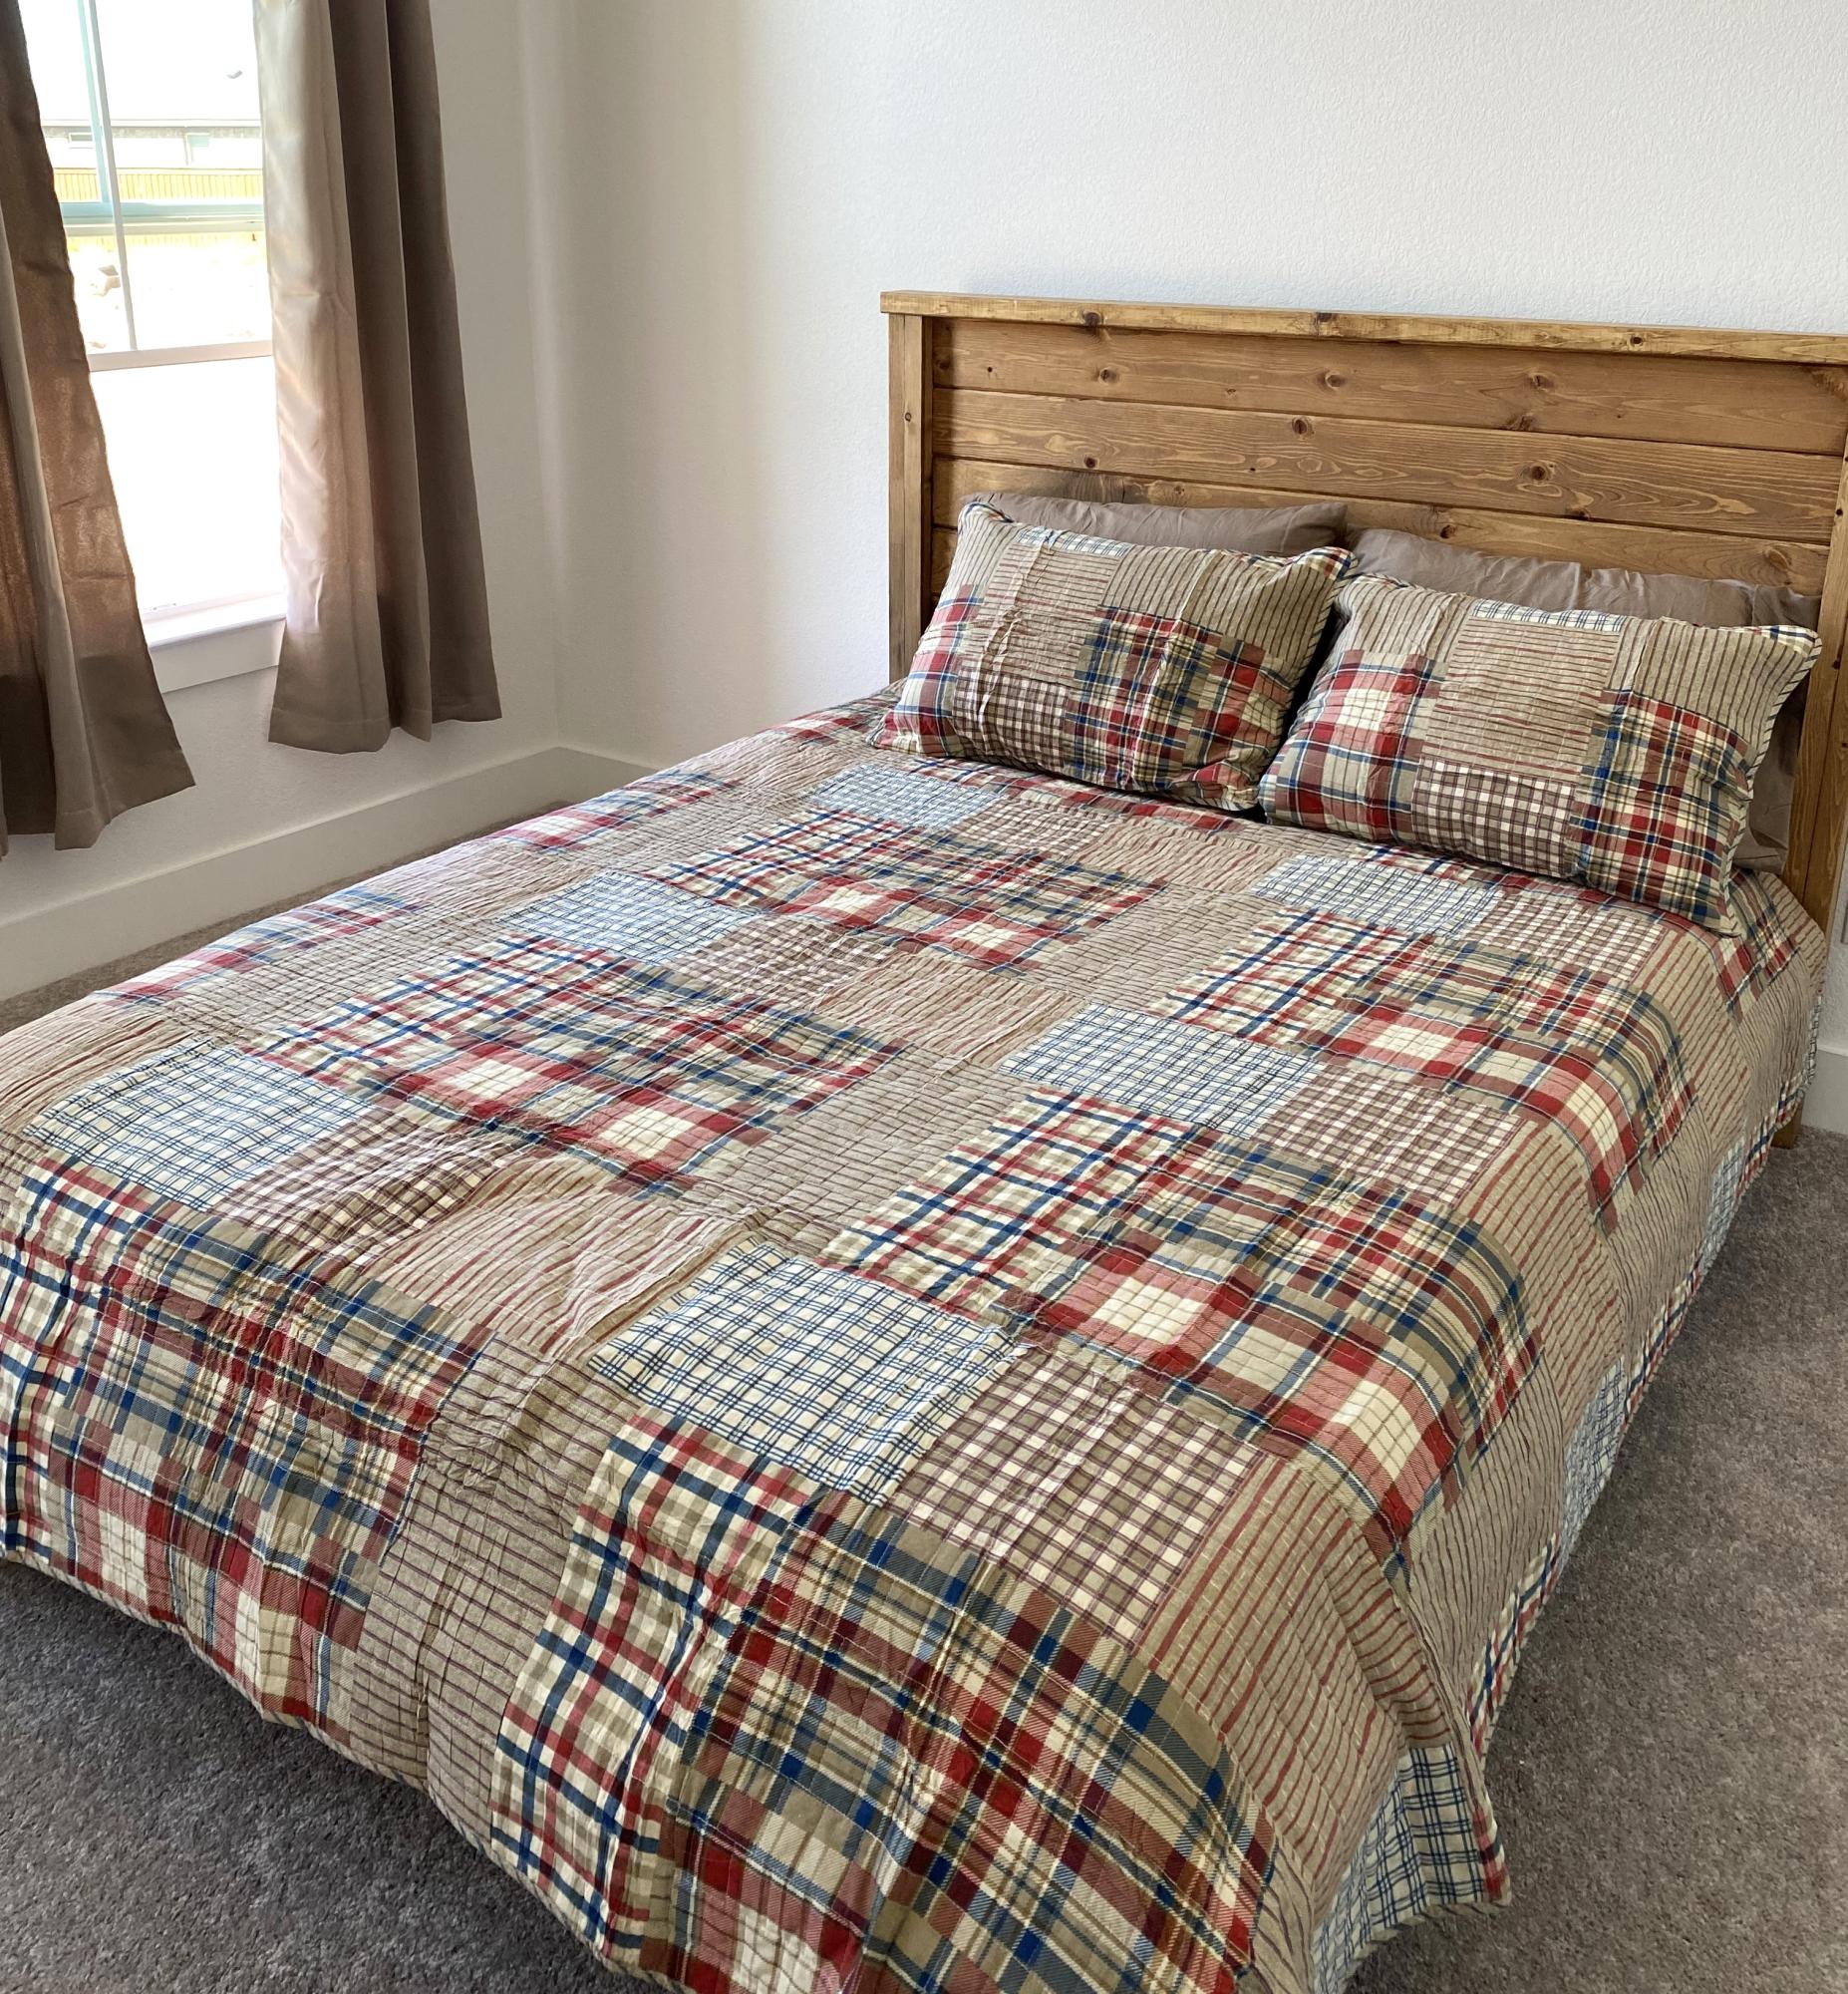
Only medication - cut 8” off the headboard to fit in our Maverick for transportation to Dallas. Stain is half minwax special walnut and half early American with dark minwax paste wax finish.
Built from Plan(s)
Daughters Desk

This was one of my first, bigger projects. It was so easy! I still need to finish the trim, but my daughter loves it as is!
Estimated Cost
20.00
Estimated Time Investment
Afternoon Project (3-6 Hours)
Finish Used
paint
Recommended Skill Level
Starter Project
Comments
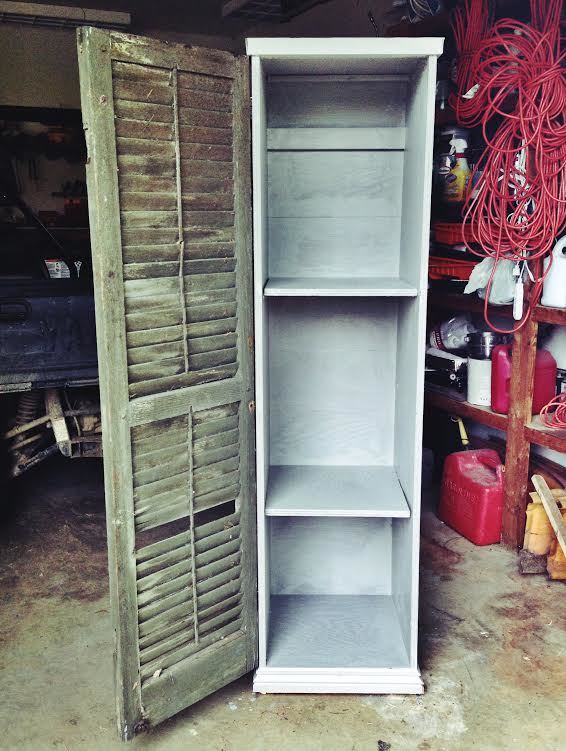
modular locker with old shutter
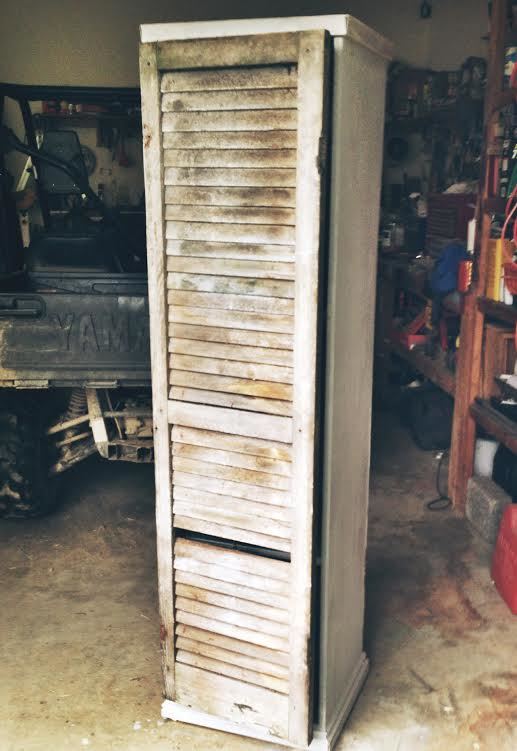
This was my first project! I used the plans for the modular locker, but used an old shutter for the door instead. Next, I think i'm going to try to connect 5 or so in a row for an entryway, all with different shutter doors :)
Estimated Time Investment
Afternoon Project (3-6 Hours)
Recommended Skill Level
Starter Project
Comments
Wed, 05/21/2014 - 16:27
looks great!
I am a total sucker for shutters. Love the look of them, not sure why..lol. this is nice, great job!
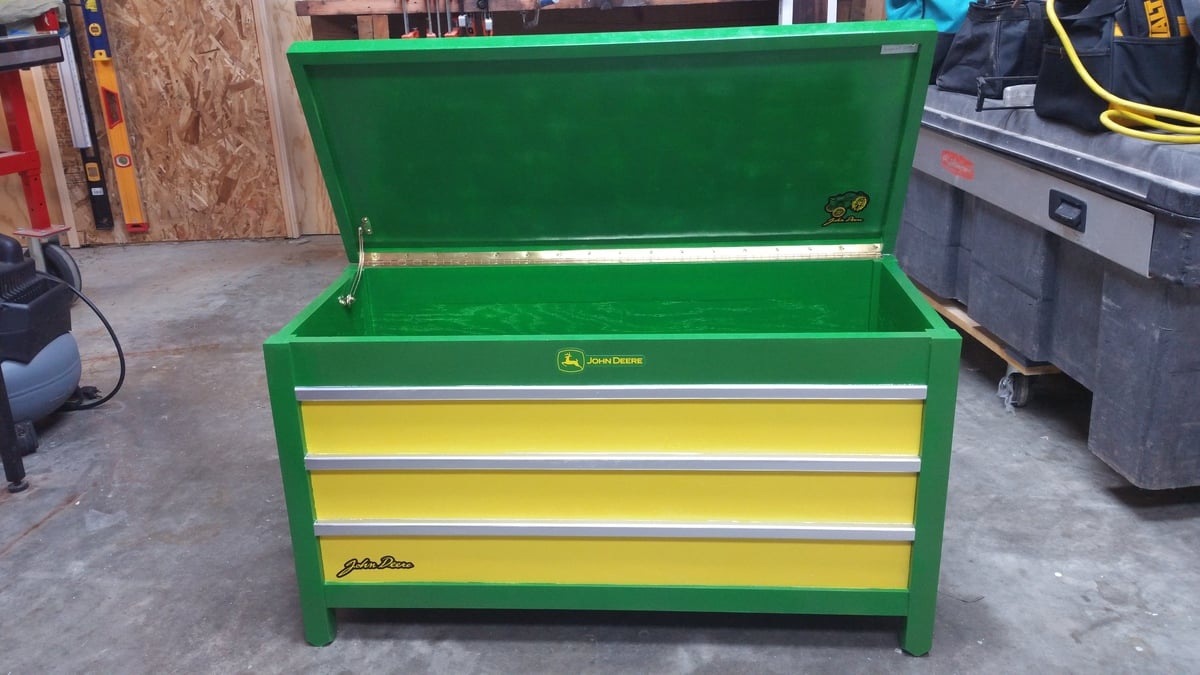
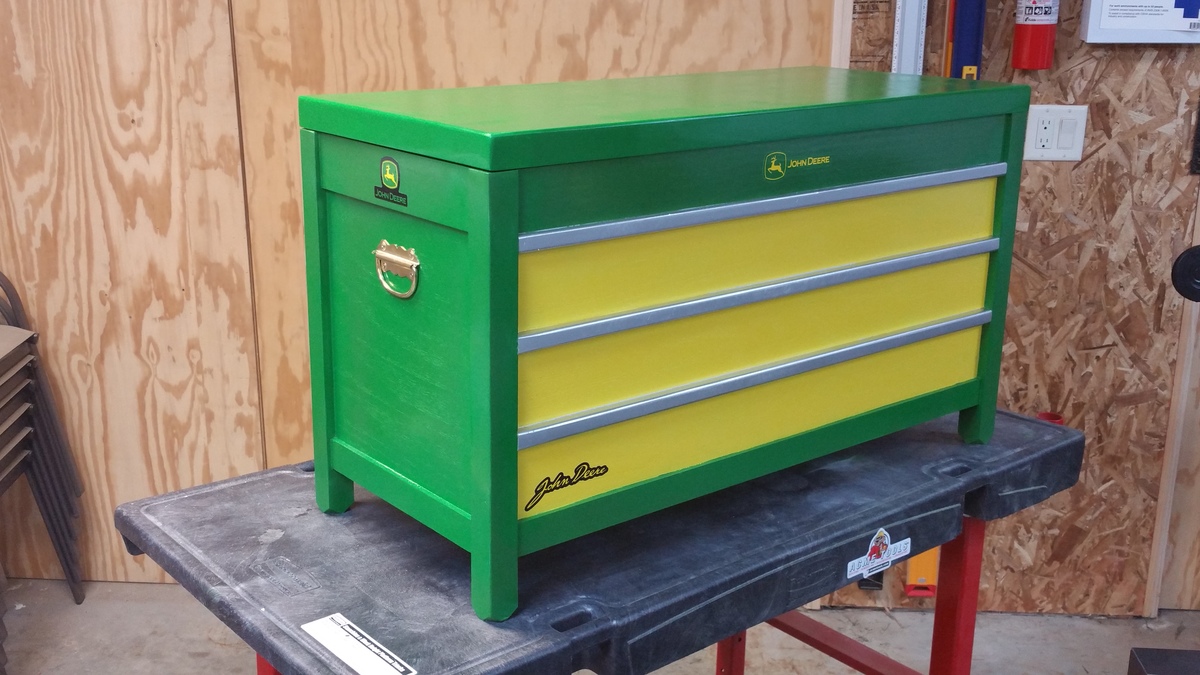
John Deere Toy Box
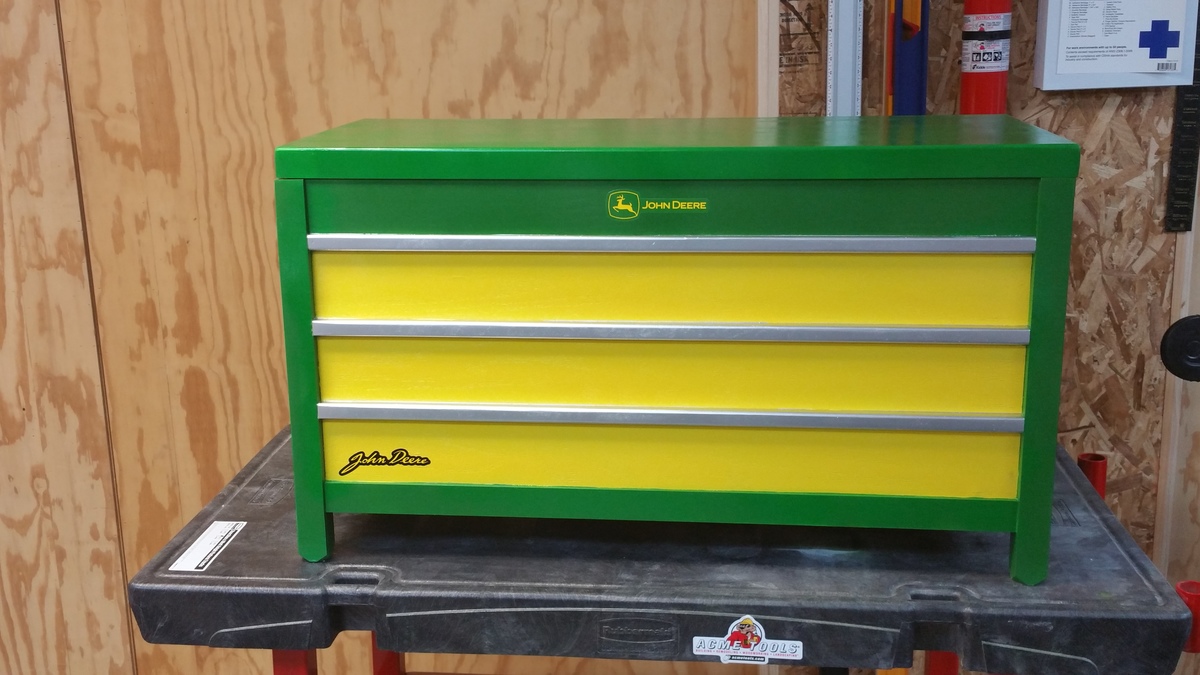
I built this toy box for my nephew, who is into Tractors, using the plan provided by Ana. I made some modifications to the lid mostly, other than that the differences are cosmetic. I thought the plan was super simple and easy to use!
Built from Plan(s)
Estimated Time Investment
Weekend Project (10-20 Hours)
Finish Used
Machine Paint
Recommended Skill Level
Beginner
Comments
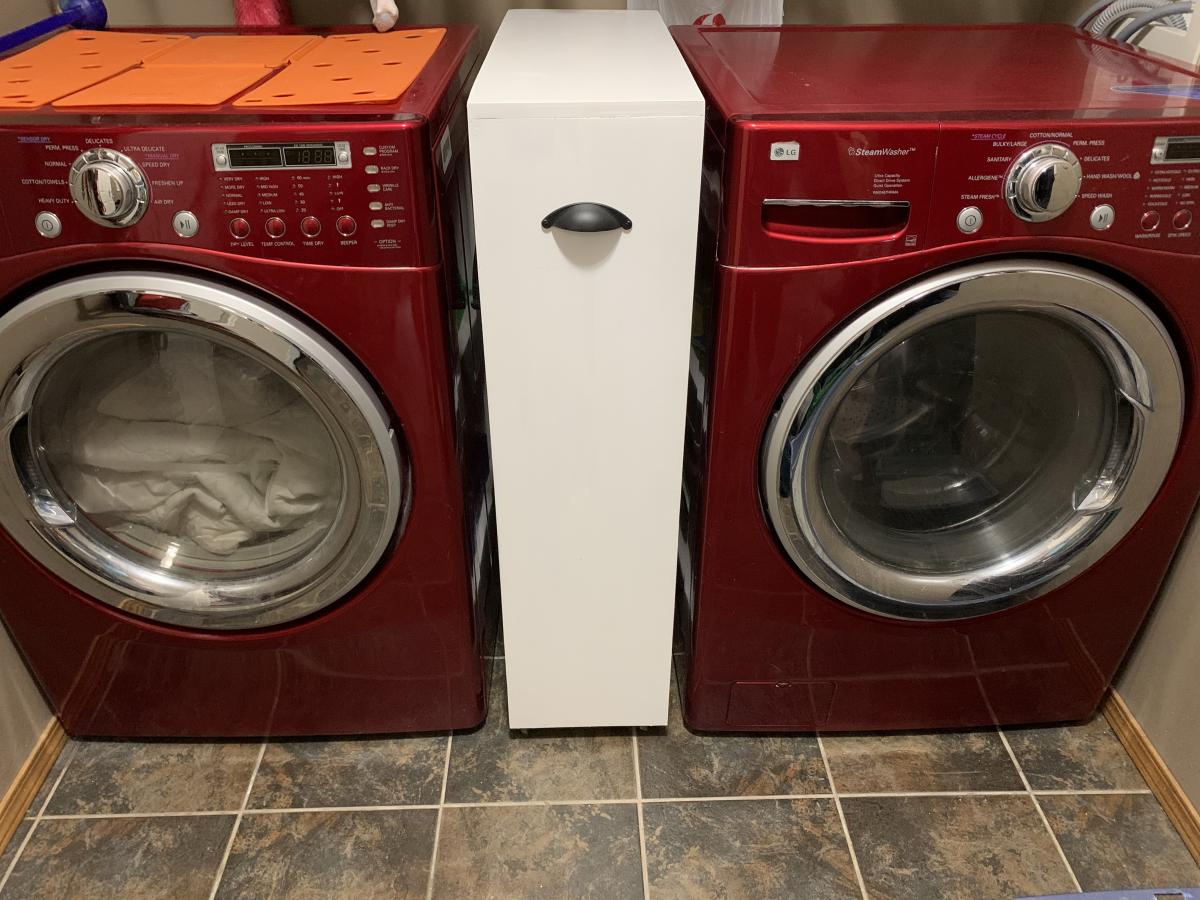
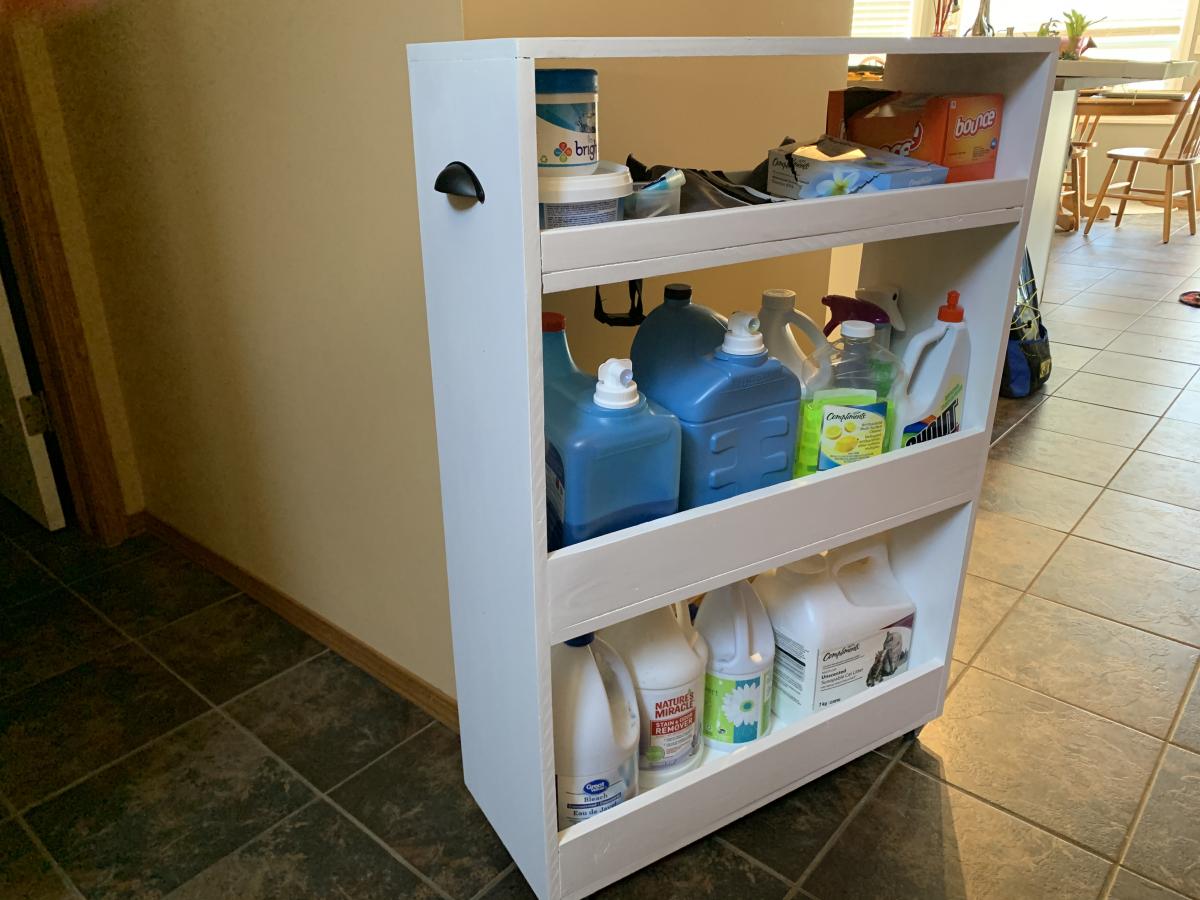
Rolling laundry cart
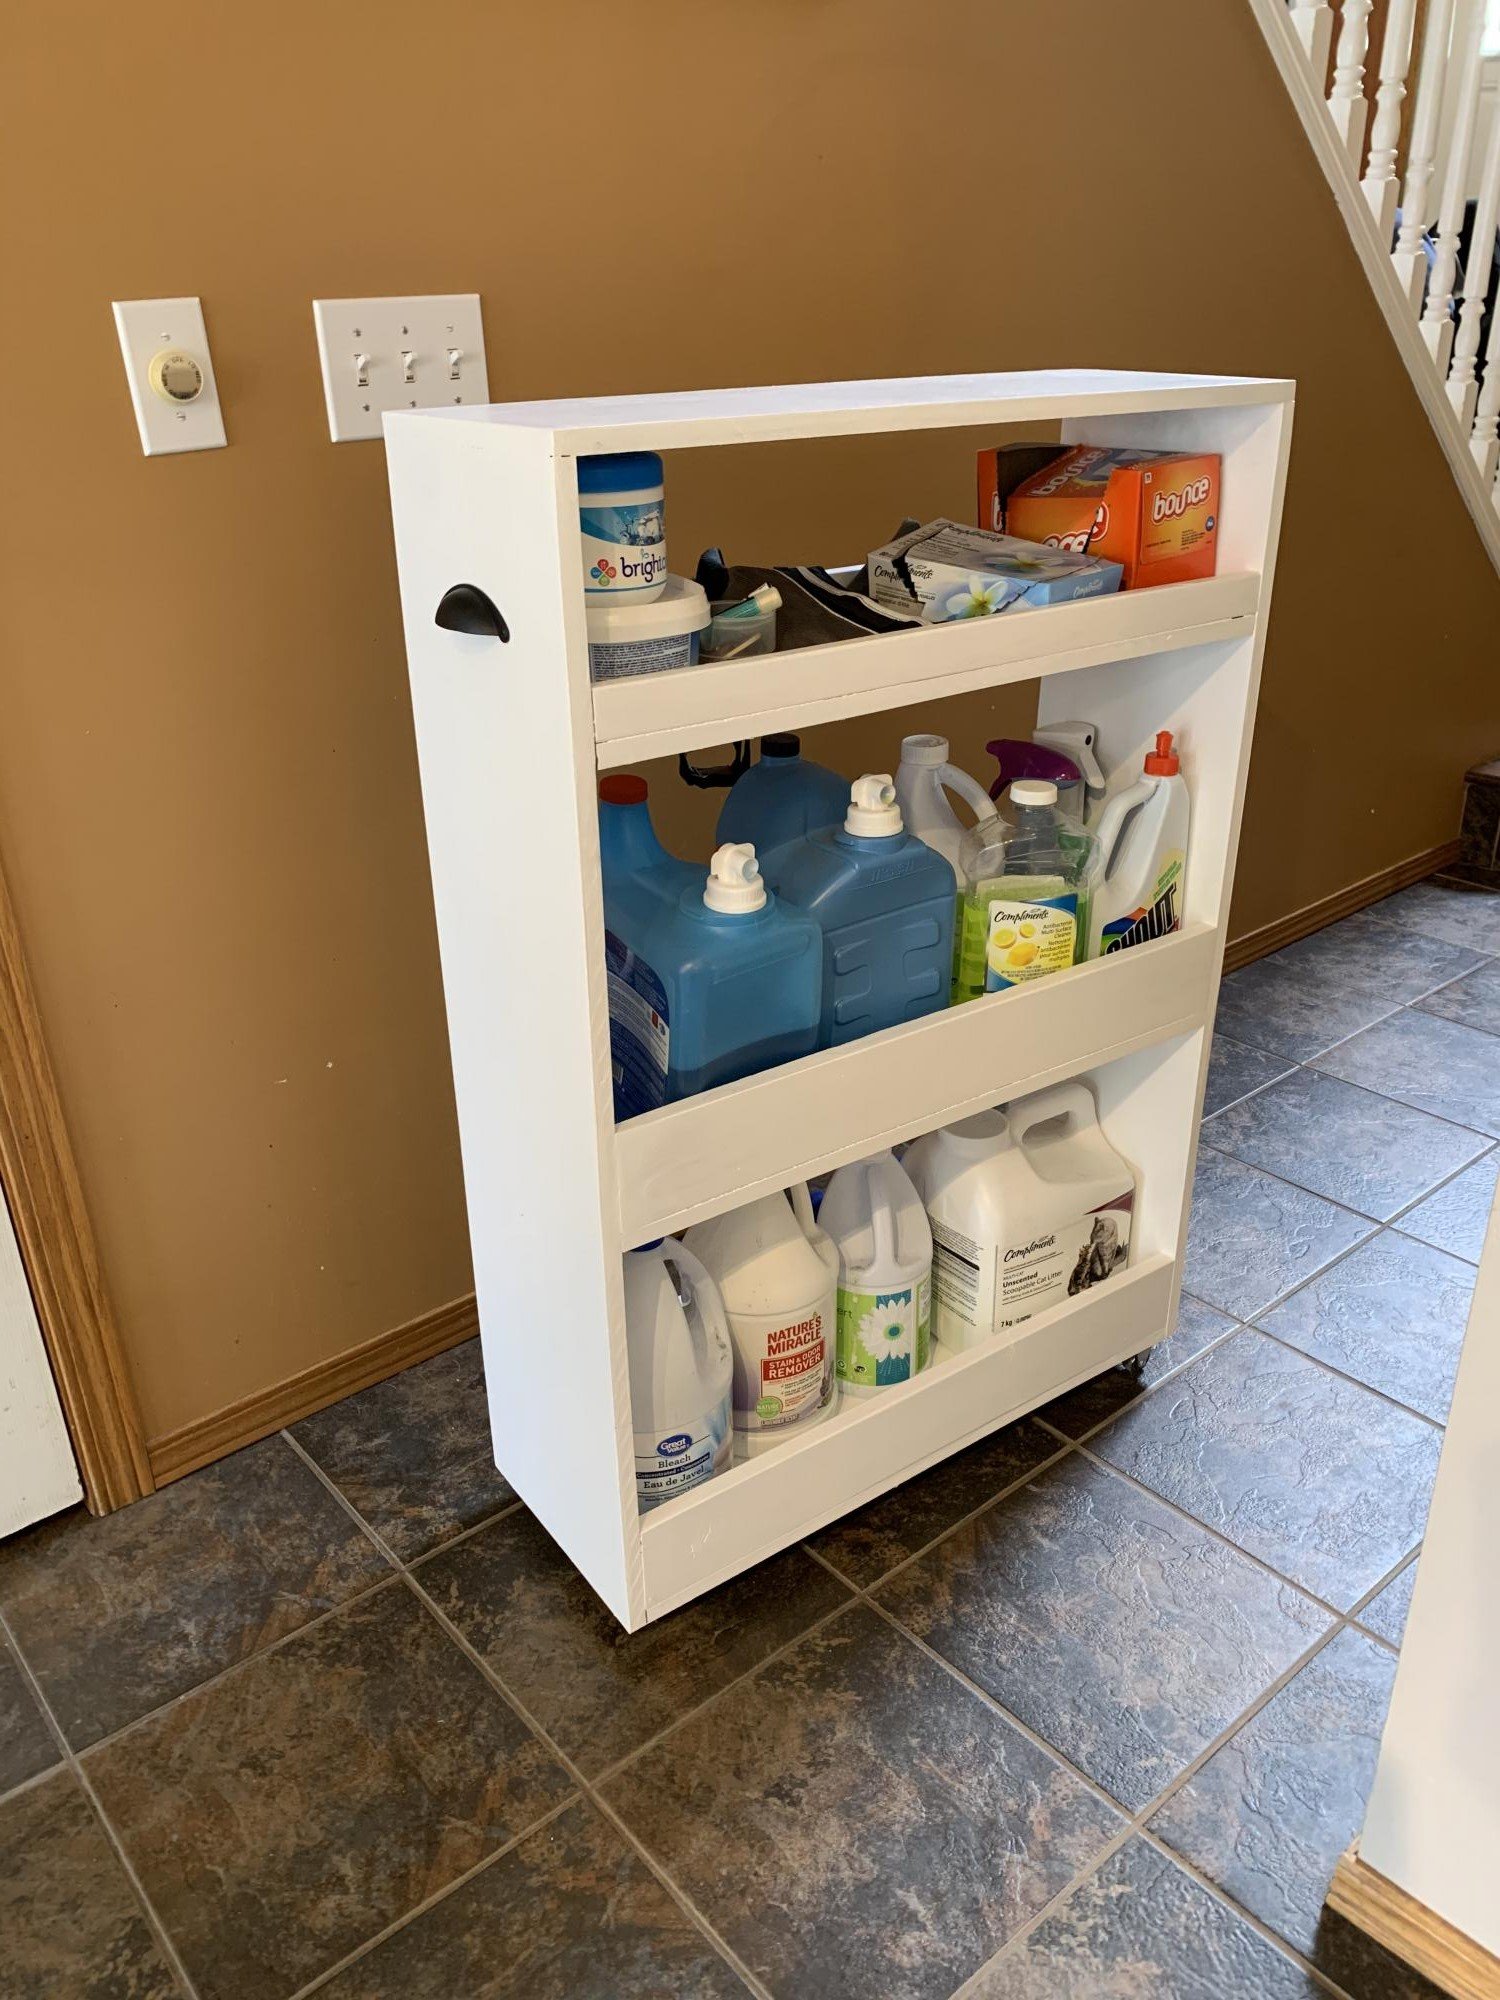
My husband and I have been inspired by your website and are getting started with wood working projects. We did this cart on the weekend. We used MDF board for the front, back and shelf bottoms because we had it laying around after replacing our garage shelving. I’m pleased with how it turned out given that we are just beginners. I do think we’ll have to invest in a table saw. Not a fan of working with MDF board. We used the example found on Infarrantlycreative.net but changed it up slightly. (Sorry about the first photo, I can’t seem to delete it)
Estimated Cost
Under
Approximately $35 CAD because we had the MDF, paint and nails
Approximately $35 CAD because we had the MDF, paint and nails
Estimated Time Investment
Afternoon Project (3-6 Hours)
Recommended Skill Level
Beginner
Comments
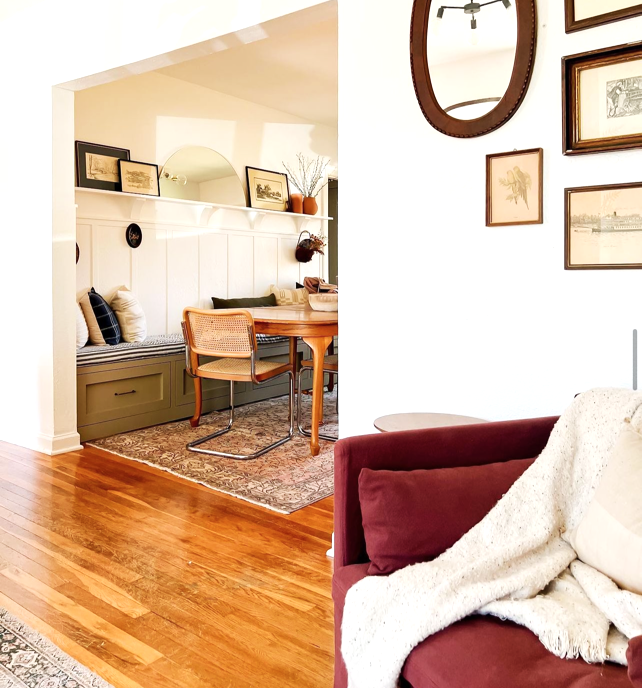
Dining Storage Bench

Love, love, love this gorgeous dining room with the storage bench, such a beautiful space @mylushabode
Built from Plan(s)
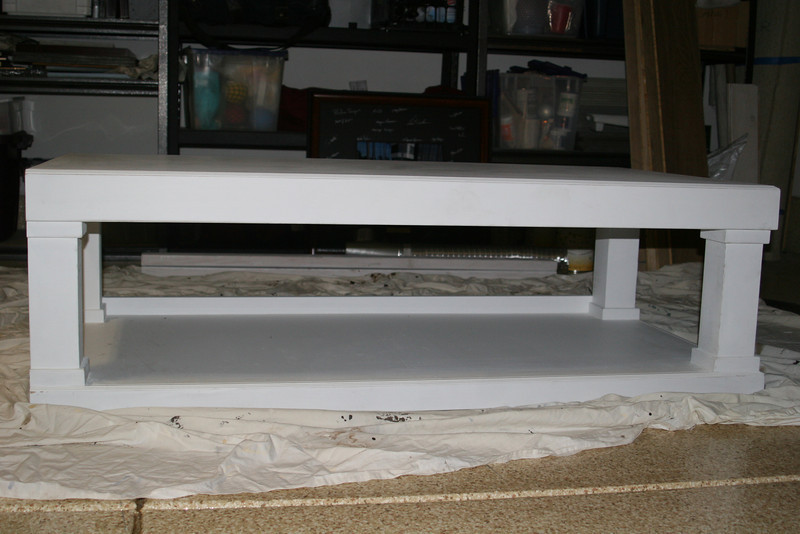
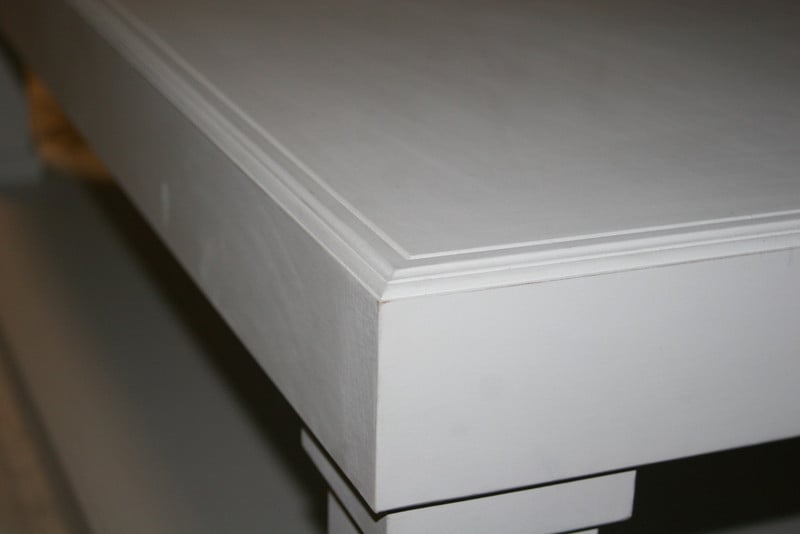
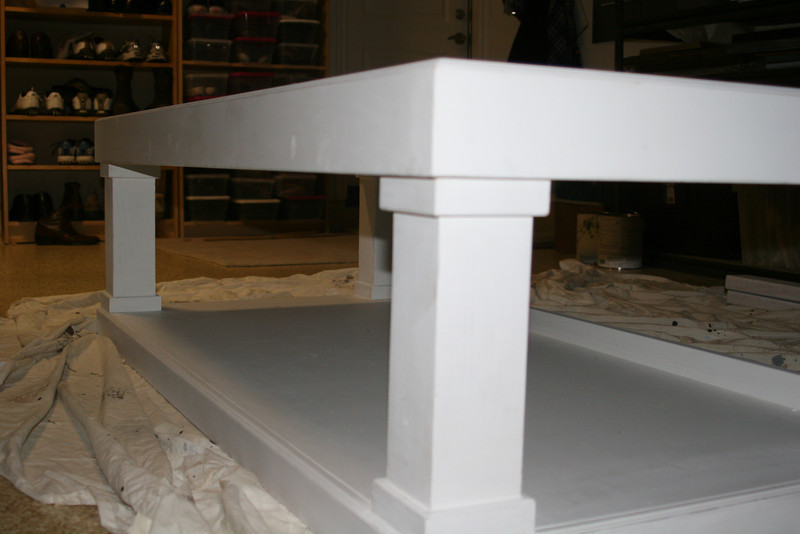
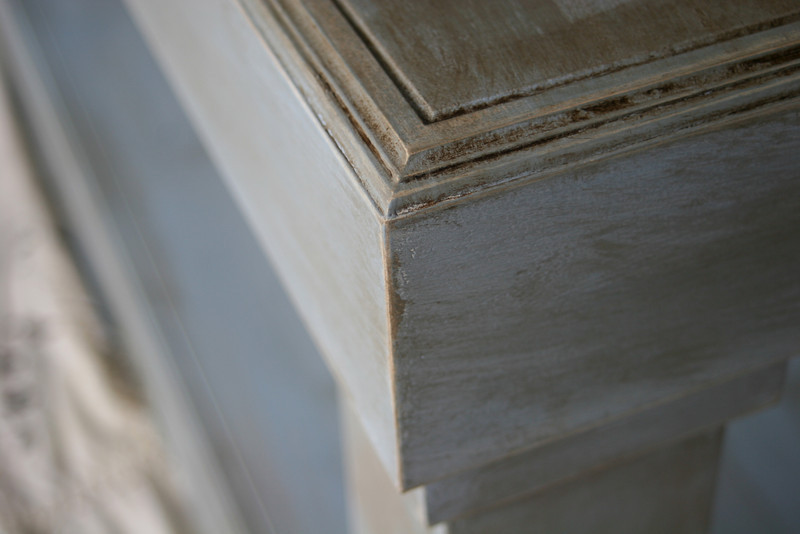
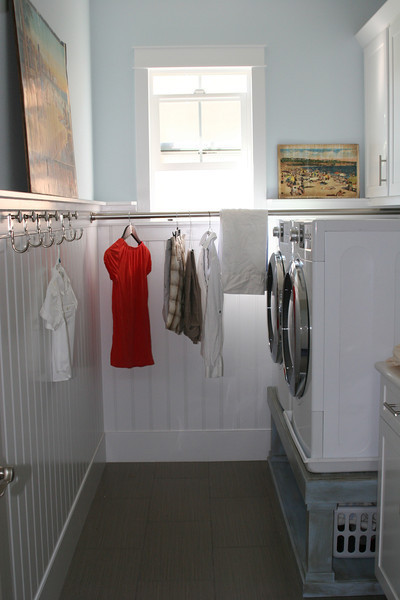
beachy cottage laundry room with Sausha's pedestal!
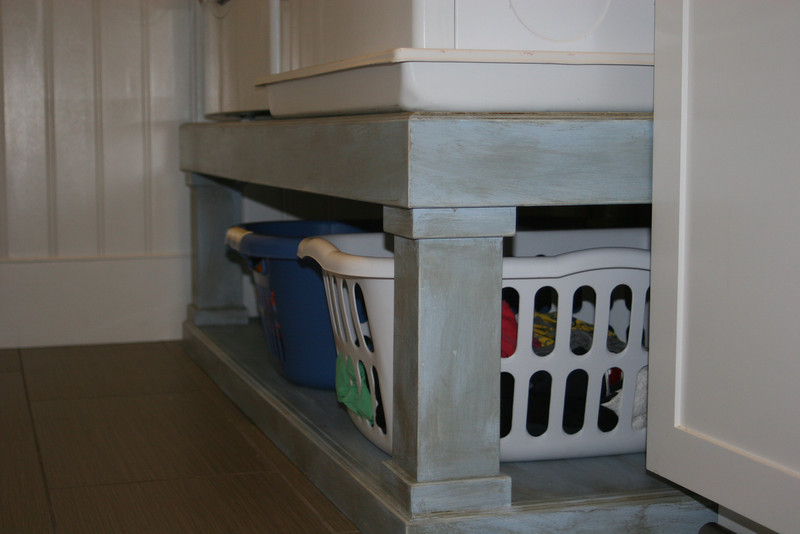
we remodeled the laundry room to have a beachy cottage feel. best part is getting the washer and dryer off the ground with Sausha's pedestal.
Estimated Cost
$500
Estimated Time Investment
Week Long Project (20 Hours or More)
Finish Used
Benjamin Moore's Ultra White in flat as a primer. Annie Sloan's Louis Blue over primer, then dry brushed Annie Sloan Paris Gray. Sanded with fine sandpaper. Wiped clean and vacuumed. Then clear wax and dark wax, rubbed in very well.
Recommended Skill Level
Intermediate

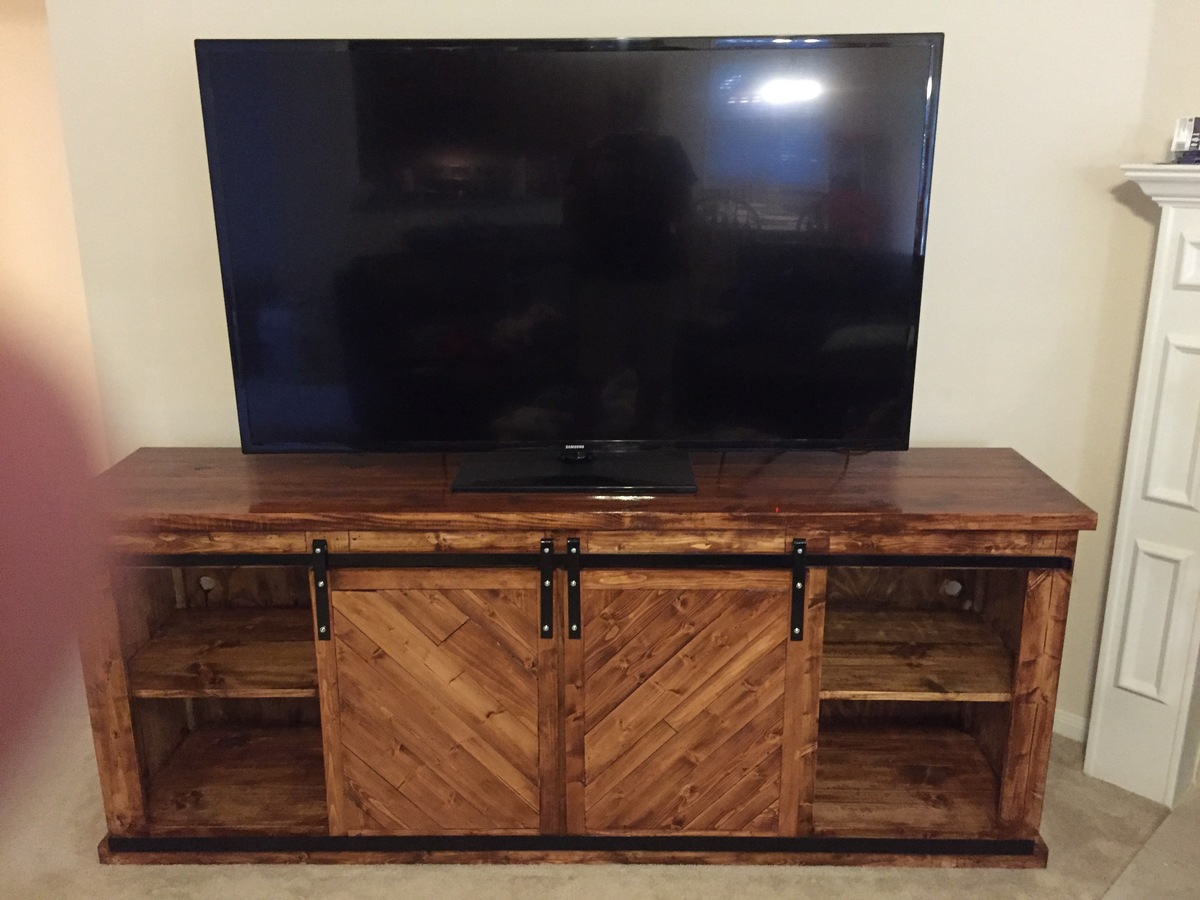
Grandly TV stand
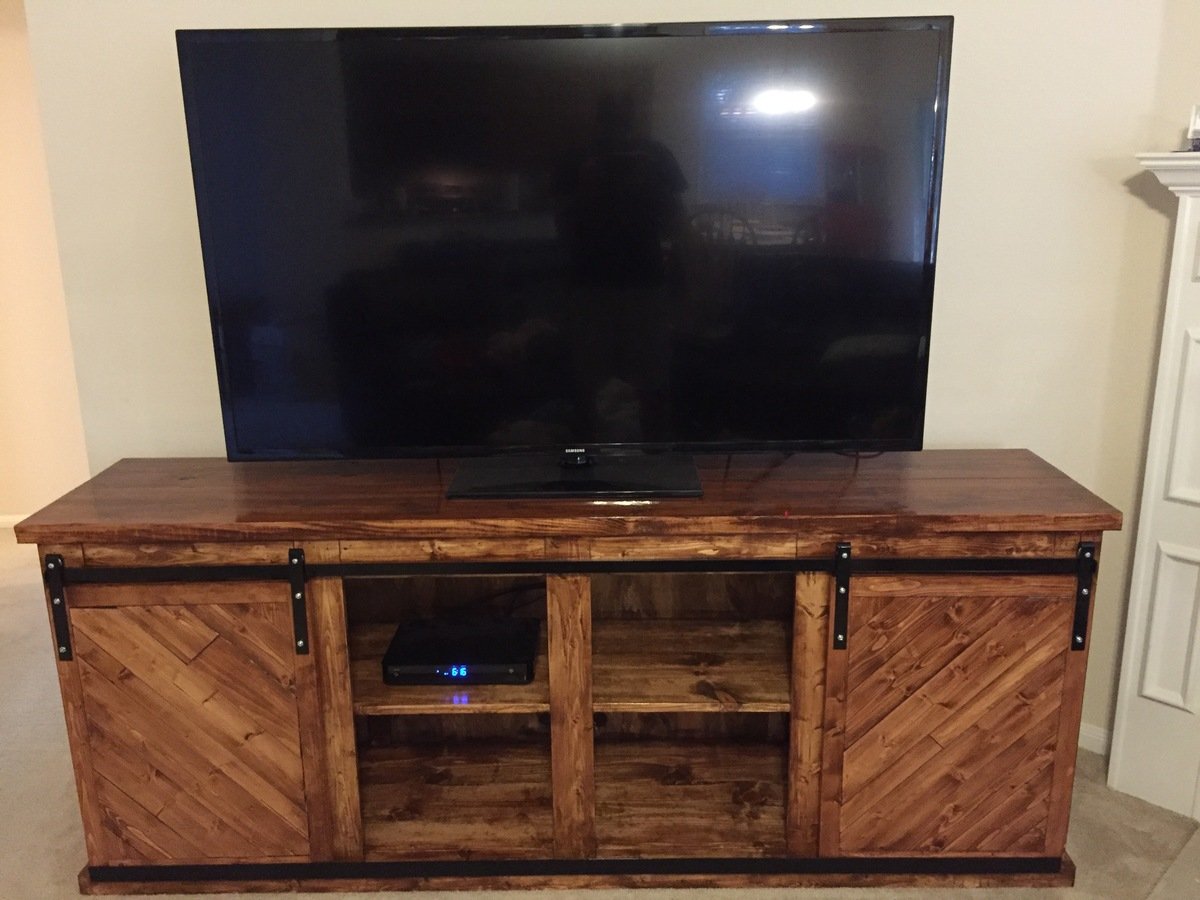
I used replacement screen door wheels and 1" by 1/4" Aluminum bar to make the hardware.
Built from Plan(s)
Estimated Cost
$250
Estimated Time Investment
Day Project (6-9 Hours)
Finish Used
Polyshade American Chestnut
Recommended Skill Level
Beginner
My interpretation of Modern Adirondack Chair
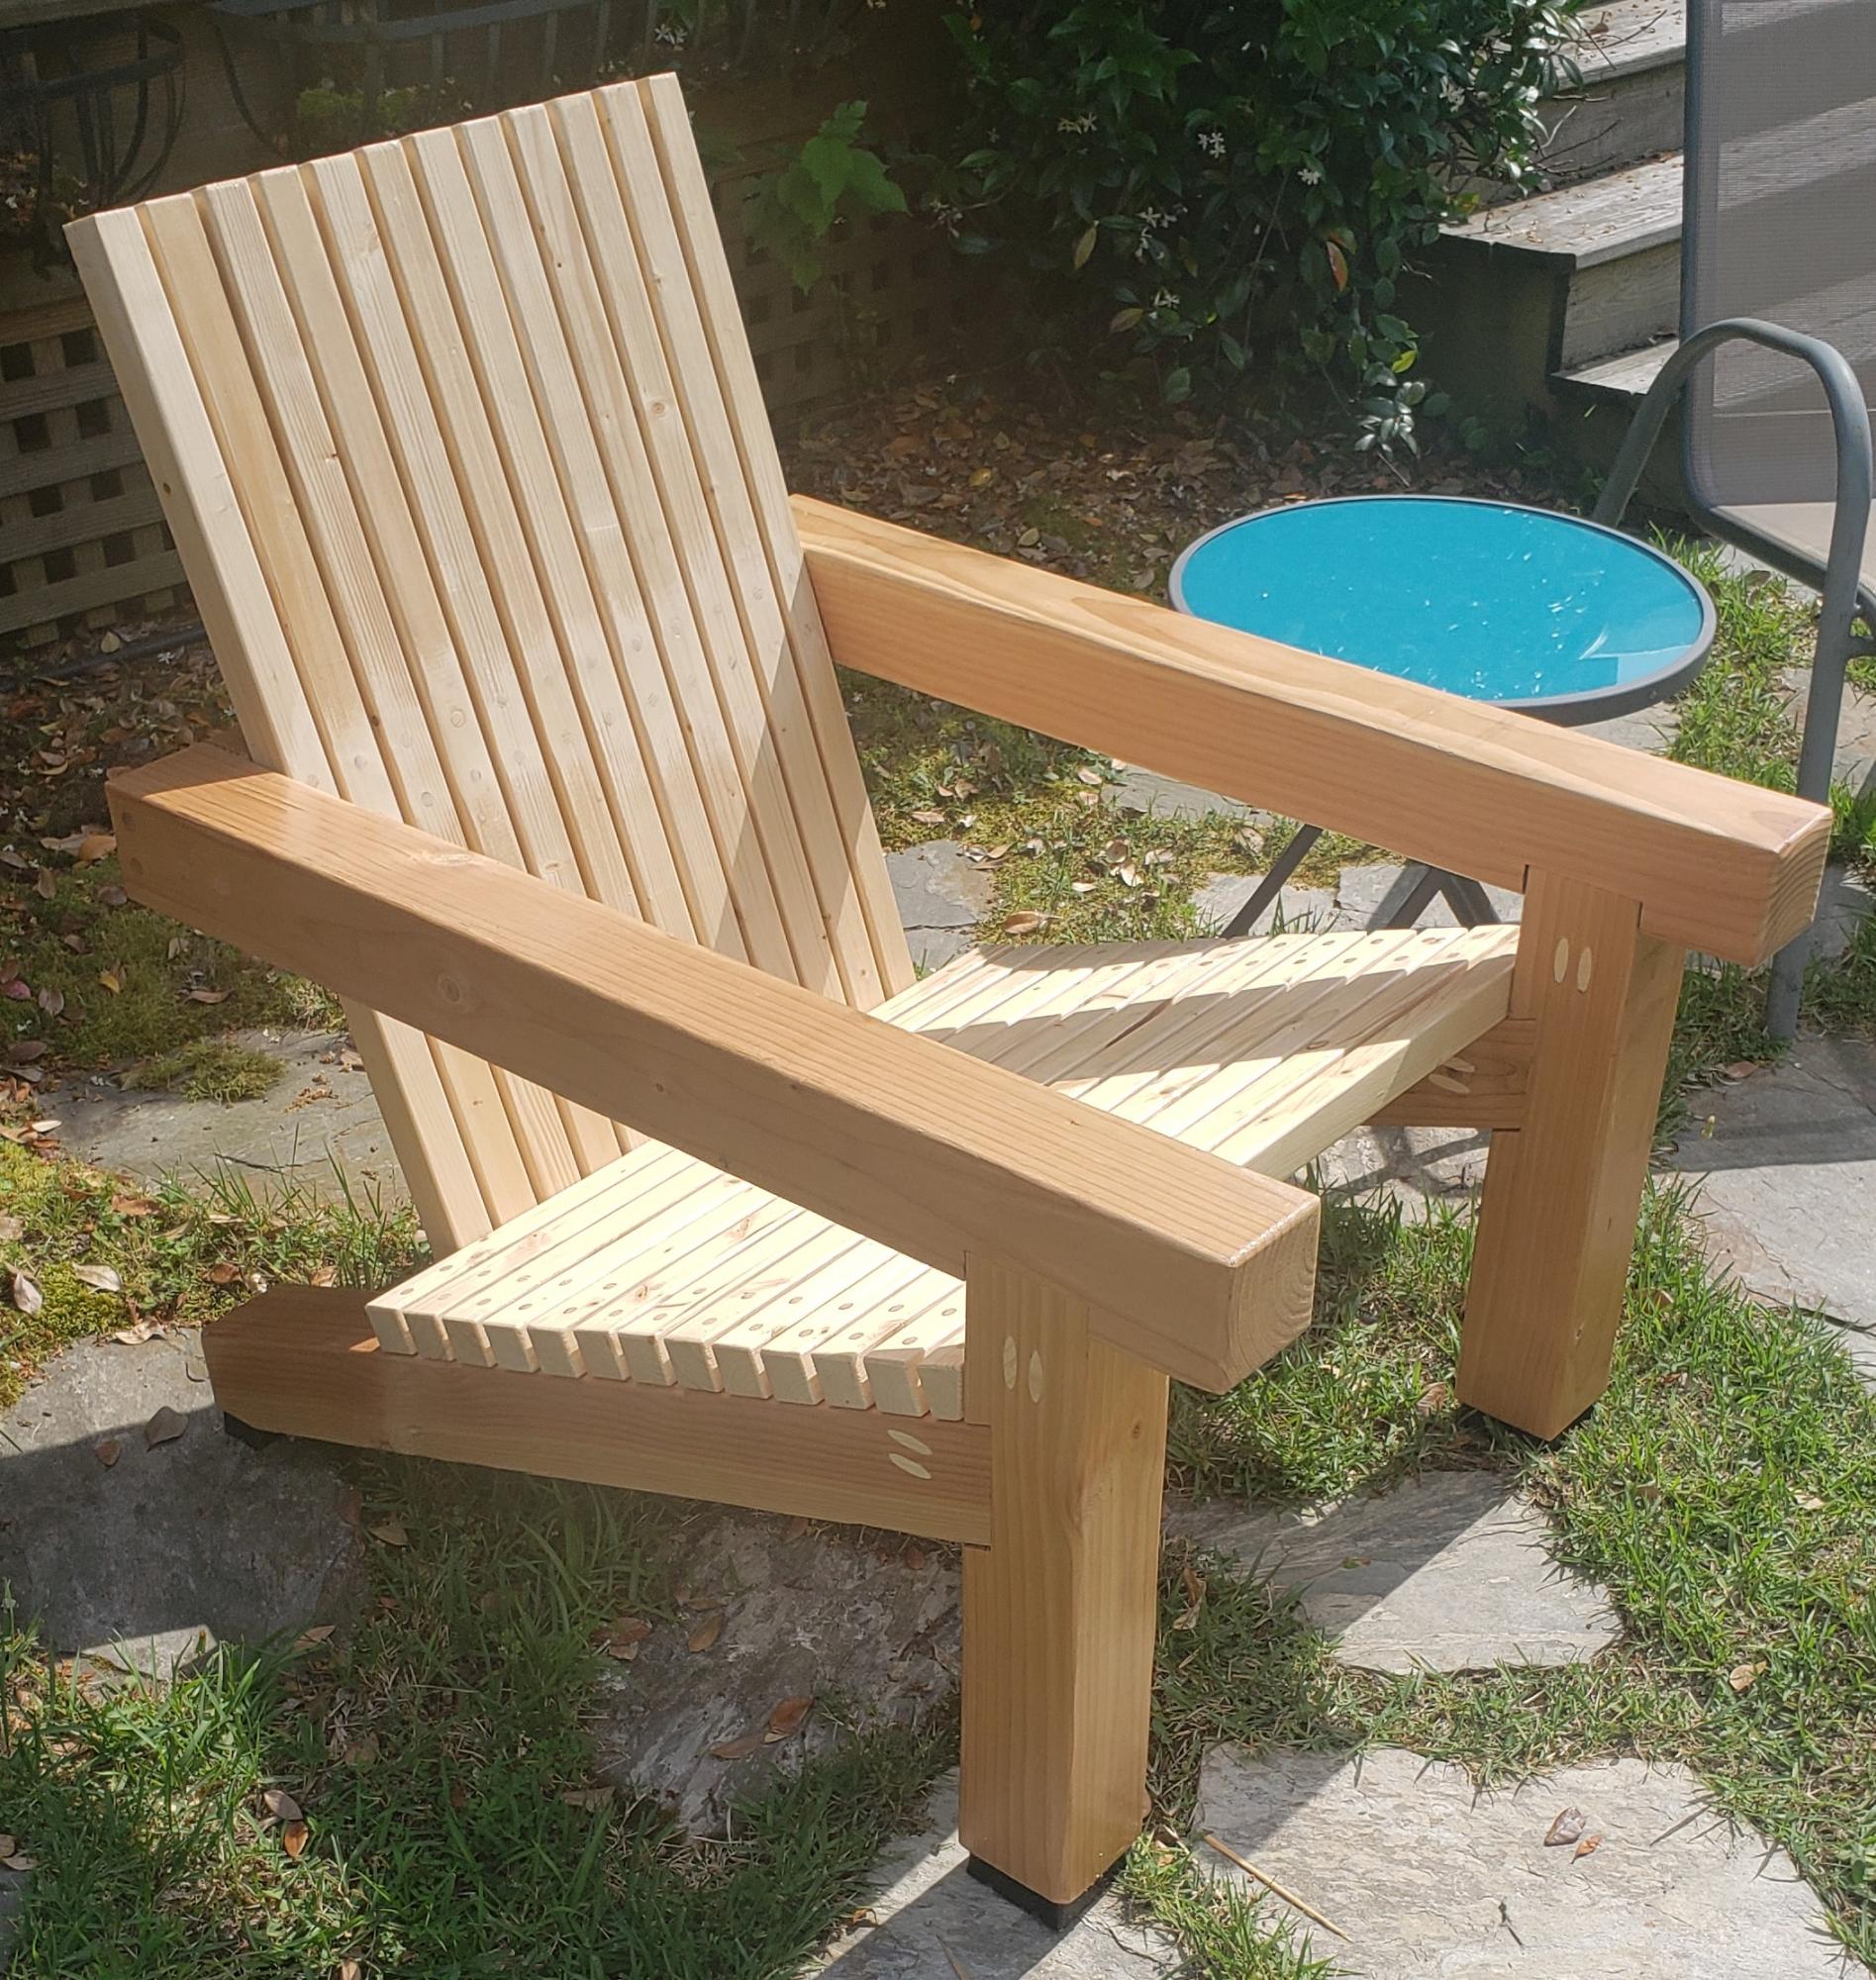
Went beefier.
Built from Plan(s)