Community Brag Posts
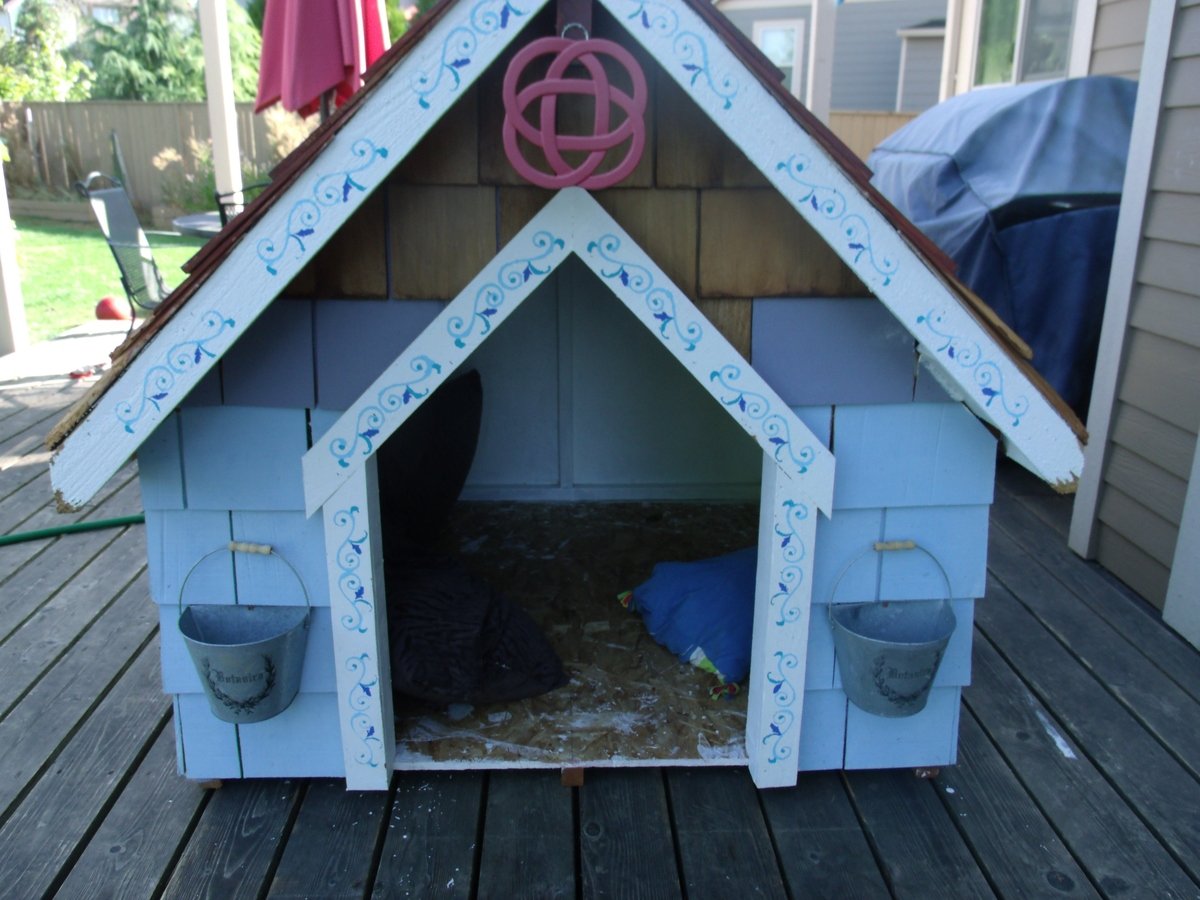
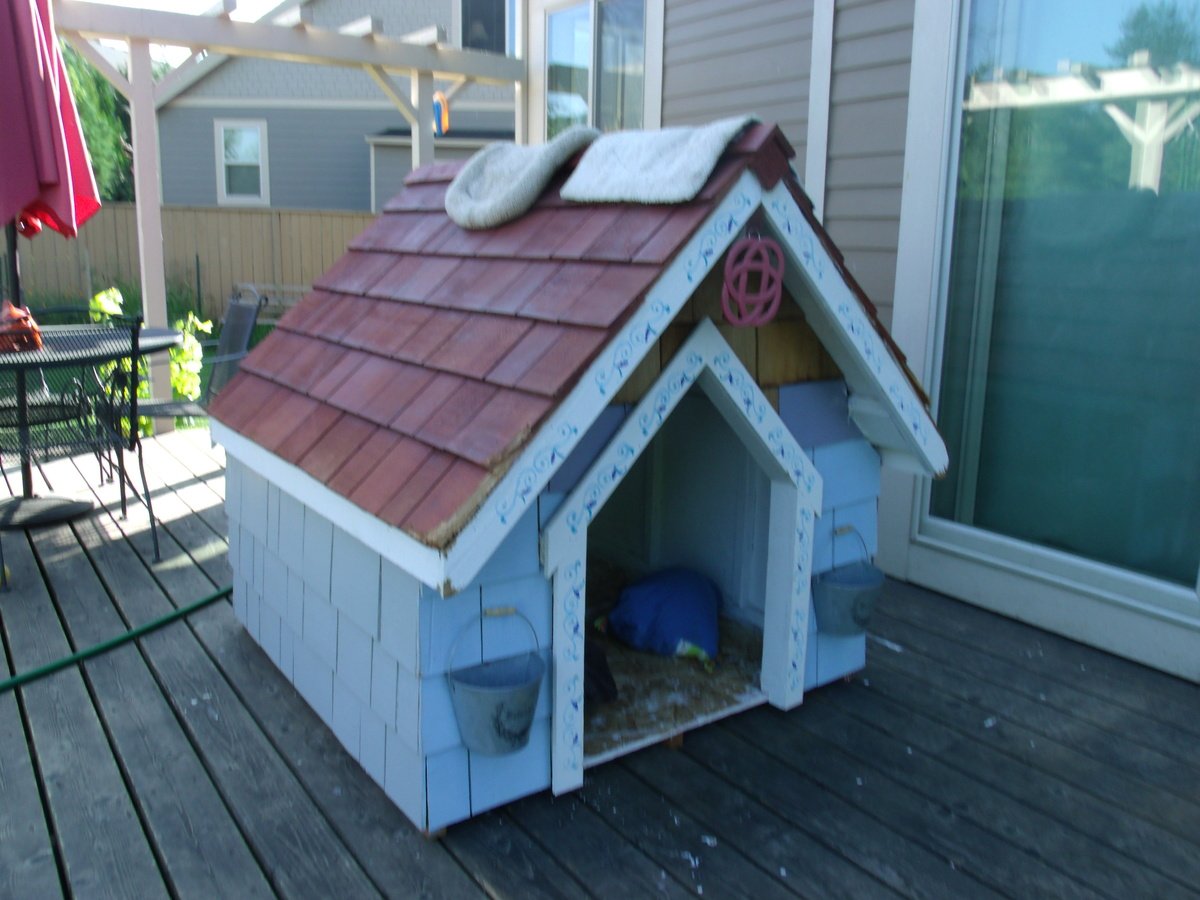
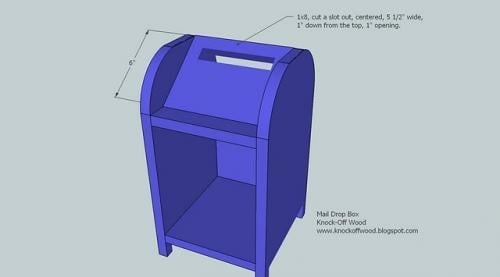
East Fork Dog House - copy
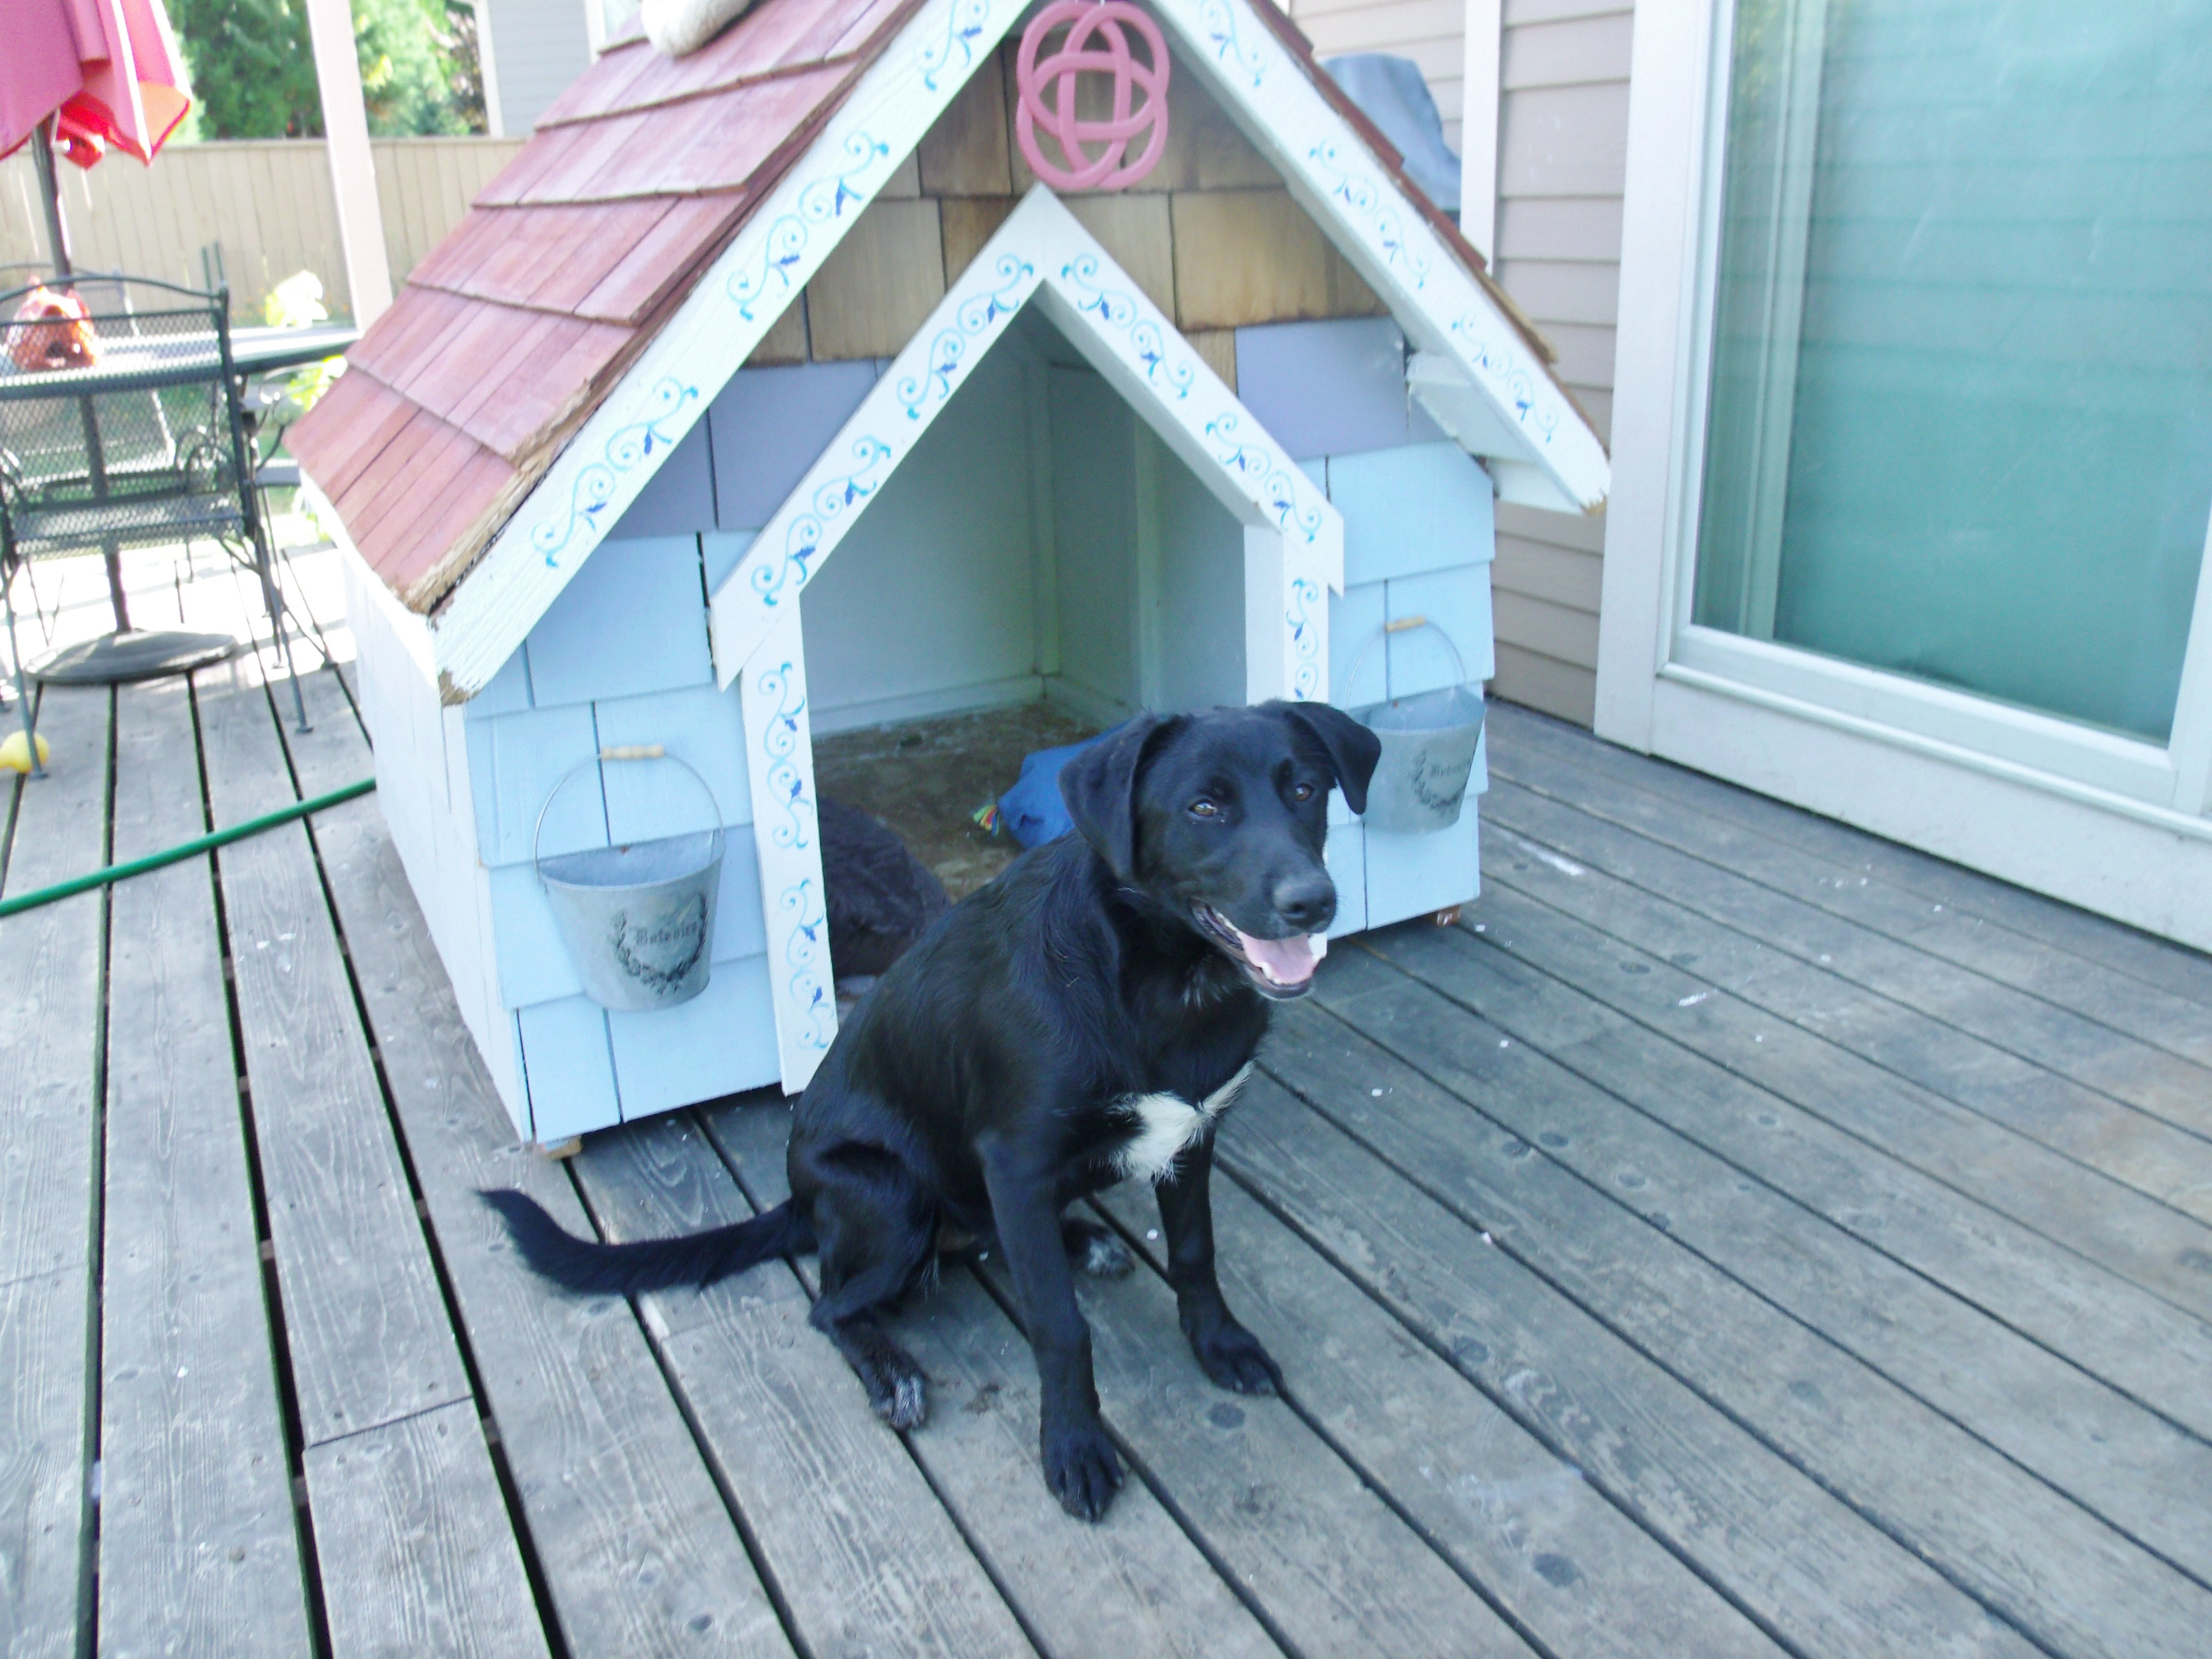
We adopted two puppies: Blueberry and Pink, and needed a dog house. I showed my bf the post of the East Fork Dog House on this website for inspiration. He winged the basic construction as he's a carpenter guy. Our foster children helped paint it, and the puppies love it (chewed the corners of it already).
Built from Plan(s)
Estimated Cost
400 - unfortunately we didn't use salvage
Estimated Time Investment
Weekend Project (10-20 Hours)
Finish Used
Latex exterior paint from Home Depot.
Recommended Skill Level
Intermediate
Comments
My Santa & Sleigh

All hand cut accept for runner are attached with biscuits
Estimated Cost
$12
Estimated Time Investment
Day Project (6-9 Hours)
Finish Used
Red Rustoleum paint
Gold trim
Stars are starch made candy. (very stable)
Antique Santa from thrift store
Gold trim
Stars are starch made candy. (very stable)
Antique Santa from thrift store
Recommended Skill Level
Intermediate
Bench with foam padding
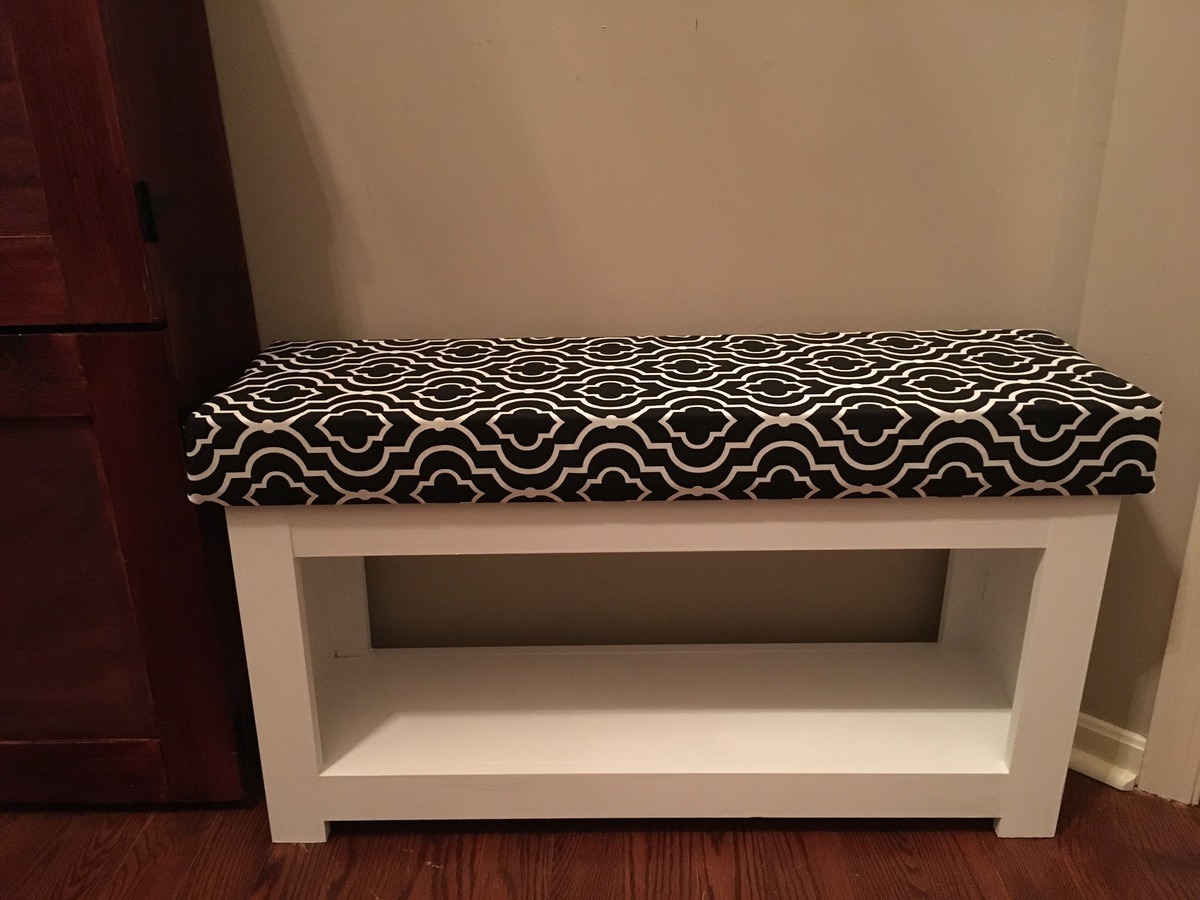
This was a fun little project. I made the bench to be placed in our foyer to sit down and put your shoes on and off. 3” foam and fabric makes for a comfy bench.
Estimated Cost
$100 ($60 lumber, $40 3” foam and fabric)
Estimated Time Investment
Afternoon Project (3-6 Hours)
Finish Used
White paint
Recommended Skill Level
Beginner
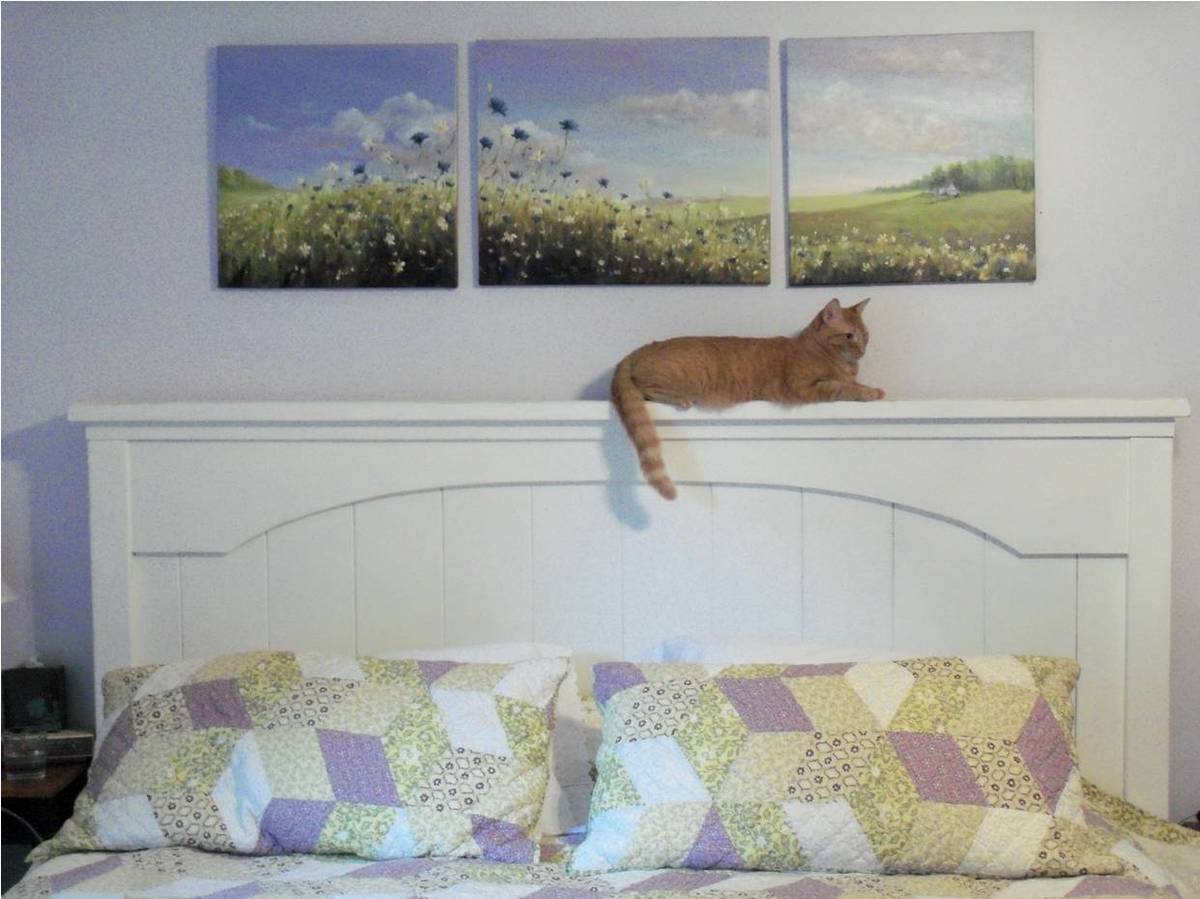
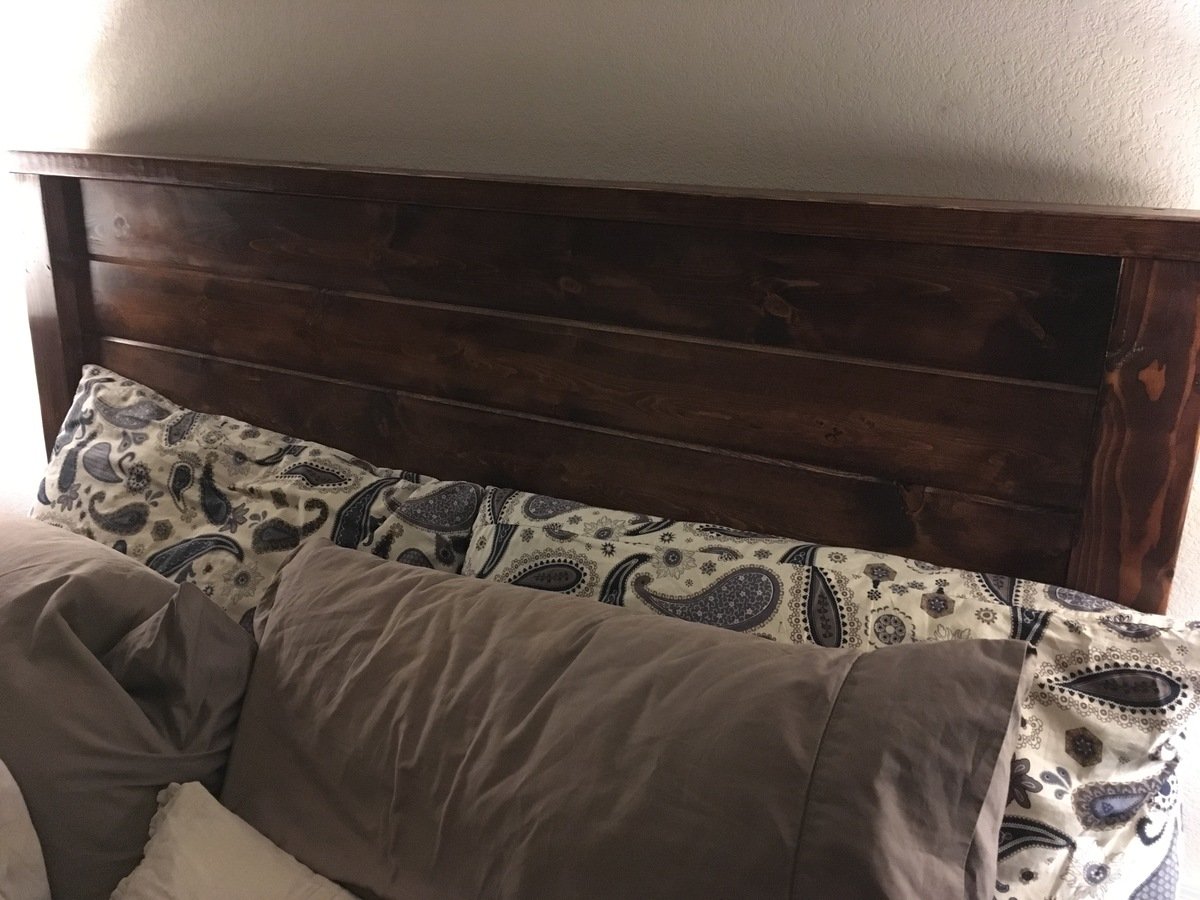
Farmhouse Bed... fit for a king!
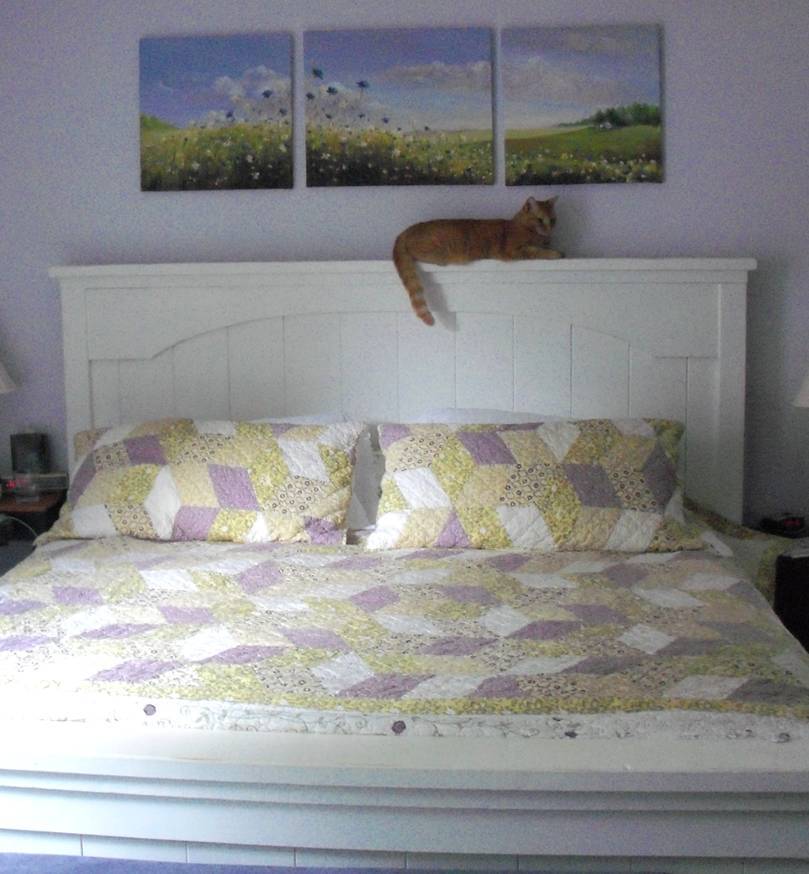
This is Ana's king sized farmhouse bed with an arch. This turned out great and is super strong...much better than most store bought pieces. The "king" cat thinks its pretty cool too.
Built from Plan(s)
Estimated Cost
$120
Estimated Time Investment
Week Long Project (20 Hours or More)
Finish Used
egg shell "dove white", distressed with sand paper
Recommended Skill Level
Intermediate
Comments

Sun, 09/25/2011 - 15:13
Good story and beautiful bed
I loved the story on your blog. I was surprised my first project that I spent more time sanding than cutting wood. Looks gorgeous!
Mon, 09/26/2011 - 01:26
fit for a king
I can see the king (i.e., the cat) is enjoying his new throne!
Mon, 09/26/2011 - 15:33
Thanks for your kind words.
Thanks for your kind words. You should have seen my scrap pile! Ana needs to come up with projects for all of that scrap:)
Meg
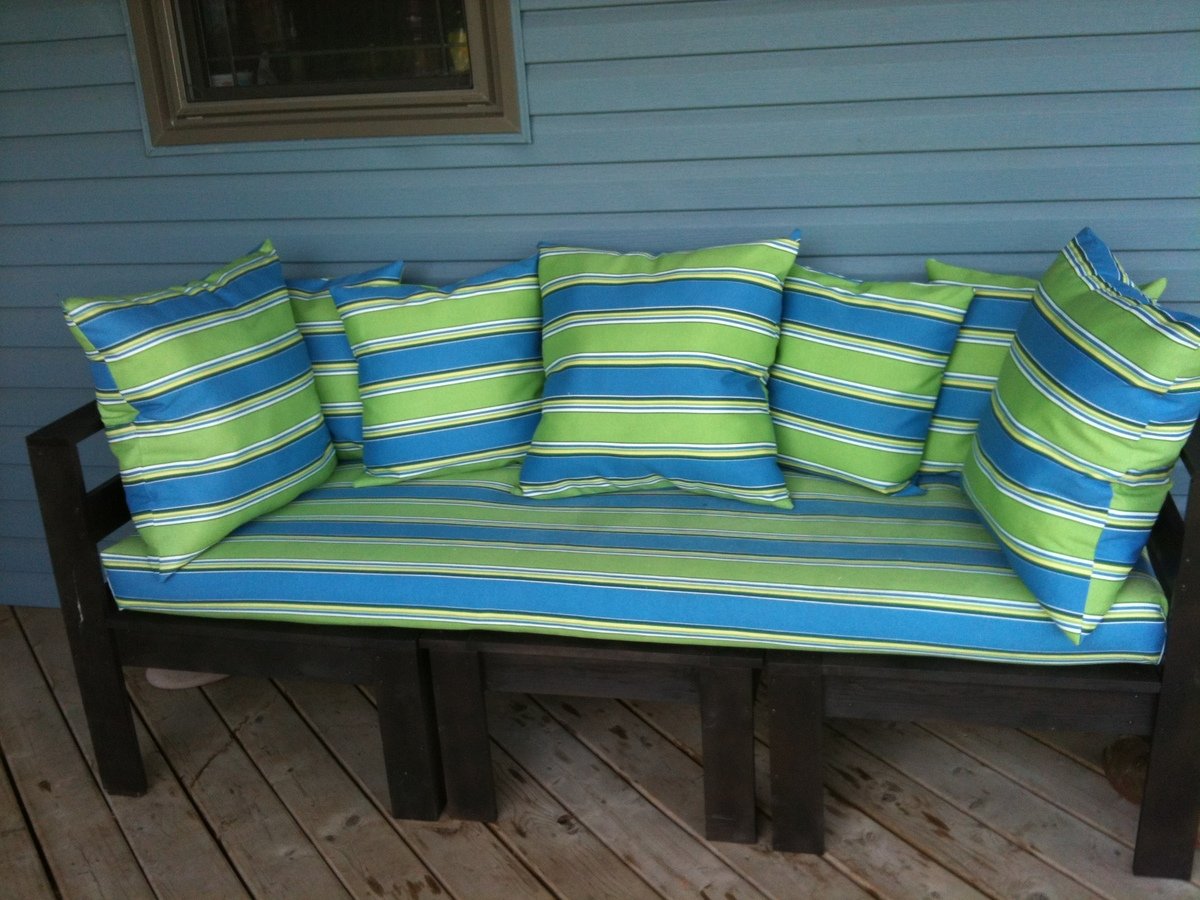
Outdoor Sectional as love seat
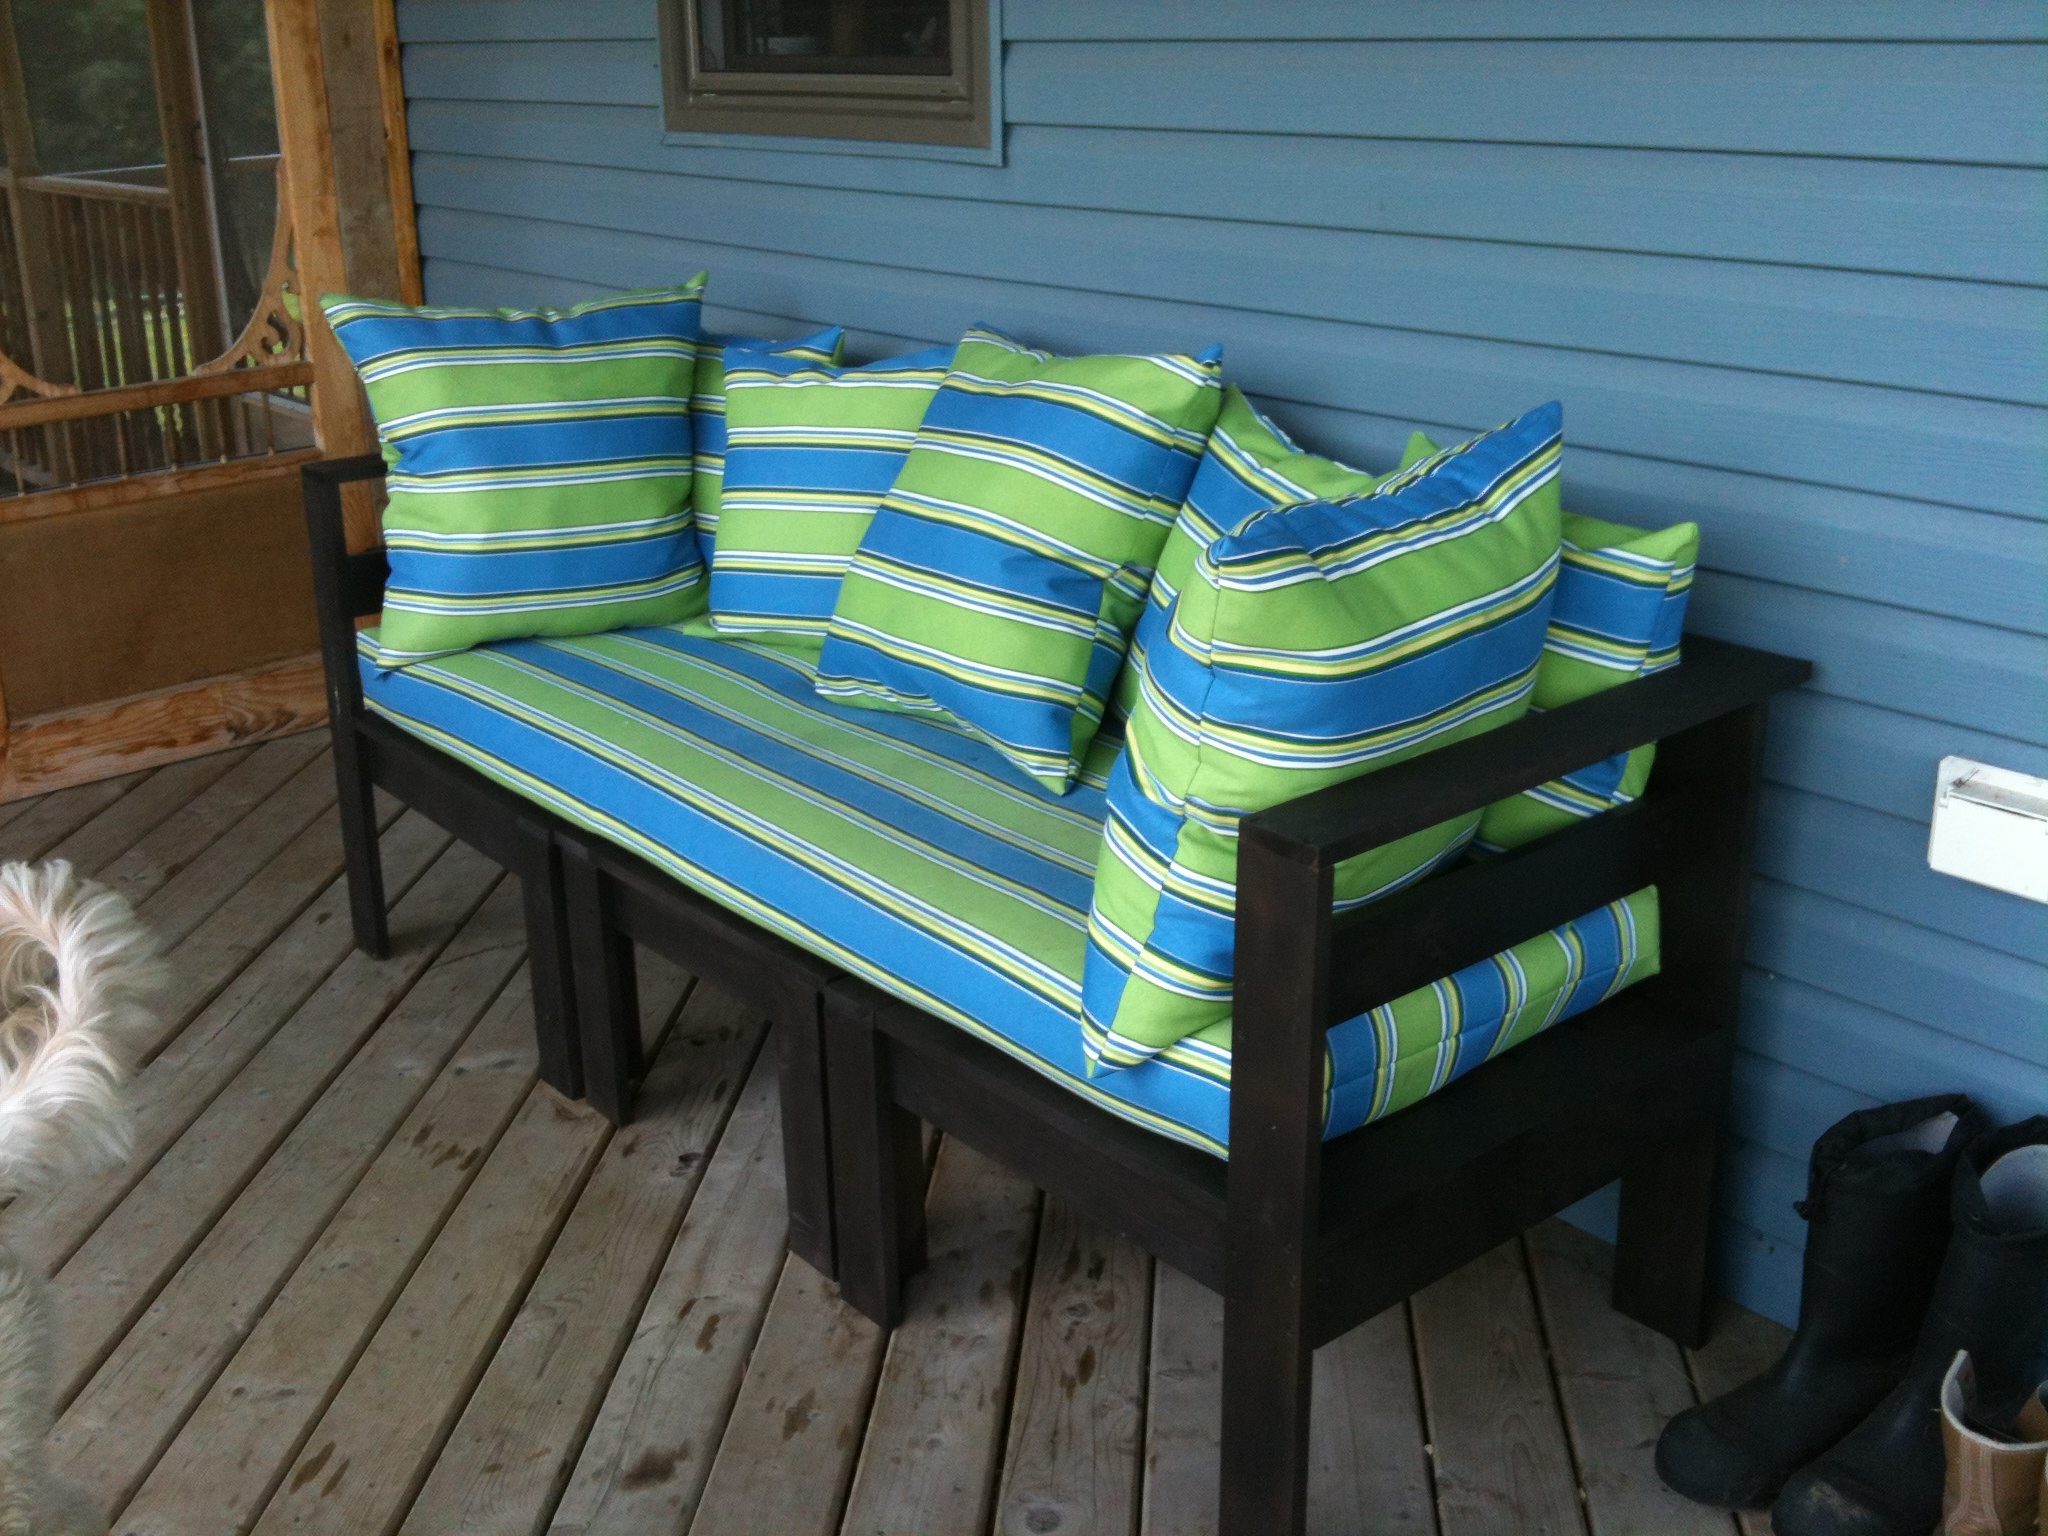
We made these last year, and managed to find cushions at walmart- but I never loved them. This year I painted the pieces black, added an extra horizontal slat in the backs, and recovered the walmart cushions and added some from ikea.
This is a fantastic place to check my email in the morning and read in the afternoon.
Thanks!
Built from Plan(s)
Estimated Time Investment
Weekend Project (10-20 Hours)
Finish Used
I spray painted these- I didn't think to paint them before assembly, and then spraying seemed the easiest way to get into the cracks.
Recommended Skill Level
Starter Project
Faux fireplace
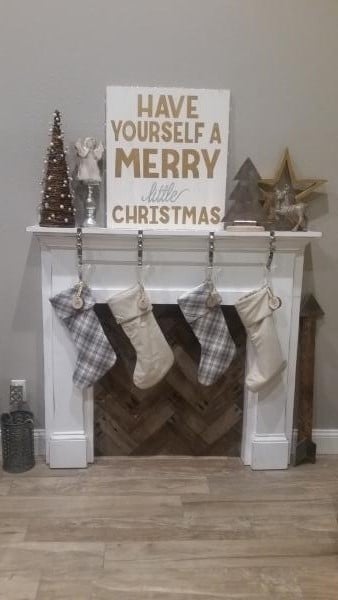
Faux fireplace
Built from Plan(s)
Recommended Skill Level
Beginner
Farmhouse modern queen

We followed the plans except added in bed rail brackets to make it easier to relocate and adjusted the bed as a whole to sit higher off the ground.
Built from Plan(s)
Estimated Cost
$150
Estimated Time Investment
Weekend Project (10-20 Hours)
Finish Used
Varathane carrington with gloss finish
Recommended Skill Level
Beginner
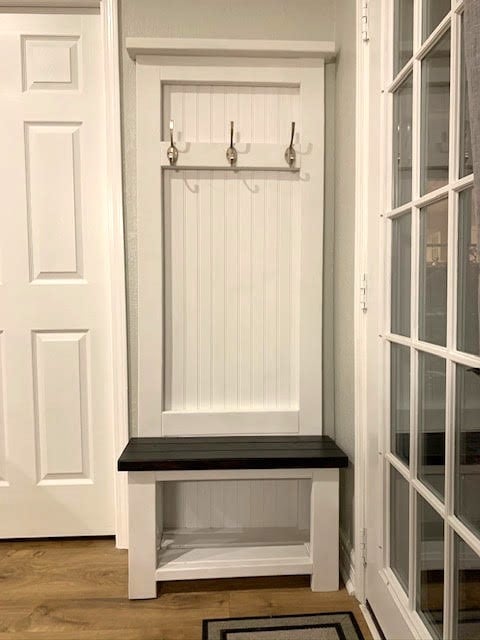
Narrow Cottage Hall Tree
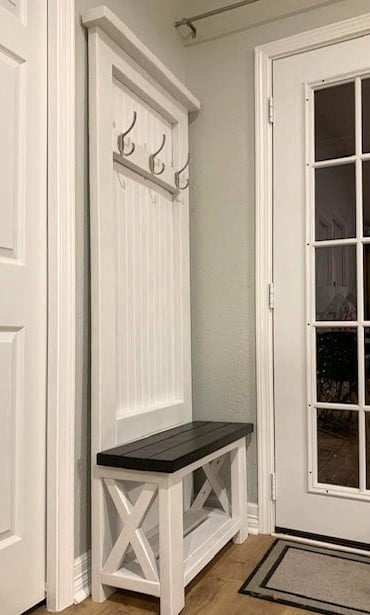
Farmhouse hall tree modified for the space!
Built from Plan(s)
Flat bookcase
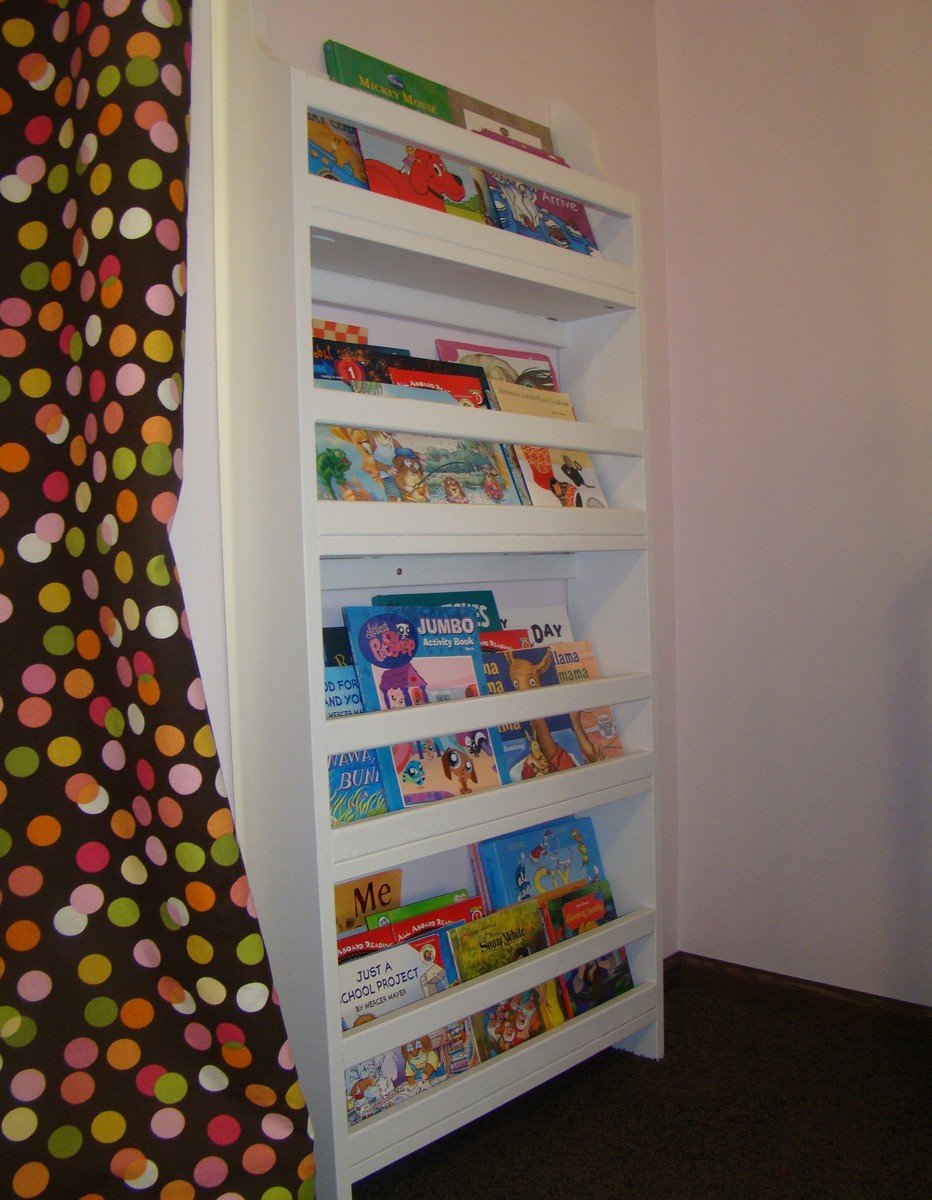
I built this for my daughter's room one Saturday afternoon. She even helped me sand and paint it! Its perfect for little ones who love to read. Keeps the books from spilling over the floor when we're looking for her favorites at night.
Built from Plan(s)
Estimated Time Investment
Afternoon Project (3-6 Hours)
Finish Used
Used 3 coats of Martha Stewarts Heavy Cream from Home Depot.
Recommended Skill Level
Beginner
Comments
Sun, 10/14/2012 - 10:18
Kids Room Bookshelf
Hi Ana,
I came across your kid's room bookshelf and my husband would love to make it for our nursery. Would you be able to give a few more details on how you when about constructing it? We would really appreciate it!
Thank you,
Nicole
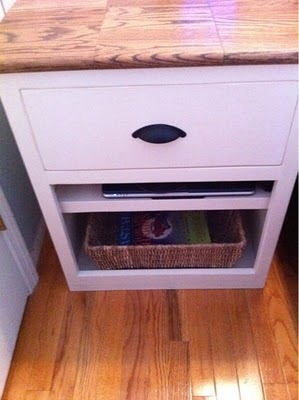
Changing table out of discarded birch plywood
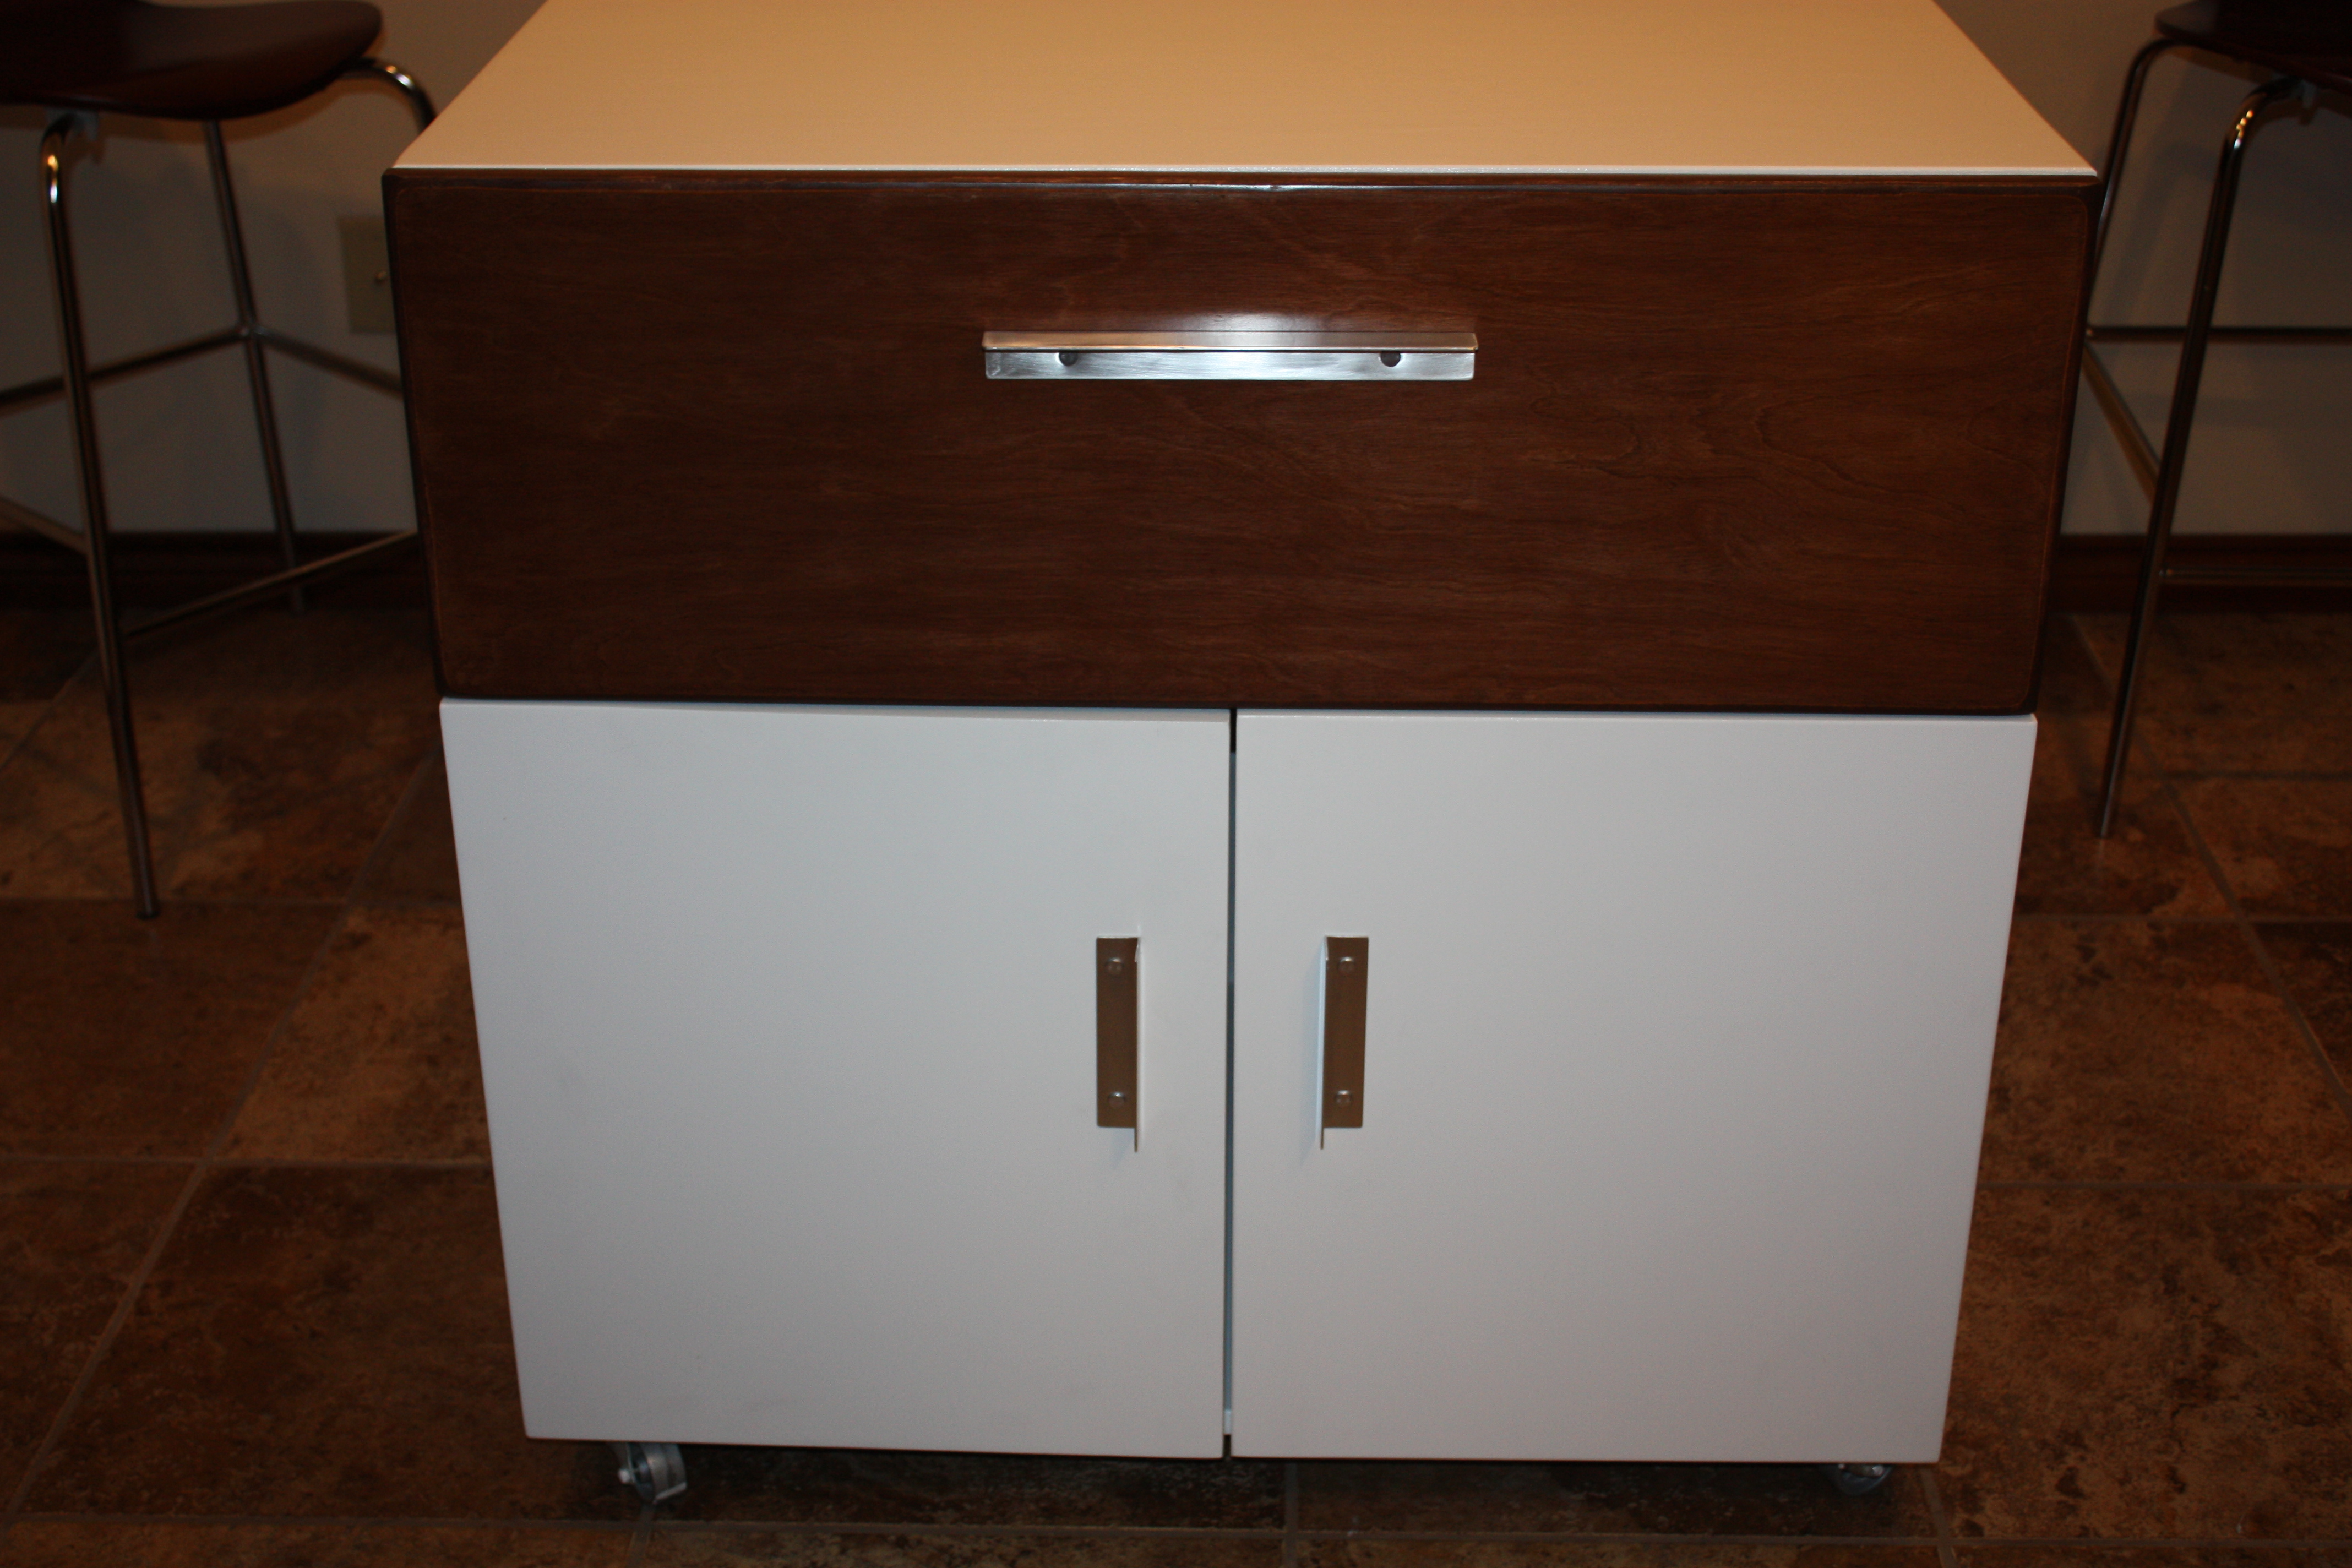
There was a cute little niche in the guest room my son and daughter-in-law stay in, probably designed for a dresser. With the addition of grandkids to our lives, I knew what they really needed was a changing table. On a trip to a popular home decor store, I saw a HUGE pile of lumber and shelves in a pile in the parking lot. I asked to see the manager who told me it was all being hauled away TO THE DUMP the following morning! I asked if I could take some off of her hands, and she said I could have all I wanted (a woodworker's dream come true!) I quickly put the seats down in my Pryus and stacked it to the ceiling! 3 trips later, and I managed to gather enough wood to make this project and many others, all for FREE! It's all 3/4" birch plywood. Most has deep scratches, probably from being thrown in a pile in the parking lot. Some of the scratches are too deep to sand (because of the birch veneer) so that is why I painted the top, sides and doors.
This was my first time making a drawer and these type of hinges. I also made the hardware and the legs. I love mid-century modern, so used a 1 X 4 and cut/sanded down a 1 X 1 at an angle for the legs (ok, honesty time, this was my 5th attempt! It took me awhile to figure out how to get the angle just right and make sure it was sturdy enough).
A big THANK YOU to my new KREG JIG, which I learned about in Ana's book. Without it, I couldn't have done this project!


Estimated Time Investment
Week Long Project (20 Hours or More)
Finish Used
2 coats of KILN primer, 3 coats of BEHR high-gloss ultra white paint and MINWAX walnut stain and 3 hand-rubbed coats of Tung Oil on the drawer front.
Recommended Skill Level
Intermediate
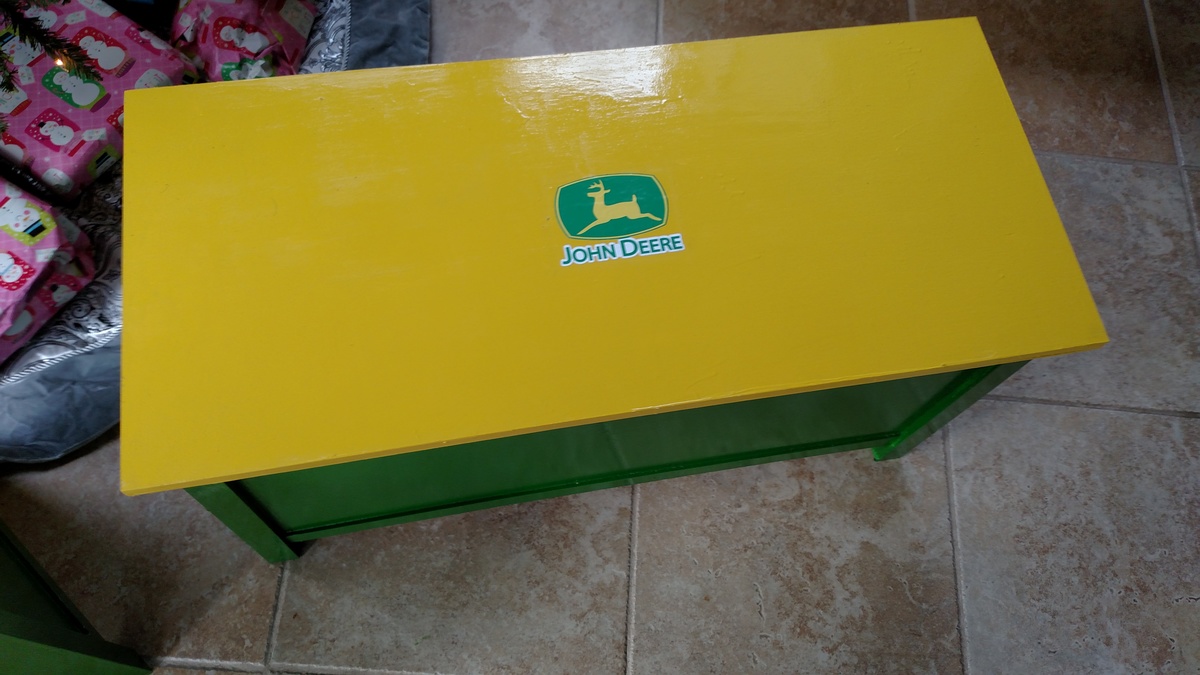
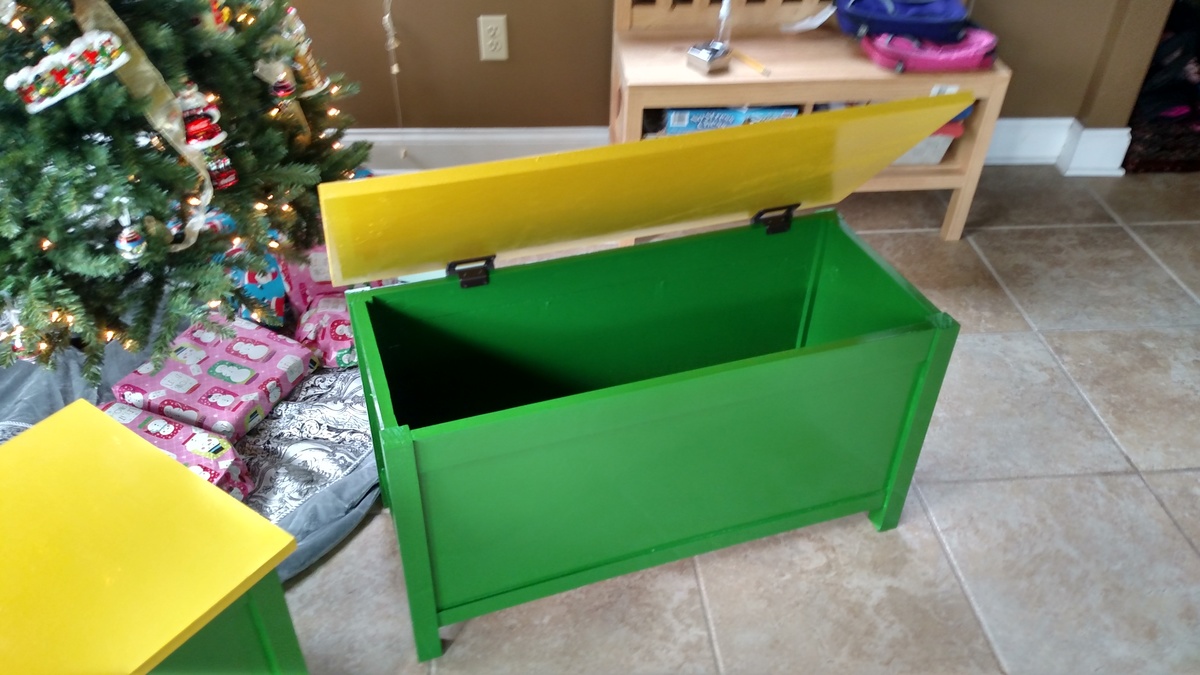
Toy Boxes for Nephews
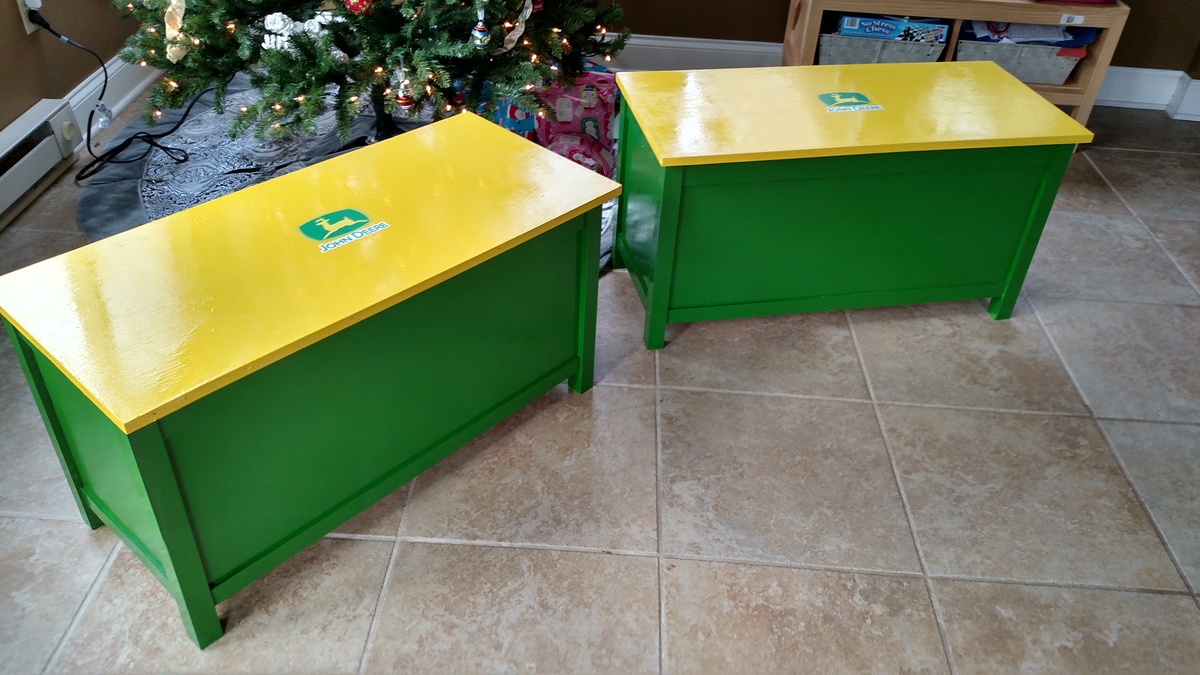
Made these for my nephews for Christmas. Only issue I had was the screws stuck out a little bit of the 1/2" pocket holes. I even tried the pan head type that were designed for the 1/2" holes.
Built from Plan(s)
Estimated Time Investment
Weekend Project (10-20 Hours)
Finish Used
John deere colored paints
Recommended Skill Level
Intermediate
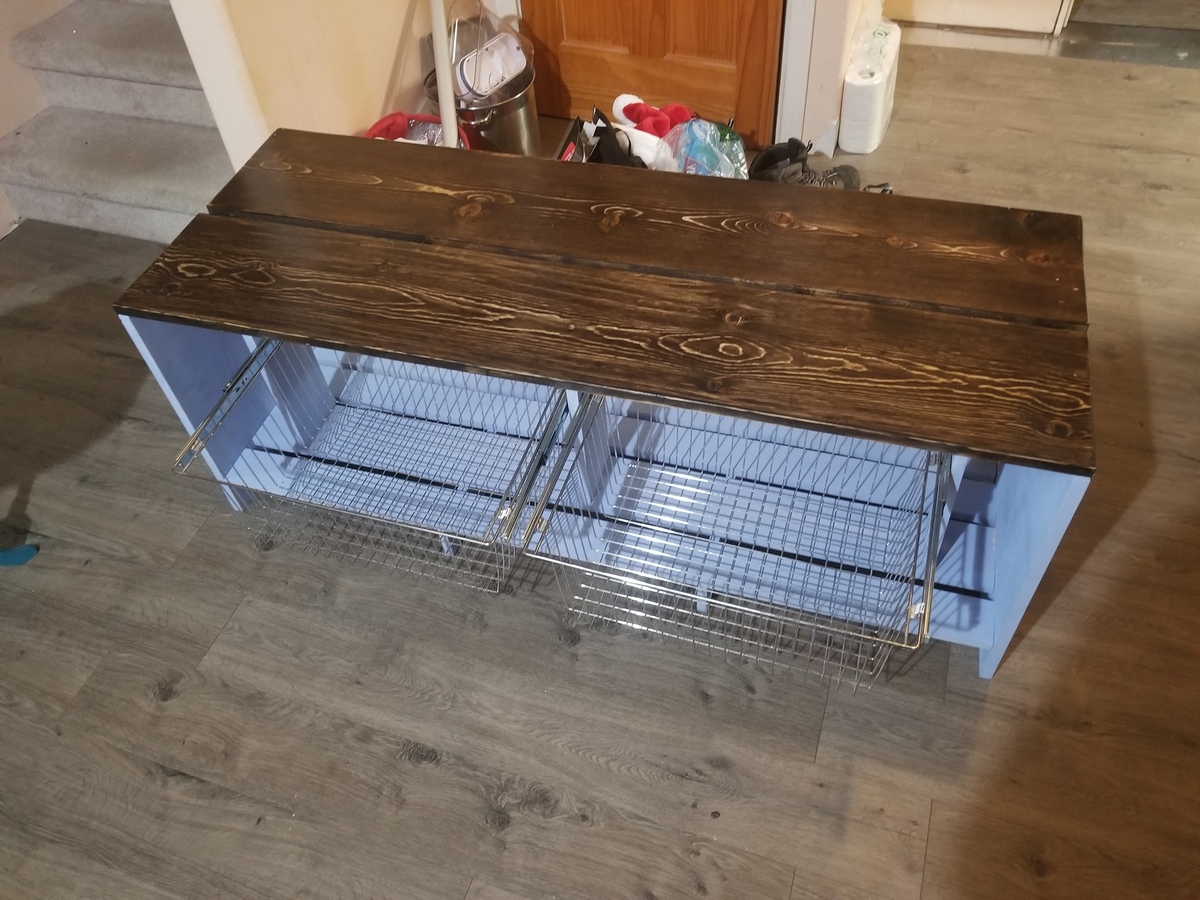
Entryway closet bench
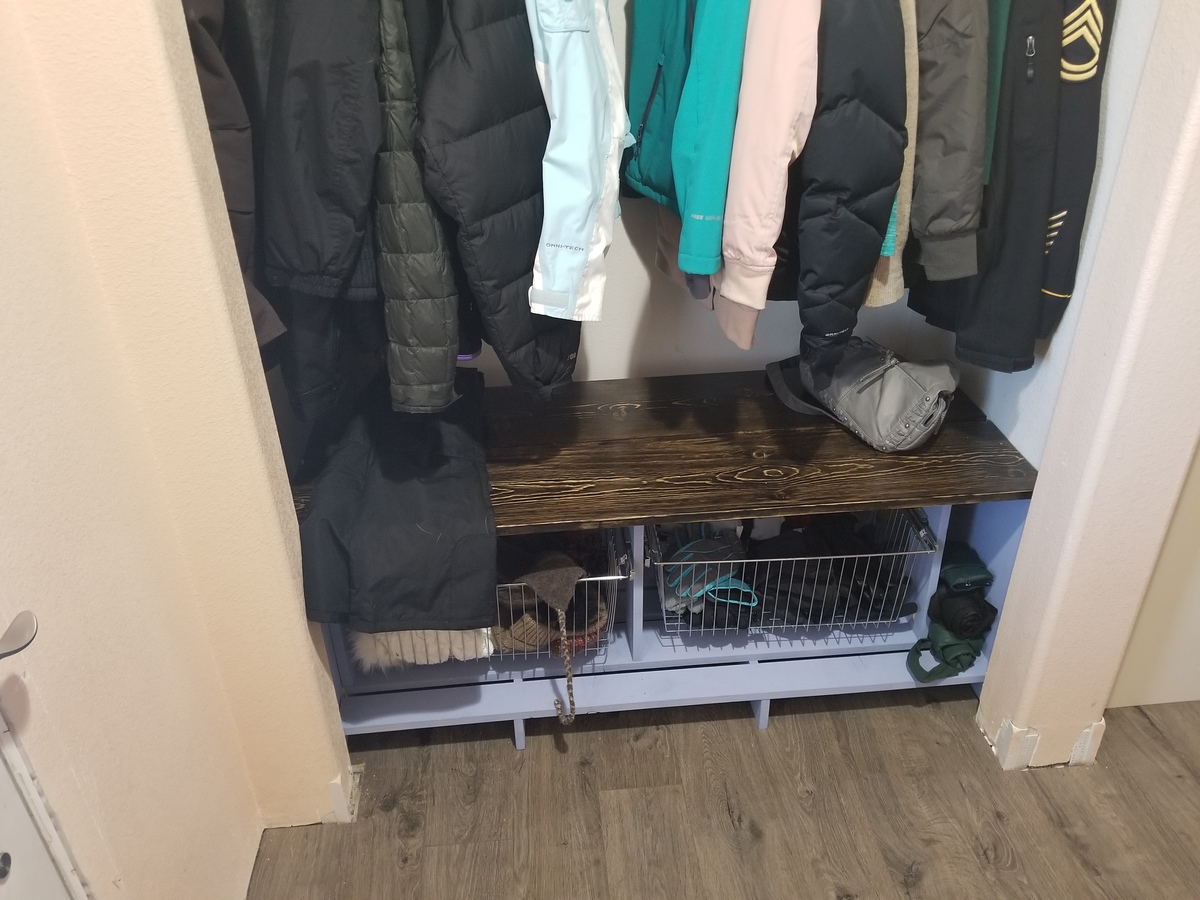
Adapted from Ana's mudroom in closet plans, I made this to fit the small closet when you walk into the house. I slotted it and hung wire baskets for air flow since it will be used mainly for hats and gloves which we wear more than not up here in AK. Next for the closet directly across will be a sho storage project which I'm sure I will find on here. Thank you Ana for your awesome site and work you put in.
Built from Plan(s)
Estimated Cost
$80
Estimated Time Investment
Weekend Project (10-20 Hours)
Finish Used
Espresso min wax and satin poly for top. Morning sky chalked paint for bottom.
Recommended Skill Level
Beginner
Fancy X Farm table
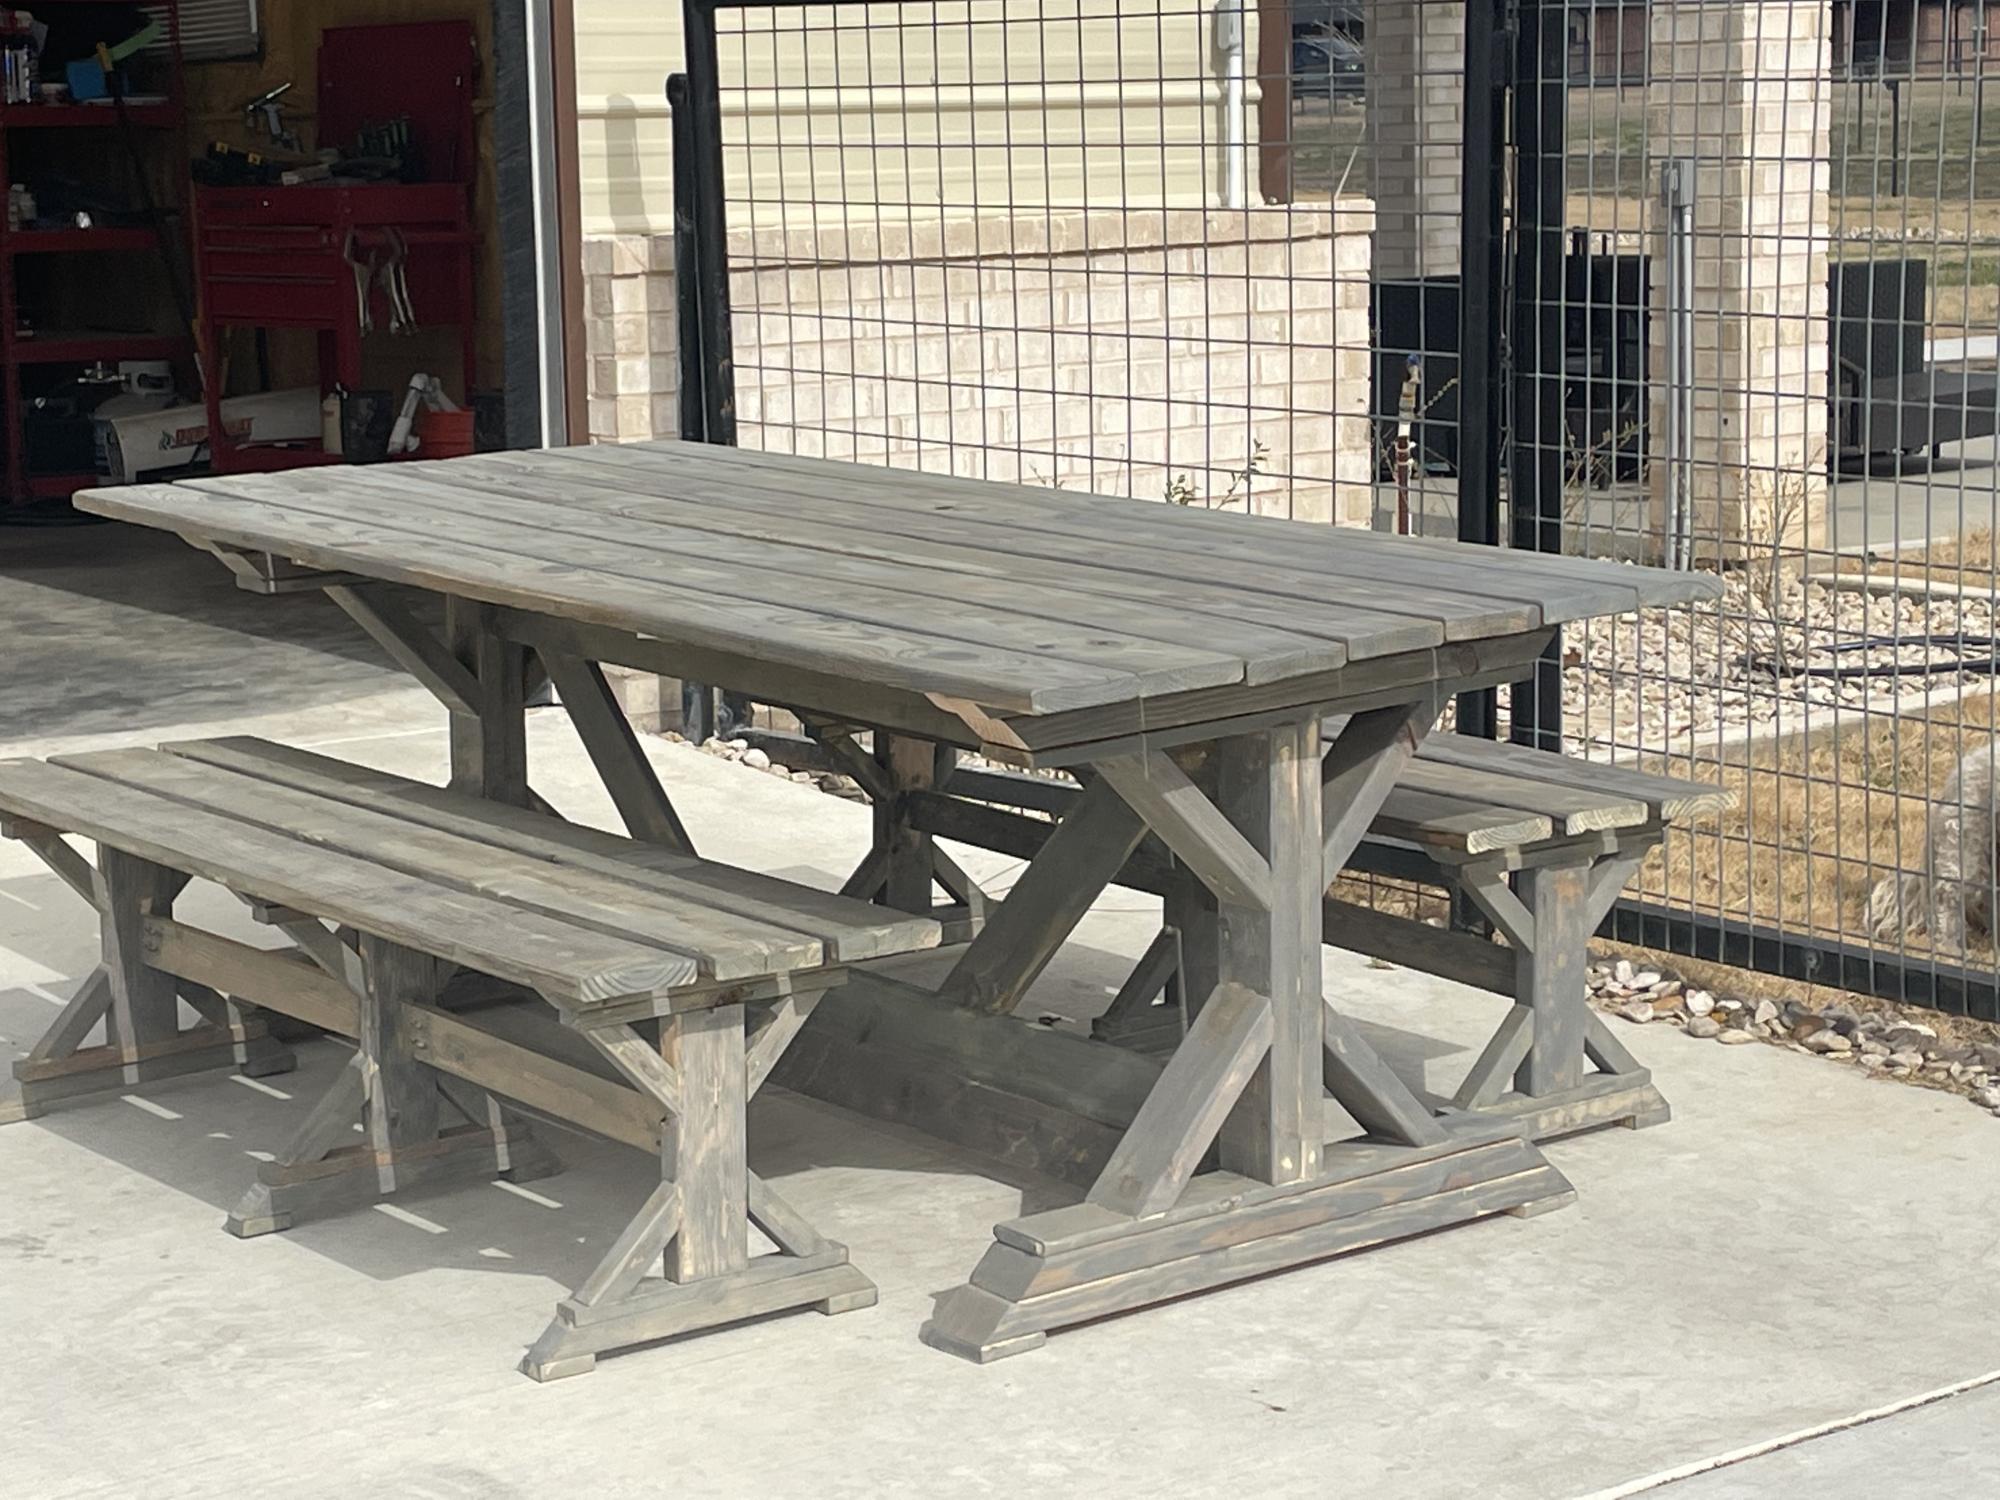
Had to watch a few YouTube videos but got it done and very happy with how it turned out!
Comments
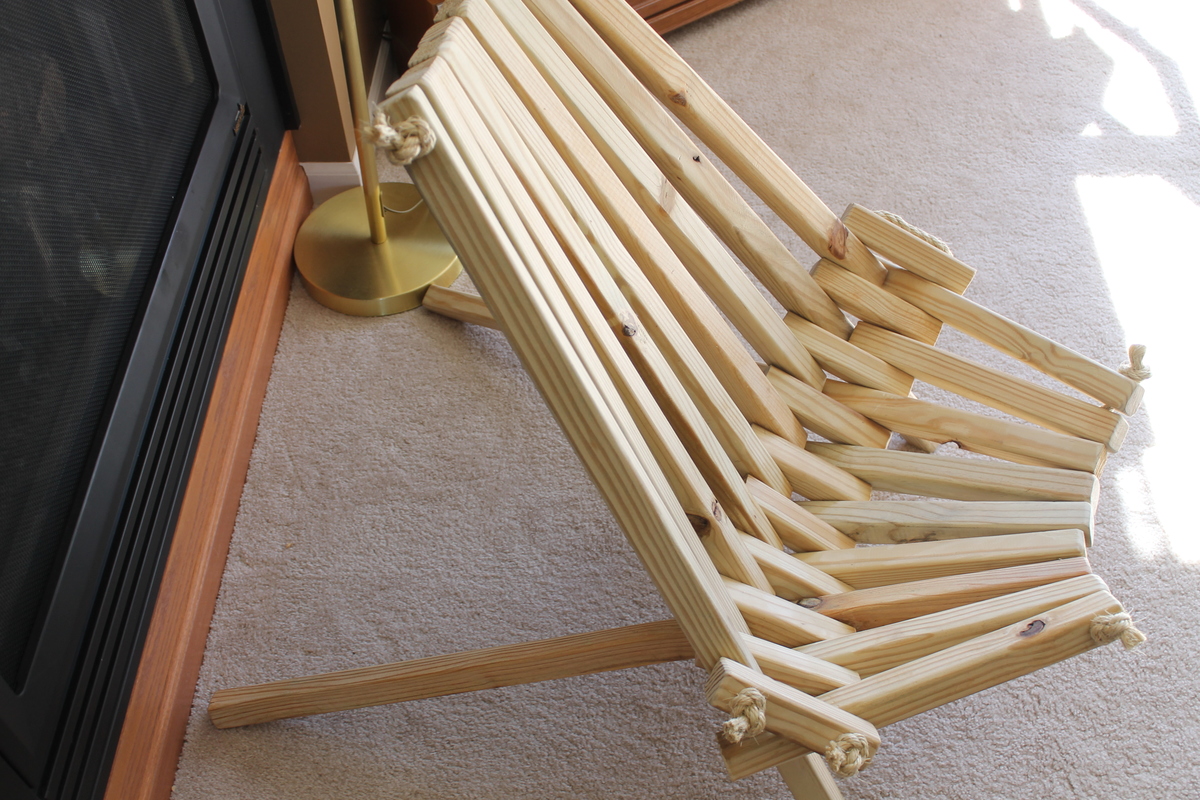
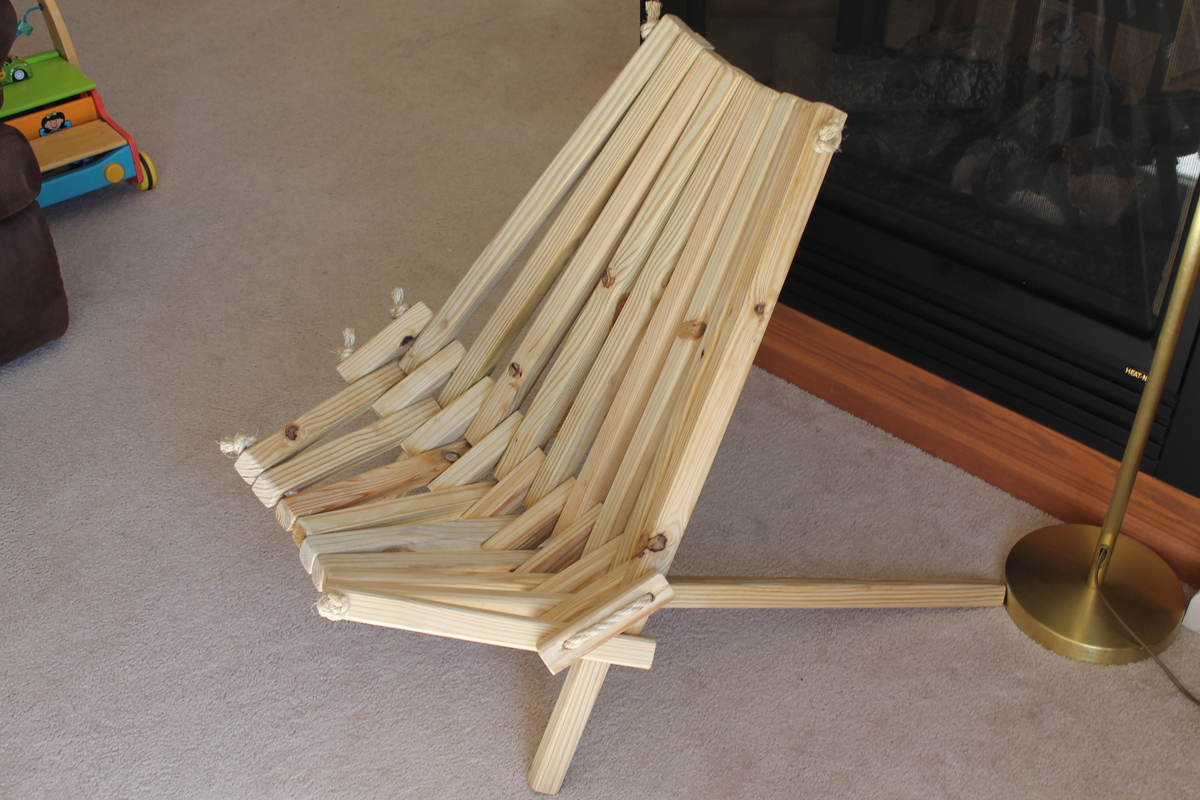
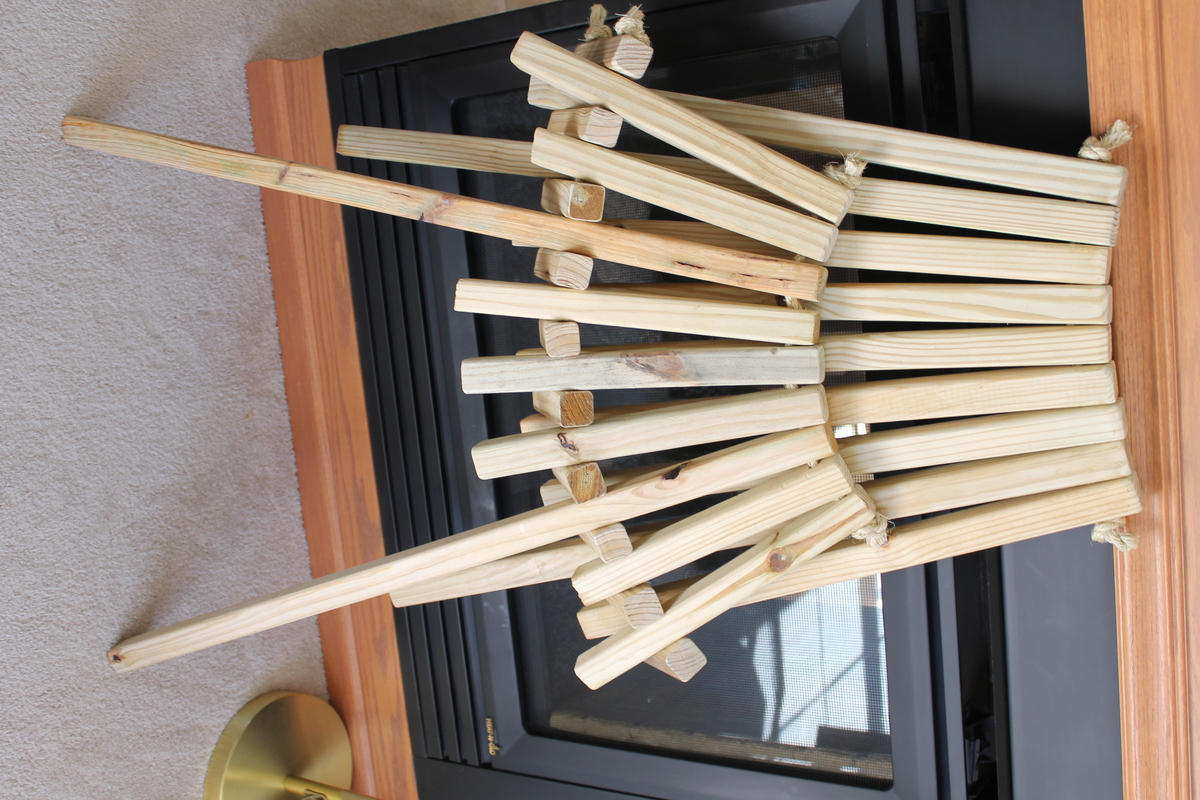
Chair
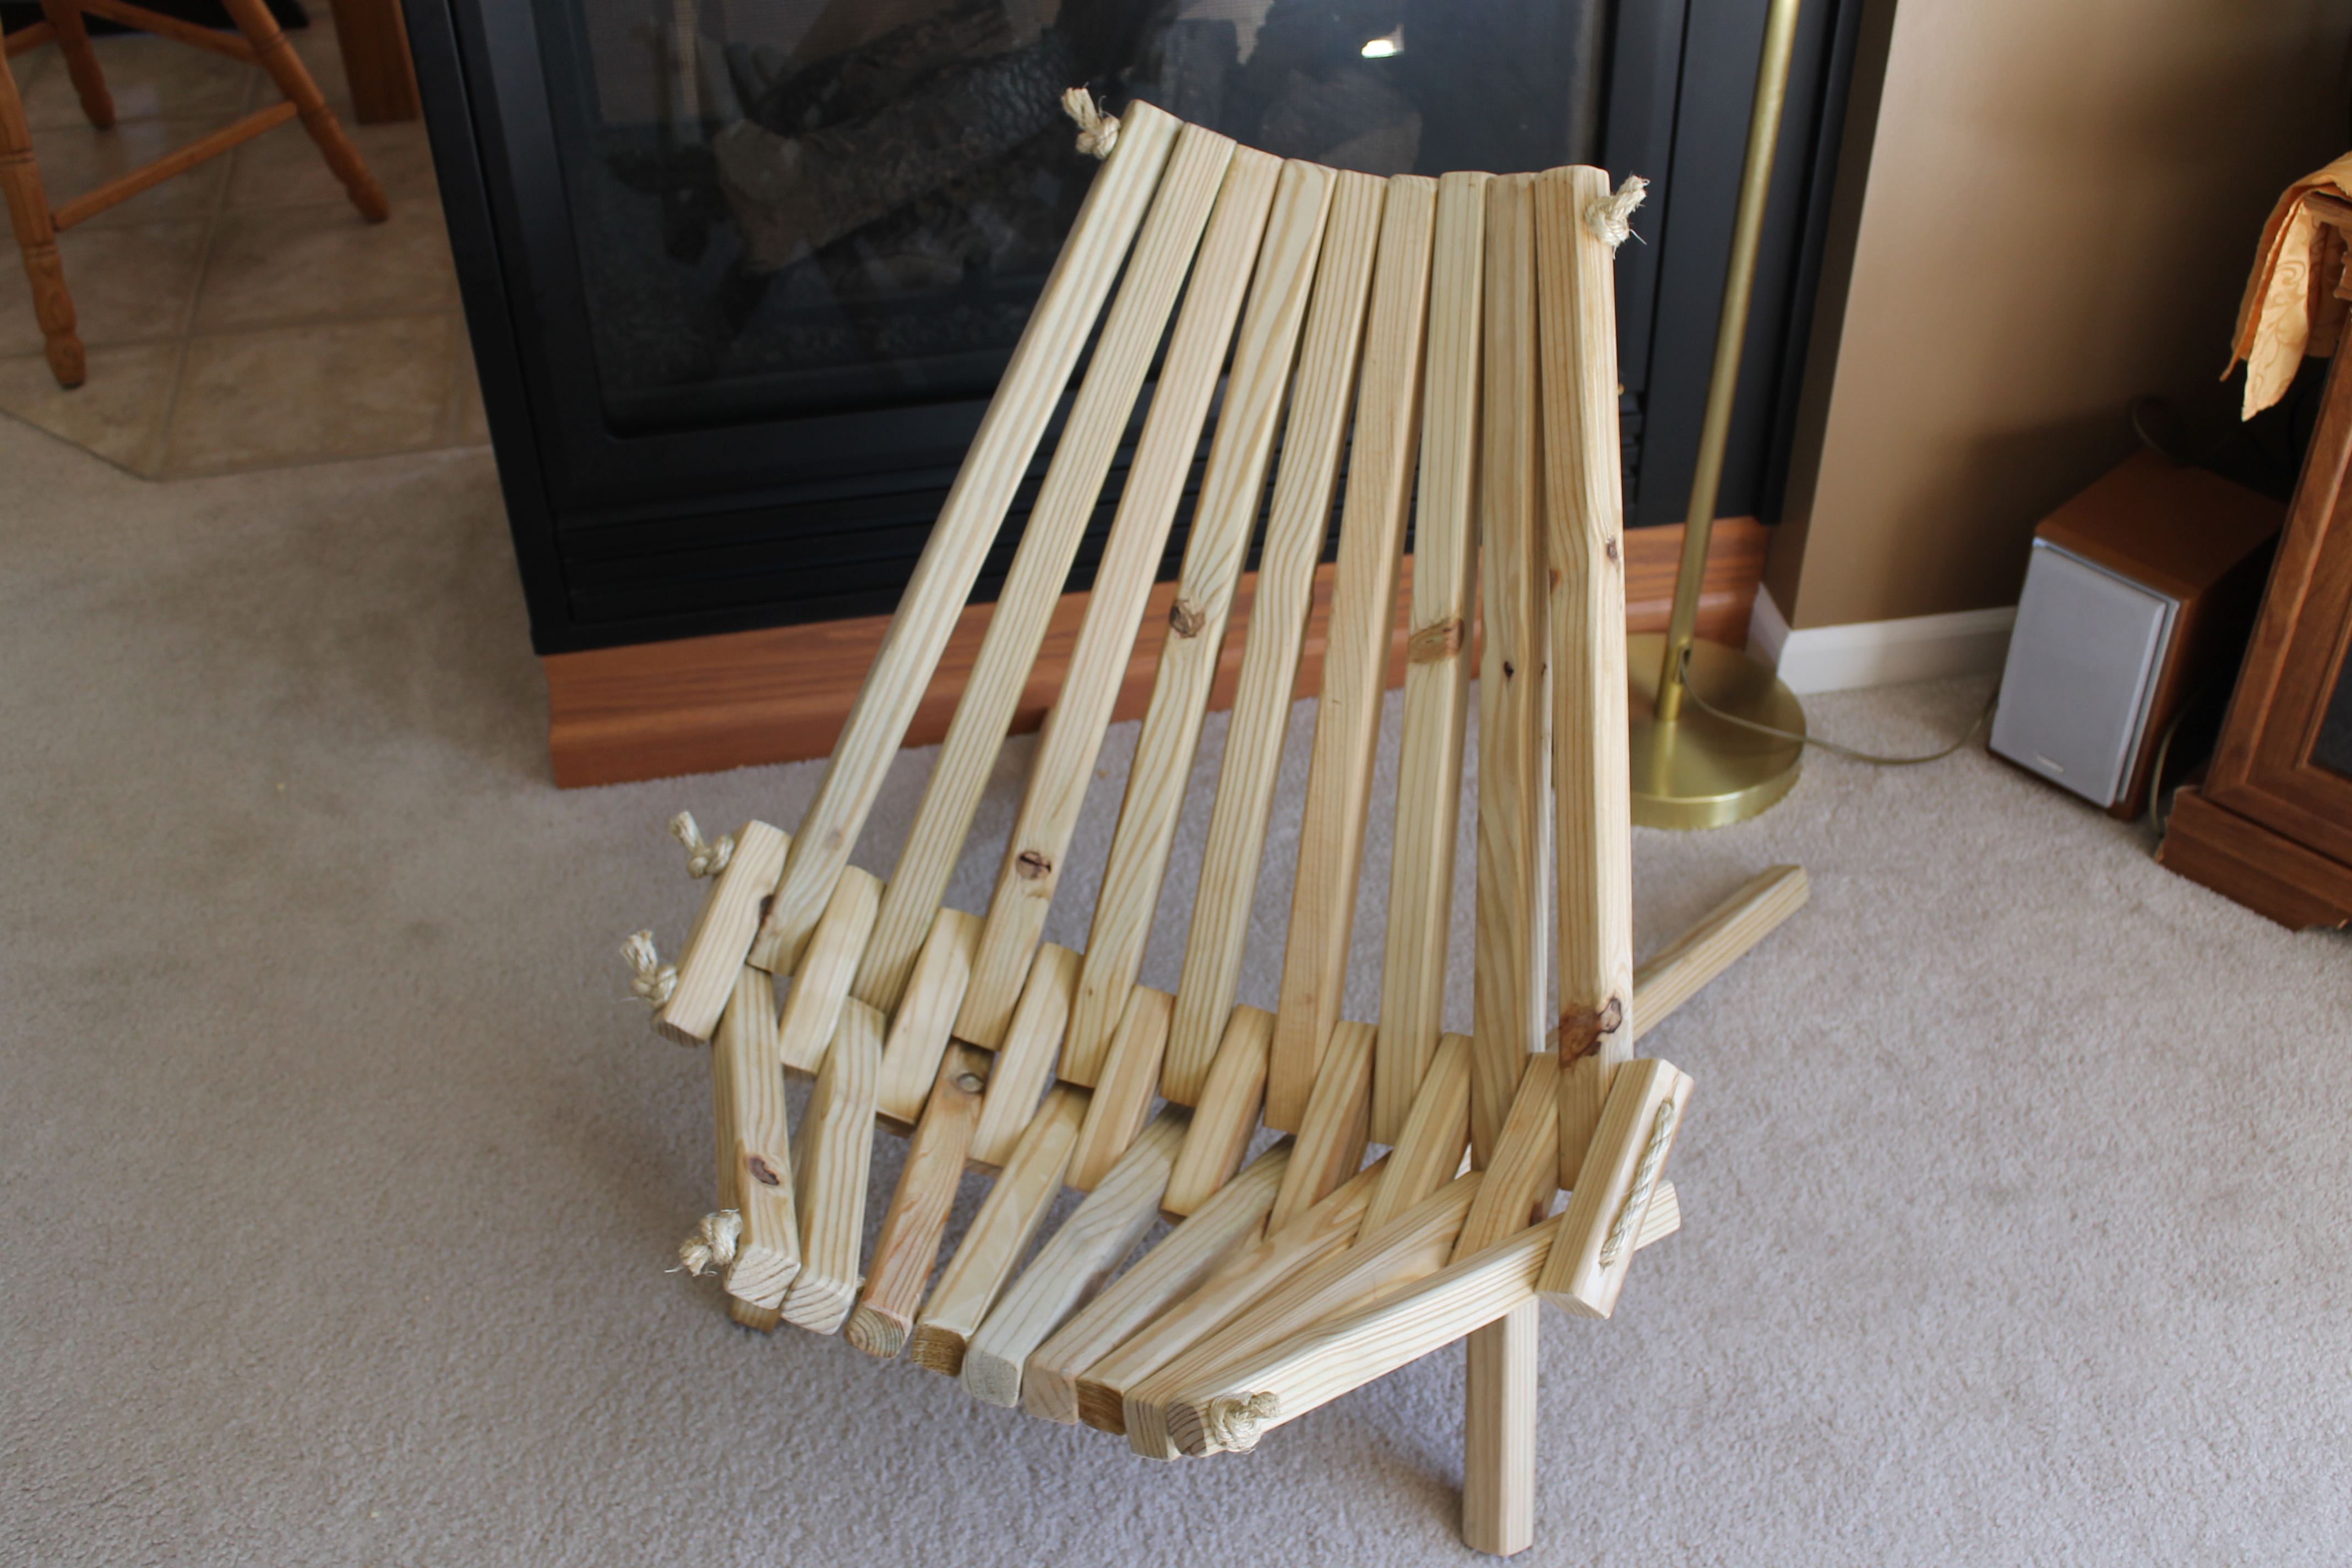
Bulit this chair , It is a couple of hours that requires extreme concentration. But not to hard. All you need is a hand saw some rope and a Drill.
Estimated Cost
20-25
Estimated Time Investment
An Hour or Two (0-2 Hours)
Finish Used
none
Recommended Skill Level
Starter Project
Comments
Mon, 10/07/2013 - 14:43
I like the design, but can
I like the design, but can you explain how the chair keeps from leaning all the way back?
Mon, 10/07/2013 - 14:56
The top is connected. so the
The top is connected. so the longer pieces that touch the ground wedge into the bottom. IF that makes any sense. If you try to make one like I said, it will make you crazy at first until, You have the whole thing together. Good Luck

Fri, 10/25/2013 - 13:18
General Measurements Please?
I love this idea, and I don't feel like spending ridiculous amount of money for chairs. Perú has the most uncomfortable chairs I have ever sat on in my life! From the pictures, I can gather a lot about how it's made, but what about measurements? Can you provide some guidelines? If I can get the wifey to approve the project, I'll shoot you some pictures of the finished project :)
"There is no such thing as a fool-proof system. Someone will make a better fool, tomorrow." @LoneWolffe JerewIndependentResearch.com
Santa's Workshop
Everyone gets projects from Ana-White plans for Christmas this year.
I can't wait to give them away.
Built from Plan(s)
Estimated Cost
Porch benches were $60-$70
Rustic Benches $25-$35
Rustic Coffee Table $25-$35
Rustic Benches $25-$35
Rustic Coffee Table $25-$35
Estimated Time Investment
Weekend Project (10-20 Hours)
Finish Used
Satin Exterior Paint
Recommended Skill Level
Beginner
Henry Desk
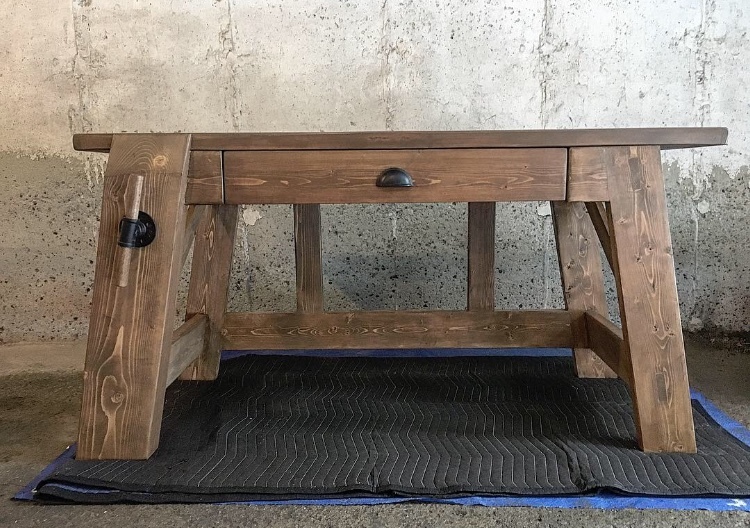
Hey guys,
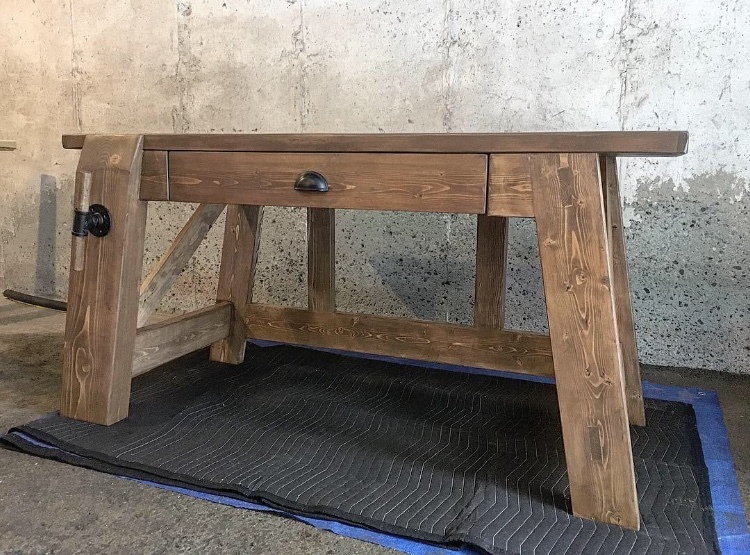
Here's my version of the Henry Desk following Ana's plans. There are a few minor differences that were requested by my client:
- A thicker top. I used 8/4 dressed pine (basically 2x6 knotty pine) and I laminated them together.
-Smaller desk - Top 60 inches long.
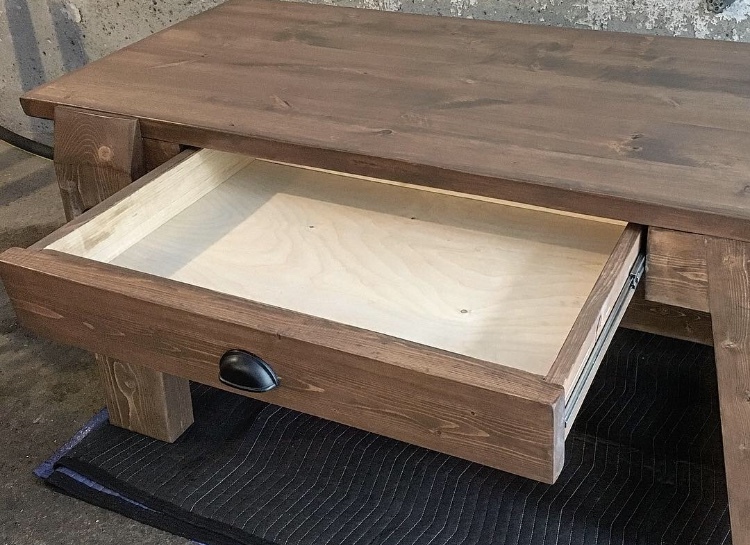
-A large drawer.
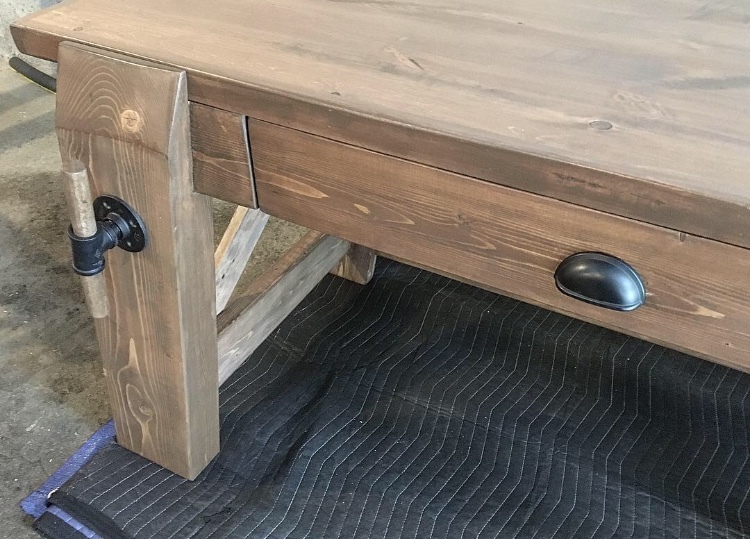
-Through tenons on the right leg that I made by using a drill press, chisels and lots of elbow grease.
I used mainly glue and dowels to assemble the pieces together, but also some pocket holes here and there.
Very helpful plan Ana. Thank you!
Erika
Rustic Charm Woodshop
Built from Plan(s)
Estimated Cost
$200 CAD
Estimated Time Investment
Week Long Project (20 Hours or More)
Finish Used
Stain: Minwax water-based stain - 1 part Colonial Pine to 1 part Coffee.
Clear Coat: Varathane Diamond Satin finish
Clear Coat: Varathane Diamond Satin finish
Recommended Skill Level
Intermediate
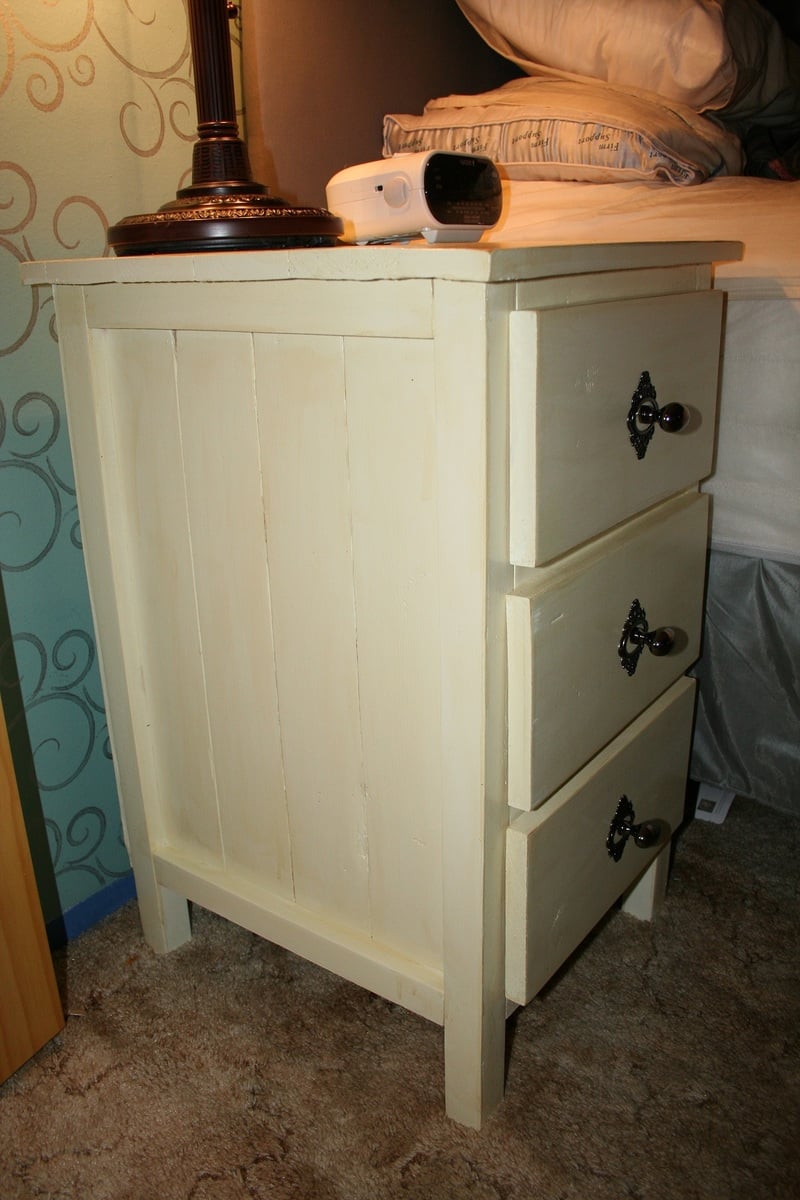
Wood look bedside table
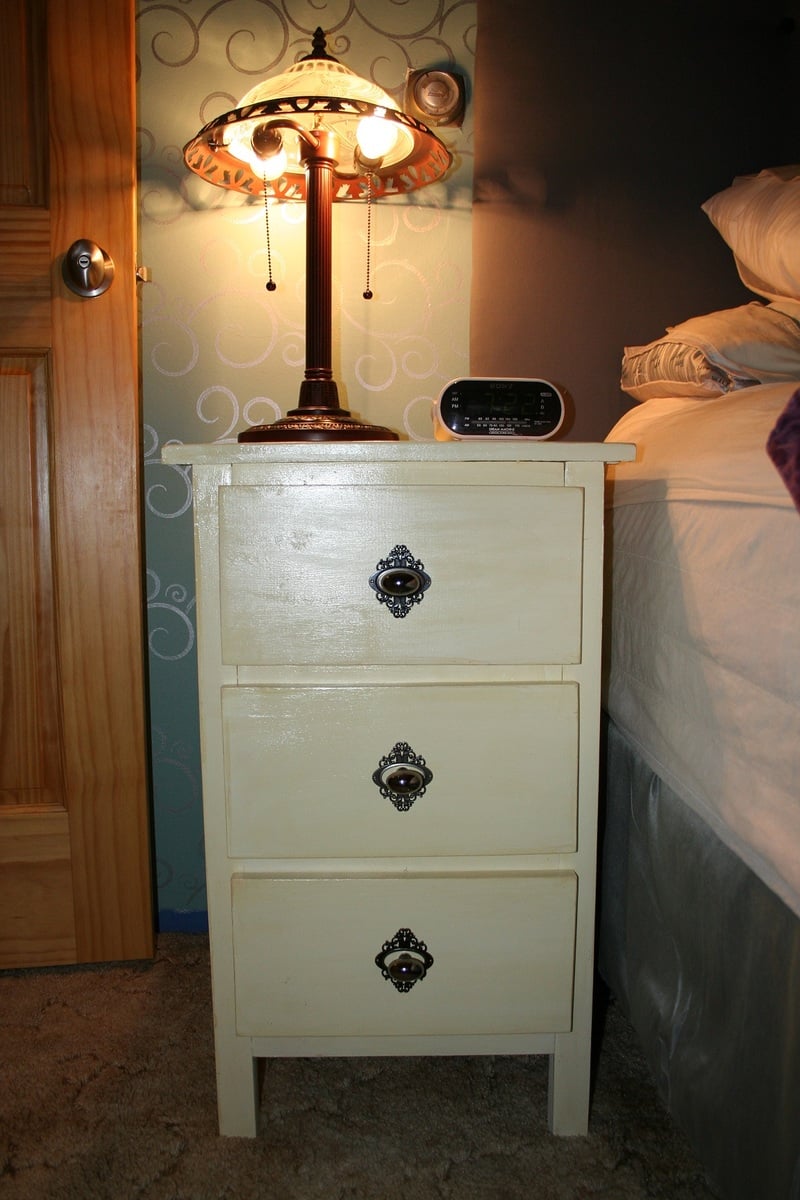
This is a husband and wife project, well mostly husband...LOL. It's the same pattern as Ana's nightstand except we shorten the width to 17" and it fit perfectly in my bedroom. Thanks Ana white for this :)
Built from Plan(s)
Estimated Cost
$70
Estimated Time Investment
Day Project (6-9 Hours)
Finish Used
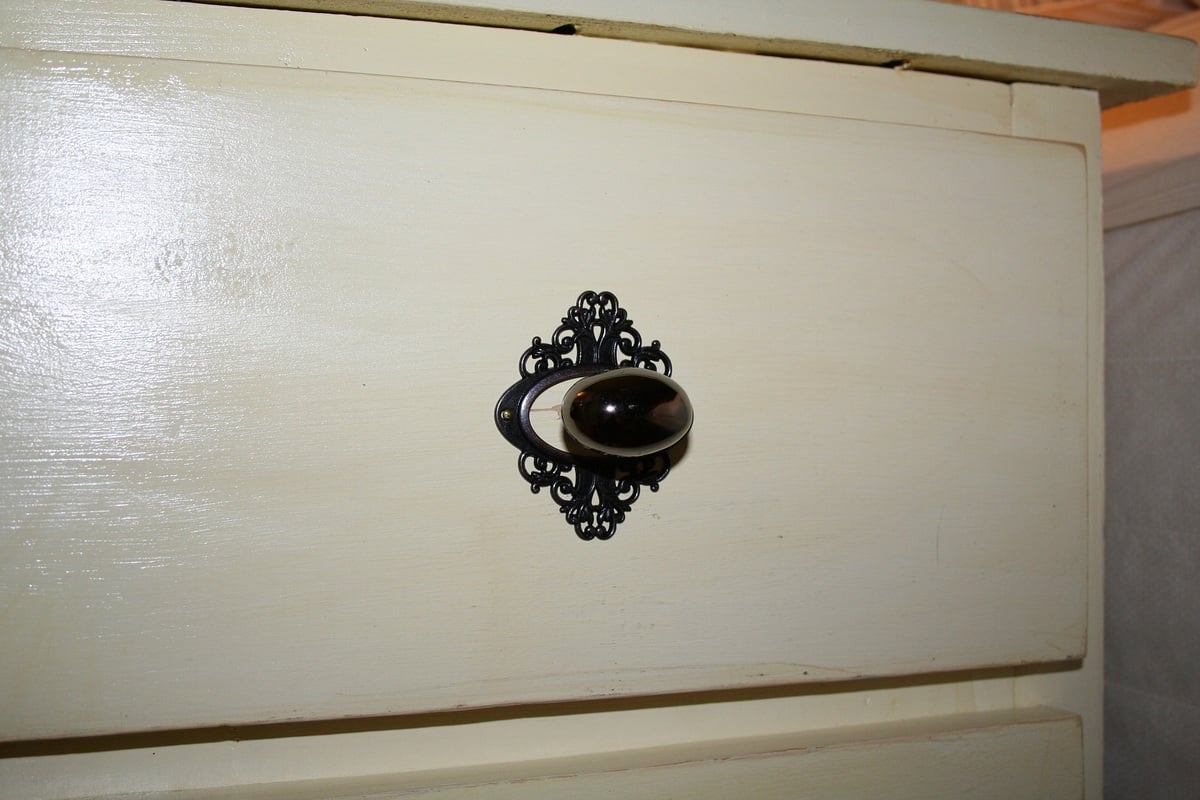
I used Valspar paint and sanded it a bit for distress look and shellac on top of it. For the knobs, i use a simple one from our local hardware store and embellished it with Tim Holtz's ornate plate. the ornate plate is for scrap booking and i thought this would go great with the knobs :)
Recommended Skill Level
Starter Project
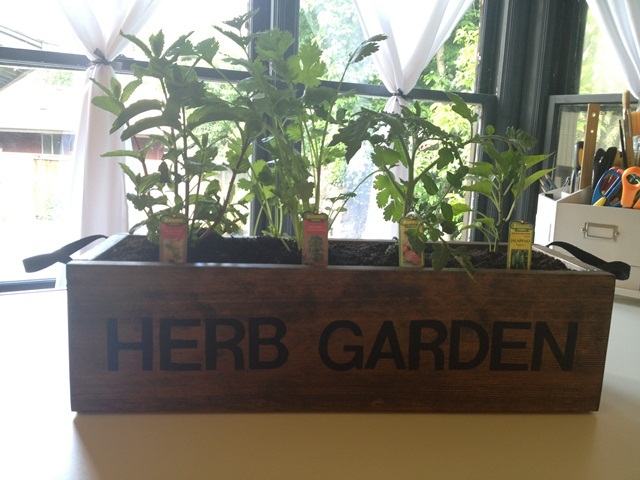
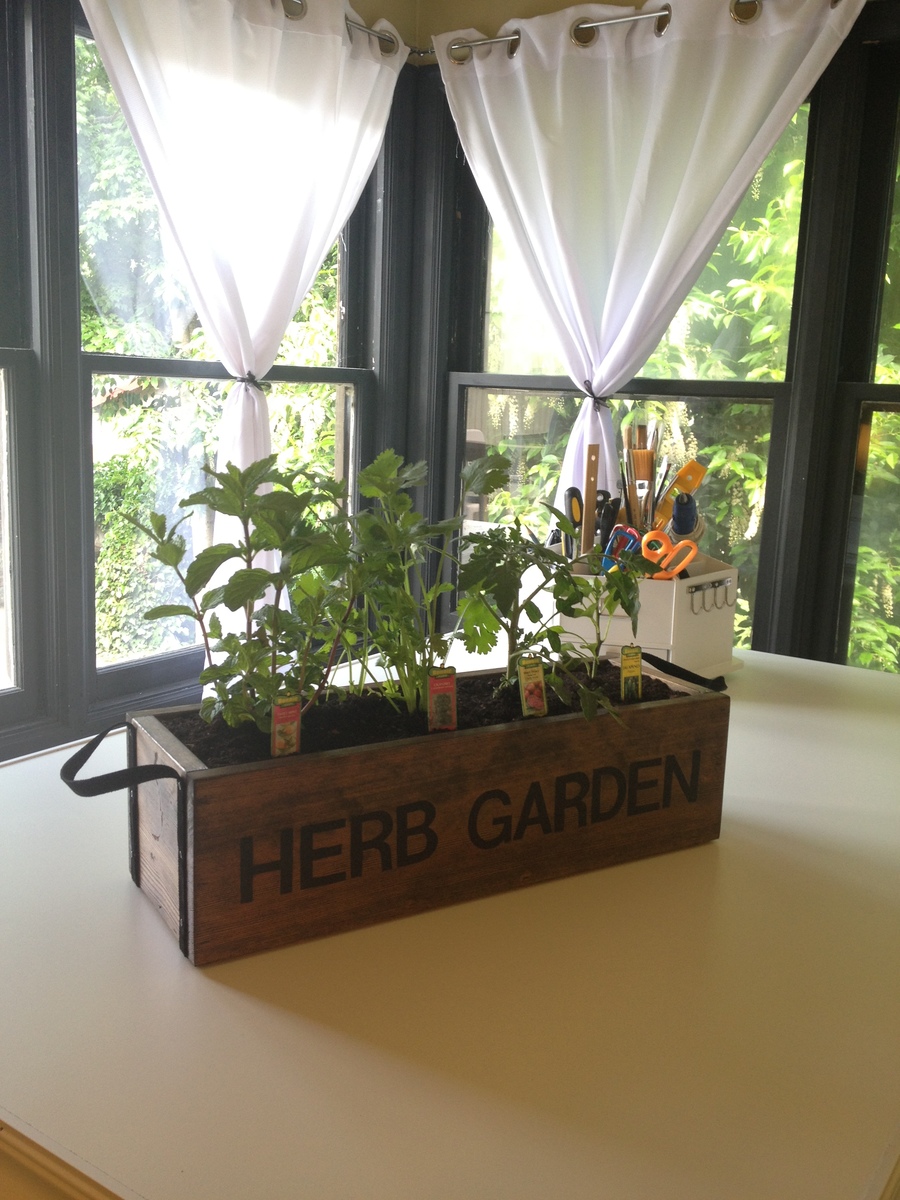
Mother's Day Herb Garden

I followed the instructions for Ana's Herb Garden box. For the handles I used leather strips from Michael's. I think it turned out really nice! I almost wanted to keep it, but I still have scraps to build my own. I am LOVING the Minwax Special Walnut color. It's definitely my favorite!
Built from Plan(s)
Estimated Time Investment
An Hour or Two (0-2 Hours)
Finish Used
Minwax Special Walnut
Recommended Skill Level
Starter Project
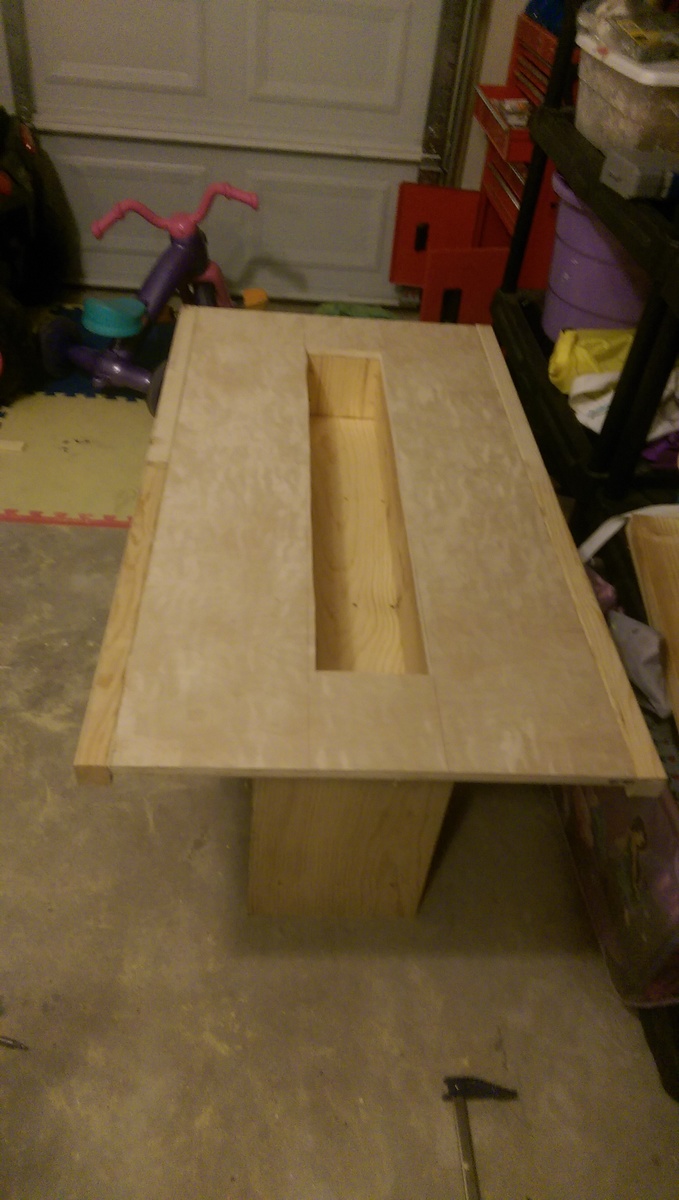
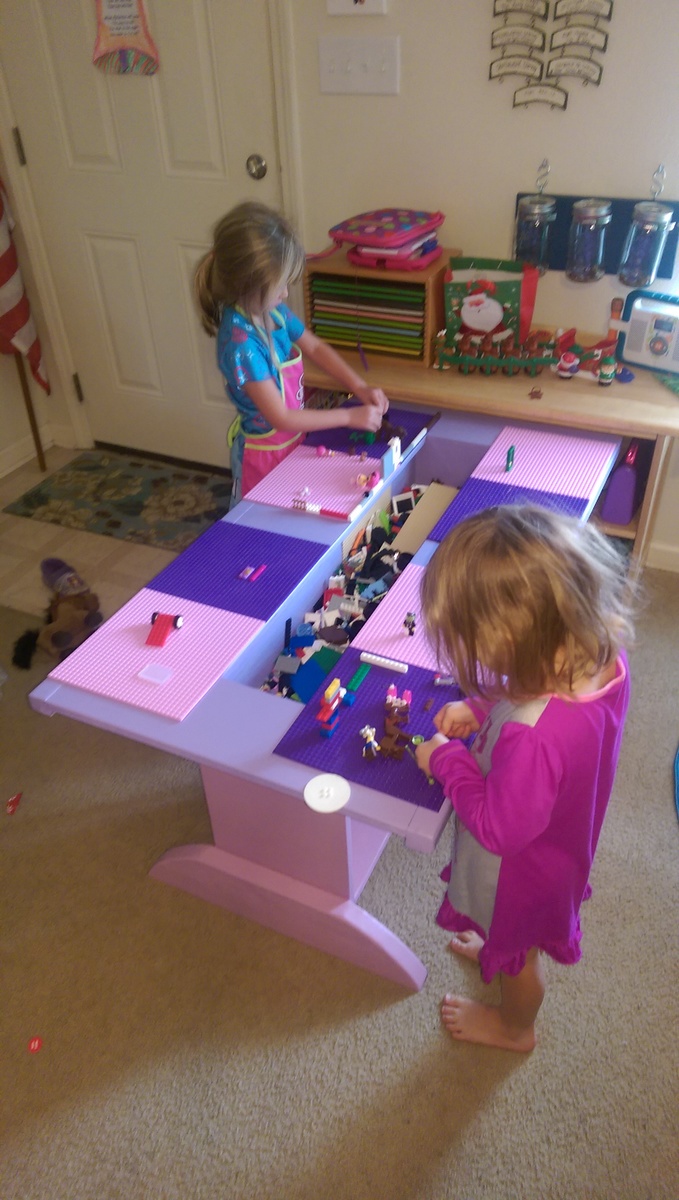
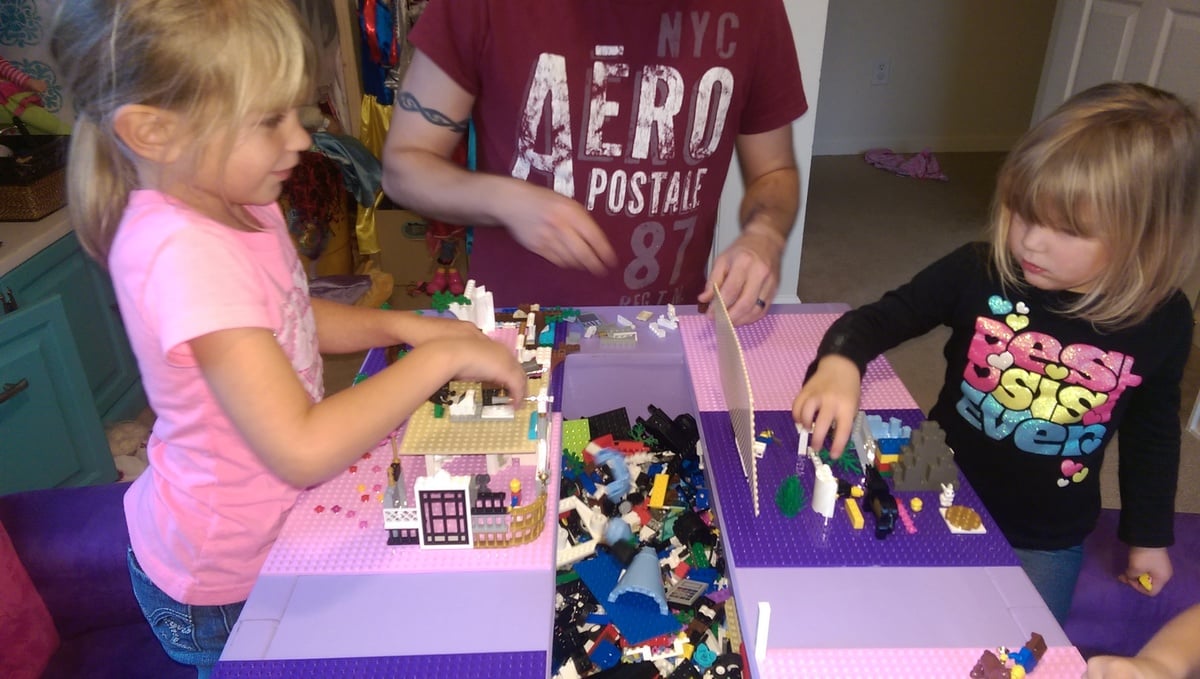
Lego table

I wanted an easy way for my girls to play with their legos and not have to fight over an area or who had the Lego bin. So I took the plans and tweaked them to have a cutout and storage area for legos. I built this by myself in two days. I had to wait till the kids were asleep since it was a Christmas present. All in all it took maybe 2 hours to build and another 2 for sanding and painting.
Estimated Cost
$100+ The table was only about $60 but the Lego boards were about $7 each. I had a total of 8 boards.
Estimated Time Investment
Afternoon Project (3-6 Hours)
Finish Used
Paint
Recommended Skill Level
Beginner
Comments
Wed, 12/30/2015 - 16:21
Awesome gift
Great job! I love the space for separate builds and storage underneath.
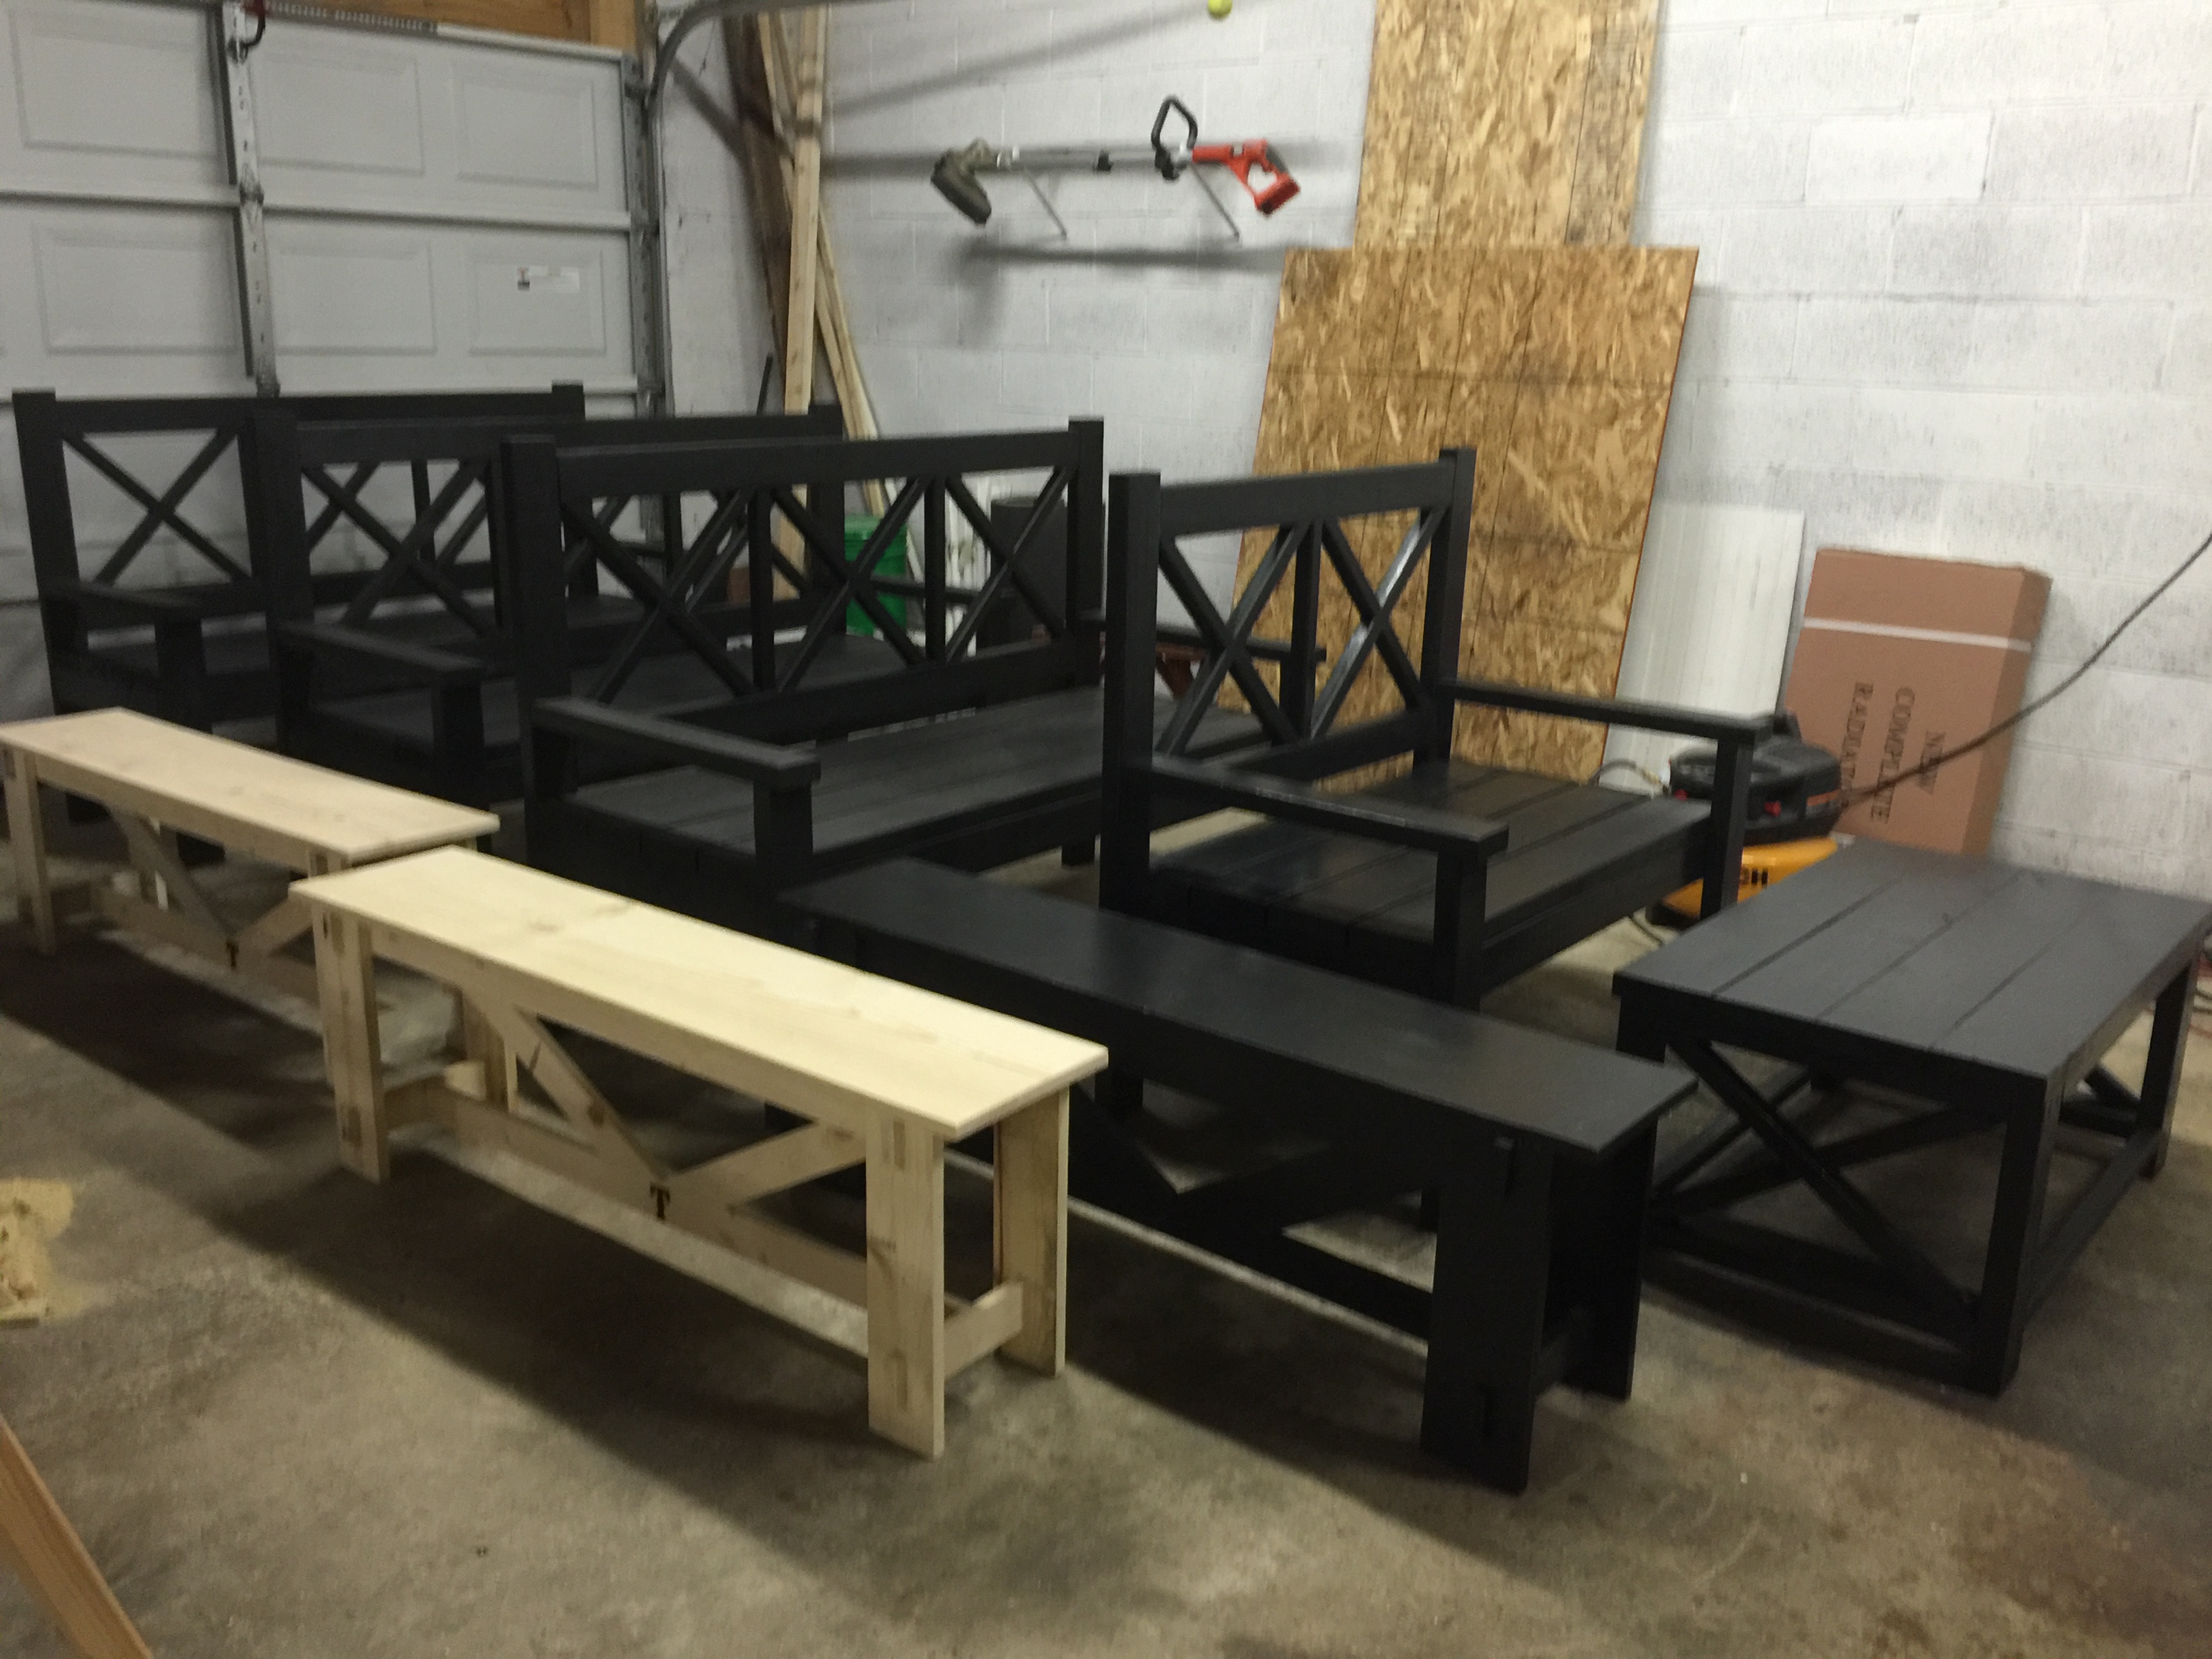
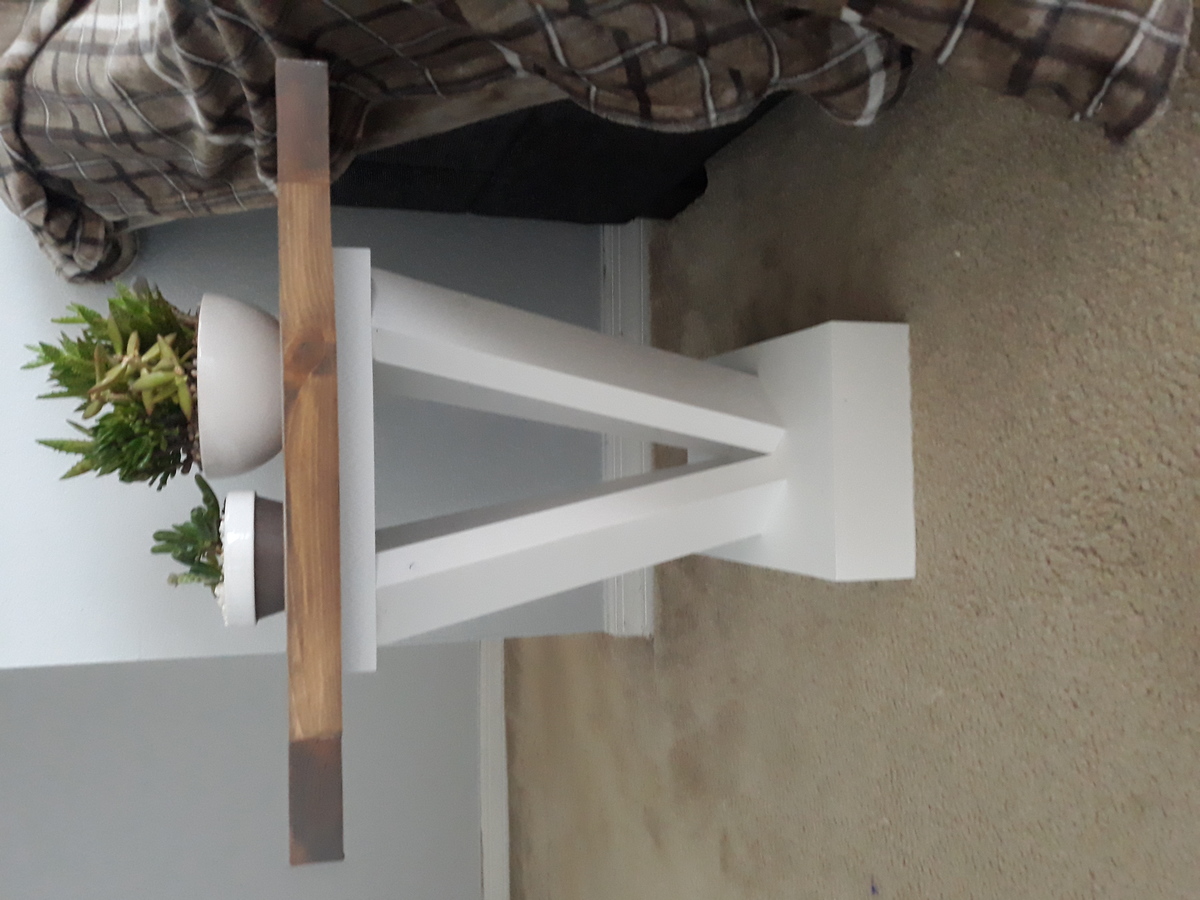
Handcrafted table set
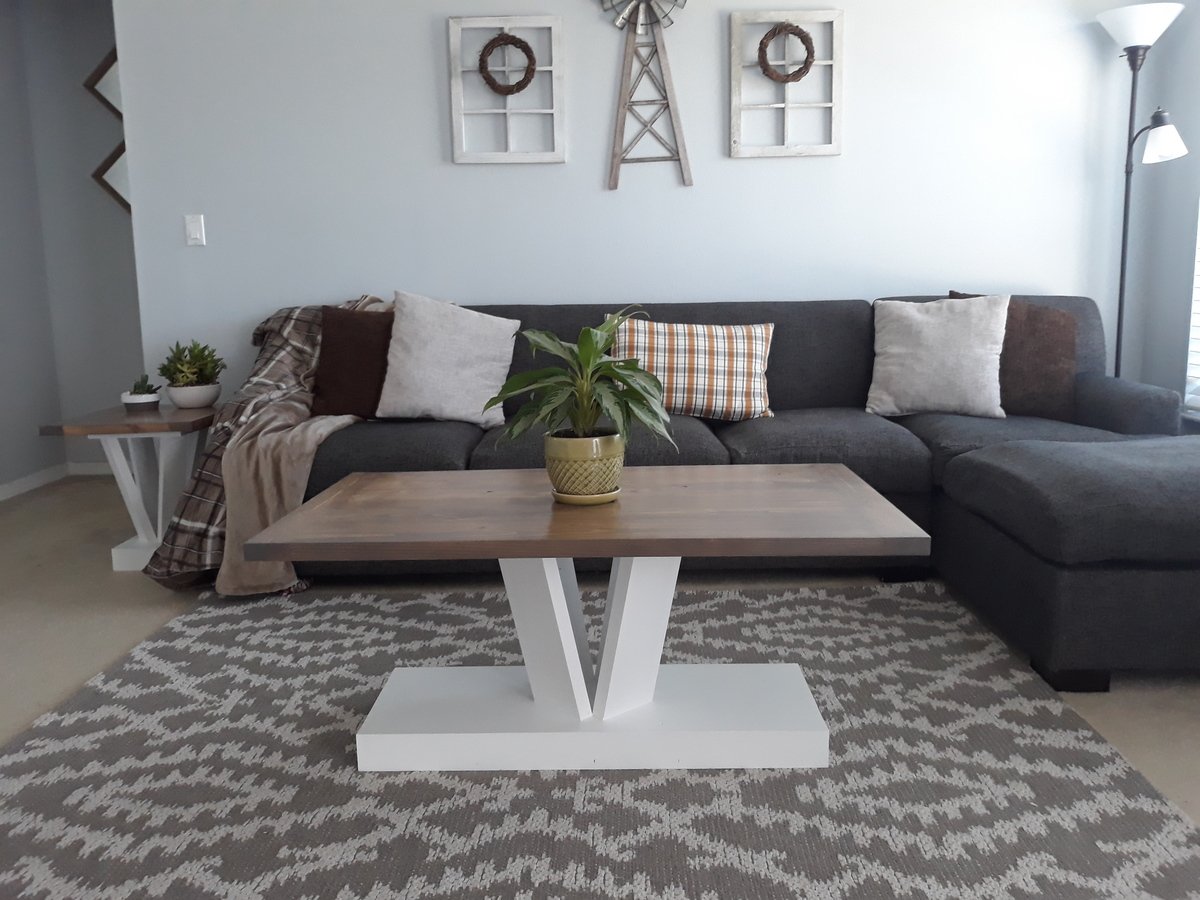
I was tired of browsing the market place and seeing the same traditional farmhouse design coming from just about everyone in the woodworking industry. It seems as though the market place is inundated in the same 4 leg, and cross support design. I designed these to go against the grain. They were my first project ever and were sold within days. They had nearly 3k views within the first 2 weeks on facebook. I am particularly proud of them.
Estimated Cost
$120
Estimated Time Investment
Weekend Project (10-20 Hours)
Finish Used
Briarsmoke varathane stain
Lacquer finish
Swan white legs support w/ poloycrylic finish
Lacquer finish
Swan white legs support w/ poloycrylic finish
Recommended Skill Level
Beginner