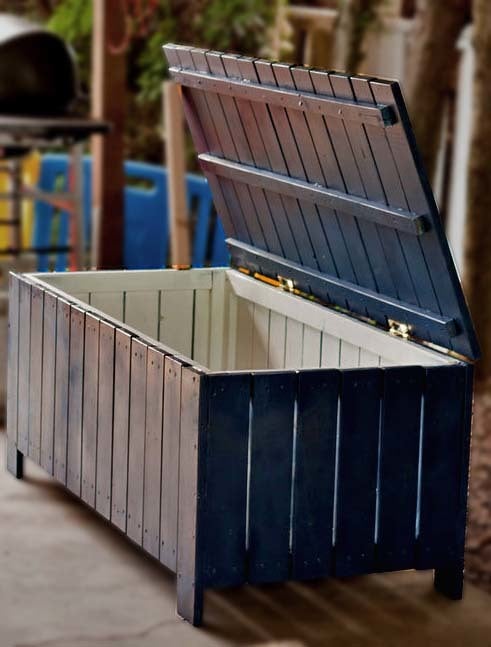
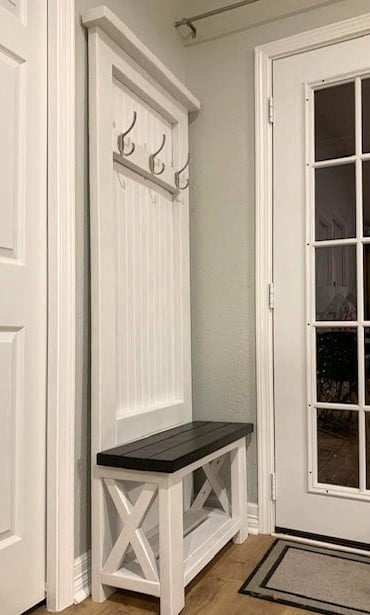
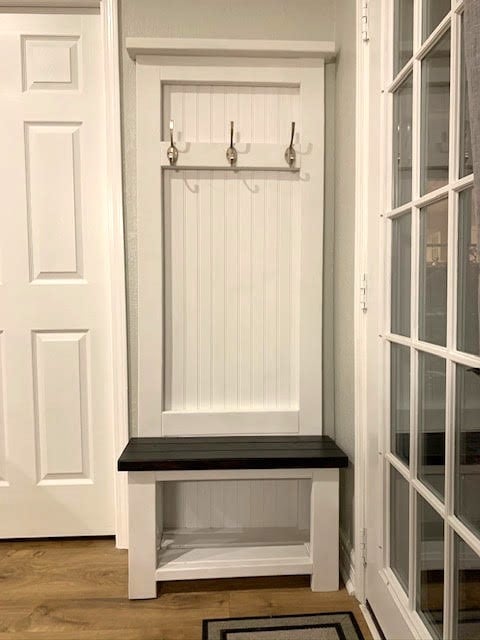
Historic Palouse Halltree
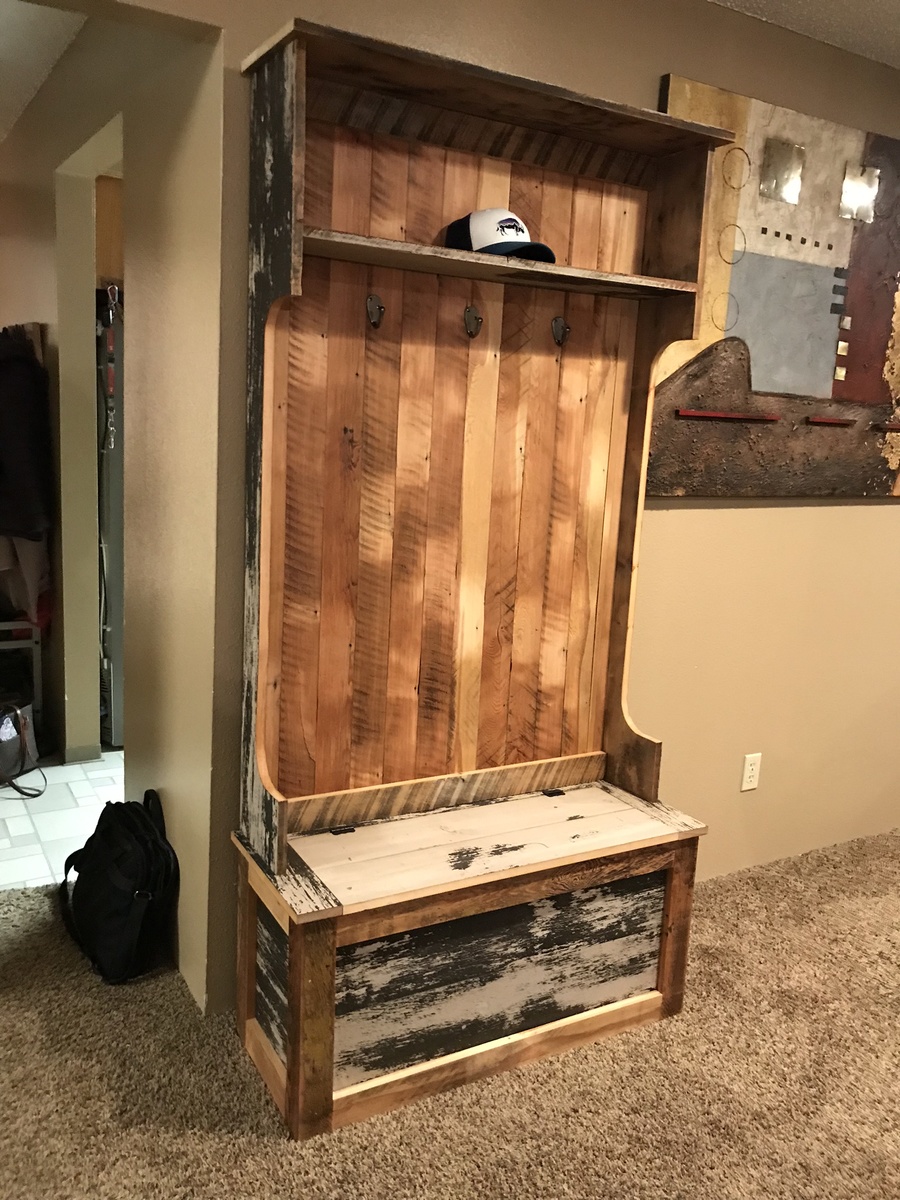
This piece was inspired by Ana’s plans and built as a collaborative project with my son. The stock was all salvaged from a century+ old railroad depot on the University of Idaho campus that was marked for demolition. The green and cream boards were the ceiling of the depot, and the unfinished stock came from the flooring, which was 1” tongue and groove red fir. The first agricultural crops, forest products, and settlers of the region (North Idaho, Eastern Washington) flowed through that terminal. This piece, therefore, is iconic of the regikn’s rough-hewn beginnings and stands as a reminder of its important past.
Estimated Cost
$60 for glue, hinges, screws, polyurethane. The wood was salvaged for free.
Estimated Time Investment
Weekend Project (10-20 Hours)
Finish Used
After sanding the bare wood and scrubbing the painted surfaces, I sprayed a satin polyurethane (good ol’ rattle can!)
Recommended Skill Level
Intermediate