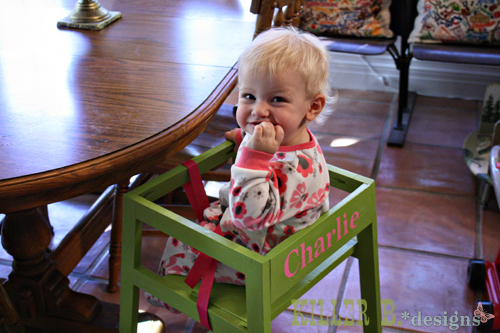
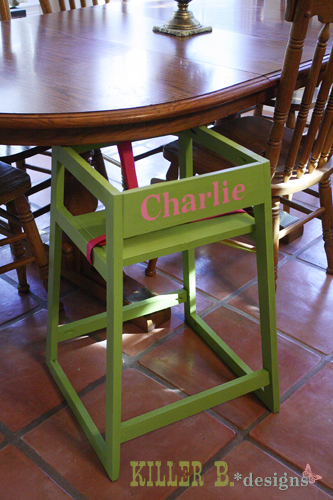
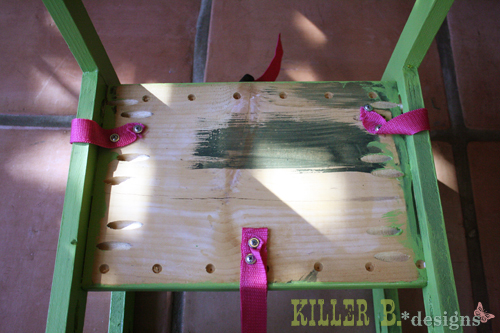
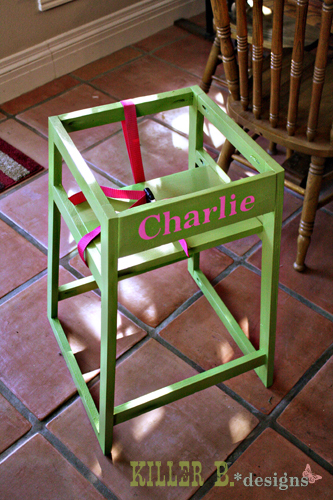
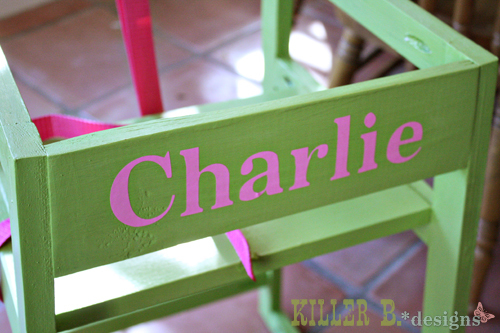
Vegetable Bin Cupboard
My husband's and my first Ana White build. Made it for my mom for Mother's Day 2015. She loved it and I absolutely loved how it turned out!
I built this as a Mother’s Day present. There were a few hiccups (i.e. the cut list doesn’t include the drawer face which I didn’t know while shopping), but the plans were great and most of the project went smoothly.
Well with a new addition to family it was time to start baby proofing the house. With some help from the wife we decided to build a dual purpose door to keep babies out and dogs in. After looking all over the internet this is what we found. I hope you like it. sorry about the photo being so dark..
We have 12 foot studs in our house so I wanted to make use of the height of our ceiling to provide more space on the floor for the boys to play! With two boys sharing a room, the beds were going to take up a lot of valuable floor space. I found the bunk bed plans in Ana's book and decided to modify them to make loft beds. We had to do two so decided on an L shape so we could fit them into the room! Once we made the first bed we decided we should put only one set of stairs in to save space. The safest way we could think to do this was to place the stairs against the wall so the boys were less likely to fall. The stairs double as book shelves. The coloured rope was an added safety feature we thought up and gives me peace of mind! This was a fun, relatively easy build for two non-builders making their first big project. I bought a Kreg pocket hole jig for this project and it was a life saver. I can't imagine doing this build with out it!!! We completed it in about two to three days while my brother was down on holiday. It was fun and good brother sister bonding time! I am about to embark on phase two of the boys room, this time by myself , adding a storage dresser under one bed. I will modify Ana's laundry dresser plans to fit some plastic storage boxes. Then a day bed/sofa under the other bed using Ana's Alaska cabins day beds plan and finally (if I'm still standing) a shorter version of the craft table for the middle of the room! That's my year planned! Hope you enjoy the pictures, the beds are so big and high it's very hard to get a good photo.
I followed most of the farmhouse plans for the headboard and footboard. Adjustments were made for the size of our mattress being 80x77 here in Canada. Also the primary reason for building a bed was to get away from boxsprings as I am am just too sensitive with previous back injuries to they 'not so flat' feel. Because of this I somewhat designed a slat system based on our mattress' guidelines for maximum gap between slats. I framed a simple setup just 3/4" below the side rails so the slats would be flush with it. Also our floor is not flat (yikes) so the side rail is not the same measurement from end to end it is instead done using a level (out 1/4" over about 7 feet).
My first “real” build! I’m thrilled with how it turned out! Thanks Anna for giving me the confidence to give it a try.
this is the Markham Workbench Console and Rustic Hutch, a little modified
Build Instructions: http://www.instructables.com/id/Quilt-Rack/
This is a nice little project that can be made in an afternoon. The simple design allows for easy construction with only a few basic tools. All joints are interference fit with glue added for extra strength.
We looked for a simple plan for a bed and found this one on Ana’s site. Easy to build in a weekend.
Mon, 06/03/2019 - 11:35
Thank you so much for sharing a photo! I've been looking forward to seeing how the bed turns out! Great job!
"I had a great time building these chairs."
Peter
I'm building new beds for my daughters for Christmas. My oldest wants a bigger bed, so she's getting the full size simple bed. My baby bear needs a little more space in her room, so she gets the loft bed. The loft bed is finished but no pic's yet, as I can't assemble it till Christmas. For the full bed, I combined the Simple Full Bed with the Simple Bed with Arch. It's not quite finished yet, but here is a picture of the headboard. I'll add more pics when I'm done. I want to thank Ana for the hard work she puts into this website. To go out and buy similar beds to the ones I'm building would have probably cost me a couple thousand dollars, and would have been made of flake board. Because of Ana's plans, both my children will sleep on good quality, solid wood furniture for under five hundred dollars. Thanx Ana!
Fri, 12/30/2011 - 18:00
Just added a picture of the finished product. Family and friends are putting in orders. Looks like I'm gonna be busy for a while!
Fri, 10/24/2014 - 06:13
Not sure why but I likeyour arch version so much better. I can't tell what the difference is between yours and the original, perhaps more subtle arch? Very nice.
Can you post some pics of what it looks like today??
Check out thepaisleypeanut.com for more details, but we just loved this plan, so we tweaked it a little, but it's perfect!!
This was my husband's first furniture build and he really enjoyed it. The whole project took about three or four hours to build. He changed the top to a plank style with Douglas fir pine planks which I then beat up with a hammer and a screwdriver to look old. The top was then stained with five layers of Minwax Ipswich Pine and sealed with two coats of satin polyurethane. The base of the island was chalk painted, then distressed. I then took the Minwax furniture stain and wiped it on over the chalk paint and immediately wiped it off to age it and darken the chalk paint. I then sealed it with Rustoleum Chalked Matte Clear. We love our new kitchen island and it really fits in with our little cottage!
Preschool picnic table from plans posted on Ana White. Thanks for sharing the plans. My kids and family love the table. Doesn’t take long to make, but painting with two colors added some extra time.
This is a simple project that requires very few tools and a beginners level took about a hour to make:)
Mon, 03/27/2023 - 15:35
This looks fantastic, thank you for sharing!
I needed a guest room, pronto, so I made this bed in an afternoon. I used lots of glue and my cordless finish nailer. I'm very happy with the outcome and thinking about my next project. Thank you, Ana.
Tue, 12/13/2011 - 11:07
Very nice! This headboard is my favorite.
Great job! I like the bedside lamps too.
We originally re-sized these plans smaller to make a worktable for my office. Once that was built and we realized that we actually could make a table, we decided to make the full sized version. It turned out beautifully! A couple of clients have actually asked if they could pay us to make them one! Thank you, Ana, for the plans. :-)
I used pallet wood on the top and regular 2x4's on the bottom section.
Comments
Ana White Admin
Mon, 01/11/2016 - 13:22
Beautiful finish and details!
Thanks for sharing, it is gorgeous!