Community Brag Posts

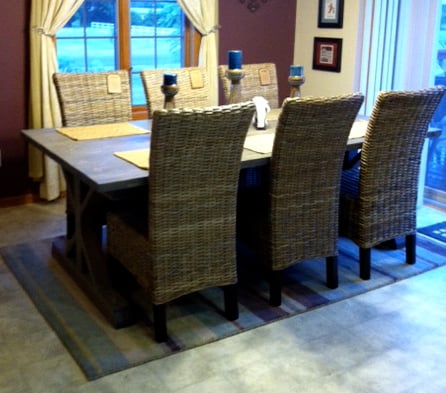
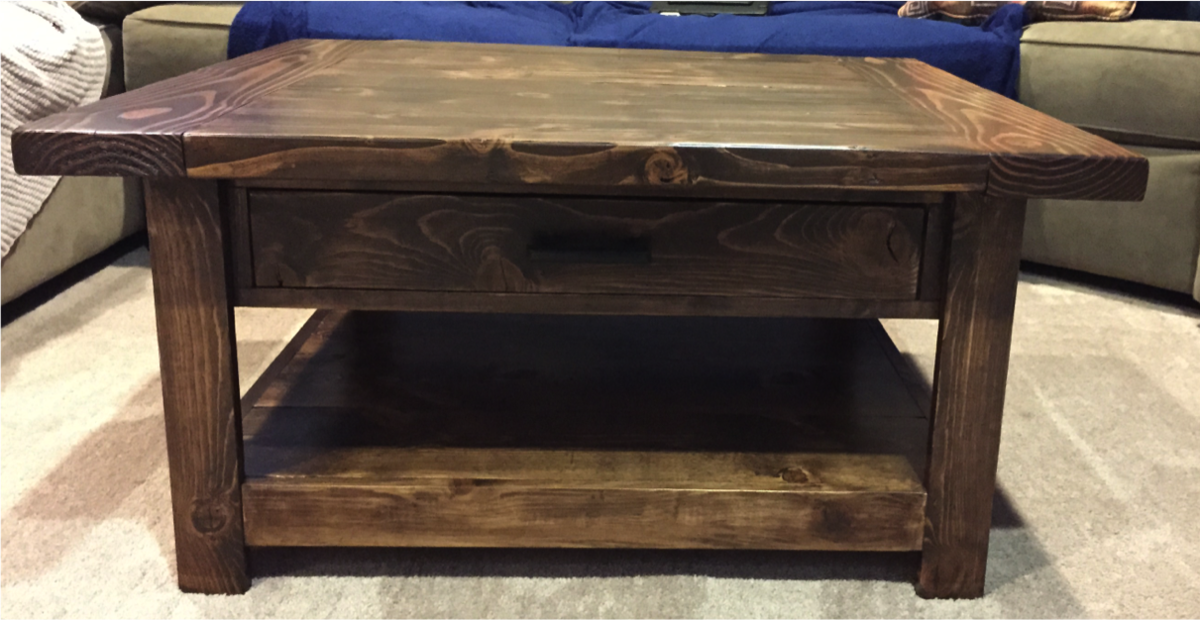
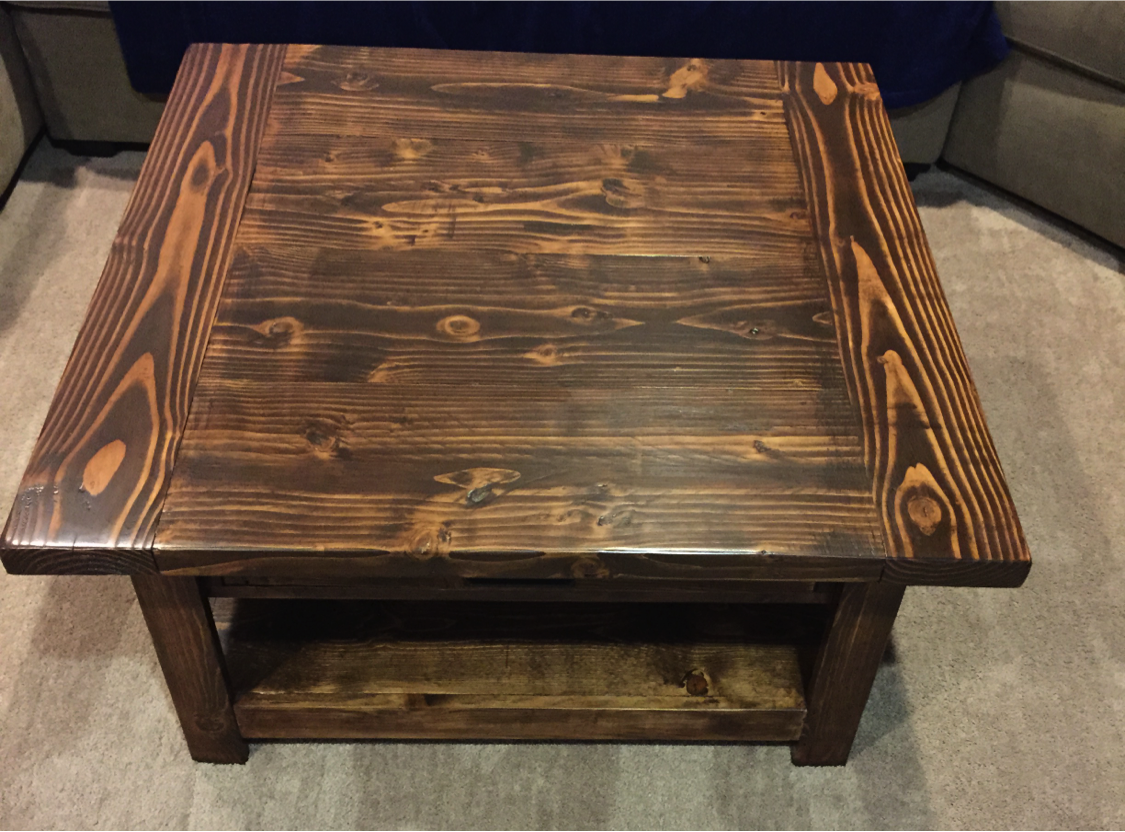
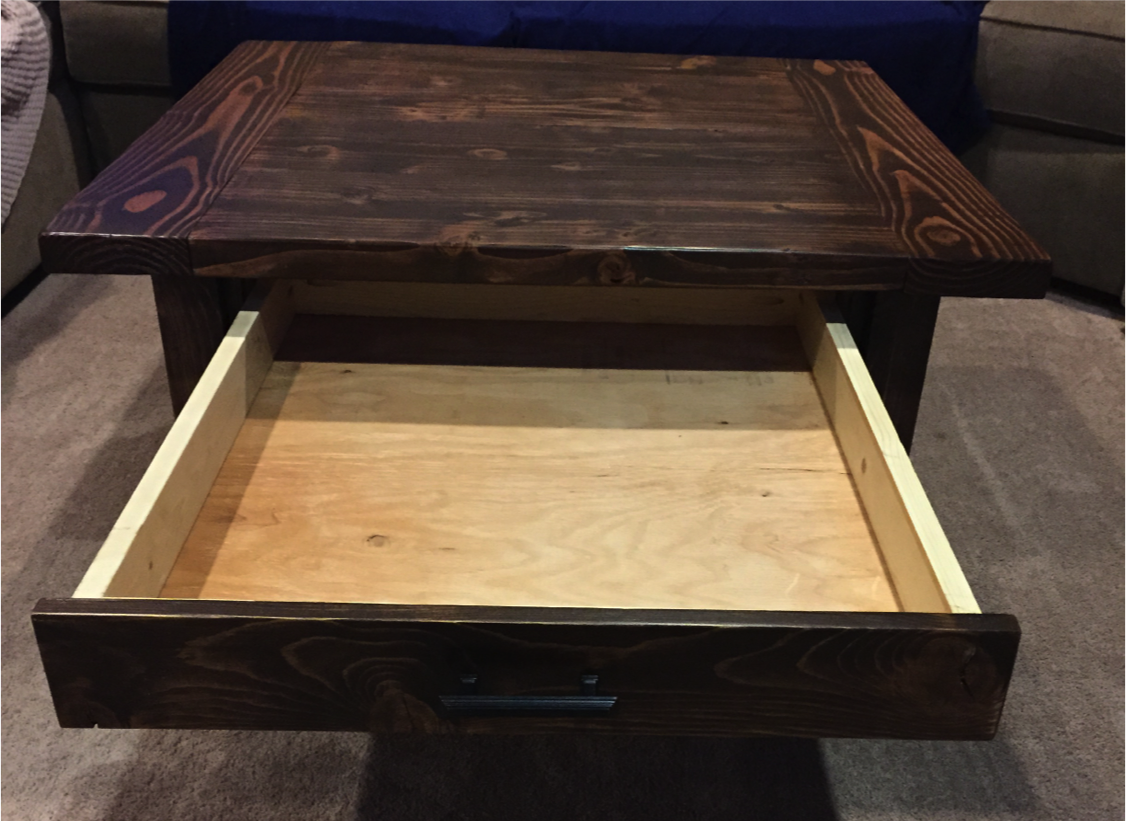
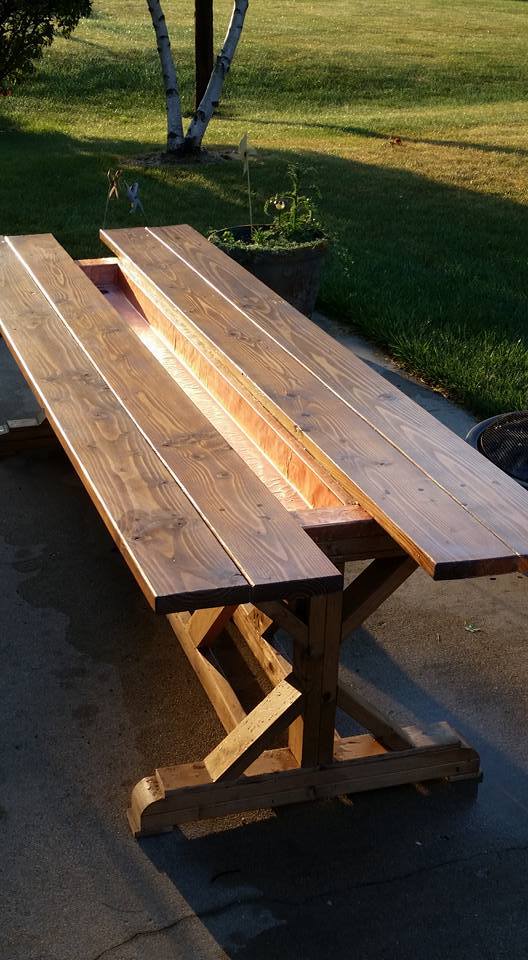
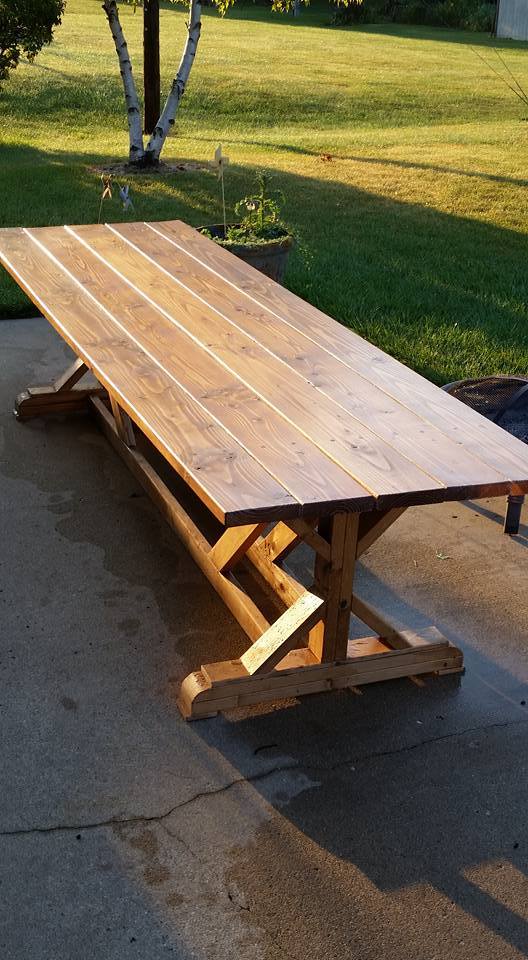
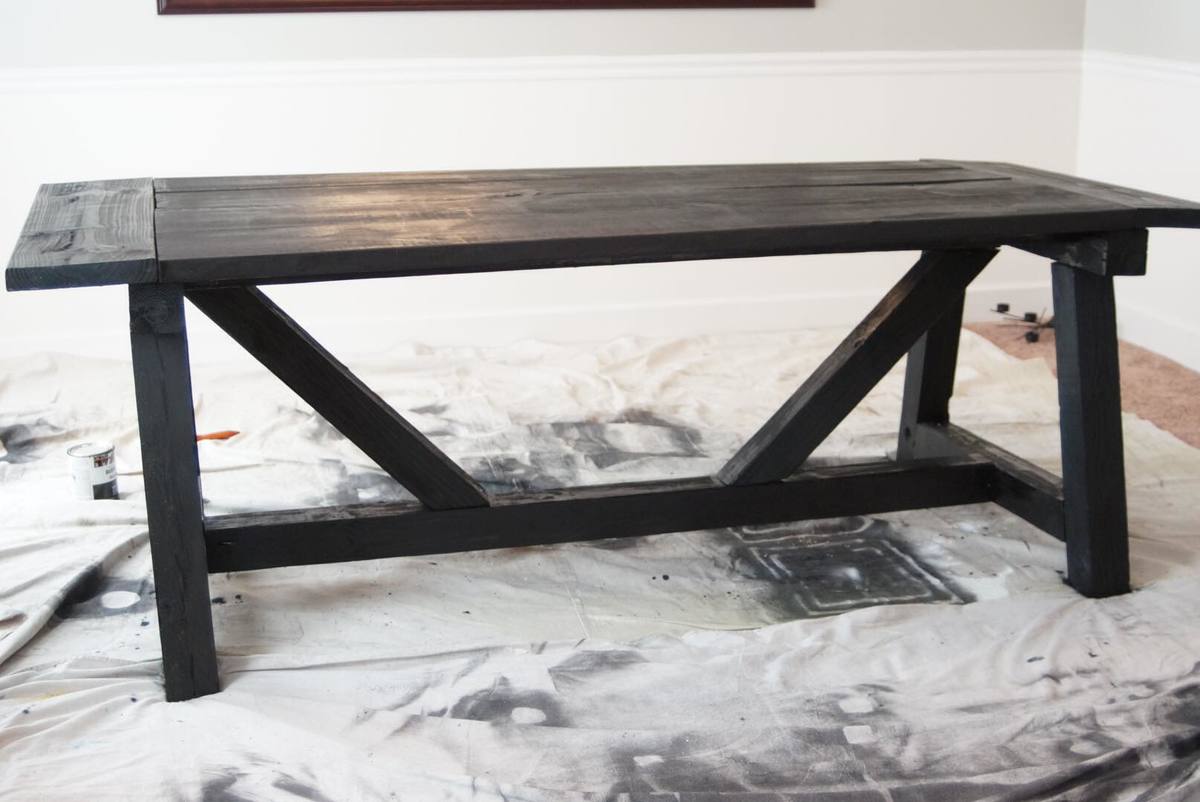
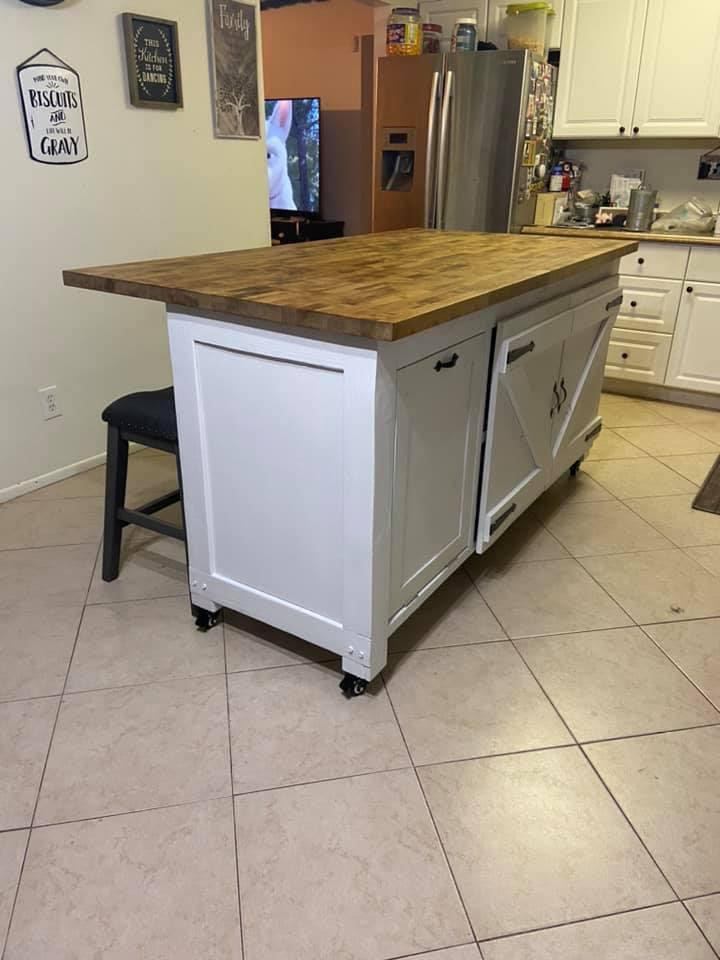
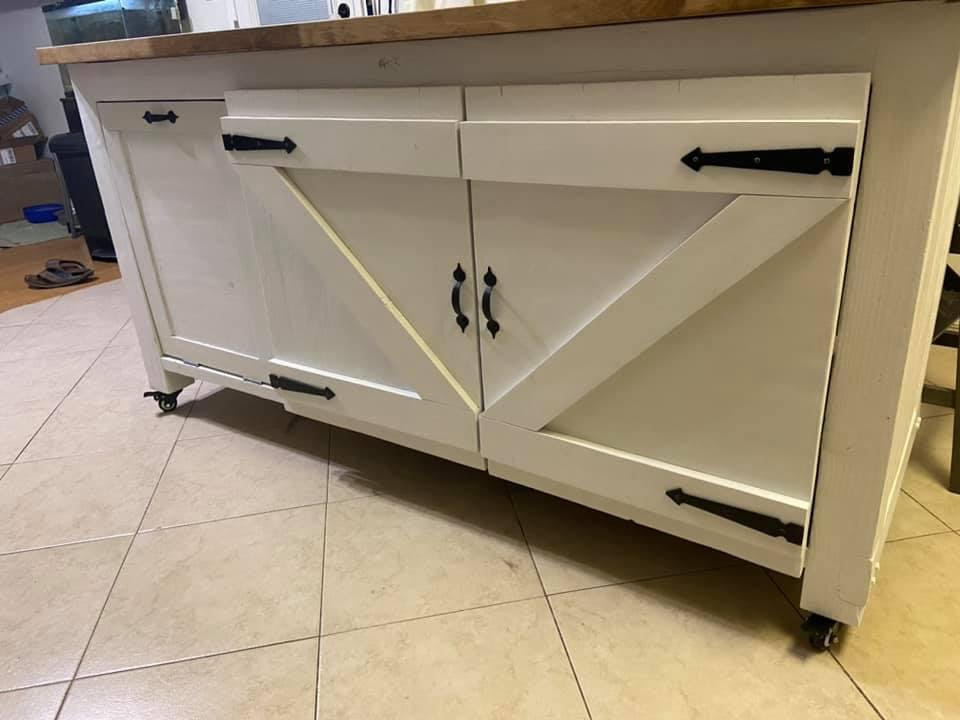
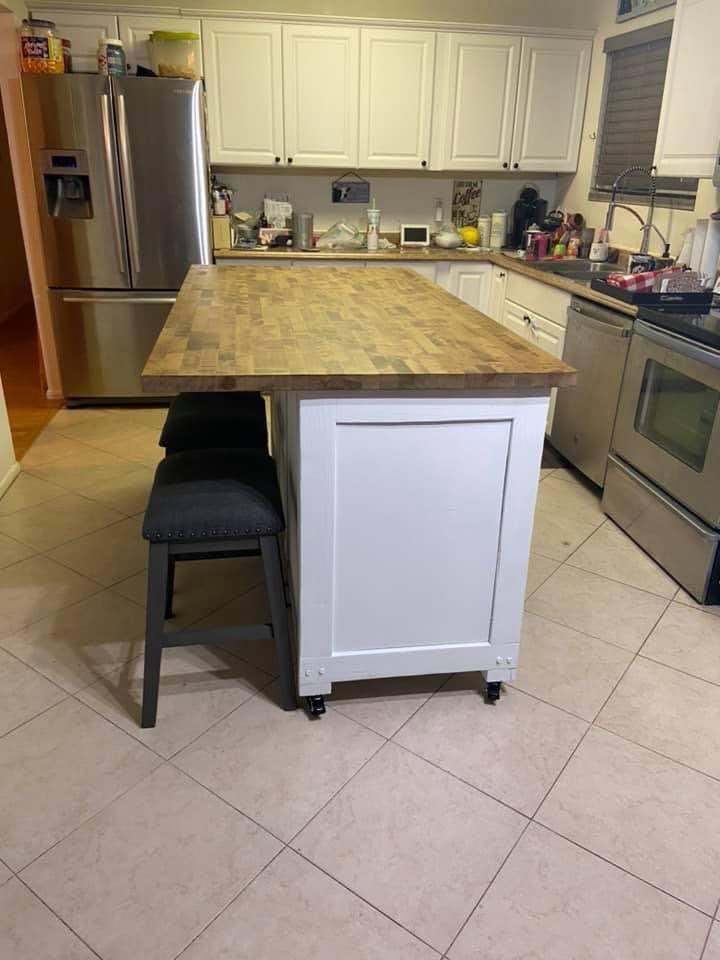
Classic Grey Fancy X Dining Room Table

Submitted by collins814 on Sat, 07/27/2013 - 19:56

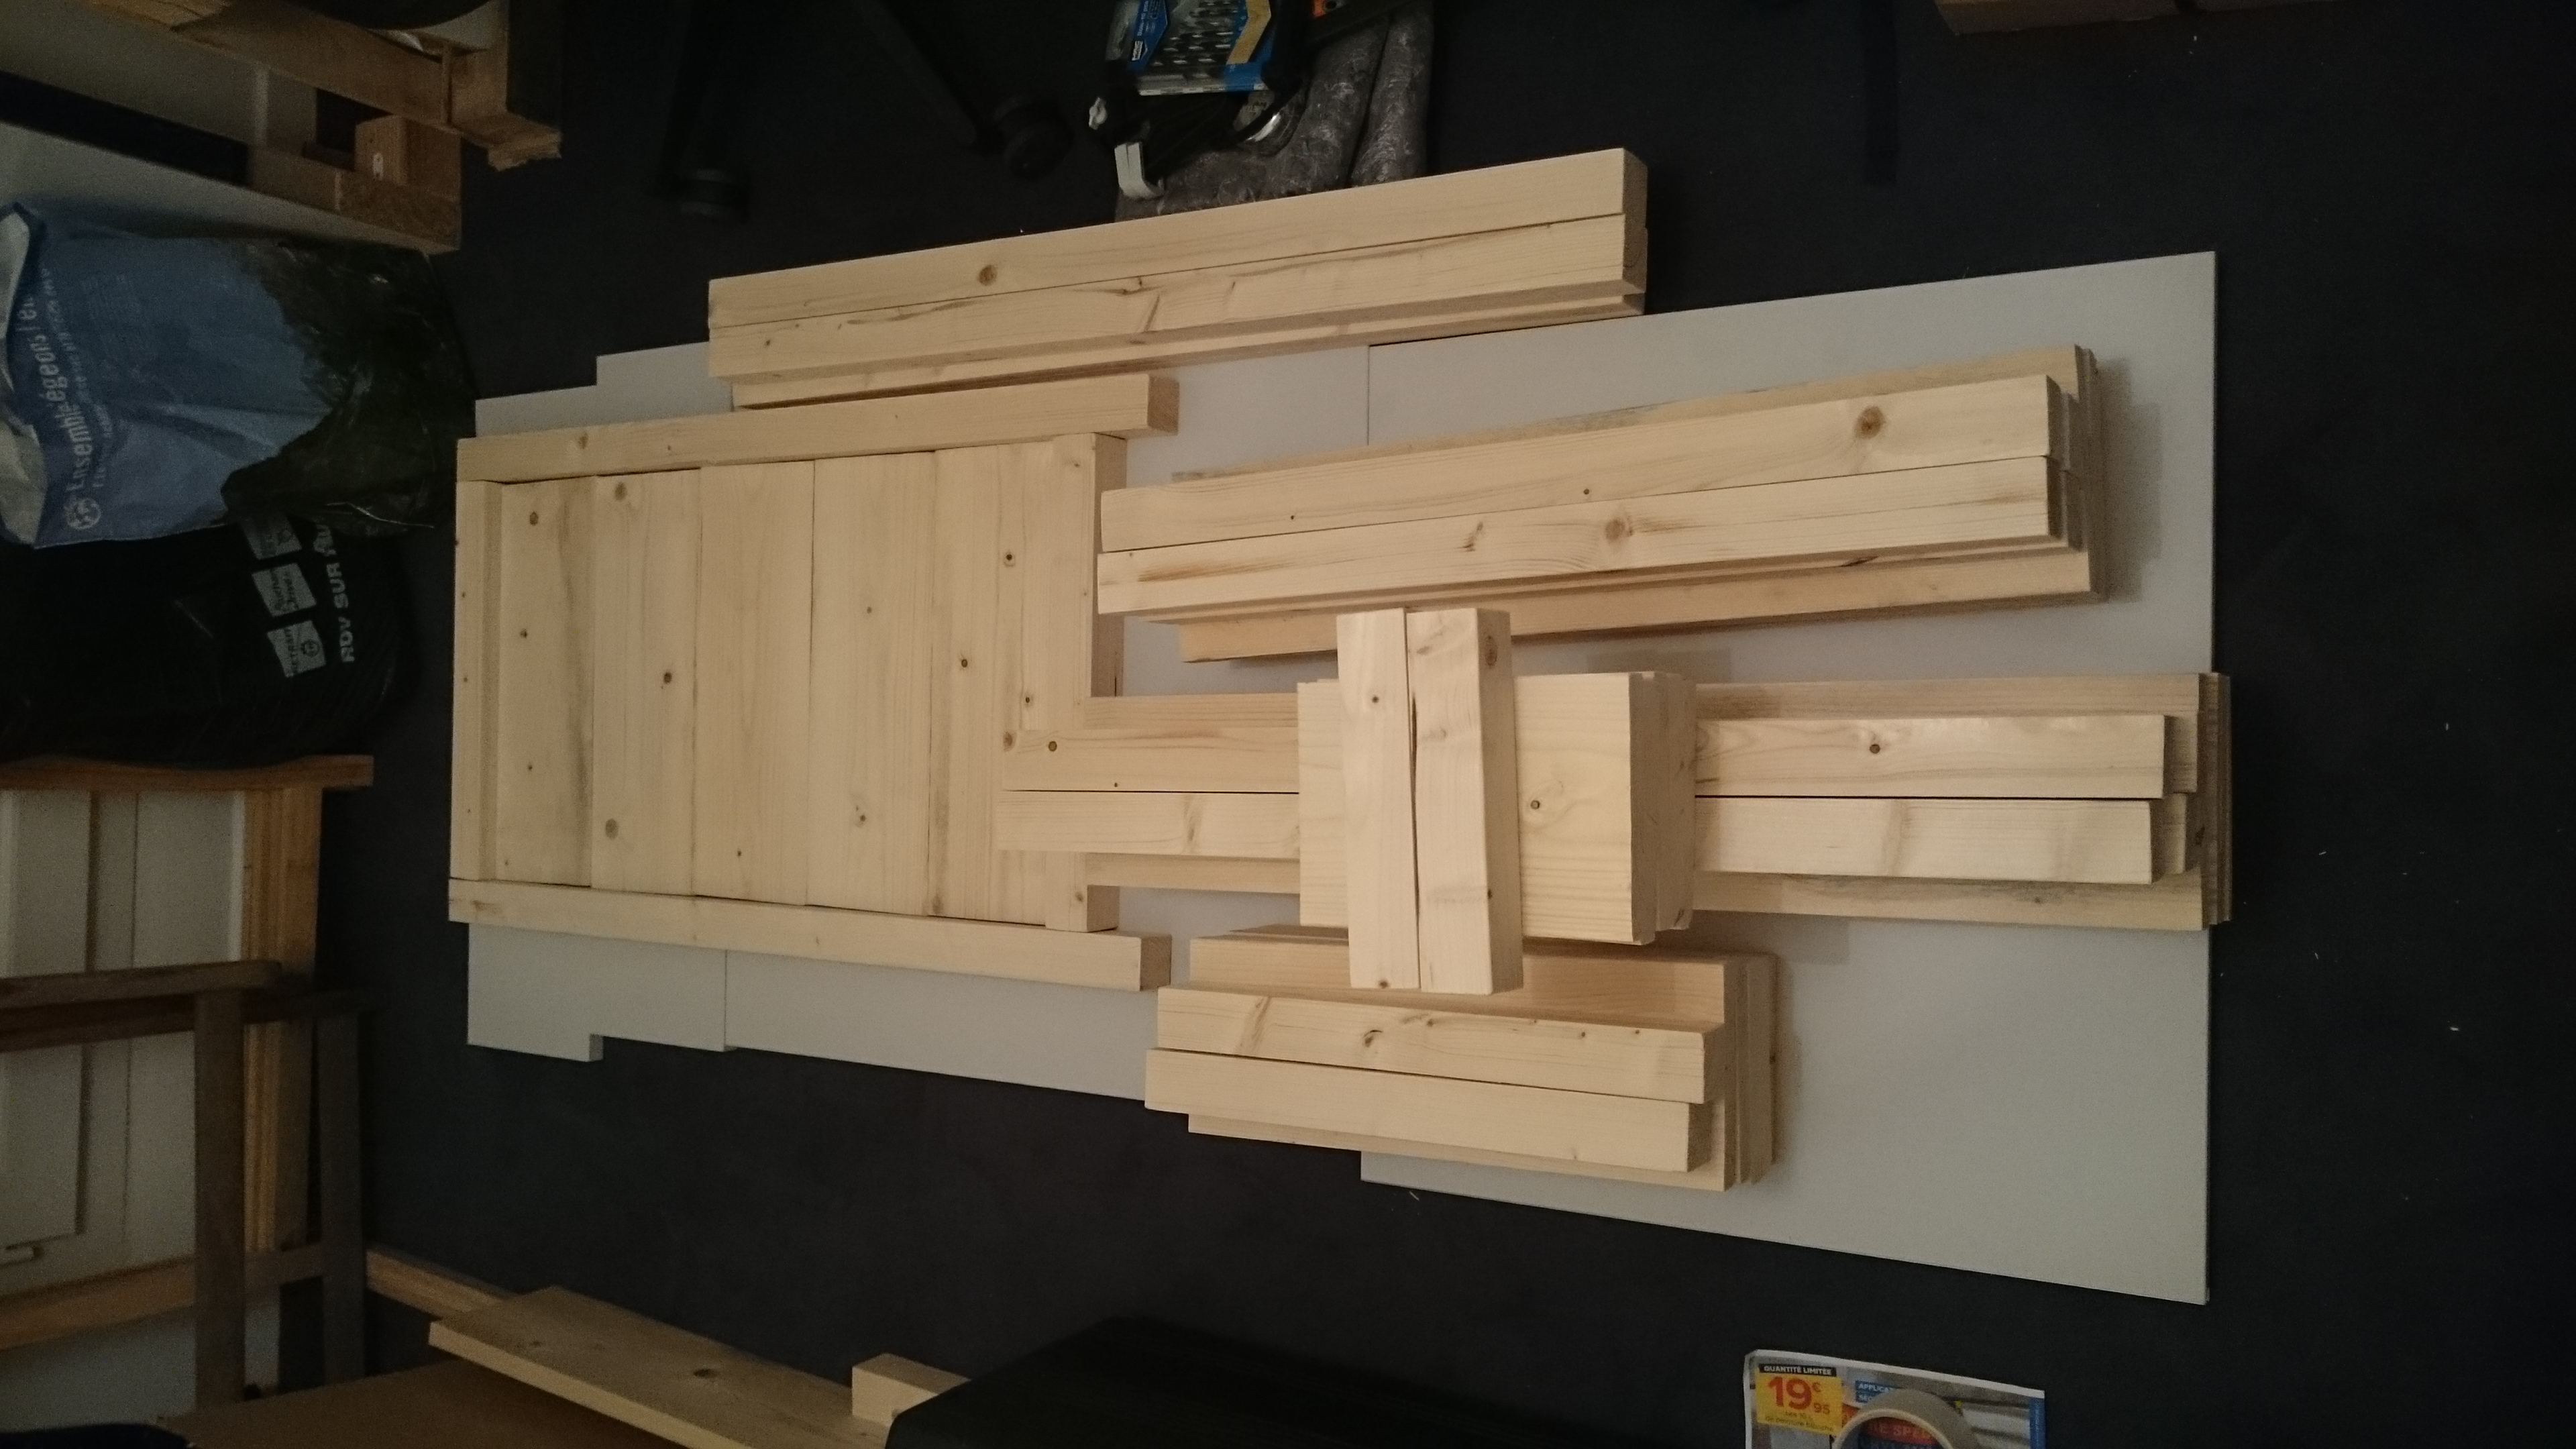
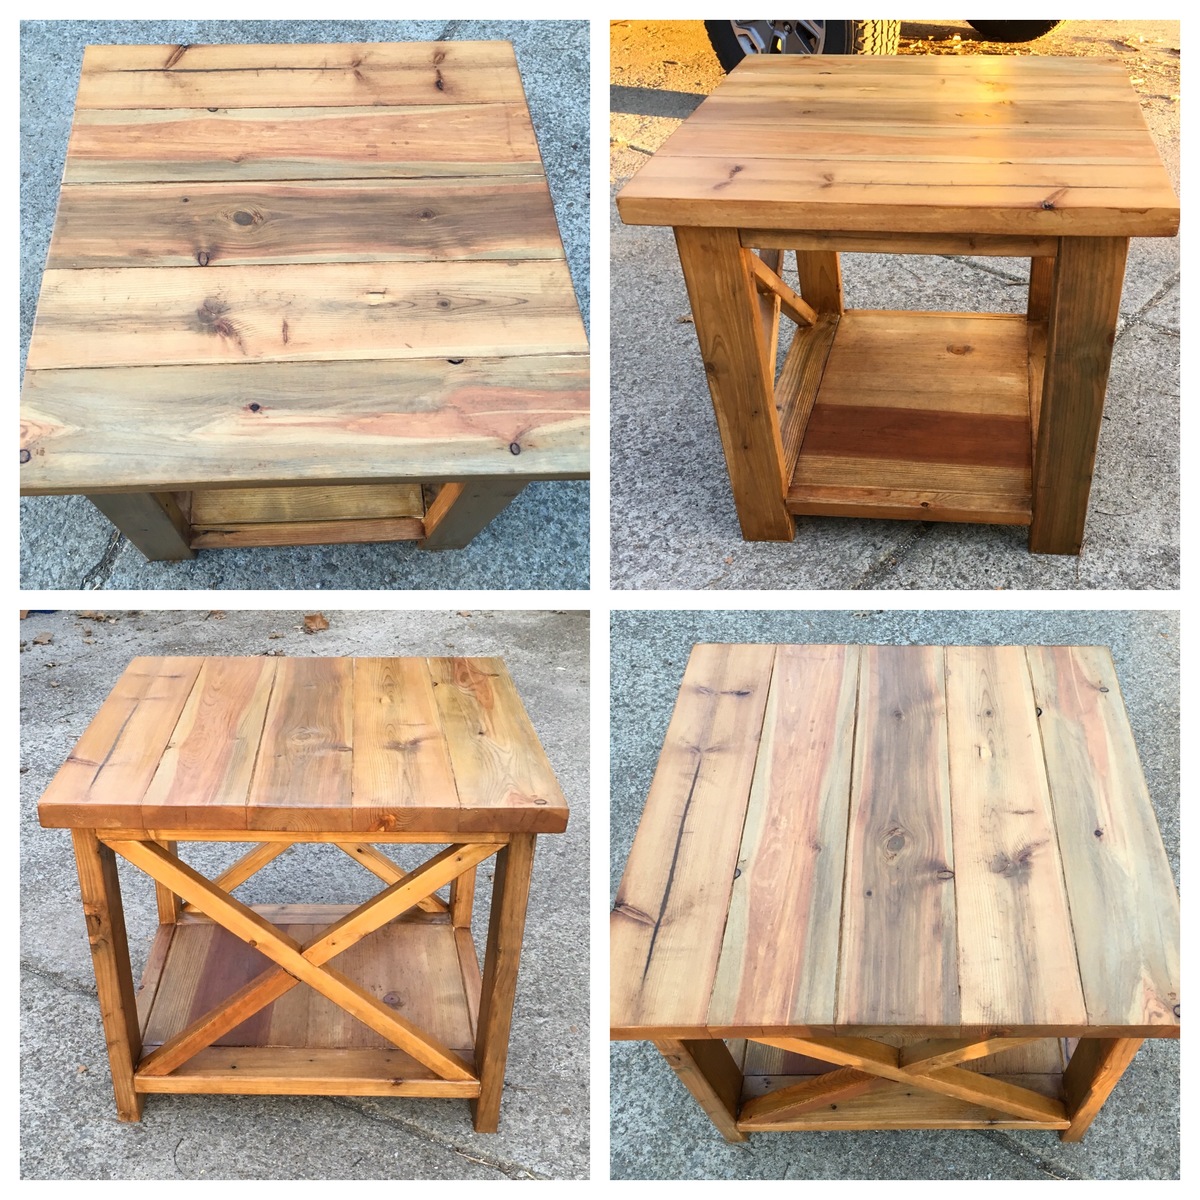
I recently made the end table and console table from the "Rustic X" collection and those were my very first wood projects that I have EVER done. I think I am addicted now! I have had NO experience in working miter saws, kreg jigs and barely drills before this. If I can do it, anyone can do it :)

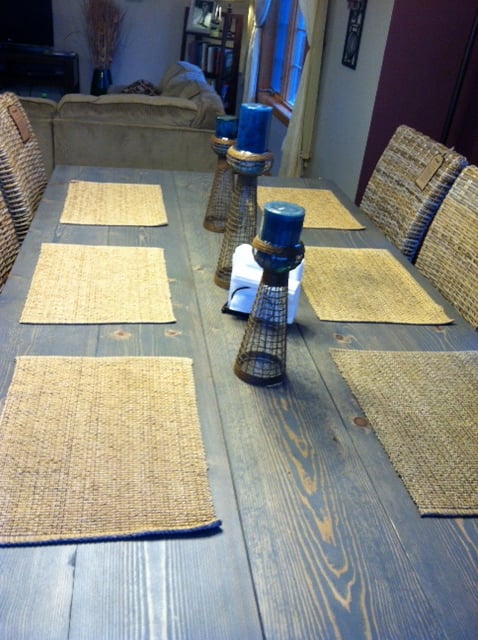
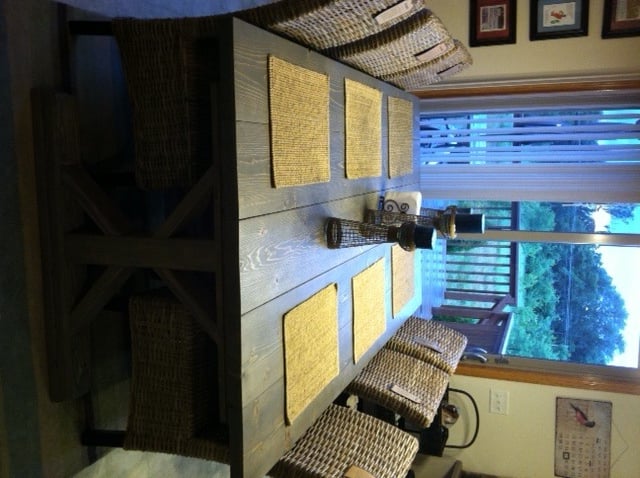
My husband and I made this table over a weekend and I am very excited about how it turned out. I was inspired by the color and size (and chairs!) of Sawgrasshomegirl "weathered grey fancy x farmhouse table with extensions" and I used the classic minwax stain. Thank you so much to Anna White and Sawgrasshomegirl for their plans, ideas, and inspiration!

Built from Plan(s)
Estimated Cost
$100
Estimated Time Investment
Weekend Project (10-20 Hours)
Finish Used
Minwax Pre-stain, Minwax Classic Grey and Minwax Polycrylic Protective Finish
Recommended Skill Level
Beginner

Comments

camkin02

Mon, 08/12/2013 - 20:40

Those chairs are beautiful(table also) where did you find them.

collins814

Tue, 08/13/2013 - 05:37

The chairs are from Pier 1 (Kubu hand-woven dining chair). They have a hint of grey in them too which I love!

Around the corner, outside

First of all, sorry for my english, i'm french and i don't speak english often in life, so i don't know now if i still speak and write it well enough to be understood.


We needed some space outside our appartment to room bootles.

When i found the plans on this website i decided to start this project.

It was the first time i used my device "undercaver jig" to assemble or link all the wood pieces together.

Once all the "wooden wall parts" made, i strated assembling the whole wooden furniture.

Then i painted them and once the paint was ok, i protected the wall furniture (painted parts and unpainted parts) whith an uncoloured protective product.

After that the inside was done to be able to store milk and water bottles.


The last part to be done was the upper part. I decided to make it in 4 indepedant concrete parts to be abble to replace it in case it breaks.

Estimated Cost
150 Euros
Estimated Time Investment
Week Long Project (20 Hours or More)
Recommended Skill Level
Intermediate

Three Little Sling Chairs

Submitted by LissaNY on Wed, 06/15/2011 - 13:16

My first non-home-repair project. Made three of the sling chairs for my kids. They each picked out their own fabric (regular fabric). We still have not sanded, filled and painted but are hoping to do so this weekend. The kids were very excited to have them. I have been reading your website for months now wishing I had time to make something, and these chairs fit the bill. Thank you!

Estimated Time Investment
Afternoon Project (3-6 Hours)
Finish Used
Still unfinished. Undecided on how we are going to do each chair.
Recommended Skill Level
Starter Project

Comments

RyansMama (not verified)

Wed, 07/13/2011 - 18:16

How old are your kids? My daughter is 6 and I am wondering if the chair will be too small for her.

Crib for Ella

My husband recently designed and built our daughter's crib. After looking online and measuring another crib to make sure he had the rail spacing just right he came up with a plan and built it over a few weekends. He also built the changing station and will later build an armoire for her room as well.

Built from Plan(s)
Estimated Cost
$250
Estimated Time Investment
Week Long Project (20 Hours or More)
Finish Used
Rustoleum American Walnut on rails and frame
Minwax Gunstock on oak plywood (head and foot)

Recommended Skill Level
Intermediate

Comments

Pabs

Tue, 07/30/2013 - 18:53

Beautiful!, I've been searching the web for plans to build a crib and haven't found any, would you mind sharing yours?, I think it looks amazing!

Farmhouse Twin Bed

After making the sling chairs, I decided to give the Farmhouse twin bed a whirl for my daughter. I absolutely love it! It ended up costing us $225 for all of the supplies needed. The only issue we had in making this was trying to make it easy to disassemble. This was fun to make!

Built from Plan(s)
Estimated Cost
$225
Estimated Time Investment
Weekend Project (10-20 Hours)
Finish Used
Behr Creamy Almond Paint
Recommended Skill Level
Beginner

Potting table

This is our version of the potting table all made with free materials. We love it!!!

Estimated Time Investment
Afternoon Project (3-6 Hours)
Finish Used
Teak stain
Recommended Skill Level
Beginner

First Coffee Table

Submitted by anmillard on Tue, 08/18/2015 - 21:39

Inspired by the Pottery Barn benchwright square coffee table, I made this approximately 36'' square with one large drawer.

Estimated Time Investment
Weekend Project (10-20 Hours)
Finish Used
Rustoleum Dark Walnut stain with Minwax Satin Polyurethane
Recommended Skill Level
Intermediate

Comments

New side table for our guest space

Submitted by Tbacks on Sat, 03/17/2018 - 04:57

I was making a set of side tables for my daughter and decided to make an additional one for our spare room/guest space.  I love to try new wood treatments so I used Apple Cider Vinegar applied with a steel wool pad on this table.  Let the steel wool soak for about an hour and then applied.  Sanded after dry to even out the finish and then applied a gloss finish to give it a beautiful shine.  

Built from Plan(s)
Estimated Time Investment
Afternoon Project (3-6 Hours)
Finish Used
Apple cider Vinegar applied with Steel Wool Pad
Recommended Skill Level
Intermediate

Princess Play Loft Bed

Submitted by fsmumford on Wed, 06/22/2011 - 09:26

I love the play loft bed, but wanted to add a princess twist for my 5 year old's birthday. I found melamine plywood, which helped in the finishing since it was already white. It was a lot of work, but so worth it! I think the kid's favorite feature so far is the slide, which has seen a ton of use :) My favorite feature is all the storage! Thanks so much Ana! If it wasn't for you, there is no way I would have had the courage to tackle a project like this!

Built from Plan(s)
Estimated Cost
$350
Estimated Time Investment
Week Long Project (20 Hours or More)
Finish Used
The plywood was already white, but after filling the holes I went ahead and painted the whole thing white so that it would all be the same color.
Recommended Skill Level
Intermediate

Comments

Ari Z (not verified)

Thu, 06/23/2011 - 11:12

What a fantastic design for your daughter! She must pretend she's Rapunzel every time she gets into bed. The little cubbies to store toys were an excellent idea.

fsmumford

Mon, 07/11/2011 - 19:32

I started out by building the back and outer walls just like the stairs, just slightly narrower to fit my space and the side walls longer, coming out into the room more since the slide sticks out into the room farther. I then also did the top platform of the slide like the top step, having the top stair trim, cleats, and plywood support underneath the front of the platform. Then, I did some calculating to figure out how long to make the slide and what angle to use. I wanted it to come out into the room farther than the rest of the bed so that the slide wasn’t too fast, but I didn’t want it to stick out too far. So I used a piece of melamine board (nice and slick wood) that was 56” long. At the bottom of the slide, I put a piece of plywood that went from the ground up about 8 inches, so that the end of the slide would be up off the ground. So the slide ended up dropping a total of 34”, from the platform down to the plywood 8 inches off the ground. This made a fairly quick slide, but perfectly doable for my little ones. Then, before mounting the slide, I attached 1x2’s to each of the sides of the slide under where the slide was to be to support the slide from beneath. Then, I used a kreg jig to attach the slide to the sides and then screwed the slide into the supports. This made a very stable slide. If you have any more questions, I would be happy to try and help. I hope I’ve made sense ☺

Guest (not verified)

Sat, 07/16/2011 - 15:45

Hello Slide! My daughter screamed when she saw this bed...can you please tell me how to build it all? I would love it if you could share...

fsmumford

Sat, 07/16/2011 - 20:54

I'll try :) I started by building the towers. It was just deciding how wide I wanted them (I did one narrower and one wider to use like a window seat). Each tower is essentially three sides of plywood with one having shelves in it and the other having one shelf to make a seat. I also put a shelf at the bed's height so that my daughter can use it to put things when she is in bed, such as her alarm clock. Then I knew how long I needed the bed to be and how wide each of the towers were, and I made the middle front section to be the remaining width. The rest of the bed is very similar to the Play loft bed with storage steps, but instead of making the steps storage, I just attached them down and then cut out on the inside underneath the stairs to allow access for storage from within the castle. I used a jig saw to cut out the window. The top pink parts of the tower are just decoration, so I bought a thin piece of plywood and used a jigsaw to cut the up and down cuts. And then on another post I talked about making the slide. I hope I helped some :) If you have any more questions, feel free to ask and I will try and help.

Guest (not verified)

Sat, 10/01/2011 - 12:53

*I'm willing to pay you for your help*

I wish to start making this bed, but need some help. I'm novice and need more instructions. If I were to email you measurements, could you elaborate more in depth?

Please respond.

Thank you for your consideration.

fsmumford

Thu, 10/06/2011 - 10:04

I would love to help in any way I can (free of course!) I have wanted to do the plans on the computer, but haven't been able to figure out the program :( So feel free to ask away and I'll try and help. You can post questions here, or email me at [email protected].

jkcd513 (not verified)

Tue, 07/19/2011 - 13:01

I was wondering what the dimension for your room are (especially the wall the bed is against. Just trying to figure out if the slide idea would work in our little room. Also would you mind telling me how wide the the n_n_n (That is my attempt to show the part of the castle that has the little rectangles/squares and then a space and another rectangle/square (the pink and purple parts of the bed) I have been drawing some trying to get spacing right and they never seem to look right, but your spacing looks great. And is the purple part that has the shield painted on it a seperate piece from the rest or is it cut out with the main part of the bed- if it's seperate how wide across and length down is it? We are in the process of attempting a similar bed for our little one and I have been playing around with ideas and so far yours looks like what I have been trying to show my husband in my drawings, only yours looks a lot closer to what I had in my mind than what I have on paper. Any help would be appreciated.

fsmumford

Mon, 07/25/2011 - 09:27

The wall the bed is against is 125.25", so a little over 10'. I still have a few inches of wall left and wish I had made the slide a little wider (the slide I made is 14.5" wide), but thought I would be tighter on space. For the pink on top of the tower, I first used 1 x 3 that I attached to the front of the tower. Then I used 1/8" plywood for the part that I cut the up and down parts. It is 6.5" tall, but part of it sits behind the 1x3, so only 5" is visible. I then cut the plywood 3" down, 3" across, 3" up, 3" over, etc. to make that up and down look at the top of the towers. And the purple part with the shield is separate. It is again just a thin piece of plywood that I nailed to the bed. When I put this up, part of the shield thing was sticking above the bed and I didn't think anything of it until someone broke off part of it. So now I've added a piece of wood behind the shield (the same width of the shield) so that it keeps the shield from being broken. The shield's overall size is 23.25" wide x 27" high. I hope this helps :) If there is anything else I can help with, please just ask. Good luck with your adventure :) !

Guest (not verified)

Sun, 08/21/2011 - 22:19

I am incredibly curious to know if I can get plans for this bed. I have looked extensively throughout various internet pages for a bed/playhouse like this. I would like to make it with a queen mattress on top. I have look through your posts and haven't gathered enough information to proceed. I am willing to pay for the plans.

Is there anything different you would do, if you did this project again?

Thank You,

Guest

Guest (not verified)

Tue, 10/18/2011 - 08:43

Hello:
First of all I have to say THANK YOU. I found the plans for the playhouse (which are fabulous) are there plans available for the princess castle?

fsmumford

Tue, 10/18/2011 - 19:54

Hey all, I added the plans for this under the plans section of this website. Please let me know if you have any questions, and have fun building!

CherylBella (not verified)

Thu, 04/05/2012 - 15:40

I would love your directions or plans to build this my little princess. Thanks for any help. Just love this bed!

Fancy X Farmhouse table with built in copper cooler

Submitted by J Dixon on Sun, 08/23/2015 - 01:54

My version of Fancy X Farmhouse table with a built in copper cooler!!

Built from Plan(s)
Estimated Time Investment
Weekend Project (10-20 Hours)
Finish Used
Dark walnut colored danish oil base with satin poly top coat.
Recommended Skill Level
Intermediate

Comments

Codding58

Thu, 05/12/2016 - 12:27

VERY nice build!   How did you make the copper cooler, if you don't mind me asking.    Great Idea and love that you can hide it away!  Cheers

Harriet Outdoor Dining Chair with Cedar Slats

Submitted by kmatt55 on Sun, 06/26/2011 - 16:49

This chair was pretty easy to make with Ana's plans. I plan on making four more just like it (updated: completed). The only modification I made was adding another slat to the back of the chair. I used a miter saw for all cuts which really helped with the speed of the project. The 2x2's are treated pine and the 1x3 slats are cedar that I got from the "orange box store" for about four bucks a stick. I also primed and painted the 2x2's (legs) before I assembled. I could not imagine trying to paint the legs white and not getting at least some on that beautiful cedar. The contrast really pops in person. Thanks ana-white.com! $20 per chair.

Estimated Cost
$20
Estimated Time Investment
Day Project (6-9 Hours)
Finish Used
Semi-gloss exterior white, outdoor seal.
Recommended Skill Level
Intermediate

Comments

sgilly

Thu, 07/14/2011 - 10:35

Love the chairs! and like the painted body with the natural pine slats.

CreativeBaggage

Wed, 08/03/2011 - 08:03

I love that you added the extra slat on the back. Such a simple change that made a big impact. The contrast is also very clever! They look great :)

kmatt55

Wed, 08/03/2011 - 11:29

Thanks CreativeBaggage! I finished the dining table yesterday, I'll have to post that soon. As a couponer myself, I really like the standing can rack you made on your blog. Brilliant!

Apothecary Media Console

Apothecary Media Console Table. No modifications to plans.

Built from Plan(s)
Estimated Cost
$200-$300
Estimated Time Investment
Weekend Project (10-20 Hours)
Finish Used
Minwax Dark Walnut Stain, Rustoleum red spray paint, and Minwax Finishing Paste Wax. I stained the bottom trim and top board. I then spray painted 2 coats over all visible MDF surfaces. I sanded the spray paint and used the stain to glaze all visible surfaces. For the false fronts, I stained them first. I then rubbed soap (standard hotel soap) all over the fronts, heavily coating the edges. I then spray painted them red. Using a large chisel, I chipped off the paint around the edges, distressing where I thought appropriate. I glazed back over the paint with the Minwax stain. I stained the wooden knobs. I finished by applying the clear paste finishing wax all over and buffing.
Recommended Skill Level
Intermediate

4x4 Truss Beam Table Black

I had trouble with the angled cuts not fitting perfectly. I have a circular saw, not a table saw or miter saw, so I had to measure with a protractor and mark, then try to follow my lines exactly. Tedious, but I like the table. It is mad heavy though!

Built from Plan(s)
Estimated Cost
$30 for stain. I had all the rest of the reclaimed wood. Otherwise, $150.
Estimated Time Investment
Weekend Project (10-20 Hours)
Finish Used
Minwax "ebony"
Recommended Skill Level
Intermediate

Comments