Community Brag Posts
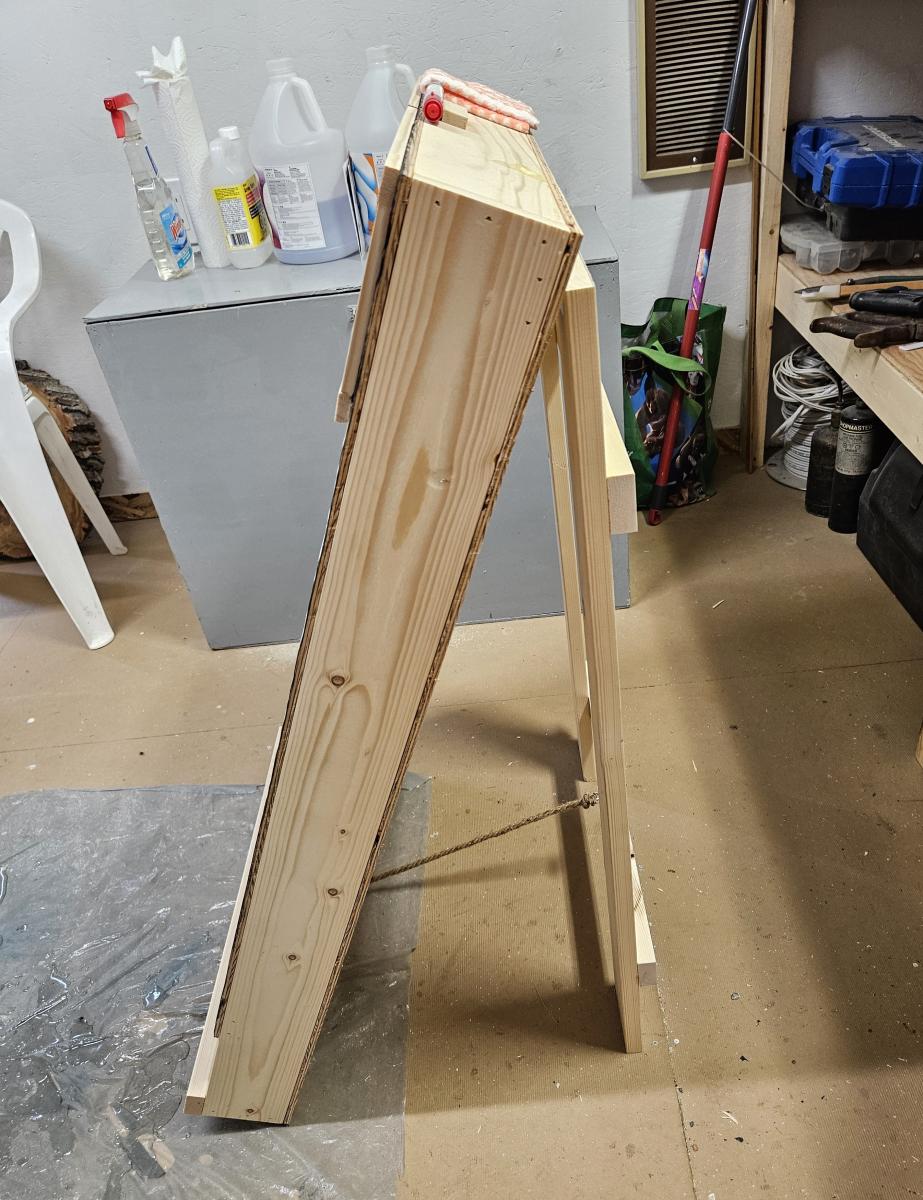
DIY Baseball Bean Bag Toss Game Board
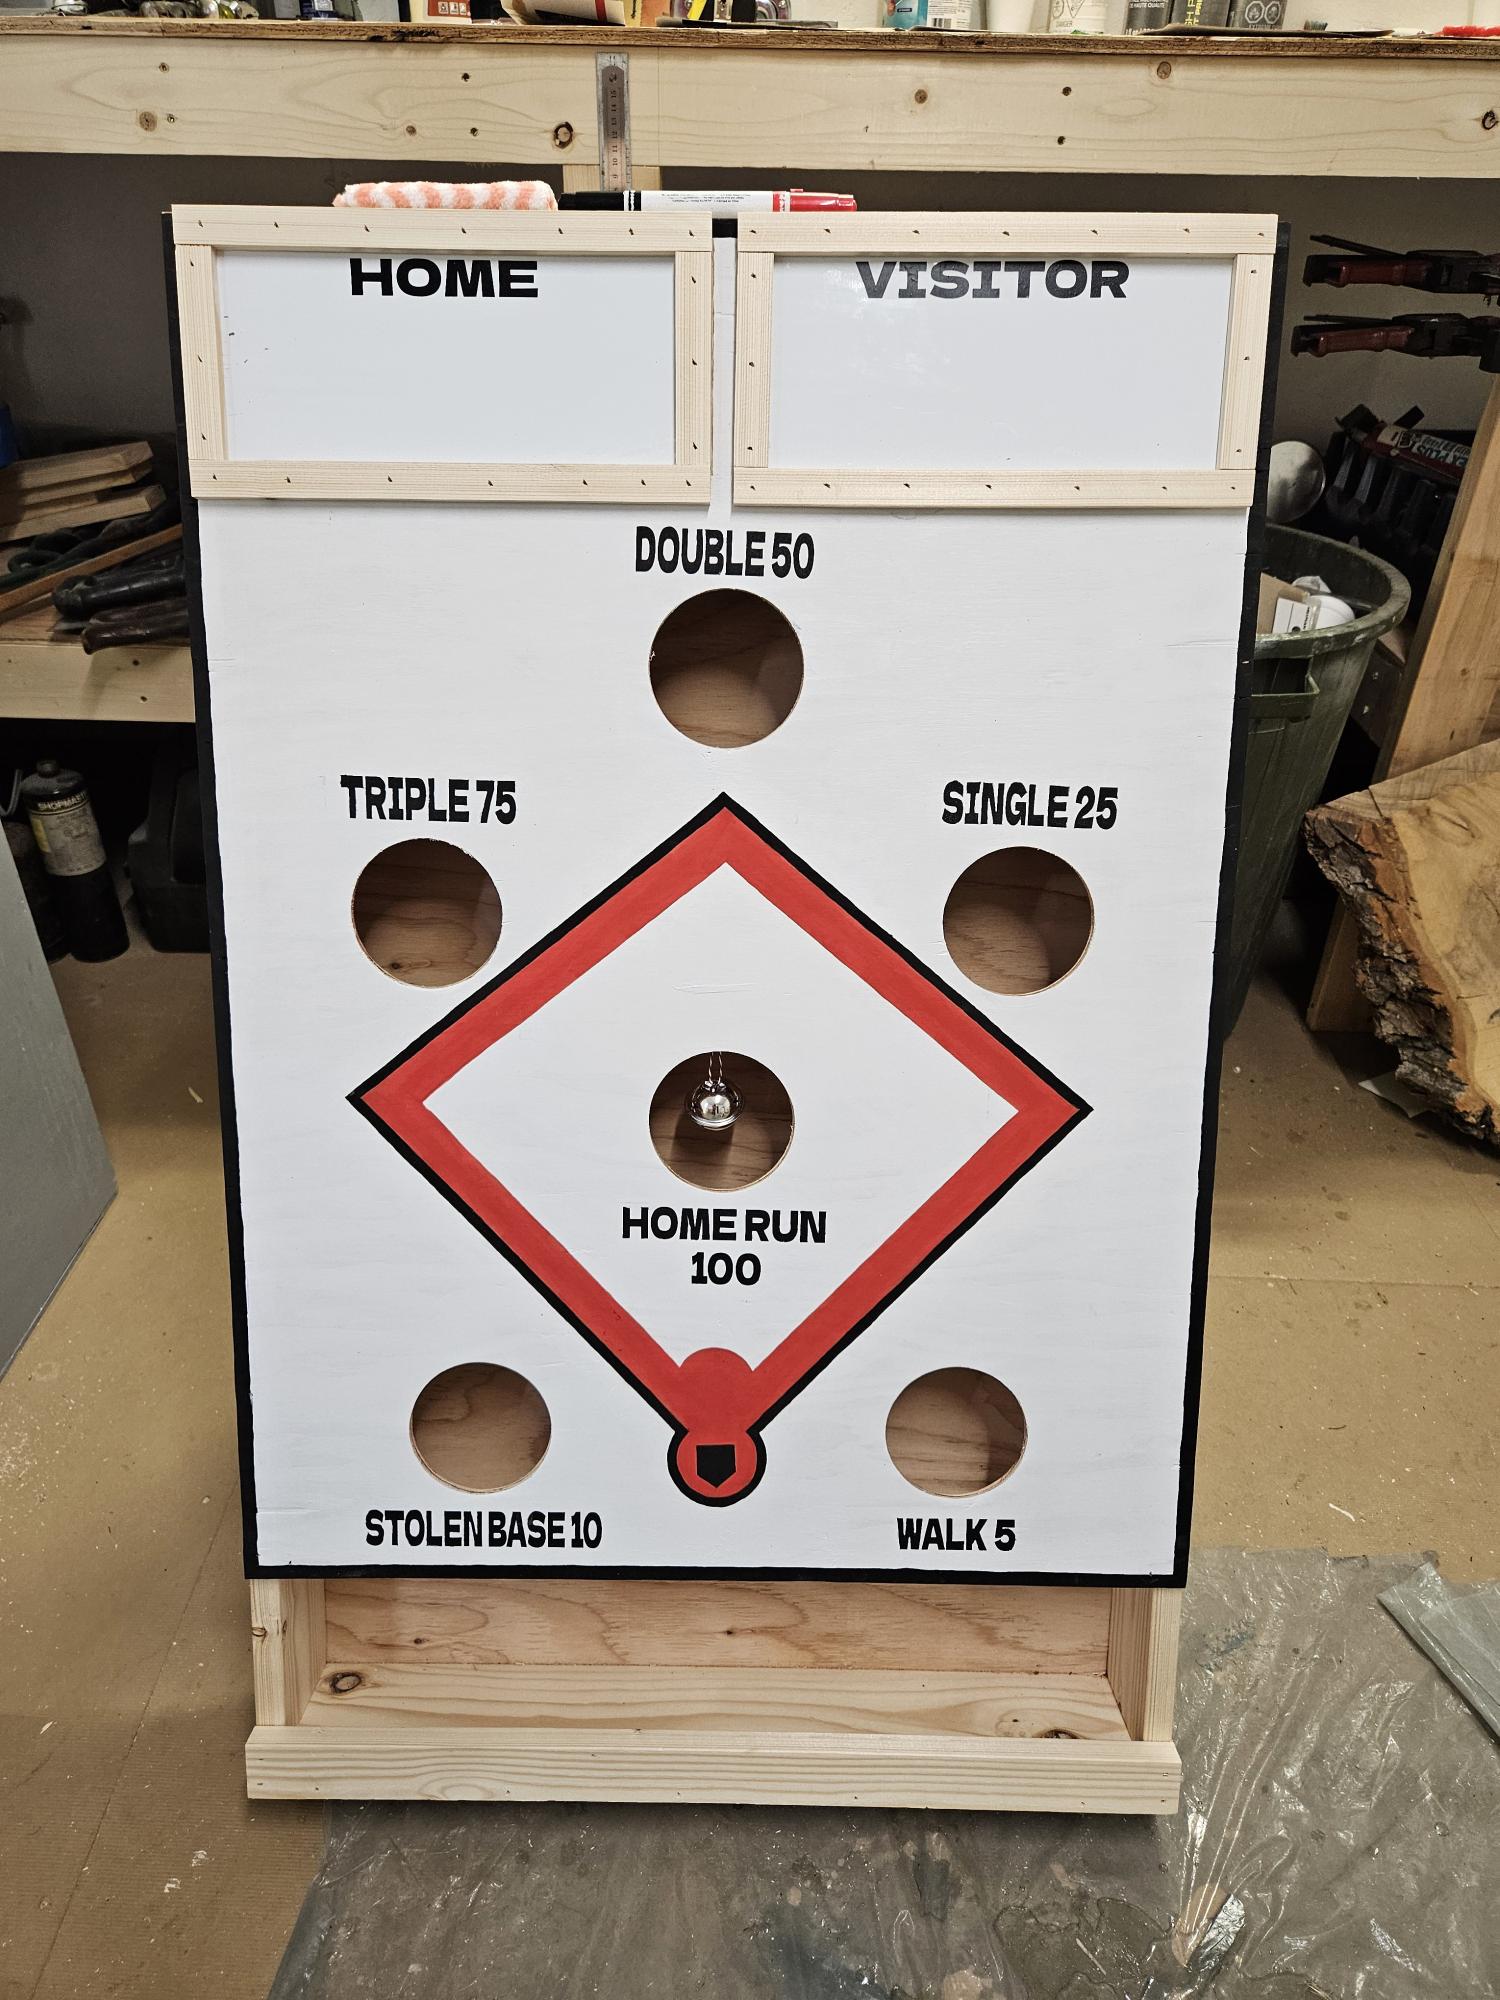
I used your plans to build this one, but I put a back on it and legs instead of hanging it on a wall. This was made for a senior center, so they can use it inside or outside
Donna Brown
Miniota, Manitoba
Canada
Built from Plan(s)
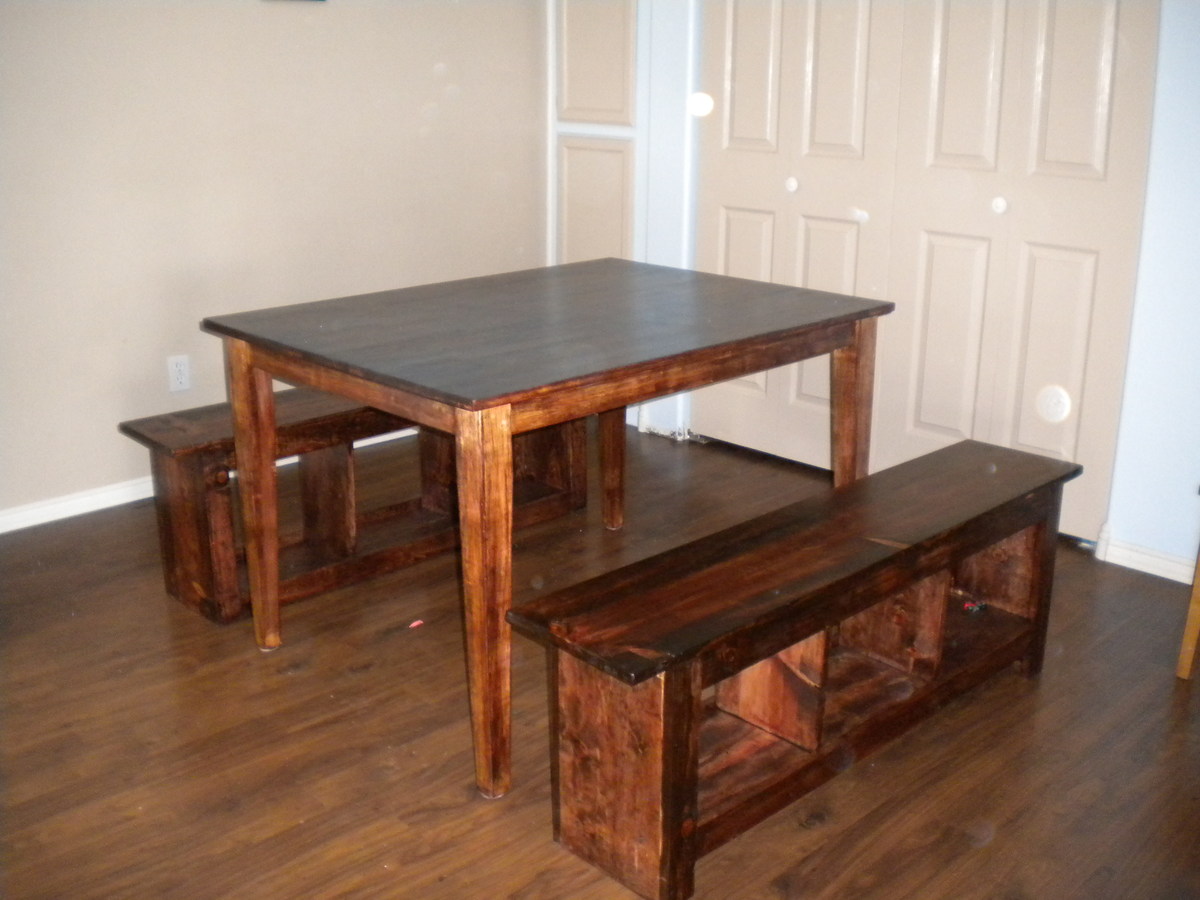
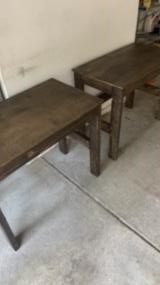
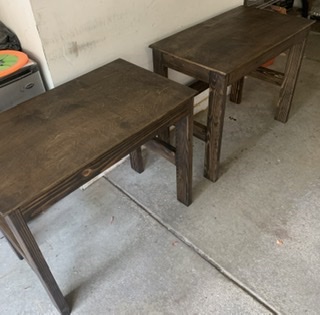
modified spa-bench
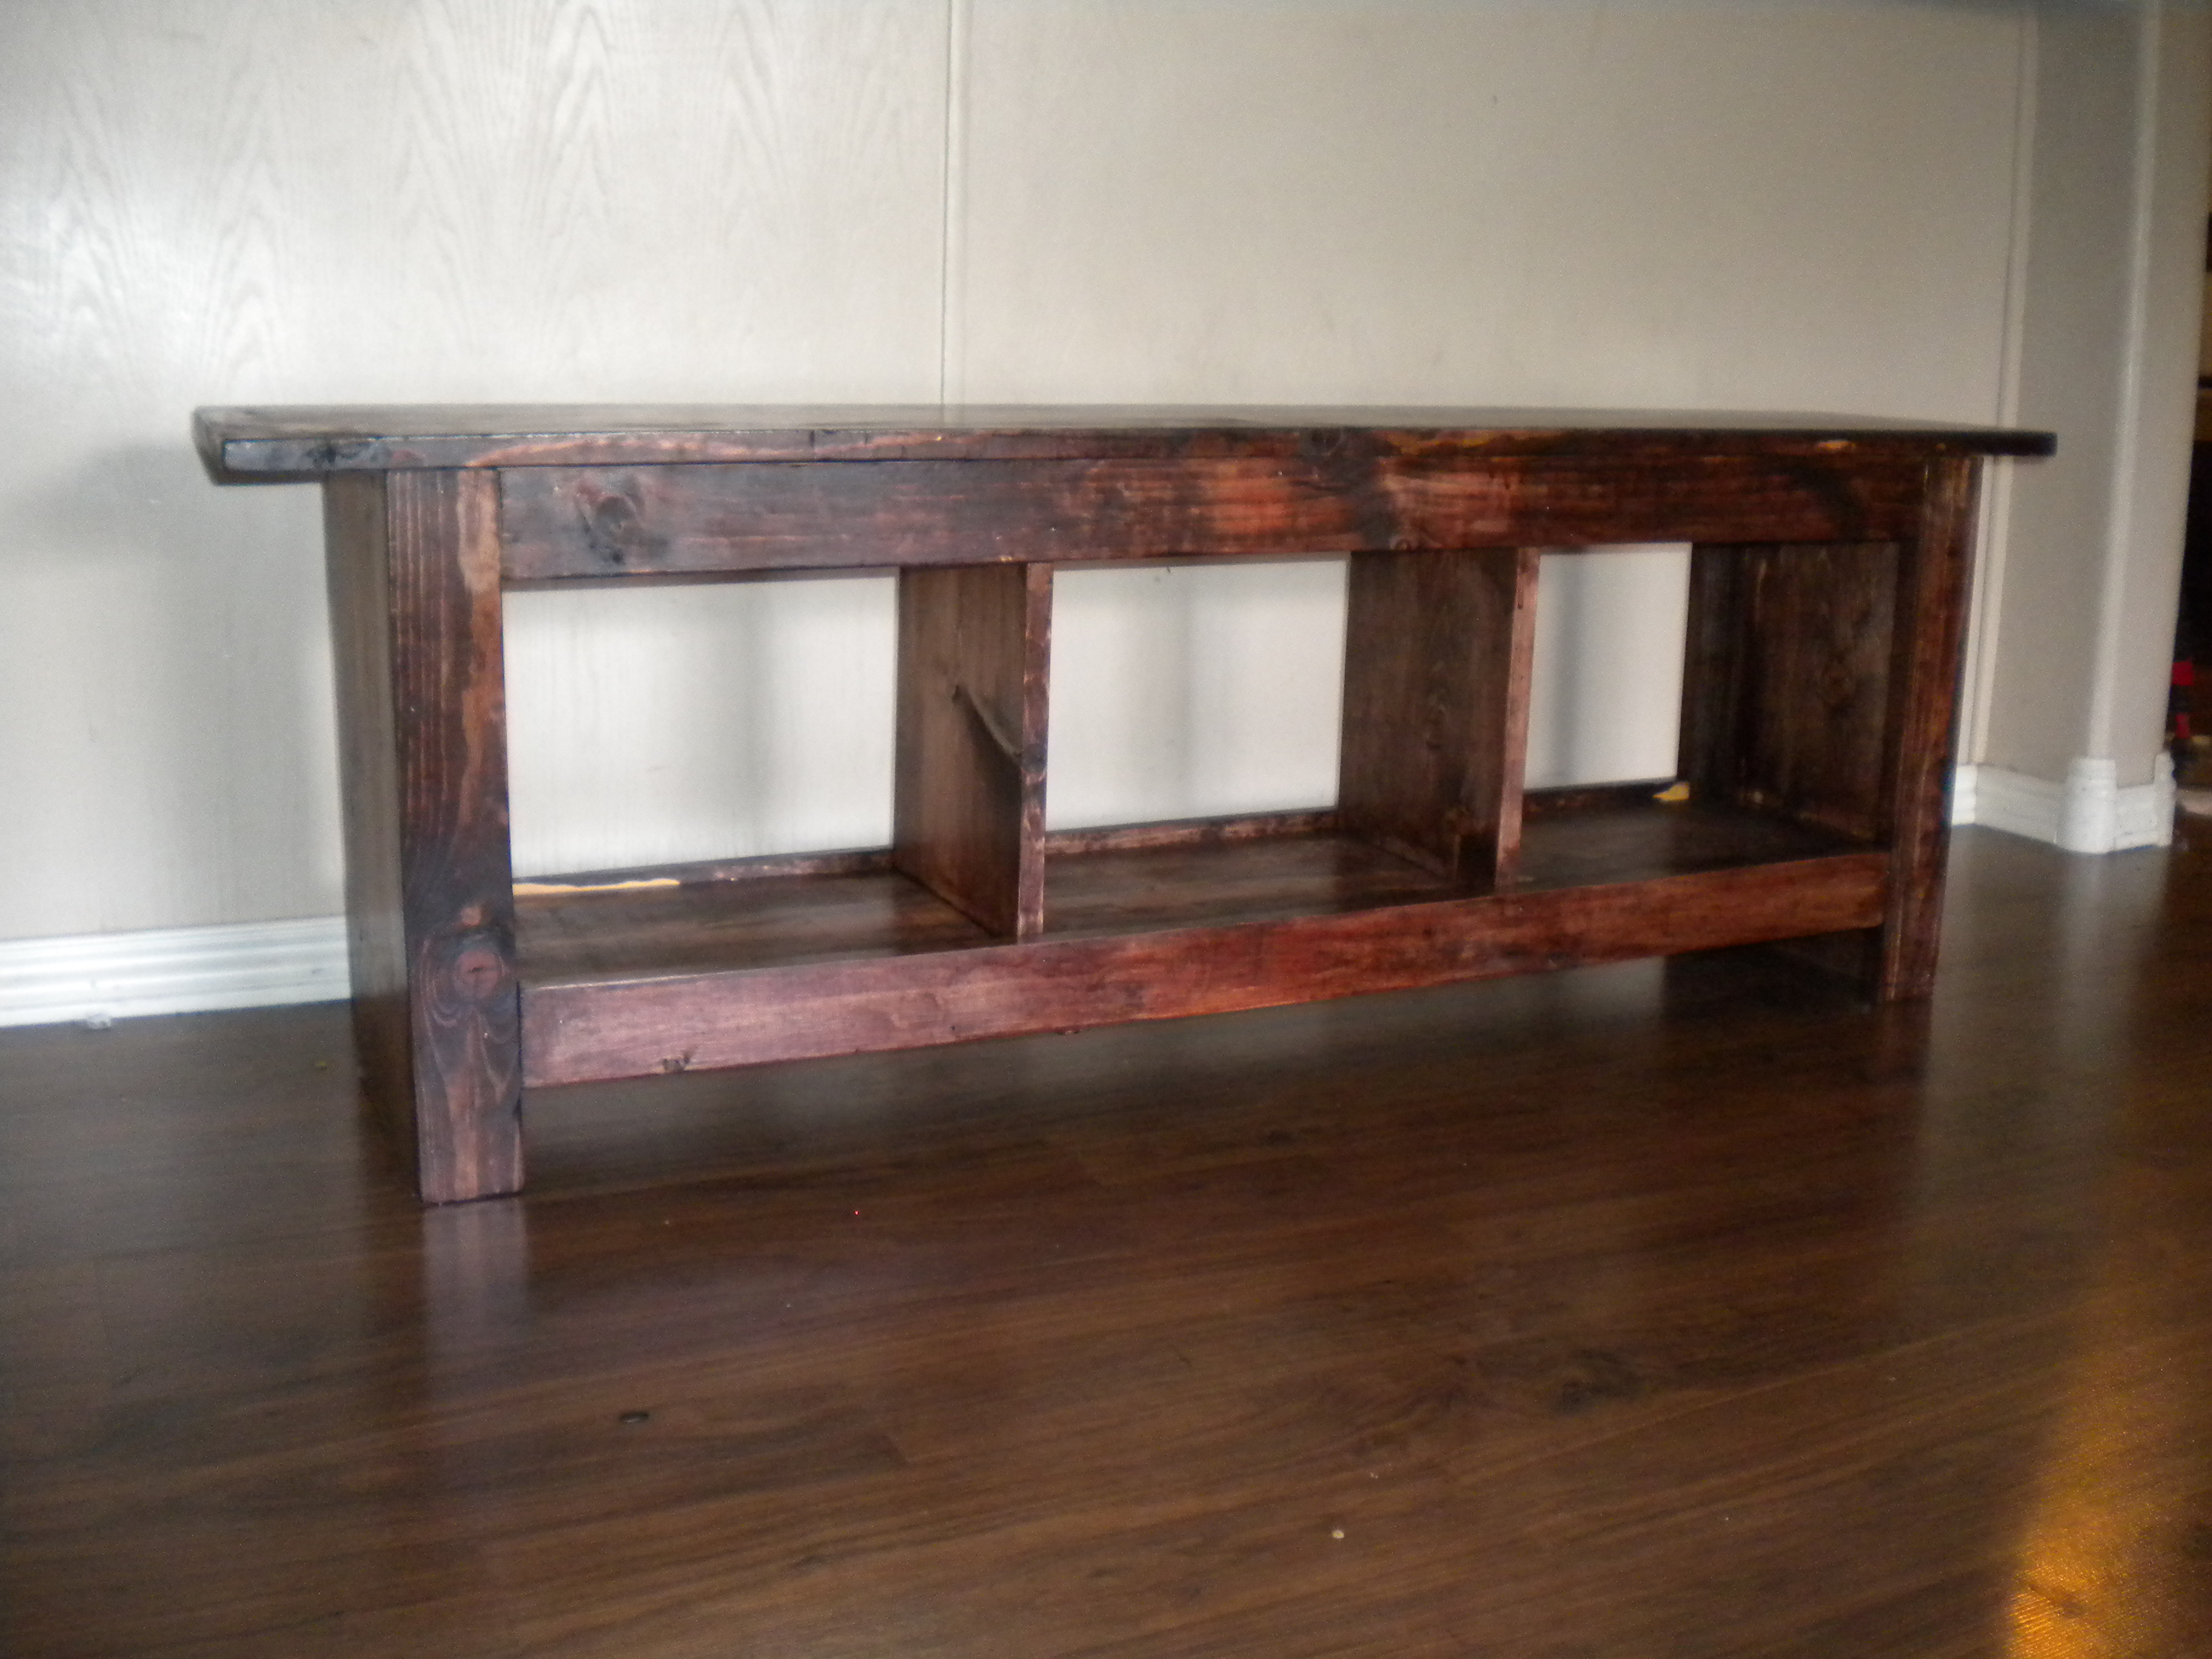
I've wanted to build benches for my dinningroom table for years. When I first saw the plans for the spa bench 2 years ago I bookmarked it, saying thats the one. Now all this time later Ive finaly gotten to it! I modified my benches by making them longer, they are 48 inches, adding the dividers/supports to the inside to make 3 cubbie compartments, (I will eventualy put baskets under there to store stuff) and raising the bottom edging up a half an inch to create a lip to keep the baskets on. I made 2 benches, sanded and restained my table at the same time. the benches took about 3 hours and $50 each to build. Simular benches cost aobut $150 for the cheep particalboard ones, thank you so much Anna White for making this possible!
Built from Plan(s)
Estimated Cost
$50
Estimated Time Investment
Afternoon Project (3-6 Hours)
Finish Used
minwax red mahogany 225, 2 coats of red mahognay 225 applyed with sponge brush, 3 coats of polyurathane gloss(2 hours between coats) applyed with sponge brush
Recommended Skill Level
Beginner
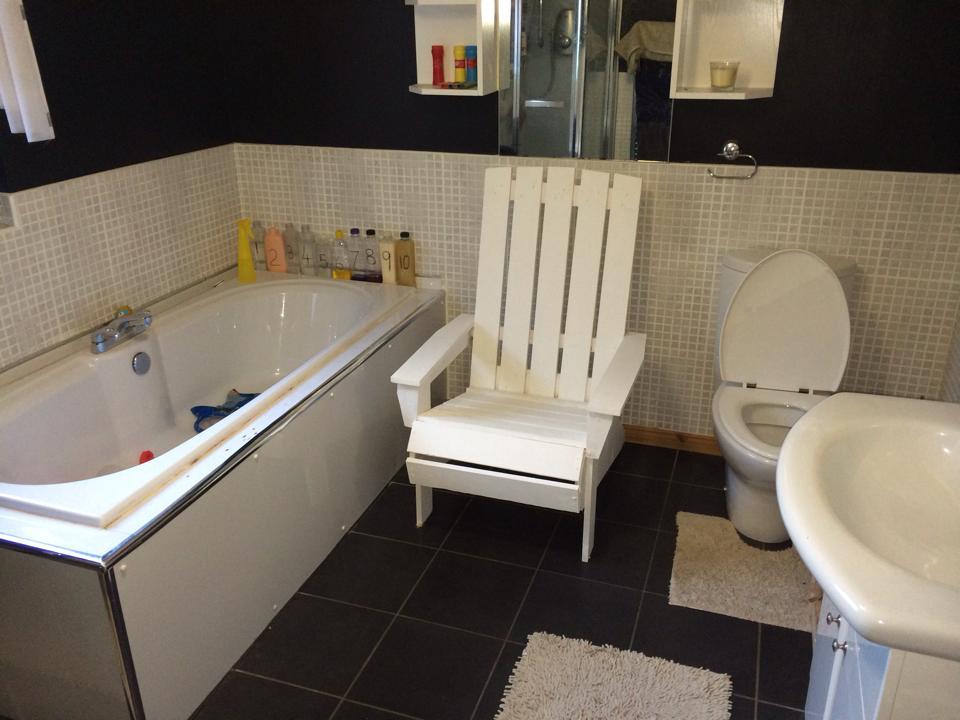
Adirondack Chair
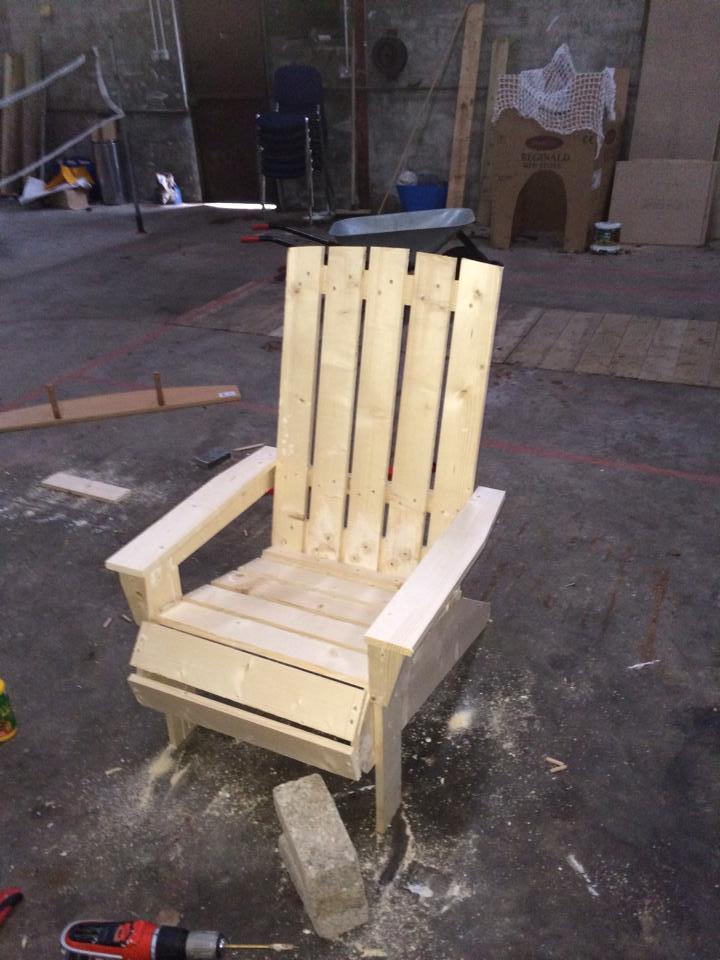
Adirondack Chair
Built from Plan(s)
Estimated Time Investment
Weekend Project (10-20 Hours)
Finish Used
Paint
Recommended Skill Level
Beginner
Media center
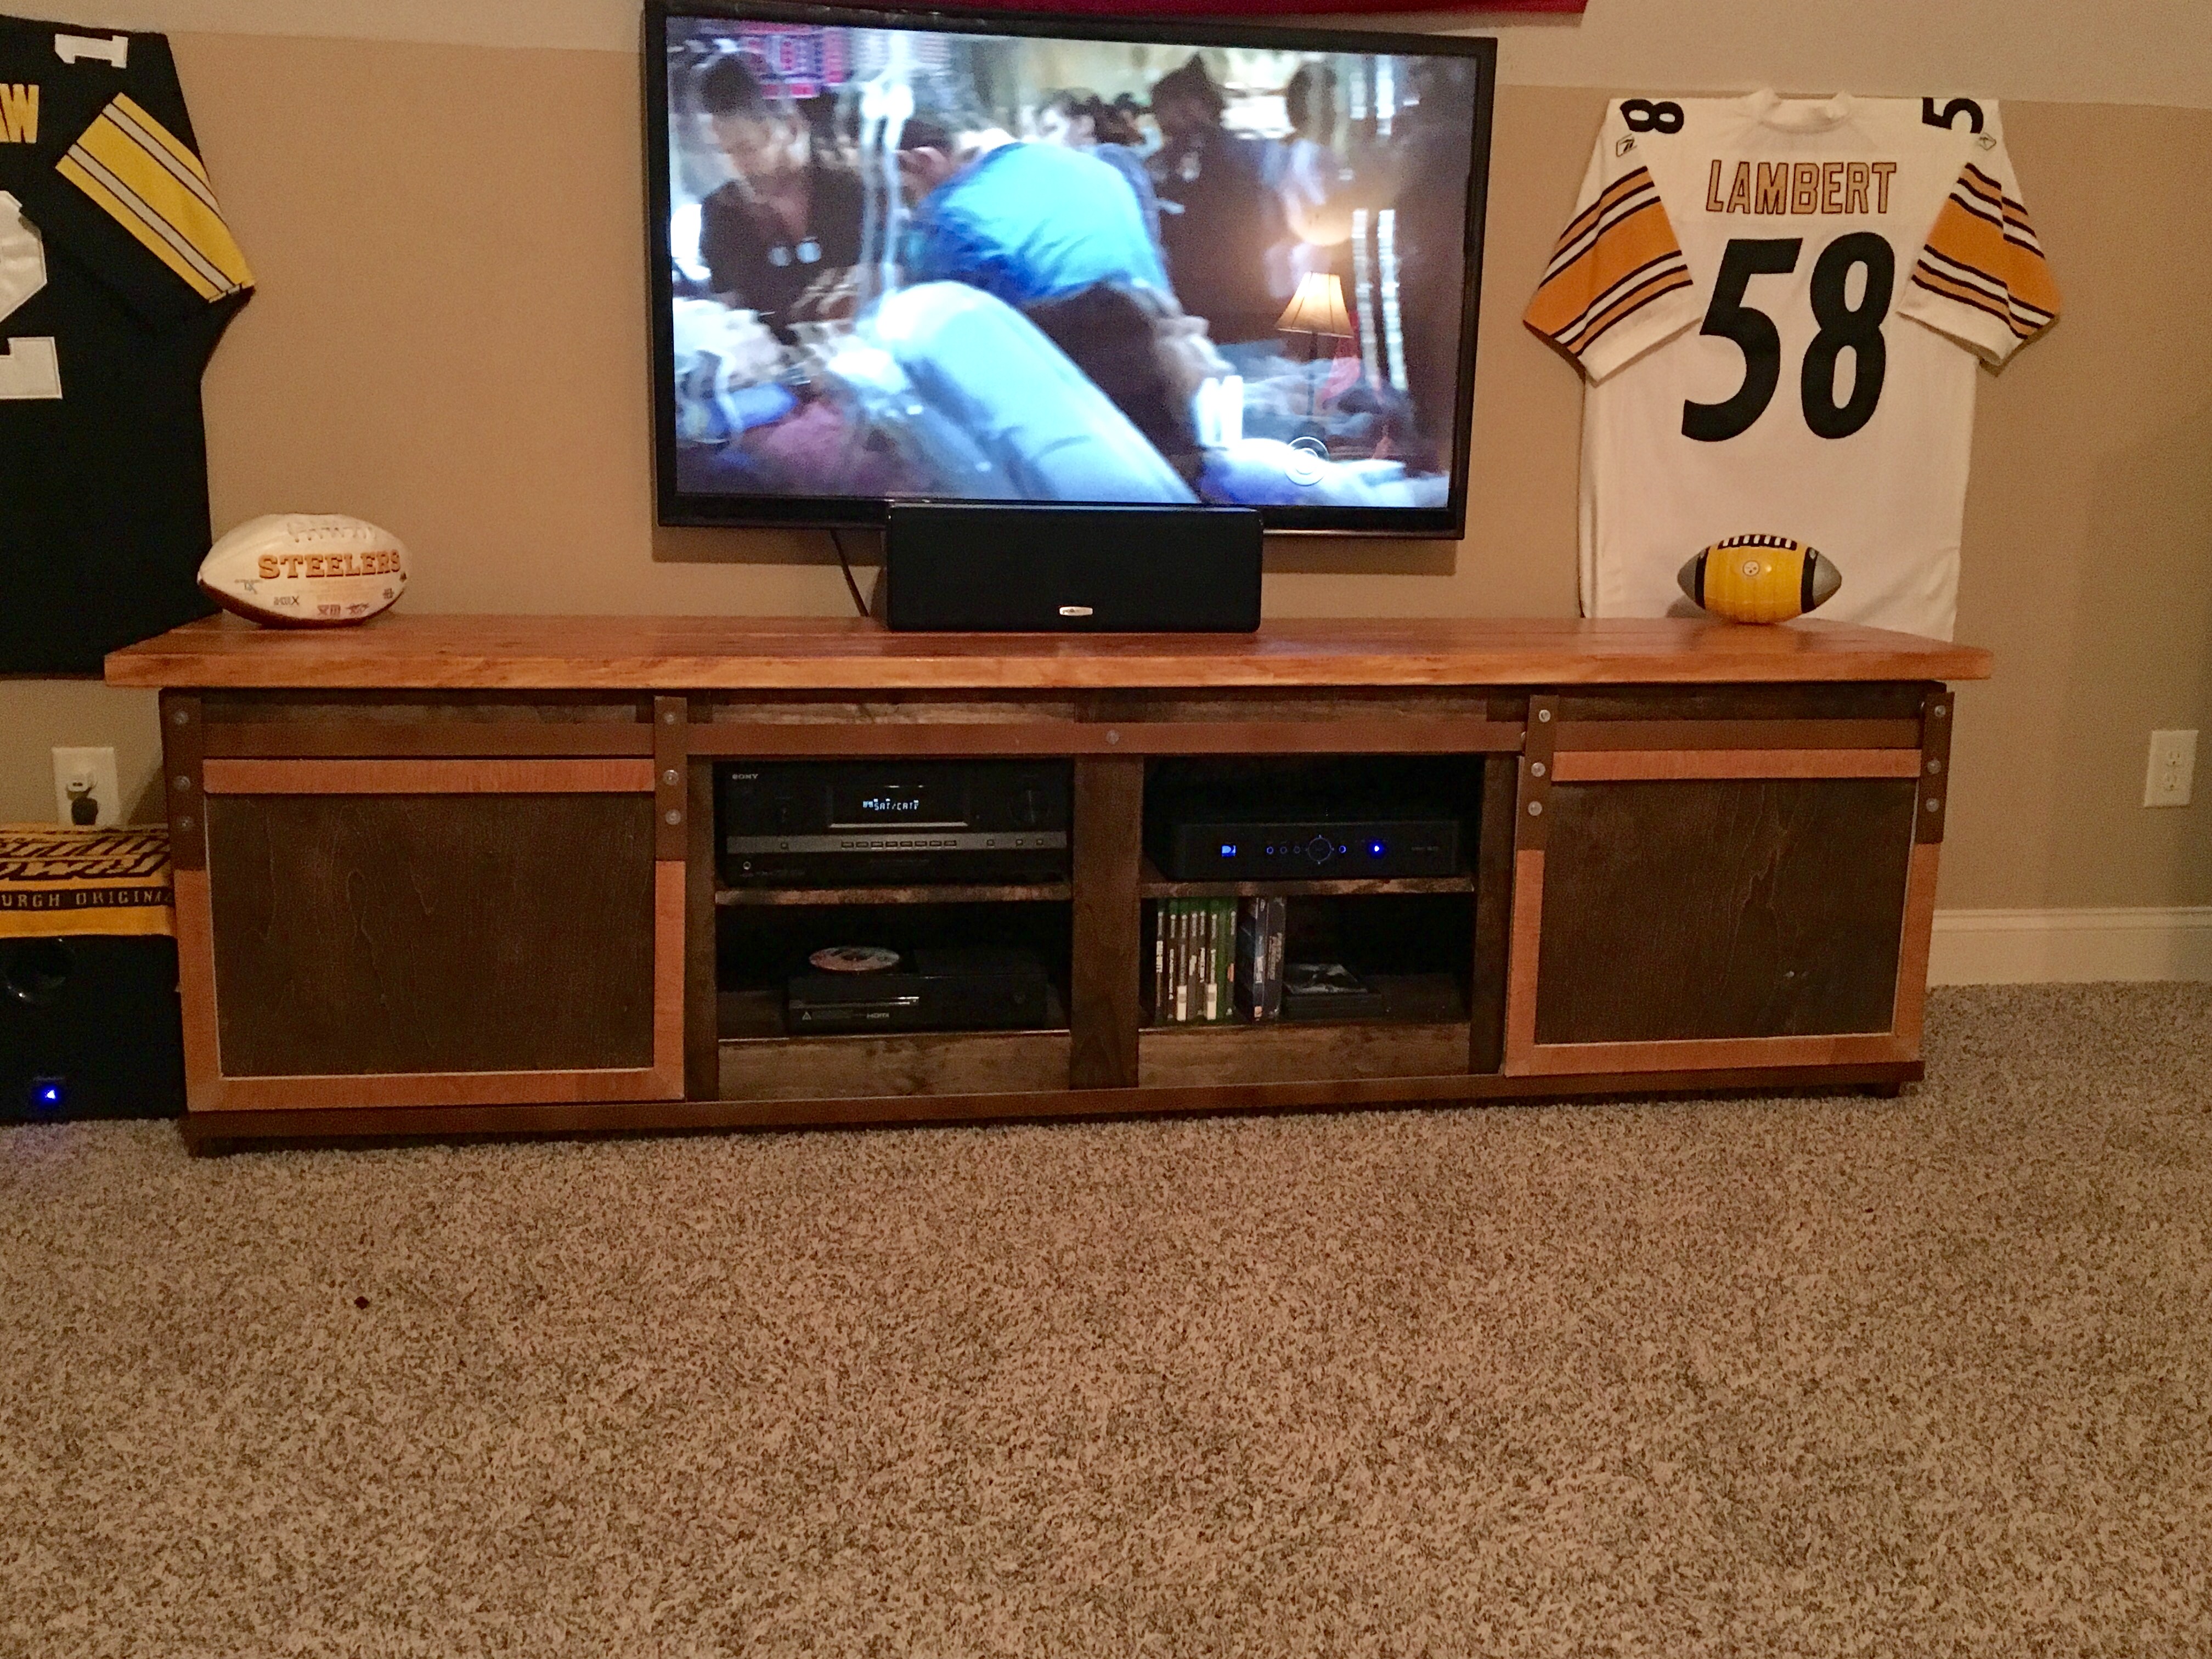
I needed to replace my particle board entertainment center. So here is my final project
Built from Plan(s)
Estimated Cost
$200
Estimated Time Investment
Weekend Project (10-20 Hours)
Finish Used
Mini wax Jacobean for the hutch and Miniwax Ipswich Pine for top and trims
Recommended Skill Level
Intermediate
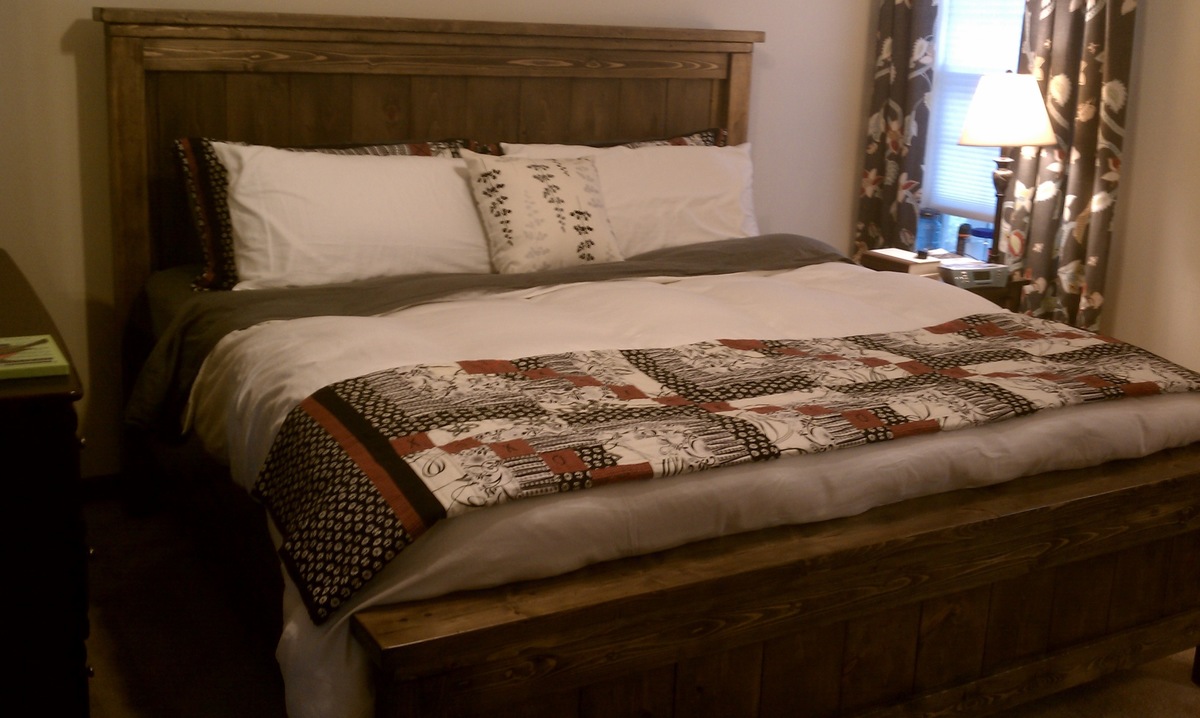
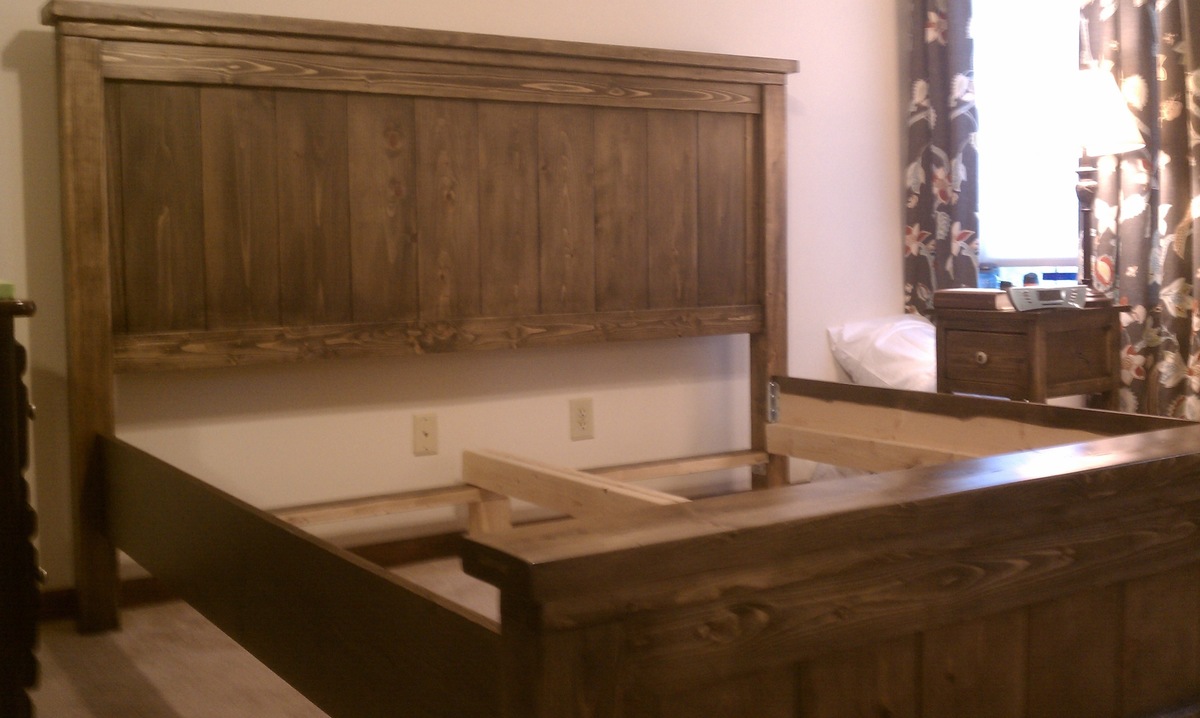
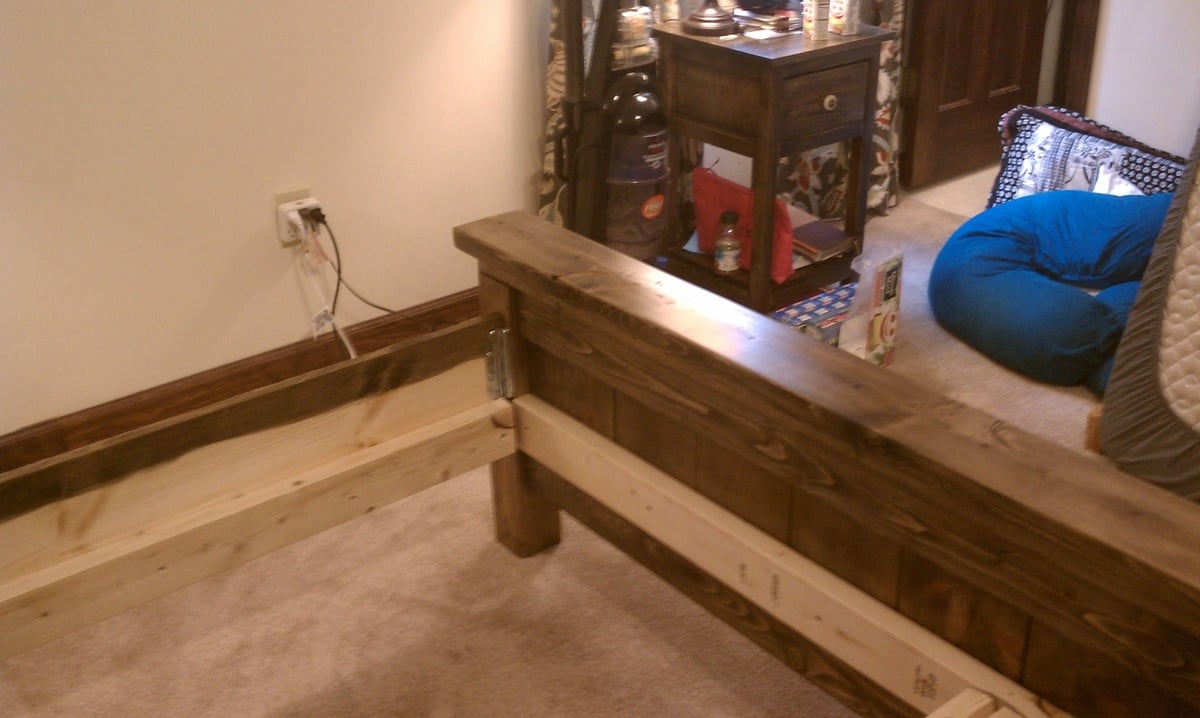
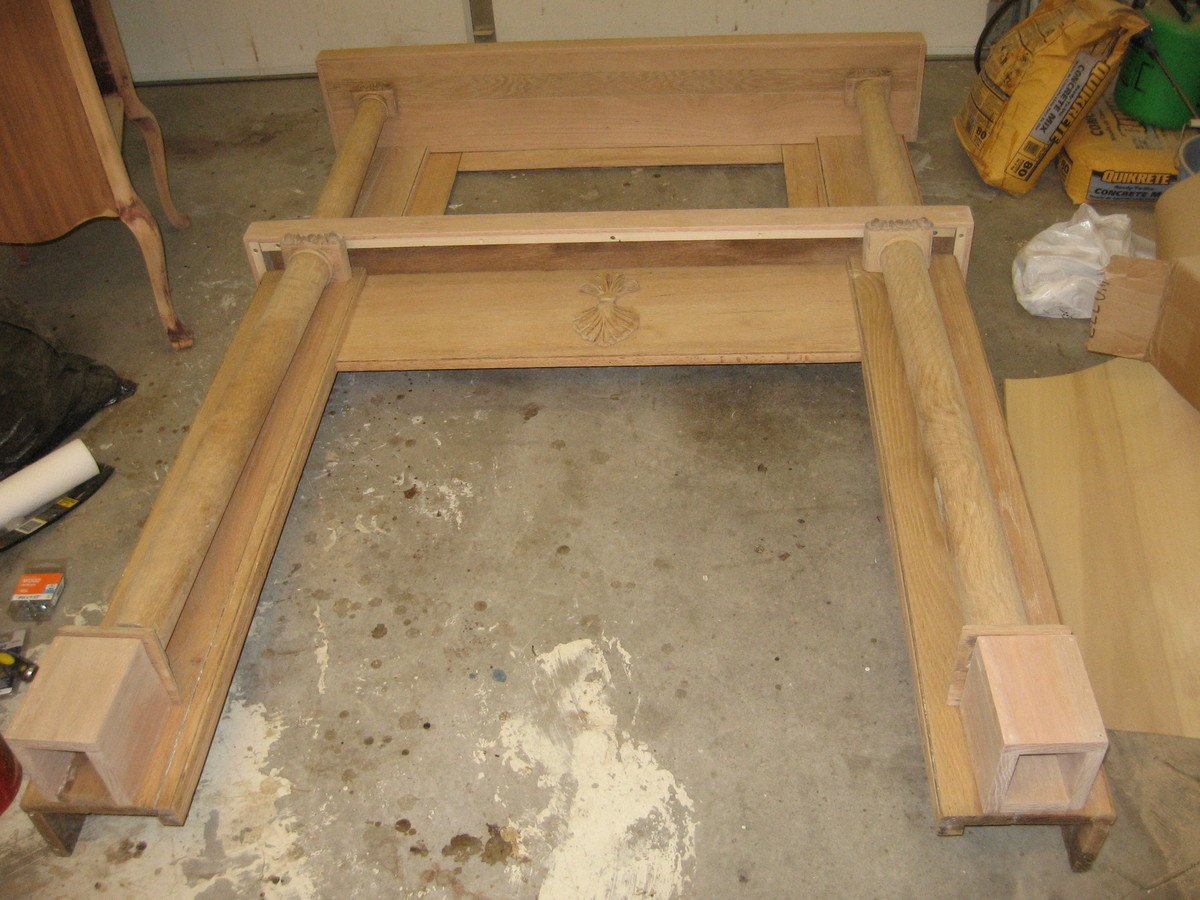
Rustic blue Bed
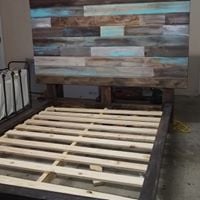
This was a build for a client's daughter's new bedroom. The clients added lights to the head board but I could not post the pic. I also built a cute bedside table mostly out of remnants of the bed to match.
Built from Plan(s)
Estimated Cost
$150
Estimated Time Investment
Week Long Project (20 Hours or More)
Finish Used
Combination
Dining Banquette Nook

1st time making one turn out pretty good.
Built from Plan(s)
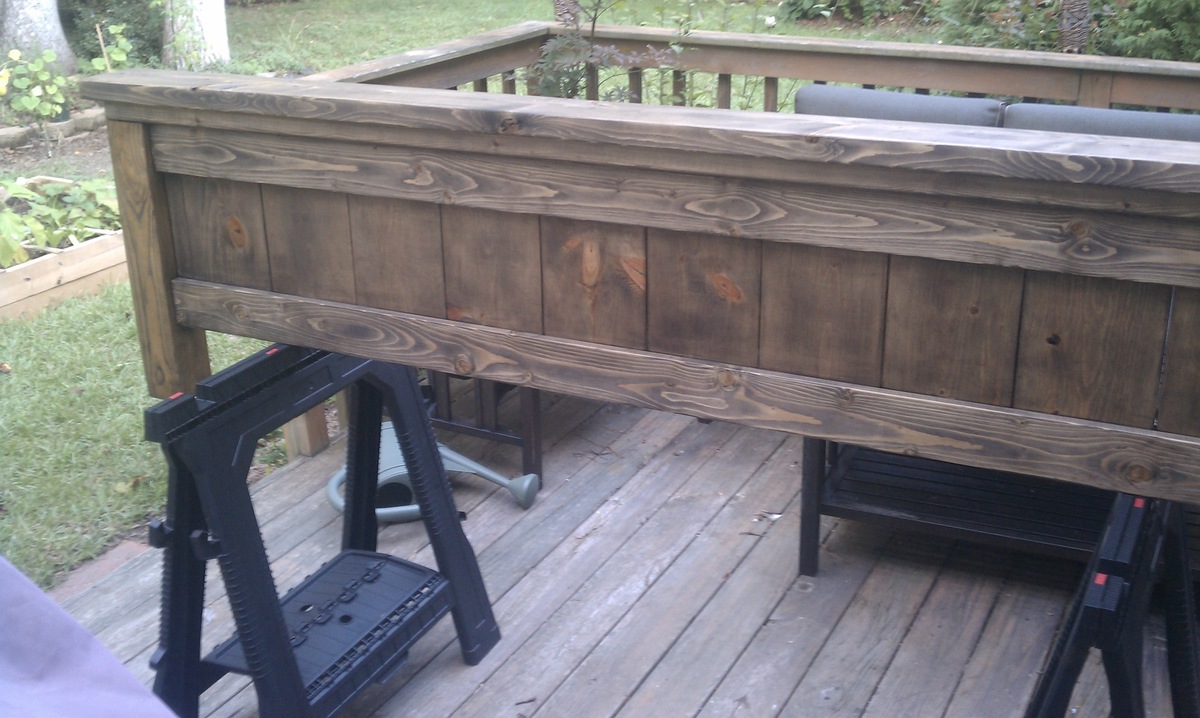
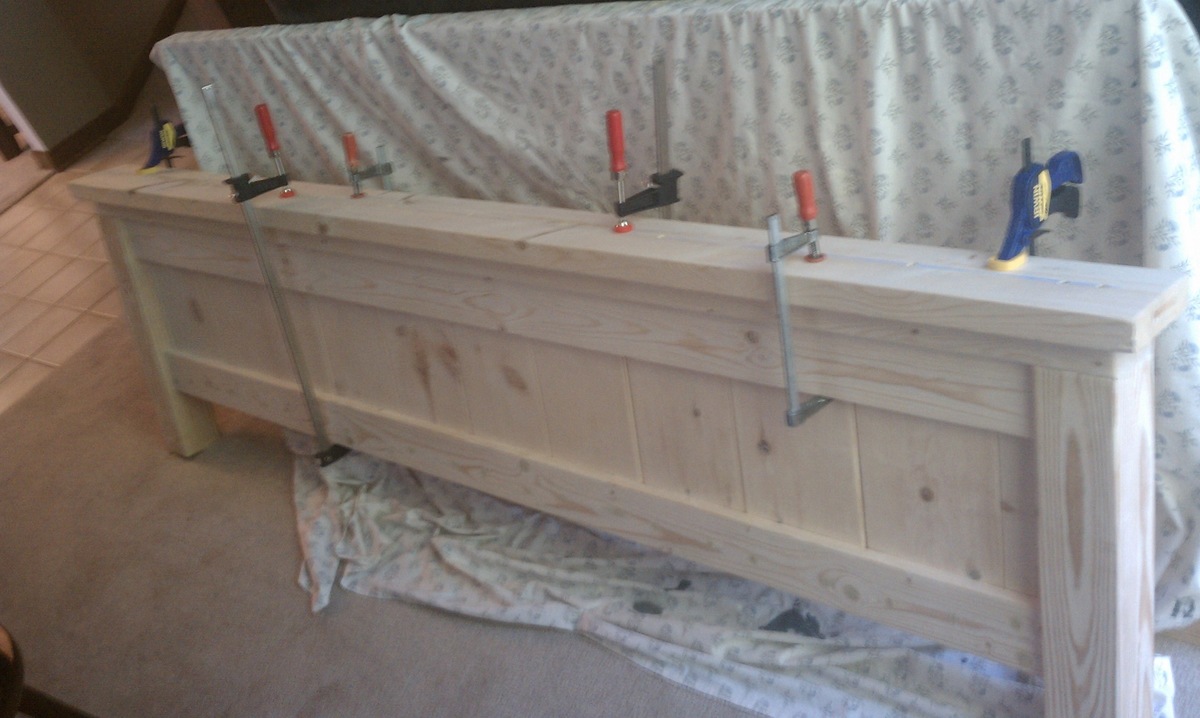
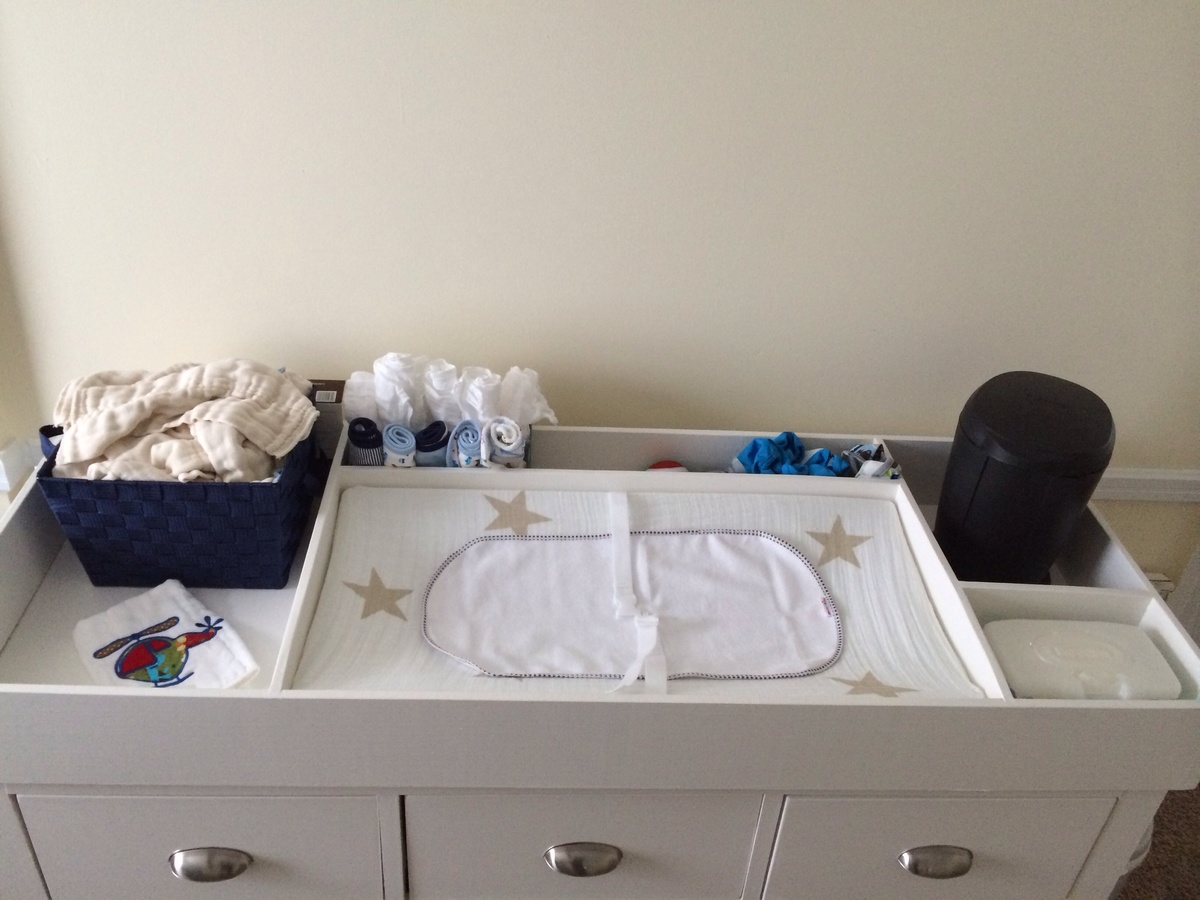
Changing table - dresser
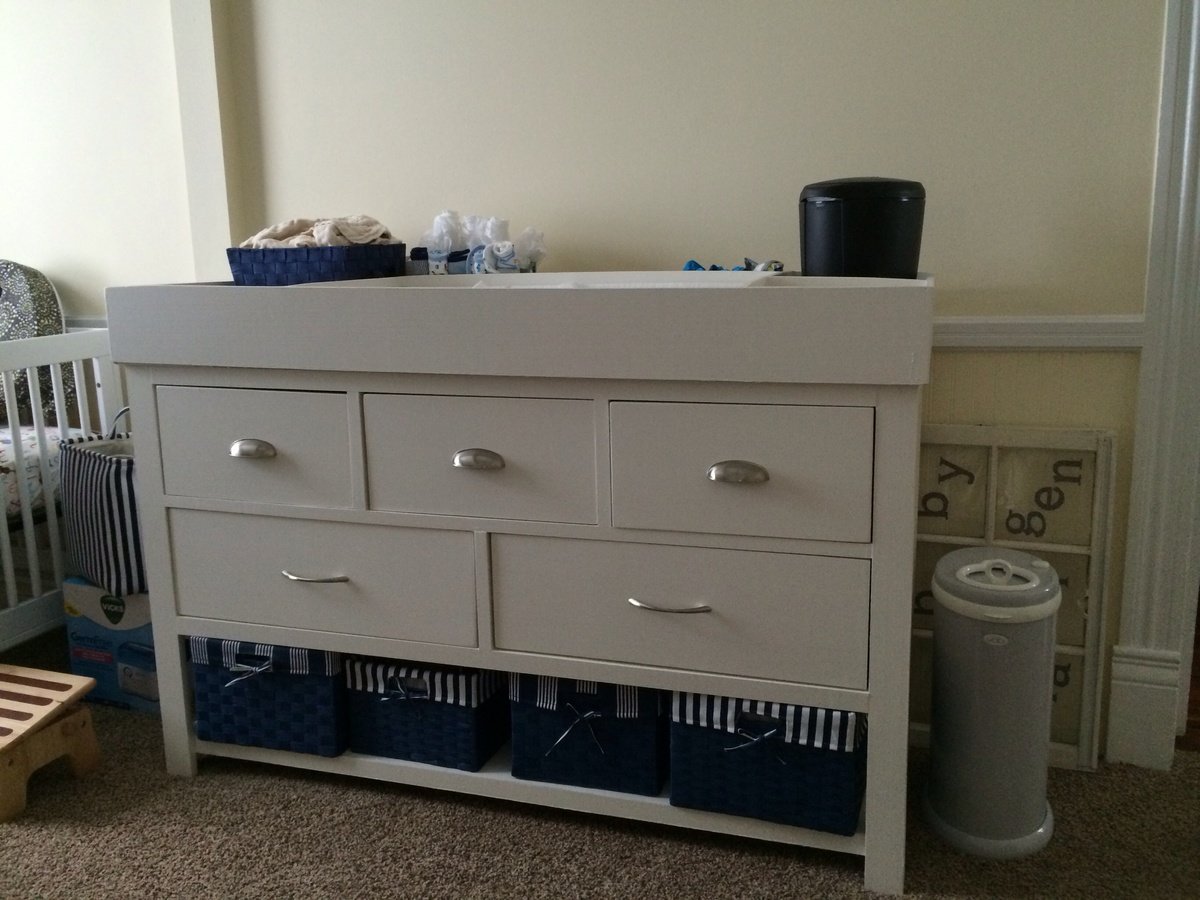
The storage on the dresser is great! I added a changing table top with routed dividers for changing pad and other accessories. I attached the top from above into the dresser frame with recessed screws so it can later be removed and a plain top added (I added a cross bar in both directions to the dresser frame under the top to support the additional weight). I used rough cut poplar from a local lumber yard except for the drawer boxes which are plywood. The legs on my version are made from 2 1x2½" boards cut on a 45° bevel on the table saw. I used full extension side mount metal slides. It was somewhat difficult to attach the drawer slides with a very pregnant belly - my husband helped out with that, not to mention lugging around lumber and painting. It helps to have an extra set of hands on assembly with a big piece like this. Thanks for great plans.
Built from Plan(s)
Estimated Cost
~ $250-275
Estimated Time Investment
Week Long Project (20 Hours or More)
Finish Used
Behr low VOC ivory mist
Recommended Skill Level
Intermediate
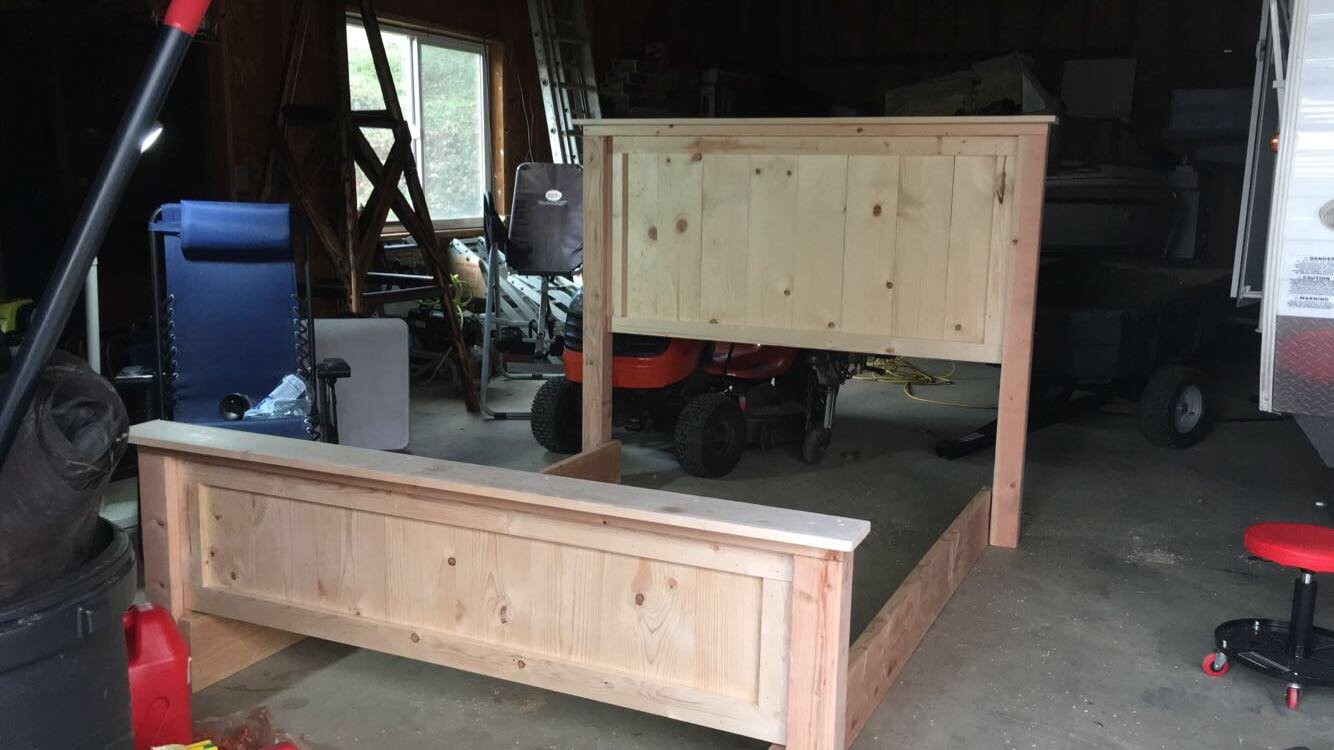
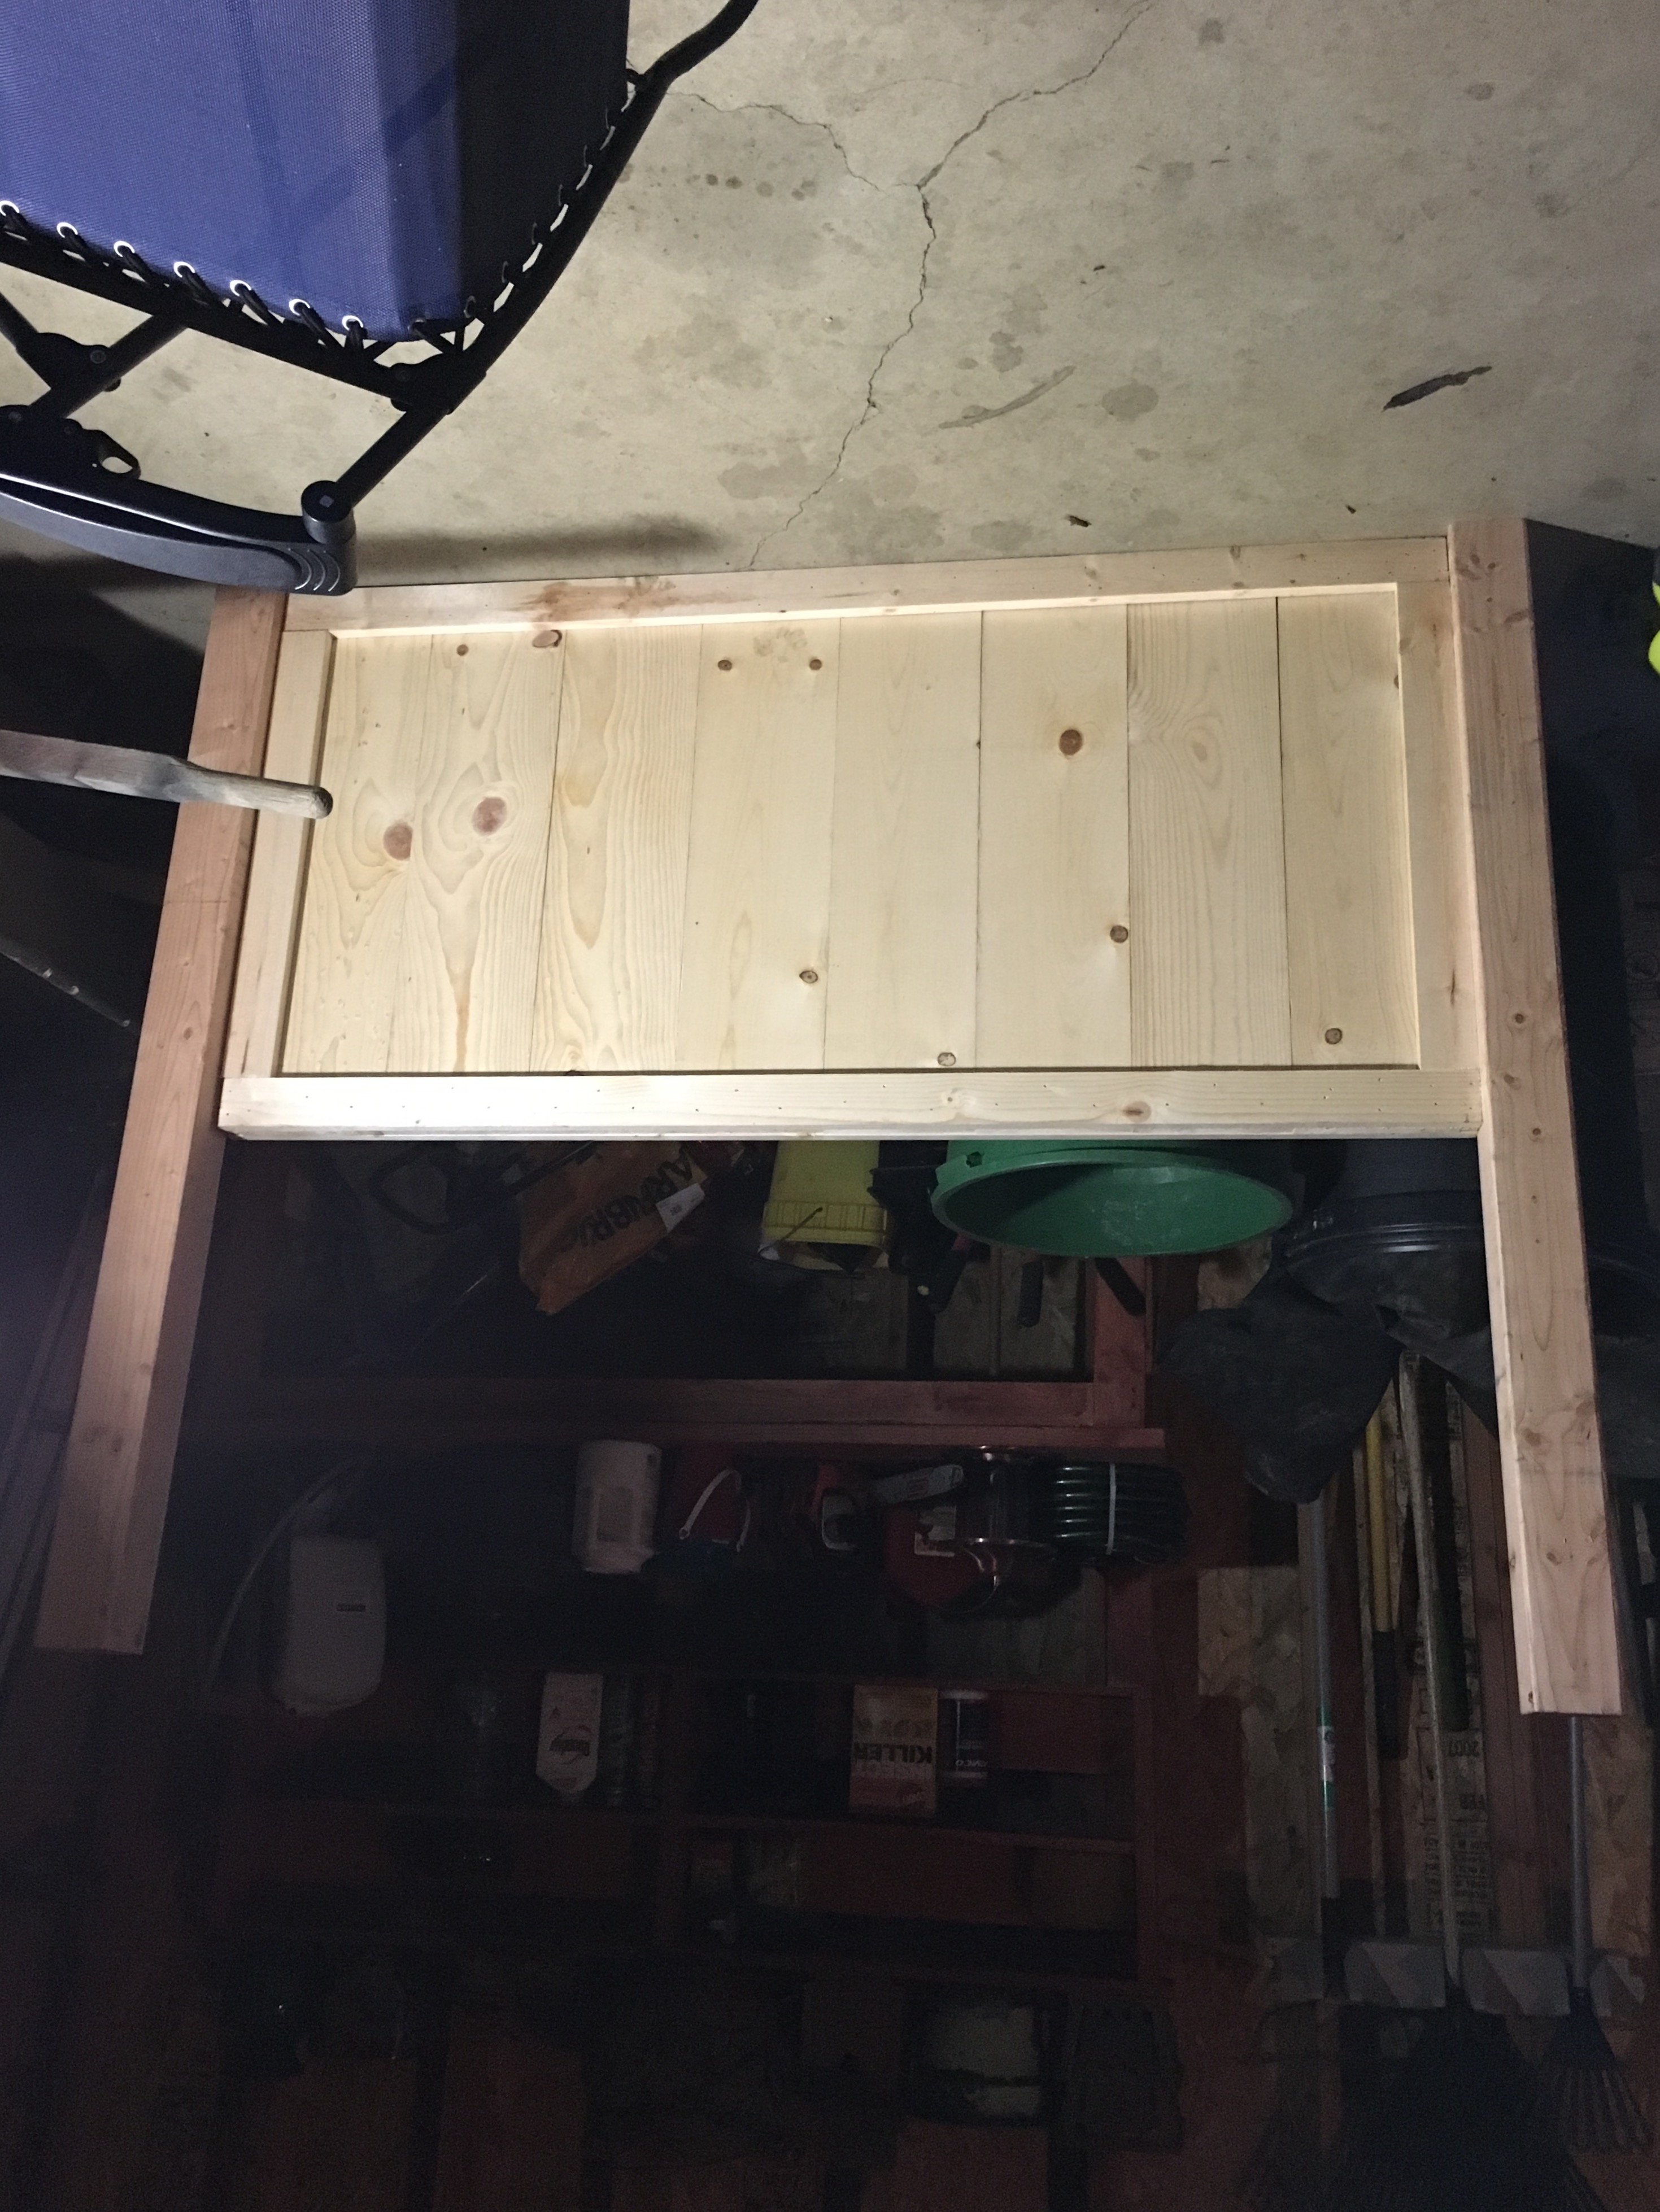
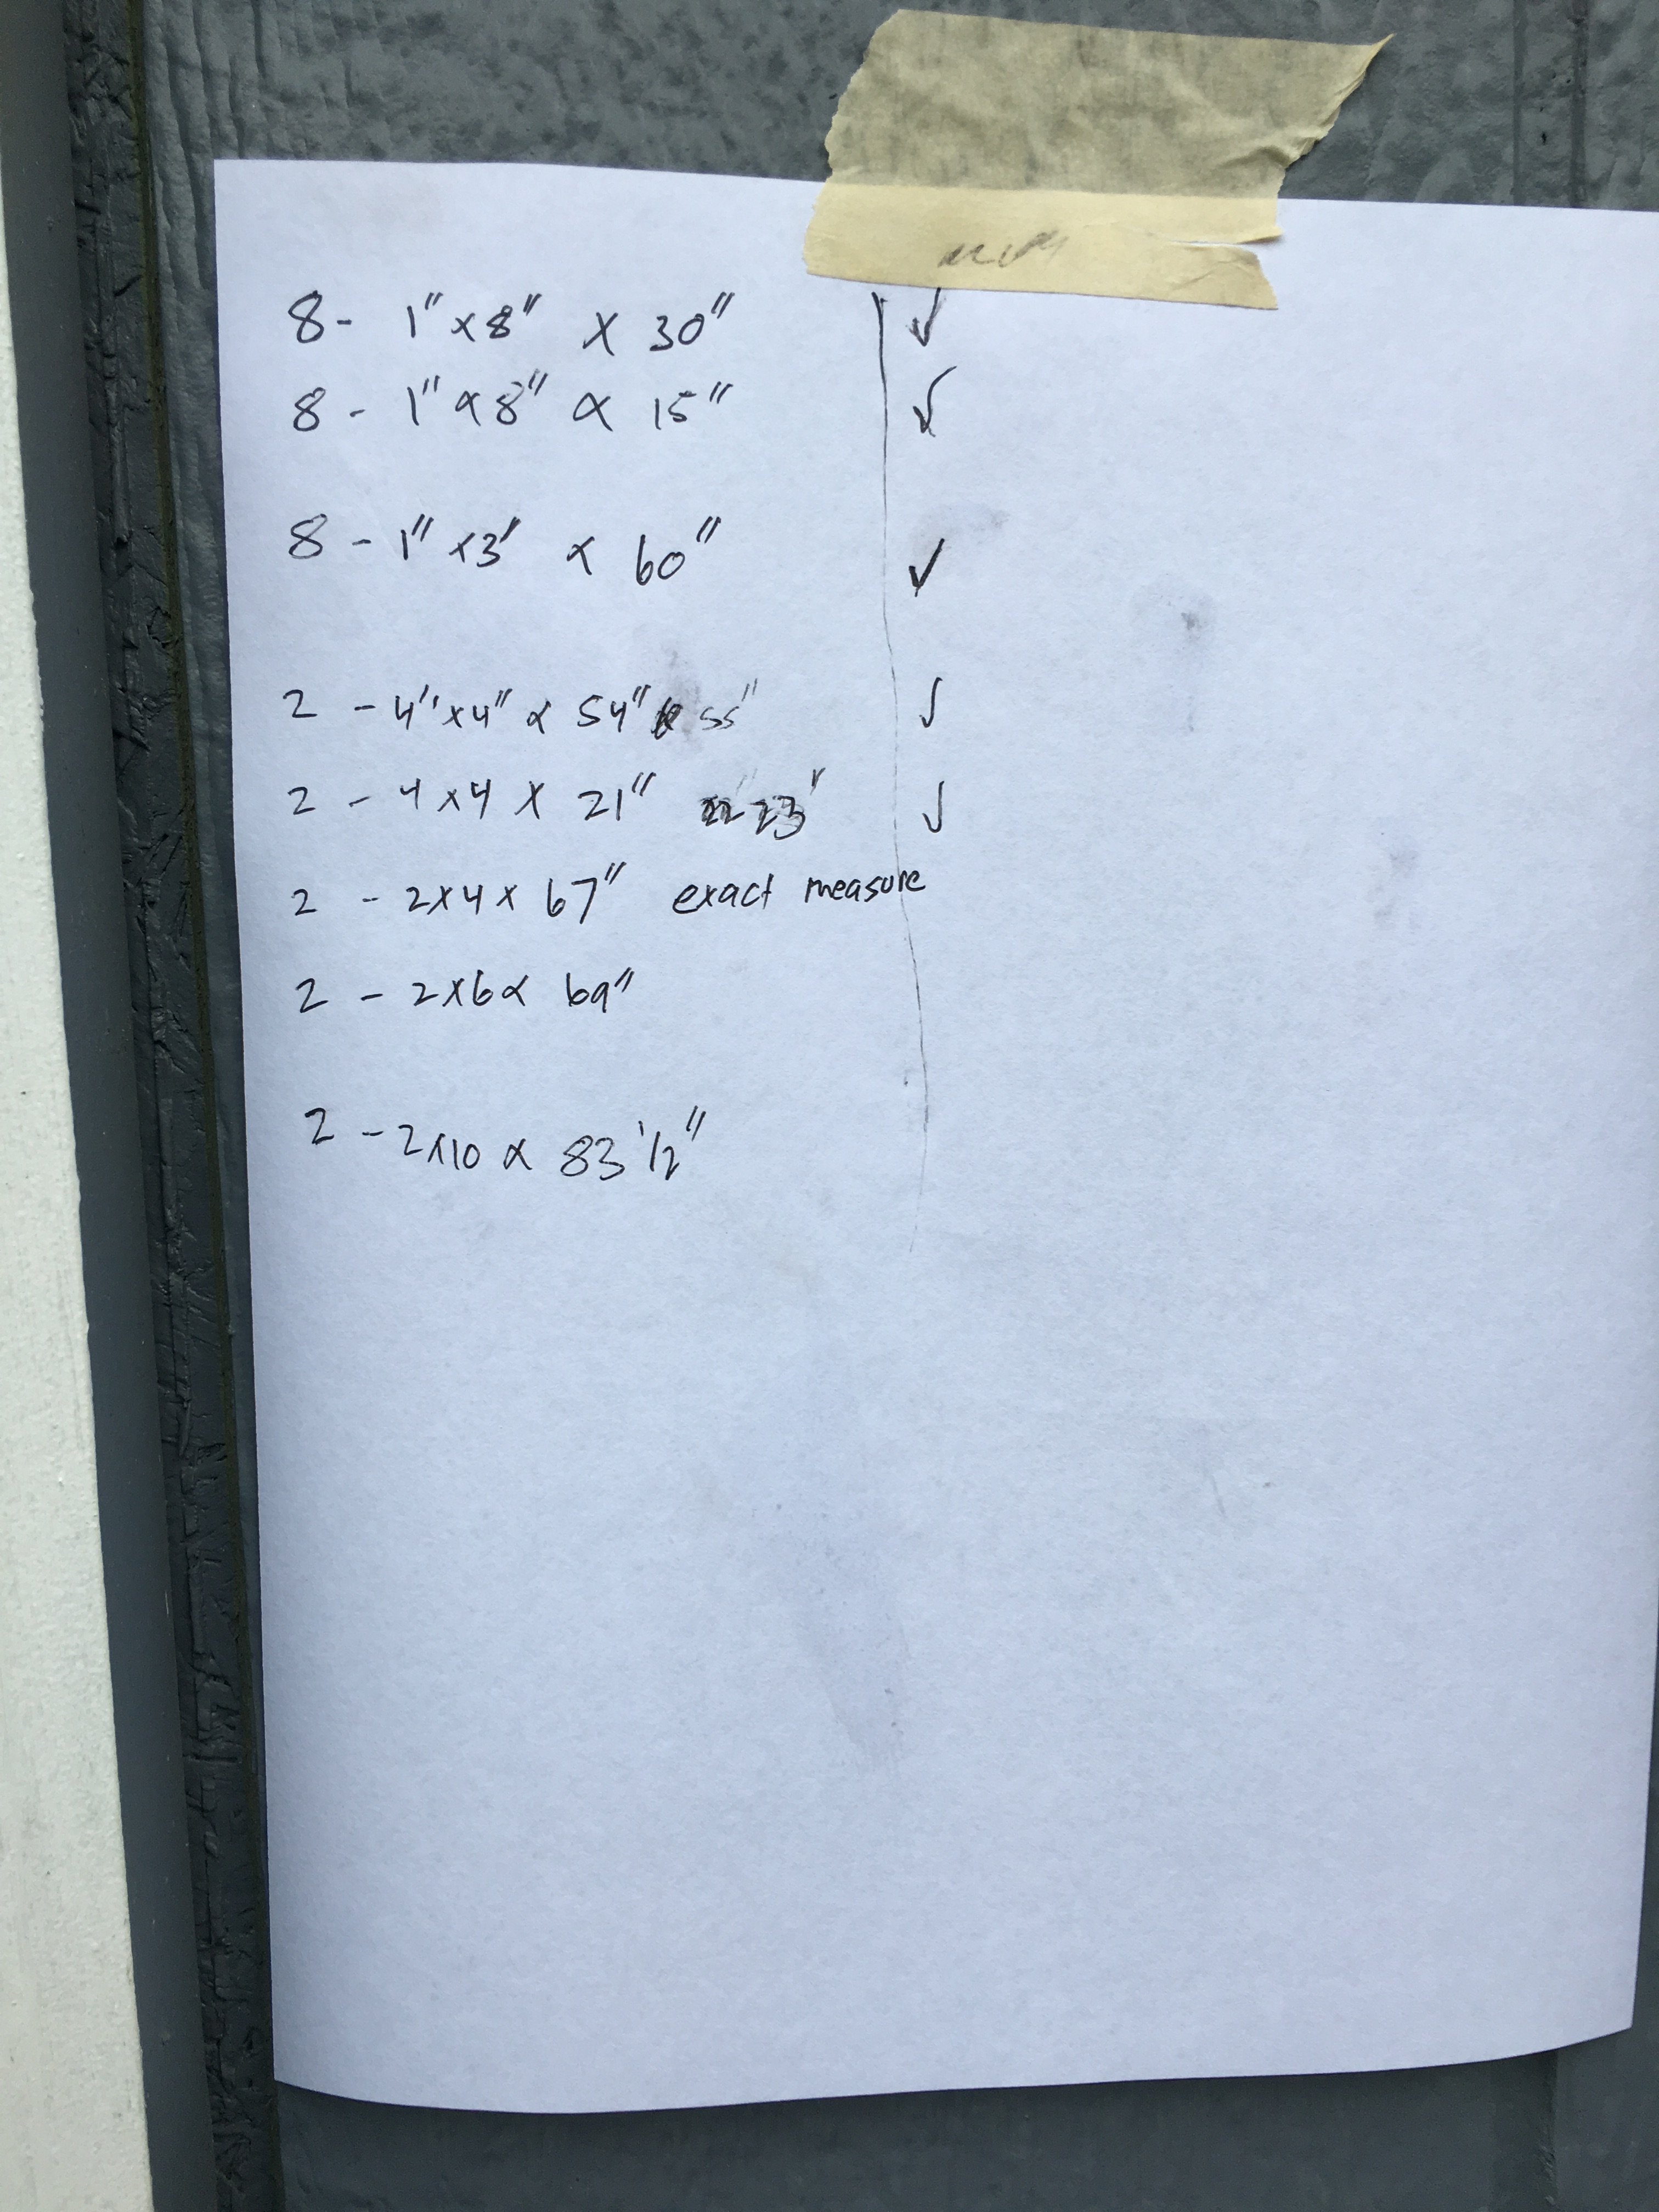
Farmhouse bed

I followed the plans provided by Ana and boy am I delighted. I changed up the color scheme based off a whim. All the stained pieces or cordavan brown semi transparent from Home Depot and the wood is pine. All the white is Douglas fir, (4x4, 2x4, 2x10) and I used a chalked white also from Home Depot. It was fairly easy, I just tweaked the dimension due to our bed height. Great weekend project. Beginner project to certain extent, turned into a intermediate based on tools used and certain finishes.
Measurements were for a queen bed frame and tempurpedic adjustable bed frame (had to adjust post height to be taller, adjust 2" shorter for standard Hollywood frame)
Built from Plan(s)
Estimated Cost
$225 based on more expensive finishes.
$120 ish in wood, paint and stain was about $60. Hardware cost the rest.
$120 ish in wood, paint and stain was about $60. Hardware cost the rest.
Estimated Time Investment
Weekend Project (10-20 Hours)
Finish Used
Cordavan brown stain, chalked white paint
From Home Depot. Poly coat on top
From Home Depot. Poly coat on top
Recommended Skill Level
Intermediate
Comments
Quick build desk
Modified from plan listed. Width is only 36 inches. Height in picture is 30 inches but I cut down before delivery to 25 inches. 25 inches is a better fit for elementary school kids. Top is 1/2 inch birch plywood.
Built from Plan(s)
Estimated Cost
$50 plus labor
Estimated Time Investment
Afternoon Project (3-6 Hours)
Finish Used
Dark walnut, satin polyurethane
Recommended Skill Level
Beginner
Round Modern Dining Table
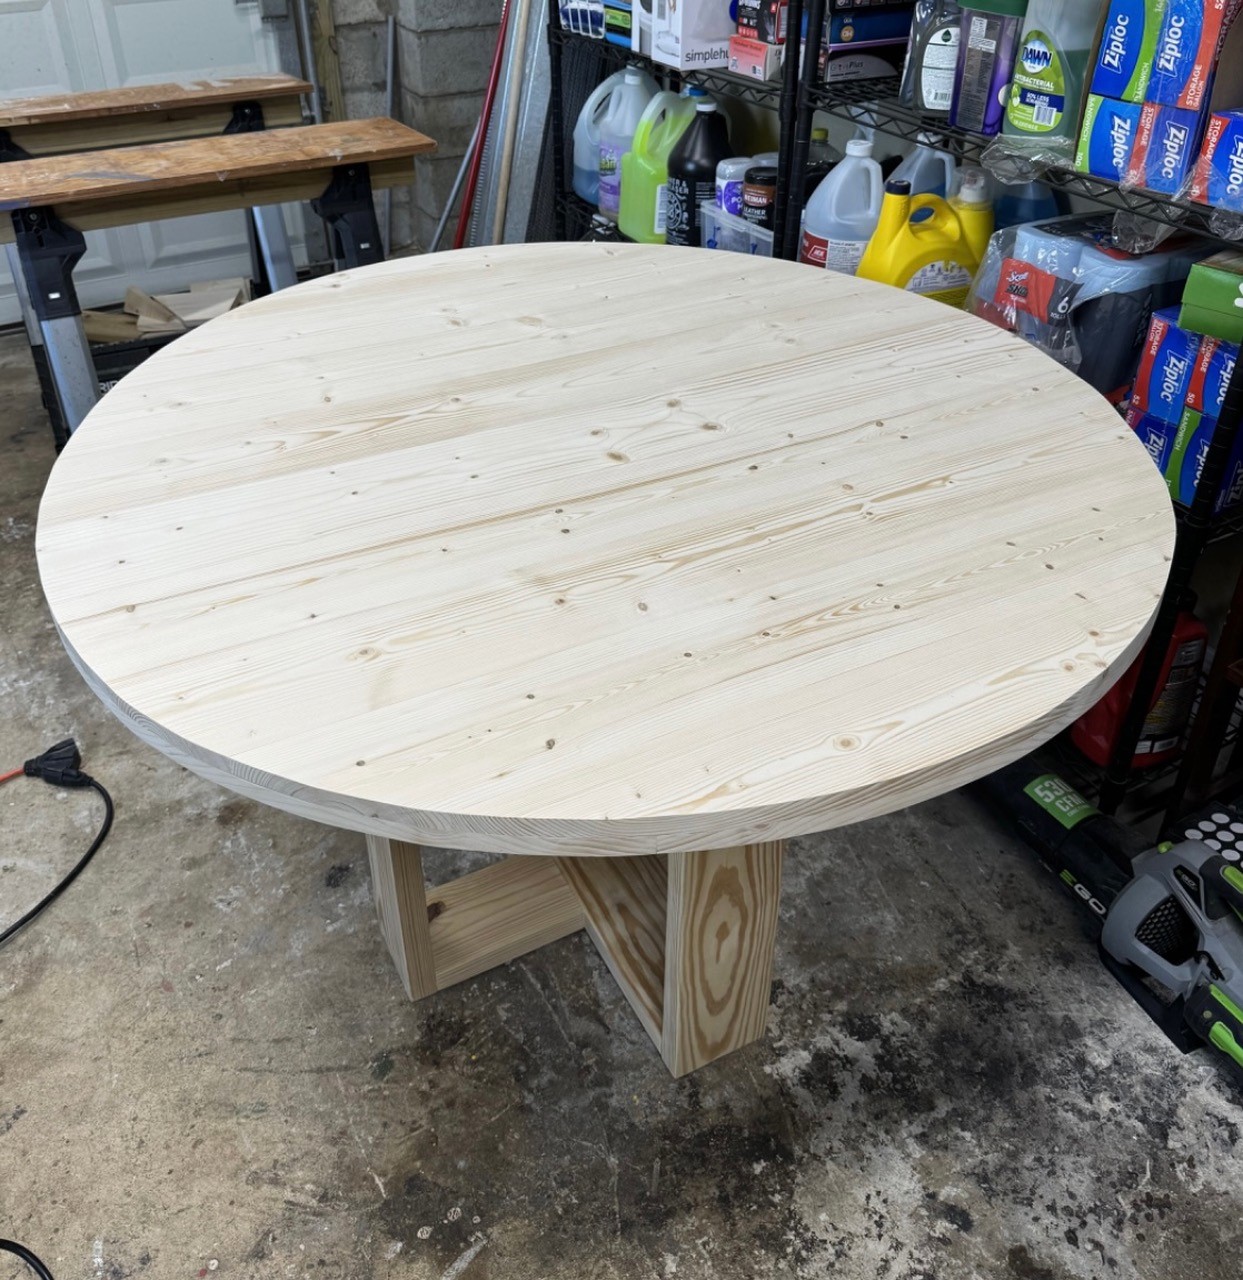
Follows your plans and it worked out well.
Built from Plan(s)
Retro Play Kitchen
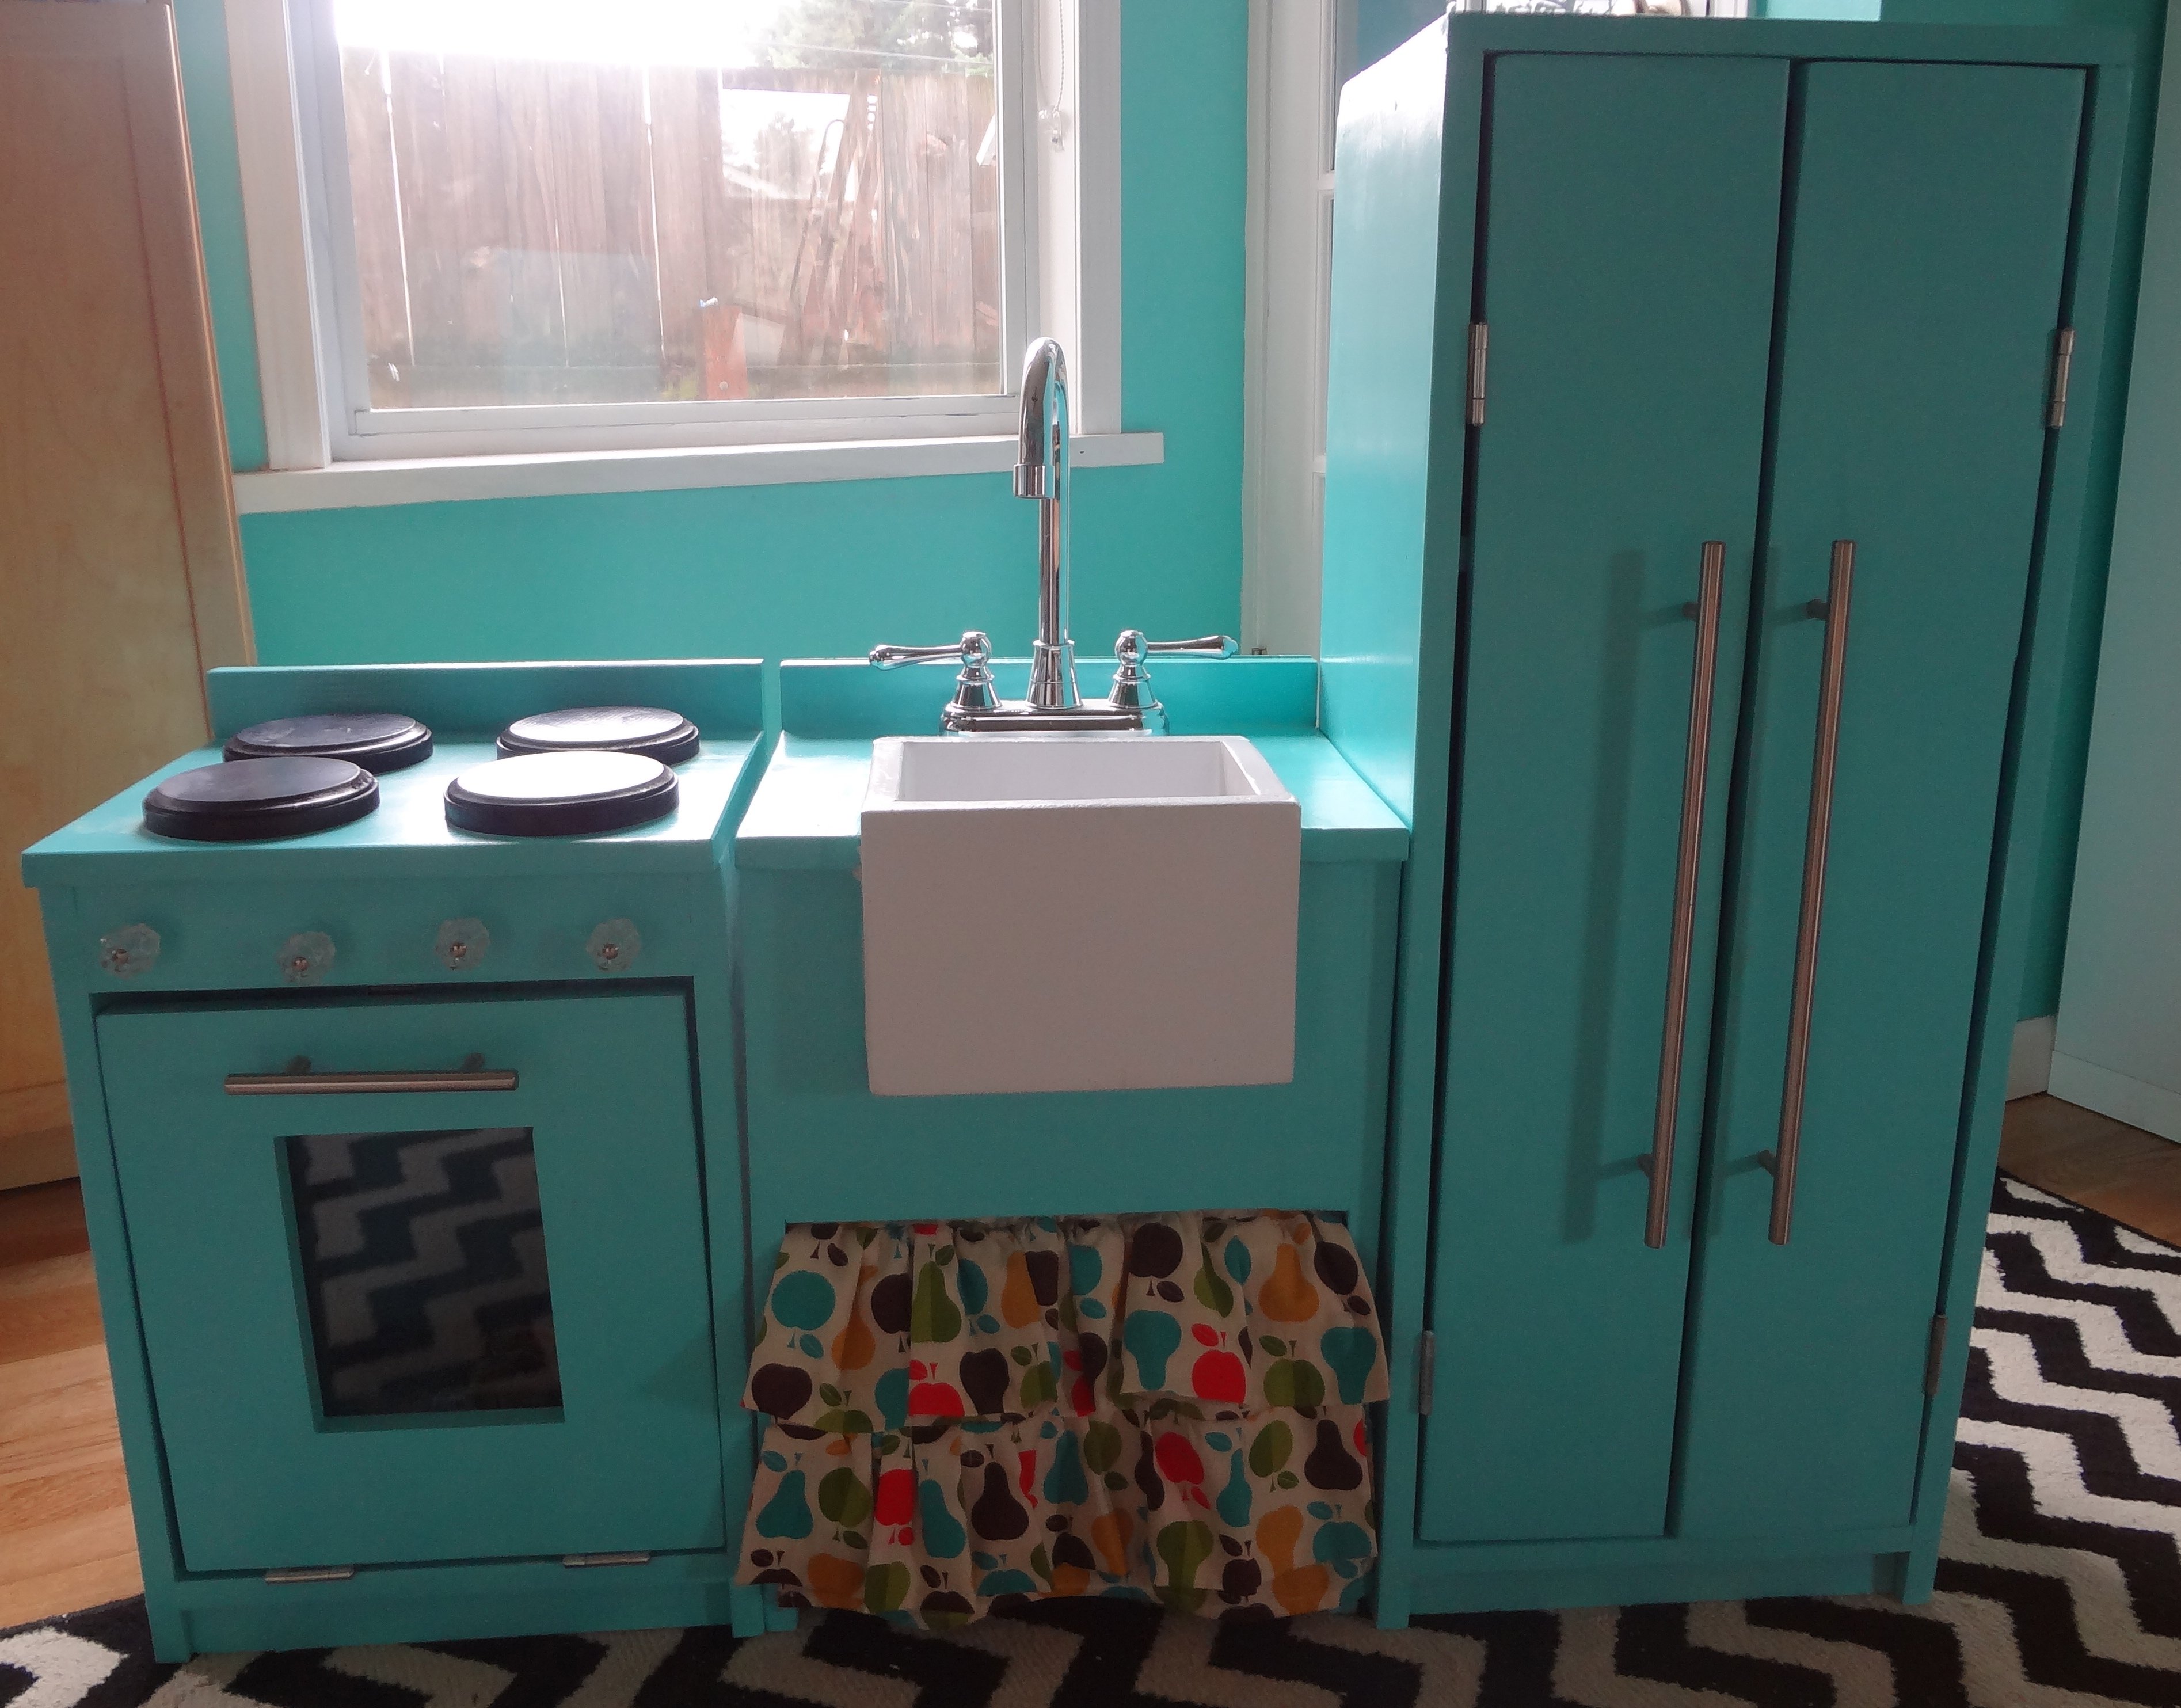
I made this from the Simple Play Kitchen Plan. I recently purchased Ana's book, and it inspired me to finally build something on my own. I am proud to say I got it done within a few weekends, with minimal issues.
Built from Plan(s)
Estimated Cost
$150
Estimated Time Investment
Weekend Project (10-20 Hours)
Finish Used
Semi-Gloss Behr Interior Latex, Sea Life
Recommended Skill Level
Beginner
Comments
Sat, 11/24/2012 - 13:26
The idea for the apron sink I
The idea for the apron sink I borrowed from this blog. http://www.catdmoore.com/2010/vintage-inspired-play-kitchen/
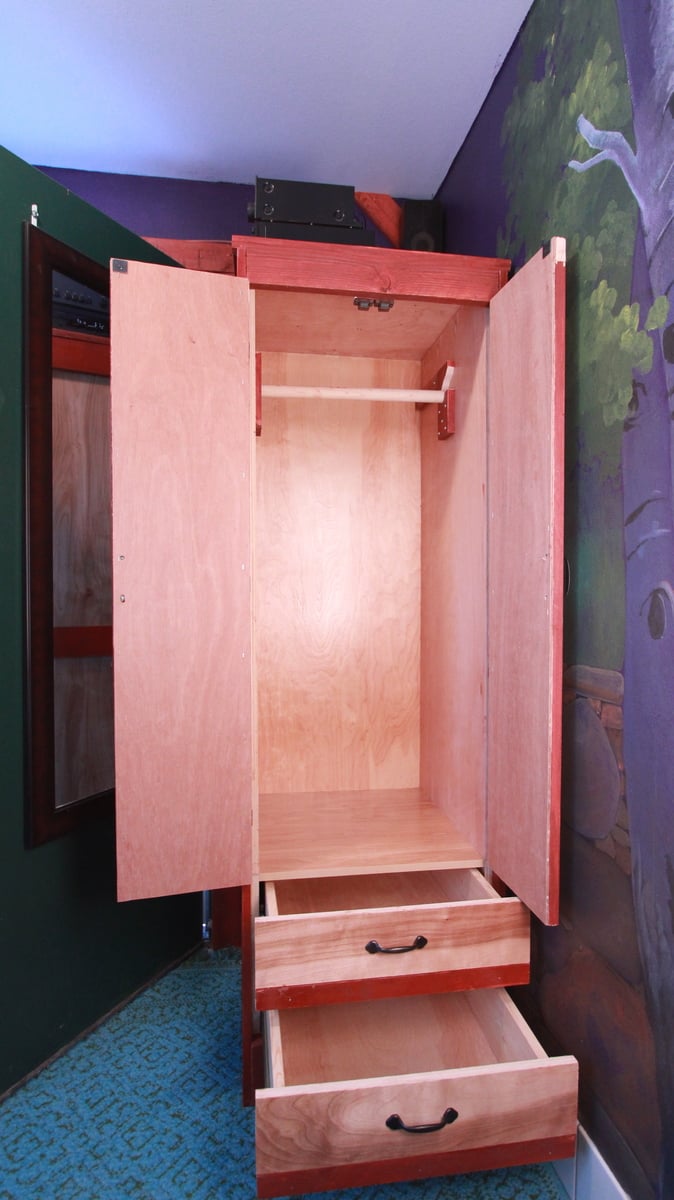
Tall Narrow Wardrobe for Tiny House
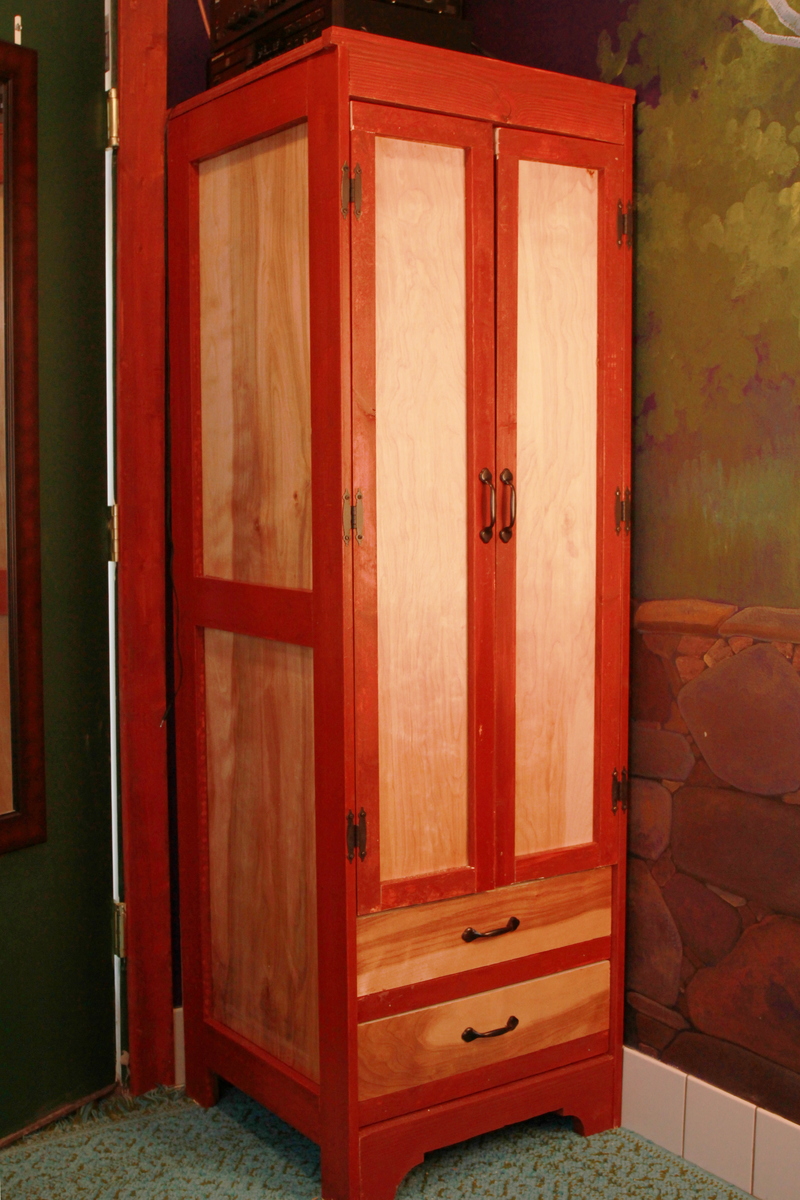
Needed a wardrobe for a 24-inch wide space. Not sure you could buy such a thing -- certainly not in the small town where we live. Glancing at Ana's "Toy or TV Armoire" plans gave me an idea how to proceed.
Didn't plan for drawers, initially, but turned out I hadn't pre-stained enough trim for full-height doors, so decided to add drawers. Glanced at the insert plans, and it didn't look too bad. Decided to build the drawers right in with 22-inch 75lbs sliders, since again, not enough trim for full doors. Also, I think it might be tedious to first open a door or in my case doors just to get to the drawes. Miraculously, cabinet turned out to be square enough (+/- 1/16th inch) for the sliders. Here's to $99 table saws and pocket hole screws!
Thank you, Ana, for this and the other plans I built (craft table). Also, I admire your webmasters Drupal-craft!
Built from Plan(s)
Estimated Cost
$40 for the stain, $10 for varnish
$24 for hardware
$120 for plywood
$50 for trim
$30 for drawer sliders
$5 for pocket hole screws
Total: $279
Oh wait... $20 more for the two 2 x 6s used for the drawers, $8 worth of Tite Bond, and? Call it $310 or so.
$24 for hardware
$120 for plywood
$50 for trim
$30 for drawer sliders
$5 for pocket hole screws
Total: $279
Oh wait... $20 more for the two 2 x 6s used for the drawers, $8 worth of Tite Bond, and? Call it $310 or so.
Estimated Time Investment
Week Long Project (20 Hours or More)
Finish Used
Trim has two coats of Pratt & Lambert oil-based "Toy Wagon" color semi-transparent redwood stain, which takes two weeks to dry. The ply has water-based MinWax polyurathane. Finished most everything before assembling. Was too lazy to varnish over the trim, though that would certainly make it less "rustic." Oh well. It's not a piano.
Recommended Skill Level
Advanced
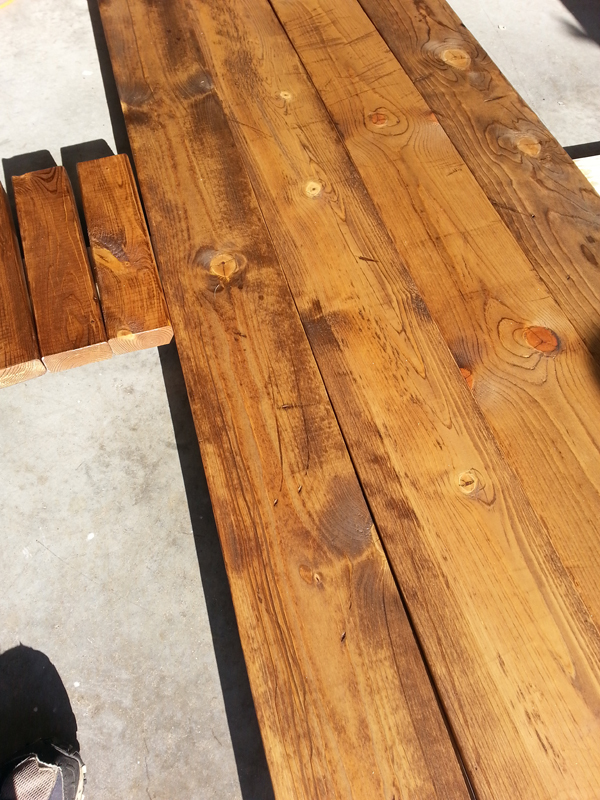
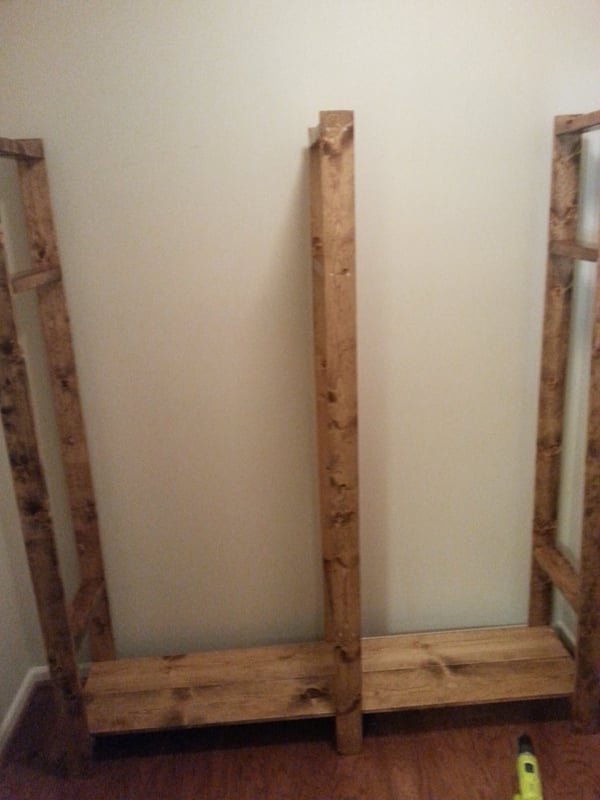
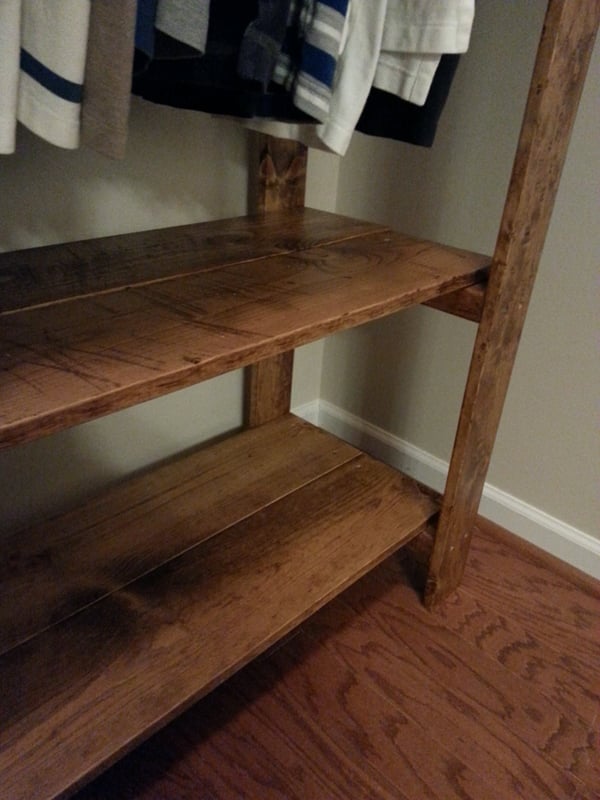
New Closet
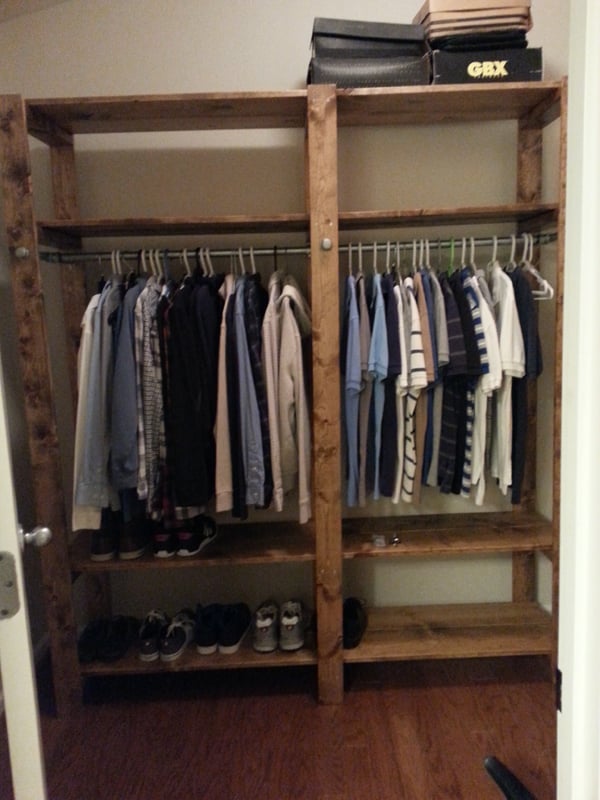
This is my first carpentry project. Bought my house recently and it had the white wire organizers on the wall but I wanted to do something different. Only had 6' width to work with so had to shorten it a bit and lose the middle shelves. Lowes didn't have enough 1x4's for the shelves so I used 1x8's and just left a gap in the front which in my opinion looks good.
Built from Plan(s)
Estimated Cost
$200-$300
Estimated Time Investment
Weekend Project (10-20 Hours)
Finish Used
1 coat of Early American stain followed by a light sand and 1 coat of Minwax Polycrylic Clear Matte
Recommended Skill Level
Beginner
Our Console
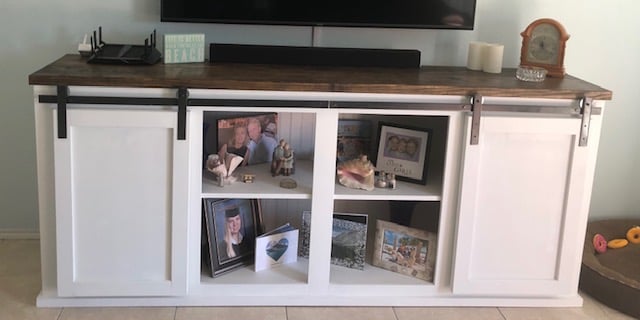
It was fun to build this and i took my time over several weekends. Not being in a hurry probably helped me figure stuff out before actually doing things. I will probably remake the door as these are thick and probably to heavy. We will probably end up doing something decorative with the doors once we decide if we are making new ones or not.
Built from Plan(s)
Estimated Time Investment
Weekend Project (10-20 Hours)
Finish Used
Poly Shades espresso on the top and a simply flat white paint on the main console. Used wax sealer over the paint.
Recommended Skill Level
Intermediate
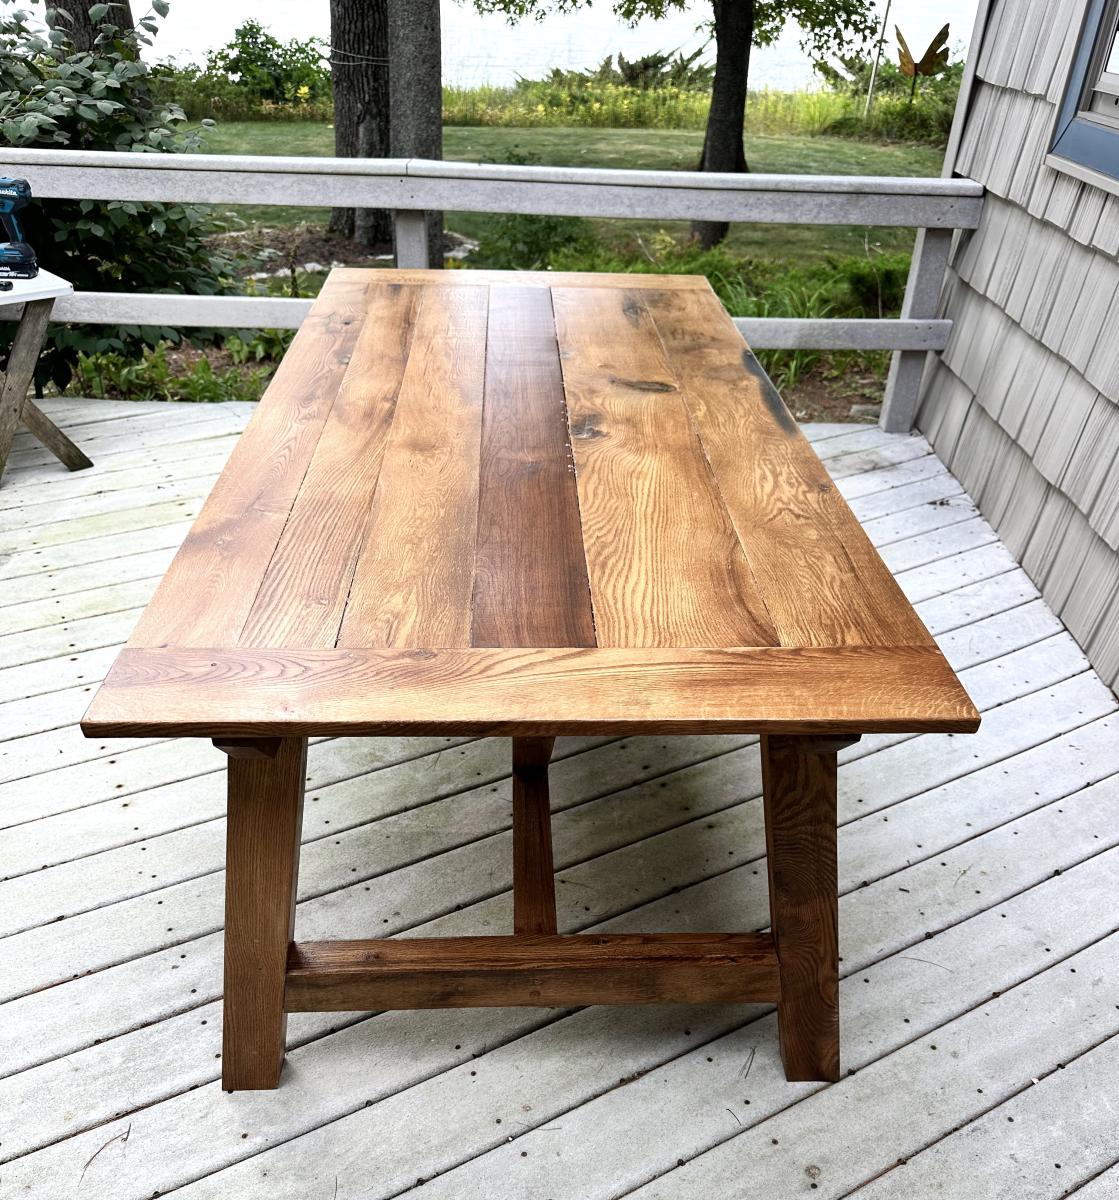
Rough Sawn Oak Plank Dining Table
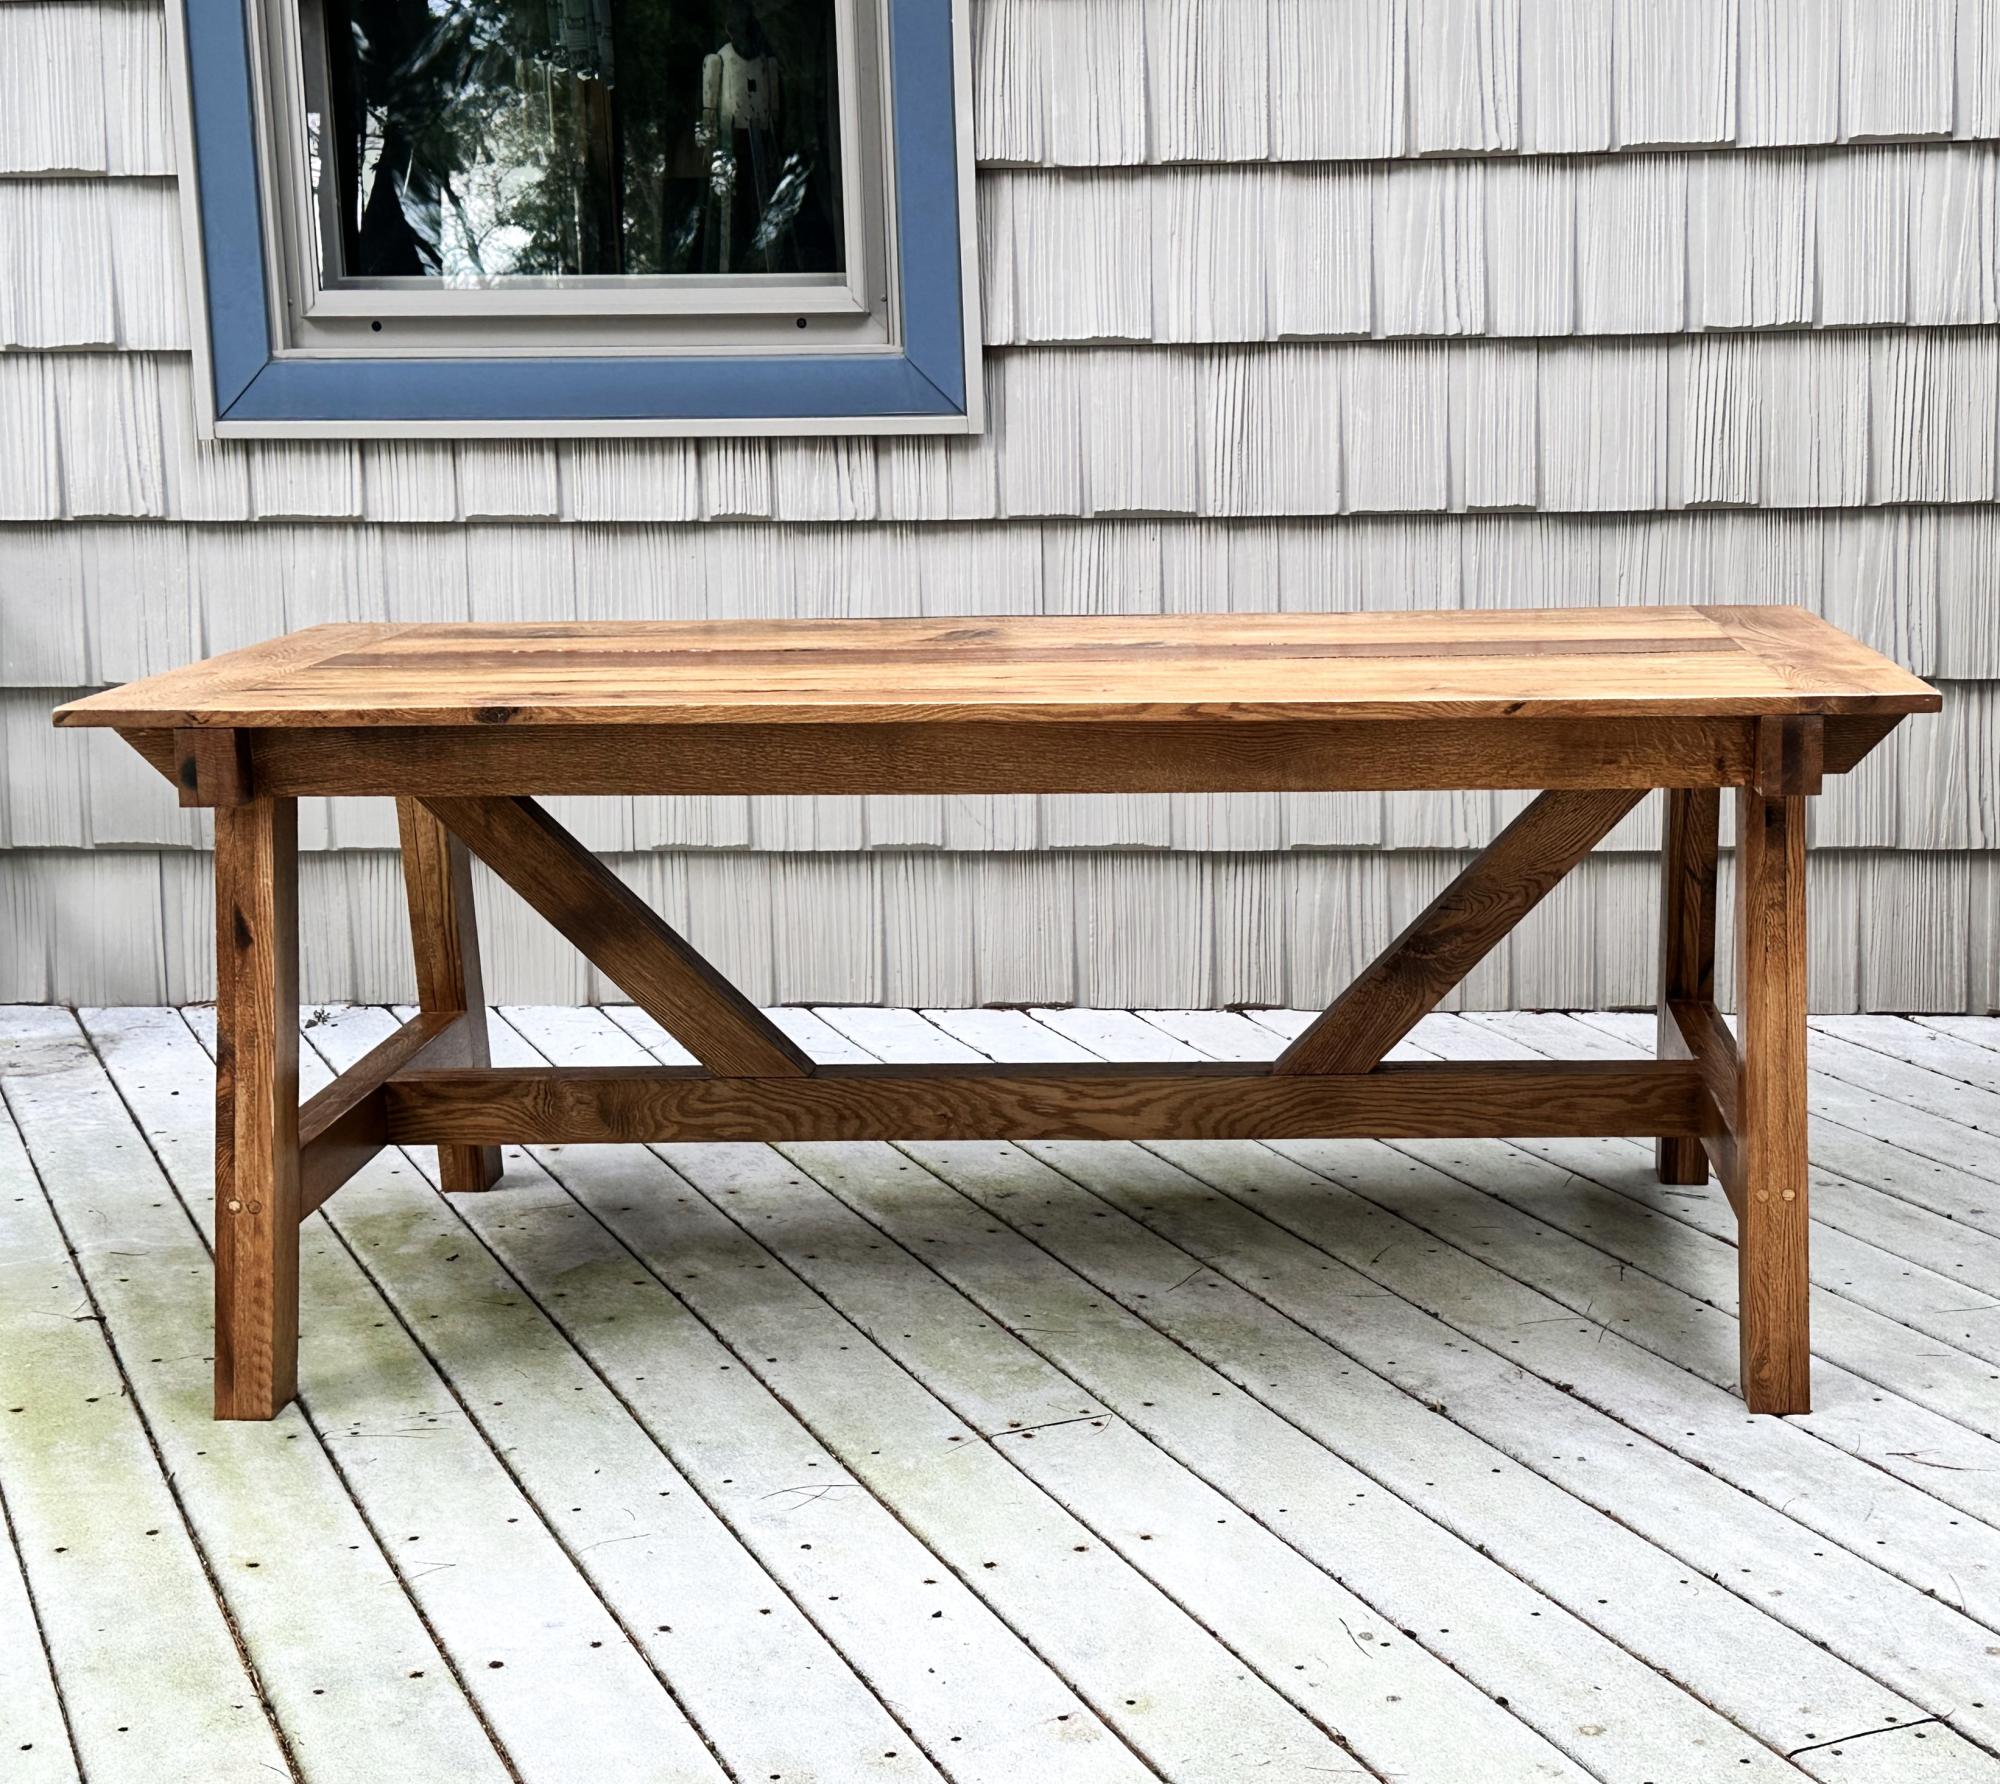
Modified 4x4 Farmhouse table, my first picnic table project.. We used rough sawn oak planks from a tree cut down 20 years ago that were sitting in a garage waiting for a special build. All framing is built from 3/4” x 3” boards glued up to create the legs and supports. For character the water spots were sanded down but not out to bring out some different hues after staining. The benches follow the same design plan and when the outdoor poly sets up they will be added to the set. Great plans from Ana White! - by "Grandpa Can Fix It"

Built from Plan(s)
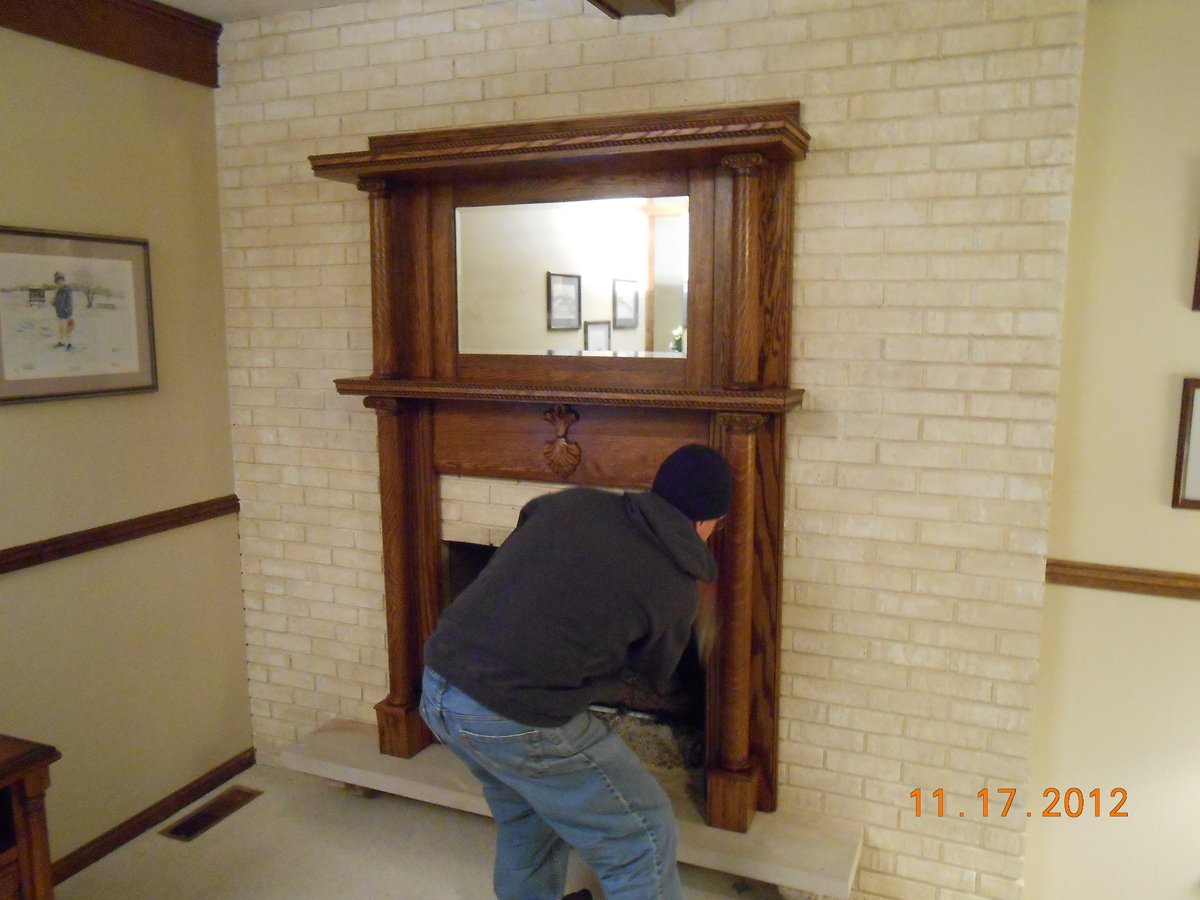
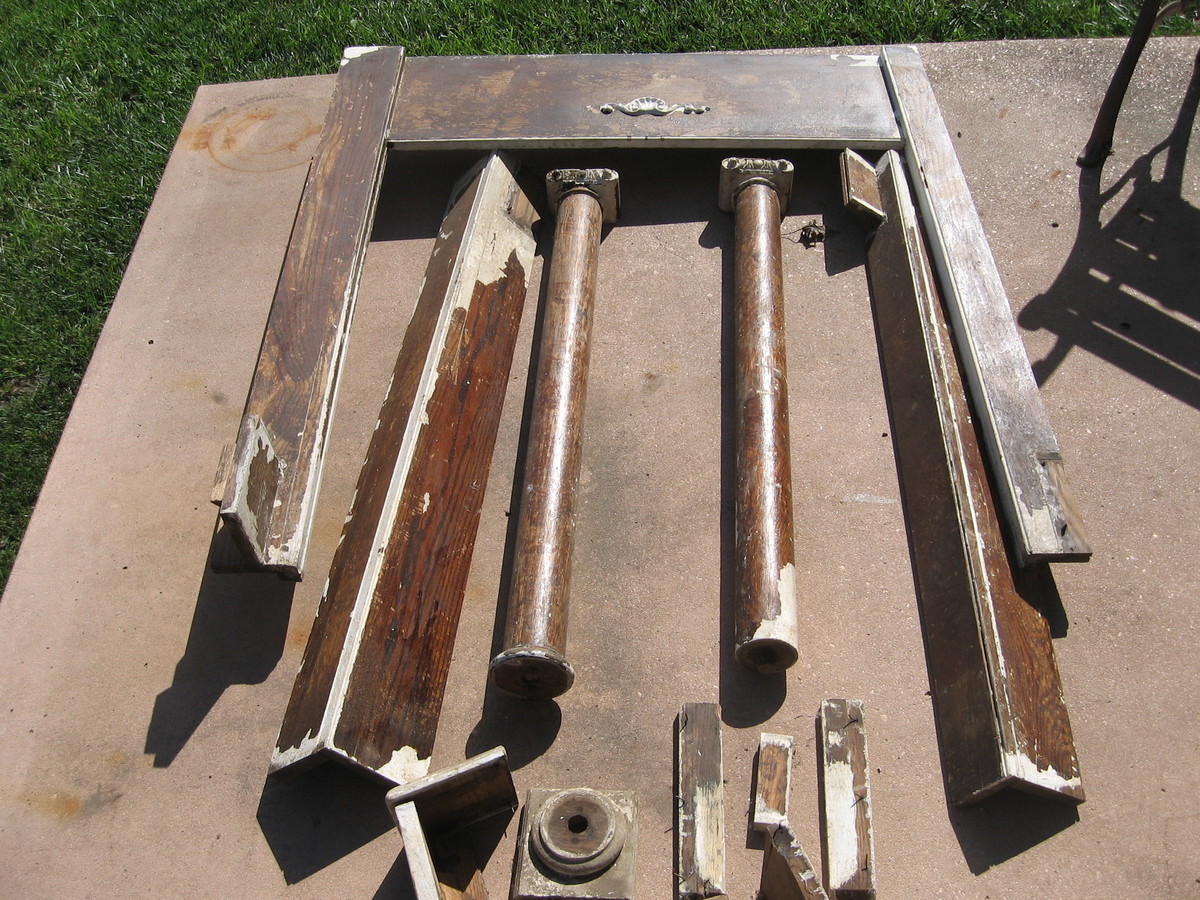
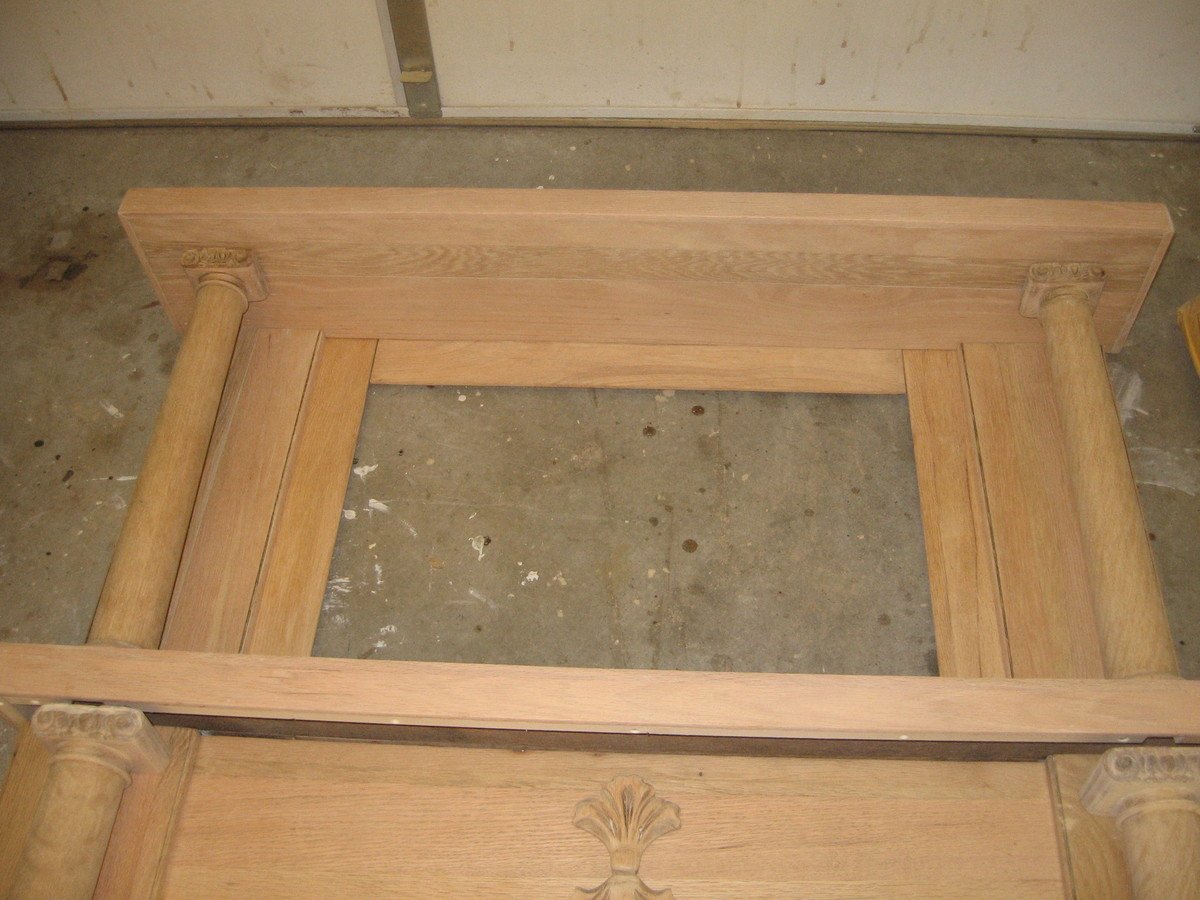
Refinished Red Oak Fireplace Mantel
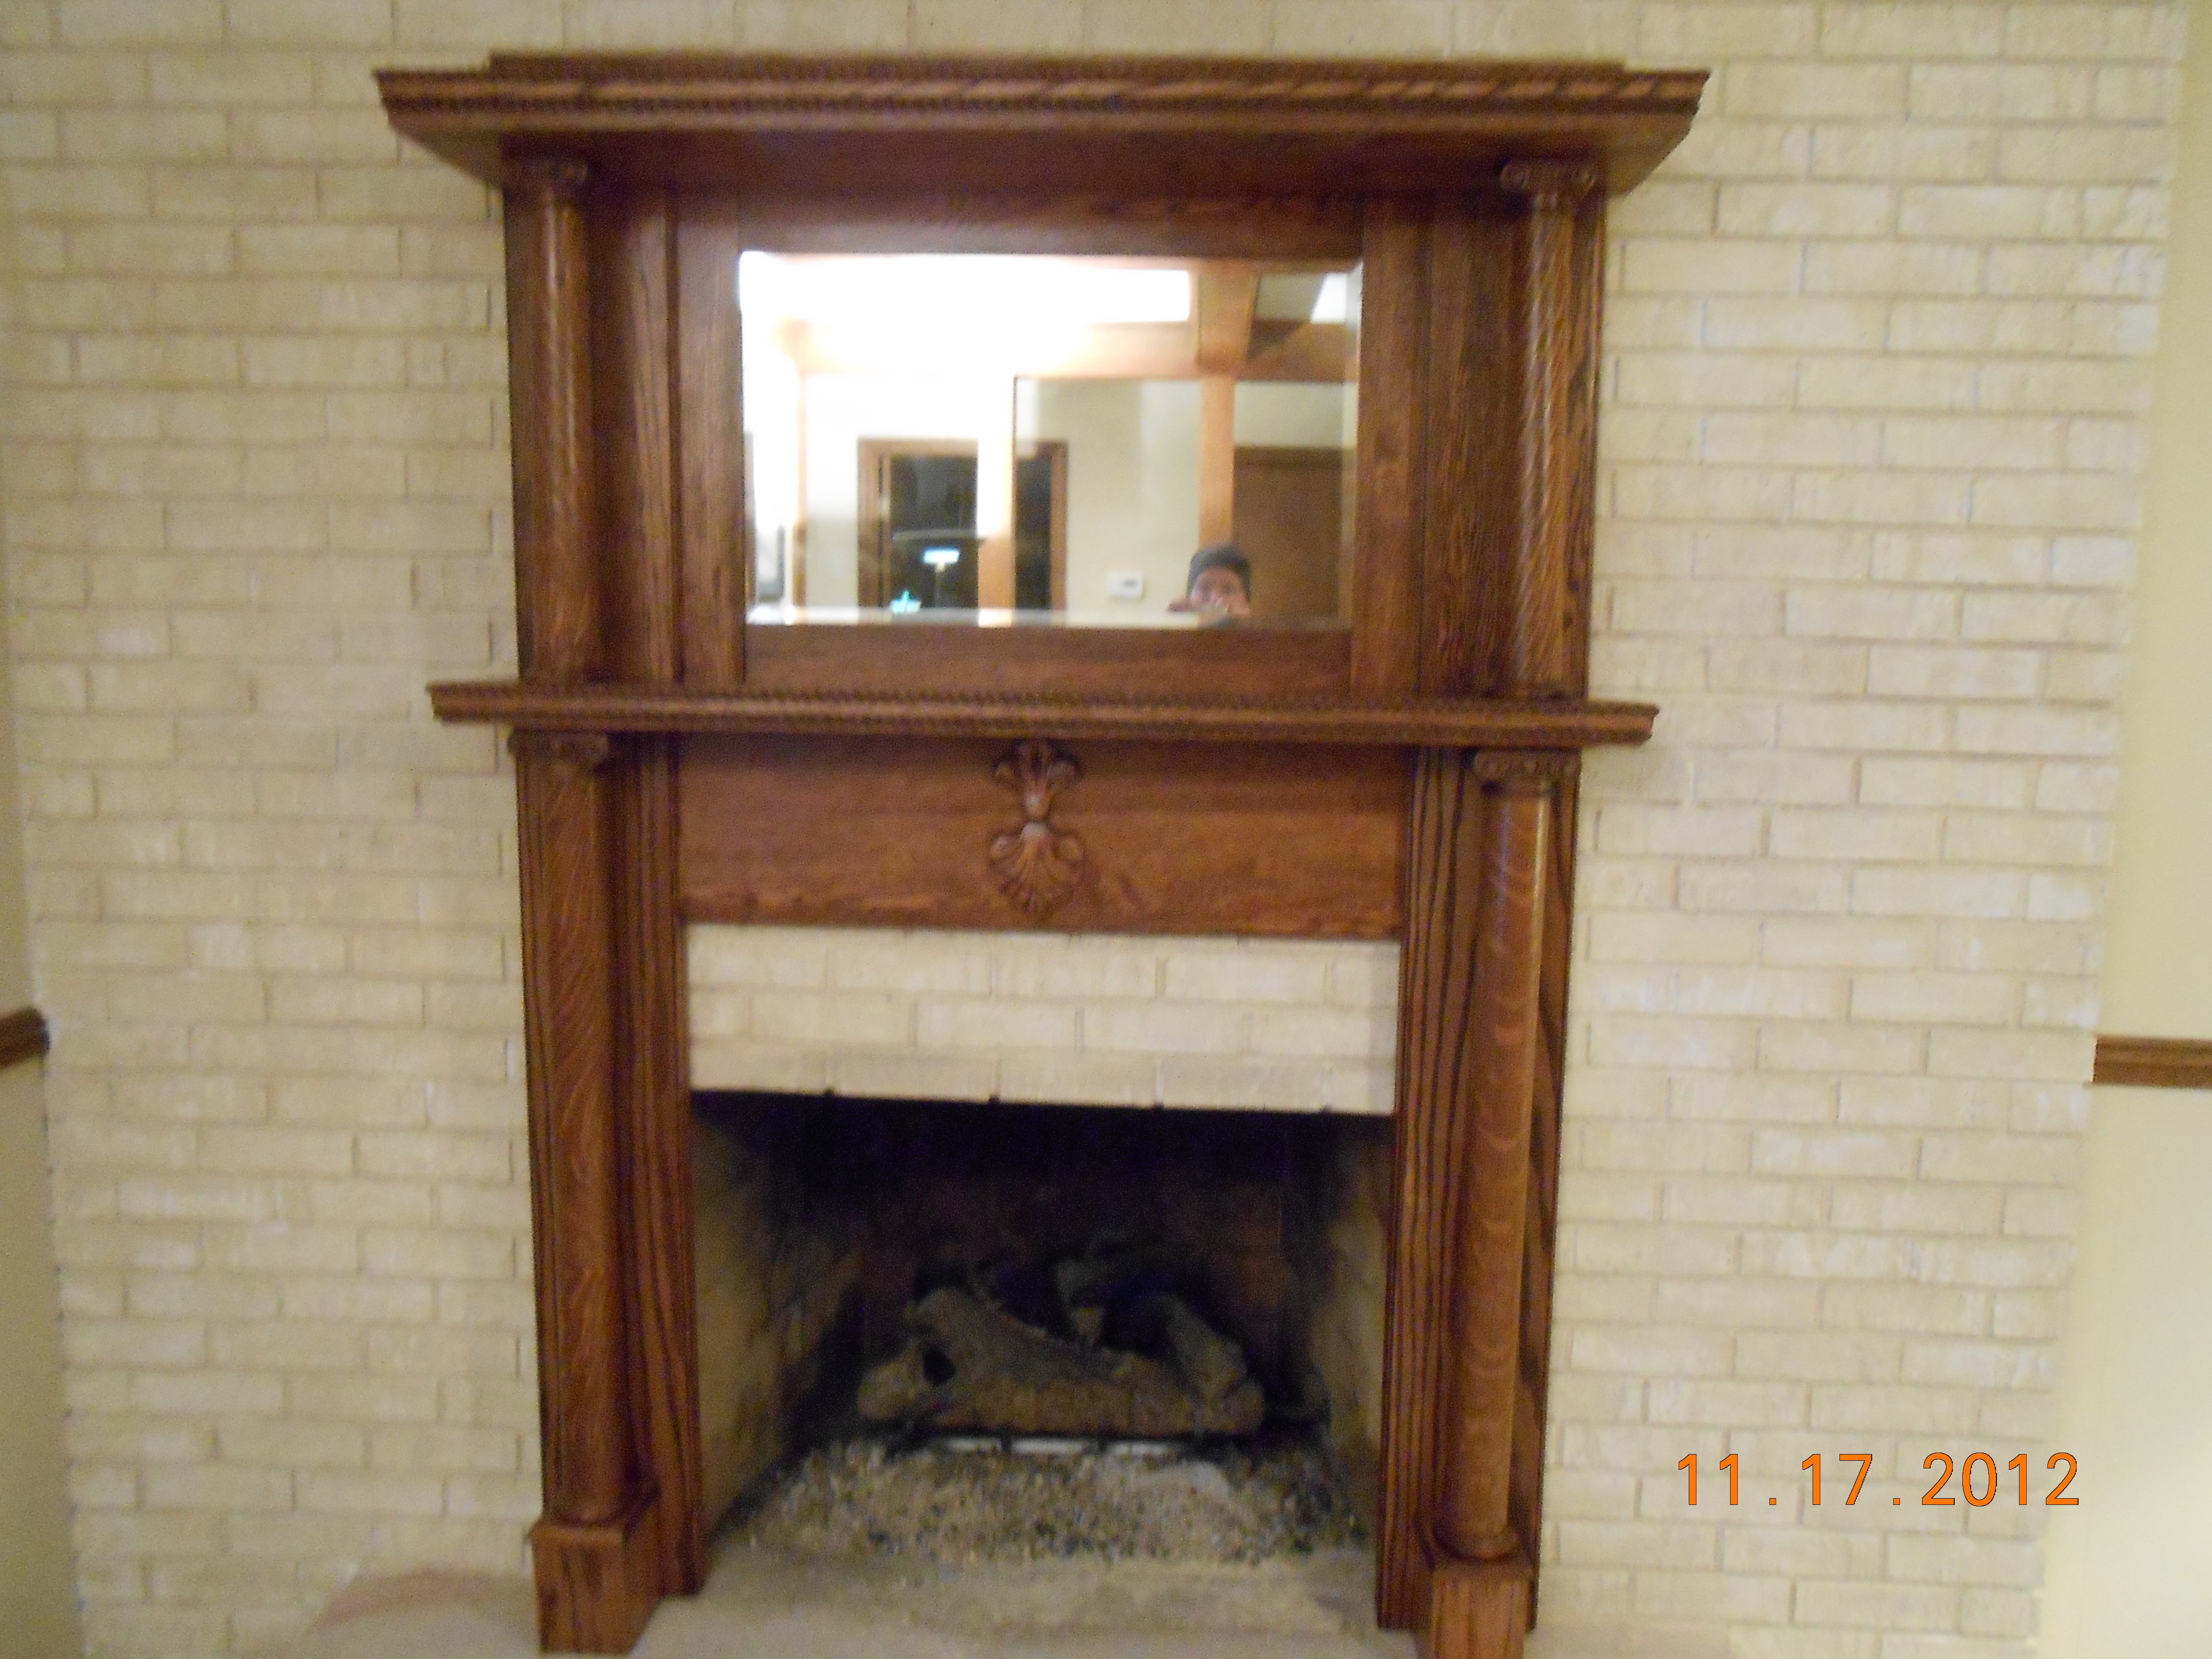
This is a century old red oak fireplace mantel I bought off of Craigslist. It came out of a home in Louisville, KY. It was in bad shape as you can see in the photos. I stripped it and replaced the veneer that needed it. I had to modify it a bit to install it to my mother-in-laws brick fireplace. The mirror is mercury glass and beveled. I did add some red oak rope trim which I beveled to give a more formal look. I countersunk some holes along the sides that I covered with some red oak trim. This allowed me to attach studs to the brick and then attach the mantel to the studs. The very top shelf was rotted so I found some beautiful spalted red oak and rebuilt this. The former onlay on the front was beyond repair and I found the current salvaged onlay on Ebay for around $10. I am really happy with how it turned out.
Estimated Cost
$200-$40 initial cost and about $160 in improvements
Estimated Time Investment
Week Long Project (20 Hours or More)
Finish Used
The stain is Minwax Early American. I gave the old growth wood 2 coats and the newer wood and trim 3 coats. I used Minwax fast drying satin polyurethane. I used three coats throughout the project. I applied 2 coats of poly and then sanded with 220 grain sandpaper before applying the third and final coat.
Recommended Skill Level
Intermediate
Comments

Coat Nook
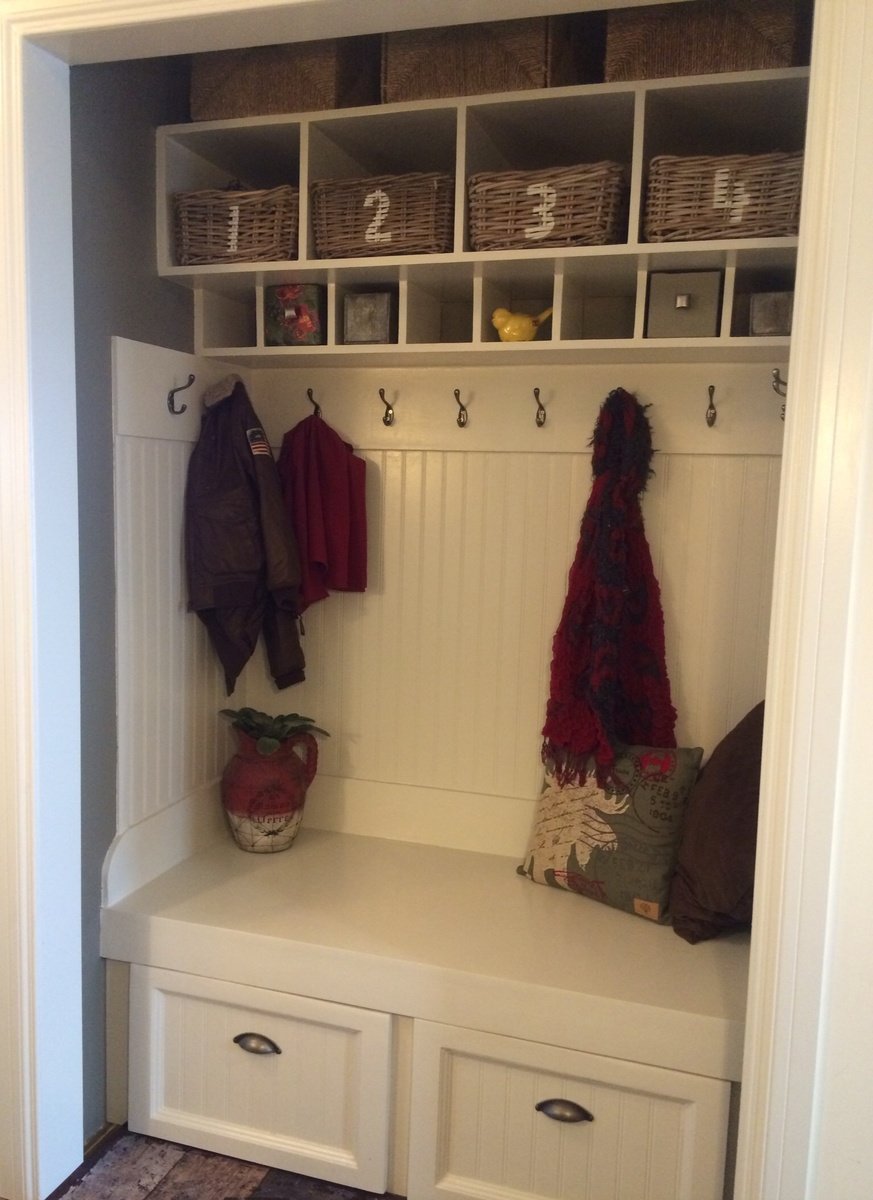
I am a complete novice, learning as I go. But the plans were so straight forward and well written that I got brave and added some cubbies! So happy with the nook and it helps when trying to get three little ones out the door for the school bus in the mornings. All of the things they need are in one convenient place.
Built from Plan(s)
Estimated Cost
$300. The hardware was pricey (hooks and drawer pulls), as well as the paint (I purchased gallon pails at $80/gallon since we will be using it elsewhere in the house).
Estimated Time Investment
Week Long Project (20 Hours or More)
Finish Used
Benjamin Moore semi gloss paint for the wood and egg shell finish for the walls.
Recommended Skill Level
Intermediate
Comments

Wed, 09/10/2014 - 14:17
Fantastic build!
This looks awesome! You did a fab job on this build, it looks very professional! The extra cubbies and bead board are a great touch too!
Outdoor furniture
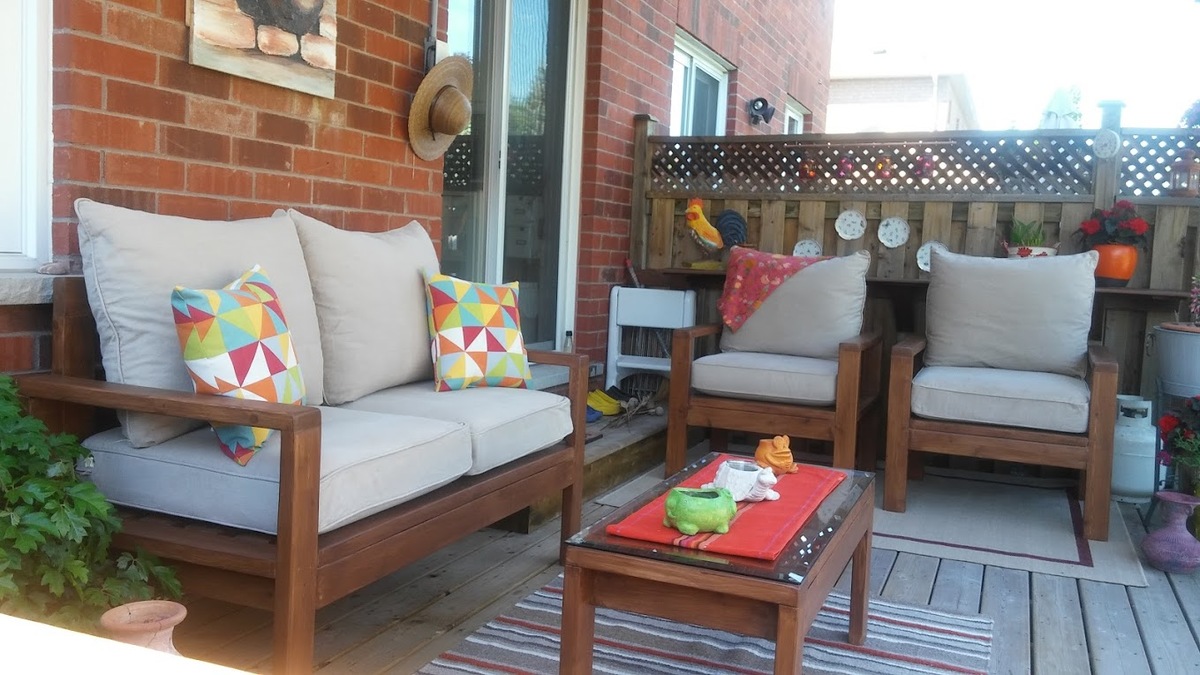
I love taking good stuff that people throw out and up cycle them. Someone on my street had thrown out two sofa sets and the cushions were is perfect condition. They had slip covers on them too. I washed the covers and built the sofa to fit the cushions. I built two single chairs, a love seat and a matching table. Super happy with the way it turned out.
Built from Plan(s)
Estimated Time Investment
Weekend Project (10-20 Hours)
Finish Used
Stained and varnished.
Recommended Skill Level
Beginner
Comments
Fancy Farmhouse Table
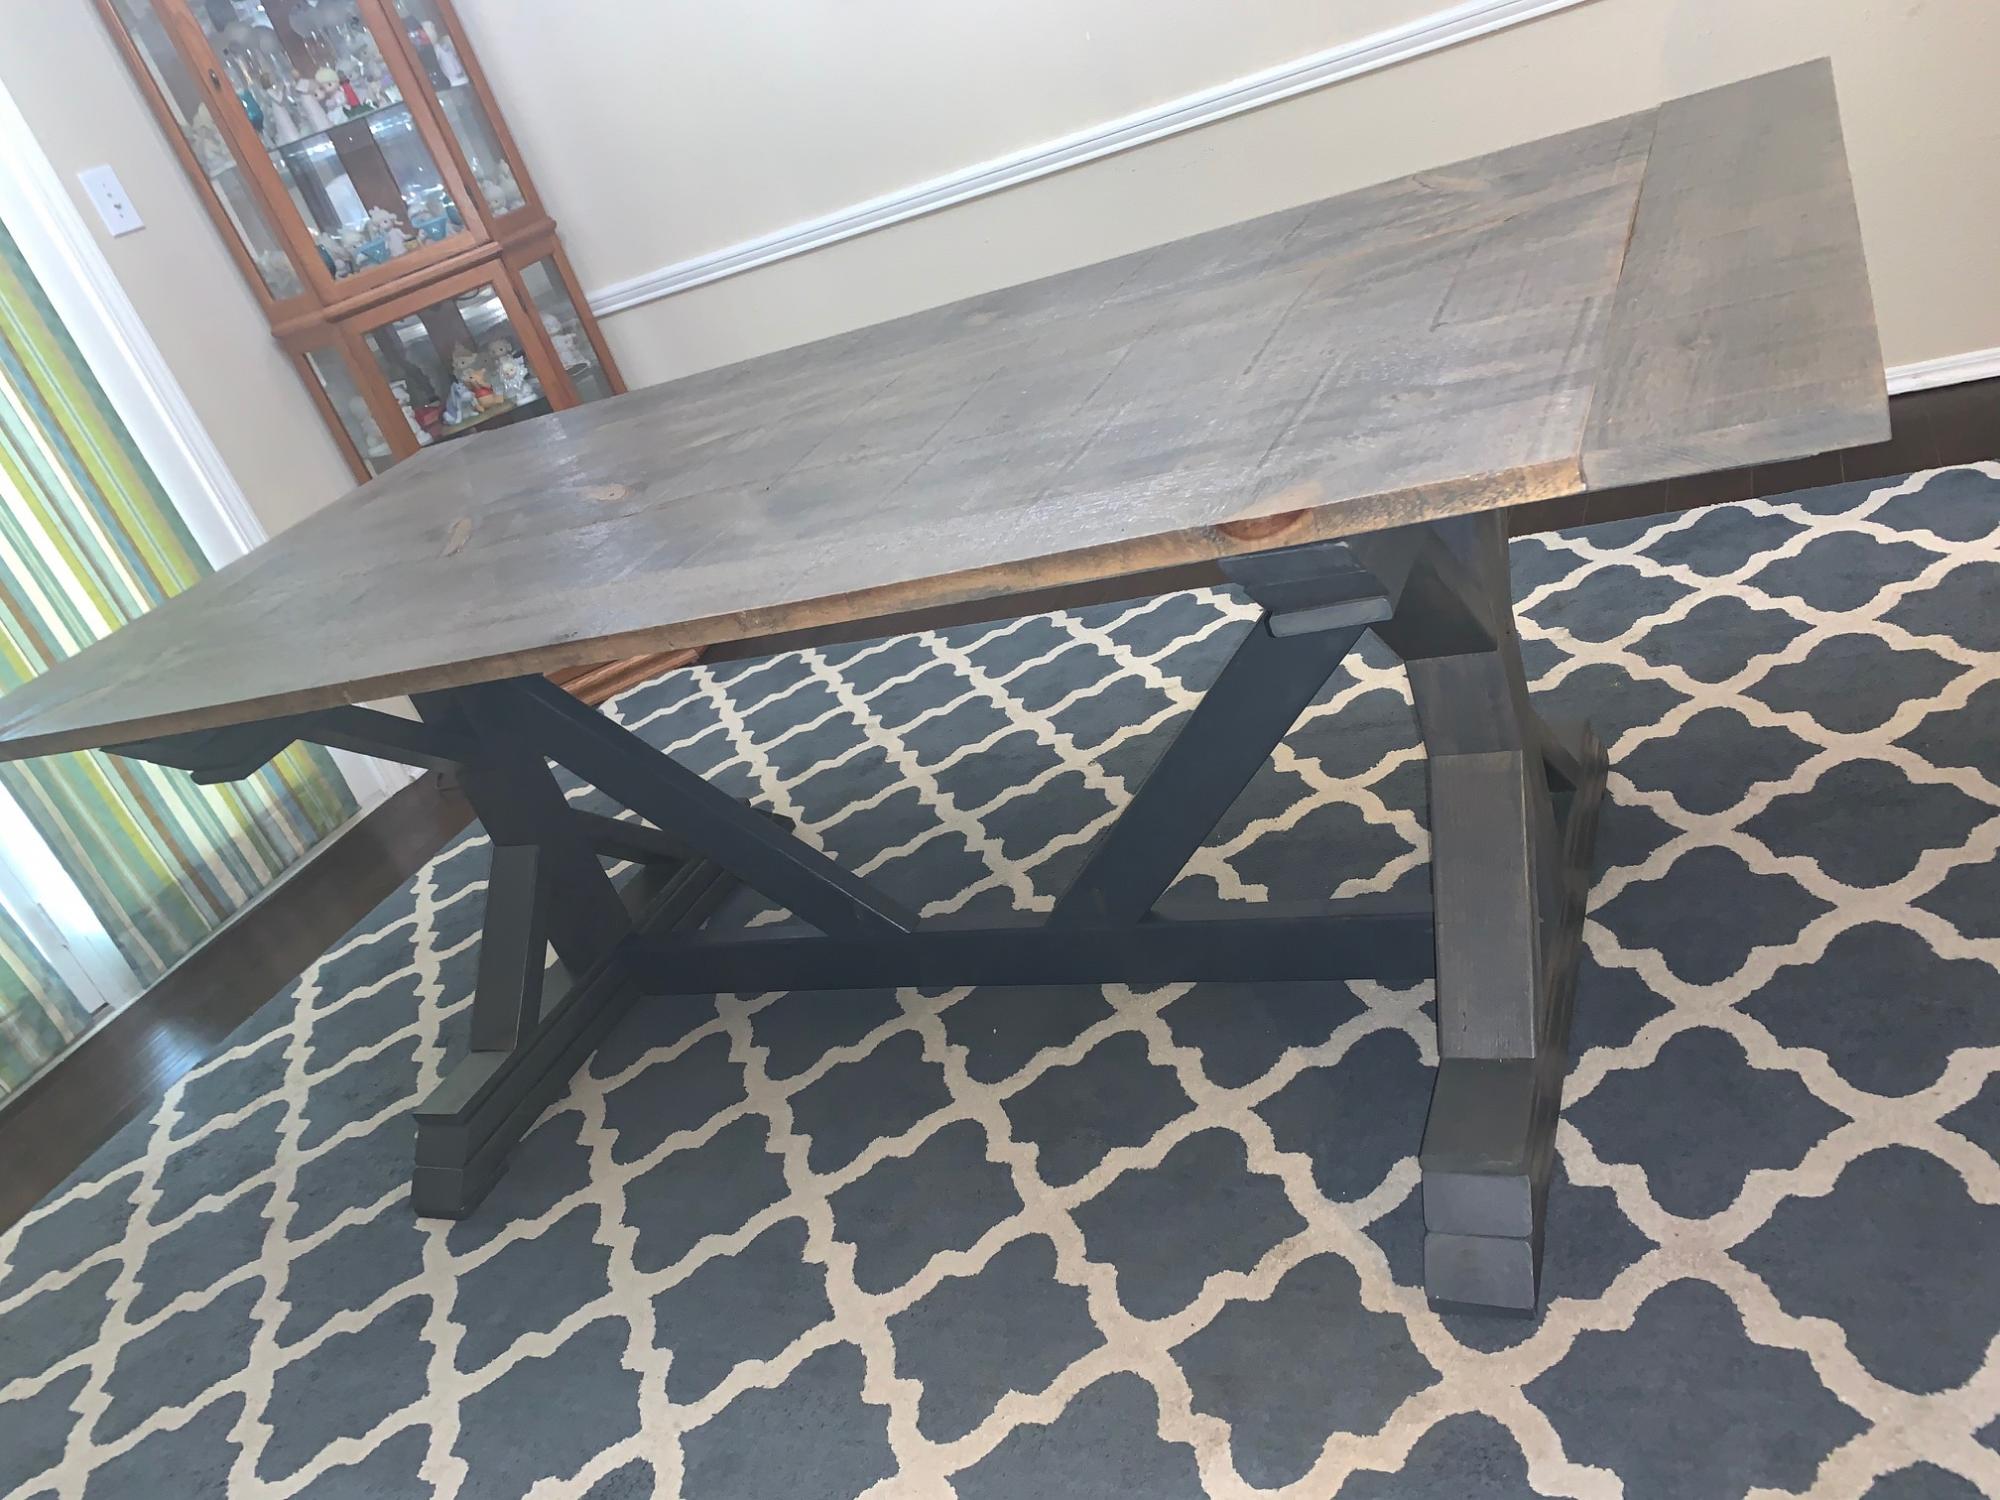
My mom, dad, husband, and I built this farmhouse table over the course of a couple weeks. The top was barnwood pine and the base was pine lumber. This was my first build and I'm hooked!
Built from Plan(s)
Estimated Cost
$300 (barnwood was most of the cost)
Estimated Time Investment
Week Long Project (20 Hours or More)
Finish Used
Grey stain on base and just poly on top
Recommended Skill Level
Intermediate
Comments
David King
Thu, 03/18/2021 - 01:27
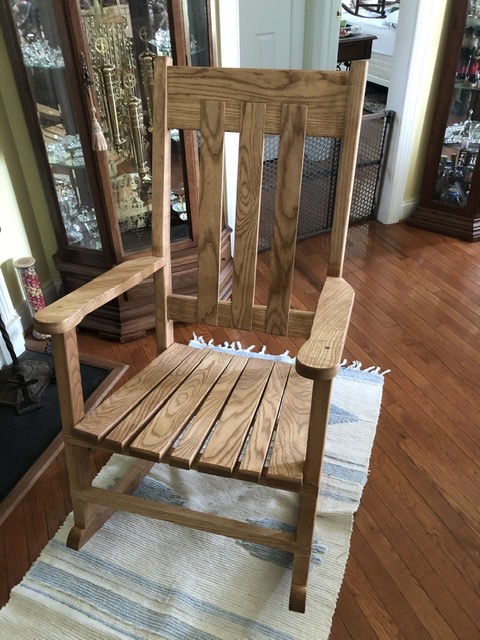
Rocking chair.
Lovely chair. Nice proportions. Would like to copy it. Have you got any plans, sketches, or dimensions to share?
jlxvnwk
Fri, 02/10/2023 - 13:10
Rocking chair
Love this rocking chair! Do you have any dimensions or plans. I would live to take this project on. Thank you.