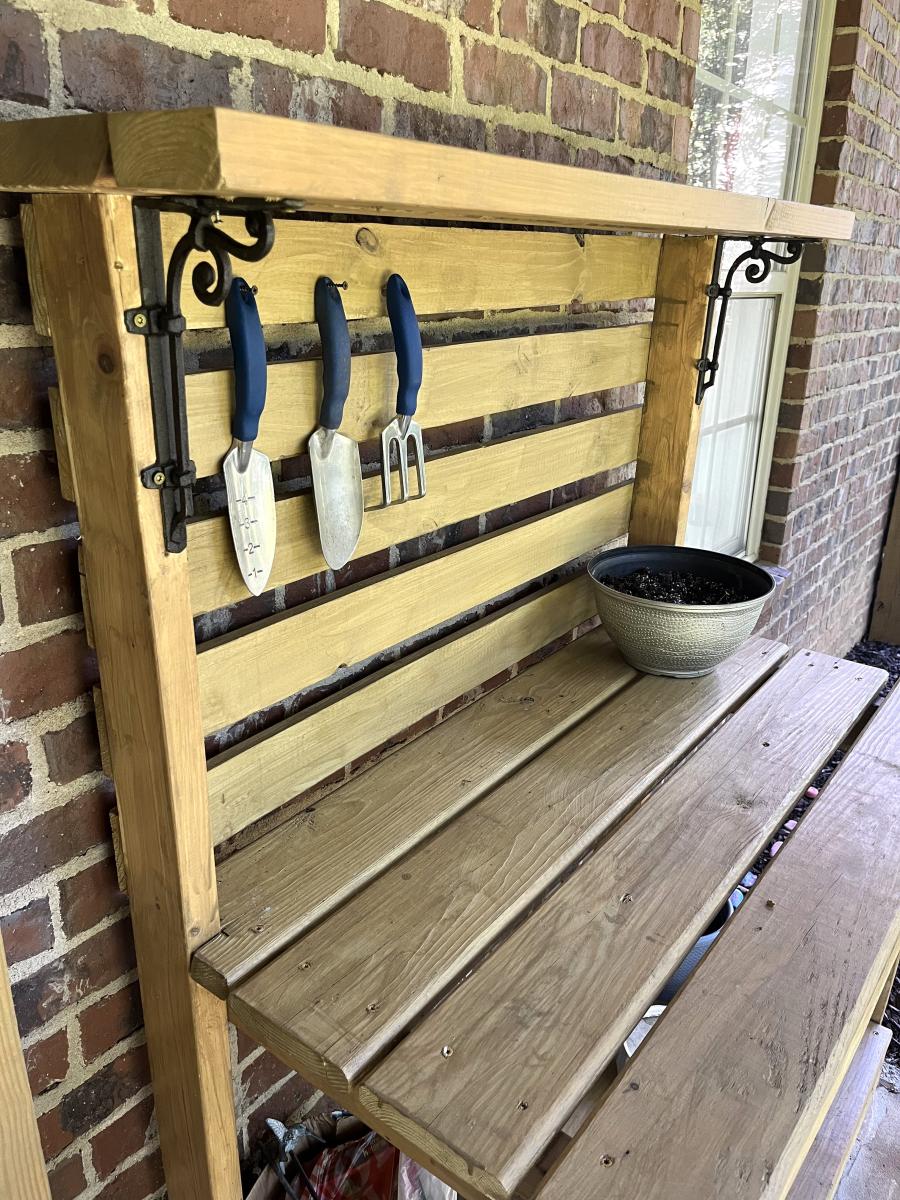
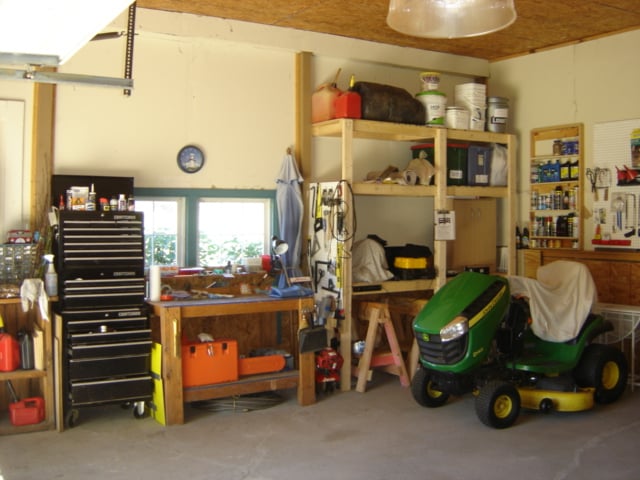
Potting Bench
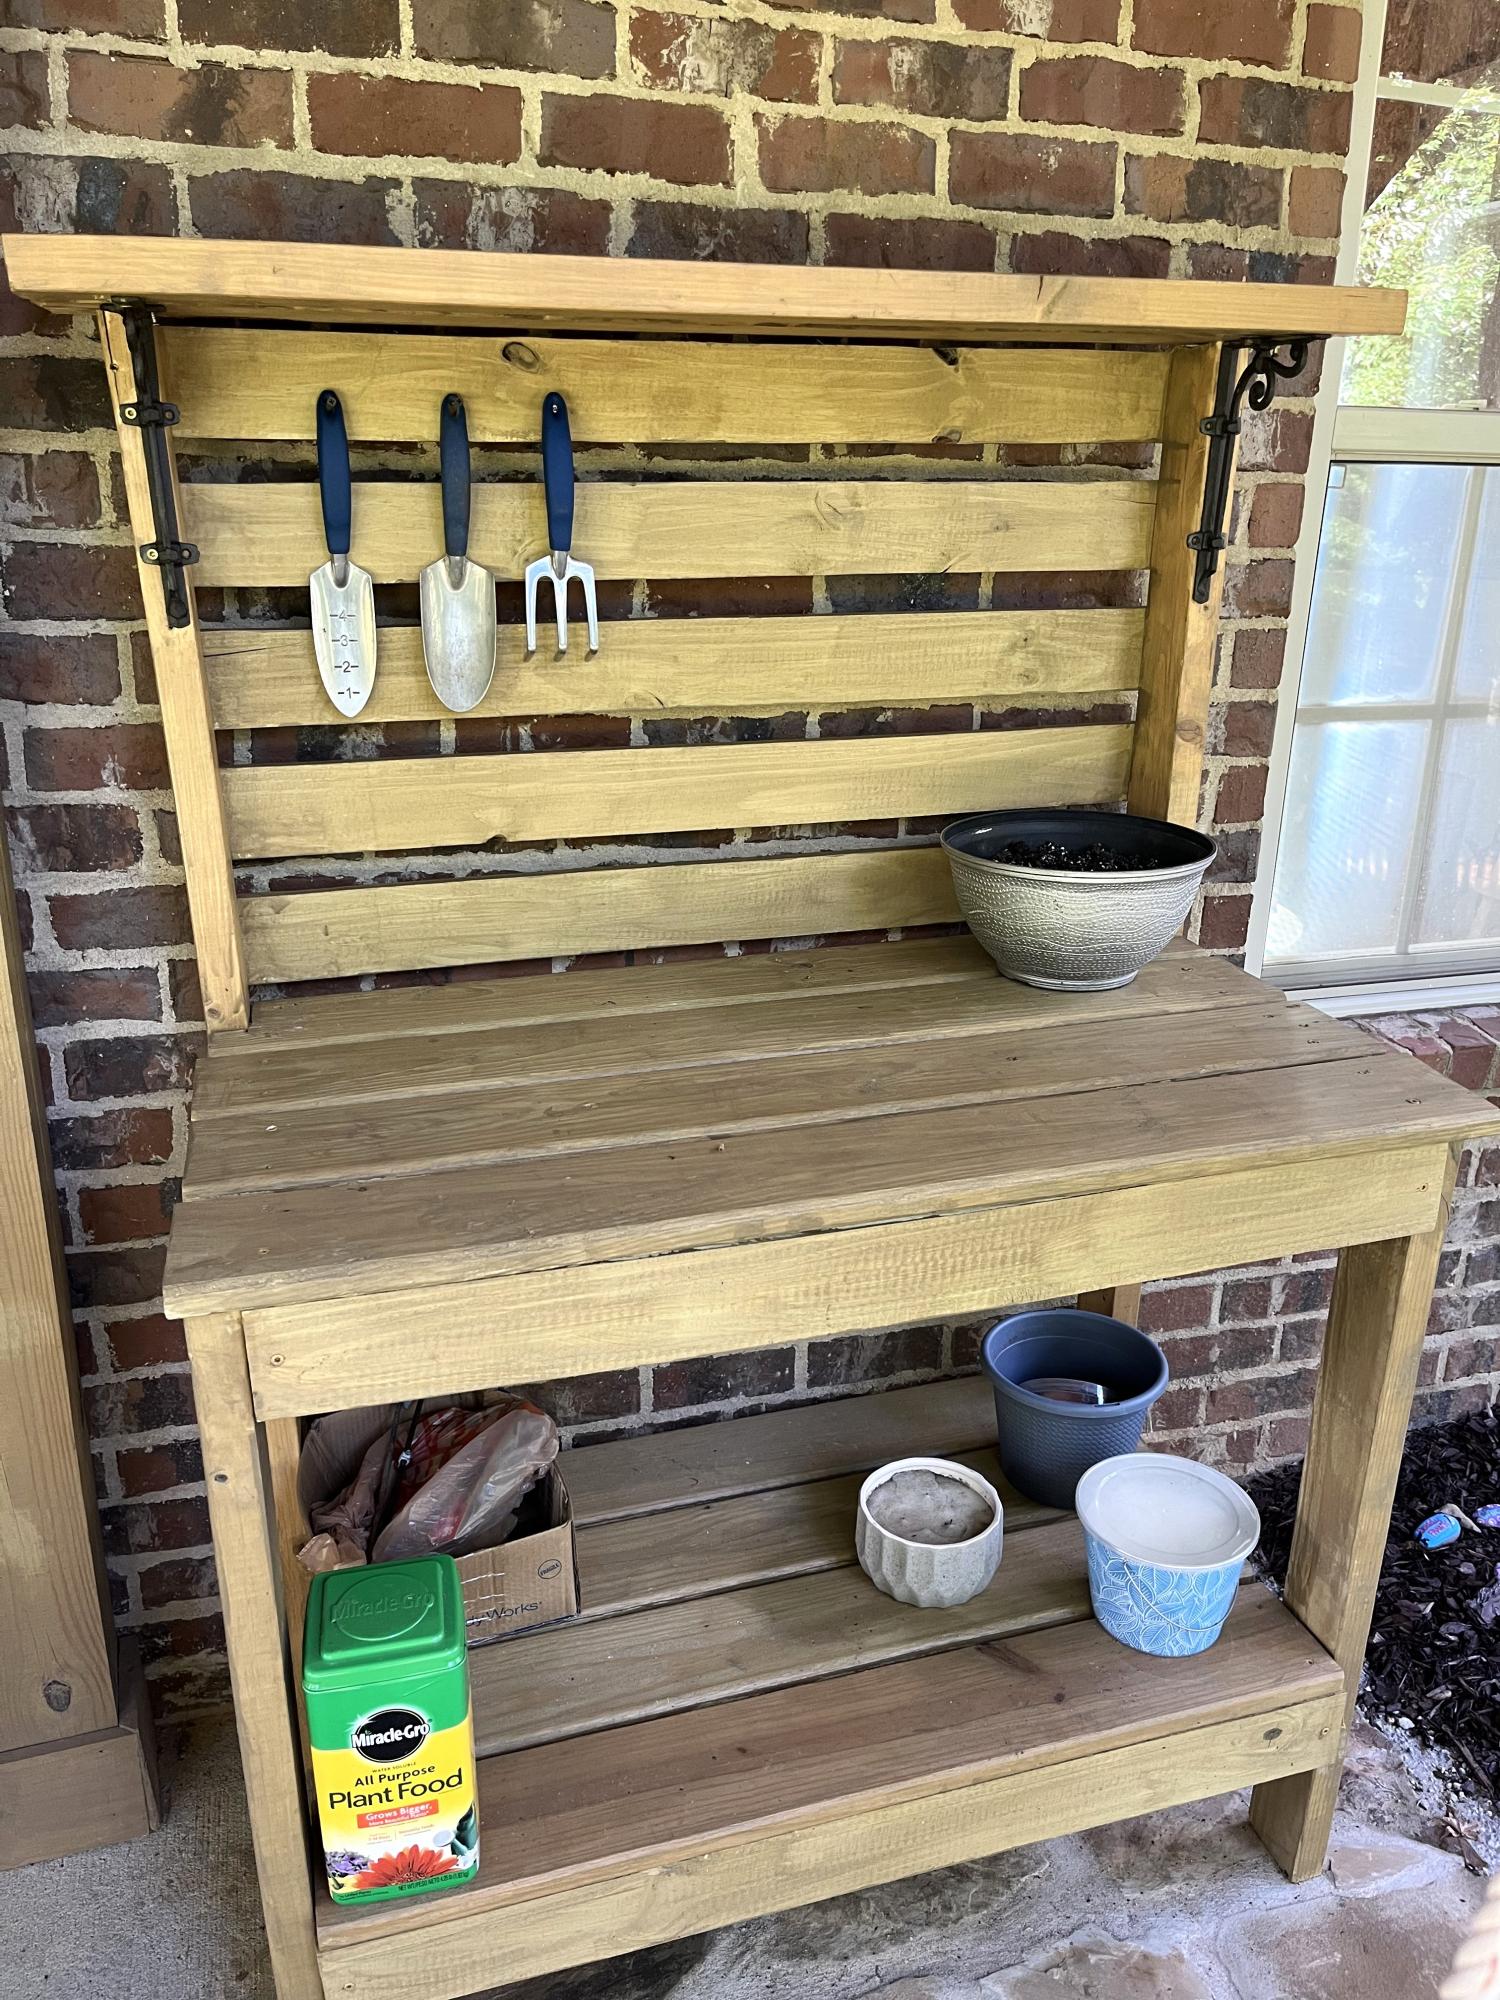
So proud of our first build! We used Ana’s potting bench design and leftover wood from our deck rebuild! Turned out great and has been so useful this spring!
Chita Johnson Drinkard (cjd58 on IG)
Built from Plan(s)
So proud of our first build! We used Ana’s potting bench design and leftover wood from our deck rebuild! Turned out great and has been so useful this spring!
Chita Johnson Drinkard (cjd58 on IG)
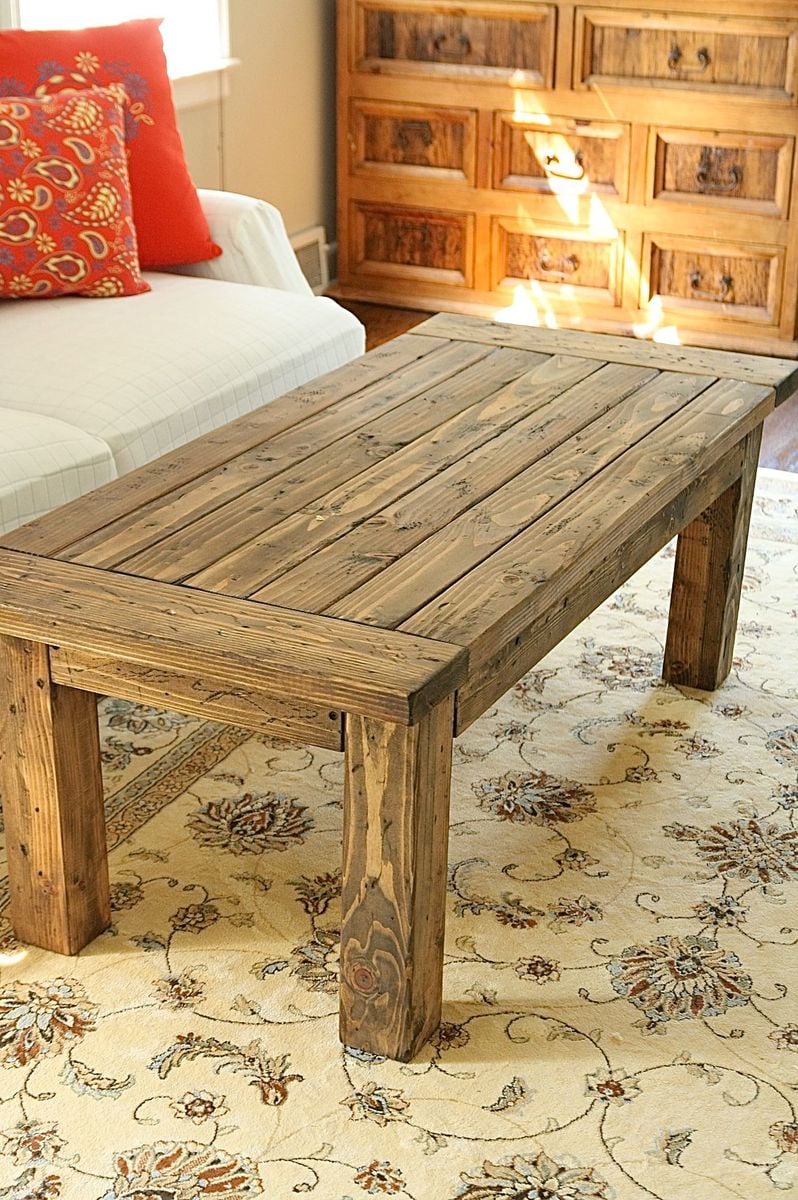
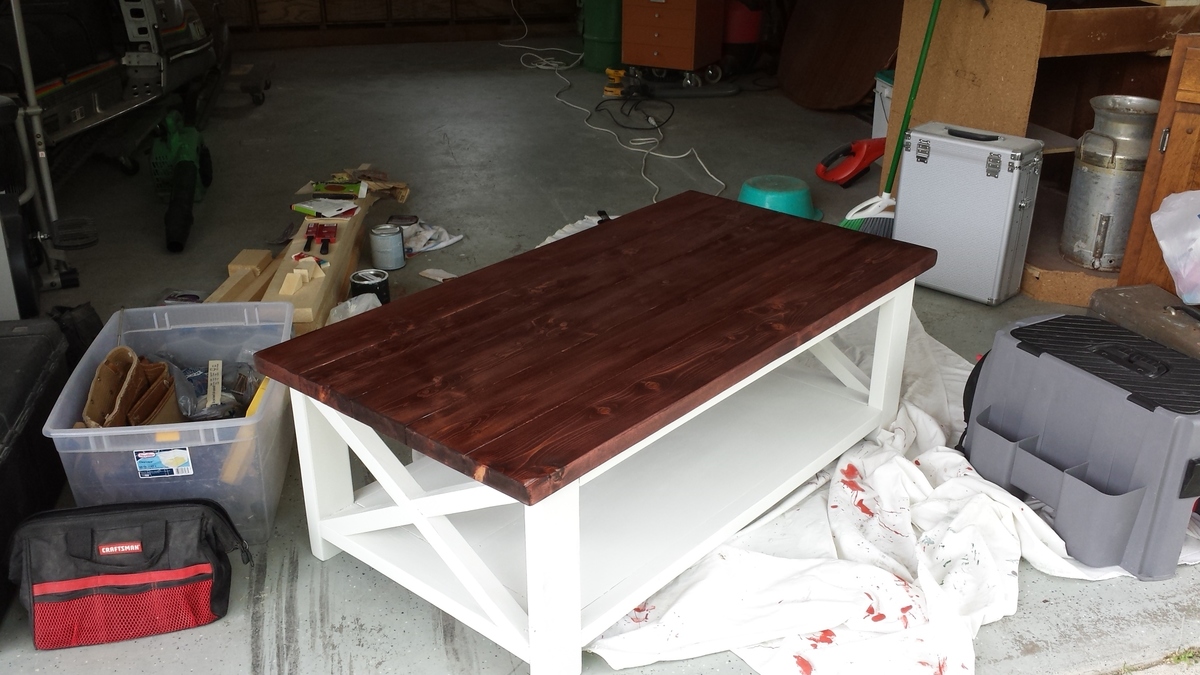
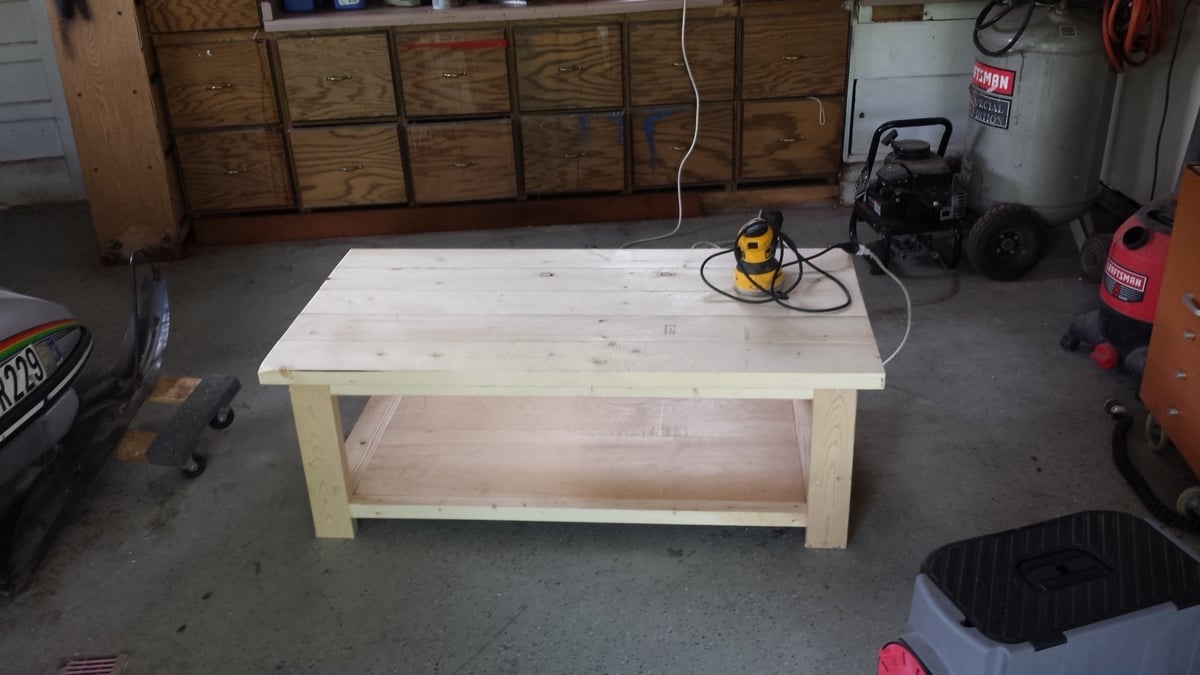
This coffee table was our first DIY project! We found the plan from Ana's website, and it was pretty easy to follow. We are so happy with the result and now we are itching to build everything for our house!

Sun, 09/23/2012 - 21:39
So beautiful! Thank you so much for sharing photos! The finish is beautiful!
Mon, 09/24/2012 - 02:53
Looks very nice! And yes - you're right, Ana's projects - they give enthusiasm to dare to do smth. Keep on homemaking - your coffee table is great!
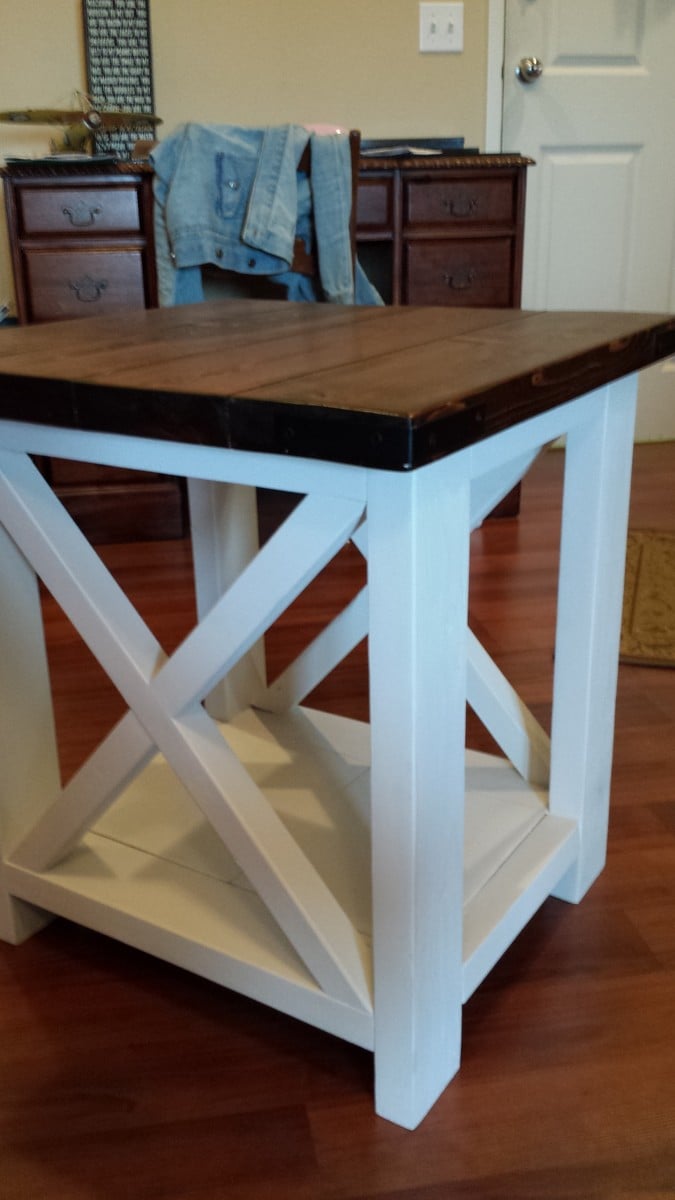
My wife and I got the idea of the two tone from one of the other brag posts and thought it looked great. The end table plans called for it to be 27 by 27.5, we thought this was a little to big for our home so I changed the plans to 22 x 22. Everything worked out great with the exception of some tool spacing issues. When screwing in the PHS my drill did not fit in the smaller space that was left after I shortened the length. Over all I am thankful for this website and all of the people who give back. We saved a lot of money doing these two projects and they turned out exactly how we wanted.

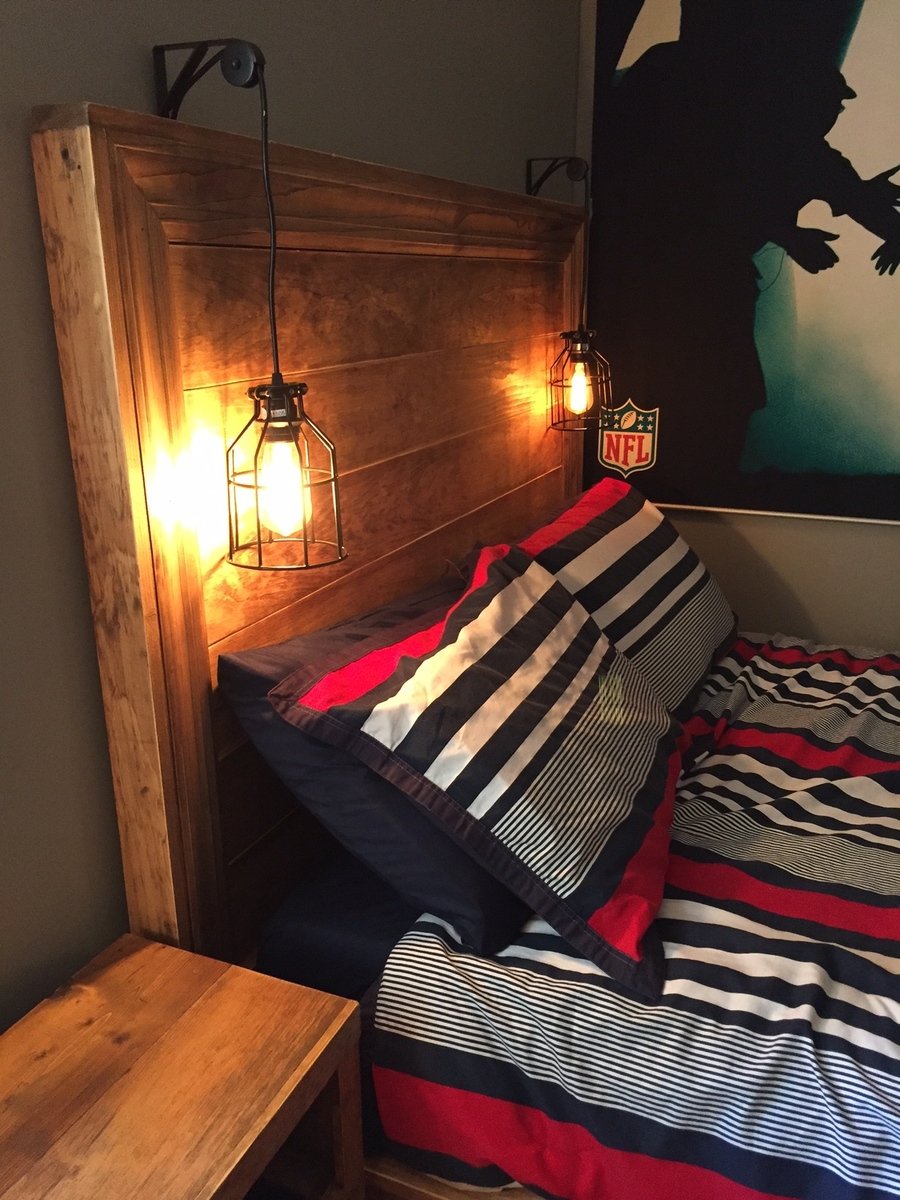
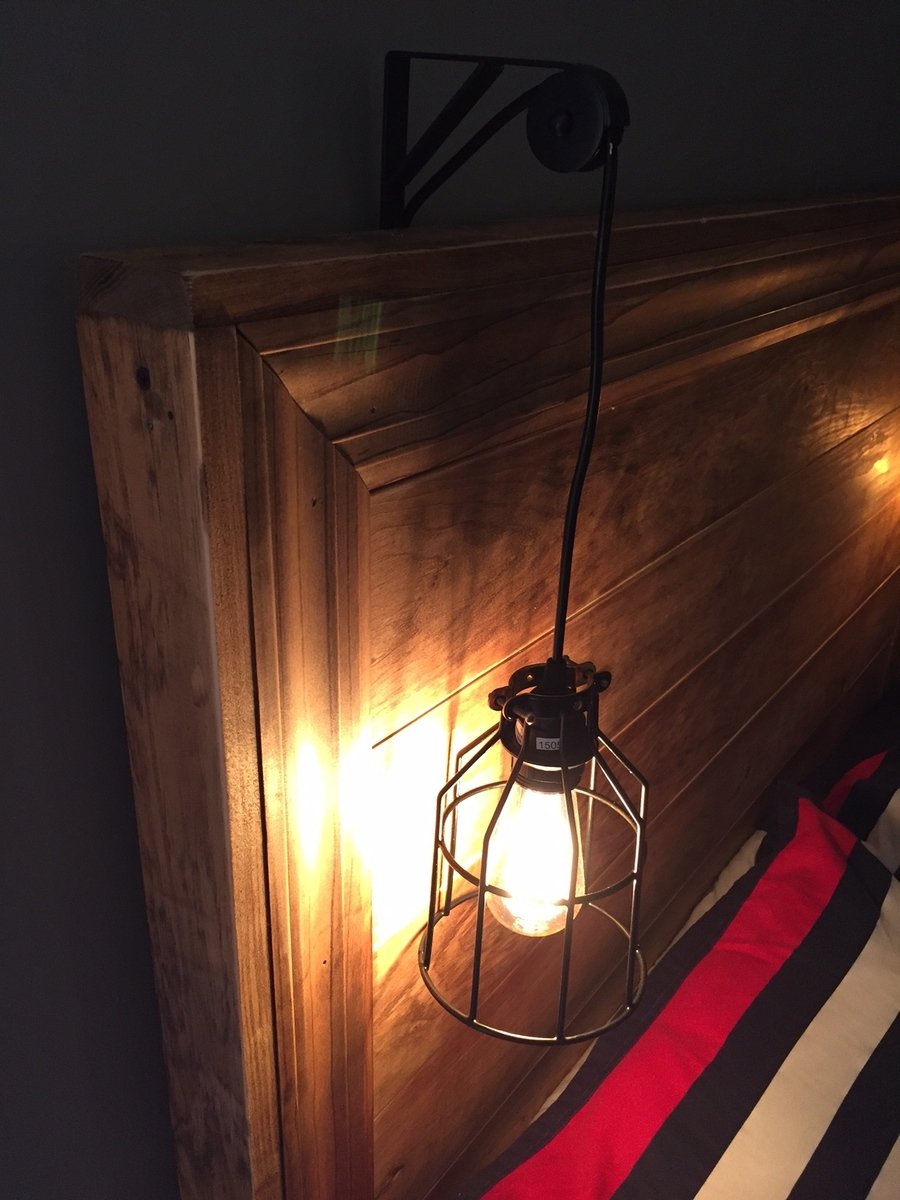
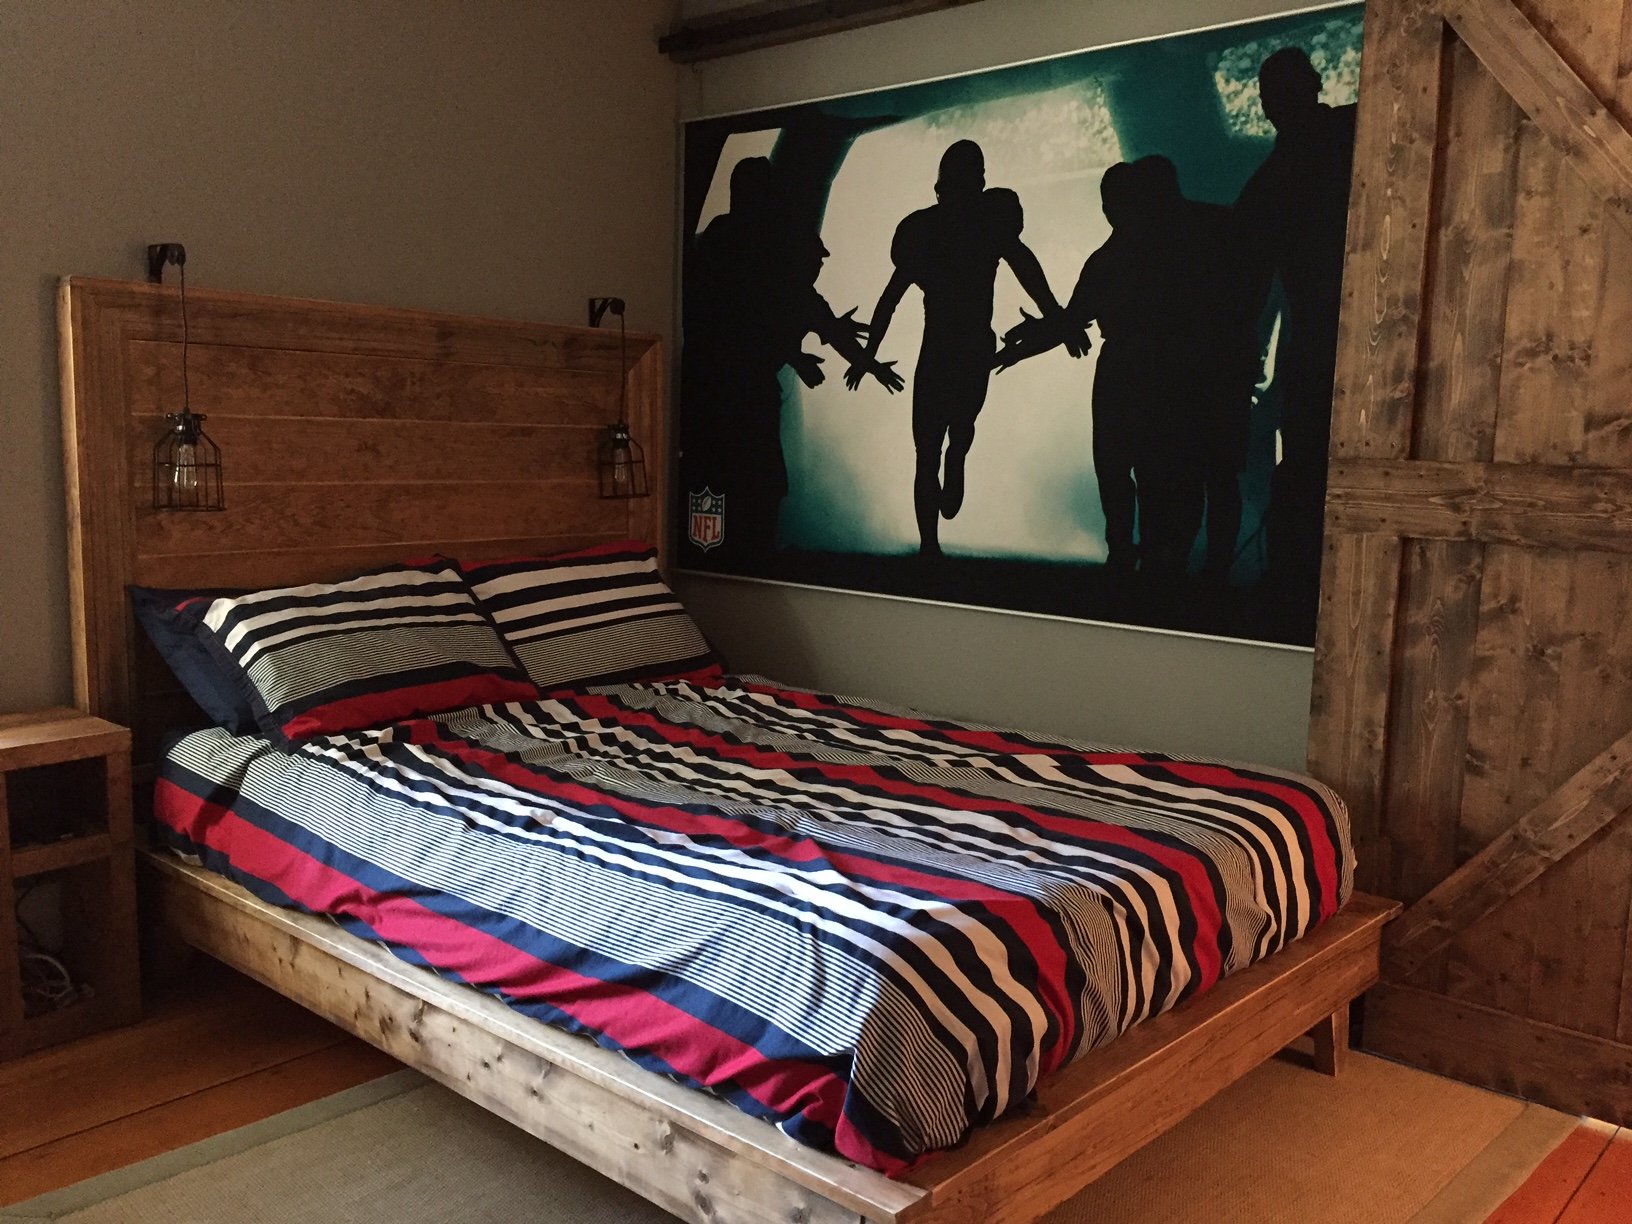
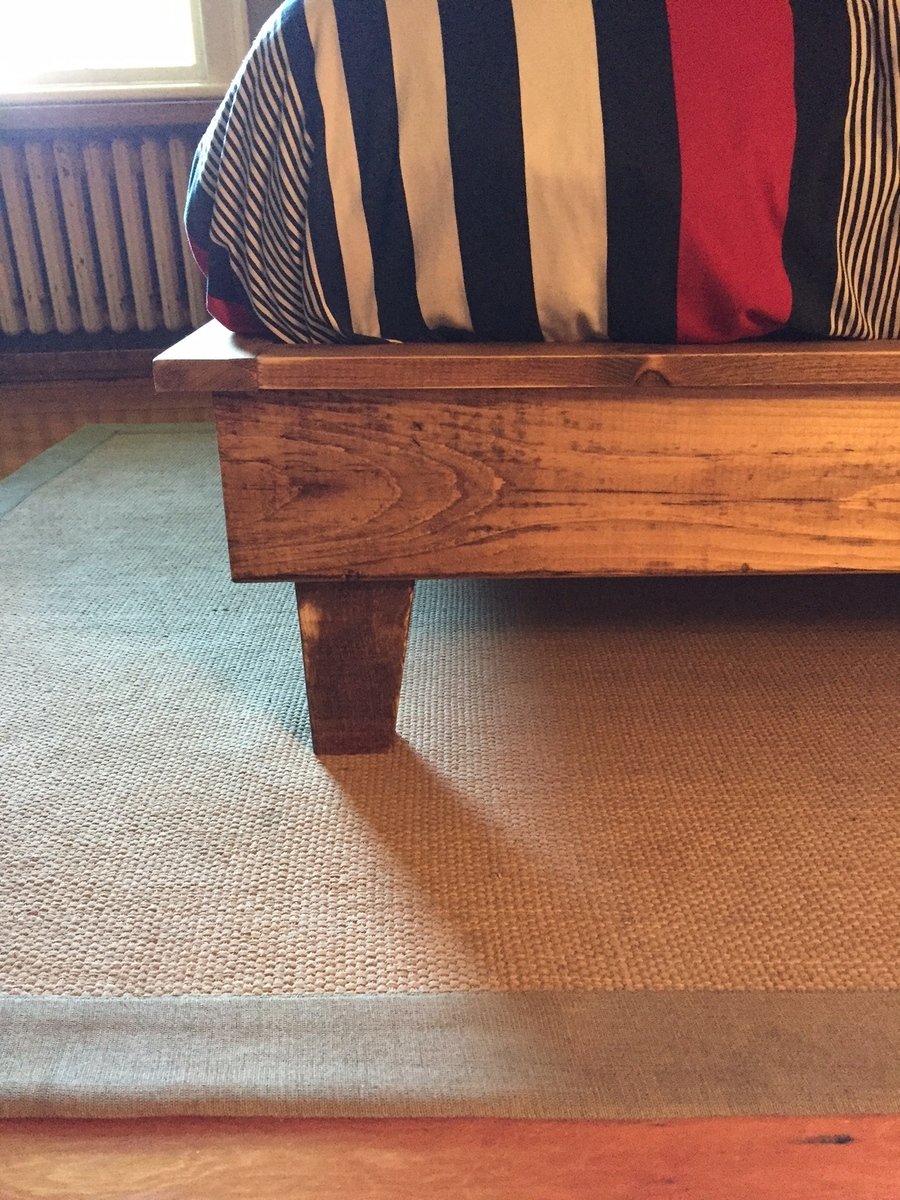
I love this bed in my son's room. They were wonderful plans that were easy to follow. The only change I made was to make the feet slightly taller so he could slide underbed storage containers underneath. My only mistake was not planning ahead for how I would attach the headboard to the frame. It ended up not being necessary because the weight of the bed pins it against the wall, but If I ever wanted to make this for someone else I would want to solve that piece first.

Mon, 07/15/2019 - 13:53
Amazing job, I love the hanging light fixtures....and the matching side table....and the matching barn door. A dream bedroom for a kid! Thanks for sharing!
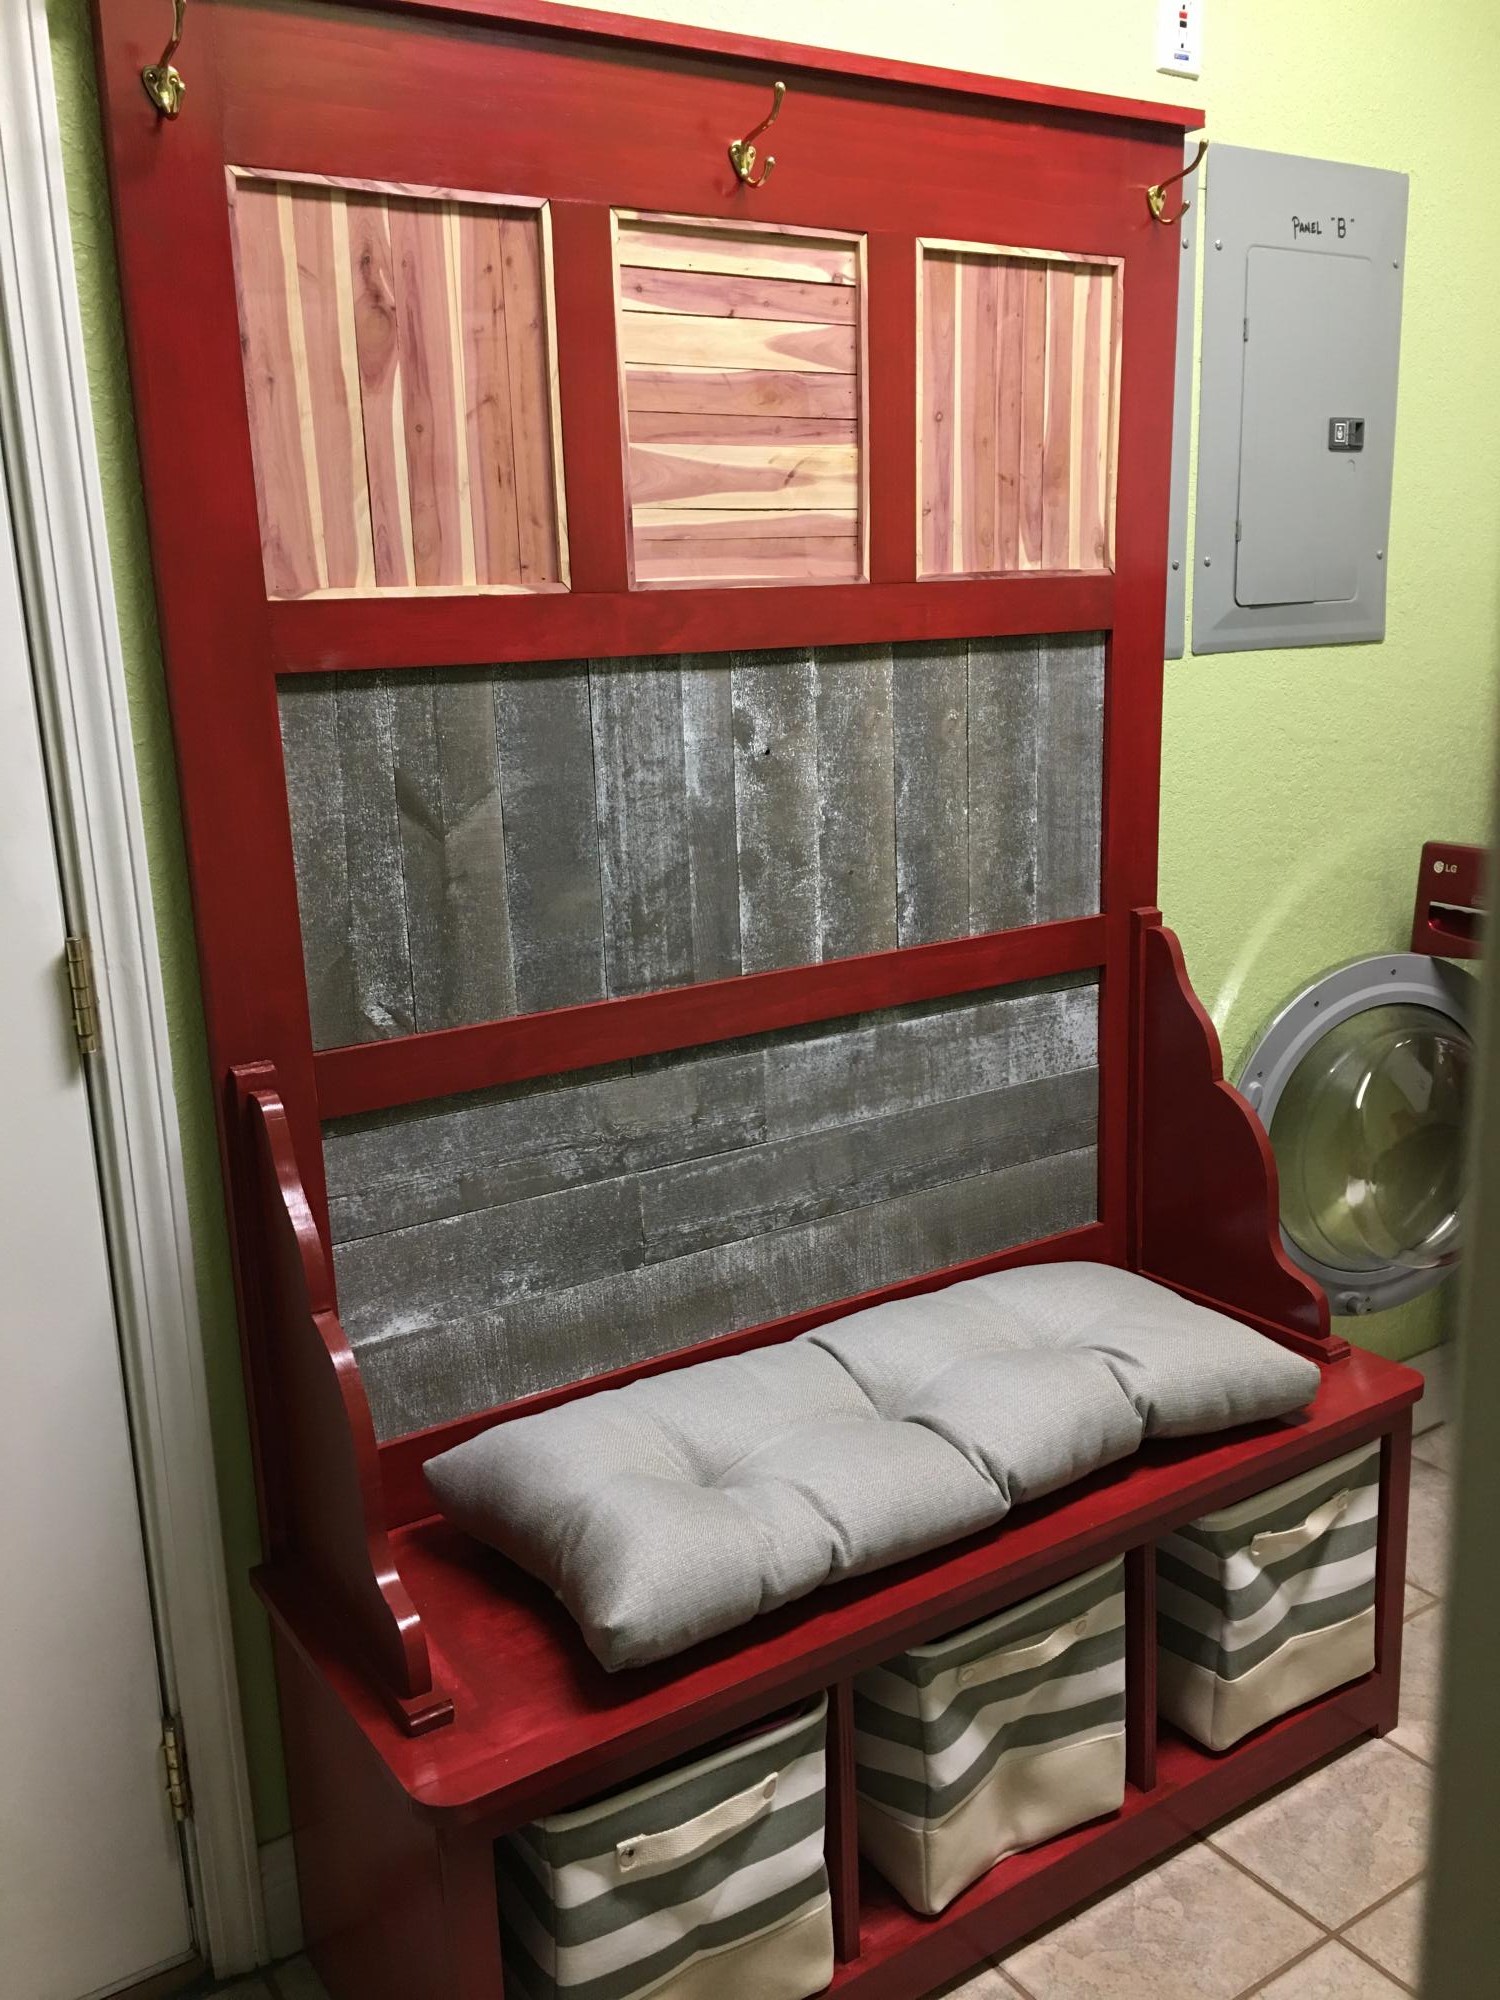
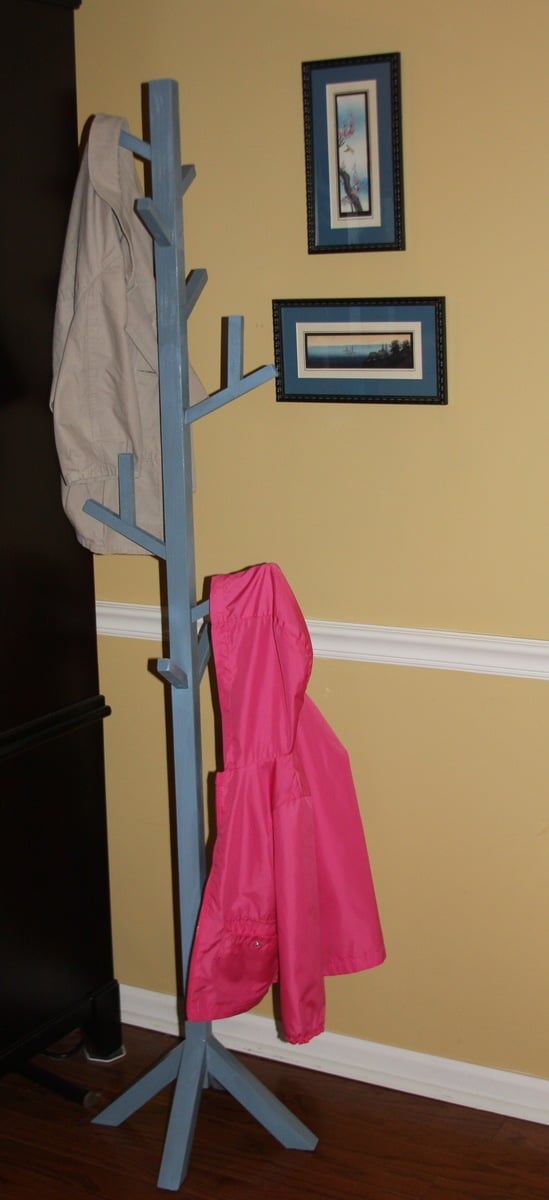
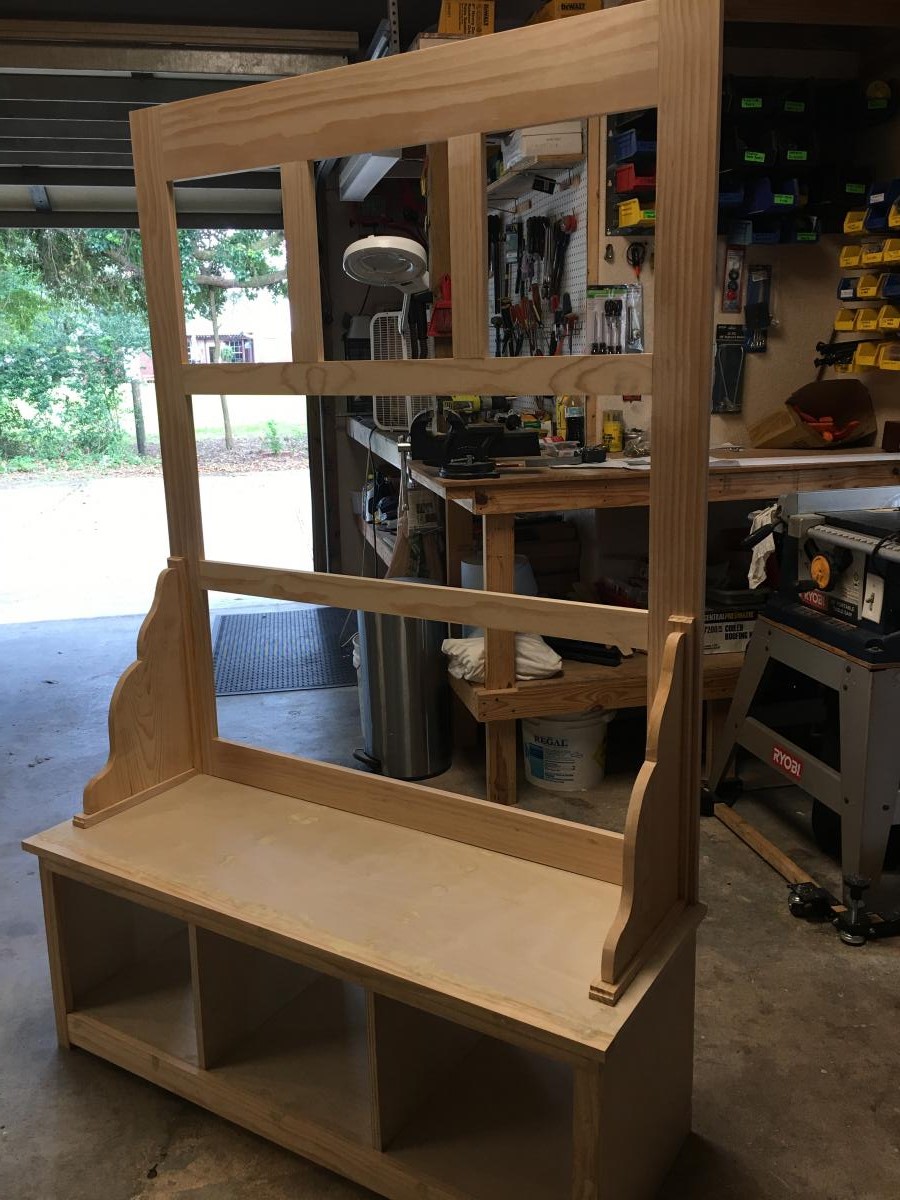
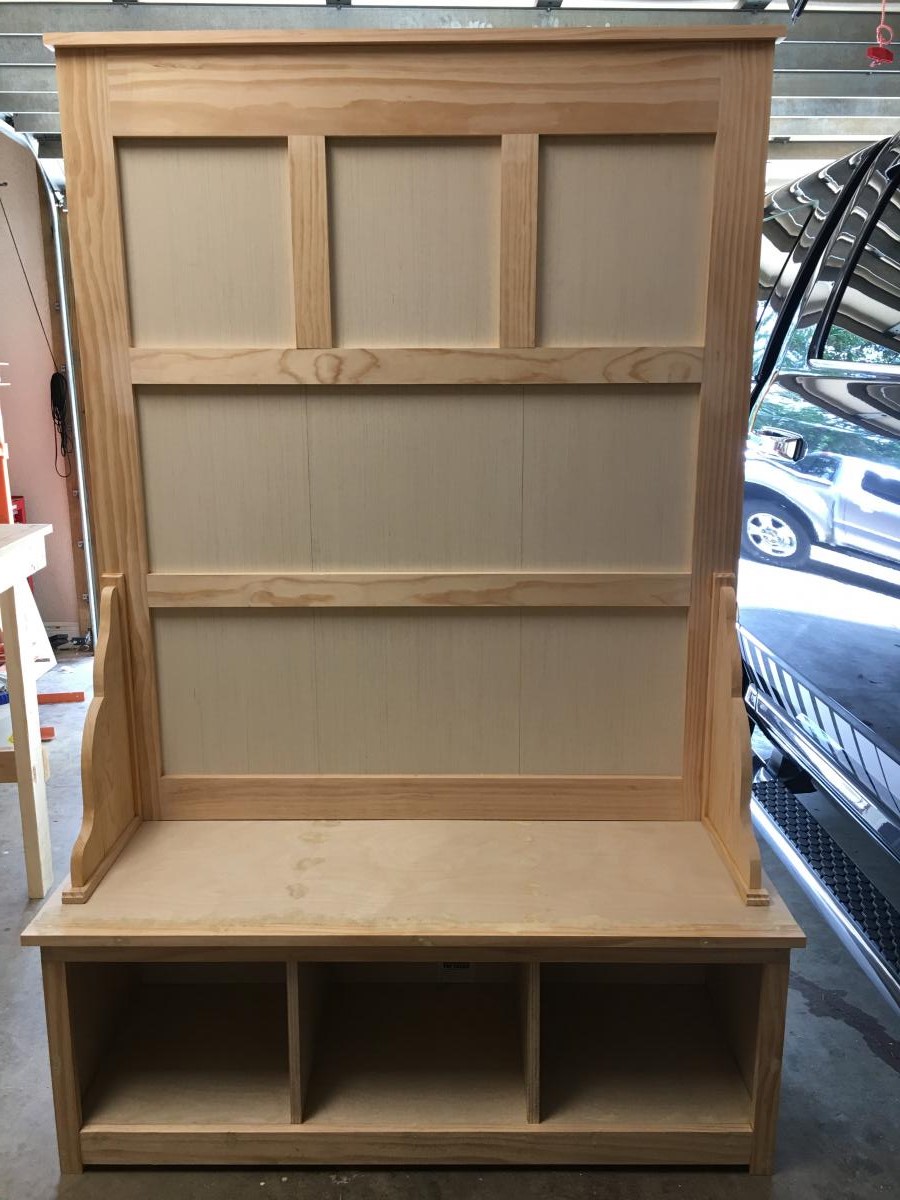
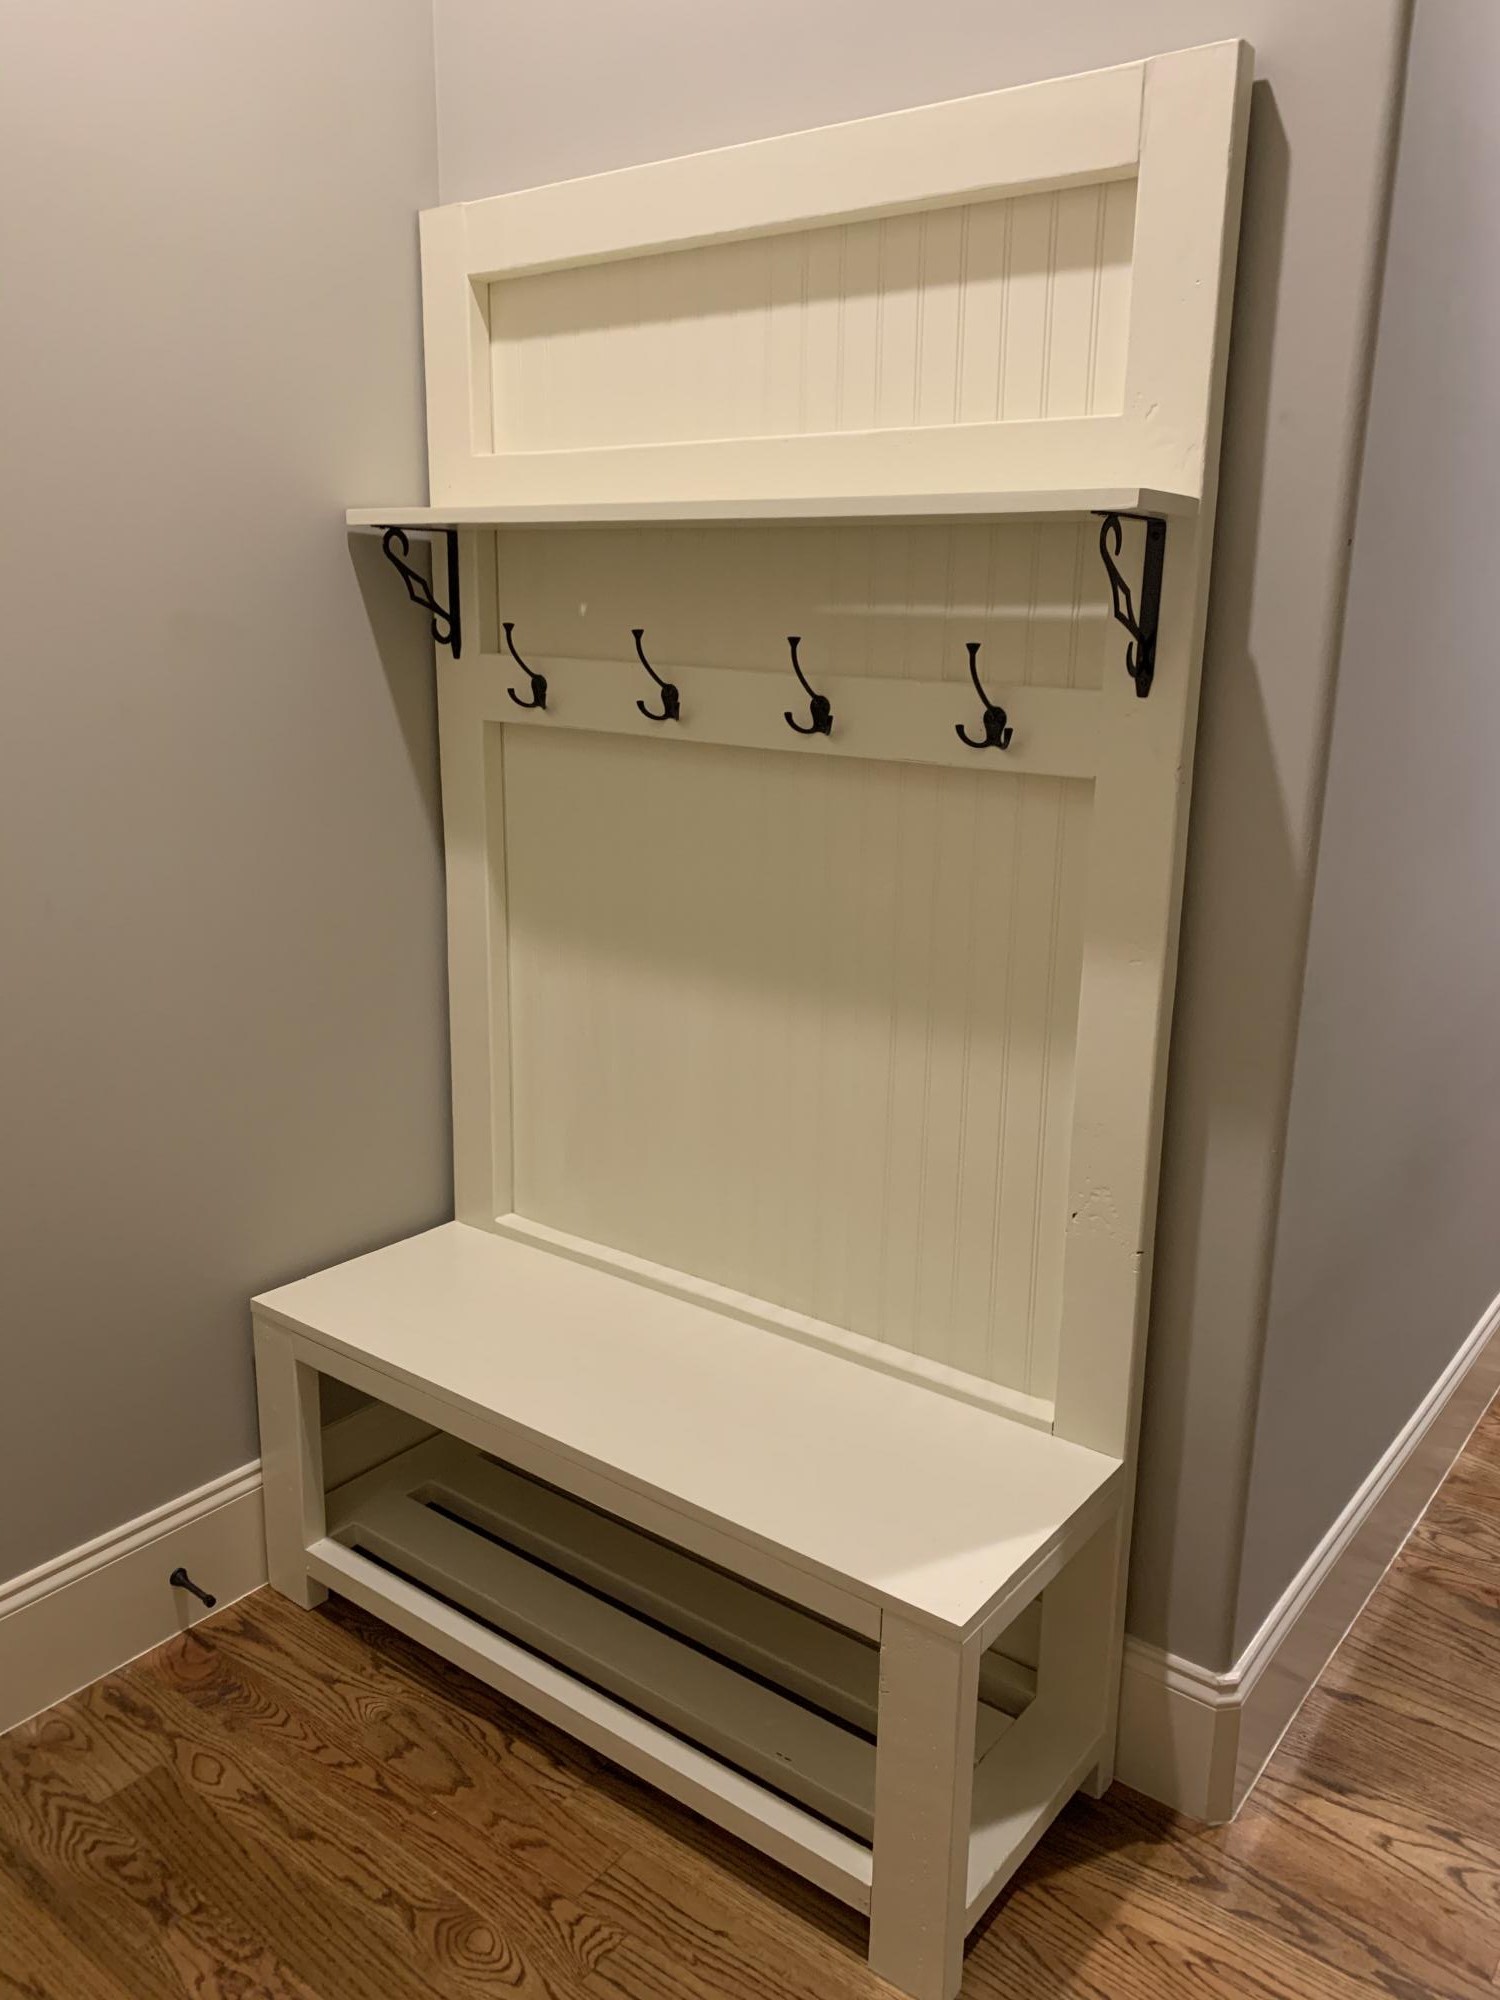
Hall tree I got off your web site, very simple to build, out standing plans I put my own twist into it. I had some cedar tree limbs on my property that I had cut down . I ripped down on my table saw and added to my project. it was a challenge to turn limbs into small boards but worked out well.
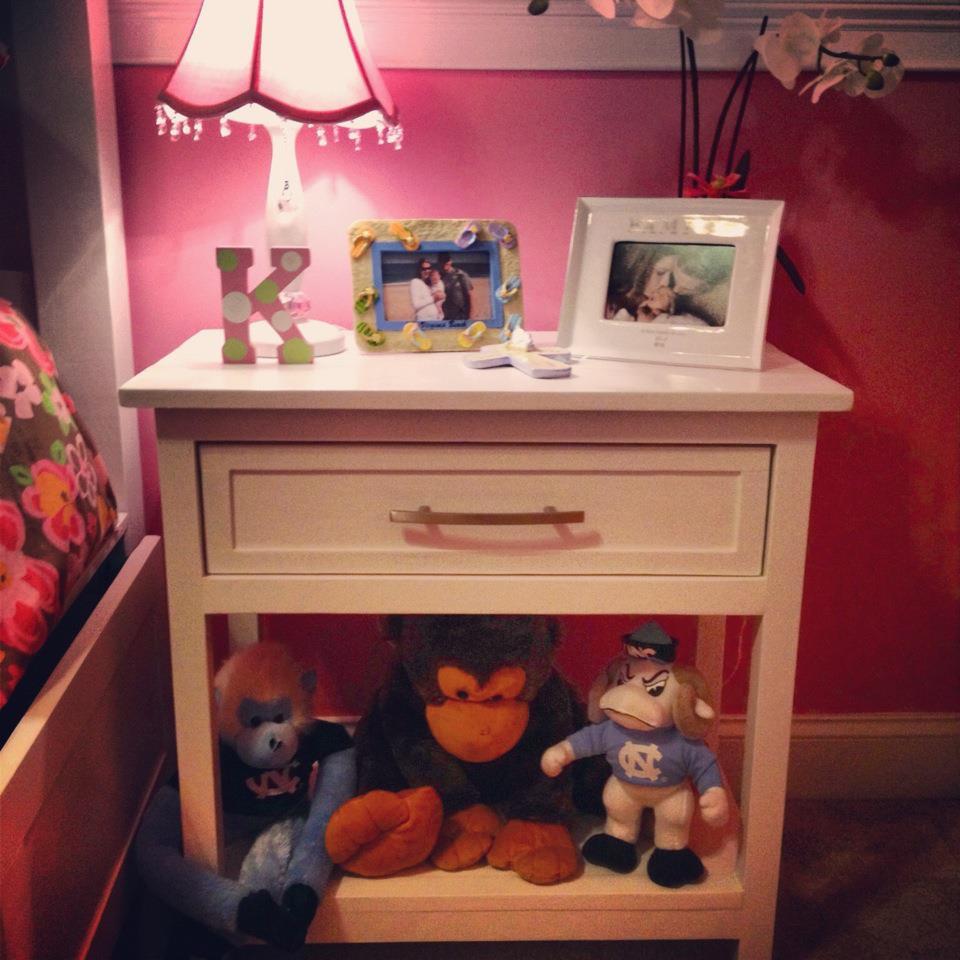
Built this bedside table to go along with the Farmhouse Storage Bed I built for my daughter. I added molding to the front of the drawer to match the molding on the drawers in her bed. I used a ratio based of the size of the drawers which left me using 1/4" plywood strips cut to 1" wide to frame out the box.
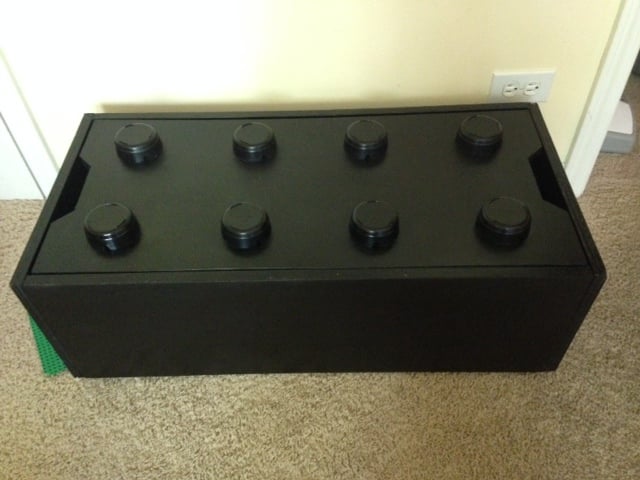
I didn't have a jig-saw since I am still pretty new at this, so I searched for alternatives. I found these plastic ashtrays at the dollar store, flipped them upside down and spray-painted them! Now my bin even says 'made in china' ;)
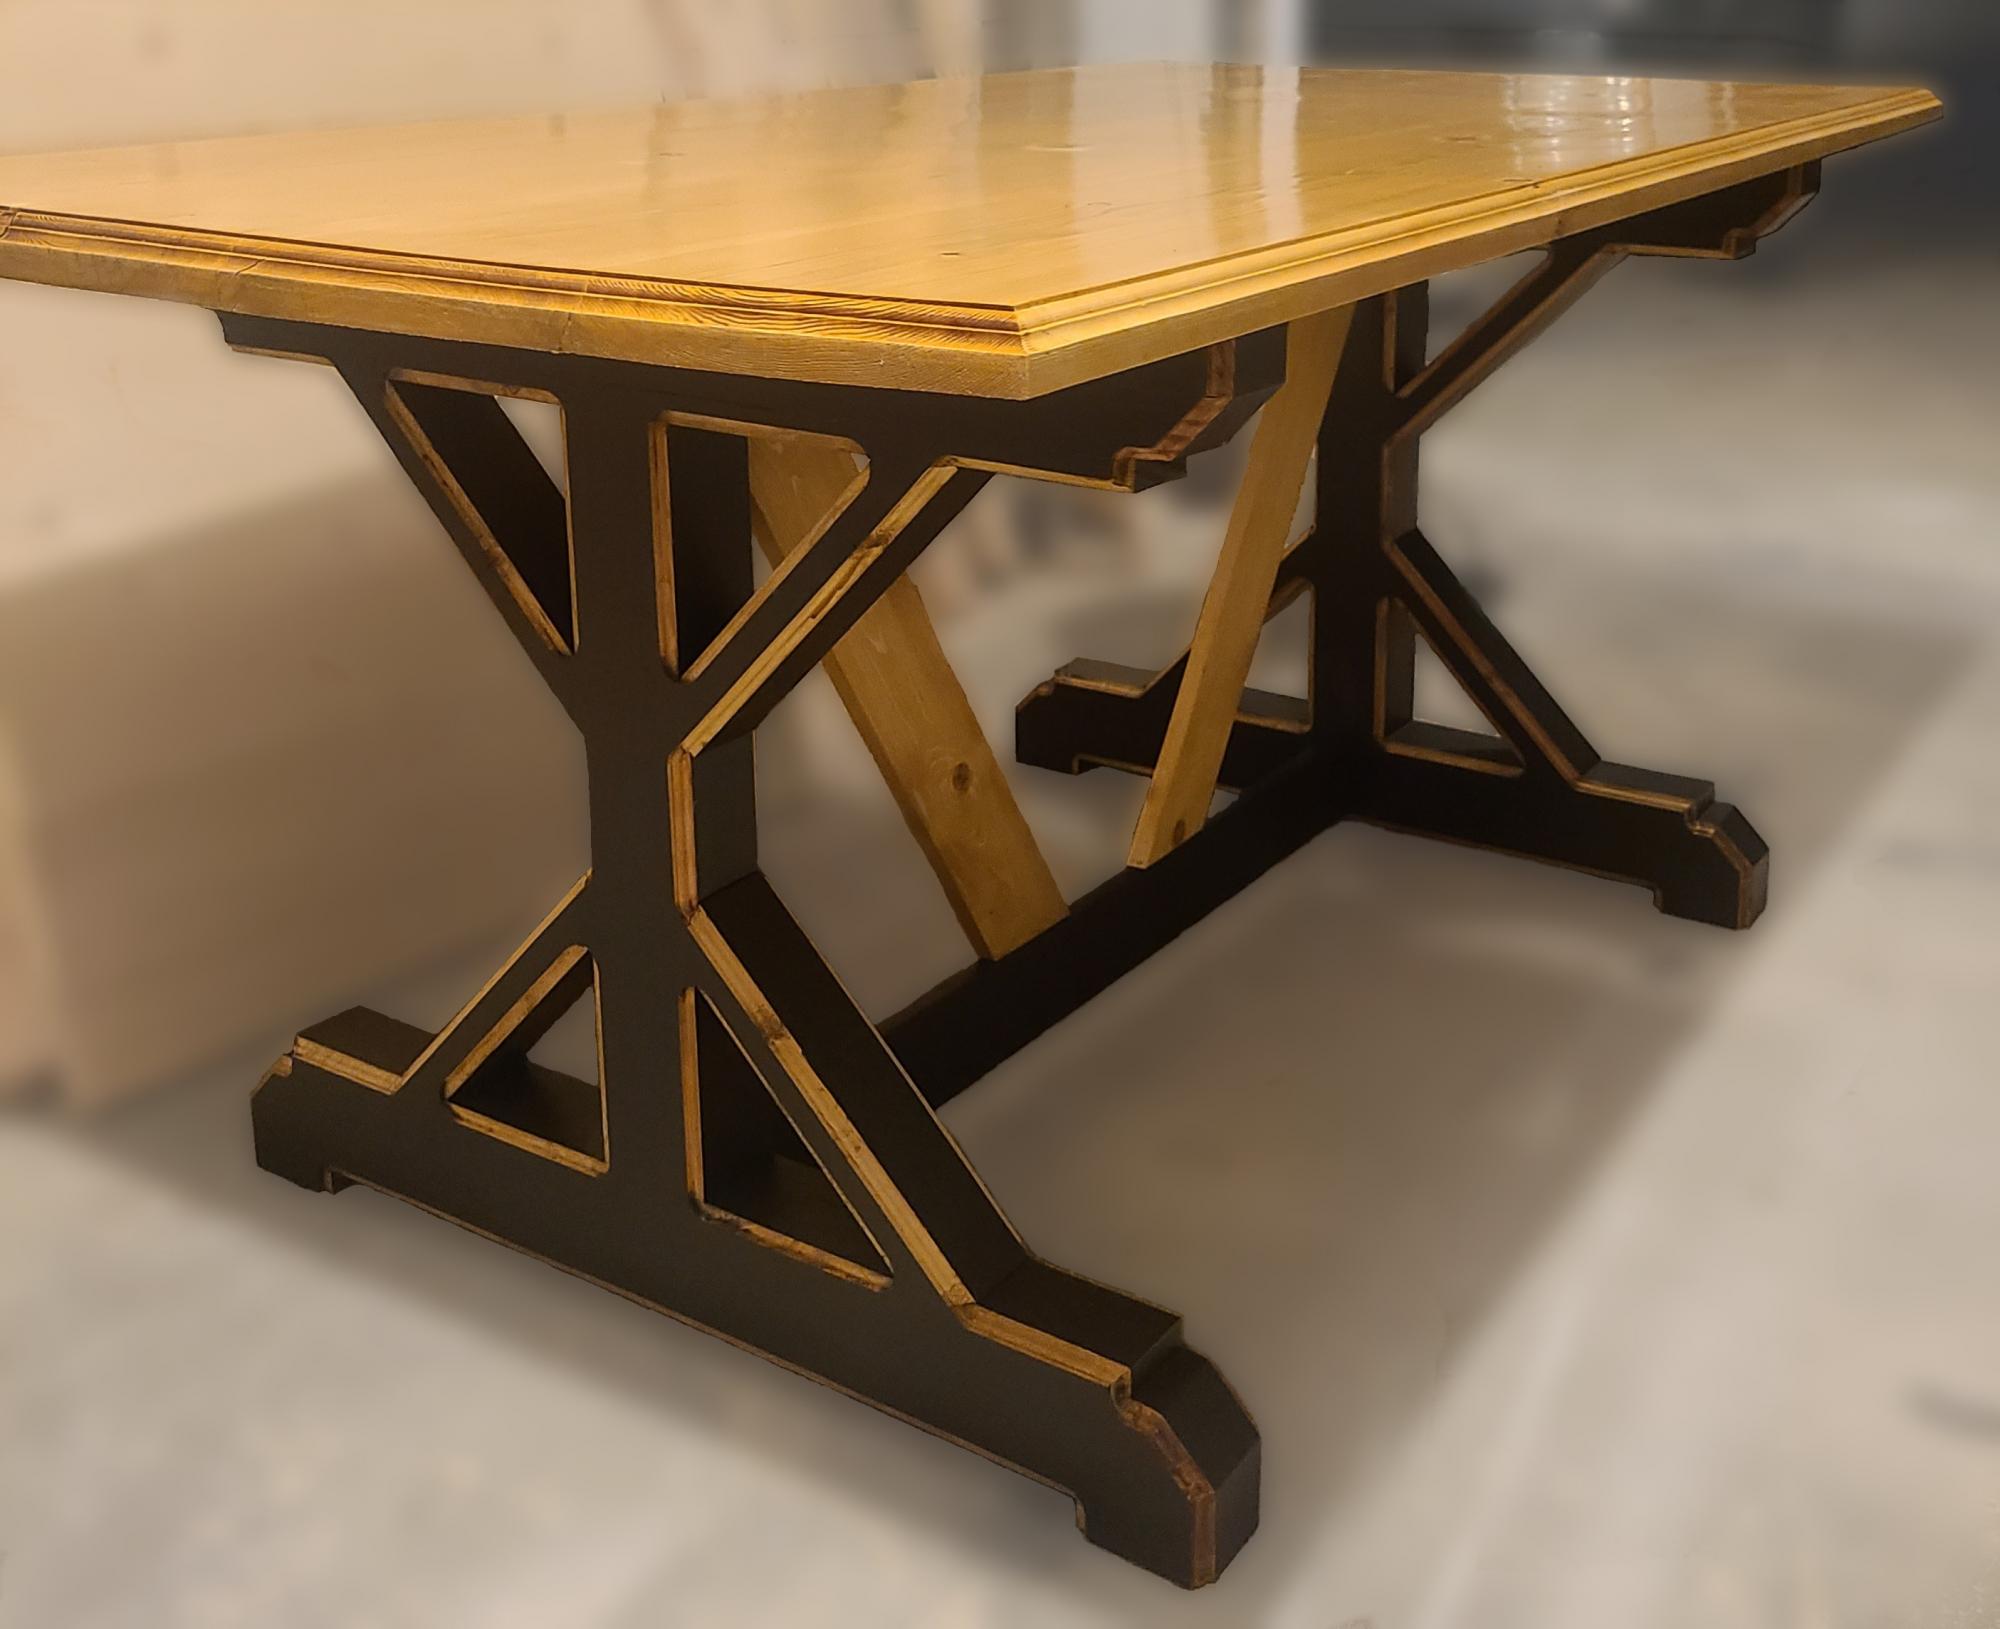
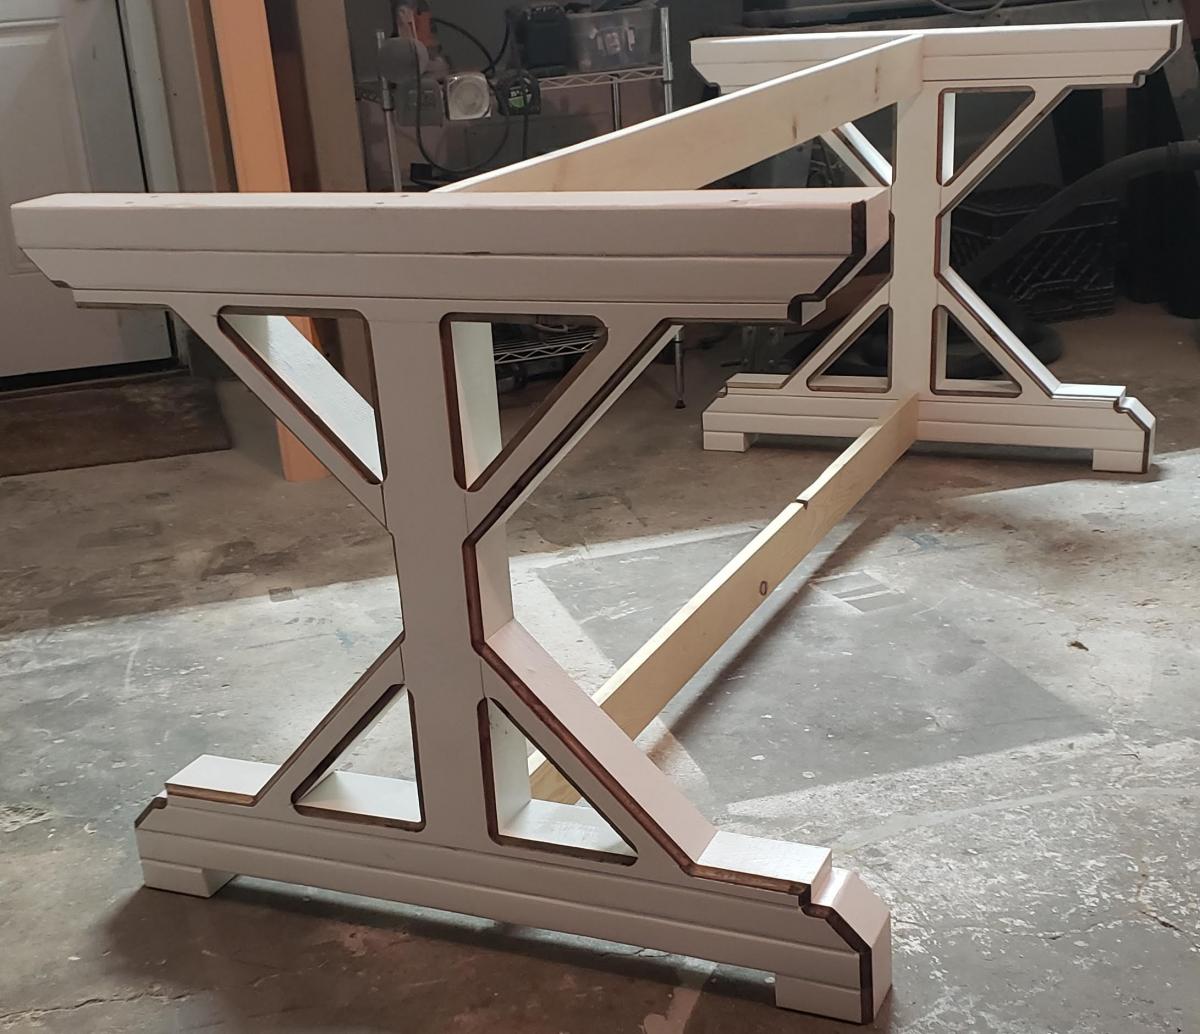
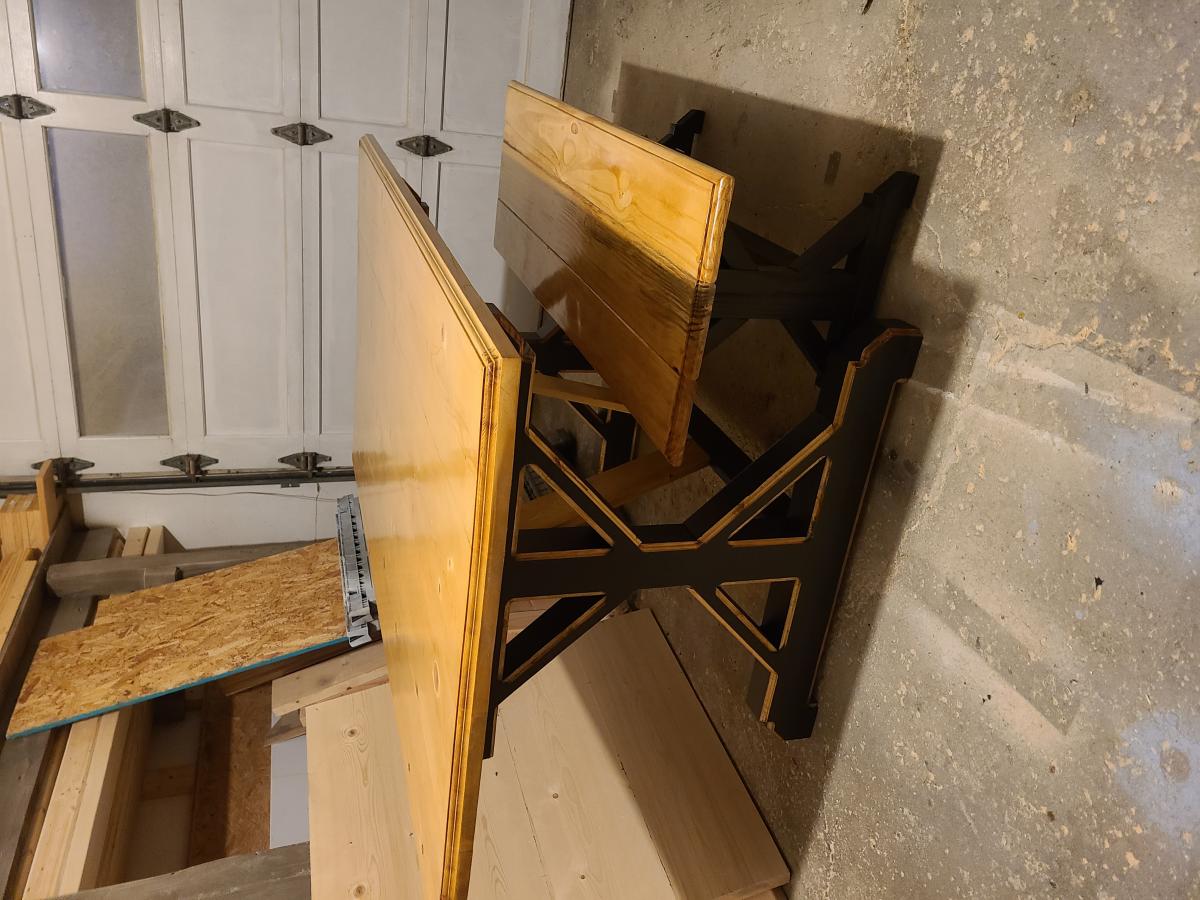
I used this awesome plan from Ana White and tried to add my own touch on it. After painting the legs, I then routed the edges and stained them to match the table top. Thank you for this plan!
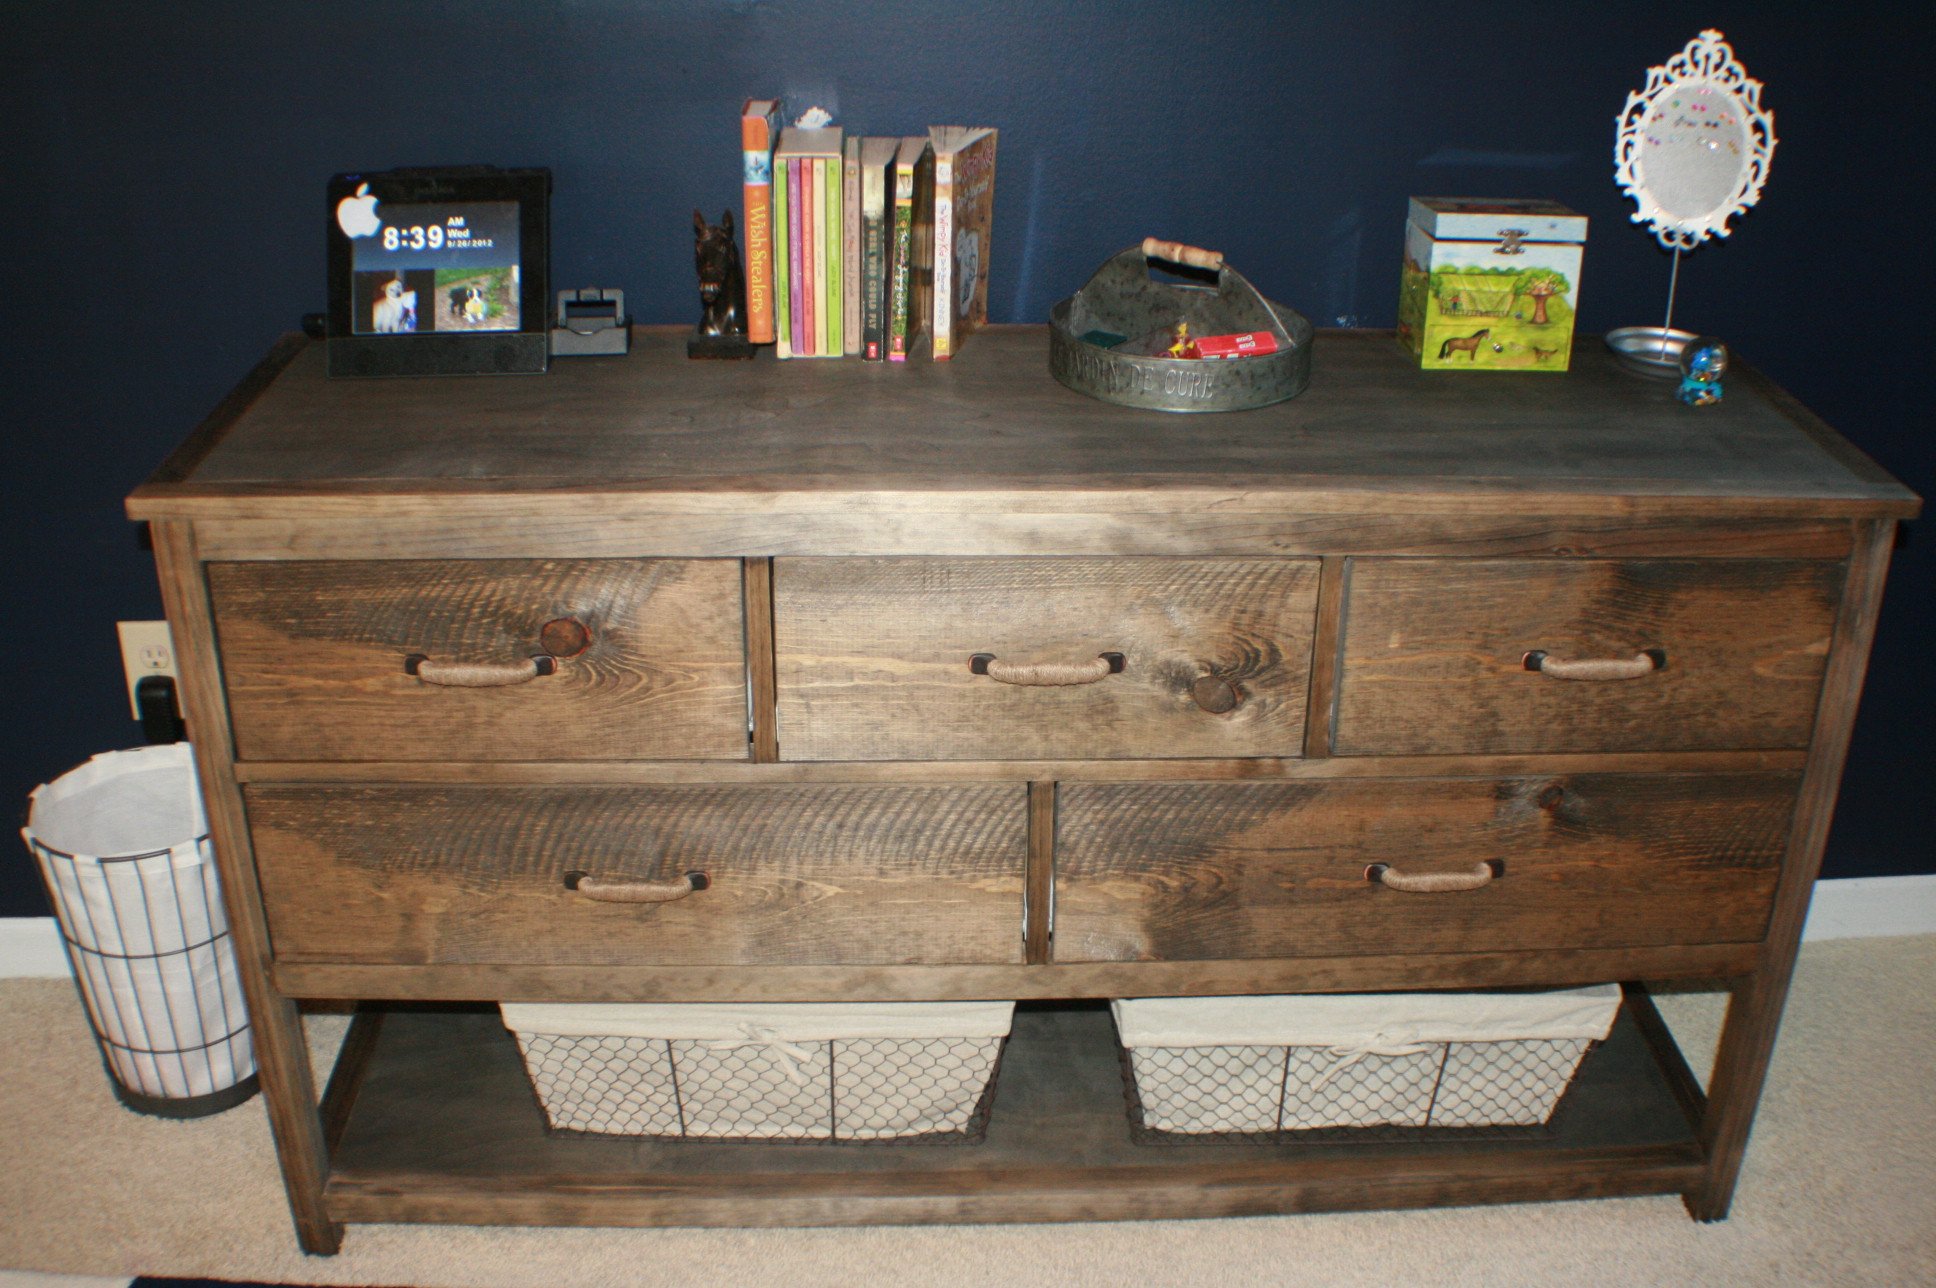
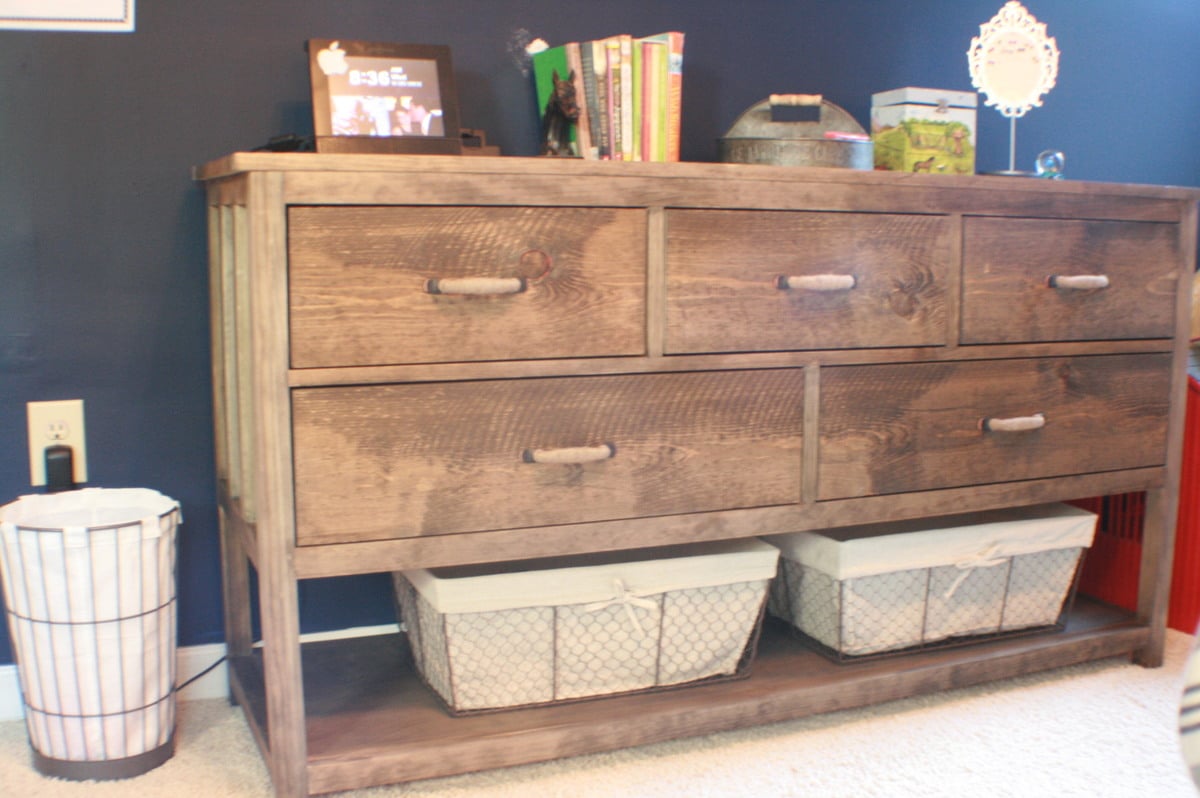
My husband and I did this together. It took him about 4 days to get the dresser built and then I did the finish. It is SOLID and we absolutely love it. It's in our 10-year old daughter's "horse" room and goes really well with the barn wood on her back wall and her barn door (closet).
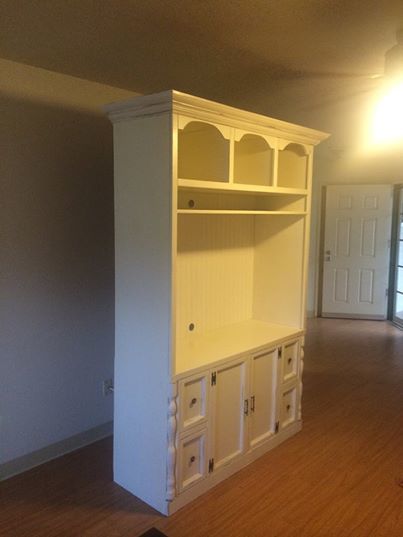
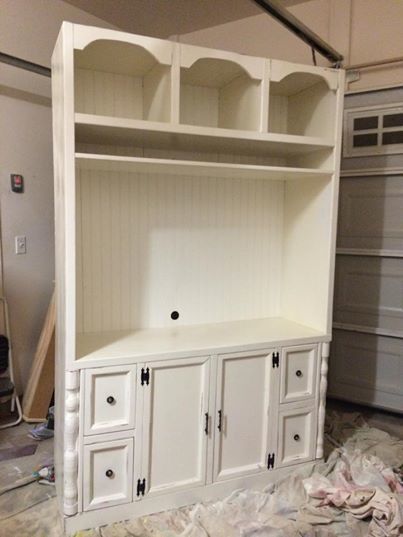
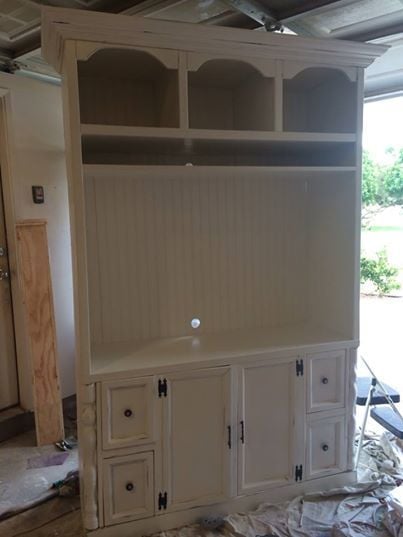
Swiss coffee Entertainment Center... Distressed. All Trim work made by me.
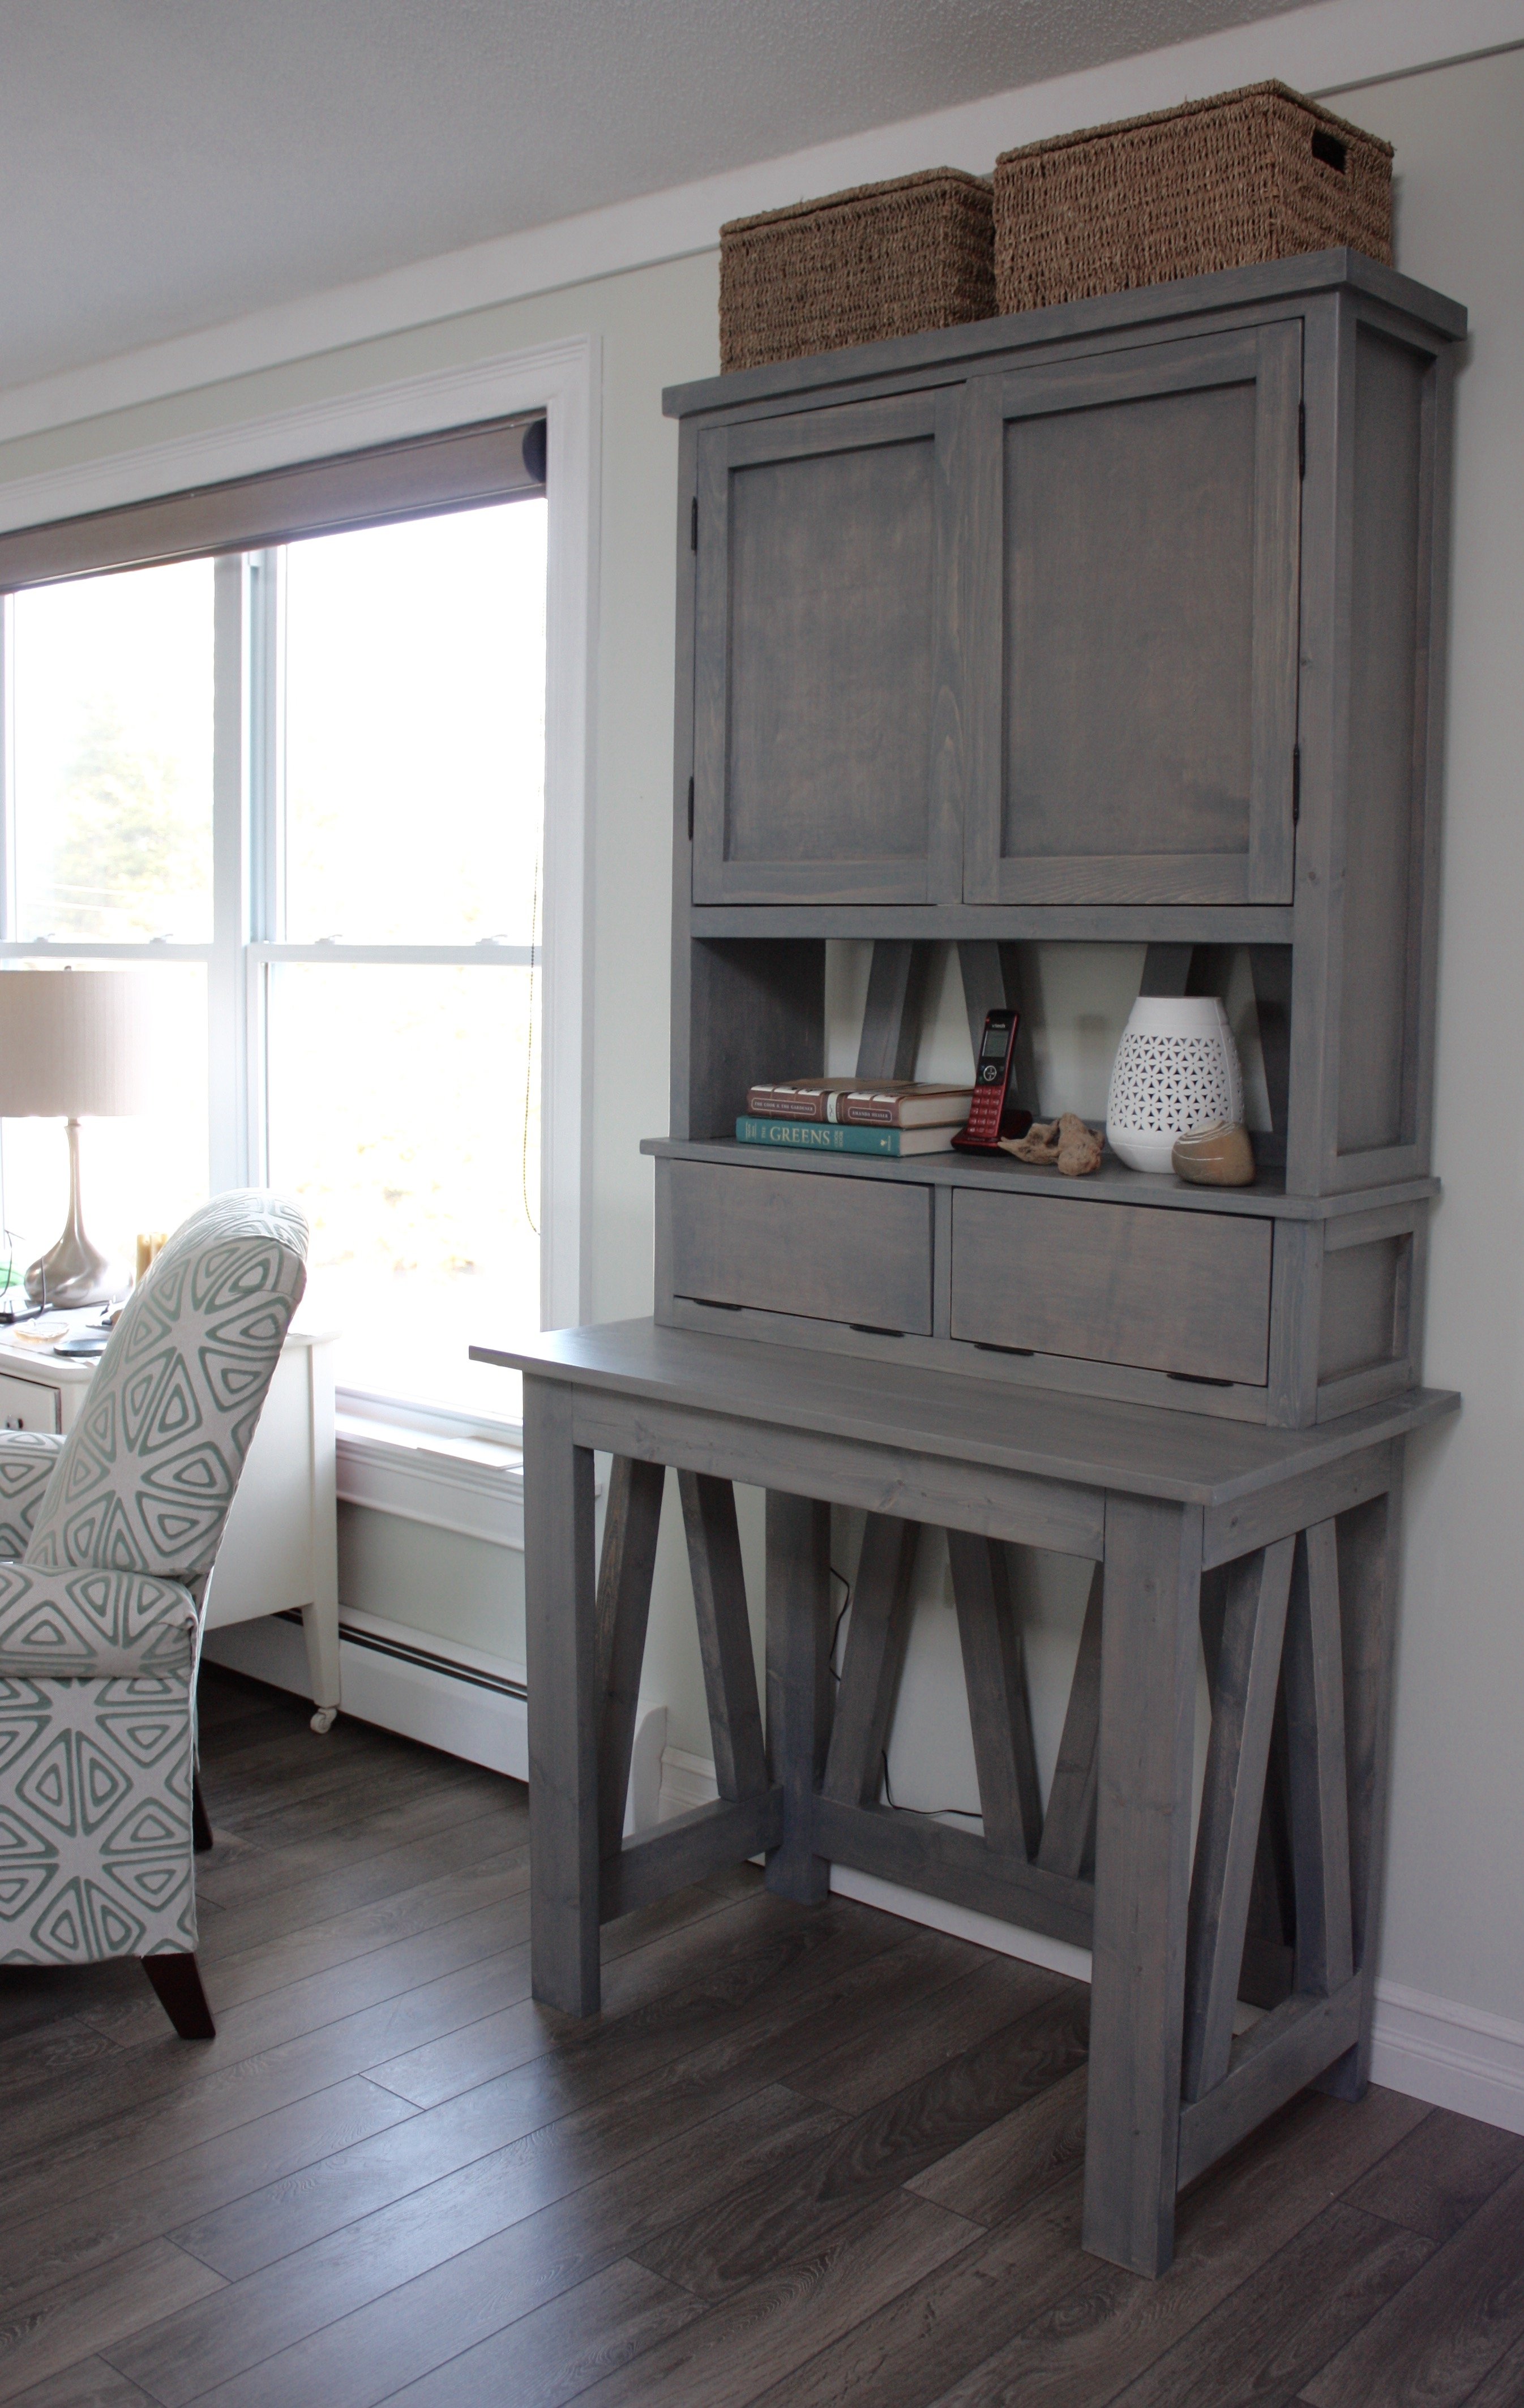
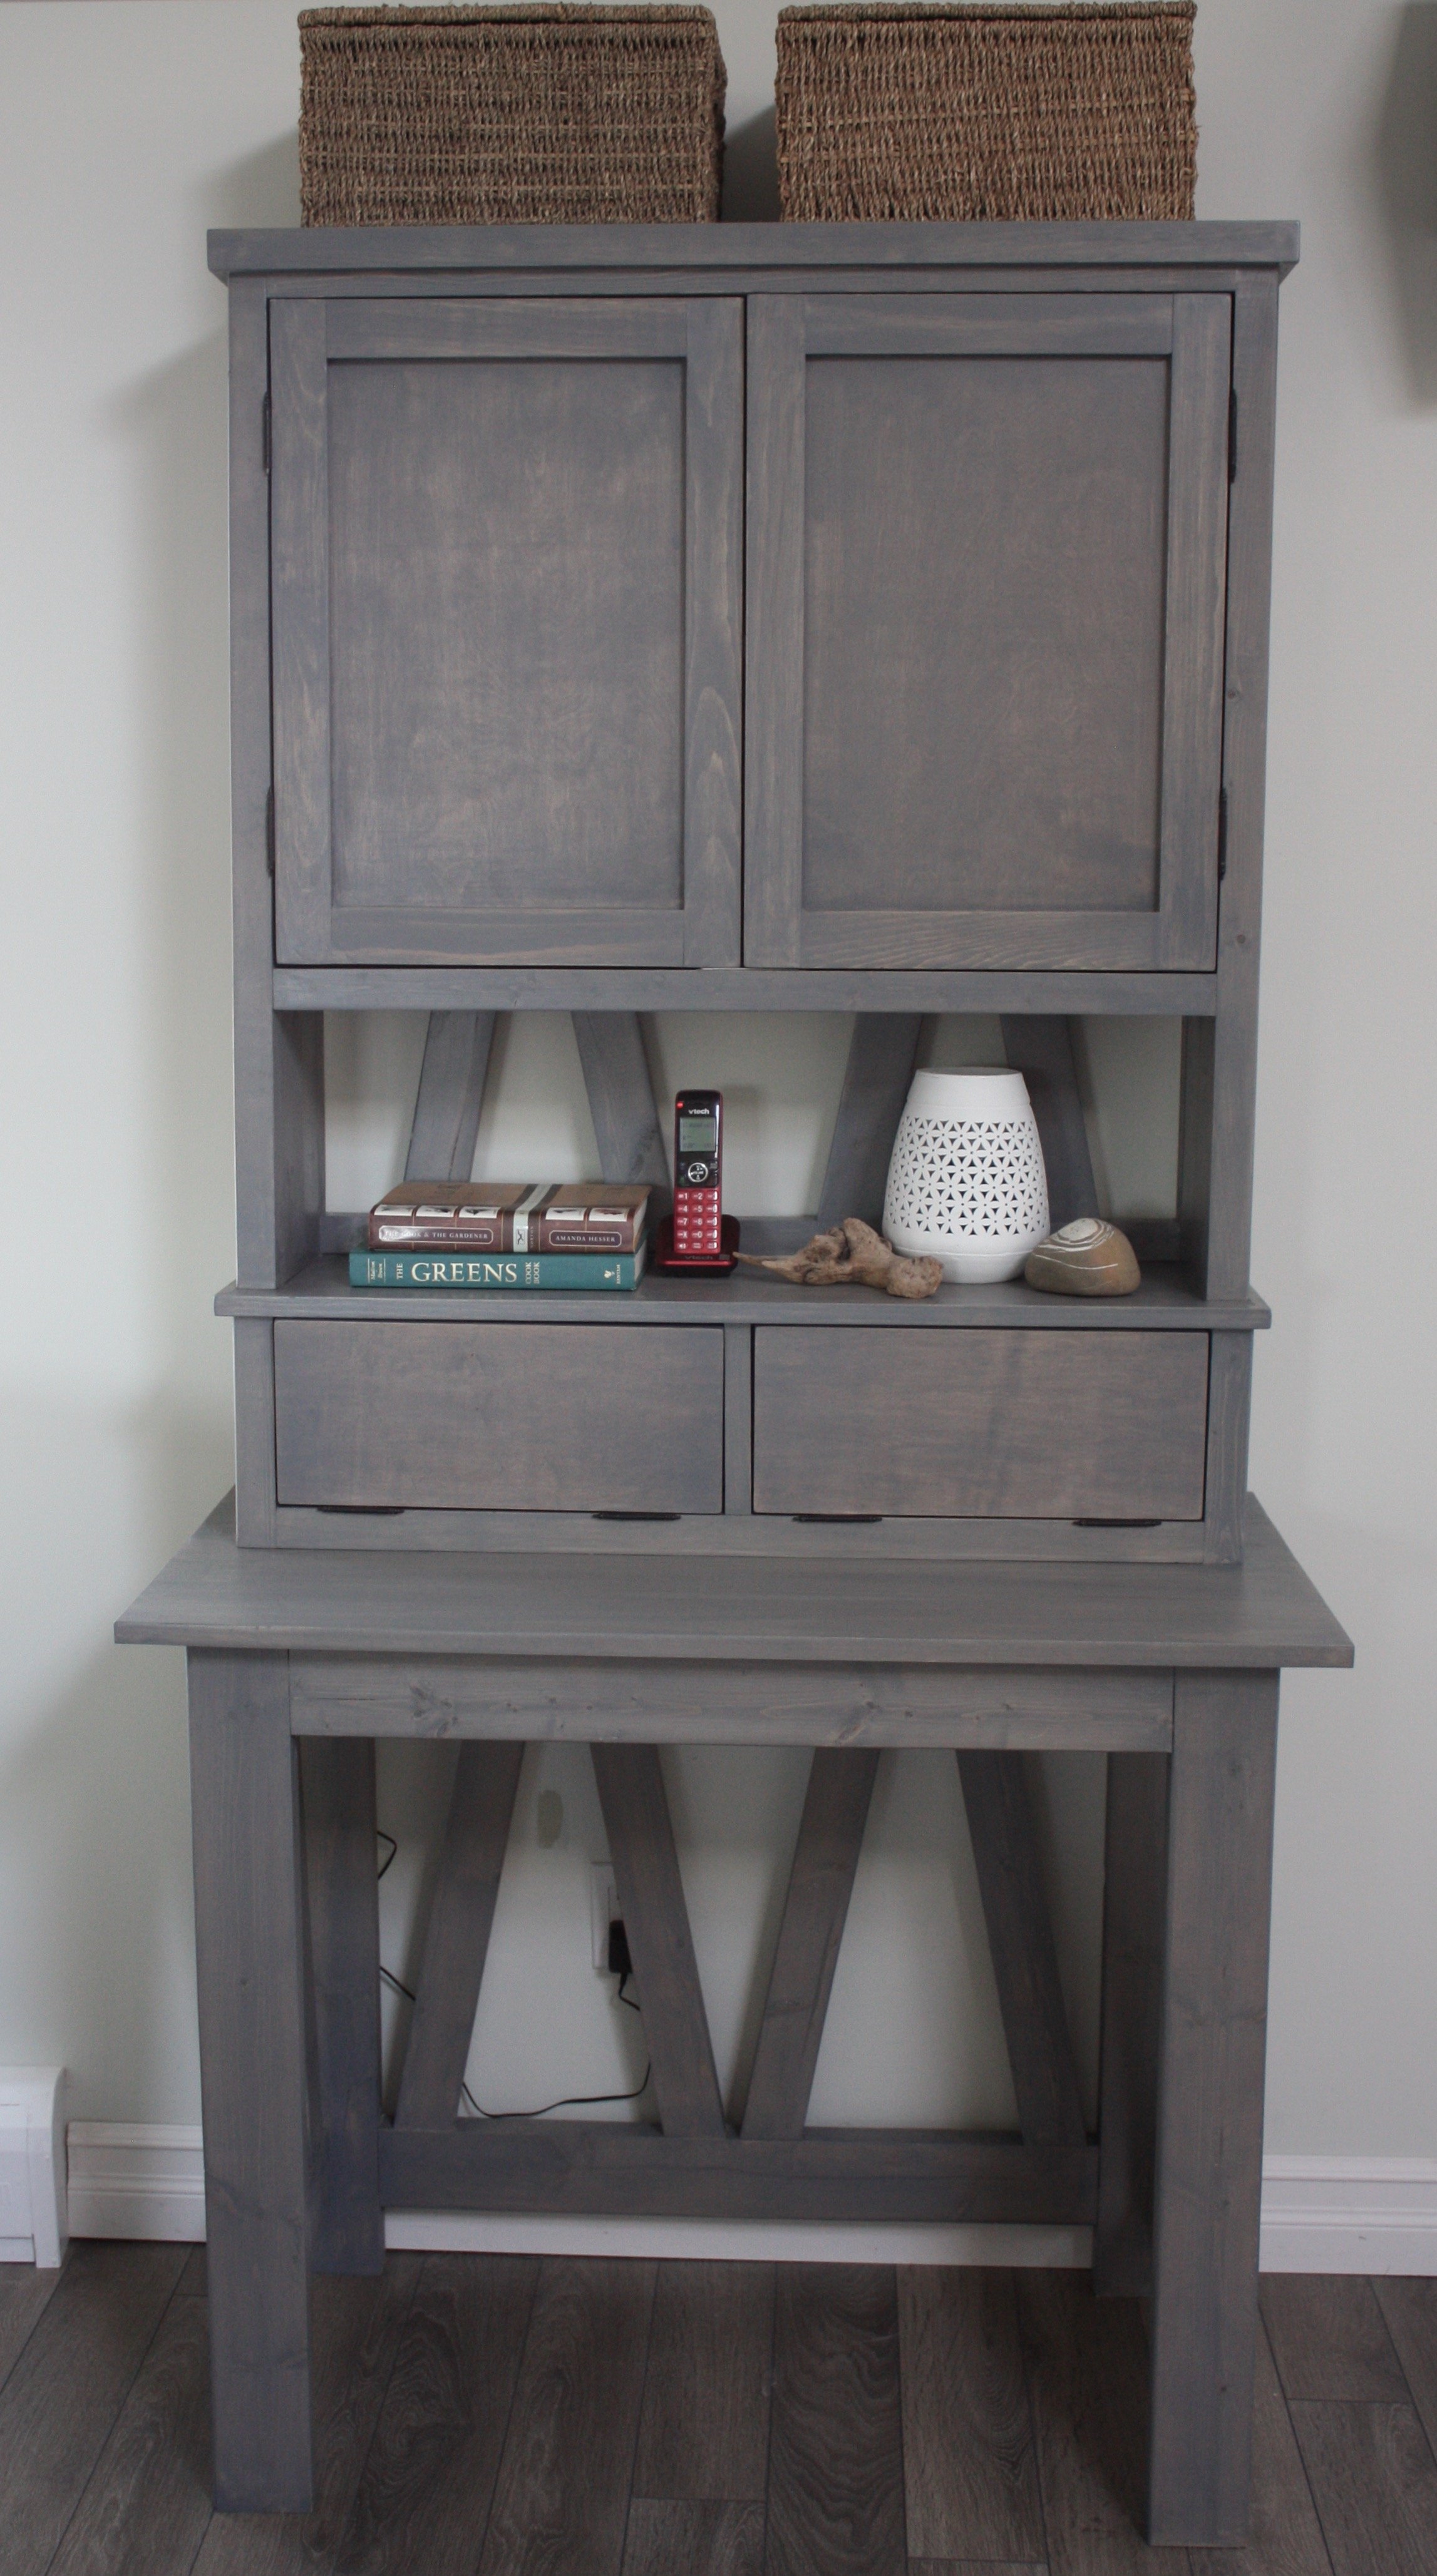
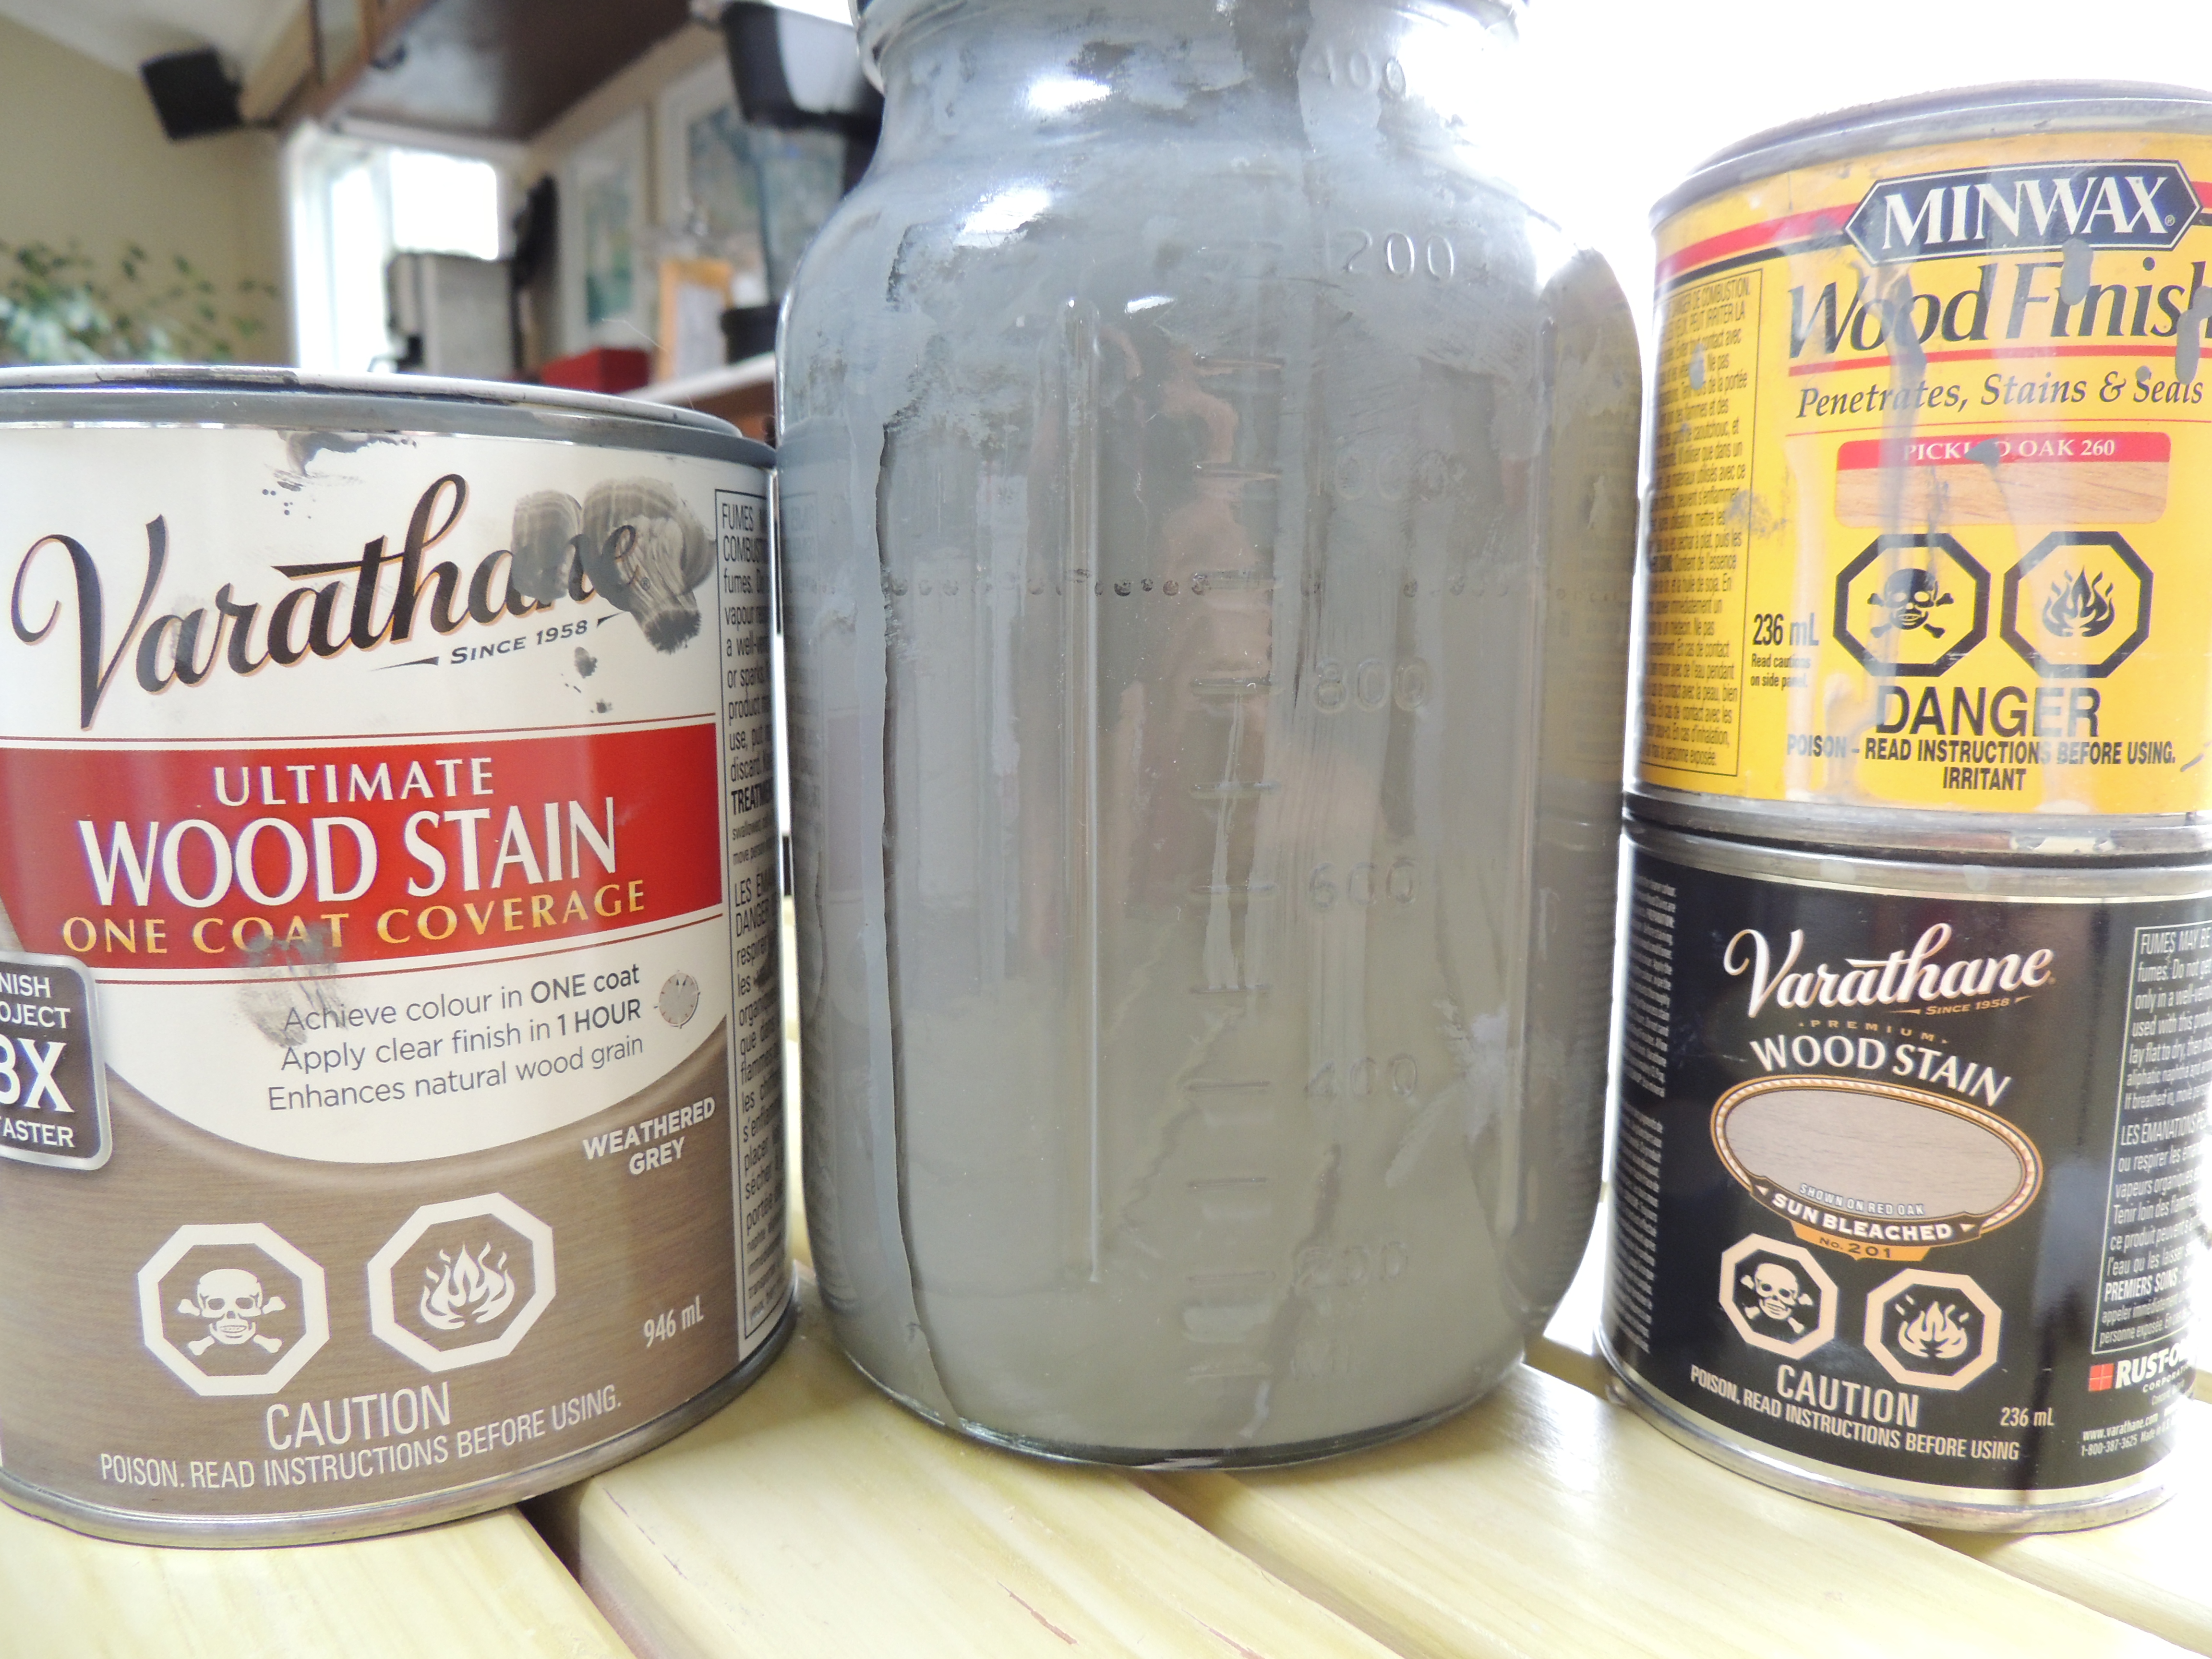
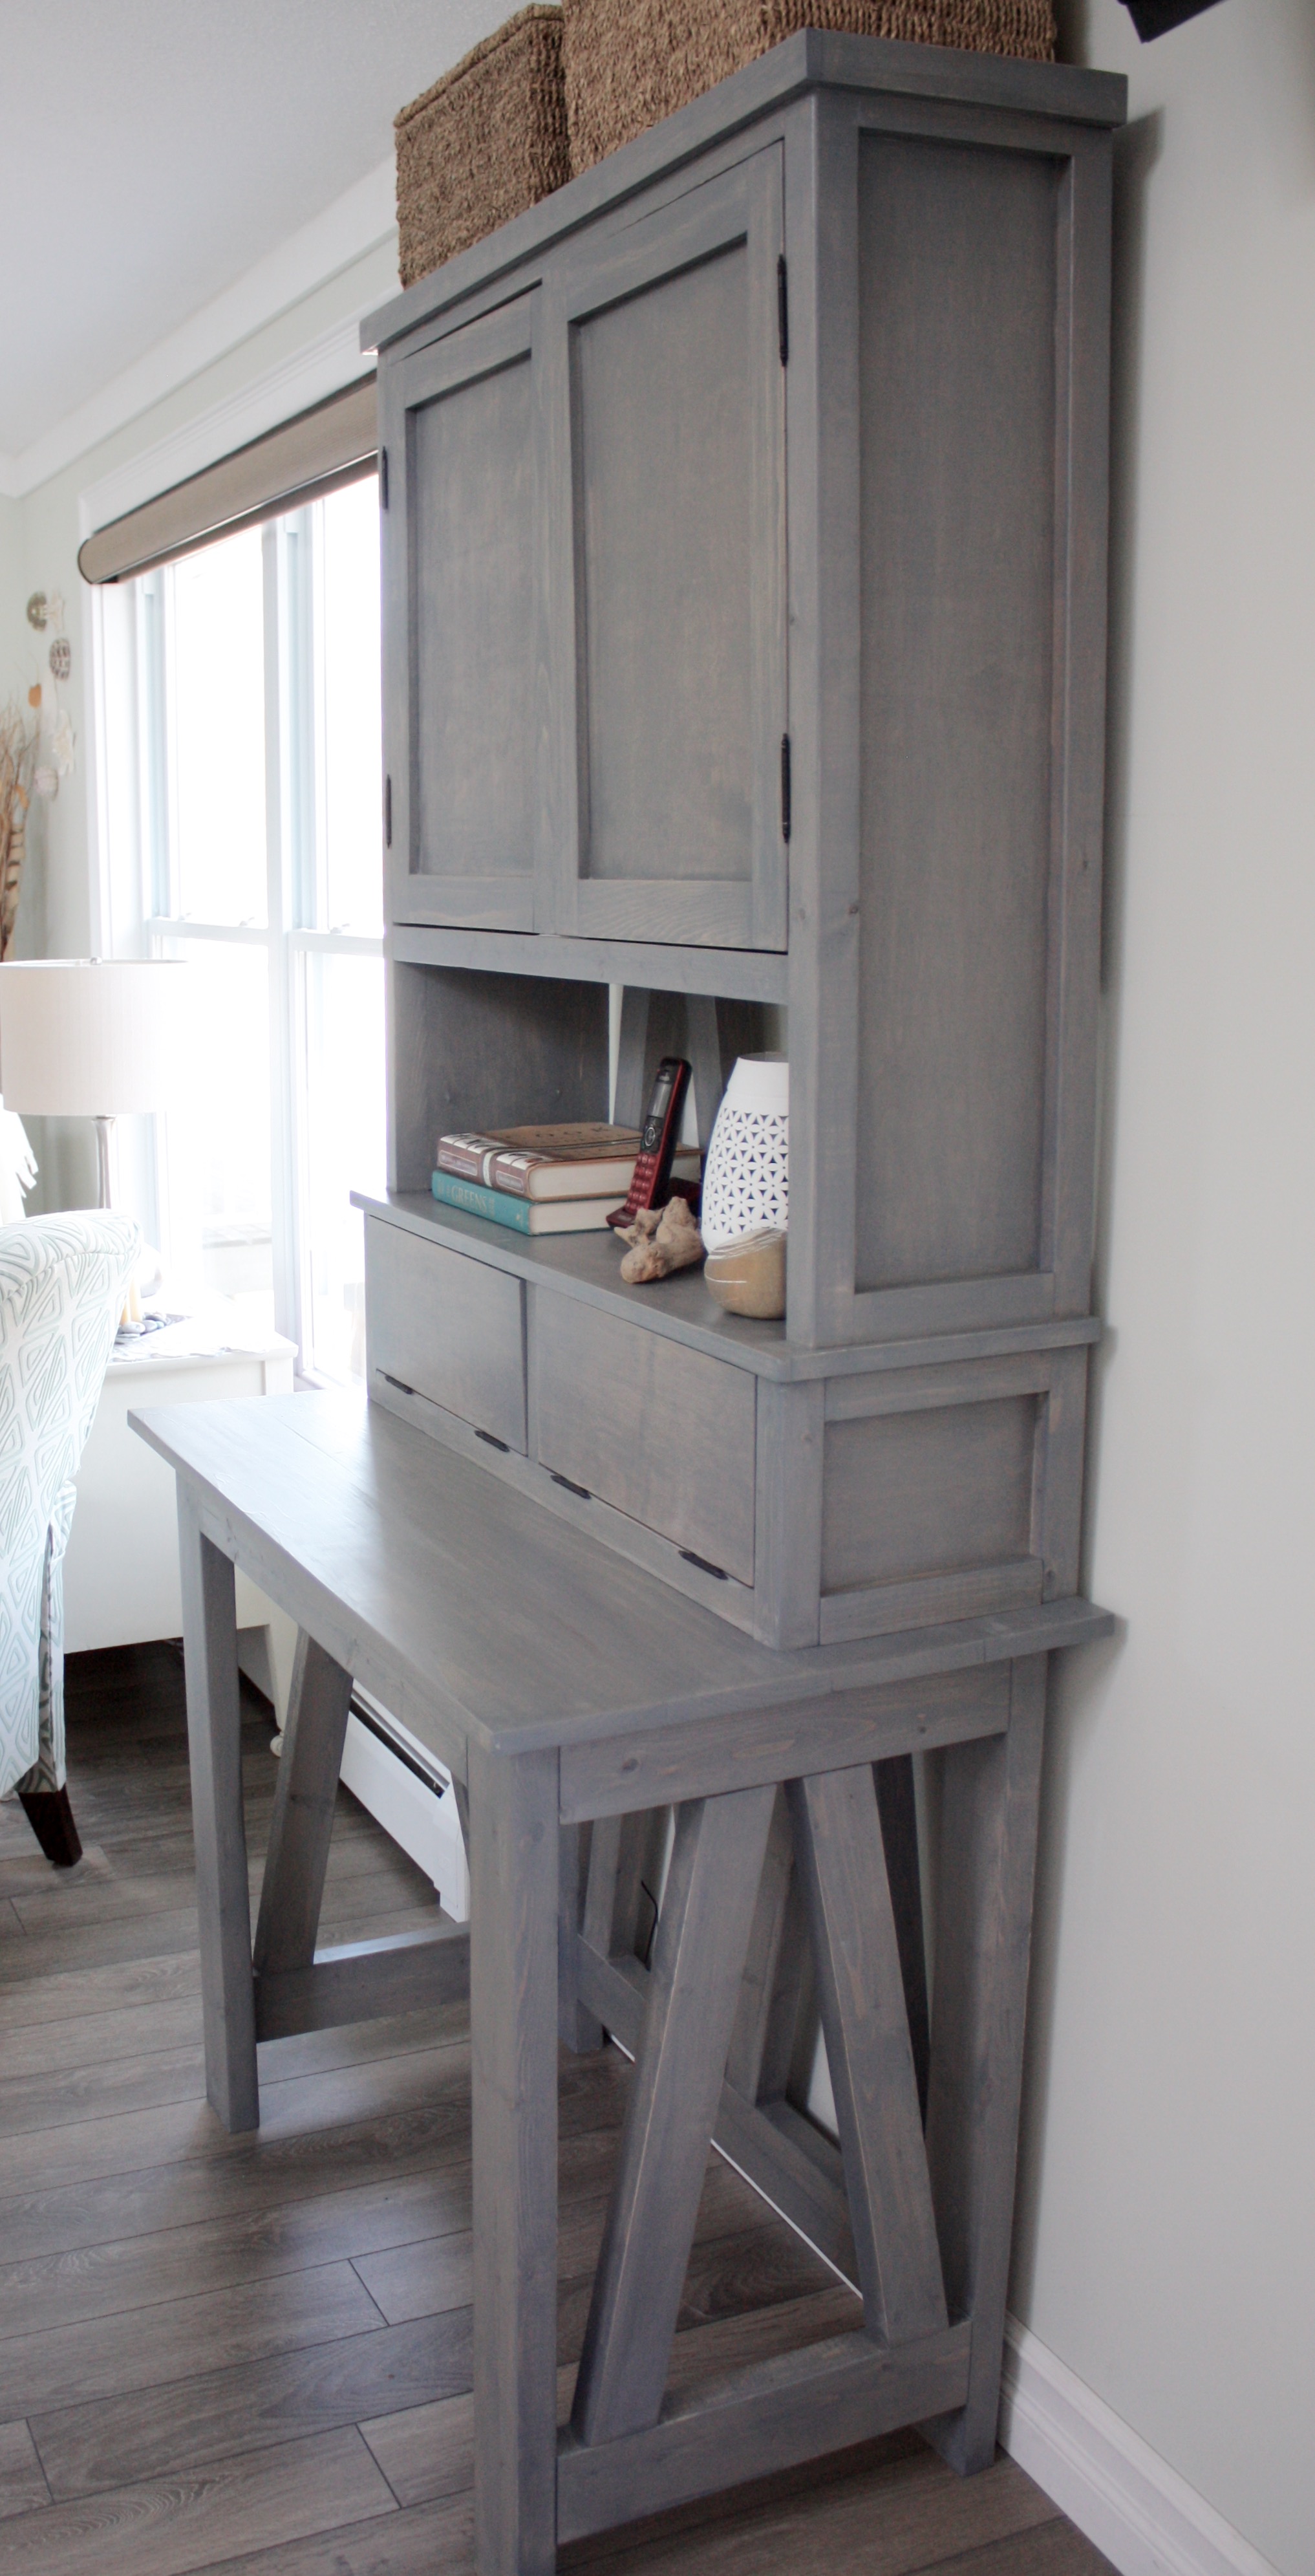
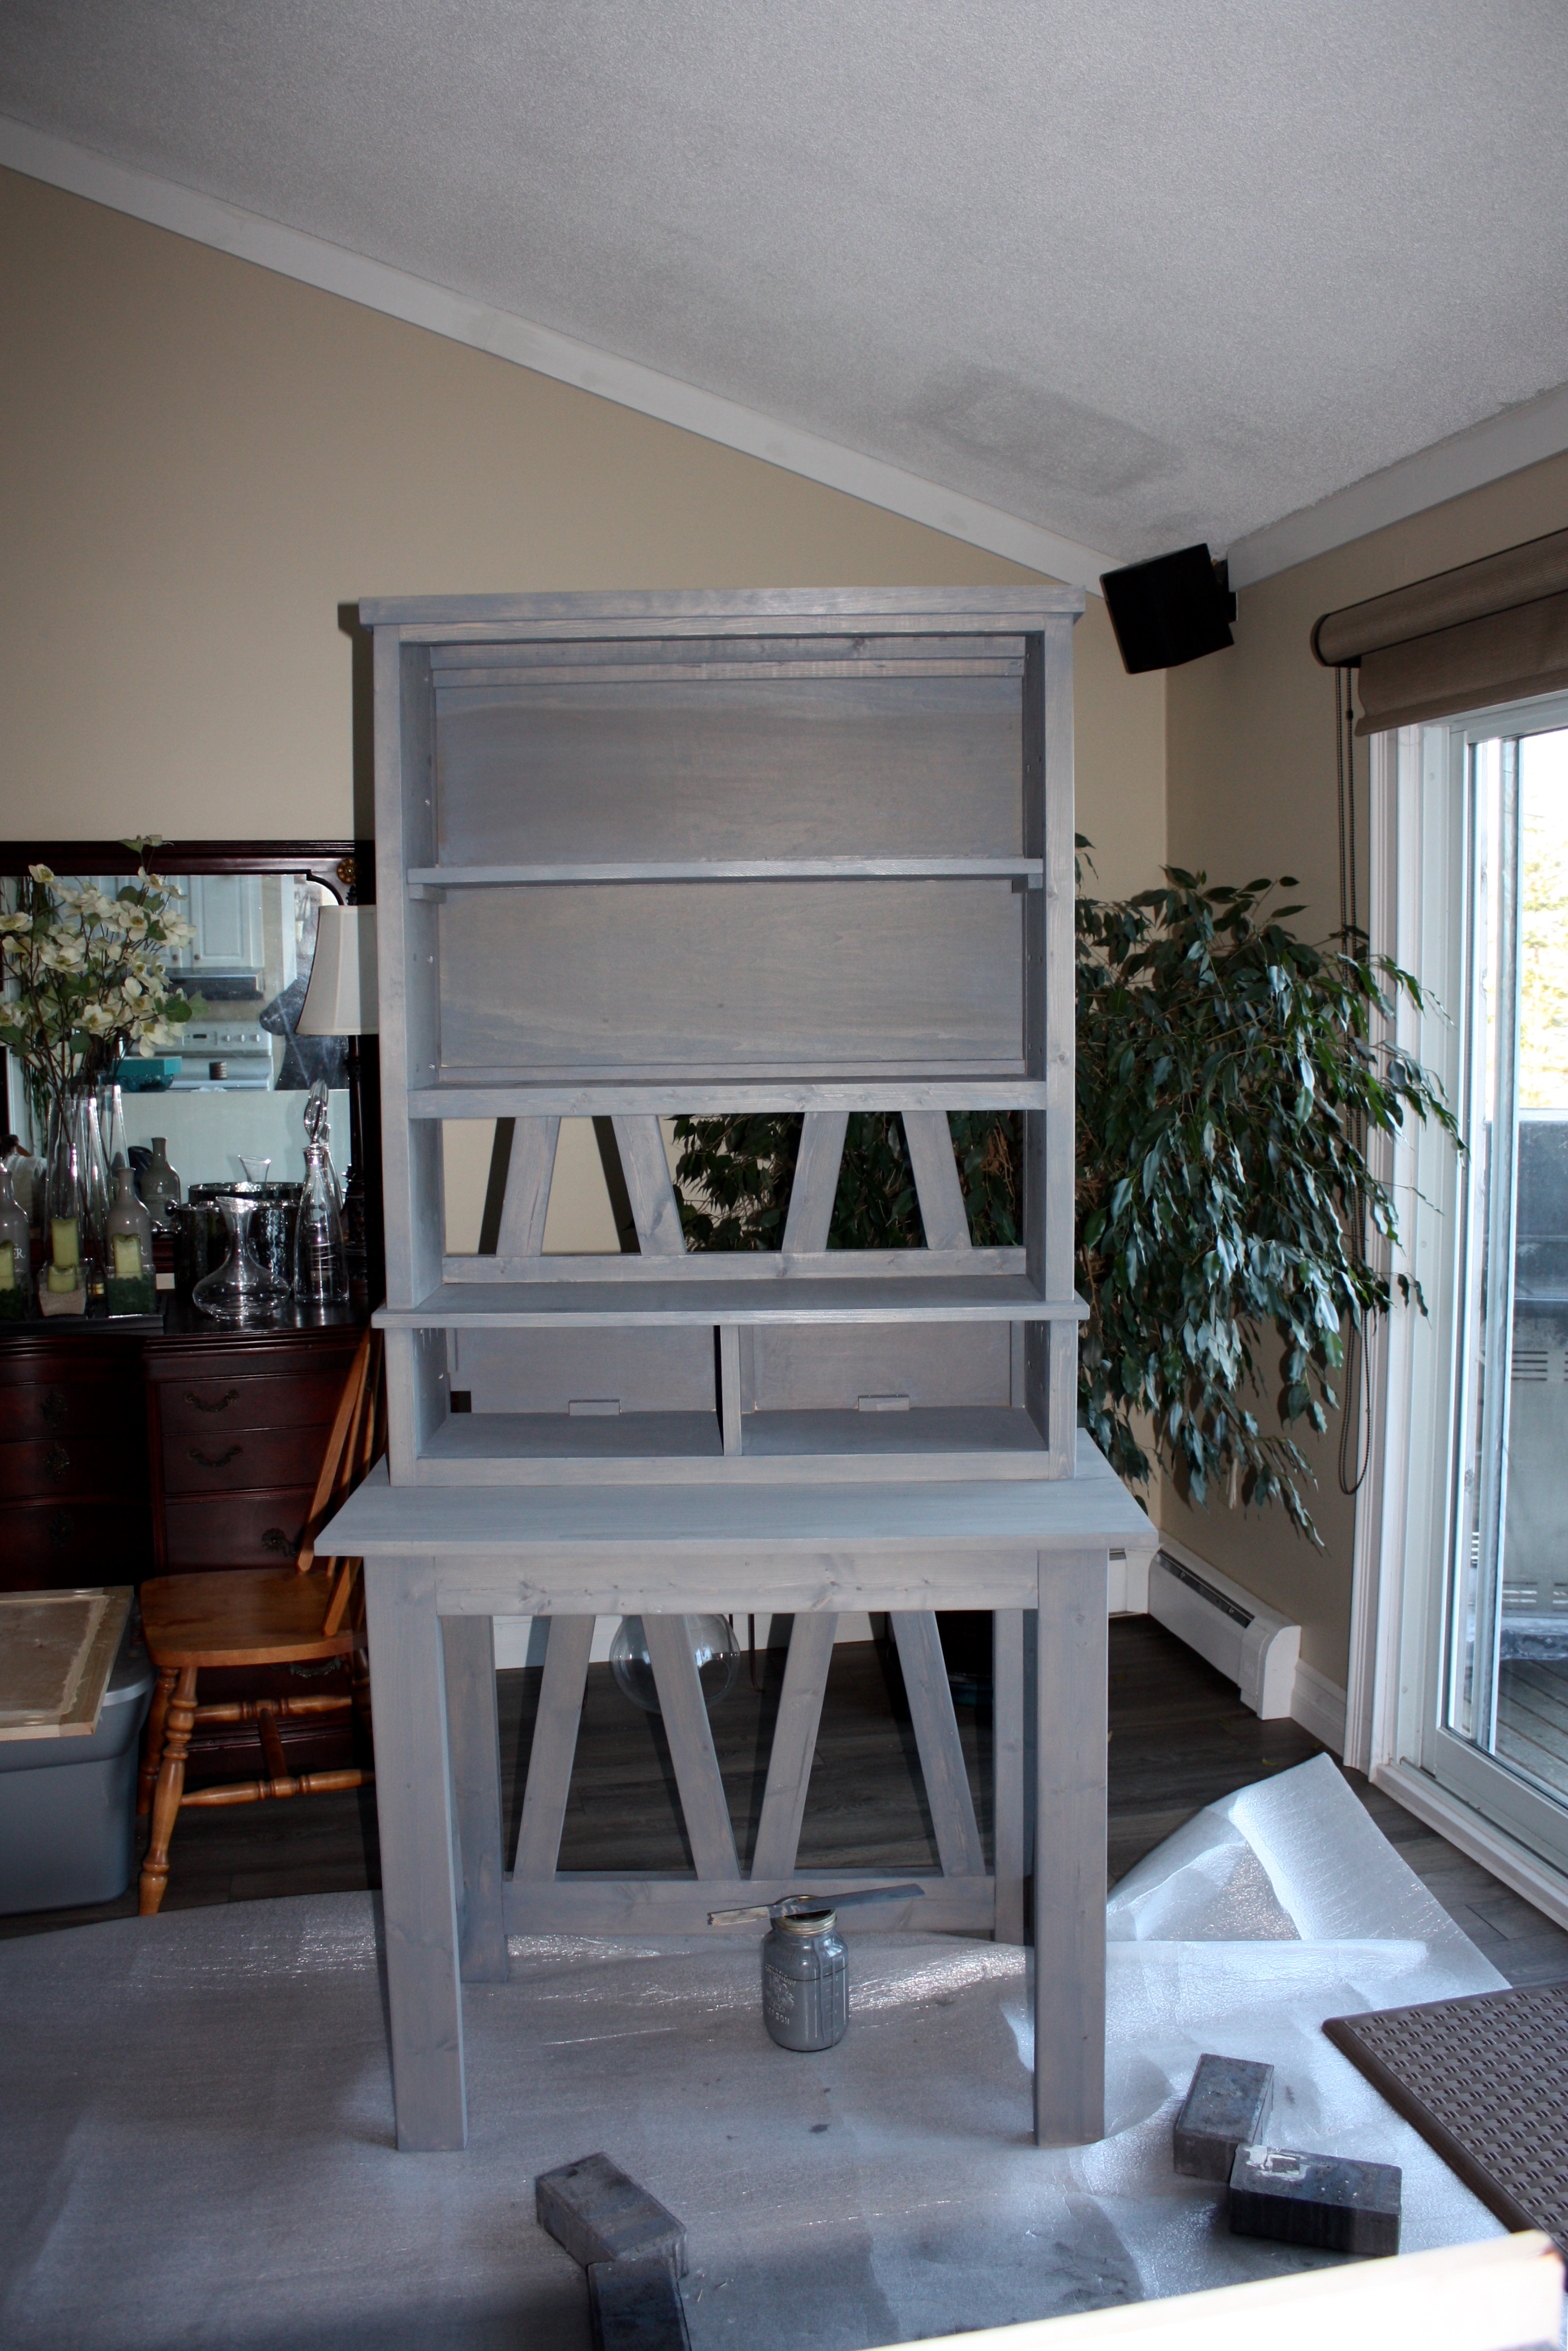
I built this makeup vanity to fit a 40" wall. I was inspired by the design of the DIY breakfast bar. The hutch sits on the top and has plenty of storage. The front drawer fronts are hinged at the bottom, this storage space holds a hairdryer and iron or makeup with a cord pass through at the back. The stain is a mixture of three colours.
Sat, 11/05/2016 - 07:47
Can you link to the plans you based your inspiration off of? I can't seem to find it on the site. Thank you!
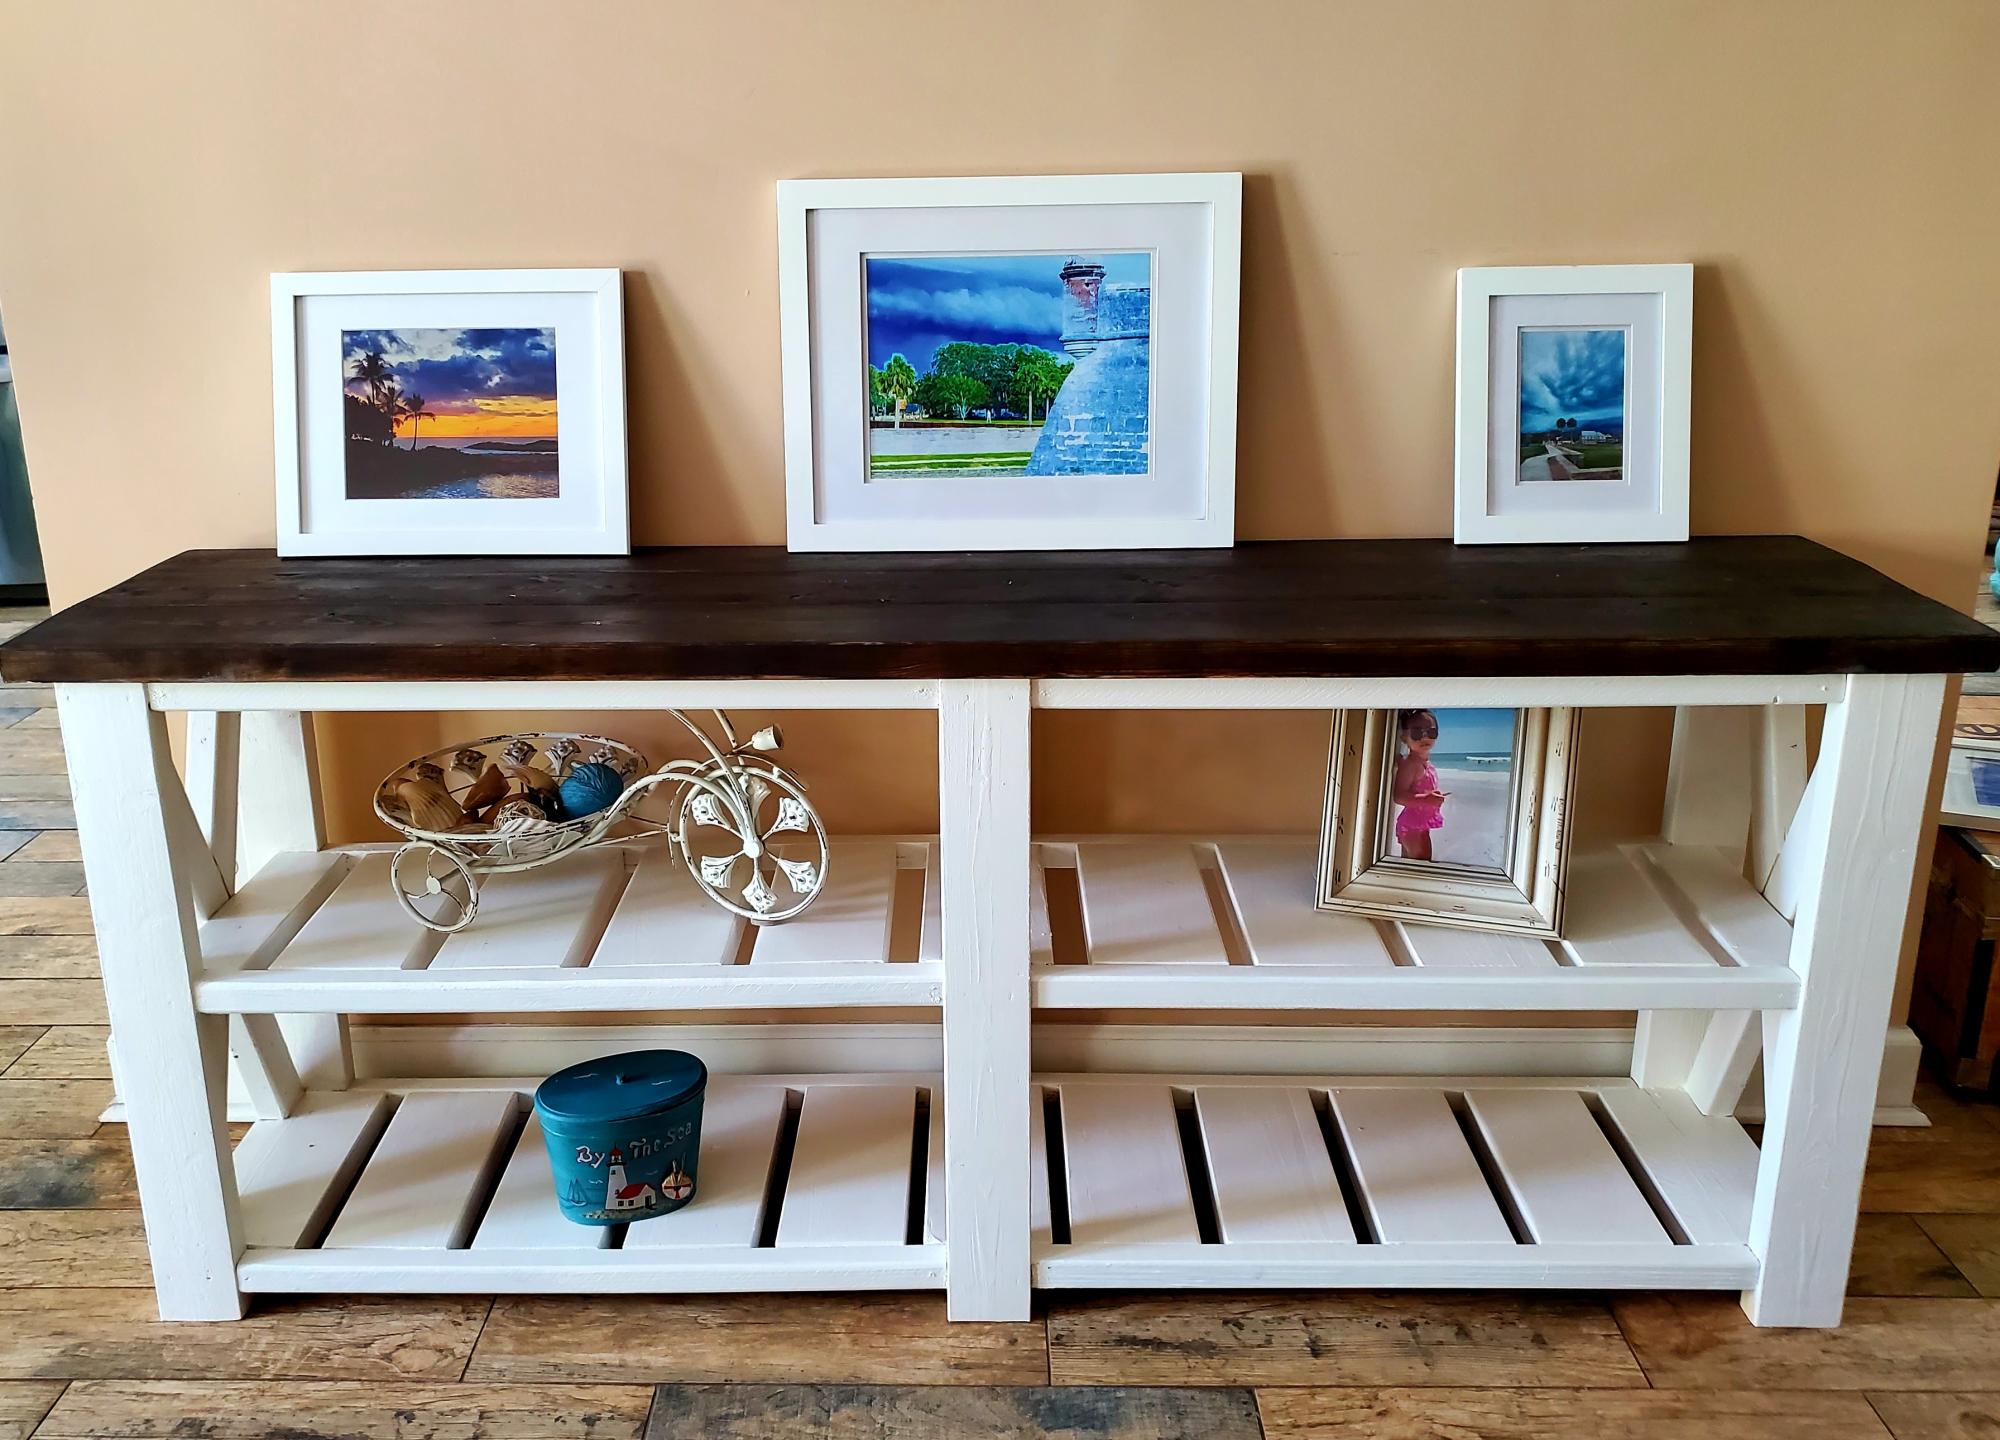
DIY Wood Waterfall Console Brandy Robinson @beautylikebran on IG
Did this project for a friend. Super easy and instructions are extremely helpful! I didn't have a jig to create pocket holes so I left the screw holes exposed. I then covered them with wooden dowels and sanded it down. I kind of liked it better than hiding the screws underneath!
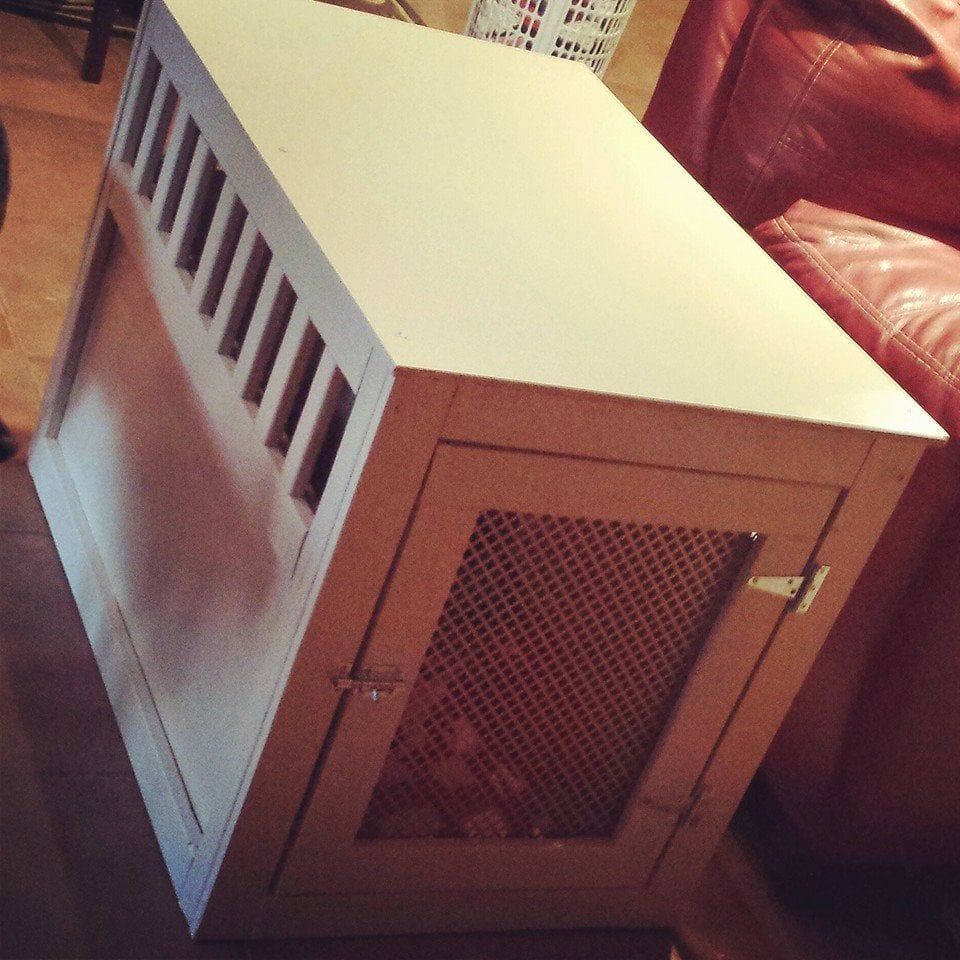
Built this project for Mindy, our dog who needed a new crate. We used metal screen for the front door, and probably would use it fo the sides too for the future. Lessoned learned, be more accurate in cutting pieces! I also didnt find the door plans! So i had to wing it!
Hi Ana & Hubby
Completed the shelving unit this past summer in my Barn, great plan and really easy to put together,
Thank's for the plan and step by step instructions, Going to build another unit in the barn come spring time here in Upstate New York. I made mine only eight feet wide by eight feet high givin the space I had
it's eight feet between 4x4 upright polls. I went with a center 2x4 for added strength to avoid possible sagging from heavy weighted items I will be storing. I left room inderneath as you can see, I store my saw horses and my push mower under it well.
Warmest Regards
Steve

Tue, 11/08/2016 - 16:23
Hi Steve! Thank you for posting, your shelving looks awesome!! I like the lawn mower storage underneath. Nice! Ana
Made a few tweaks to support using some leftover wood from a previous project and hide a seam in the beadboard.

I enjoy all of your plans that you make available. I made these beds with a few minor adjustments.
Debra

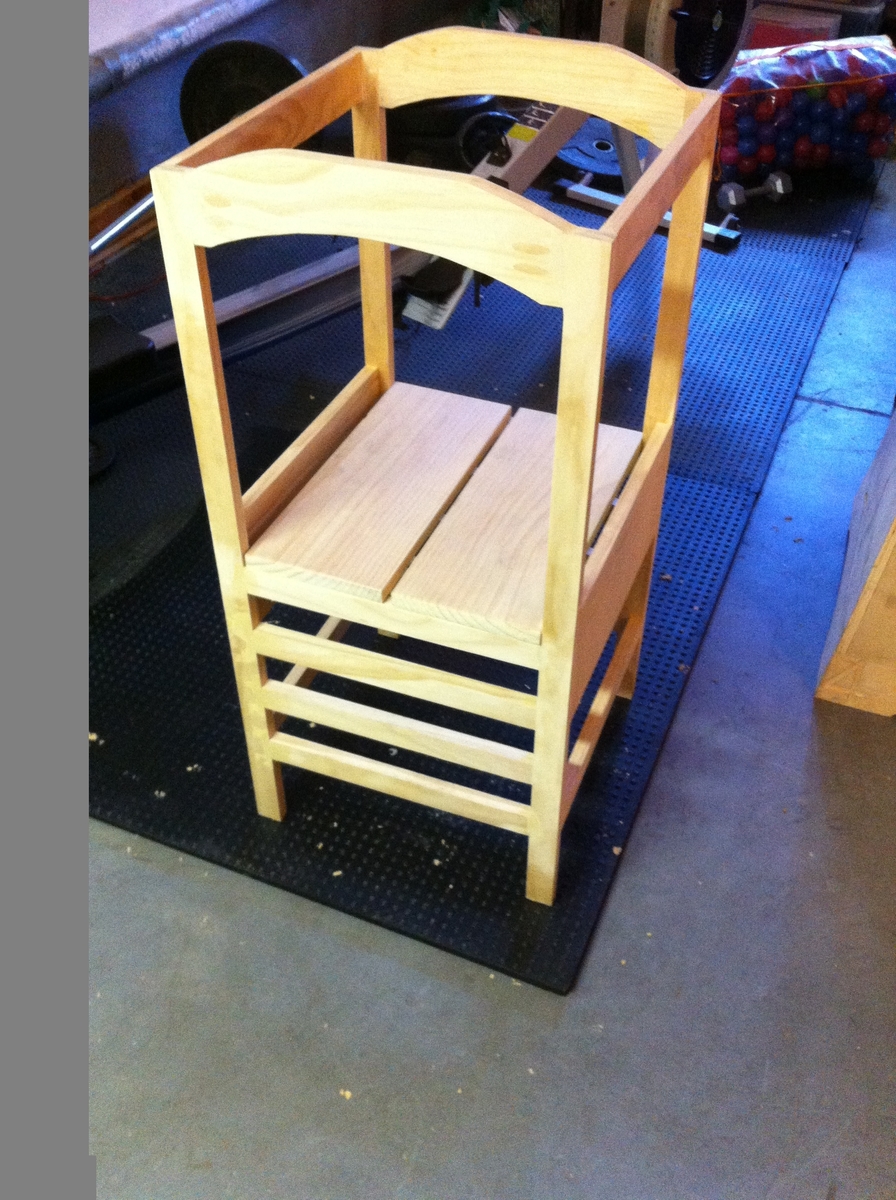
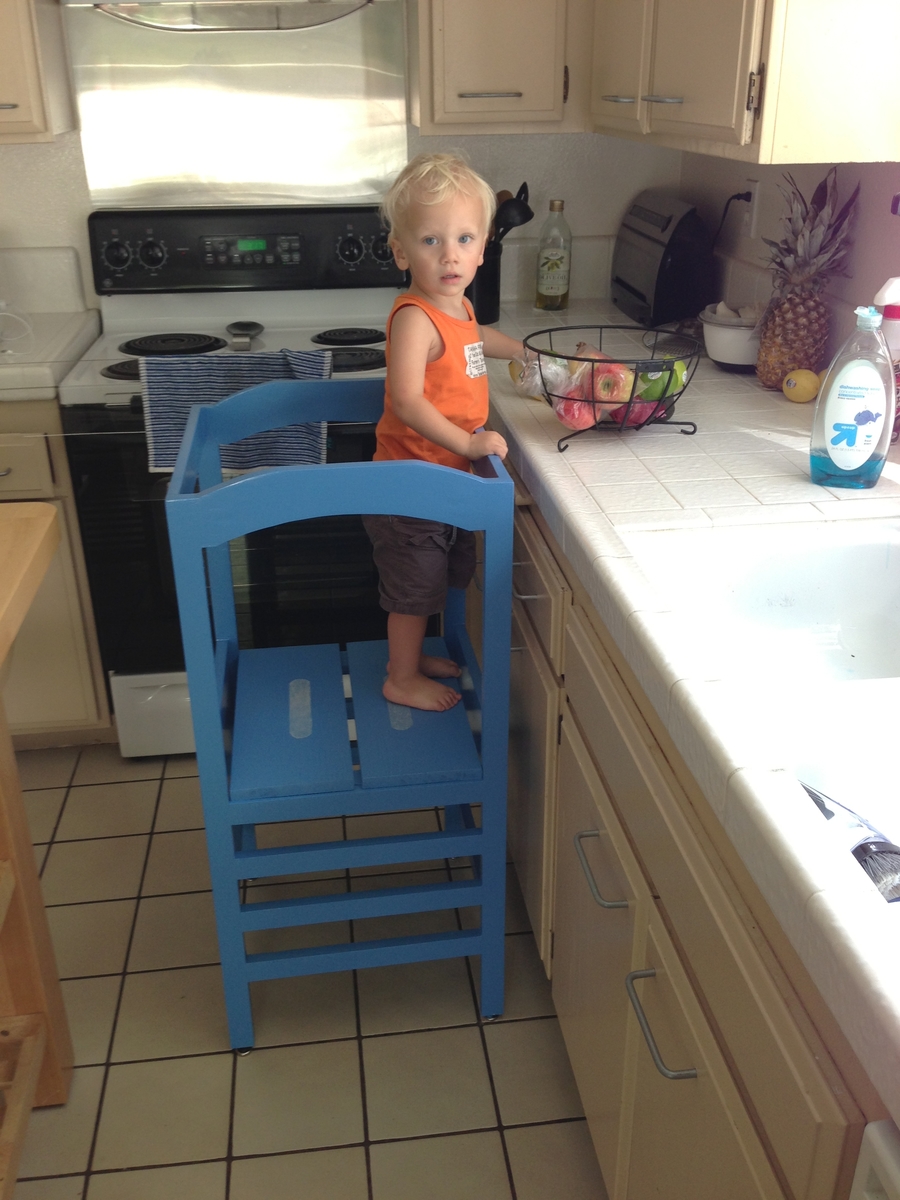
Actually building this tower was considerably easier than finishing it (primer, paint, wood filler sanding). 4 hours to build 16+hours to finish!
Once I had the tower built, I used the pre-made Kregs pocket-hole wooden fillers to fill the pockets. I glued them in place with wood glue, and then used a chisel and orbital sander to get them flush. In a few areas, I had a small 1/64" discrepancy in surfaces, so used the wood filler and then sanded it smooth. I deviated from plans by making my arches a little different with flattened tops; it was easier with my jig-saw this way.
I took my cut-list to Home Depot and had them make all my cuts with their laser sight radial saw (super clean cuts) Achieving clean-cuts requires a nice saw, I almost bought the Bosch table saw to build this little guy. Considering that I never built anything before, I quickly found out that furniture, especially small furniture requires a lot of patience to look good. Spending a few extra hours making sure everything is square, flush etc. will prevent a ton of finishing work later on.
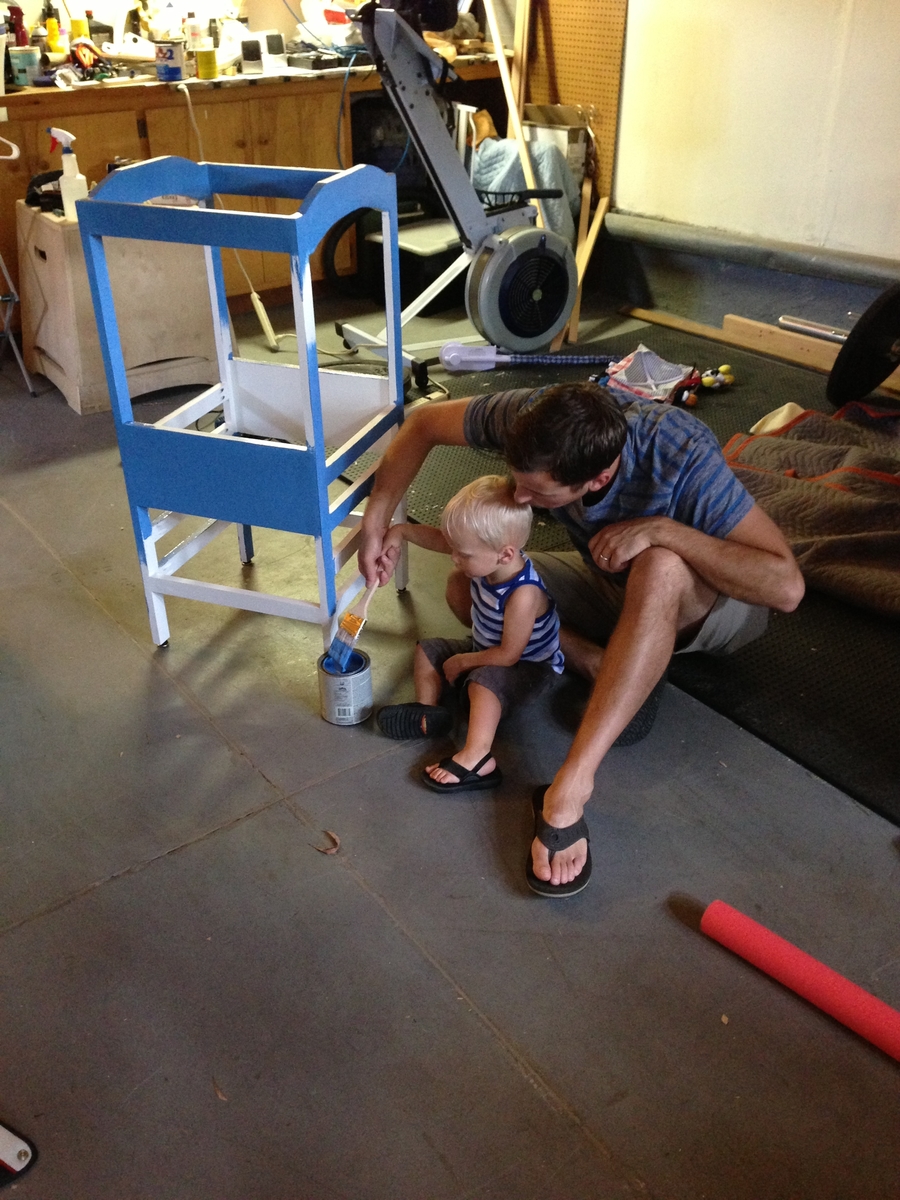
Once I had the tower built and all my pocket-holes filled and sanded, I primed twice with Kilz II. I waited about 2 hours between the coats and made a few wood filler adjustments in between coats. I then used Olympic Latex and painted (2) coats with about 8-10 hours in between.
Extras
•I religiously put (2) Kregs pocket holes on every joint, the stability is incredible!
•I went to the local skateboard shop and purchased some clear grip tape to add a little extra grip to the footboard.
Recommendations:
•A nice saw or a mediocre saw with a good blade OR someone else with a nice saw make the cuts for you.
•A few extra bucks on the “Select” pine wood. The nicer wood probably only cost an extra 20 bucks.

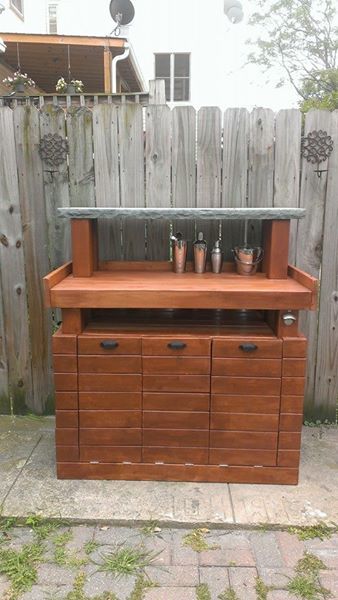
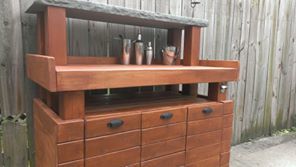
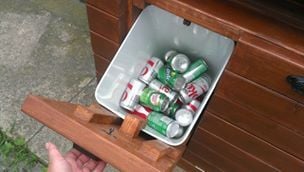
I used two of Ana's designs (the Potter's Bench and the Recycle/Garbage tilt out design) to make this outdoor bar. The containers can hold the beverage of your choice (I found metal ones and used ice to keep things cold). It was a big hit at the party and makes serving much easier. Thanks Ana! Keep up the good work.

Wed, 12/03/2014 - 13:24
Thanks it was a Bluestone slab from a local gardening/landscaping store in Chicago.
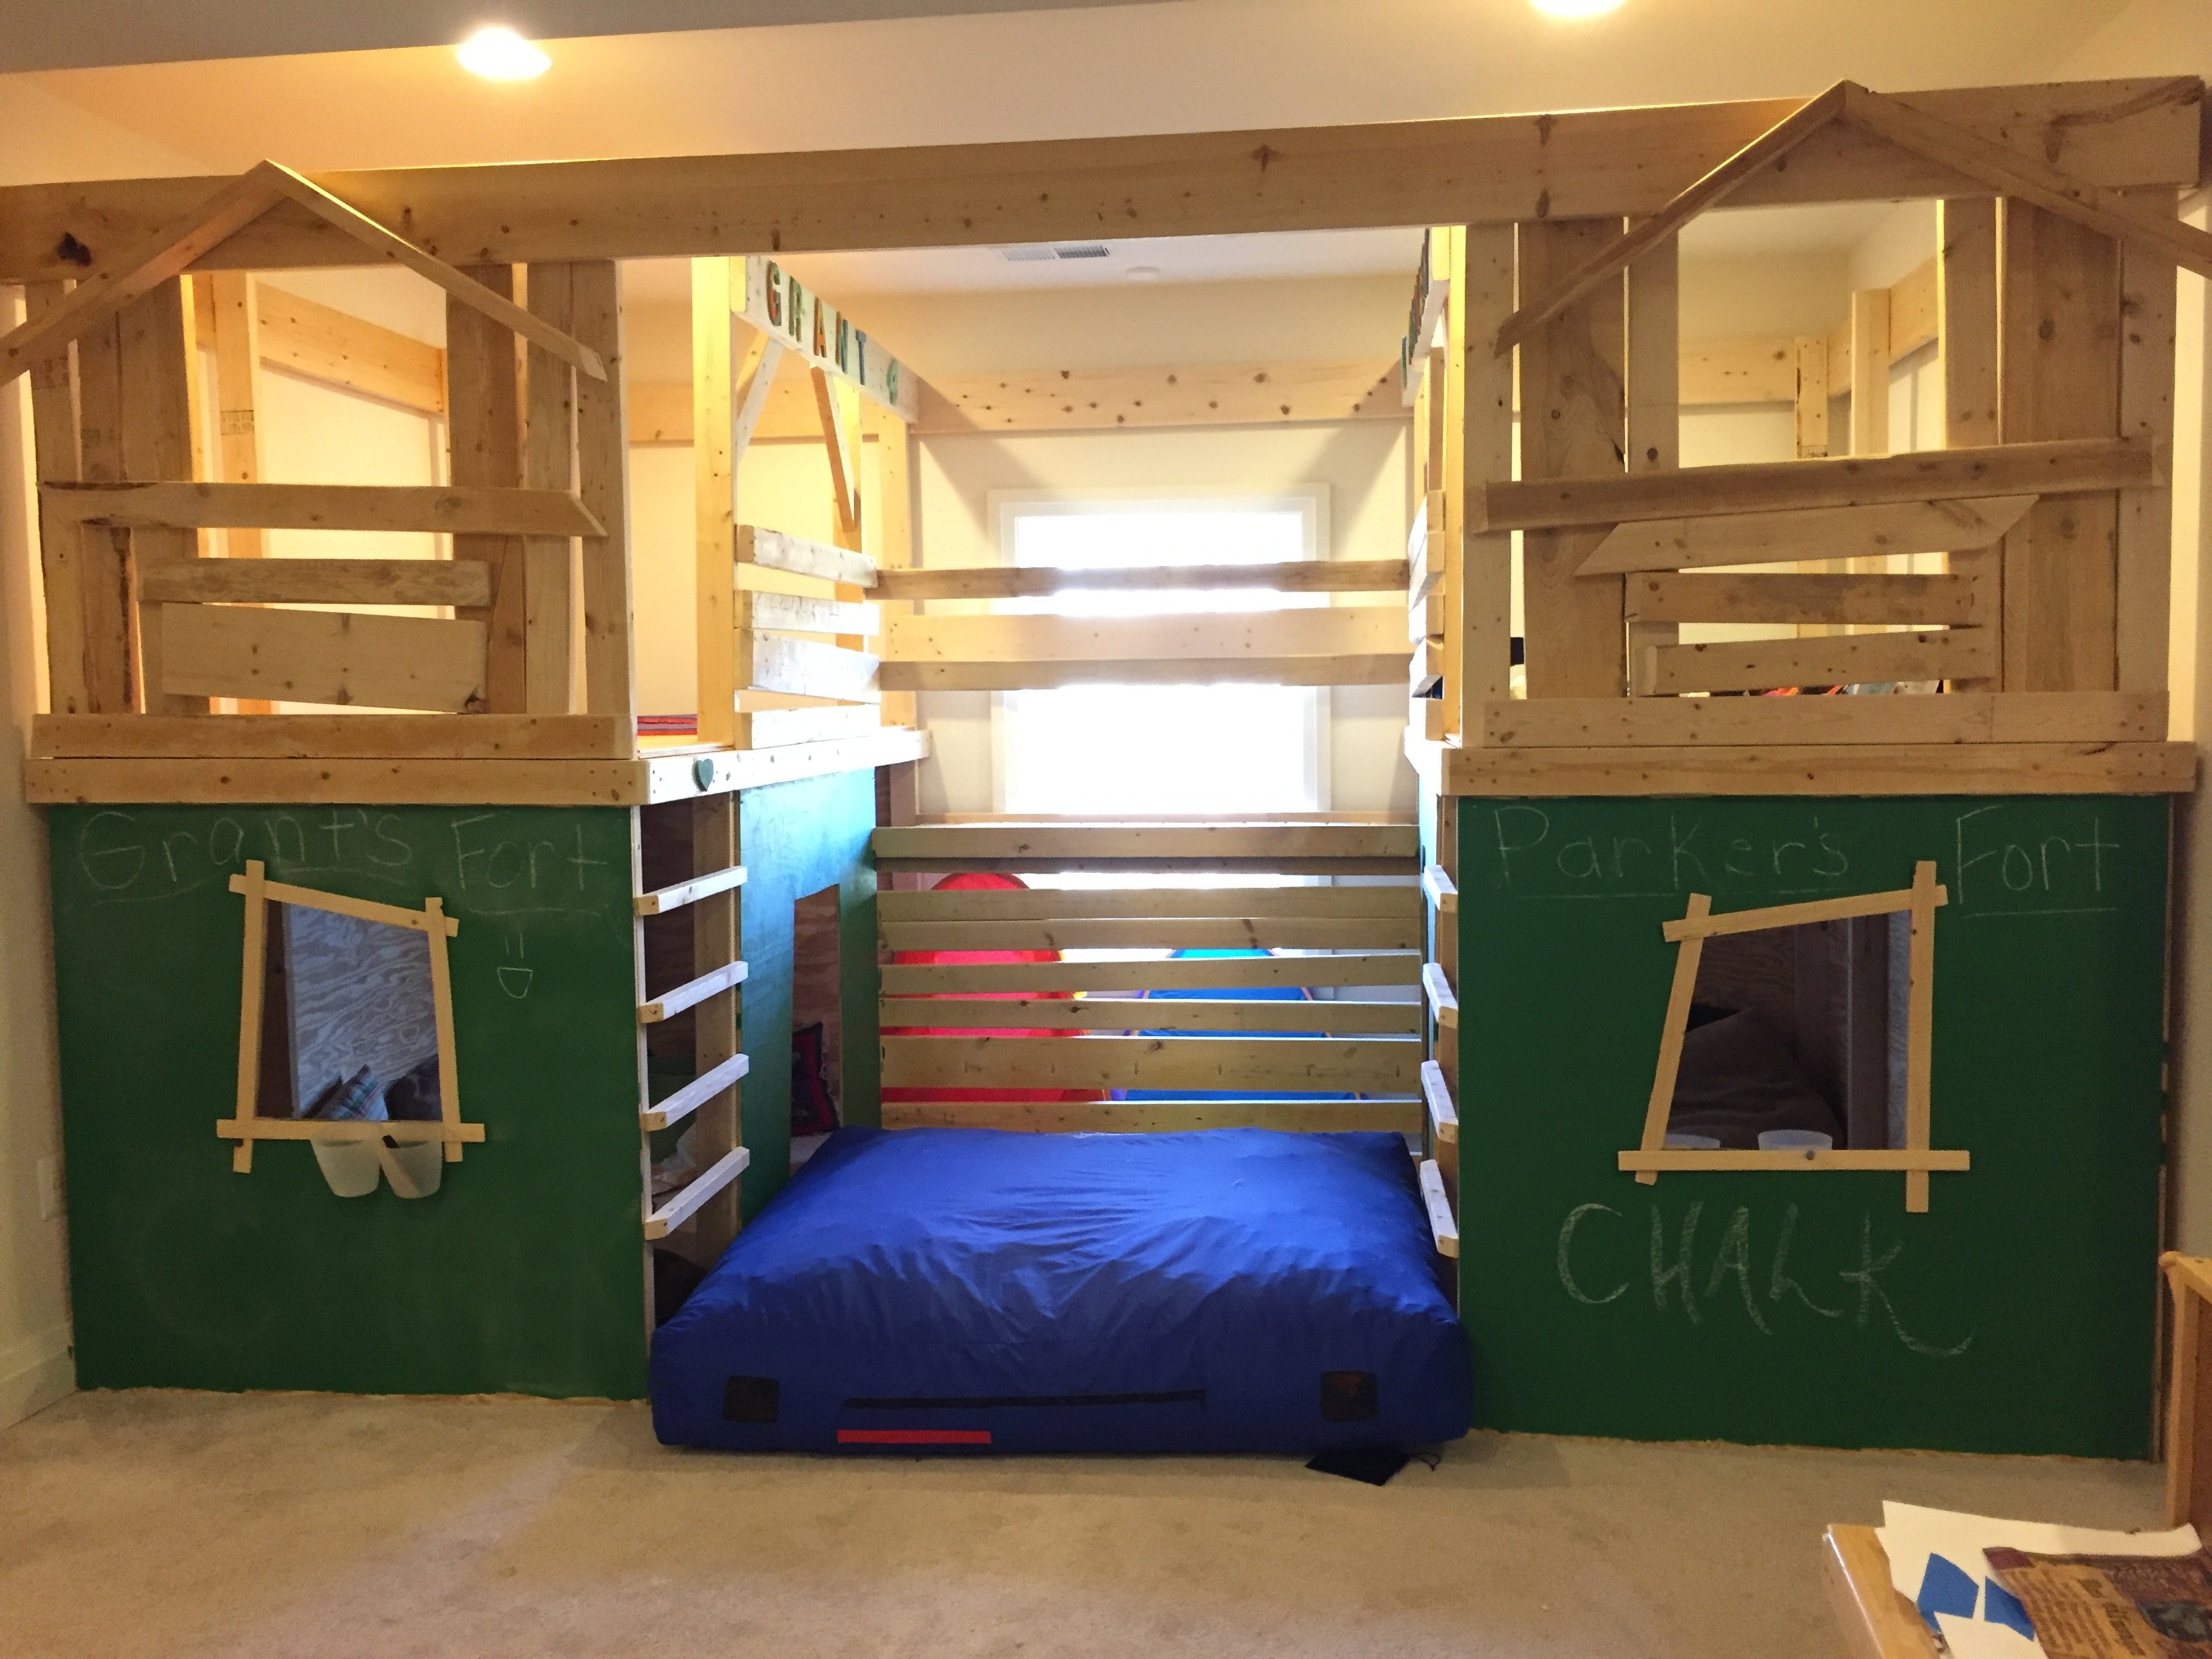
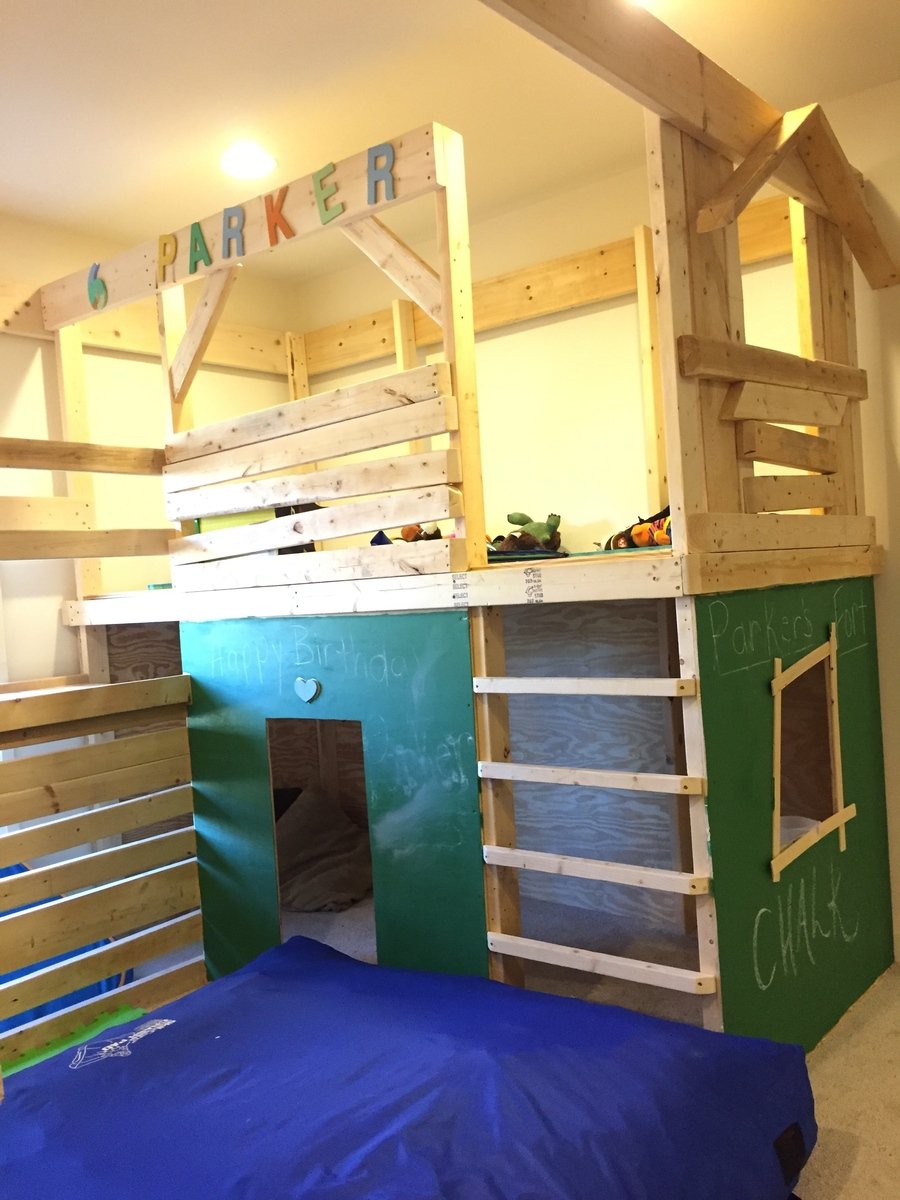
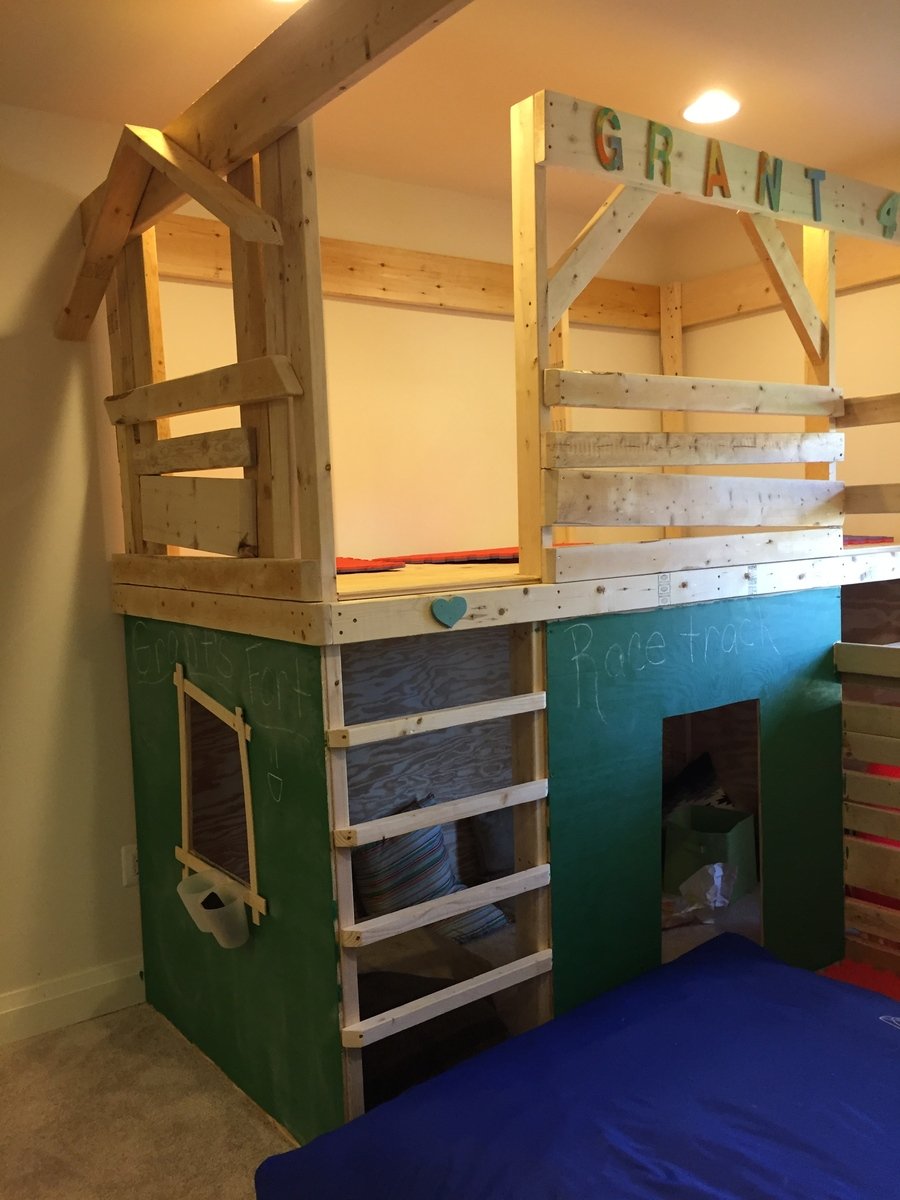
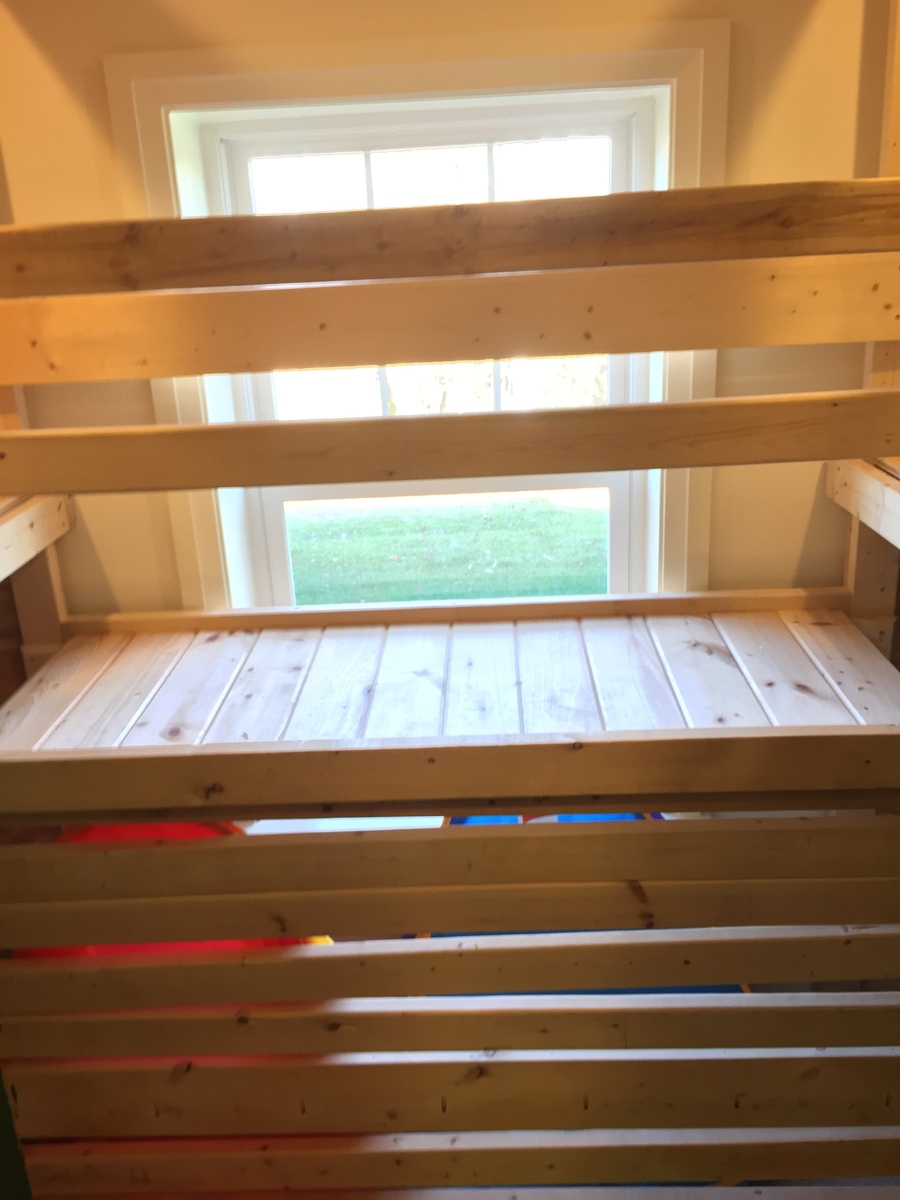
I built this project by myself. My husband helped move the large pieces when I connected them, so one person really can tackle this project! I had a combination of scrap wood from new home construction on hand and store bought lumber. Most of my time was spent sanding, sanding, and more sanding, especially with the construciton grade lumber. Yes, it was worth it! I used tongue and groove wood for upper level flooring and bridge. It really made it easier to put the floors together. I connected all the tongue and groove pieces with a snug fit and used my brad nailer to secure it down on the perimeter of the floor. Therefore, not every peice had to be screwed down.