Community Brag Posts

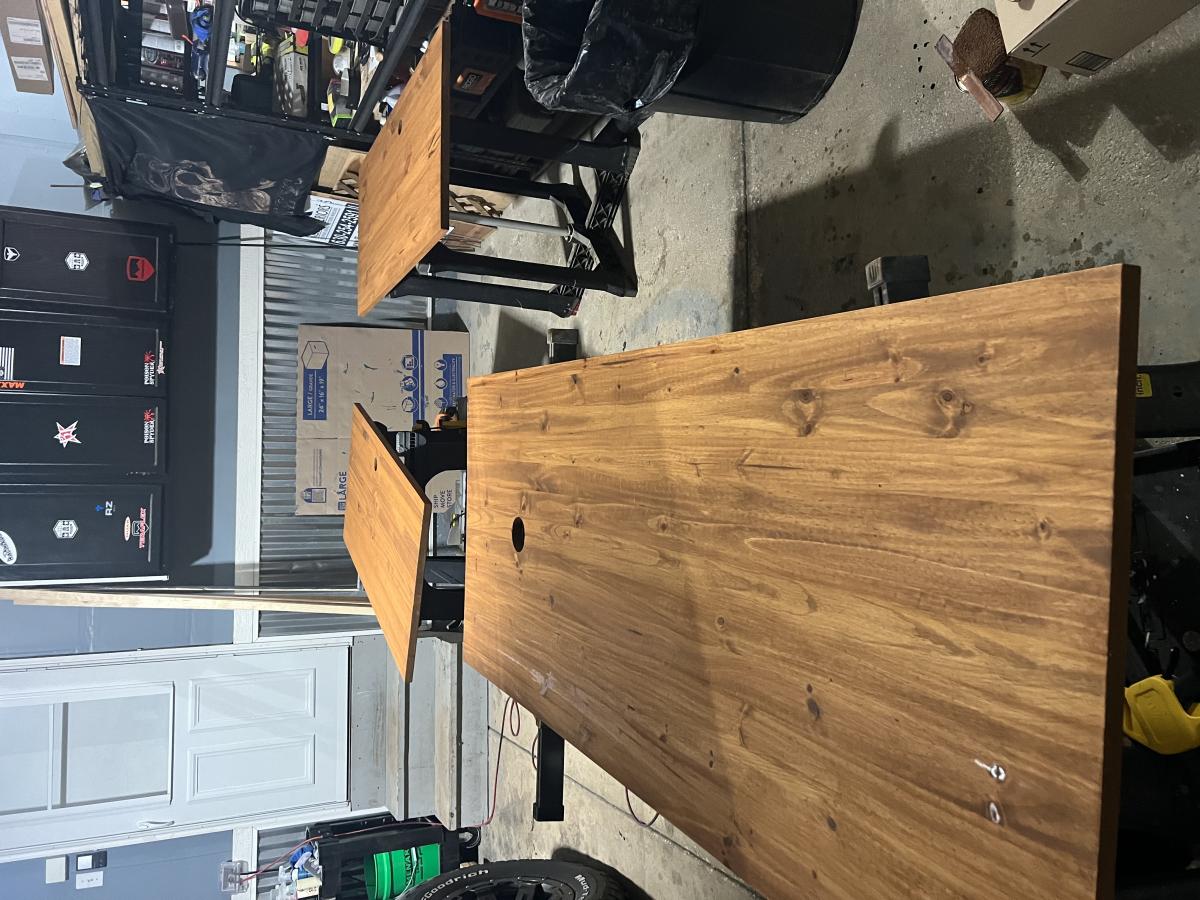
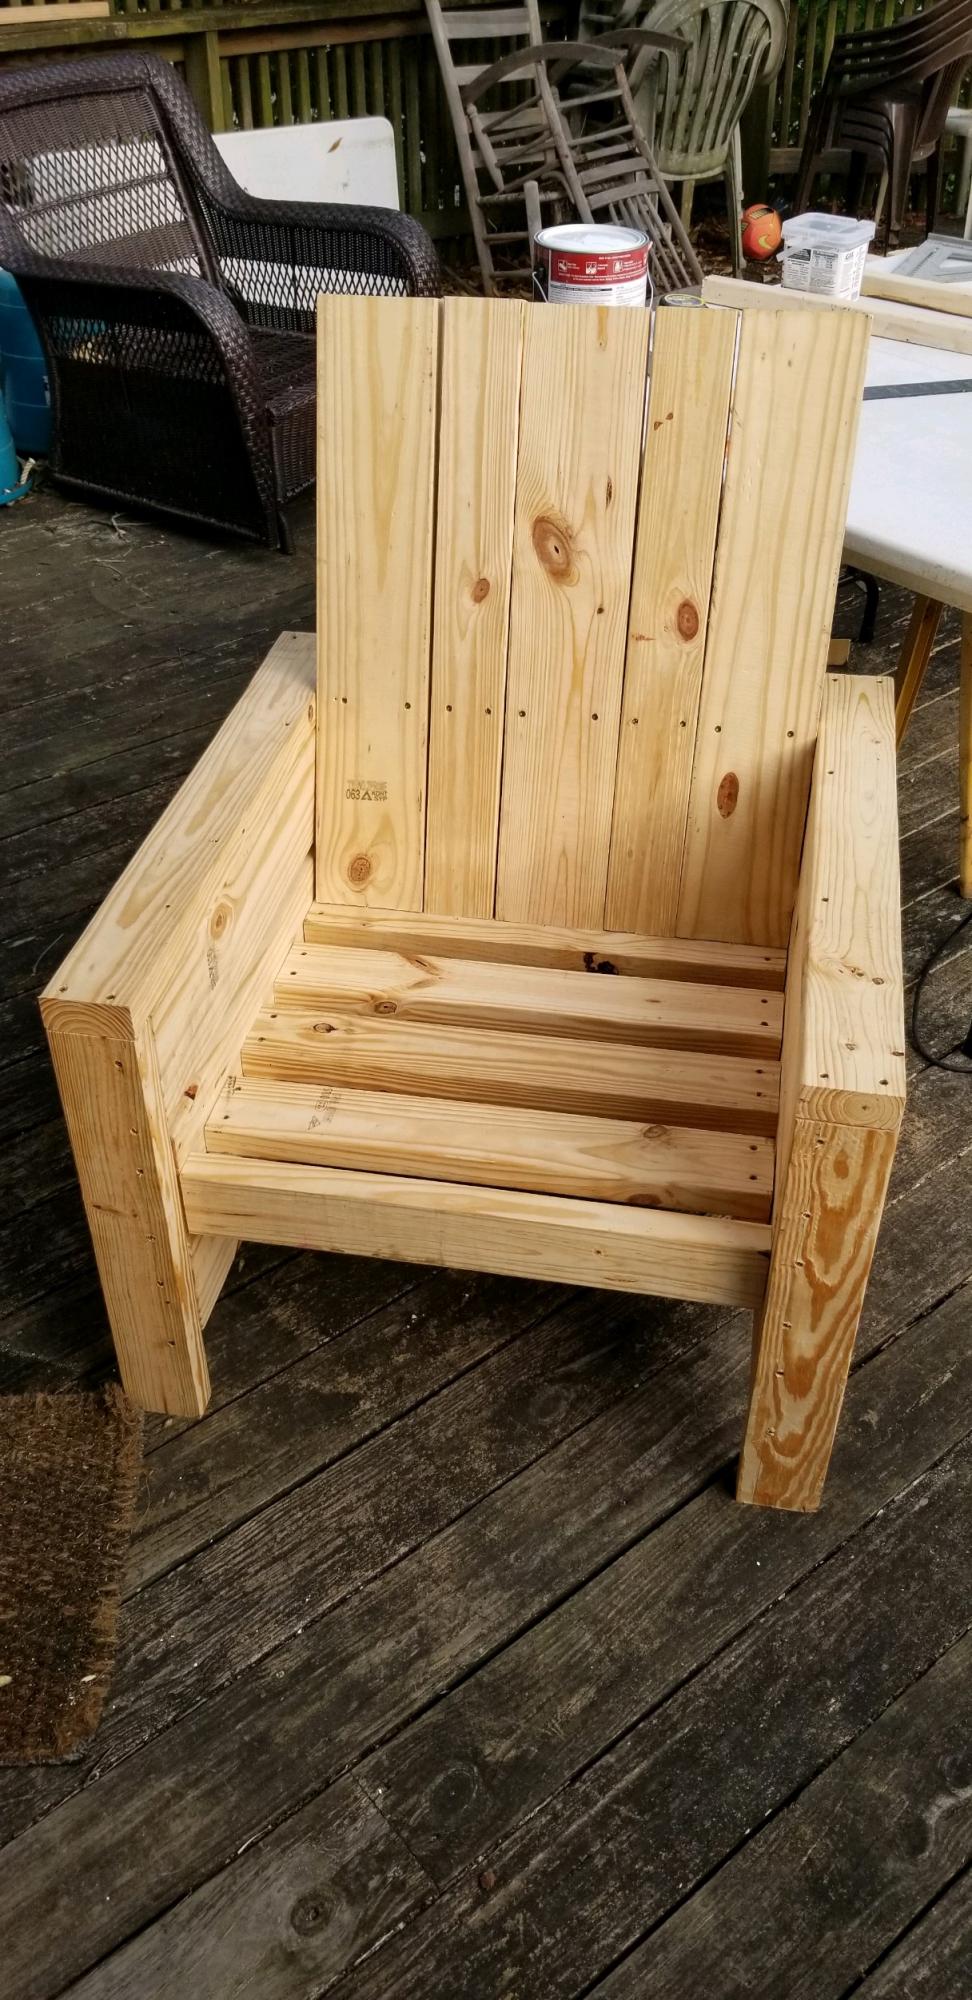
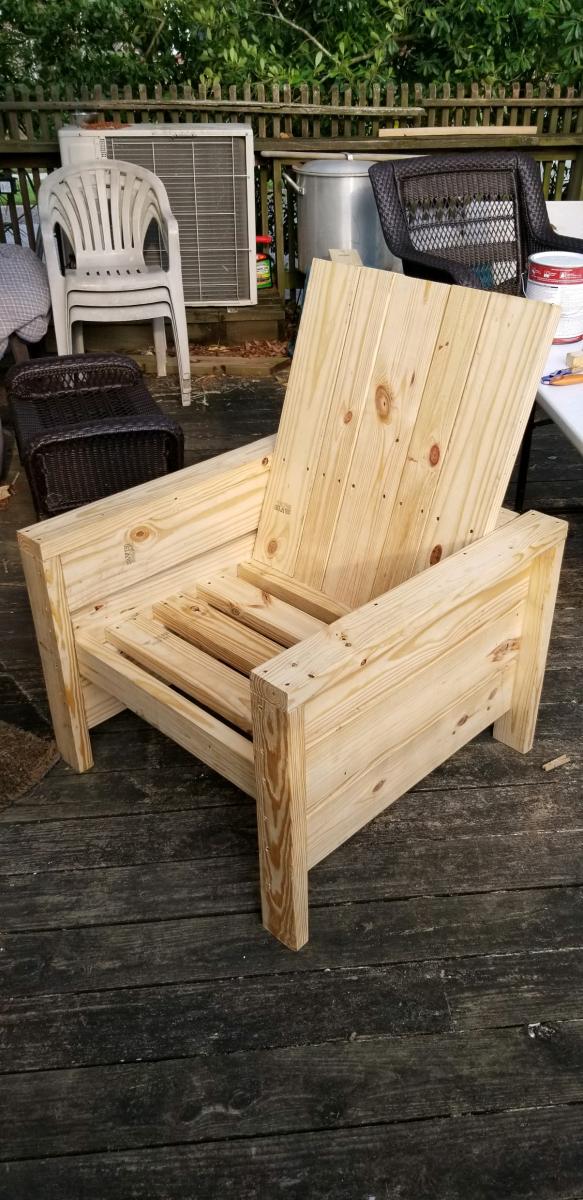
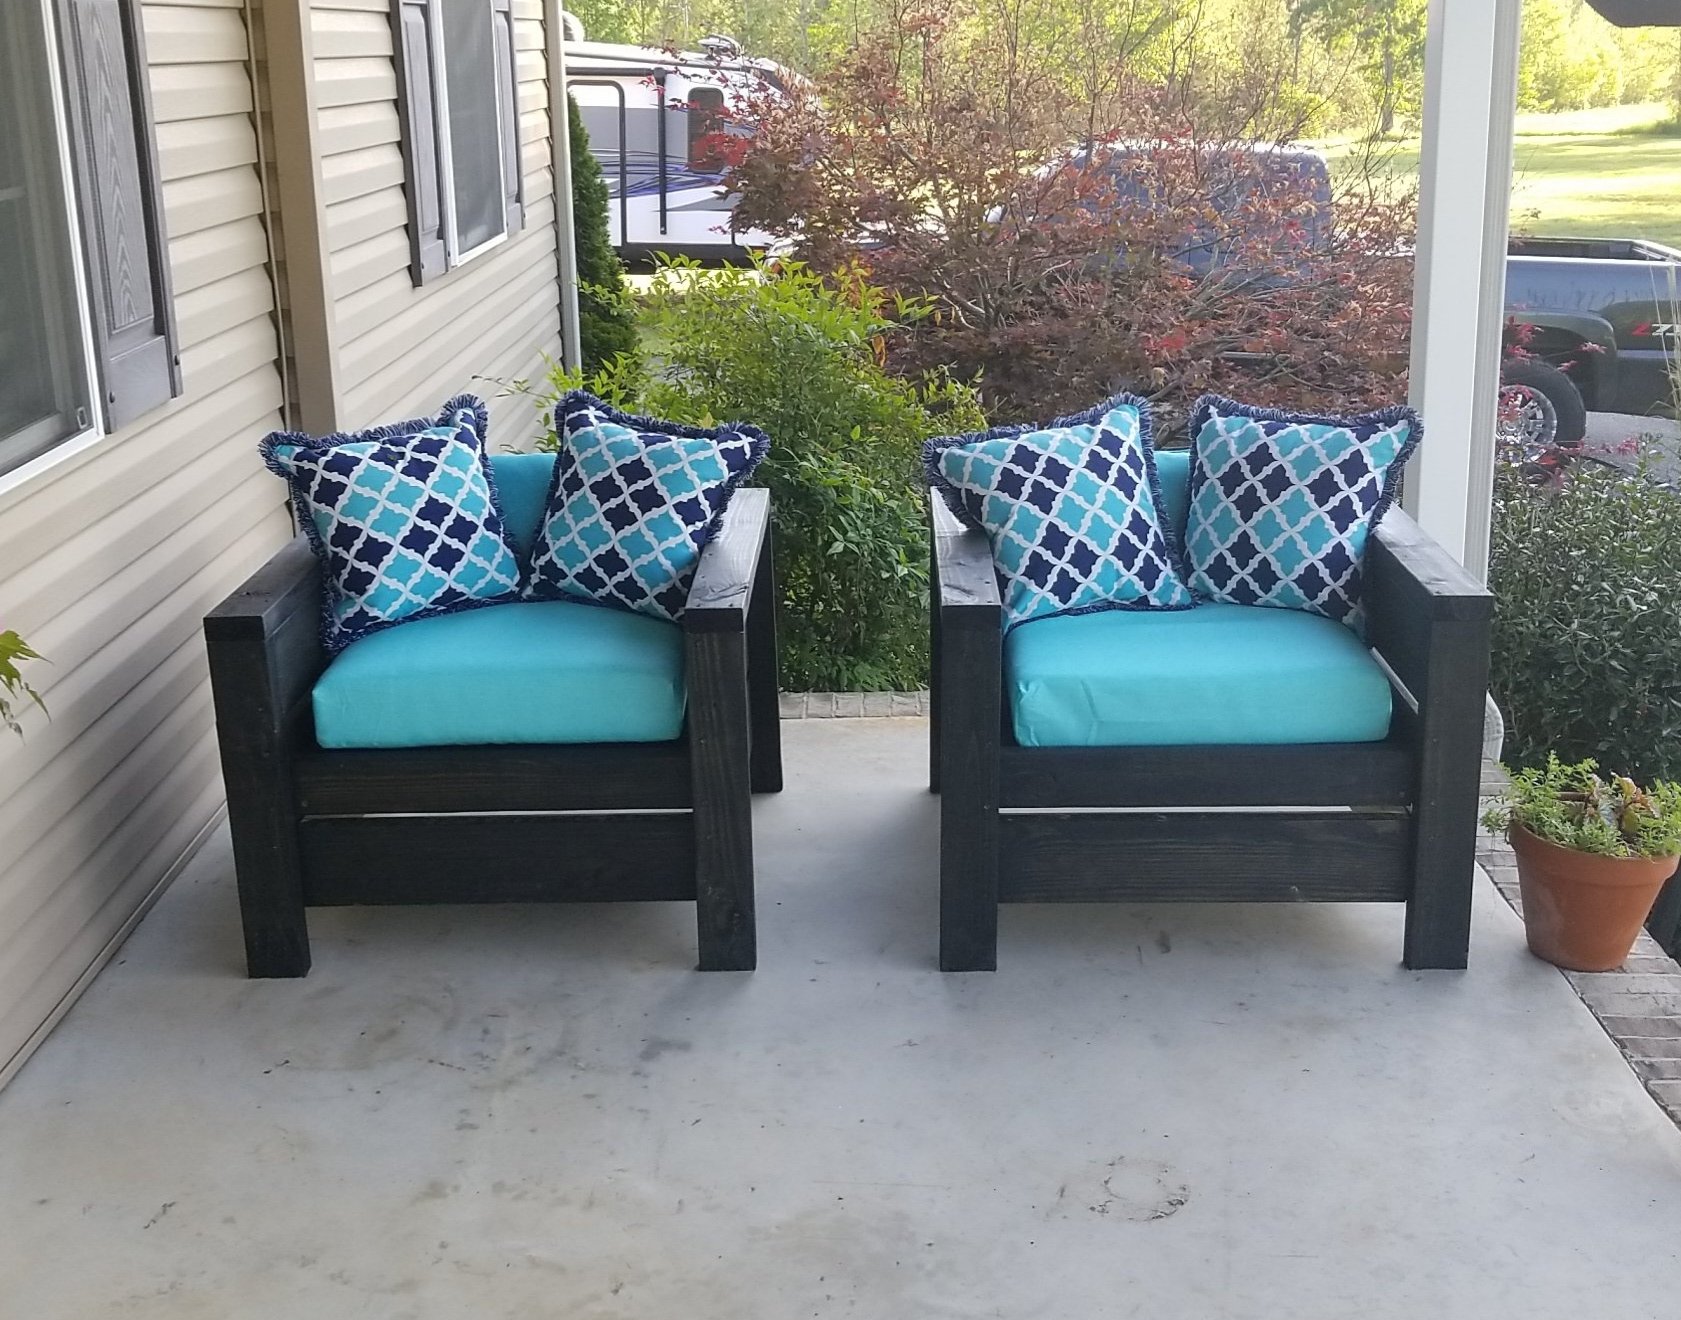
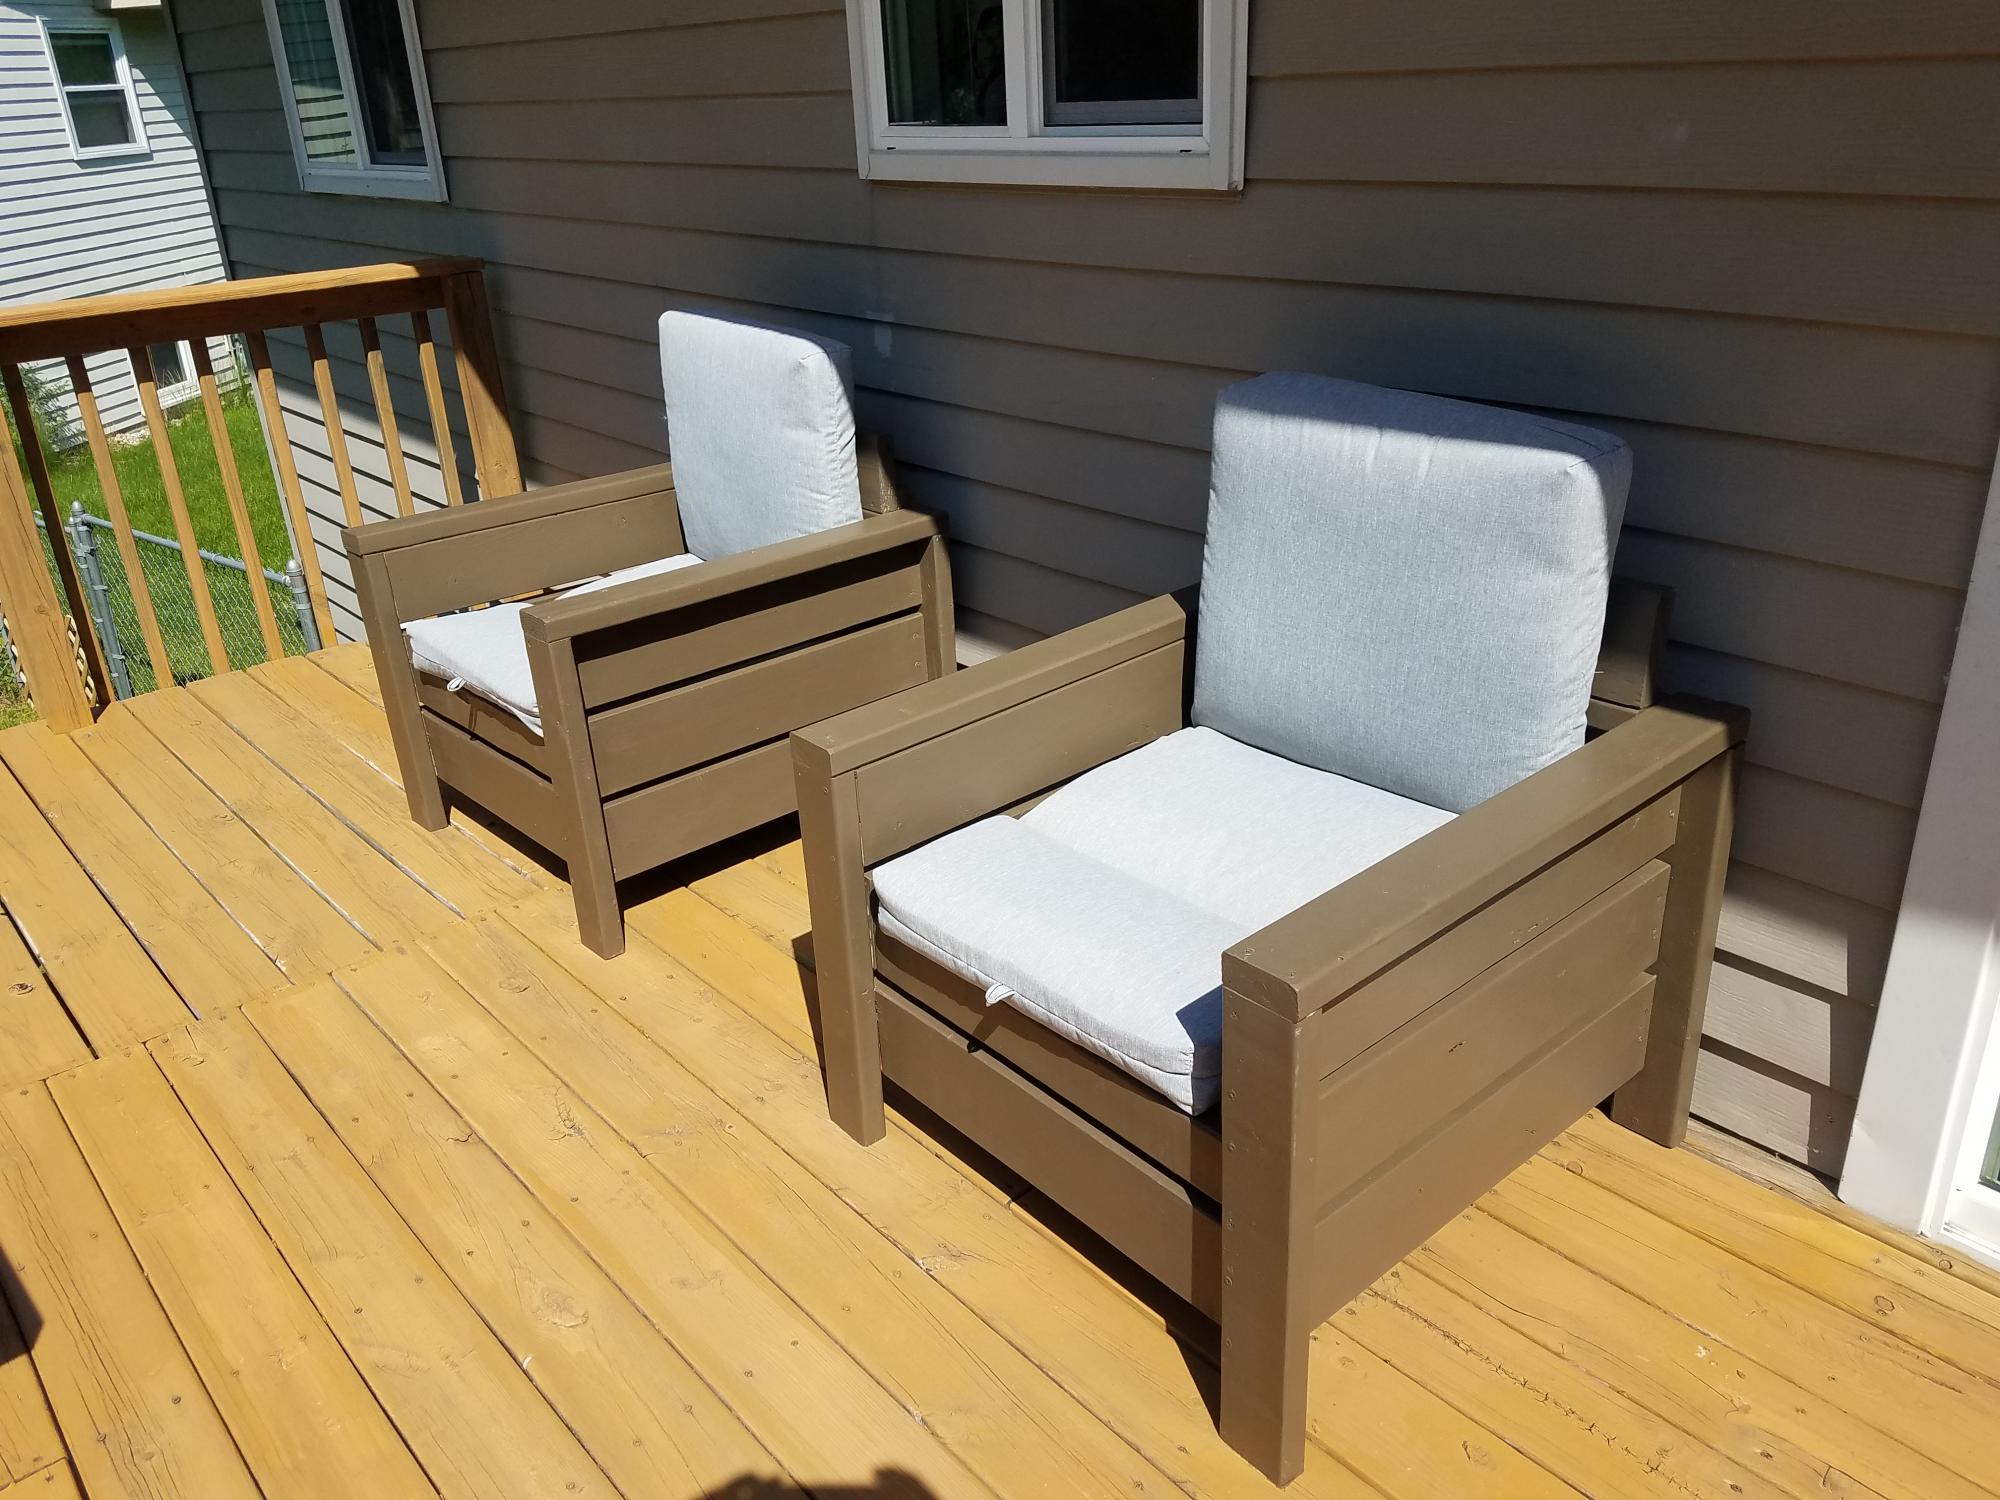
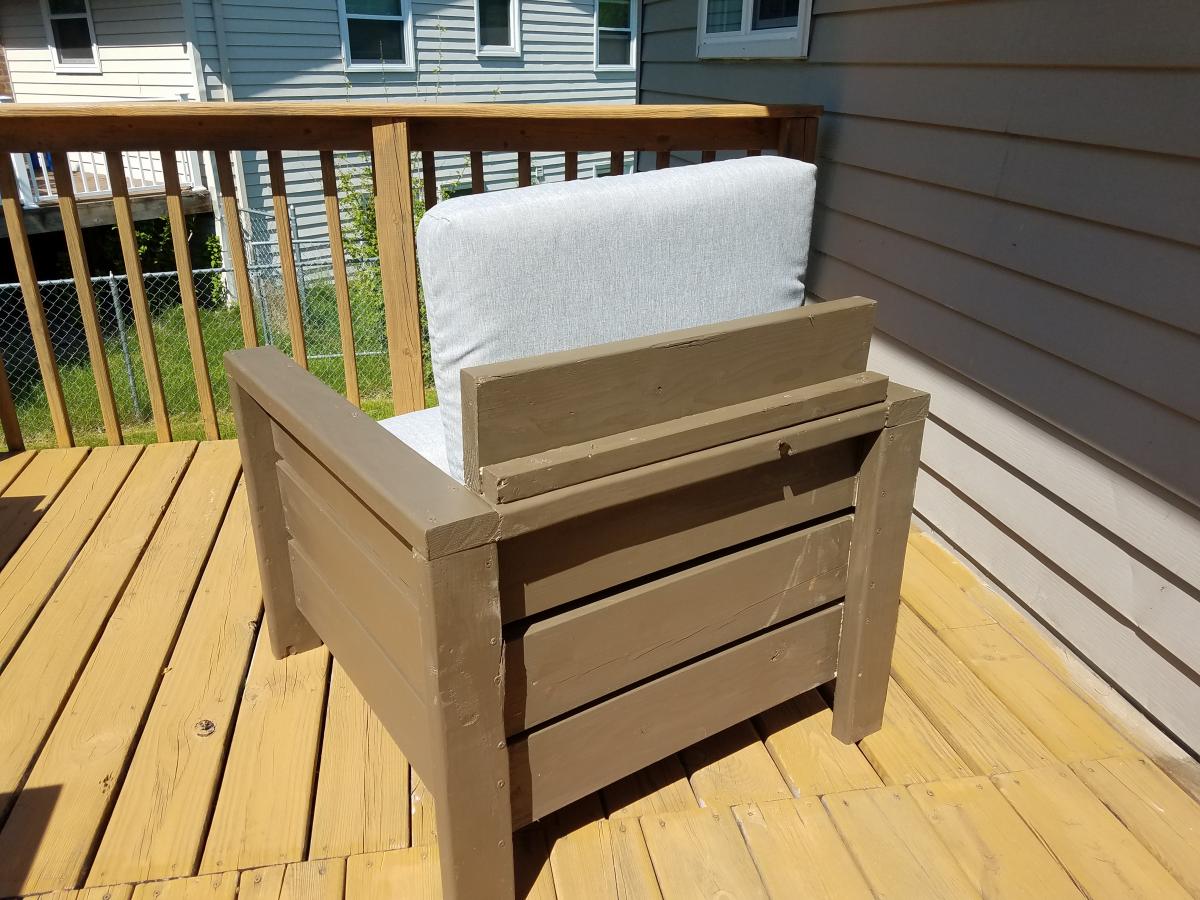
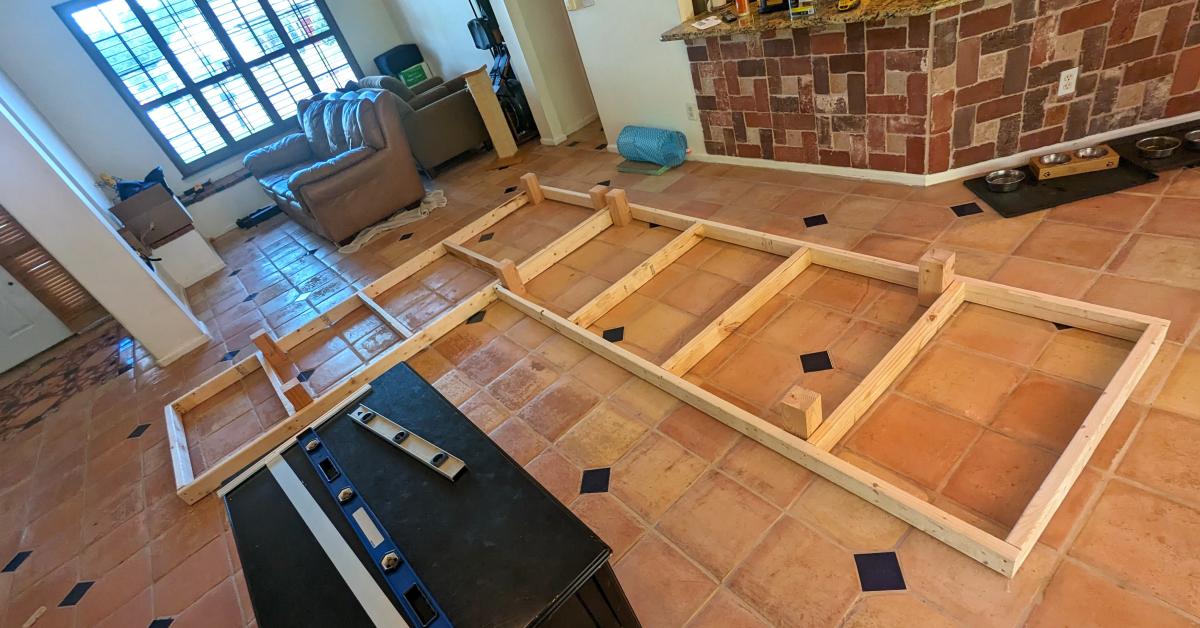
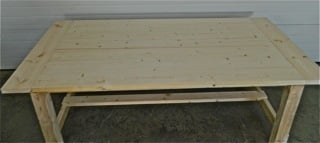
DIY Platform Sectional

Submitted by Anonymous (not verified) on Mon, 08/07/2023 - 17:20

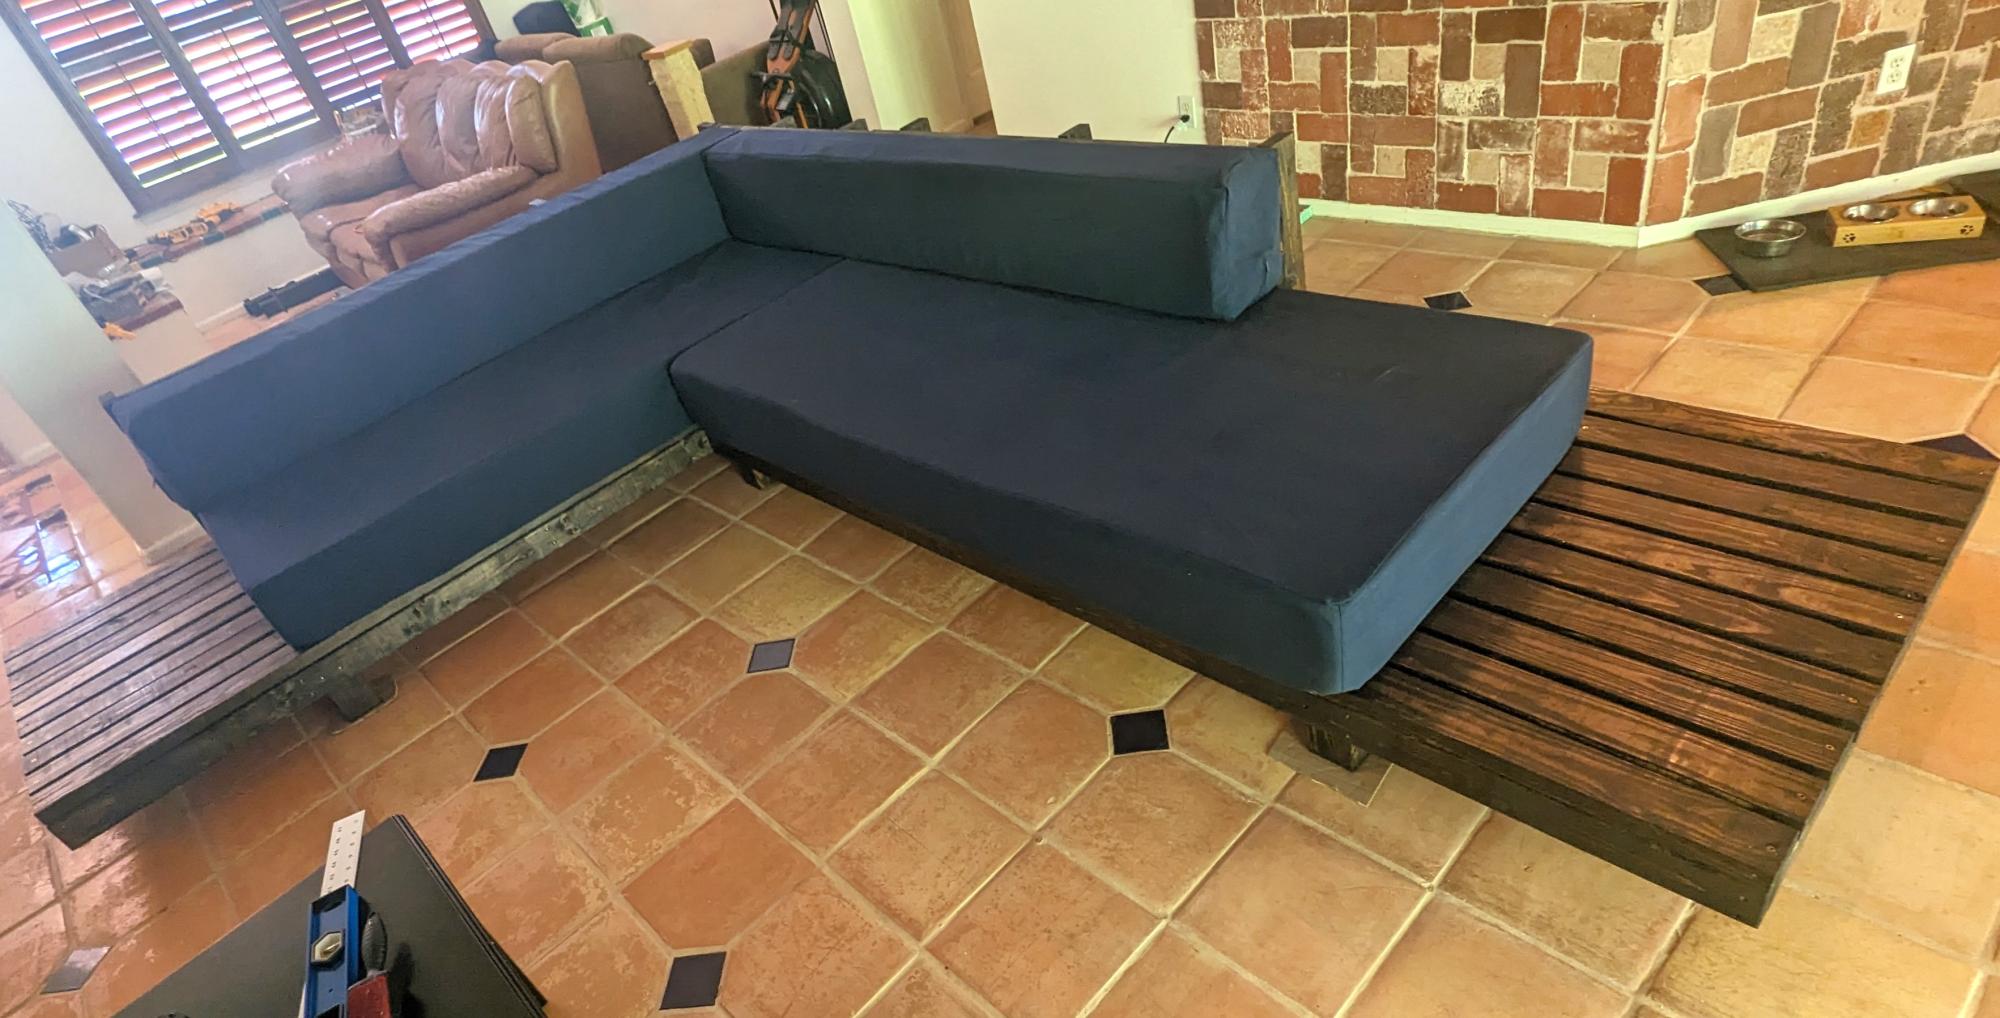
Hello! Thank you so much for providing information and inspiration. I was looking for a very specific couch and I found one. However it was $3000 and had to ship from CA to FL and then I had to assemble it to decide if I liked it or not. Some friends directed me to your site where I found your plans for the outdoor sectional. I modified them to fit my desired outcome and wow! I'm so happy about this. Thanks again!

someJabr0ni

What I used:
36 - 2x4x10s
1 - 4x4x8
A whole bunch of screws
Foam cushions from foamfactory.com
Cushion covers from slipcovershop.com
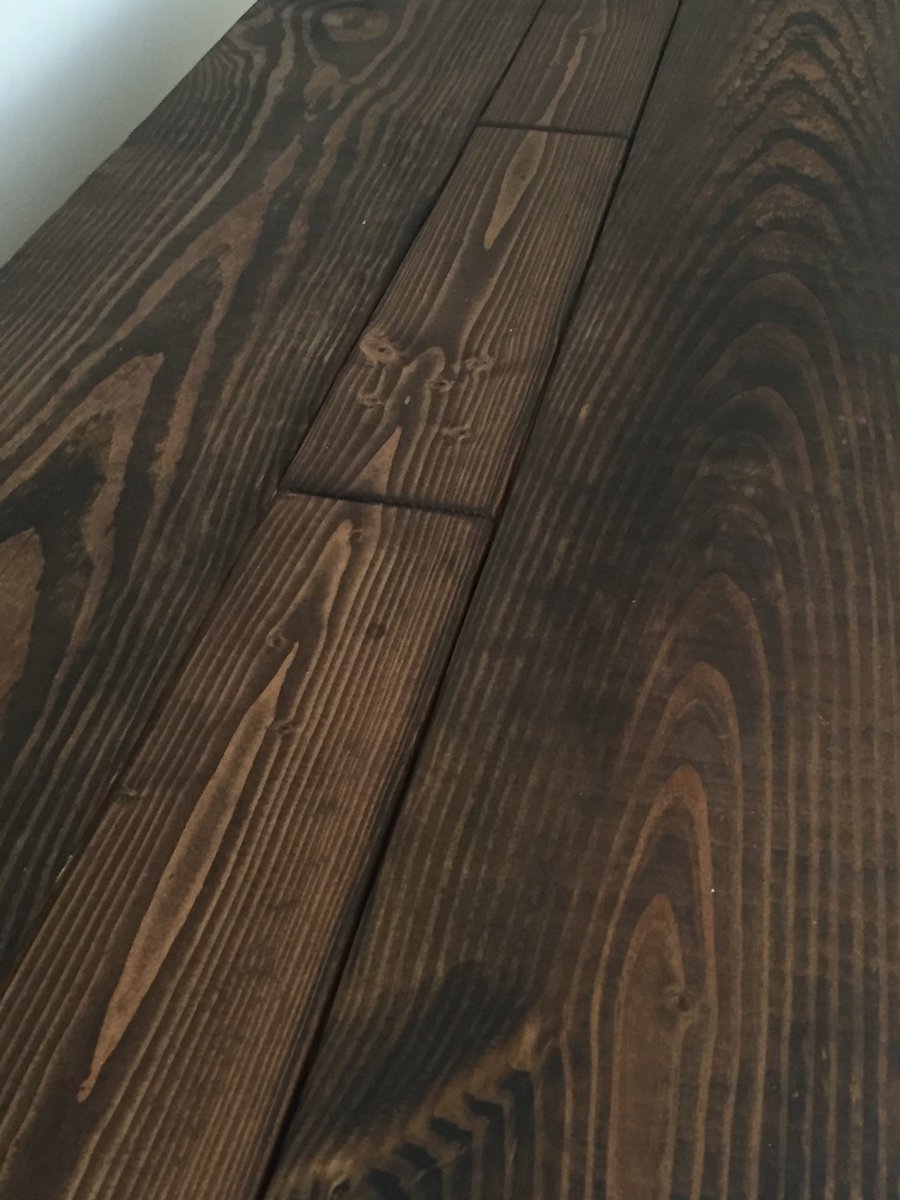
Minwax jacobean stain (finish on top tbd)
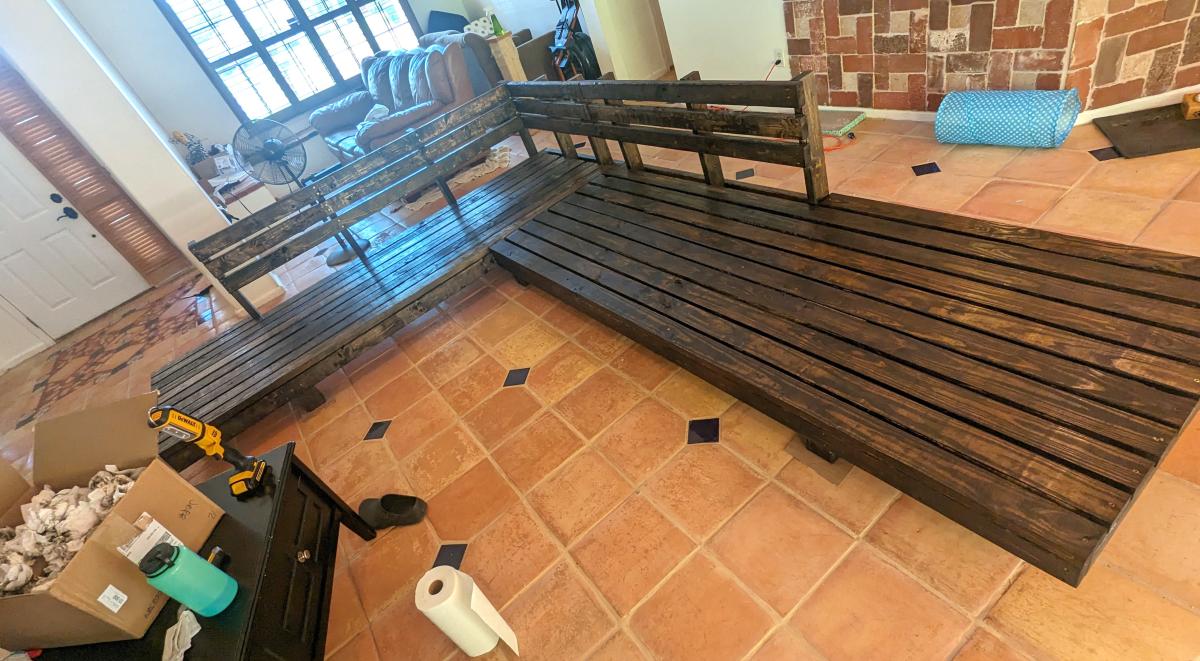
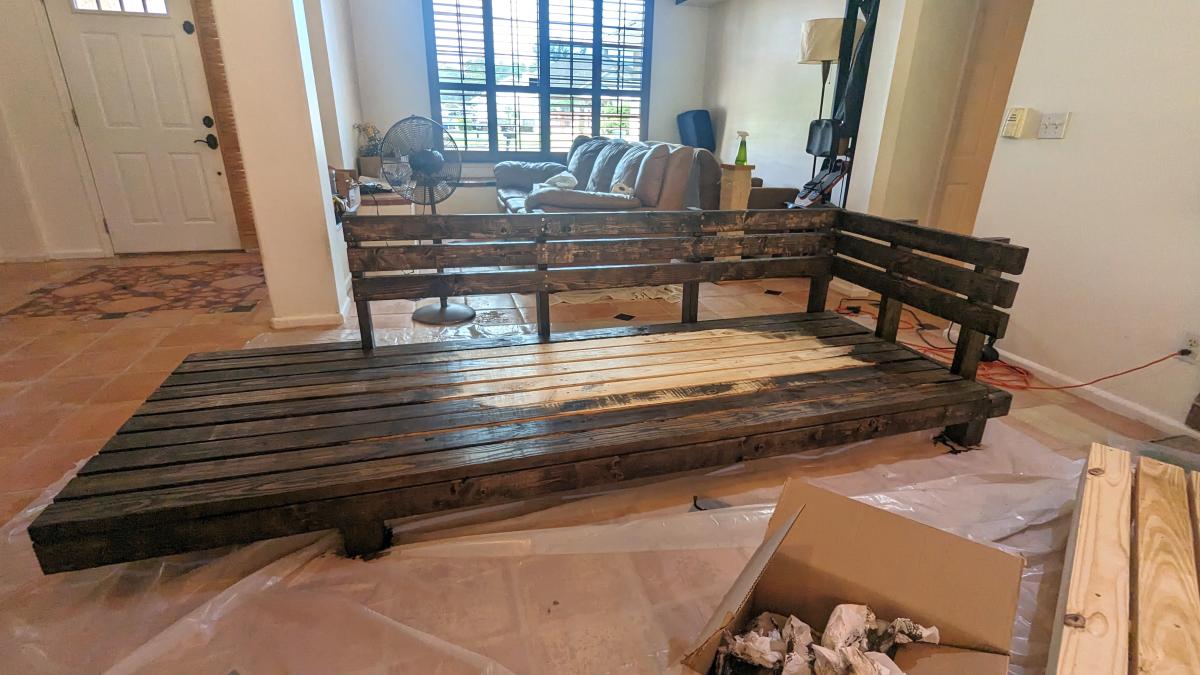
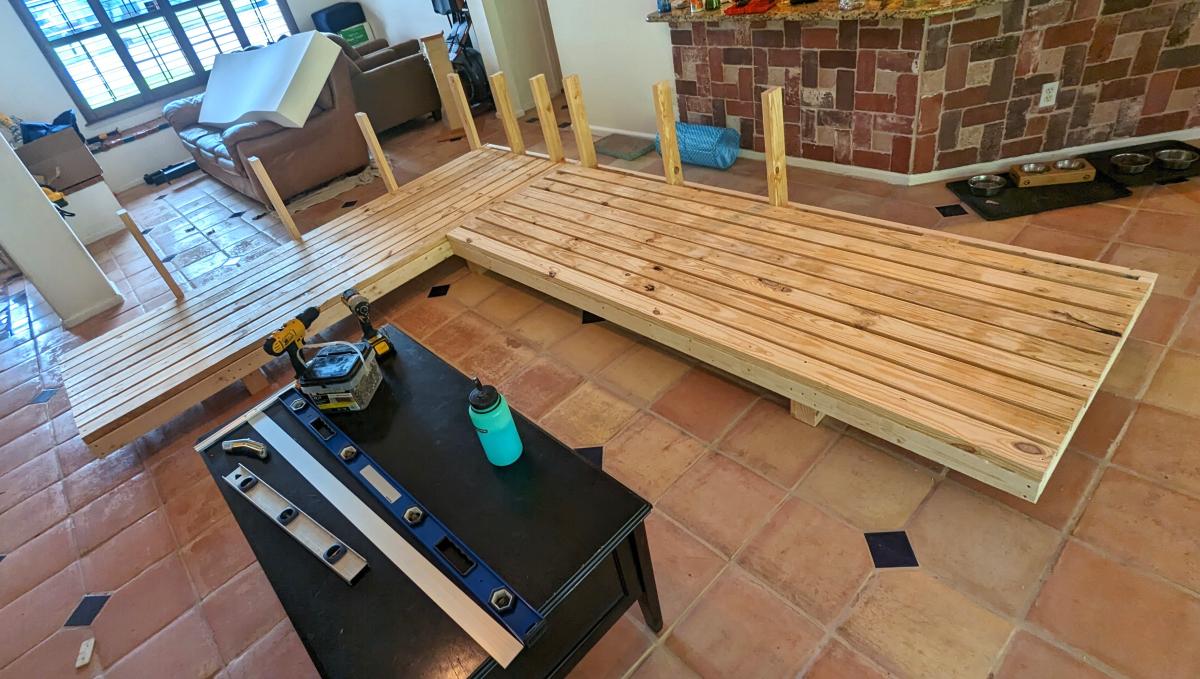
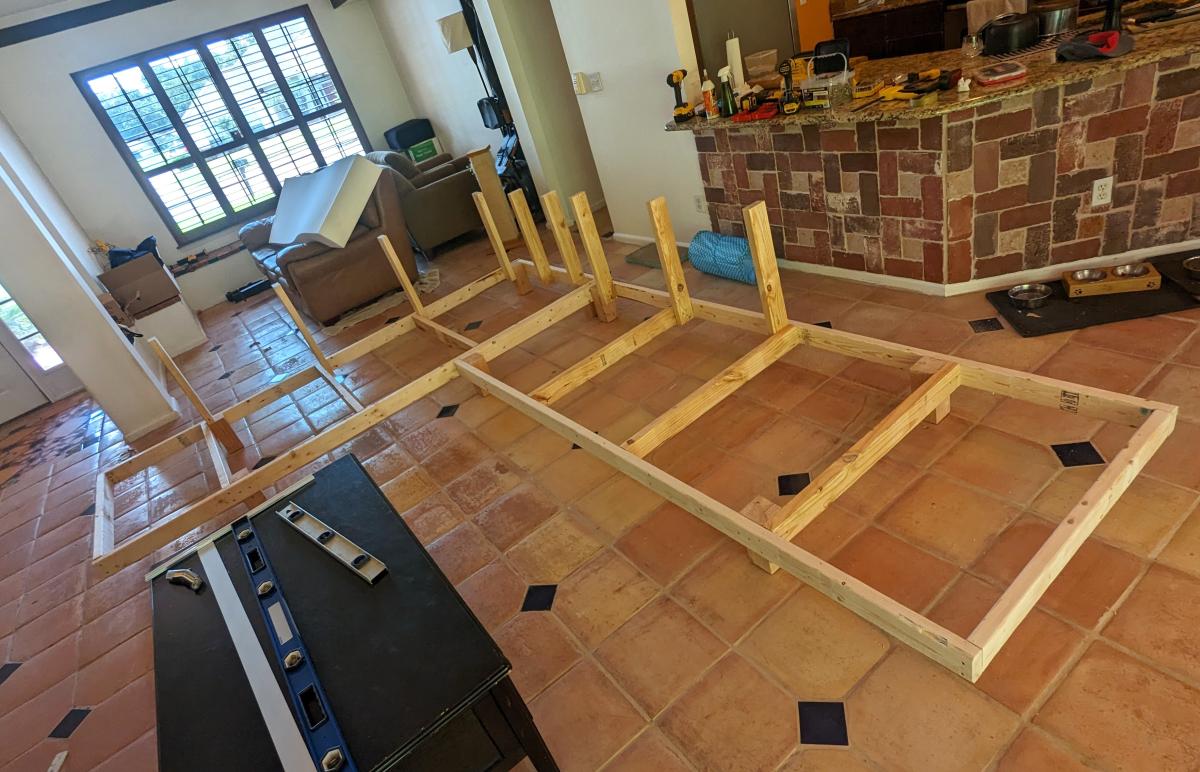
Built from Plan(s)

Levi's play kitchen

Submitted by Ash Matson on Thu, 12/26/2019 - 11:17

We modified the plans a little we made the 2 pieces together instead of separate. We used a 2” hole saw to cut out the oven knobs, then drilled holes a tad bigger than the screw so they would still turn once attached. We also made the back splash taller to accommodate our faucet that had to attach on the back splash instead of the counter top. We used all pocket holes to attach everything it makes it look so much nicer but doesn’t need to be done that way. We bought vinyl circles for the burners on the stove. A dog bowl for the sink and a laundry room faucet for the faucet.

Links to products we used

Faucet - https://www.amazon.com/gp/product/B01KRCTHEA/ref=ppx_yo_dt_b_asin_title_o07_s00?ie=UTF8&psc=1

Oven hinges - https://www.amazon.com/gp/product/B004K7V8UU/ref=ppx_yo_dt_b_asin_title_o08_s00?ie=UTF8&psc=1

6 – 4 inch circles matte black Stove vinyl - https://www.etsy.com/listing/713062039/circle-circles-pack-set-vinyl-decal-car?ref=yr_purchases

Sink 56oz dog food bowl - https://www.amazon.com/gp/product/B00H6OXRN0/ref=ppx_yo_dt_b_asin_title_o01_s00?ie=UTF8&psc=1

Oven handle - https://www.lowes.com/pd/Sumner-Street-Home-Hardware-Vail-10-in-Center-to-Center-Matte-Black-Pull/1001368422

Estimated Cost
100.00
Estimated Time Investment
Weekend Project (10-20 Hours)
Recommended Skill Level
Beginner

Comments

Benchwright Console Table

I followed the plans exactly, except I didn't put the trim pieces on the lower shelves sides. I really like the way it turned out, and my wife painted it with Annie Sloan Chalk Paint, color "Paris Grey" and then used Annie Sloan finishing wax (both clear and dark wax) to protect the piece and age it. I think it turned out great! Thanks for the plans!

Nothing was to difficult with these plans, at least not if you have a Kreg Jig. I would add that I used pocket screws on the top pieces not only to join them to the breadboard end pieces, but also to each other. That made it really strong!

Built from Plan(s)
Estimated Time Investment
Weekend Project (10-20 Hours)
Finish Used
Annie Sloan Chalk Paint. Yes, its called chalk paint, but not neccessarily chalk BOARD paint. its just a really flat paint that has way more color pigments per oz than most latex interior paints. In other words, less coats, and rich colors. You can paint it on raw wood (no primer needed) and you can paint it over old finished pieces too, and it has great coverage and bonding strength! Also used Annie Sloan clear and dark waxes for the finish. Just apply with a stipple brush and then buff. And don't forget fun drawer pulls to top it off!
Recommended Skill Level
Intermediate

Rustic Dresser and Bedroom Set

My son was too big for his toddler bed and had been spending his nights in the guest bed, instead. For his Christmas gift this year, his grandparents were going to get him bedroom furniture, but I insisted on building it instead! I love the rustic theme, saw the rustic dresser on wheels and thought it was perfect for him and perfect for us since we move so much with the military. Hello, a dresser on wheels? Like, no man labor trying to carry the thing out of the house? Just roll it? SOLD! I HATE the wheels that I put on it, but I really did not want to dish out $100 for the spoked wheels. I think I may change them one day and put the wheels on that will make it look ten times better, but for now, these will do. The wood for the dresser was pricey, but it was my first time buying plywood and I didn't realize that I could buy nicer plywood in smaller amounts that would have been a little cheaper since I didn't need to buy entire boards! Otherwise, it wouldn't have cost as much I am sure. I built a bed and a night table to match the dresser (as seen in the pictures), and frankly, I am very pleased with this set that I built! (CHECK OUT MY BED! http://ana-white.com/2014/02/rustic-twin-bed-upholstered-headboard-matc…) It was quite a difficult project for me, being the first time I had built drawers and because I didn't have more than a few hours in a week to get outside to work on it, but I finally finished :-) I also had a very small space to work in, since my husband consumes the garage with his man "stuff" and it was cold, so I needed the door closed with the space heater ;-). This project could definitely use some good amount of workspace!

Built from Plan(s)
Estimated Cost
$100-$200??
Estimated Time Investment
Week Long Project (20 Hours or More)
Finish Used
Minwax Early American , used a natural bristle brush, foam brush and cloth, set for a minute or two, wiped off.
Minwax Furniture Wax, rubbed on with cloth and let dry for a bit.
Recommended Skill Level
Intermediate

Modified Kitchen Island from the Handbuilt Home Island Plans

Today I’m sharing this unexpected addition to our kitchen! Everything about the construction of this furniture-style kitchen island seemed to be charmed. There is usually a lot of trial and error that goes on behind the scenes during our projects- but everything seemed to just kind of fall in to place. We enjoyed it while it lasted, since we know it won’t be that easy again! ;) Without a real plan for the island, we found the beautiful marble slab on Craigslist for a steal. While the slab was having it’s edges finished, I began comparing island legs. The ones I decided on came from Osbourne Wood, they are called The Grand Harvest Island Posts. I liked the chunky style in order to support the heavy marble. We are so so happy with the quality of the legs that we plan on using this company for all future furniture building projects. For the specifics on how to build the island, we were a bit stumped. We were just kind of going to wing it. Then, when I was daydreaming about a completely unrelated project, I stumbled across the kitchen island plans in Ana‘s book The Handbuilt Home. The dimensions were almost perfect for the slab! We modified the plans slightly- we didn’t need casters, and our island needed to be a bit narrower than the plan in the book, and we swapped out the 2×4′s for 2×6′s in some places- but the length was perfect, so we were still able to use most of the materials list (a huge time & money saver!) to maximize yields. We ordered a Kreg Jig, like Ana recommended, and I have to say- I love it! This island was so much fun to build and finish- and it makes a huge statement in our DIY renovated kitchen!

Built from Plan(s)
Estimated Time Investment
Day Project (6-9 Hours)
Finish Used
Aged Driftwood Finish: I started out by giving the island a coat of Minwax pre-stain conditioner, since I was planning to use a water-based stain. Next, I did a coat of Minwax Waterbased Wood Stain White Base tinted Slate at the paint counter at Lowes. My next step was the whitewashing. I very lightly dry brushed the entire island with white satin paint. After it dried, we sanded it all smooth, removing some of the white paint. Some stayed behind in the detail. Then, we stood back and looked at our results… and we decided that it was too white with the rest of the kitchen, so we went over the paint with Rustoleum Driftwood. Weird, I know- but it worked perfectly! It changed some of the white paint into a more natural looking gray color, and toned down some of the blonde wood peeking through. The overall effect made it appear aged, and we were so happy with it!
Recommended Skill Level
Intermediate

Comments

suschen

Fri, 02/28/2014 - 05:22

This looks amazing! I was wondering how you attached the marble slab to the posts?

gkubrynski

Mon, 03/03/2014 - 17:24

Unbelievable! Great accent to the kitchen. You mentioned you used both pine and maple... can you specify which parts were pine v. maple? Beginner here... Thanks

Modular Desk System

desk
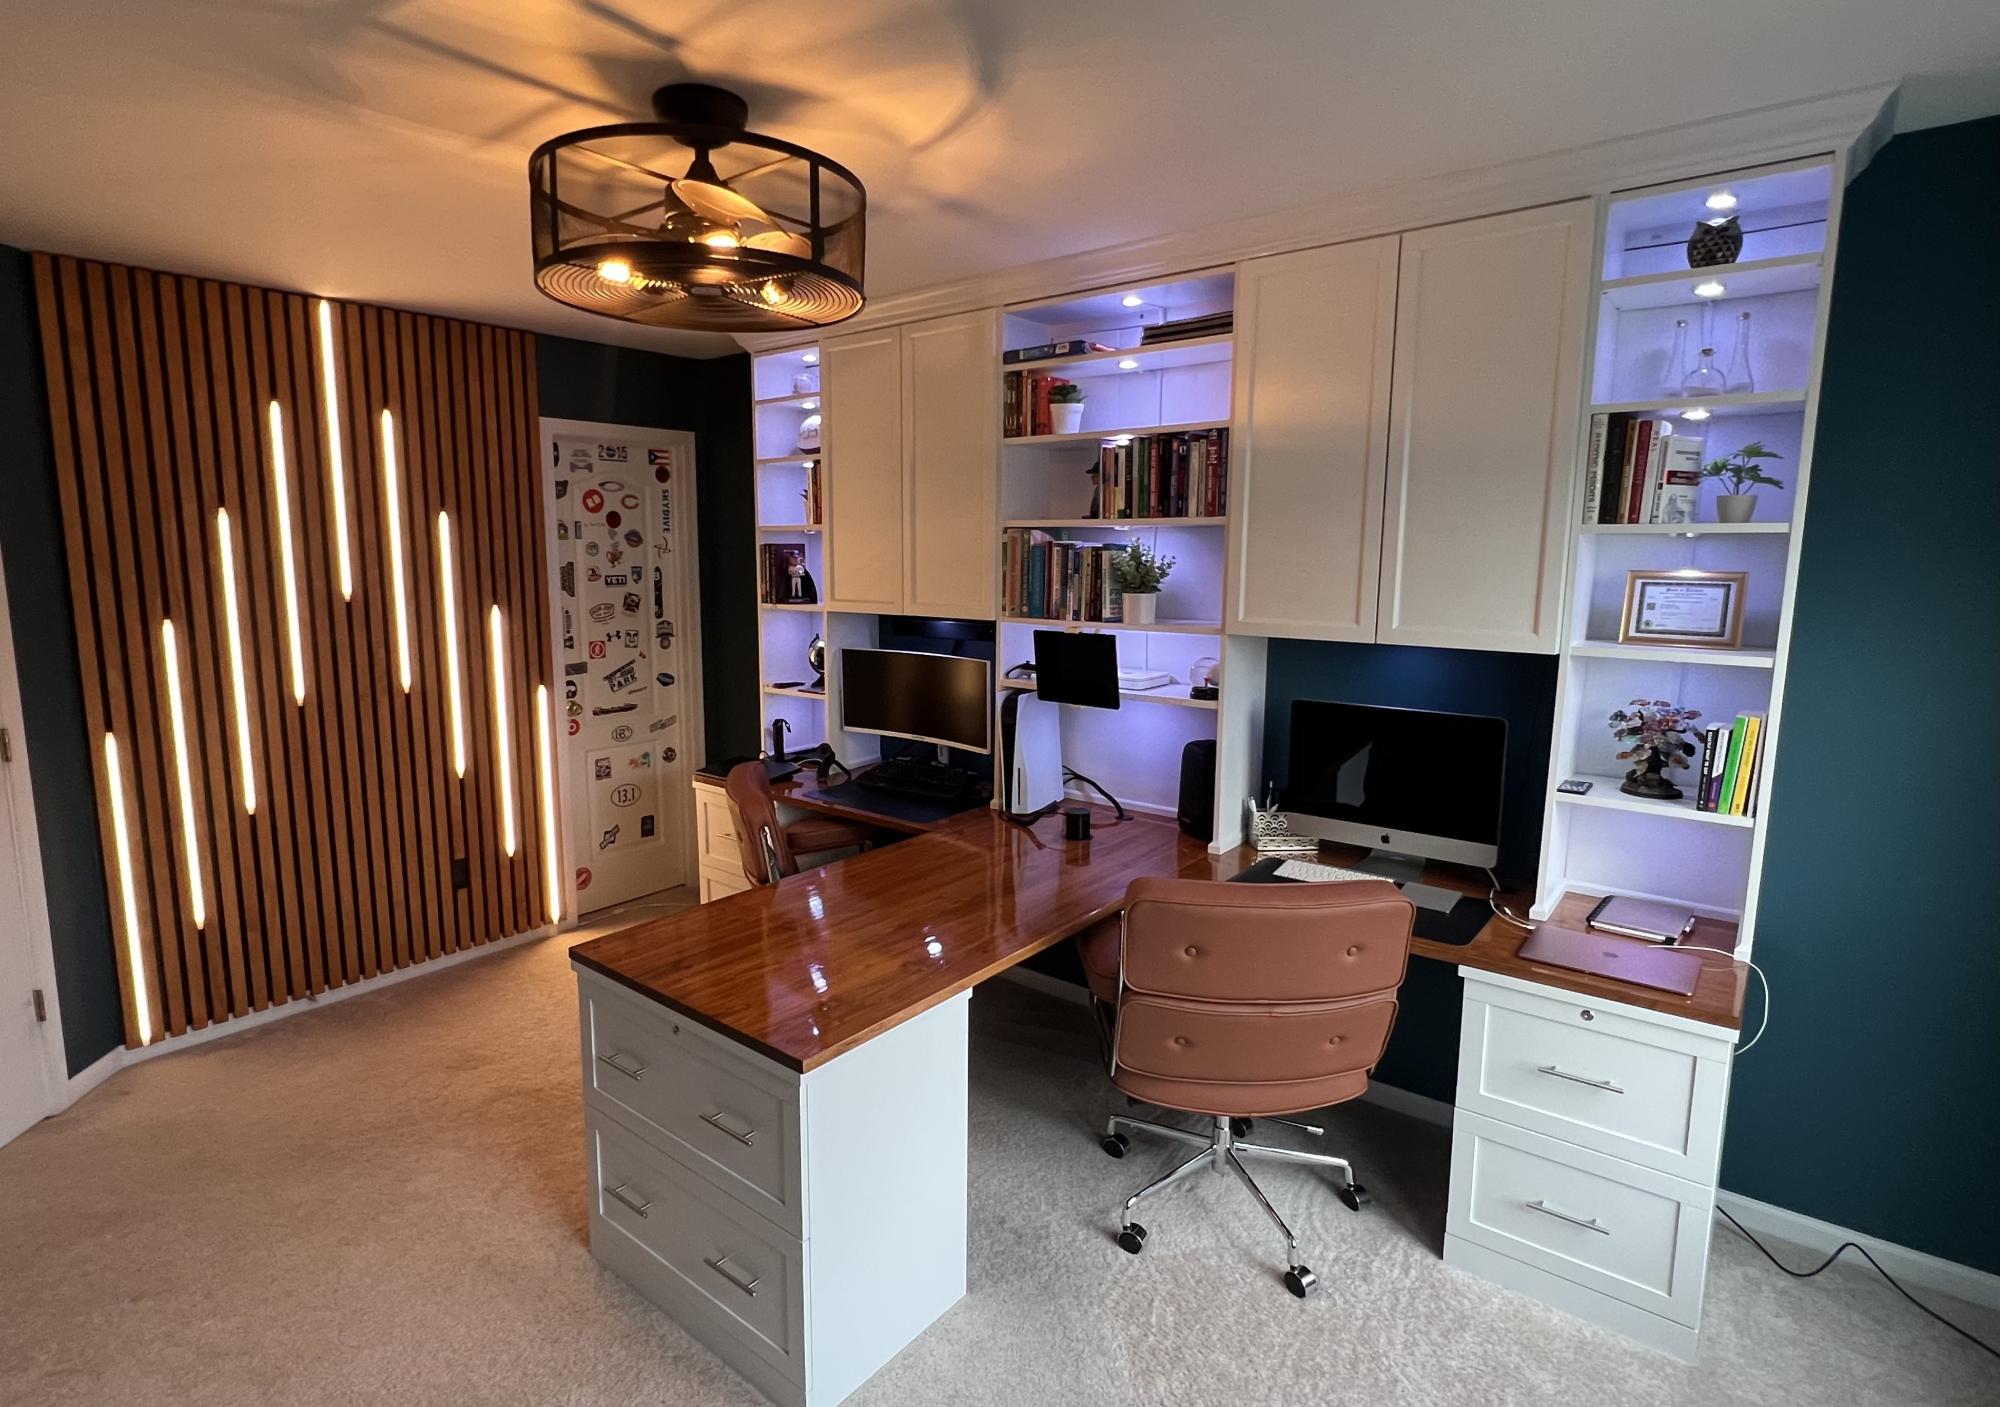
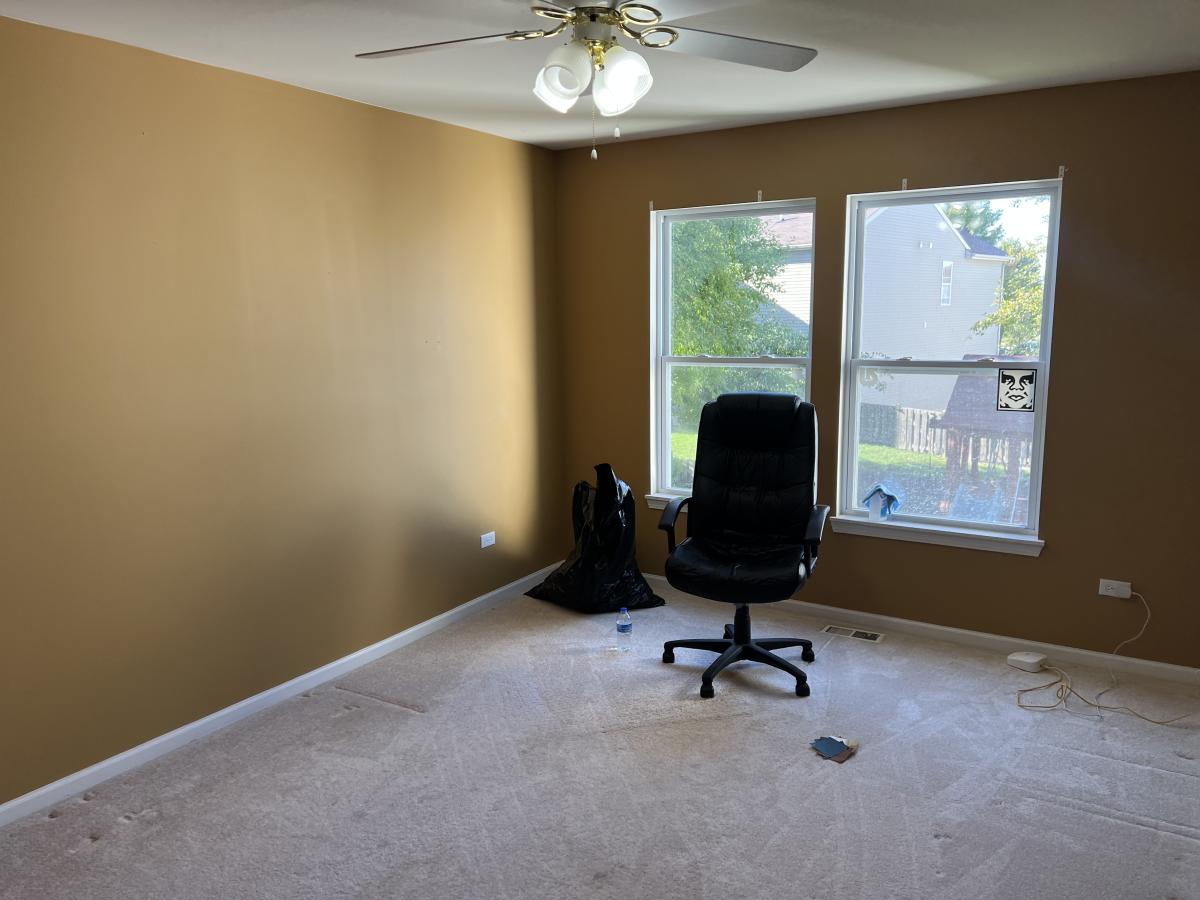
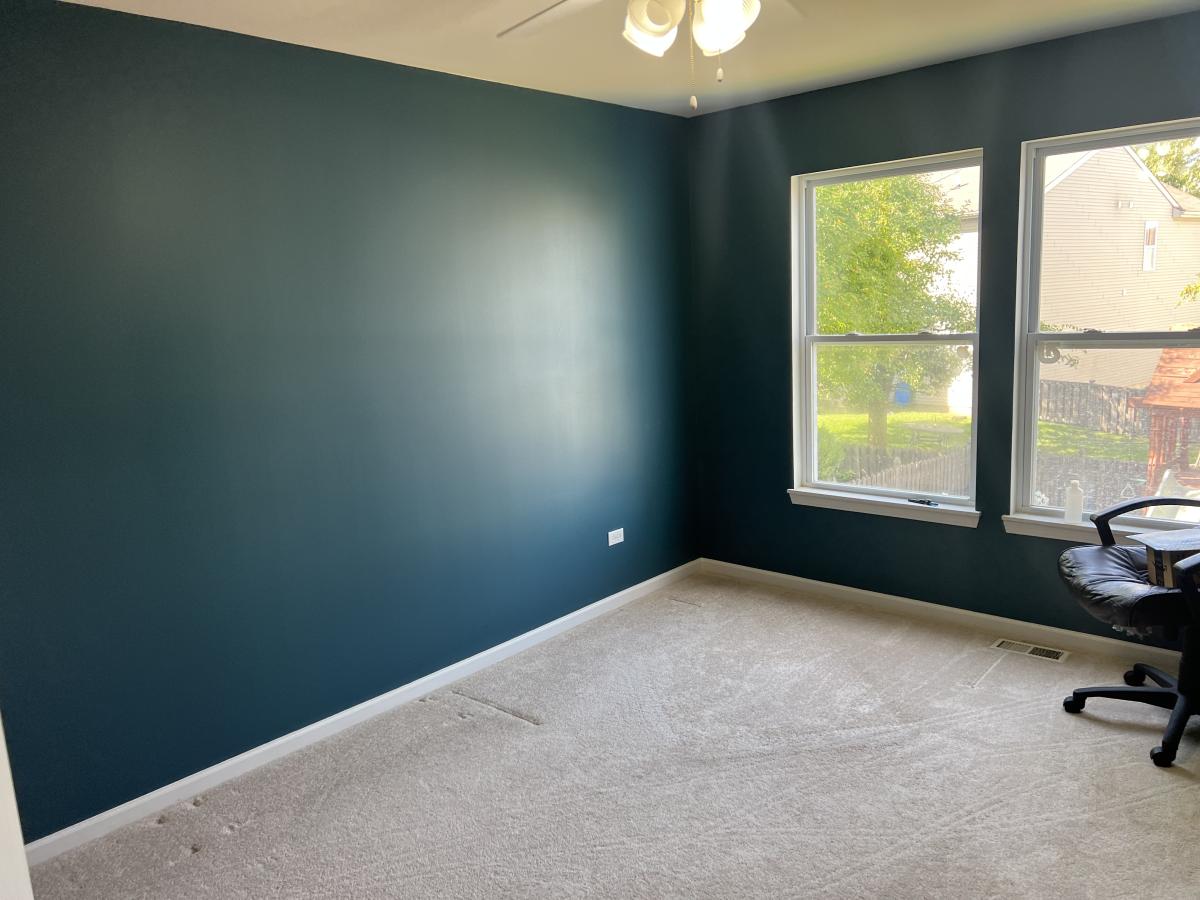
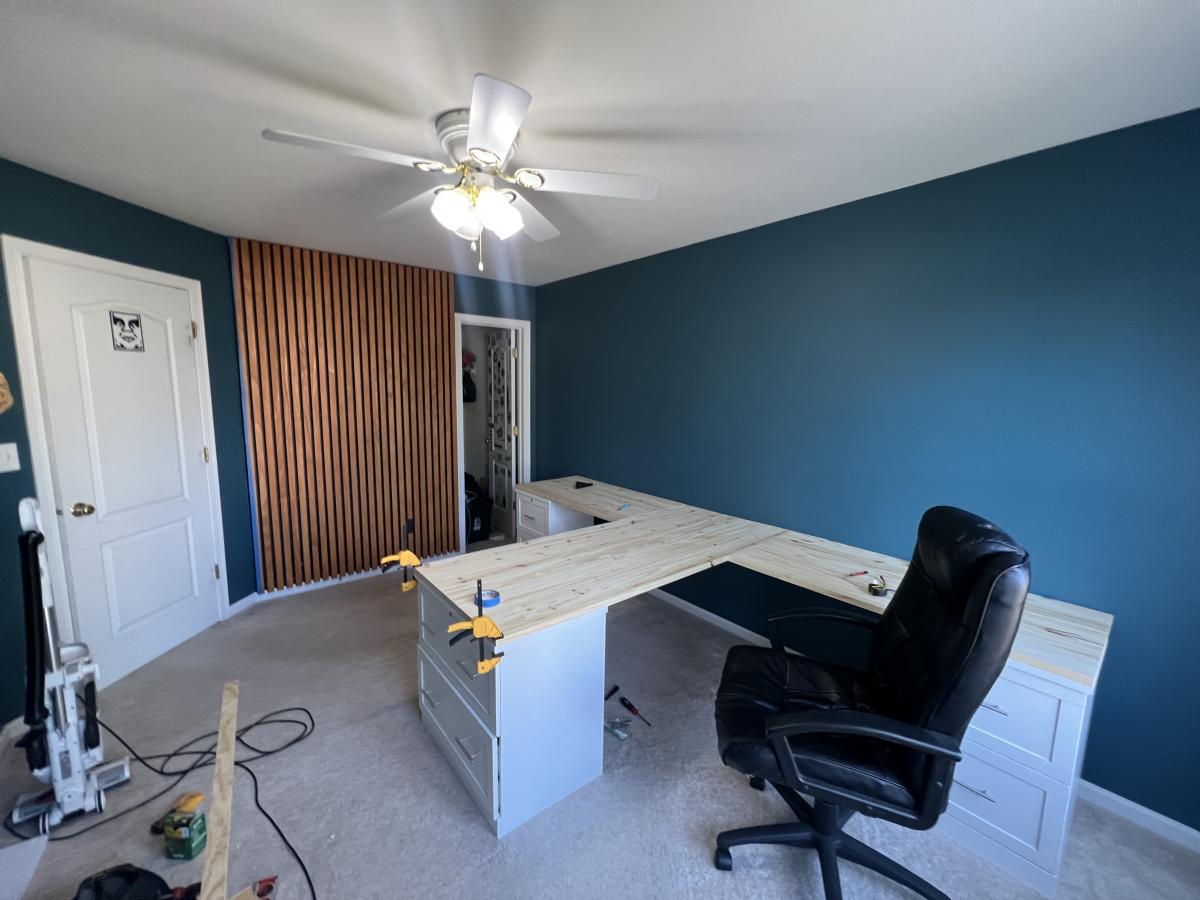
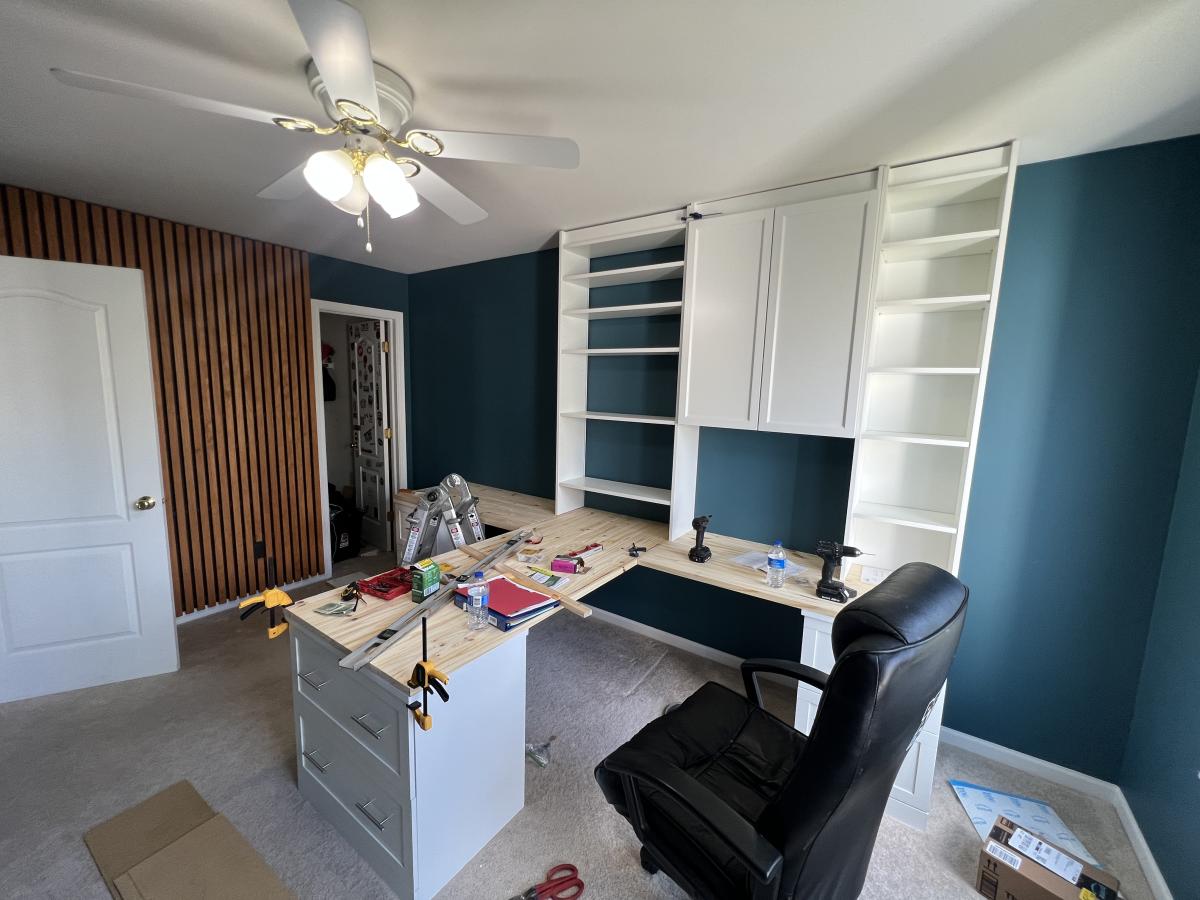
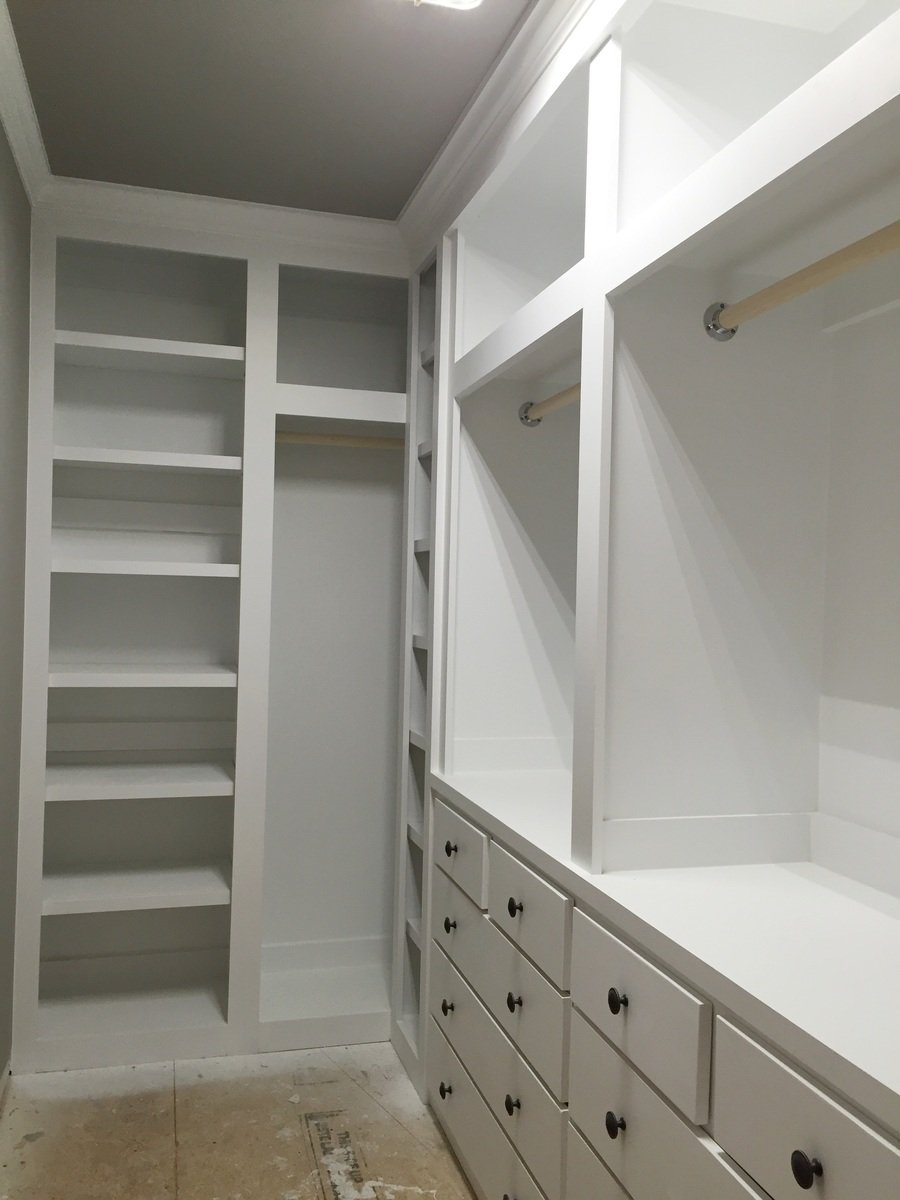
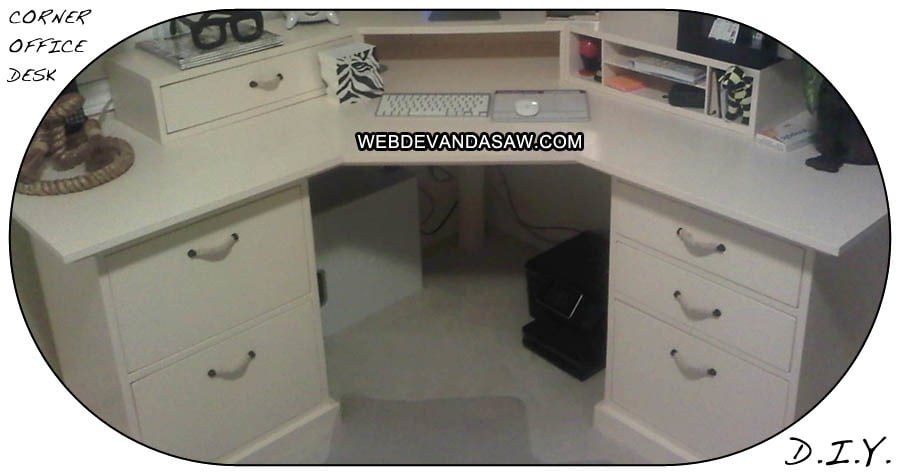
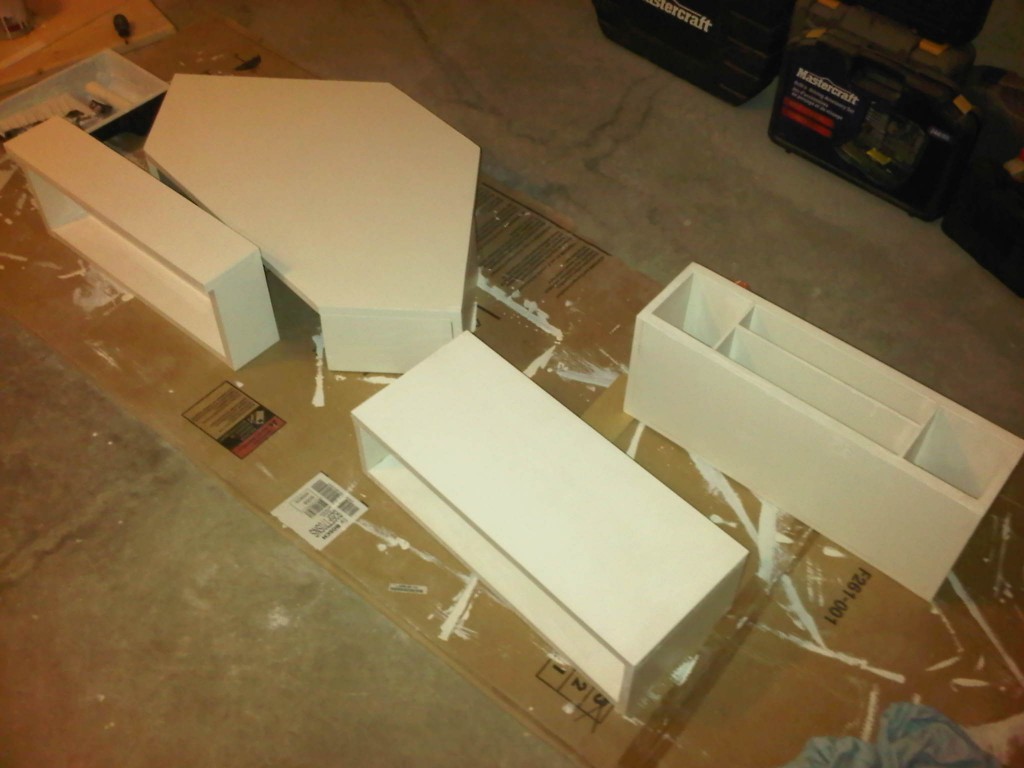
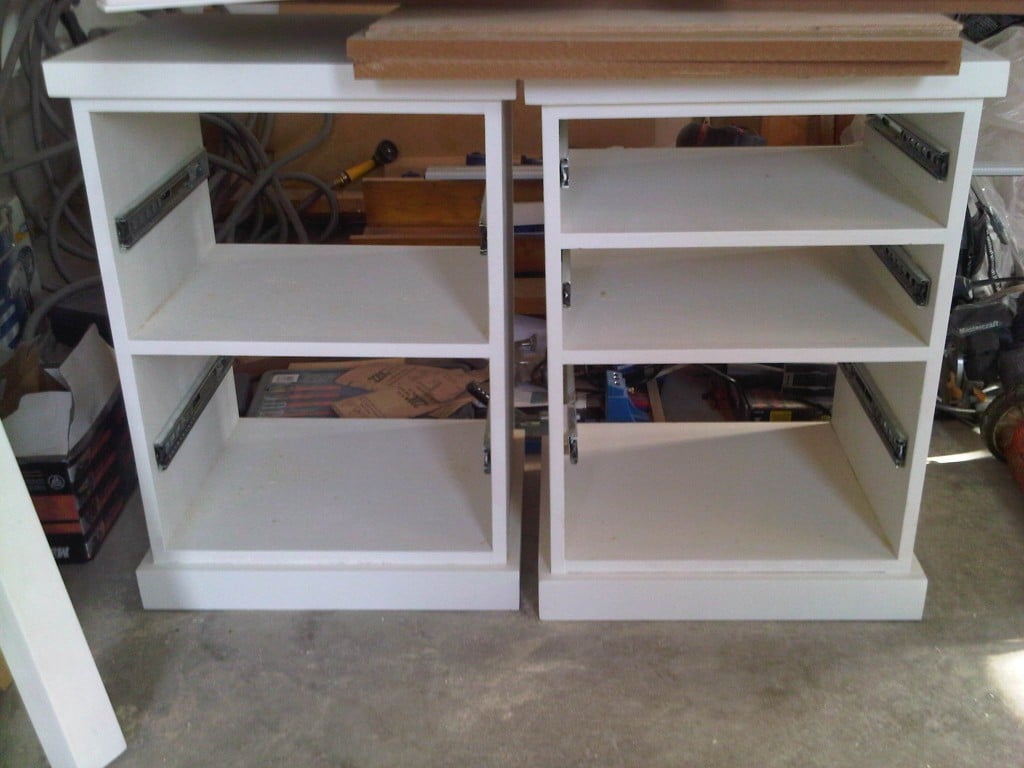
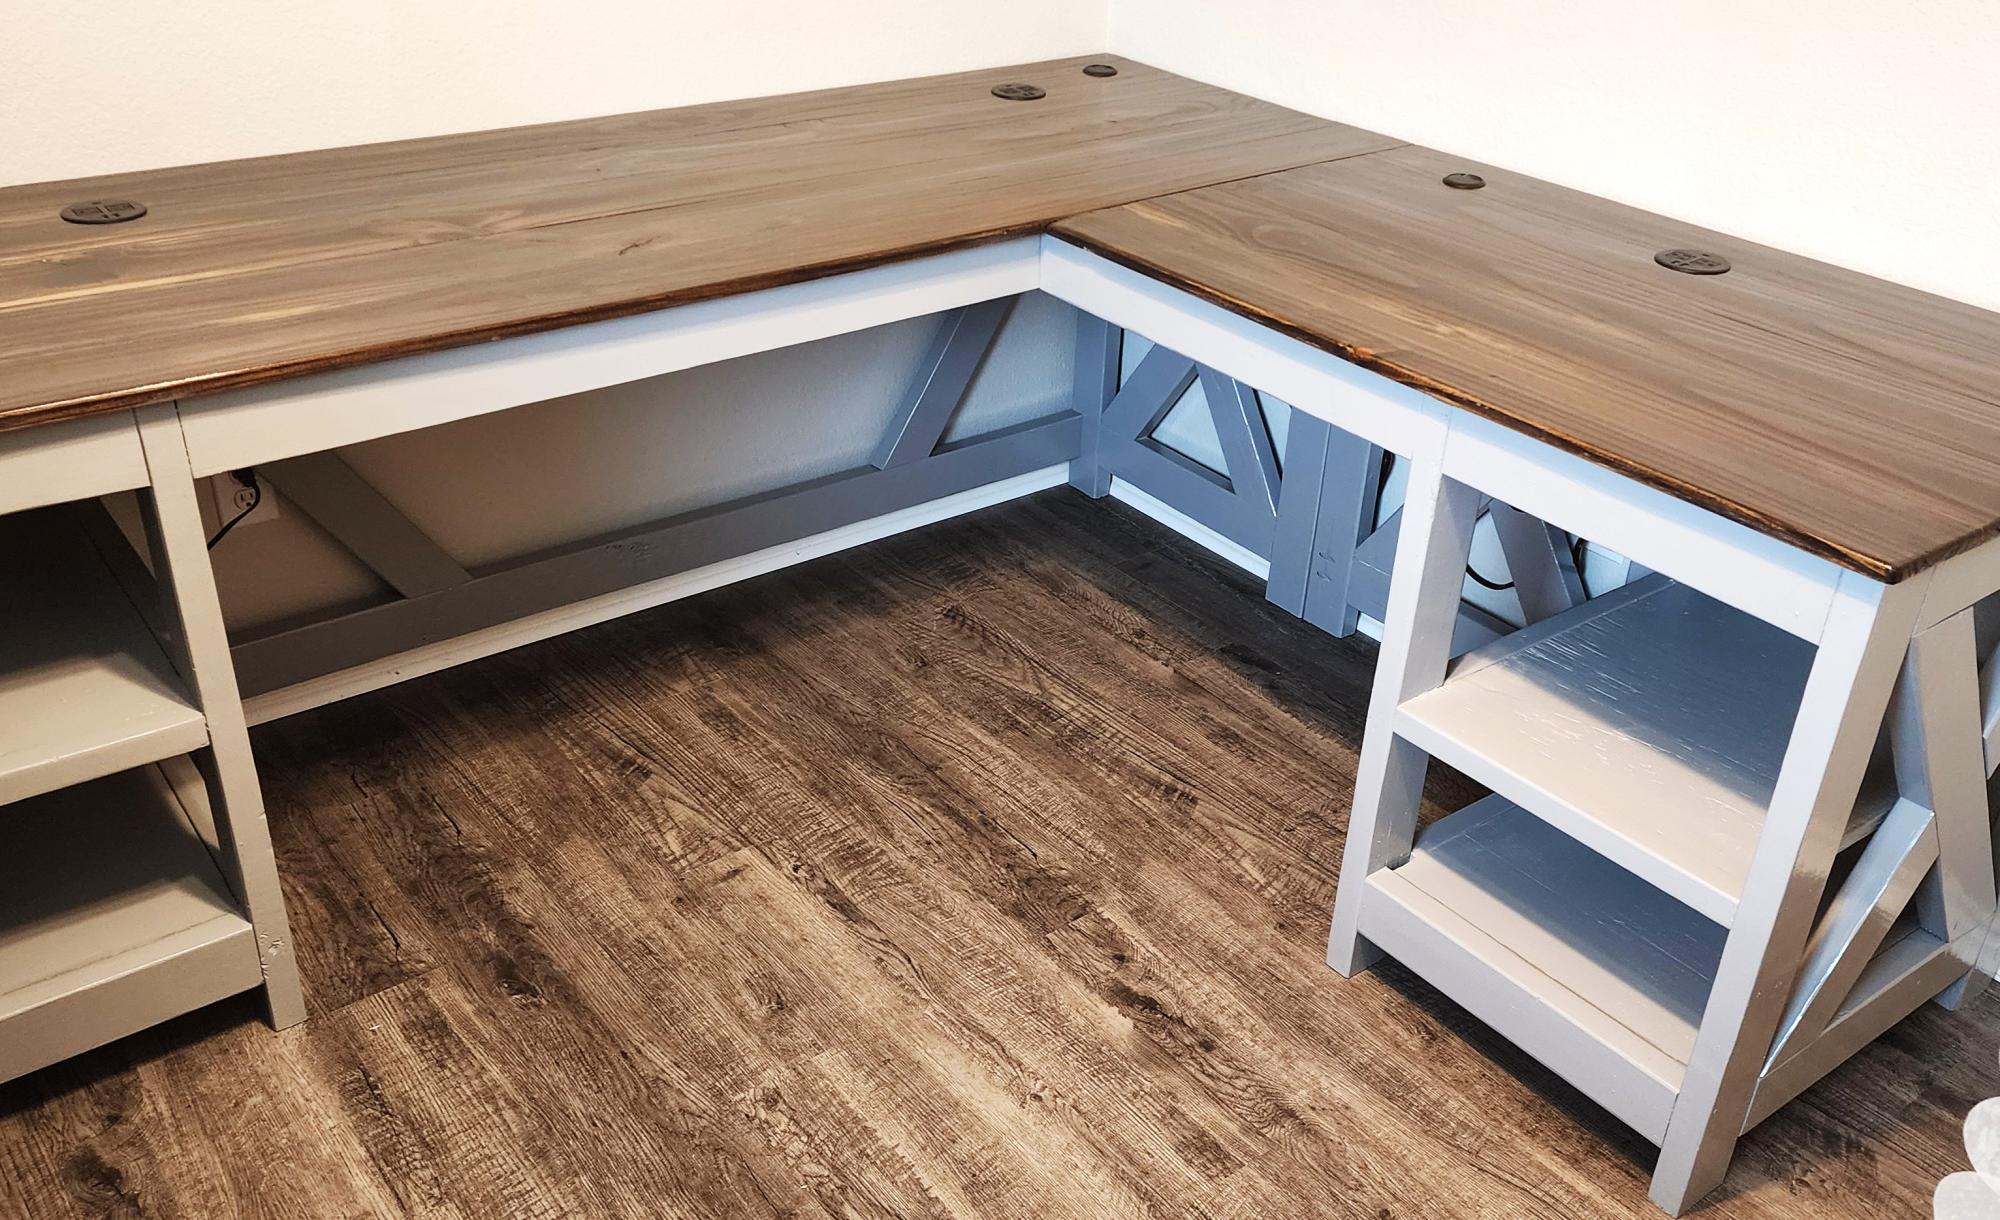
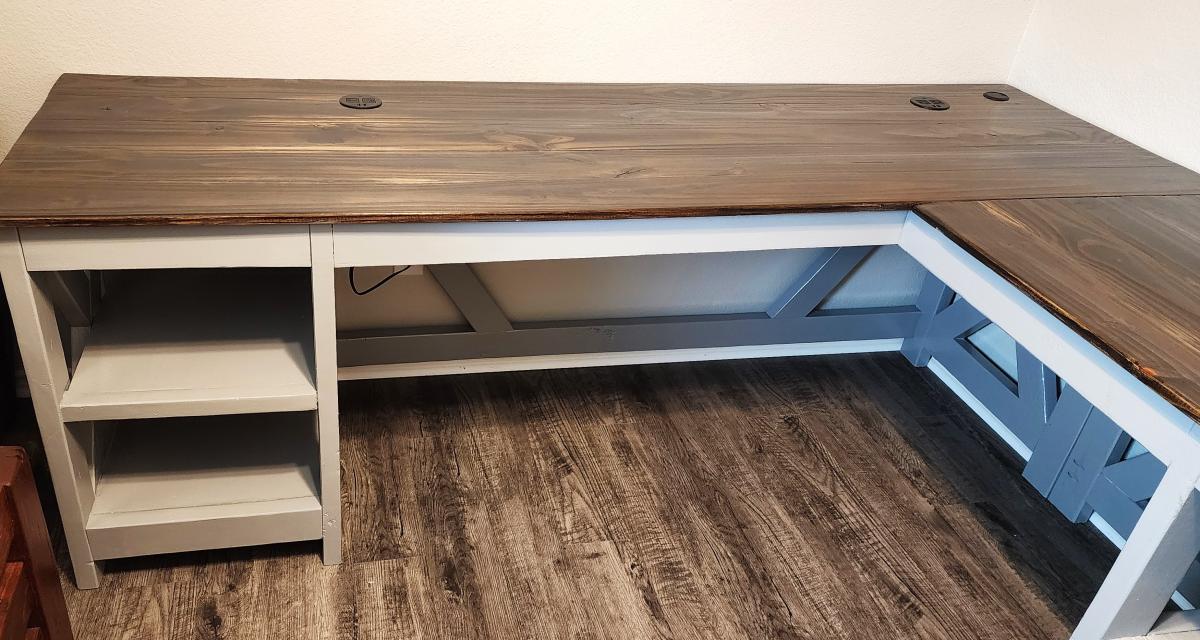
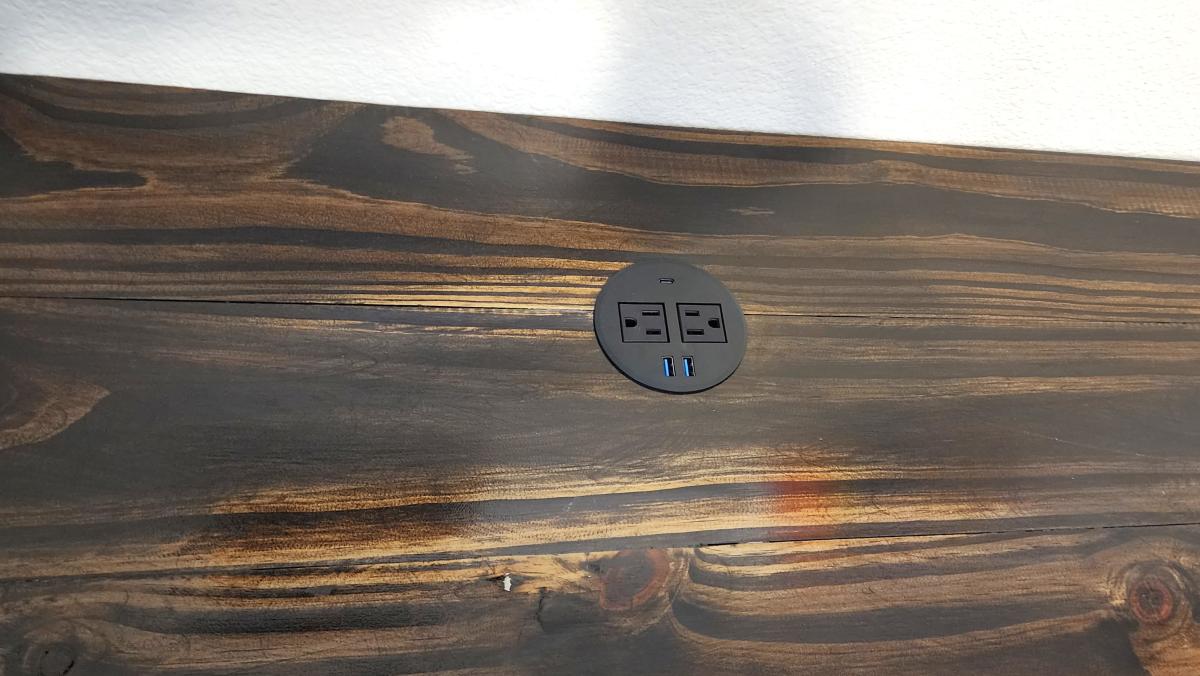
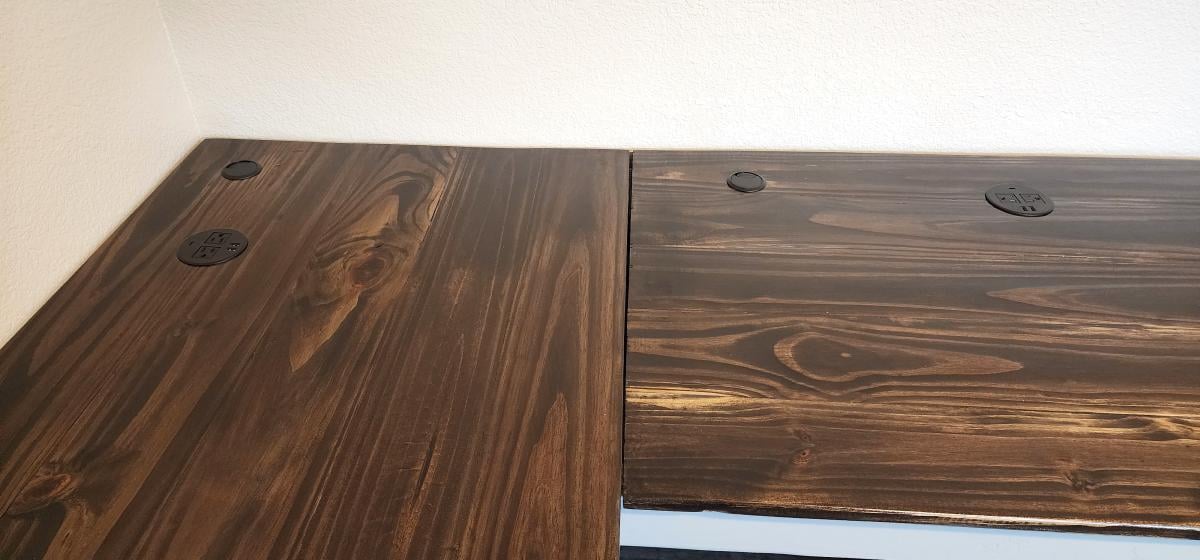
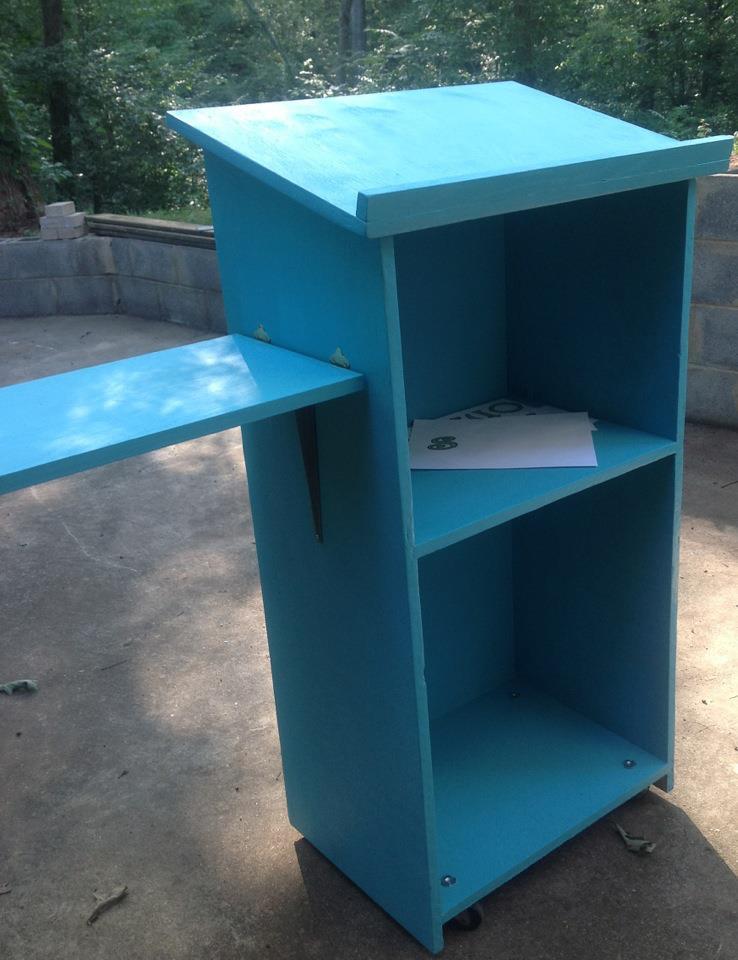
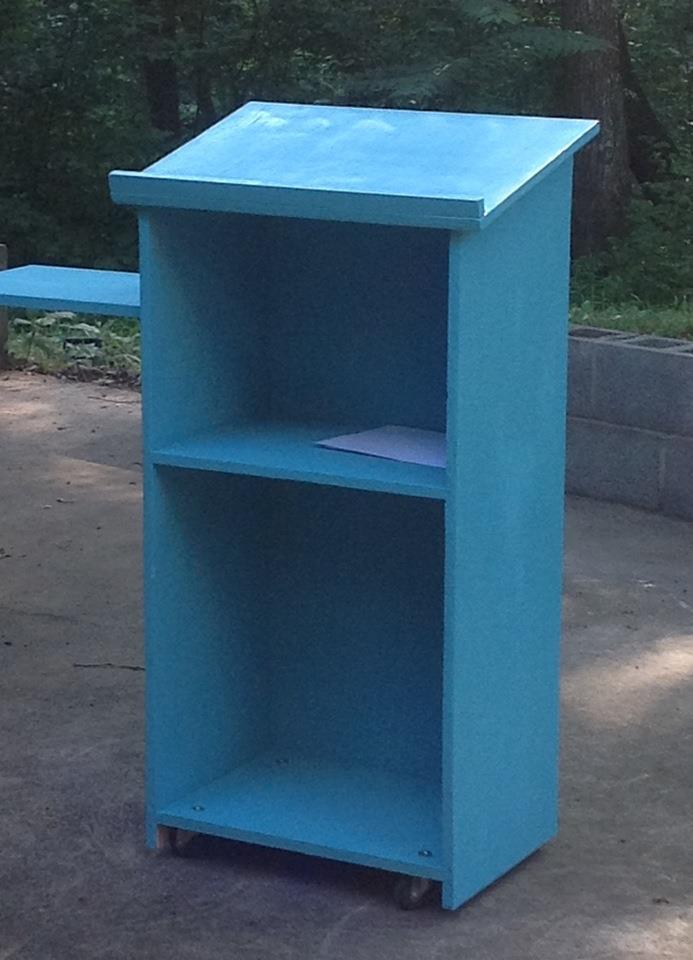
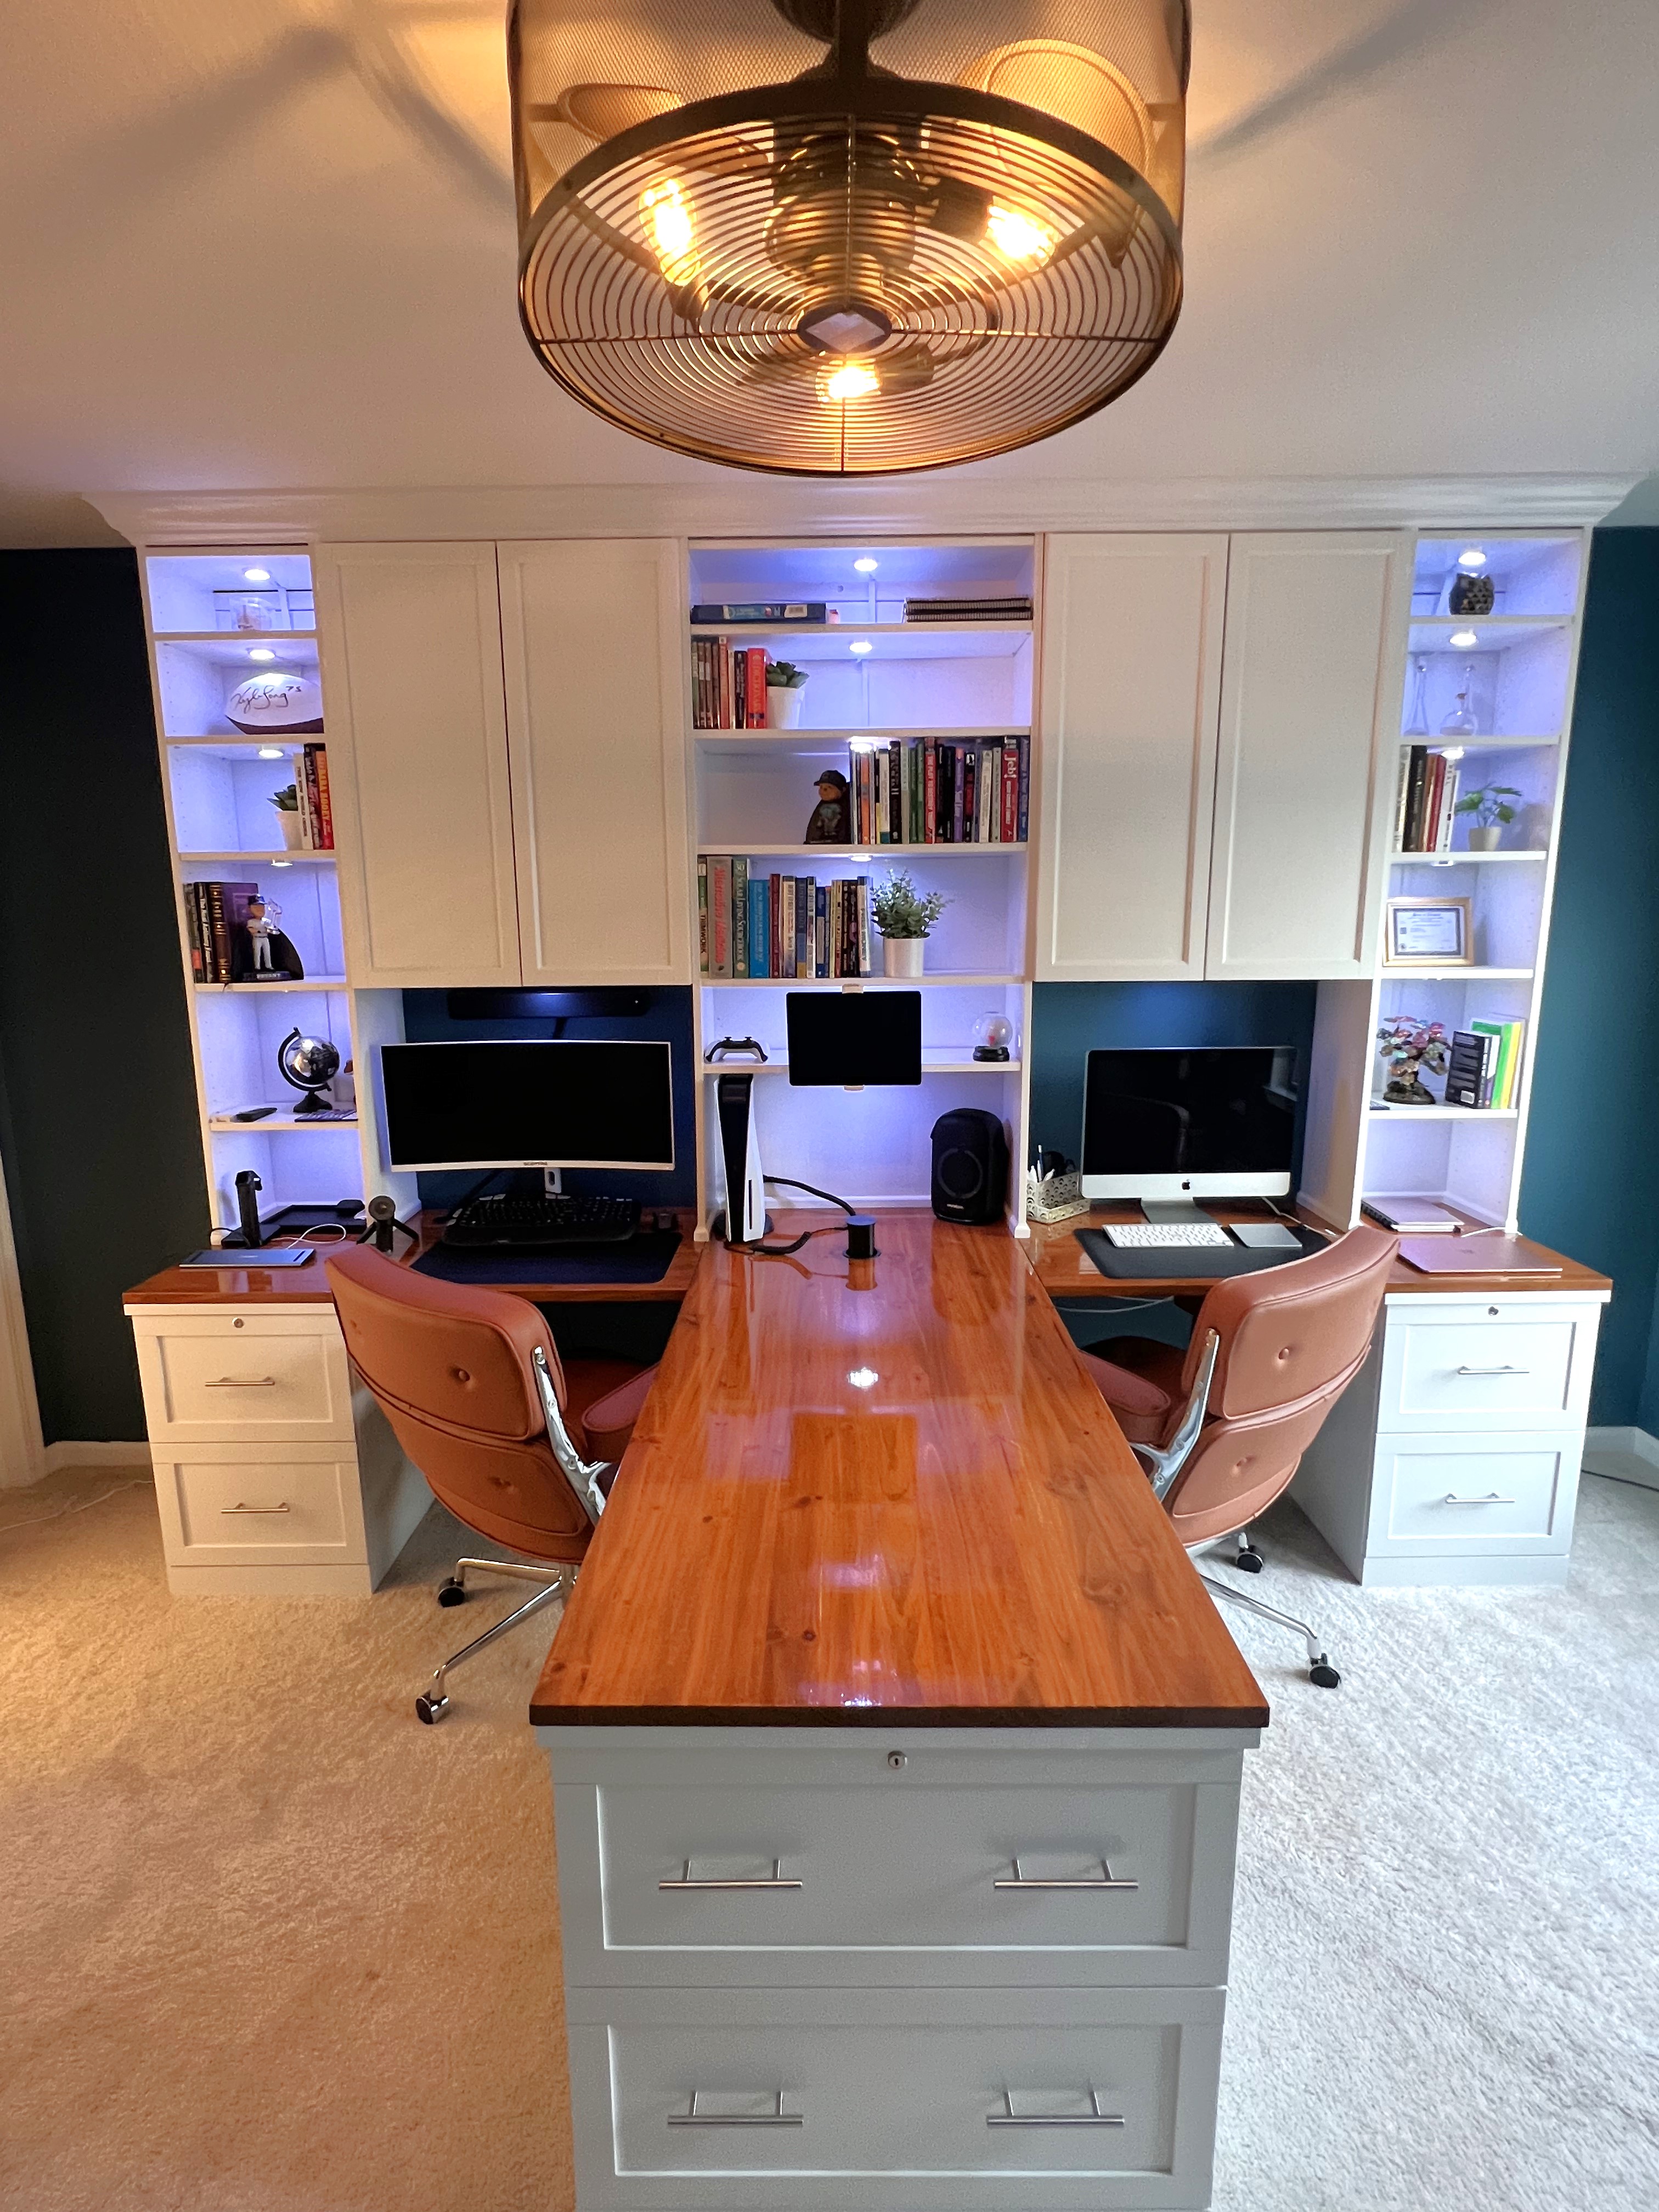
My home office remodel was inspired by a post from Ana White a few years ago. For this project I ended up using IKEA bookshelves and cutting the tops off and flipping them upside down. I used some crown mounding to cover the base of the cabinets on the tops. The desk top bases are file cabinets I found at the office supply store and the desk tops are edge glue pine. Overall I think I only had to make 8 cuts for the entire project. Saving me a ton of time and money. Thank you Ana for all of the wonderful post!
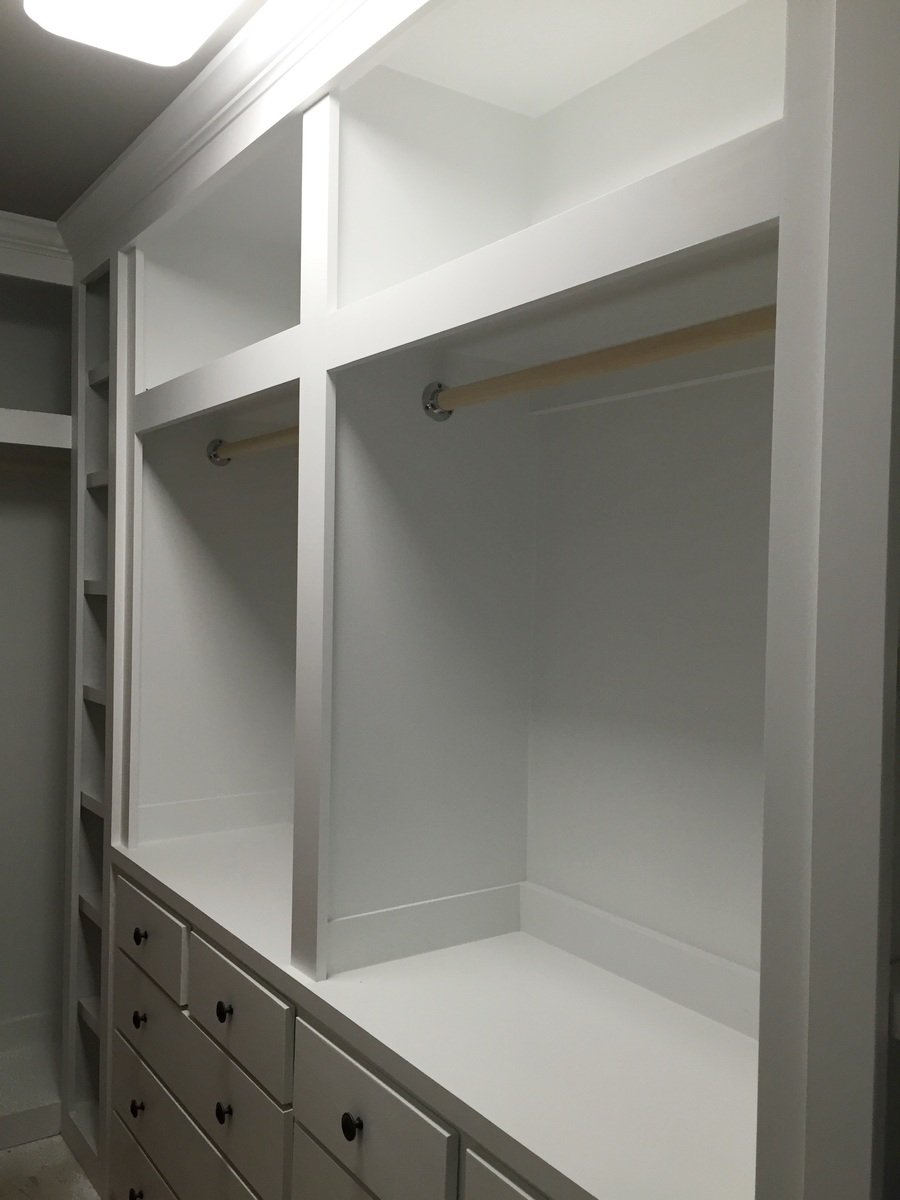
Mark Danreiter on Facebook

Log Cabin Birdhouse

I enjoy making birdhouses and log cabin style is my favorite. I make the logs by setting my saw to rip 3/4 pine at 3/4 so I have 3/4 square strips. I then decide the size of my birdhouse and cut the logs accordingly. I also "wittle" on them a little to make it look more authentic. I simply then just stack, glue and nail one row at a time. You can use 1/4 poplar for the roof but I ripped pine at 1/16 and cut shakes with my utility knife and glue them on one at a time (there are 104 on this roof).

Estimated Cost
7.00
Estimated Time Investment
Afternoon Project (3-6 Hours)
Recommended Skill Level
Intermediate

Built in closet

Submitted by AndyH on Mon, 06/13/2016 - 19:14

Built in closet to replace builder grade wire wracking.  Closet is approximately 11 feet by 5 feet.  consists of two shoe racks with 7 shelves each.  6 large drawers and 4 small drawers.  Two hanger sections with storage  above them.  End wall has hanger for longer items and storage above and a cabinet with shelves.

Yet to finish the floor.

Estimated Cost
$1000
Estimated Time Investment
Week Long Project (20 Hours or More)
Finish Used
Sherwin Williams Extra White satin paint.
Recommended Skill Level
Intermediate

My version of the outdoor chair

Submitted by jharrisjr on Mon, 04/20/2020 - 00:12

I saw the plan and thought I would give it a shot. My wife loved the plan, but wanted something with a higher back. I used the bases of the plan as is, but I adjusted by adding some higher pieces at the back. They are attached at the seat flat and the back rail. It worked out pretty well. I still need to sand and stain.

Estimated Time Investment
Afternoon Project (3-6 Hours)
Finish Used
None yet
Recommended Skill Level
Beginner

Office Corner Desk with Hutch!

Being my first DIY project - it was a pretty big task not using a saw before or doing any building. Following the plans was easy, just took a lot of time to learn how to do things for the first time.

I modified her plans to have 3 drawers on the one side to match the pb design.

After finishing the table, I knew I needed to create the hutch that is sold along with this desk. After some rough paperwork estimates I went ahead and built the hutch.

Looks pretty amazing and similar to the real deal.

Check out my blog for further pics and details of paint, primer and drawer slides I used. Leave a comment if you'd like me to work on getting a hutch plan organized.

With doing the hutch without real plans, this project took me a while to get those cuts organized and completed.

Estimated Time Investment
Week Long Project (20 Hours or More)
Finish Used
Benjamin Moore Antique White Paint
Recommended Skill Level
Intermediate

Comments

onehandymommy

Sat, 07/21/2012 - 09:56

I would love to see the plans you used to make the hutch! Also, I can't seem to find your website. The site on the picture isn't working. Wonderful corner desk, is it very heavy?

webdevandasaw

Sat, 07/21/2012 - 15:08

I will work on getting some hutch plans up.. I did it sort of on the fly from a rough estimate on paper.. I will post up on my website and a link here when I do.. might take a bit of time to get it up and learn how to draw it up all nicely on the computer. Not sure why the website won't load for you? http://www.webdevandasaw.com/ should work. Had a few people test it :S

The desk is pretty heavy and solid. I was able to bring each part up a flight of stairs myself (all three parts of the hutch are seperate) - and the desk top is seperate, as well as each drawer I took out before bringing it up the stairs.

allenml2

Mon, 08/08/2016 - 19:50

It's been a while since you built the corner desk with hutch that is posted on Ana White website, and I had a question. do you have a new blog or website where you have posted details on the paint and drawer slides you used as well as the plan for the drawers and hutch that you create? Thanks.

Maureen

Modern Outdoor Chairs with Backrest Modification

Submitted by GBev44 on Tue, 06/02/2020 - 08:16

My first crack at building outdoor furniture. I built two of the Modern Outdoor Chairs built with 2 x 4 and 2 x 6. The first one was a little rough, but the second one was much better. In order to accommodate the higher cushions and make the chairs more comfortable, I added piece 2 x 6 secured to a 2 x 2 to make a partial backrest.

Estimated Time Investment
Day Project (6-9 Hours)
Recommended Skill Level
Starter Project

Back To School Podium

I recently landed my first teaching position, and unfortunately my predecessor left quite a blank canvas for my classroom. I will be teaching math and definitely needed a lectern to hold my book as reference for examples during instructional time. However, I was completely unable to fork over $200 for a lectern...so of course I turned to Ana White! I saw the Podium Plan that another had submitted, and used it as a guide with some changes:

1) My dimensions are 15" wide by 21" long by 43" tall (I'm shorter than your average bear).

2) Used the table saw set at 45 degrees to create mitered joint edges with my plywood

3) Inset the shelves into the frame for added stability using a router.

4) Added casters to the base for maneuverability

5) Added an easily-removable laptop shelf for the side for easy hook-up to the Promethean Board in the classroom.

6) Decoupaging my name to the front for some visual interest...(and of course to claim ownership...:) )

My room is painted yellow, and all of my accessories are teal, lime green, and brown. This is gonna look GREAT in there, and best of all, it's attractive AND functional!

Built from Plan(s)
Estimated Cost
$40.00
Estimated Time Investment
Afternoon Project (3-6 Hours)
Finish Used
Paint and Spray-On Poly
Recommended Skill Level
Beginner

Comments

birdsandsoap

Sat, 07/28/2012 - 22:23

I don't remember having ANY teachers with anything this cool and personal in their classroom (except maybe woodshop, har-de-har-har). All the other teachers will be jealous!

Modern Round Table

Submitted by Anonymous (not verified) on Wed, 06/17/2020 - 22:23

Like any good DIY project, I started with plans and then changed pretty much everything.

We wanted a modern but sort of rustic table for our dining area. The Modern Round Table plans almost fit the bill but not quite. The local Lowe’s had the perfect answer—Birch plywood. It also fit our Alaska setting.

I laminated two half sheets of 3/4” together, then cut out a 48” round top with a router.

Built from Plan(s)
Estimated Cost
$100
Estimated Time Investment
Afternoon Project (3-6 Hours)
Finish Used
Danish Oil Natural, then 4 coats of Polyseal
Recommended Skill Level
Beginner

Cabinet with doors and shelf

Submitted by AndyH on Tue, 09/06/2016 - 12:26

White cabinet made from some doors and hardware left over from my built in book case project and other wood left over from the book case and closet projects.  All I bought was the wood for the top and the legs.


Estimated Cost
$30 (as used leftover wood)
Estimated Time Investment
Weekend Project (10-20 Hours)
Finish Used
Stained gray and then two coats of white satin paint sanding between each coat.
Recommended Skill Level
Beginner

Ryobi Nation workshop and shelves

Submitted by Anonymous (not verified) on Tue, 06/30/2020 - 15:48

I bought a whole workshop full of Ryobi tools second hand from my brother over a year ago. I started researching workshop plans and came across Anna White’s Ryobi Nation Dream Workshop. I downloaded the plans and spent about 2-3 months working on it in my spare time. I made a lot of mistakes along the way but I’m pretty happy with it overall!

Estimated Time Investment
Weekend Project (10-20 Hours)
Finish Used
None
Recommended Skill Level
Intermediate

Comments

rcjones4

Fri, 08/11/2023 - 11:50

Do you still have these plans for the project? can't seem to find them anymore

Back