Community Brag Posts
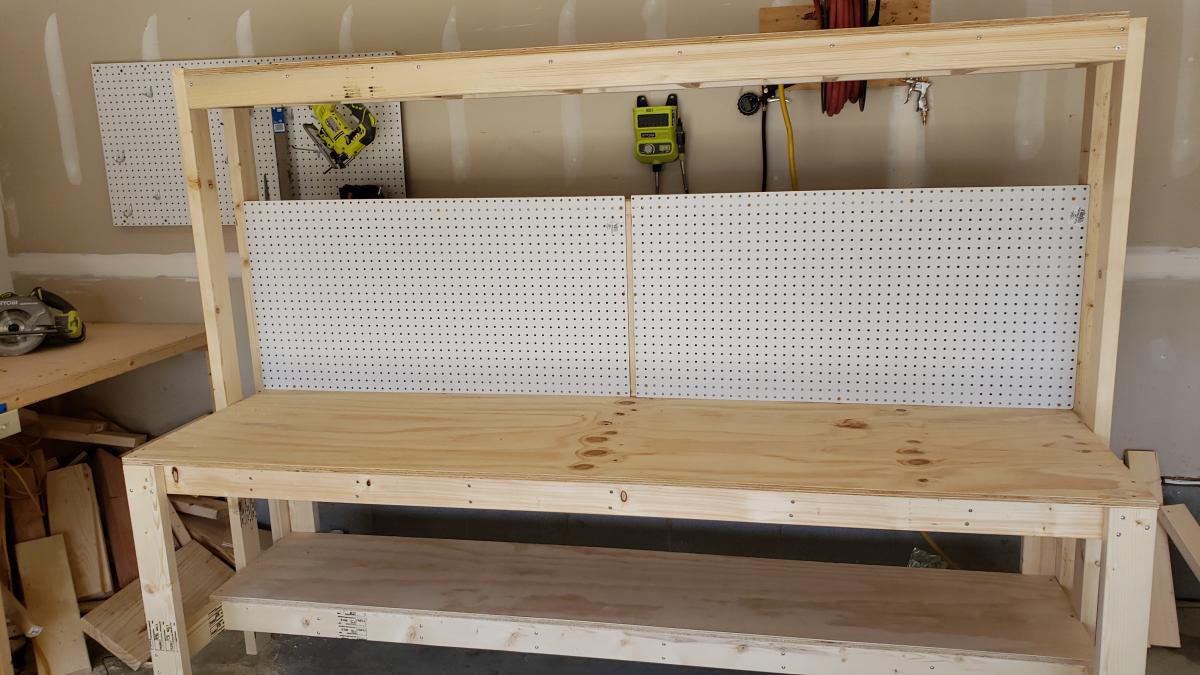
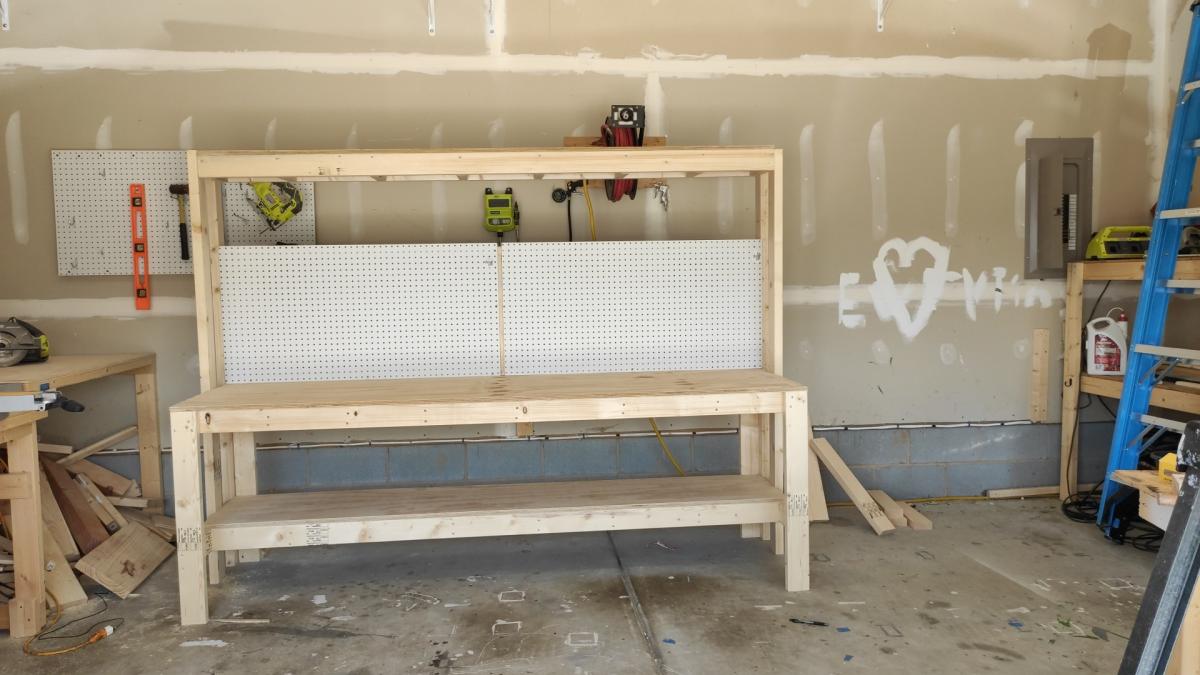
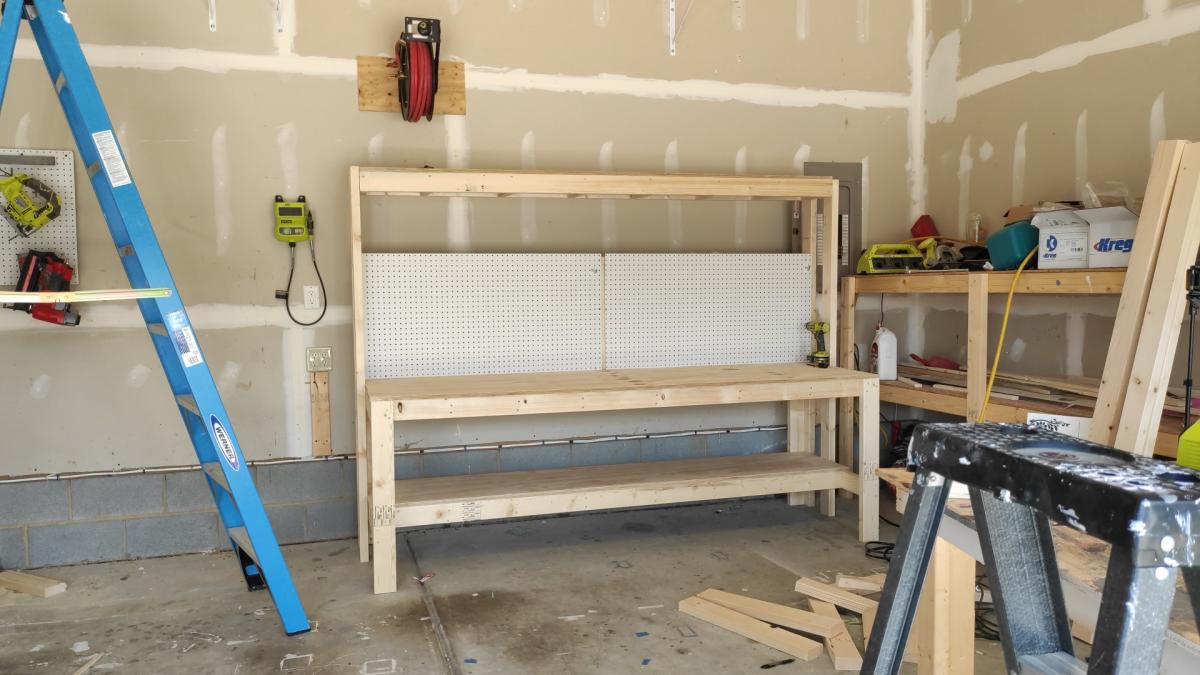
Workbench with pegboard
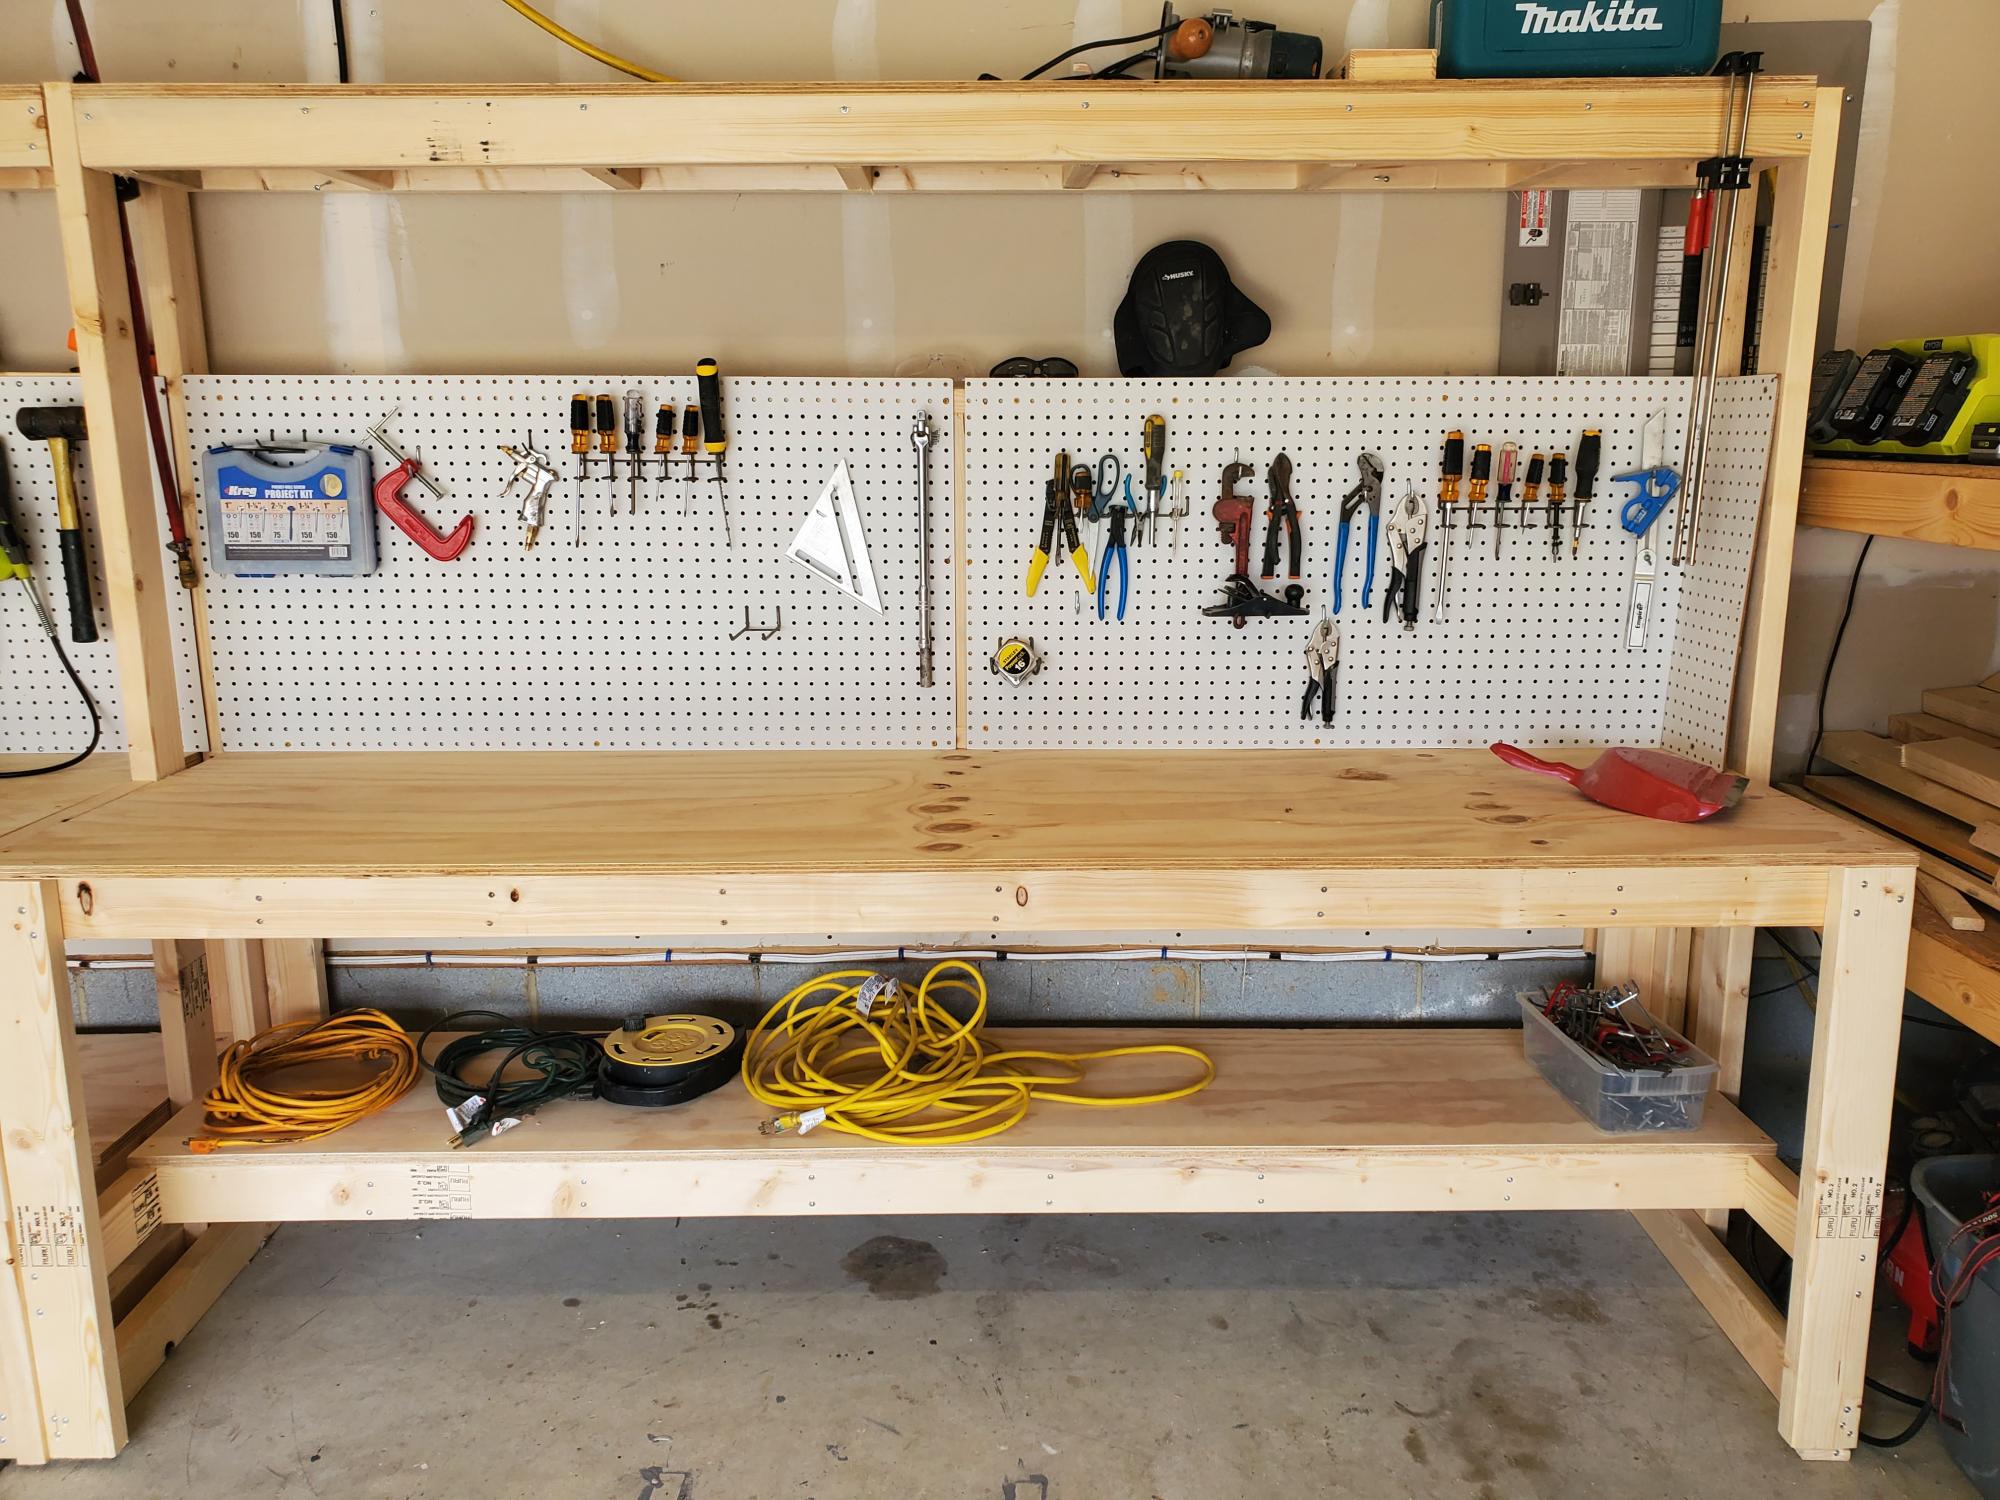
I made a workbench for my garage it was pretty easy. I also made an instructional youtube video if you want to learn how to make it. #diy #workbench #bench
Estimated Cost
125
Estimated Time Investment
Afternoon Project (3-6 Hours)
Finish Used
none
Recommended Skill Level
Beginner
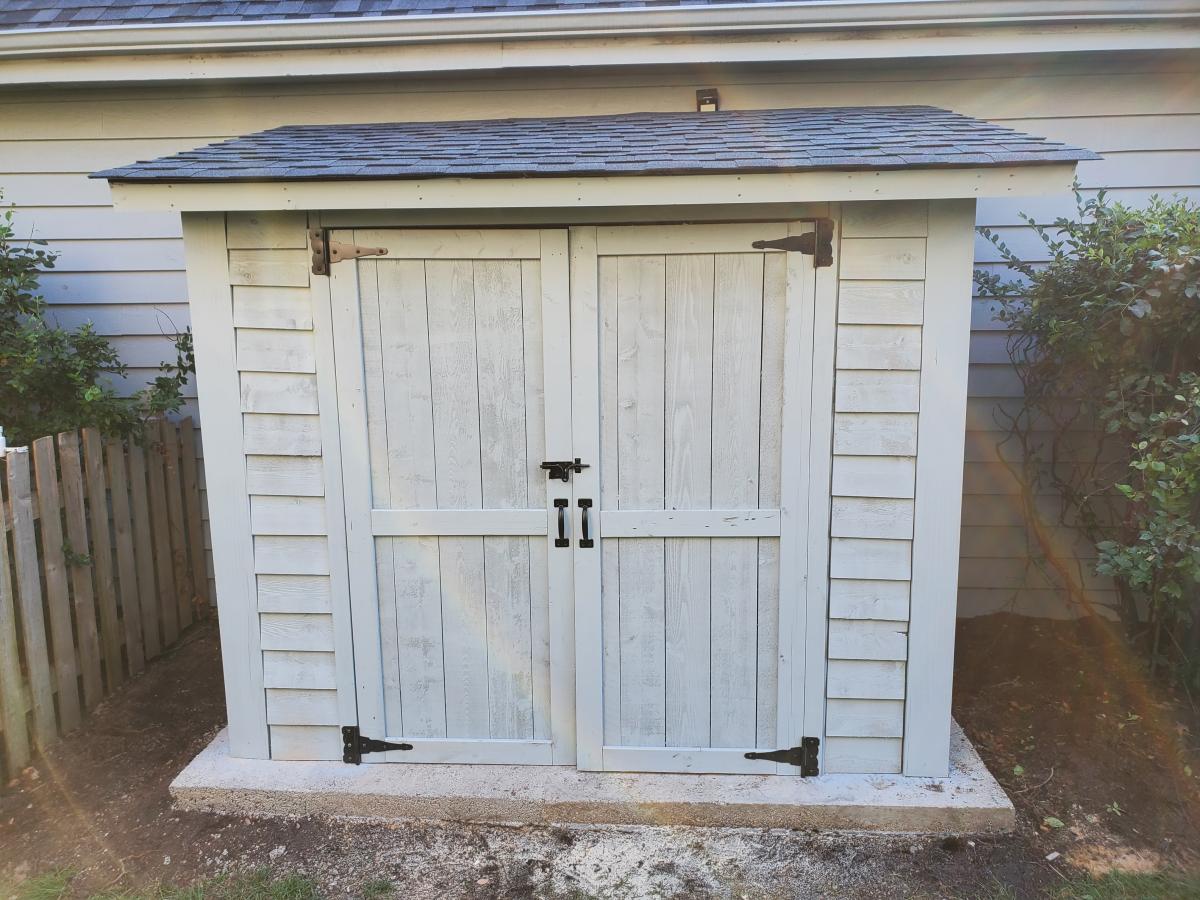
Eric's Cedar Shed!!
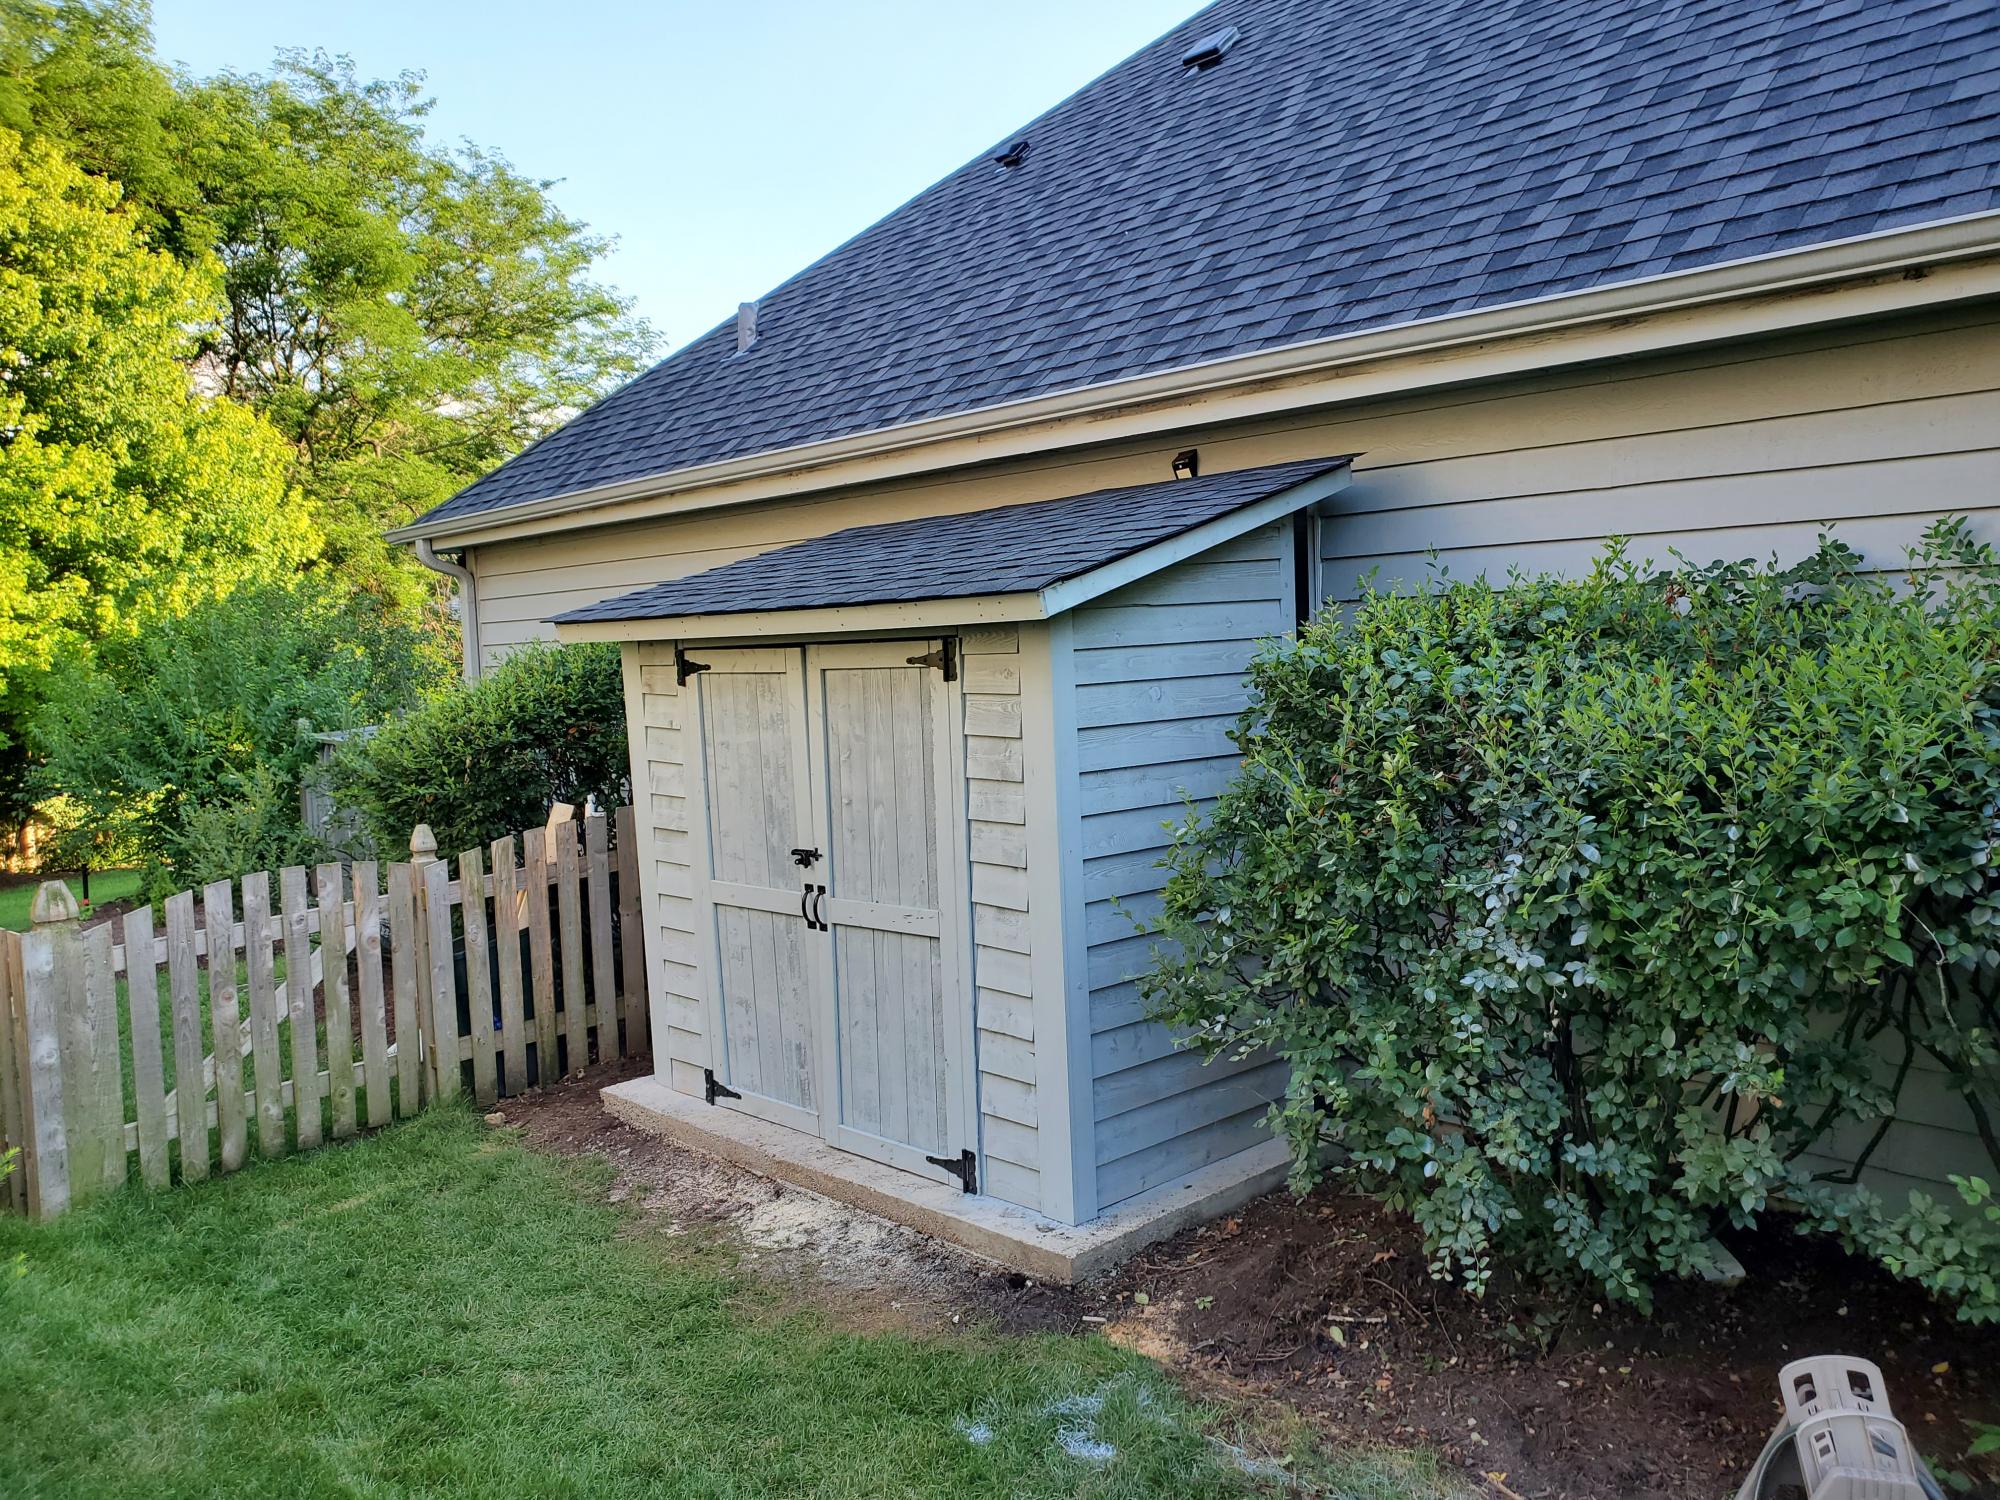
Thank you for the plans, shed turned out great! My association required me to match the siding color, roof color, and anchor to a concrete slab. So I poured 25 bags of 80lbs concrete to make a 9x5 slab. Redid the plans for an 8x4 shed, built the frame with 2x4s and not 2x2's, installed flashing, ice/water shield + felt + matching shingles since I'm near Chicago, and used a flexio finishing sprayer to paint the shed. Saved some $ by using 2 Redwood Grain Fiber siding panels for $22 each at HD.
All in all very happy with my shed and all my dangerous yard tools and woodworking tools can be put away from my toddler.
Built from Plan(s)
Estimated Cost
400
Estimated Time Investment
Weekend Project (10-20 Hours)
Finish Used
Behr Premium Plus exterior paint
Recommended Skill Level
Intermediate
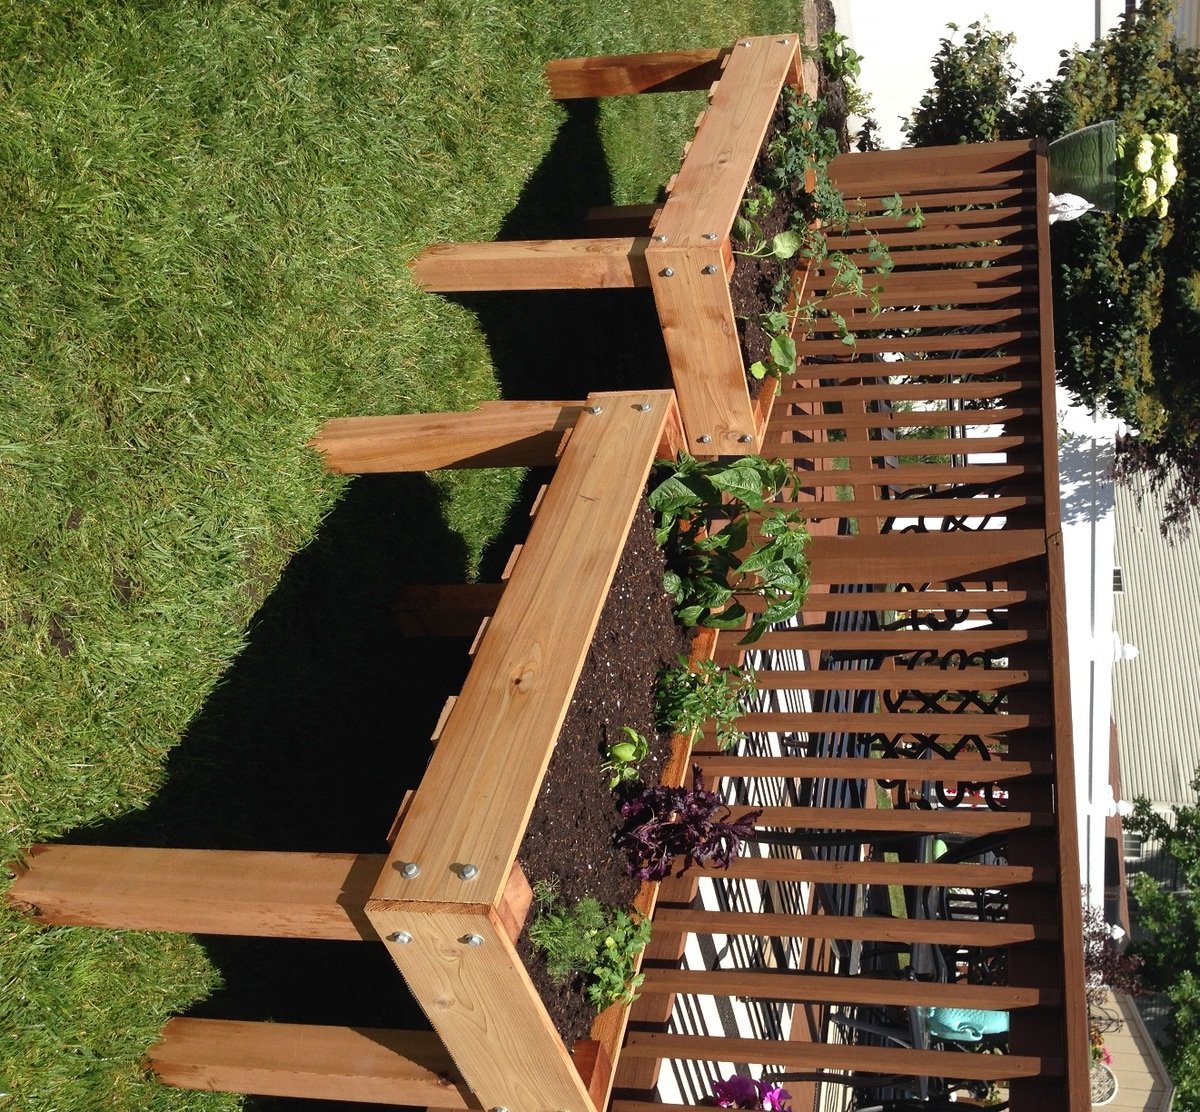
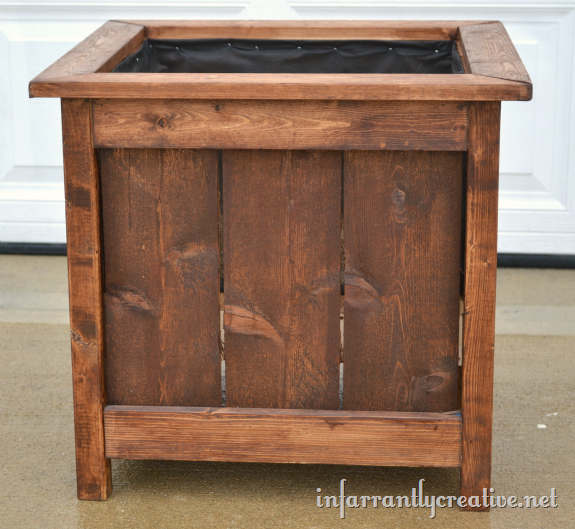
Cedar Planter with Mitered Top
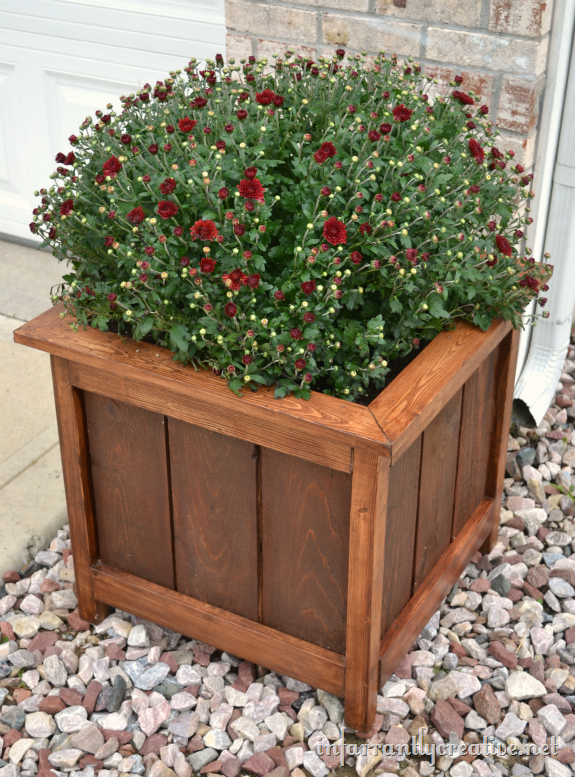
This was by far the easiest project. This planter is HUGE as well and makes a great focal point for your curb appeal. I didn't extend the sides but rather created a mitered edge for the top creating a nice clean finish.
Built from Plan(s)
Estimated Cost
$20
Estimated Time Investment
An Hour or Two (0-2 Hours)
Finish Used
Minwax English Chestnut with a Spar Varathane protective coat
Recommended Skill Level
Beginner
Comments
Mon, 10/29/2012 - 23:02
This looks beautiful! I just
This looks beautiful! I just made one too, I will have to do the top like yours it's pretty that way. I love how the stain too!
:) Valerie
Sun, 09/22/2013 - 20:25
about the top....
how exactly did you attach the mitered top?? Finish nails or is there a way to use the kreg jig to hide joinery? These are beautiful, BTW. Thanks :)
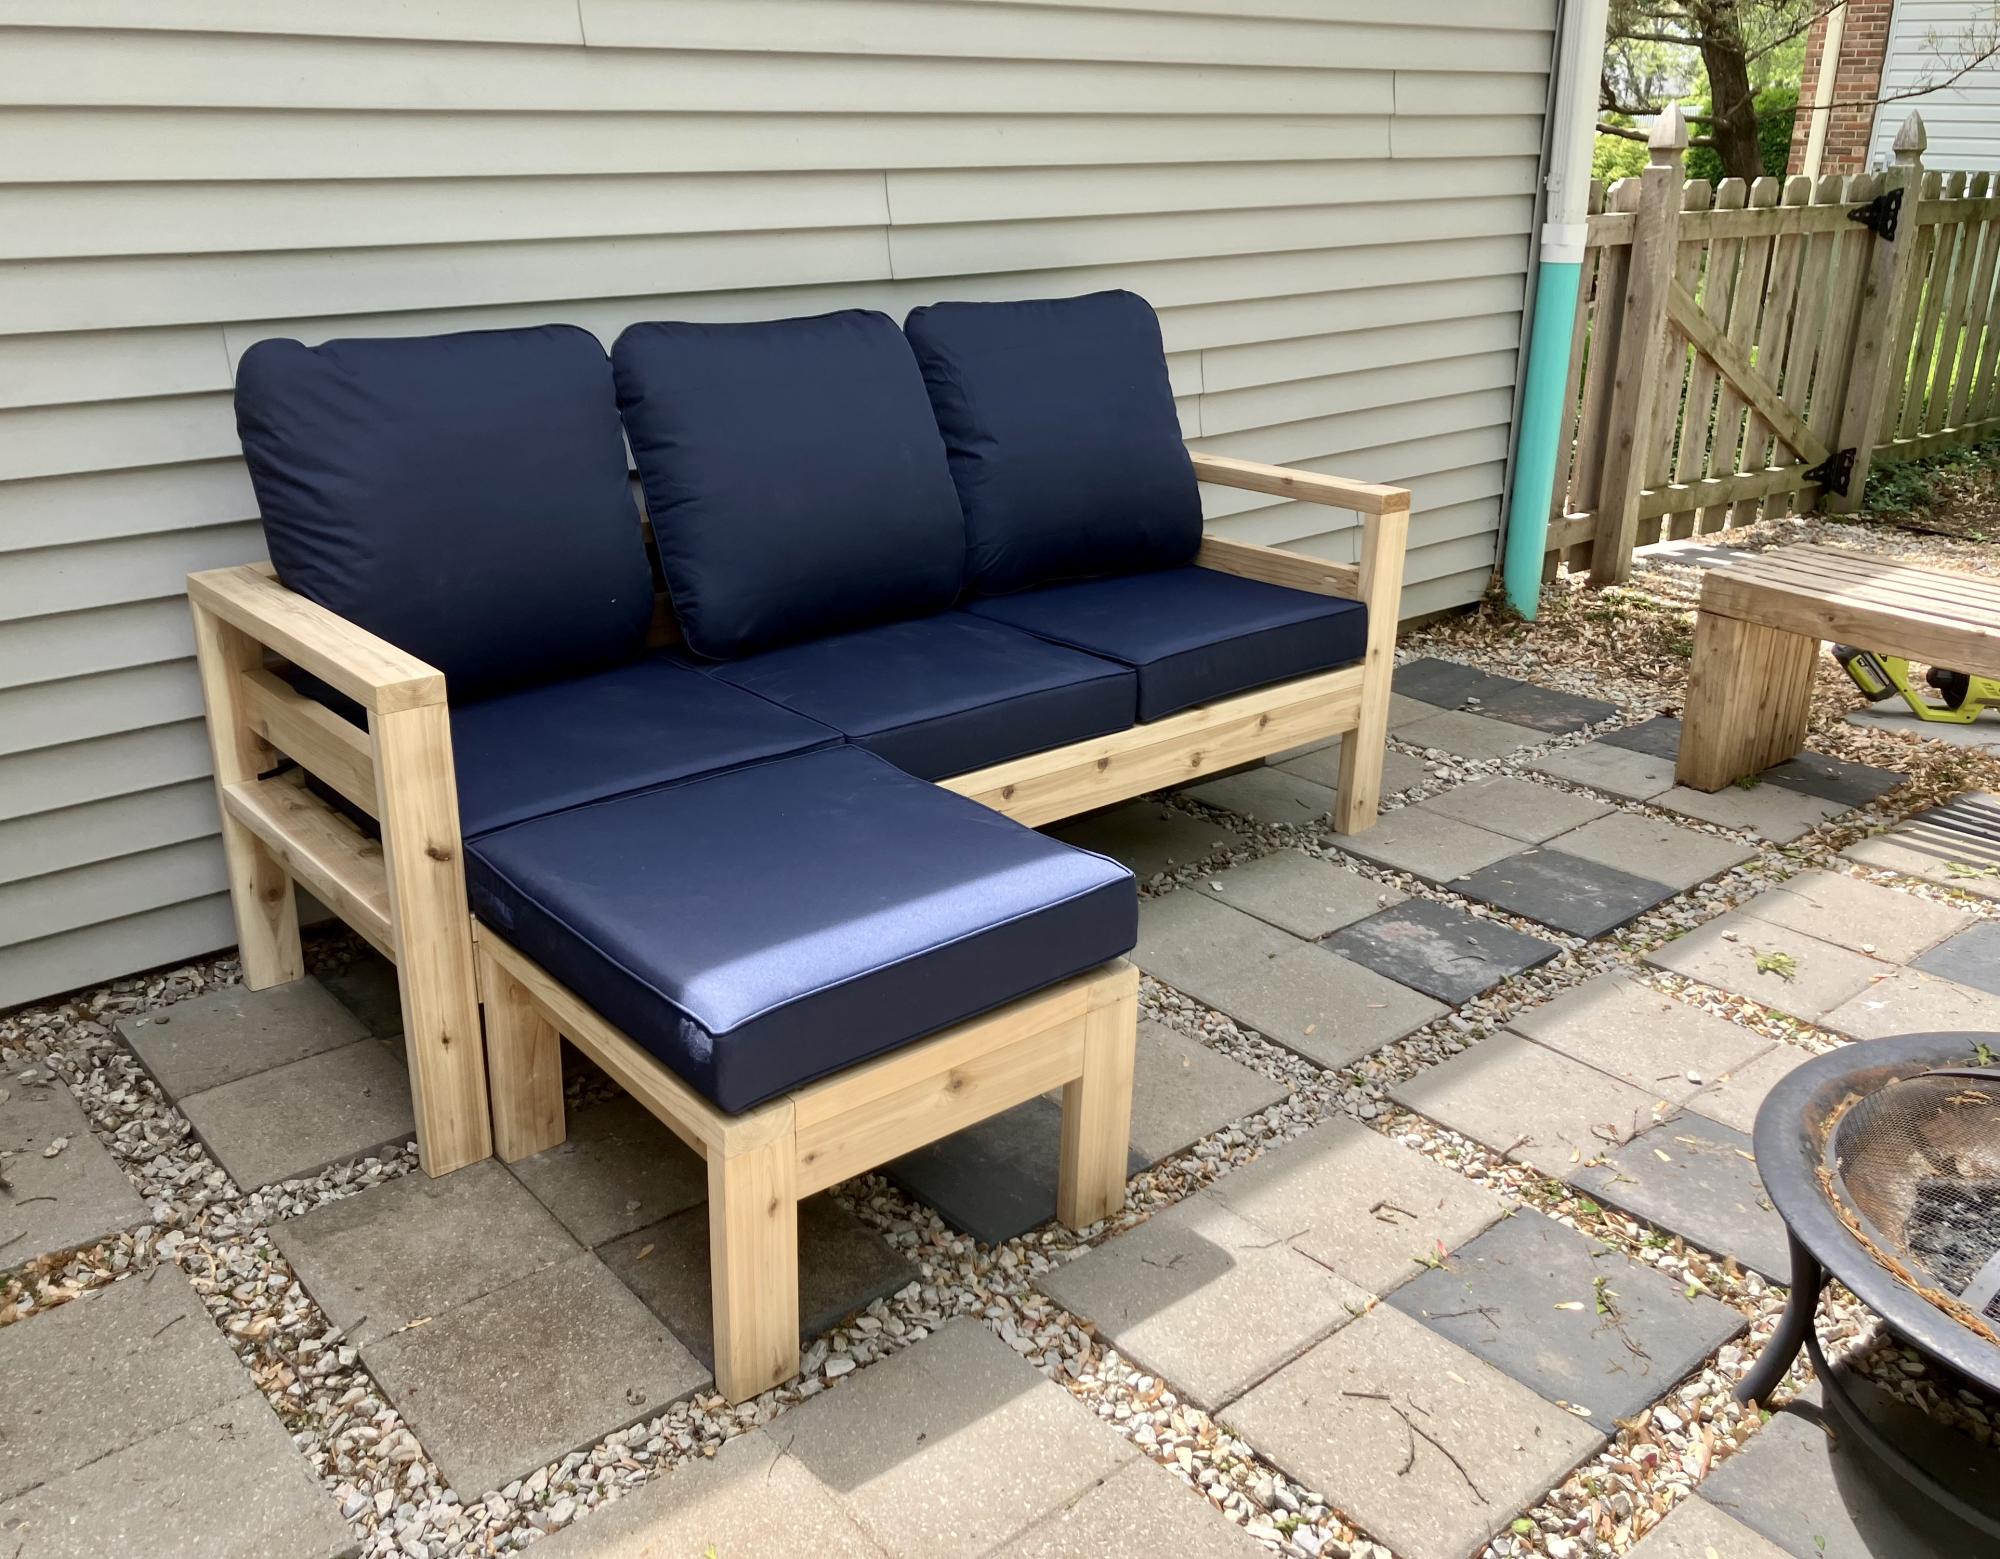
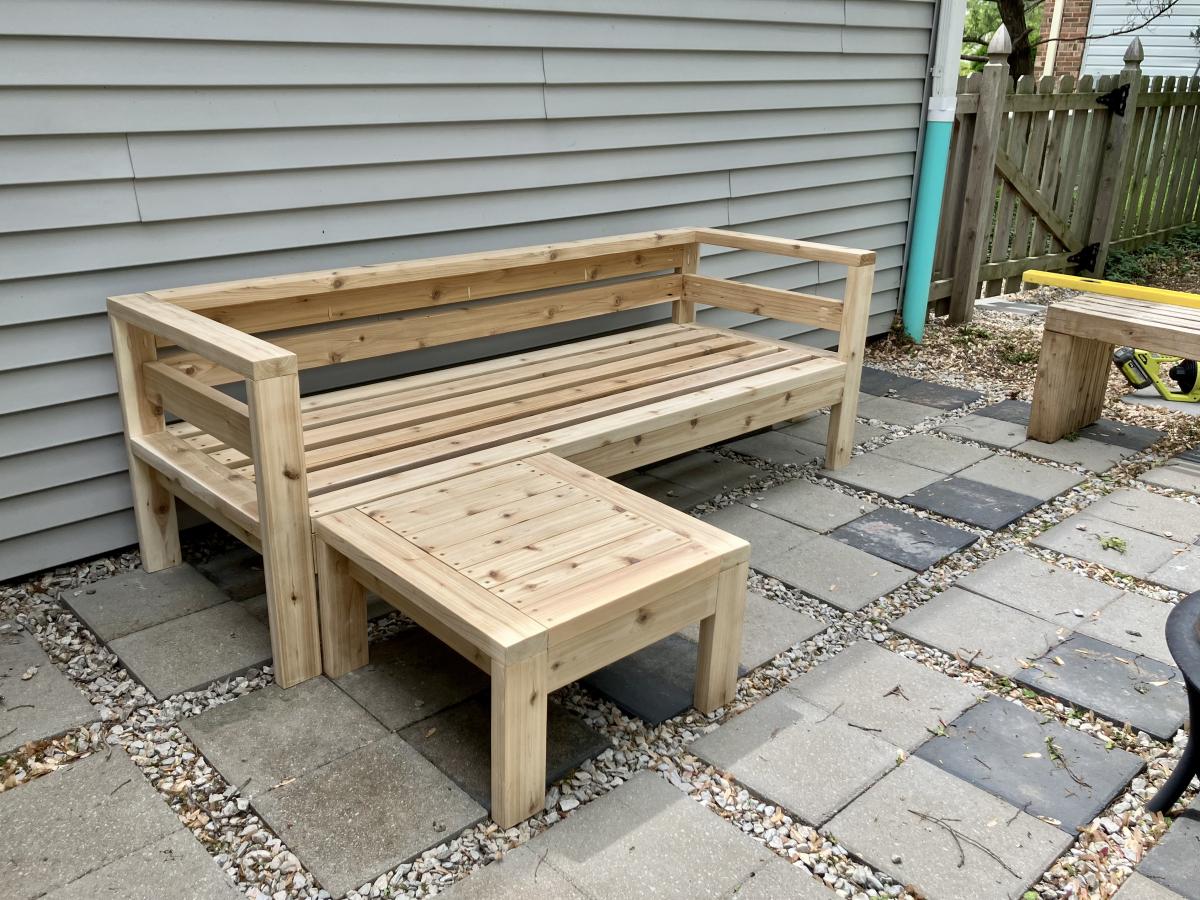
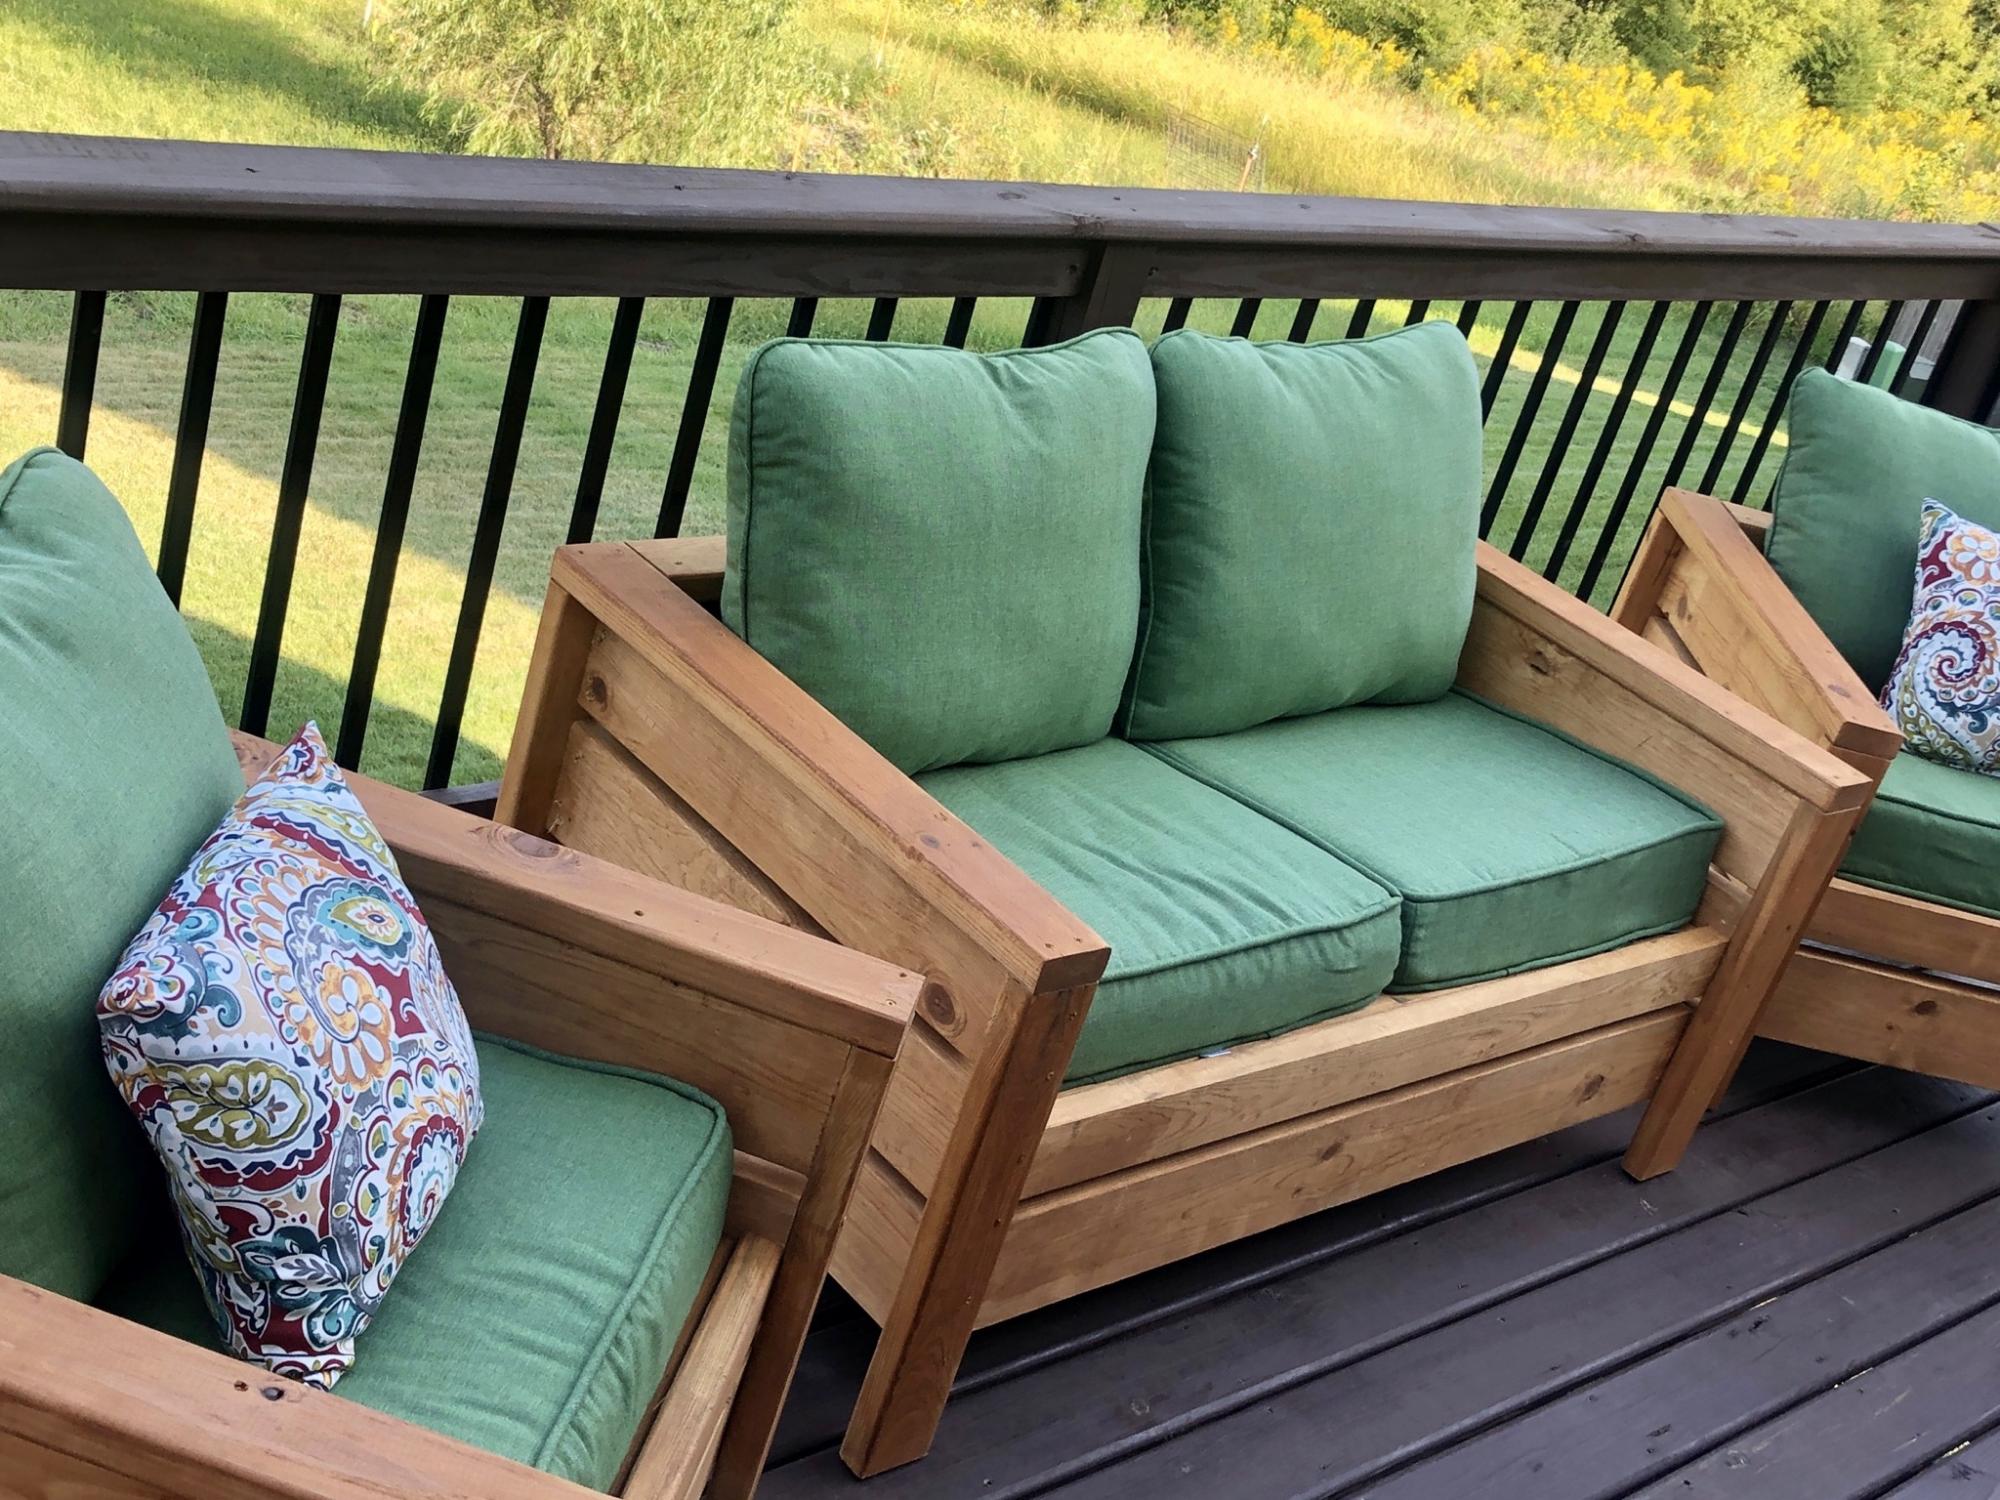
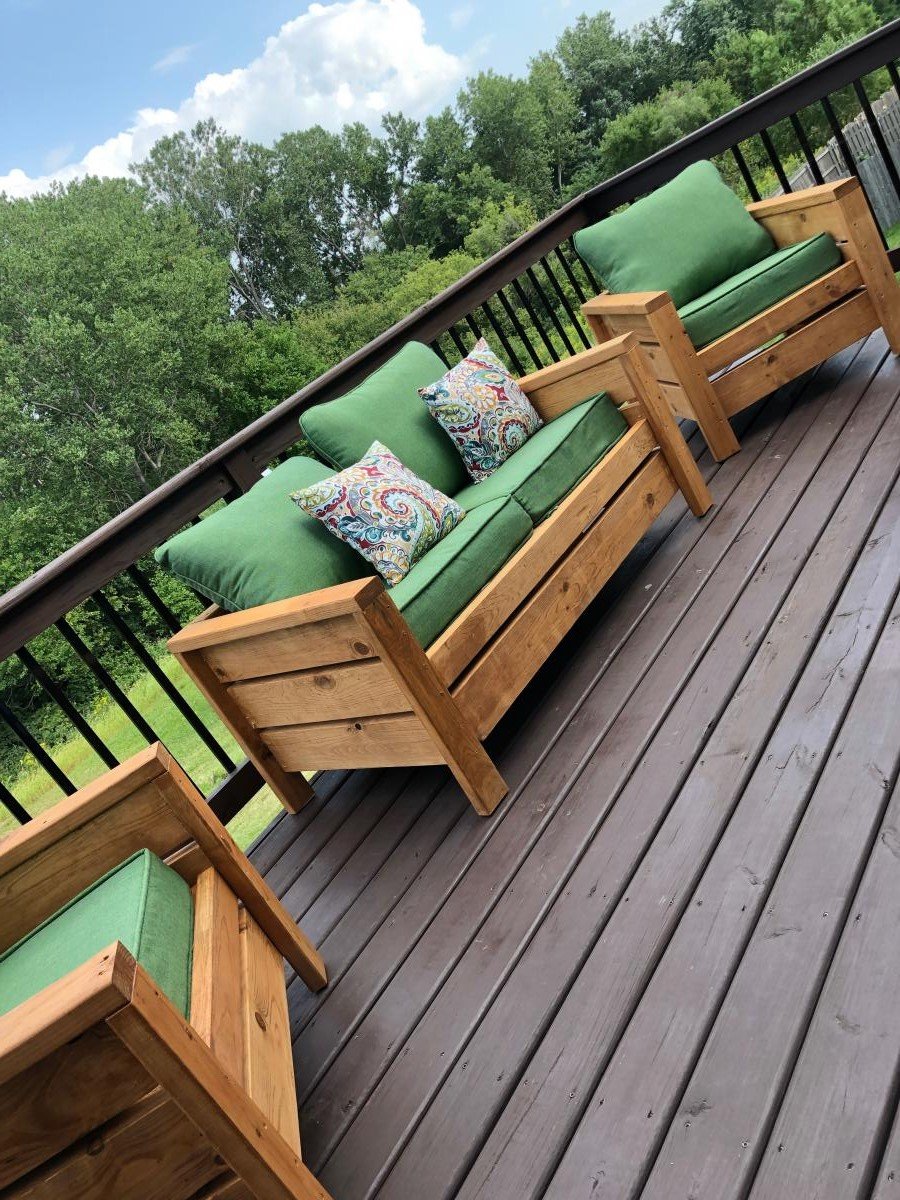
2x4 and 2x6 Chairs and Couch
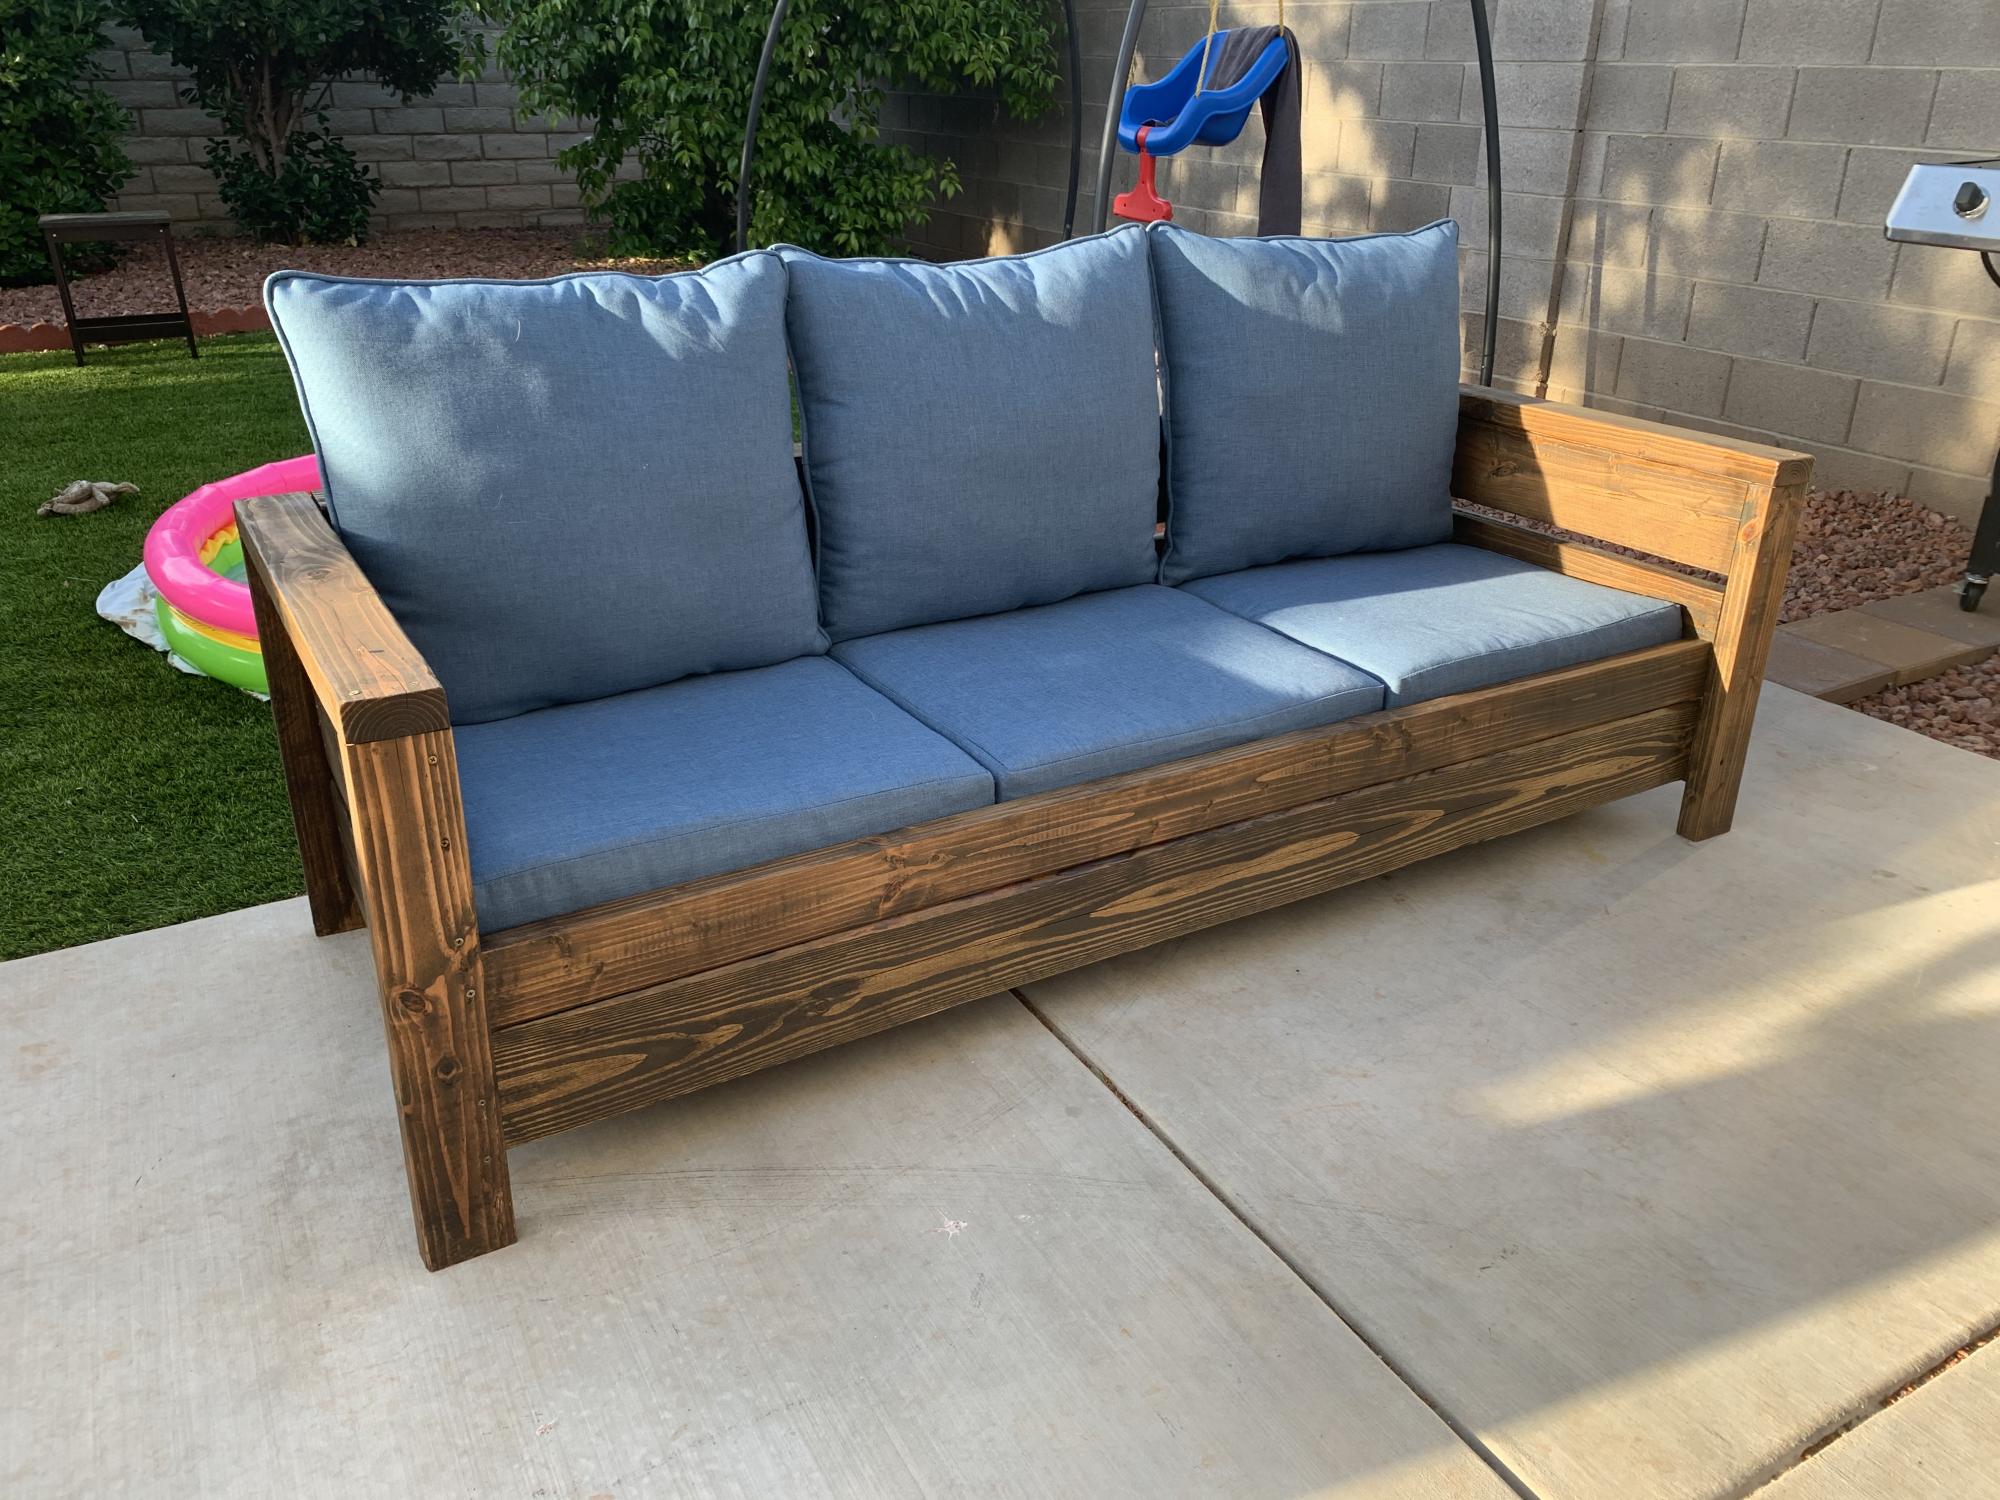
I used the Modern Outdoor Chair from 2x4s and 2x6s plans and slightly modified then to make a 3 seater couch. My cushions(most expensive part) were 24 in x 24 in and purchased from Lowes for $40 per seat. The couch is 79 inches in total length. I also dropped the seat down to the lower level to allow more room for my cushion backs to sit further down into the seat.

Built from Plan(s)
Estimated Cost
$400
Estimated Time Investment
Weekend Project (10-20 Hours)
Finish Used
Thompsons Waterseal Teak Oil Walnut Semi-Transparent
Recommended Skill Level
Beginner
Rustic Adirondack Bench (love seat)
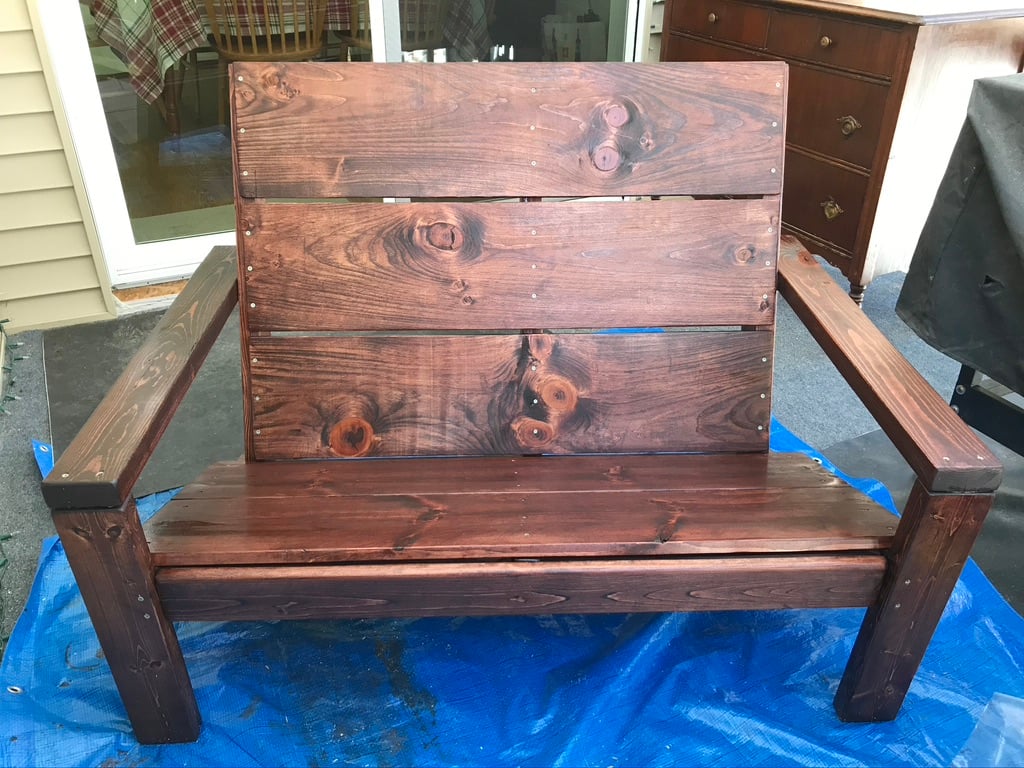
I loved the Rustic Adirondack Chair so much I felt I needed to make a bench in the same style. I had to be a little creative with the chair plans and modify them to make my bench work. I am absolutely thrilled with how it came out! I already have a friend who has requested a chair and bench (love seat) for his son's wedding gift!
Built from Plan(s)
Estimated Cost
Material costs for the wood was $85-ish. Wood prices are nuts right now!
Recommended Skill Level
Intermediate
Comments
Mon, 08/16/2021 - 10:51
Can someone tell me the…
Can someone tell me the dimensions of the wood (1x10) for the bench and the dimensions for the frame (2x4)
Please
Thank you
Fri, 08/20/2021 - 16:37
My loveseat version of Ana’s Plan
You can make the 1x10 in any length you want. I’m planning on making a loveseat too and The measurements I chose for the seating area will be 48” long (which is the size for 2 seat cushions).
The Step 1 in Ana’s plan, all measurements will be the same.
Step 2: The two 2x4 horizontal supports will be cut at 48”.
Step 3: the two 1x10 seat panels will be 3 inches longer than the horizontal supports. So you will cut the 1x10 seat panels at 51”.
Step 4: Instead of two, you will need THREE seat supports. So cut three 2x4’s @ 32 3/4”. The third seat support will go in the middle of the other seat supports, drilled to the horizontal back support.
Step 5: Attach your back bottom horizontal support which will be a 2x4 at 48”.
Step 6: Attach the 1x10 seat back panels. You will cut (3) 1x10 @ 48”.
Here is the cut list for the loveseat version of Ana’s Adirondack plan. These are the lengths I chose. So with this cut list your loveseat should be big enough for two 24x24” seat cushions. I plan to add cushions for extra comfort.
My cut list:
(2) 2x4 @ 31 3/4”
(2) 2x4 @ 19 1/2”
(2) 2x4 @ 33 1/4” Cut at 20 degrees as per Ana’s plan.
(3) 2x4 @ 48” Horizontal supports. One goes behind your calves.
The other connects the end frames/arm rests at the back.
(2) 1x10 @ 51” Seat panels.
(3) 2x4 @ 32 3/4” Vertical supports for the back panels.
(3) 1x10 @ 48” The back panels.
Fri, 08/20/2021 - 17:32
P.S. You will also need an…
P.S.
You will also need an extra support attached underneath the seat panels in the middle for extra support and keep the long seat panels from bowing.
Kitty Outhouse

My first Ana White project. Built Ana’s awesome small cedar shed as an outhouse for our many cats. The have access to it from inside the house. Great way to keep litter boxes and the mess out of the house. It is stand alone, and attached to the house, in front of a bedroom window. There are two ‘entrances’ as well as two, one-way, escape hatches, if a cat in the outhouse is interrupted by another cat (I.e. a male cat comes in and the female feels trapped) they can exit to the outside (one way so no critters can come inside!). Ana has easy to build plans, great site! I plan on making the square table just posted today for my newly refurbished deck. Keep in mind, my estimated costs and time reflect a LOT of additional features on the inside. The shed itself, very easy, simple, inexpensive. Very little waste with Ana’s projects as well.

Built from Plan(s)
Estimated Cost
$500
Estimated Time Investment
Week Long Project (20 Hours or More)
Finish Used
No finish, at least not yet.
Recommended Skill Level
Intermediate
Comments
Thu, 04/29/2021 - 09:06
Wonderful solution for your cats!
Thank you for sharing, what a cool project!
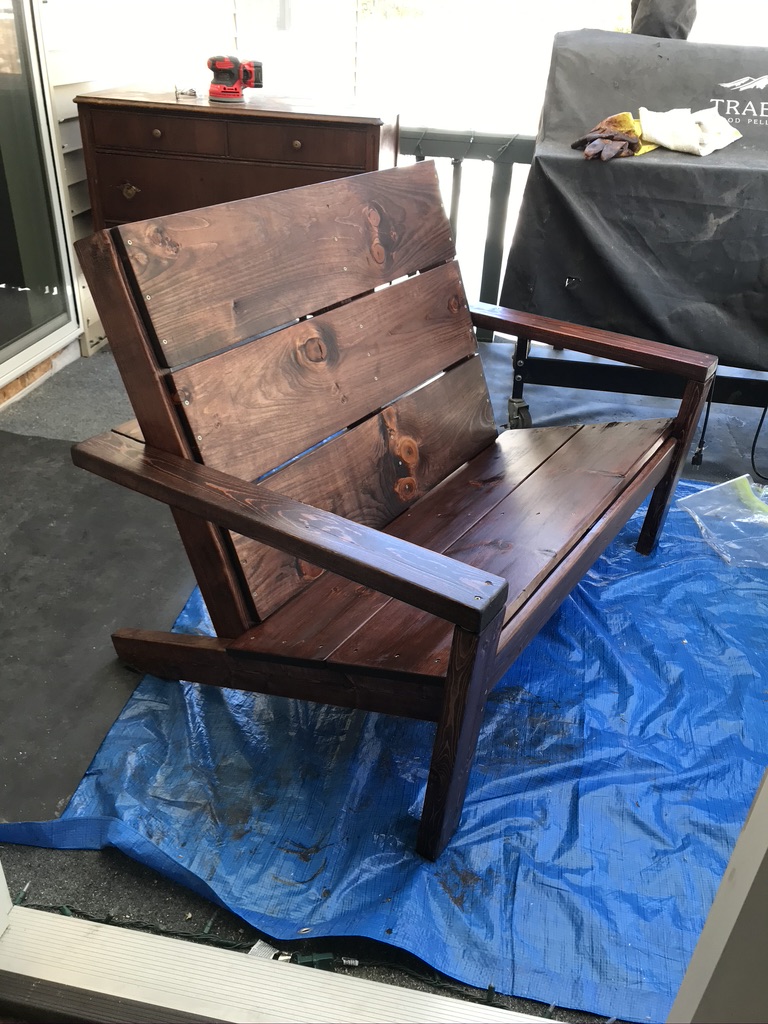
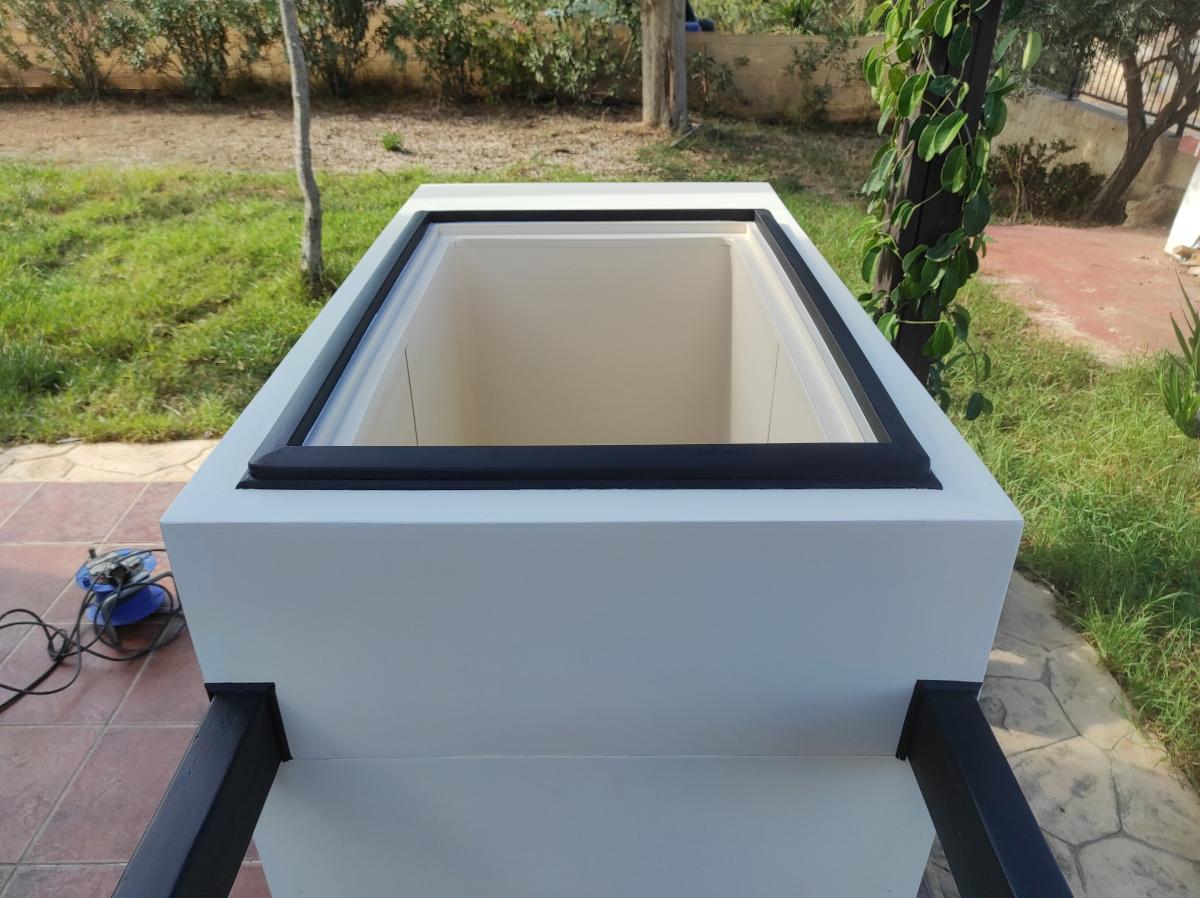
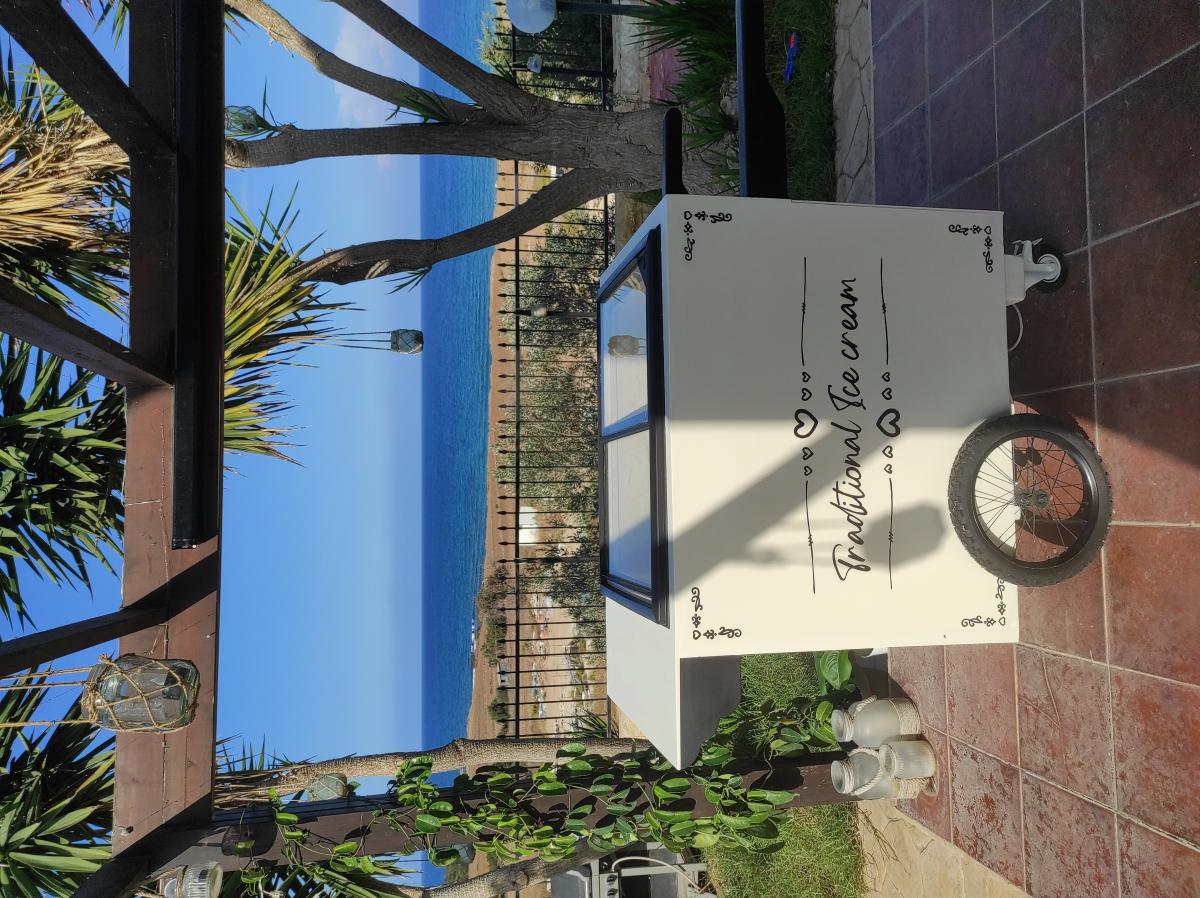
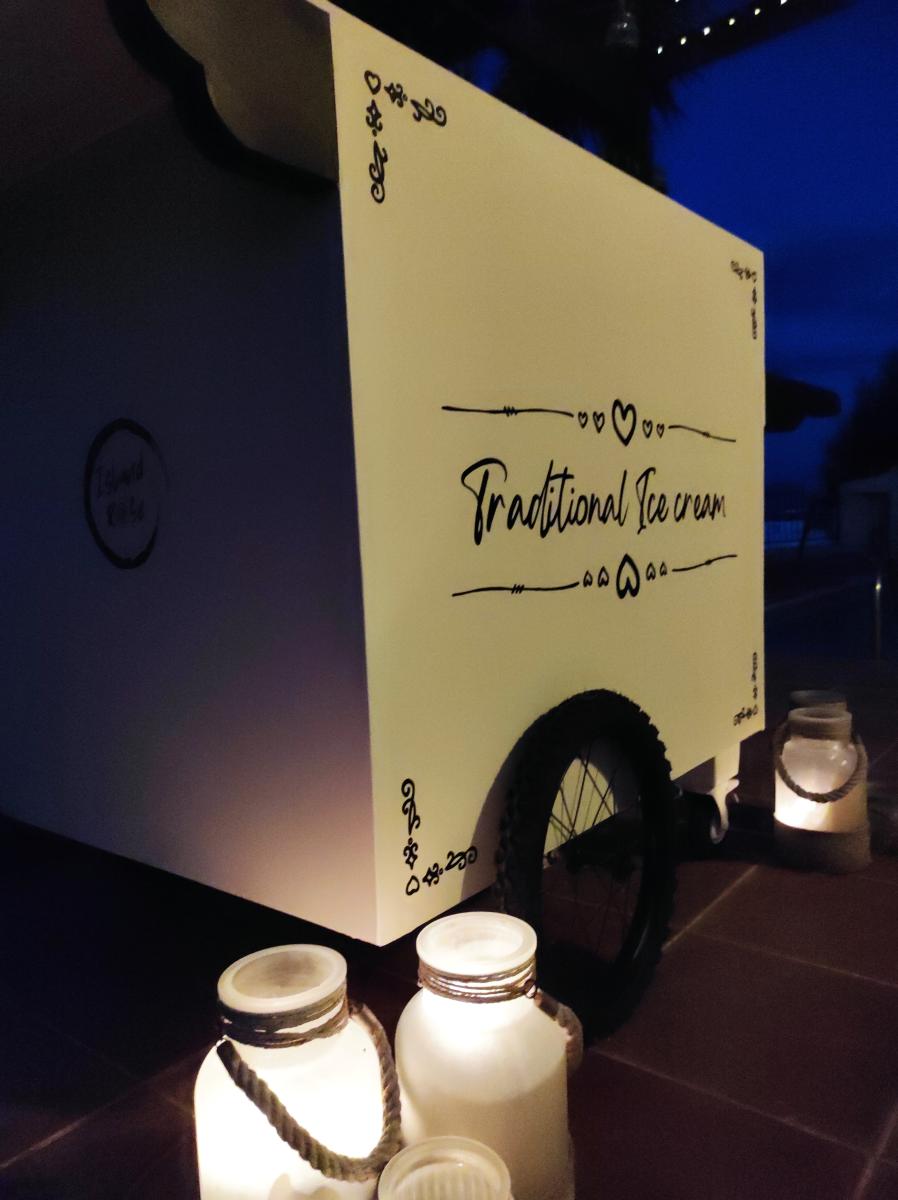
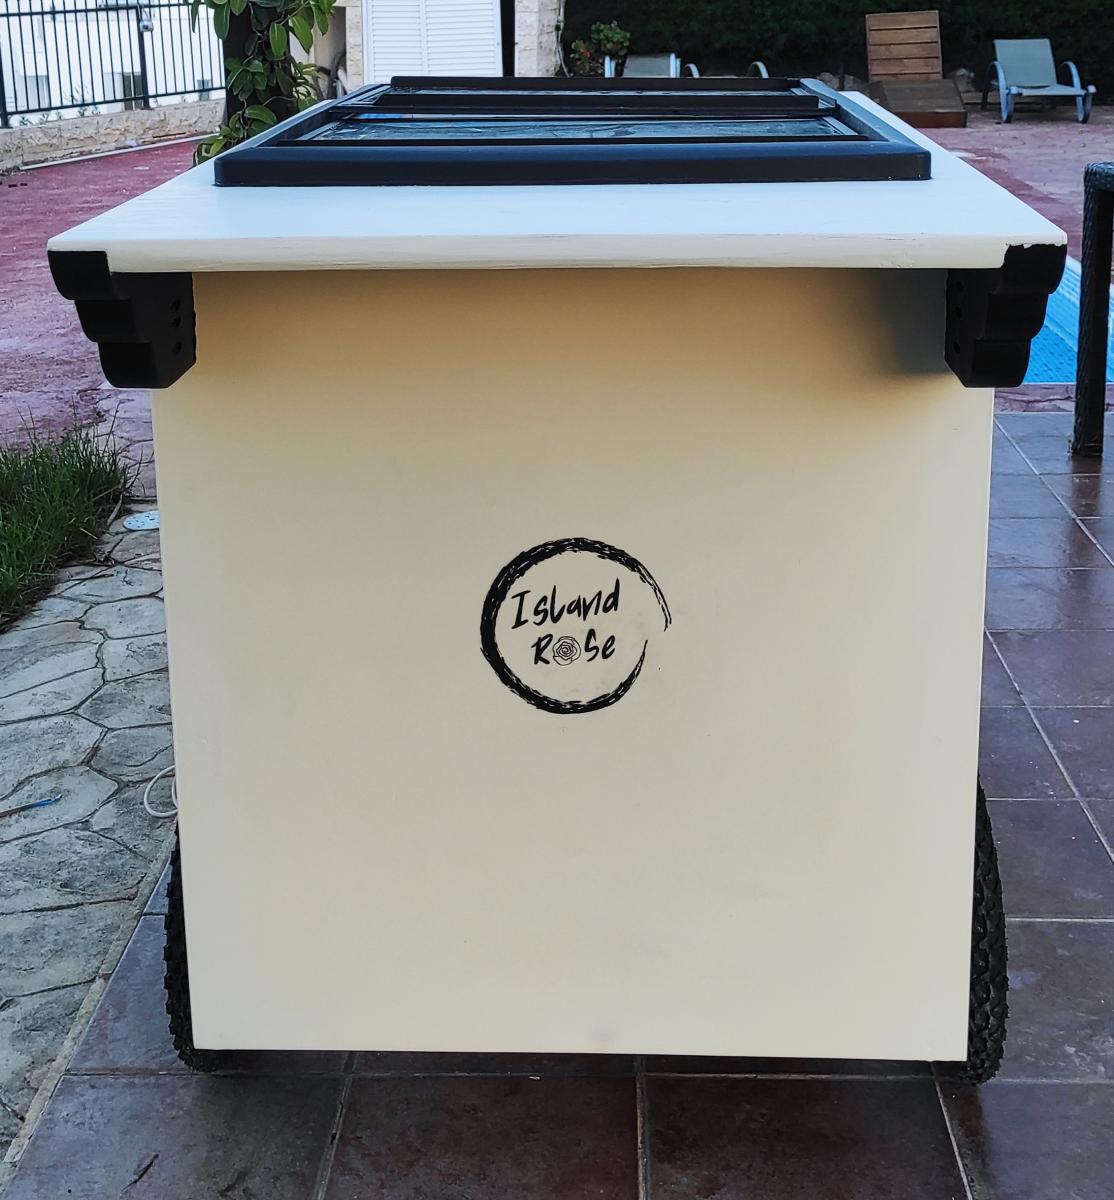
Ice cream cart

A friend wanted a tatty old chest freezer turning into a traditional looking ice cream cart for her business. The freezer itself was way to heavy and not really fit for purpose but, after a week of tinkering about with a couple of design changes here and there to accommodate the weight, I don't think I've done too bad a job.
The internal frame is Nordic fir, half lapped at the joints and secured in place with 38mm oak dowels, the cladding is 6mm birch ply finished with paint from the French chic Al fresco range, the writing proved a little challenging on the the eyes and my hands aren't as steady as they used to be but she's happy.

Comments
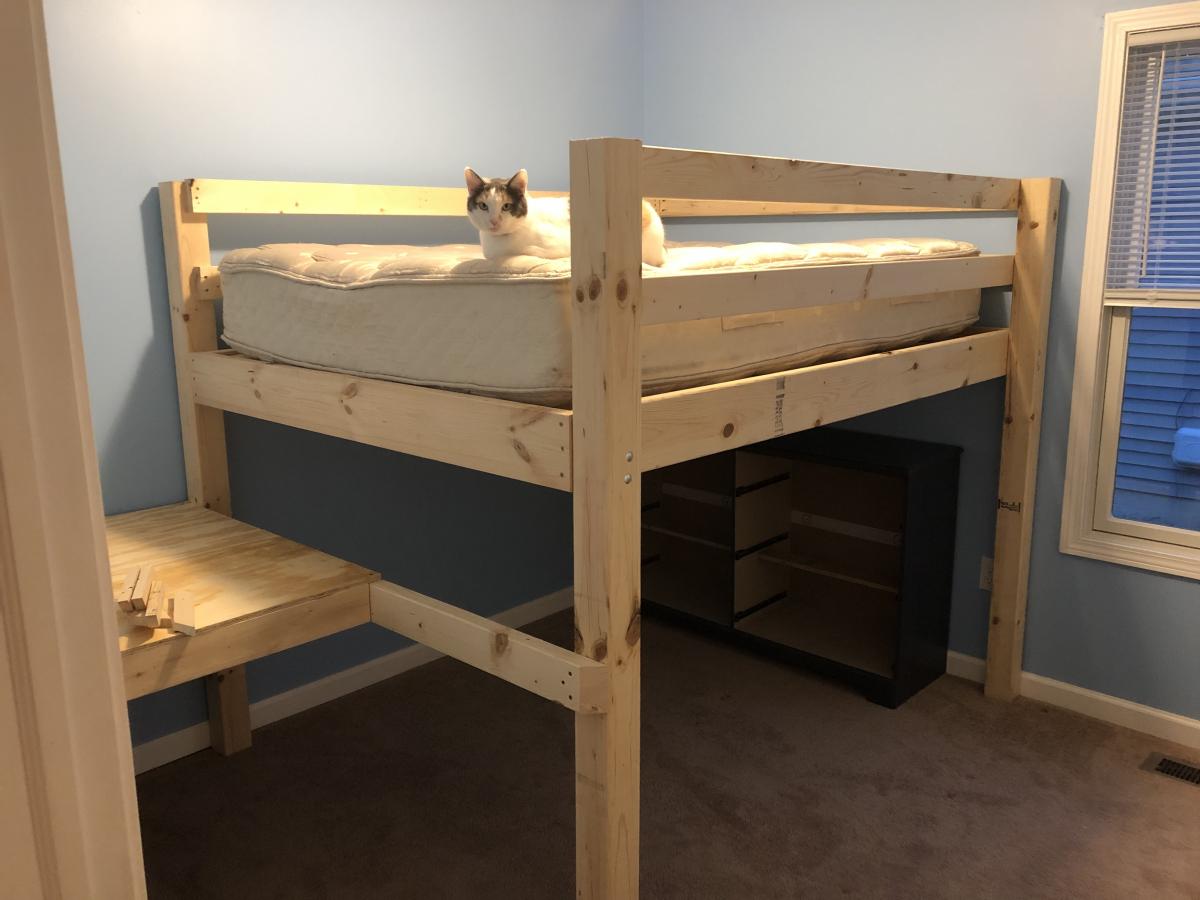
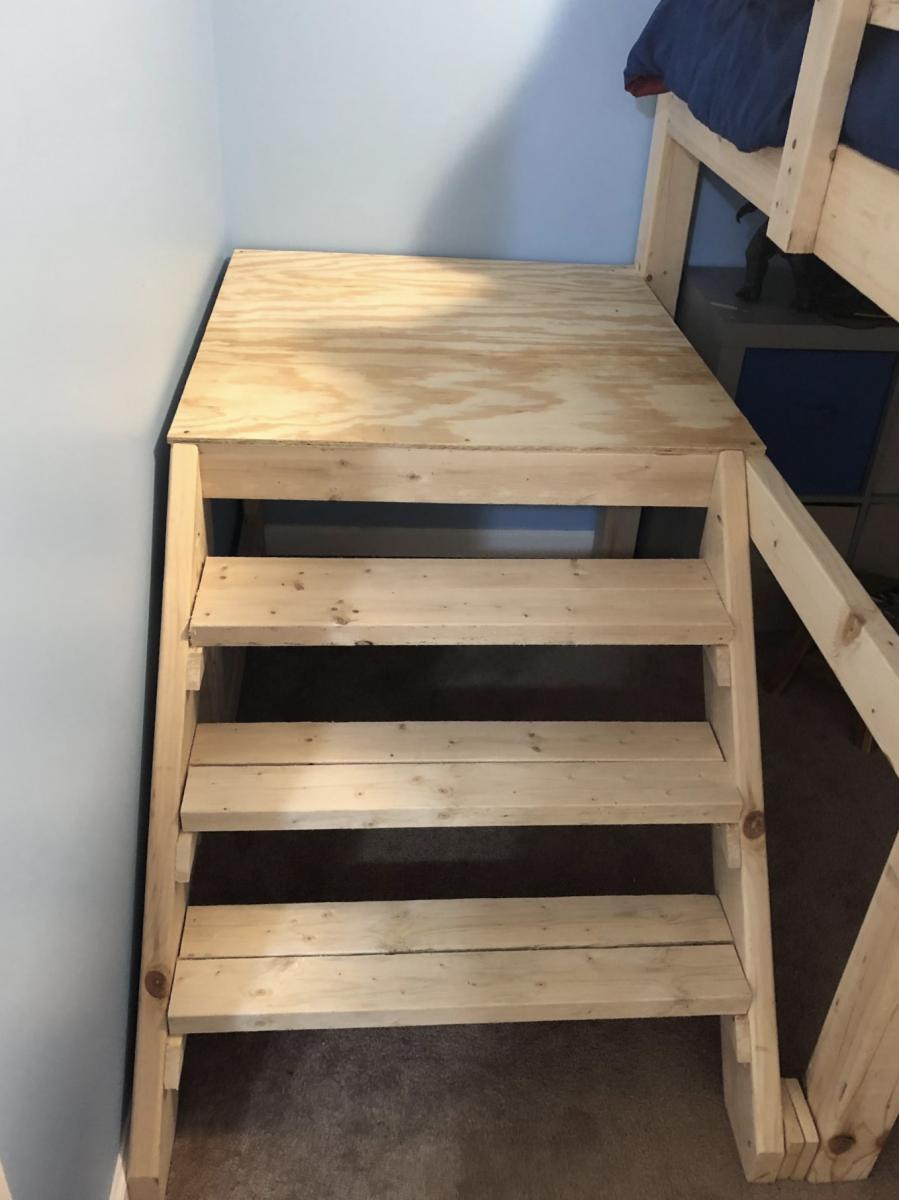
Full size loft
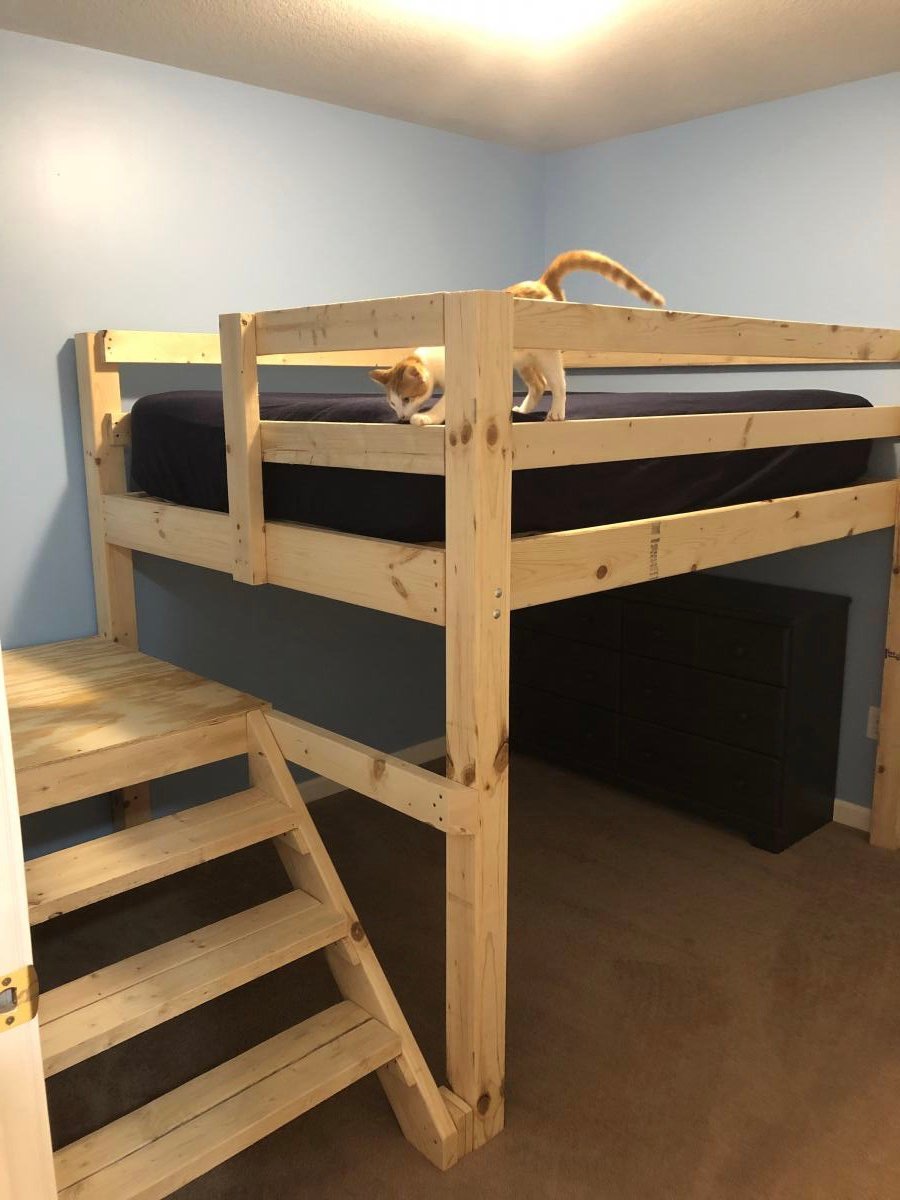
Built a full size loft bed for my kids but wanted something safer than having them climb up and down a ladder so used the Camp Loft Bed plans to add the platform and stairs. It is much easier for the kids. Going to finish by covering the platform and stairs with carpet.
Built from Plan(s)
Estimated Cost
180
Estimated Time Investment
Day Project (6-9 Hours)
Comments

Wed, 10/02/2019 - 09:51
I really like how the…
I really like how the platform is only half way so the stairs are inset, this is very smart and good use of space.
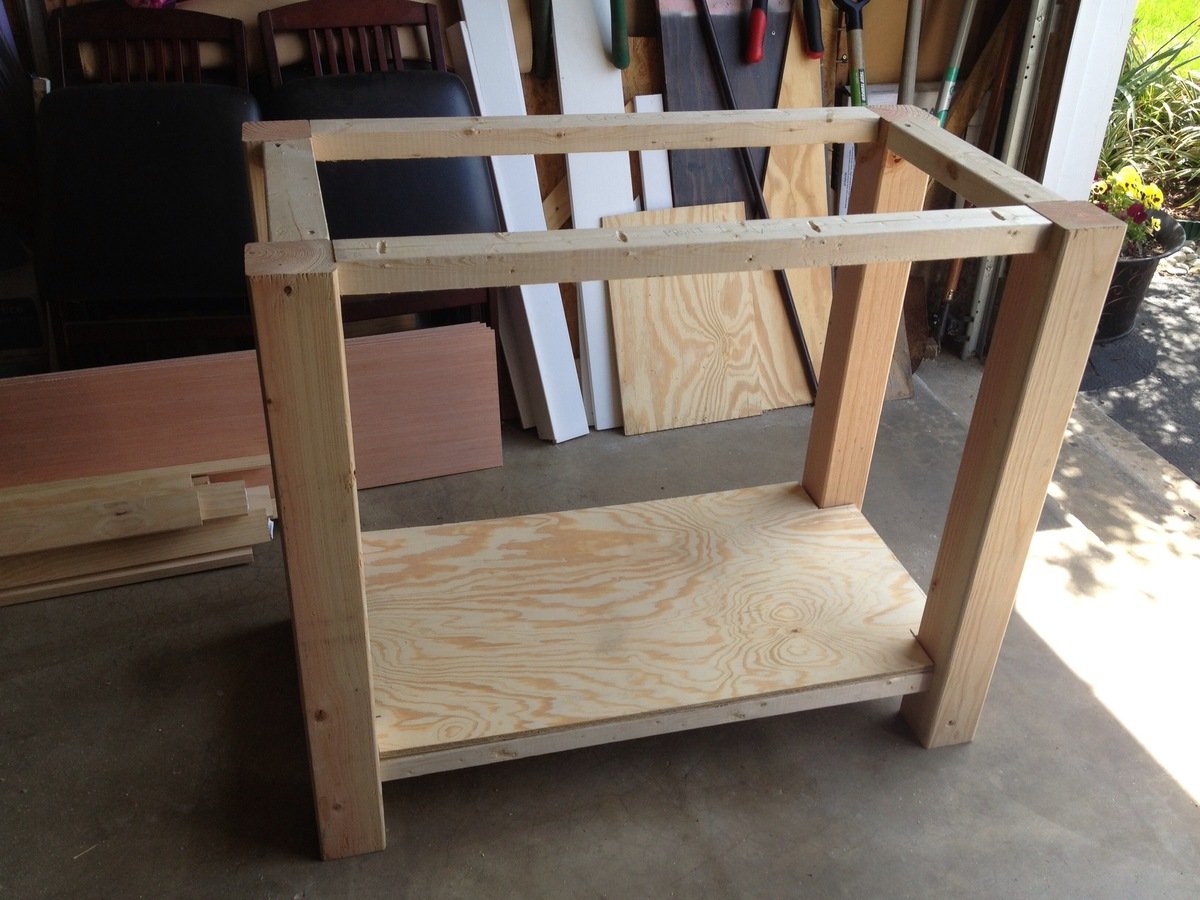
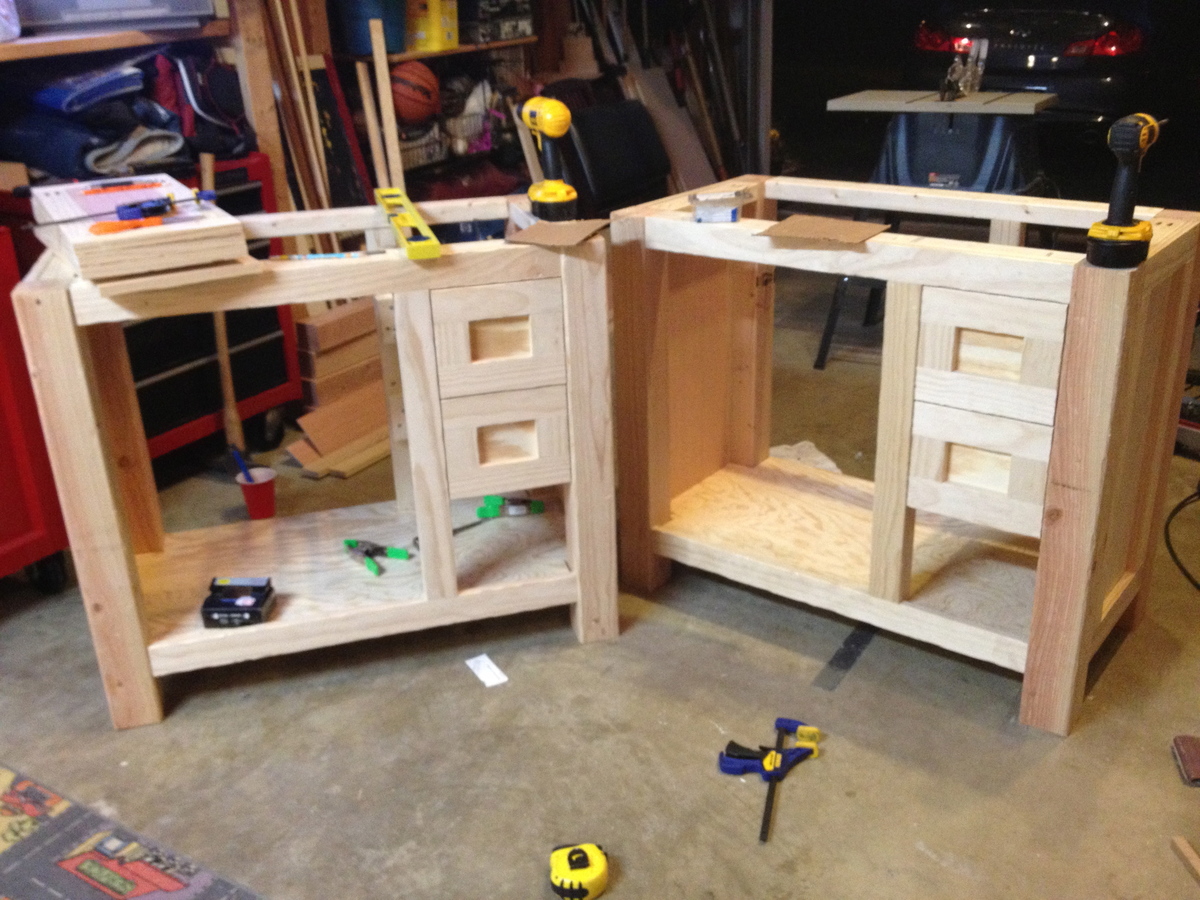
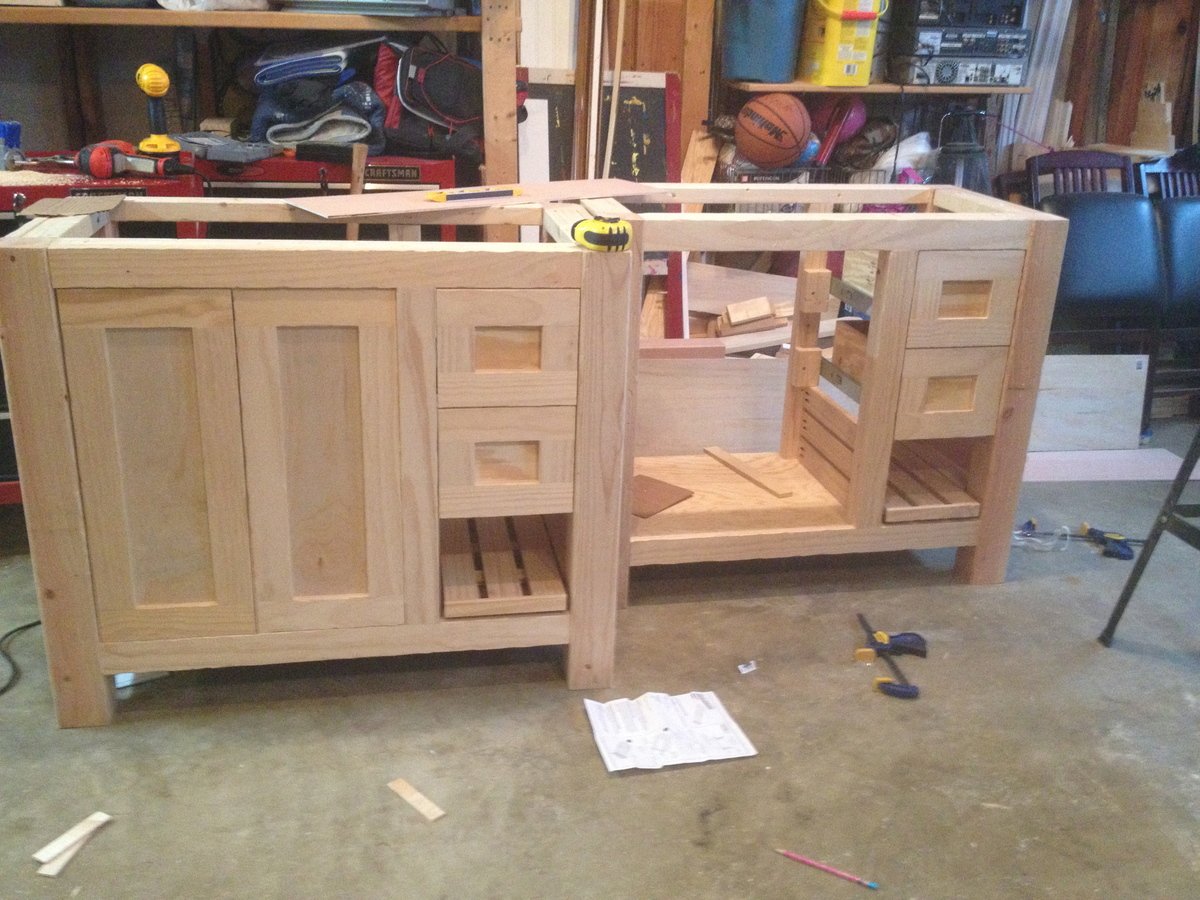
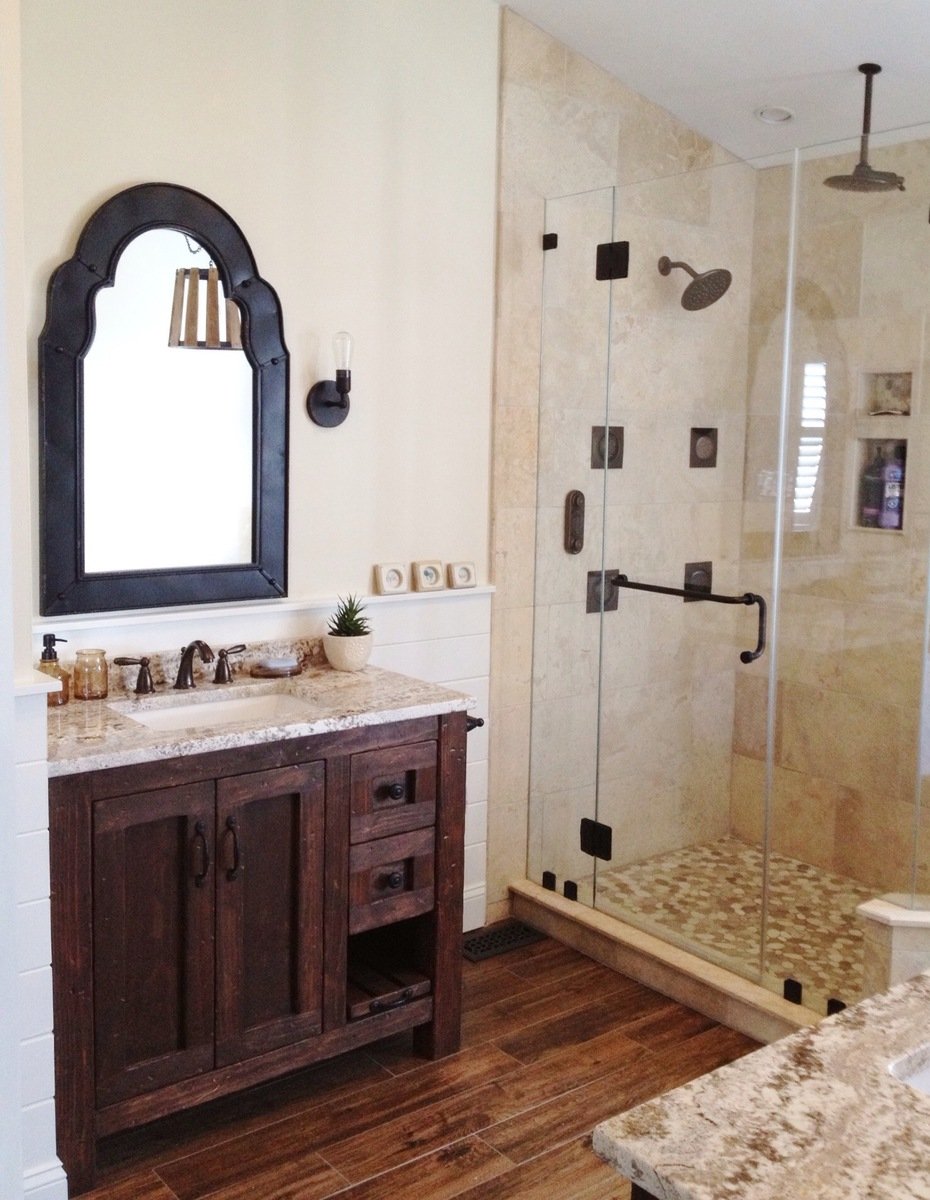
Bathroom Vanities
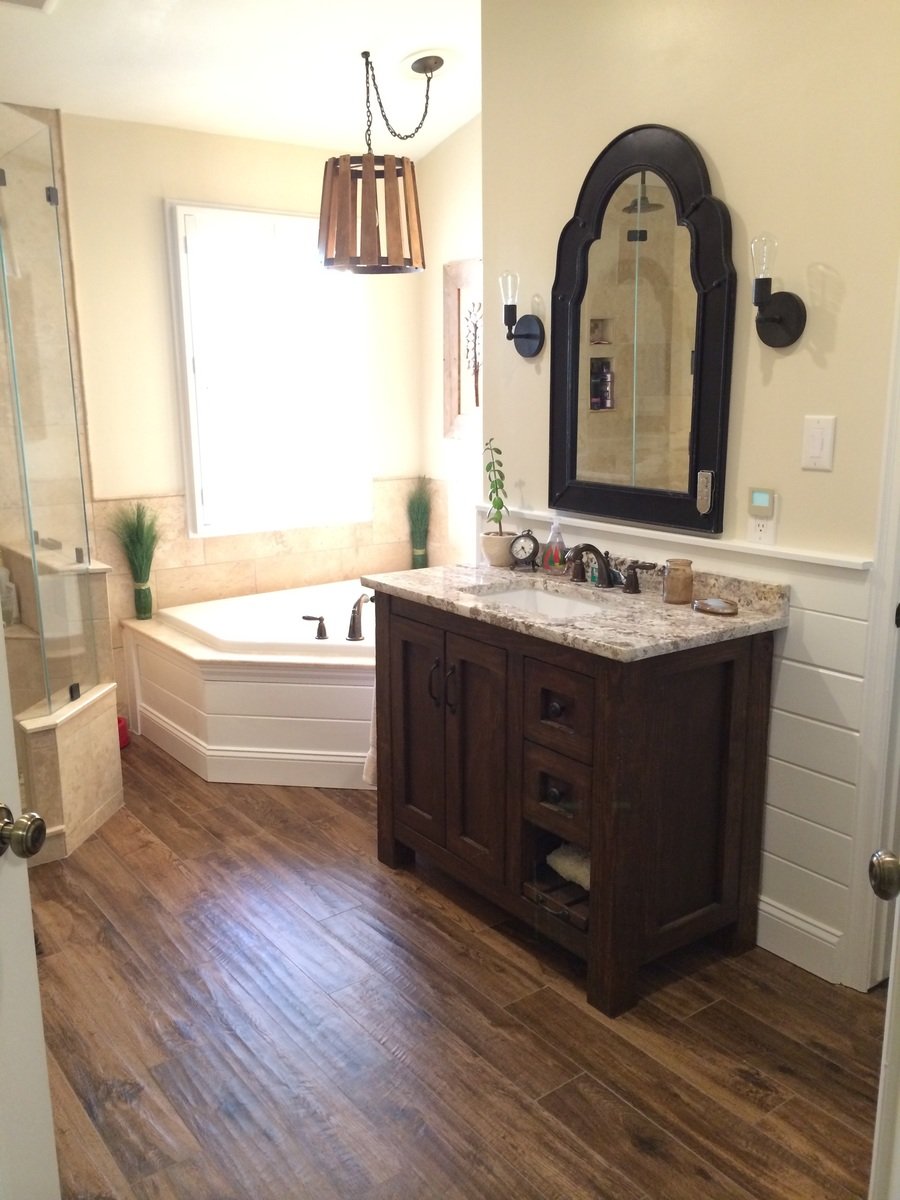
Rather than burning a few thousand on vanities for my bathroom remodel I decided to build them instead. The bottom shelf on the right slides out for a footstool so the kids can reach the sink.

Estimated Cost
Wood was cheap, the granite and sink were not, though I was able to save by getting remnant slab from granite shop.
Estimated Time Investment
Weekend Project (10-20 Hours)
Recommended Skill Level
Intermediate
Comments

Sun, 01/05/2014 - 20:55
Absolutely stunning!
These are so beautiful -- they really look like high-end rustic pieces. The slide-out footstool is genius. The distressing is fantastic. I really love your pebble art as well.
Would you mind sharing the stain color?
Wed, 02/03/2016 - 17:48
I drew this up in sketchup as
I drew this up in sketchup as I was planning to build one like this, but decided to do something different. Is there a way to upload a sketchup file?
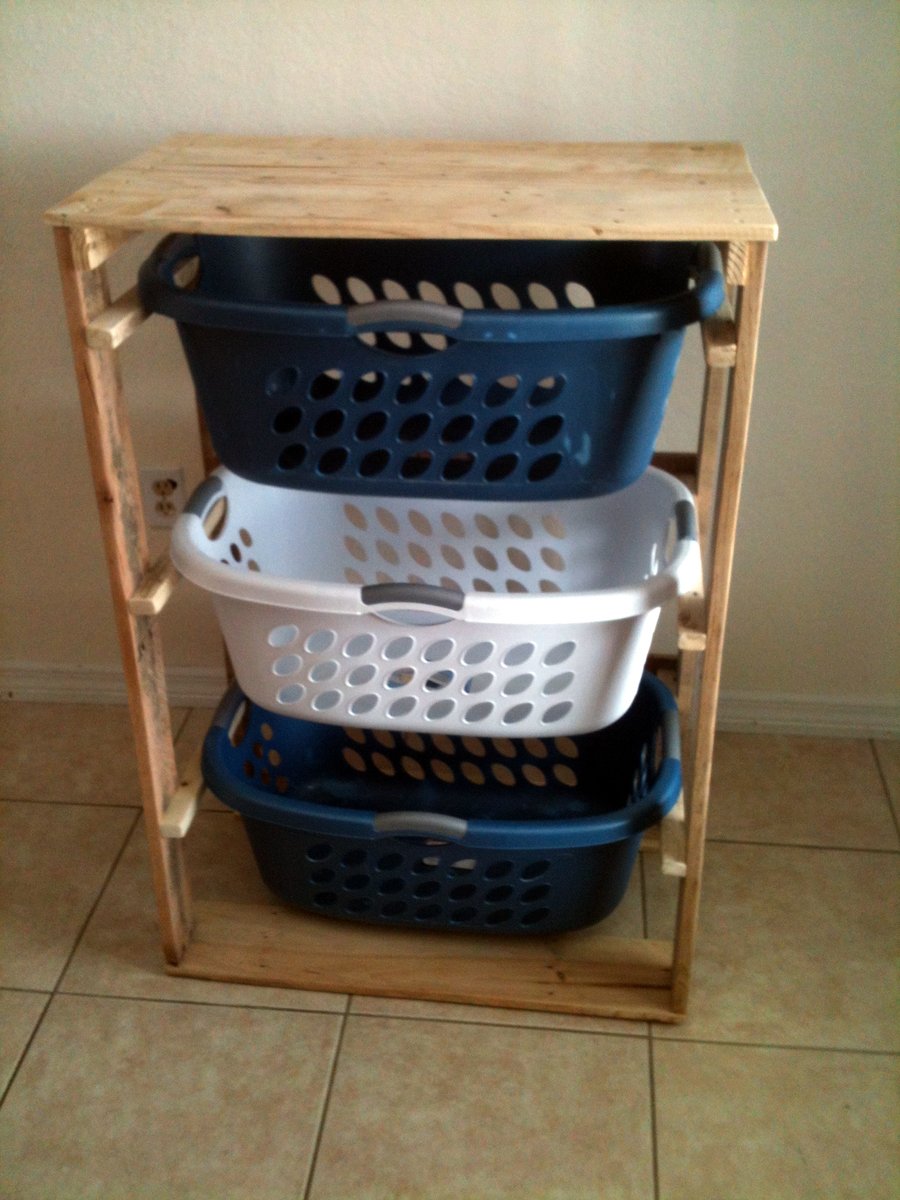
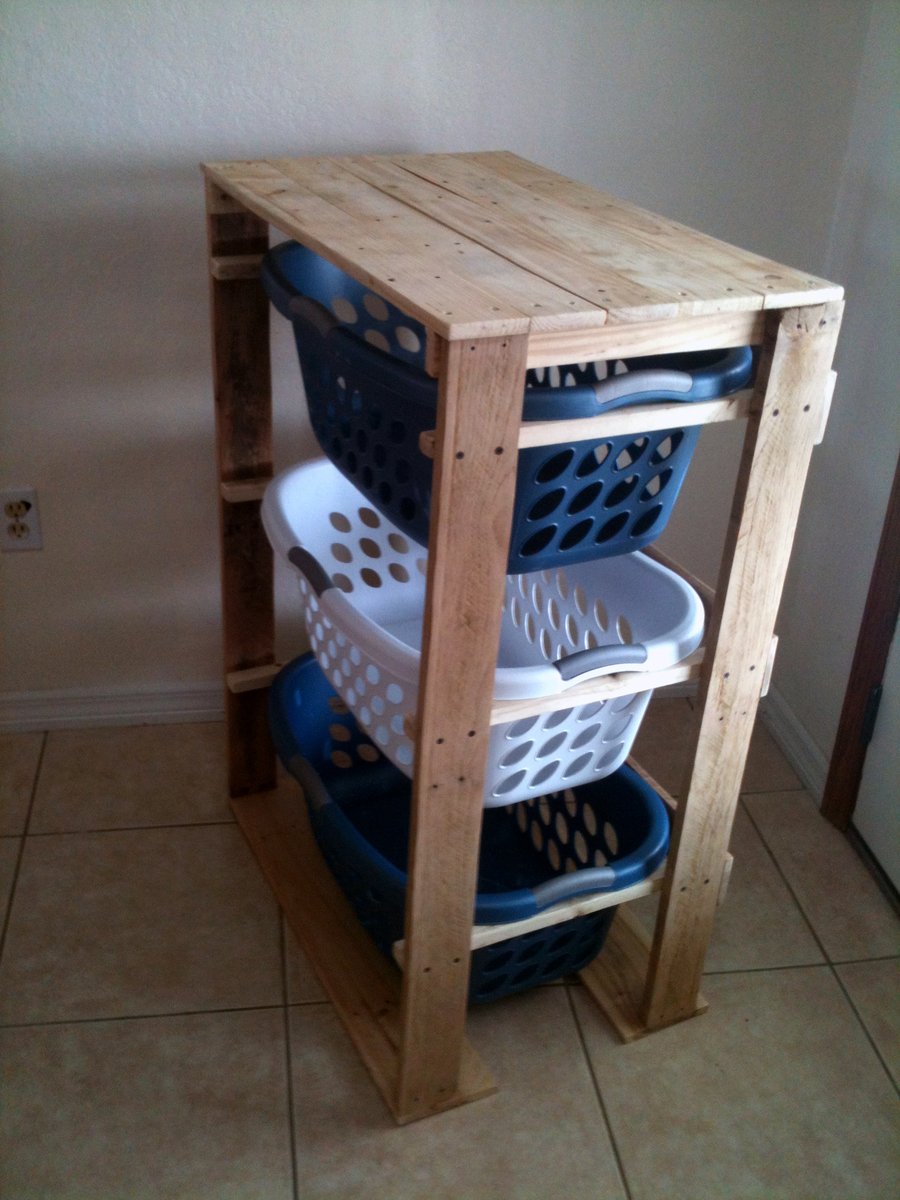
Pallirondack Laundry Basket Dresser
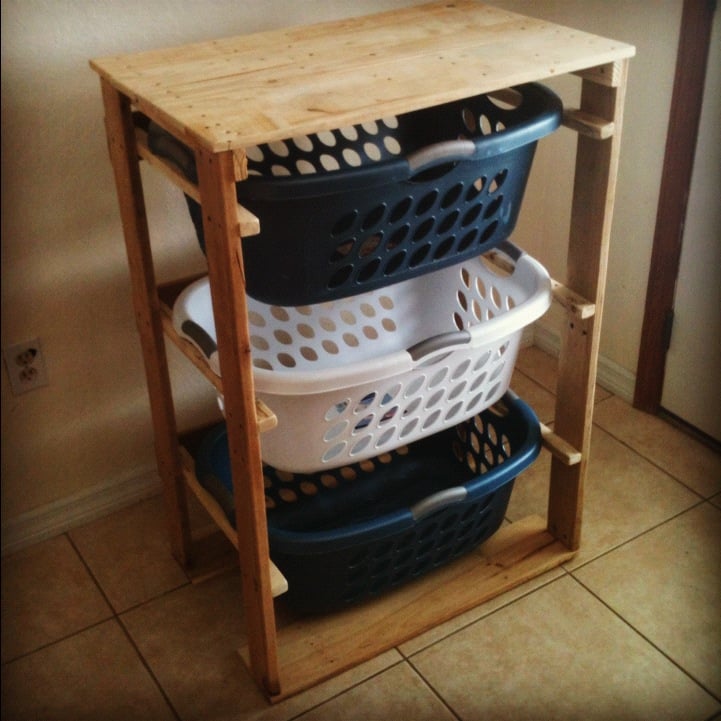
I showed my wife the Laundry Dresser featured on Ana White's website and she asked if I could make one for her, but not quite so tall. I also turned the orientation to fit our laundry room space. I used primarily oak from recycled pallets to build the Laundry Basket Dresser. She wanted a work space on top, so folded laundry, empty baskets, etc. all have a temporary resting place depending on the day. From start to finish, it took me about 6 hours. She plans to stain the piece at some point, but its already in use, so I'm not 100% sure that will ever happen until we move or something. ;-) Great idea and laundry room organization!

Built from Plan(s)
Estimated Cost
Half a box of screws
Estimated Time Investment
Afternoon Project (3-6 Hours)
Recommended Skill Level
Intermediate
Comments

Sat, 09/08/2012 - 17:39
very nice!!
Great job on this!! I love the open sides!! Thanks for sharing. :-)
Mon, 09/10/2012 - 10:22
great job`
I love the open sides, plus it makes it much more feasible to build with scraps repurposed wood, which I love. Thanks for the inspriation
Sun, 10/19/2014 - 06:16
perfect use of pallet wood
I have a pallet sitting against the garage that would be perfect for this
Looks fab, great job.
Fri, 01/09/2015 - 12:27
Laundry baskets...
Hi, I really like this project but was curious what size laundry basket you are using in the project?
Sun, 06/14/2015 - 20:16
laundry baskets
Soooo I made this according to the measurements and no laundry basket I find fit. Kind of dissapointed in the fact that this cool thing I just built doesn't have any baskets that will fit it. Any advice on finding a basket that fits?
Fri, 07/10/2015 - 20:14
Same here. No basket fits.
Same here. No basket fits. Did you ever find one?
Fri, 07/10/2015 - 20:56
Build to fit
I think the idea is to build it to fit the baskets you have or buy some and build around them.
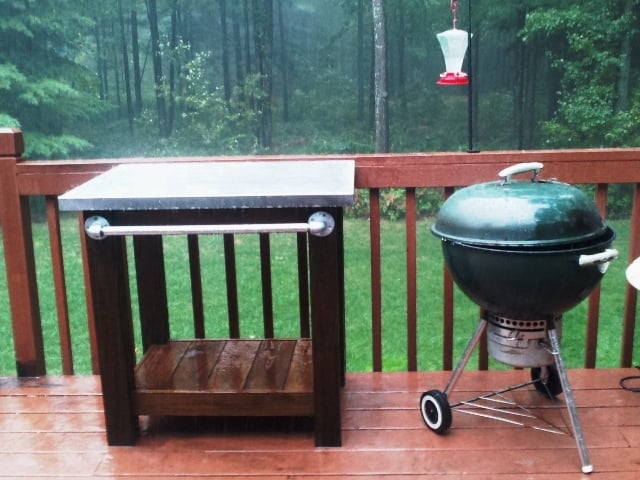
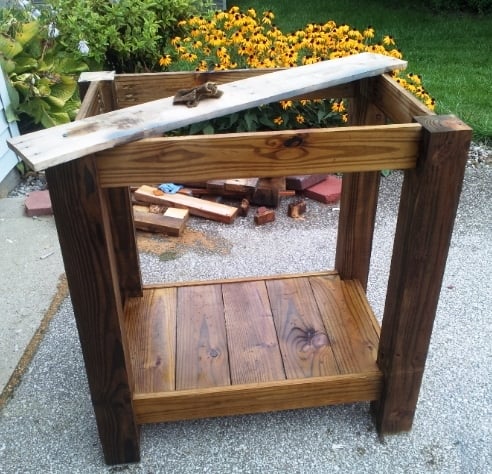
Grill table with stainless steel top

I made this table to go next to an outdoor grill to be used as a food prep area or just a surface for holding ingredients (instead of using the deck railing!). The top is stainless steel which fits tightly over 2 3/4" pieces of plywood laminated together. The bar/handle in front is made out of galvanized pipe. All wood was treated.
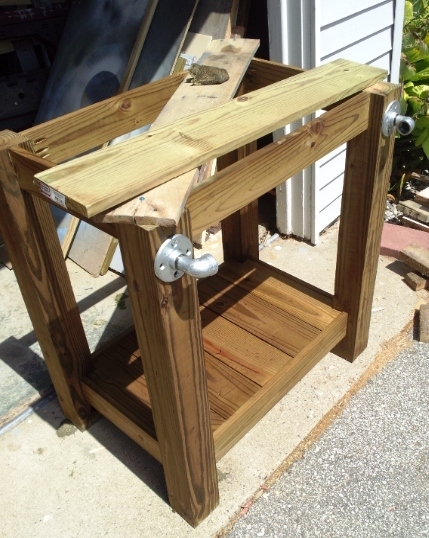
Legs - 4x4 posts
Bottom shelf - 1x6's
Sides - 1x4's
Top - 2 pieces of 3/4" plywood laminated together with a stainless steel top (custom fit) over top
Towel bar - galvanized pipe (cut and threaded to size at Lowe's), floor flanges and 90 degree elbows
Estimated Cost
$120
Estimated Time Investment
Day Project (6-9 Hours)
Finish Used
I used Kona stain but since it was over treated wood the stain did not take as dark as it should have. I will have to restain this piece after it has completely dried out.
Recommended Skill Level
Intermediate
Comments

Thu, 05/15/2014 - 10:33
Stainless Top
Sorry about the late reply! Yes, I just gave my dimensions to a local steel supplier and they made the top. I think I have about $40 into the stainless. They didn't weld the corners but I've never had an issue with them.

Sat, 04/26/2014 - 15:41
Stainless steel sheet metal
I too would like to know your source for the sheet metal.

In reply to Stainless steel sheet metal by Pursuit of Handyness
Thu, 05/15/2014 - 10:35
Stainless Top
I just found a local steel supplier, told them what I need and they formed the top. It cost me around $40 (without welding of the corners). I took a fine grit sandpaper to it afterward to scuff it up so it didn't look so bright.
Wed, 04/30/2014 - 12:55
Grill table with stainless steel top
I would like to know are there any plans available to make this table? I am very impressed of its design.
In reply to Grill table with stainless steel top by AMR4412
Thu, 05/15/2014 - 10:46
Plans for top
No...I didn't have any plans when I built it but it's a very simple concept. I chose to use all treated wood since I knew it would be sitting outside unprotected. However, my 4x4 posts weren't square so this caused a lot of problems and everything was built to fit. I believe I just used 4x4's, 1X6s (for the bottom shelf) and 1x4s for the sides (top and bottom). For the top, I just laminated 2 pieces of 3/4" plywood together to bulk it up and then had the stainless top built to fit. It fit perfectly so I didn't glue it to the plywood. This makes it easy to remove and clean, if necessary. For the galvanized pipe (towel bar), I bought it at Lowe's and had them cut/thread it to fit my dimensions.
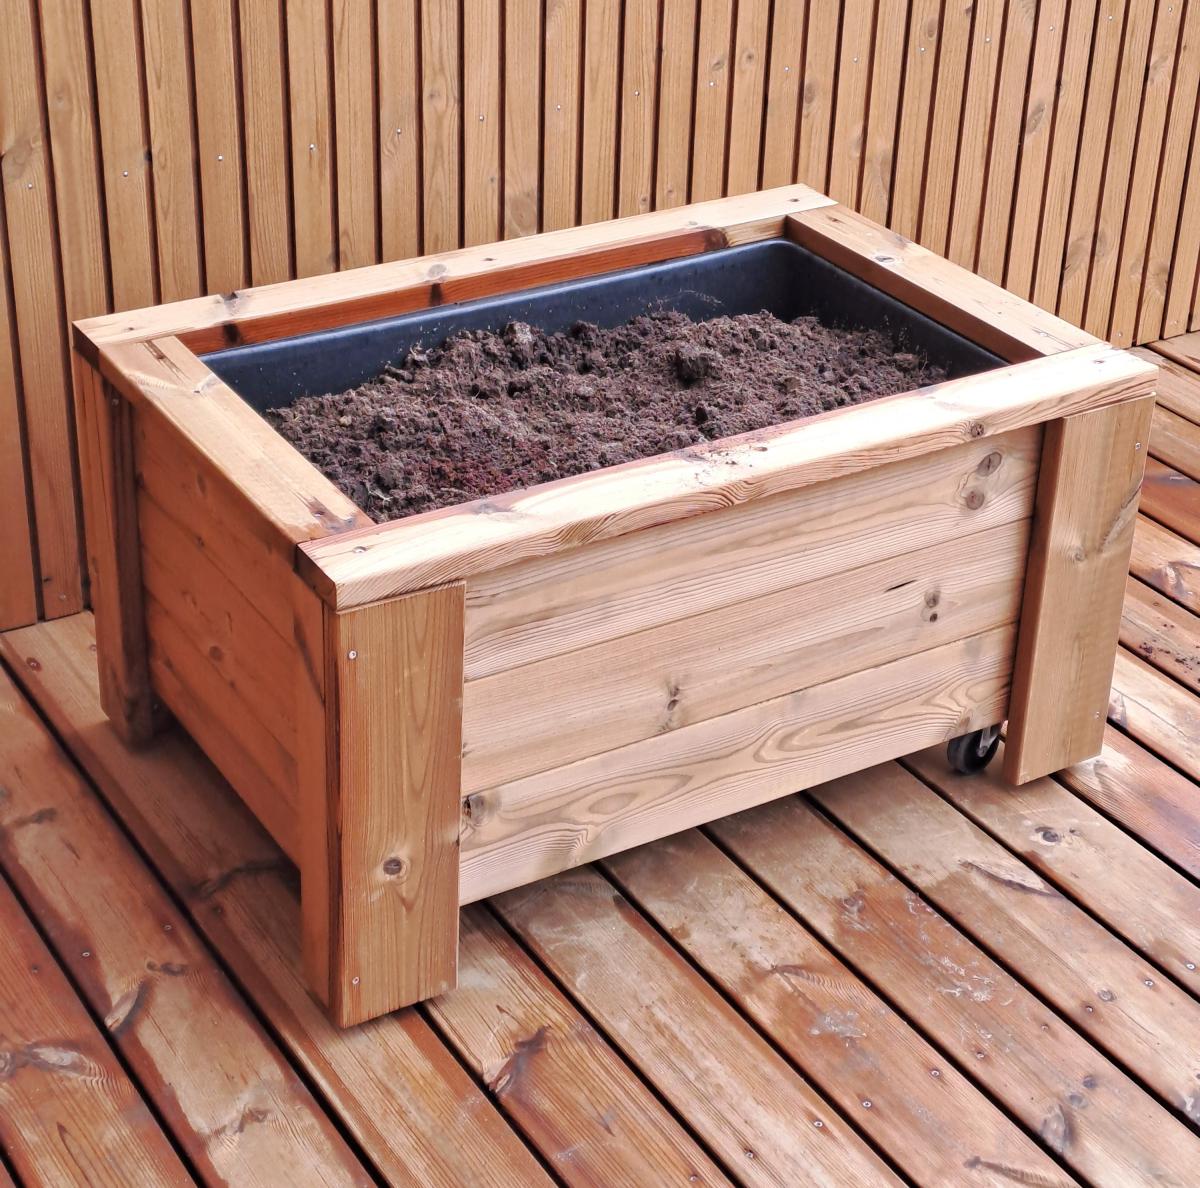
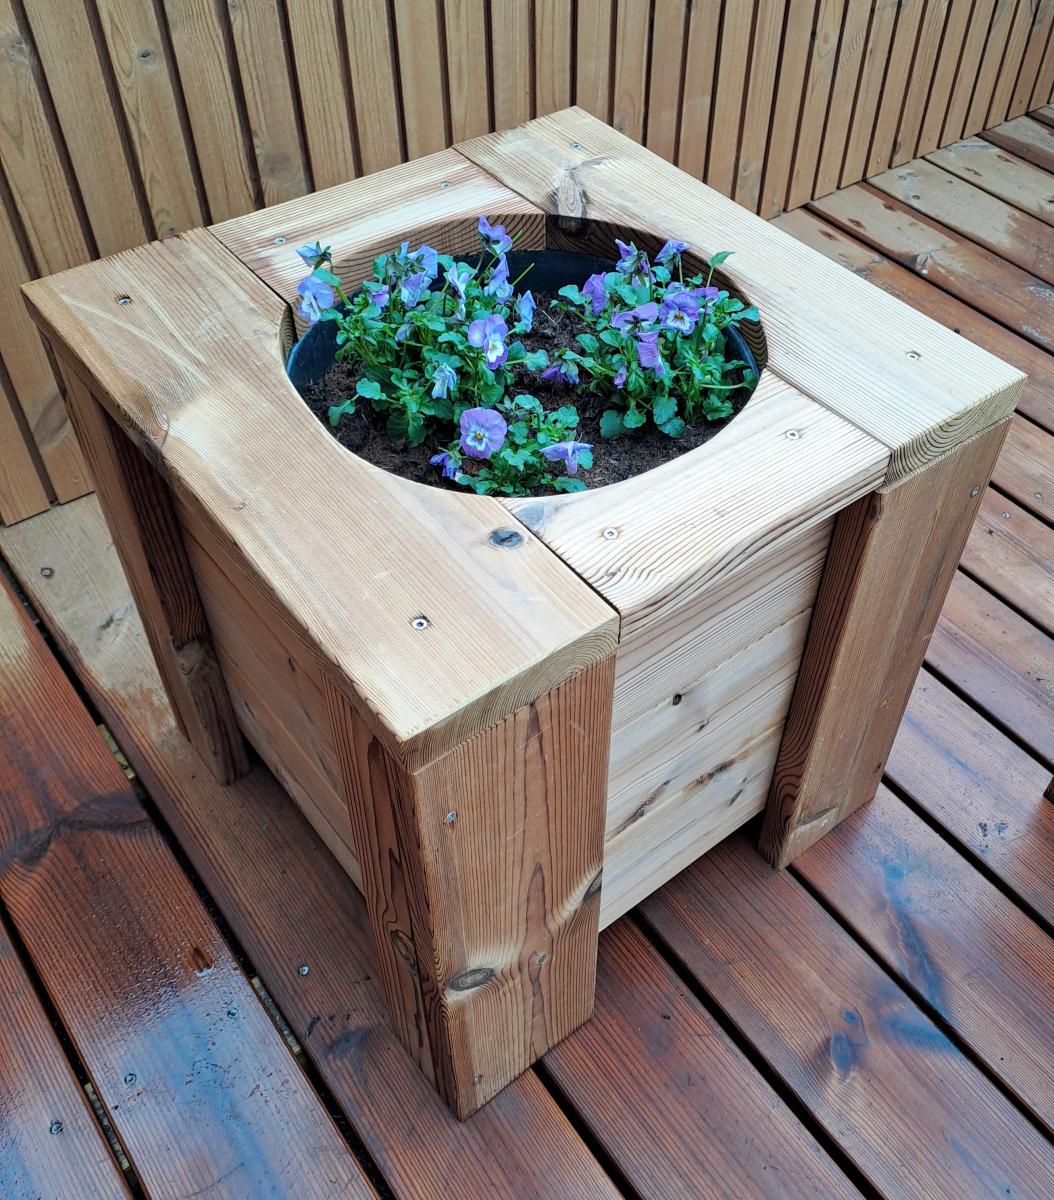
Modern Cedar Planter Box

I build these planter boxes, from wooden remains from terrace building, inspired from Ana White planter boxes.
Søg
Built from Plan(s)
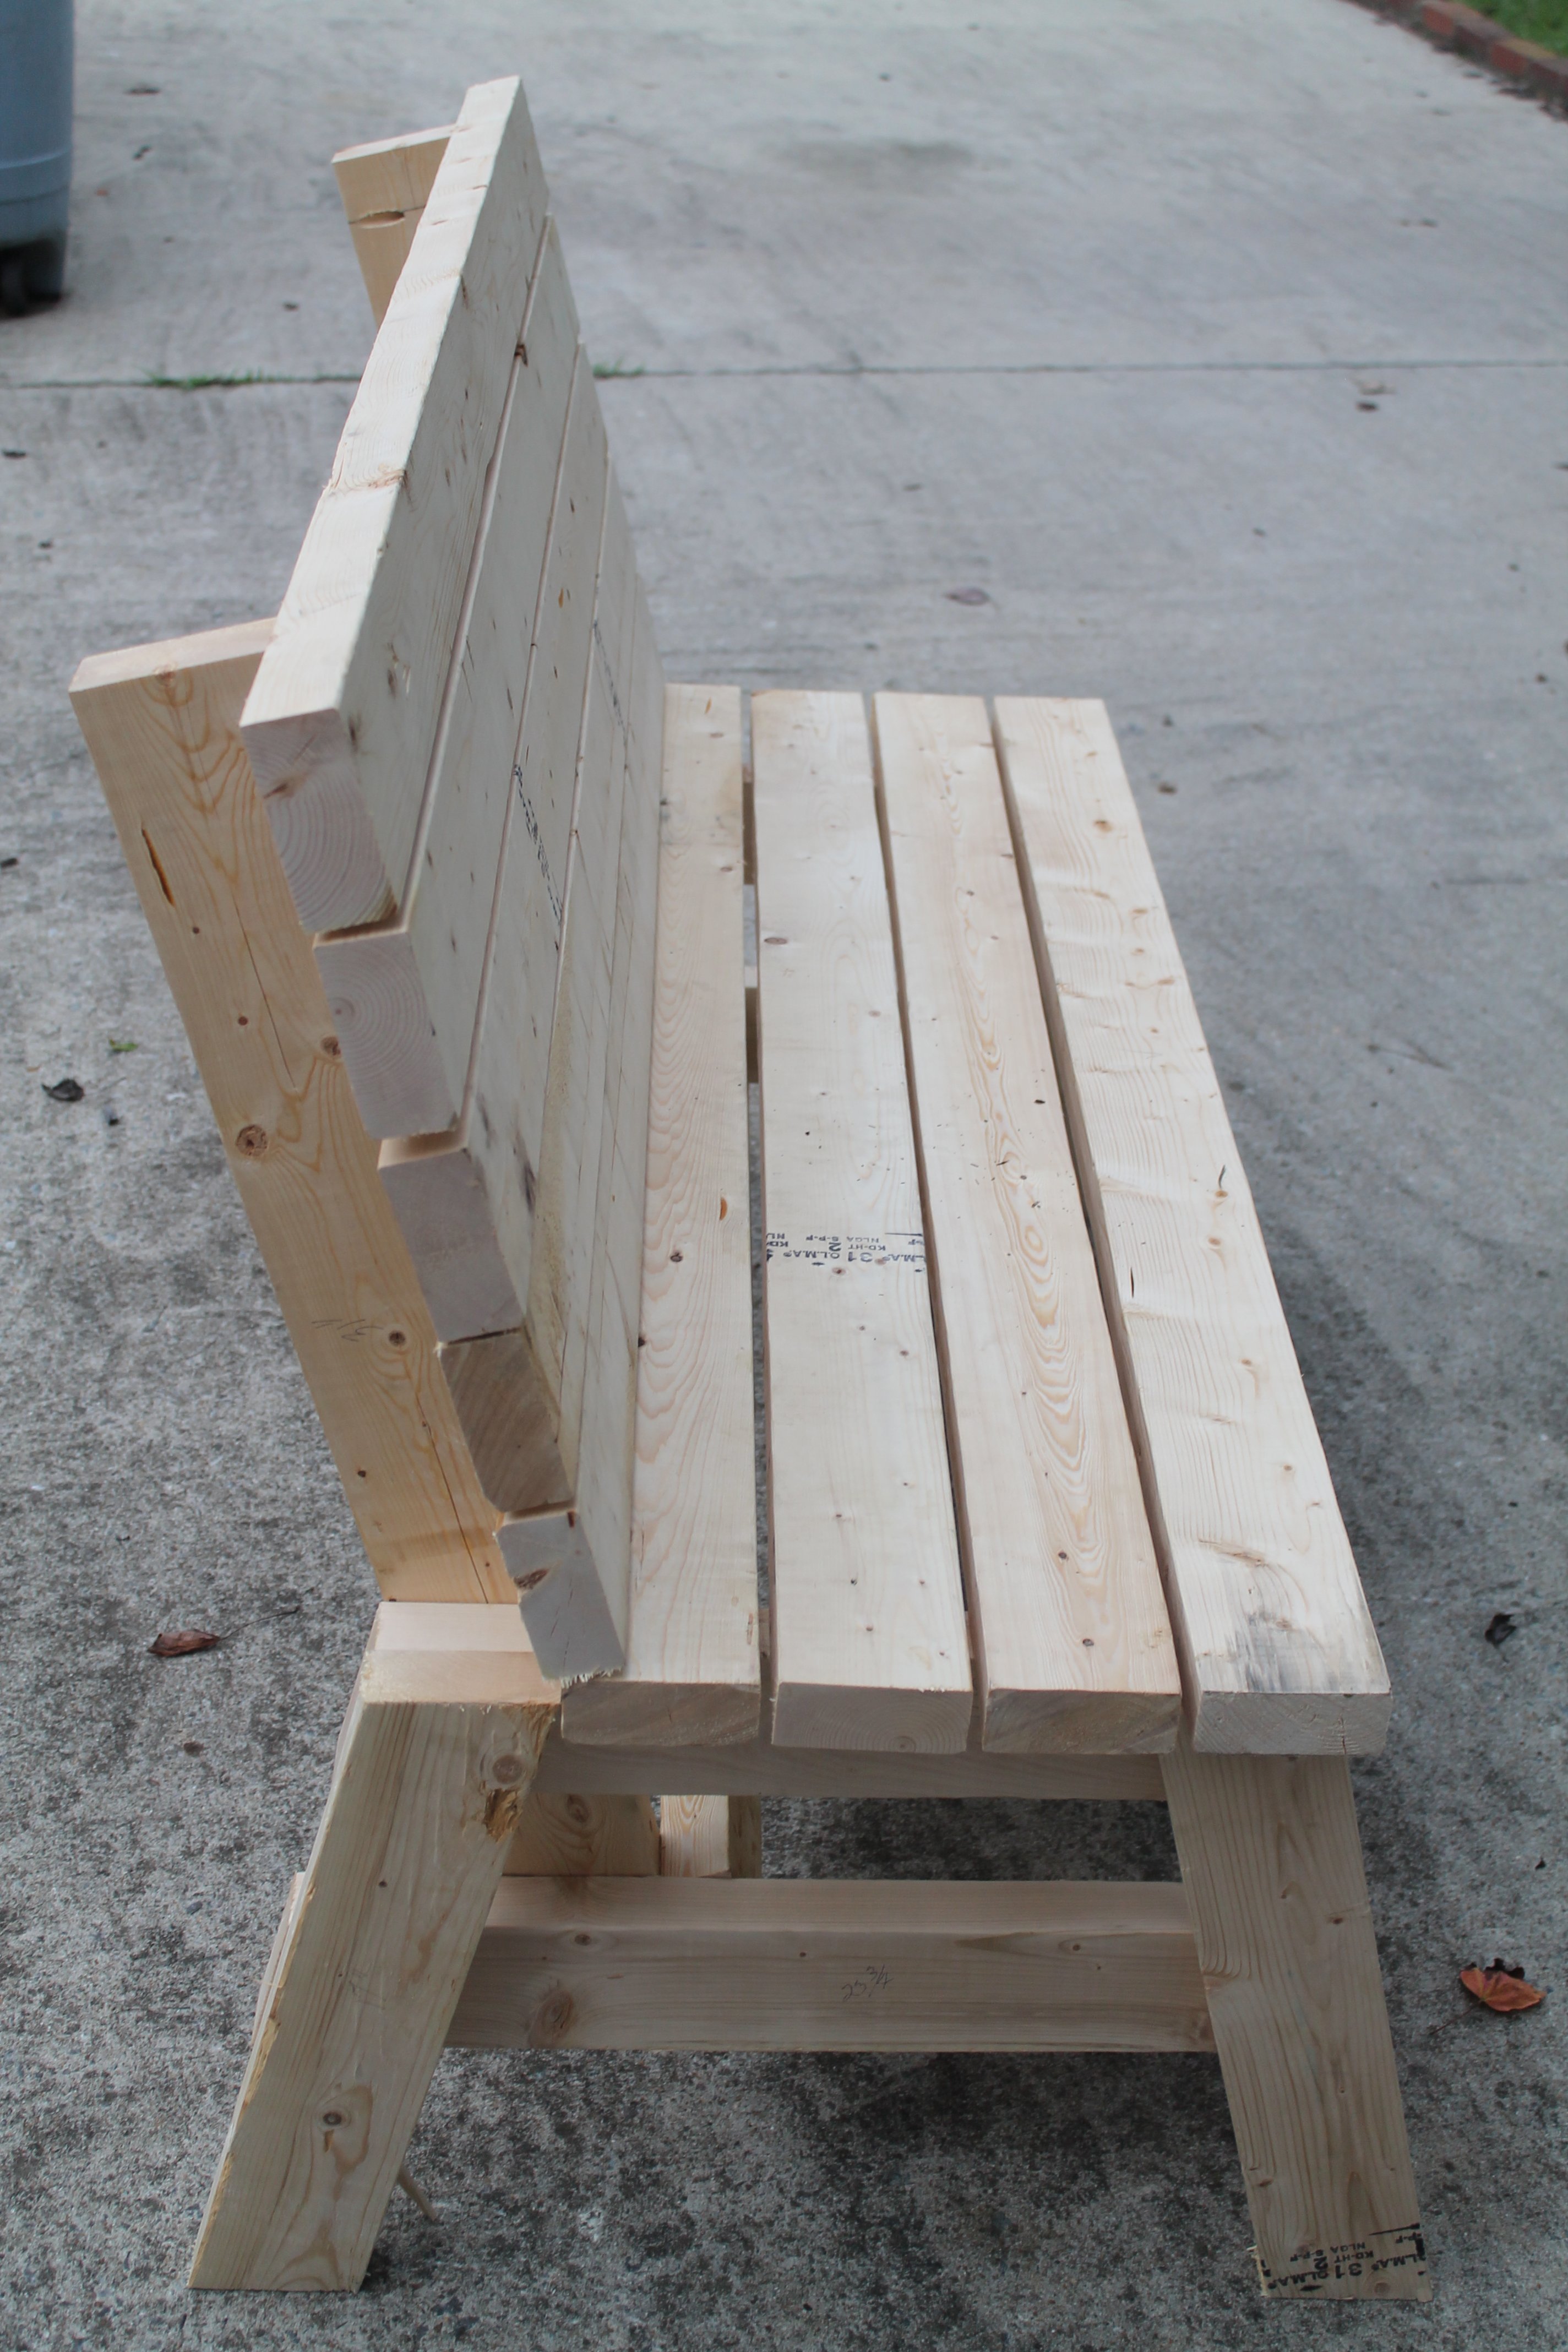
Simple 2x4 Bench

I made this in an afternoon. Loved this project. It is made with 2x4's using a Kregs Jig and mitre saw (plus additional tools like a drill and square). This was my frist time using the Kregs Jig and I am sold!!
The free plans were taken from another website. They are very detailed and there is even a video (I recommend it as he gives a great tip for making sure the back stays equal/level to each other before putting the back on). Even though you can build this by yourself, I did have help for the heavier sides once they were assembled. I plan to build the additional side table soon and finish them both with sanding and staining when the weather seems less iffy for rain.
If you are looking for a good beginner project that doesn't take forever or have complicated steps, this is your project.
Built from Plan(s)
Estimated Cost
Around $50
Estimated Time Investment
Afternoon Project (3-6 Hours)
Recommended Skill Level
Beginner
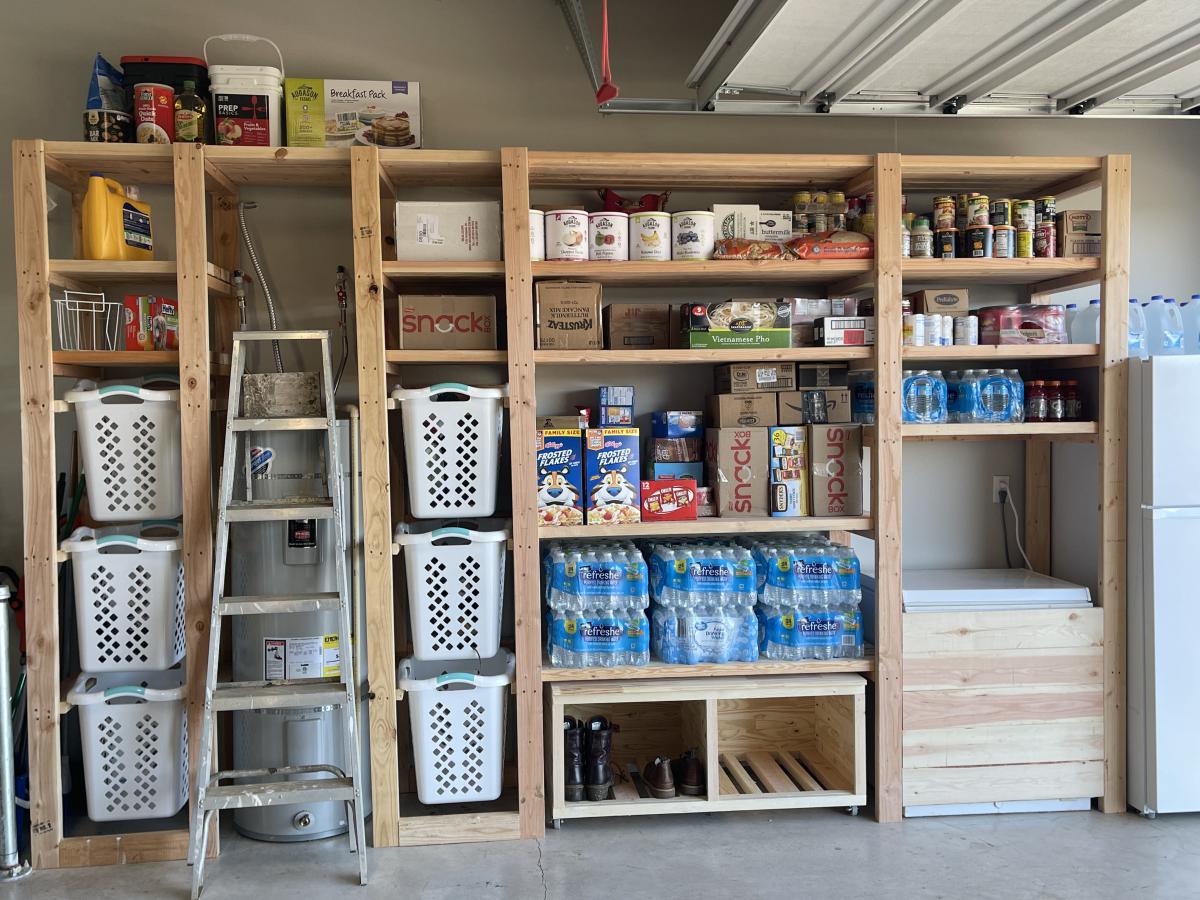
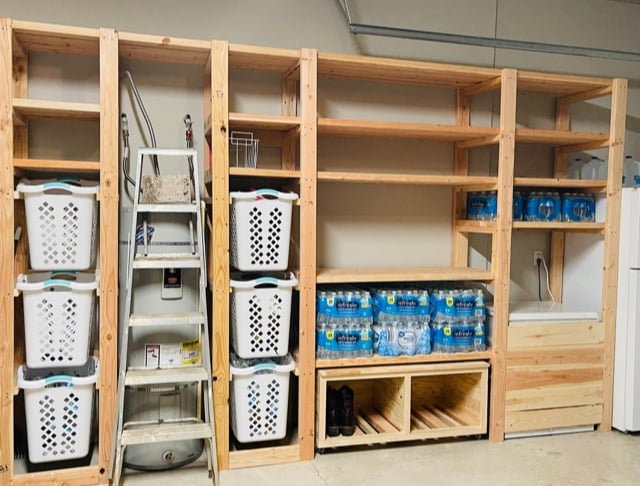
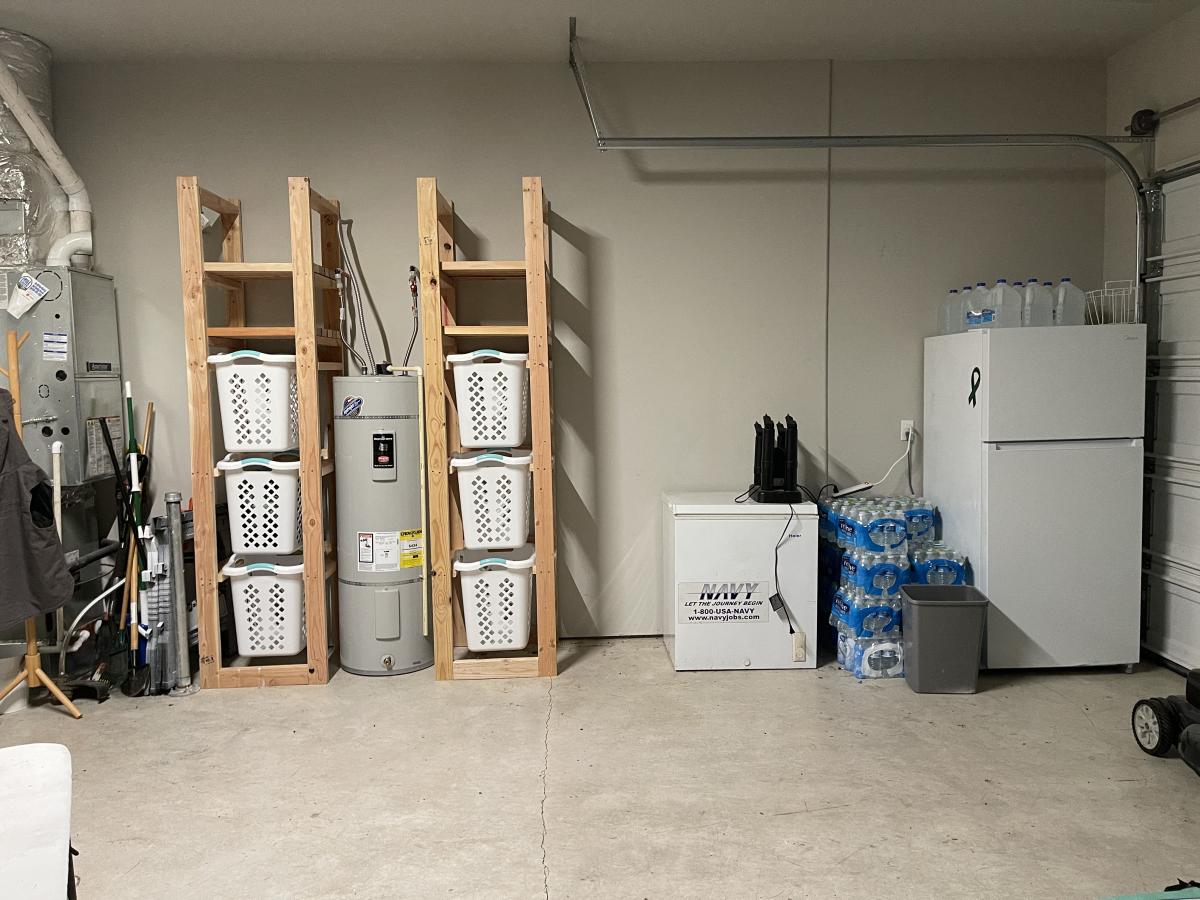
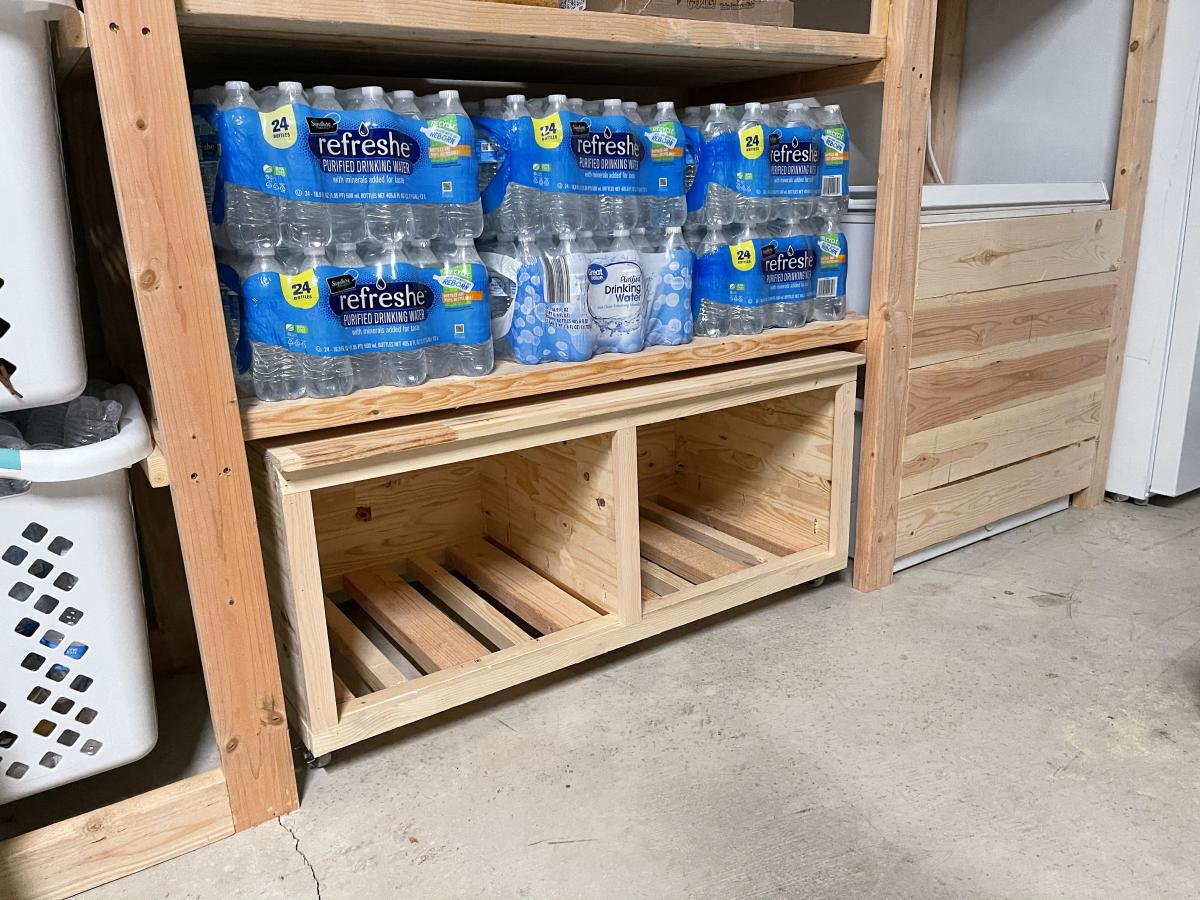
Easy Garage Shelving
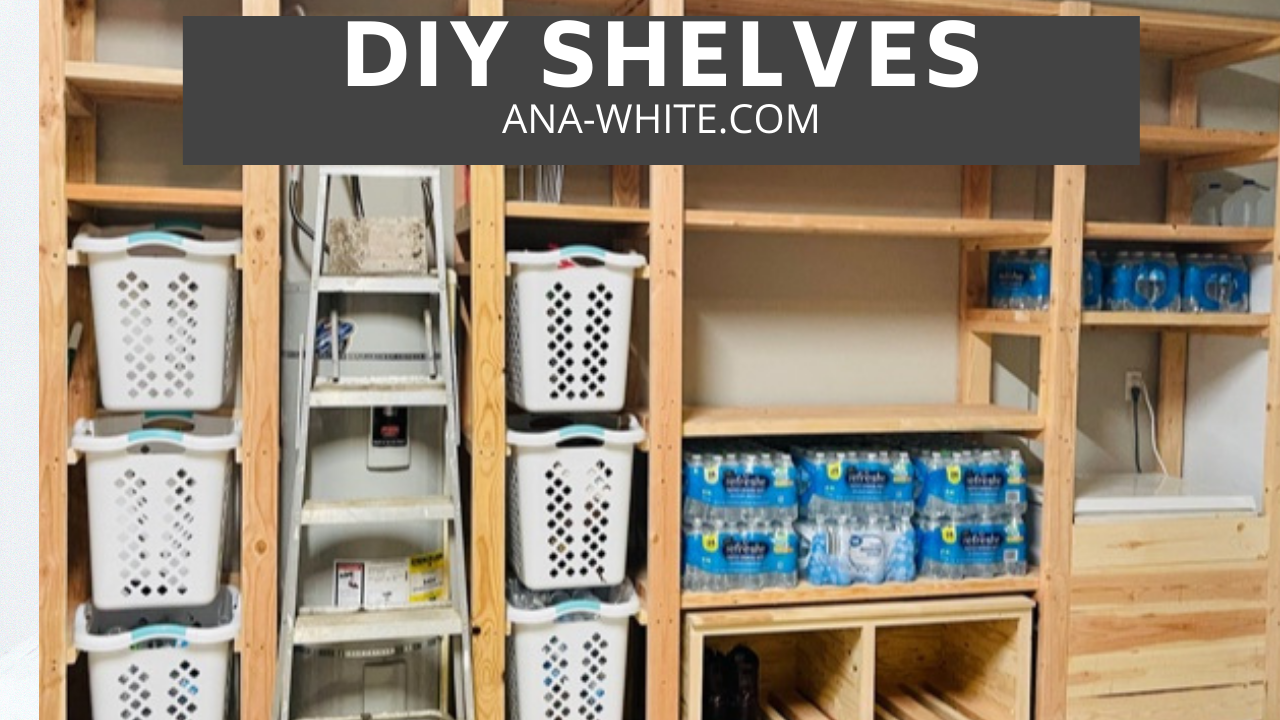
I used Ana's Freestanding Shelf plan and customized it to fit my needs. I incorporated laundry and recycle storage, a rolling bench and built in for our chest freezer. If you want to see it being built with some added tips, that video is available here https://www.youtube.com/watch?v=N8w7XGiVMbs&t=258s
Built from Plan(s)
2x4 outdoor cedar couch with ottoman
I used pocket holes to hide the screws. I made an ottoman out of the outdoor coffee table plans to my dimensions that can be used as a coffee table when we need it.

Built from Plan(s)
Comments
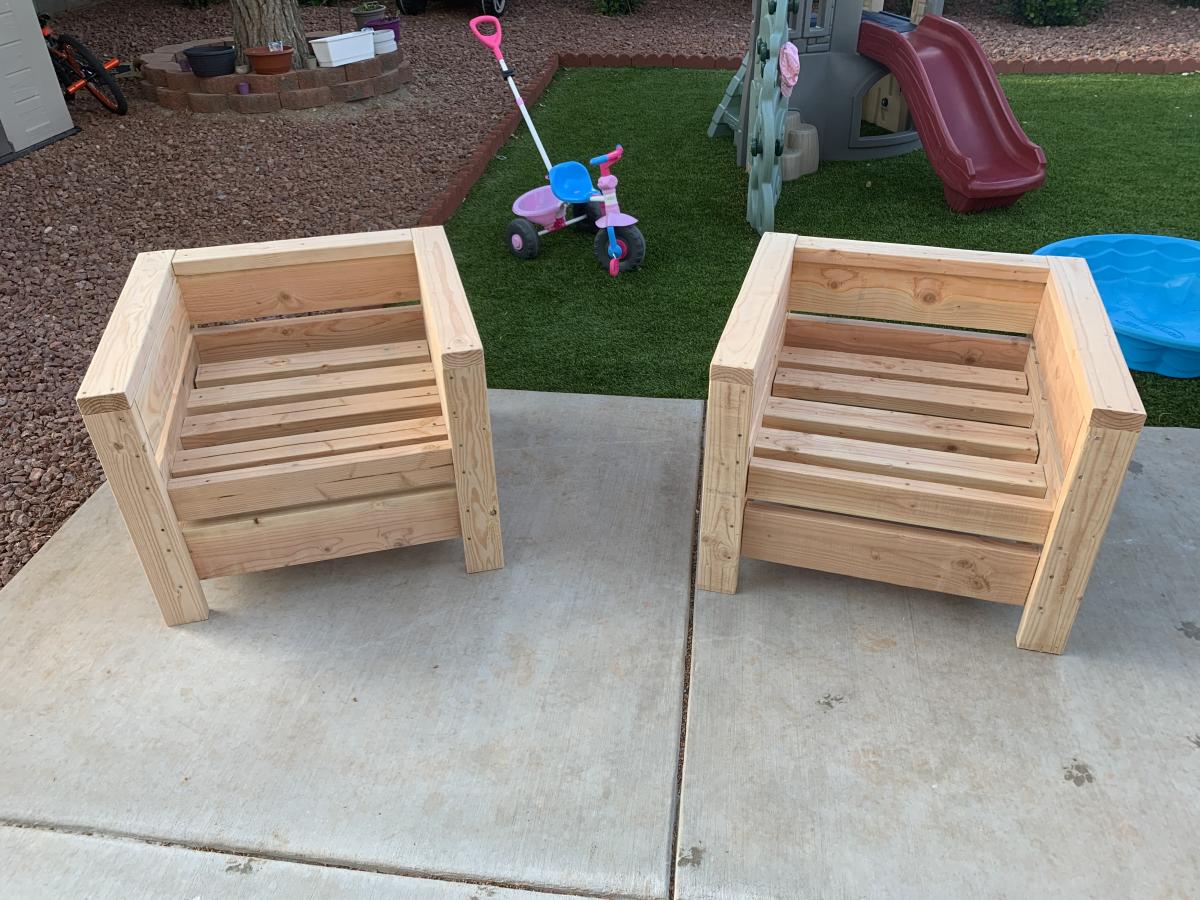
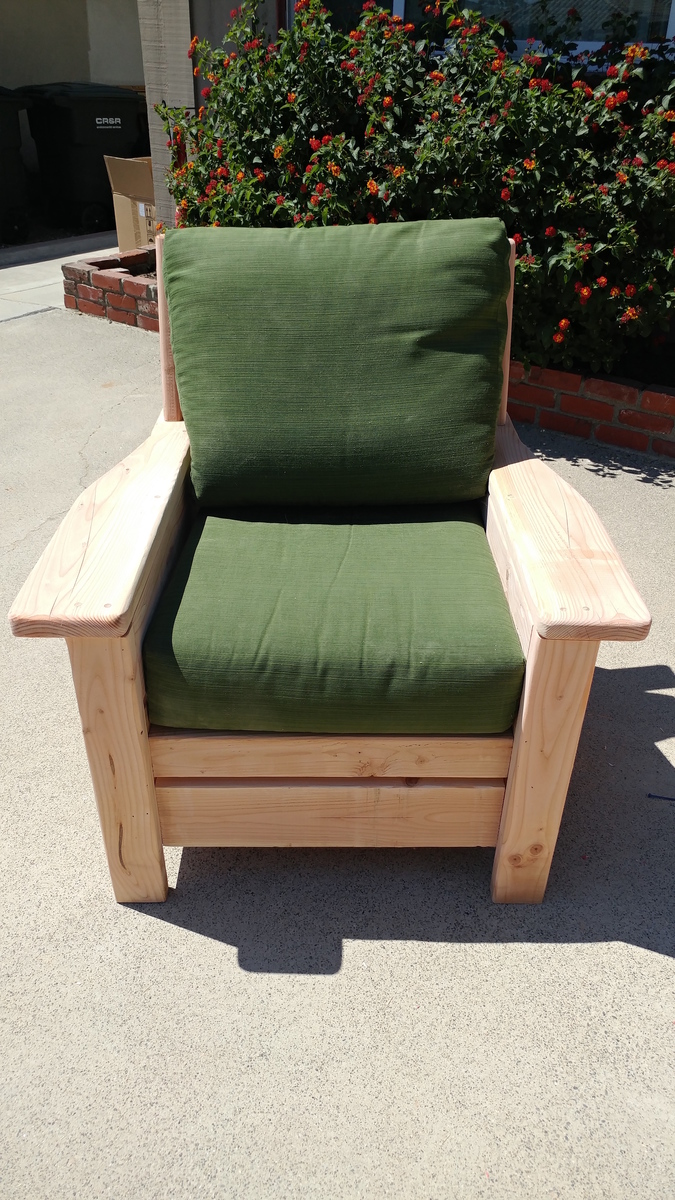
Modern Outdoor Chair with a twist
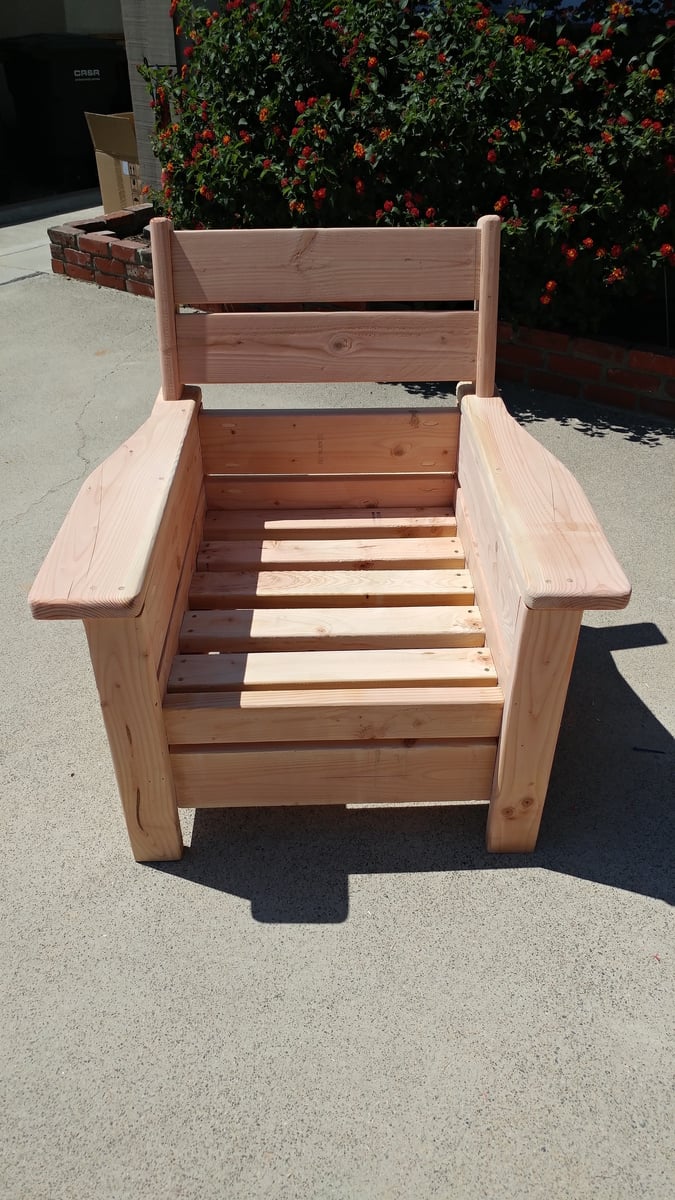
Taken from the Modern Outdoor chair project and added a back. Then decided that I love the andorak style chair arms and thus the Andrmodern chair was born..
Built from Plan(s)
Estimated Cost
$35.00
Estimated Time Investment
Afternoon Project (3-6 Hours)
Finish Used
Will use the Behr two in one
Recommended Skill Level
Beginner
Comments
Mon, 08/03/2020 - 09:02
I’d love to know how you…
I’d love to know how you made the changes, love it!

Thu, 03/18/2021 - 09:20
Modern outdoor chair with a twist
Could you please share how you added the back and arms to the modern chair plans.
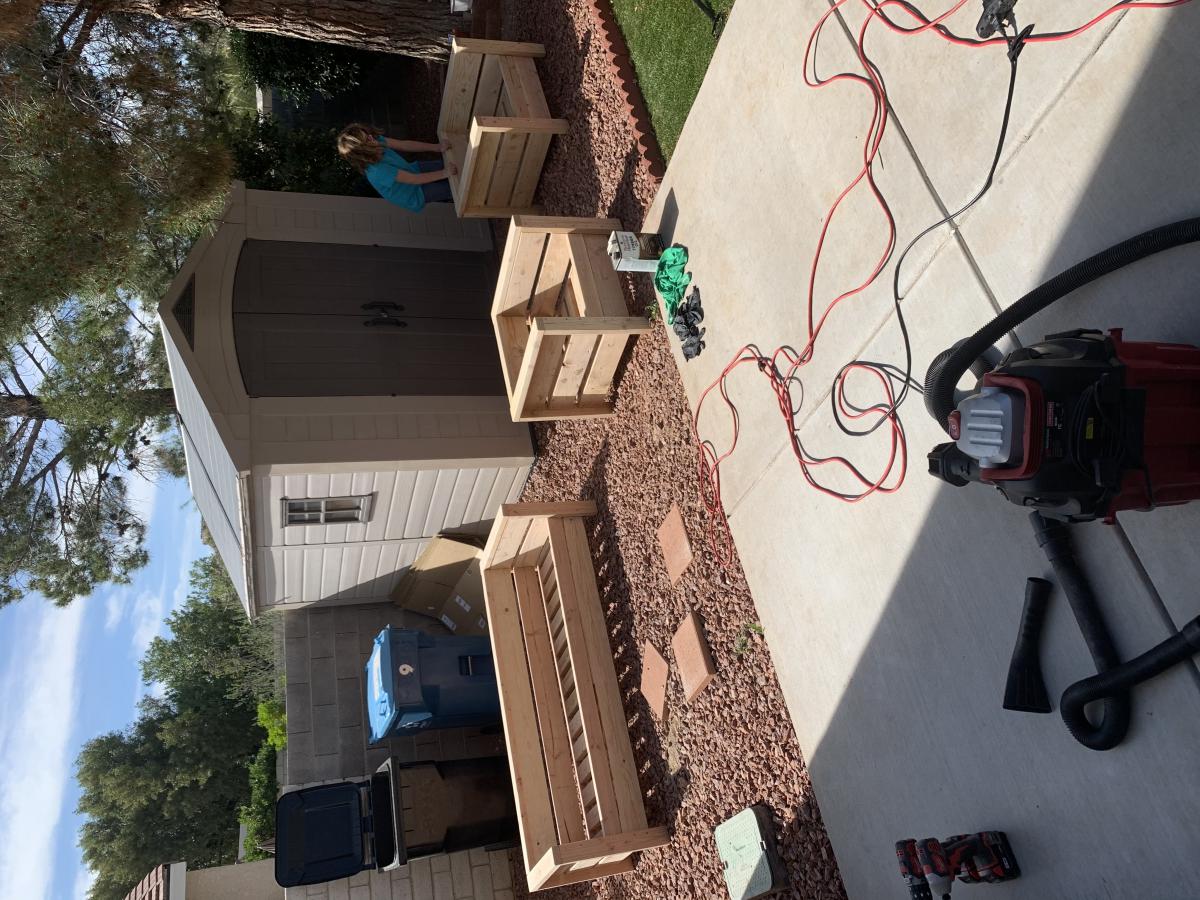
Modern Outdoor Patio Set
Built this over the weekend for my girlfriends sister. It was a great project and the whole family was able to work together on it, sanding and waterproofing it before assembling. The loveseat plans need a little tweaking. We ran ran the slats the same direction as the chair plans call for so we added a middle support for extra stability. We also pitched the seating down towards the back by 5* to make a more natural sitting position.
Built from Plan(s)
Estimated Cost
$300
Estimated Time Investment
Weekend Project (10-20 Hours)
Finish Used
Behr Cedar Natural Tone Waterproofing Stain and Sealer
Recommended Skill Level
Beginner
IKEA Hack 6" Tray Cabinet
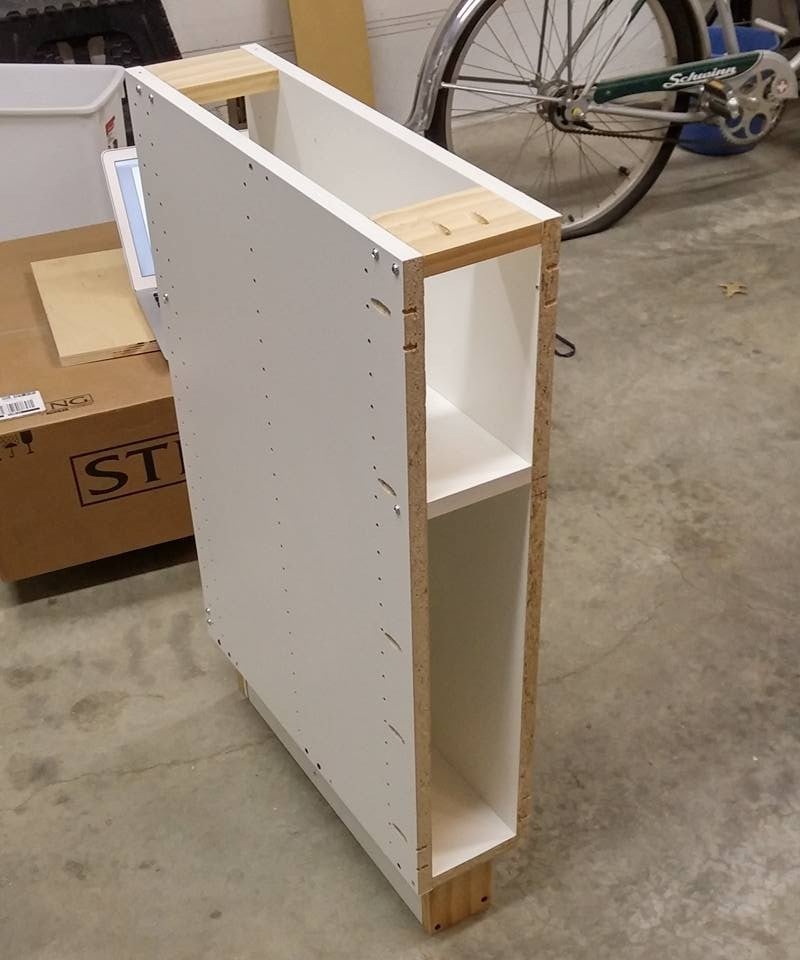
I'm happy to share with everyone my IKEA hack 6" tray cabinet.
I found a 24" cabinet box in IKEA's As-Is section and took it home for half price ($23)! I would have preferred plywood, but my table saw is a little small and cutting large sheets of plywood is a little scary. When I deconstructed the cabinet, it sustained some damage (as its particleboard), so if you try this at home, be careful! I ended up changing the depth to 22" in order to cut off the damaged piece, but that shouldnt be noticeable with average trays and cutting boards.
I used Ana's 6" tray cabinet plan and modified the dimensions a little for my planned space. It still needs the back, face frame and door (which will be a replacement drawer front from the cabinet manufacturer). I plan on building the face frame at the time the cabinets are installed, since this will go in between the 36" corner easy-reach and the 36" sink base. Once its done, I'll post updated pics!
Built from Plan(s)
Estimated Cost
$30 (cabinet and an aluminum straight edge tool to help me cut straight lines with my Dremel).
Estimated Time Investment
Afternoon Project (3-6 Hours)
Finish Used
Face frame will be painted to match factory cabinets
Recommended Skill Level
Intermediate
John's Washer/Dryer Pedestal

The wife has a hard time bending down so she wanted pedestals for the washer and dryer. The metal ones with a drawer were too tall. I showed her Sausha's and she really loved that design. I basically used the same construction plans idea from Sausha's project and some tips from Ryan's brag post. But, I wanted to beef it up some. I didn't like the L-bracket to attach the top and 4X4 legs. It didn't seem sturdy enough for me. I used my table saw to square the edges on the 4X4 posts and the 2X6 rails. Then I used my Kreg jig and glued and screwed everything together. I liked Ryan's trim ideas, so I used baseboard trim for the bottom and flipped it for the top trim. I made a 1/2" lip so if it were to vibrate, the washer/dryer would not fall. I put the trim on the bottom of the legs and was considering putting on the top but I put some different trim all the way around the bottom of the 2X6 rails. The wife liked that. I also added some carpet on the top to cut down on vibration and to help keep the units in place. I also put some 4X4 pieces of carpet on the bottom to keep the noise down and to help in moving it. I primed and used an gravity sprayer to paint it. Then I put 3 coats of polyacrylic to help in cleaning and to cut down on scratches from the laundry baskets.


Built from Plan(s)
Estimated Cost
150.00
Estimated Time Investment
Week Long Project (20 Hours or More)
Finish Used
Paint
Recommended Skill Level
Intermediate
Comments

Wed, 06/29/2016 - 14:31
Holy structure!
I think you could probably drive a truck on top of yours. :) I was a bit concerned about the strength of the construction when I first decided to build it, but I decided that since it would be stationary once I have it in place and the only force would be straight down, it would be fine. Once I got it put together, it was actually sturdier than I thought it was going to be...from a horizontal force perspective. Virtically, that thing could hold 100 washer/dryer pairs...the plywould would give out before the 2x4s and 4x4s would even budge.
Anyway, nice work! I love the Kreg Jig...I need one of those.
Sun, 01/29/2017 - 16:23
Great looking build, thanks for the detailed photos!
Great looking build, thanks for the detailed photos!
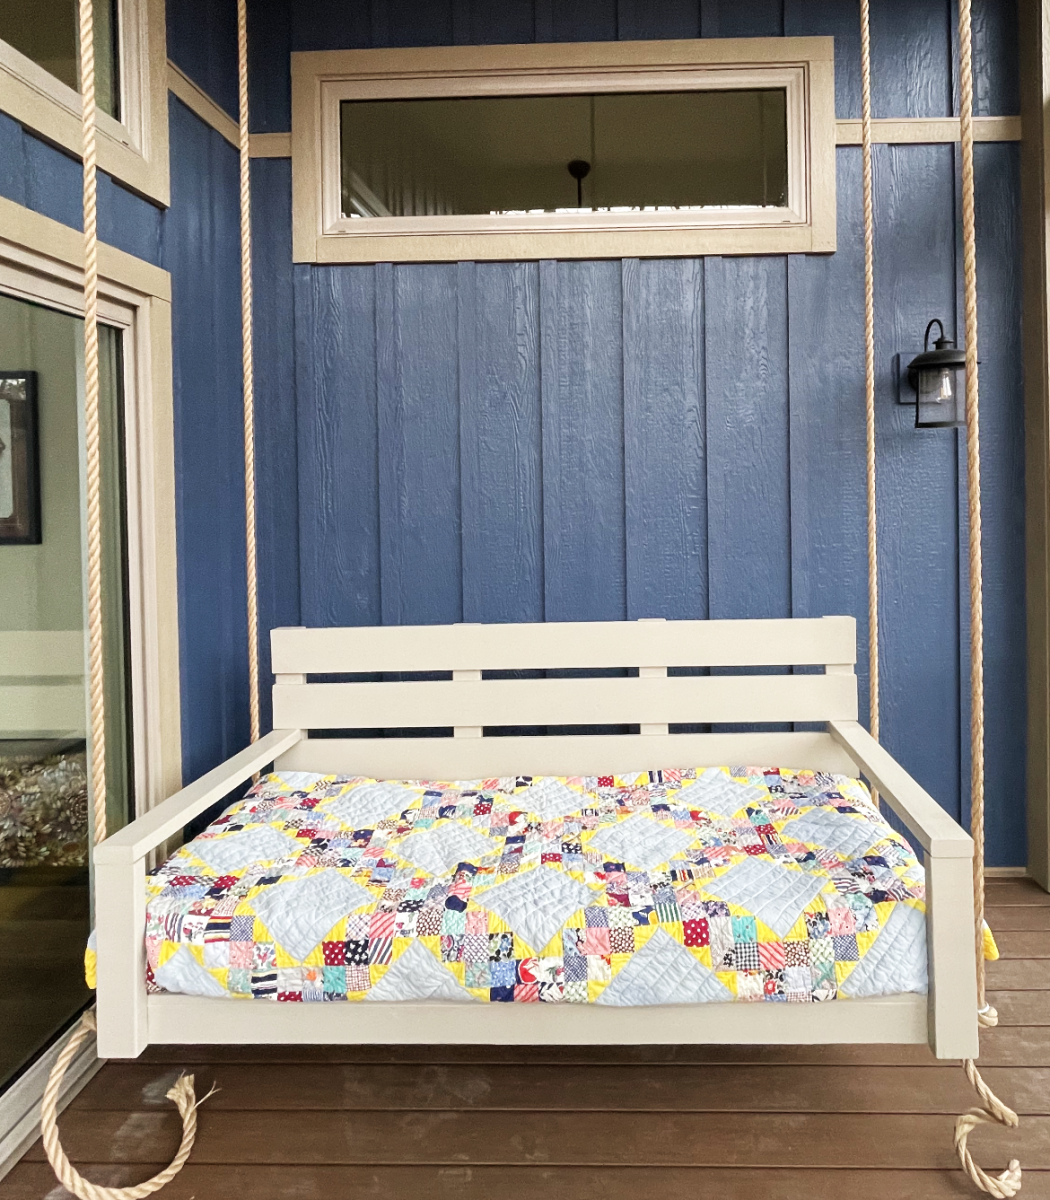
DIY Mattress Size Porch Swing
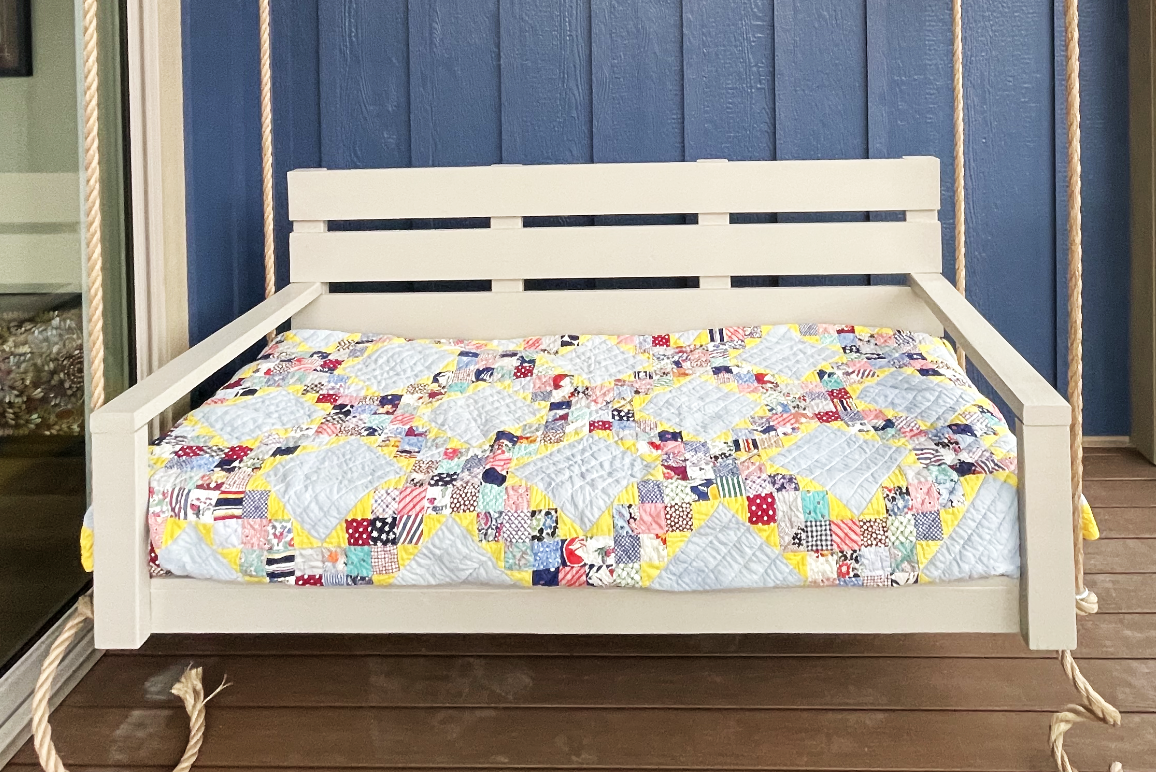
I altered the plans to fit a twin mattress. It’s a bonus sleeping area on the porch. My second project. I’m a 69 year old female and enjoying the building.
Lou Ann
Built from Plan(s)
Comments
Janettx
Mon, 09/20/2021 - 13:24
Nice job!!! I'm still using…
Nice job!!! I'm still using mine. I ended up putting 12"x12" pavers under each leg to extend their life. After the 2nd year now we get bumper crop out of ours each season.