Community Brag Posts

DIY Shed Chicken Coop 6x8

Submitted by Anonymous (not verified) on Thu, 05/19/2016 - 19:50

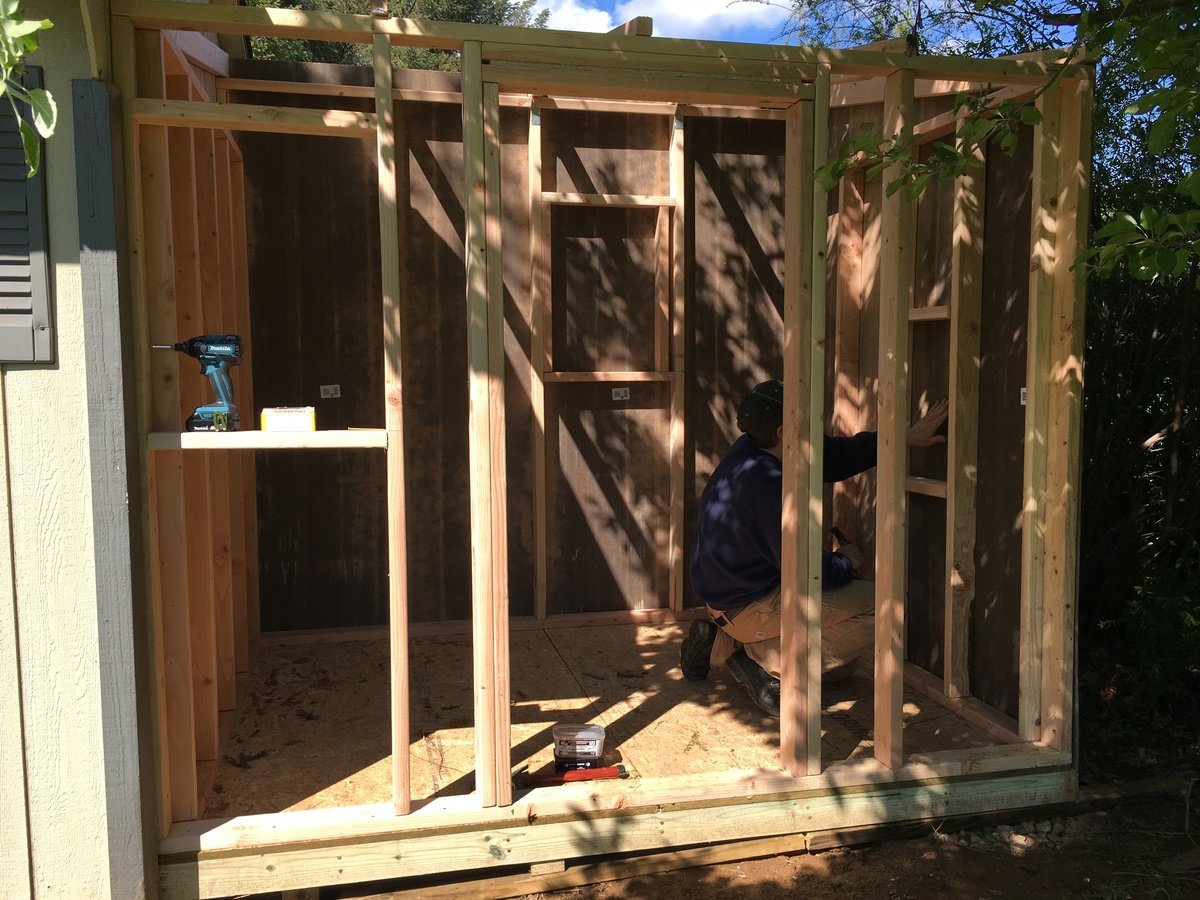
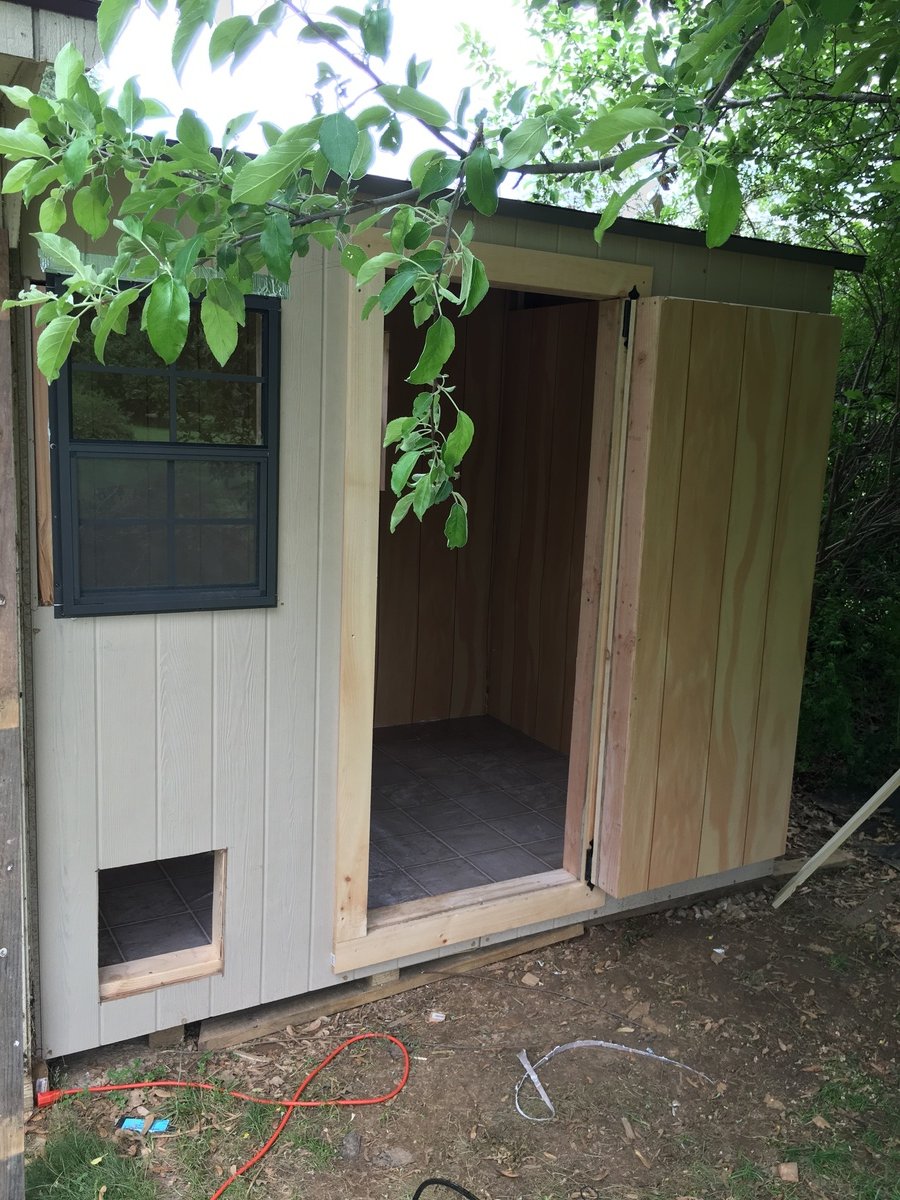
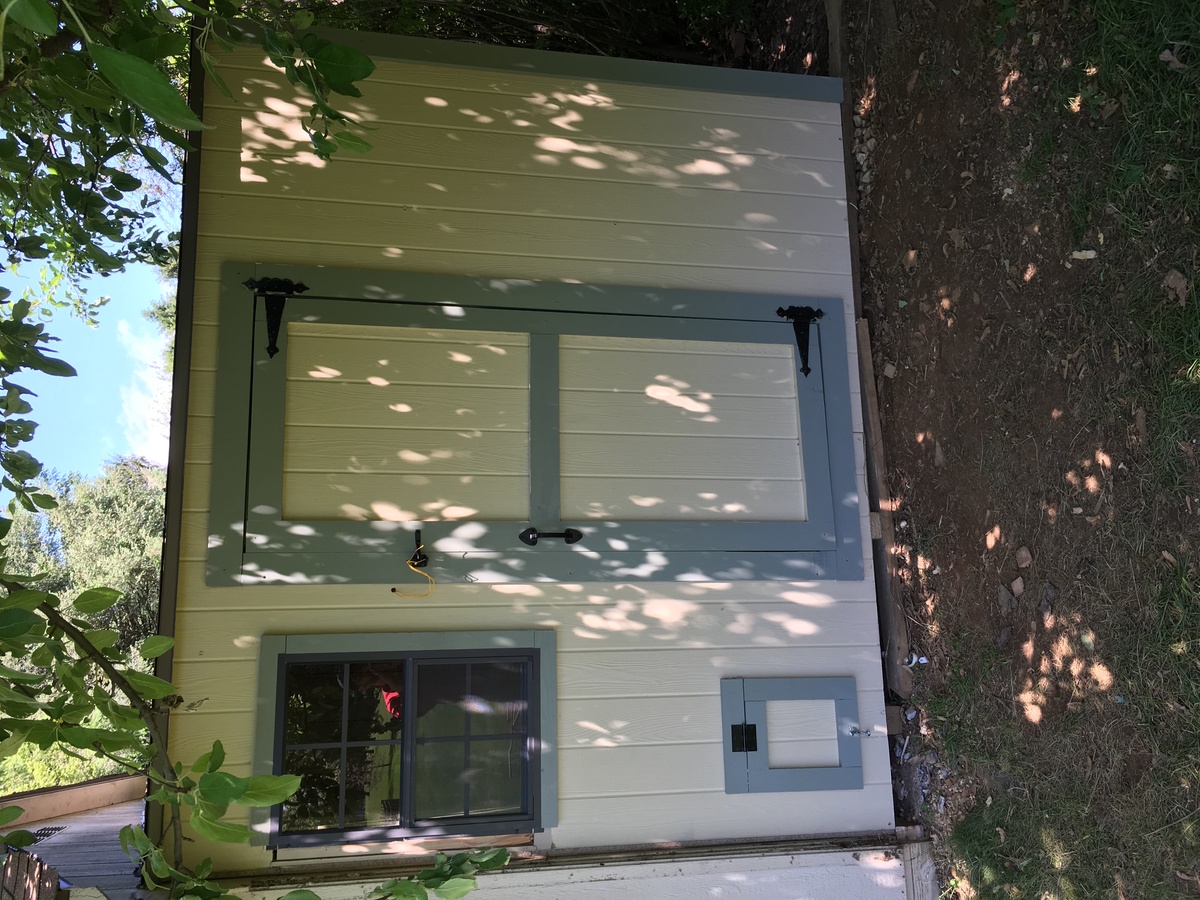
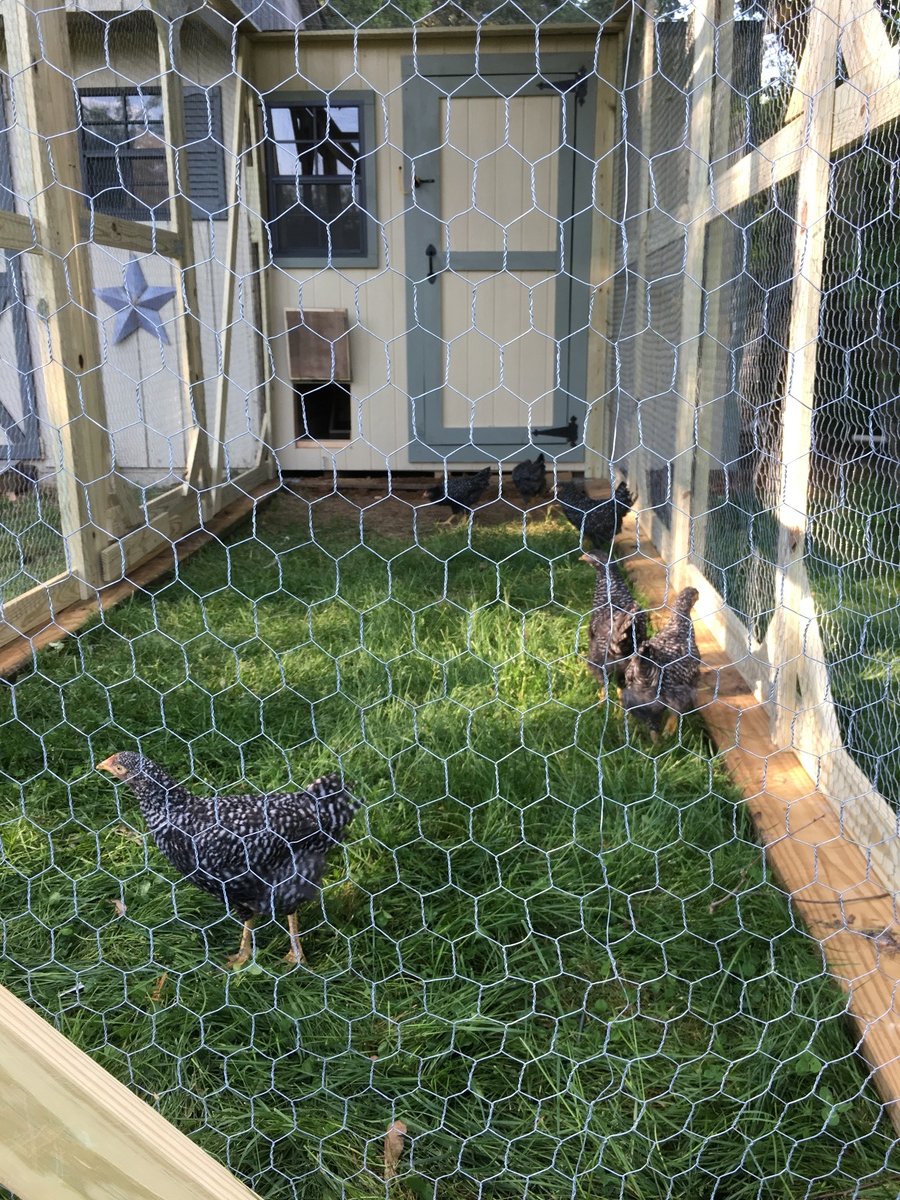
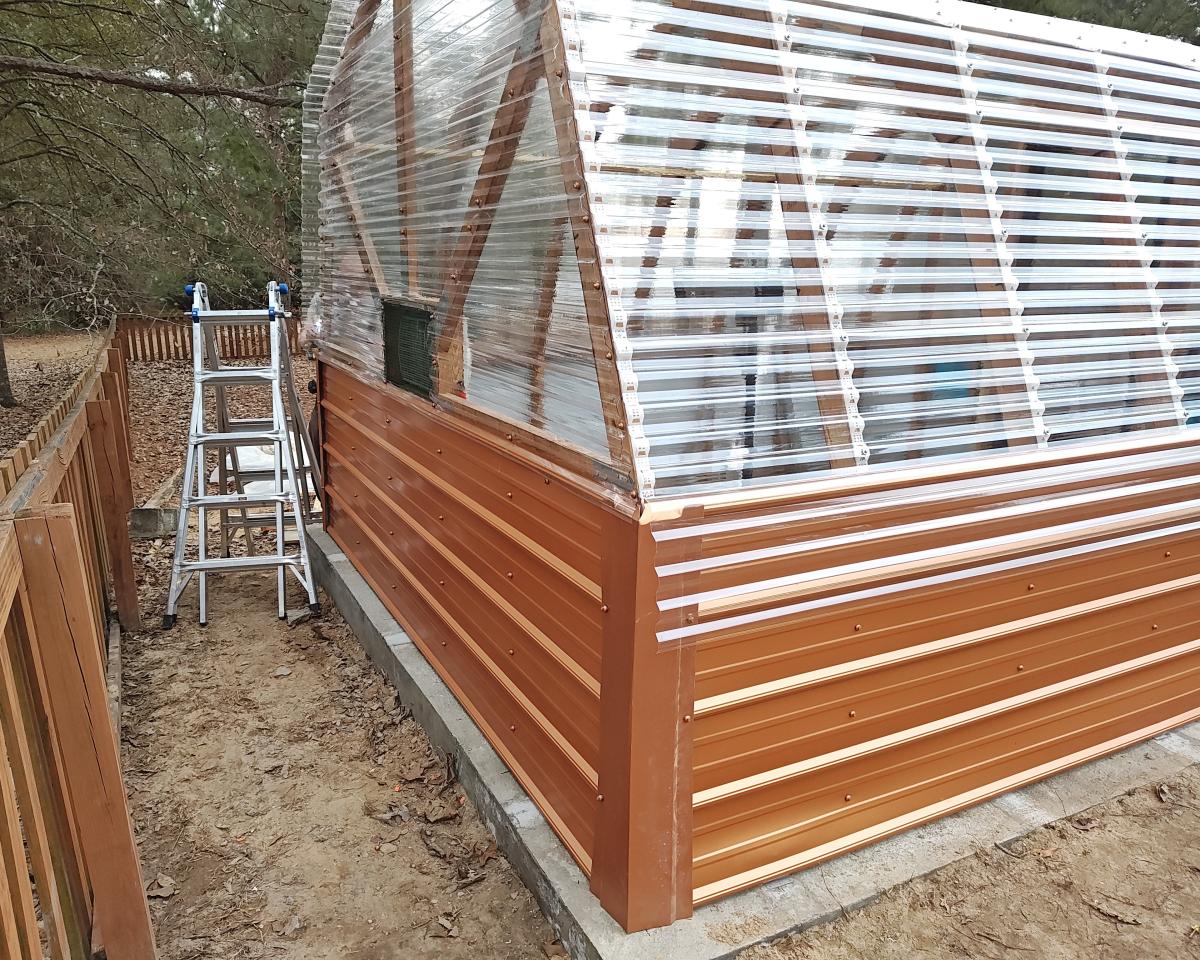
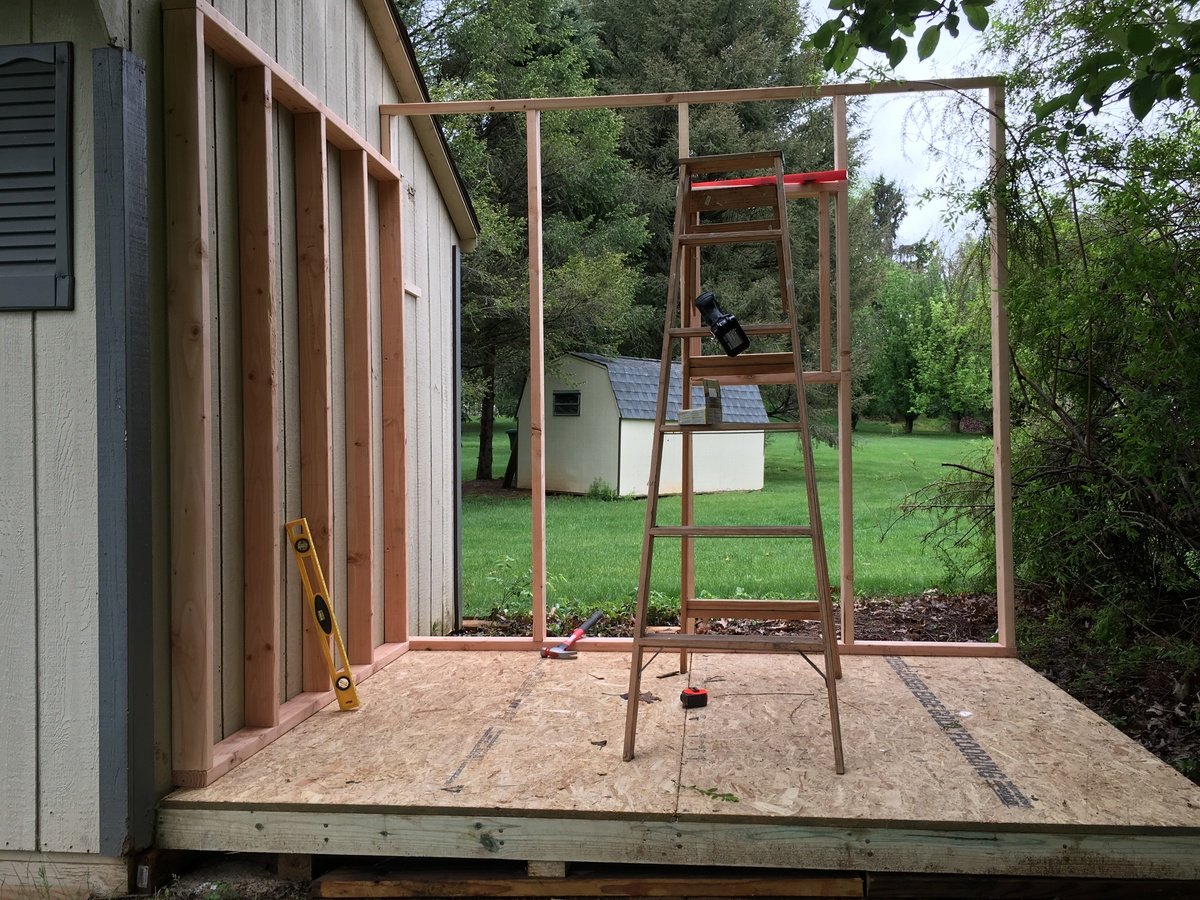
 The project was used using the same plans but I extended the floor to be 6 feet wide vice 4 feet the additional 2 feet provided the perfect amount space I wanted. I also added an extra windows  to get cross ventilation.    I also insulated the coop and put paneling on the walls and lenolium on the floors.  I dropped the back wall sheeting 1.5 inches for additional airflow since the shed doesn't have a ridge vent.   The plans are easy to follow and easily adaptable.   

Built from Plan(s)
Estimated Cost
$700. You may think that is a lot but you will learn a lot. Coops we were looking at were $1,200. This coop was less expensive and bigger and better plus you can say you built that.
Estimated Time Investment
Week Long Project (20 Hours or More)
Finish Used
T1-11 with home depot behr exterior paint.
Recommended Skill Level
Beginner

Comments

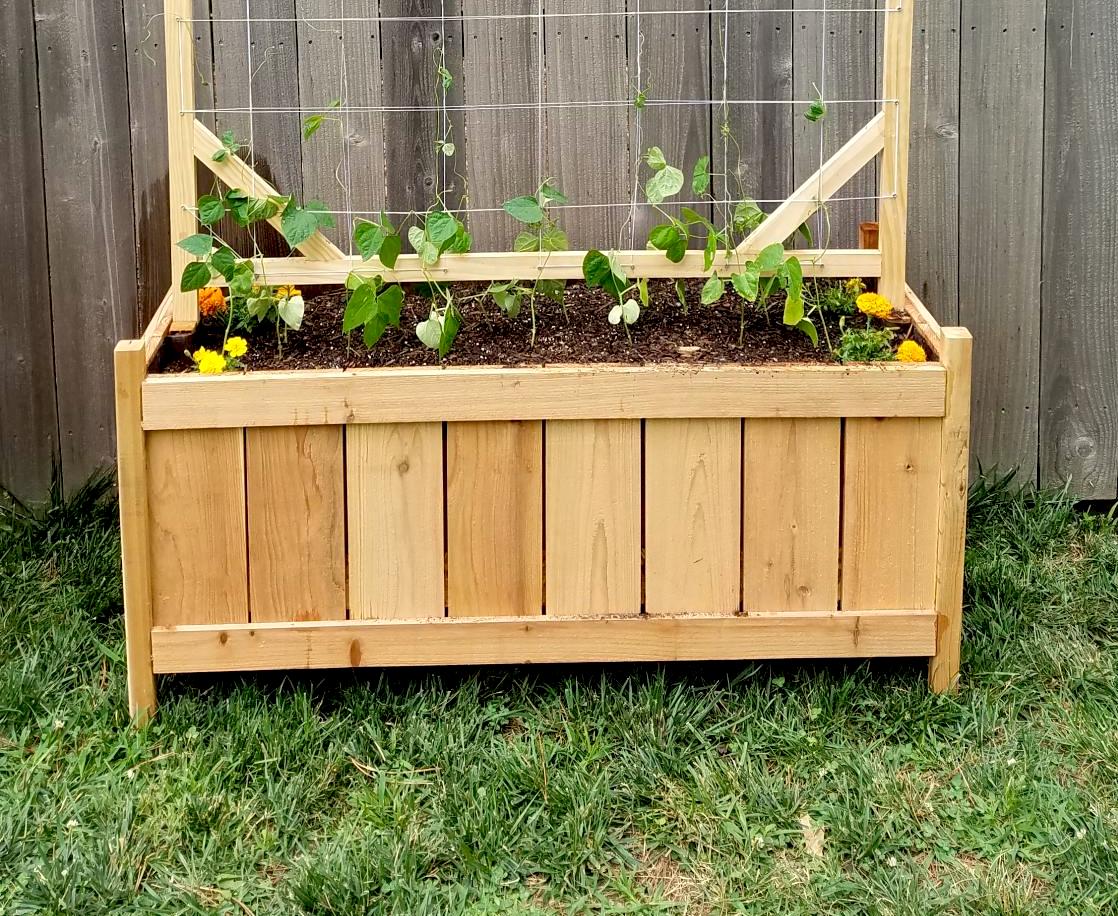
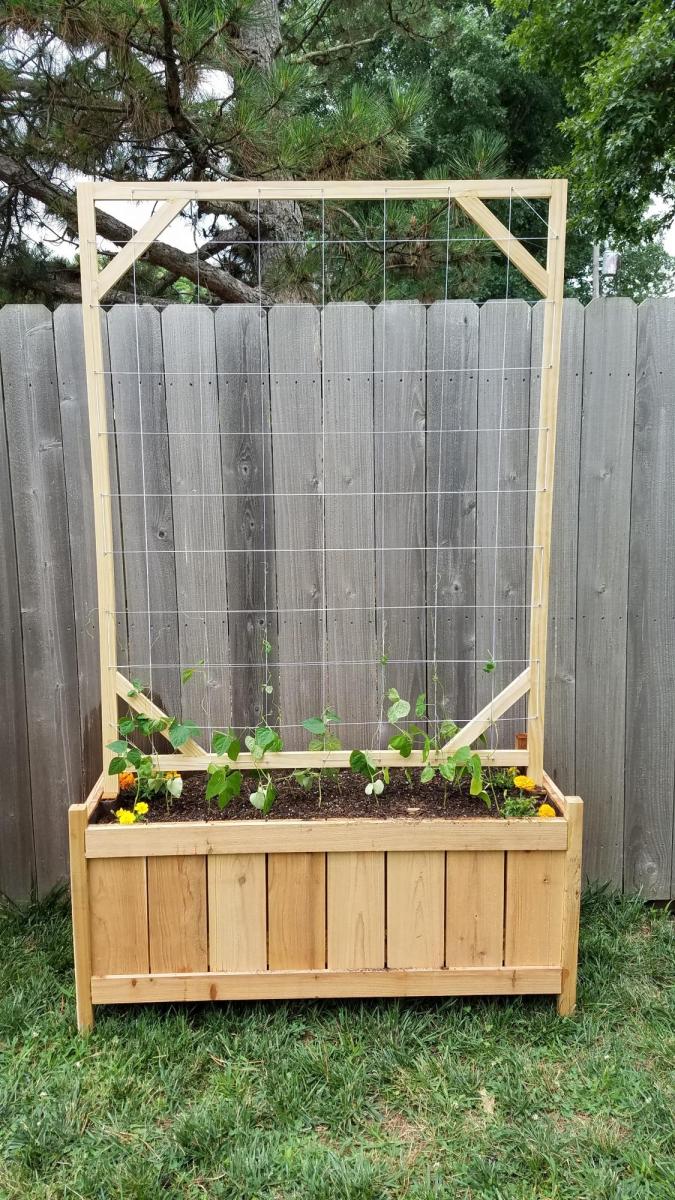
Cedar Planter for Pole Beans

Submitted by swhitead on Mon, 07/20/2020 - 10:41

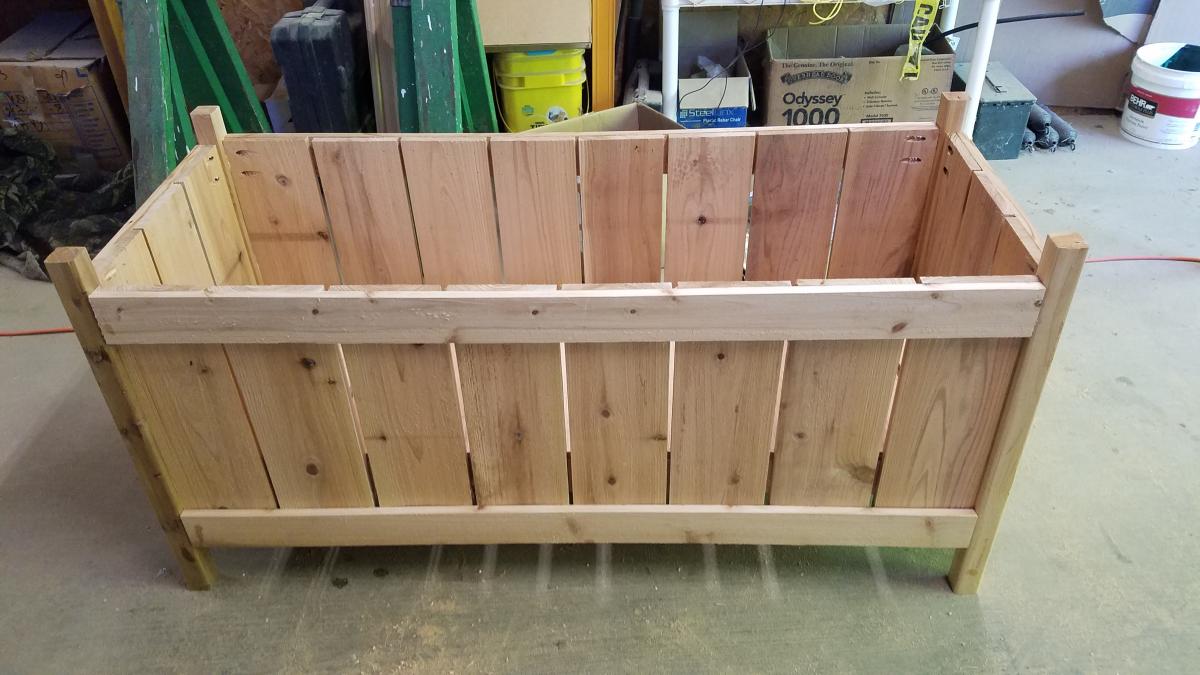
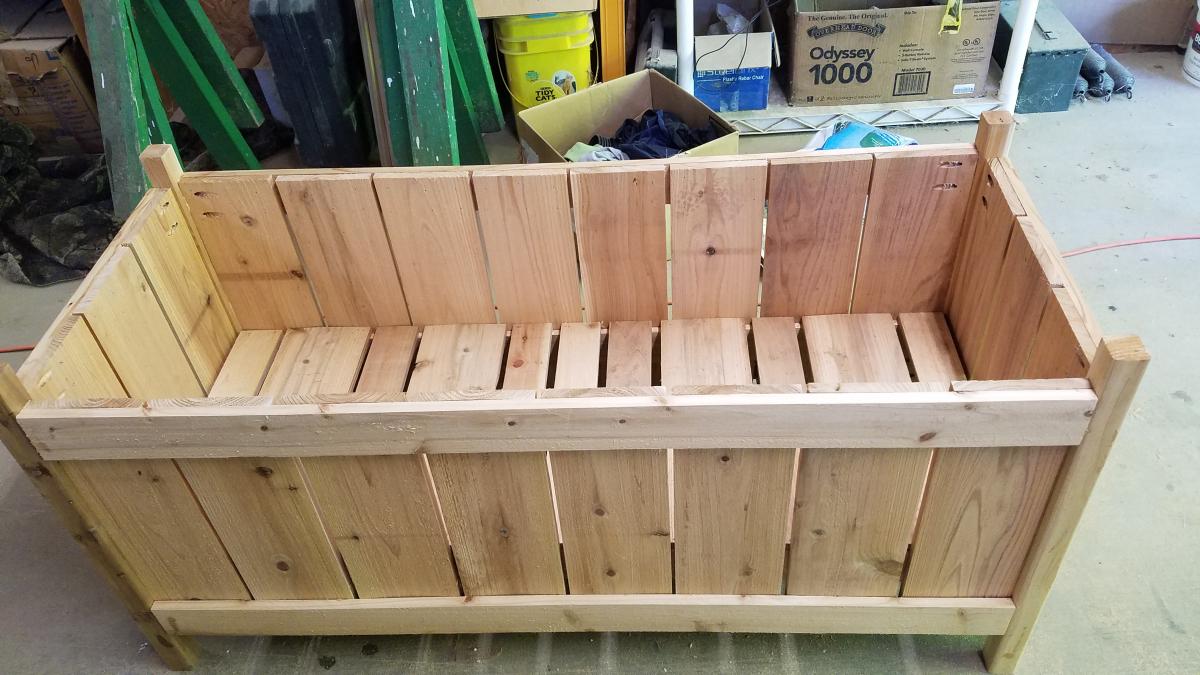
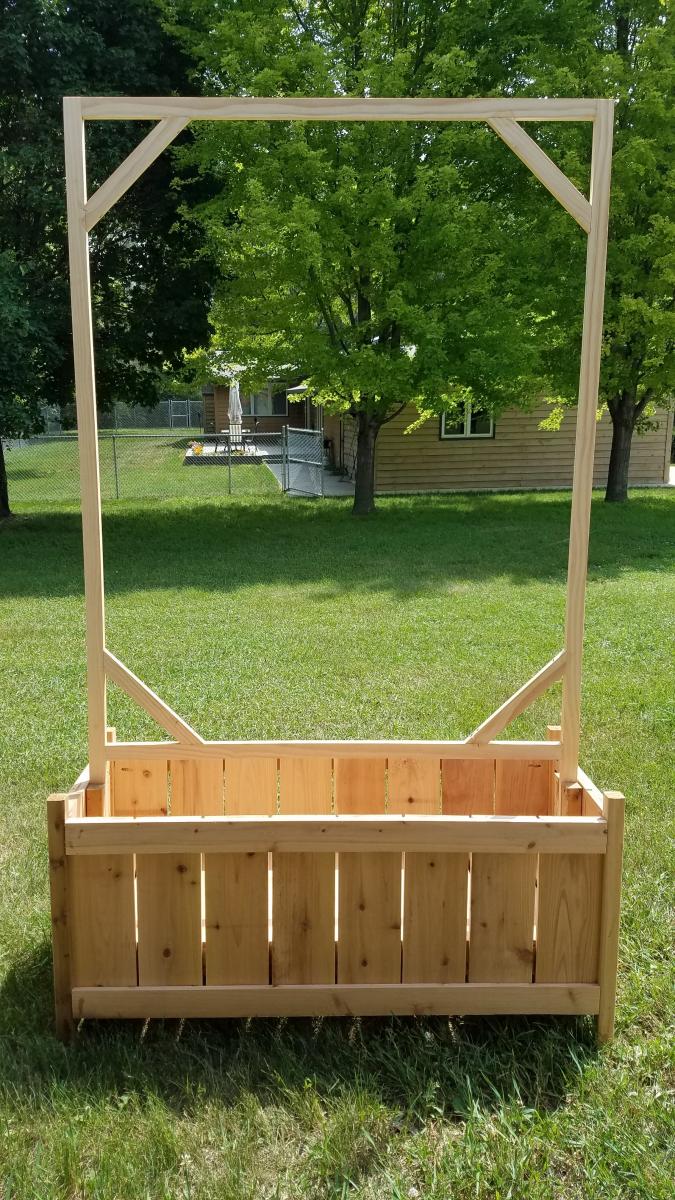
Increased width of box to 46" by using 8 fence boards instead of 3. put base at 12" down, lined box with landscaping fabric to hold dirt. Created trellis with 1x2 boards with 10" long corner braces, spaced screws 6" apart around edges and weaved cotton thread to create the trellis. Used 12" scraps of 2x2 to create a "slot" inside the center of the planter to support the trellis. Added container mix and green pole beans started in egg cartons earlier in the spring.

Built from Plan(s)
Estimated Cost
$35
Estimated Time Investment
Day Project (6-9 Hours)
Finish Used
None
Recommended Skill Level
Intermediate
Seasonal And Holiday

Laundry Basket Rack

This was a great last minute Christmas gift. Took me a little over two hours. Made completely out if pallet wood.

Comments

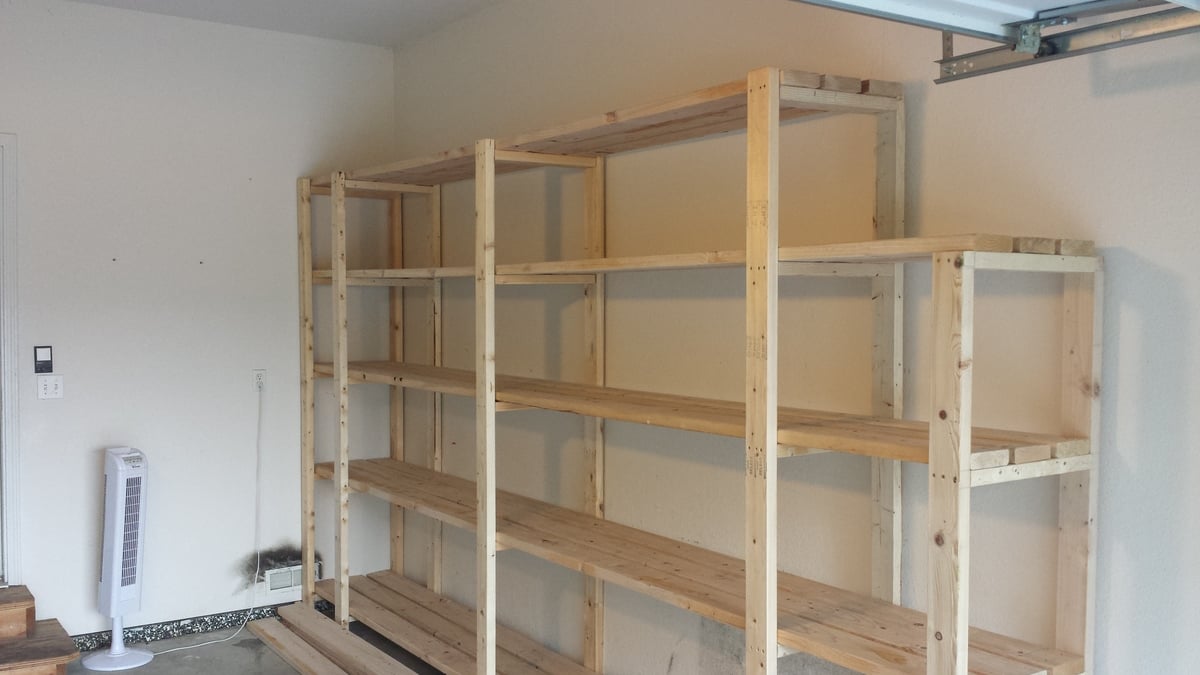
Garage Shelving - Some minor mods to Ana's great basic plan

My father-in-law and I knocked this project out in about 5 hours including the trip to the lumber yard. You've got a great basic design here! A few modifications we made:

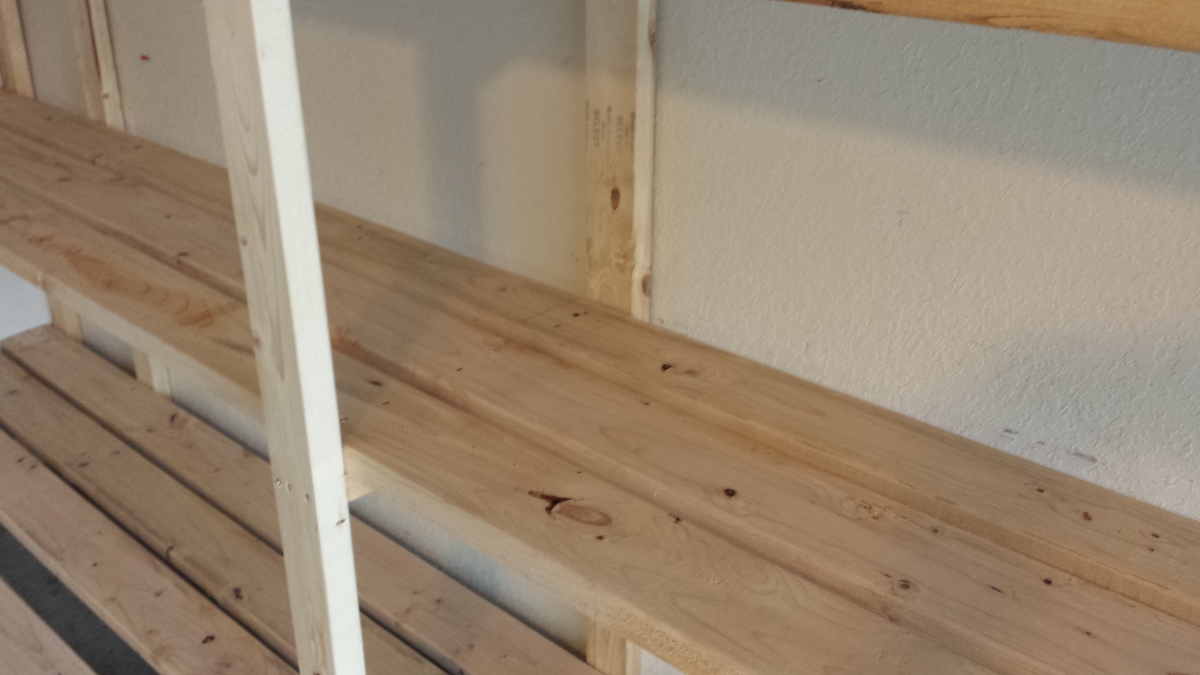
1. I thought the depth of the shelves in the original plan was a little too shallow so I used 3 2"X6"s instead of the 4 2"x4"s. That made the shelves 1 1/2" deeper. Although 2"x6"s are obviously more expensive, the overall cost for the project didn't change much because we only had to use 3 boards per shelf instead of 4. This also reduced the amount of screwing and made it easier to position the shelf boards without taking measurements since we only had one middle board to deal with (instead of 2 with the 2"x4"s). We just eyeballed the spacing of the middle shelf board as we worked.

2. Since our garage has a 10' ceiling, I decided to go 8' tall with the unit. This allowed us to add a 5th shelf.

3. Some oversized tubs can be 18-20" high or more so I varied the height of each shelf -- 24" at the bottom, then 20", 18" and 16". There's approx. 24" available between the top shelf and the ceiling.

4. Due to the position of the garage door track, I had to notch out a couple feet at one side. The end support piece is only 6' high.

5. Since many storage tubs can be 16-18" wide, I made sure that there was at least 54" between 3 of the vertical support structures. This will allow us to store 3 tubs side-by-side and maximize storage. You might notice that I have two vertical supports that appear to be very close together near the back wall. I did this so I would have something on that side to attach more shelving to on that short wall where the garage door opener is. 

The only cuts we had to make for this entire project were for the 18 1/2" 'braces' or support pieces on the vertical ladder structures. The shelves are either 14' or 12' (top shelf only) and the vertical 2"x4"s are either 8' or 6'. Most lumber yards will carry these lengths in either 2"x4"s or 2"x6"s. 

We didn't use any wood glue, and I admit this may come back to haunt me. However, to get a good fit and eliminate gaps, I used clamps I already owned to squeeze the boards together before adding the screws. Everything feels very solid and sturdy to me. 

Because of the extra height compared with the original plan, I was worried about it possibly tipping over (we have a 10-year-old who likes to climb frown) so I made sure that 3 of the supports are lined up with the wall studs. After leveling the entire unit, I plan to anchor it to the wall using 3 1/2" screws.

So for about $187 in lumber and maybe $20 in construction screws, I've got 76 feet of STURDY shelving that should accommodate hundreds of pounds! Not a bad investment at all...
 

Estimated Cost
$187 lumber + $20 construction screws
Estimated Time Investment
Afternoon Project (3-6 Hours)
Finish Used
None right now, but my wife wants to sand it and apply marine varnish to give it a shiny, yet still unfinished, look.
Recommended Skill Level
Beginner

Comments

My Simple Outdoor Lounge Chair with 2x4 modification

I modified this chair with 2x4's as the base and 2x2 for decoration on arms, this is prior to sanding and finishing

Built from Plan(s)
Estimated Cost
$15-$20 dollars, depending on local lumber prices and finishing options.
Estimated Time Investment
An Hour or Two (0-2 Hours)
Finish Used
Unfinished
Recommended Skill Level
Beginner

Comments

RandyW

Sat, 06/13/2020 - 16:33

I always take my sander to the sharp edges and round them off

BLUE BENCH

Submitted by spustay74 on Mon, 06/16/2014 - 05:26

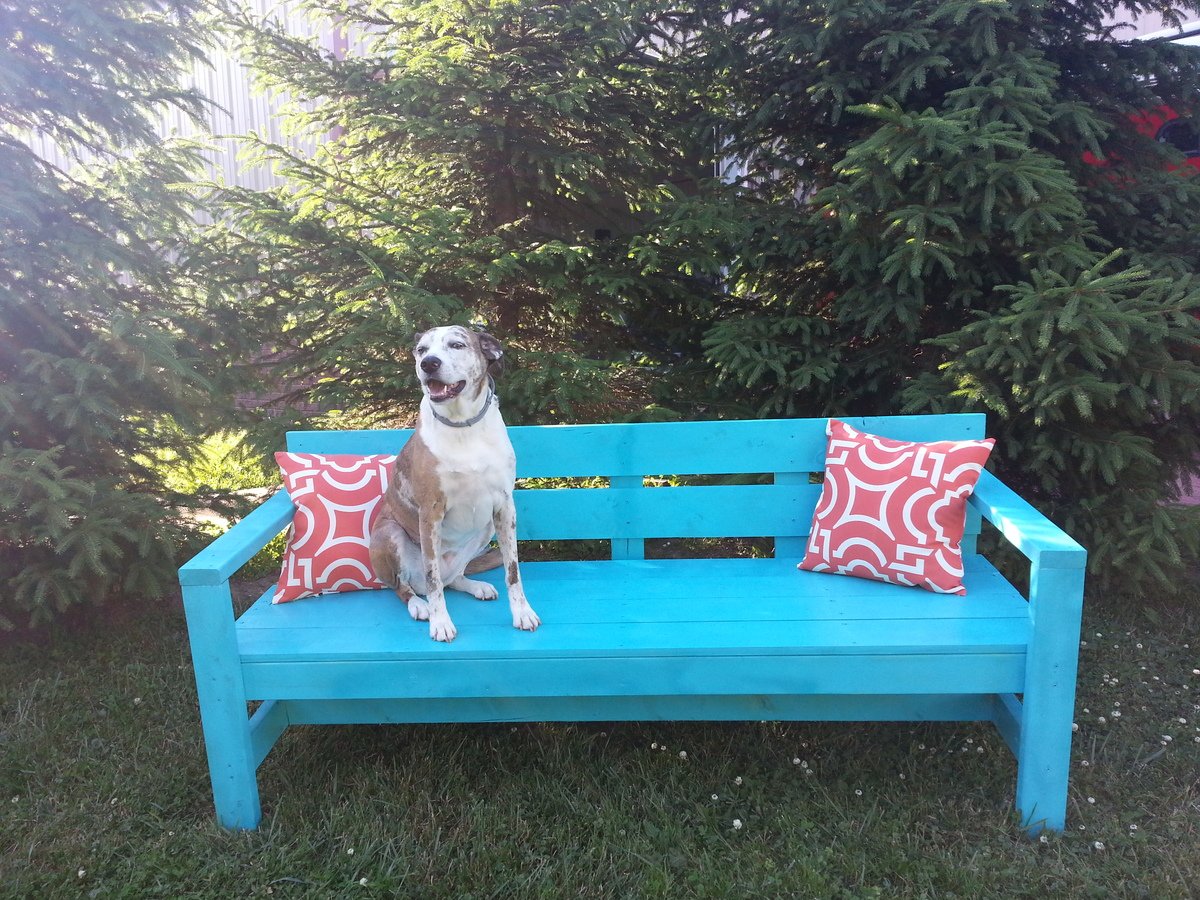
This was my wife and I's first Ana White project. We are now hooked, and loved spending time together building something we will enjoy for years, and our dog mindy of course was the first to test our beautiful bench out!

Thanks Ana,

Steve & Courtney

Built from Plan(s)
Estimated Cost
80$
Estimated Time Investment
Day Project (6-9 Hours)
Finish Used
Rustoleum Spray paint, Clear coat sealer. If we did it again, we would use regular exterior paint instead of spray paint.
Recommended Skill Level
Beginner

Comments

Square Picnic Table Project

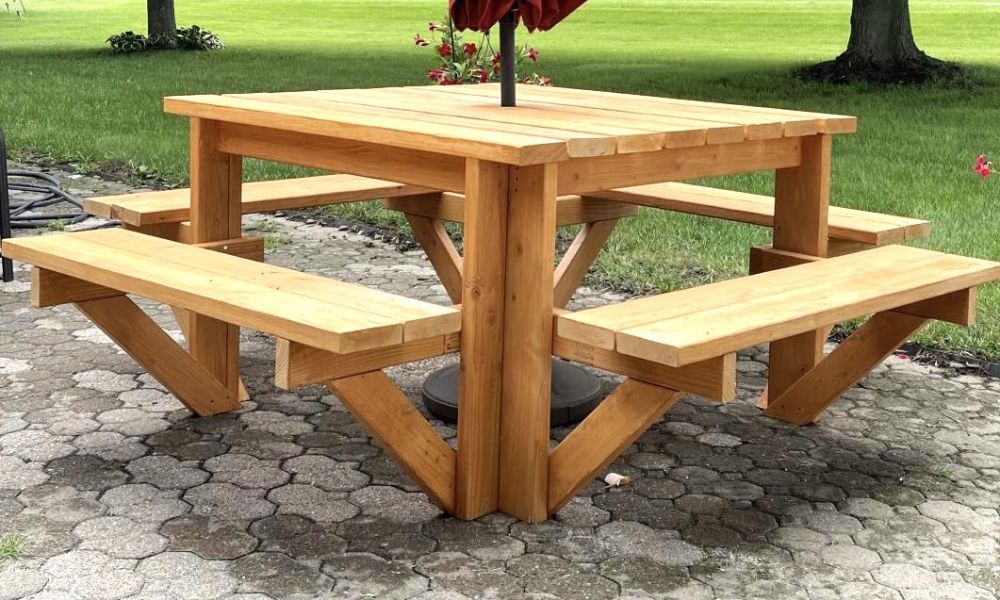
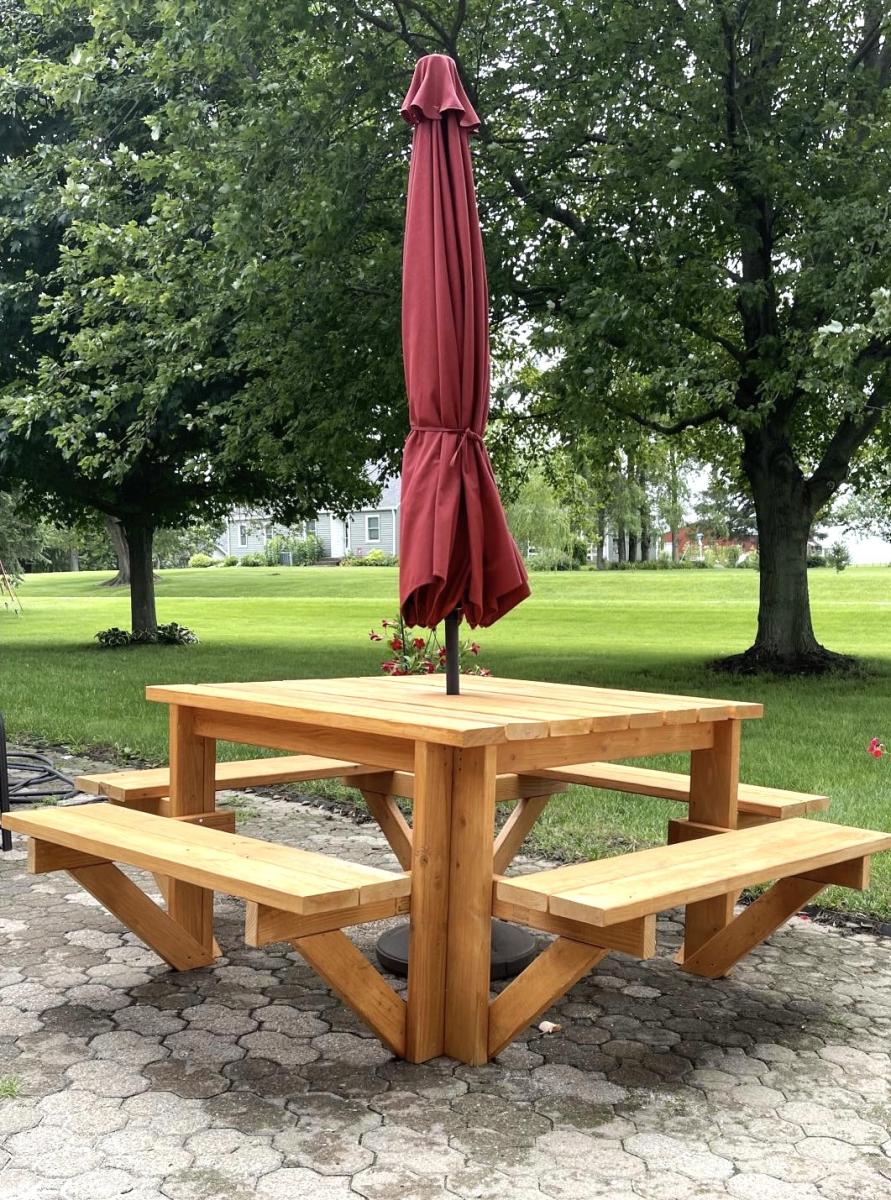
This was a great summer project. The table looks great and it was any easy build. Doesn’t get any better than this. I added a hole in the center of the table for my umbrella and used the longer screws for more frame stability.

Built from Plan(s)
Estimated Cost
$200.00
Estimated Time Investment
Day Project (6-9 Hours)
Finish Used
Used semi transparent cedar tone stain. Lightly sanded edges and surfaces. Applied stain with a brush before assembly.

Comments

Seasonal And Holiday

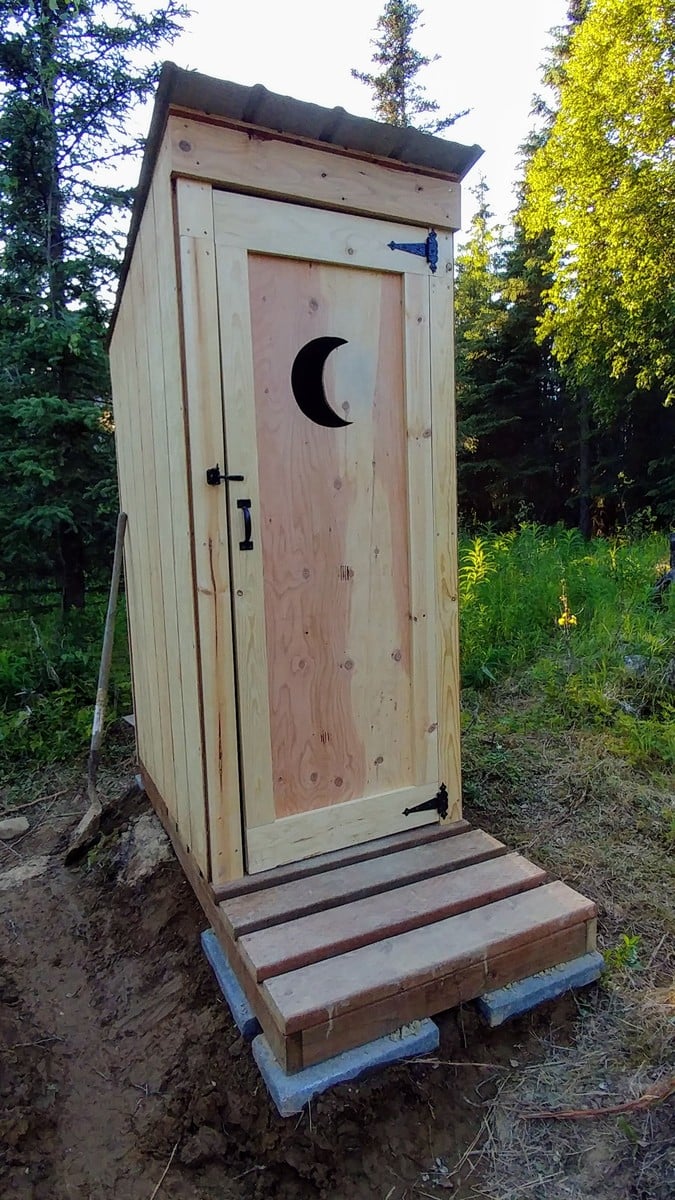
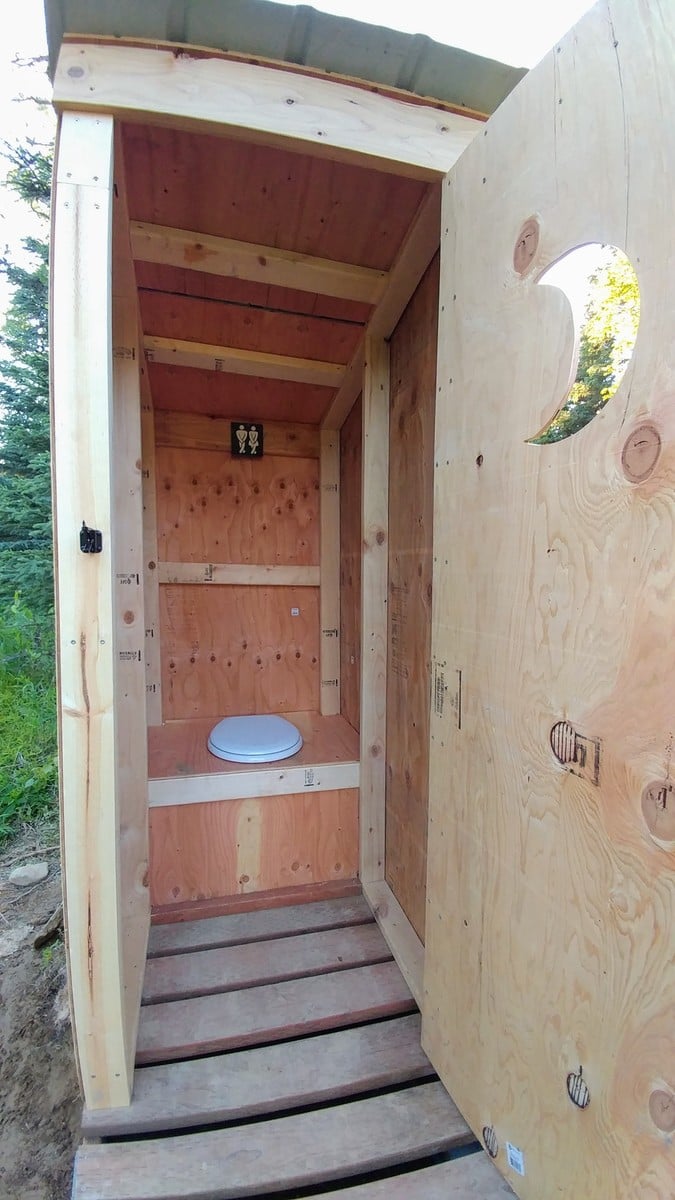
Simple Outhouse

I built this outhouse to go with a dry cabin I'm working on, and also as an emergency backup for my house. I used treated lumber on the base/deck and splurged on T-111 for the siding. I wanted to use greenhouse polycarbonate for the roof, but found a piece of metal roofing in my shed that was exactly the right size so I used that instead. I thought about doing a fancy cutout on the door but ended up going with a half moon because it was easy. I'm thinking about cutting out stars of different sizes all over the rest of the door to let in more light. I'll trim and stain it next summer.

Built from Plan(s)
Estimated Cost
$450 - I used T-111 which is $40/sheet here in Alaska. I also used treated lumber where recommended and stainless steel screws.
Estimated Time Investment
Weekend Project (10-20 Hours)
Recommended Skill Level
Beginner

Comments

CH

Mon, 01/13/2020 - 15:25

WHAT HAPPENS TO THE 'STUFF' THAT YOU DEPOSIT IN THE TOILET?  I DIDN'T READ ANYTHING ABOUT DIGGING A PIT/TREATMENTS, ETC.  PLEASE LET ME KNOW.  THANK YOU!  CH.

Clubhouse based on Ana's Plan

Submitted by MattSl on Tue, 05/03/2011 - 09:18

I used Ana's plan as a base.

I changed it from 8x8 to 8x12, made the 4x4x8's to 4x4x10' for a higher main platform and swing platform, and added a 12' long monkey bar set to the other side. Also, an 8' climbing wall and a plank walkway to accompany the two slides.

For the clubhouse, I used Hardiplank 4x8 sheets for the siding and an EZ-Framer kit for the structure itself.

The slides I purchased from Lowes, monkey bars from Amazon, and the swing frame braces from Amazon as well. The swing kits I got from ebay.

Estimated Cost
1500
Estimated Time Investment
Week Long Project (20 Hours or More)
Recommended Skill Level
Intermediate
Seasonal And Holiday

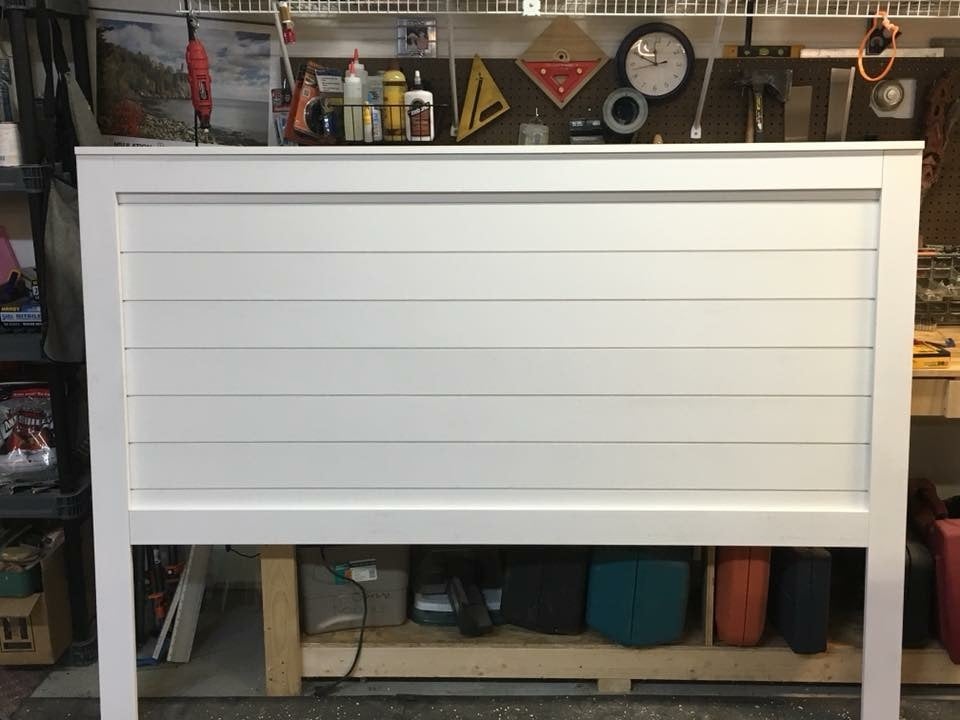
King Shiplap Headboard.

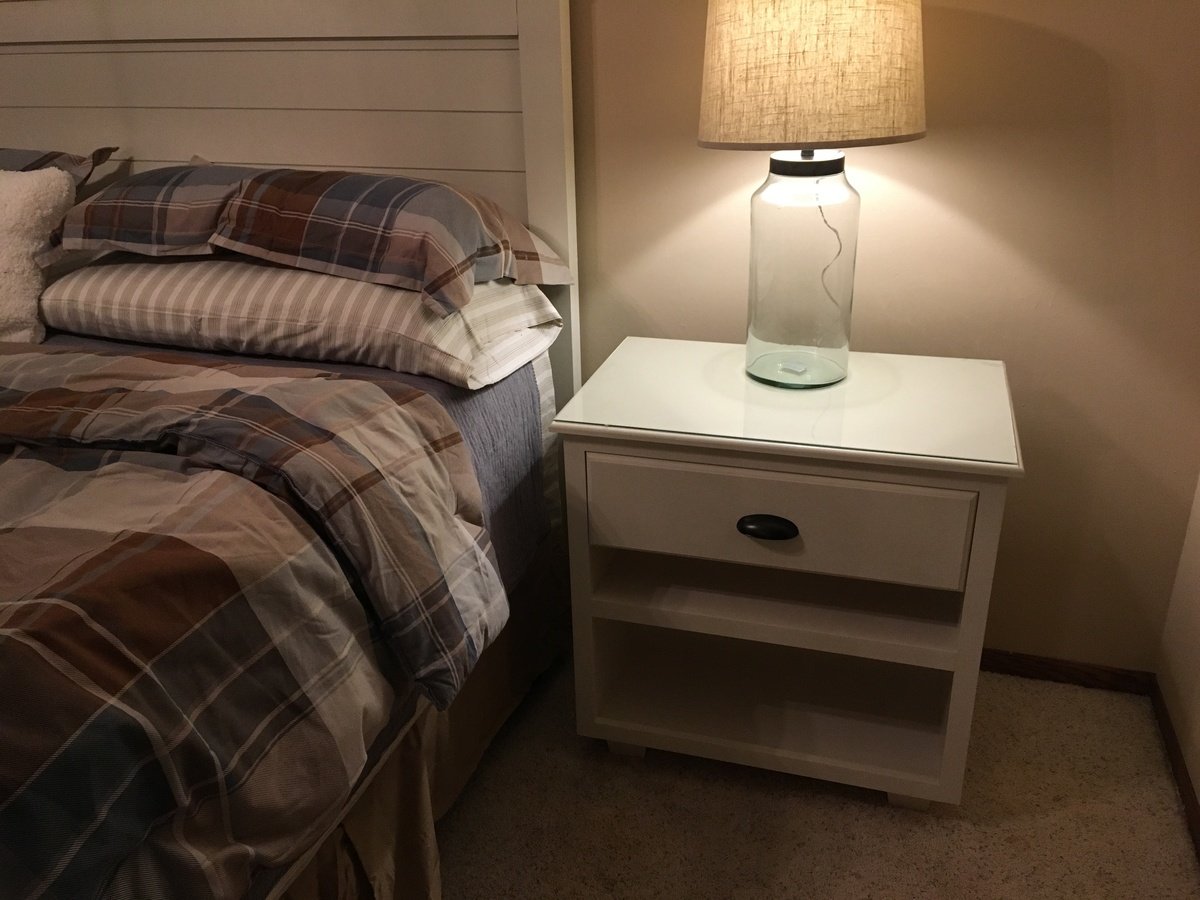
The Beauty Queen described a headboard with shiplap and sort of cottage style. I modified the Ana White plan to fit my needs and the wife’s taste. I used the preprimed shiplap and 1x material from the big box store so it was a little more expensive but still very reasonable. Then I made side tables. 

Estimated Cost
$100
Estimated Time Investment
Afternoon Project (3-6 Hours)
Finish Used
Marquee Semi-gloss enamel in antique white
Recommended Skill Level
Beginner

Modified Garage Shelf (w/ Workbench)

Submitted by Anonymous (not verified) on Thu, 06/08/2017 - 11:15

Great plans allow for versatility and easy customization. Put the whole thing together in a day w/ one other person. My set up is 16' long - 5' on the side shelves and 6' for the workbench. Added a pegboard and fluorescent light under the top middle shelves. I'm also designing a slim drawer to go under the workbencheck area. Thanks a bunch!

Estimated Cost
~$150 including pegboard.
Estimated Time Investment
Afternoon Project (3-6 Hours)
Finish Used
Will stain dark in the future
Recommended Skill Level
Starter Project

Comments

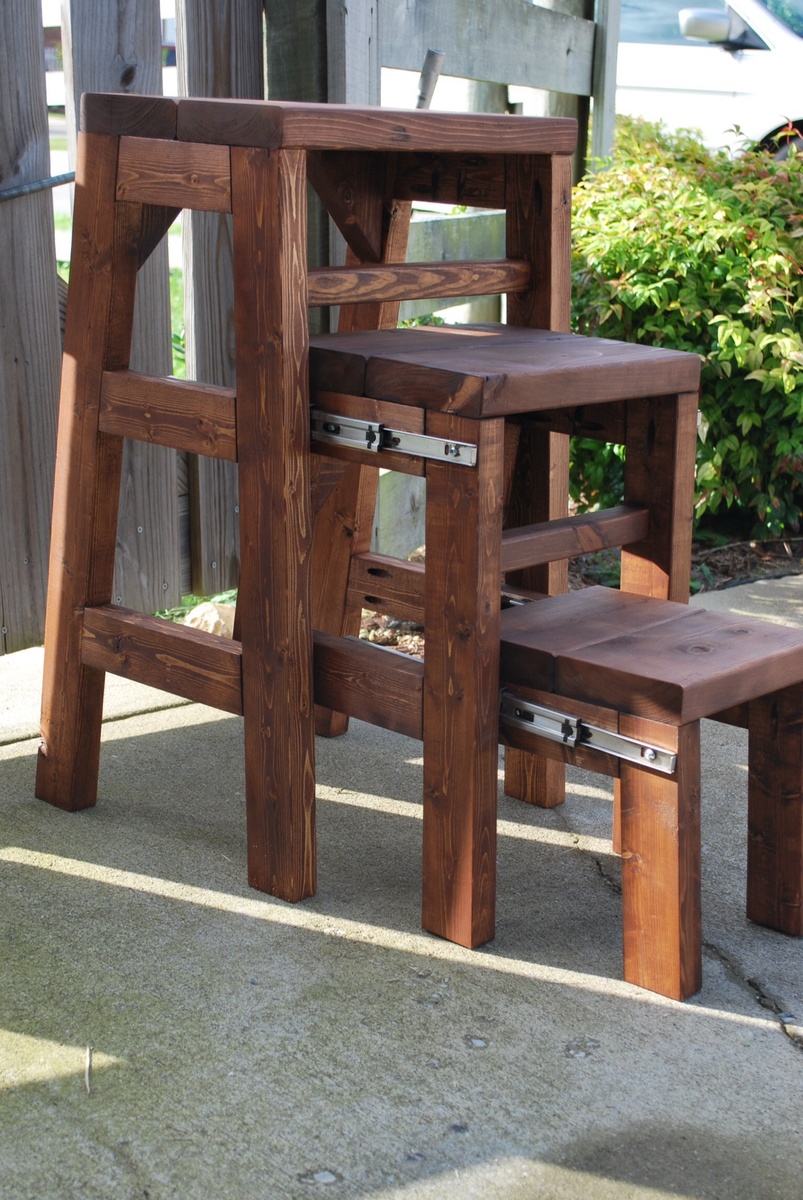
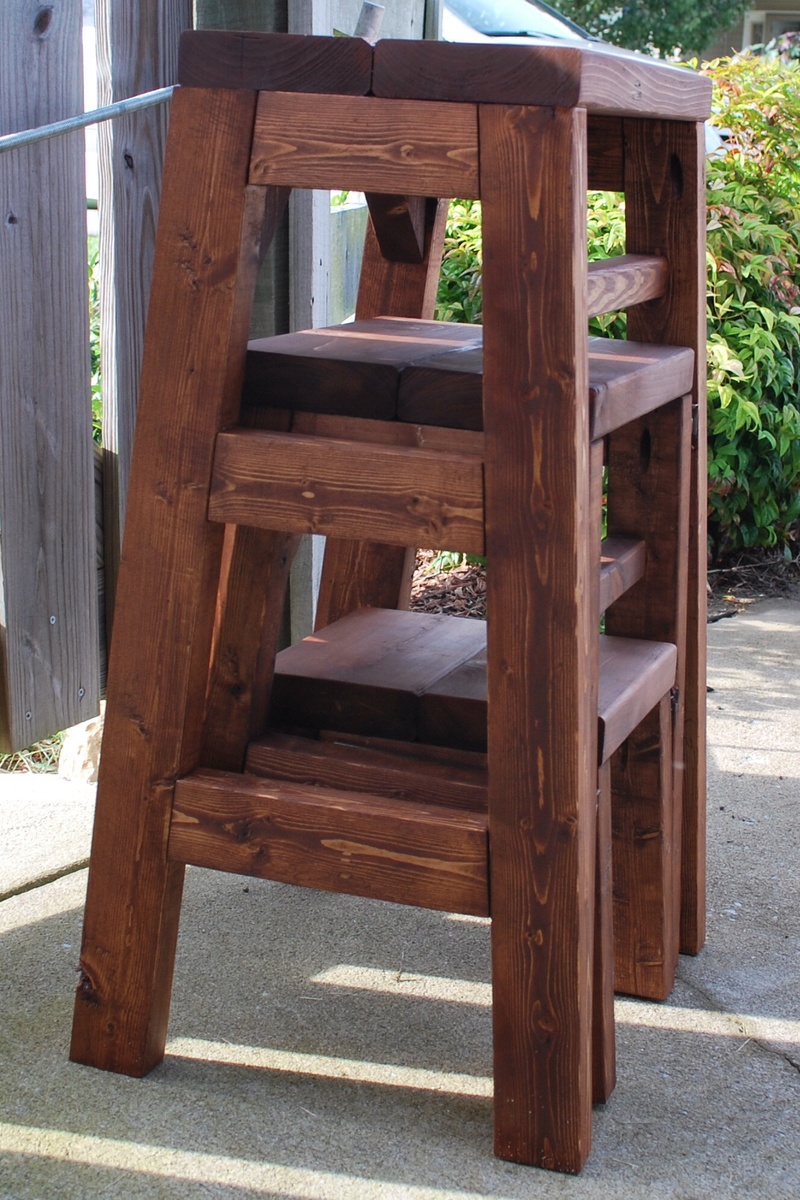
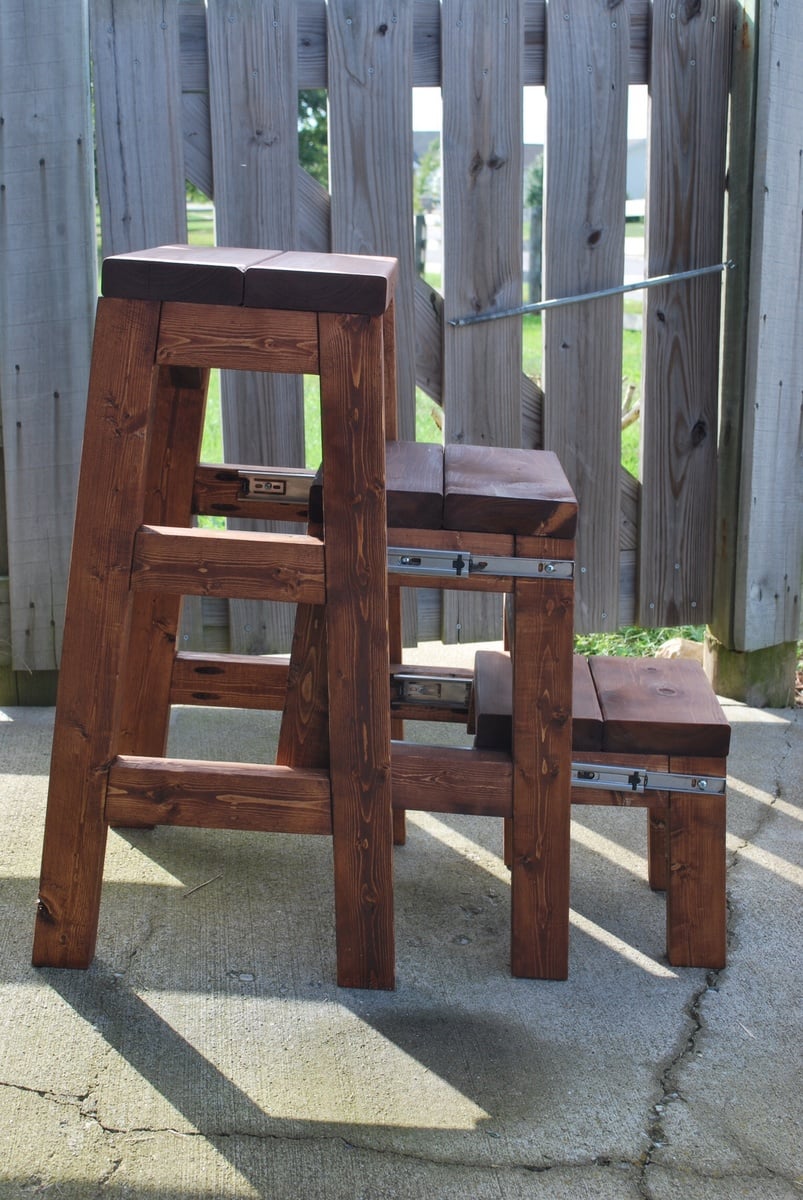
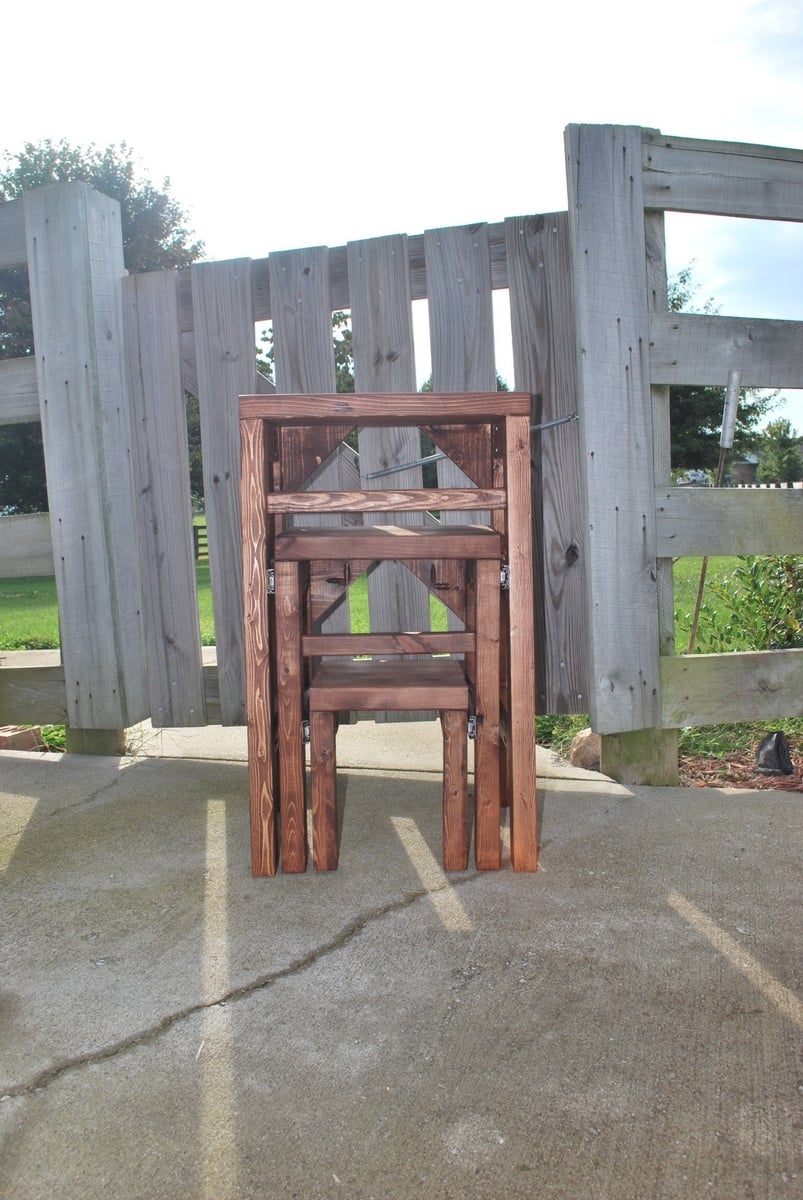
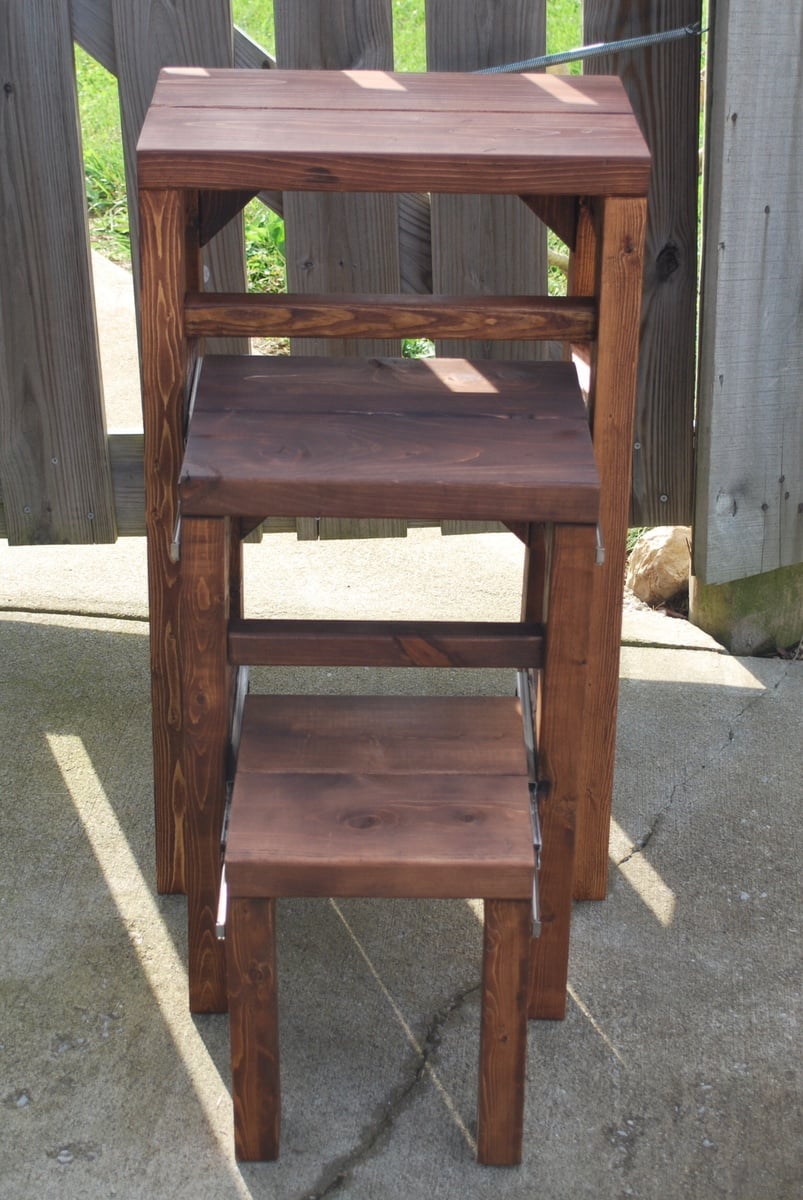
Pull-out step stool

I needed a step-stool in my kitchen to reach in my top cabinets. I'm rather short so I was constantly dragging a chair from my dining table over to find things. I did a google search for a step stool and looked at images. As soon as I saw the picture I knew I had to build it, the retailer selling the original one I saw has a starting price of $270 and goes all the way up to $680! It took me 2 weeks off and on and several times of putting together and taking apart to get Ito the size specifications on the retail website.

Estimated Cost
Around $50
Estimated Time Investment
Weekend Project (10-20 Hours)
Finish Used
Stain and satin finish poly
Recommended Skill Level
Beginner

Comments

Bunnie1978

Wed, 10/09/2013 - 04:13

That's a cool idea... mix between nesting tables and stools! Great job!

Mrswhetstone

Sun, 05/31/2015 - 18:27

I just used the picture i found online as reference and built it through trial and error. Unfortunately I don't know how to create plans either.I can tell you the legs are 2x3's cut at a 5° angle and the tops are 2x6's. I ordered the drawer slides from amazon for approximately $12 a piece.

robear529

Fri, 08/21/2015 - 06:34

Hi, I've been looking for the original image that you used as your model in an attempt to find dimensions to start with, but haven't been able to find it. Could you perhaps remember what brand it was or what site you found it on? If you still have the stool, could you maybe tell me the width of your top step and I could maybe go from there? 

Thanks for the picture. This is a brillant idea and exactly what I'd like to create for my kitchen. I'm hoping to be able to use it as a counter height seat as well when I'm working in the kitchen.

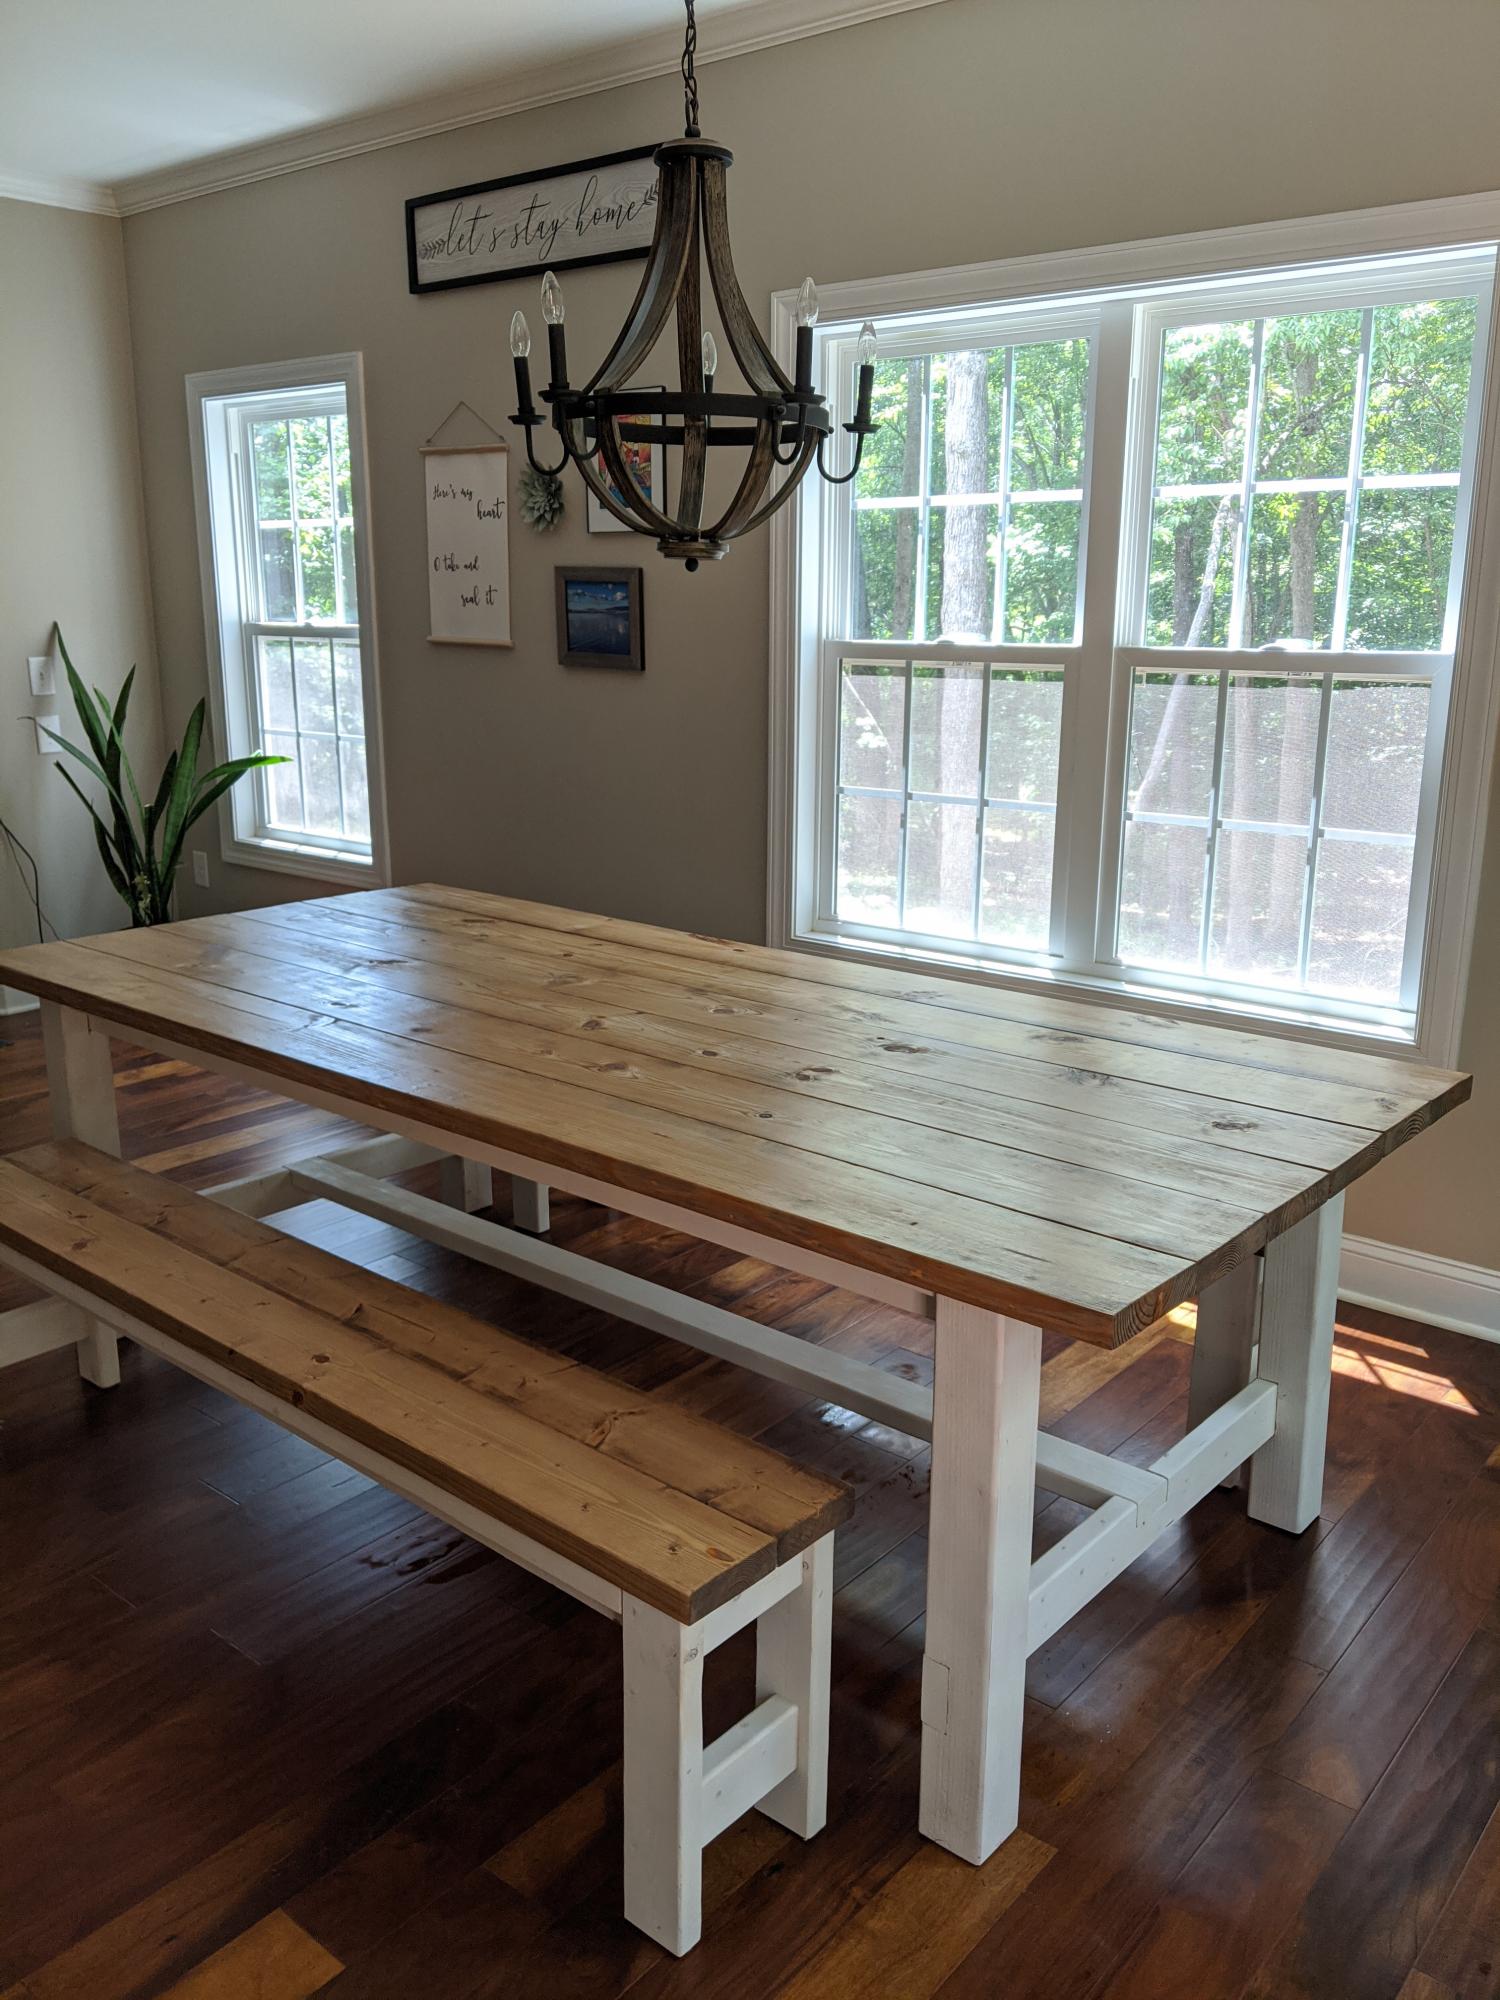
Farmhouse table

Submitted by Anonymous (not verified) on Thu, 06/18/2020 - 19:25

First table build! We modified the plans with no breadboard ends since we live with lots of humidity and wanted to allow the wood movement. We also used 4x4s for the legs. White chalk spray paint legs and custom mix of special walnut and weathered oak stains. We LOVE it!!

Estimated Cost
200
Estimated Time Investment
Weekend Project (10-20 Hours)

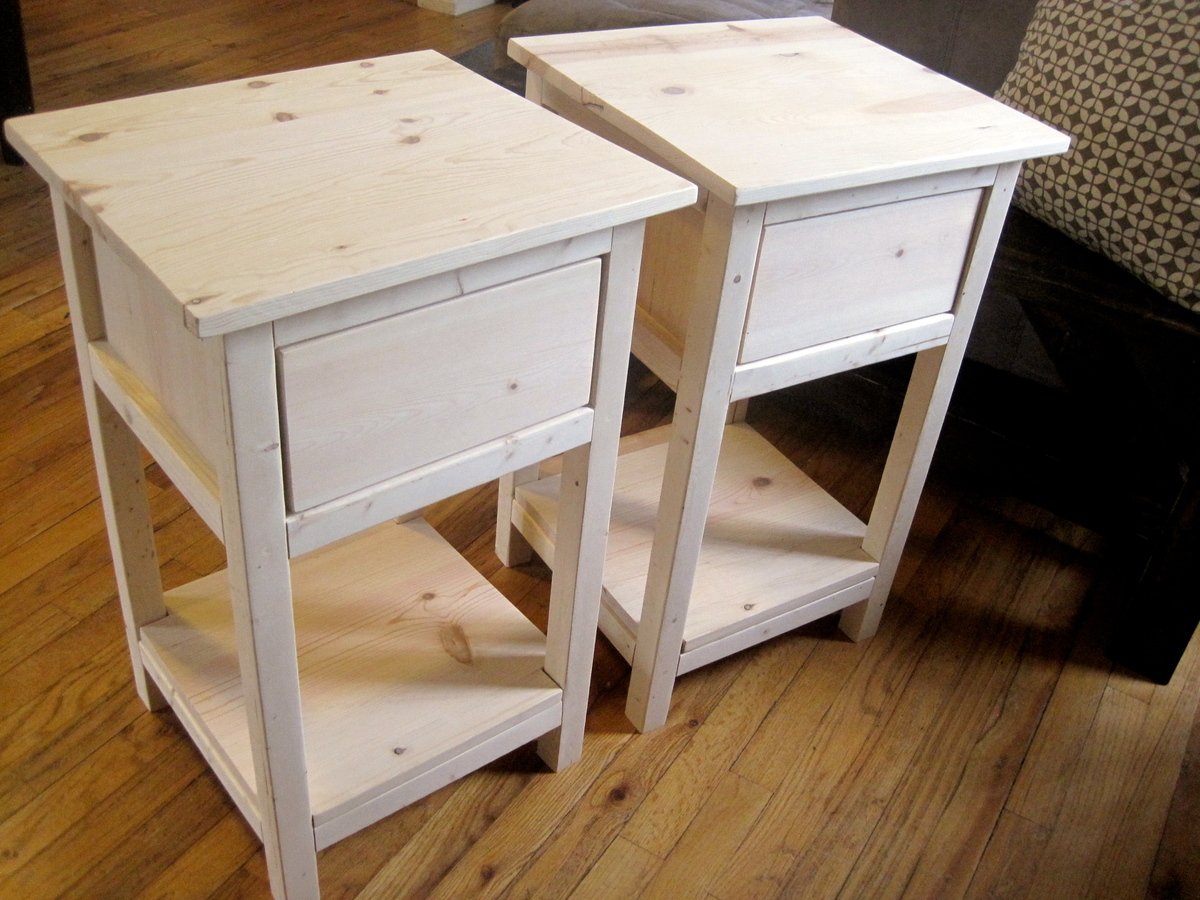
Mini Farmhouse Bedside Table

Submitted by danicarby on Tue, 05/14/2013 - 06:59

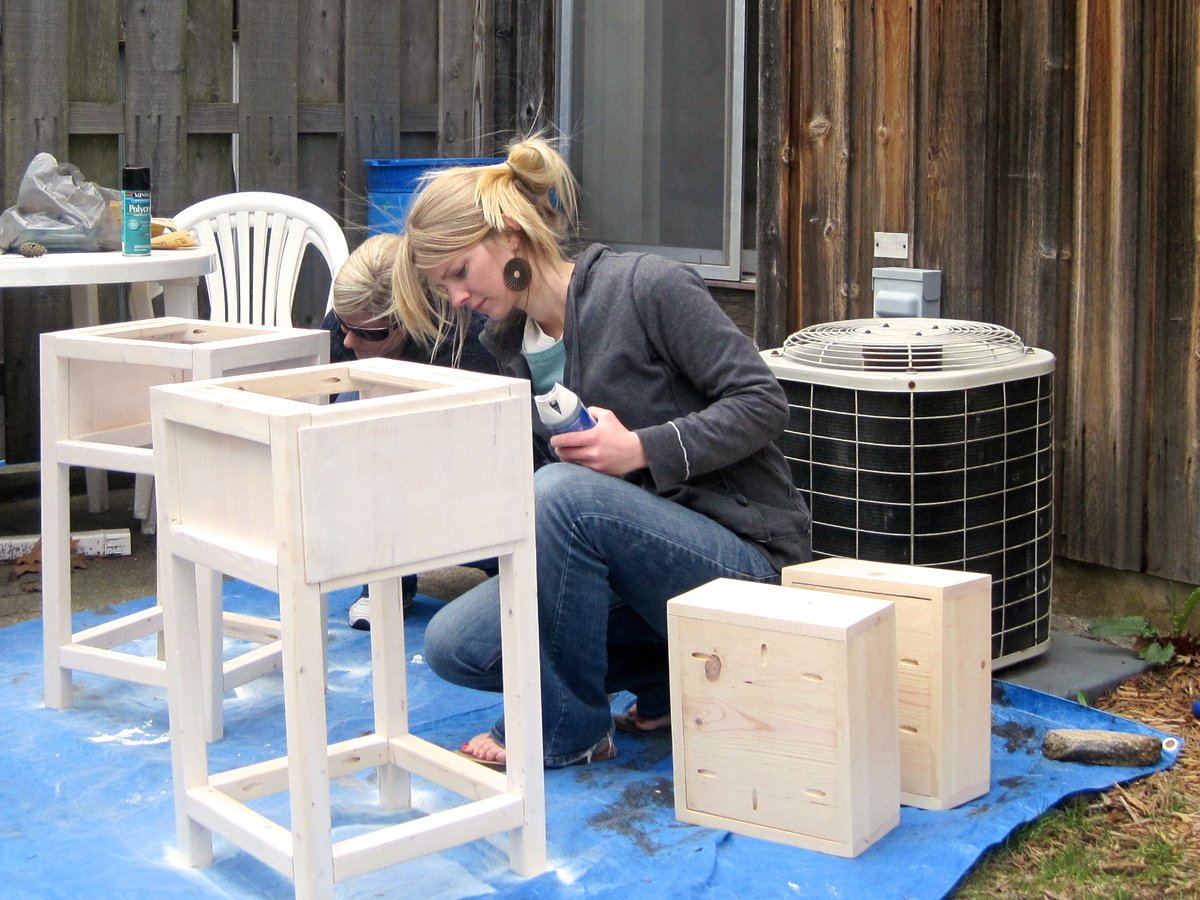
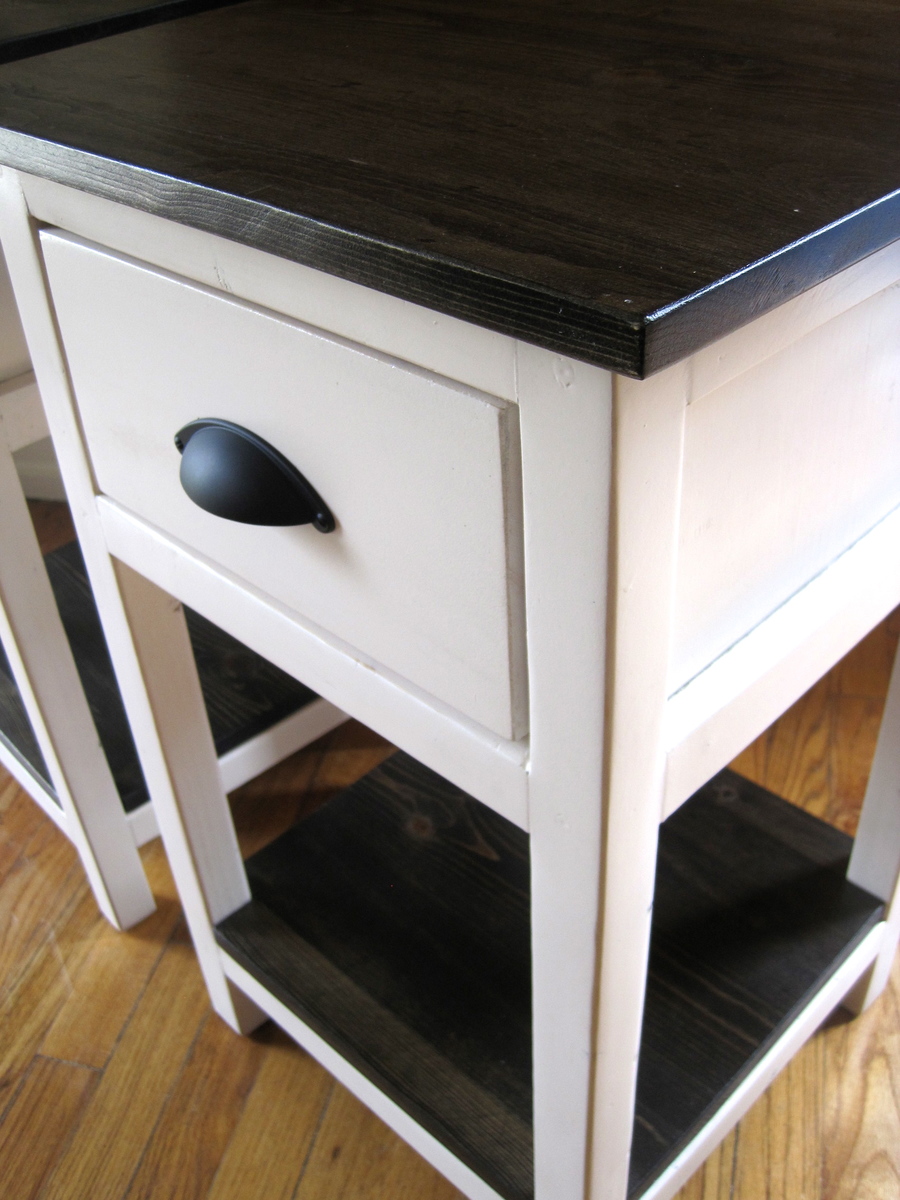
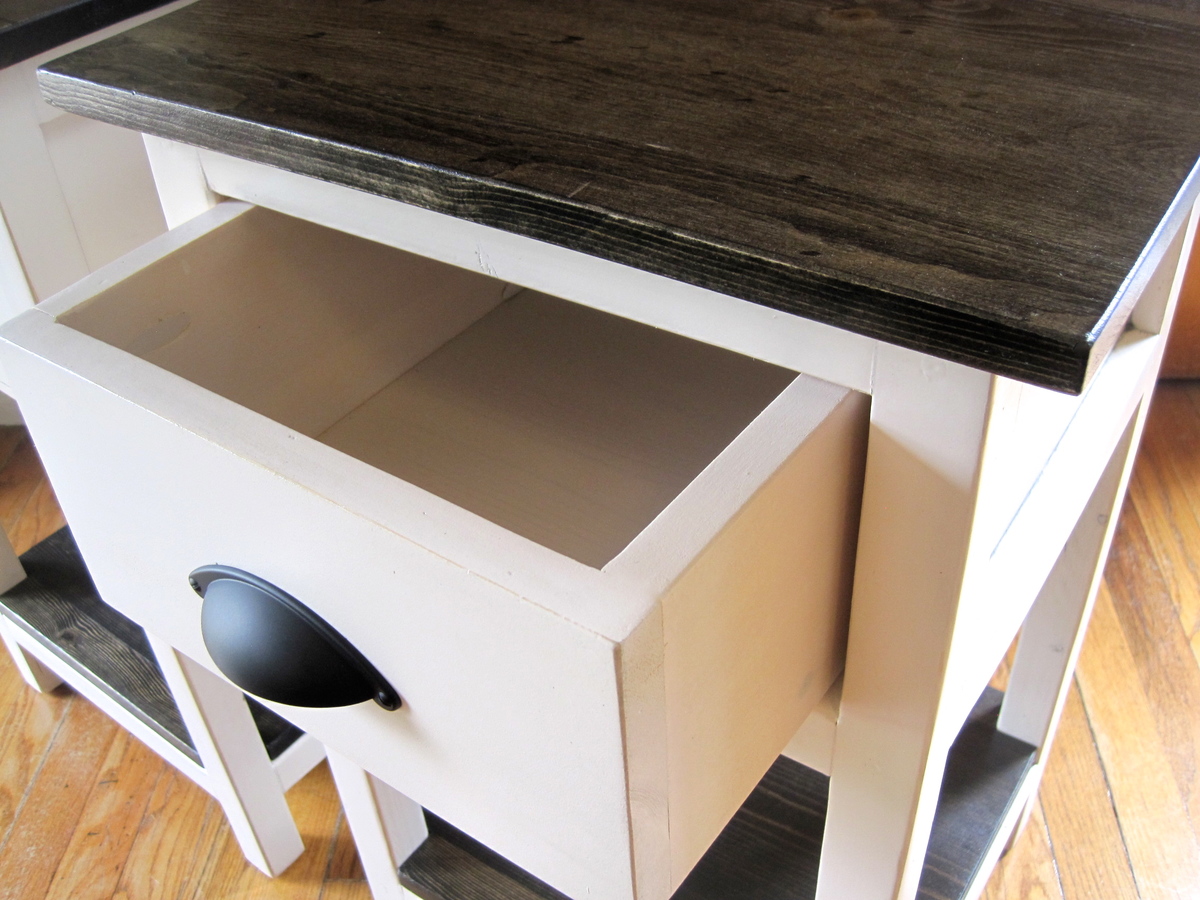
I built these side tables with a friend. We under estimated the time it would take by a long shot! We estimated that with the both of us it took 15+ hours to complete. We spent $120 on all the wood, paint and hardware for both. It was a lot of work and the most time consuming part was the finish (sanding, painting, sanding, painting, clear coat, sanding, clear coat, sanding, clear coat). In the end, it was worth it! They turned out so cute!

Estimated Time Investment
Weekend Project (10-20 Hours)
Finish Used
Creme Spray Paint, Ebony Minwax Stain for top and shelf, and Spray Polyurethane. We sanded in between all the layers for a smooth finish.
Recommended Skill Level
Intermediate

Comments

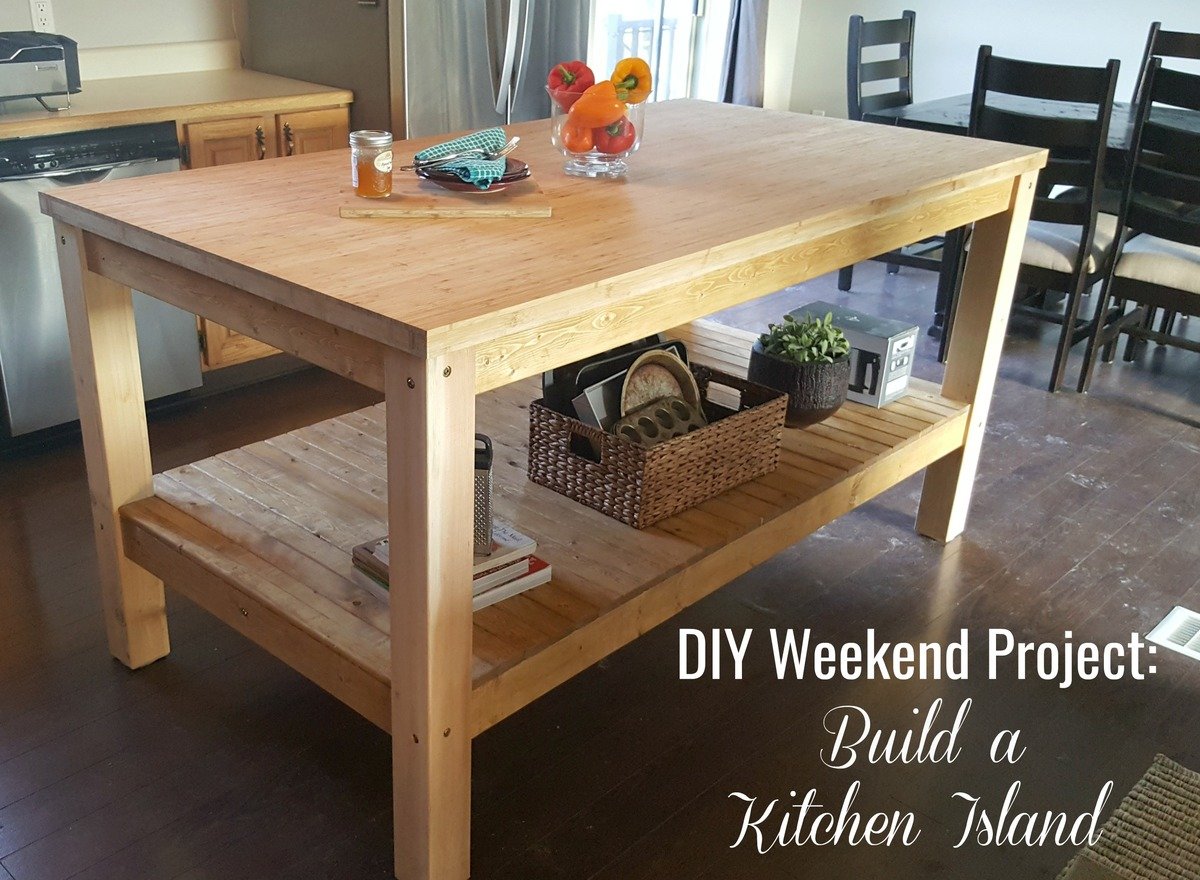
Weekend Project: DIY Kitchen Island

Submitted by bdel on Fri, 11/10/2017 - 11:09

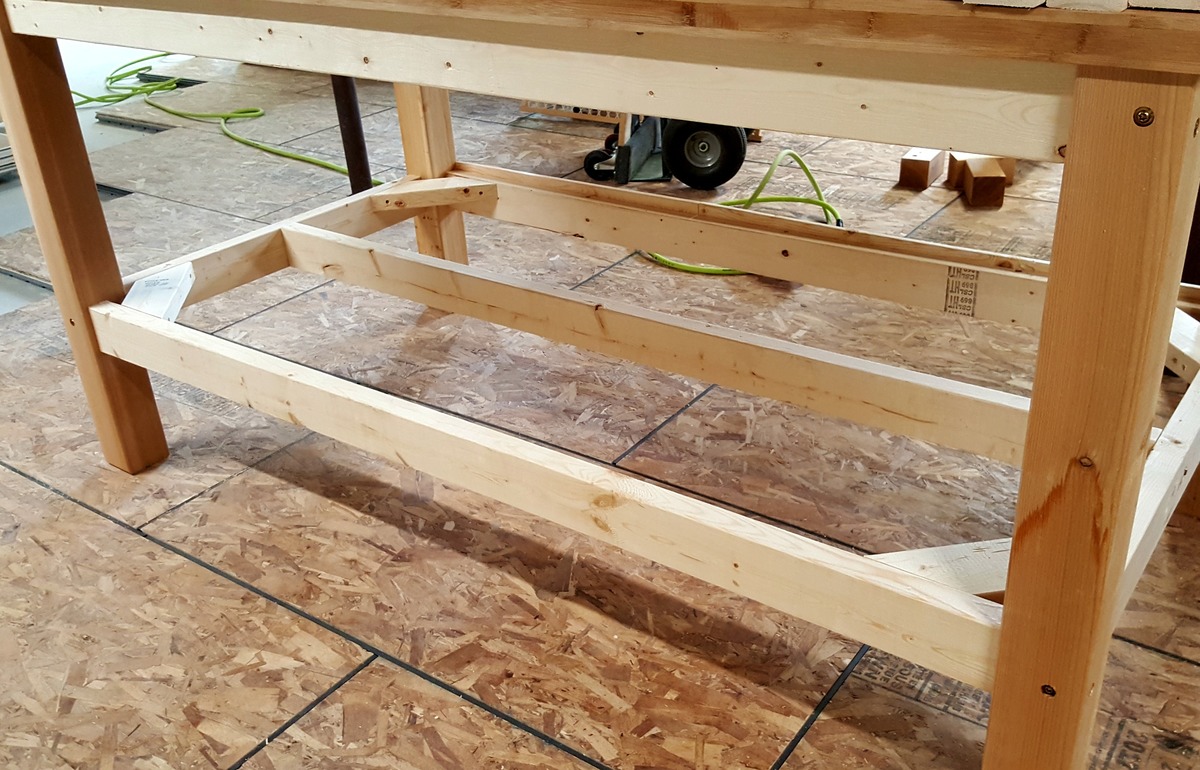
We have a limited amount of counter space in our kitchen, while also having a large open space that is unused. We've always planned on including an island once we renovate, but we didn't want to wait. We decided to build a butcher block-style island with open shelving underneath - a simple design that would give us all the counter space we needed and some additional storage space.

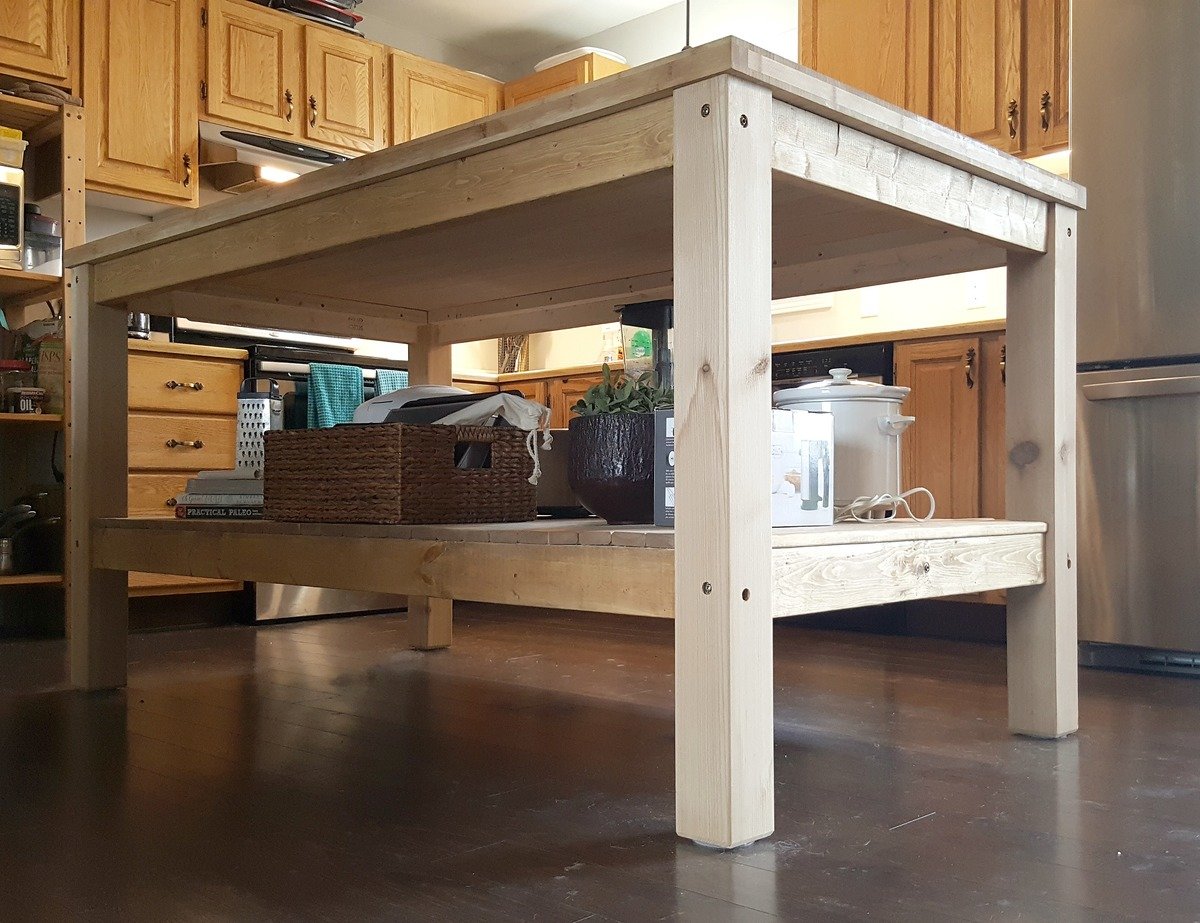
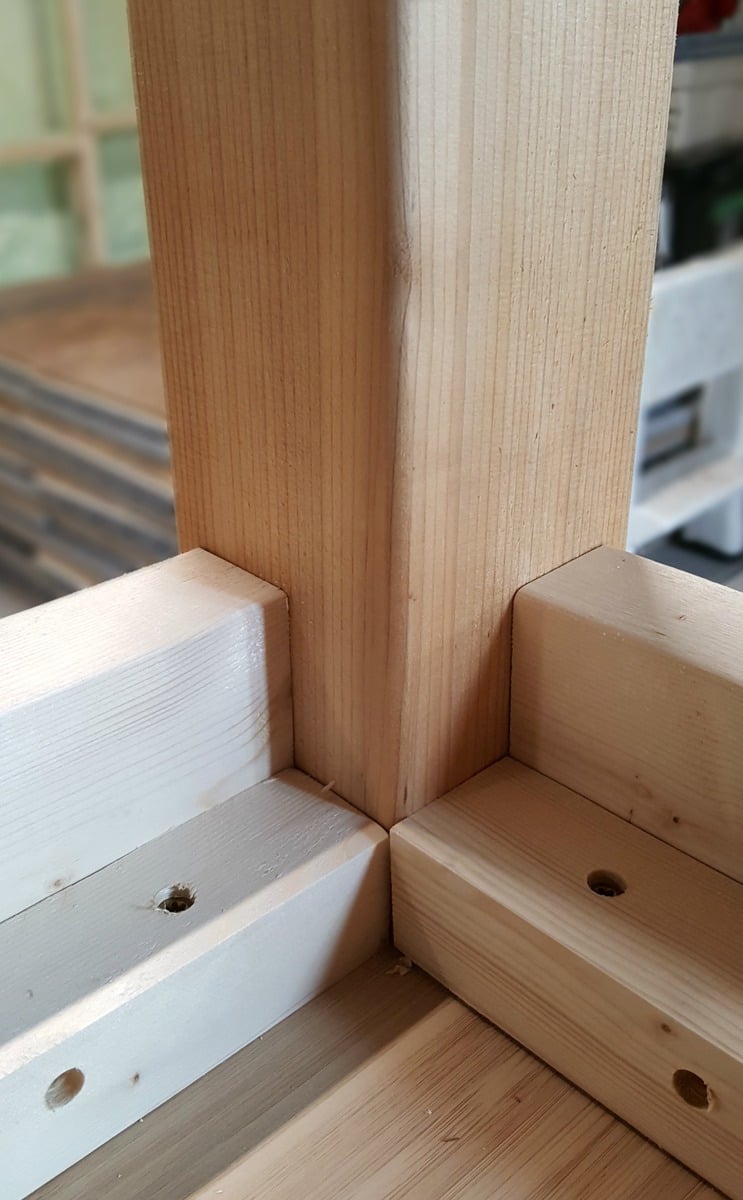
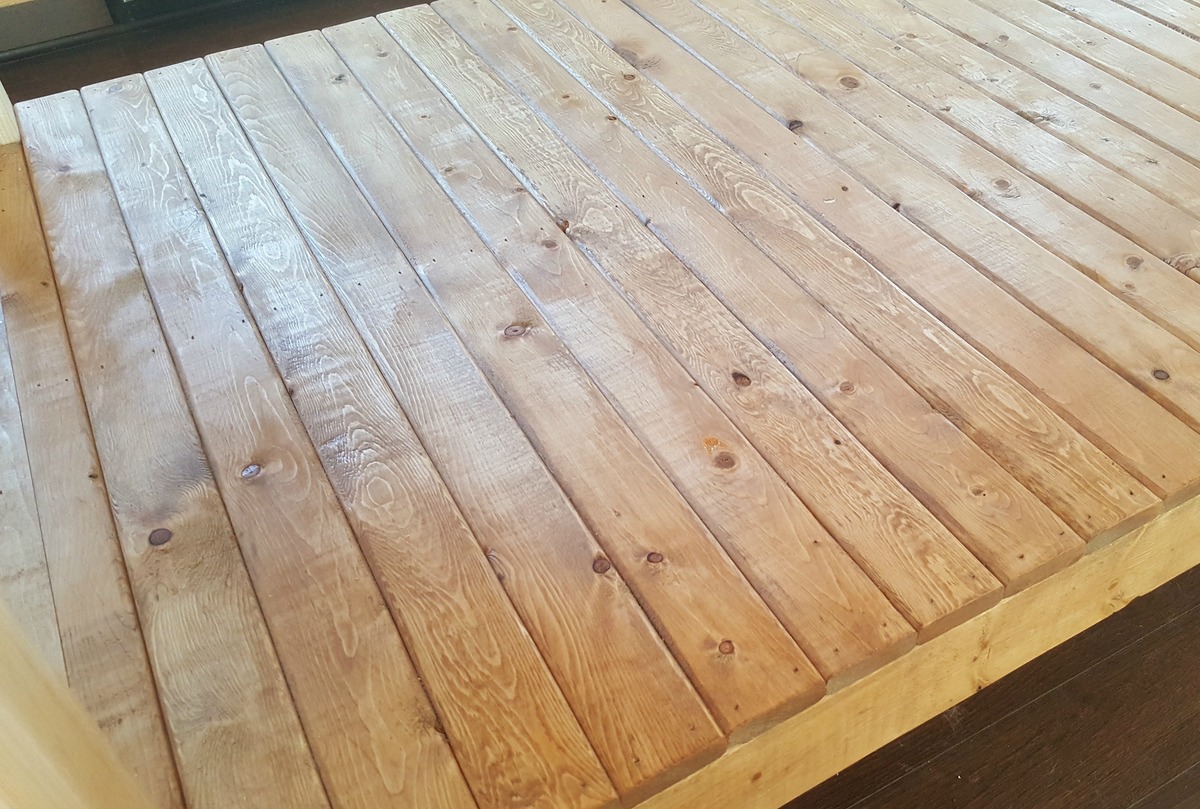
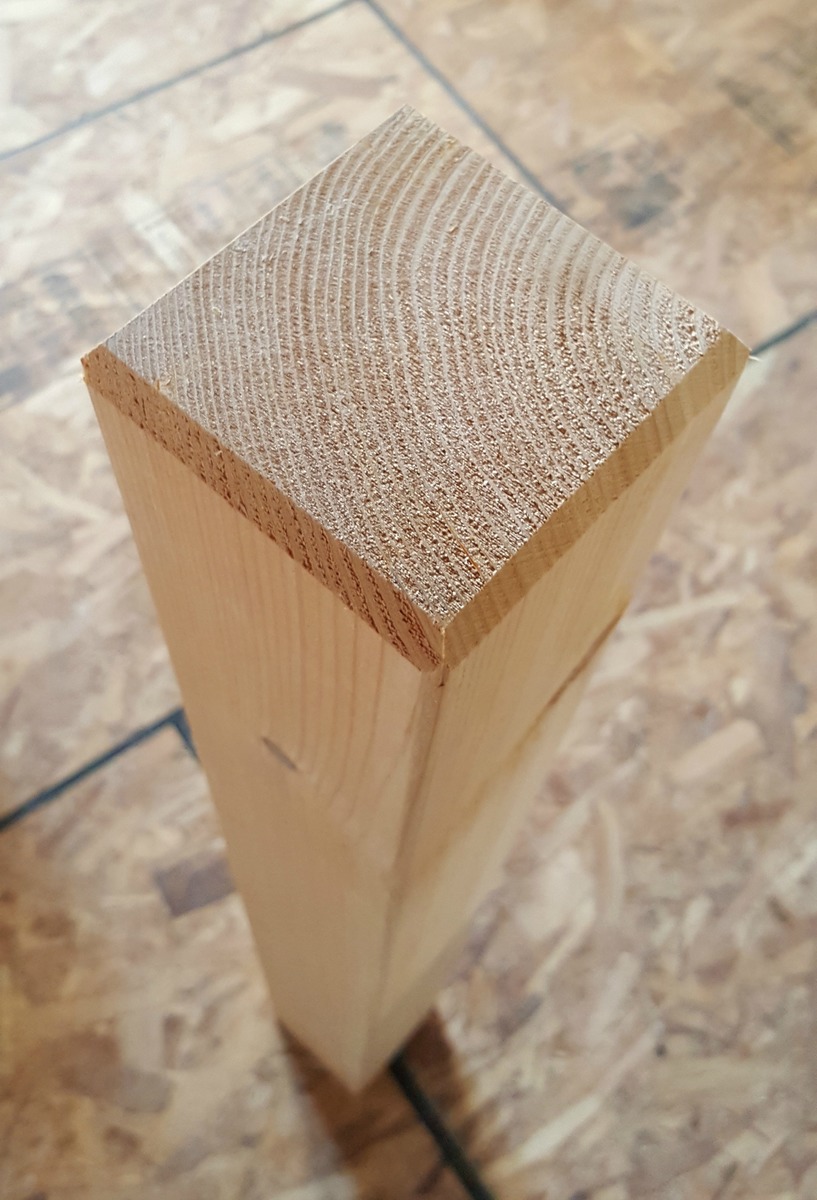
We bought a premade bamboo tabletop, as well as 4x4 cedar posts for the legs, 2x4s for the framework, and 1x2 slats for the shelf.

You can see all of the details of how we built it in the blog post, but here are a few of the features:

- an interior framework that connects to the tabletop and outer framework so that no screws are visible on the outside

- countersunk GRK structural screws used to attach the legs htat look like carriage bolts

-feet are angle cut so that floor is less likely to be scratched if the island is moved


We're really proud of this build and are enjoying having so much extra counter space. It's amazing what you can get done in a weekend!

Estimated Cost
$200 - $250 - pre-made top, cedar 4x4s, pine 2x4s, pine 1x2s, assorted screws, finishing nails, stain.
Estimated Time Investment
Weekend Project (10-20 Hours)
Finish Used
Minwax Provincial stain on pine (2 coats), mineral oil on bamboo top, no finish on cedar.
Recommended Skill Level
Intermediate

Not quite the same

Submitted by cyfry77 on Sun, 04/10/2011 - 14:45

This was something I build a couple years ago, it's not the same as this plan, but very similar. When we moved in to the house, the slab was already poured, with 4x4s already in place, I just used what was there and my imagination for the rest.

Built from Plan(s)
Estimated Cost
$200
Estimated Time Investment
Weekend Project (10-20 Hours)
Finish Used
Purple outdoor deck stain. (Behr?)
Recommended Skill Level
Intermediate

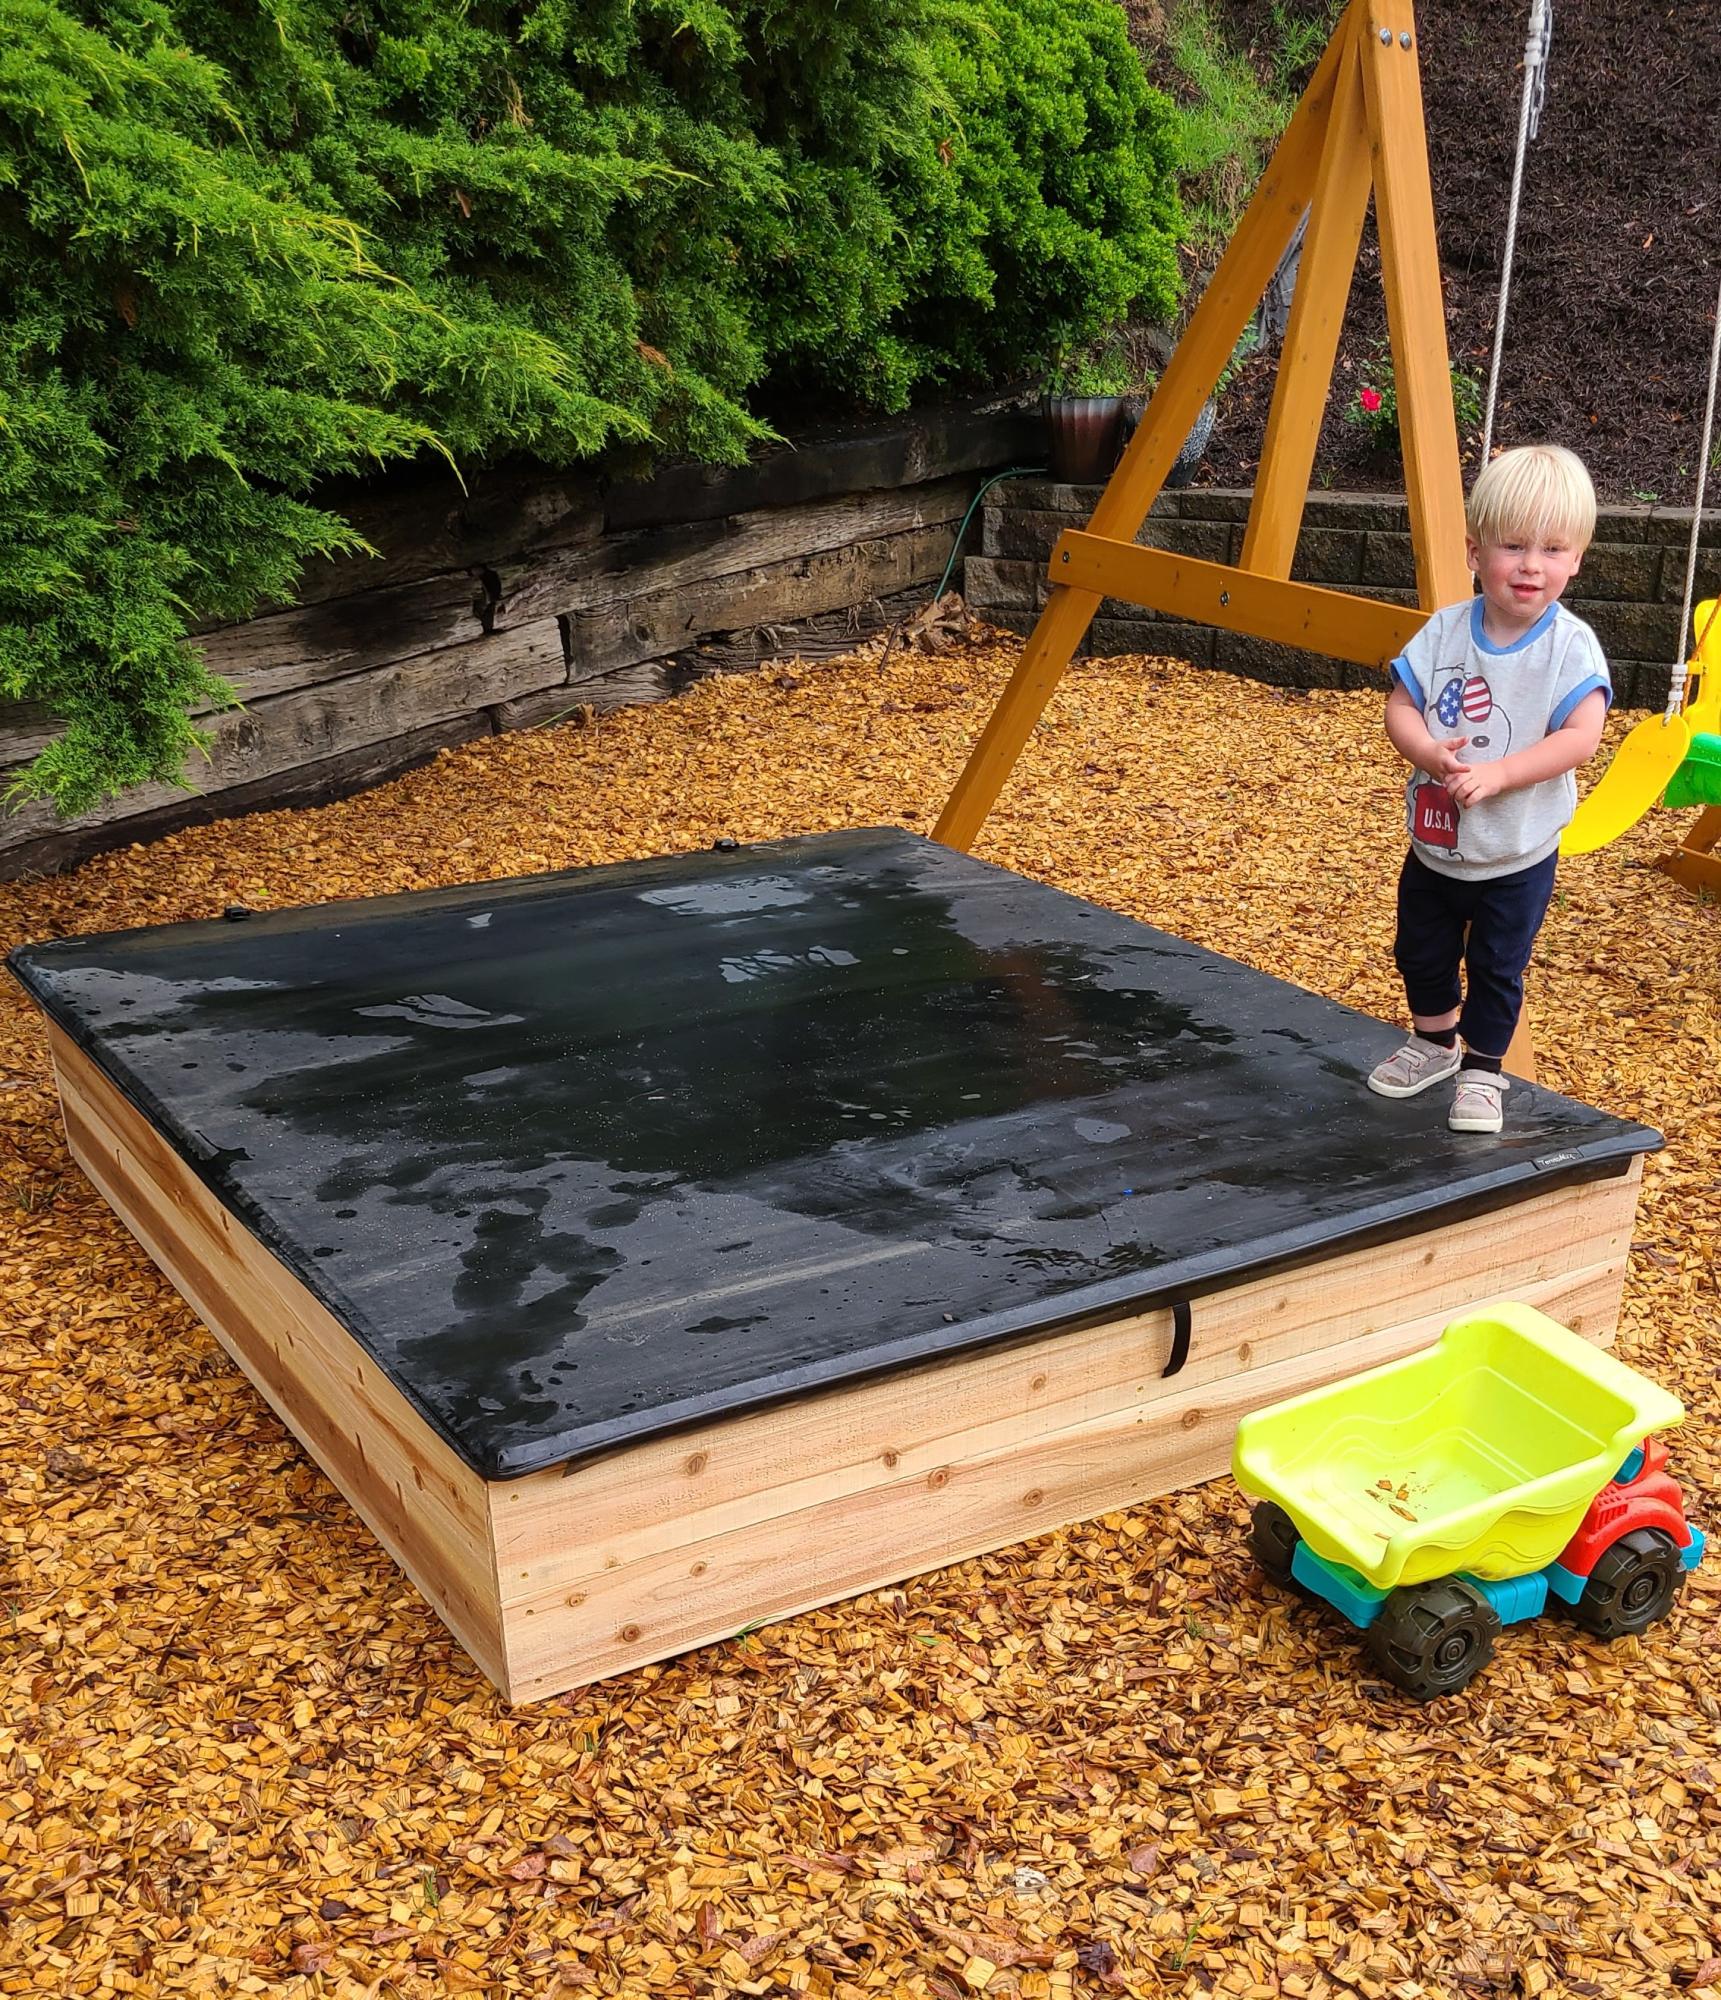
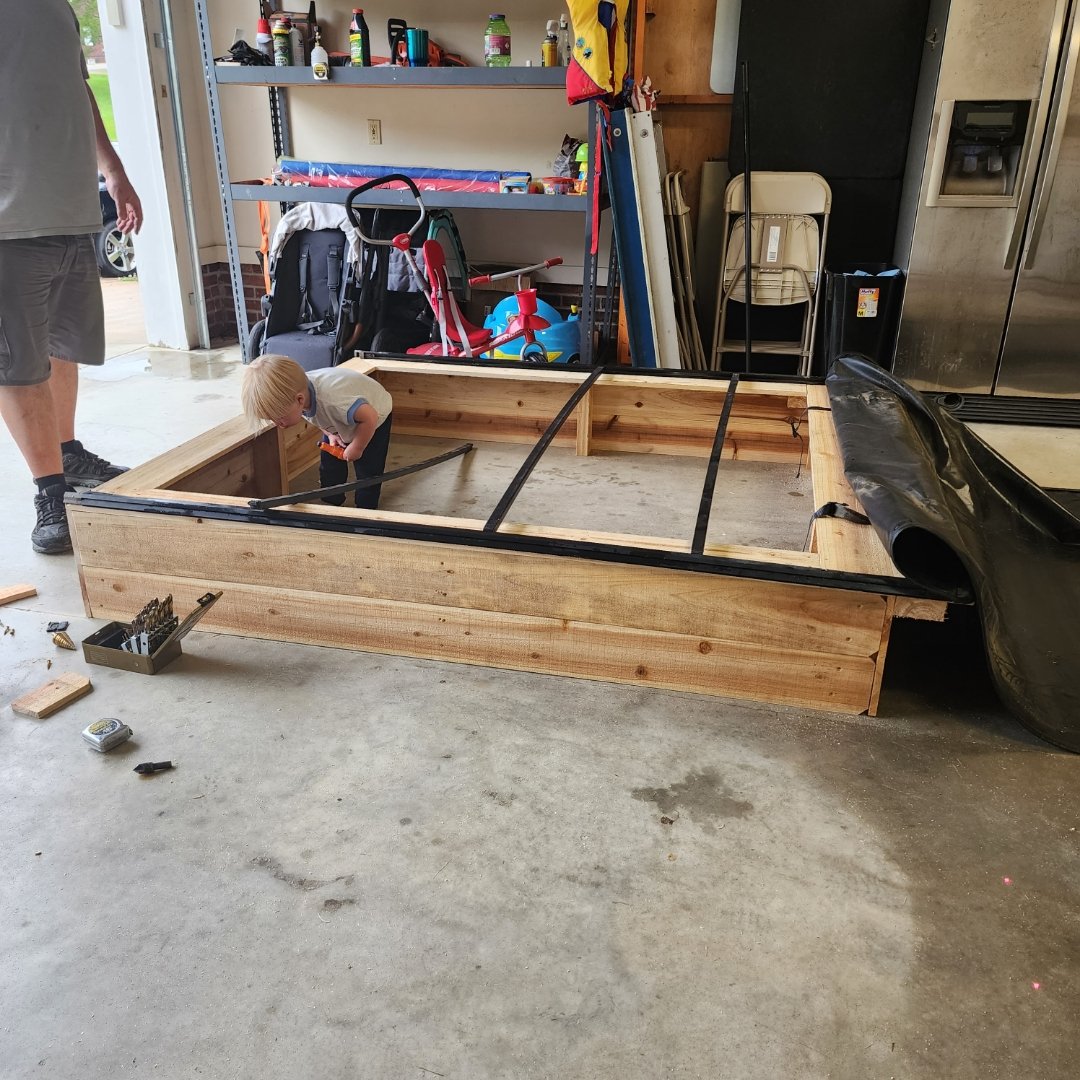
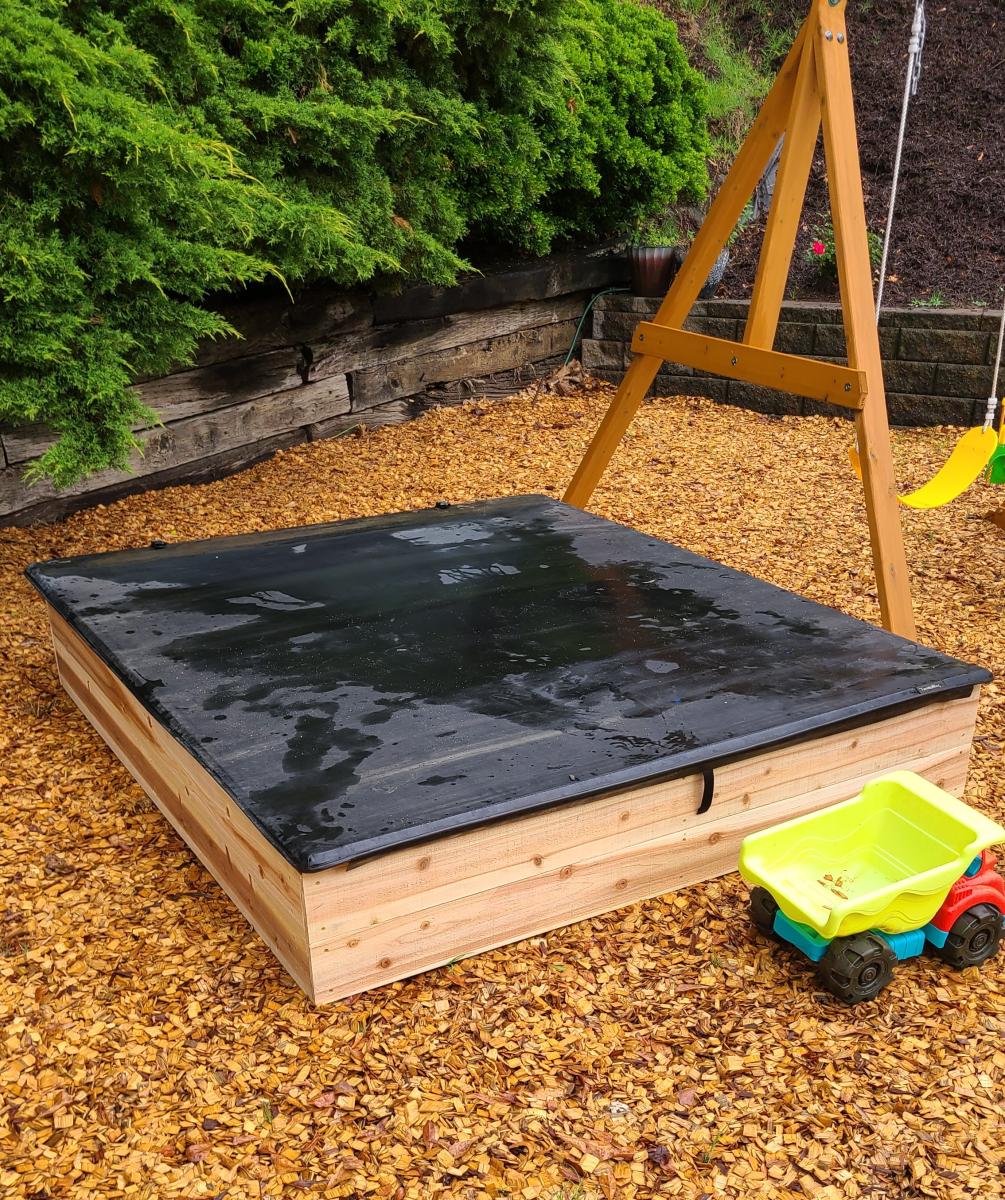
Sandbox with Cover

The cover is a tonneau cover for a pickup truck. It's for a 6.5' truck bed so if you notice, I had to ad a 2x4 and one more picket on top to accommodate the extra length. 

The cover would add a ridiculous amount of money to the project but it was repurposed.  I found it on a truck that was in an accident and going to the scrap yard. I think it it came out great and my grandson loves it.

John

Built from Plan(s)

Tack Box

Submitted by Evandgc on Tue, 12/30/2014 - 16:21

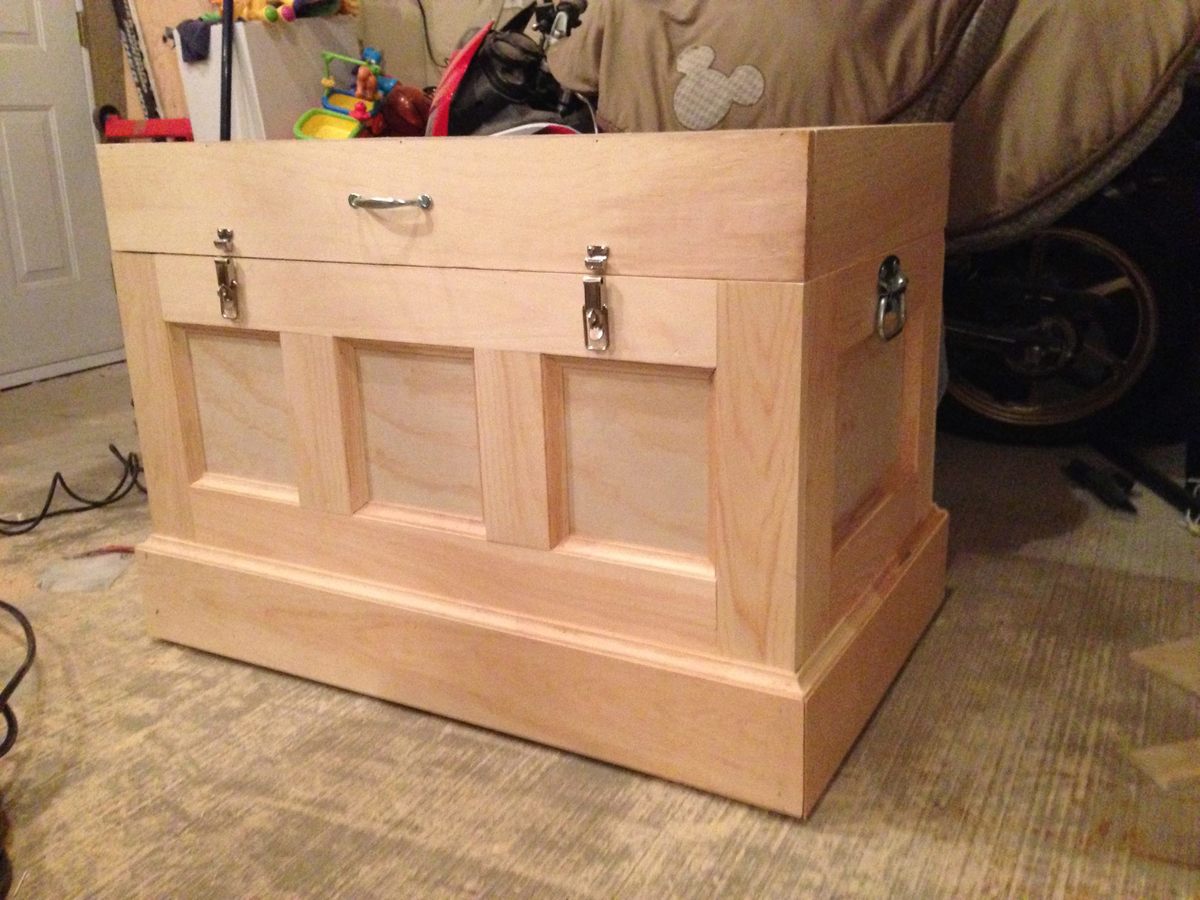
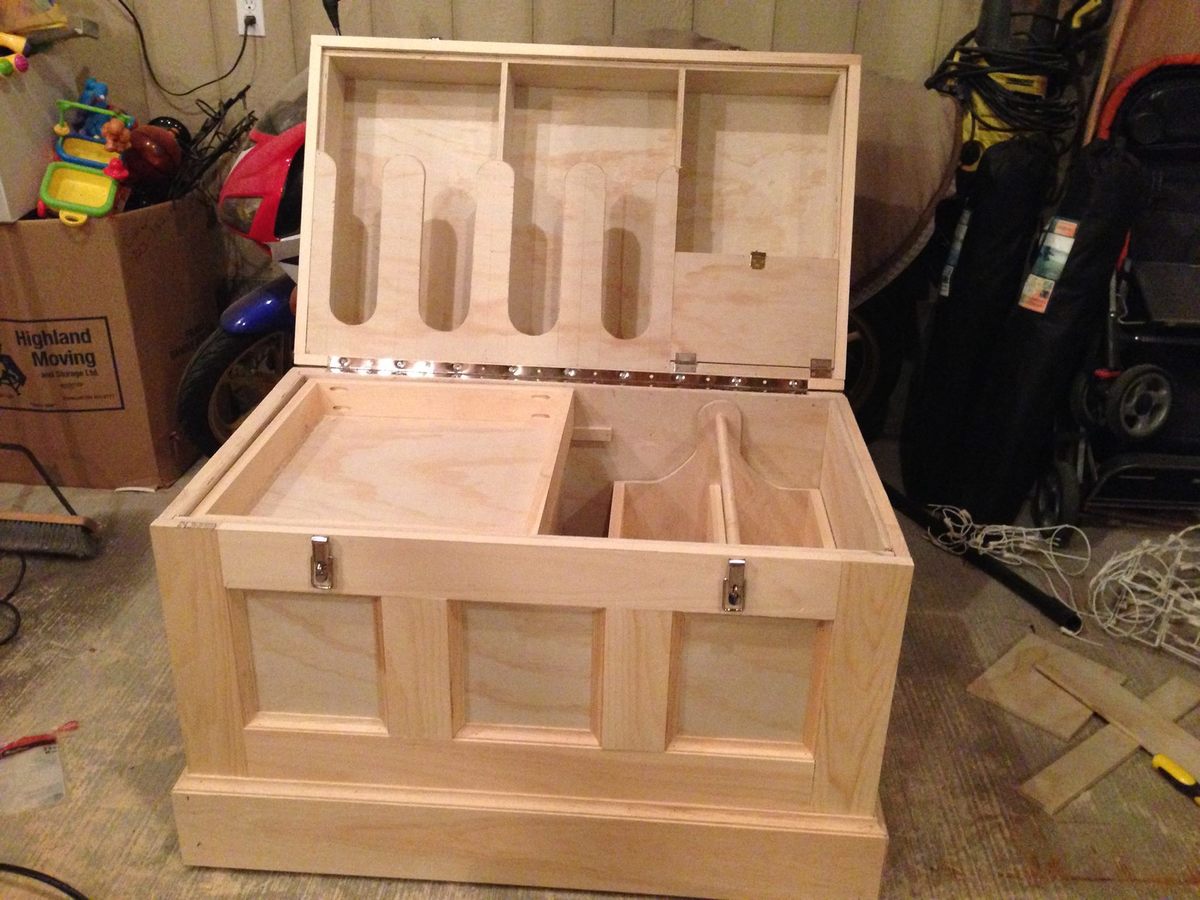
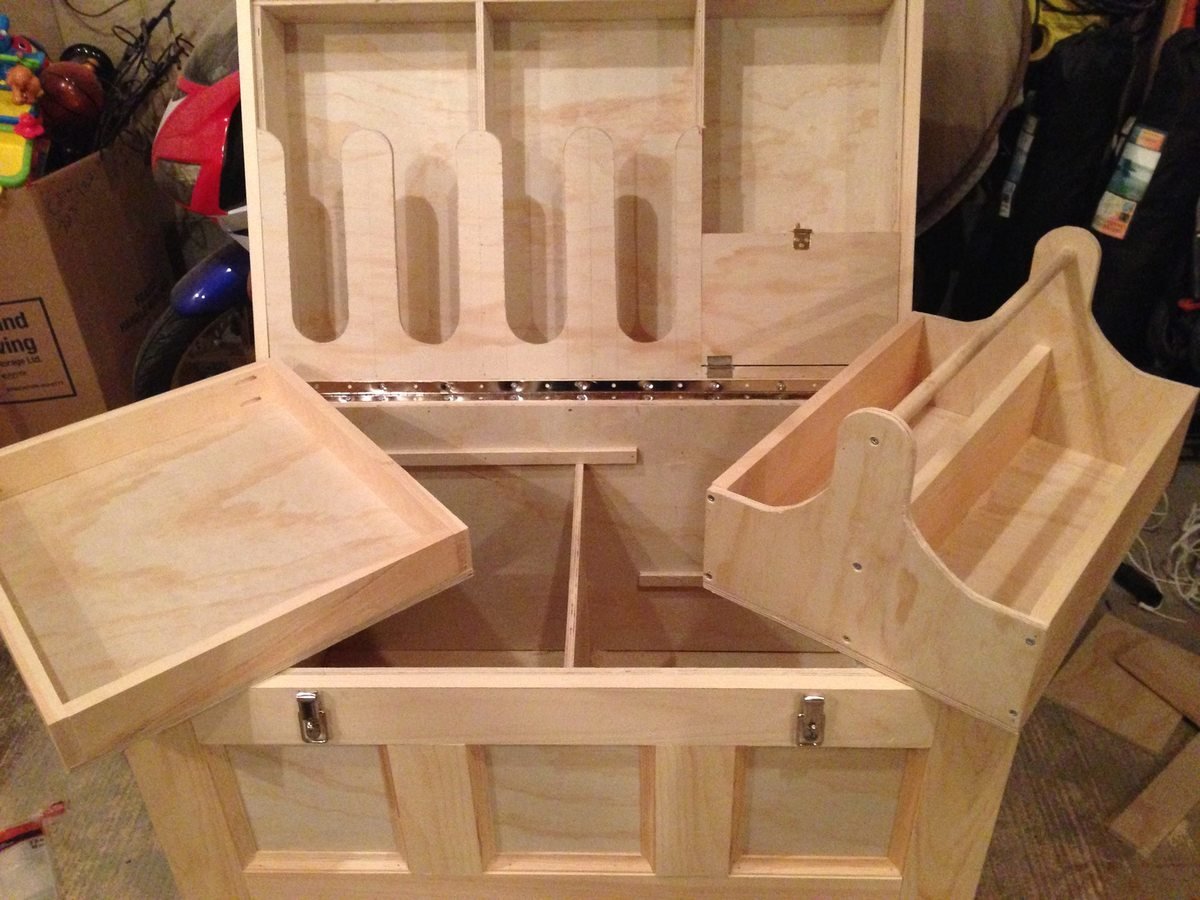
I made this box for my wifes christmas present. She has been riding horses for sometime and is planning on doing some shows. I built this box from Mimi's storage bench design, made it bigger, added a deeper box top and created the rest from looking at pictures online. Its all made of pine plywood and pine boards to keep it light. I added 4 castors to the bottom to make it easily moveable and hid them with the moulding around the bottom. Still has to be sanded and stained before it hits the barn. Its 39W X 24D X 29H. I used a piano hinge and routered the back to set the hing in. Added cove moulding around the bottom and to all the boxes around the front and side. Used a lot of pocket holes and finsh nails. Took me longer than it could have, because I planned everything as I went.  I will add more pictures when its finsihed. I would rate it intermediate to advanced depending on your skills with certain tools. 

Built from Plan(s)
Estimated Cost
Will all the hardware, wood materials, screws etc, I think it cost me around $250-$300
Estimated Time Investment
Week Long Project (20 Hours or More)
Finish Used
not finished yet
Recommended Skill Level
Intermediate

Comments

Back