Community Brag Posts

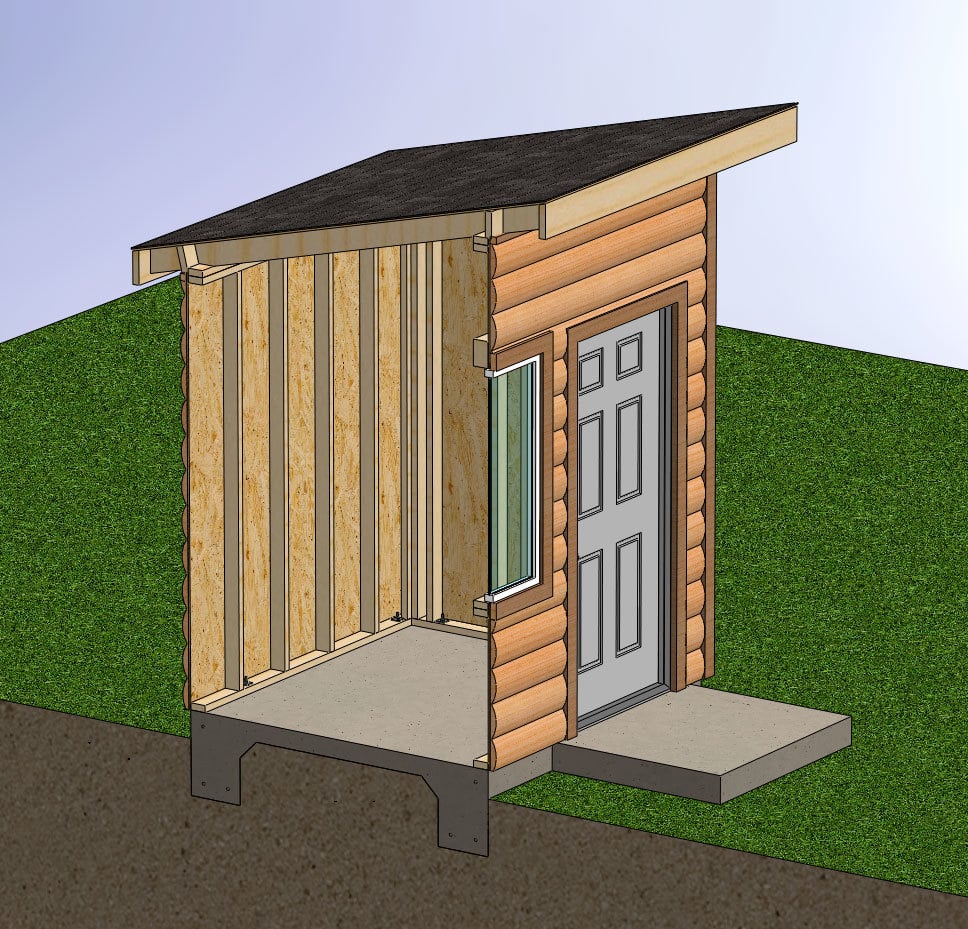
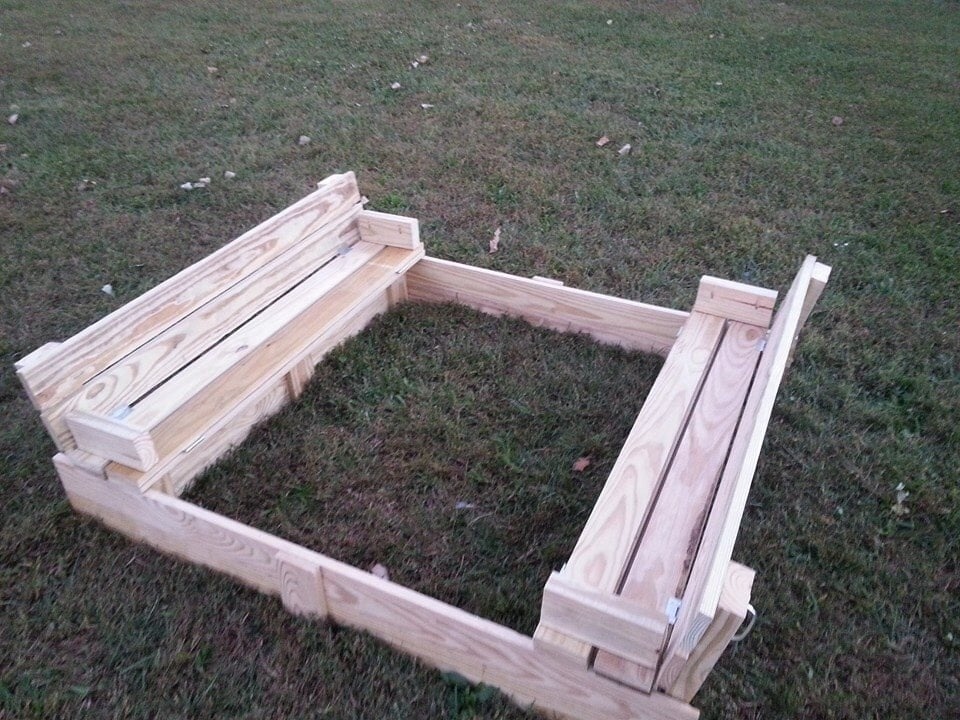
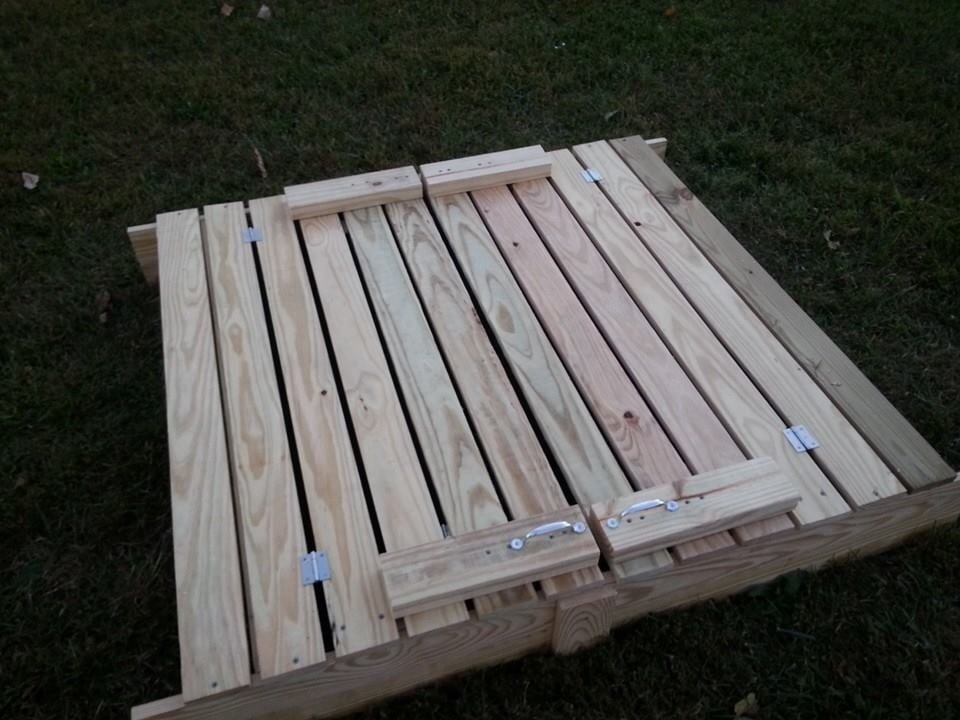
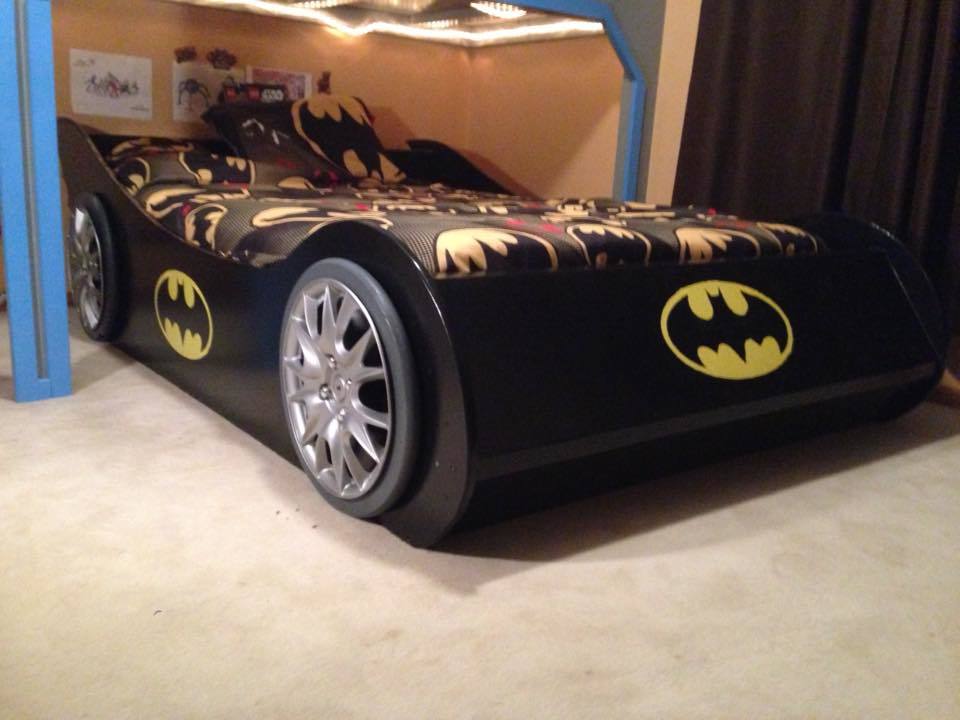
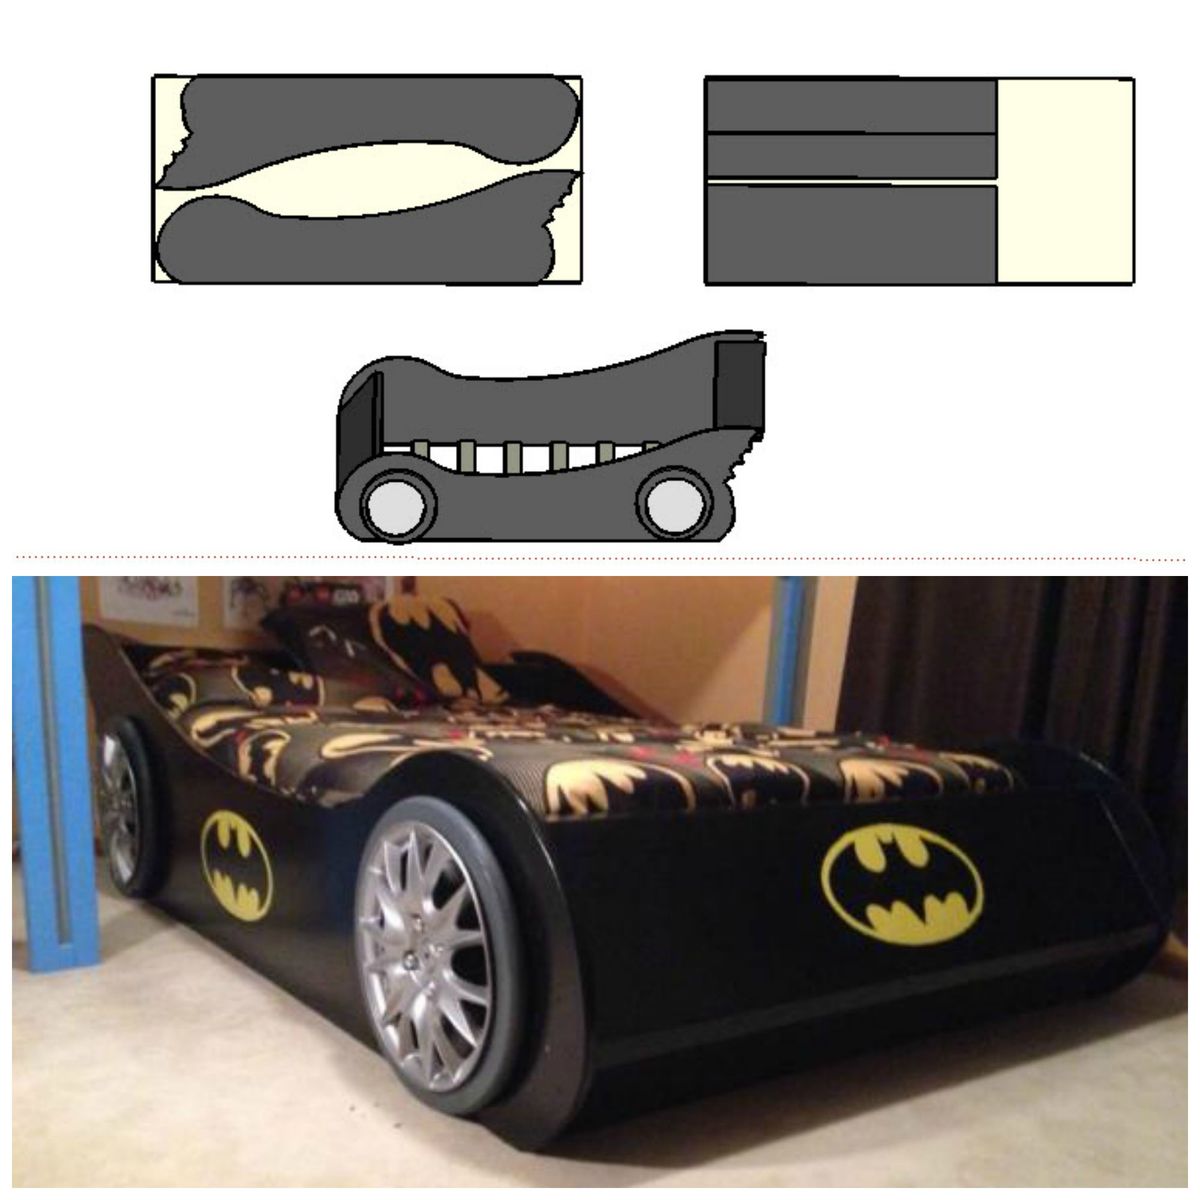
Rural School Bus Shelter

Submitted by Medeek on Thu, 02/28/2013 - 09:02

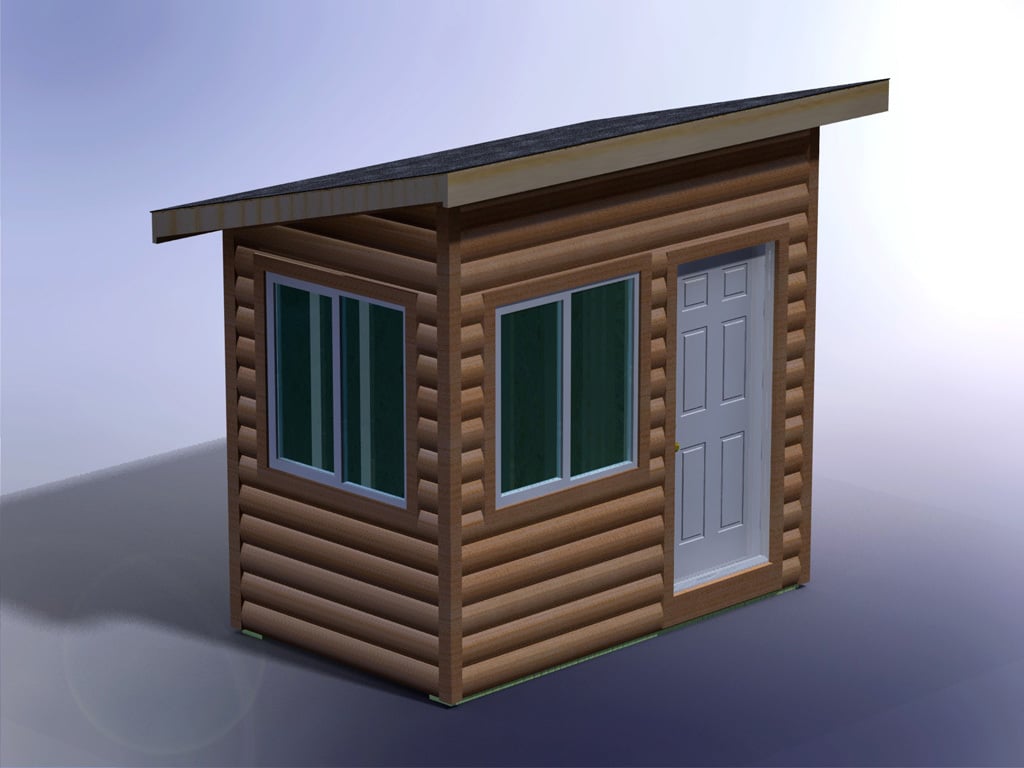
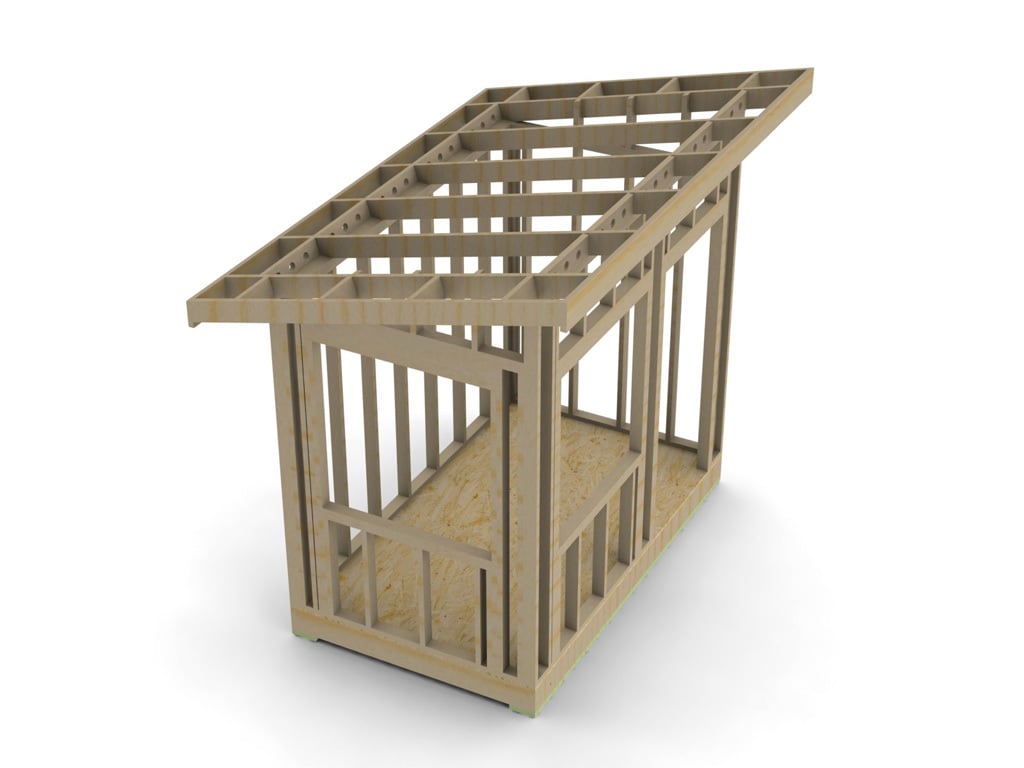
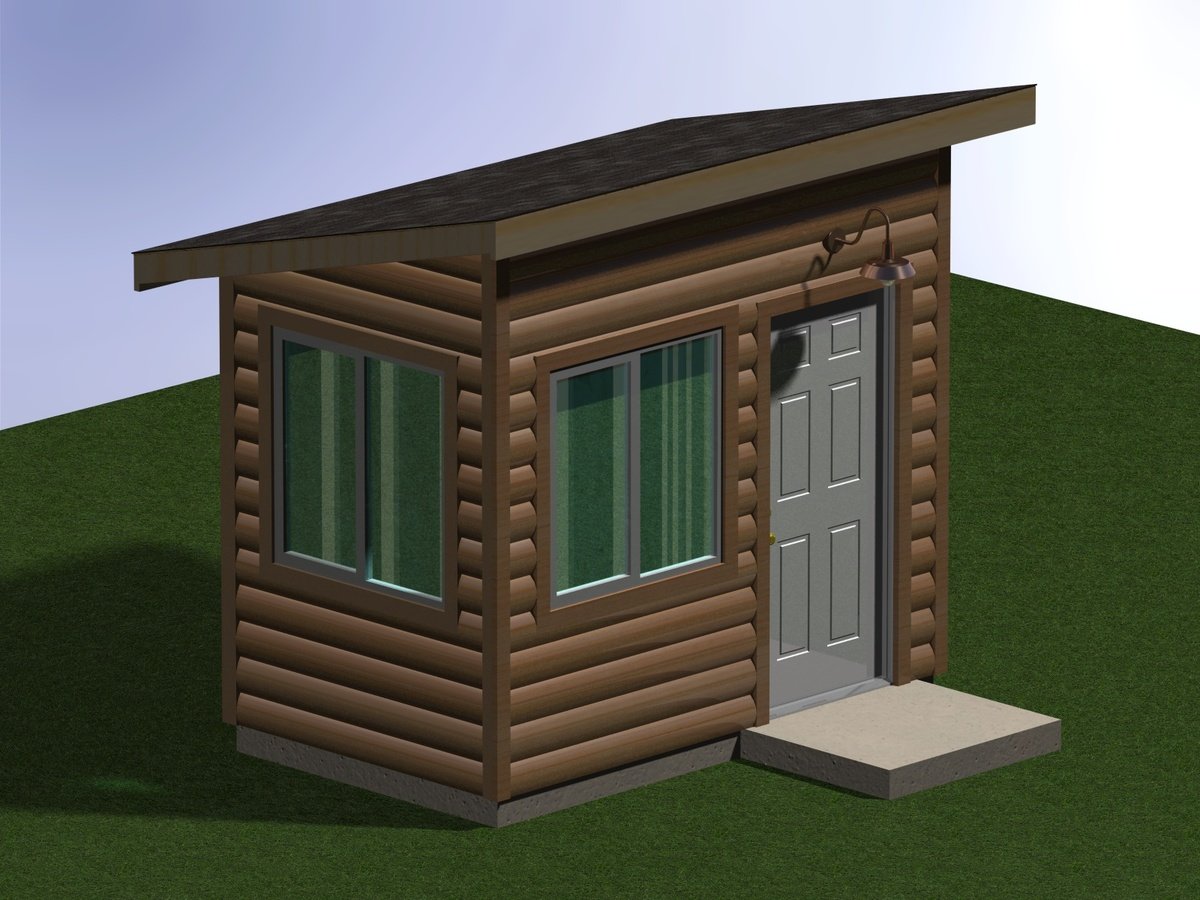
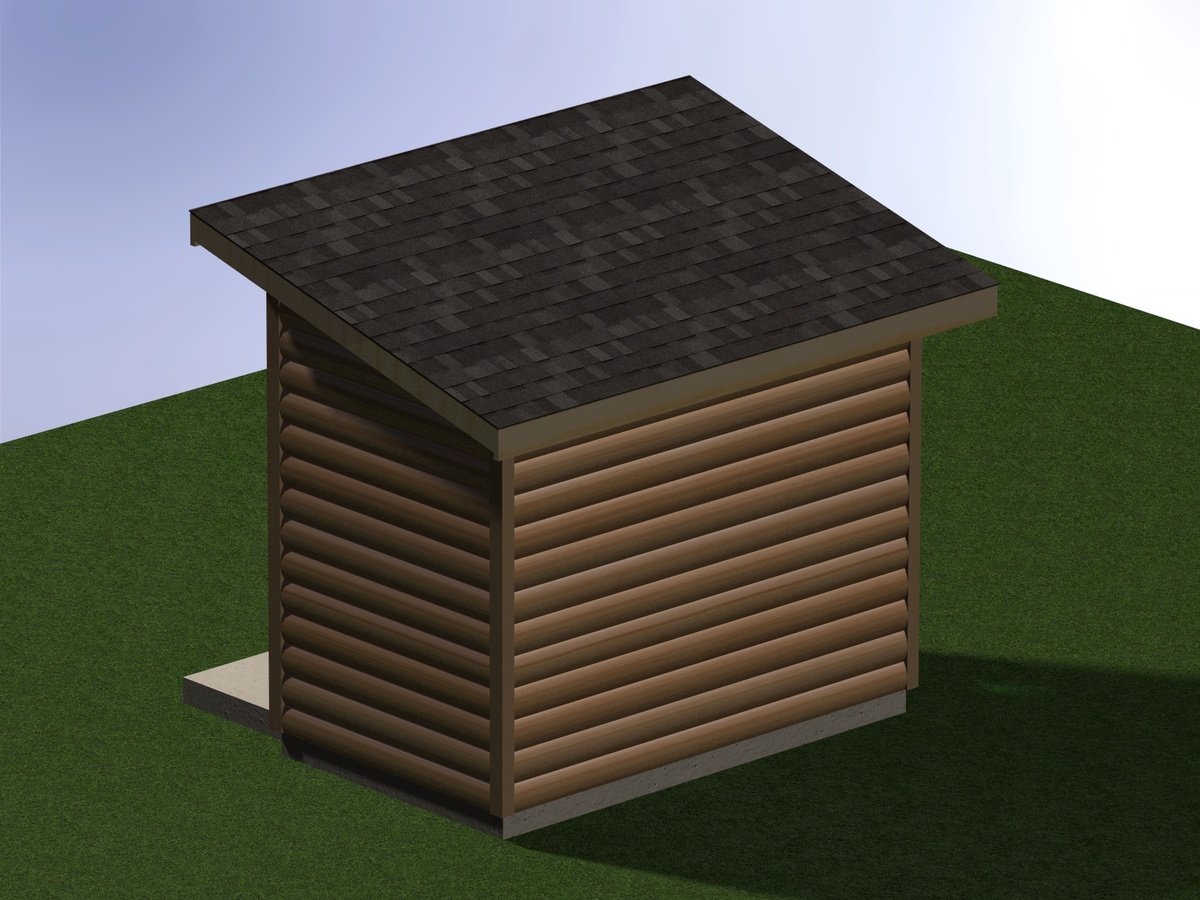
Rural Bus Shelter with 3/12 shed roof, designed to keep your kids out of the elements as they wait for the bus. Shown with log siding and 2x trim. Can be constructed on a slab on grade or remain portable with pressure treated runners and wood floor as shown.

Upgrade further with electricity and insulation for those really cold and dark climates (ie. Washington, Oregon, Alaska, B.C.).

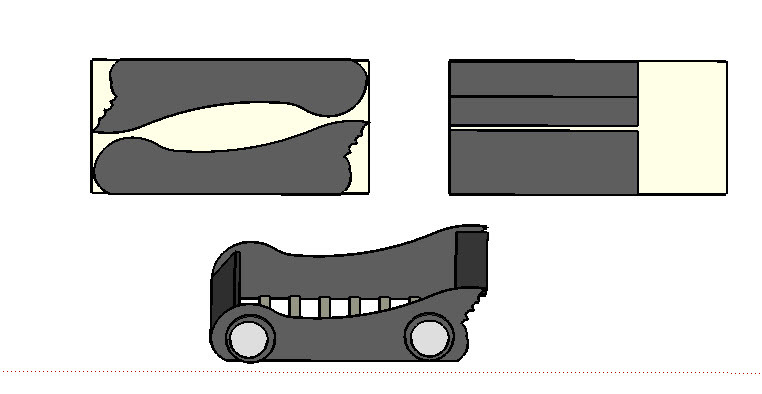
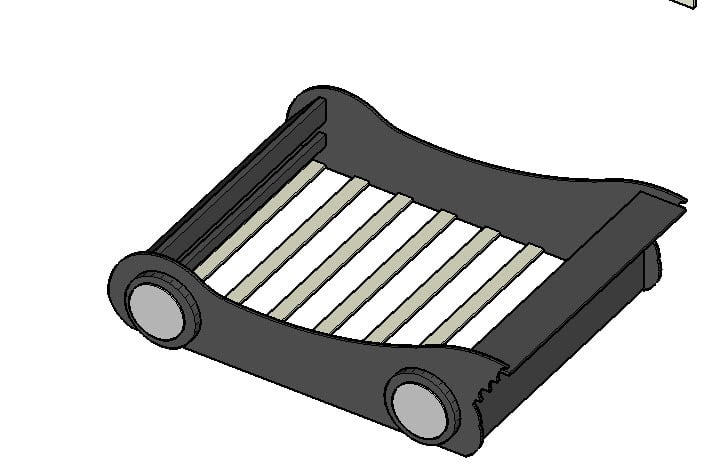
I will make the plans for this shelter freely available to all that are interested.

Estimated Cost
$1200
Estimated Time Investment
Week Long Project (20 Hours or More)
Finish Used
Very good idea to stain and treat the siding which will greatly increase its longevity and attractiveness.
Recommended Skill Level
Intermediate

Comments

Kid's Playhouse and Slide

Submitted by docfin02 on Mon, 03/28/2011 - 18:56

I LOVE these plans. This was my first project, and although it was a big one to start with, the plans were easy to follow. If I can do it, anyone can. I added the rock wall. My kids and I love it. Total cost for me (including all lumber, nails, paint, slide, etc.) is about $850.

Estimated Cost
$850
Estimated Time Investment
Week Long Project (20 Hours or More)
Finish Used
1 coat primer, 2 coats paint
Recommended Skill Level
Intermediate
Seasonal And Holiday

Rolling shelf turned laundry cart

Submitted by makermave on Sun, 11/21/2021 - 16:17

This is my first build! It came together really easily. I modified the dimensions to fit my space. I didn’t add the black pipes, simply because I couldn’t find all the pieces, or the corner brackets, and I think it looks great without them. I added a handle (a towel bar I found on Etsy) to pull it in and out. I used rough cut cedar, and have not finished it. I’m not sure if I will. I wanted to spray paint the wheels, but the person that helped me attach them (a.k.a. my dad) was ready to to help me before I had them painted! But I love it, and it really adds functionality and stoage to this little gap between our washers and dryers.

Built from Plan(s)

Comments

OUTDOOR SOFA

Decided to build Ana's outdoor sofa for our Master Balcony and love the results. I was a bit impatient to finish the build and therefore did not take the time to use pocket screws for a more finished result, (which I will do next time). Regardless, I love how the sofa turned out and would reccomend for anybody to build. The cheapest outdoor cushions I could find were from Ikea and we spent around $160.

Built from Plan(s)
Estimated Cost
$100 BUILD, $160 CUSHIONS
Estimated Time Investment
Afternoon Project (3-6 Hours)
Finish Used
OUTDOOR STAIN
Recommended Skill Level
Beginner

My take on the chicken coop design

Submitted by Anonymous (not verified) on Thu, 12/30/2021 - 13:01

When we became accidental chicken owners, we had to build a coop fast. I found the plans for Ana’s replica of the Williams Sonoma chicken coop and got to work. They were very easy to follow and easy to modify to fit our own needs and aesthetic. We decided to enlarge the coop and remove the planter in the original plans do we could accommodate more chickens while keeping the original footprint. Instead of plywood, we used cedar reclaimed from an old fence we had recently replaced. We also enlarged the rear door to make clean out as easy as possible. I cut pieces of corrugated plastic that fit inside the door and windows to winterize the coop when temps drop below freezing. The run is designed to follow the shape of the coop and is large enough to give our 5 chickens plenty of space. The planter box runs the length of the chicken run, providing some plants to munch on inside and shady vines that will eventually cover the outside. Thanks for the awesome plans!

Comments

Chaise Lounge

I built this chaise lounge for my daughter from your plans. She will paint it tomorrow. Thanks!!!

Comments

Sandbox with built-in seats

I modified this a tad from the original plans to suit my needs. I will eventually be adding a platform with attached slide and swing set.

Plans were easy to follow. My store didn't have 1x8's so I stacked 1x4's and used my Kreg jig to join them together and then I added extra bracing.

I had seen this on Pinterest a couple years ago and thought it was the coolest thing! Io excited I was able to build it myself!

Built from Plan(s)
Estimated Cost
About $40
Estimated Time Investment
Day Project (6-9 Hours)
Finish Used
None yet. I will stain and seal everything when I get the entire play set finished.
Recommended Skill Level
Beginner

Farm House Table and Bench

Submitted by Anonymous (not verified) on Fri, 05/05/2023 - 08:52

Built this table and bench according to Ana's plans worked out great.

Comments

My Simple Outdoor Lounge Chair with 2x4 modification

I modified this chair with 2x4's as the base and 2x2 for decoration on arms, this is prior to sanding and finishing

Built from Plan(s)
Estimated Cost
$15-$20 dollars, depending on local lumber prices and finishing options.
Estimated Time Investment
An Hour or Two (0-2 Hours)
Finish Used
Unfinished
Recommended Skill Level
Beginner

Comments

RandyW

Sat, 06/13/2020 - 16:33

I always take my sander to the sharp edges and round them off

The Gíaffe TV Stand

Submitted by Anonymous (not verified) on Thu, 02/06/2020 - 09:55

The Gíaffe Free Standing TV Mount. Handcrafted and engineered to use its center mass to deliver strength and balance for tv sizes 30-60". Display your television without detracting from your home's decor. The Gíaffe Free Standing TV Mount is the perfect solution and its rich finish will be perfect for any house/office room.

Estimated Cost
$109
Estimated Time Investment
Day Project (6-9 Hours)
Finish Used
Stain - Dark Walnut - Varathane - 2 Coats
Finish - Water Based Polyurethane - Varathane - 3 Coats
Recommended Skill Level
Intermediate

Comments

Doggie Daybed

Submitted by MurdaRae on Wed, 06/06/2012 - 10:16

I've thought for a while about building a bed for our dogs, but wasn't sure where to start. We had an extra crib mattress so I set out to find a toddler bed that would work. I decided the Lydia Toddler Bed plan would work best. It doesn't look anything like it, but it was a great starting point.

First, I got rid of the canopy and the decorative side pannels. I also raised the bed 12 inches. (The hope is to add a rug on the floor underneath as sort of a "bottom bunk") The lumber store didn't have 2x2s so I used 2x3s for the legs. I also only used two 1x6s at the head and foot of the bed. They are seperated by 1" because when I got home, I realized they were actually 1x5 (RUDE).

All in all, it turned out exactly as I had hoped and the dogs love it! GOODBYE stinky dogbeds!

**Photo 1: Just finished building--the slats weren't screwed down yet.
**Photo 2: Deacon is testing out his new digs! See the stinky dogbed underneath?YUK!
**Photo 3: Dog Bed Completed! Mac & Deacon love it!

Built from Plan(s)
Estimated Cost
$38
Estimated Time Investment
Day Project (6-9 Hours)
Recommended Skill Level
Beginner

Comments

Outdoor sectional and coffee table

Submitted by Rynhffr on Mon, 07/06/2020 - 21:06

Loved these plans! Was my first project I tackled trying my hand with a new hobby of wood working to stave off quarantine craziness :-) finished project looked awesome and got me started working on other plans on the site.

**note**
Side table was just sanded and refinished, wasn't built just tried to match.

Estimated Cost
400
Estimated Time Investment
Weekend Project (10-20 Hours)
Recommended Skill Level
Beginner

Cedar planter and 3 tier planter

Submitted by Anonymous (not verified) on Tue, 08/04/2020 - 17:48

My very first attempts at wood working. My new COVID-19 hobby 🥰

Estimated Cost
20.00
Estimated Time Investment
An Hour or Two (0-2 Hours)
Recommended Skill Level
Beginner

Do-It-All Mobile Workbench

Submitted by JL Hurst on Wed, 11/28/2012 - 11:02

The need for a proper workbench in my garage/shop is a must, but. So is space! I already have a fold down workbench I’ve made with ¾ inch pipe & a door, but. I just need something that can handle all my tools. So, I stumbled upon these plans from the Family Handyman & couldn’t find a reason why this wouldn’t work in my shop. It has room for storage, can easily accommodate my tools & most importantly fold up to store. Easy to build too! Make sure you read all the plans first as some of the materials could be pricey, but well worth it. Technically it’s taken 2 months to build this bench, as I operate on a firefighter/teacher’s budget & during the holiday season no doubt. I ordered all the shelf standards & brackets through Amazon, $210.00 for those alone, but they hold so much weight to support your tools I figure it’s worth it. The rest materials (wood, screws) were purchased at Home Depot for around $150.00. The plans called for ¾ inch ply & it was $45.00 per sheet. However they did have a smaller thickness for $22.00 per sheet & was only a 1/32 inch thinner. I plan on topping all my surfaces with some ¼ inch tempered hardboard later on so I knew it would work. That also left me adjusting my screw size to mount my brackets. Due to the reduction in thickness of the plywood all my #8-1 inch screws needed to be adjusted to ¾ inch so to not screw through the ply. I also hit the molding isle to nab some pieces to use as furring strips to use under the shelves before attaching the brackets. This way I can sand each strip to match before mounting to make sure it lined up flat with the center top. One more thing; where it says “drill 1/8 inch hole in brackets make sure you use 1/8 inch pop rivets. I barrowed a pop rivet gun & was handed some rivets as well. Popped two & they had to be trashed because the rivet size turned out to be 5/32. So I stepped up in drill bit size & it all worked out. As I said, I’ll be topping it with some ¼ inch hardboard. I also plan to run it’s own electrical with an outlet on each post. I hope you all enjoy & this can help!

Estimated Cost
$350.00
Estimated Time Investment
Weekend Project (10-20 Hours)
Recommended Skill Level
Beginner

Comments

Rusty Cottage

Thu, 11/29/2012 - 07:03

This is by far the best workbench I have ever seen!!! Thanks for sharing. And excellent choice of table saw and miter saw.

JL Hurst

Thu, 11/29/2012 - 14:59

If I had it to do over I'd had gotten the contractor grade portable saw from Dewalt. The smaller version I have is the same 10" saw, but. It's maximum rip capasity is only 16. The other will at least rip a sheet of ply in 1/2.

Thanks for the kind words on the bench! I hope everyone that may find this valuable will. The plans came out of a 2005 issue & were hard to find on the internet.

uniquetrio2000

Thu, 07/04/2013 - 18:28

I love this work bench and would love to build it but i cant find them. Could you post them or email them to me please. uniquetrio2000 [at] gmail [dot] com

phantom1

Tue, 06/02/2015 - 05:39

I built this bench 3 years ago and I couldn't be happier. The portability, space savings and functionality make it wonderful!

StepFar

Mon, 01/08/2018 - 14:44

Am I missing the actual plans for this. I downloaded the pdf but it doesn't have the build plans apart of it.

Tilt Out Recycling Center

Submitted by ppavel on Fri, 09/18/2020 - 07:36

Tilt Out Recycling Center to match the floating desk and barn door in the same room. Great project from the recycling center plans. (slight modification)

Estimated Cost
$80
Estimated Time Investment
Weekend Project (10-20 Hours)
Finish Used
Espresso Stain (Minwax)
Polyurethane Finish (3 coats)
Recommended Skill Level
Beginner

Comments

2x4 full outdoor patio set

Submitted by dtirrell on Tue, 07/06/2021 - 06:44

Used the plans for the 2x4 outdoor sofa. Modified the dimensions to better fit my personal needs. Made the coffee table a square instead of the rectangle plans posted here

Estimated Cost
$1200
Estimated Time Investment
Week Long Project (20 Hours or More)
Recommended Skill Level
Beginner

Comments

Modified Garage Shelf (w/ Workbench)

Submitted by Anonymous (not verified) on Thu, 06/08/2017 - 11:15

Great plans allow for versatility and easy customization. Put the whole thing together in a day w/ one other person. My set up is 16' long - 5' on the side shelves and 6' for the workbench. Added a pegboard and fluorescent light under the top middle shelves. I'm also designing a slim drawer to go under the workbencheck area. Thanks a bunch!

Estimated Cost
~$150 including pegboard.
Estimated Time Investment
Afternoon Project (3-6 Hours)
Finish Used
Will stain dark in the future
Recommended Skill Level
Starter Project

Comments

Batmobile full Bed

Submitted by bbcarey on Mon, 08/03/2015 - 10:12

My son had a 'lightning Mcqueen' toddler bed- but we needed to get him into a little bigger bed.  We had a spare full bed, and Batman is his current favorite... Since there aren't Batman full race car beds- time to start planning and building from sketchup!  Took me about 2 weeks of evenings (after the kids go to bed) and about $110 in materials.  The model is available in the sketchup warehouse at:

https://3dwarehouse.sketchup.com/model.html?id=u6b750a53-37a4-4d52-9d31…


For the wheel covers I ordered online at Amazon for $25 for a set of 4.

For the Wheels both HD and Menards make a 18" wood table top for ~$7 that I just cut the middle out  with my router to fit the wheel covers.

The slats to hold the bed (made to fit both box spring and mattress) were just 1x4 pine boards from menards.

The body was made from 3/4 MDF, though you could of course use plywood. 

I used a projector to project the image from sketchup onto the board to get it transferred- else it would have been 50+ pages if printing..

For the logos I just used a minila folder as my stencil and cut out the logo.  Needed to touch up the 'tabs' to hold the logo in the circle after pulling off the stencil.

Estimated Cost
$115
Estimated Time Investment
Week Long Project (20 Hours or More)
Finish Used
High gloss Latex paint.
Recommended Skill Level
Intermediate

Comments

In reply to by Ana White Admin

bbcarey

Fri, 01/29/2016 - 21:18

I give you credit when people ask how I got started in woodworking because until I found your site and my first project (library cart) then 2 helper stands for my kids and other friends kids and it just went on from there. The skils taken from this site and learning Sketchup have brought a lot of nice furniture to our home as well as a sense of confidence to me!! Thank you!

MoxieMan13

Sat, 09/12/2015 - 19:10

My son really wants this and I promised him that I would make it.  Do you have a PDF or anything of the outline of the batmobile?  Thanks! 

Woodlandfox

Sun, 02/21/2016 - 14:29

Thank you so much for the greatest idea ever!  We stumbled on this and believe it will be the perfect next bed for our son, however, we cannot download any of the files.  Do you have a PDF of the measurements or any other form you can upload so we can make this bed?  Thanks in advance!  Great work!

SDonahue9807

Tue, 12/06/2016 - 07:23

I apologize if I am just missing this, but... do you have step by step instructions on building this bed? I see the pictures of each part and its corresponding dimensions, but I cannot located instructions on assembling the bed. 


Thanks!

Double Inset Bookshelf Doors

Submitted by dholubar on Wed, 08/21/2013 - 07:08

You made this project look so simple that I just had to try it. However, to suit my needs I had to make a few alterations to the plans. I had a set of bi-fold doors that were in need of replacement and I thought inset bookshelf doors would be the perfect way to replace them. This project was easy enough for me to do it myself and I am really new to the DIY game but I did have some help. I really love the way they turned out. You can read all about my my adventure at http://heresalittletmi.blogspot.com/2013/08/bookshelf-doors.html

Built from Plan(s)
Estimated Cost
$120.00
Recommended Skill Level
Beginner

Porch Planter Steps

Submitted by Anonymous (not verified) on Sun, 08/27/2023 - 12:23

I love how sturdy and beautiful these planter steps turned out! They were easy to build and work perfectly with the new deck/front porch I built this summer. I only needed one step and I used the same 1x material for the top of the step as I did the deck. I just added a couple more supports for the 1x material, as it isn't as sturdy as 2x6's. Thank you so much for the wonderful plan!