Community Brag Posts

Vegetable Bin

Submitted by Anonymous (not verified) on Mon, 02/29/2016 - 10:55

I had a great time with my first project being this vegetable bin. I did have to have some help with the actual construction and I know it's not perfect. It's uneven and has flaws, but I think it gives it a little character.

Estimated Time Investment
Day Project (6-9 Hours)
Recommended Skill Level
Beginner

Camp Loft Bed

Submitted by MommaBlue on Tue, 10/08/2019 - 10:58

I built this bed for my 8 year old son's room "face lift." His only request was to have a place to hang out, but being his room was so small, that was a struggle! The loft bed allowed us to make a cozy little hangout - the poor guy can't get rid of his siblings now!

I added a few extra inches to the height of the Camp Loft plan, I also added the pipe hand rail for additional safety and give his room a little older boy vibe! It was a very easy build, the staining/sealing took the longest. The stairs make it much easier to change sheets and getting up and down for those of us who aren't 8 year olds :).

Estimated Time Investment
Day Project (6-9 Hours)
Finish Used
I used a mixture of Varathane Weathered Gray and Minwax Special Walnut. It is about 3/4 Gray and 1/4 Walnut.
Recommended Skill Level
Beginner

Loft Bed w/ Bookcase and Headboard

Submitted by trodkewich on Sun, 02/12/2012 - 15:05

We used the loftbed plans, http://ana-white.com/2010/05/furniture-plans-loft-bed.html and the bookshelf plans, http://ana-white.com/2010/06/plans/what-goes-under-loft-bed-how-about-b…- then designed our own headboard. The girls love their new room and we're going to build another one for the boys! We just put a platform bed from Ikea underneath!

Estimated Time Investment
Weekend Project (10-20 Hours)
Recommended Skill Level
Beginner

Comments

greg f (not verified)

Sun, 12/30/2012 - 06:39

i want to build this project for my daughter, but the link for the bookcase is a dead link. where can i find the bookshelf plans? i plan on making the loft be a full size, so will be adding 15" to my project. thank you!

Colin's New Bed

Colin needed a bed for his room to upgrade from his toddler bed. I new immediately I was going to use plans from Anna's site! Building the bed was extremely easy with the new tools that I received for my birthday. This was my first time staining anything so that took the longest time for this project. It is my second thing that I have built from Anna's awesome website!

Built from Plan(s)
Estimated Cost
$135
Estimated Time Investment
Week Long Project (20 Hours or More)
Finish Used
Minwax Gel Stain - Hickory
Recommended Skill Level
Intermediate

Comments

mltnichols

Thu, 03/06/2014 - 07:00

Did you use a kreg jig and attach 4x4 legs via pocket holes? I don't see any screws... trying to decide how to best attach everything before taking on this project. Thanks!!

mltnichols

Thu, 03/06/2014 - 07:00

Did you use a kreg jig and attach 4x4 legs via pocket holes? I don't see any screws... trying to decide how to best attach everything before taking on this project. Thanks!!

christinamurr922

Thu, 03/06/2014 - 20:16

Yes. I used the kreg jig and created pocket holes that screwed into the 4x4. I used the correct size when drilling the holes but I may have used the next size up in the screw length for extra support. The bed gets plenty of use between my 7 and 5 year old and is one solid piece of furniture.

Scroll Legged Console made by RW Creations

Submitted by Anonymous (not verified) on Wed, 03/02/2016 - 12:01

I found these amazing plans from Ana's website here.  Couldn't be easier!  I modified mine a bit to fit the space and used recycled pine wood for my project!  The Scroll legs I used my jig saw to cut them out with the great stencil provided in these plans.  I was really happy with the result, as I only had minor sanding to do to make them match up when I glued them together.  Since I was painting this piece I used dry wall mud over the seams on the legs to hide the joints (a lot less expensive than wood filler).  Since it was all recycled wood I had to do a lot of sanding but it saved me a lot of money!  So very happy with this project!  Thanks for again for the amazing plans!!!


Randi Wolf

RW Creations

Estimated Cost
$150-$200.
Estimated Time Investment
Weekend Project (10-20 Hours)
Finish Used
I stained the piece with a dark walnut stain. I then painted it a Chalked Ivory. Sanded the edges to bring the dark weathered look through and then sealed it with Varathane Triple thick polyurethane.
Recommended Skill Level
Intermediate

Comments

DIY Pergola

Submitted by Anonymous (not verified) on Fri, 06/30/2023 - 11:15

I built this pergola in 3 days and added mason jar solar lights.

Vonda Jones

Built from Plan(s)

Adjusted Balin Console Table

I loved the Balin Console Table plan, so my husband and myself decided to try it as our first project. We adjusted the height to 42" and we added a bottom shelf. I am so happy with the way it turned out. I have received many complements.

The mirrors were made by my father, I have to brag on him since he did such an amazing job! I show him Viva Terra's porthole mirrors collection and he re-created them with Teak wood.

Built from Plan(s)
Estimated Cost
$160
Estimated Time Investment
Weekend Project (10-20 Hours)
Finish Used
Minwax Dark Walnut Stain
Recommended Skill Level
Intermediate

Comments

spiceylg

Wed, 02/15/2012 - 14:39

You did a beautiful job and I love how the whole area is staged. The mirrors are amazing, too!

hammertime

Sat, 02/18/2012 - 11:14

Beautiful job. I love the finish and the hardware you chose. And your dad is quite talented too!

Chauncey's Car

Submitted by Gaucho85 on Tue, 12/24/2013 - 19:55

Thanks for the idea. I added a couple extras and figured I'd post them in case it helped anyone. Fun project!

Estimated Cost
$50
Estimated Time Investment
Weekend Project (10-20 Hours)
Recommended Skill Level
Beginner

Comments

My gigantic bed!

Submitted by ThiaD on Sun, 03/06/2016 - 07:45

Thank you so much Ana for providing such good plans! I use your Mom's Fancy Farmhouse Bed plans and added drawers underneath (a girl can never have too much storage!) using your Under Bench Trundle Drawers plans. I made it look a bit different than yours so it fits with the desk I already have in my room and used Mortise Bedlocks to assemble it, so it will be easier to take it apart when I move next time. This was my first project using your plans and my Kreg Jig and I'm hooked!

Estimated Cost
600 CAD
Estimated Time Investment
Week Long Project (20 Hours or More)
Recommended Skill Level
Intermediate

Comments

Wood Closet Shelving

Submitted by Anonymous (not verified) on Mon, 10/14/2019 - 13:57

This was a great build and easy to do.

Built from Plan(s)
Estimated Time Investment
Day Project (6-9 Hours)
Recommended Skill Level
Beginner

Double Bunk with Dovetail Joinery

Submitted by Anonymous (not verified) on Wed, 07/05/2023 - 08:34

This double bunk bed has been inspired by Your plans for modern bunk bed - Side Street. To facilitate quick assembling - disassembling of beds for relocation dovetails joints with double inclined tails and wedges have been made. Because the beds has been made for orphanage/"kids in difficult life situations" I changed spacing between headboard and footboard rails to let footboard serve as ladder and in this manner reduce costs and time of construction, save place for installation, avoid tripping hasard. Thank You very much for detailed and simple plans.

Andriy Pronin, Ukraine

Built from Plan(s)

Sausha's Washer and Dryer Pedestal

This was one heck of a project LOL! But I am so pleased with the results!!

Estimated Cost
$120
Estimated Time Investment
Day Project (6-9 Hours)
Recommended Skill Level
Intermediate

Comments

pdoughty (not verified)

Sun, 09/23/2012 - 08:03

My washer will shake on the metal pedestals. Will it shake on this one?

Shawna Sommerville (not verified)

Mon, 12/31/2012 - 19:01

My husband just finished one similar to this for me today-total cost about $65.....Thank you for the fabulous & frugal idea!!

Jelly Cupboard(s)

Submitted by bbomer on Fri, 12/27/2013 - 09:48

I have built several of these Jelly Cupboards since the plans came out. Everyone really likes them, and they are super fast and easy to build. The last one had glass doors that turned out pretty well. I like to use plywood beadboard on the back to give it a little more character. I also like to use 'hardware cloth' for the mesh type doors (found at farm stores). It usually has openings about 1/8" or less but not as tight as screen, which looks perfect.

Edit: For hardware part numbers and sources please see: http://grvland.com/wordpress/2012/02/07/jelly-cupboard-project/

Built from Plan(s)
Estimated Cost
$50-$100
Estimated Time Investment
Weekend Project (10-20 Hours)
Finish Used
Black Walnut Danish Oil, Wax Free Shellac, Latex Paint (dark), more latex paint (light), sand back, Water-based Poly
Recommended Skill Level
Beginner

Comments

romanweel

Tue, 12/31/2013 - 00:51

Really lovely work! I scoured a couple of those pretty butterfly hinges by pure luck a while back, and I know where to find more...but those strap hinges! Where did you get them? I can't seem to find them for a decent price (Ohio).

bbomer

Tue, 12/31/2013 - 07:15

The strap hinges are from Acorn Manufacturing. I had to order them because I could not find anything like them locally. For some reason I can not post links in the comments, but the sources are linked on my blog, grvland dot com (no spaces and a . obviously). Just search there for Jelly Cupboard and you will find the source links in the earlier of the two posts. I will also see if I can add a direct link above.

Flip Top Bench

Submitted by Anonymous (not verified) on Wed, 03/09/2016 - 19:54

Hi Ana,


I liked your design, but I've made a few changes to it for my bench:

-The dimensions

-The type of wood used

-All the joinery (Only screws are in the hinges)

-The inlays and a few other aesthetic features.


Thank you!

-

Estimated Cost
$100
Estimated Time Investment
Week Long Project (20 Hours or More)
Finish Used
50% Polyurethane, 50% Mineral Spirits,
Recommended Skill Level
Advanced

Farm table and bench

Submitted by Anonymous (not verified) on Sat, 10/19/2019 - 09:42

The table was my first ever built and I am beyond thrilled!! The 8 ft table is beautiful and sturdy and fits perfectly in my kitchen in front of my picture window. I bench is equally beautiful and sturdy. I can’t wait to start my next project!!

Estimated Cost
$100
Estimated Time Investment
Weekend Project (10-20 Hours)
Recommended Skill Level
Beginner

Square Picnic Table using Deck Boards

Submitted by Anonymous (not verified) on Fri, 07/07/2023 - 11:32

I used deck boards instead of 2x6 for the top and seats; this lightened the table overall while negating the need to sand and finish the boards.

I also used a cedar-tone treated board so staining wasn't necessary.

Kelly S.

Built from Plan(s)
Seasonal And Holiday

Storage Bench

I built just the bottom portion and chose to omit the molding. I lined the inside with contact paper so that items stored inside don't snag on the rough plywood on the other side of bead-board.

Built from Plan(s)
Estimated Cost
$75
Estimated Time Investment
Weekend Project (10-20 Hours)
Finish Used
Minwax stain/poly in one
0000 Steel wool between coats
Recommended Skill Level
Beginner

Hand made vanity mirror/door

Initially I was simply going to replace the old medicine cabinet with a mirror but my husband insisted that he needed a medicine cabinet. So I built the cabinet. Then I built the mirror. I wanted the mirror to stand upright but the width of the hole left behind by the old cabinet was too wide. I then tried to have the right side of the cabinet remain open but then realized that the door would not open because of the height of the faucet. In the end I had no choice but to make the door horizontal.

Though it's not what I wanted and it is not centered like I would I liked it to be I think it still turned out fine. And the mirror looks fantastic! Better than the pics show.

Most of the wood used were scraps from other projects. Including the trim. The one thing I bought for the project was a mirror that turned out to be the wrong size. It was too large and I did not want to cut it so I used the mirror from the old medicine cabinet. It did have hole where the door handle was which I tried to fill. Now I just try not to look at it. lol

Built from Plan(s)
Estimated Cost
$20 for cabinet hardware
Estimated Time Investment
Day Project (6-9 Hours)
Finish Used
Minwax 1-qt. PolyShades Espresso Satin Stain and Polyurethane. I applied it with a sock like I did the vanity but then I did the last coat with a high density sponge (on a stick). A total of 3 or 4 coats. Lost count...
Recommended Skill Level
Beginner

Sofa and Long Couch

Submitted by Anonymous (not verified) on Sat, 03/12/2016 - 12:18

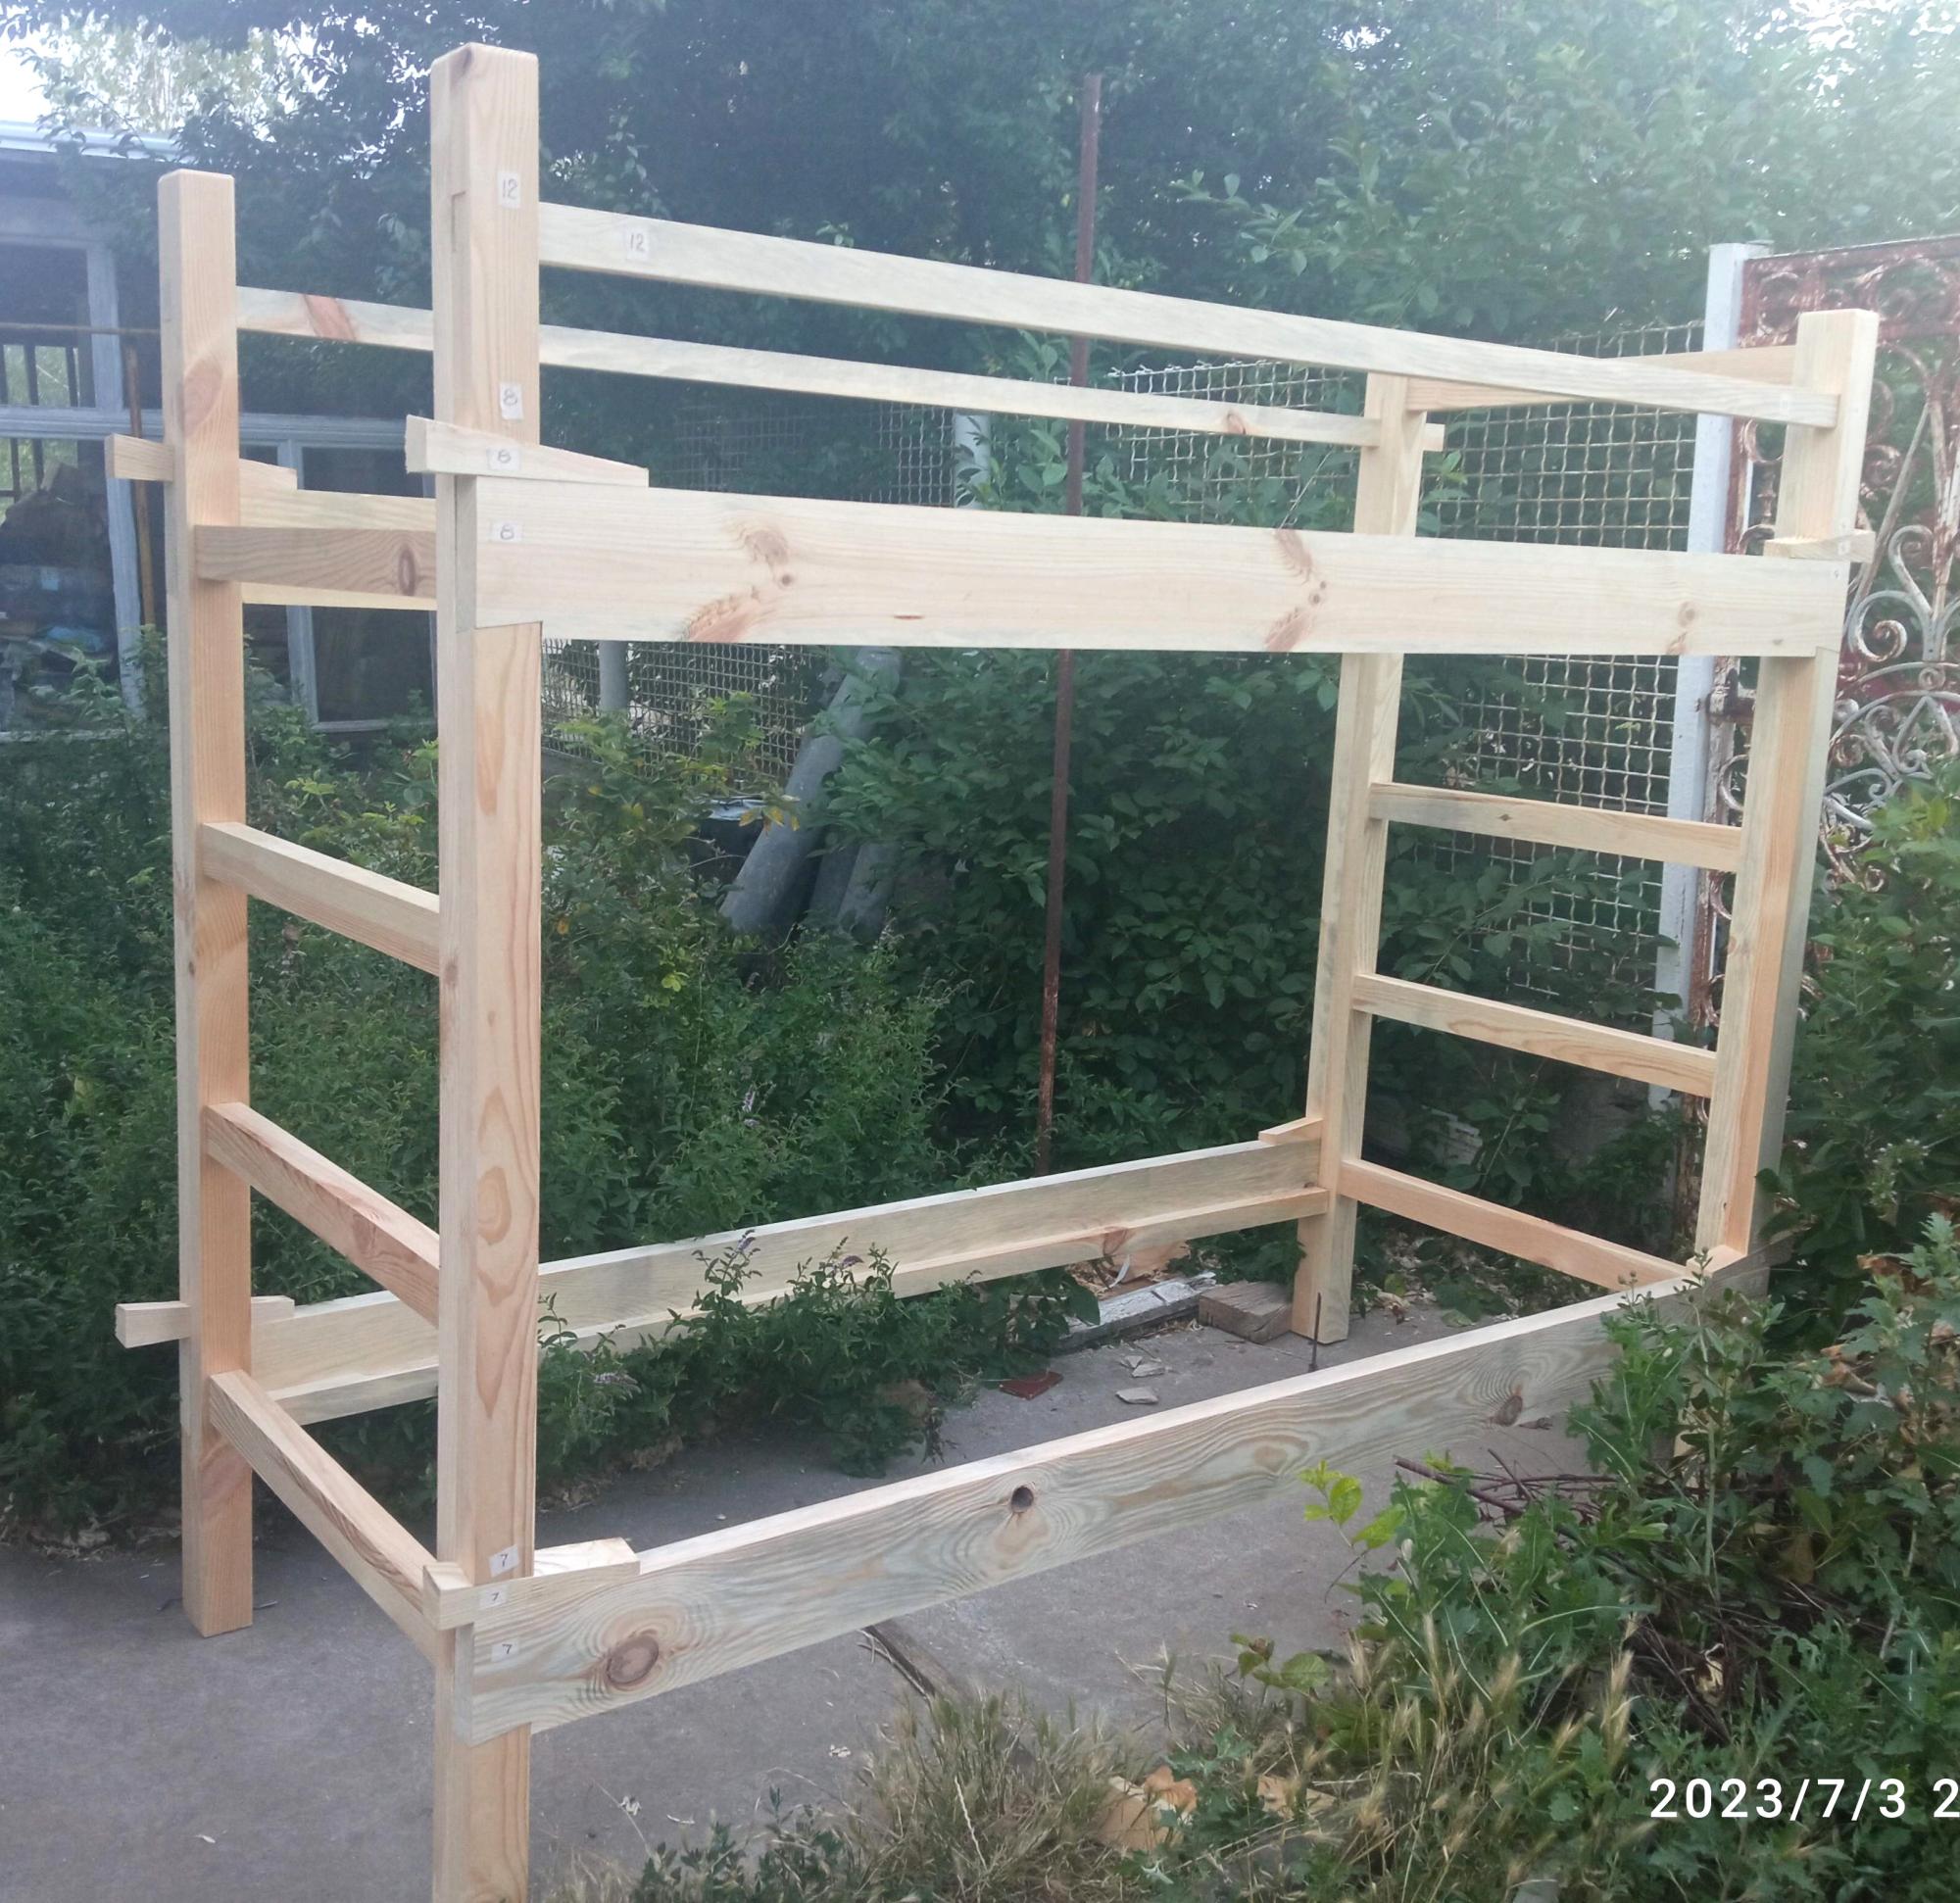
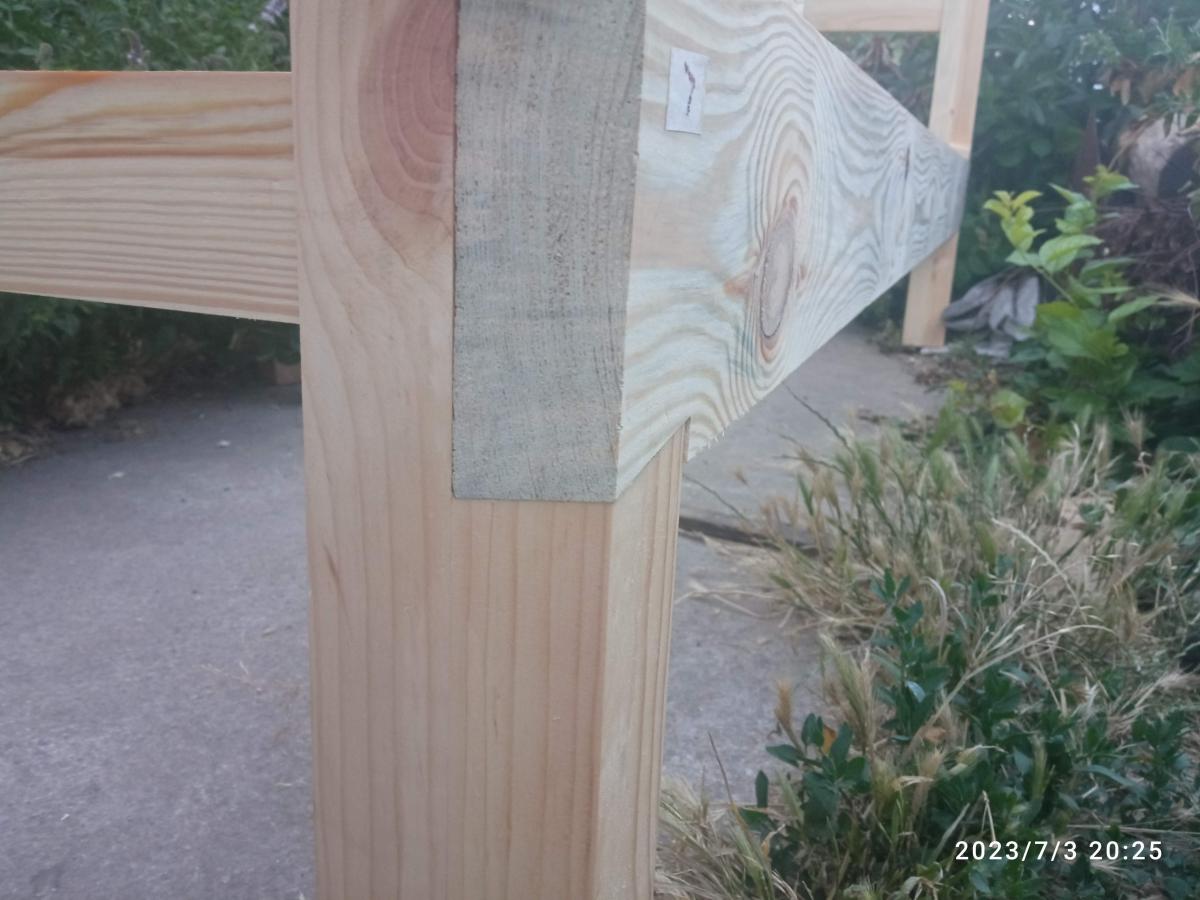
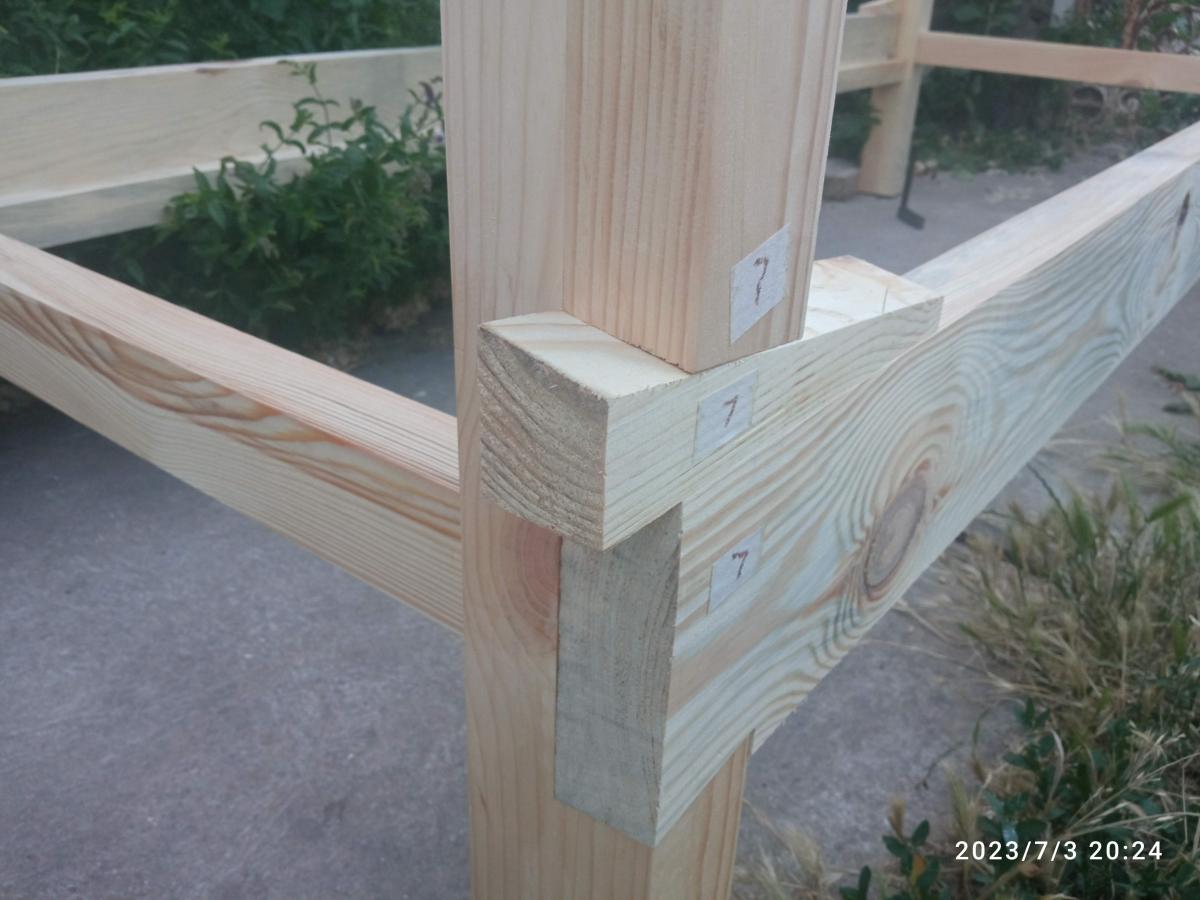
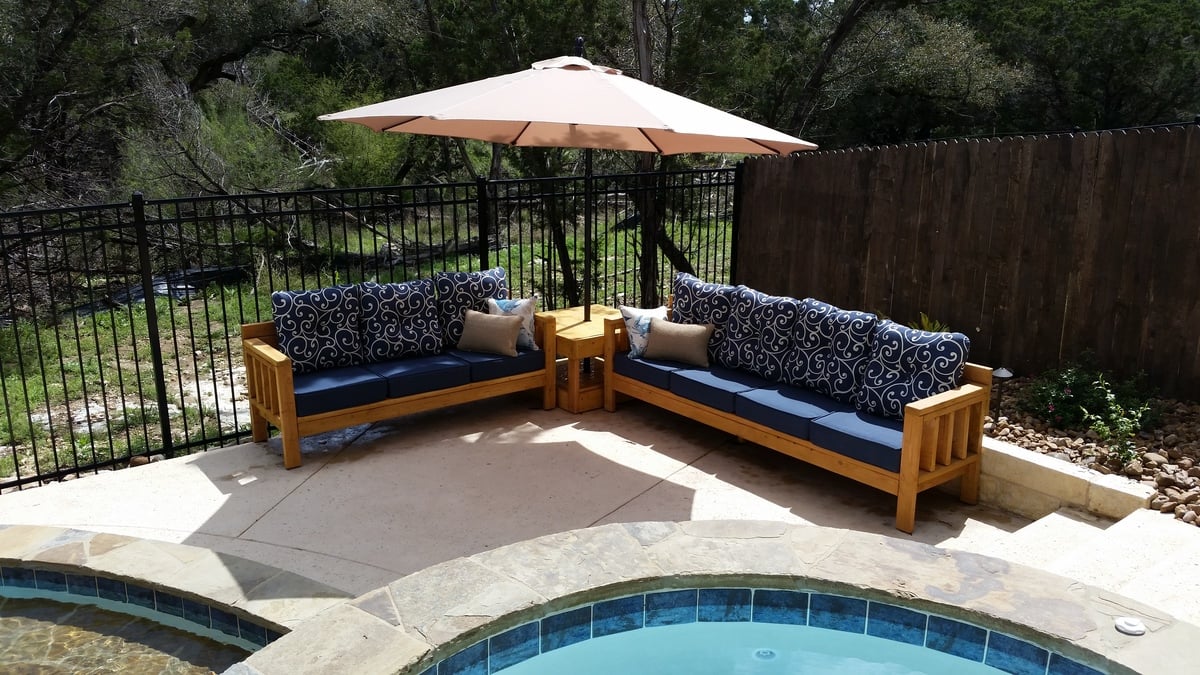
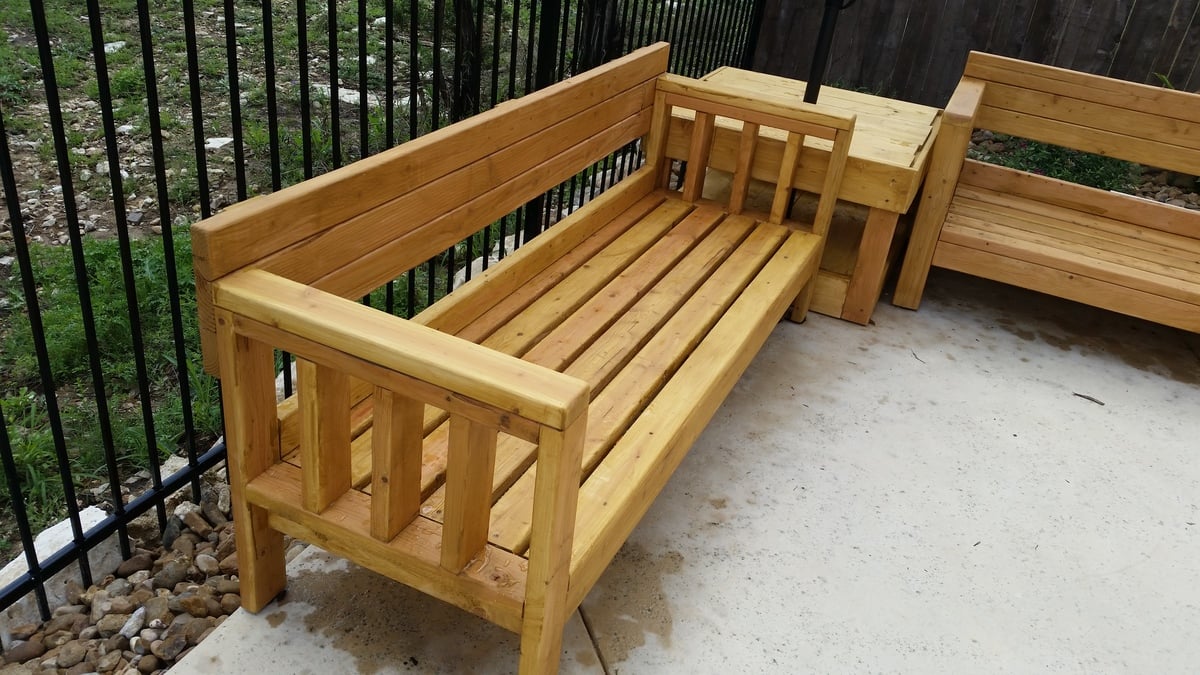
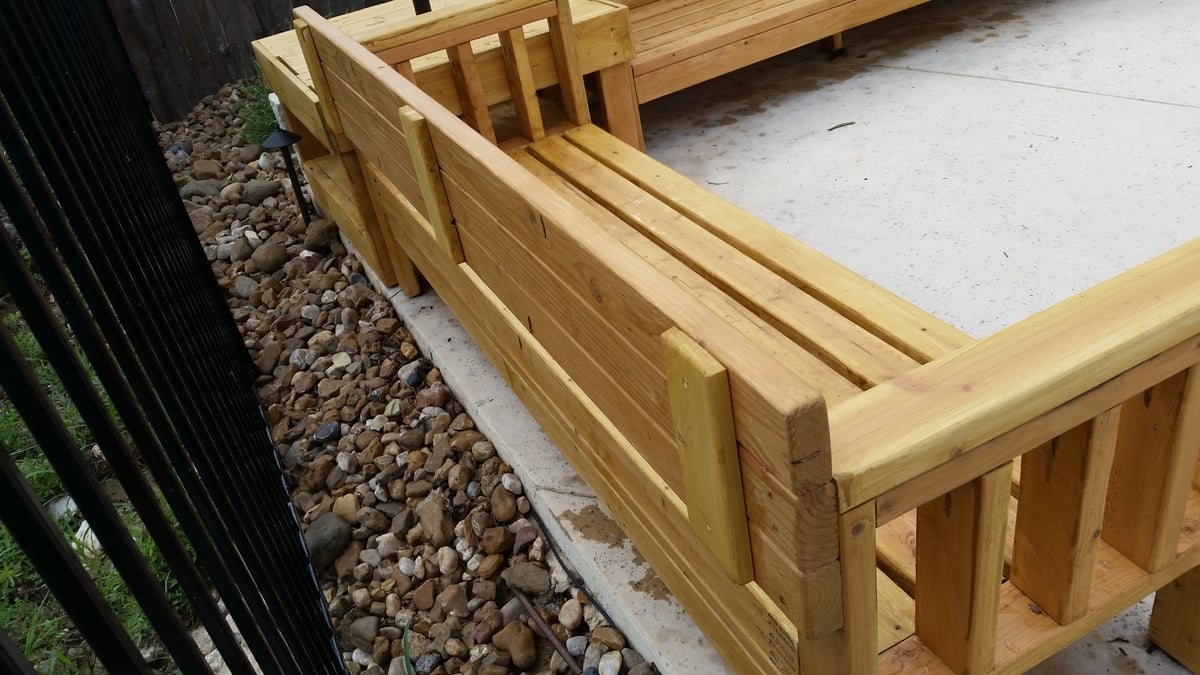
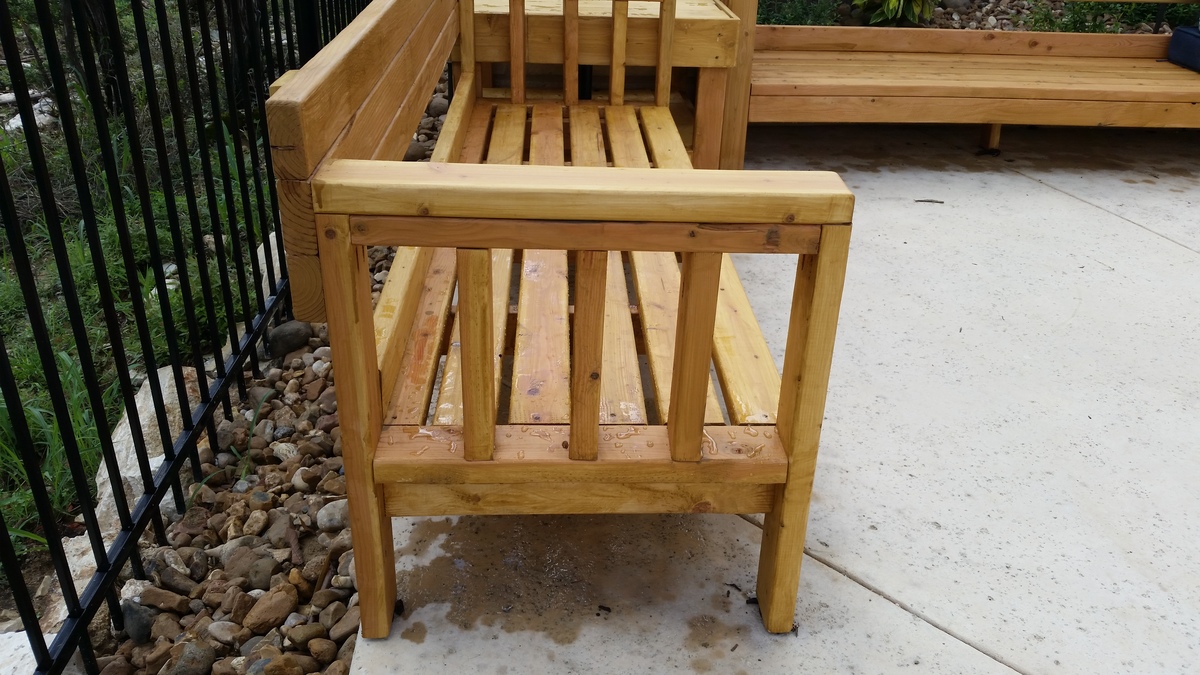
So, we basically took the pans for the 2x4 outdoor sofa and extended it for one of the sofas because we wanted 4-across seating. We also finished up the look by adding vertical beams in the arms and a second 2x4 across the top (see photos). Because of the really long couch, I added extra bracing foot to make sure it won't sag.


Once complete, we determined the pillows across the back were a bit too tall, so we adjusted the plans by adding a couple beams and then lengthening it to attach to the back of the arms rather then between the arms. We pocket drilled the beams together and then braced it with 1x4 slats across the back. I also used a 1/4 router bit to soften all the edges. Anna we took your advice and pocket drilled all attachments except the seat slats for a real finished store-bought look. Cost of wood was under $100 because we went with pine. Pillows and seats from At Home put us at about $600 total for the project.

Estimated Cost
All in with umbrella and stand, wood for stand, two couches, pillows, and sand to add weight for the umbrella was under $700.
Estimated Time Investment
Weekend Project (10-20 Hours)
Finish Used
Thompson Water Sealer
Recommended Skill Level
Beginner
Back