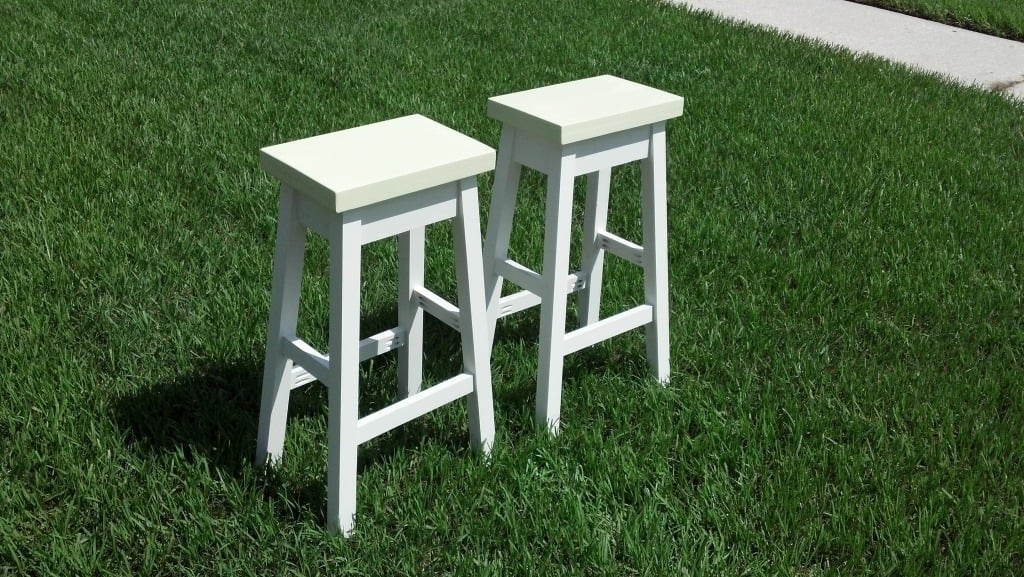
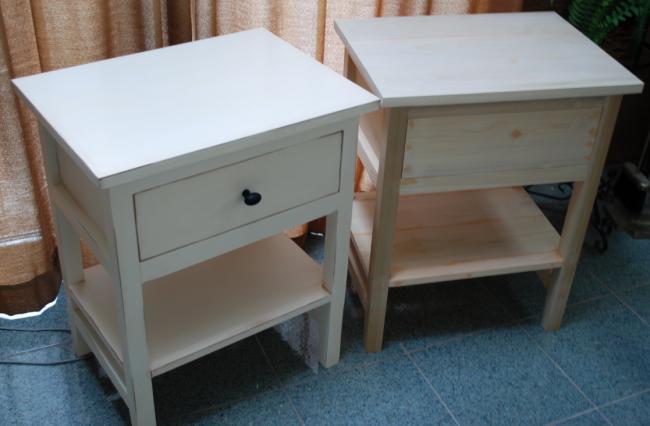
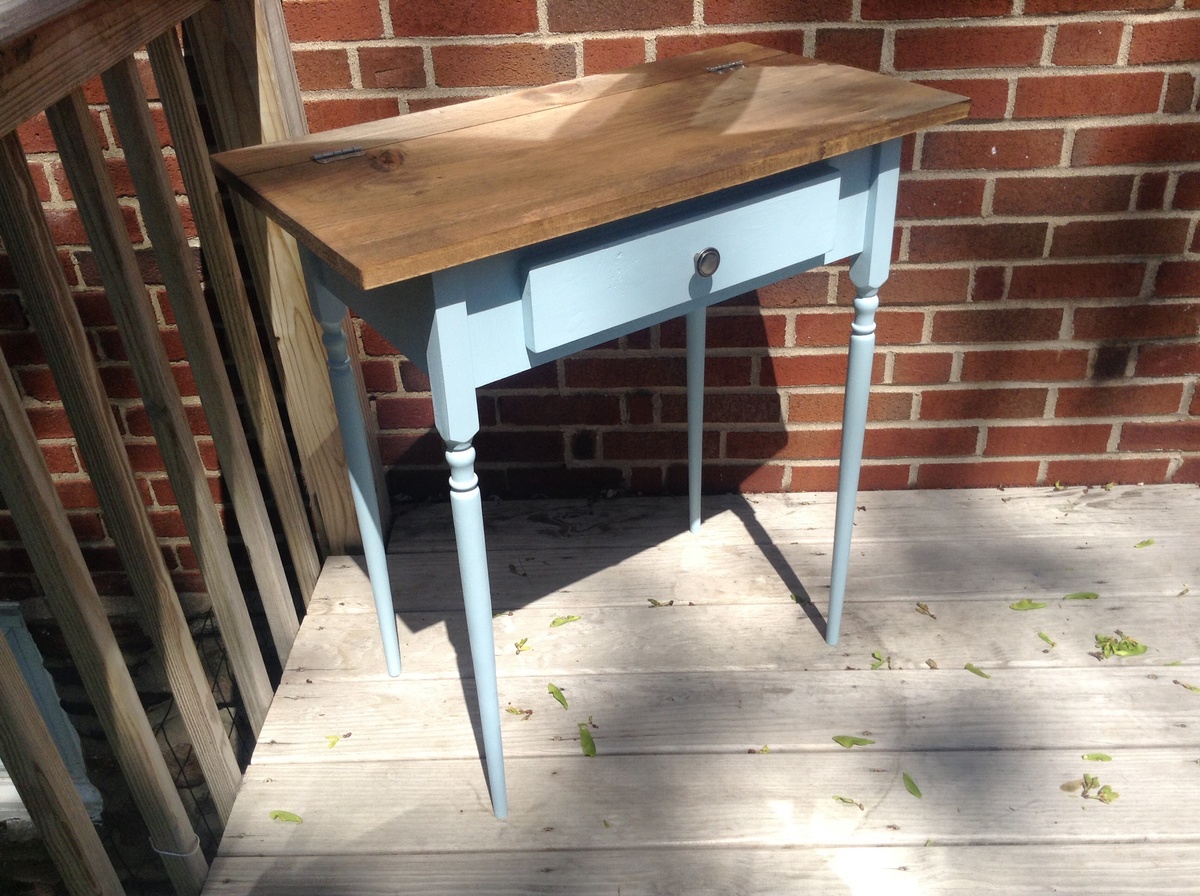
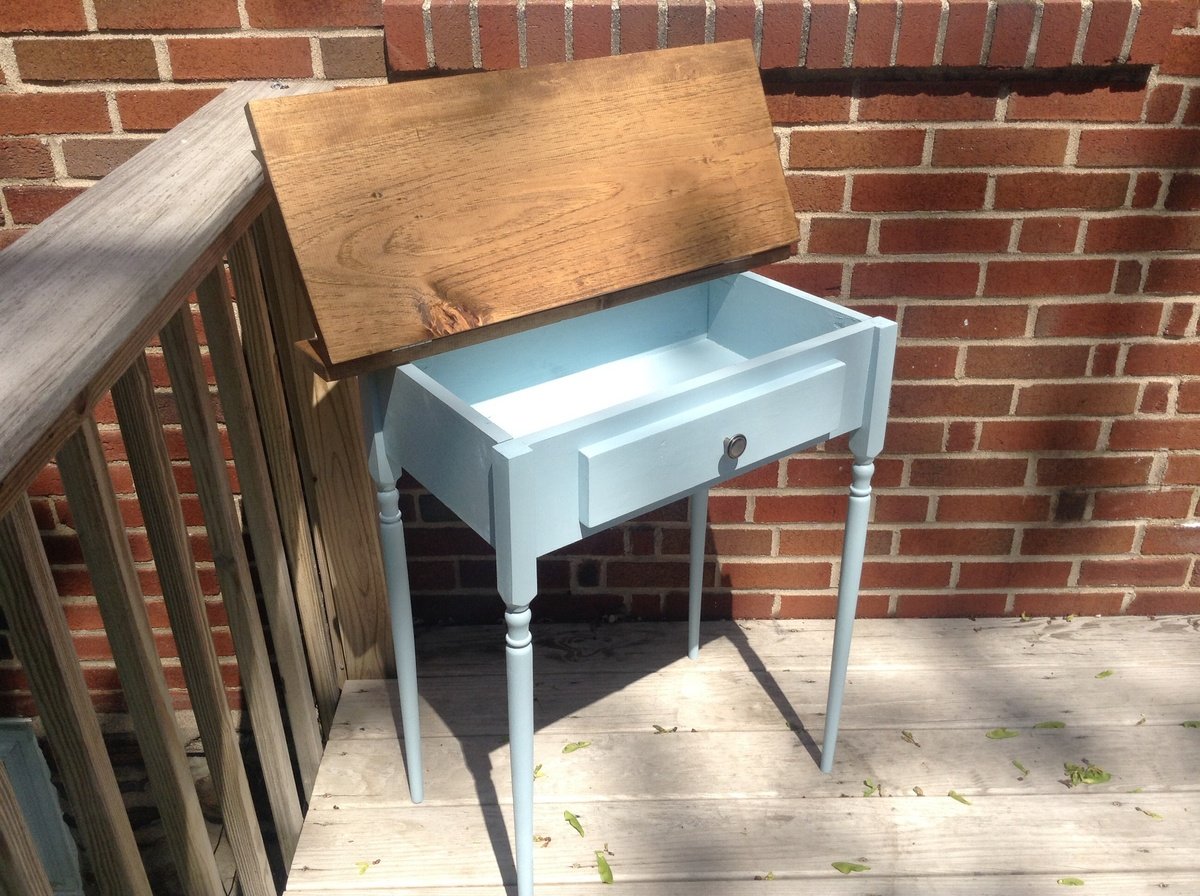
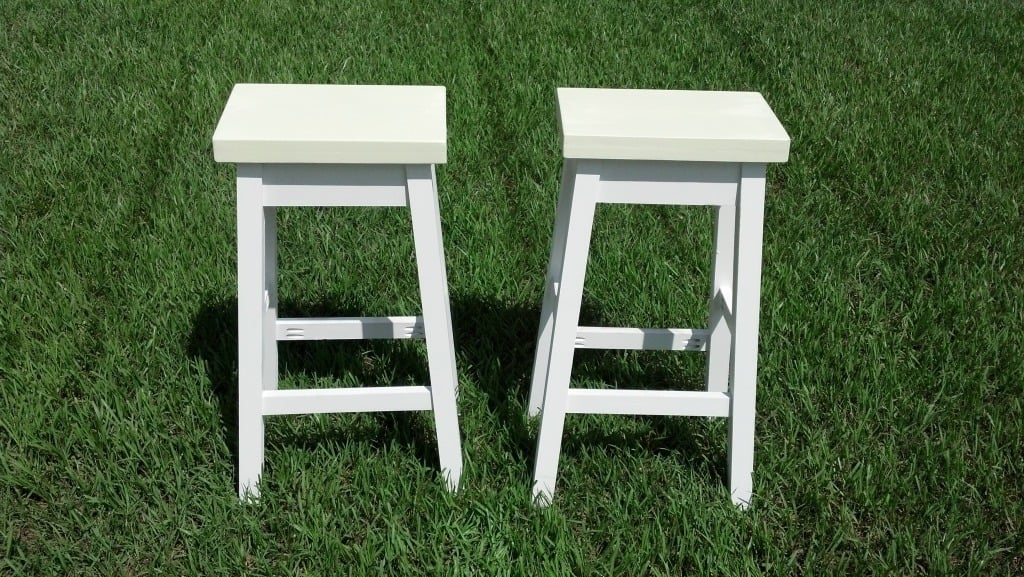
Large Modern Porch Swing + Ghetto Stand
Made the swing then just kinda came up with my own frame.
This was our first build from this website and we are so pleased! Having seen very involved plans on an Australian website for a similar sandpit, I was so pleased to come across this version, with its far simpler design!
We wanted a slightly bigger sandpit, so I needed to do some modifications, and while I was enlarging it, I also converted to metric sizes, and designed specifically for the timber I knew I could buy locally (very obscure and inconsistent seeming German sizes). So the end result is a 1.5x1.5m sandpit, that has so far had 6 kids playing happily in it at once!
I've put in the drawings I used, and the cutting list for larger sizes in case anyone else is working in metric, or wants a bigger size!
Our other modification was to offset the shorter sections of the base to run along the front plank of the bench seat - there were two main benefits for this - we need a lot less sand, as there is none wasted under the seat, and the seat is supported and can't bow downwards!
The dimensions and layout we used are in the images.
Supplies
Timber
2 - 200 x 40 x 3000mm
6 - 120 x 24 x 3000mm
1 - 80 x 50 x 3000mm
Hinges
12 - 140mm long (the original design had 8, we went with three per edge to allow for the extra width)
Self tapping decking screws
18 - 5 x 80
48 - 5 x 50
96 - 3 x 20 (or enough for your hinges, depending on the design)
Paint
3 - 375ml PU Acrylic Paint, suitable for exterior use (top planks and seat supports)
1 - 750ml PU Acrylic Paint, suitable for exterior use (base)
Weed matting and staple gun
Sand
I calculated I would need 20 x 25kg bags - in the end we needed 11 - don't ask me where we went so wrong!
Cutting list
2 - 200 x 40 x 1500 (long sides of base)
2 - 200 x 40 x 1415 (short sides of base)
12 - 120 x 24 x 1495 (top slats - just under half a plank, to allow for waste)
4 - 80 x 50 x 245 (armrests / seat braces)
4 - 80 x 50 x 495 (back supports of seats)
I gladly paid 5 Euro for the wood to be cut in Hornbach - it should have been more than this, but the guy was generous!
12 hinges (the original design had 8, we went with three per edge to allow for the extra width)
On Sunday we had the idea, on Monday I drew up the plans, on Tuesday I went shopping! Once all our wood was home safely, we sanded it down - most edges weren't badly finished, but there were a few splinters that needed getting rid of!
The next two nights Mr W gallantly set to work with the paint brush. After two nights, the wood all had two good coats of paint and we were ready to start assembling on Friday.
I pre-drilled the base of the bench before the second coat of paint - three holes for each butt joint - with some careful measuring this made screwing the base together really easy!
The top planks were also pre drilled, but there unfortunately my tiredness made me make mistakes, and some had to be re-drilled! Spacing the planks out took a lot of time, but I am glad I made the effort. I used cereal box, and experimented with different numbers of layers - I knew I wanted a theoretical 5.4mm gap, but it took some time to get the right number of layers of carefully creased and concertinaed card!
Having got our spacing wedge sorted, we screwed the blue planks in place at either end of the base. We then assembled the green seat section, and the blue/yellow back rest. Following a tip from the comments section, we added the hinge to the seat/back combo first, as this ends up being on the underside. Once those two hinged sections were made, they were then laid in place on the base (card wedge spacers in place) and then the final hinges added. The final assembly took about 5 hours - but this was partly because we started outside, then had to move everything inside when a huge thunderstorm rolled in!
The next morning we got busy with the staple gun and tacked weed matting over the base, then it was hauled in to position and filled up! For us getting this done and dusted was important, otherwise it could have dragged on a lot, but we are terribly proud that it was done in less than a week from being fist conceived!
I hope the metric/enlarged plans are of use to someone else too. One other idea we had, which we didn't get round to building in, was a support bar to be fitted when you close the pit, so the kids can play on top as a stage when it is not being used for a sandpit!
A nice quick build to add some decoration to the house. I made three ledges at 80" long. I had initially made them for a different room that could only allow 80" ledges, but ended up not being able to put them there because the wall was too curved to attach the ledges. Ledges have two coats of Miniwax Special Walnut Oil stain and Polycrilic.
All the "art" things were painted on old scrap from a years worth of ana-white projects. I used the three different stains I had left over (Miniwax Aged Oak Gel Stain, Weathered Oak Oil Stain, & Special Walnut Oil Stain) and alternated them on the three different types of wood scraps (Oak, pine, & maple). Then I "distressed" them with physical abuse and watered down acrylic craft paint. The designs were also acrylic craft paint. Then I sanded it all down to give it a worn look.
Mon, 07/14/2014 - 19:11
These are beautiful and creative! I see some staples from my own childhood there. :) Come do mine!
Still needs stain and cushions. Will post finished product once complete.
My wife wanted a collapsible table for her craft fair sales. I put a wooden dowel in the opening for her to drape packing paper over and hooks on the sides for gift bags. Easy plans to follow and it turned out great!
Todd Martens
Made two of these this spring. One for strawberry plants, and one for herbs and flowers. Made according to plans.
Thanks Ana, for the great plans and inspiration!
I built this for our laundry sorting needs using the Brook 4 tall and lengthwise plan. I modified the plan to take the baskets width wise, added a little more distance between baskets, and added guide rails above each basket (except the top one) to allow them to be partial pulled out without flipping out. I also beveled and slightly rounded the front of the guide rails just for looks. I think it turned out pretty good for my first woodworking project.
First build.
The plans and cut list were a tad off but I made a saw guide a cut it down from 36 to 24 after assembled.
I had HD do all my cuts but have since done my own!
This project cost us about $850CAN and took us around a week (5ish hours a day) to complete. My husband and I are definitely not carpenters so it's not perfect but it's pretty amazing :)
we made several alterations to the plans including making the bottom bunk larger to accommodate a double/full size mattress. We also made the "door" to the bottom bed larger with an opening of 30". Another alteration was we dropped the mattress cleats to 9" off the ground so that the mattress dat down in the bed. The bed is for our 2 year old so we thought she would have trouble getting in if it was much higher. This eliminated the storage area underneath but she has a large closets so we didn't think it would be an issue.
The plans were great and pretty easy to follow. We are over the moon with how it all turned out!
This project was such a fun challenge for me! I needed a table top version of this great Christmas tree shelf, so I modified the plans just a bit, and created an additional shelf. The little ornament blocks were fun to make too!
I built this picnic table while I was pregnant with my youngest. It was an addition to our outdoor kitchen. Came out pretty good, thanks to Ana's plan.
Super easy and useful project. I made mine 8 ft. long because my studs are on 24 in. centers and I had a lot of tools to hang. It was fun building it and even more fun getting all those tools and things off the floor.
I had been wanting to build something to hide the litterbox for a long time. When I saw the Printer's Console plan, I knew this was the perfect plan for a cat litter box furniture. I loved that Jen Woodhouse's version was completely modified to her bar plan, so I thought I could modify for my litterbox idea. I modified the plans on size, as I was trying to use a bunch of mis-matched plywood. I also modified it to include a cat door, a cat passageway on interior panel, a vent on the back behind one of the drawers, and the stone top. I built a frame on the back to house the backing as an inset piece, as I didn't want it to be seen at all. I learned a very important lesson during this build. Not all 1x3s are created equal. Once I got my doors assembled, they were too big for the opening. I couldn't shave off the tiny amount needed, and couldn't make anything work short of starting over with 1x4s, sawing off a small amount, and cutting down the # of "drawers" (and handles). I wanted the inside to be fully finished (because cat pee on raw wood would not be good!). I had to finish certain "planes" prior to putting the thing together. I used kitchen and bath paint on the inside floor and sides for easy cleanup. The stone was carryover from construction on our house 12 years ago. The handles were an amazing deal @ $1.81/each .
Sun, 11/25/2012 - 09:51
That is a fantastic idea and the table top is beautiful.
Mon, 11/26/2012 - 09:38
That is the most beautiful litter box I have ever seen!
Mon, 06/17/2013 - 12:23
Love your use of the buffet. Our family has discussed making a piece of furniture like this for our smaller dog. Nice to see someone has done it! Our big dog has scheduled feedings but our little dog would prefer to be a free feeder. Poor thing chokes down his food in our pantry listening to our big dog breathing under the door waiting for him to finish. When he is done we open the door and the Big, greedy dog bolts in looking for left overs. A family member has to wait patiently for the little dog to finish so he can escape the pantry. I really don't want a doggy door in my pretty swinging bi-fold doors to my pantry which is also access to our kitchen.That would be a pain to have to keep closed all day. But this buffet idea is super cute! Thanks for the inspiration.
Fri, 01/09/2015 - 22:01
I know this is an old post, but I'll ask anyway
I love this piece and am in the planning stages for ours. Thank you for sharing!
I am Wondering how you went about the table top. Did you install a 3/4 ply on top but not flush, allowing room for mortar and tile? If so how much room did you allow for the tile/mortar? 1/2 inch? How did you keep the surface of the tile level and uniform? Lastly, did you seal the tile with anything when you finished?
Aesthetically, the tile top really sets this piece off and I really want to make my own.
Thanks
Easy project no crazy cuts or tools needed. I did change a few things on the build. I changed the top from a 1x12 to a 2x12 to match the rest of my builds. And honestly it just looks and feels better! The trim is 1×3’s but I changed the middle shelf trim to a 1×2. Add the shelf 7.5 inches up from the bottom.
I had so much trouble deciding what to do with this HUGE closet in my breezeway. Previously it had just one bar across the top and ugly sliding doors. I loved Ana's design, but made several changes. Since my closet was super deep (32") I extended the depth of her design to about 25". I also staggered the rods for longer coats, and one that my 8 year old can actually reach to hang her stuff up! I changed the shelf design up a little bit too! Her instructions are super easy to change to your specifications. I did end up spending about $350 on this project, but keep in mind I was using 3 - 1x8's for each shelf instead of 1x4s.
I just wanted to share the loft bed I built for my daughter based on the plans available here. I added a desk, painted an existing chair I had built to match and included pink LED lights around the inside of the bed. Thanks for everyone sharing their ideas, plans and pics..!
Fri, 08/14/2015 - 21:39
Awesome! Do you have plans up for the desk area? I would like to incorporate that similar style. Thank you.
Sliding barn door kitchen island with planked siding. 48L x 30W x 36H
Thants for the inspiration We love it.
Comments
mikejillnelson
Tue, 09/11/2012 - 05:04
Comfortable?
I have been considering making this bench for a friend but I wonder how comfortable it is...is it comfortable? Does it require a cushion? Is the back high enough to be comfortable leaning back in it for long periods? Also - how long did you wait to paint your pressure treated wood? I just recently learned you have to allow pressure treated wood dry out before painting...no one seems to tell you how long you have to wait though. Thanks for any help/opinions you share.
In reply to Comfortable? by mikejillnelson
mrhelton
Wed, 09/12/2012 - 19:38
Needs Tweaking
Honestly, it's not very comfortable. I think the seat part is a little too long, and the back is a little too short. We're going to put a beefy cushion on the back, and I think that's going to help because it will push us forward a little bit. It's not bad to sit in, but I definitely think it could be tweaked.
I let the wood dry out for 4 days (but I cut and assembled it the day I bought the wood). I'm not sure if that was long enough of not, but I was getting impatient, and, like you, couldn't find any real answers on drying time. It wasn't really that wet to begin, though. Hope that helps!
tracysmith
Thu, 09/13/2012 - 00:04
I have to laugh
I thought my kids and I were the only ones who used "ghetto" as a way to describe things... but I have to say that your frame looks great, it serves its purpose so I have to respectfully disagree with you, it doesn't look anything like "ghetto" :-)
In reply to I have to laugh by tracysmith
mrhelton
Thu, 09/13/2012 - 15:31
:D
Well thank you! I put the first coat of white paint on the frame today and it looks much nicer now!
Joe (not verified)
Tue, 01/22/2013 - 10:02
Hey, can you post the
Hey, can you post the dimensions of your frame? its exactly what I'm looking for. Do you have it screwed down to the deck? will it tip over?
Joe (not verified)
Tue, 01/22/2013 - 11:27
Hey, can you post the
Hey, can you post the dimensions of your frame? its exactly what I'm looking for. Do you have it screwed down to the deck? will it tip over?
jtv001
Fri, 10/27/2023 - 13:58
Would love the frame plans.