Hot Wheels Wall Tracks wall
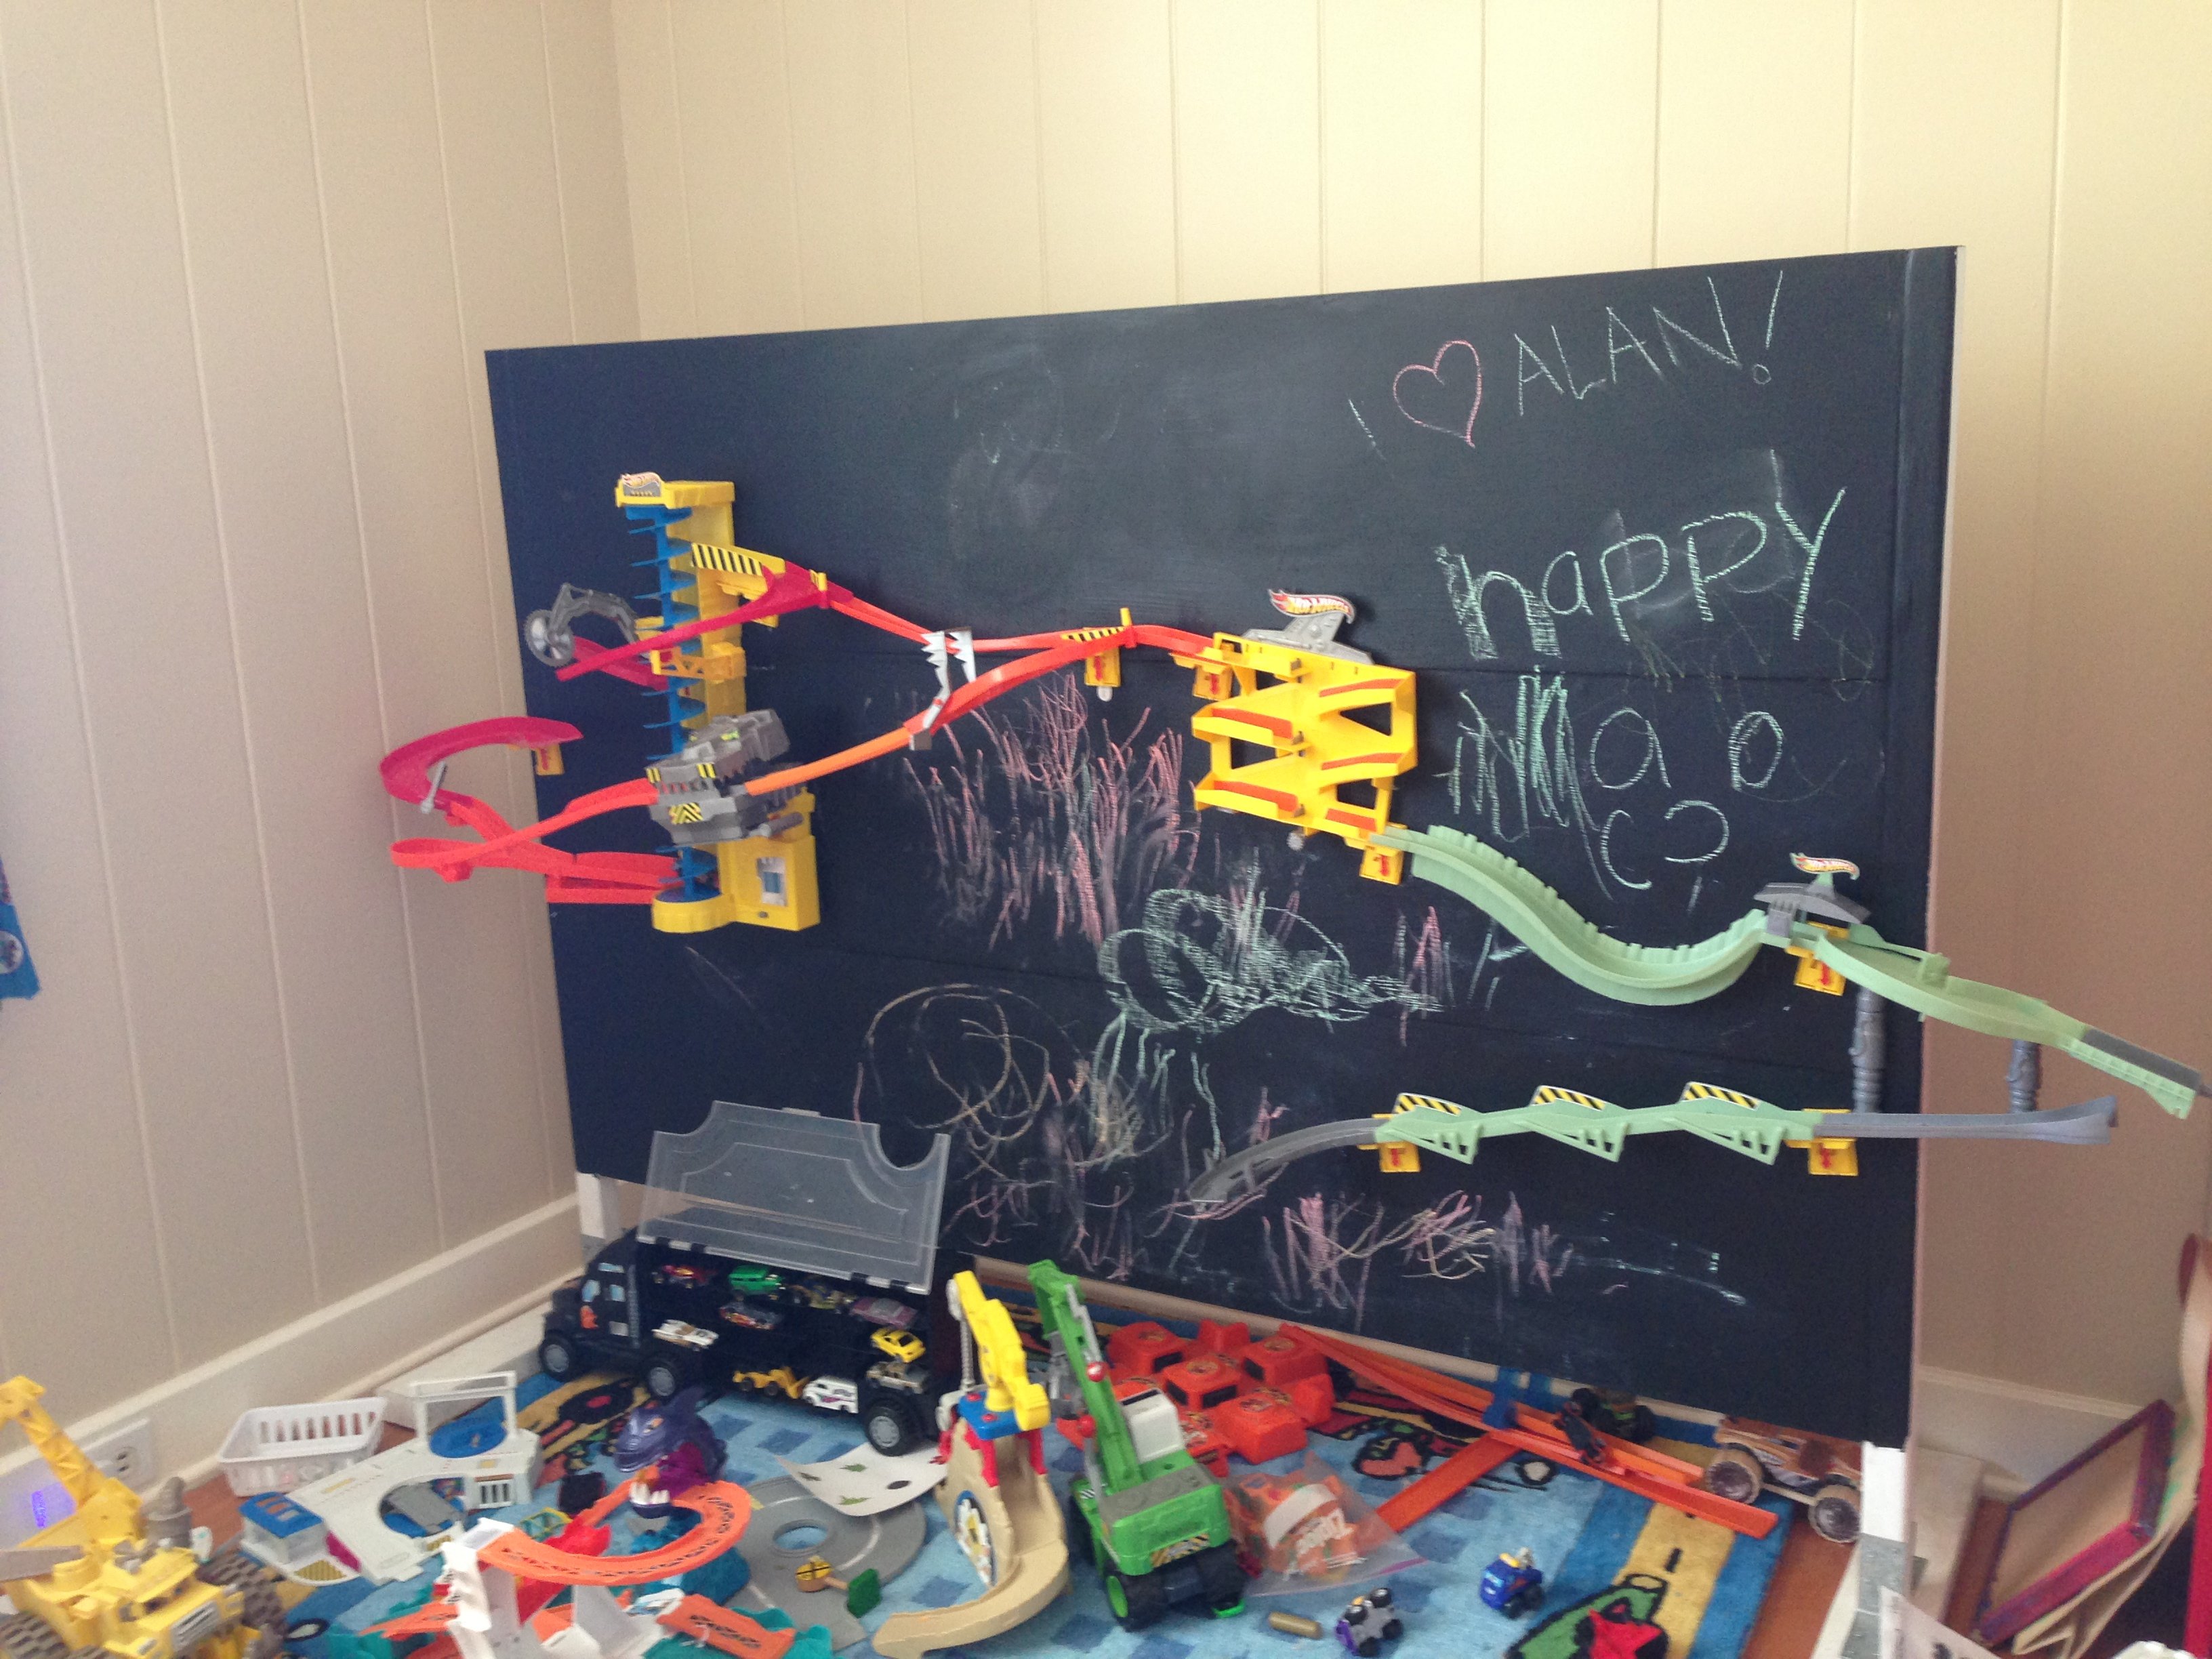
The Hot Wheels Wall Tracks are designed to stick to your wall, but ours kept falling off. My husband hates putting extra holes in the wall, so what to do? Build your own wall!
I just used 2x2s as side supports, kreg jigged 3 leftover 1x16 pieces of plywood from another project (if I were to do it over again, I would use one piece of plywood to make a smoother surface) as the wall, and screwed the 2x2s onto scrap 2x4s as the base. I added some 'L' angle pieces as supports at the bottom where the 2x2 join the 2x4s to ensure that that the sides would not start to lean over time... The overall size is about 5 feet across and about 4.5 feet high - I wanted something big enough to fit our wall track pieces on, but not too big...
We painted the wall with chalkboard paint, so we can draw on the background as desired, then mounted the various wall track components on using screws. Voila - wall tracks without messing up your wall. And, the wall is easily movable too.