Community Brag Posts

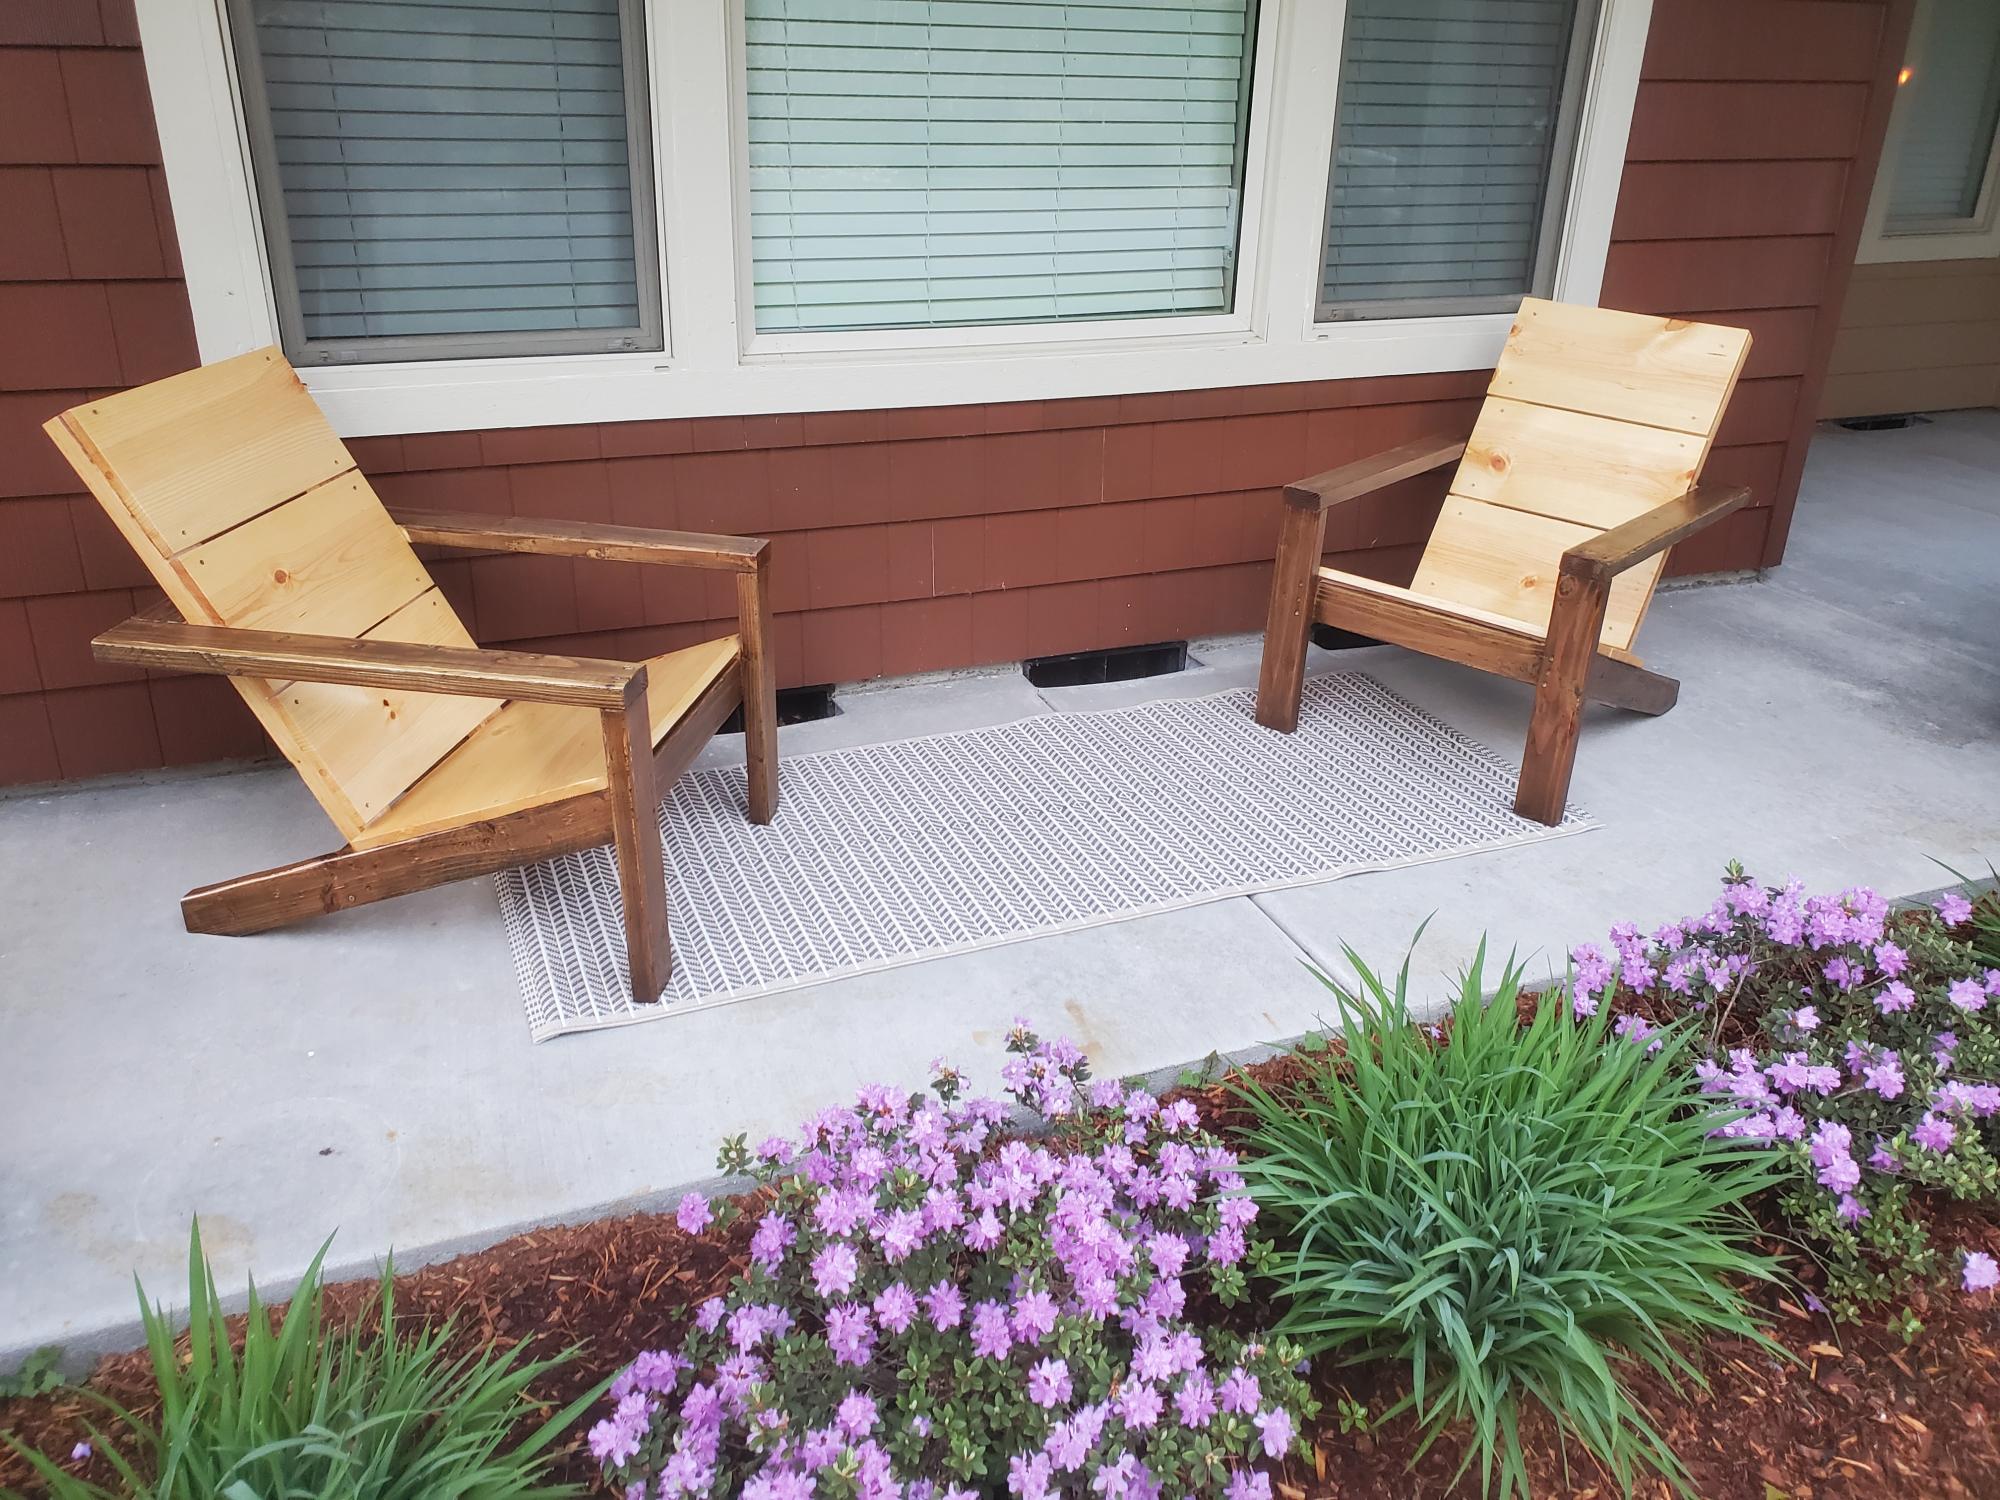
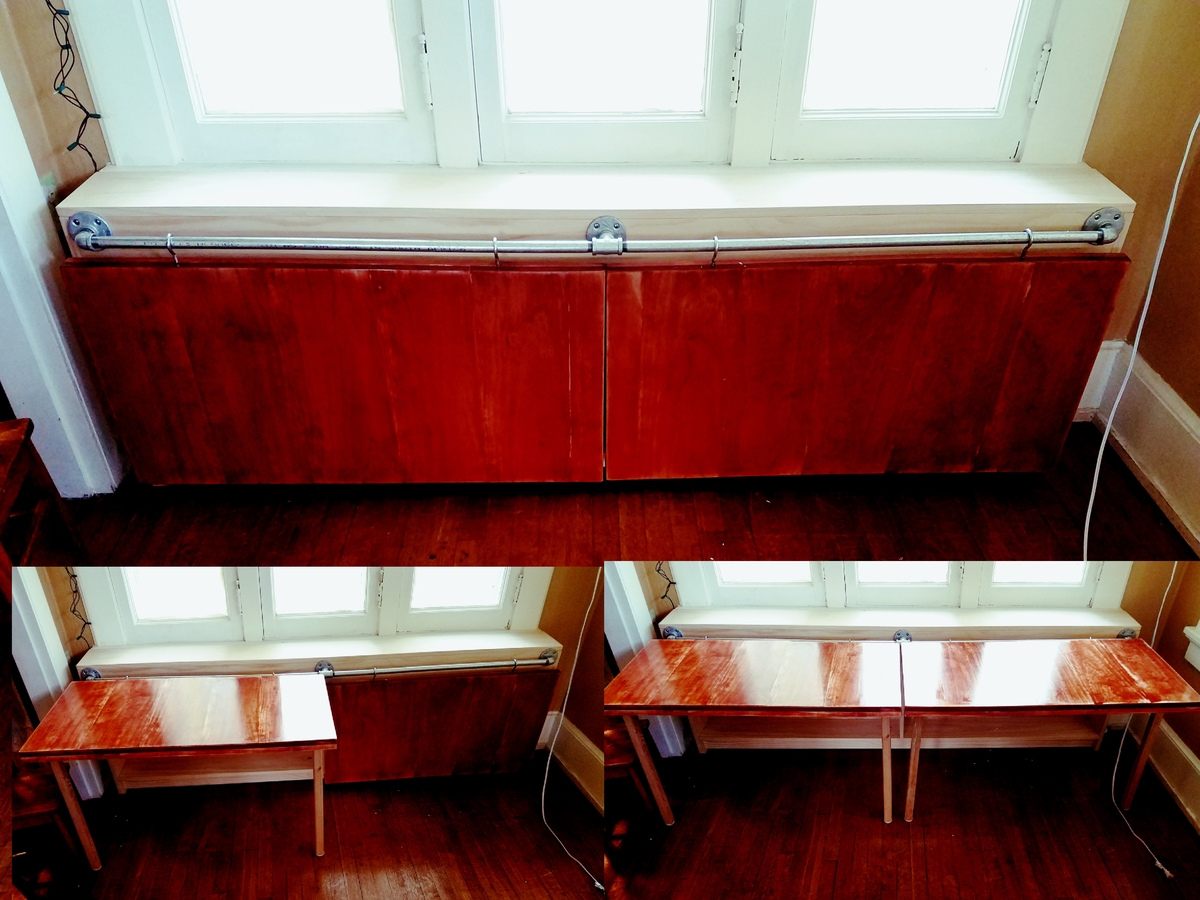
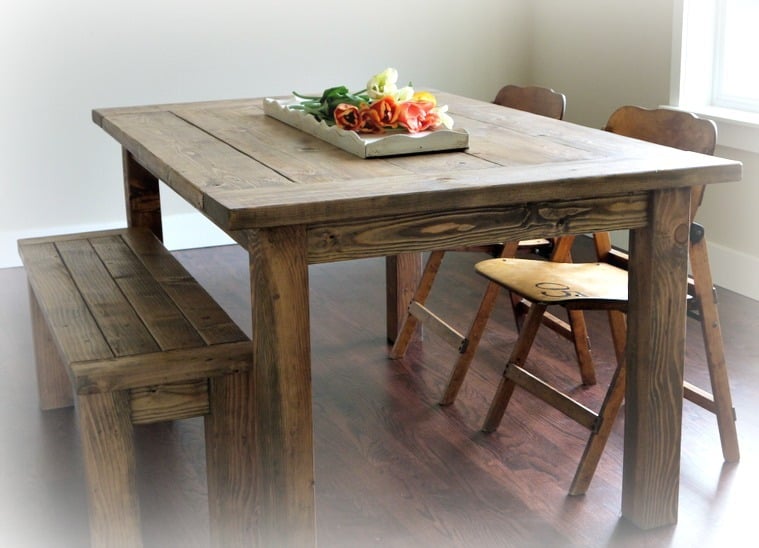
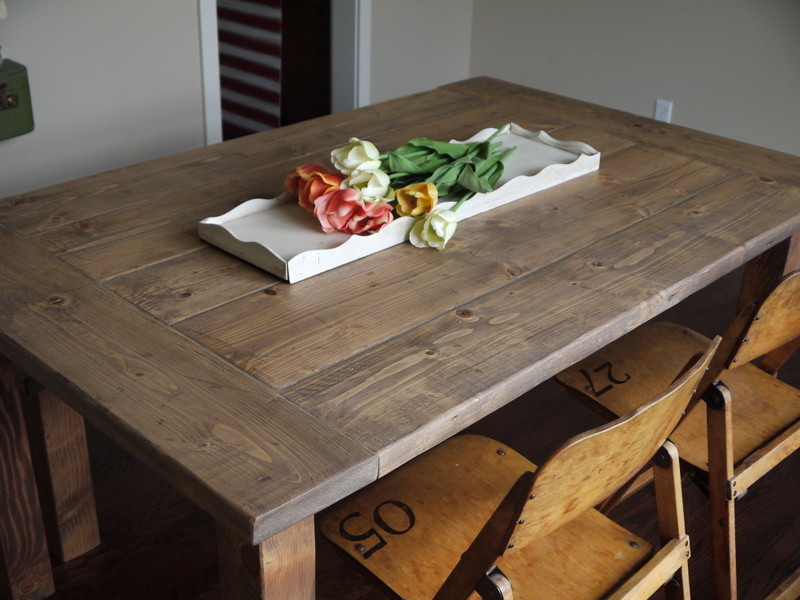
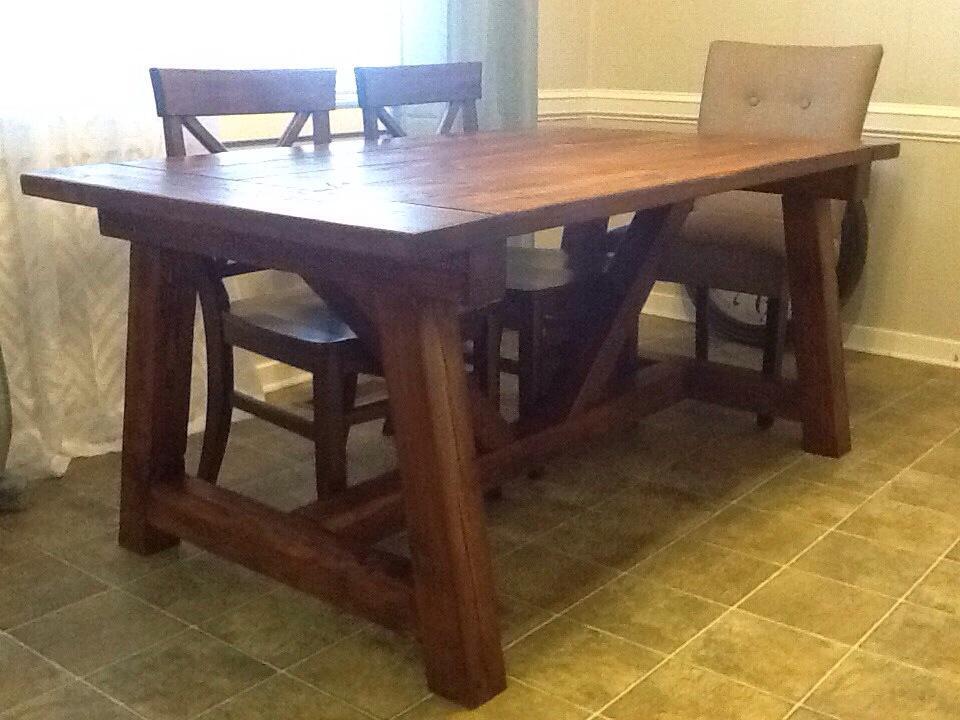
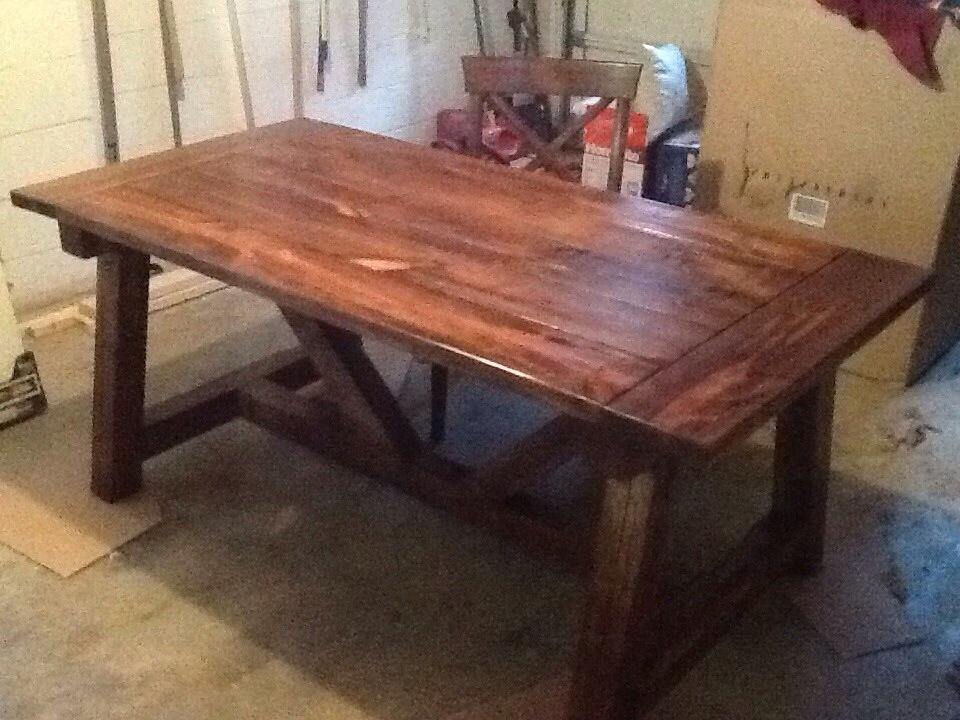
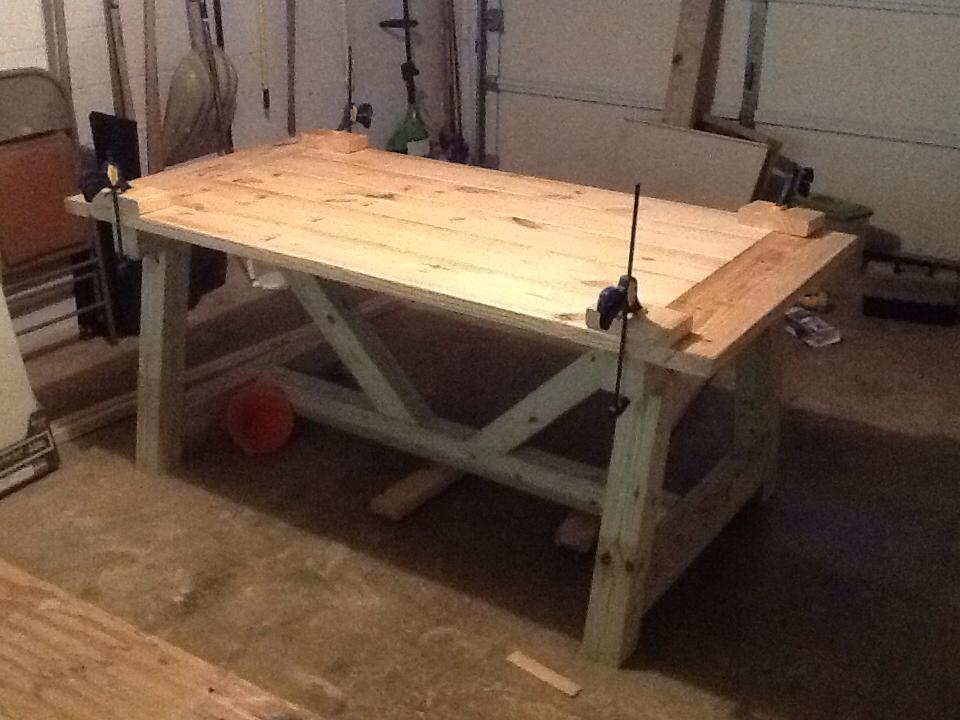
Bench to Table conversion

Submitted by Donna_Led on Fri, 04/09/2021 - 15:22

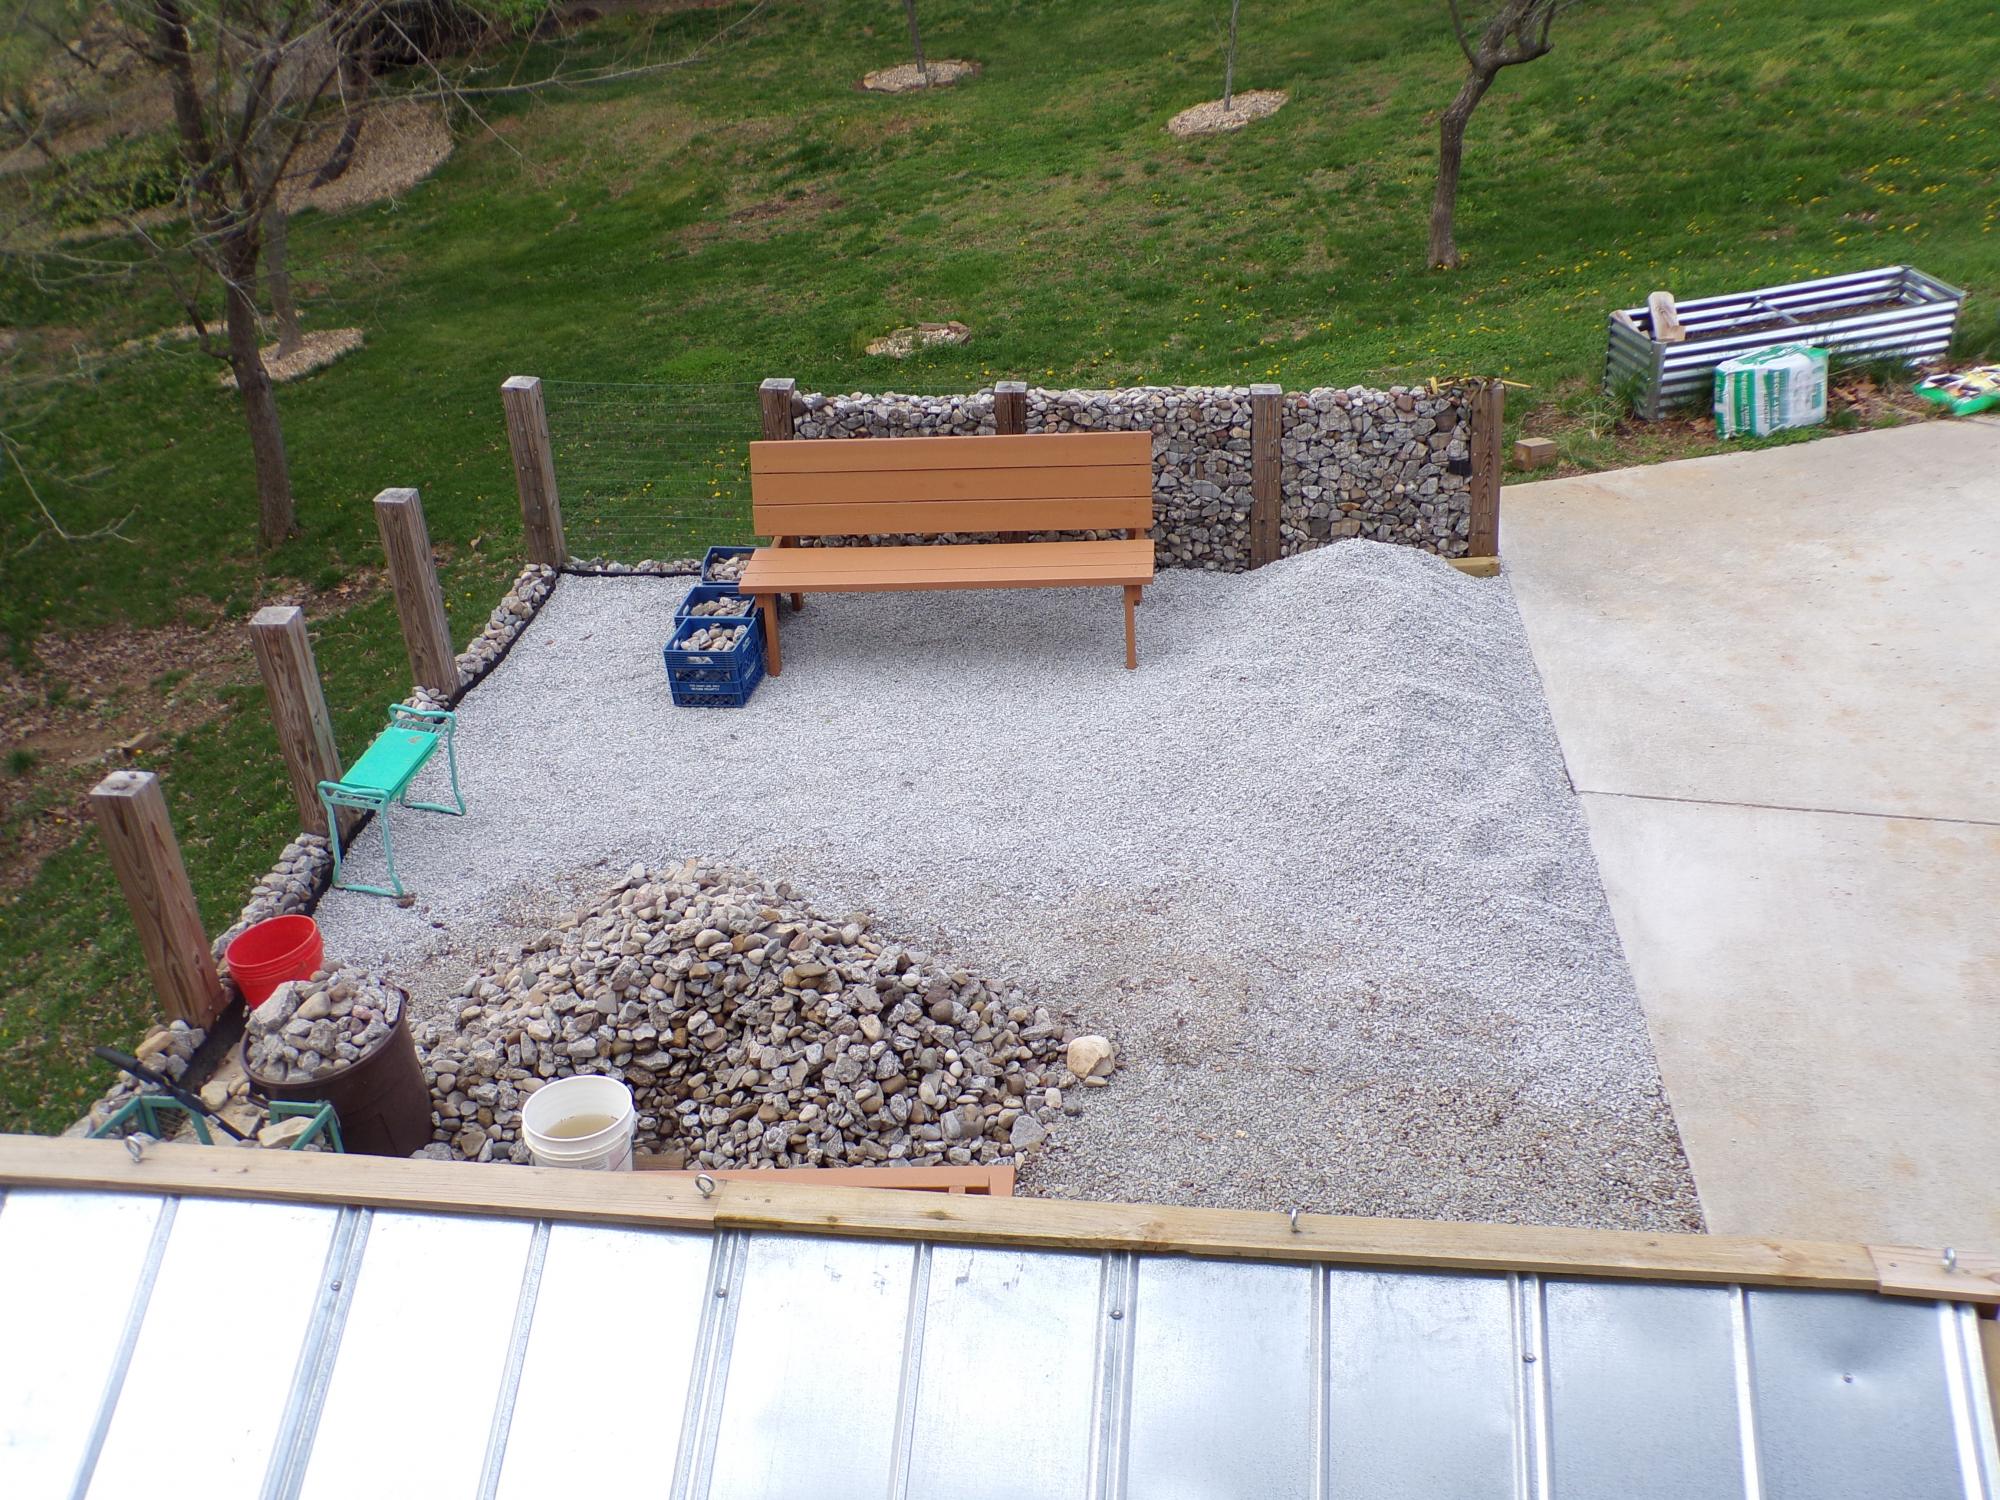
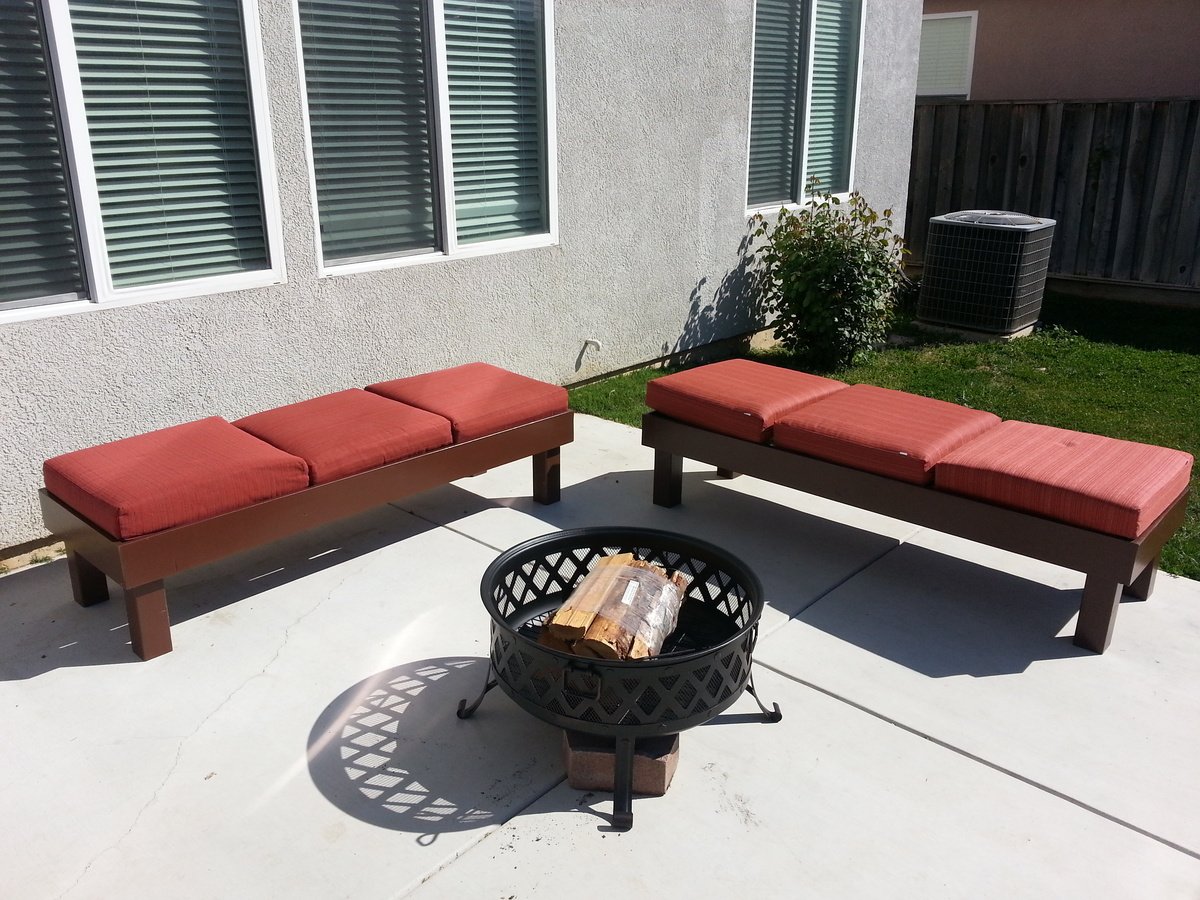
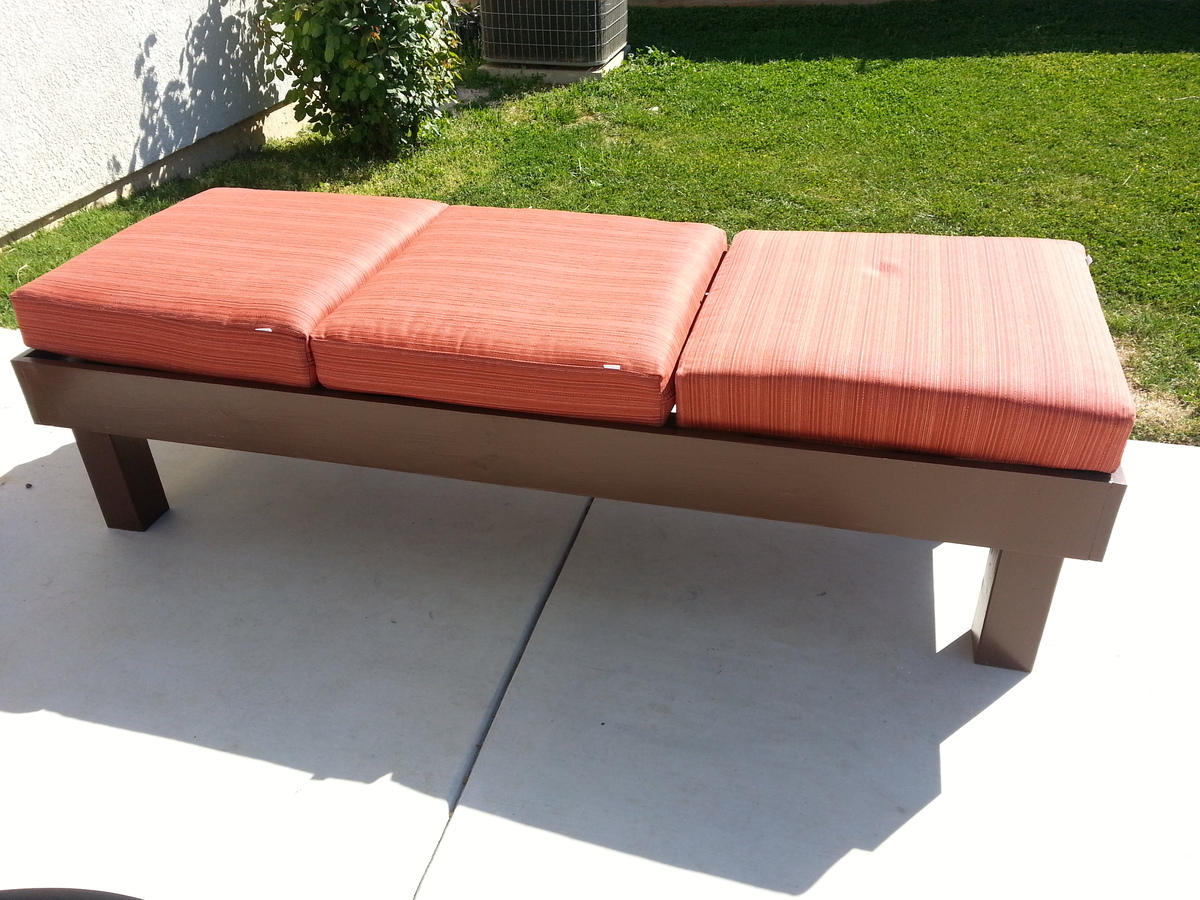
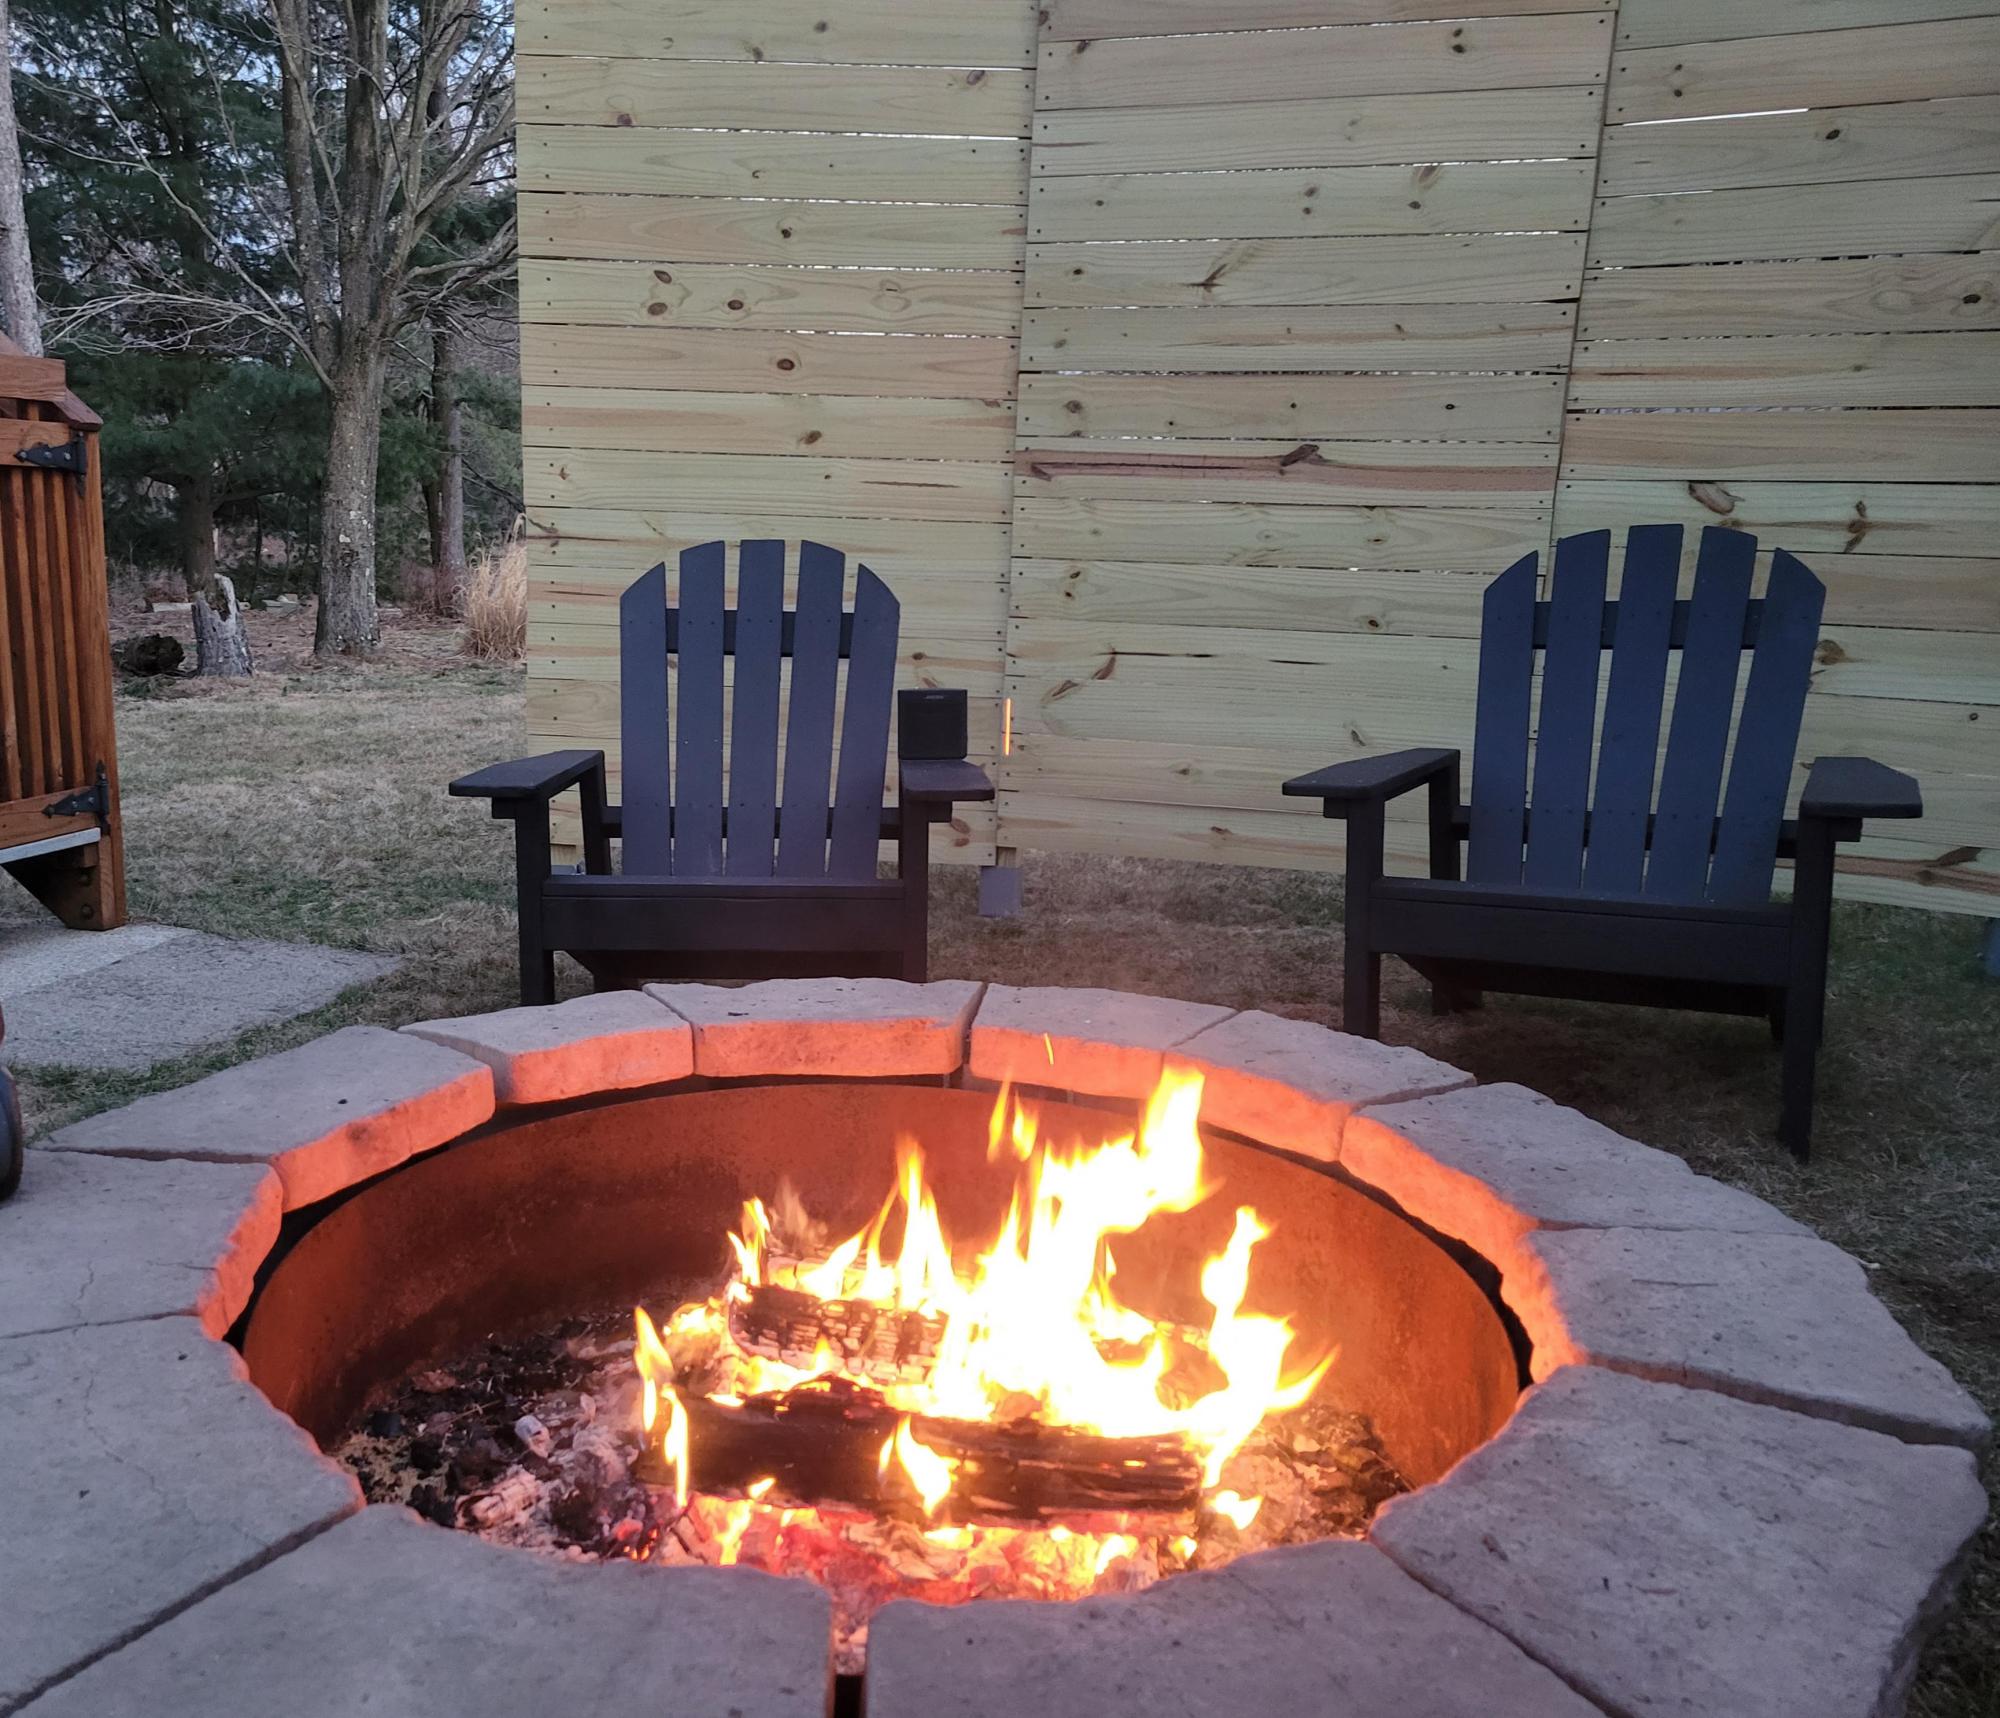
We made two of the Picnic Table to Bench units in the month of March. The second one is in the bottom part of the picture hidden by the wood rack. I took the picture from our upstairs porch. My husband is still amazed that we accomplished this. He is not a DIY'er. We built a new house in 2016 and had a bunch of leftover wood sitting on our (unfinished) basement floor. We managed to build our benches mostly from that wood. We did have to buy 3 more pieces to finish the second back/tabletop. Then we got the balance of the wood moved out to our storage barn. The color is deck stain from our porches. I chose 20 hours as our time frame because the used wood required a lot of sanding and prep work. Our time frame was probably about 3 weeks but we are 68 and 73 years old and were really in no hurry. The plans were very simple to follow. We made them 6 feet long.

Estimated Cost
Nearly free except for the big bolts and three 2x6x8ft boards. We had everything else.
Estimated Time Investment
Week Long Project (20 Hours or More)
Finish Used
Solid deck paint from Lowes in a cedar color we already had.
Recommended Skill Level
Beginner

Comments

Rustic hall tree-bench

I built this in a weekend. I used the Kreg pocket hole jig to build frame and also secure back panels to side rails. The bench is 4' wide and almost 6' tall. I put the coat hooks on either side of the top rails.

Estimated Cost
$140.
Estimated Time Investment
Weekend Project (10-20 Hours)
Finish Used
Flat white covered w/ semi gloss urethane
Recommended Skill Level
Beginner

Comments

Large Porch Bench - NW Indiana

Submitted by Anonymous (not verified) on Sun, 04/30/2017 - 17:37

Instructions were very easy to follow. I got wood at Home Depot and had it cut to size there as well (fit better in car that way). Without help it will take longer than if you can get a person to help out. I needed to go buy a Kreg jig, Kreg nails, and a c clamp. I used chalk paint from Joanne's. Done in 2 days. 

Estimated Cost
$55
Estimated Time Investment
Day Project (6-9 Hours)
Recommended Skill Level
Beginner
Seasonal And Holiday

Modern Adirondack Chairs - First Project

Submitted by Anonymous (not verified) on Fri, 04/16/2021 - 06:32

I ended up painting them a Bright Blue and Bright Red like crayola colors and I forgot to take an after picture but I was so excited about this because it was my FIRST time building something with wood. My husband made the table with the scraps I had leftover.

Comments

Modified Bench for backyard camping

Submitted by Keith on Sun, 03/24/2013 - 11:44

My family and I really enjoyed camping last year and with the addition of another child we will not be able to get out this season. So, I modified the simple bench plan to create a comfortable seating area while we "camp" in the backyard. With the money I saved building vs. buying, I was able to purchase a new miter saw and sander and still save a ton of green. I plan on building a couple side tables to complete the set. Thanks for the site Ana, it helps make our home more warm and affordable.

Built from Plan(s)
Estimated Cost
$100 a bench (most of the money in the cushions)
Estimated Time Investment
Weekend Project (10-20 Hours)
Finish Used
Sprayed enamel paint with a spar varnish
Recommended Skill Level
Beginner

Comments

Farmhouse headboard

I built this headboard a while back but just never got around to posting it.  I distressed the wood, painted it mint green and applied a chocolate glaze. 


Estimated Cost
$100.00
Estimated Time Investment
Day Project (6-9 Hours)
Finish Used
Mint green and chocolate glaze
Recommended Skill Level
Starter Project

Comments

Adirondack Chairs

Submitted by Anonymous (not verified) on Thu, 04/22/2021 - 10:17

I originally made the Adirondack chairs in a Beach style, then I made them matte black for around the fire pit. I modified the design a little, making the arms wider (to accommodate food and drink better) and fanned the back a bit. Everyone loves the look and how comfortable they are, as well as how sturdy they are. Goodbye to those plastic chairs that break.

Thanks for the great project ideas during the quarantine.

Estimated Cost
$70/each
Estimated Time Investment
Afternoon Project (3-6 Hours)
Finish Used
FLat Black spray-paint, and High Gloss Bright Colors brushed on (then Turtled Waxed so the chairs dry quickly)
Recommended Skill Level
Beginner

Comments

X console variation

Submitted by khanson17 on Wed, 03/27/2013 - 10:45

My wife asked me to build her a sewing table so I modified the x console a bit. Pretty happy with the result. Still need to add the hardware to complete the piece. Finished with the vinegar / steel wool solution after pre treating it with black tea. First time using that technique and will definitely use it again.

Built from Plan(s)
Estimated Cost
$80
Estimated Time Investment
Day Project (6-9 Hours)
Finish Used
That stinky oxidizing vinegar solution with a black tea pre-treatment. Need to be careful that no glue, grease or dirt is on the wood, preventing the solution to work its magic.
Recommended Skill Level
Beginner

Comments

katiemakes

Sat, 03/30/2013 - 01:36

I'm very jealous of this desk, looks amazing, is there a tutorial on here for the finish you mentioned? Tea and vinegar sound like fun!

In reply to by katiemakes

khanson17

Fri, 04/05/2013 - 22:20

I can't remember where I stumbled across the technique but basically you take some steel wool (0000), tear it up, put it in a big glass jar, fill it with stinky white vinegar and let it sit for a few days to dissolve the wool. Shake the jar every day or two and don't cap it tight. In about three days the wool will have dissolved and you will have a murky liquid.

I then brewed some black tea I bought at Walmart and painted the entire piece with the tea. After it dried I painted over it with the vinegar, and wallah! it totally changed colors...not sure why it does...something to do with oxidization and tannin and chemical reactions.

Then I went over the entire piece with furniture wax.

There are plenty of online tutorials which go into more detail. My suggestions is make sure your surface is completely clean and as smooth as possible. Let your tea layer completely dry before applying the vinegar and then let your vinegar layer dry outside. We rushed the table into our house mere moments after it was dry to the touch, so our home smelled like stinky, rusty vinegar for a few days. I can't stand the smell of vinegar....I loathe salt and vinegar chips....blah.

Anyway, glad you liked it.

spiceylg

Tue, 04/07/2015 - 06:05

Love this mod. Might copy but will cut into the desk portion so the sewing machine surface is flush. I have a desk in which it sits on top now and have thought of cutting into it, but it's Amish made and the thought of ruining work gives me the willies, ha! Anyway, great job!

Benchwright Coffee Table

This is a replica of the Pottery Barn benchwright coffee table.  I altered Ana's plans slightly by changing the design of the legs to be 2.25" by 2". I added full extension drawer slides.  The finish is a combination of transtint shellac base coat, gel stain, transtint dye, and poly. 


Built from Plan(s)
Estimated Cost
$250.00
Estimated Time Investment
Week Long Project (20 Hours or More)
Recommended Skill Level
Intermediate

Comments

coloradonp

Sun, 01/31/2016 - 18:56

Hi! The finish is absolutely gorgeous. I was wondering if you could give a little bit more detail on which products you used for the finish. I've only used oil based stains and I'm not quite sure what the transtint dye is. Thanks!

Little girl hideout

Submitted by Anonymous (not verified) on Sat, 05/06/2017 - 15:20

I changed the entrance from the front to the end and added the steps.

Built from Plan(s)
Estimated Cost
$500
Estimated Time Investment
Week Long Project (20 Hours or More)
Finish Used
Gel stain with General Finishes Arm R Seal
Recommended Skill Level
Intermediate

Adirondack Love!

This was my second build ever, and I'm so extremely satisfied with the entire process! Ana's plan was super easy to follow, and I couldn't be more proud of how they turned out!

Recommended Skill Level
Beginner

Comments

Flip up desk

Submitted by Anonymous (not verified) on Tue, 05/09/2017 - 17:09

I'm in love with the way these turned out!  Thanks Ana!

Estimated Cost
$150 (incl finish)
Estimated Time Investment
Day Project (6-9 Hours)
Finish Used
Stain in Gunstock, varathane polyurethane
Recommended Skill Level
Intermediate

Step stool

Submitted by brittrad14 on Sun, 05/09/2021 - 10:22

Love, love , love this step stool. It’s perfect and relatively easy to make.

Estimated Cost
$10
Estimated Time Investment
An Hour or Two (0-2 Hours)
Finish Used
Wood finish early american
Recommended Skill Level
Starter Project

Comments

Shirley Table

This is 2 different shirley console tables .  I did both out of pine boards and golden oak stain.  One I used wax on and the other poly.  

Built from Plan(s)
Estimated Time Investment
Weekend Project (10-20 Hours)
Finish Used
Golden Oak, Poly on one of them. Wax on the other.
Recommended Skill Level
Intermediate

Pub table

Submitted by Anonymous (not verified) on Sat, 05/13/2017 - 07:07

A full write up of this build, including photos & dimensions, is here: http://imgur.com/gallery/YyawW

Built from Plan(s)
Estimated Cost
The wood cost $40.
The Kreg K5 pocket hole jig cost ~$130.
The stain & polyurethane cost ~$15 total.
The lag bolts + washers + nuts cost ~$10 total.
Estimated Time Investment
Weekend Project (10-20 Hours)
Finish Used
1) Sand all individual pieces (prior to assembly) by hand. I believe I used only 60 grit sand paper, because I wanted to retain the look of lumber.
2) Varathane brand stain; color "Early American." Applied with a rag, not a brush.
3) Varathane brand Triple Thick Polyurethane; satin finish. Applied with a rag, not a brush. Polyurethane applied to the 2x6 table top surface boards only (i.e. I did not apply polyurethane to the table's skirt or to the table's legs).
4) Lightly sand the dried polyurethane by hand with 300 grit sand paper to obtain a smooth-to-the-touch surface finish.
Recommended Skill Level
Beginner

Red Hen Home's Farmhouse Table and Bench

This is the third farmhouse table I built, although it is trifle smaller to fit in a smaller space. I think this one is just about 62” long. I also built a 48” bench to go along with this table, and I think they look so cute together!

Estimated Cost
100
Estimated Time Investment
Day Project (6-9 Hours)
Finish Used
Custom mix of Minwax Antique Walnut and Weathered Oak. Finished with hand-rubbed polyurethane, followed by paste wax.
Recommended Skill Level
Beginner

Comments

smitty22

Tue, 04/16/2013 - 08:59

I love your farmhouse tables! Did you make any changes to the plans when you took away the stretchers? I really want to make a table like this soon!

Shorted 4x4 Truss Beam Table

Submitted by ClayCox86 on Mon, 02/16/2015 - 13:19

Shorted this length of the table by 6 inches to fit the available space. Came out great. Tip: If using pine, after stain dries, gently sand again with high grade paper to remove raised ridges after wood has absorbed stain, but not hard enough to remove stain. This will help make the eating surface much smoother to the touch. 

Built from Plan(s)
Estimated Cost
$110 dollars in wood. $50 in new equipment, sandpaper, stain, and gloss.
Estimated Time Investment
Weekend Project (10-20 Hours)
Finish Used
1st coat: Steel Wool (grade 0) and vinegar (Let sit 3 plus days, the longer the better);
2nd coat: MinWax: 1-qt. PolyShades Antique Walnut Gloss Stain and Polyurethane in 1 Step;
Last coast: 2 coats of Rustoleum Ultimate Polyurethane in Matte
Recommended Skill Level
Intermediate

Comments

Simple Paver Coffee Table (patio)

Submitted by Anonymous (not verified) on Tue, 05/16/2017 - 09:15

Ana,

I was looking for a Mother's day project that I could build with my 14 year old son. When I saw your share on Pinterest, I figured this would be perfect.  There were a limited number of pieces (in terms of sizes/lengths) and the construction was pretty basic.

We purchased our pavers at Lowe's and found that they only sold 11 7/8" pavers (after our build).  However, the 1/4" reveal around the border of the pavers turned out to be a terrific little detail. You would think it was on purpose.

As always, keep up the great work and sharing. 

WoodworkCity

Estimated Cost
$20
Estimated Time Investment
Afternoon Project (3-6 Hours)
Finish Used
Polyshade
Recommended Skill Level
Beginner

Comments

slamarca

Wed, 09/13/2017 - 07:12

Hi Ana,

Could you please tell me if you sealed the pavers. 

Thanks so much for all the inspiration you have given me!!! I am going thru a very difficult time and don't see it getting better anytime soon, you helped me find myself and my passion. When I feel like I can't take another day, I go to your webisite and find one of your projects. Building gets my mind off of everything and a little break in all the worring.  I just can't thank you enough!

Thank you Ana,     Susan 

Farmhouse table

Submitted by lilh_18 on Thu, 05/27/2021 - 20:42

Adjust the height slightly. Easy to follow plans, quick project.

Built from Plan(s)
Estimated Time Investment
Weekend Project (10-20 Hours)
Recommended Skill Level
Beginner

Comments

Baseball bat headboard w/ farmhouse style footboard.

Submitted by jbayer80 on Sat, 04/06/2013 - 11:21

I found a baseball bat headboard that I wanted to make for my son...thankfully I found this website that has helped me so much. I BUILT every piece of furniture my in sons room, crazy!

I had a blast doing and have no plans on stopping.

Estimated Cost
$250 for everything
Estimated Time Investment
Week Long Project (20 Hours or More)
Finish Used
AS chalk paint. @ $36 a can, I will be making my own from this point forward.
Recommended Skill Level
Beginner

Comments

mrpaulperry

Wed, 07/31/2013 - 07:54

That looks awesome!

What site did you use to build the headboard?

Where did you get the wood bats? I'm struggling to find a cheap option for those.

Thanks

In reply to by mrpaulperry

jbayer80

Sat, 01/18/2014 - 20:52

There wasn't a plan for the headboard. I found a picture a few years back and knew I wanted to make it for my son. I can take measurements of everything and let you know but I got the bats then just did what looked best.

I searched high and low for bats in local stores and online. I ended up finding the best and cheapest online. I did my best to find old, used bats but couldn't find all the right sizes for what I wanted so I just got new bats.

kpmcmullin

Wed, 08/19/2015 - 14:50

Hi- do you have the plans and measurements you used to make this headboard and bed? Thanks!