Community Brag Posts

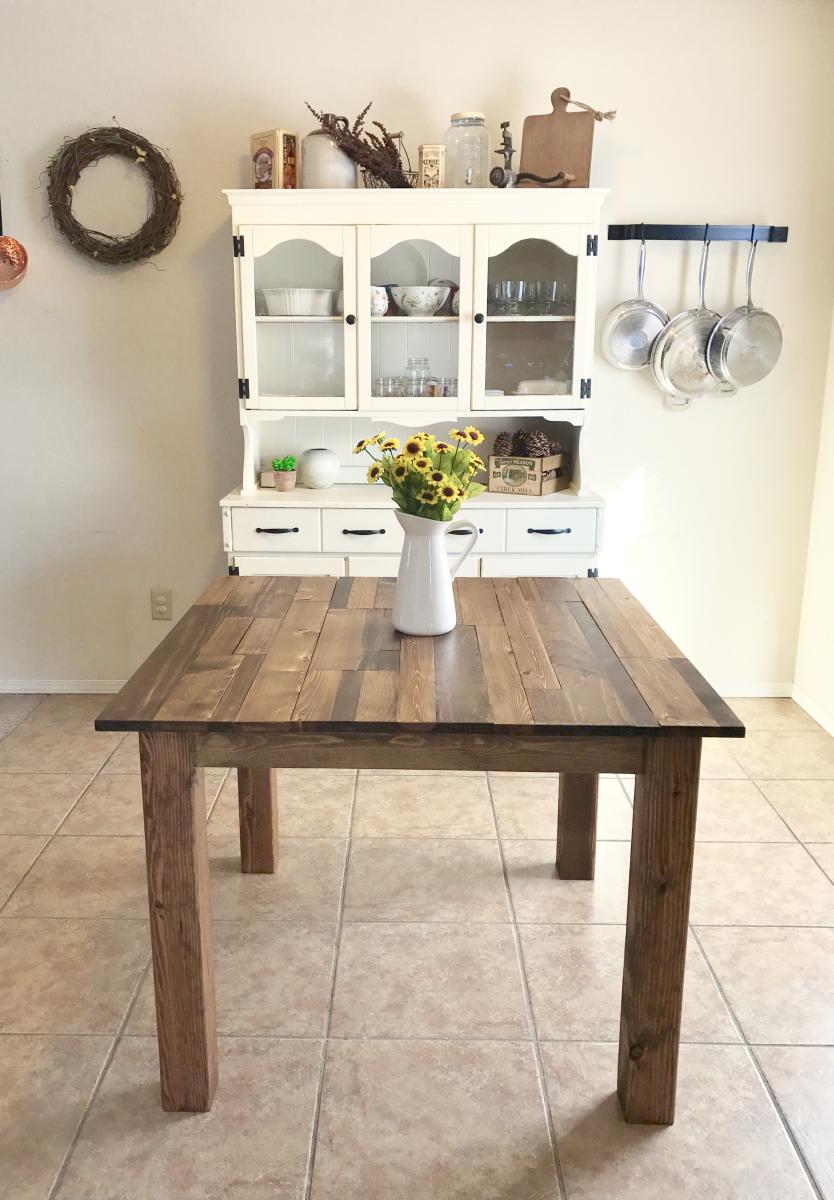
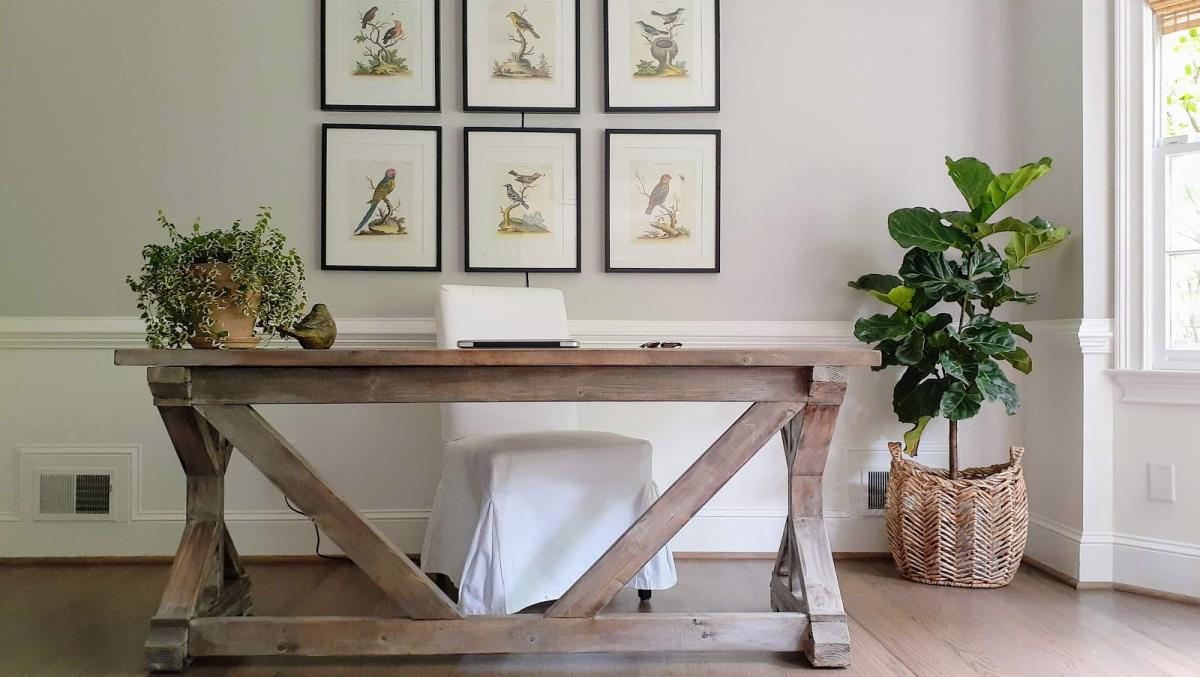
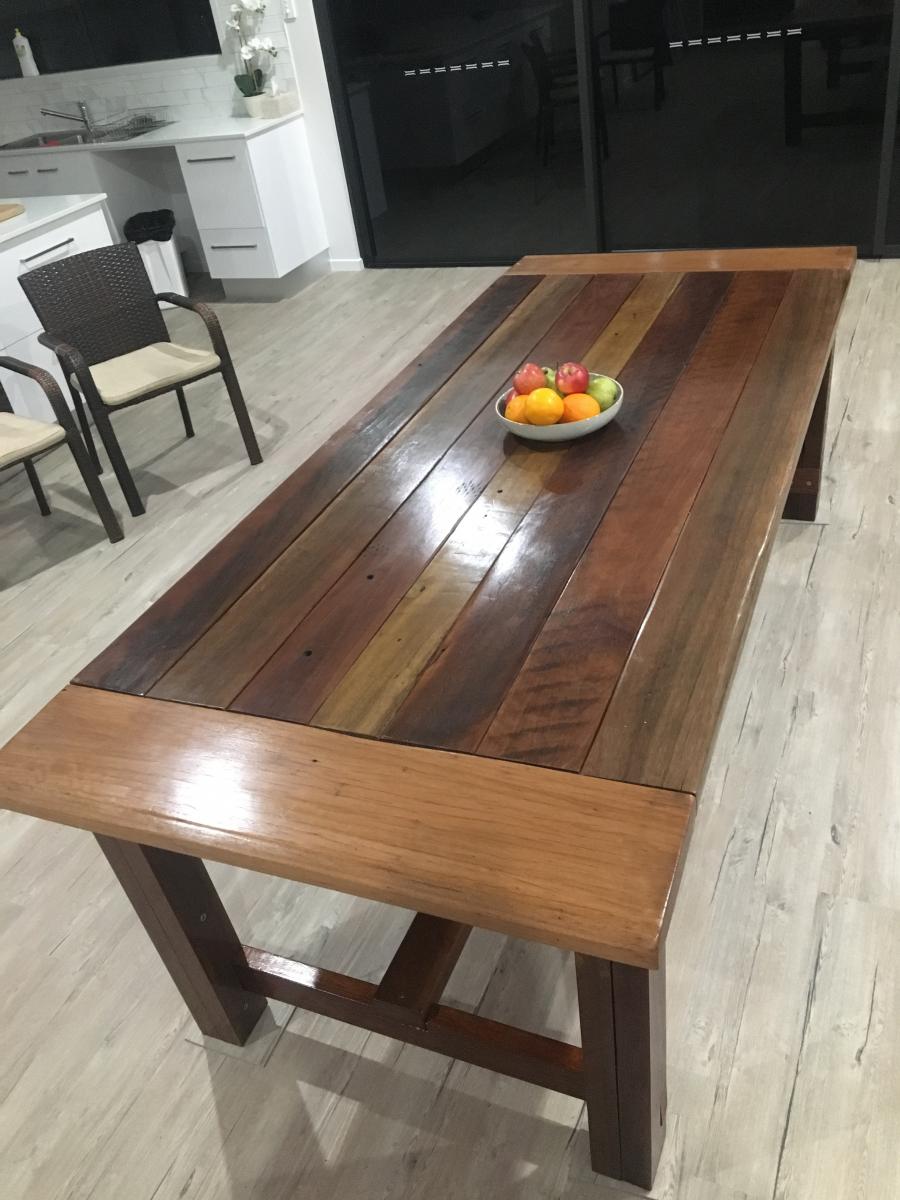
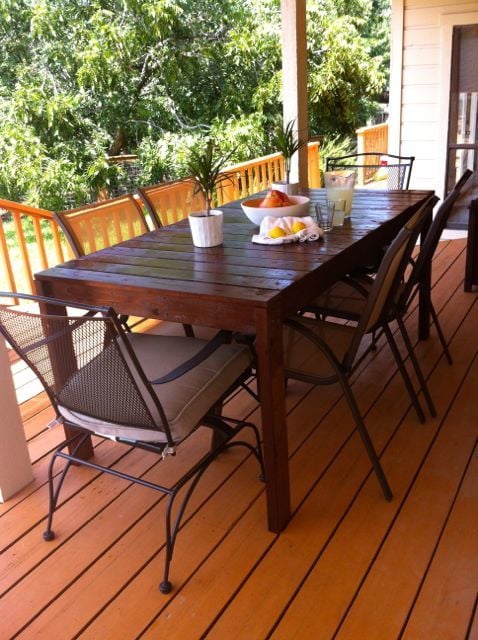
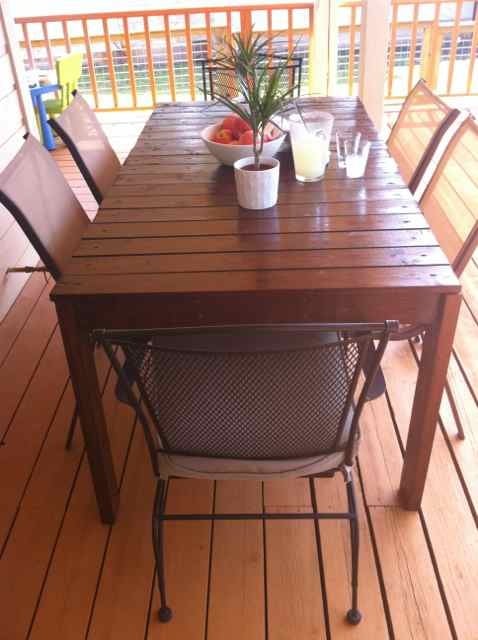
Dining Room Table - Dual Trestle and Extension Slides

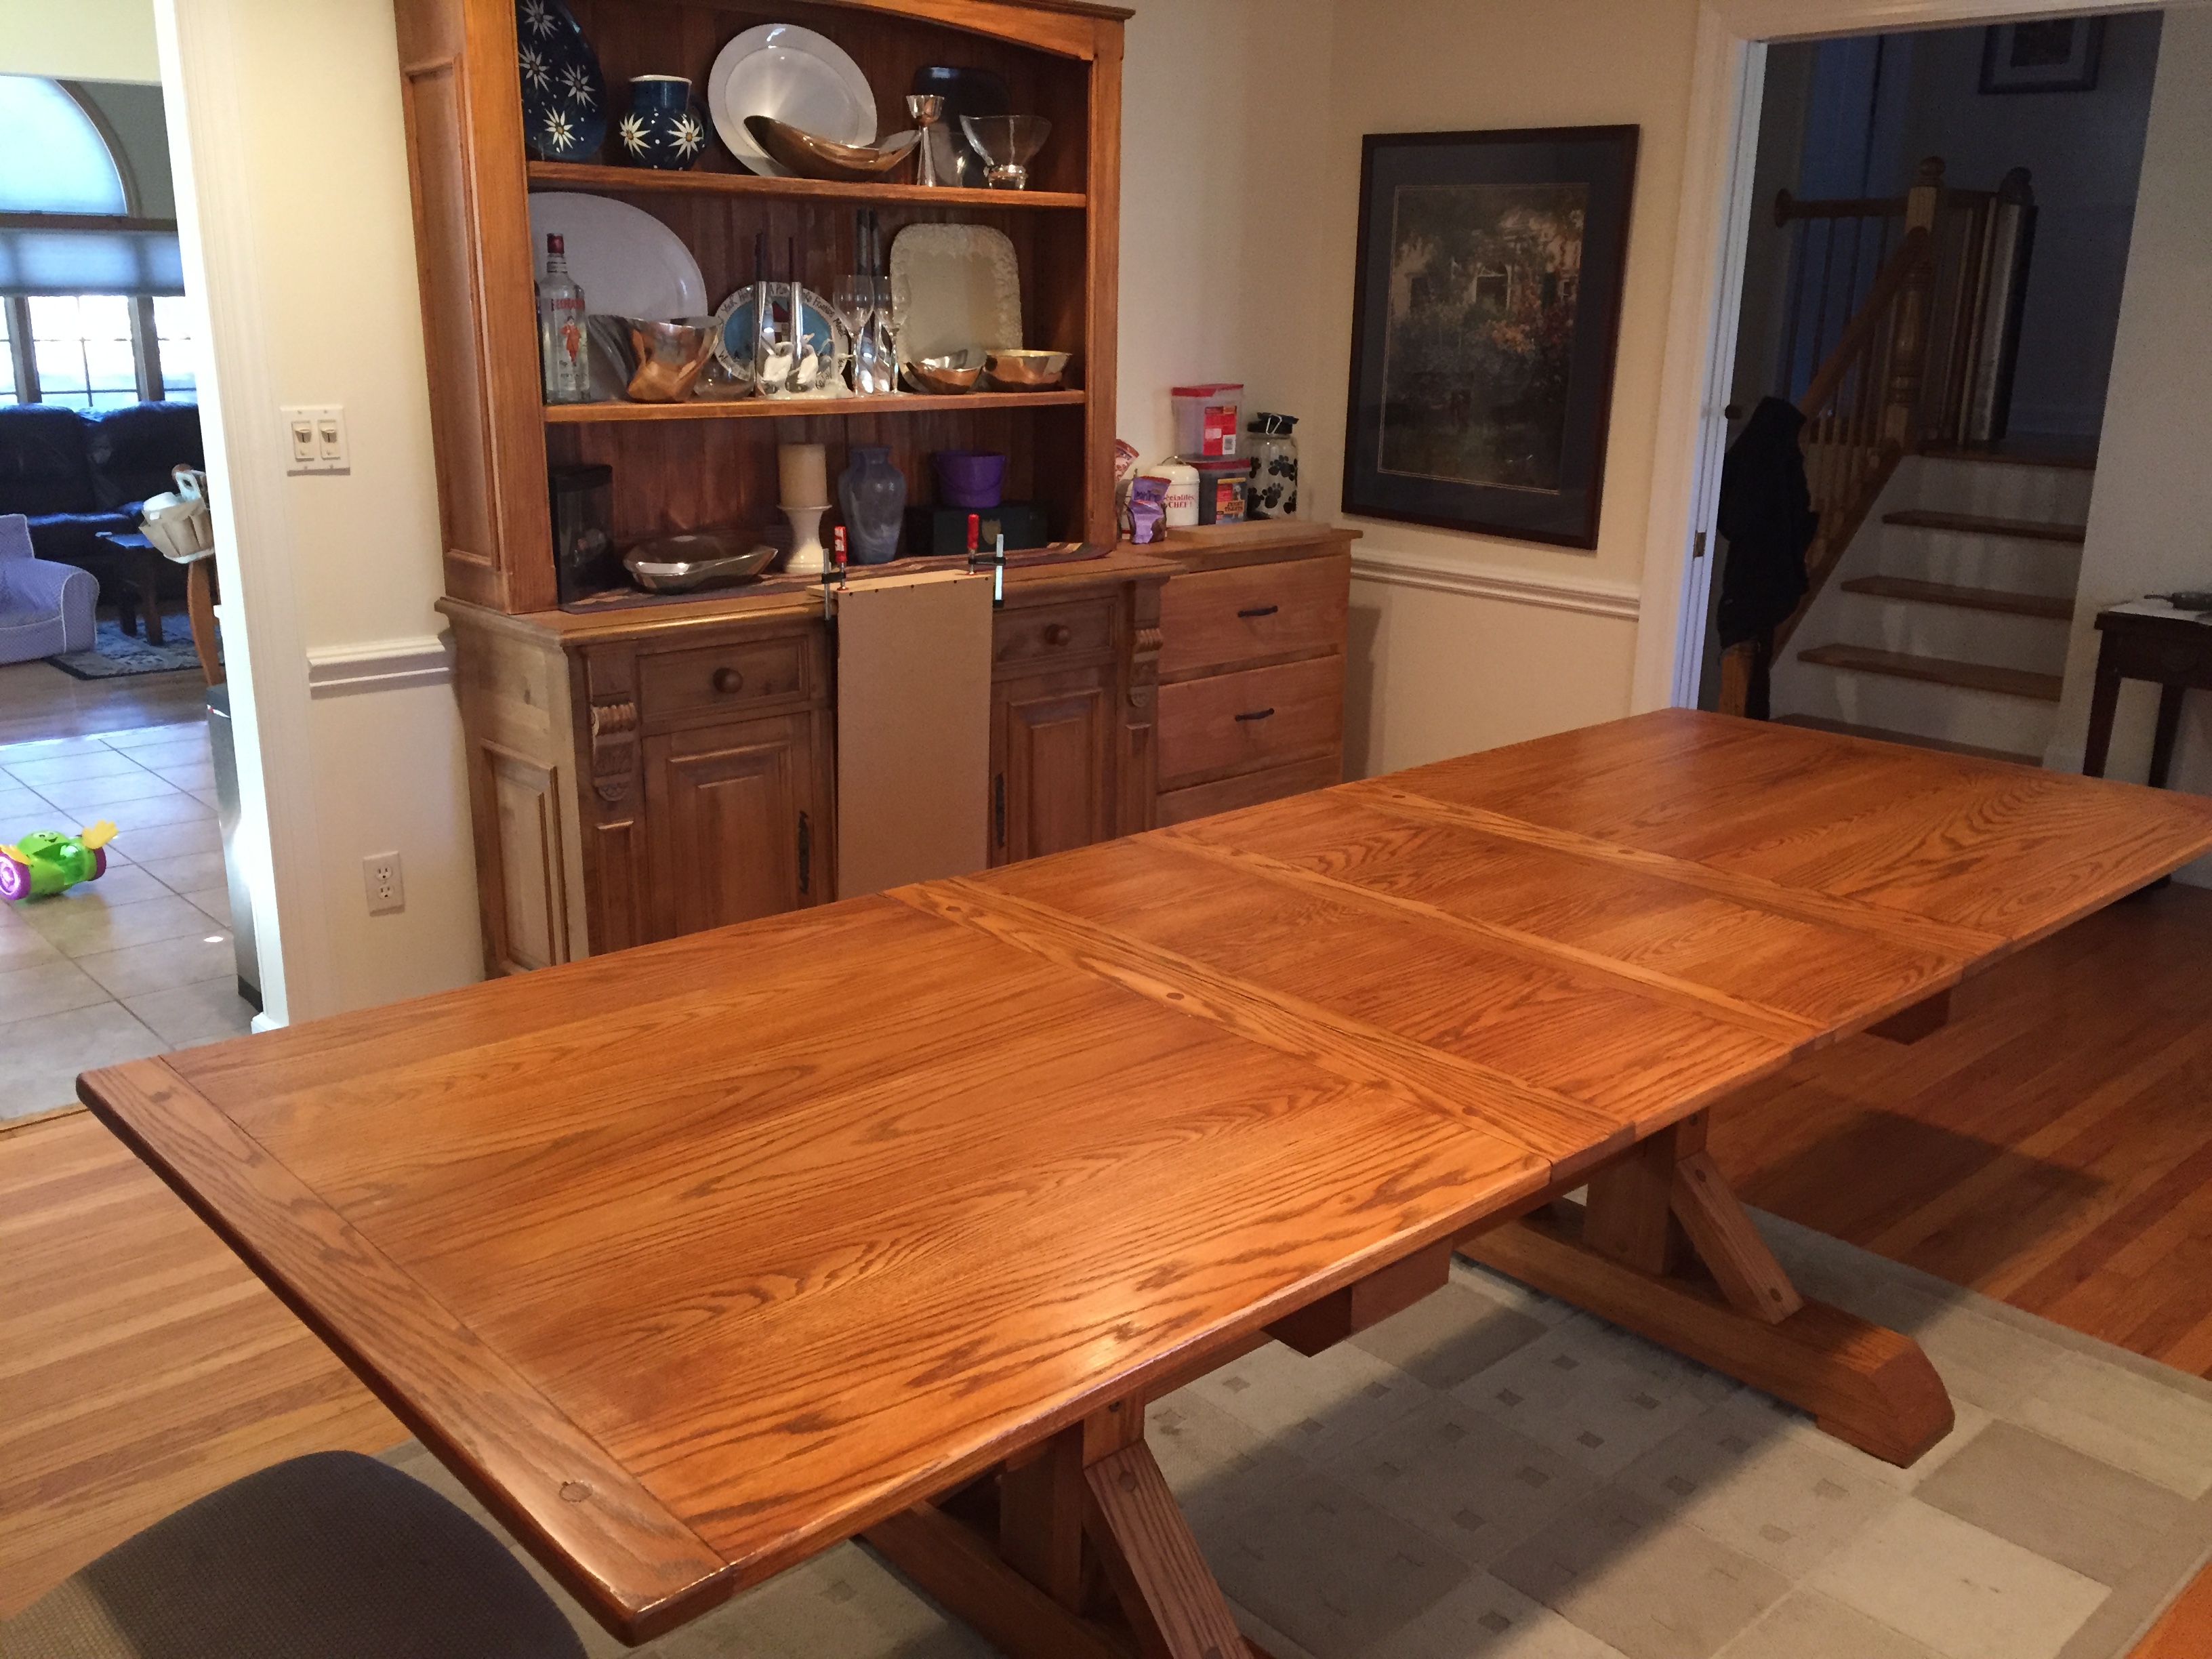
My 40”x80” dining room table with equalizer extension slides that bring it to 110” when both leaves are installed. This was initially inspired by the Farm Hose trestle table. I've got details in some blog posts on my build. It’s not exactly the most complete blog with every detail, but it has a bunch of pictures along the way.

Estimated Cost
$1,200 for wood. Probably around $1,500 total if you add in some tools / supplies I didn't have.
Estimated Time Investment
Week Long Project (20 Hours or More)
Finish Used
Aqua Coat grain sealer. General Finishes Prairie Wheat Gel Stain, General Finishes Arm-R-Seal poly seal coat.
Recommended Skill Level
Intermediate

Comments

Can’t Believe We actually built this

Submitted by Anonymous (not verified) on Mon, 09/14/2020 - 13:48

5 1/2W x 5 1/2L x 8H.
Ana made this project very easy for me. I did the main building while hubby cut the wood & helped drill in hard to reach areas. Thank you Ana for boosting my confidence. I’ve never done anything trike this.

Built from Plan(s)
Estimated Cost
500.00
Estimated Time Investment
Weekend Project (10-20 Hours)
Finish Used
Did not have time to paint. Will have to be another long weekend. When I do, it’ll be white.
Recommended Skill Level
Beginner

Comments

Square Farmhouse Table

Submitted by eddingsr on Sun, 01/08/2017 - 13:17

I built this table for a friend who wanted a rustic, plank-top kitchen table. She wanted a square table with 4x4 legs. Since I don't have clamps, I used pocket holes and wood glue for the table top. Also, I only have a 7&1/4" miter saw, which means the 4x4s were too thick to cut. So I made one cut in the legs, then flipped them and made another. It worked! :) I sanded down the sides of the table top with 80 grit. They needed to be evened up since some of the planks were a little longer than others. I back braced underneathe the top with (3) 1x3s. Then, I sanded all over with 120, vacuumed, then wiped it down with a damp towel. Fun build!! 

Estimated Cost
~$100 for lumber, screws, wood glue, sandpaper, and finishing products.
Estimated Time Investment
Week Long Project (20 Hours or More)
Finish Used
For the finish I used Minwax wood conditioner, then a coat of Minwax stain in Provincial. I went back and put a second coat of stain on a few of the premium pine pieces, because they soaked up the first coat really well, and I wanted some darker pieces on top. I let those soak for about 15 minutes. Afterwards I did 2 coats of Polycrylic all over, then a third coat for the top only. I dry sanded between coats with 600 grit sandpaper.
Recommended Skill Level
Intermediate

pipe/wood bookcase

Submitted by ltodd on Thu, 04/11/2013 - 18:26

1/2 ' x 18" black pipe was used along with 1/2 ' flanges. The wood was re-purposed 2x6' pine lumber that had been used for pallets, that would have been thrown away. The boards were joined with a Kreg Jig, It will house my stereo components.

Estimated Cost
$150 pipe/flange costs
Estimated Time Investment
Weekend Project (10-20 Hours)
Recommended Skill Level
Beginner

French County Wardrobe

This is probably one of my favorite pieces I have built.  Challenging but fun.  I built it as two separate sections, an upper and lower cabinet to make it easier to carry indoors.  I added a full-extension drawer below for storage. The two-toned paint combination did take a lot of extra time. Because I used an airless spraying to paint I had to tape and cover each section separately. 


Built from Plan(s)
Estimated Cost
$300.00
Estimated Time Investment
Week Long Project (20 Hours or More)
Finish Used
Venus teal and creme brulee by Behr. Dark walnut stain for the top.
Recommended Skill Level
Intermediate

Comments

Wood Chuck

Fri, 03/06/2015 - 10:43

WOW it looks awesome the extra time spent on the painting was more than worth it looks spectacular. I bet you also could make a great profit selling this Wardrobe either on line or in a consignment shop, if I had the need for one and the money I would defiantly buy one!!

MrCoffee

Fri, 03/06/2015 - 13:54

I love the way the paint job came out on this and I really dig the having the molding on the top stained.

Calmly

Sun, 03/08/2015 - 07:36

This looks awesome! I love the the paint finish and it your profession work

TwoCuteKids

Mon, 03/09/2015 - 17:30

I agree this is your best so far...which is hard to say b/c all your projects are amazing! I love the style, the paint colors, the stained top, and the hardware!

whopua

Tue, 11/10/2015 - 11:13

Are there any available plans? I'd love to make this for my wife!

Anela

Sat, 03/19/2016 - 15:06

It looks really great! 

I have fallen in love with it the second I saw it and somehow I am now convinced that I need a new wardrobe ;) 

I guess you don't have plans for the wardrobe laying around - but would you mind doing a fast sketch (just a simple one on paper) with all the measurements noted? I would be thrilled to try building it myself in the summer. 

Greetings from Germany!

Anela

Sat, 03/19/2016 - 15:07

It looks really great! 

I have fallen in love with it the second I saw it and somehow I am now convinced that I need a new wardrobe ;) 

I guess you don't have plans for the wardrobe laying around - but would you mind doing a fast sketch (just a simple one on paper) with all the measurements noted? I would be thrilled to try building it myself in the summer. 

Greetings from Germany!

petemoore

Mon, 08/22/2016 - 07:32

its very nice but there are no plans

can you put up the plans or email me them please

many thanks

leftysgirl

Tue, 07/18/2017 - 05:43

Are there plans used for this beautiful piece? I do not see any links. Help please!! I absolutely need to make this armoire :) :) 

Fenced-In Walkthrough Garden

Submitted by jmholzma on Fri, 04/29/2022 - 17:08

Used the Garden Enclosure plan as a reference, but wanted a much bigger area to walk through and relax in. Dimensions are about 30'x20'. Took a few months with a break for winter because it was just me working in spare time on weekends, would have gone a lot faster with an extra set of hands. Towards the end realized that drainage in the walk path was going to be an issue so I put in a very basic french drain before I weed fabric and mulched.

Really happy with how it turned out. Cost was pretty high, probably about $1500 all told, between wood, garden soil, etc. But we'll be able to enjoy it for many years.

Built from Plan(s)

Comments

Simple Modern Desk

Submitted by lilred02 on Sun, 07/17/2011 - 18:01

Built this a little smaller - only 15" deep and 42" wide for use behind the couch with multiple functions - laptop desk, dining room buffet table, and behind-the-couch-set-things-on table. Love it!

Tricky parts - the drawers. Because I changed the dimensions, I built the drawer box to fit my new dimensions and installed it. Then, I cut the sides of my drawers 10" deep (the smallest drawer slides I could find and a perfect fit). I laid the Hettich ball bearing drawer slides (from my local lumber and cabinet supplier, not big box) in the drawer box and trimmed down my drawer front/back until they fit nicely. If you're interested, it was 15 1/8" wide.

Nail gun is a must on this project!!! And remember to glue and use 2" nails.

I used the Kreg jig to build my drawers because I'm familiar with building drawers that way and feel comfortable getting them squared. I highly recommend the Kreg jig!

Then, I attacked it with my orbital sander until it was nice and smooth.

Love Ana's great patterns!

Built from Plan(s)
Estimated Cost
$85
Estimated Time Investment
Day Project (6-9 Hours)
Finish Used
lots of sanding, vacuum, wipe with microfiber cloth, spray primer, sand, vacuum, wipe, paint, sand, wipe, poly to finish. Use sponge brush to avoid brush strokes.
Recommended Skill Level
Beginner

Comments

simplyelle

Sat, 06/22/2013 - 13:34

I've been looking for a post with dimensions more similar to my sketch and found yours. Thanks! I must say that I'm a bit puzzled with how to attack my drawers. My table's dimensions being 44Lx16D. I am in desperate need of a comp table to fit along a short wall, but need it to be functional, hence the need for drawers. Were your drawer dimensions limited to the length of the drawer slides you found? If possible, I'd like my drawers deeper. However, I'm open to one longer, less complicated, drawer as well, lol. I'm curious. Help!

Fireplace with recessed TV mount

Submitted by medicscott on Thu, 02/16/2023 - 07:46

This is a very custom fireplace that I built for my wife as a 40th wedding anniversary gift. It is built around a Samsung 55” Frame TV and a Vivo motorized mount. The motorized mount allows the TV to be lowered to a better viewing height than the standard above mantle position which is usually too high for comfortable viewing.

In order to maintain the flush mount effect with the TV in art mode, I recessed the mount into the fireplace. That required building a “back” frame for the TV mount then the outer frame for the surround. I covered the outer frame with ½” OSB then ship lap. The mantle and hearth is made from Poplar with walnut stain and Polyurethane satin top coat. The hearth opens for storage.

This was sourced from several different plan sets with a lot of customization and input from the Technical Support Staff at Vizo-US.

Comments

Ana White

Thu, 02/16/2023 - 09:46

Happy Anniversary!
This is a beautiful, well thought out project.
I was hoping someone would do the recessed mount, and you nailed it! It's so much better with the tv flush like yours.
Also love the motorized mount.
Thank you very much for sharing photos.
Ana

Outdoor hangout using 2x4 and fence boards

Submitted by sylvialh on Sun, 06/16/2019 - 18:13

Bought enough lumber for one sofa but ended up using old fence boards for the  decking so had enough lumber to make the sectional and a shortened coffee table. 

Great way to save some cash even if u have to buy the fence posts. 

Added a reinforcing piece to the one armed sofa between the legs using a kreg jig to stabilize the legs a bit more. 

Waiting on my foam from Amazon to finish off this project!

Used inspiration from the beer/wine cooler patio table and made the middle of the table removable to add a buck underneath later. 

Note the 5 year old patio set, also an ana white project from back in the day!

Super quick build!

I did find that the measurements for customizing it for your cushion size seemed about 1.5 inches too big for all the depth pieces so I sized down but I haven't received my foam yet so maybe I'm wrong but Smth to think about. I didn't want my cushions to slide around so I took that into consideration when building. 

Estimated Cost
60$ CAD for the high density foam for each sofa (3x24x72) plus throw cushions for the back.

11 2x4x10 - cost varies depending on cedar or PT
Fence boards were reused

Outdoor Fabric to cover the foam
Estimated Time Investment
Afternoon Project (3-6 Hours)
Finish Used
None yet
Recommended Skill Level
Beginner

Mothers Day

Submitted by Anonymous (not verified) on Wed, 05/17/2023 - 20:20

I made this tall planter for my Mom for Mothers Day. She loves it!

Built from Plan(s)

Comments

Rustic Farm House Table

Submitted by Scotto on Mon, 09/30/2019 - 22:00

First Crack at any wood work since high school. All timber used was reclaimed hard wood, hours of

planing,sanding and clamping (its heavy). A few mistakes but that's learning.

Estimated Cost
$300 Australian
Estimated Time Investment
Week Long Project (20 Hours or More)
Finish Used
Estapol - Tung oil
Recommended Skill Level
Intermediate

Dog Bed Window Seat

Submitted by shellyward on Mon, 01/20/2014 - 16:53

I wanted a place for our dog beds, without just having them all over the floor (we have 2 big dogs and 2 little ones. I decided to build a window seat in front of the large window in our dining room which could double as dog beds/kennels. While the base plan was off the large wood pet kennel end table, it had to be modified significantly to be wider, shorter, and sturdy enough to sit on. I am also still trying to decide if/how i want doors on here. This is actually 2 kennels next to each other (not 4) Next will be to build 2 actual kennels for the big dogs to place on either side of this.

Estimated Cost
$150-$200 (high because of the foam and fabric for the seat cushion)
Estimated Time Investment
Weekend Project (10-20 Hours)
Finish Used
black paint/ poly
Recommended Skill Level
Beginner

Comments

My Big Ur Farm Table

Submitted by Jake on Sun, 06/24/2012 - 16:12

I built the table to use in my garage but it came out so beautiful that I now find myself wondering who to give it to. I followed the plans except I used 1x3s instead of 2x6s or 2x2s for the trim between the legs. I built the top first using pocket holes and then added the legs. I then added the side trim before adding the joists. That process had every board fitting perfectly. No attachments are visible from the outside. I attached the legs using pocket holes and three inch screws and glue , of course.

I will build two benches which should be a snap.

I had no luck finding a 10 foot 4x4 so I bought two 8 foot. Got a good deal at HD with each less than $8 each

Built from Plan(s)
Estimated Cost
$61 which includes screws and glue but not stain.
Estimated Time Investment
Day Project (6-9 Hours)
Finish Used
I use Minwax Golden Oak for the pine components and Minwax Red Oak for the fir legs. I like the contrast.
Recommended Skill Level
Beginner

Outdoor Patio Table

Submitted by stephanief on Wed, 07/18/2012 - 18:29

I built this outdoor patio table in about a weeks time working on and off. There are mistakes, it's uneven in places and it is not perfect! That being said, the plans for this are very forgiving and nobody would ever know without looking for these things.

You can get the breakdown on the build, the finish I used, chair solutions and other suggestions here:

http://legosecretagent.blogspot.com/2012/07/outdoor-patio-table.html

This beautiful table only cost around $60 total to build!

Built from Plan(s)
Estimated Cost
$60
Estimated Time Investment
Weekend Project (10-20 Hours)
Finish Used
Minwax, specifics at http://legosecretagent.blogspot.com/2012/07/outdoor-patio-table.html
Recommended Skill Level
Beginner

Rolling Cart - pallet recovered wood

Submitted by jgrunwaldt on Thu, 08/25/2016 - 19:36

Rolling bar cart made entirely from recovered pallet wood.

Based on original Ana White's plan, I've just added a side pocket and rails on the lower shelf to prevent sliding of items placed on it. 

Later on I made another one for a friend who attached a hanger plate and a magnetic knife holder.

Built from Plan(s)
Estimated Time Investment
Weekend Project (10-20 Hours)
Finish Used
wax
Recommended Skill Level
Intermediate

modified bench swing

Luv your site. Took your bench swing plan and modified it a bit (shortened depth) and then created a small pergola to hang it from. Just need to stain/poly to finish it off. Thanks for your plan and website it is very inspiring.

Estimated Time Investment
Weekend Project (10-20 Hours)
Recommended Skill Level
Beginner

Craft Table/Sewing Desk

Estimated Cost
$250
Estimated Time Investment
Week Long Project (20 Hours or More)
Finish Used
Paint (sigh)
Recommended Skill Level
Beginner

Comments

Easy small space side table

Submitted by Dedavies3 on Mon, 07/07/2014 - 17:57

This was my first project. It was relatively easy but I did make some mistakes that are now design features

Estimated Cost
Reclaimed wood
Estimated Time Investment
Afternoon Project (3-6 Hours)
Finish Used
Minwax English chestnut
Recommended Skill Level
Beginner