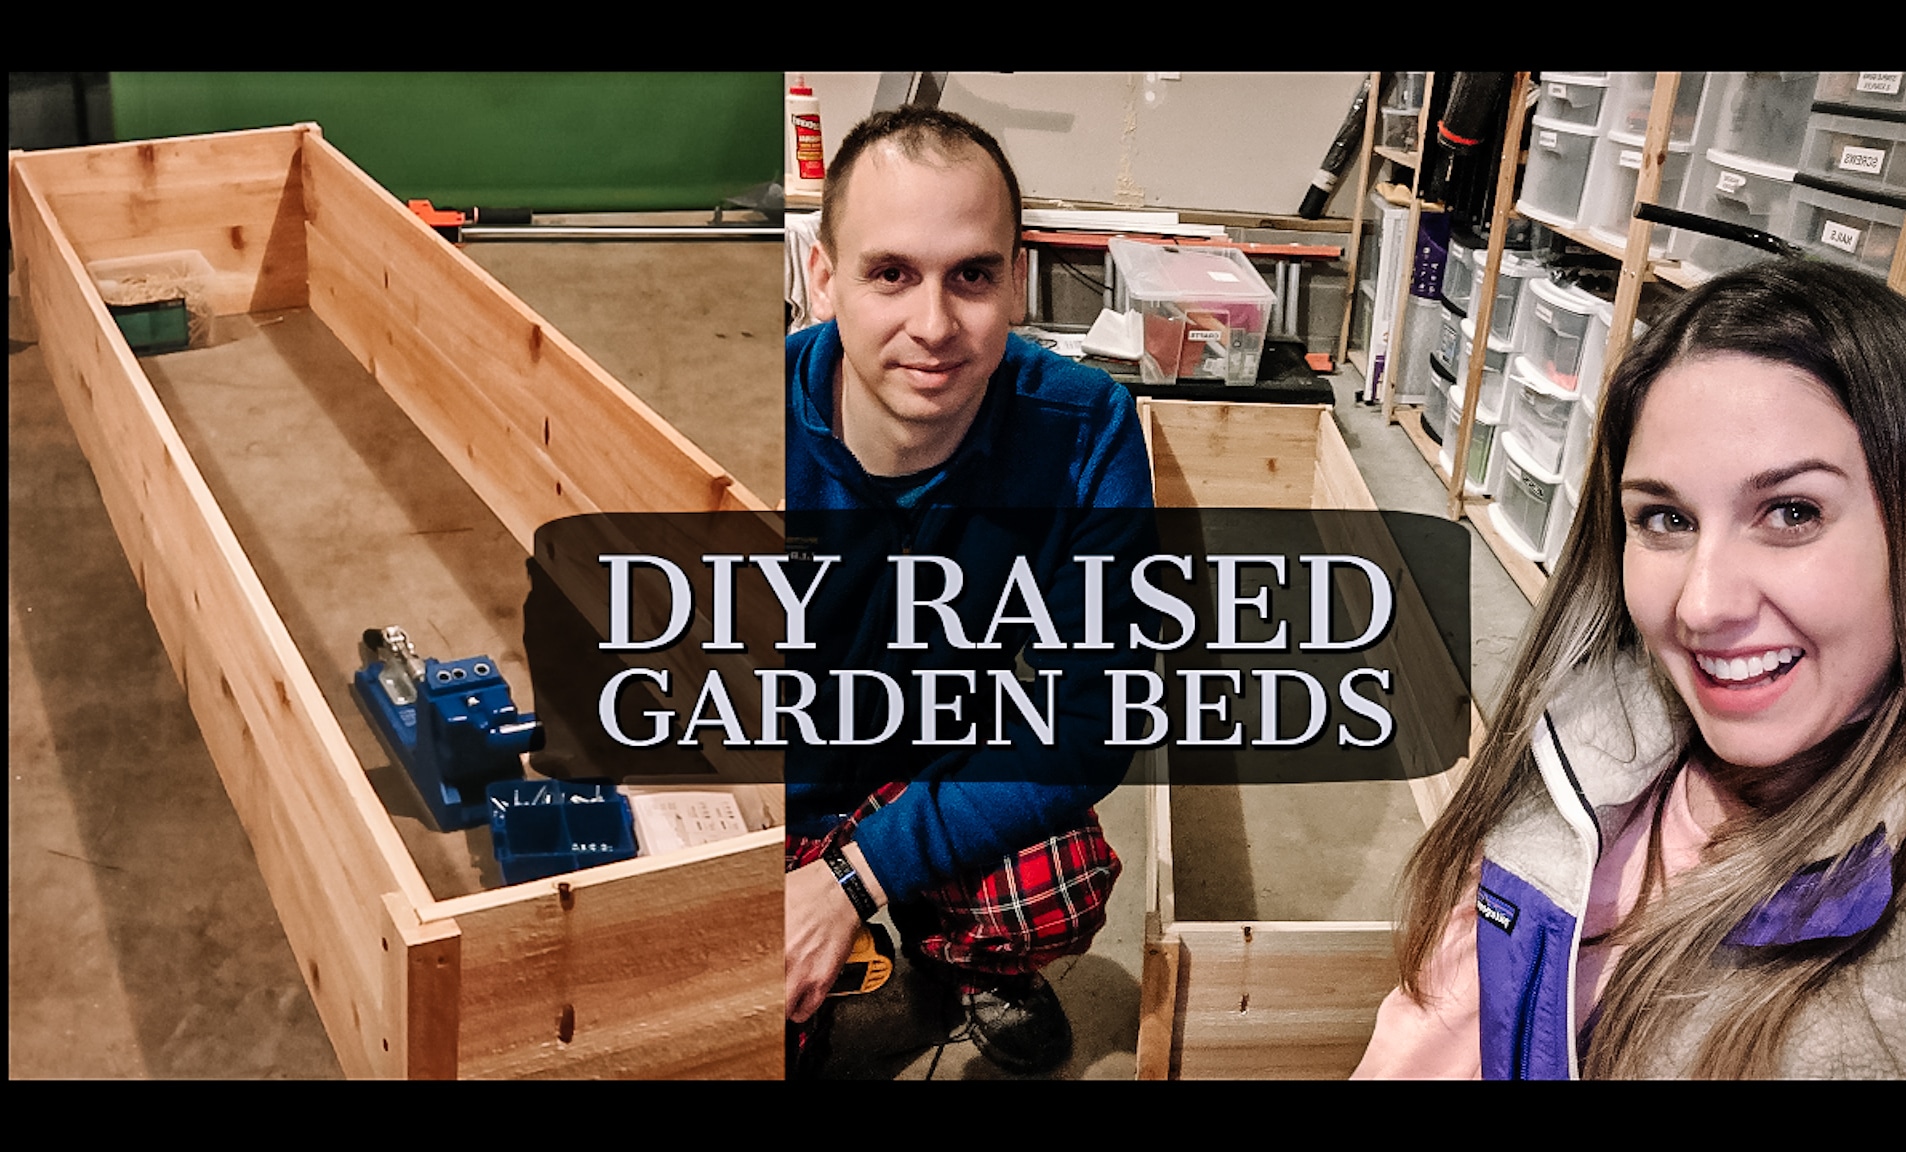
Palette Mud Kitchen
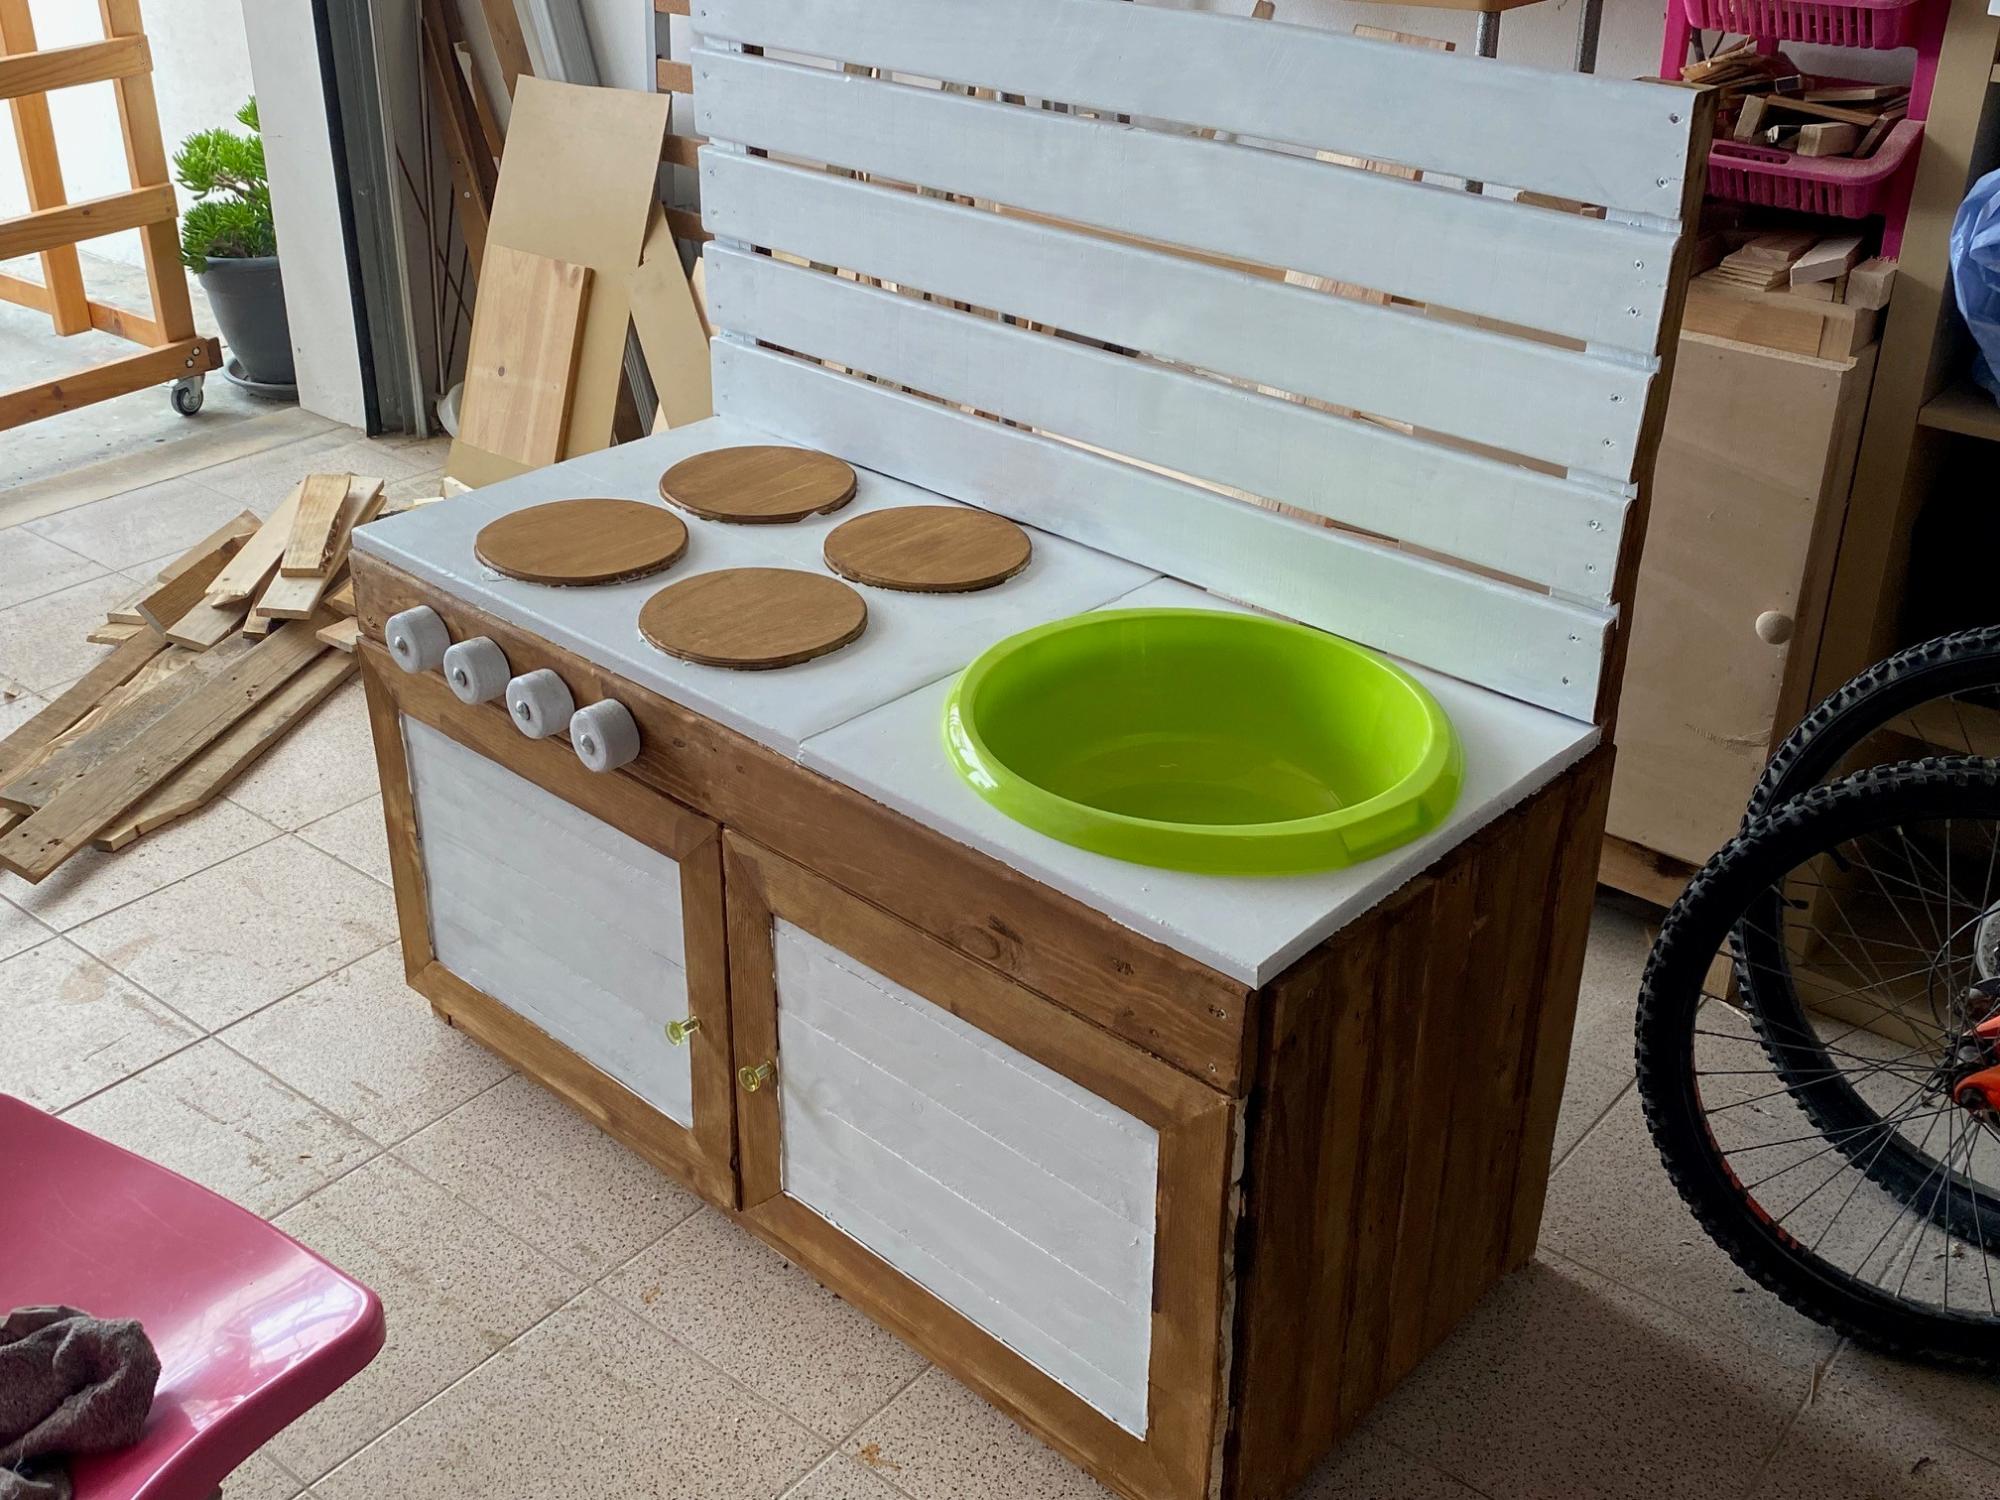
Here's the Mud Kitchen I made for my son's kindergarten. All made from palettes. Unfortunately your plans came out just too late
Built from Plan(s)
Here's the Mud Kitchen I made for my son's kindergarten. All made from palettes. Unfortunately your plans came out just too late
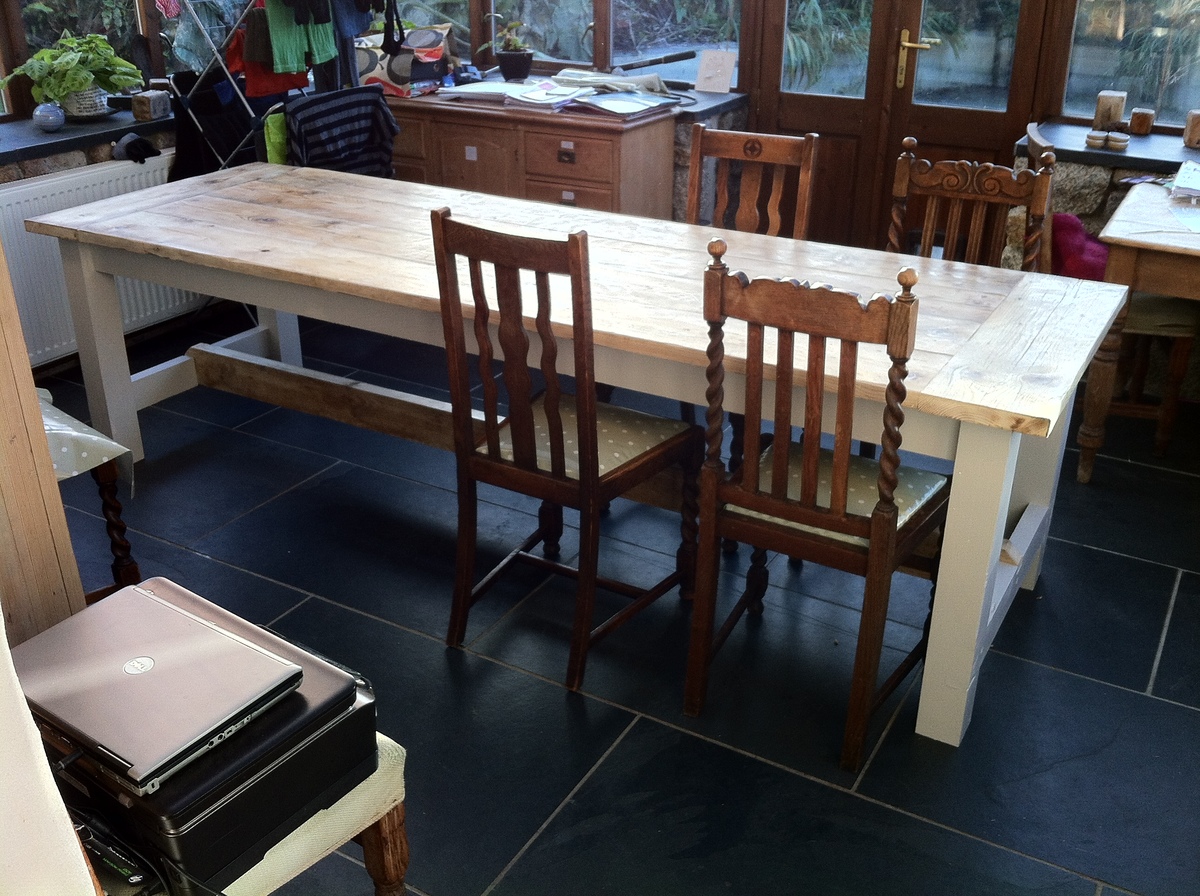
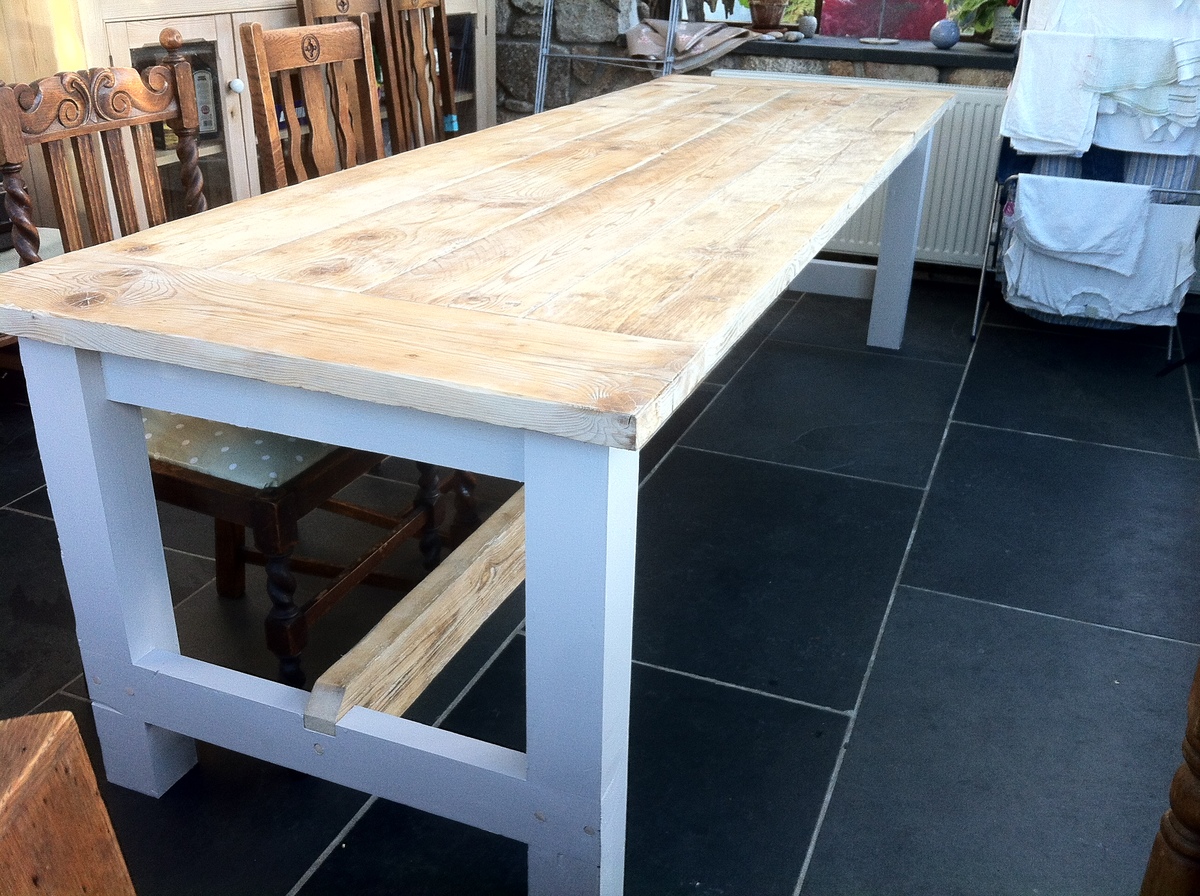
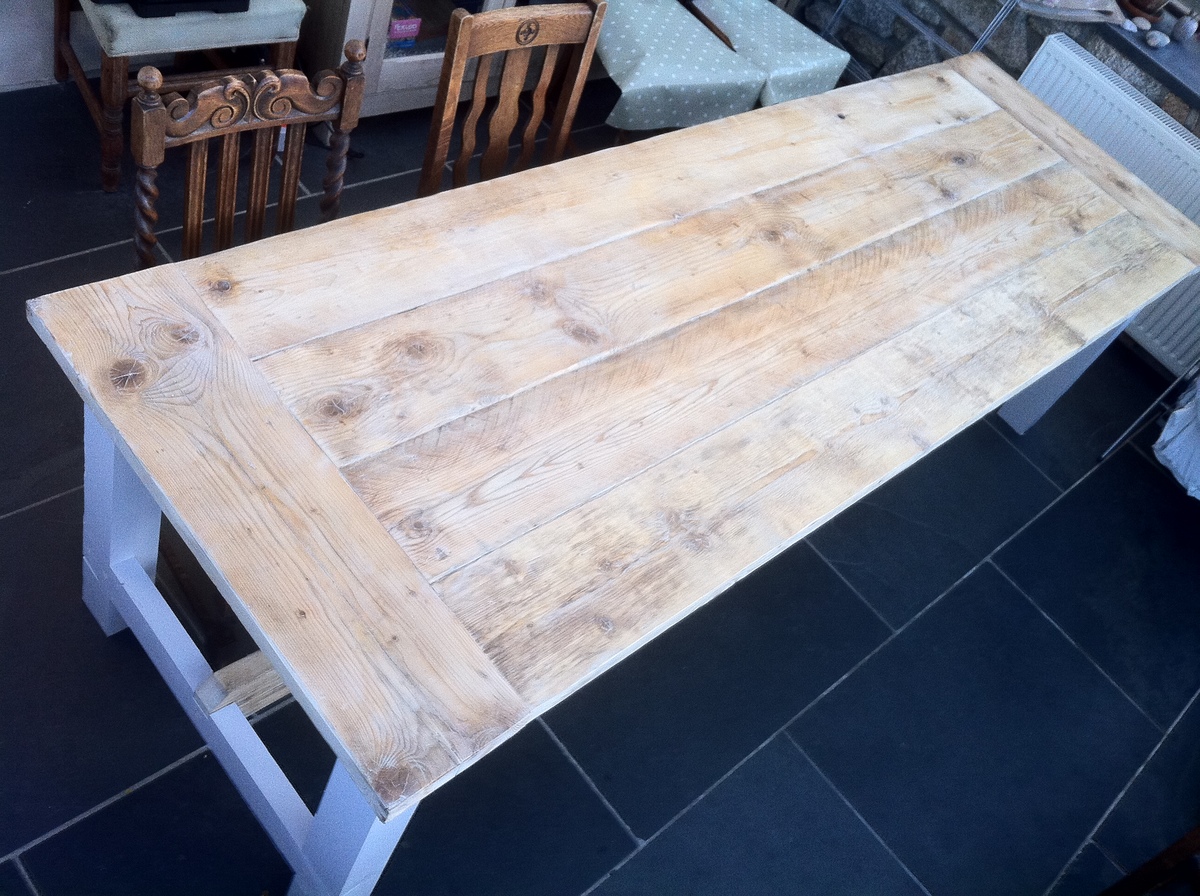
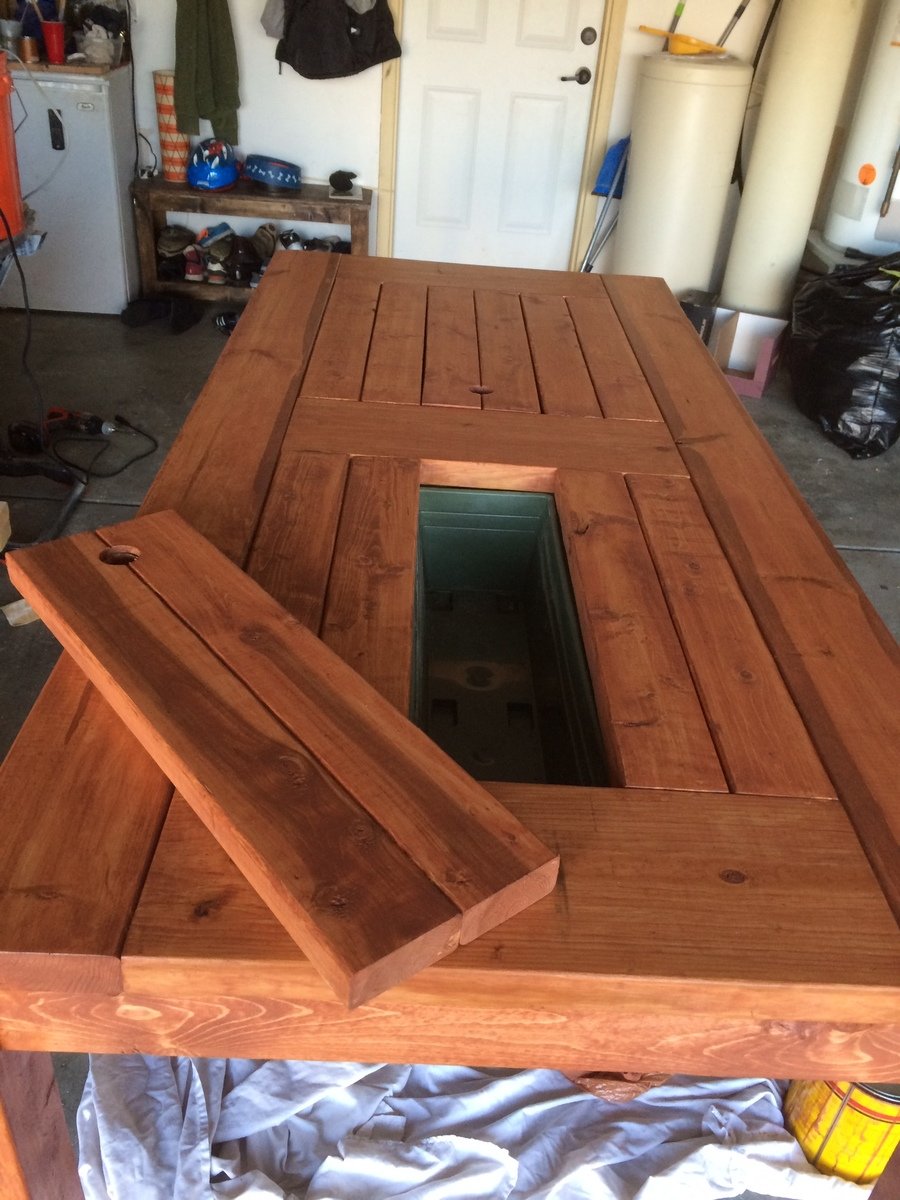
wanted a big table for christmas, this is over 8 foot, and we couldn't afford a table like that so having seen the site thought i'd try and build one. thanks for the plans absolutely great
first project, no real woodwork experience but competent diy-er
made mainly out of reclaimed wood, the top and side apron are made of old scaffold boards and the main brace a chunk of wood form my neighbours shed.
i did have to buy some 2x4s for the legs and the cross braces
sides painted and the top waxed, looks a bit patchy in the photos but the finish is good.
all in all cost about £70
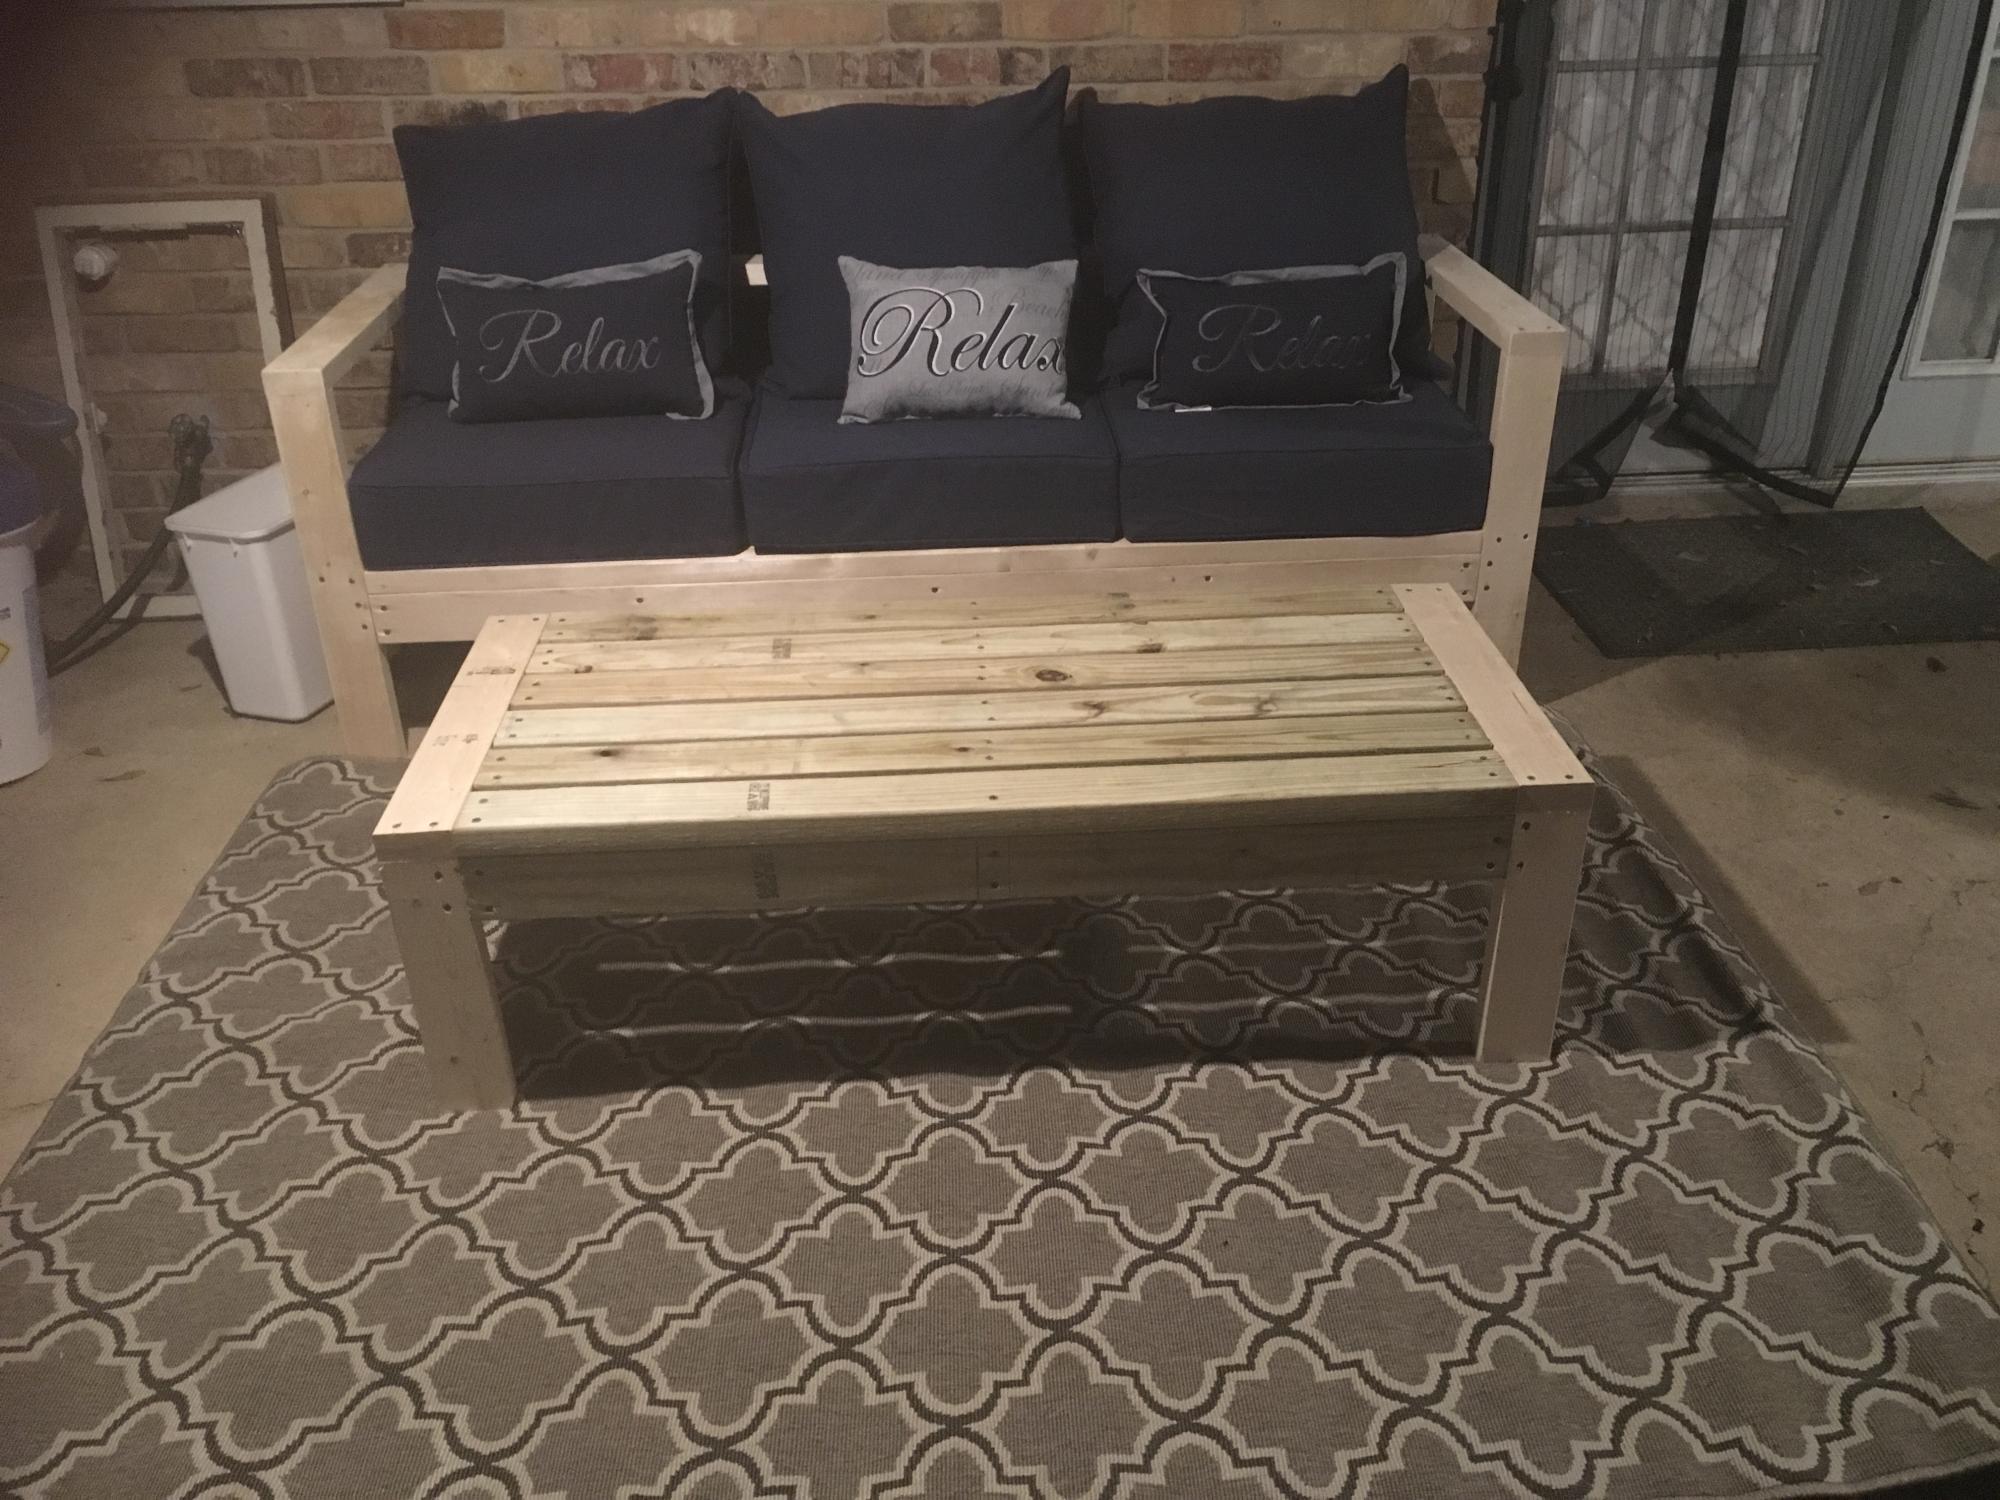
We modified Ana’s plans only slightly and we love our outdoor furniture we are going to make a second couch and a couple of chairs as well!
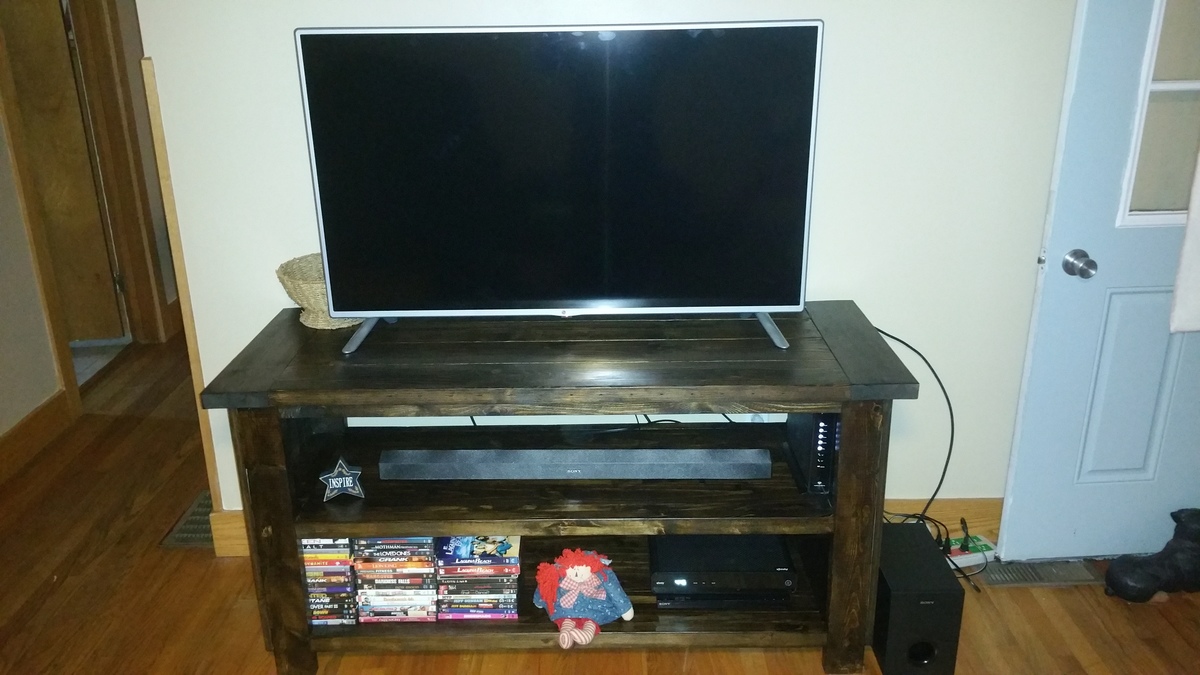
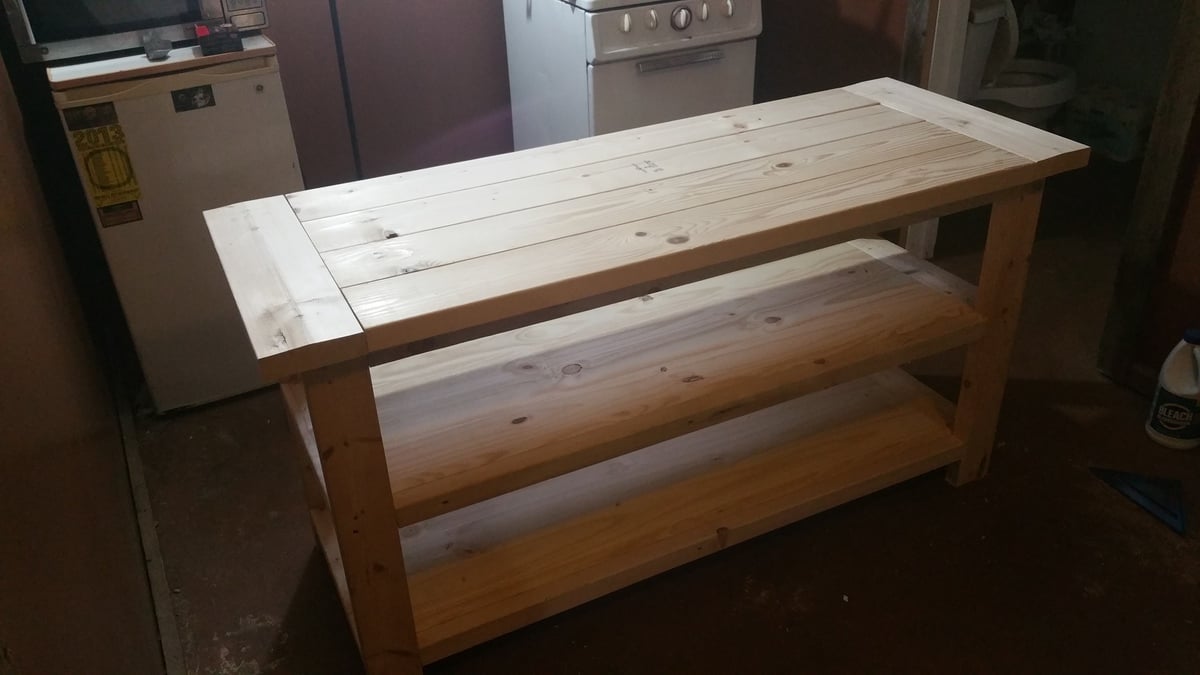
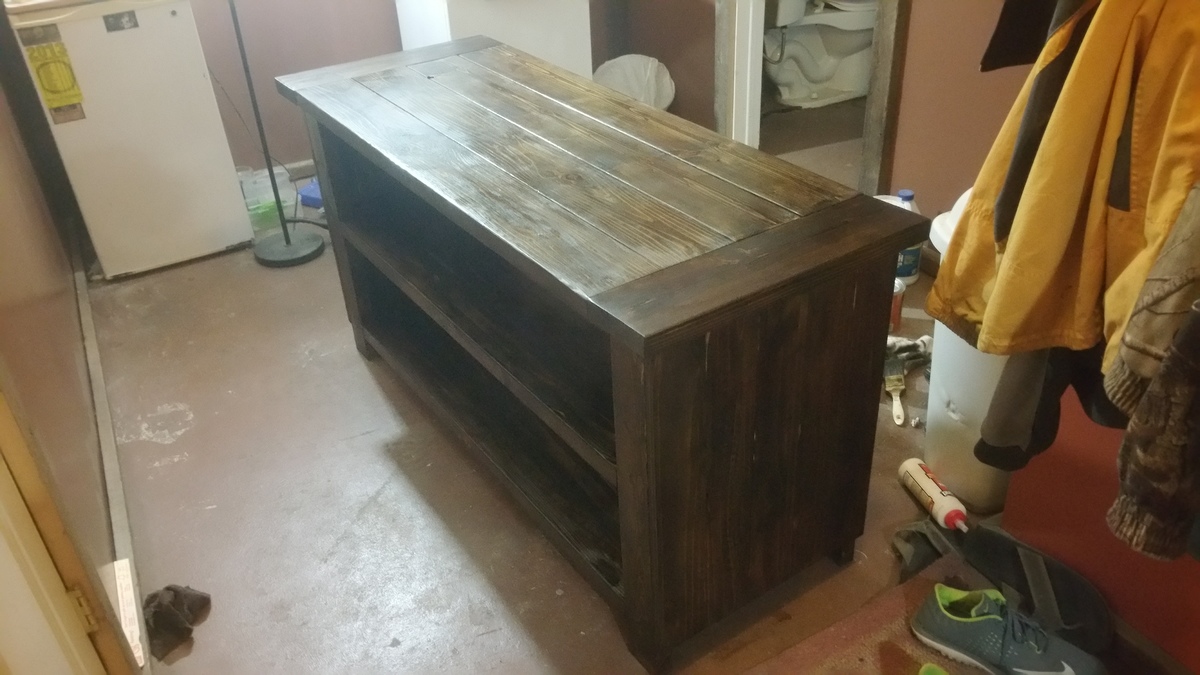
I saw someone else make a stand similar to this by combining the rustic x and tryde plans. I just used 1x for the sides instead of the x. Didn't take more than a few hrs to build but finishing took forever bc a couple boards were crowned so I sanded forever. If anyone has aby questions or needs help feel free to email me @ [email protected]
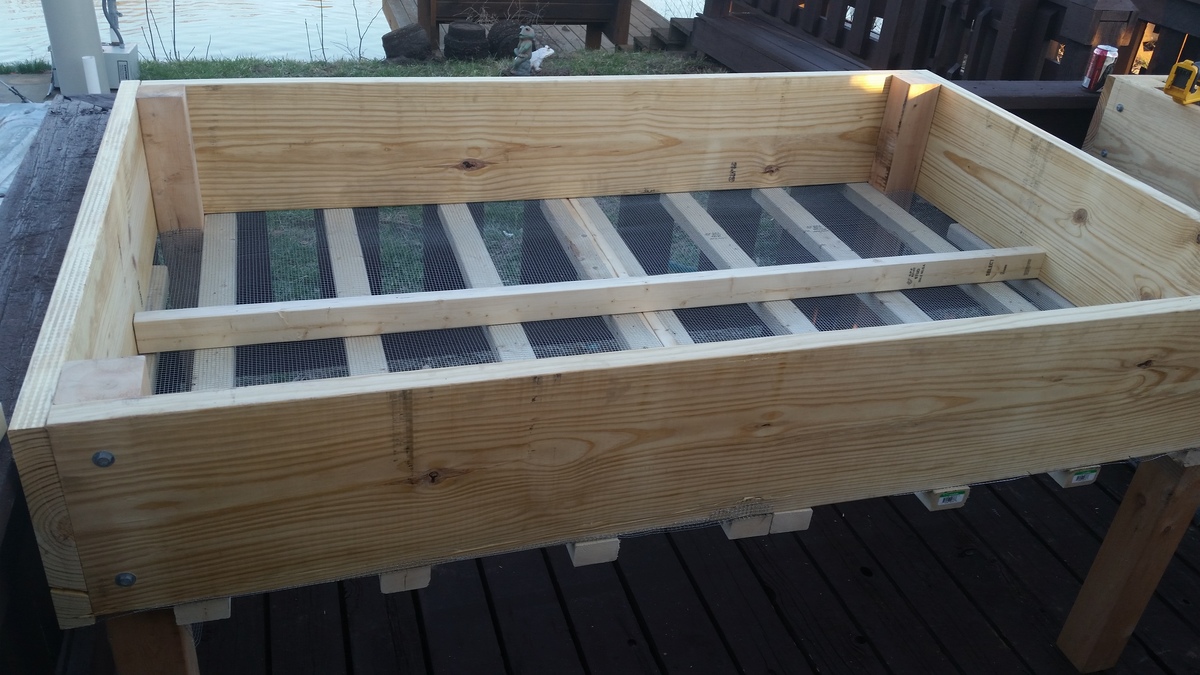
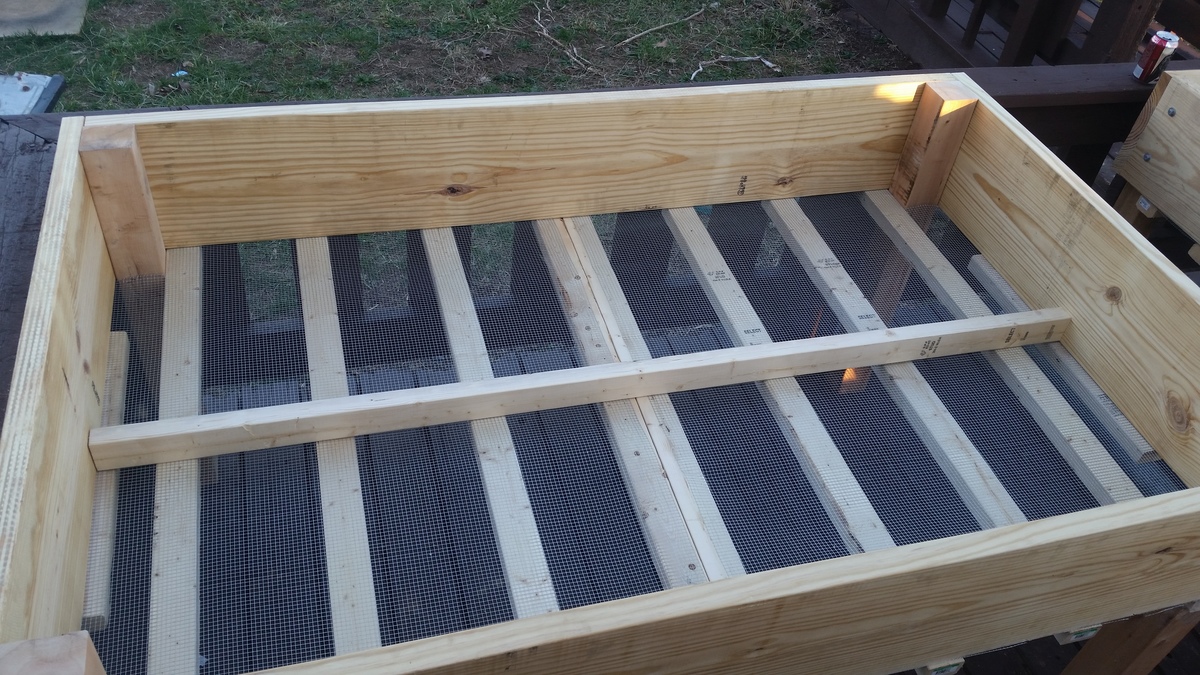
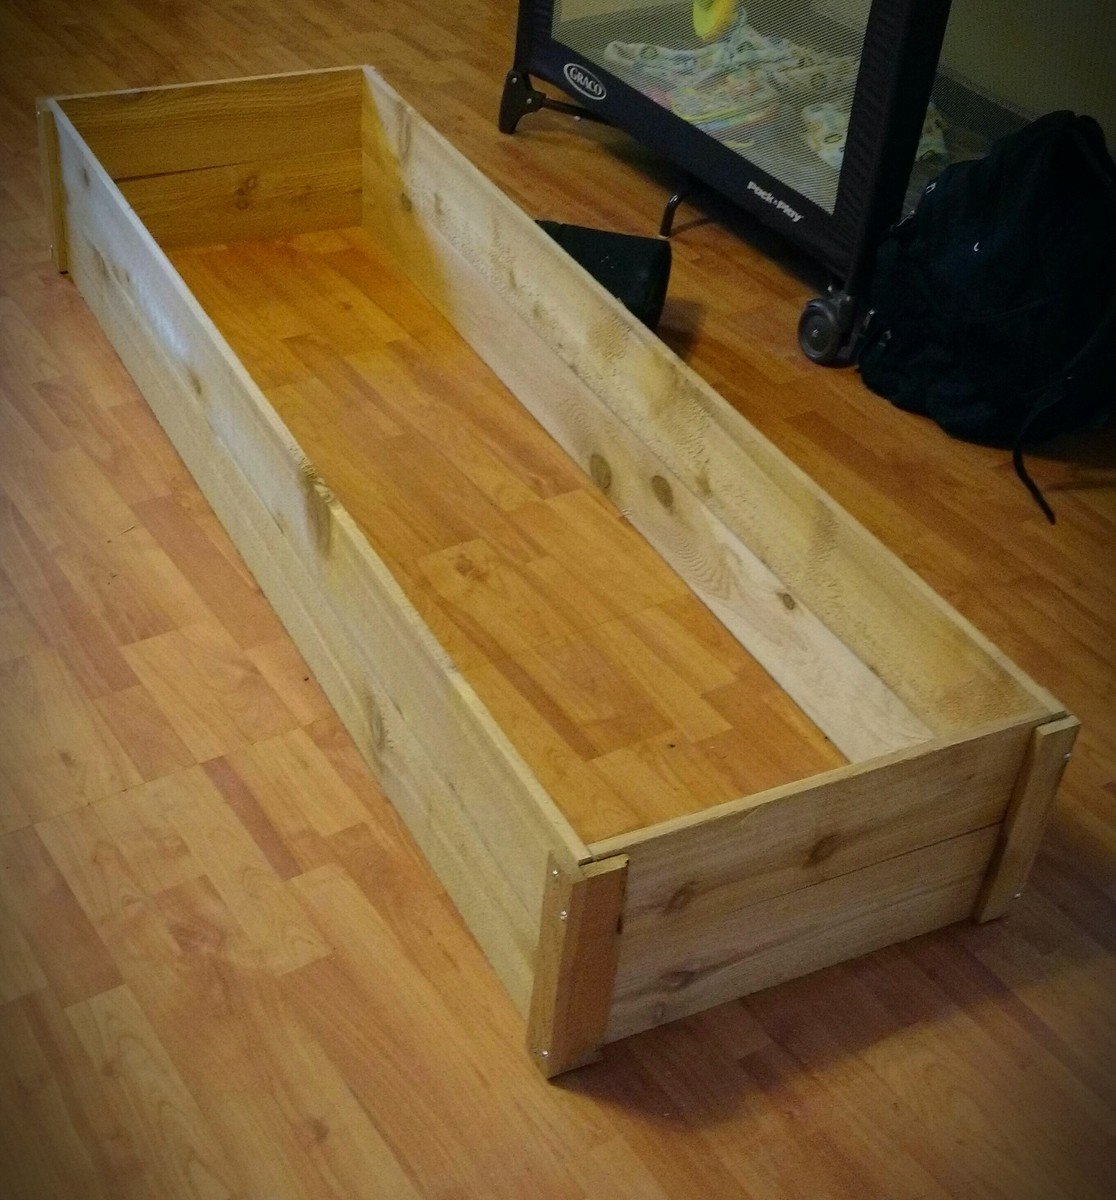
2 - 2x12x8
2 - 2x3x8
2 - 4x4x8 (cedar, fur is cheaper and will work fine also)
16 - 5/16x4 lag screws
16 - 5/16 washers
3x10 feet 1/4 hardware wire
20 - 3inch wood screws (outdoor rated, deck screws or the like)
you will have left overs if you buy extra lags you can make some other boxes depending on how high you want these, or set them on ground without legs. and use the wood screws
No more IKEA for me!

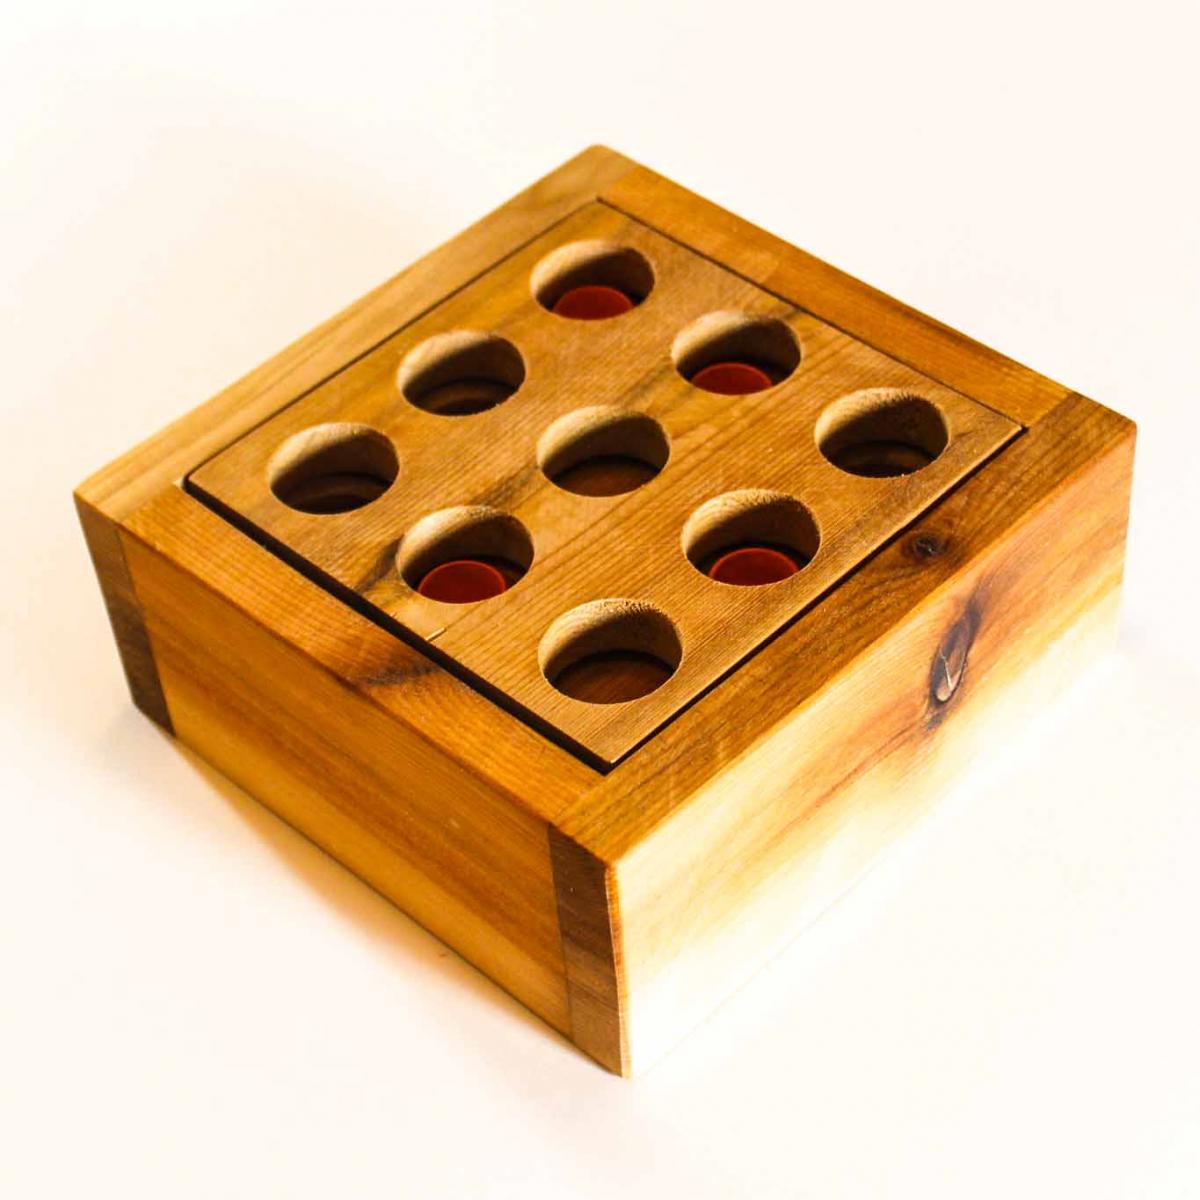
This is a fun little puzzle that goes by the name of Golf, Nine Hole and, my favorite, Gopher Hole Puzzle. The goal is to fit all six pieces into the box. The possible combinations make it pretty challenging.

This was my first build from Ana White and my first piece of furniture. It is doable for a determined, handy beginner/ intermediate. I took my time and worked on it when I could, thanks to my wife for letting me take over the garage for several weekends and her great painting skills!
This was my first Ana White build, and I’m hooked. Super simple for a beginner to make.
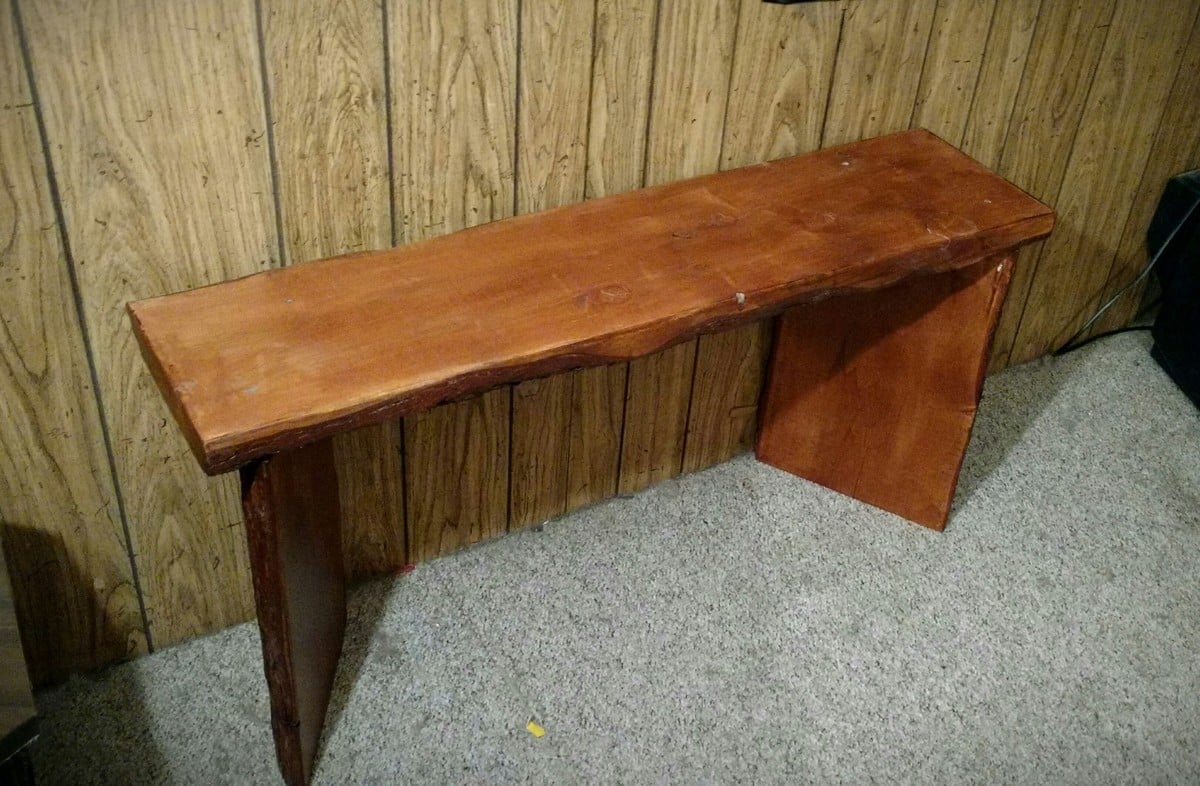
My little sister is building her first garden this year, and had asked about a garden bed and bench. I found this plan on the Ana White site, and waited until the local Home Depot had cedar fence pickets on sale for $2.34 each. Once these were purchased, the 3 garden beds were put together easily with screws and some Titebond II, and then sprayed with spar urethane on the outside for further protection. I also took some live edge fir slabs I'd gotten for free from a lumbermills scrap pile, and cut, sanded, and stained them to put together a live edge bench. I assembled the bench using rabbet and tenon, and then further braced the legs with small L brackets that cant be seen from the front and some 3" screws from bench top to legs. After assembly, I spar-urethaned the bench with 4 coats for protection. My sister loved both the bench and her boxes. Thanks for the plan!
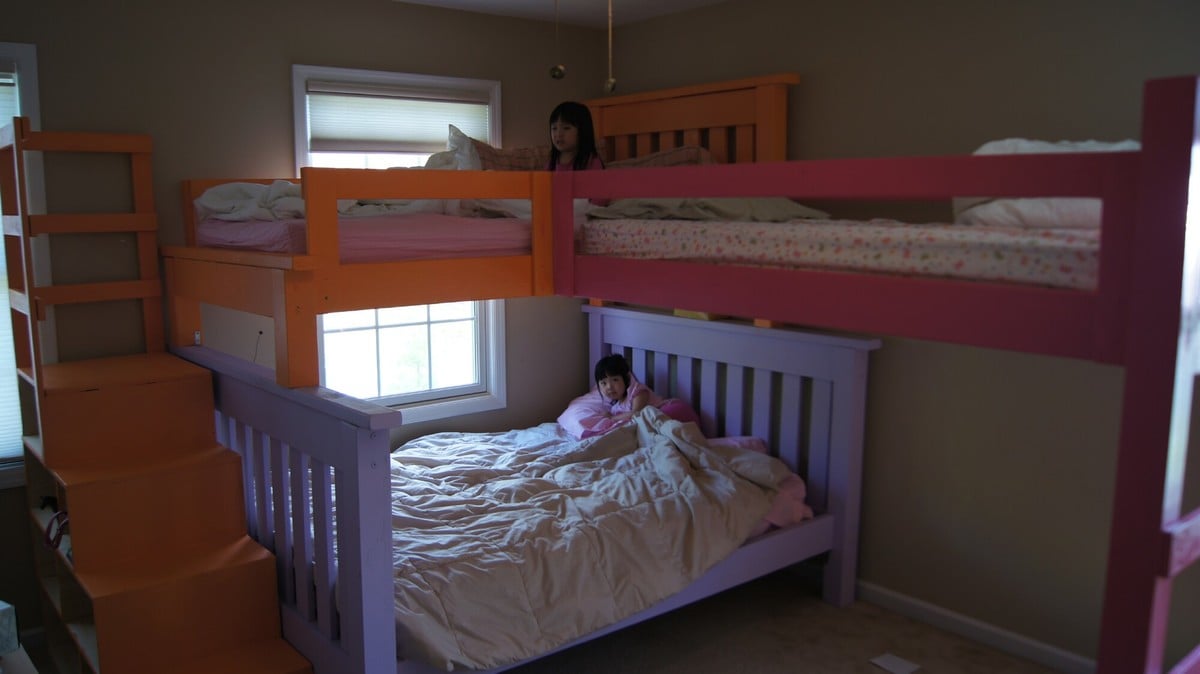
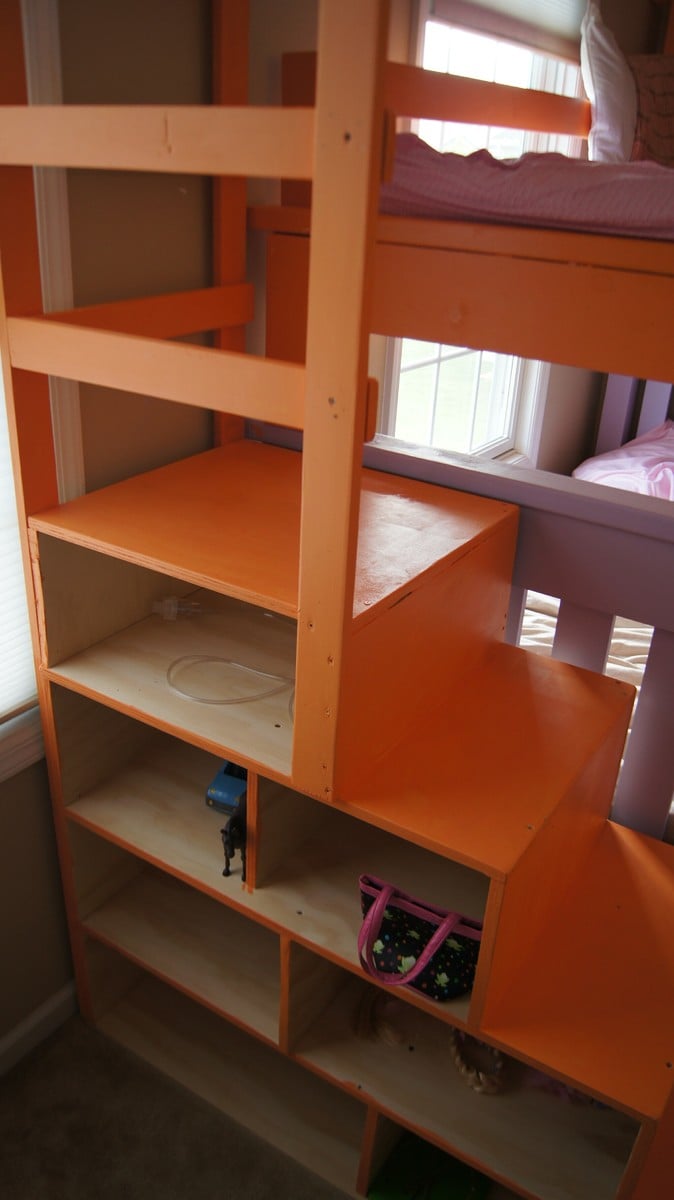
I'm a father of 4 girls ages 6,5,4, and 1. So a regular bunk wasn't enough so I decided to add the 3rd bunk. Each painted in my girls favorite colors. The paint was Martha Stewart signature paint which was on clearance on Lowes. Think it was 3 or 4 dollars a quart. The cubby steps are basically just 4 boxes stacked on top of each other and nailed together and made from 3/4" furniture grade plywood.
It didn't come out perfect but I'm pretty happy with the results. Let me know what you guys think. Thanks.
PS, Ana...my wife is a big fan of yours. She's the one who turned me onto your site.
Fri, 05/11/2012 - 17:30
That looks awesome! It's definitely one of a kind too. Nice job.
Sat, 11/24/2012 - 09:06
Hi,
We are looking to build something very similar, but are needing more information. How did you attach the loft bed to the top bunk bed? What do you have at the foot of the loft bed to keep it up? Thanks so much for any information.
Thu, 07/31/2014 - 14:17
This is BEAUTIFUL. I bet your girls have loved it and worn it well. :) I would love to see 2-years-later pics to see how it has held up over the years. :)
So proud of how this turned out. Plans were so easy to follow. Thanks for such a wonderful site.
David Akridge
I made this table for a friend of mine. I'm a Realtor and he used me to help purchase his home. Instead of a boring house warming gift, I made him this table instead!
We made two $10 raised beds last weekend and can't wait to get them in the yard!
The cedar fence pickets ended up costing us about $15 per bed with another $15 for screws, so total cost was about $30 per bed.
We found it tricky to do the 1x2 pieces in the order recommended and when we make these again, will form the full box and then add on the 1x2s for support.
We made a YouTube video detailing the process - hope you'll check it out!
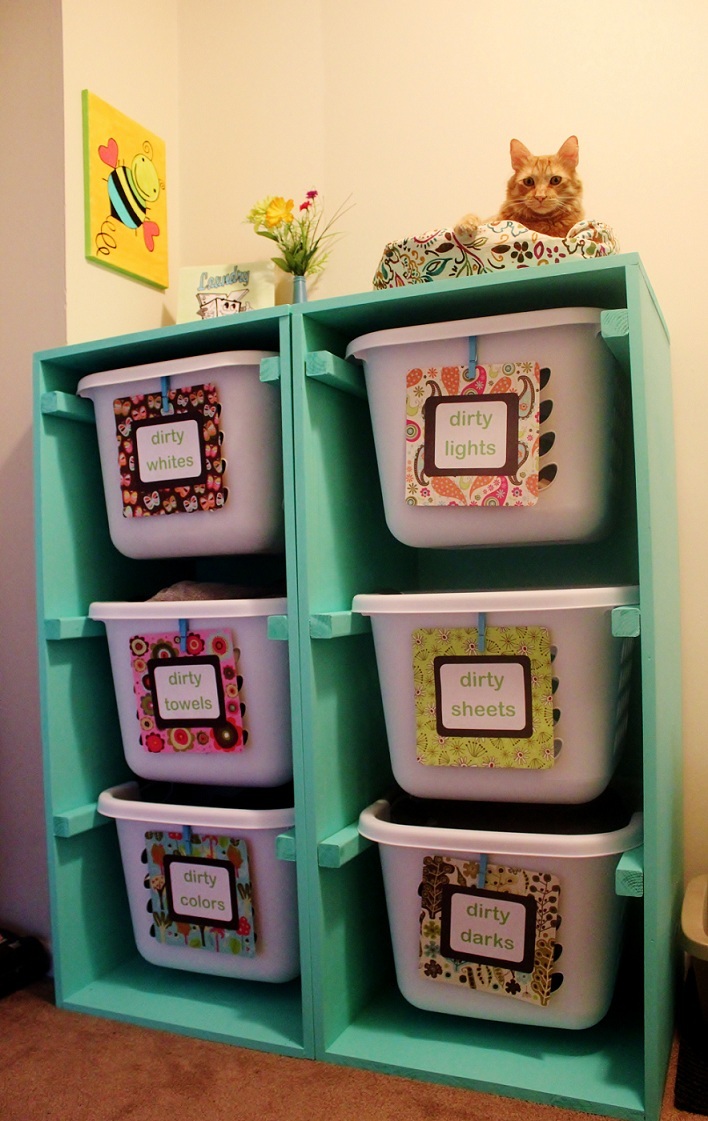
Both dressers were completed in one (long) day by my boyfriend and his father. Modifications were made to make it fit square Sterilite 1.5 Bu./ 53 L laundry baskets (serial/bar code # 073149121789).
I'm not sure what size pieces they purchased, however this is the cut list (for one dresser, 3 laundry baskets):
2 - 48" x 20" (sides) - could possibly be shorter, we had a little bit of extra space
1 - 20" x 20" (bottom)
1 - 21.5" x 20" (top)
1 - 48.5" x 21.5" (back)
6 - (2" x 2")'s cut into 20" pieces (or the metal angle option in the original design)
They did not distance the spaces perfectly for the (2" x 2")'s, but every 14-16 inches should be about right.
I'm sorry these instructions are void of a lot of information, but I hope they can help.
I think this project can take a shorter amount of time if no mistakes are made. They had to run to Lowe's 2 times in the middle of the project because they forgot to purchase a second size of screws and then they cut the back too thin.
Good luck, and have fun! It is a fabulous project and oh so very useful.
Mon, 05/28/2012 - 09:53
This is a brilliant solution, particularly since most sorters don't have enough compartments to separate the whites, sheets and towels from each other. But we really don't want to wash them together, do we?
Love how cozy your kitty looks up there, too.

The wife has a hard time bending down so she wanted pedestals for the washer and dryer. The metal ones with a drawer were too tall. I showed her Sausha's and she really loved that design. I basically used the same construction plans idea from Sausha's project and some tips from Ryan's brag post. But, I wanted to beef it up some. I didn't like the L-bracket to attach the top and 4X4 legs. It didn't seem sturdy enough for me. I used my table saw to square the edges on the 4X4 posts and the 2X6 rails. Then I used my Kreg jig and glued and screwed everything together. I liked Ryan's trim ideas, so I used baseboard trim for the bottom and flipped it for the top trim. I made a 1/2" lip so if it were to vibrate, the washer/dryer would not fall. I put the trim on the bottom of the legs and was considering putting on the top but I put some different trim all the way around the bottom of the 2X6 rails. The wife liked that. I also added some carpet on the top to cut down on vibration and to help keep the units in place. I also put some 4X4 pieces of carpet on the bottom to keep the noise down and to help in moving it. I primed and used an gravity sprayer to paint it. Then I put 3 coats of polyacrylic to help in cleaning and to cut down on scratches from the laundry baskets.


Wed, 06/29/2016 - 14:31
I think you could probably drive a truck on top of yours. :) I was a bit concerned about the strength of the construction when I first decided to build it, but I decided that since it would be stationary once I have it in place and the only force would be straight down, it would be fine. Once I got it put together, it was actually sturdier than I thought it was going to be...from a horizontal force perspective. Virtically, that thing could hold 100 washer/dryer pairs...the plywould would give out before the 2x4s and 4x4s would even budge.
Anyway, nice work! I love the Kreg Jig...I need one of those.
Sun, 01/29/2017 - 16:23
Great looking build, thanks for the detailed photos!
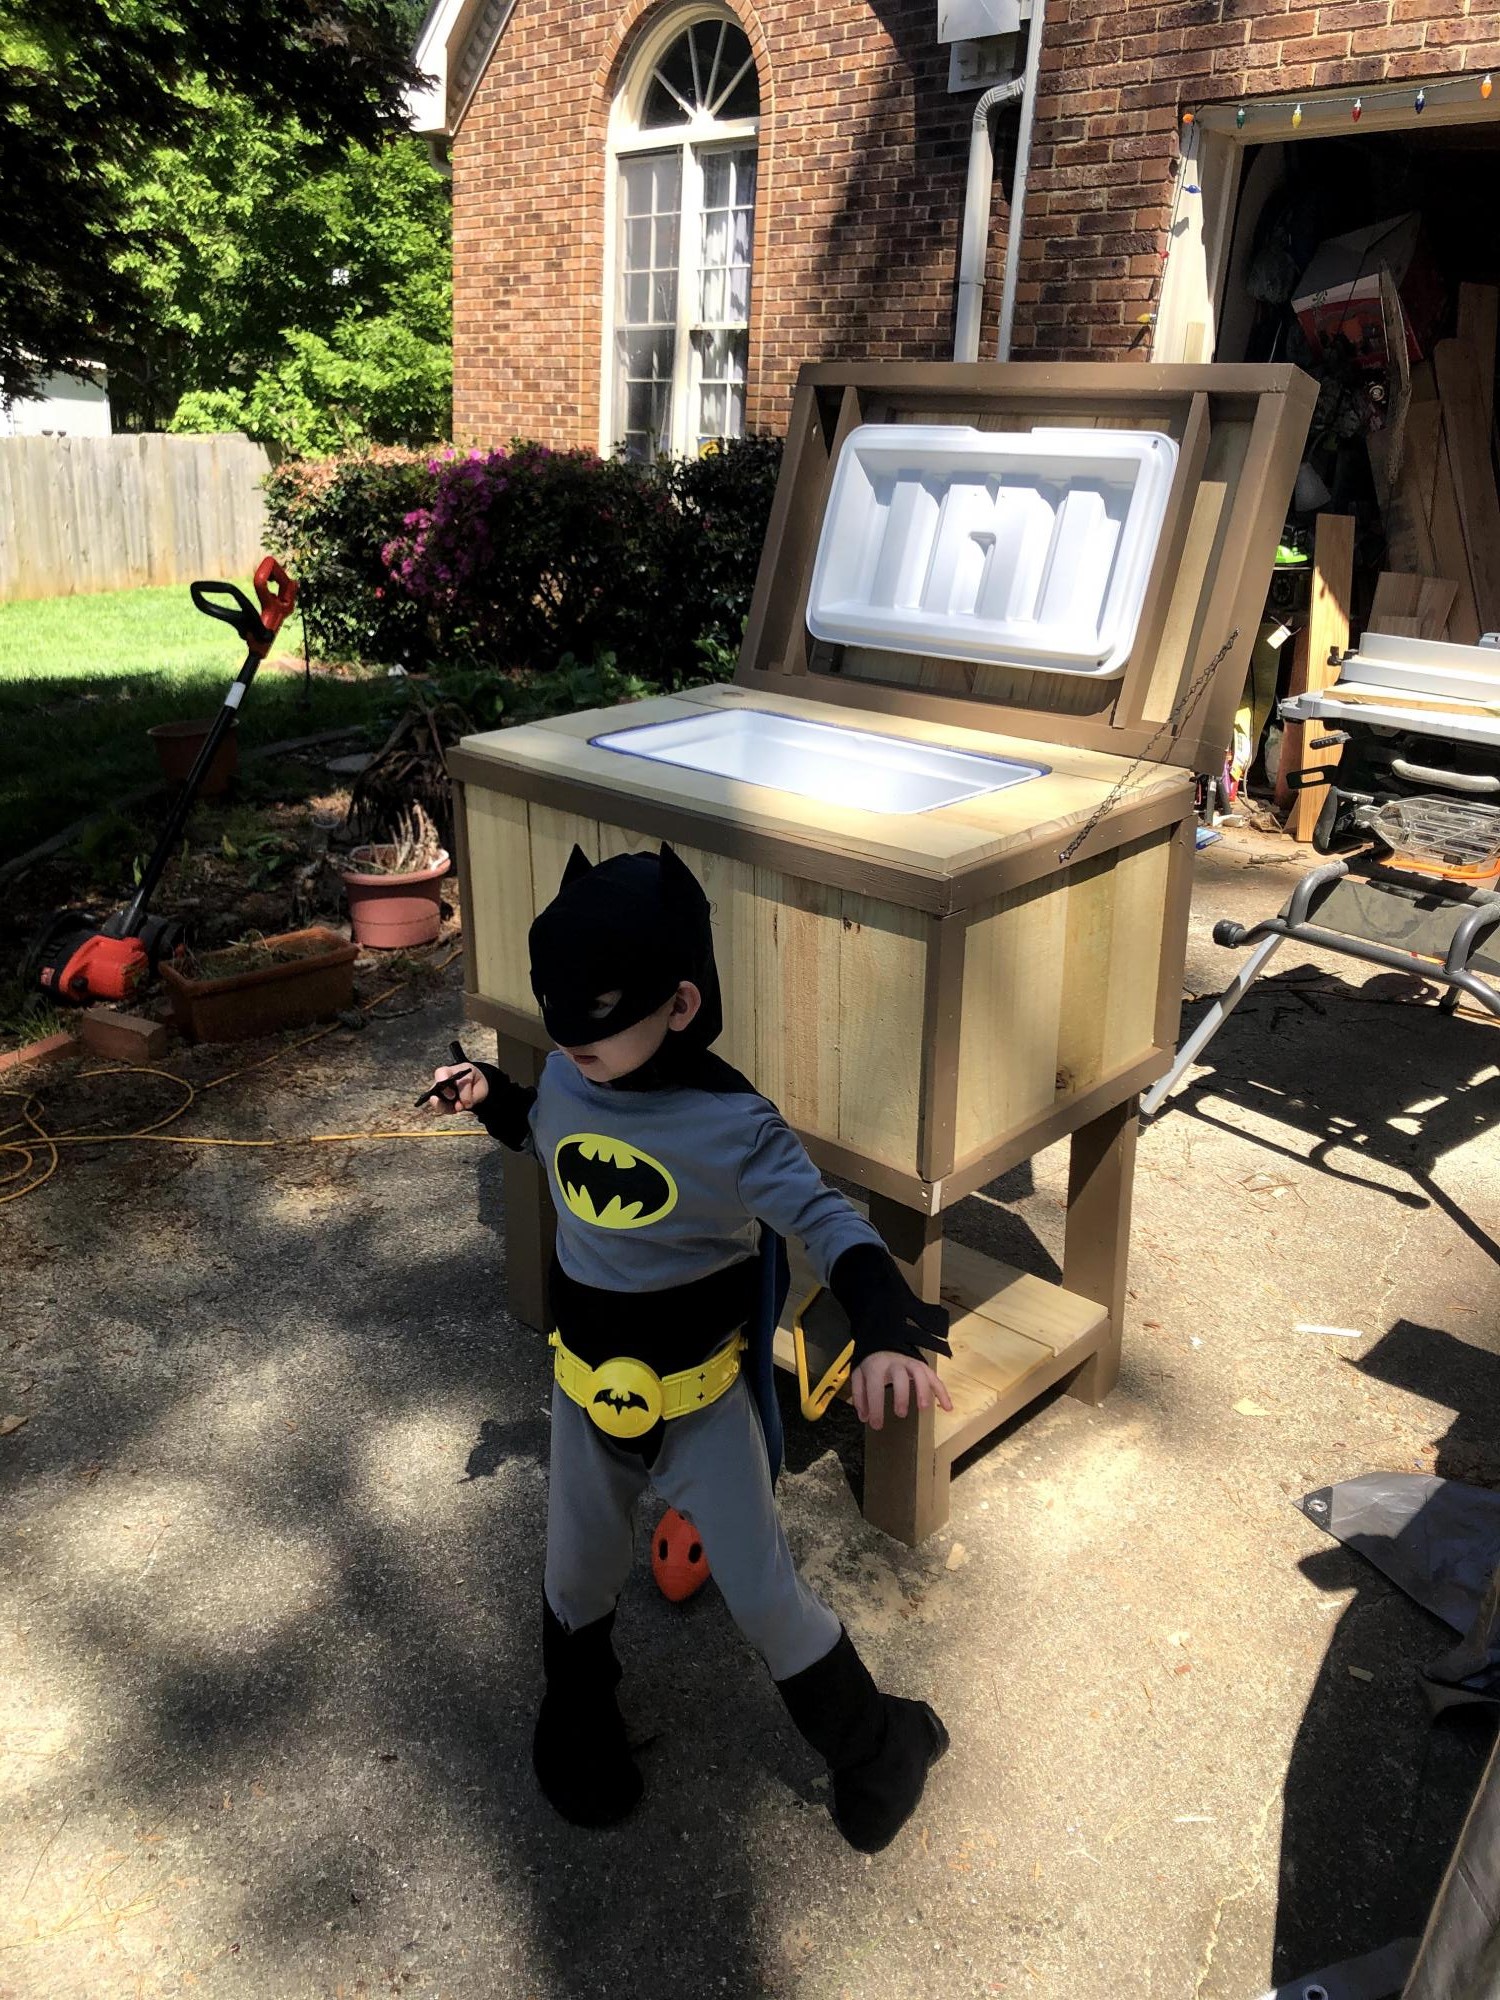
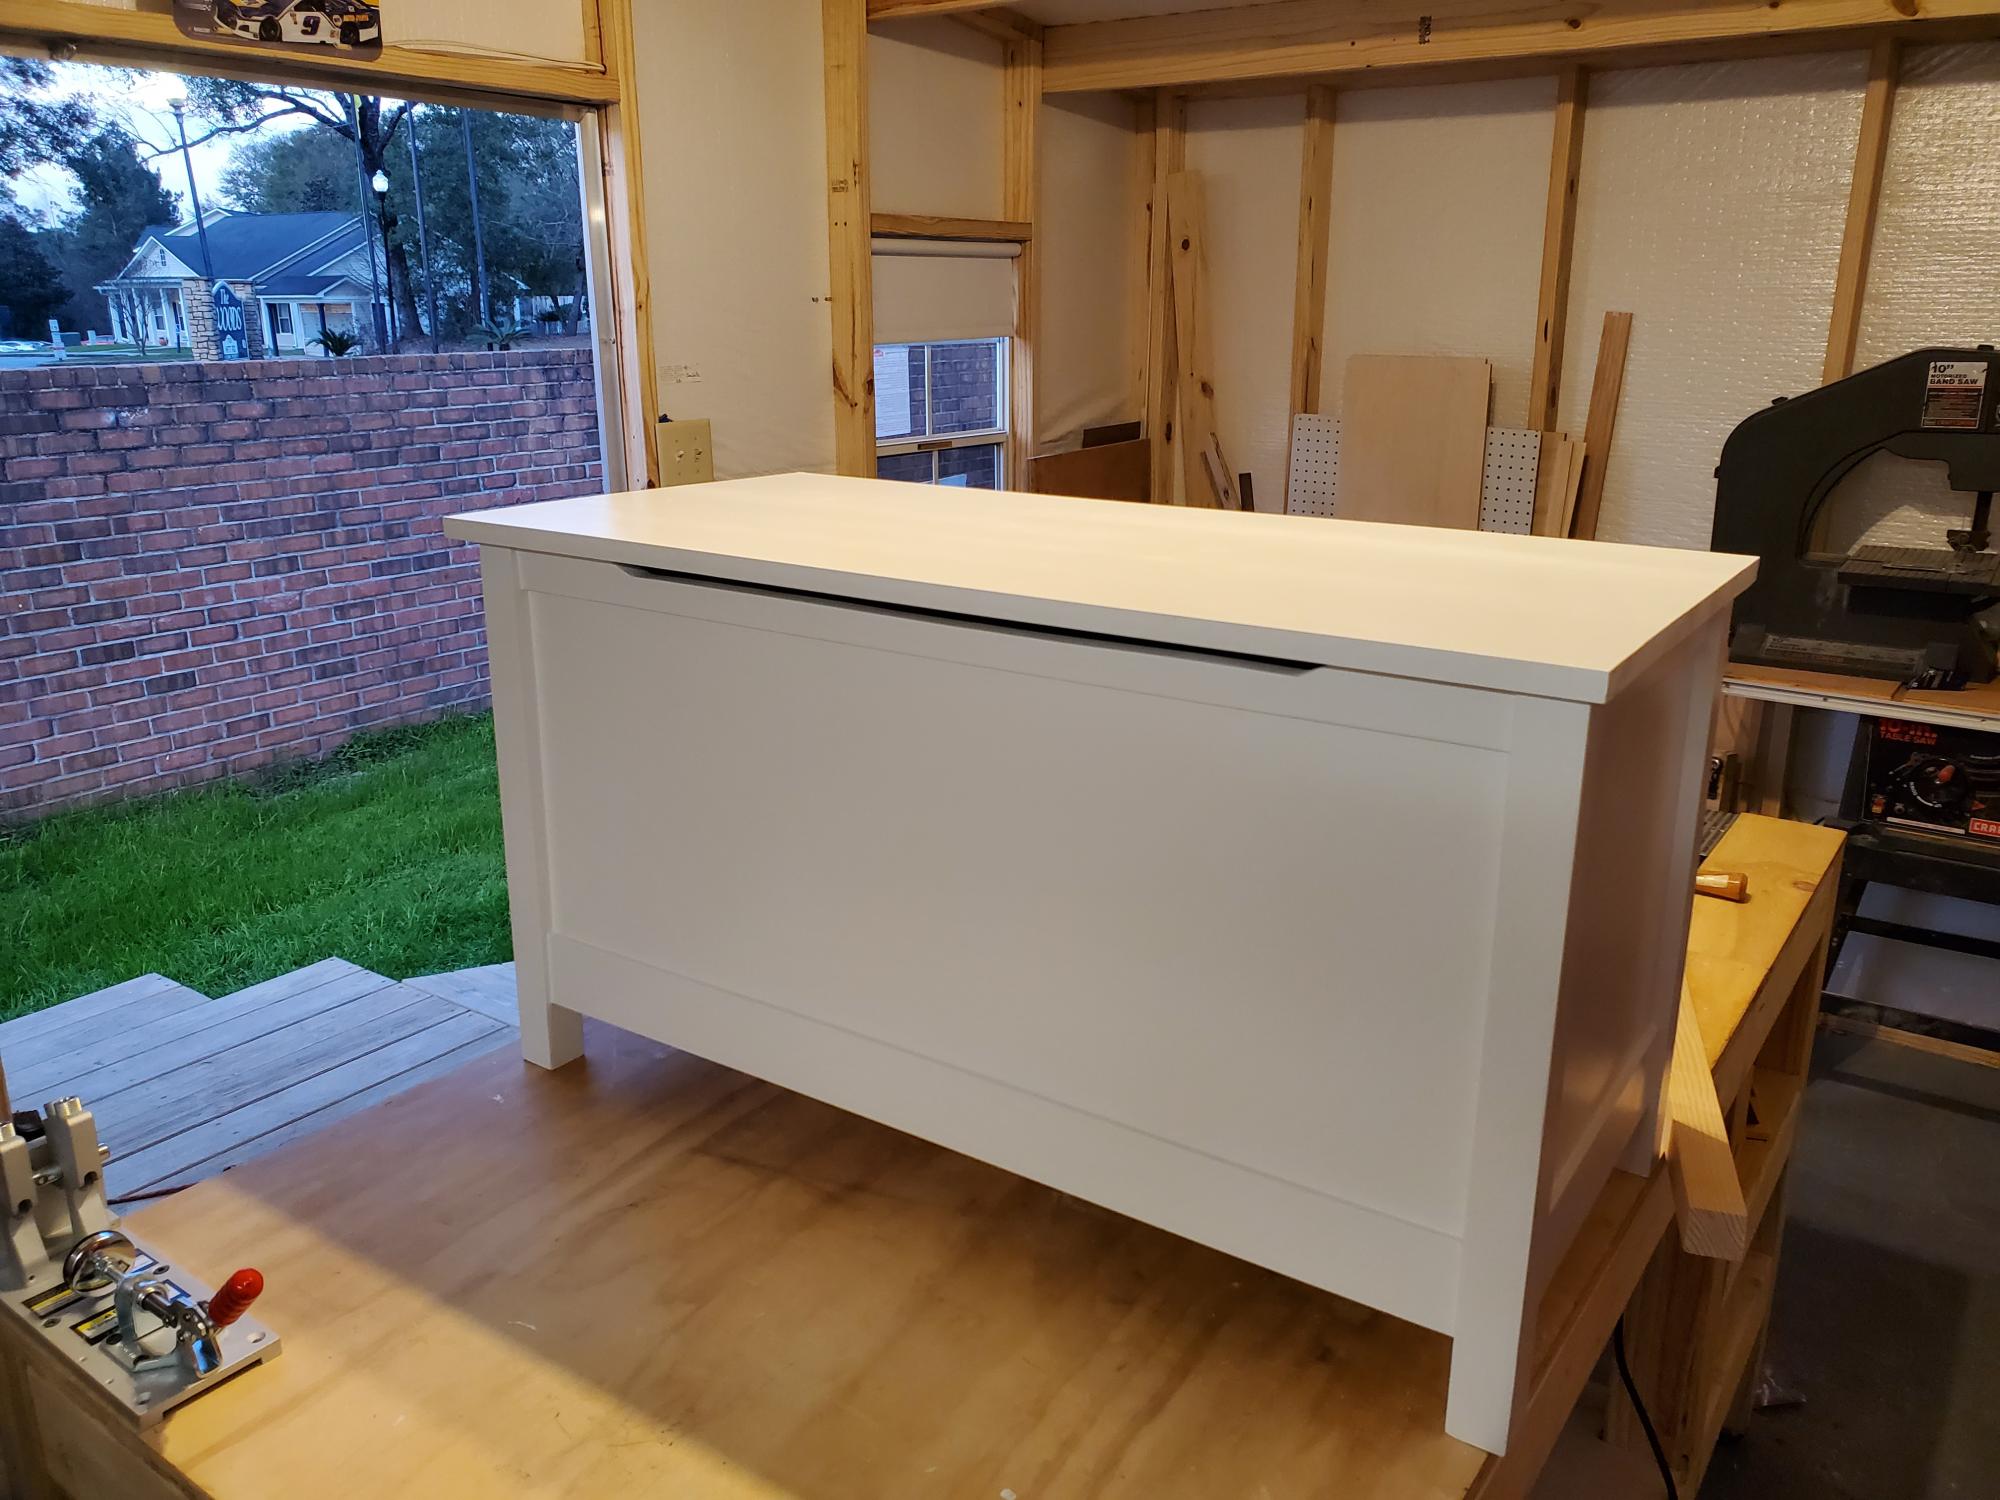
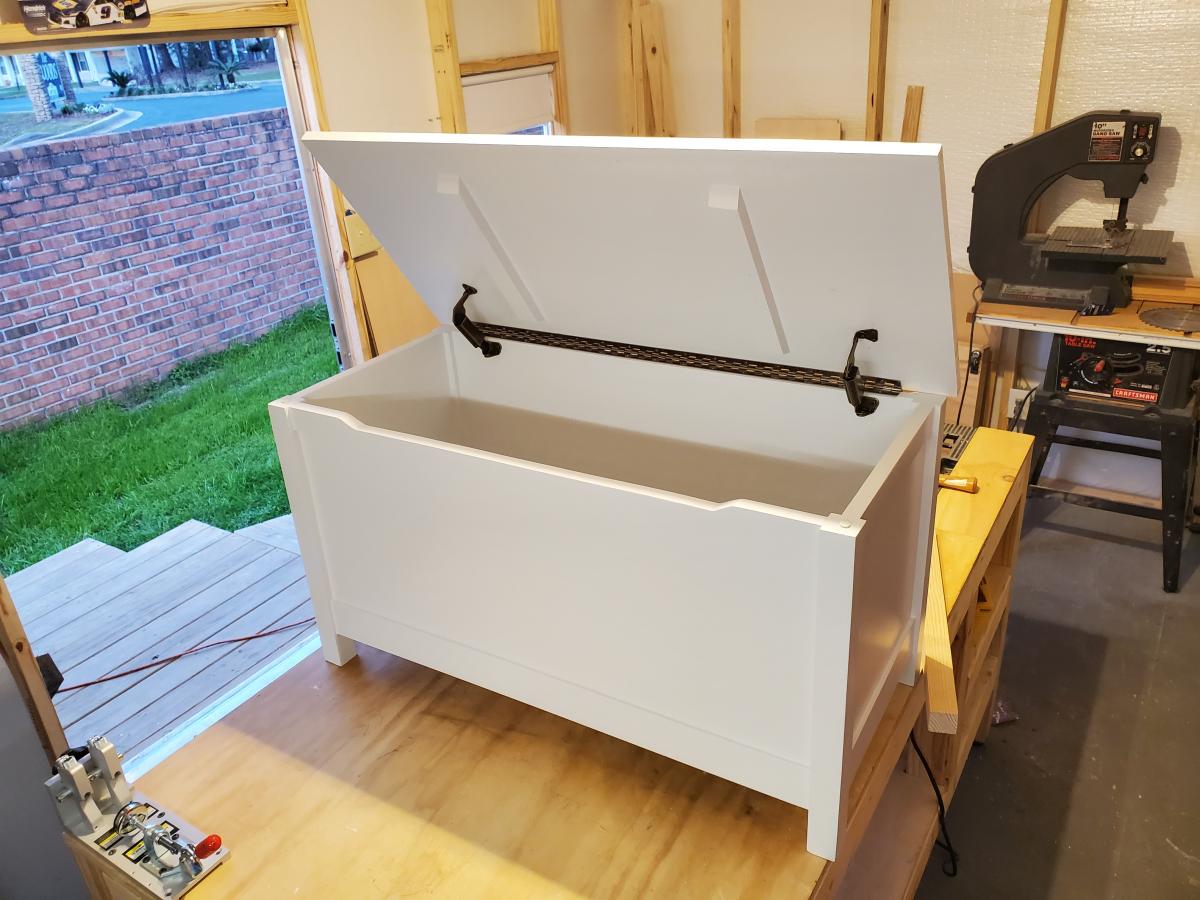
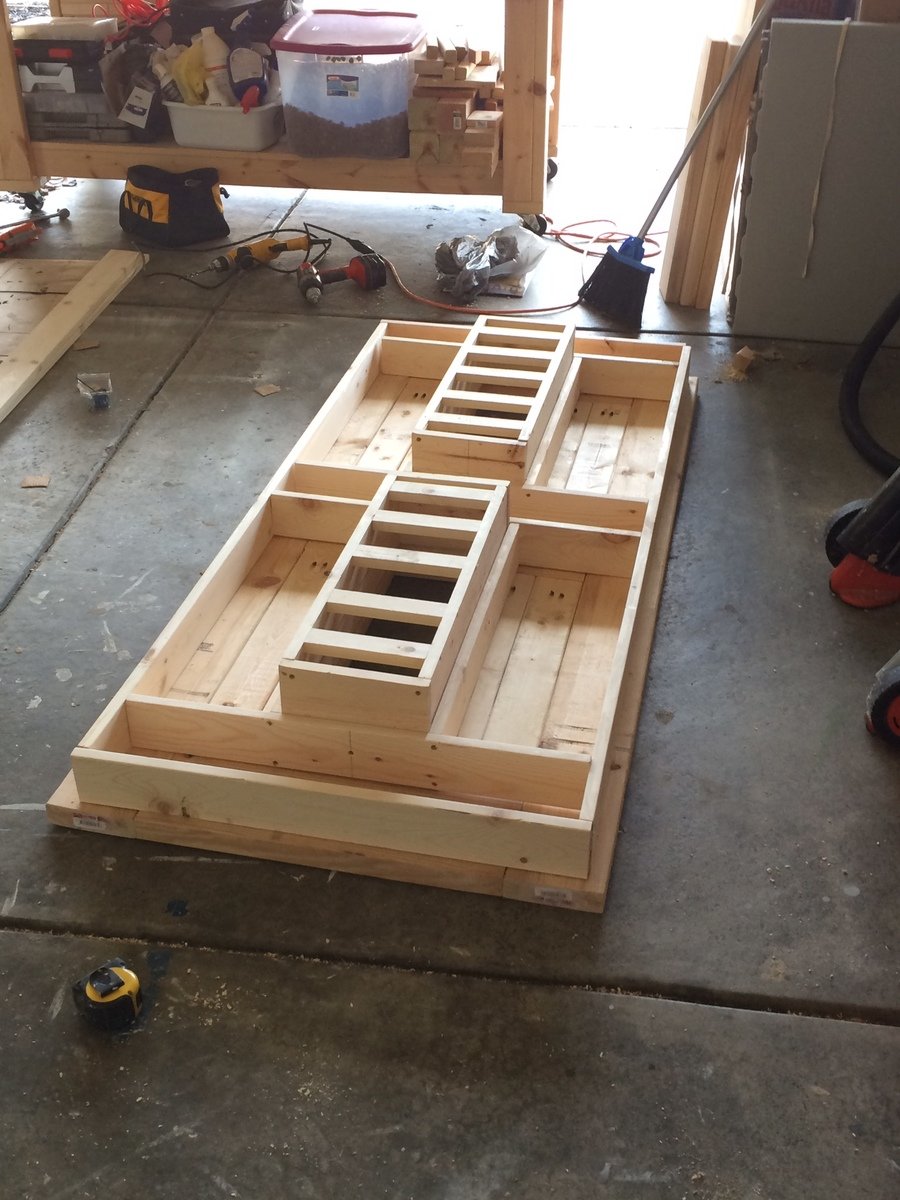
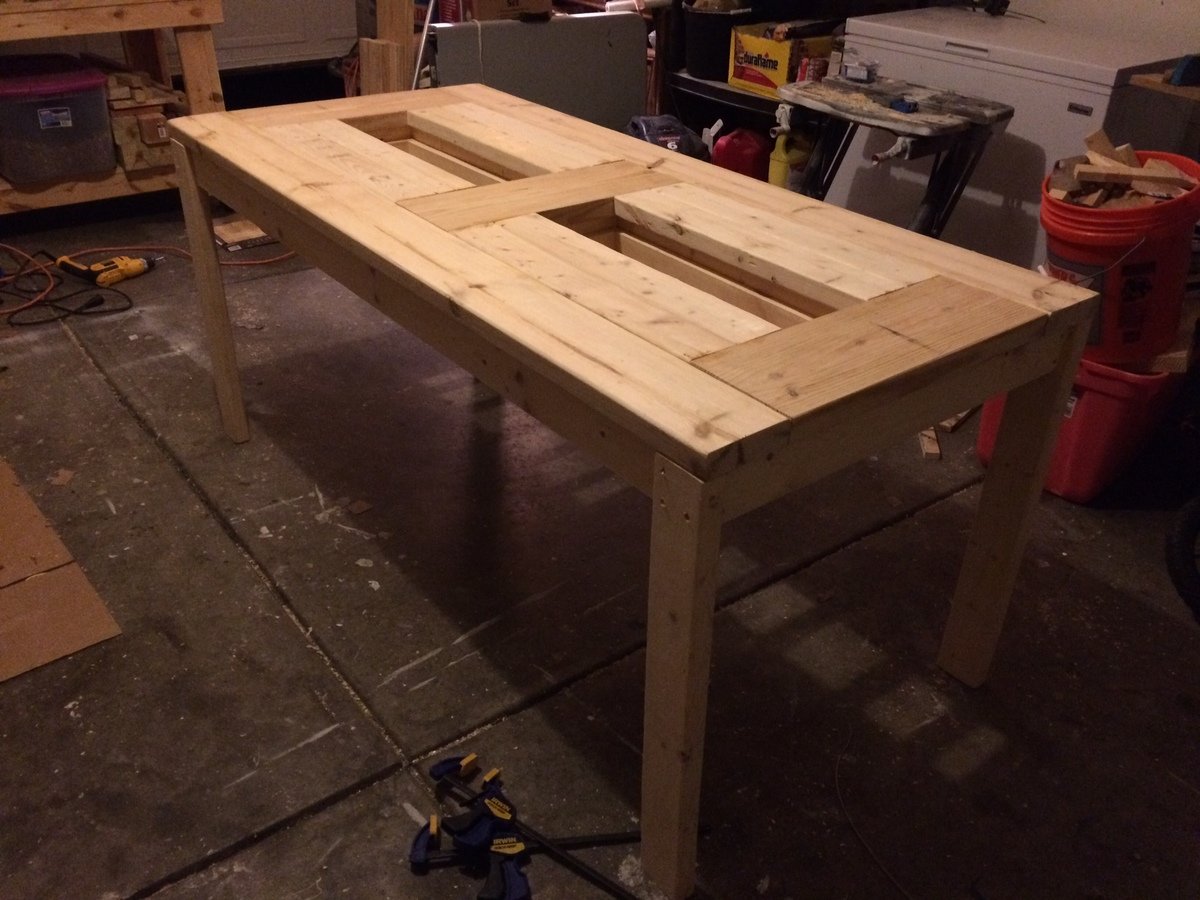
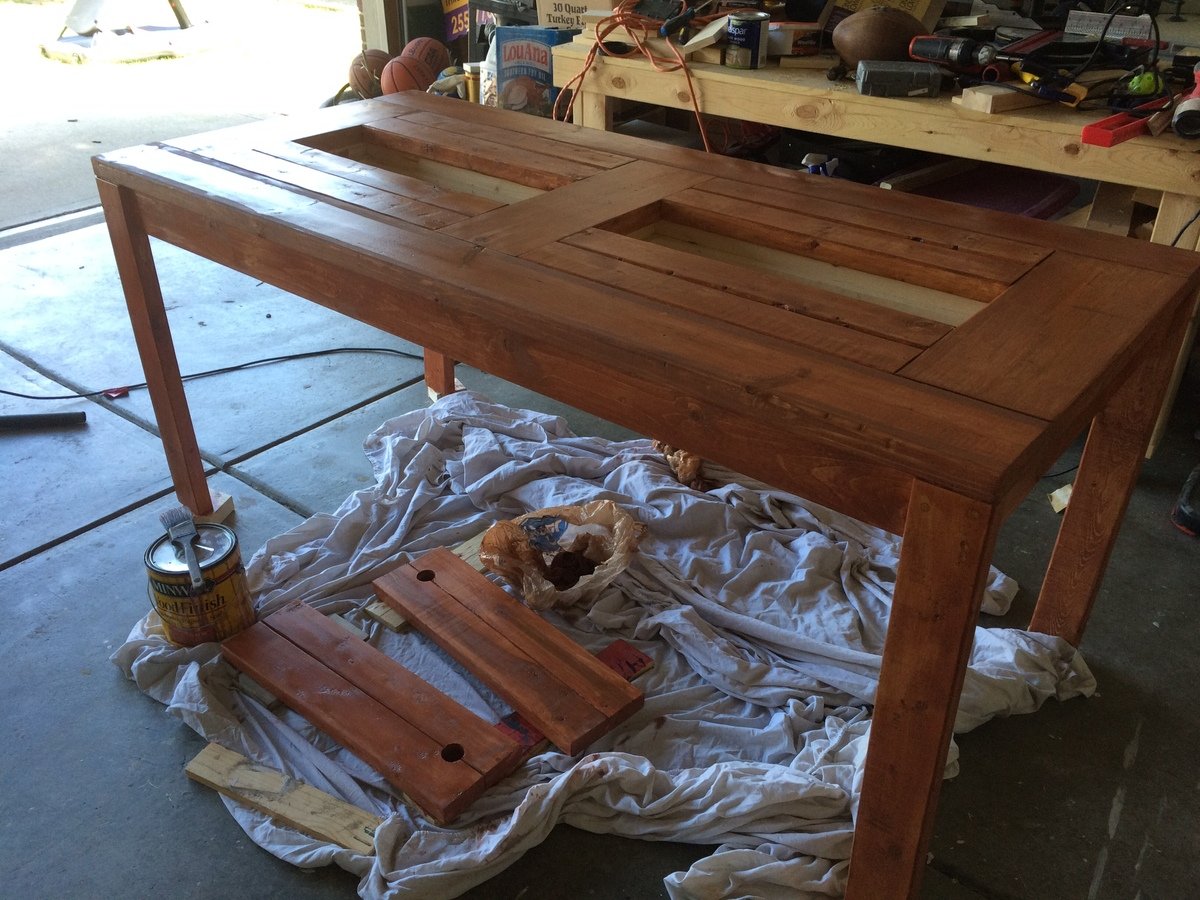
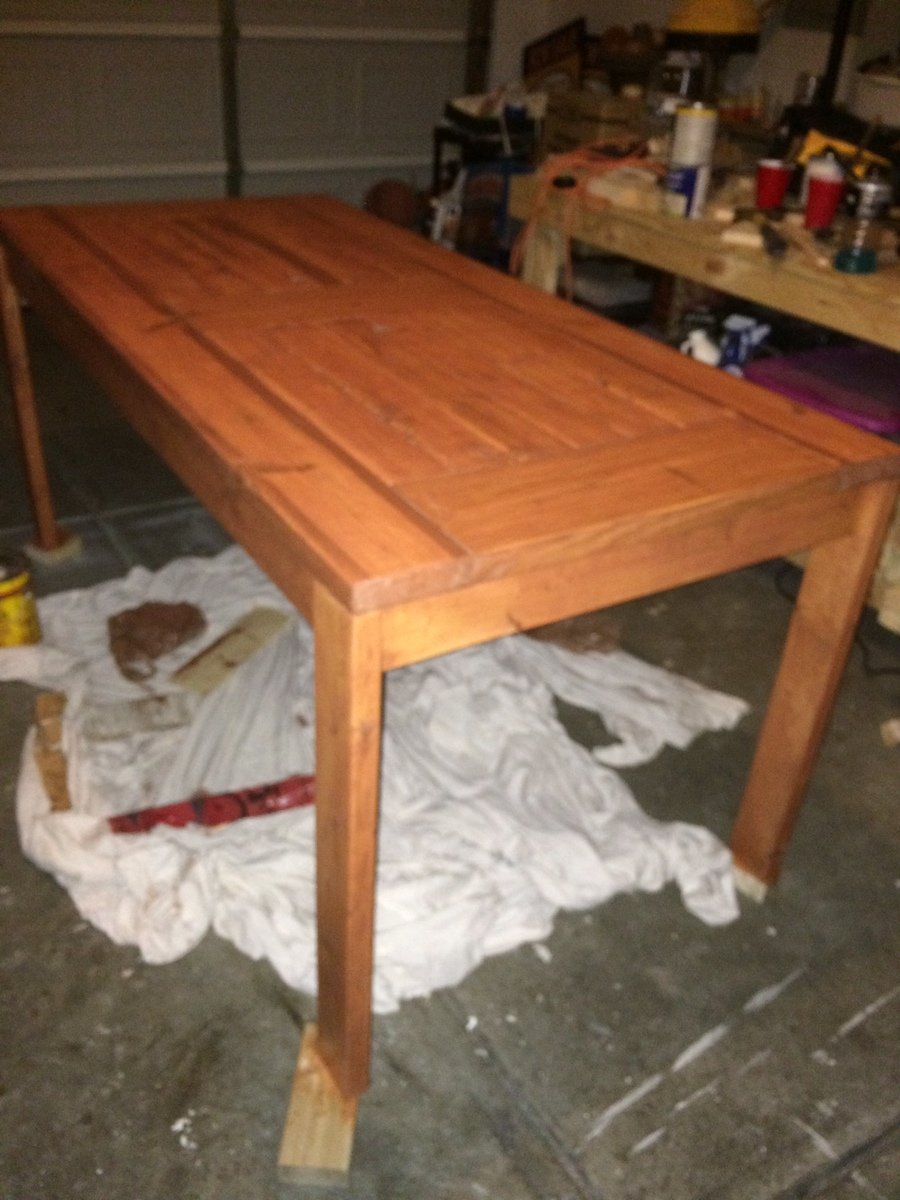
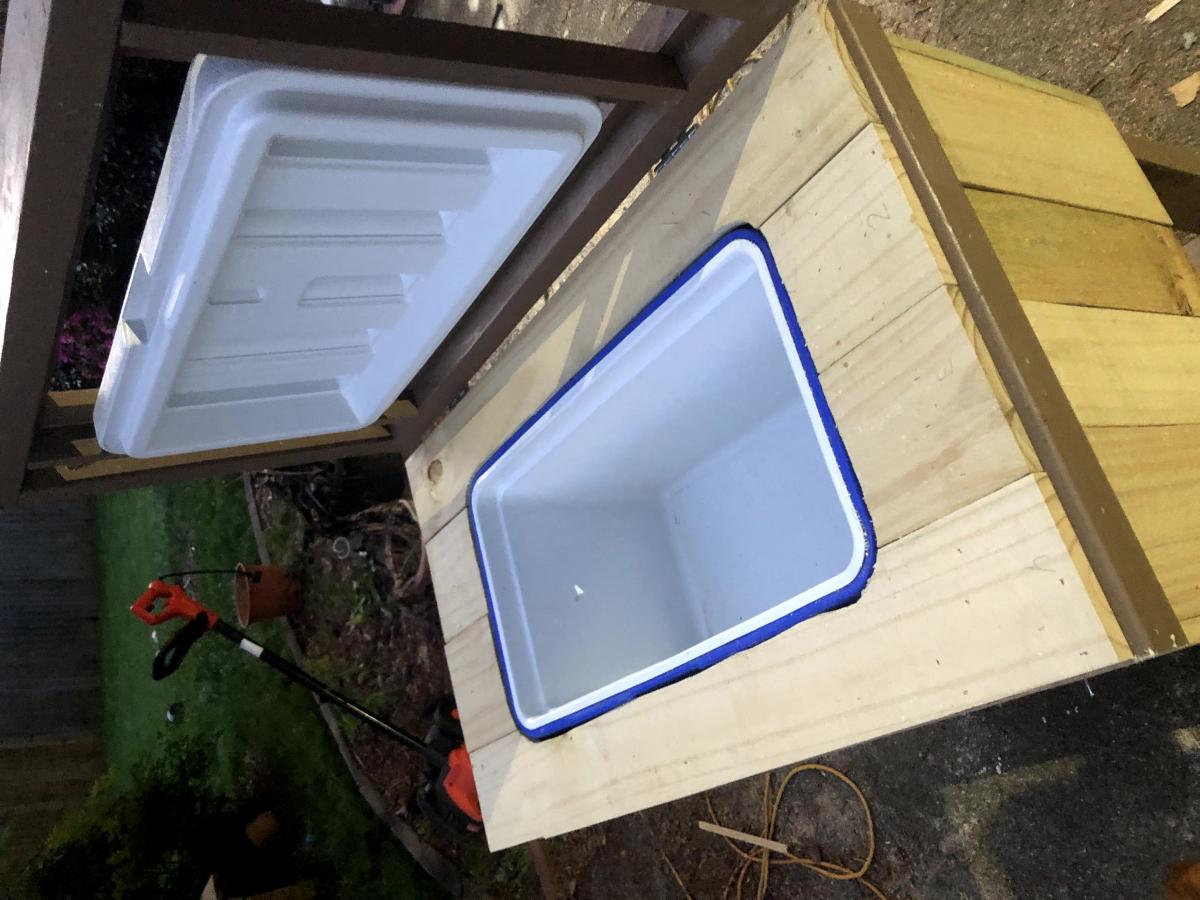
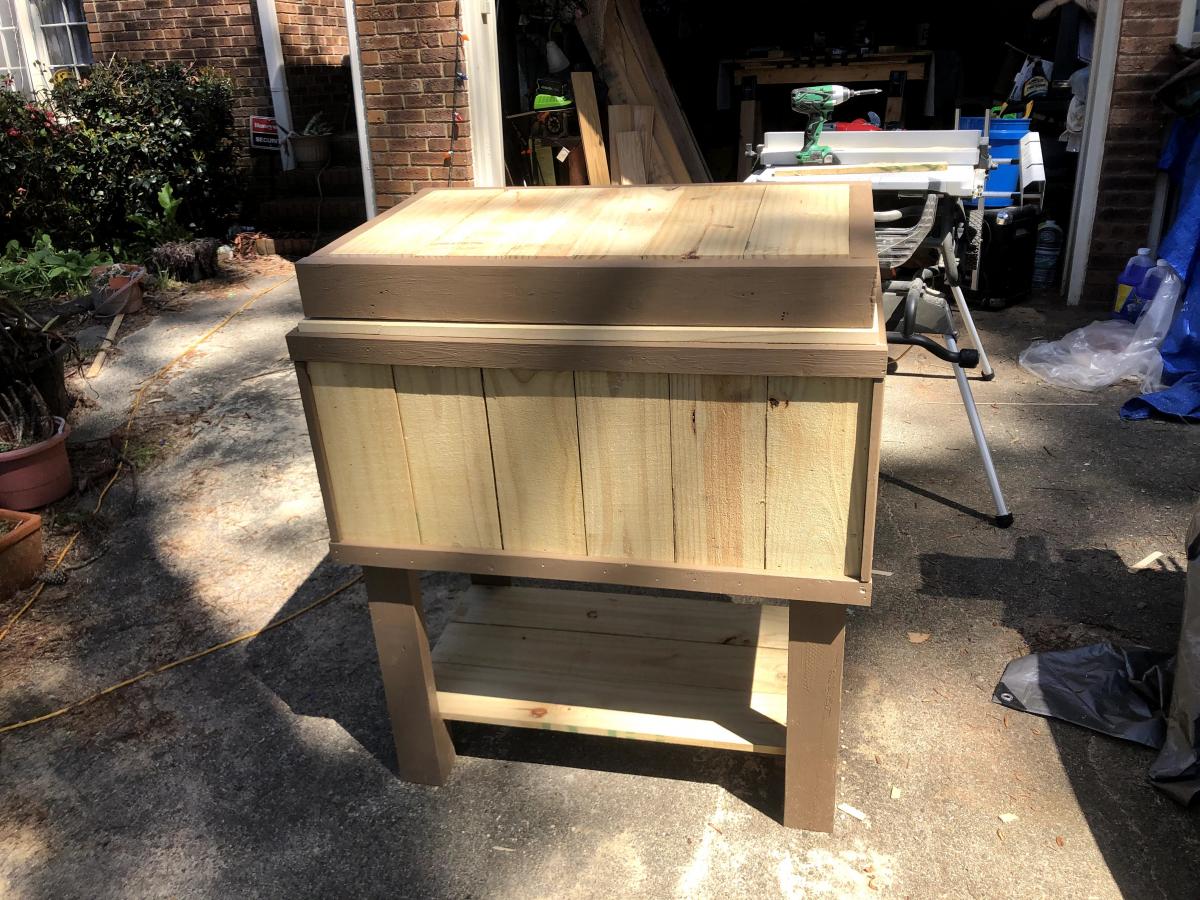
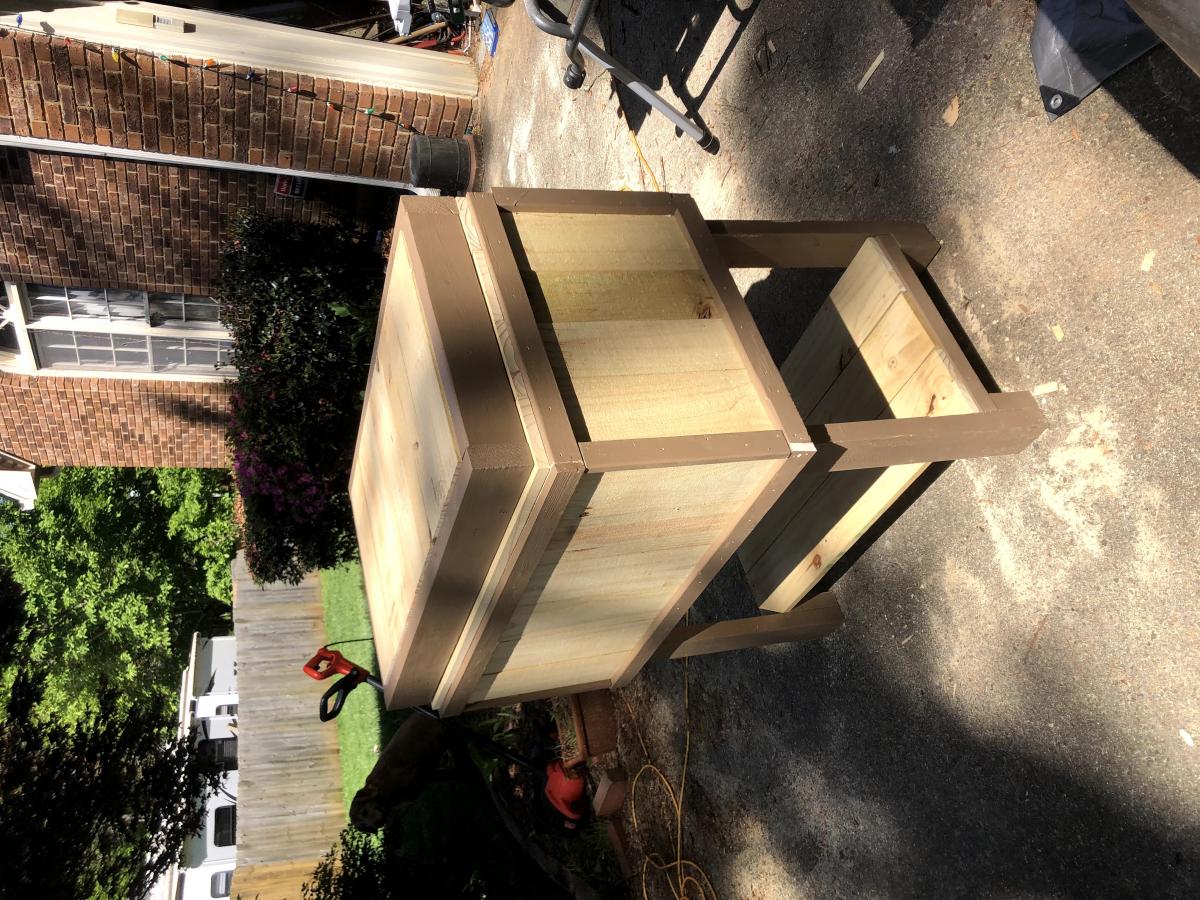
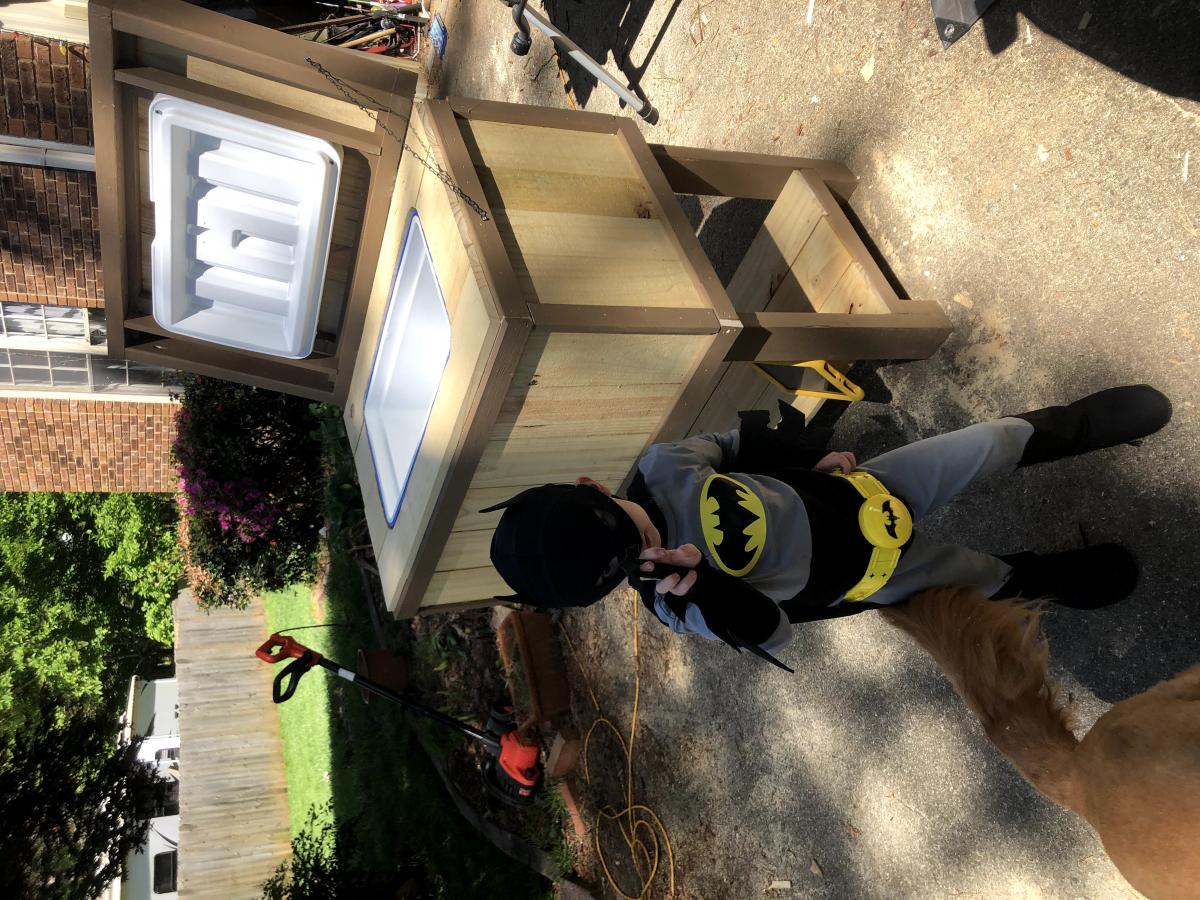
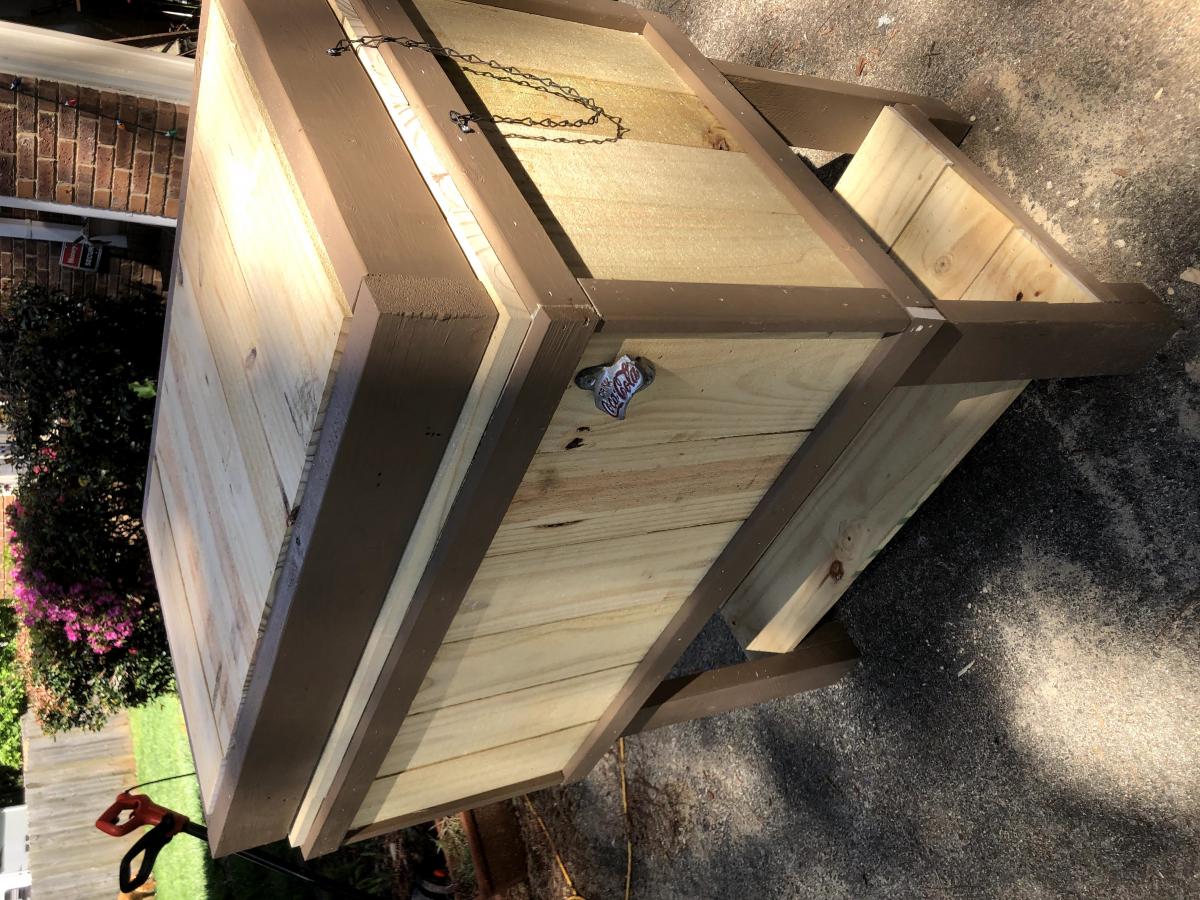
Wood Cooler Stand
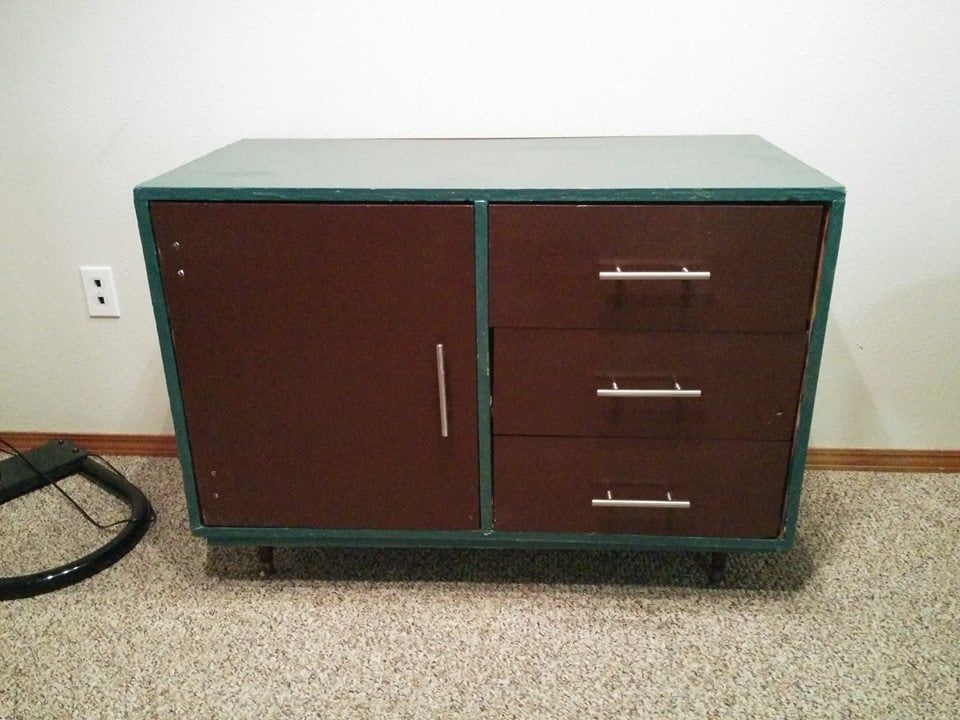
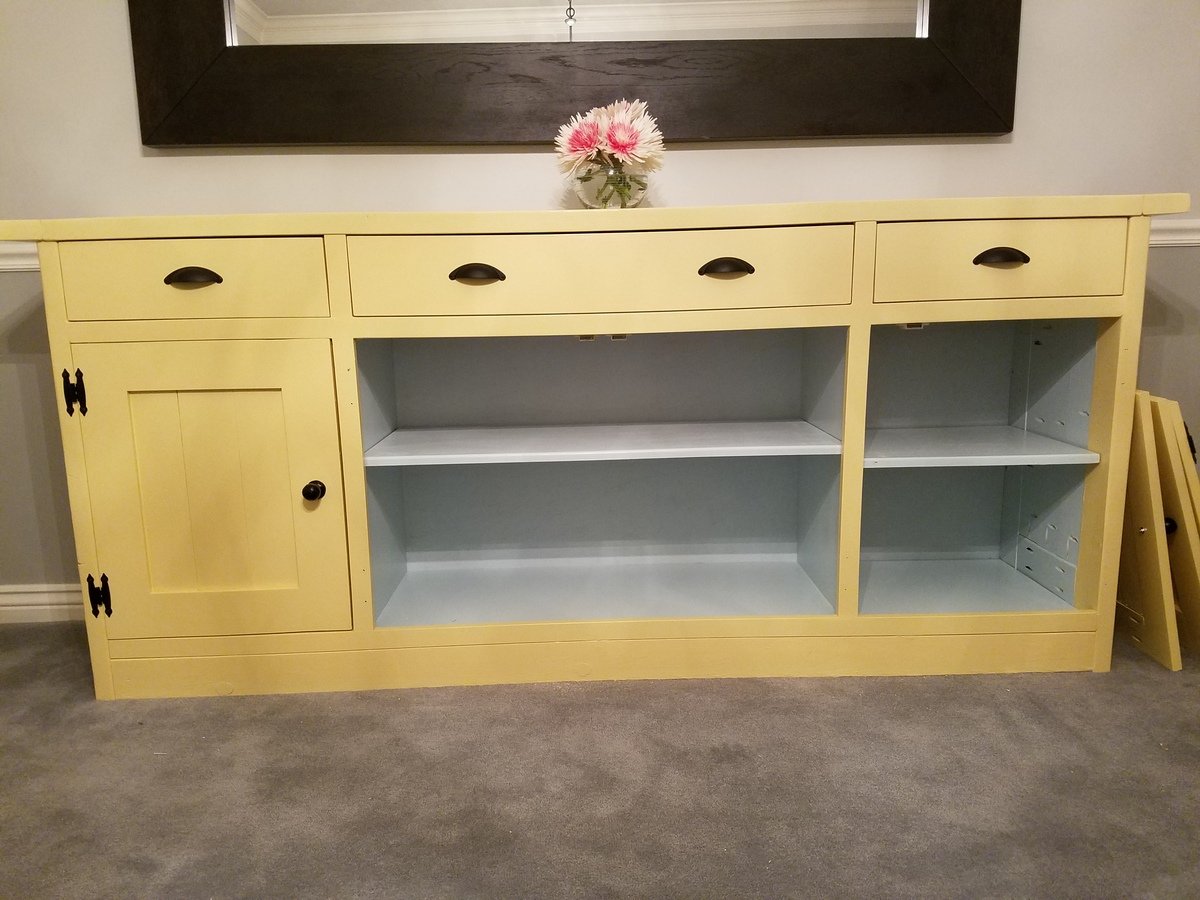
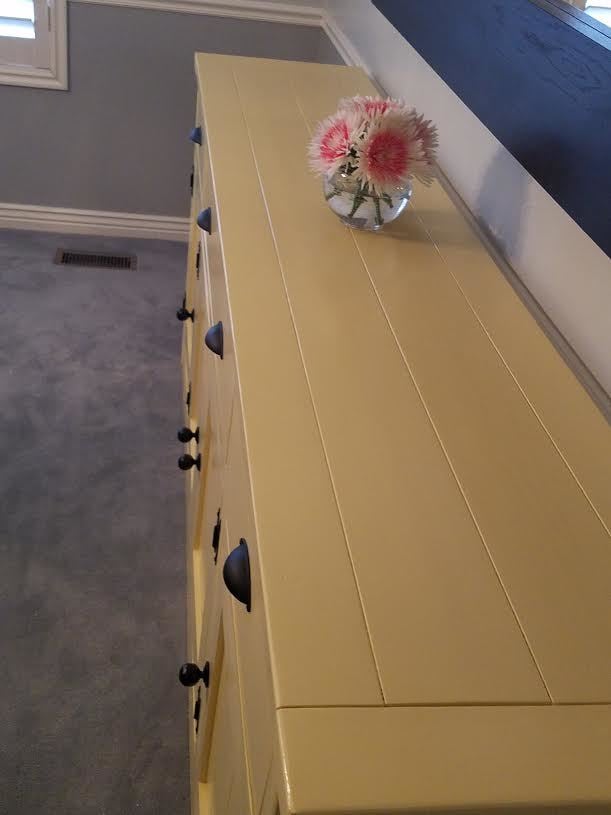
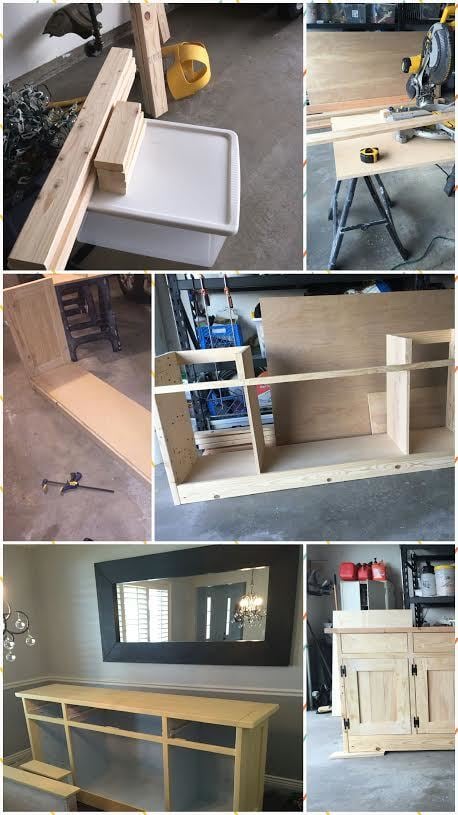
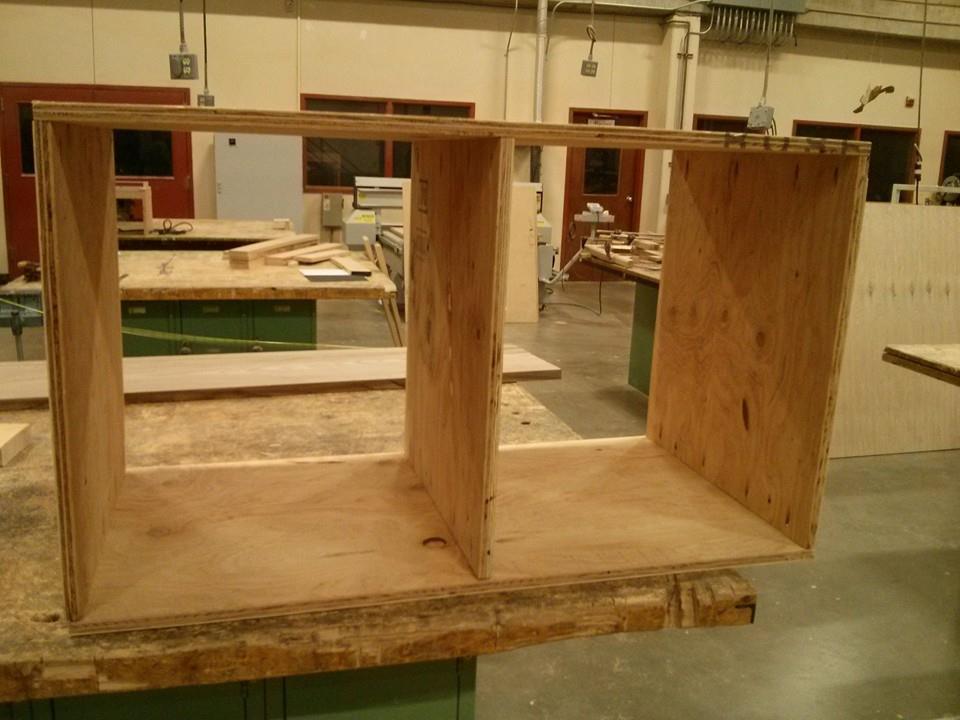
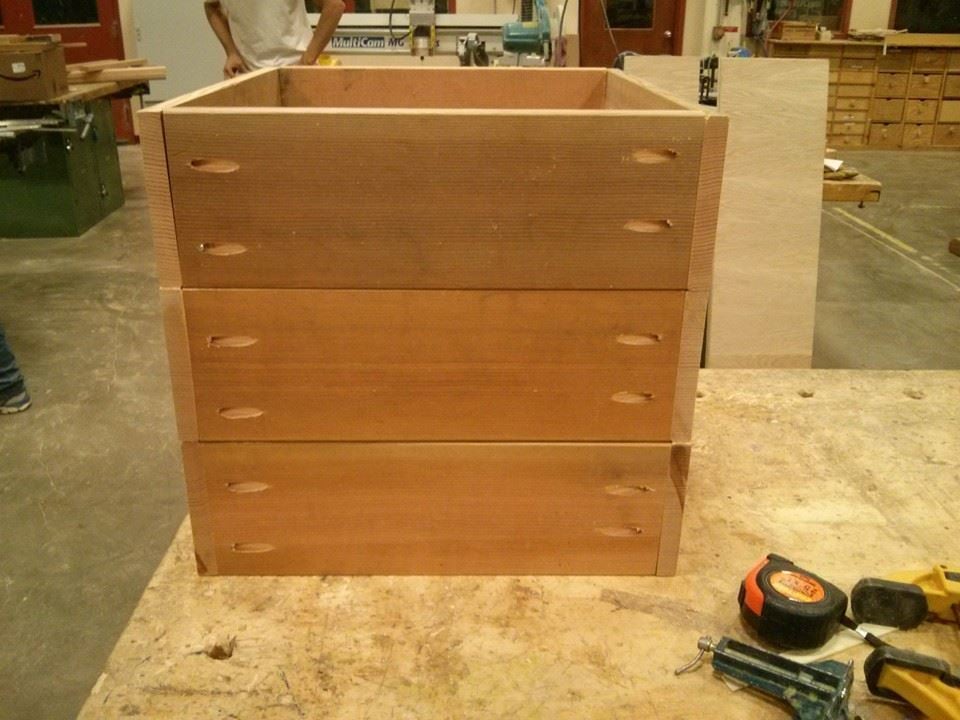
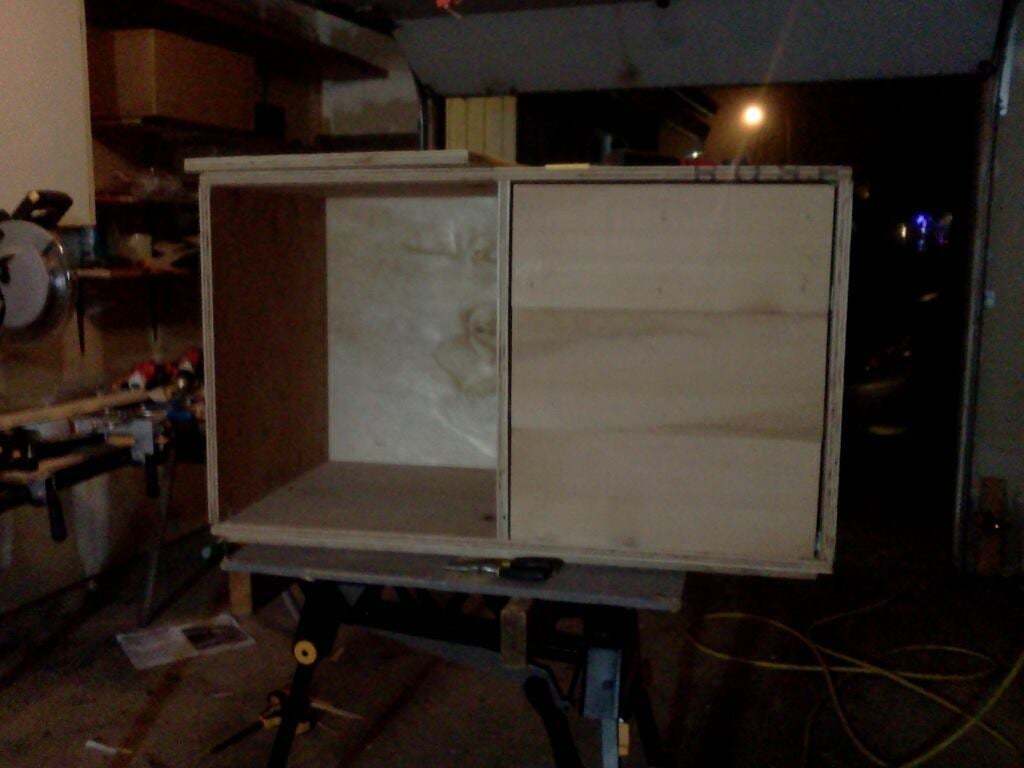
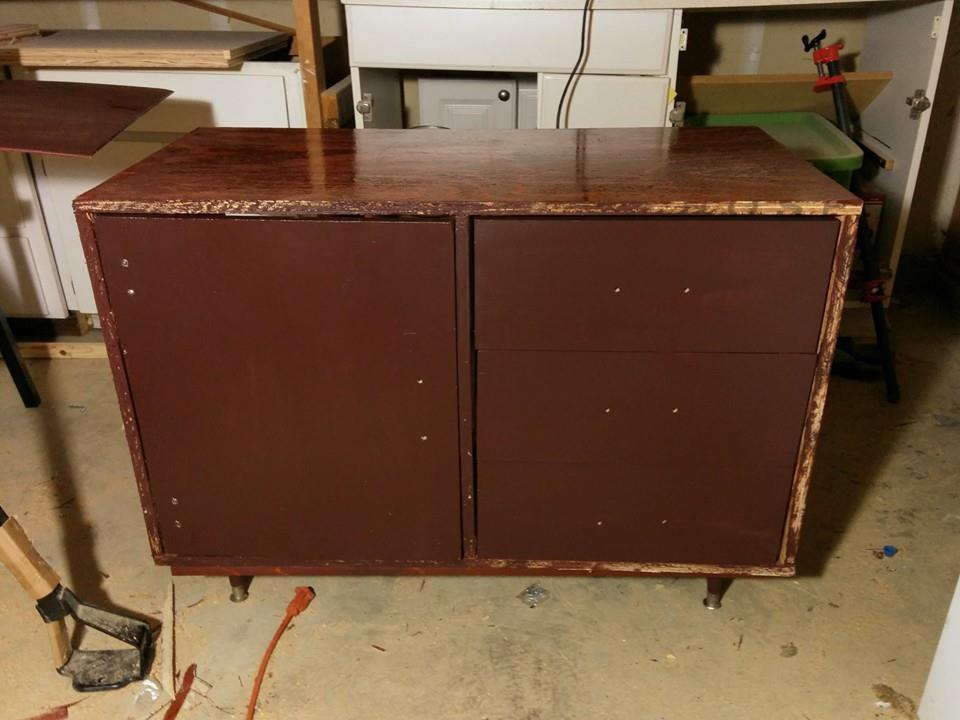
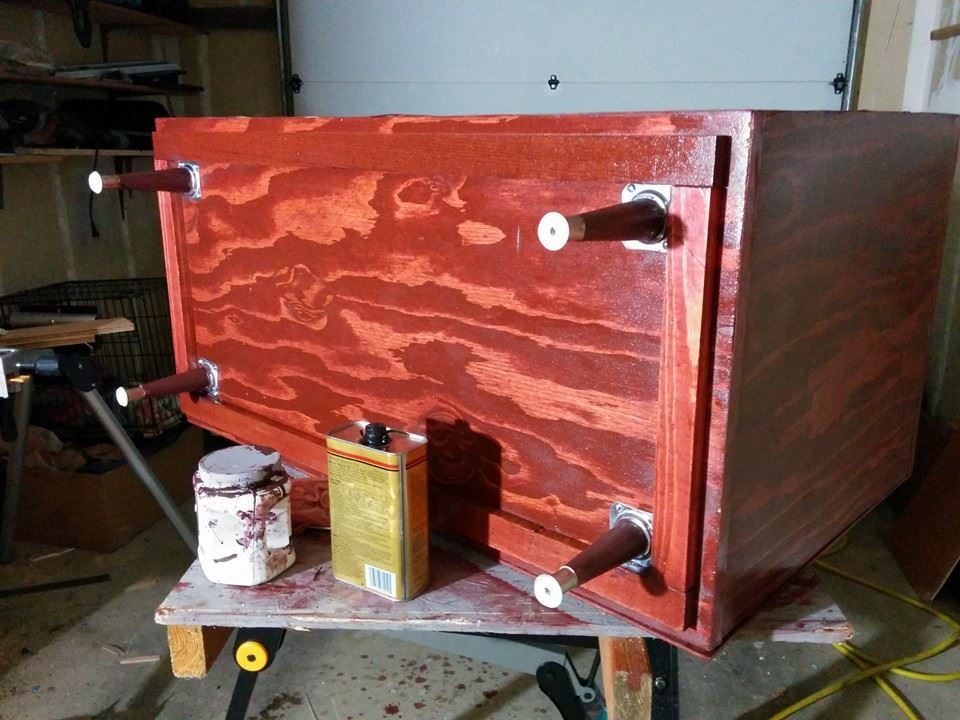
My neighbor loaned me a shop vac and a palm sander to refinish a table, and I fell down a rabbit hole. This is the Brooke Mid-century Console Table from this site. I need to touch up paint the front, and it's not perfect, but this was my first woodworking project. I think the hardest part was wrestling with the drawer slides; I think I had to remount them three or four times. There was plenty of swearing involved with the Euro hinge as well.
I took a "Woodworking: Your Own Projects" class at the local community college, but this project was almost entirely self-taught (although I had plenty of adult supervision while learning to use the saws.)
I bought most of the materials from Building Materials Resources, a local reclaimed building supply store. And then took about a million trips to the local big box home supply stores for "just one more thing."
I had originally stained the project with Minwax Sedona Red and put some wipe-on oil-based poly on it, but the drawer fronts came out blotchy because I had used wood putty over the brad holes, so I painted those and the door brown ("Polished Mahogany" SW2838.) Then the edgebanding that I had applied on the front and stained was peeling off and looking terrible, and I didn't want to redo it.
I gave up and scuff-sanded the whole thing and painted the rest of it blue ("Still Water" SW6223.) I then applied several coats of semi-gloss spray water-based polyurethane, sanding lightly inbetween coats. I finished it off with a coat of Howards Feed N Wax and 0000 steel wool.
One tip that I have is that you can buy enormous (quart sized!) paint samples at Sherwin Williams for about $5 apiece. I used a paint sample for the brown portions, and a "real" quart of paint for the blue portion, and I cannot tell the difference in quality.
Skills learned:
Drilling pilot holes (believe it or not)
How to use the Kreg jig
How to use a miter saw
How to use a circular saw
How to use a table saw
Applying edgebanding
Applying wood filler
Staining
Building drawer boxes
Installing drawer pulls
Installing drawer slides
Installing euro-hinges (and how to use a Forstner bit)
How to use a brad nailer
How to attach table legs
Probably some other stuff that I forgot

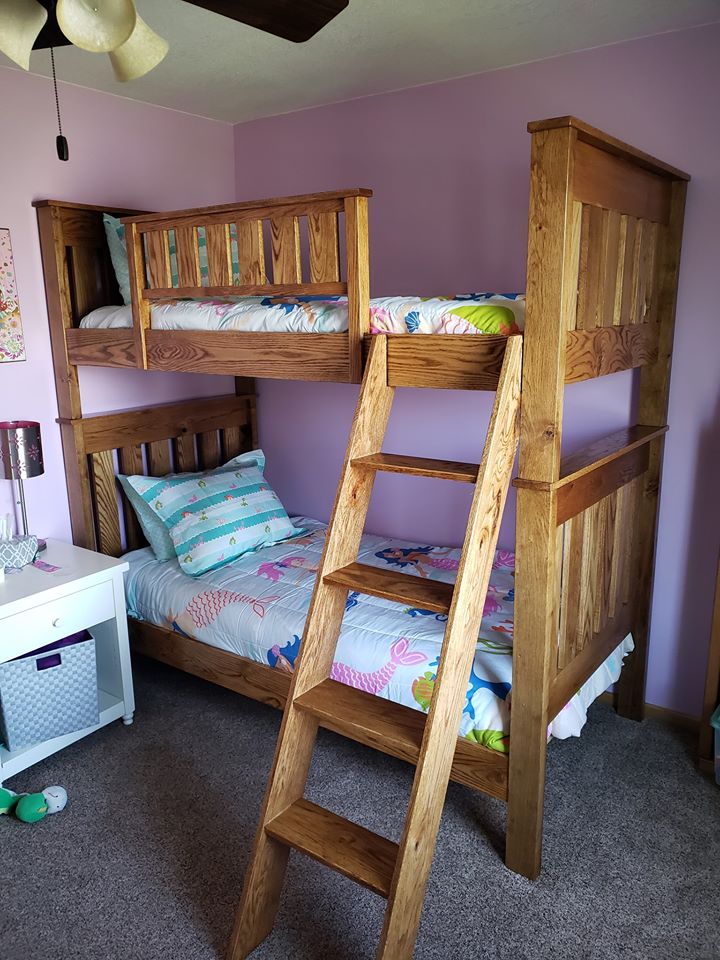
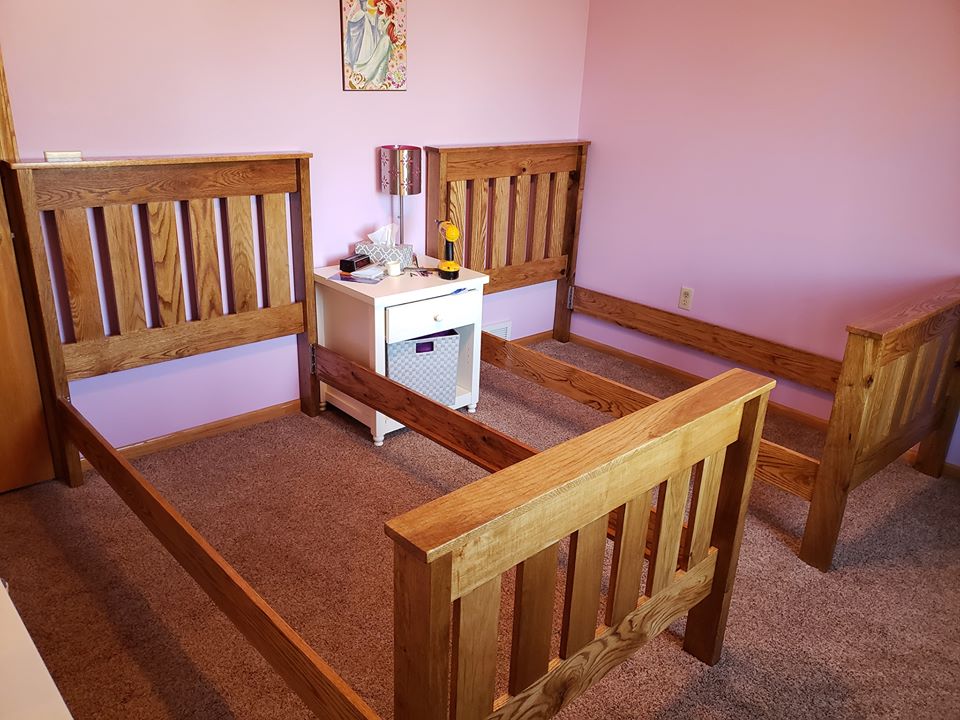
I used the Simple Bunk Bed plans as a rough guide for the sizing of this twin over twin bunk bed plans. Bed is made out of solid oak that I sourced locally for free and planed down the oak slabs. There are a number of variations, but the sizing helped tremendously in putting my plans together.
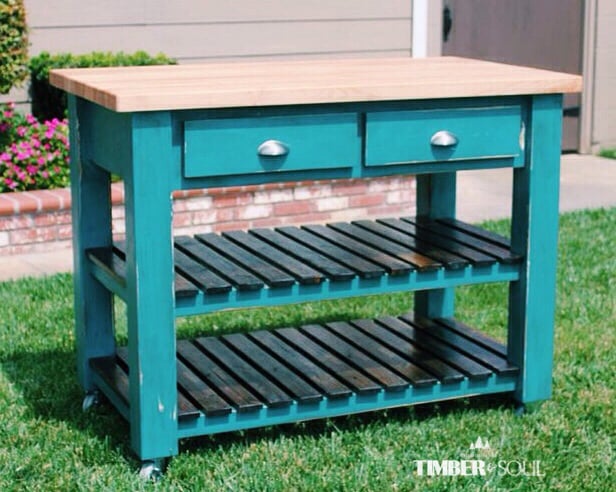
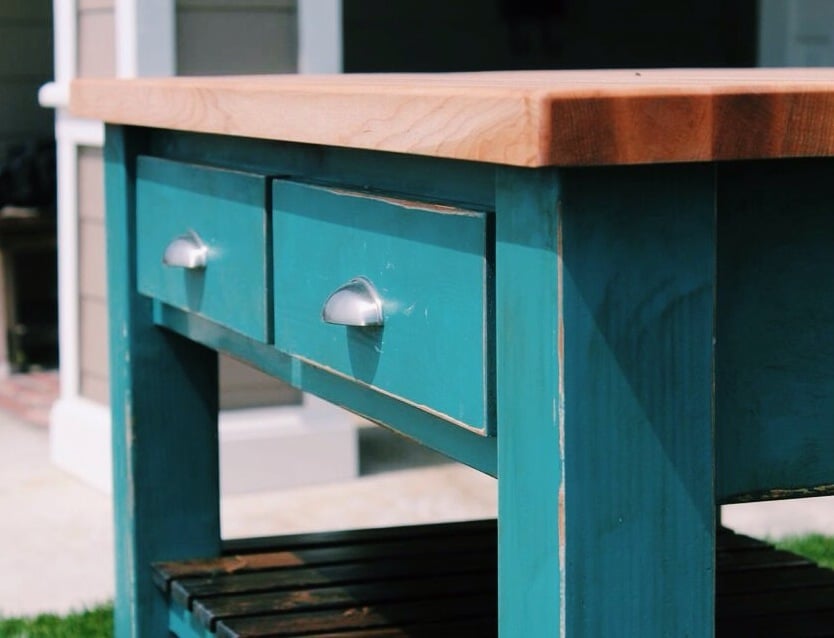
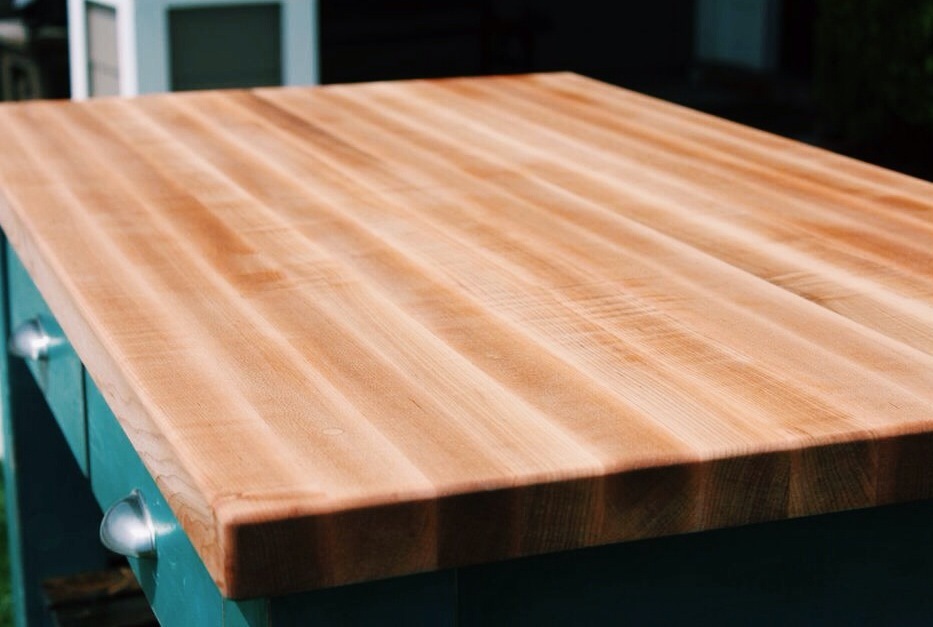
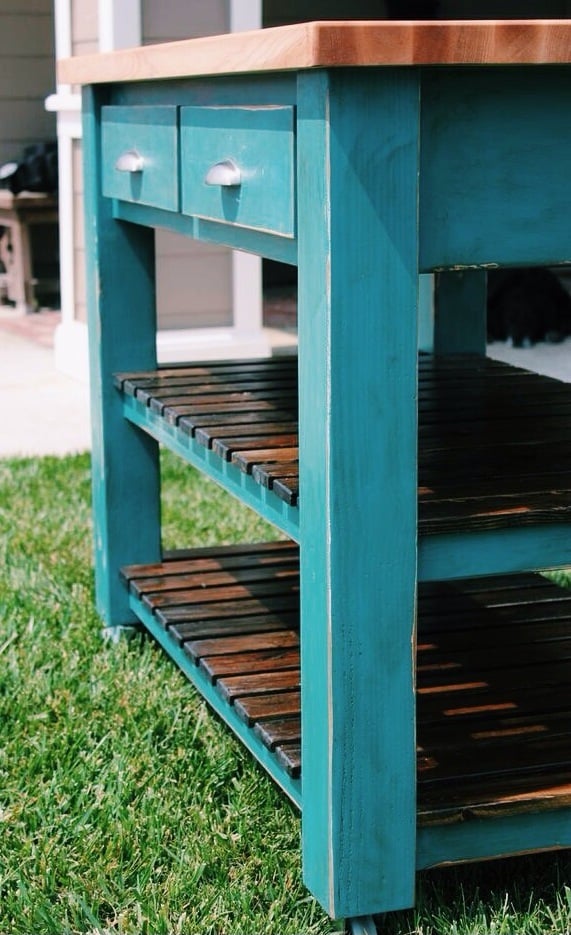
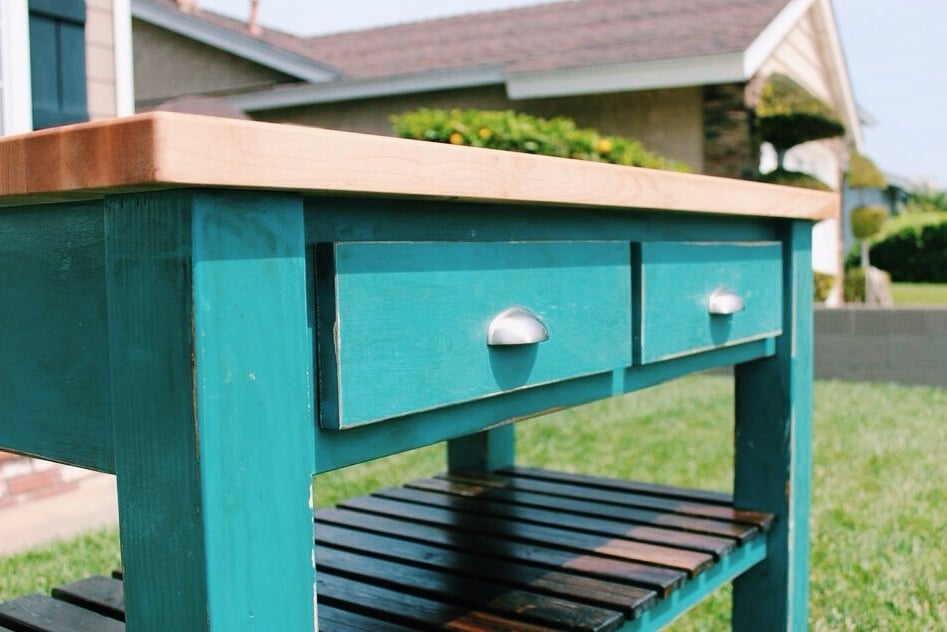
I built this from Ana's plans with some slight modifications. The top is built from hard maple and is an edge grain butcher block. I sealed the top with mineral oil and beeswax. The finish is distressed calypso blue. I also added 3" locking and swiveling casters.
Comments
Ana White Admin
Fri, 05/05/2023 - 11:40
Great mud kitchen!
Thanks for sharing your version, it looks like a lot of fun!