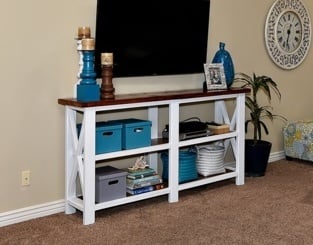
Made 14 crayon blocks as Xmas gifts!

I made 14 personalized crayon blocks from Ana White's plan for Christmas presents. It was affordable, easy, and everyone loved them! I'm not sure who loved them more, the adults or the kids. I made them for preschool classmates, friends, nieces, and nephews.
I am a mom of a 1 year old and 3 year old so it's hard to estimate how much time it took me. I worked in half hour shifts during naptimes over a couple of weeks. It's totally doable!
Here are some tips:
- Buy pine wood with sharp edges. Some of my wood had slightly rounded edges and that made for bigger grooves on the sides. These were the ones that were harder to paint the letters.
- I followed the size dimensions for everything except the holes. I tried several times with Ana's plans, but the wood just kept cracking. I narrowed it down to just 26 crayon holes and spaced it about an inch from either end. This worked perfectly for me 14x!
- I tried many ways to drill the holes. My winning combination was to start each hole with a spade drill bit (drilled 75% through) and then finished it off with a regular spiral drill bit of the same size. I found it cracked way less on the backside if I didn't use the spade bit all the way through.
- I used a simple piece of sandpaper to lightly sand in the holes.
LETTERING
I have a Silhouette machine. I cut out the words/names on vinyl, weeded out the letters and stuck them on the wood as a stencil. I wrote their name on one side and "crayons" on the other. Then I rubbed clear kraft glue in the letters to "fill the gaps" so no paint would leak through. Then I painted over the glue and wood with acrylic craft store paint. Worked perfectly. Looks crisp. Some of the moms thought they were stickers. I finished with a matte clear spray finish.
What does NOT work:
-I tried the method of printing on paper, tracing with pencil, and then hand painting. Mine looked awful. Maybe I just don't have a steady enough hand.
-I tried using permanent marker instead of paint. Nope. It seeps into the wood and leaves you without crisp lines.
-I also tried cutting the letters on vinyl, sticking them on the wood then putting a clear coat on top. This was OK... but it didn't look as good as painted.
Hope this can help someone!