Community Brag Posts

corner cupboard

Submitted by Anonymous (not verified) on Sat, 11/19/2016 - 16:25

Finished it with two coats of shallac and used black iron hardware.


I built it for a cabin I am building. Thank you for the palns, they were great!


Built from Plan(s)
Estimated Cost
Around $100
Estimated Time Investment
Day Project (6-9 Hours)
Finish Used
Two coats of Shallac
Recommended Skill Level
Intermediate

Simple Modern Outdoor Sectional

This project my husband and I started together. We live in a very damp and rainy area where cushions would just be more of a pain than a comfort outside.
We decided to add slats on the back so the sectional would stand alone without cushions.

Well, after the first corner piece, I got busy and every day my husband would add another piece to it.

I did do much of the sanding and painting. We sanded and painted these before assembly, made life tons easier.

It was white pine with out exterior house paint color. We really love them!
Thank you Ana!!!

Estimated Cost
$170
Estimated Time Investment
Weekend Project (10-20 Hours)
Finish Used
Behr Exterior Paint and primer in one.
Recommended Skill Level
Beginner

American Flag Themed Adirondack Side Table

Submitted by kieseroll on Fri, 08/08/2014 - 05:09

I built this in small spurts over a week. The most time consuming part was waiting for paint to dry. I painted all of my wood before I assembled since it would be too hard to get in the crevices after putting together. I painted the table top at the very end after it was assembled. I used painters tape to make sure I didn't goof and the stars are stenciled on. I extended the table to 20 inches wide so it would look more like a flag and just adjusted my other cuts to make it work. I built one for my Step-Mom and had to build another for my Mom after she saw how cute it was.

Built from Plan(s)
Estimated Cost
$25-$30
Estimated Time Investment
Day Project (6-9 Hours)
Finish Used
Outdoor/Exterior paint + primer in red, white, and blue. I don't have the names in front of me right now to get the exact paint color name.
Recommended Skill Level
Starter Project

Restoration knock off shelf

Submitted by Anonymous (not verified) on Tue, 11/22/2016 - 19:50

I modified the plans to fit my space. I needed a shorter wide shelf. This project was easy and fun. Turned out great

Built from Plan(s)
Estimated Cost
$60
Estimated Time Investment
Afternoon Project (3-6 Hours)
Recommended Skill Level
Intermediate

Window Seat

Submitted by MaryL220 on Tue, 08/11/2020 - 19:28

My daughter turned 5 in July. She loves twirly dresses, unicorns, and building. Her current project is a full size airplane made from wood. She is certainly ambitious. For her birthday, she received all kinds of building toys (Legos, knex, etc.) and quickly got to work, creating masterpiece after masterpiece. Like every 5 year old, dismantling a masterpiece is unthinkable. So, she has taken it upon herself to display her projects on every available surface, despite its intended function (i.e., my desk). We needed something that she could use to build, store, and display her projects that wasn't in the way and didn't disrupt our everyday routines (Mama's gotta work!).

Enter, this window seat. I've been wanting to build one for years but never really found a plan I liked. This is exactly what I was looking for, as it has enough building space and storage space to meet our needs. Maybe one day i'll get to use it as a window seat!

I used the flip top storage bench plan and modified the length to fit our windows. The lid is 69" wide and the base is 64.5". I added some supports in the middle, as well. I painted the inside storage space purple to give it a kid friendly touch. I also added lid supports on both sides to prevent pinched fingers.

Estimated Cost
$100?
Estimated Time Investment
Day Project (6-9 Hours)
Finish Used
White paint with purple paint in the storage area. Sealed with mod podge hard coat. 😁
Recommended Skill Level
Intermediate

Porch Bench with storage

Submitted by bbcarey on Tue, 10/23/2012 - 10:27

We added a small porch on the front of our house last summer, but the only seating we had out there were our porch rockers. So- I had been checking Ana's plan catalog for something we could use. I came across the Weatherly Sofa- but with the back on it would cover some of our picture window... plus we wanted someplace to put the cushions while we were not on the porch.

I designed this using those plans- but enclosed the bottom as well as stopped the backrest at the point where our picture window starts...

The W-Mart here in town had their summer end clearance on pads at $10 a piece and voila- completed project.

ou cannot see the bench top- but it is pieced together from 1x4s. The remaining bench was made from 2x6 and 1x2s.

Built from Plan(s)
Estimated Cost
$75
Estimated Time Investment
Week Long Project (20 Hours or More)
Finish Used
Exterior latex and sealer
Recommended Skill Level
Intermediate

Rustic X End Table

Submitted by suschen on Tue, 08/12/2014 - 06:36

Built two of these over the weekend. The first one took 7 hrs to build and the second one only took 3 hrs. Things I learned:

1) Do step 3 before you do step 2. It was a nightmare trying to fit the 1x12s into the rectangular opening. Once you get the 1x12s in there, you can sandwich the 2x2s neatly onto the sides without having to shave down the 1x12s trying to get them to fit.
2) Check for square as you go. This will be important when you get to step 4 and 5.
3) I don't know about other folks but the 2-1/2 PH screws were always screwing all the way through to the other side so I used 1-1/4 PH screws for most places.

And that's it folks! A gorgeous and easy side table. =)

Built from Plan(s)
Estimated Cost
$30
Estimated Time Investment
Afternoon Project (3-6 Hours)
Finish Used
haven't decided what kind of finish but I am kind of digging the natural pine color!
Recommended Skill Level
Beginner

Old English Style Farmhouse Dining Table

Submitted by Anonymous (not verified) on Sun, 11/27/2016 - 06:12

First table my husband and I have ever made, and it turned out beautifully!

Built from Plan(s)
Estimated Cost
$150
Estimated Time Investment
Afternoon Project (3-6 Hours)
Finish Used
Minwax Provincial Stain, 2 Coats
Recommended Skill Level
Beginner

dumpster dresser

Submitted by msemishko on Sat, 08/15/2020 - 16:29

I had left over lumber from a fence that I put up. The kiddo needed to have a big boy dresser. Made this with all treated 2x4s. I cut all of the inside supports to dimension from the 2x4s. Only wood that I needed to buy was for the drawers.

Estimated Cost
150
Estimated Time Investment
Weekend Project (10-20 Hours)
Recommended Skill Level
Intermediate

King Farm House Bed

Submitted by SteveB on Sat, 10/27/2012 - 11:04

I made this bed for my wife using the plans found on this side.
I worked out great and she loves it!!!! Very east project. It took one week end to complete. I altered it slightly and added decorative side panels.

Built from Plan(s)
Estimated Cost
150.00
Estimated Time Investment
Weekend Project (10-20 Hours)
Finish Used
Distressed, antique look
Recommended Skill Level
Beginner

Comments

Craft Table

Submitted by jimsnurse1 on Wed, 08/13/2014 - 14:07

This was my second big DIY project ( I should say DIO for Do it OURSelves) since my husband had to help me with a few things. Anyway, I chose to paint the whole thing the same color as my office/craft room; BM Revere Pewter. Then, I stenciled some flowers in different colors of gray and white on the top. I had a piece of thick glass cut for the top. When I need to do anything heavy duty (like the open shelf console I did next) I simply put a bath rug on the glass. Even so, it's pretty tough as I've dropped lots of stuff on it without a crack!
I made this from the plan in Ana's book. Before we tackled this, I pulled all the carpet out of my office and put in a plywood floor (ripped into 6" widths).
I just finished the console which was made with plans from Ana and Shanty. Looking to move onto the next big project; a bar cart with doors or a dresser. Yikes! This is fun!
P.S. Love my Ryobi One Plus tools!
Thanks Ana, for the inspiration!

Estimated Cost
$150 ($80 for glass)
Estimated Time Investment
Week Long Project (20 Hours or More)
Finish Used
Paint, glass top
Recommended Skill Level
Beginner

Full size approach

Submitted by Anonymous (not verified) on Wed, 11/30/2016 - 13:14

First of all I want to Thanks Ana for such a great website and projects and all she do. Its amazing how a person can do all of that for free. If all Americans were the same we would be the greatest Nation by far (anyways we still great!).

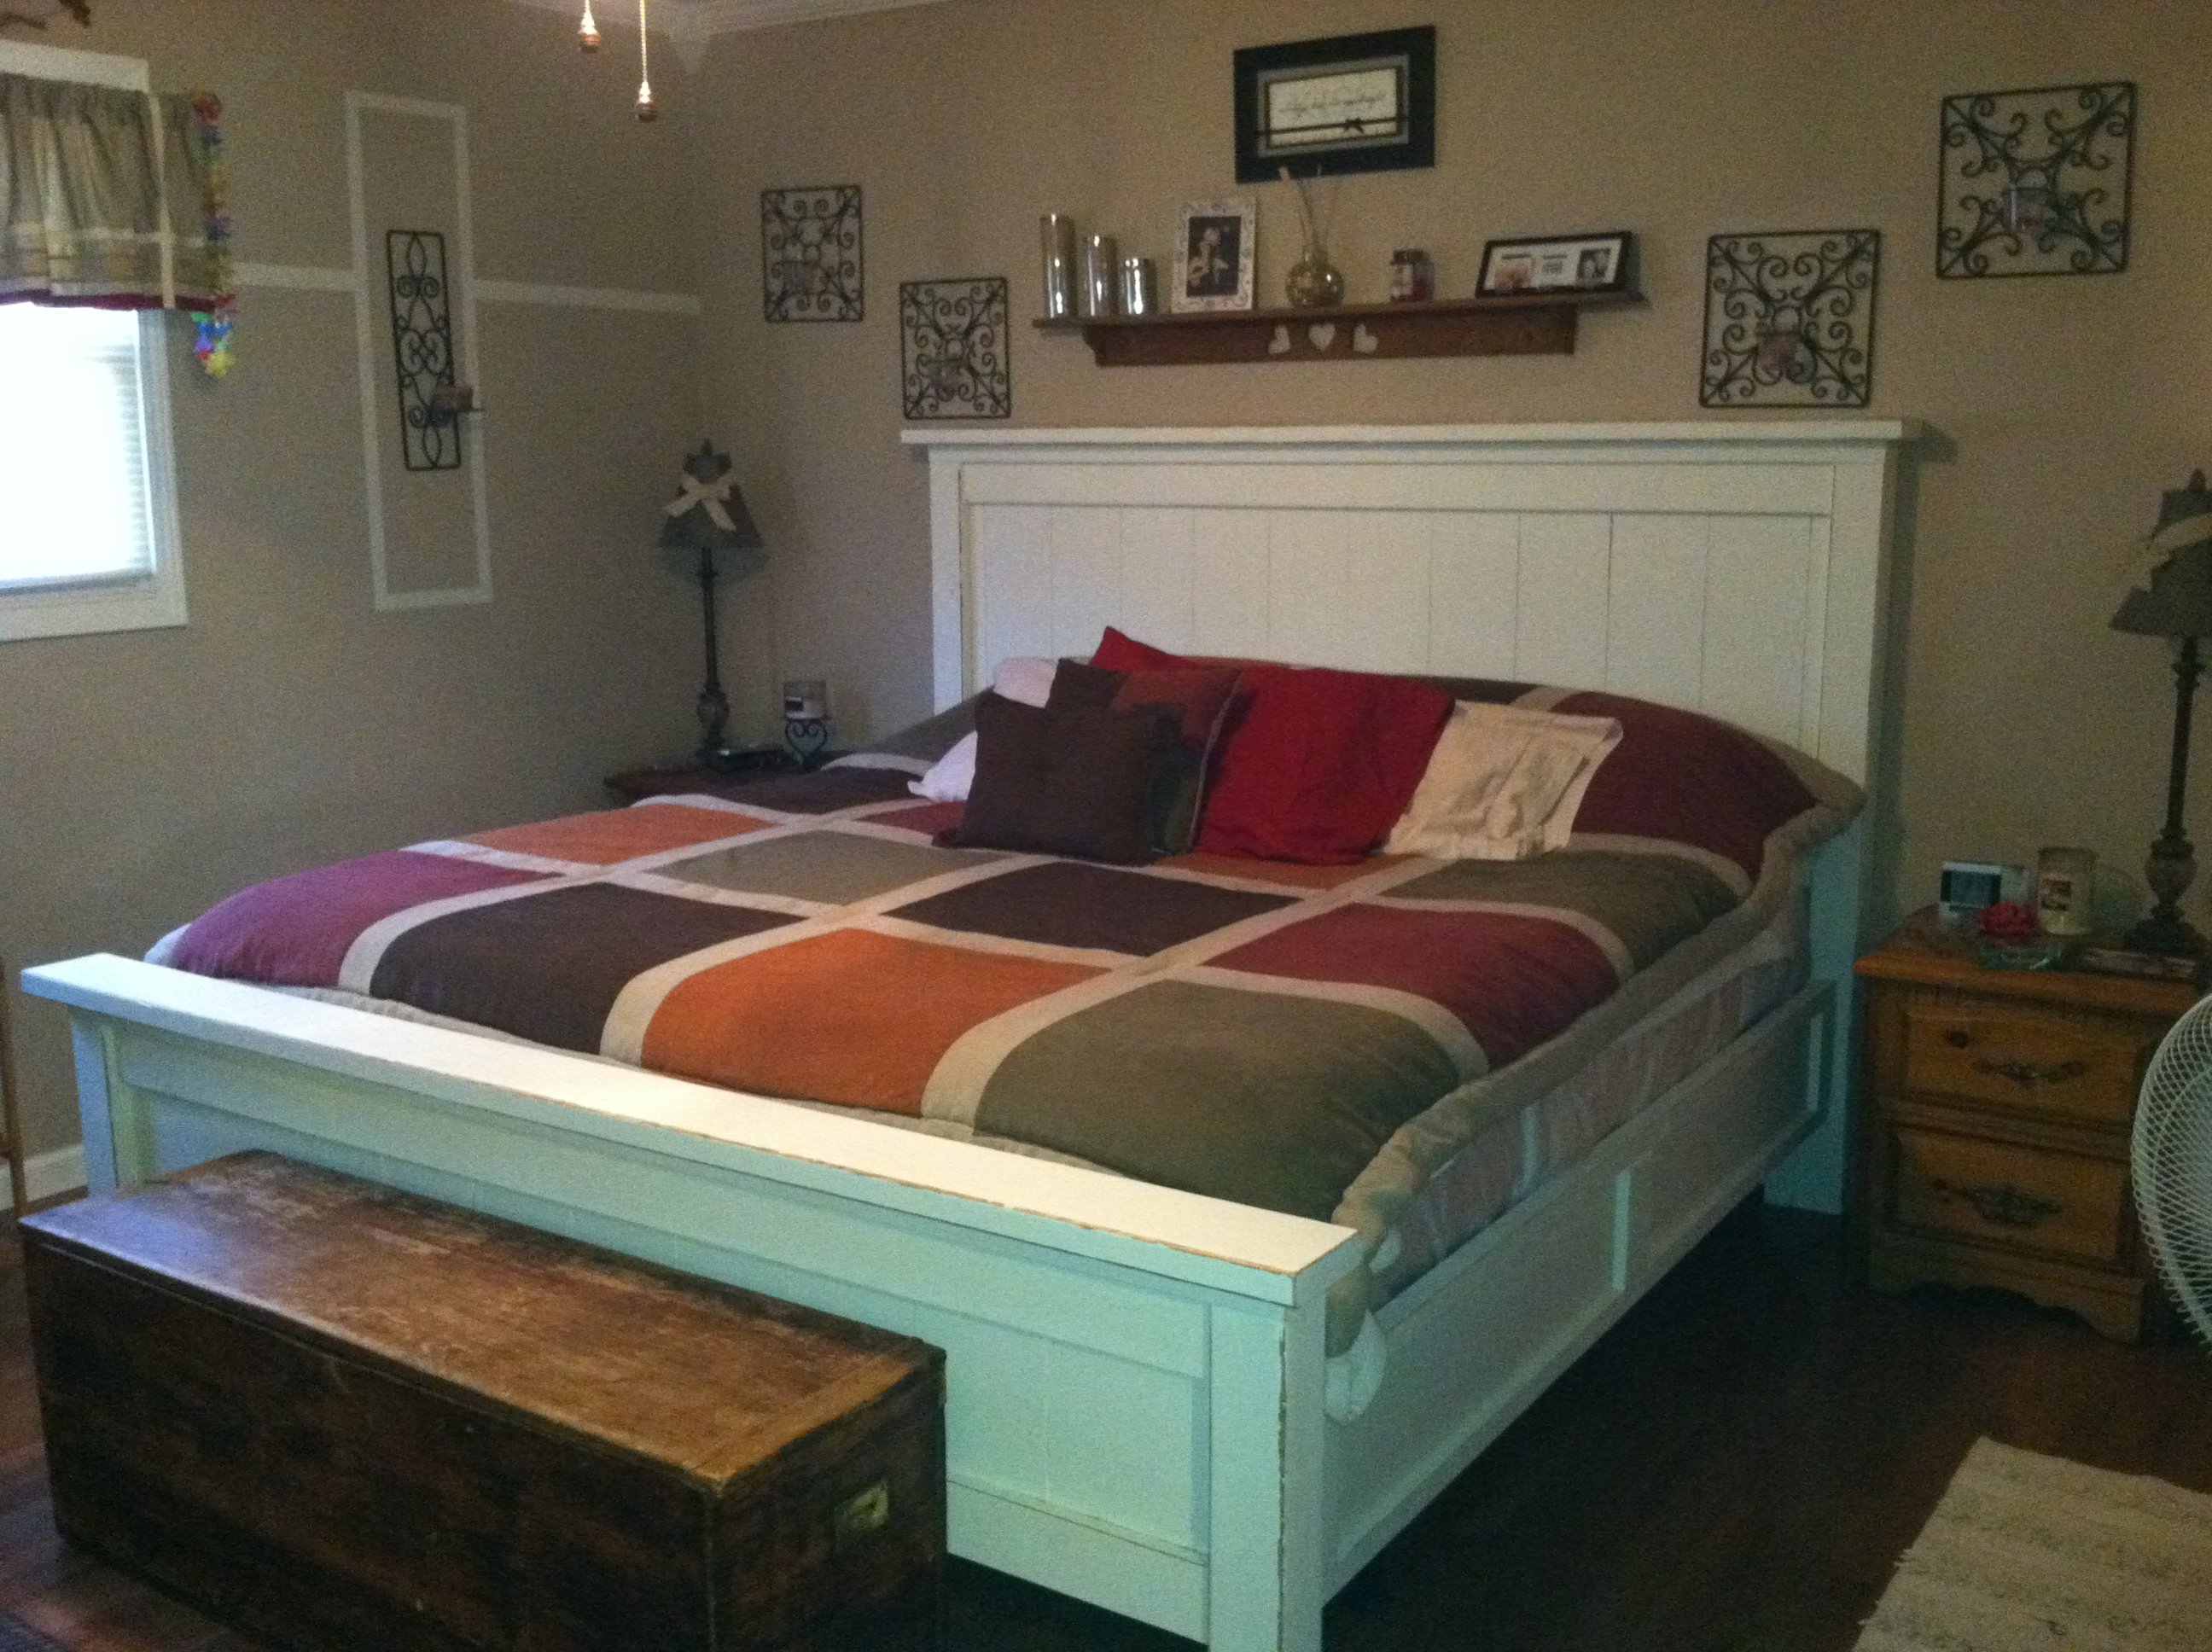
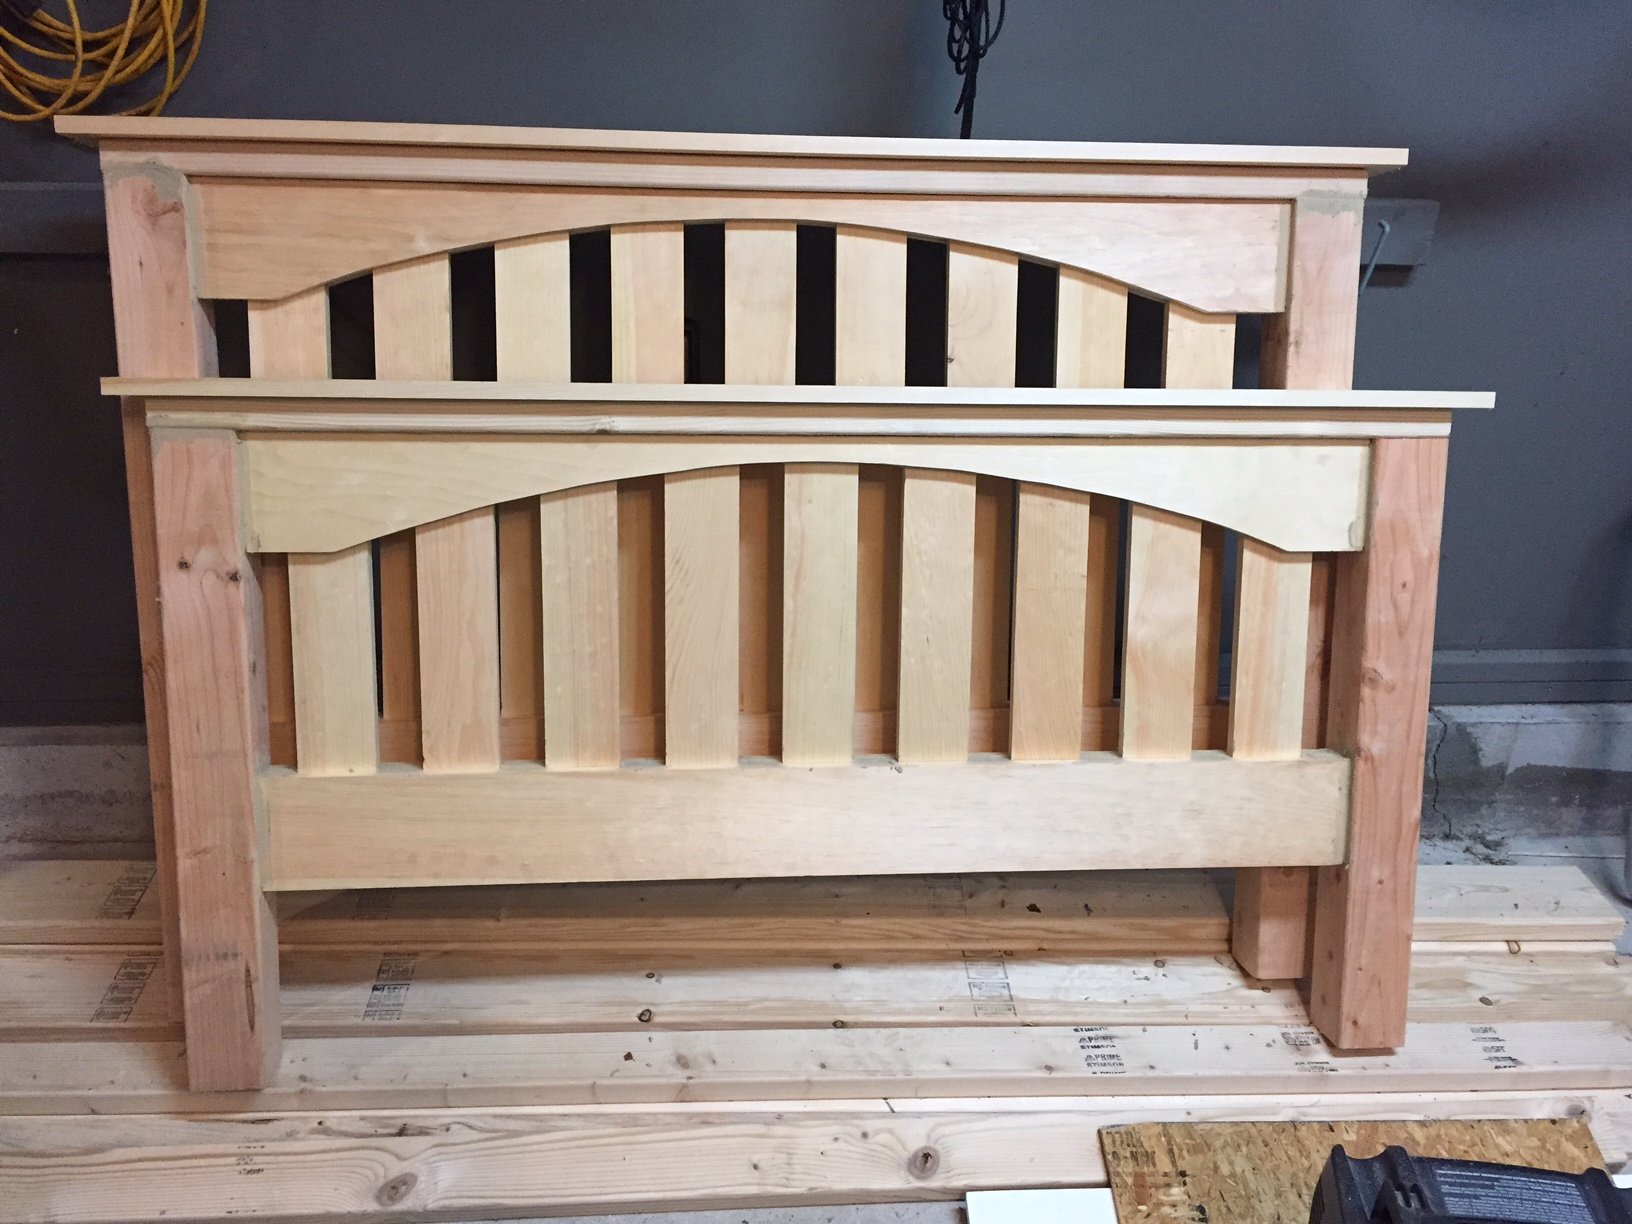
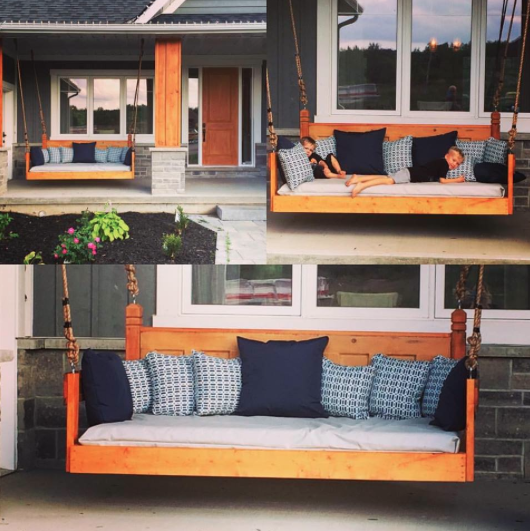
     I wanted to make this bed full so I had to re-scale the dimensions and I wanted to share leasons learned.

First: The legth for a full size is the same.

Second the width for a full size will be 52 inches (I would make it 53in); if you are going to follow Anas design and use a 2x6 as a side rail then then the width of the header could be 53in.

I made a design change at the last minute (and paid for it at the end :-s). Instead of follow Ana's design I decided to use railing hardware in this link to be able to take the bed appart without any problem.

 Using these mortises I was able to change the side rails for 1x6 which in my opinion look way better. The problem is that now with those mortises the bed frame is going to be wider (56in), so instead of an extra 1in for play with the boxspring I have 3.5in :-(

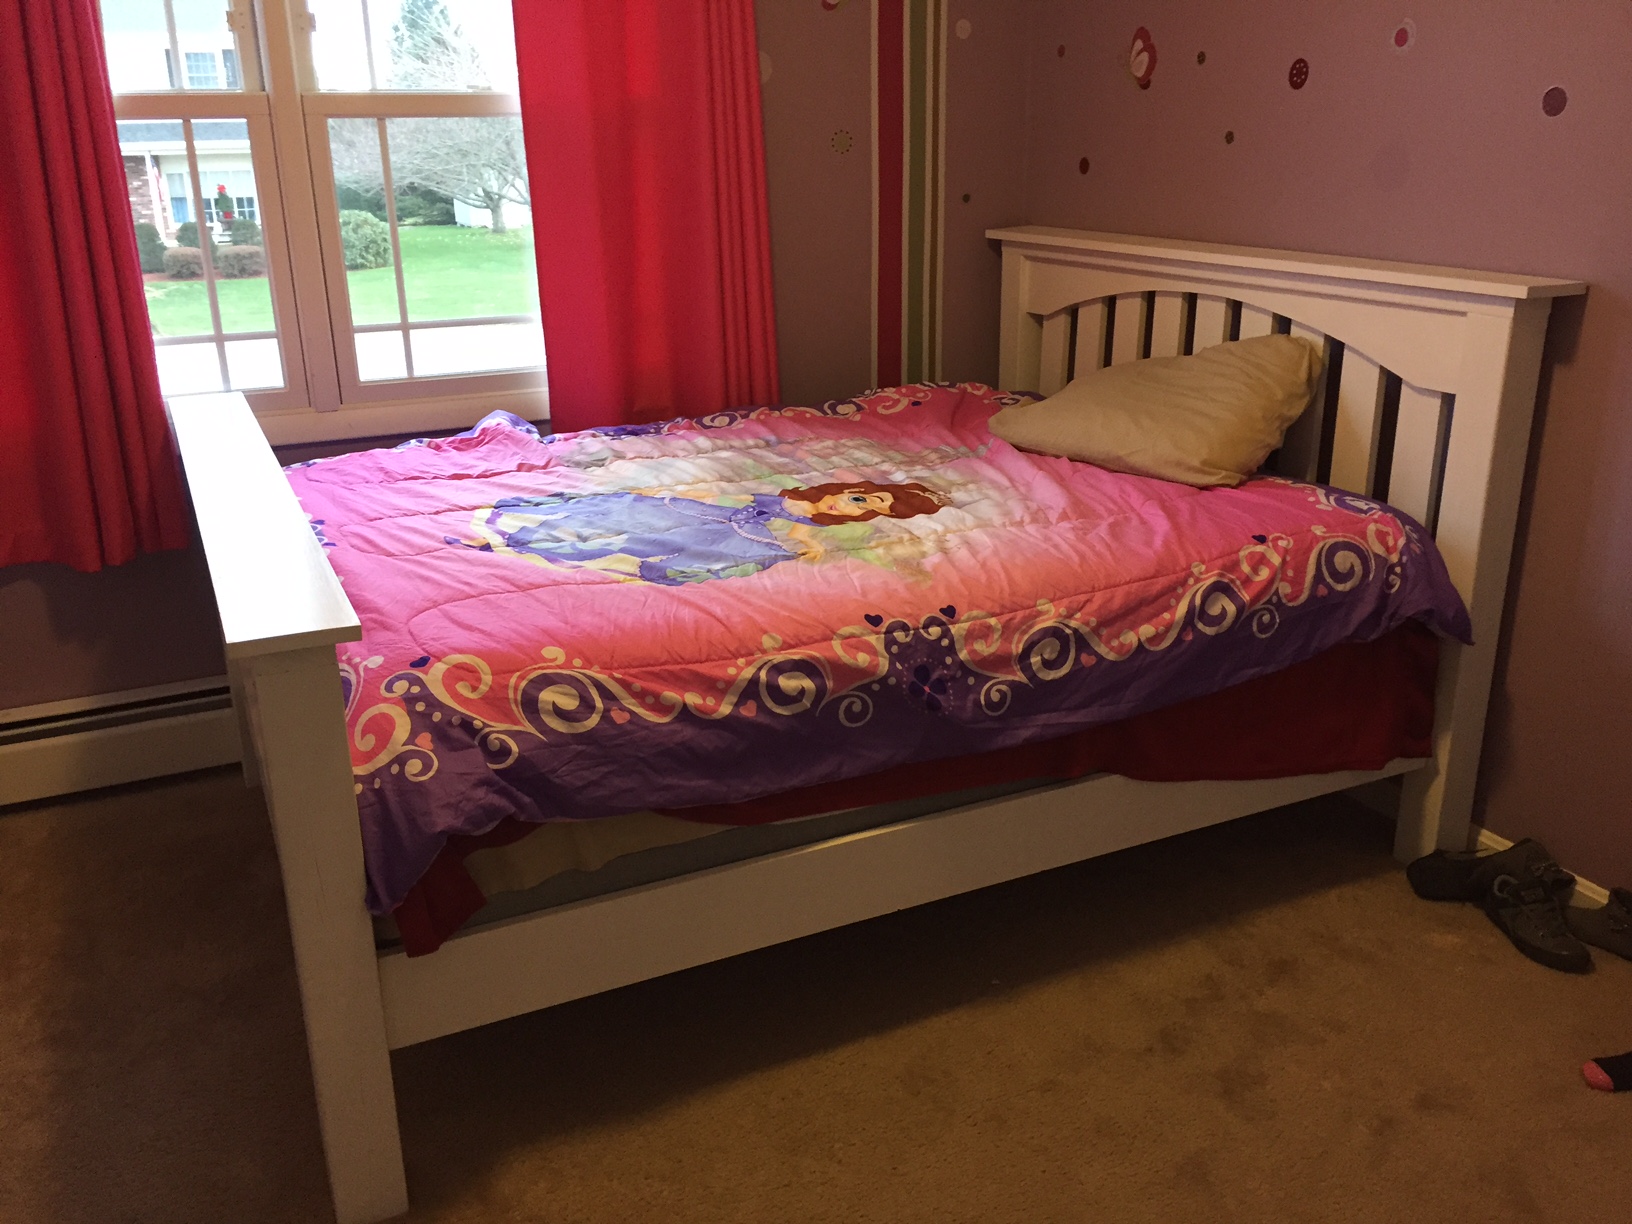
My wife is nice enough and tried to gave me moral support and she insist that is not a big deal because the gap is toward the wall and my doughter can't care any less; she has her big girl's bed and thats all she wanted; but I know is there and I hate that gap!

Summary:

If you stick to Ana's design 53 inches for headboard is perfect; but if you want to use the mortise then 50.5 should work fine.

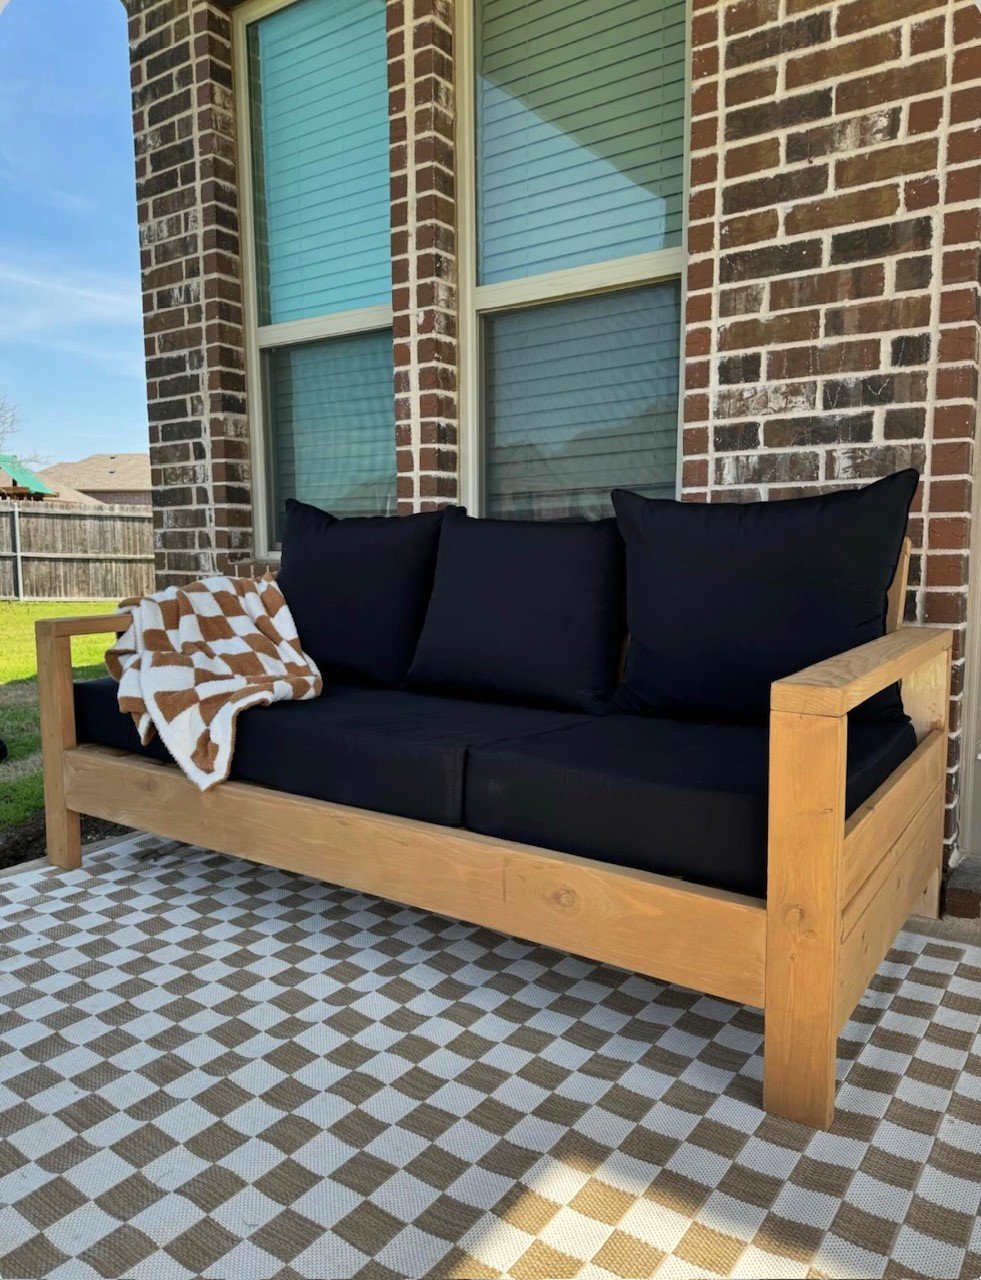
To paint the bed I did two coats of primer and two cotas of semi-gloss white paint; in my opinion for furniture I probably would go gloss next time, but this doesn't botter me.

I used prime pine wood so the price went to the $300, if you choose mid-grade pine (it has a lot of knot) you can probably drive the cost down by good 25%.

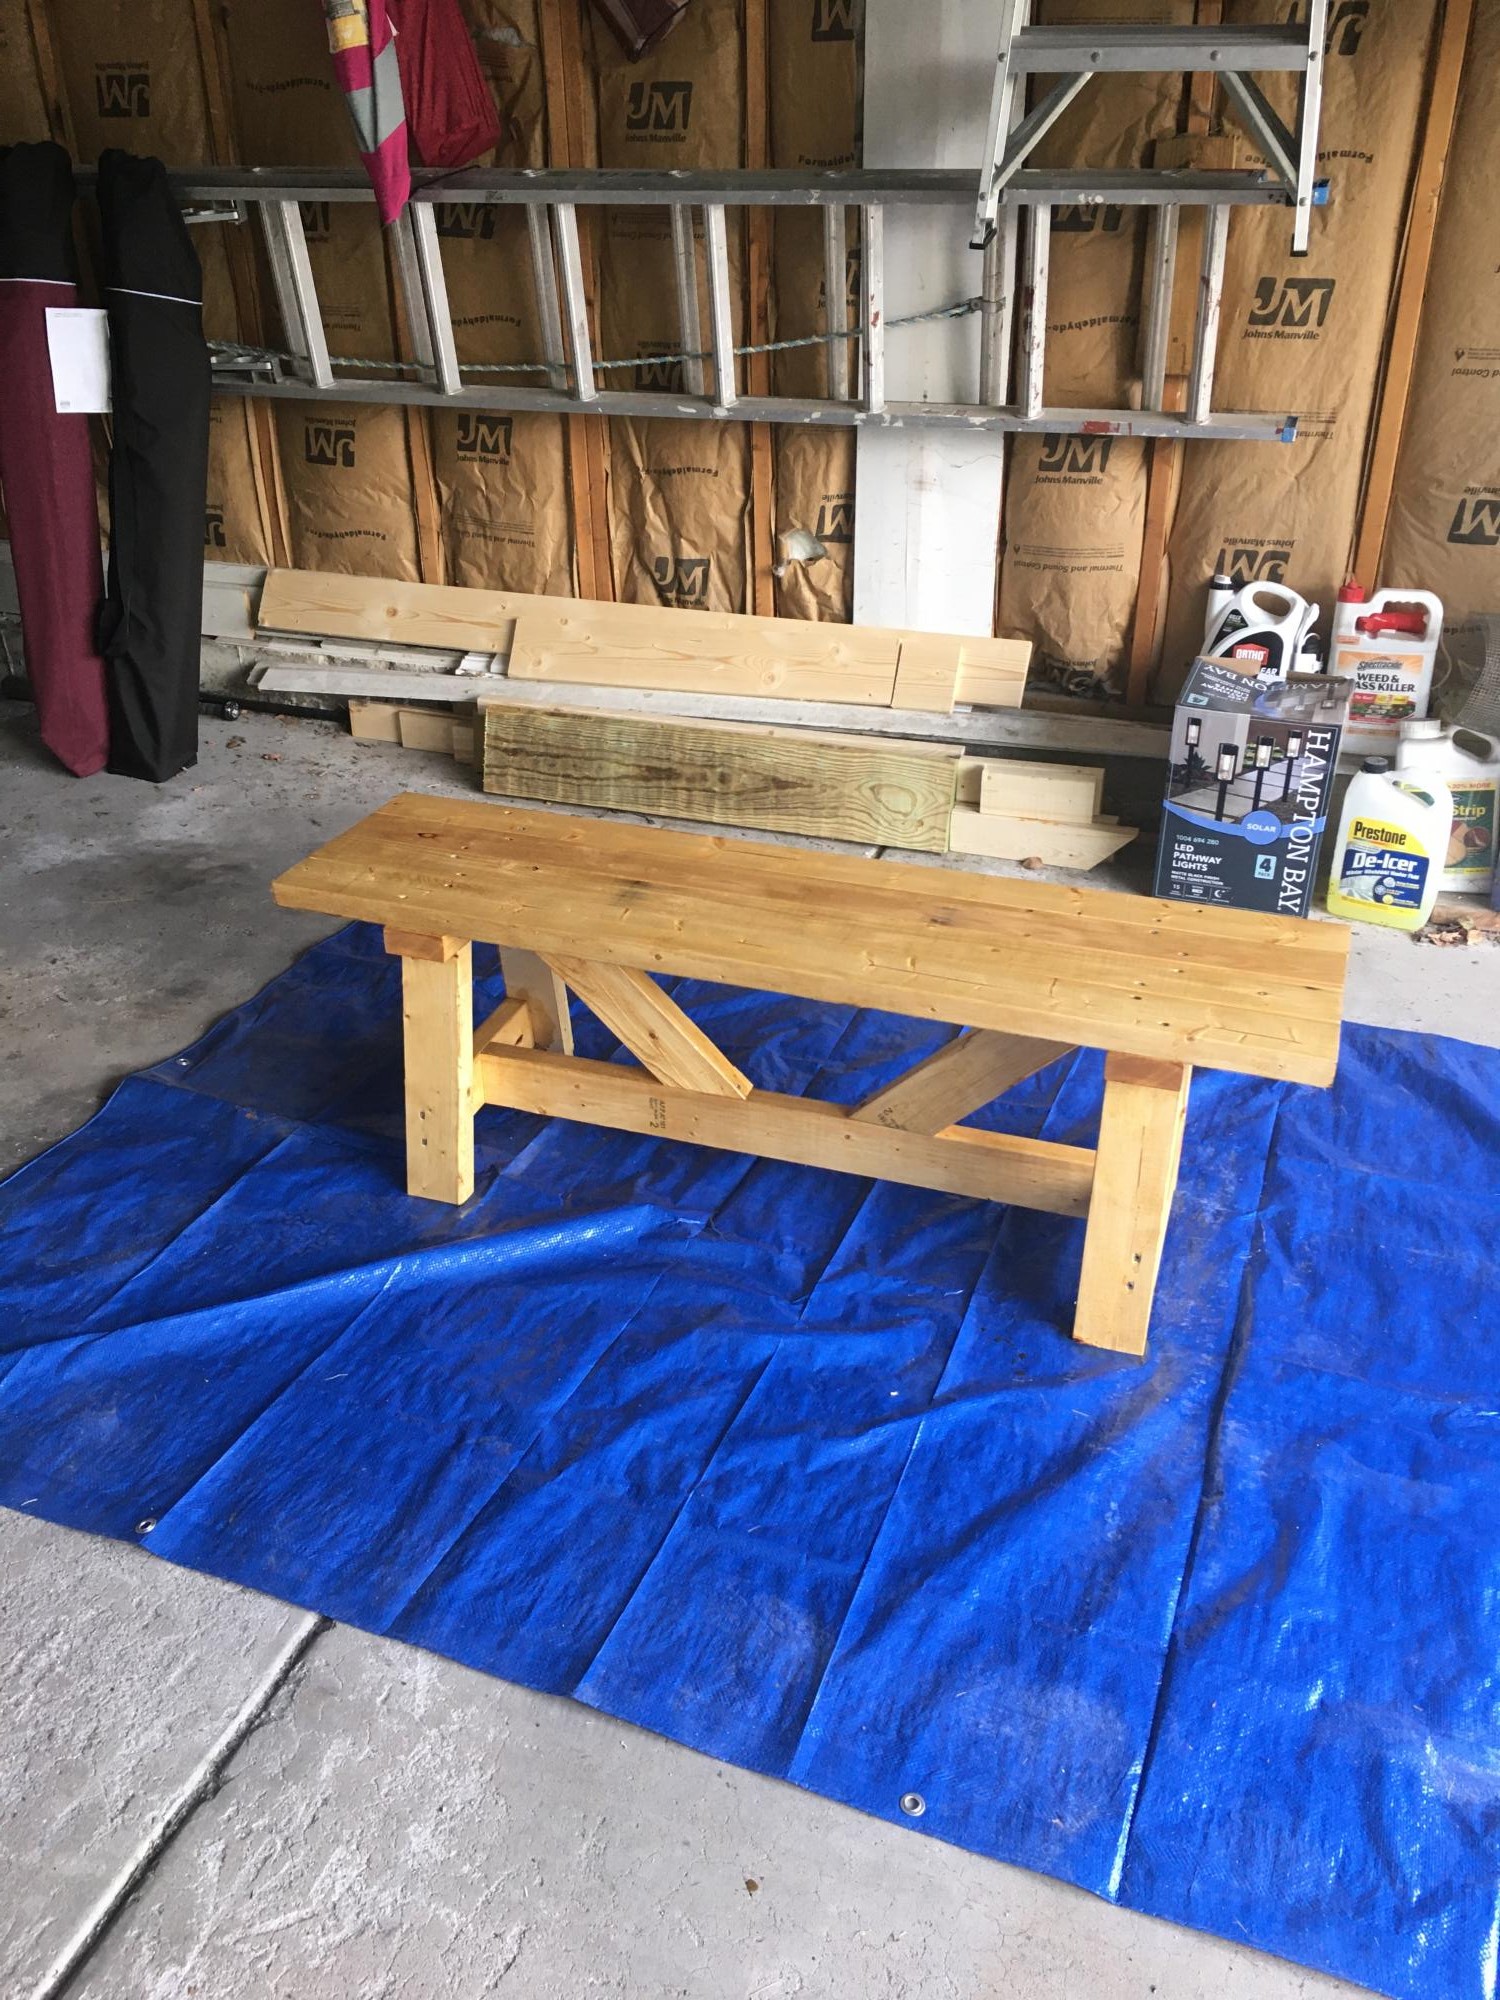
Time: took me one full day to build the bed and since I had to go to work every day and I was doing one coat of paint every afternoon after work (so "five" days total); maybe you can do the painting it in one day if don't have to go to work and the weather is right!

Estimated Cost
$300
Estimated Time Investment
Weekend Project (10-20 Hours)
Finish Used
white, semi-gloss
Recommended Skill Level
Intermediate

Comments

Modified Farmhouse X Desk

I modified the Farmhouse X Desk plan from Handmade Haven to add the shelving on both ends. I also have a Z on the end instead of the X as that was the way my husband preferred it (it is for him after all). The top is live edge wood which is tricky to work with since the thickness is different from board to board but I still like the way it turned out! The live edge top did add time to the build as well as staining and varnishing as opposed to painting the base.

Built from Plan(s)
Estimated Time Investment
Week Long Project (20 Hours or More)
Finish Used
Minwax Jacobean stain mixed with Special Walnut (had a little of both on hand) for the base and left the top natural. Both coated with Minwax oil modified water based polyurethane.
Recommended Skill Level
Intermediate

Comments

The Perfect End Table

Submitted by Deb1974 on Wed, 10/31/2012 - 20:00

This is my first project, and I'm so happy with how it turned out. This was so easy to make, a great place to start for beginners! Thank you Ana White for your inspirational website.

Estimated Cost
$20
Estimated Time Investment
An Hour or Two (0-2 Hours)
Finish Used
I Stained the top, and painted the bottom with a light cream color.
Recommended Skill Level
Starter Project

Hemnes cabinet with wire mesh

I'm still pretty new to woodworking so this cabinet took a little longer than it probably should have. I made the drawers a little deeper than the plans originally called for, which changed the height of the cabinet doors, but otherwise, all the other dimensions are the same. The laminated glass would have added another $100 to the cost so I used a chicken wire mesh that I dry brushed with the white I used on the interior. The knobs are from Anthropologie and I added a little trim piece around the top. I really love how much this cabinet holds. It is very versatile.

Built from Plan(s)
Estimated Cost
$100 including wood, hardware and paint
Estimated Time Investment
Weekend Project (10-20 Hours)
Finish Used
I used a custom mixture of Annie Sloan's Chalk Paint ( Duck egg Blue) and an antique white. The mixture was about half blue and half white. I finished with a couple of coats of dark wax.
Recommended Skill Level
Beginner

Comments

CroomScM

Sun, 10/30/2016 - 13:07

love it! Did you have any issues getting the drawer in when the slides are installed? We installed the slides on the drawer box and then the slides on the case and we had to loosen some to actually get the drawer in, because the little wheels of the slides were basically blocking us from pivoting it in. Thanks!

We love our hanging outdoor bed - Thank you, Ana!

Submitted by Anonymous (not verified) on Sun, 12/04/2016 - 11:12

We started this project with Ana's hanging outdoor bed frame, added a vintage door as a back/headboard, and some panels from an old barn shed as arms.  Finished it off with some homemade pillows and outdoor mattress cover, and voila! Our family's new favourite spot to relax and read :)


This was the fourth plan we've used from the site, and every single time have been wowed by how easy it is to follow the plans, buy the material, and how well the projects come together.  Thank you so much for your generosity in sharing them, Ana.  We are so apprecitiative of your creativity, talent, and kindness.


Kindest Regards, 

The Culbert Family

Built from Plan(s)
Estimated Cost
$215
Estimated Time Investment
Weekend Project (10-20 Hours)
Recommended Skill Level
Beginner

Classic Chair made simple

Submitted by danaxboo on Sat, 11/03/2012 - 16:15

This is a build a month in the making... I started and assembled 3 chairs but just couldn't get them exactly the same, so I labeled them "garage chairs" and went on to the next project. It wasn't until the BF surprised me with a router and router table that I started dreaming of chairs again!! (It also helped that I begged and begged for a band saw for my birthday hehe) I built the Narrow Farmhouse Table for a homework table for my kids, and have been itching to create chairs to match. :)
I made a template for the chair leg, and arch for the top of the chair. I cut the legs down using a jig saw, and then used the router and cut them to the template. EXACTLY THE SAME! SCORE!! The rest was just following instructions. I did make the legs a little taller, and the whole chair more narrow.. Gotta fit 5 kids at this homework table!! The seat cushions were a breeze (they scared the crap out of me until I did it and realized how darn easy it was) and then just searched the internet until I found a back design I liked :) ANA IS AWESOME!!! And to think I used to spend my days sleeping or watching TV. I don't know if I've ever been more happy OR productive in my life! Finish is golden oak. Thanks again Ana!! I've saved thousands in the last few months DIYing and building building building!!

Estimated Time Investment
Day Project (6-9 Hours)
Finish Used
Golden Oak
Recommended Skill Level
Beginner

Comments

Coffee table with a glass top.

Submitted by coachtom on Wed, 08/20/2014 - 18:53

Made mine exactly like the layout except I used an old piece of glass from a different project that didn't work out so well. This 1 turned out really nice. Going to make a couple end tables next with a hidden compartments in them next...

Estimated Cost
$50
Estimated Time Investment
Weekend Project (10-20 Hours)
Finish Used
Black Tea and White Vinegar with steelwool.
Recommended Skill Level
Intermediate

Comments