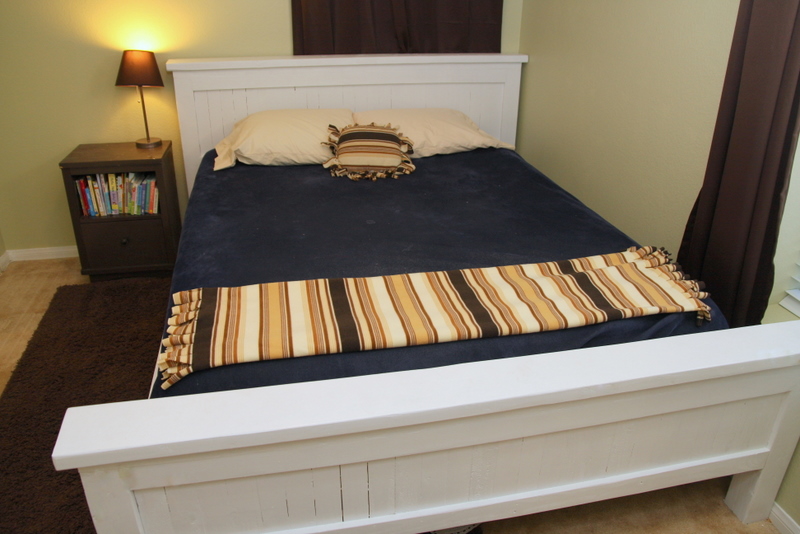
White Farmhouse Nighstand
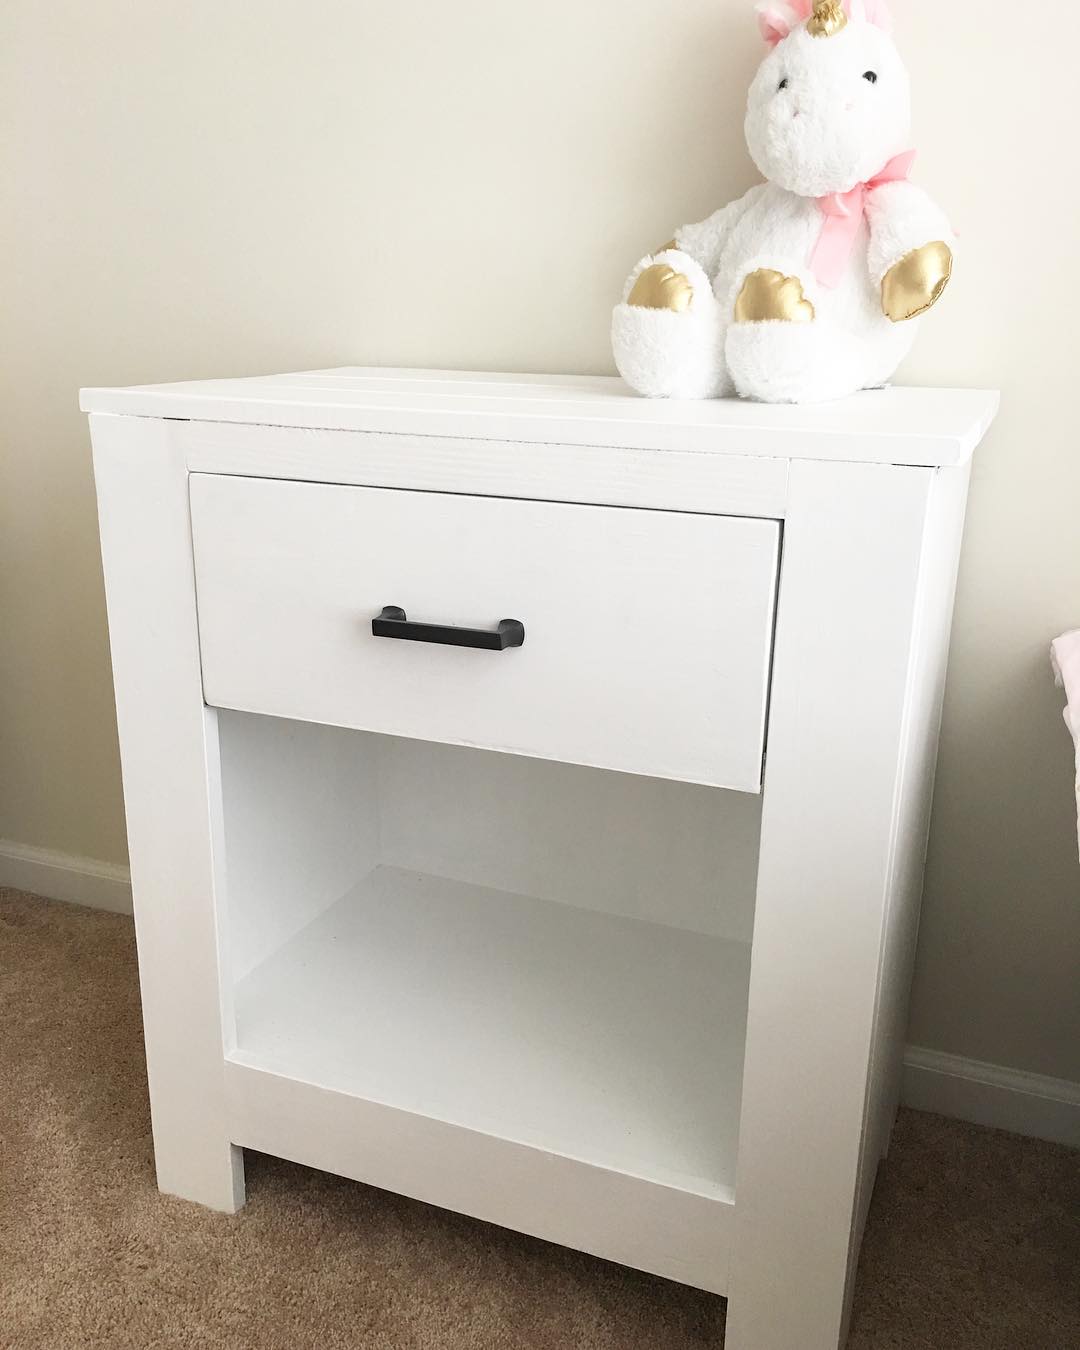
For more information please check out Leahslemonsdiy on Instagram
Built from Plan(s)
Recommended Skill Level
Beginner
For more information please check out Leahslemonsdiy on Instagram
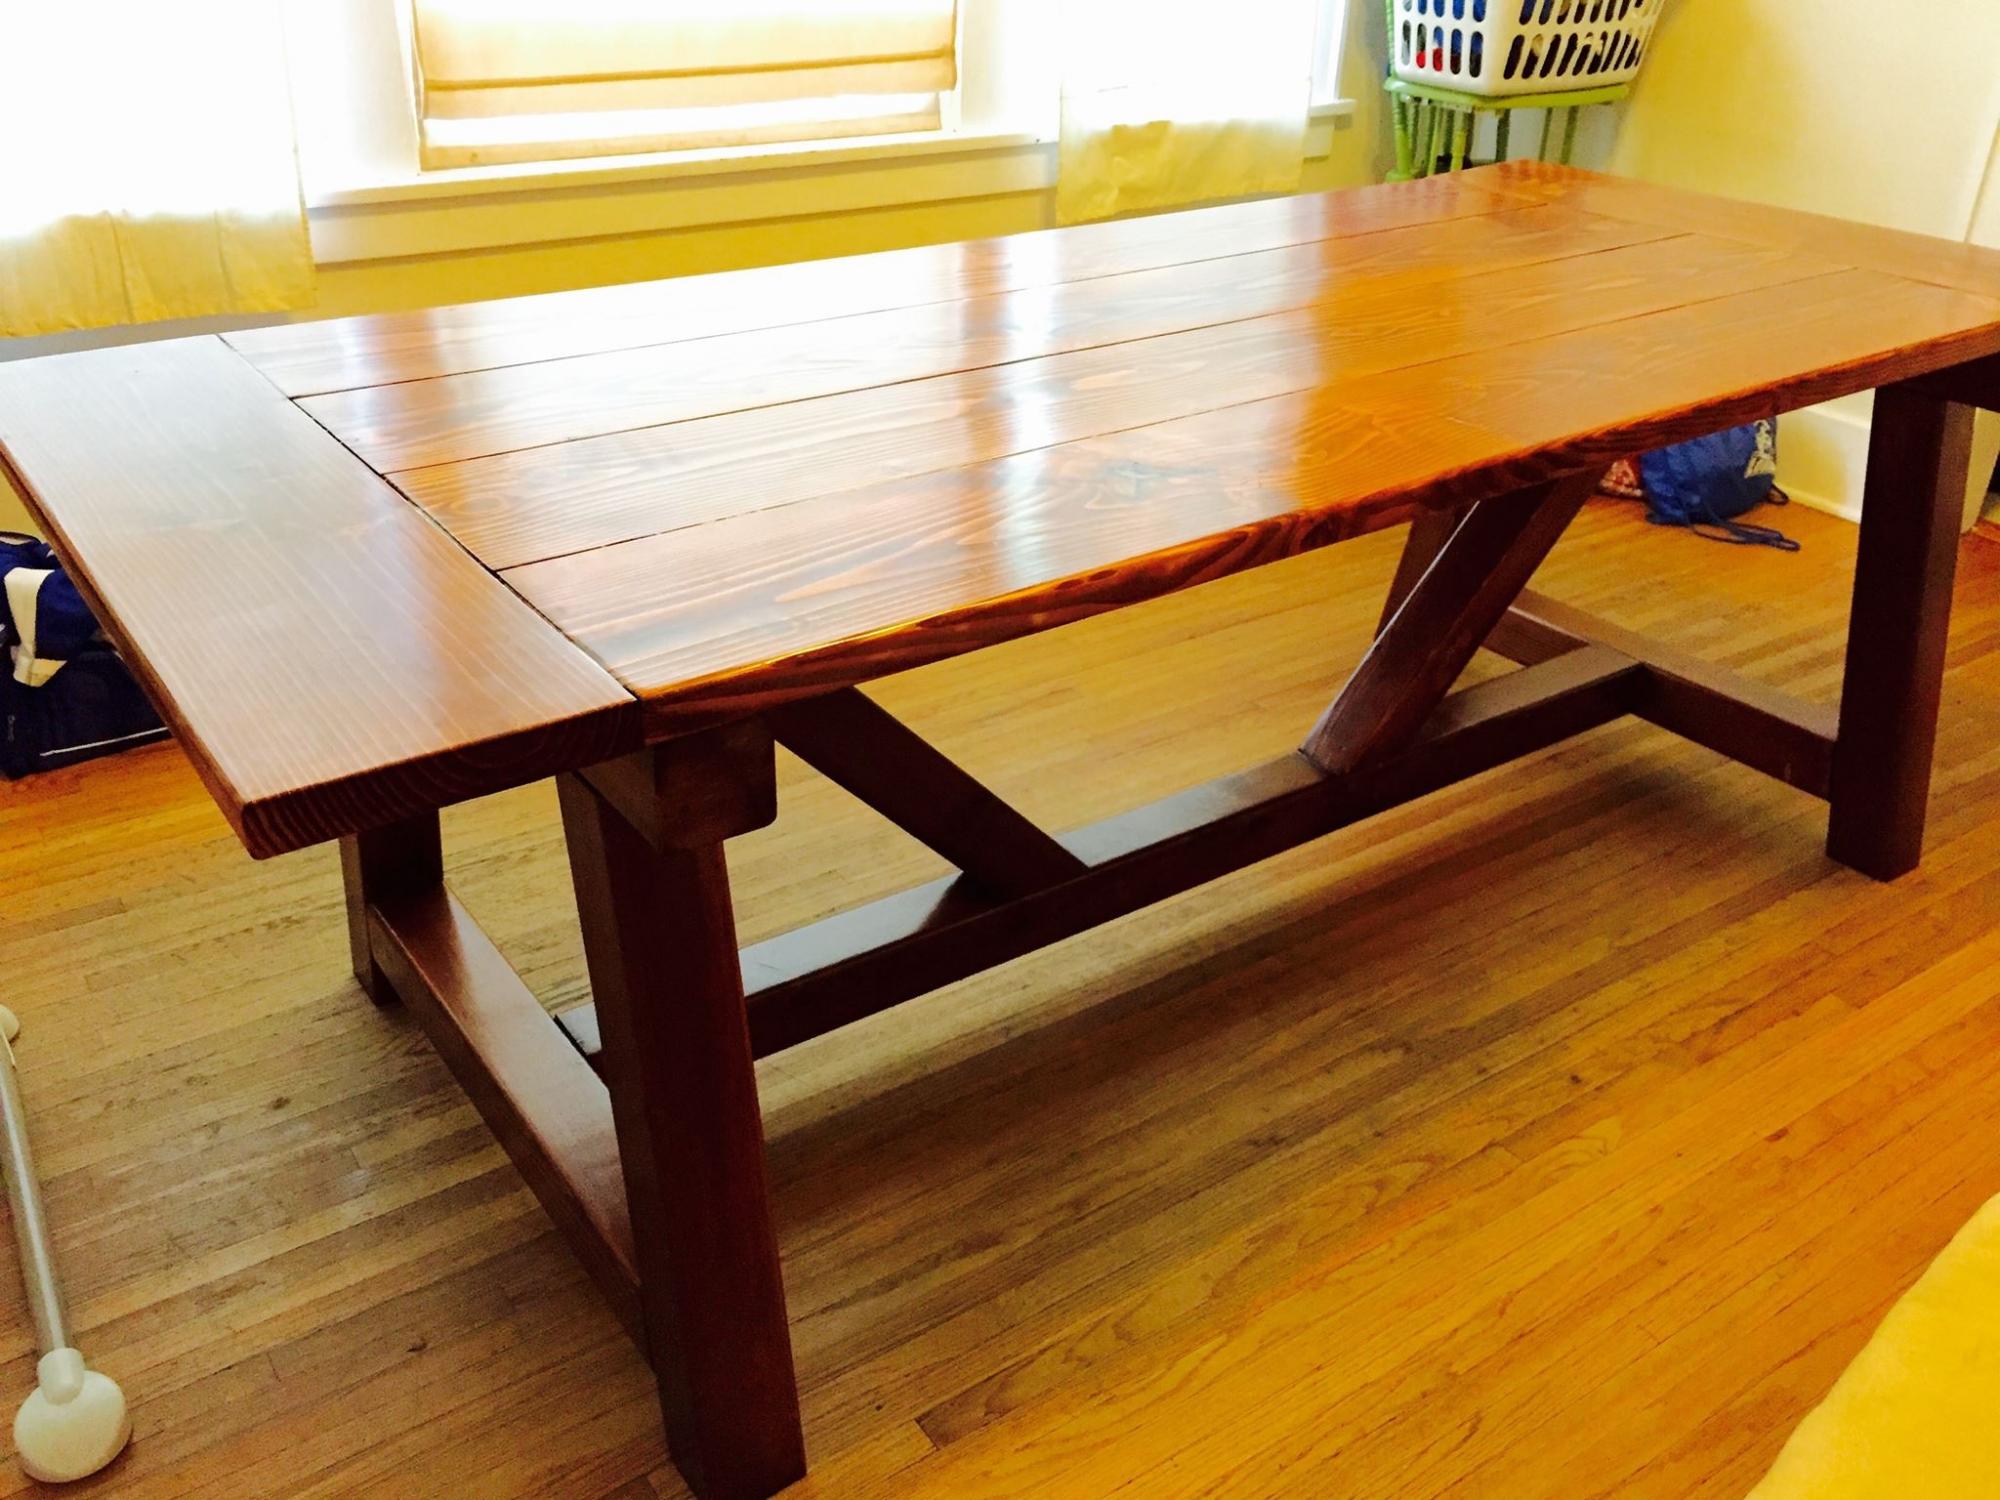
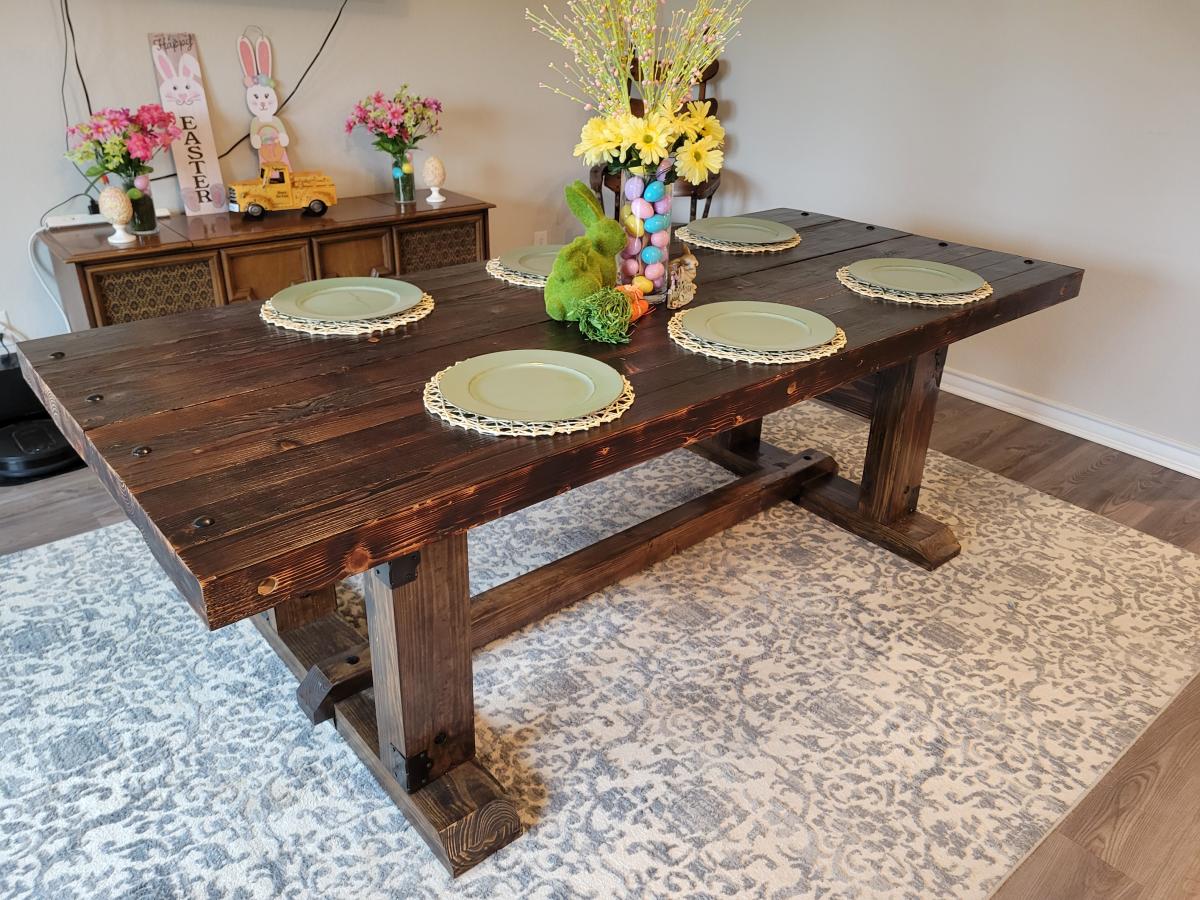
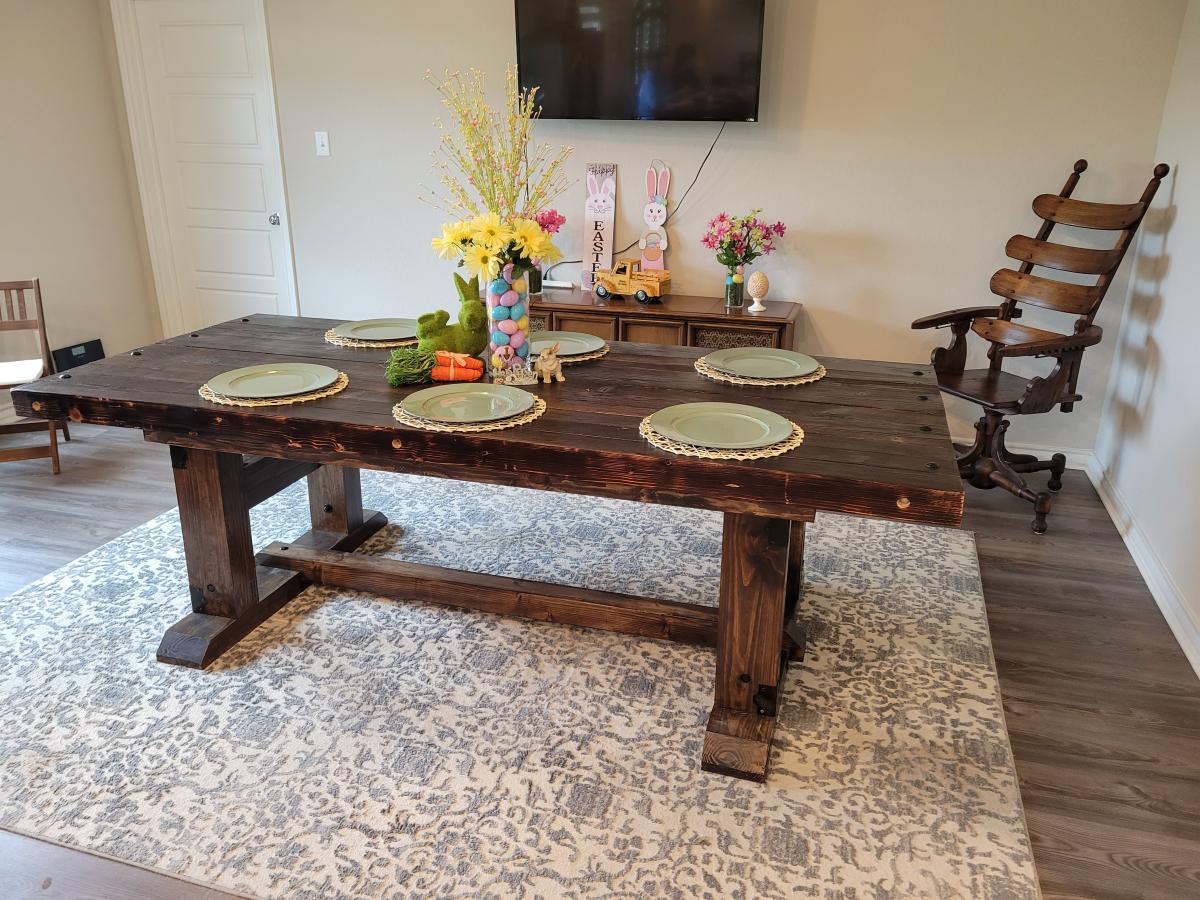
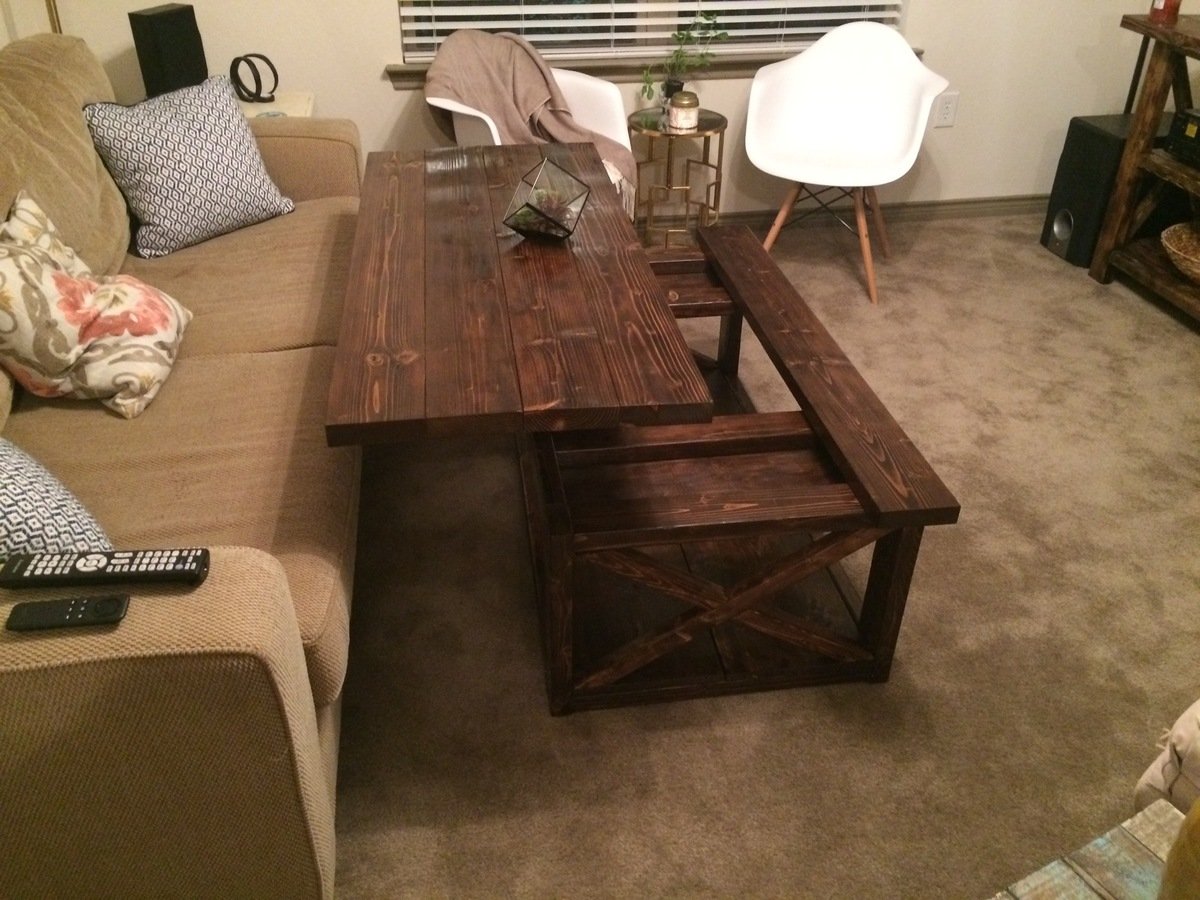
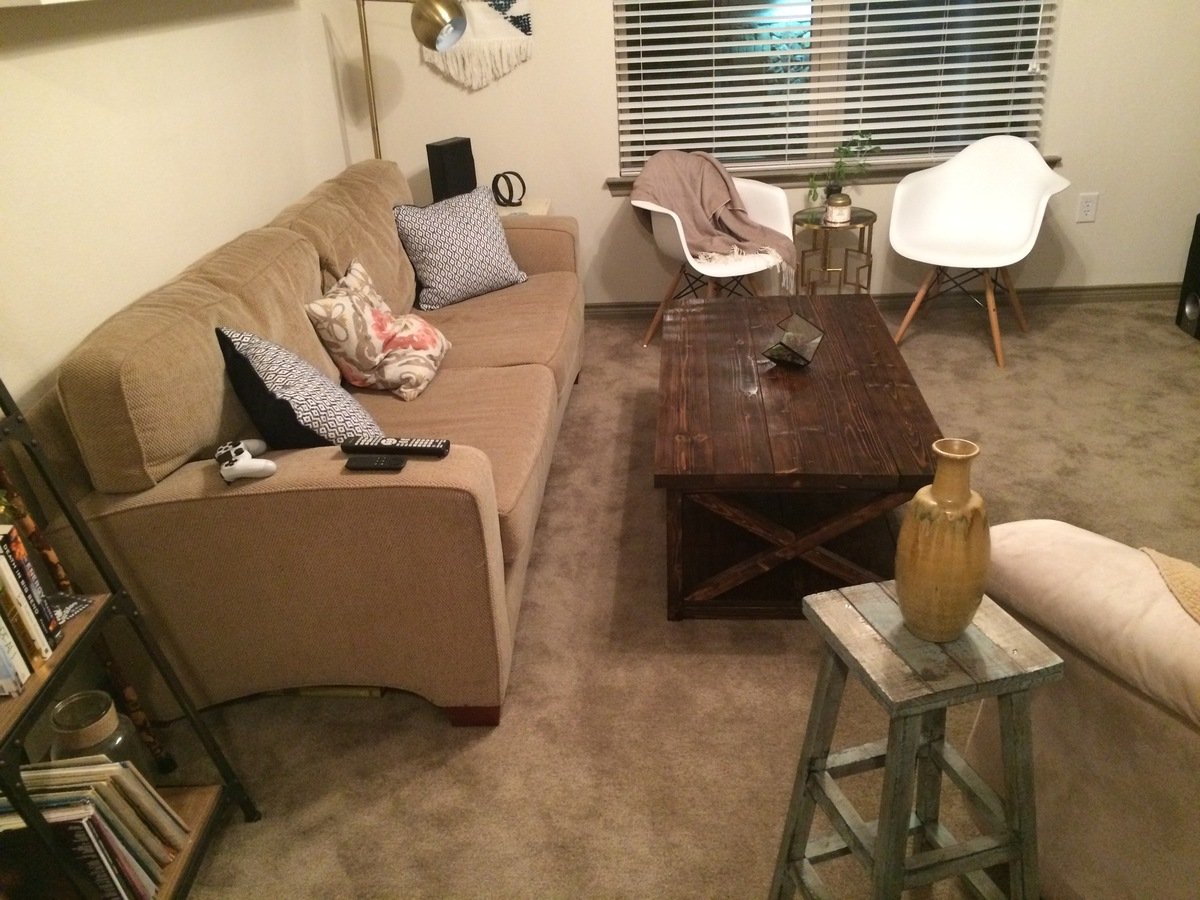
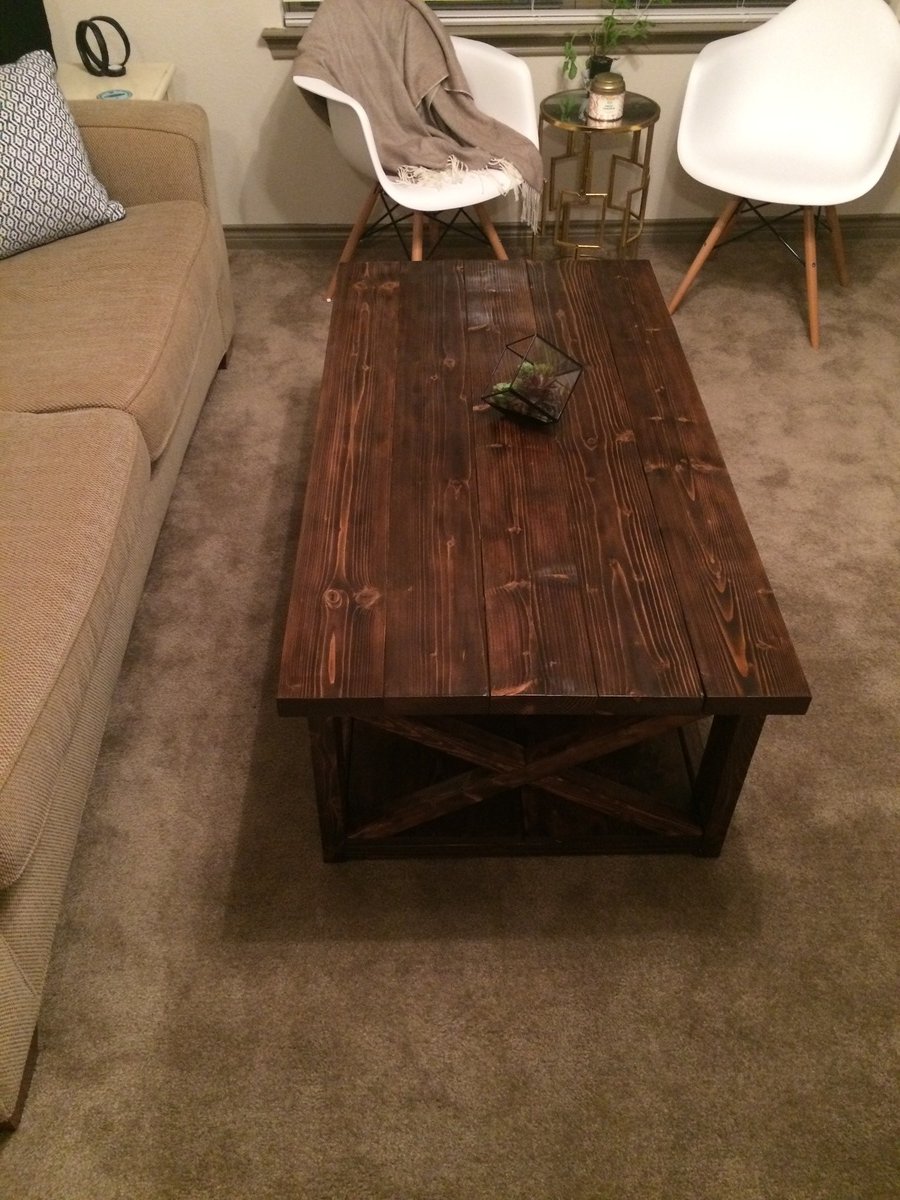
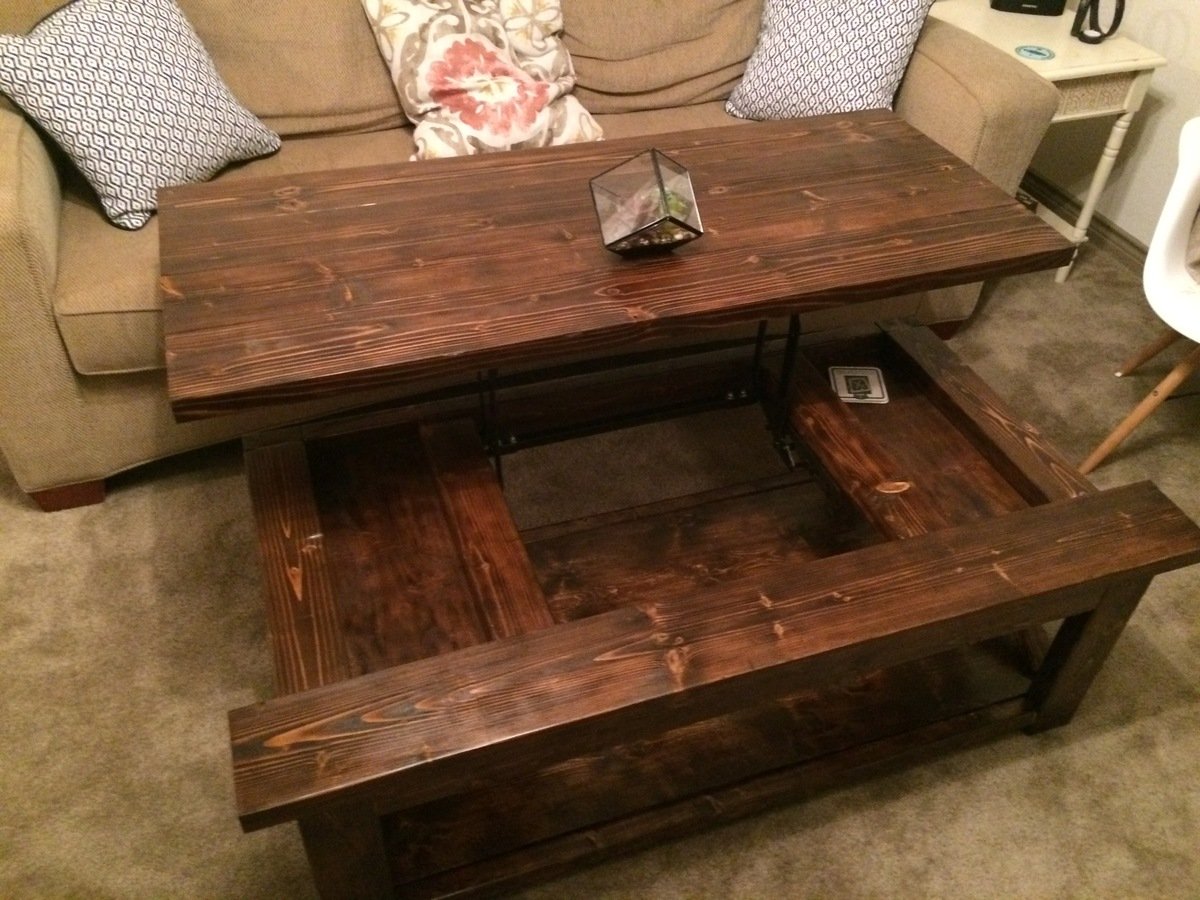
Just a super heavy rustic table I built for my neighbor. Thank you Ana for help in giving me the confidence to start my wood working journey.
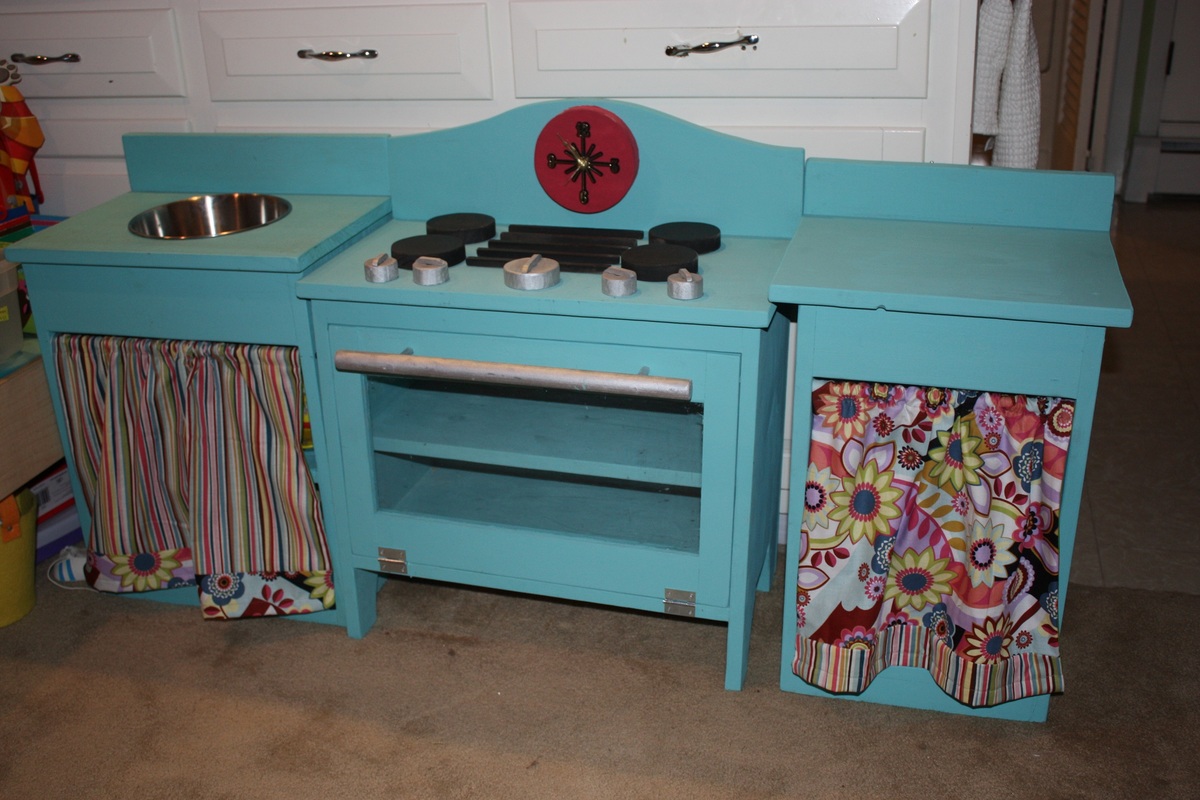
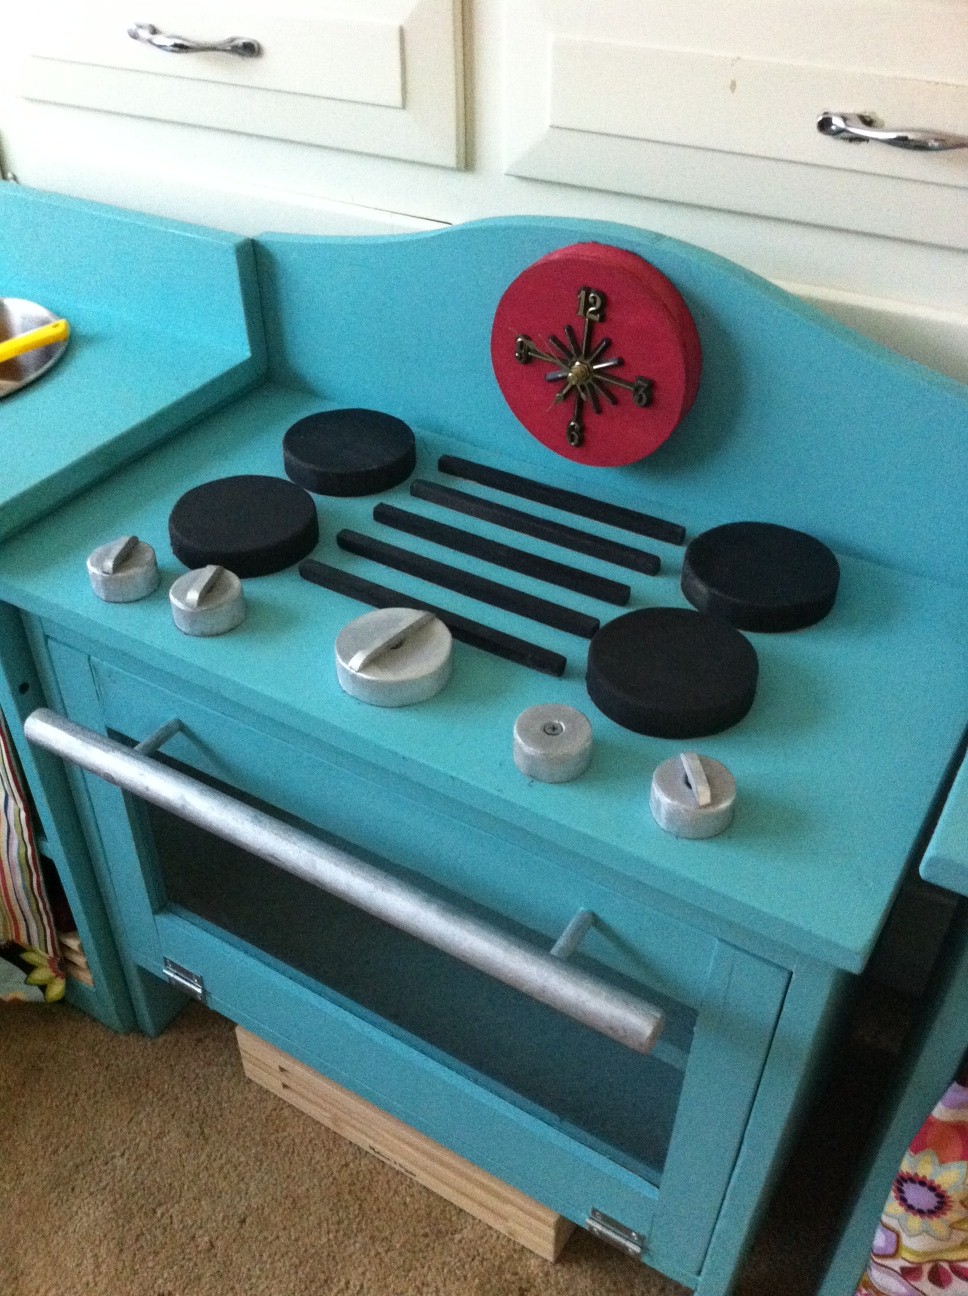
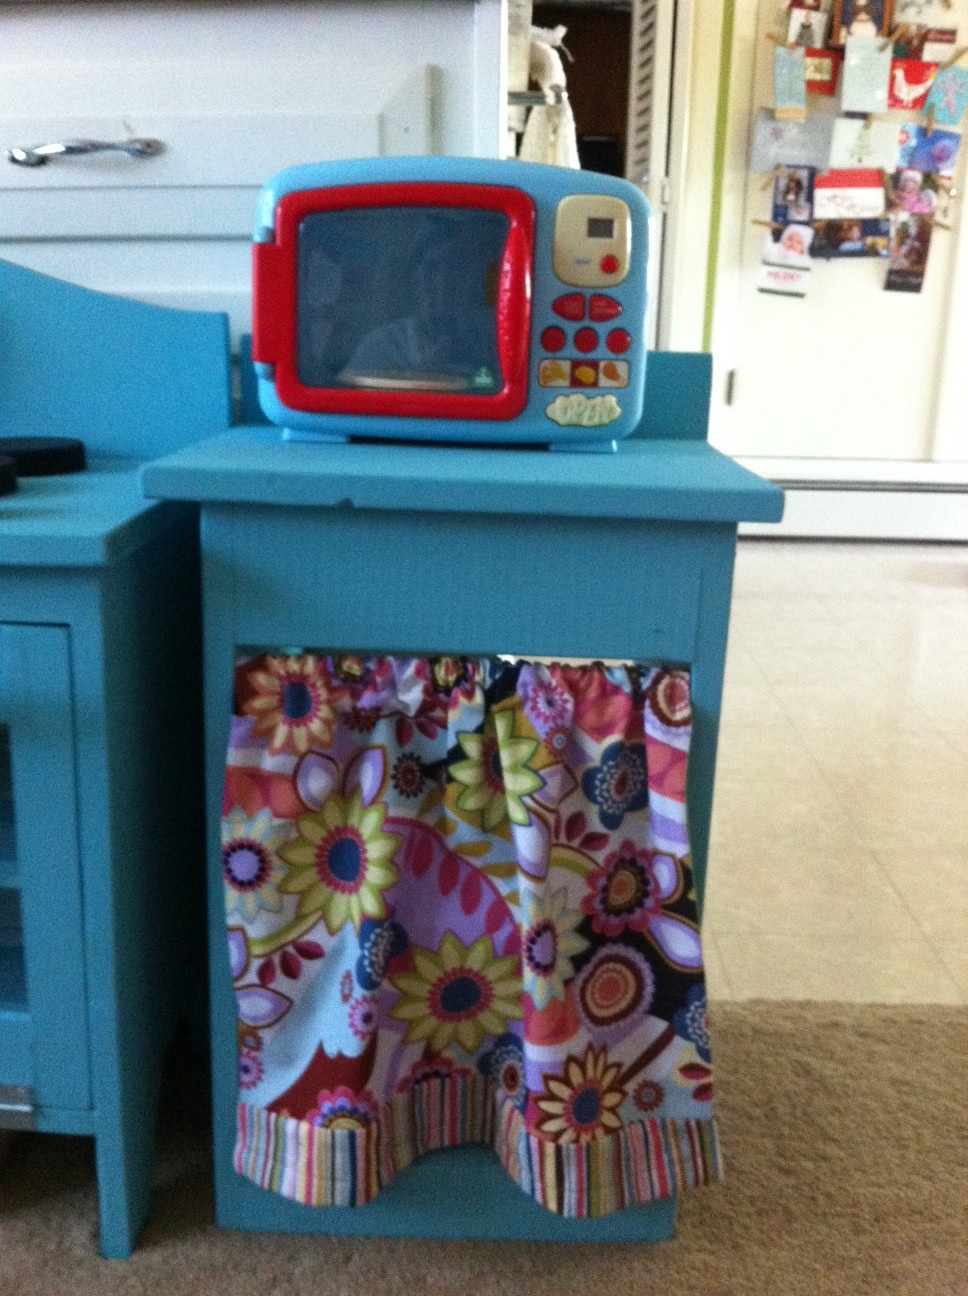
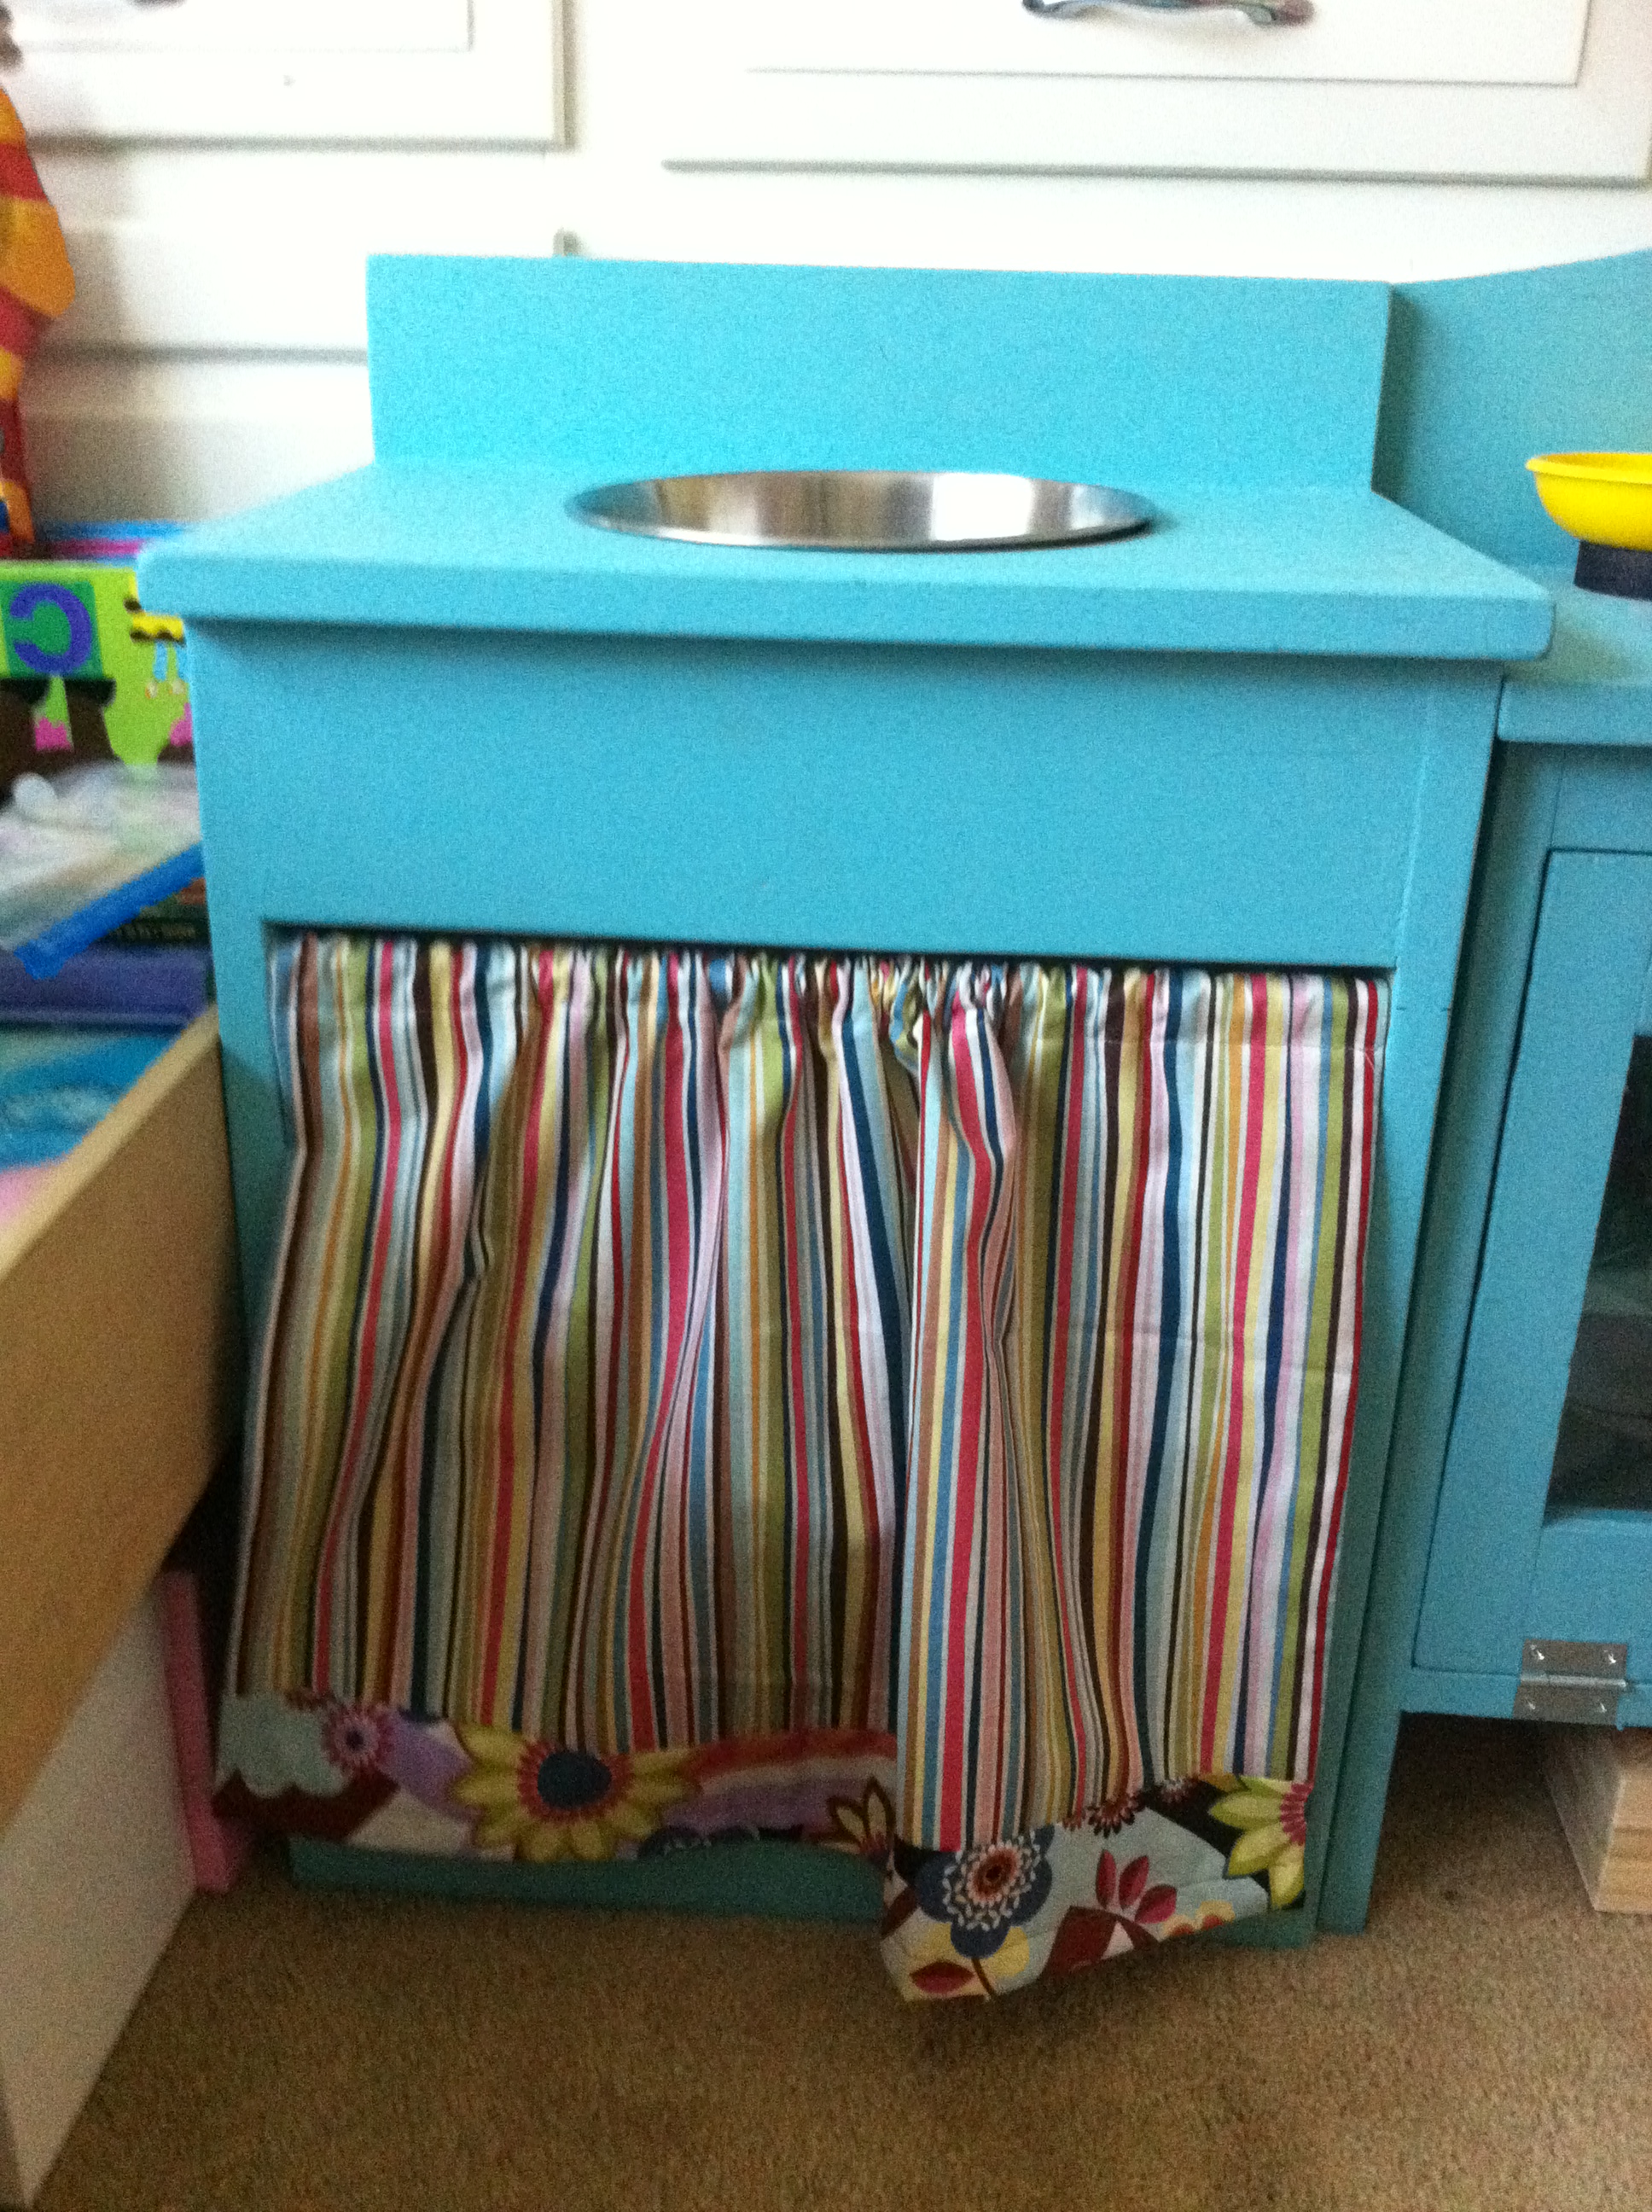
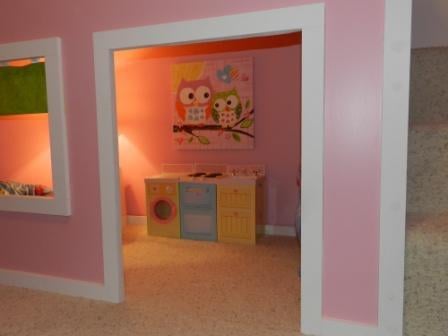
My husband made these over the course of the last year. We started with just the sink, and are still looking for a good faucet. For Christmas this year he added the oven and microwave stand using the sink design just scaled a little narrower. I made the curtains and the are attached with wooden dowels screwed into the sides. The sink basin is a dog bowl from Big Lots, and the clock was made from a set at Michaels. We bought a lot of the kitchenware from a flea market in town along with The Dollar Tree. My daughter is turning 3 this month, and loves to cook along with Mommy!
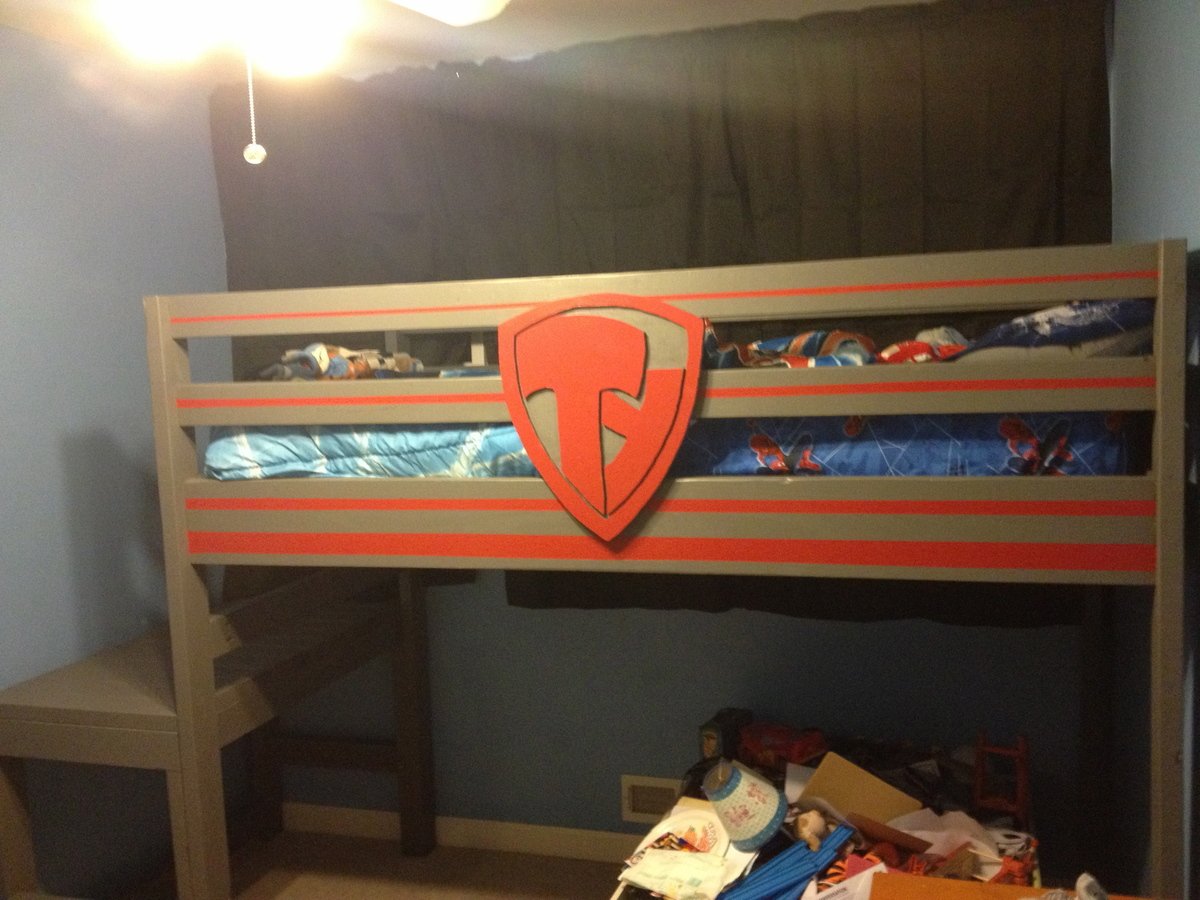
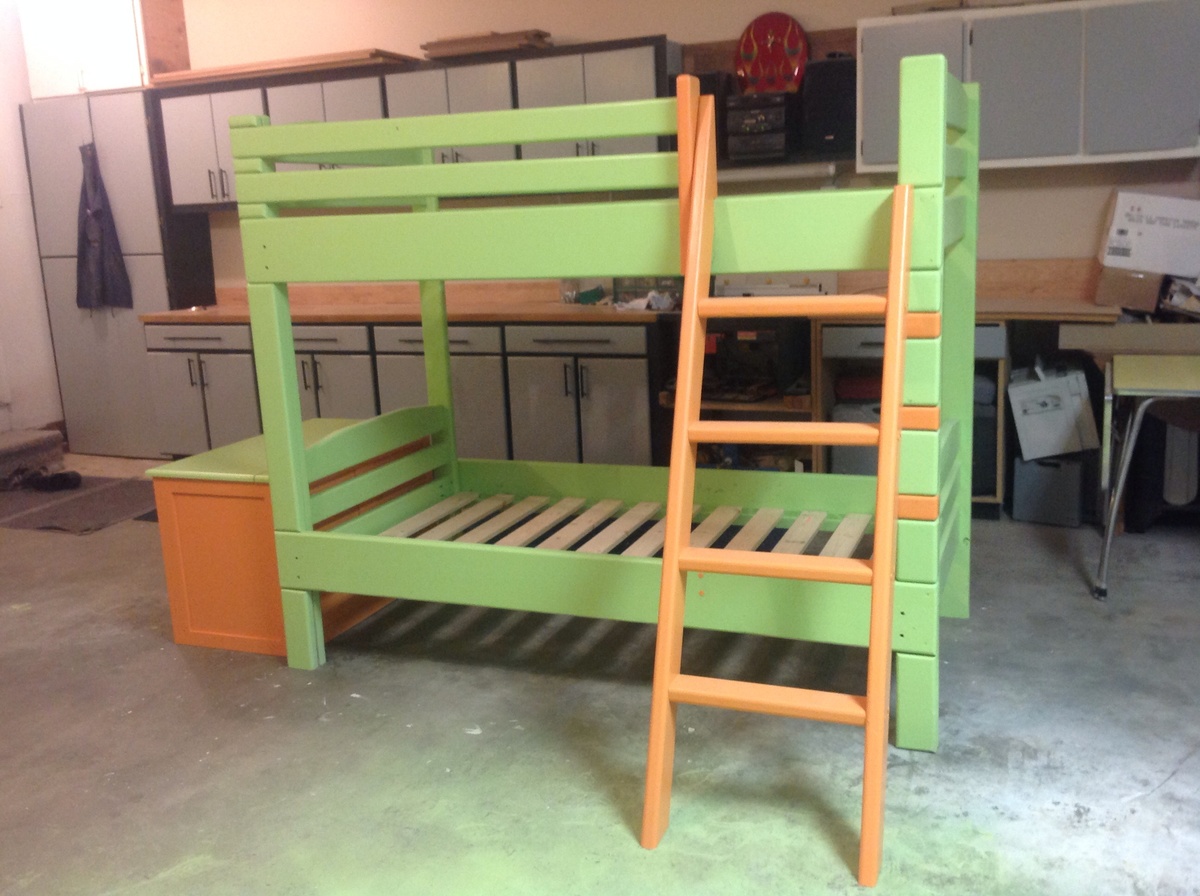
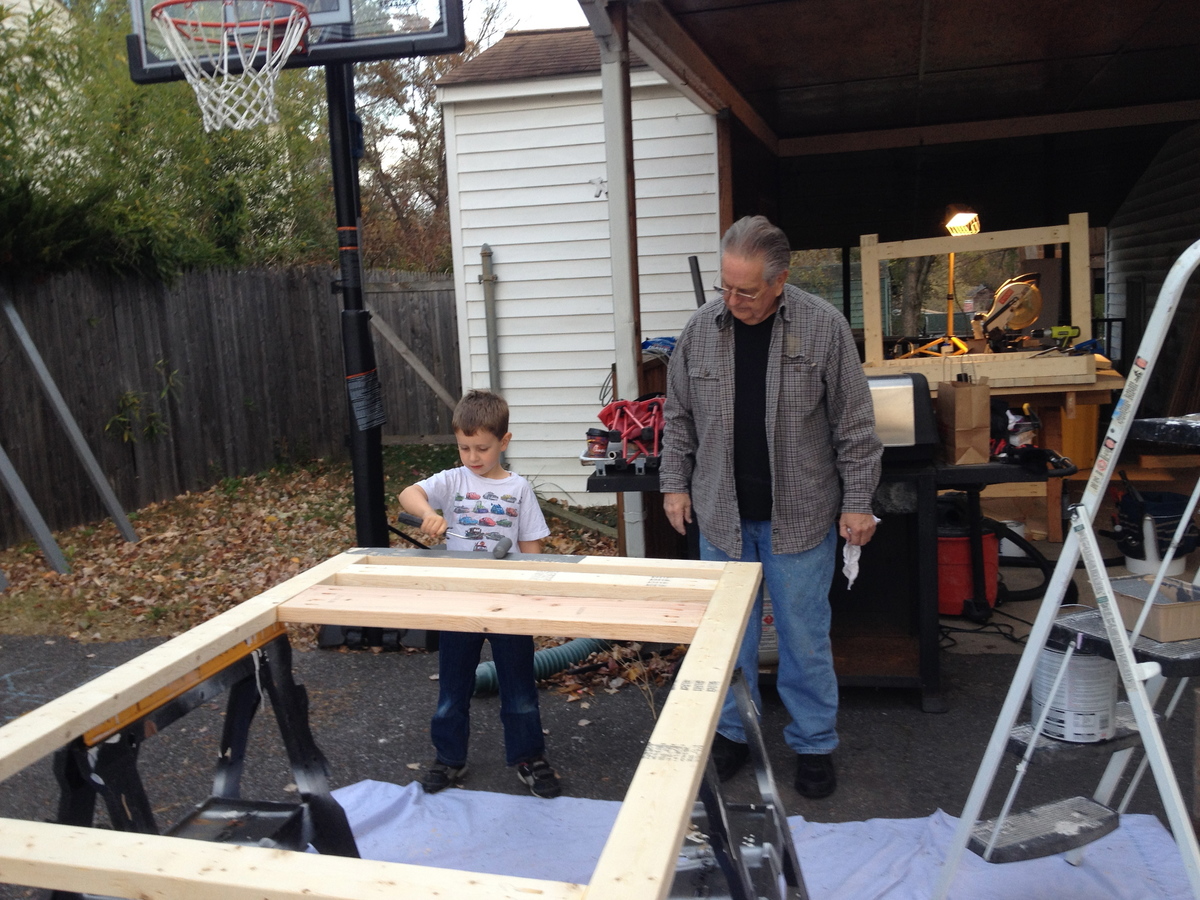
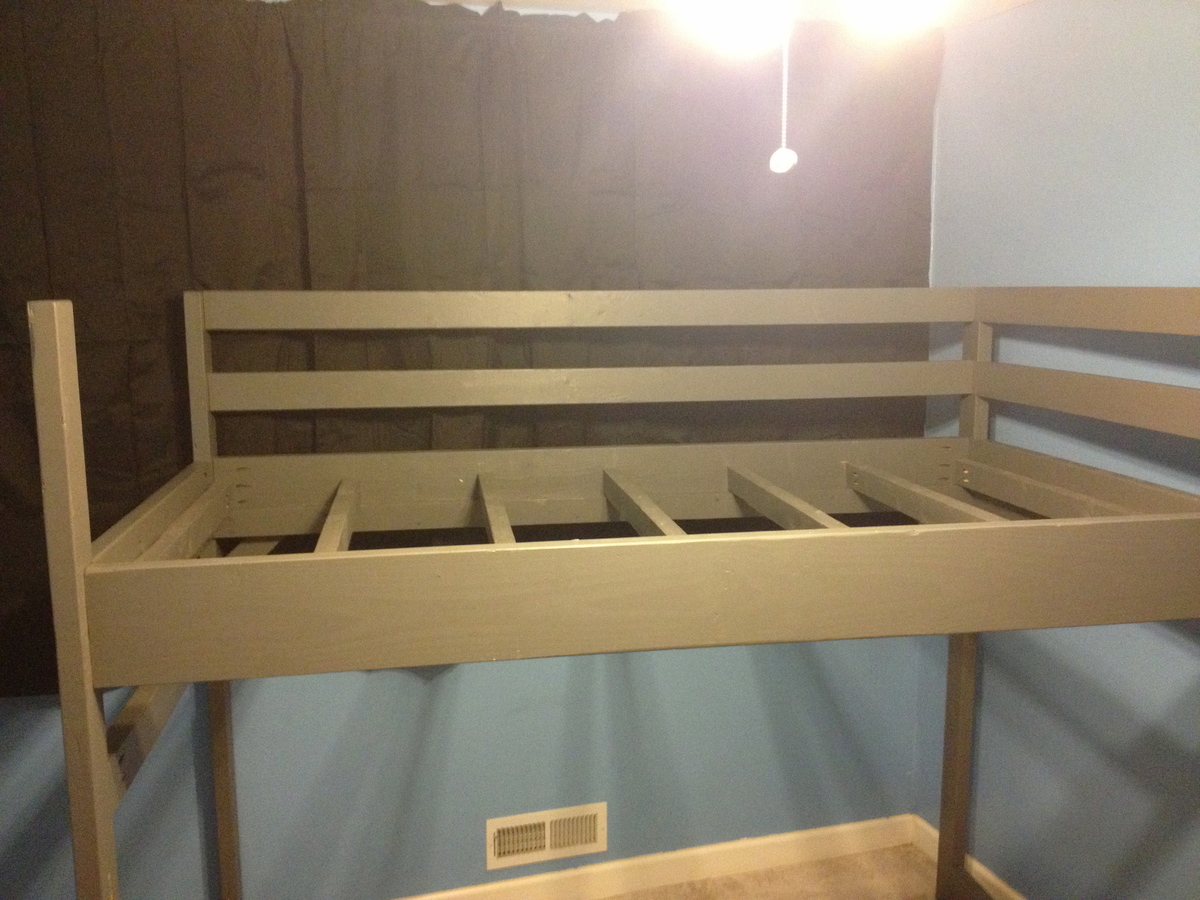
This was my first Ana White project and we had a blast putting it together. The plans were clearly explained and the end result is a sturdy loft bed for my son.
There were only a few modifications to this build from the suggested plans. First, I traded out the 2X6's for the bed supports and replaced them with 2X8's. I also replaced the cleats with 2X3's and used the same for the bed slats. Between the slats and the mattress is 1/2" OSB. We also did not use the steps as it took too much floor space for our needs. We added some 2X4's for a ladder step up to the landing.
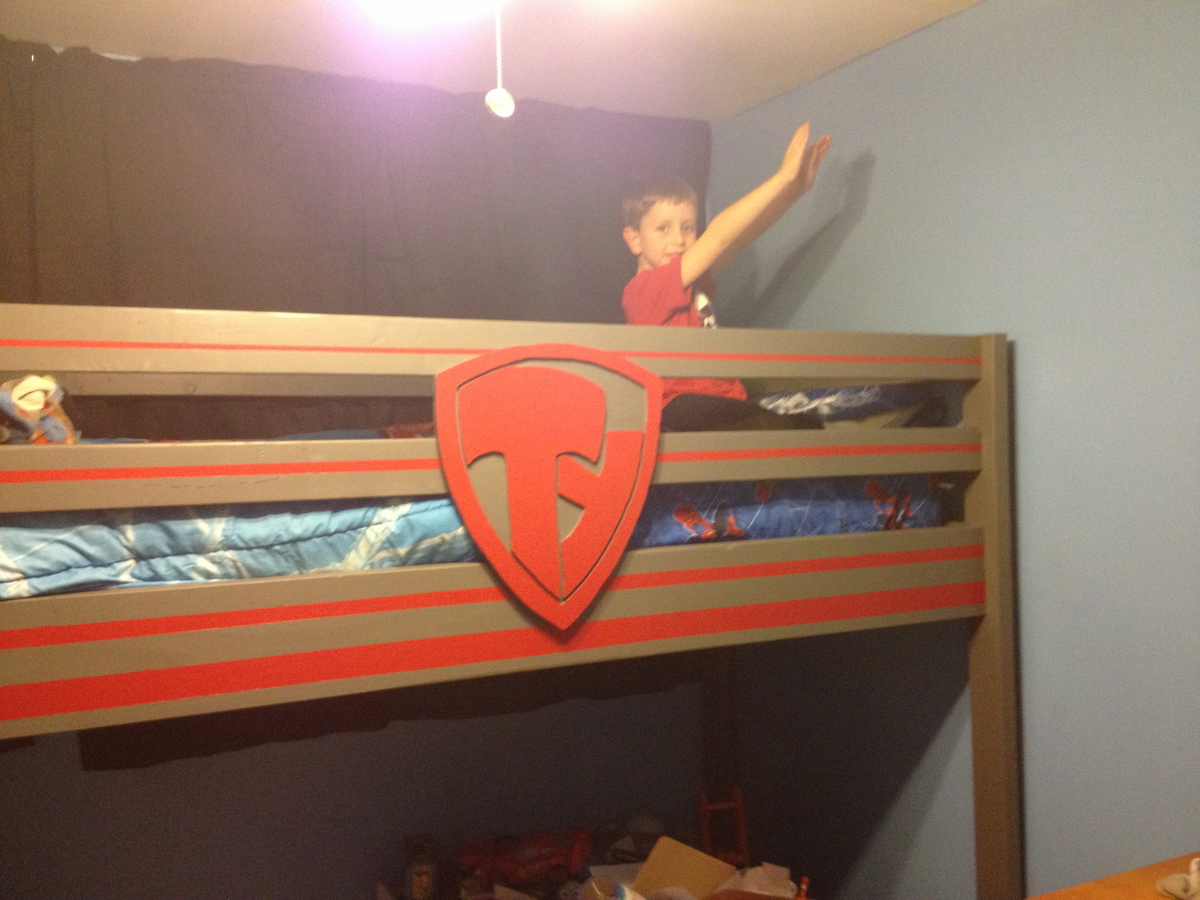
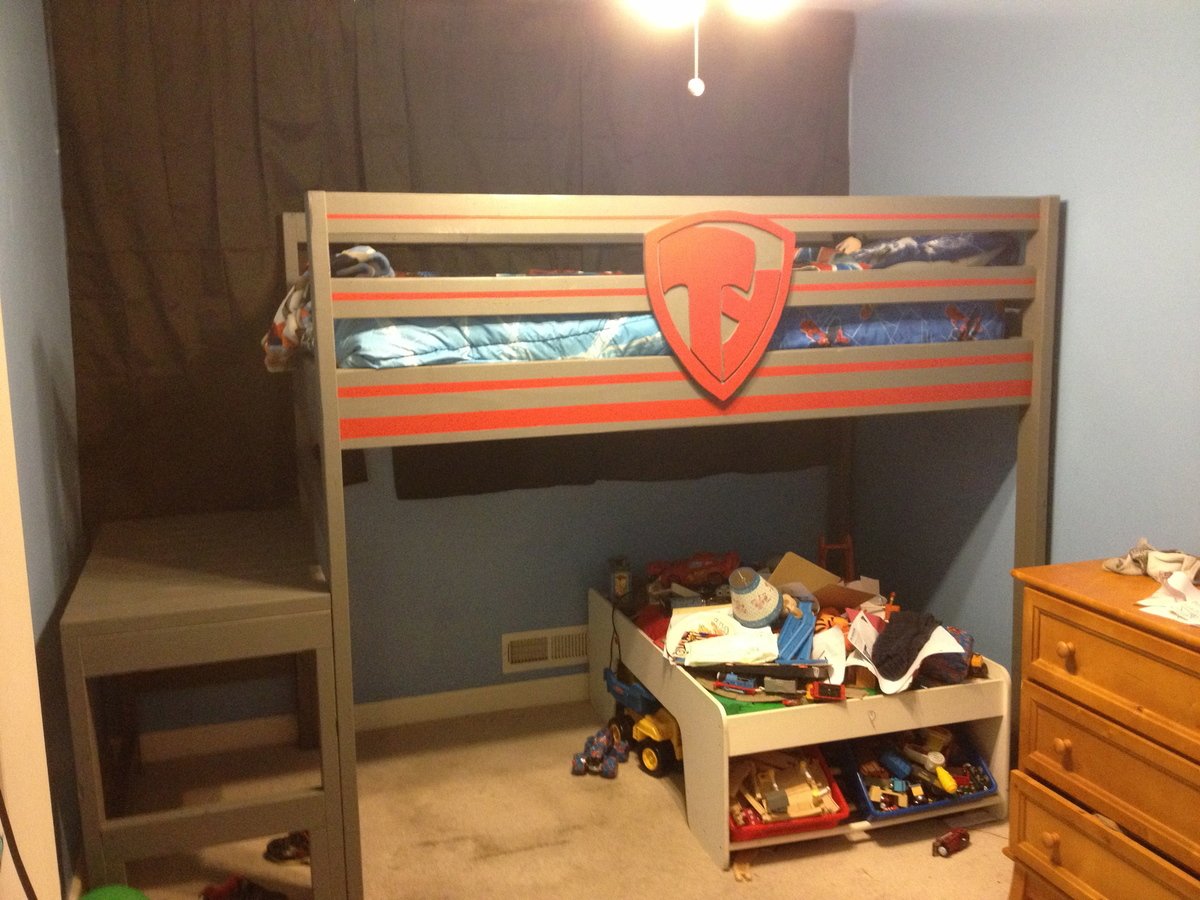
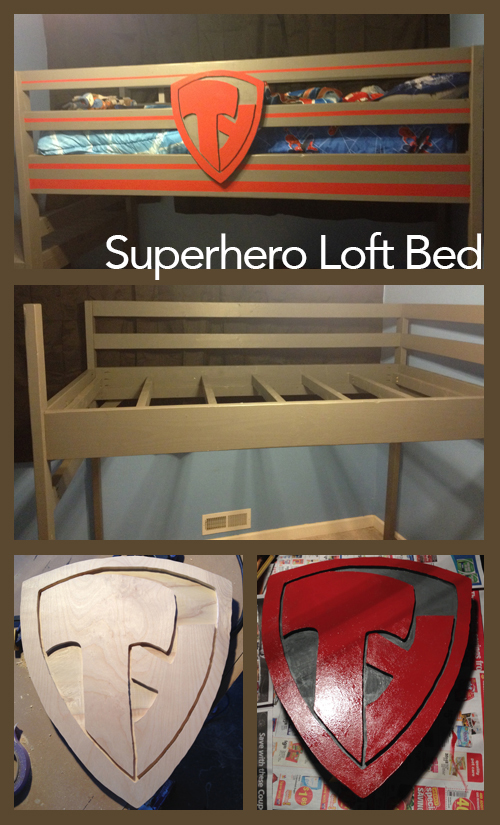
The theme is Superhero so I designed a custom hero logo in Adobe Illustrator, printed it out and carved it into 3/4" birch plywood with a rotary tool and router.
We're pretty much done with the bed. We now just have to arrange the room and add some lights underneath and maybe some extra storage under the landing.
My boy loves his new bed and I loved building it with him and my dad. It was a blast and will be one of the most memorable weekends of our lives! There's nothing like building with family.
Just wanted to do something a little more original.

Sat, 12/10/2016 - 17:57
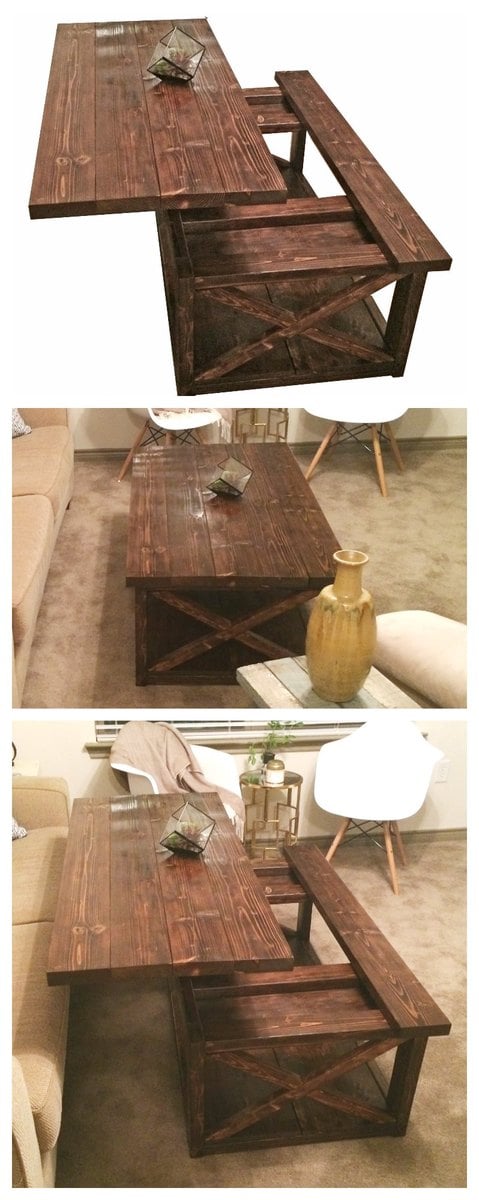
Hi. Are there any plans for this piece using the lift top hardware?
Wed, 12/21/2016 - 20:46
Just curious about the hardware and design if there are any actual plans for this coffee table
Wed, 04/08/2020 - 05:01
Where can plans for this lift top version be found?
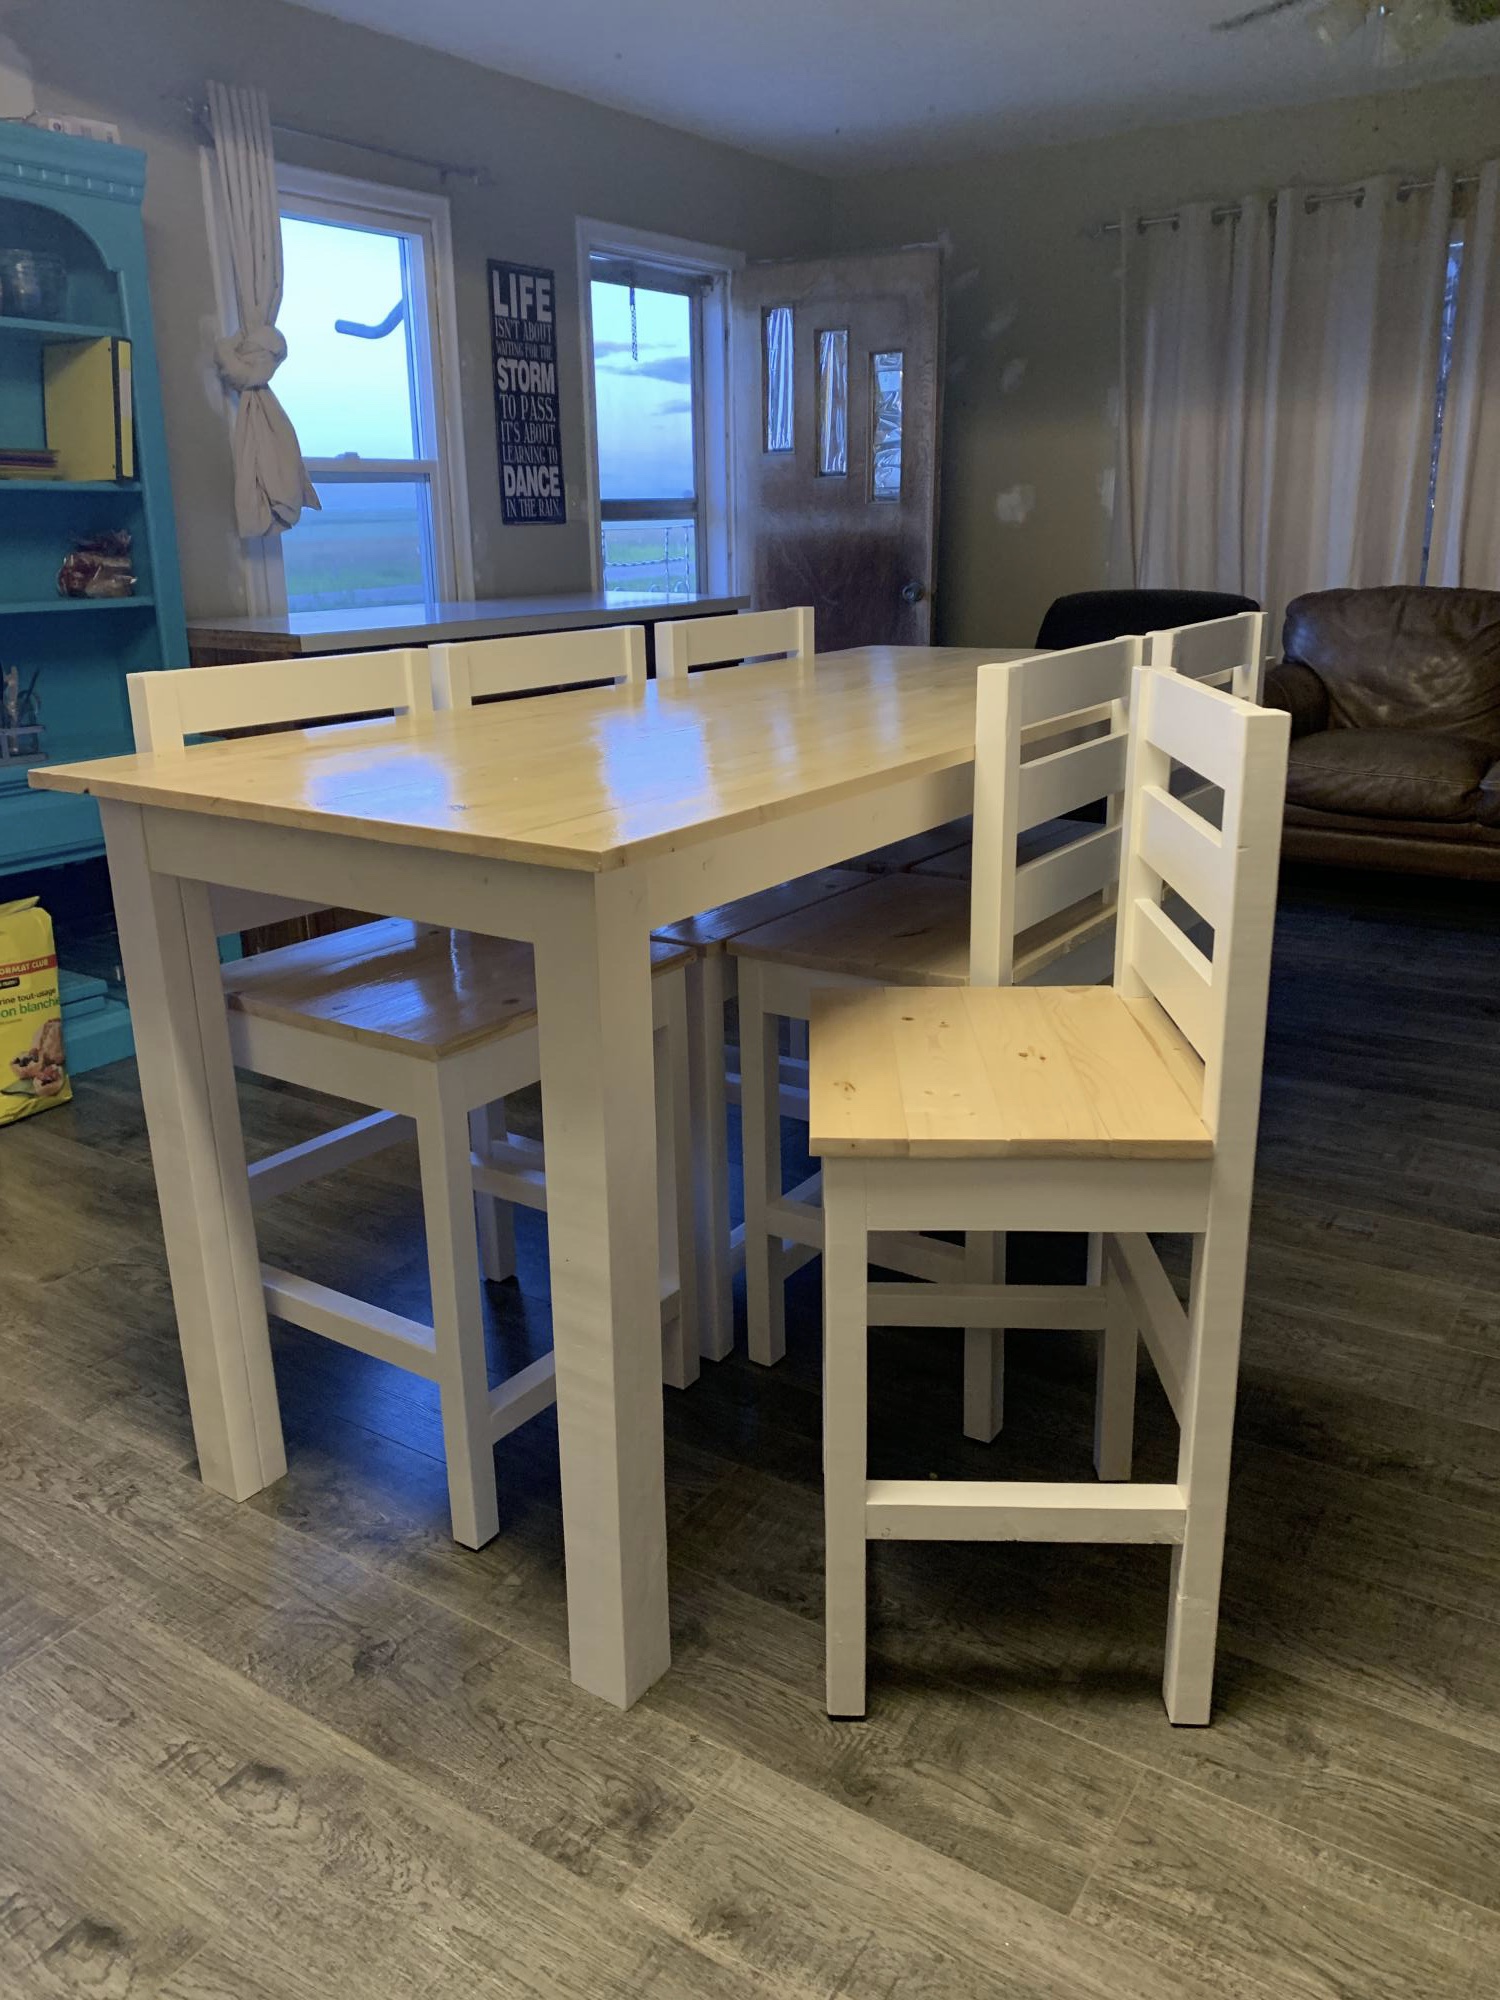
When we took the wall out from between the living room and kitchen in our small farmhouse, we found that our tiny table just didn’t work and we definitely needed more space at the table with the kids growing. So this is what I built. I wanted it counter height so I can have extra working space in the kitchen during canning and baking. I love how versatile it is in our space as well. We did cut down the backs of the chairs because it was too tall and overpowering in the small space. I also didn’t account for the seat length and wanted the whole chair to pushed up right to the table, so we adjusted the side measurements and made three of the chair seats one board smaller. They are perfect for the kids. Now on to the cabinets and painting the walls!
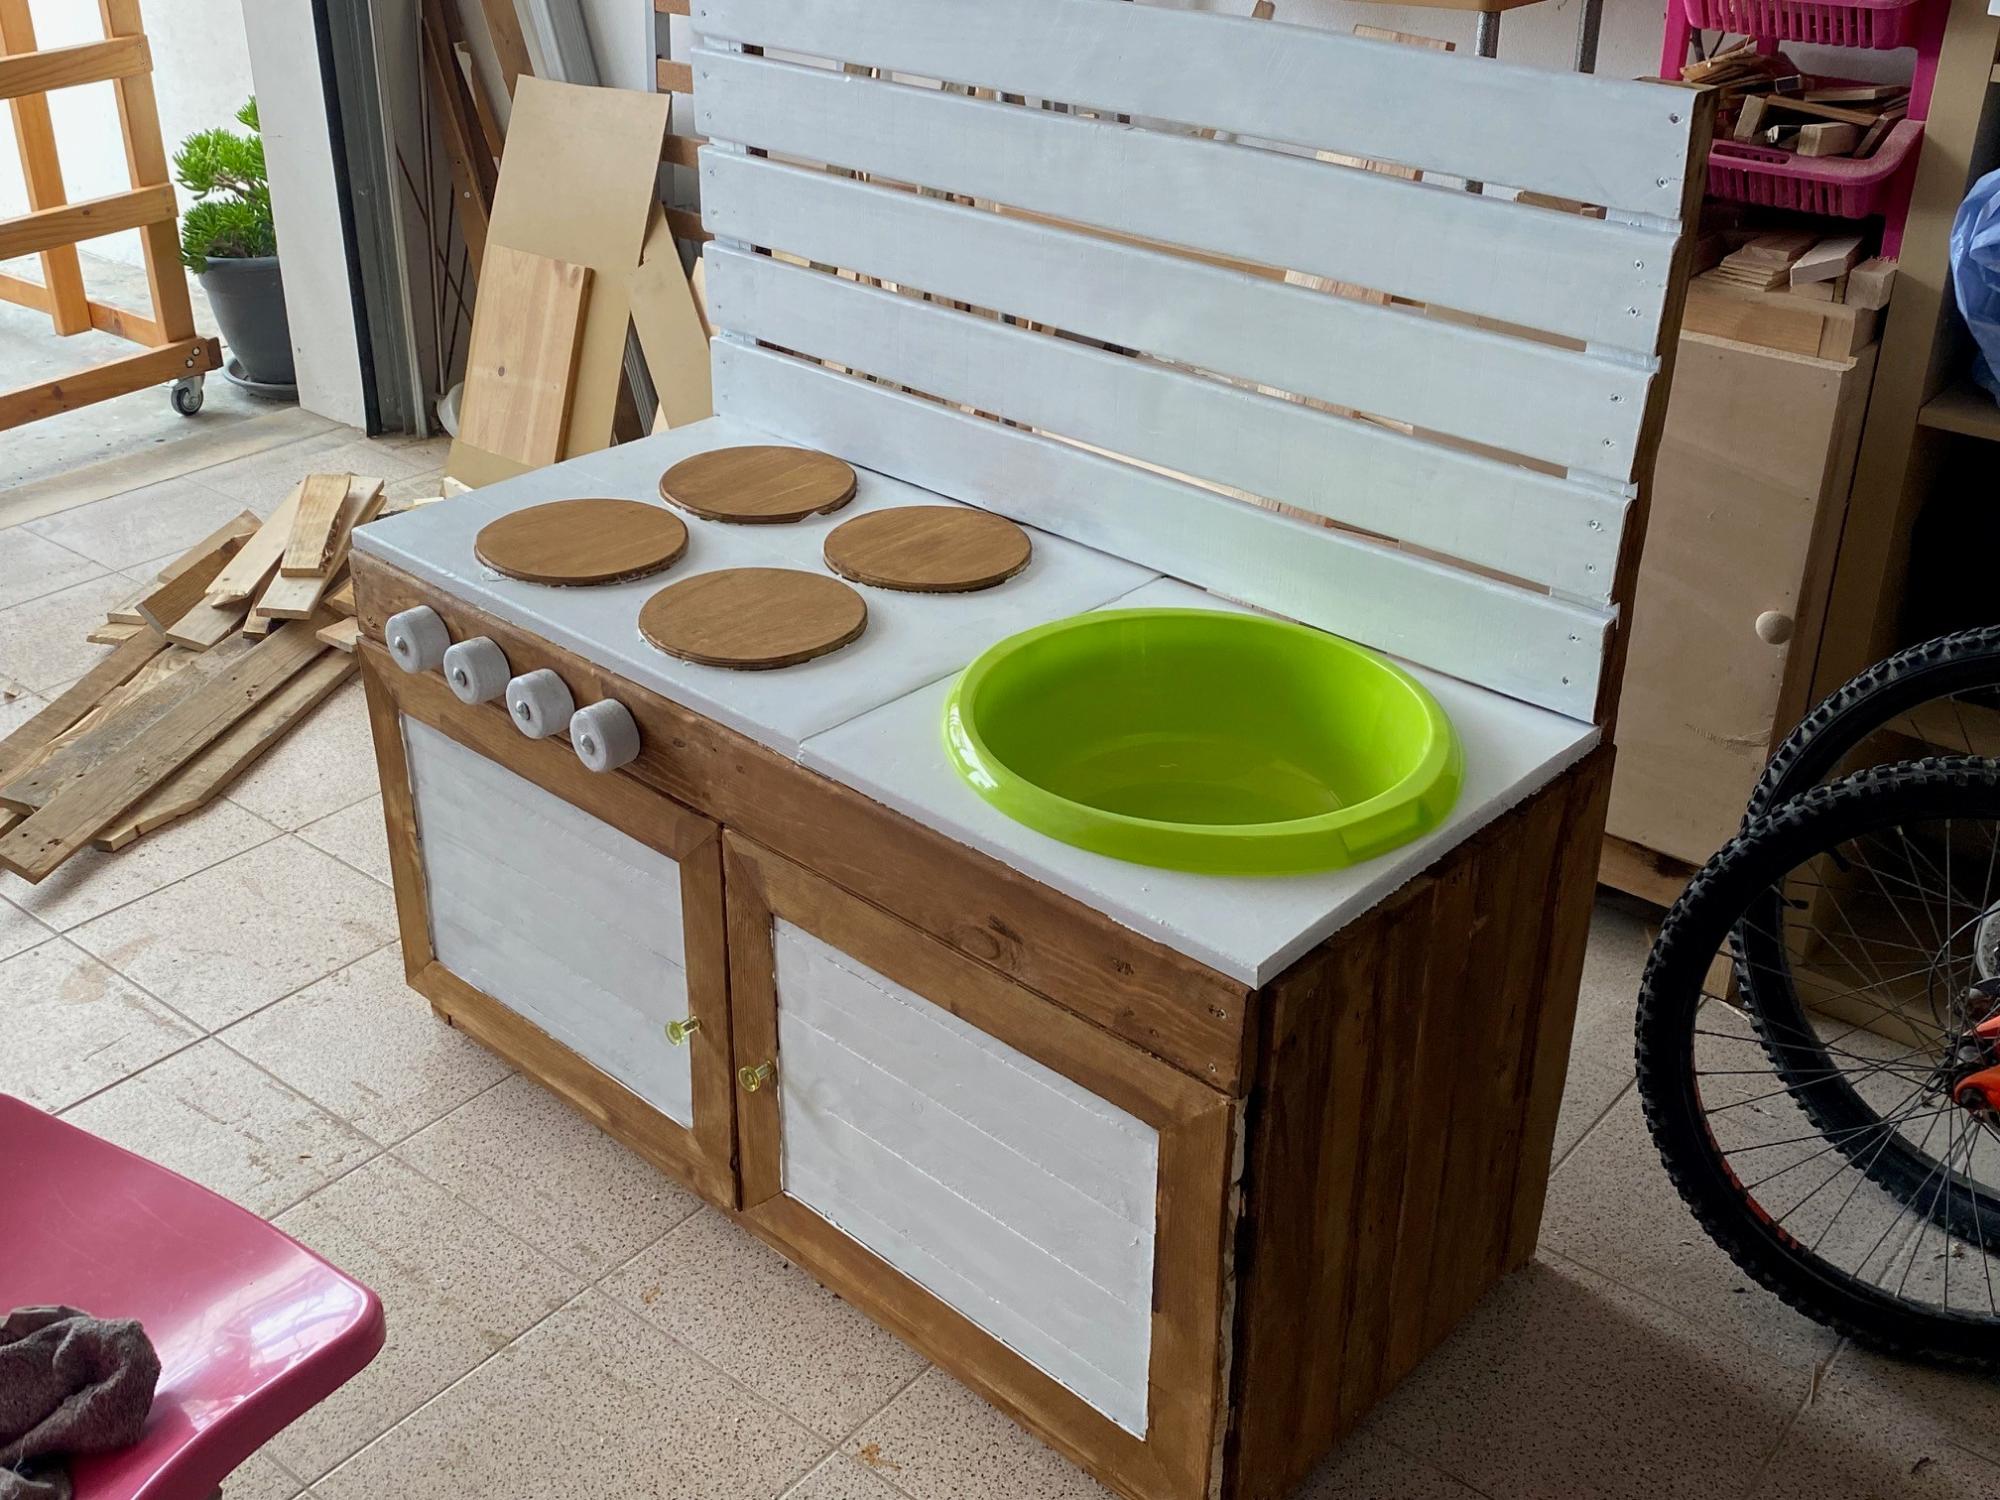
Here's the Mud Kitchen I made for my son's kindergarten. All made from palettes. Unfortunately your plans came out just too late
Fri, 05/05/2023 - 11:40
Thanks for sharing your version, it looks like a lot of fun!
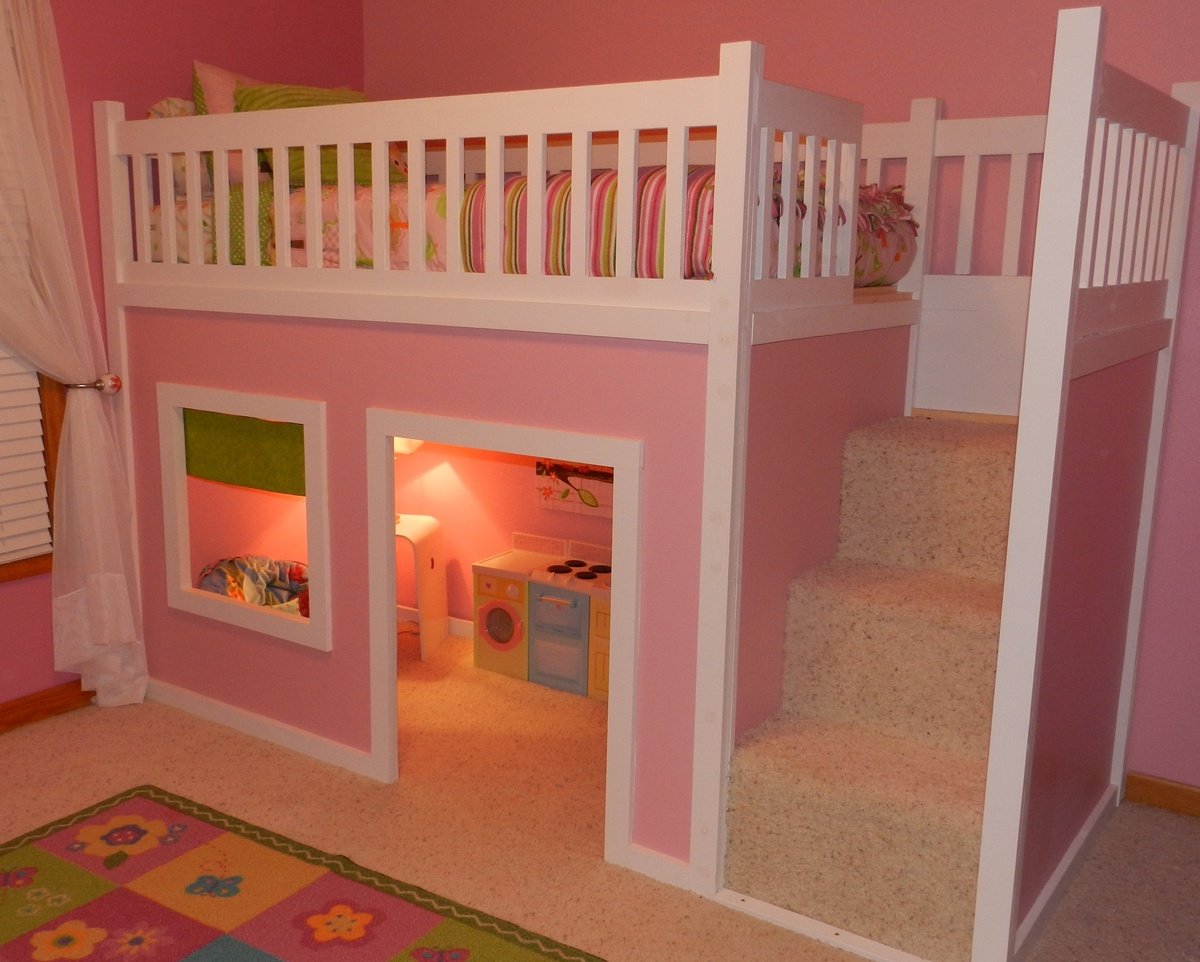
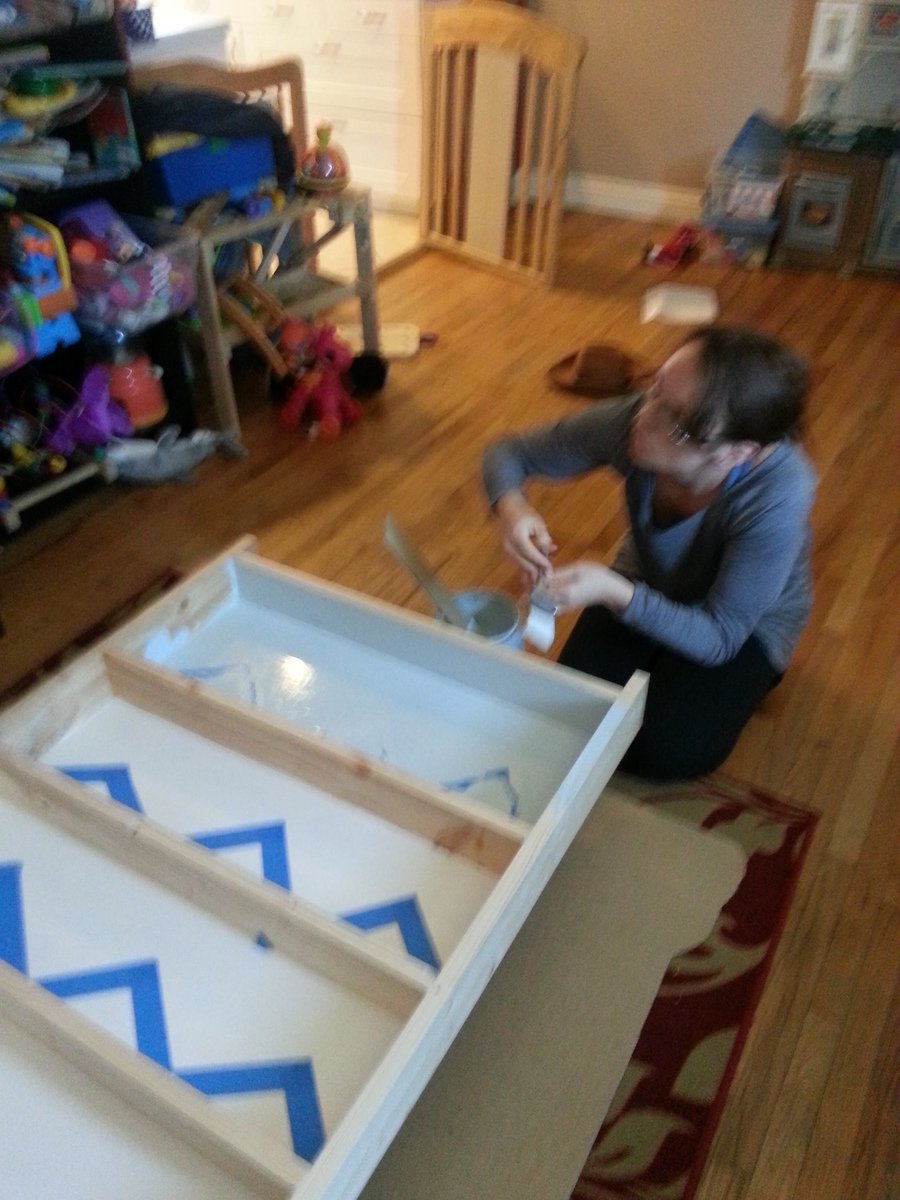
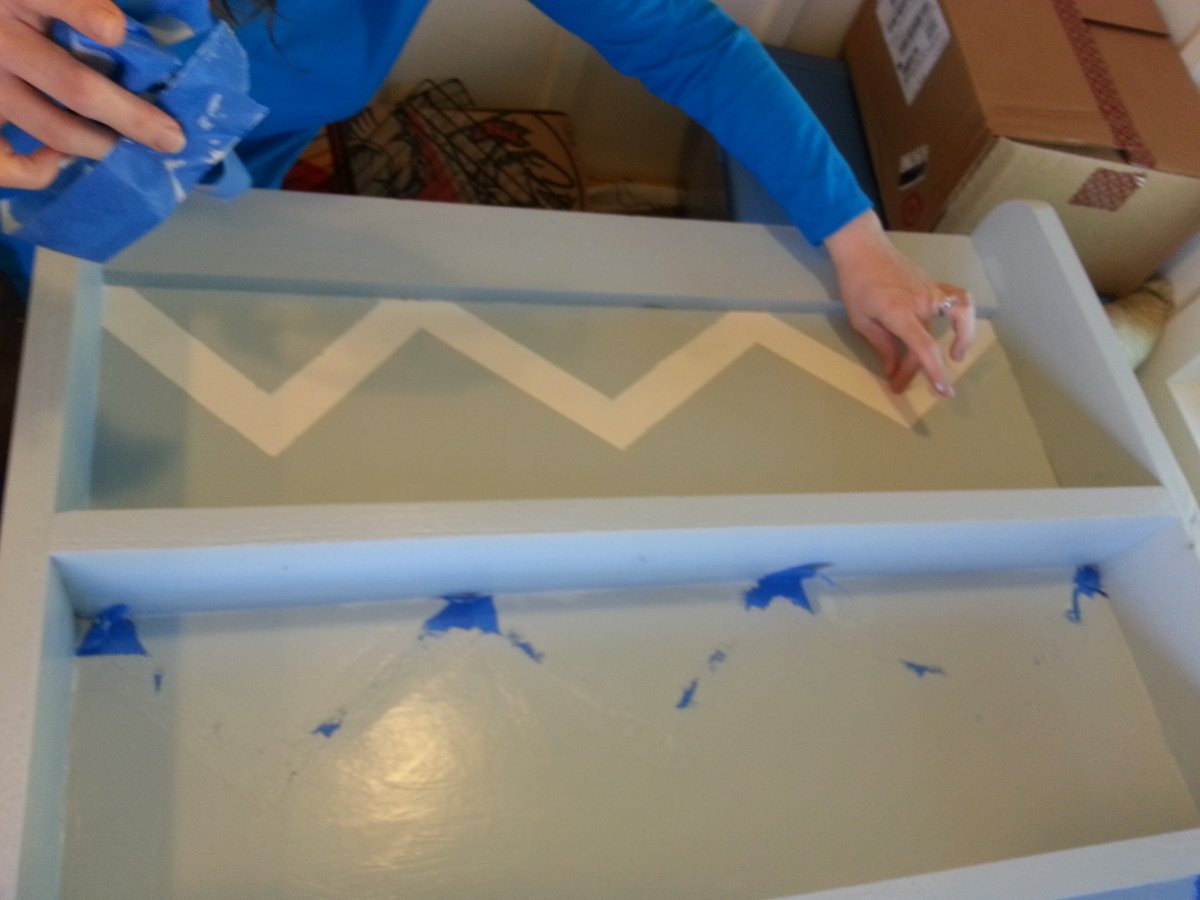
When I showed my husband the plans for this playhouse loft bed on Ana's site, he decided that we needed to build it for our daughter for Christmas. We combined the two plans for the Playhouse & the stairs and modified it slightly to fit our space. We had left-over carpet which we used on the stairs. She absolutely LOVES it!! And secretly, I think her 3 older brothers do, too. Thanks SO much, Ana!!
Sat, 01/12/2013 - 19:47
Omg....I love this I need to know how to do out....so I can make my husband build it..
Thu, 01/05/2012 - 06:34
are the plans free, and if so can I get a copy?
Thu, 01/05/2012 - 07:16
Philip and Guest -
The plans are free, and click on the links in the post
From Plan: (plans are linked here)
Sun, 01/15/2012 - 17:58
RE: http://ana-white.com/2012/01/playhouse-loft-bed-stairs
Would you please send me the plans for the Playhouse Loft Bed with Stairs?
Thank you.
Tue, 01/17/2012 - 09:20
I would like to know how to get a copy of the plans for this bed. This is exactly what I want to do in my little girls room but I have not beed able to find plans. Thanks!
In reply to Playhouse Loft Bed Plans by Guest (not verified)
Fri, 01/27/2012 - 21:44
If you look in the section above, you'll see "From Plan:" There are two links (they're black and don't look like links. You'll need to hover over them). One for the basic bed and one for the stairs.
Tue, 01/17/2012 - 18:38
I do not see the plans for the playhouse loft bed. Where is it located? Can you email it to me or post the link?
Thu, 01/19/2012 - 21:42
In reply to Age by Guest (not verified)
Fri, 01/27/2012 - 21:38
I would say your 2 year old daughter is a little young for a bed this high. I think general guidelines would suggest waiting until age 6 for lofted and bunked beds, but I think that's being very cautious. Our daughter is just about to turn 4 and she does fine in it.
Wed, 01/25/2012 - 11:29
You did a great job! That looks fantastic!
I'm going to be making this bed within the next month or two for my daughter. She's 4 (will be 5 in April). I know the overall design isn't *that* high off the floor, but my daugter has a tendency to roll out of bed...often. LOL
Do you find the guardrail/slats are high enough to prevent roll offs, or should I add some height to them when I build?
Yours turned out awesome! I can see why your daughter (and sons) love the bed!
Cindy
In reply to Looks fantastic! by Cindy from Indiana (not verified)
Fri, 01/27/2012 - 21:34
Hi Cindy.
Thanks for your kind words.
We had the same concerns about our daughter rolling or falling out. She is almost 4, but still had rails on her previous bed. We put the slats that the mattress sits on in the very lowest possible position and actually traded twin mattresses with her brother who had a thinner mattress. Her's had a pillow-top and even the extra 2 inches made quite a difference.
There are nearly 9 inches between the top of her mattress and the top of the rails which is plenty to prevent accidental roll-outs, but it certainly wouldn't hurt to add extra if it would make you more comfortable.
Now if we could just keep her from standing up there, I'd feel a whole lot better. lol
Good luck with yours.
Kara
Sat, 01/28/2012 - 07:27
Hey Kara,
Thank you so much for replying! That does make me feel more comfortable that there will be around 9" between the mattress top and the rail top. Not sure yet if I'll add a bit more or not, but it's good to hear how it worked out for you guys. Now I'll be hoping to keep my little dare devil from trying to 'fly' off the top of it and we'll be good to go. LOL
Thanks, again! That was really helpful.
Cindy
Thu, 01/26/2012 - 12:59
Hi! LOVE THIS!!! Am planing on making for my daughter. Any chance there are plans for this in a Full Size bed?
In reply to Hi! LOVE THIS!!! Am planing by Guest (not verified)
Fri, 01/27/2012 - 21:48
I've seen some posts on Ana's Brag Boards of these lofts with full sized mattresses on top. Ana's original plan is a twin bed, but others have modified it to suit their needs. You may just want to search and see if anyone has included their plans for a full. Sorry I can't be more help. Good luck!
Tue, 01/31/2012 - 18:32
That is very nice if you dont mind me asking how long did you make that one... I am wanting to make one for my daughter but I dont have 103 inches that called for in the one plan...
In reply to Very Nice... by JessiW (not verified)
Sat, 02/04/2012 - 16:10
We made our bed to the exact specifications that Ana gave (103"), however, if you need to save space, you could leave the stairs off and opt for the ladder.
In reply to Bed Plans by Kelly Kelley (not verified)
Wed, 02/15/2012 - 18:34
Hi Kelly,
There are links to the 2 plans in the "ABOUT THIS PROJECT" section above. Just hover your cursor over the "From Plans:" and the links will change color. They appear black and therefore, don't look like they're linked to anything. They're both there. Good luck!!
Sat, 02/11/2012 - 09:30
I need the plans for this can someone please send me them :) [email protected]
Wed, 02/15/2012 - 18:40
There are links to the 2 plans in the "ABOUT THIS PROJECT" section above. Just hover your cursor over the "From Plans:" and the links will change color. They appear black and therefore, don't look like they're linked to anything.
Or...I've added them here.
http://ana-white.com/2010/09/playhouse-loft-bed
http://ana-white.com/2010/09/easy-playhouse-loft-bed-with-storage-stairs
Mon, 03/05/2012 - 20:01
Hi there, I was wondering if you could tell me where you got the fabulous little washer and dryer combo that I see in the photo. I know the sweet owl painting is from target, but I love the little play space you seem to have created! :)
Sat, 03/17/2012 - 22:52
I LOVE this so much! I love the color scheme as well, we decided to copy the scheme in my daughter's room. I was wondering where you got the curtain from? Did you buy it or make it yourself? It's almost exactly the color of the green paint we bought so I would love to know. Also, I love the washer and dryer too, also curious about that. Thanks!
In reply to Cute Decorations! by Kirstie (not verified)
Mon, 03/19/2012 - 19:40
Hi Kristie.
I made the little curtain and the little washer/stove/sink set are from the Playskool Rose Petal Cottage collection. Good luck building your playhouse. It's a little girl's dream!!
Wed, 03/21/2012 - 20:27
Hi Kara,
I'm really interested in building two of these for my girls... they caught my attention because they've been asking for a bunk bed and I don't want to do a bunk bed because I hate the idea of struggling to change the bedsheets. Just wondering if it's a hassle with a bed this height.
Yours looks amazing, btw!
Thanks,
Sarah
Tue, 04/10/2012 - 11:18
oh my god i love this it would be awesome for my daughter also. were you able to stay in your budget???? do you think is a safe style for a 3 year old? she would go absolutely nuts!
Fri, 04/13/2012 - 20:17
so beautiful! if i wanted to do this with a full mattress how would i tweak the measurements? i want to do this with a full with the stairs... just so she can be in the bed for a longer period and also the space underneath to be a bit bigger... also if i wanted to make the stairs have a drawer? i really would appreciate alll the feedback if possible because im so far from handy... :-/ and 1 more thing how did u get a light down there?
Fri, 05/11/2012 - 18:27
I was wondering if once put together is it easy to take apart? My dad builds houses for a living and was going to make it for my daughter at his house then bring it to mine to set it up
Sun, 06/10/2012 - 14:40
My husband and I just finished making this bed with stairs for our 3 year old and he loves it.
Tue, 06/12/2012 - 06:41
what age would you reccommend this for?? my son is 3 n a half and i woant to attempt to make this bed, but dont want to spend time and money if i will have to buy him a new bed in a couple of years. i would like it to last a good while. also, like veahava, i was wondering if this was easy to dismantle once put together as i am planning a move in the future, thankyou
Tue, 10/02/2012 - 02:14
This is absolutely divine - you are so talented! I have just found this website and can't imagine I'd ever be able to make something so beautiful. Putting up a shelf is beyond me. Your daughter must be so proud of her little nighttime palace!
Sun, 10/21/2012 - 20:01
I am trying to get the plans for this bed with the stairs but when I click on the link it doesn't give me the plans. Help, my granddaughter would love love love this. Thank you so much.
Wed, 01/16/2013 - 06:05
hi!
Someoneo to tell me how many hours spent on it?
Mon, 02/04/2013 - 20:53
PLEASE, PLEASE, PLEASE, SOMEONE TELL ME HOW TO GET THE PLANS, I REALLY WANT THIS BED FOR MY LITTLE GIRL!!!!

In reply to PLEASE, PLEASE, PLEASE, by ochoa
Mon, 05/25/2015 - 22:12
You can download more plans from these resources:
Thu, 02/14/2013 - 12:36
This is awesome, how do I get a copy of the plans for this bed? I would love to do this for my grand daughter as a birthday gift
Thu, 02/14/2013 - 12:48
found the link, here is it for those wo are also looking I can't wait to start this project THANKS
http://ana-white.com/2010/09/easy-playhouse-loft-bed-with-storage-stairs
Wed, 09/11/2013 - 05:11
We made this bed for our daughter and now my son and daughter play with her kitchen and table underneath in the playhouse. Your instructions were so easy to follow and everything matched up perfectly. We did do the ladder due to space but the bed is beautiful. We get so may compliments when people come over and I always tell them about your website. You truly have awesome ideas! I can not wait for the next project and I am sure it will be off your site :-)
Mon, 10/07/2013 - 17:26
I love your playhouse with loft bed! How tall is the underneath part? Would you be able to fit a desk underneath? Also, could the plans be adjusted to accommodate a double bed?
THANK YOU!!
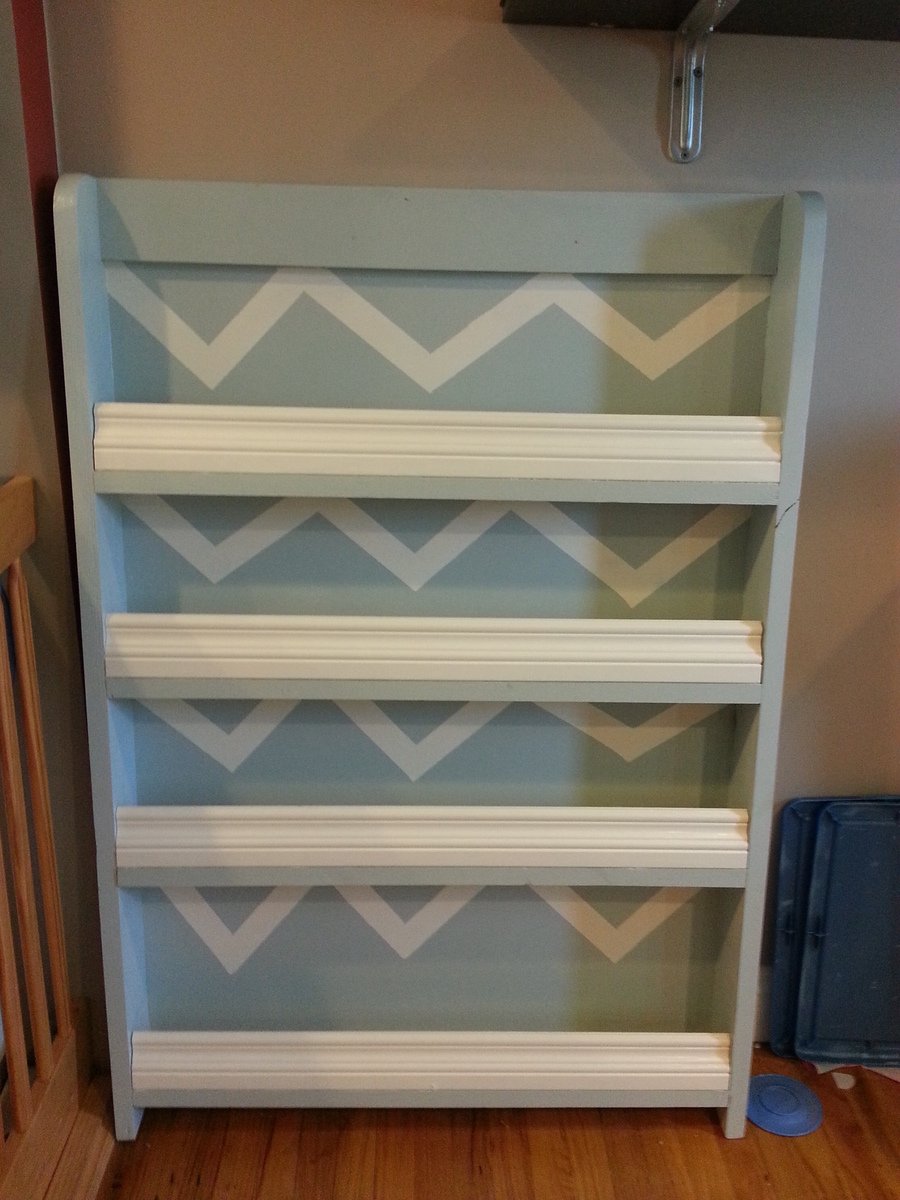
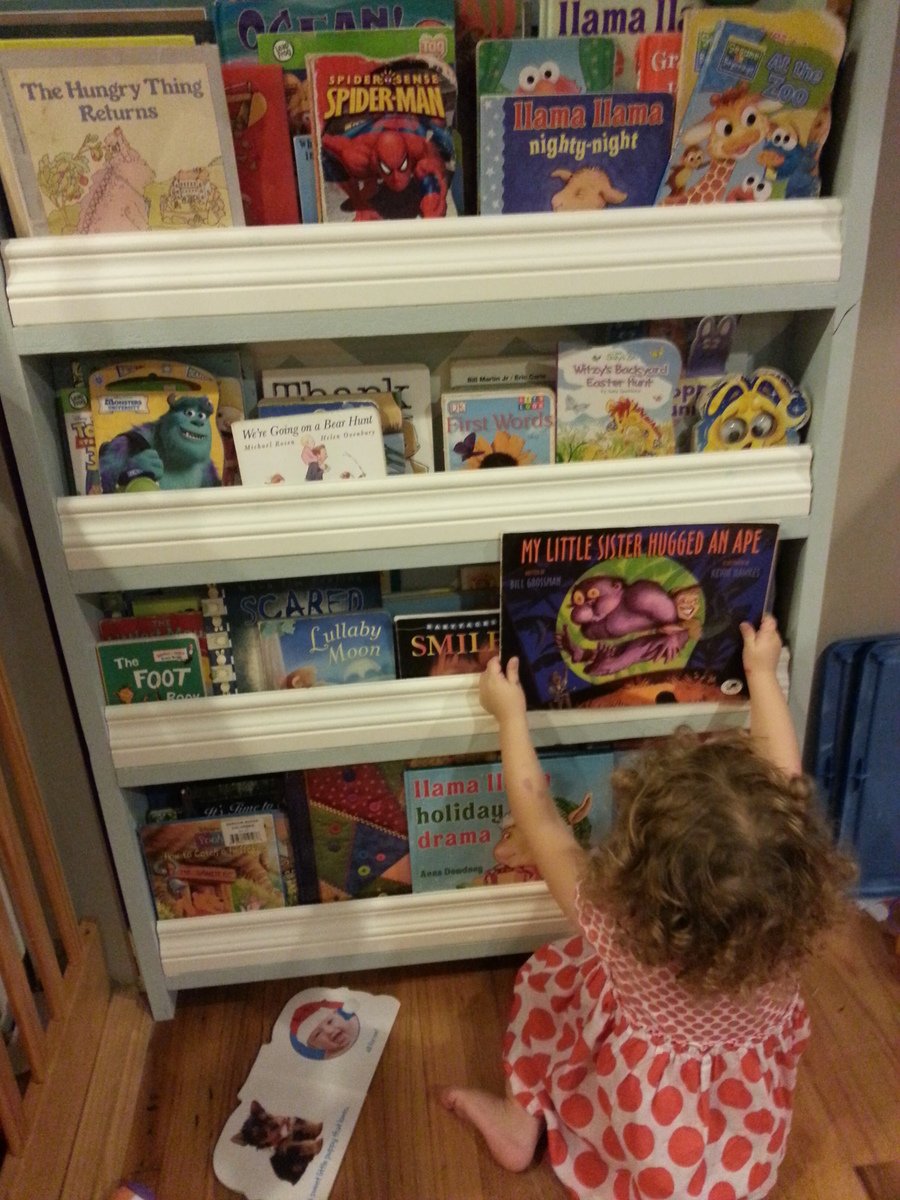
Loved doing this project! We had been have a book-tastrophy for over a year. Too many books and not enough shelf space, and the shelf space we had wasn't being used efficiently. I love the different sizes for different books. We made some adjustments to the plans including using baseboard and wider shelves.
We did a blog post going into more detail here:
http://thisinsanehouse.blogspot.com/2013/11/brag-post-diy-small-footpri…
Thanks for viewing!
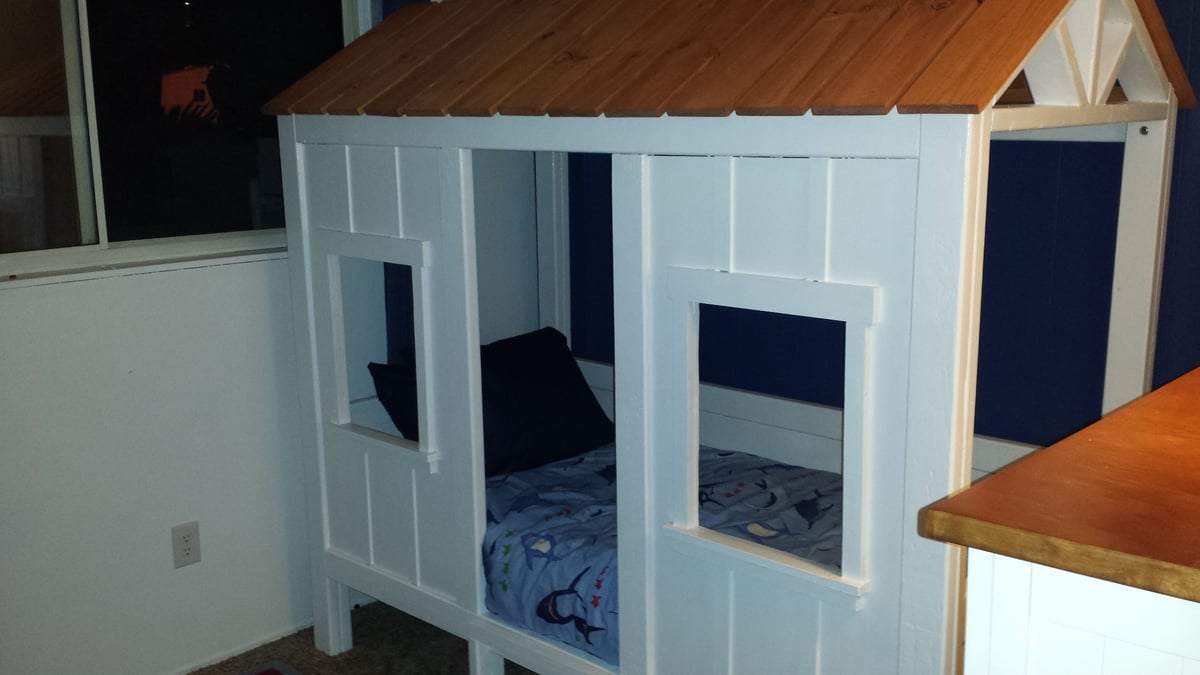
I built this for my son's beach room. We stained the roof to match his dresser and built him a ladder as well.

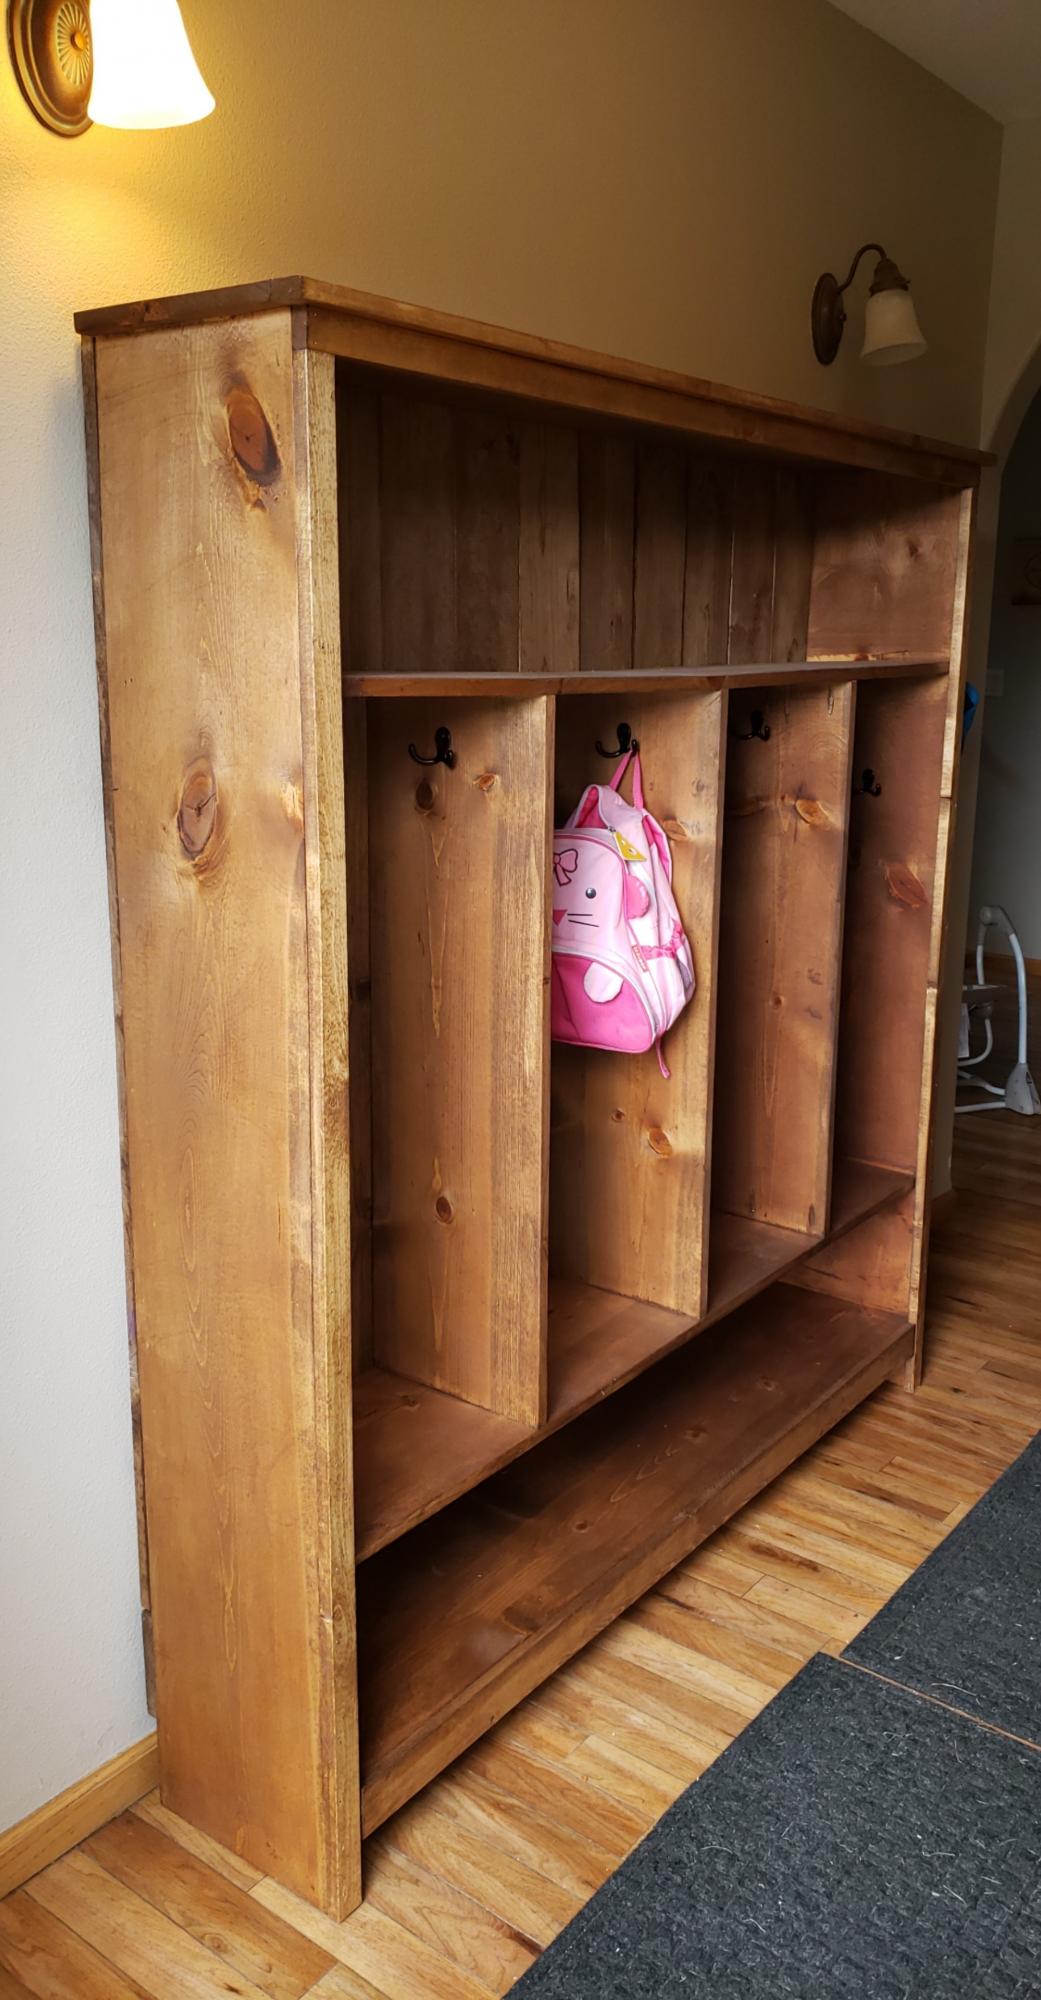
Modified the plans to make a fourth cubby, they turned out great!
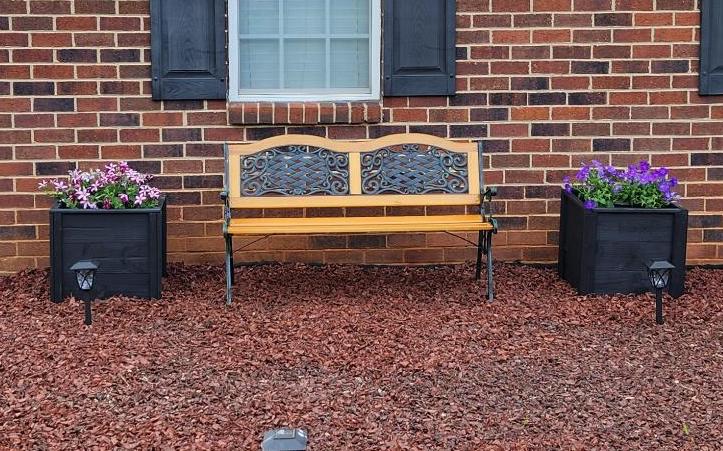
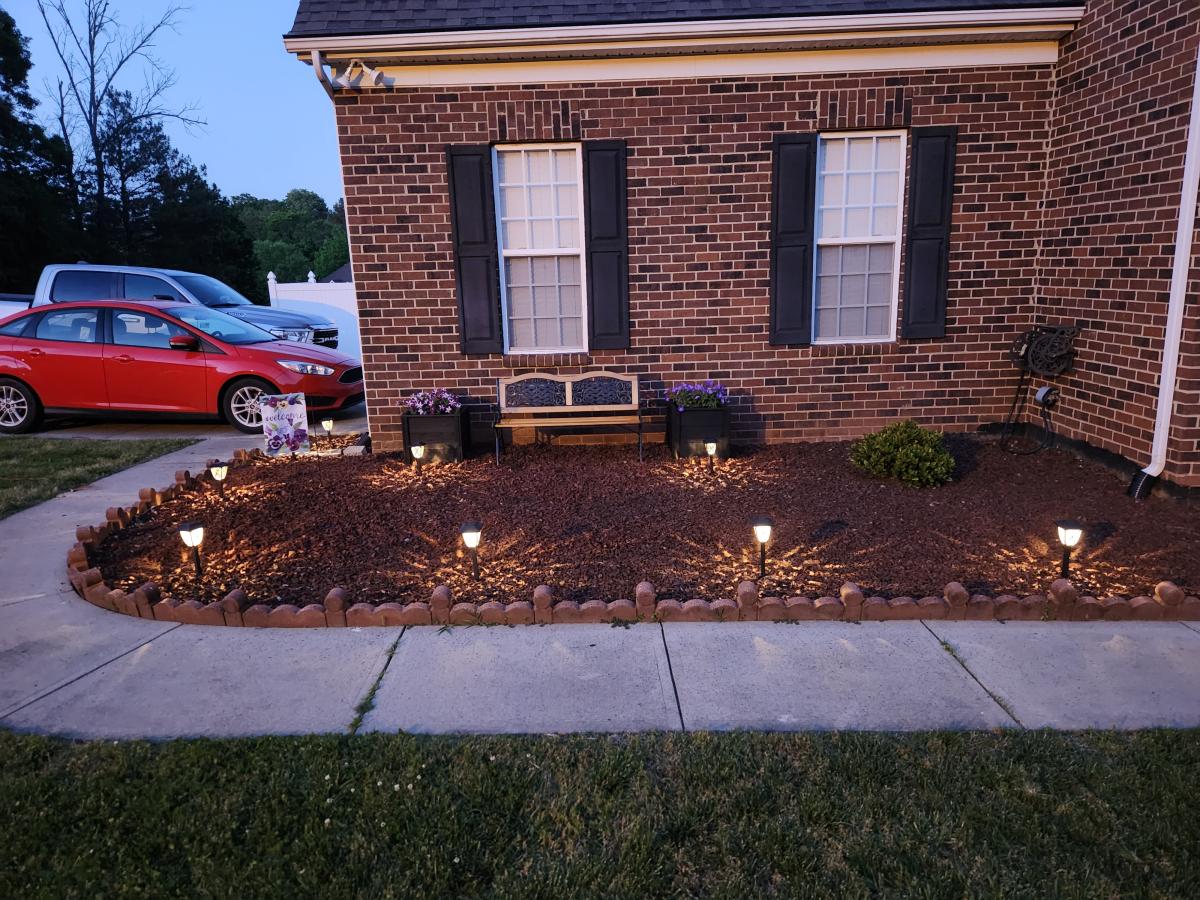
I made these for my Aunt. She loved them. Can't wait to do another Ana project!!
Mon, 05/08/2023 - 20:07
Very nice, I'm sure your aunt loves them! Thanks for sharing.

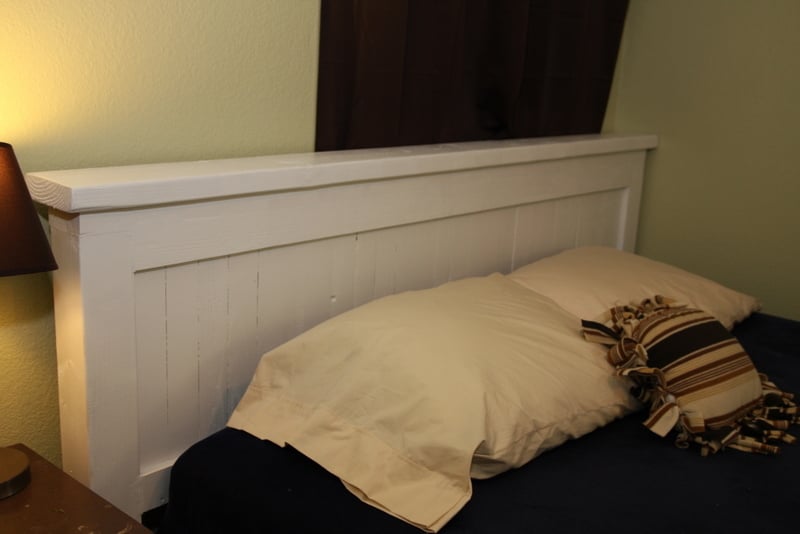
My little two year old is sleeping on this right now, hehe, which is so funny to see his little body take up only 1 square foot of it.
We got a queen mattress from a family member and I had been wanting to build this bed for a while so what better excuse. I had a TON of 1x3's from other projects so used those as slats instead of 1x6's as in the plan. I also used some other scraps up so my headboard part is shorter than in the plan which I also was fine with. It barely fits in his little 10 x 10 starter home room, but I am still pretty proud of it.
Sun, 01/07/2018 - 11:13
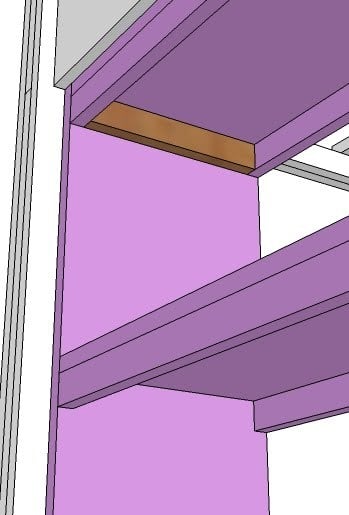
I am a beginner and I understand what to do until this point. I am confused by this. Can it be explained in another way: Thanks.
Construct the frame as shown, leaving a 3 1/2' overhand on the headboard end to secure the frame to the headboard. Predrill to at least 4 holes to in this overhang to ease attatching to the headboard.
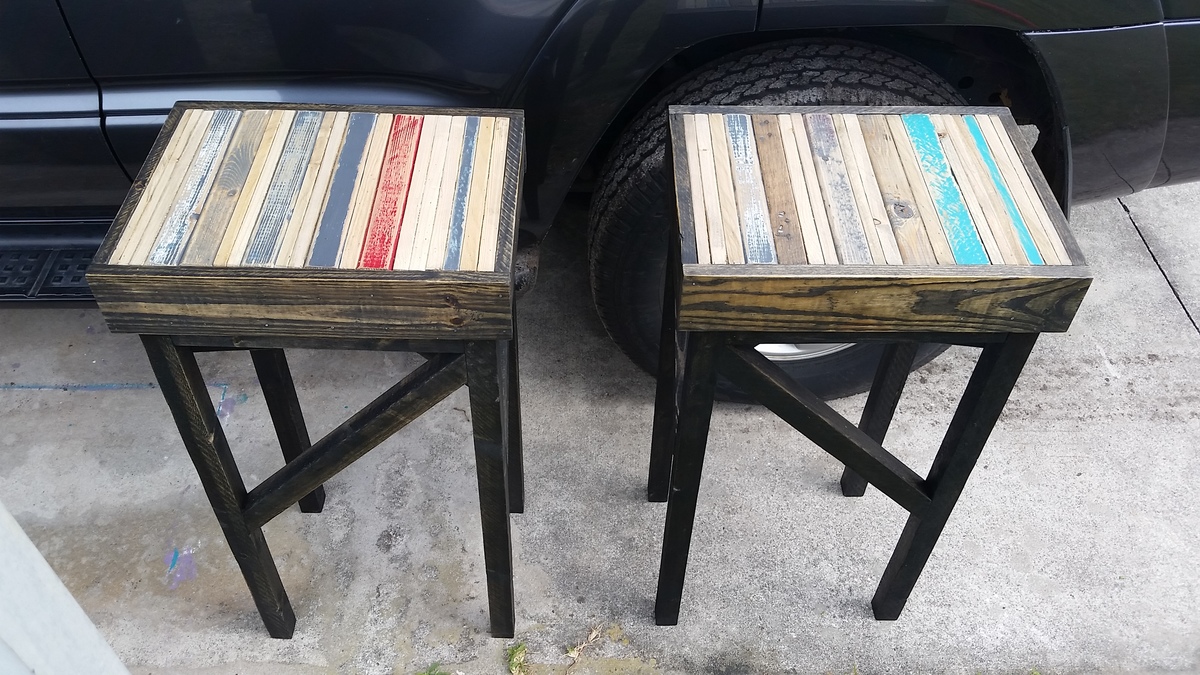
Wife wanted me to throw out all the scrap wood I had lying around. Instead I made some killer barstools. Fun look.
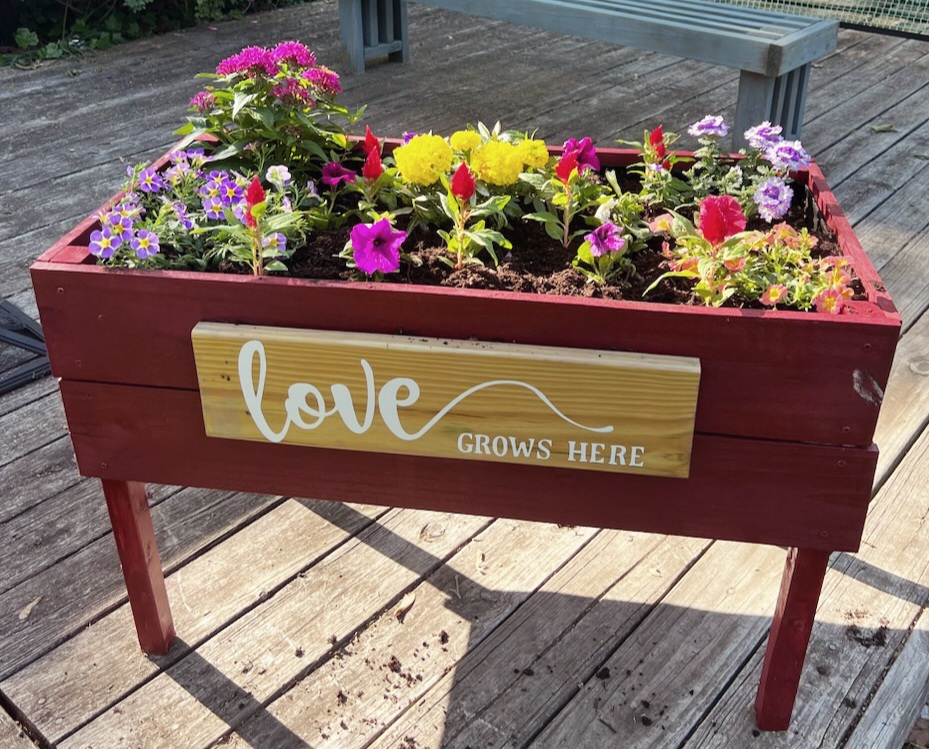
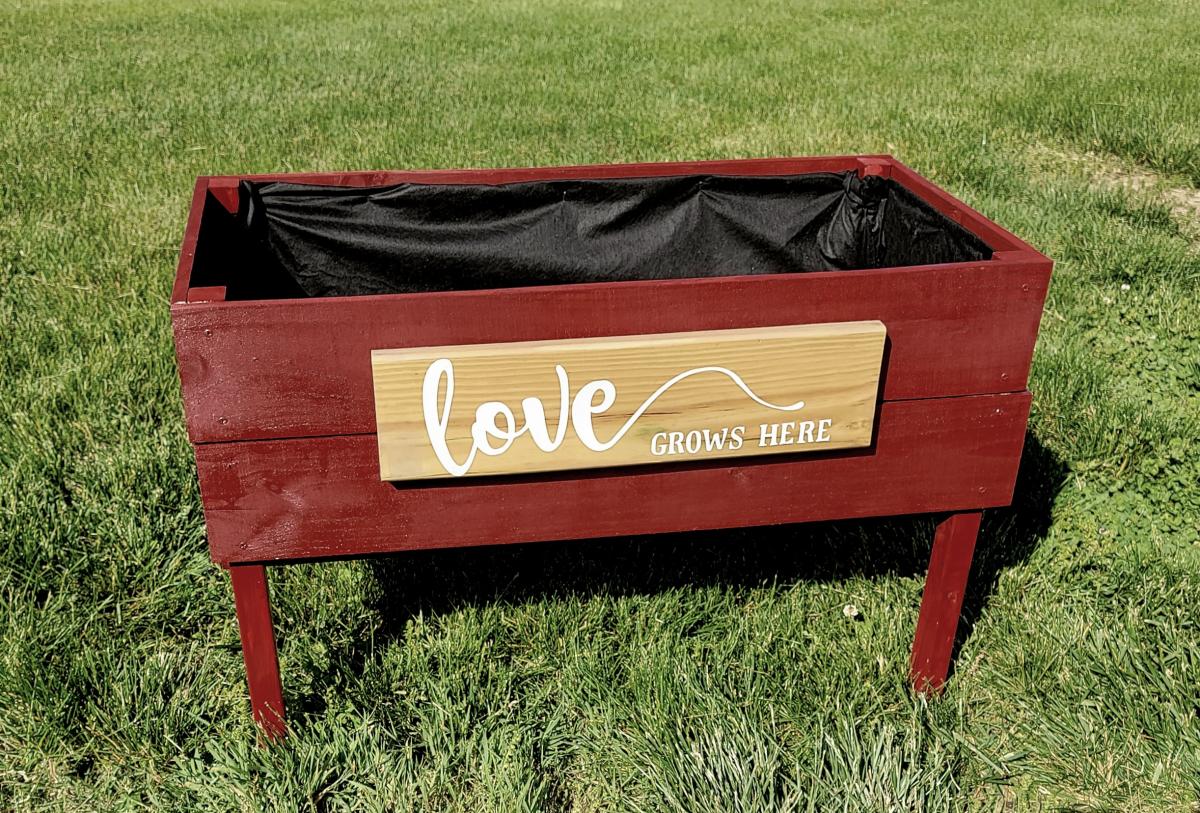
I helped my 3 grands make this for their mom for Mother's Day. They loved it and she was over the moon!

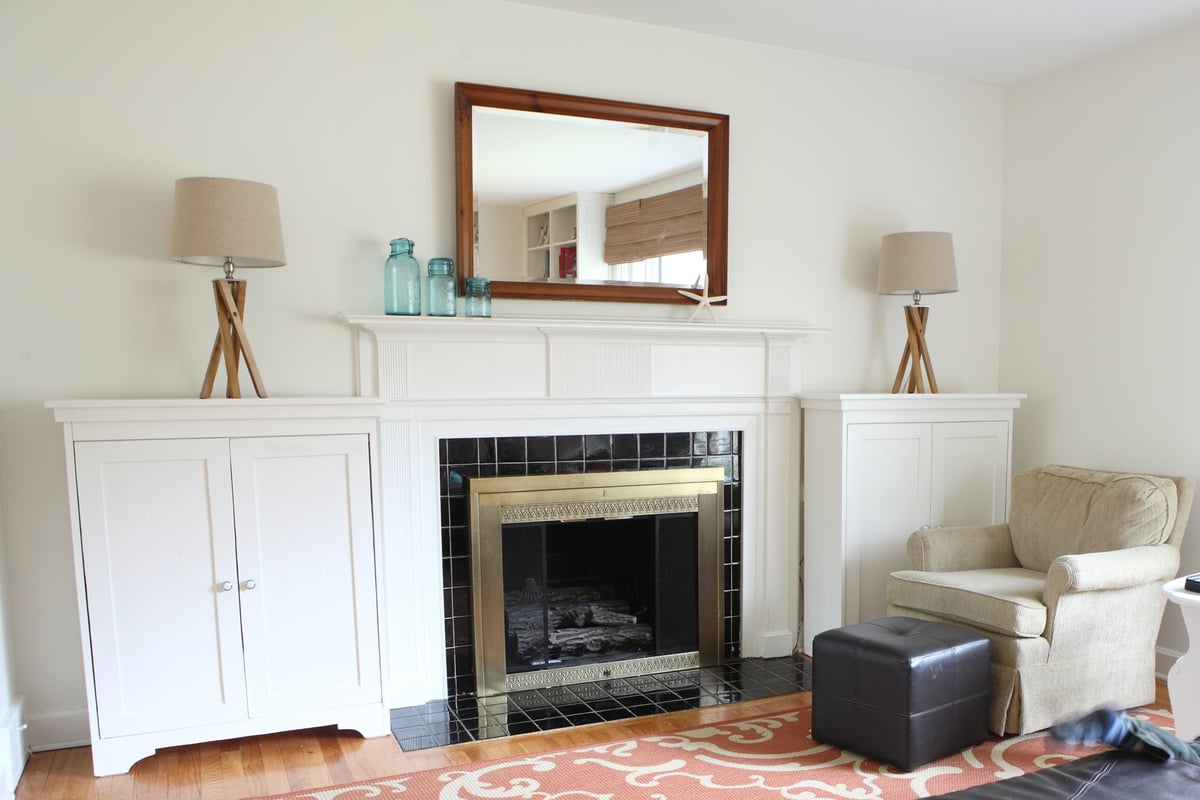
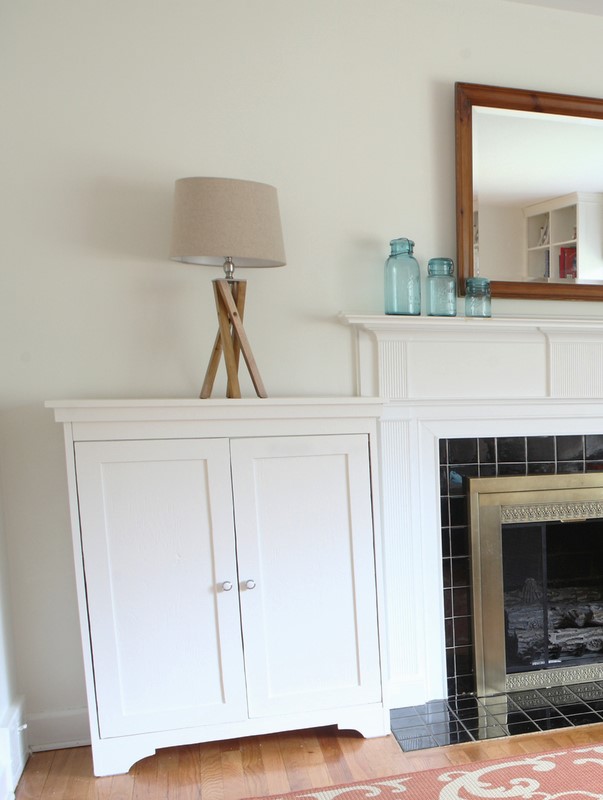
I made two smaller versions of the Simplest Armoire for either side of my fireplace.
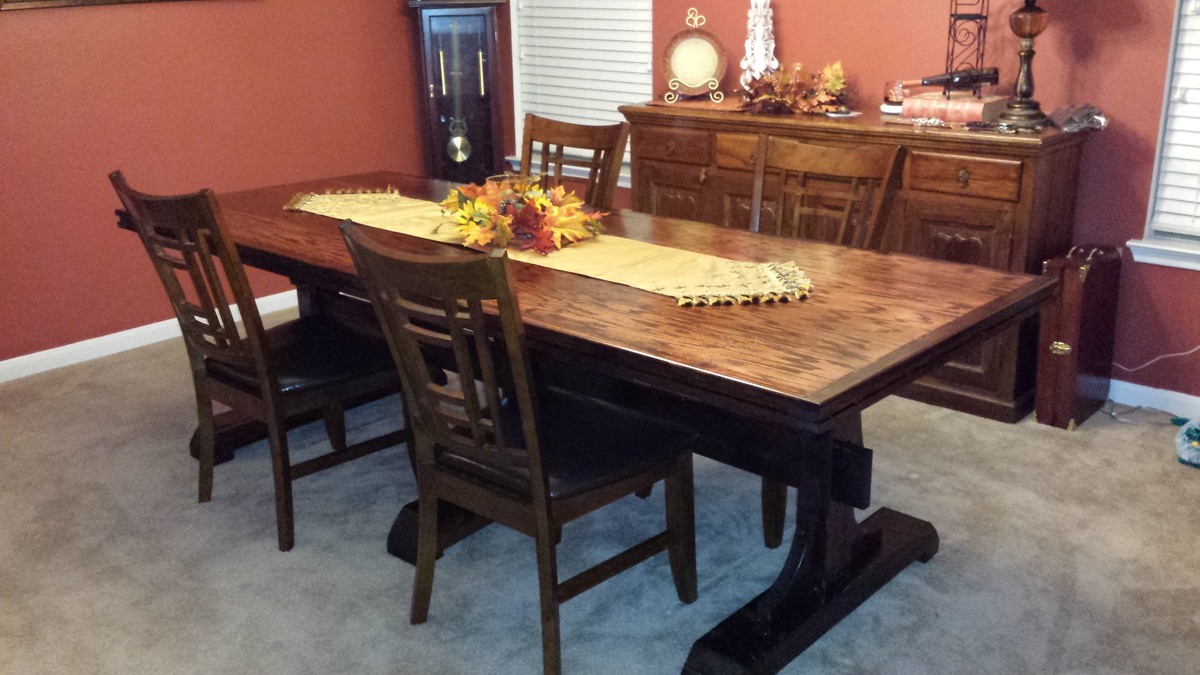
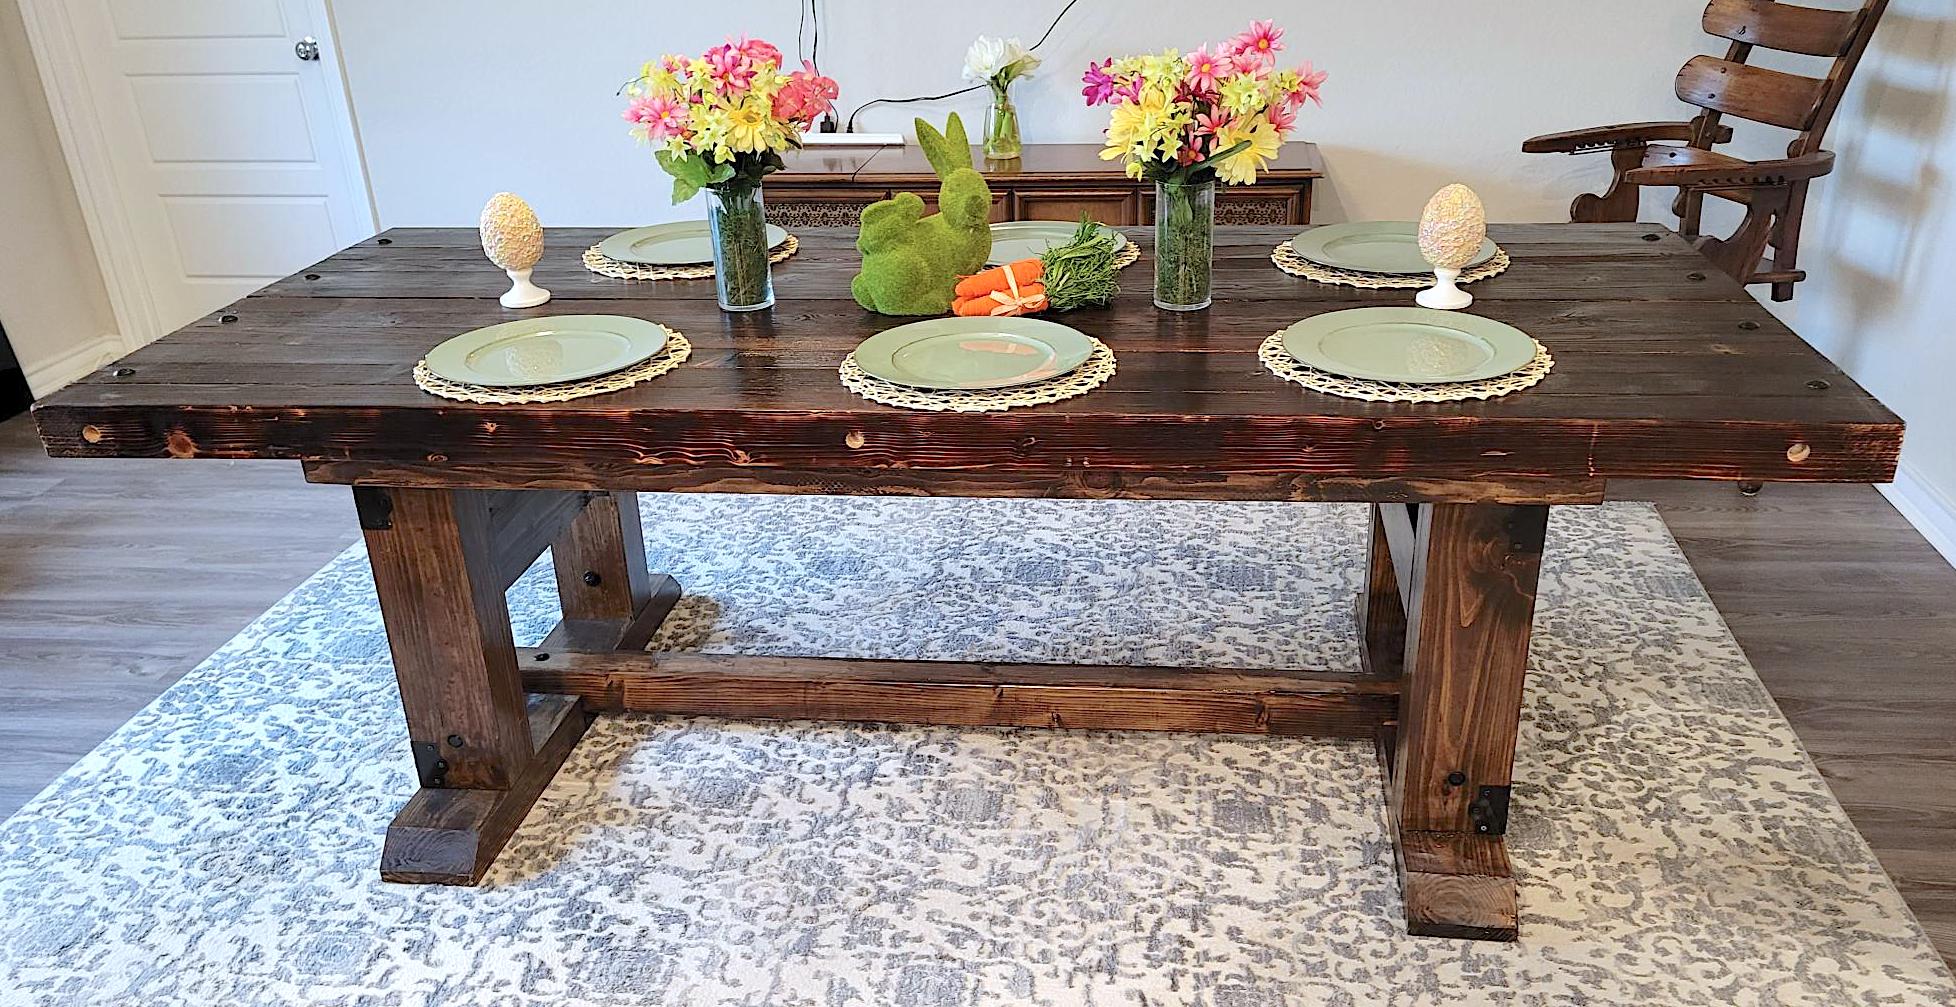
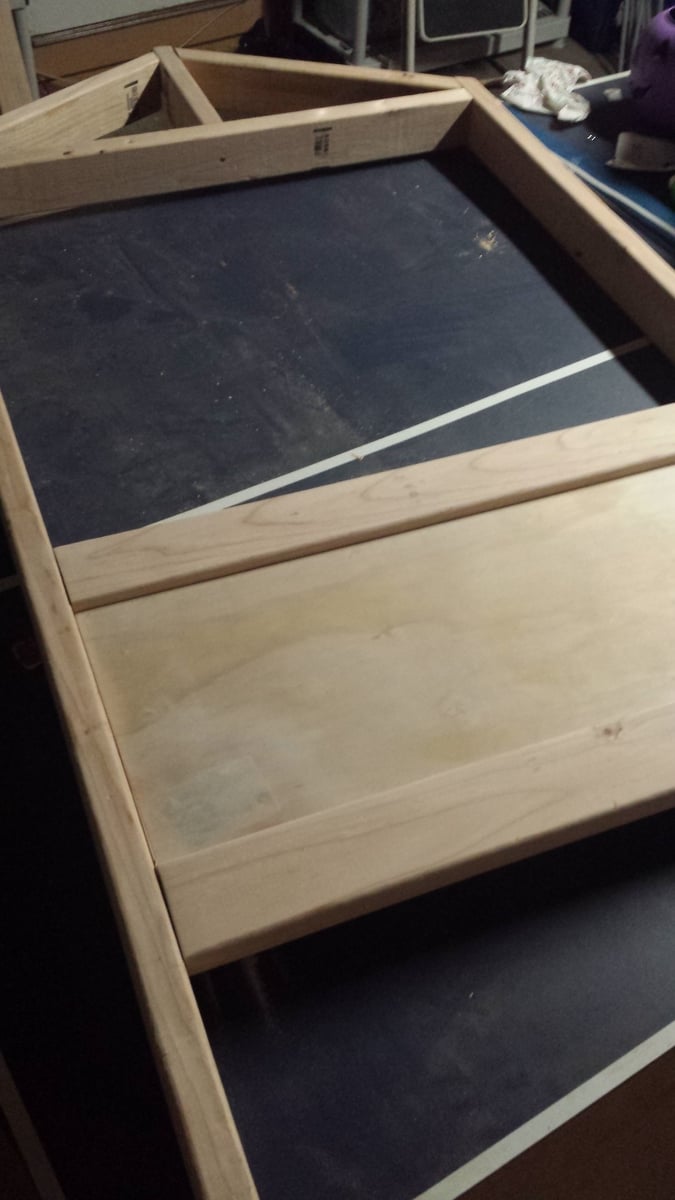
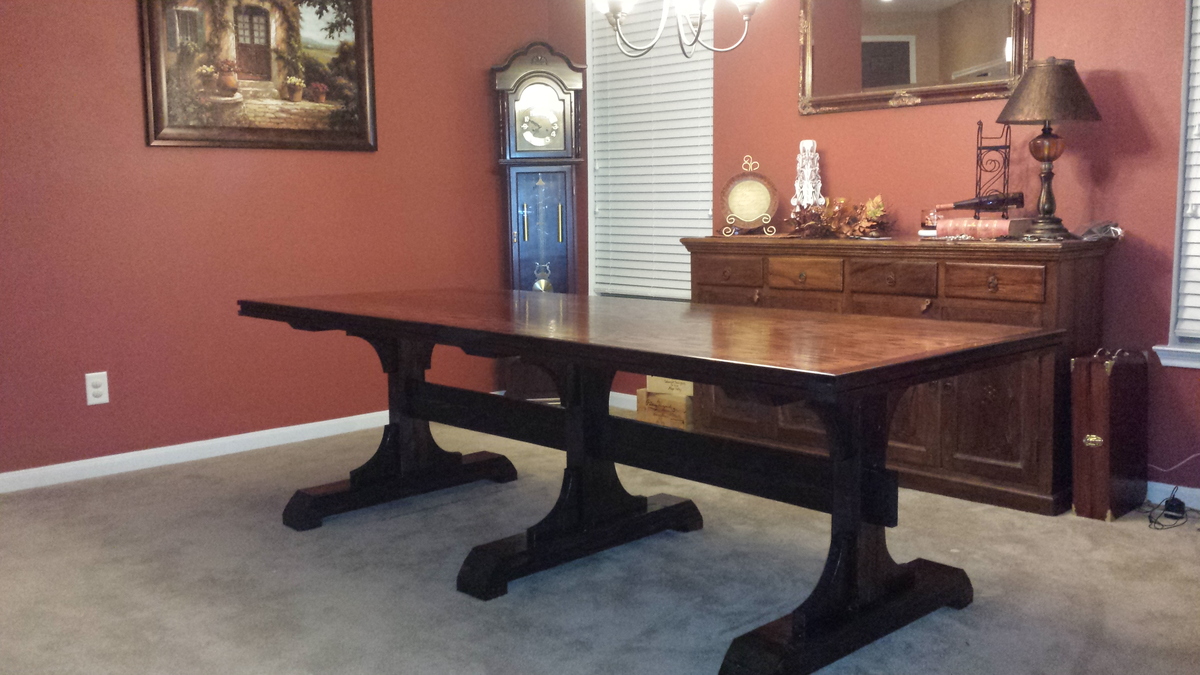
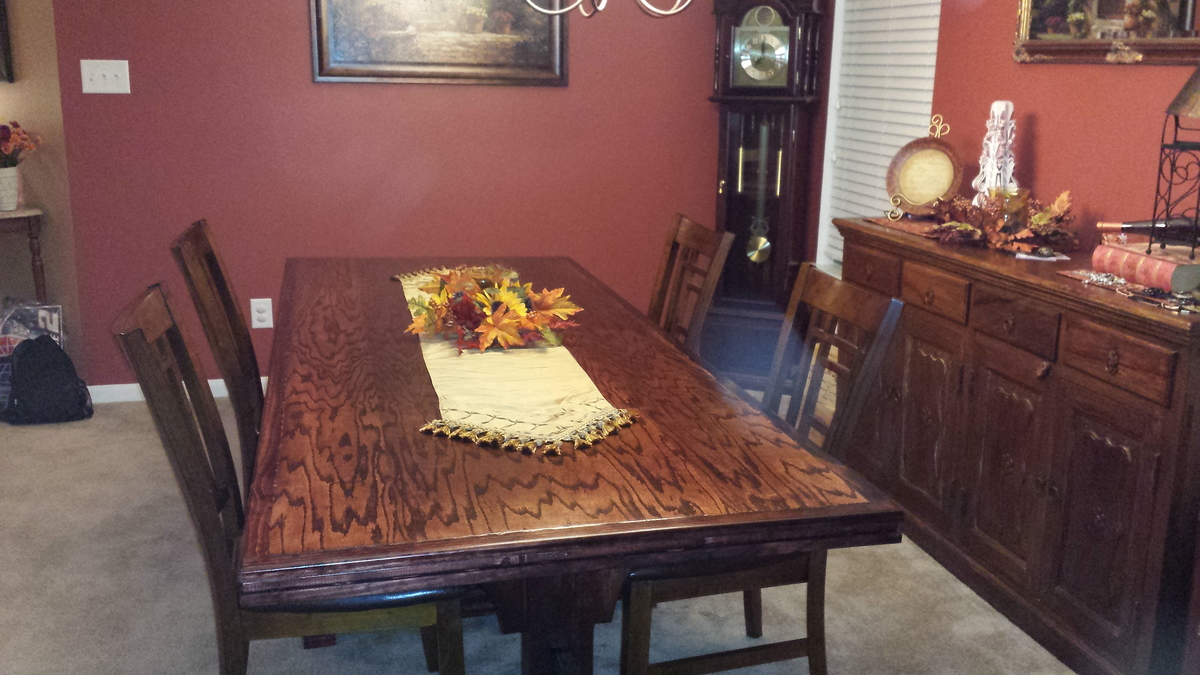
This beautiful table measures a little over 8ft x 3ft and made out of oak plywood and pine.
Instead of using individual slats for the main surface as in the building plans, I decided on one large 8ft x 3ft piece of oak plywood. I encased it in 2 inch pine and routed the top edge with a 1/4" round over bit.
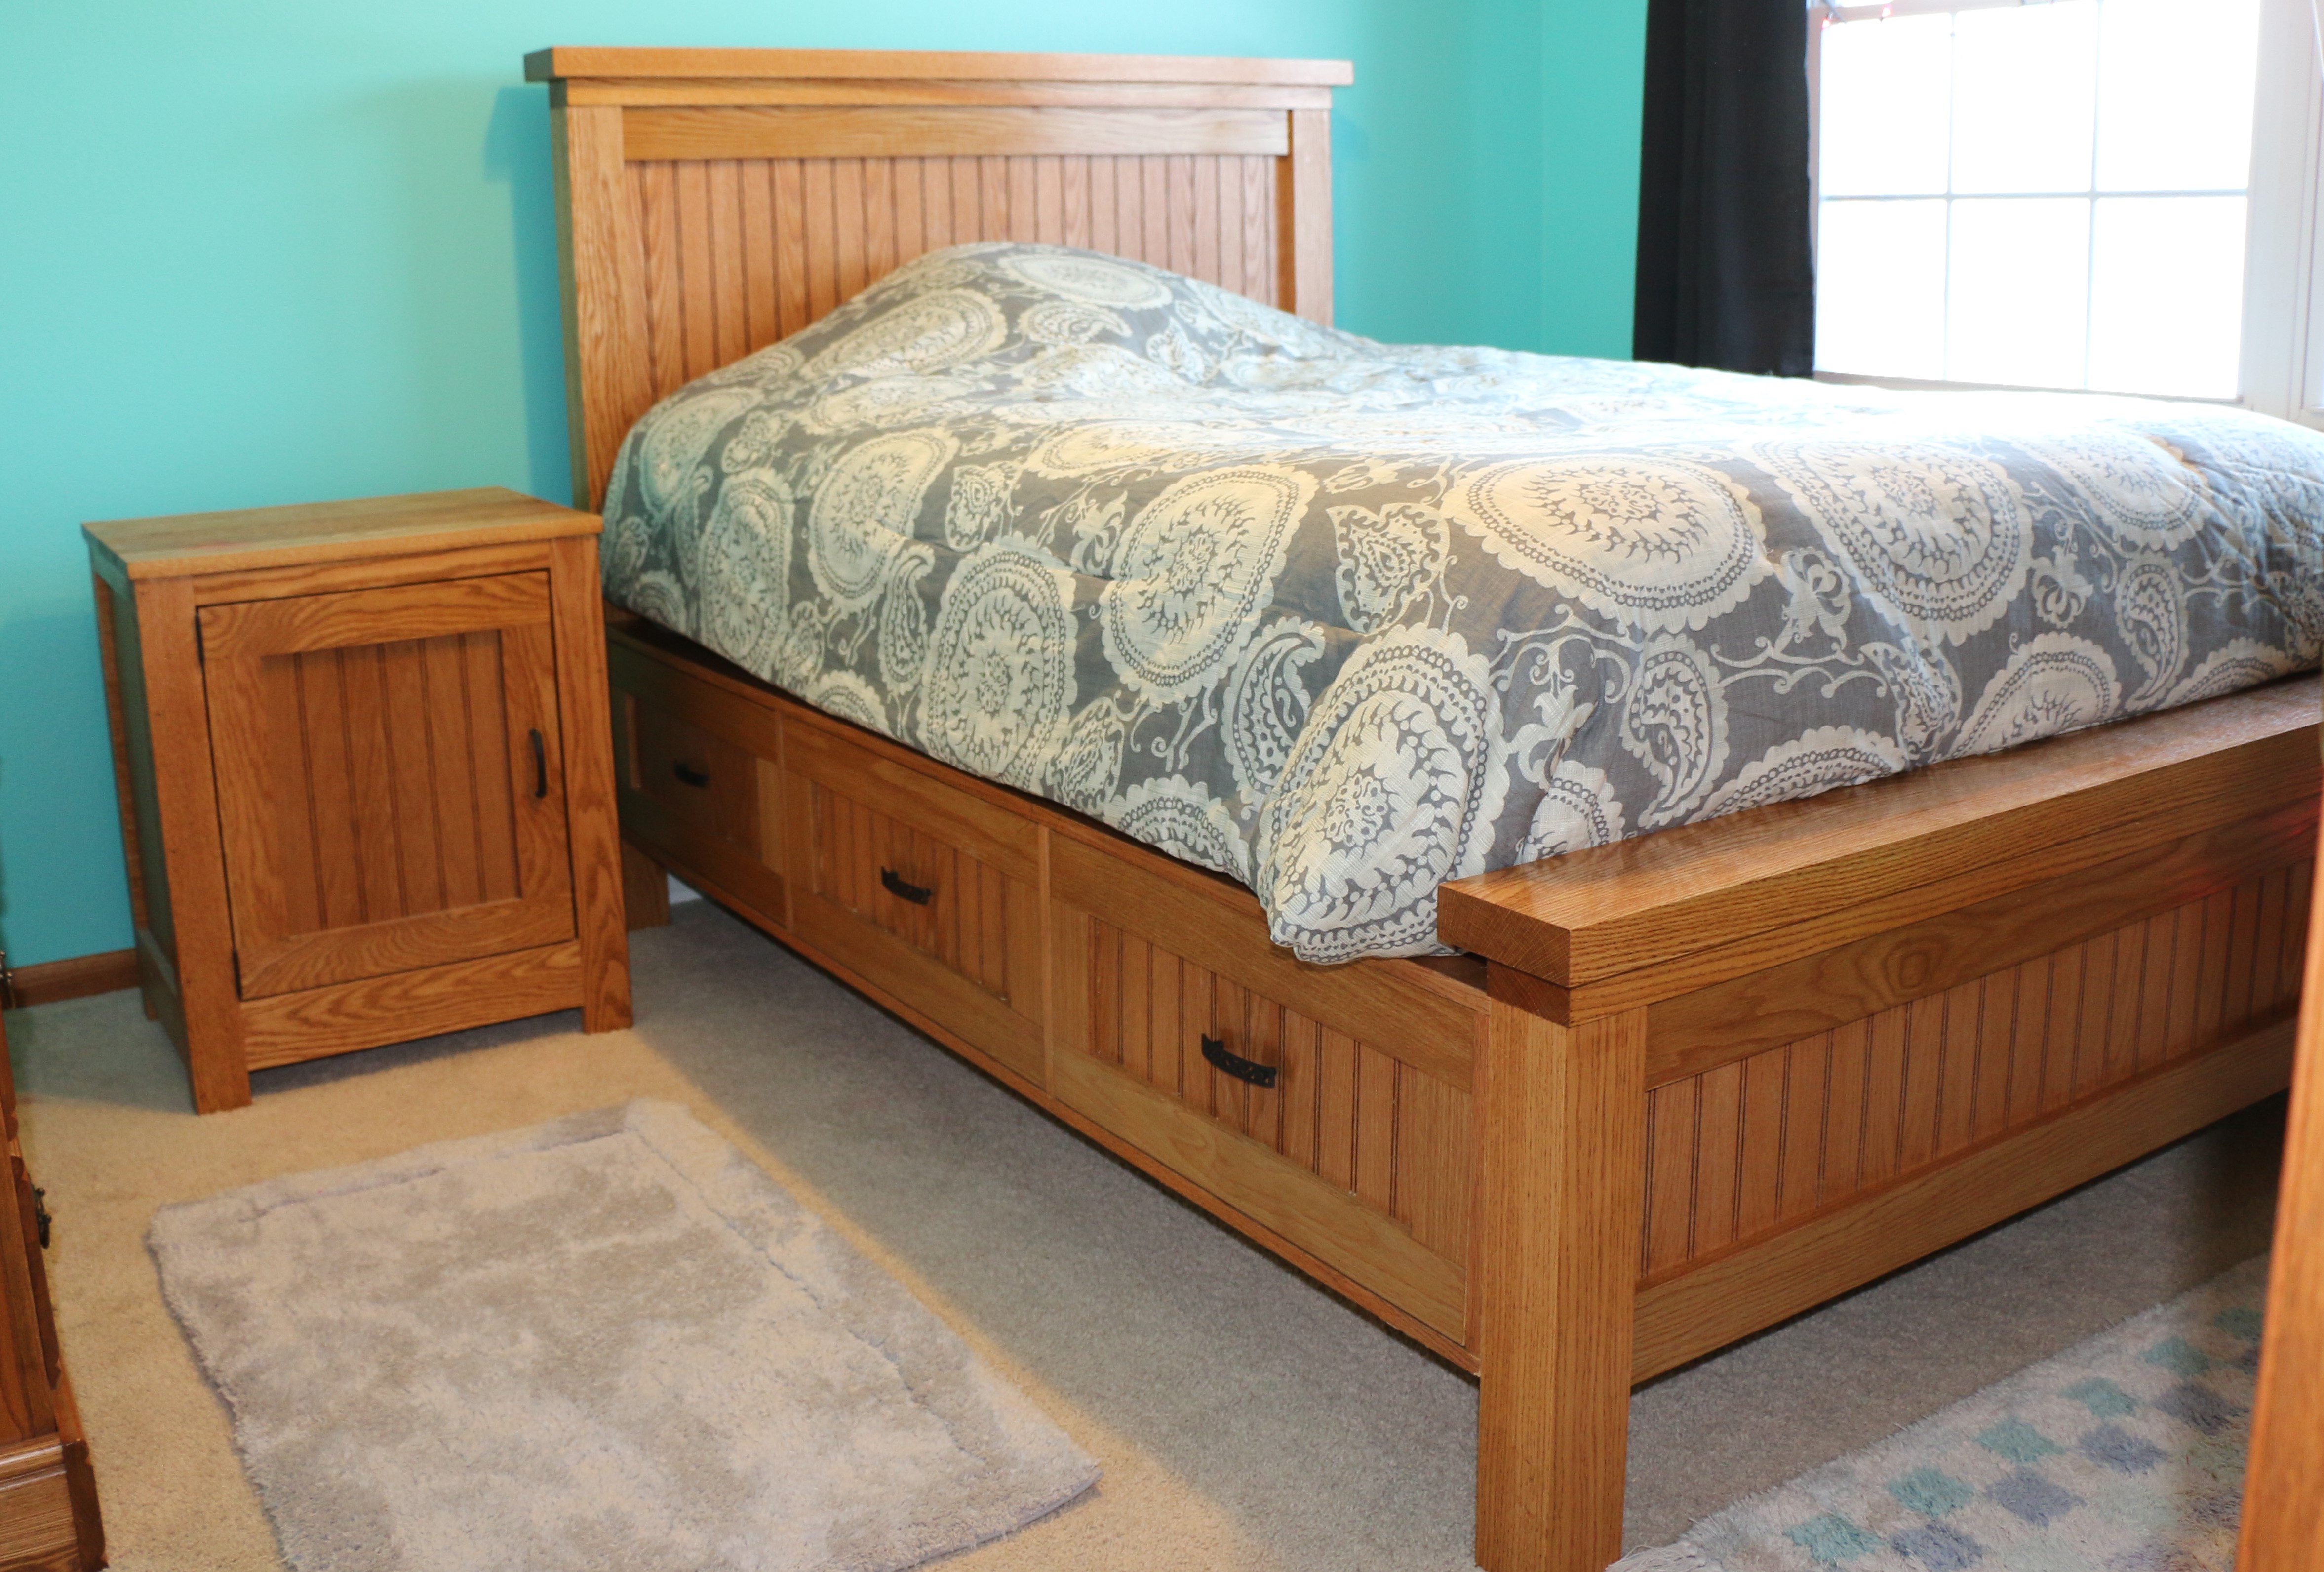
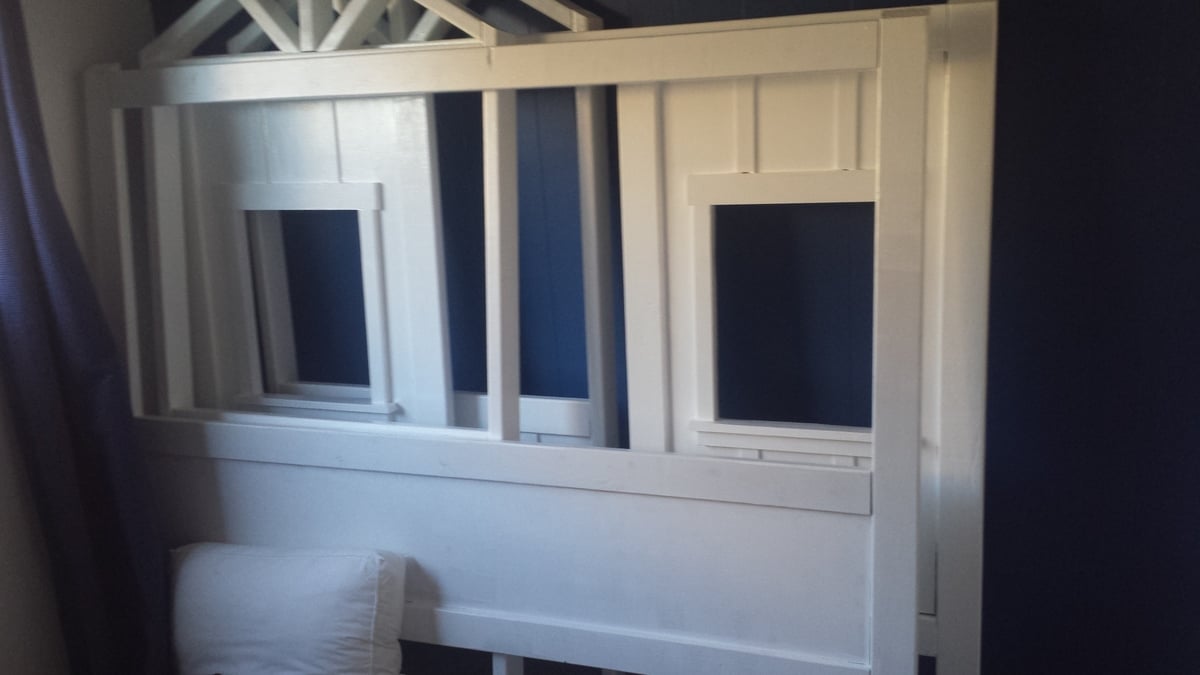
I modified the queen size bed to a full and adjusted the dimensions of the bed accordingly. I used solid oak for the headboard posts and top boards. I used oak beadboard to match the Kentwood night stand I previosly made.
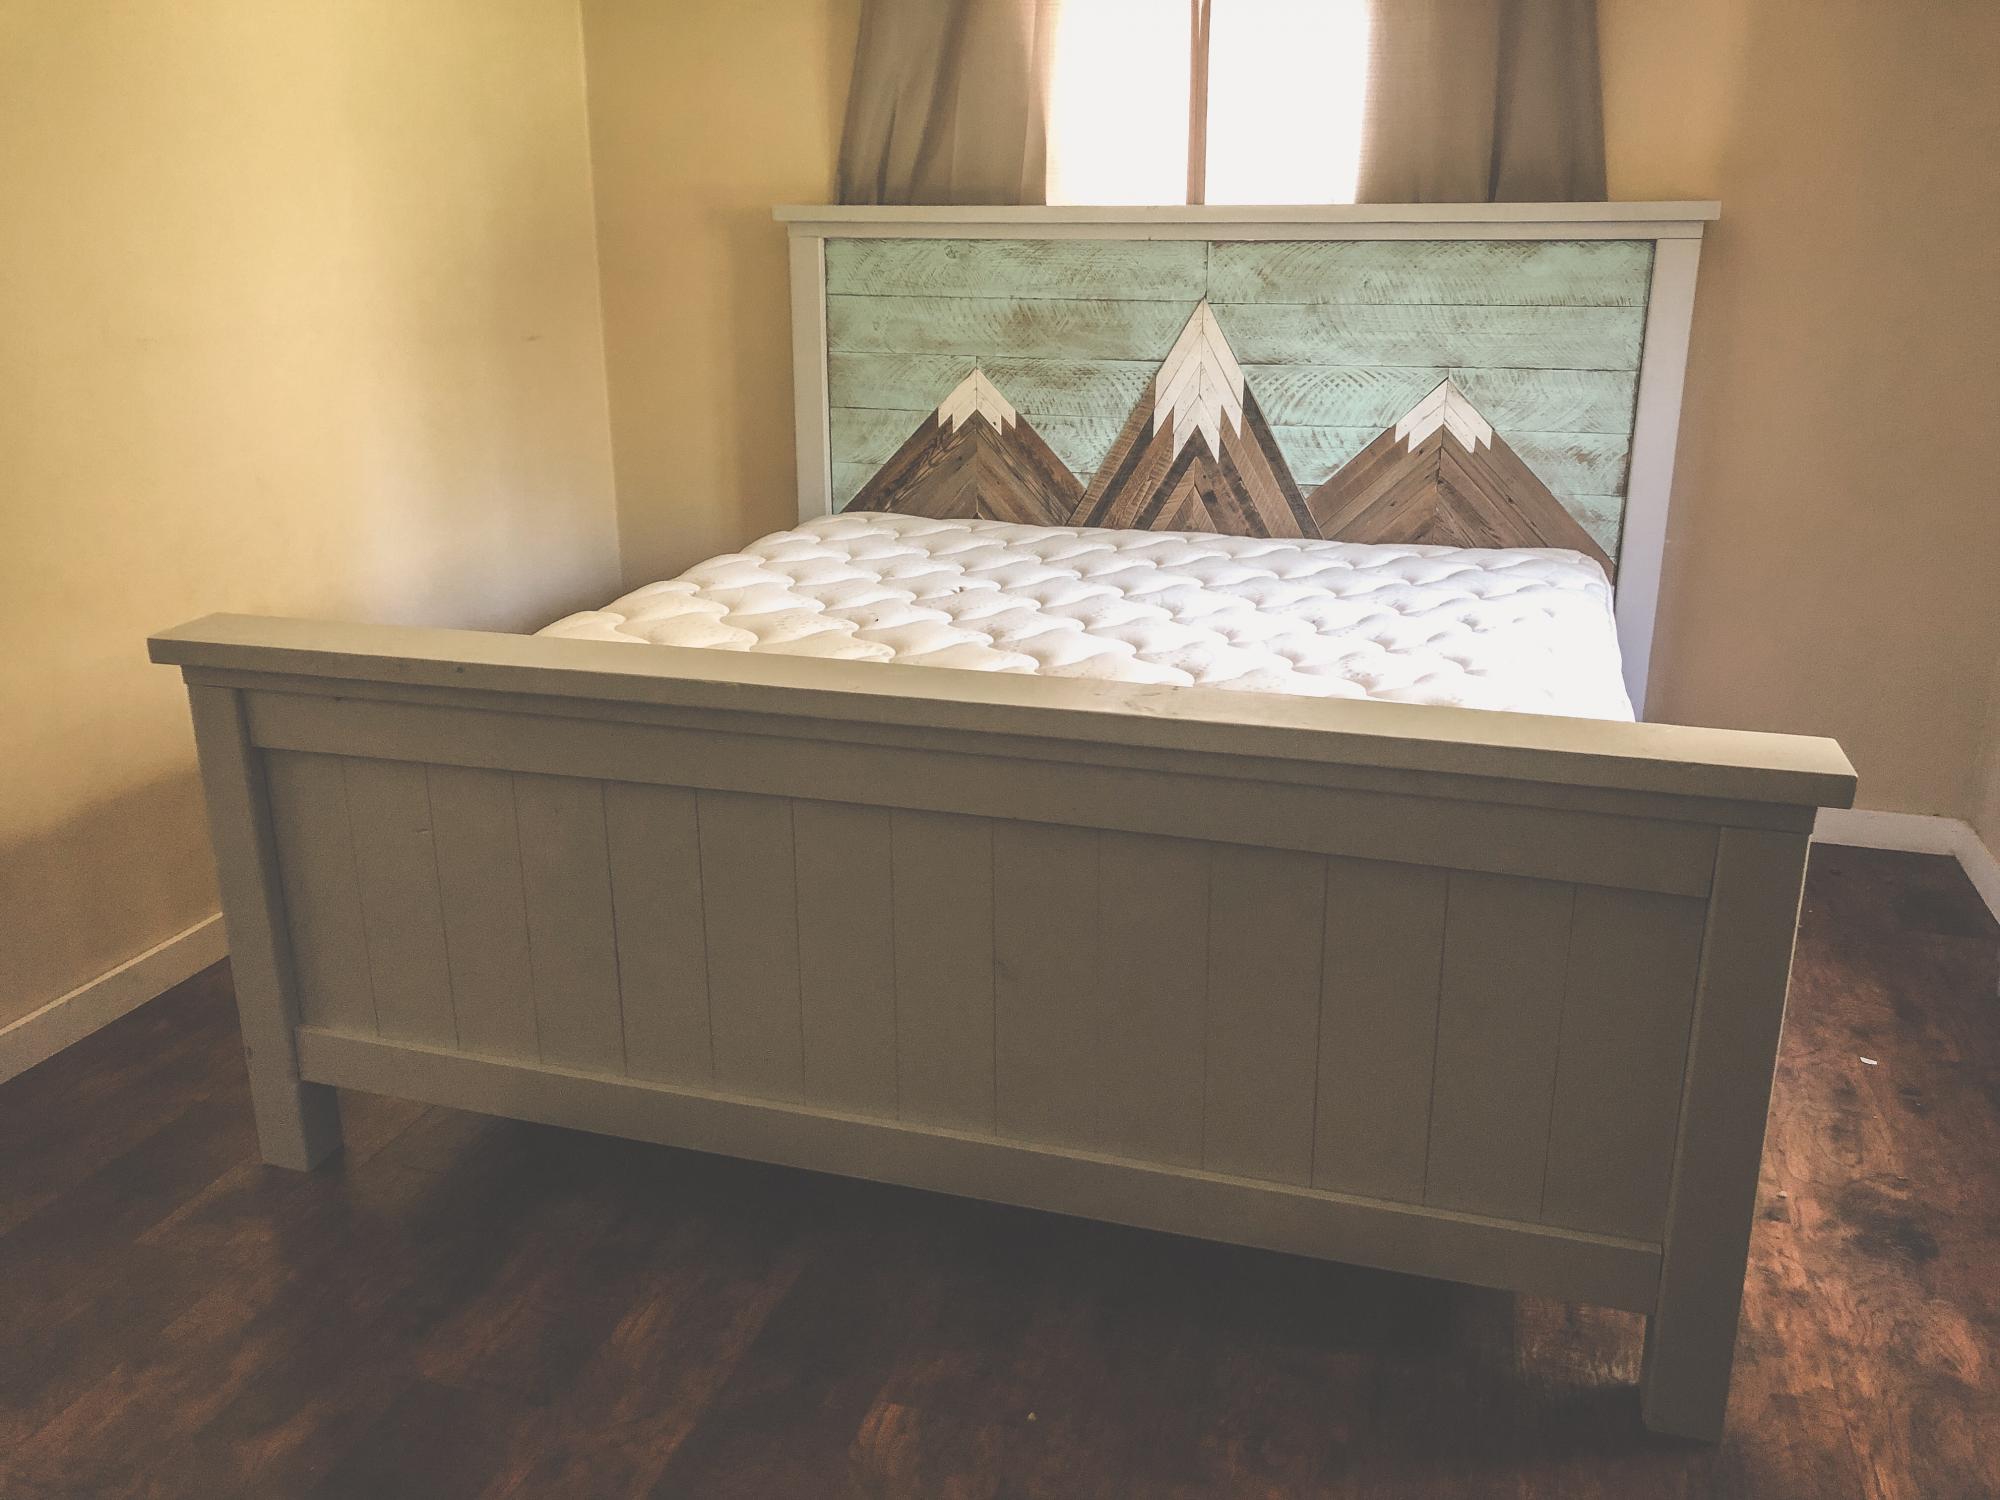
After numerous moves cross country, it was time for a new bed frame, so I was excited to find the time to try out the farmhouse king bed plans! I was lucky enough to get my hands on reclaimed lumber from an old dairy barn in the UP Michigan so that is what I used for the mountain design. I made the bed to plan, but replaced the headboard slats with the mosaic insert. I couldn’t be more thrilled with how it turned out!