Shed for Pool Accessories

Shed and and table for storing pool accessories - Marie Keller Facebook Community

Built from Plan(s)
Shed and and table for storing pool accessories - Marie Keller Facebook Community
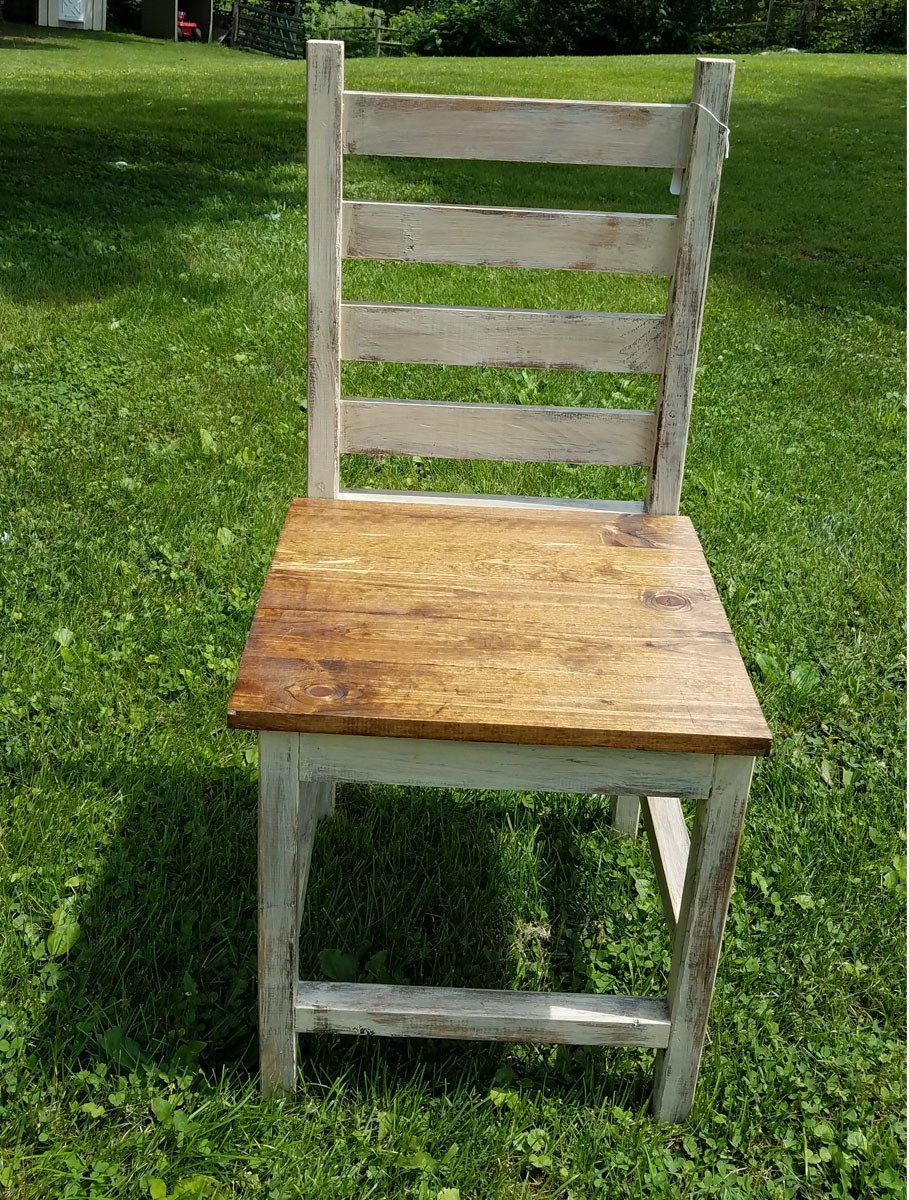
I adjusted the plans to make this a chair that would fit under a regular table. The front legs are 19" and the back legs are 40". Then I followed the plans as written.
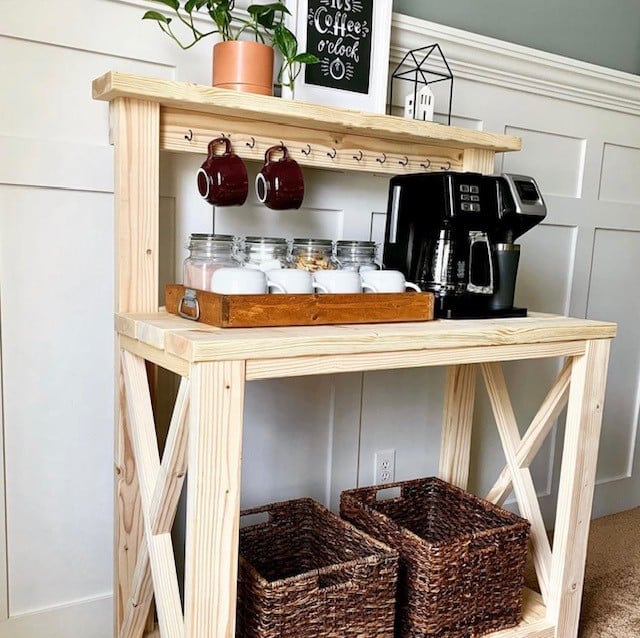
Built from the farmhouse potting bench plan
I created this from rough cut cedar I glued everything together and finished it off with brad nails and brass hinges. Then I added a poly gloss on the outside.
I used your basic plans, but modified it to use some scrap wood I had from another project. I used blue stain pine, tongue and groove.
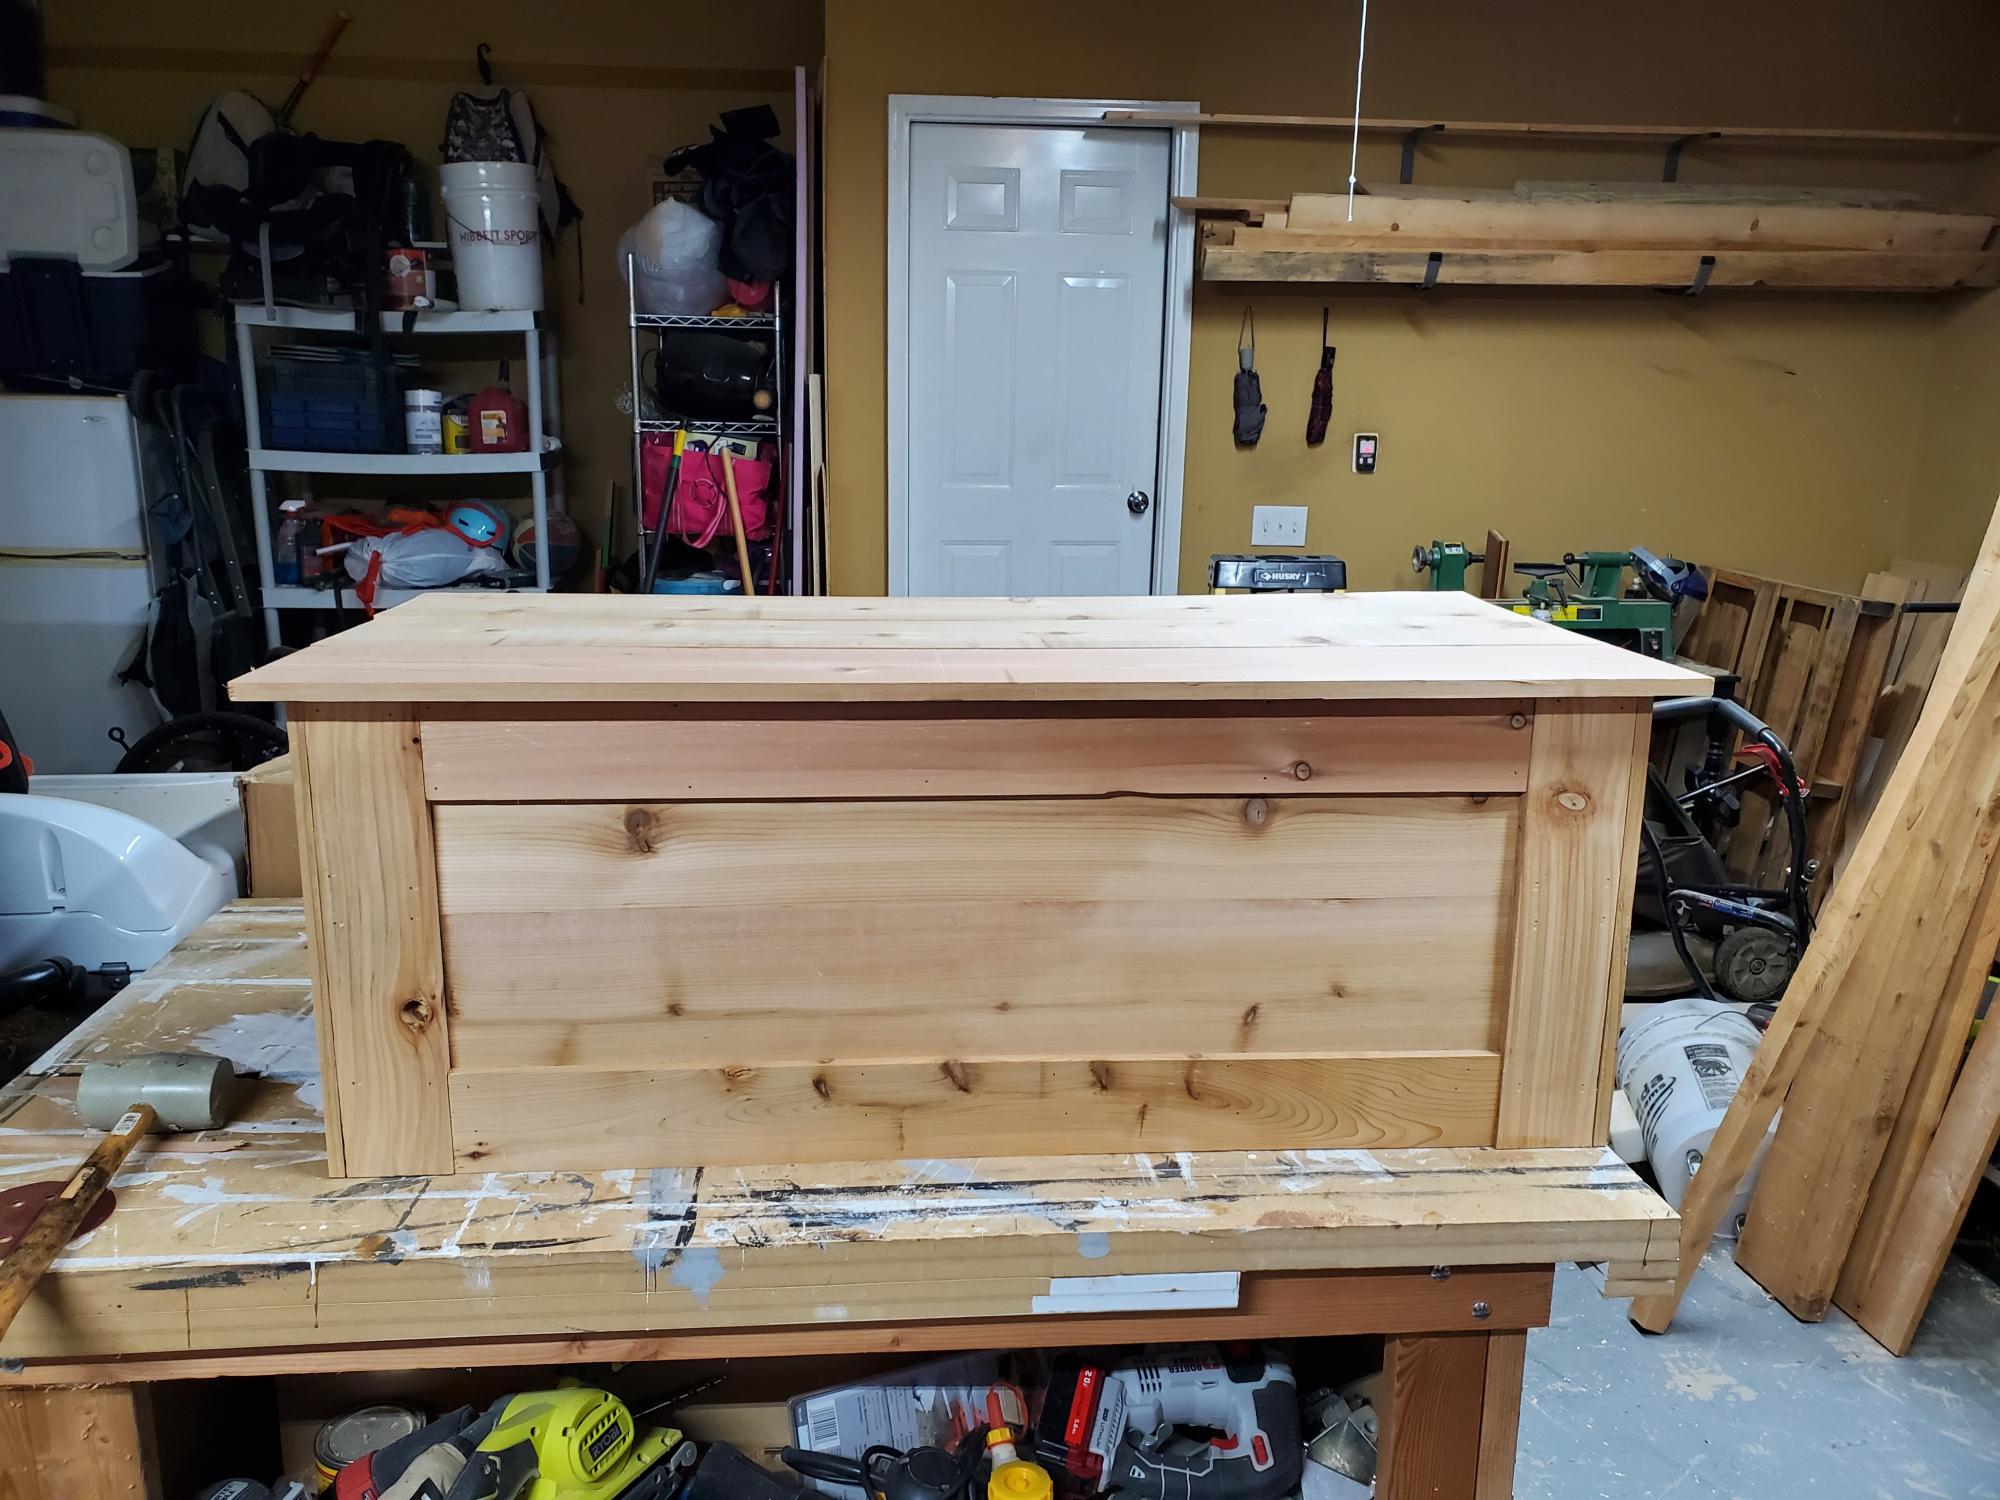
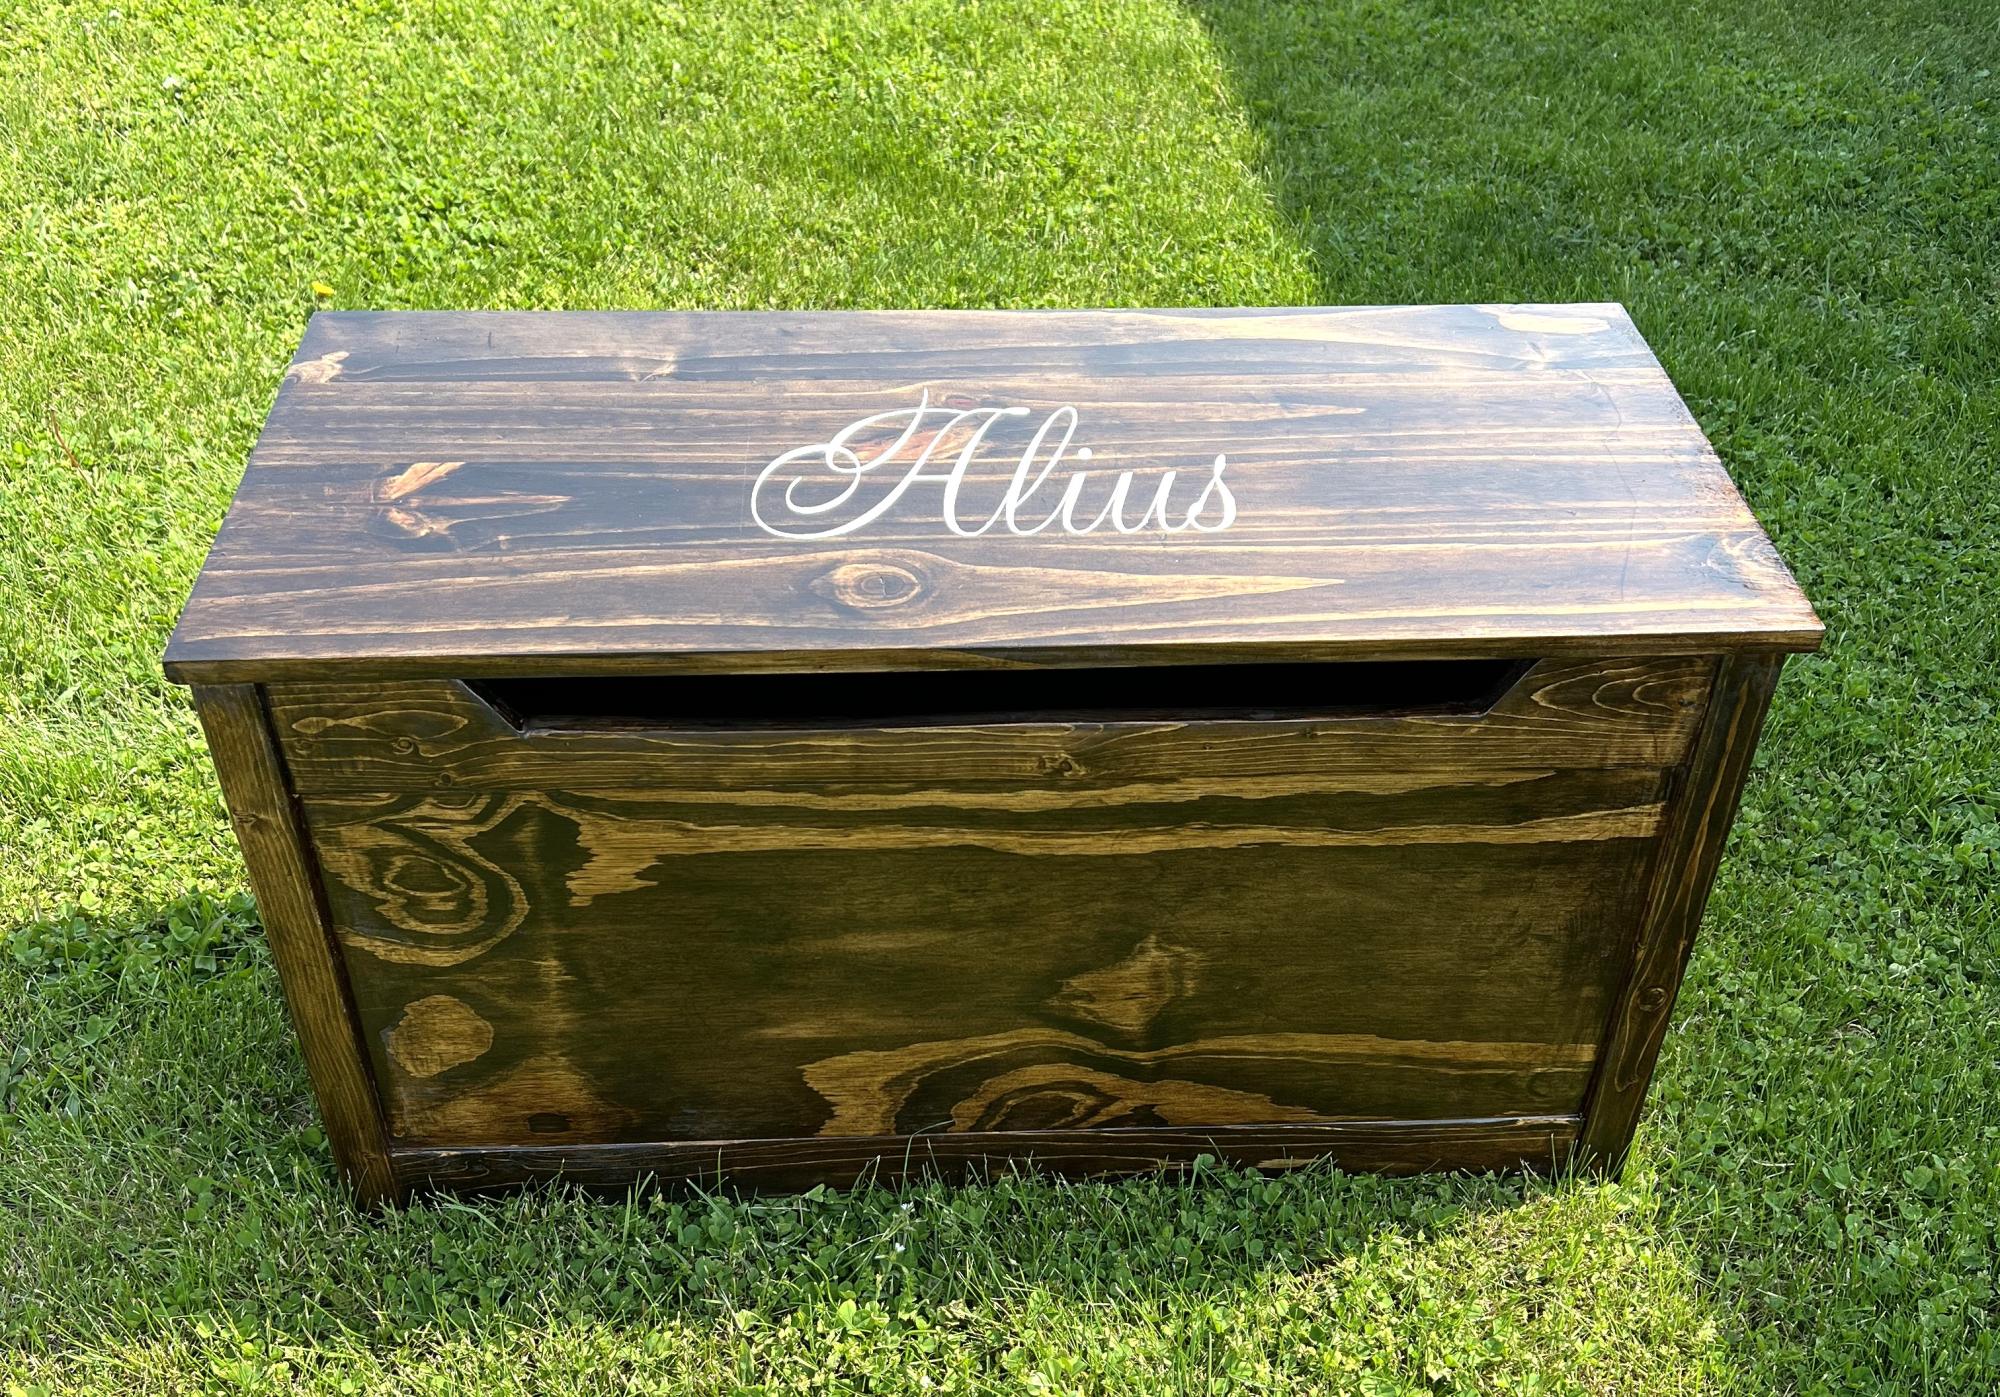
I made this toy box for my niece who is expecting her first baby (it's a boy). I know she likes things clean and uncluttered, so I added a lid, and then added some corner pieces to make it a little more juvenile.
It was so much fun.
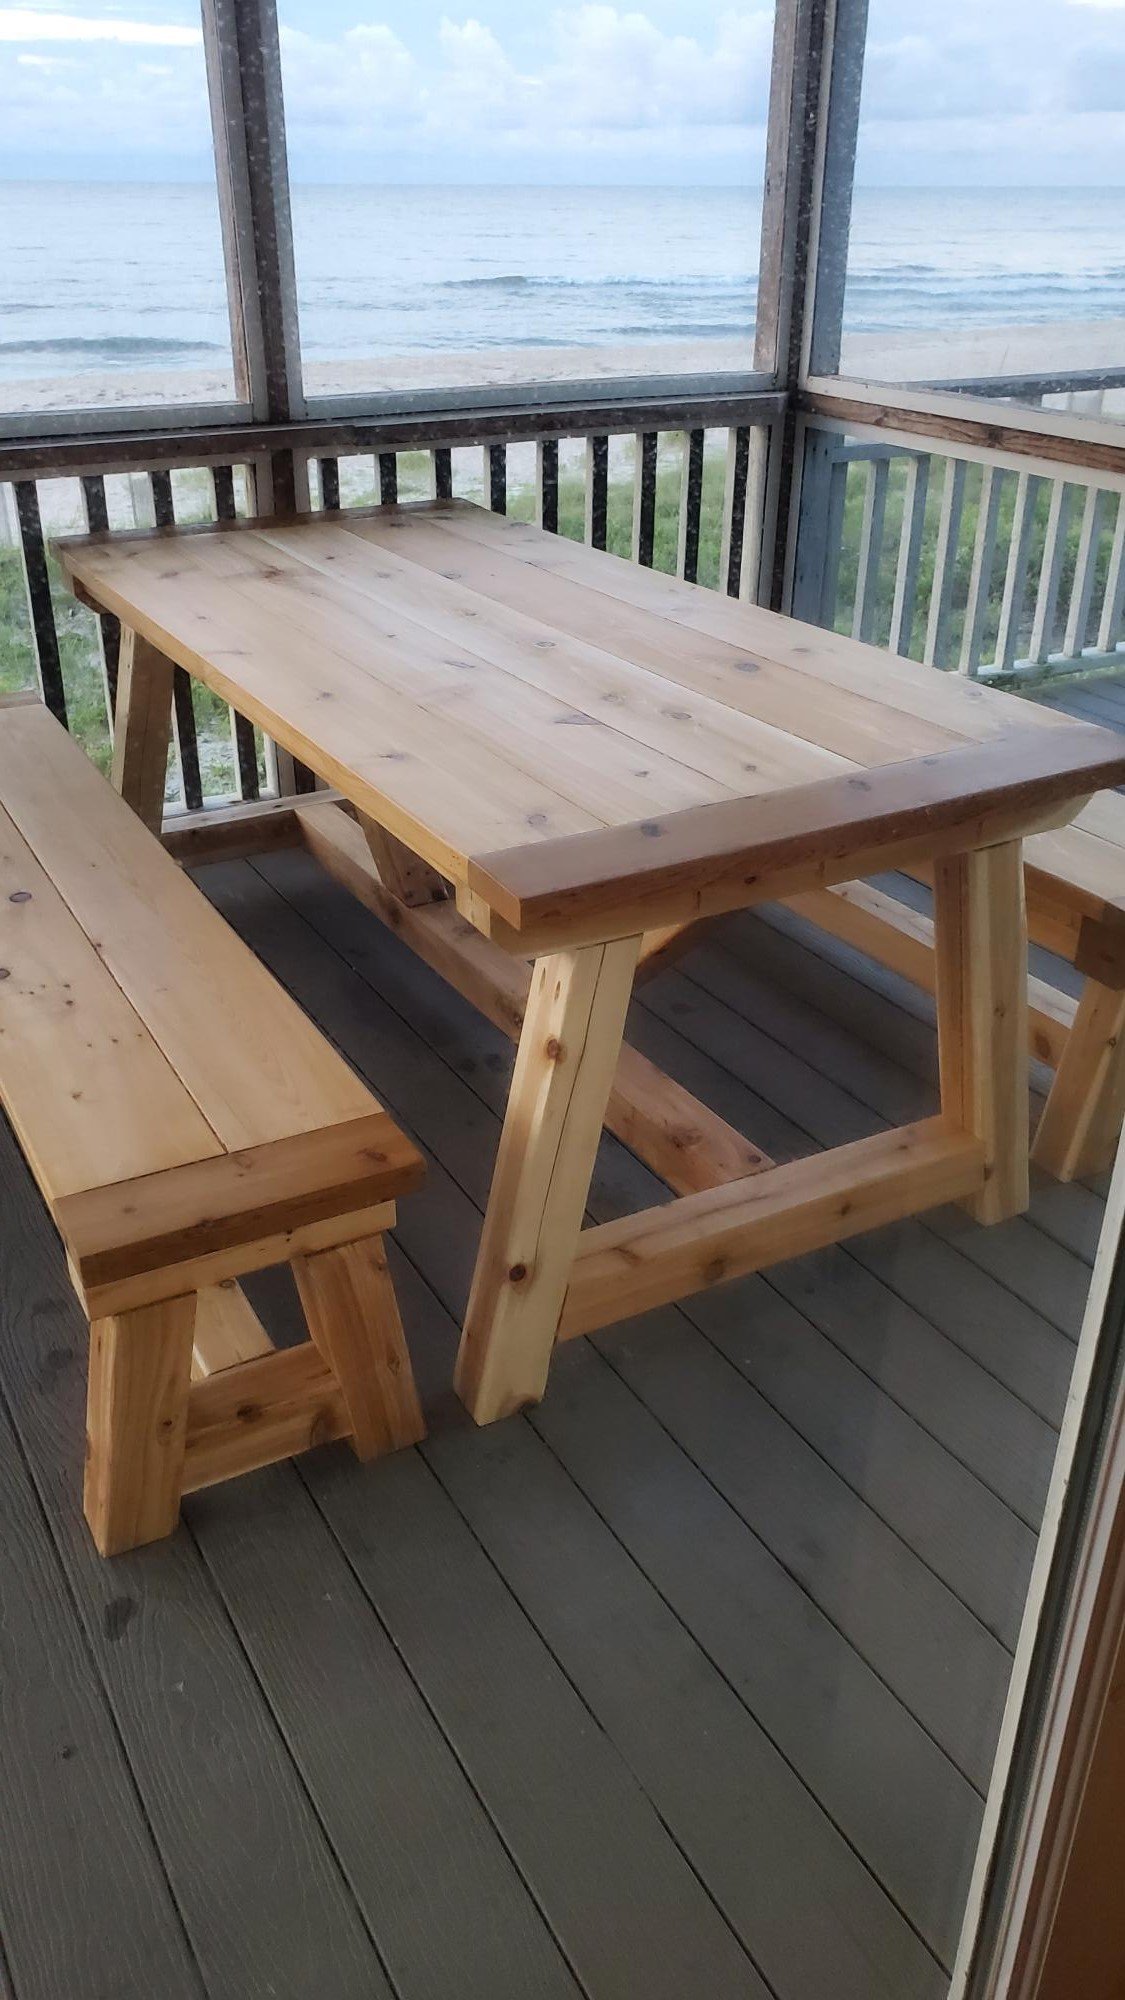
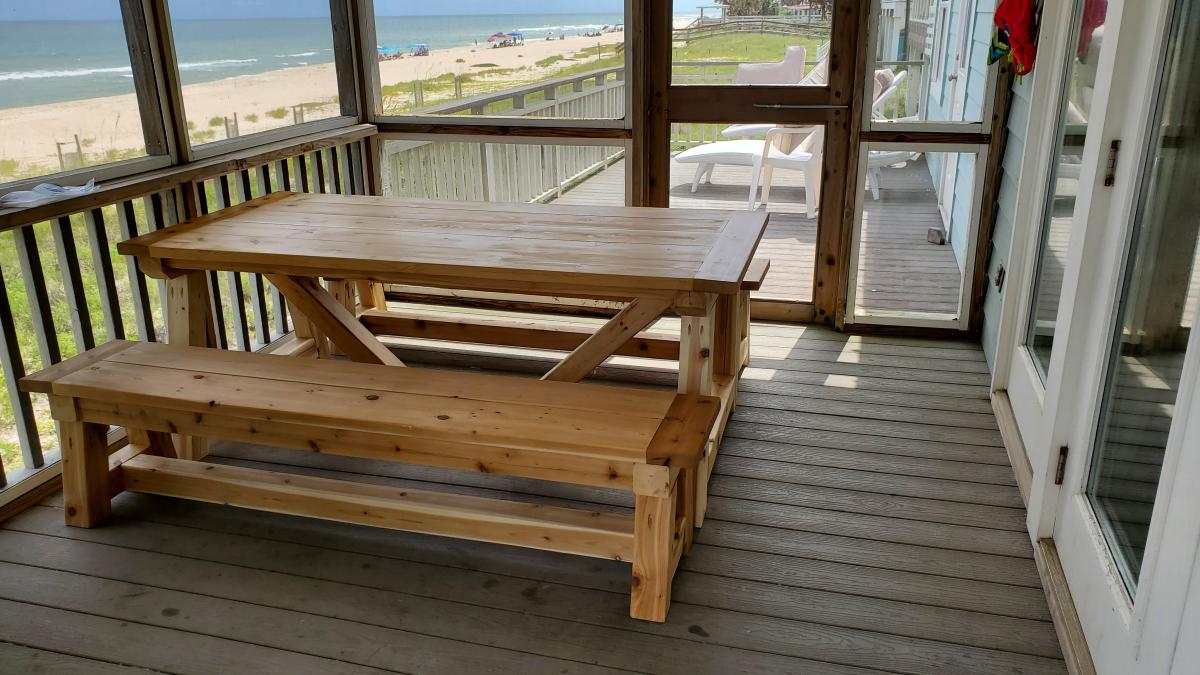
I used the trestle table and benches plans to make a cedar picnic table...
by Joe
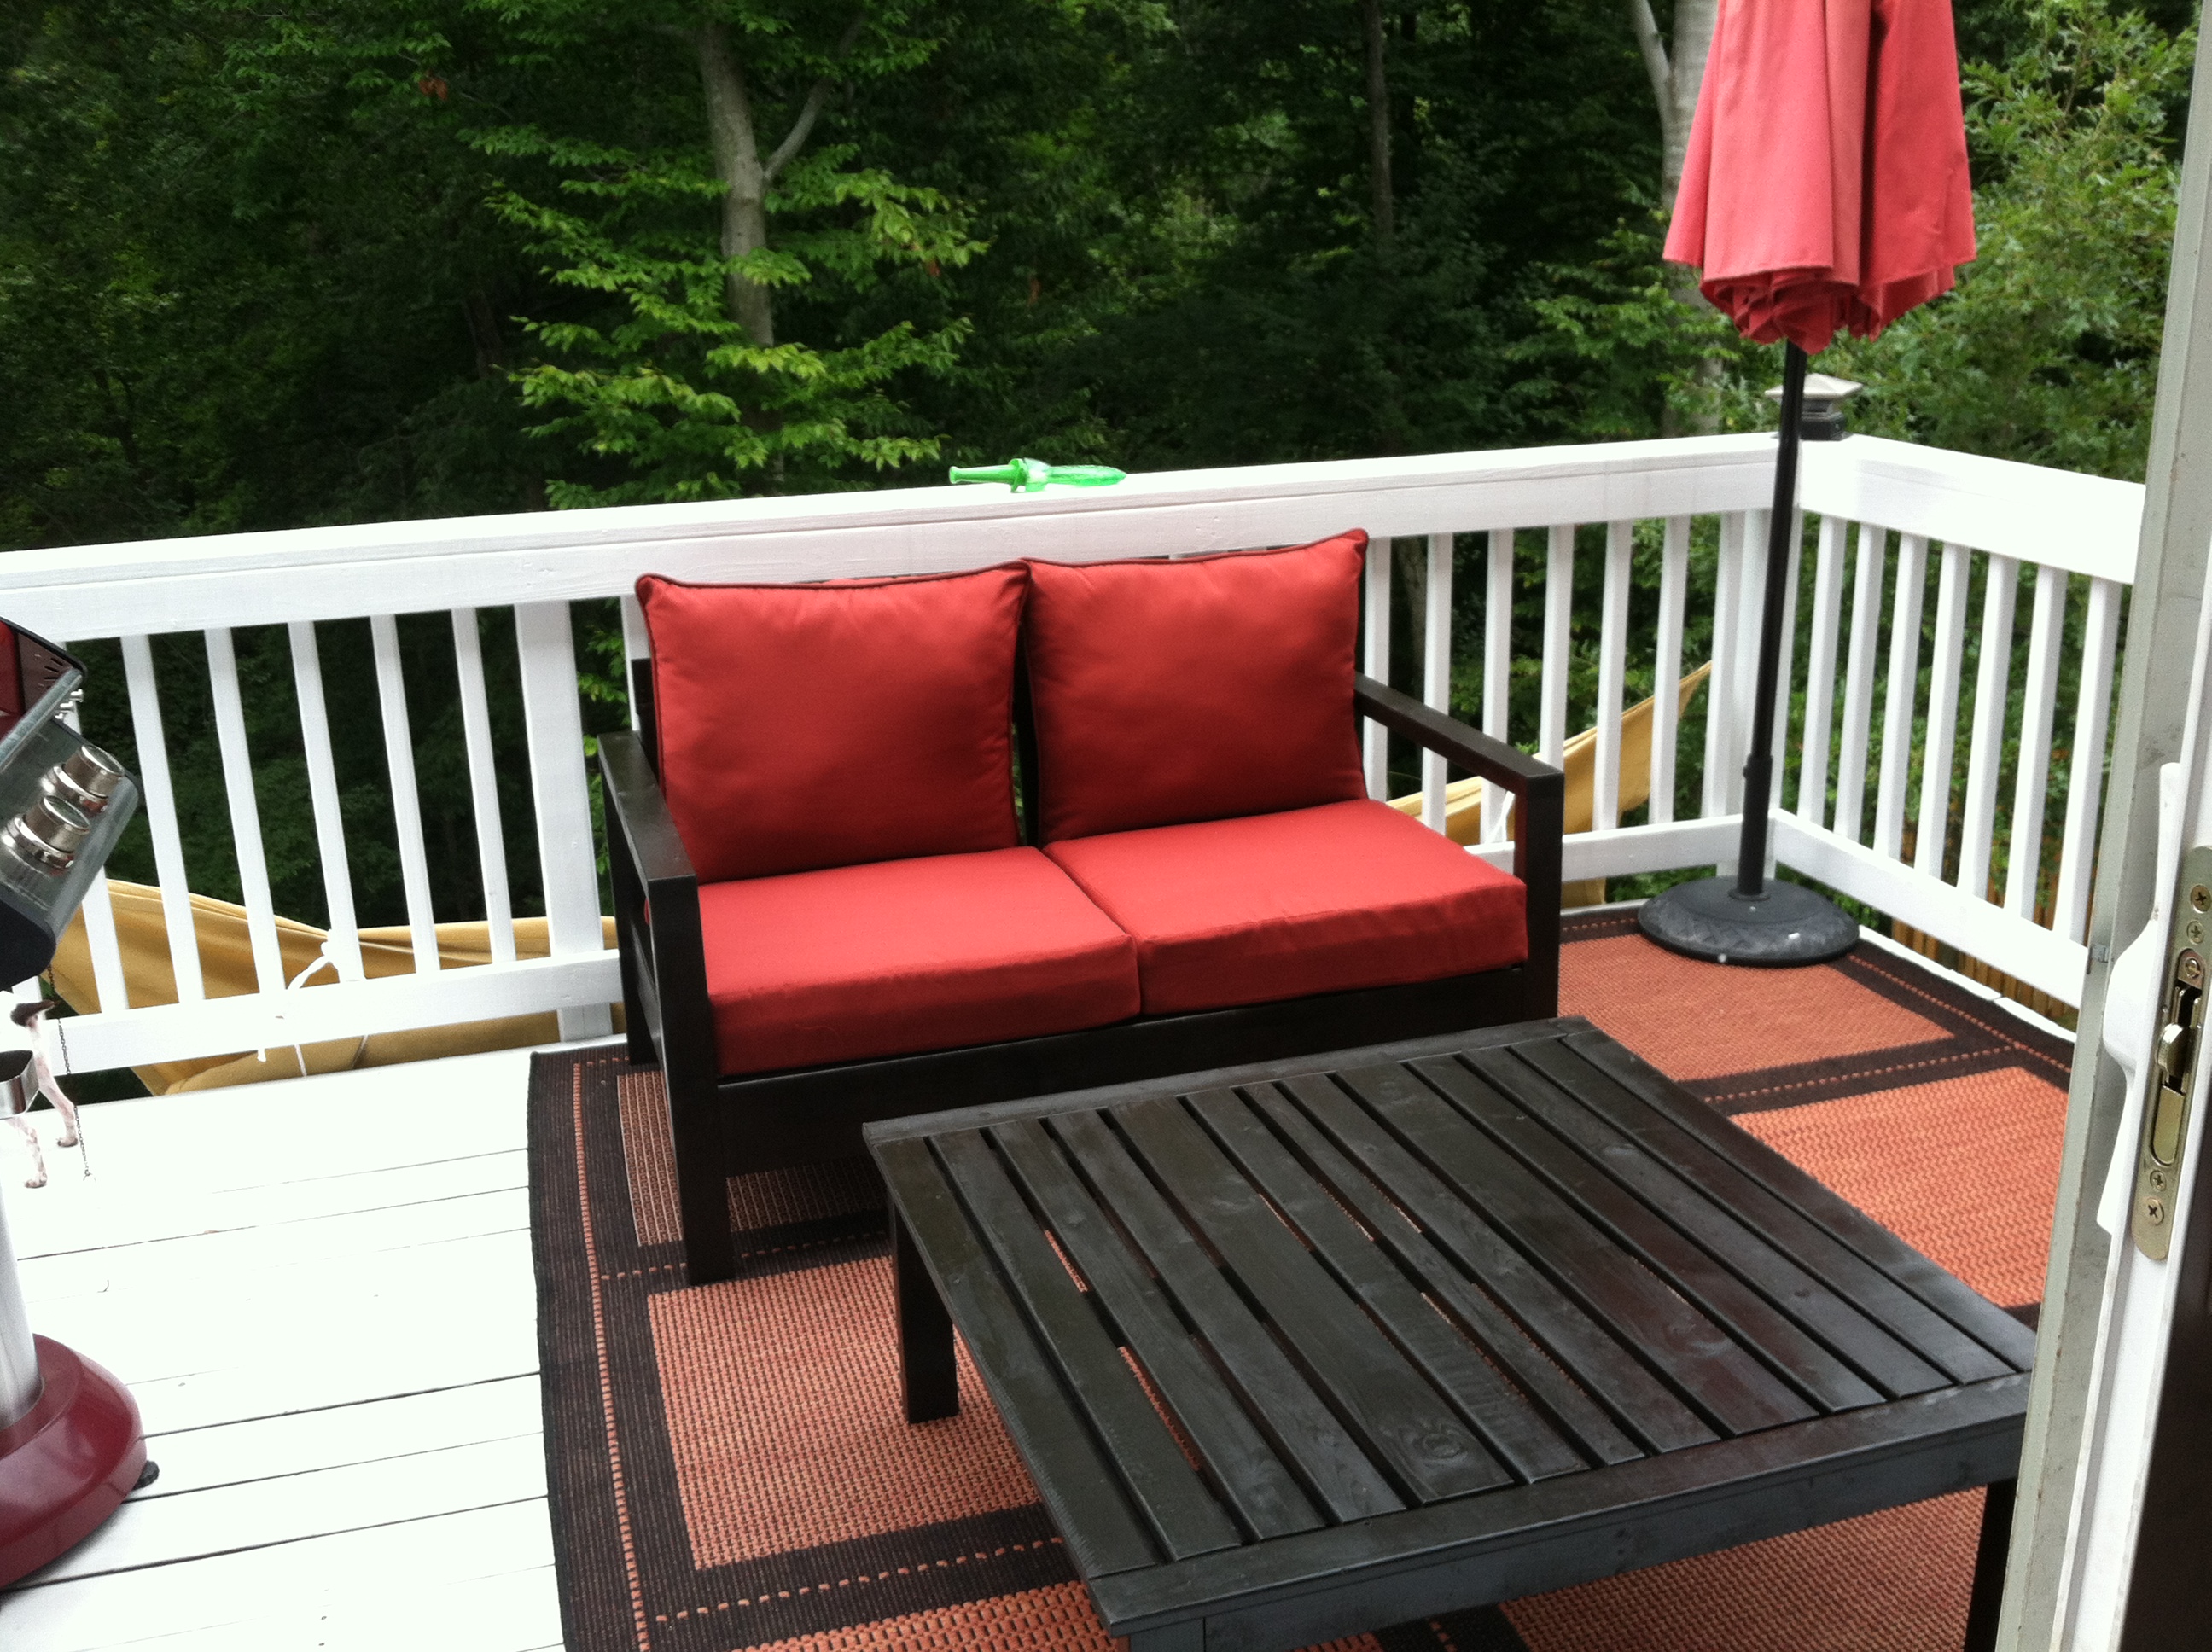
The wood for this project cost me about $50 from Lowes (and this was combined with making a 3ft square table and another love seat, so in total for all 3 was about $145).
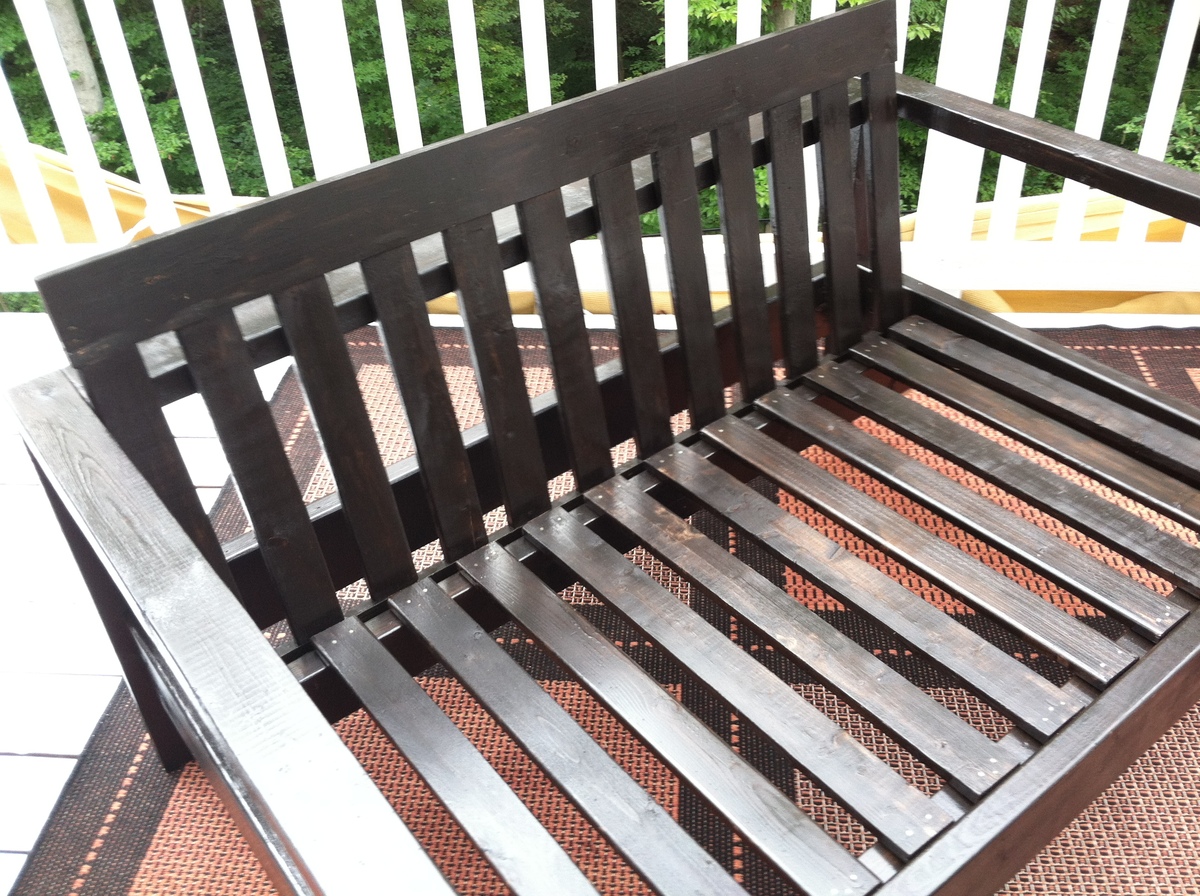
I didn't add the trim pieces (I felt they were unnecessary and more likely to come apart or fall off), I used only 1x3 for the slats on the seat and back, and 1x4 for the seat back top rails. I used 2x3 for the legs because the 2x2 was horrible quality and I used a 2x3 for the front cleat, which I think makes it stronger.
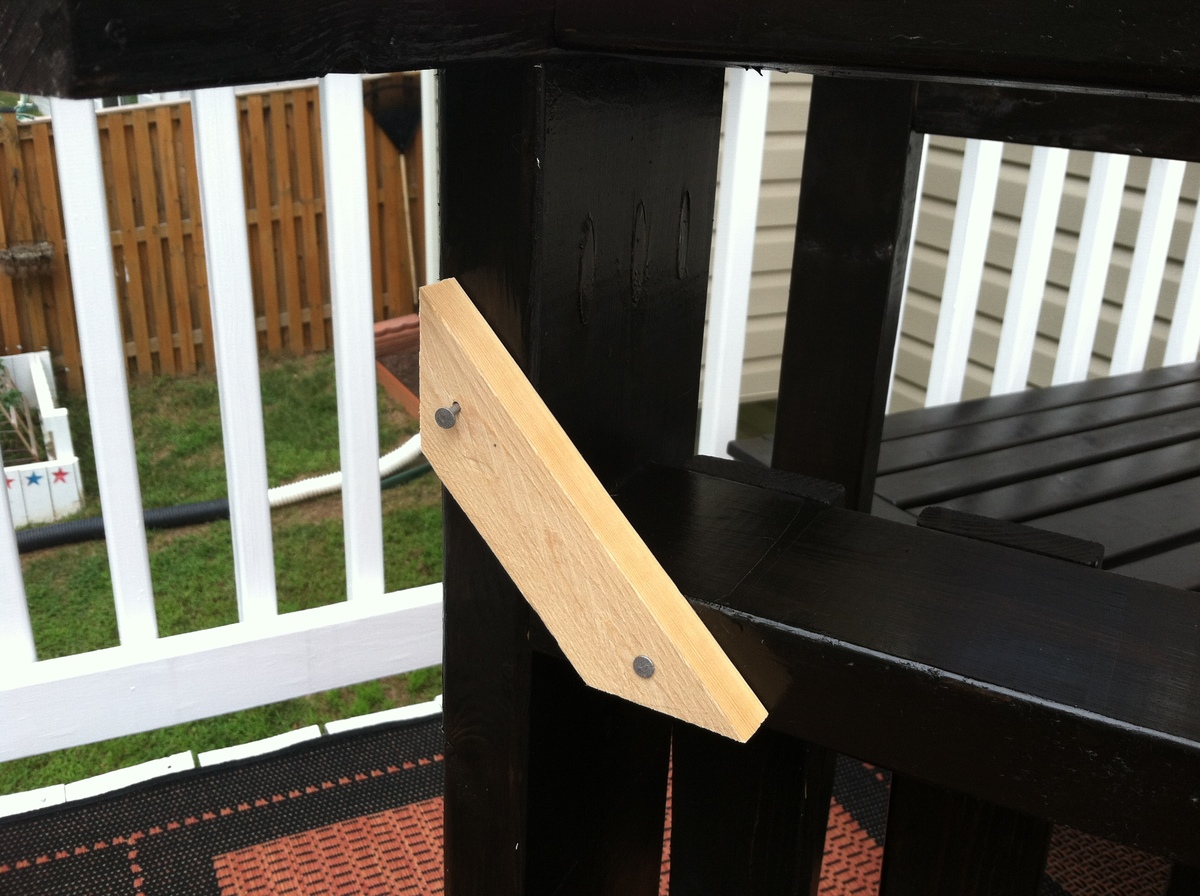
I also didn't attach the back the way the instructions say as I thought all those screws would look ugly, so I fashioned a wooden corner brace to hold the back in place, and used metal corner braces and screws (in 3 places, UNDER the back rest 2x4) to hold the seat back still and then only 2 screws to hold the bottom of the back in place. I added photos of these changes to help you see what I did.
One HUGE TIP - assemble the frame (minus the slats) and stain / paint that part, THEN stain and polyurethane the slats before attaching - it's horrible to try to stain or paint with the slats in place as there are too many tiny gaps to fill!
All in all, I think this plan of Ana's is brilliant - it's simple, rustic looking and yet looks great on my deck - I will take a photo of the 2 sofa and table as soon as the second sofa dries enough to finish assembly.
First sofa took me a little longer as I was getting used to the Kreg, second sofa has taken me about 6 hours in total so far.
One issue I do have is that I think I would use a 2x4 for the top rail of the seat back, simply because the 1x4 has a tendency to split easily.
If you make this project, you won't be sorry, it looks awesome!
Built this from Ana White plans. Love how it looks in our four season room.

Fri, 04/21/2023 - 10:20
Gorgeous build and finish, well done! Thank you so much for sharing.
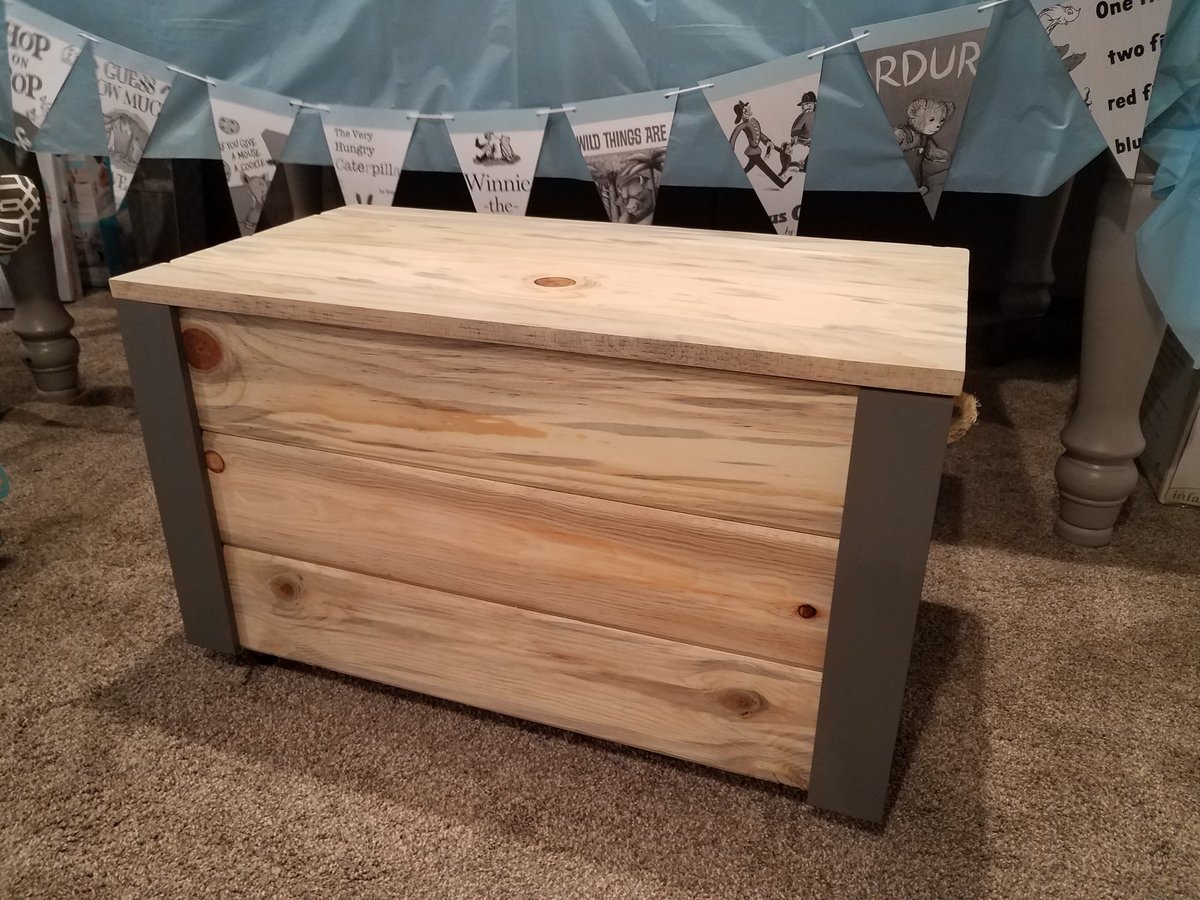
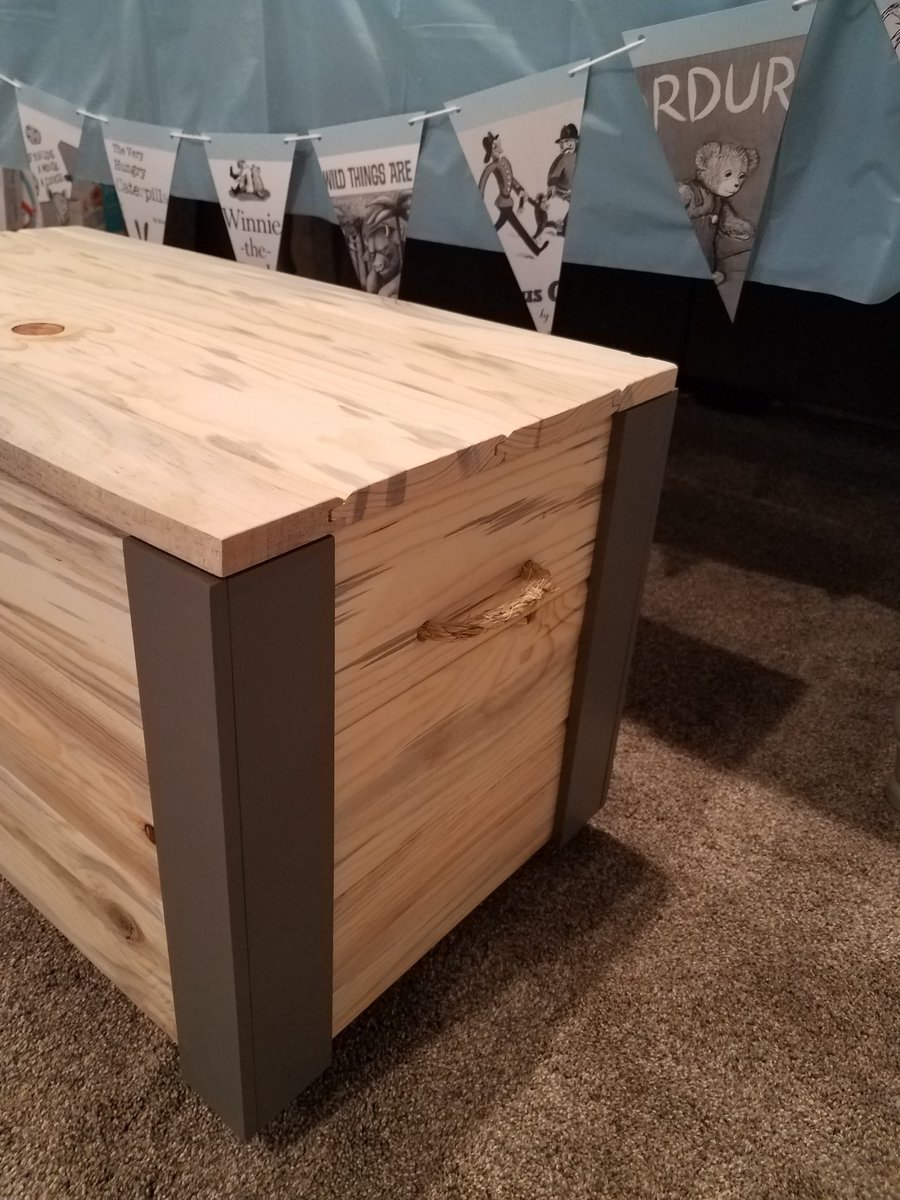
I made 2 of these toy boxes Yor my friend that have twins. They love them and want me to make 2 more for 2 other children.
Kim Myers

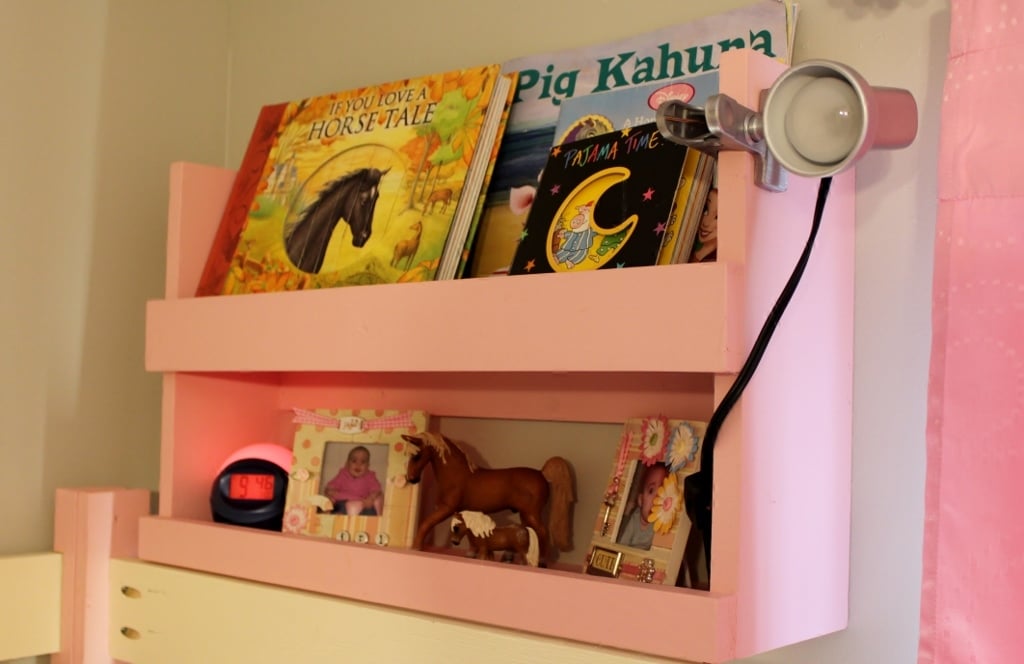
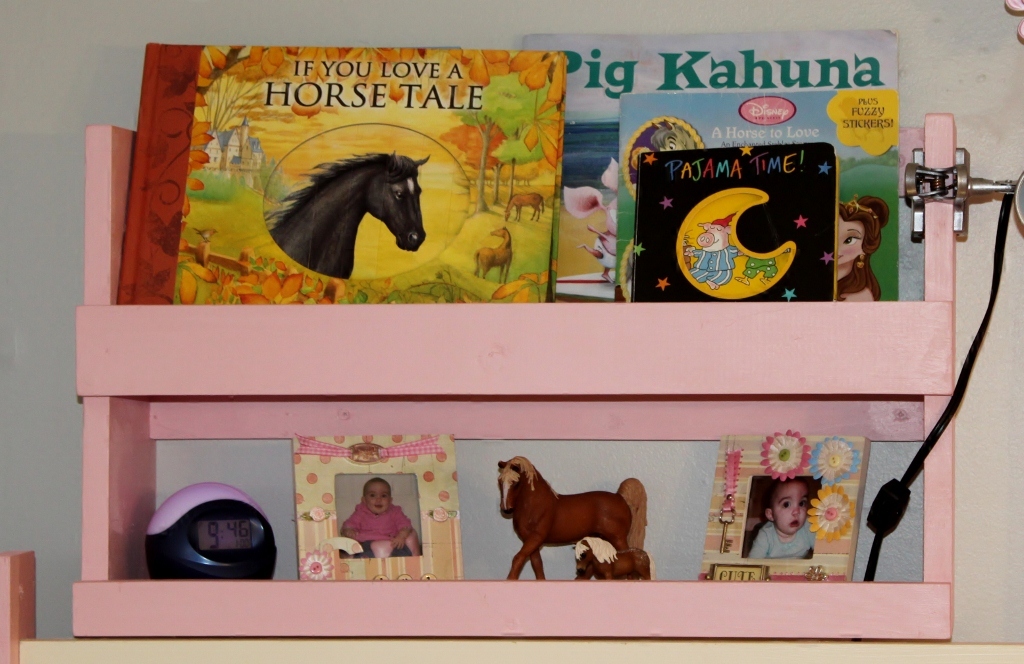
We built this dollhouse bookcase pretty much to plan. We did add "shingles" to the top.
View more on our blog: http://www.bearrabbitbear.com/2012/02/dollhouse-bookcase.html
Thu, 12/13/2012 - 06:21
My husband is about to start cutting the wood for this bookcase. He made the farmhouse doll bed last year! It turned out great! He is making the doll bed for a friend andthe doll bunkbeds for our daughter.
Yourbookcase is beautiful!:o)
Wed, 09/02/2015 - 06:27
I made this for my daughter for her second birthday and she loved it too! 
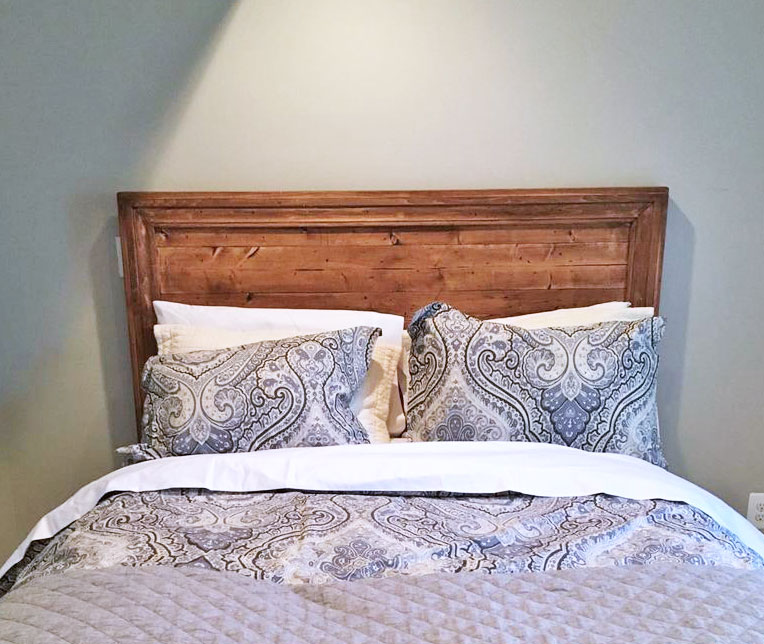
Head board we made over the weekend. Great beginner project.
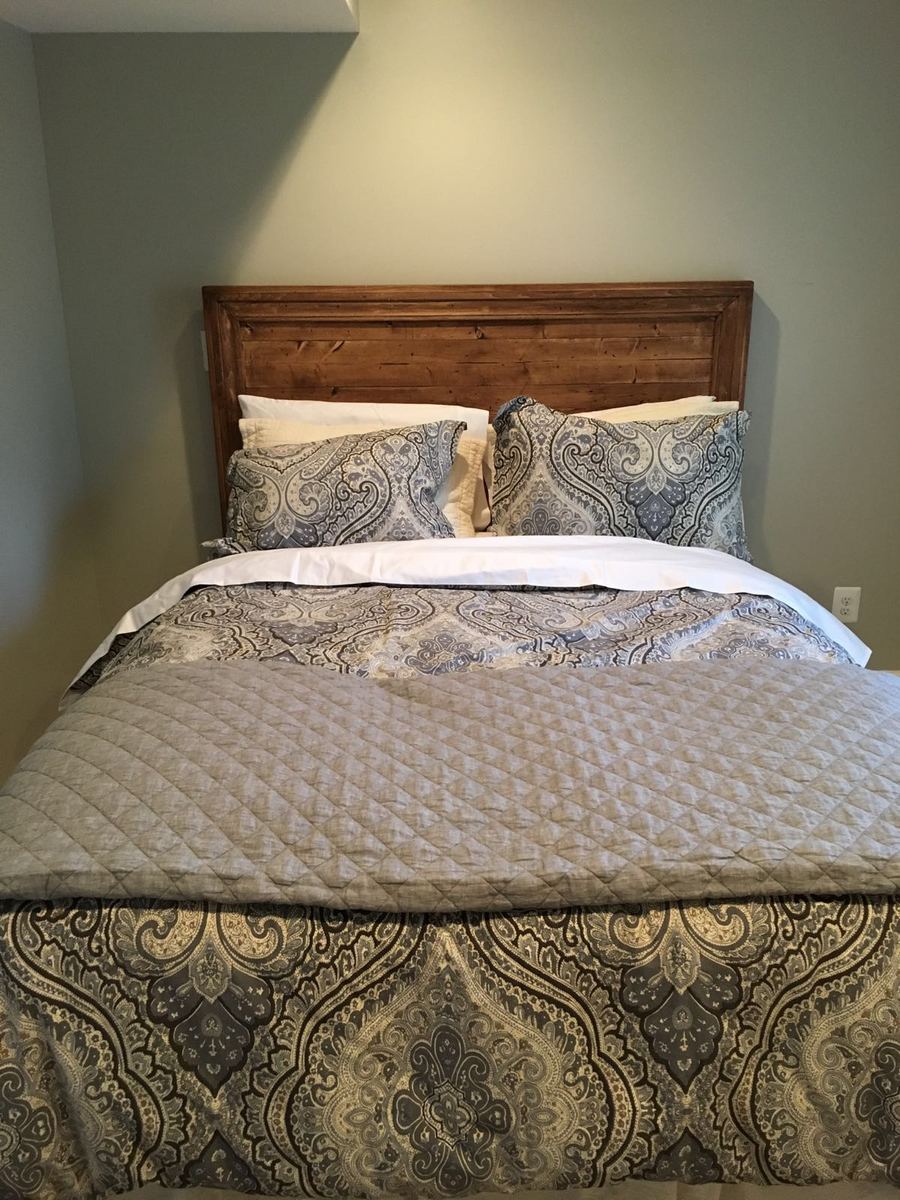
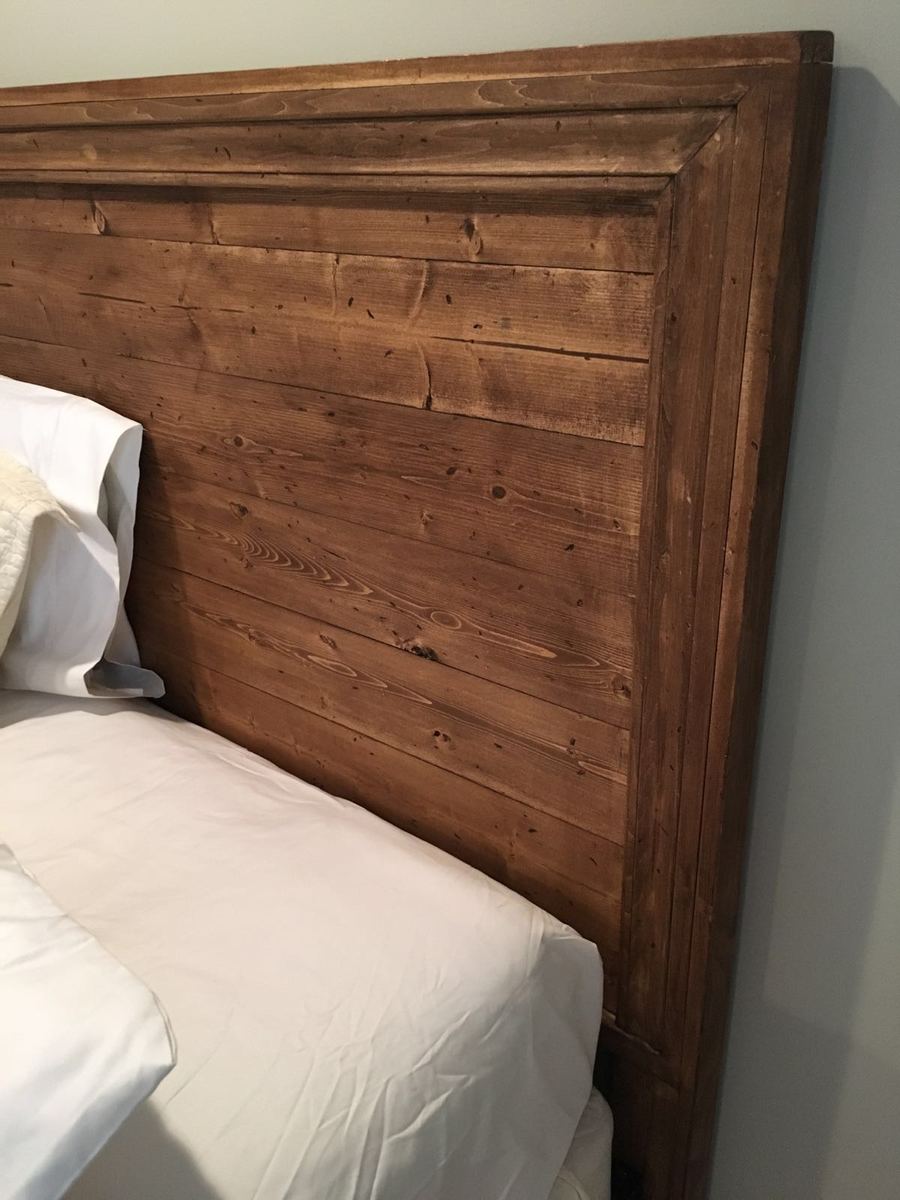
My first ever project that was intended to live in my house.
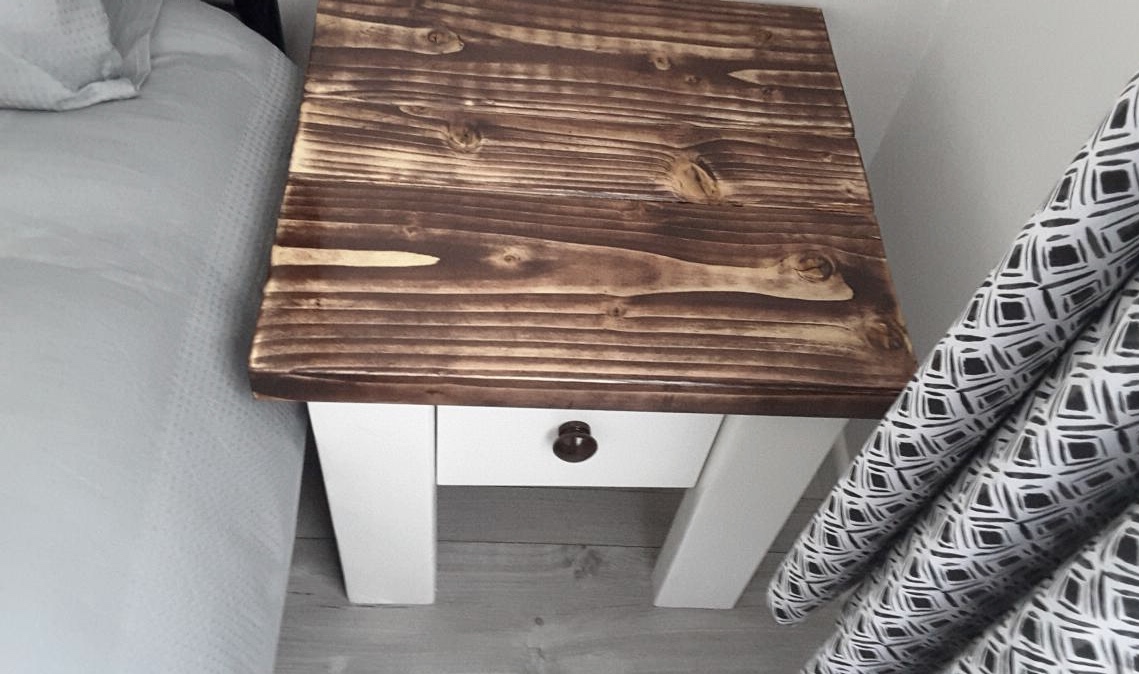
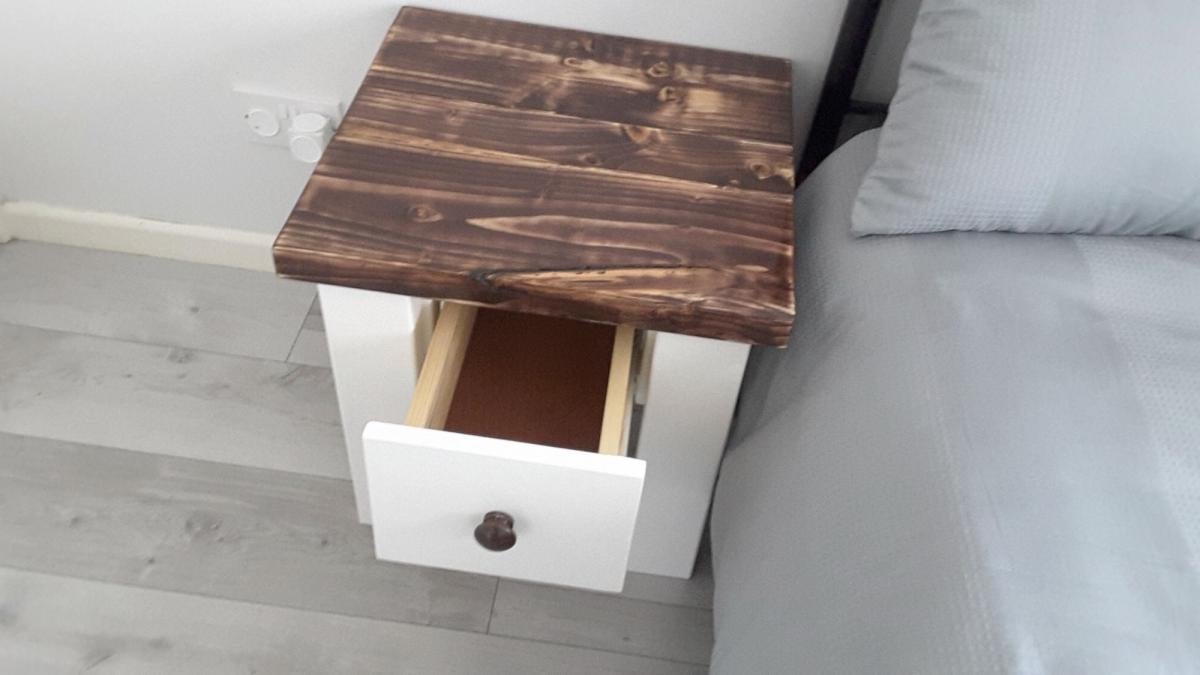
Built a pair of these Farmhouse Nightstands for a spare bedroom from a modified version of Ana's plans. The only real difference was that they were re-sized to fit the space available. The tops are made up from two 8x2s and a 4x2 and the base by about an inch on all sides. The three pieces making up the top are joined underneath by Kreg screws (another first for me) and the top is secured to the base by small angle brackets from underneath also.
The base was painted first with a primer, then undercoat and finally with a top coat of Antique White satin finish. The top was stained with a walnut stain. I didn't apply a sealer beforehand and so the wood absorbed it at different rates but I like this effect. Finally the top was finished with 3 coats of Danish Oil
Really pleased with this first project. Thanks Ana for the design.
Sorry about the photos - everytime I load them the appear upside down 🙃🤔
Thu, 06/04/2020 - 12:36
My fifteen year old daughter made this. She would only let me do the sanding.
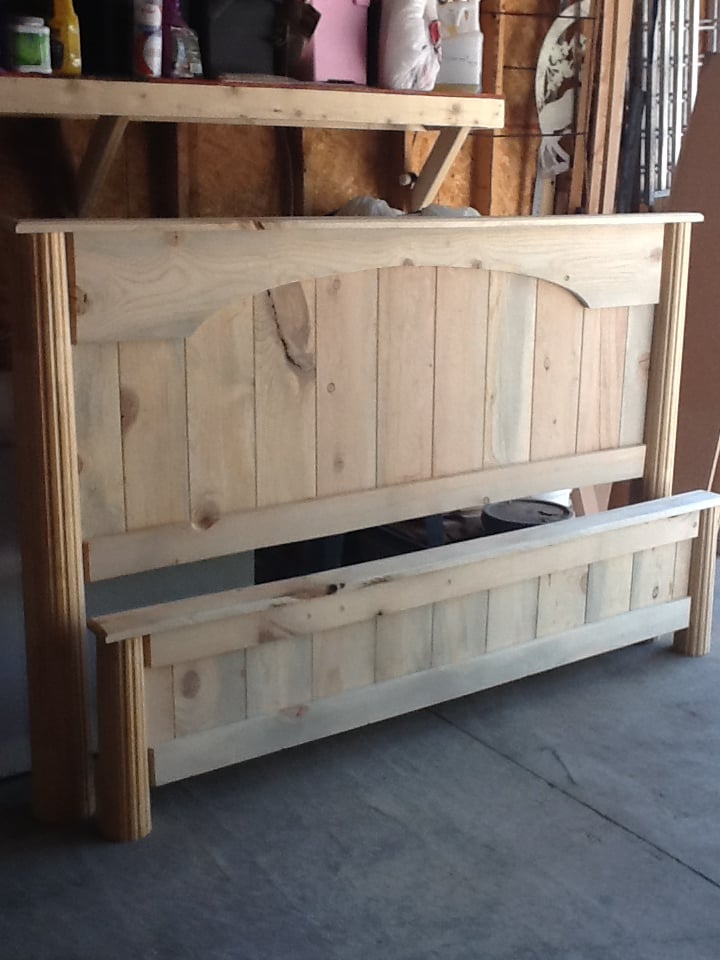
I drove to my dads house to get the wood. He has had rough cut 1X12's sitting in the back yard for several years. They are warped, dirty, cracked..... I think my husband thought I was crazy for wanting to do this. 6 months after getting the wood I finally started. I first took the boards and sanded the caked on red dirt off. Then my 8 year old helped me rip them on the table saw into an 8 inch piece and a 4 inch piece. Then sanded again. The boards turned from red or grey to a yellow color. My husband told me to do it right I needed to use a jointer and he showed me how and I needed to use biscuts to join the planks together, we borrowed one and he showed me how to use the tool. It is so cool, I want to buy one. Then I called my neighbor over to help me, he brought a power planner over and showed me how to use it. It made all the boards the same heighth and REALLY sanded them good (remember these are rough cut boards). Then we used a belt sander to make them really smooth. Then we used a router with a Vgrove bit down the planks where the 1x8's meet. He had two fluted, tapered columns in his garage he has been trying to get rid of so we cut them down and used them as the posts for the headboard and footboard. I cut the arch with a jig saw. Looks pretty darn great! I surprised people with the wood I used! Thank goodness for biscuts, jointers, planners and belt sanders! Best part......cost me a whole $15 to get to this point. I had to buy wood glue, biscuts, and sand paper.
I want to use a laquer finish and try to use a glaze in the grooves. I will try to attach a finished picture when it is done.

Tue, 06/26/2012 - 14:12
That is gorgeous! Such memories you made by building it this way! Priceless!
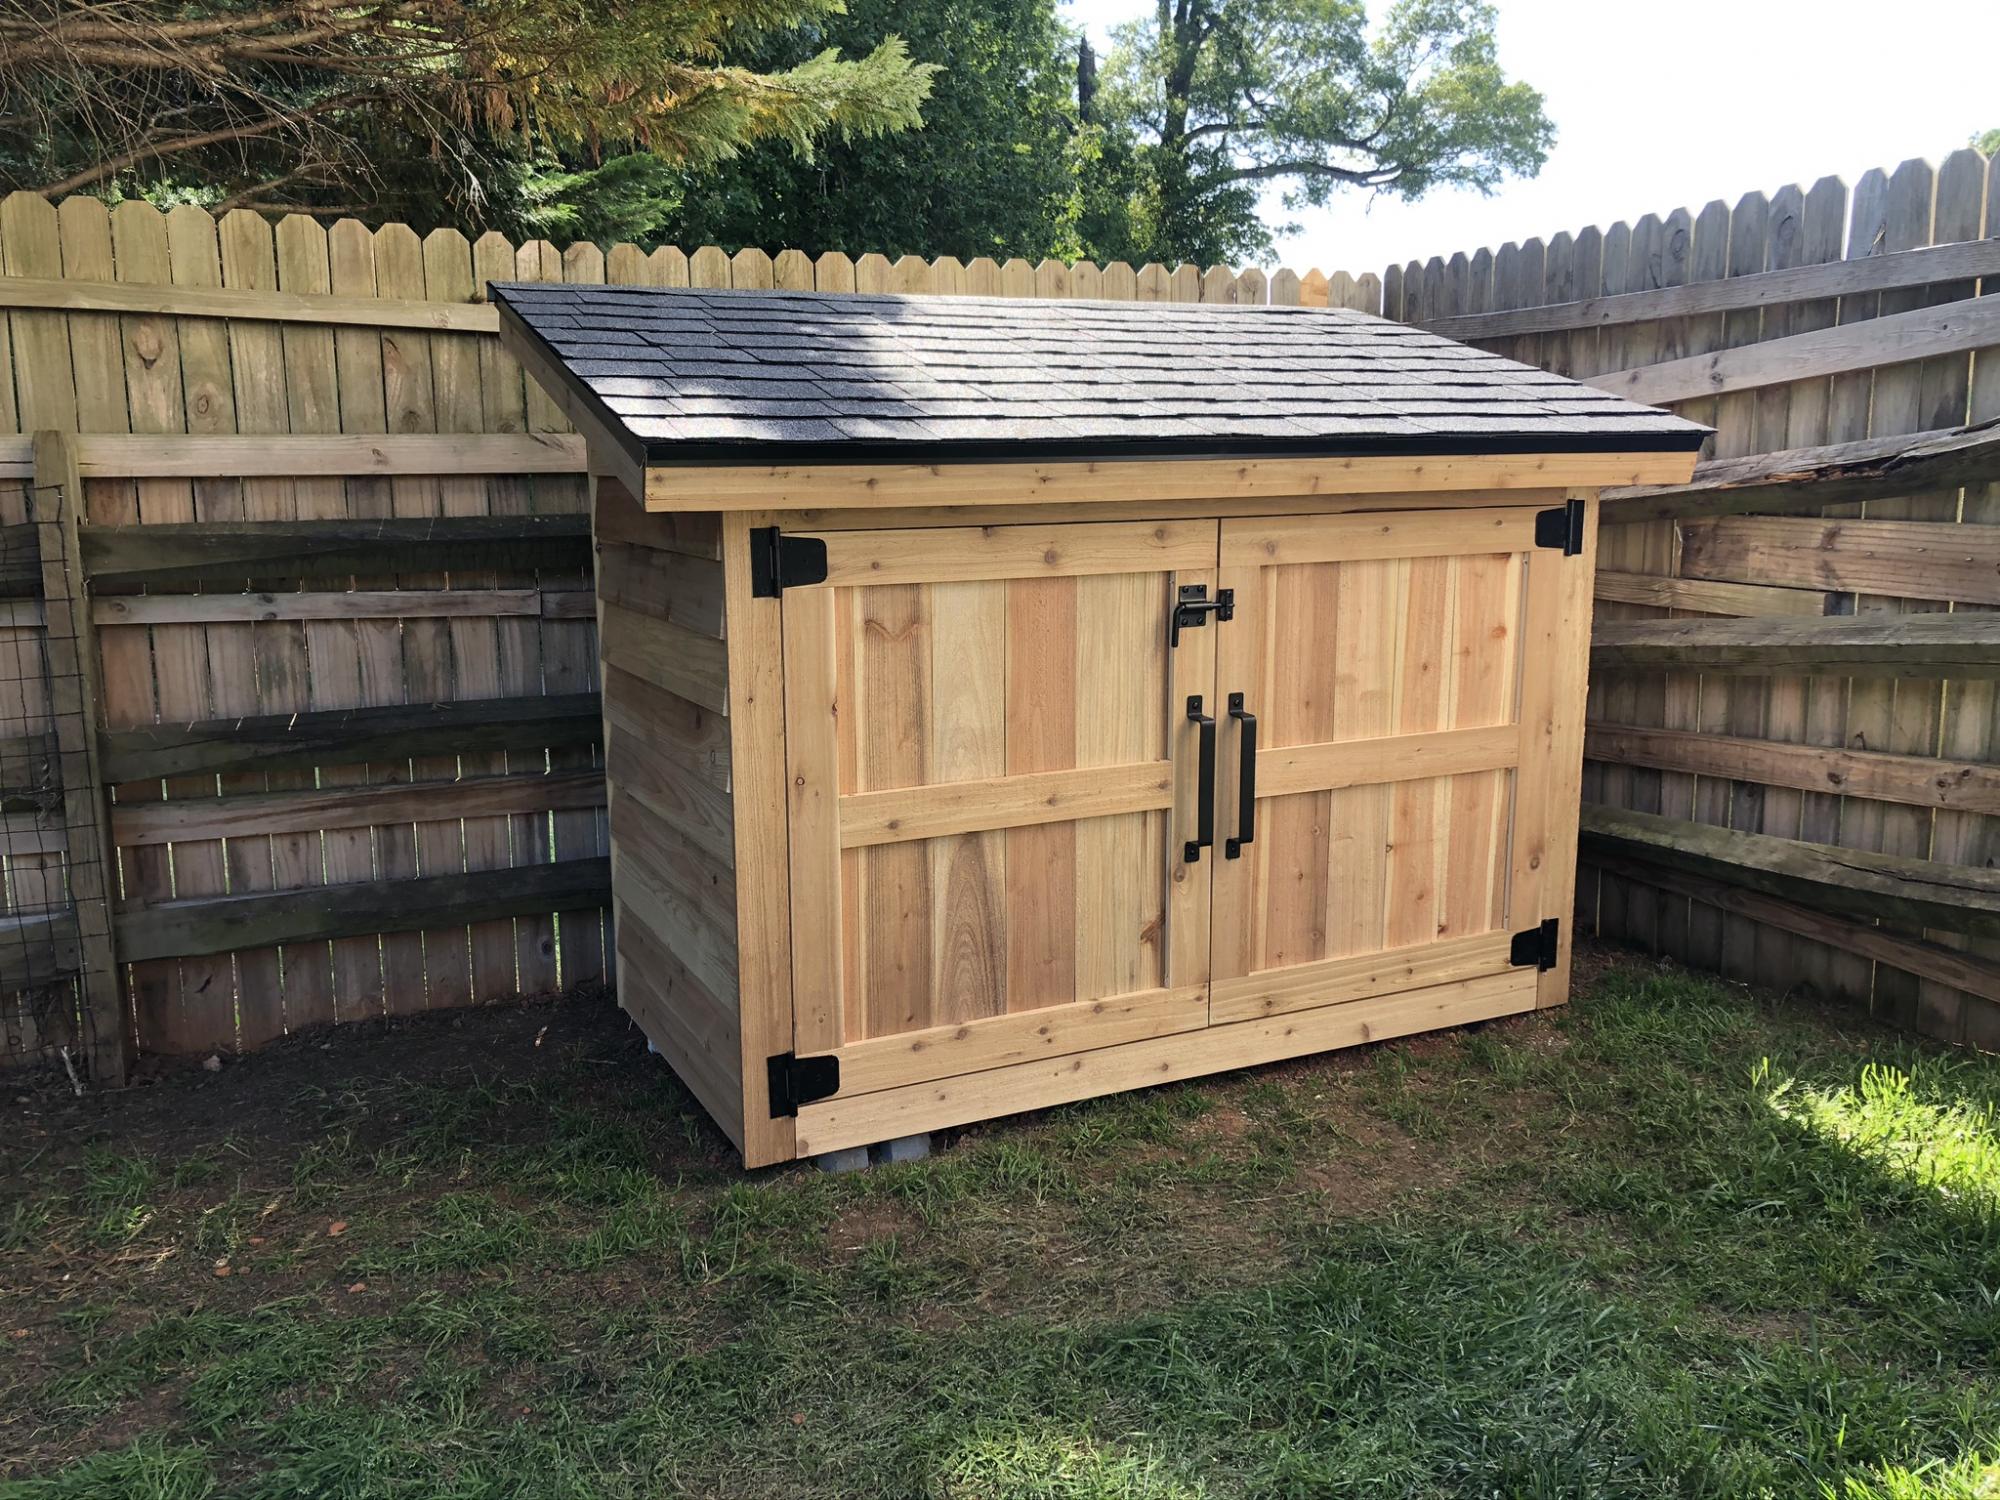
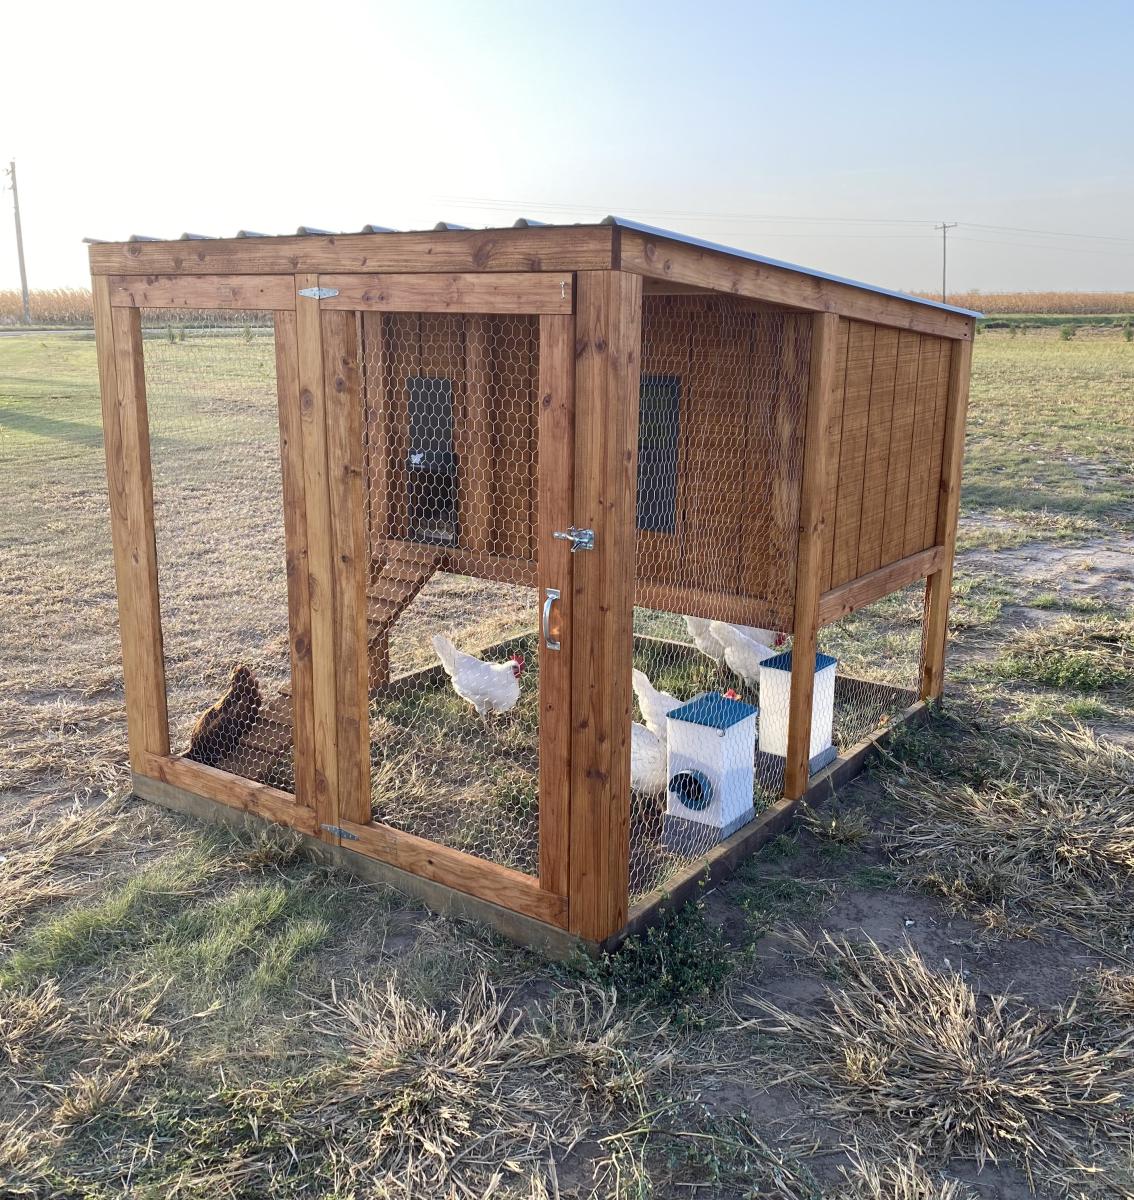
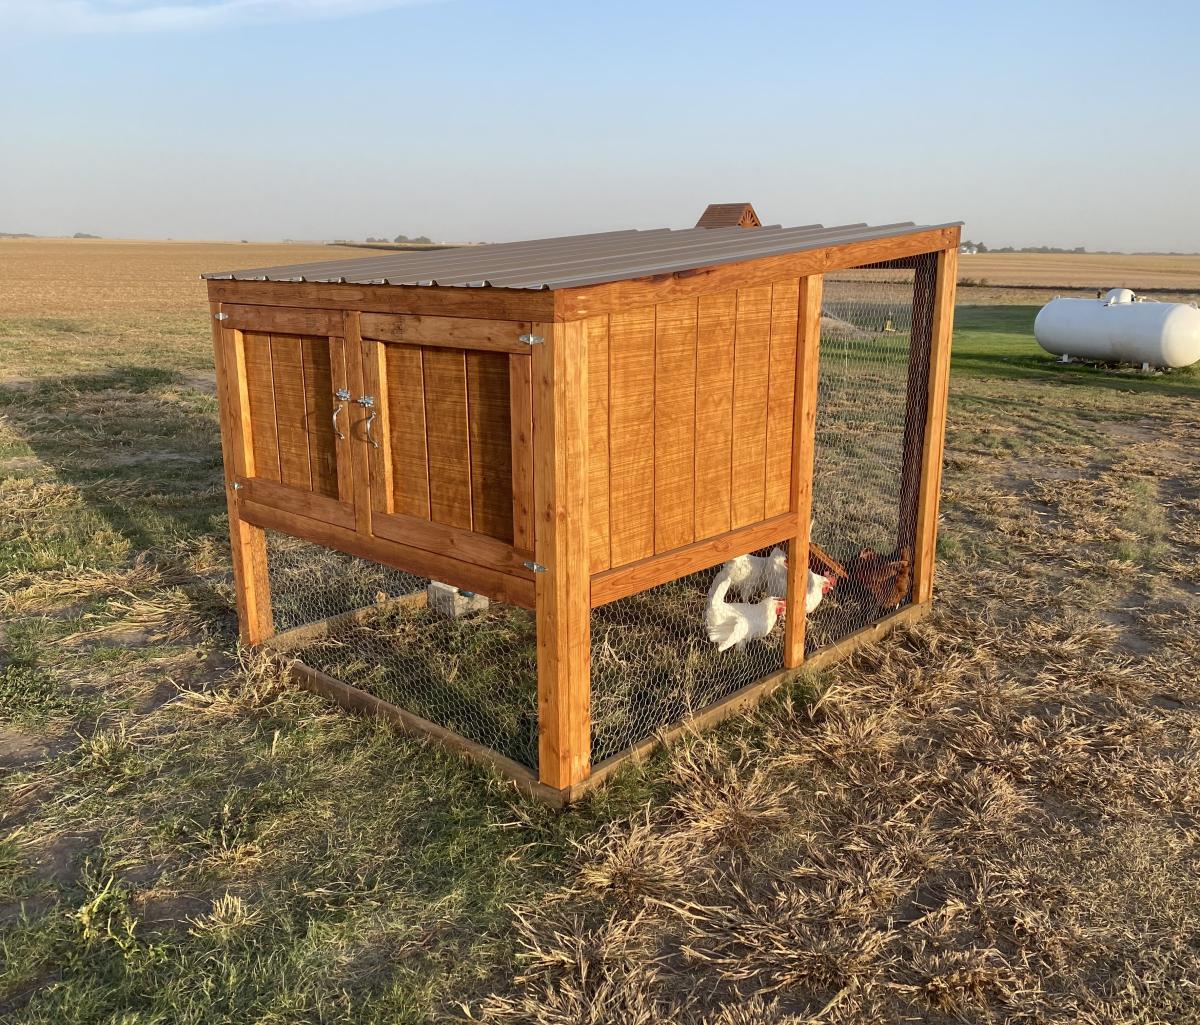
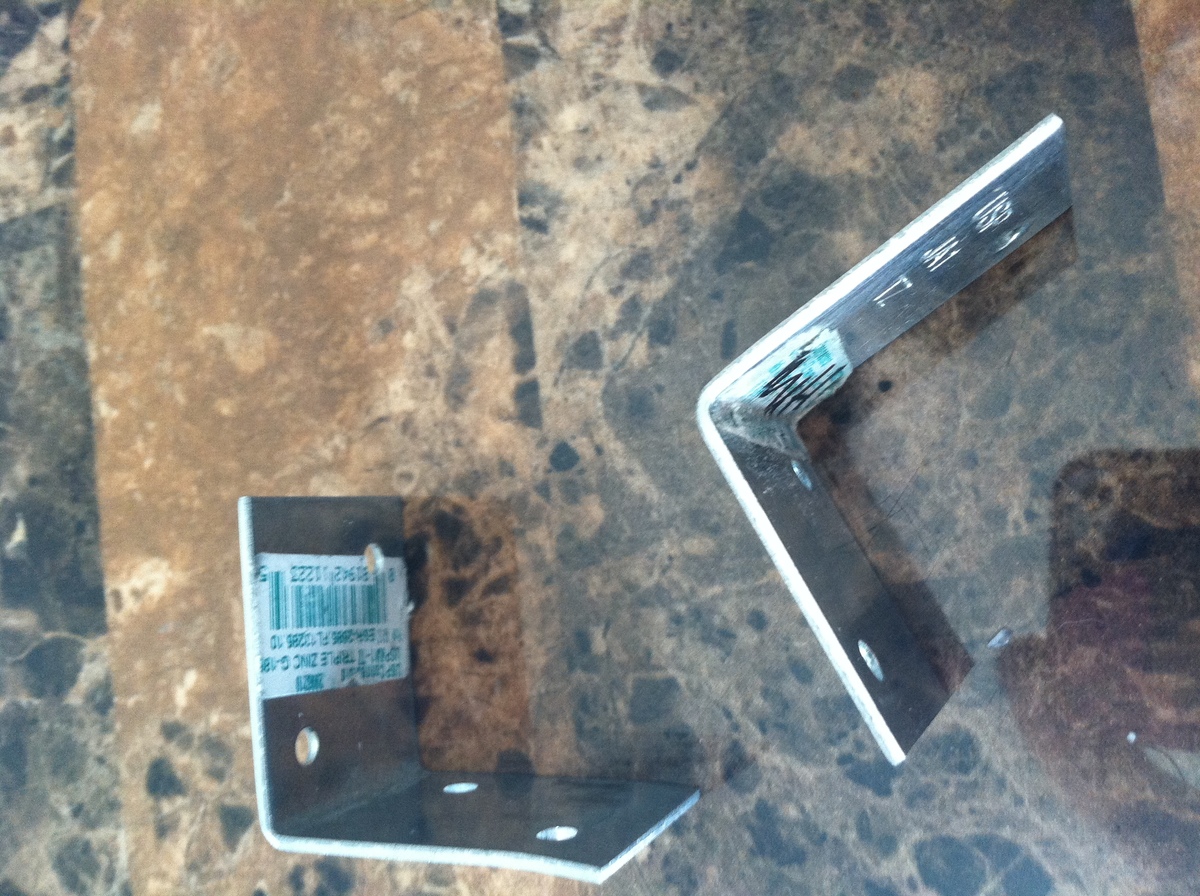
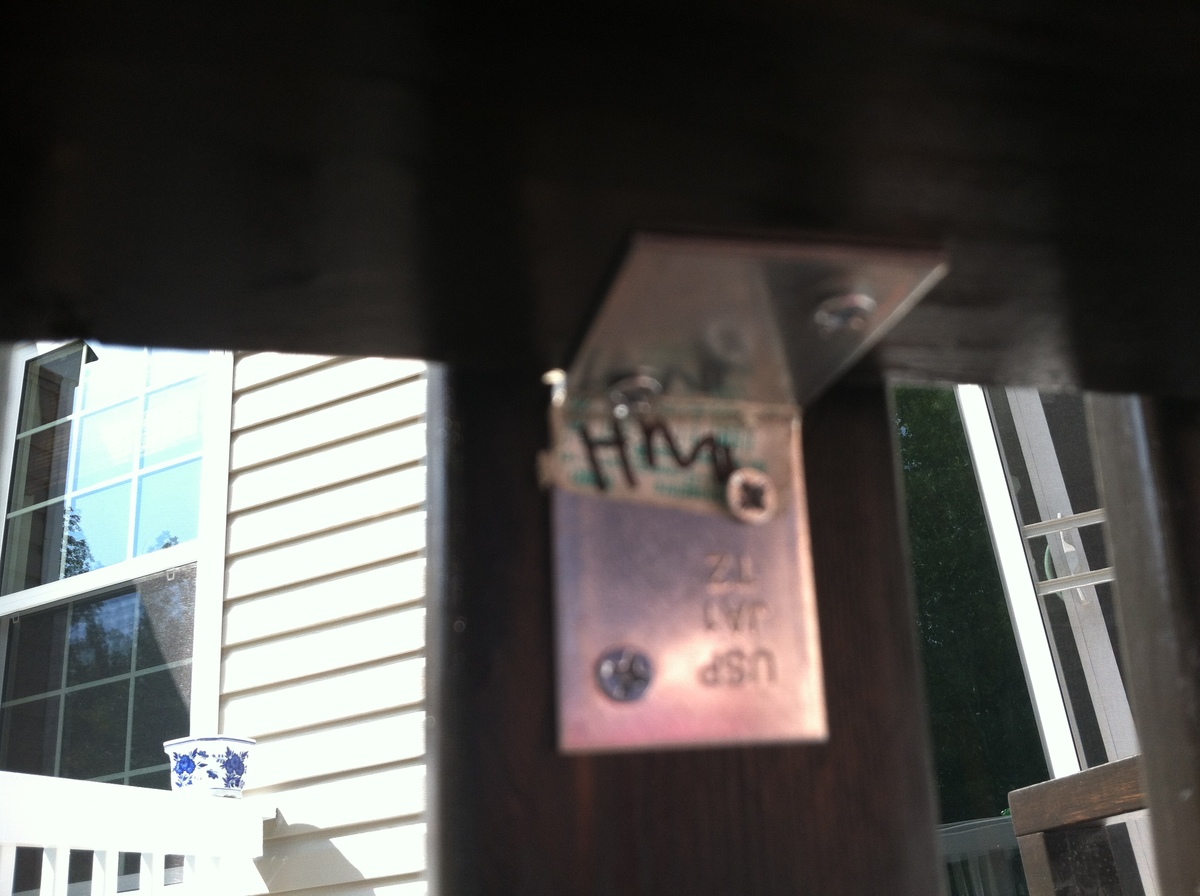
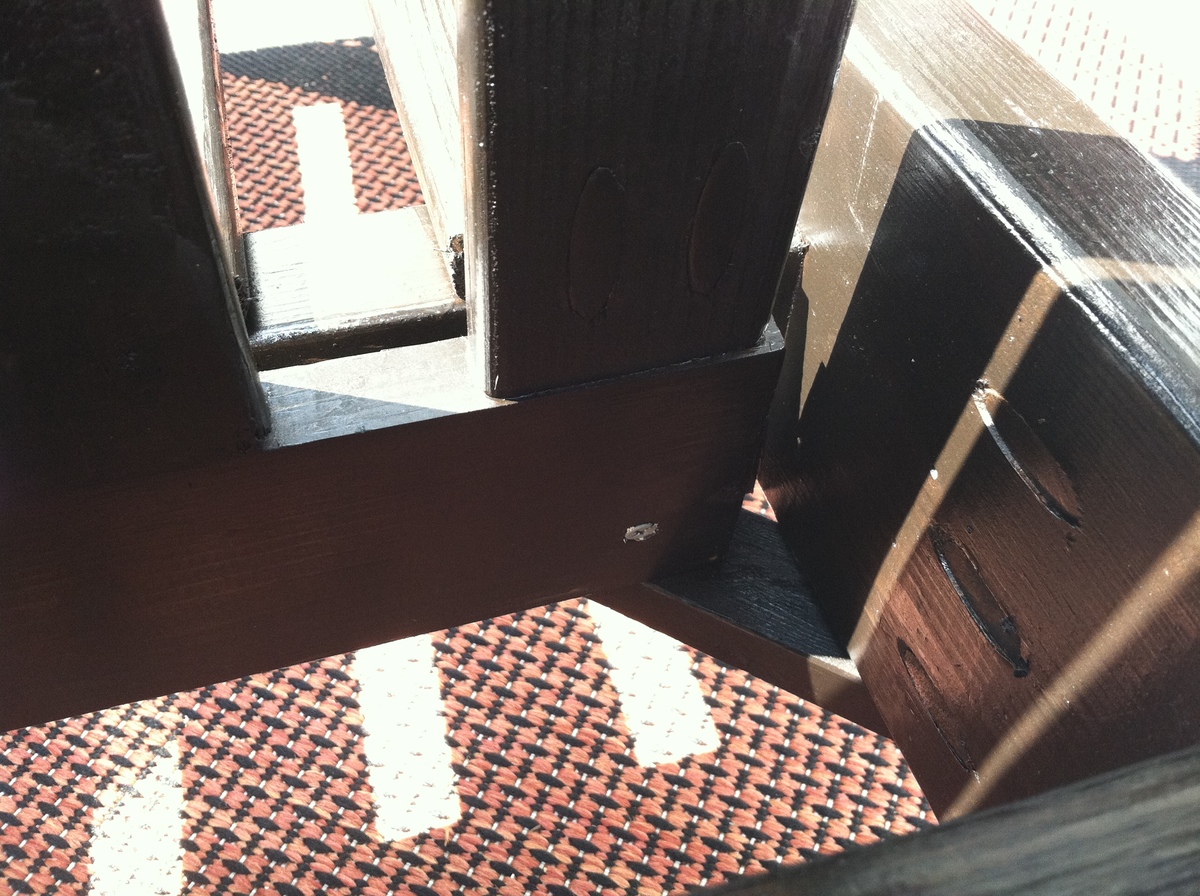
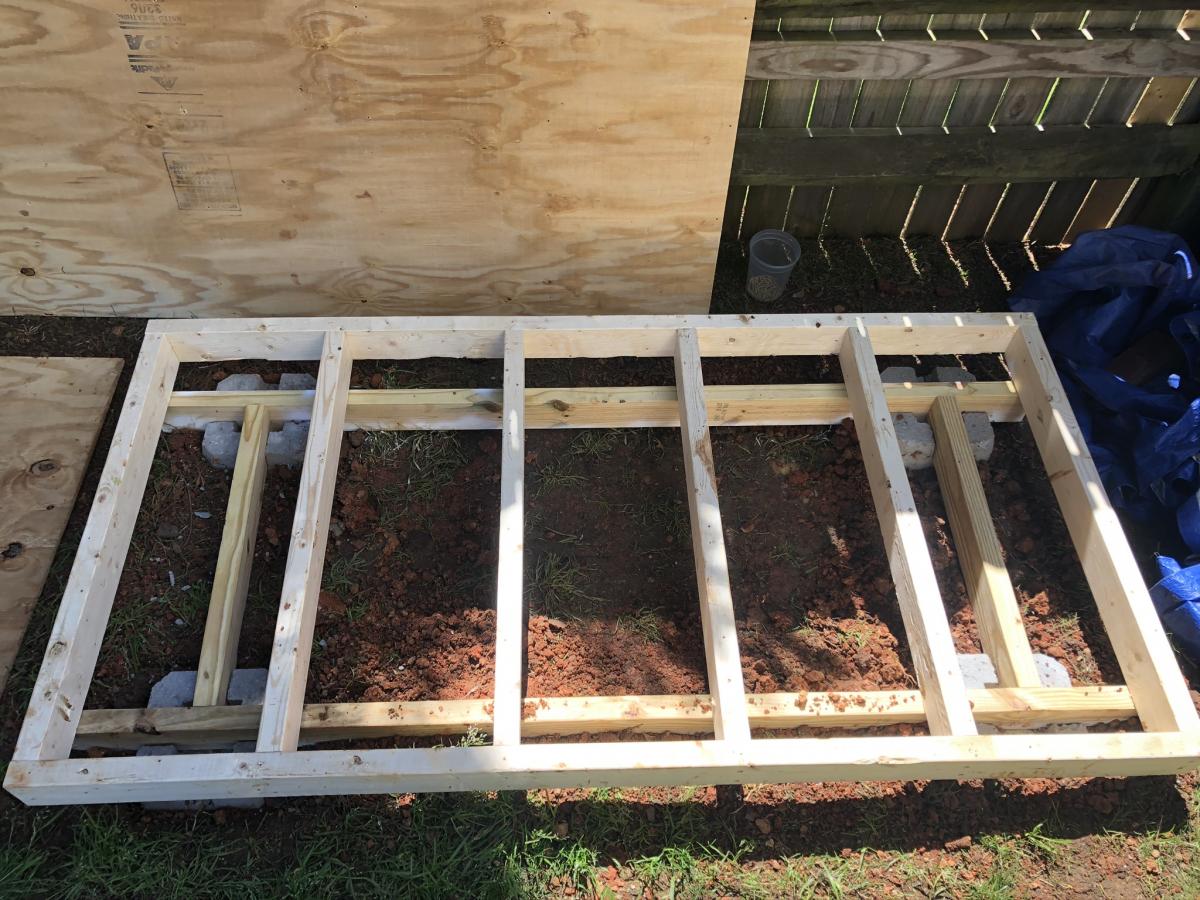
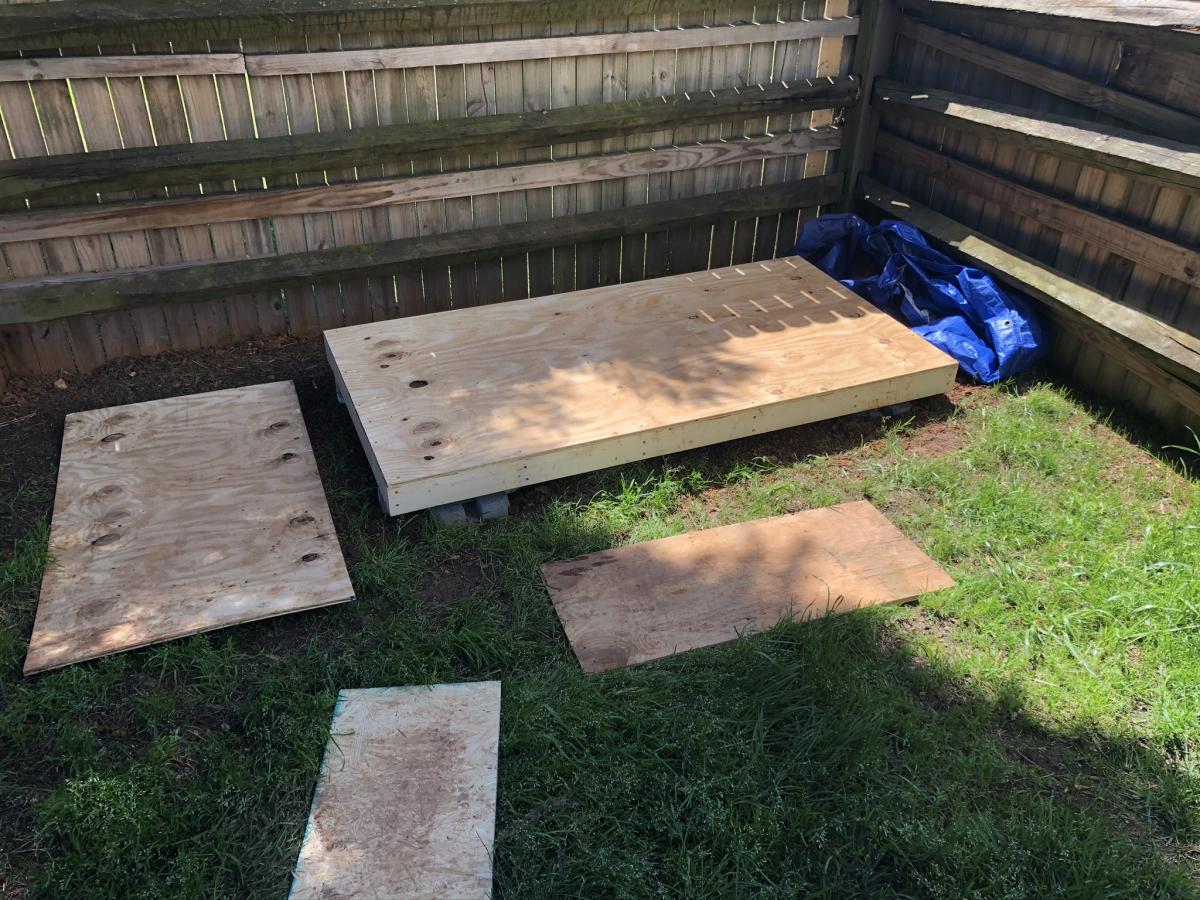
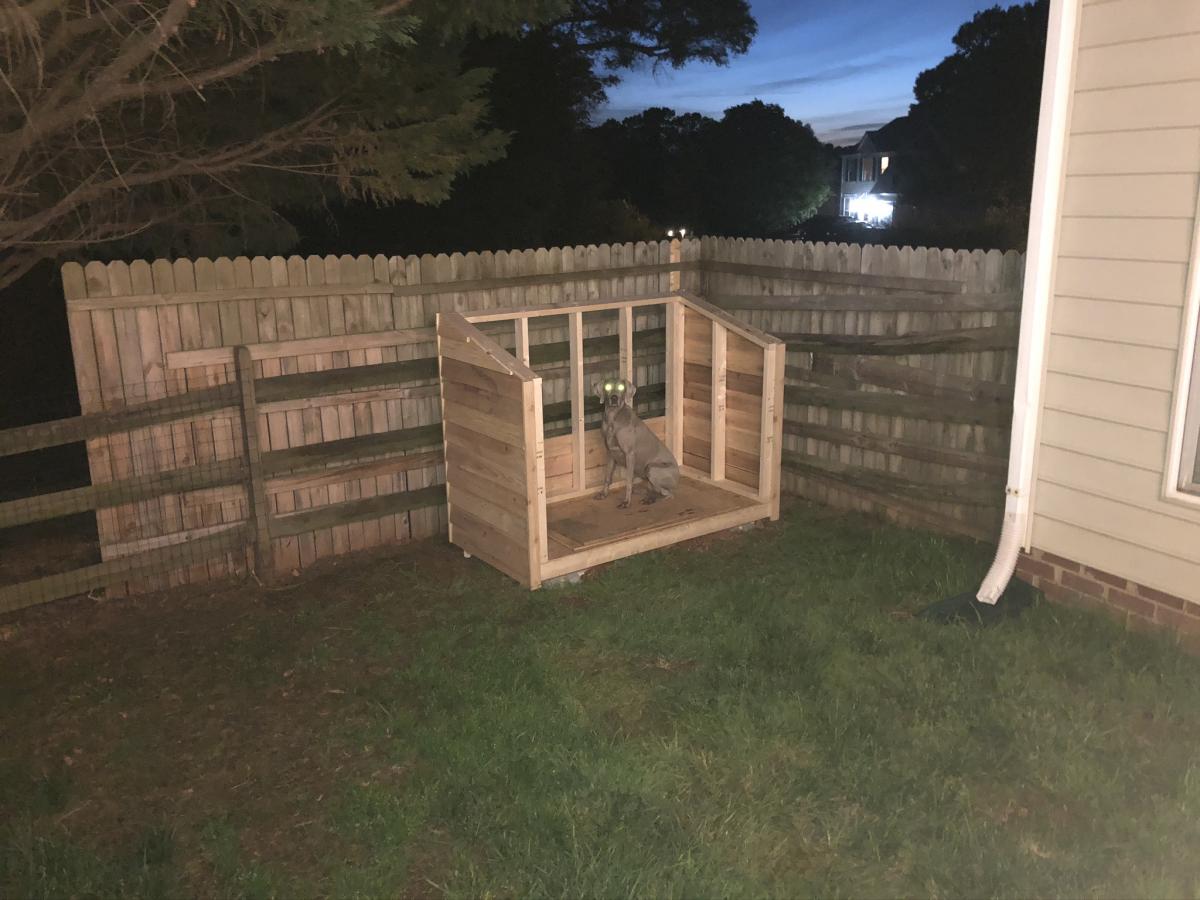
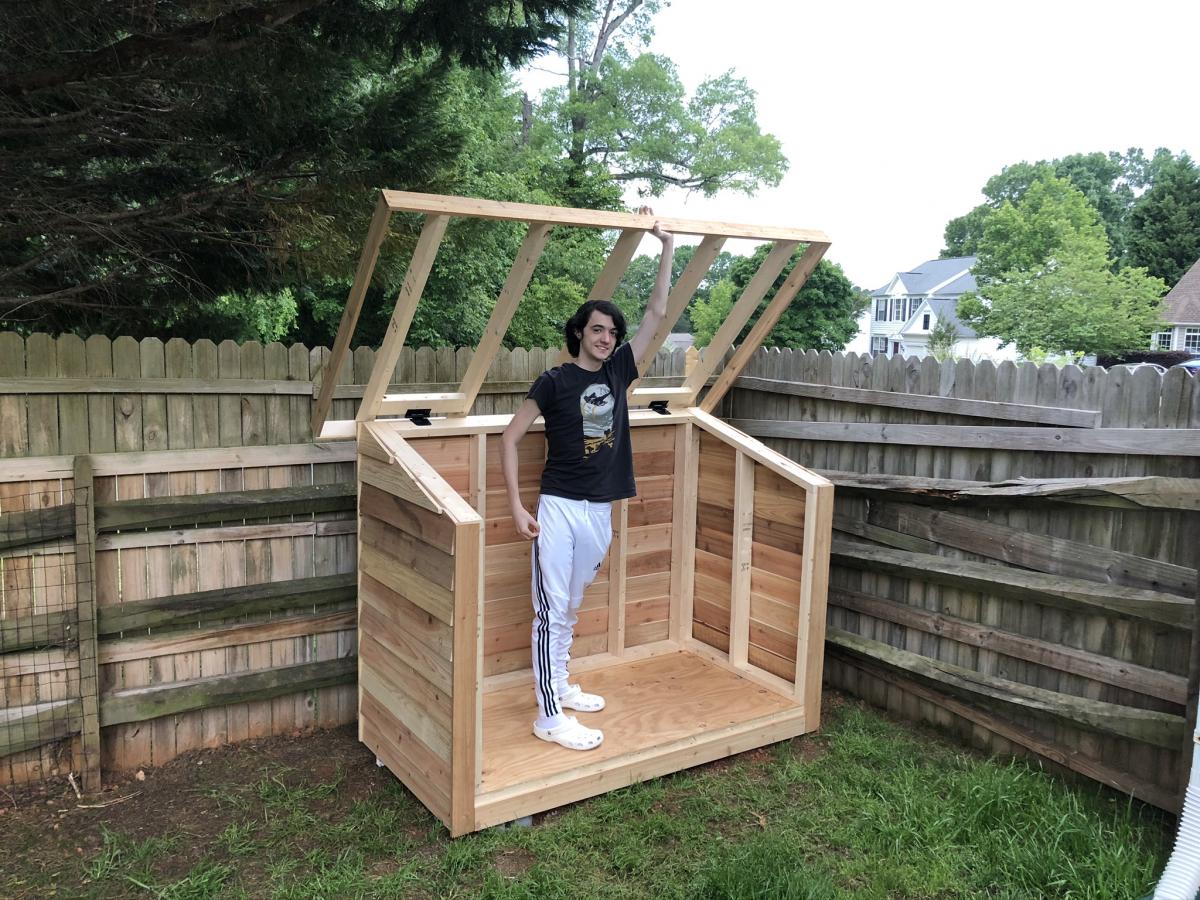
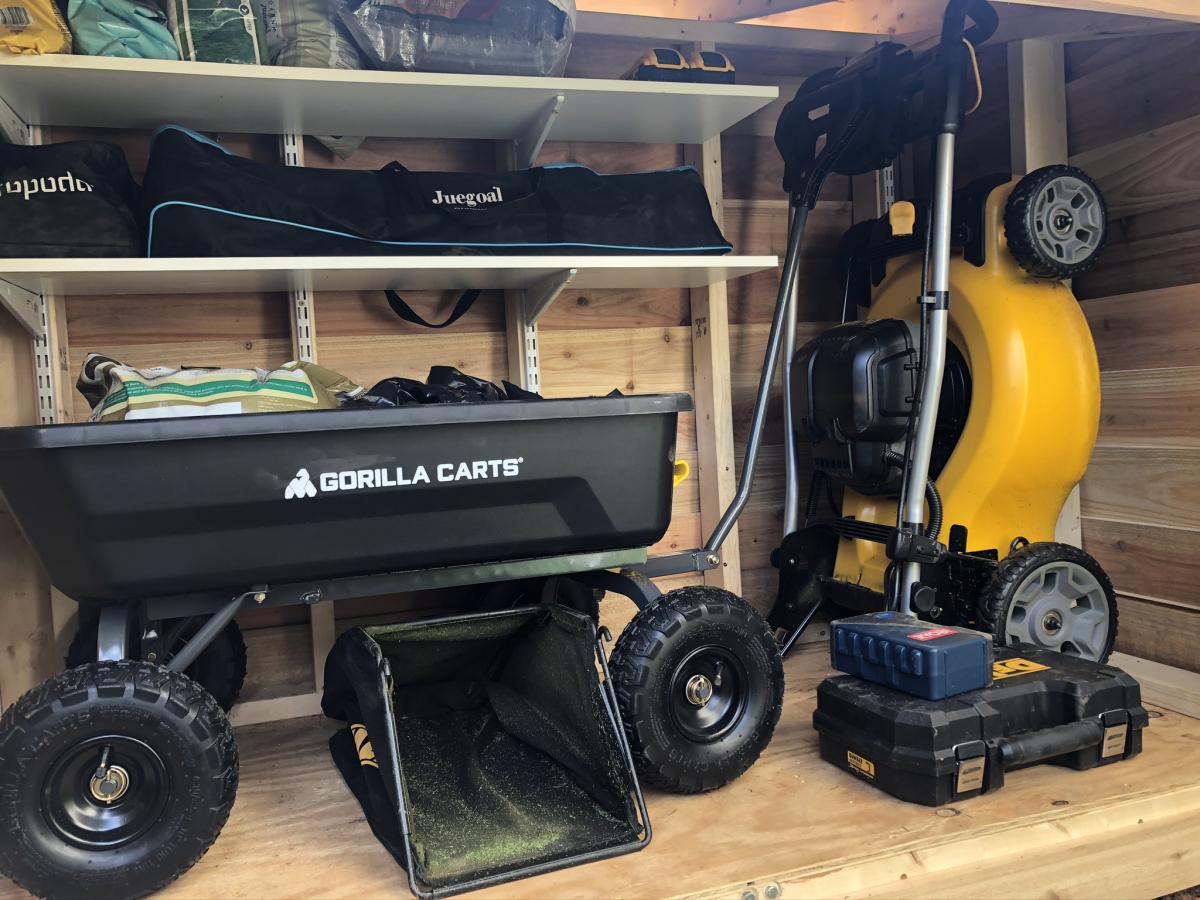
We wanted a shorter version, so that it would hide behind this fence. I just needed somewhere to store lawnmower, wheelbarrow, and a few yard supplies. I started putting the roof on hinges, but the gas struts couldn't support the 170 pound roof. So it's fixed in place (stronger structure anyway). That's why I went with 2x4's for the framed walls instead of 2x2's.

Thu, 06/11/2020 - 17:15
Very Nice modification. Two thumbs up! May I please ask you for the dimensions of the shed?
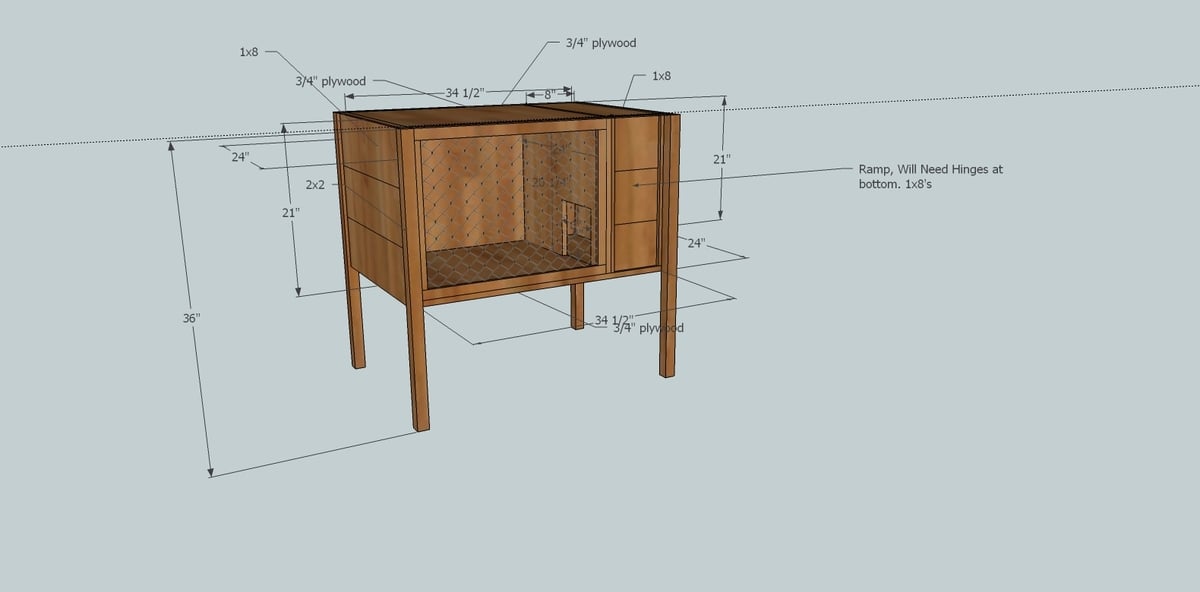
I have a pet ferret that has little room to run around. So I seen this rabbit/ferret cage at the pet store. It was about $150 or so. So I took a pic of it on my phone, and found the Google Sketch app, and watched some videos, and now I have plans for the cage. Some 2x2's, 1x8's, plywood, chicken wire, and some locks and hinges for the ramp an lid.... Still tweaking it, but hopefully it will work out.
I had just finished my daughter's playhouse loft bed when I saw this plan. It was super easy to build and I used all left over wood from the playhouse. I used 6-inch boards for the sides and shelves since that was what I had left over. Other than that, I followed this plan exactly. Thanks for posting!
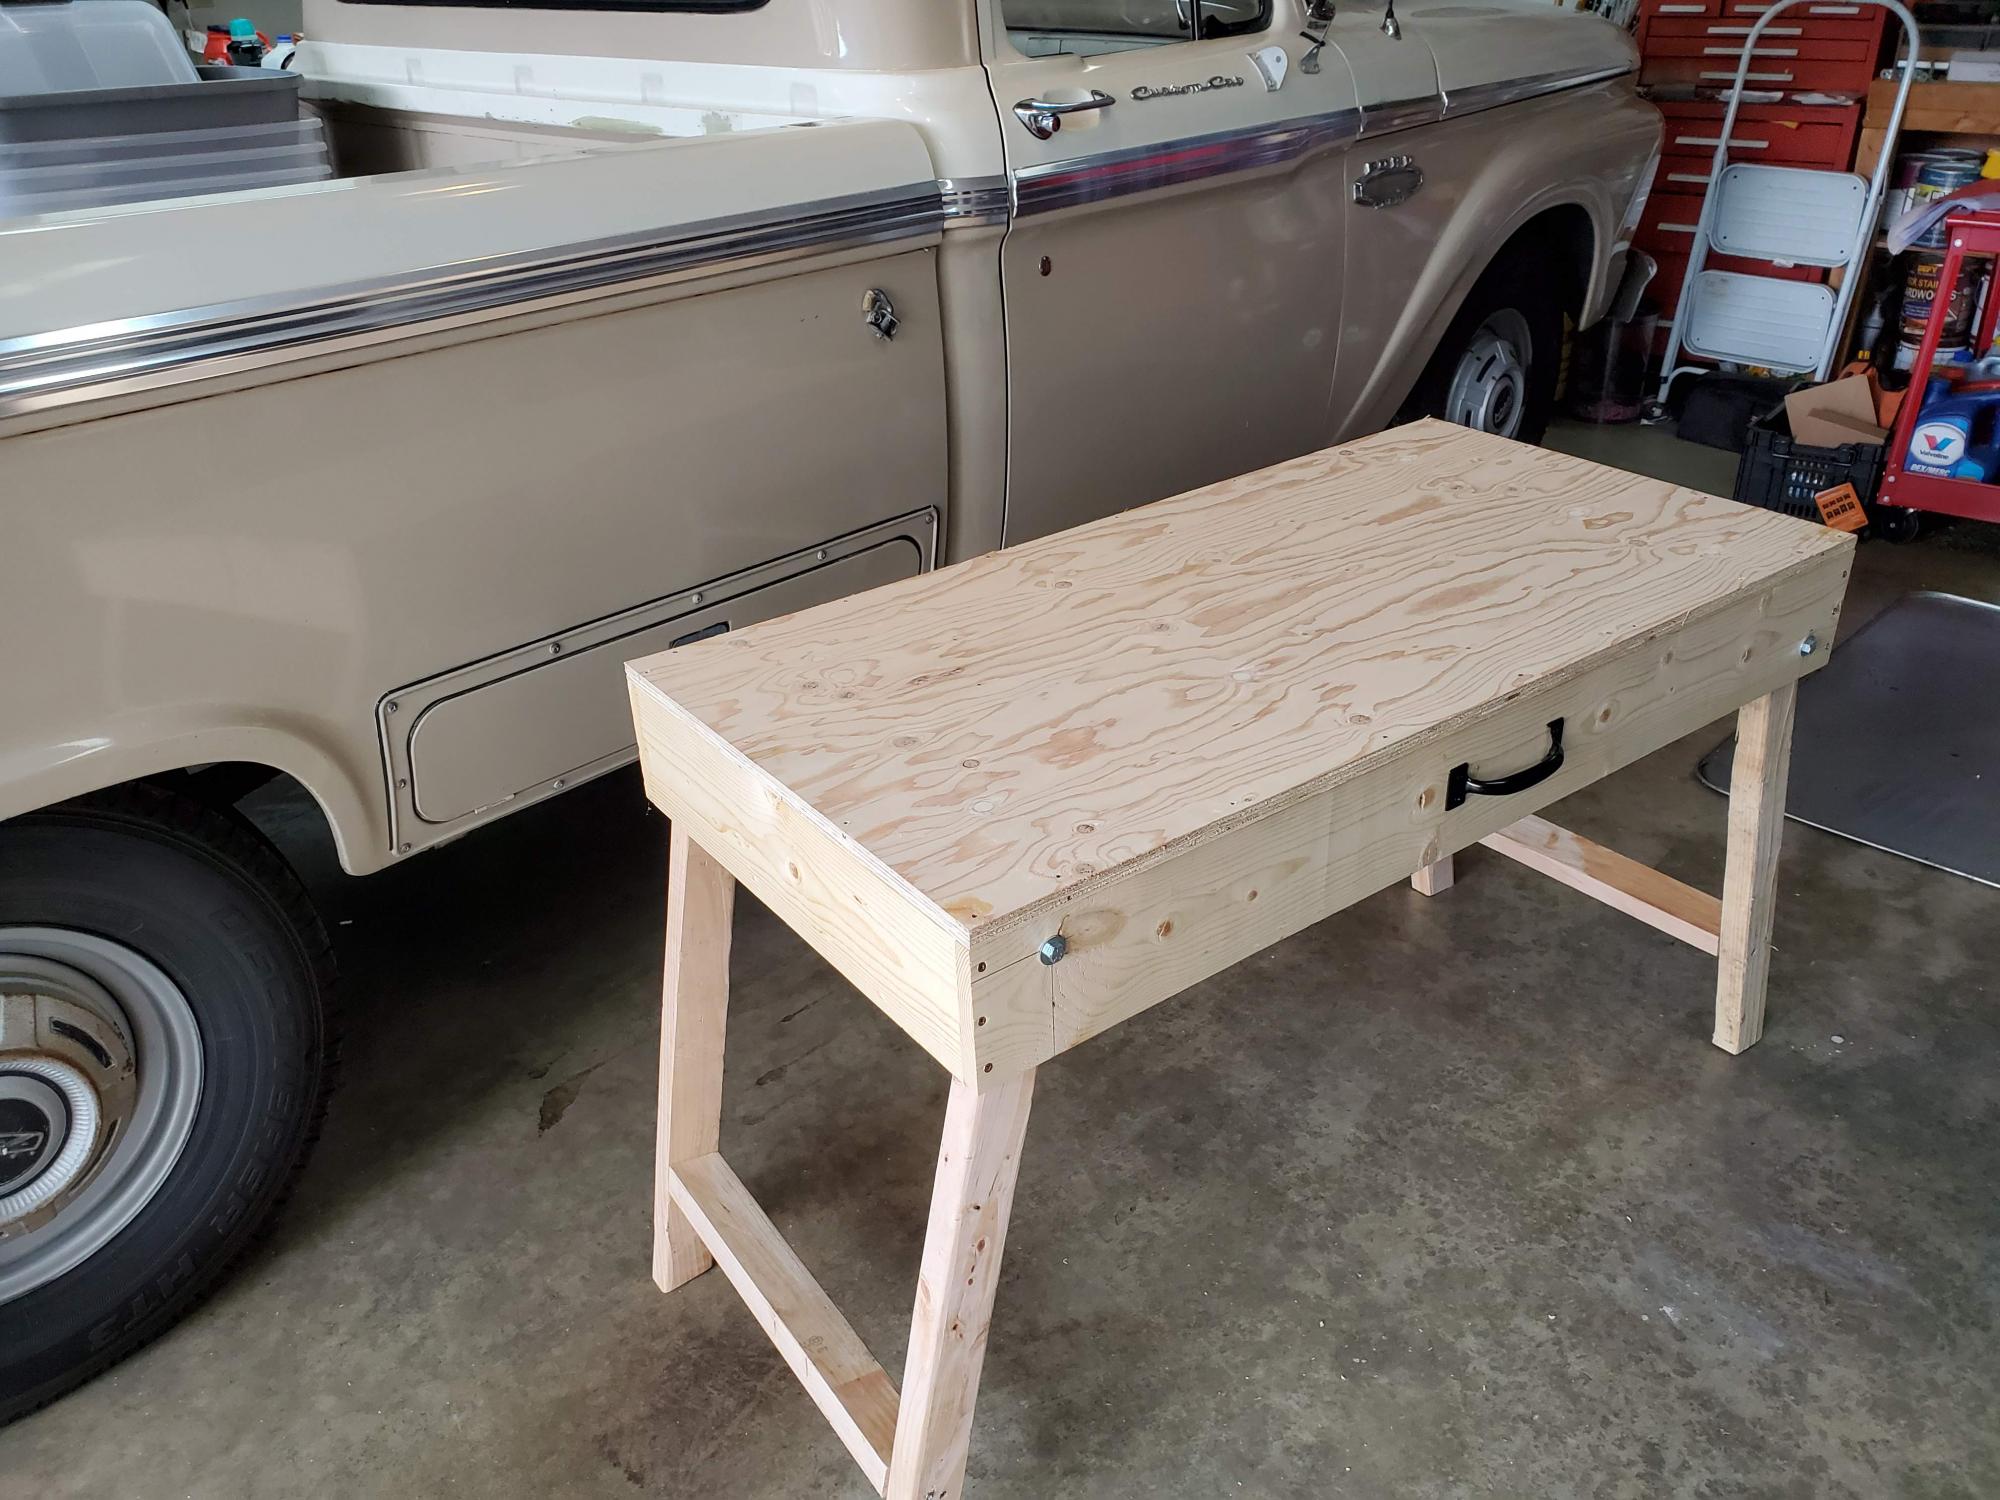
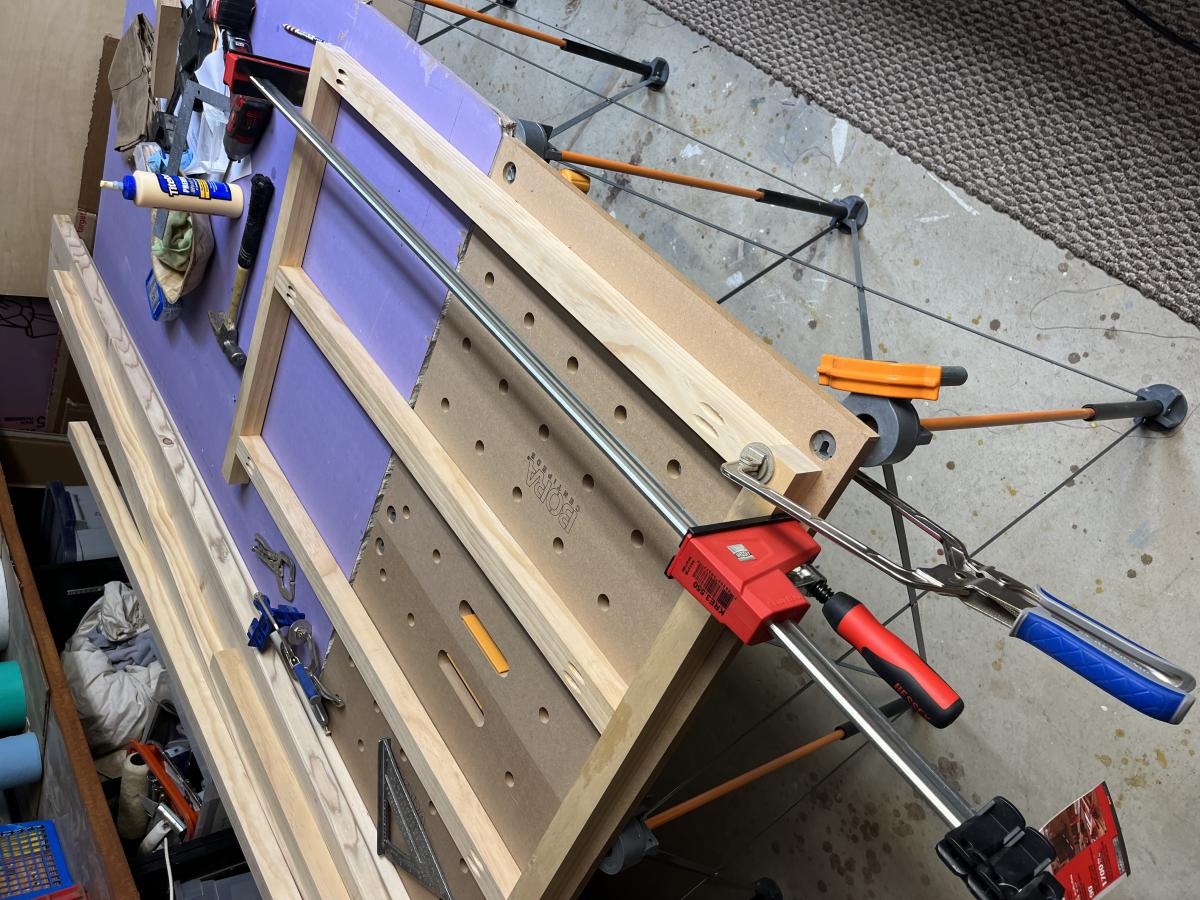
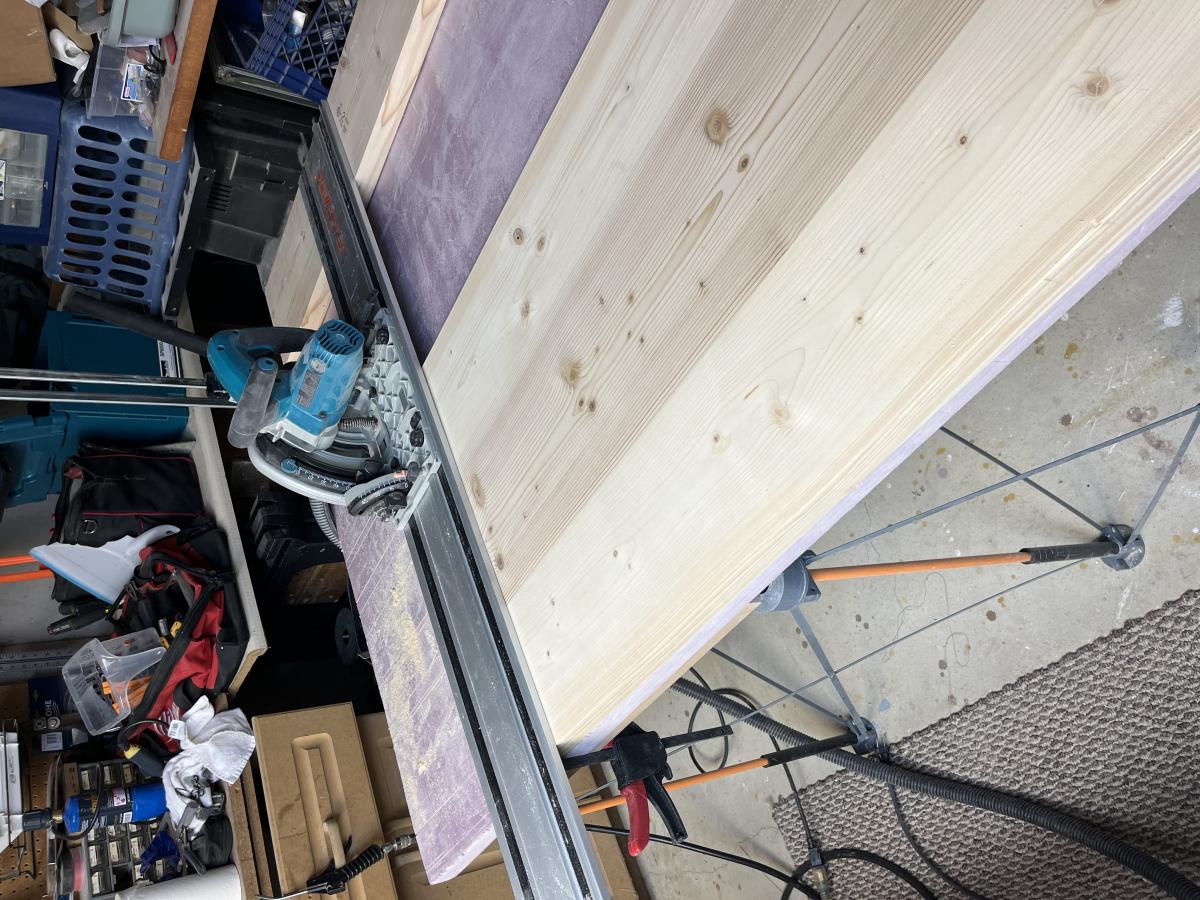
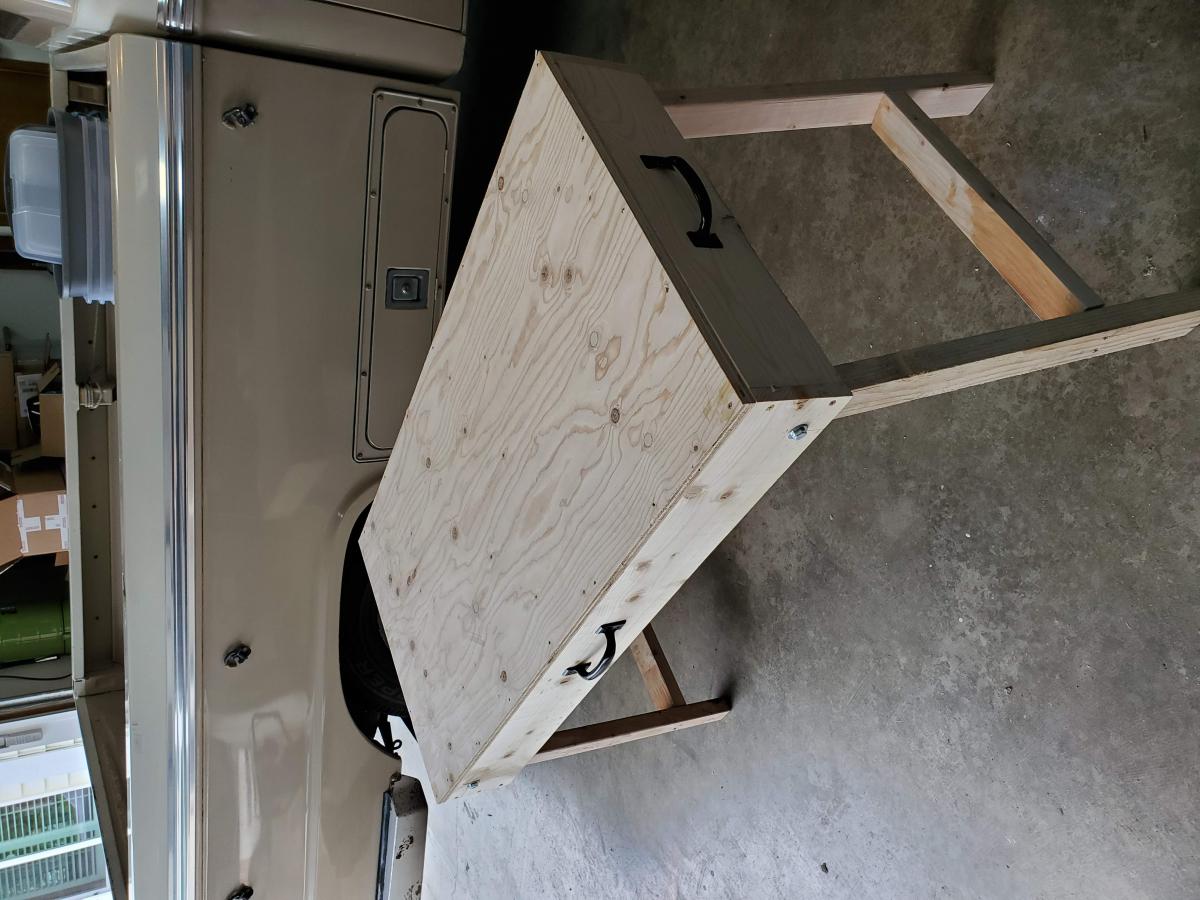
This is my first build. I thought making a work table would be the ideal first project. I'm very happy I came across Ana's Youtube channel and website. I made some rookie mistakes with the cut list. I t was my fault but a good learning experience. In the past I have dreaded any kind of woodworking project. I became very frustrated using the garage floor or some makeshift work table. This sores nicely in the garage and is very functional. I did add a handle on the side of the work table to carry it to the work site. I'm looking forward to many new projects.
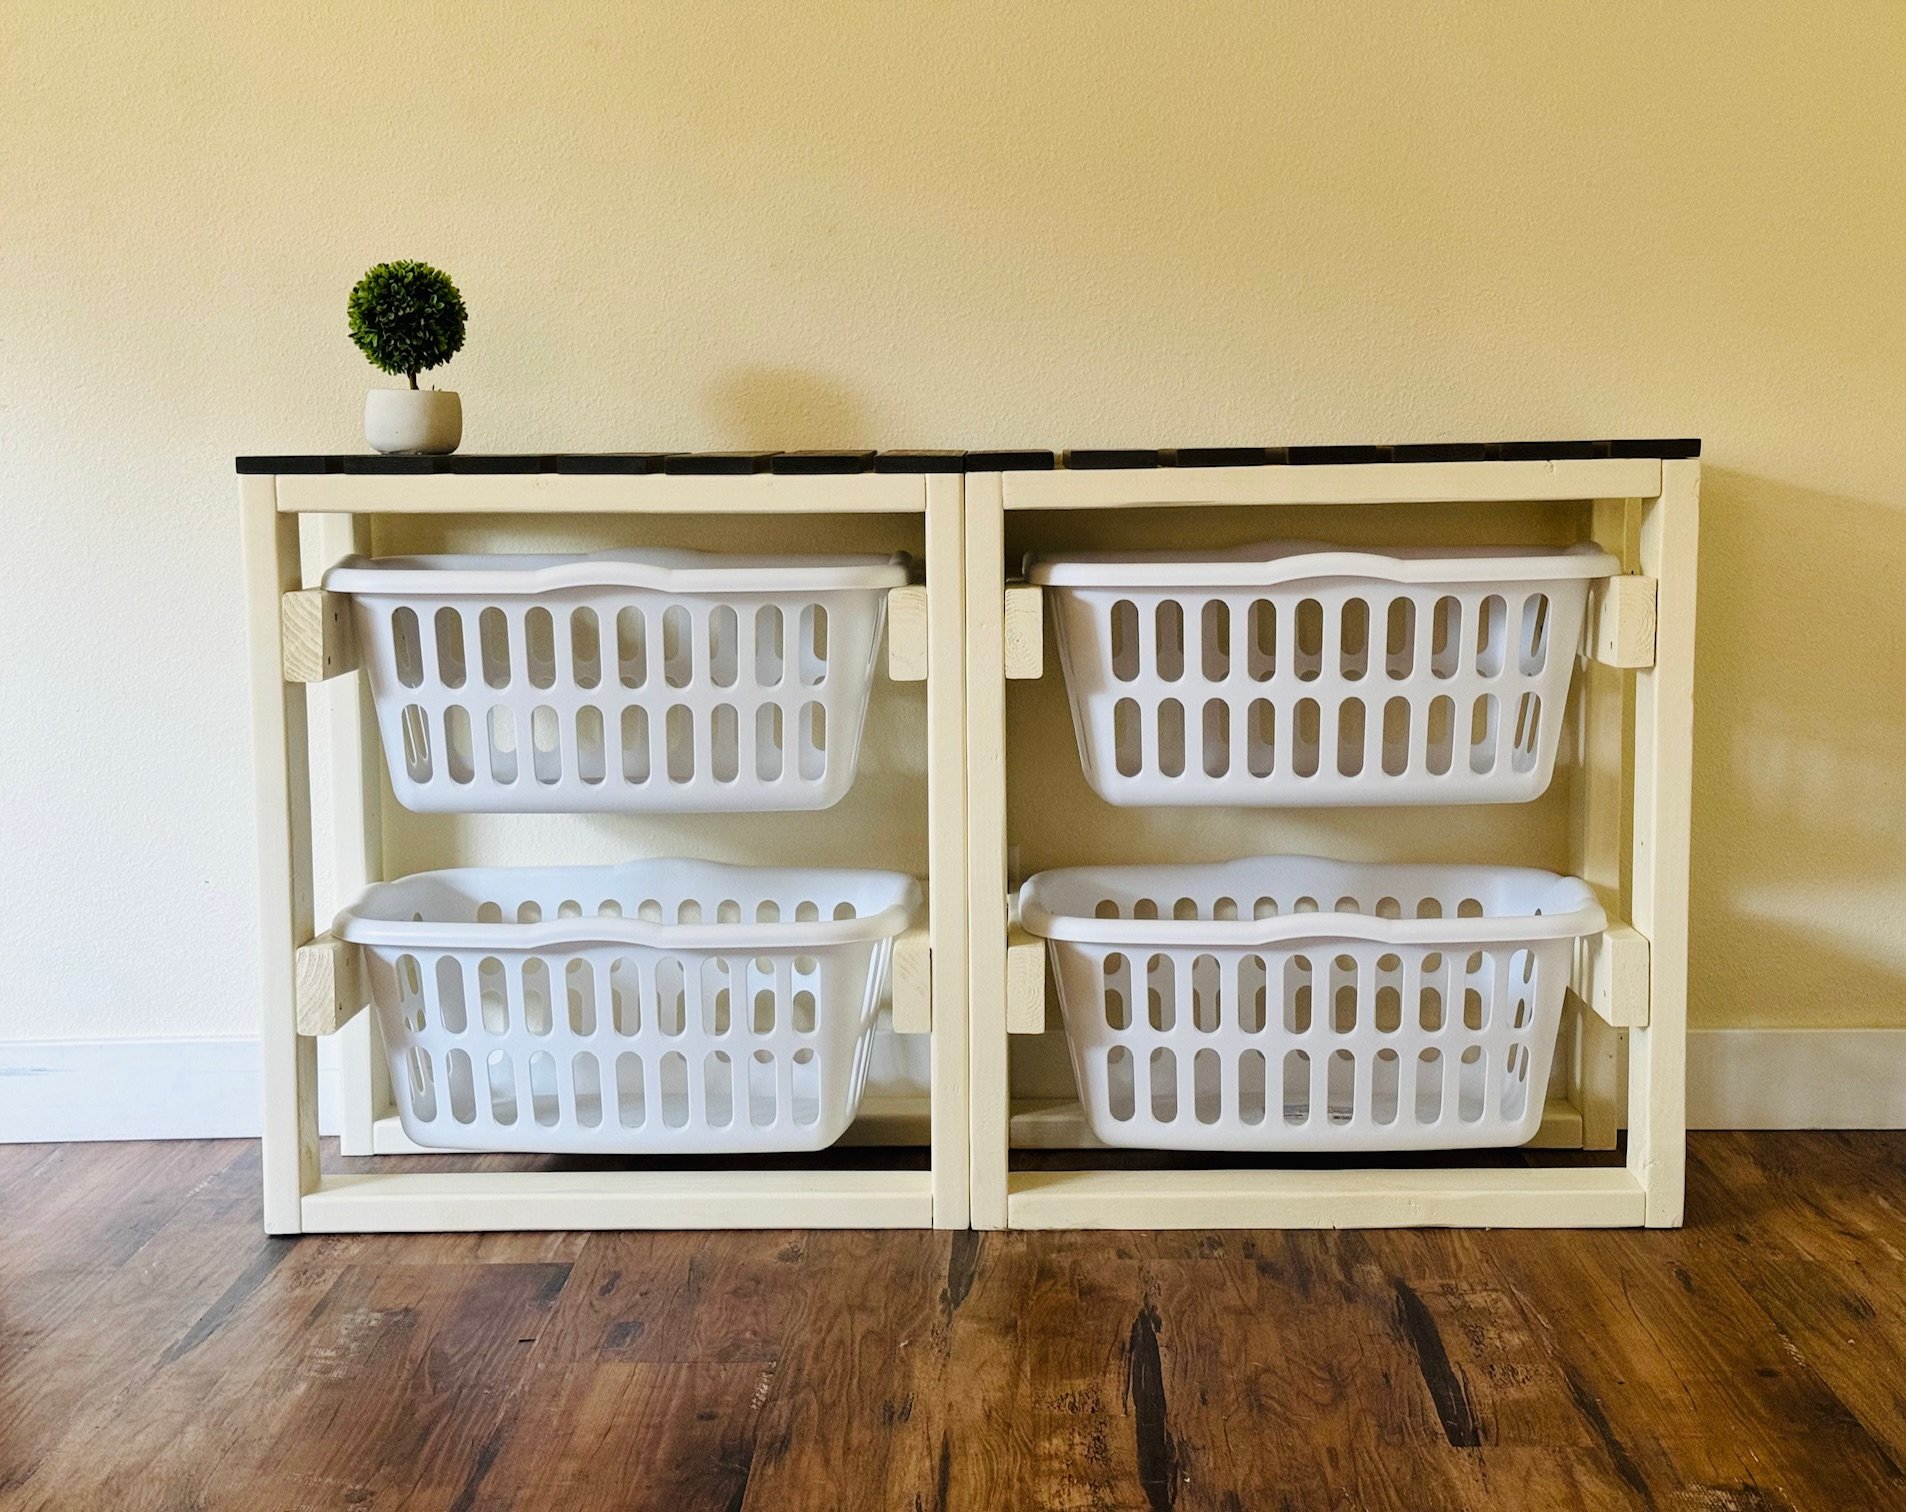
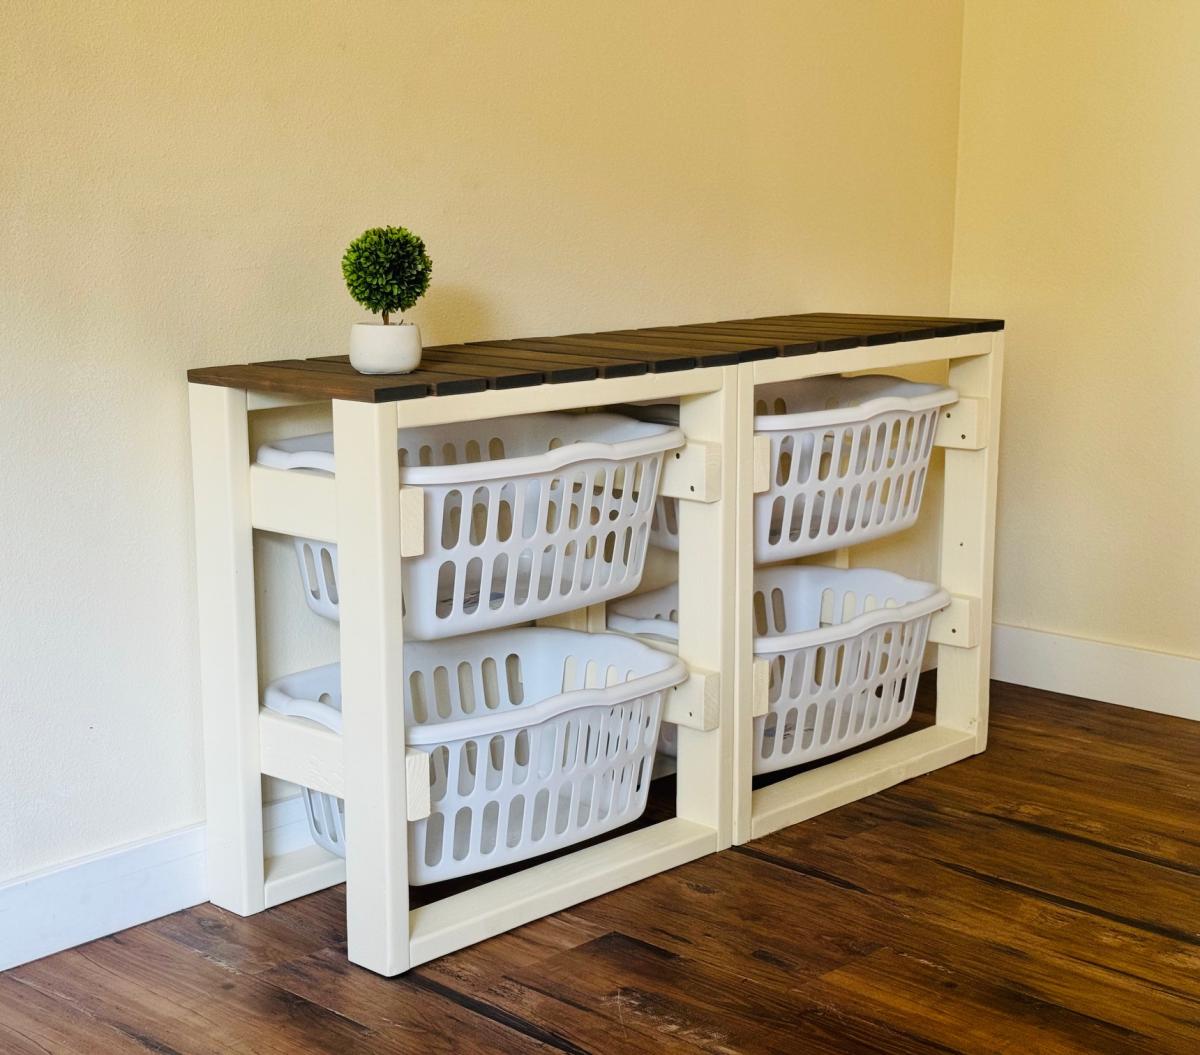
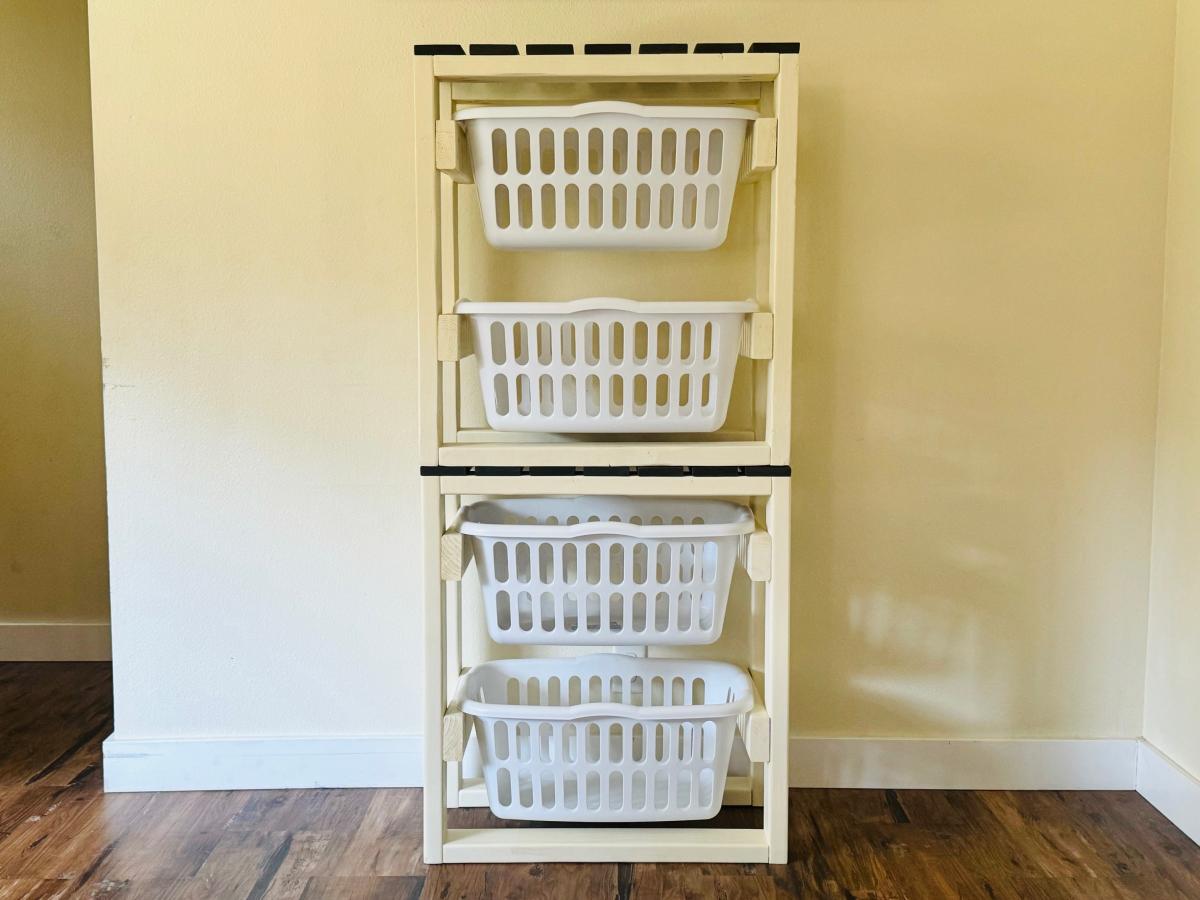
This is an easy build to get laundry baskets organized. I like that you can build multiple and stack them or put them side by side. The plan is easy to modify for different baskets or make it taller for a folding station.
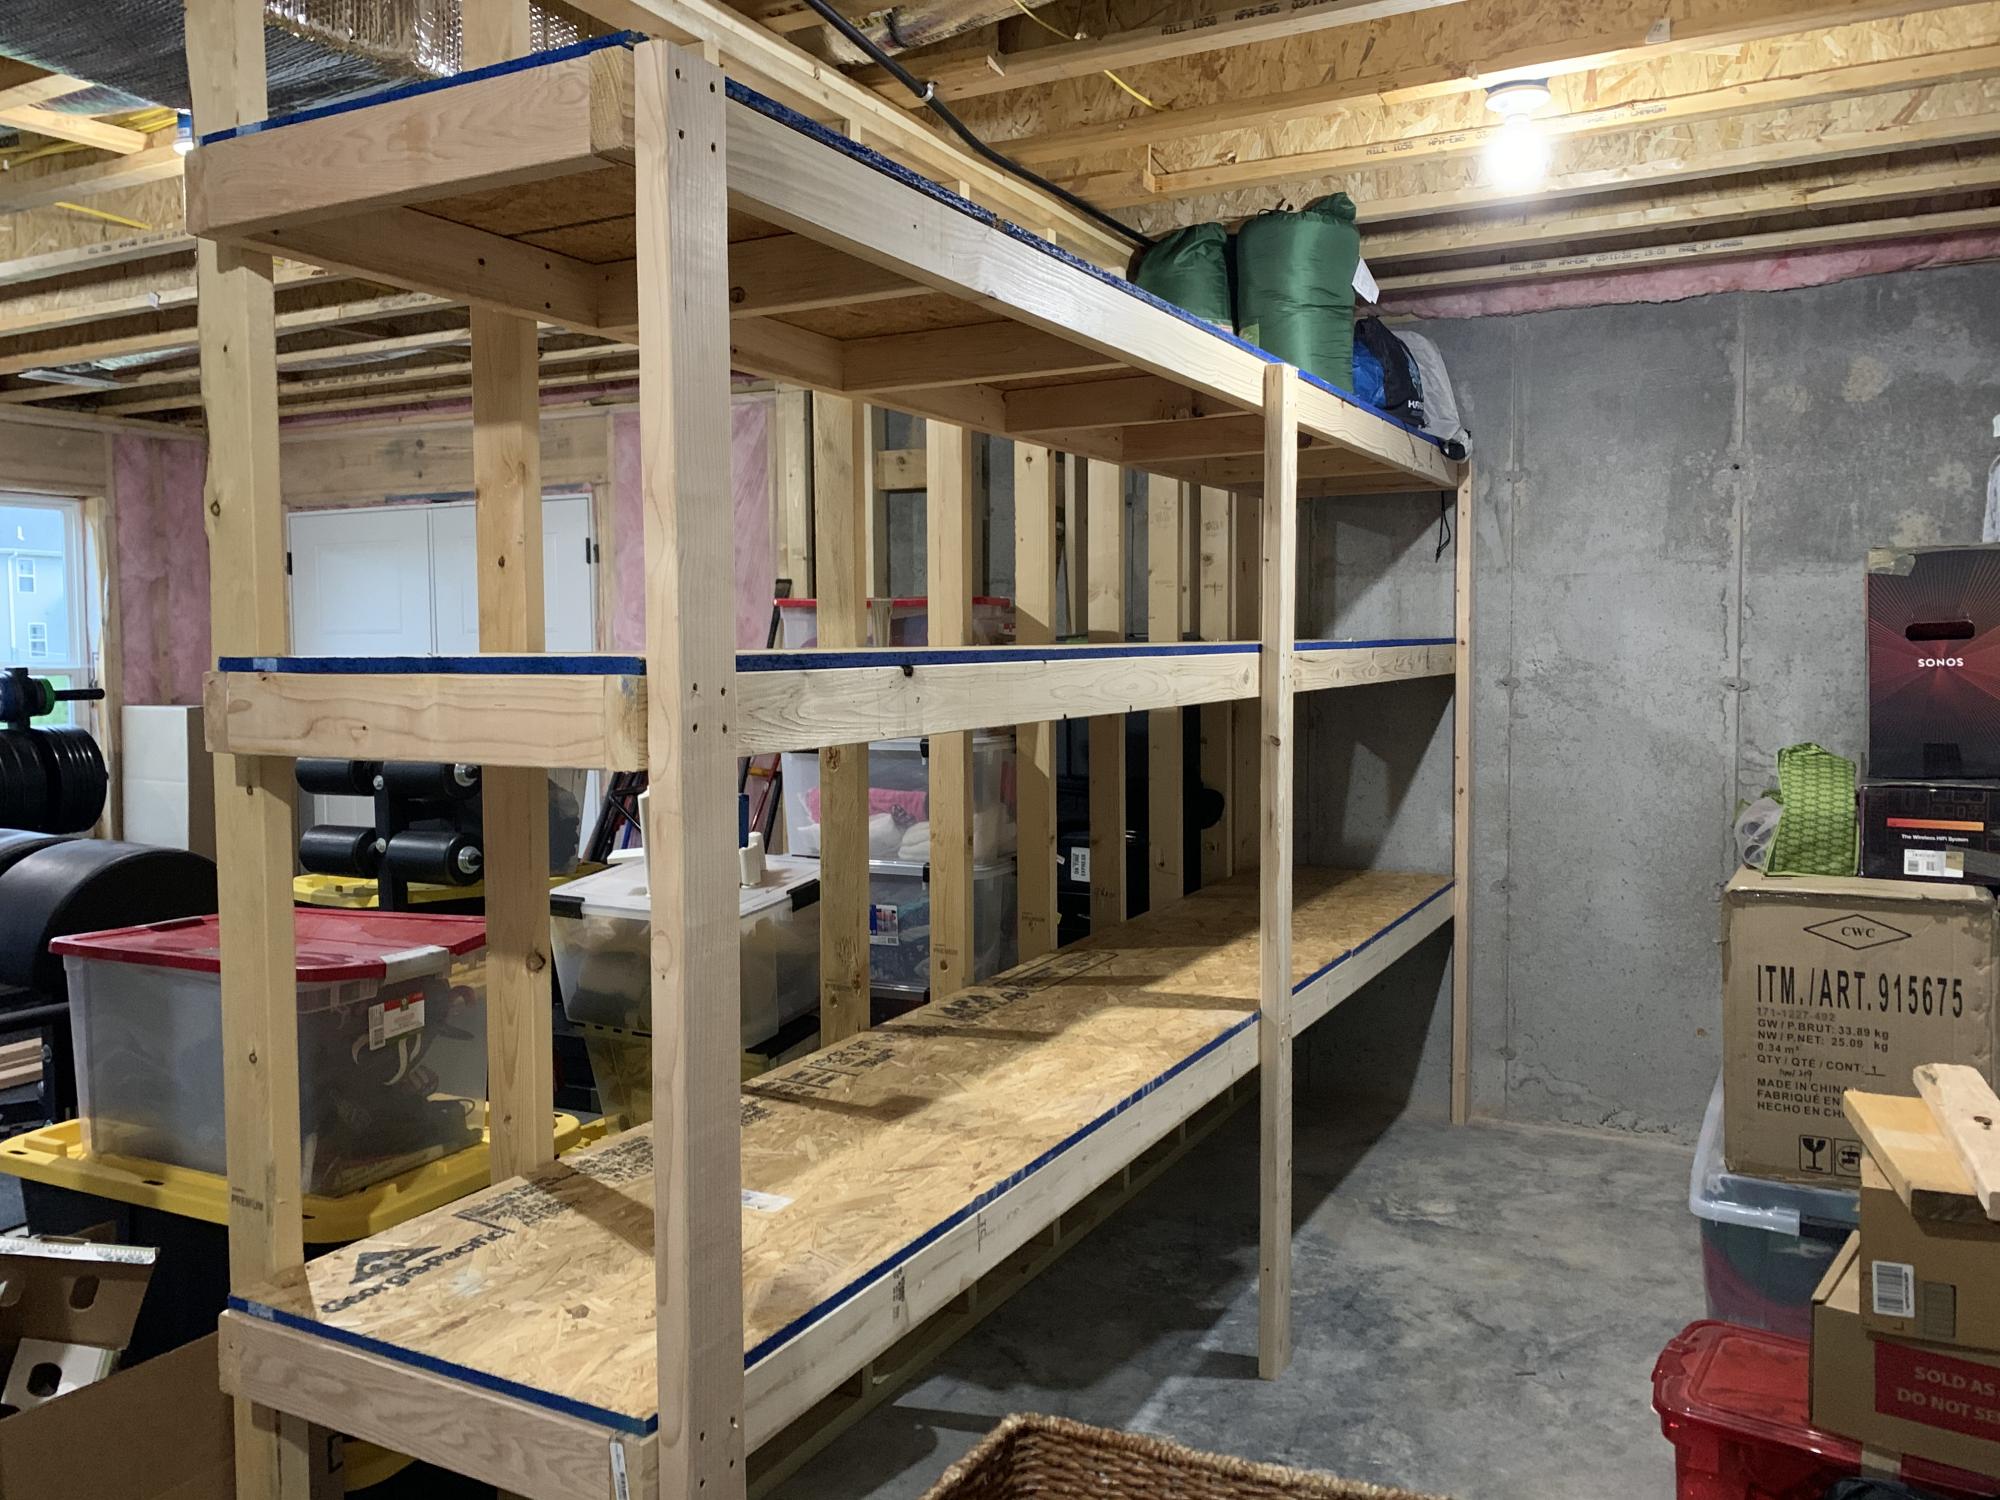
We just moved into a new home and had a huge open storage area in the unfinished portion of our basement and we’ve got a lot of stuff so we needed to make the best use of that space and these shelves deliver big time. This shelf is 12’ long by 2’ deep with 2 each 24” and 18” tall shelves. Really simple construction and I got to use my Kreg HD jig for the first time on the cleats so these bad boys are SOLID! My wife love this one so much I’m building another one in the opposite side of the wall with all 4 shelves at 18” tall.
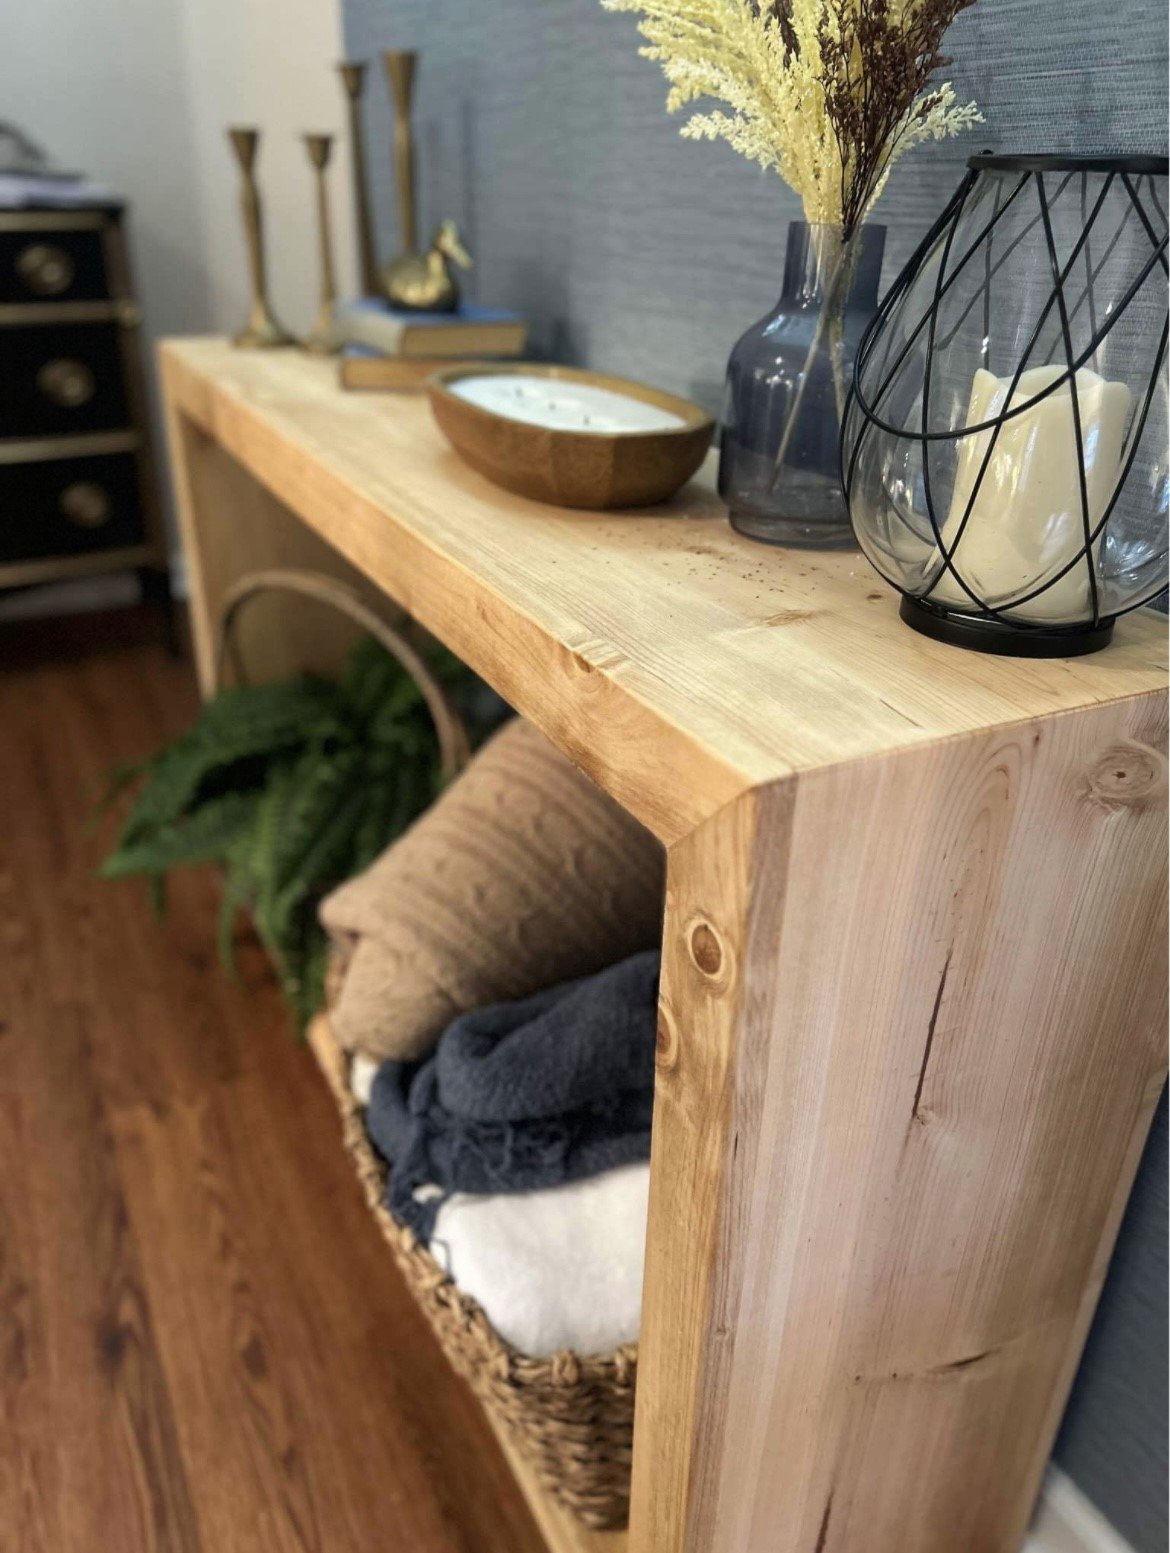
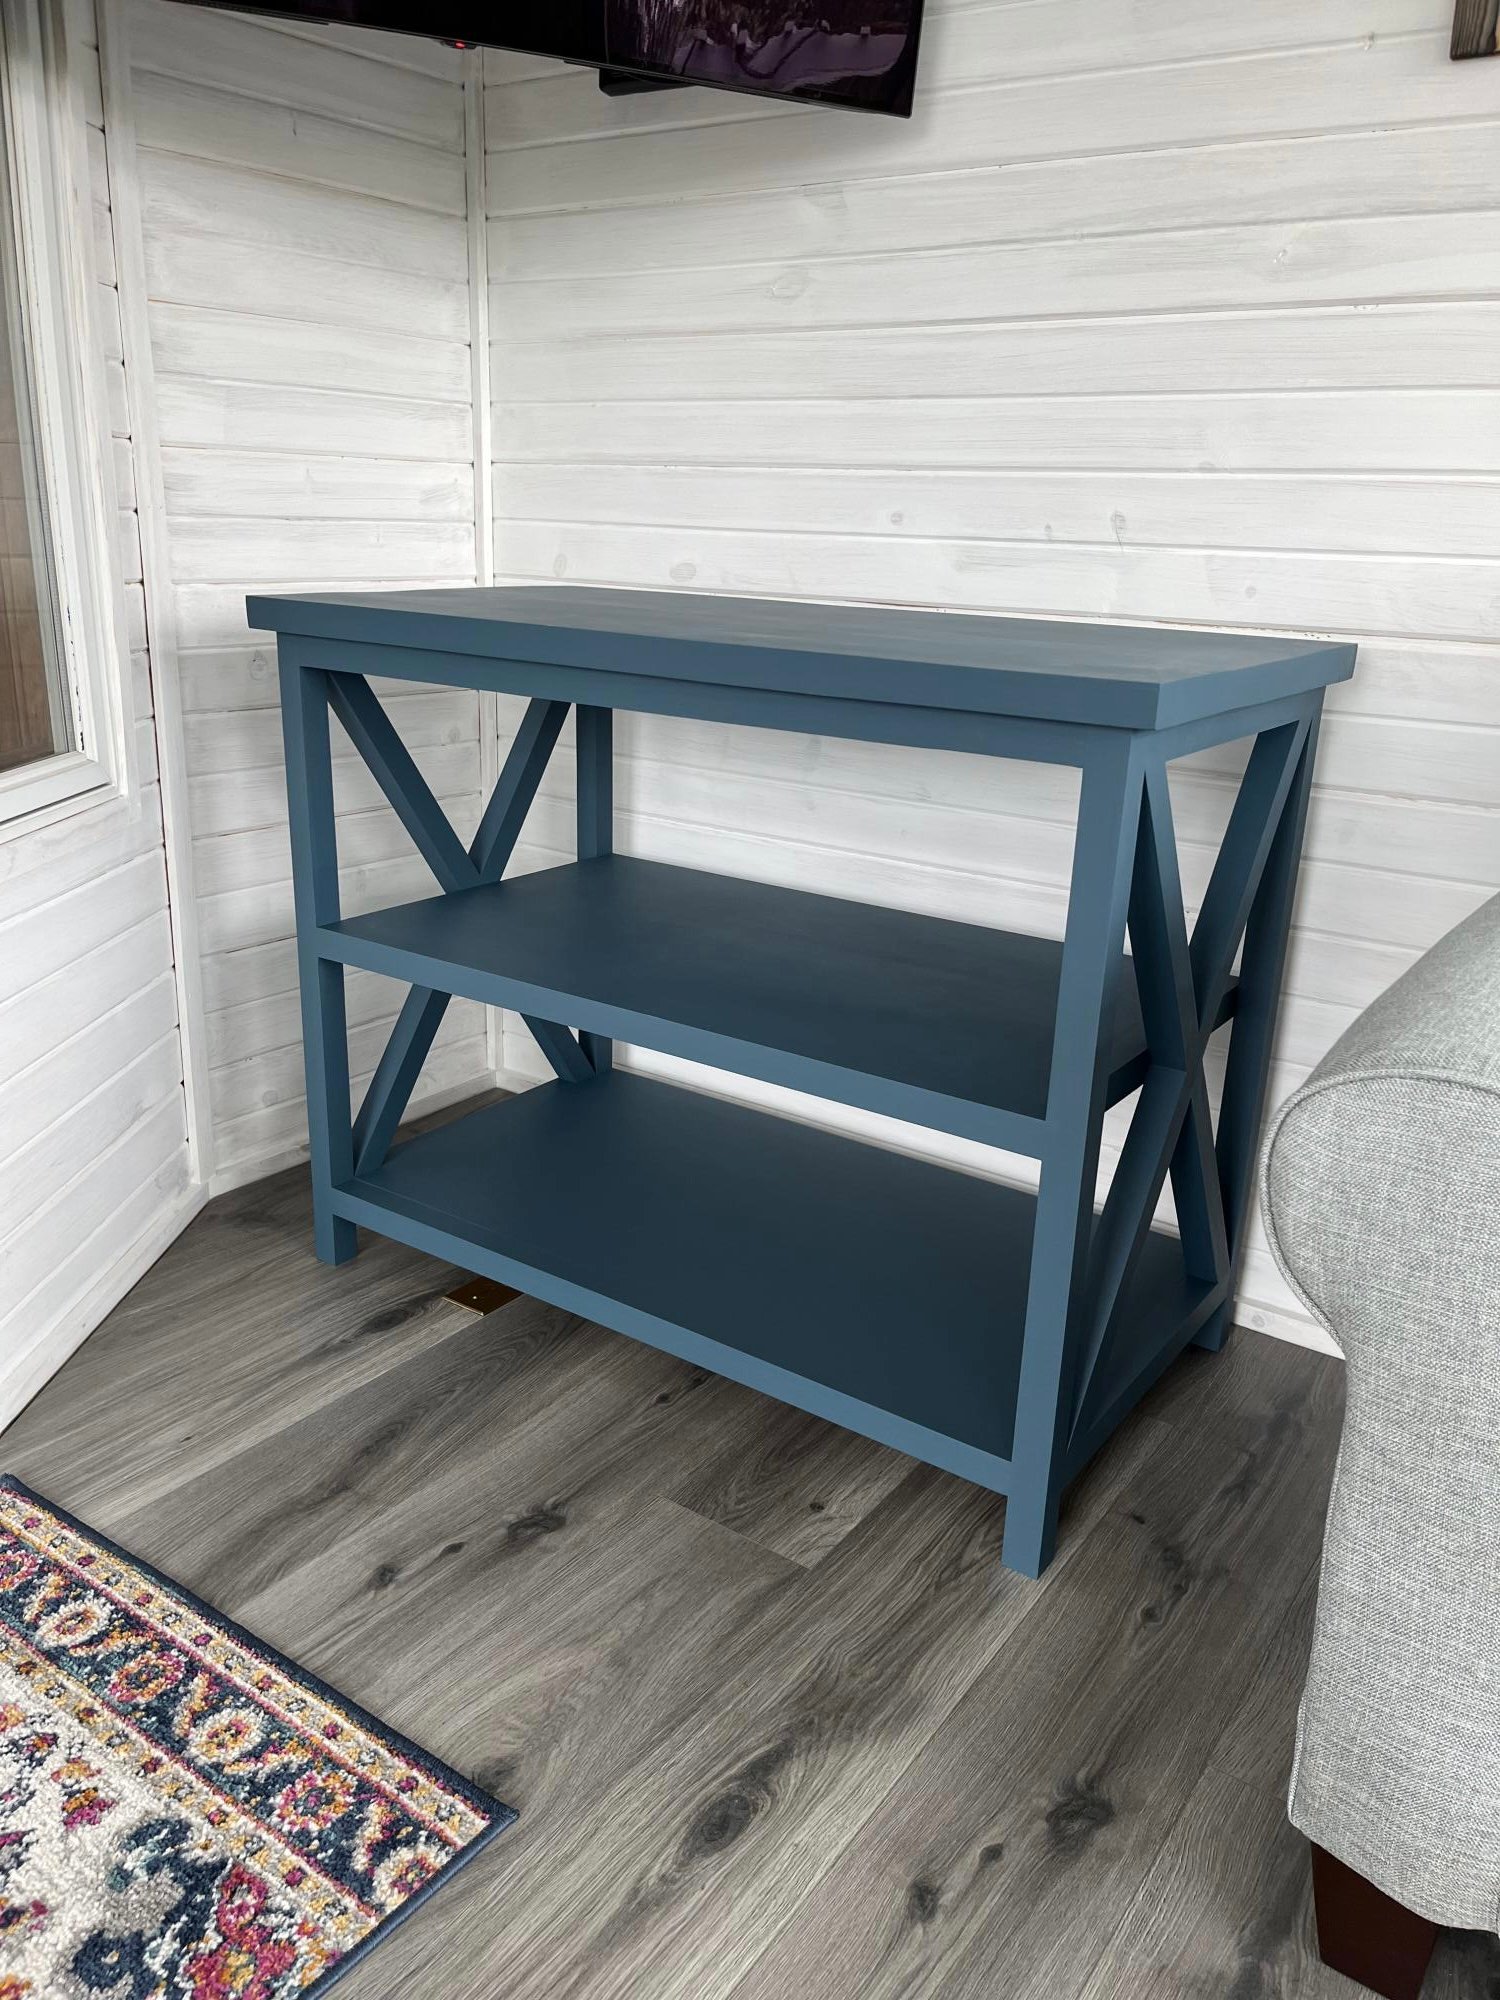
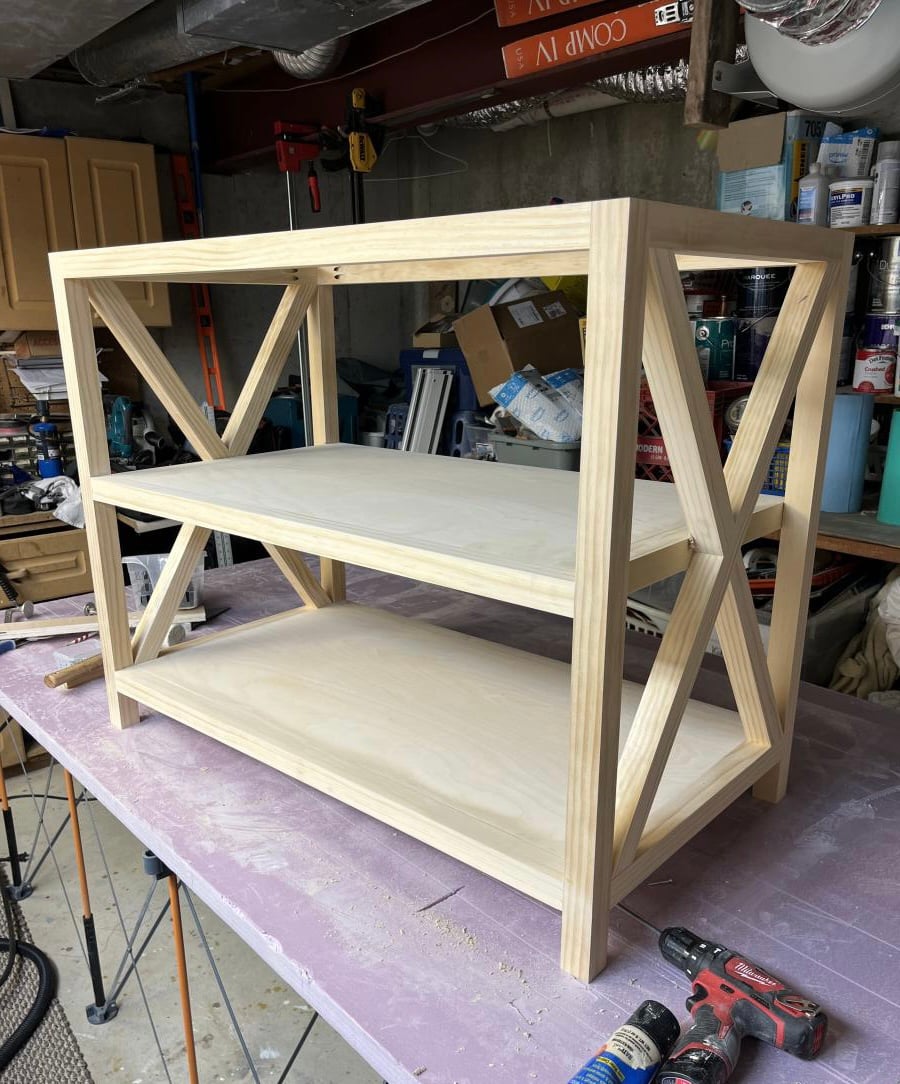
I was looking for a console table and saw your website while searching various stores online and decided to go ahead and build one myself. Followed your plans for the waterfall console table and I think it turned out great and for a fraction of the cost! Thank you and you definitely gained a new follower!
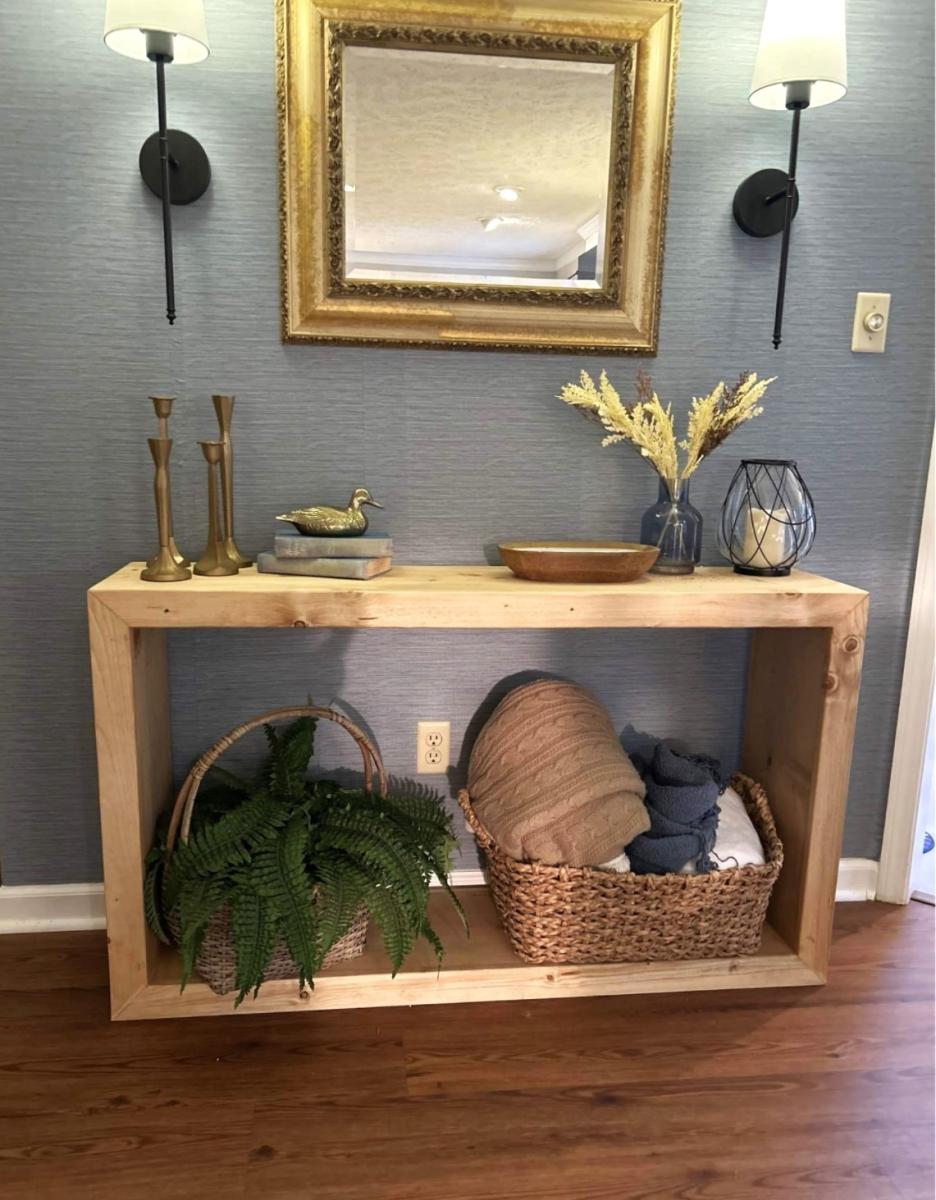
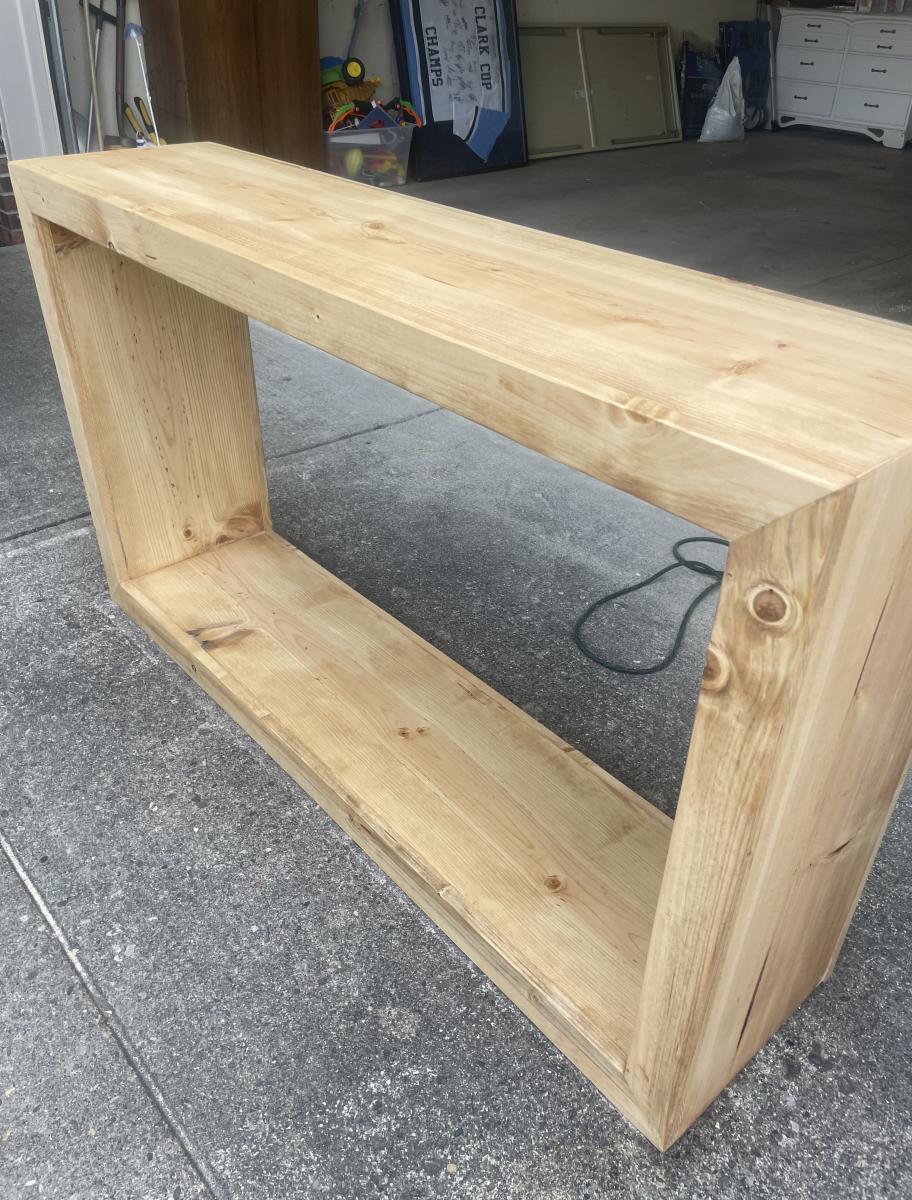

Thank you so much! The plans were fantastic! - Kyle in Nebraska @kkreimers