Community Brag Posts

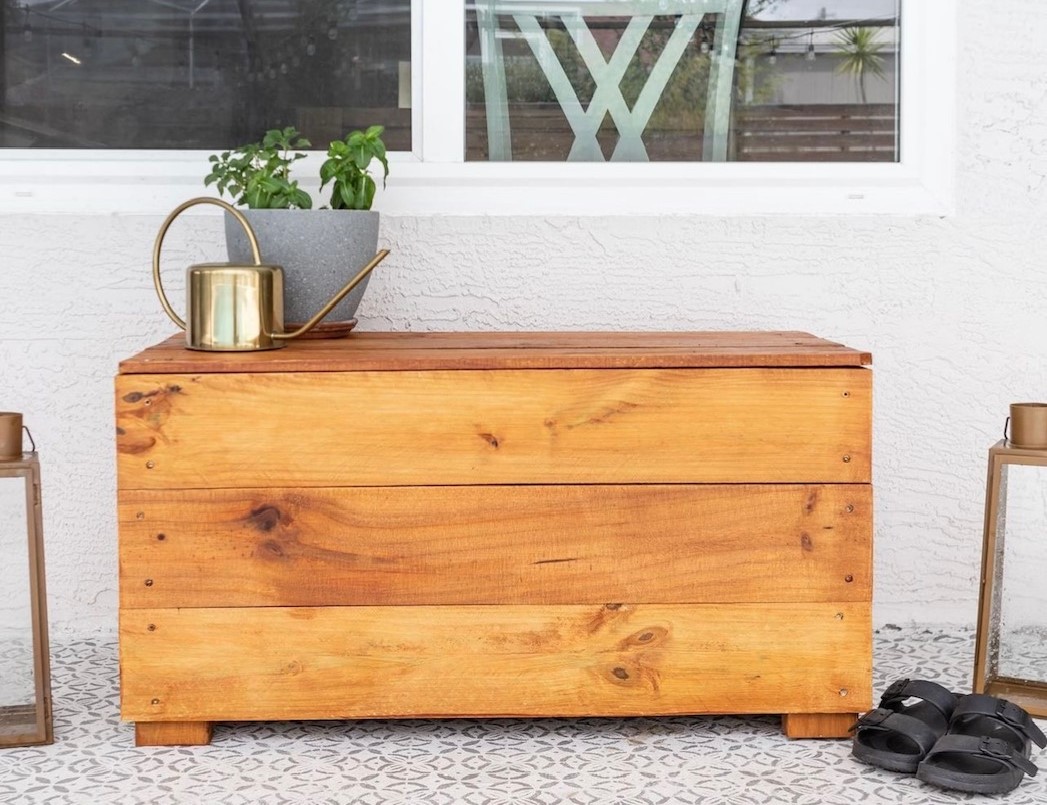
Modified Adirondack Coffee Table

Submitted by Indiri on Mon, 09/16/2013 - 13:37

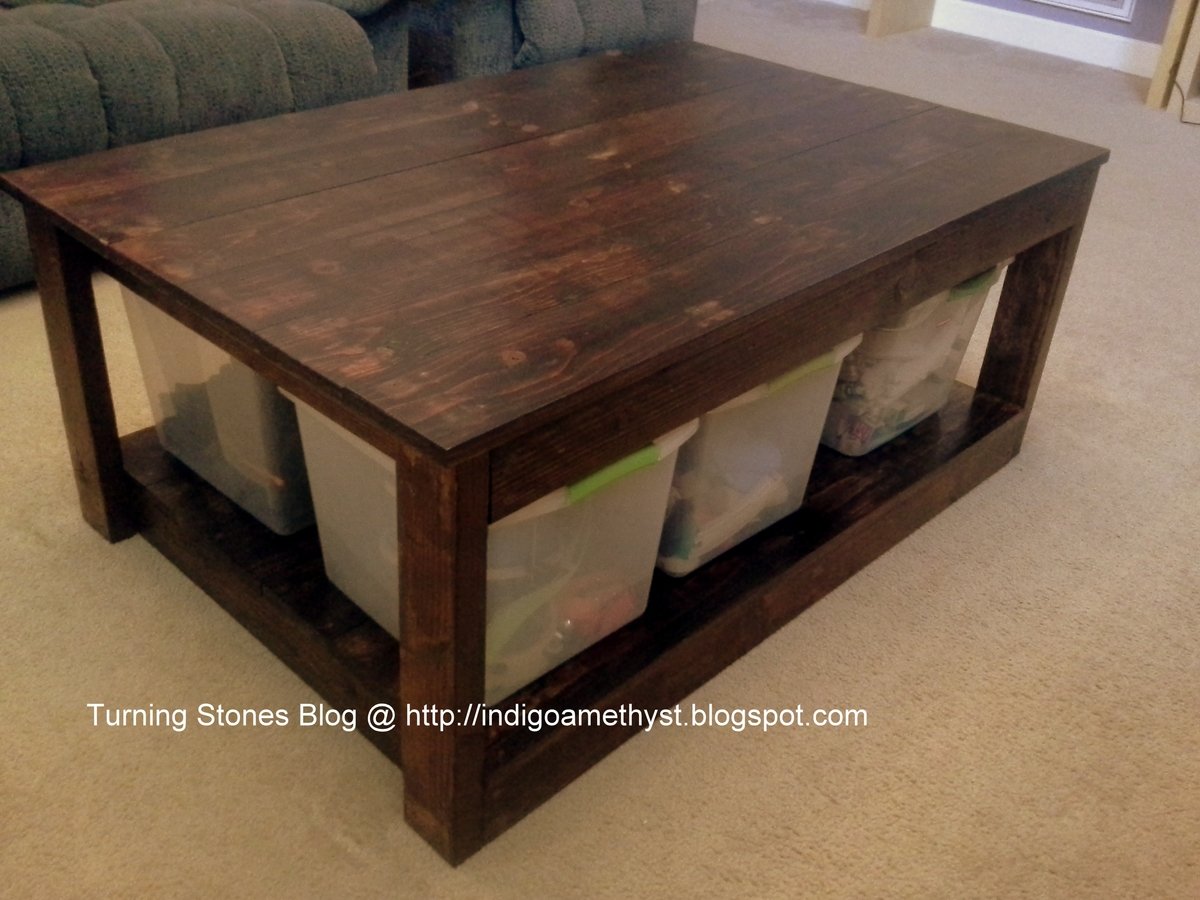
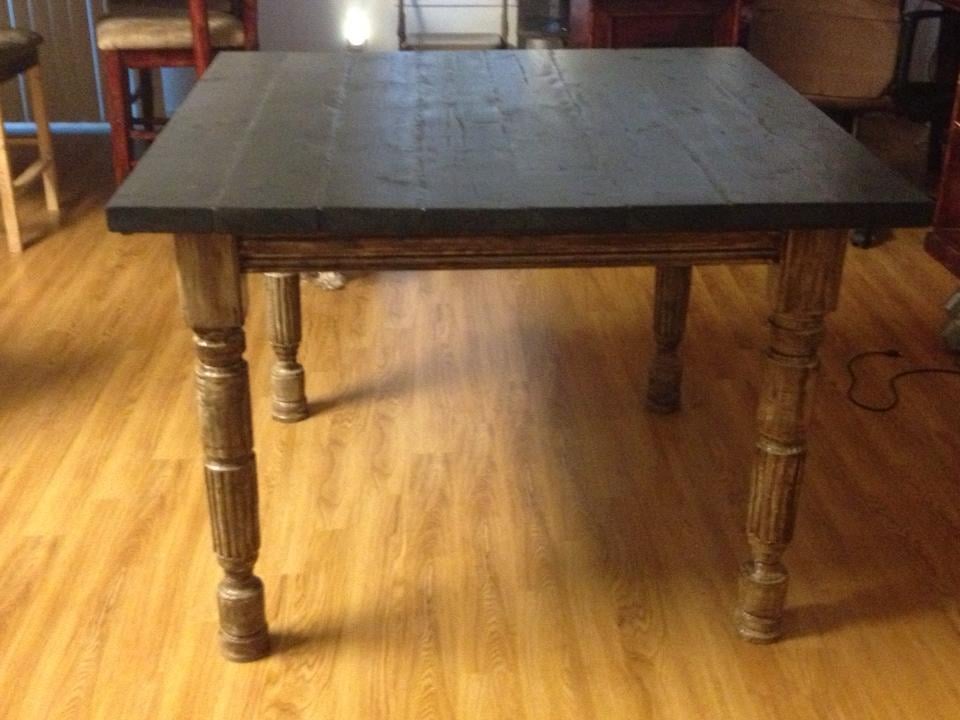
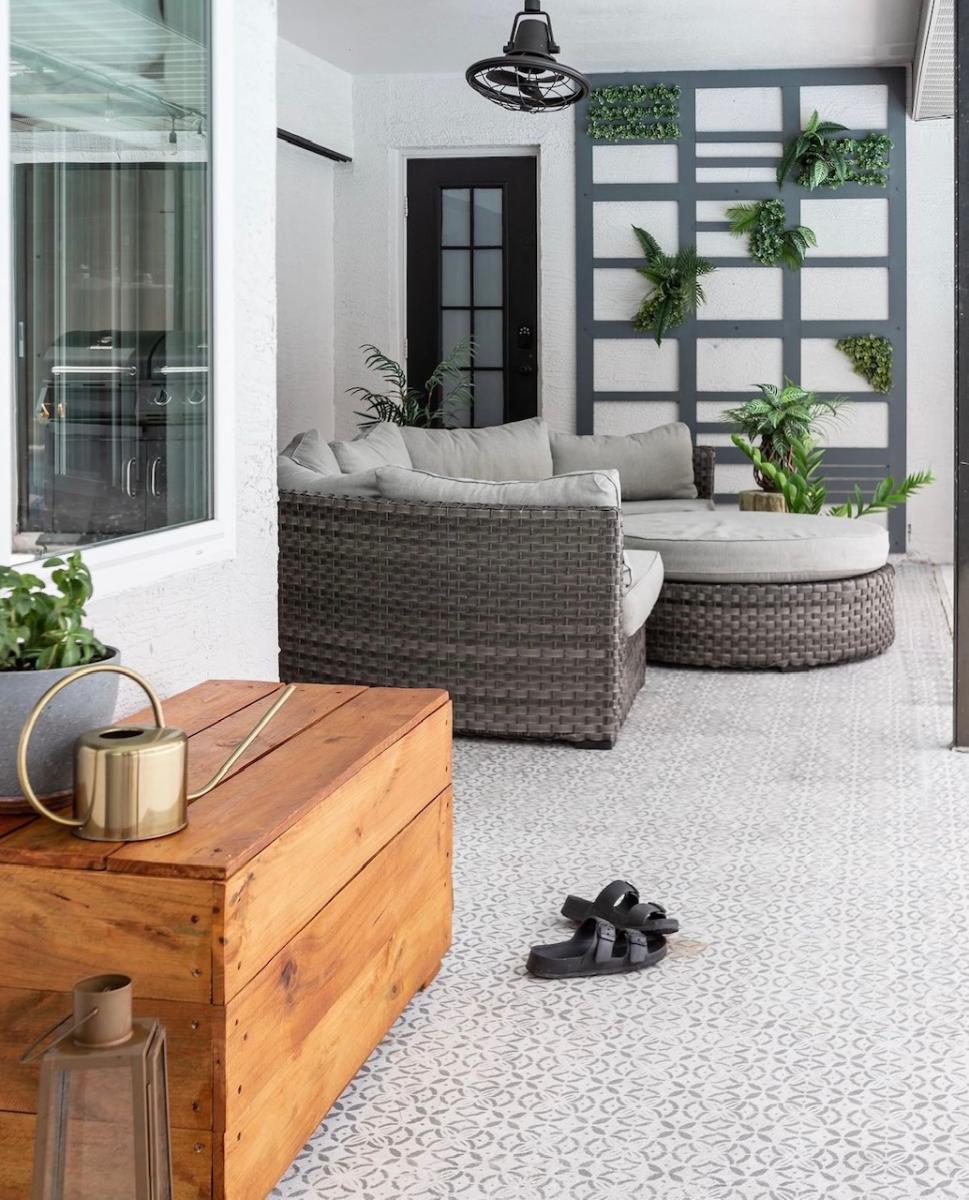
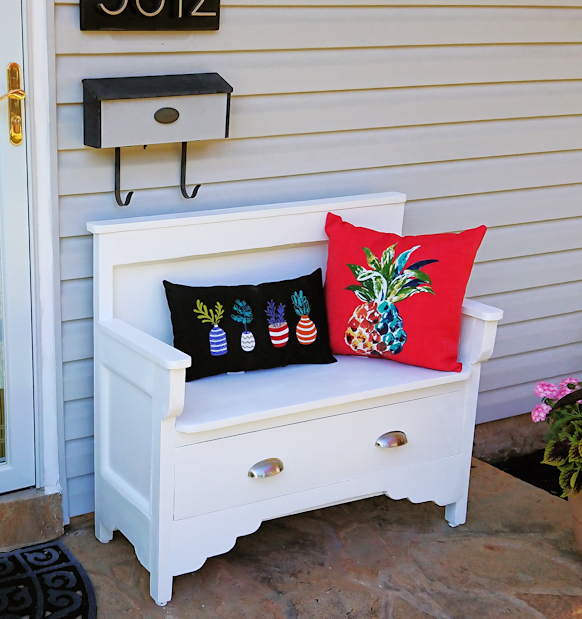
As the kids are getting a little older it was time to retire the train table and pass it on to family. Although our living room is growing up we still wanted a place for storage, though.

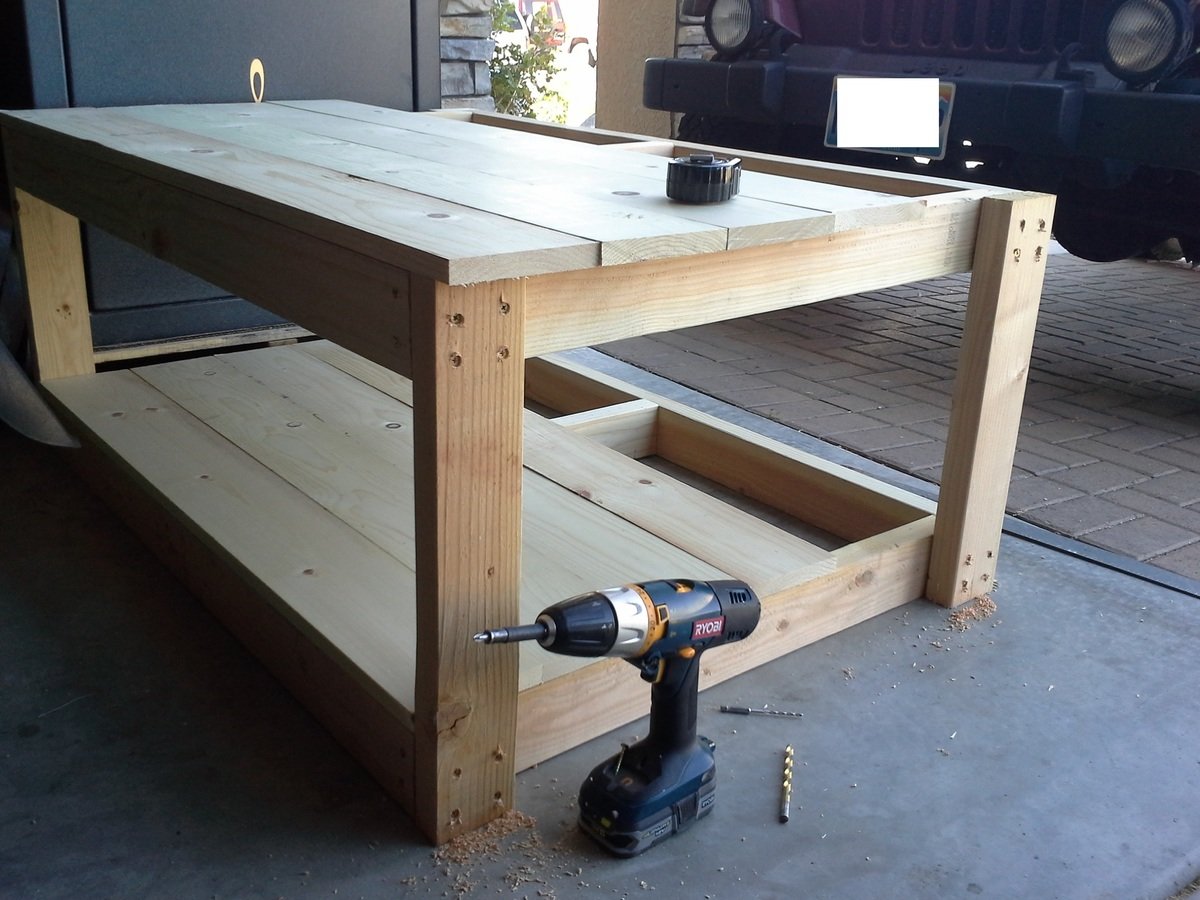
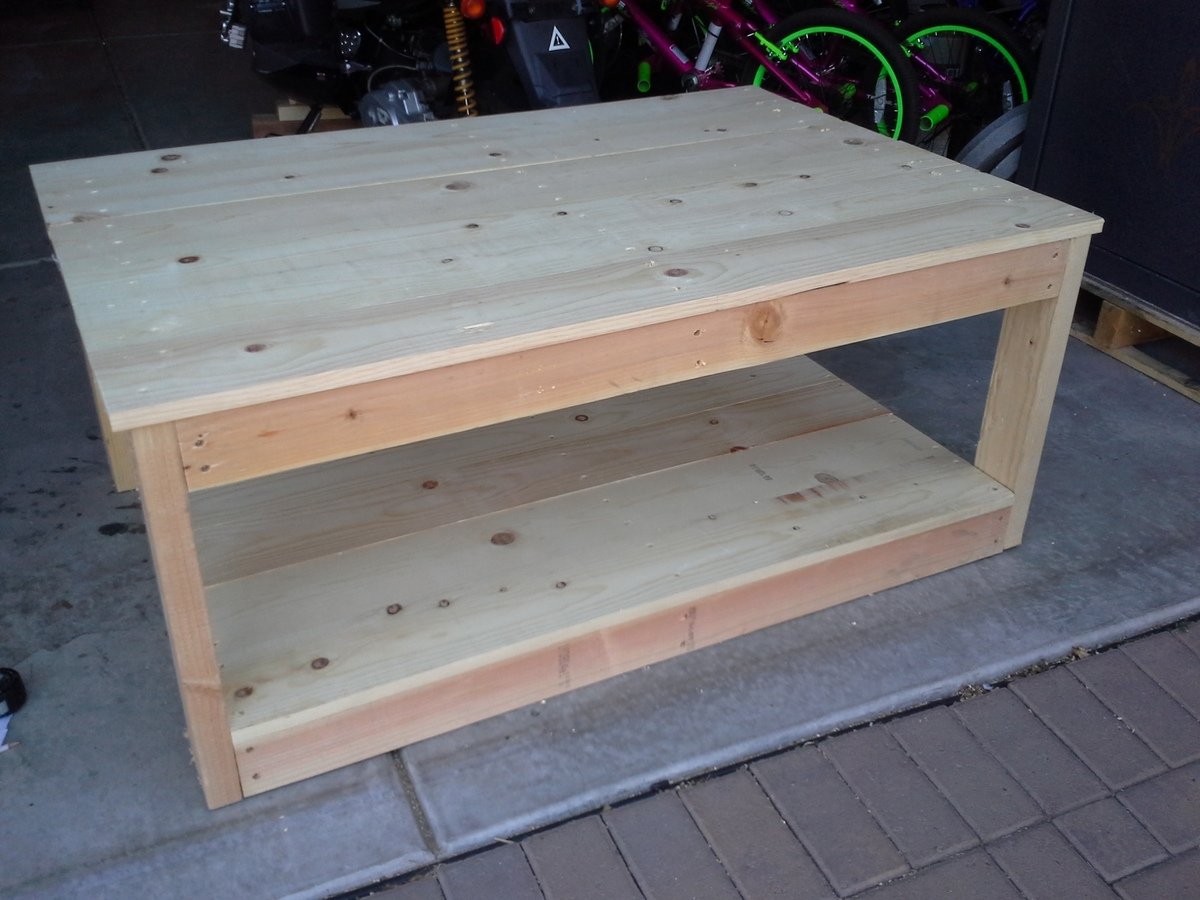
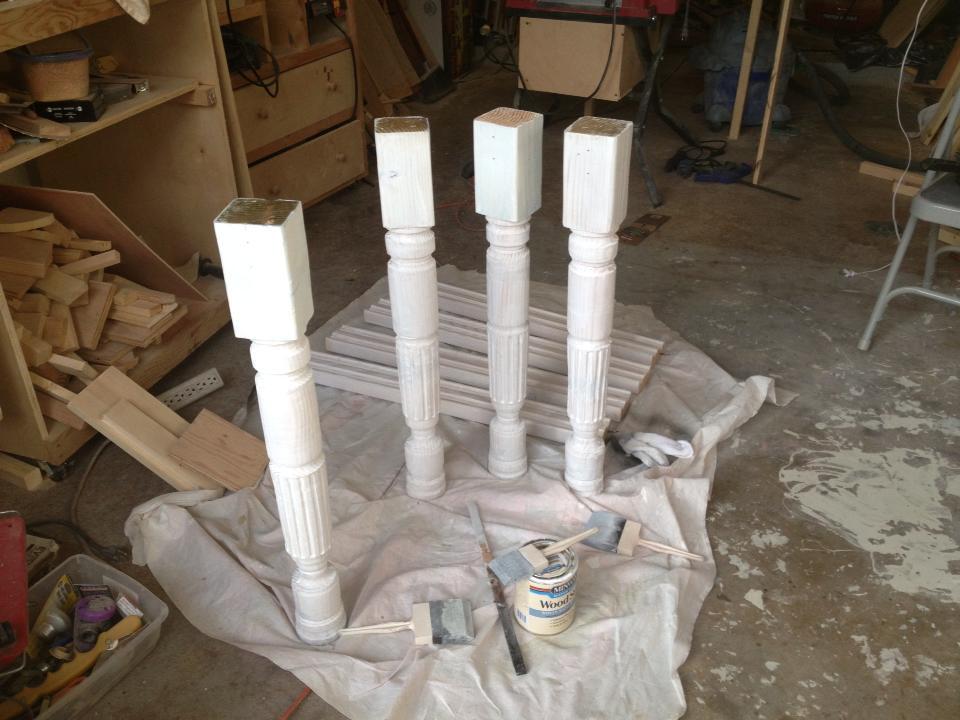
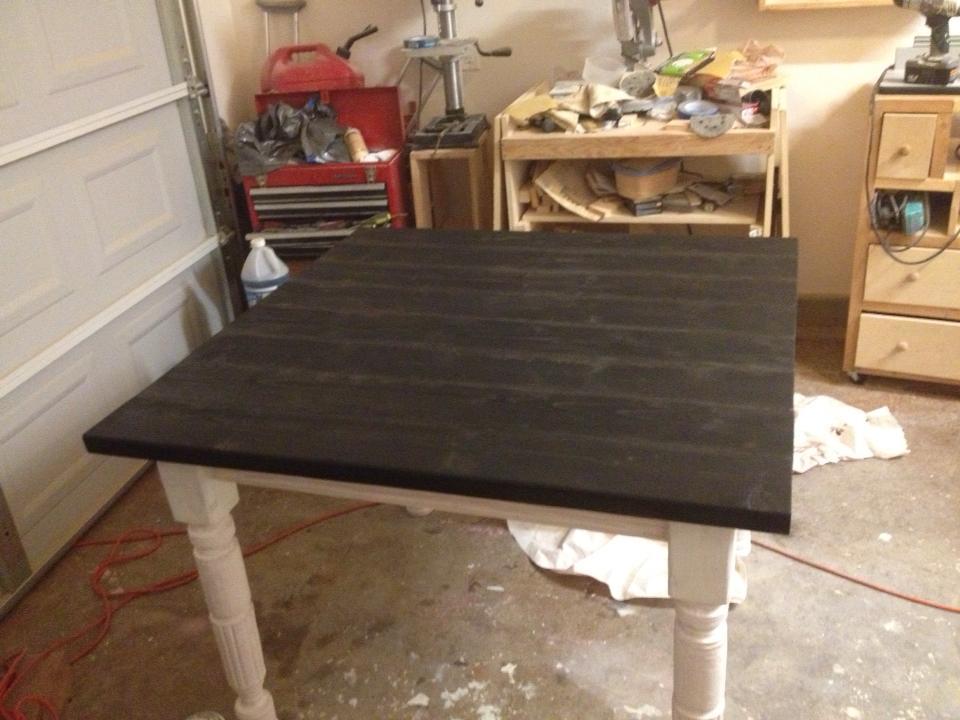
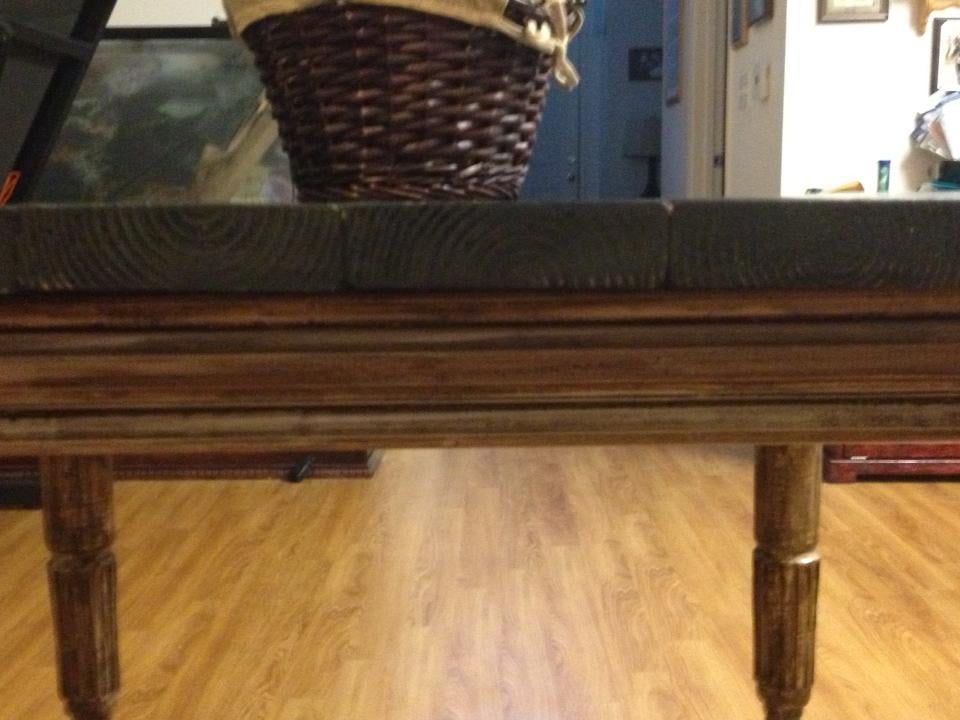
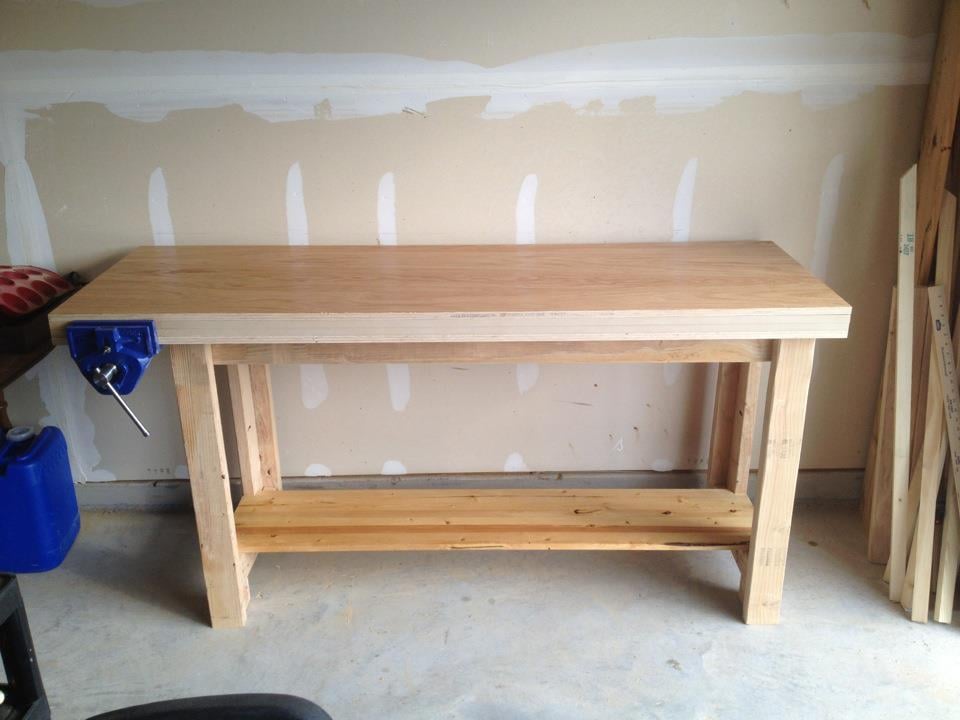
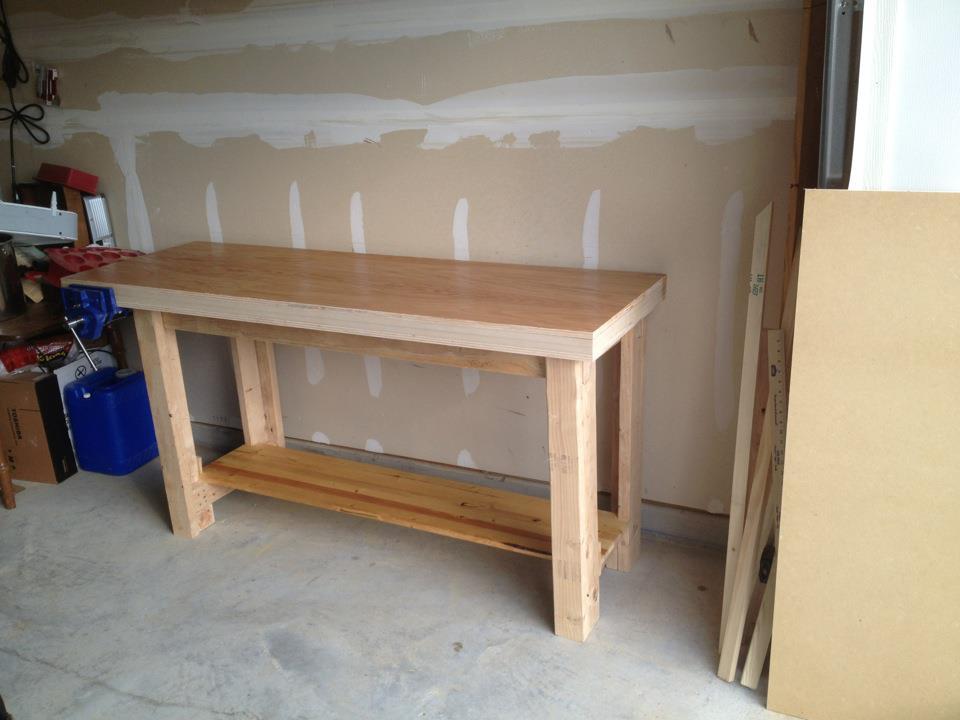
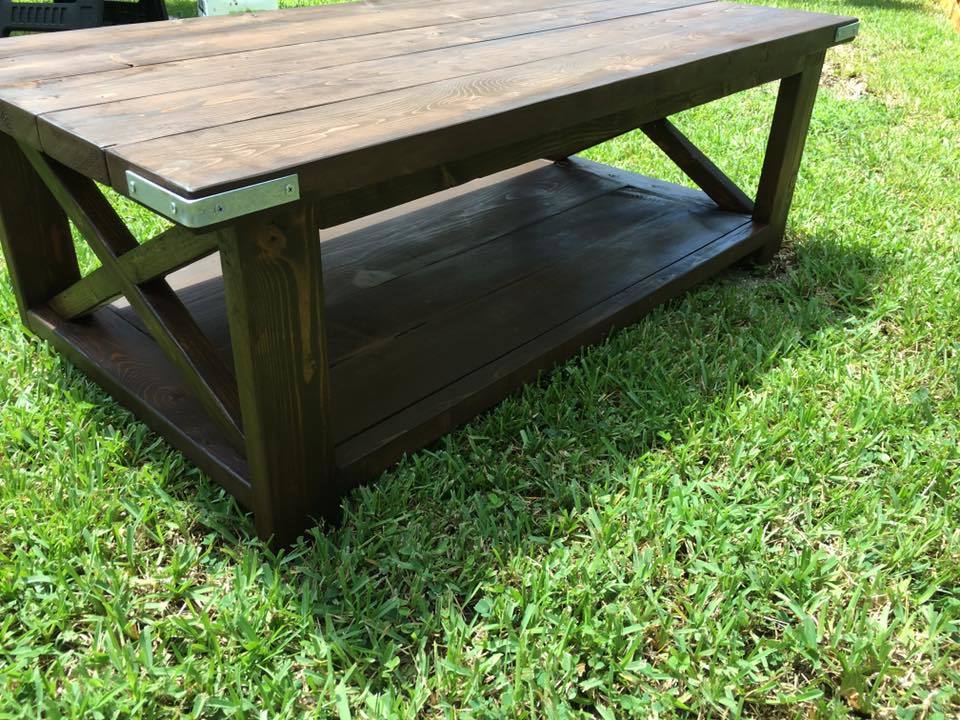
I modified the Adirondack Coffee Table to include a lower shelf (just make a second box the size of the top one and screw it into the bottom of the legs) and made it wider and longer (49"x33") and taller (20"). 6 of our toy buckets will fit on the lower shelf for storage. By making the top 49" I was able to cut the 1x6 to make a top board and a bottom board from each (top 50" for a little overhang, bottom boards 46". 6 1x6 boards were needed to make the two shelves, in addition to the 2x4s. Since it is bigger there is also a stretcher across the center for a little extra strength (because we all know that at some point a child will stand on it).

It took me about 4 hours to build it and then a couple more hours spread over the weekend to stain/poly. All total this one was about 6-7 hours for me to build.

Estimated Time Investment
Day Project (6-9 Hours)
Finish Used
Red Mahogany Stain and Minwax Poly, 2 coats of each.
Recommended Skill Level
Beginner

Rustic X Bookshelf--Short

I've loved the Rustic X series from the first plan (the console table) but none of them were things I needed for my home. So when I saw the Rustic X Tall Bookshelf I was thrilled since I have been needing a cookbook shelf in my kitchen, and had been trying to design my own using some form of the X construction. I still needed to customize it, but it was much easier to do from the existing plan. I made it half the height since I wanted it to be flush with my counter, and also wanted it narrower. I had leftover 1 x 12s from another project so I used those, and decided to make two Xs instead of one because of the narrower width. I cut the X's to fit, and used wood glue and 2" nails to secure them from the bottom. Perfect fit for my space!

Built from Plan(s)
Estimated Cost
$25 in new wood, plus leftovers for shelves
Estimated Time Investment
Weekend Project (10-20 Hours)
Finish Used
I used a technique for oxidizing wood which I read about at The Friendly Home. Hillary does a great detailed tutorial (http://thefriendlyhome.blogspot.ca/2012/07/how-to-oxidize-wood.html) on how to use tea, vinegar and steel wool to give new wood an aged weathered look. Cheap and beautiful! I will absolutely do it again! But it was a bit lighter than I wanted, so I used Minwax Polyshades in Tudor to darken them up and seal the wood.
Recommended Skill Level
Beginner

Comments

King Farmhouse Bed

Submitted by Webbuzzard on Tue, 01/22/2019 - 15:44

I pretty much followed the original plans.  I added a chamfer on the outside corners of the posts and on the top boards on the head and foot boards.  I also stained these to match the nightstands.  Since I used a foam mattress, i built a platform by gluing/screwing a 2x4 inside the side rails.  Then I set 1x6s on the 2x4 to support the mattress.  

I use the free version of Sketchup to design the bed and estimate materials needed.  

Lessons learned

  • Take extra time to figure out how to connect the side rails to the head and foot boards.  I thought i could use a sliding lock but this wouldn't work for my design.  I improvised using 3x7 tie plates and screwed the two components together.  For the headboard, I lined the 2x4 with the inside headboard post.  For the footboard, I bent the tie plate 90 degrees and screwed the 2x4 to the footboard.  It worked very well.
  • I would recommend chamfering the outside top of the side rails.  I didn't and my wife complains that she  bumps her shins on it. 
  • Top boards are 1x5s, which in my are are only sold at home depot.  The other wood is readily available.

It's not that difficult of a project.  It is time consuming, though.


Estimated Cost
About $150
Estimated Time Investment
Week Long Project (20 Hours or More)
Finish Used
Latex semi-gloss enamel for everything except the top boards which were stained and polyurethaned.
Recommended Skill Level
Beginner

Comments

markswoodprojects

Fri, 10/16/2020 - 13:48

I love the look of your version. Do you have the SketchUp file anywhere that I can download? I would really like to make this version as I love your proportions and the color scheme.

TV console

Submitted by Anonymous (not verified) on Sat, 02/09/2019 - 14:24

Had to build something to go with our brand new OLED TV. Combined Ana's 'Grandy Sliding Door Console' with a modified version of these modern barn door plans found at https://howdoesshe.com/build-a-fixer-upper-style-modern-barn-door/ from @angelarosehome to make the finished product shown here. My wife loves it (the pup doesn't mind it either)! 

Built from Plan(s)
Estimated Time Investment
Week Long Project (20 Hours or More)
Recommended Skill Level
Intermediate

Shiplap fireplace

Submitted by Medickep on Tue, 01/31/2023 - 05:42

My fiancée wanted to spice up our living room and we got this great idea from Ana, whose video made me realize I could do this! I was a little reluctant because a lot of these you see don’t have a lot of electronics and the TV is pretty high. I feel like we we able to balance this out by adding the shelf’s to the side for electronics!

Comments

Farmhouse Table

Small Farmhouse table with custom made husky legs and side trim. I used my router to create the legs and trim.It was my first attempt at turned legs. I used minwax white wash pickle, then I went over with a mixture of minwax of dark walnut and golden oak.

Finish Used
minwax white wash pickle, then a mix dark walnut and golden oak, polycrylic
Recommended Skill Level
Advanced

Comments

Val Manchuk

Thu, 11/07/2013 - 08:18

Great job on those turned legs! That table looks beautiful!

Val
artsybuildinglady.blogspot.ca

JoanneS

Thu, 11/07/2013 - 12:23

Your table looks awesome! What an amazing job you did turning the legs, and the finish is fab! Beautifully done!

Stick on drawer organizer for laptops

Submitted by Ana White on Tue, 04/25/2023 - 14:06

Our family uses the dining table for homework and work with laptops. I have drawers in a window seat, so I added the stick on dividers to create laptop storage in the drawer.  This was super quick and easy.

I used ripped 1/2” thick plywood pieces.

loved the results!  So easy and exactly what I needed!


Firetruck Loft Bed

I knew I had to build this bed when I saw the images on a Google search. Thank you so much for such great plans. And FREE no less. Due to the small size of my son's bedroom I couldn't add the front bucket. He's so excited now to go to bed. Thanks again.

Built from Plan(s)
Estimated Cost
$275.00
Estimated Time Investment
Week Long Project (20 Hours or More)
Finish Used
Olympic One paint.
Recommended Skill Level
Beginner

Modern Outdoor Storage Bench by Crazy Life with Littles

It’s a miracle I was able to finish this outdoor storage bench considering my kids are on summer break 😂

💡Tip: can’t find cedar pickets at your local stores? Just stain them. No one will ever know 😉 sealed with Thompson’s WaterSeal

by Crazy Life with Littles on Instagram

Seasonal And Holiday

Stable for Nativity Scene

Submitted by arkep on Fri, 12/06/2013 - 18:51

I had been thinking about making something to go with the nativity scene that I made a few years ago, and was so excited to see the plans for this stable this morning. It's less historically accurate, but much easier to build than a cave. =) I had cedar fence picket scraps laying around, so this project didn't cost me anything extra.

Built from Plan(s)
Estimated Cost
$0--made from scraps
Estimated Time Investment
An Hour or Two (0-2 Hours)
Finish Used
none--just sanded
Recommended Skill Level
Intermediate

Playroom Stage!

Submitted by kdins31 on Thu, 01/02/2014 - 09:48

I had a perfect corner in our playroom that was reserved mostly for clutter and always wanted to do something fun with it. The base is made with 2x8"s topped with Handscraped Hickory laminate flooring. Bored holes into the floor and installed 1" diameter color-changing LED decklights. Added theatre-style tracklights, disco ball and other dance floor lighting for extra effect. Of course the stage wouldn't be complete without wireless microphones for karaoke and mic stands hooked up to a small amp and speakers in the ceiling. I made the shelving on the right side with 1/2" black pipe and used leftover 2x12" shelves from an old garage shelving install from 7 years ago! The kids were ecstatic on Christmas morning for the reveal!

Estimated Cost
$125-150 for wood, flooring and moldings. Black pipe is very inexpensive.
Estimated Time Investment
Weekend Project (10-20 Hours)
Finish Used
Send me message if you'd like to know which products I used, e.g. mics, speakers, lights, etc.
Recommended Skill Level
Intermediate

Comments

Garofola2013

Wed, 04/16/2014 - 11:53

I would like to know which products you used...e.g. mics, speakers, lights, etc. We want to do this is in our basement =)

THANKS!

Snix26

Sun, 07/27/2014 - 15:52

This is great! I was just wondering what your dimensions were? I've been looking for something like this to do for my niece but have been struggling to find a plan and figure it out myself LOL.

kdins31

Tue, 08/05/2014 - 05:58

Hello, the back wall is 8' and side wall is 6.5'. The stage comes out about 2.5' on each side then the front is around 7'.

Hope that helps, good luck!

atilley

Tue, 11/18/2014 - 19:37


Great job!! can you tell me where you got the microphones and mic stands for this?


dmbphoenix

Sun, 04/10/2016 - 14:44

Actually, I was wondering ,what lights did you use? I'm working on a very similar project and was curious to the lights your used please.

Mls4460

Wed, 11/13/2019 - 09:53

Do you have the actual plans to build this?

I would love to copy this idea for my 4 year old!

Live Edge Floating Bed

Submitted by Anonymous (not verified) on Fri, 08/18/2023 - 12:31

Older children moving out for college left the youngest without a bed. We decided to use your plan for a bed, but altered the headboard just a bit so that we could use live edge cypress. We love how it turned out, plus we were able to use locally sourced cypress!

Kathleen R

Front Door Storage Bench

My bench sits outside my front door to welcome visitors and provide a place to set your packages while unlocking the door! I made it two years ago, and it's weathered three Baltimore winters with out repainting. I'll probably sand t and repaint it this spring. Folks are always asking where I bought it, and I give all the credit to Ana White, your site and your wonderful furniture ideas!

Jim Dupree


Built from Plan(s)
Seasonal And Holiday

$18 Star Shaped Clothes Drying Rack

Submitted by Anonymous (not verified) on Fri, 07/15/2016 - 19:54

Make a beautiful star shaped clothes drying rack that magically expands, using very simple tools and materials! Detailed tutorial and free building plans.

Estimated Cost
$18
Estimated Time Investment
Afternoon Project (3-6 Hours)
Recommended Skill Level
Beginner

Custom Step Stool

Submitted by Anonymous (not verified) on Wed, 01/03/2024 - 08:40

I’m going to make a step stool for the son of good friends in Florida. The design I liked had dovetail joints, which I’ve never cut before. So I made this stool for my wife as a prototype. Walnut sides with Cherry for the steps. 12.5” front to back, 14” tall, and just about a foot side to side.

Mark Johnson

woodworking bench

Submitted by jcengel on Thu, 07/05/2012 - 21:17

Used the sturdy work bench plans for the base. The base is 60" x 20". The top is 6'x2'. I wanted 2" overhang all around to accomodate clamping. I used 3/4" oak plywood for the benchtop. It's stacked as follows, oak plywood, 3/4" mdf x 2, oak plywood for a massive 3" thick top. I used pocket holes to join the legs and on a few of the other joints including to attach the top. The benchtop layers are screwed together with 2.5" wood screws with countersinks for the heads. I would have put a full shelf in but that's the piece of wood I had so I used it. I bought the 7" undermount woodworkers vise online for around $70. It's mounted with 2.5" lag screws and washers. I did not use exact 2x4's for the base, I used the standard 2x4's (which are actually 1.5" by 3.5"). The bench is pretty sturdy as is but with the massive top/vise and not using standard 2x4's it is not as solid as I would like. It's fine for now but eventually I going to install some threaded rods through the legs length and width to pull it together rock solid. I put some tung oil on the top and later i'll put some wax paste over that. I'm going to seal the edges with shellac or maybe just leave as is. Eventually put some bench dog holes in the top for my vise. I did this all with a cordless drill/bits, kreg jig, circular saw with homemade fence, rulers, squares, random orbit sander etc. Took about two weeks time, working mostly on weekends. The bench alone is around $130, all bought from a "big box" store. Be ready to spend more $$ on tools if you don't have them. This is my 2nd project.

Built from Plan(s)
Estimated Time Investment
Week Long Project (20 Hours or More)
Finish Used
tung oil
Recommended Skill Level
Starter Project

Hand Made by: Rusty Pine

Submitted by Anonymous (not verified) on Fri, 07/22/2016 - 09:27

I made this in 1 day from the plans here on Ana White what a fun project it was and fairly simple to build 

for such a beautiful piece..www.facebook.com/groups/ozaofwc/ 

Estimated Cost
it cost me roughly 49.00 to build materials got at home depot here in florida..
Estimated Time Investment
Day Project (6-9 Hours)
Finish Used
We used Varathane Dark walnut stain..
Recommended Skill Level
Intermediate

Beer Wall for Wedding

My cousin recently got married and wanted a beer wall at her wedding. I quickly searched Ana's site for the perfect plan and chose the Tall Panel Headboard for my starting point. With a few modifications it became a beer wall in no time at all. I love how Ana's plans can be easily modified to make a totally different project.

No fancy wood was used here. Just regular wood from the big box store. A jockey box was attached to the back side of the wall. It worked awesome!

Since I discovered this site in January, I've made close to 30 items from her plans. I'm ridiculously addicted and not just with Ana's site but also with her blog friends. For Valentine's Day I asked for a Air Strike gun and got it. It was better than jewelry and chocolates! I'm well on my way to collecting my own tools and learning how to save money by making it myself. Oh, and I can't even begin to tell you how impressed everyone is with my finished products.

Built from Plan(s)
Estimated Cost
roughly $200.00
Estimated Time Investment
Weekend Project (10-20 Hours)
Finish Used
Valspar paint from Lowes
Recommended Skill Level
Intermediate
Back