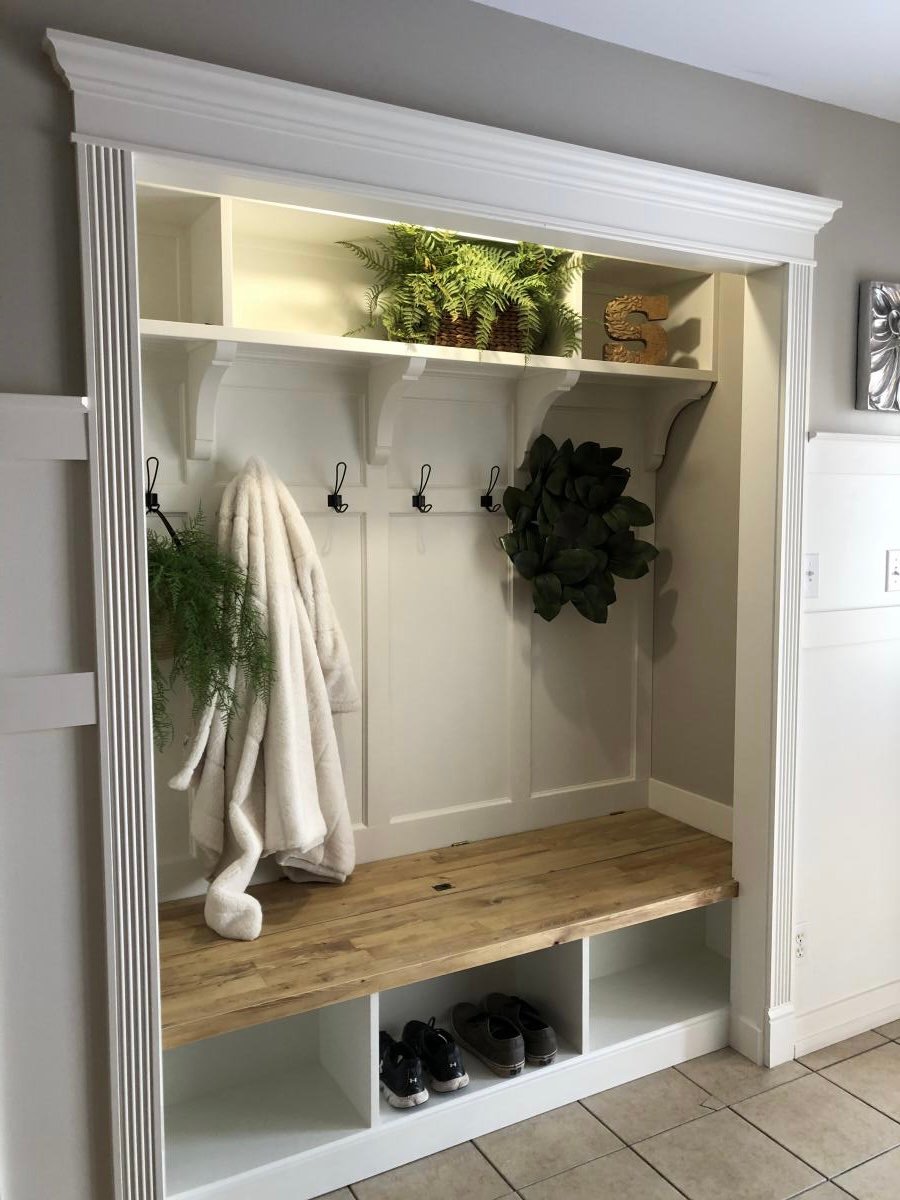
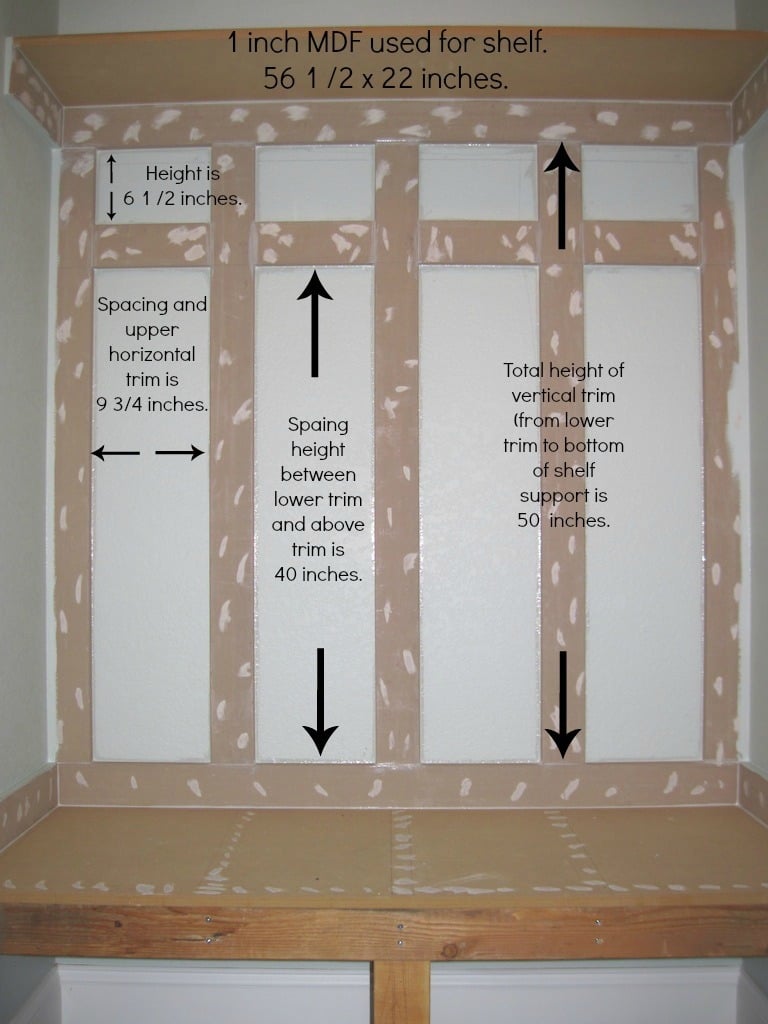
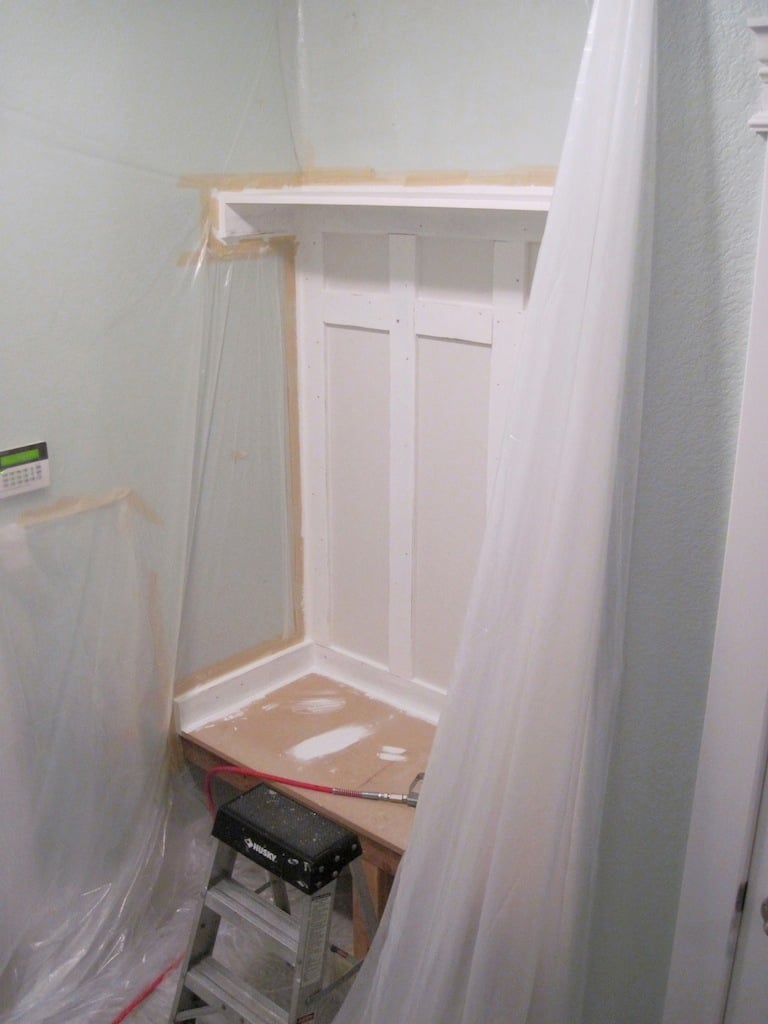
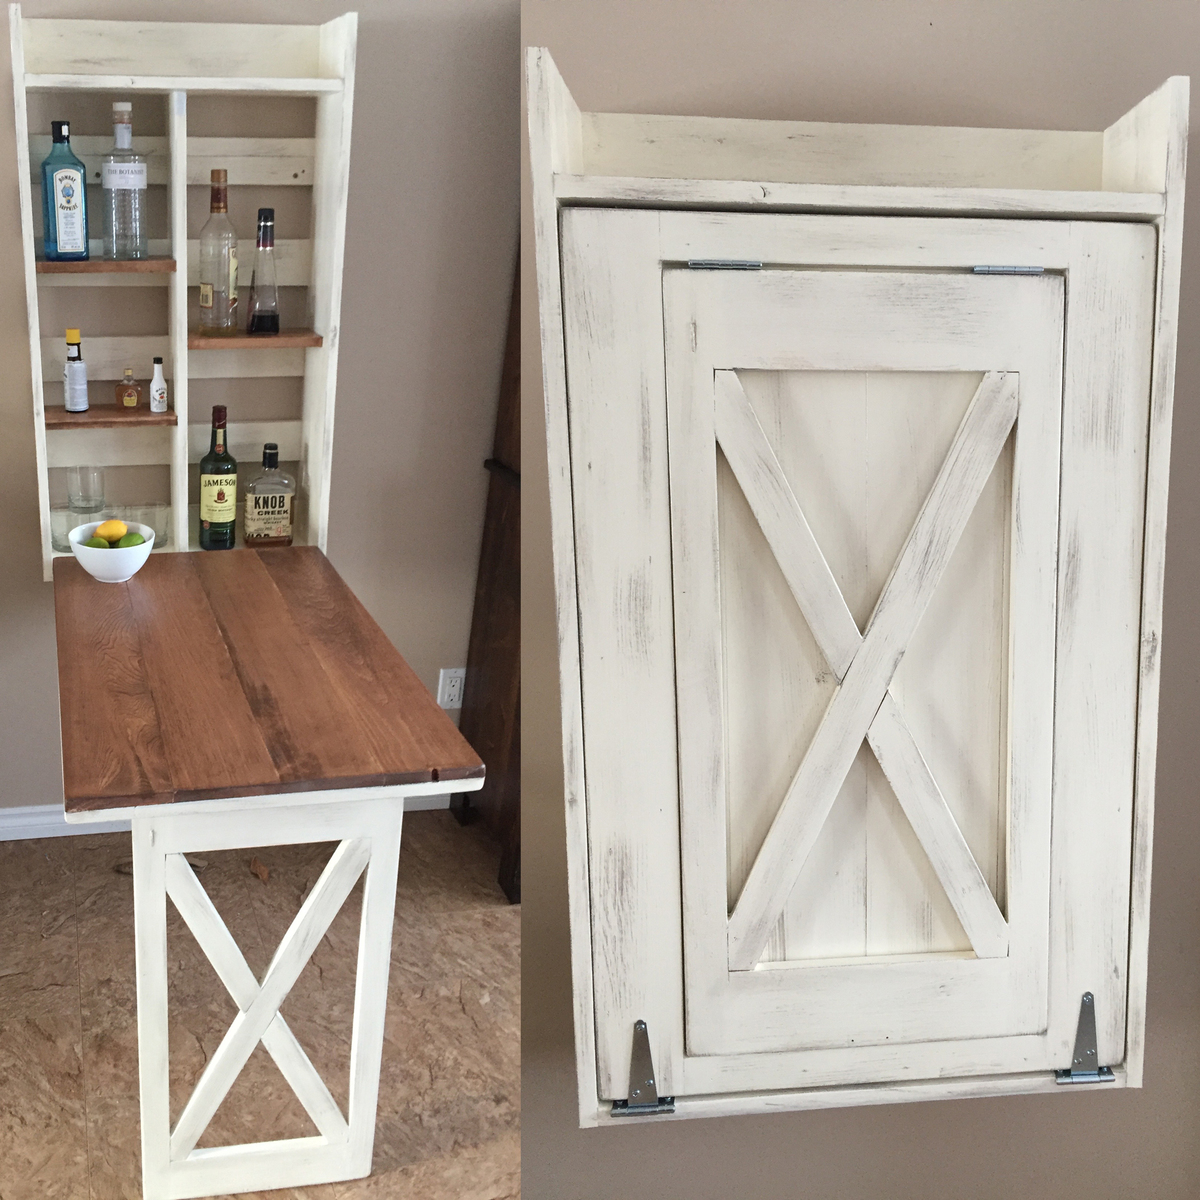
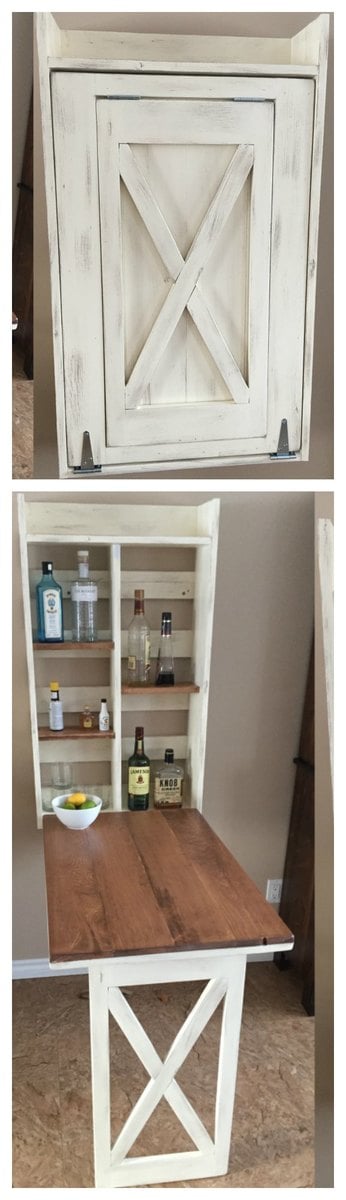
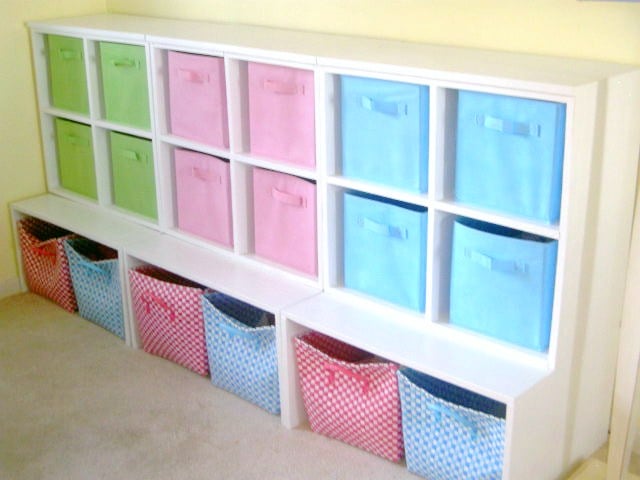
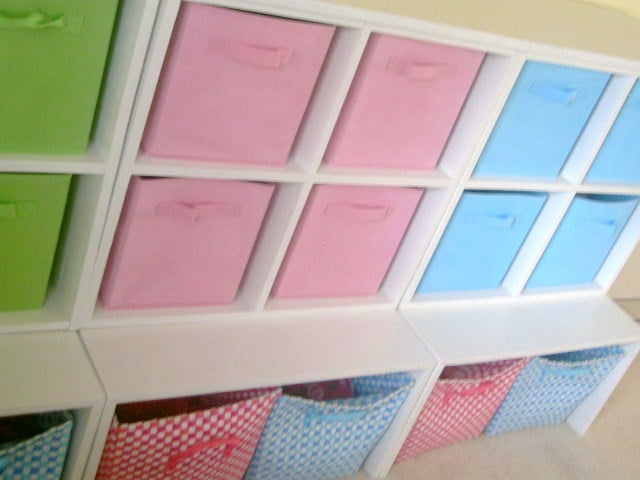
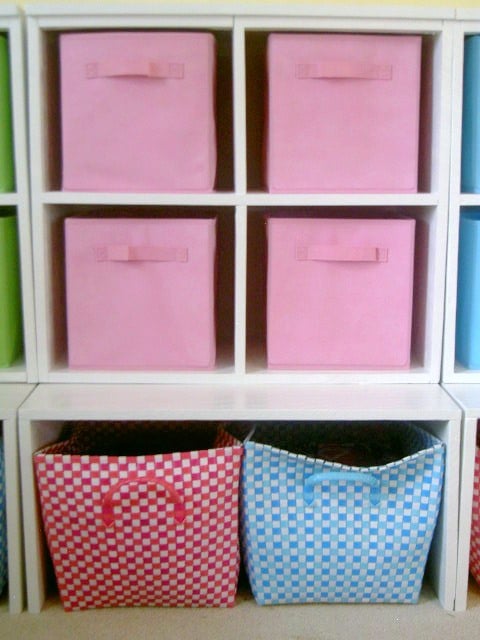
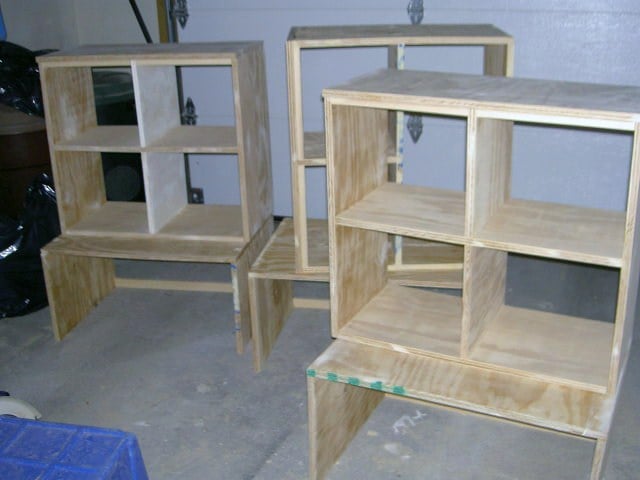
Mudroom Closet Makeover
The concept of hidden boot storage at the back is genius!!! I knew as soon as I saw your plan that I needed that in this space! Thank you so much for what you do!

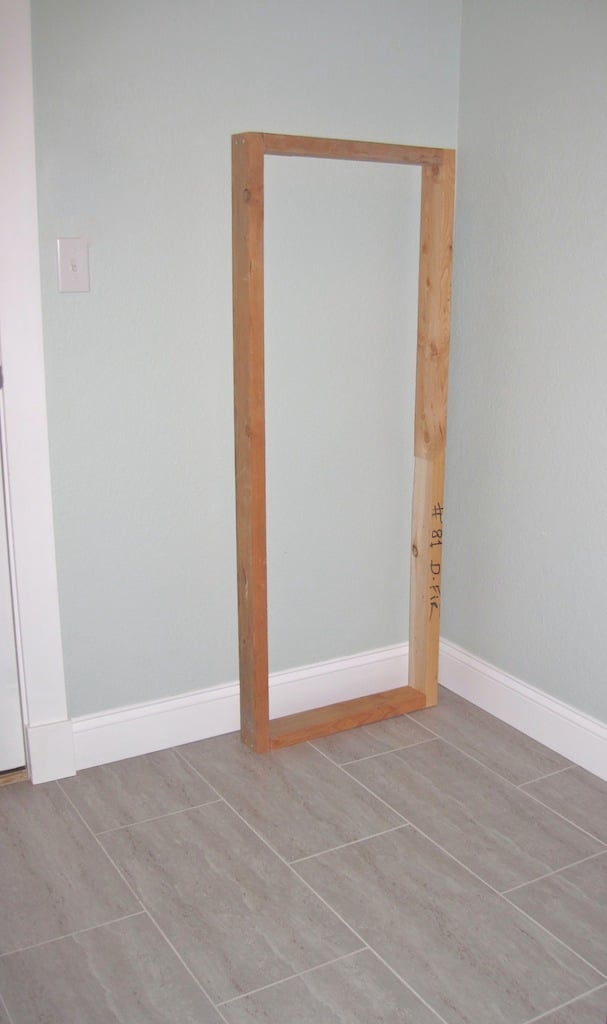
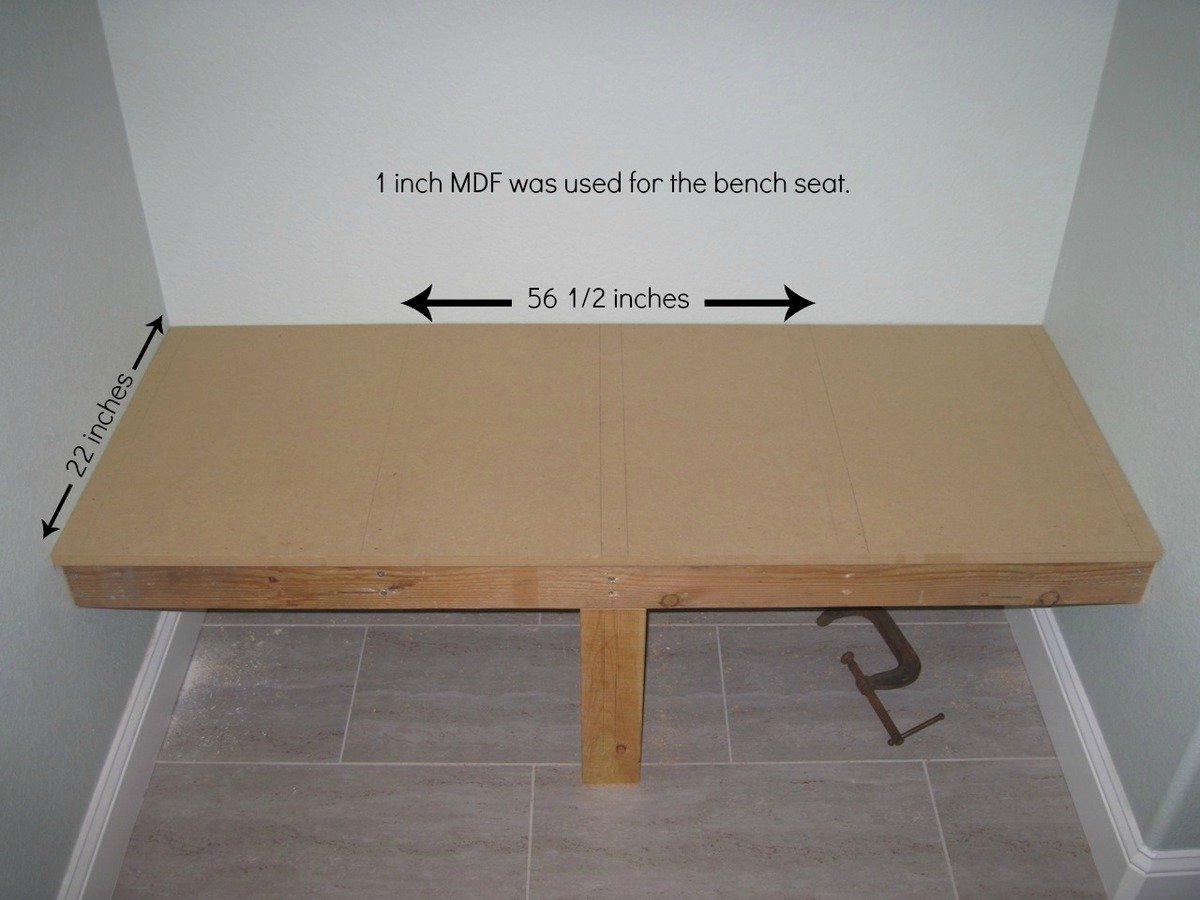
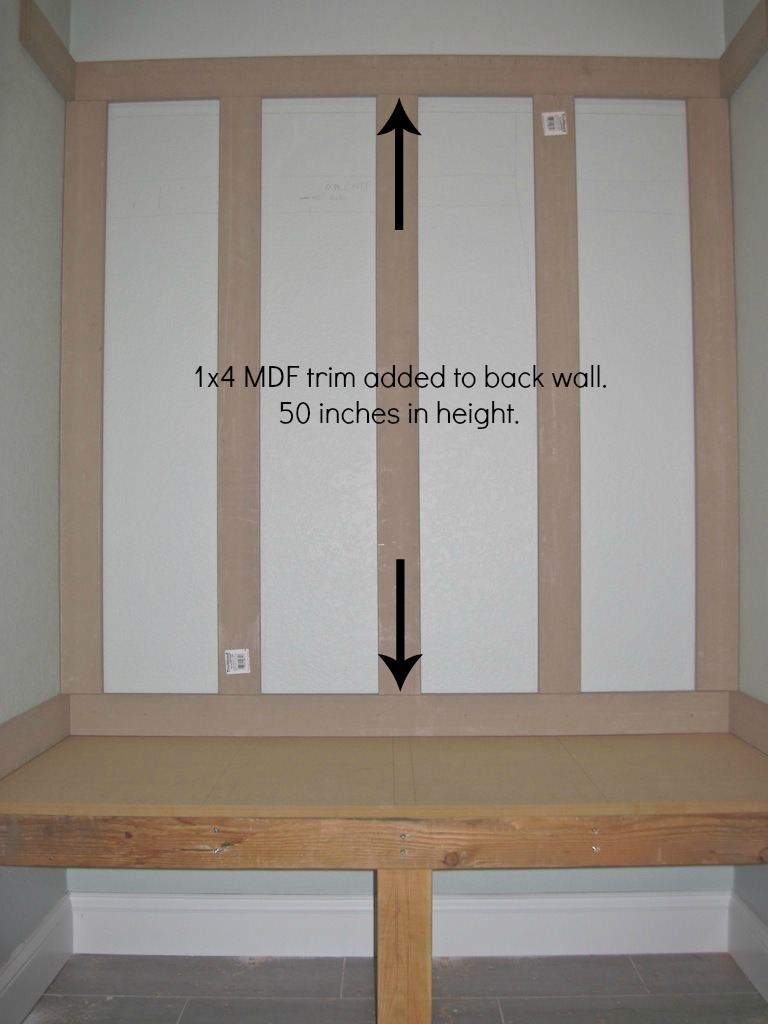
Built from Plan(s)
Finish Used
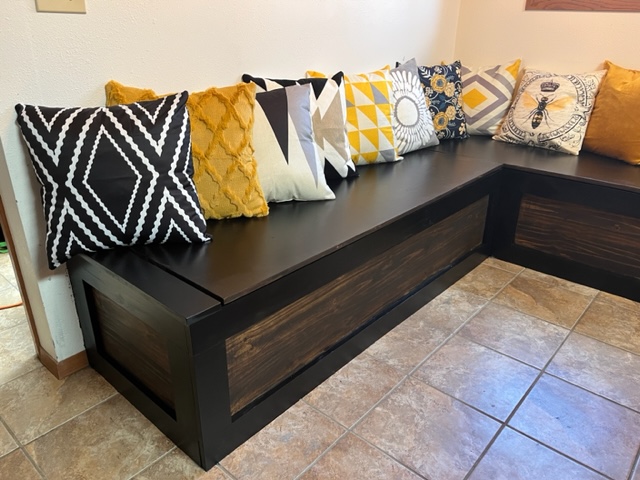
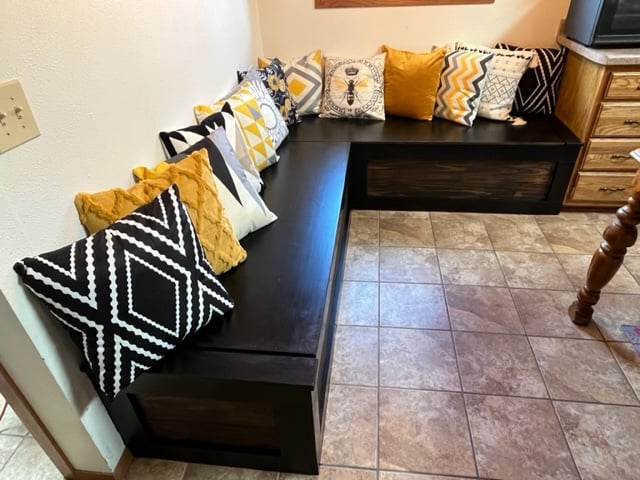
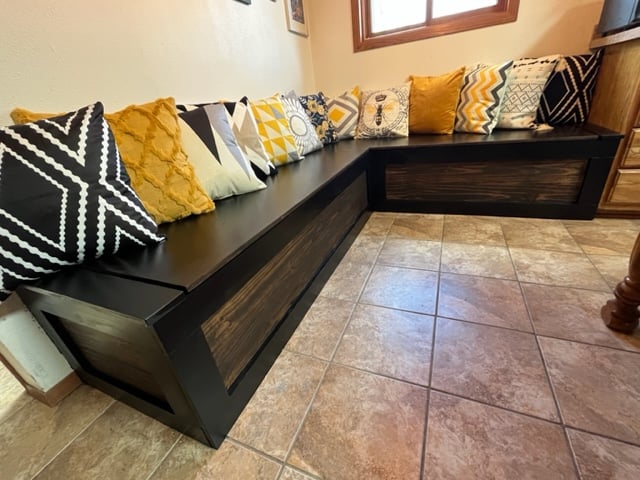
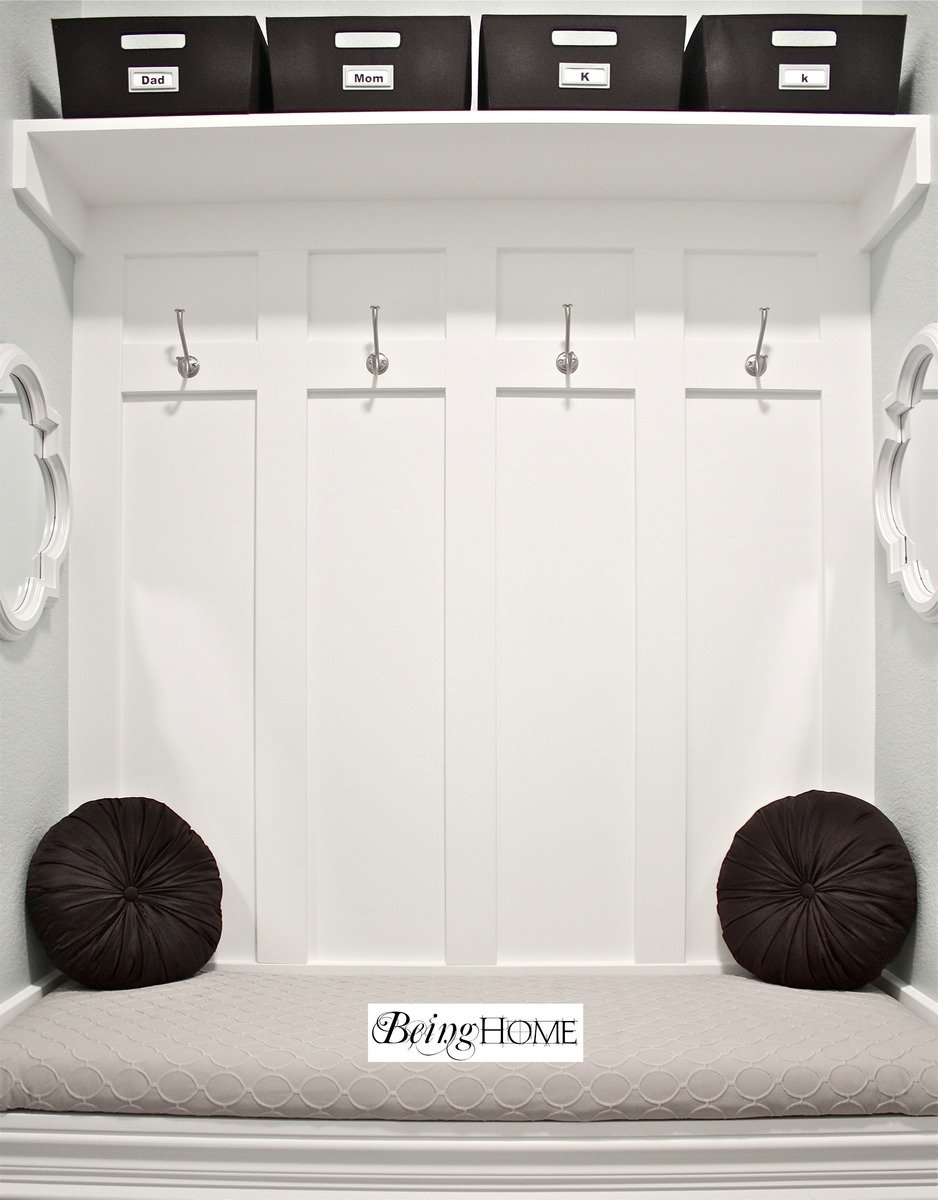
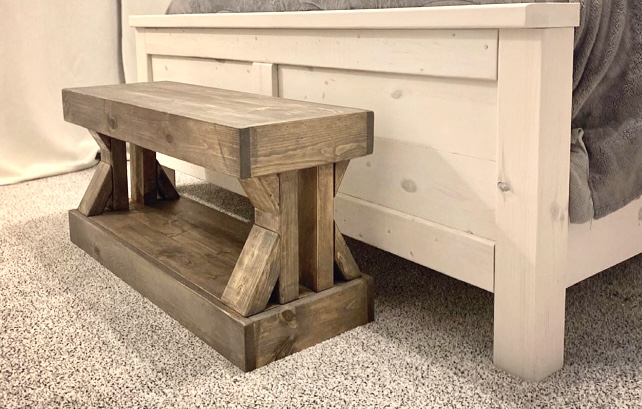
Bench seat was wood conditioner, minwax early American, minwax weathered oak. Then finished with shellac. The coat hooks are from Amazon. The ring pull is from Lee Valley.


Comments
Ana White Admin
Thu, 01/21/2021 - 18:36
Beautiful!
Thank you for sharing here, it is amazing!
foreveryoung8
Fri, 01/22/2021 - 11:42
Closet Mudroom
May I ask how you would assemble if you wanted the hinge in the back as in this picture?
Thank you.
jeansay
Wed, 08/25/2021 - 04:51
Hello, can you tell me how…
Hello, can you tell me how to find the plans for the Mudroom Closet makeover? I’m interested in doing the one pictured on this page.
Thank you