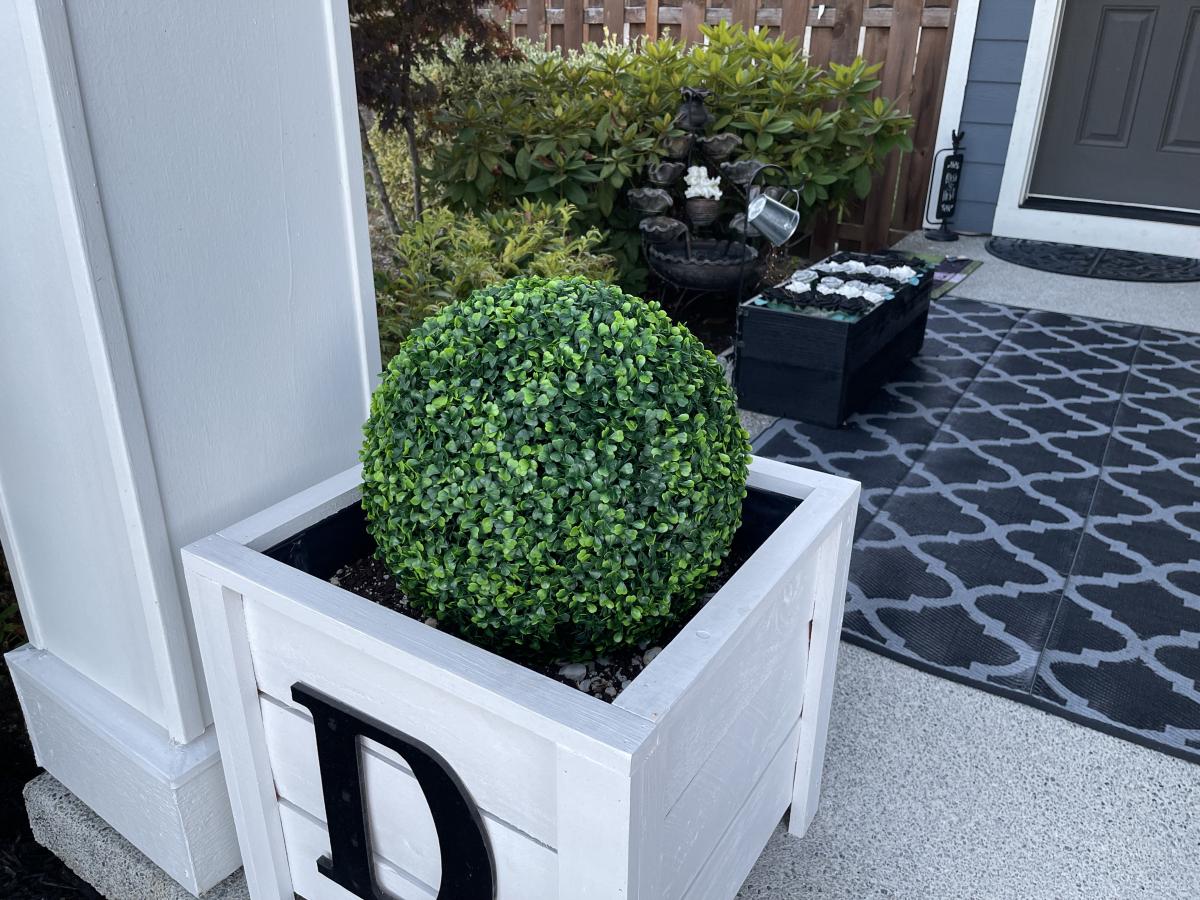
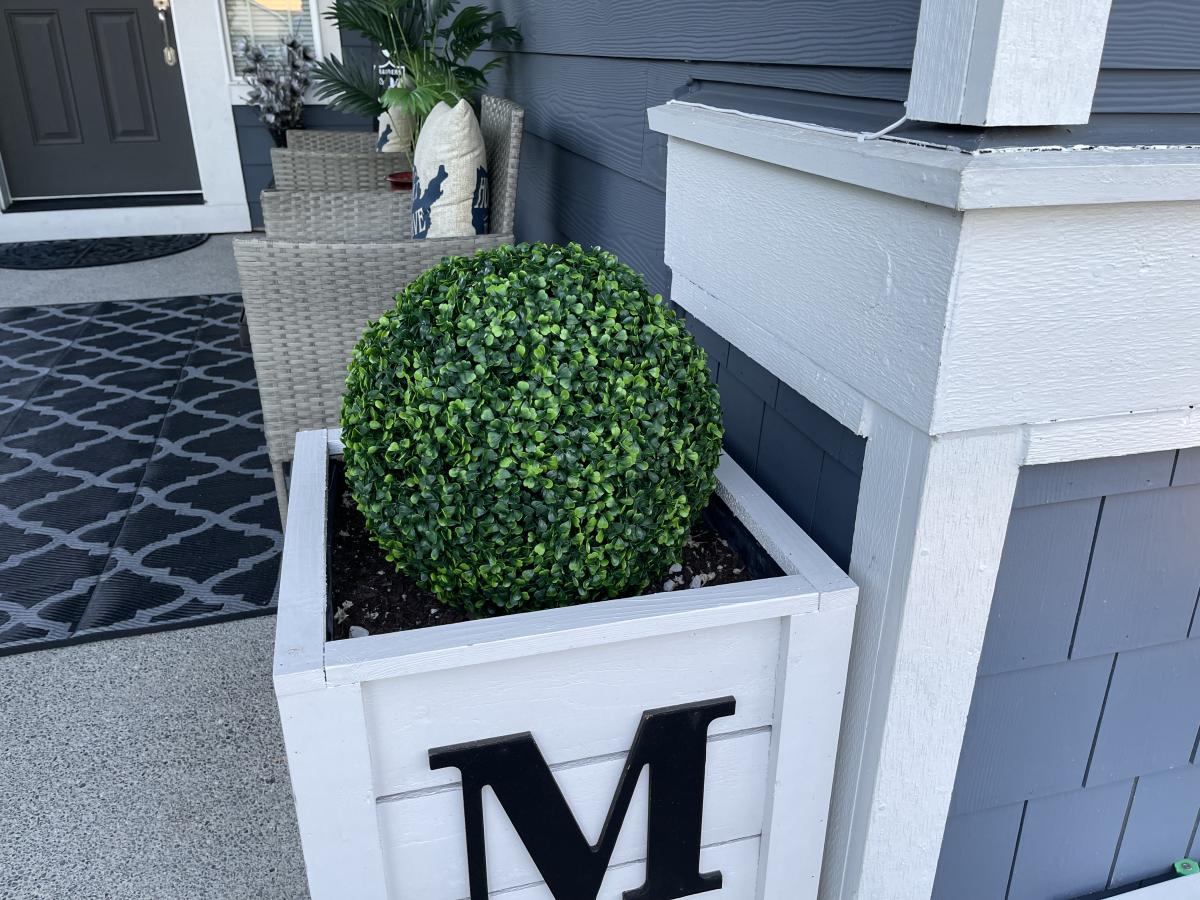
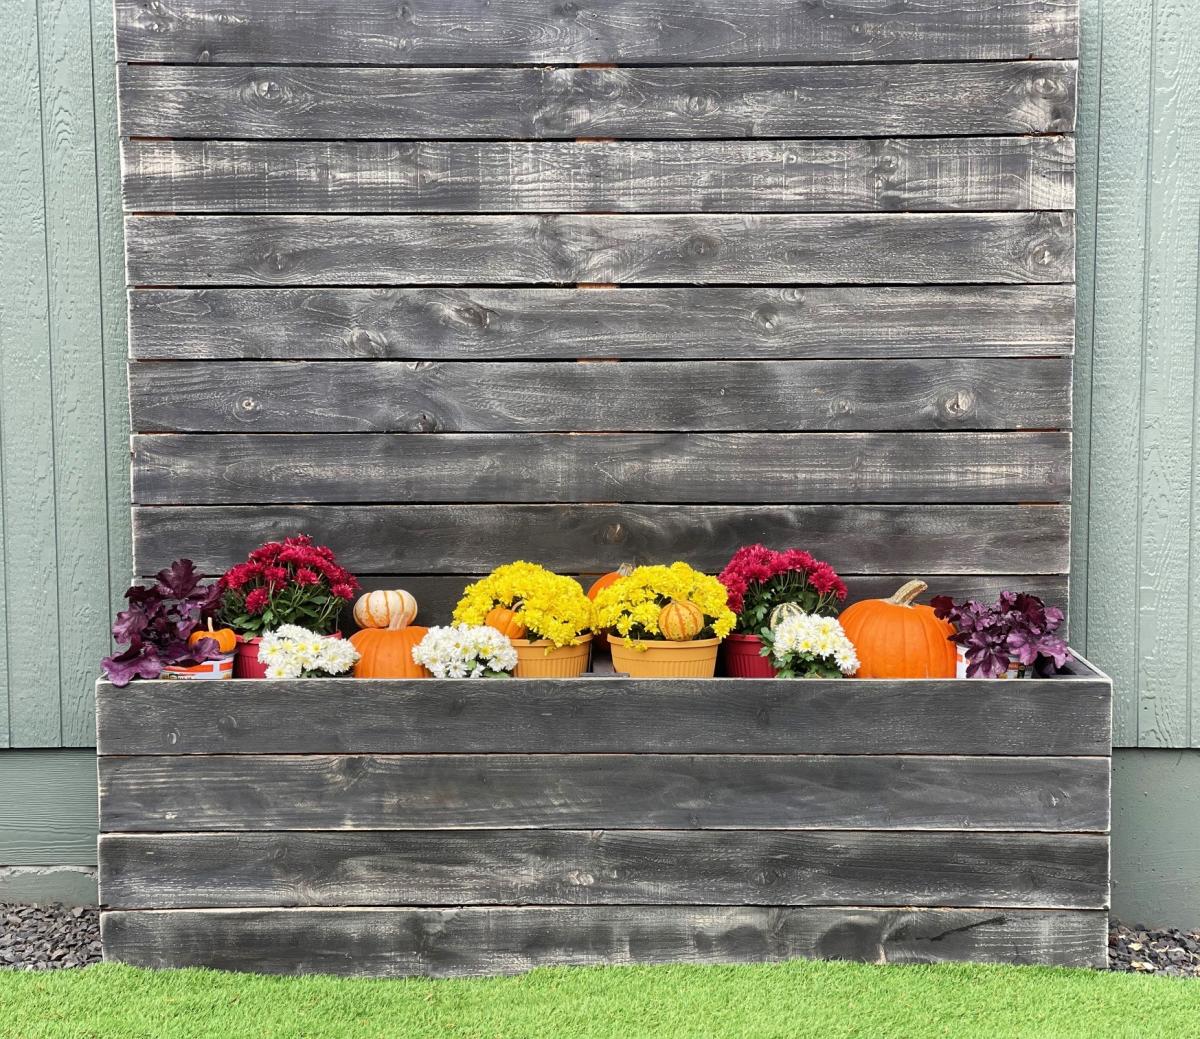
Porch Planters
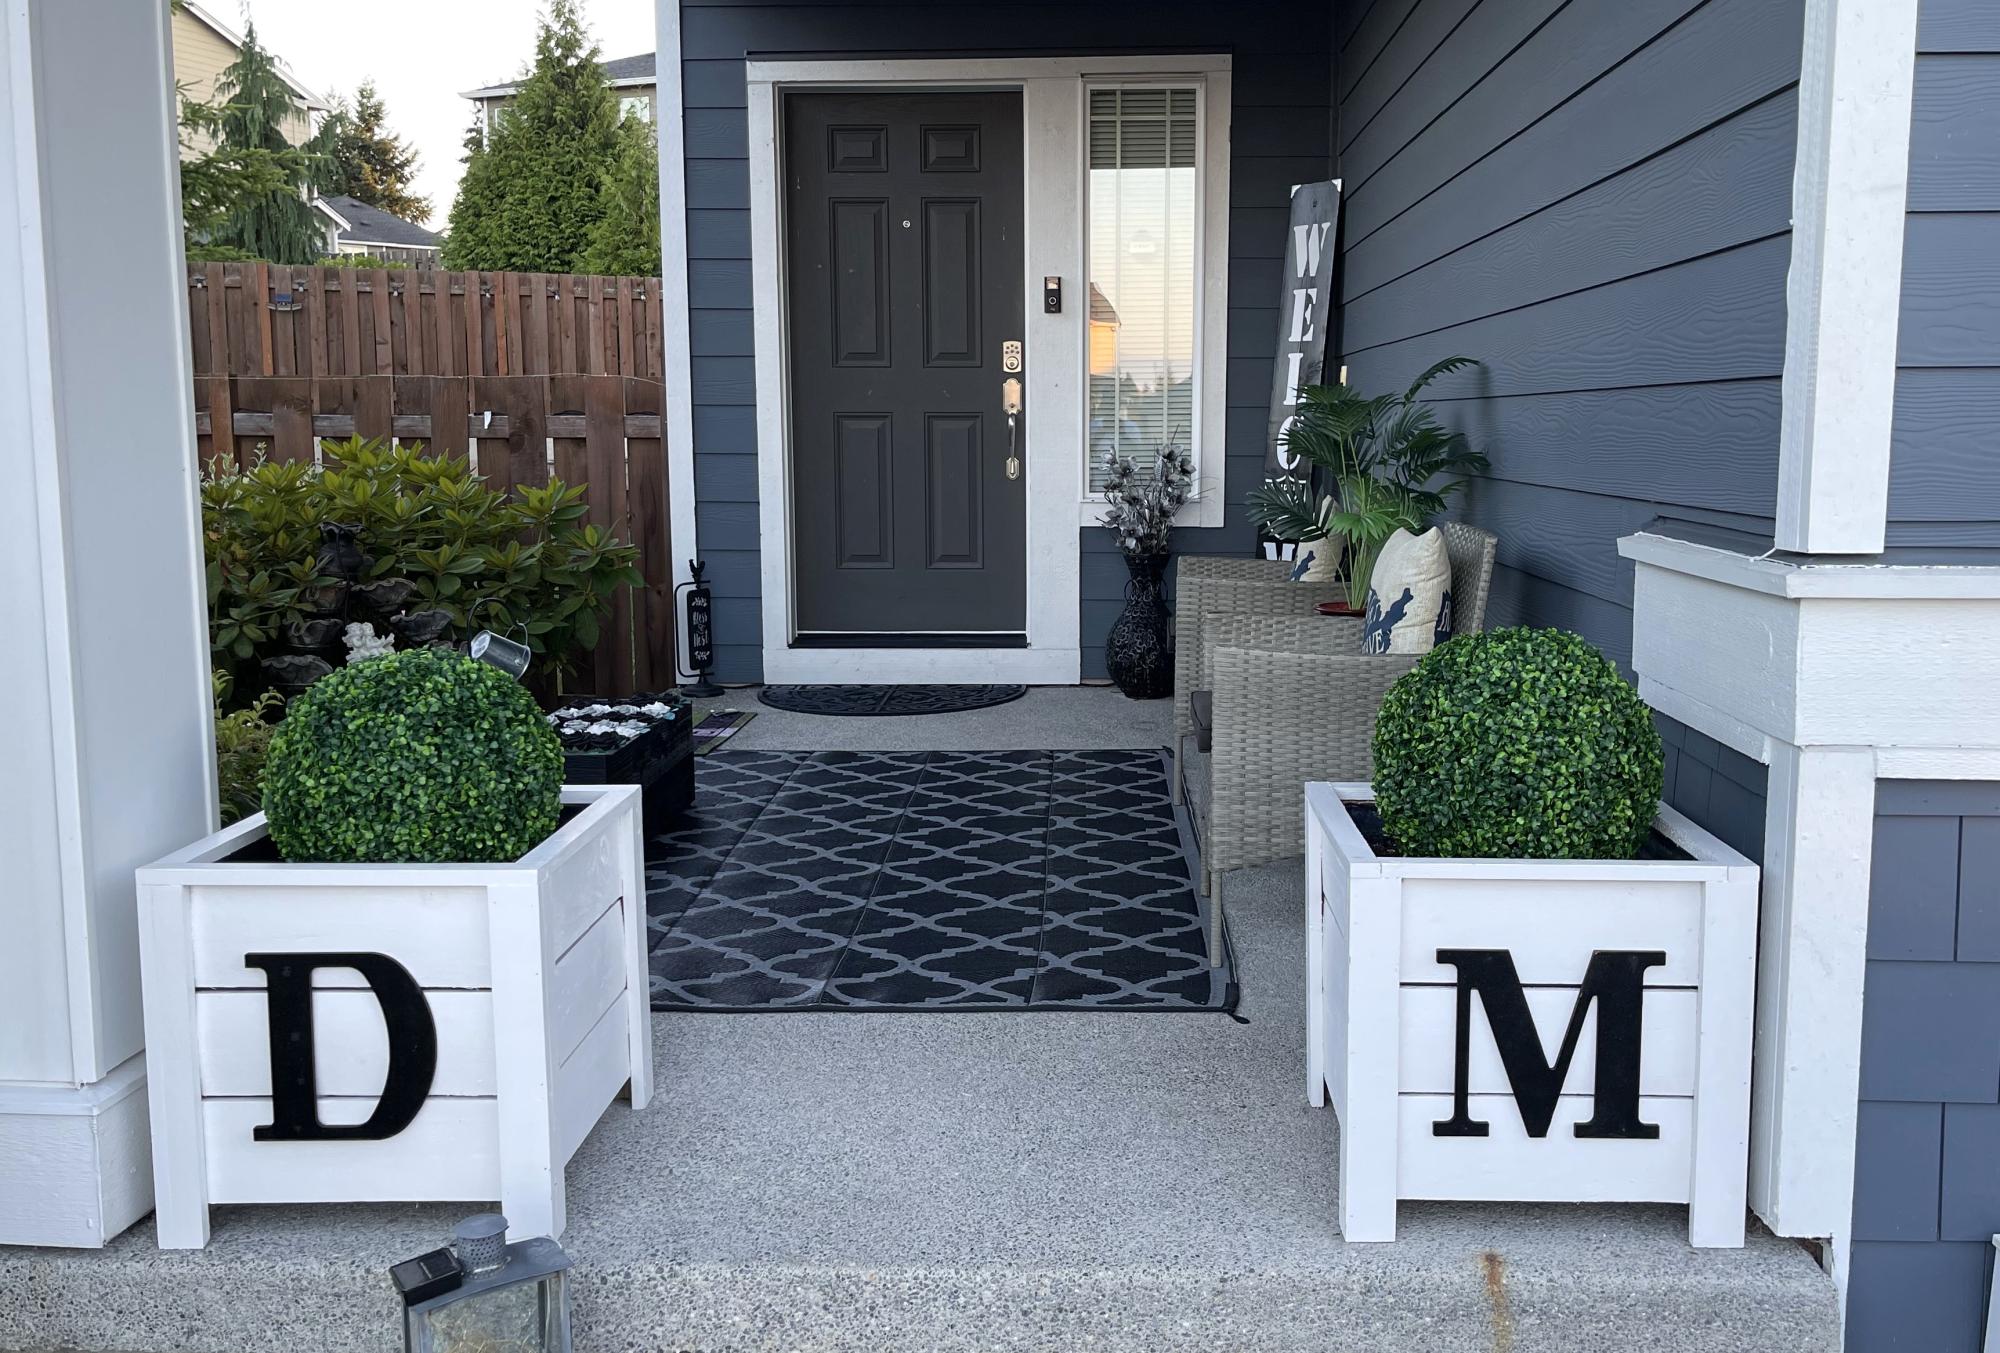
This build was a lot of fun! Thanks ANA!
David Marks
Built from Plan(s)
This build was a lot of fun! Thanks ANA!
David Marks
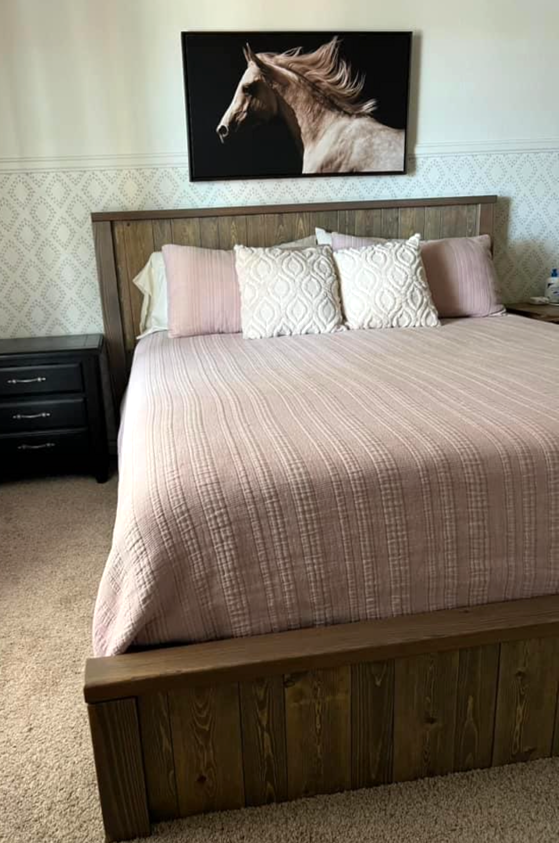
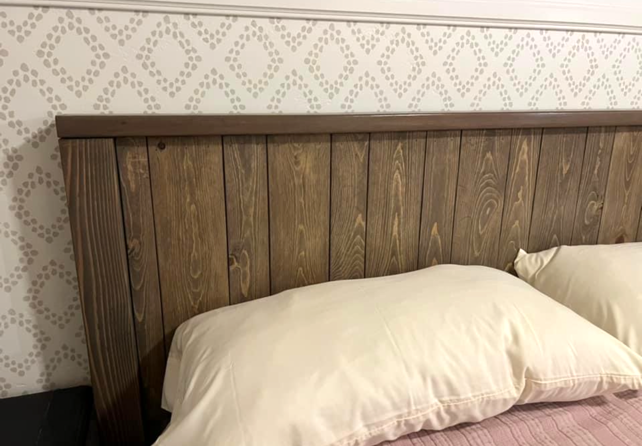
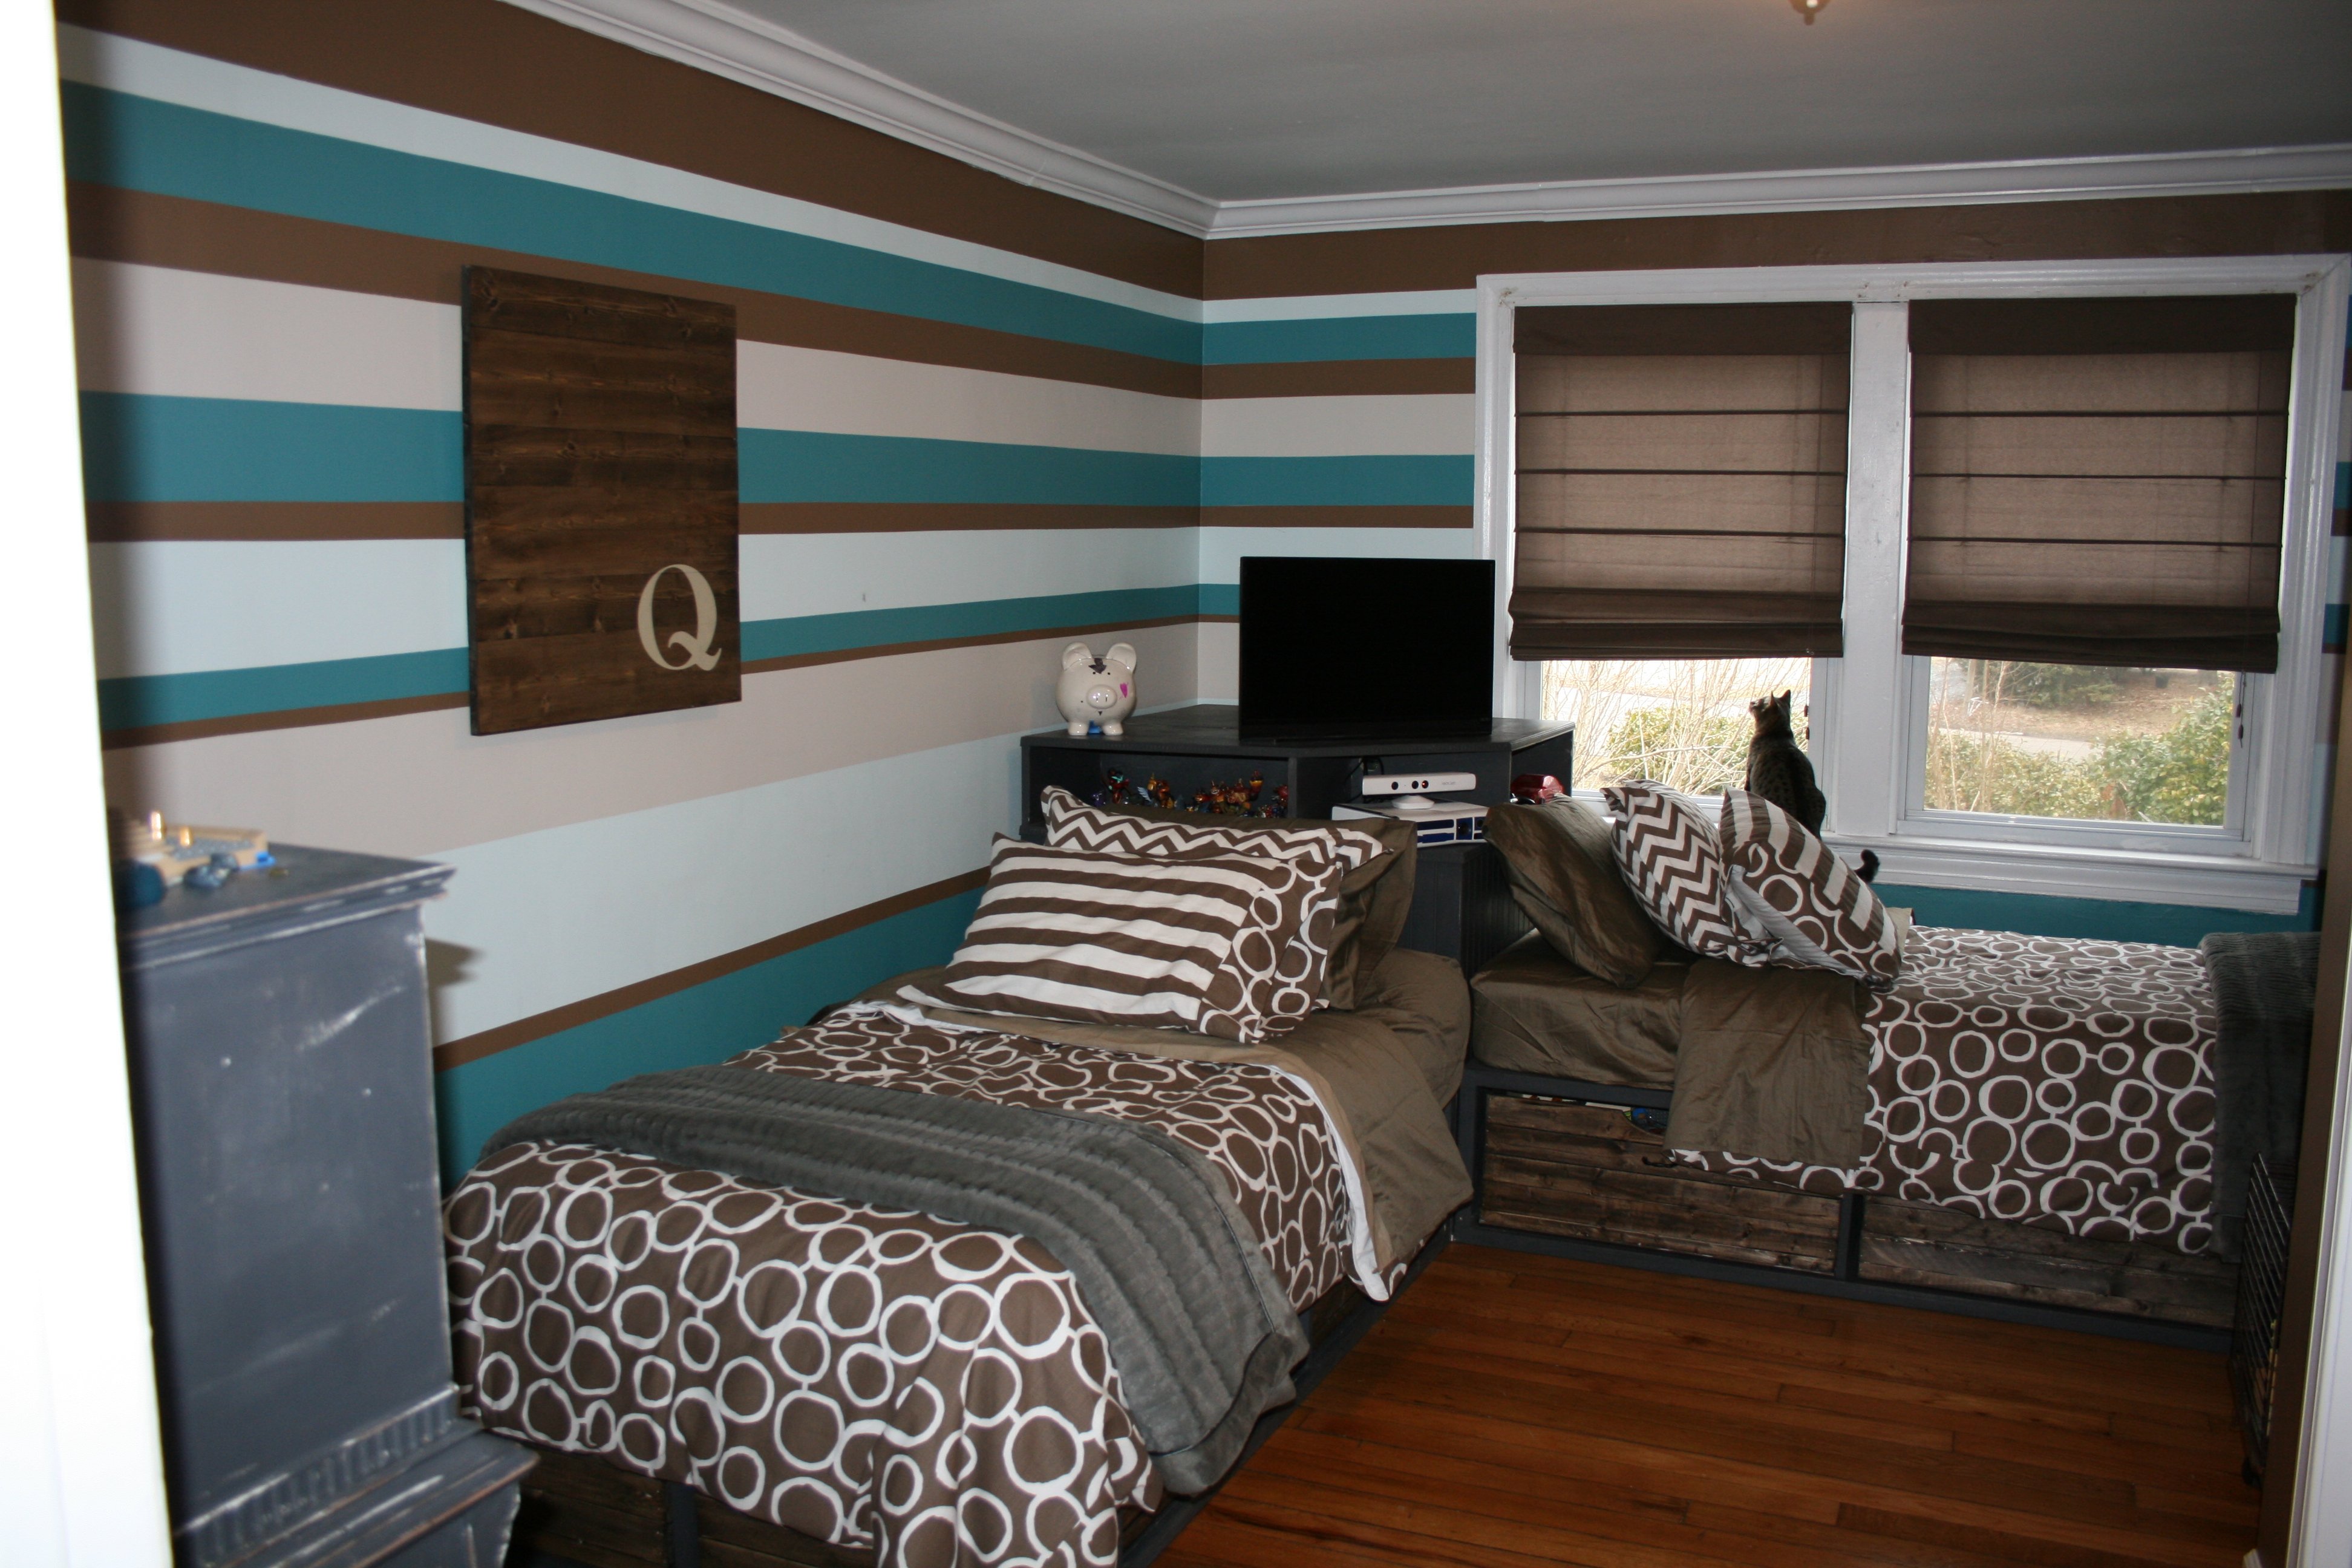
Beautiful Rustic Bed Build by Natalie Riley

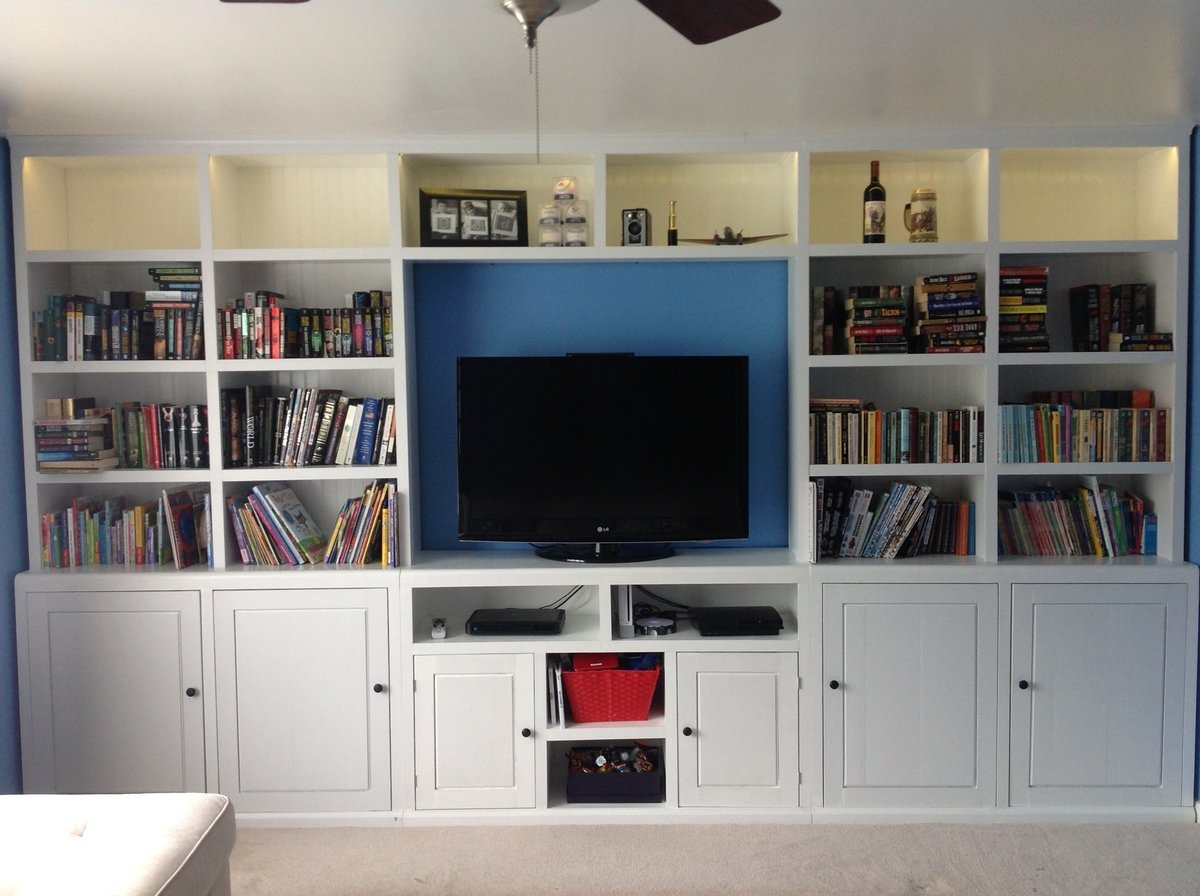
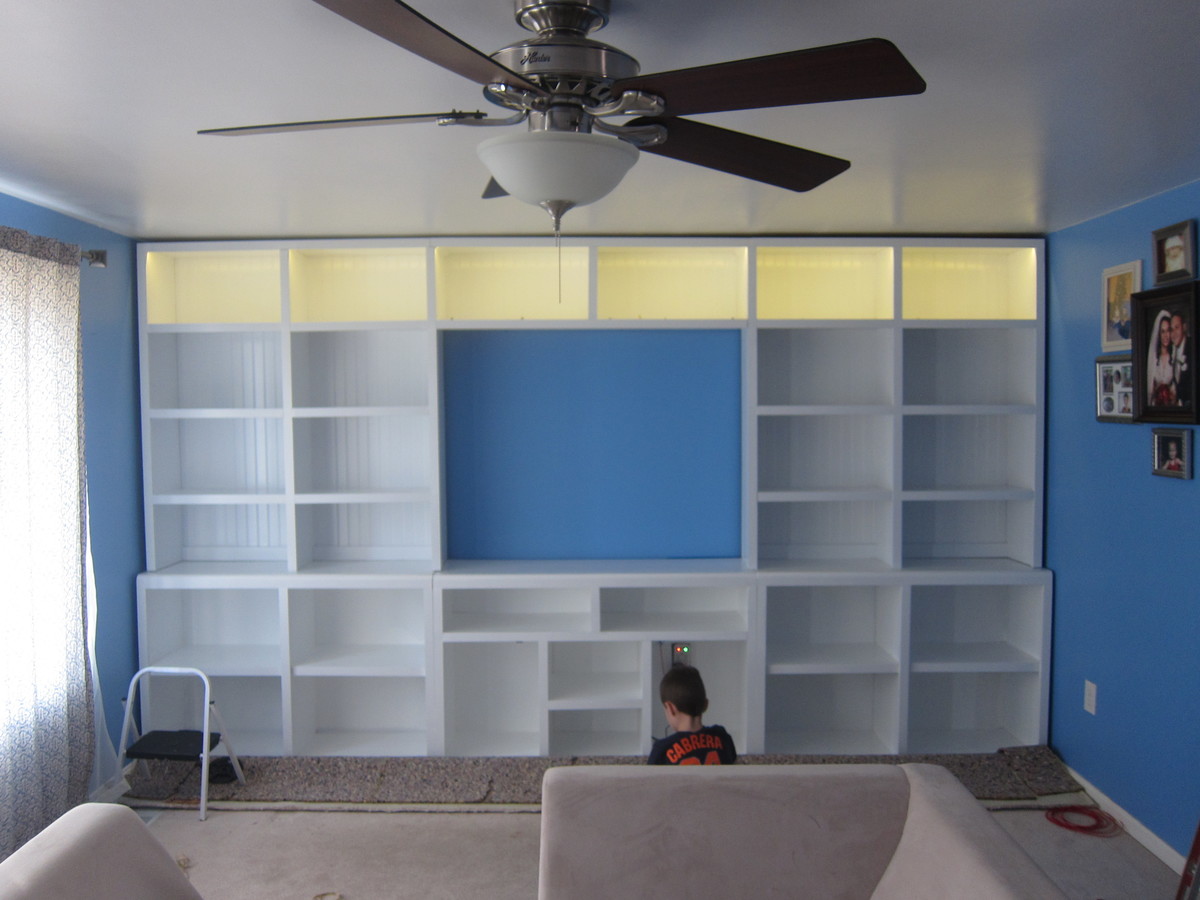
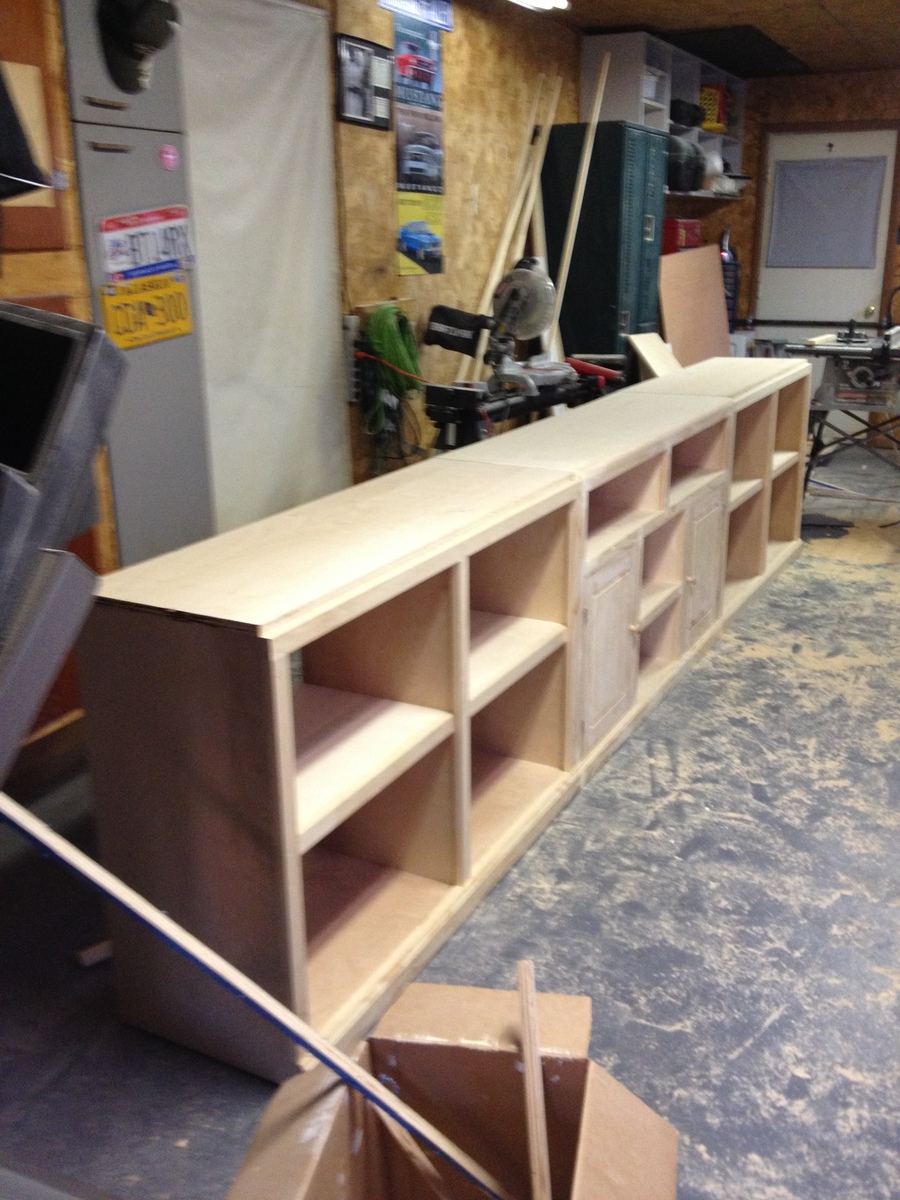
This is from the Rebecca Media Center project. With my wife being an avid book collector and my children being avid toy collectors, we were quicking running out of space for both. Being the amazing husband and father that I am, I made this project and solved both issues. I had a wall that was 13 feet wide and thought this would be a great place for some bookcases. The plans provided were almost perfect. I only had to change the sizes by a few inches to make it fit the wall and raise to the ceiling. I also added a string of led lights across the top. These were cheap, hid well, use little power and came with a dimmer to adjust the brightness. I really like them. I think they came from hit lights for around $30.

Sun, 05/24/2015 - 20:08
Does anyone know if there is a step by step for this entertainment center

Mon, 05/25/2015 - 08:16
Hi Jason,
There are 3 plans for this media center: Side hutch piece, side base, and console piece. These are the links to the plans (also highlighted in the post above in orange -- clicking those will take you to the plan)
http://ana-white.com/2012/04/plans/rebecca-media-center-center-hutch-pi…
http://ana-white.com/2012/04/plans/rebecca-media-center-side-base
http://ana-white.com/2012/04/plans/rebecca-media-center-console-piece
To do a search, at the top of the screen under "search for something great!" if you type in "rebecca media center" it will show you all the plan posts and the brag posts.
Happy building!
Joanne
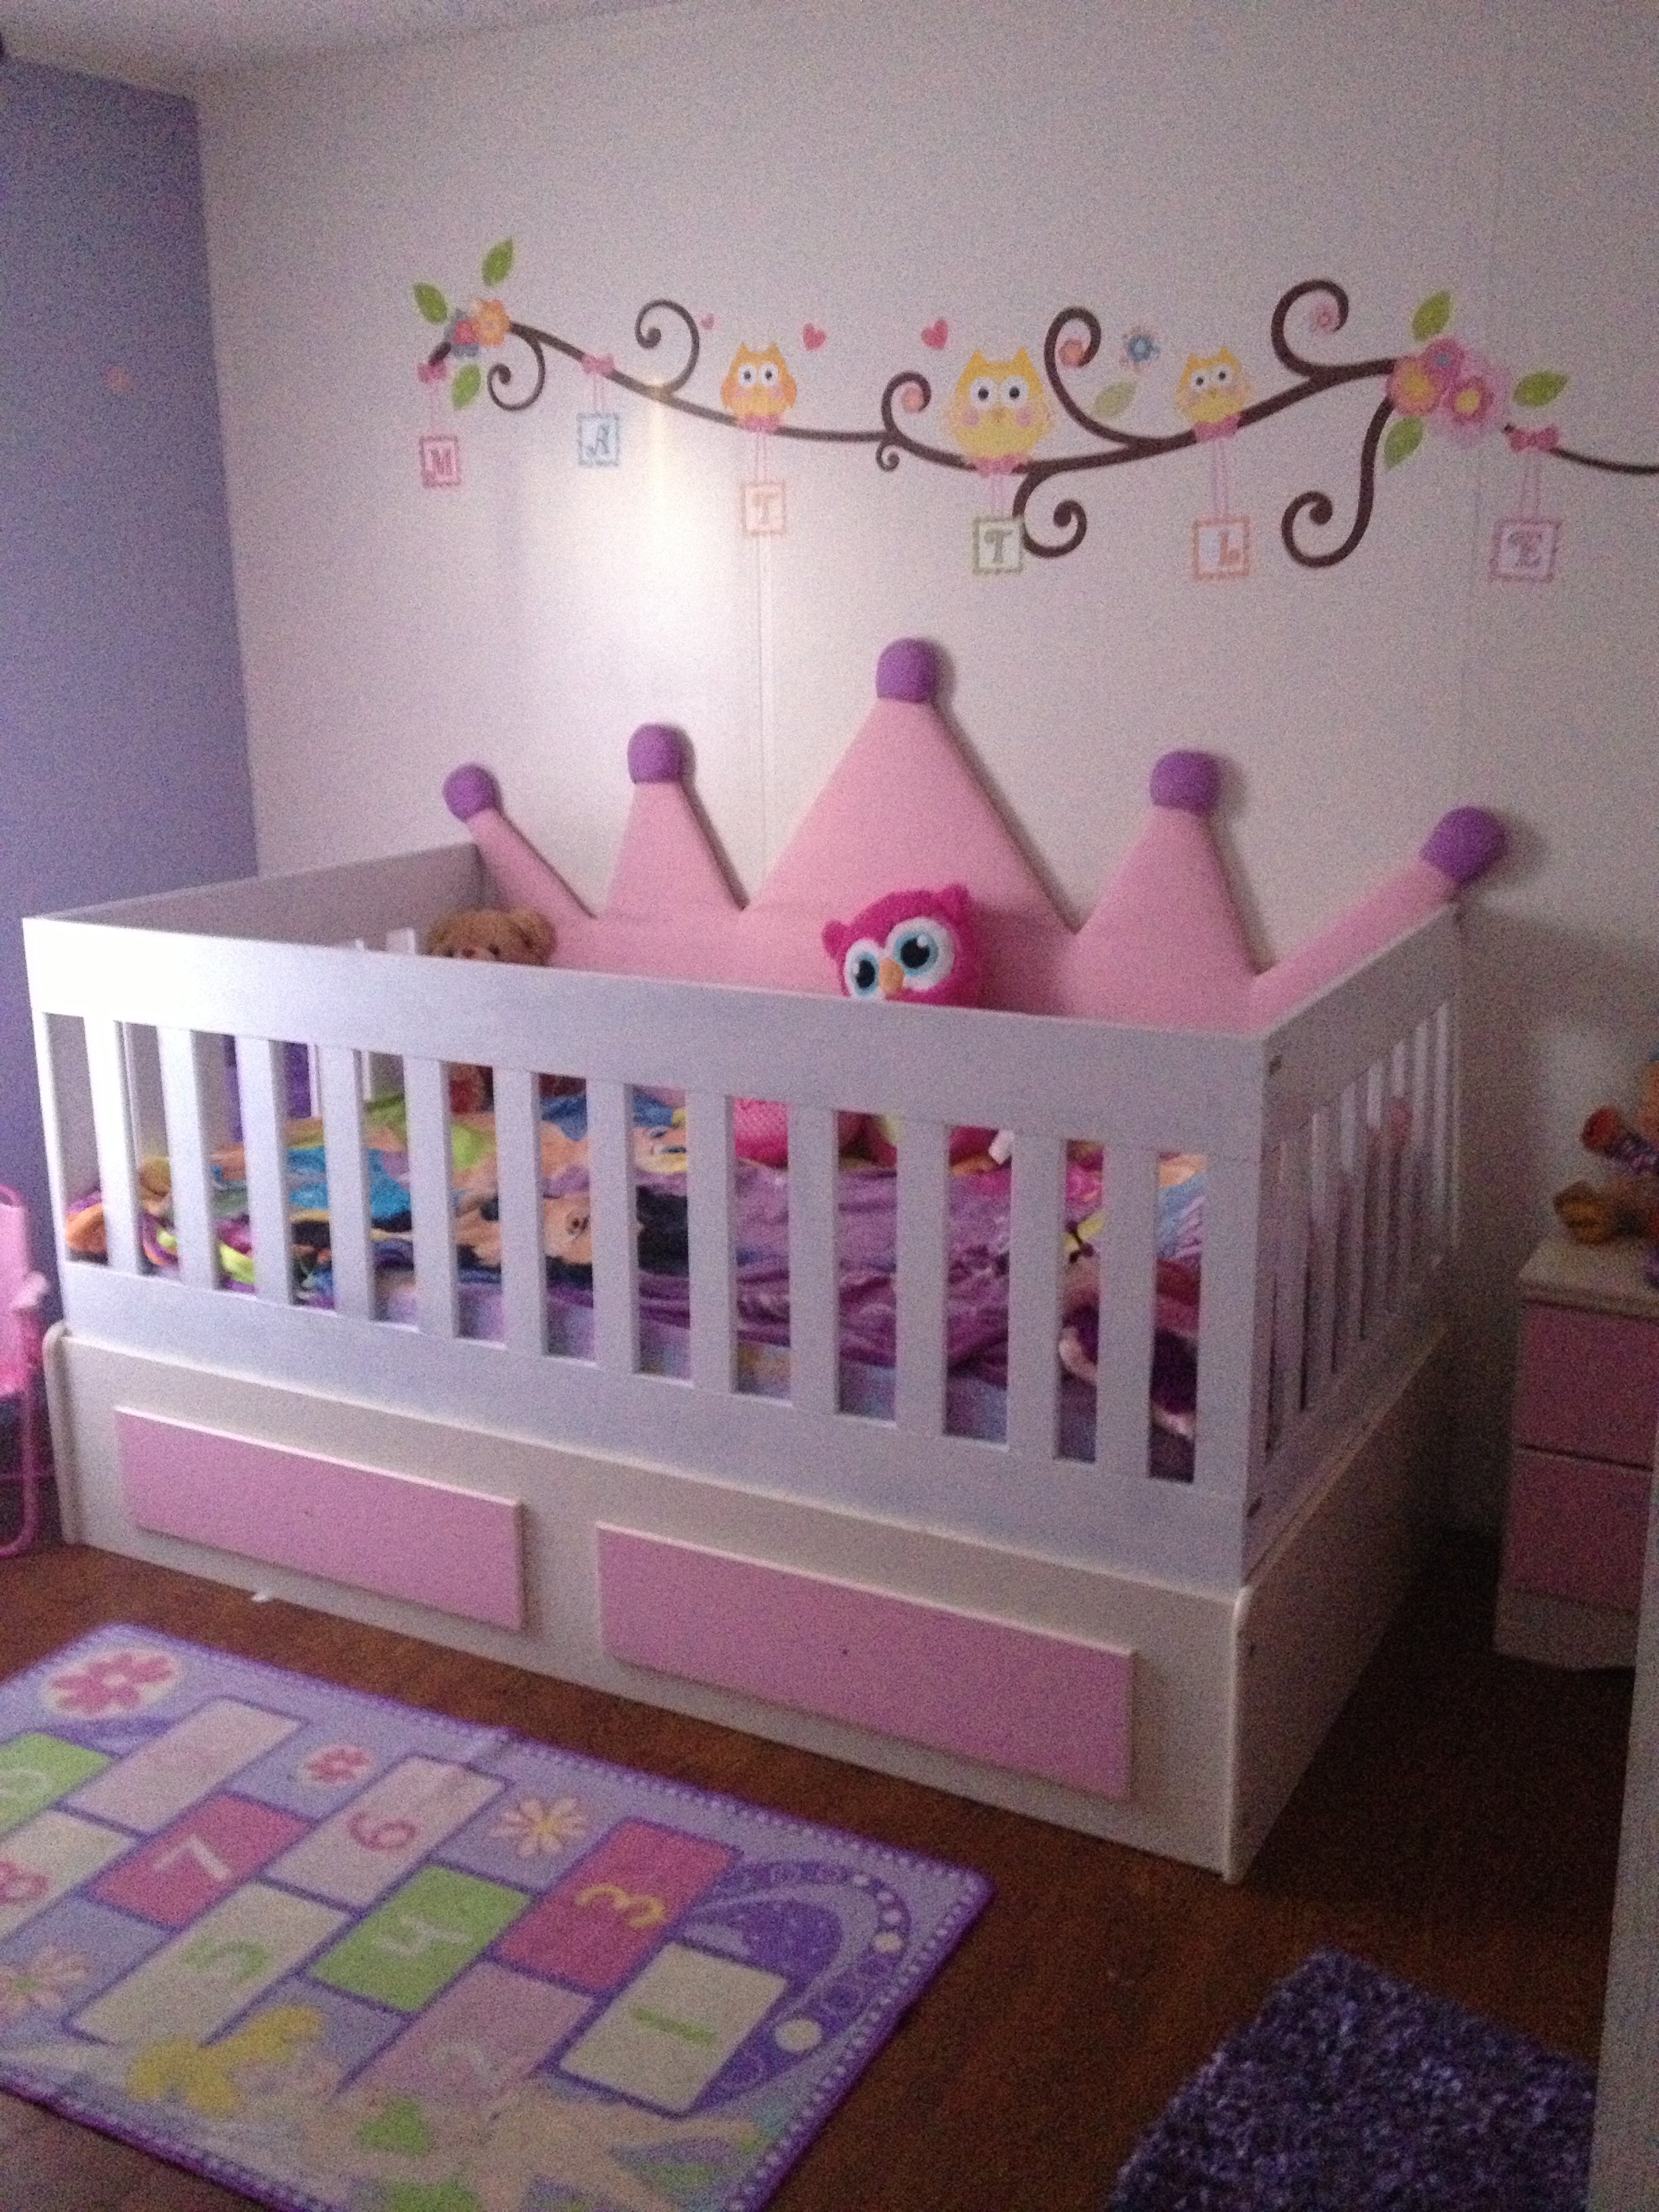
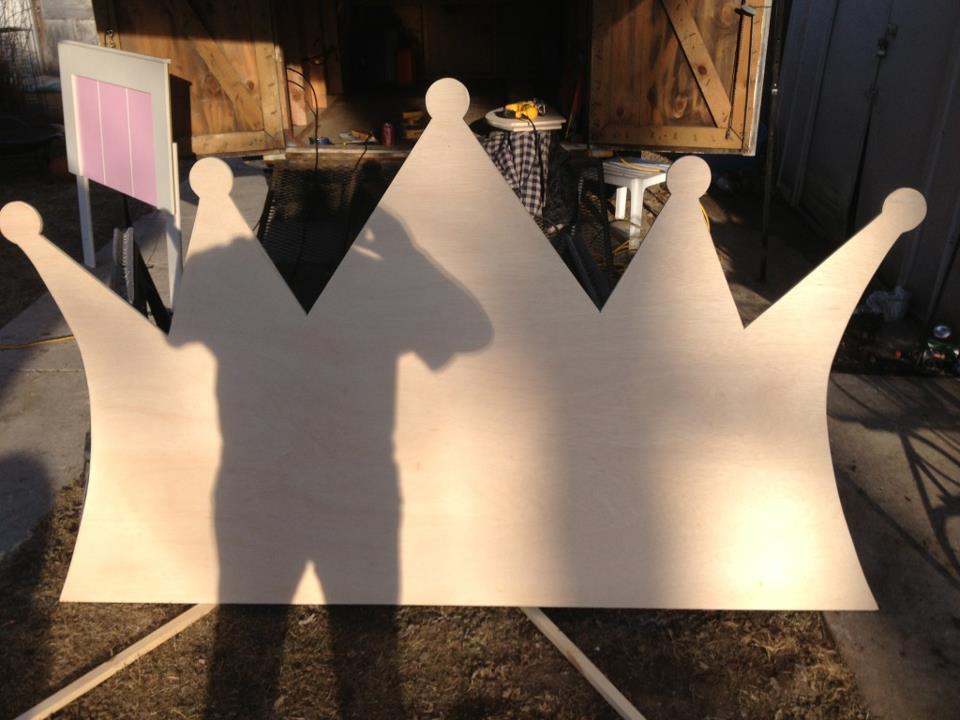
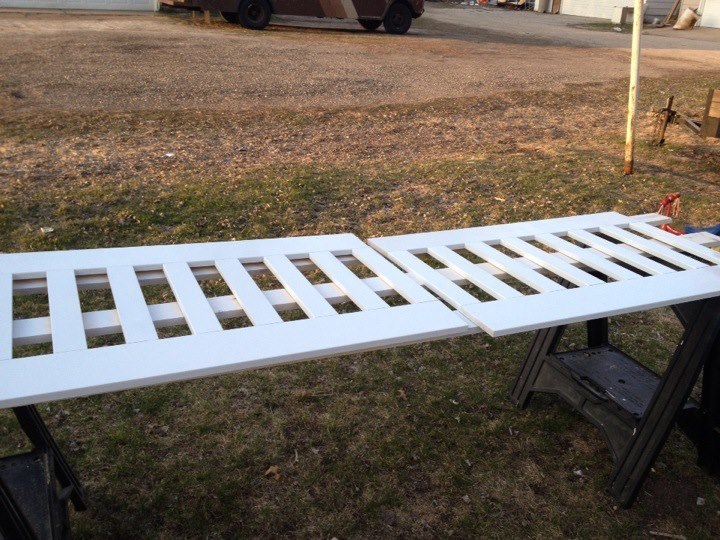
I purchased a twin girls captins bed for my daughter to grow into but she wasn't quite big enough for it yet so I had my husband convert it into a twin size crib!!!! Im in love with how it turned out. My husband Free hand a crown on a sheet of ply wood and cut it out. I used quilt batting and covered it with pink material and did the tips of crown in purple.
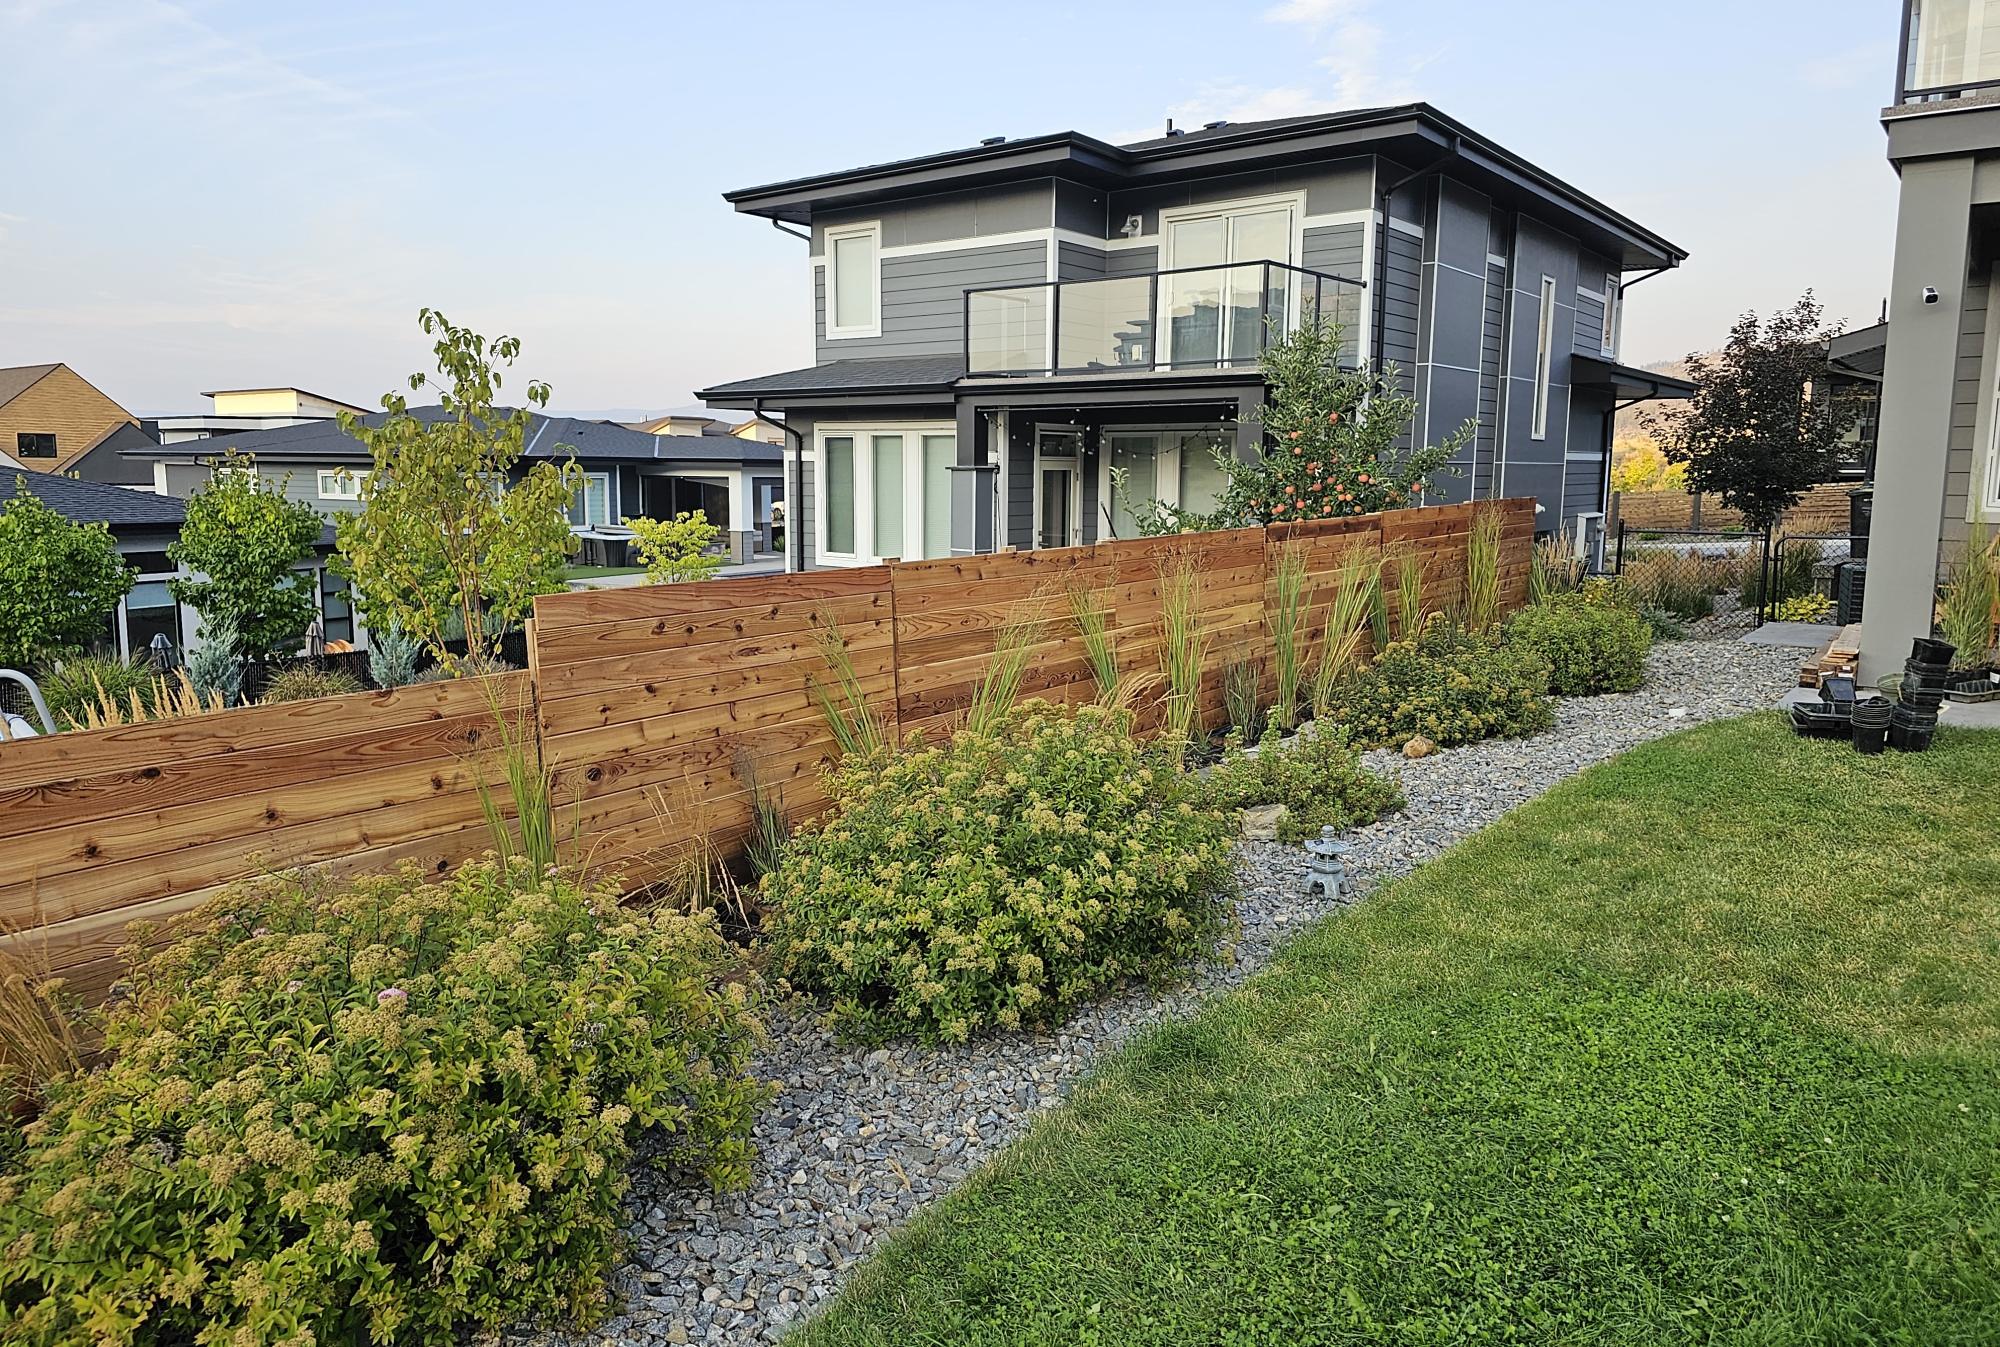
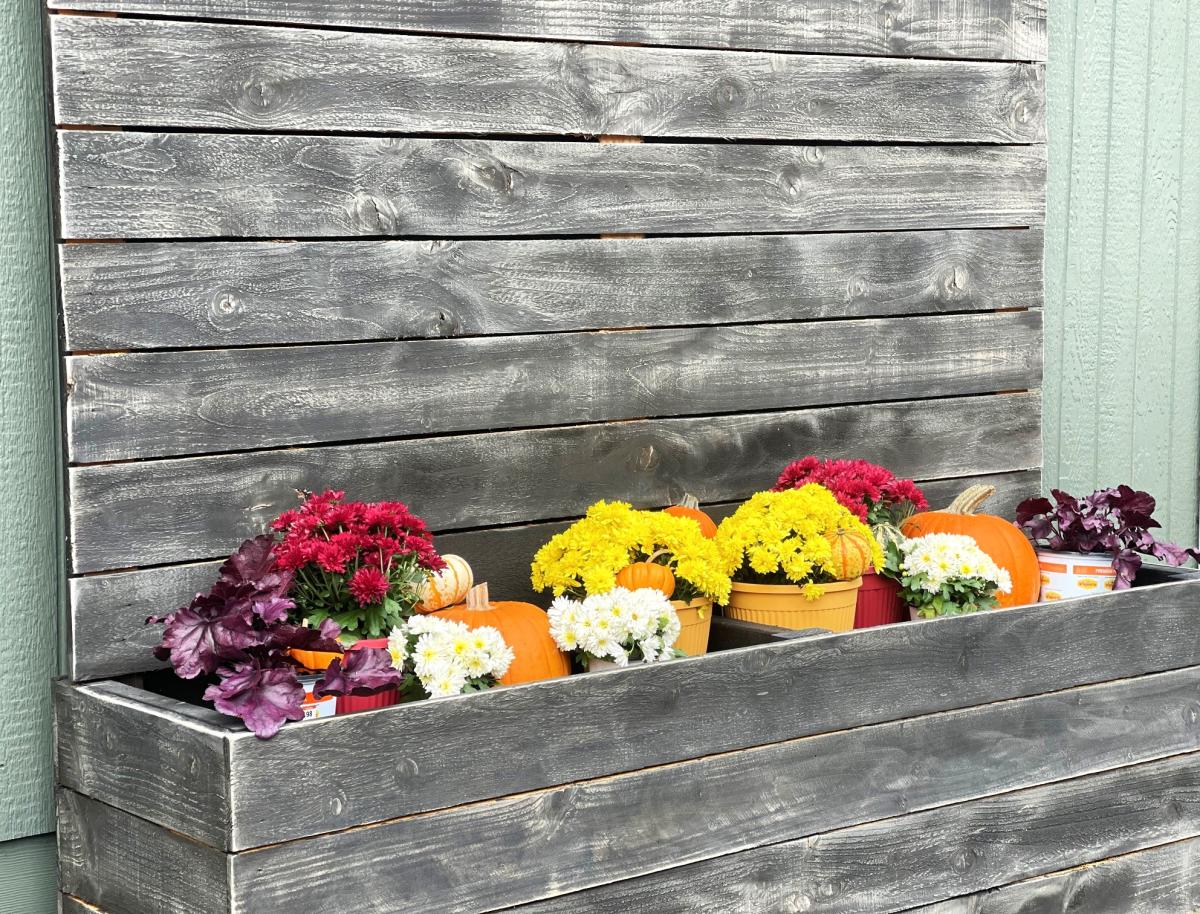
Created a privacy planter fence, using multiple planters. Most of the bases were custom sizes due to the existing rock wall. Tongue and groove cedar utilized and coated with linseed oil. I ensured the frames were square and plumb which the directions omit for some reason. Great week long project!
Kyle
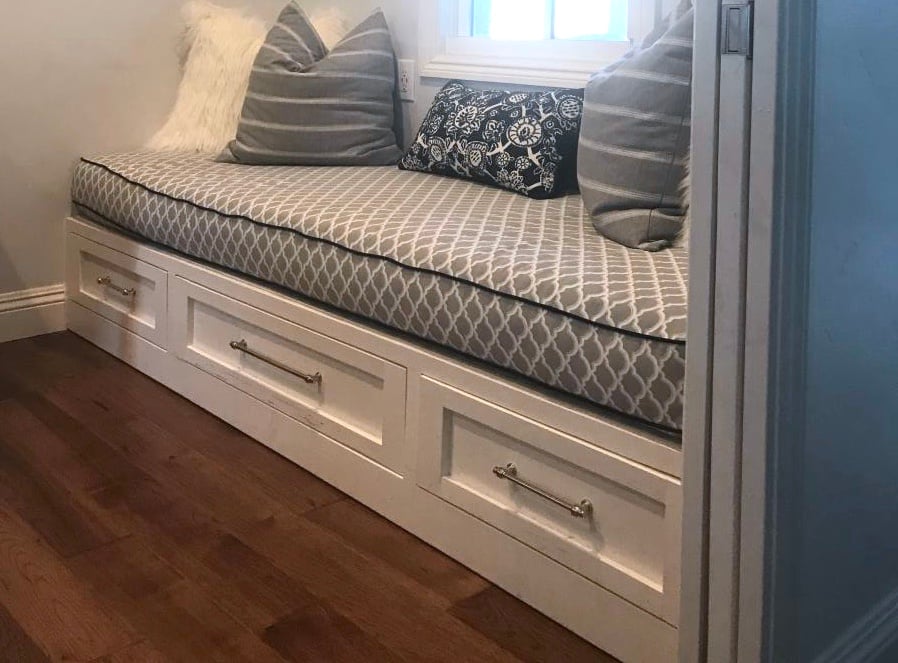
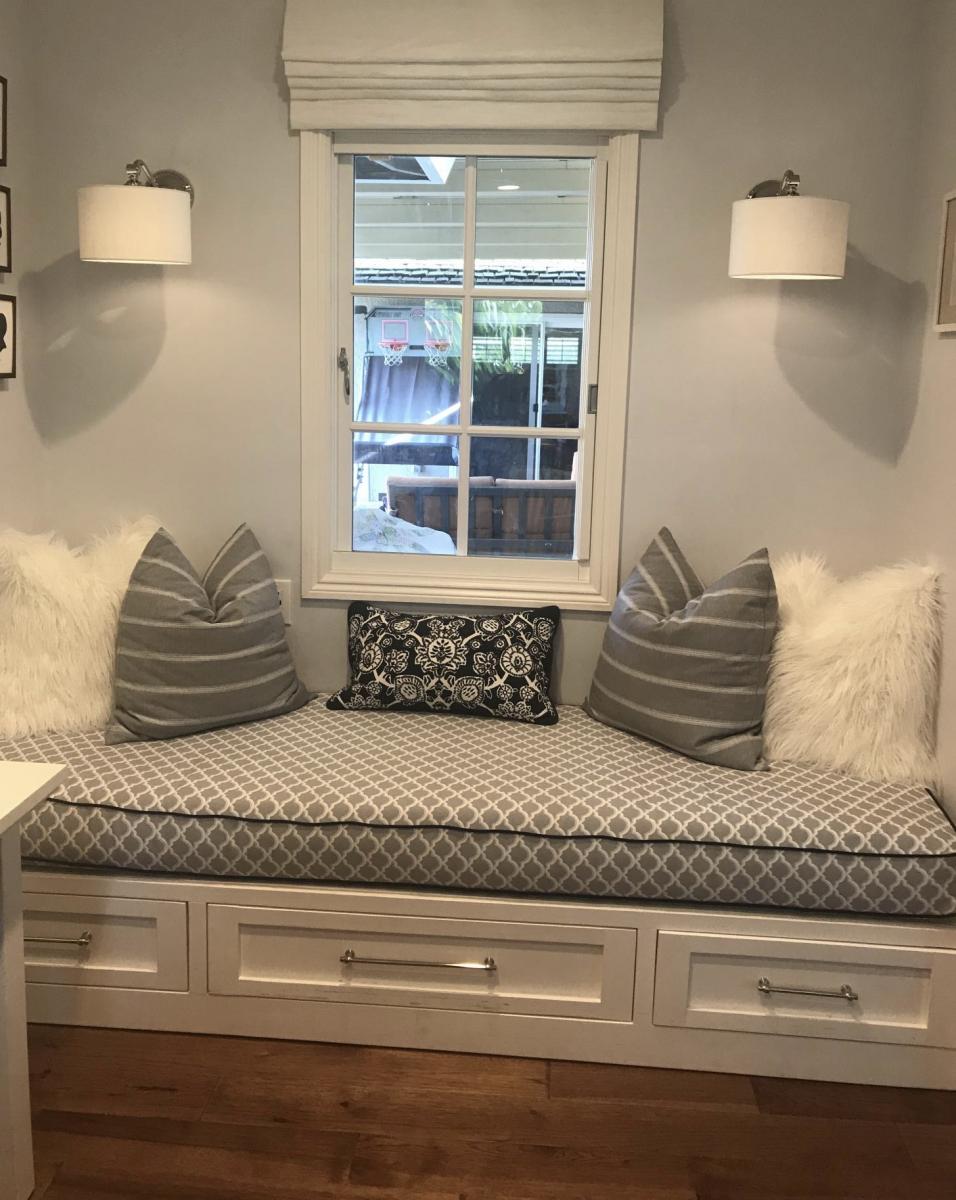
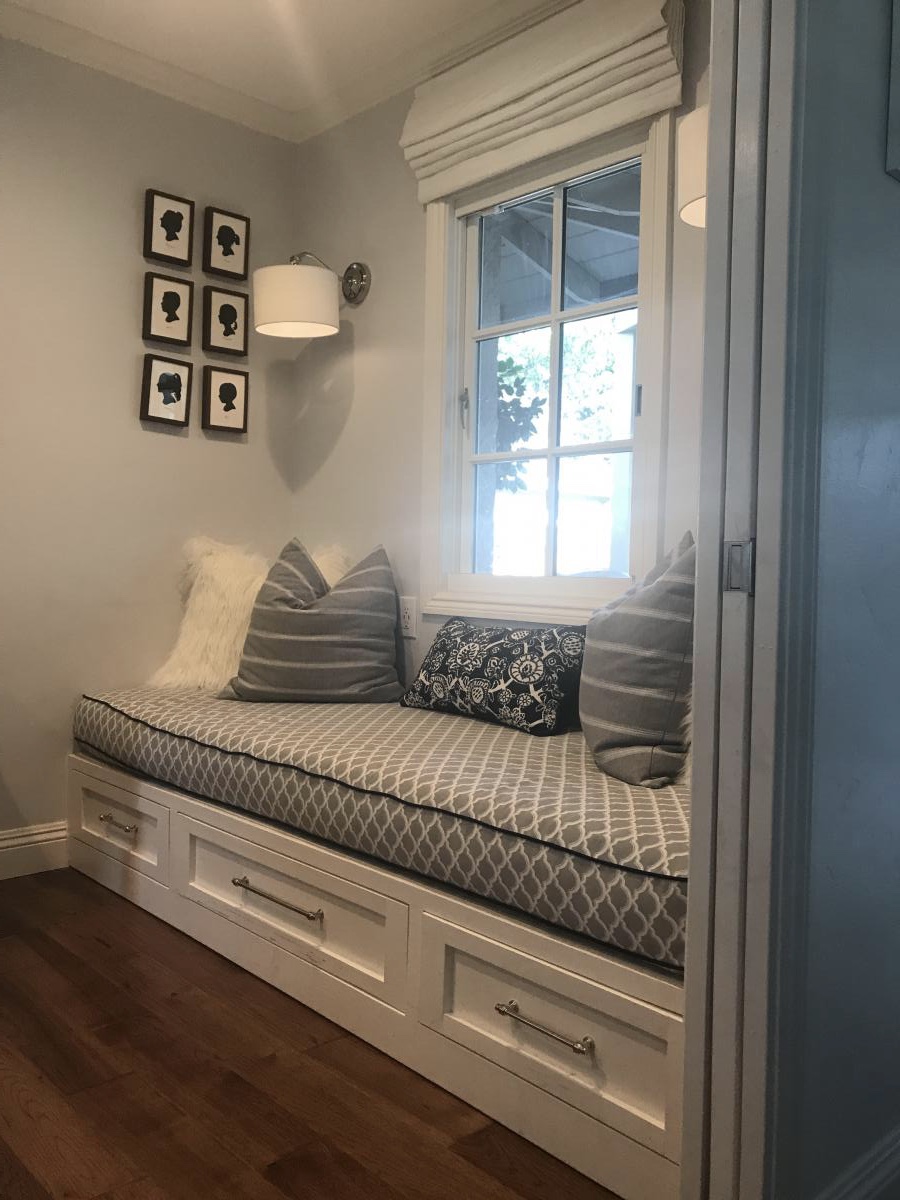
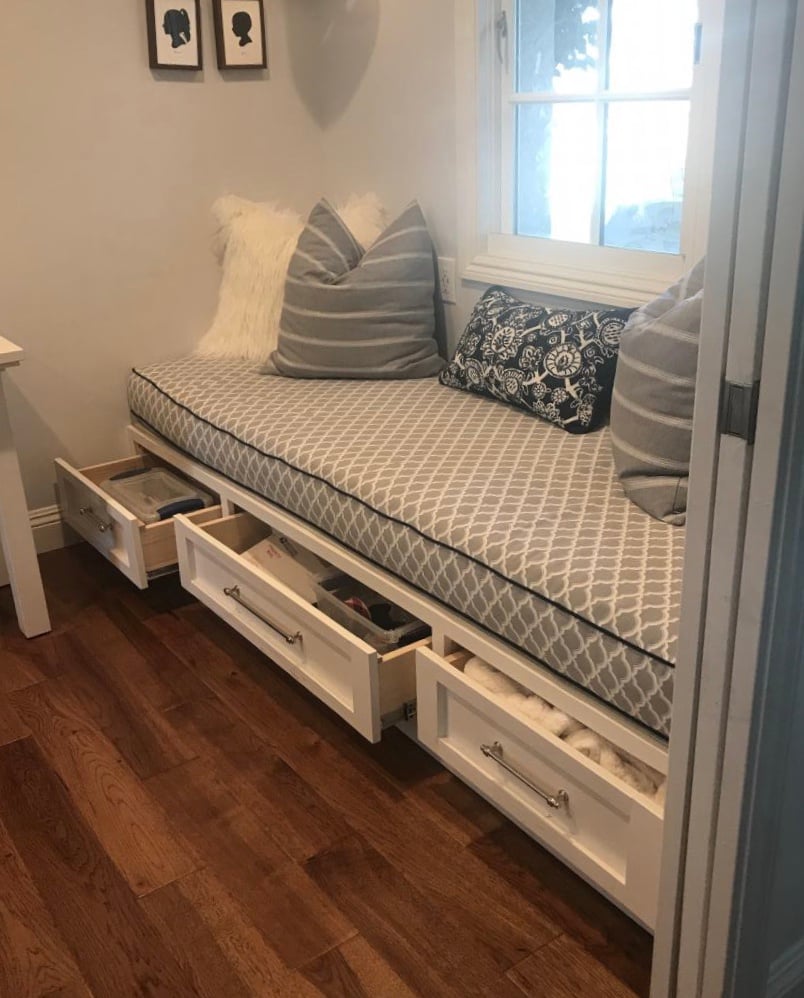
Ana White, you inspired me! My husband bought me a miter saw for Christmas but I was too afraid to use it for all of my woodworking dreams...and then I found your blog!
I am a mother of six young kids but I watched your videos over and over and I reworked your plans to fit our little build-out and voila! We are beyond thrilled with the results! We have a new bed for overnight guests and a great reading nook for 2-3 people at a time!
Thank you for empowering women in the BEST way. My husband was there to help me with the heavy lifting and to cheer me on when I needed it. But if I hadn’t found you, I’m not sure I would have tackled it in the first place. Thank you and God bless your family!!

Sat, 03/14/2020 - 14:11
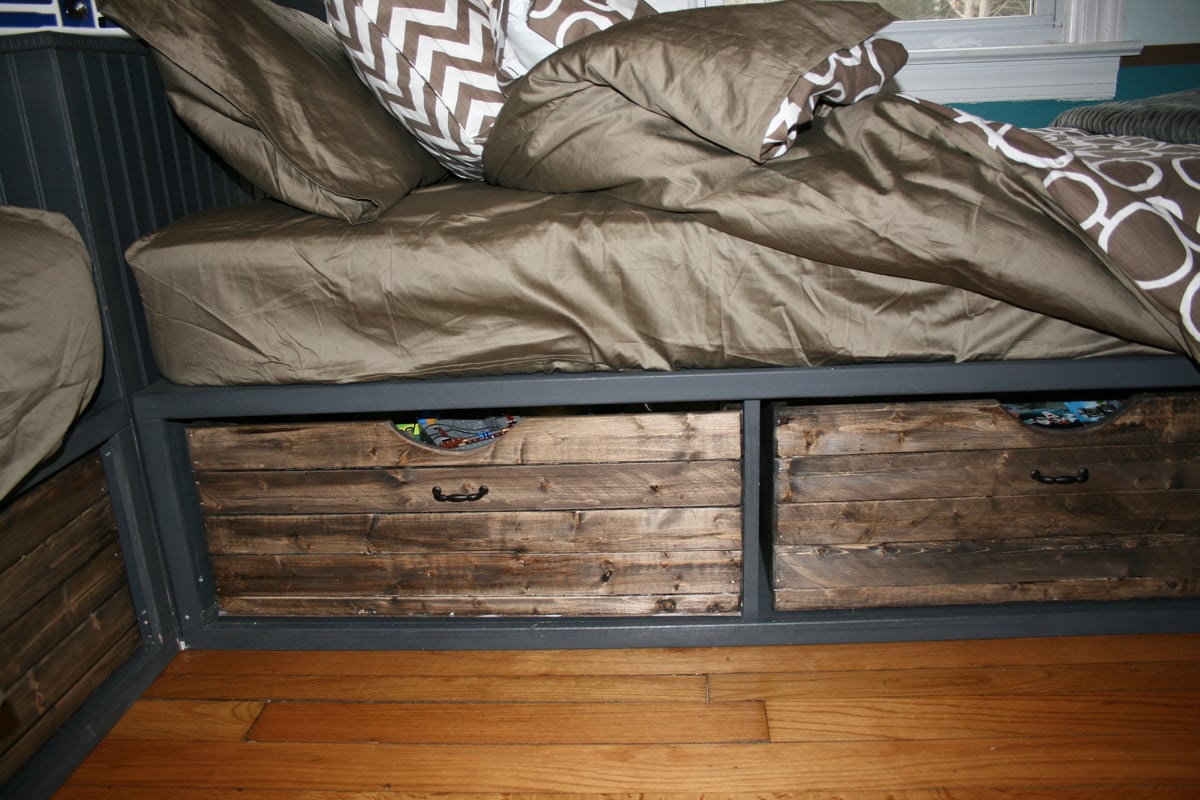
We are building a bed for my son with drawers. Would you mind giving the dimensions of the drawers you mad? Thank you
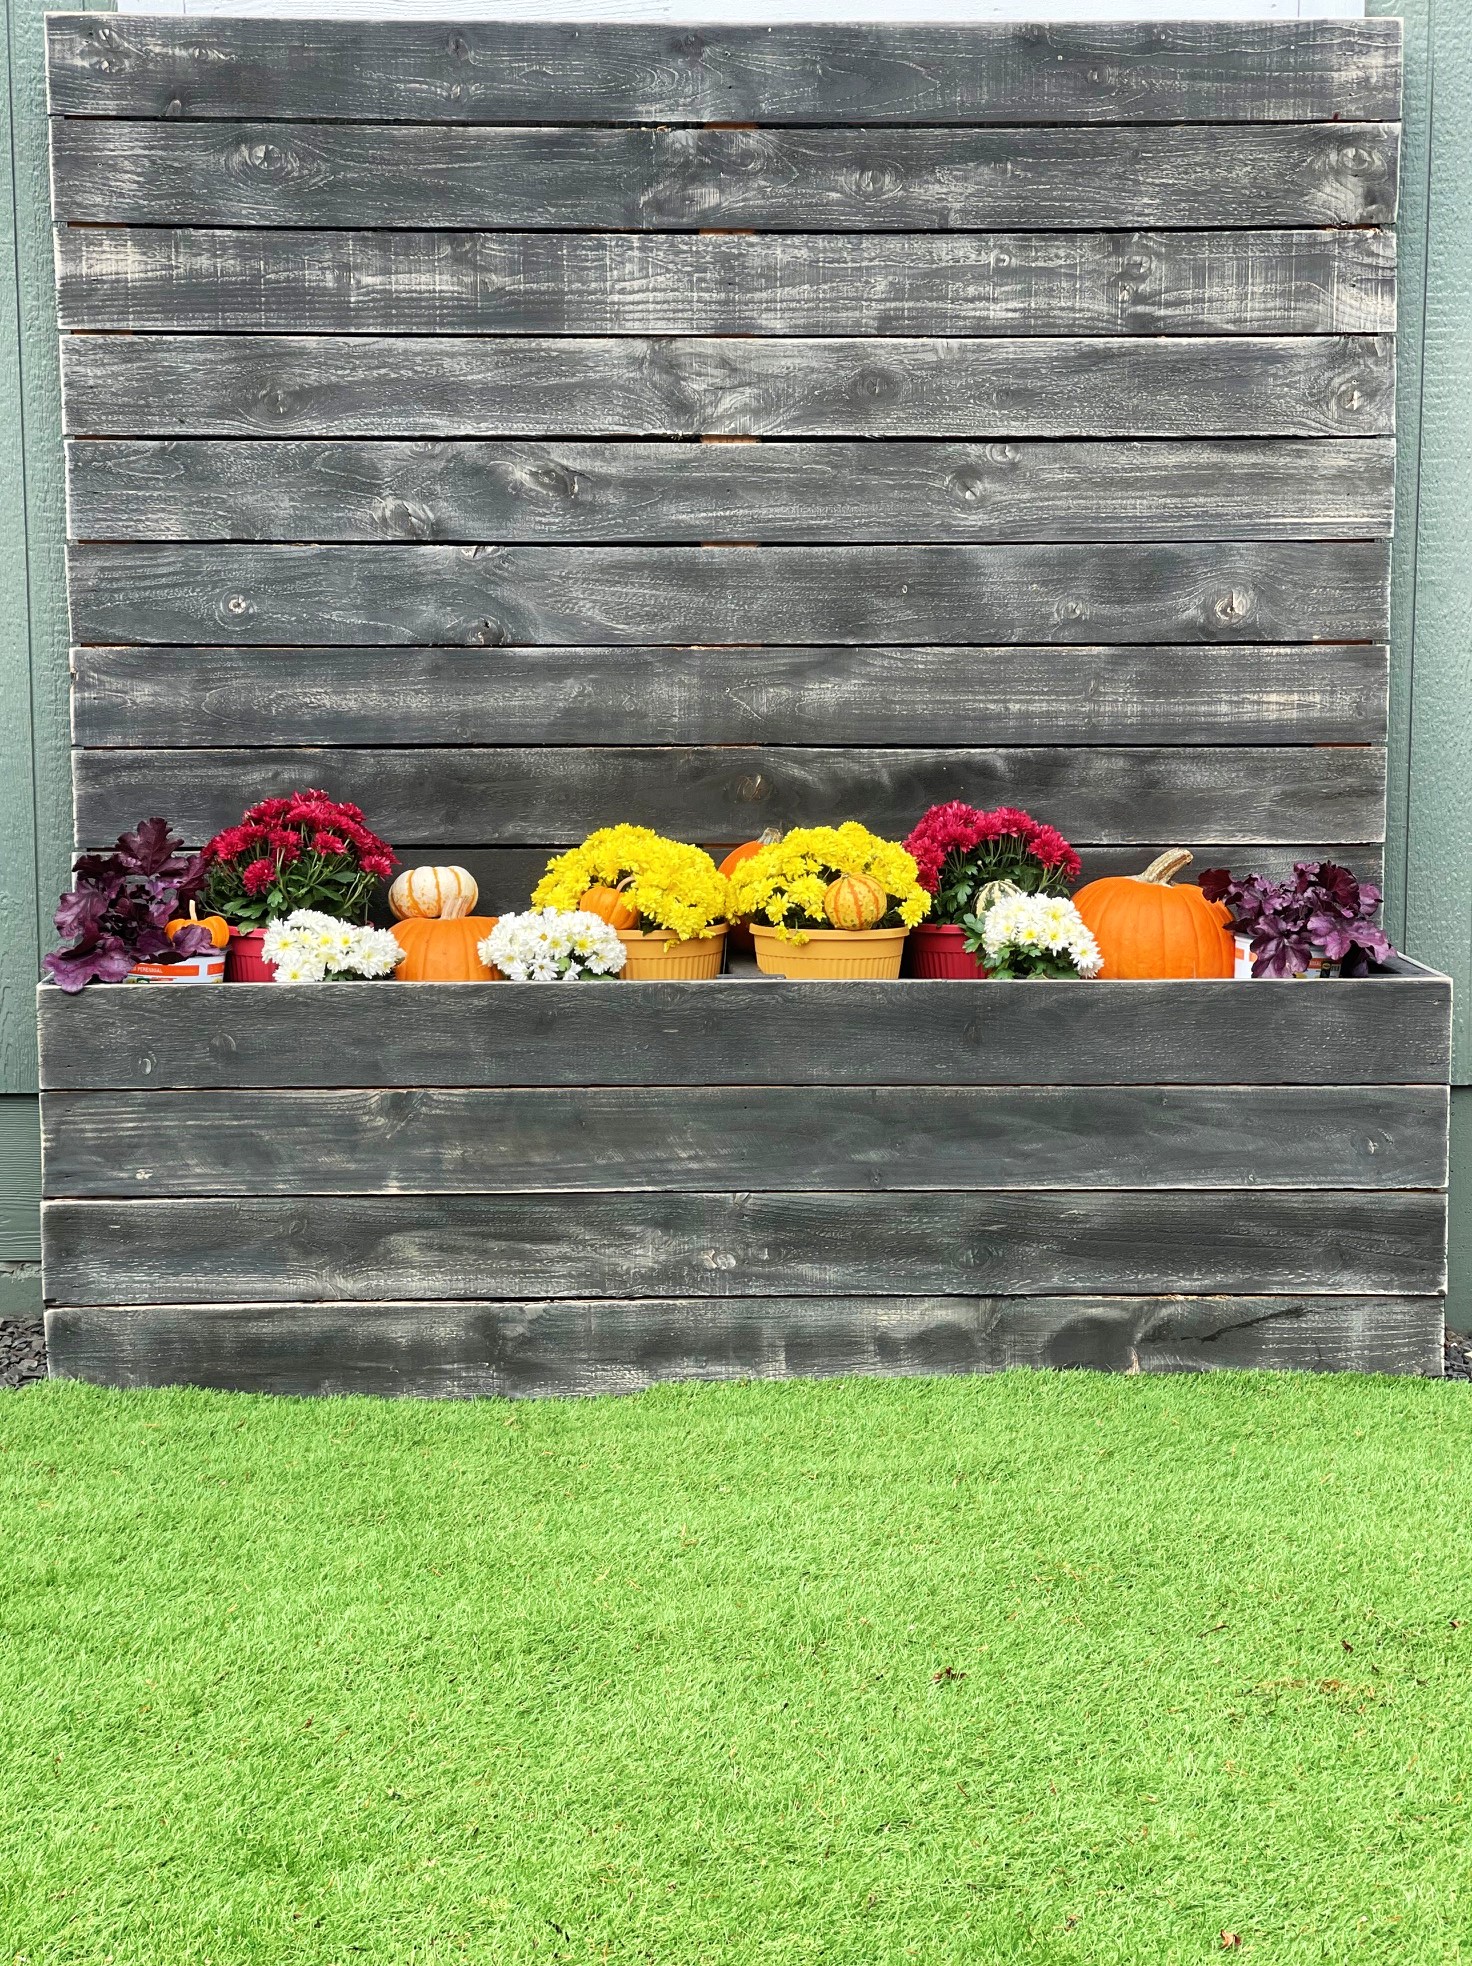
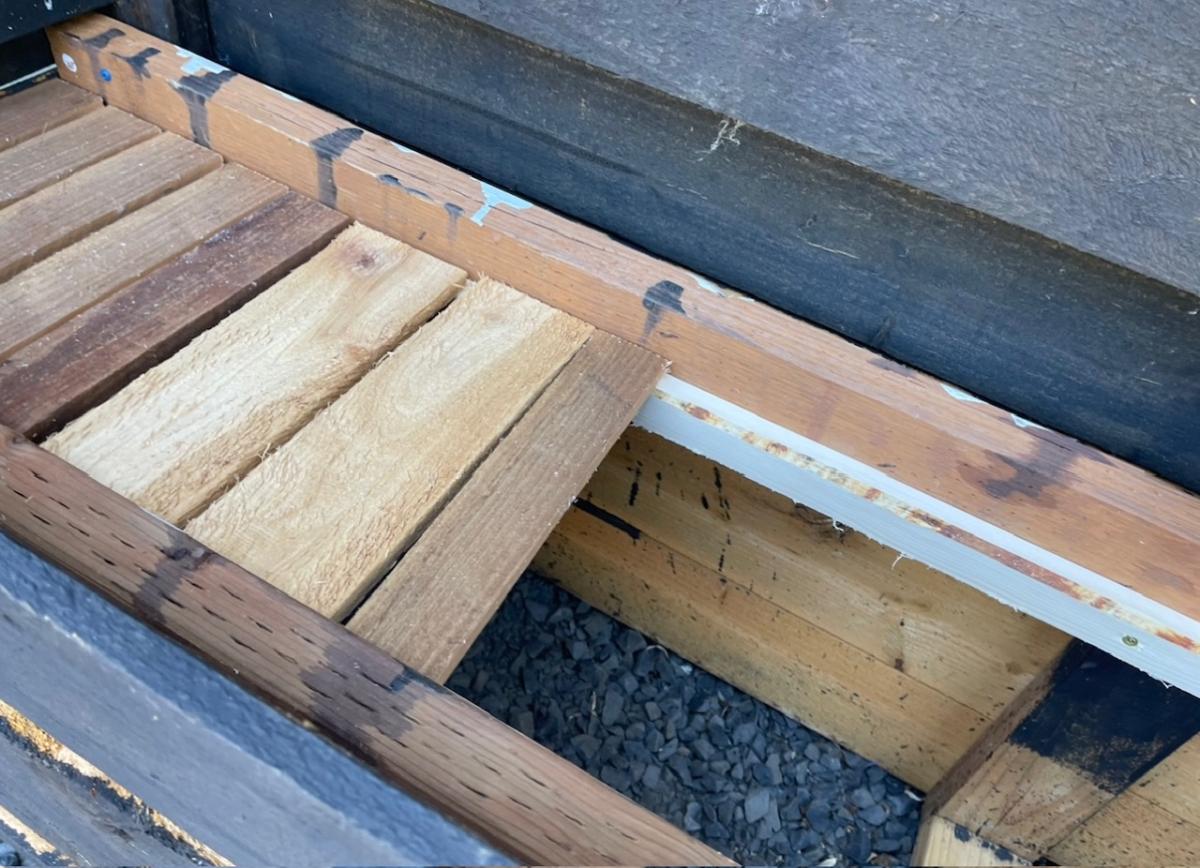
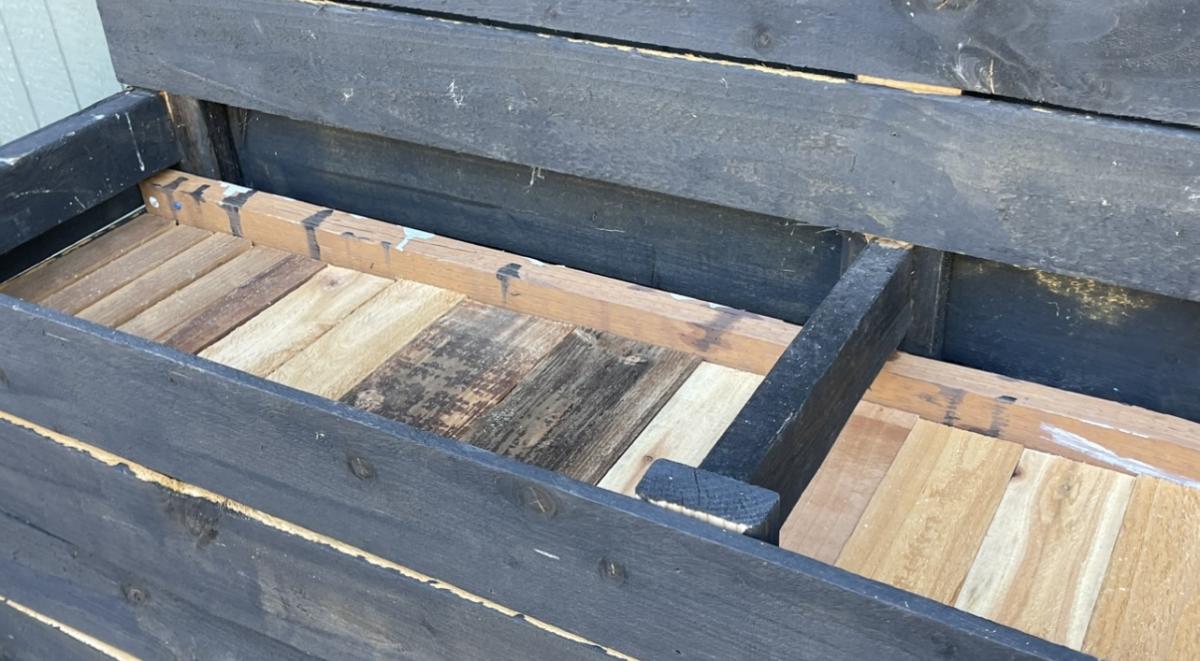
Love this privacy planter and how easy it is to switch up between the seasons. I build a false bottom to make it easy to just set plants on it.
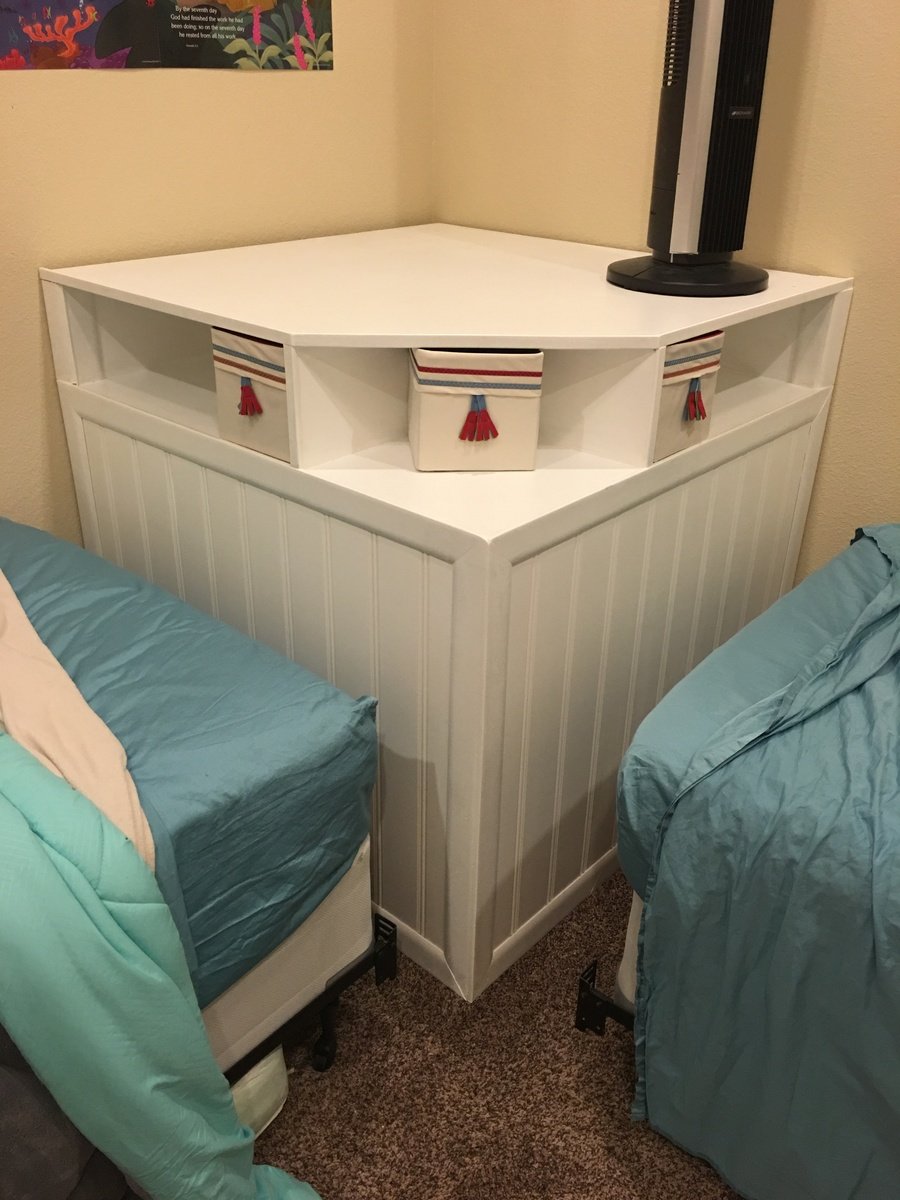
Corner unit for kids bedroom. Added fabric boxes from ikea. The fit perfectly
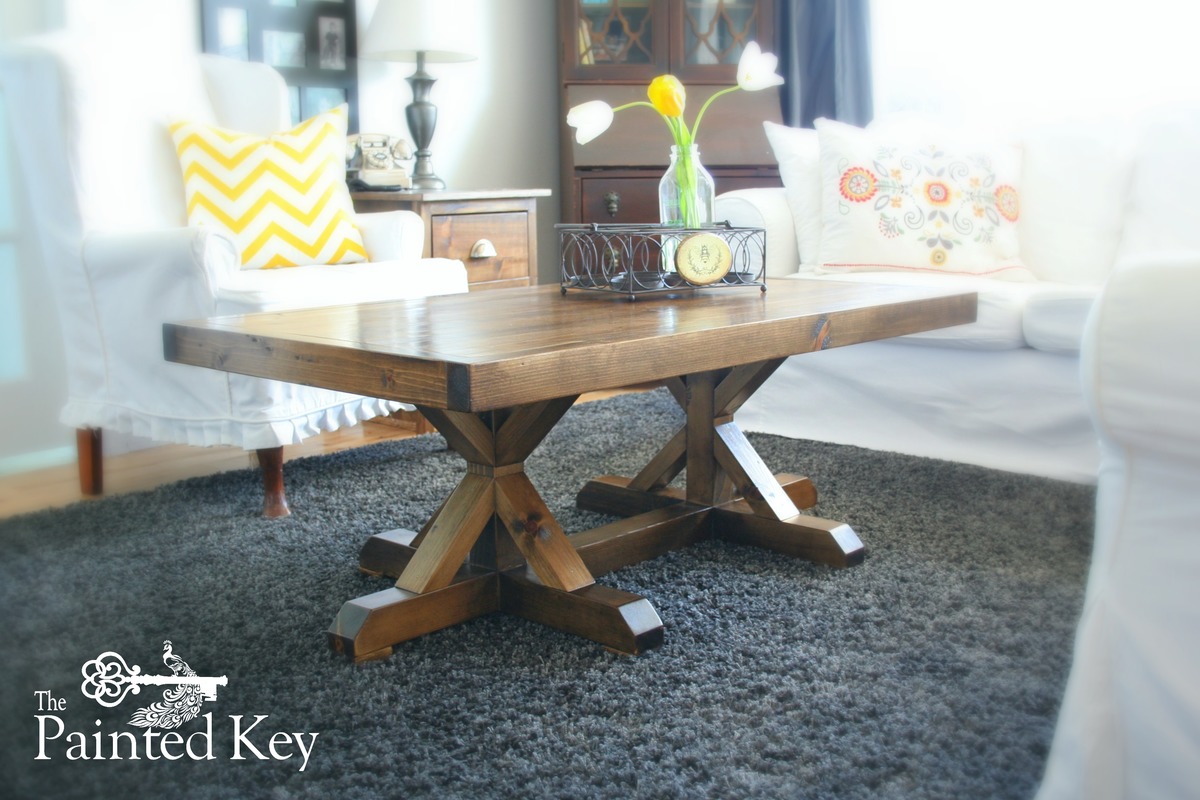
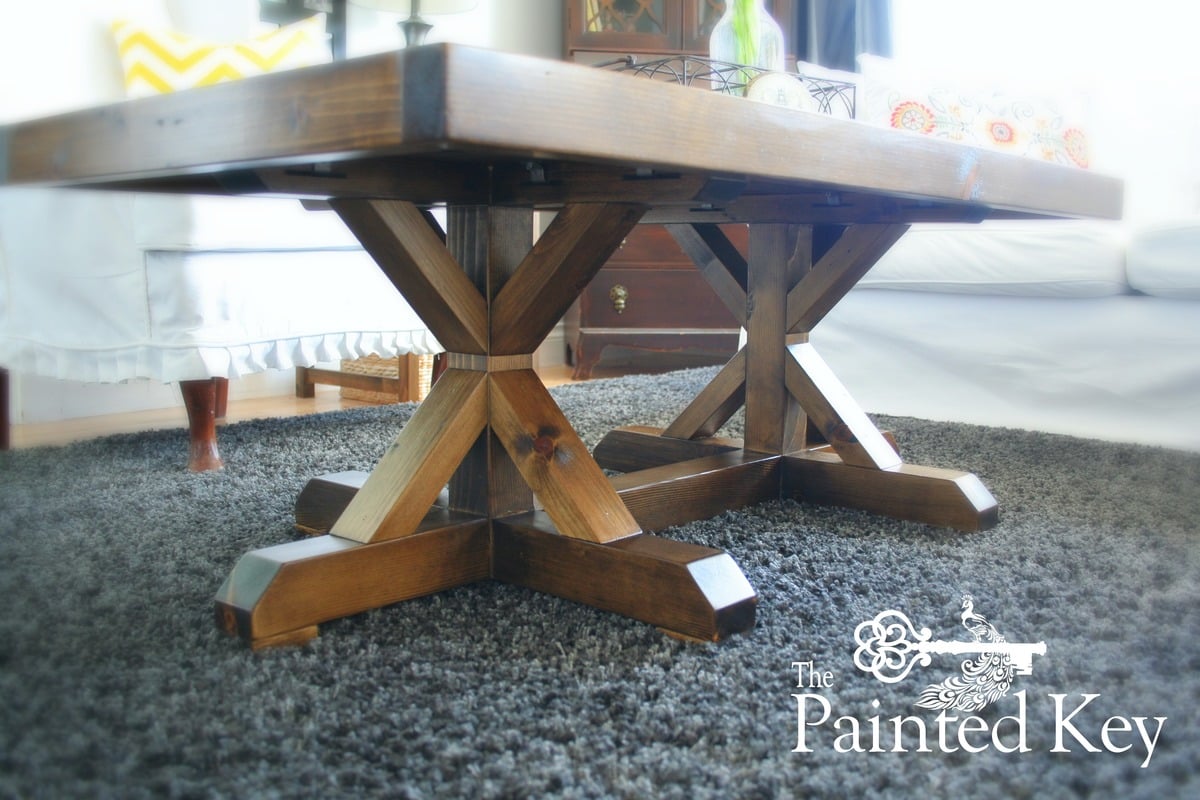
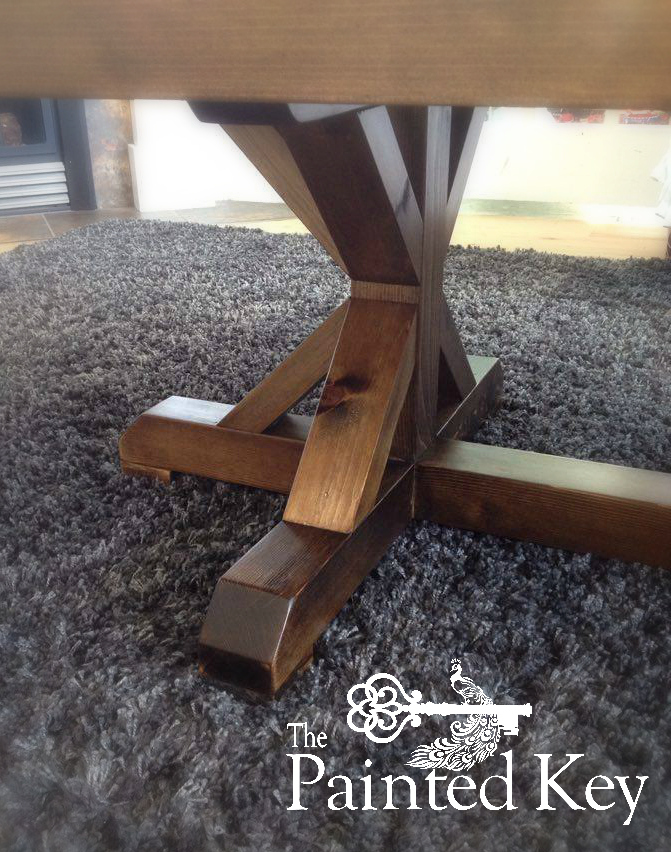
When a friend sent me a picture of a Restoration Hardware inspired dining table from Shanty to Chic and asked if I could recreate it as a coffee table, I was up for the challange. After sketching up new plans to the measurements she needed, I came up with this and am thrilled with the finished piece...and so is she!
All lumber is knotty pine. I used pocket hole construction for most of it, but used my 16 guage nailer and glue to attach the angled pieces. I attached the table top with "z" clips, first cutting a slot with a biscuit joiner for the clip to slide into.
Sat, 05/14/2016 - 18:16
I love this. It's perfect as a coffee table. And the finish you used is perfect. Excellent job!

In reply to It's Beautiful! by jkassel78
Wed, 05/18/2016 - 22:27
Thank you so much Jackie! :)
Cristina
Mon, 03/21/2022 - 17:06
Could I get your plans?? I would love for my husband to build this for me!
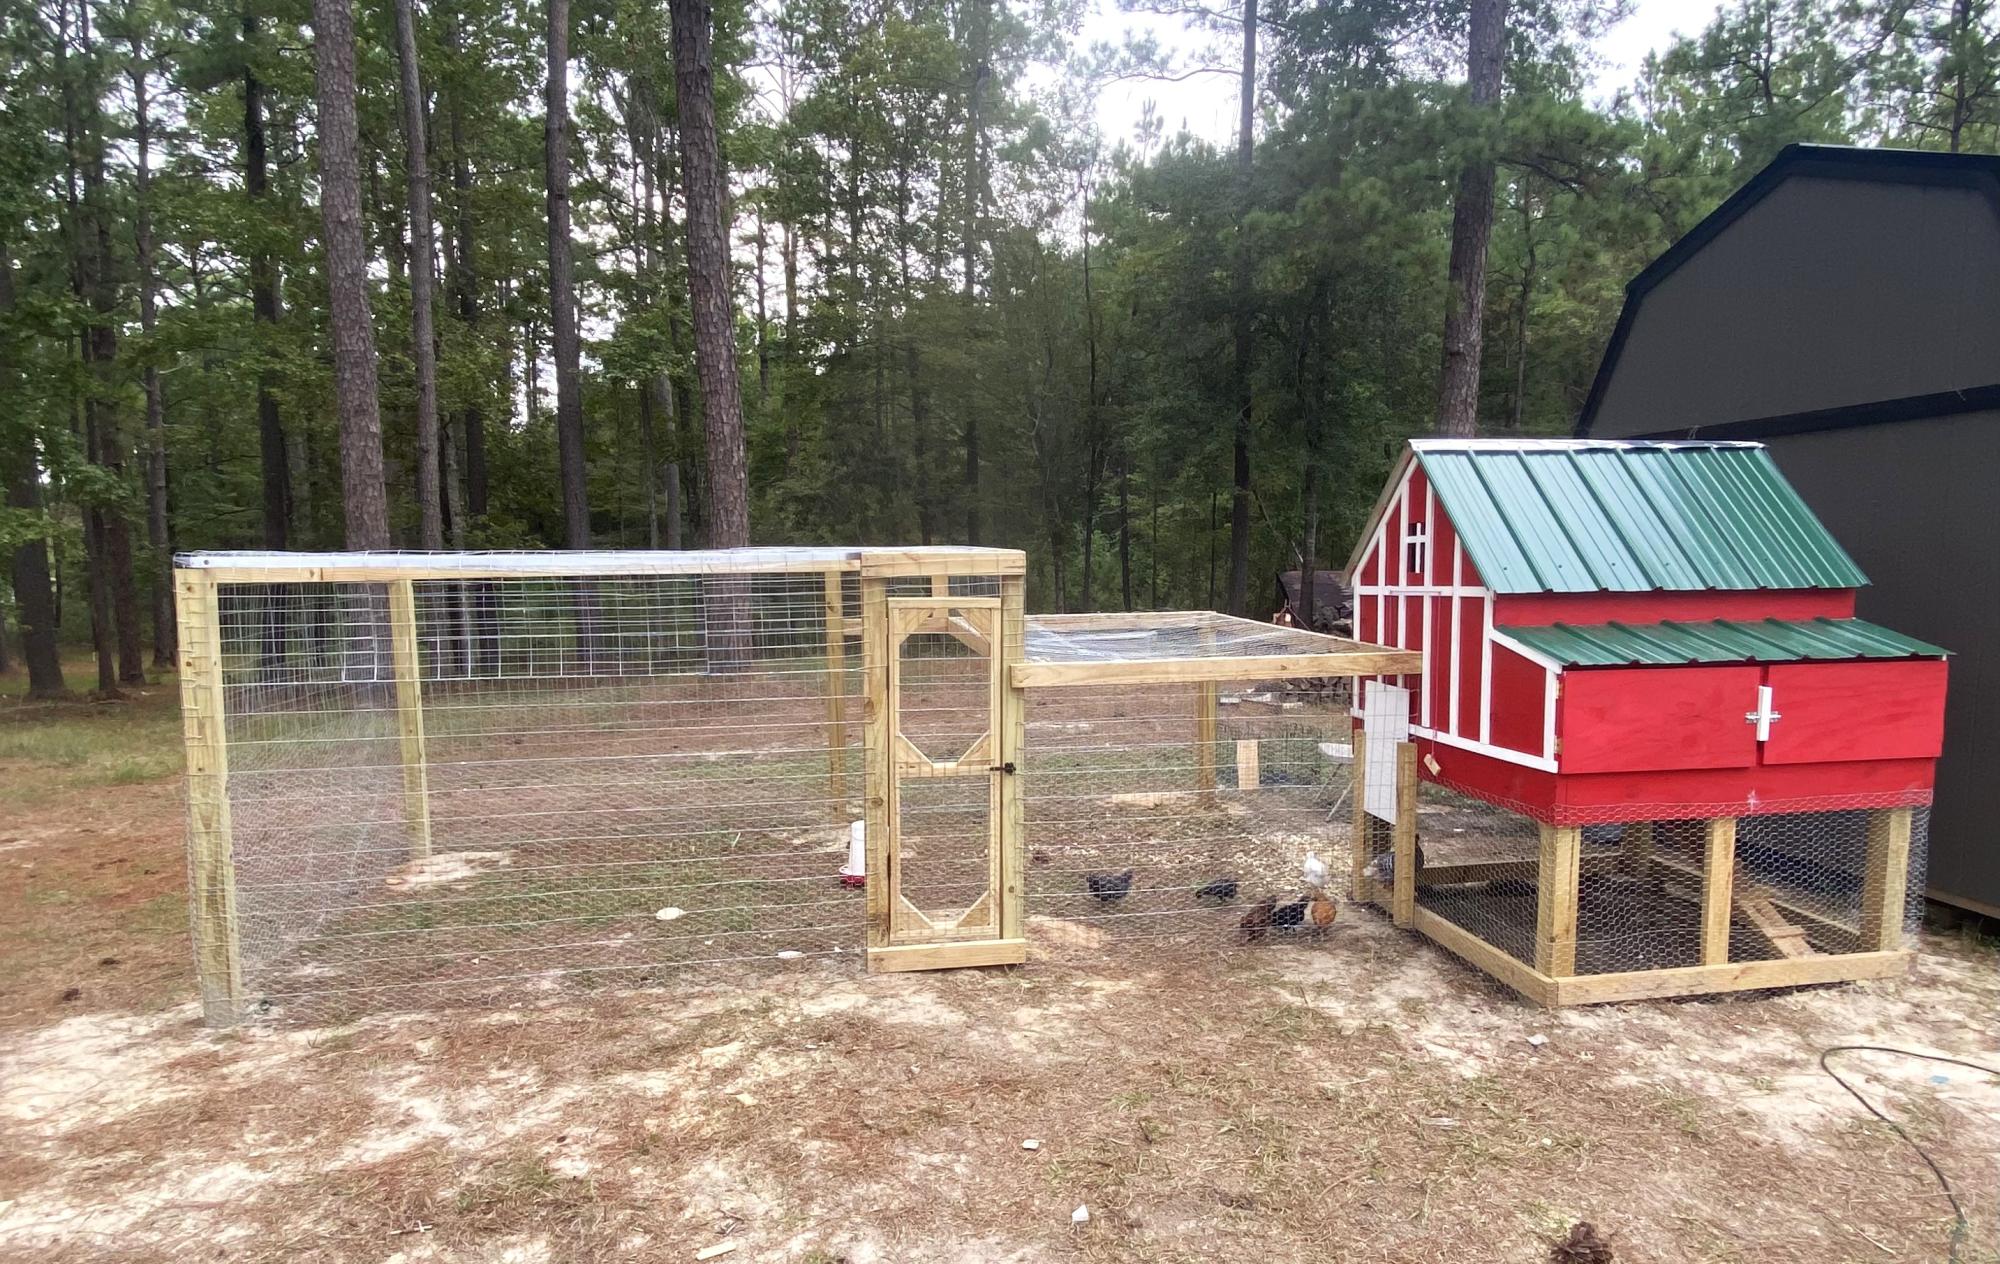
Small coop with run. Awesome plan.
Jinks hill farms
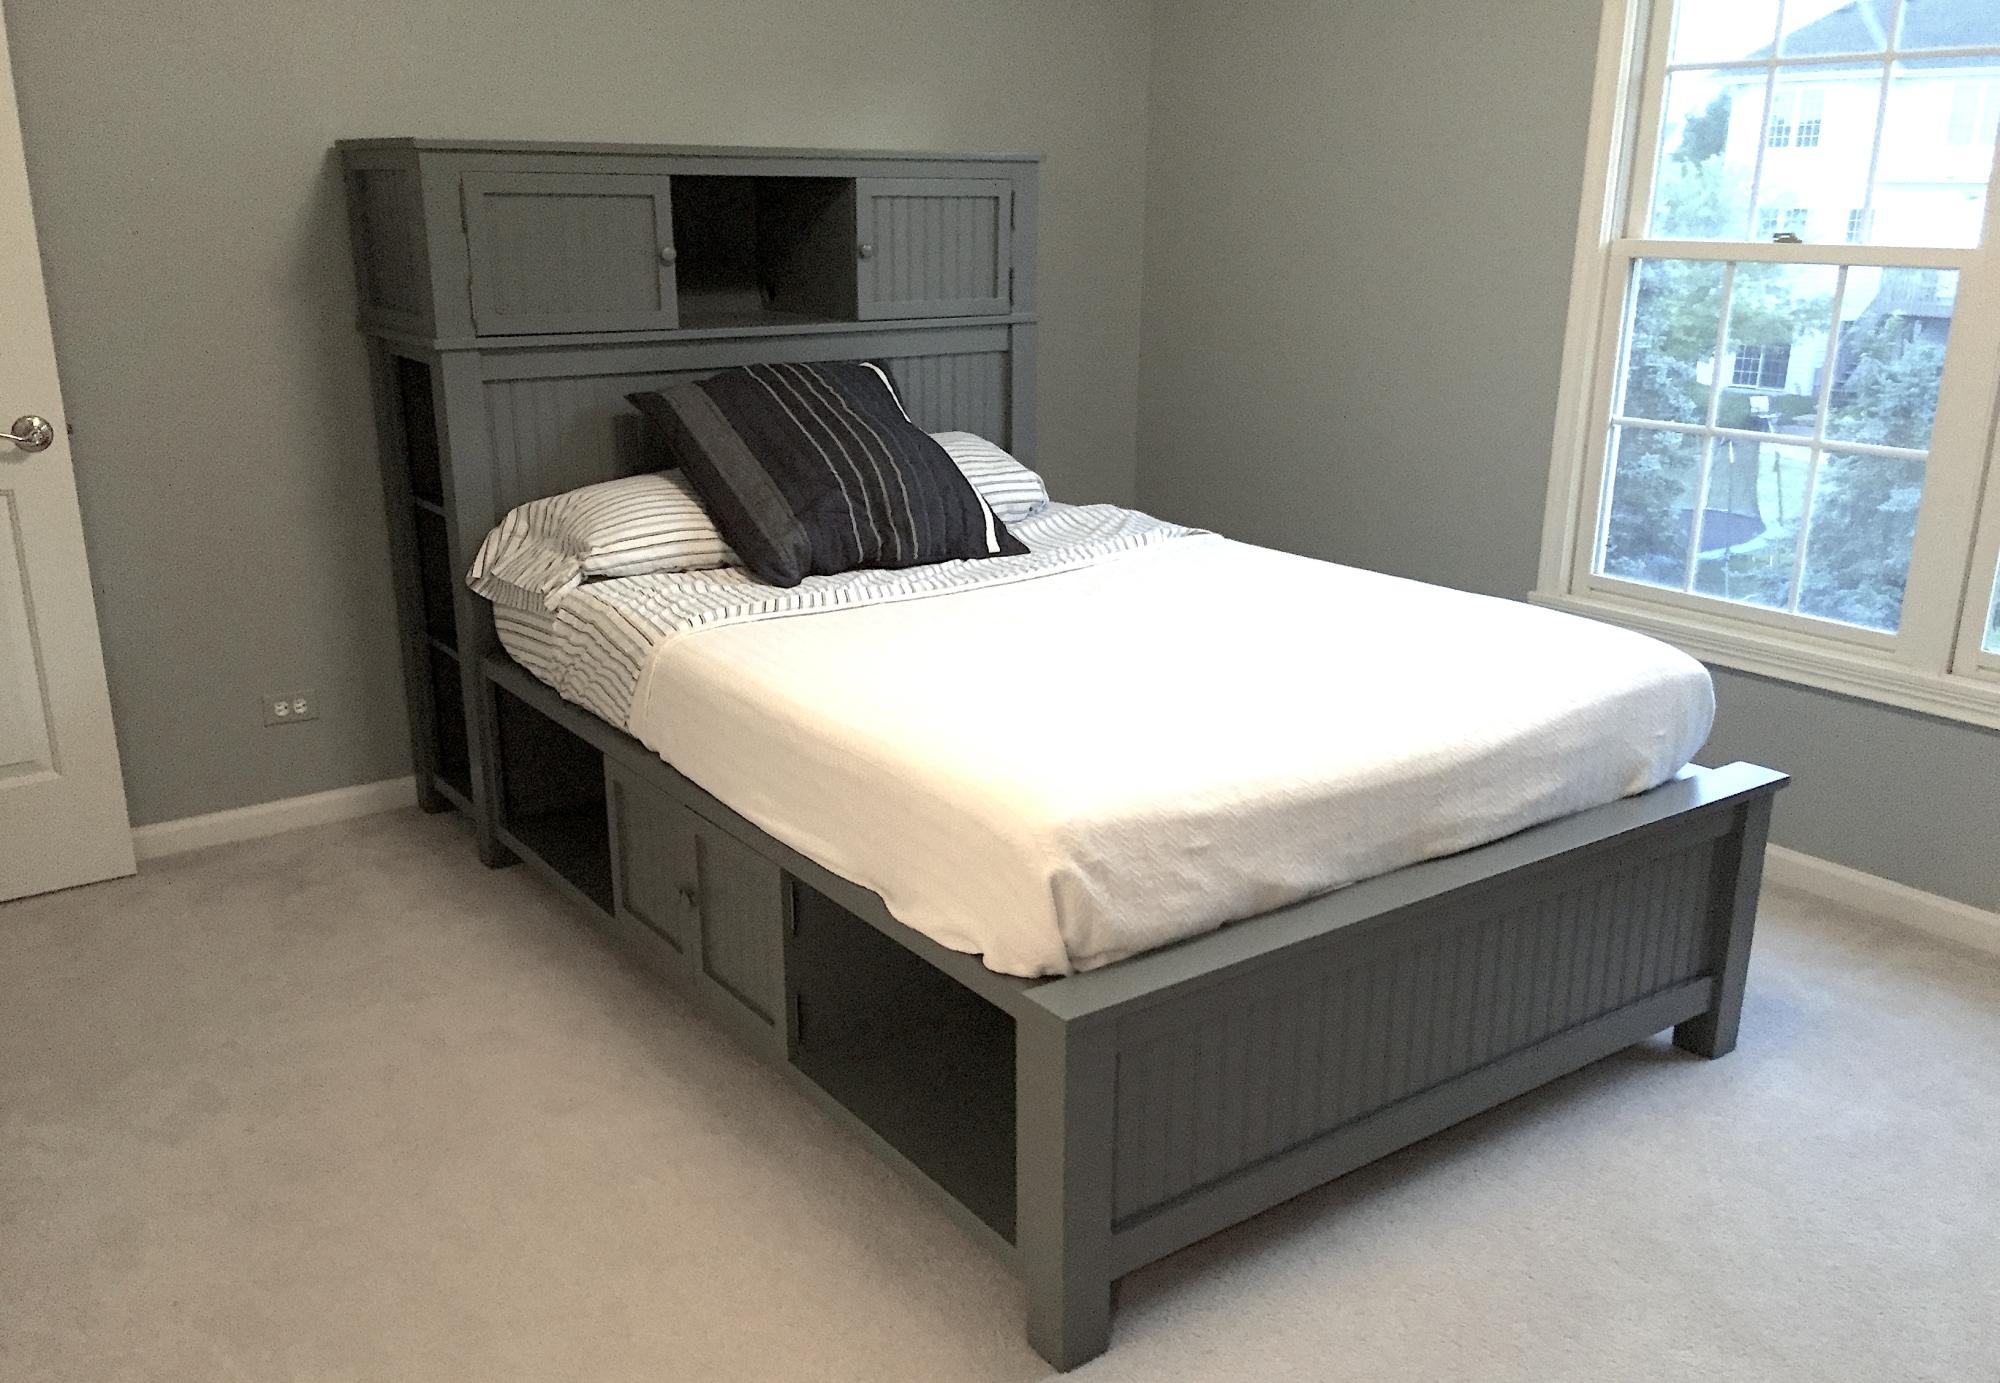
This was a fun build. I enjoyed making it . This was my first attempt at a bed and I am very happy with it. The bed was a knock off of a major retailer. The plans were fairly straight orward. I did make a few changes to the plans but it was a good guide to follow.

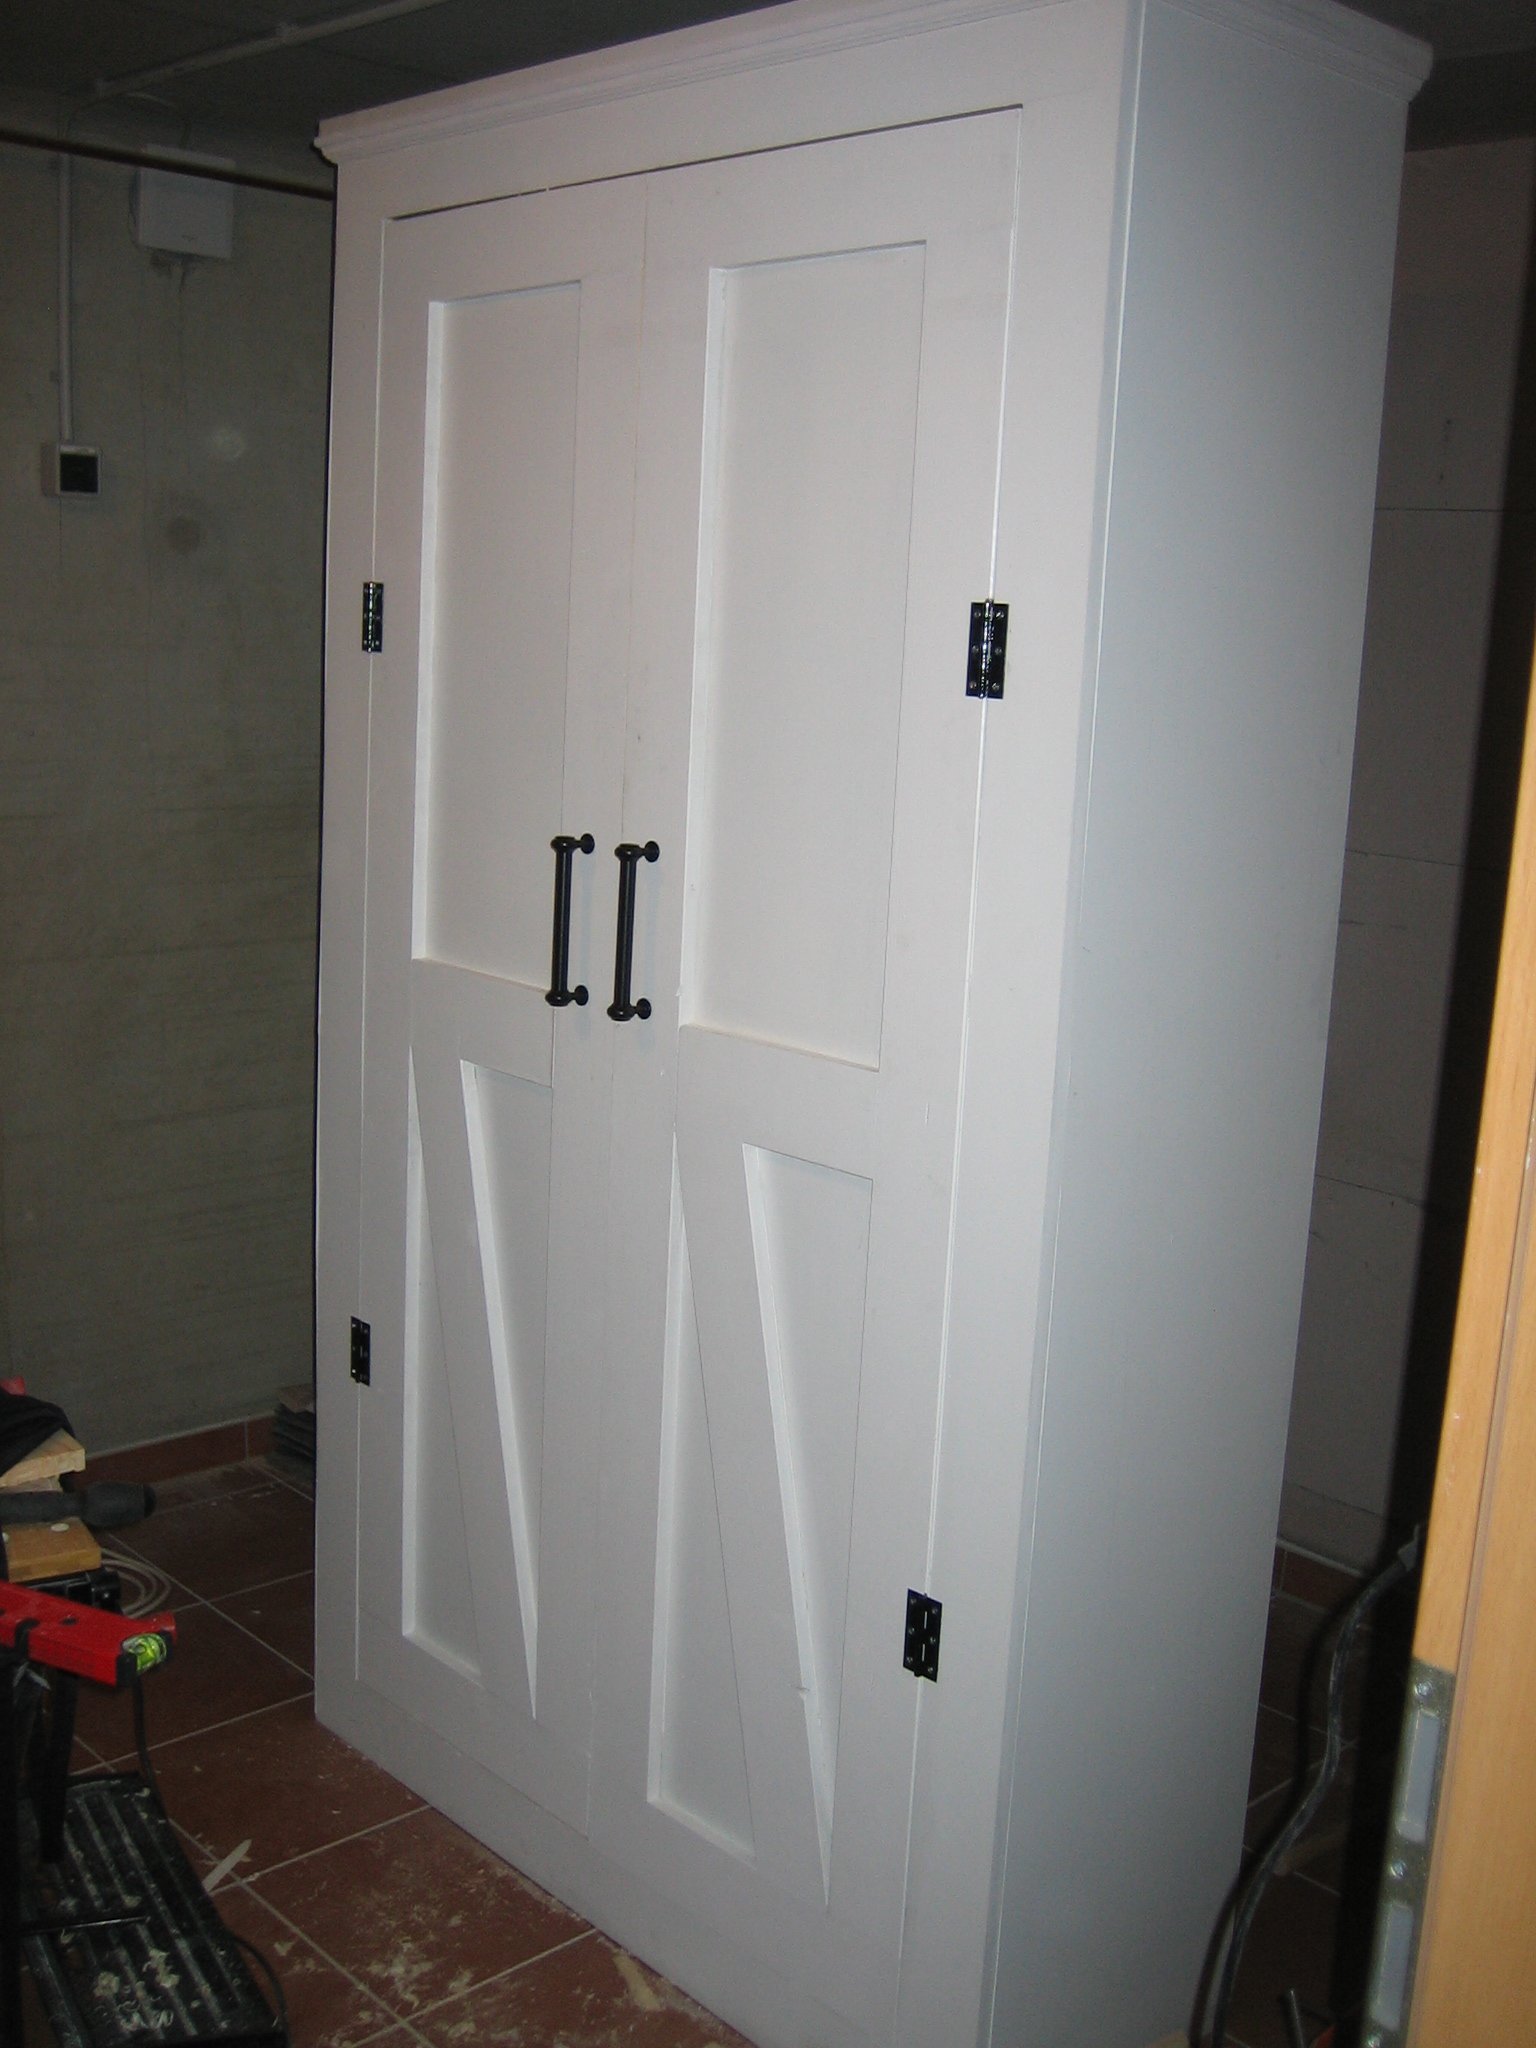
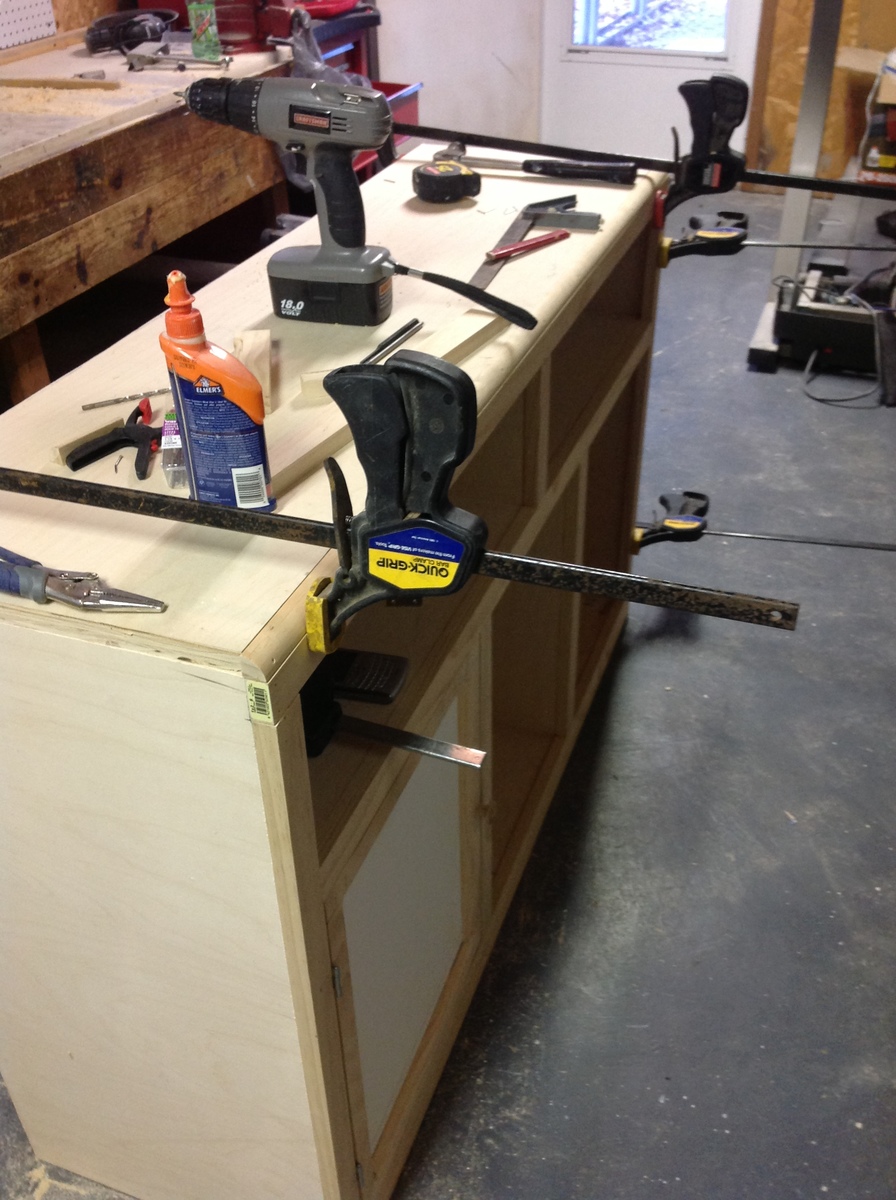
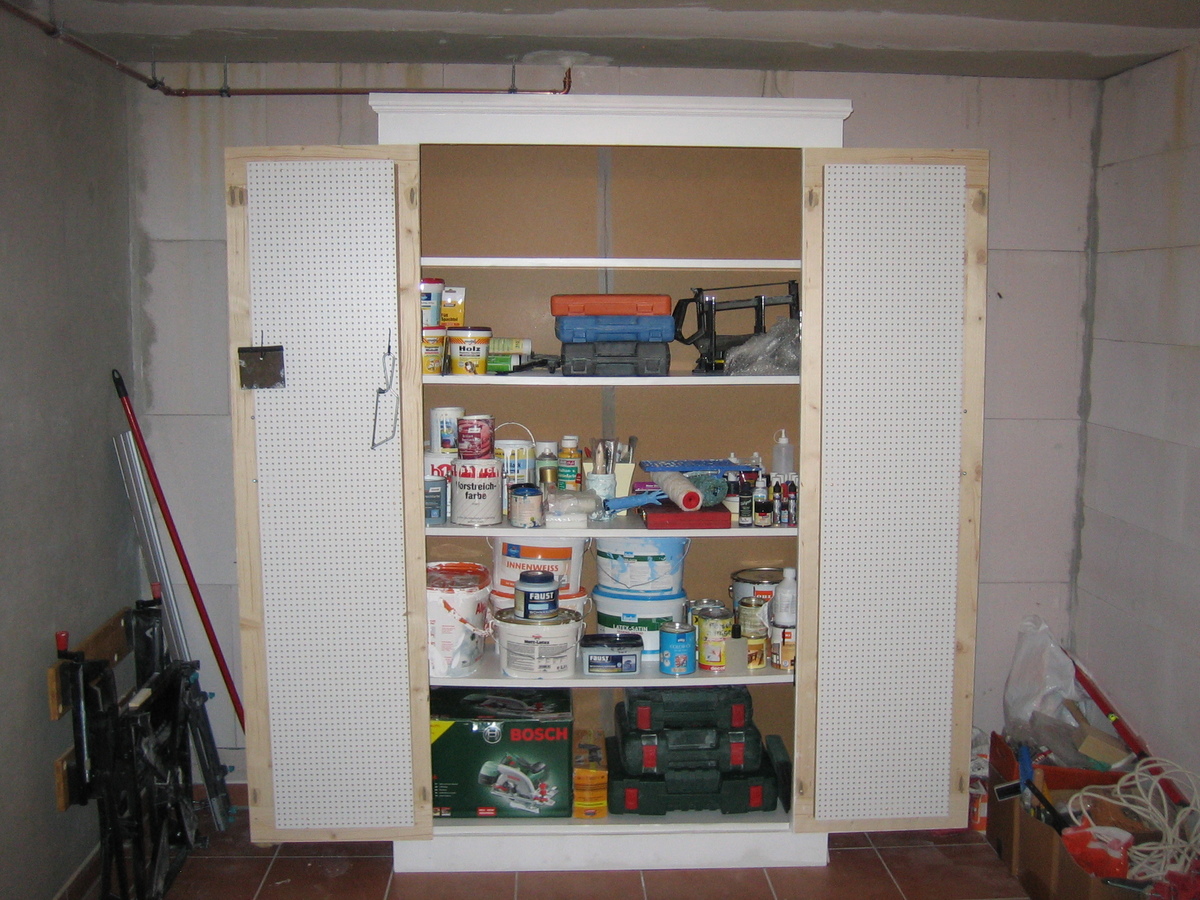
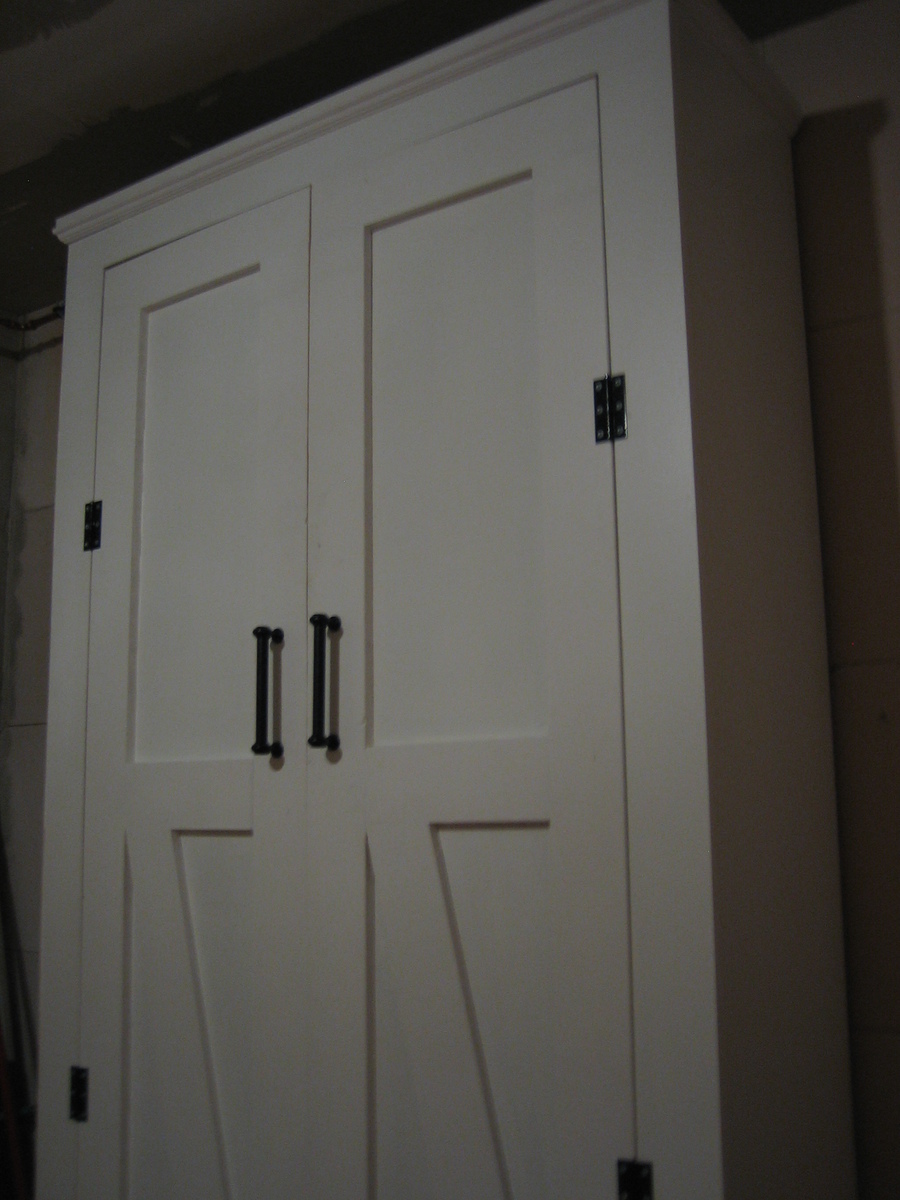
My cupboard is quite a lot bigger than the one in the original post but is super sturdy.
It was a relatively easy project to build. My main issue was that I used chipboard for most of the cupboard and ironed on veneer on the cut sections which threw my door frame measurements out of whack and I had to shave a bit of my door off with a plane to get it to fit in neatly.
Sun, 08/12/2012 - 11:47
Hi there. I love this!!! I was wondering if you remembered the dimensions of wood used or what not? I want to make one or two of these for my basement laundry room for storage but am new to this so not sure how much I would increase all of the wood etc from the original plans. Thanks!
Mon, 08/13/2012 - 02:48
Hi! So glad you like it! I used SketchUp to create my dimensions to fit my space. Have you ever used it before? It's a free designing tool and really helps me to visualise if the wood's all going to fit together or not.
Here are the wood measurements I used:
Chipboard, white, 19mm
Part/Length (mm)/Width (mm)/Amount
Top:1200/436/1
Side x2:2000/400/2
Bottom shelf:1124/350 /1
Shelf x4 :1124/350/4
Frame top & bottom:1162/100 /2
Frame side x2:1800/100/2
Door frame top & bottom:476/100/2
Door frame side x2:1594/100/2
Door backing MDF 3mm
Part/Length (mm)/Width (mm)/Amount
Back:2000/1162/1
Door back:1700 /360/2
If you have any other questions, I'd be happy to help. Good luck!
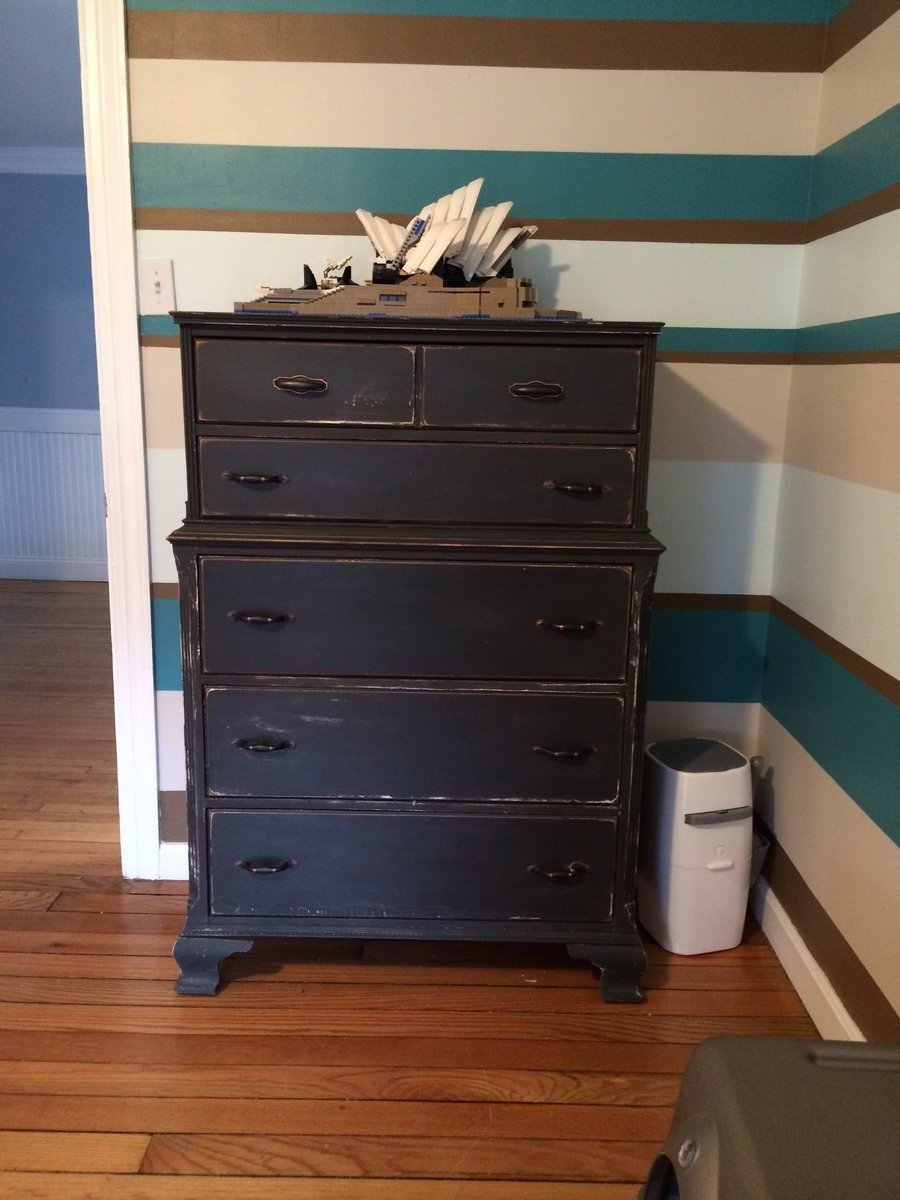
This was my first build and it took me about a week to finish. My son has an L shaped room due his closet being the laundry room. This plan was perfect for his room and provided tons of storage. I could not find baskets that I liked so I just made bins using 1x2 for front and backs, left over scraps for sides and 1/4 plywood for bottoms then stained them. The approx cost for each bin was 5 dollars. I made my own chalk paint and painted them the same as the antique dresser i found on craigslist that I refinished.


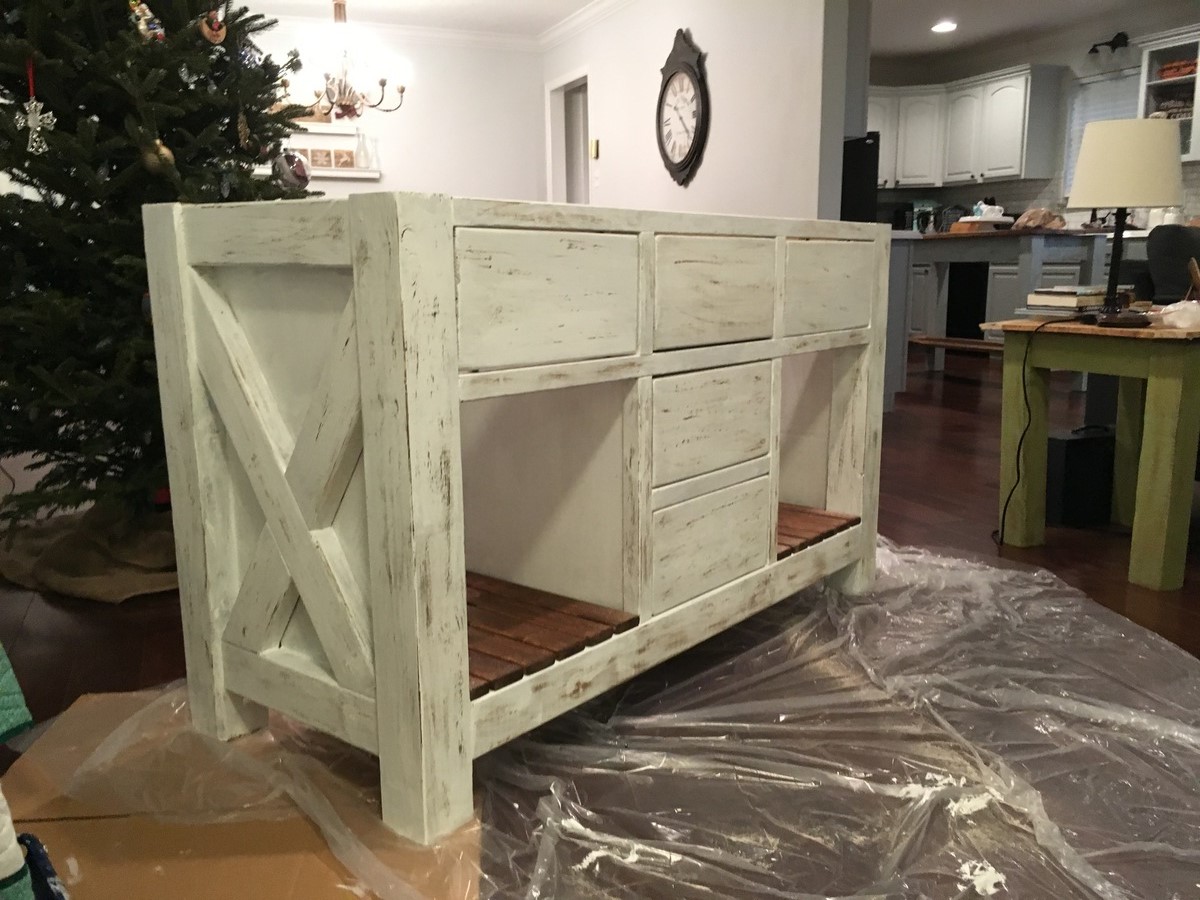
This is a heavily modified version of the rustic x kitchen island that I tweaked to make for 2 sinks.

Thu, 08/15/2019 - 11:52
This is gorgeous! Thanks so much for adding a brag post!
Mon, 11/25/2019 - 11:39
Do you happen to have plans or info on what you did to modify it to hold the sinks?? Absolutely love this!!!
Mon, 02/03/2020 - 06:41
Absolutely love this but I would like the actual modified plans . Is it possible to get them?
Sun, 01/03/2021 - 16:01
Love this!!! Great job!!!! II need new vanities... this will be a great project!!
Made this for my granddaughter Kellan.
Daniel Richards
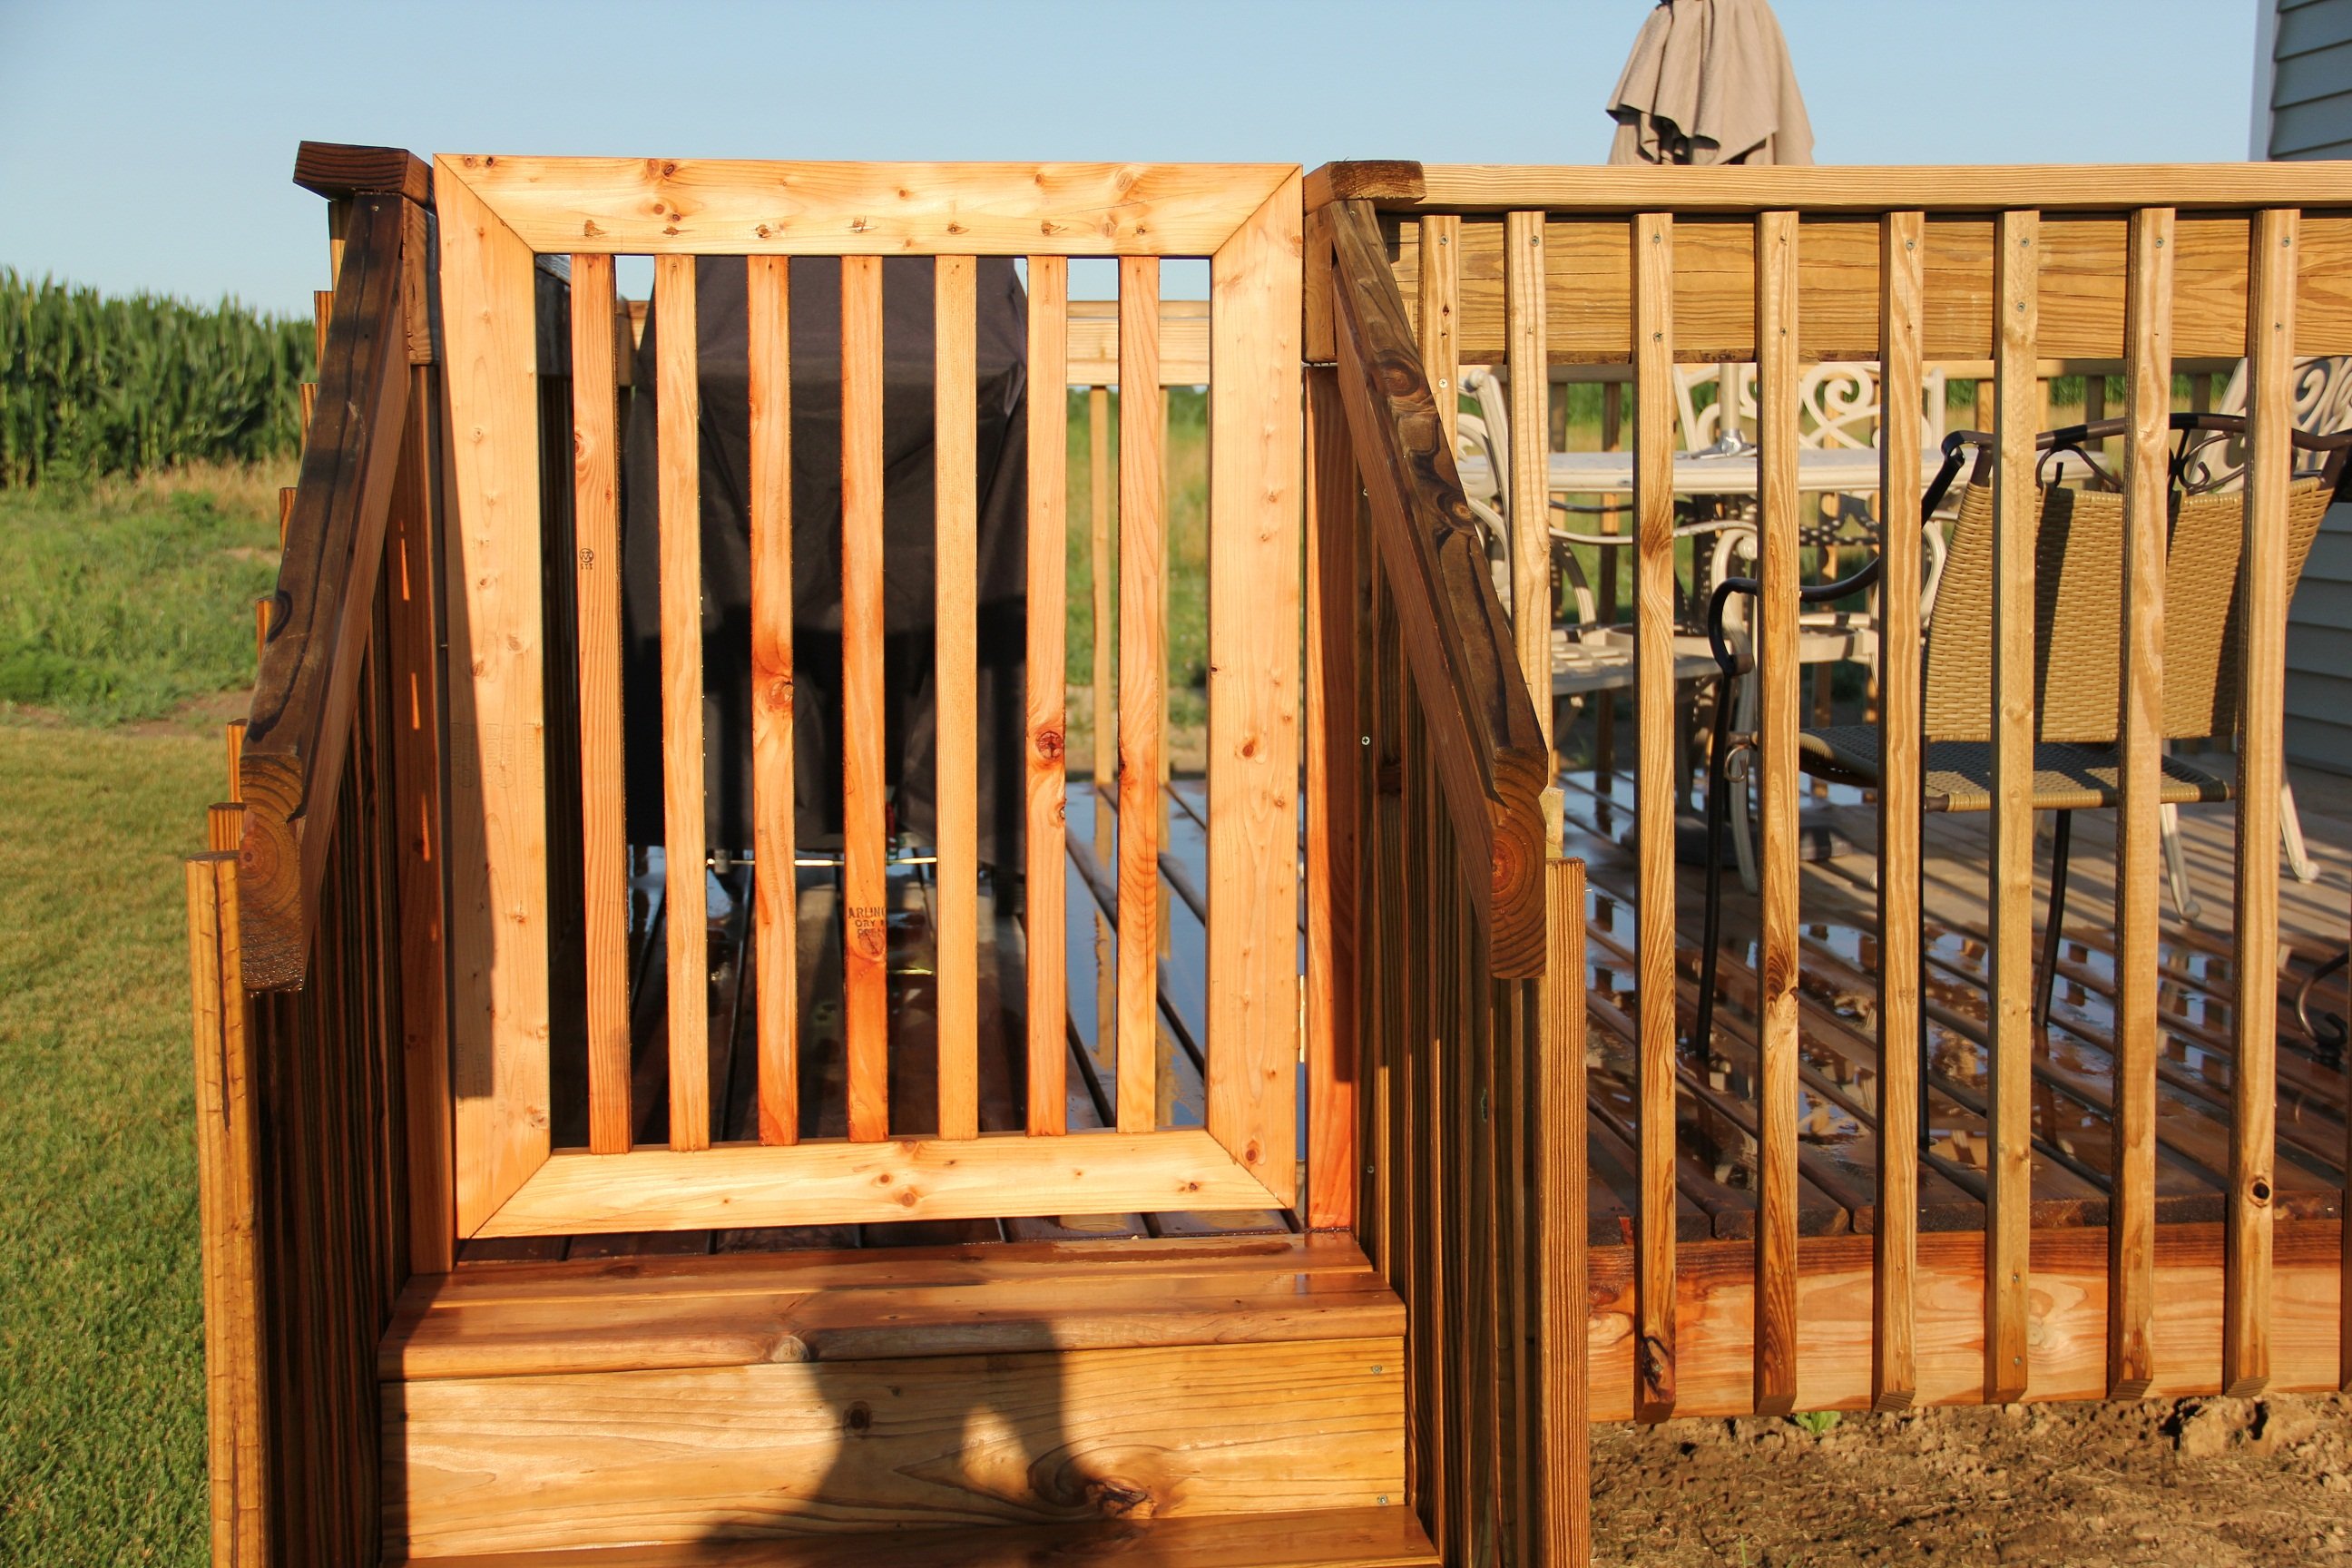
With grandchildren and pets we decided to put a gate on the deck.
The gate is made from 2 X 4's and 2 x 2's. I used brass hinges to prevent rust and smooth operation

I used plans for the Essential Entryway Bench and Shelf with Hooks, tying them together with a shiplap panel. This was my first big project using a Kreg jig and Rip-Cut. Many more to come!
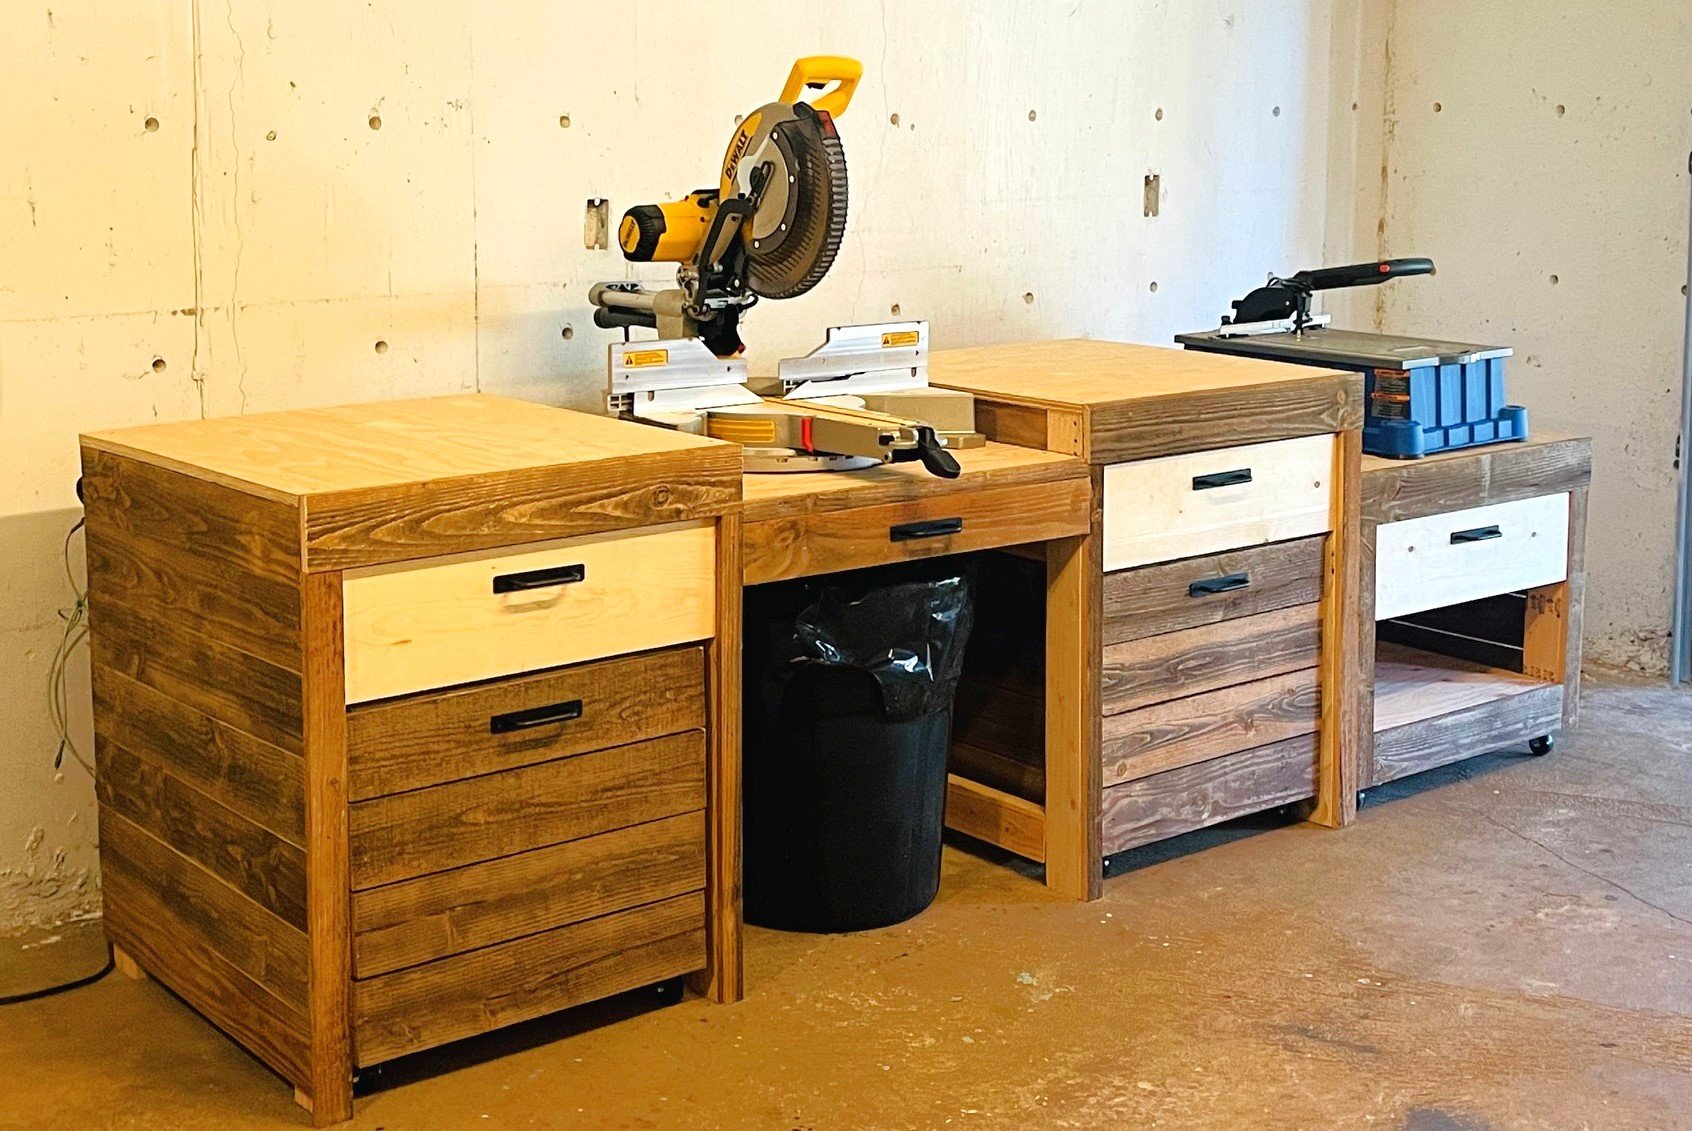
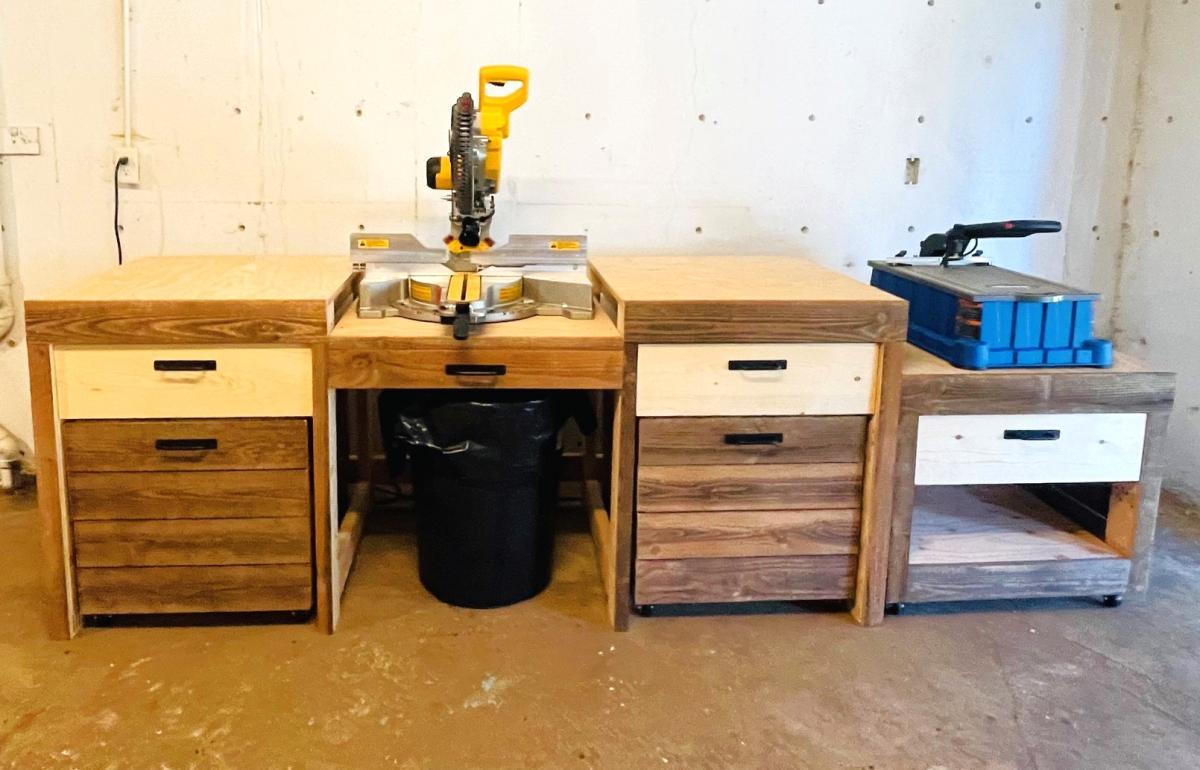
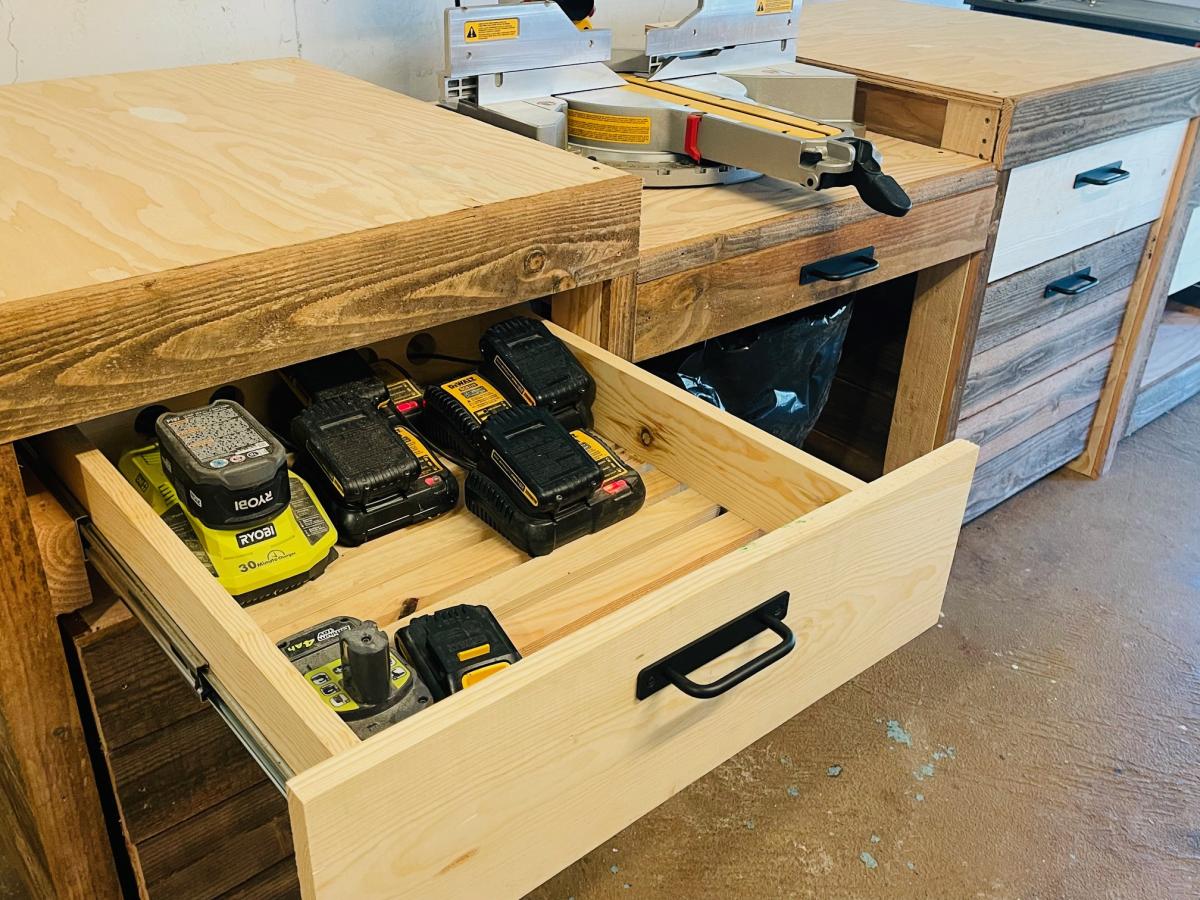
Using Ana's Ultimate Workbench Plan and her easy drawer method I built this. I decided to do storage carts that roll in and out for small scrap lumber storage. The Kreg Foreman got it's own cart, I made it so the deck of the machine was at the same height as the work surface. I added a drawer so all of my kreg bits and screws can be in one place. I had batteries and chargers laying all over my small shop, so I incorporated a battery charging drawer. I'm excited for the projects to come using my new set up!
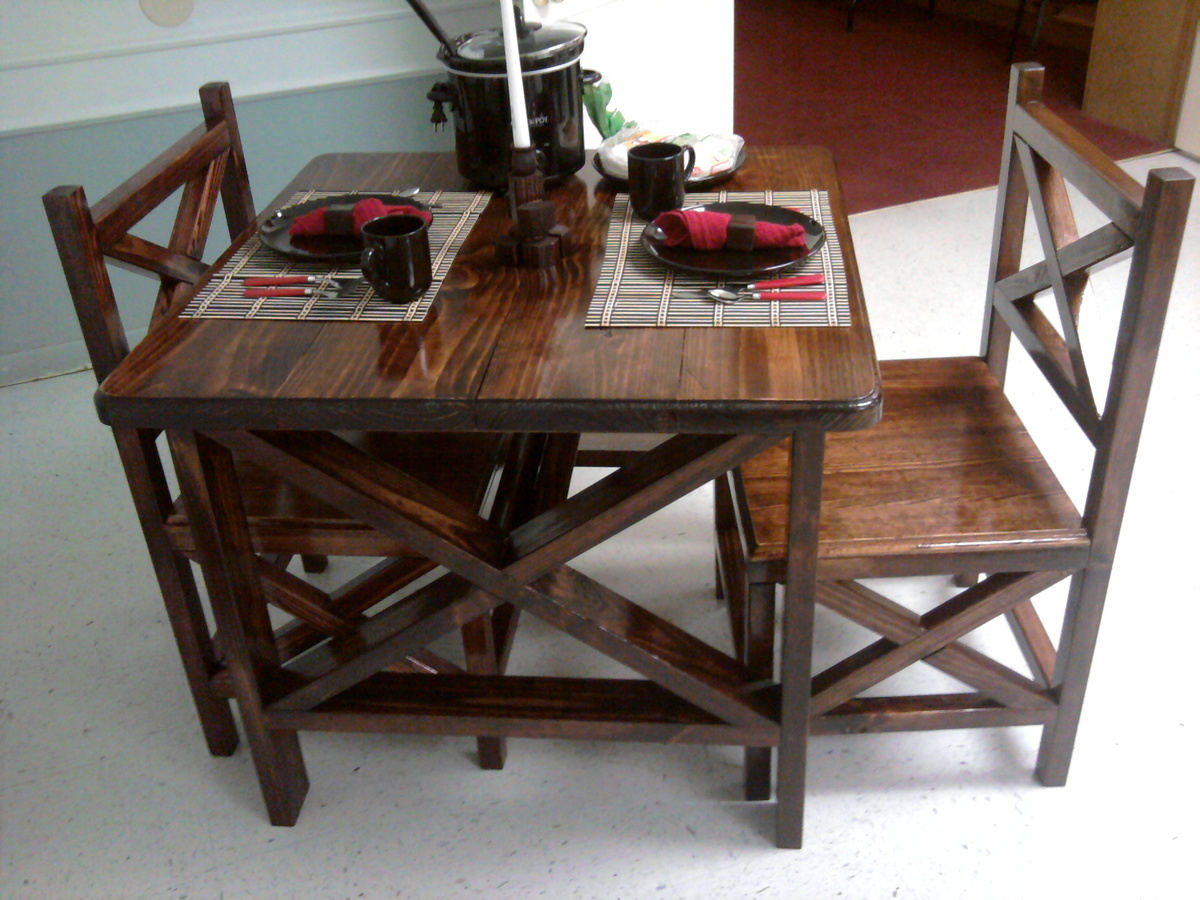
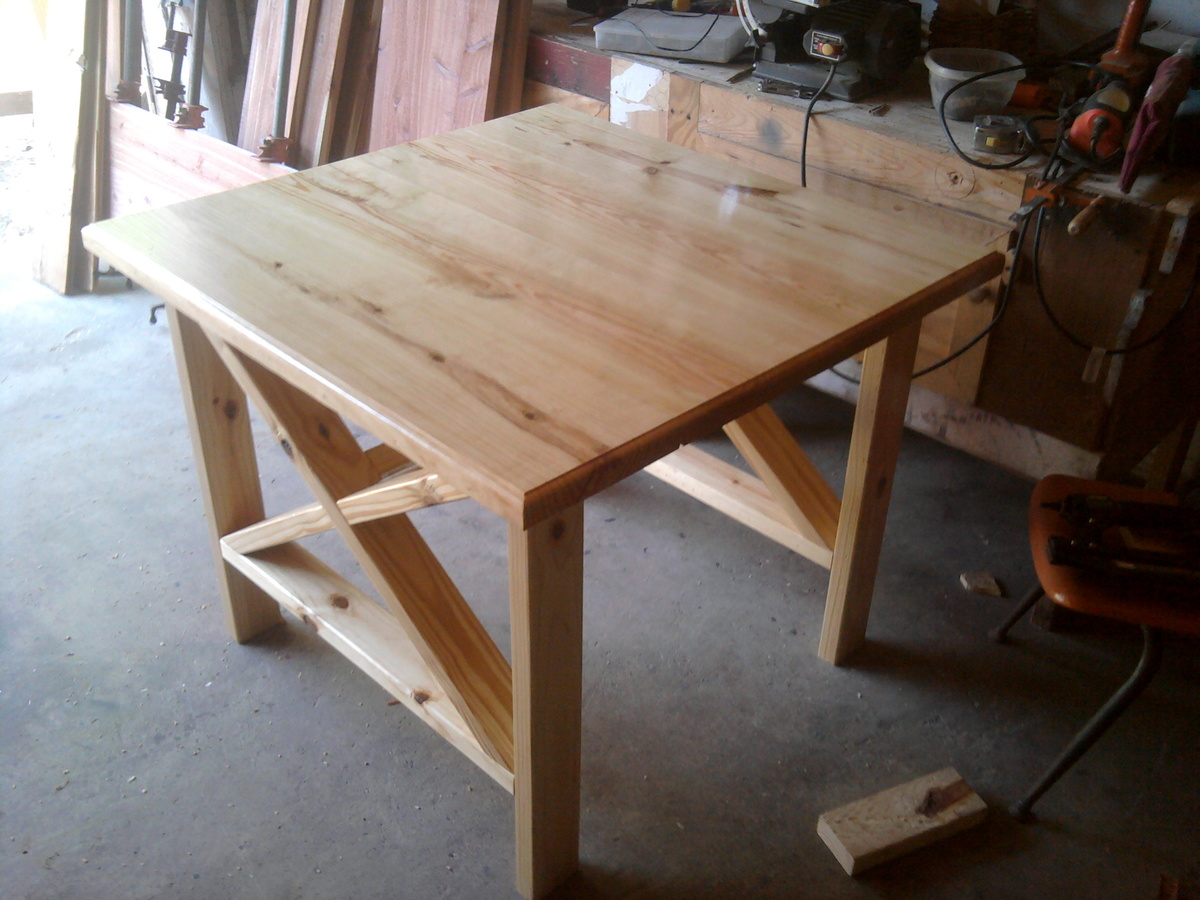
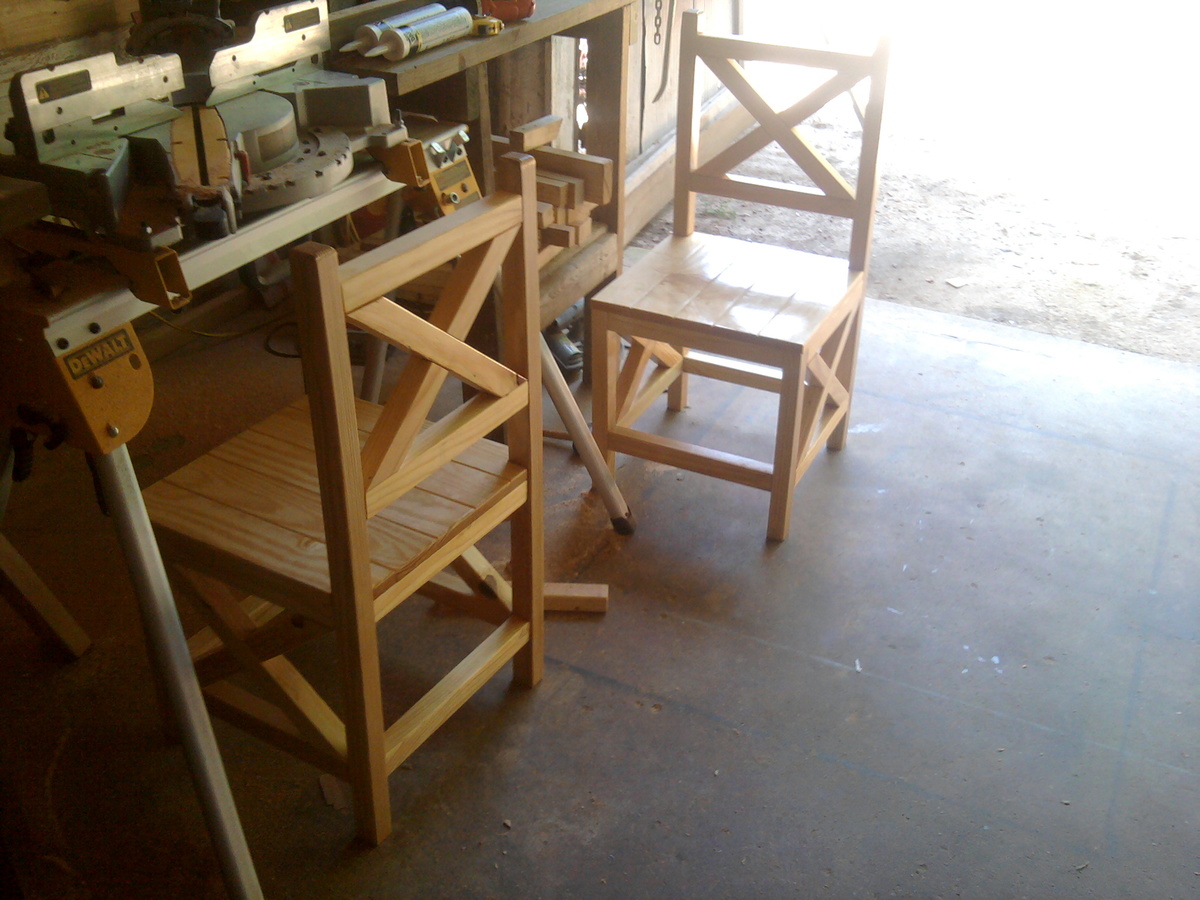
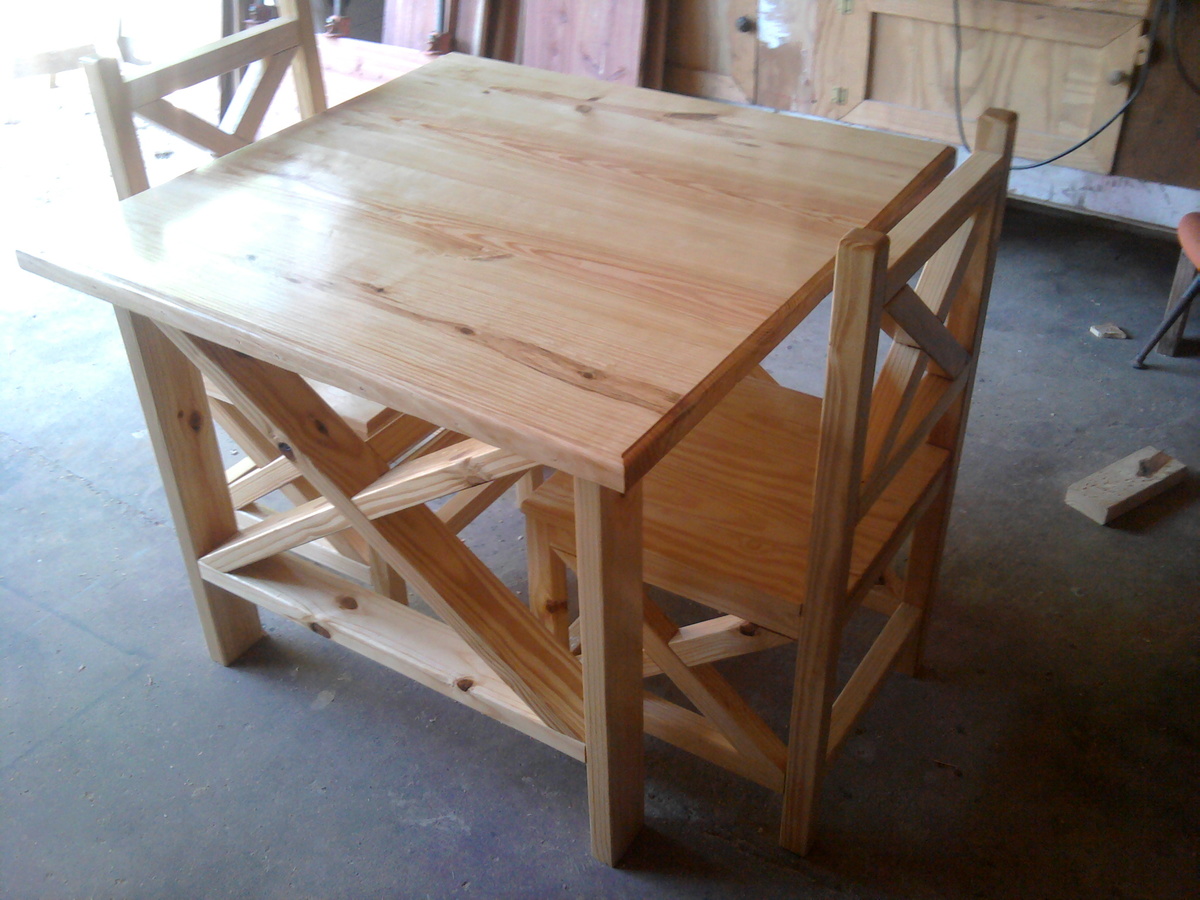
I wanted to build a table and chairs for my daughters wedding shower gift so i printed the coffee table plans and modified it to make the dining table. We just measured my sisters chairs and built the chairs.All of the lumber is white pine.We used 2x4s for the legs and frame, 2x10's for the top and 2x2's for a crossbrace under the table. The chairs are 2x4's ripped on the table saw to 2x2's with 1x4's for the seat. we routed the edge of the table and all pieces on the chairs.I spent $50 on the lumber on Monday and had it finished by Saturday for her shower. It is minwax red mahogany brushed on and wiped off and 2 coats of gloss polyuretane. It needs a couple more coats on the table top and the seats for a smoother finish. Lydia and Adam were thrilled, as was their friend who had us build her one just like it. She wanted hers in white pine with no stain and it has 4 coats of polyurethane for a very smooth finish. I love that we built a gift that will last them a lifetime!
Mon, 08/20/2012 - 03:24
Absolutely gorgeous! Great job and I love the price, too!
I am so excited - I'm going to finally get a kreg jig in the next few weeks and now I will have to add this beautiful project to my growing list of things to build!
Sat, 02/07/2015 - 16:04
Yes I would also like to know if there are plans for these chairs! Love them.
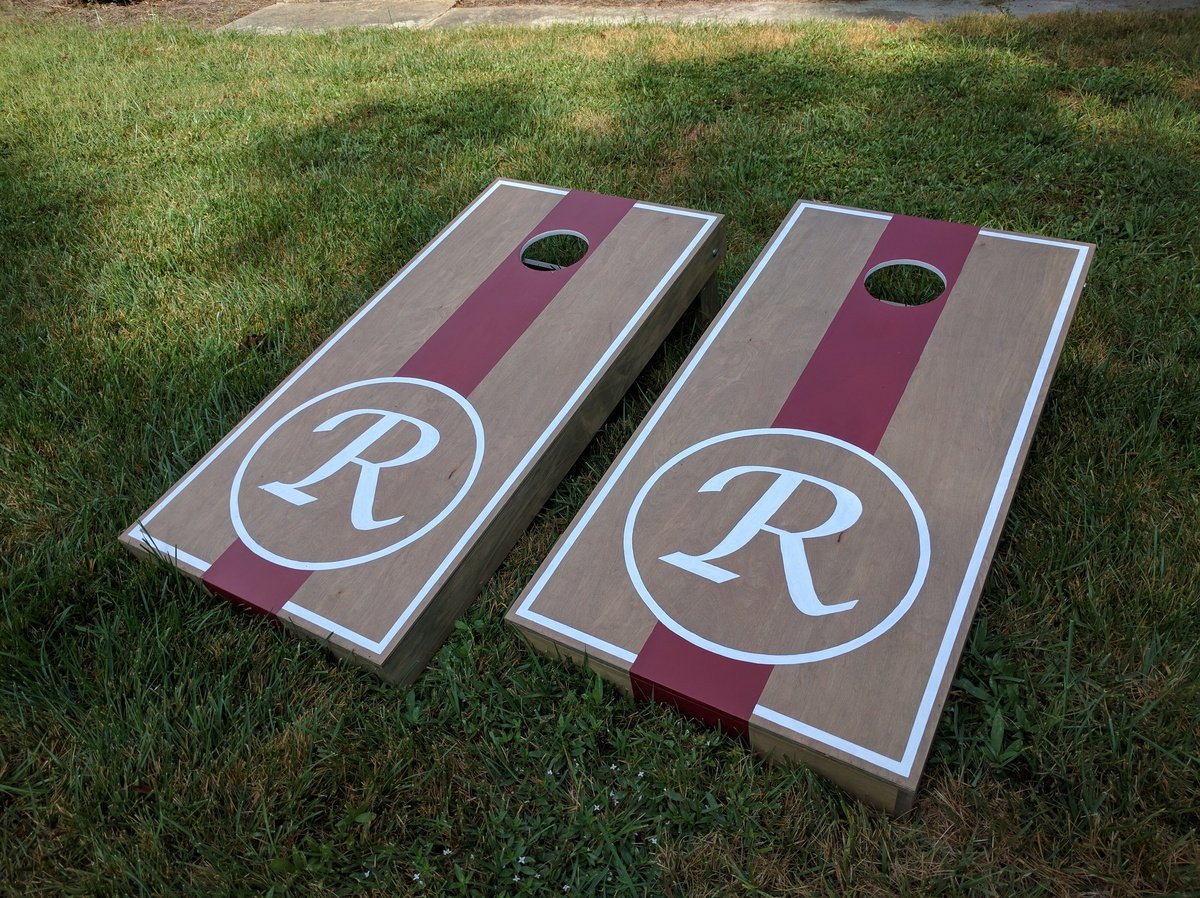
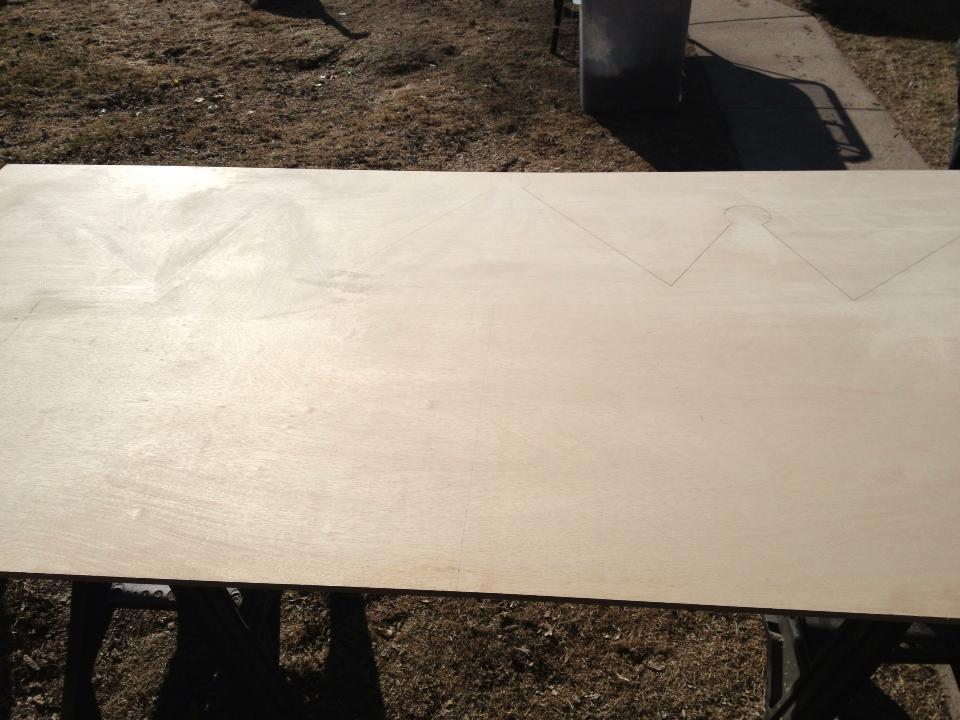
Cornhole boards for friends and family :) Used 1x4s for framing and legs, 1/2" ply for top.
"R" set: Birch plywood tops w/ (2) coats of Miniwax Weathered Oak oil stain. Red stripe is Behr 'Cherry Cola.' (3) coats of Polycrylic finish.
"AW" set: Regular plywood tops w/ (1) coat of Miniwax Special Walnut oil stain & Glidden 'Clemson Orange' stripe. (3) coats of Polycrylic finish.

Sat, 09/24/2016 - 10:16
Gorgeous! These would make such a fabulous wedding or house warming gift!


Comments
Rschriner17
Thu, 11/16/2023 - 10:47
Nice work
Looks great!