Community Brag Posts

Hamper

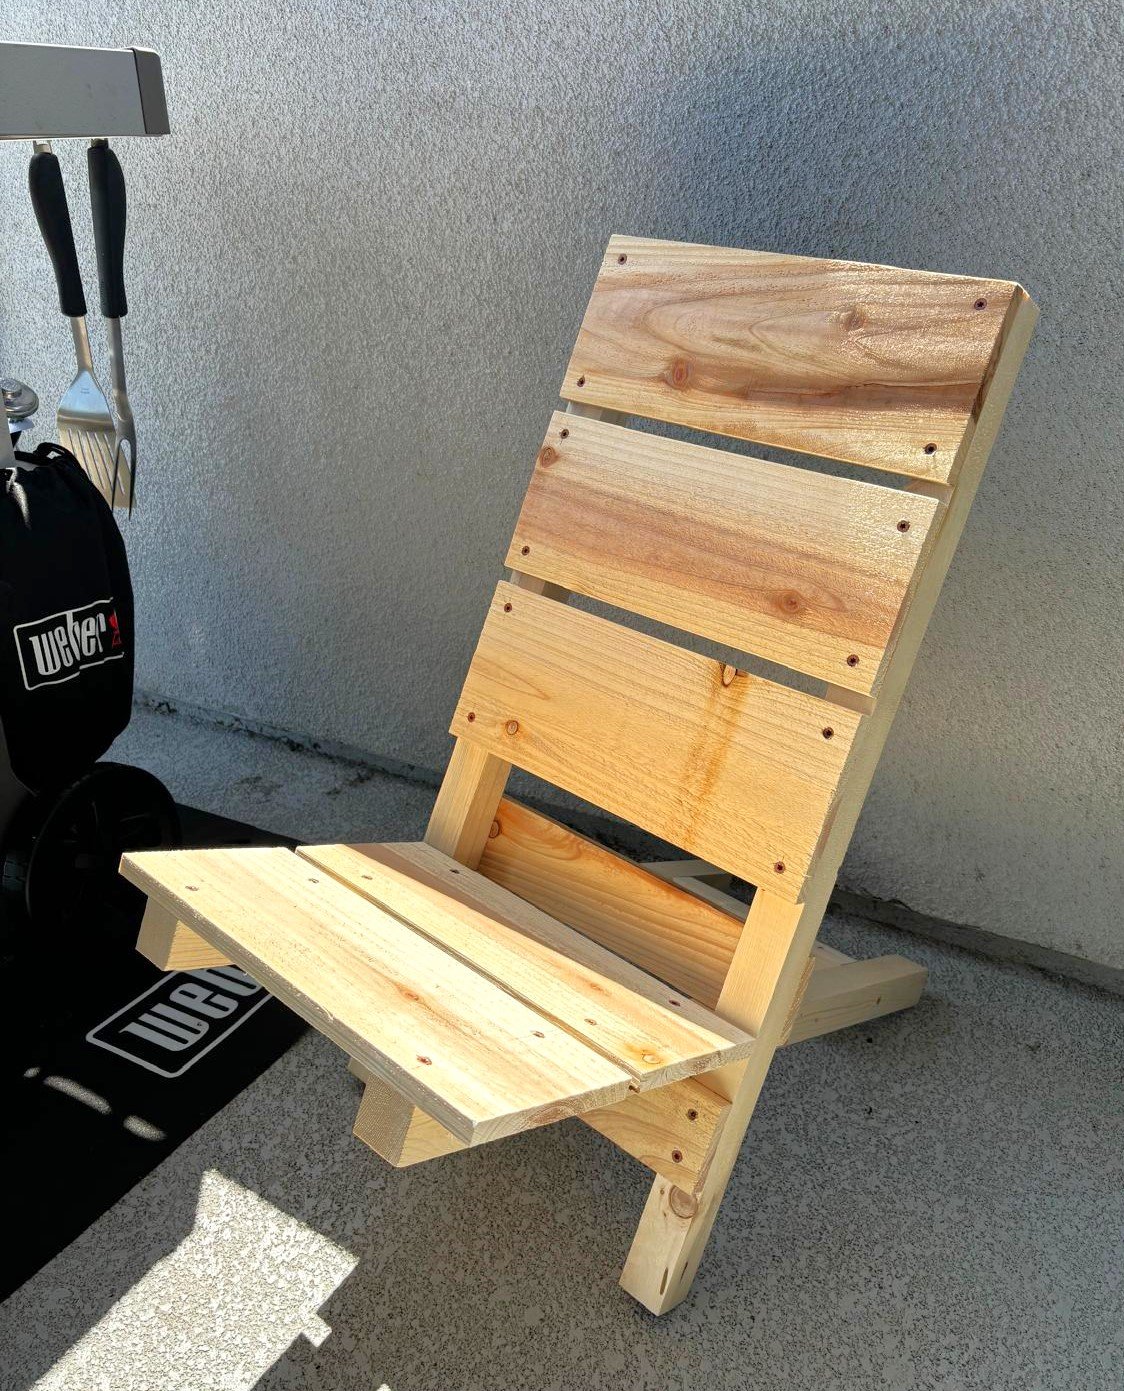
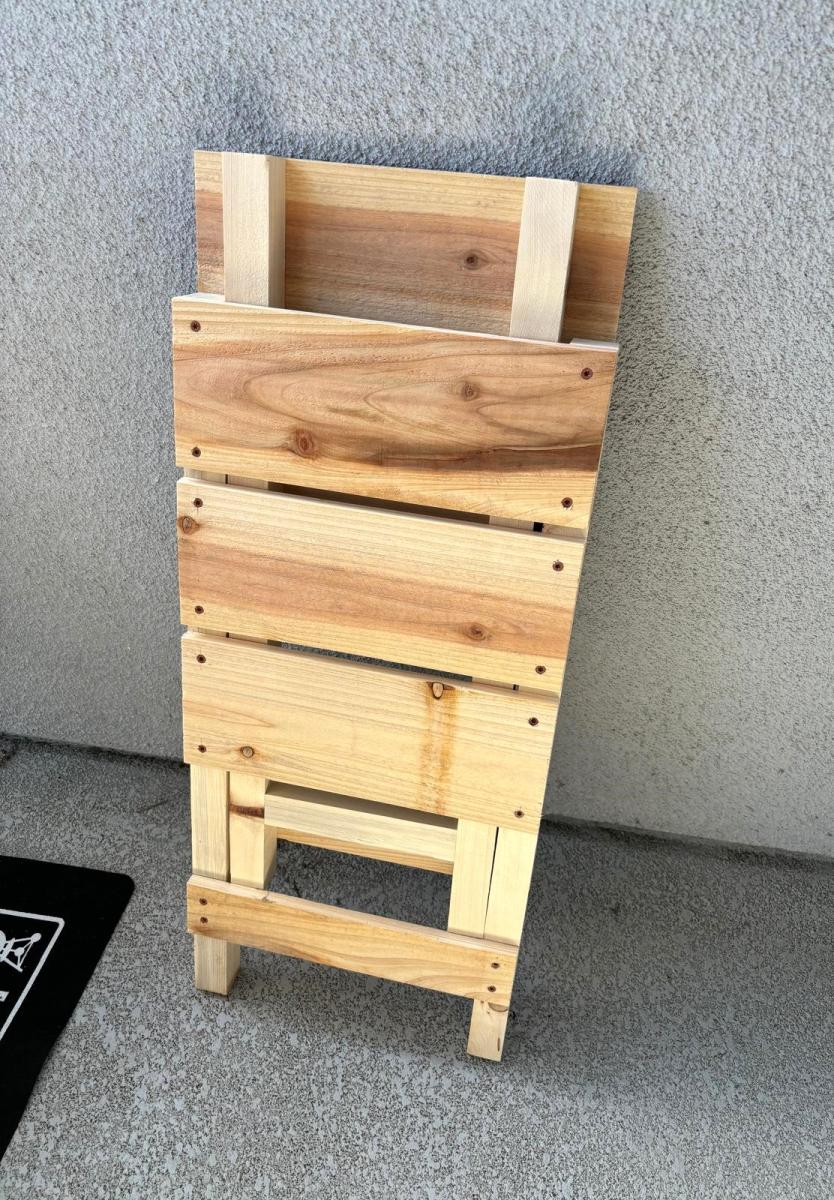
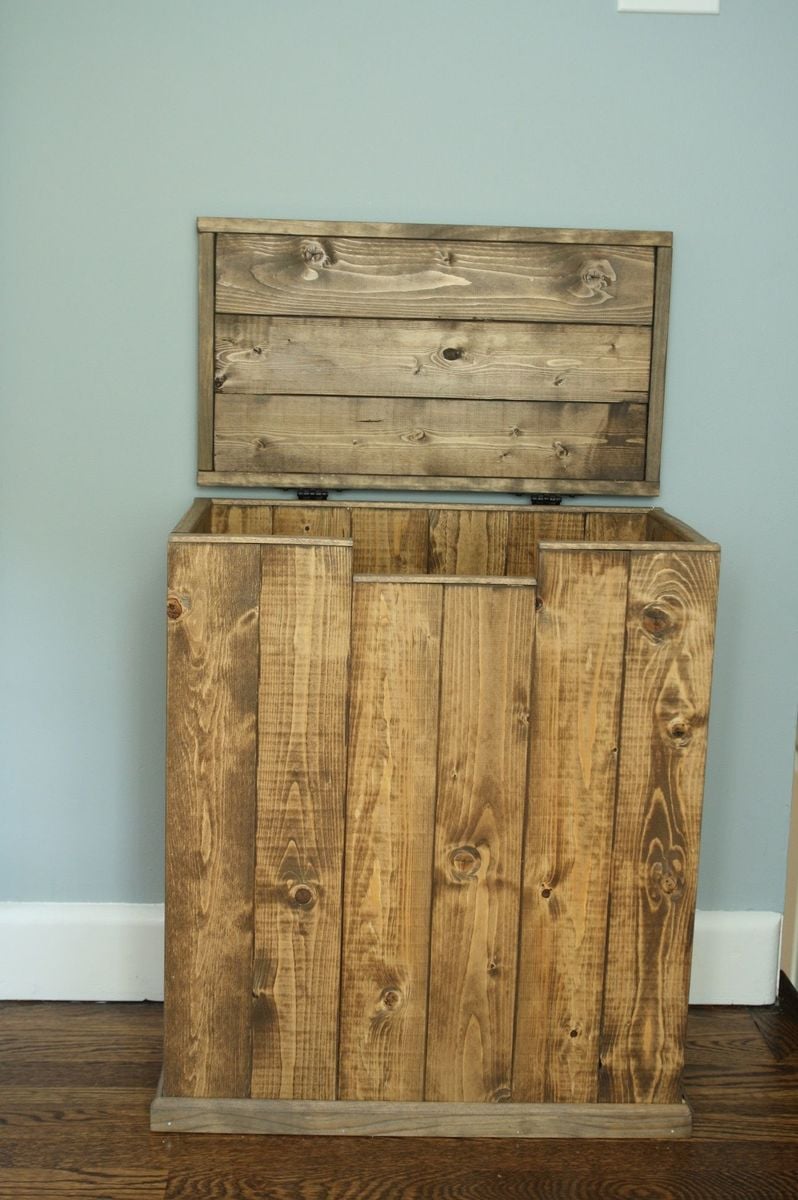
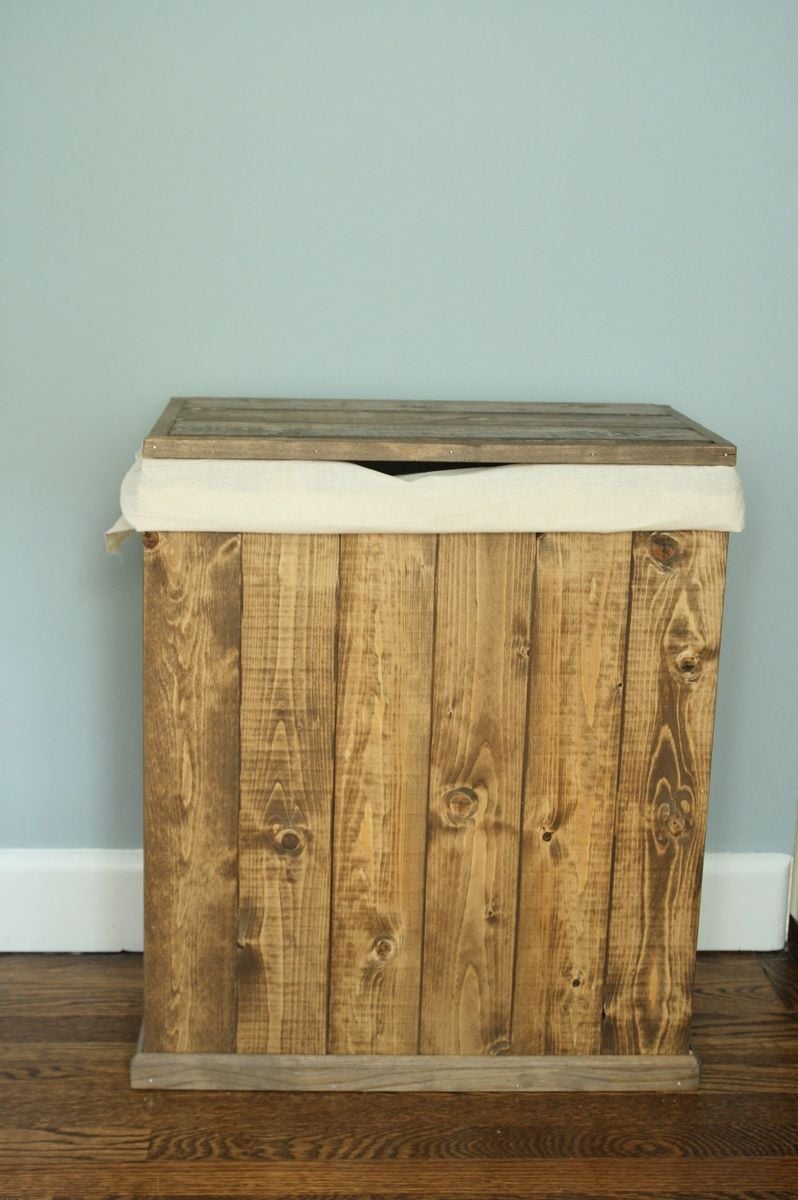
My family is expanding, which means more laundry! (I am 39 weeks pregnant now) So I decided to build a big enough hamper for us (two adults, one toddler who constantly dirties his clothes). For finish, I tried to mix two stains "weathered oak" and "dark walnut" and I think it came out really nice! I must admit I love my new hamper!

Estimated Cost
$40~50
Estimated Time Investment
Day Project (6-9 Hours)
Finish Used
weathered oak : dark walnut = 2:1
Recommended Skill Level
Starter Project

Comments

momkanof6

Wed, 04/01/2015 - 05:00

I liked this design of hamper you made. After looking at your photo and doing some figuring I started working on my own yesterday. So far I like it, although I think mine maybe taller. Again I really like your idea here.

Beautiful Table

Submitted by Anonymous (not verified) on Mon, 11/07/2016 - 05:27

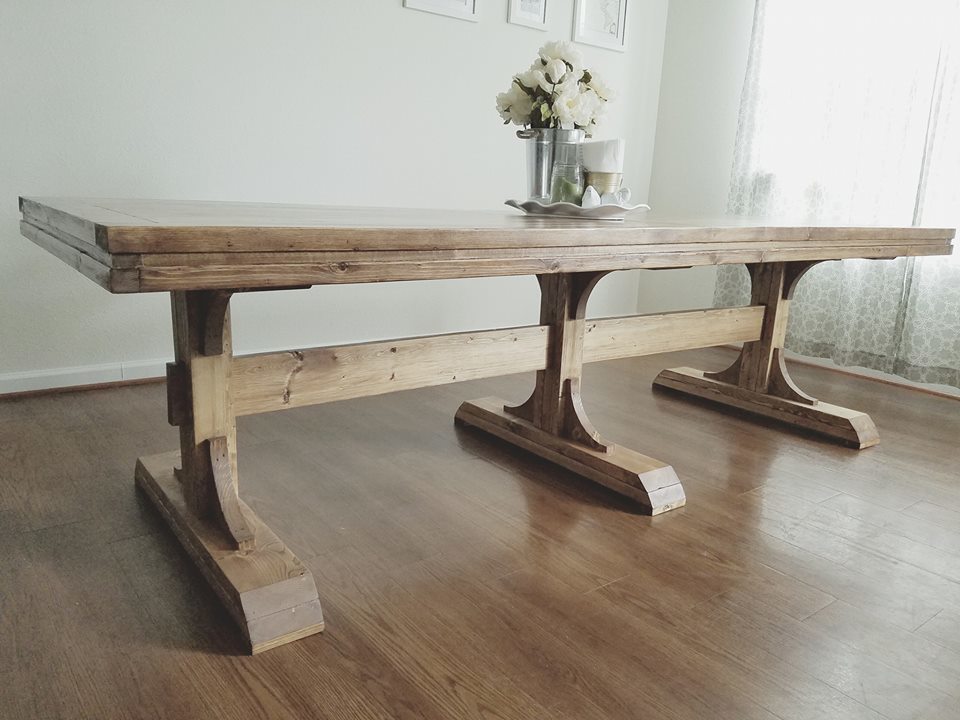
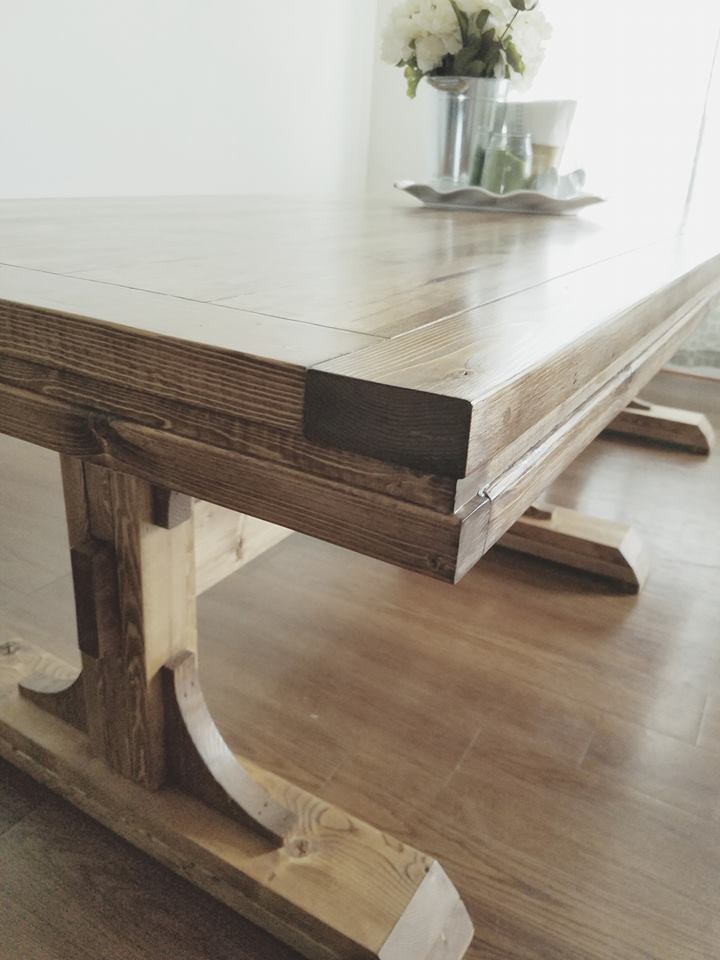
We have been eyeing this table for years now...finally the military has brought us to the east coast where we have room to do some wood work hobbying! This table is sturdy and beautiful. Love that we can break it down into so many pieces for our moves. Thank you Ana White!!

Built from Plan(s)
Estimated Cost
140 for wood, hardware, stain and sealer
Estimated Time Investment
Weekend Project (10-20 Hours)
Finish Used
Minwax Early American, Varthane semi gloss poly
Recommended Skill Level
Intermediate

Comments

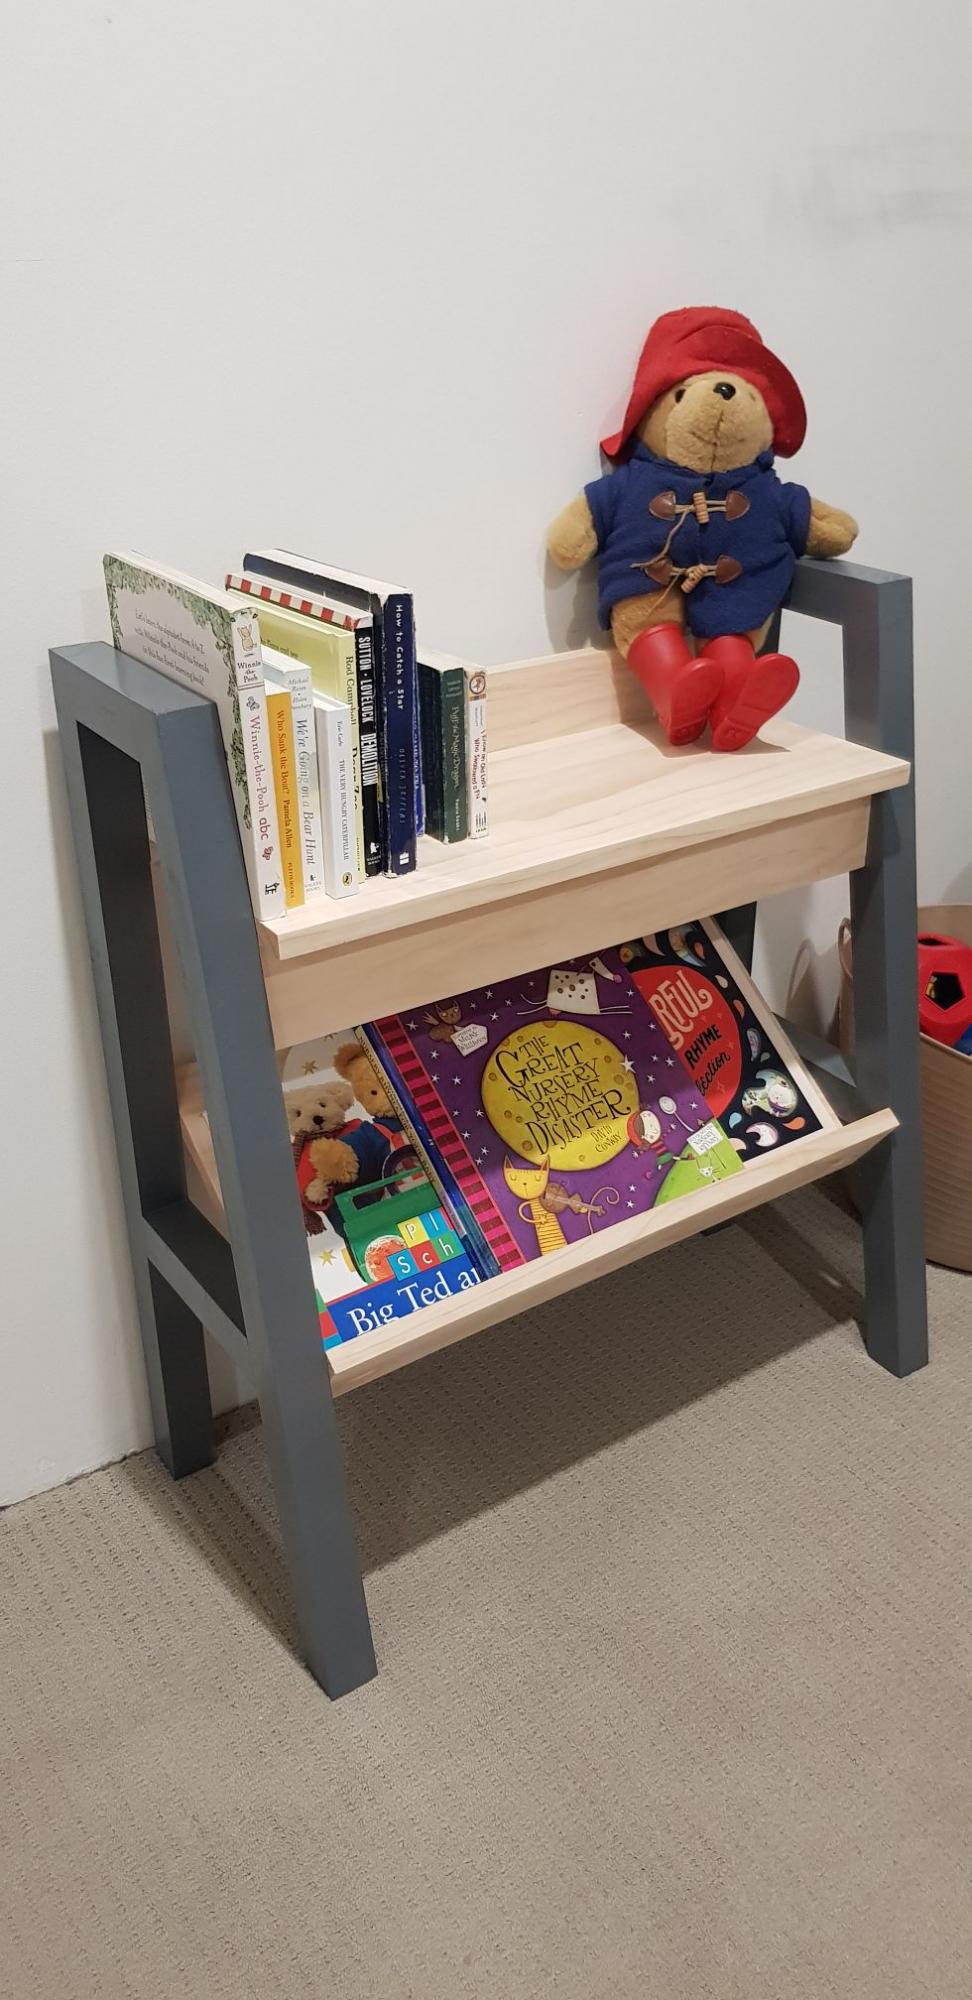
Kids bookshelf

Submitted by Anonymous (not verified) on Mon, 07/27/2020 - 17:52

Had to half the length due to room size, but was happy with the results!

Built from Plan(s)
Estimated Time Investment
Weekend Project (10-20 Hours)
Finish Used
Charcoal spraypaint and clear varnish
Recommended Skill Level
Beginner

Comments

Modern Industrial Adjustable Work Stand

$120 for 2 bases, one top ... less if you have scrap lumber and pipe

The hard part of some woodworking is what to do with the stuff BEFORE and AFTER it goes through the tools.

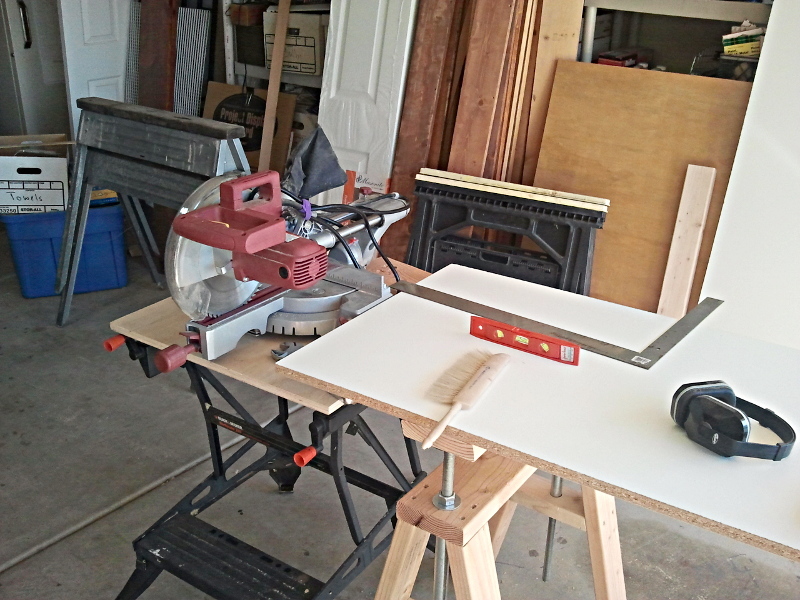
We need an infeed and outfeed table for routers, drill press, and saws but have no room to install a permanent workbench with an adjustable tool lifter.

We saw the coffee table to desk height adjustment mechanism and lightbulbs went off! This adjusts! We can take the top off! It stores!

The first photo shows it adjusted to align with the miter saw's cutting area.

As built, there are a couple of changes:

1 - It's taller. Lowest table height is about 30" ... add 8 inches to each leg.

2 - We only used 1 leg brace, about half way down the leg. Cut it to fit after you get the legs screwed to the top.

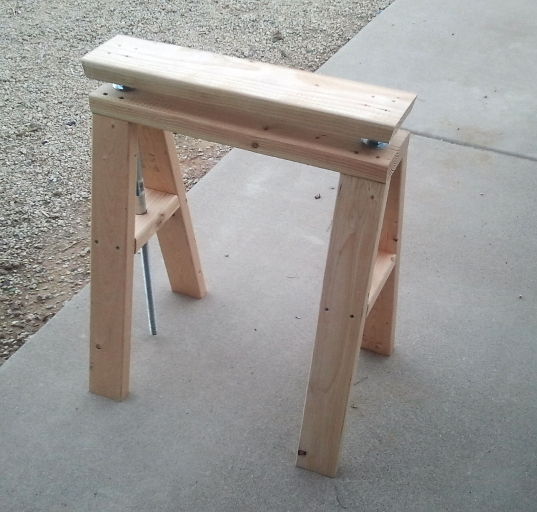
3 - the wobble of the adjustable bar on the threaded rod is not good for precision woodworking ... the second picture shows the guide pipe that keeps the threaded rod straight up and down.

4 - No pocketholes (sorry Anna) because this is a workbench, not fine furniture.

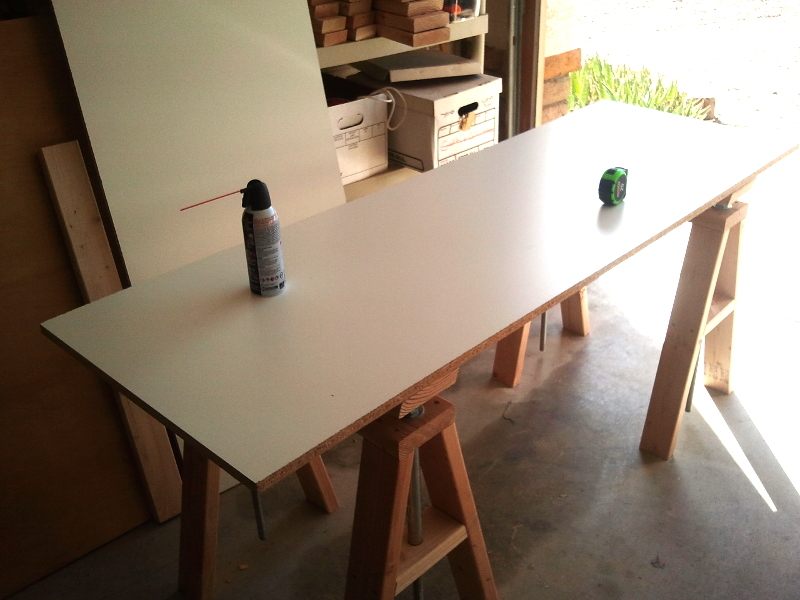
5 - The tops are cut from one sheet of 4x8 3/4 in melamine coated MDF ... 2 are 2x6 and one is 2x4.

This could also make an adjustable craft table. Raise or lower it to handle fabric for your sewing machine.
Estimated Cost
$120 for 2 bases, one top ... less if you have scrap lumber and pipe
Estimated Time Investment
Day Project (6-9 Hours)
Finish Used
None
Recommended Skill Level
Intermediate

Comments

Router table w/ rockler table, fence and lift

Submitted by 1n4001 on Fri, 11/02/2012 - 08:19

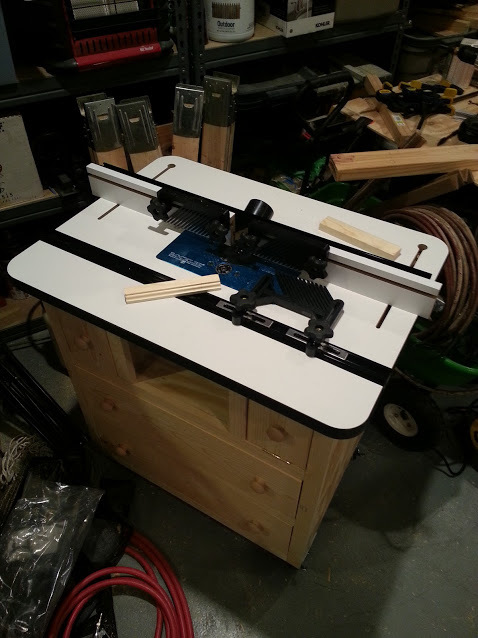
Built Patrick's Router table and added a rockler table, fence, and lift to finish off.

Built from Plan(s)
Estimated Cost
~$90 in lumber and hardware + ~$460 for table top, fence, and lift + $170 for bosch 1617evs router
Estimated Time Investment
Day Project (6-9 Hours)
Finish Used
raw, probably sand and spray some poly on it in the near future.
Recommended Skill Level
Intermediate

Comments

Patrick Hosey (not verified)

Fri, 11/02/2012 - 09:10

Yes! Enjoy. It'll be the most valuable tool in your shop trust me.

patrickhosey

Sat, 11/03/2012 - 19:28

Here's a tip for that 1617 router. Try putting a bandaid over the on/off switch. That thing will get gummed up if left uncovered. It's annoying.

jimssolidwoodp…

Sun, 03/05/2017 - 21:13

My question for Patrick is when he built the top section for 2 small drawers and middle section for the router access..

Did Patrick put on top a 3/4" pc of plywood then the router table top.

Can l attach my router table top to the top pc if 3/4"plywood then my table top is 1 3/4" thick that it would be to thick could you email to let me know please.

Jim

Rustic Kitchen Island

Submitted by meggeh on Wed, 08/19/2020 - 17:19

5 8’ 2x4s were not enough. I could not figure out how to get the needed cuts from 5 boards. We had to go back and get more (a 3 hour round trip) which didn’t help with keeping costs down.

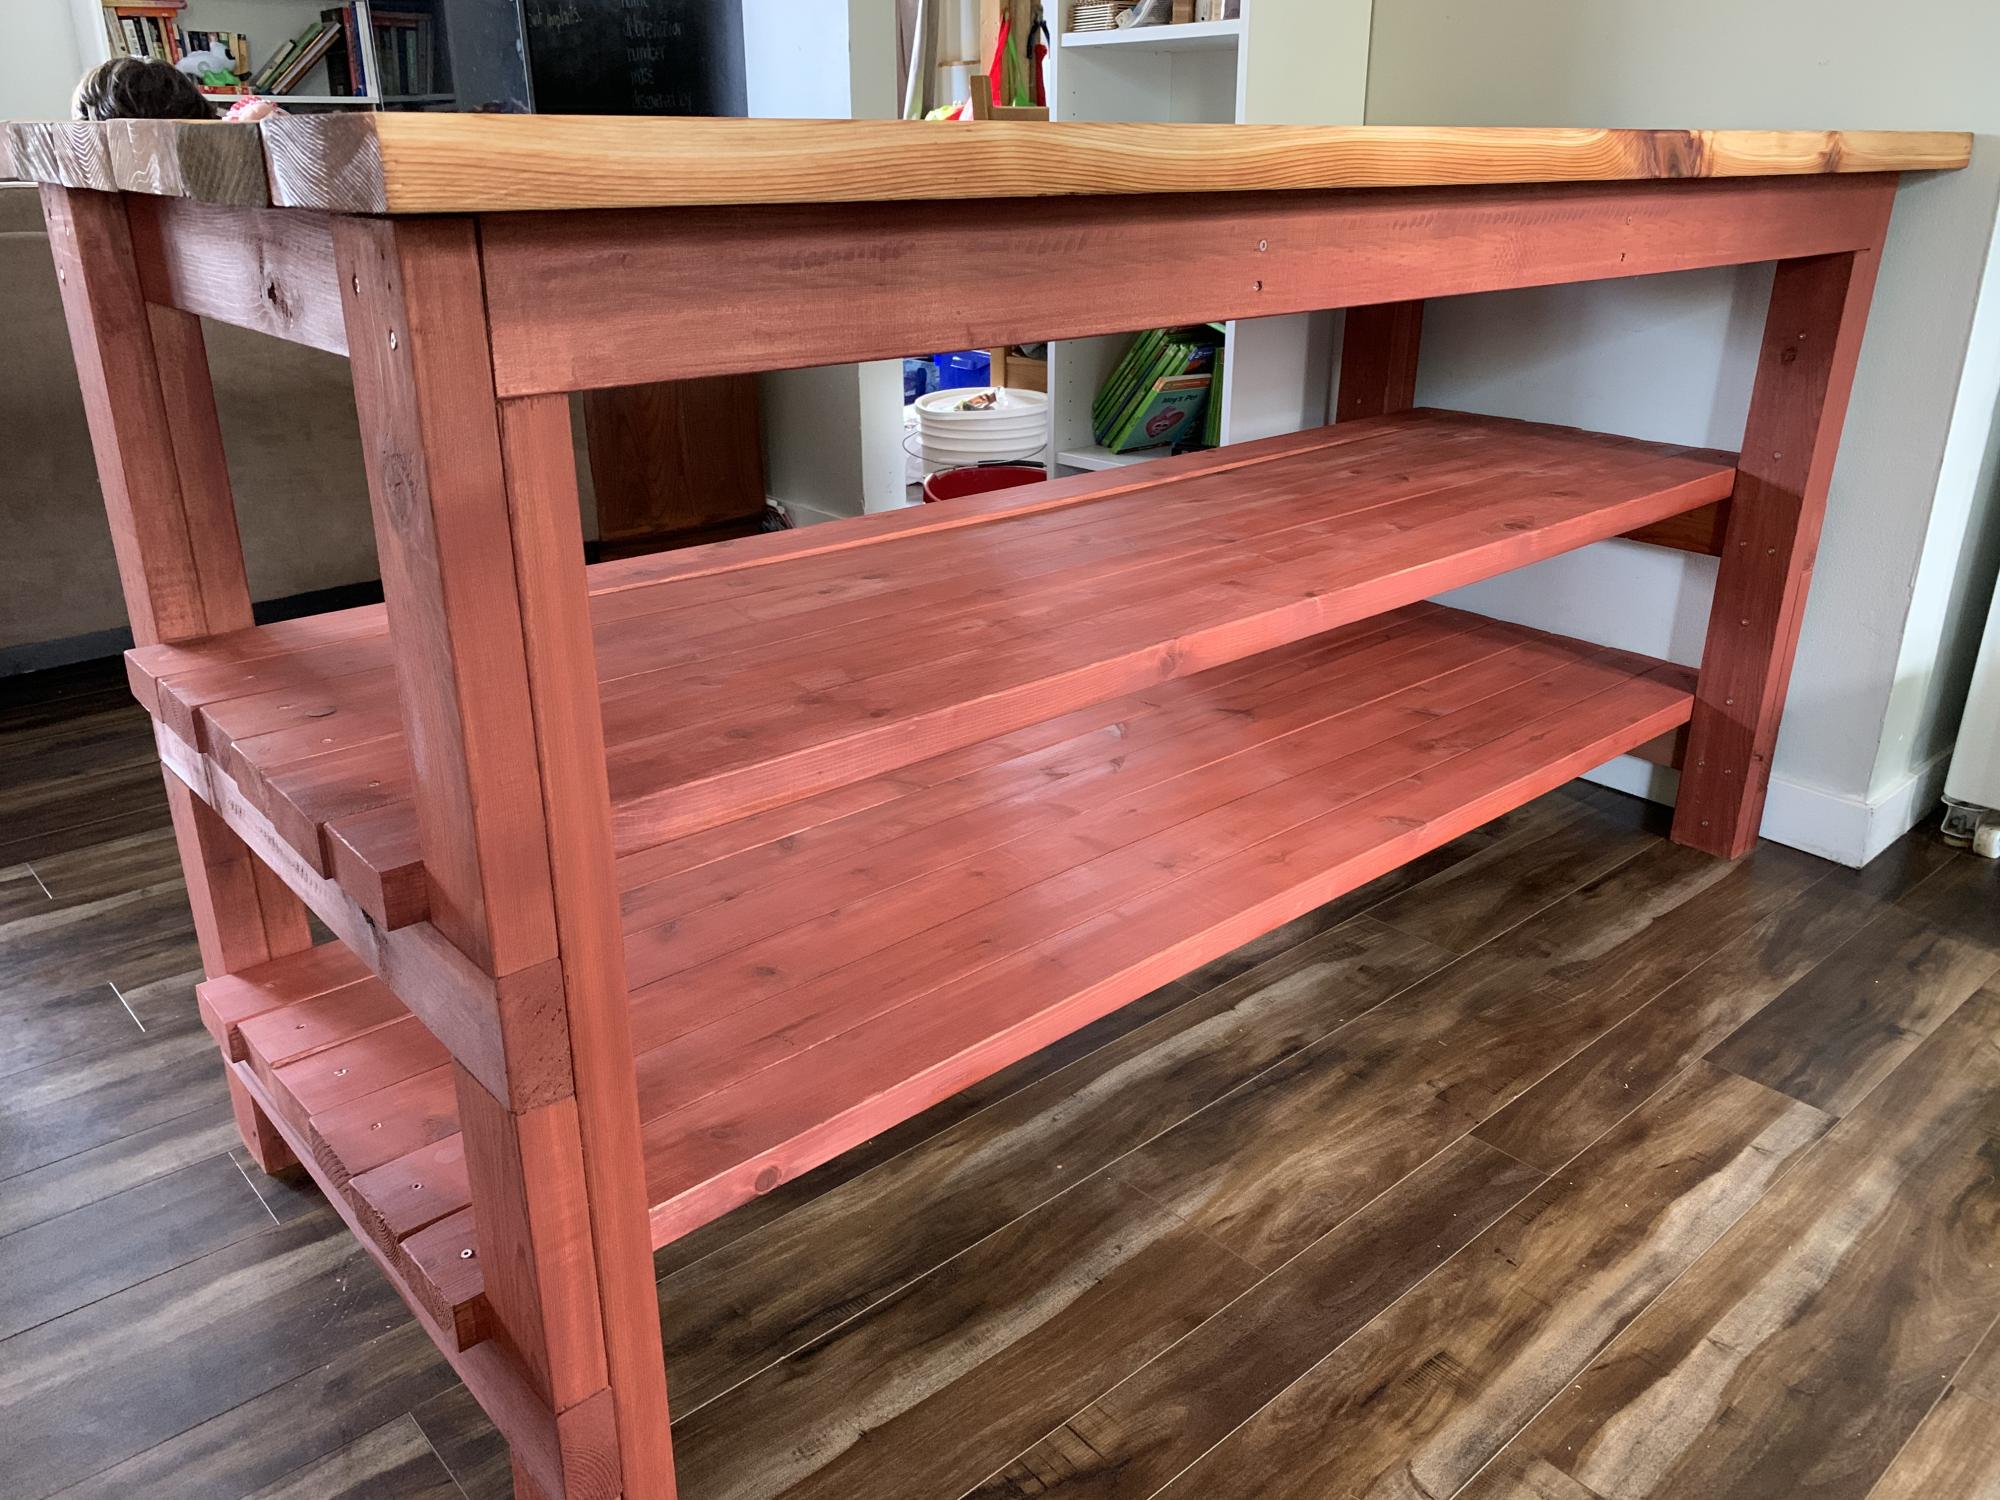
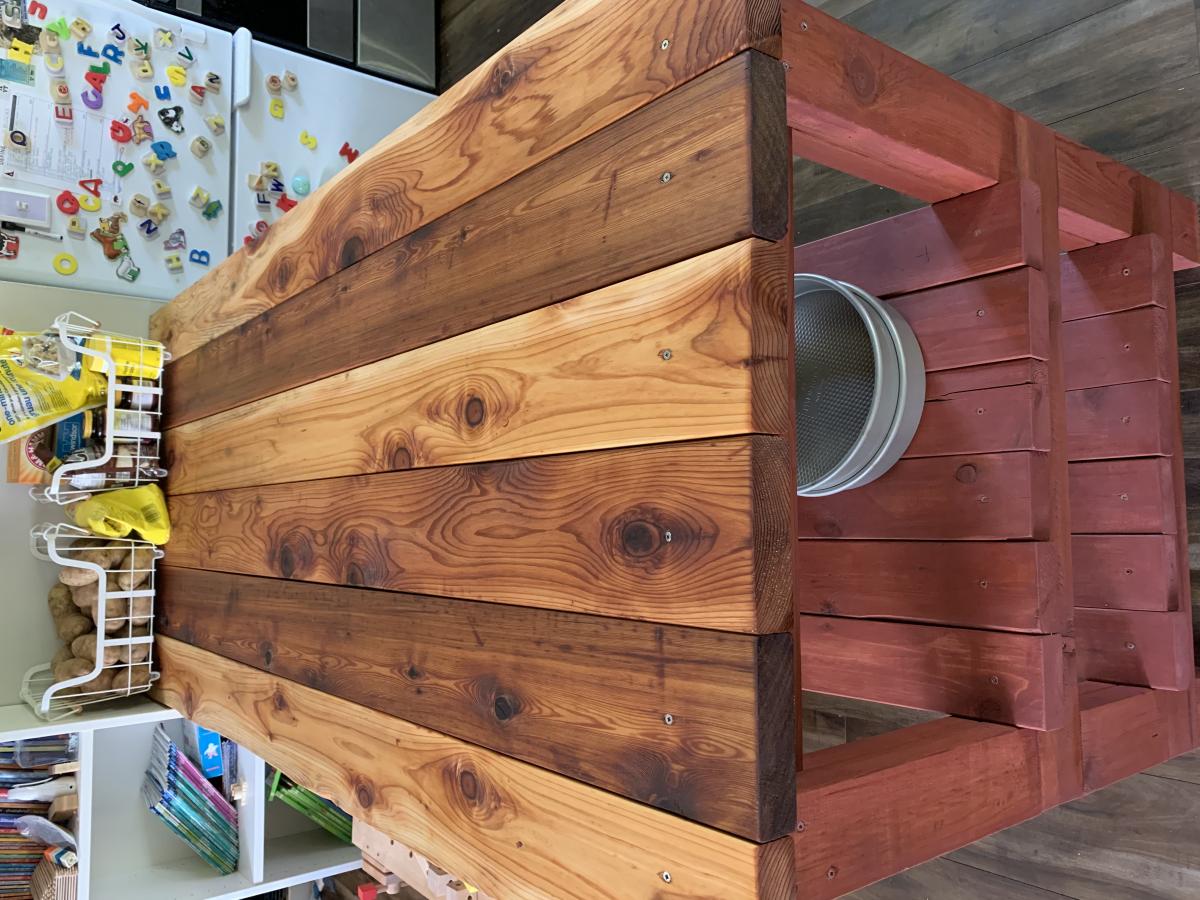
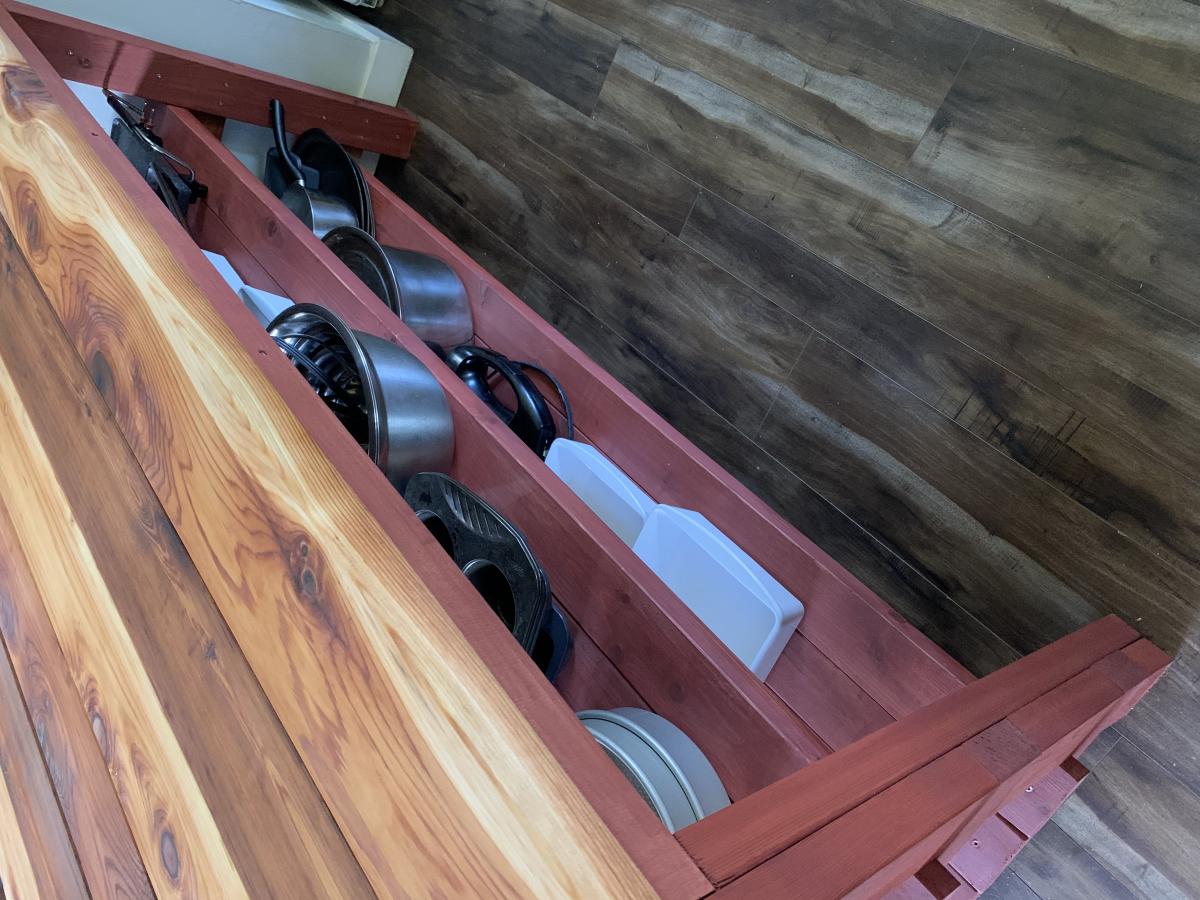
I’ve wanted this built for a looong time and finally roped my husband into building it for me. We used cedar. 2x8s weren’t available so we substituted for 2x6s. We have 6 of those boards across the top, making a few inches of overhang on either side. I liked it just as it was so I didn’t trim the ends of the shelf boards.

The top is stained with pure tung oil for waterproofing. The frame and shelves are painted with milk paint stain. 2 coats of this left it pink until a light coat of tung oil brought out the nice darker colour. Waiting for the tung oil to dry killed me because I wanted to be able to use it right away.

Estimated Cost
About $340 CAD in lumber
Estimated Time Investment
An Hour or Two (0-2 Hours)
Finish Used
Tung oil & milk paint stain
Recommended Skill Level
Beginner

Country Pie Safe

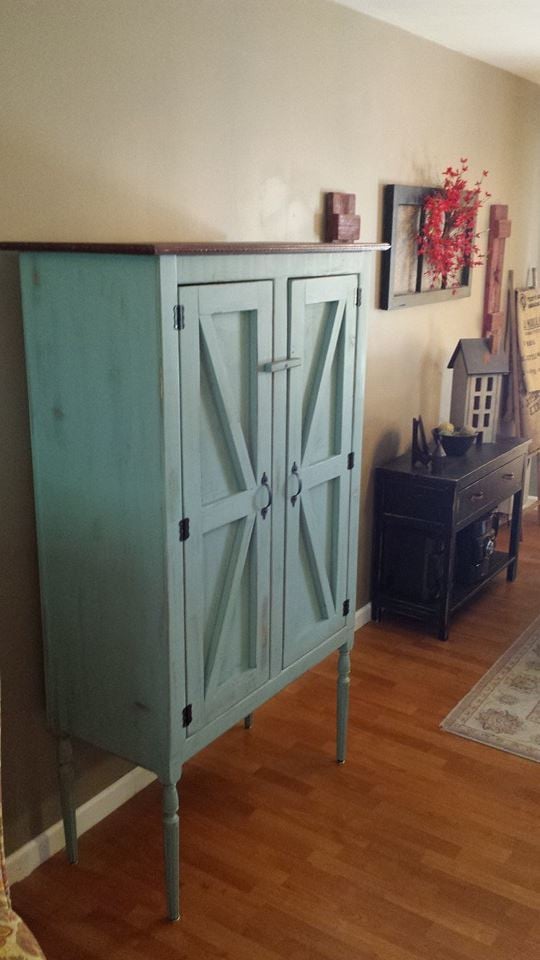
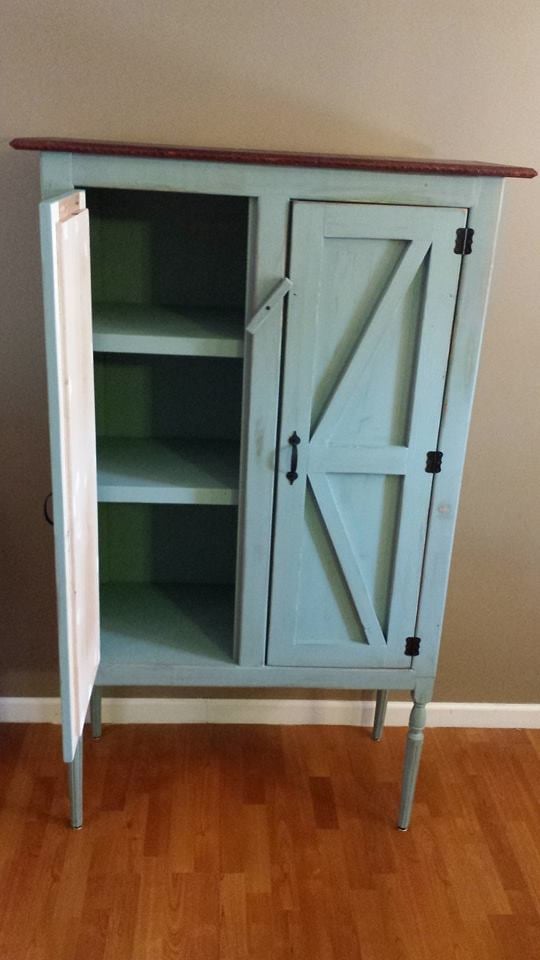
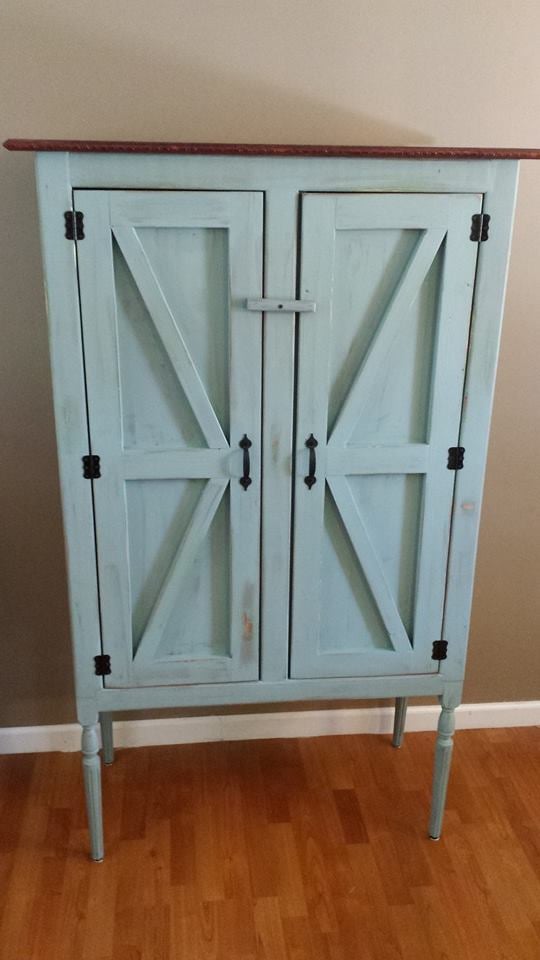
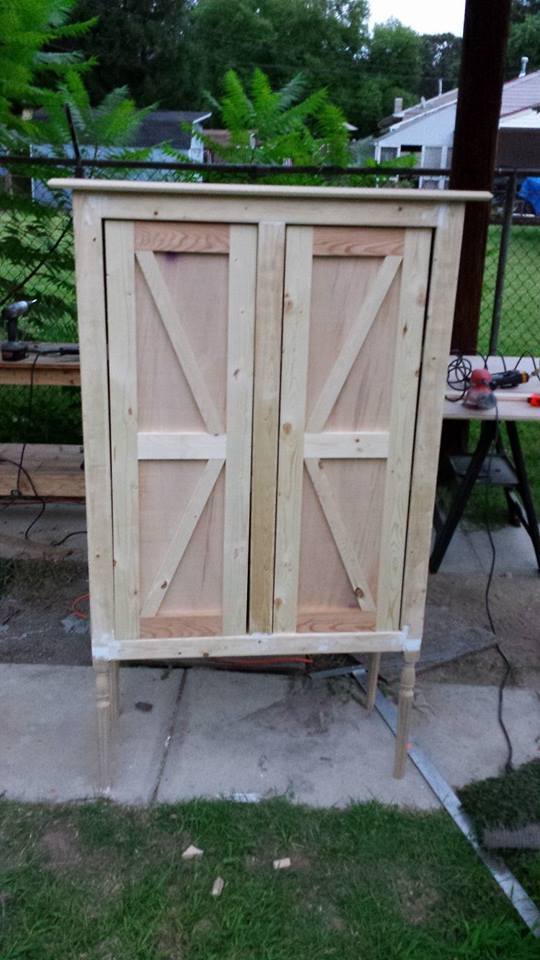
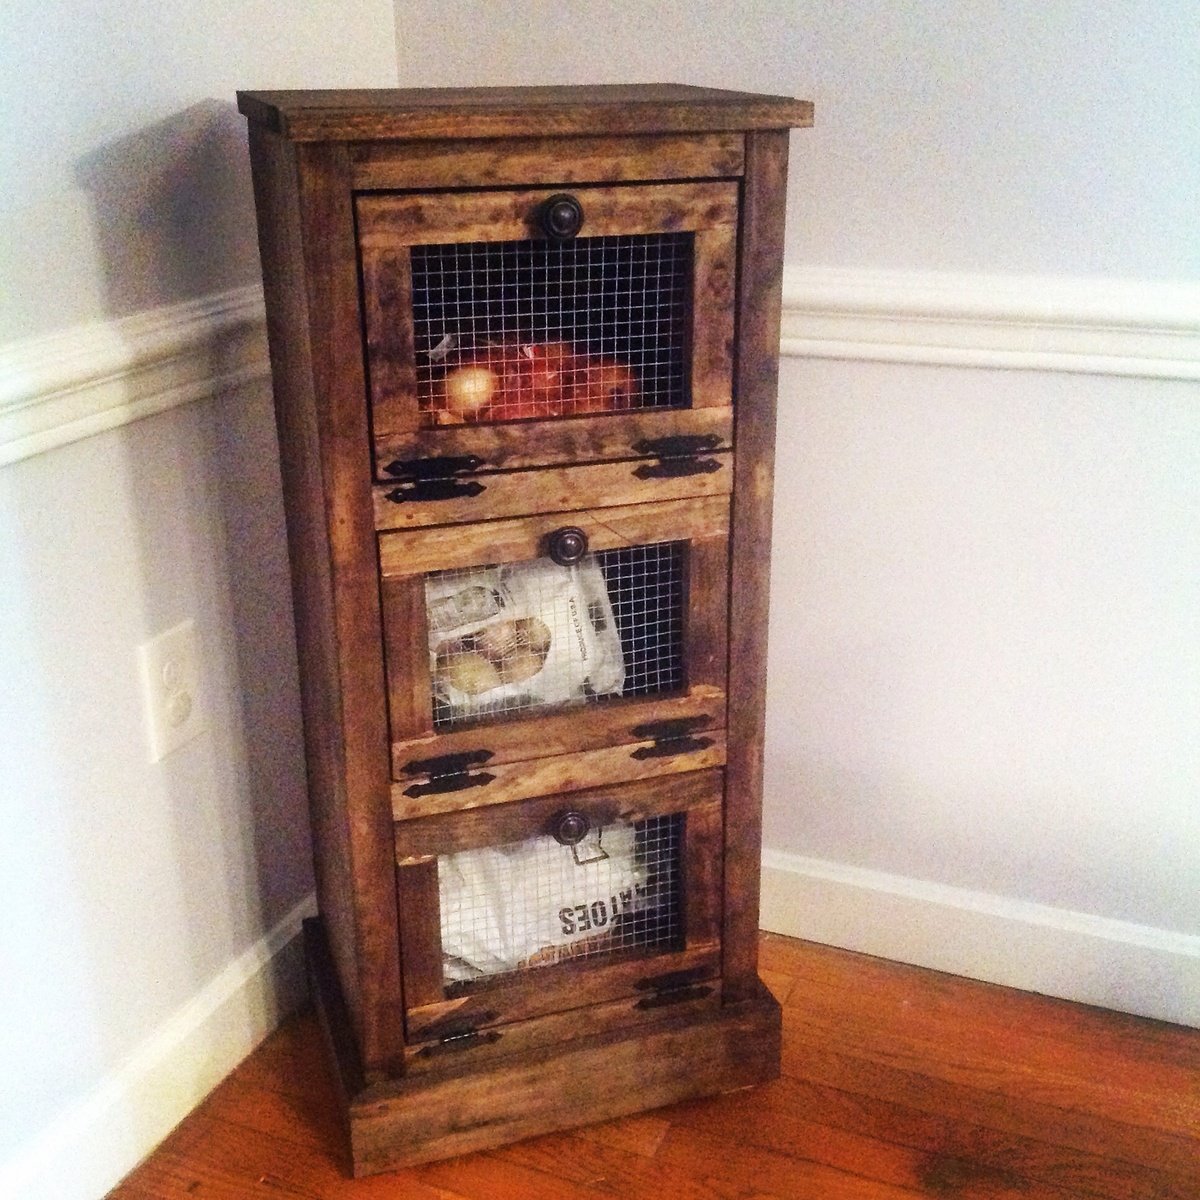
We recently moved from Washington state to Maryland and the house we rented didn't have a pantry. I decided after searching pintrest that this would be the perfect addition to the house and it could add to our kitchen storage. I am completely happy with the finished project.

Estimated Cost
$115.00 for paint and wood
Estimated Time Investment
Weekend Project (10-20 Hours)
Finish Used
Paint and stain
Recommended Skill Level
Intermediate

Comments

Pantry Door Spice Rack

Submitted by HR Dad on Wed, 09/02/2020 - 18:11

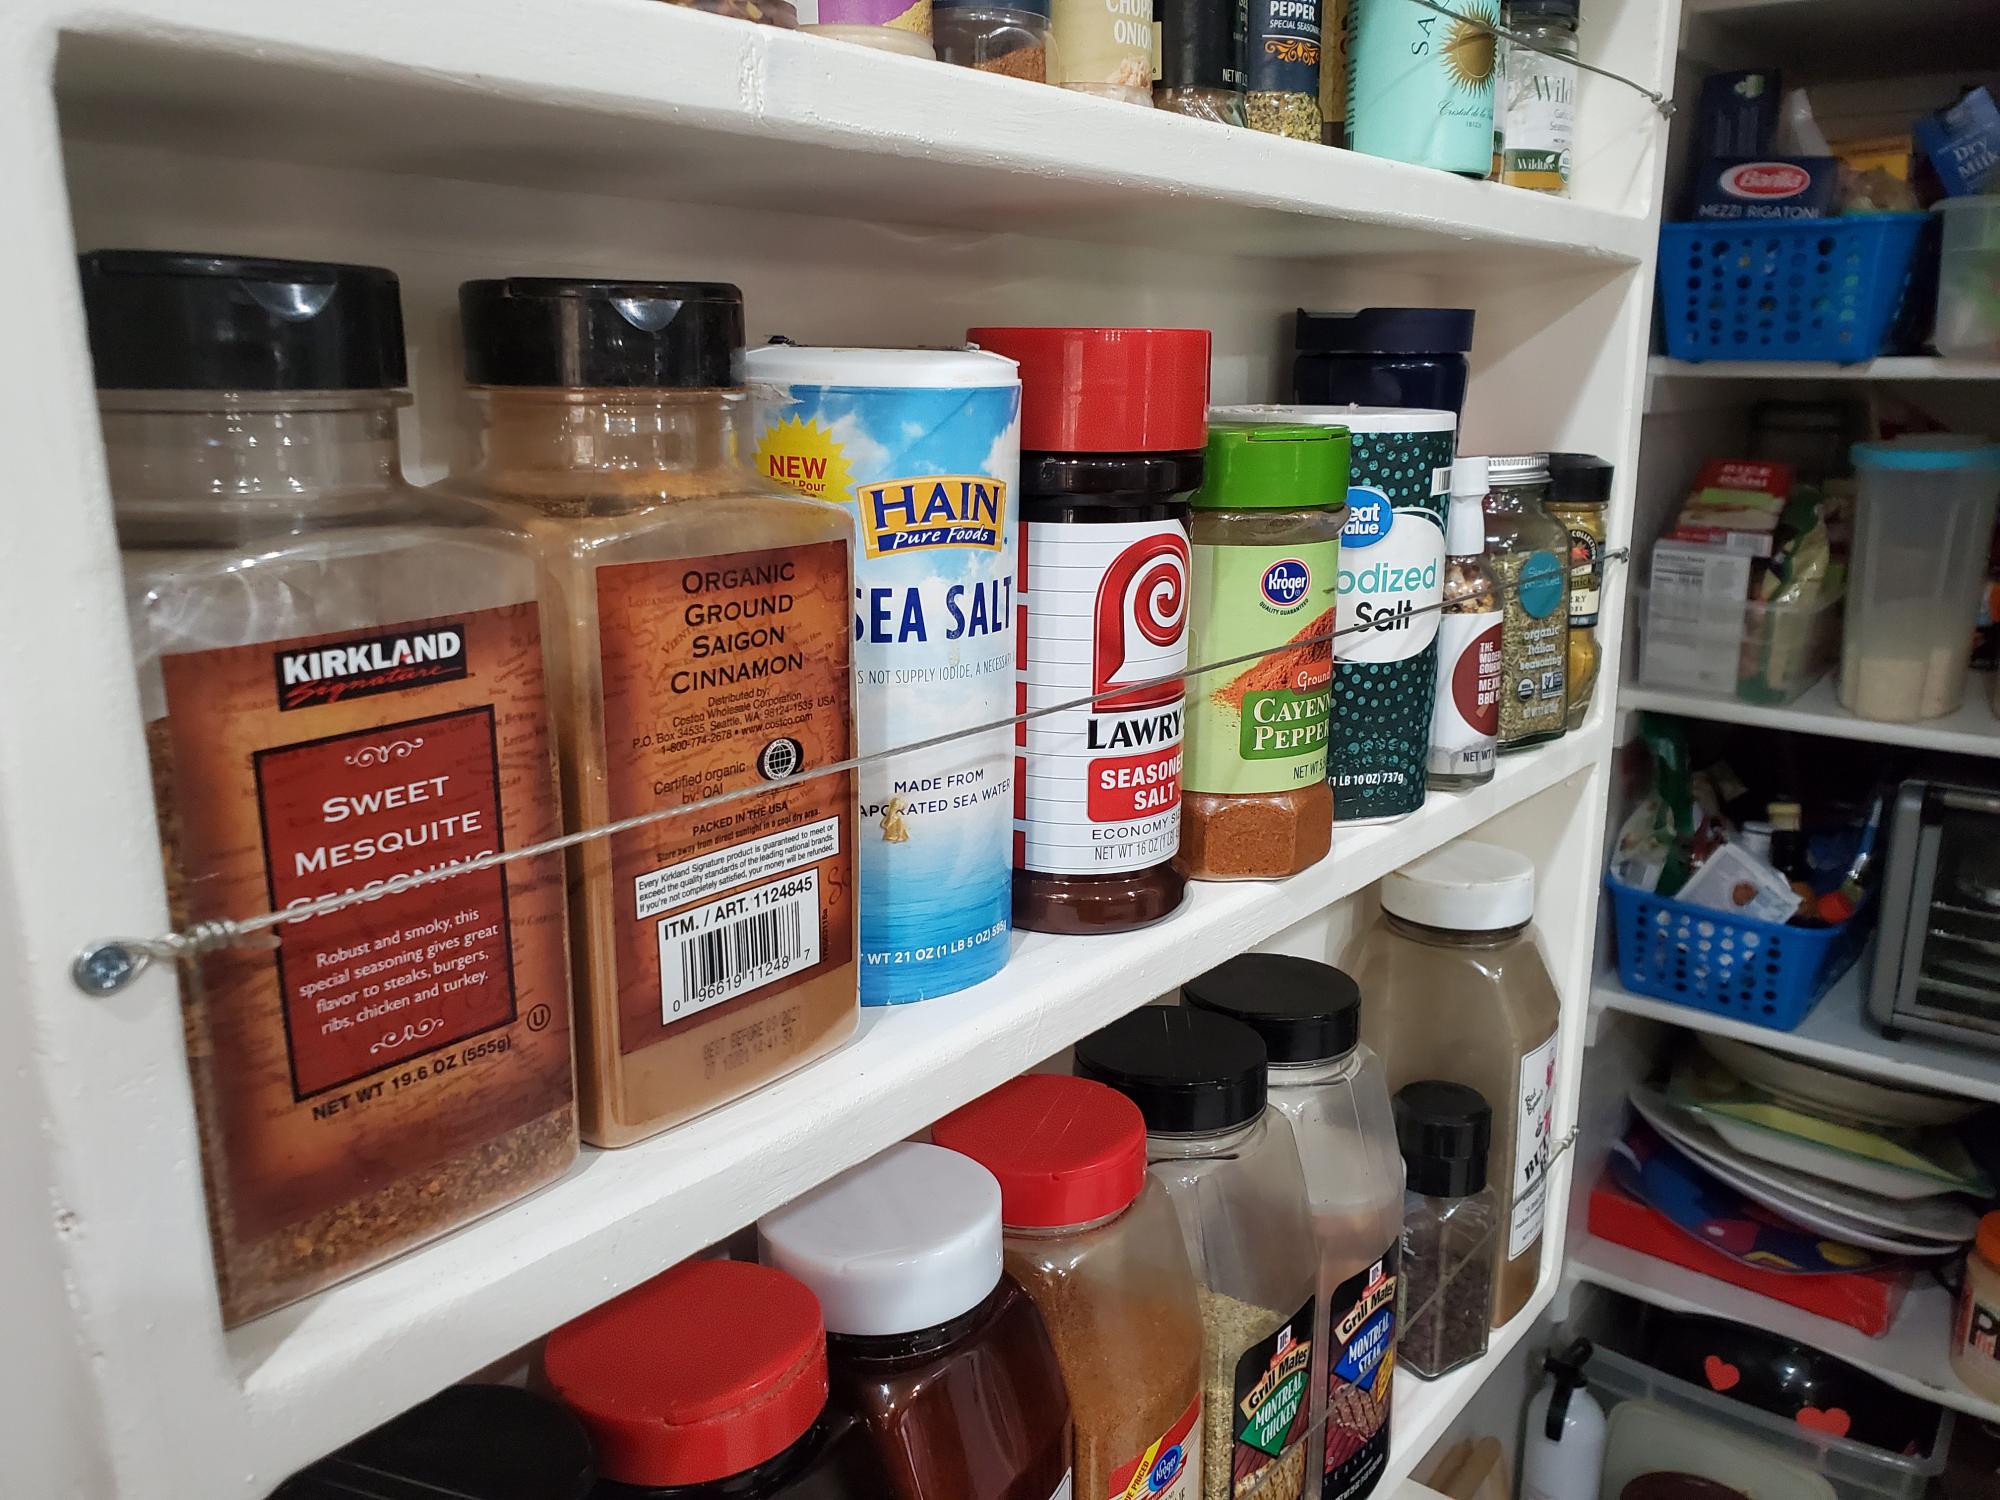
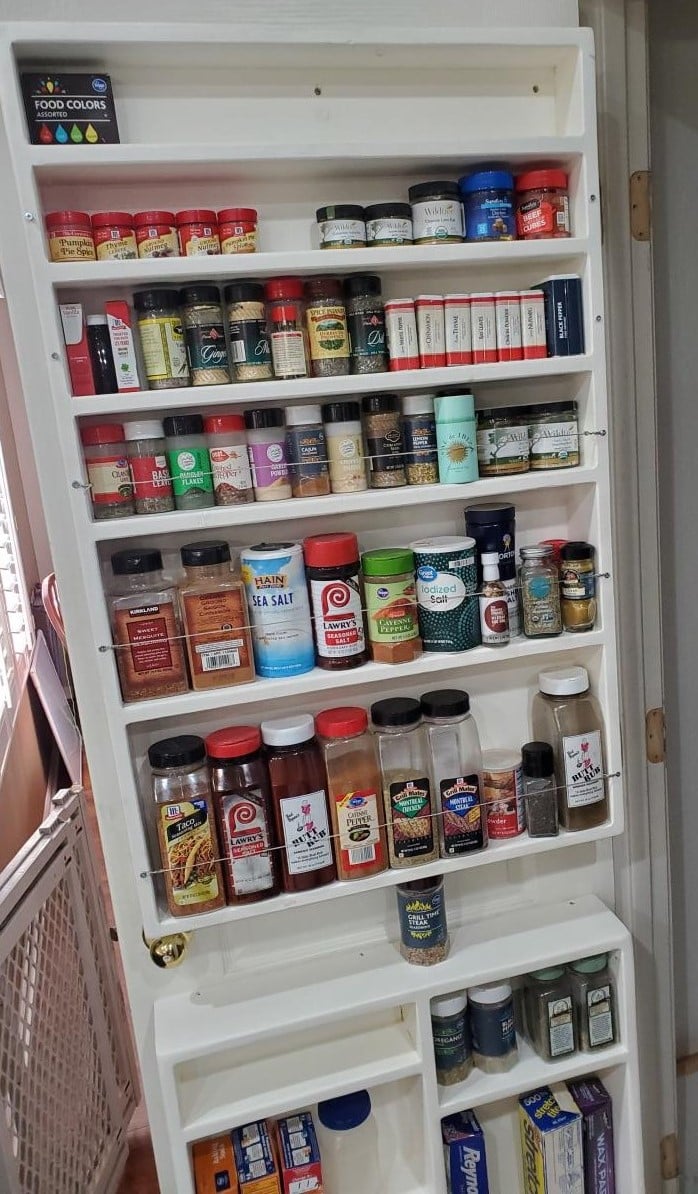
First I had to flip the pantry door from opening into my small pantry to opening out. Doing this allowed me to utilize back of the door for this spice rack. Frees up quite a bit of space in our cabinets, drawers and pantry for other items. Substituted braided picture frame wire for the wood dowels; still keeps all items secure on the shelves but also allows for more flexibility when dealing with canister sizes that are very close to the amount of space in between shelves. Already had the paint from doing some baseboards as well as quarter inch ply. So, final cost was for 1x4's and 1x6's coming out to about $30

Built from Plan(s)
Estimated Cost
$30.00.
Estimated Time Investment
Weekend Project (10-20 Hours)
Finish Used
Equal parts Behr Premium Plus Semi-gloss interior and Minwax Polycrylic Clear Satin
Recommended Skill Level
Beginner

Reclaimed wood console table

Submitted by RedRoof on Tue, 09/30/2014 - 10:28

I was originally going to build this console table for our new bathroom vanity. It ended up being too long for the space, so now it is used for storage and to fill empty space in the master bath. (The floor is not level, the table is sitting on blocks on one end.) We love this table! It was easy to make and it is very sturdy and is quite beautiful with our old barn lumber on the drawers. I will probably build another just like it for our laundry room! 

This was my first time installing slides! It is embarrassing to admit how many hours it took to get those to slide smoothly! But they are WELL worth the effort! 

I definitely recommend painting the 1x4 slats BEFORE screwing them to the 2x2 stretchers on the bottom grate. I made a similar grate for another project and forgot to paint them before attaching. BIG MISTAKE. I had to take it all apart to paint it.

Thank you for the plans, I loved working on this table!!

Built from Plan(s)
Estimated Cost
I already had all of the 2x2s and the 1-by's, paint, and some of the knobs. We had to buy the plywoods, stain, and slides and some knobs which was about $100. Now I have leftovers of the wood, stain and knobs to make another one, so it ended up being pretty cheap!
Estimated Time Investment
Week Long Project (20 Hours or More)
Finish Used
For the paint, I used a light cream we already had here. For the stains, I used from left to right: Rustoleum Dark Walnut (several layers to make it darker), Minwax Provincial, Rustoleum Willow, Rustoleum Wheat, Rustoleum American Walnut. Top drawer is stained with Wheat, bottom with American Walnut. Whole thing sealed with water-based polycrylic.
Recommended Skill Level
Beginner

Chicken Coop

Submitted by Wraight on Fri, 10/30/2020 - 10:49

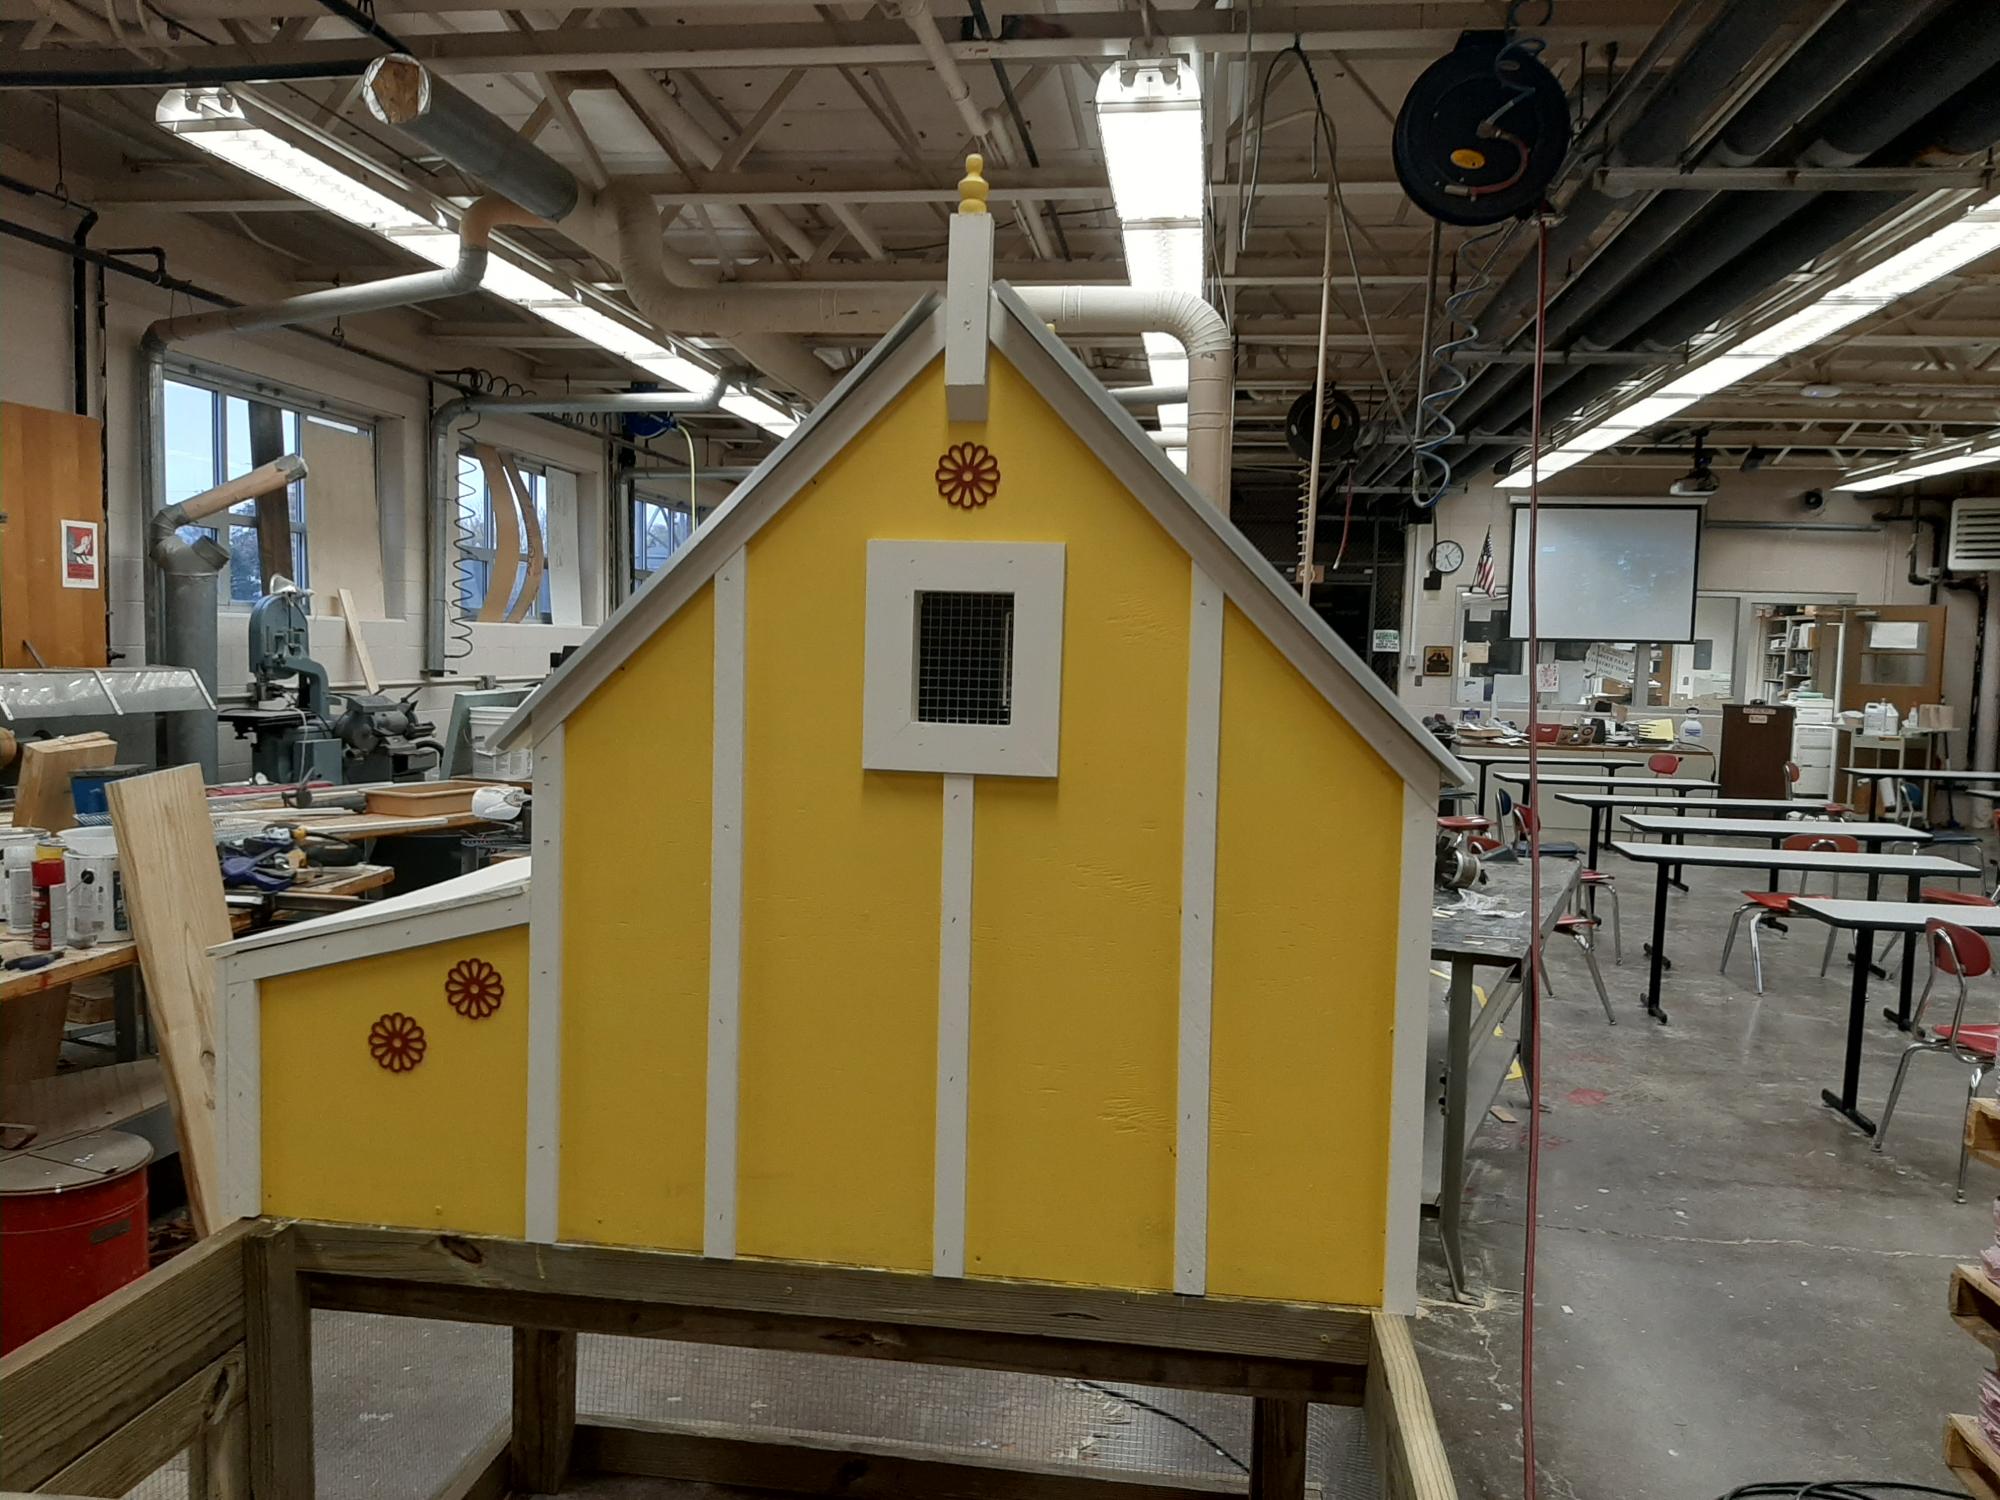
I teach construction at Plymouth High School. This was our first project of the year. The students did the majority of the work with my guidance. I had started the year with the intent to build sheds, but that requires groups of 4. The chicken coop allowed us to work with groups of 2. We only have 50 minutes each period to work, so it took us about 5 weeks to complete spread over 4 classes. Some of the wood was scrap that we had on hand. We cut a lot of it down to size from 2x10s. The roof was scrap metal roofing that we found in a recycling container. There were no trim pieces so we had to be creative and make our own ridge cap. I decided we would add the finials to give it more visual appeal. We took some liberties with decorating because I like to add extra flair - and I have access to a laser and CNC router. We used the plans that Ana developed for Lady Goats. https://www.ana-white.com/woodworking-projects/small-chicken-coop-plant…

Estimated Cost
$300
Estimated Time Investment
Week Long Project (20 Hours or More)
Finish Used
Exterior grade paint
Recommended Skill Level
Intermediate

Comments

Barn Door Bookcase

Submitted by Anonymous (not verified) on Mon, 11/02/2020 - 06:29

This project cost us about $430, but we modified Ana's plans, a Lot! We made it deeper, narrower, and taller to fit out space. The best part of this project was creating a hidden litter box area in the bottom shelf. We cut a hole through the bottom center board, and put the litter on the side with the door so it was hidden yet easy to clean!

Built from Plan(s)
Estimated Cost
430
Finish Used
tinsmith gray
Recommended Skill Level
Advanced

Comments

18" Doll Wardrobe

Submitted by Anonymous (not verified) on Sat, 02/18/2017 - 07:33

I used the 18" Doll Wardobe plans! I decided not to do the Murphy bed. I loved how it turned out and the plan was easy to follow! Looking forward to more DIY projects

Recommended Skill Level
Beginner

Kitchen cabinets

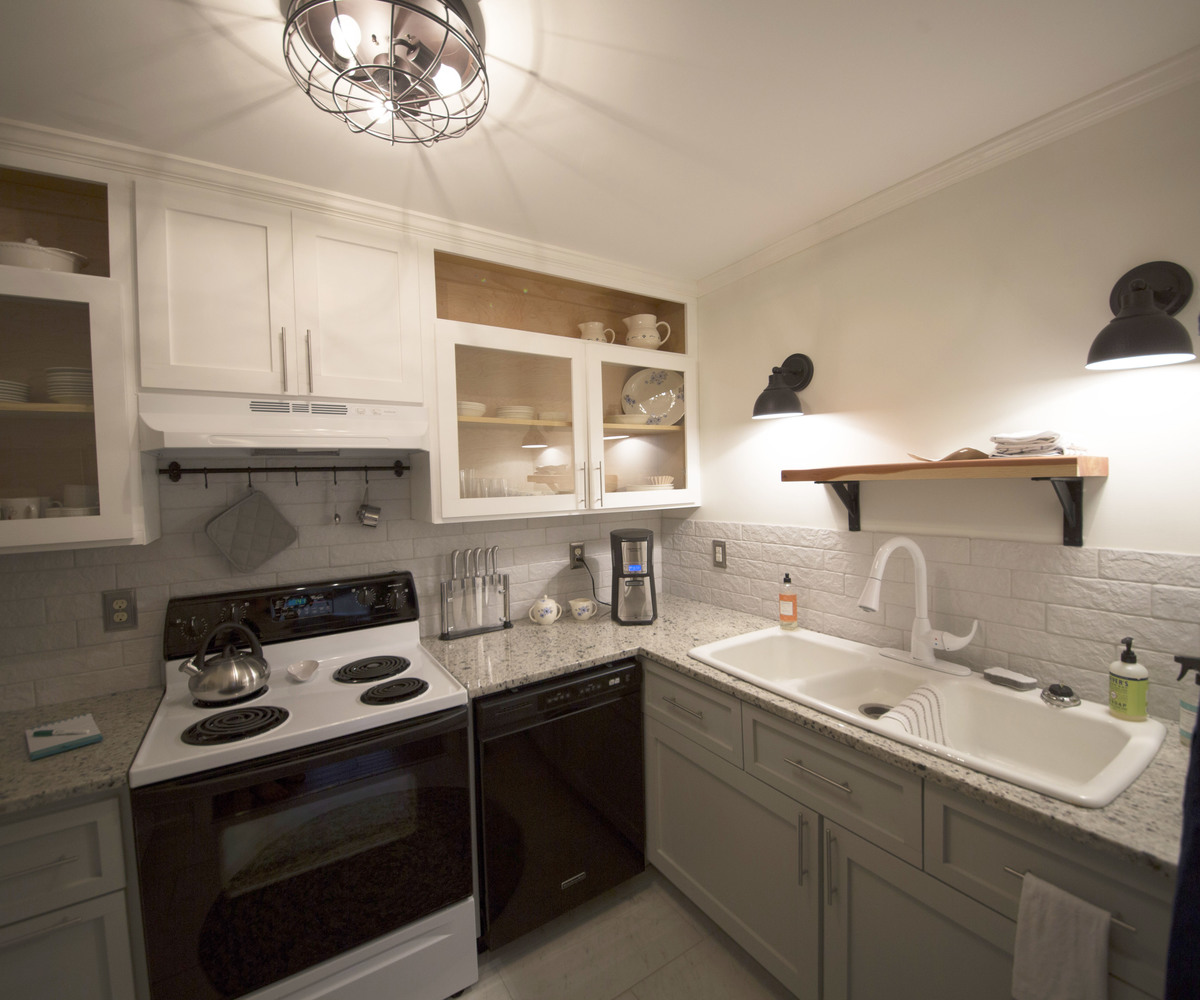
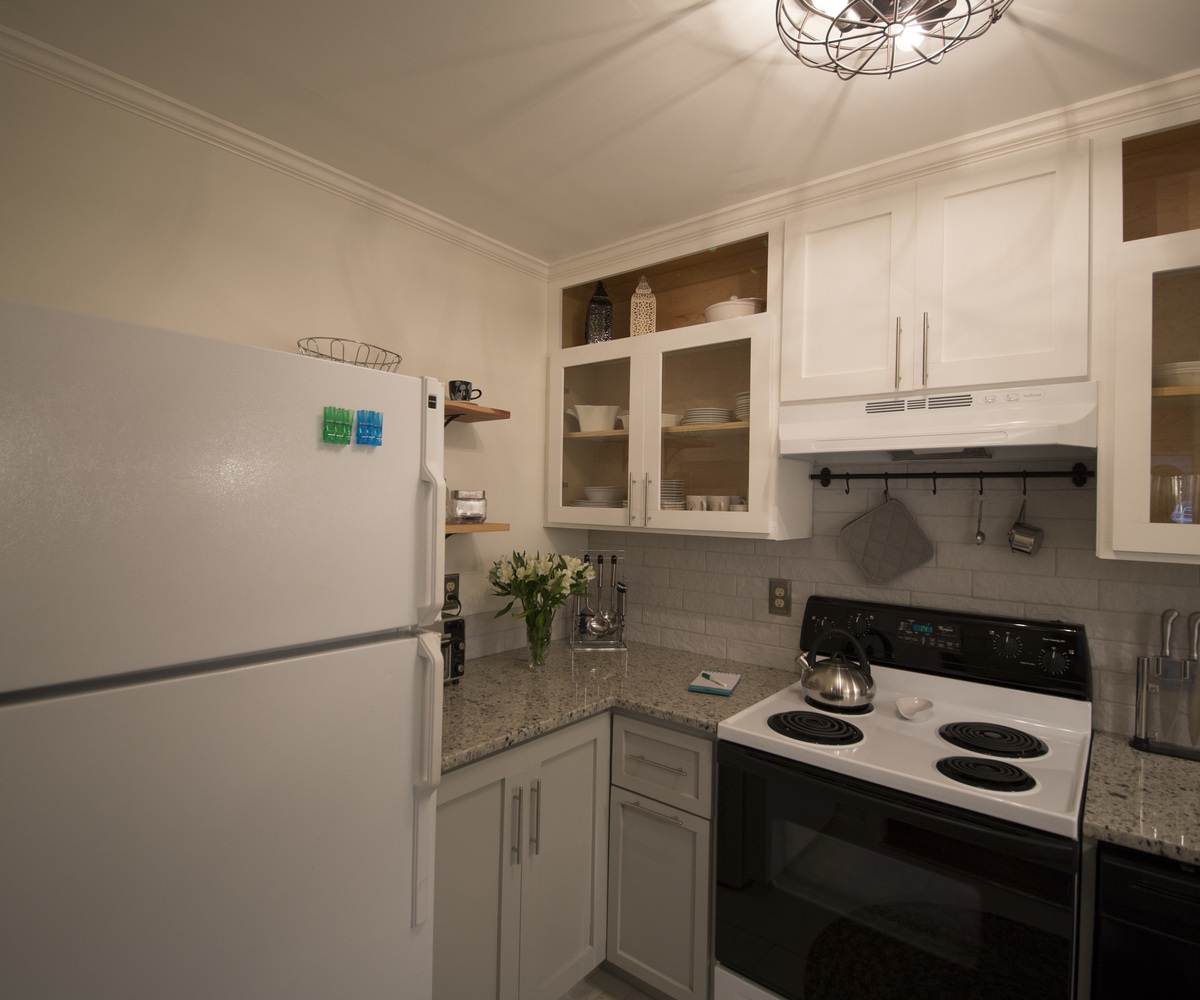
I took an old storage closet and turned it into a kitchen so that we could rent out our downstairs using Ana's basic cabinet plans altering them to fit my space. I really liked that she used 2 x 6's for the base of the cabinets and it worked out perfectly for the toe kick. 

Estimated Cost
$300 for materials and paint
Estimated Time Investment
Week Long Project (20 Hours or More)
Finish Used
exterior primed with zinsser oil based primer, top coat is oil infused furniture paint white on top, medium gray on the bottom. The inside of cabinet is clear shellac + water based polyurethane.
Recommended Skill Level
Intermediate

Console Table

Submitted by mrich_d60 on Sat, 12/12/2020 - 06:42

This was my first indoor woodworking project, where it mattered if the corners were 90 degrees and the colour matched and the wood was not warped.
Even when the lumber yard gave me the wrong width of board, did all the cuts and I didn't notice until I was home, laying out my pieces and measuring everything, I will still able to complete it.
I went with the 10" (9 3/4") wide top instead of the 12" (11 3/4") rather than go back to the lumber yard and have it recut. I was anxious to make my project and it was a hassle to drive that distance. it didn't have the 1 1/2" overhang that the larger width would have had but it fit in my tiny space better.
The next time I visited that lumber yard for more wood, I got my money back and I learned a valuable lesson - just because the lumber yard staff are picking up the wood for you, you need to read and check. I didn't go closer to see it because of Covid-19 restrictions but next time I will ask to measure it and check it before I bring it home. I've learned to carry my tape measure with me, just in case!

Estimated Cost
$50
Estimated Time Investment
Afternoon Project (3-6 Hours)
Finish Used
Varathane ultimate one coat stain and Varathane triple thick clear finish. Used a cloth to apply and brush in the corners where the cloth could not reach easily. Applied 2 coats with light sanding in between. I used a dark stain because other furniture in the room is stained a darker colour. Due to the pine's absorption, it is a little lighter, as I wanted.
Recommended Skill Level
Beginner

Round X Base Pedestal Dining Table

Submitted by bRick on Thu, 12/18/2014 - 18:05

We wanted a round table that would seat a full Monopoly game. To do this we needed about a 5' diameter tabletop.  The base was made consistent with the plans.  

A few tips on the base:

  1. Get your angles as close to 45° as you can.  Otherwise, there will be much sanding and puttying in your future.  
  2. If you want to hide your lag screw like I did, I used a spade bit to recess an area for the screw head.  Then I glued in a plug made from dowel and sanded flush.  

If you want to make a round tabletop, here is what I did (there may be better methods).  Keep in mind this was for a ~60" diameter table, I was assuming that the perimeter arc pieces would be about 4.5" wide and that I would cut the inner circle at a 50" diameter.

  1. Picture 1 - I built two 5' slabs of (7) 2x4s pocket-holed together.  
  2. Picture 2 - Then I cut two pieces from each slab that would later make up the 90° "pie slice" pieces.  Make sure to remove the screws that will be in the way your saw blade. Also, you just have to concern yourself with the angle since the radius will be dealt with later.  There is a lot of wood waste with this method, but I think it avoided headaches. 
  3. Picture 3 - I assembled (screwed and glued) the "pie pieces"to the cross pieces. The length of the cross pieces don't matter much since they will also be to cut to a specified radius.  Since I would be cutting a 50" diameter circle, the large cross piece had to be at least 50" and the two small pieces had to be at least 22.25" (subtracting the 2x6 width).  
    1. Picture 3 - I mounted my router to a piece of MDF and drilled a hole at the necessary distance to cut a 50" diameter circle. This distance is 25" + half of the bit diameter.  Since I used a 1/2" straight bit, my point was 25.25" from the center of the router bit.  I screwed this jig to the center of the tabletop assembly so the router could pivot and cut a circle.  As for logistics, I rested this assembly on some scrap wood and kneeled on the tabletop as I was cutting it.  It took a large number of passes with the router since I was cutting through 1.5" of material. 
  4. Picture 4 - The perimeter pieces required some time and geometry. I found that I would need (8) 23" 2x8 pieces (the 23" is approximate because I was a little off for some reason, though I can't recall why).  From those pieces, I used the same router jig to cut the perimeter arc pieces. You will need to make two new radius holes in teh jig to accomplish what you need.  To cut the inner arc you need a hole set at 25" - half of the bit diameter (24.75" for me).  To cut the outer arc, I used a hole that was 29 5/8" from the center of the router bit.  You may need to do some fine tuning to these pieces to get them to fit correctly, but for me it pretty minor.  I trimmed a couple pieces with a miter saw but that was it. 
  5. The rest is screws and glue. 
Estimated Time Investment
Week Long Project (20 Hours or More)
Finish Used
Sanded using 60, then 120 grit. The stain was Rust-Oleum's Ultimate Wood Stain in Dark Walnut. The top coat was General Finishes water-based polyurethane in flat. One coat of stain, six coats of poly, while sanding with grade #0000 steel wool after every other coat.
Recommended Skill Level
Intermediate

Comments

ILoveDIYing

Sun, 03/08/2015 - 10:23

Hi, your table is beautiful! I was wondering if you had to increase the size of your base since your table top is 60". I'm going to be building a round one the same size and wanted to make sure it would be stable at the current size.

bRick

Fri, 03/13/2015 - 20:36

The only modification I made to the base was the to the lengths of the 2x4 pieces that make up the "X" that sits between the base and the tabletop. In the plans, this "X" is made of (1) 32" piece and (2) 14.5" pieces. I believe I increased these to 36" and 16.5", respectively. Truthfully, I don't think this modification added much value.

I did some calculations and at a 60" diameter, it would've taken over 100 lbs placed at the edge of the table. This was also a function of the weight of the table. The heavier the table, the more stable it will be.

Momma Gladden

Sun, 04/05/2015 - 19:21

I want to put a concrete top on this base and increase the diameter to 72". Would I need to increase the size of the base to accommodate the larger and heavier top? Thank you

bRick

Tue, 04/14/2015 - 20:20

It all depends on how much your tabletop weighs. I'm going to take a wild guess that your tabletop will weigh around 500 lbs (~28 sq. ft. at ~18 lbs/sq. ft.). For reference, I think my wood top weighed about 80 lbs. I will also assume the wood base weighs 50 lbs. Using these assumptions, the result is a worst-case scenario (weight placed at edge of table, tipping between two table legs) of tipping at 300 lbs. The lighter the tabletop, the less stable it will be. Since your concrete table is likely to weigh a lot more than my wood top, it will be a lot more stable.

That addresses the design and assumes none of the wood or connections (screws) fail under the increased load (weight of concrete). I can't speak very confident to this aspect. Though I can venture a guess. I will guess that it will be stable under no load, but there will increased loads when under uneven stress (i.e. somebody leaning on one side of the table). Honestly, I don't know how valuable any further speculation would be.

X3cougsp

Tue, 09/06/2016 - 08:14

Can the pedestal hold a 66"- 72" top?  I've been searching for a table that seats 6 comfortably with an occasional squeeze for 8.  I think a 60" would work but my husband thinks 72".  We are struggling to find exactly what we want and are now investigating DIYs .  This is a beautiful table!!  

In reply to by X3cougsp

bRick

Wed, 10/05/2016 - 17:16

This is a conversation that we had in our house as well. My personal opinion is that 60" is big enough for 6 people and good enough for 8 people. What we did to "dry run" it was I cut a board to 72" and set it up at table height and we sat at oppposite ends of the board. I asked my wife if it was too big and we both agreed that not only would really shrink the room, but it also was too big for regular use. We currently have 6 chairs around this on a regular basis. As for the stability of the table itself, you may want to increase the width of the base. I say this because 74 lbs at the edge of the table (in between legs) will cause the table to tip, which is probably a force that will be exceeded by someone leaning on it. 

bRick

Thu, 12/22/2016 - 20:58

I used the jig that I made the large circle but made a couple new radii. The inner edge was the round piece radius minus half of the bit diameter. The other radius is as wide as you want to make it. 


I fixed this jig to my work bench and set it up so that I would be cutting each piece identically. I have a picture that I'll add that shows it better than I can explain it. 

In reply to by Omally83

bRick

Sat, 01/21/2017 - 07:46

I believe my approach was that I cut the 2x8s to the length that would produce the arc length I was looking for. So basically the outer edge was going to (if my jig did its job) be exactly as long as I needed it to be. With that in mind, I used a piece of yarn tied to the pivot point on the jig that I was using and used that to tell me where I needed to make the cut. 

Otherwise, I could've used trig to figure it out but I was all angled out by that point. With 8 border pieces they should each cover 45 degrees (360/8) and the other two angles should be equal ((180 - 45))/2=67.5) resulting in a 67.5 degree angle. The trouble in using that method is it doesn't account for all the little screw-ups that may have thrown off certain measurements. Plus, the yarn-thing was pretty easy. 

SueInVA

Sat, 01/23/2021 - 14:17

We made the table base for a 60" solid walnut top (used the wider measurements). When people get up from the table, my husband thinks the base twists when they push off. Has anyone else noticed this or have a suggestion on how to make the table not twist? Thanks, Sue

Poolside Towel Cabinet from Benchmark Cabinet Plan

Submitted by Anonymous (not verified) on Thu, 03/23/2017 - 11:21

My father and I made this awesome poolside towel cabinet using the Benchmark Cabinet plans. A super easy 1 day build and it looks amazing on the patio. Bring on the pool weather! 

Estimated Cost
$60
Estimated Time Investment
Day Project (6-9 Hours)
Finish Used
Chalk paint/Poly topcoat
Recommended Skill Level
Beginner

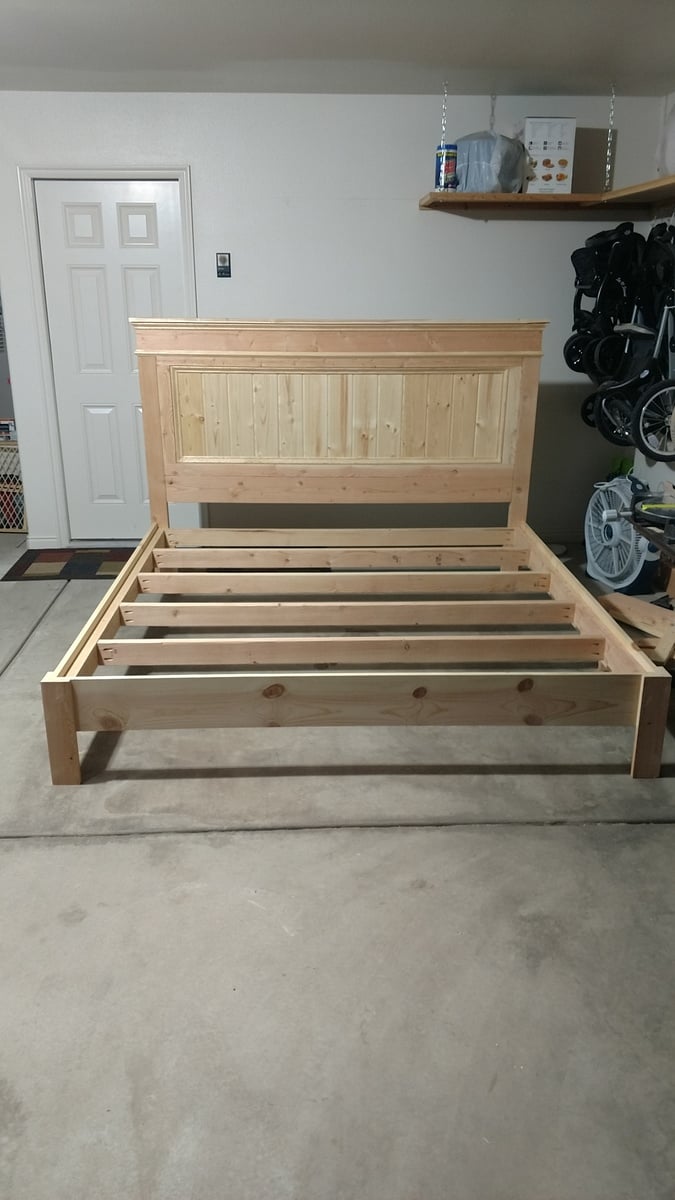
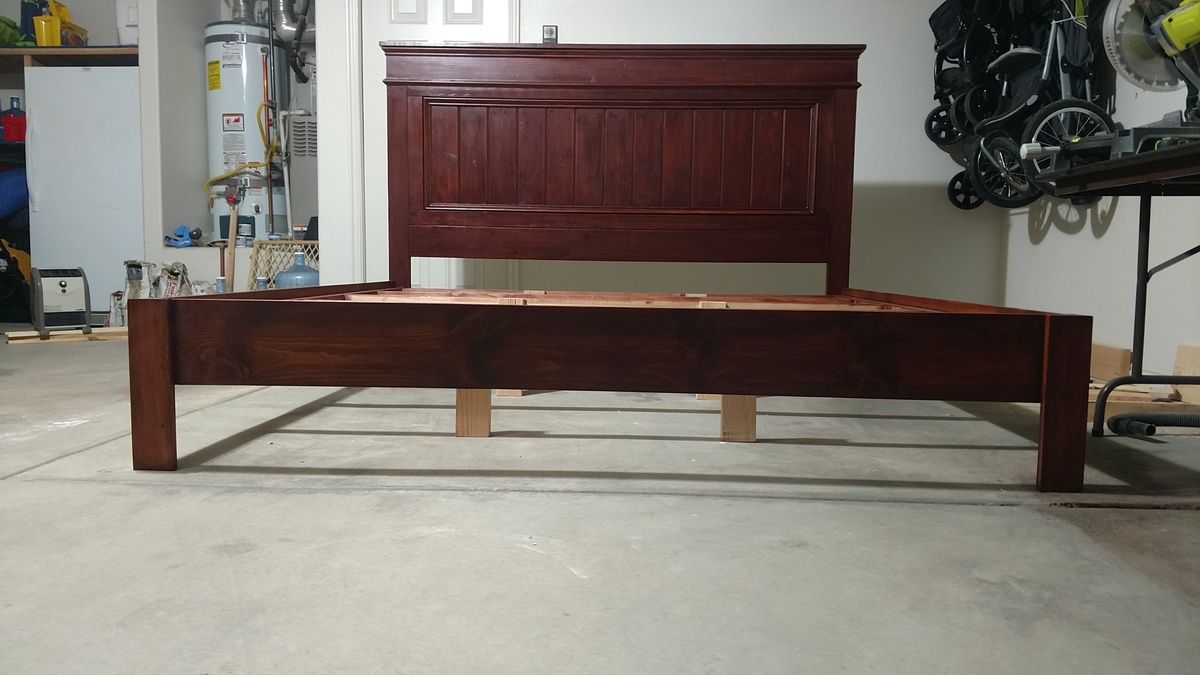
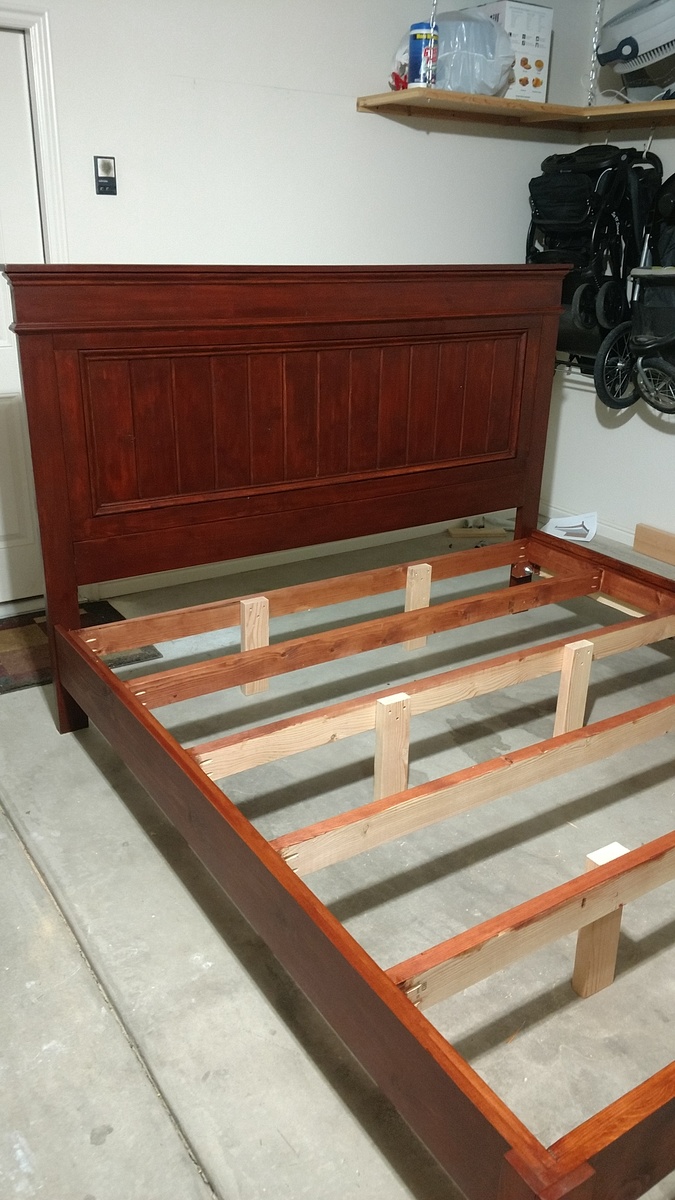
King Bed Frame

Submitted by Anonymous (not verified) on Tue, 04/18/2017 - 16:39

This was a fun project. Easy instructions great piece of furniture. It is very sturdy. I'm a beginner at DIY wood projects so this was a rewarding project.

Built from Plan(s)
Estimated Cost
$200
Estimated Time Investment
Weekend Project (10-20 Hours)
Finish Used
Minwax red Chestnut and American Chestnut. Treat the American Chestnut more like paint than stain it dries quickly.
Recommended Skill Level
Beginner

DIY Board Game Cabinet

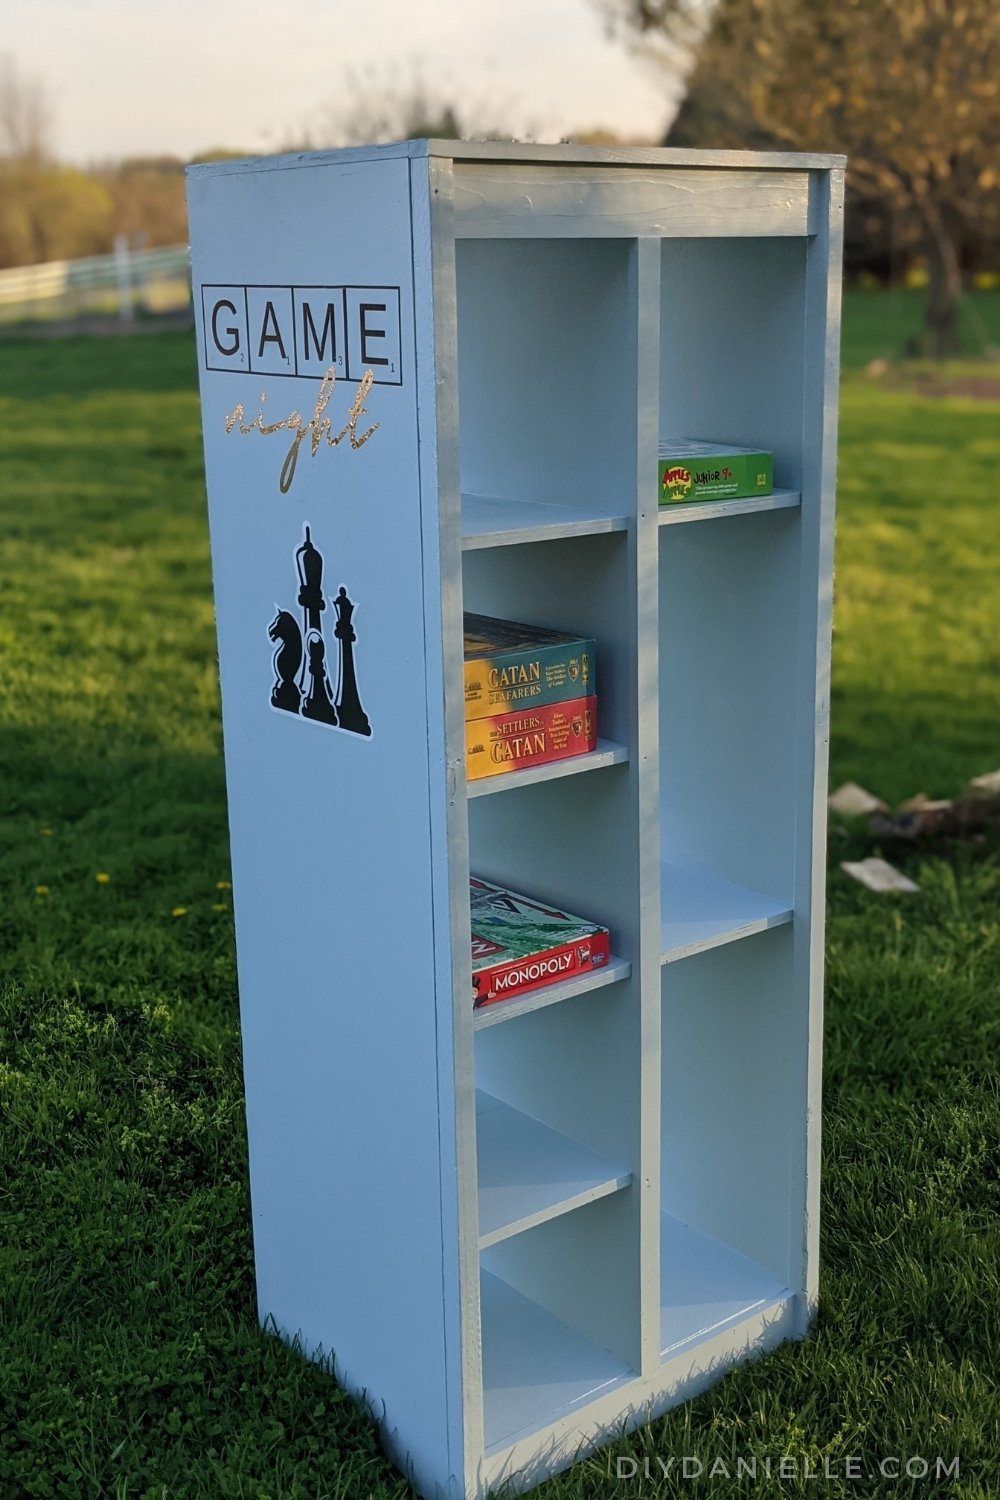
We tweaked the Ana White Barn Door bookcase plan for a bathroom linen closet, made it a hair too wide (it was soooo close), and decided to use this for board games instead. It's PERFECT for storing long games like Monopoly, as well as puzzles, cards, and more. I decorated it with vinyl cut with my Cricut to give it that "game night" feel.

The project ended up being fairly time consuming because painting the shelf took a lot of time... if I did it again, I'd probably use a paint sprayer. I just don't have a great space for spraying furniture builds.

Built from Plan(s)
Estimated Time Investment
Weekend Project (10-20 Hours)

Comments

Hugertown

Thu, 10/24/2024 - 21:06

While exploring online casino reviews, I came across an excellent breakdown of review. The play Hippo Casino review provides a thorough look into everything the casino offers, from its game selection and bonuses to the overall user experience. If you're curious about Lucky Hippo Casino, this review is a great place to get all the details you need to decide if it's the right fit for your gaming preferences. For anyone looking to learn more about this casino, it's definitely worth checking out!

BeckerHugues

Wed, 11/06/2024 - 04:25

Que projeto incrível! A estante ficou perfeita para armazenar jogos de tabuleiro e parece que você conseguiu um visual super divertido com os detalhes em vinil. Entendo totalmente sobre a pintura – um pulverizador de tinta facilita muito o trabalho em projetos grandes.

Por falar em diversão, se você está procurando entretenimento online, recomendo conferir cassinos online com dinheiro real no GambleZoid. Uma ótima forma de aproveitar momentos de lazer com segurança!