Community Brag Posts
Hall-End Photo Ledges
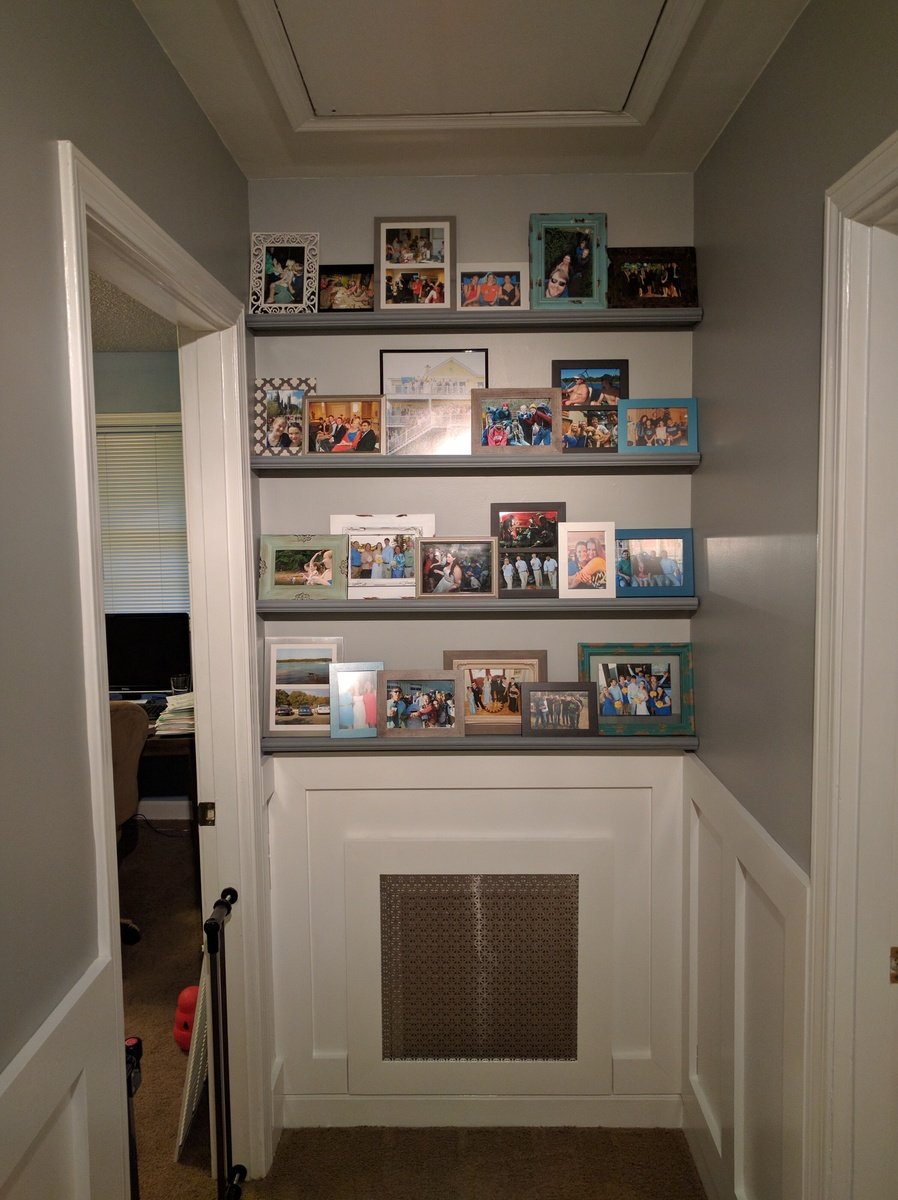
$10 Ledges made with 1x3s instead of 1x4s and fronted with cute trim pieces I found at Orange store. Finished with Behr Marque sample paint that didn't make the cut for the hallway walls (color: Gotham Gray).
Estimated Cost
Select Pine Lumber = $40
Pine Trim = $17
Behr Marque sample = $4
Total = $61
Pine Trim = $17
Behr Marque sample = $4
Total = $61
Estimated Time Investment
Afternoon Project (3-6 Hours)
Finish Used
Behr Marque - Matte - Gotham Gray
Recommended Skill Level
Beginner
Comments

Sat, 09/24/2016 - 10:33
Love this! The trim really
Love this! The trim really makes the shelves beautiful!
6' Square Sandbox

I've been wanting to buy or make a sandbox for my son for a couple of years now. Since seeing this on Ana White I knew I had to make it. My son is 4 yo and I didn't think the 4' square sandbox would be big enough for him, so I made it bigger. Ours is 6' square. Materials: 4@1x8x6' 12@1x6x6' 2x4 - used leftovers from another project 8 hinges 4 handles decking screws Cut lengths: 2@1x8 cut to 71.5 (long sides of the box) 2@1x8 cut to 70.5 (short sides of the box) did not cut the 1x6 boards (top planks) - actually designed the other boards to fit their length to prevent cutting (saving time) (note that original plan uses 1x4 planks - I used 1x6s so I could use the same number of planks but cover a larger area) 4@2x4 cut to 11.5 (arm rests) 4@2x4 cut to 18.5 (back supports) followed instructions for assembly otherwise. At my husbands suggestion we put the handles on the sides and can easily open from either side - prevents having to lean over to the middle to open (back saver) I finished the project in 4 hours including clean up and a couple of small breaks. This is my first Ana White project. It was a lot of fun to build and I hope my son will enjoy it for years to come!

Built from Plan(s)
Estimated Cost
$190
Estimated Time Investment
Day Project (6-9 Hours)
Finish Used
Sand and stain with sealer included
Recommended Skill Level
Beginner
Comments
Sat, 09/01/2012 - 20:59
This is perfect!
Wow, this is just what I need! I've been wanting to make a sandbox for under the playhouse but the other plan was too small. This would be great for the little guys. Thanks!
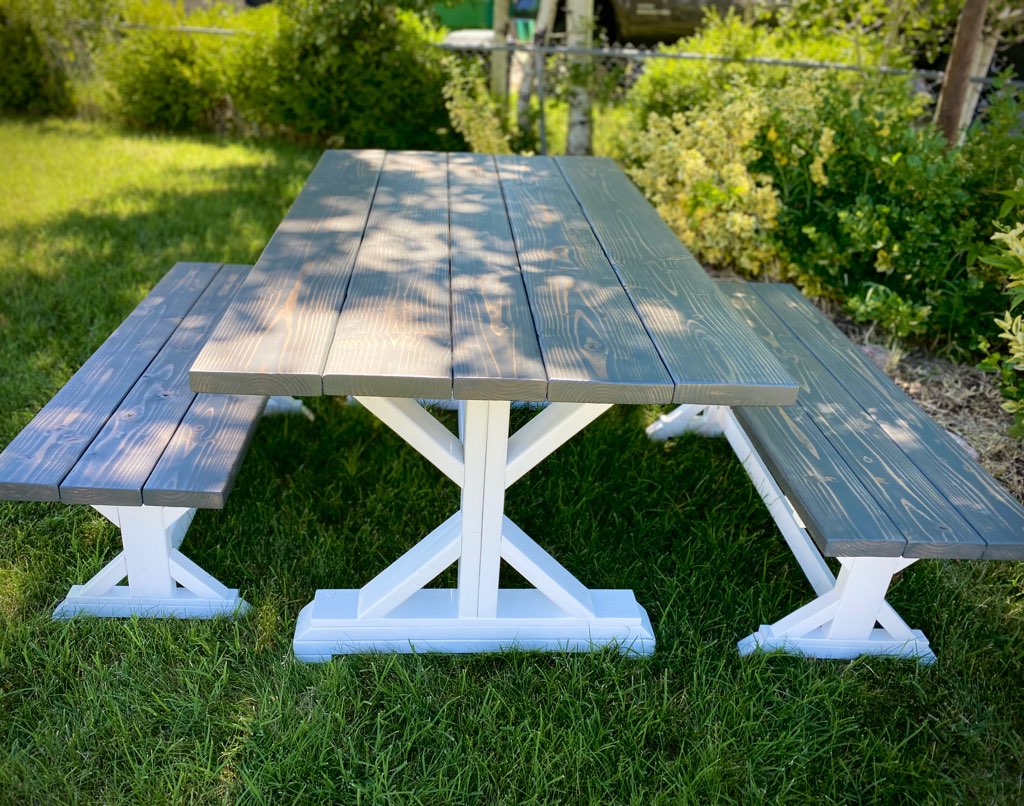
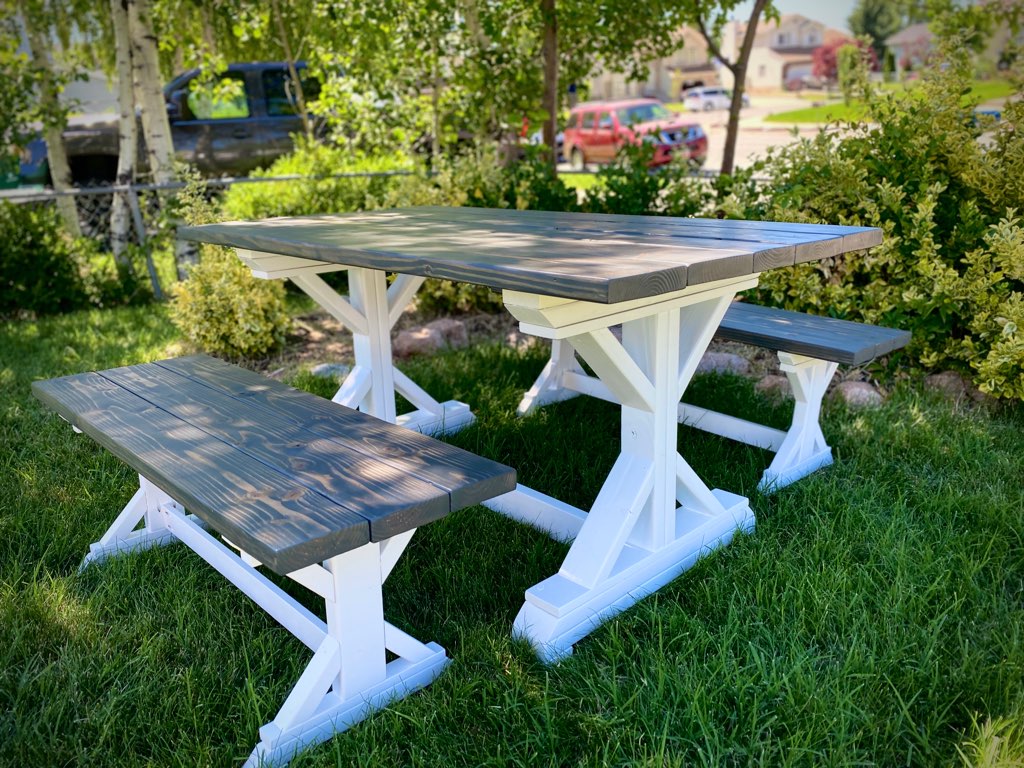
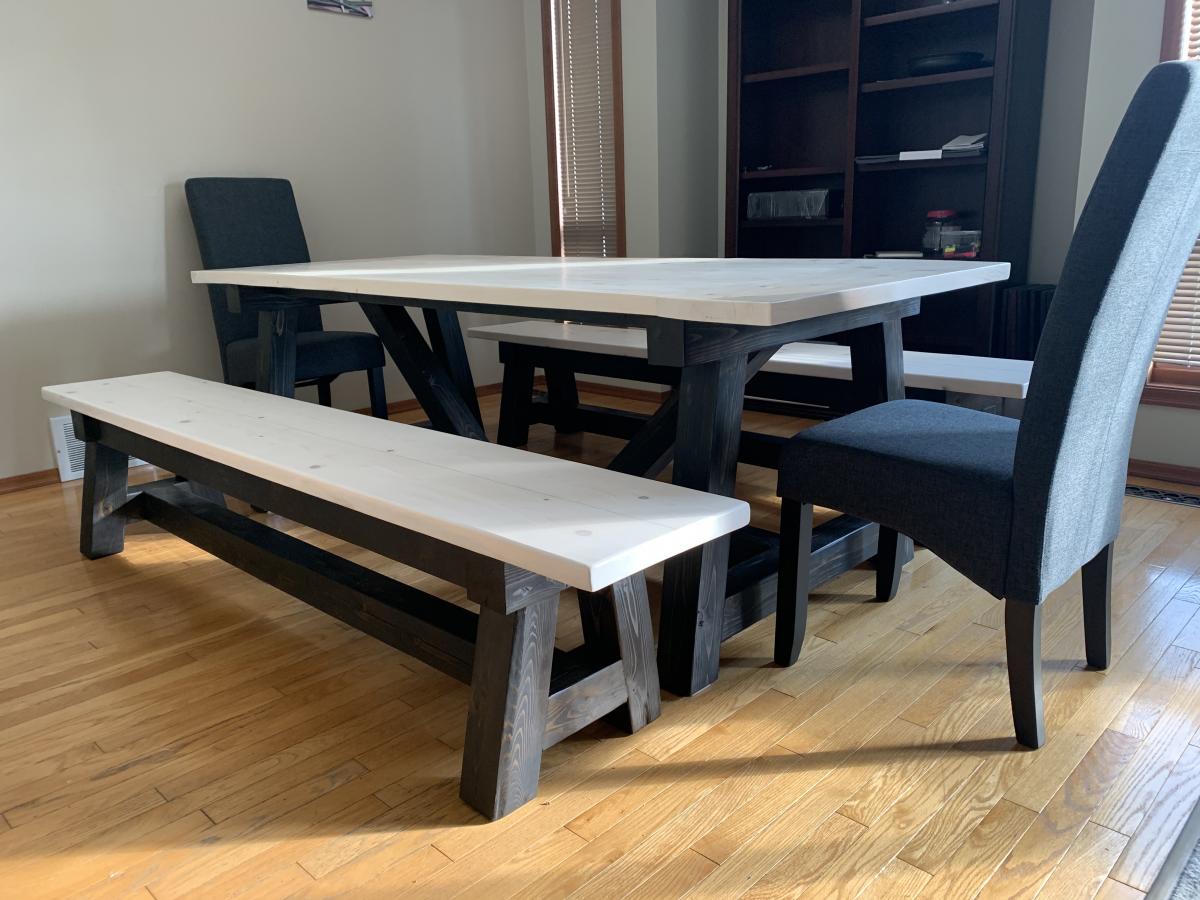
Fancy X Farmhouse Table and Benches
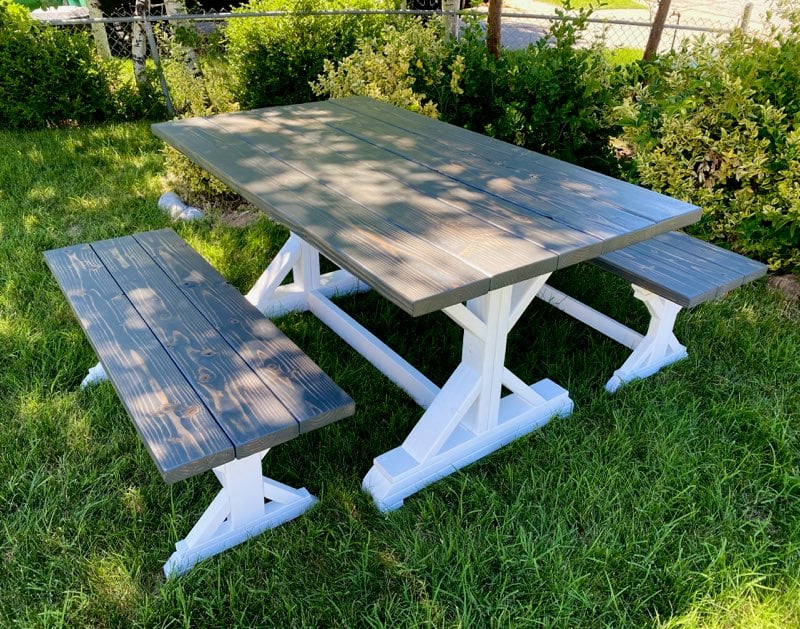
Modified the size of the Fancy X Farmhouse table, down to 34-1/2" x 60", and the benches to fit fully under the table.
The only thing I wish I could change with these plans is how you attach the tabletop. Because you are stacking wood for the base, and there are no aprons, you have to attach the top by going through the table top. But wood filler and stain hides them well enough, but I'm never the biggest fan of going from the top. I prefer to hide the screws on the underside.
Other than that, I love building this table.
Built from Plan(s)
Finish Used
Varathane Carbon Gray Stain for the tops
Glidden Ultra Bright White for the bases
Glidden Ultra Bright White for the bases
Recommended Skill Level
Intermediate
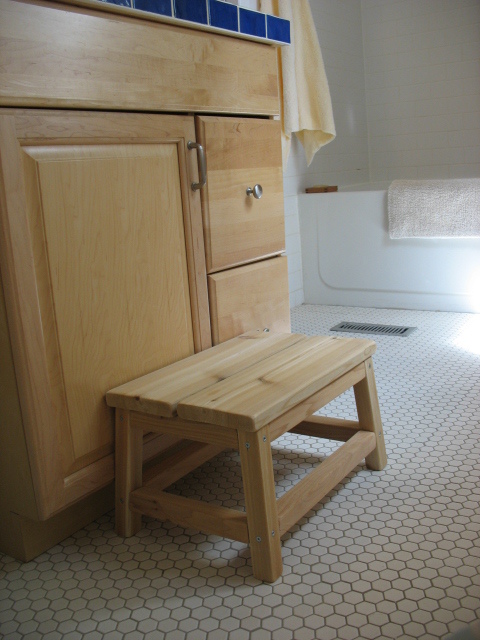
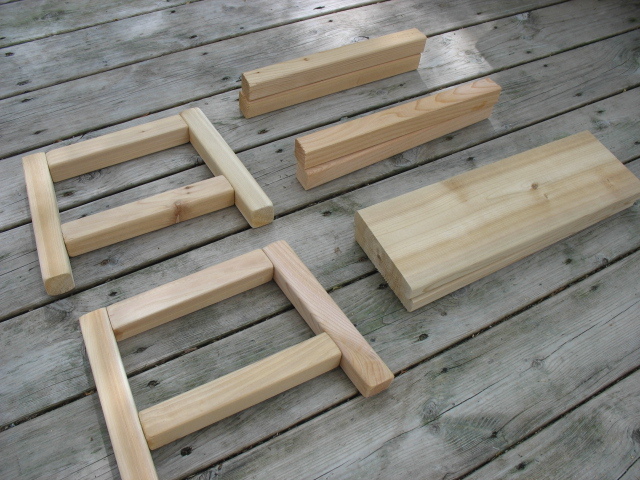
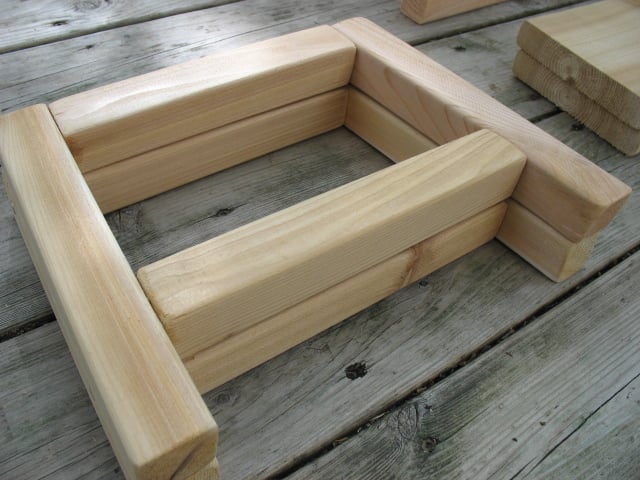
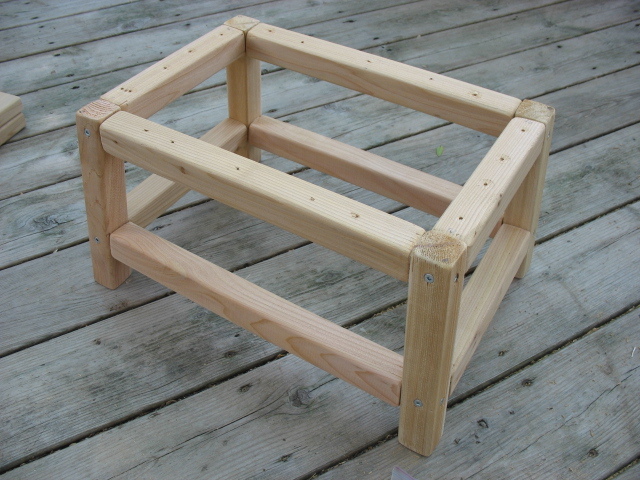
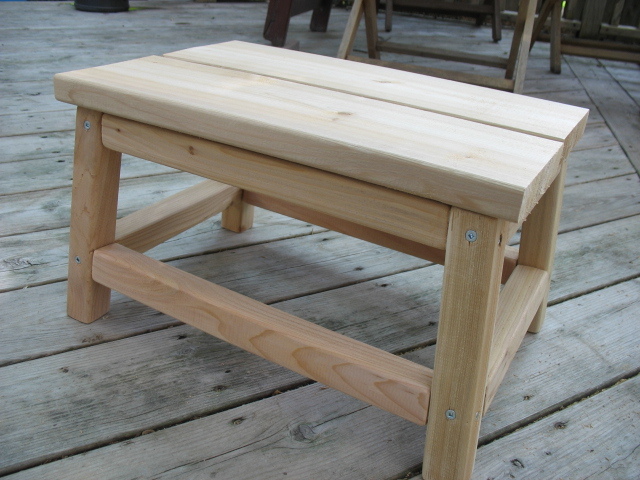
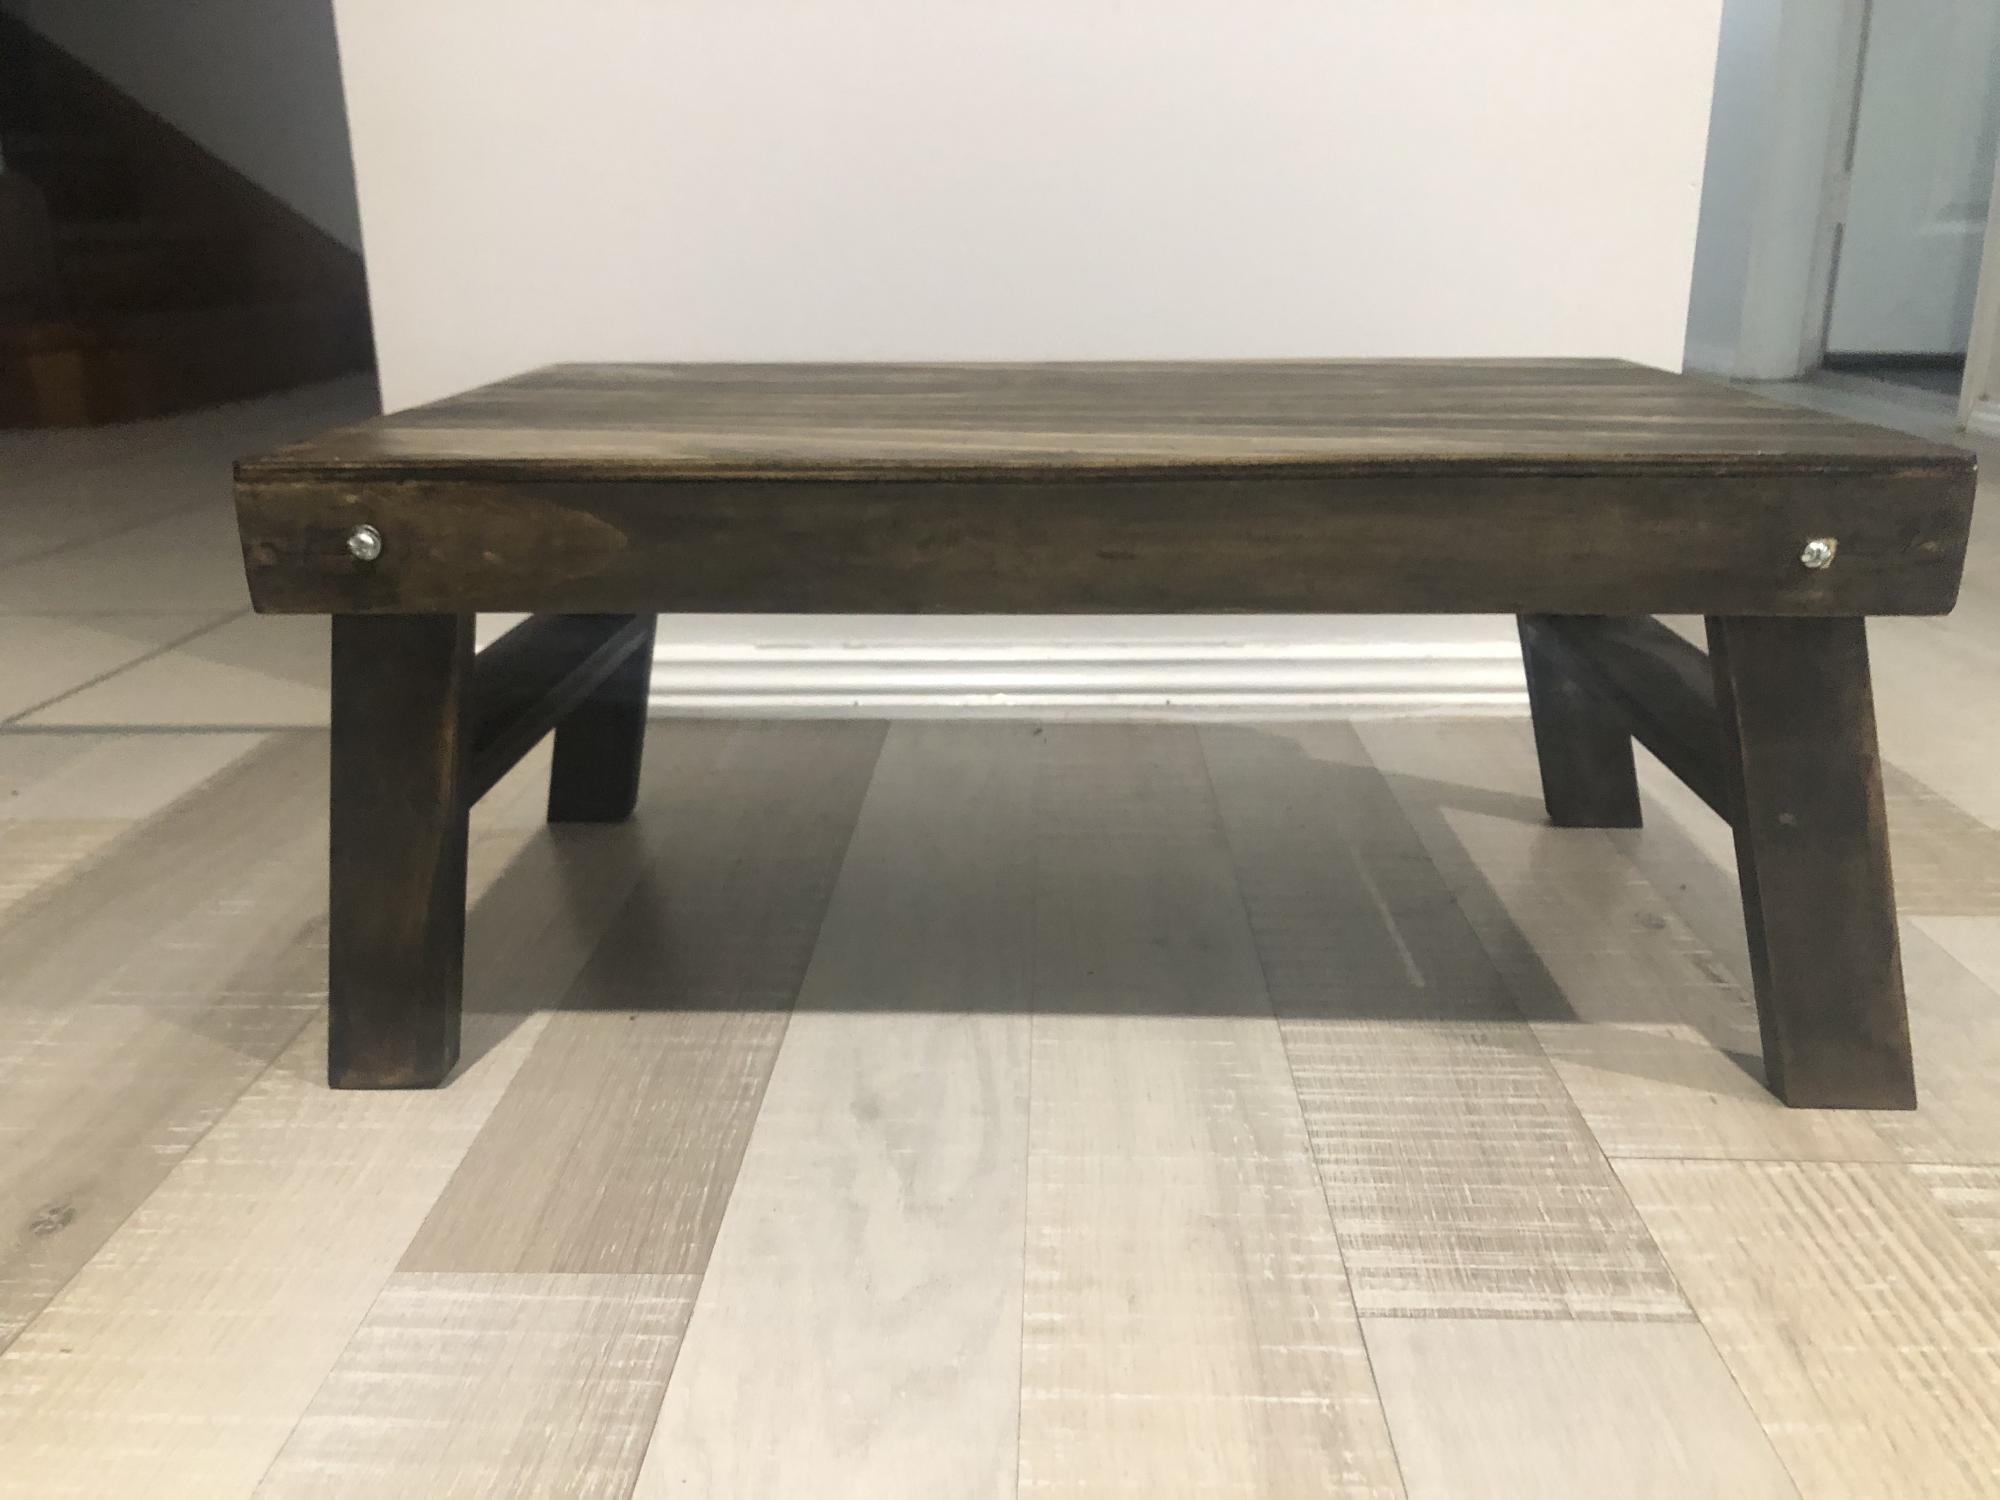
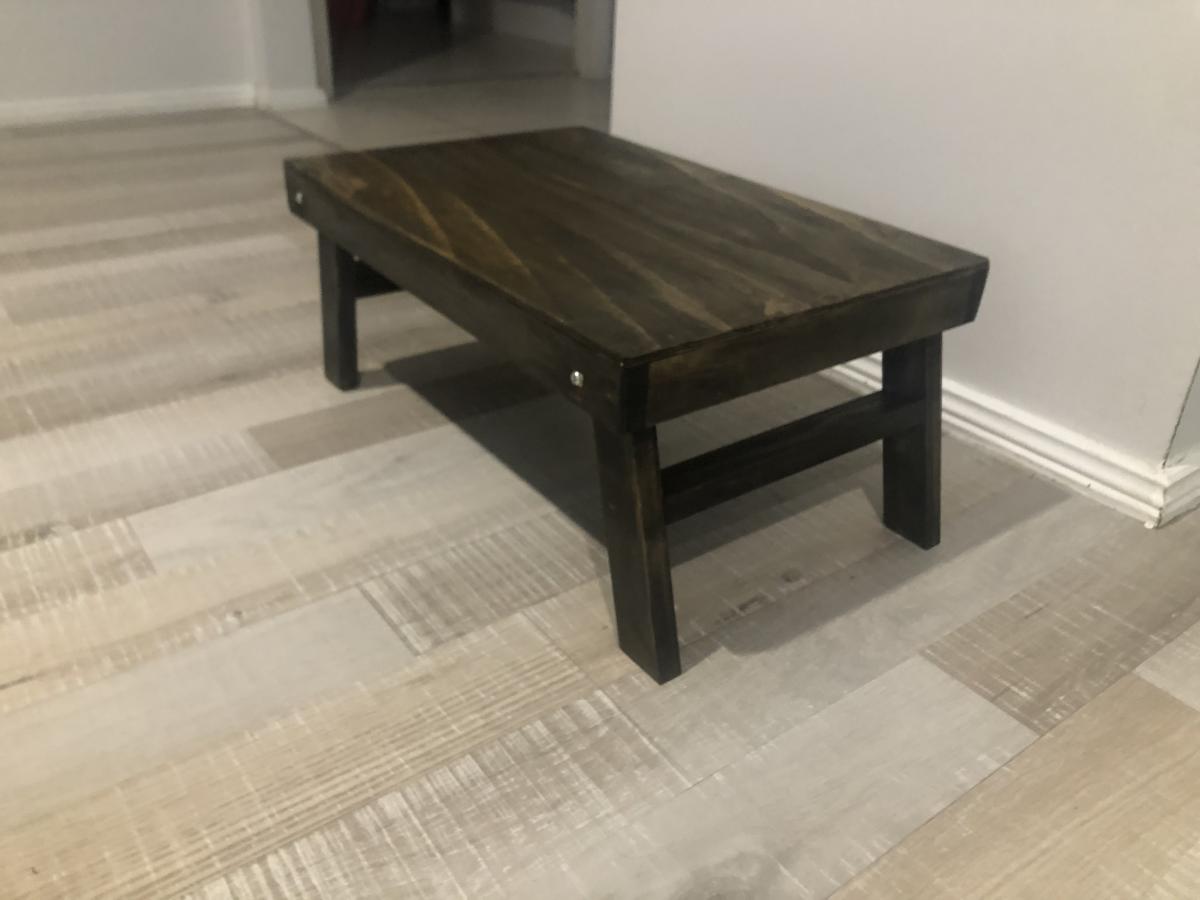
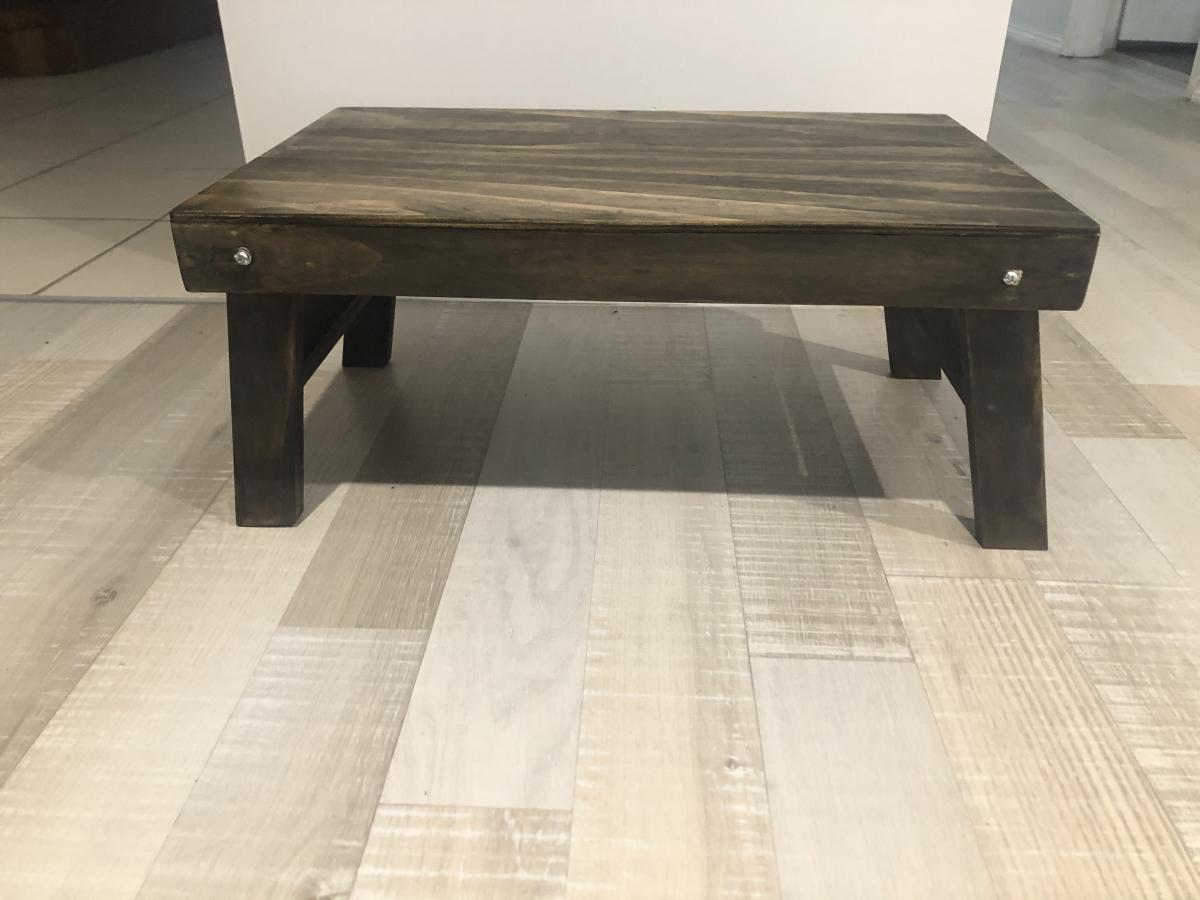
Cedar Spa Bathroom Step Stool
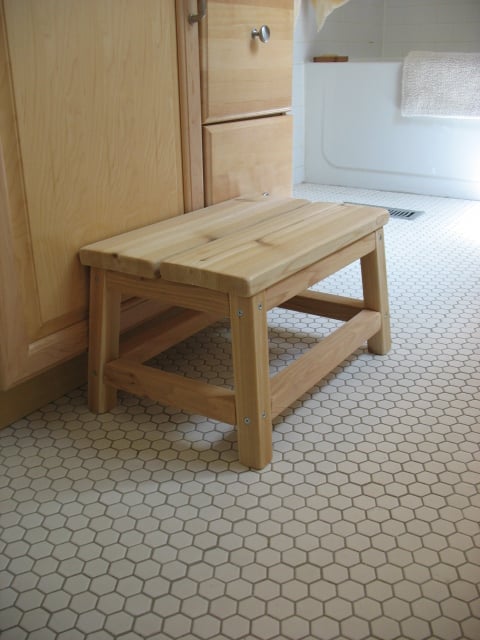
After searching the town high and low for a 10" high wooden stool, I decided to make one. Ana had the perfect stool pattern to modify for our needs - A little shorter, a little wider.....et Voila!
It's the perfect height for little ones to reach the taps in the bathroom, as well as helping out in the kitchen from time to time. And, the cedar smells wonderful.
Finished height: 10"
Top measures: 11.25" x 16.5" (2 boards, cut 16.5" long + a space in the middle)
Footprint: 12.375" x 17.375"
I also lined up the rails (instead of staggering them), similar to the Harriet Higher Chair plans. The joint will be weaker, but I prefer the cleaner lines on such a short step stool.
Thanks Ana for the great plans!
Built from Plan(s)
Estimated Cost
less than $15 (cedar)
Estimated Time Investment
Afternoon Project (3-6 Hours)
Finish Used
No finish added, exposed screws.
Recommended Skill Level
Beginner
Paulieboxer
Ana, First time I have every attempted any kind of woodwork/building furniture other than building Ikea stuff. The plans were very easy to follow and now I want a chop saw for xmas. I roped my daughter in to help me and we completed the project in 2 days. Husband was totally blow away by our achievement. I love it and feel accomplished. Away to work on the table and further benches/seating over the next few weeks. Pauline
Built from Plan(s)
Estimated Cost
£200
Estimated Time Investment
Day Project (6-9 Hours)
Recommended Skill Level
Beginner
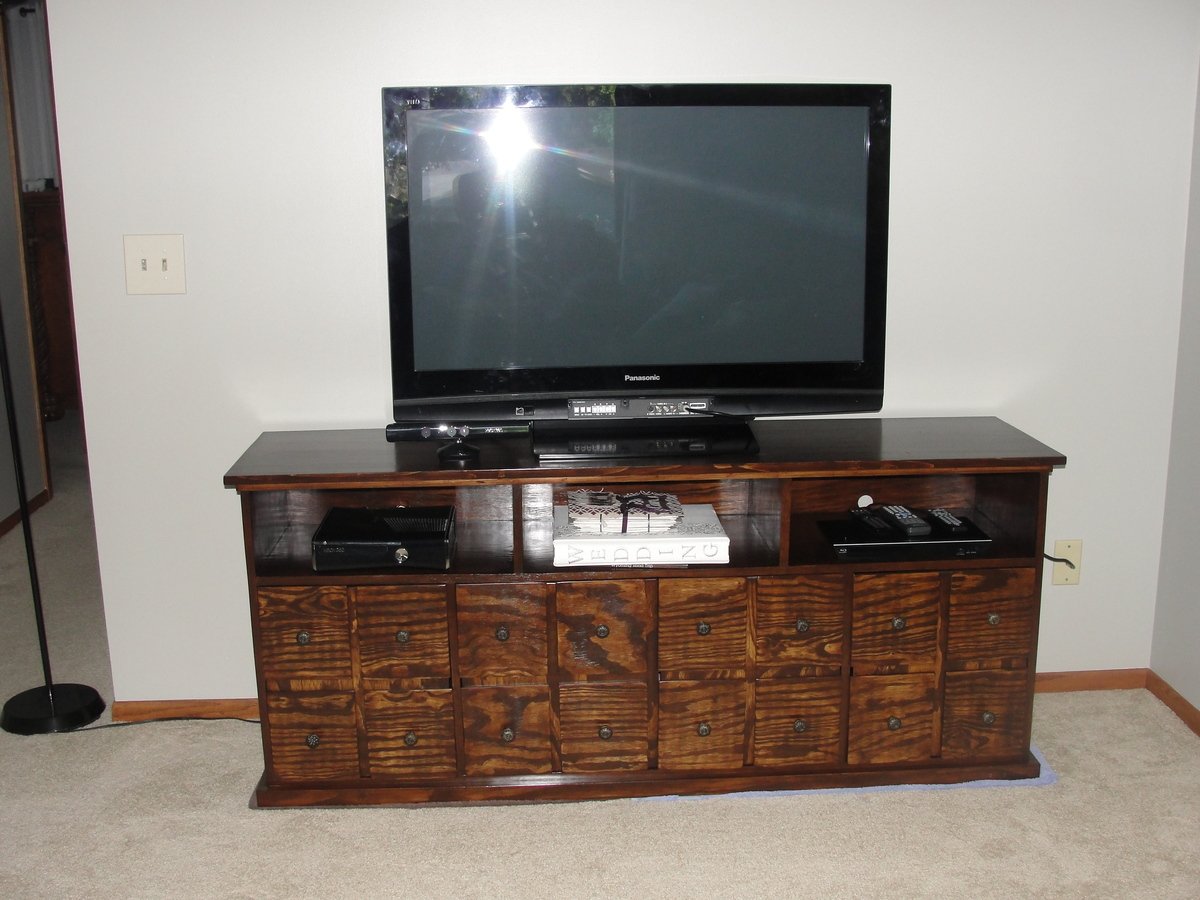
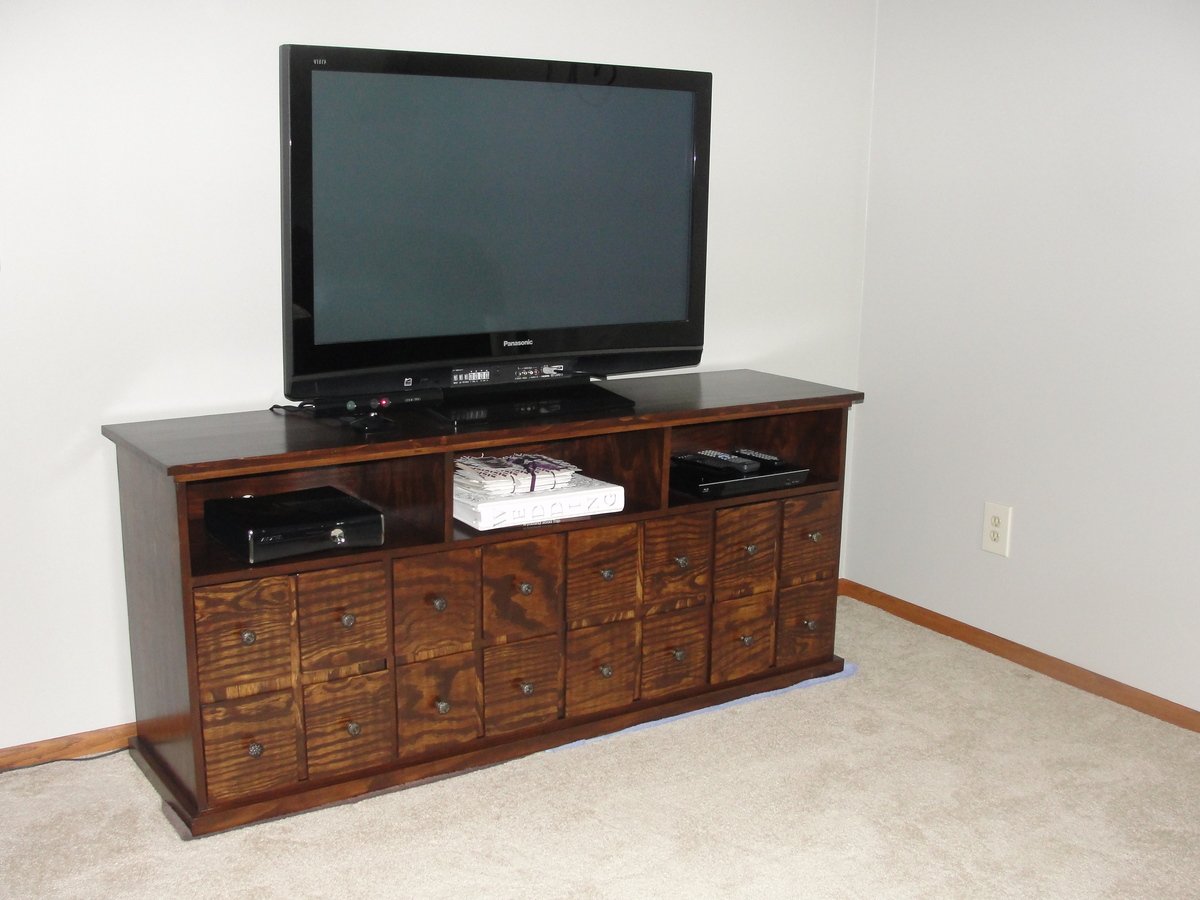
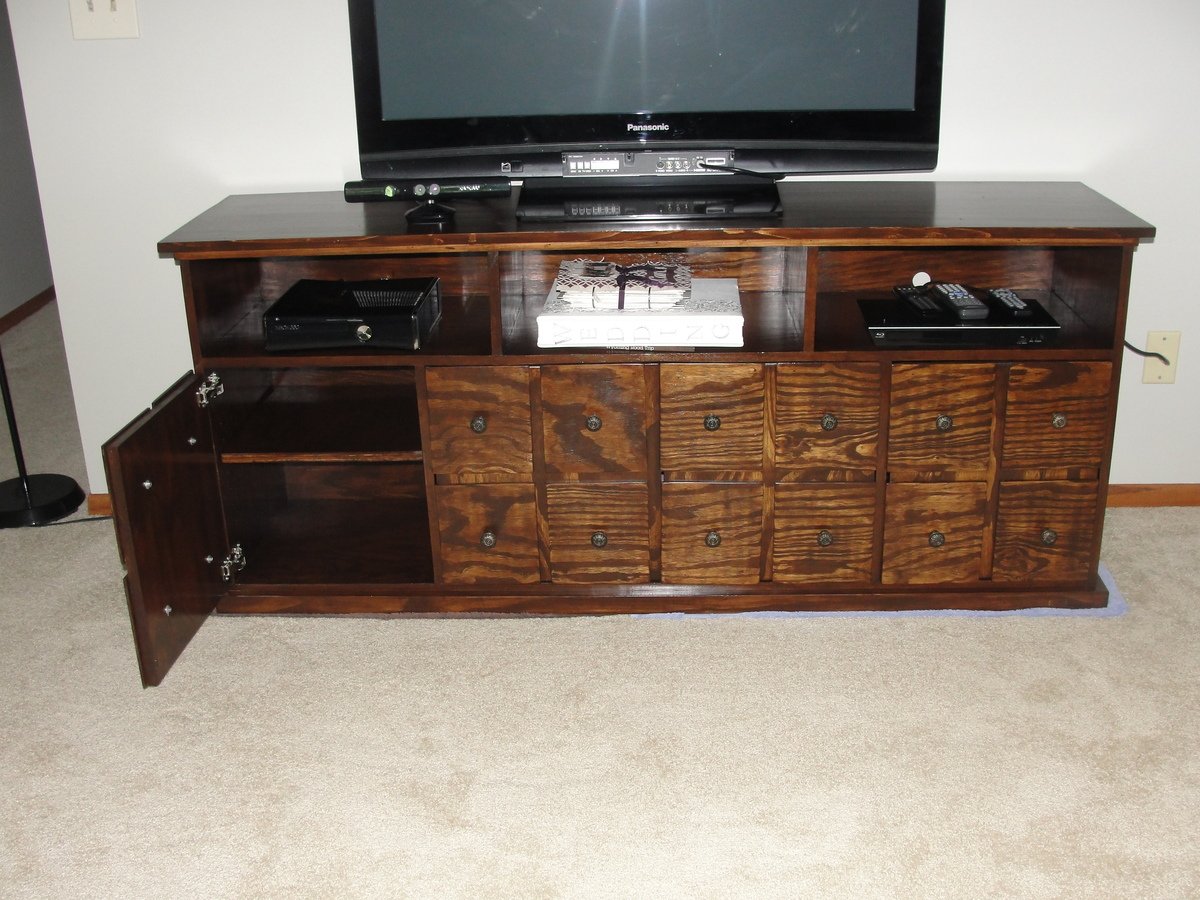
Apothecary Console
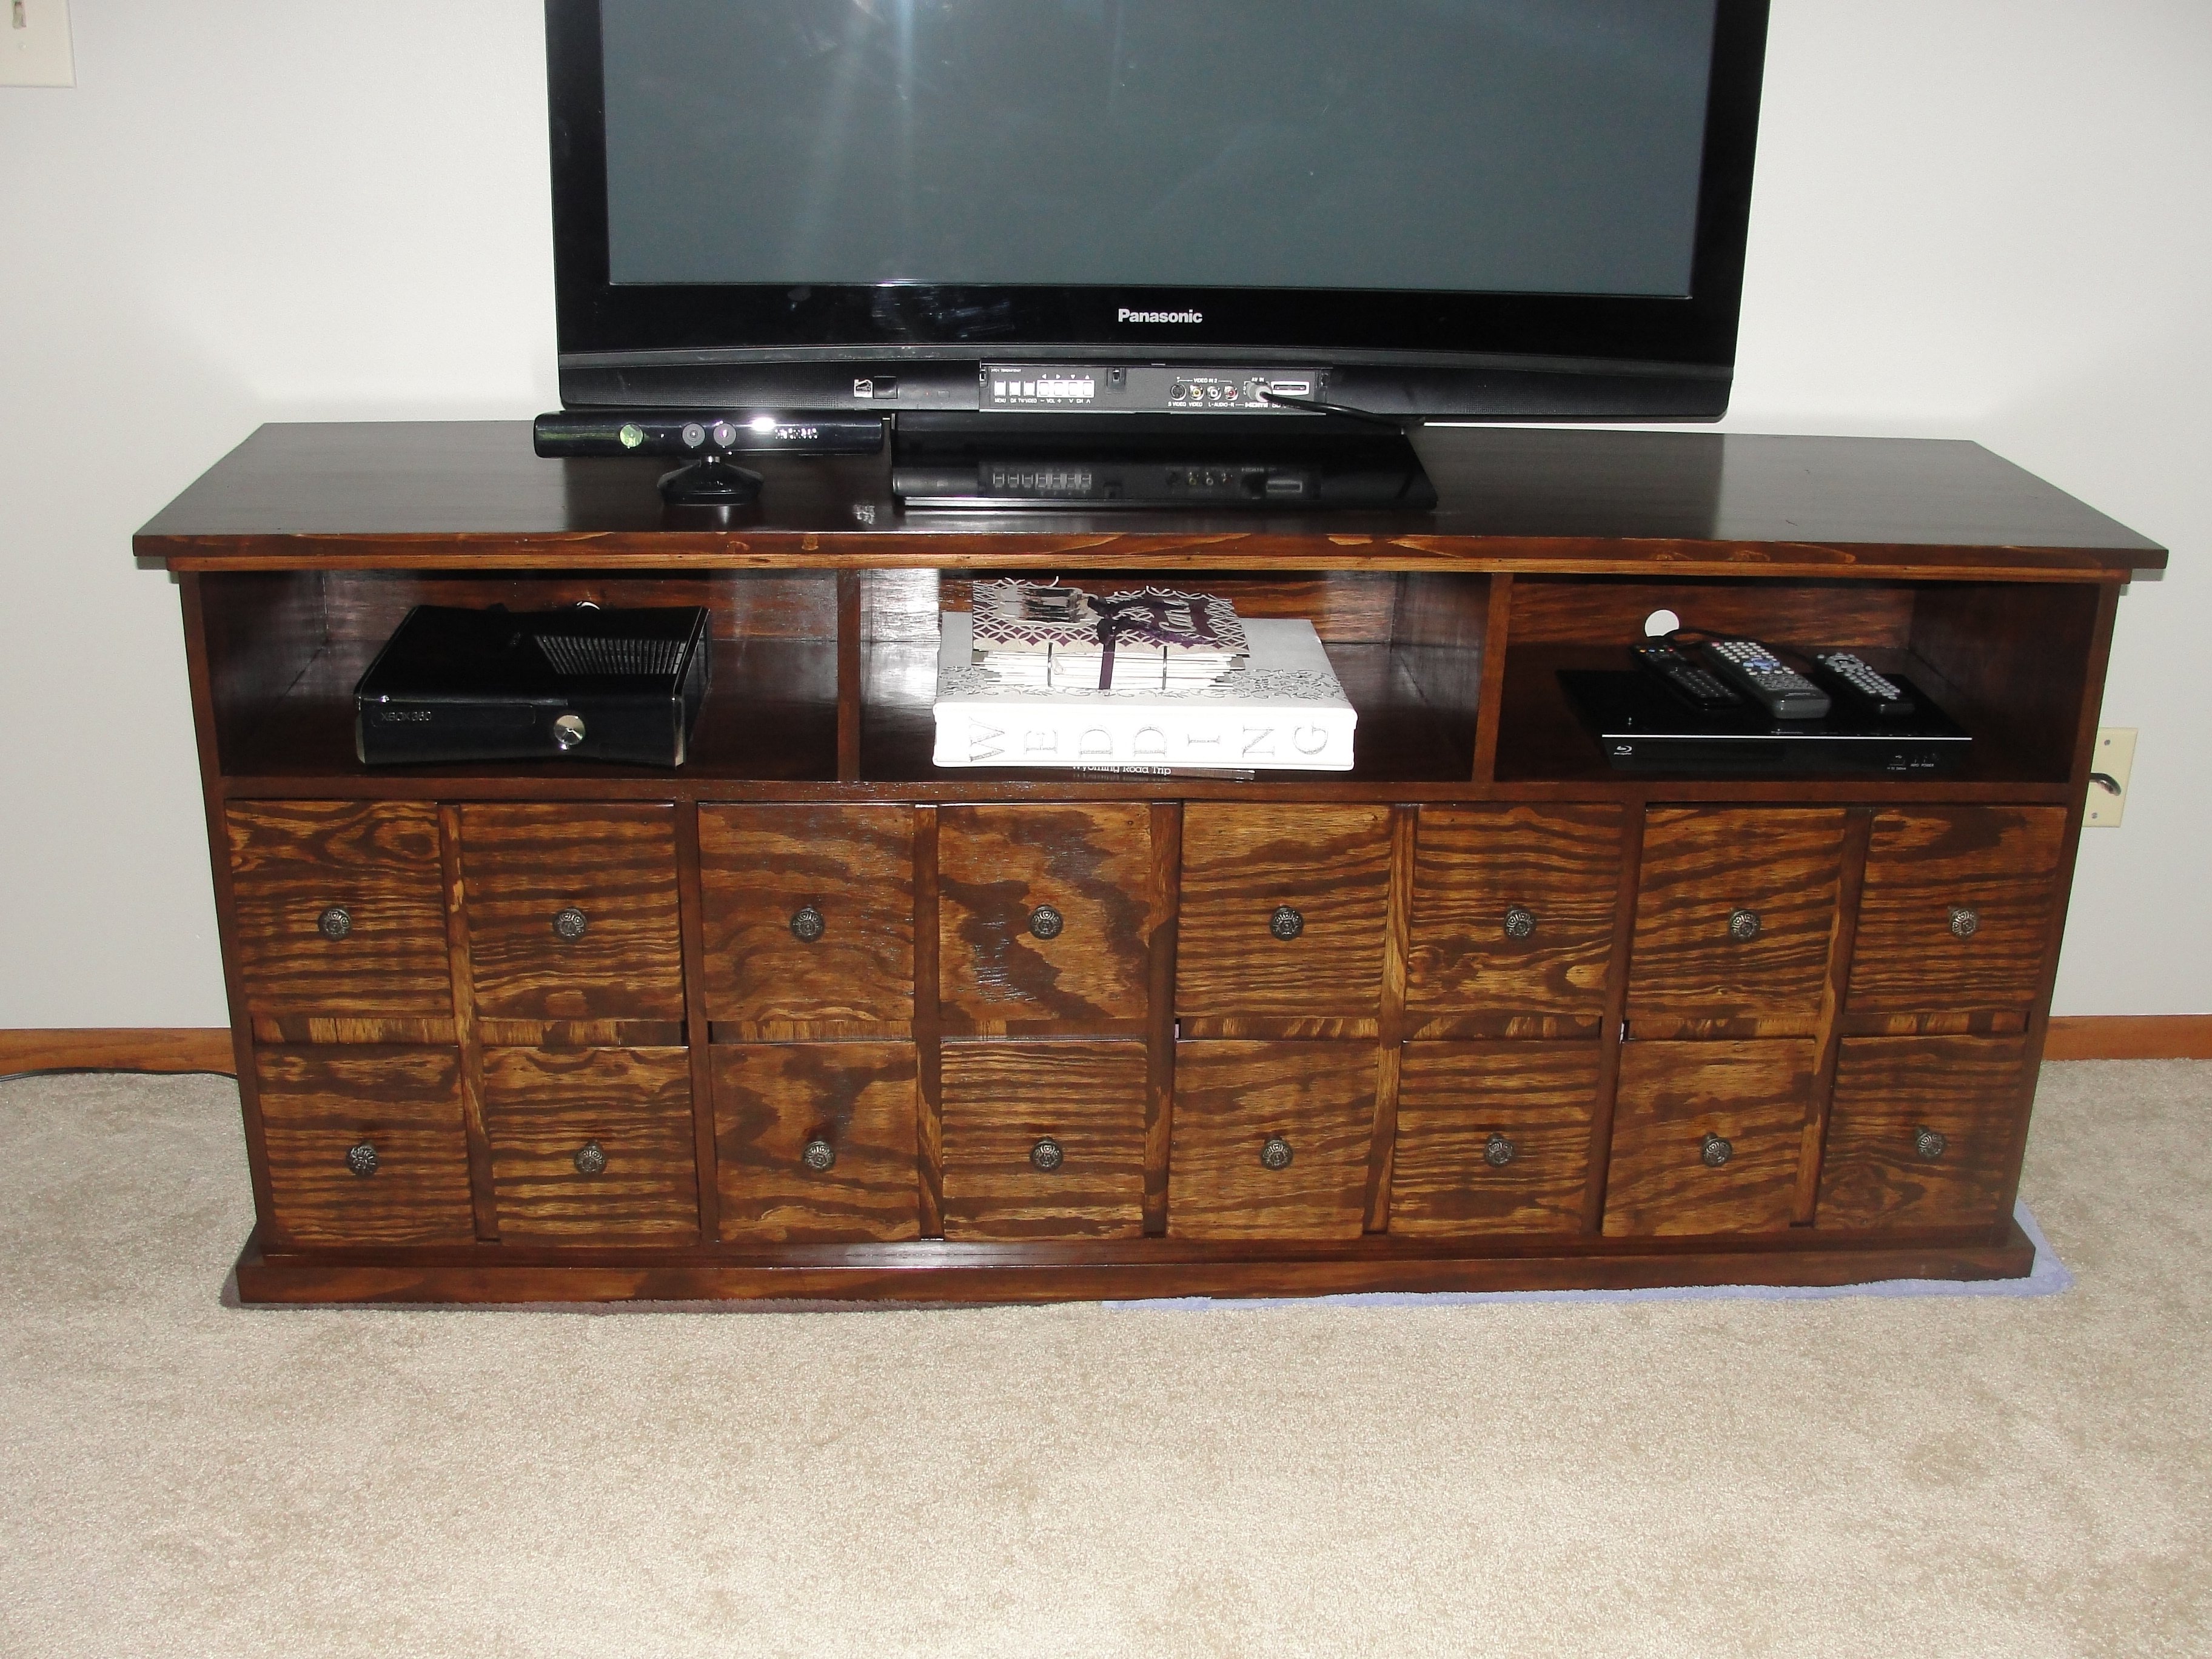
I completed this project using pine plywood for the body and doors and a pine board for the top. Modifications included omitting the drawers and adding doors instead. Side doors open up to adjustable shelves, which I used the Kreg Shelf Pin Jig to create the holes. The hardest part was fitting the doors. I would suggest waiting until the unit is build, then cut to size leaving space for your paint or polyurethane finish. The hinges are from Lowes and the knobs are from Hobby Lobby. I did add veneer edging to the front as well as the sides of the doors- this was a bit messy and I spent a lot of time sanding off the adhesive that seeped out the sides. I used an old iron I picked up at Goodwill so I wouldn't ruin my clothing iron.
Built from Plan(s)
Estimated Cost
$250
Estimated Time Investment
Week Long Project (20 Hours or More)
Finish Used
Applied two coats of a mixture of 1/2 Varathane Wood Stain in American Walnut, 1/2 Varathane Wood Stain in Dark Walnut. Followed this with two coats of Varathane Gel Stain in Dark Walnut. Finished with three coats of Minwax wipe-on poly.
Recommended Skill Level
Intermediate
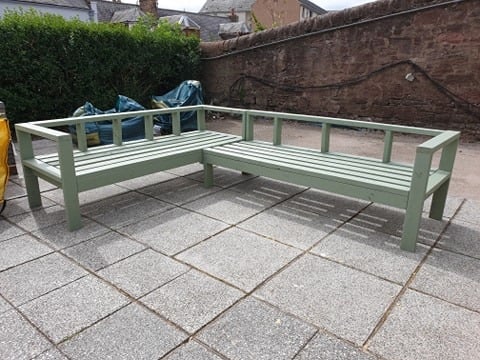
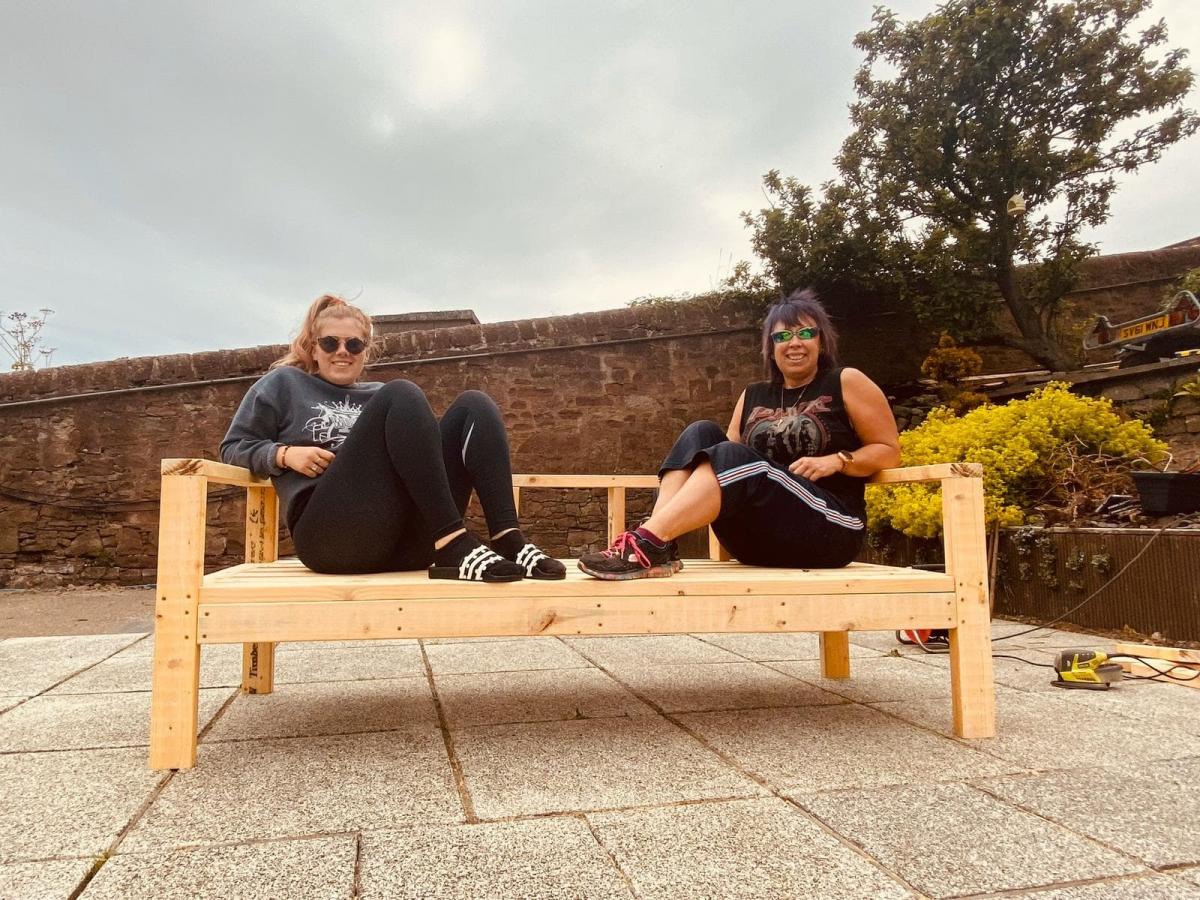
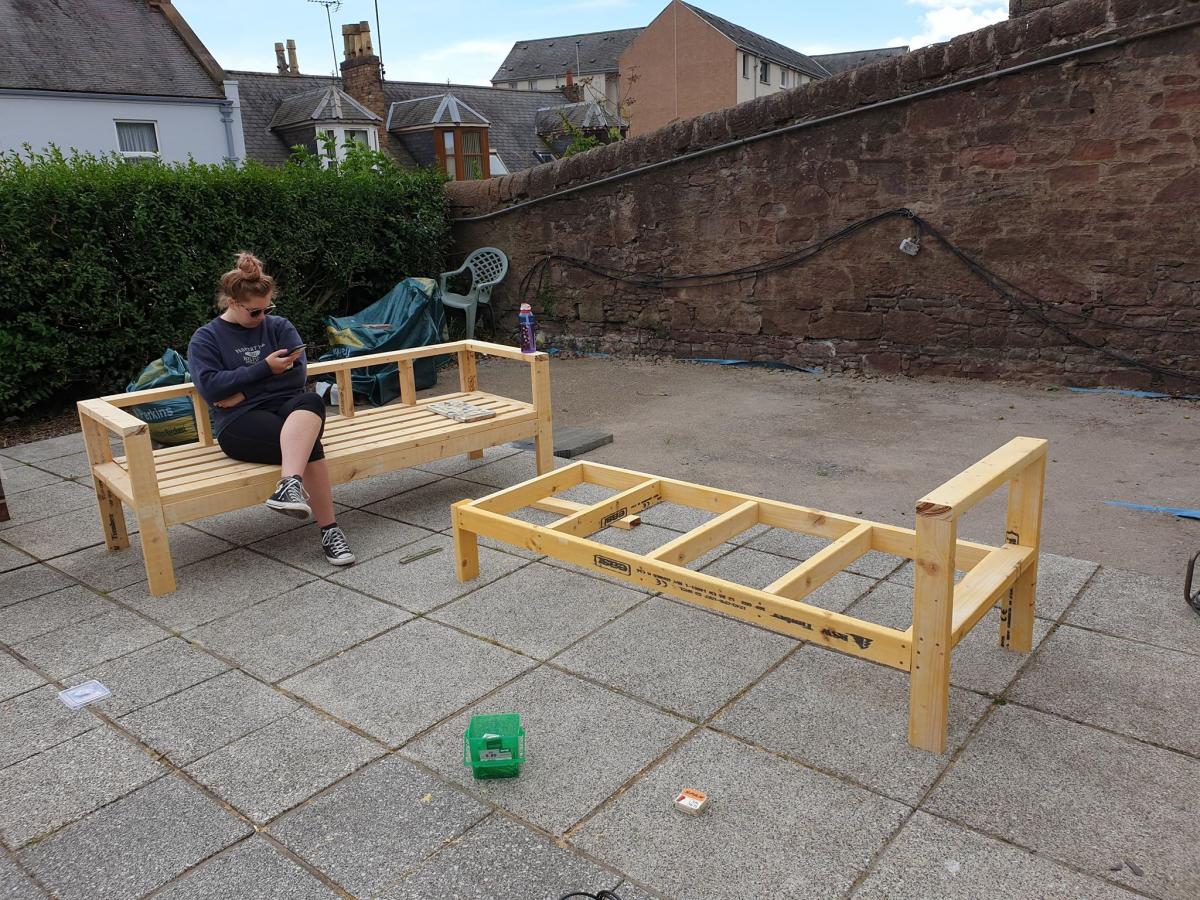
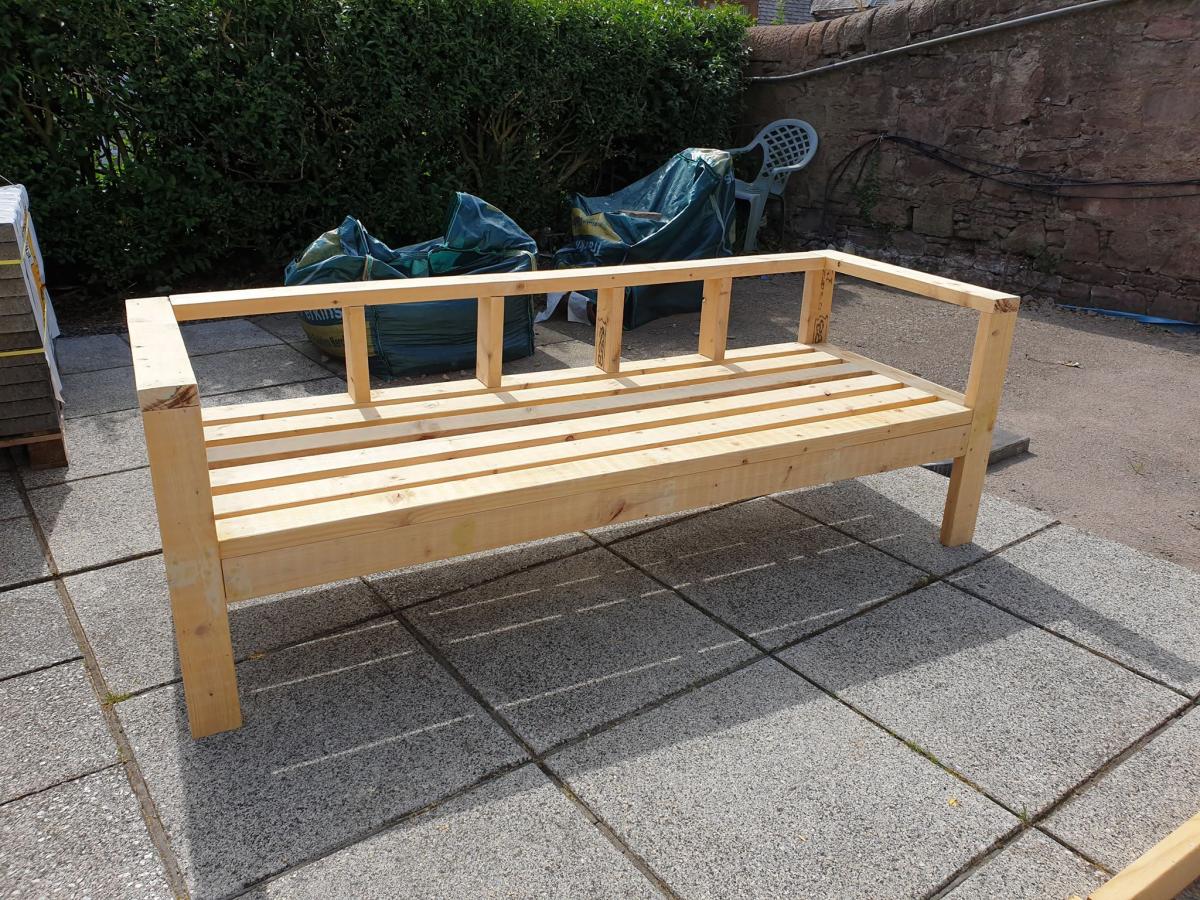
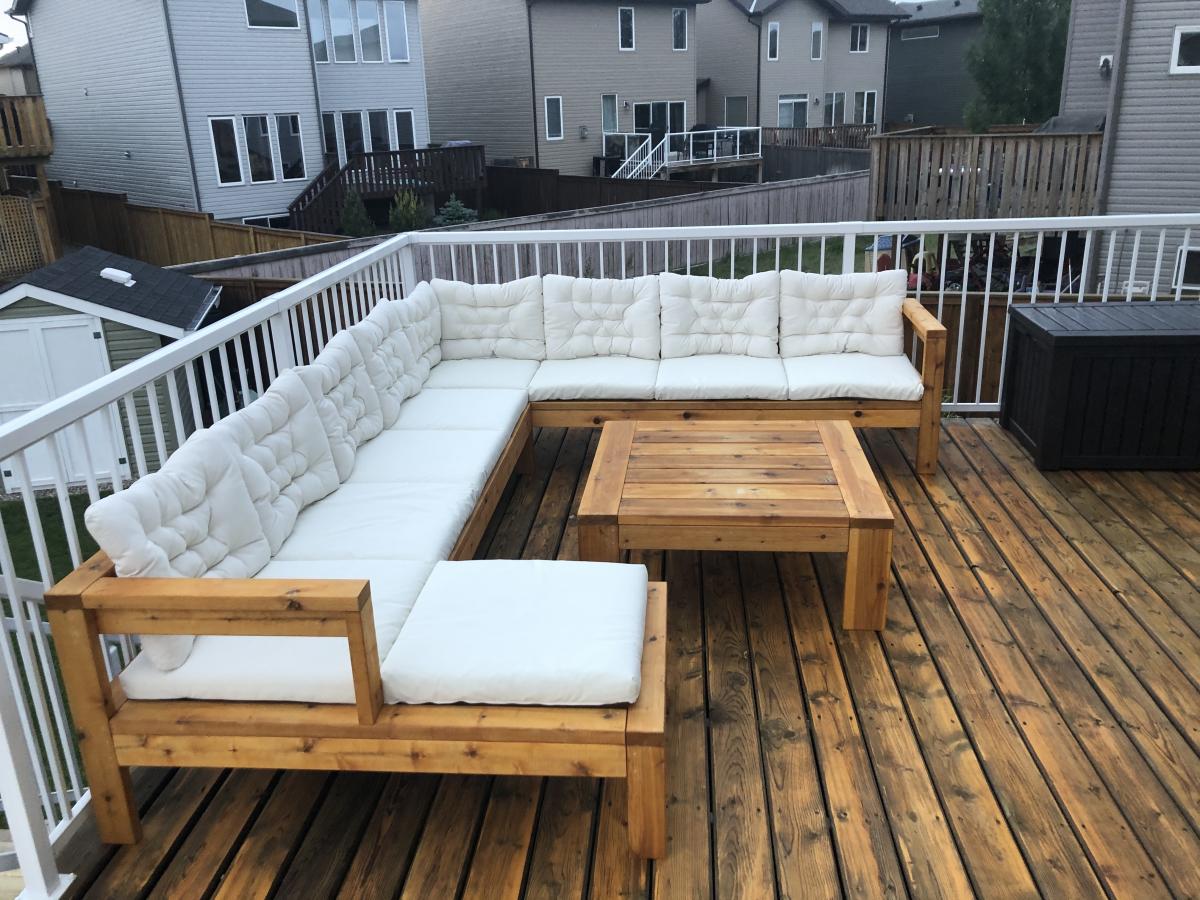
Outdoor Sectional
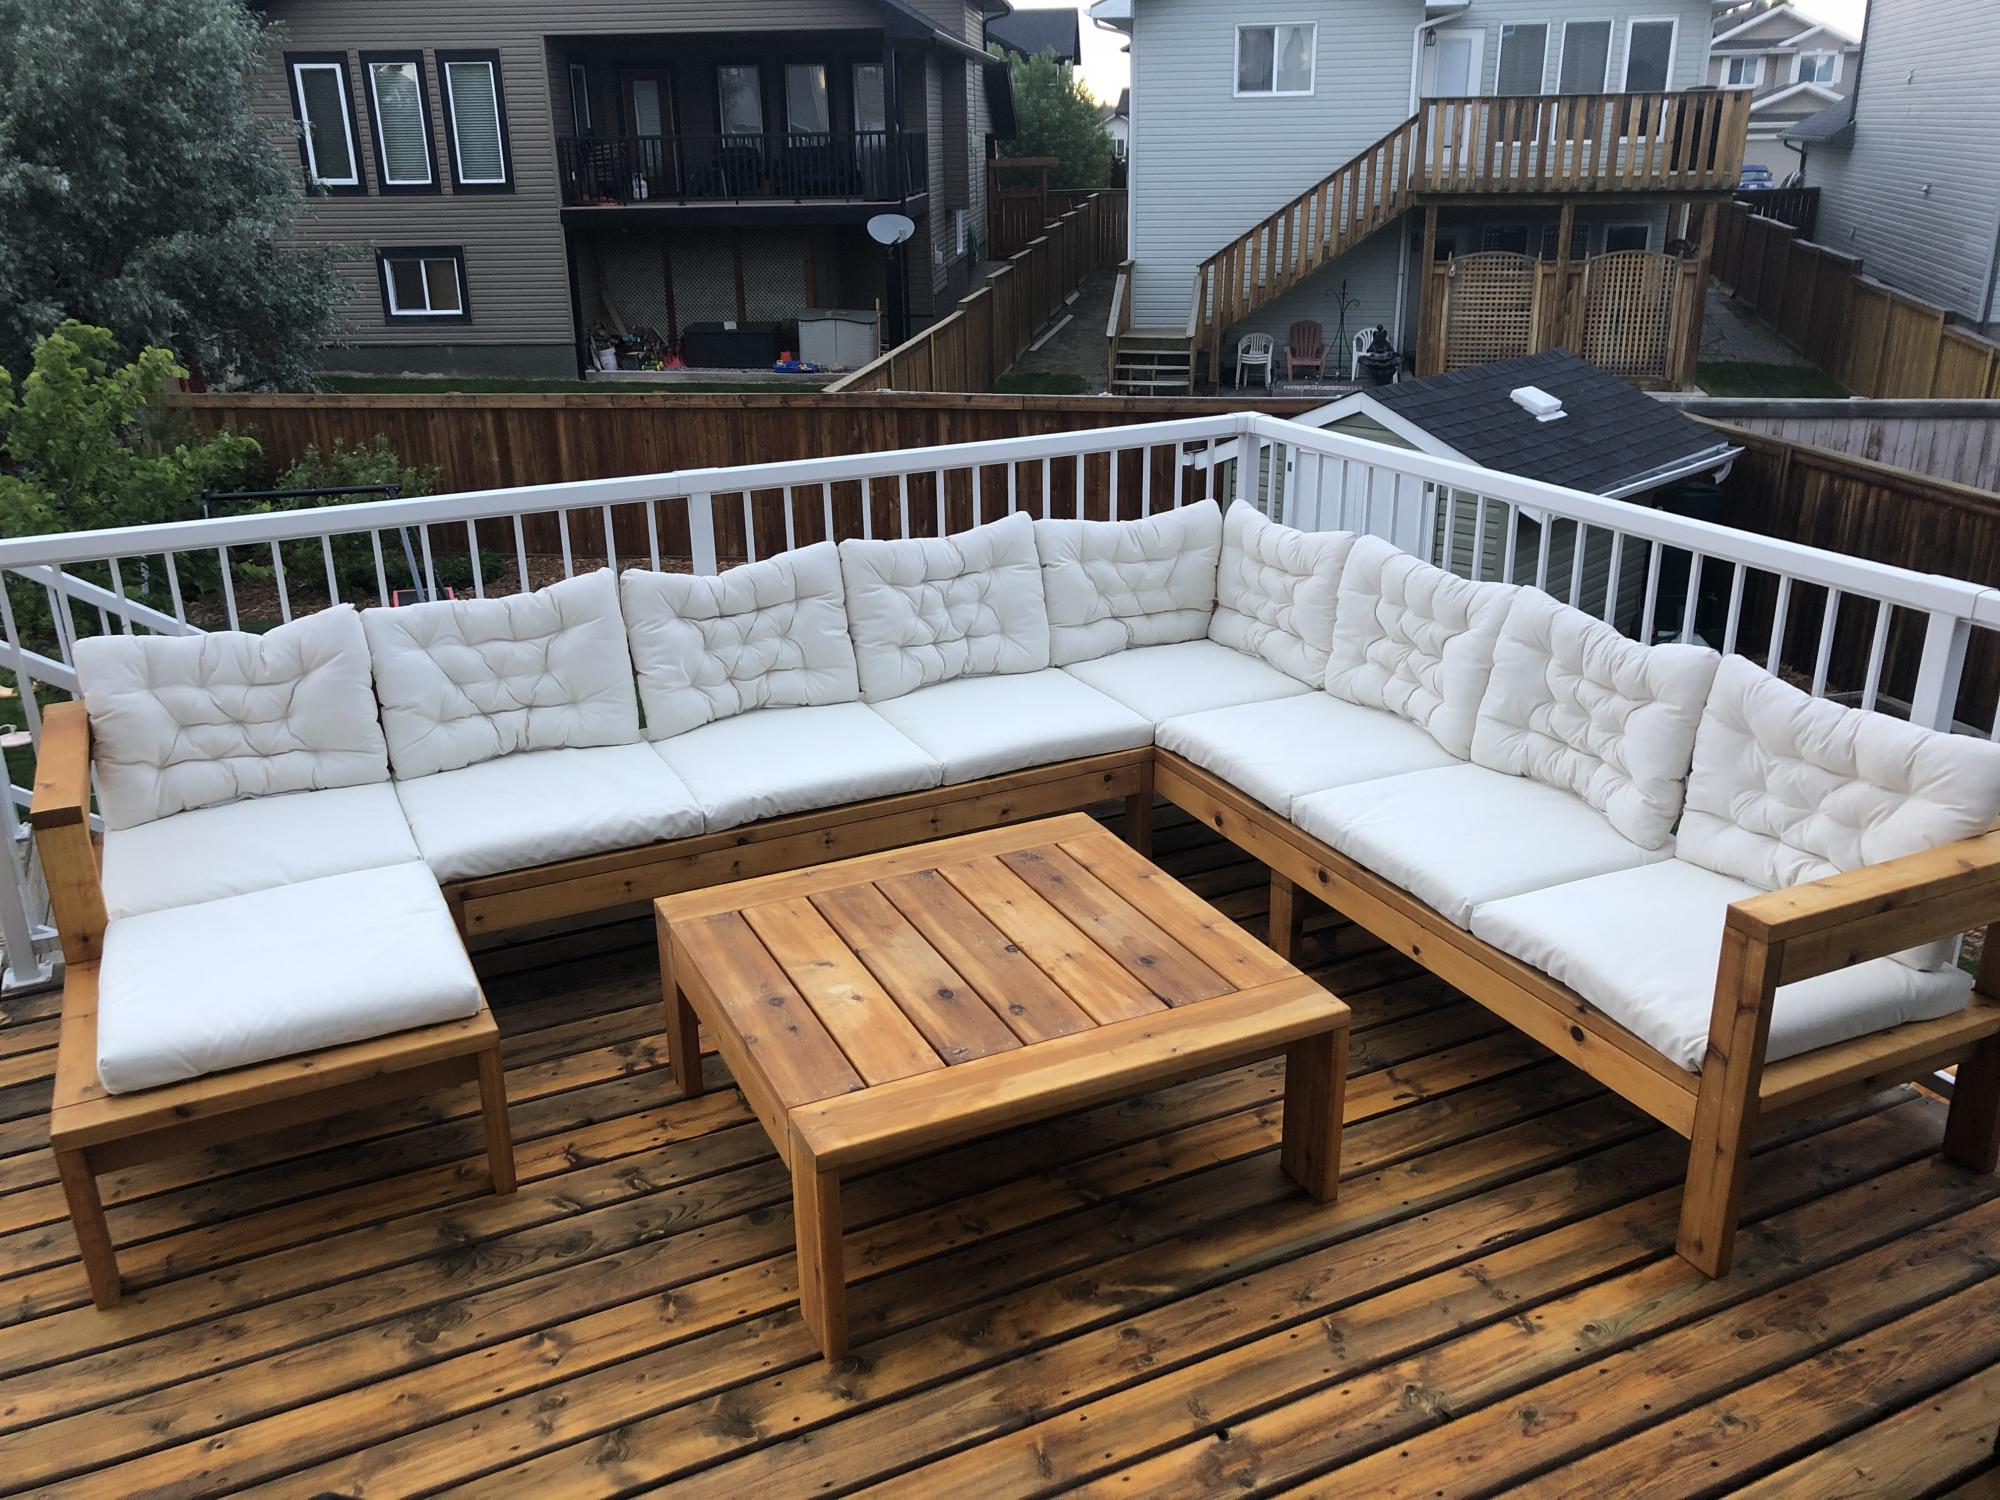
Modified the plans of the outdoor sofa and sectional piece to create this set, then added cushions from IKEA.
Built from Plan(s)
Finish Used
SuperDeck Cedar Tone Natural
Comments
Wed, 02/21/2024 - 10:27
I'm building the sectional…
I'm building the sectional this weekend, and saw your addition to the end piece and am going to steal your idea. Very nice.
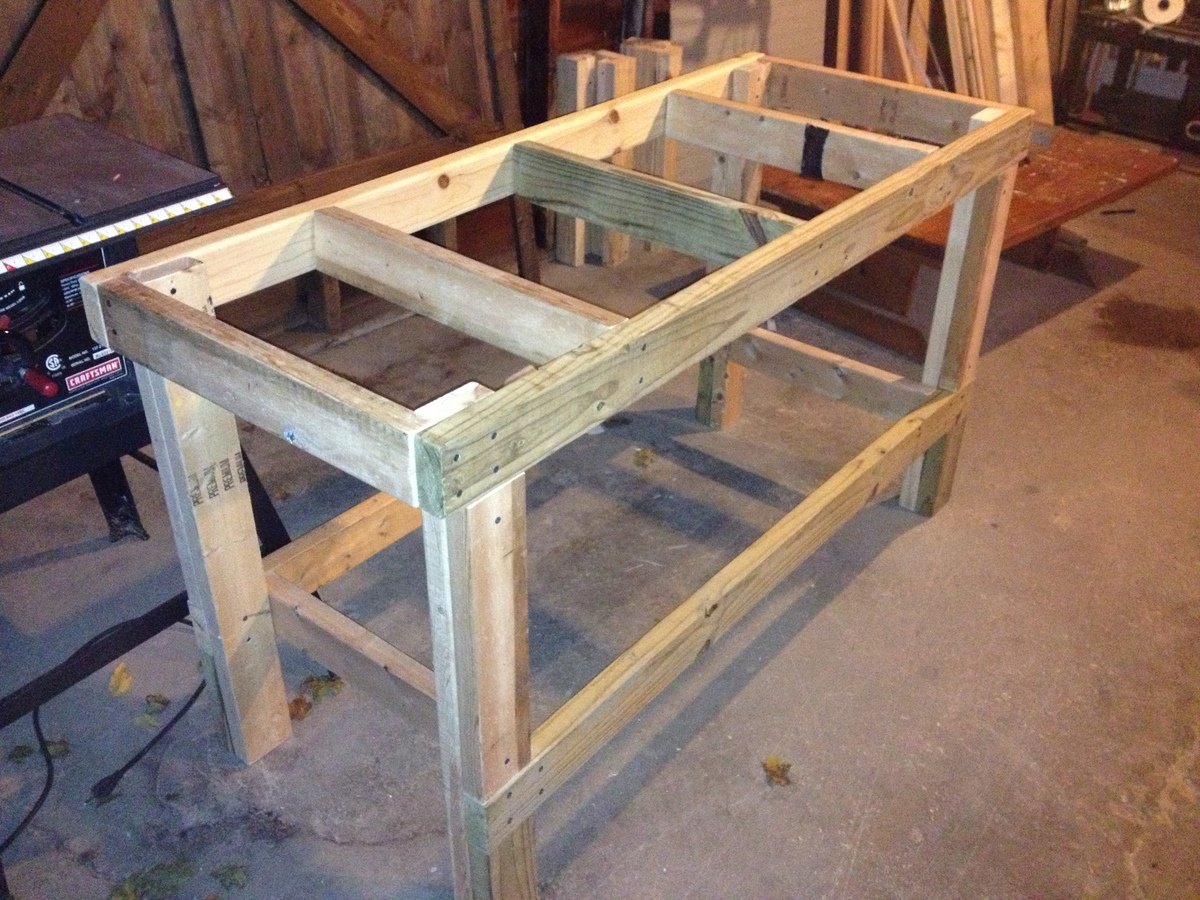
Quick & Easy Workbench
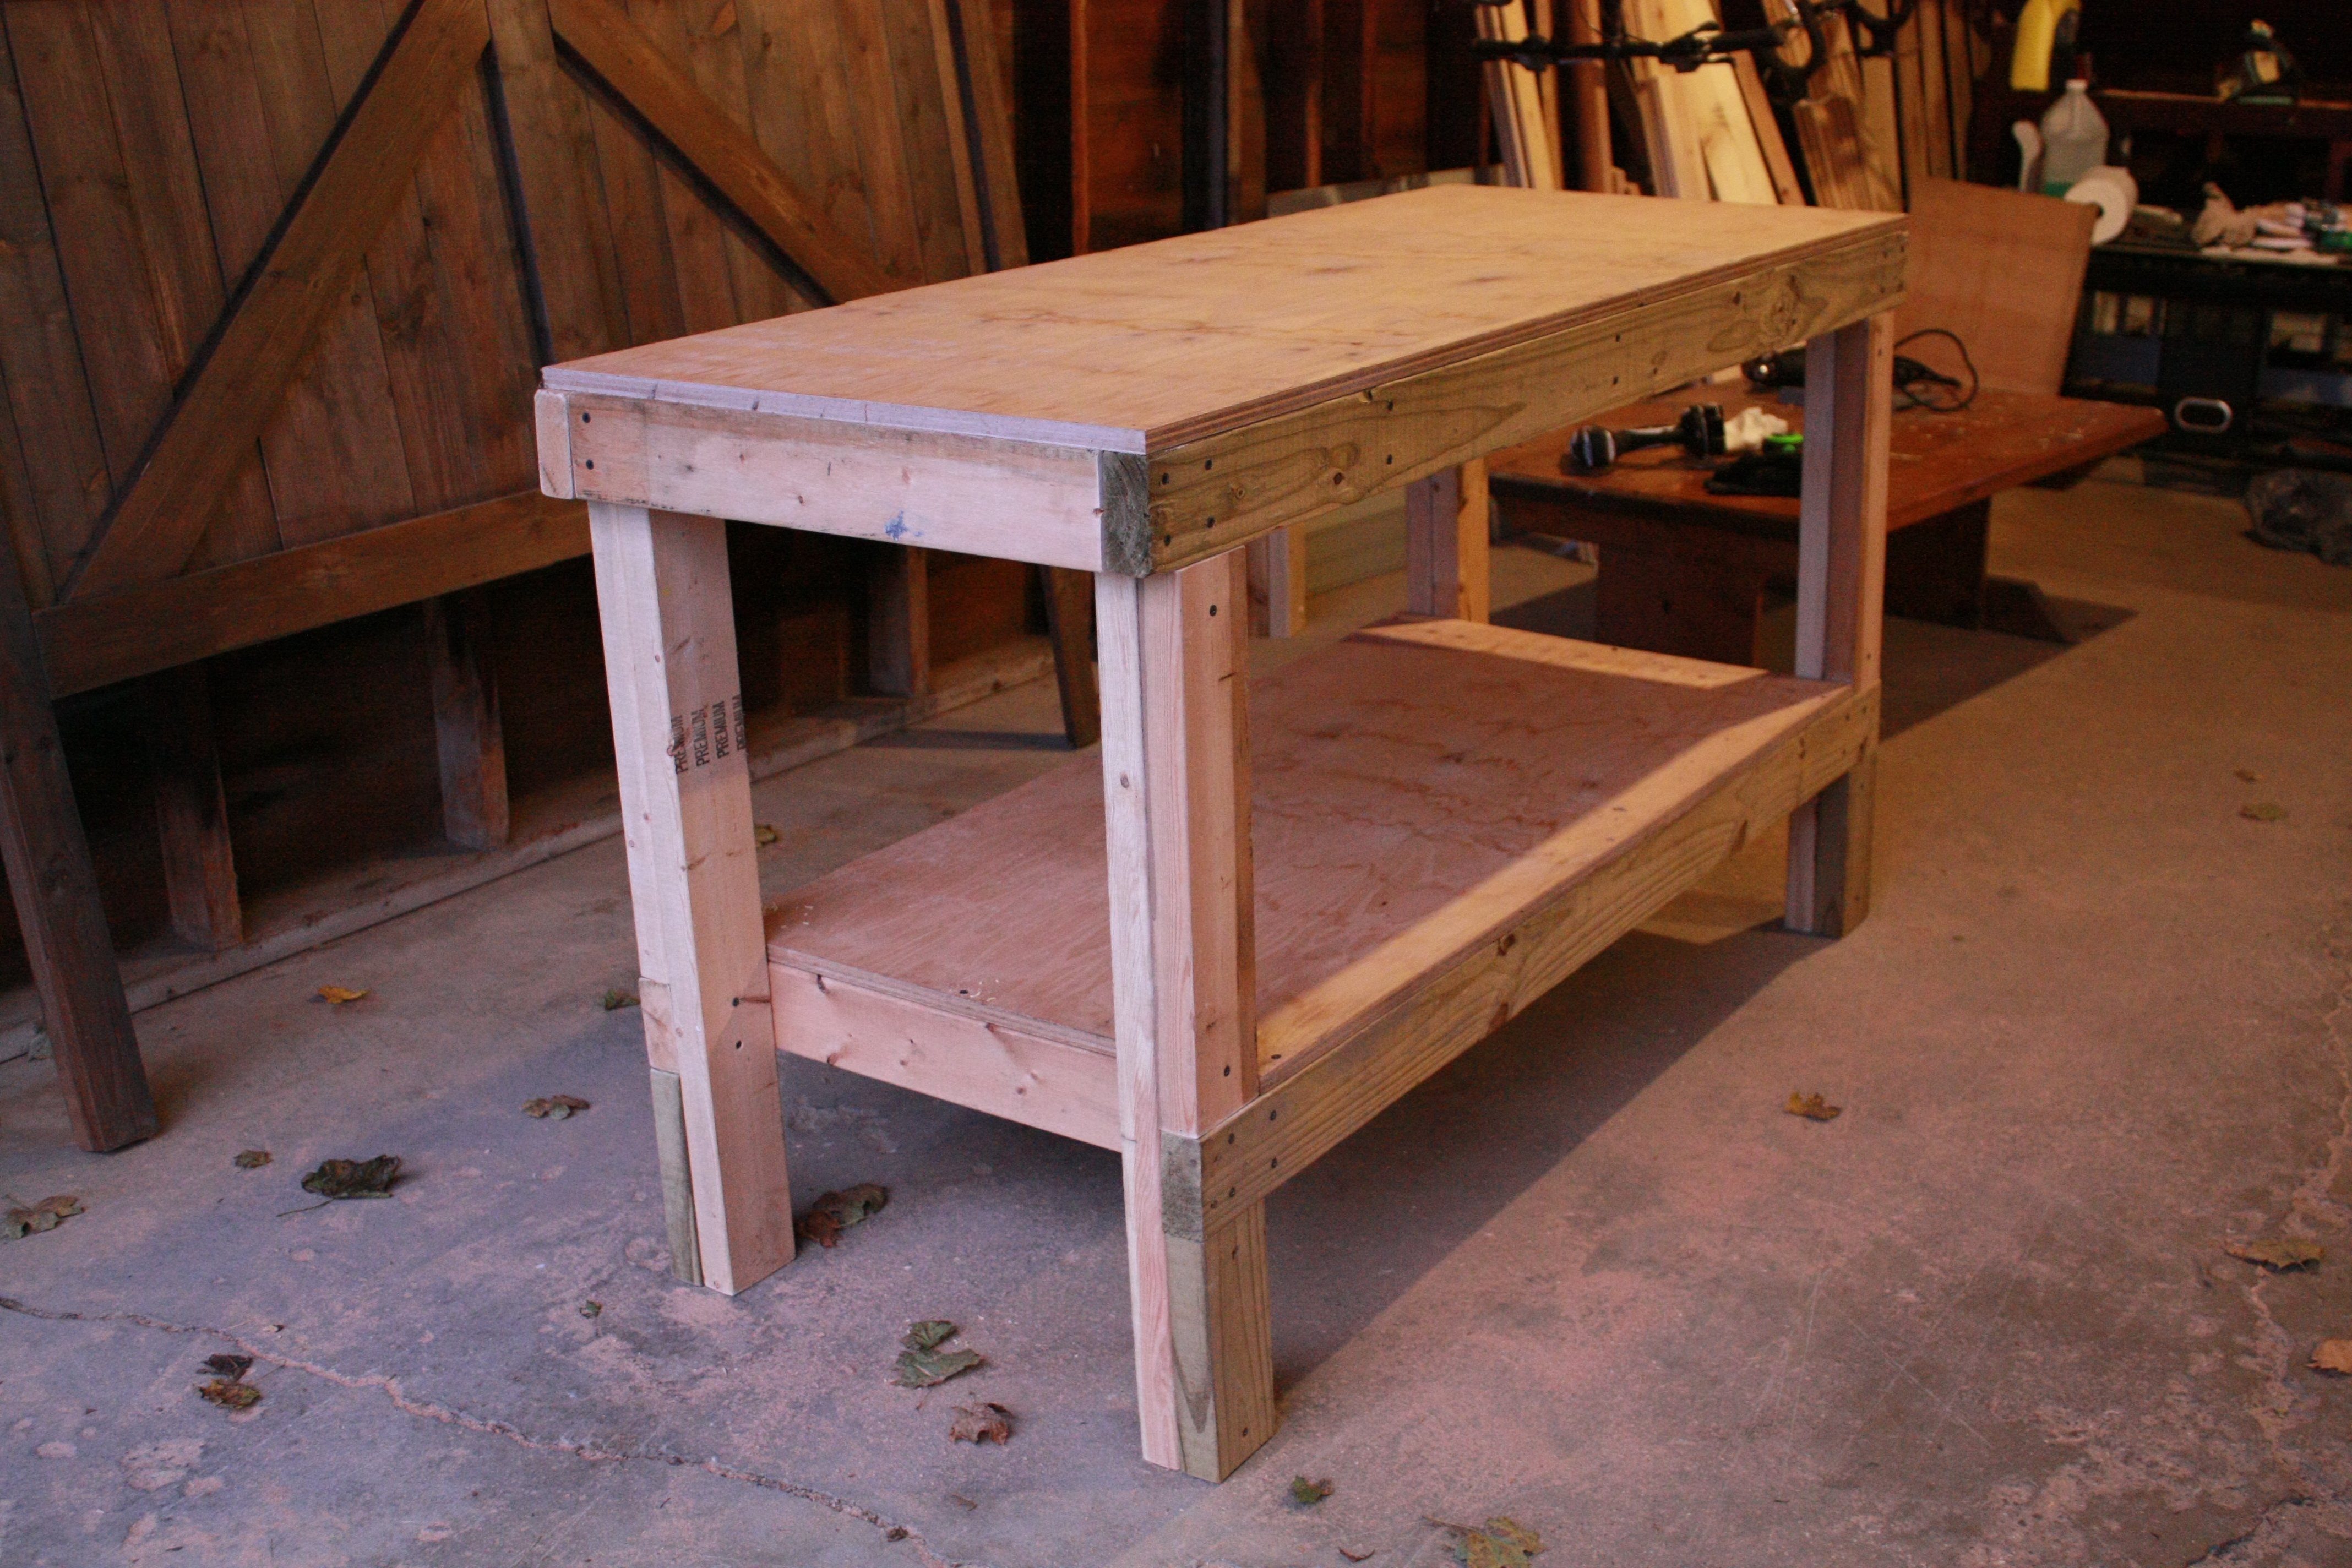
After diving head-first into this website and too many projects to mention, I decided it was about time to have a workbench. I received some free scrap wood from my neighbor so I spent a quick couple of hours putting this together. The plans were great and it went together very quickly. Looking forward to using this for more projects!
Built from Plan(s)
Estimated Cost
$0 (used free scrap lumber)
Estimated Time Investment
Afternoon Project (3-6 Hours)
Finish Used
None since it's just a workbench. =)
Recommended Skill Level
Starter Project
Comments
Sat, 11/24/2012 - 06:04
Help...
Hi Ana .. I`m lookin into building a single bed frame and head and foot board . Do you have any input that would help me along the way here.. Any info would be great . Love your work . and you look great as alway`s . Thanks in advance , and hope to hear back from you soon. Bye for now , and be safe .. Claude . G :-)
Farmhouse Table

I used a combination of the farmhouse table and the tryde coffee table (but on a larger scale). I don't have a Kreg drill or any of that and so I just screwed from the top side down. Since I knew the screws would show, I decided to take a platinum/shiny silver Sharpie to color over the screw heads to make them stand out.
The legs were a 2x4s glued and screwed together. Can't find any untreated 4x4 at the local Lowes or Home Depot, so this was my next best option.
I used a few coats of Rustoleum Dark Walnut and then Rustoleum Semi-Gloss poly.
I have since made a new bench with the same main design, but just to a small scale. Also, I did it opposite of the top. The table is 2x4 with 2x6 breadboard ends. The bench is 2x6 with 2x4 breadboard ends.


Built from Plan(s)
Estimated Cost
About $60
Estimated Time Investment
Afternoon Project (3-6 Hours)
Finish Used
Rustoleum Dark Walnut
Recommended Skill Level
Beginner
Comments
Mon, 10/22/2012 - 09:12
It is just regular whitewood
It is just regular whitewood 2x4s glued and screwed together. Then I just used wood filler to make it look llike a 4x4.
The Traditional Wood Toddler Bed
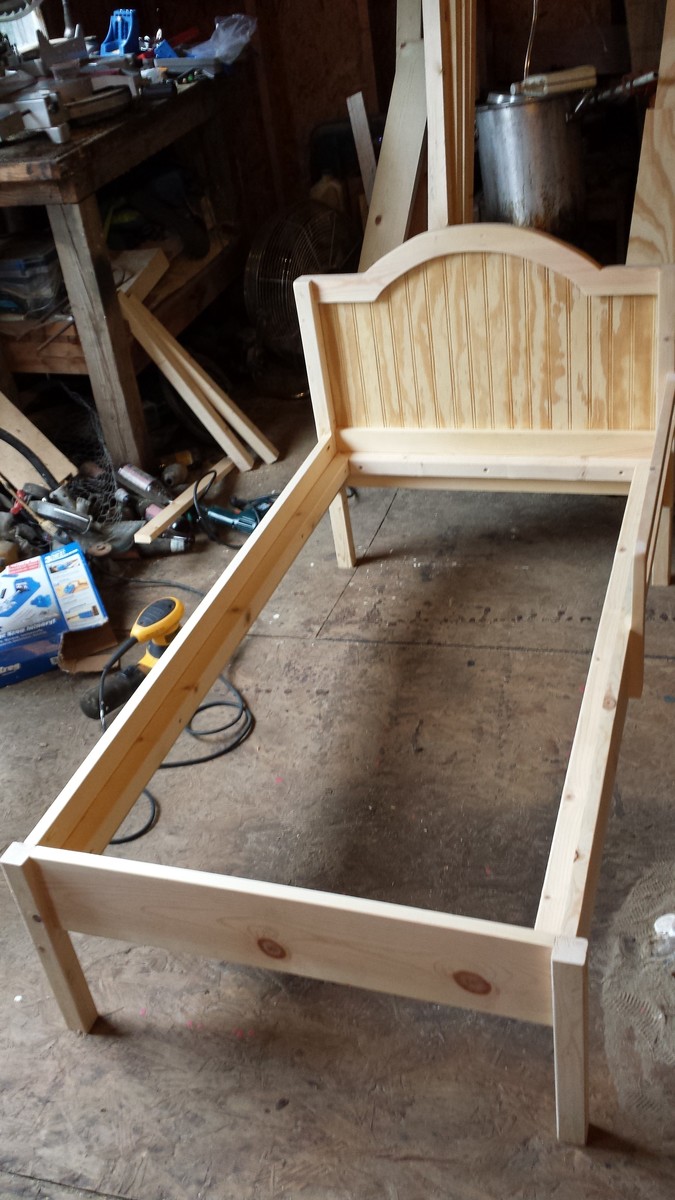
This is The Traditional Wood Toddler Bed. Built straight from the plans. Worked out great and my daughter loved it!
Built from Plan(s)
Estimated Time Investment
Afternoon Project (3-6 Hours)
Finish Used
Unfinished for now. Daughter cant decide on a color.
Recommended Skill Level
Beginner
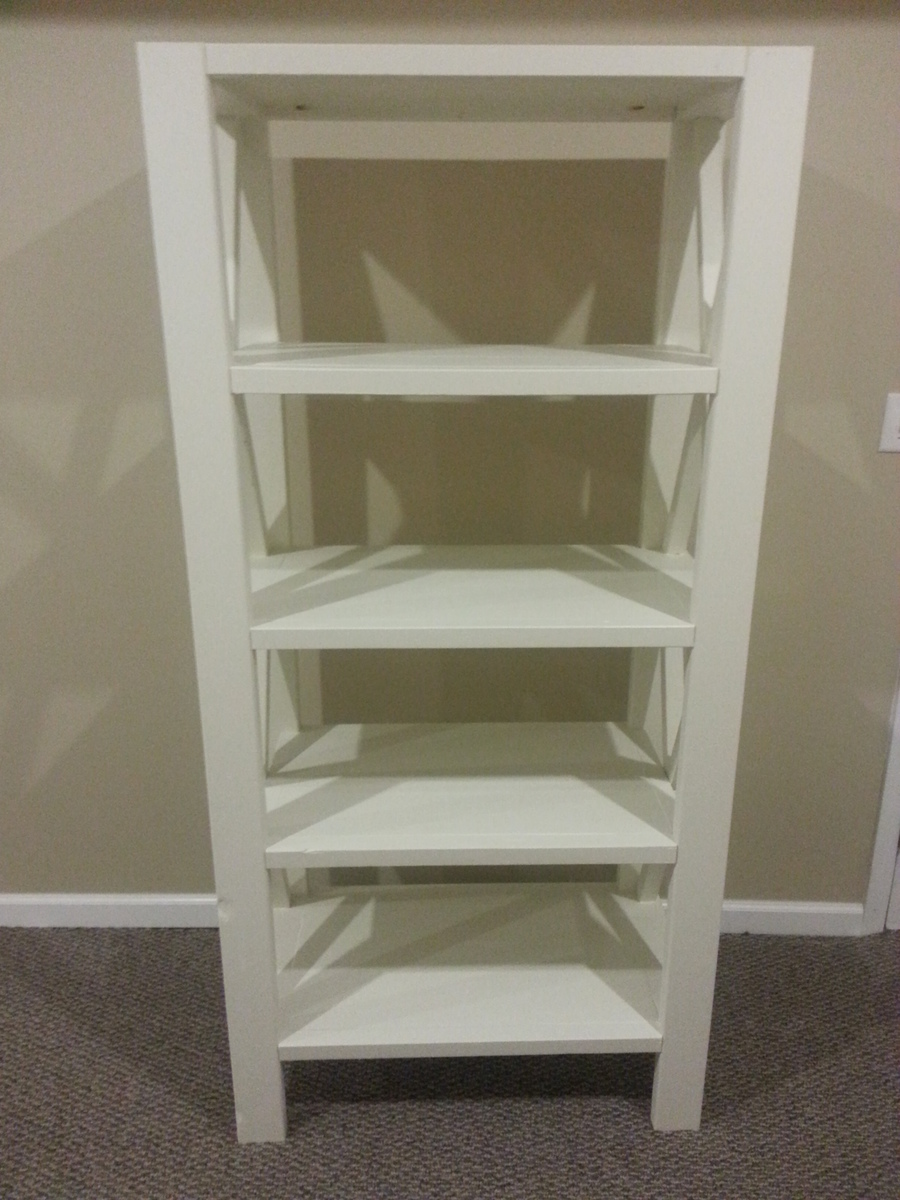
X Bookcase
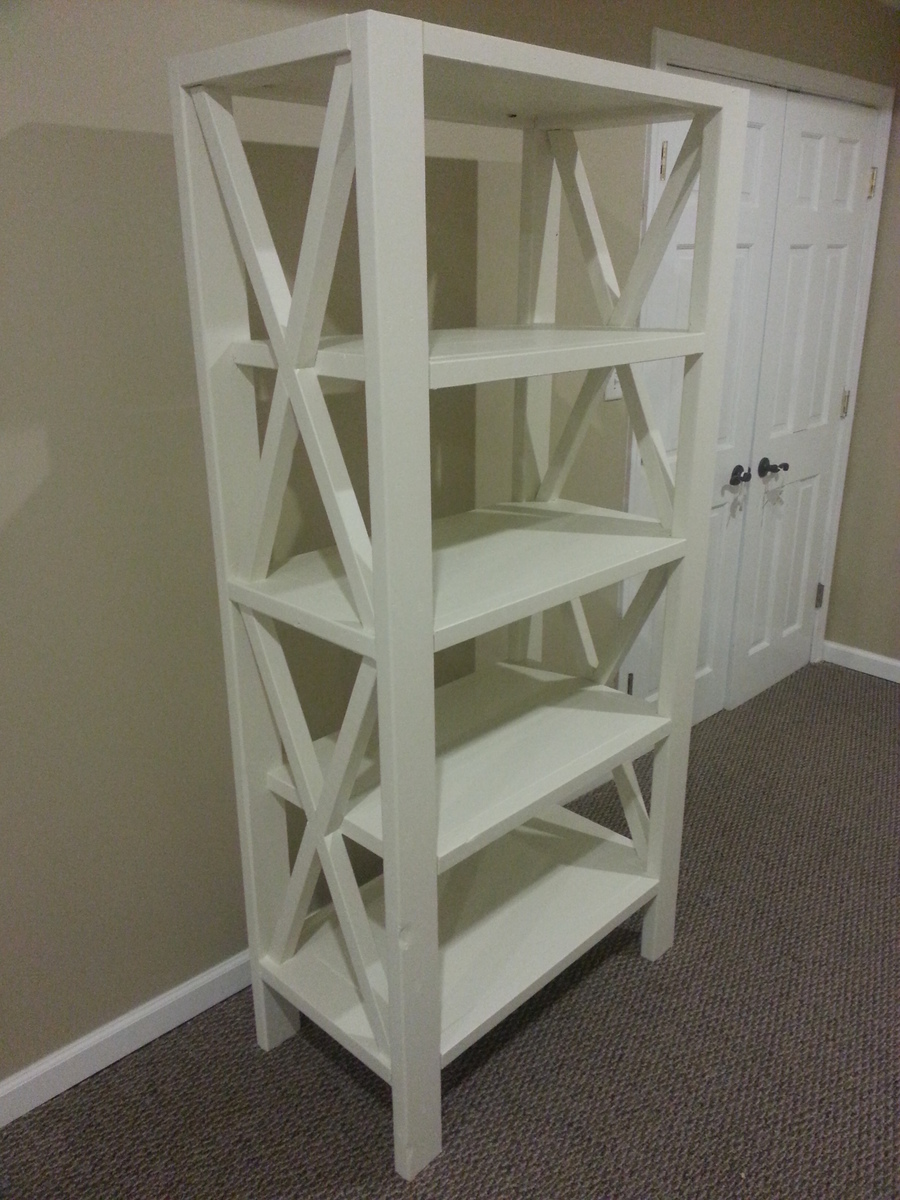
X Bookshelf. Followed Ana's great plan, only change was to spare 1x4s that I planked for shelves. Finished with antique white milk paint. Very happy with result.
Estimated Cost
70
Estimated Time Investment
Weekend Project (10-20 Hours)
Finish Used
Antique white milk paint (love it).
Recommended Skill Level
Beginner
Comments
4x4 Truss Table with Benches
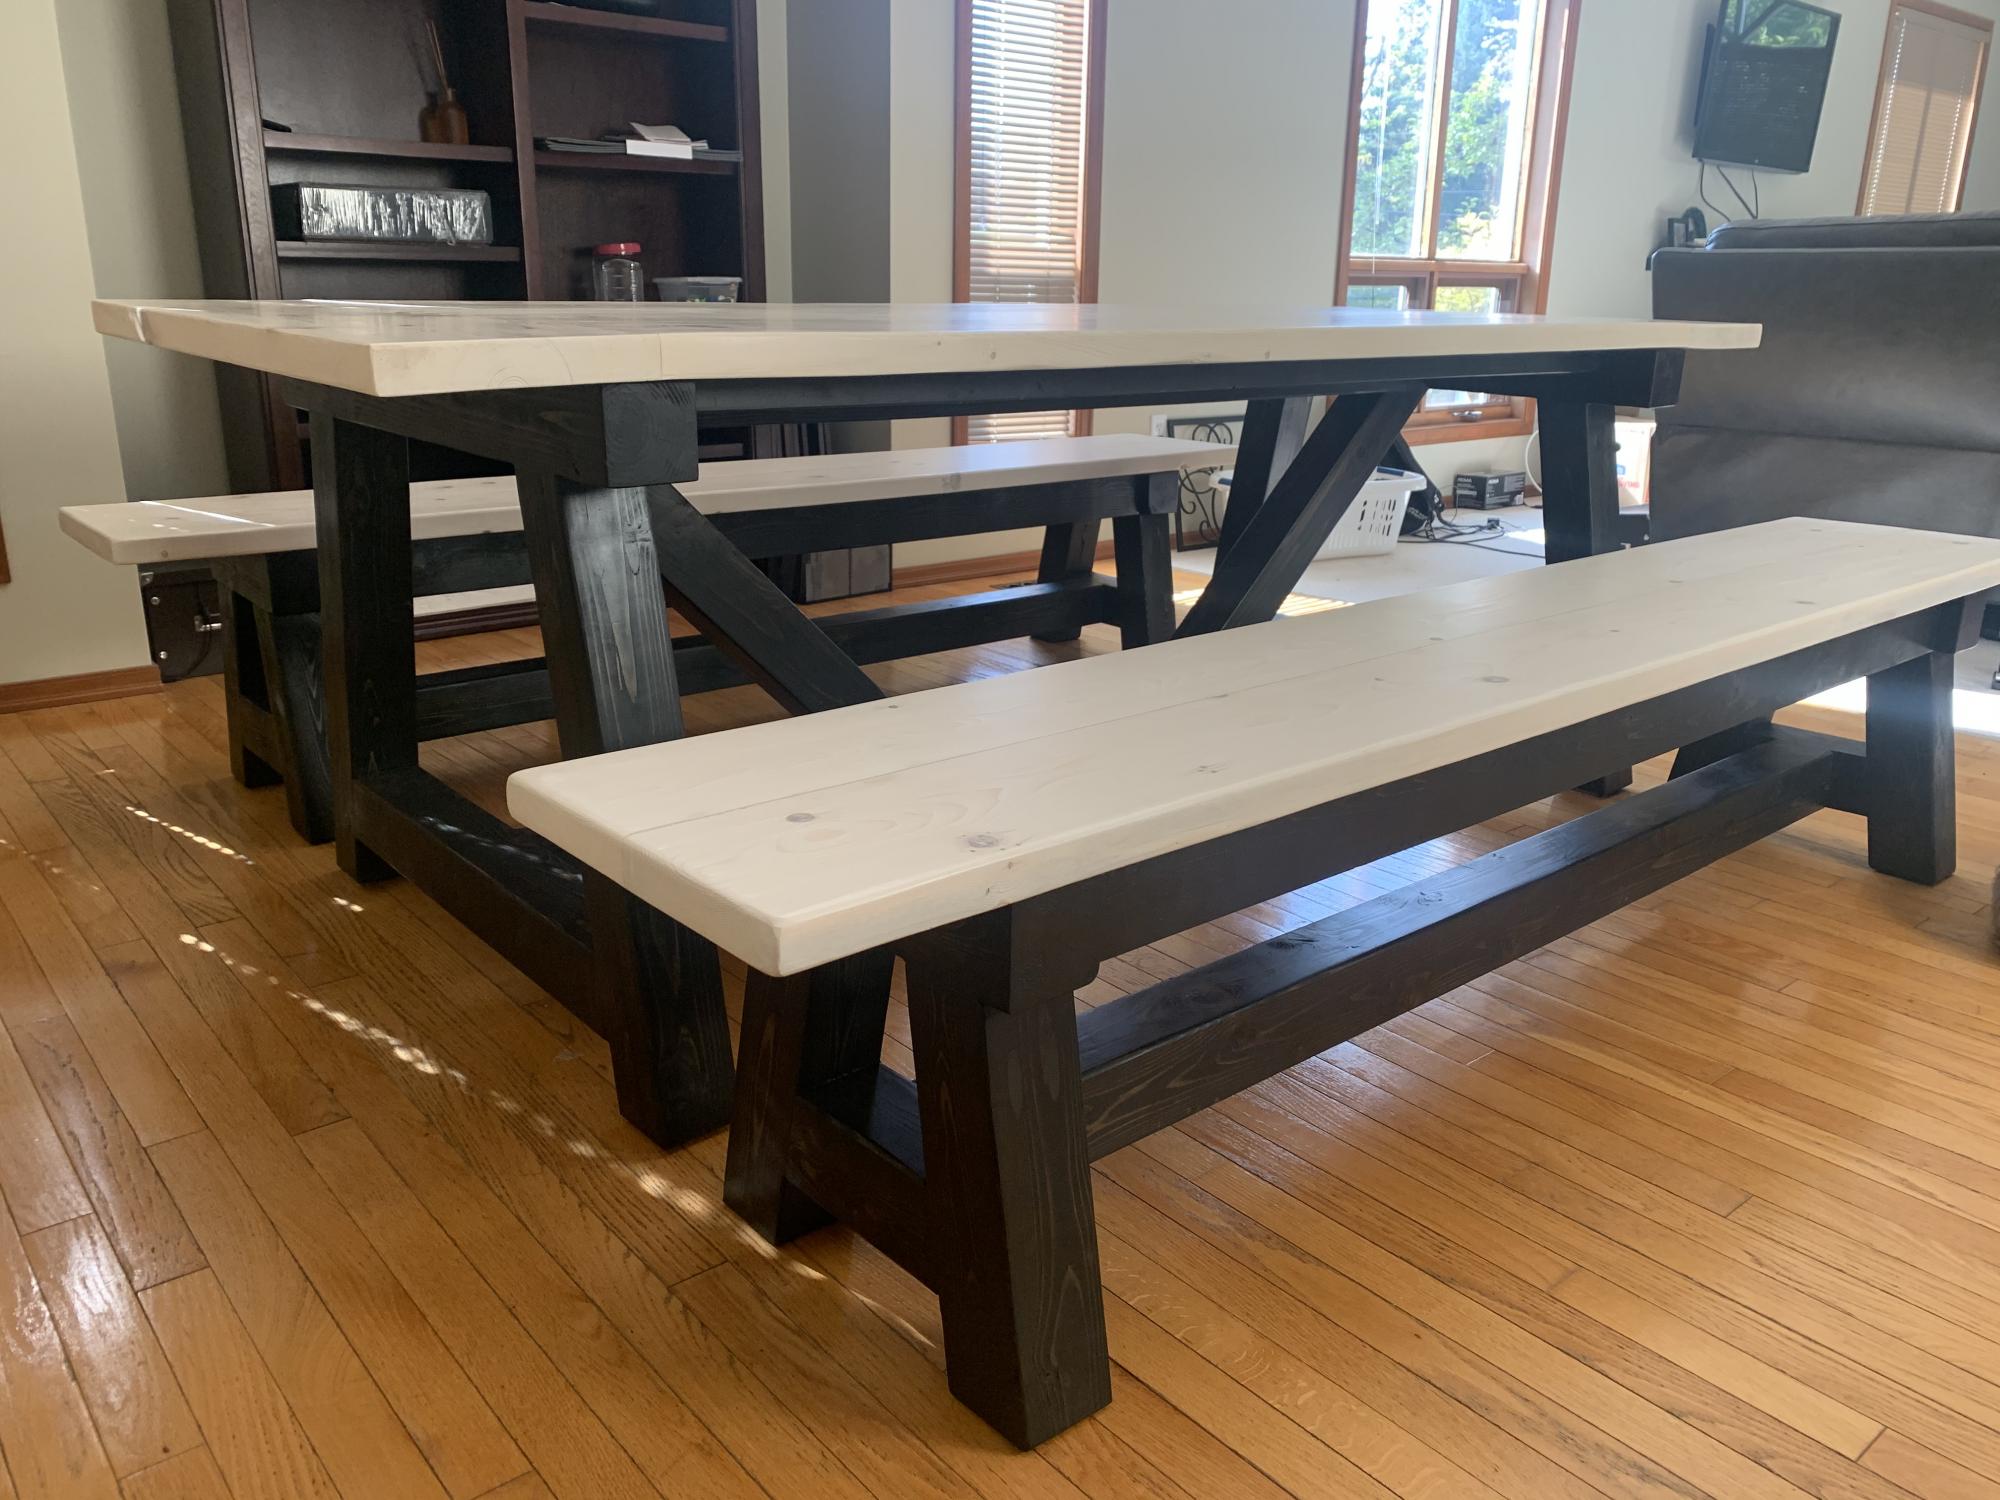
My first furniture project. Made the 4x4 Truss table and matching benches. I used cedar for the 4x4’s as they are the only kind of untreated 4x4’s available here other than knotty pine for $9 a foot. The rest is spruce as that’s what most dimensional lumber here is. The only changes I made were to the pocket holes. I didn’t feel 2 on 1 side would be a tight enough joint so for the table I put them where the plans called for them and then 2 more on the opposite side. I filled in the visible pocket holes with 1/2 dowels and sawed them off flush
Built from Plan(s)
Estimated Time Investment
Week Long Project (20 Hours or More)
Finish Used
For the bases I used Varathane Ultimate Ebony stain and minwax fast drying polyurethane spray in satin.
For the tops I use Varathane Ultimate White Linen stain and Varathane Diamond Finish Soft Touch polyurethane in matte. I applied polyurethane with a brush. Very light sanding with 220 between coats to remove any dust particles that settled and with 400 after last coat. Final sanding was very very light. Just ran the rubber block sander over with the grain to remove any imperfections. This product really is aptly named. The matte finish is beautifully soft to touch.
I believe in the US the Varathane stains I used are branded Rust-Oleum.
Recommended Skill Level
Intermediate
Comments
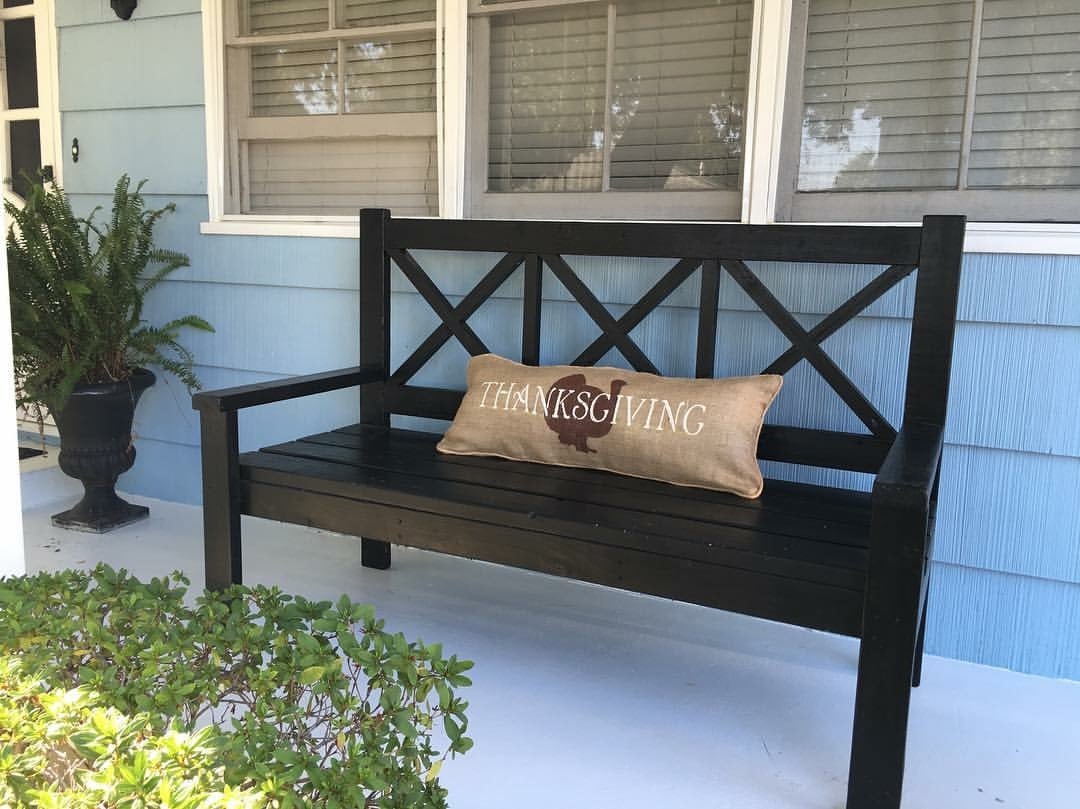
Large Porch Bench
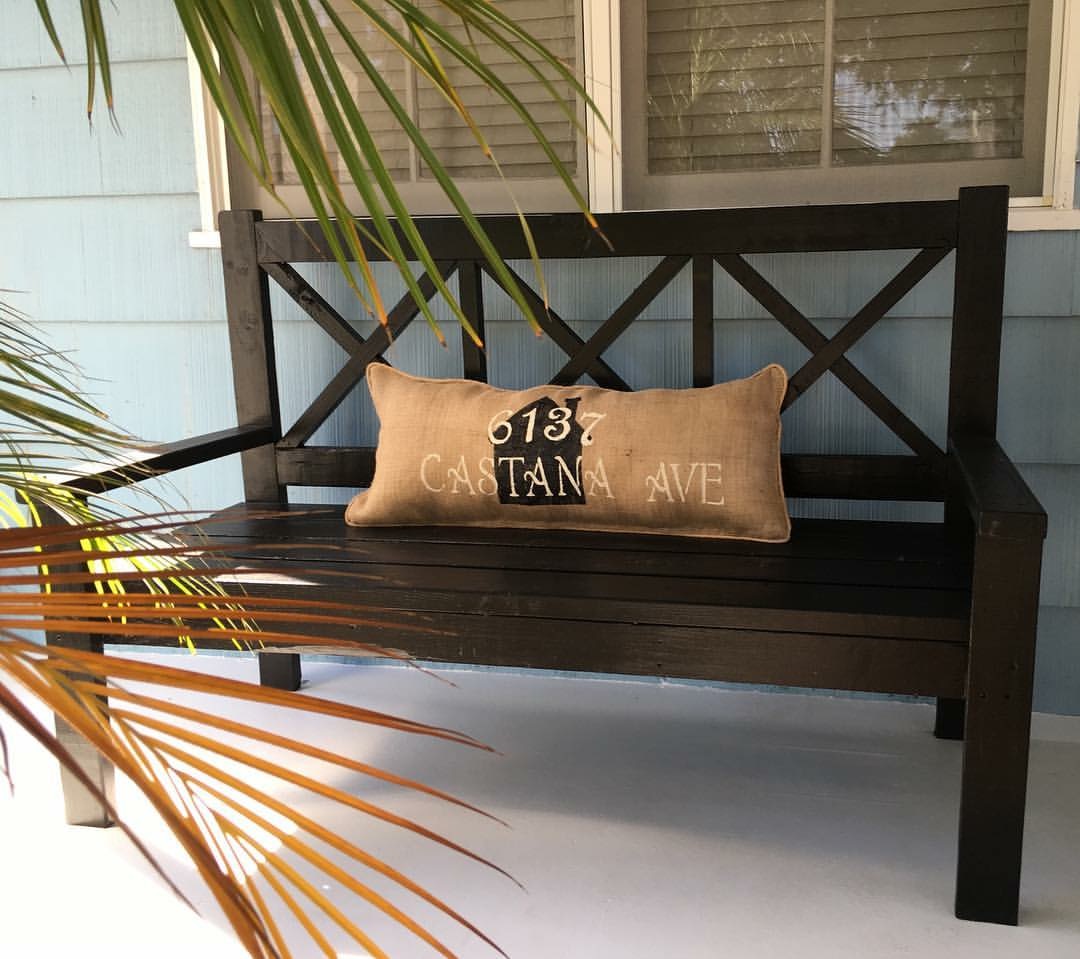
We built 2 XLarge Porch Benches,they where easy to build & look fabulous! Best part was it was a fraction of the cost if I were to buy these new!!! Thank you Ana!!!
-Sandra
Built from Plan(s)
Estimated Time Investment
Weekend Project (10-20 Hours)
Recommended Skill Level
Beginner
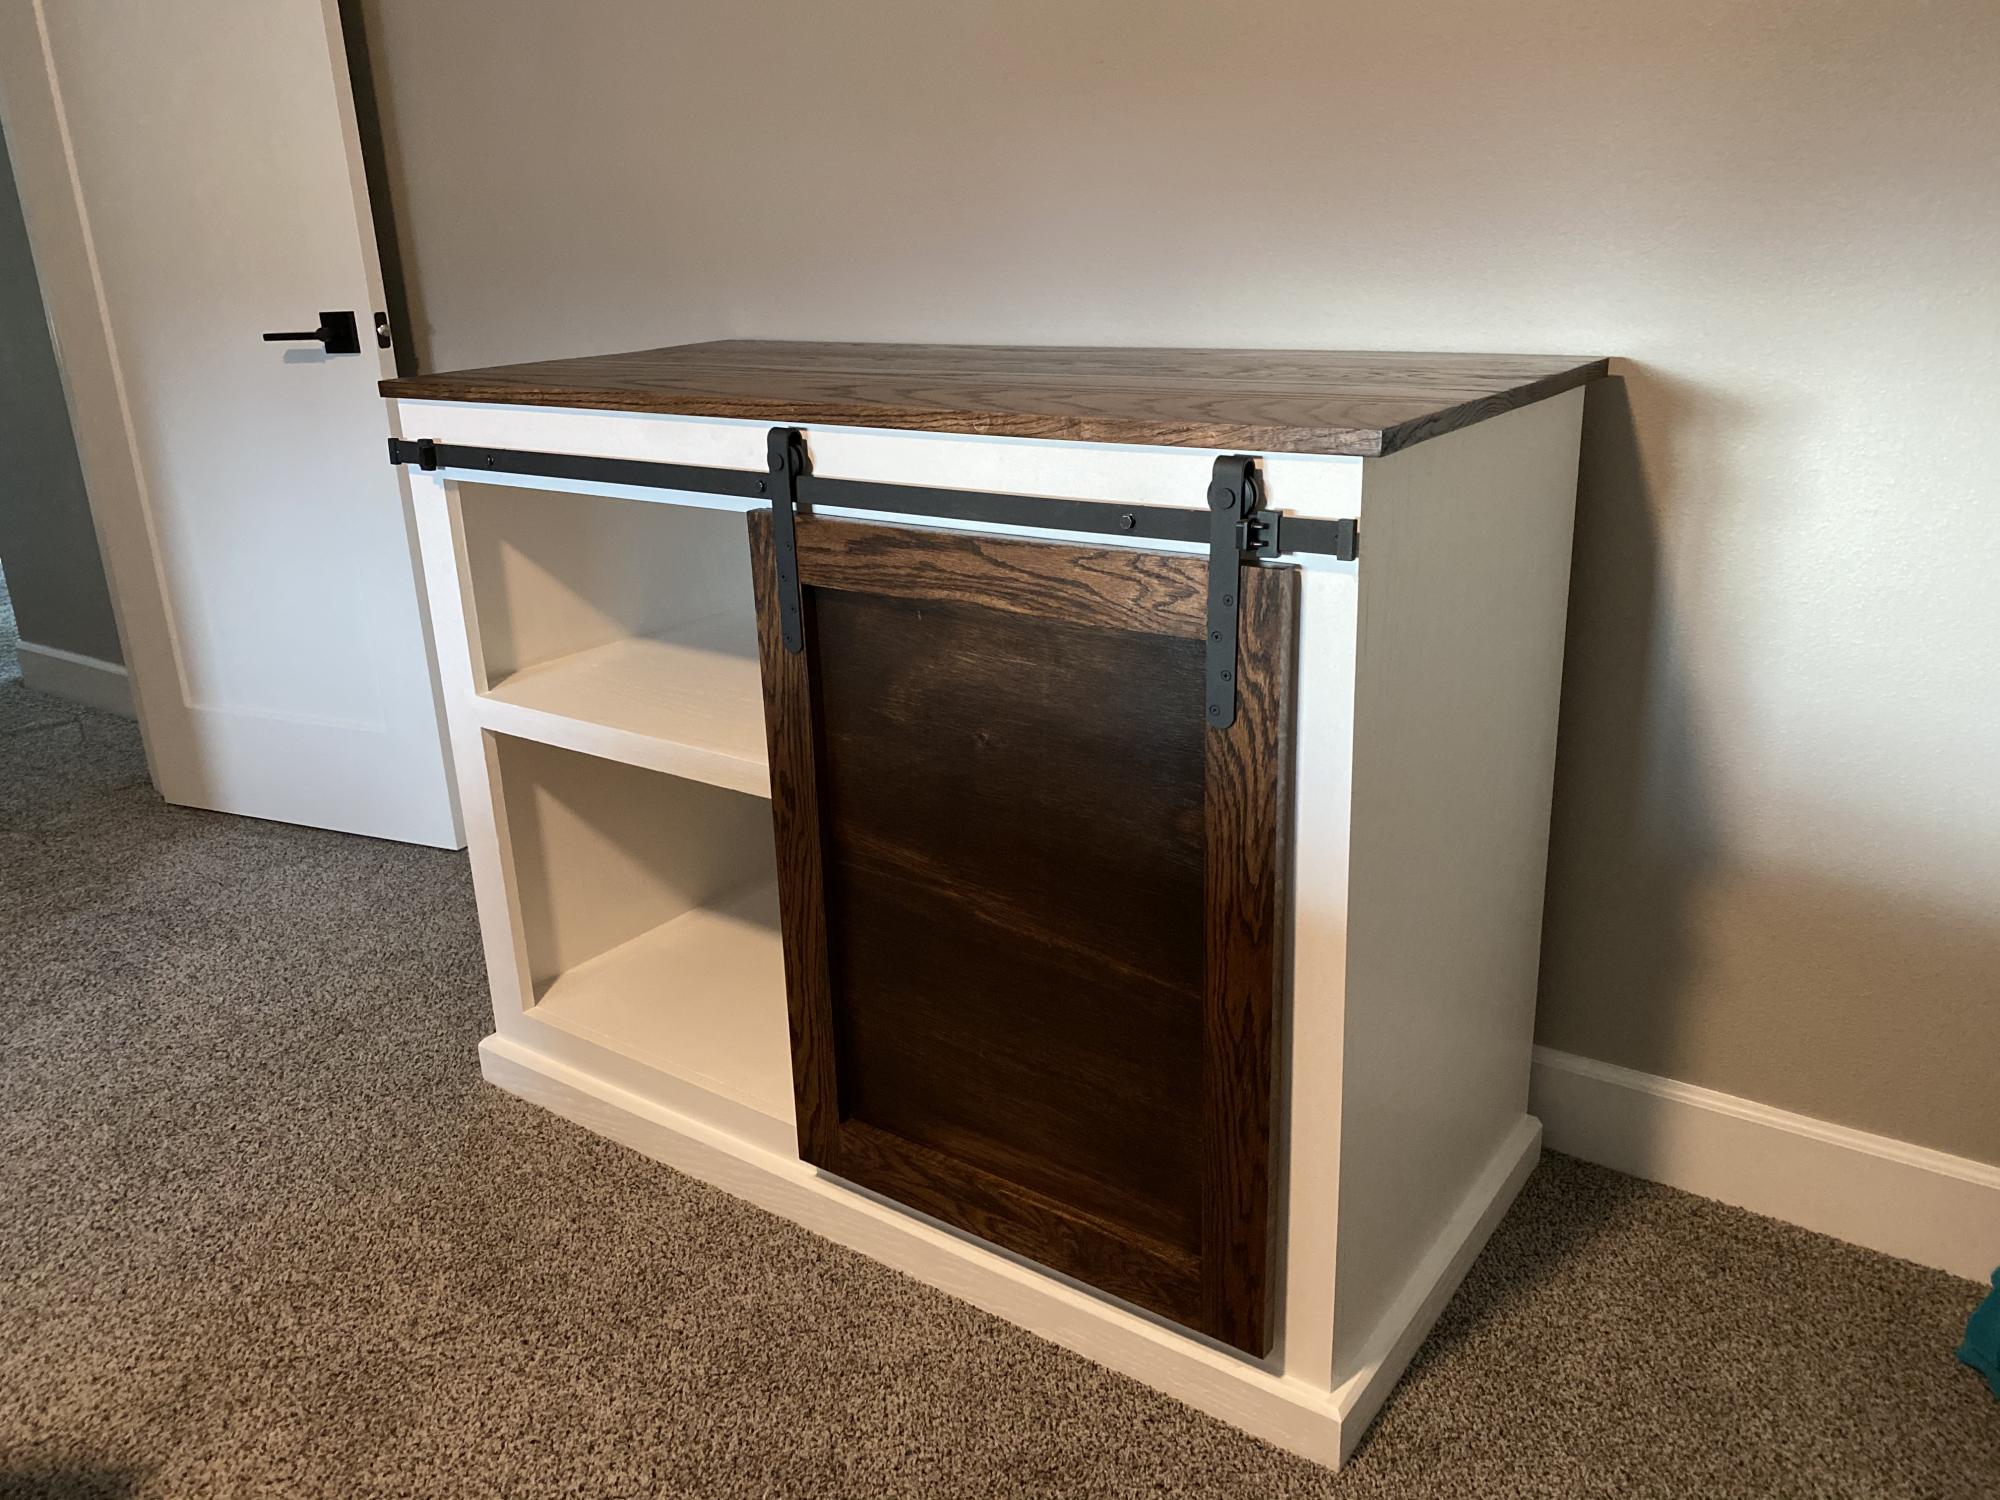
Board game cabinet / charging station

After Xmas I decided we needed a better place to keep our growing collection of board games. I made mine a bit deeper to fit our longer board games. Also, put a 3rd door on it. We also needed a central place to charge our phones and tablets. Paired with the top of the bedside charging table this cabinet is the perfect solution. Thank you!
Built from Plan(s)
Estimated Time Investment
Week Long Project (20 Hours or More)
Finish Used
Valspar Satin Paint
Recommended Skill Level
Intermediate
Standard King Farmhouse Bed
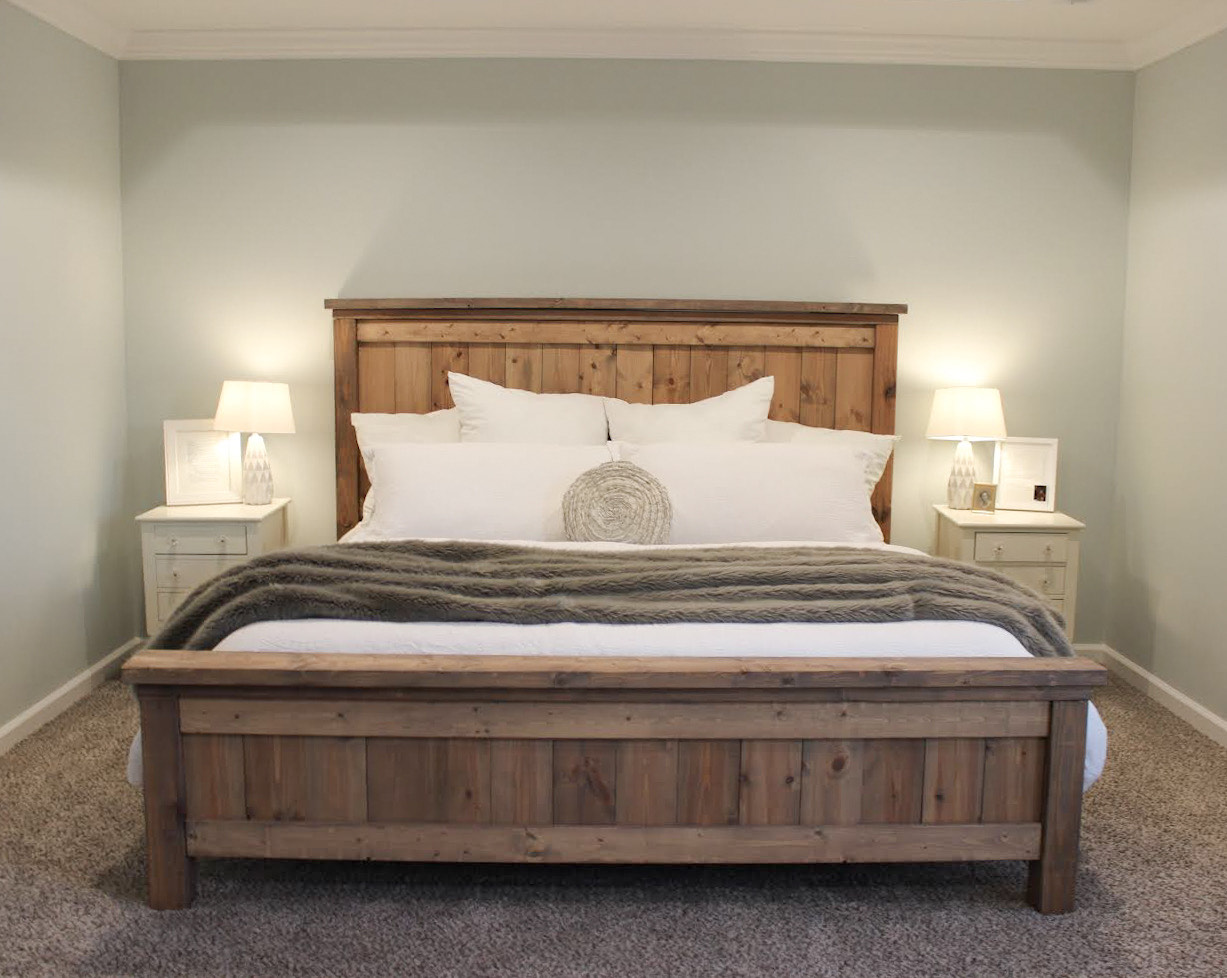
No modifications to original plans.
Built from Plan(s)
Estimated Time Investment
Weekend Project (10-20 Hours)
Finish Used
Custom stain, four-layer process.
Recommended Skill Level
Intermediate
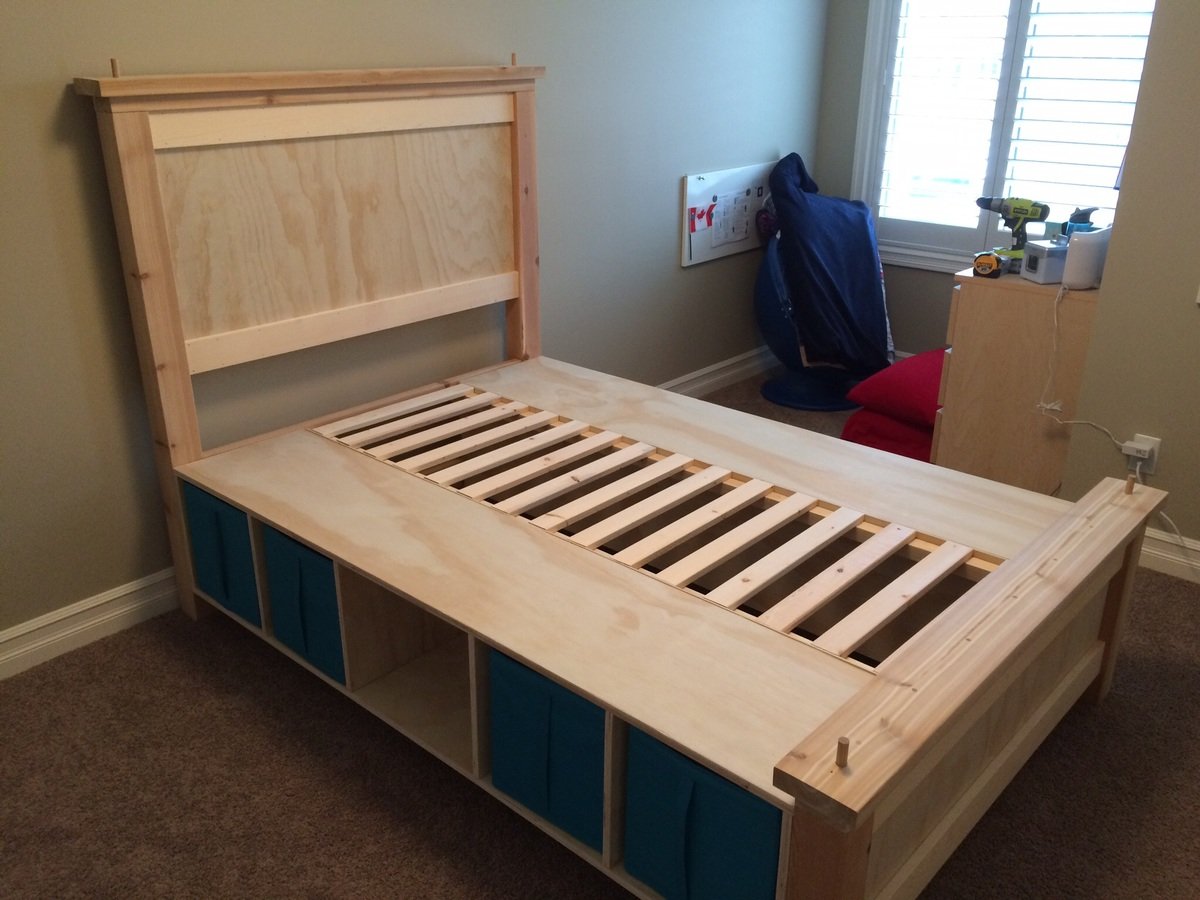
Full Size Farmhouse Canopy Bed With Storage
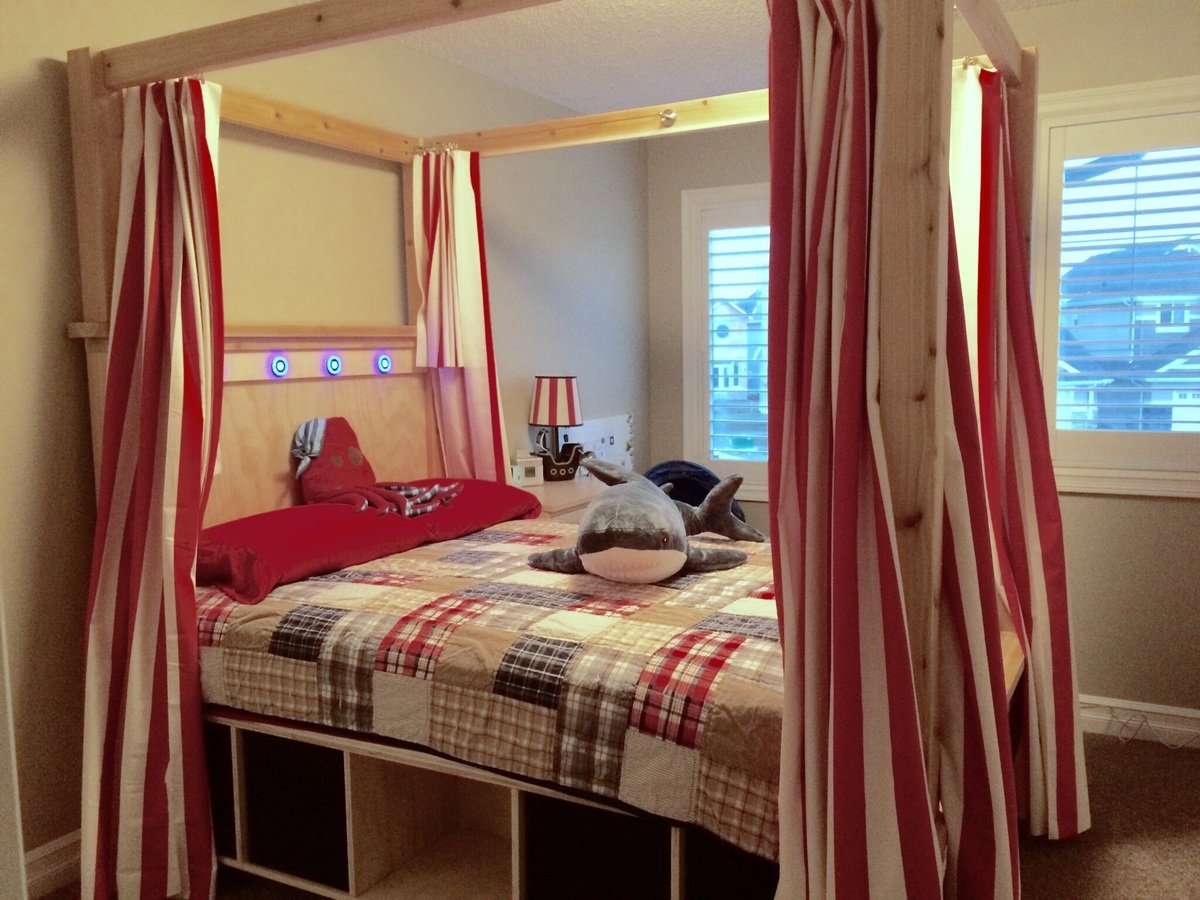
Believe it or not, this is my very first furniture project. Inspired by my 8 yrs old son special needs to be able to draw his curtains close whenever he felt the need, I happily took on the challenge to build this for his pirate themed bedroom. I have not filled the holes yet nor have I stained it in the walnut finish we have chosen. The weather is just too cold for my taste (will wait until spring). Currently, I will work on hemming the curtains. I am just so proud that I could not wait until next year to share it with you all. I carefully changed the dimensions to a full size bed, changed the storage shelves sizes to accommodate 8 cube bins and 2 book shelves, added the canopy and some multi-coloured adjustable LED lights. Feeling so proud and have one really thrilled little boy! Thanks Ana!!!
Built from Plan(s)
Estimated Cost
Roughly $500 but have lots of extra wood for a side table perhaps.
Estimated Time Investment
Weekend Project (10-20 Hours)
Finish Used
None as of yet.
Recommended Skill Level
Intermediate
Comments

Mon, 11/03/2014 - 14:21
Great job!
Great build! Love the added curtains. Congratulations on an awesome first furniture build!
Mon, 11/03/2014 - 20:00
:) Thank you!
Thank you very much! I had so much fun building it. Besides, there is nothing more gratifying than getting a great big hug from my son with a heartfelt thank you. Priceless!
Now my other two children have me planning their beds. :) Mixing things up a bit using two totally different type of plans. Can't wait to see the results.
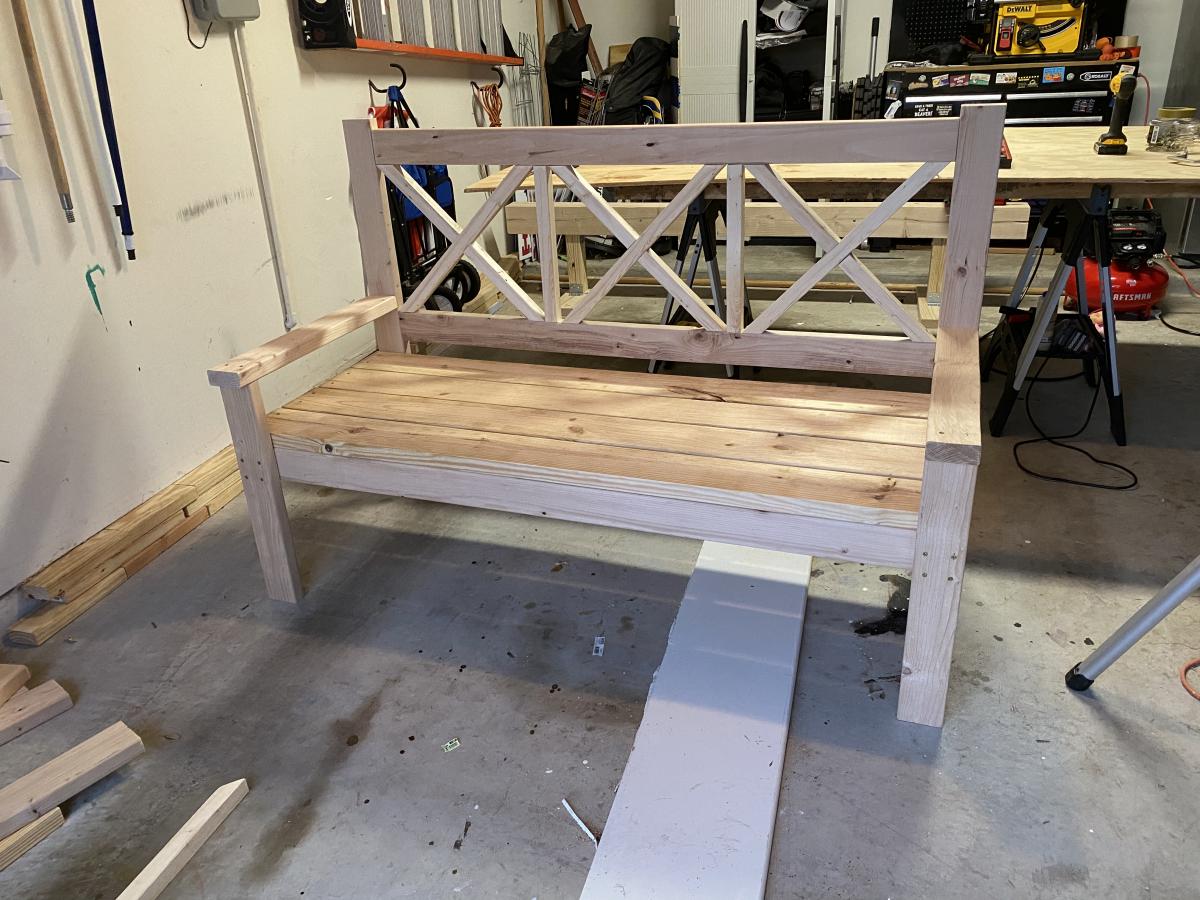
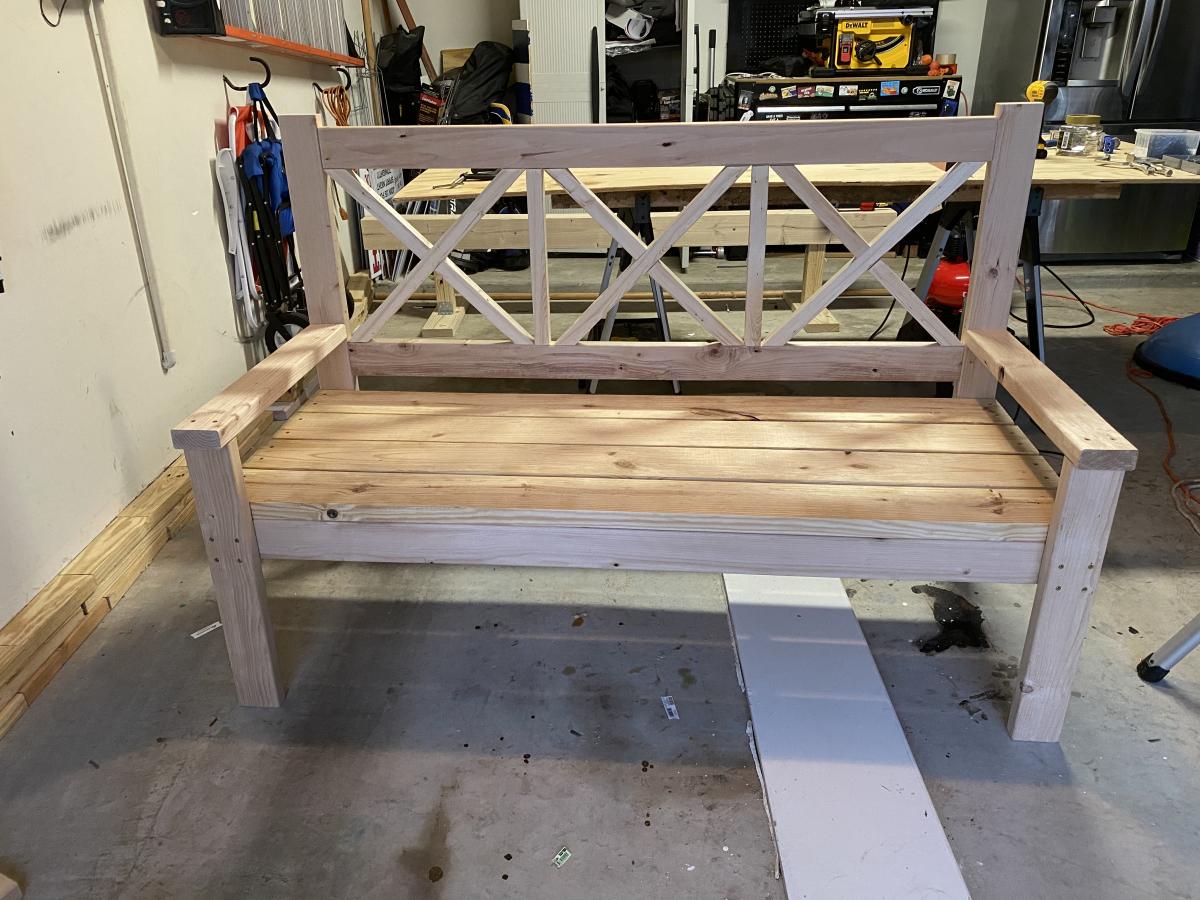
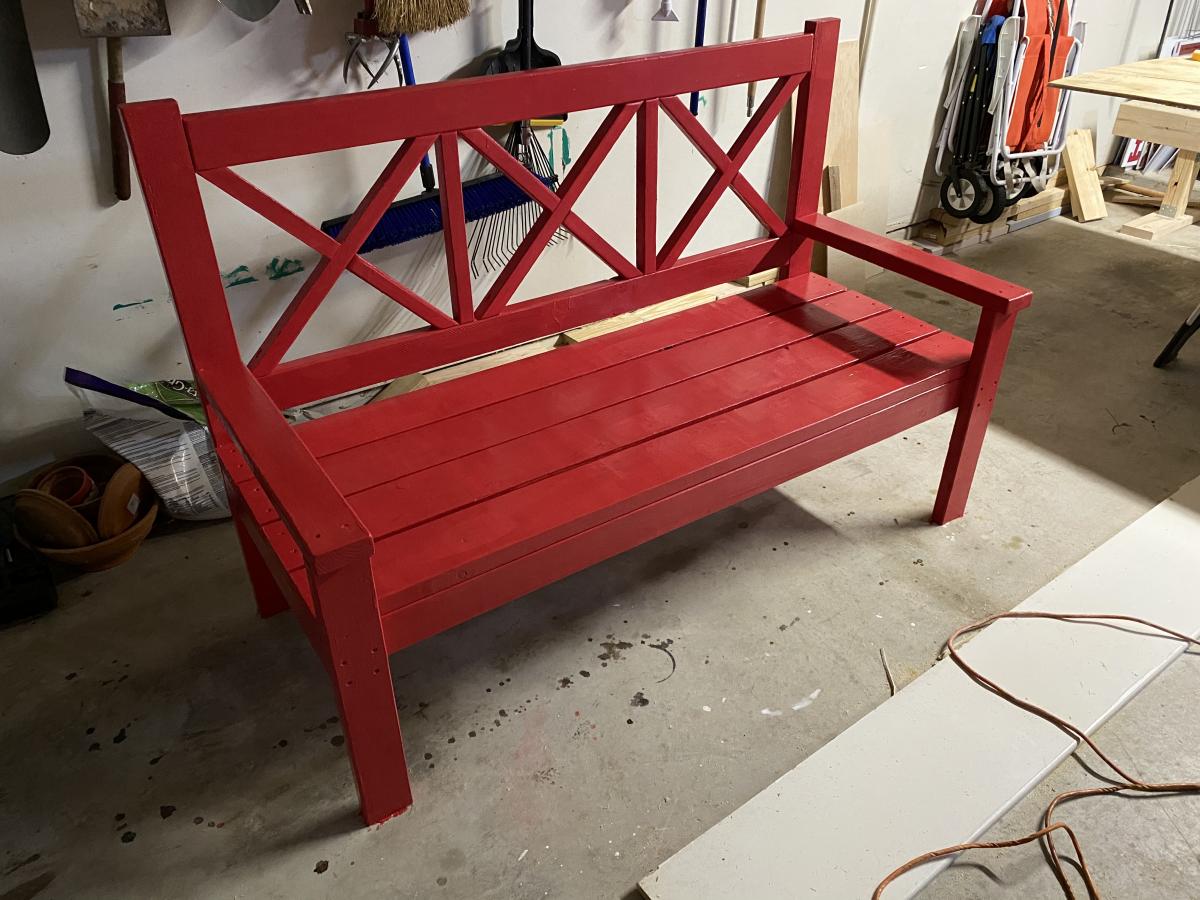
Grammy’s bench
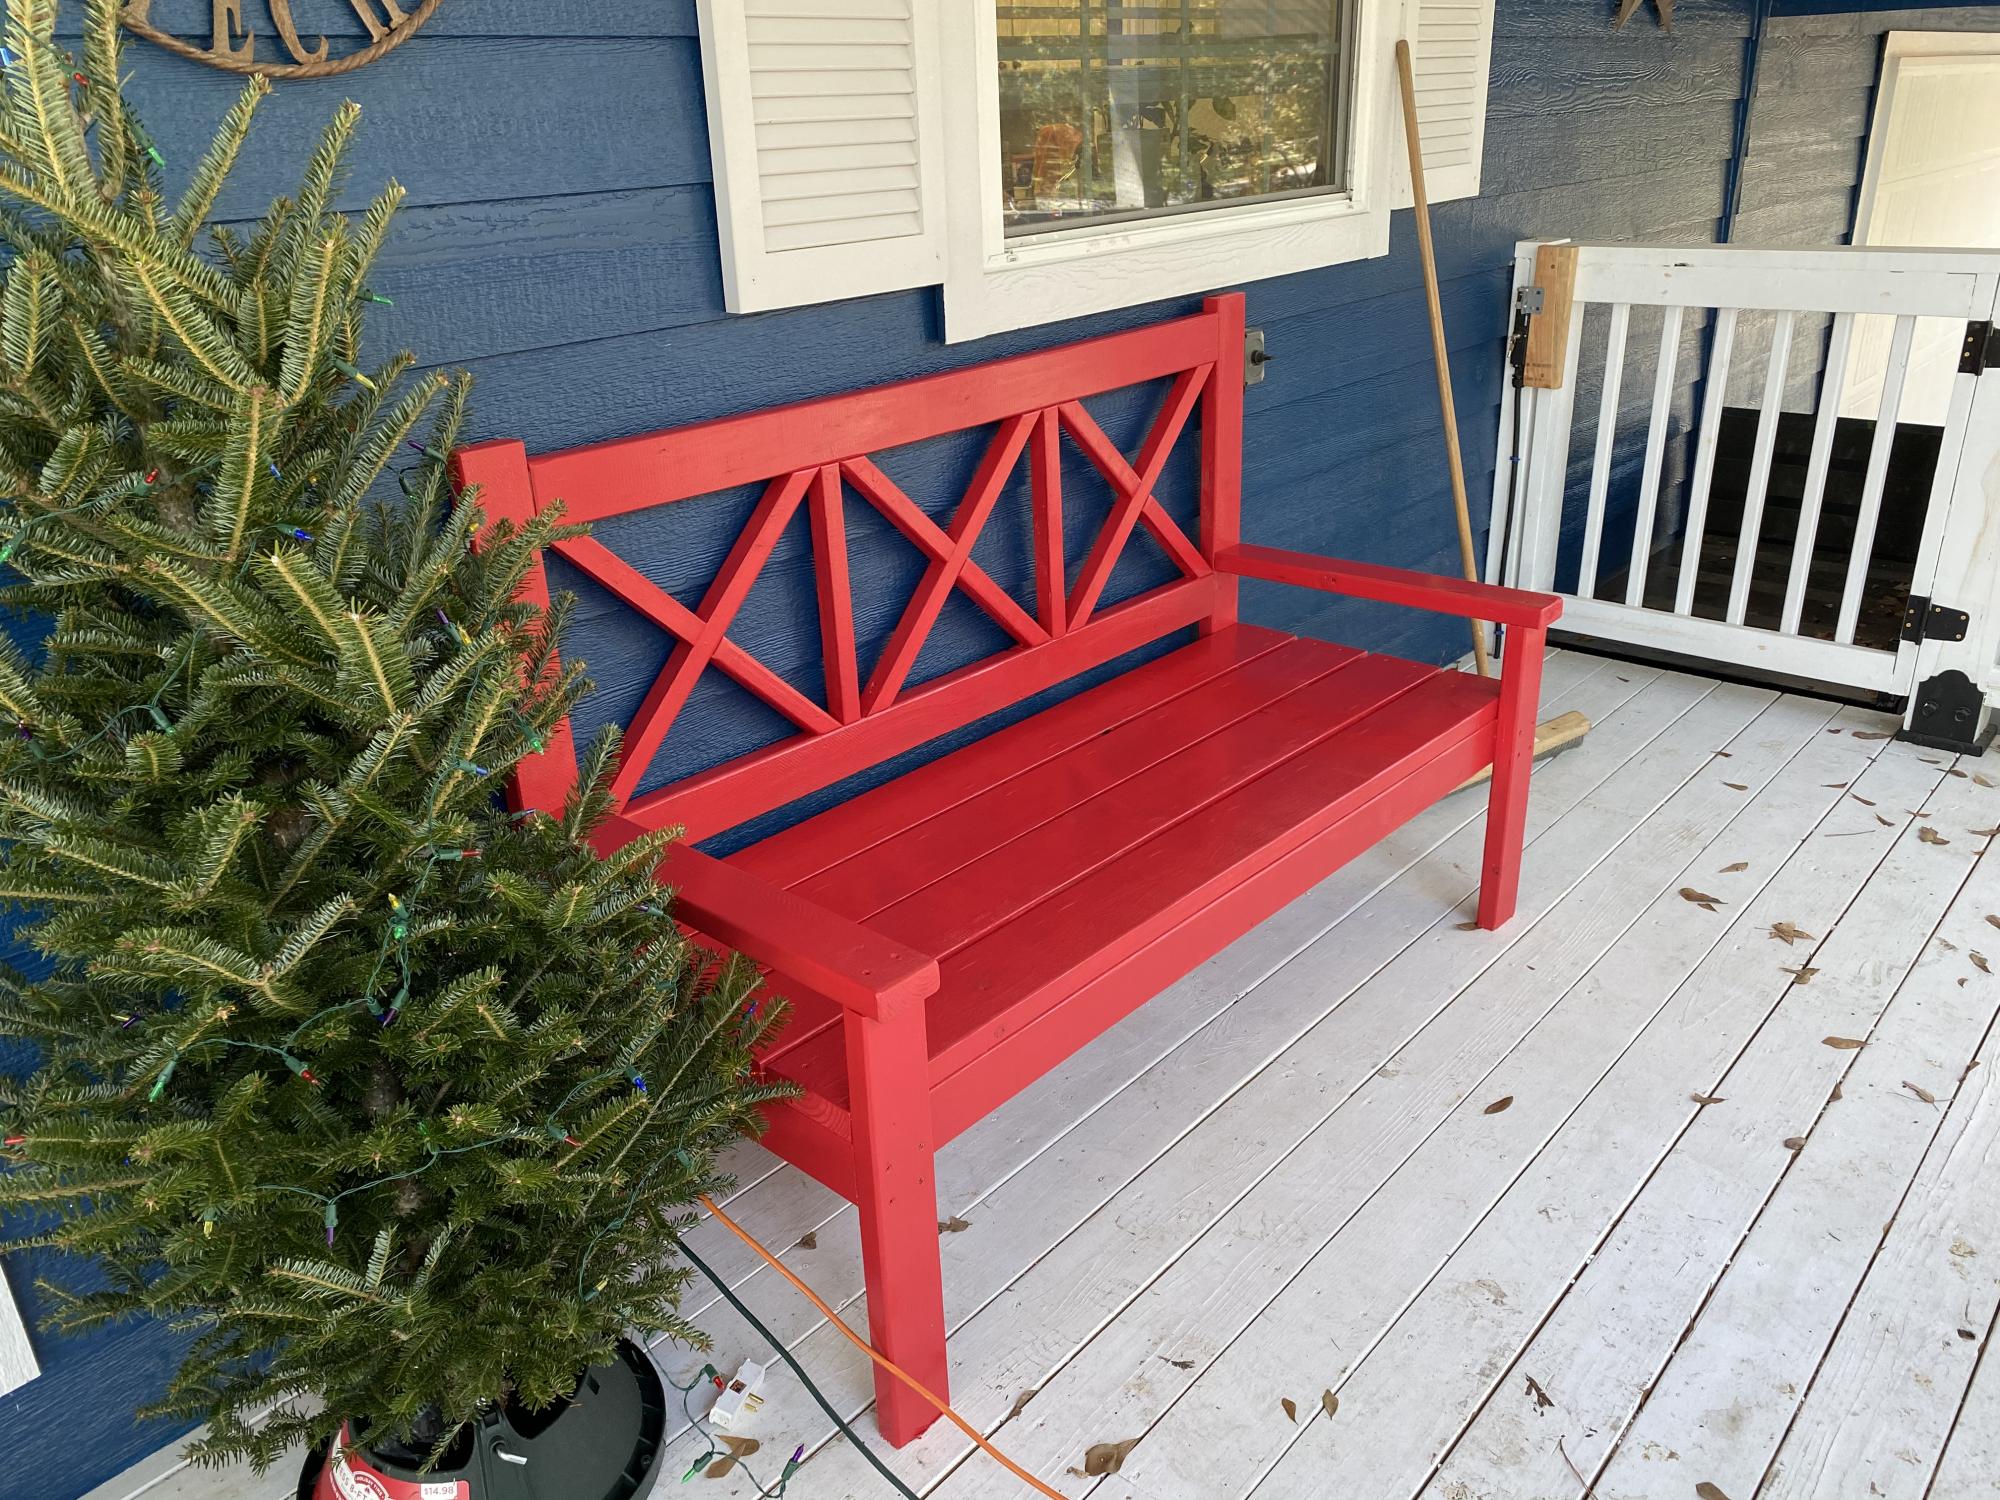
Porch bench for my parents’ new house.

Built from Plan(s)
Estimated Cost
$100
Estimated Time Investment
Day Project (6-9 Hours)
Finish Used
Exterior Valspar - Bright Red
Recommended Skill Level
Intermediate
Comments
Guest Room Addition
This project took me a couple weekends and turned out great.
Built from Plan(s)
Estimated Time Investment
Week Long Project (20 Hours or More)
Recommended Skill Level
Intermediate
Comments
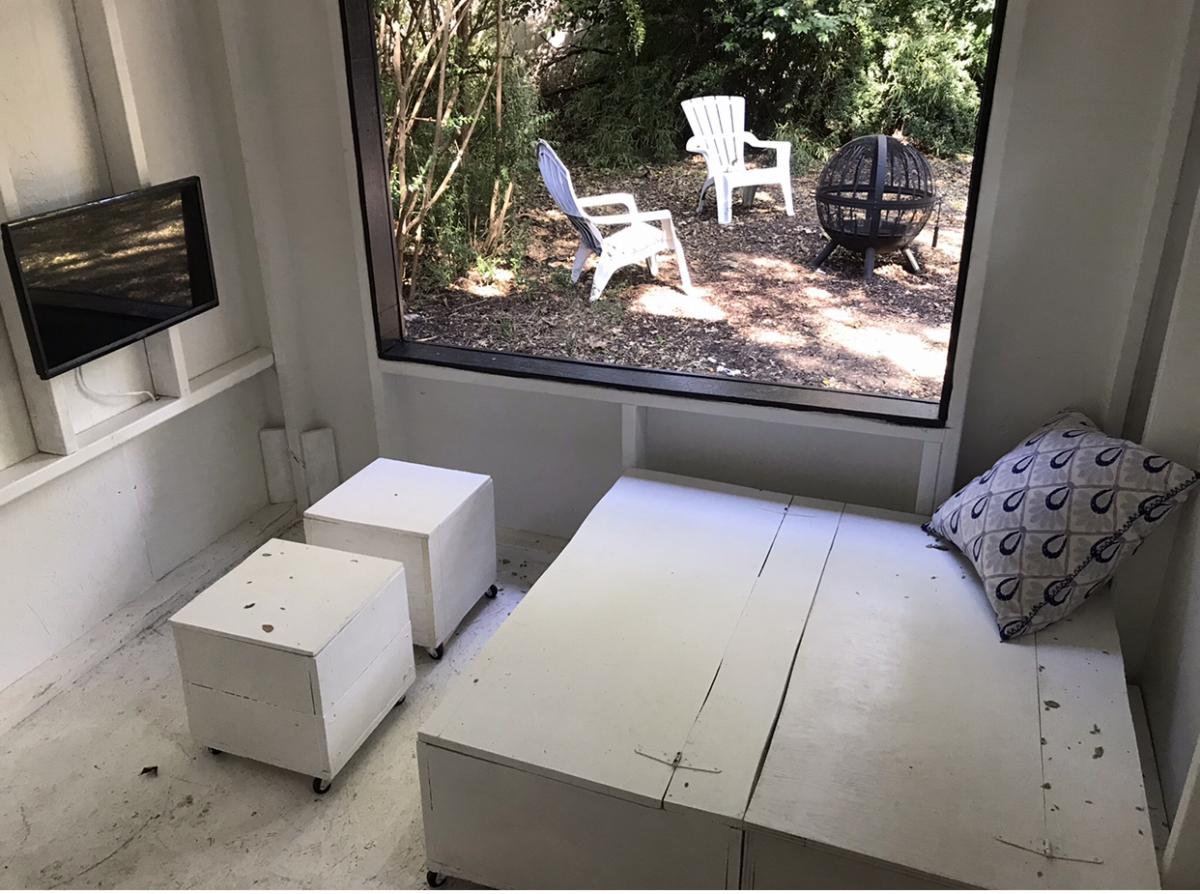
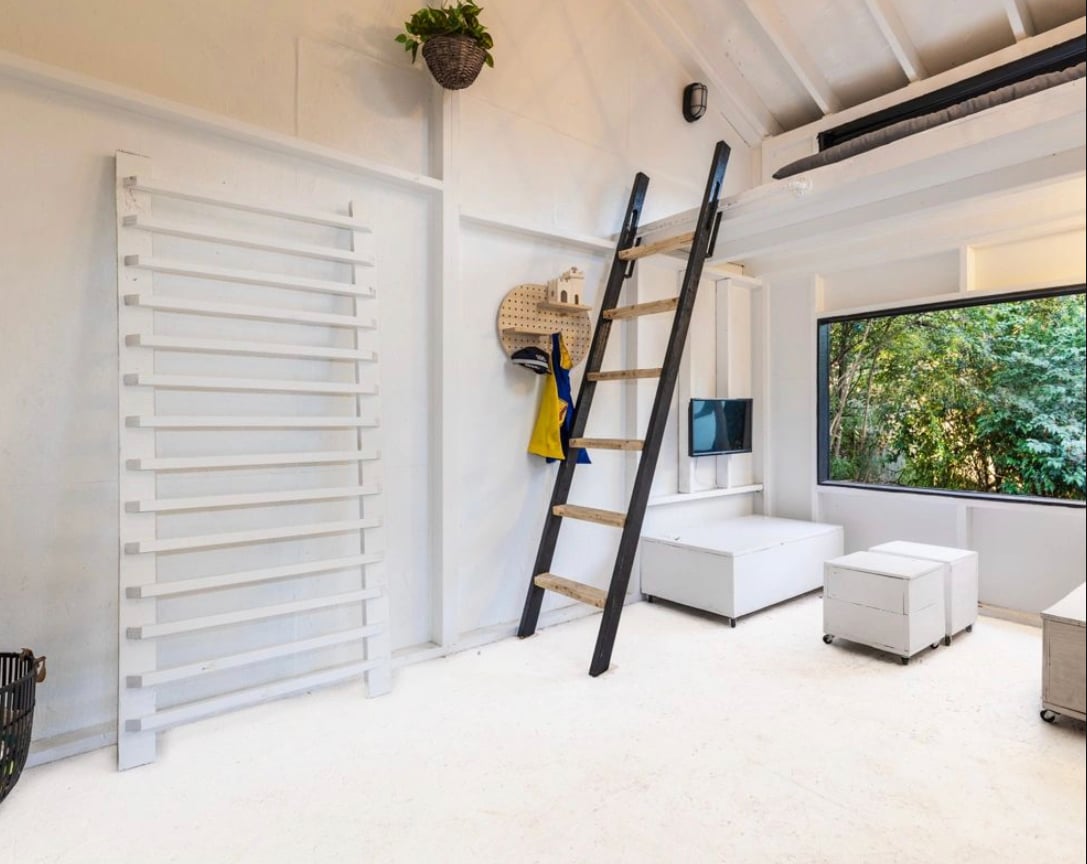
Sectional Storage Sofa for Tiny House
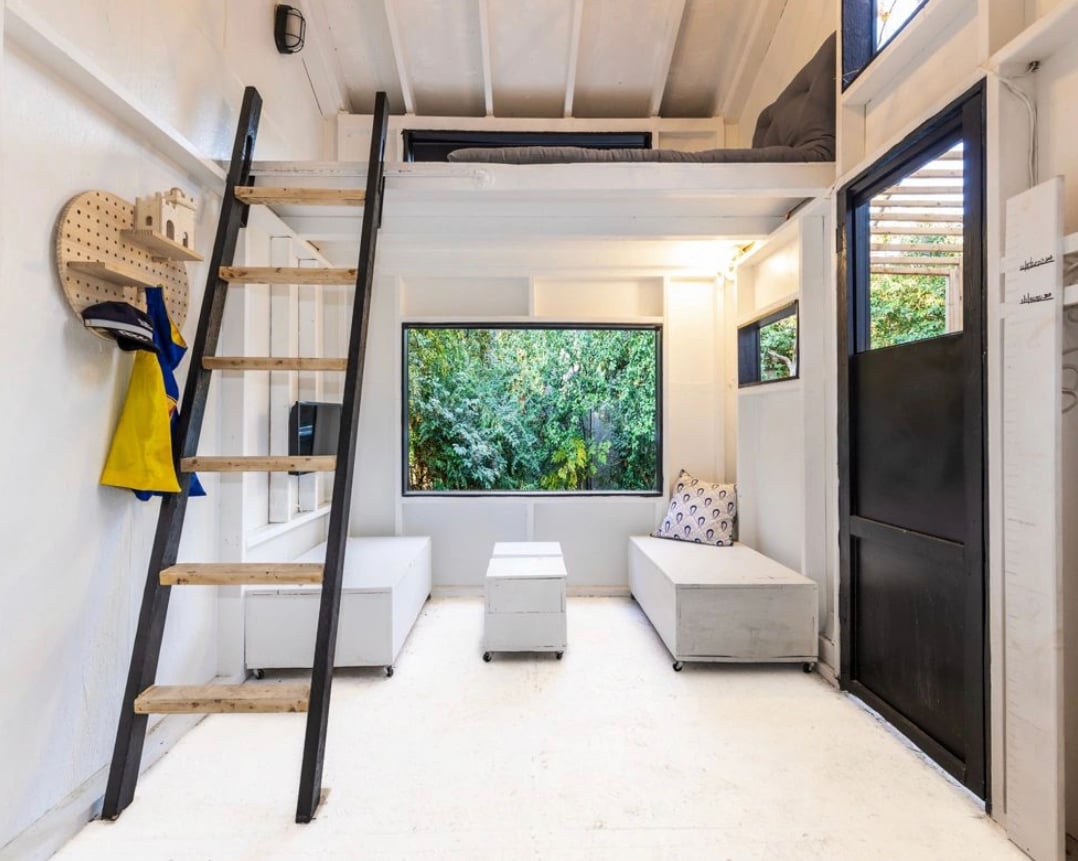
Thank you for the inspiration and plans to build the highly functional and stylish storage + seating solution! You used it for tiny house and I used it in children’s playhouse - it’s been excellent for toy storage! I also love that each piece is on wheels (even the stools that double as coffee table) - very smart and functional. I actually built another one for my garage and use that one for tool and hardware storage. Bravo Ana! Thanks again 😊

Built from Plan(s)
Estimated Cost
Under $100
Estimated Time Investment
Afternoon Project (3-6 Hours)
Finish Used
White paint
Recommended Skill Level
Beginner
Comments
Folding lap desk
This is my first project that I’ve done entirely by myself and I’m so happy with how it turned out. These plans were great! The only thing I did differently was make the legs 1/2 an inch longer and I stained the table instead of personalising. I made this for my mum and she loves it, thank you for these awesome plans ❤️ This only took me an afternoon to build and then just going back and puttying the screws and staining the table was done over a few days. The wood cost around $30 and I already had the putty and stain at home. It would cost more to make if you had to buy the stain and putty.
Built from Plan(s)
Estimated Cost
$30
Estimated Time Investment
Afternoon Project (3-6 Hours)
Recommended Skill Level
Beginner
Comments
pitaters23
Mon, 10/26/2020 - 14:27
Xx
Xx
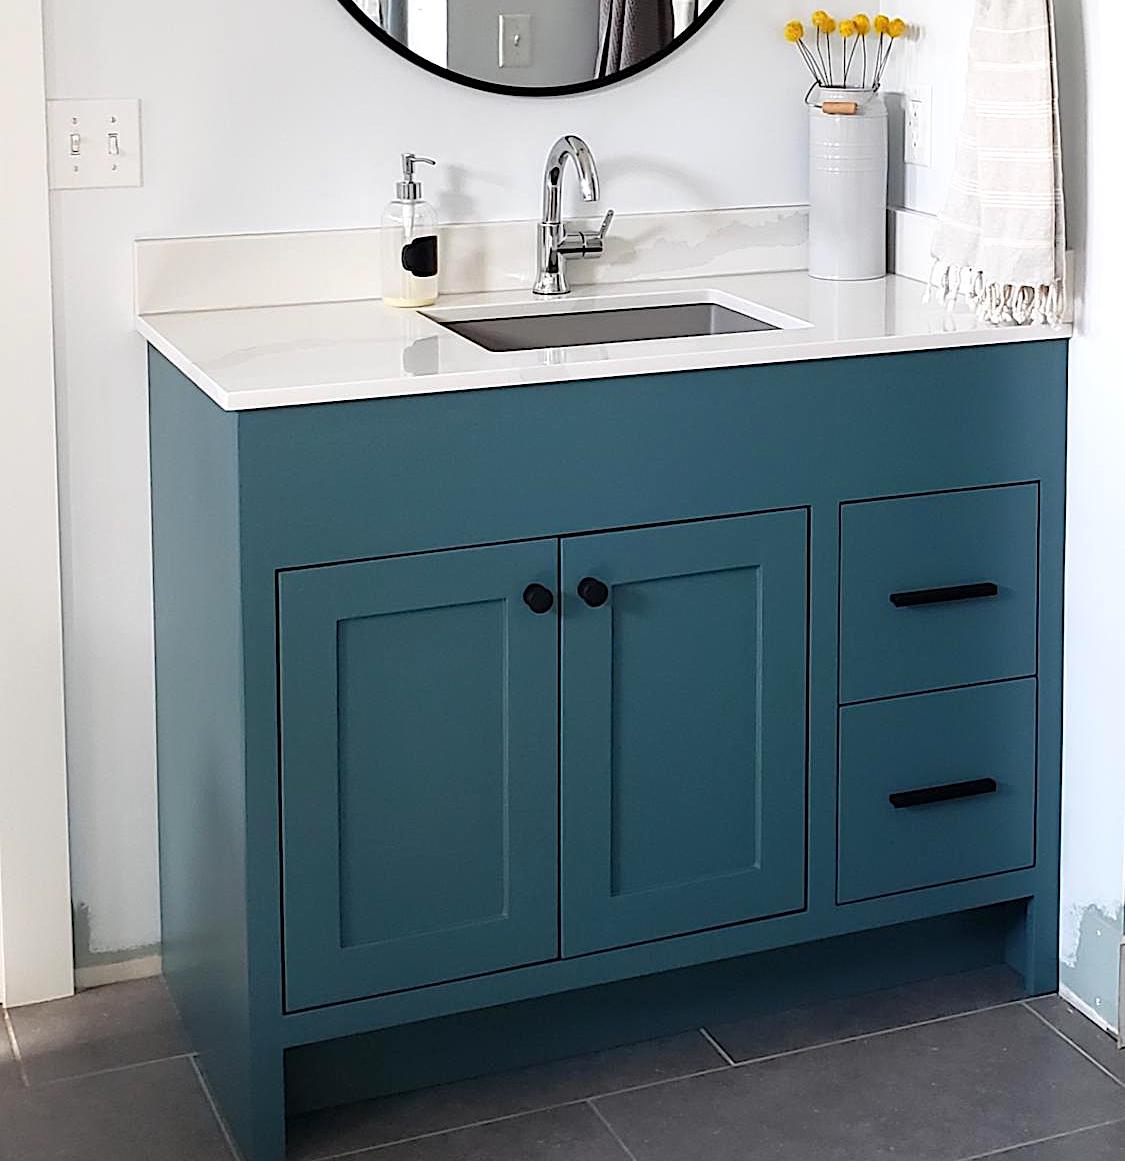
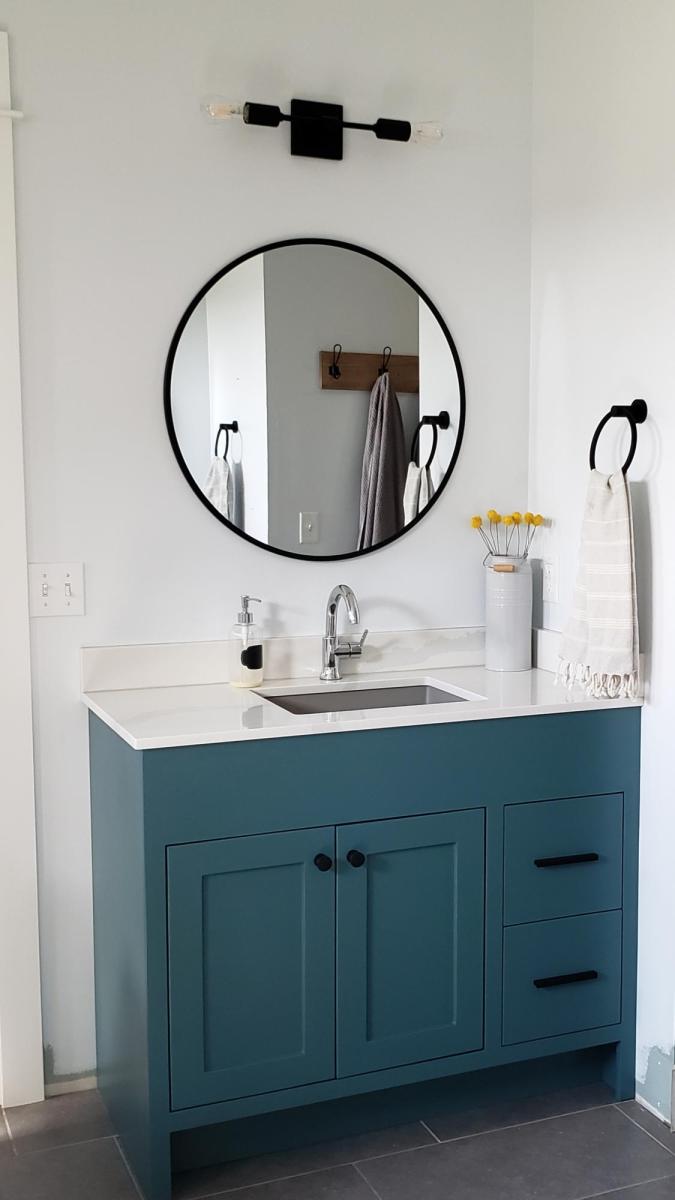
lsduran
Wed, 04/21/2021 - 10:01
This is exactly the size I…
This is exactly the size I need to build, potentially with the same plumbing requirements. Would you mind sharing your plans, please?
mfast10
Tue, 06/13/2023 - 18:29
Exact vanity
This is the exact size and style I am looking for as well. Would you mind sharing the plans with me as well?