Community Brag Posts

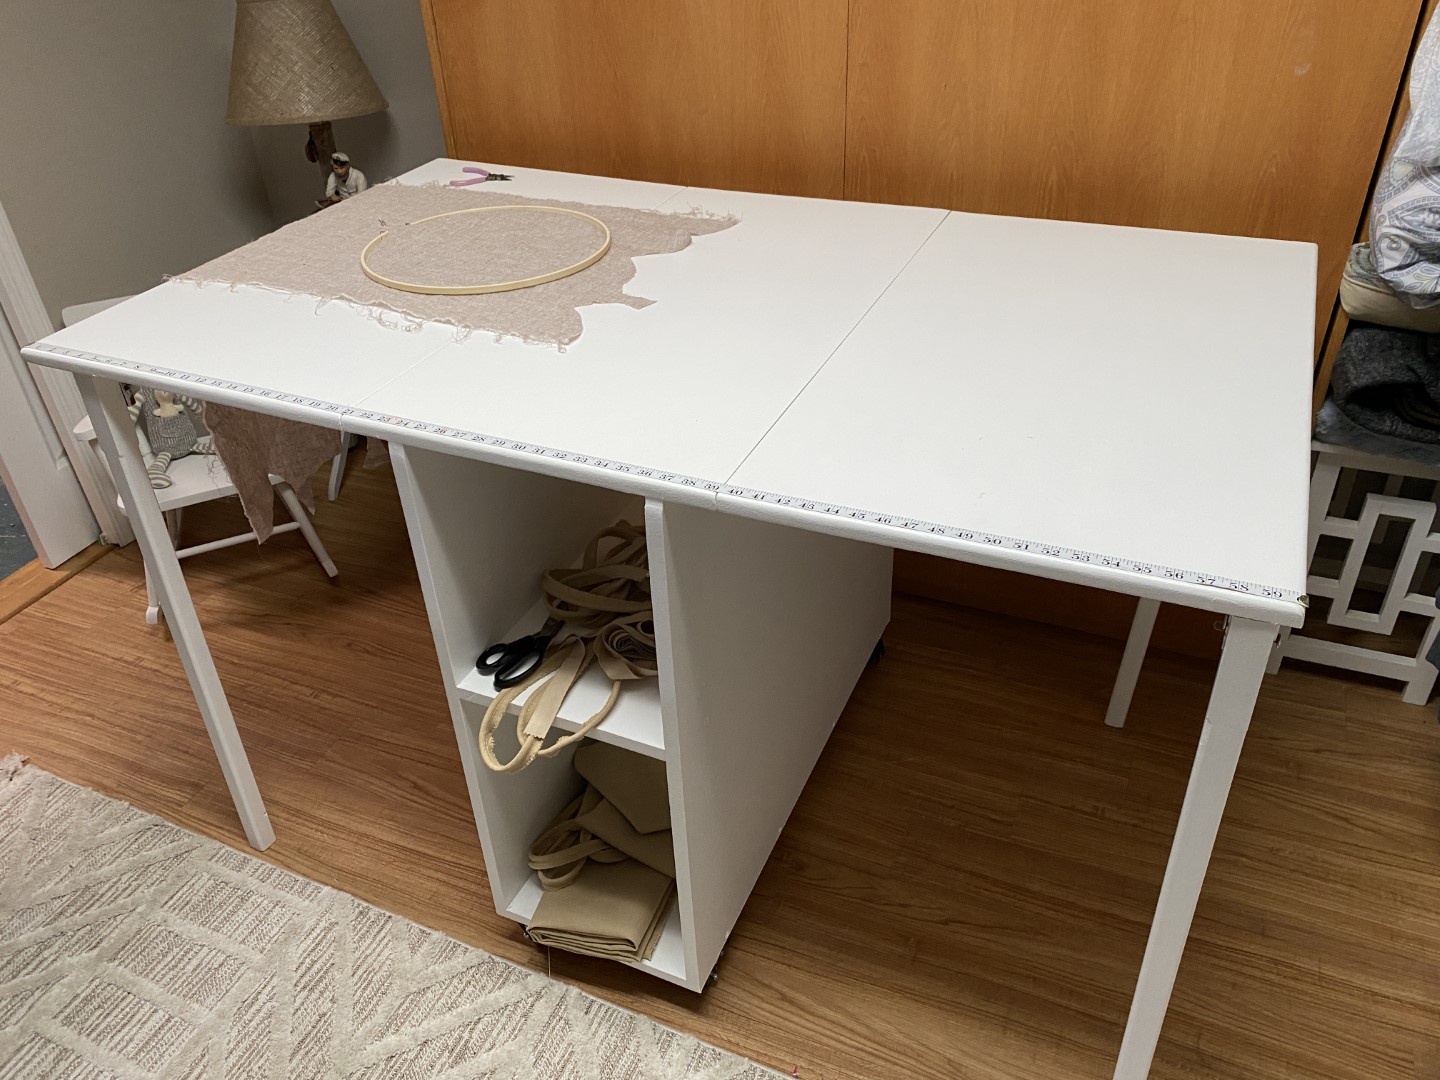
Cutting Table for Sewing room
Submitted by tjbr100 on Mon, 09/07/2020 - 22:06

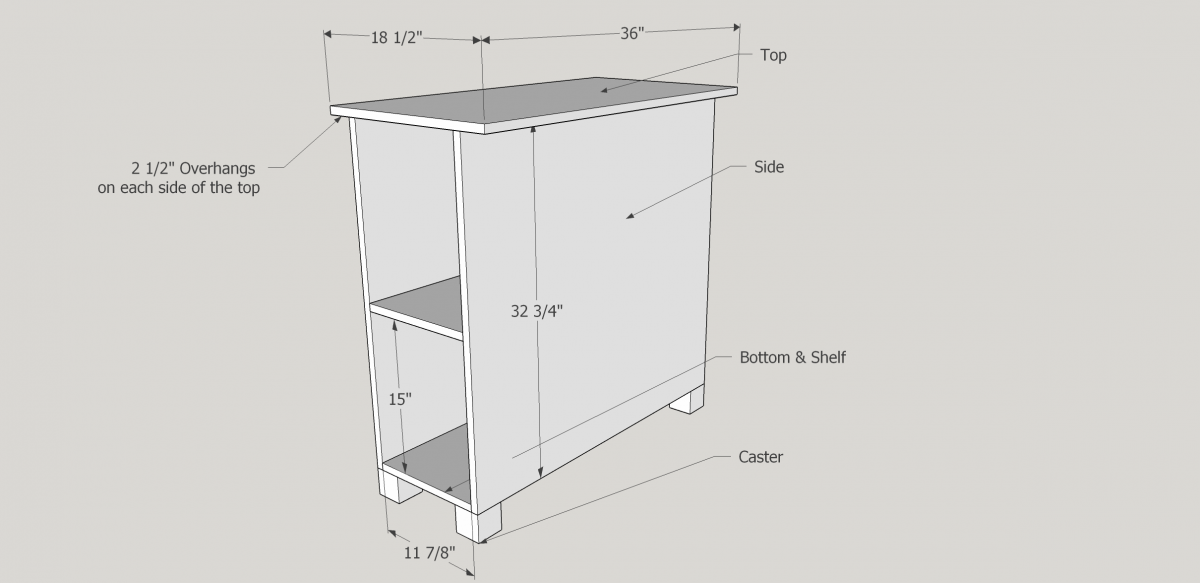
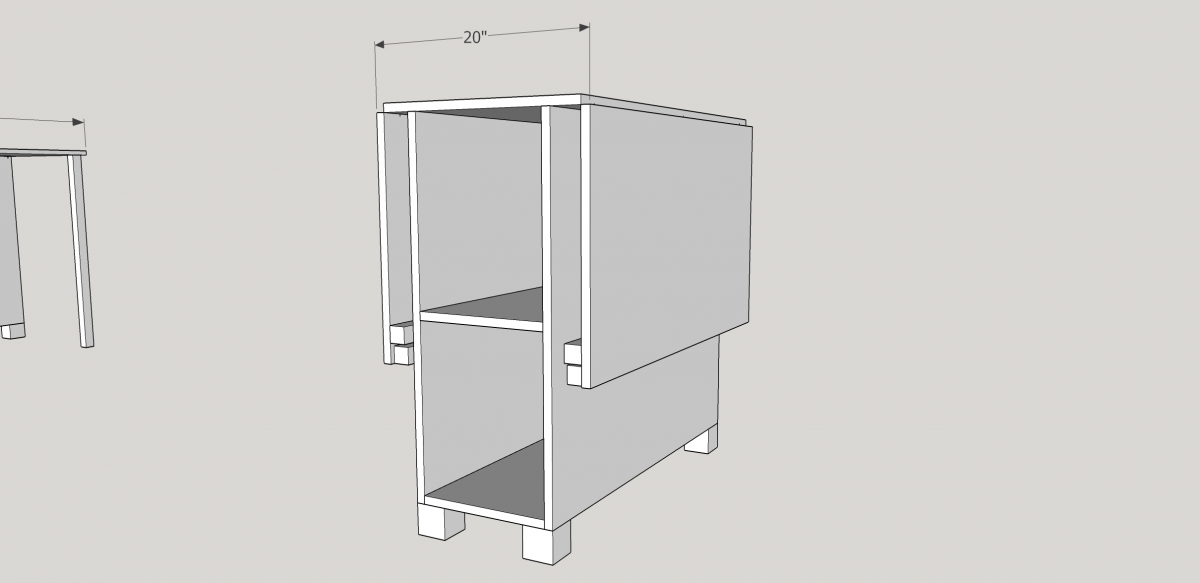
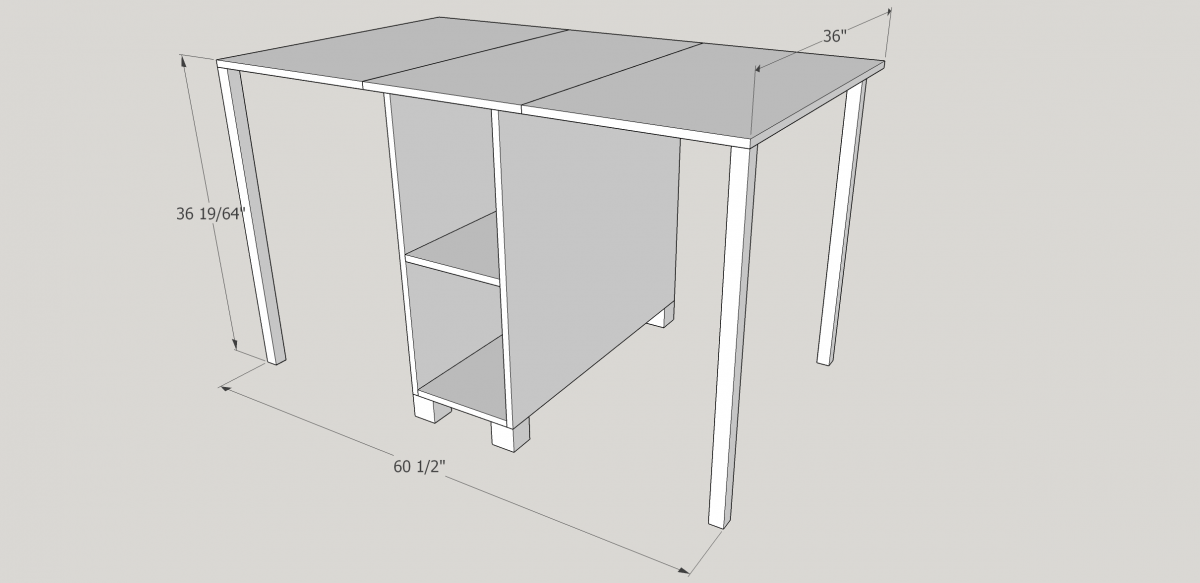
Jennifer wanted a cutting table for her sewing room and so I took Ana-White's Sewing Table plans and made them taller into a cutting table. We aimed for 36" (Standard Counter-Top Height), but ended up at 36 19/64" due to the casters not being exactly two inches. Jennifer's a little short so I was really worried about the extra 19/64" (but don't tell her I said that :)

We decided to use MDF instead of plywood to avoid the risk of snags on finer fabrics.

Instead of simple hinges for the legs, I chose locking hinges available from Lee Valley https://www.leevalley.com/en-ca/shop/hardware/table-hardware/legs/leg-b… ($38 for all four).

We purchased 2" Casters from Amazon.ca https://www.amazon.ca/gp/product/B07G84R9Q9/ref=ppx_yo_dt_b_asin_title_… ($22.99 for all four).

The base was cut from one sheet of 3/4" MDF

We used 2 1/2" screws and glue to build the base. We pre-drilled and counter sunk the screws, ensuring squarness all around.

We attached the casters with the screws provided.

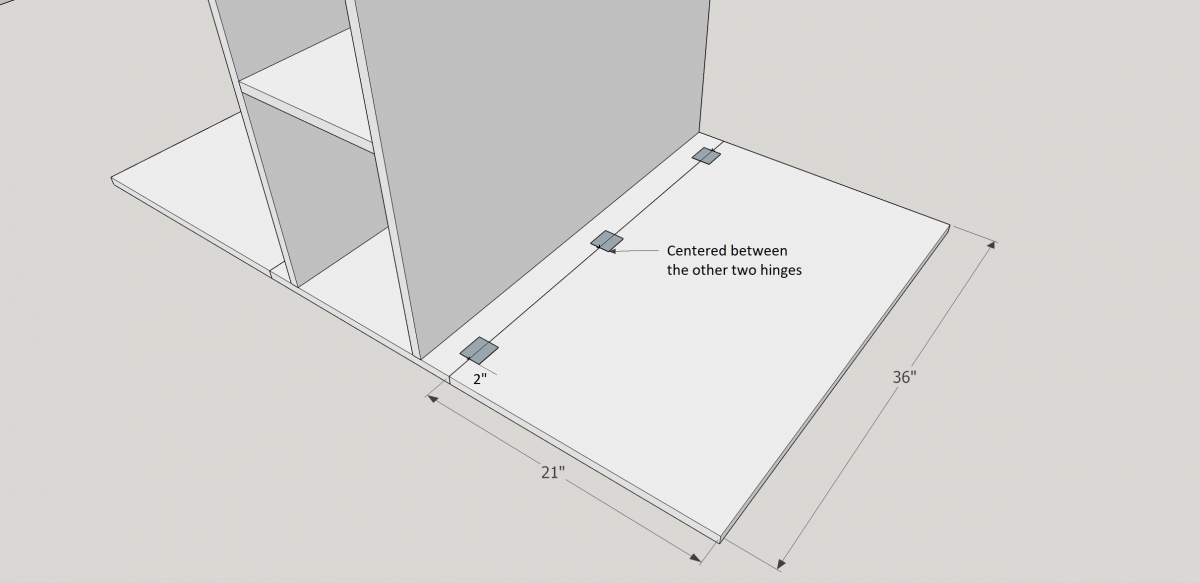
Then we cut the leaves from some scrap 3/4" MDF and attached them with some old door hinges we had.

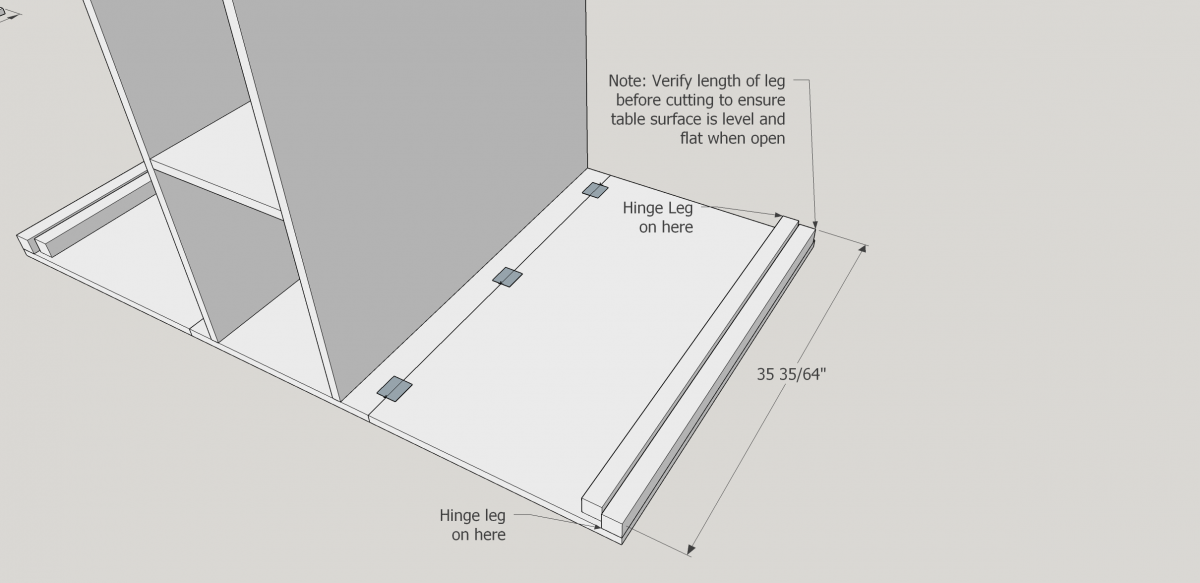
Once the leaves were attached, we attached the locking hinges for the legs.

We cut and planed the legs a little, and then routered the corners to give them a bit of a nicer look.

Once assembly was finished we applied a coat of primer and two coats of white, satin, interior paint.

The whole thing came out really well and is a nice addition to the sewing room. Once again, I found the plans on this site to be really helpful and easy to understand. Thank you!
Estimated Cost
$150
Estimated Time Investment
Weekend Project (10-20 Hours)
Finish Used
Interior Primer and White, satin, interior paint.
Recommended Skill Level
Intermediate

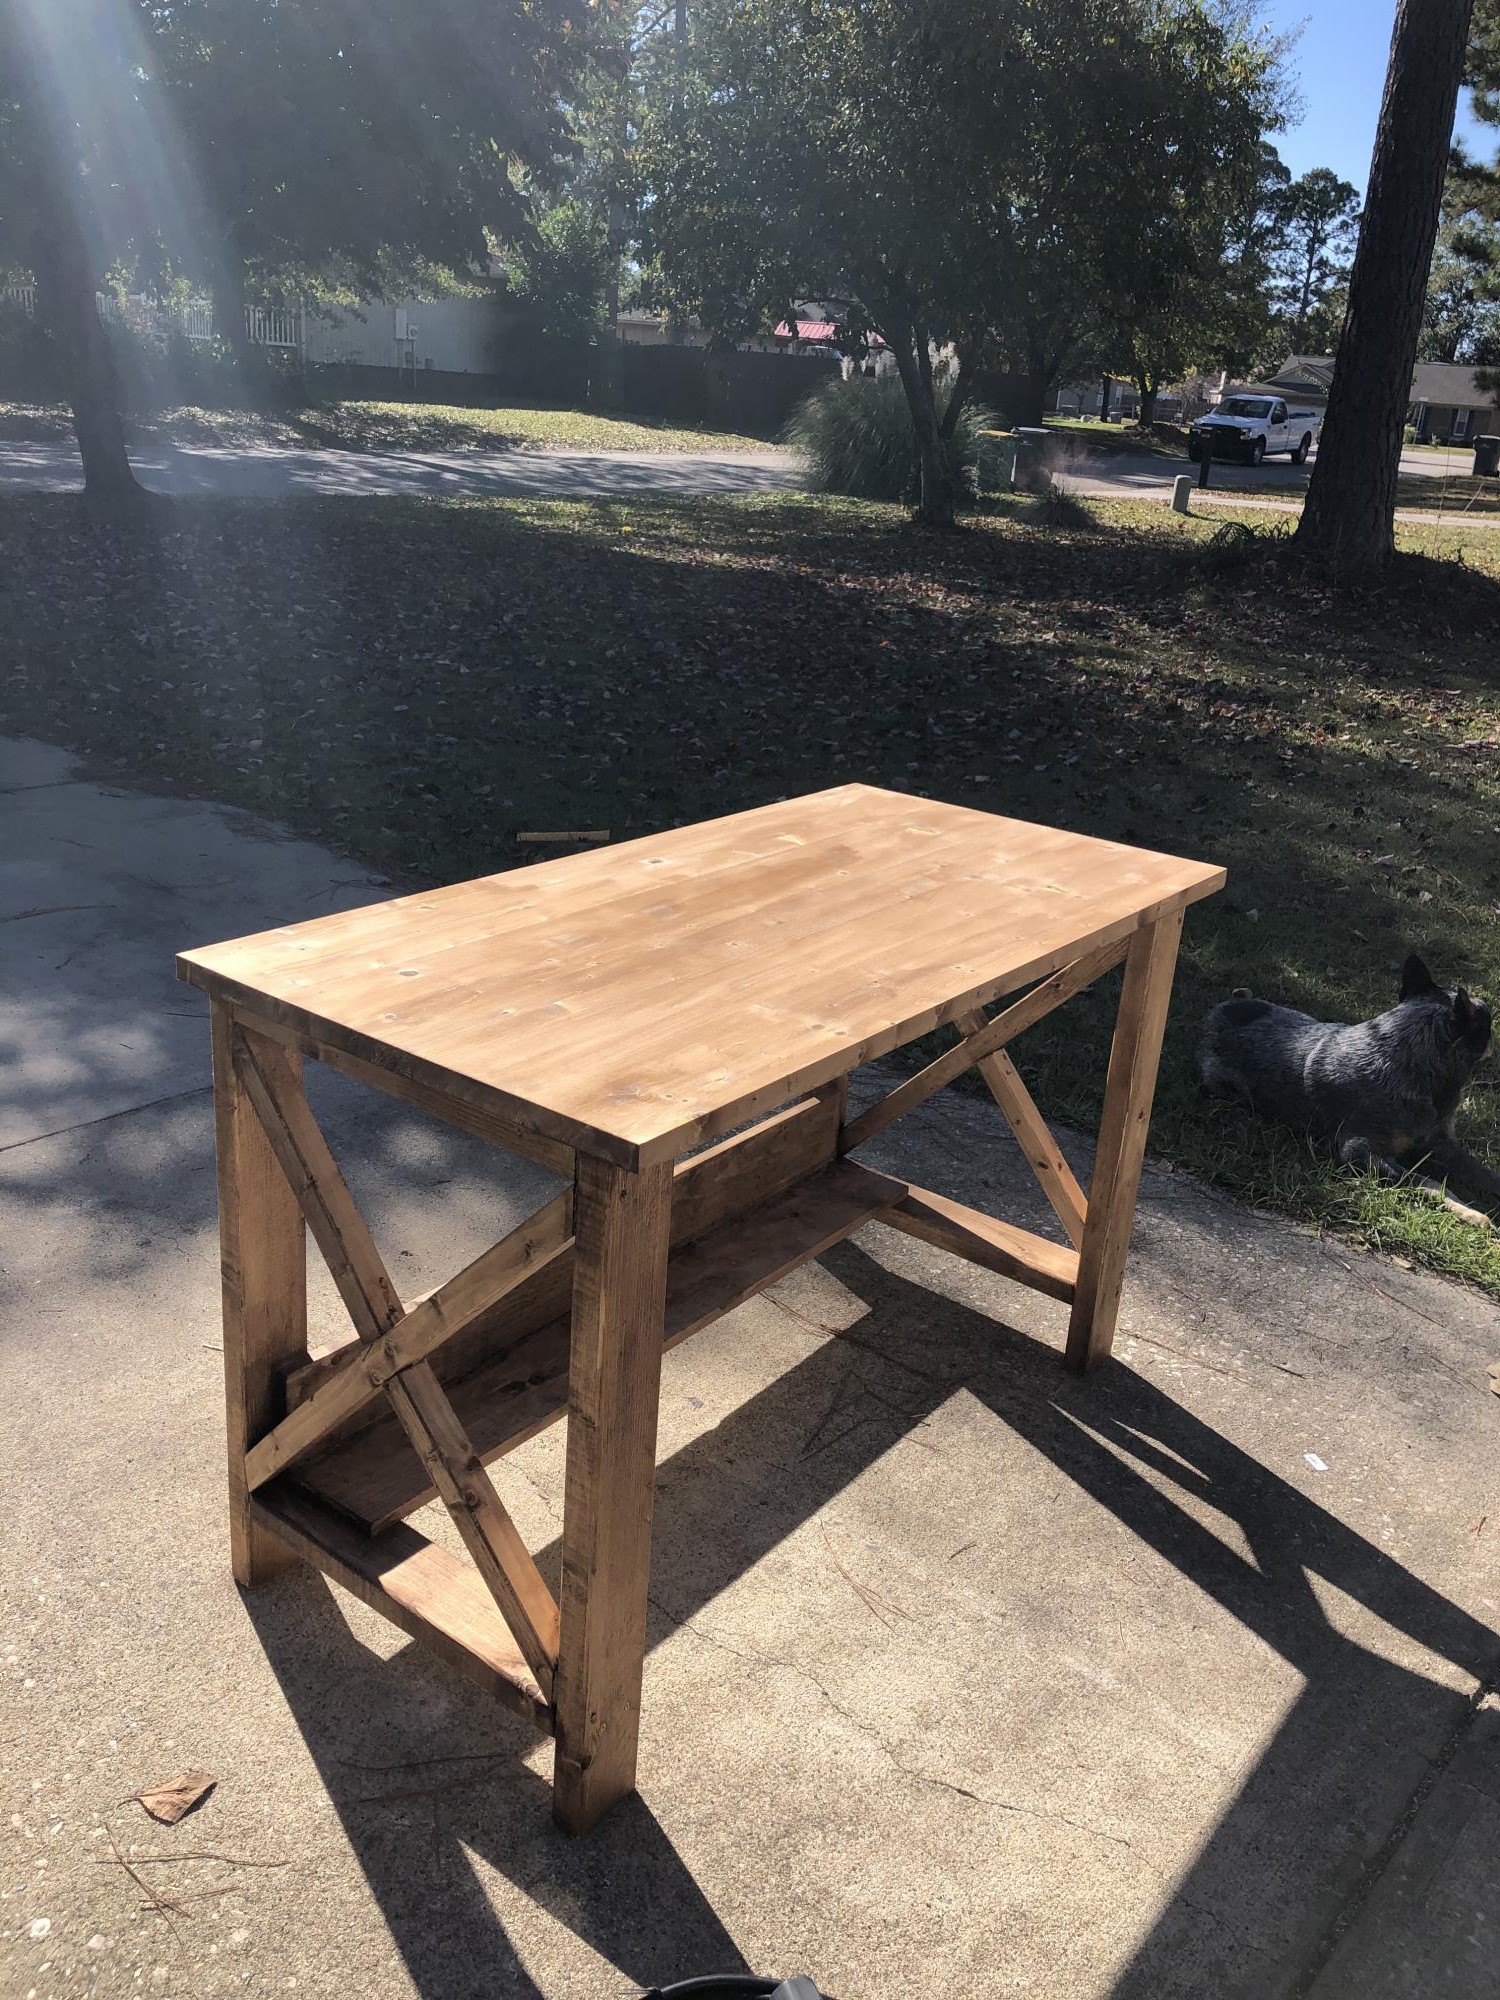
Country Desk

I wanted a good solid desk for my office and I thought these plans were perfect. The wood, screws, paint, and stain all cost less than $30. Instead of using 2x4's for the top I used a solid piece of aspen. I then stained the top and painted the bottom white.

Built from Plan(s)
Estimated Cost
$30
Estimated Time Investment
Weekend Project (10-20 Hours)
Recommended Skill Level
Beginner

Comments

Simple 2x4 Bench

Submitted by jennibee on Sun, 09/14/2014 - 17:03

I made this in an afternoon. Loved this project. It is made with 2x4's using a Kregs Jig and mitre saw (plus additional tools like a drill and square).  This was my frist time using the Kregs Jig and I am sold!!
The free plans were taken from another website. They are very detailed and there is even a video (I recommend it as he gives a great tip for making sure the back stays equal/level to each other before putting the back on). Even though you can build this by yourself, I did have help for the heavier sides once they were assembled.  I plan to build the additional side table soon and finish them both with sanding and staining when the weather seems less iffy for rain.

If you are looking for a good beginner project that doesn't take forever or have complicated steps, this is your project.

Built from Plan(s)
Estimated Cost
Around $50
Estimated Time Investment
Afternoon Project (3-6 Hours)
Recommended Skill Level
Beginner

Brookstone Desk

Submitted by Abby721 on Mon, 09/21/2020 - 20:09

This was an easy and quick build, perfect for a beginner. Due to the quality 2x4 wood available to me, I ended up ripping the boards down to 3” in width (.25” from each board side). If you do this, remember to adjust the length of the under desk supports to account for the drawer slides and drawer box width. I also ripped the drawer front board to 3”. The plus of doing this is that you will get nice joints since the chamfer on the 2x4 will be removed. Overall the desk turned out great and am very happy with the results.

Built from Plan(s)
Estimated Cost
$75
Estimated Time Investment
Day Project (6-9 Hours)
Finish Used
Varathane Aged Barrel with Varathane Triple Thick Polyurethane over the top
Recommended Skill Level
Beginner

Comments

Brookstone storage bed with storage drawers

Submitted by Julthi on Tue, 09/30/2014 - 09:03

Inspired by two different plans because we wanted storage and the barn-look of the headboard. Cedar wood has been stained with a woolsteel/vinegar mix plus few cats of black tea.

Pretty happy with the result. Only drawback: very heavy bed, hard to move with two people even without the headboard.

Estimated Time Investment
Week Long Project (20 Hours or More)
Recommended Skill Level
Intermediate

Farmhouse Console Inspired Design with Vinyl Floor Plank Top

Submitted by mowbratb on Mon, 10/19/2020 - 10:16

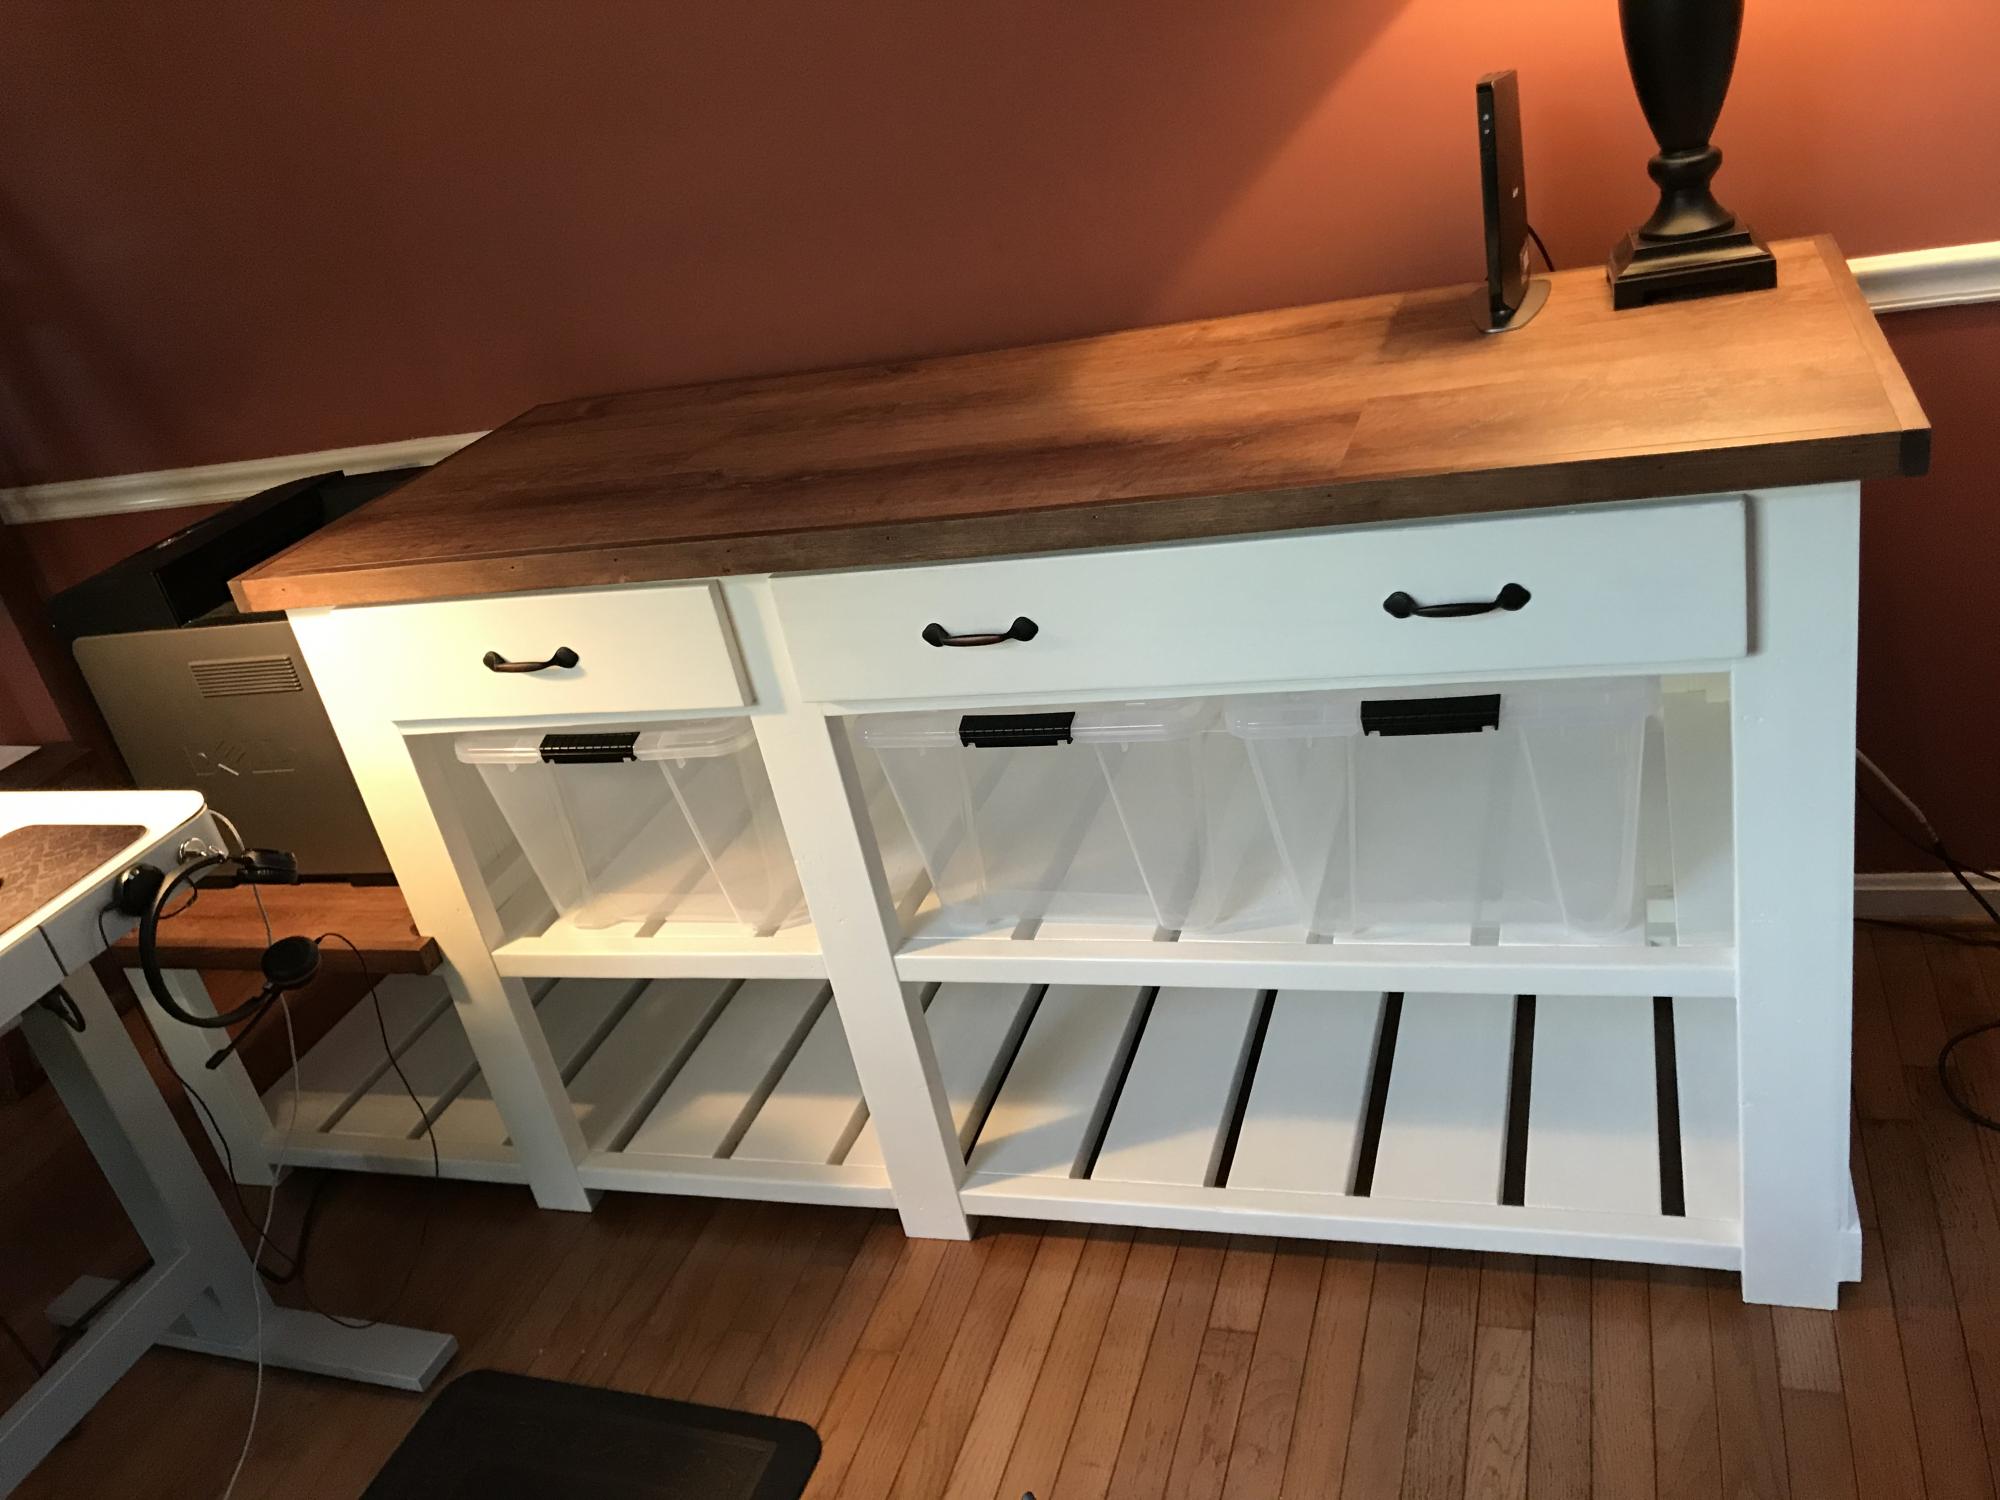
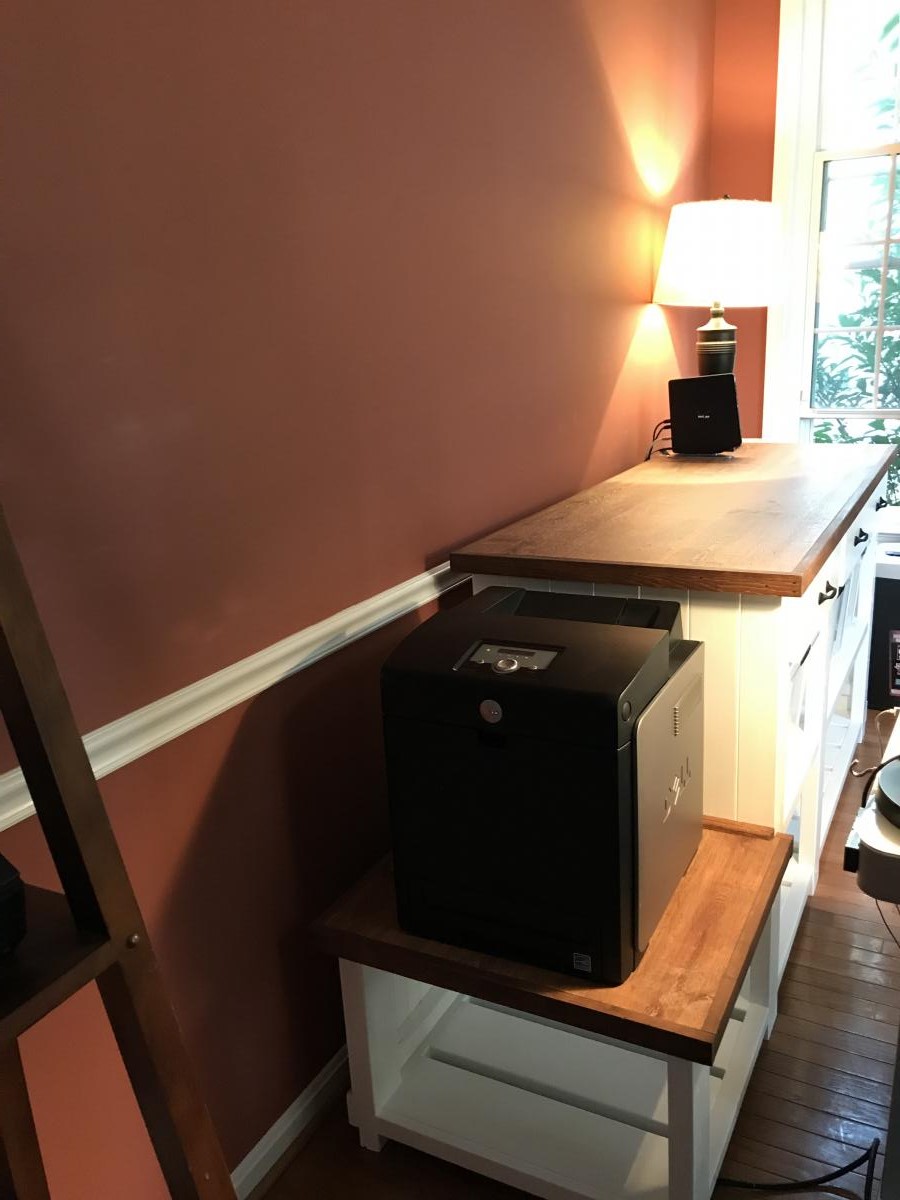
Started with the Farmhouse Console design and ended up modifying a bit but still wanted a similar look of the console. This was my first time building a piece of furniture so not too hard, just more time. Here are my changes: 37" height (12" height between shelves plus drawers and 1" top) 23" base width (wanted to use for storing clear bins) 25 3/4" top width 65 3/4" main top length 22 1/2" lower top length (wanted to a place for my printer with storage for paper below it) 88" (full top length) 34" interior width large section (2 bins for each shelf) 18" x 2 interior width for smaller sections (1 bin for upper and lower) 18" x 4 1/2" drawer opening 34" x 4 1/2" drawer opening 1 - 32 11/16" w x 21 1/4" drawer with 18" Everbilt full extension ball bearing slide set 1 - 16 11/16" w x 21 1/4" drawer with 18" Everbilt full extension ball bearing slide set Additional Notes: - Used Pine/Spruce Edge V planks (.25" thick, 3.5" width) for sides and back - Used 2x4 for drawers with 1/2 birch plywood for bottom and 1x6 face (19" and 35" long) - Assembled with pocket screws, GRK finishing screws and glue just like the farmhouse console instructions. - Had to modify the location of the 2x6 slats for the two center legs to account for the change in length to keep the 1" space between them. As noted in the title, I experimented by making the top using lifeproof vinyl "Trail Oak" floor planks glued on top of 3/4" birch plywood and trimmed it with 1 x 2 stained to match the vinyl flooring. I'm pretty happy with the turnout but was prepared to use 2/6's if it didn't look the way I envisioned.

Built from Plan(s)
Estimated Cost
~$350
Estimated Time Investment
Week Long Project (20 Hours or More)
Finish Used
1. White color, used Valspar Cabinet Furniture paint. Didn't prime underneath as the product says you don't need to but I wished I had. Took 2-3 coats to cover properly. https://www.valspar.com/en/products/interior-paints-primers/cabinet-furniture-oil-enriched-enamel
2. Top surface: Lifeproof 8.7 x 47.6 Trail Oak vinyl flooring planks, used 6 of the 7 planks from one box ($60)
3. Top Trim: Varathane (1 part Honey mixed with 2/3 part Dark Walnut) to match the vinyl planks
4. Applied brown caulking in cracks between vinyl floor planks and trim
Recommended Skill Level
Intermediate

Double Pedestal Farmhouse Table

Submitted by thesloans on Fri, 01/04/2013 - 11:06

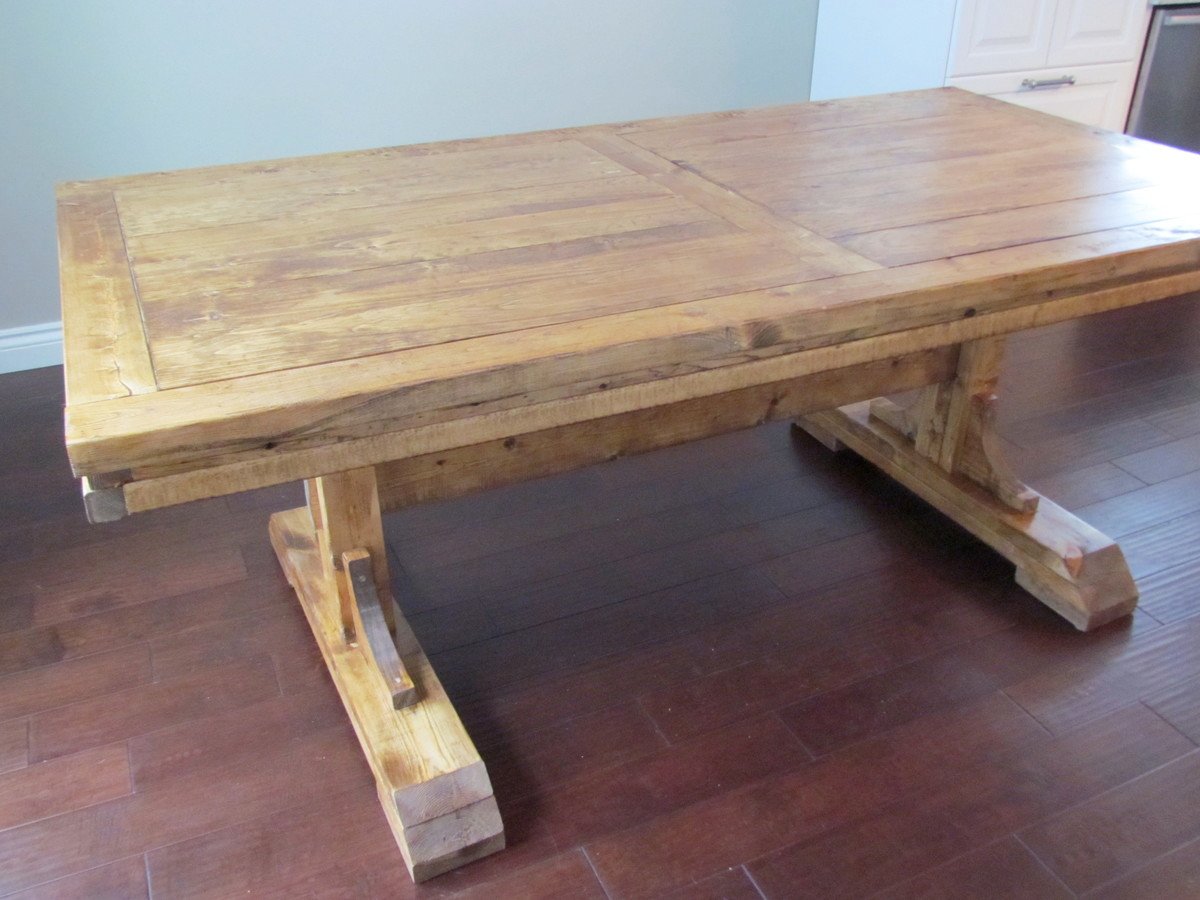
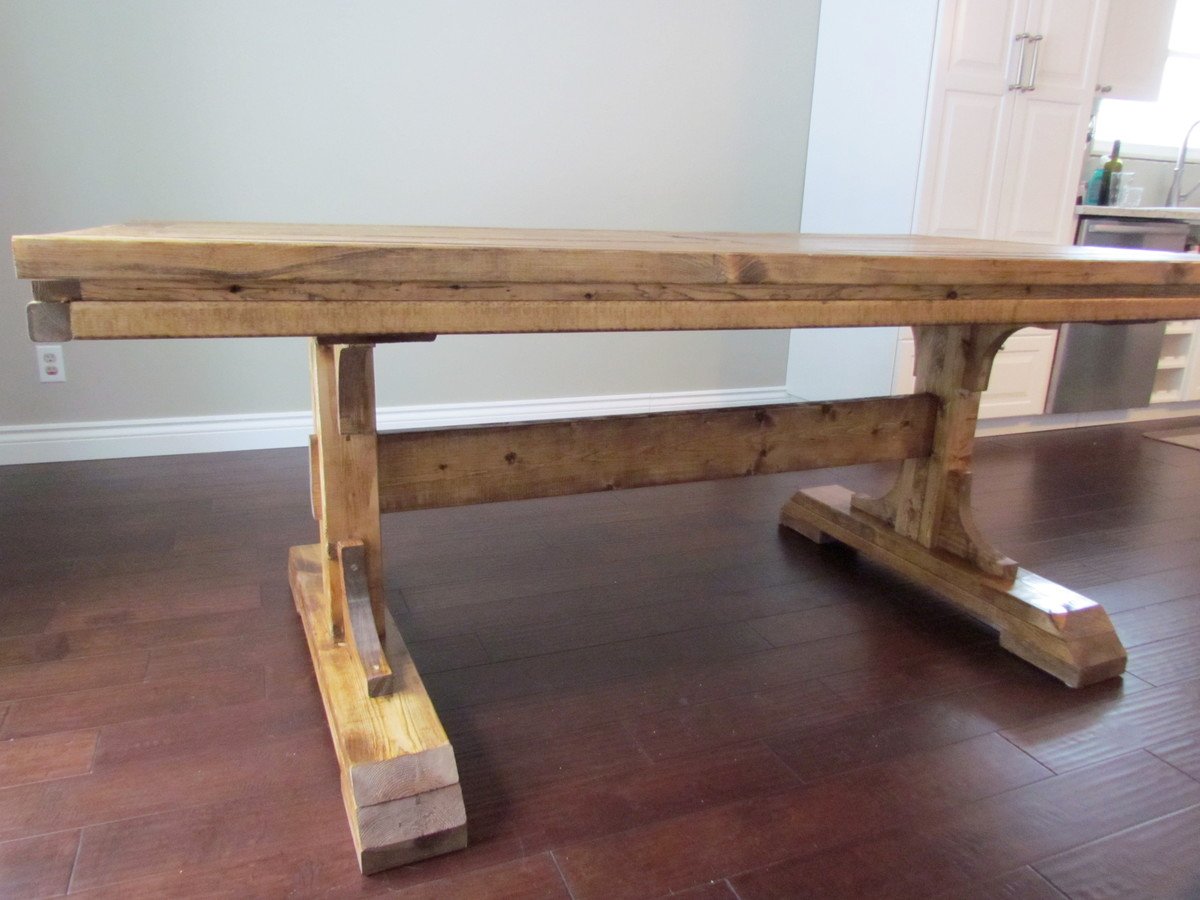
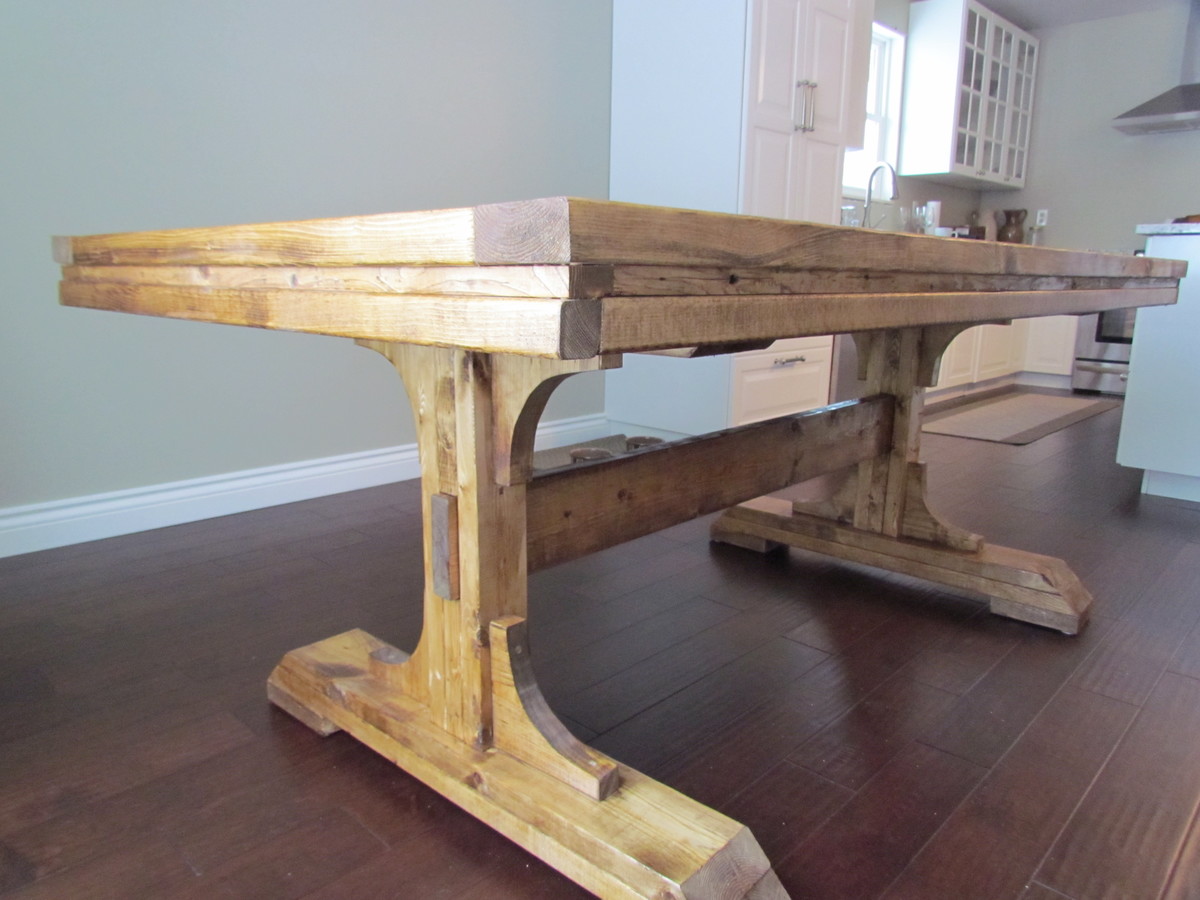
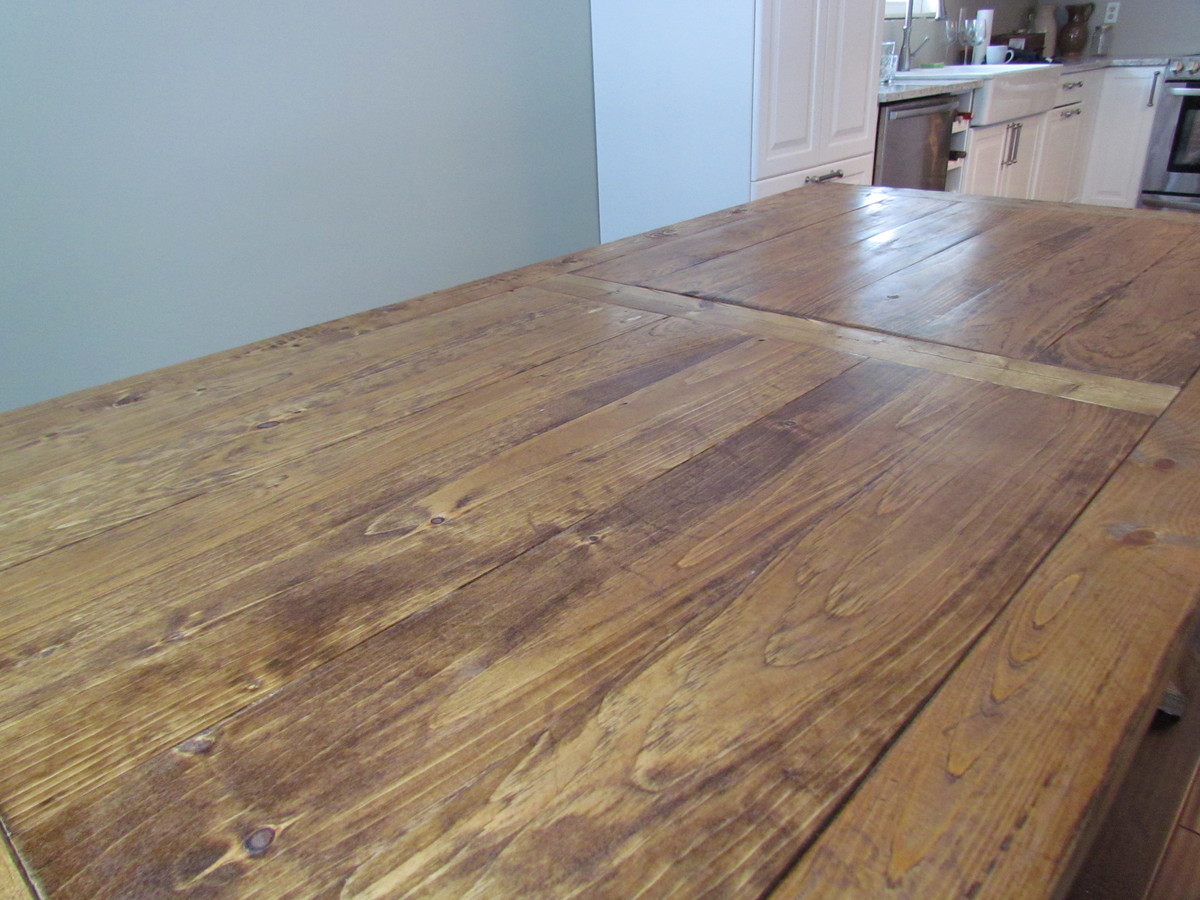
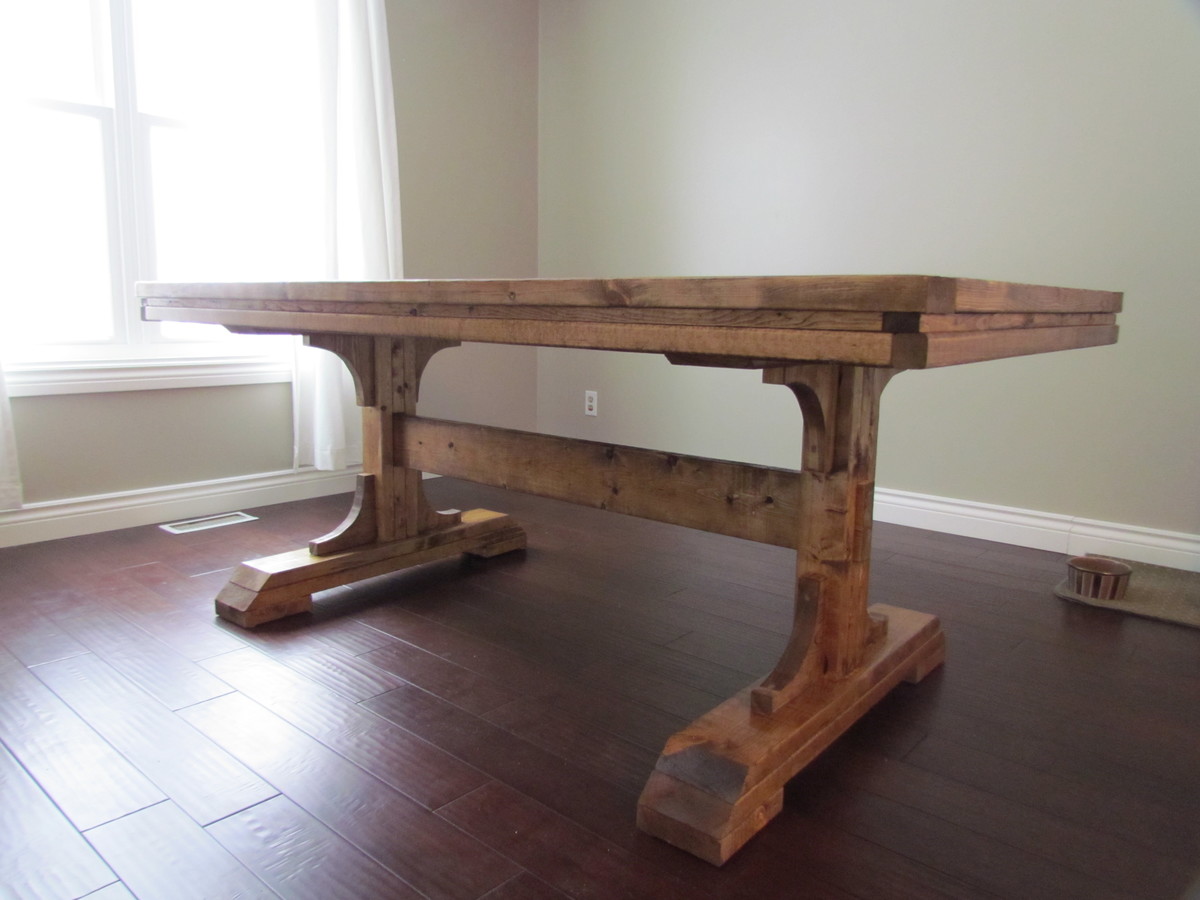
My hubby took the plans from the Triple Pedestal Farmhouse Table and altered it to make it just over six feet. It is perfect and accommodates our smaller dining area space.

Built from Plan(s)
Estimated Cost
$70
Estimated Time Investment
Weekend Project (10-20 Hours)
Finish Used
Early American (1 coat), matte clear coat (2 coats)
Recommended Skill Level
Intermediate

Comments

freefromburdens

Wed, 10/09/2013 - 10:14

Hi. I went to martha.anna blog. This is the comment she posted on the dimensions.

From martha.anna:
I've had many emails and inquiries about the dimensions of this table. So, here's what I've been sharing with everyone...

Our dining room is 11 x 10 and there is a lot of room around it to fit in a hutch and still walk around easily. (Just for size reference.)

The overall length of the table is 6' 4.5". It is such an odd measurement so that the strips of board (1x6) on the tabletop would look in proportion. They are 33" long (the 1x6).

The beam across the bottom is 55.5" from outside edge to outside edge and my husband left 1/2" showing.

The pedestals are 10.5" from the end of the table.

Phew! I hope all of the information helps everyone out there! :)

Glittergrlss

Sat, 11/16/2013 - 09:27

Hi there what would the revised materials needed list be? Also did u notify the benches? Do u have the dimension on that? My step dad is building this for me it's my job to get plans and supplies. Thank you for your help I appreciate it!!

freefromburdens

Mon, 01/13/2014 - 14:20

Oh my. After several months I'm able to get all the material needed to do this table. I did the legs a couple of months ago. Now it's time to complete the rest. Hopefully, I can do it in a day's time - hopefully :).

tdkdpt

Fri, 01/12/2018 - 09:04

Ill be making this table whcih is in the same design as the original triple pedestal table but Ill be making it smaller. Are you able to give me the measurements for this modified table? Do I make my top first and then the pedestals? I feel like if I make the same pedestals, then Im forced to make this a 40" wide table, and I only want it about 35-37".


Thanks!

Recycling center

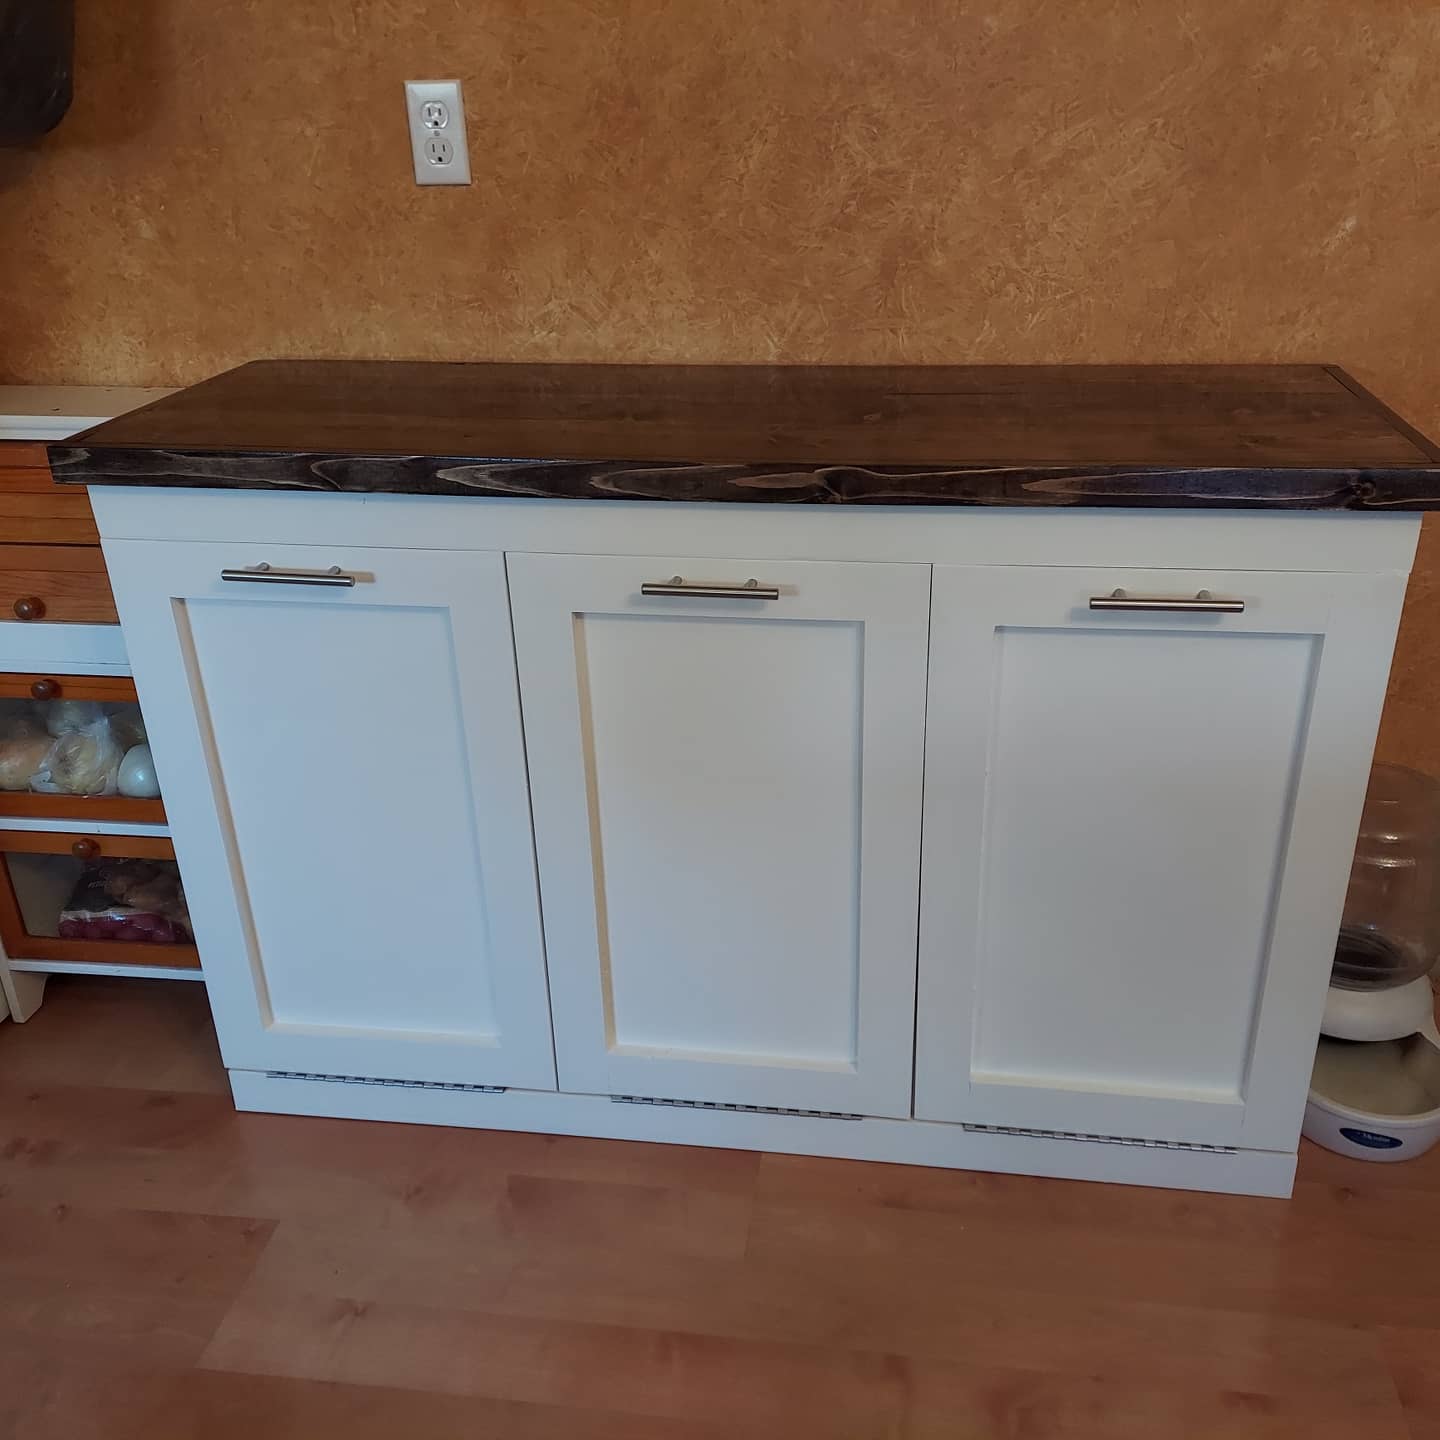
Loved building this recycling center. Basically made three cabinets from the plans and then attached them together. Now the dog can't get in the trash and the recycling and empty cans don't gather in the counter and it looks great! I used piano hinges for the doors which makes them feel much more stable.

Estimated Cost
$200 (including 3 garbage cans)
Estimated Time Investment
Weekend Project (10-20 Hours)
Recommended Skill Level
Intermediate

Comments

Farmhouse Desk

Submitted by Anonymous (not verified) on Thu, 11/19/2020 - 02:24

I had been hunting for a desk for several days, and this took less time to build than most of my shopping trips. This desk plan was so easy! I made it from start to stain in less than 3 hours.

Built from Plan(s)
Estimated Cost
$84
Estimated Time Investment
An Hour or Two (0-2 Hours)
Finish Used
Minwax Early American oil based stain, one coat, polyurethane to finish
Recommended Skill Level
Intermediate

Comments

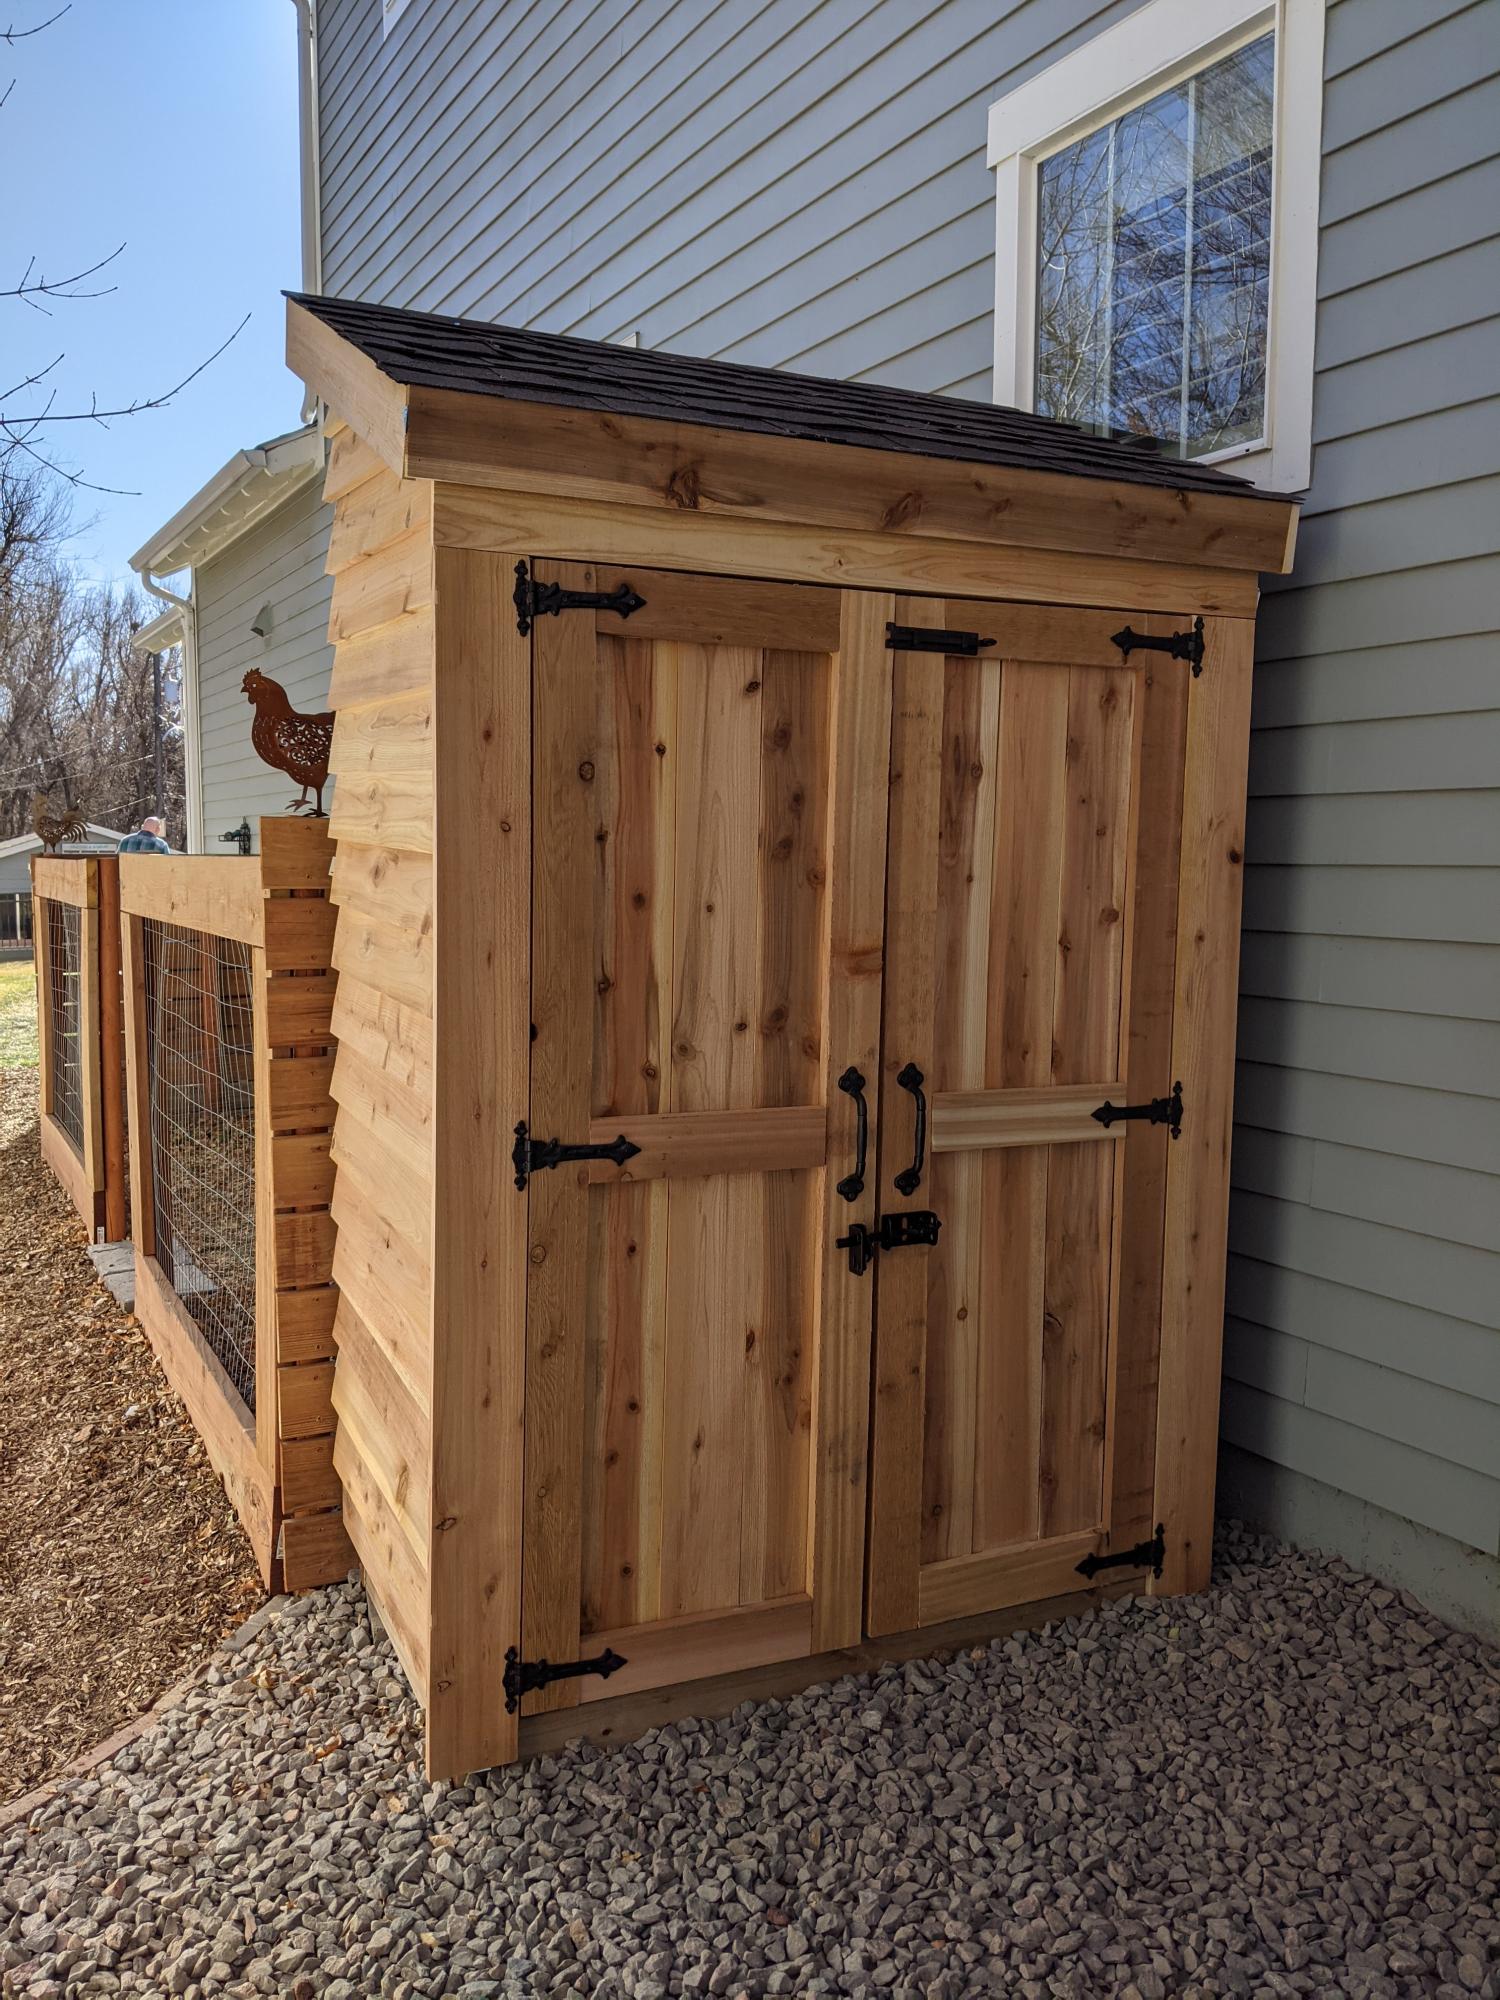
Garden shed

Submitted by Anonymous (not verified) on Sat, 11/28/2020 - 13:19

Our take on the small garden shed. Ours is 4 1/2 by 7 feet. We used cedar fence pickets and 2x4 construction. Left over shingles from when our house was built. We are definitely not roofers or framers, also chasing around a 3 year old didn't make things easier. Turned out beautiful for what we want it for. Just rustic enough. Great intermediate project.

Built from Plan(s)
Estimated Cost
$400
Estimated Time Investment
Weekend Project (10-20 Hours)
Finish Used
Thompson's clear water seal will be applied this summer.
Recommended Skill Level
Intermediate

Comments

Seasonal And Holiday

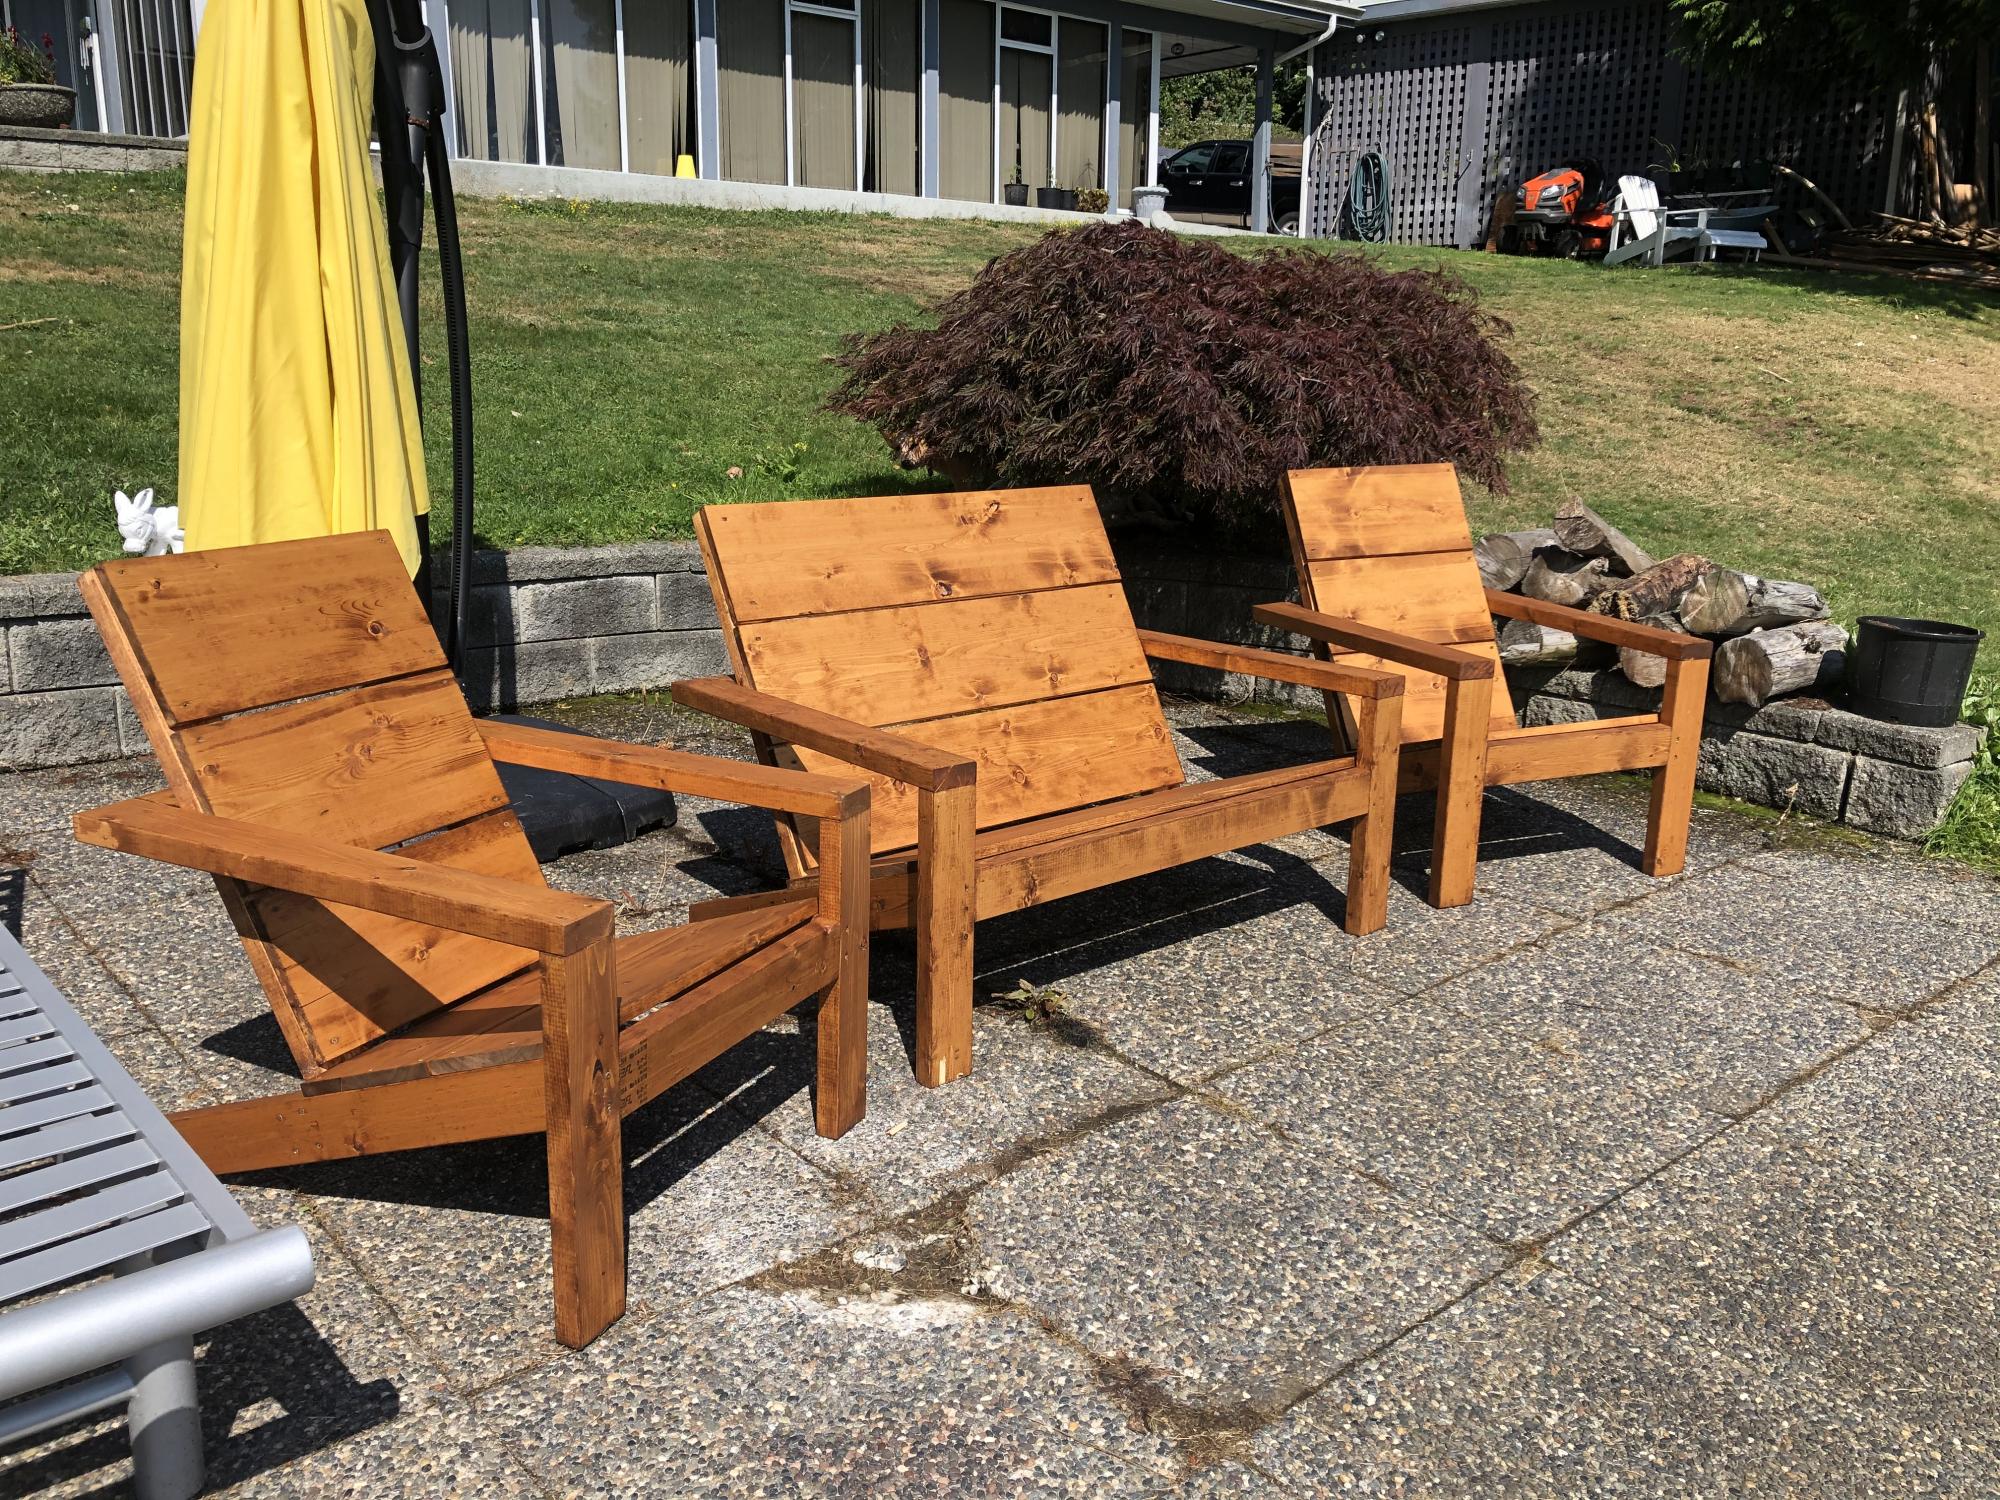
2x4 Modern Adirondack Chair and Loveseat

Submitted by SofiaTaz on Sun, 12/06/2020 - 12:51

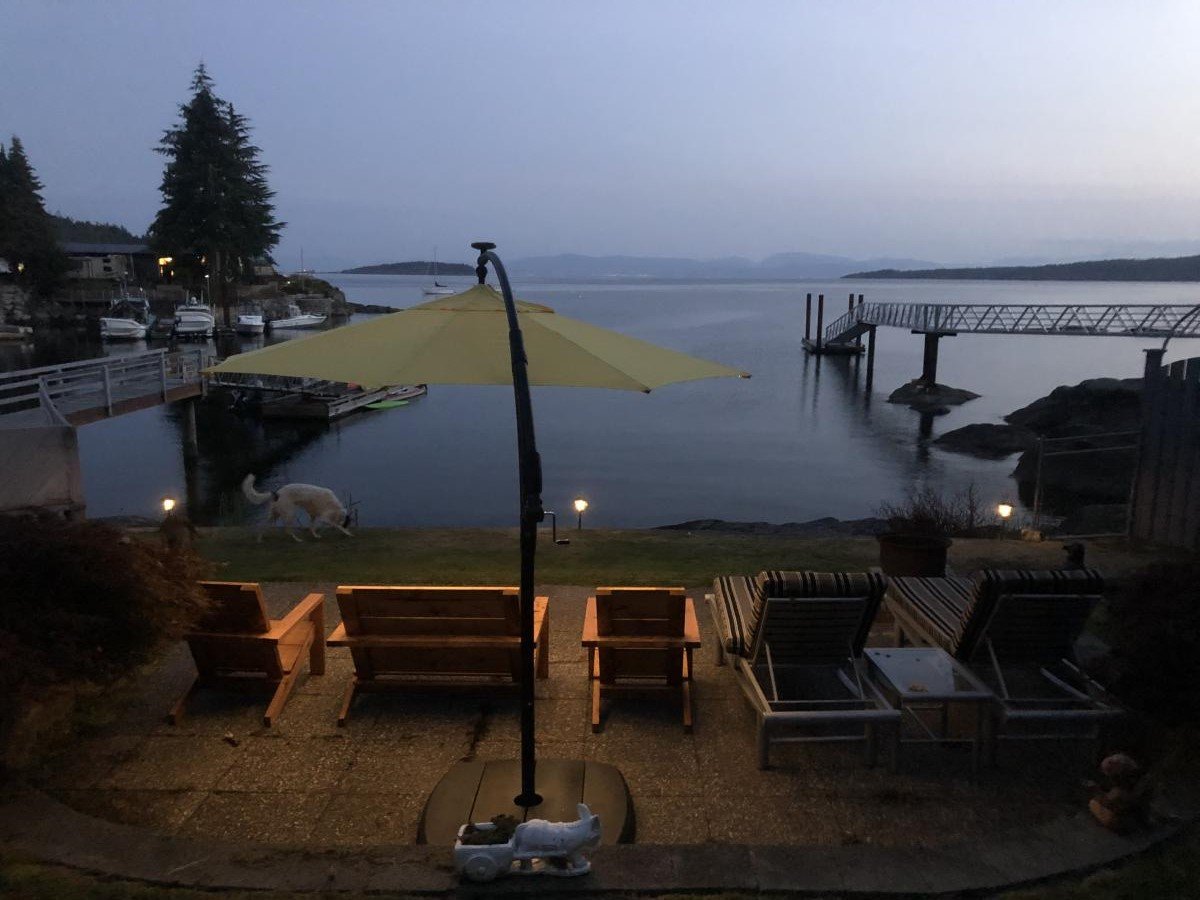
We loved the Modern Adirondack Chair pattern so much that we adapted it to have a matching love seat. It turned out beautifully!

Estimated Cost
$200 CAD
Finish Used
Dark walnut stain
Recommended Skill Level
Starter Project

Comments

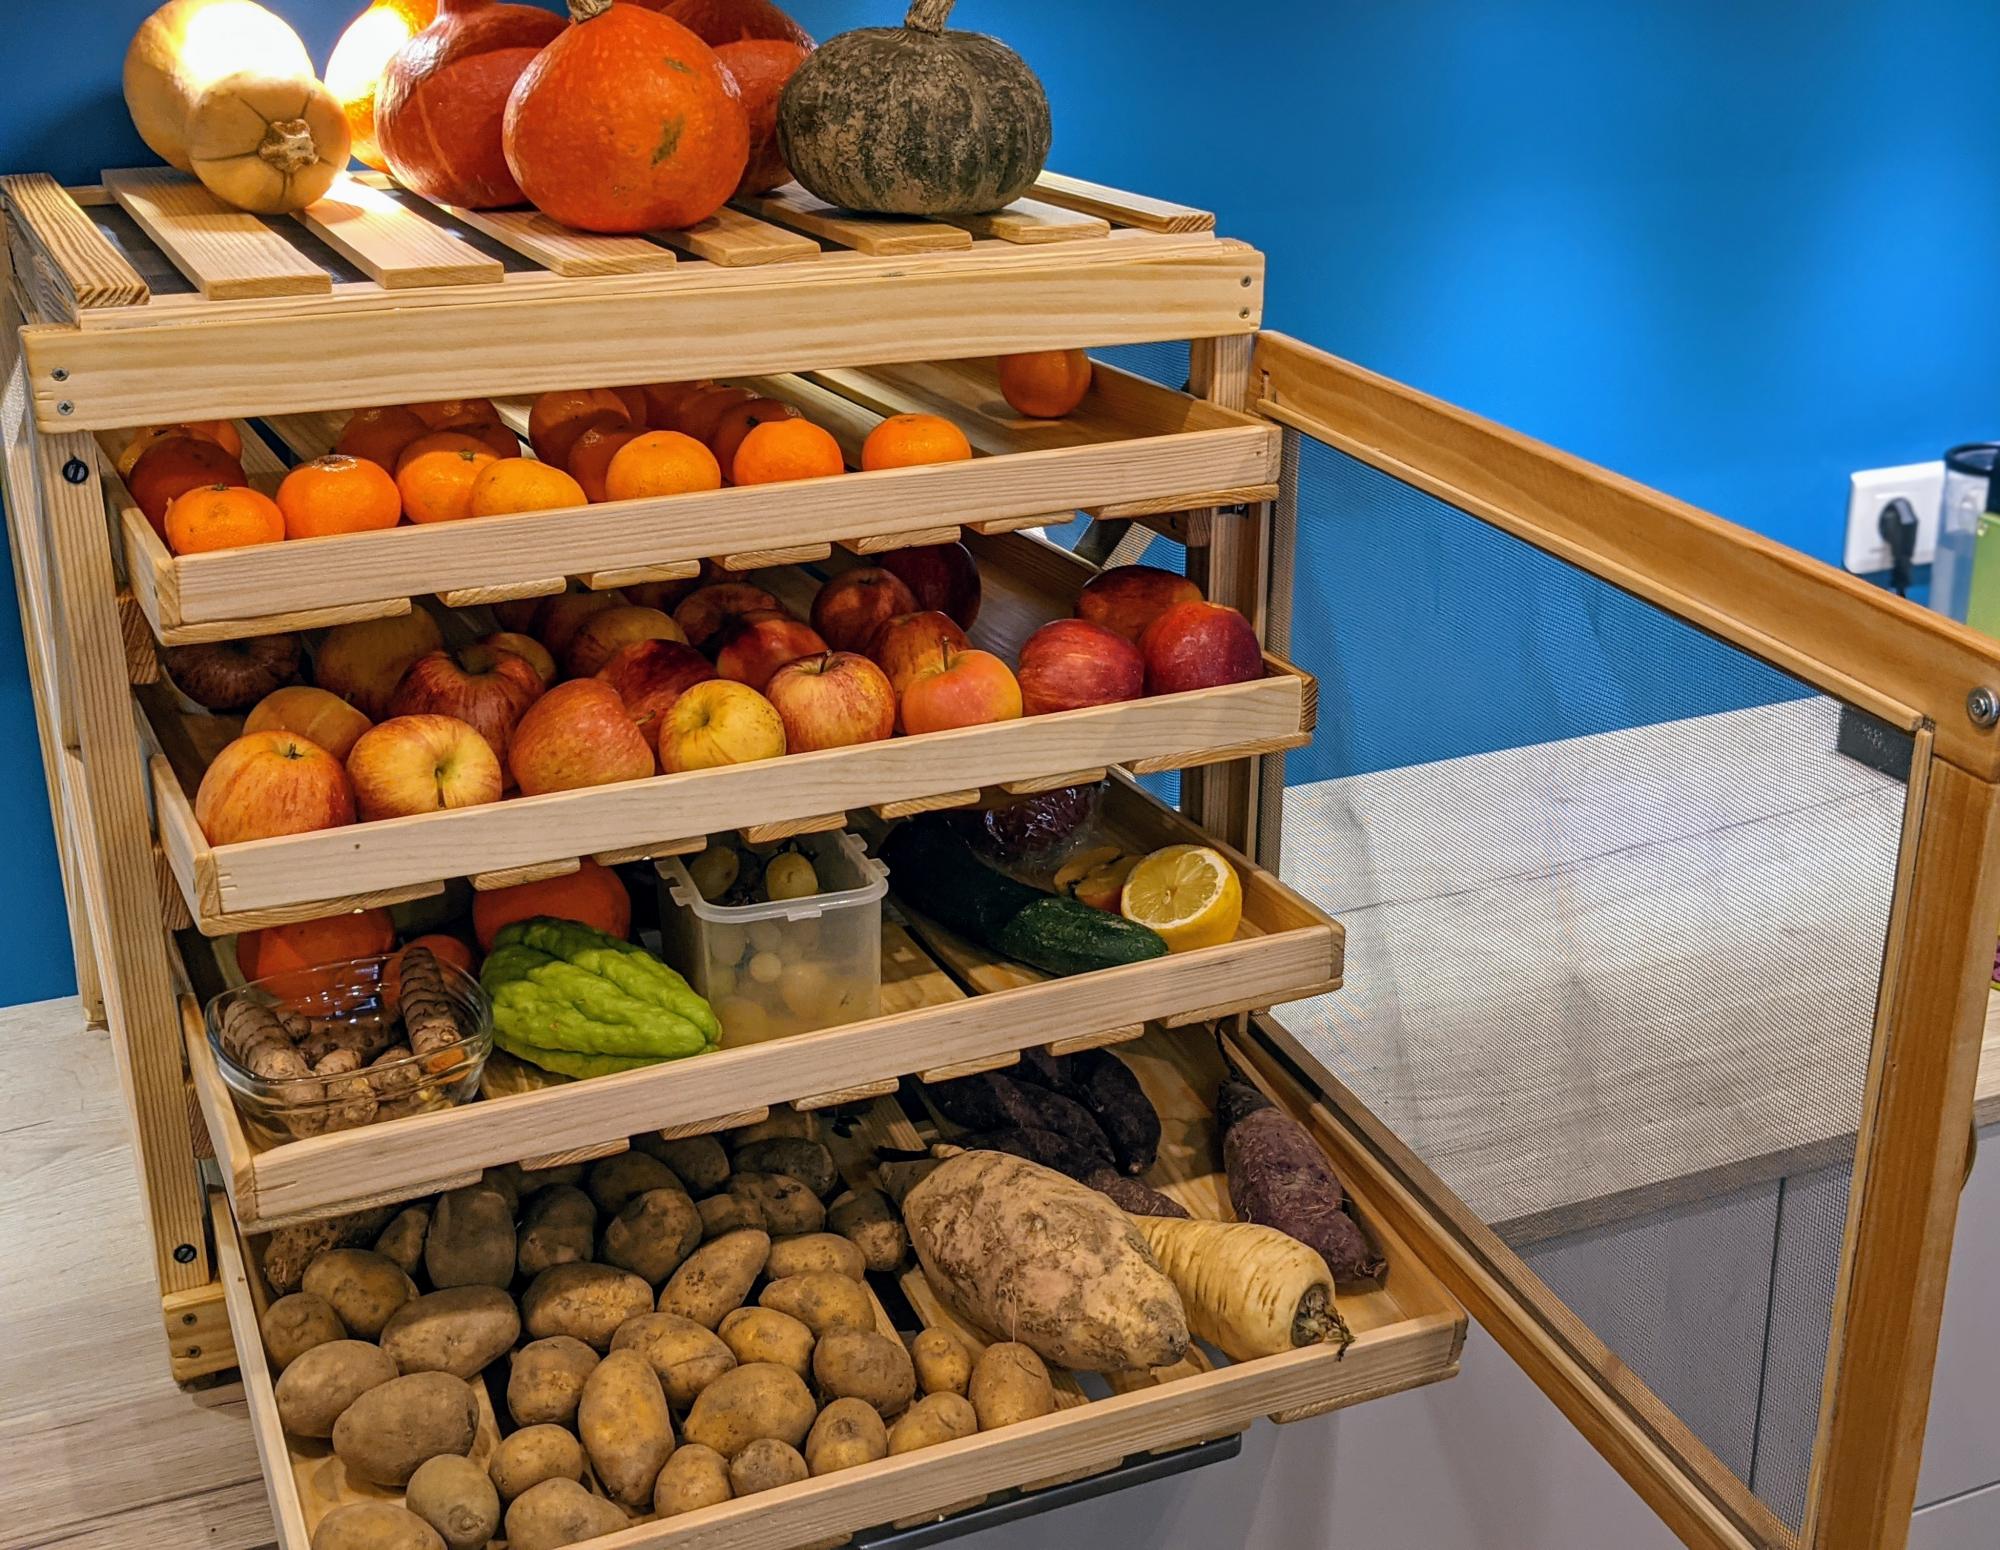
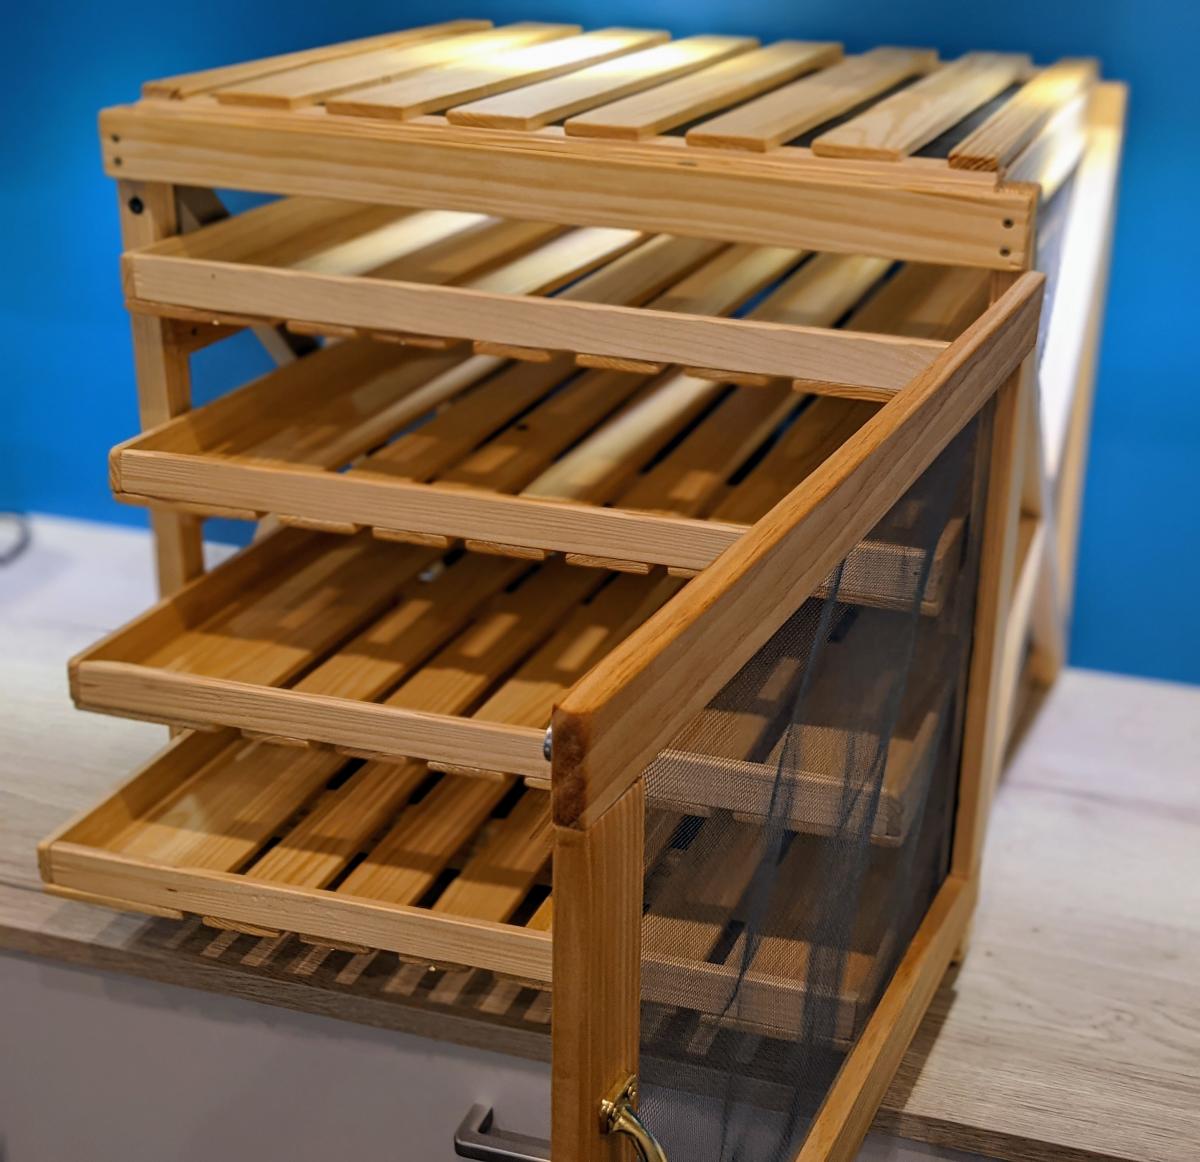
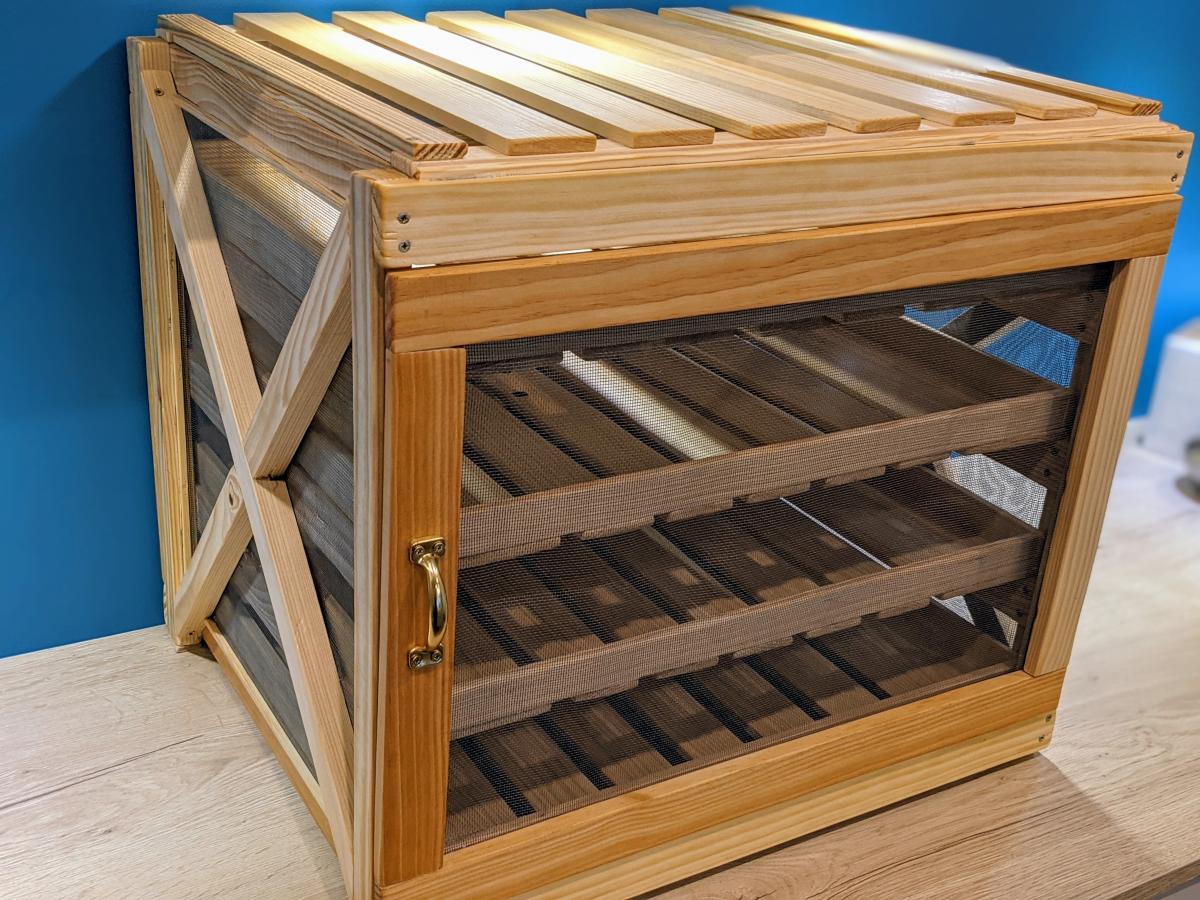
Vegetable Rack with Slide Out Trays

Submitted by Anonymous (not verified) on Sat, 12/12/2020 - 05:12

This is the application of the "Vegetable Rack with Slide Out Trays" from Ana White.
I just added a door and some mosquito net, to avoid midges in summer.

Estimated Cost
100€
Estimated Time Investment
Week Long Project (20 Hours or More)
Finish Used
A mix of coconut oil and wax.
Recommended Skill Level
Beginner

Comments

Range Hood Cover

I have a very ugly, plain old range hood that needed to go.  It's not in my budget to get a custom range hood or to buy and insert.  So, I decided to cover up the existing one.  Turned out great IMHO :)  For details and a step by step tutorial including cut list for my project, click over to my blog.  Thanks for looking!!


Estimated Cost
$20
Estimated Time Investment
An Hour or Two (0-2 Hours)
Finish Used
Off the shelf Semi gloss White paint
Recommended Skill Level
Beginner

Upgraded room with more storage.

Submitted by Anonymous (not verified) on Tue, 01/05/2021 - 12:02

My son's room still had his nursery colors and decorations. Now that he's in 1st grade, we decided it was time for an upgrade. Decided to make the full storage bed frame to allow for more storage. Turned out great!

Built from Plan(s)
Estimated Cost
$200
Estimated Time Investment
Weekend Project (10-20 Hours)
Finish Used
Black matte spray paint
Recommended Skill Level
Beginner

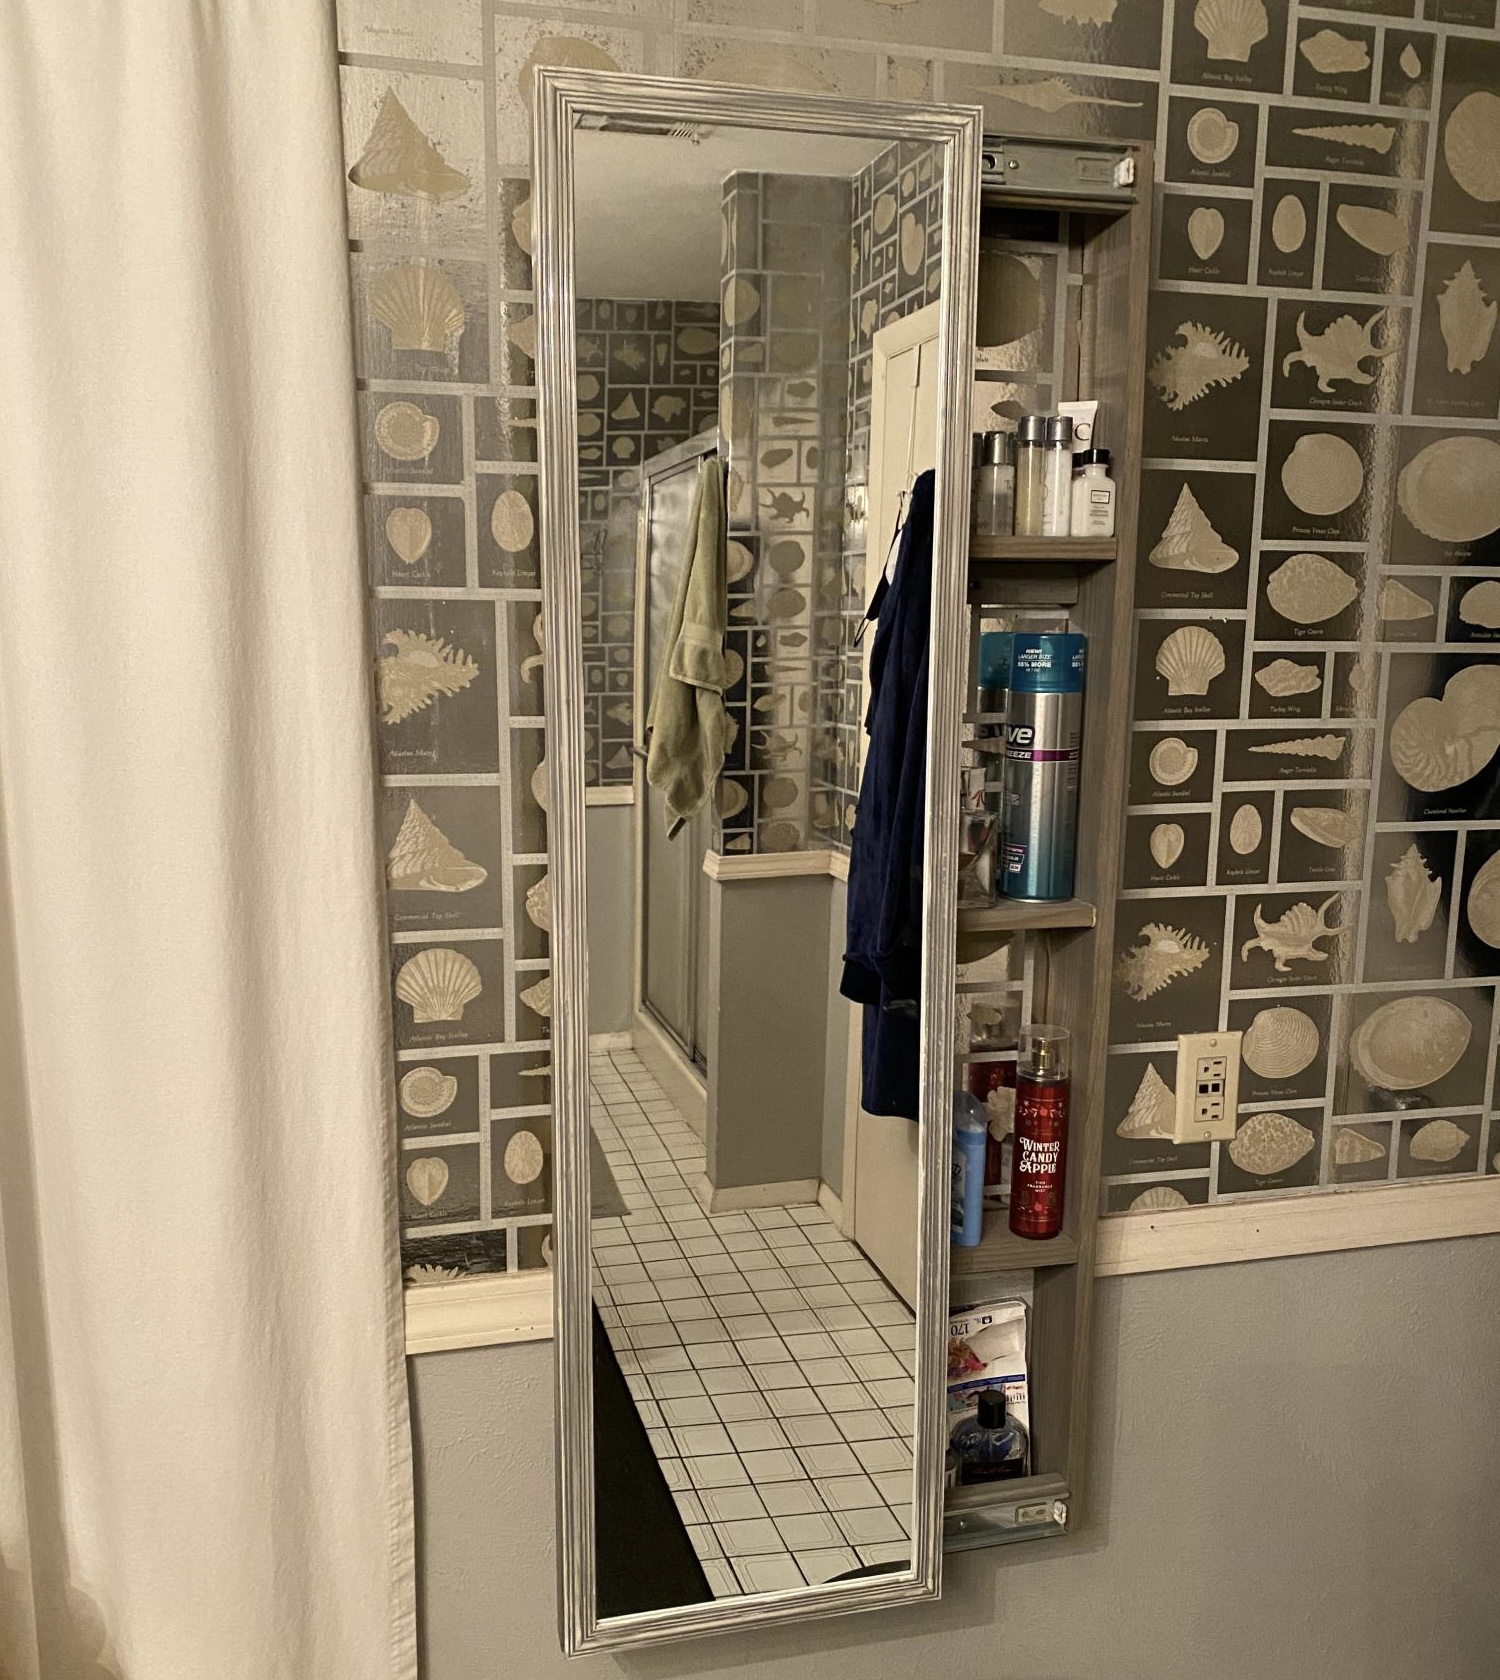
Bathroom sliding vanity

Submitted by Anonymous (not verified) on Thu, 01/21/2021 - 16:58

I don’t know anything about carpentry but my wife seen this and told me that I can do it and I said no way so she trusted me and here it is. Mirror was bought at the Goodwill $2.00 thank you

Estimated Cost
30.00
Estimated Time Investment
Afternoon Project (3-6 Hours)
Finish Used
Varathane classic penetrating wood stain classic gray
Recommended Skill Level
Starter Project

Comments

$1 Small cedar planters & $10 ledges

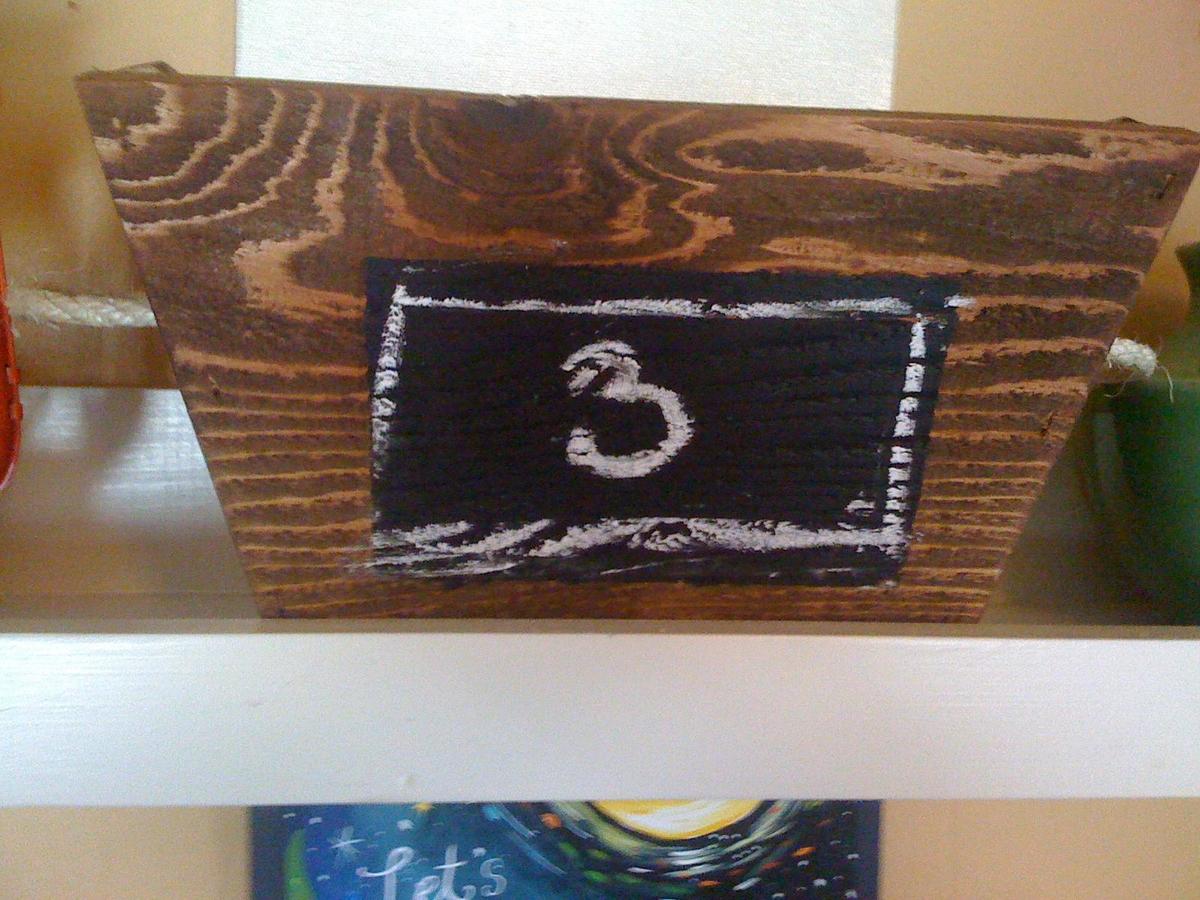
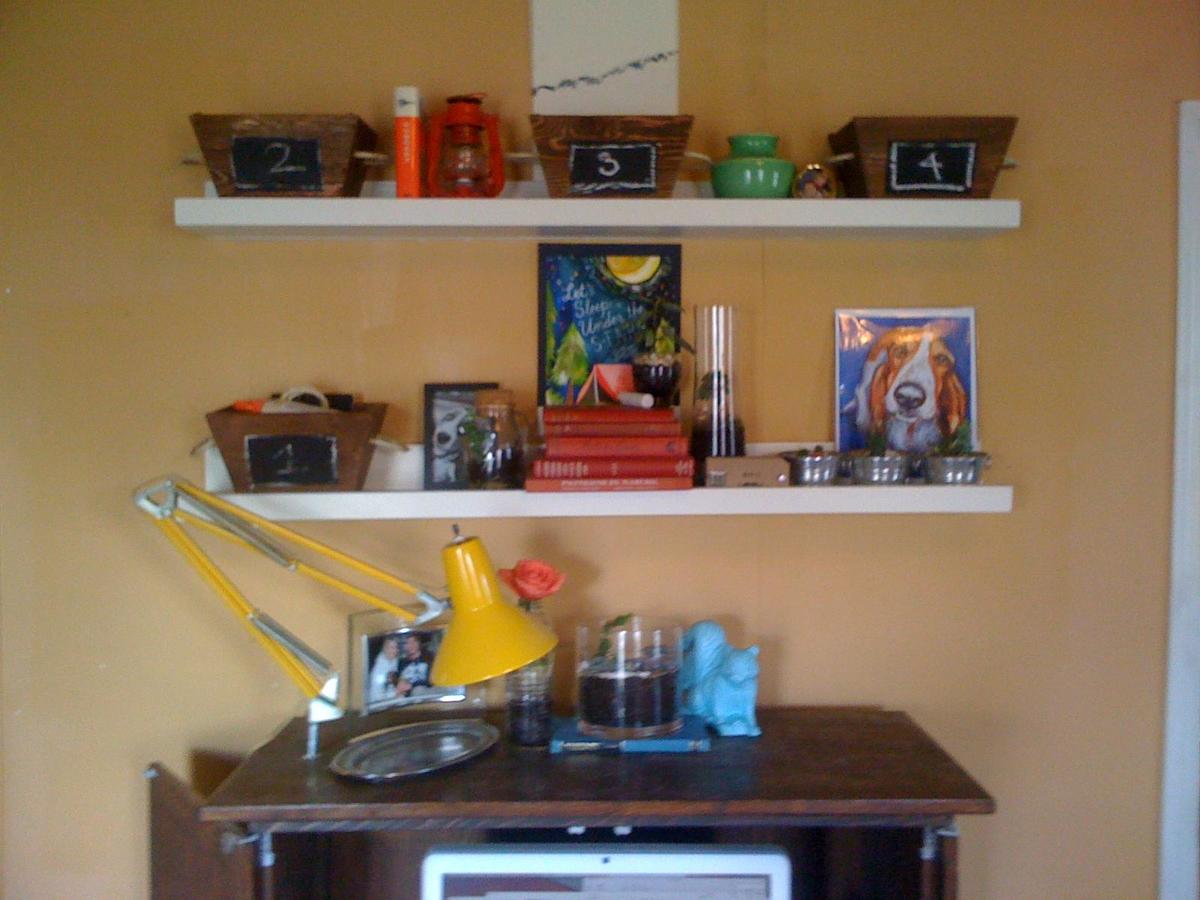
We have been stalking ana-white.com for awhile and making a few projects here and there. we made the $10 ledges to fit over our entertainment center. When we found the plan for the cedar planters we thought they would be a great little storage area for all of the little junk around the house. We made 6 of these planters out of 3 cedar planks and modified them to fit on the $10 ledges (which are actually made with a 1x6 to allow for more things to be able to fit) so they wound up more rectangular than square.

Sorry for the crappy I-phone pics!

Estimated Cost
$15 for ledges $6 dollars for 6 crates
Estimated Time Investment
An Hour or Two (0-2 Hours)
Finish Used
Miniwax in early american + chalkboard paint for crates

Antique white paint for ledges
Recommended Skill Level
Starter Project

Kitchen Shelves

Submitted by Renren_13 on Sun, 02/24/2013 - 10:08

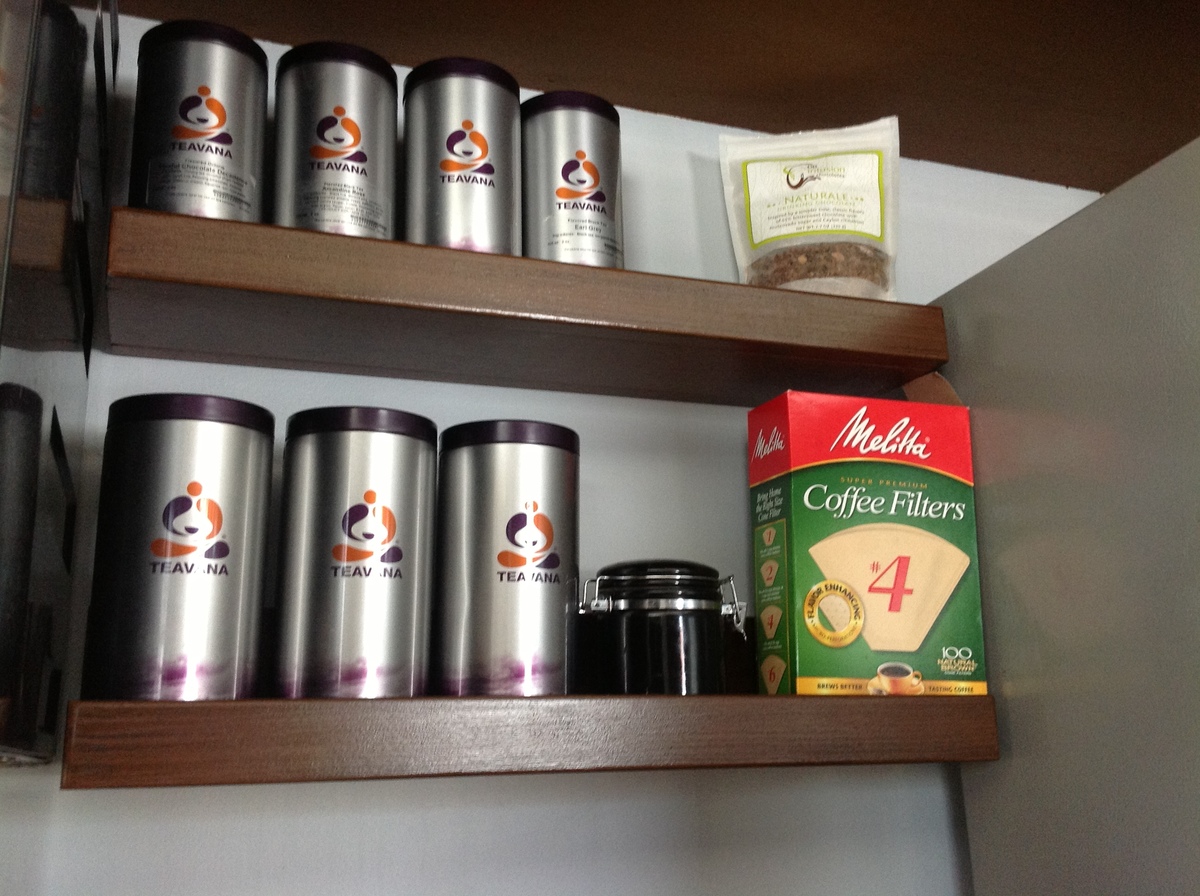
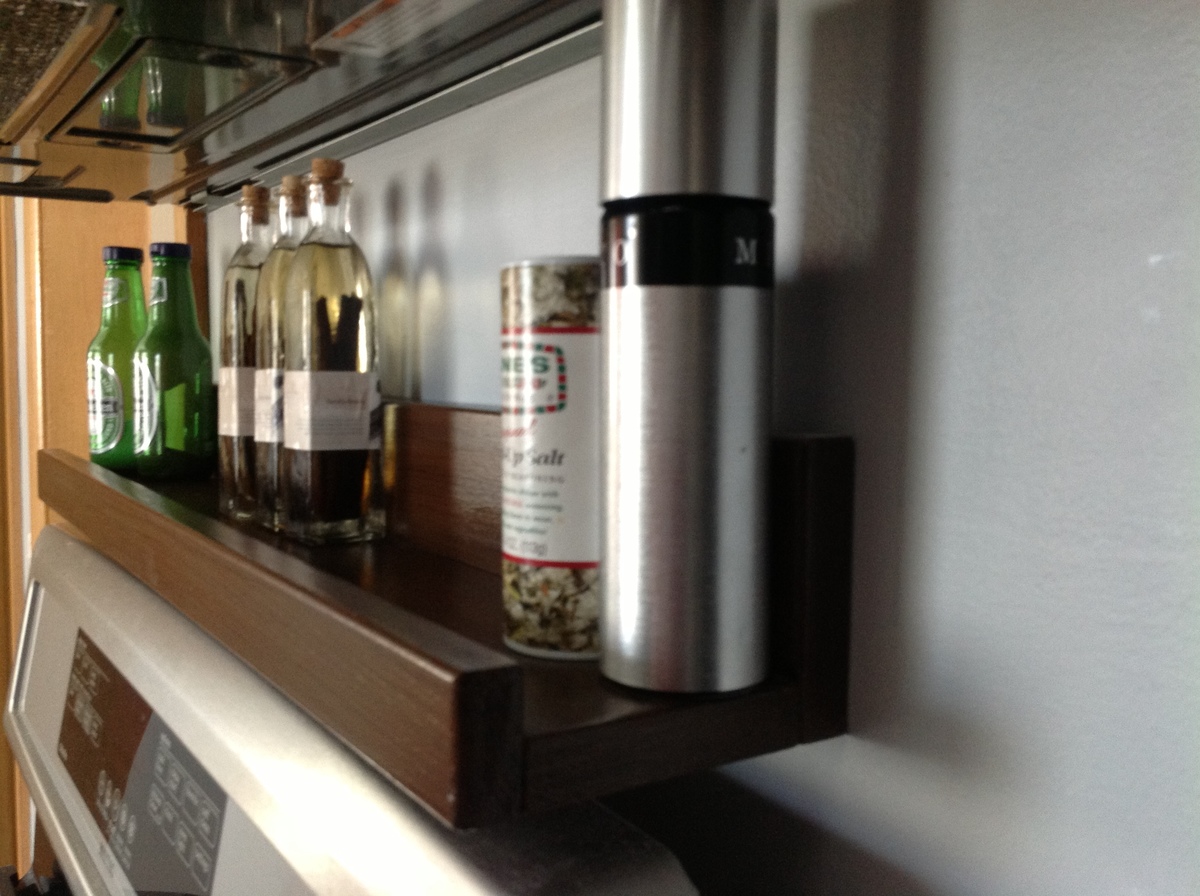
I recently painted my kitchen cabinets with a Rust-Oleum Cabinet Transformations kit, and I wanted to add some matching shelves for items I could store above the stove and coffee maker.

Built from Plan(s)
Estimated Cost
$15
Estimated Time Investment
An Hour or Two (0-2 Hours)
Finish Used
Rust-Oleum Cabinet Transformations tinted to Toasted Almond with the dark glaze. I used Minwax Polyurethane in Semi-Gloss instead of the finished included with the Cabinet Transformations kit.
Recommended Skill Level
Starter Project

Comments

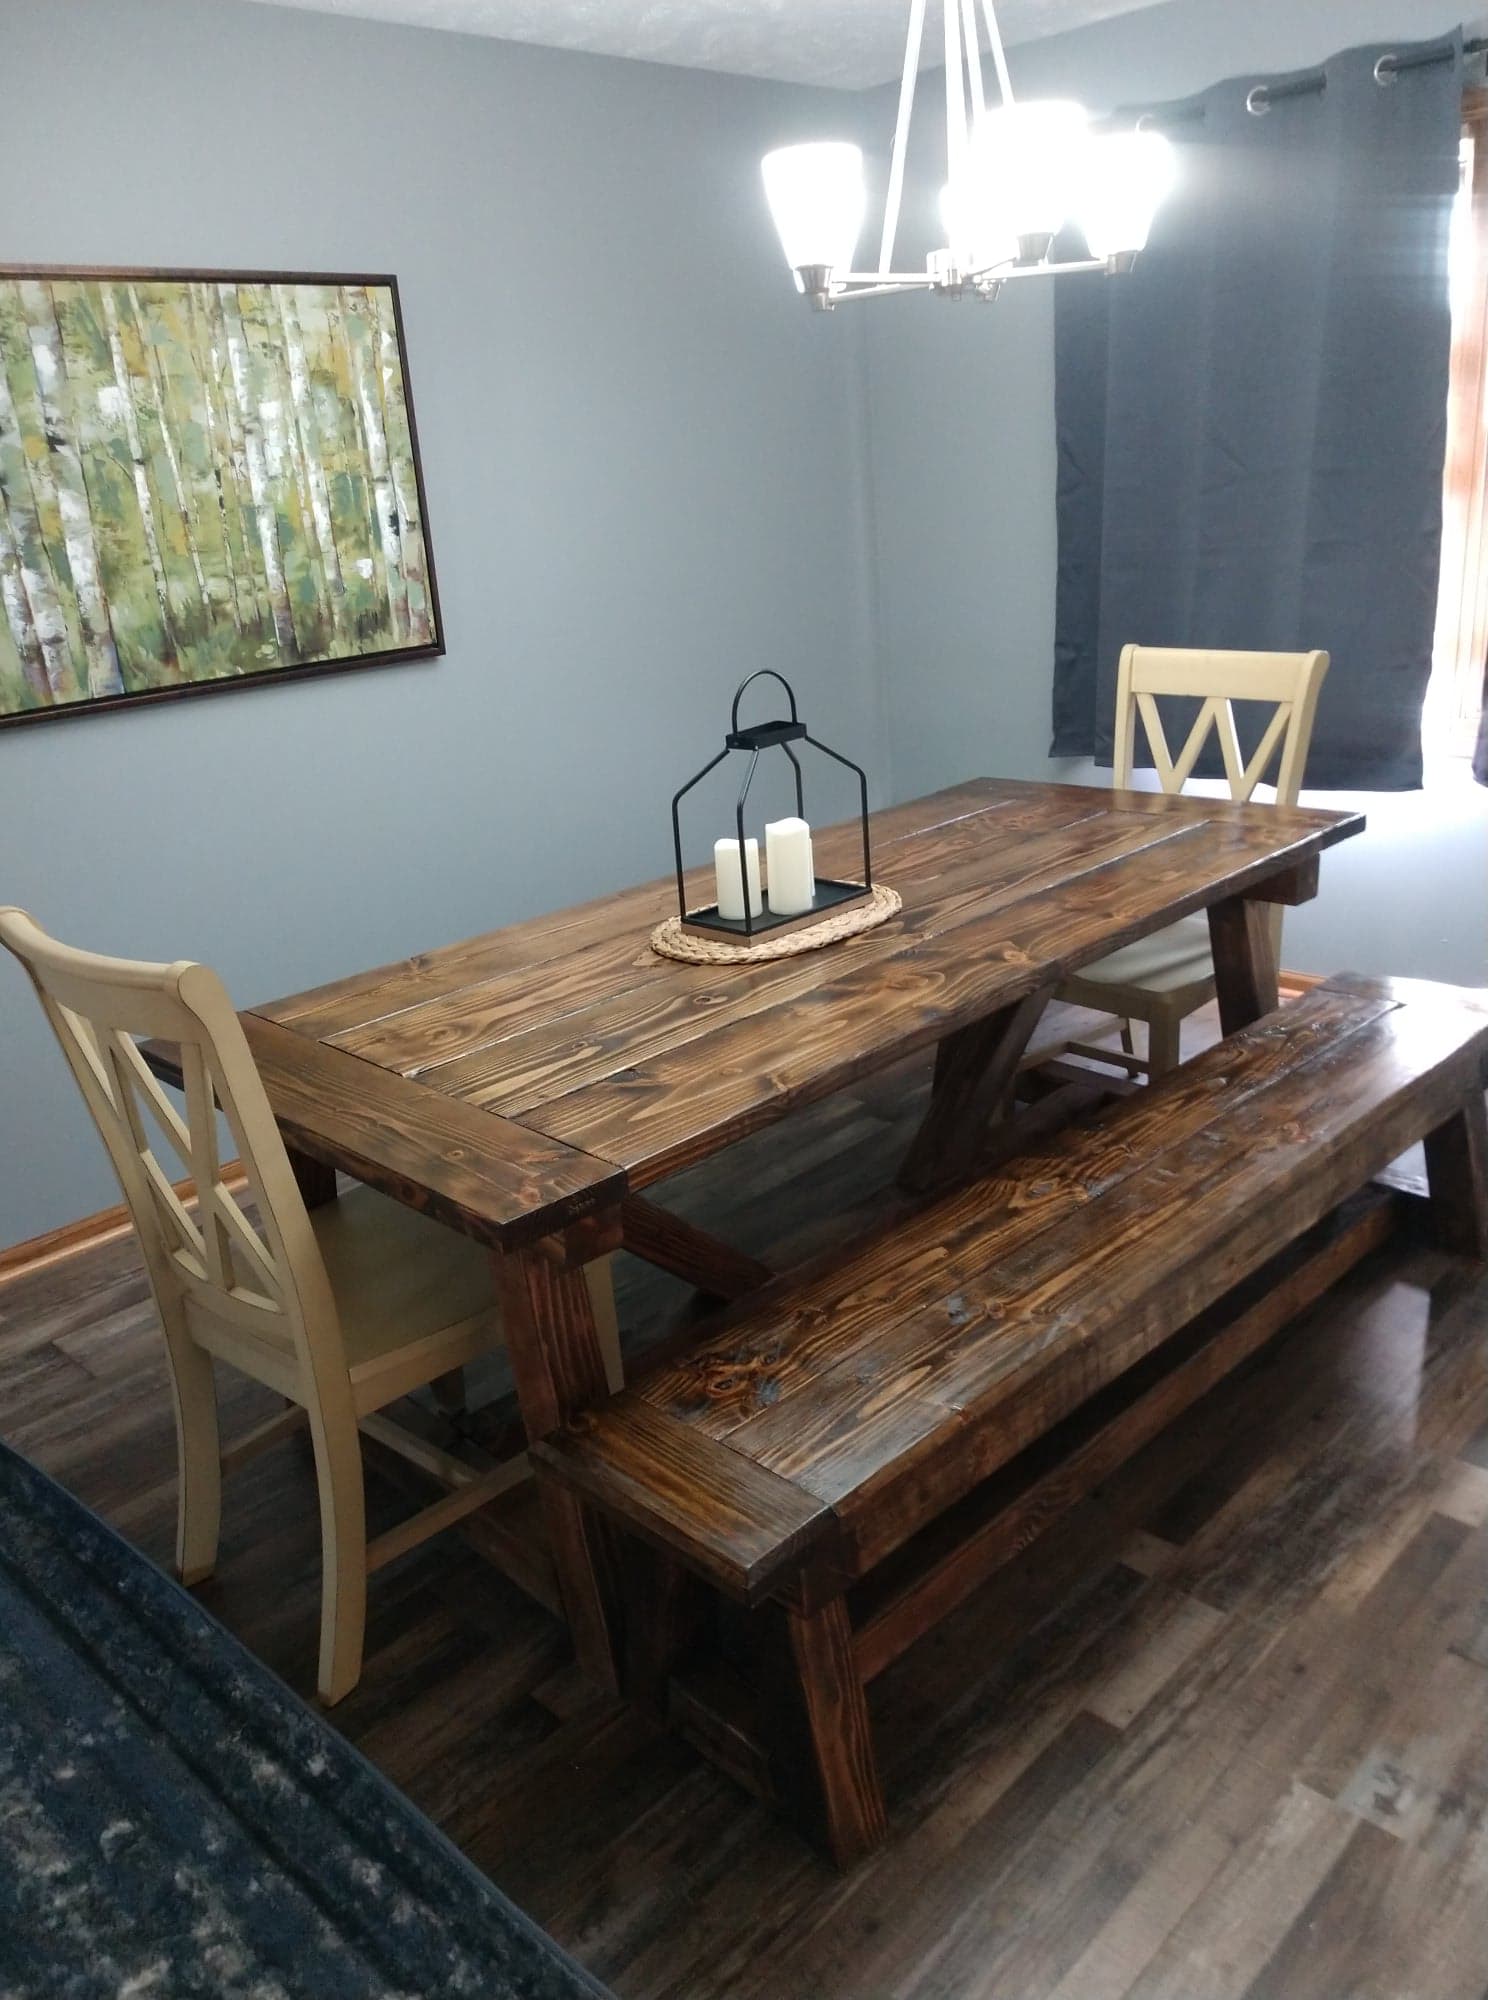
4x4 truss table with bench

Submitted by jeff.meyer on Sun, 03/07/2021 - 06:30

Ana White 4x4 truss table with matching bench.

Estimated Cost
250
Estimated Time Investment
Day Project (6-9 Hours)
Finish Used
dark walnut stain and 3 coats of lacquer
Recommended Skill Level
Intermediate

Comments

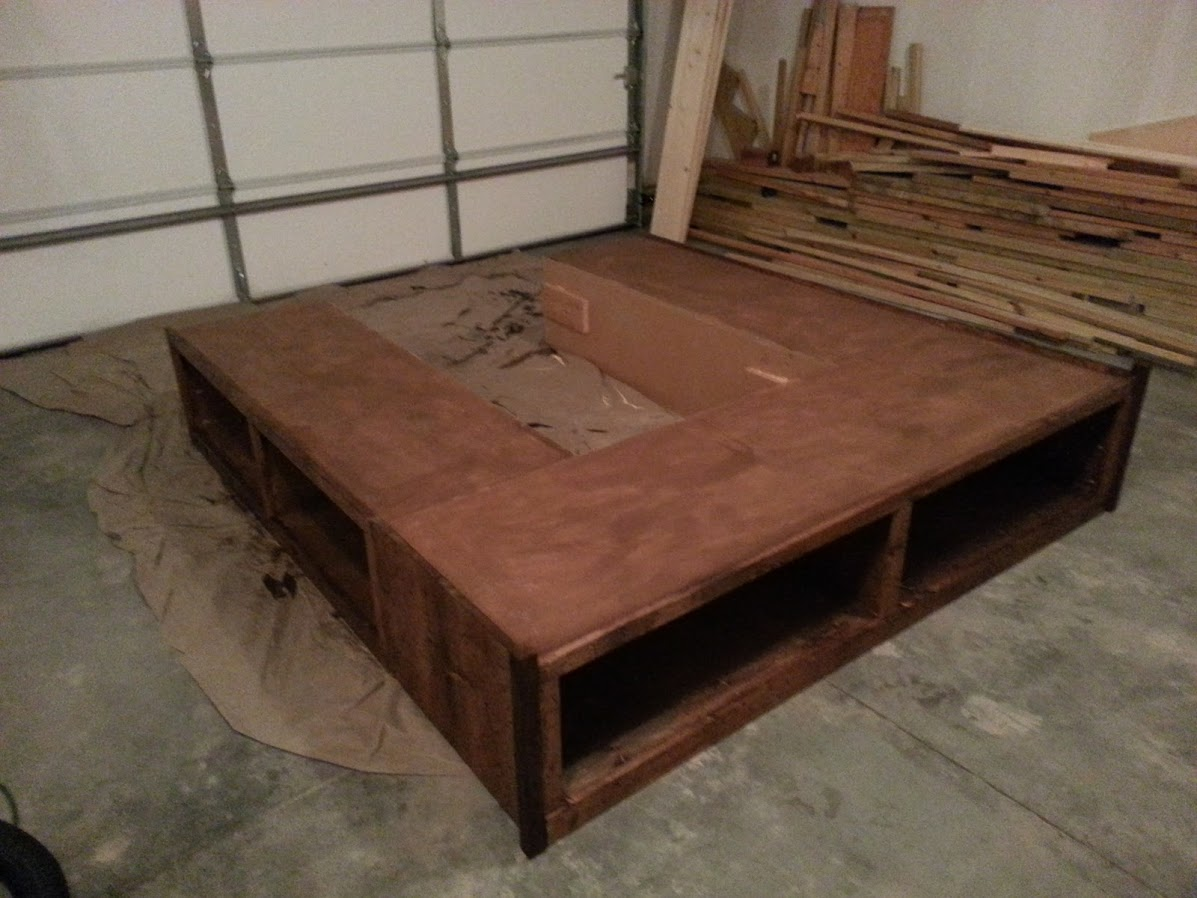
Our King Bed with Open Storage and Bolted Frame

Submitted by webs05 on Sun, 03/10/2013 - 21:20

We followed the links below to create our bed frame and headboard. The last link had some good tips that helped us. My big contribution: Use bolts to fasten everything together. Taking careful measurements I created a track for for the 2x4 spacer. This makes setup of the spacer incredibly easy. Then I put all three benches together and drilled 3/8 holes and used 3/8 bolts, washers, and wingnuts to fasten. This makes everything easy to setup and take down. http://ana-white.com/2010/03/plans-reclaimed-wood-look-headboard-king-s…

Built from Plan(s)
Estimated Cost
500
Estimated Time Investment
Weekend Project (10-20 Hours)
Finish Used
Minwax Provincial with a dash of Golden Oak mixed in (1 coat) / Minwax water-based poly (2 coats)
Recommended Skill Level
Beginner

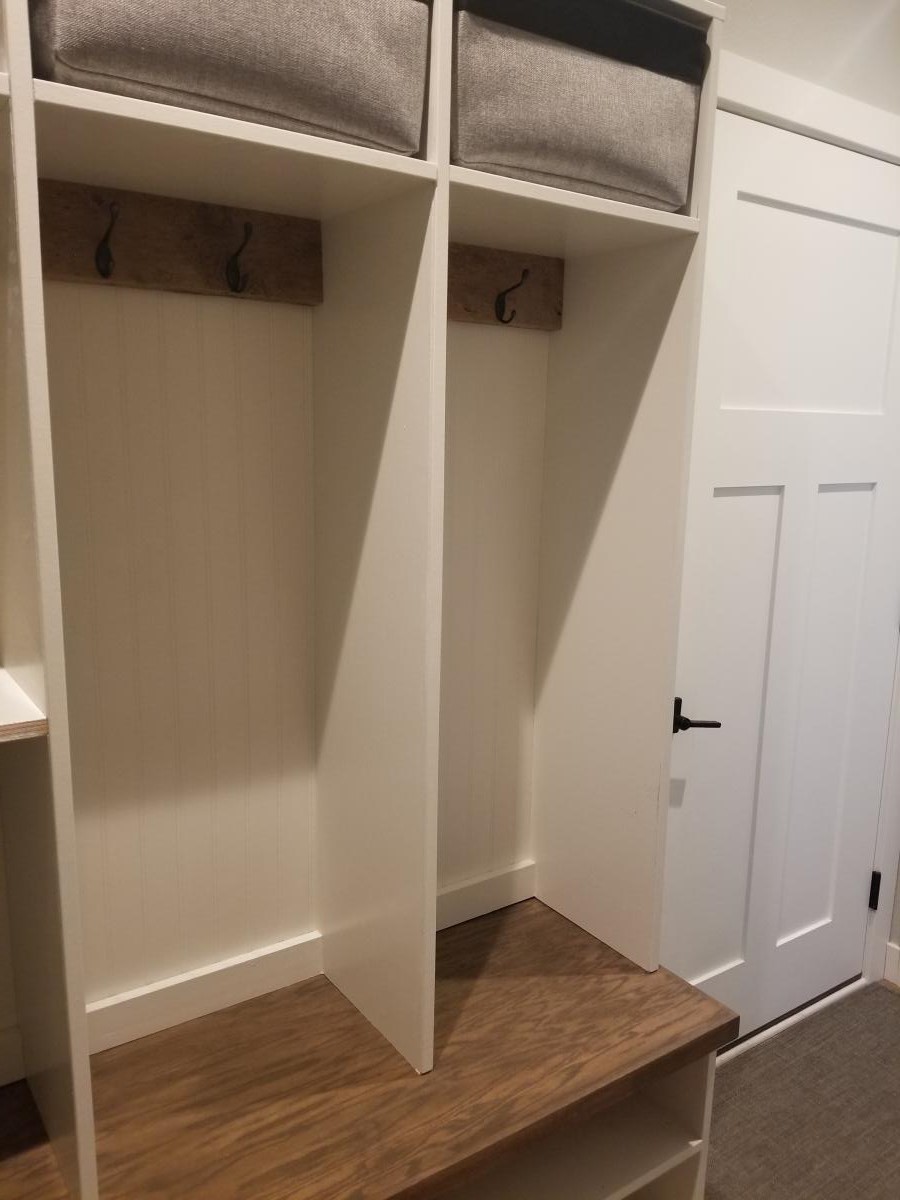
Mudroom Lockers

Submitted by rendall28 on Sun, 03/21/2021 - 11:03

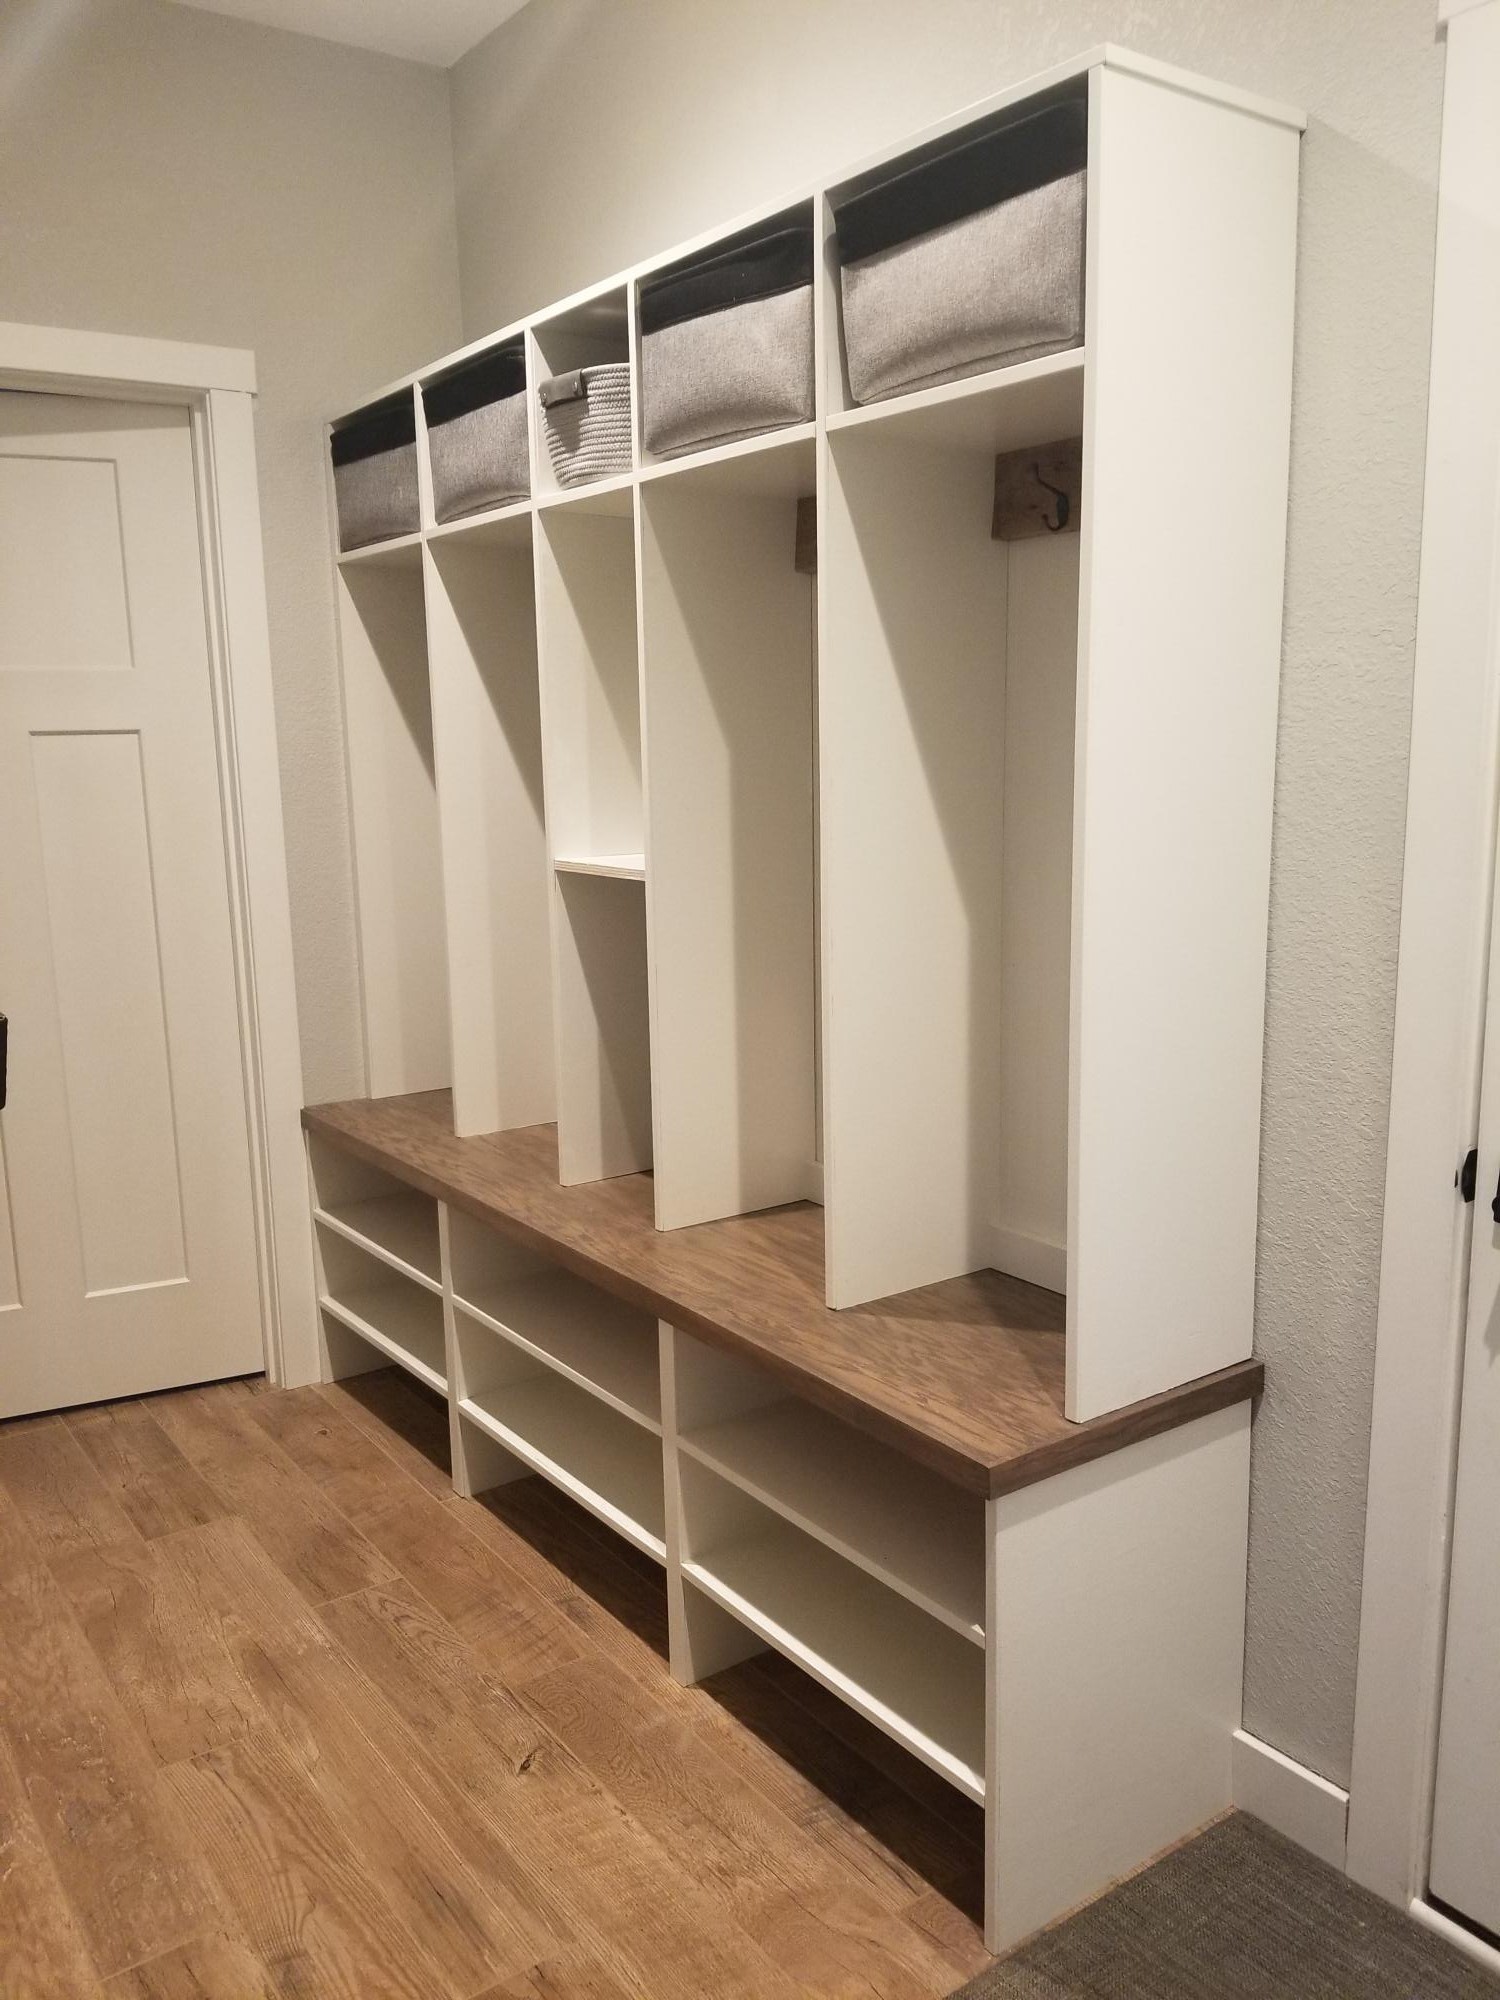
I began by first making 3 cubes of shoe shelves out of 3/4 oak plywood. After assembling I coated with joint compound and sanded smooth to get rid of grooves and grain. The hutch was assembled in 2 sections. I used a router to slide the shelves in so there were no screws visible. I applied primer/paint/ poly in these 5 large sections. The sections were then but in place in my mudroom and connected for installation. The bench top was custom measured to fit as the walls were not perfectly square. The bench top was stained/poly before the hutch was set into place. Paneling was attached to the back of the hutch unit before lifting in place. Barnwood was also installed where the hooks were attached for an added detail. I used 3/4 x 1/4 trim to finish the sides of the plywood and trimmed down mulion for the 1.5 inch sections needed for the bench trim and sides connecting to the wall to hide gaps left from un square walls.

Estimated Cost
350
Estimated Time Investment
Week Long Project (20 Hours or More)
Finish Used
White: 2 coats of primer, 2 coats of paint, 2 coats of Minwax water based Polycrylic Clear Satin. Custom colormatch paint to match our woodwork for the color.

Bench top: stain Briarsmoke with 2 coats of Minwax water based Polyacrylic Clear Satin.
Recommended Skill Level
Intermediate