Community Brag Posts

I love how it turned out!

Submitted by hoffer5353 on Sat, 06/25/2011 - 20:47

This was my second project since college 8 years ago and I am so pleased how well it turned out.
My son really wants a bunk bed so I promised him I would make the simple twin bed to complete the set. Eventually that is...May also make a trundle too.
Thanks!

Estimated Cost
Less than $150.00
Estimated Time Investment
Weekend Project (10-20 Hours)
Finish Used
Minwax-Red Oak,
Minwax-Polyurethane-Semi Gloss
Recommended Skill Level
Intermediate

Handmade by Tim

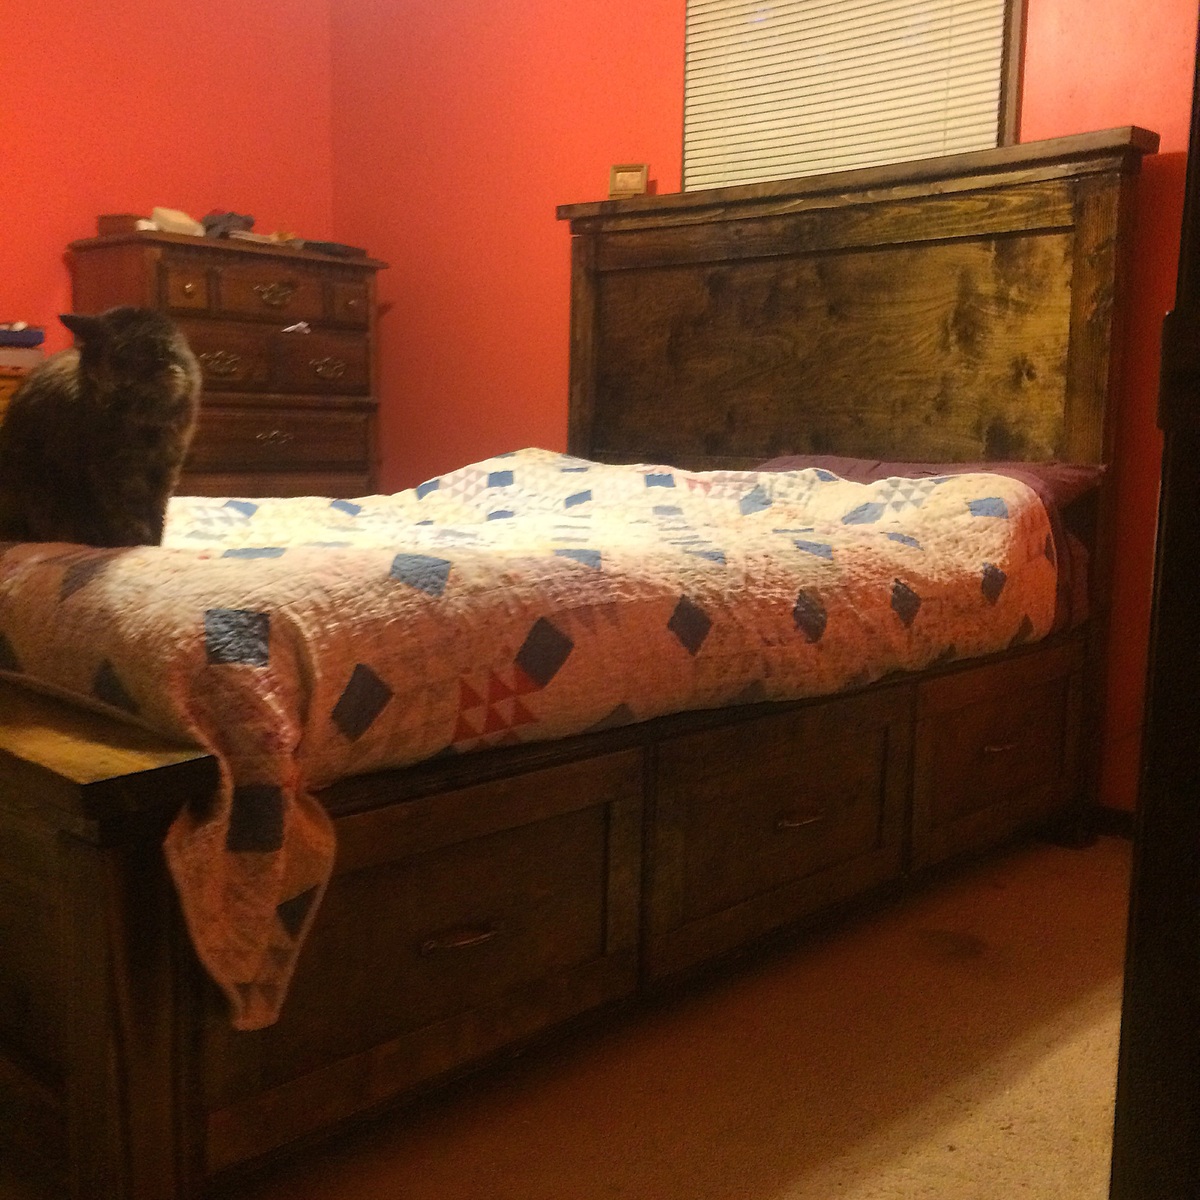
Submitted by Tjmac924 on Tue, 08/25/2015 - 17:36

Really handy for getting more storage space without taking up extra floor space

Estimated Cost
$500
Estimated Time Investment
Week Long Project (20 Hours or More)
Finish Used
MinWax Dark Walnut,
Recommended Skill Level
Advanced

Comments

Tjmac924

Tue, 08/25/2015 - 17:39

A plate (biscuit) joiner is really helpful for building the cabinets, especially if you're going to have the drawers. 

Twin Farmhouse Bed

Submitted by kelli224 on Wed, 06/29/2011 - 18:56

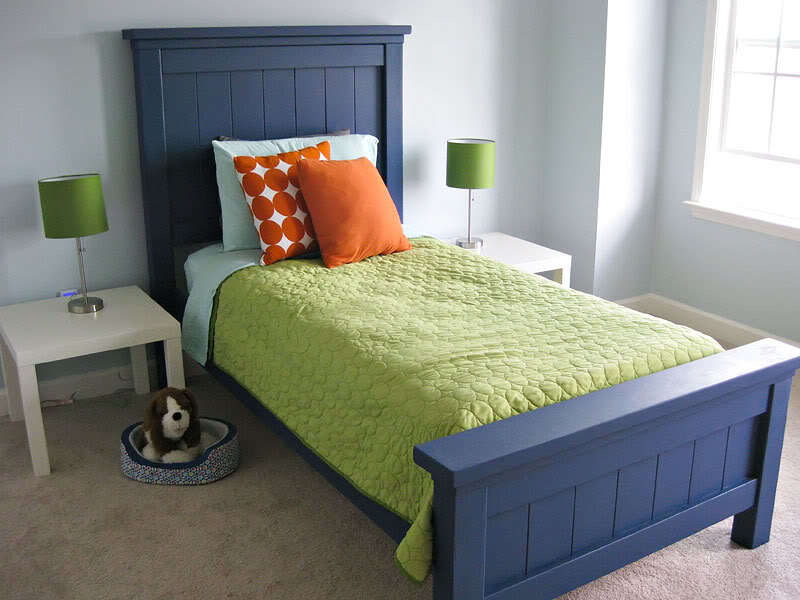
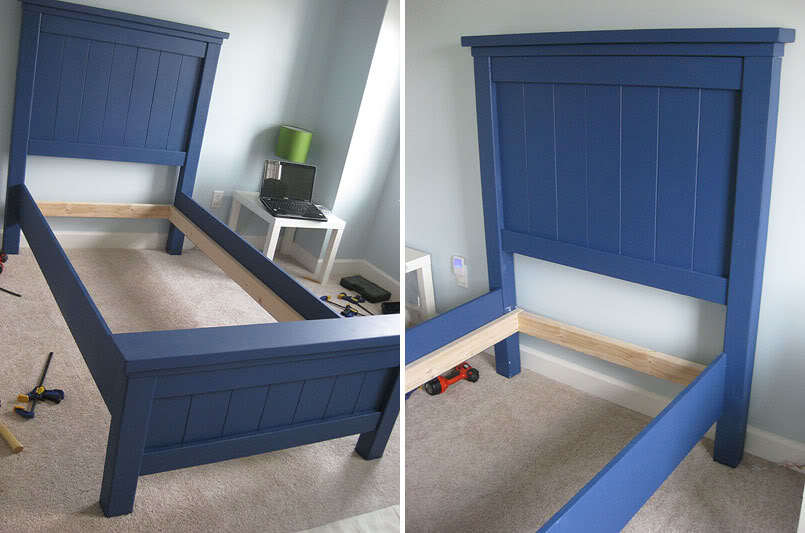
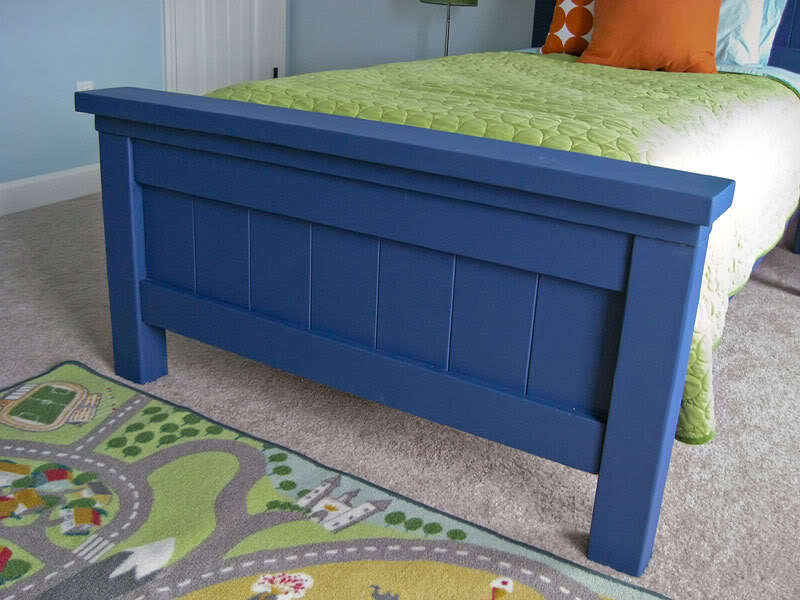
One of our first projects was the Farmhouse twin bed for our son. We couldn't love that bed anymore than we do. It is gorgeous and while it was a learning process, it was still much easier than we ever thought possible.

Built from Plan(s)
Estimated Cost
under $150
Estimated Time Investment
Week Long Project (20 Hours or More)
Finish Used
It was sanded many times, primed and then painted with flat Sherwin Williams "Commodore". We don't really like the glossy look and after a few months, it still looks just as it did the day we finished. Because there's no poly, it will be easy to touch-up when after our two young boys bang their toys into it!
Recommended Skill Level
Beginner

Comments

debandtom25

Sat, 07/09/2011 - 08:36

Your bed has inspired me to build one for my son. LOVE the color too! I'm going to add a trundle so he can have friends stay over. I'll post when I've got it finished.

Justjanet

Tue, 11/10/2015 - 06:43

this was the best post showing how you attached the rails. there are so many questions about it and yours looks so sturdy. thanks for the picture.  gorgeous color for the bed as well!

My laundry basket dresser with doors

Submitted by jensimmons on Sun, 07/03/2011 - 20:19

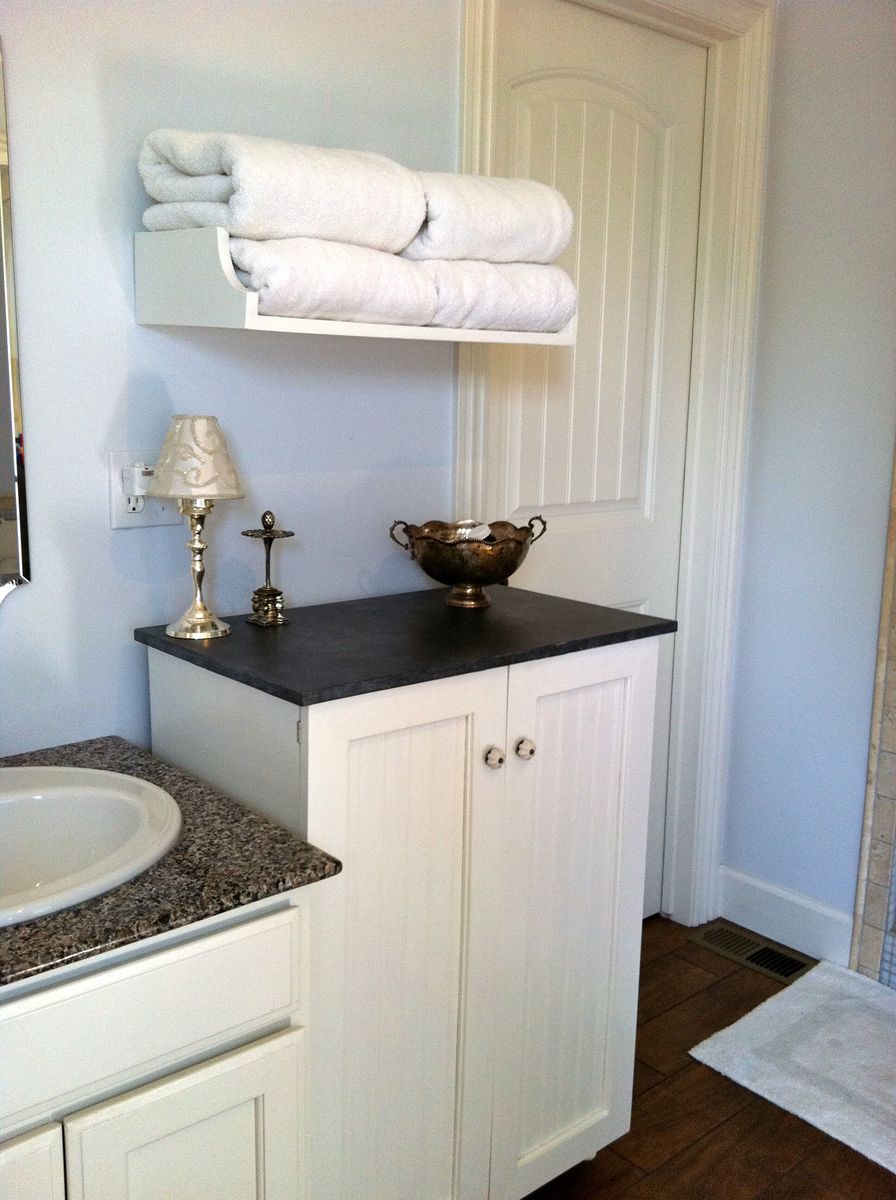
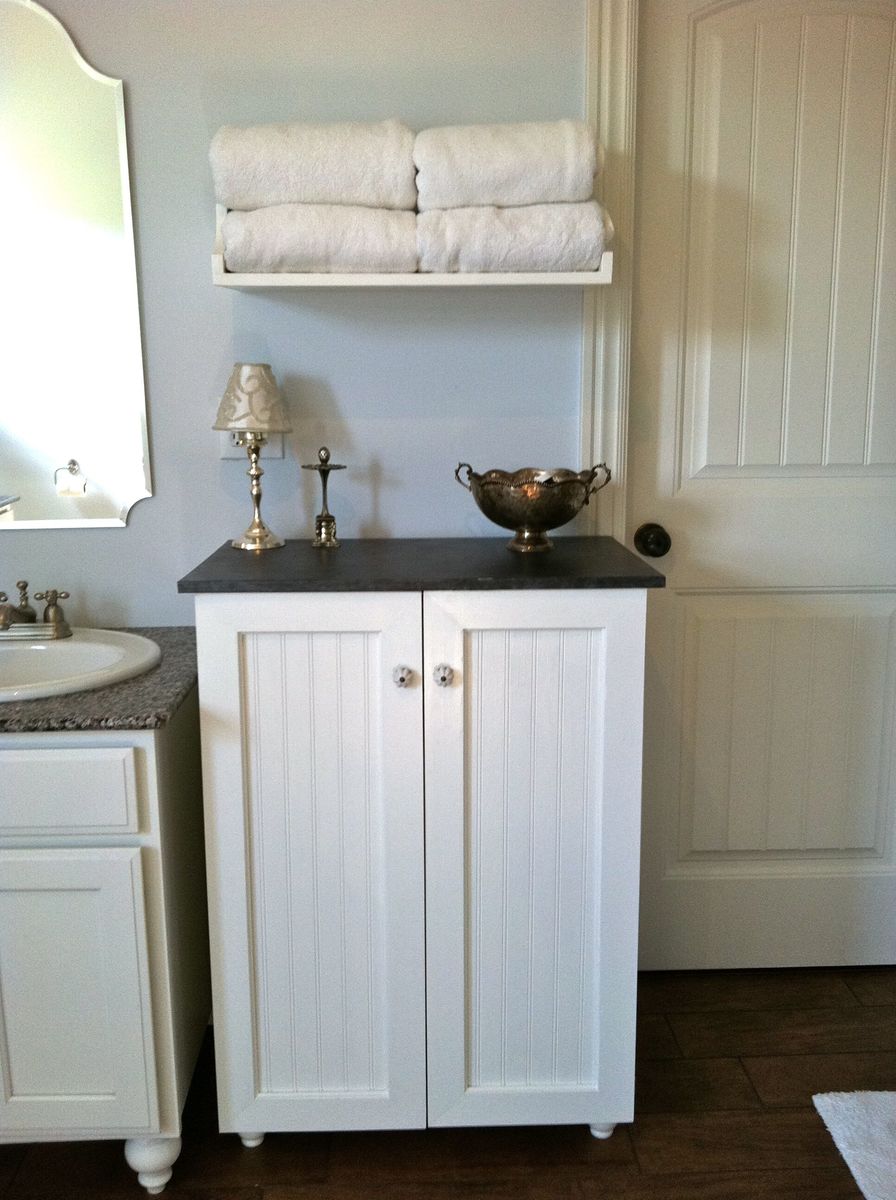
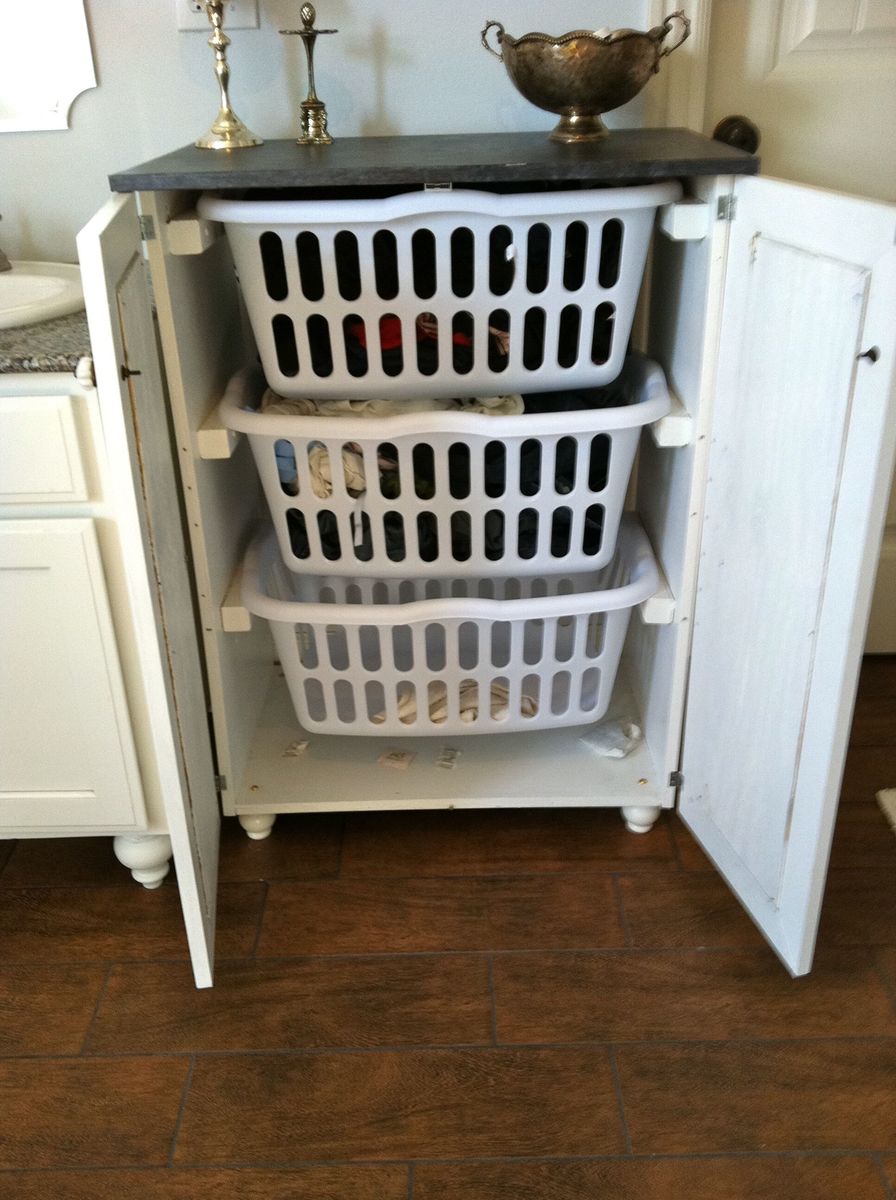
I wanted to use our laundry basket dresser as a collector for dirty laundry in our bathroom, and wanted it to have doors so it would blend in better. I also made the shelf above for our towels. It is painted white with a faux-zinc finish on the top. I made the top slightly larger so it would overhang and added cute little bun feet. My talented friend Carli helped me build the doors (and by helped I mean I handed her things while she impressed me with all her tools and skills!) and frame.

Built from Plan(s)
Estimated Cost
$75-100 (can't remember exactly)
Estimated Time Investment
Weekend Project (10-20 Hours)
Finish Used
white semi-gloss paint, zinc faux finish: layer 1 dark charcoal paint, layer 2 dark pewter metallic glaze, layer 3 white paint thinned with water & rubbed on/off.
Recommended Skill Level
Intermediate

Comments

Guest (not verified)

Fri, 07/29/2011 - 23:37

this is perfect! i totally need a bunch just like this! I love the added doors!

Pam in Colorado (not verified)

Sat, 09/17/2011 - 12:48

This is the look I'd like, fit the baskets and hide them behind doors until you are ready to do the laundry. These could be made for bedrooms, bathrooms, toy rooms (okay, toys instead of dirty laundry)...

Guest (not verified)

Fri, 11/11/2011 - 08:05

I absolutely love this! Could you please add instructions on how to make/paint and install the doors? I am a newbie to making my own furniture. Thanks!

Guest (not verified)

Wed, 01/11/2012 - 08:29

I love this idea! I will have a new bathroom soon and I think this will get used! What are the dimensions, or what style cabinet would you suggest to look for? TIA!

Jennifer Simmons (not verified)

Fri, 02/17/2012 - 05:57

The dimensions are the same as Ana's plan: http://ana-white.com/2010/11/laundry-basket-dresser except that the top is slightly bigger (3/4" overhang on front/sides) to look more like a countertop. On the doors we just made a frame w/ angled pieces, routed a notched line on the back & glued/nailed some beadboard in from the back. Sorry I can't be much more detailed on that, a friend did most of the doors for me!

Guest (not verified)

Sun, 02/19/2012 - 07:42

I actually got the plywood to do this project and I was going to add doors. I looked at the baskets suggested but it seems they would stick out the front. I was just curious, did you use different baskets that would fit inside the cabinet or did you make the cabinet slightly deeper?

Jennifer Simmons (not verified)

Sat, 02/25/2012 - 05:36

Actually I discovered the same problem after it was built. I just didn't put a back on and they stick out a tiny bit in the back. I actually kind of like it that way because it lets some air in (being in the bathroom and putting towels in I could see it getting mildewy without much circulation). But if I had gotten the baskets first I probably would have made it about 2" deeper, then leave some open space, but not all, on the back.

Craftsman Style Playhouse

Submitted by aerialc on Fri, 10/02/2015 - 11:57

I mainly followed ana's plans for this playhouse. Instead of a plywood roof I used cedar shingles. I also added plexiglass to the windows.

Built from Plan(s)
Estimated Cost
$450, including deck.
Estimated Time Investment
Weekend Project (10-20 Hours)
Finish Used
Ready Seal - Dark Walnut
Recommended Skill Level
Intermediate

Comments

Kitchen Helper

Submitted by 67GTOenvy on Fri, 08/19/2011 - 10:12

The kitchen helper tower was a fast and easy build, the modification of 16 hinges to allow the tower to fold flat was actually the most time consuming part of the build. I added clear skateboard grip tape to the platform floor. I found the hinges and griptape on ebay and most of the wood was scrap leftover from other projects.

Built from Plan(s)
Estimated Cost
$45
Estimated Time Investment
Weekend Project (10-20 Hours)
Finish Used
"Classic Red" spray paint & spray laquer for the tower frame, I stamped flowers & bugs on the platform under the griptape & clear laquered the bare sides & underside.
Recommended Skill Level
Starter Project

Comments

Guest (not verified)

Mon, 02/27/2012 - 08:52

First off, your website is awesome and I love how you give such great directions. However, on everything I pull up all this information is on it. On this one it is not, can you help me? I really want to build this for my daughter.

Thanks so much.

Stacey

Amy Patterson

Mon, 11/30/2015 - 16:48

How did you build it so it can be folded up?.  Would you explain it or post a picture?

American Girl Dollhouse with Farmhouse Bed, Bunk Bed, and Furniture

Submitted by Anonymous (not verified) on Tue, 01/08/2019 - 08:46

I've been building Ana White American Girl doll furniture for my two daughters for the last three years, culminating with my biggest build of all - a modified version of Ana's dollhouse.

My wife kept telling me it would end up being huge, and she was right.  The great news is that it doubles as storage when the girls aren't playing!  2 Bedrooms, kitchen, living room, bathroom, and upstairs bonus room for dance and gymnastics.  78" tall x 76" wide, mounted to the wall studs for safety.   Lots of joy in our home on Christmas day.  Thanks Ana!

Estimated Cost
$300
Estimated Time Investment
Week Long Project (20 Hours or More)
Recommended Skill Level
Intermediate

Comments

Deck furniture

Submitted by Anonymous (not verified) on Fri, 10/21/2022 - 10:59

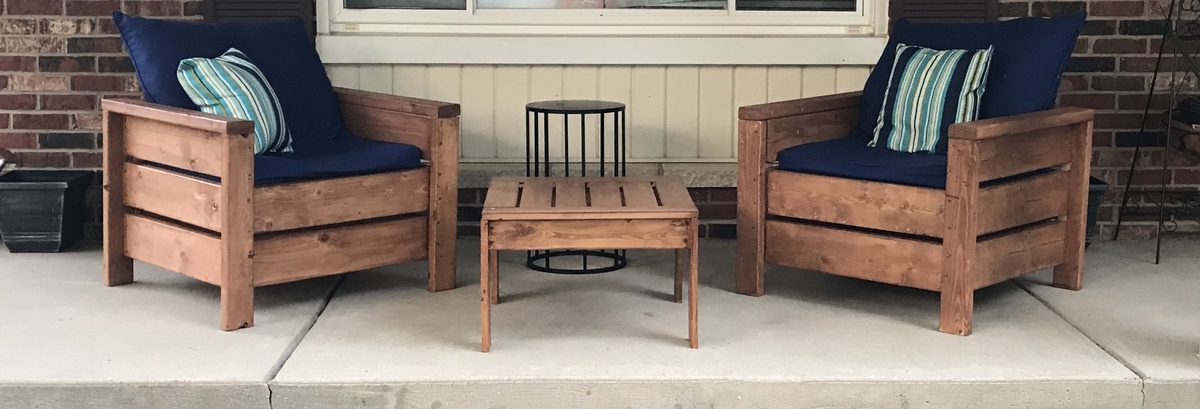
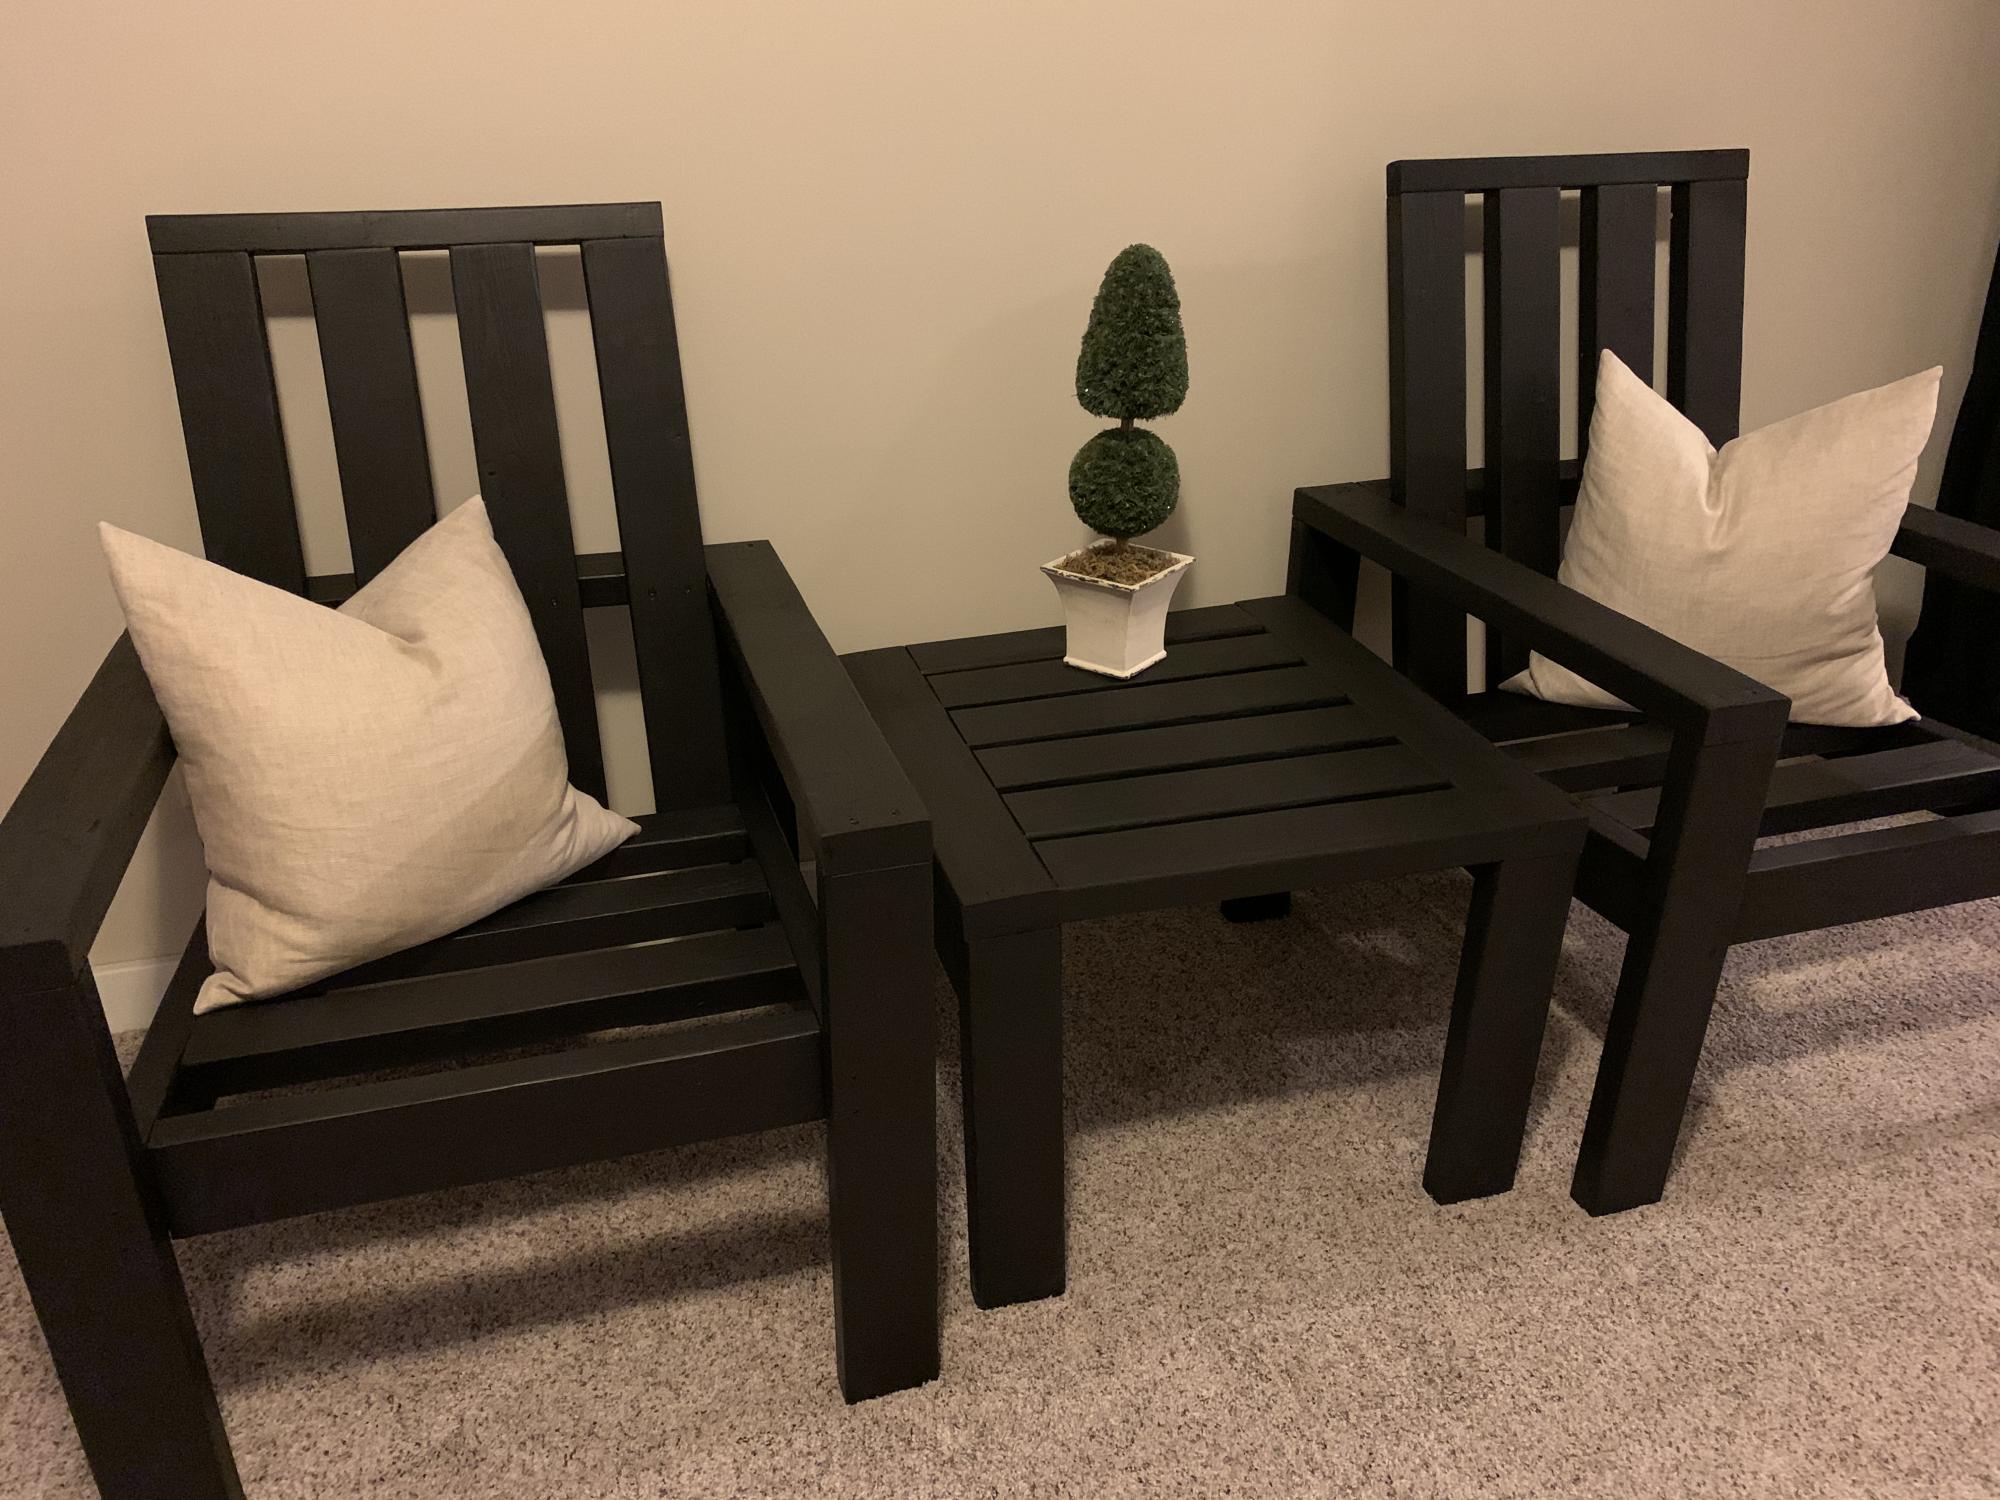
We used pine for the chairs and table and stained with Cabots black exterior deck stain and sealed with polyacrylic.

Comments

Kids Desk

Submitted by kellystern on Mon, 01/09/2023 - 16:03

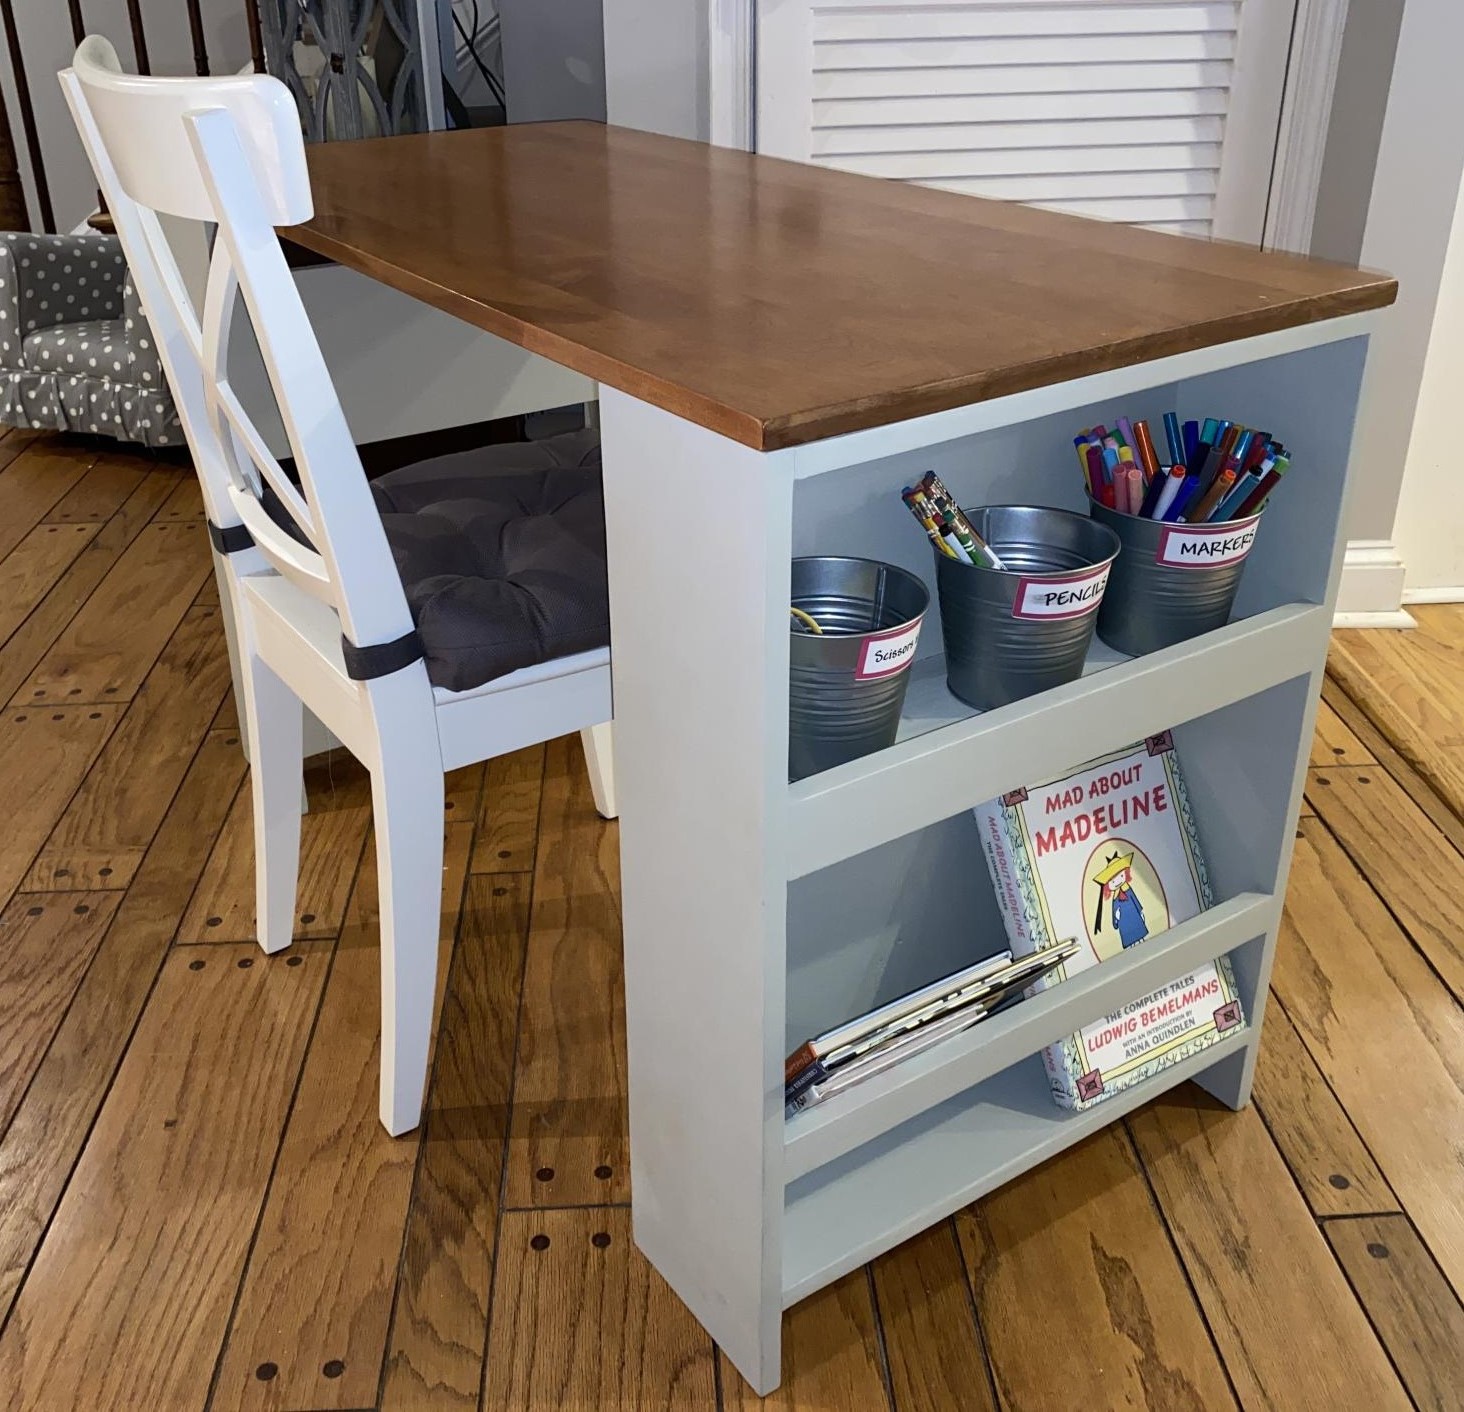
I modified the plan to allow for wider shelves on the legs. I also made the width of the desk 22” instead of 24” to accommodate the size of the repurposed coffee table I used for the desktop.

Built from Plan(s)

Comments

Seasonal And Holiday

Reclaimed Lumber Farmhouse Bench by nhemlok

Submitted by Anonymous (not verified) on Mon, 12/28/2015 - 10:46

I used reclaimed cedar and oak ripped out of a 100 year old house. The bench was made to go with the farmhouse table.

Estimated Cost
$50
Estimated Time Investment
Day Project (6-9 Hours)
Finish Used
Wactco Danish oil...natural finish
Recommended Skill Level
Beginner

Comments

Nhemlok

Mon, 12/28/2015 - 11:19

I stuck to the plans as much as possible, but I wanted to make the bench from the same wood as the table I am in the process of building so ended up changing it a little. 

Legs were made from rough cut oak posts measuring roughly 4"x3" that used to be roof timber. They aren't really all that straight, but I wanted to maintain the rustic look with the saw marked so I didn't plane them. The sides of the frame are made from cedar 1x5's that used to frame the doors of our donor house. The main part of the seat is made from 2x oak 2x8's, and the bread board ends of the seat are made from cedar 2x4's that were used for wall framing. 


Sorry for for having to include this in a comment...it's my first post 

L shaped loft beds

Submitted by AbiCurrie on Wed, 01/13/2016 - 00:49

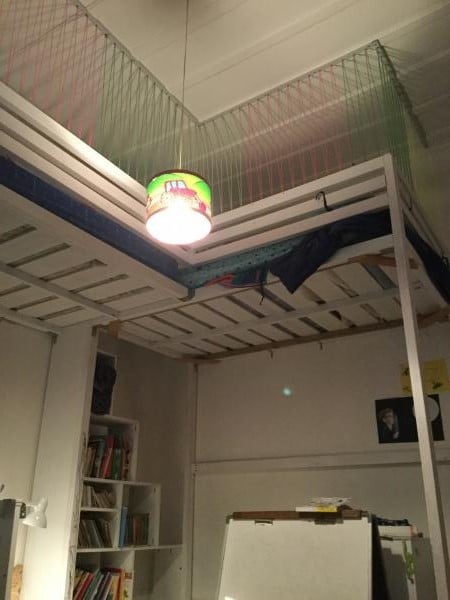
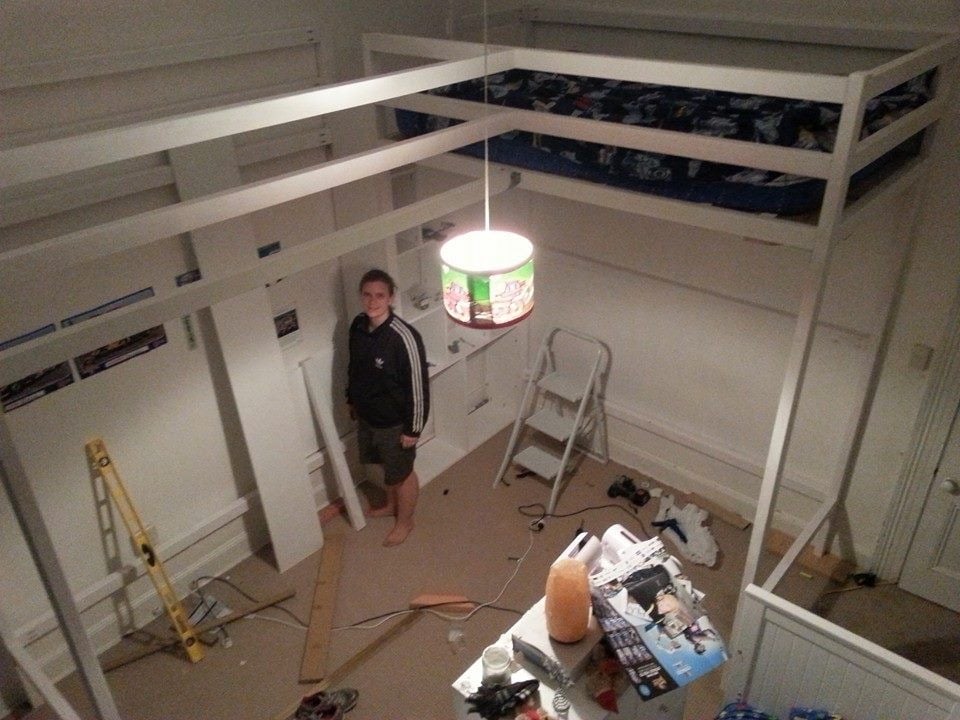
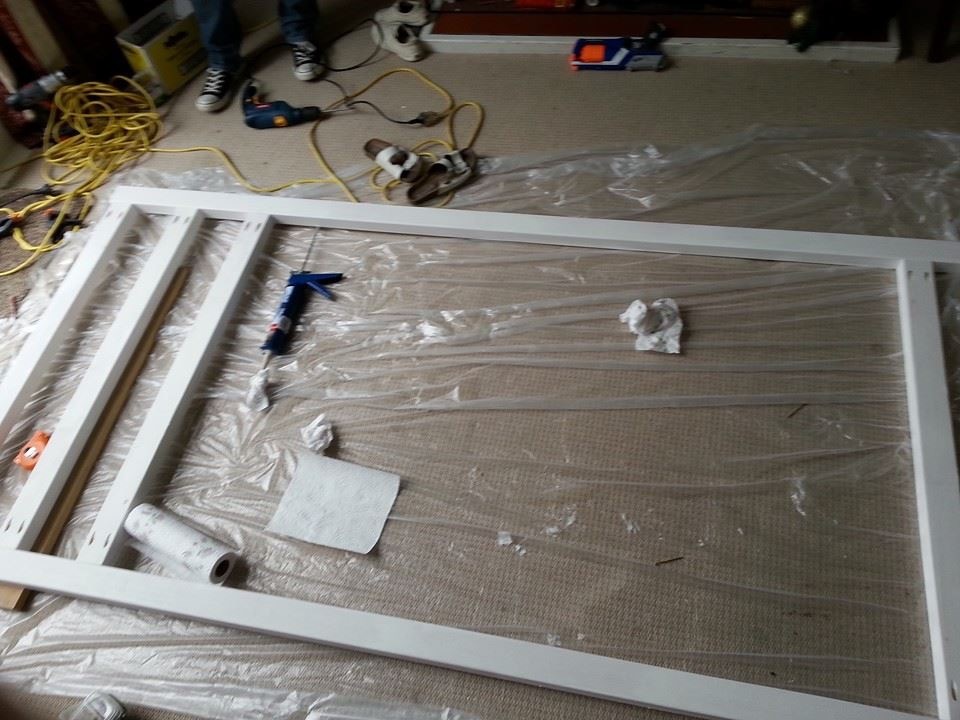
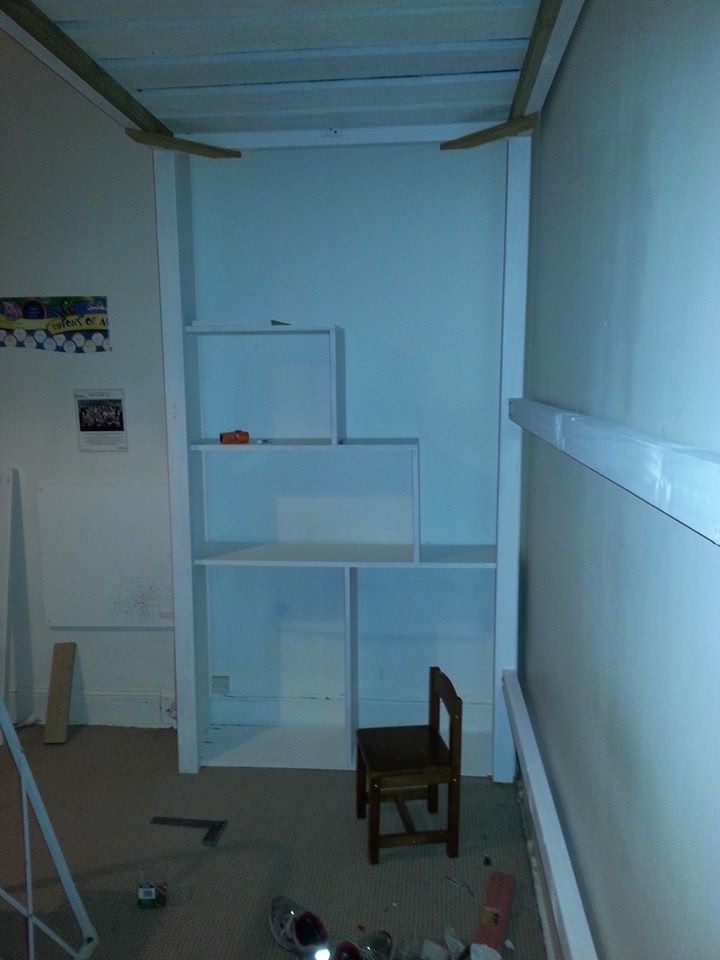
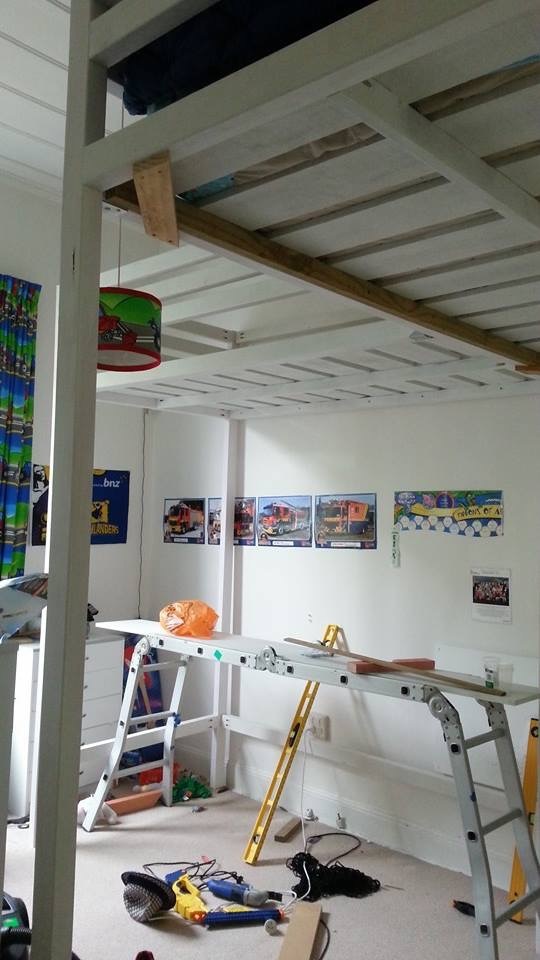
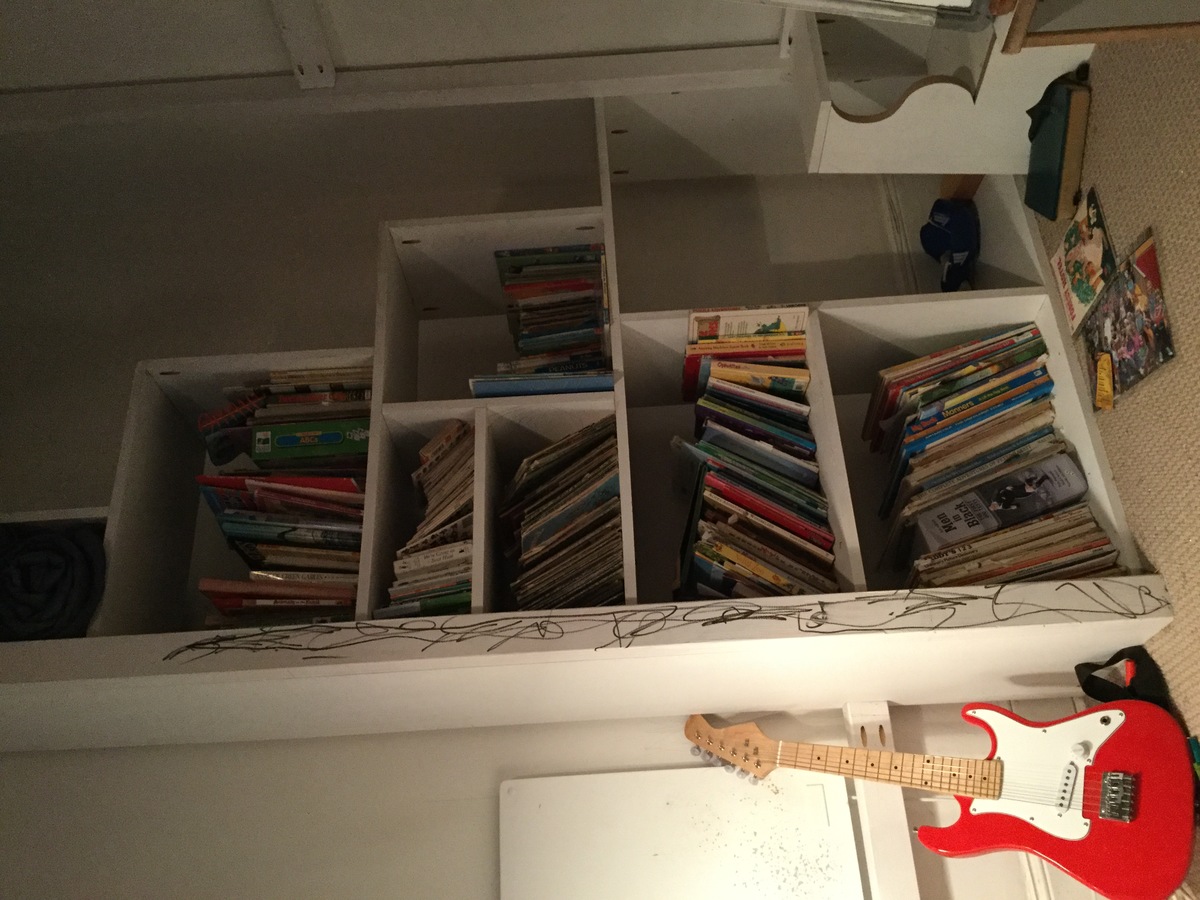
We have 12 foot studs in our house so I wanted to make use of the height of our ceiling to provide more space on the floor for the boys to play! With two boys sharing a room, the beds were going to take up a lot of valuable floor space. I found the bunk bed plans in Ana's book and decided to modify them to make loft beds. We had to do two so decided on an L shape so we could fit them into the room! Once we made the first bed we decided we should put only one set of stairs in to save space. The safest way we could think to do this was to place the stairs against the wall so the boys were less likely to fall. The stairs double as book shelves. The coloured rope was an added safety feature we thought up and gives me peace of mind! This was a fun, relatively easy build for two non-builders making their first big project. I bought a Kreg pocket hole jig for this project and it was a life saver. I can't imagine doing this build with out it!!! We completed it in about two to three days while my brother was down on holiday. It was fun and good brother sister bonding time! I am about to embark on phase two of the boys room, this time by myself , adding a storage dresser under one bed. I will modify Ana's laundry dresser plans to fit some plastic storage boxes. Then a day bed/sofa under the other bed using Ana's Alaska cabins day beds plan and finally (if I'm still standing) a shorter version of the craft table for the middle of the room! That's my year planned! Hope you enjoy the pictures, the beds are so big and high it's very hard to get a good photo. 

Estimated Cost
$300-400 NZD
Estimated Time Investment
Weekend Project (10-20 Hours)
Finish Used
Dulux - White paint matte finish. I painted all the wood before assembly, I highly recommend this. It needs another coat post build but I can confess I haven't gotten around to it yet!!!
Recommended Skill Level
Beginner

Farmhouse Table with Extensions

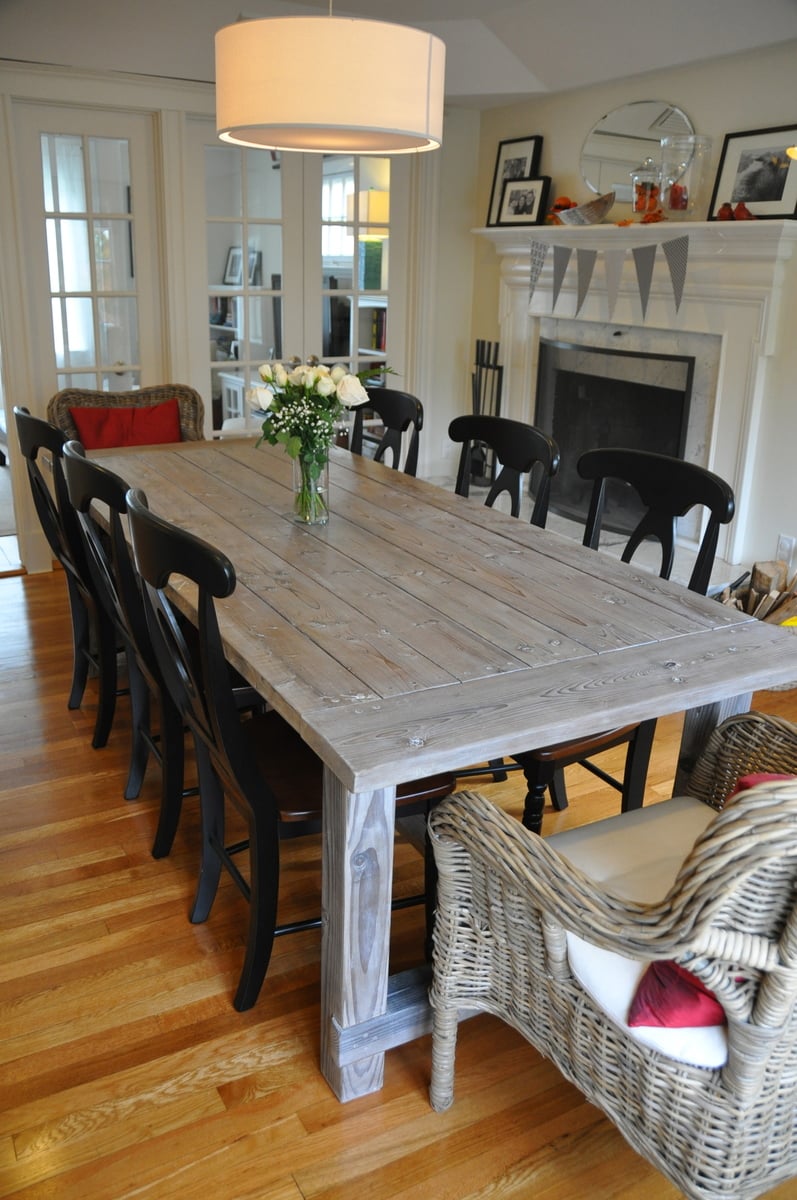
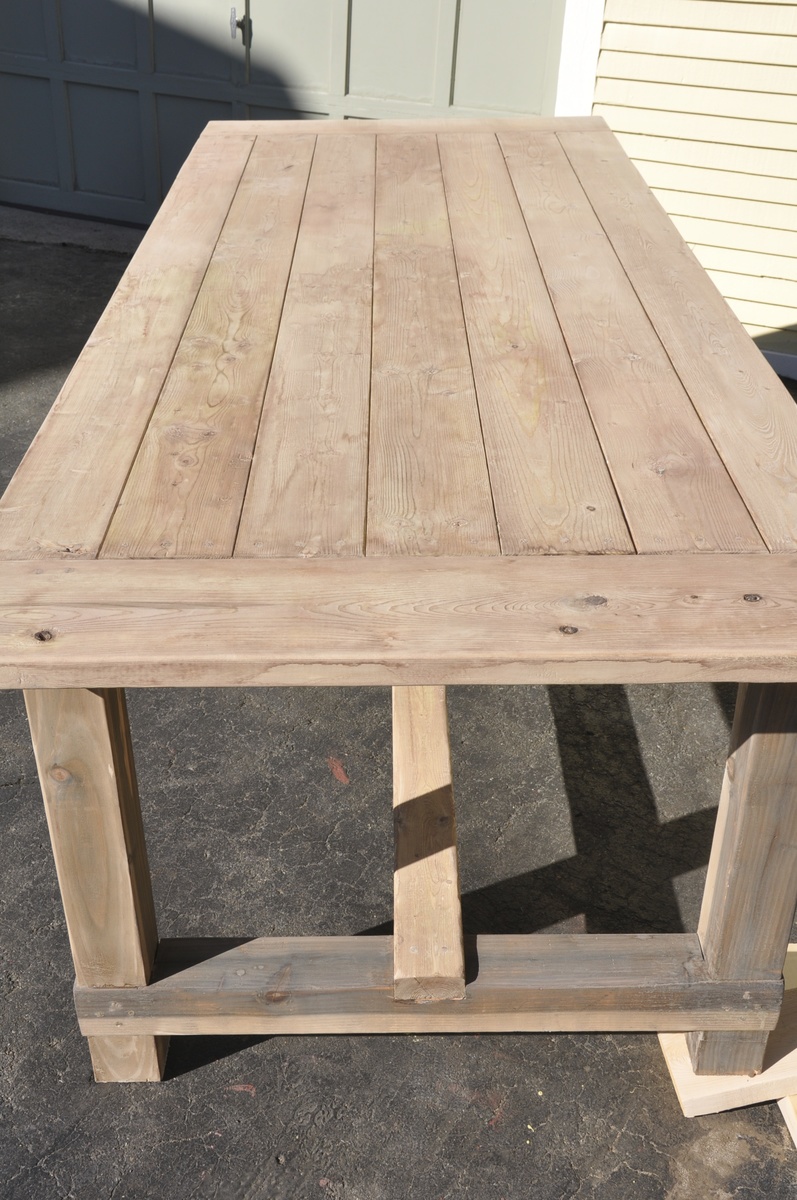
This was my first build and I learned A LOT and watched A LOT of youtube diy videos. The main take-away from this project is not to build in the freezing cold if the finished project is for inside. I finished this project in below freezing temperatures and I noticed that the wood expanded (increasing slightly the gap between the finished boards on the top) when it was brought inside.

I built this from the original farmhouse table plans with no kreg jig although I did buy and use a pocket kreg jig to make the extensions. The main modifications were using 4x4s such as were used in the Country Living magazine spread that inspired this build and also making modifications to allow the addition of 15" extensions at each end of the table's bread boards.

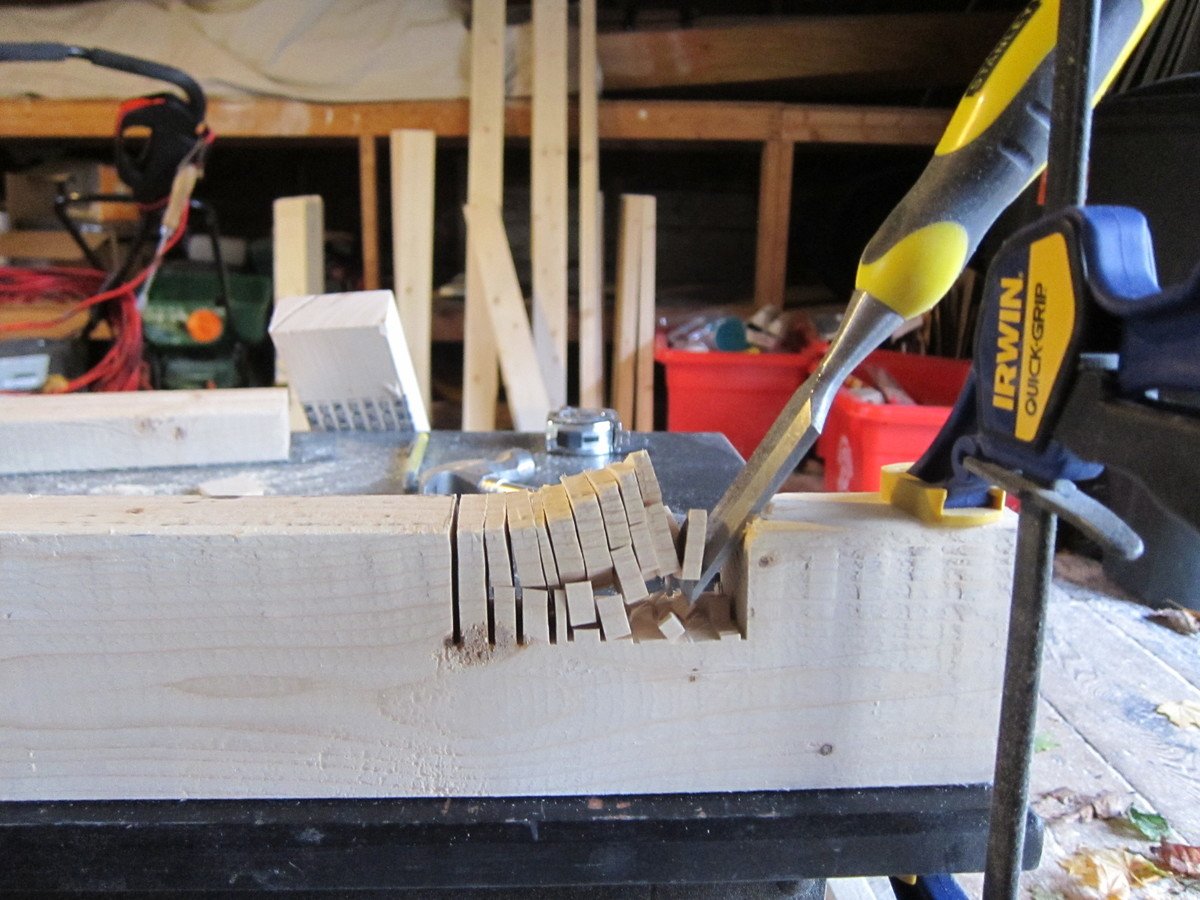
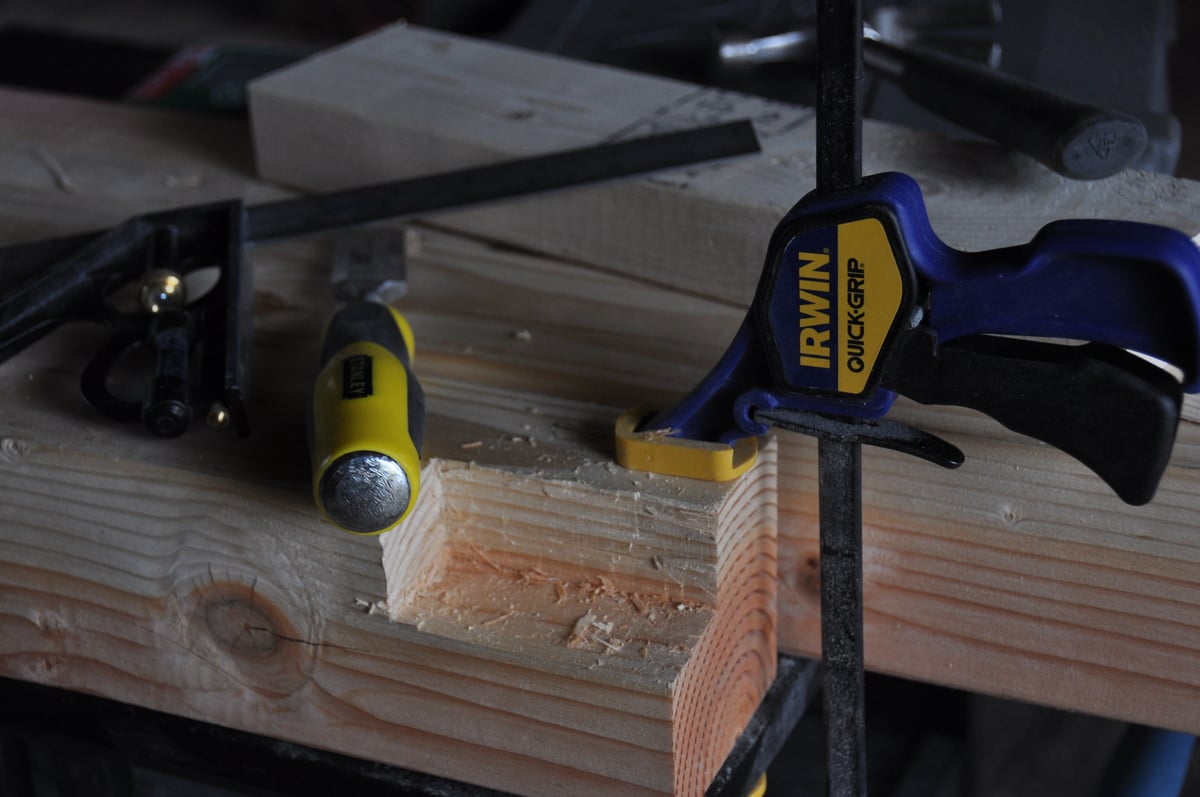
My first challenge was figuring out how to build with the 4x4 legs instead of the 2 2x4s screwed together. In order to accomplish this i had to use a chisel to create the corner lip that the table top frame would sit on. I added photos of this so I hope it will help someone. Chiseling these 4 corners (one on each post) only took an hour or two and was so worth it for the look of the 4x4s. Just measure carefully and work carefully with a sharp chisel. I actually removed half the wood by sawing off the corner at a 45 degree angle. Remember when cutting your boards for the table ends that a 4x4 has different dimensions than 2 2x4s screwed together. Compensate for this in your cuts.

Another challenge was hiding the screws on the table legs and table top. I was leaving the finish natural so didn't want to use wood fill. I accomplished this by getting a countersink bit and then buying wooden dowels the same diameter. For these screw holes, after finishing screwing, I put a dab of wood glue in the countersink hole, inserted the dowel as far as it would go, used a fine hand saw to cut off the dowel flush with the table and then used a hammer to make sure the dowel was in tight and flush.

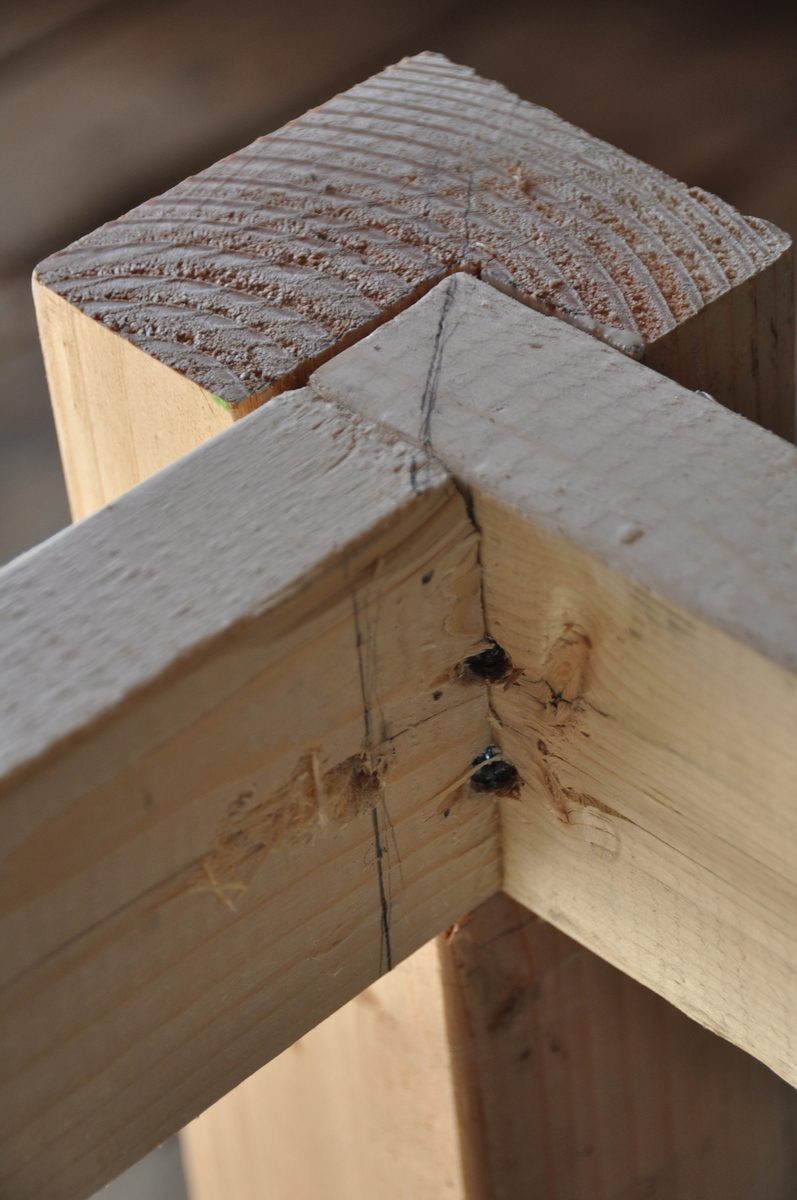
I had trouble figuring out how to attach the table top frame to the table legs with the long screws from the plans so I included a picture of this step. Its really easy but I was not able to use three screws as the plan calls for. I used two instead and it has been very solid. I used the long screws as proscribed.

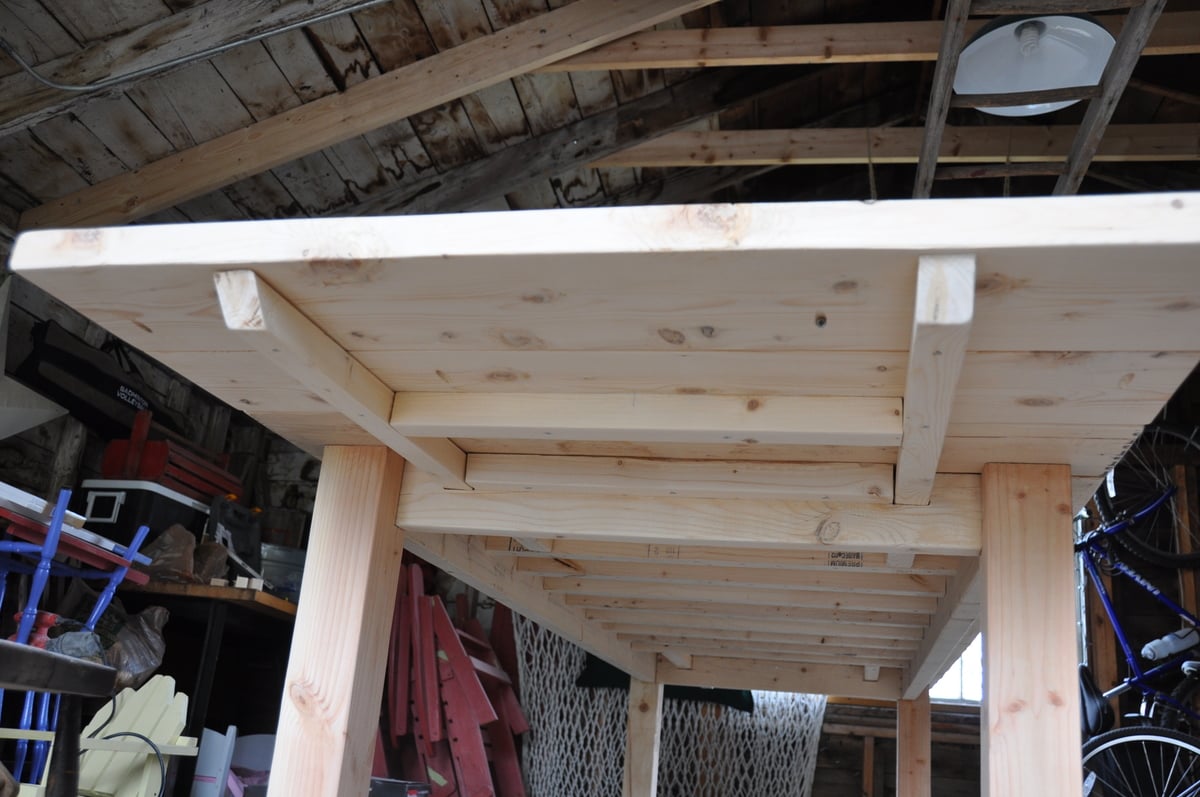
Finally, I wanted to build extensions (2 2x8 boards kreg jigged together) so I could increase seating up to a max. of 12 persons, so I needed to cut out 2x2 gaps on the table ends. I also included a picture of these in place. To make room for the 2 2x2s that extend under the bread boards and table top to brace the extensions, I left out one of the 2x2 cross beams at each end of the underside of the table (the boards that the table top boards screw into).

I hope this is helpful to you!
Estimated Cost
$250
Estimated Time Investment
Week Long Project (20 Hours or More)
Finish Used
Vinegar and Steel Wool Solution (soak steel wool for 24 hours in vinegar and be sure to test on a sample) to "age" the wood. Tung oil over this sealed the stain/wood. over this I applied a wax finish. First I used Briwax Liming Wax to enhance the gray finish and leave a slight white wash patina. This finish was enhanced because I had steel brushed with the grain to remove some soft wood so the liming wax would enhance the grain. I finished the project with clear briwax. We have been using this as our everyday table since February and there are no stains or problems with this finish.
Recommended Skill Level
Starter Project

Comments

dyemond47

Mon, 02/10/2014 - 11:55

Great job on the table! I love...I had visions of this table before I saw it. I wanted to use the 4x4's for the legs as well, the same finish. I am concerned now about the 4x4's because I am an amateur and I think that may throw too many wrenches into my plan. I started with the bench, finished in 3 hours I have patted myself on the back. Plotting on a Kreg jig right now.
epweigel92

Sun, 07/24/2016 - 09:57

Love the look of this table! Just to make sure I'm following correctly, the extensions are ones you can add and remove, not fixed? Do you have a pic of how they slide in or out?

Dresser with changing table top for nursery

Submitted by mjolgren on Thu, 06/13/2019 - 06:44

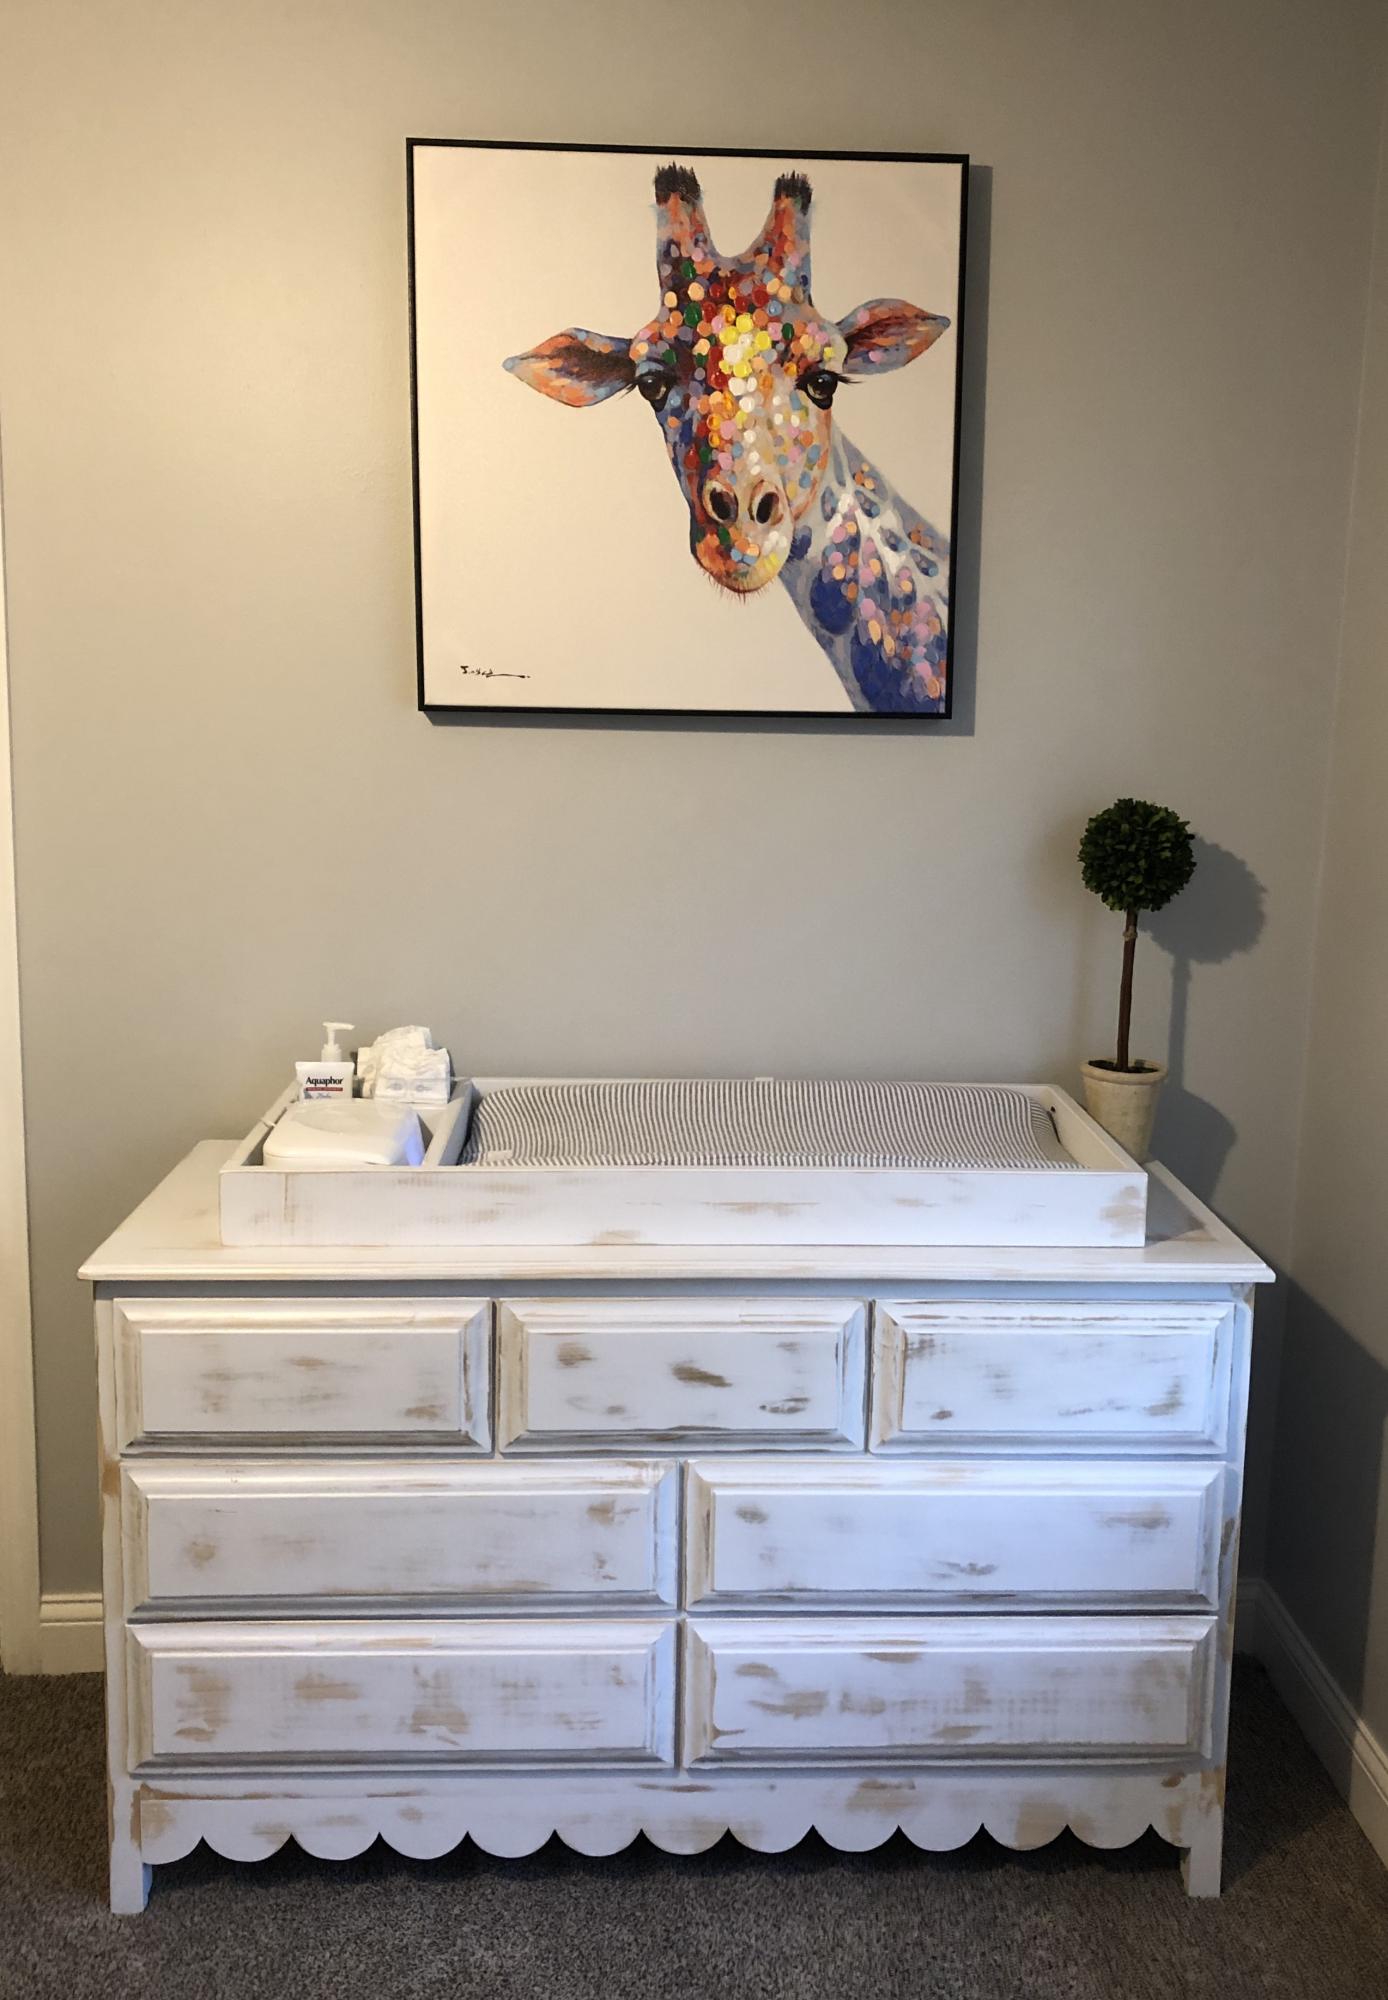
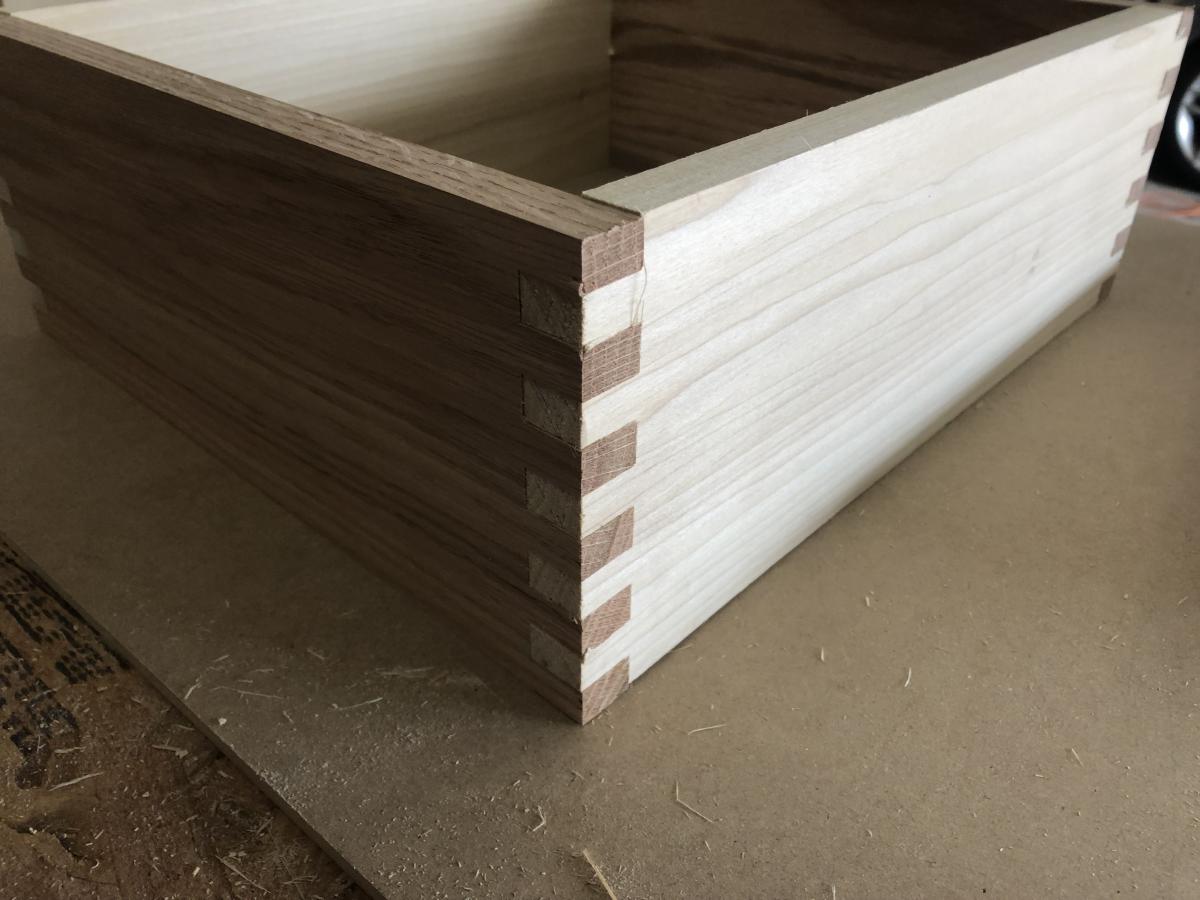
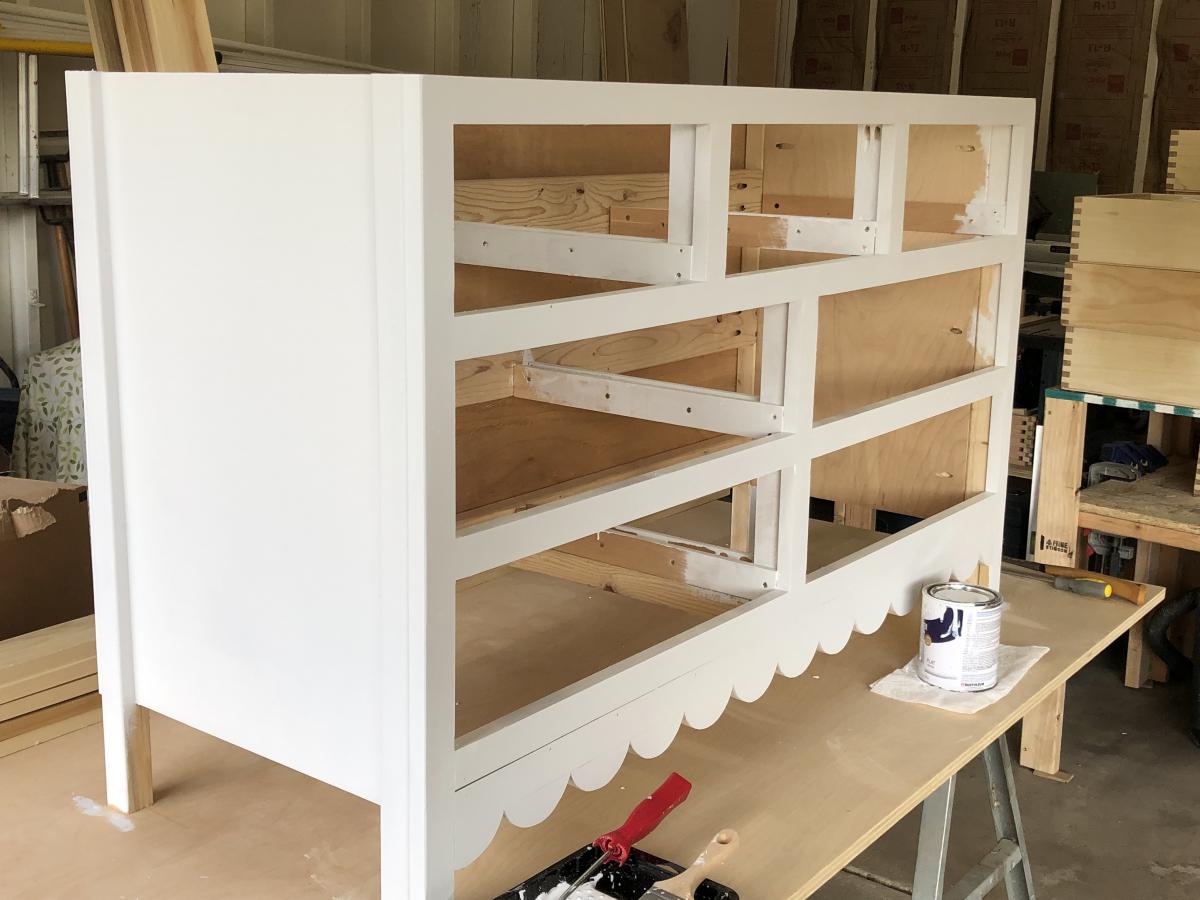
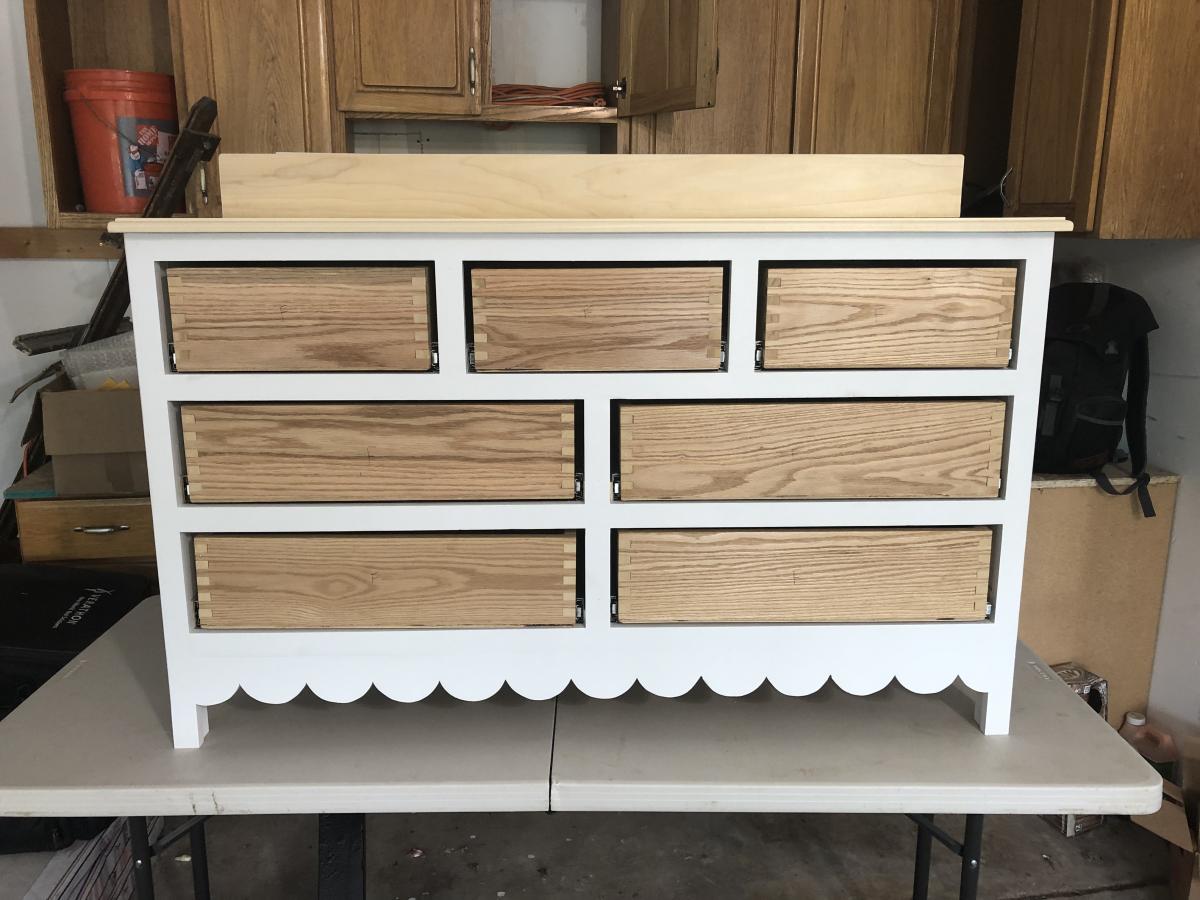
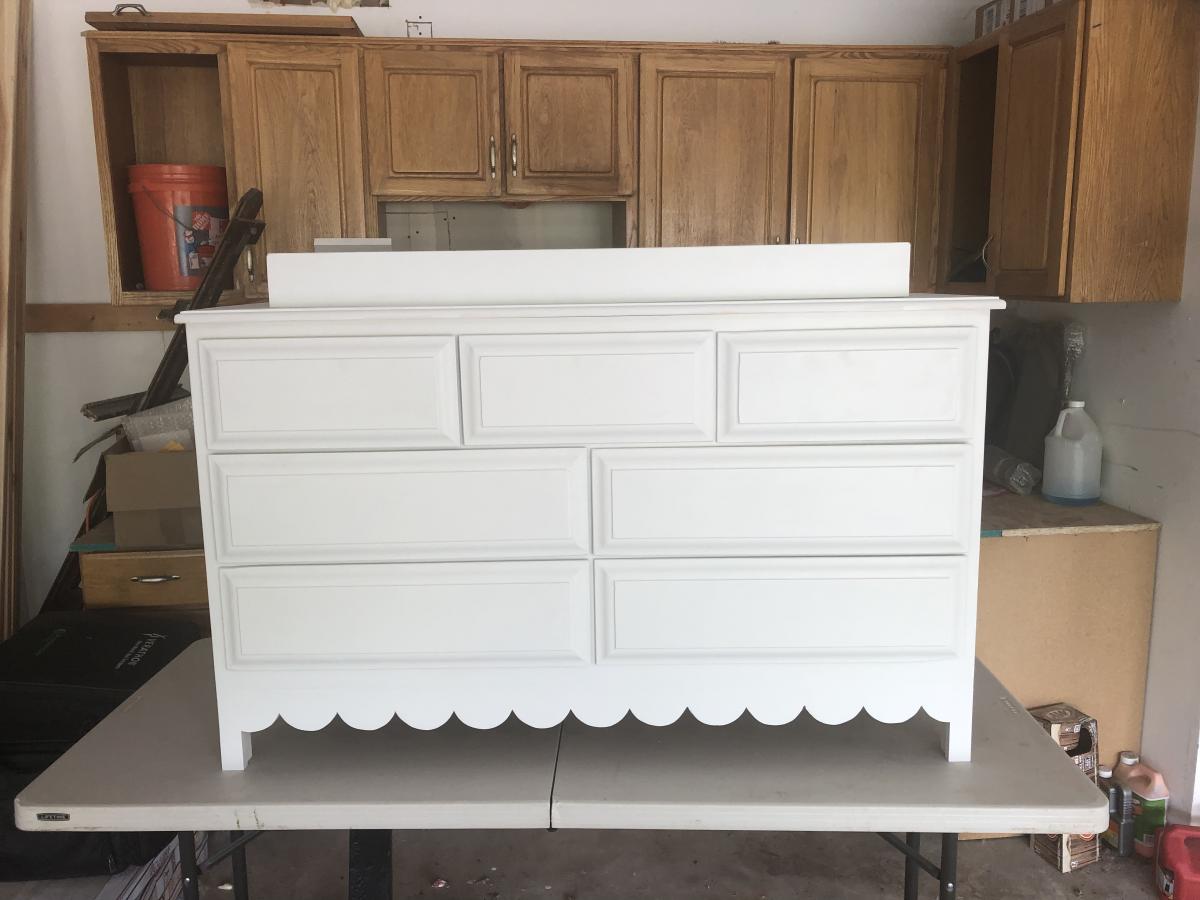
I used the Kendal extra wide dresser plans which were super easy to follow for this project. I wanted to add some of my own touches so I made the drawers with box joints, my first attempt at this. I also changed the drawer fronts and added my own scalloping at the bottom. The changing table frame on the top of the dresser was also added which is removable once we are out of diaper changing! I am using half moon aged brass pulls for the drawers once delivered. Overall I am happy with the way this turned out.

Built from Plan(s)
Estimated Cost
$400-500
Estimated Time Investment
Week Long Project (20 Hours or More)
Finish Used
Flat white furniture paint, sanded and coated with water based poly.
Recommended Skill Level
Intermediate

Modern Outdoor Chair & Love Seat

Submitted by Wilsjac1 on Wed, 06/26/2019 - 13:59

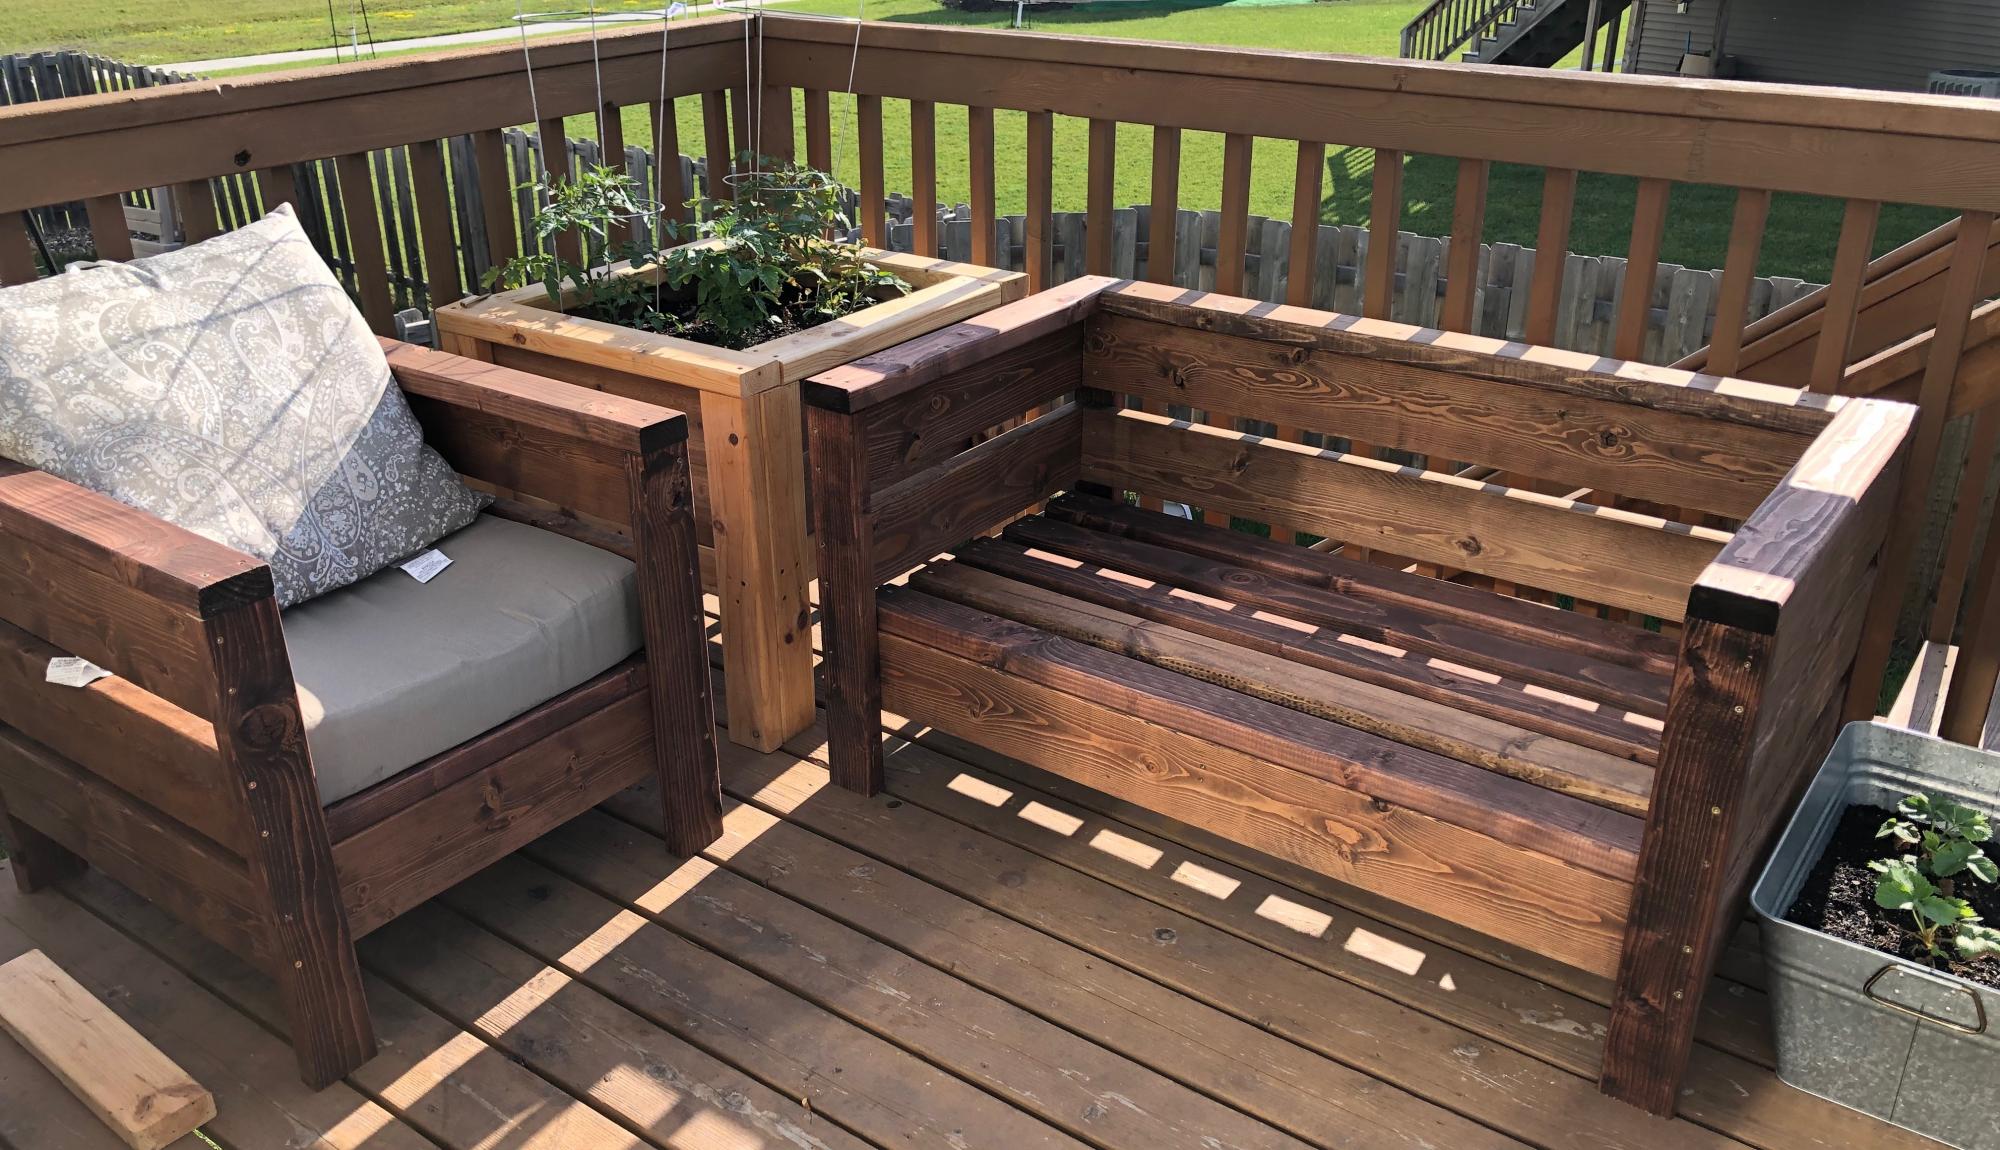
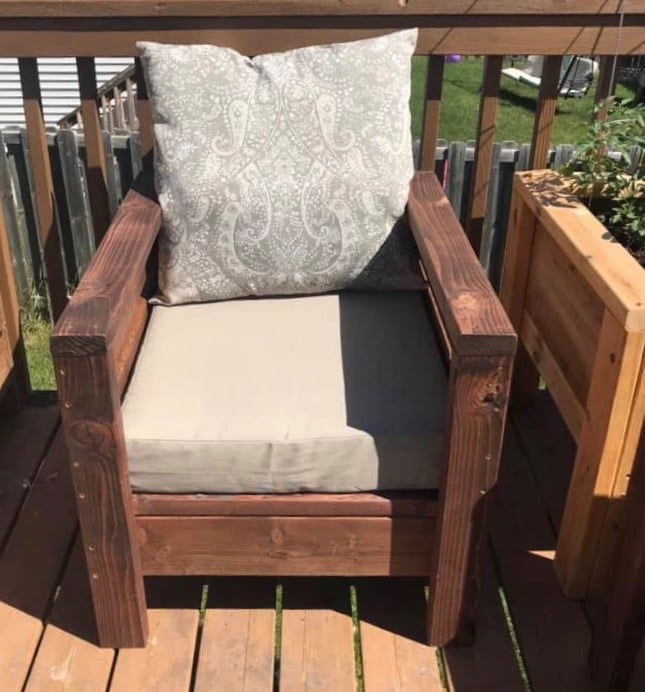
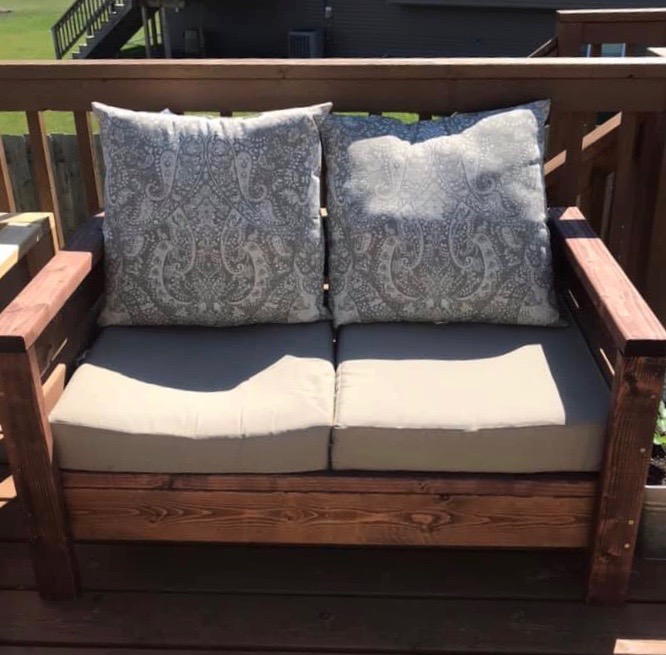
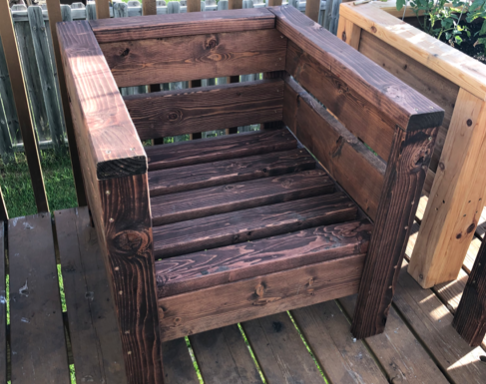
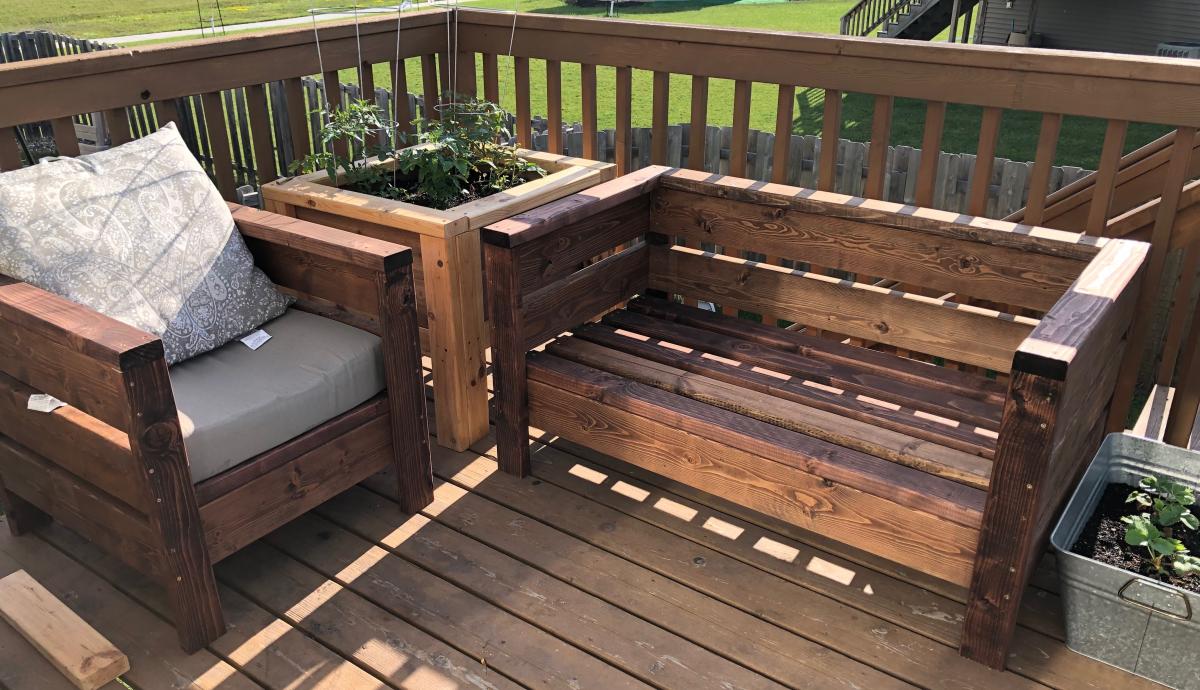
After building the first chair I decided I did not like the sizing, it felt like the arms were to low and the back cushion really did not have any support so I modified the chairs a bit and rebuilt the chair and also made a matching loveseat. 

I also decided to reverse the arms so the 2×6’s are on the outside instead of the inside, Originally I did this by mistake but I decided to keep it that way because it helped hold my cushion in place and I like it better that way. But most people I have asked say they prefer the arms the original way that Ana-White had them though.

I ended up making the legs 3" inches longer to raise the height. 

I made the side slats and the armrests 3" shorter to reduce the depth to make my cushions fit better

For the love seat the only thing I had to change was I made the back slats the front slats and the seat slats 48" and I added in a 2x4 for support under the seat slats that attached from the front slat to the back slats.

Overall I love the way they came out very sturdy and we use them everyday! 

Estimated Cost
$75
Estimated Time Investment
Afternoon Project (3-6 Hours)
Finish Used
I sanded all of the 2x4's and 2x6's with 80 grit & 220 grit, I then used minwax primer before applying the stain, I used the color "Honey"
Recommended Skill Level
Beginner

Reclaimed Wood Queen Size Headboard

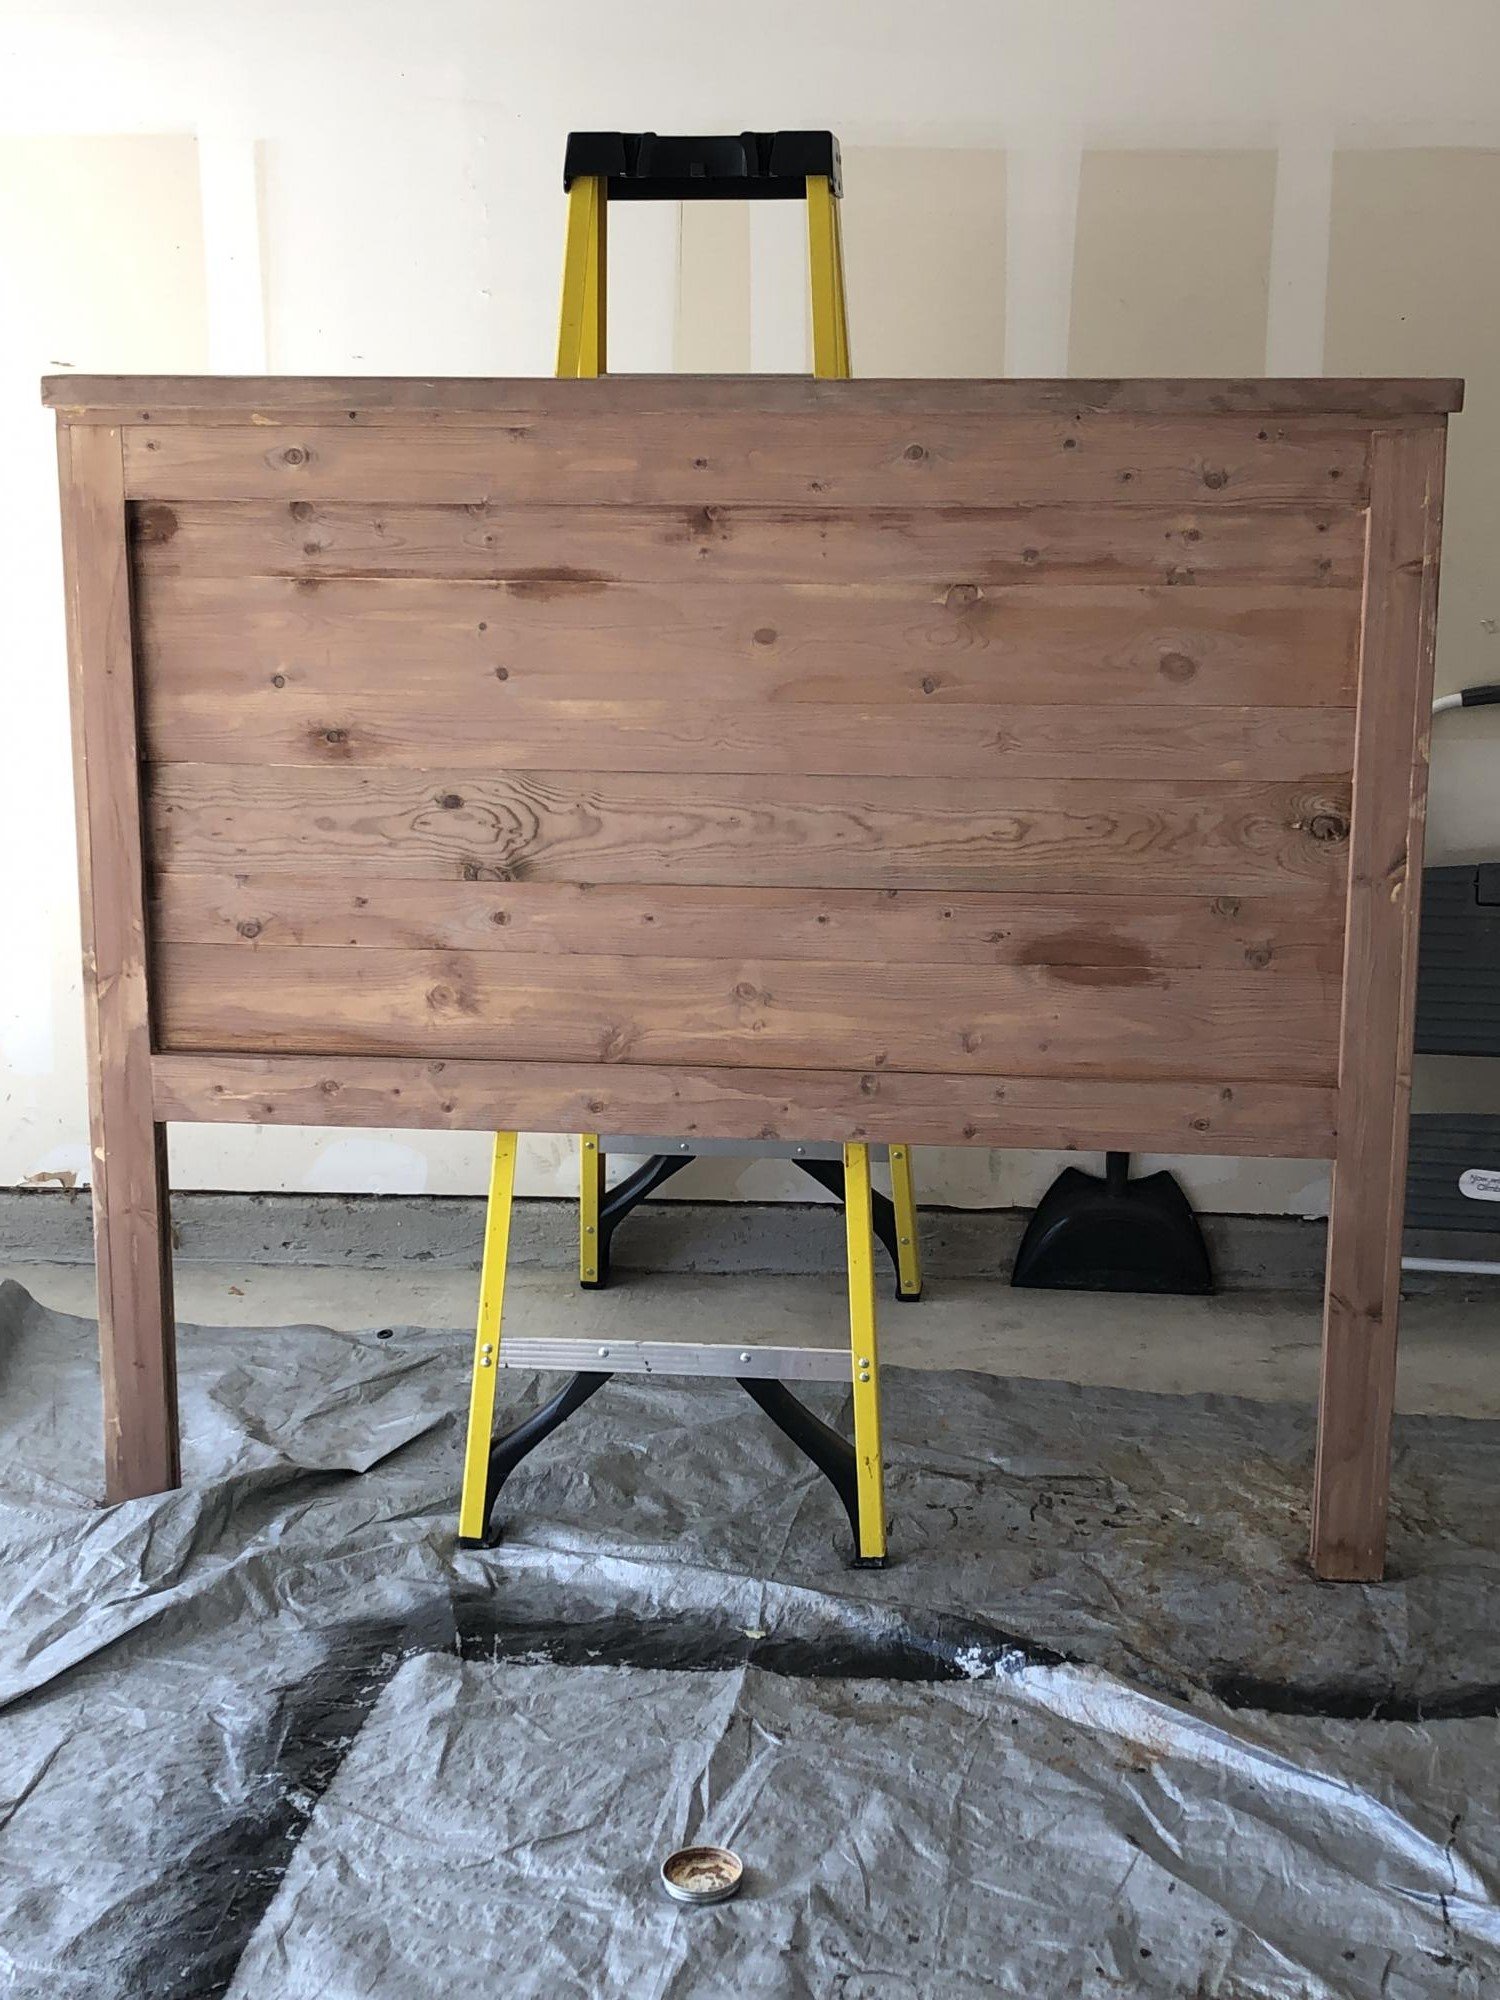
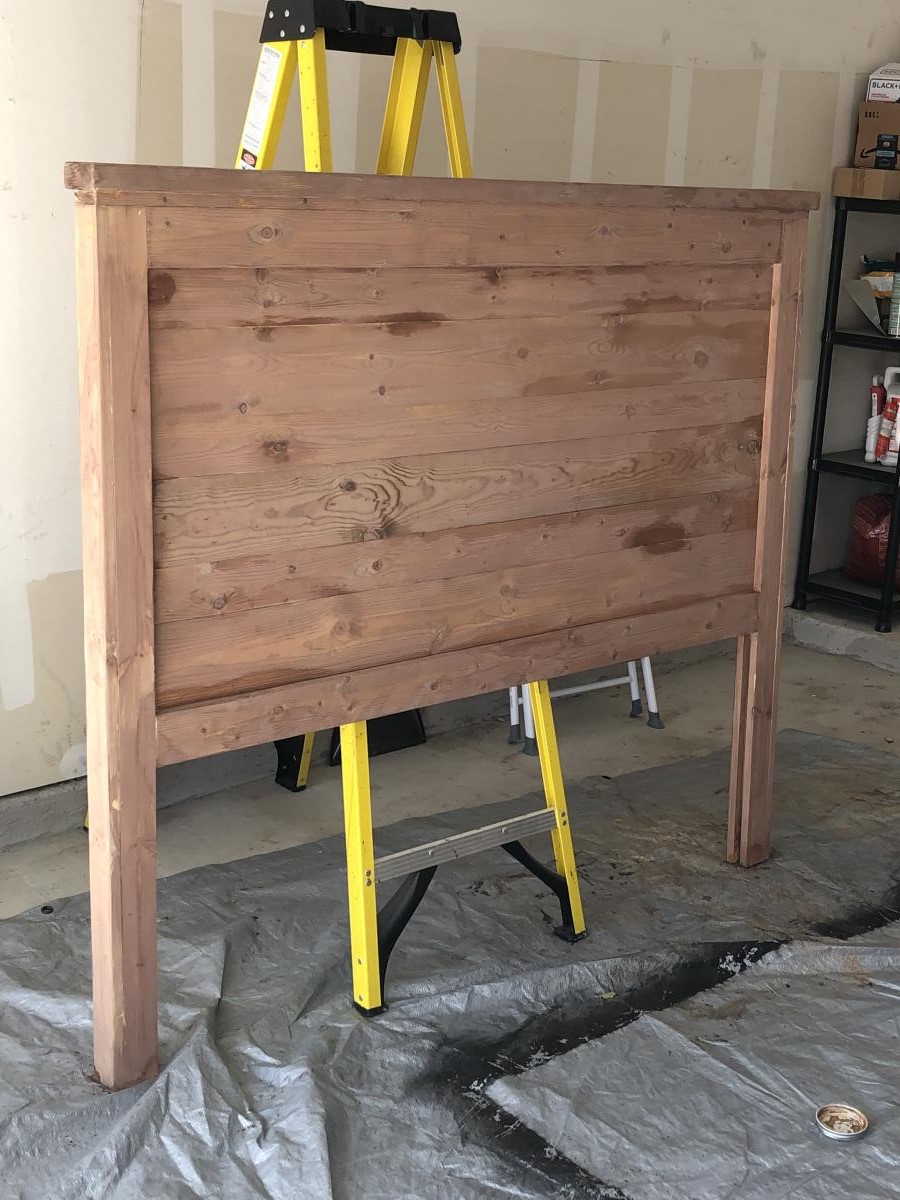
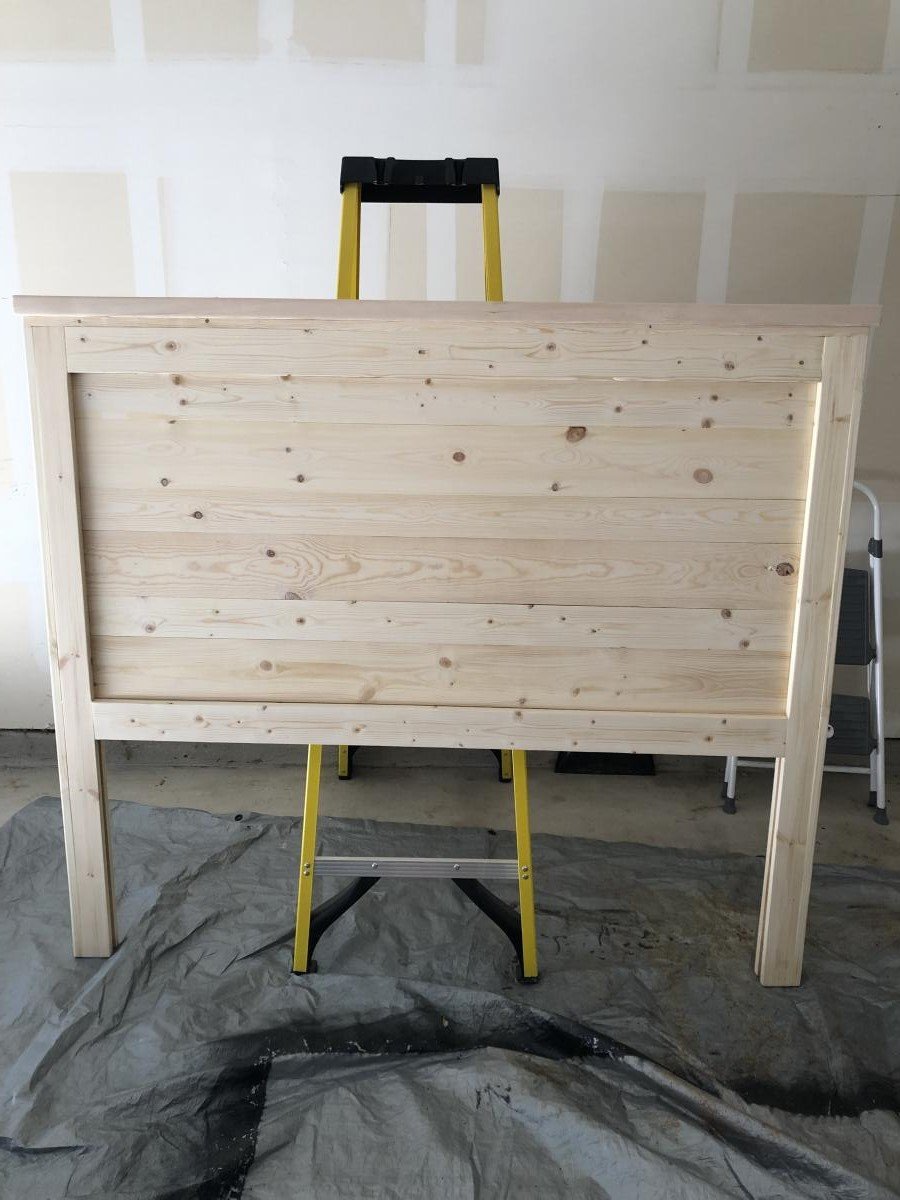
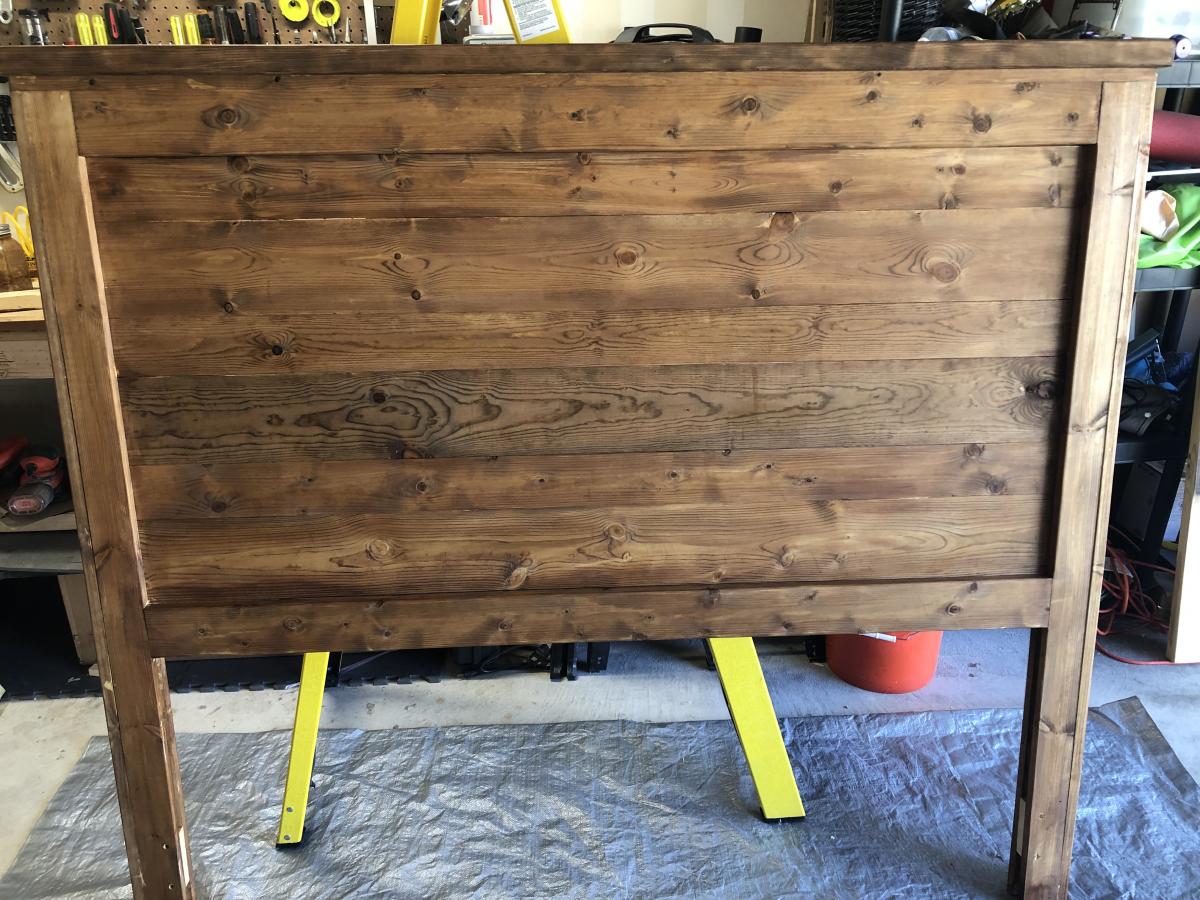
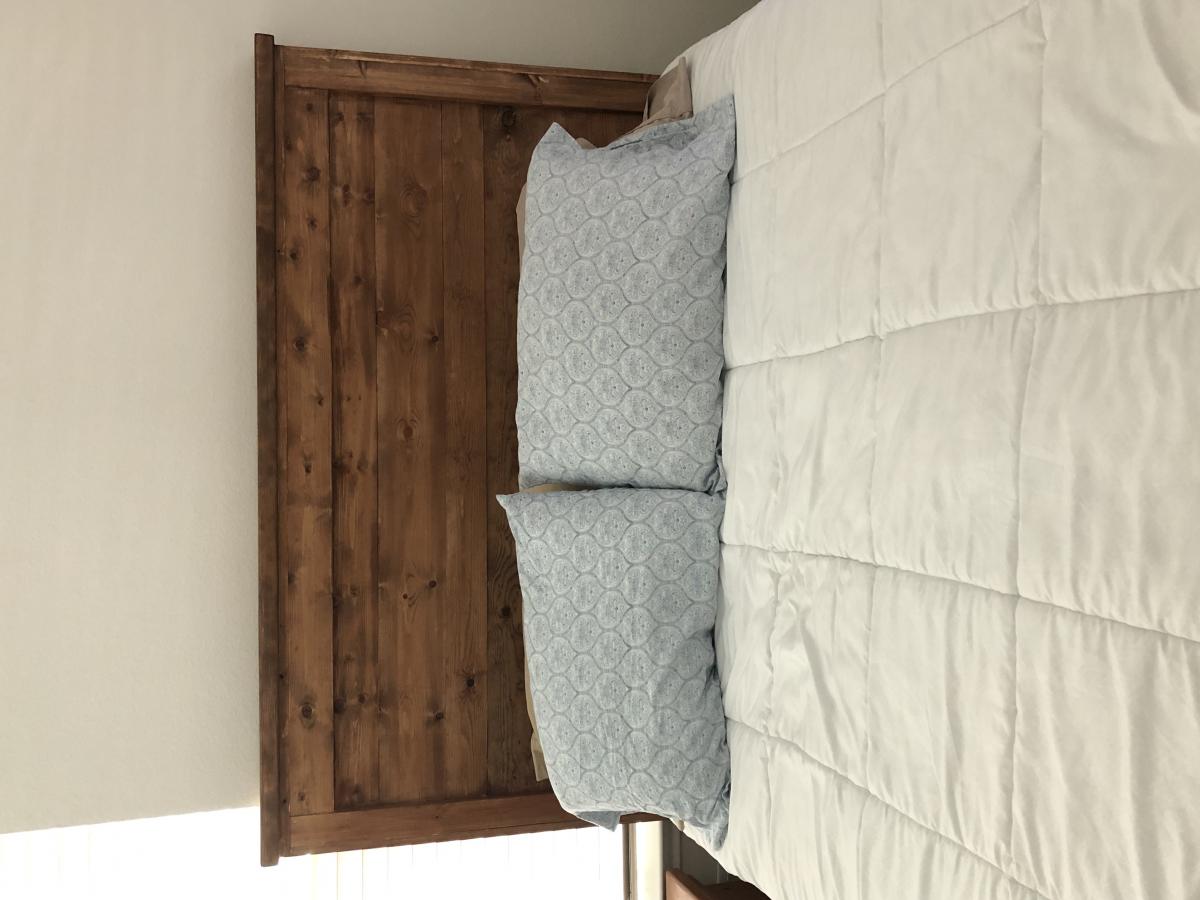
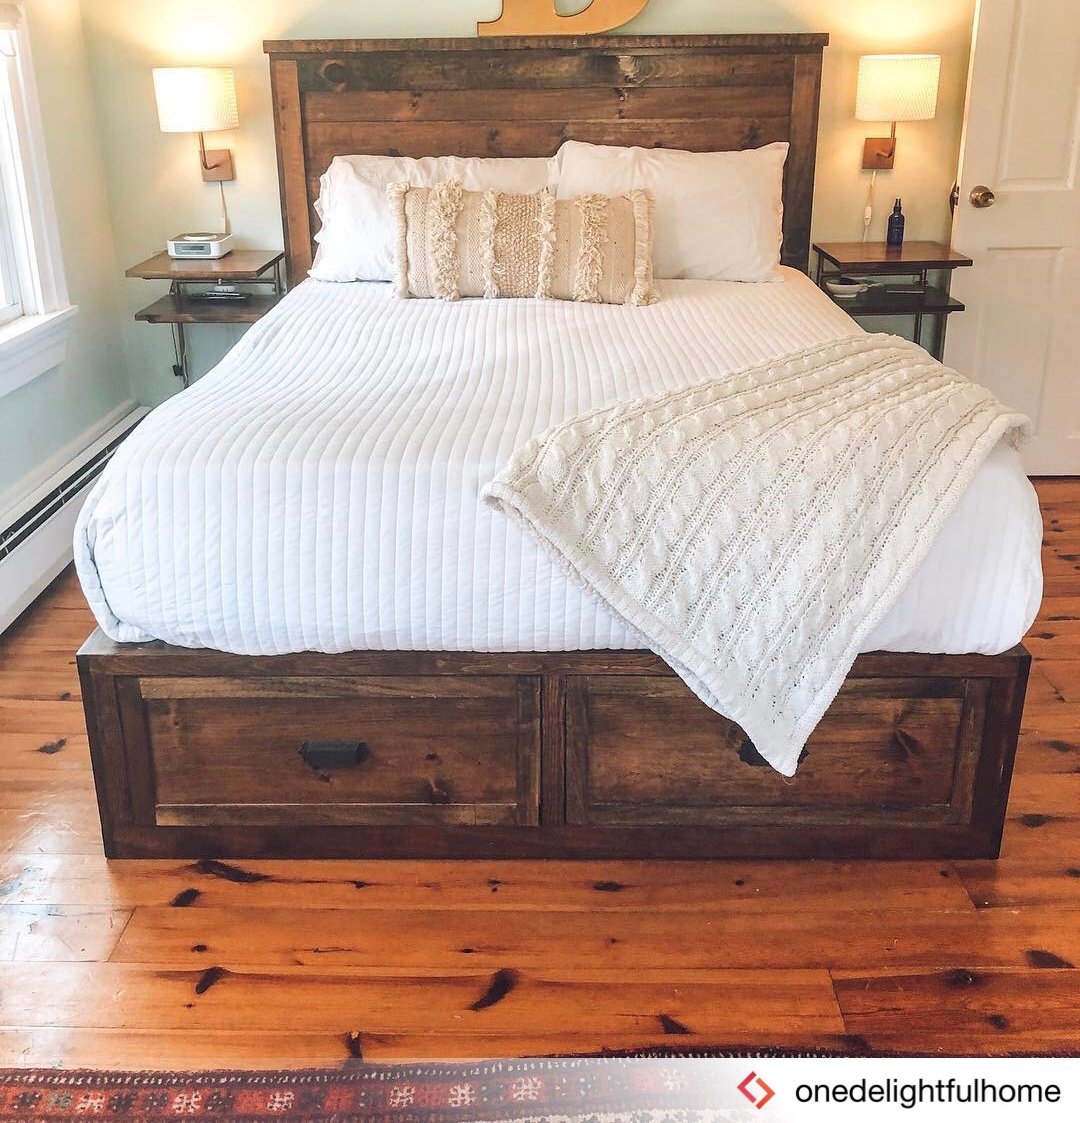
The plans for this headboard are great. Very easy to follow and the cut list is spot on. I used some choice pine from Lowe’s ($63) and then used the vinegar with steel wool mixture to age the wood.  That’s where this piece is at right now. Trying to decide if I want to leave it or put a light satin clear coat. 

Thank you for the plans!!

OK.....I added 2 more pics.  I added 1 coat of Satin Clear Poly witch gave it a richer look. 

Estimated Cost
$75
Estimated Time Investment
Day Project (6-9 Hours)
Finish Used
1 Sheet of 0000 Steel Wool torn apart and left in a mason jar of vinegar over night
Recommended Skill Level
Beginner

Comments

Mailbox

Submitted by loniwolfe on Tue, 01/10/2012 - 13:50

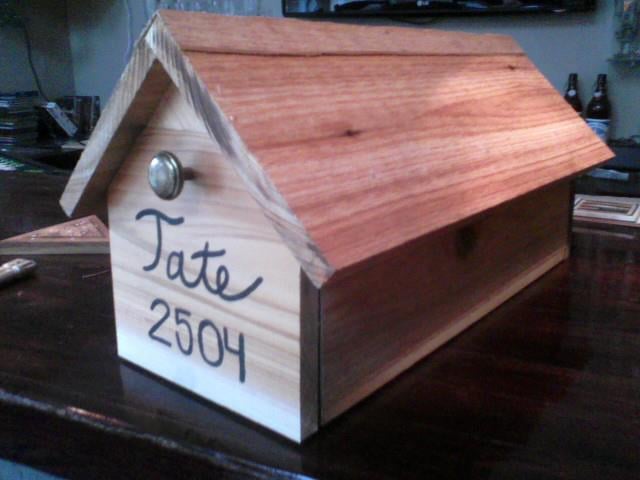
My grandmother has been in terrible need of a new mailbox. The one she had was original to the house, 1972, I believe. Needless to say it was falling apart.
My stepdad and I built this for her, and my sister painted on the name adn address.
All better now!

PS, I chose Grace's Mailbox plan because you have to choose a plan when posting a brag blog and we didn't use one, we just kind of winged it.

Built from Plan(s)
Estimated Cost
$20-$30
Estimated Time Investment
Afternoon Project (3-6 Hours)
Finish Used
Clear wood sealer, spray can
Recommended Skill Level
Beginner

Comments

Simple Play Kitchen

Submitted by Anonymous (not verified) on Sun, 06/04/2023 - 13:03

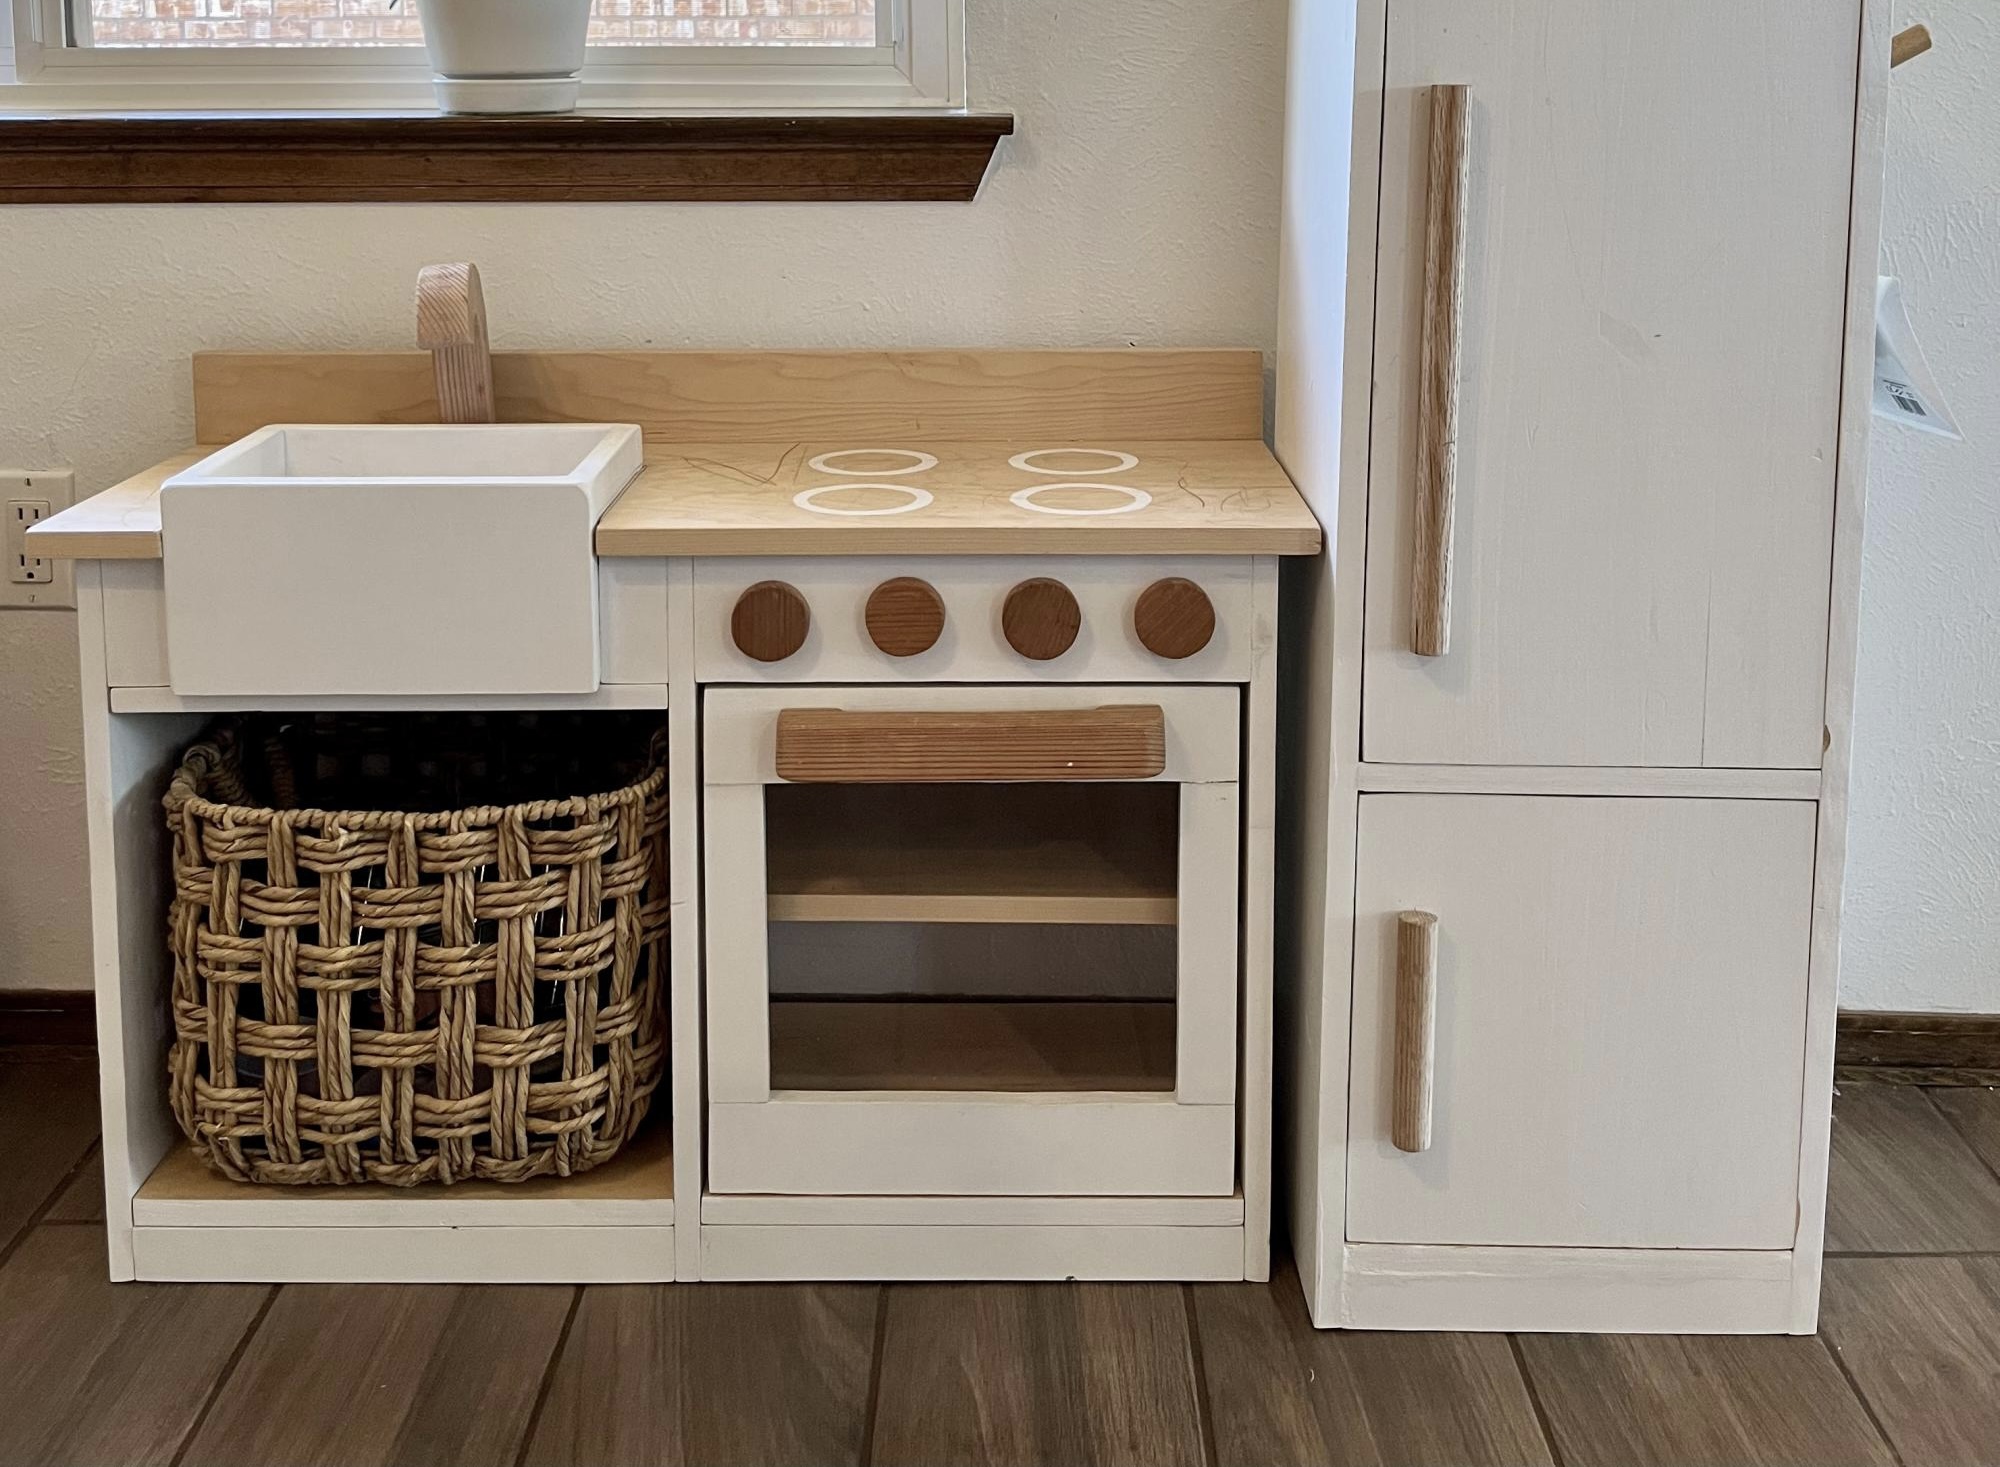
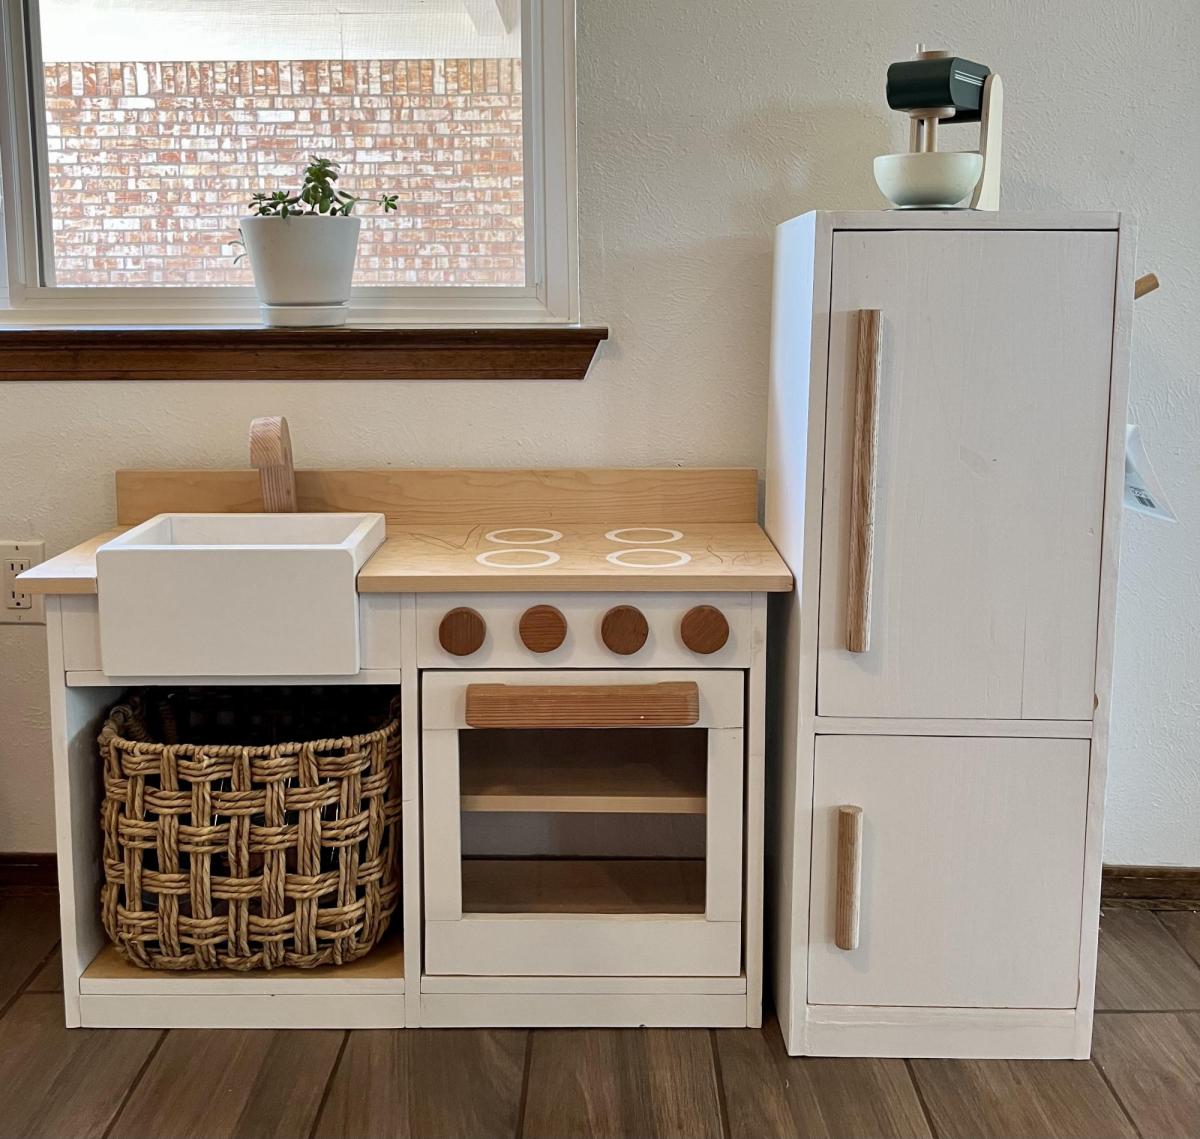
I made this play kitchen as a Christmas present for my kids, and it’s been a big hit! It’s built mostly from leftover hardwood plywood, and a couple of 1x12 pine boards. The oven knobs and faucet were cut from redwood scraps and attached with 1/2” dowels to freely rotate. The vertical surfaces were painted with leftover house paint and sealed with water-based polycrylic. It was a fun build, and I learned some new skills (like installing hinges)! Thanks for the plans!

Comments

Farmhouse Table with a Classy Twist

Submitted by Notsohandy on Fri, 01/20/2012 - 13:30

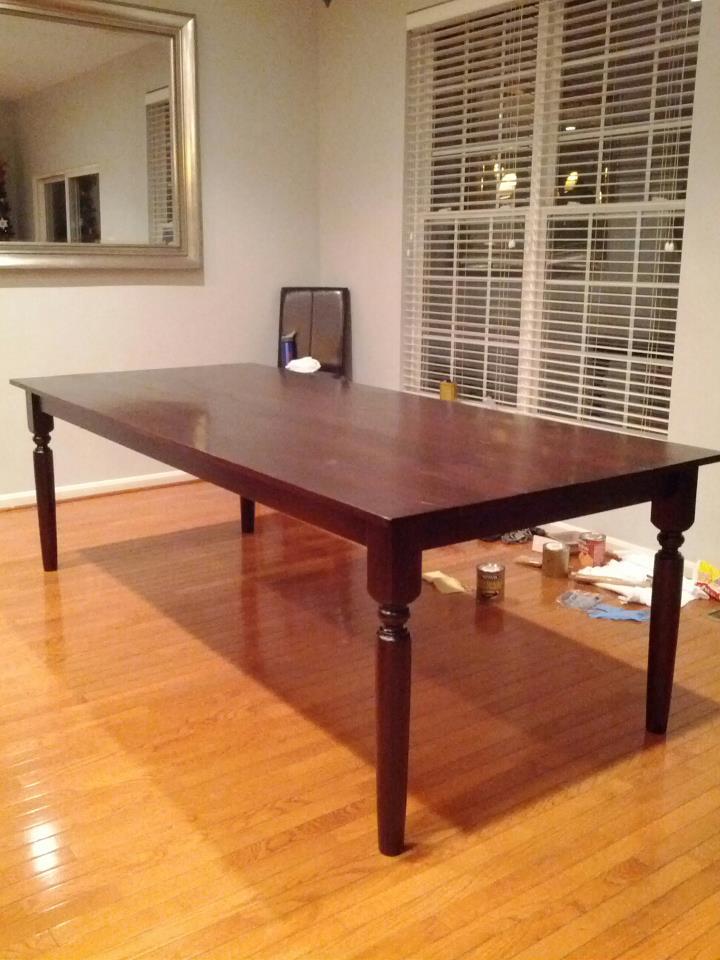
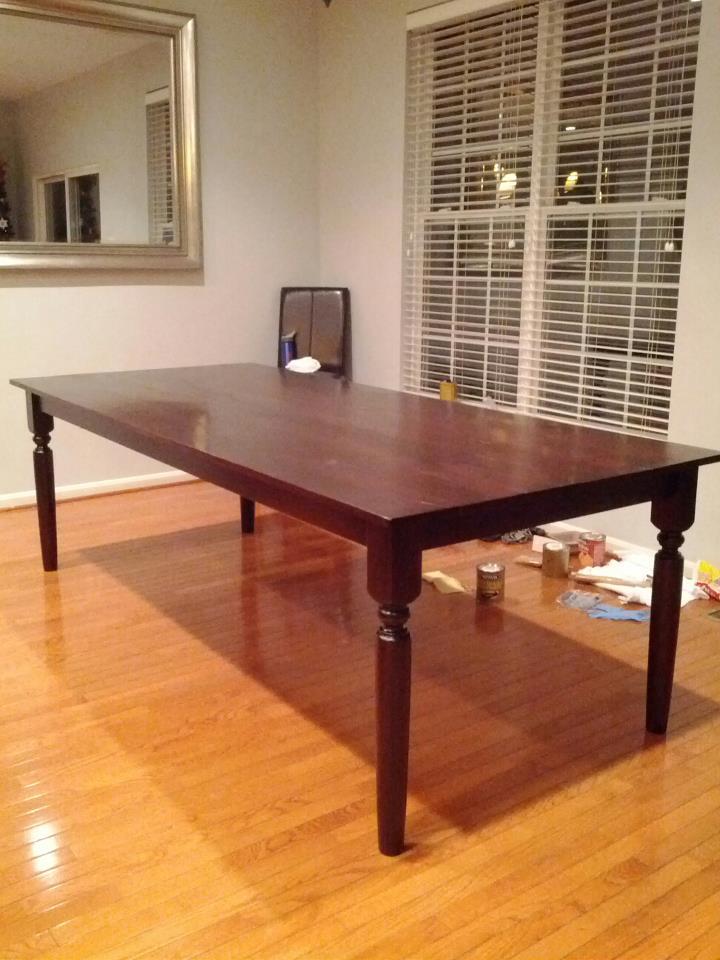
I stumbled across this site on accident one day in need of a dining room table. After hunting desperately for weeks, my wife and I couldn't find one we liked for under 1200 dollars. So, I had this great idea to build one myself. I figured if it didn't turn out I would just stick it on the deck and use it as a patio table.

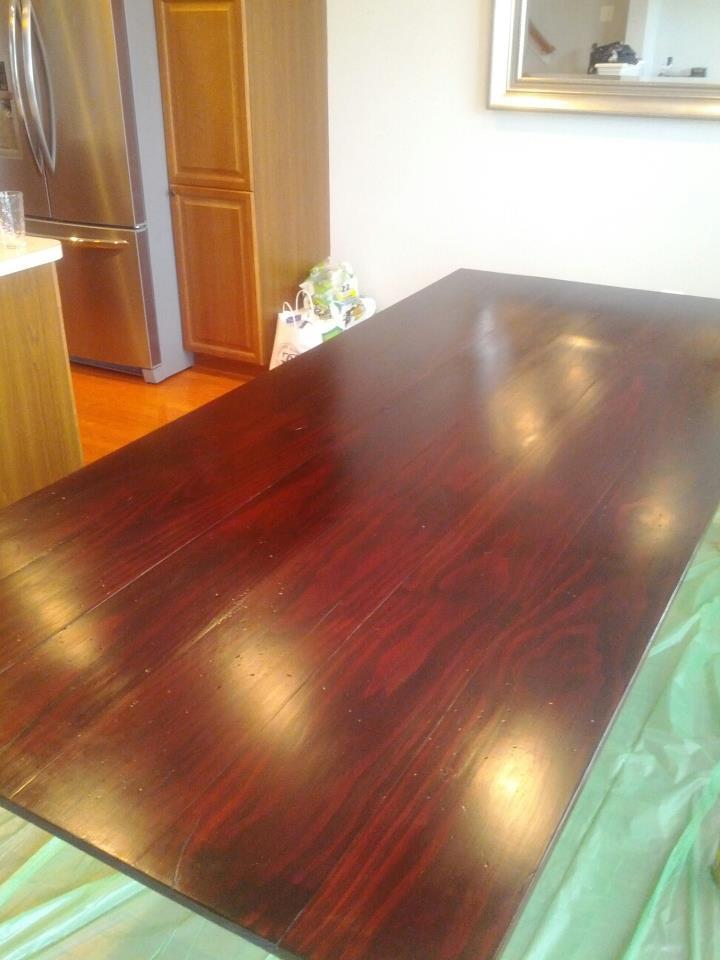
I looked at the dozens of table plans on this site and picked things i liked from each and finally came up with the end product you see in the picture.

I used all pine, and found pre-turned legs at a local big box home improvement store. Total wood investment was about 200 dollars, half of that being the turned down legs.

Came out much better than I thought, and the wife was please.

Thanks to the users for all their amazing photos and directions! They came in handy!

My wife is already asking me to build more!

Estimated Cost
~250
Estimated Time Investment
Weekend Project (10-20 Hours)
Finish Used
2 Coats of MinWax Wood Conditioner
1 Coat of MinWax Poly Shade Black (Satin)
2 Coats of MinWax Ploy Shade Bombay Mahogny (Satin)
2 Coats of Urethene
Recommended Skill Level
Beginner

Comments

Margaret Kubiszyn (not verified)

Fri, 01/20/2012 - 15:19

The finish is beautiful!

Al Meredith (not verified)

Sat, 01/21/2012 - 07:32

Great Job! Looks entirely professional. What are the dimensions?

Guest (not verified)

Sun, 01/22/2012 - 15:51

Clean and Simple, exactly how I like it.

Although, you probably should have splurged a bit and used Oak or something harder than pine. You're gonna find pine is too soft when you start getting dents and gouges really easy.