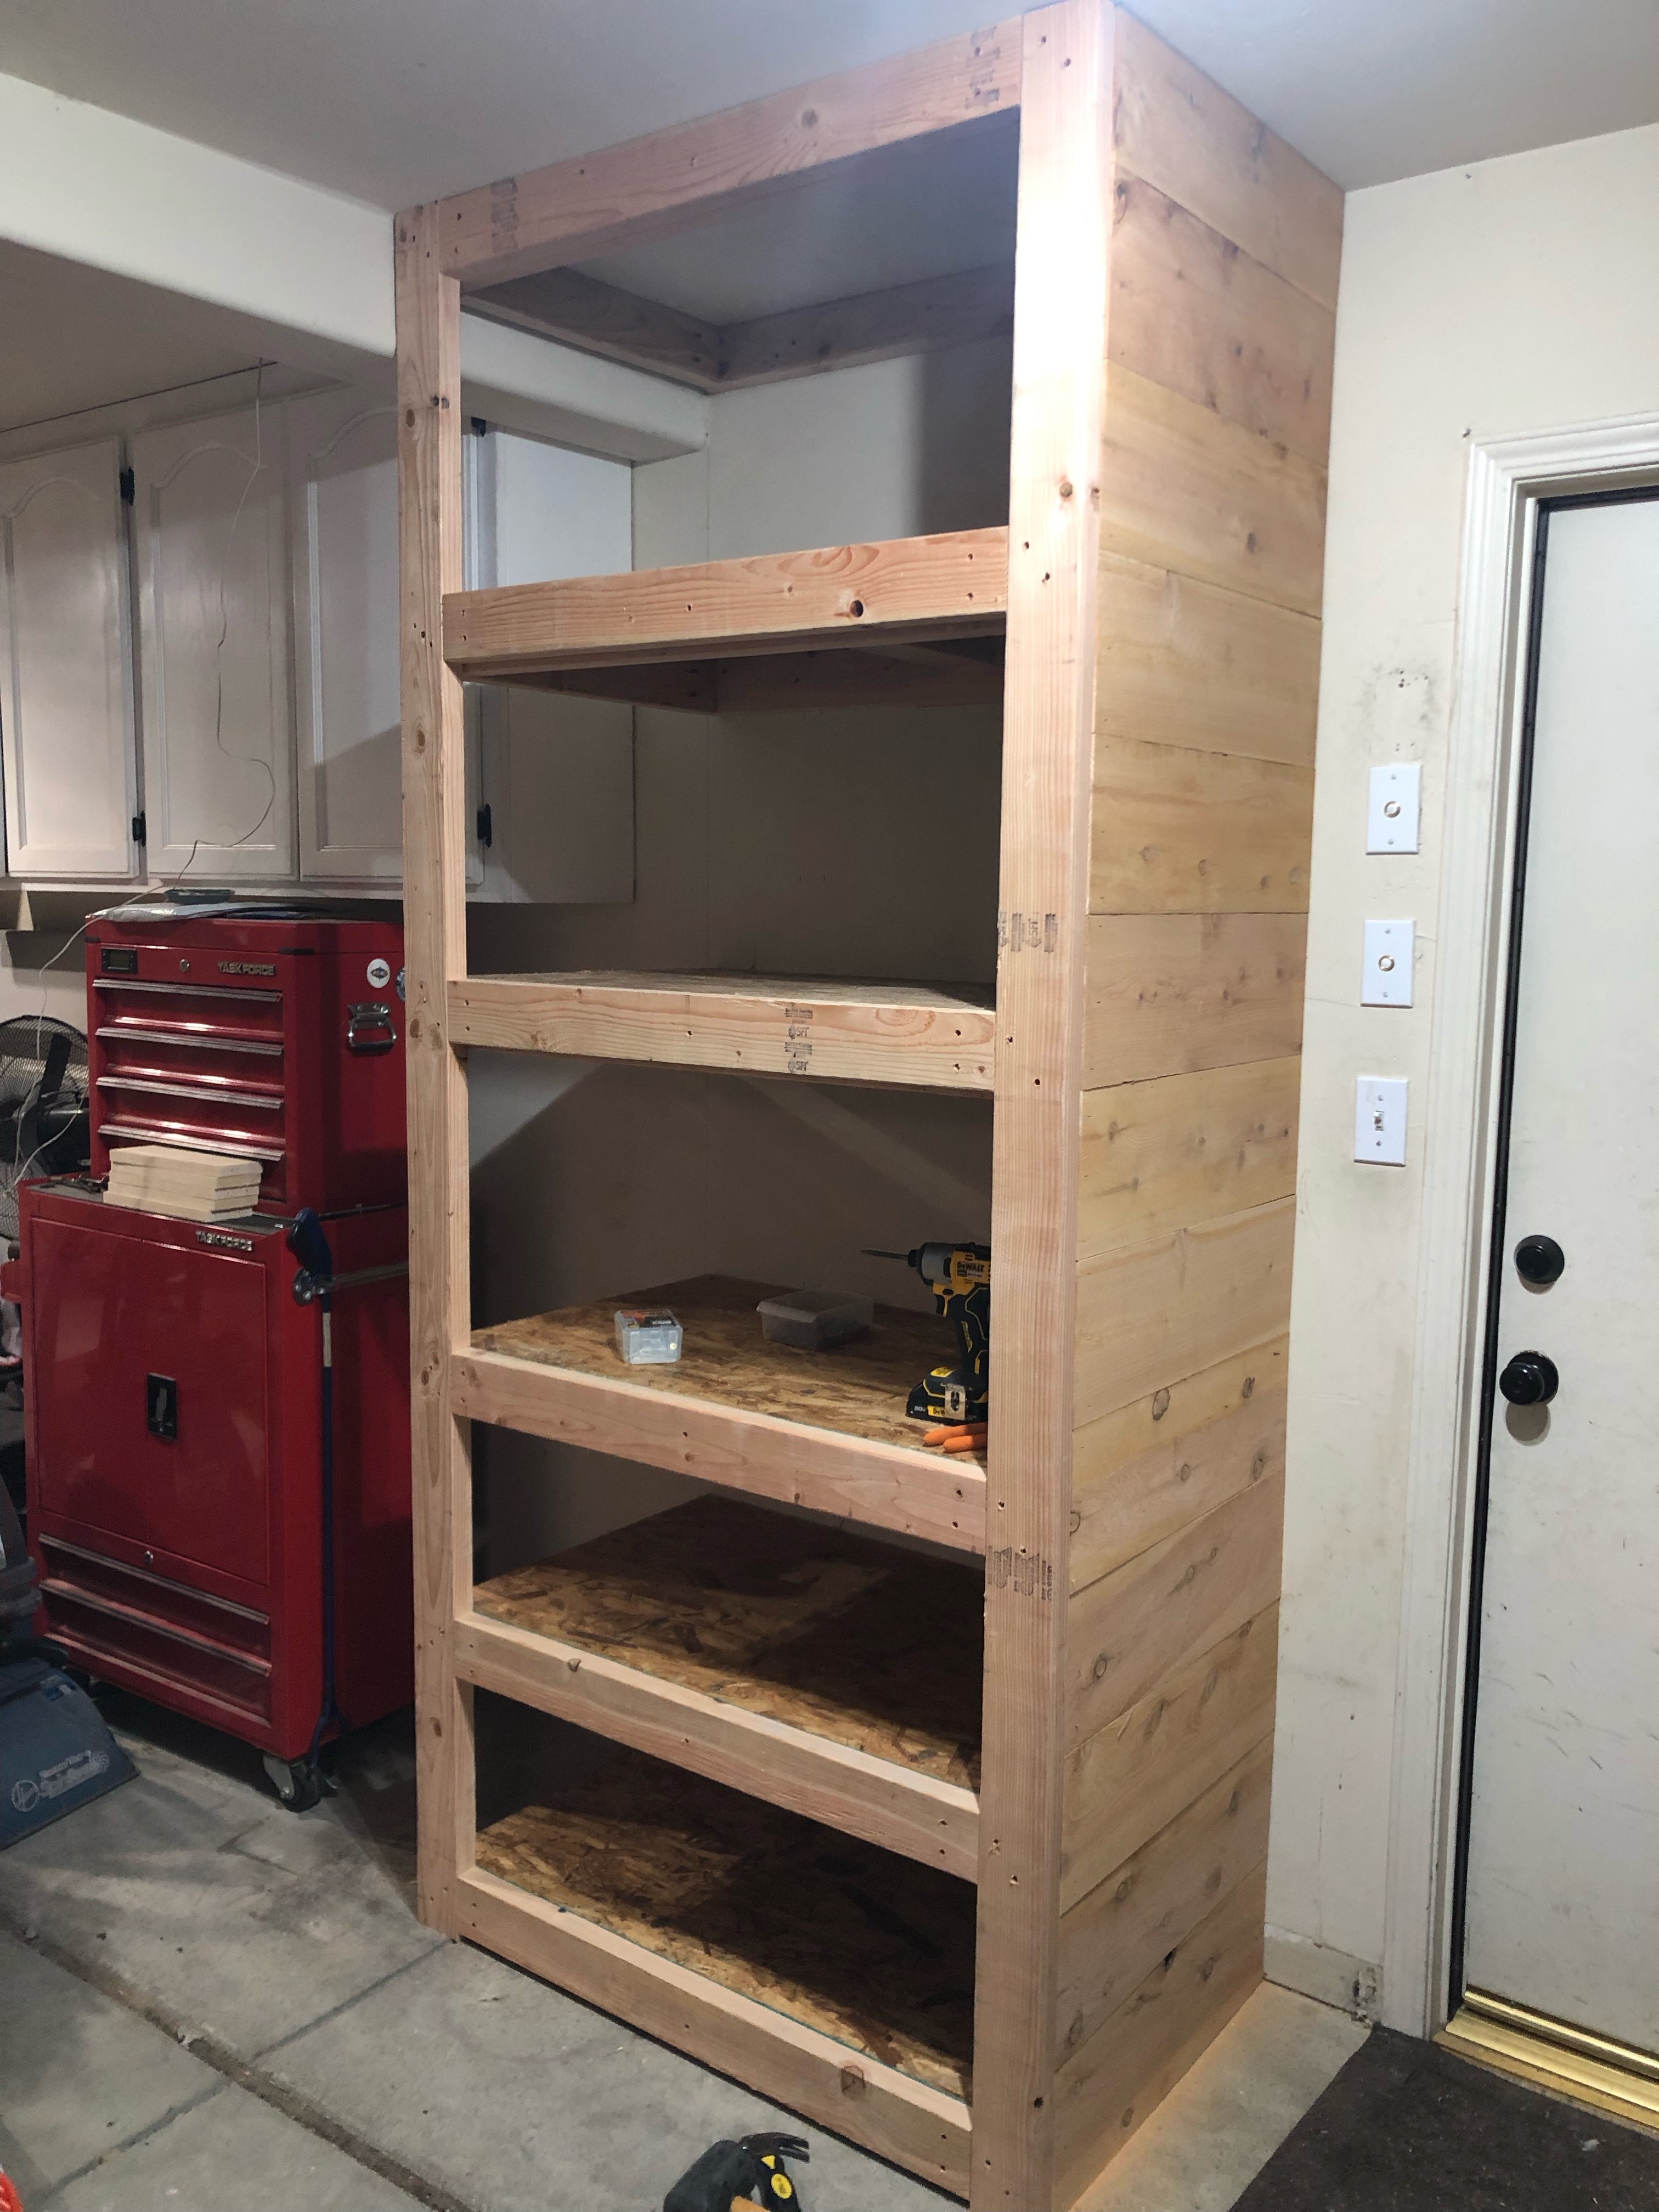
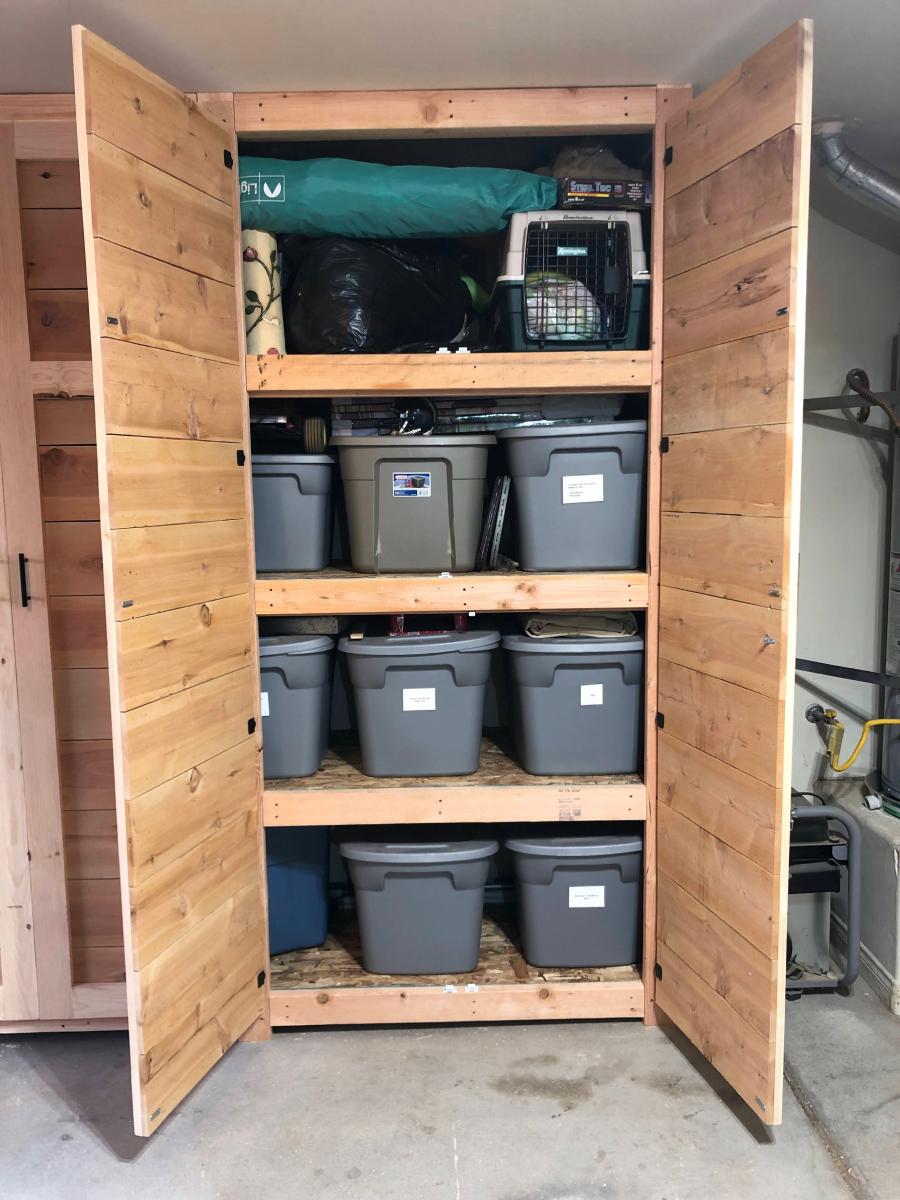
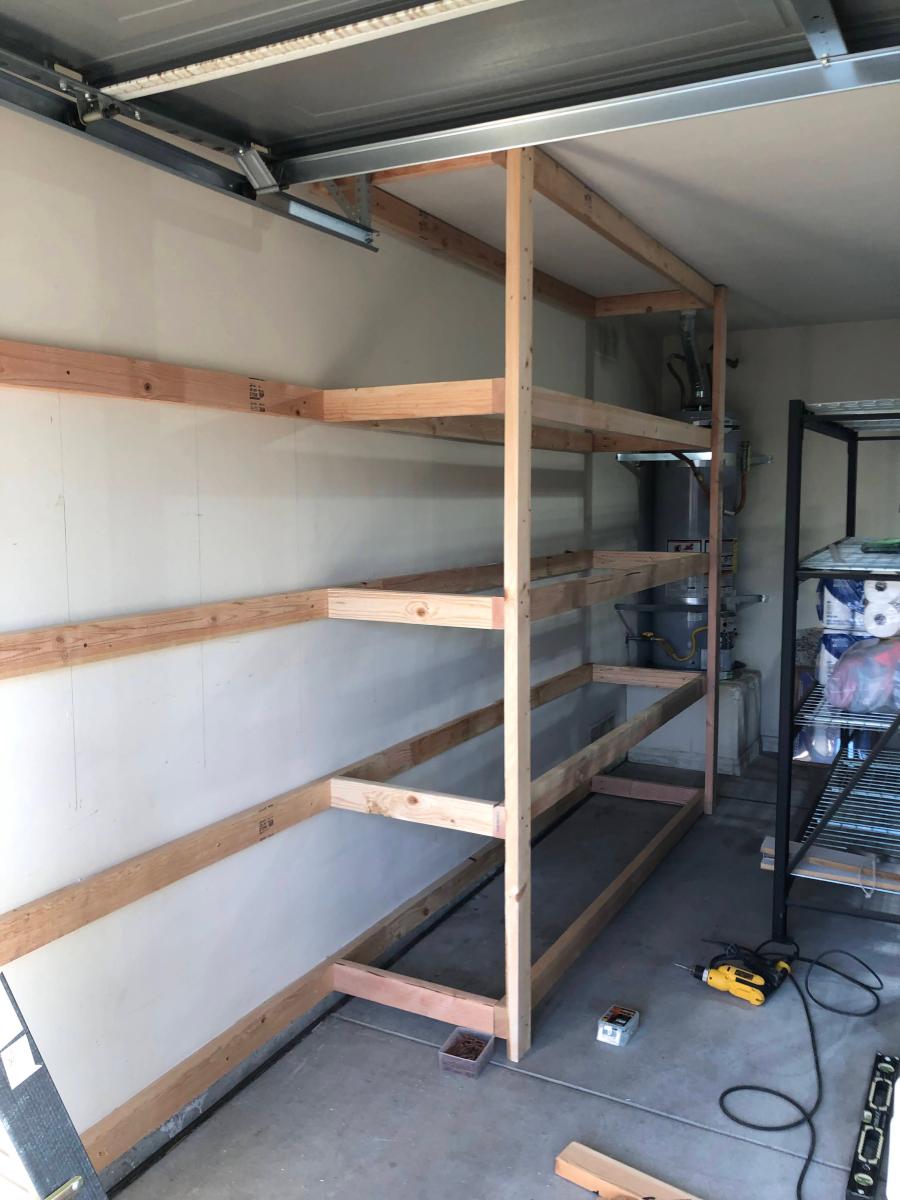
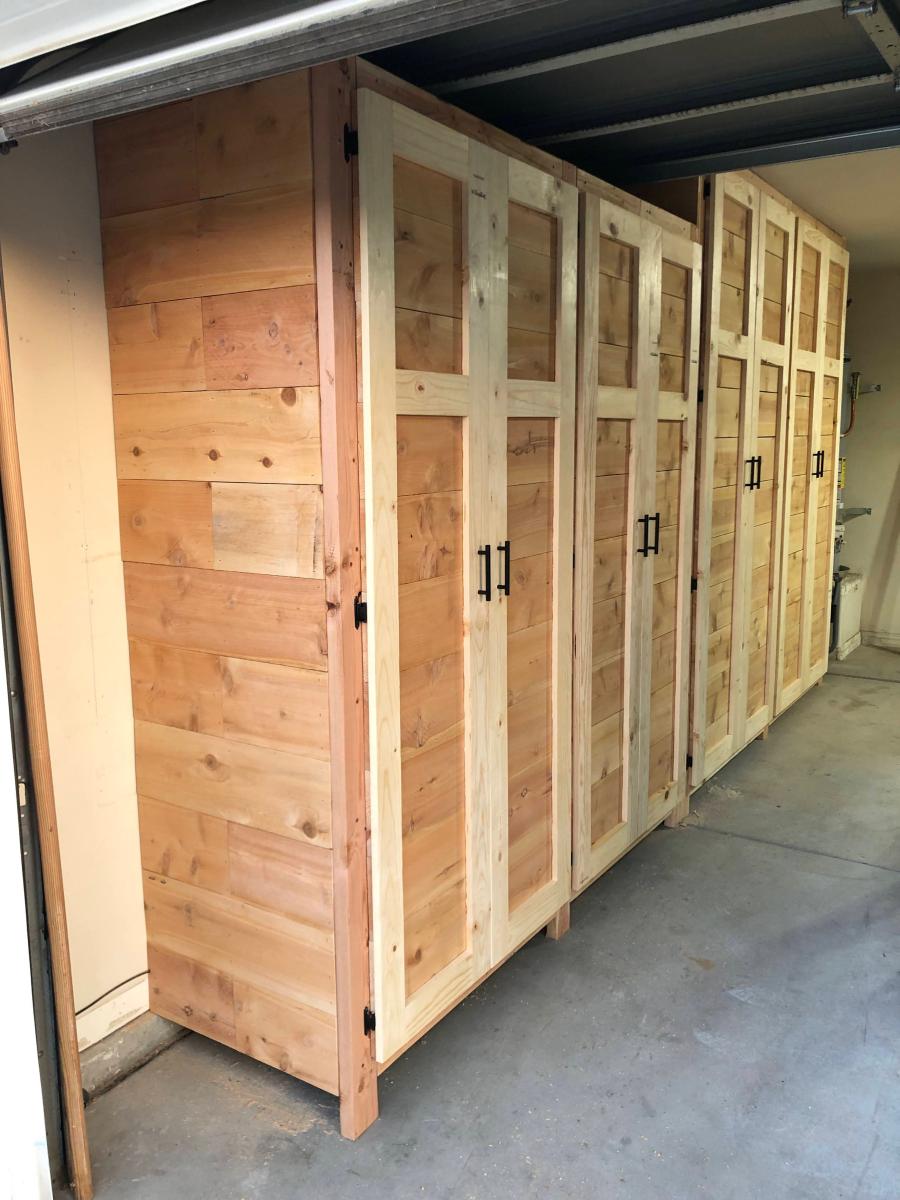
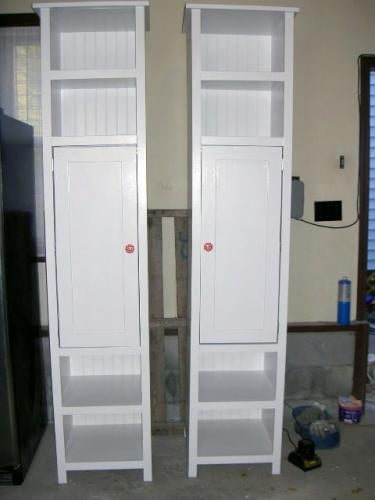
Garage Shelves Plan with Added Doors - Built and shared by Jeremy Doyle
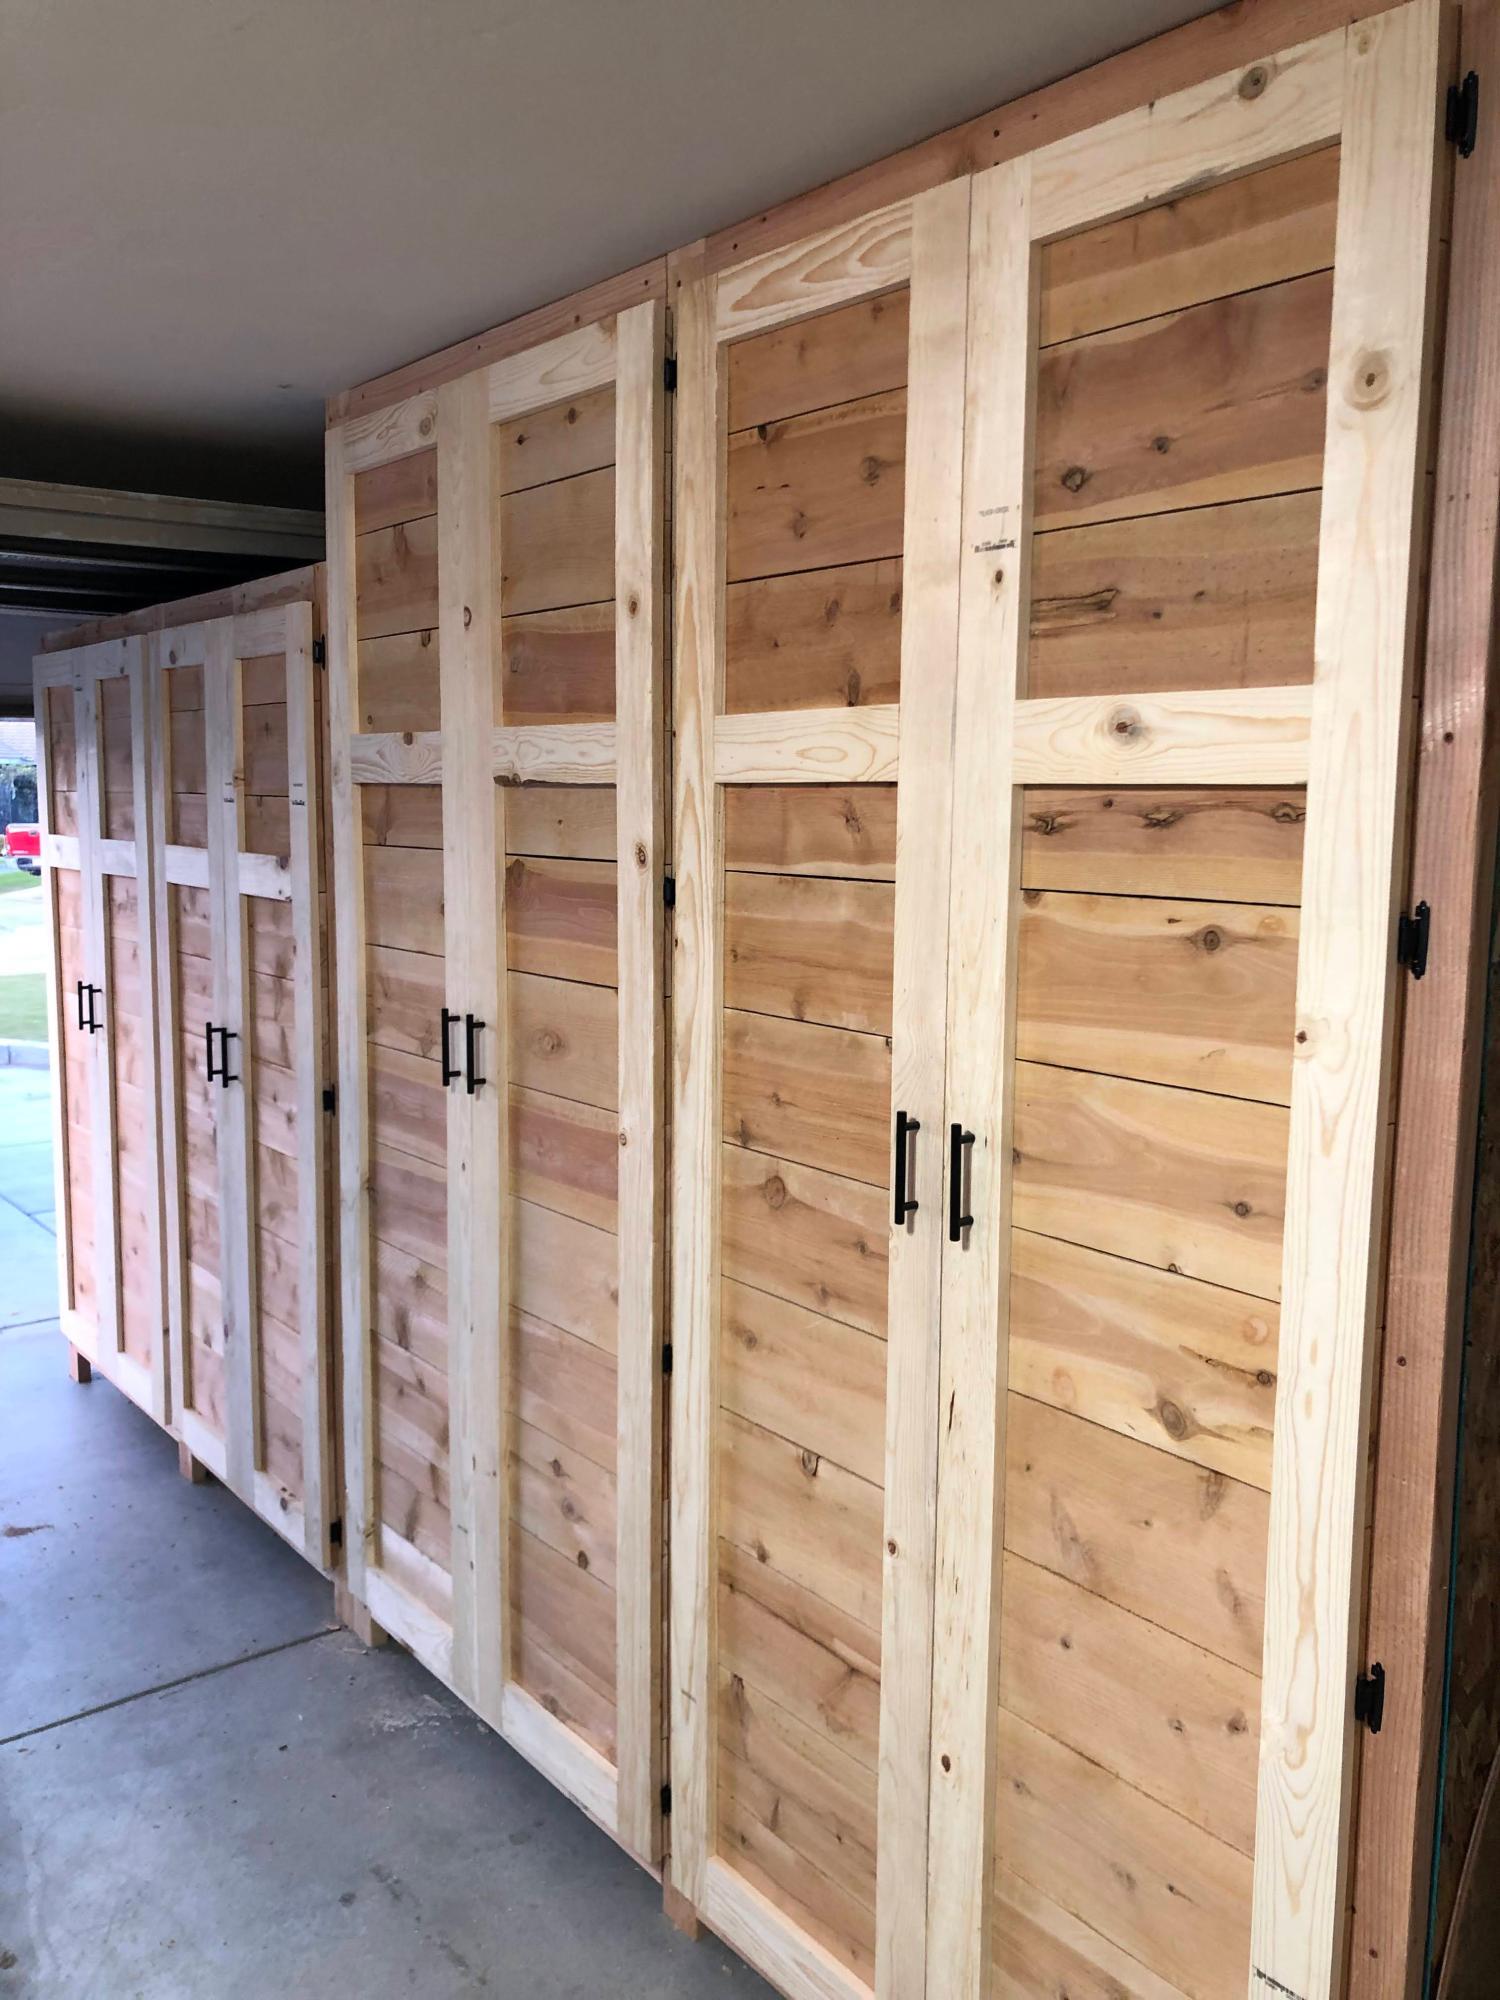
Garage Shelves Plan with Added Doors - Built and shared by Jeremy Doyle
Built from Plan(s)
Garage Shelves Plan with Added Doors - Built and shared by Jeremy Doyle
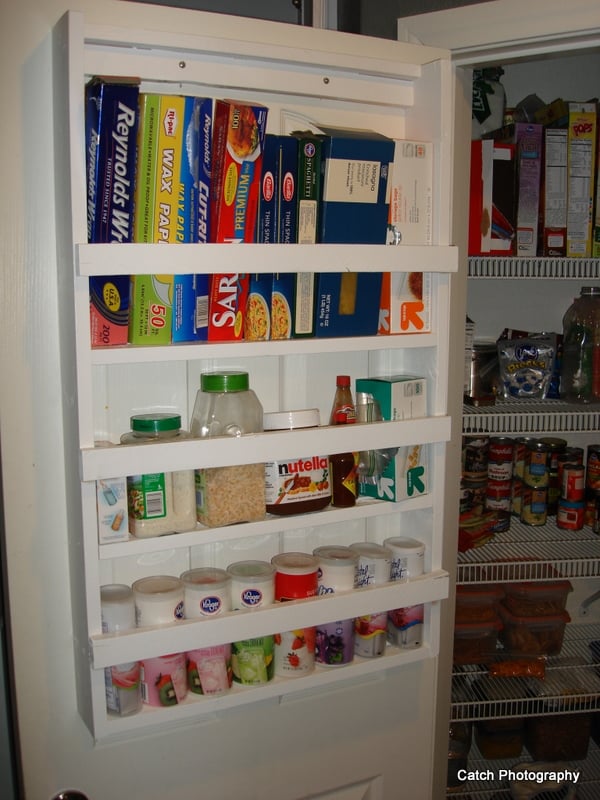
I am kind of a visual organizational neat freak and I have been annoyed by all the little things taking up good shelf space in my pantry for a long time now. This just kept getting pushed down the list ya know, not a major project. Anyway, grabbed an extra board at the store the other day and knocked this one out. I LOVE it. I made it short because I want to build a trash bag holder for the bottom half of the door. We'll see how long it takes me. I did use a 1x4 instead of Ana's plan which uses a 1x6. I only needed small things to put in here.
Tue, 09/20/2011 - 09:41
Ah, well dang it, now I have no excuses! LOL. This is on my list of things to do as well--yours looks great!
Wed, 09/21/2011 - 09:31
I love it! Great price,too!
I especially love how the design corals all those pesky little things that always seem to get pushed all the way to the back of my cabinets and drawers.
I'm definitely putting this on my list of things to build!
Cindy from Indiana

Thu, 09/22/2011 - 08:19
I just got an anchor that looked like it had a little more 'umph' to it. It is called a Cobra Tripple Grip. It looked like it had a section that popped open a little more once the screw went in. I thought that might hold it a little more securely. I feel no movement when I jiggle it at all.
Sun, 01/15/2012 - 08:29
Very nice project.
Just came along looking for a storage shelf and I saw your door shelf. Going to build one of these for sure, sick of the little wire ones we have falling down every other day.
Sun, 01/22/2012 - 19:28
Thanks for the idea. I had to purchase one instead of make one because I live in an apartment.
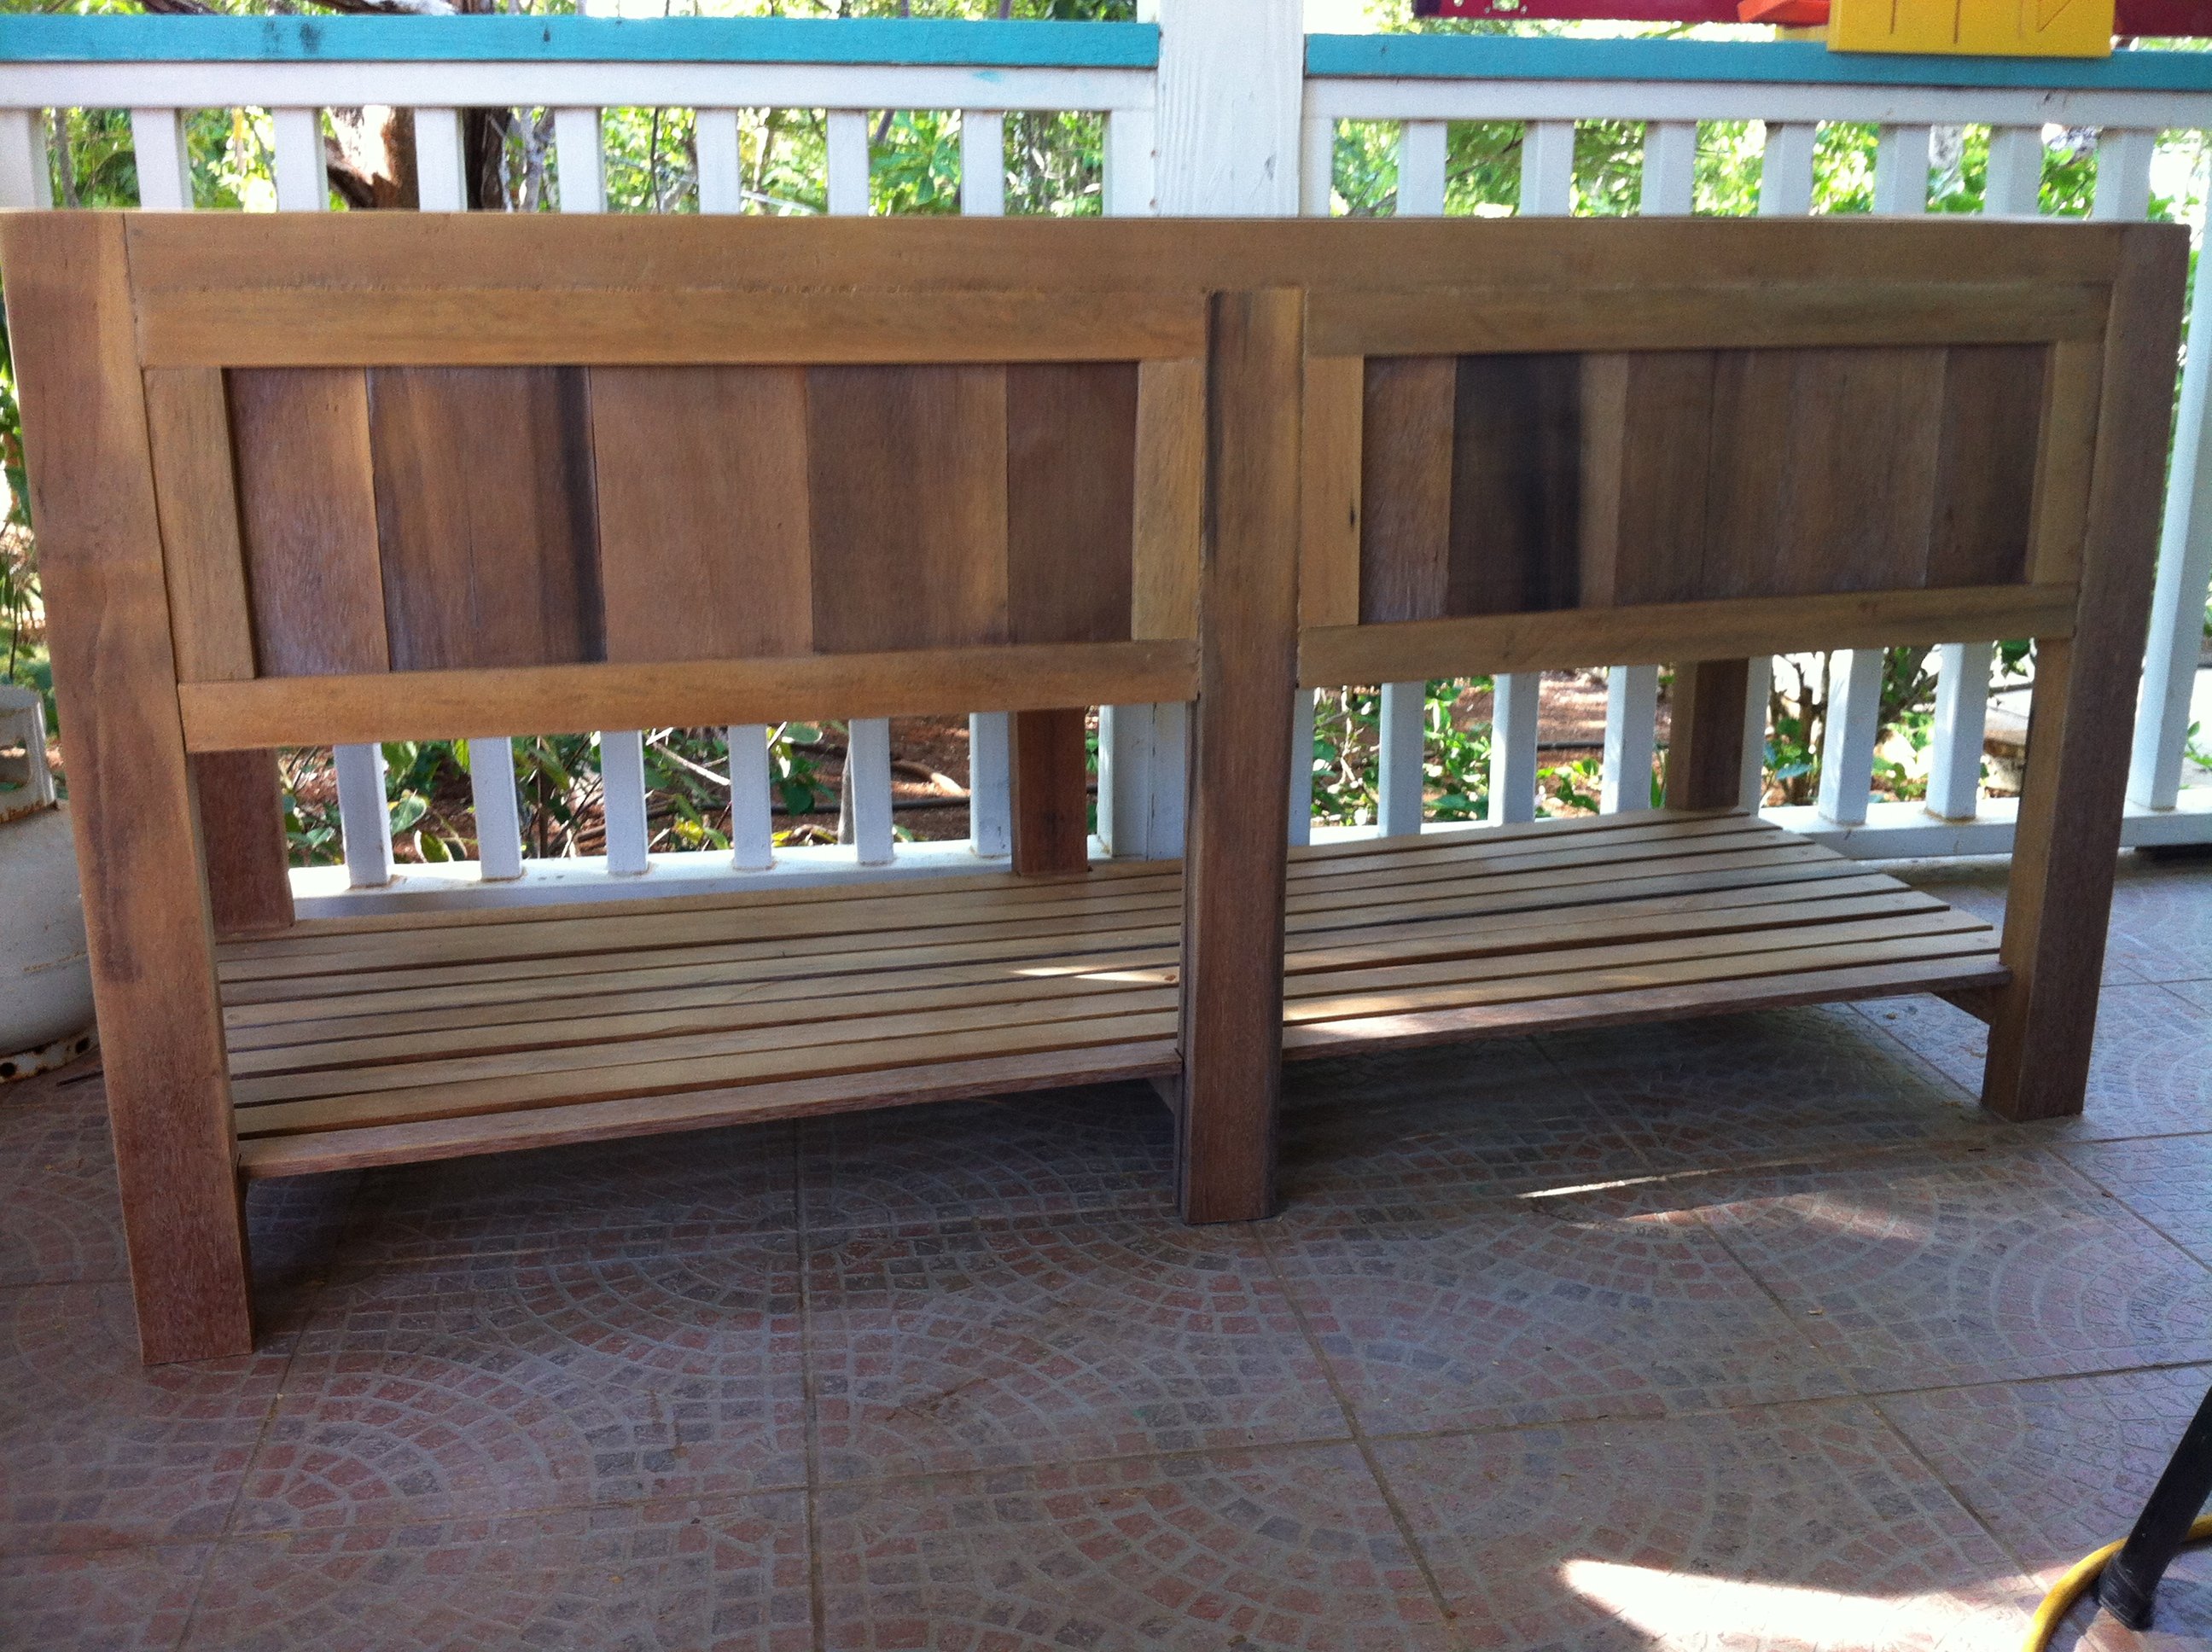
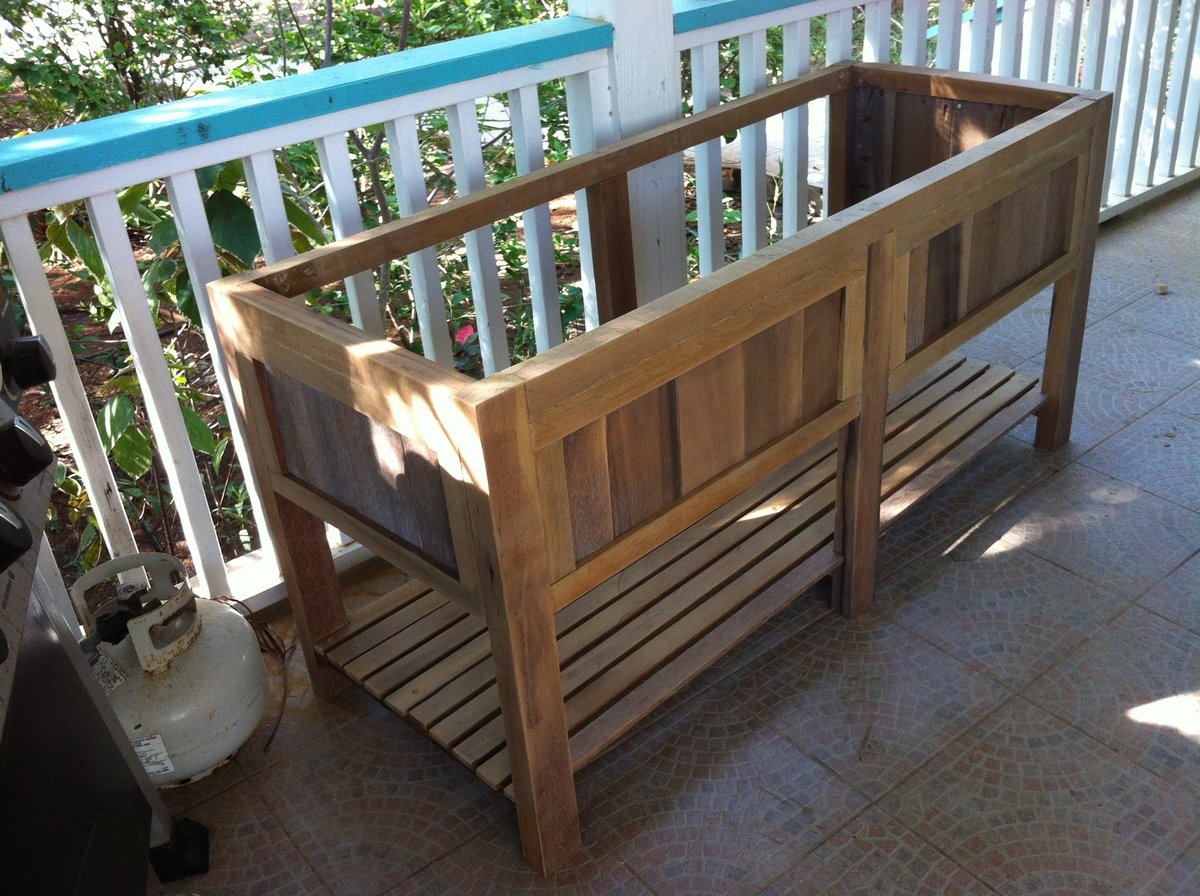
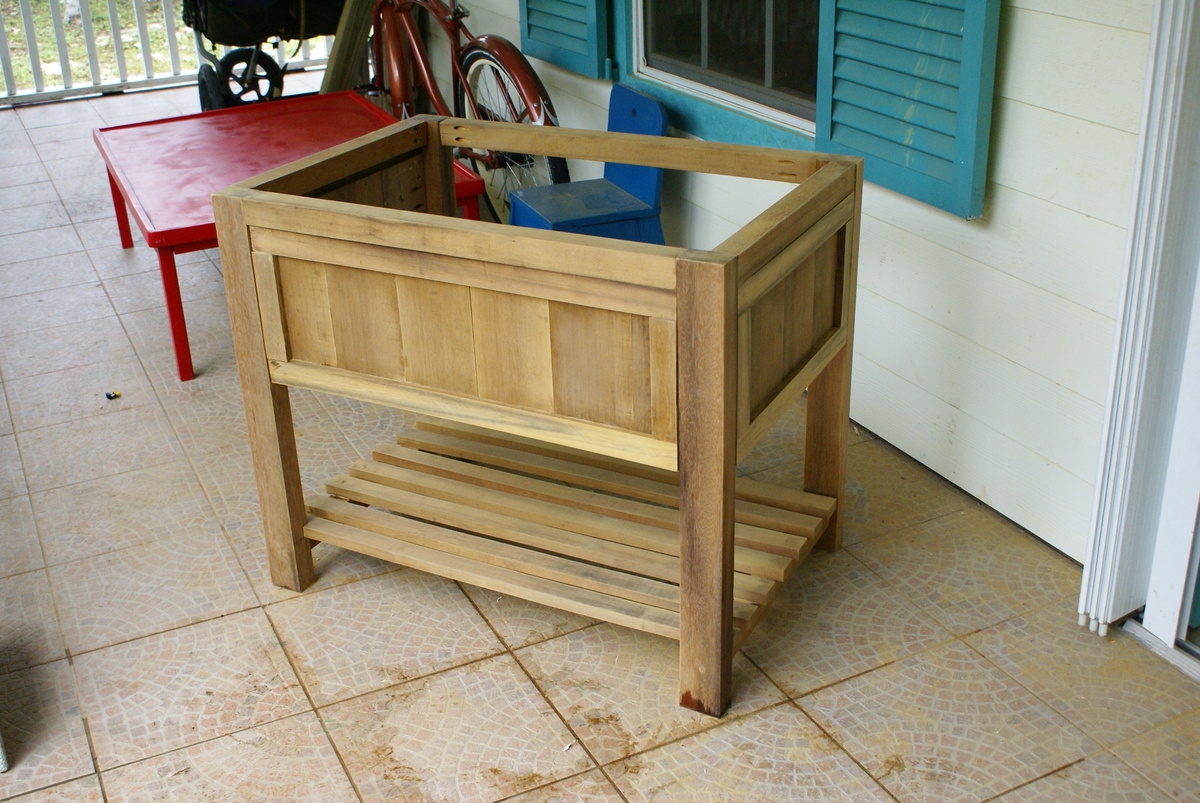
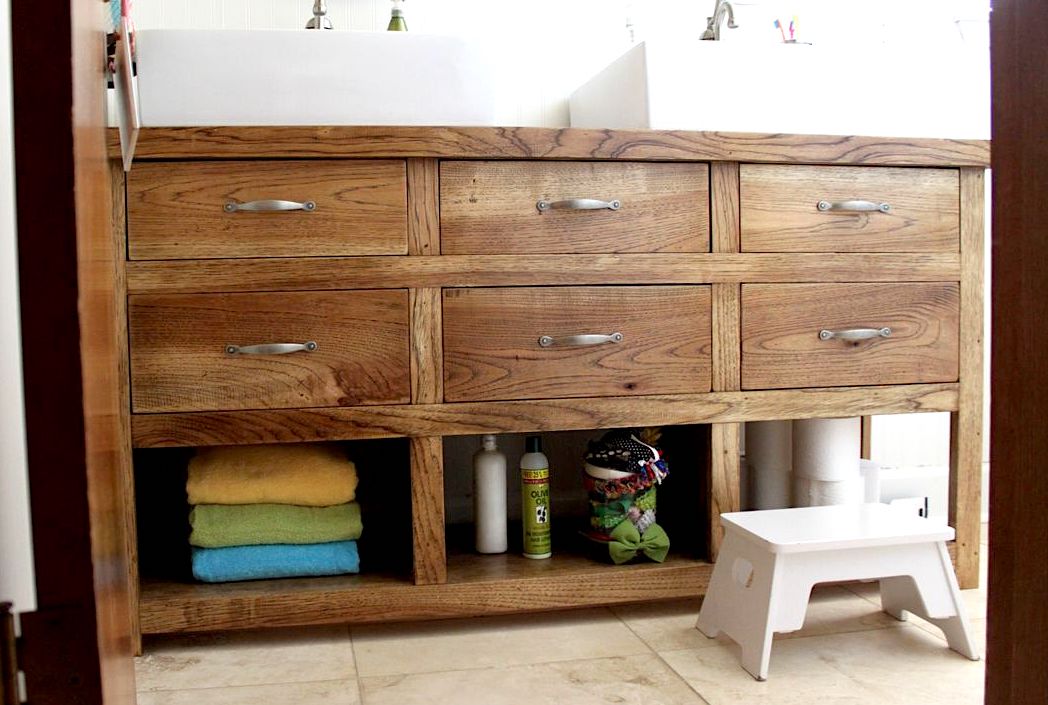
I've been working on these bathroom vanities for a family building a home. These are made of gorgeous Greenheart lumber. I have only worked with pine and spruce up to this point, but this wood is truly stunning. It has been quite the adjustment to work with, and I've broken my share of bits and screws :)
All of these together took me about a week to complete. Had I been working with a softer wood it would have taken no time hardly, but the hardwood....that's a whole other ballgame to me!
They will be adding 2'' thick concrete counter-tops on these when they get installed. I love the simplicity of their look!

Tue, 10/01/2013 - 07:35
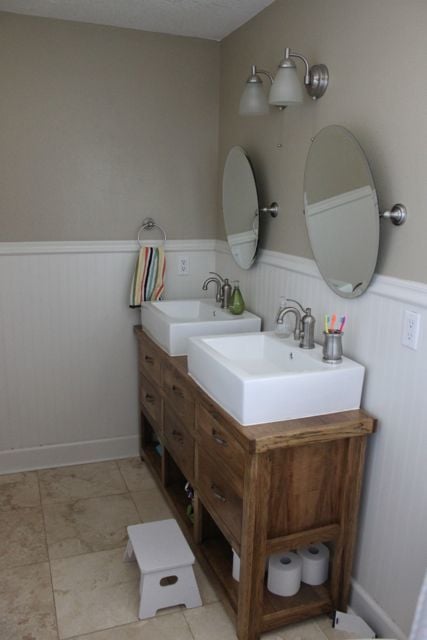
These vanities are beautiful. It would be really neat if you could add pictures when they are installed with the counter tops! I am contemplating replacing a vanity with a DIY one, and I love seeing how other people have made things beautiful with their own 2 hands.
In reply to They are beautiful! by NimbleShopper
Tue, 10/01/2013 - 14:35
I will most definitely add the pics with the counters. I can't wait to see them myself :)
Lesson learned....... Drilling straight holes is critical.
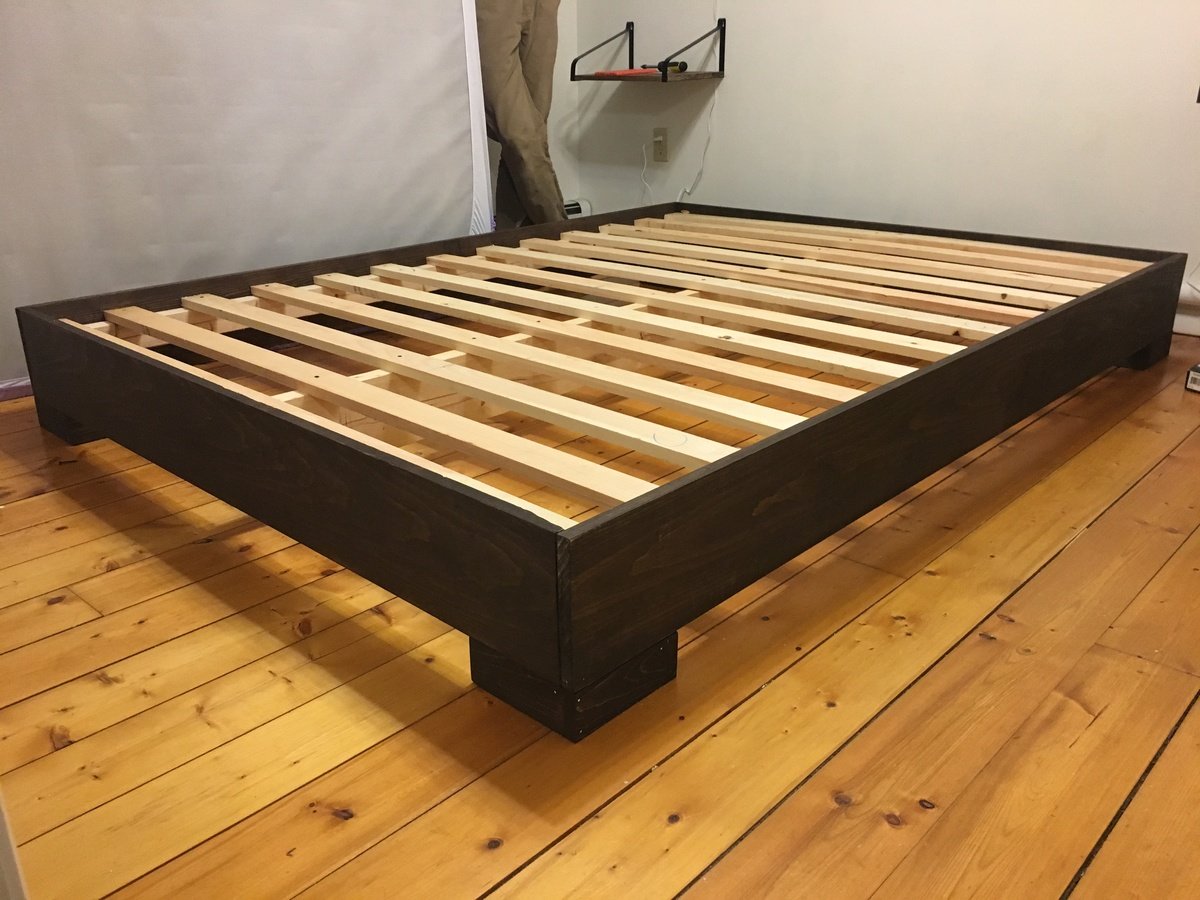
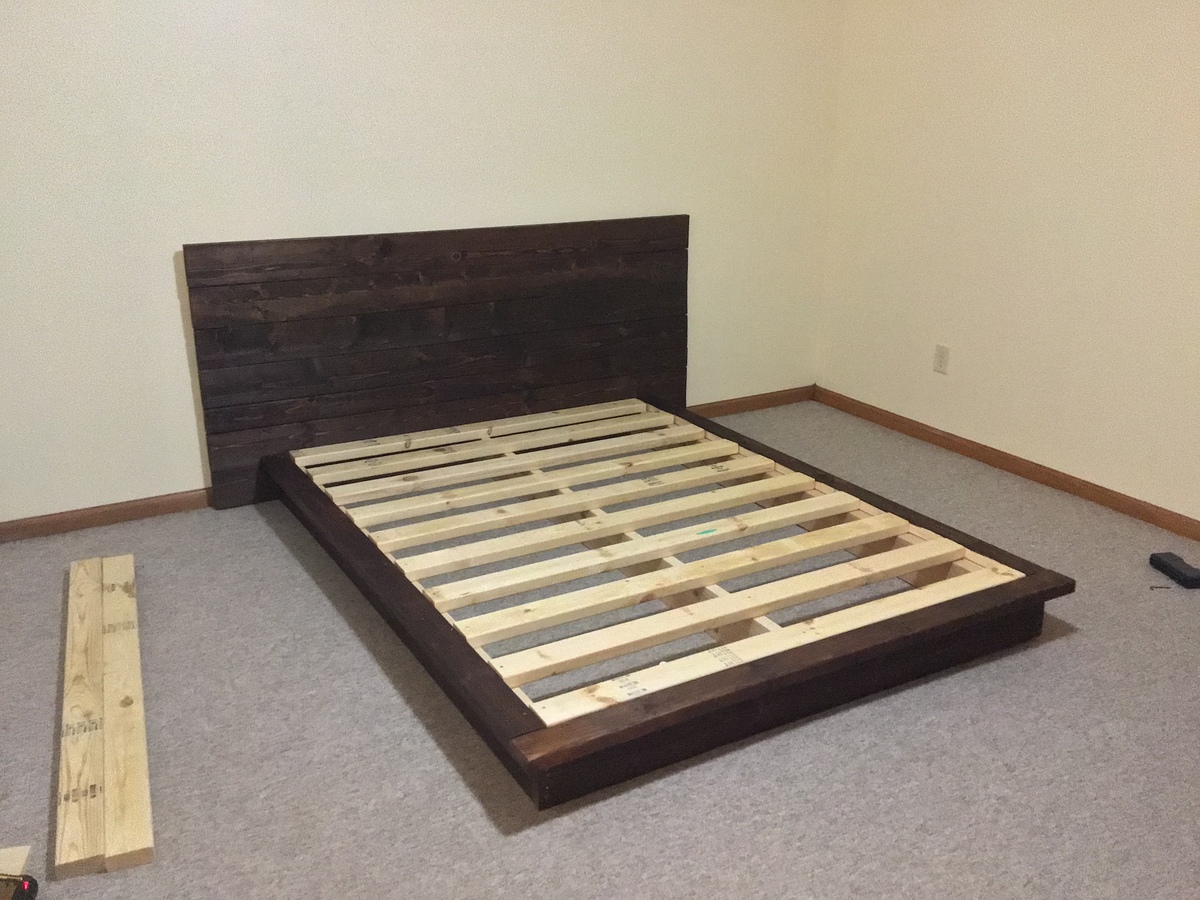
I got tired of sleeping on the floor like college kids, but I didn’t want to buy a junky particle board bedframe. My husband and I are novice woodworkers. Even still, we bought the lumber around noon and managed to finish the whole project in about 5-6 hours! We used a Kreg jig for the first time and it was pretty simple. I am really pleased with how this turned out, and I can’t wait to try more of Ana’s plans in the future.
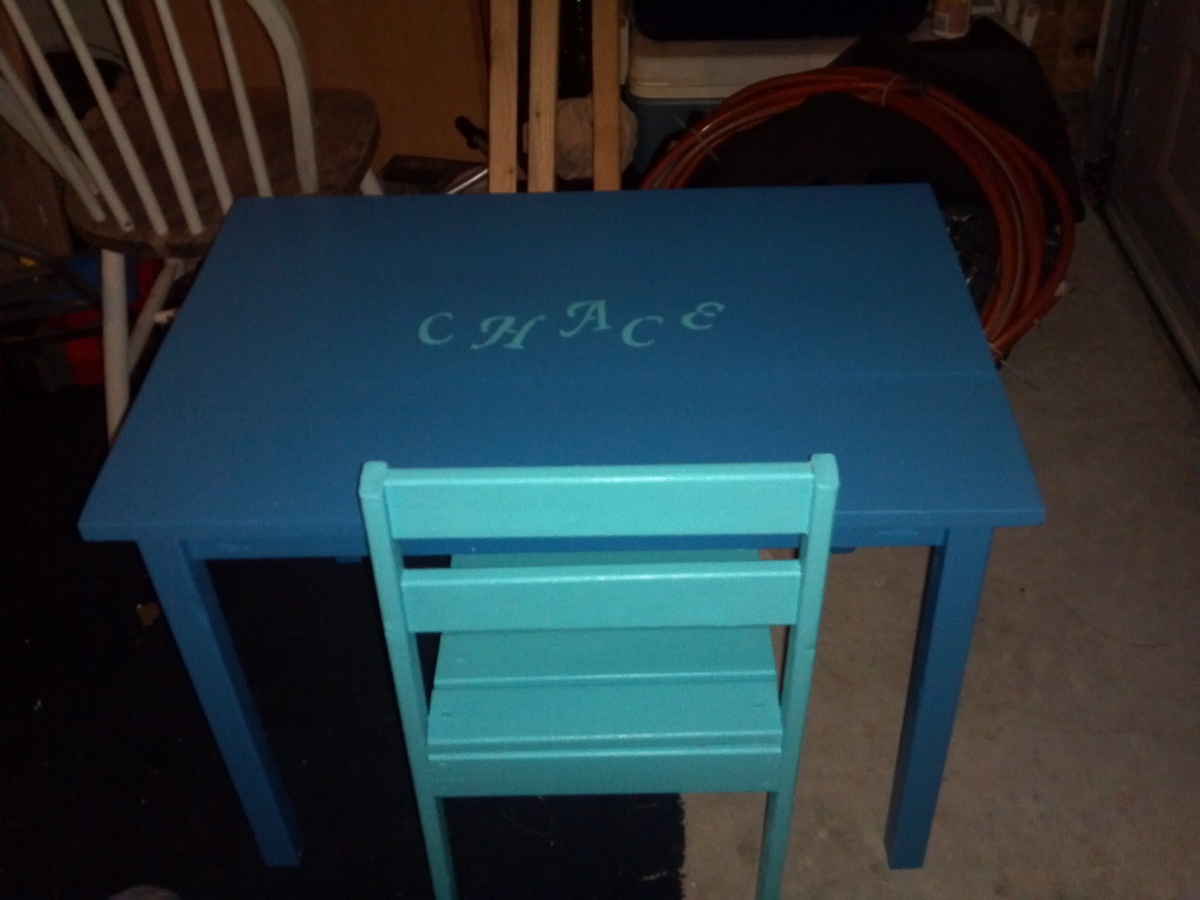
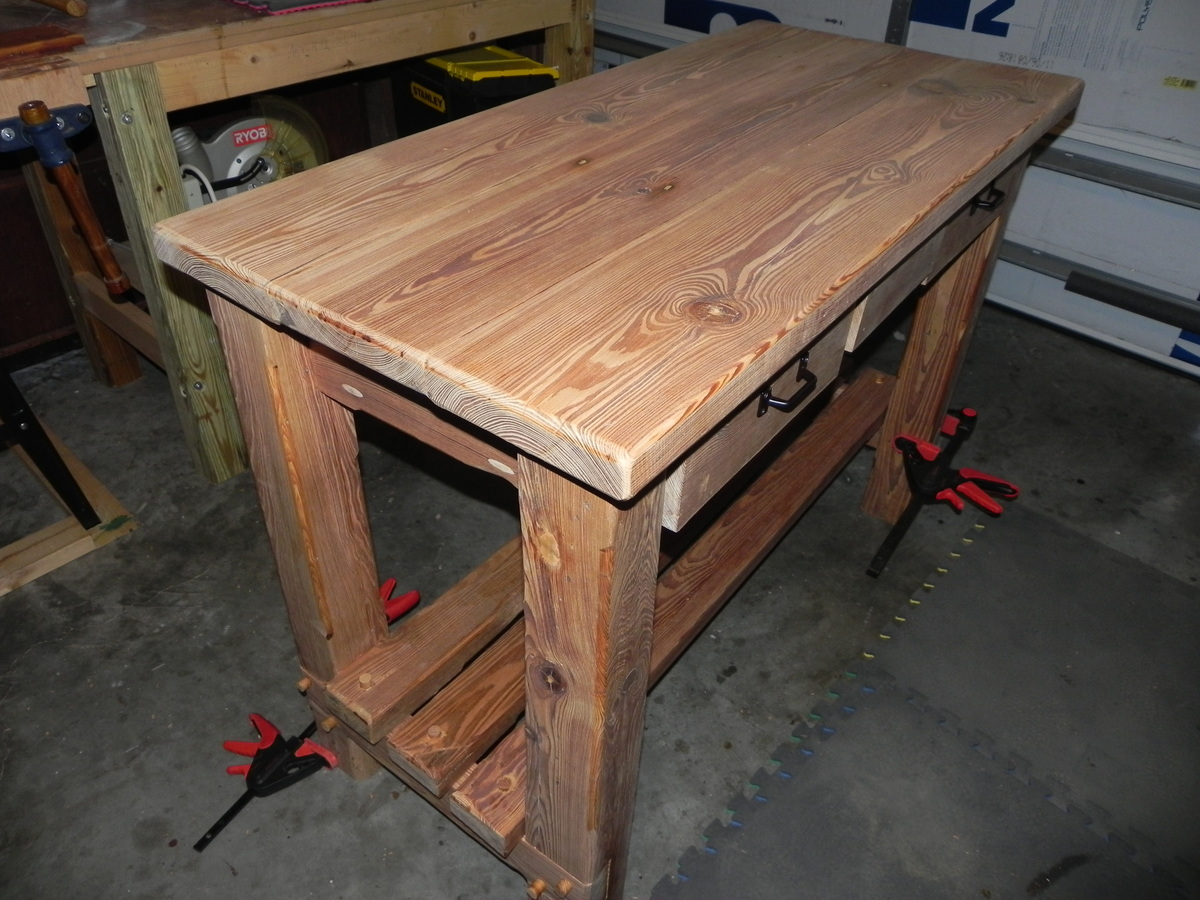
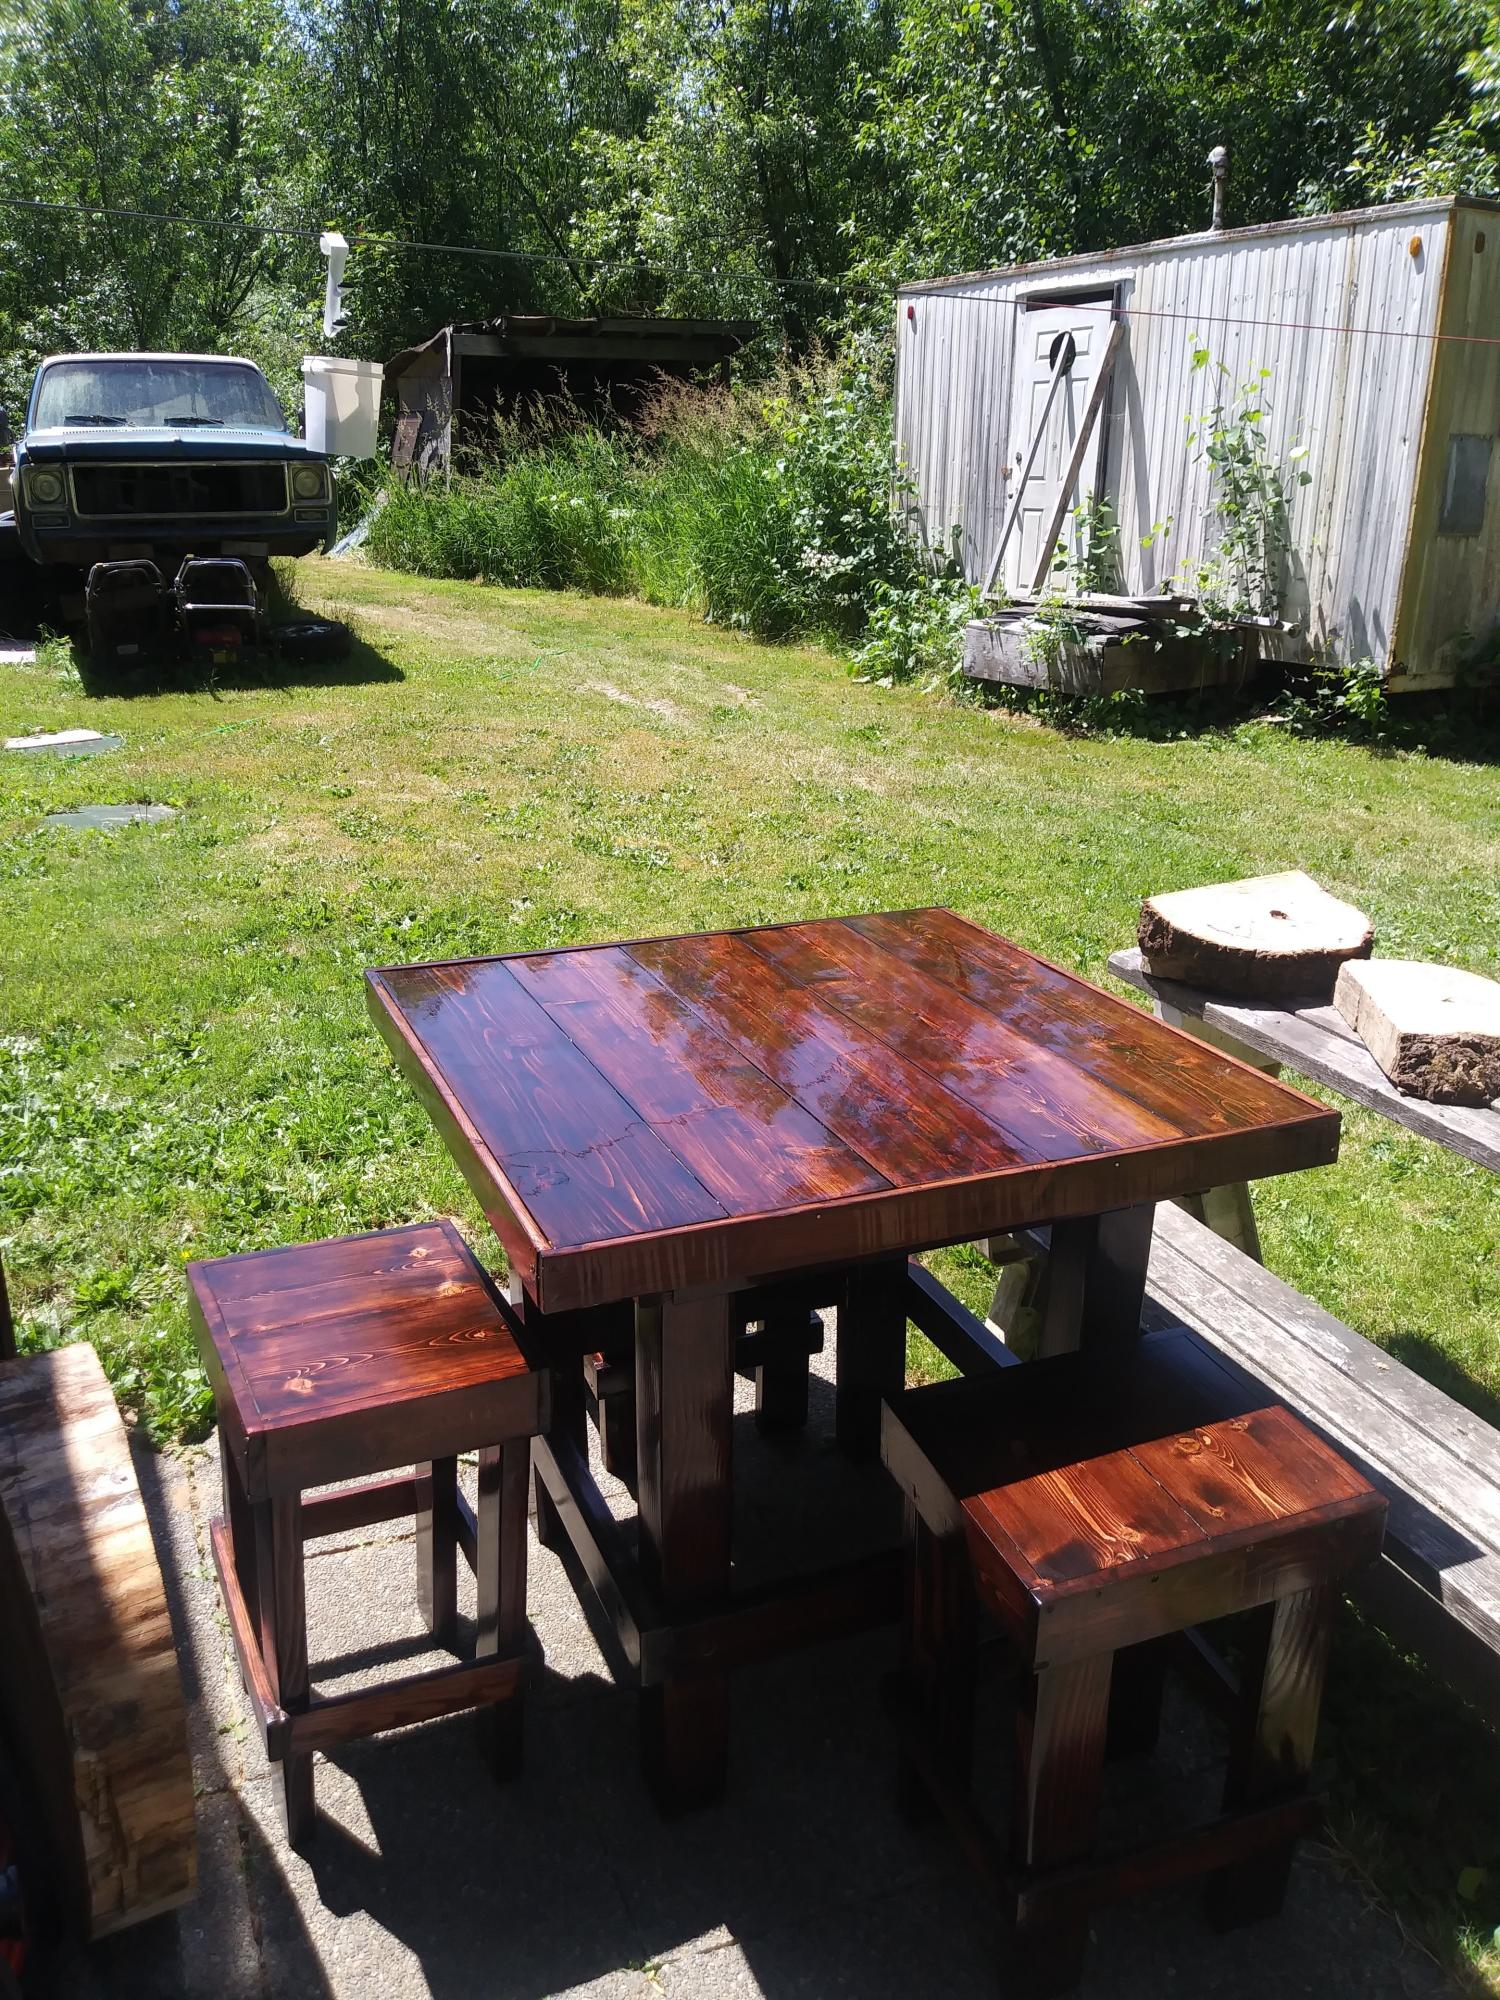
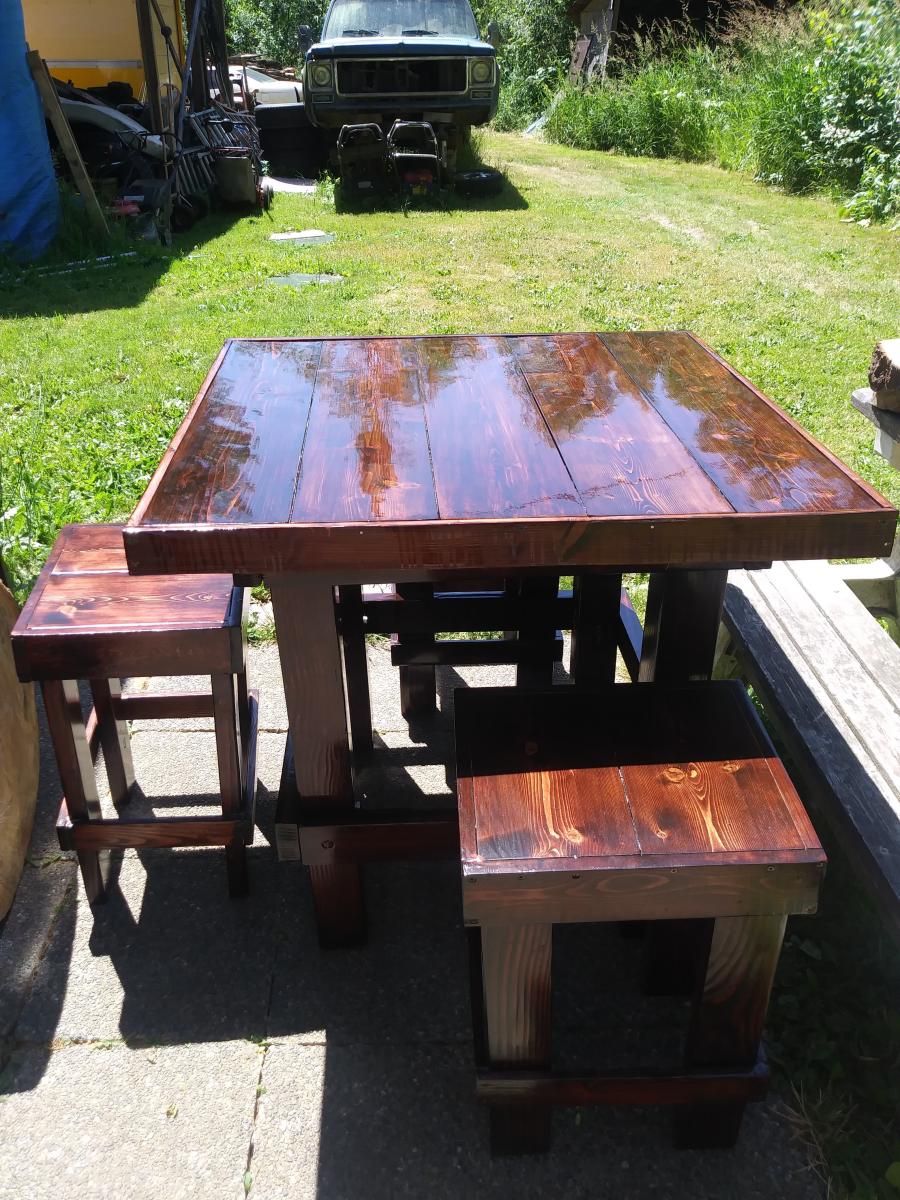
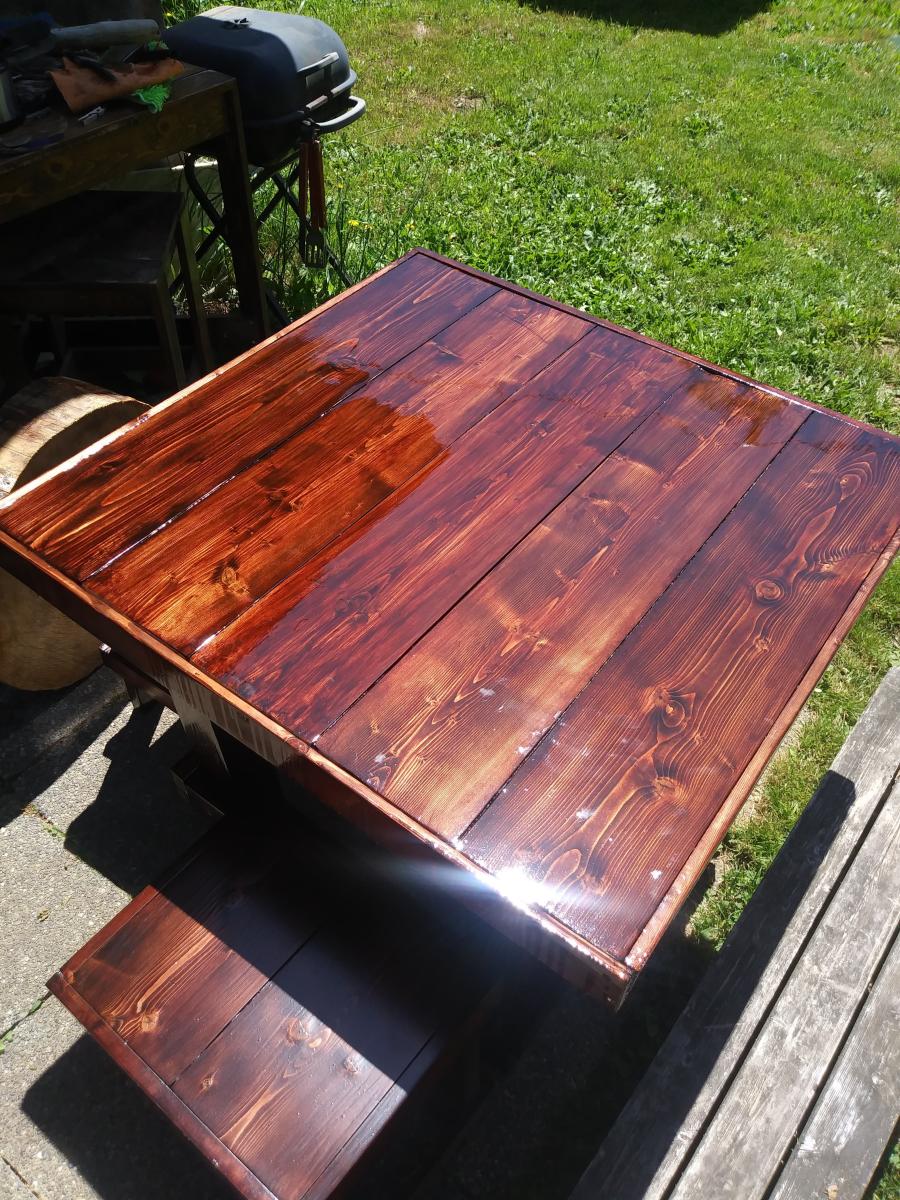
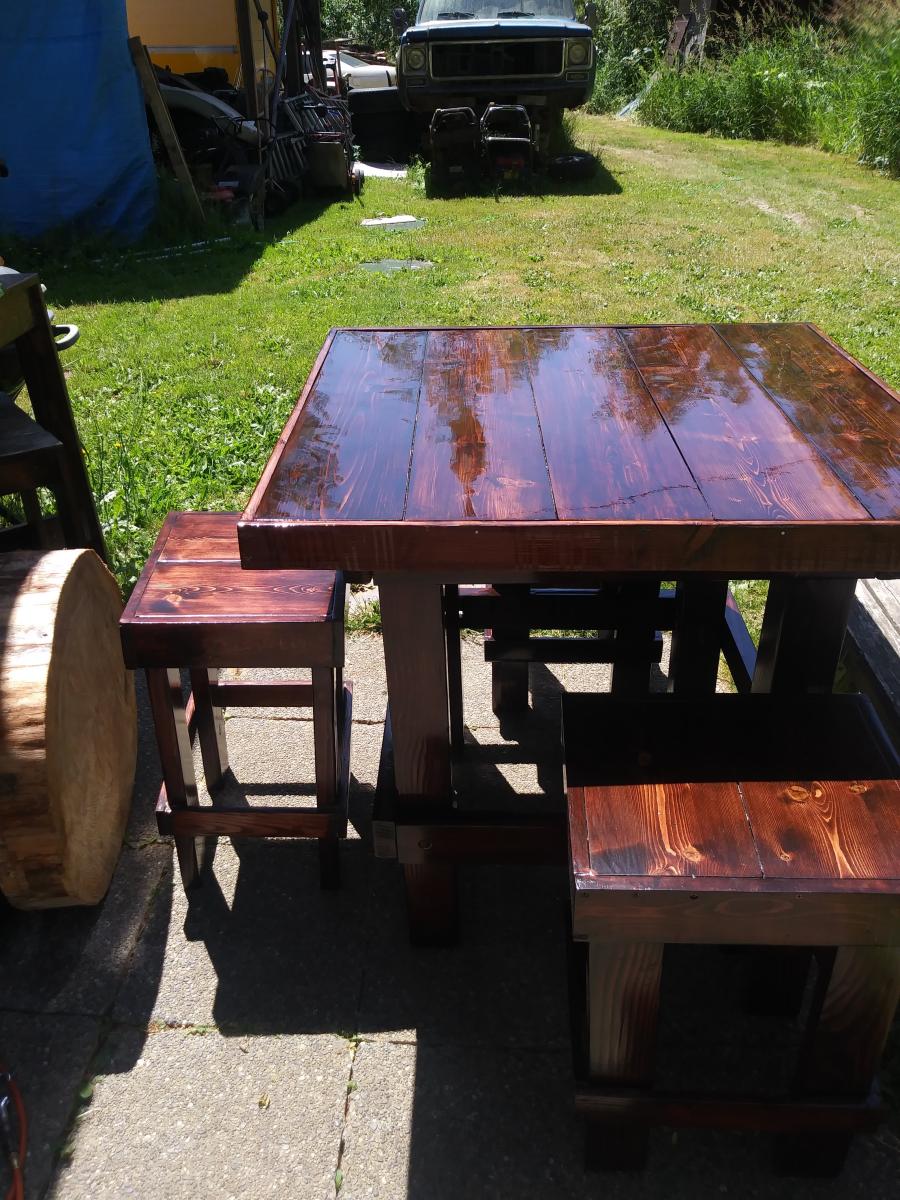
This was a gift to my good friends son. She said he needed a desk for his homework, but I hear he's using it as a dinner table. :) It was a fun project.
I was so excited to see this plan and knew what to do with the wood I had recently acquired when an old home was being destroyed near my house.
Love the site and the projects are too much fun!
Thu, 10/03/2013 - 07:29
The heart of pine is more dense than red oak and heavy!!
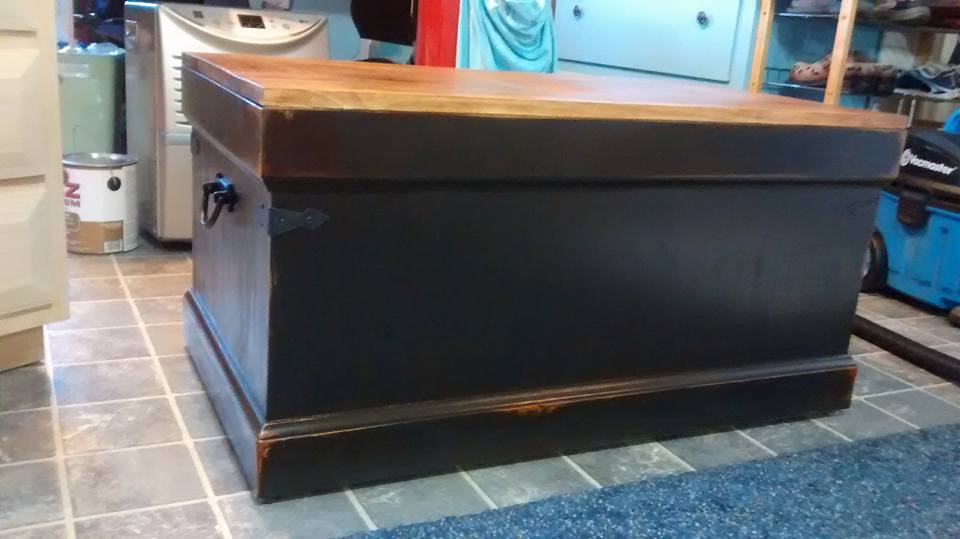
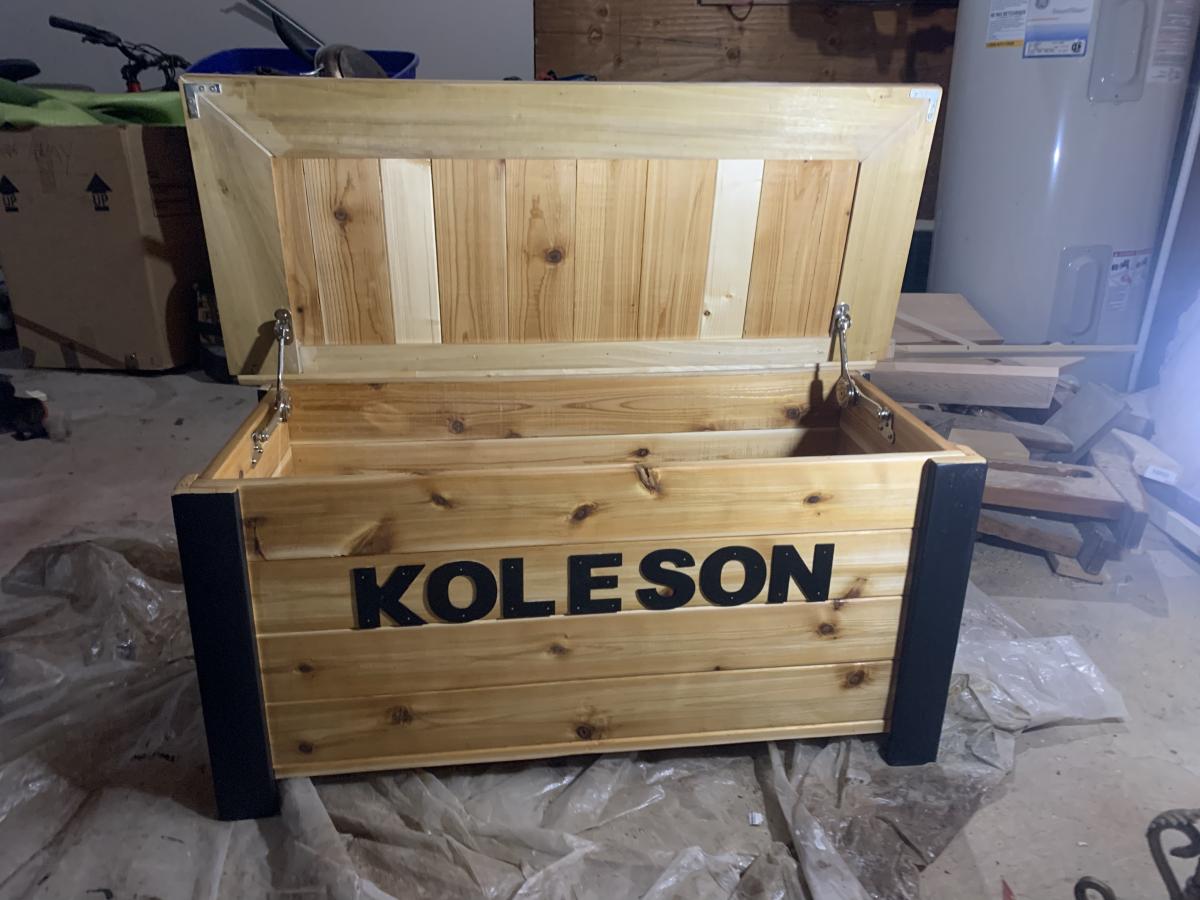
I painted mine black and distressed it. Stained the top and distressed parts with MinWax American Walnut poly stain. Hardware from Van Dykes Restores. Used piano spring loaded lid supports for lid.
Took awhile but had others projects going.
Made this for my daughters family spent hours upon hours on that finish!
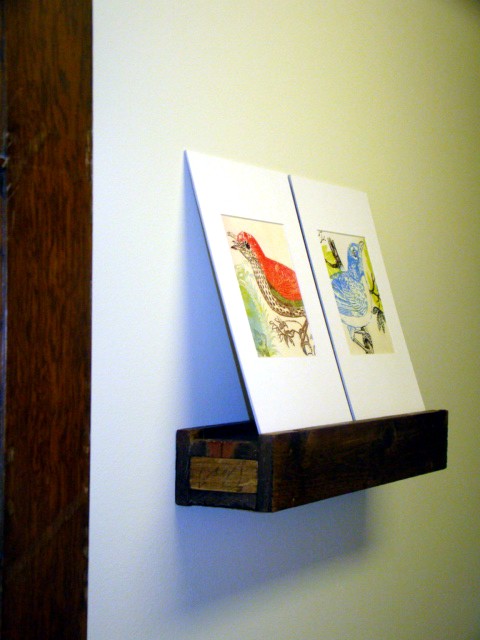
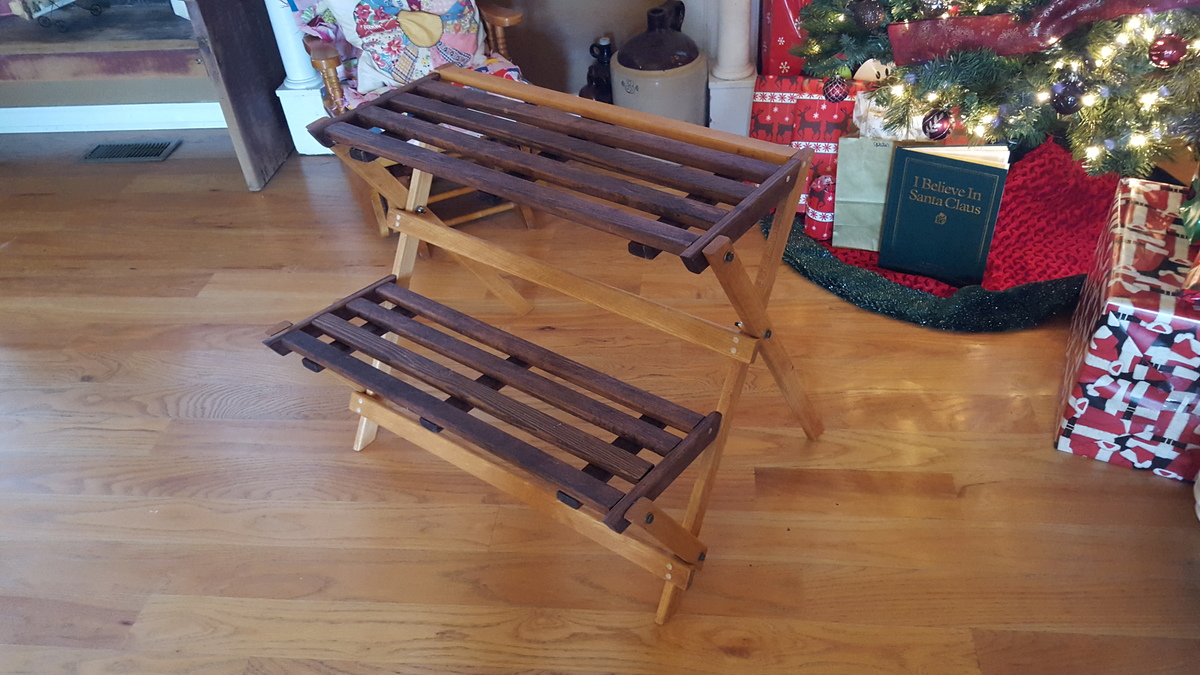
These shelves were easy to make and are sturdy also. I haven't gotten frames for my pictures yet - I was so excited to hang up my shelf.
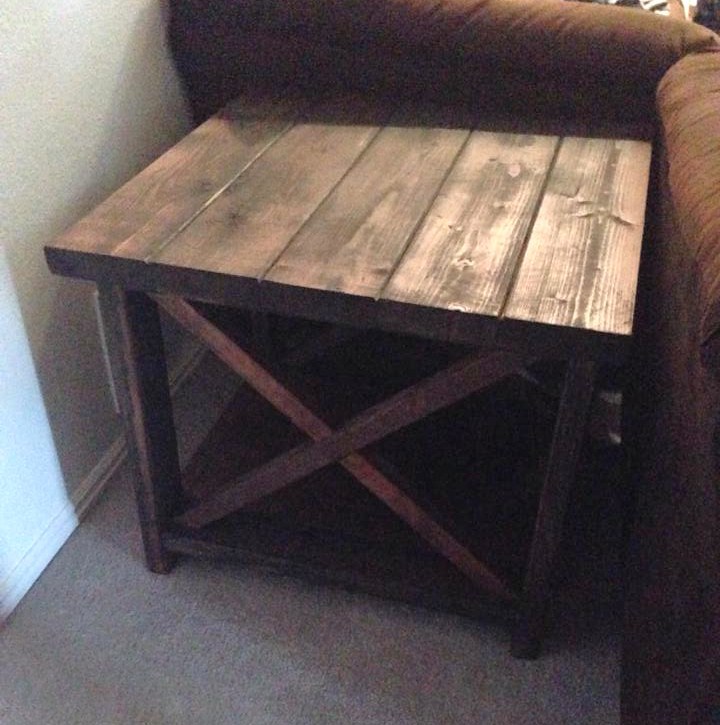
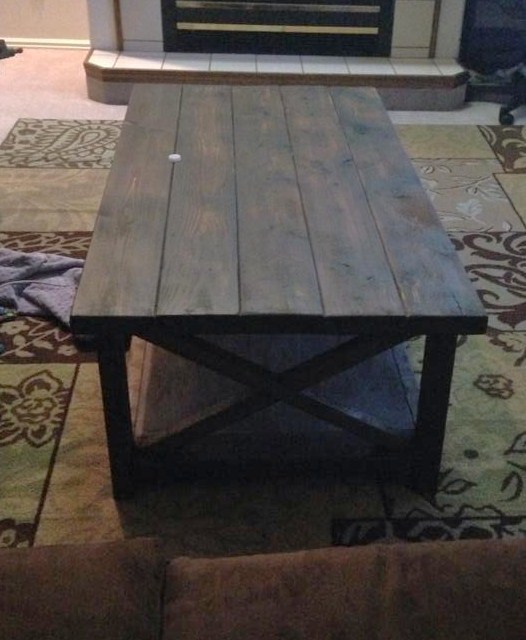
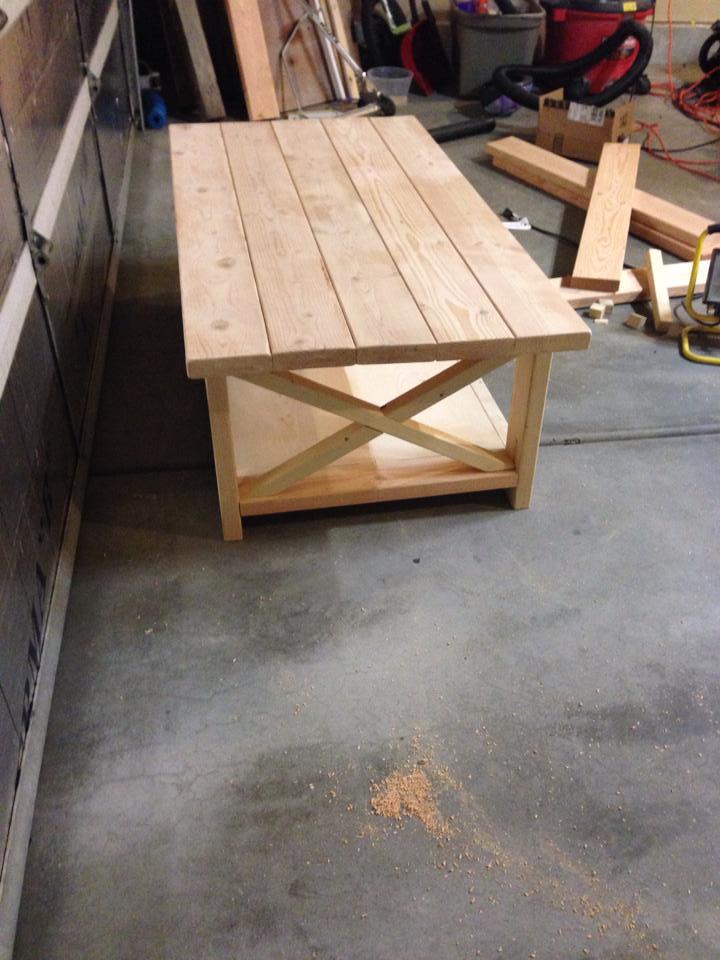
WOW this was our first build. We had some money to get started so went and bought new miter saw and sander, kreg jig, basically everything we needed to build it. Tools aside we spend only about $100 on the lumber to build the coffee table and 2 side tables.
Eric cut notches in the X instead of using 2 separate pieces for the other side, so they fit together like a puzzle piece. it was a learning experience of trial and error, but he got better and better each time.
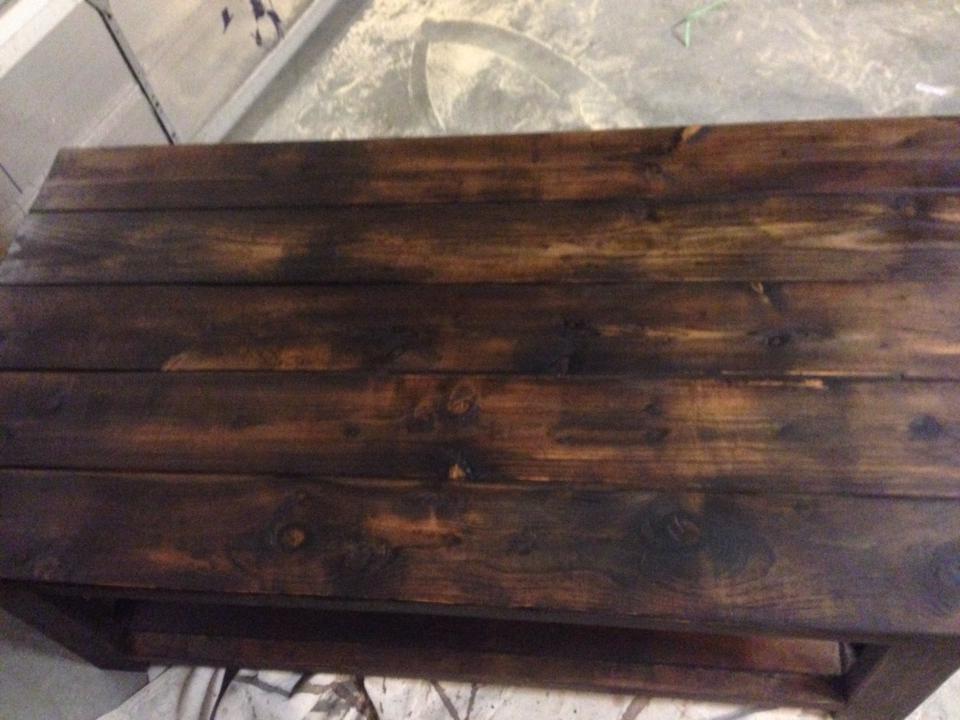
For the finish i used the tutorial of dissolving steel wool in vinegar and then added a coat of strong coffee which made an ugly green-gray color. I happened to have picked up a can of "autumn" wood stain that when applied made the color pop and look amazing. (thank goodness because i was so frustrated and wanted to give up) when we do this again (cuz i just sold the set we made) i will be better at sanding everything nice and smooth, and do staining/painting of the Xs and the top separately before putting everything together.
I dont recommend the steel wool and vinegar stain, it smelled terrible and was hard to apply because it was watery and ran a lot plus you cant see the color develop for a long time so its hard to see what was wet and what wasn't. yuk. The Minwax "gray" stain they just released would most likely work a lot better. those small can of stains for $6 are big enough for all 3 pieces we built so really i don't think i saved money buying the steel wool and vinegar.
Anyway this was way fun! Cant wait to build again :)
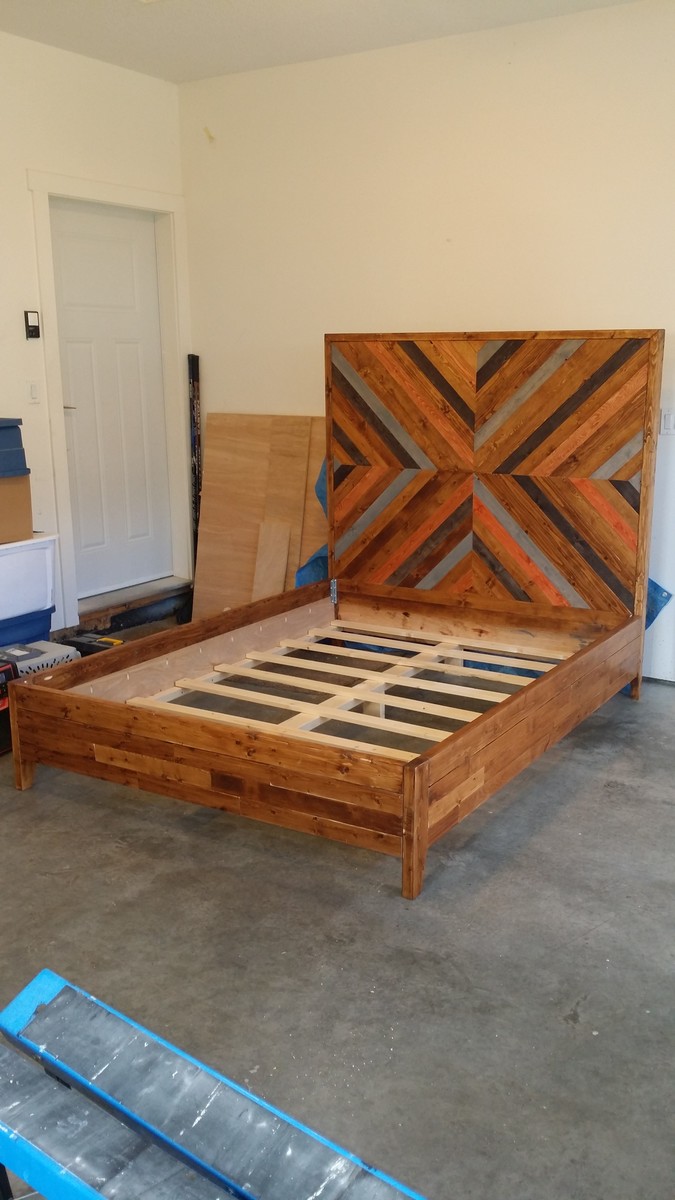
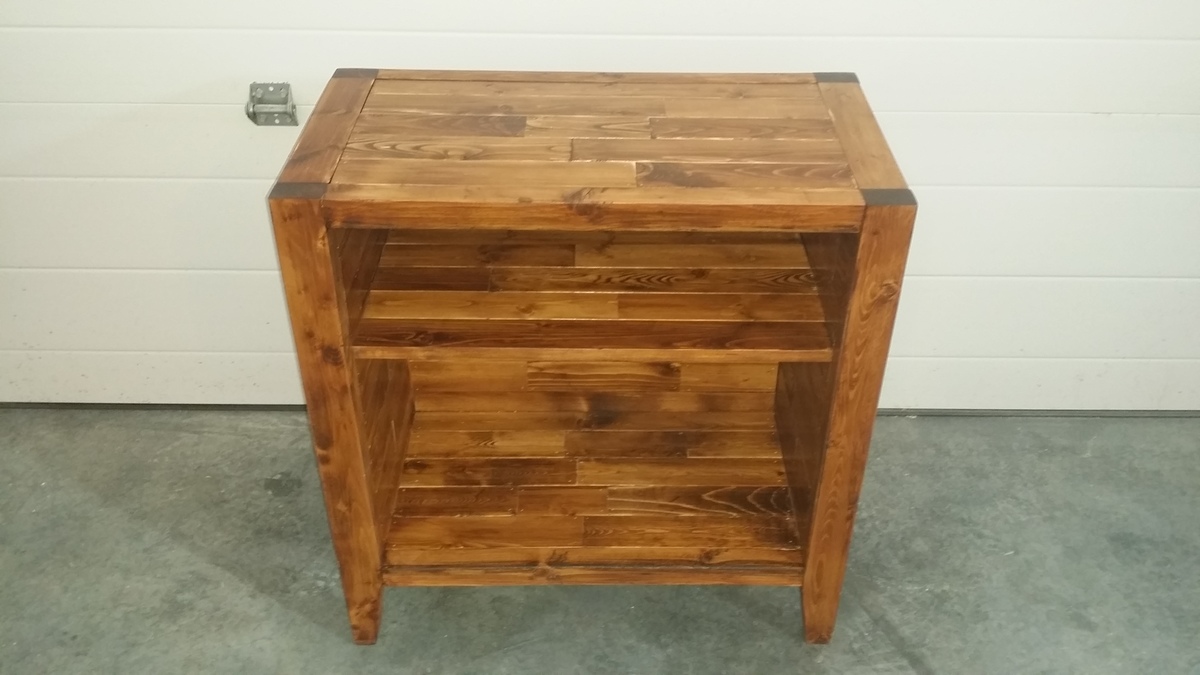
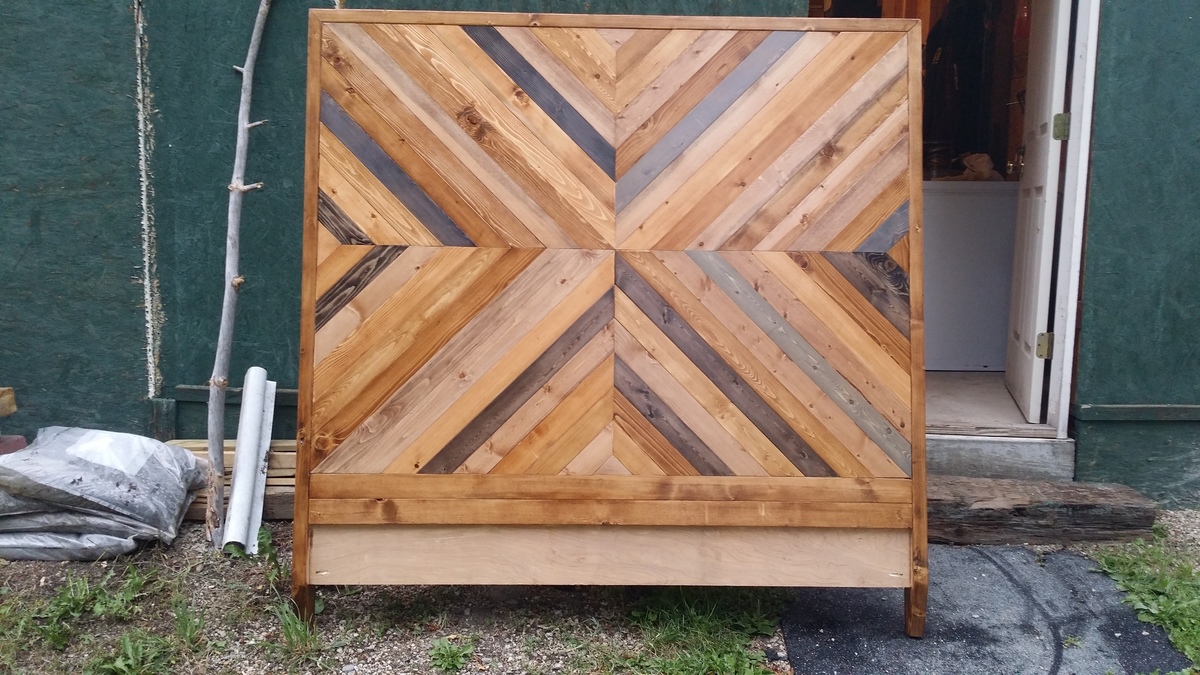
I pretty much just followed the plans. It turned out a bit more colourful that I expected but I've already sold it so I guess its okay. I'm going to make another one with a bit more toned down colours. I also created a matching night stand. I didn't follow any plan. Just used the ideas from the bed build.
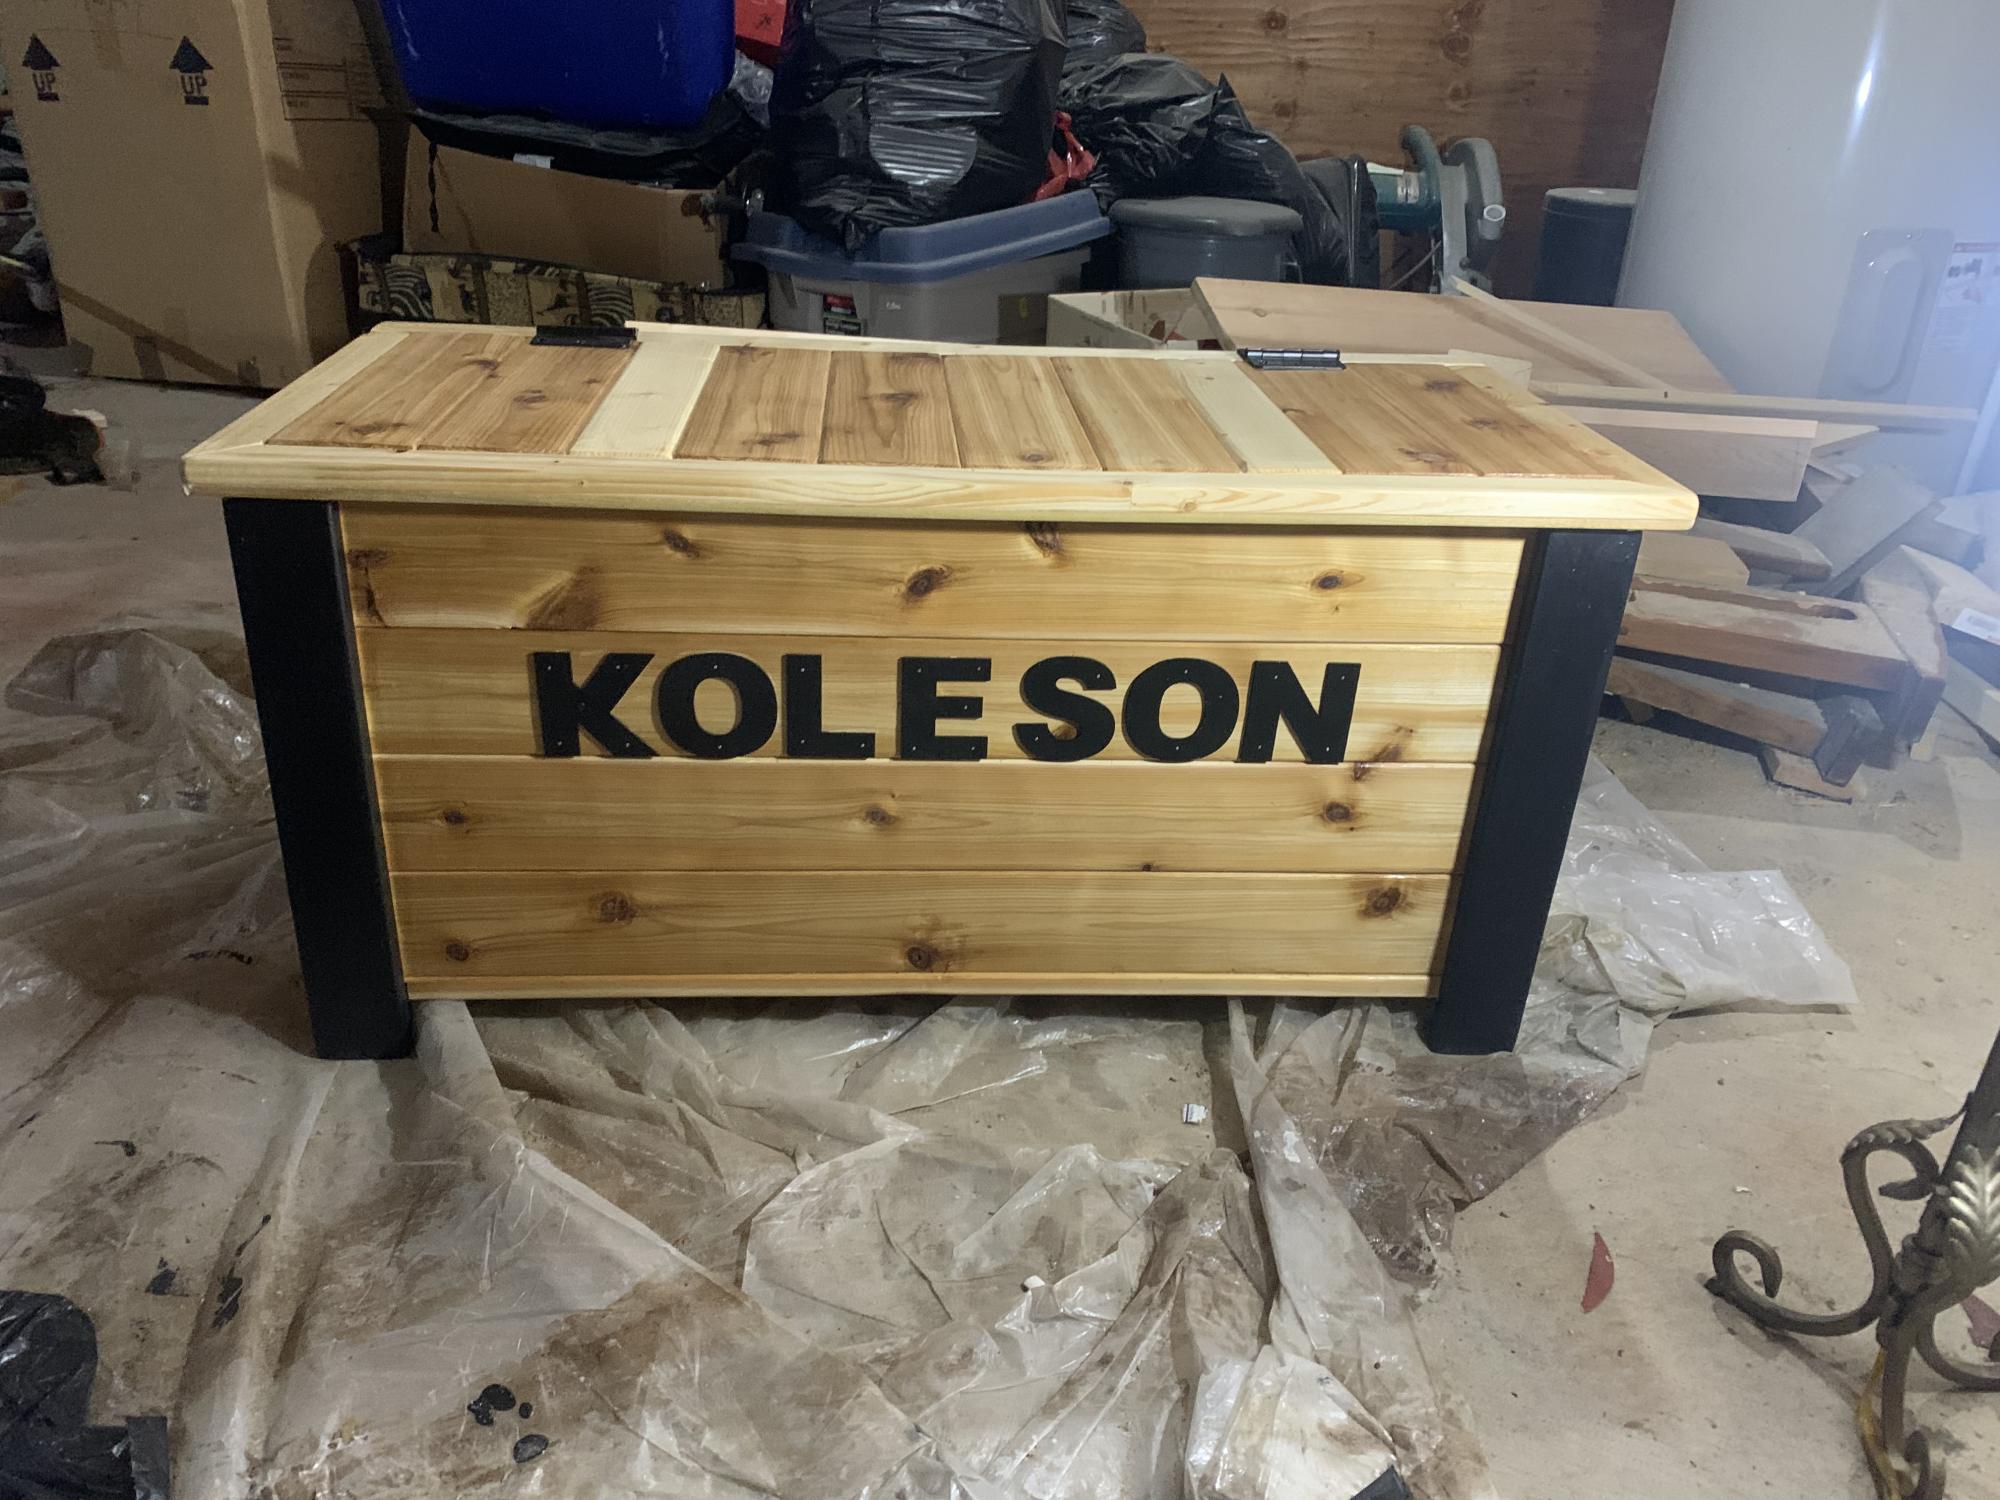
Mostly built from cedar plywood.
Had to reinvent the lid. Used panels instead of the recommended panel boards
Sun, 01/22/2023 - 08:22
Beautiful box and love the customization! Thanks for sharing.
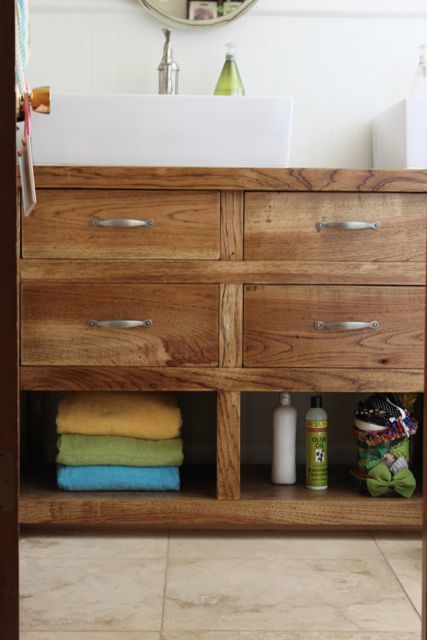
We looked high and low for a sturdy dresser we could convert to a vanity for our kid's bathroom. We could find nothing for under $500 so we decided to make it. We used solid hickory for the top and bottom and hickory vaneer for the rest. Only the middle drawers are useable, the side ones have a faux front to leave room for the sink plumbing behind. My husband also reinforced the bottom compartments by making them three separate compartments instead of one solid one. We ordered the sinks from overstock.com and the faucets are from Lowes.
Fri, 10/07/2011 - 16:14
Love it!!! I have been looking for a design I love and this is it :) Thank you for sharing!
Fri, 10/07/2011 - 16:39
My kids have been bugging for years for double sinks. I LOVE this. I was thinking along the same line but never got past the thinking part. This is GORGEOUS!
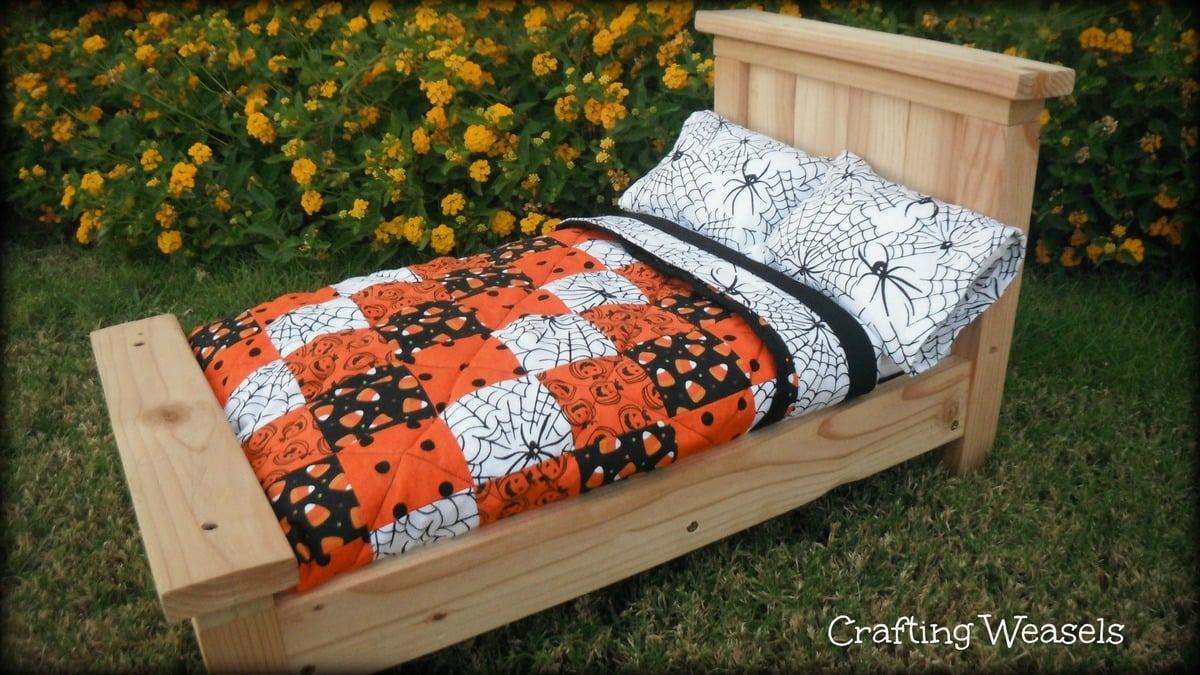
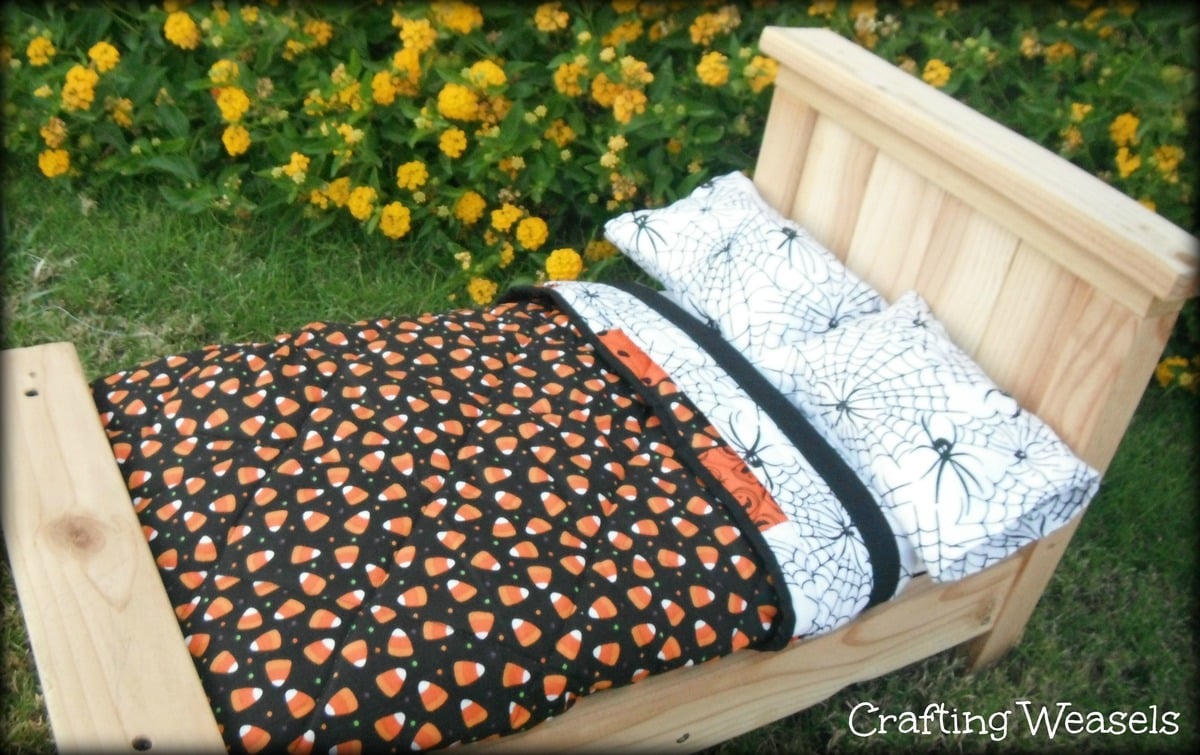
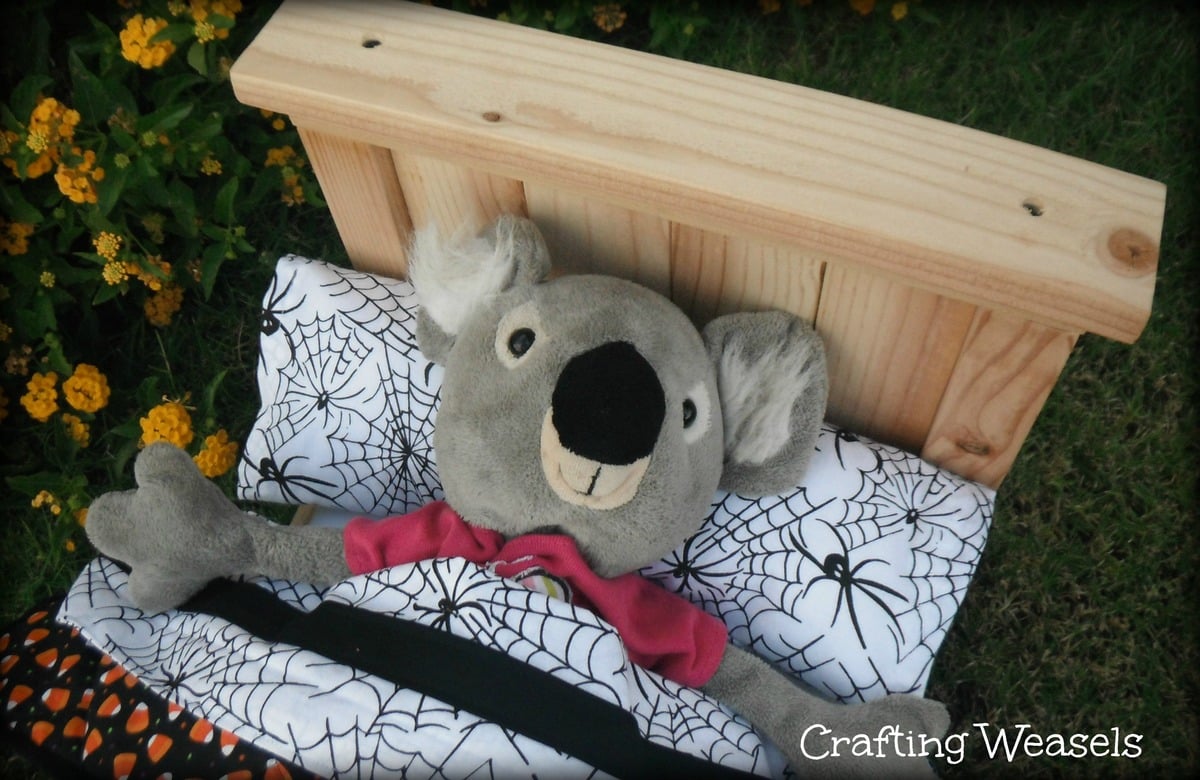
I made this bed for my daughter's Koalas (they are about the same size as the American Girl dolls).
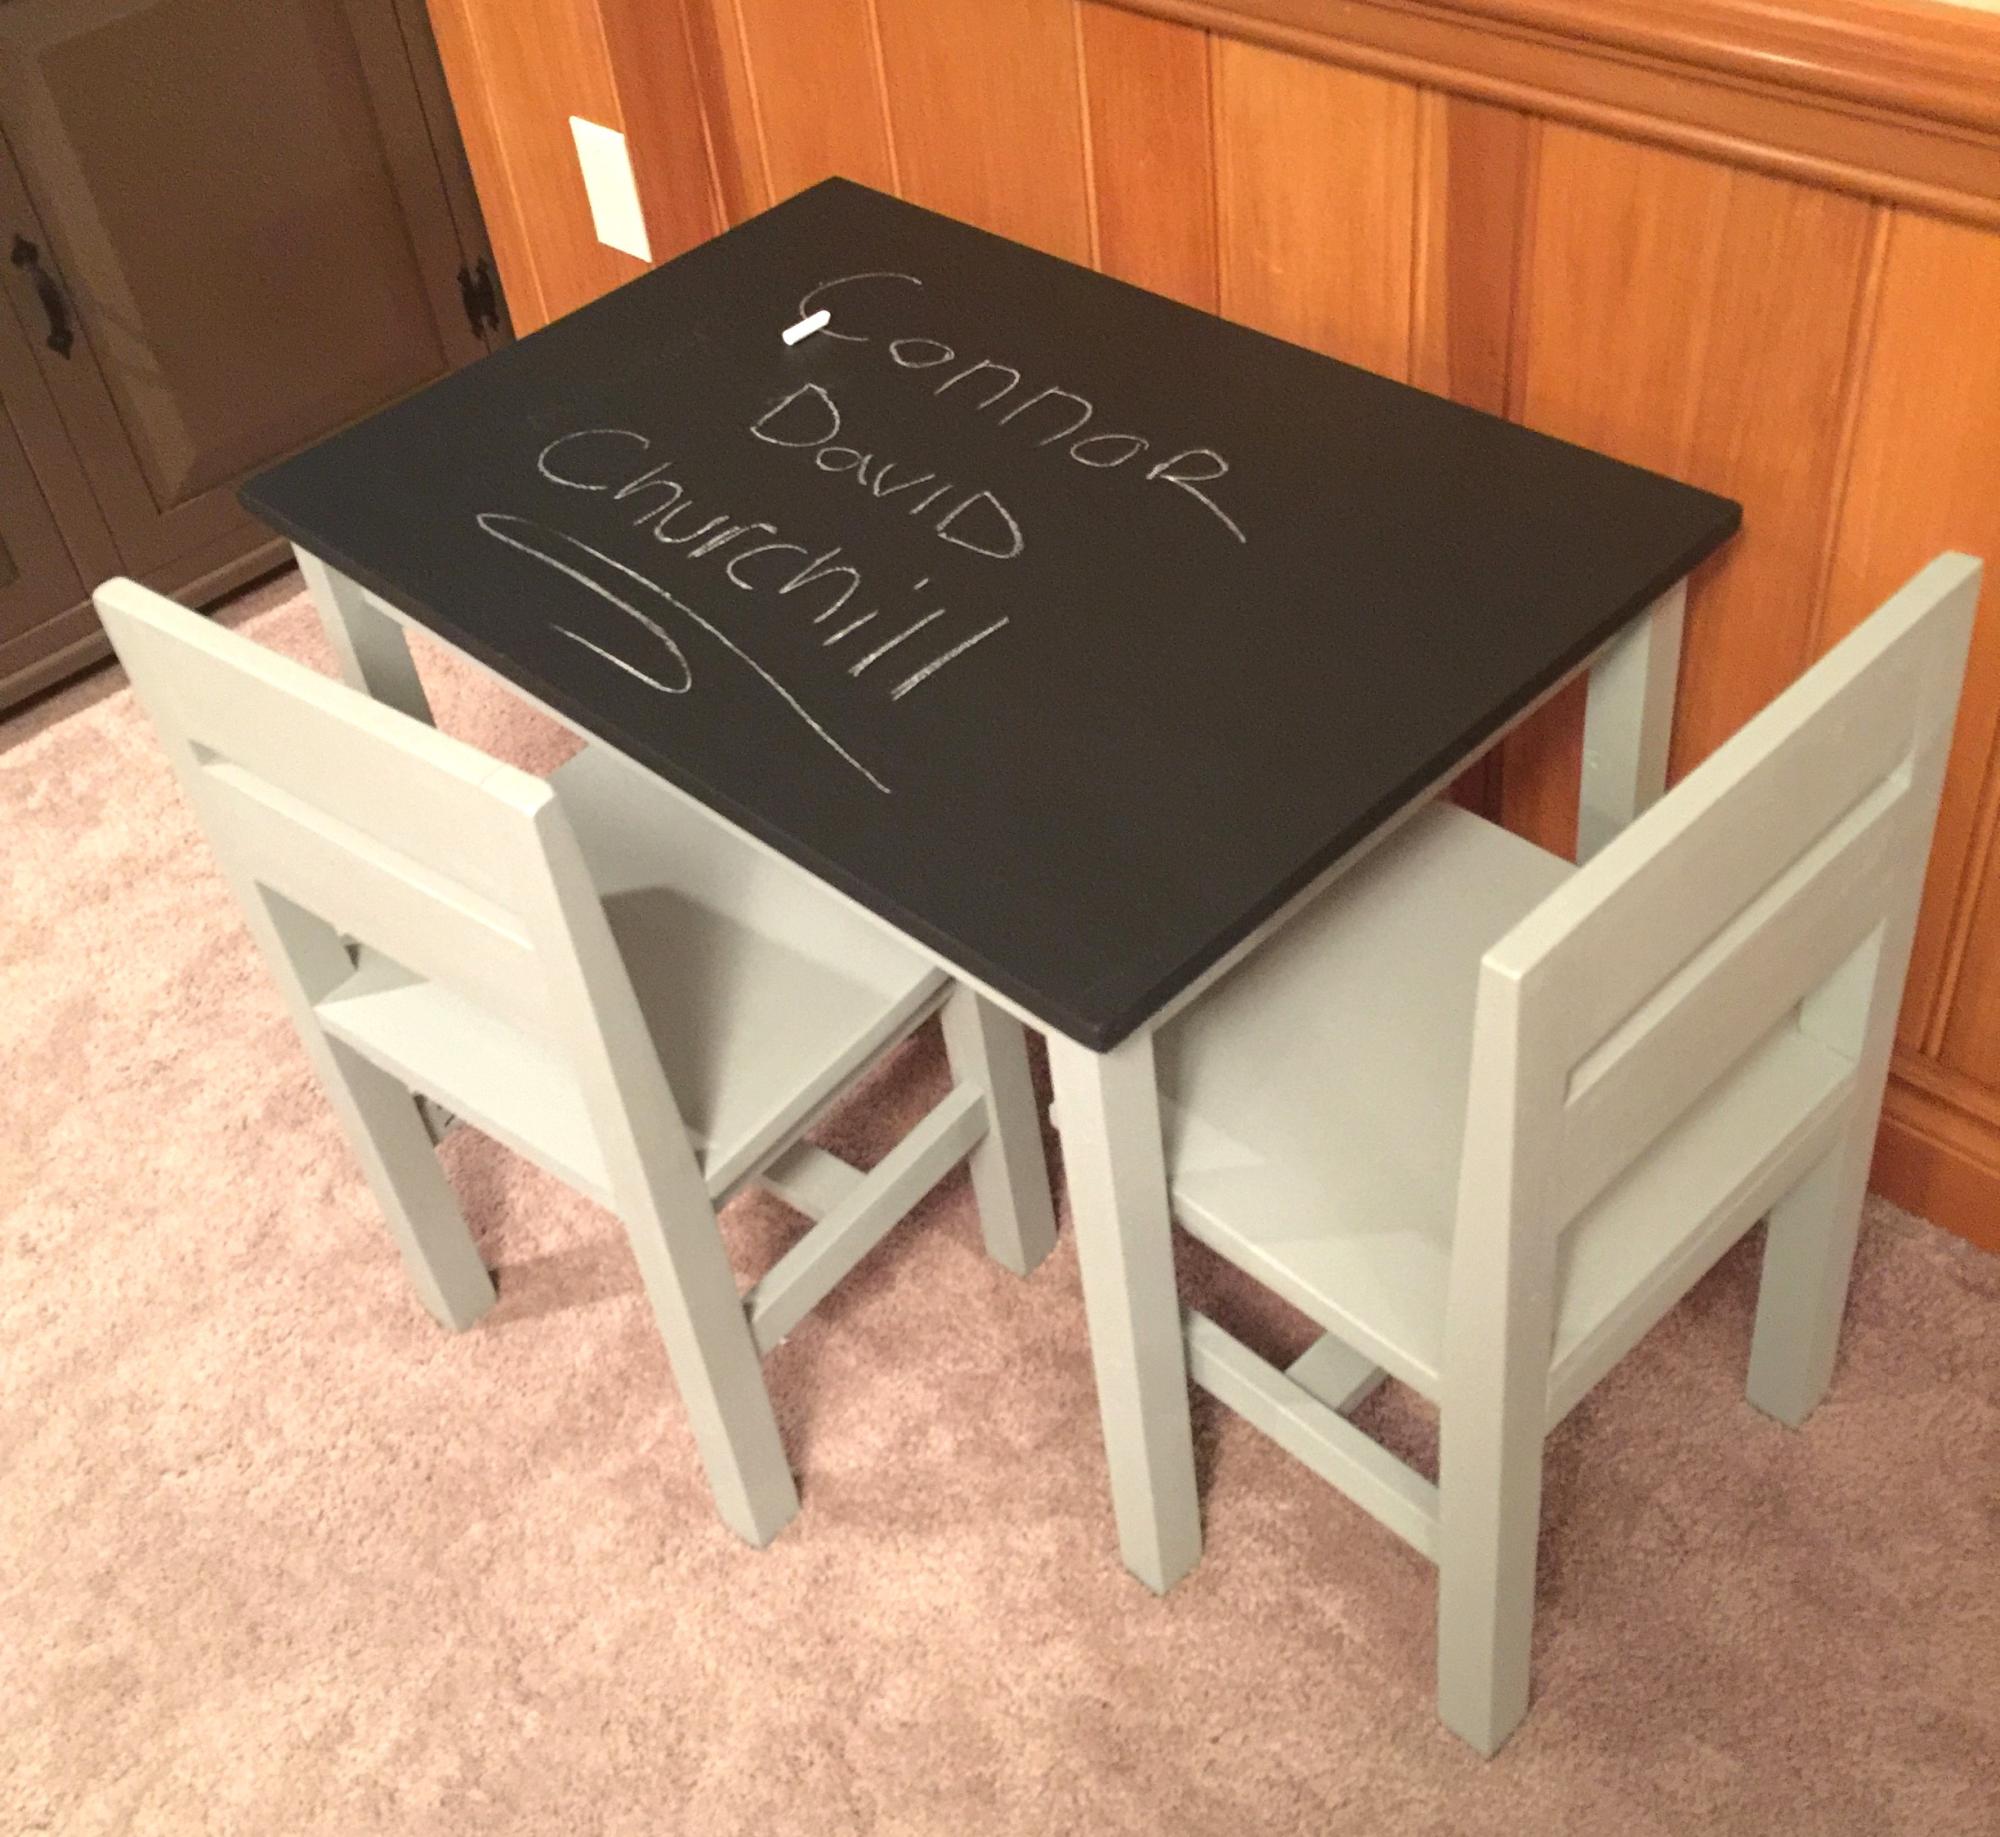
Clara table with chalkboard top.


This was an easy fun project for me! Alot of first finish wise, really like how it turned out, and so does the Mrs.

This table started out with several pieces of rough pecan slabs. I planed the lumber and created the table. It is finished with teak oil.
Mon, 01/30/2023 - 09:18
WOW, this is gorgeous, love the wood grains and finish! Thank you for sharing.
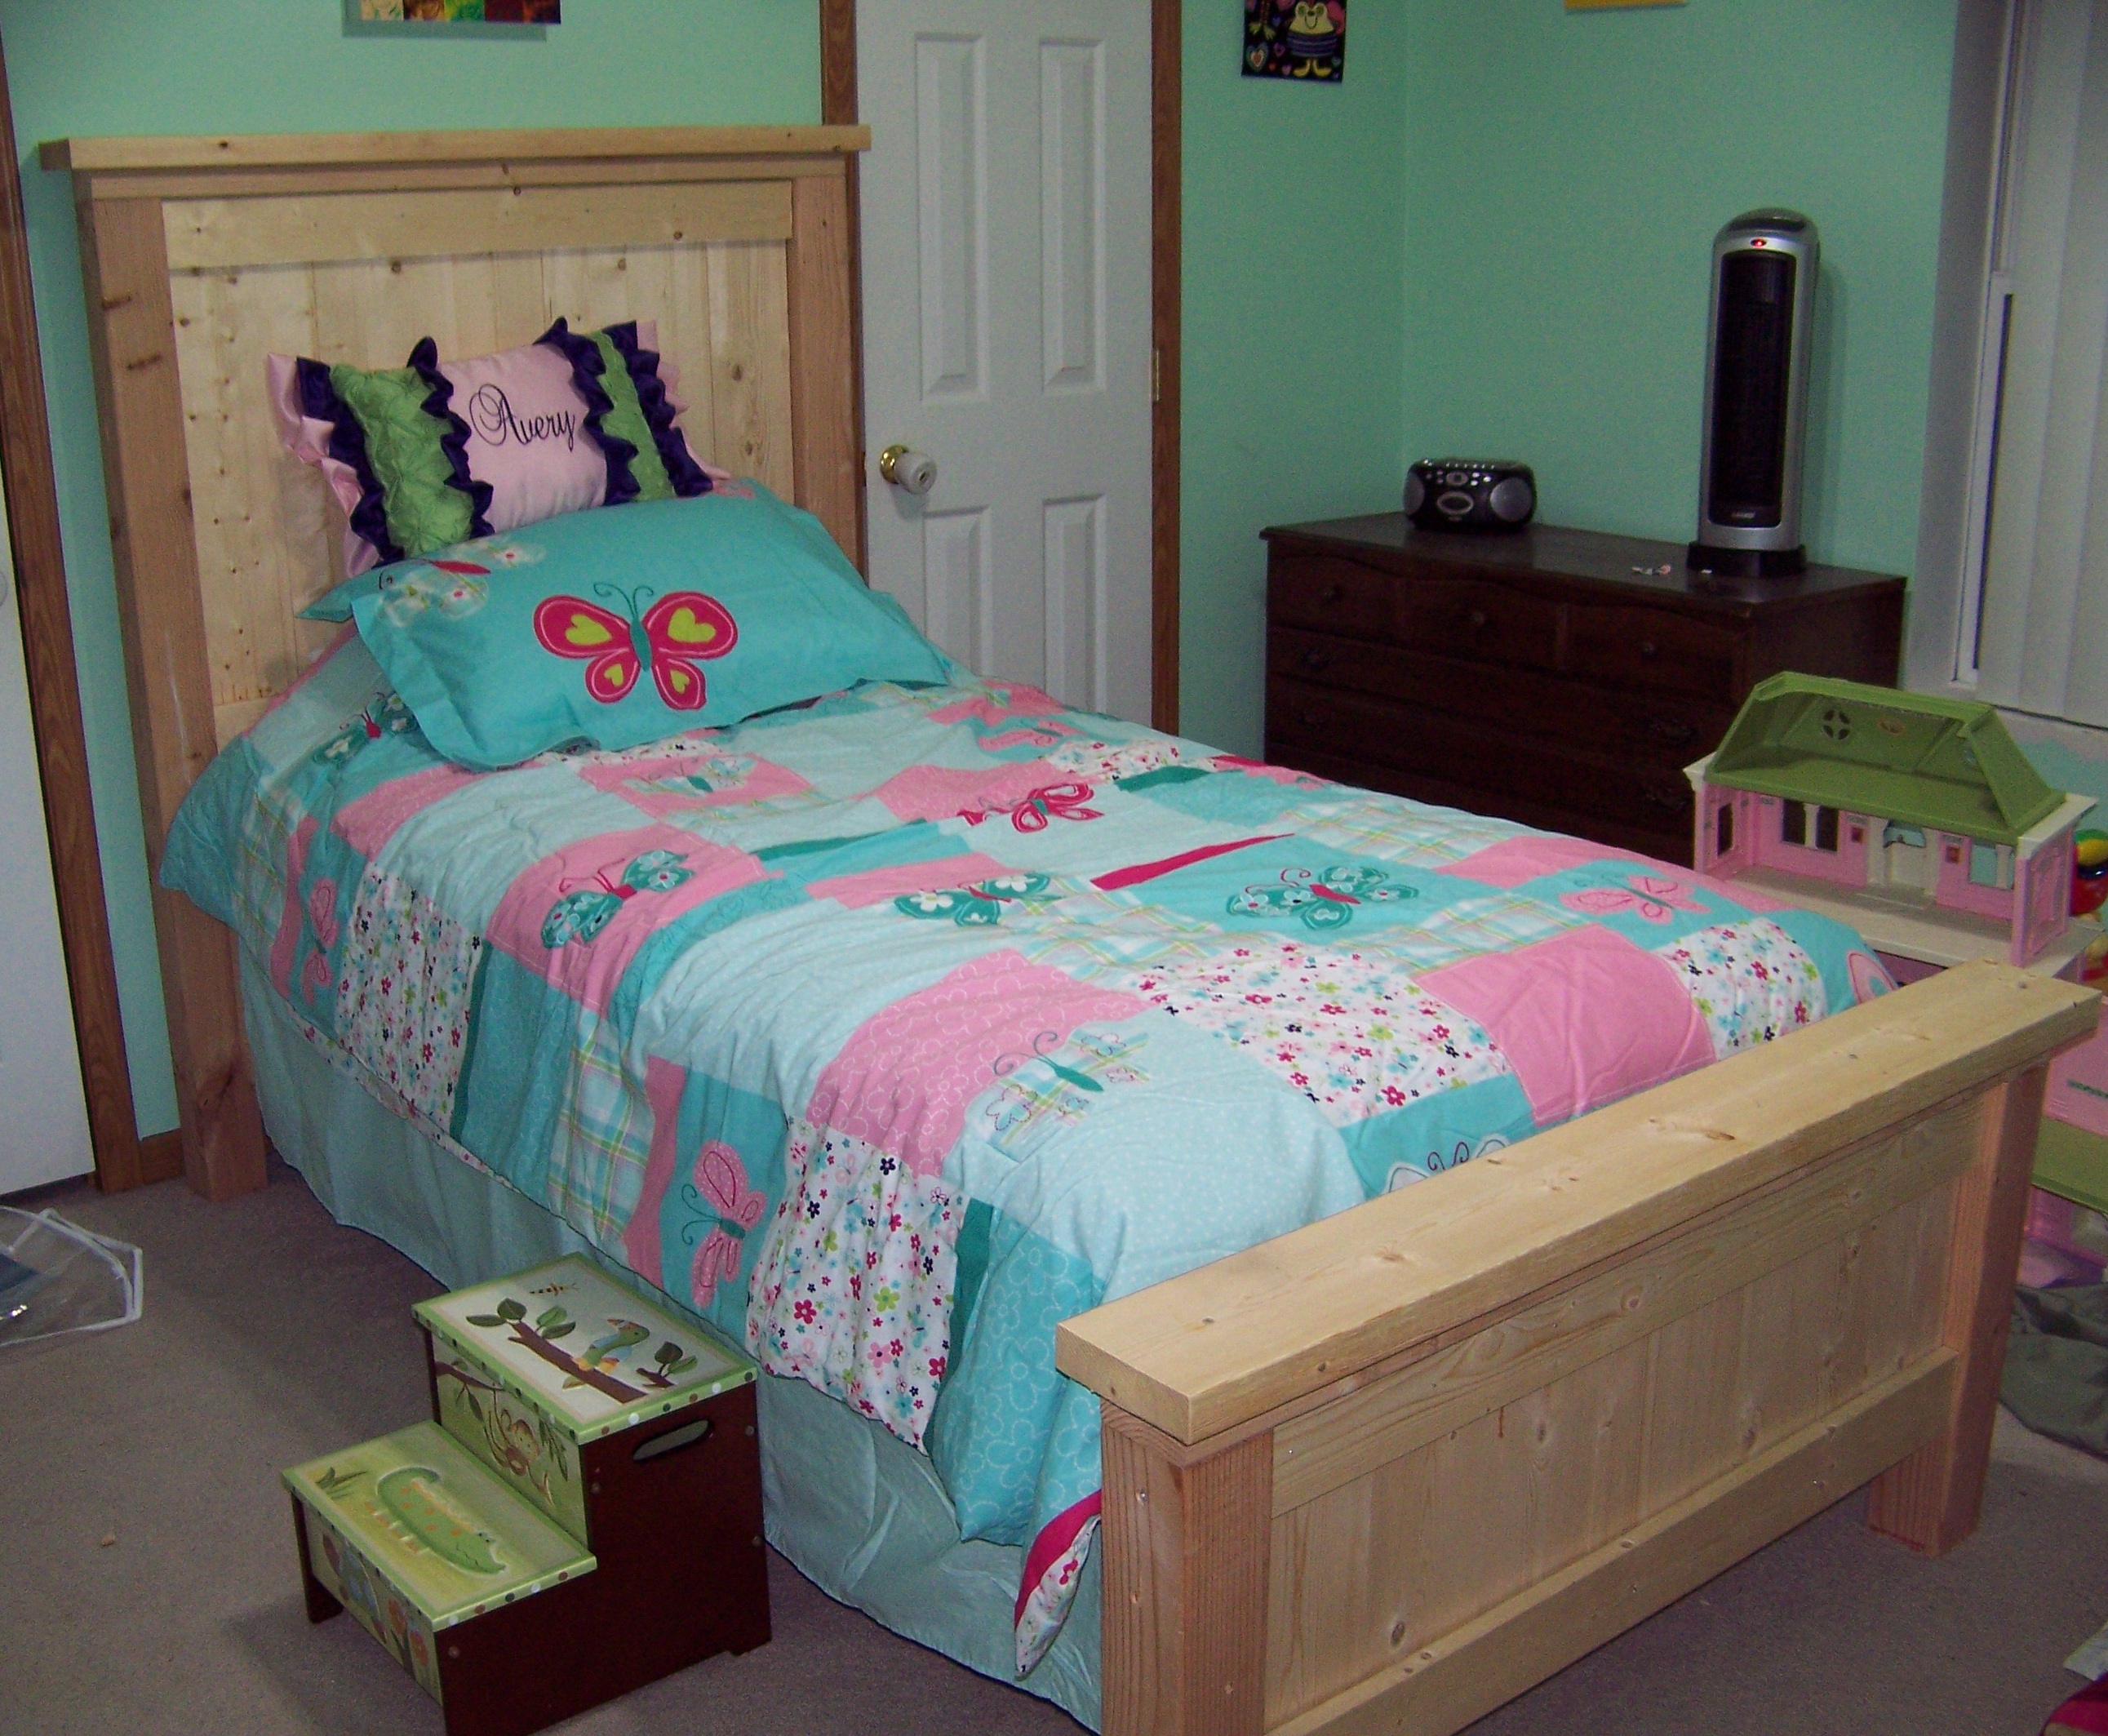
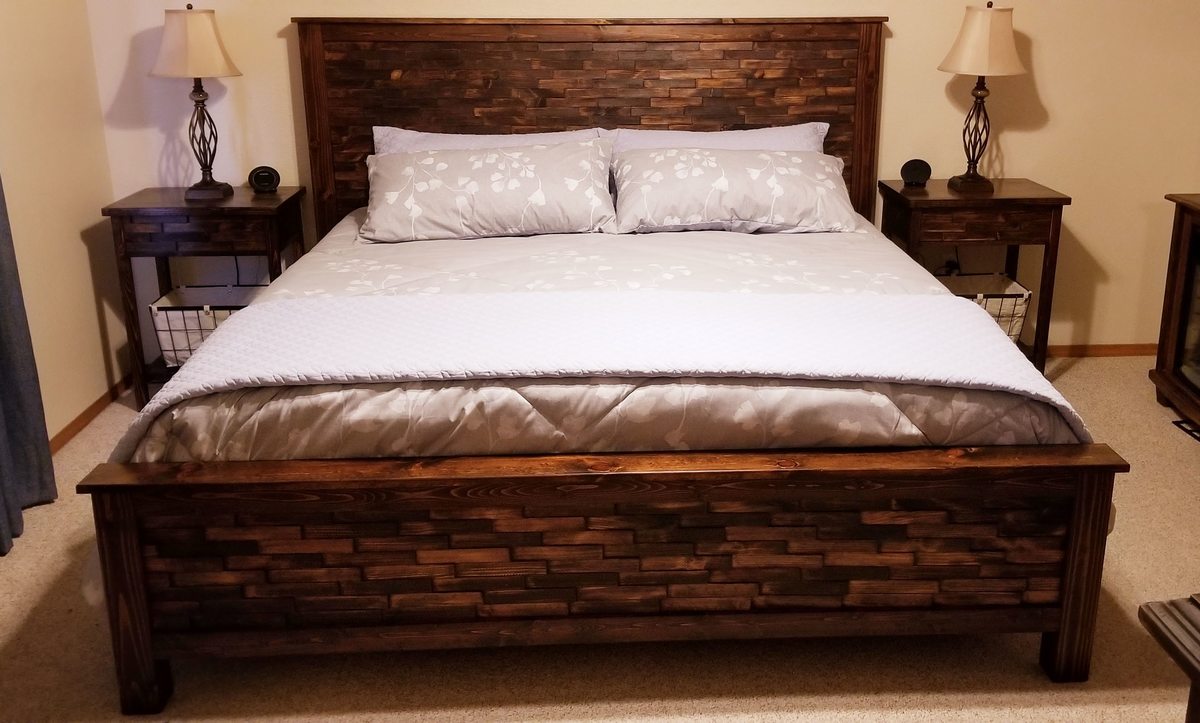
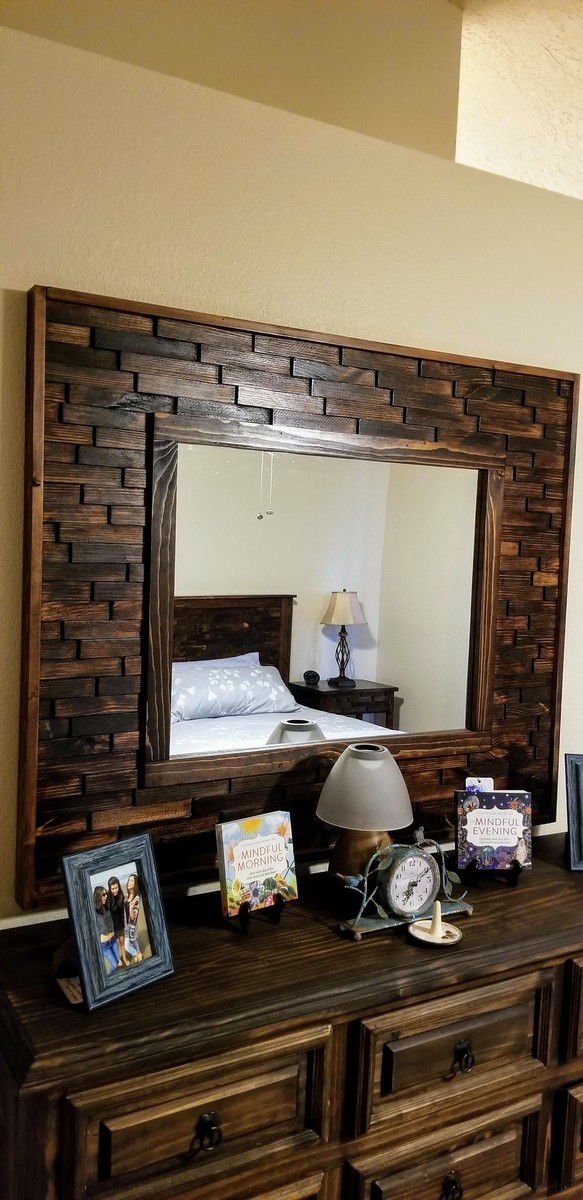
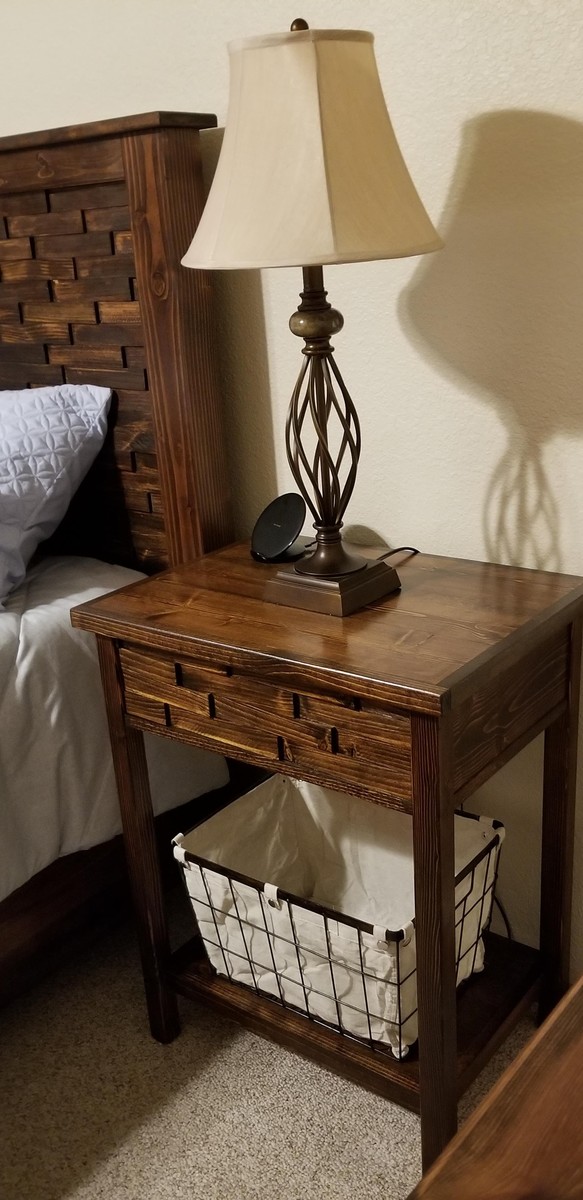
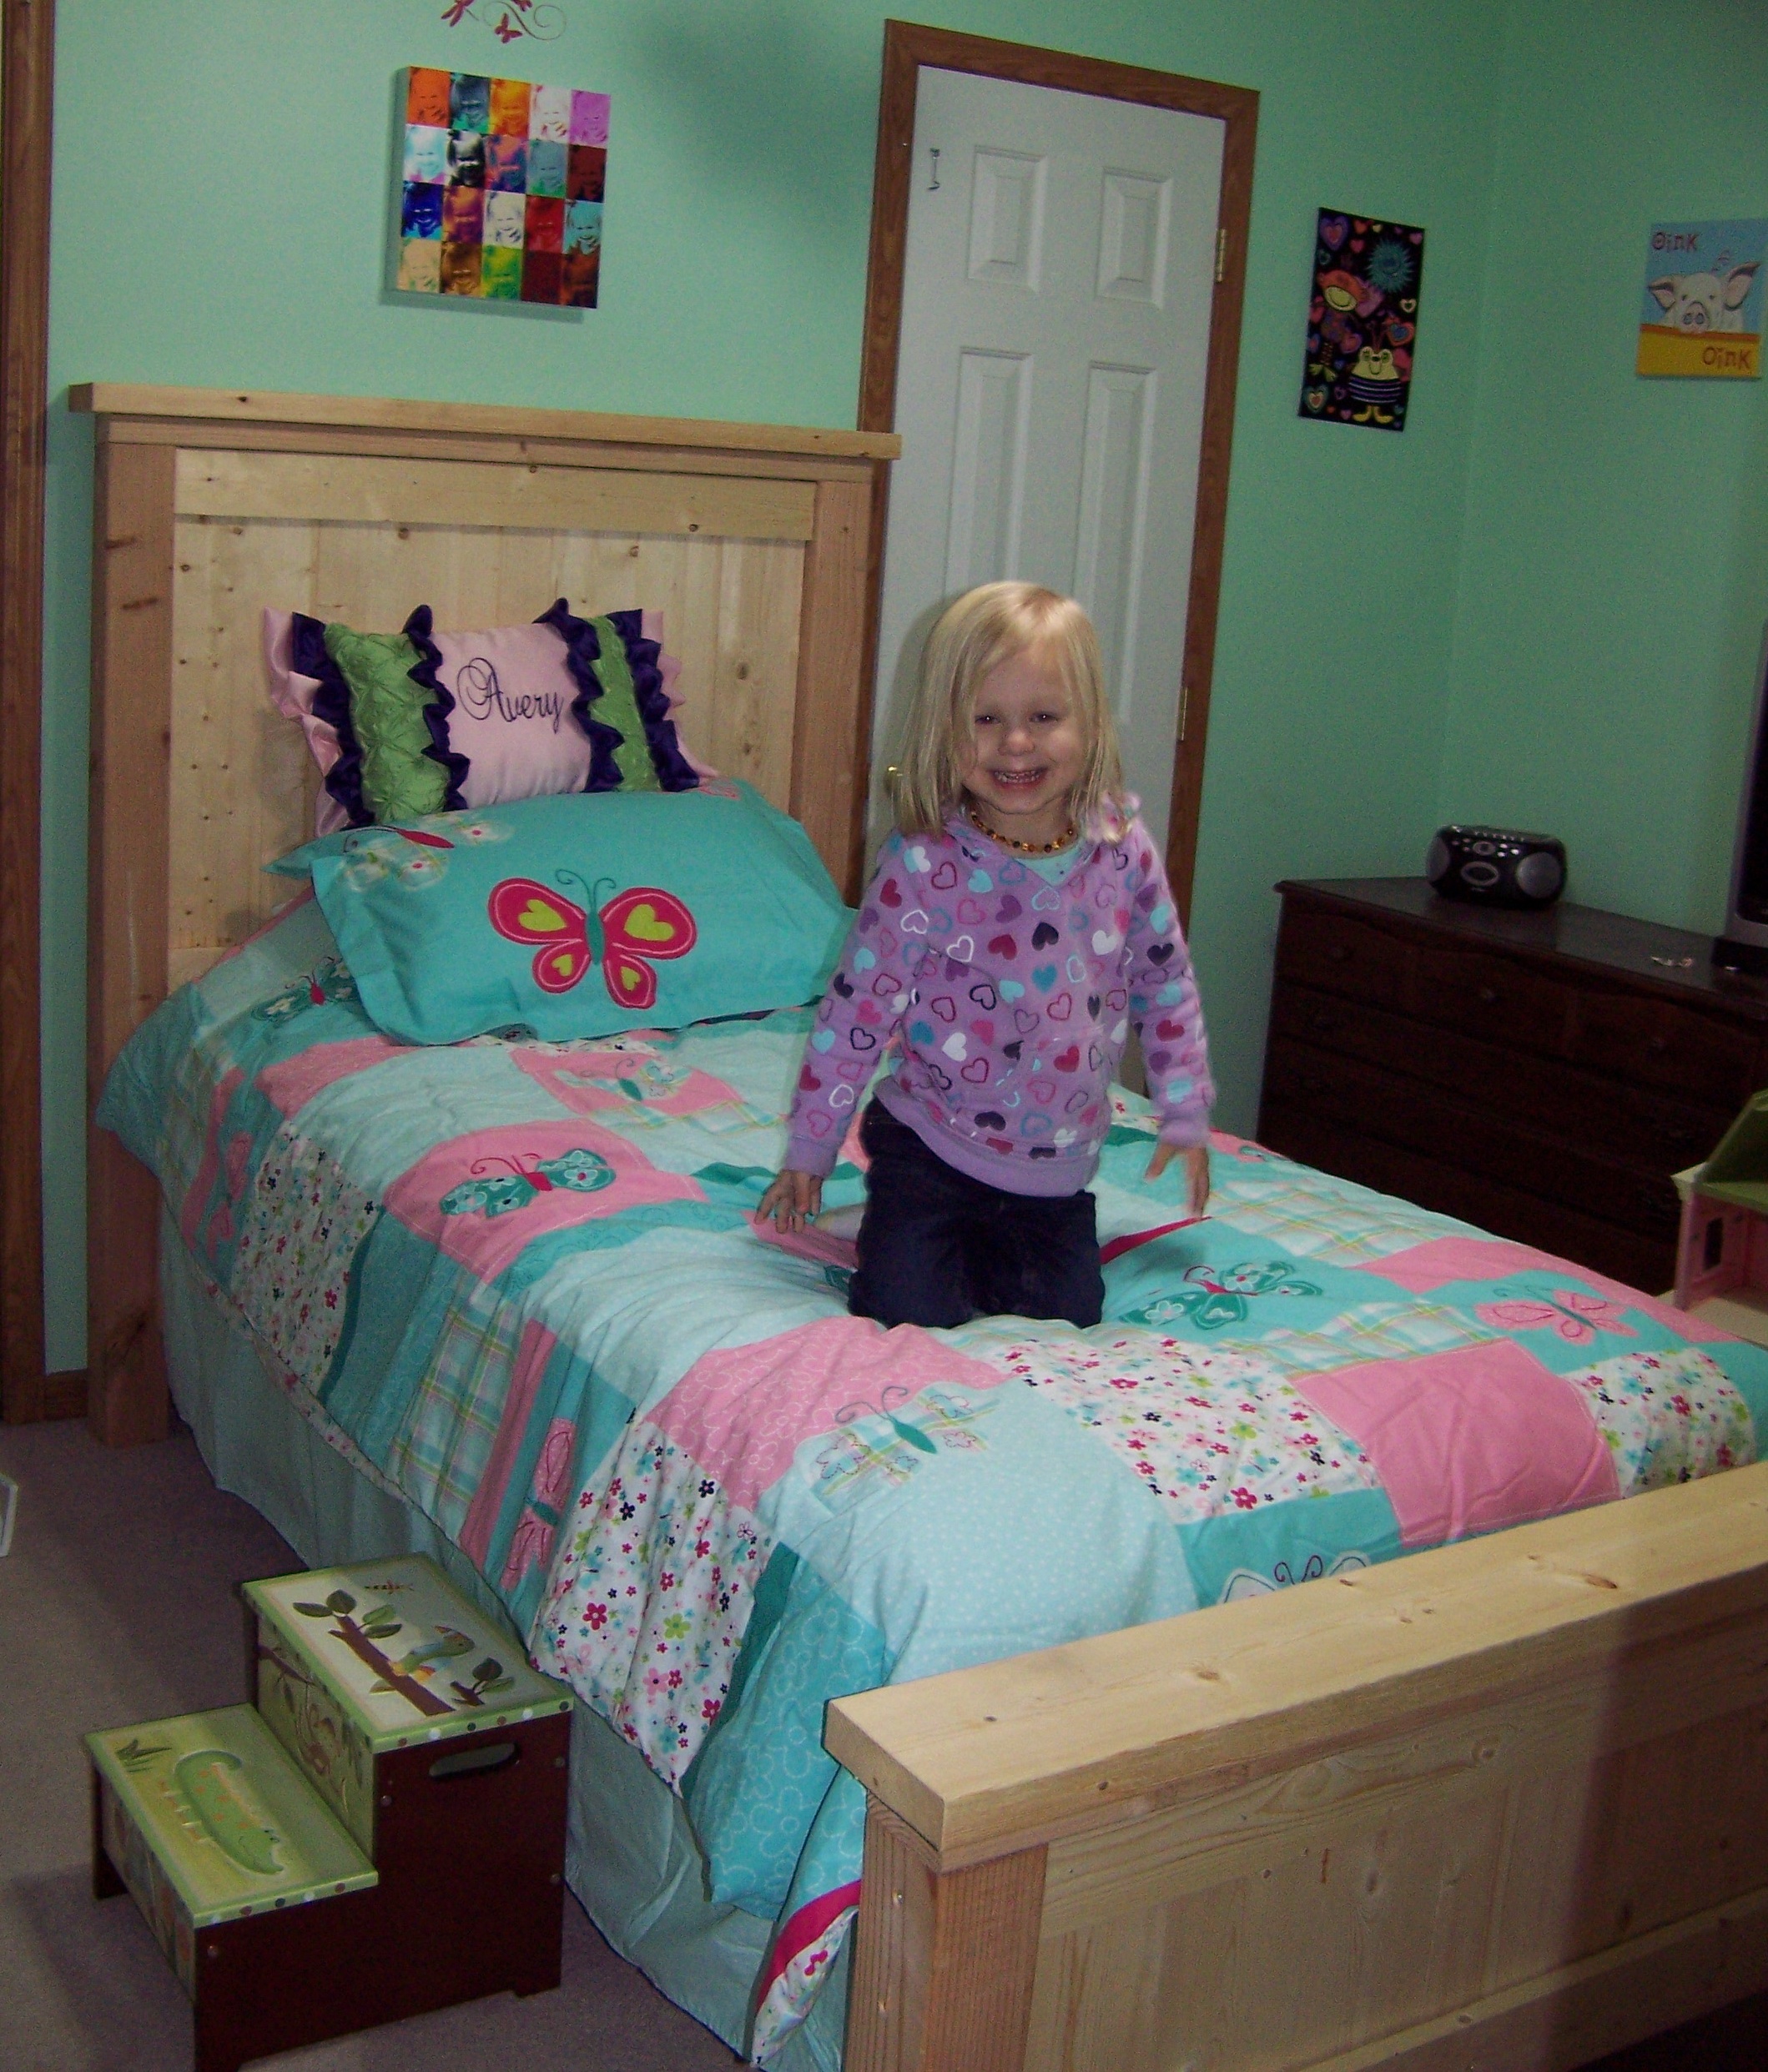
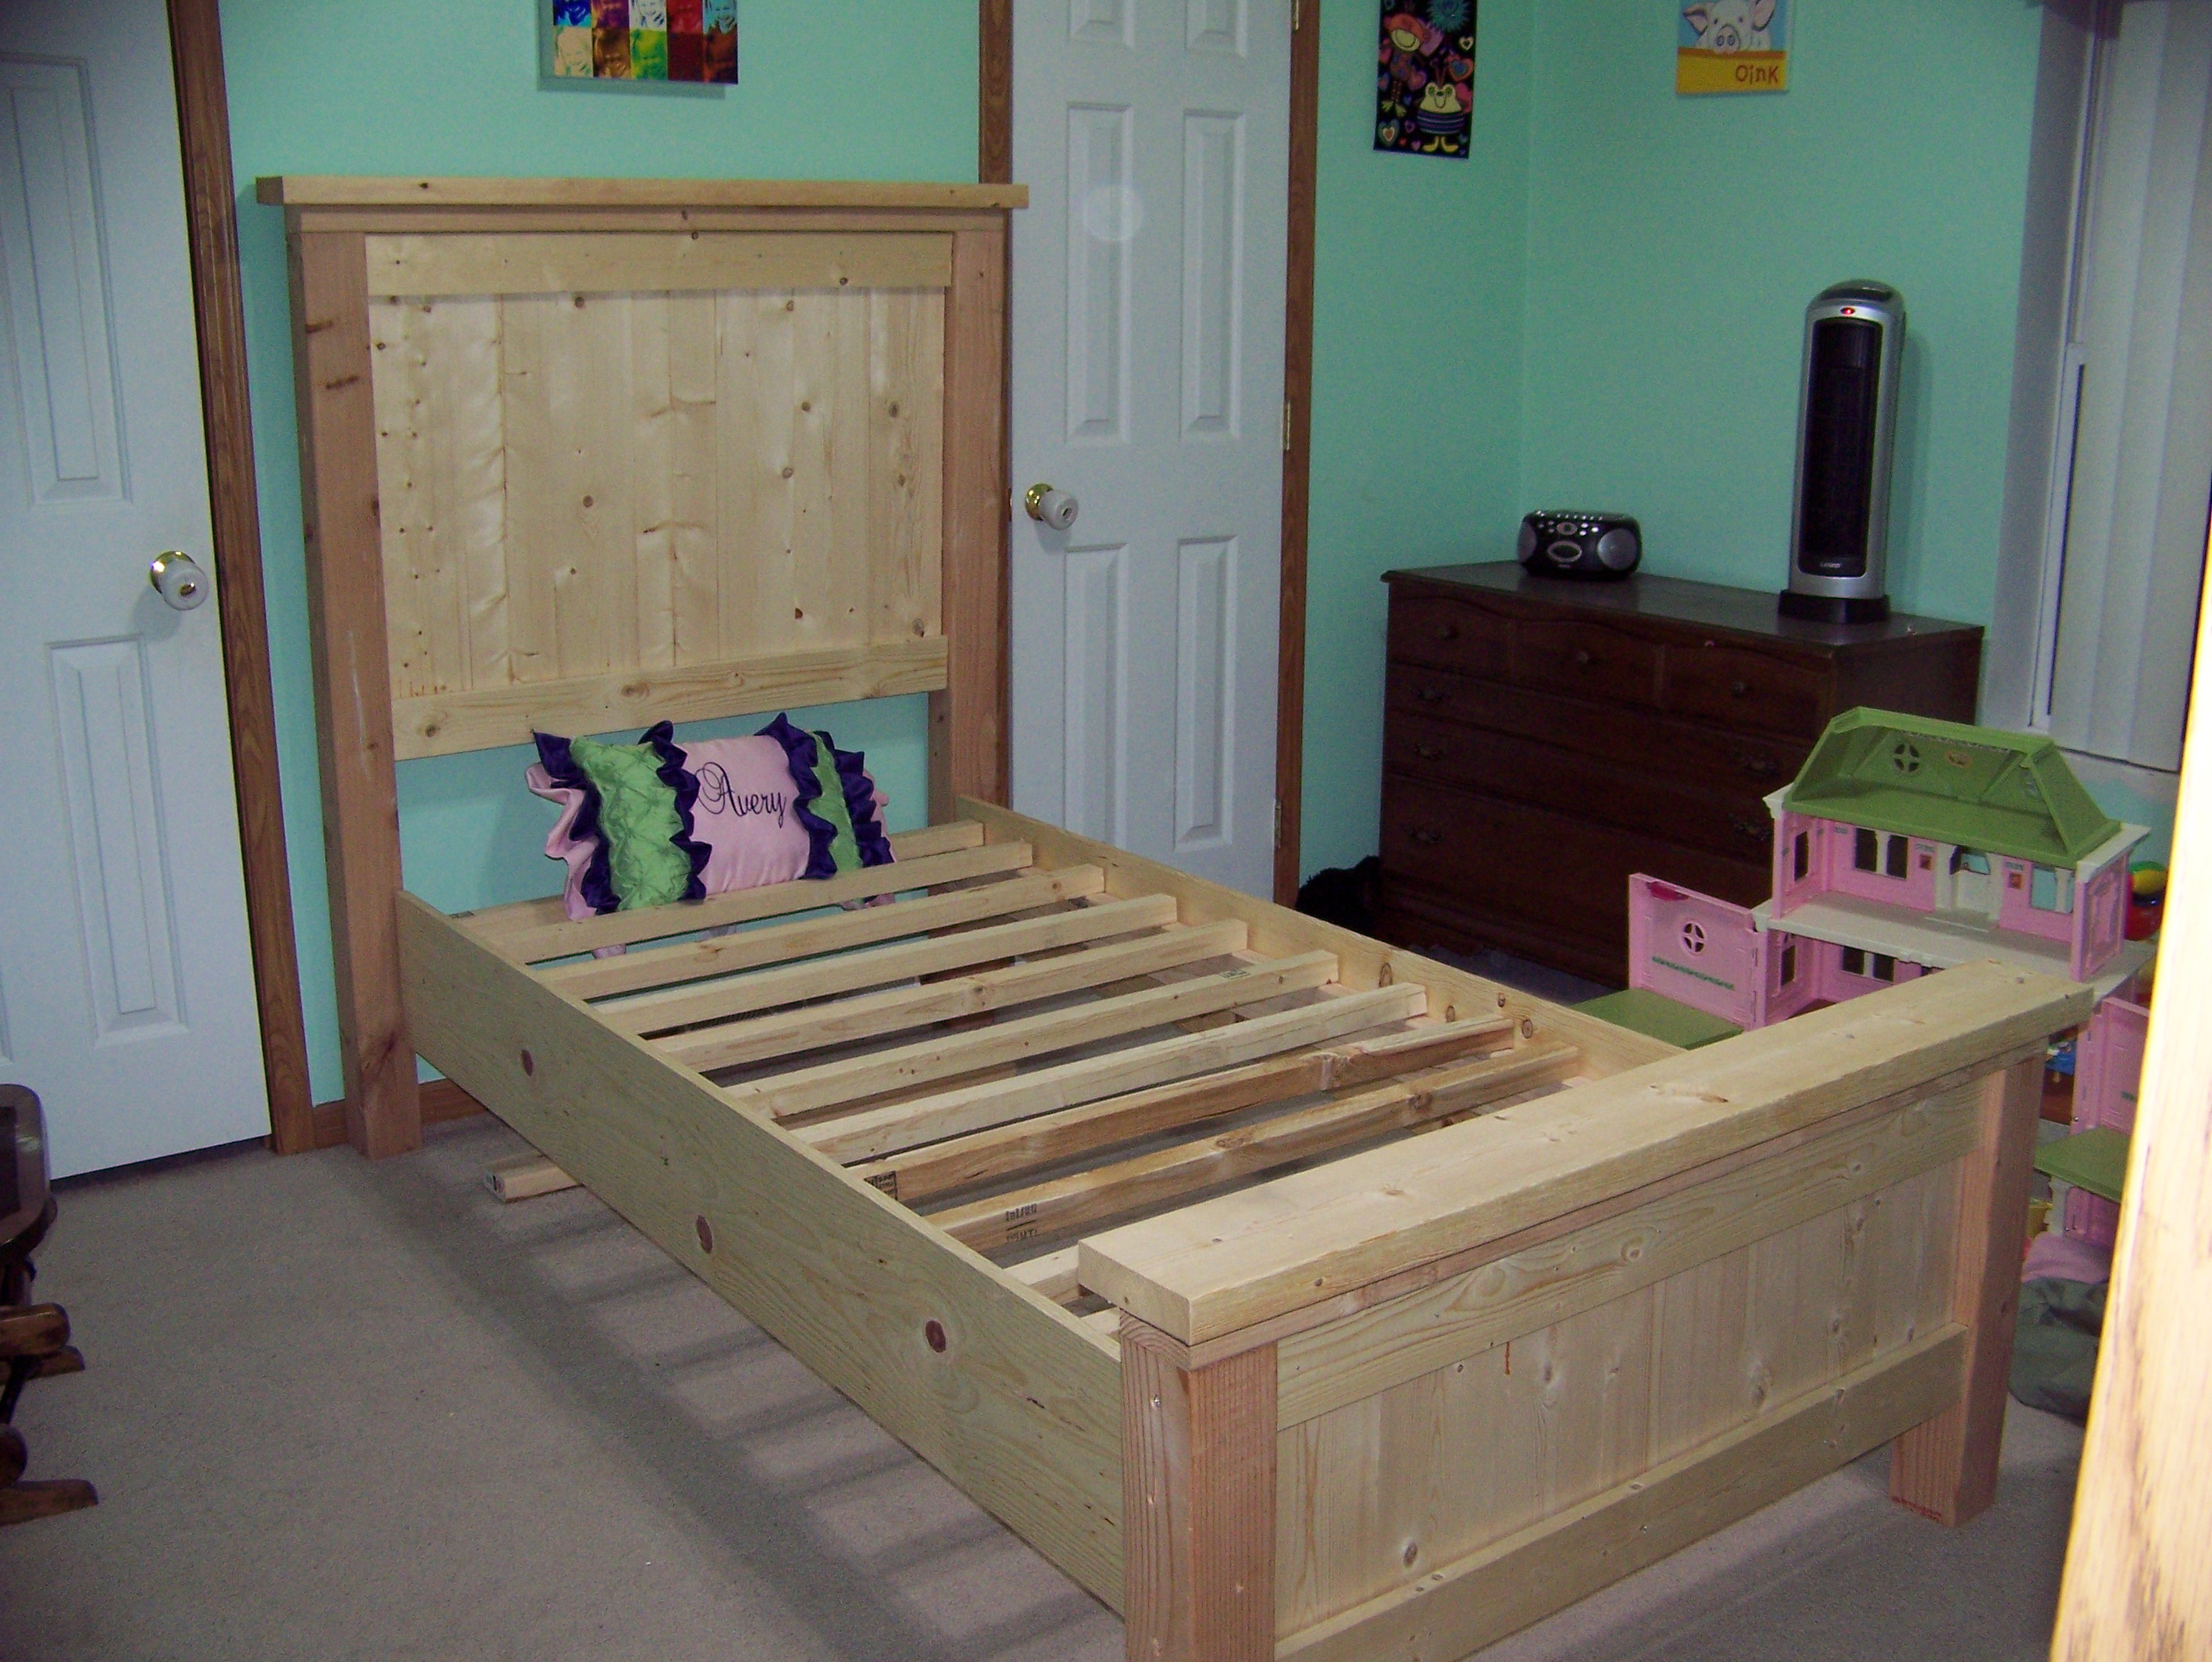
This was made with the Farmhouse Bed Plan.
Woodworking runs in my family, but this is my first item built from scratch.
We decided to leave it bare for a while. It looks beautiful as is.

Mon, 01/07/2013 - 07:24
I will be building this with modifications to the headboard. I'm going to put baseball bats in-between the 4x4's as the header.