Community Brag Posts

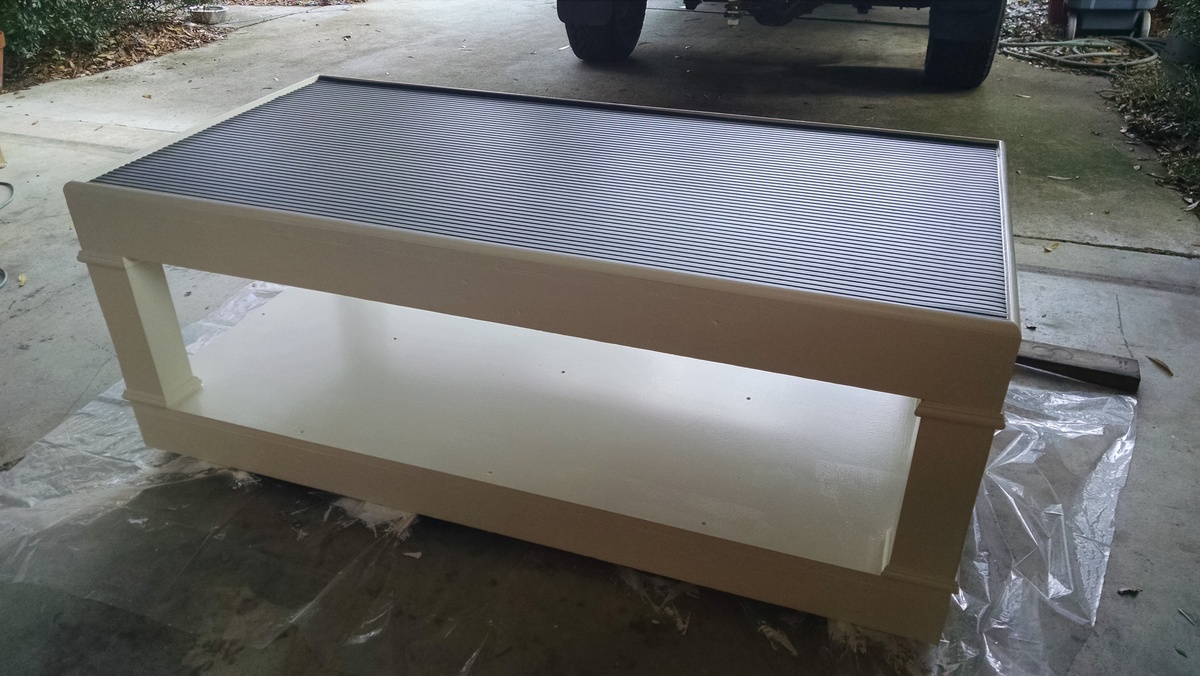
Chris's Modified Washer/Dryer Pedestals
Submitted by MxChris on Sun, 02/08/2015 - 18:30

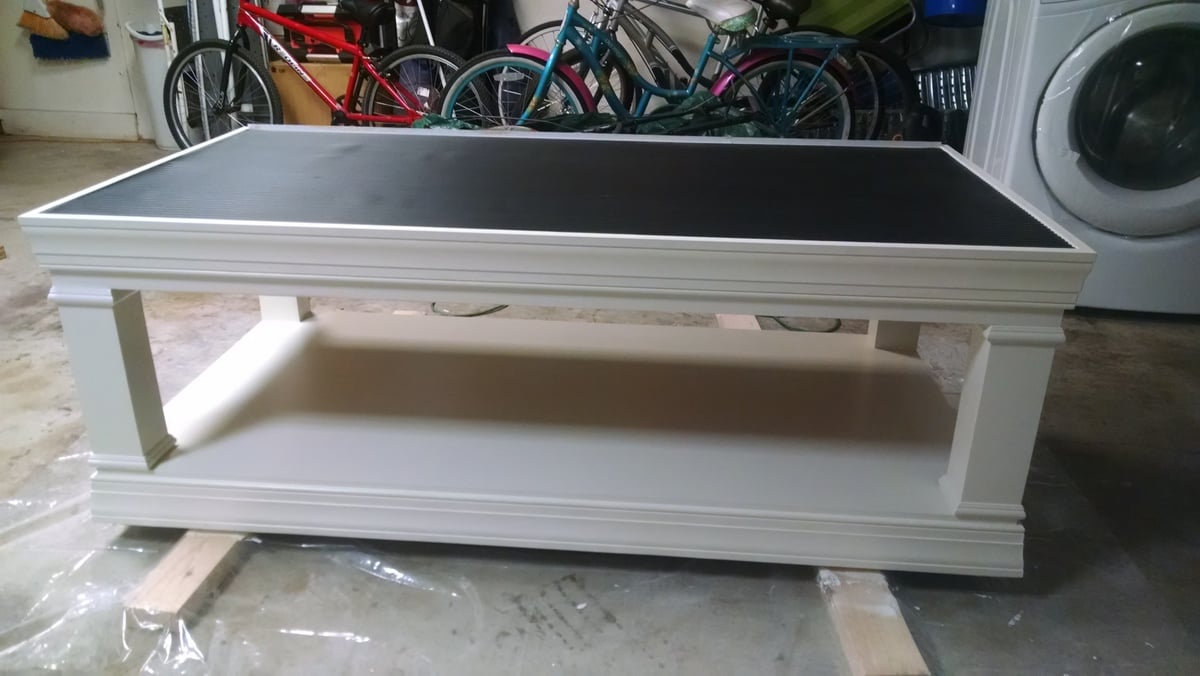
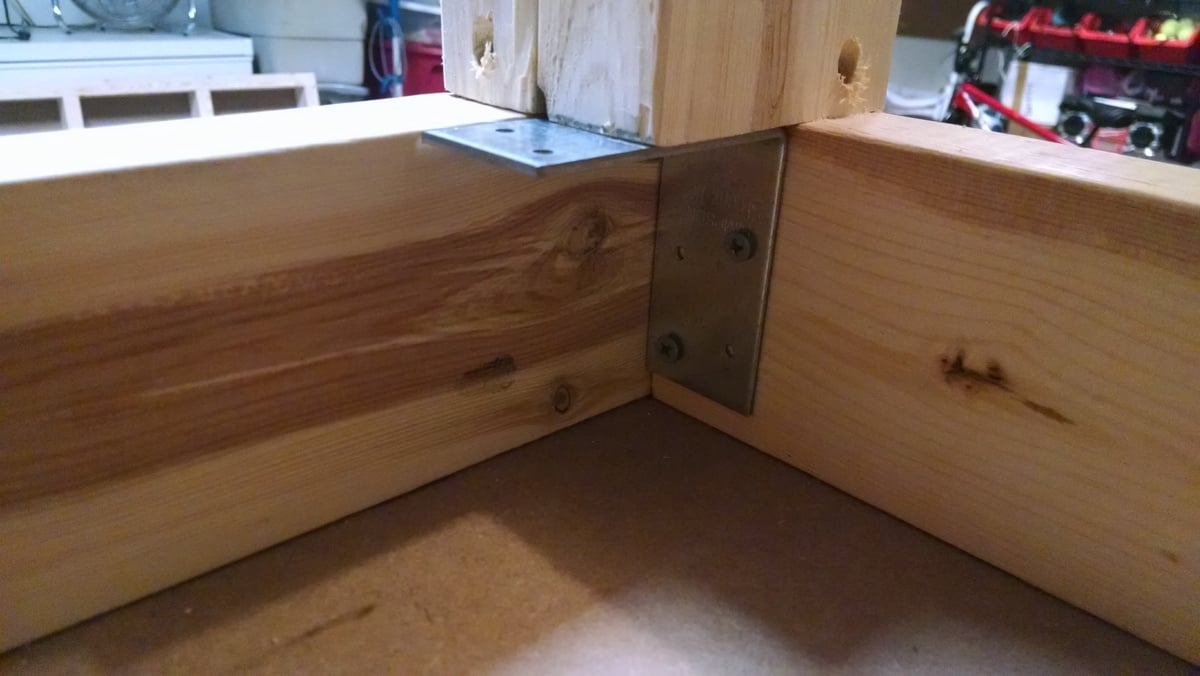
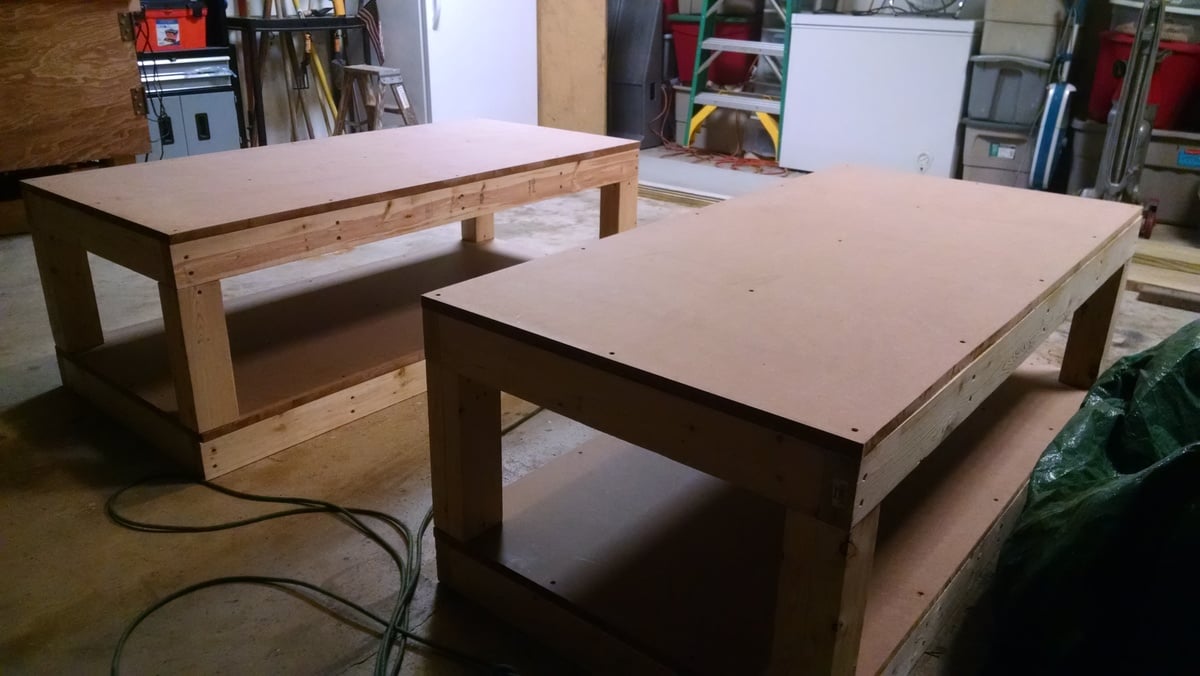
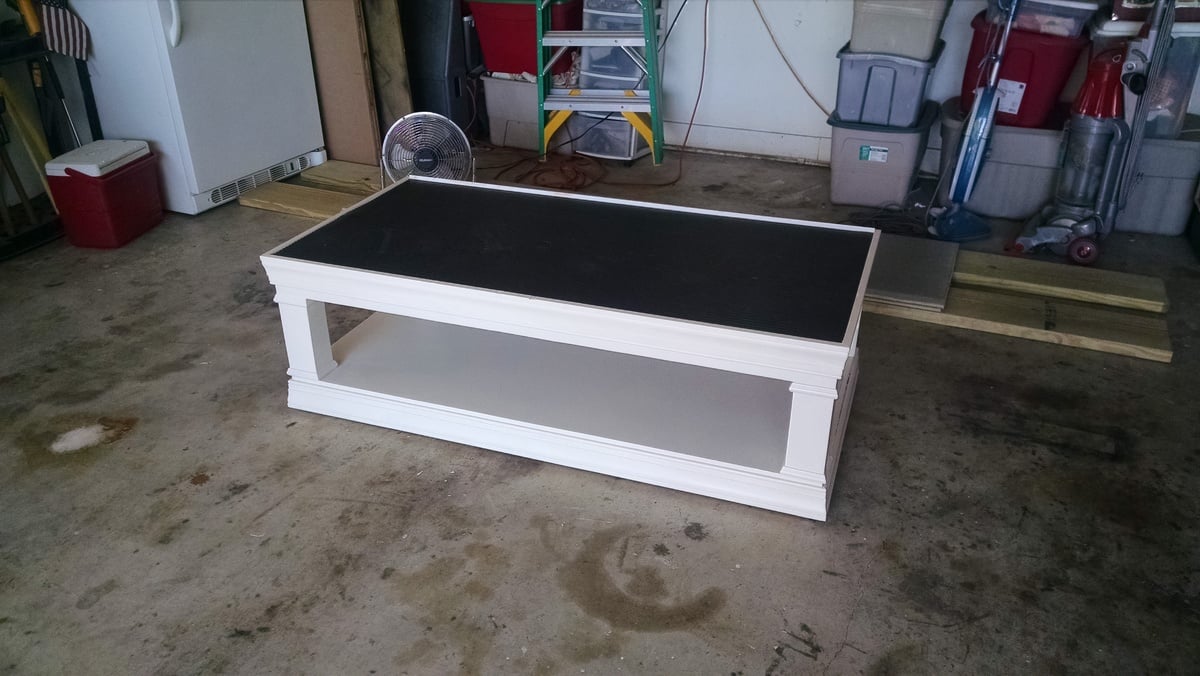
I ended up making three sets of these pedestals this month!

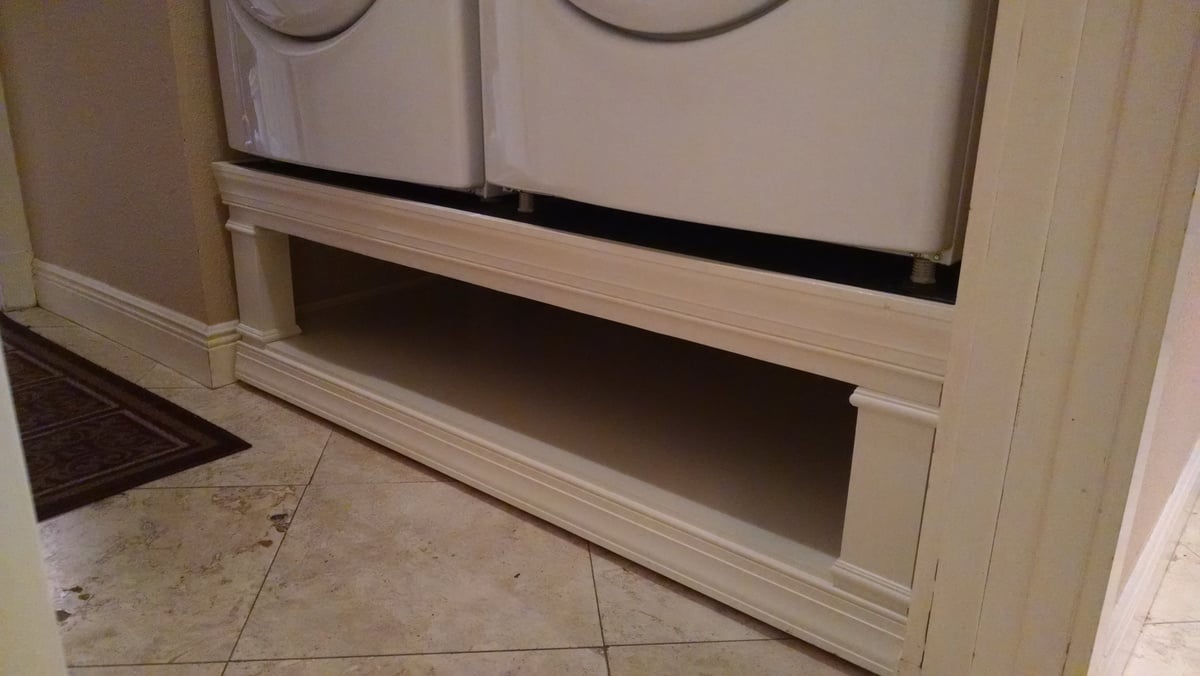
One set was for my In-laws, one for a friend and finally one for us. The two sets I gave away have a 12.5" opening underneath to accomodate two laundry baskets stacked inside each other for a total of six which is pretty good for most households. Our pedestal could only have a 9" opening due to the overhead cabinets in our laundry room so the shelf will not accomodate standard laundry baskets which is kind of a bummer.

I kept one pedestal fairly minimalistic because it's going into a laundry room off an outside patio, I added a bit of quarter round trim all the way around the top edge to act as a guard rail just in case the washer or dryer tries to travel off the platform.

The other two I trimmed out identically they just have different post heights to fit the space they are intended for. I used a little more trim than on the first pedestal, I believe it's window sash trim. Just as on the first pedstal I wanted a guard rail of sorts so I left the window sash trim with about a 1/4" reveal on the three visible sides and used quartter round on the back.

I used a very heavy black rubber runner I found at Home Depot which is sold by the foot on top of each pedestal as an additional water barrier and vibration dampner. I think this finished it off and really works well, I'm very glad I decided to add that.

My version was inspired by Ryans modification of the original plan so thanks to Ryan and Ana for these awesome pedestals, my wife, In-laws and friend love them!
 

Estimated Time Investment
Week Long Project (20 Hours or More)
Finish Used
Two coats of Kilz primer and two coats of Behr Premium Latex paint + Primer (eggshell color)
Recommended Skill Level
Beginner

Comments

zoolander

Wed, 06/29/2016 - 14:17

Glad I could help.  Yours turned out great.  I should have thought of creating more than one while I was doing it.  Every time someone sees them, they ask me to make them one.  Ain't nobody got time for THAT!  :)

bclute

Sun, 01/29/2017 - 17:29

Thanks for sharing the detailed information of your builds.  It's been a while since you built, have you noticed any sagging?  They look solid!

Farmhouse Bench

Submitted by Anonymous (not verified) on Sun, 05/07/2017 - 22:39

Fancy X Farmhouse bench with pine base and poplar seat. Minwax Honey stain. 

Built from Plan(s)
Estimated Cost
$75
Estimated Time Investment
Afternoon Project (3-6 Hours)
Finish Used
Minwax Honey
Recommended Skill Level
Beginner

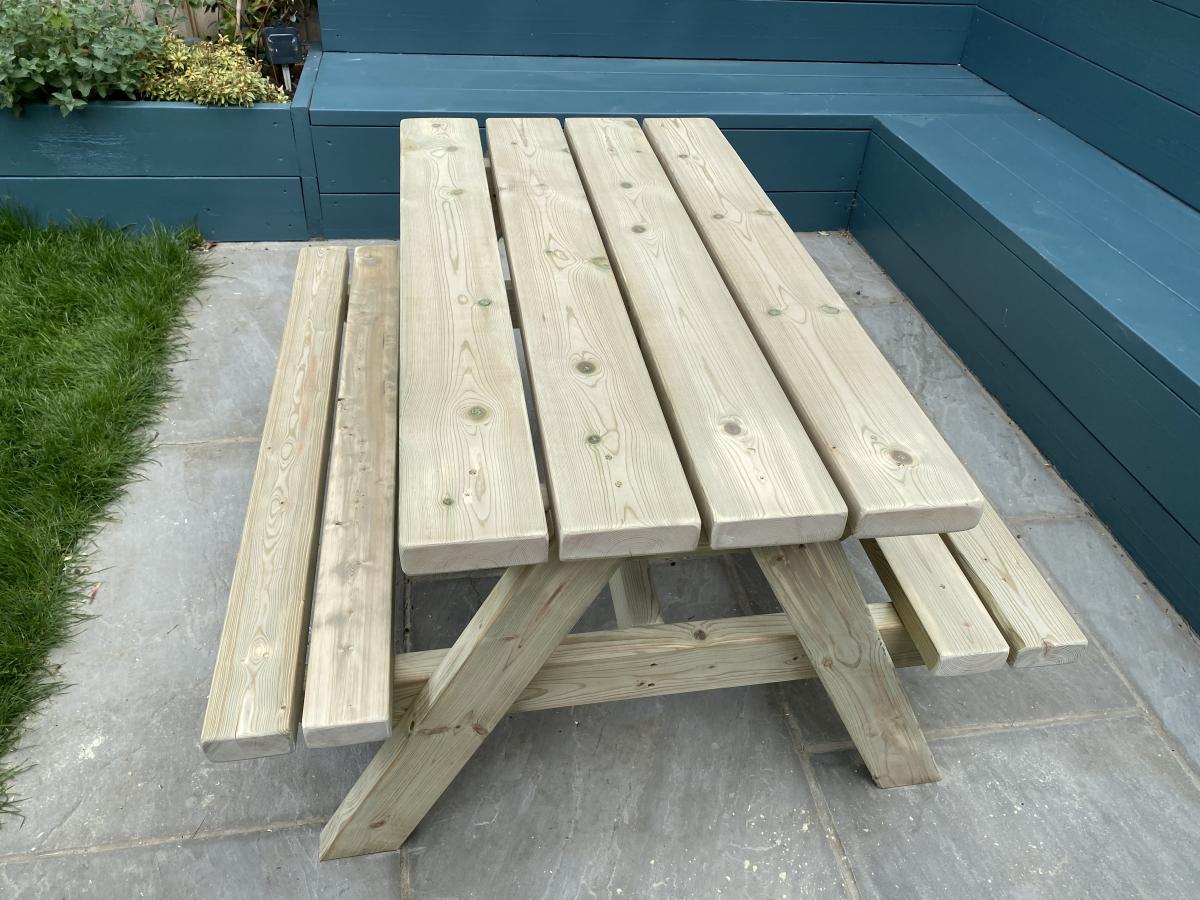
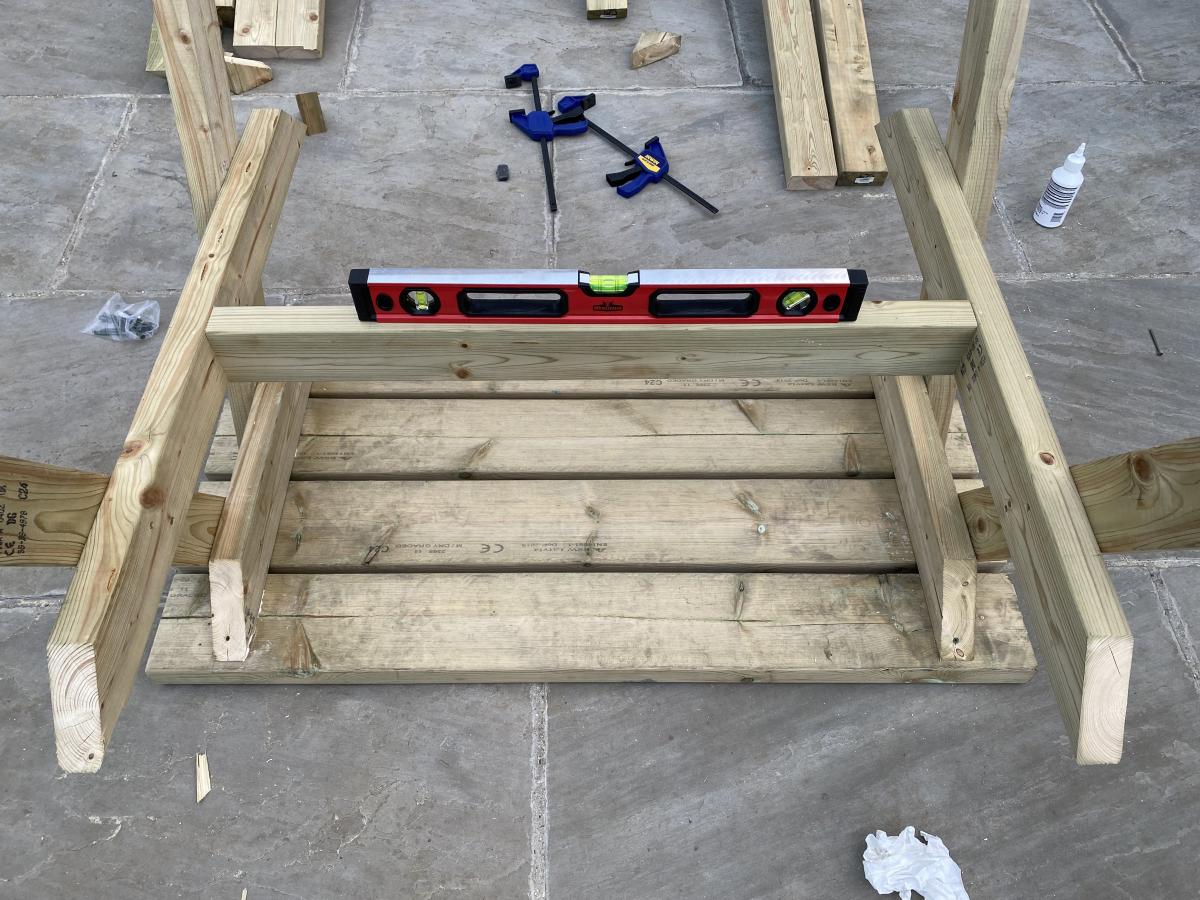
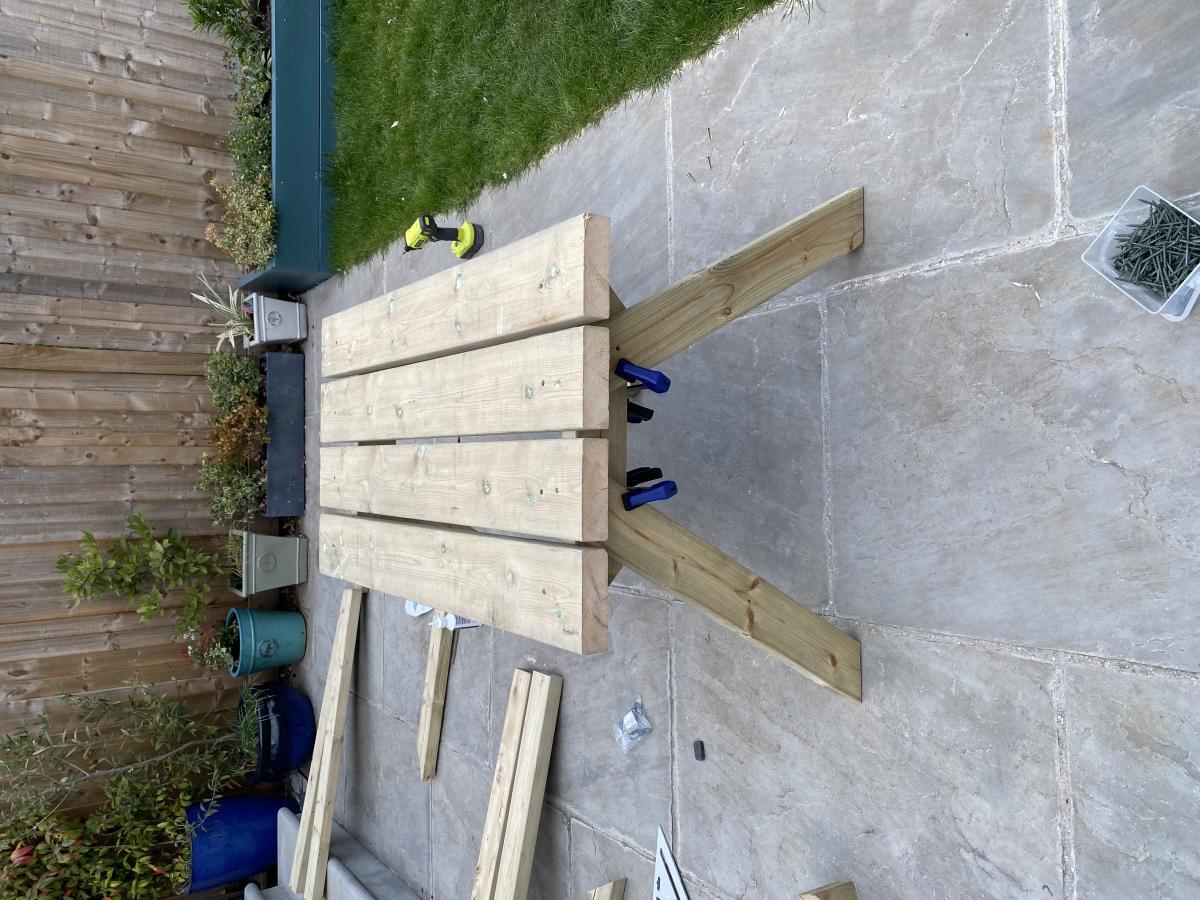
Big kids picnic table

Submitted by Anonymous (not verified) on Mon, 05/03/2021 - 08:14

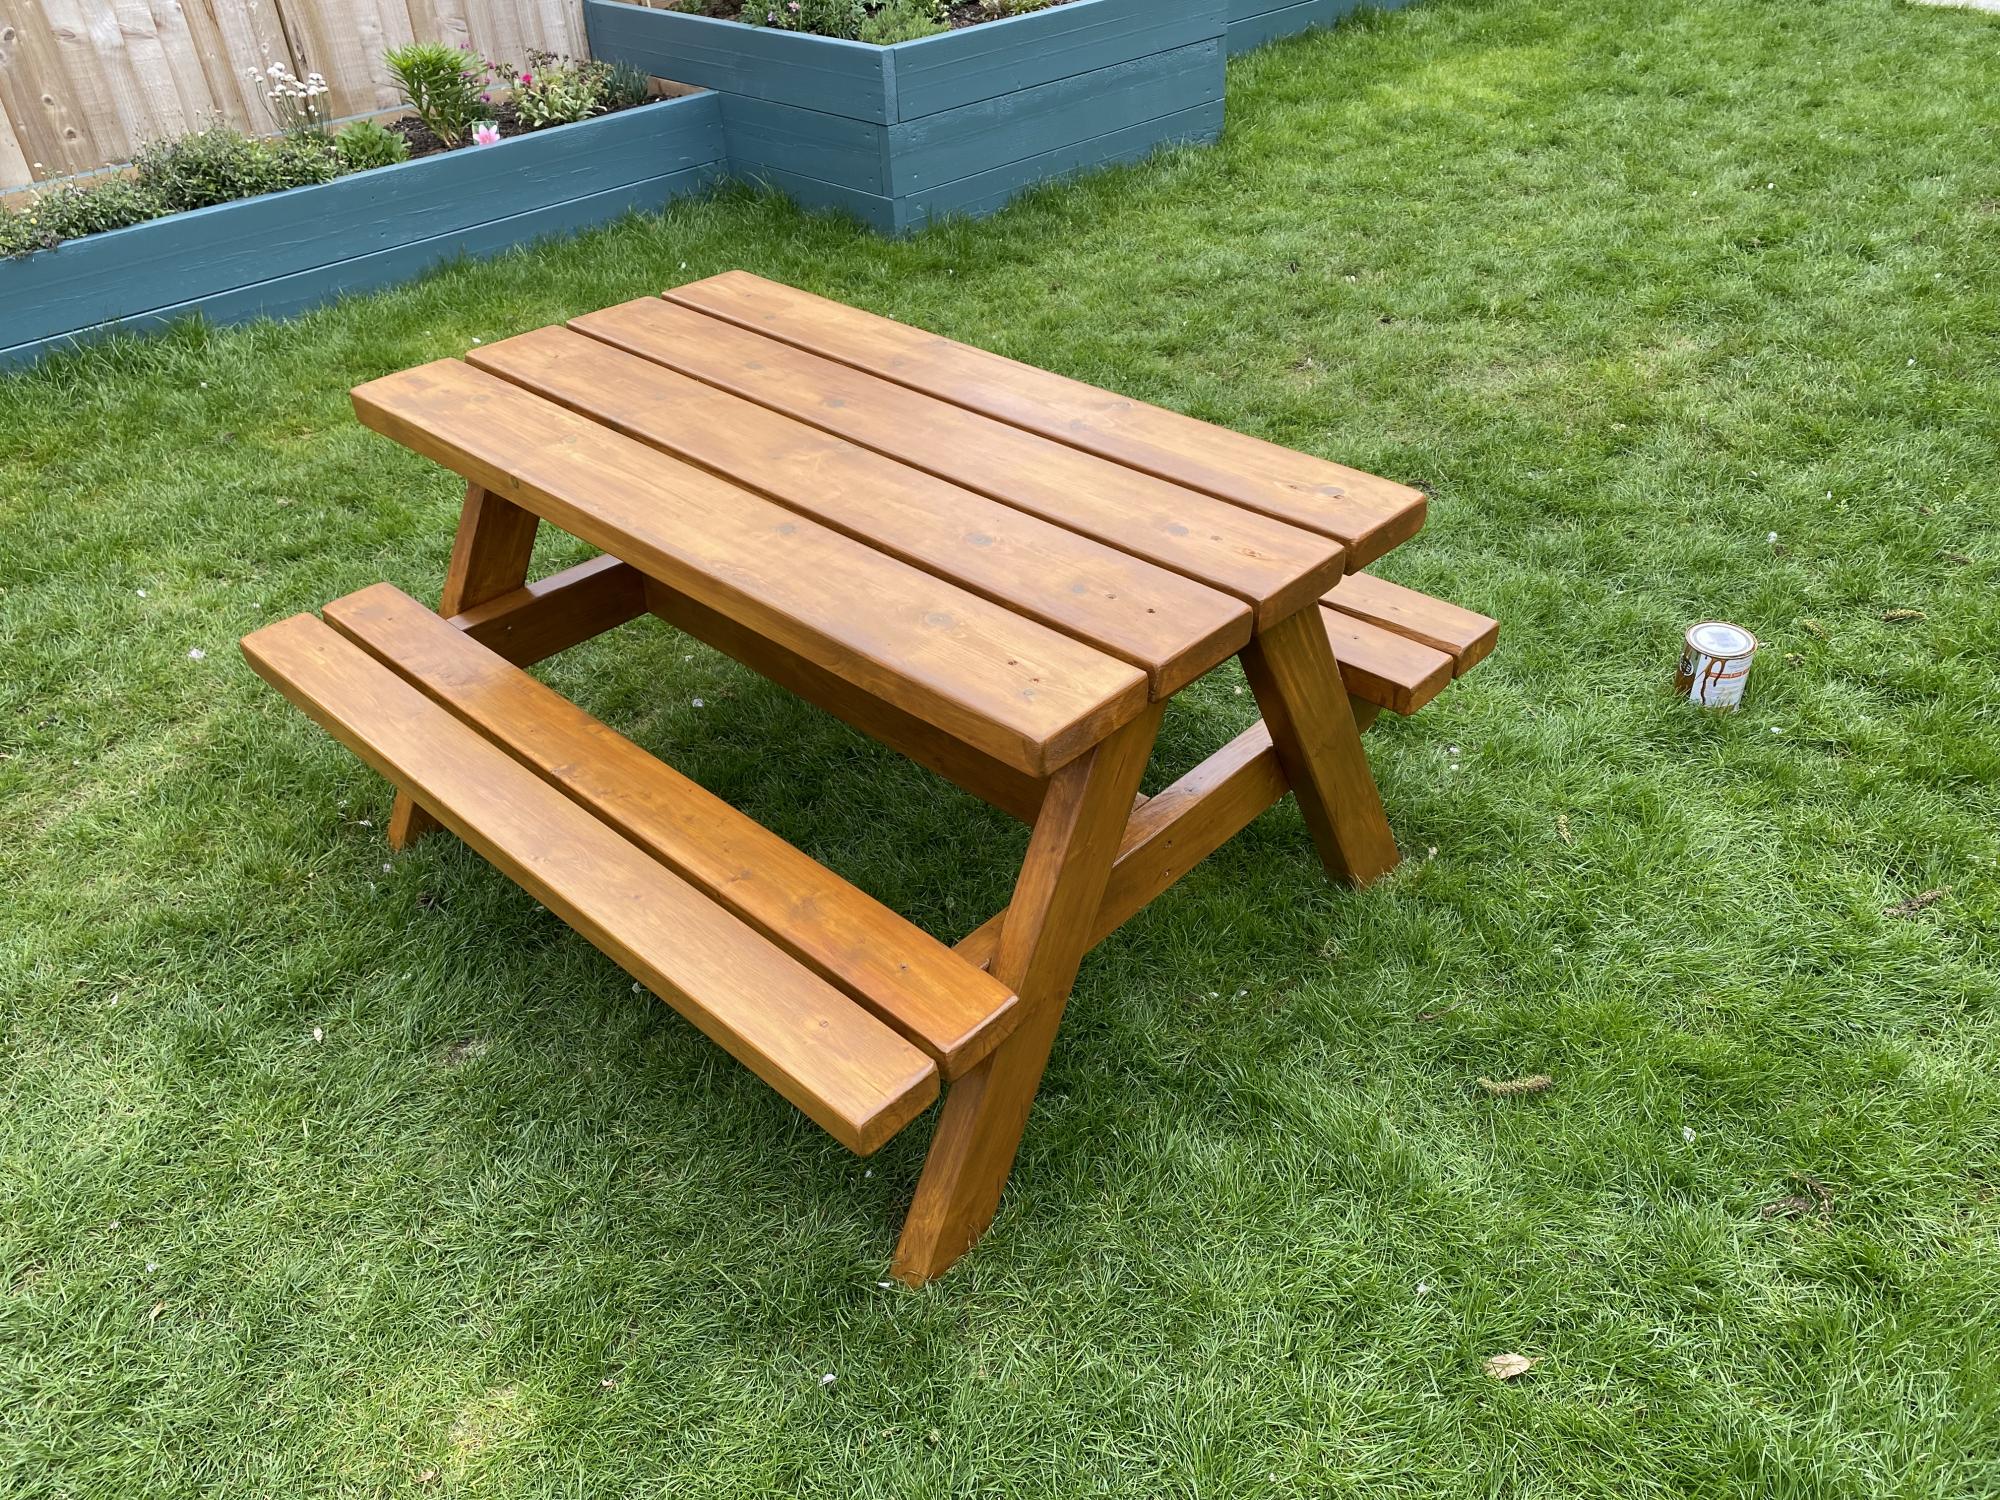
Hello from London, UK.
Used 120grit sandpaper and stained with Ronseal 10 Year Exterior Satin Woodstain 750ml Natural Oak

Built from Plan(s)
Estimated Cost
£120
Estimated Time Investment
Day Project (6-9 Hours)
Finish Used
Ronseal 10 Year Exterior Satin Woodstain 750ml Natural Oak
Recommended Skill Level
Beginner

Comments

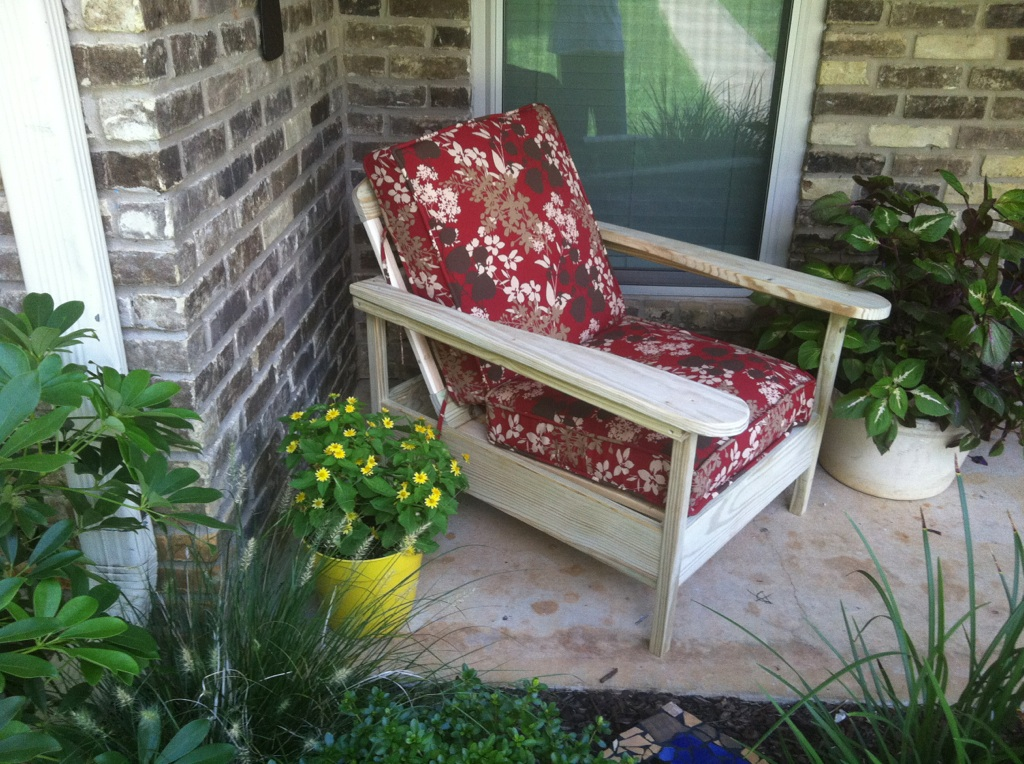
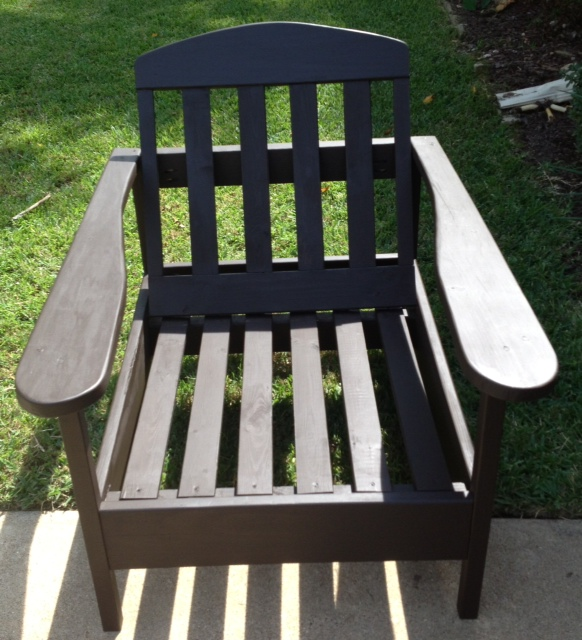
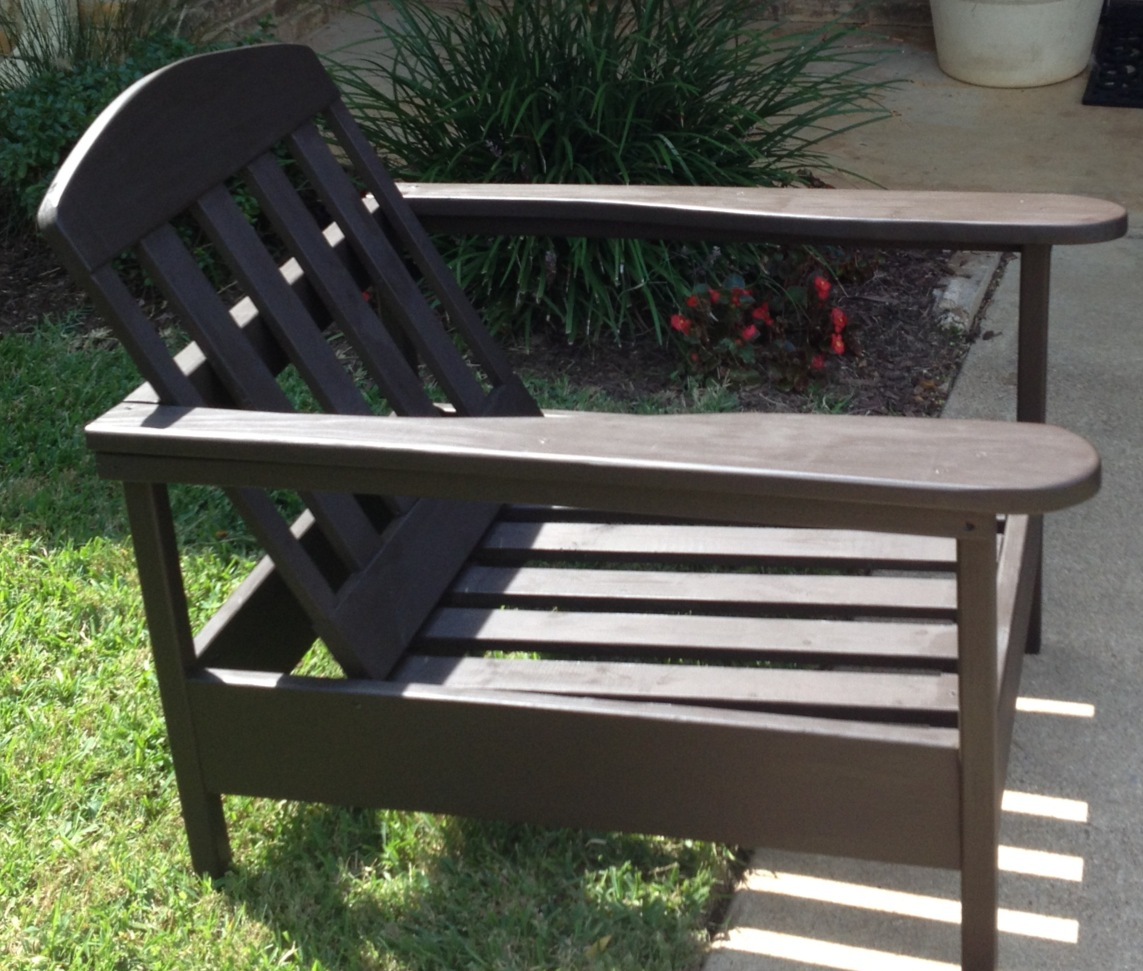
simple outdoor chair with larger arms

A friend at work was wanting a chair for her front porch. This chair was a perfect fit for the space. I made the arms wider for more comfort. I have build several of these for family and friends. I even built a pair for my parents but made them taller so it would be easier for them to get up. They are so comfortable and very easy to build. I can't wait to build the sofa and love seat!

Estimated Time Investment
Afternoon Project (3-6 Hours)
Finish Used
Deck stain
Recommended Skill Level
Beginner

Comments

sharshar1960

Sat, 03/30/2013 - 19:13

I love this! Your scale is wonderful. Did you just add the wider arms on top of the arms in the plan?

dawnkasotia

Mon, 04/08/2013 - 06:42

I love the wider arms. Did you round them by using a jigsaw and did you use the jigsaw on both arms at the same time?

dawnkasotia

Mon, 04/08/2013 - 06:43

I forgot to ask about the name of the color and brand of paint you used. I like the dark brown color. Thanks.

In reply to by dawnkasotia

givehugsprn

Sat, 04/13/2013 - 03:31

I used deck stain instead of paint. Holds up better and easier to reaply when needed and doesnt require a clear coat. I cant remember the name of the color, sorry.

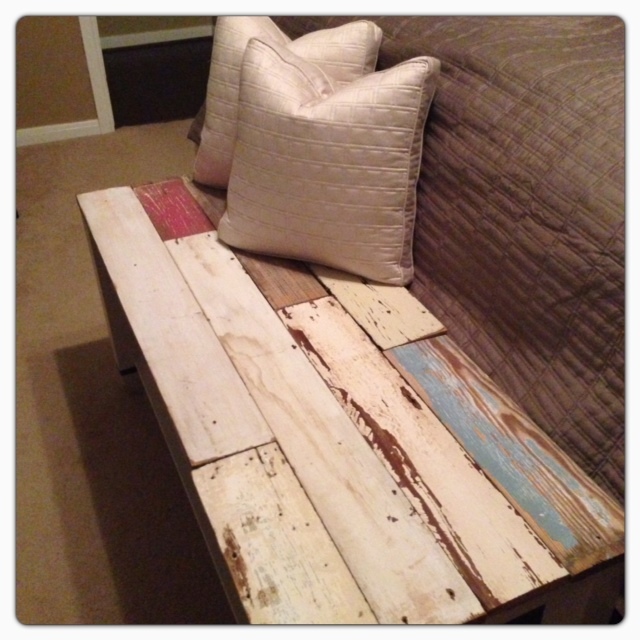
Barn Wood Bench

Submitted by KiraLynne on Wed, 02/11/2015 - 14:14

Loved this project! Bench made from old barn wood to put at the foot of your bed for extra storaage. 

Estimated Time Investment
Weekend Project (10-20 Hours)
Recommended Skill Level
Beginner

Comments

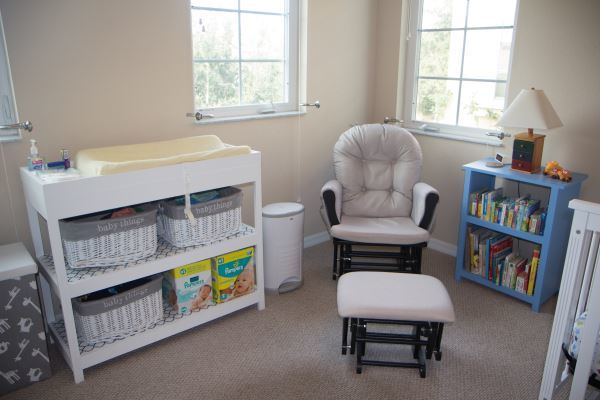
simple changing table

Submitted by Anonymous (not verified) on Wed, 05/10/2017 - 16:43

I built this before my son was born to use as a changing table in his room.  I used leftover plywood from another project which made it a cheap build.  It is super sturdy and has plenty of storage on the top to hold wipes, diapers, and creams.  I used shelf lining and bought cute baskets to complete the look.  

Recommended Skill Level
Beginner

Flipped Cedar Planter

Submitted by Marrero44 on Tue, 05/11/2021 - 04:20

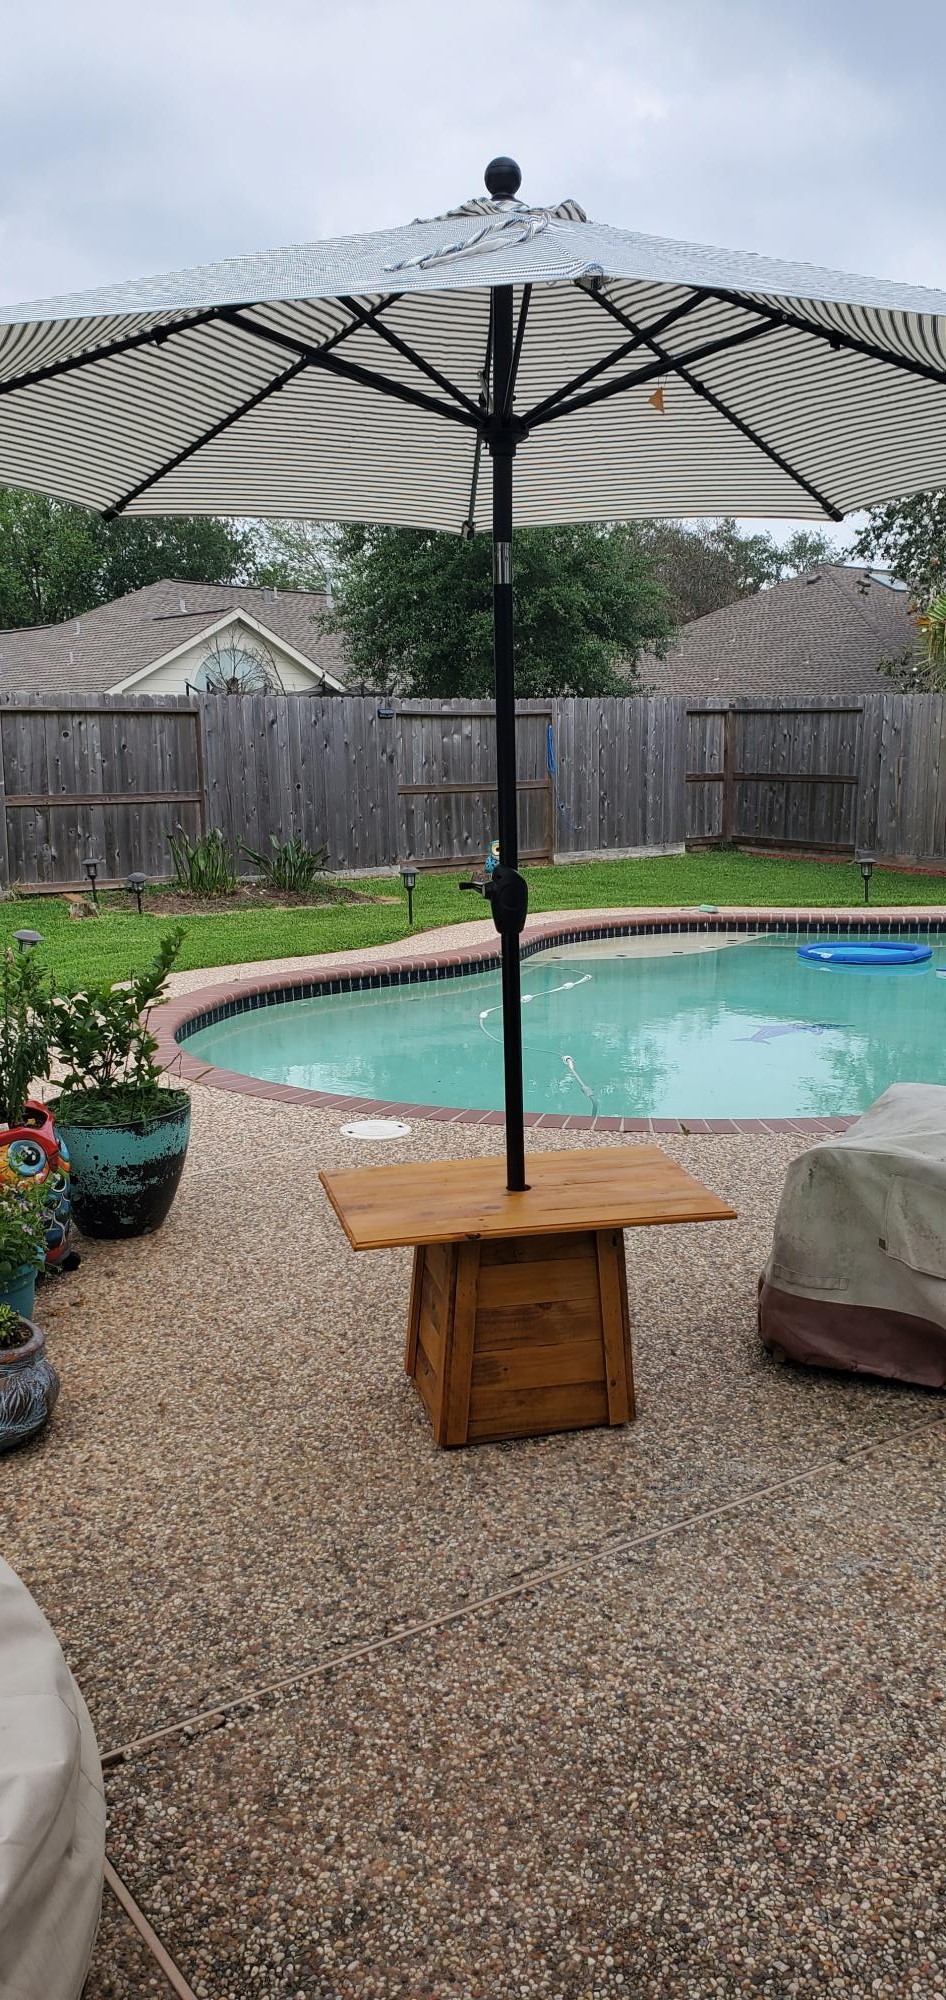
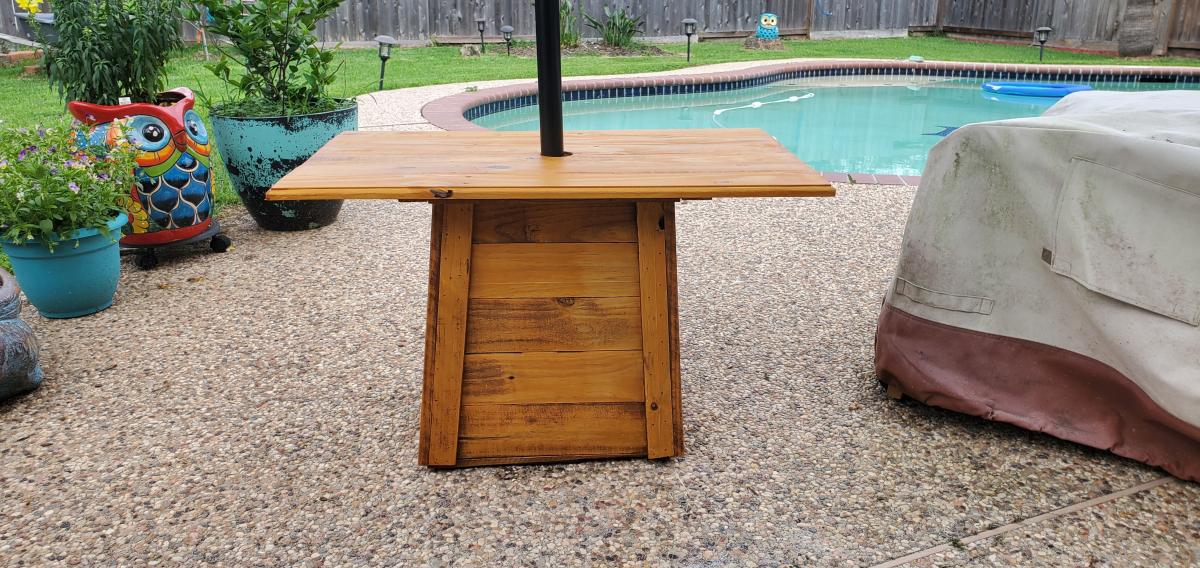
I used the Ana's Cedar Planter plans and flipped it, placed a bucket with cement inside to support umbrella and made a simple table top for drinks. Hope you like it ✌🏾

Built from Plan(s)
Estimated Time Investment
Day Project (6-9 Hours)
Recommended Skill Level
Beginner

Flip Top Storage Bench

Submitted by Sherman on Mon, 04/01/2013 - 17:45

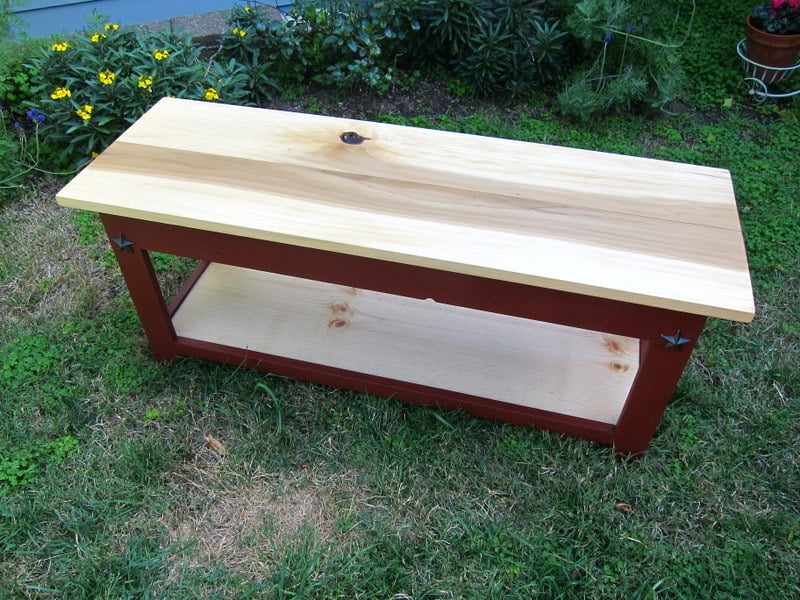
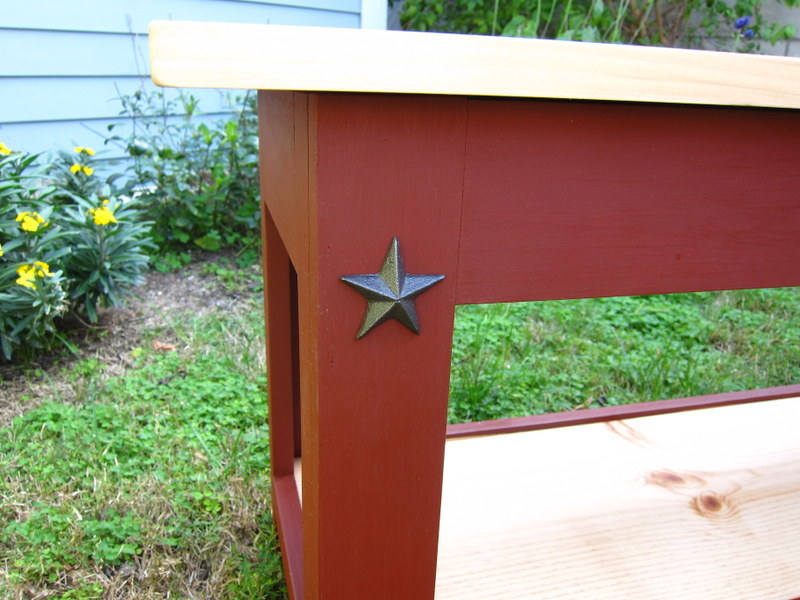
I built a modified version with the top made of two pieces of poplar joined by pocket screws. The hinges are the back outside of the bench. I finished the top with 100% tung oil and painted the structure with barn red milk paint. I finished the lower shelf with a home made poly-tung varnish blend to make it more waterproof for wet shoes. I added some metal stars I found at a flea market because I like the look of the stars -- like those on so many old houses on the east coast.

Estimated Cost
$50
Finish Used
Milk paint, tung oil, tung oil - poly varnish
Recommended Skill Level
Beginner

Comments

Mod Bar

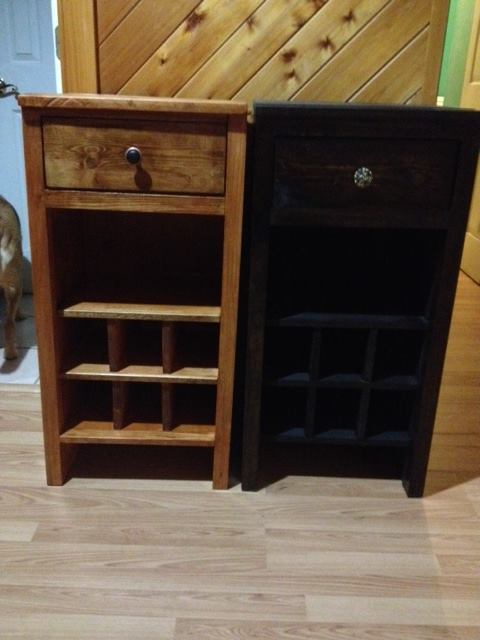
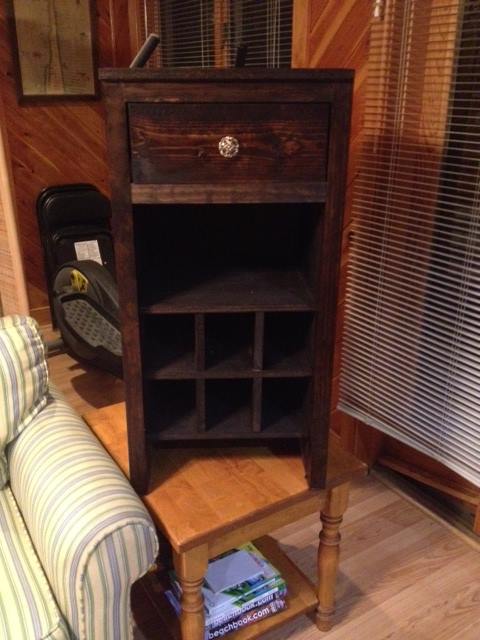
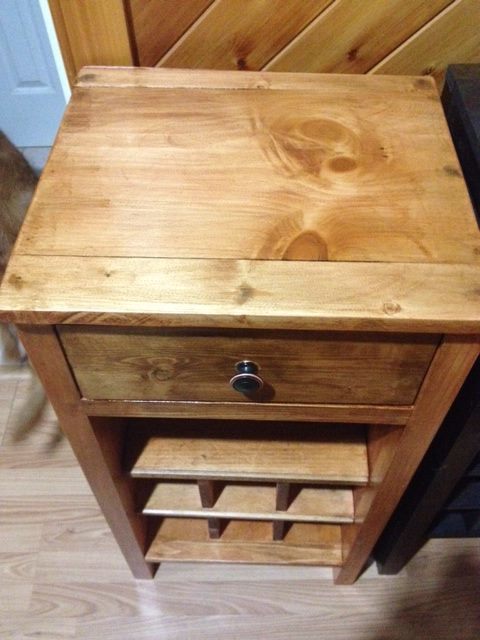
I made it to hold 6 large or small bottles.  Glasses can be set on the shelf.  

Built from Plan(s)
Estimated Time Investment
Weekend Project (10-20 Hours)
Finish Used
Golden Oak and Southern Pecan mixed on one. I forgot the name of the dark stain, Im not sure it could be jacobean .
Recommended Skill Level
Intermediate

Ana's Outdoor Sofa

Submitted by Anonymous (not verified) on Sat, 05/13/2017 - 22:26

We used Anna's outdoor Sofa plans, which were very easy to read. For wood, we kept costs low by using pressure treated wood, and staining it with Minwax Colonial Walnut stain. We did use the lumber cutting service at Home Depot- only $15 for the cuts, and it made the project time very quick.  The cushions were from Lowes, and throw pillows were purchased the previous season at Homesense. We are so happy with how it turned out. Thanks, Anna!

Estimated Cost
$95 for wood, including cuts done by Home Depot
Screws and wood glue $15
Lowes cushions $ 200
Stain $0 (used for previous project)
Total cost $310 CDN
Estimated Time Investment
Afternoon Project (3-6 Hours)
Finish Used
Minwax Colonial Walnut
Recommended Skill Level
Starter Project
Seasonal And Holiday

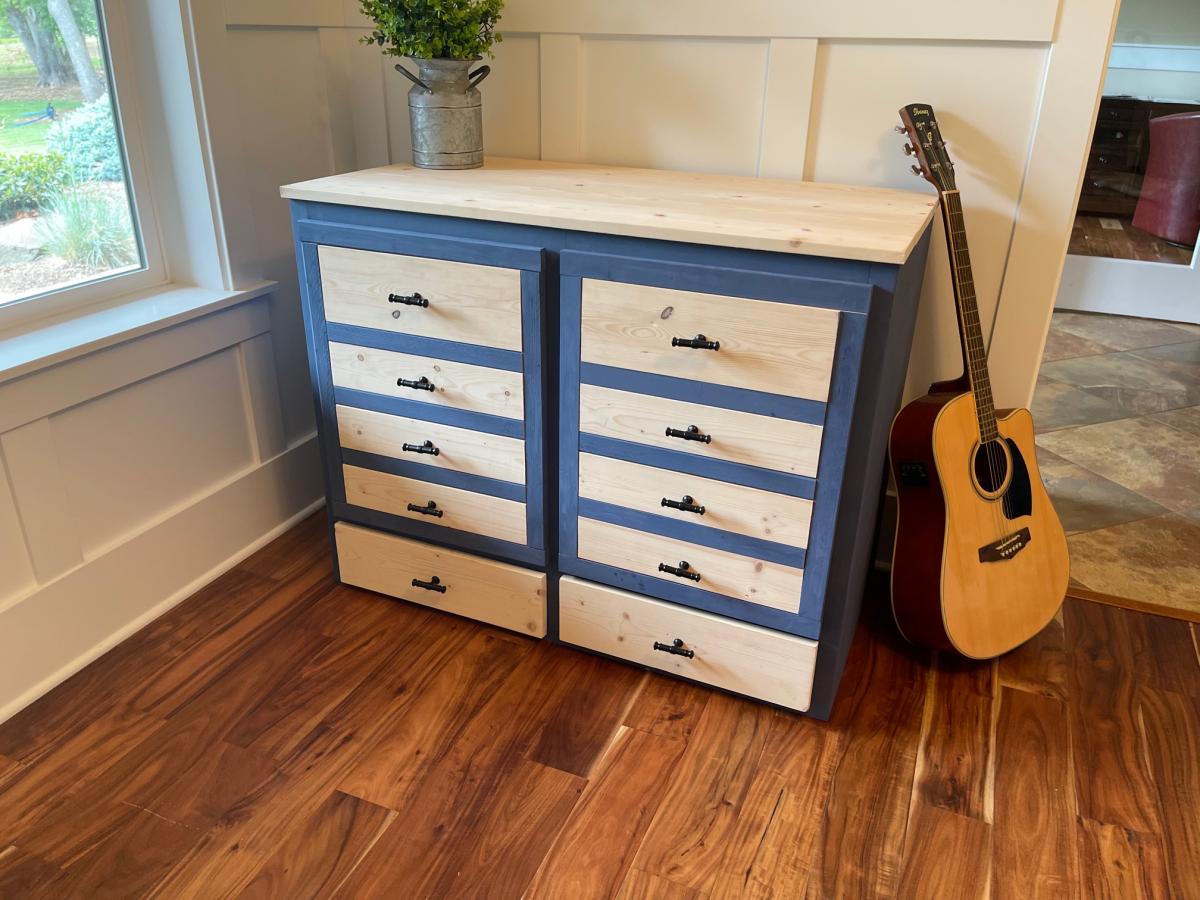
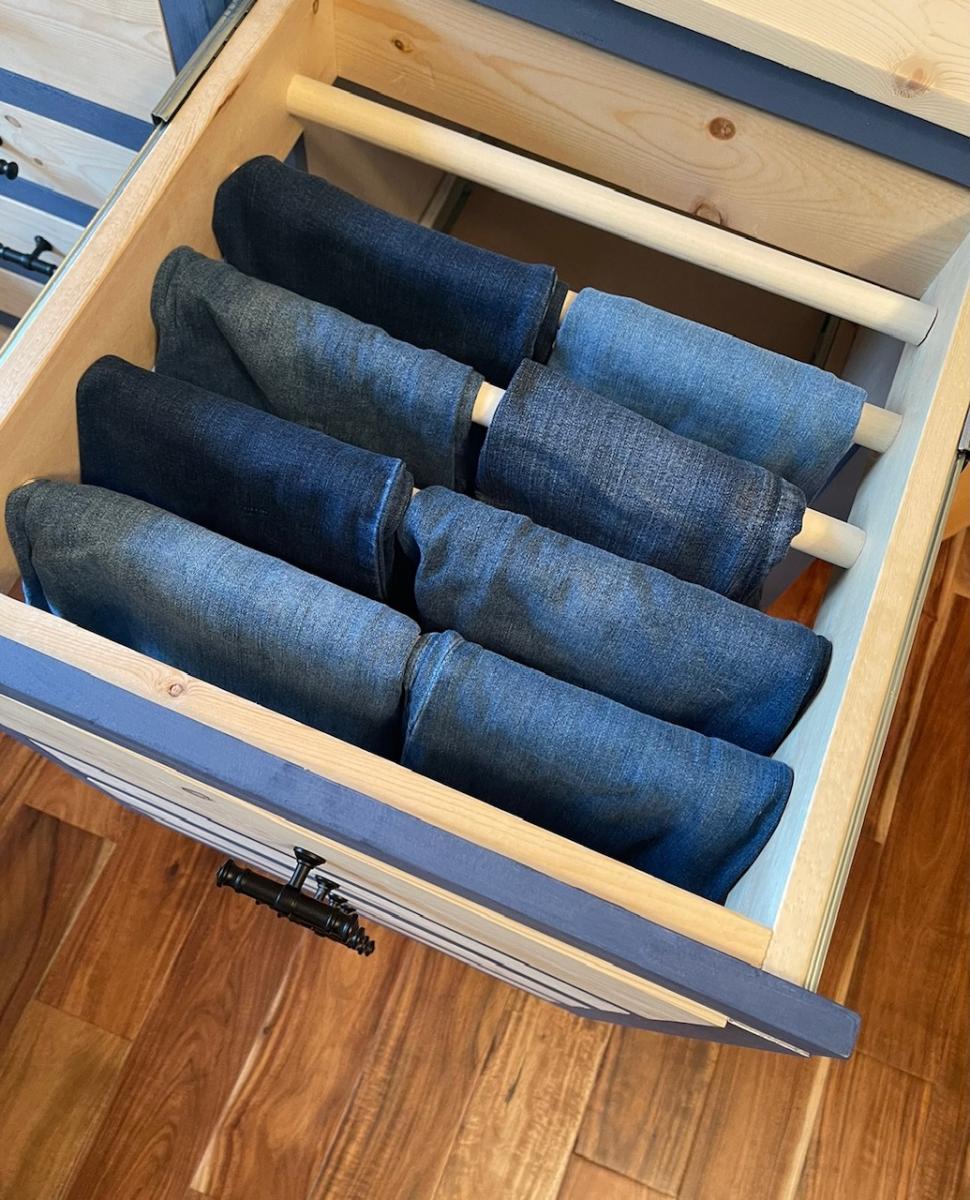
Apothecary Jeans Dresser

Submitted by vendo on Wed, 05/19/2021 - 18:27

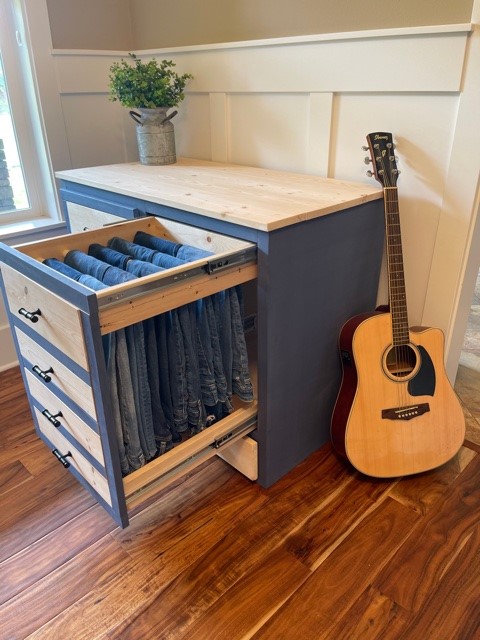
I used Shelf Help for the plywood pieces and a mash up of Ana's plans for the rest. I shared a video on my family page for steps used here https://www.youtube.com/watch?v=urFoX5j4J0s

Estimated Cost
250
Estimated Time Investment
Weekend Project (10-20 Hours)
Recommended Skill Level
Beginner

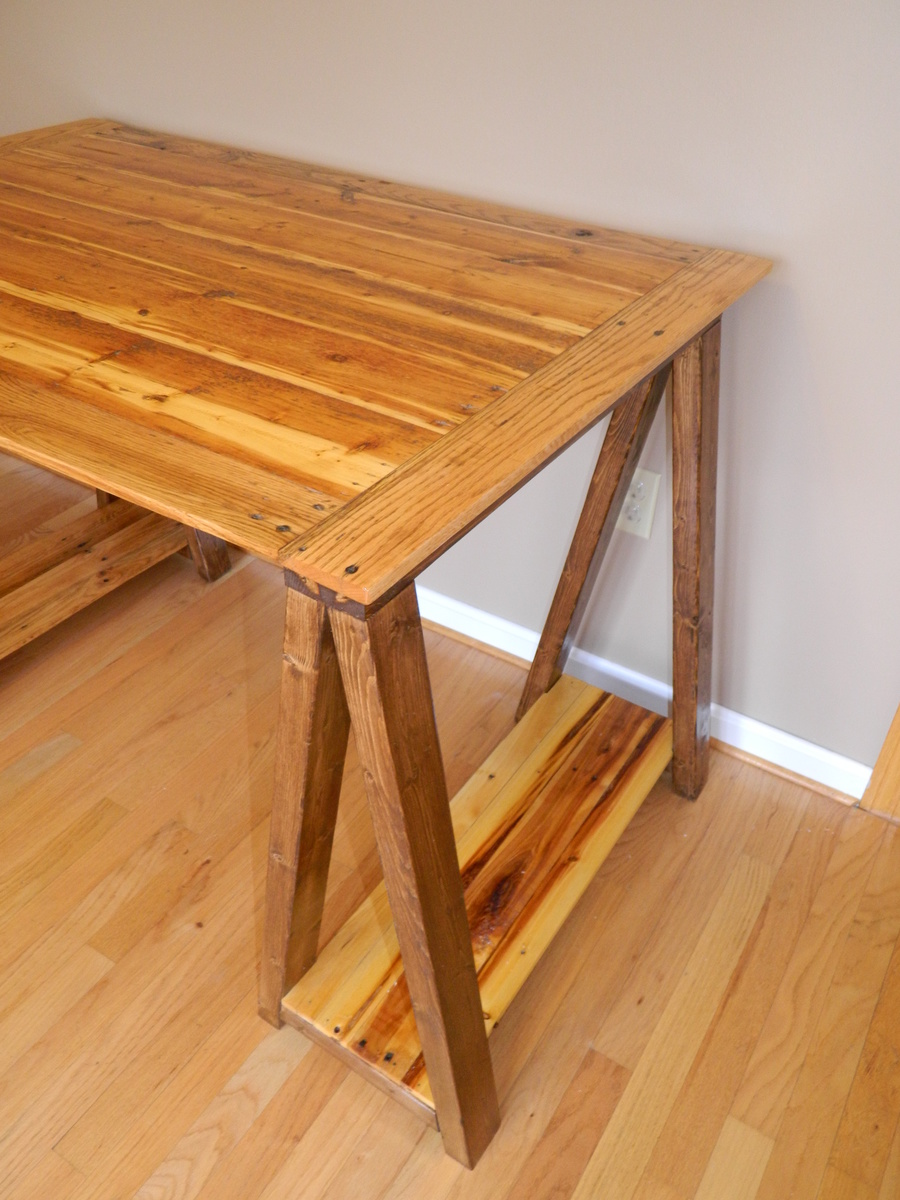
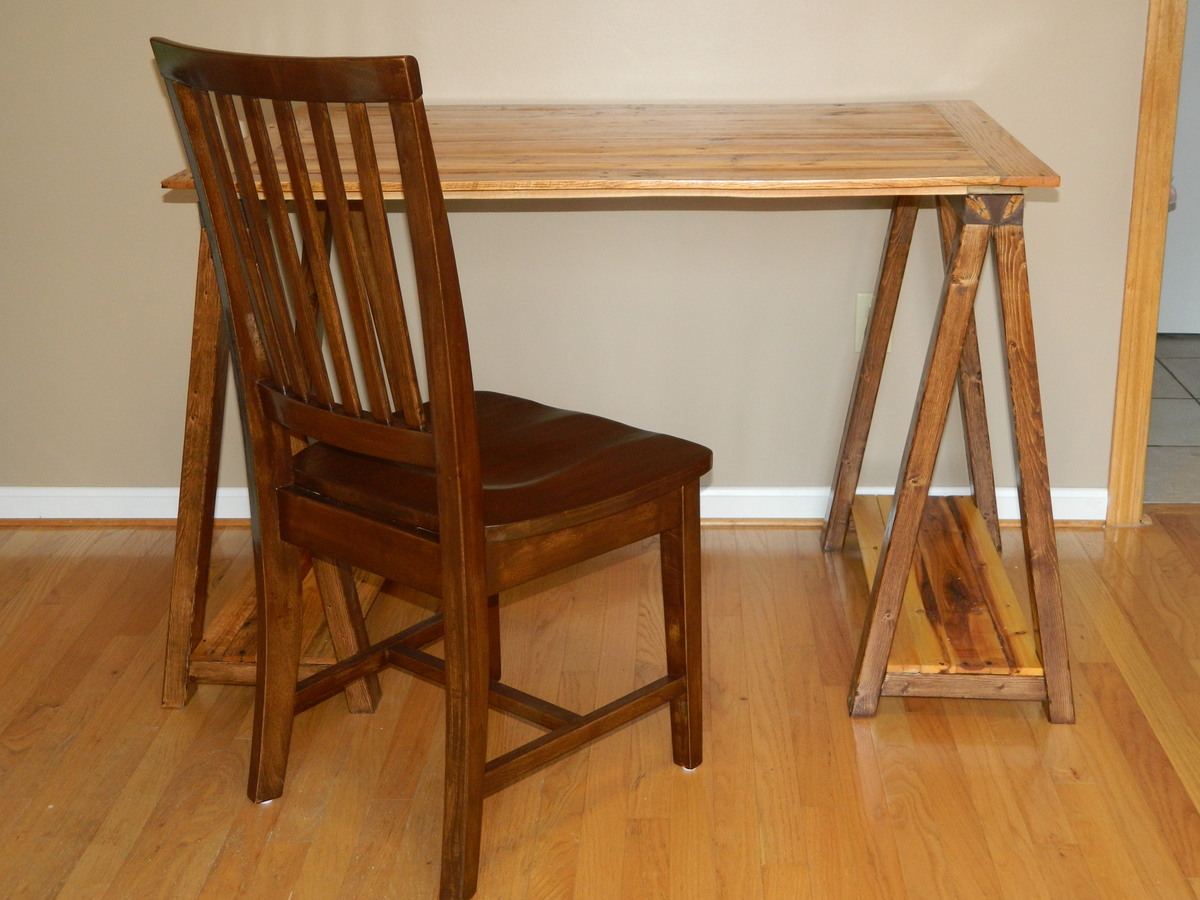
Sawhorse Desk

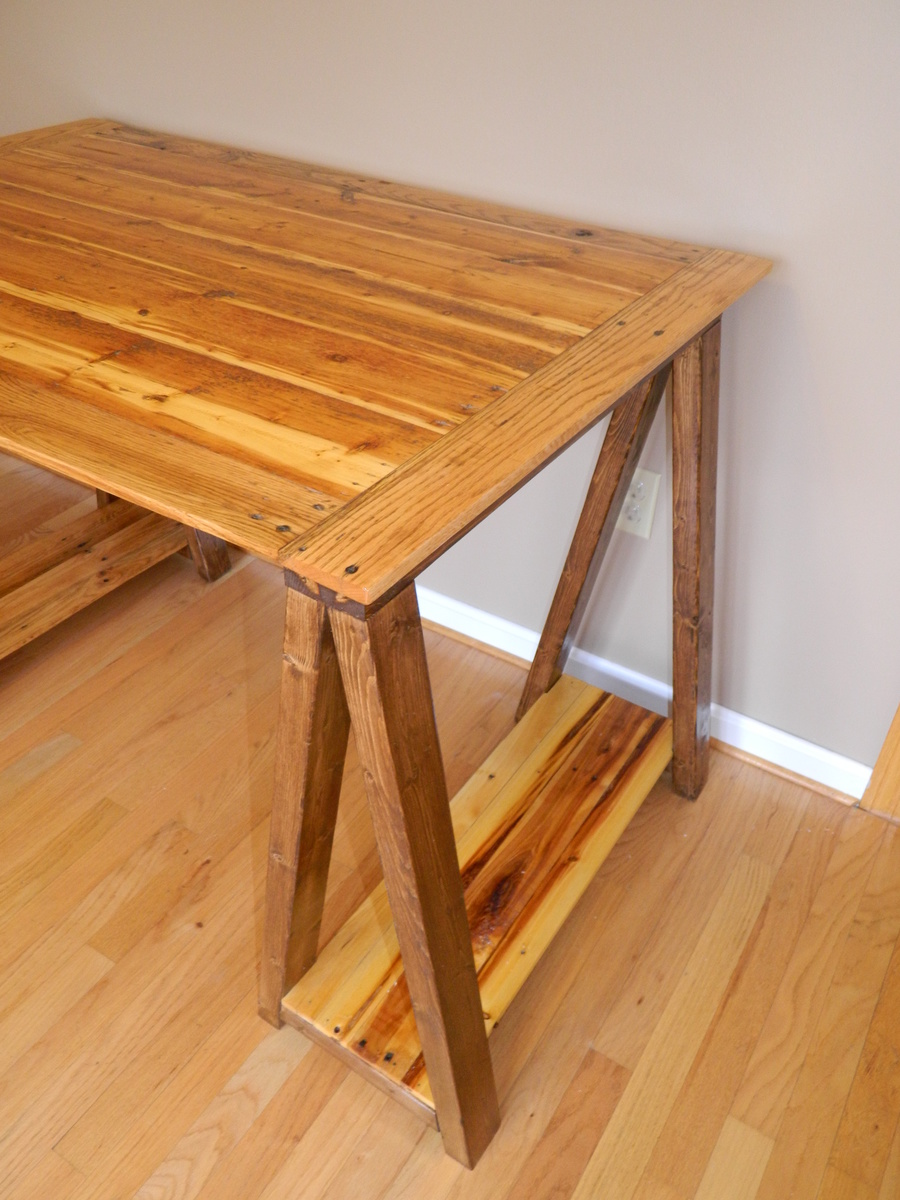
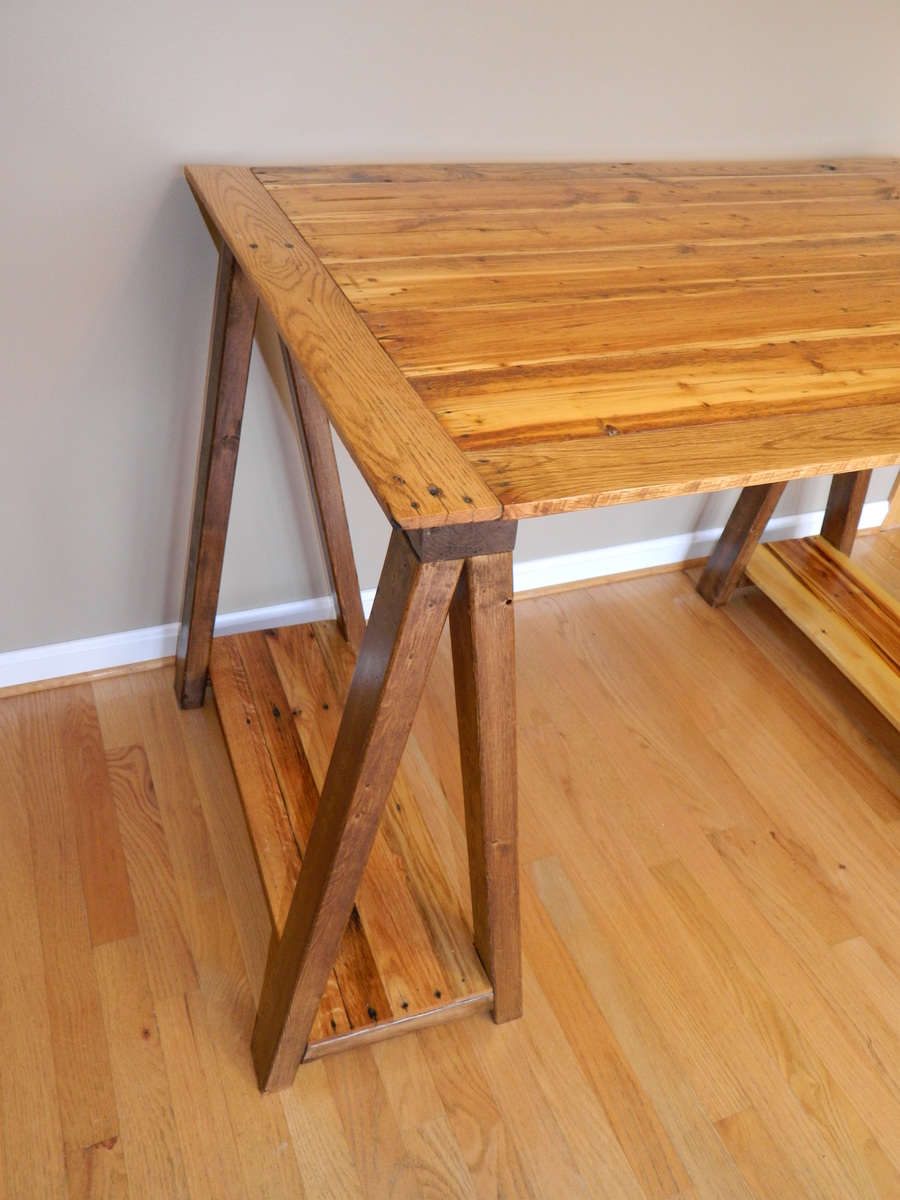
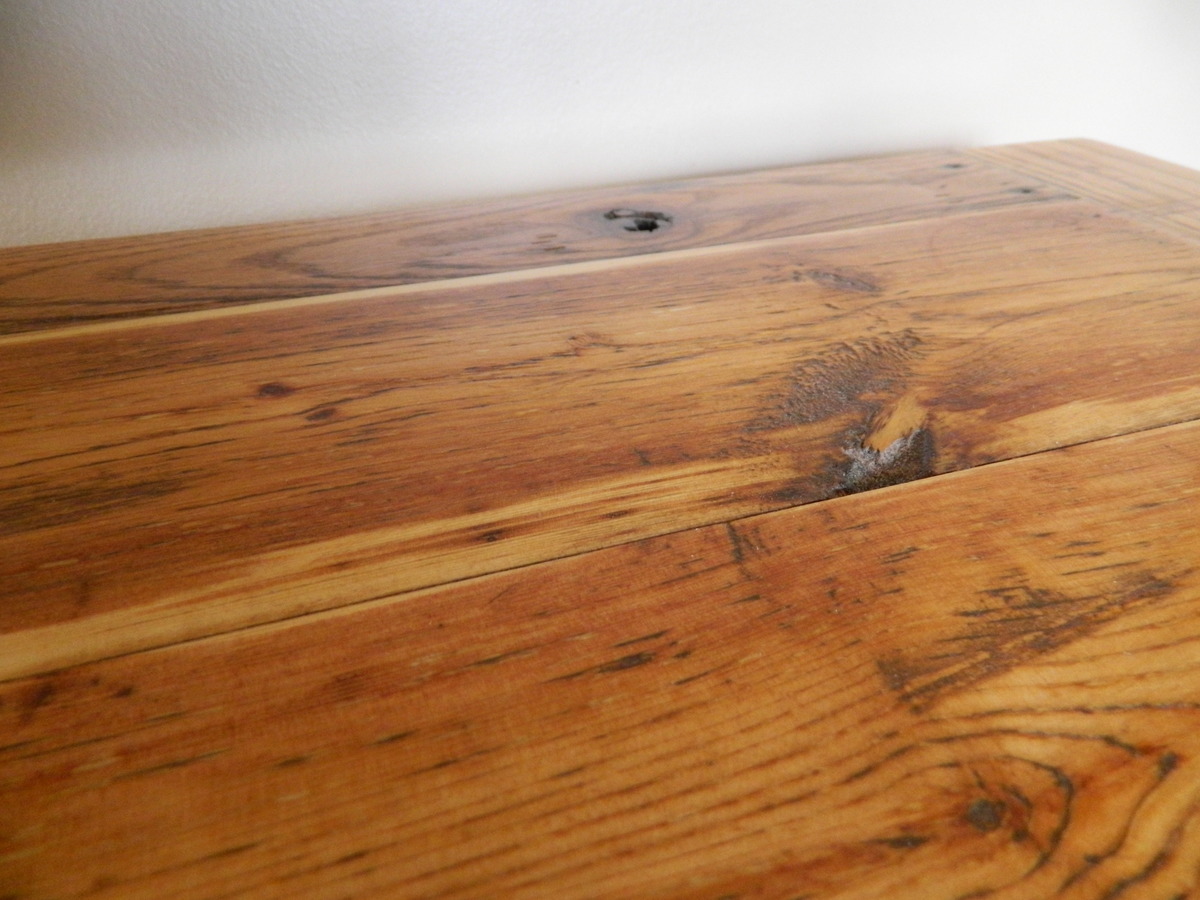
I added my own unique twist to this desk by building it from reclaimed pallets. I made a frame to support the desk top pieces, then sized the pallet pieces to fit on top. I also used pallets for the shelves. Full details at the blog in the link.

Built from Plan(s)
Estimated Cost
$30
Estimated Time Investment
Day Project (6-9 Hours)
Finish Used
Minwax Special Walnut and Minwax Natural, finished with General Finishes Arm-R-Seal Urethane Topcoat.
Recommended Skill Level
Beginner

Coffee Table with 2 drawers

Submitted by AndyH on Tue, 02/17/2015 - 12:15

Small coffee table. Have to admit it and say messed up on this one as cut the sides wrong length and didn't realize until all glued up!!!

Ended up 3 inches wider than was supposed to be which then messed up my plans for the top.

Had to redesign the top and decided to use some 1 by 6 and 1 by 4 offcuts to fill in the middle part which was supposed to be one long 1 by 6 piece. Pretty pleased with how it turned out in the end.

Finished with Varathane Kona and three coats of Varathane Satin Poly.

Drawers were finished in Minwax Special Walnut.

Estimated Cost
Approx $40 of new wood as a lot of it was left over from other projects.
Estimated Time Investment
Weekend Project (10-20 Hours)
Finish Used
Finished with Varathane Kona and three coats of Varathane Satin Poly.

Drawers were finished in Minwax Special Walnut.
Recommended Skill Level
Beginner

Outdoor patio sectional and patio coffee table

Submitted by Anonymous (not verified) on Tue, 05/16/2017 - 13:08

Welcome to our labor of love. This is our first build and while my bf did most of the work, it was a great project for us as a couple. It was definitely work, but well worth it. We love the way it fits perfectly in our courtyard and people keep commenting on how high-end it looks. Thanks for the plan, Ana! The project took a little longer than it probably should, since it was the first project for us. You should account fort he time it will take to cut, sand and stain your pieces before assembly. There are times you will need to allow for the lumber to dry etc.

Finish Used
1-gal. #ST-129 Chocolate Semi-Transparent Waterproofing Stain and Sealer
Recommended Skill Level
Beginner

Comments

Rustic X Console Table

Submitted by mmartin86 on Sat, 05/29/2021 - 08:30

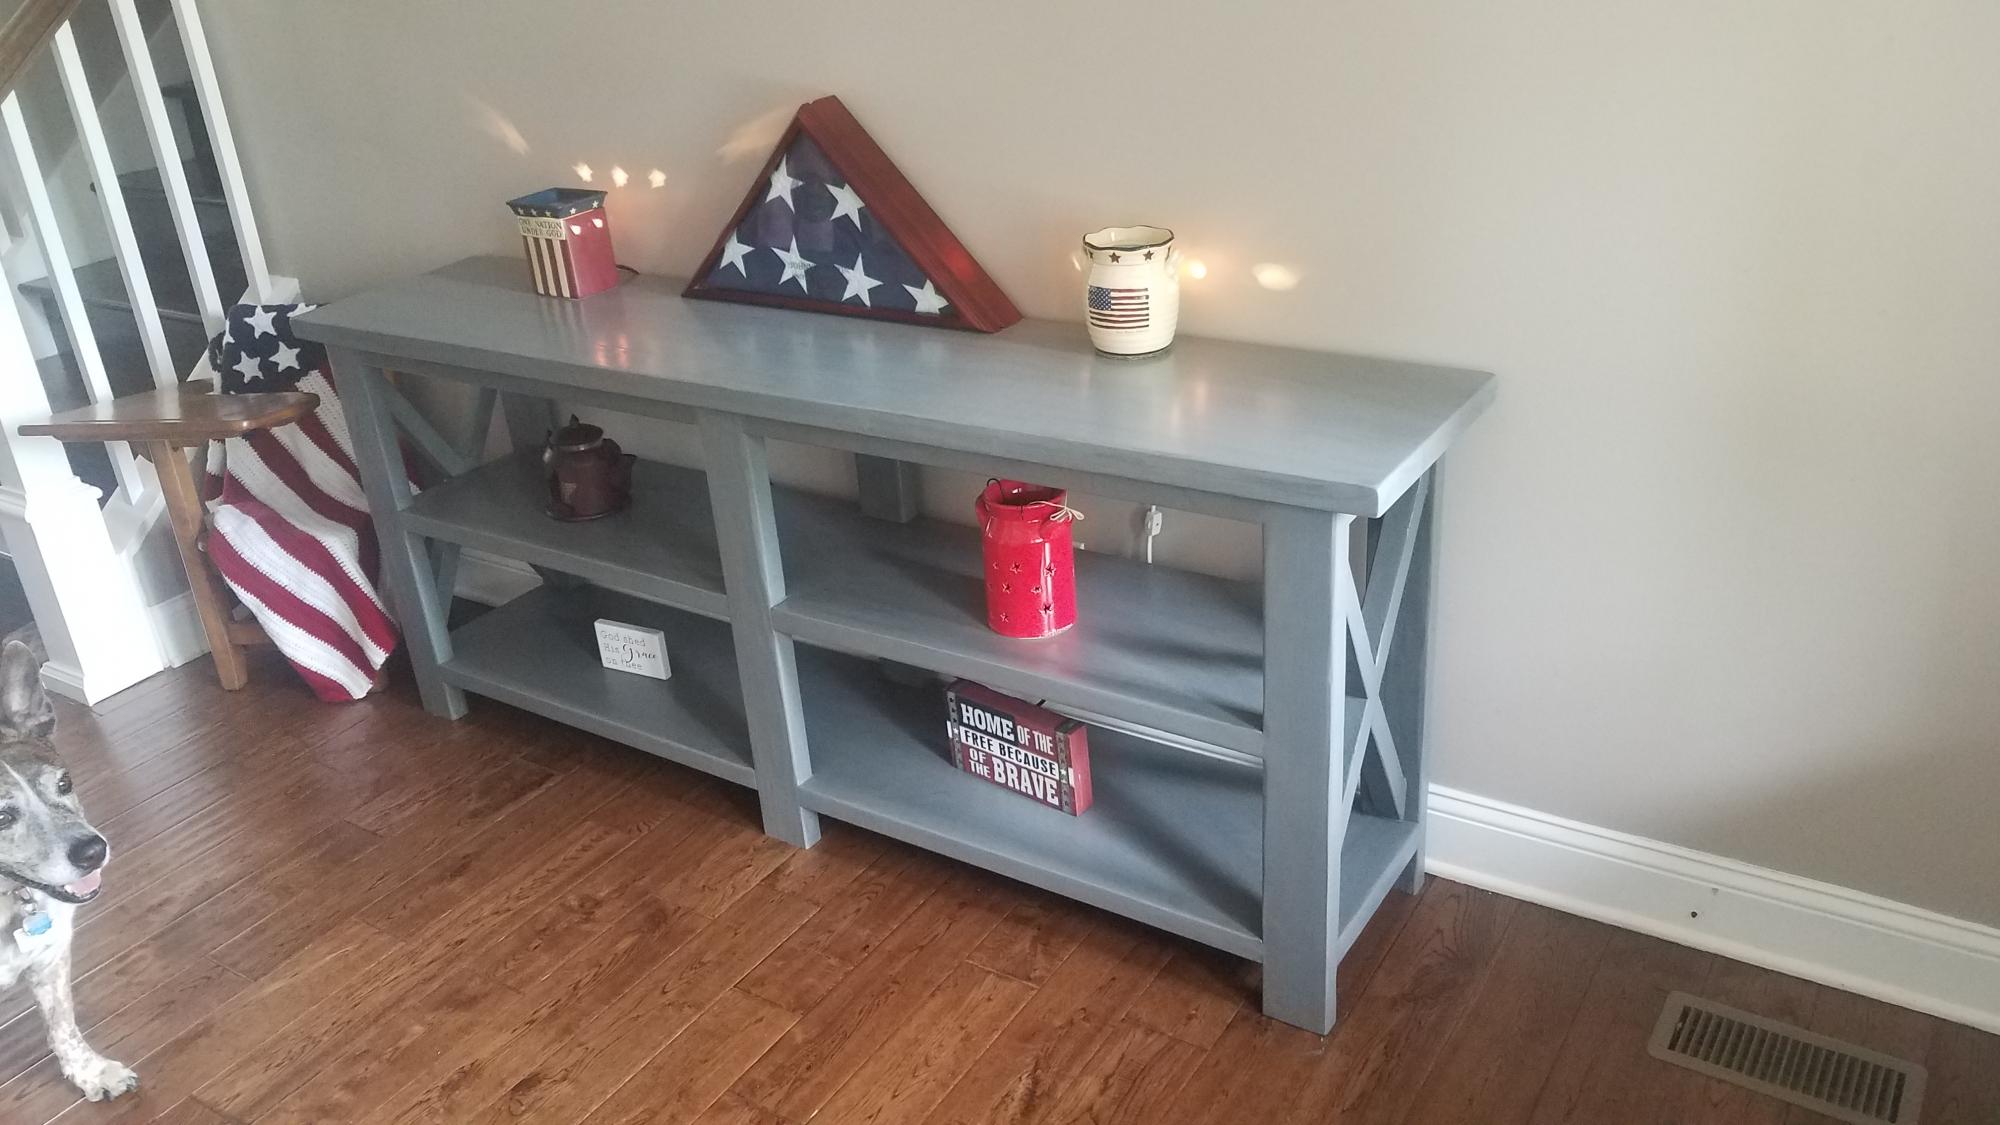
Built this using Ana's Rustic X console table plan.

Built from Plan(s)
Recommended Skill Level
Intermediate

Comments

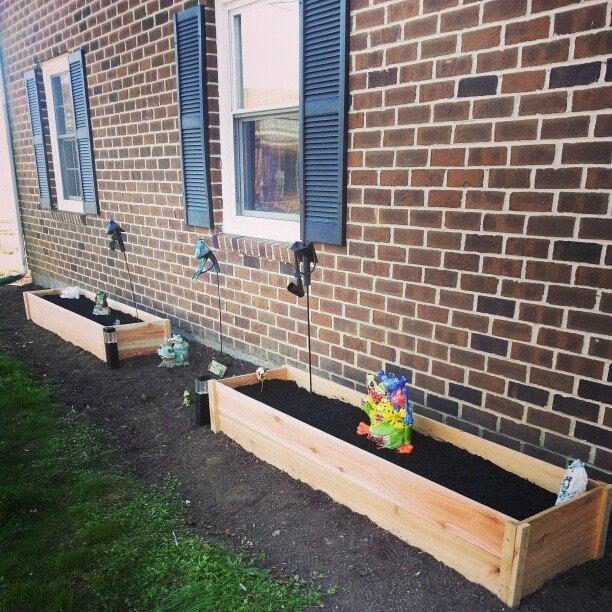
Built some Cedar flowerbeds!!

We live in a ground level 3 bedroom apartment, and I desperately wanted somewhere to plant some veggies and pretty flowers. When I found the plans for the $10 cedar garden beds we went to town! Cedar fence posts were more expensive than had been used in the plan, and we chose not to finish the tops, so lumber cost us $36 to build two. Still pretty good considering the plastic snap together ones run about $40 a piece and are smaller than the ones we built. We're really proud of them and can't wait to get some stuff planted!

Estimated Time Investment
Afternoon Project (3-6 Hours)
Recommended Skill Level
Beginner

Comments

JuliaLovesTiffany

Sat, 04/06/2013 - 19:28

Hi! I saw these cedar beds and was excited to make them as well, but I was unable to find any cedar plans or fence posts are our local home depot. Any suggestions on where you found your wood?

Dining Room/ Home Office

Submitted by kristen on Sat, 02/21/2015 - 11:33

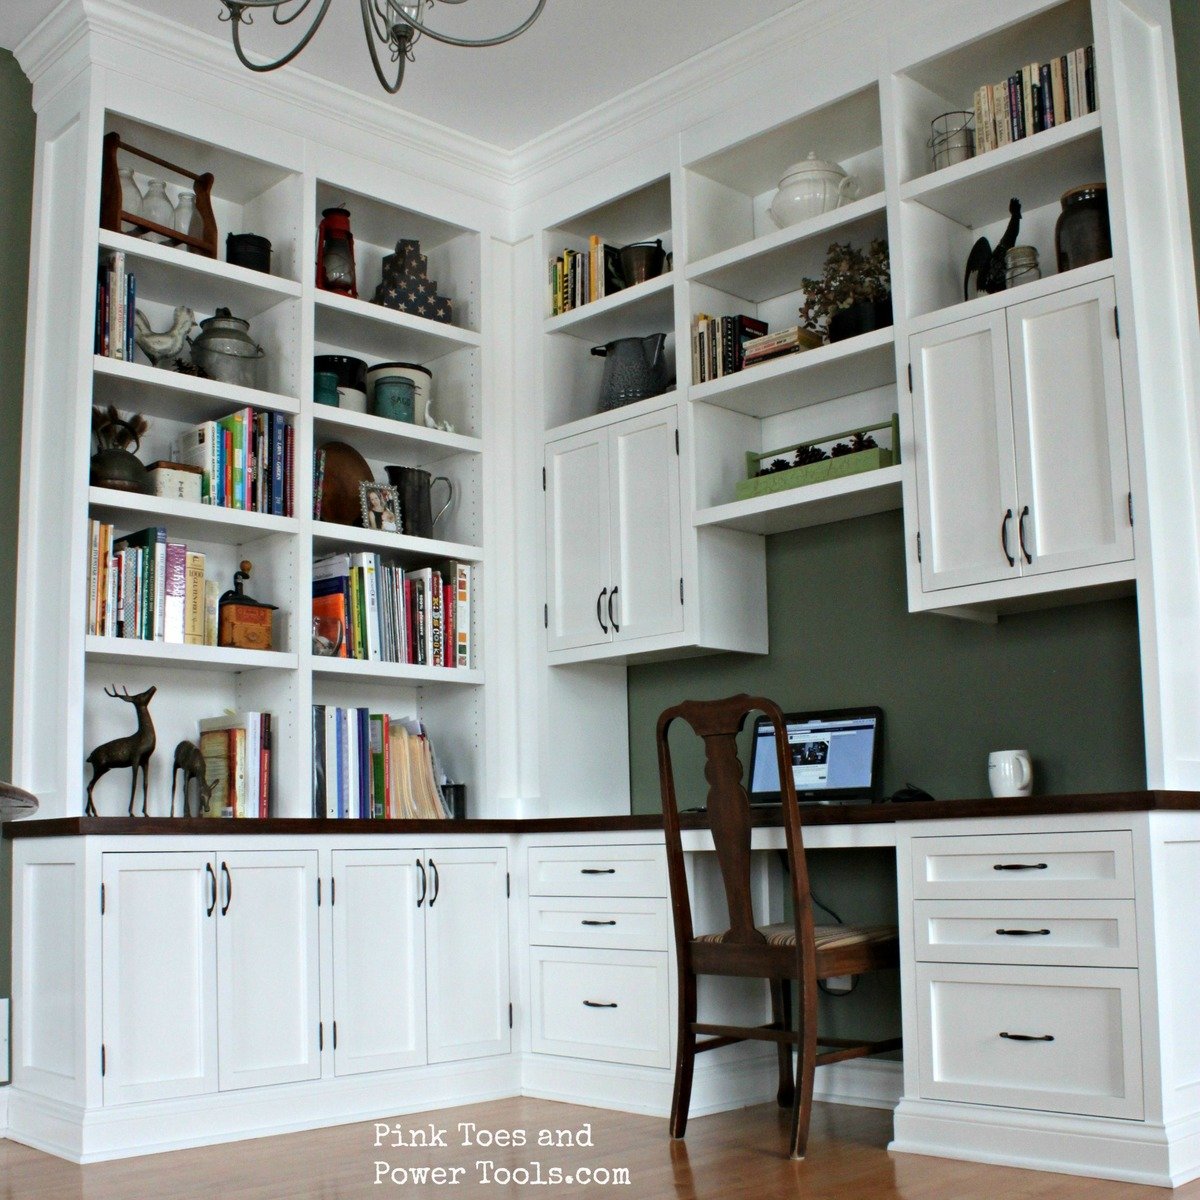
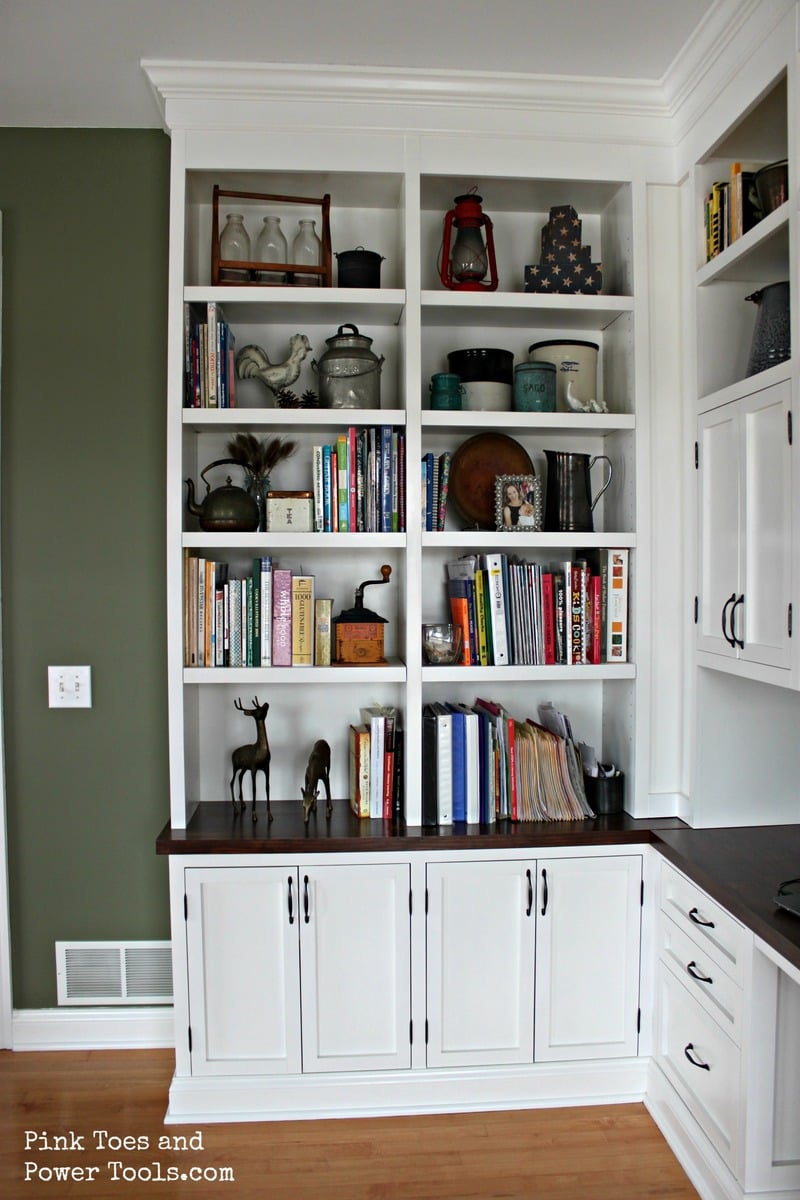
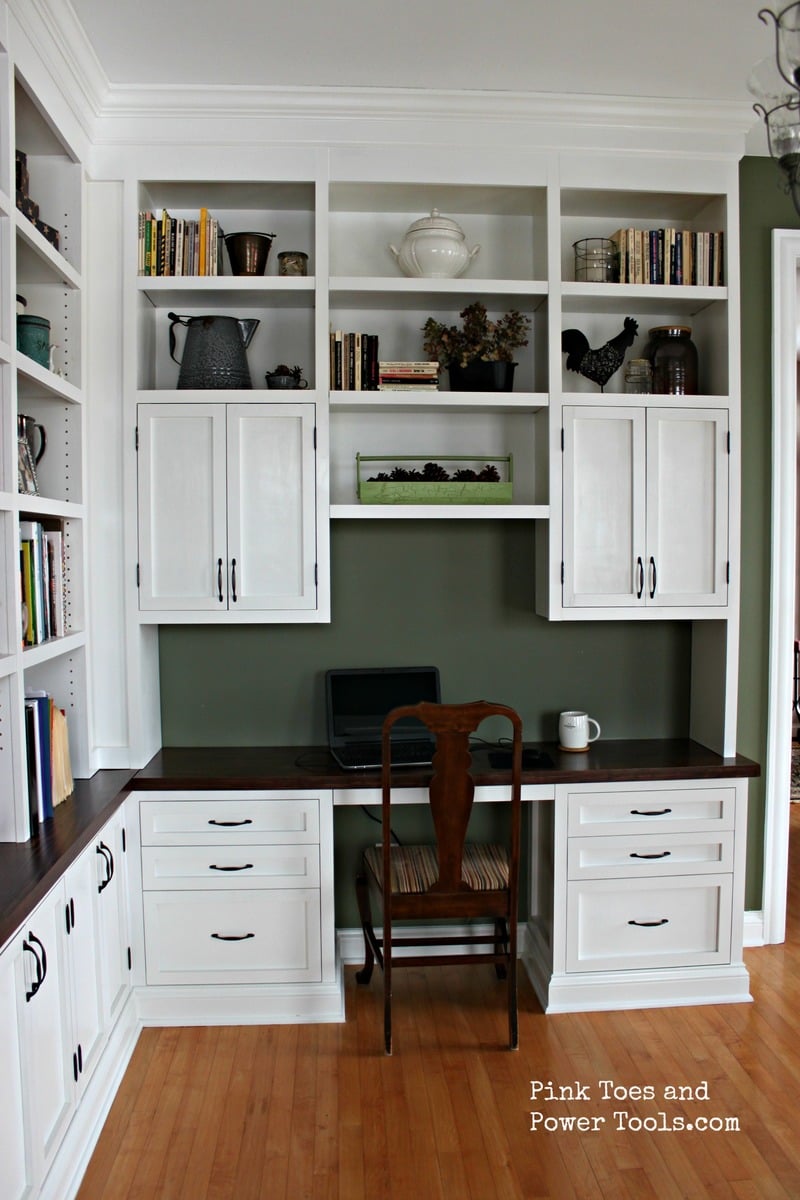
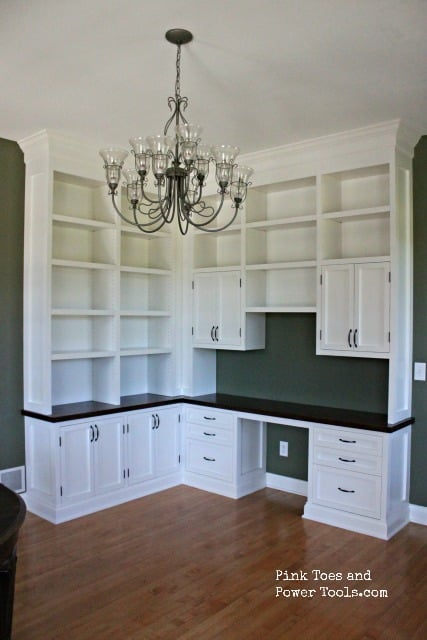
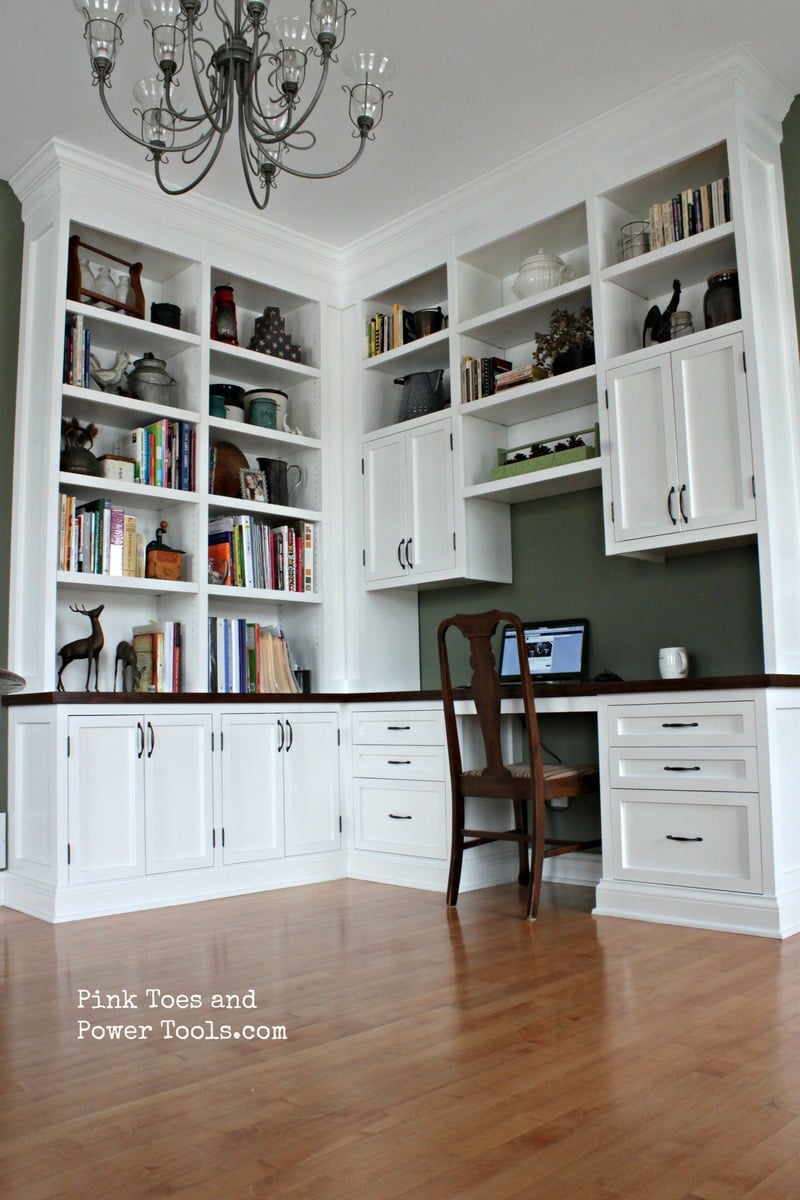
I didn't really follow any specific plan from Ana to build this project (I've become better at creating my own plans after putting together several of Ana's project plans--I owe Ana big time for getting me started in building!), but I did study her kitchen cabinet plans in order to put this together.  Up until now I've done mostly stand-alone projects and this was more like a small kitchen plan than anything I've done before.  This took a LOT of time to complete, but it has been a fantastic addition to our home for organization and aesthetic appeal. 

It is constructed of plywood and pine faceframes.  I used a Kreg Jig to construct most of it, including the drawer and door fronts.  The desktop has a 3/4" plywood base with a pine edge-glued panel on top of that with a pine edging. 

The estimated time investment was way more than 20 hours!  It took every minute of free time for 2.5 months to complete this.  But I was working alone, so you can cut that down significantly with help ;)

The link to my blog about this project contains links to all the posts I wrote up during this build. 

Estimated Cost
Approximately $900
Estimated Time Investment
Week Long Project (20 Hours or More)
Finish Used
White paint with a satin polycrylic topcoat. Sand well before the first coat and then with 220 grit sandpaper between each coat of paint (1 coat primer, 2 coats white paint). Sand with 320 grit between each coat of topcoat for 3 coats. I did use a HVLP sprayer (Woodcraft's $35 version with a large air compressor) but I have finished other projects using a foam roller and foam brush that gets really close to the spray finish--it just takes longer.
Recommended Skill Level
Advanced

Comments

Michael K

Mon, 02/23/2015 - 03:52

The time and effort you put in to this project was well worth it! I'm inspired.

Fancy X Farmhouse Table

Submitted by Anonymous (not verified) on Sun, 05/21/2017 - 17:53

Built this table for a friend from the Ana White- Fancy X plans. It turned out amazing!

Built from Plan(s)
Estimated Cost
$80
Estimated Time Investment
Weekend Project (10-20 Hours)
Finish Used
Tabletop: Minwax Weathered Gray Stain with Polycrylic Clear Matte seal

Legs and Stretcher: Distressed White
Recommended Skill Level
Intermediate

Comments

cm18lajo

Fri, 01/10/2020 - 07:23

Love the table. Colors are great. I noticed you modified the table to to have five 2x10s instead of the plan 4. I was planning on doing the same thing. Did you have to modify the base to account for that? Specifically I'm wondering how, if at all, I need to adjust the angle of the X pieces. Thanks for your time!

My Mother's day gift (Chicken Coop)

Submitted by Bondgirl8 on Wed, 06/02/2021 - 19:44

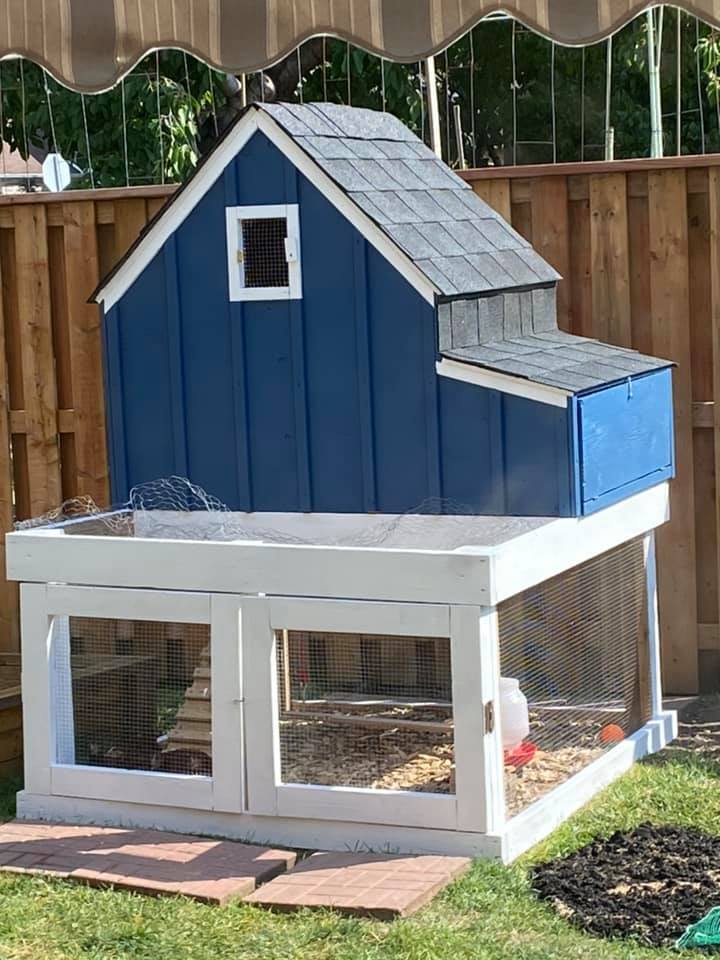
I printed off your instructions and I had all the wood in the garage already. My husband and son finished this in a day and a half. I love it! I painted it. Still not sure what I want to do instead of the planters. I like that idea but I like to have access if I need to clean it. I love all the ideas on this site.

Estimated Time Investment
Weekend Project (10-20 Hours)
Recommended Skill Level
Advanced

Comments

West Elm Inspired Upholstered Outdoor Sofa

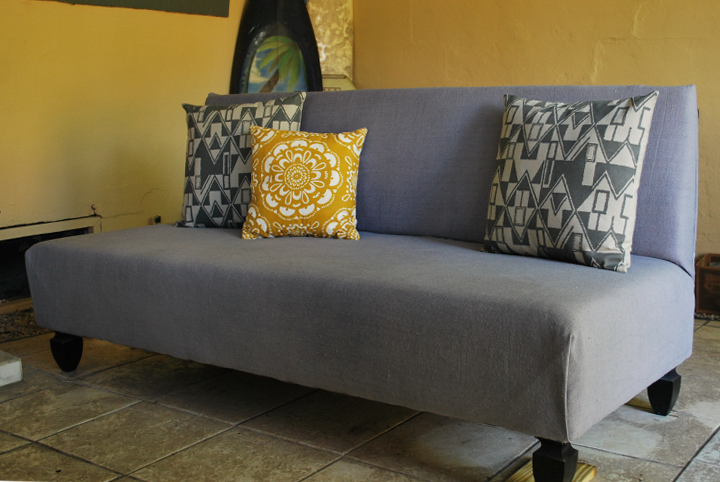
My husband and I built this modern upholstered outdoor sofa for our back porch. As it was going outdoors we used treated lumber, a painters drop cloth (dyed with Rit dye), and coated deck screws. We are so proud of the way it came out! Please see my blog for more details on the build.

Estimated Cost
$300-350
Estimated Time Investment
Weekend Project (10-20 Hours)
Recommended Skill Level
Intermediate

4x4 Truss Beam Table

We recently moved into our new house and had an empty dining room.  Instead of buying tons of furniture, I bought a compound miter saw, a drill, & a Kreg jig.  I'm the heavy lifting & my wife is the cosmetics.  We couldn't be happier with how the table and bench turned out.  We get complements constantly on the set.  

Built from Plan(s)
Estimated Cost
$75 - $100
Estimated Time Investment
Weekend Project (10-20 Hours)
Recommended Skill Level
Beginner

Comments

wjc129

Wed, 02/25/2015 - 10:18

Everything looks great ... what grade of wood did you use? My fear is if I use the cheap stuff from Lowes or HD that it will shrink up on me. I know the Kreg Jig will work to alleviate gaps, but I didn't know if you upgraded wood to help as well.