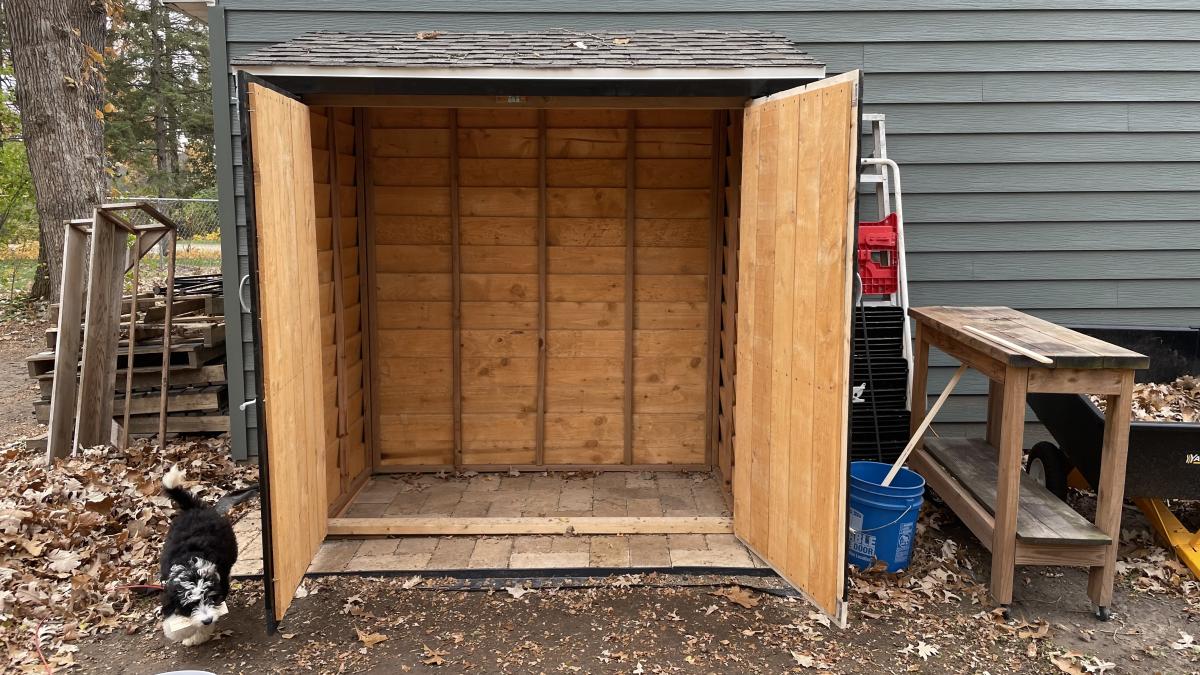
Cedar Shed
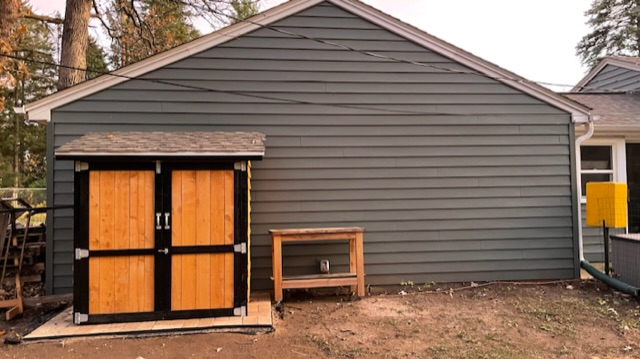
I needed a place for all my gardening pots and planter boxes and this was a perfect solution. So with my dads help we built this shed.
Built from Plan(s)
I needed a place for all my gardening pots and planter boxes and this was a perfect solution. So with my dads help we built this shed.
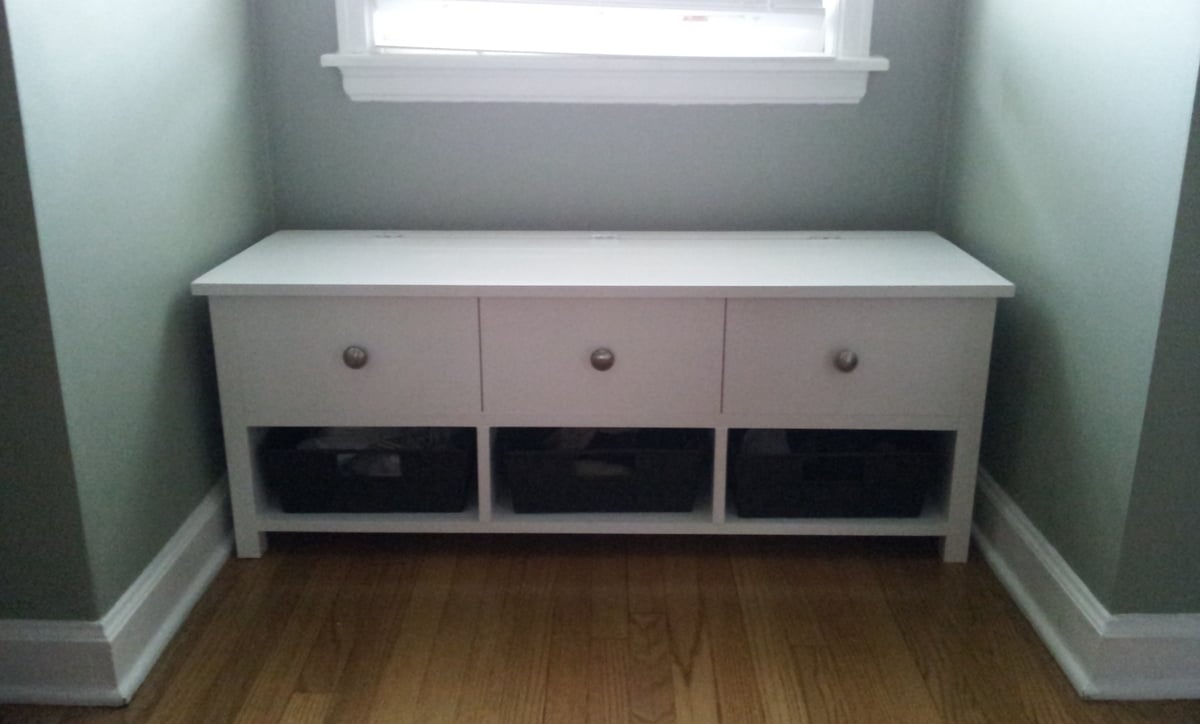
We've recently moved into a new house and I've wanted a bench for the mudroom entrance from the garage. This bench is perfect.
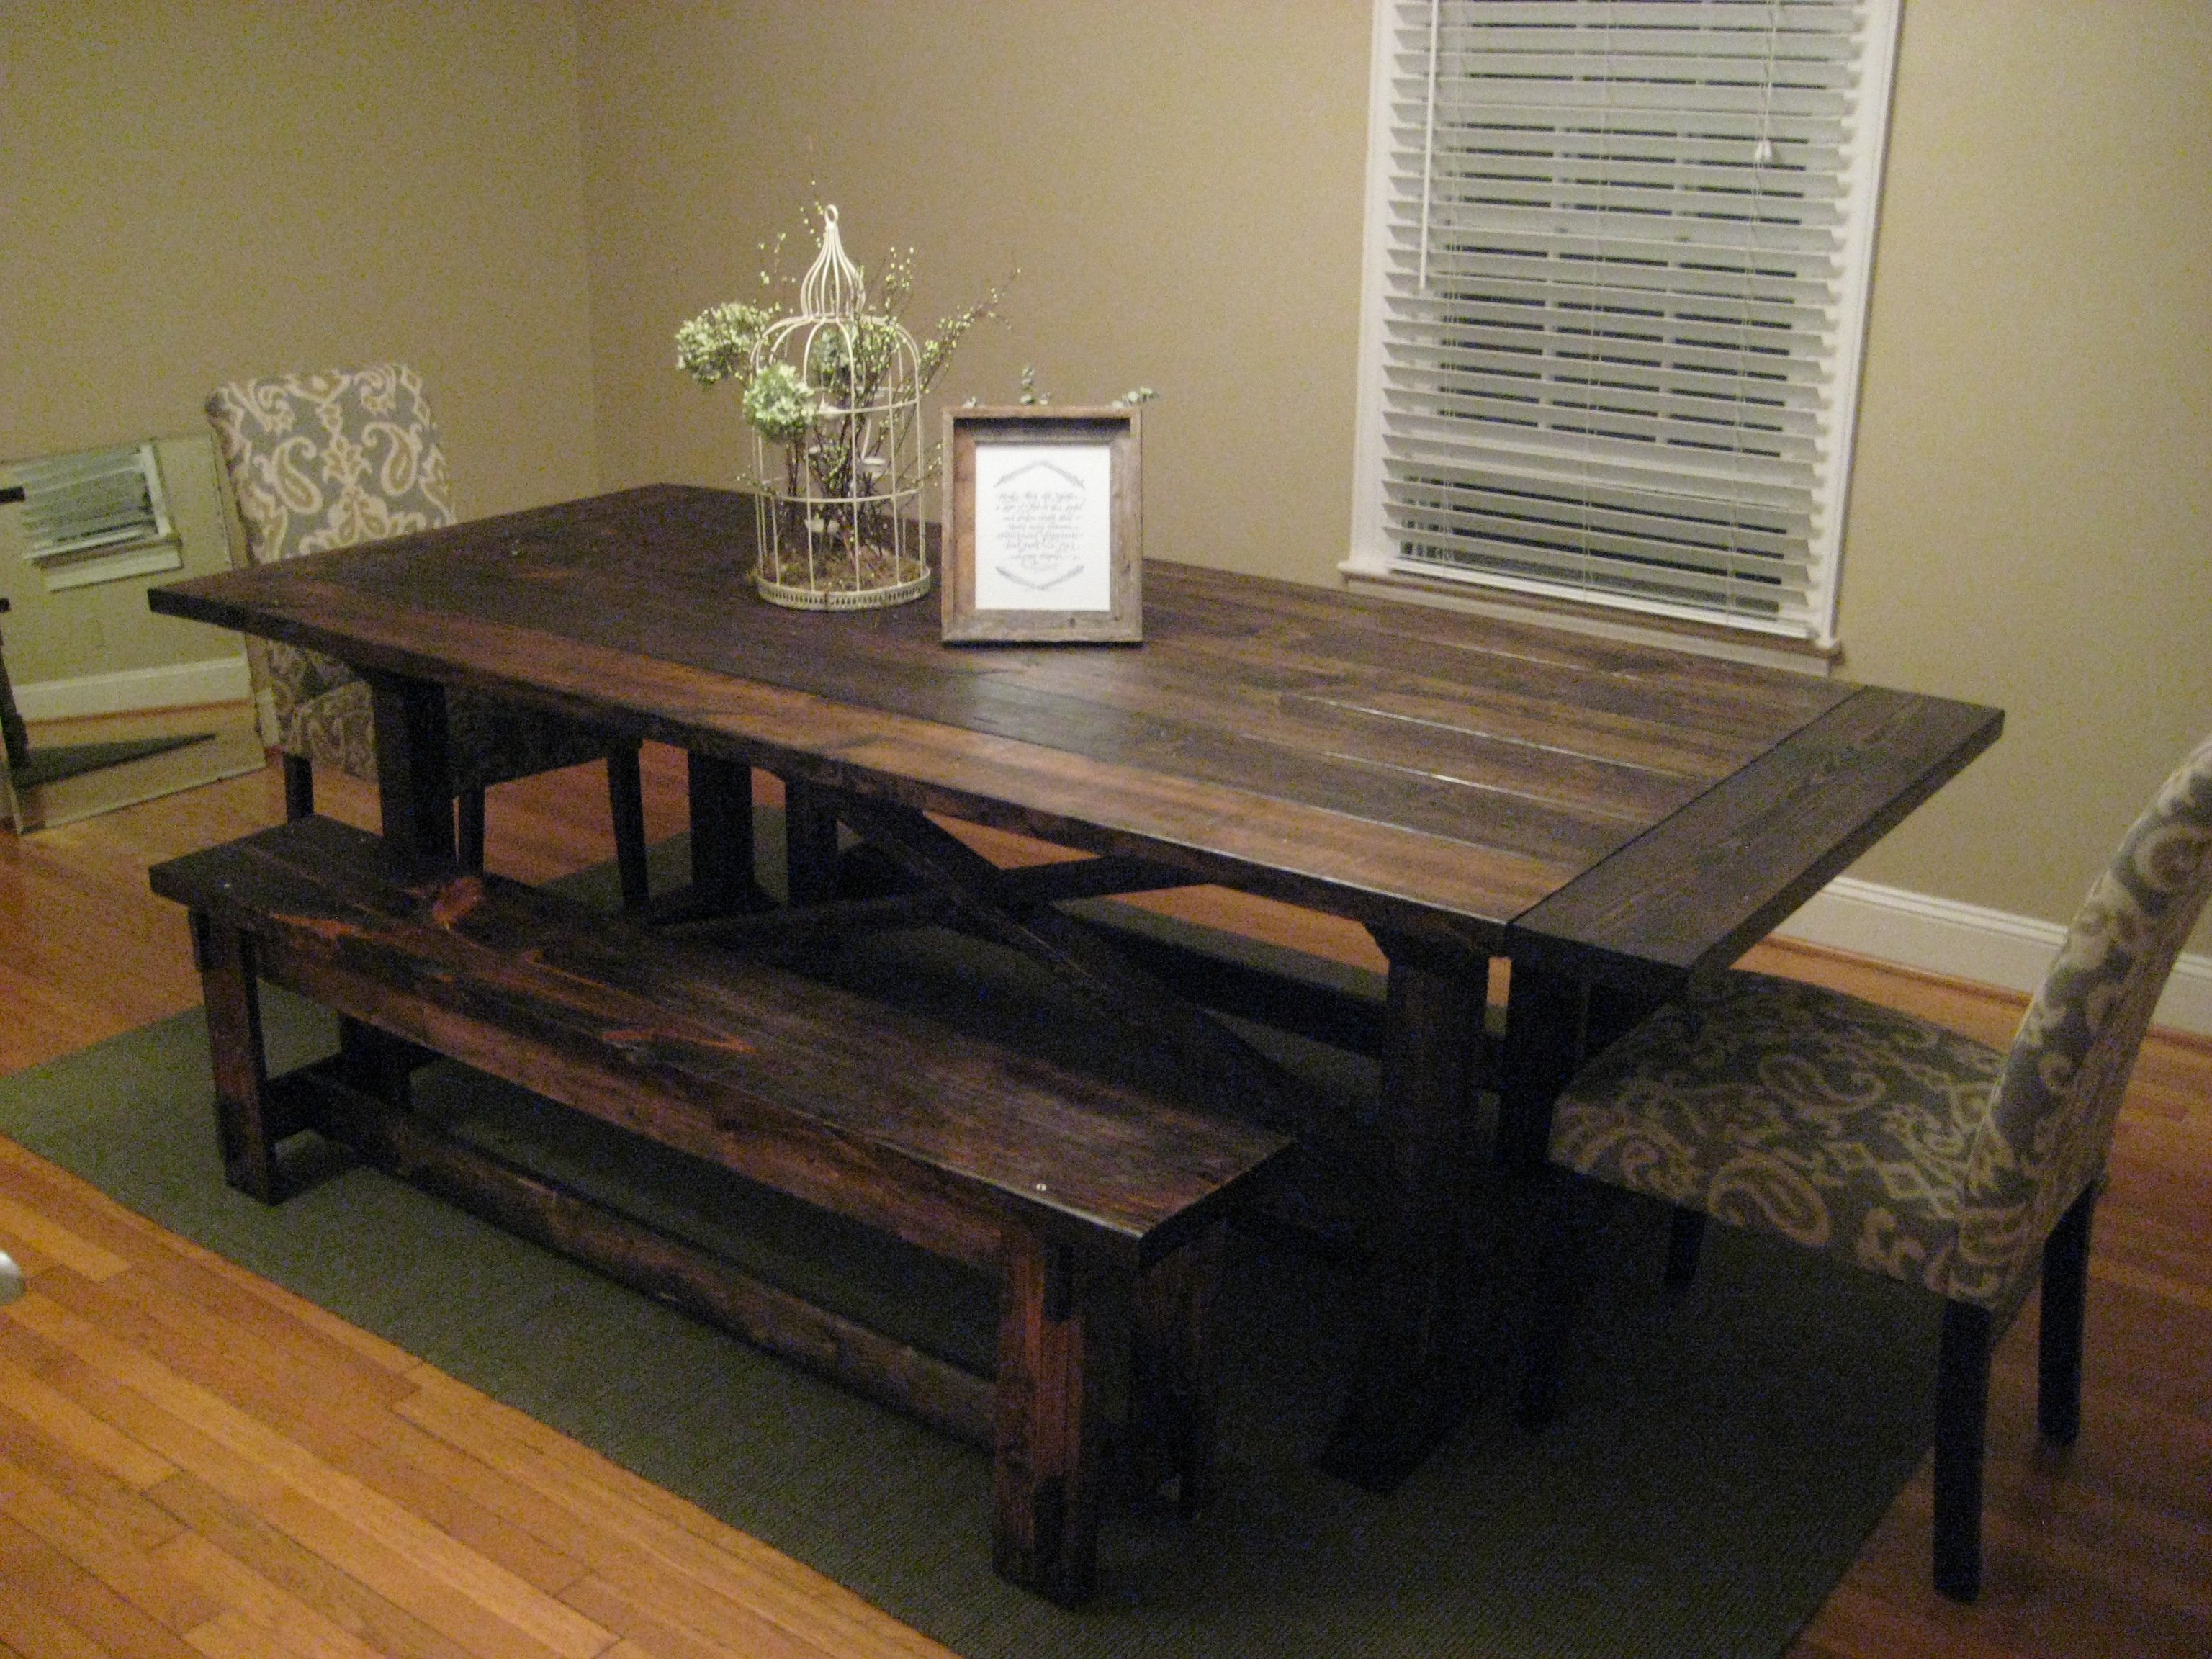
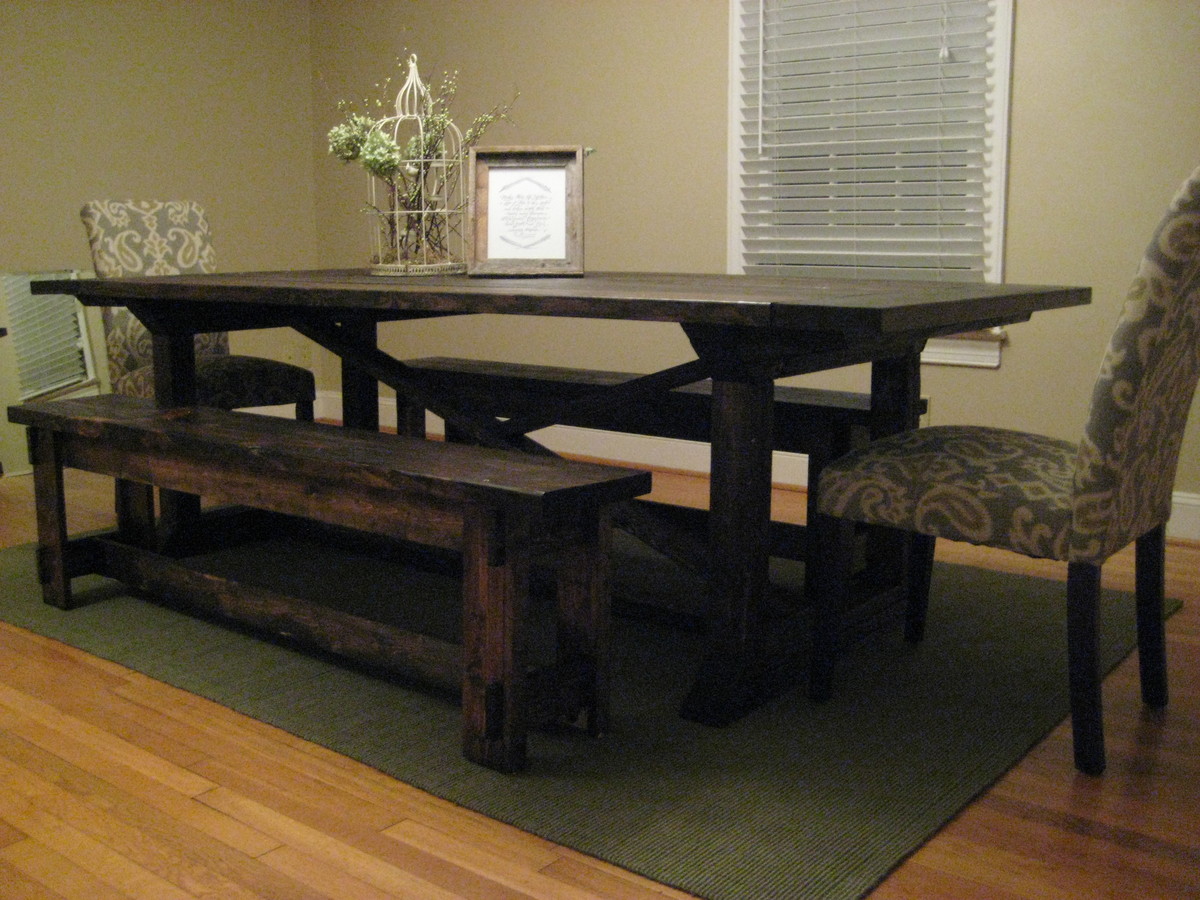
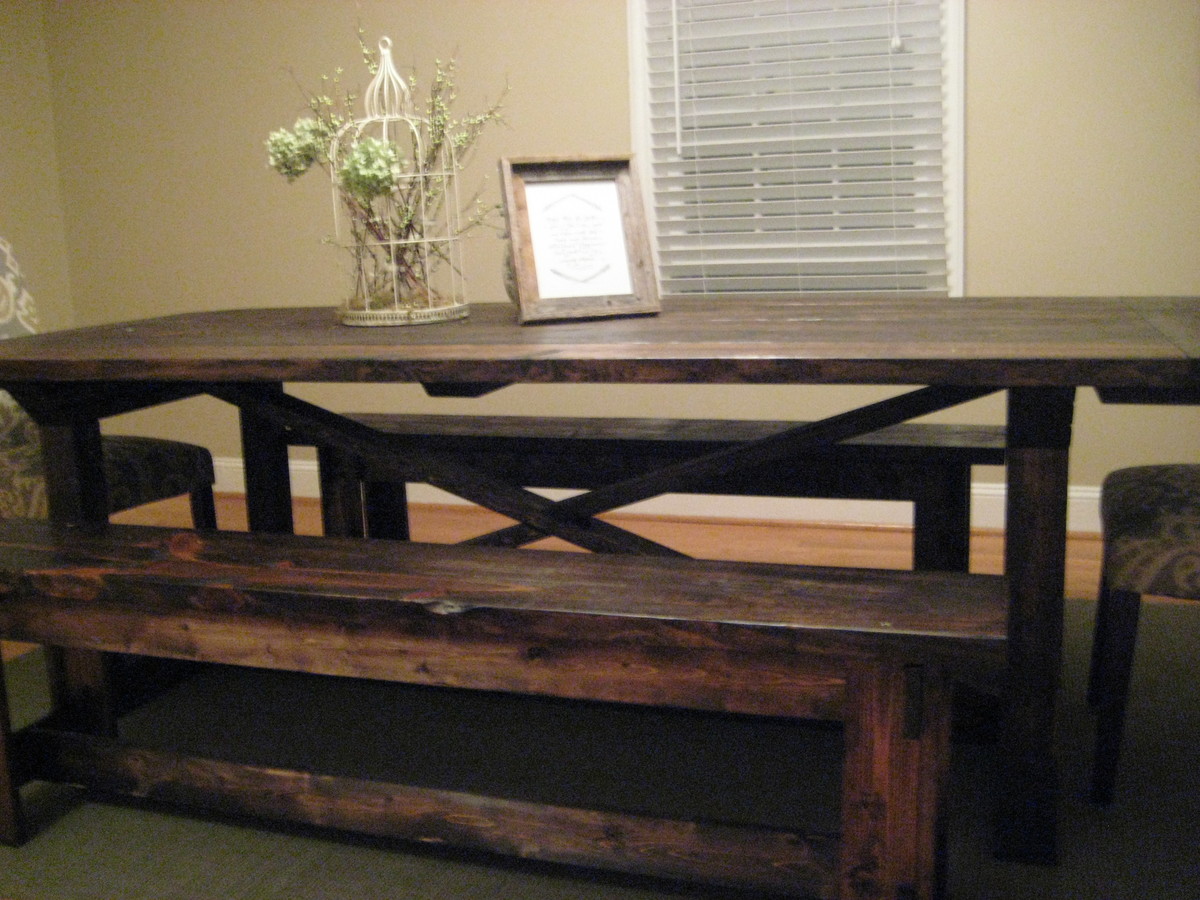
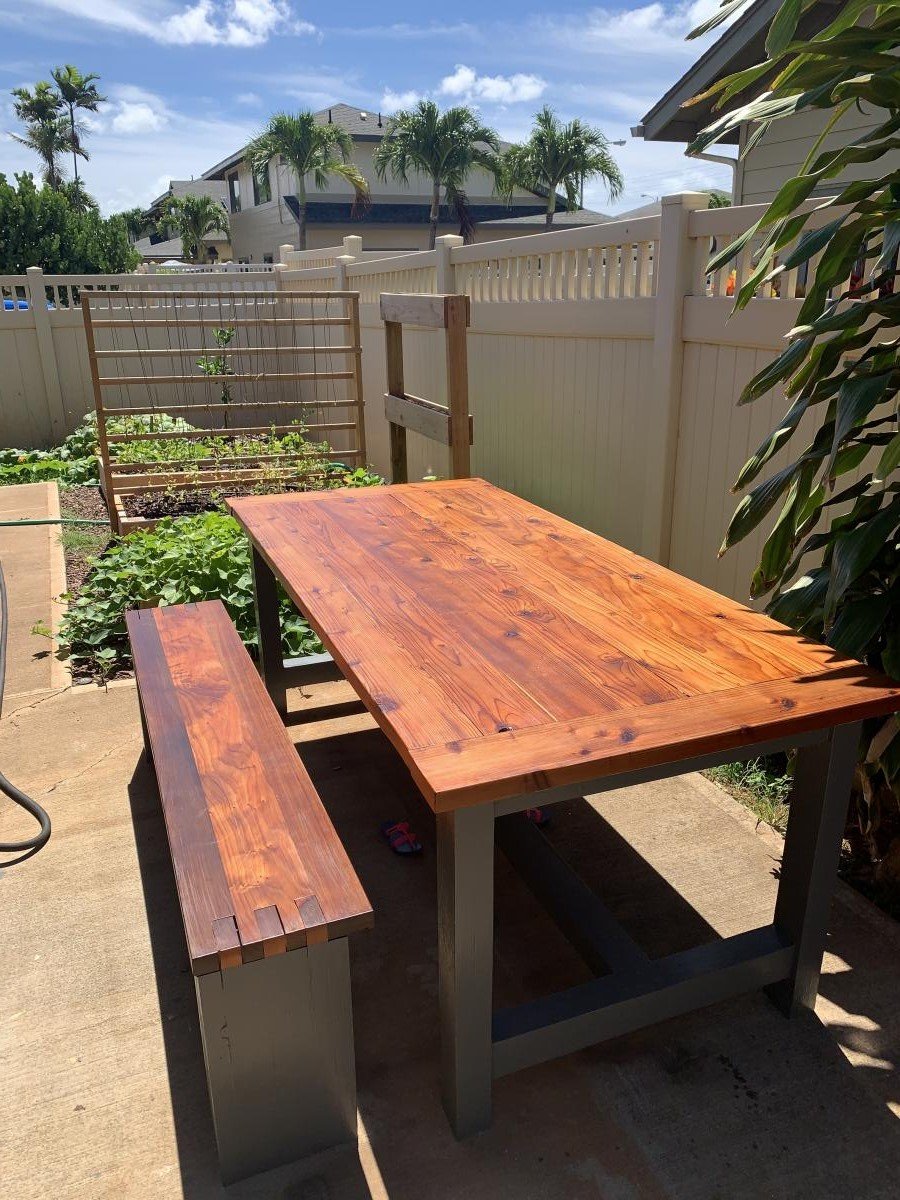
We made this table using the Rekourt Farmouse table plan. We used wider boards for the table top and simplified the angles on the legs a bit. We also built benches for each side of the table and dressed the ends with formal dining chairs. Used Dark Walnut Minwax stain and a clear satin epoxy to coat the top and bench seats. Had issues attaching the breadboards even with a Kreg Jig, Would probably do better if we did it all over again but totally happy with how it turned out.
Mon, 07/20/2015 - 07:53
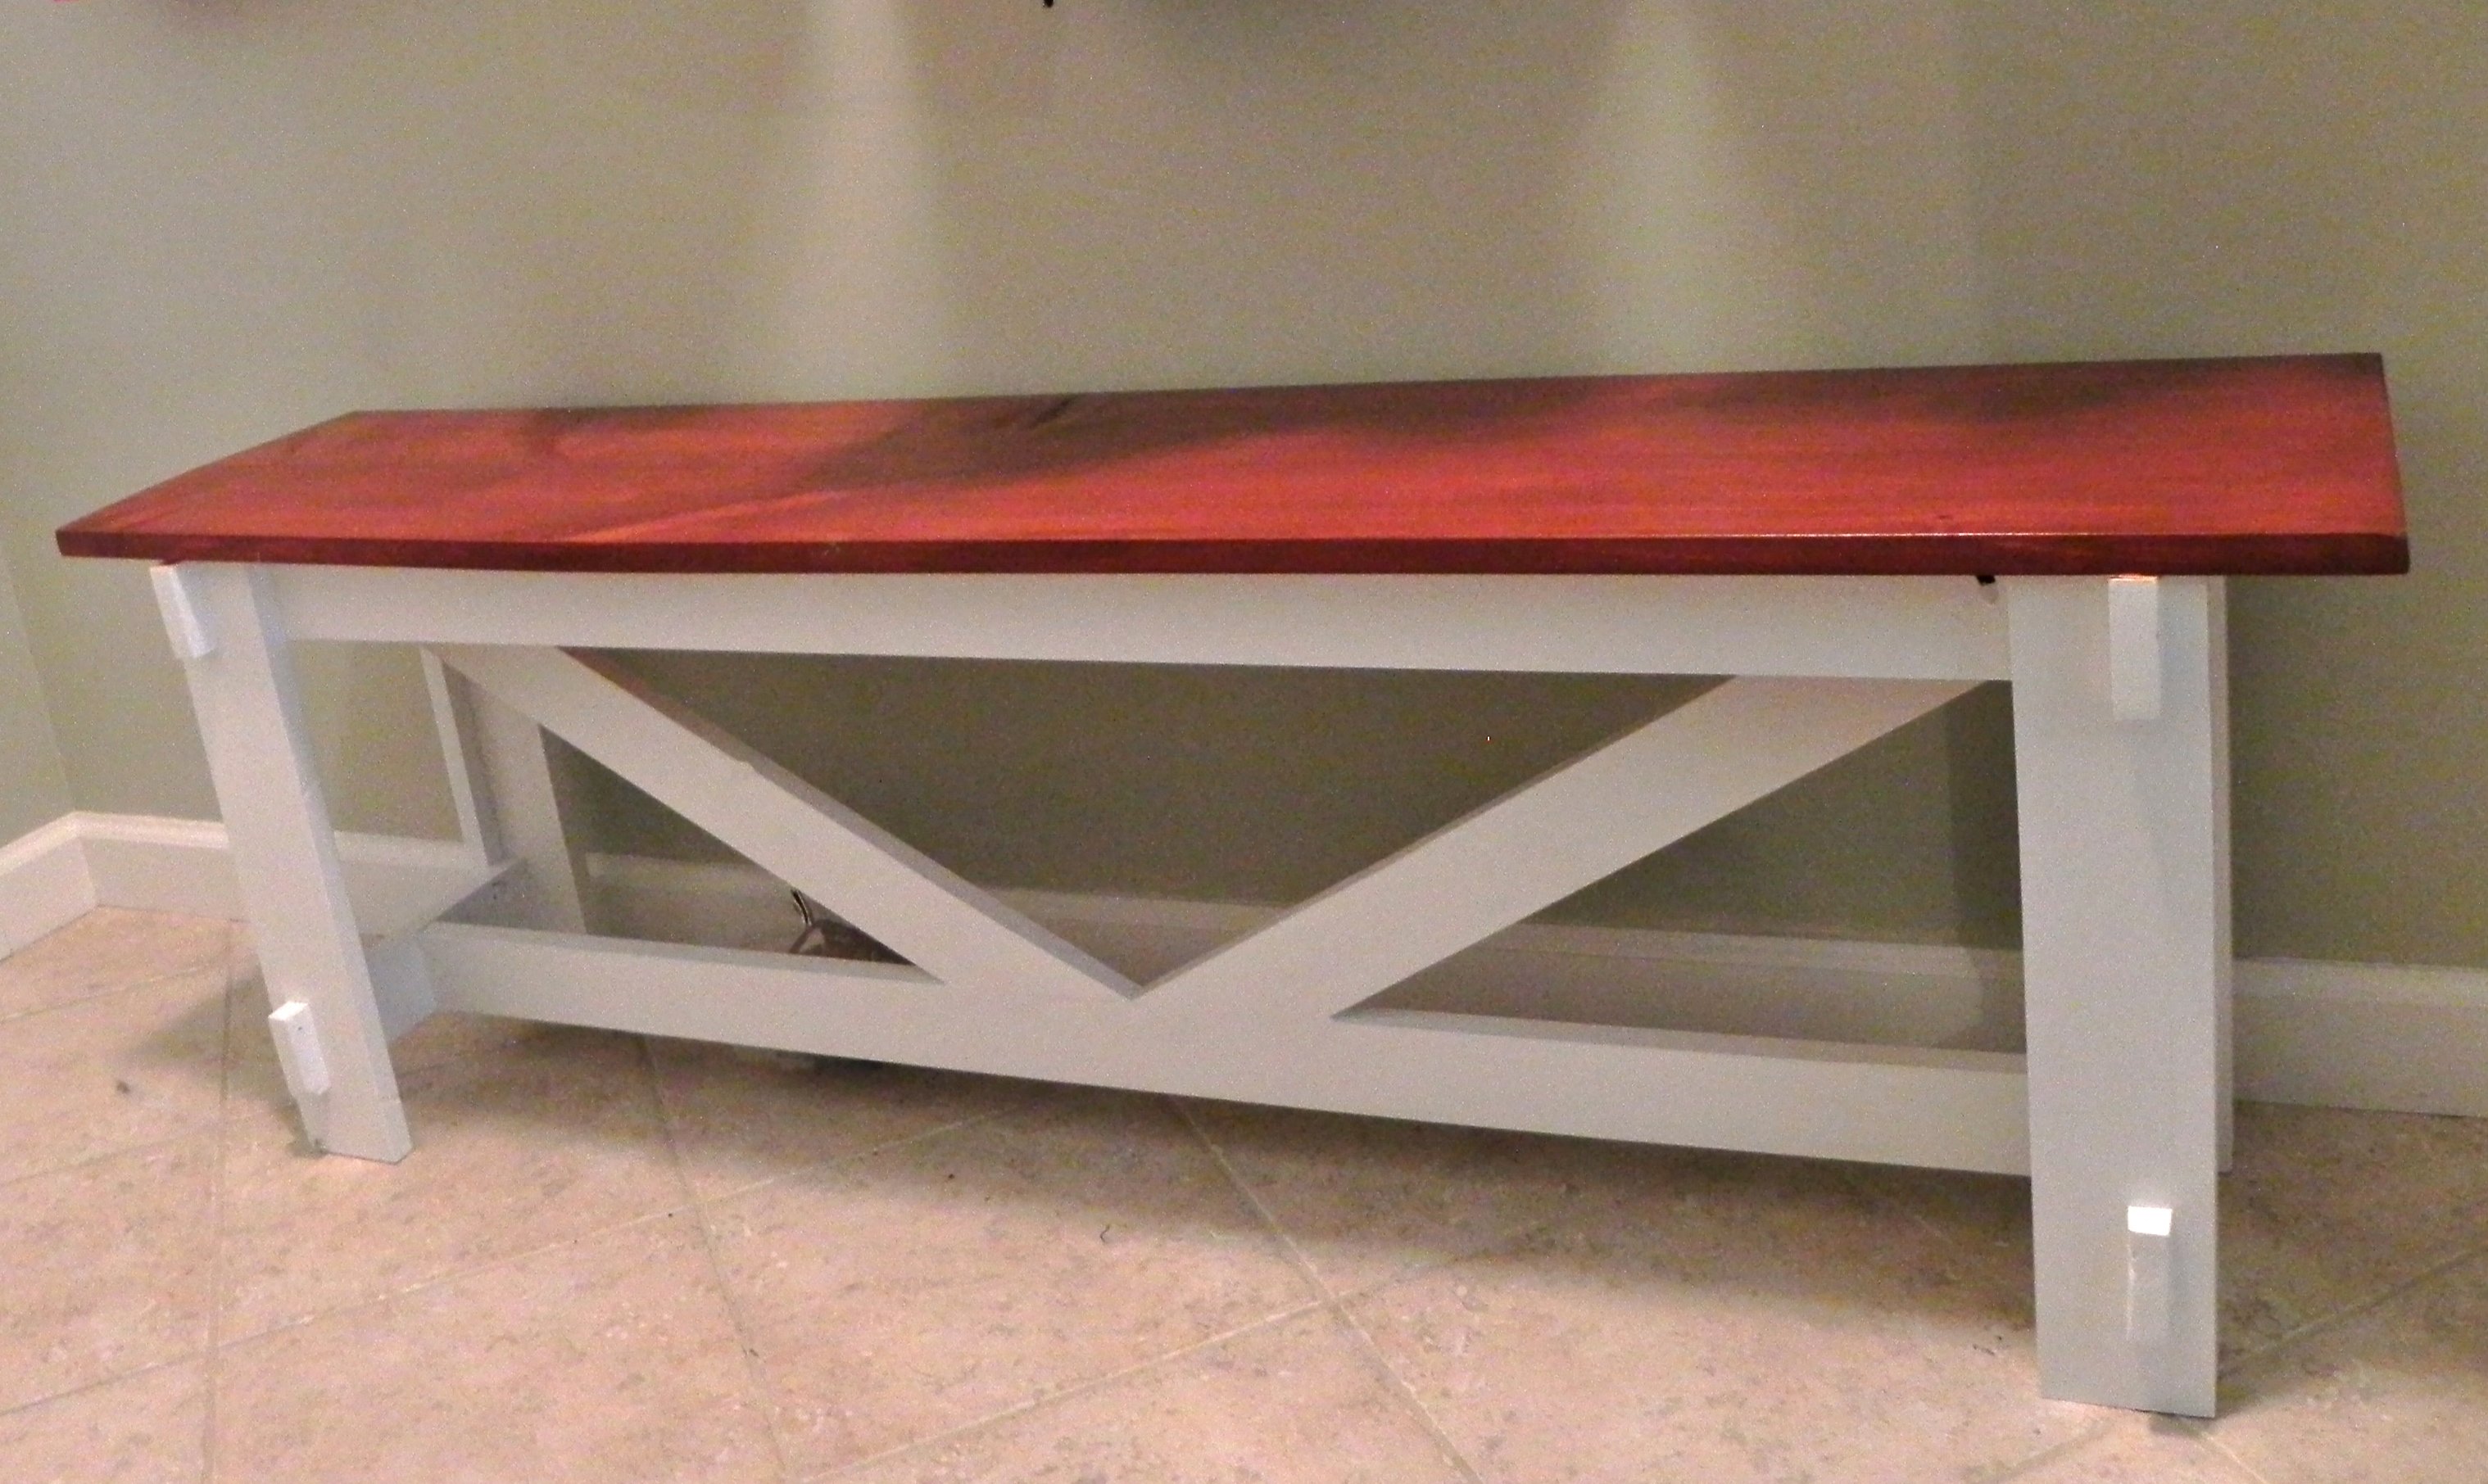
I modified Ana's plan of this bench
http://ana-white.com/2010/01/plans-rustic-bench-pottery-barn.html.
I didn't use the diagonal support beams. 1x12 for the top of the bench.
Mon, 07/20/2015 - 07:54
I modified Ana's plan of this bench
http://ana-white.com/2010/01/plans-rustic-bench-pottery-barn.html.
I didn't use the diagonal support beams. 1x12 for the top of the bench. Adjusted the length to make sure it fit right under the table in between the legs. Extremely sturdy without the diagonal supports.
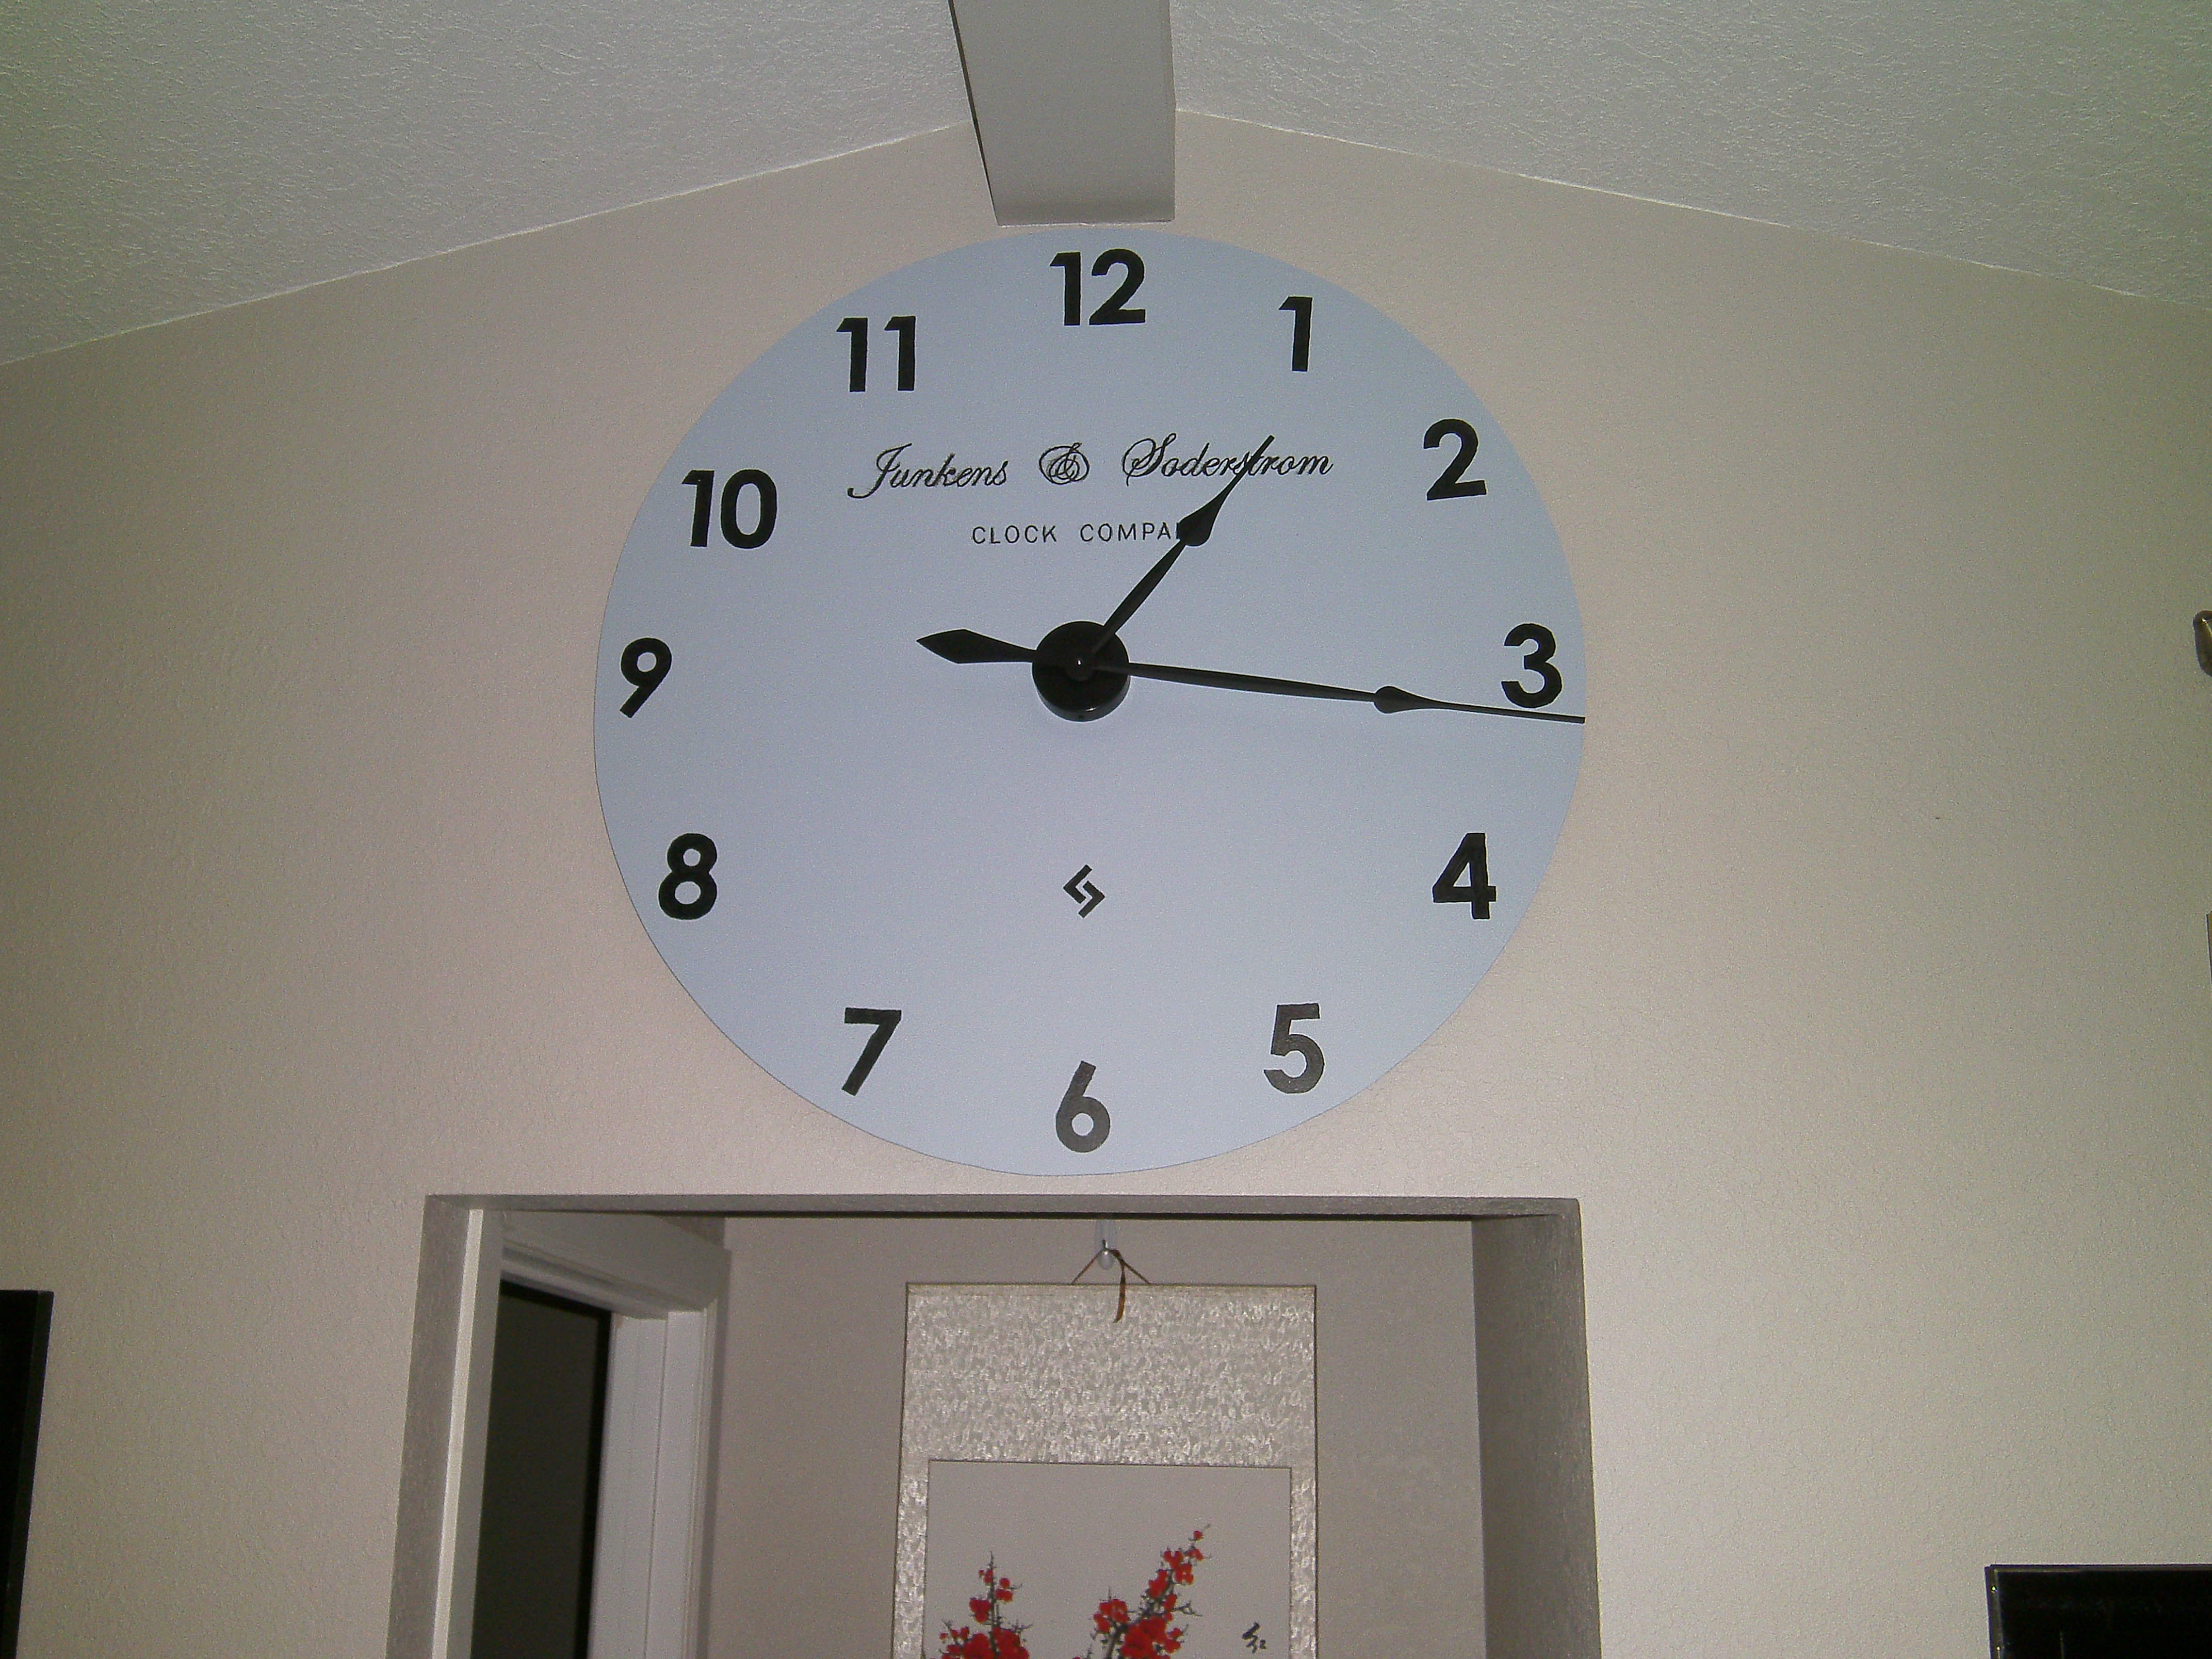
My wife wanted something to replace the wreath on our wall after Christmas and I was thinking of making her a large wall clock as a gift. Plan meets opportunity and we just happen to be at Hobby Lobby at the time and so it began. I used a piece of paneling for the face of the clock (same material as peg board without the holes about $8, enough to make two if I wanted) and built a wooden frame out of 1' X 2' s on the back that resembles a four pane window frame. Painted the face and numbers, then printed our names and transferred them on to the face and followed up tracing them with a sharpie. Affixed clocked to face and hung.

I made this with leftover lumber after my mom helped me make a swingset for my kids. It's the very first project I've ever done by myself and it turned out GREAT!

Tue, 07/02/2019 - 14:07
This looks awesome! Thank you for submitting a brag post, we really appreciate it! Ana
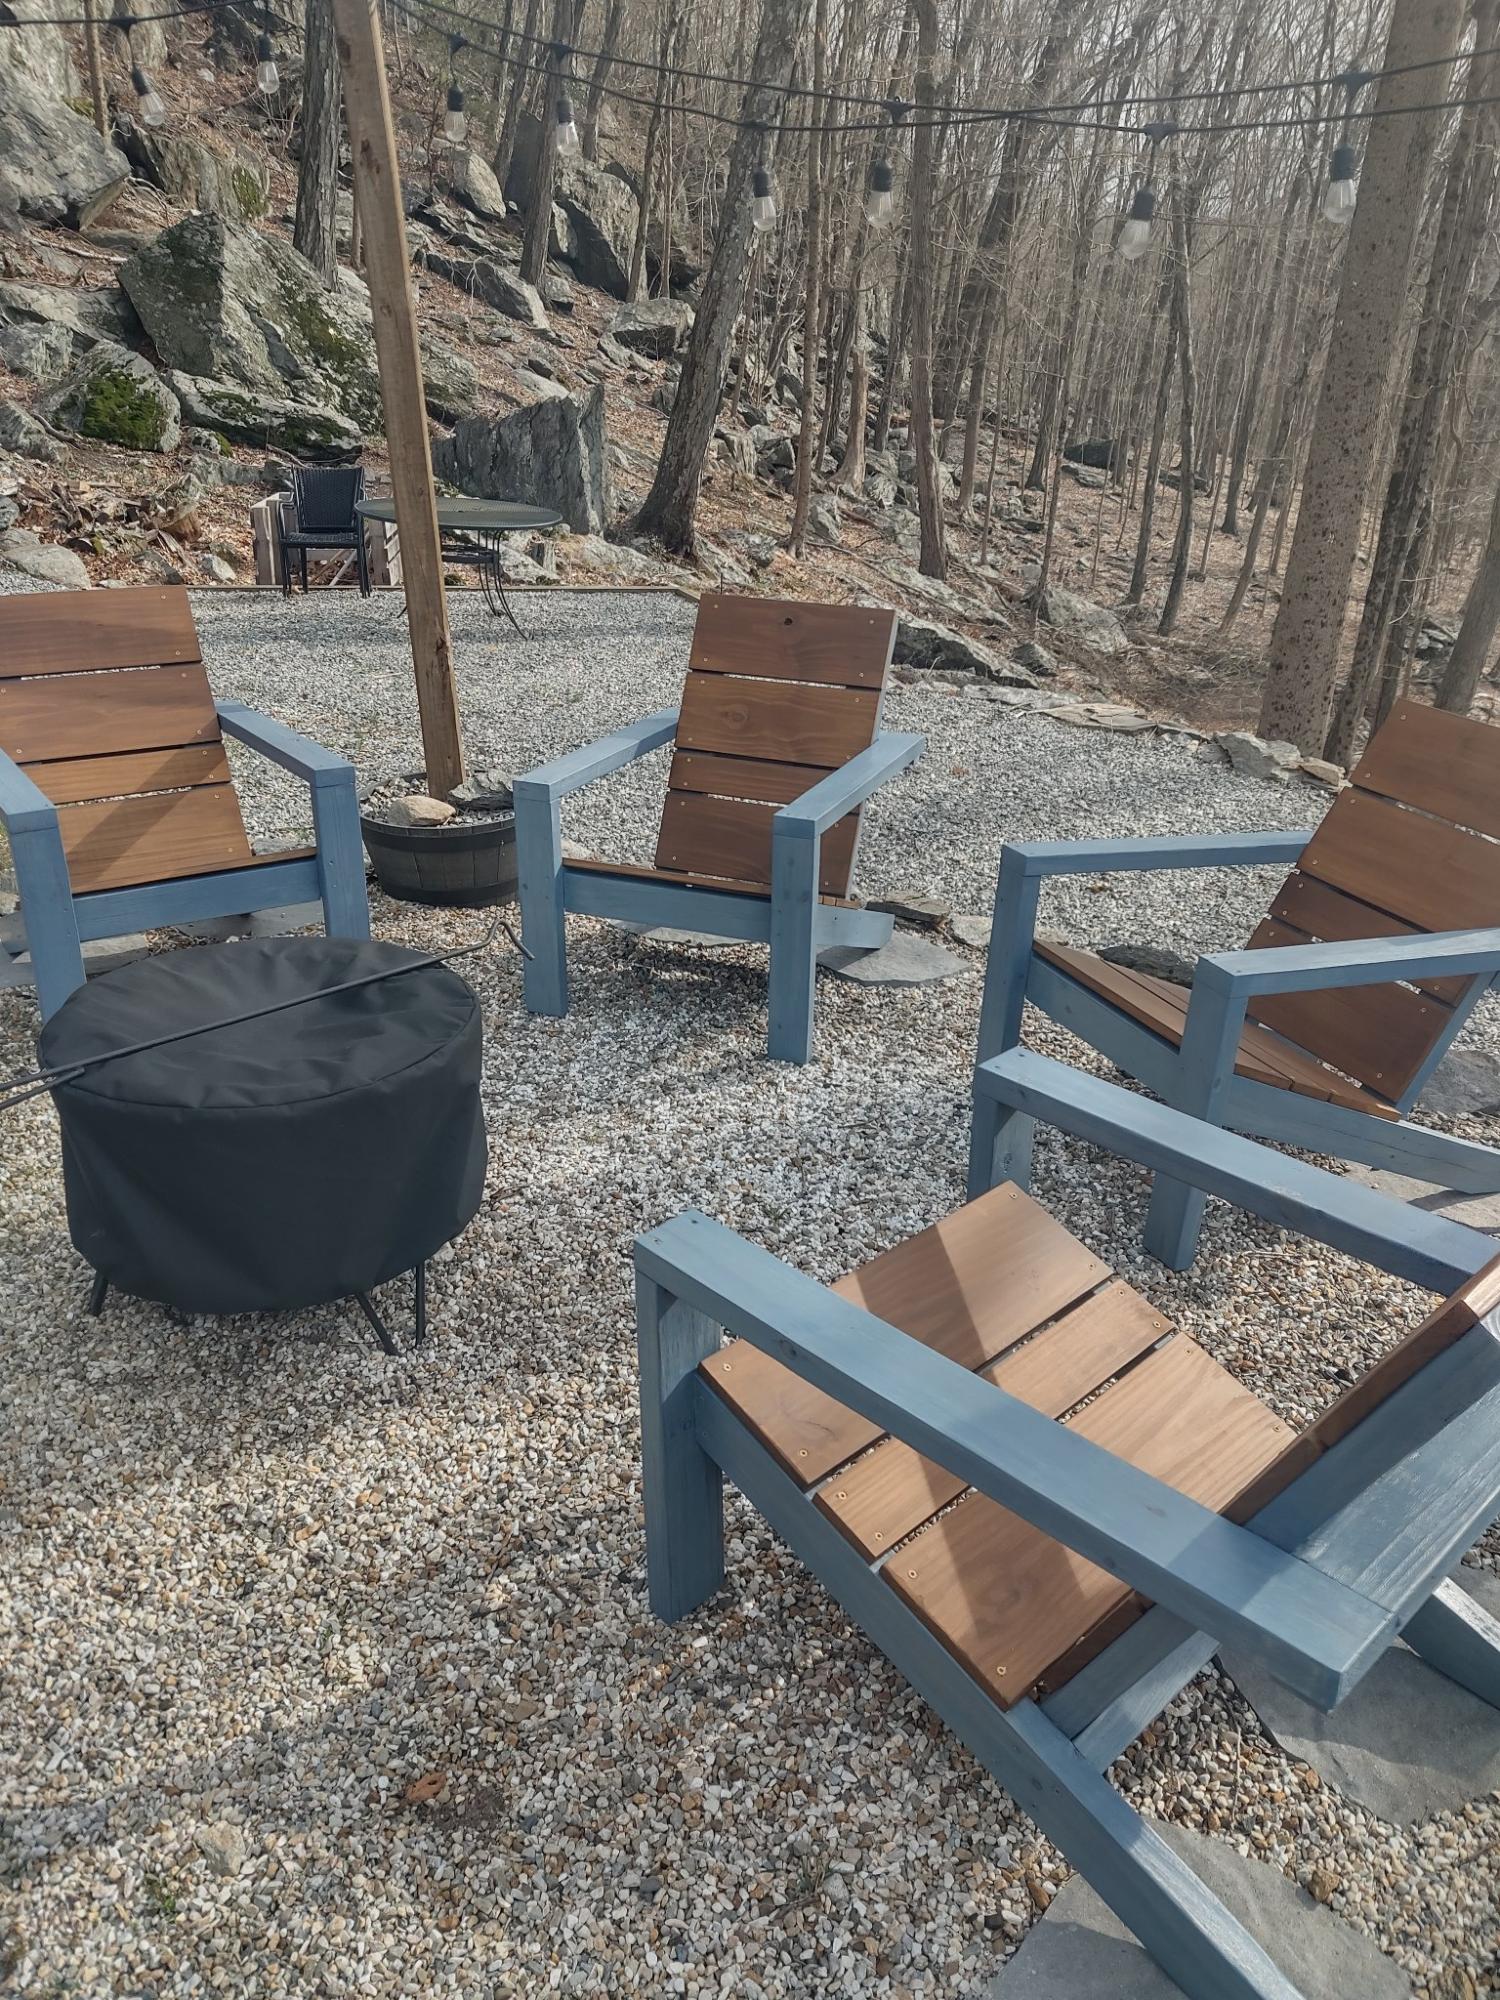
Love these chairs!
Mon, 04/10/2023 - 10:07
Looks like a fun time and the chairs look fabulous! Thanks for sharing.
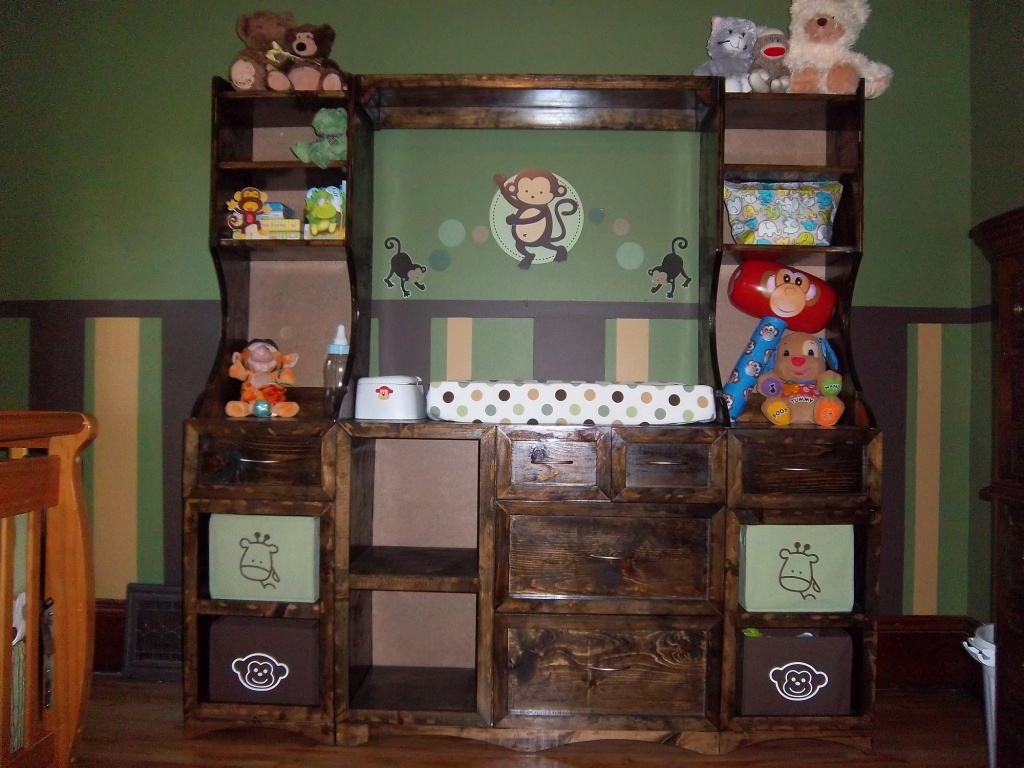
My husband and I built this changing table for our sons room. We made a few modifications, but overall, I think it looks great! This was the first of many projects to come from this website!

Sat, 09/22/2012 - 05:02
This looks fantastic! We're headed out to buy wood for this project today!
Fri, 11/09/2012 - 12:13
Hi! This looks great! Was wondering if you had the plans for the side hutch? I tried to use the link but it keeps telling me the link is unavaliable.
Thanks so much!
Distressed chalk paint
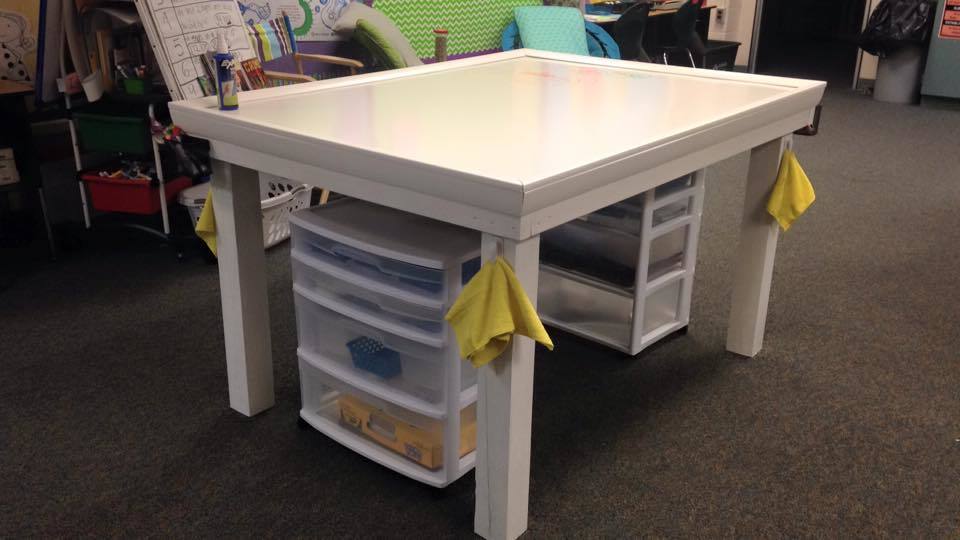
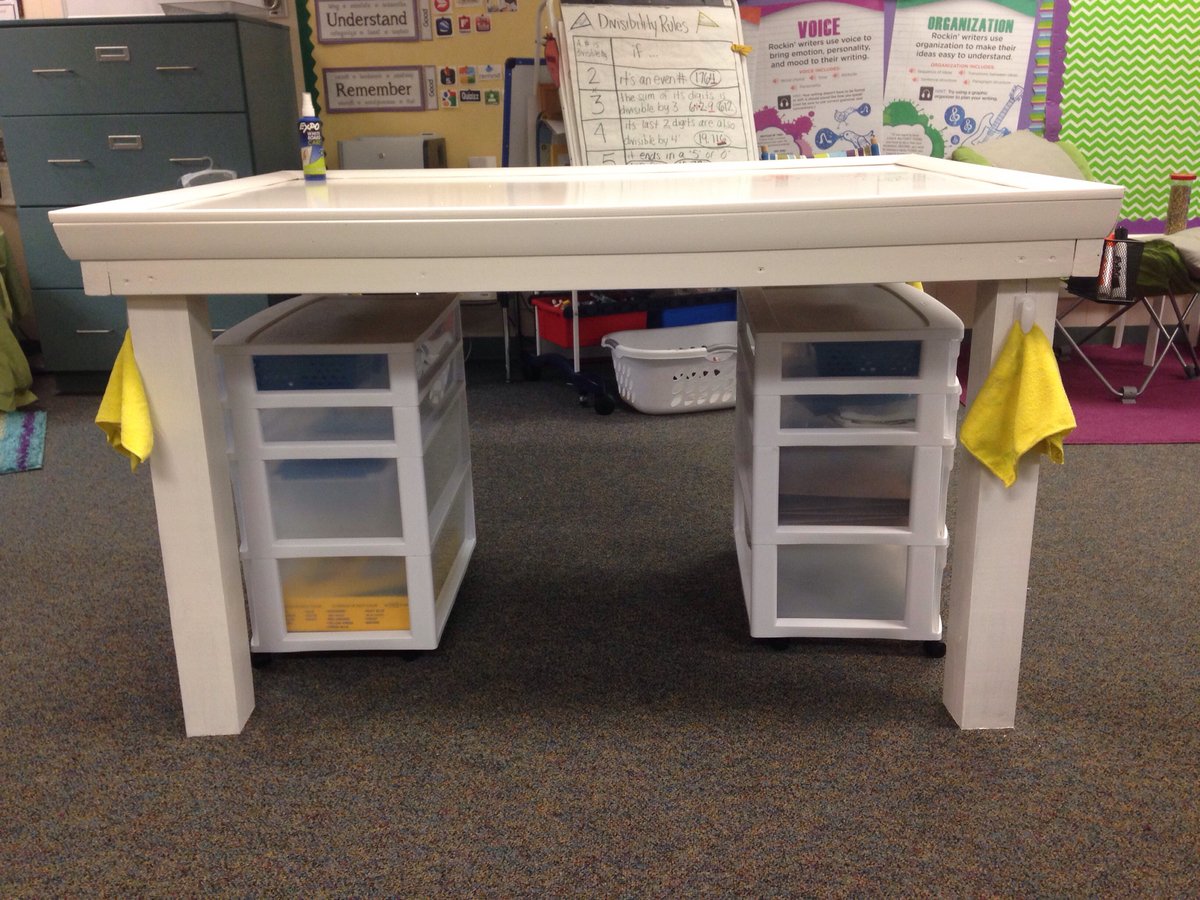
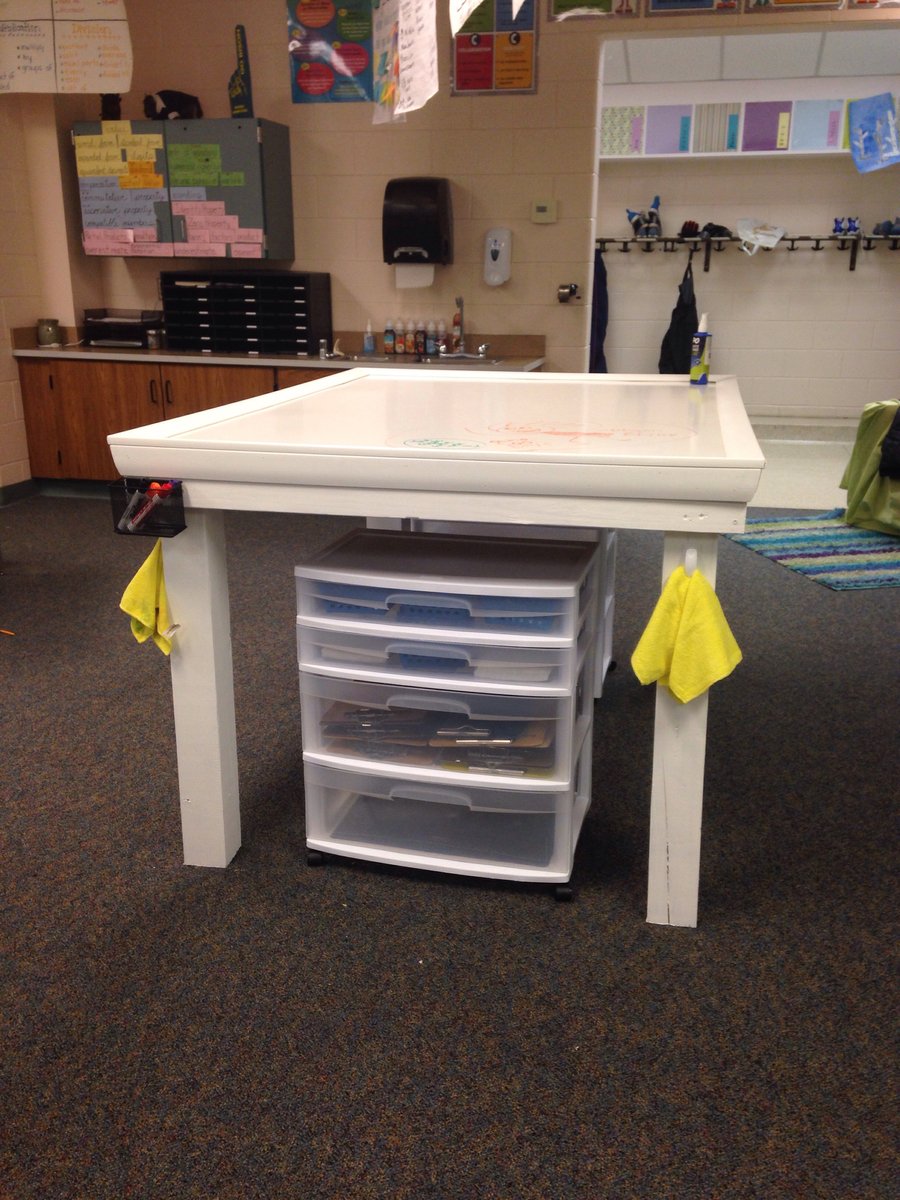
I love this table! Made for my 5th grade classroom, I modified the plans to include a dry erase table top, magnetic strips to support dry erase marker holders and clips on each leg for microfiber cloths to clean the board. I also lowered the table by two inches so my vertically challenged students could still stand, wiggle, and work comfortably. Thanks for posting the plans!
Tue, 11/24/2020 - 04:43
I like this table https://www.ana-white.com/community-projects/student-work-table
Can you share the tutorial?
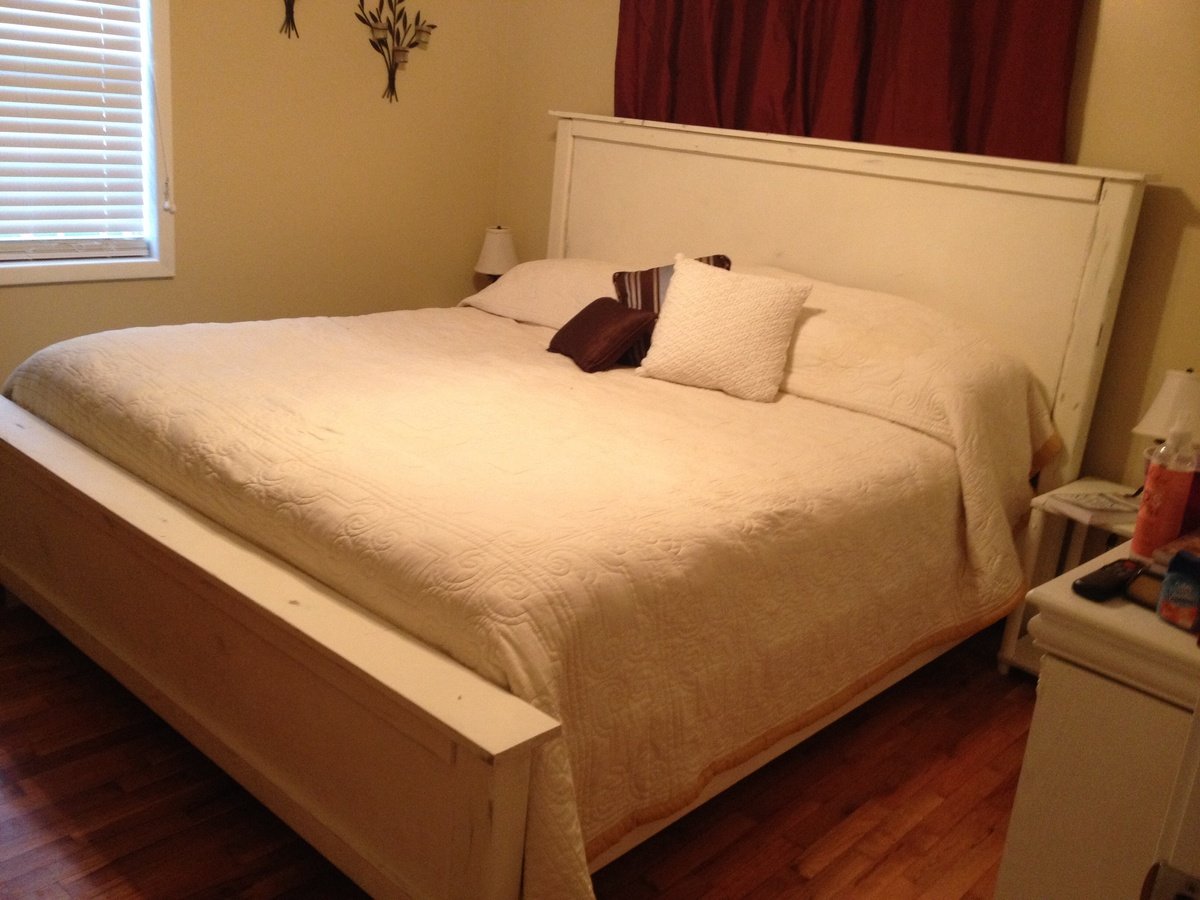
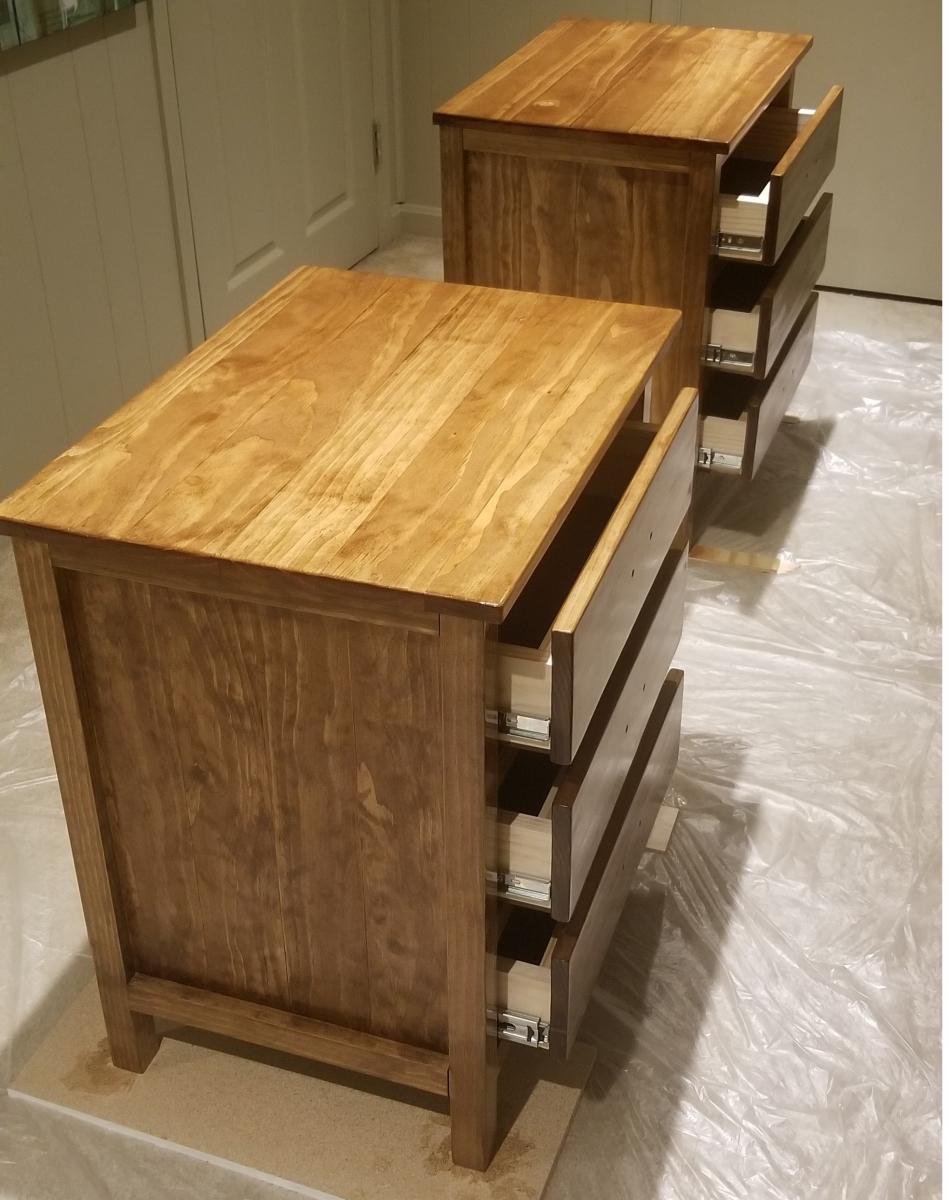
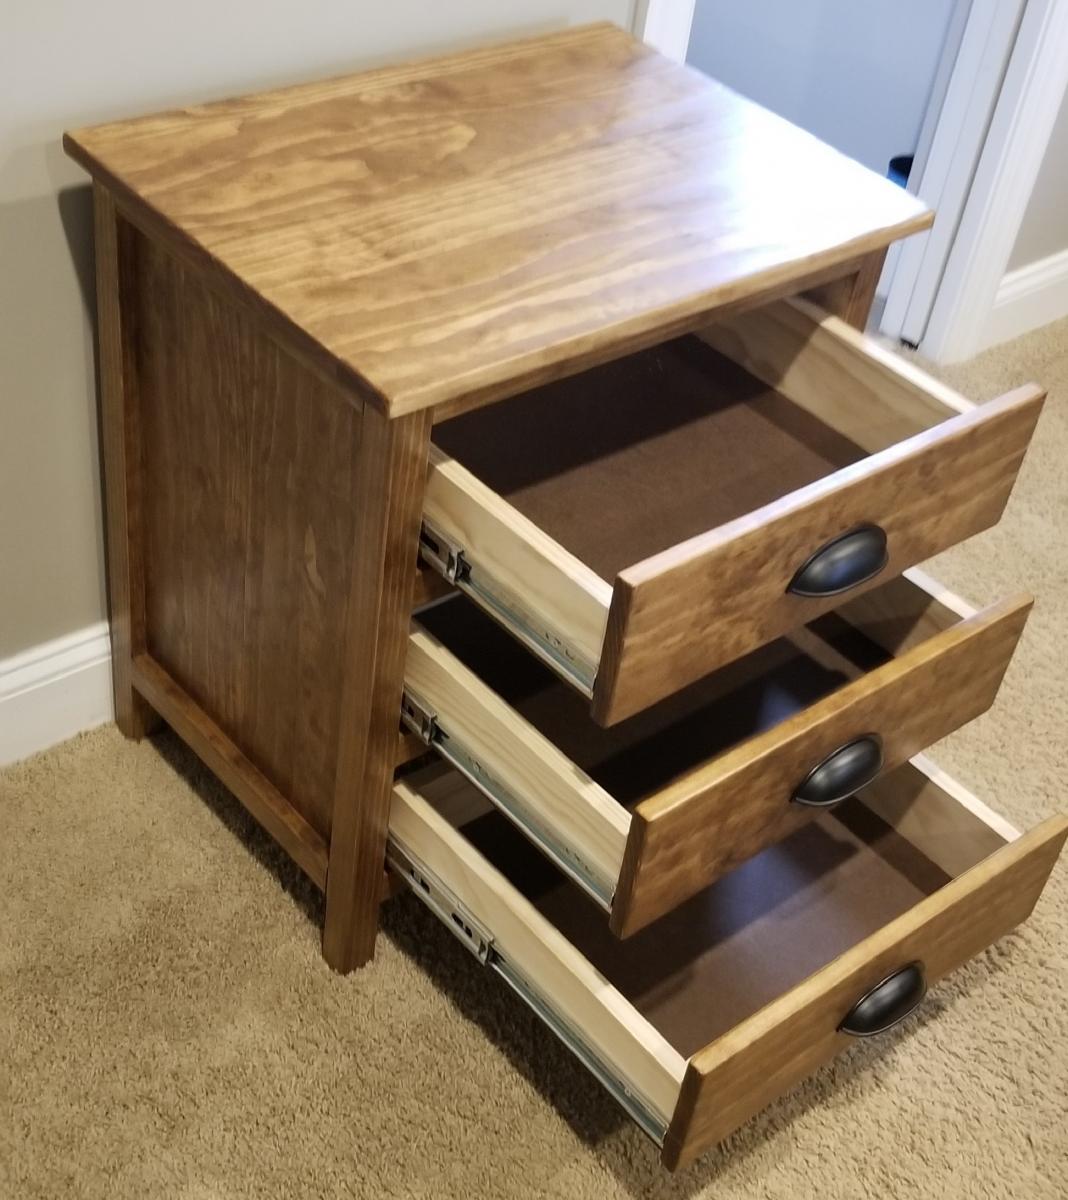
I used one of the plans found on the site but modified it by making mine 8 inches wider. They are slightly higher as well to match what I replaced in our master bedroom. This was actually the first project that I took on after looking at bedroom furniture for over a month and realizing how expensive cheap furniture is.
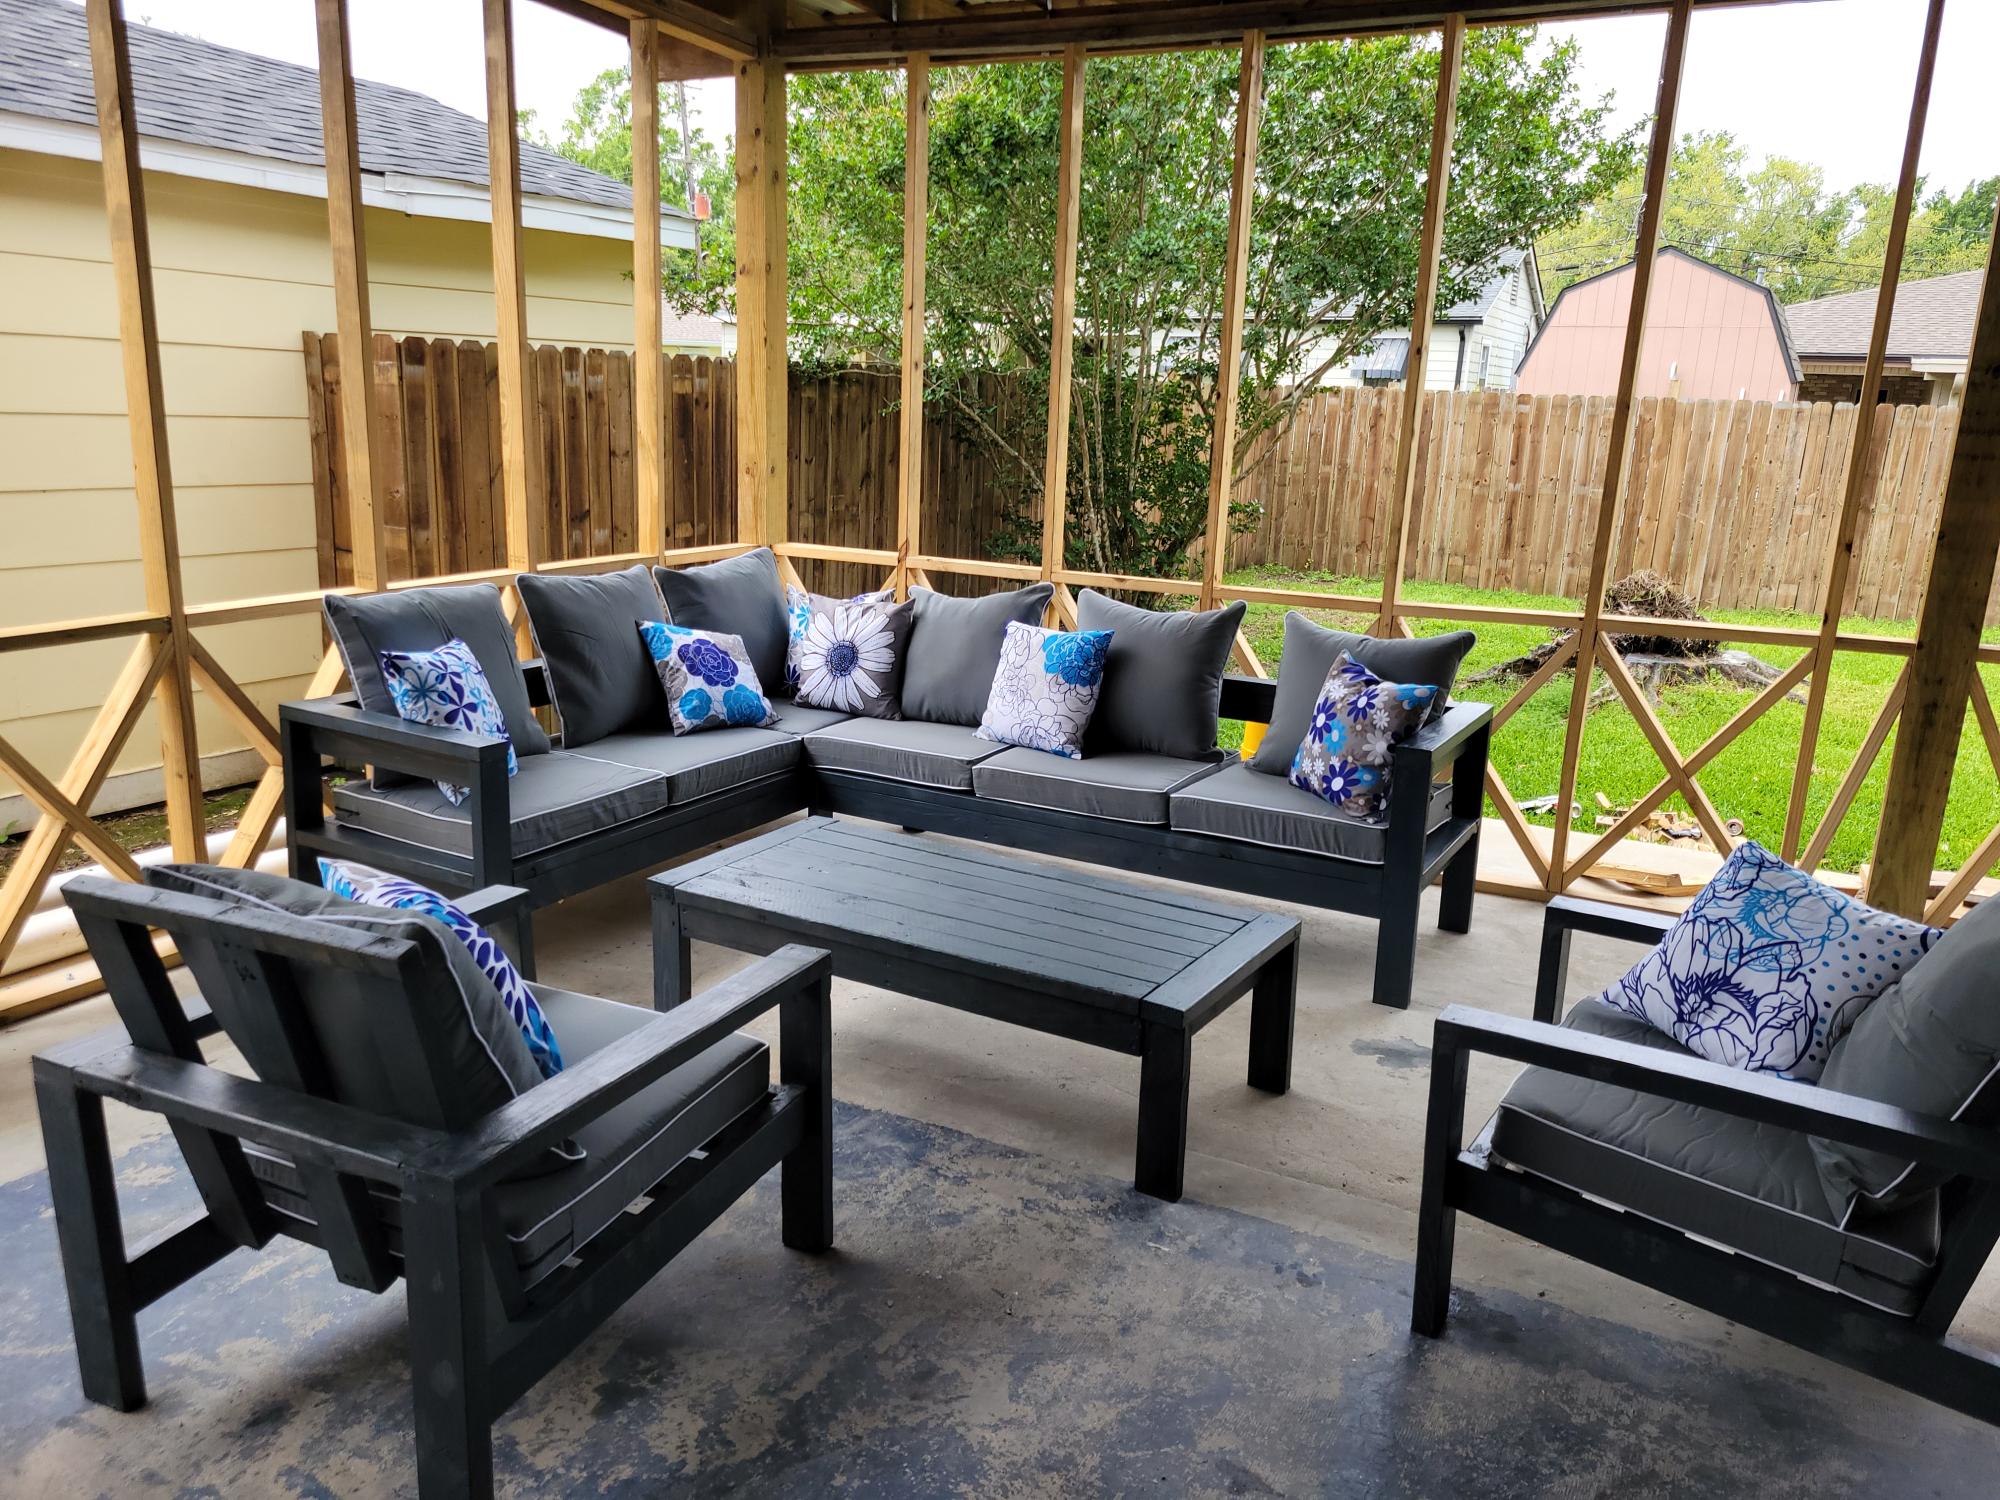
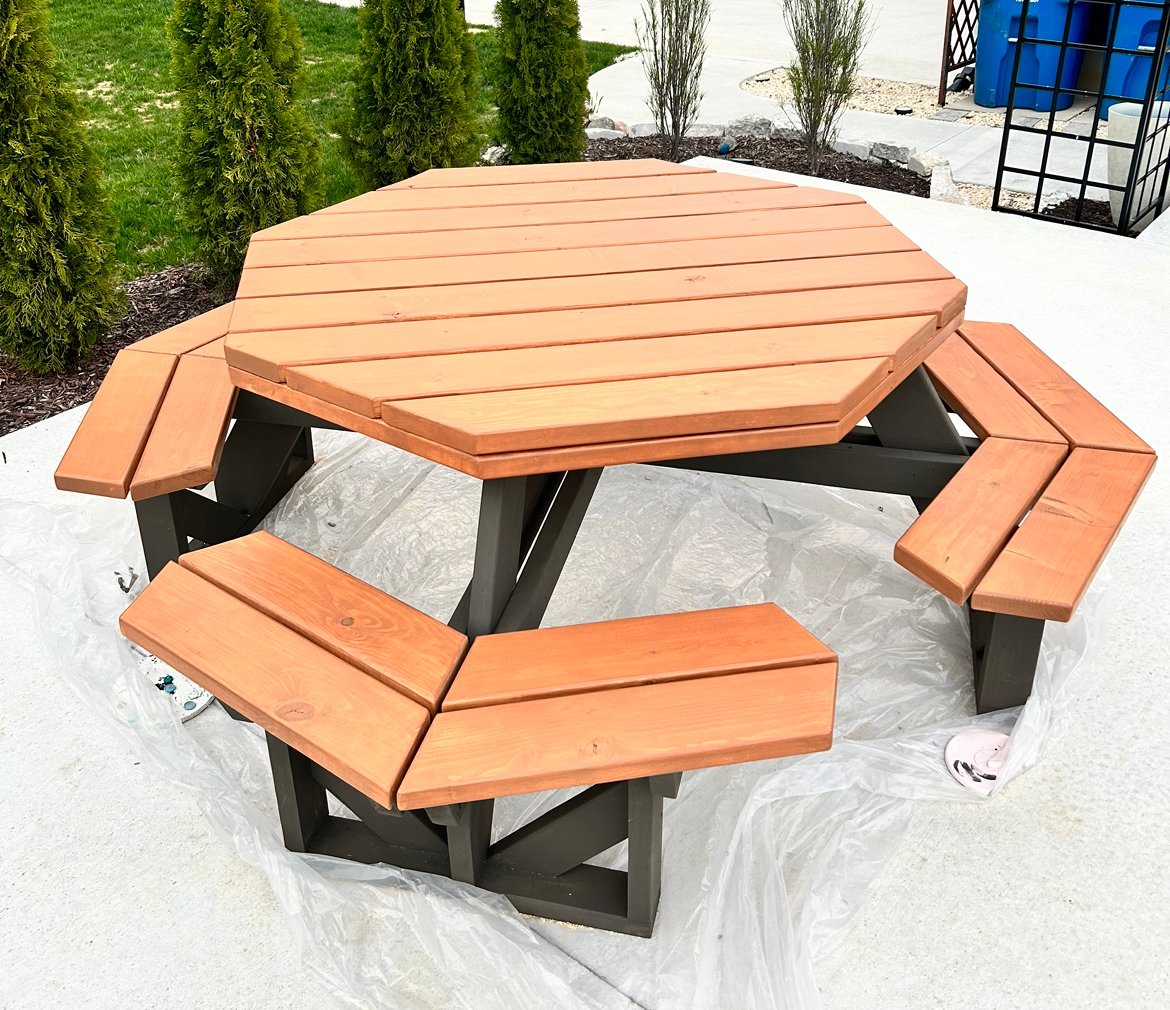
Your easy to follow 2x4 proje ts turned out amazing. My outdoor set is complete. The chairs, also, came from your plans. I built all of it by myself in one weekend. Thank you

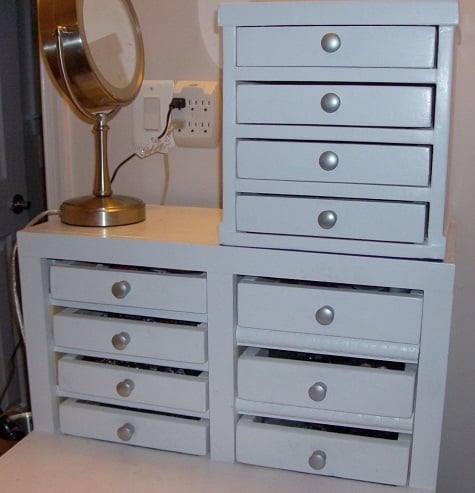
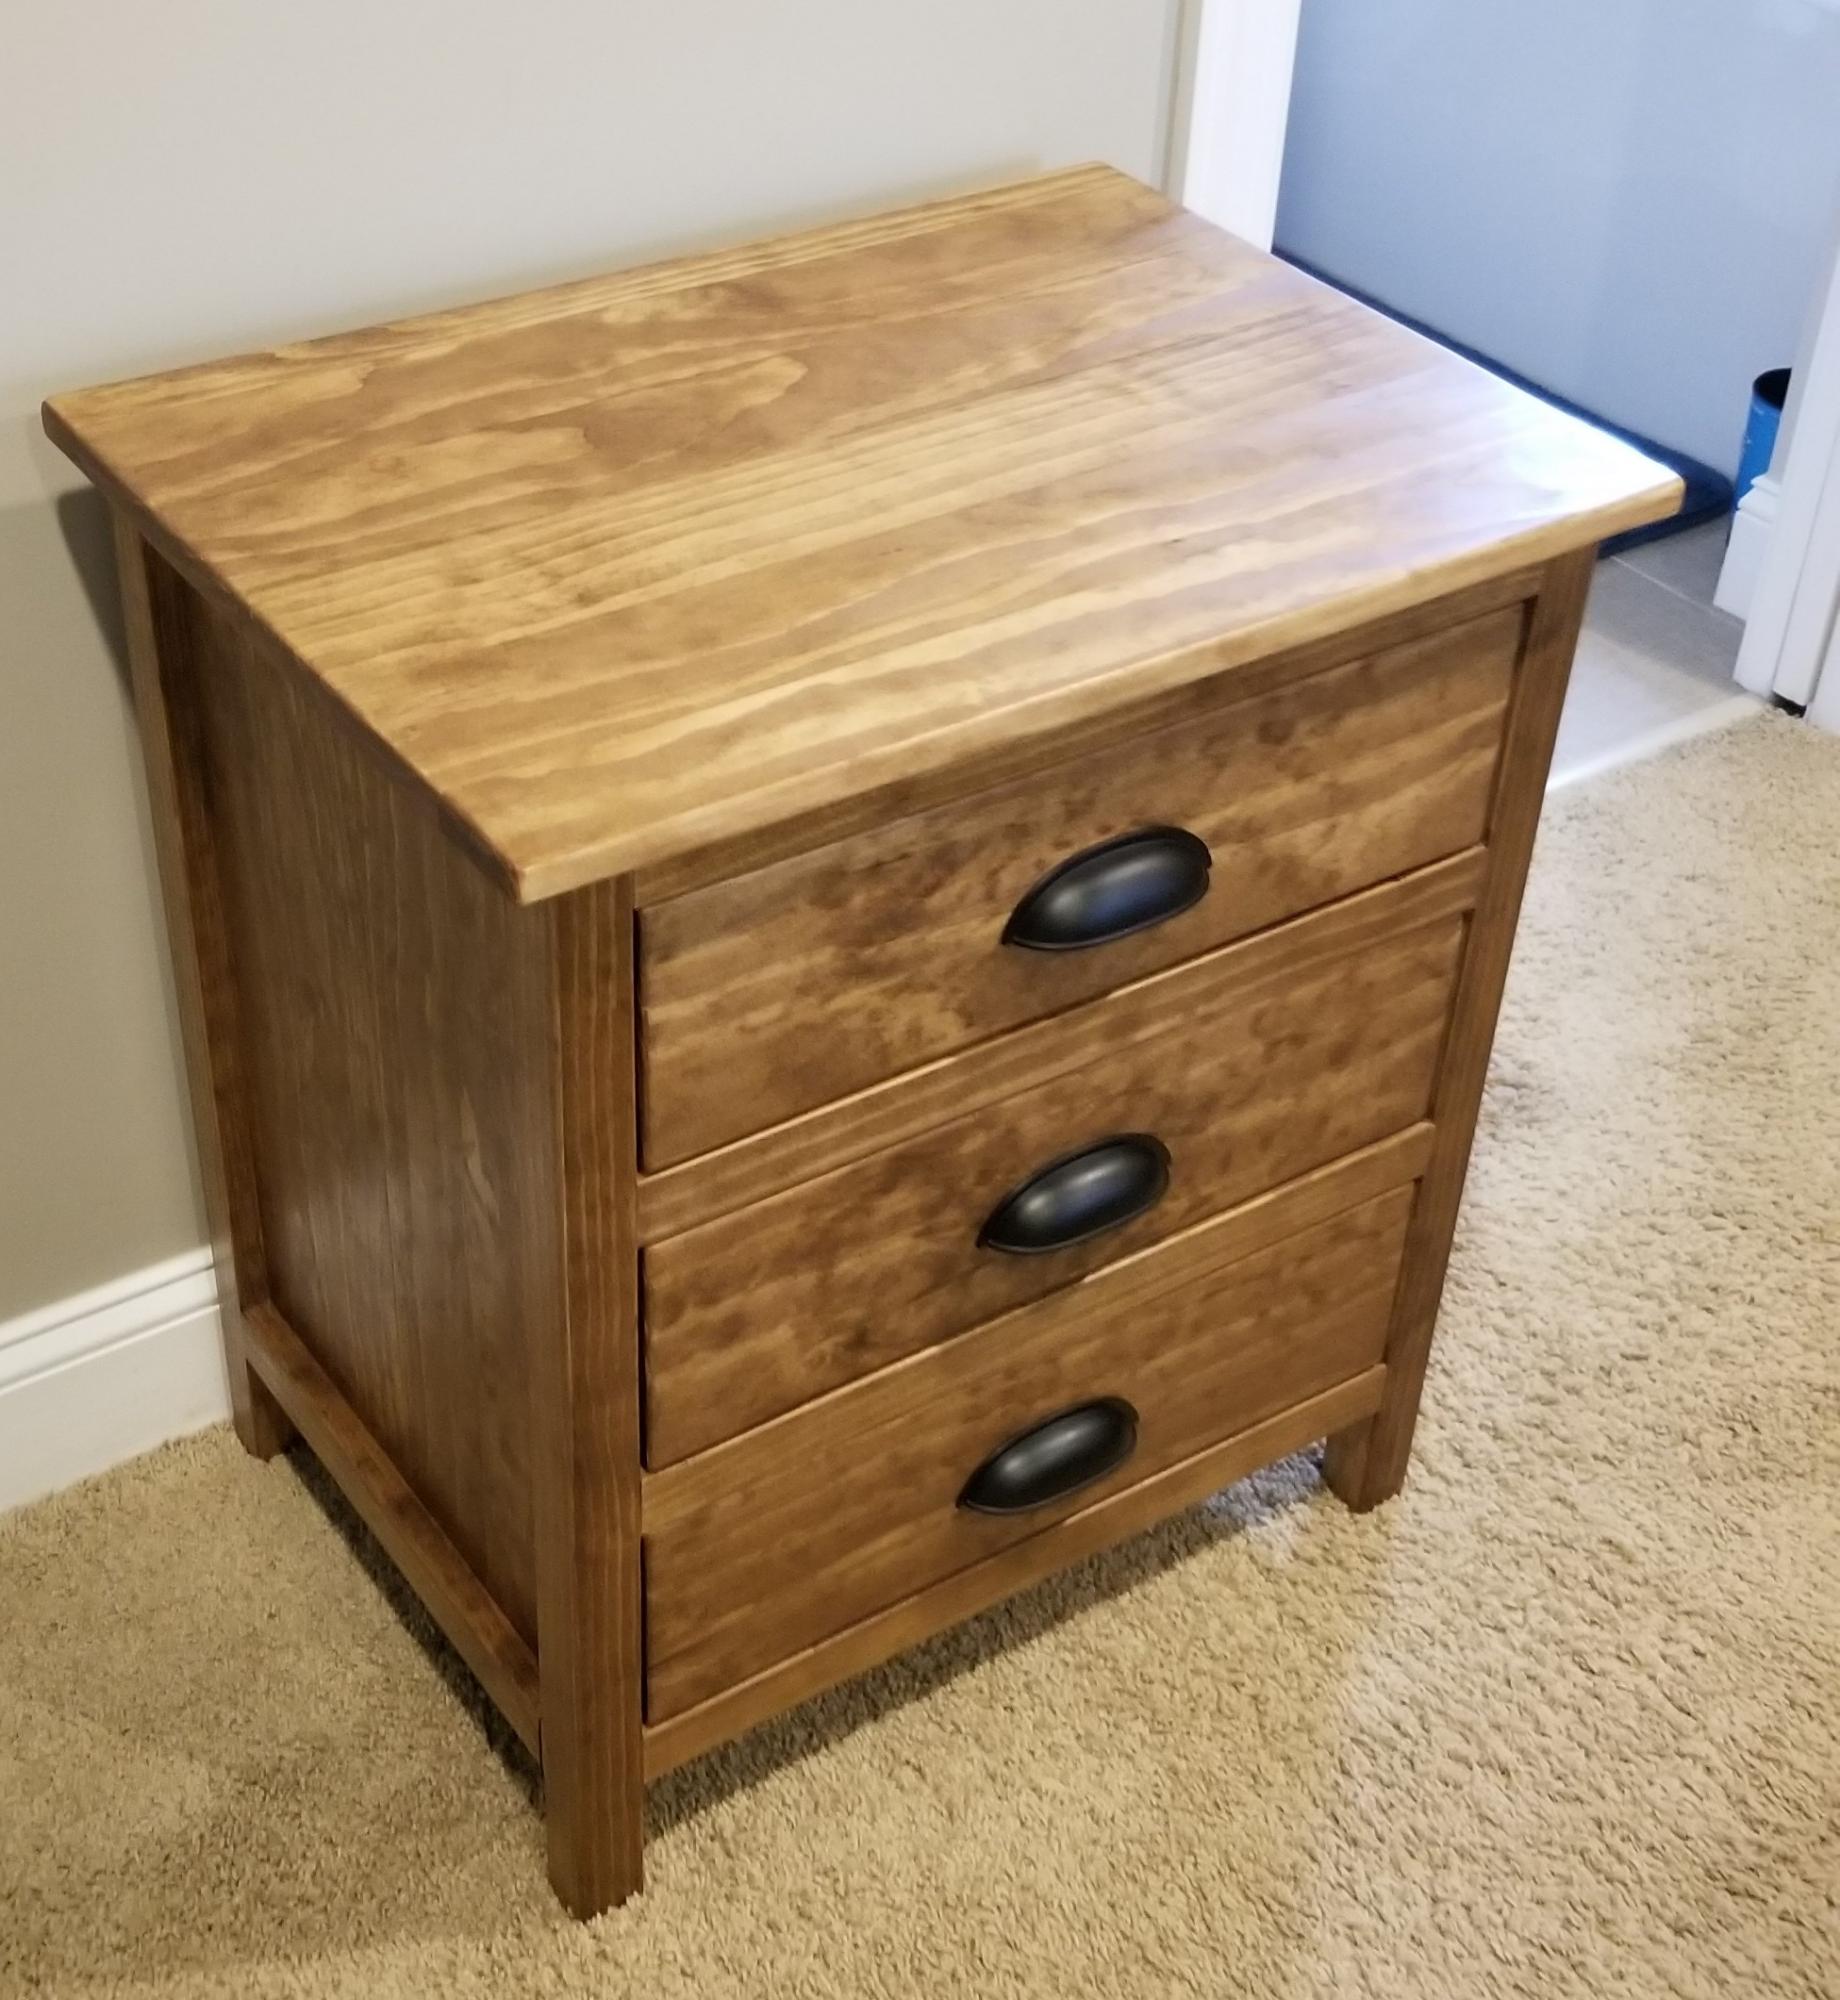
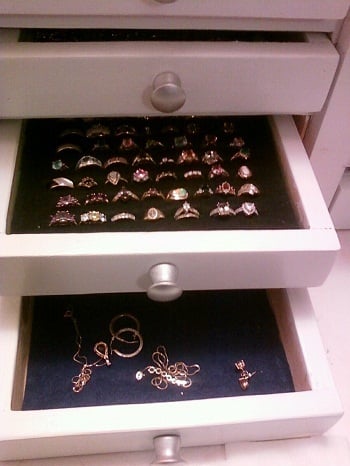
These little dressers are inspired by Ana's Master Closet System drawers, and the Willy Bookshelf. These were made entirely from scrap wood, so it only cost me for the knobs and the felt for the drawers/bottom. These drawers were sized to fit inside the cubes in my vanity/desk, and to fit the left over wood available from my scrap bin. This took a while to cut everything, but it was fun and didn’t cost me anything but my time. On the top dresser I used some ‘slices’ of lauan for trim, to hide the cut edges and the bit of ‘cup’ on my side pieces (these were re-purposed old shelf boards from the garage). I used my finish nailer and glue for these.
Here’s a shopping and cut list (and a few tips) to make the 4-drawer equivalent (similar to the top one) with standard sized 1x12 lumber, and using 1x2 for drawer front/back/sides and applying 3/16” lauan ply for the bottoms. Haven't figured out how to use sketch up yet, so I can only provide a shopping list, cut list, and finished dimensions, so here goes:
Shopping list: (my 1x12’s are 11.25” wide and .75” thick, and 1x2’s were 1.5” wide, and .75” thick, and lauan is 3/16” thick)
1 pc 1x12x8
2 pc 1x2x8
2 pc 24” x 24” lauan (3/16’ plywood) (you’ll have some left over from the 2nd piece)
Felt - 4 pc 8.5” x 9.75” for insides of drawers, 4 pc 10” x 11.25” for drawer bottoms, and 1 pc 11.75" x 11.25" for dresser bottom. You can use 9 sheets craft felt (9” x 12”) for this – the 11.25” front – back measurement on the drawer bottoms is what’s most important –craft felt is 9” wide, and it’s OK if the felt doesn’t go all the way to the edges on the side-to-side measurement
(Sticky-back felt works and looks great, but costs a lot more than regular. I use sticky back on something I’m making as a gift, but these were for me so I just used regular felt and glued it in place with wood glue)
4 mini-knobs (Mine are unfinished ones from Ace, got for 2/$1.29 and spray-painted them)
Finish nails (I had 1 ¼” on hand) and plenty of glue
Finishing materials - filler, sand paper, plus paint/stain to suit your tastes
Cut list:
2 pc 1x12, cut at 2” (spacers - use these 'slices' for spacers while assembling, so the shelves are all spaced the same distance apart – this idea is from the Kreg jig demo video where they built the bookshelf). I like to cut these first, making sure they are nice and square. To me it’s easier and safer to cut these thin pieces from a larger piece with my miter saw.
2 pc 1x12 @ 11.75” (dresser top/bottom)
5 pc 1x12 @ 10.25” (2 for sides, 3 for shelves)
8 pc 1x2 @ 10” (drawer front/back)
8 pc 1x2 @ 9.75” (drawer sides)
4 pc 10” x 11.25” lauan plywood (drawer bottoms)
1 pc 11.75" x 11.75” lauan plywood (back)
Finished dimensions:
Dresser: 11.75” H x 11.75” W x 11 7/16” deep (includes back)
Drawer opening size: 10.25” wide x 2” tall x 11.25” deep
Drawer dimensions: 10”wide x 11.25” long x 1 11/16” tall (felt on the bottom of the drawer will make this height just a little taller)
Finished inside depth of drawer 1.5”, drawer inside dimensions 8.5” wide x 9.75” long
Finish: sanded, filled, sanded some more, and painted with some left over white paint, and used silver spray paint for the knobs
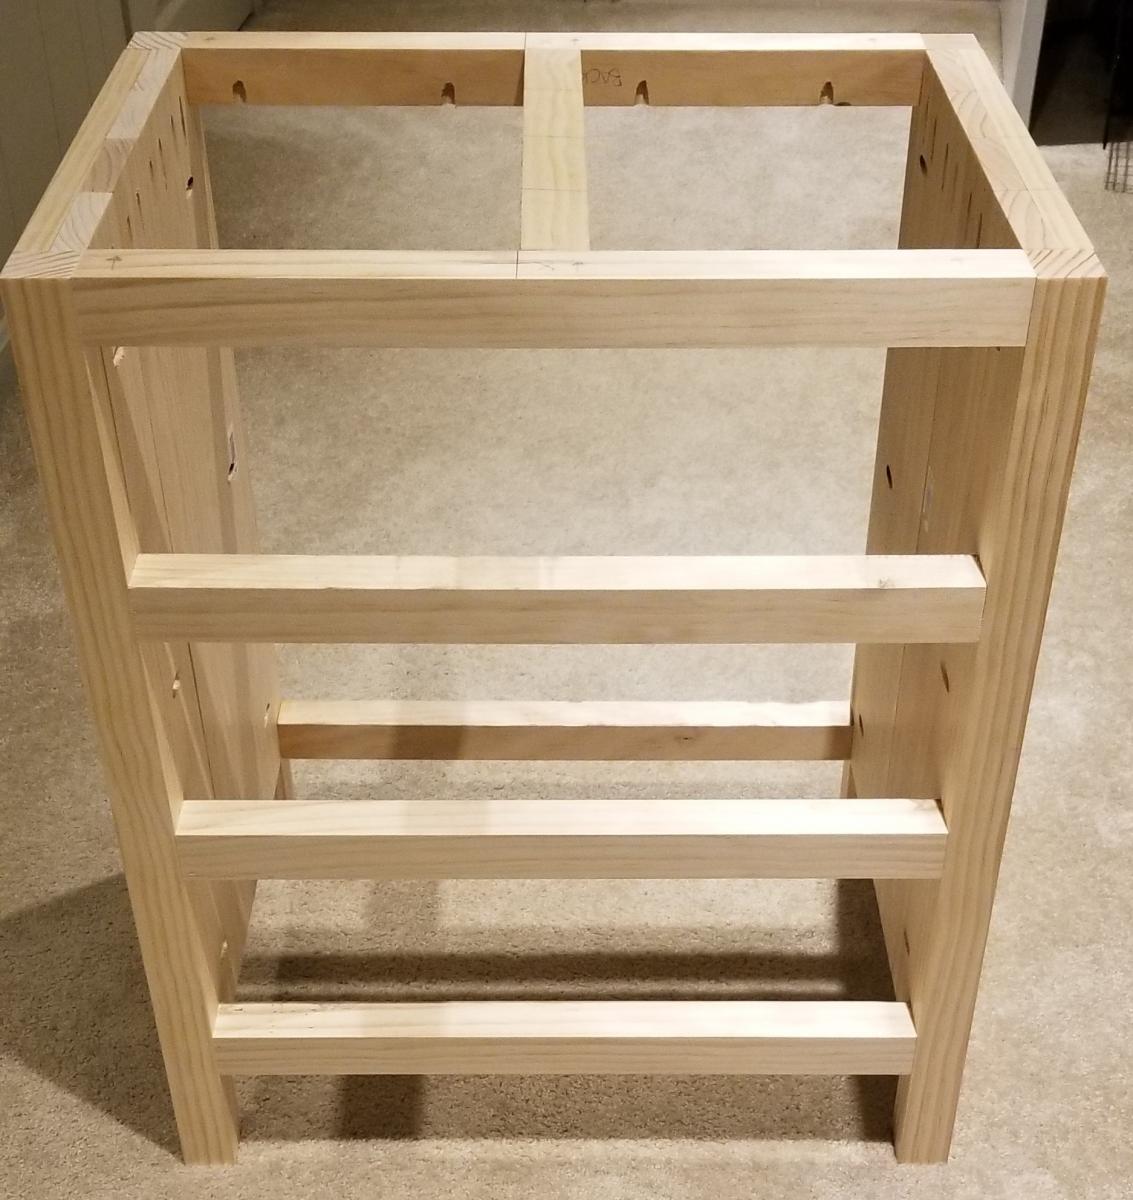
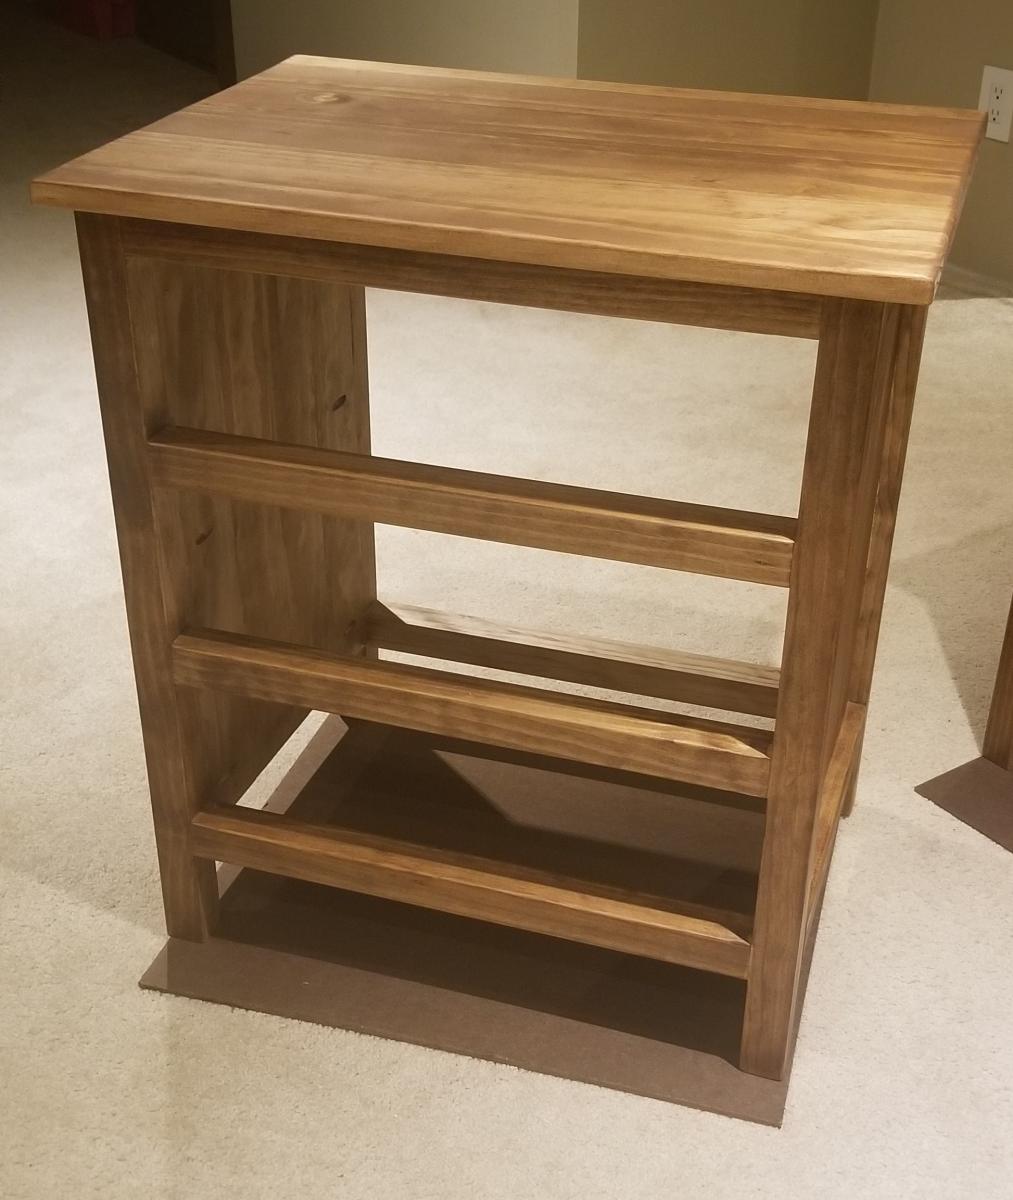
Assembly tips: Dresser part is constructed very much like the Willy bookshelf. The top and bottom are the same size on this one and the dresser bottom is applied the same way as the top of the Willy bookshelf. Once the bottom is on, use the ‘spacers’ to make sure the shelves are the same distance apart all the way up, then the top goes on last. 3/16” plywood goes on the back. Drawers are constructed like the master closet system drawers. Drawers slide directly on the shelves (and bottoms of drawers covered with felt) so no drawer glides are used. Applied the felt and knobs after sanding and finishing. Make sure the felt goes all the way from the front to the back of the drawer bottom, and is glued on thoroughly.
Thu, 12/22/2011 - 23:15
How did you do the insides? Did you line it with some type of foam? Great work. Thank you for posting.

Fri, 12/23/2011 - 11:56
Thanks very much! For the ring drawer, I used a piece of 1" thick high density foam (I cut up a kitchen chair pad) and on top of this is a piece of sticky-back felt. I drew lines on the paper side and cut slits into the felt first, then stuck it on top of the foam, and cut into the foam following the slits, using a utility knife. I didn't cut all the way through the foam, but almost to the bottom. The slits go all the way across the foam (to about 3/4" from edge) to fit more rings in there, but you can also do individual slits for each ring (if you have more patience than me - haha). The other drawers have regular felt cut to size and attached with wood glue. (Sticky back felt inside the drawers would have worked fine too, it just costs more).

Fri, 12/23/2011 - 16:55
I just built a gentleman's valet for my sister in law's boyfriend, partly to test out some joinery ideas, and partly because I found a beautiful piece of white oak in the discount bin while I was looking for something else at the lumber dealer. I was pretty impressed with myself, but it's got nothing on the ambition of this project.
Excellent work. I absolutely wouldn't have guessed it as a beginner project.
I'm almost certainly going to have to build a jewelry chest like this for my wife pretty soon. My dad just built my mom a nice one, and my wife will be wanting her own.
Sat, 12/24/2011 - 13:54
Clay, thanks very much for the nice compliment. I've seen your projects here and on your blog and they are beautiful, so I'm very flattered! I've edited my original post to include measurements and cut list for a 'regular lumber' equivalent to the top chest. Lots easier than cutting all those drawer sides out of plywood and 1x12 like I did with my 'prototypes'. :) The next one I do will be with regular size lumber. Thinking of building one for my Mom. Happy holidays!
Thu, 02/02/2012 - 00:26
do you sell these? Its awesome. I've been looking for a tabletop drawer to store my makeup but everything is made of plastic! I was actually googling to see if there was someplace I can do woodshop to make my own jewelry drawer but alas I dont have the skills nor do I have any tools. I really admire this drawer!
Thu, 02/02/2012 - 04:56
Lucy, try looking for something like a Makerworks. These are communal workshops with space and tools that you can use for a fee or a subscription. I don't know how prevalent they are in most of the country. I live in a suburb of Detroit, and because of the large manufacturing base there are a lot of them around.
The more expensive ones offer classes where you can pick up basic skills on unfamiliar equipment, but even those "expensive" ones don't cost a lot of money. The inexpensive ones still offer training on their equipment, but less formally than a scheduled class.
One of the more interesting features of these places, at least around here, is that they have CNC machines available. A CNC machine would let you transfer sketchup drawings directly to cut parts. For a one-off item it's not worth the trouble, but if you wanted to duplicate an item it would be great.
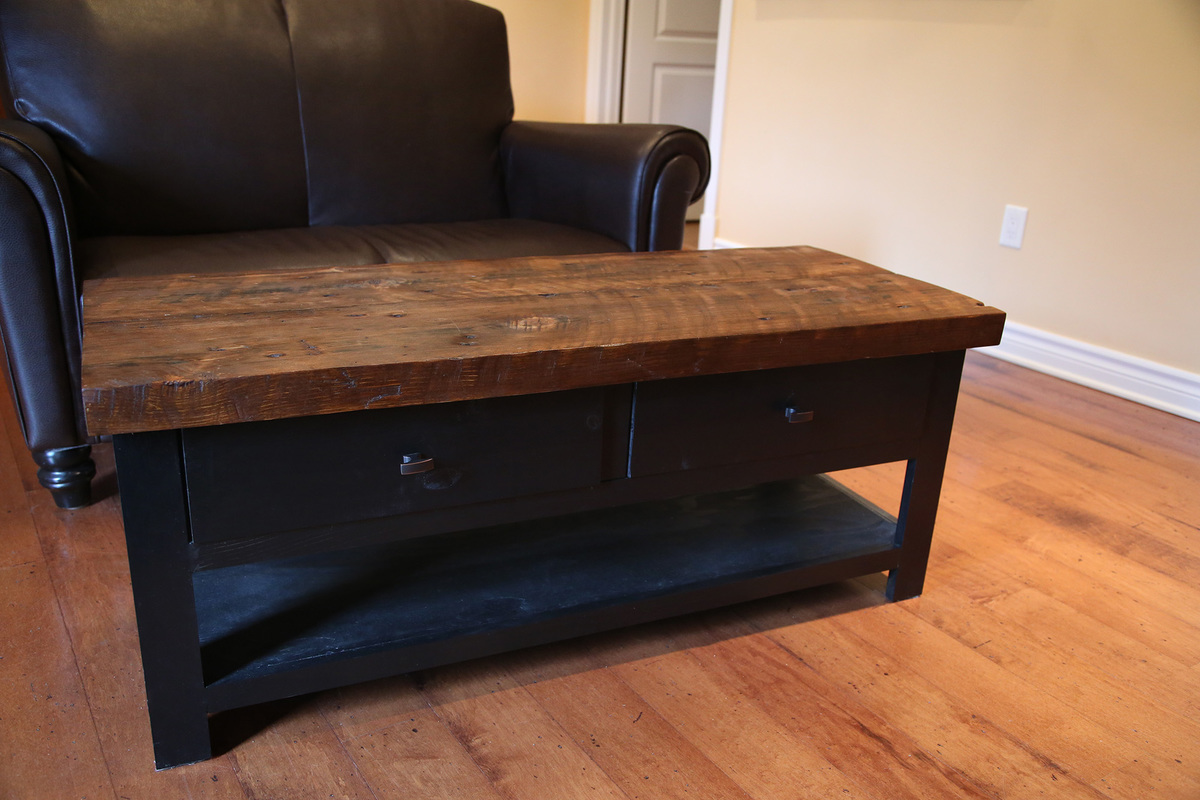
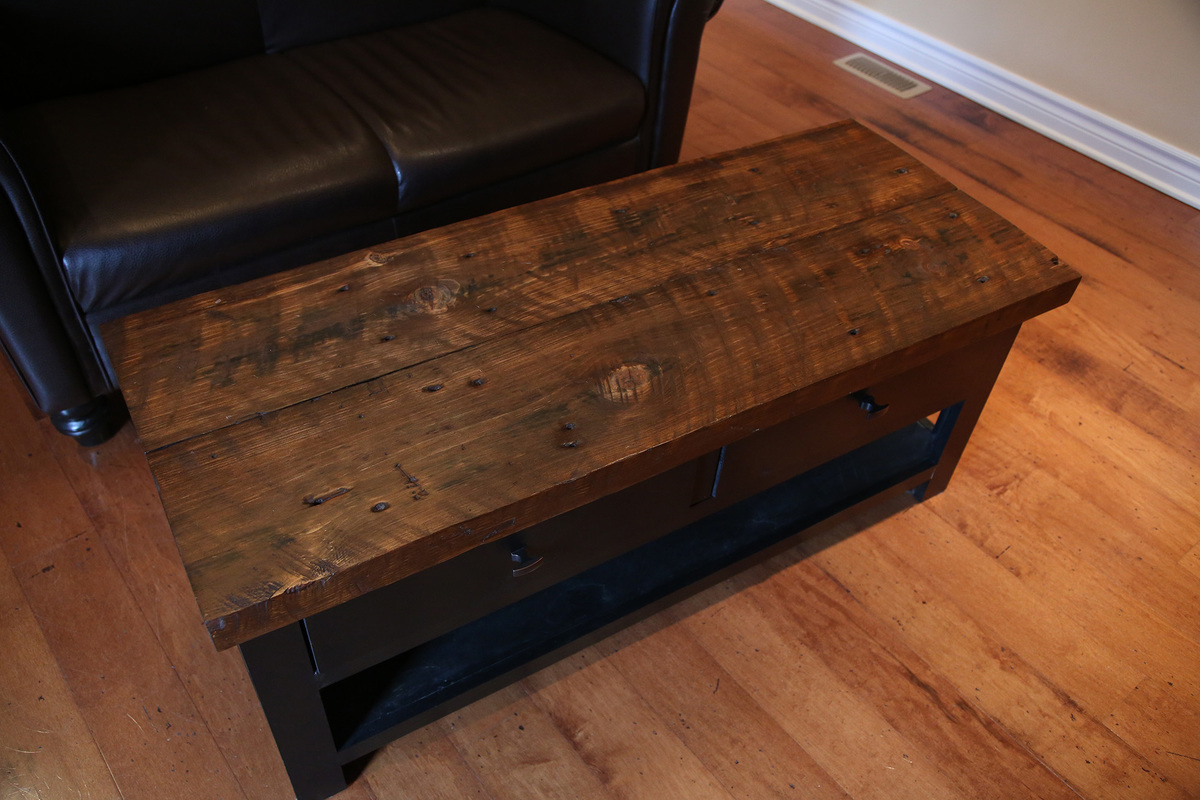
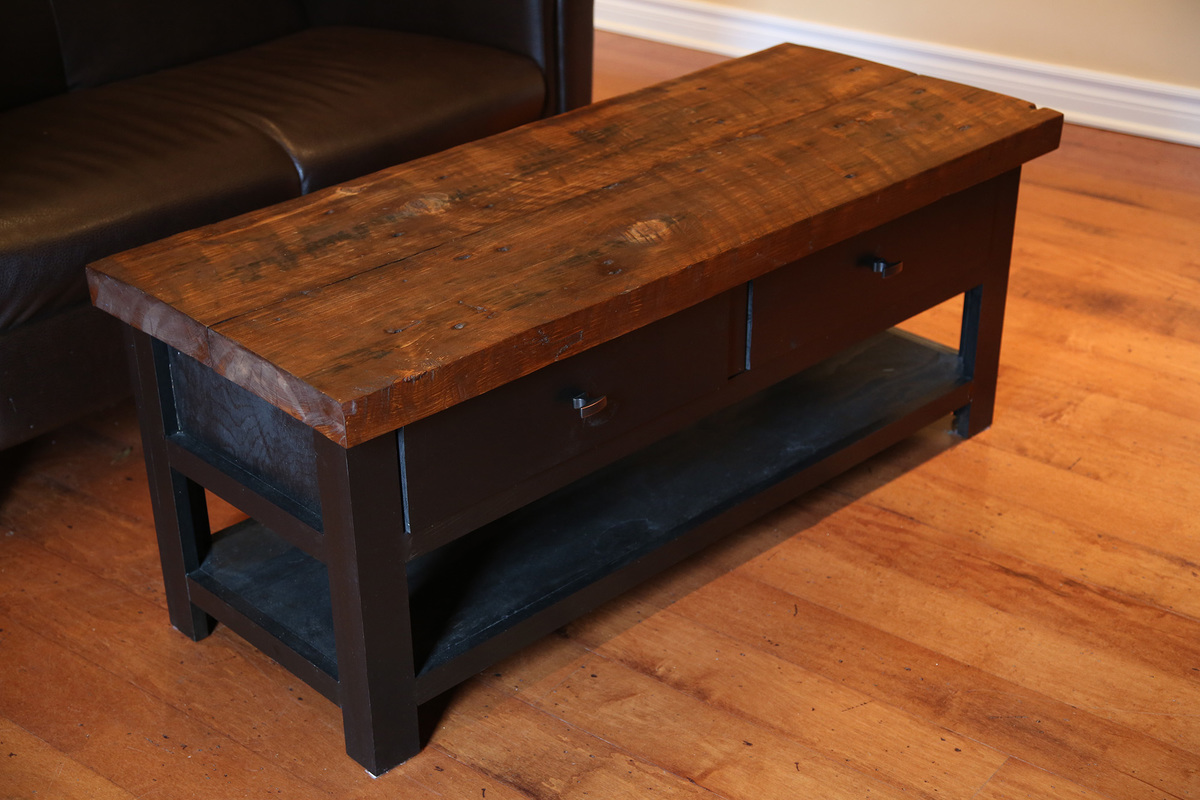
I tweaked the console plans to work best for my space, and to work with the reclaimed barn threshing floor boards that I used for the top.
I love how it turned out and it works wonderfully in my space.
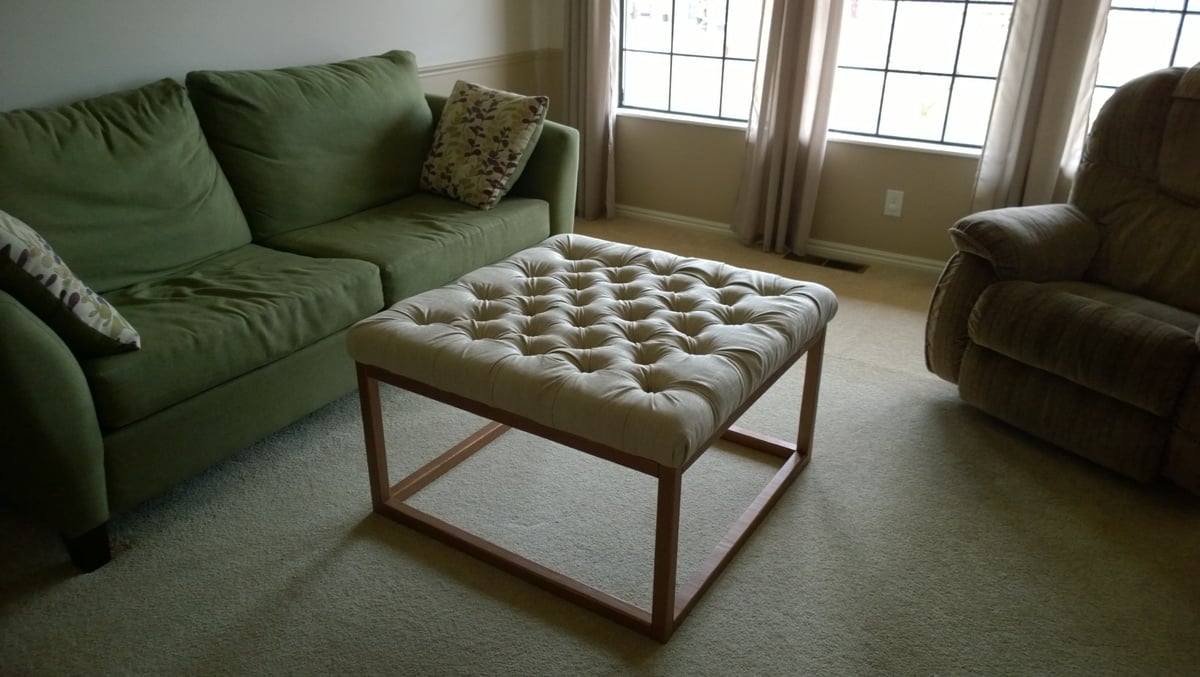
I built the plans exactly as given (minus the top of course) but in hindsight I would have reduced the height by three inches to accommodate for the three inch height of the upholstery foam. I am still very happy with it!
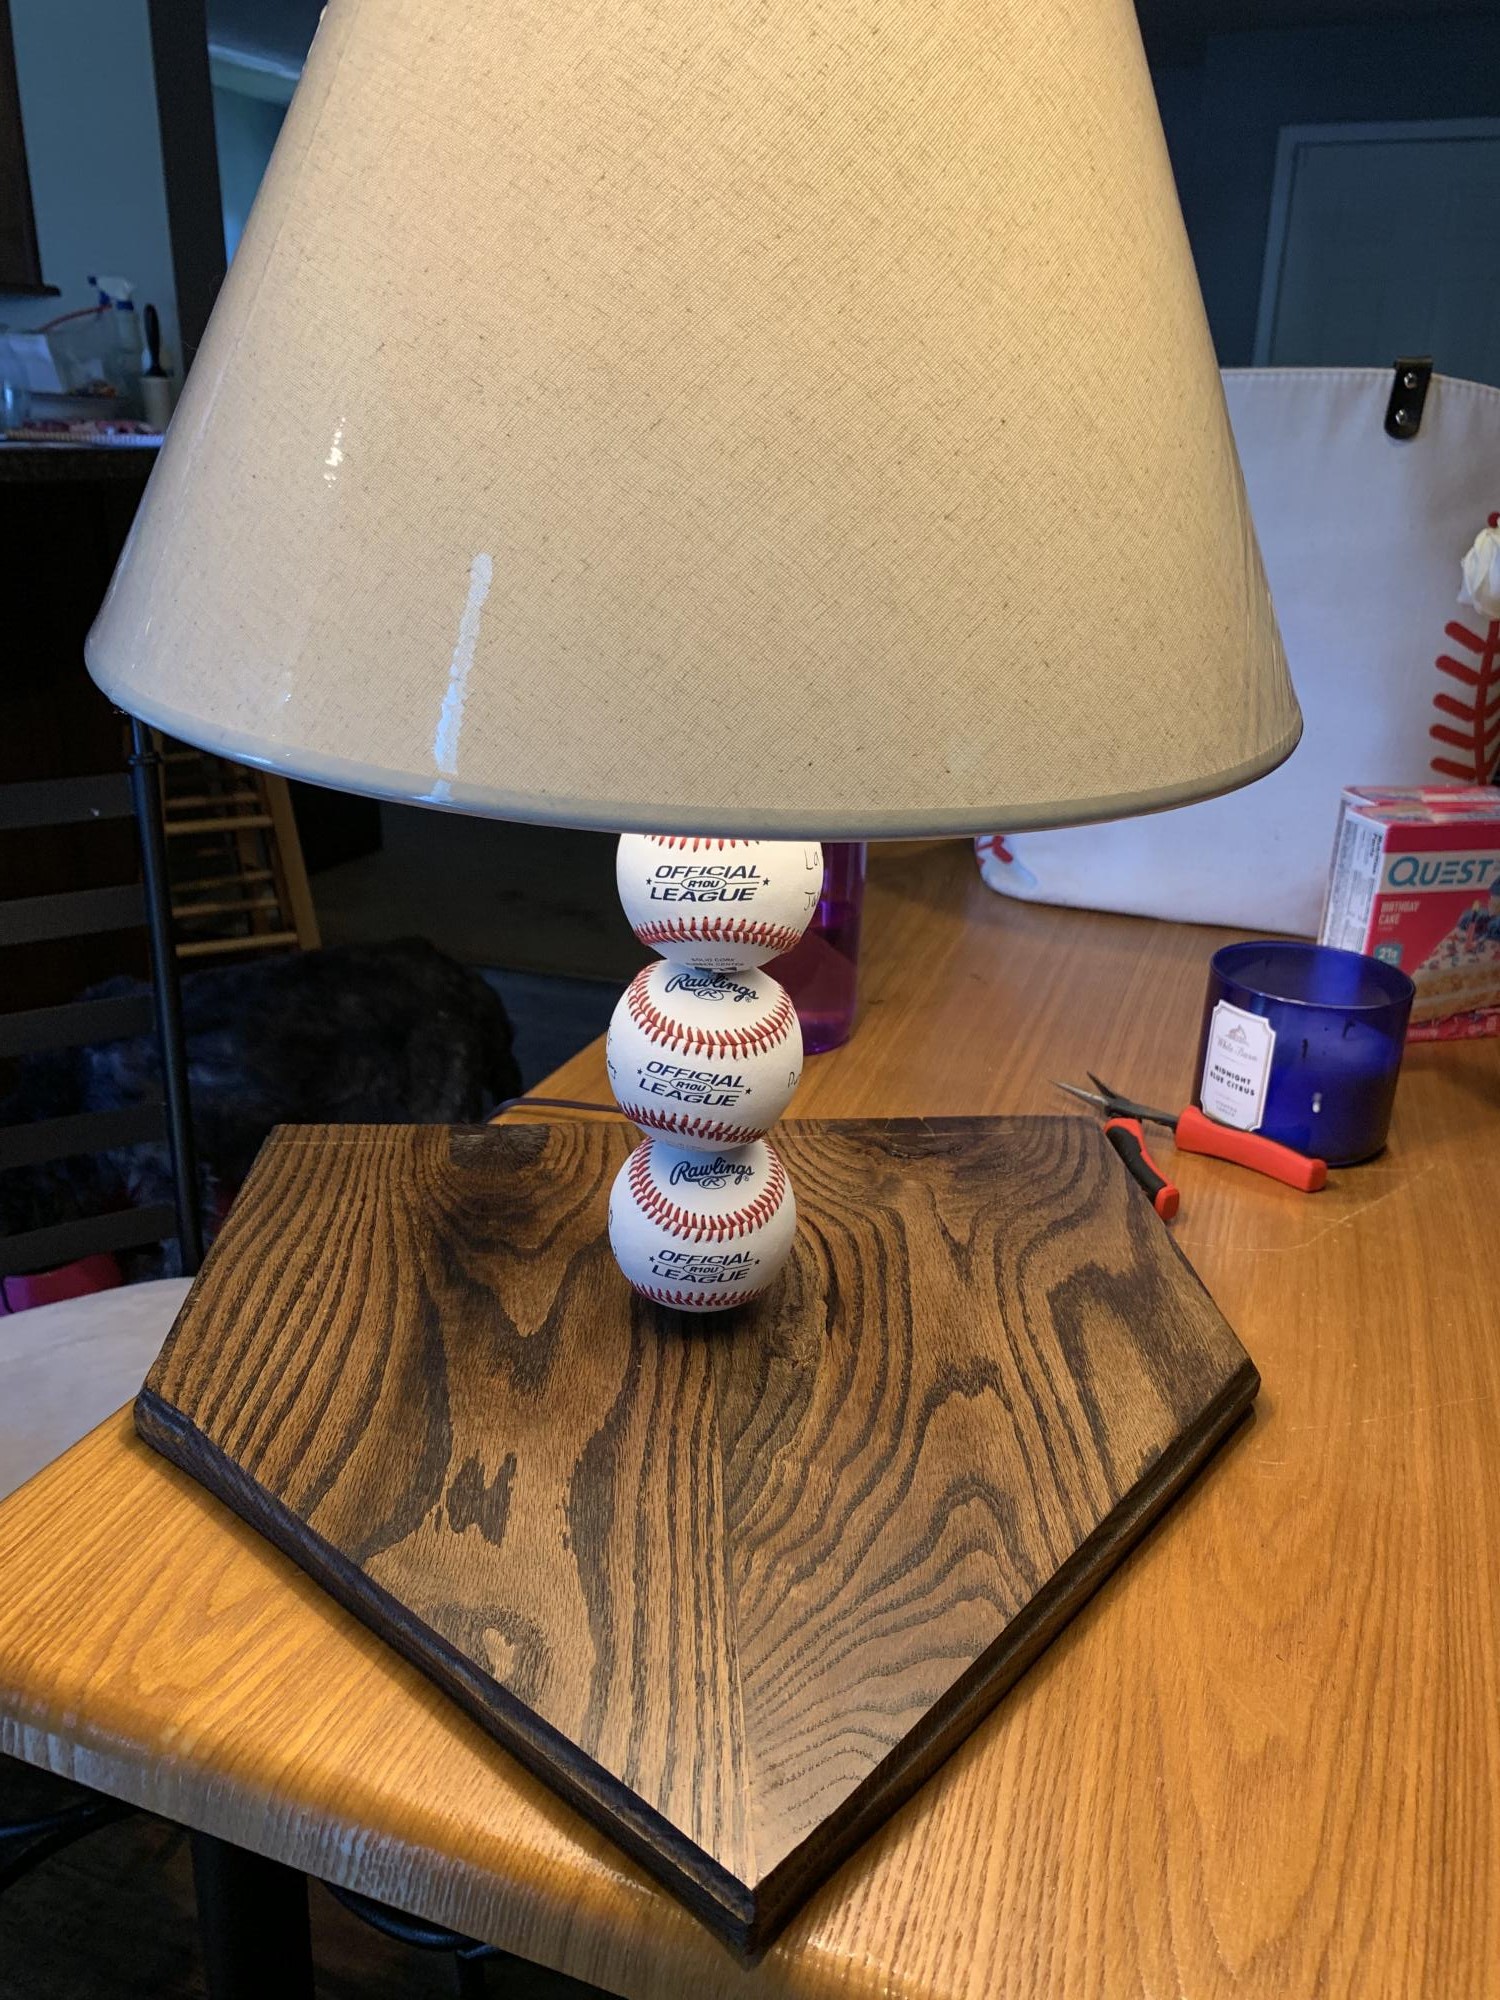
Just finished baseball season and made this light for our coach with finishing touches of all players signing the balls.
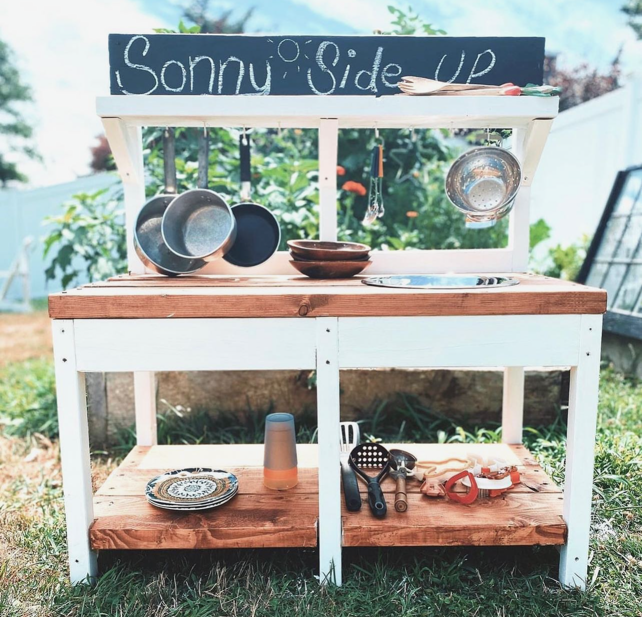
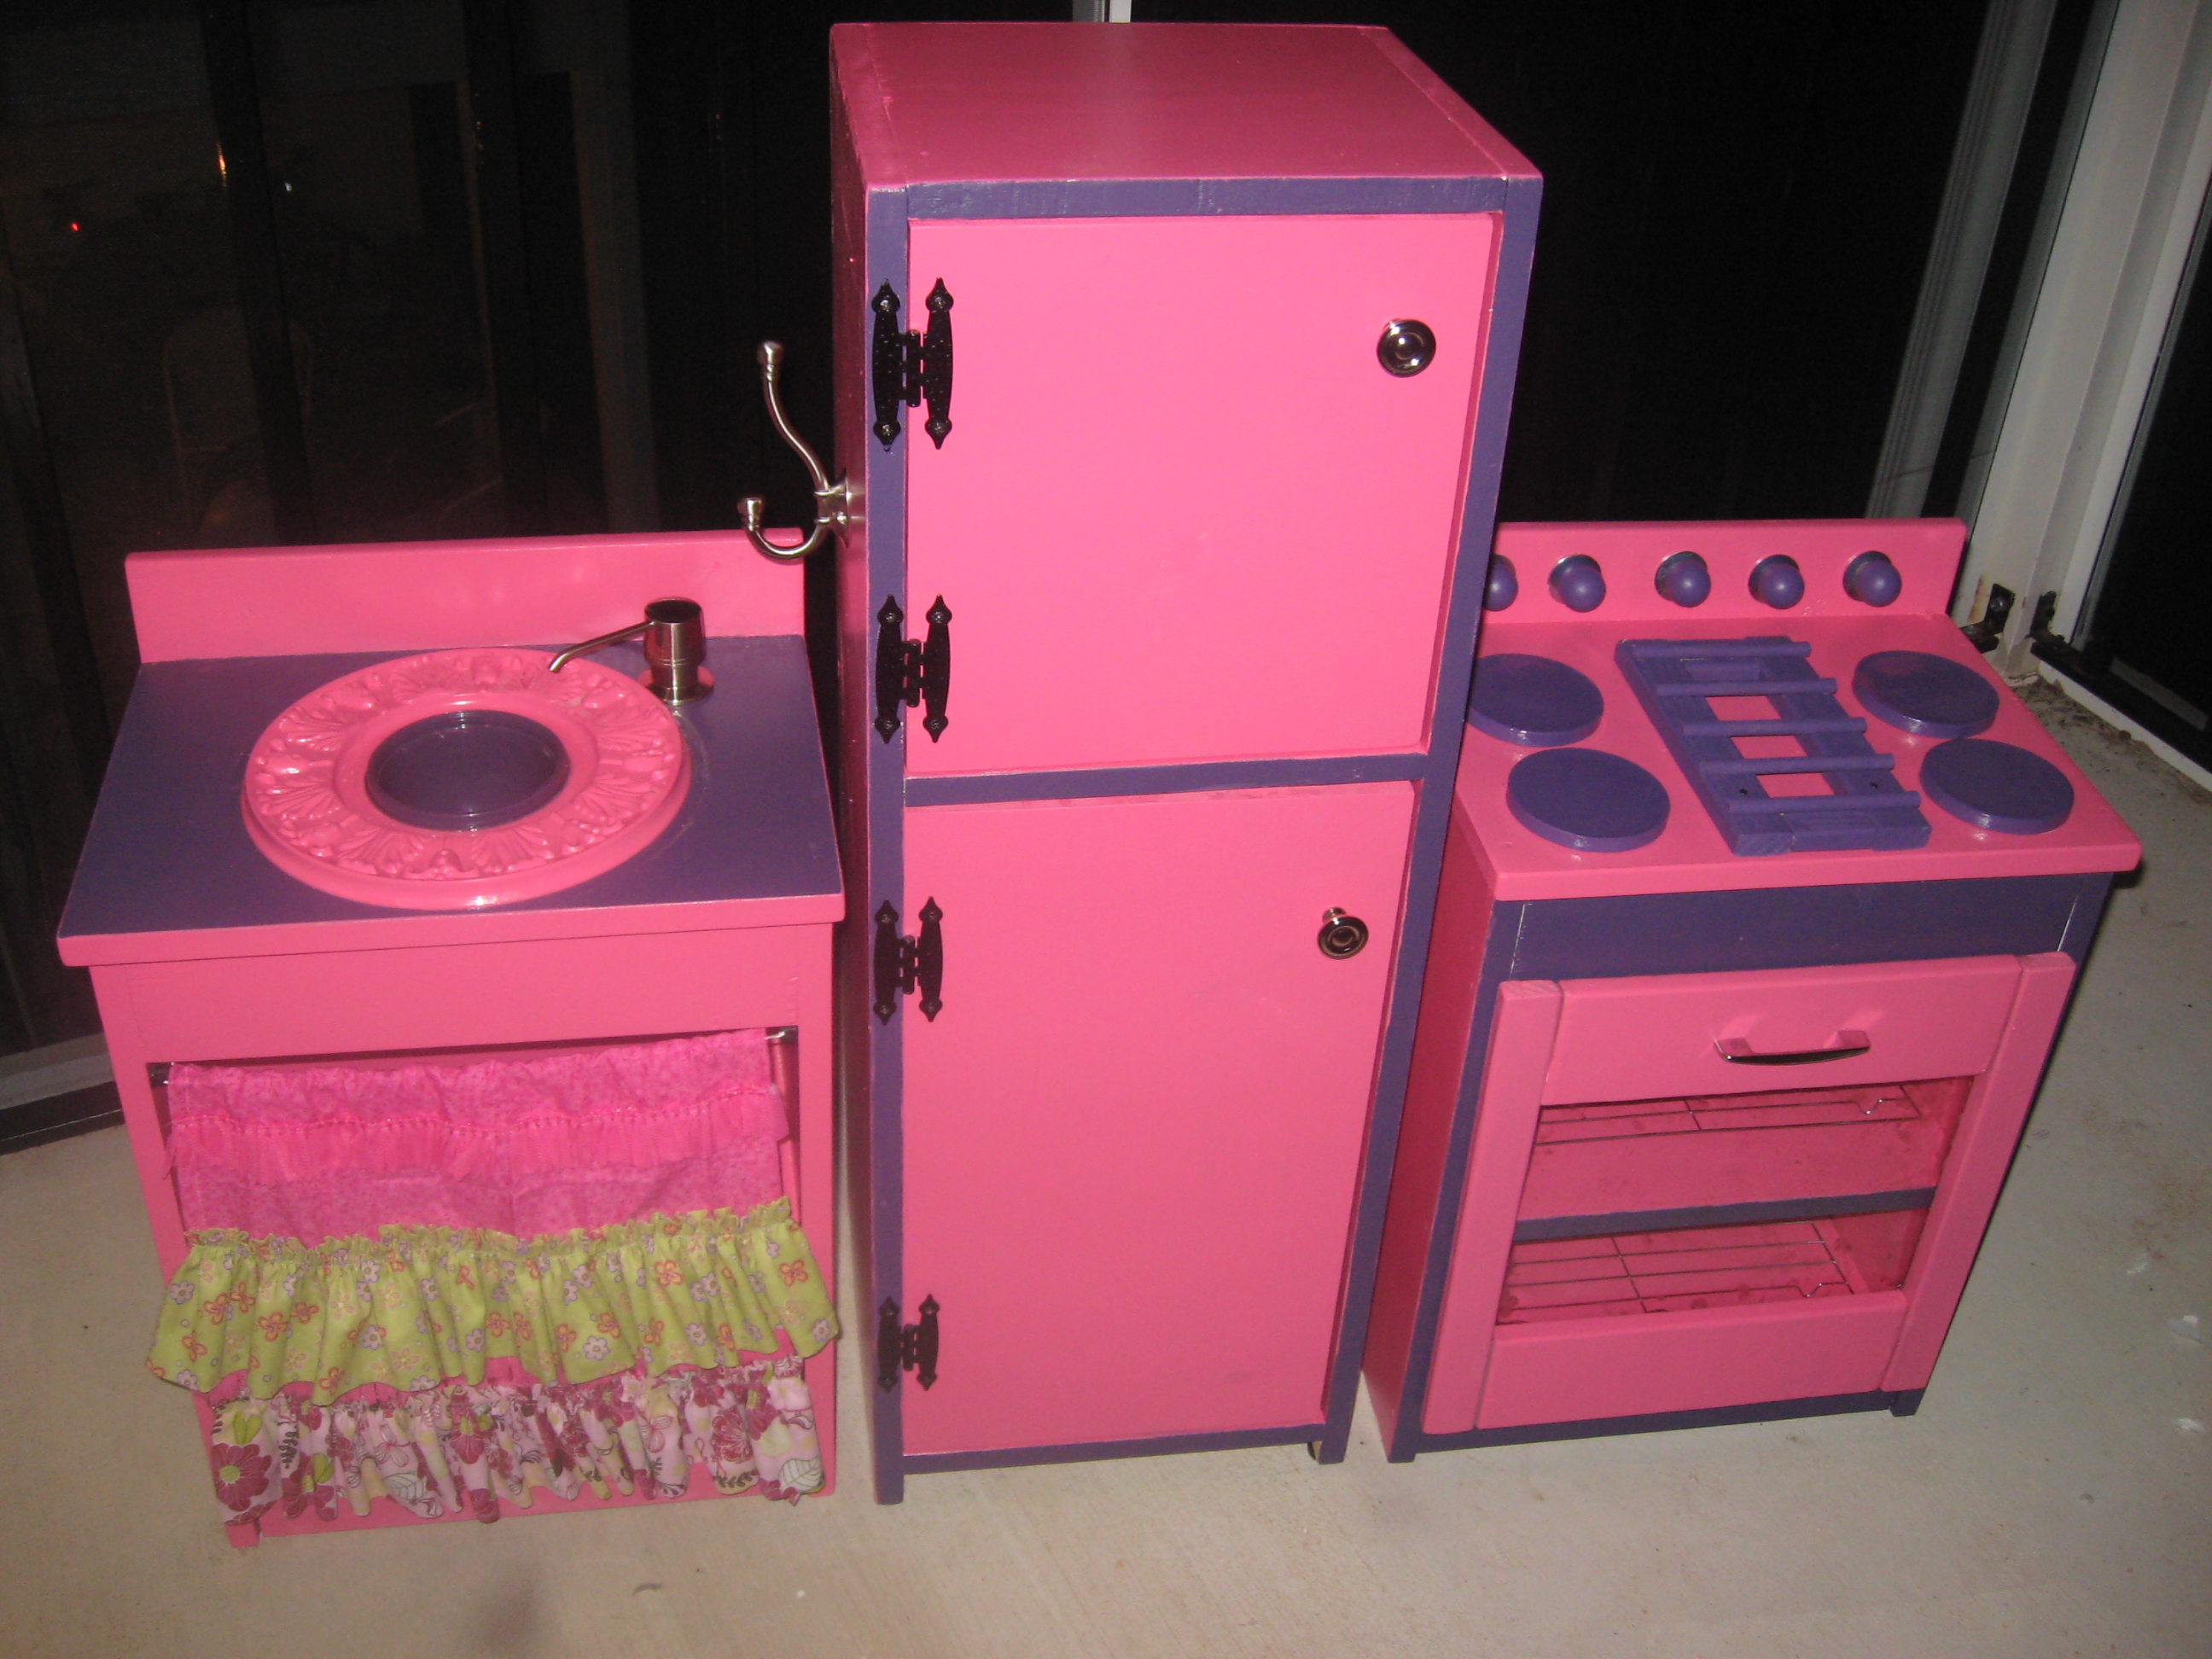
Darling Mud Kitchen by Sarah Jean Gammon
"I had this idea of making Sonny a mud-kitchen, a kids play kitchen for the yard. I mentioned it to Brent and he laughed saying he had enough projects on his list. This was not something he was going to build. Sooo I built this all by my self...or as Sonny would say, “me do this my own self”. It cost ~30 bucks in lumber and a trip to the thrift store for some second hand pots and pans. 3 hours later, a little paint, a little stain and voila... Sonny Side Up Mud Kitchen! Thanks for the plans Ana."
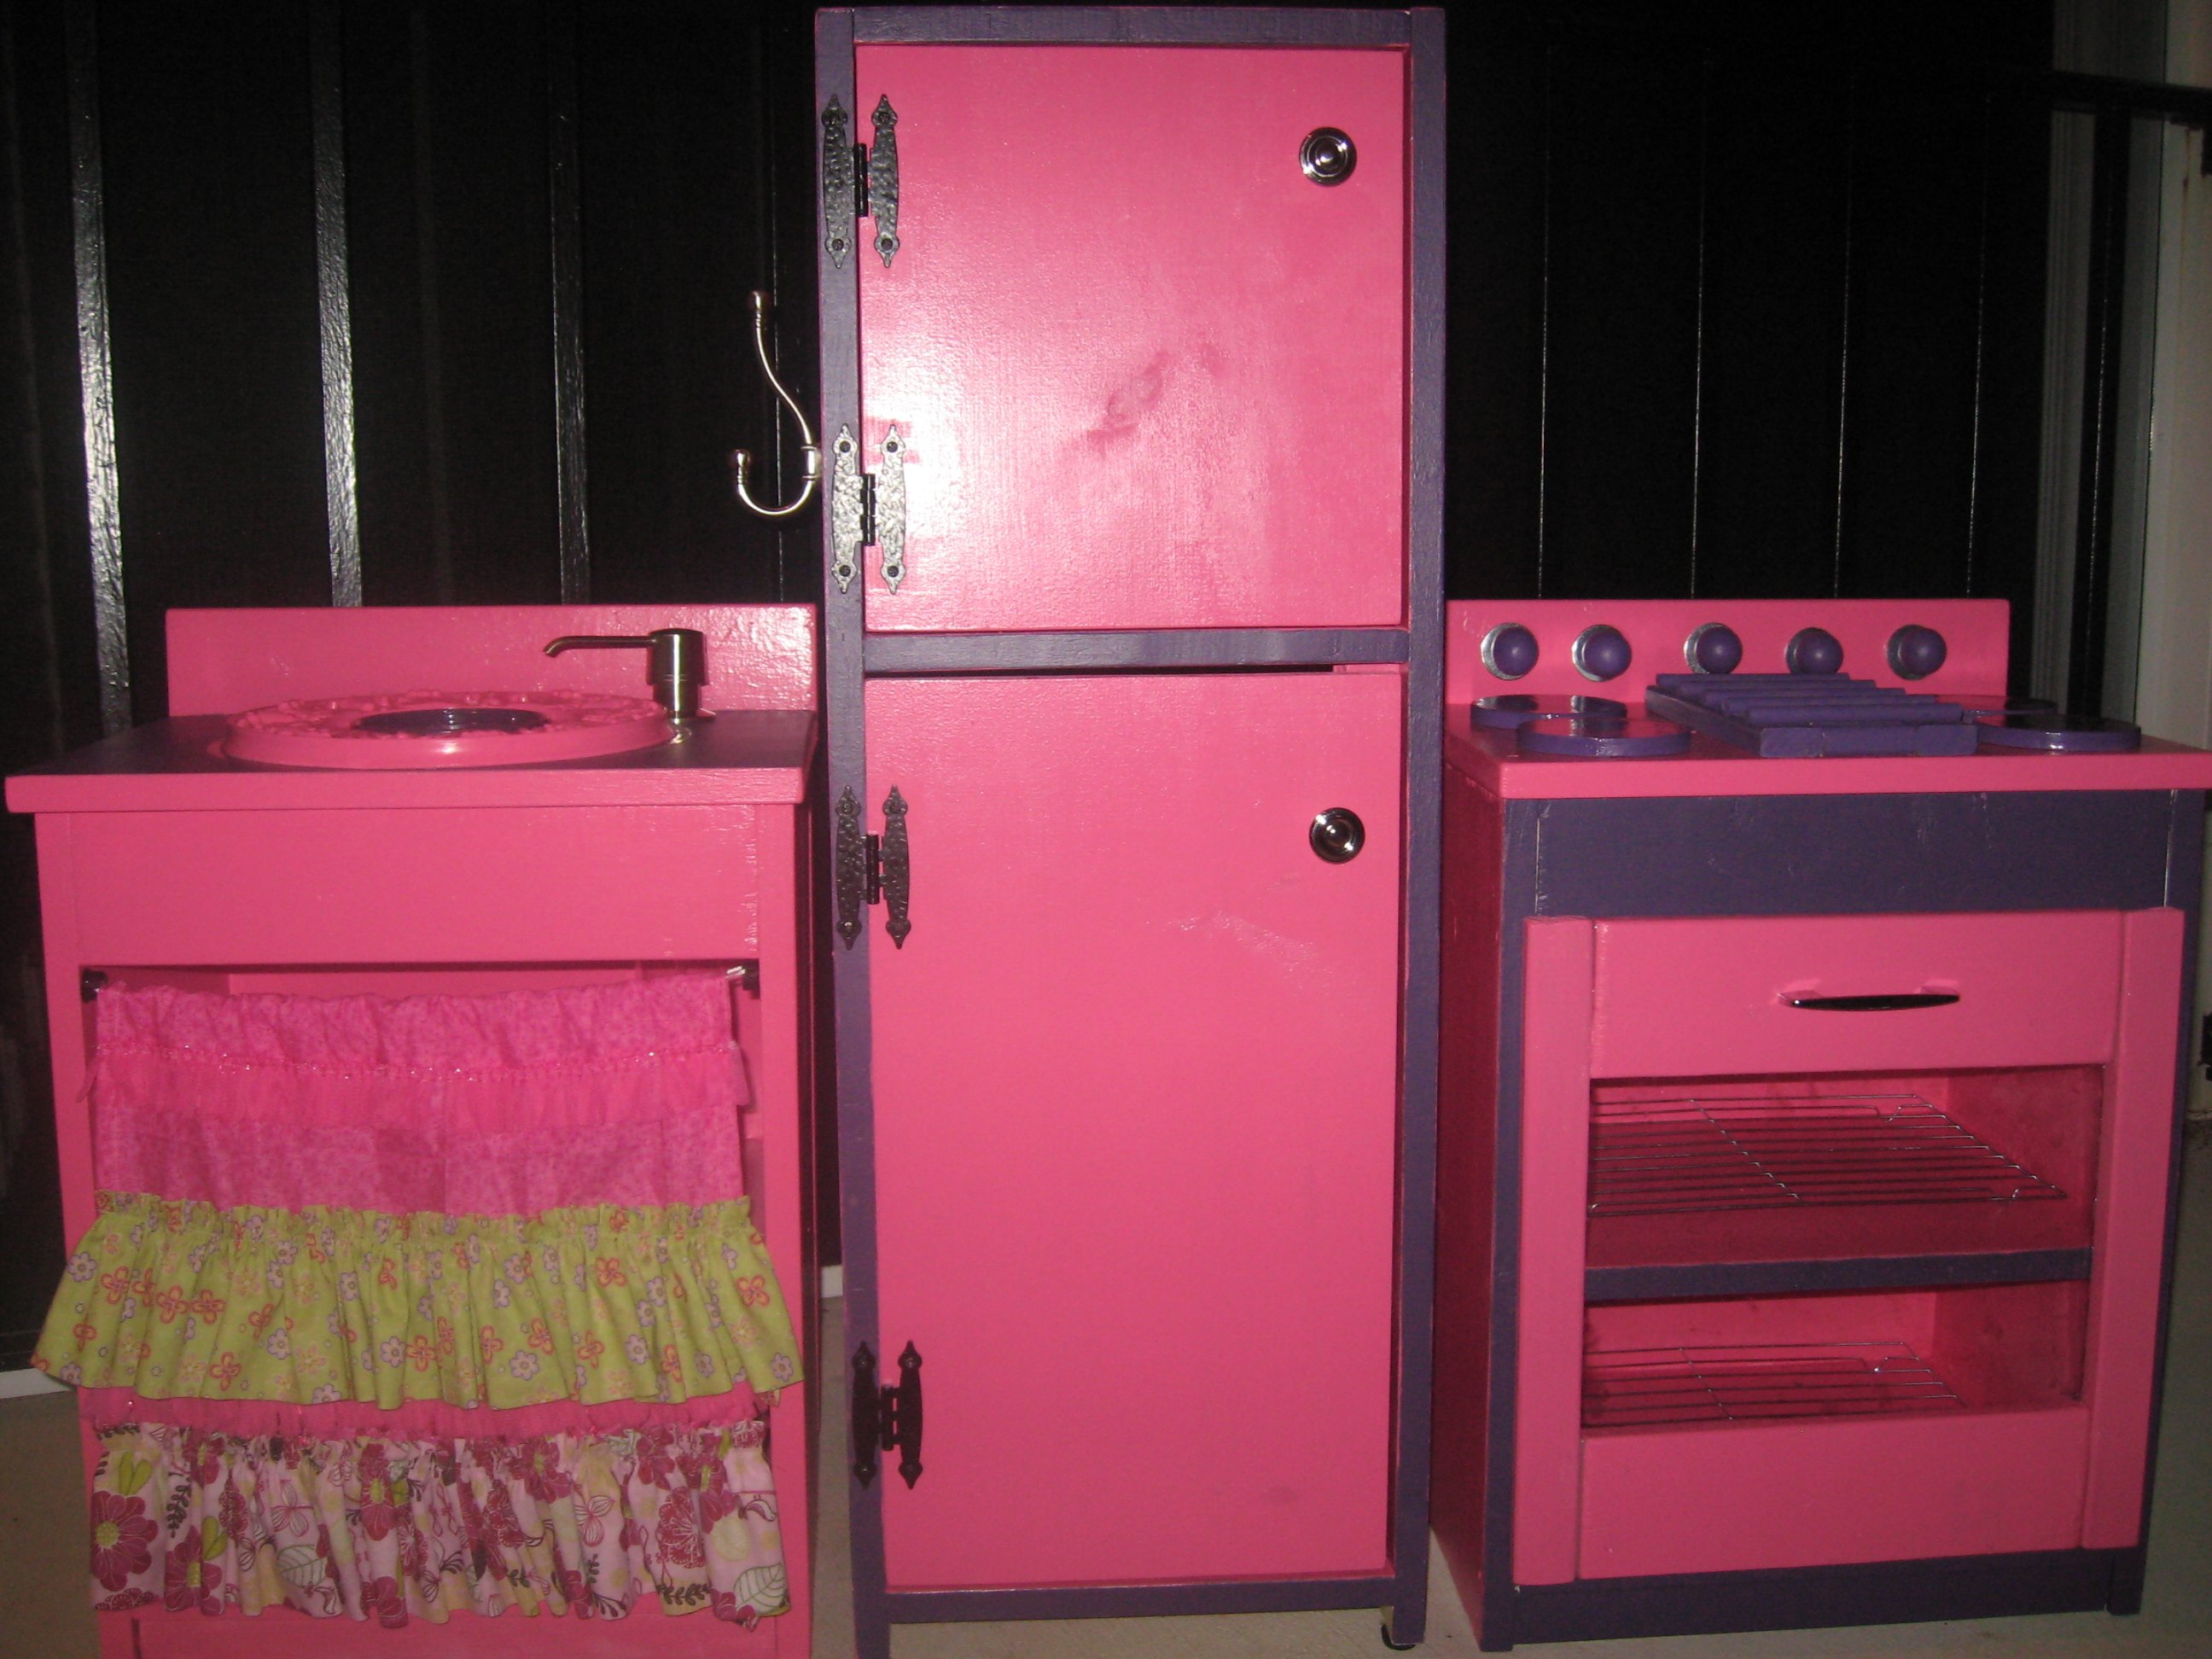
Well, this was my first ever wood build. I have made plenty of sewing projects and many other things, but haven't ever done a wood build.....and I have to say - I'm ADDICTED! I can not wait to do my next wood build. Actually, already making plans to take the beach hut bed and modify it to be a bunk bed for my two girls!
Modifications I made to the kitchen center are as follows:
Fridge: I installed magnetic clips inside the door area so it would stay closed and not go in to far when she closed it. I used basic exterior hinges due to the ackwardness of the size of the boards and placement, but it actually looked better. I installed hooks on the left side for her apron and hot pads and hooks on the right side for her cooking utensils to hang up.
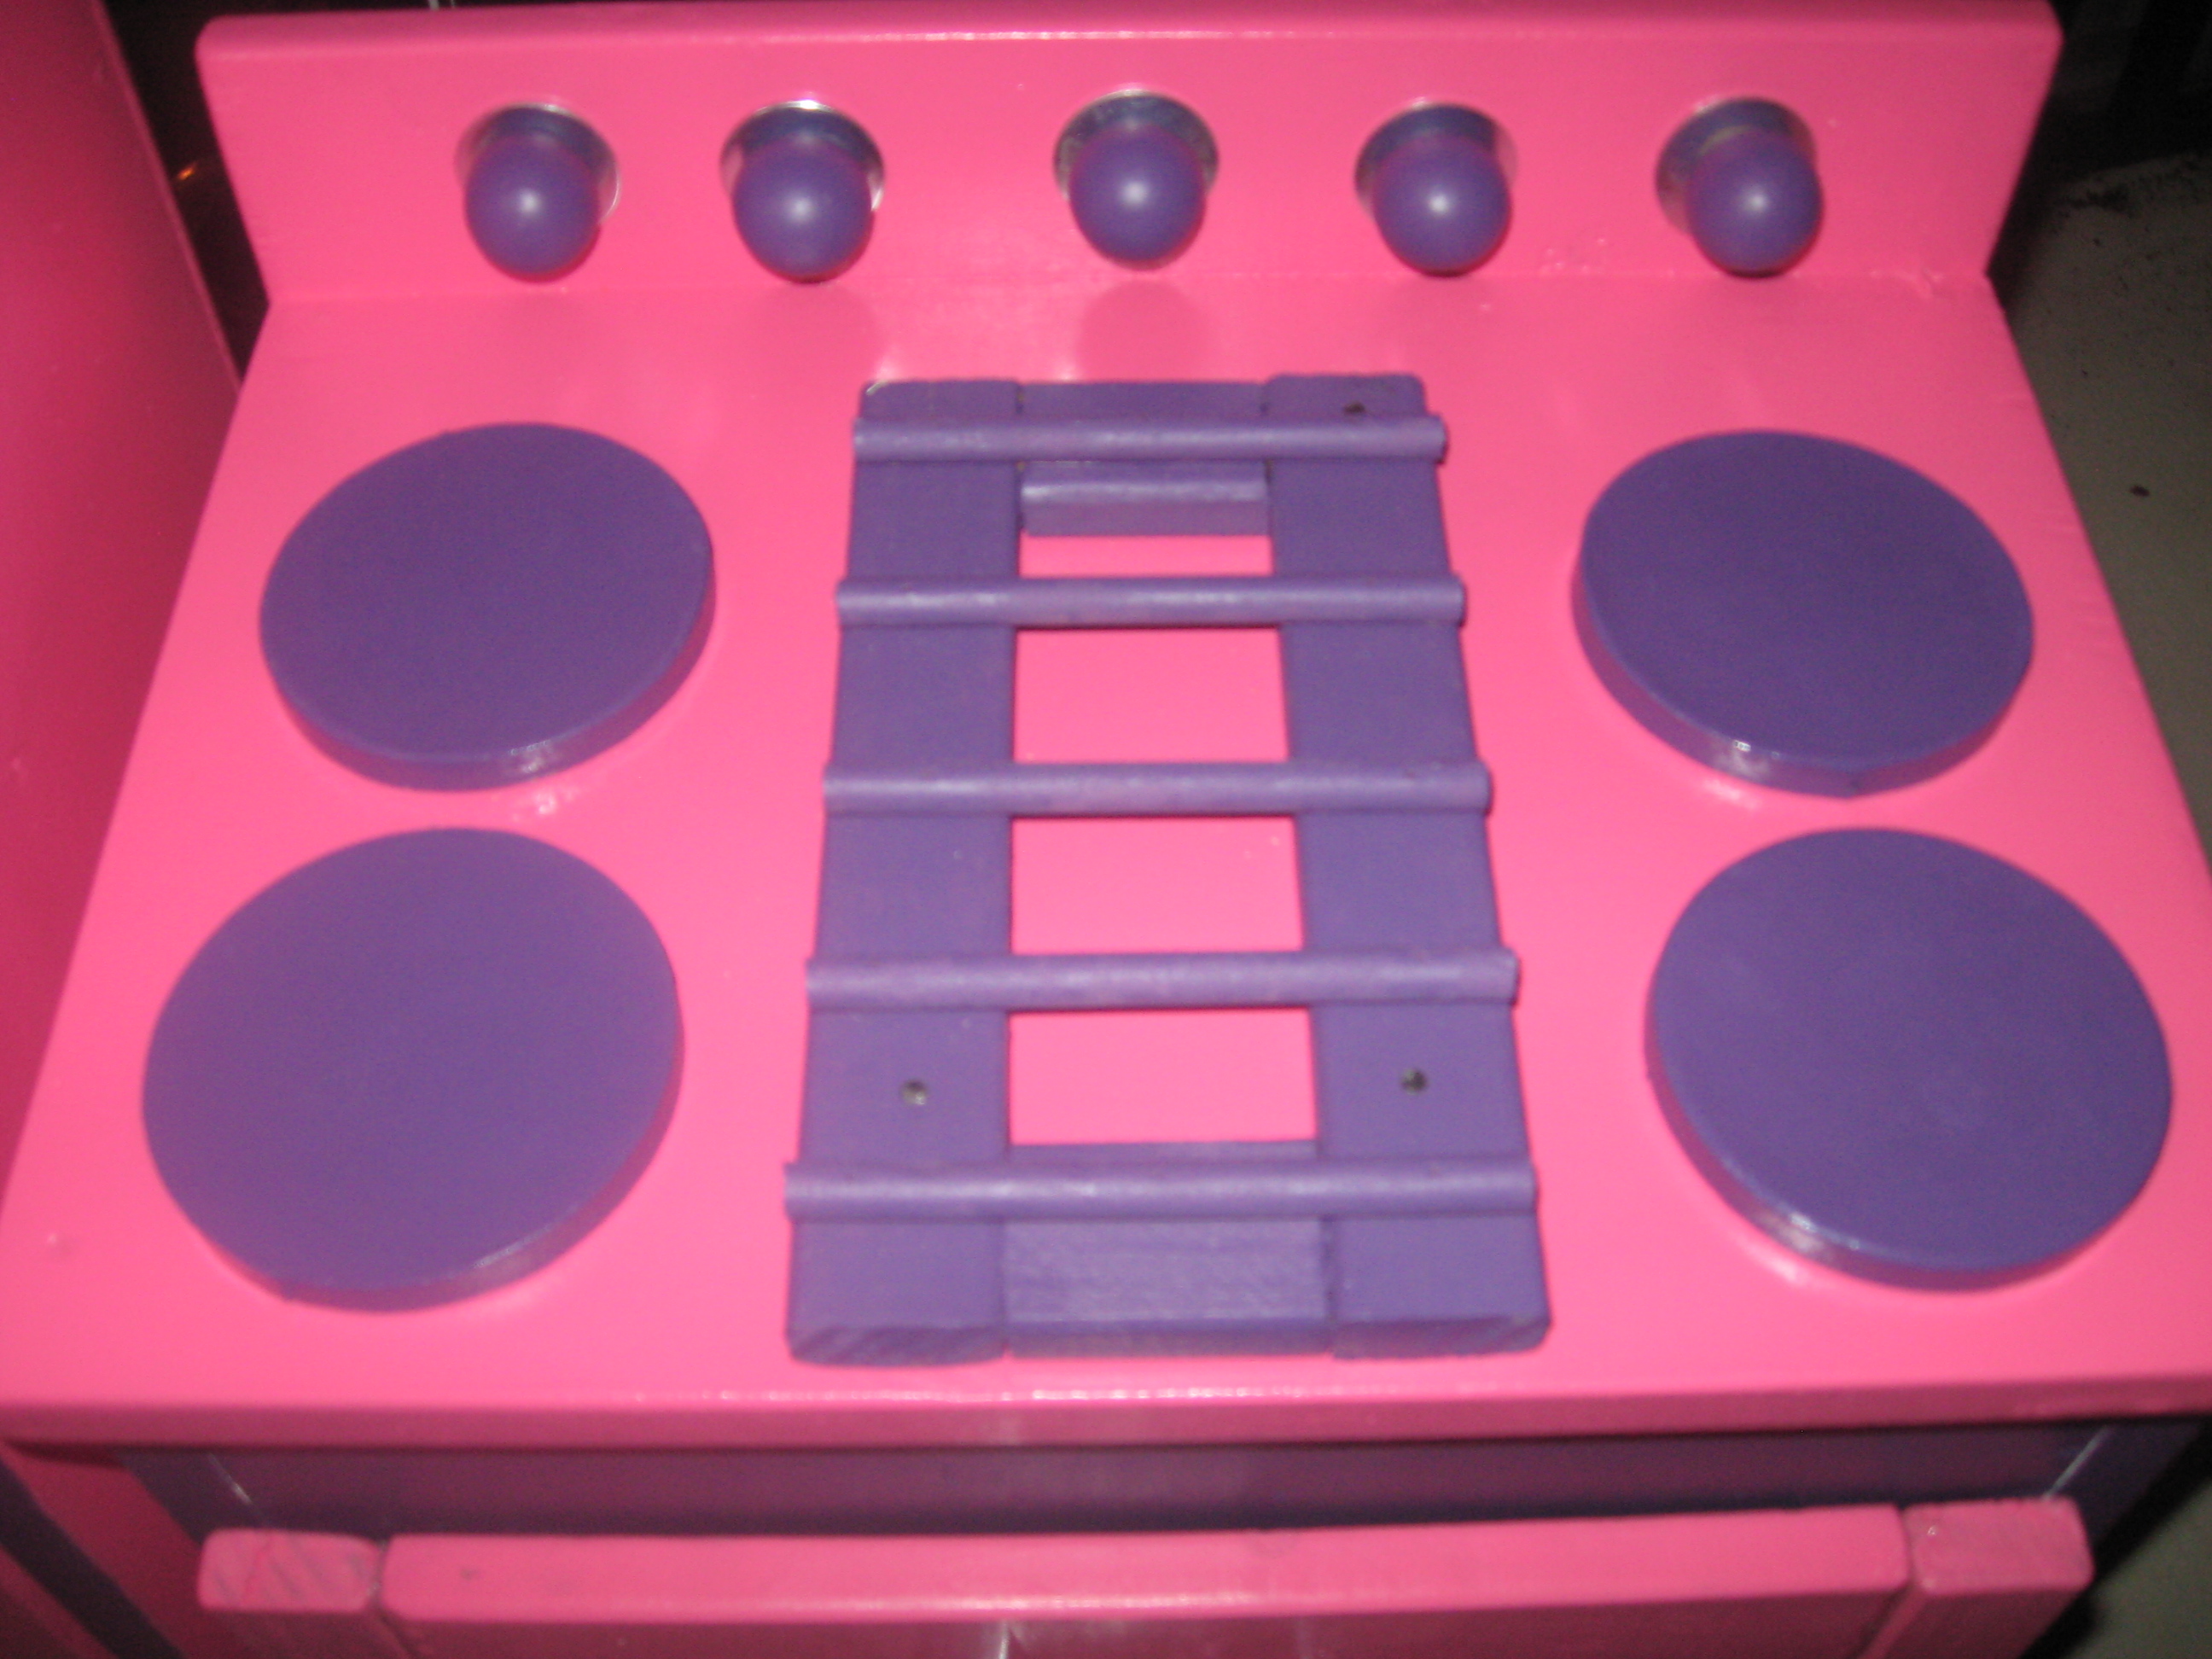
Stove: I made the knobs to the stove able to turn and pull out a little to imitate an actual knob on a stove so she feels as though she is able to turn on the stove and cook. I made the top have four electric burners on the sides and a gas grill plate in the middle....she loves this for her "burgers" lol. I found some cookie cooling racks at dollar tree and they sit perfectly on the shelves inside the stove. I also mounted a tap light on the inside of the stove so it has an "oven light" in it.
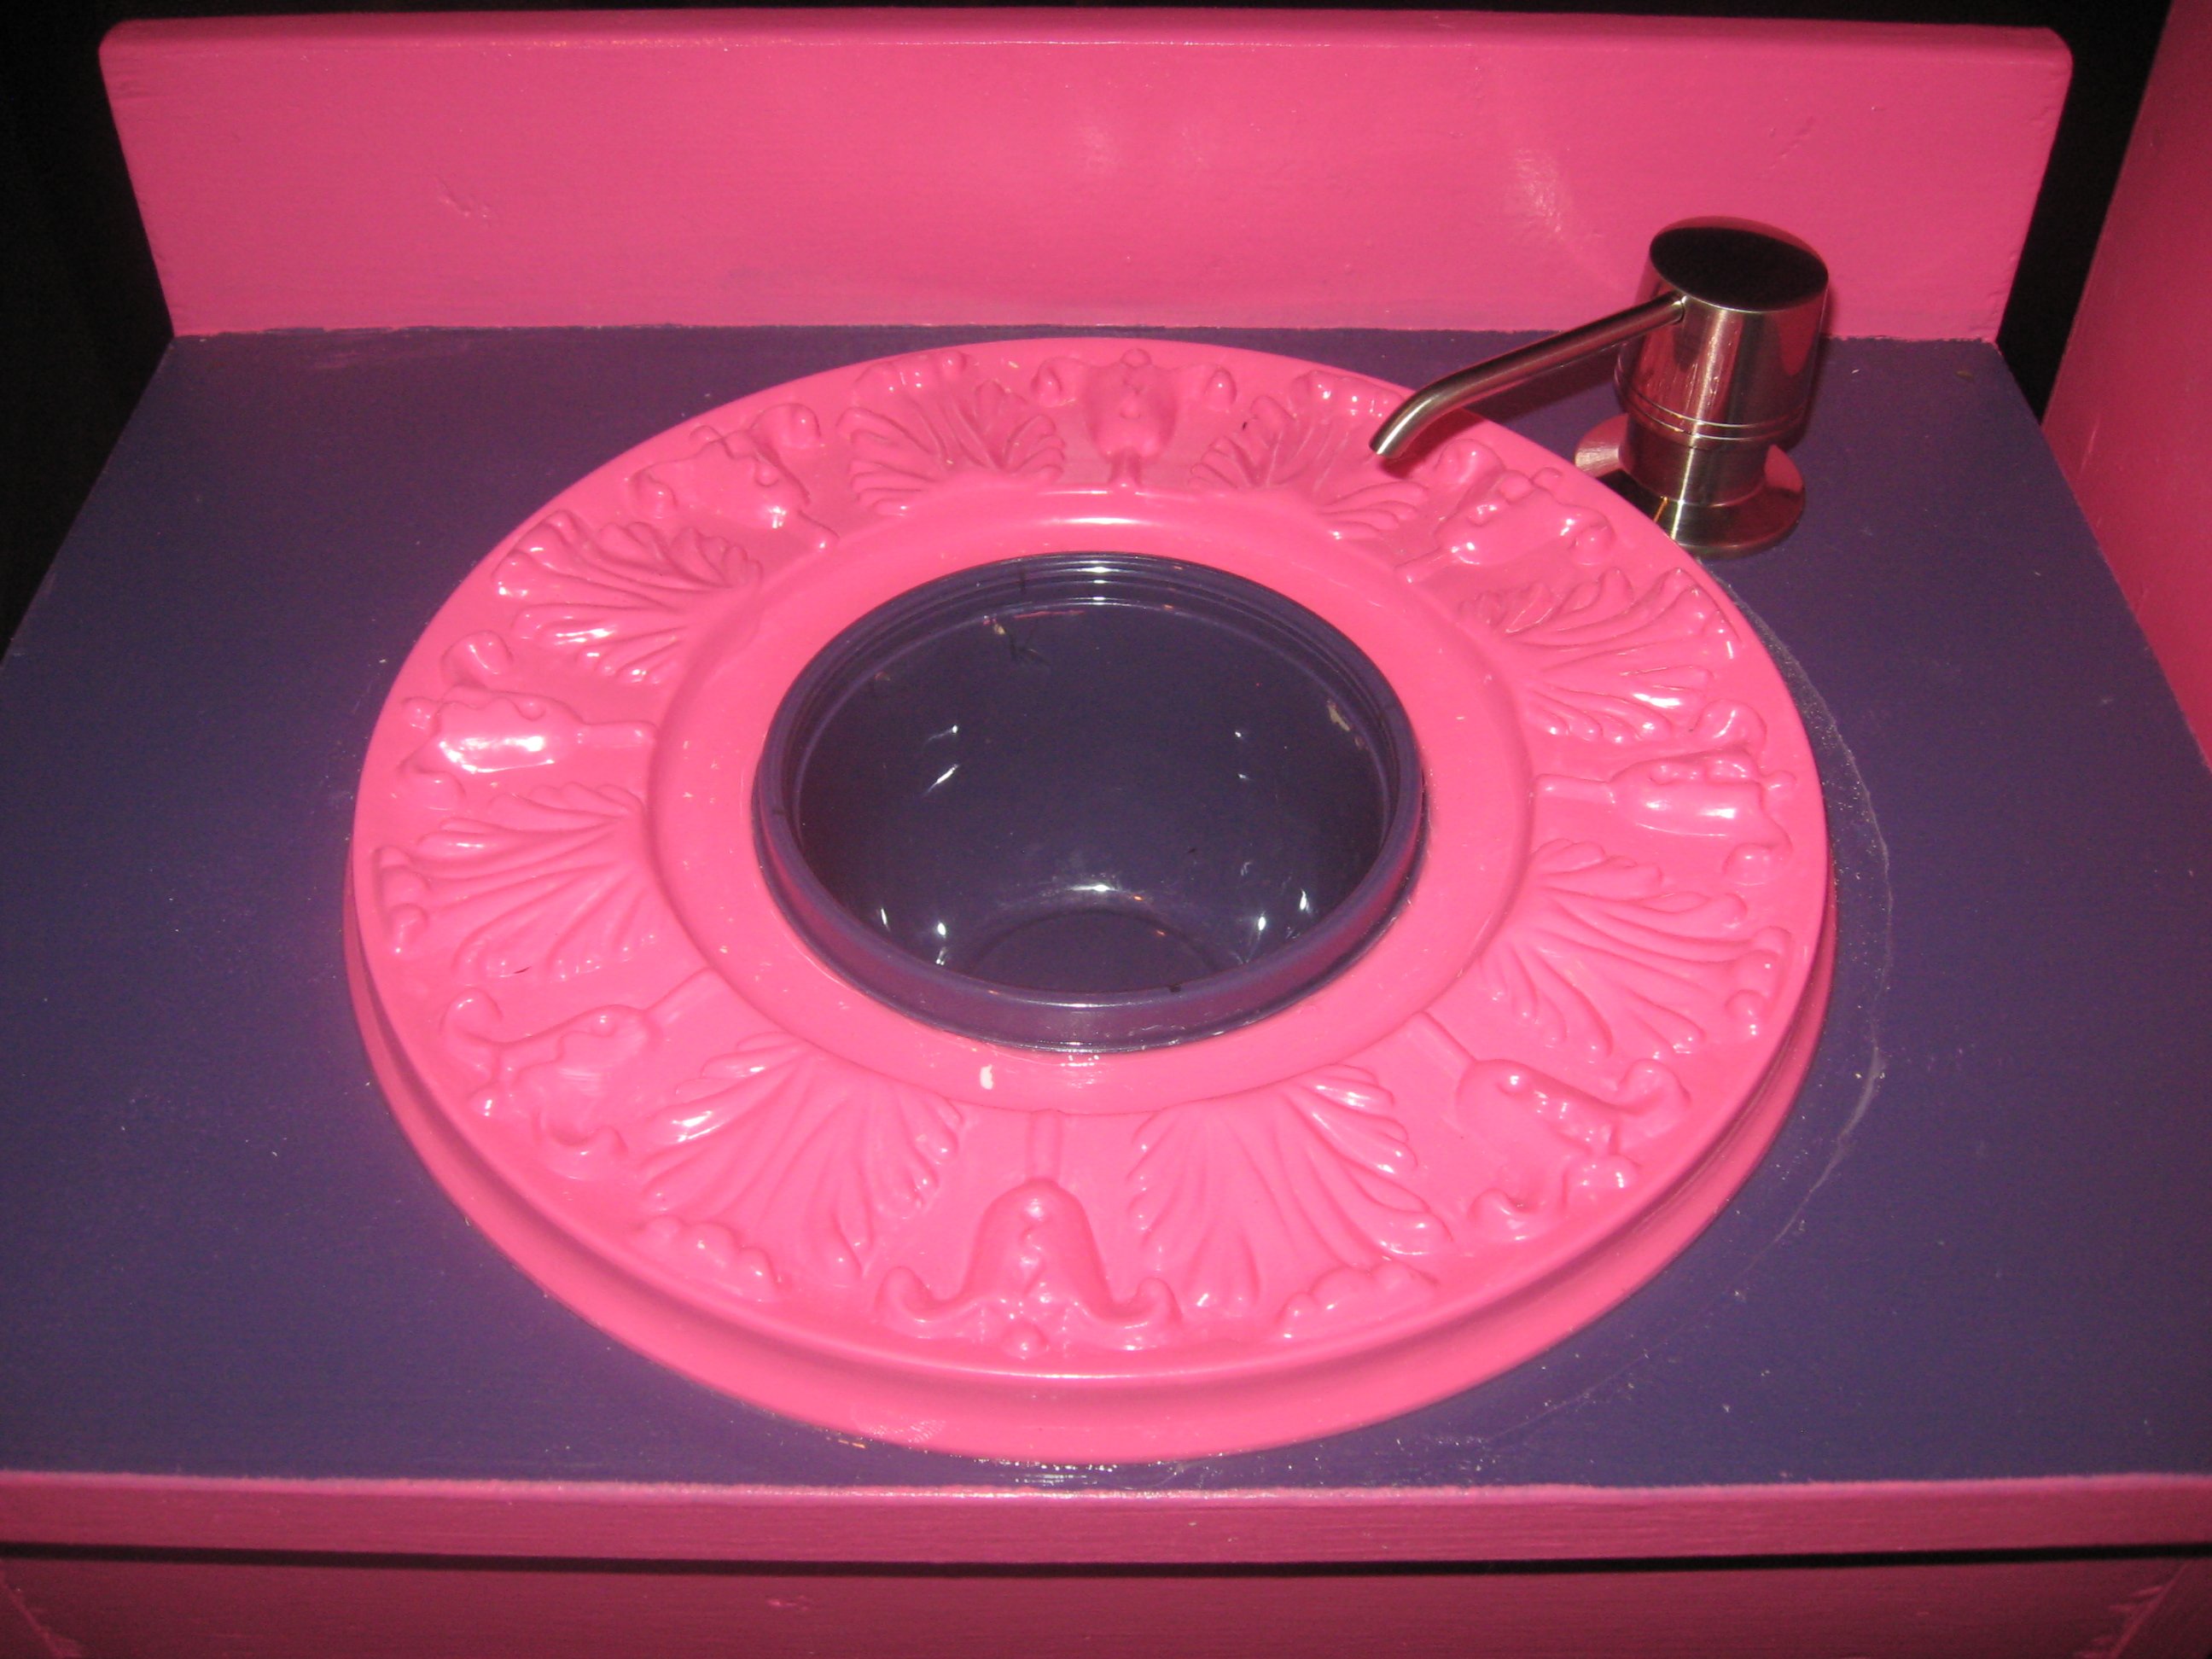
Sink: I painted a ceiling medallion to match the set colors and have that as her decorative sink border...the actual sink is a purple tupperware bowl. The faucet is actually a sink mounted soap dispenser I purchased. It has a bottle that attaches under the sink that I can fill with water so that when she is playing she can pump the faucet and actually get water! I made sure to use kitchen and bath grade silicone sealant on the sink and used paint that is ok in a kitchen/bath area.
I painted her set Disney Tink Pink lol.....her favorite color! She is loving this set and I am so thankful I found this site so I could make it!
Sun, 01/01/2012 - 09:47
Congrats on your first build! You did a super job! So cute. Love the creative elements like the turning knobs, grill and the 'running' water. Your sink bowl and trim colors are a great touch too. :)
I followed the plans and everything went really well. Th bench was built to match a Farmhouse Bed and nightstand that I built. I added fake drawers and knobs to make it match the nightstand. The top of the bench is made from boards screwed together rather than plywood, to add a little character.
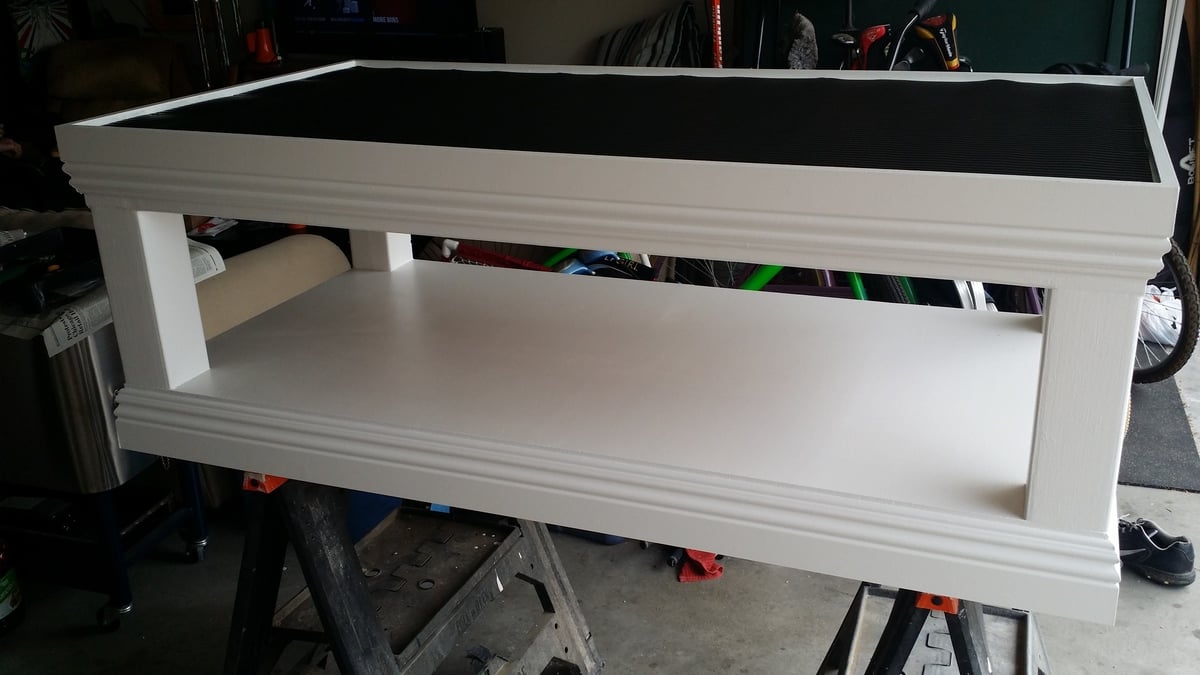
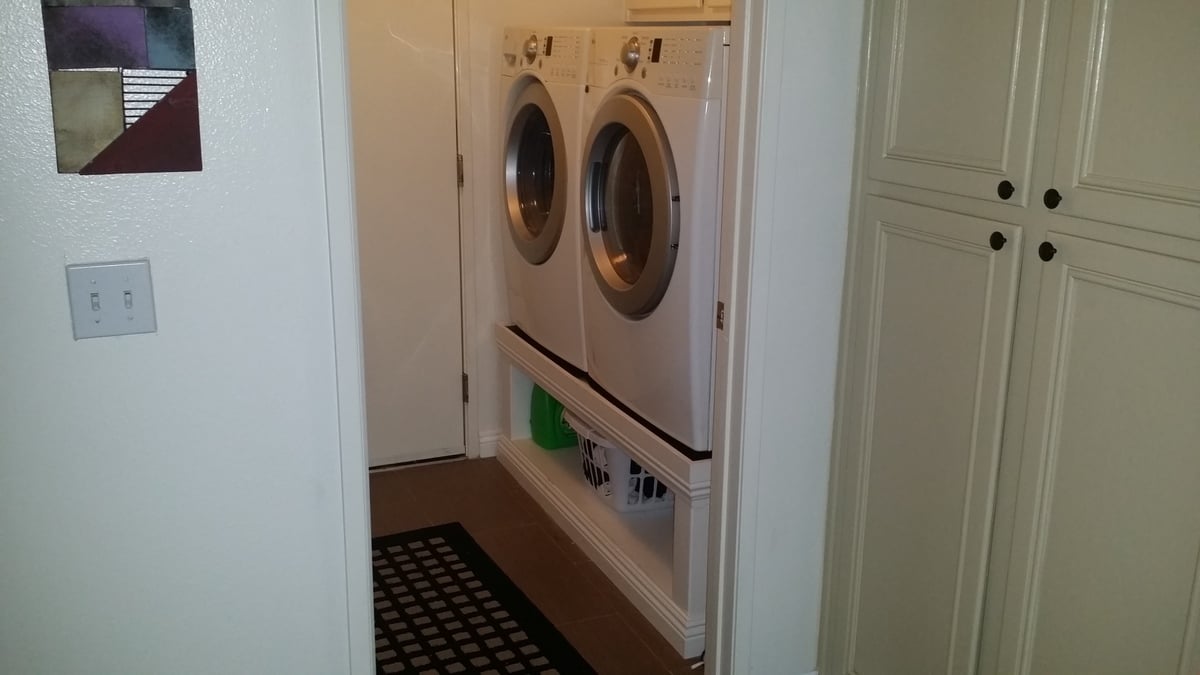
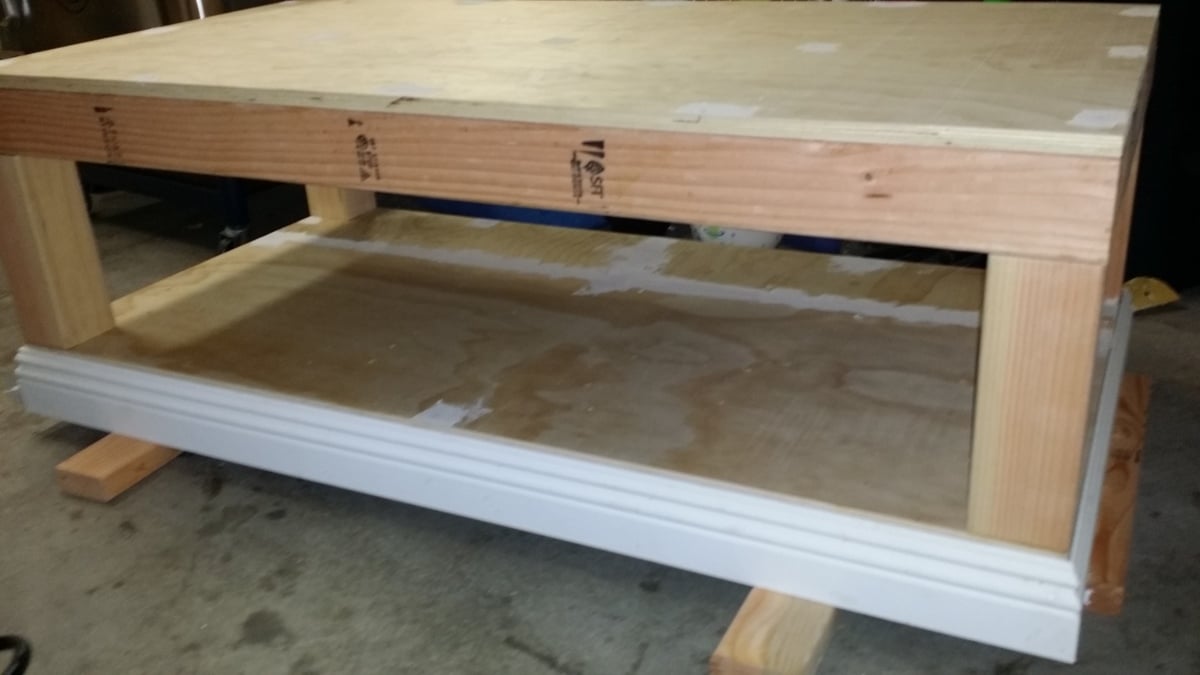
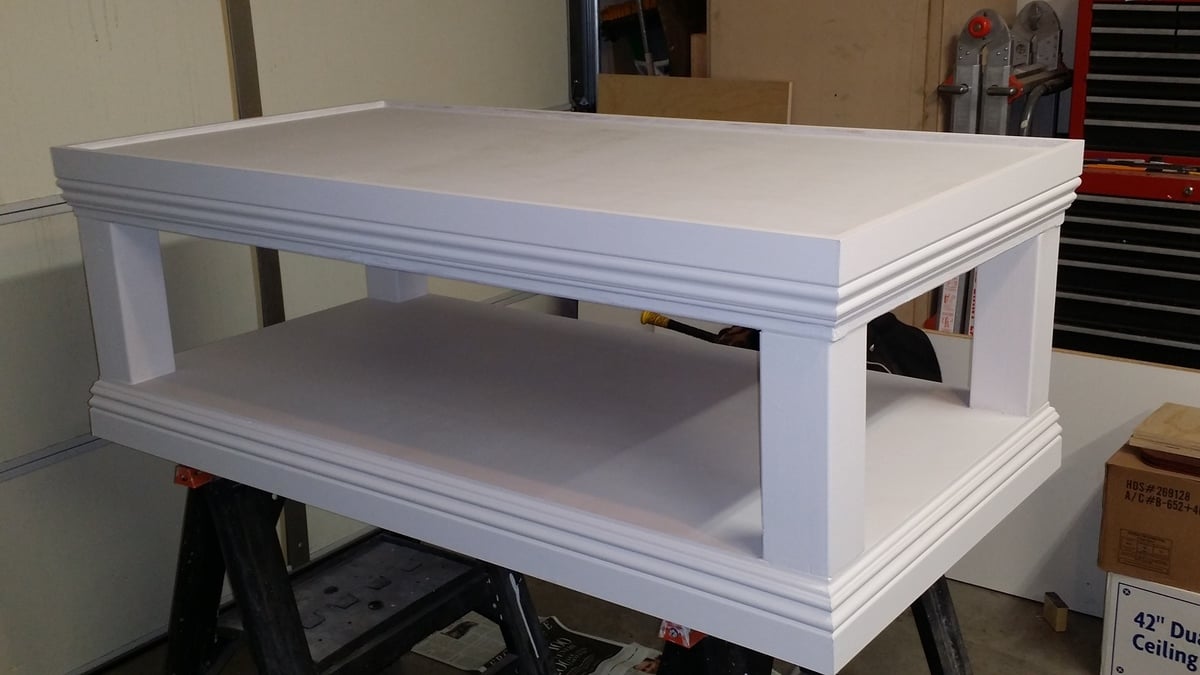
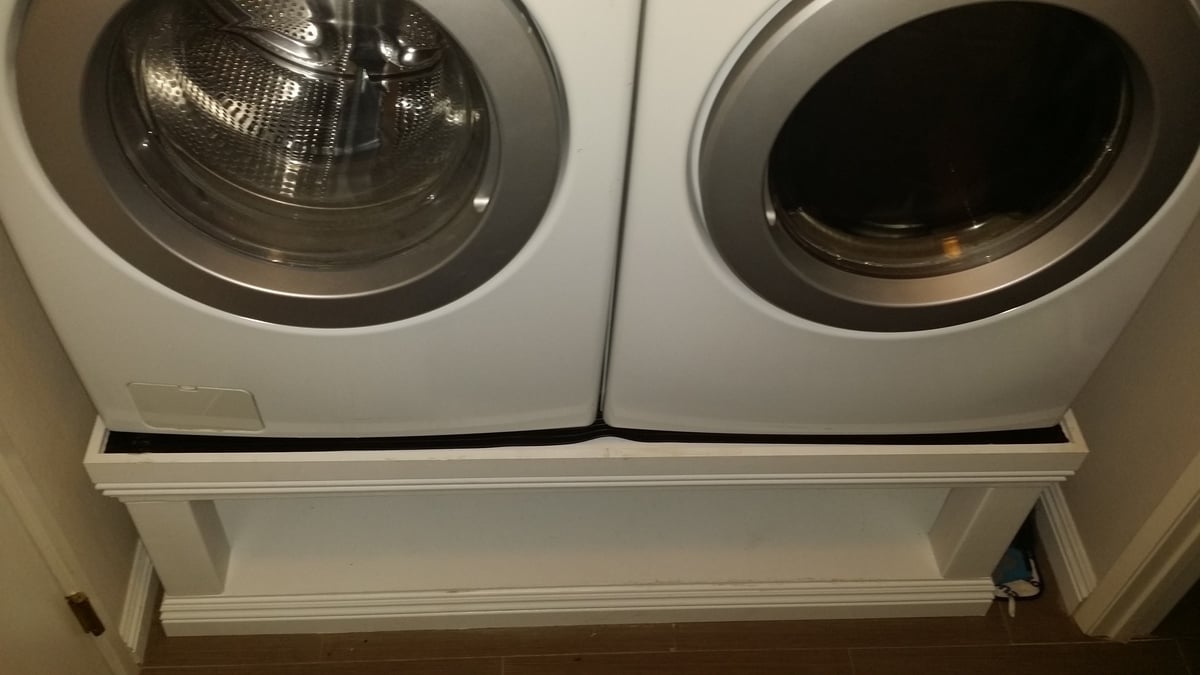
Been waiting to tackle this project for months. This was more for a place to put our laundry baskets while our laundry was being washed and dried. We come through our laundry area from our garage and so do most of our guests as our front door is a long way from parking. Tripping over empty laundry baskets no more. The opening for baskets is 11.5", which also elevated the opening to clear the dryer exhaust out and allow our units to push back a little closer to the wall. The floor and top were framed using 2x4's cut at 26" and a kreg pocket hole jig. 4x4 posts 11.5" were attached using the kreg jig and L brackets. 3/4" plywood sheeting the top and bottom cut at 55"x29". I did save a little money by only using one sheet of plywood. Full cut for the top, pieced together on the base in the back using excess from one sheet. 3.875" base moulding was used on the top and bottom to cover the seam where the 3/4" plywood sheet for the top and bottom meet the framing. The moulding on the top was inverted, and raised 5/8" over the plywood sheeting top to create a lip so the machines would not slide off the pedistal. Didn't want too much dressing up, I like clean, straight lines. A coat of primer, and 3 coats of semi gloss white paint. I put a sheet of the black rubber runner from Home Depot in the carpet roll area like Chris did, for some noise dampening to prevent our washer from walking at all. Tacked down with black carpet tack nails. The hardest part of the whole project was hooking the washer and dryer up in the tight space we have after getting the units on the pedistal. The dryer exhaust vent pipe in the wall is behind the washer, so I used adjustable rigid exhaust vent elbows to route the flexible exhaust duct through the pedistal, tacked it up to the underside of top with zip tie's and then up and around the side of the pedistal to the dryer exhaust port. All and all a very fun and rewarding DIMyself project. Thanks Sausha....

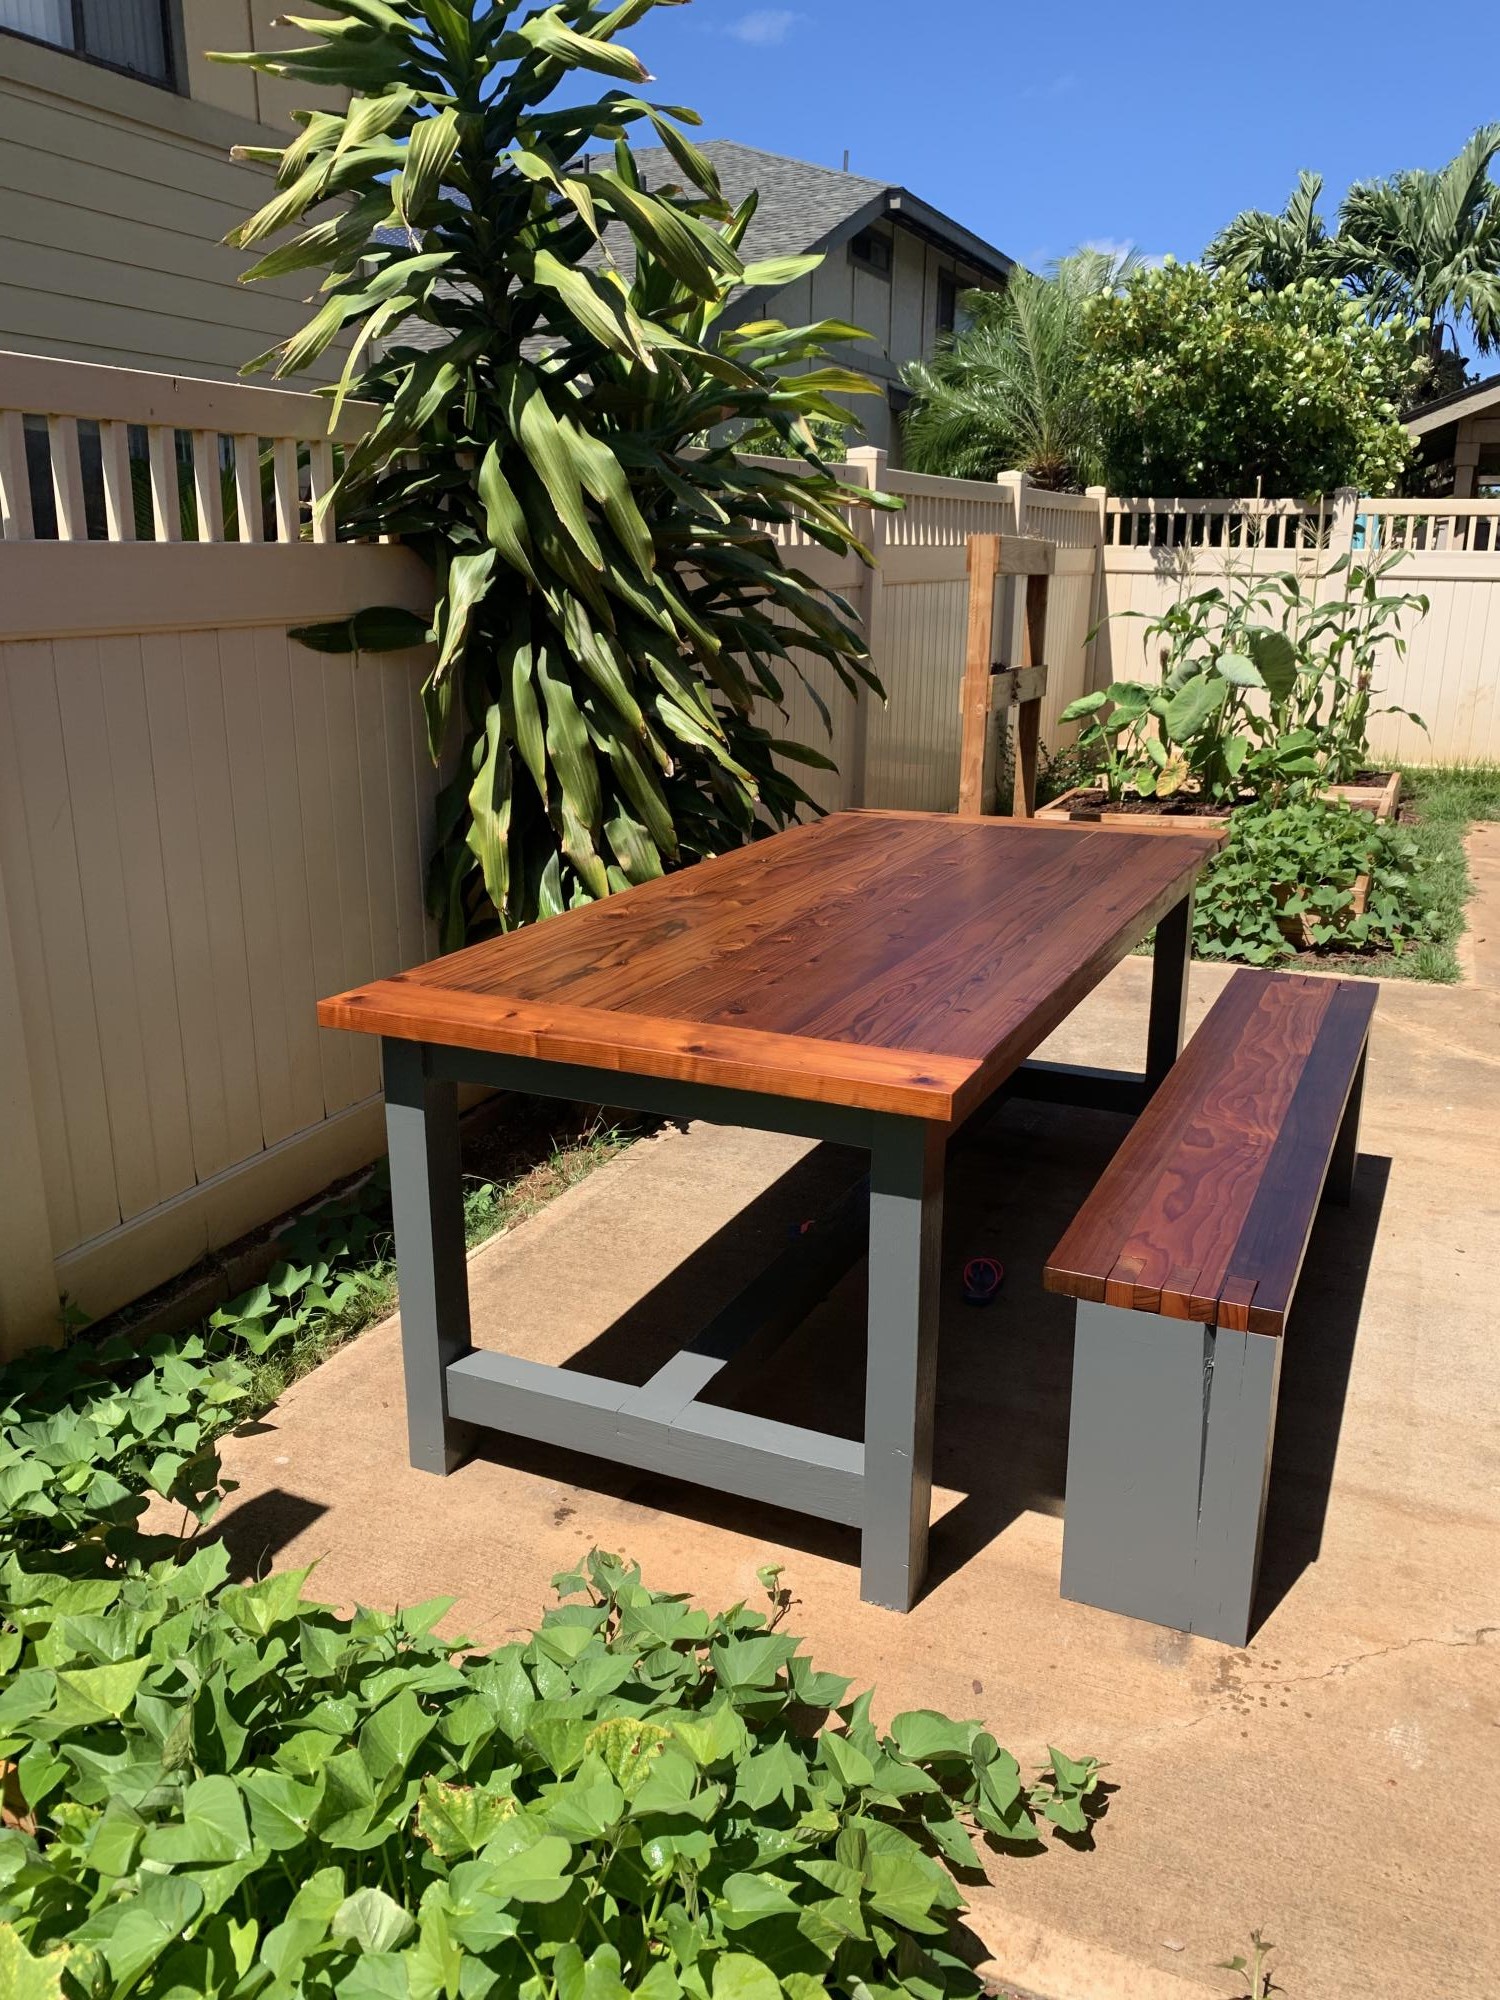
Farmhouse Table and Bench. Made from all redwood. Table is all new wood, and half the bench was from reclaimed redwood. Used Danish Oil and Spar Urethane to finish the tops, and paint to finish the legs.
Mon, 07/22/2019 - 11:14
What a gorgeous table and chairs. the top is done very nicely! Love it!
Great plans and easy to follow!


Comments
Ana White Admin
Fri, 03/31/2023 - 10:32
Great outdoor storage shed!
Looks awesome, thanks for sharing!