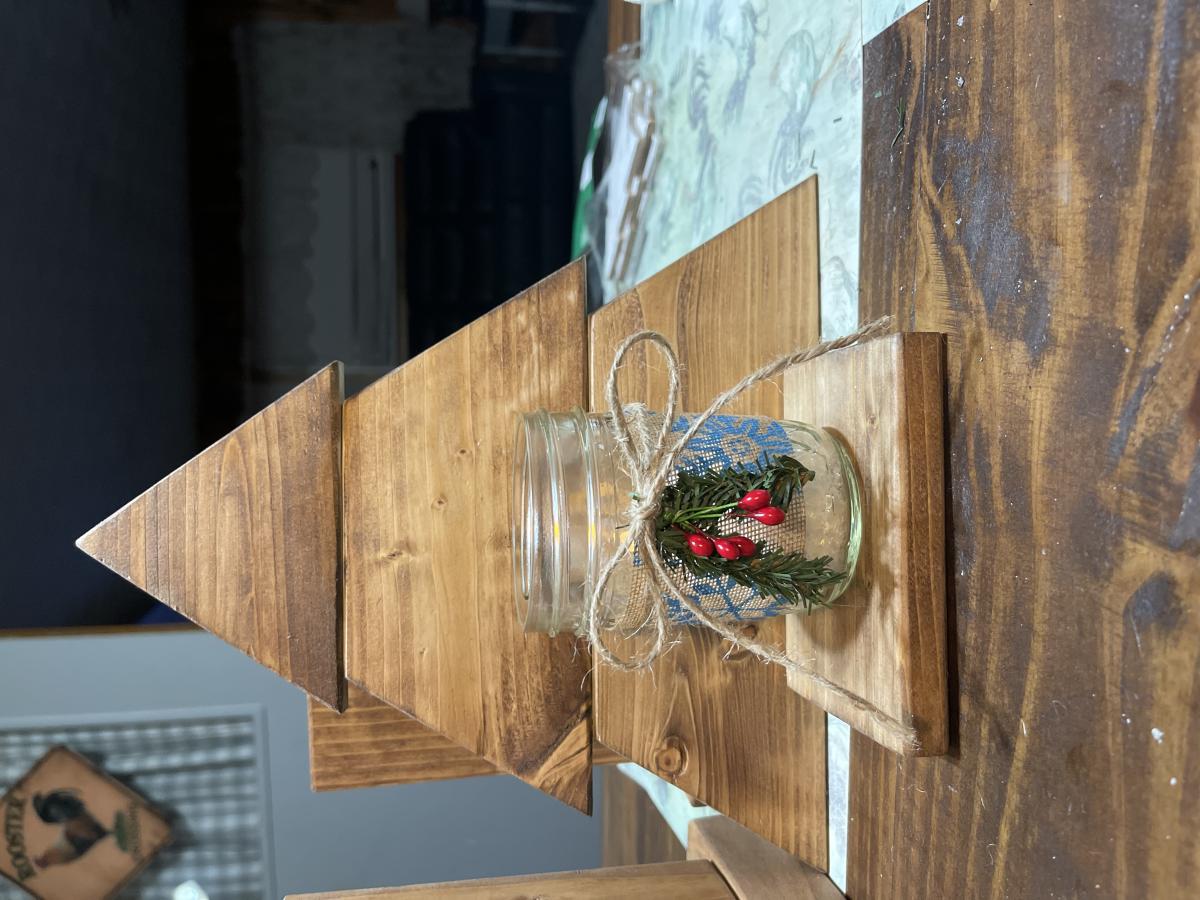
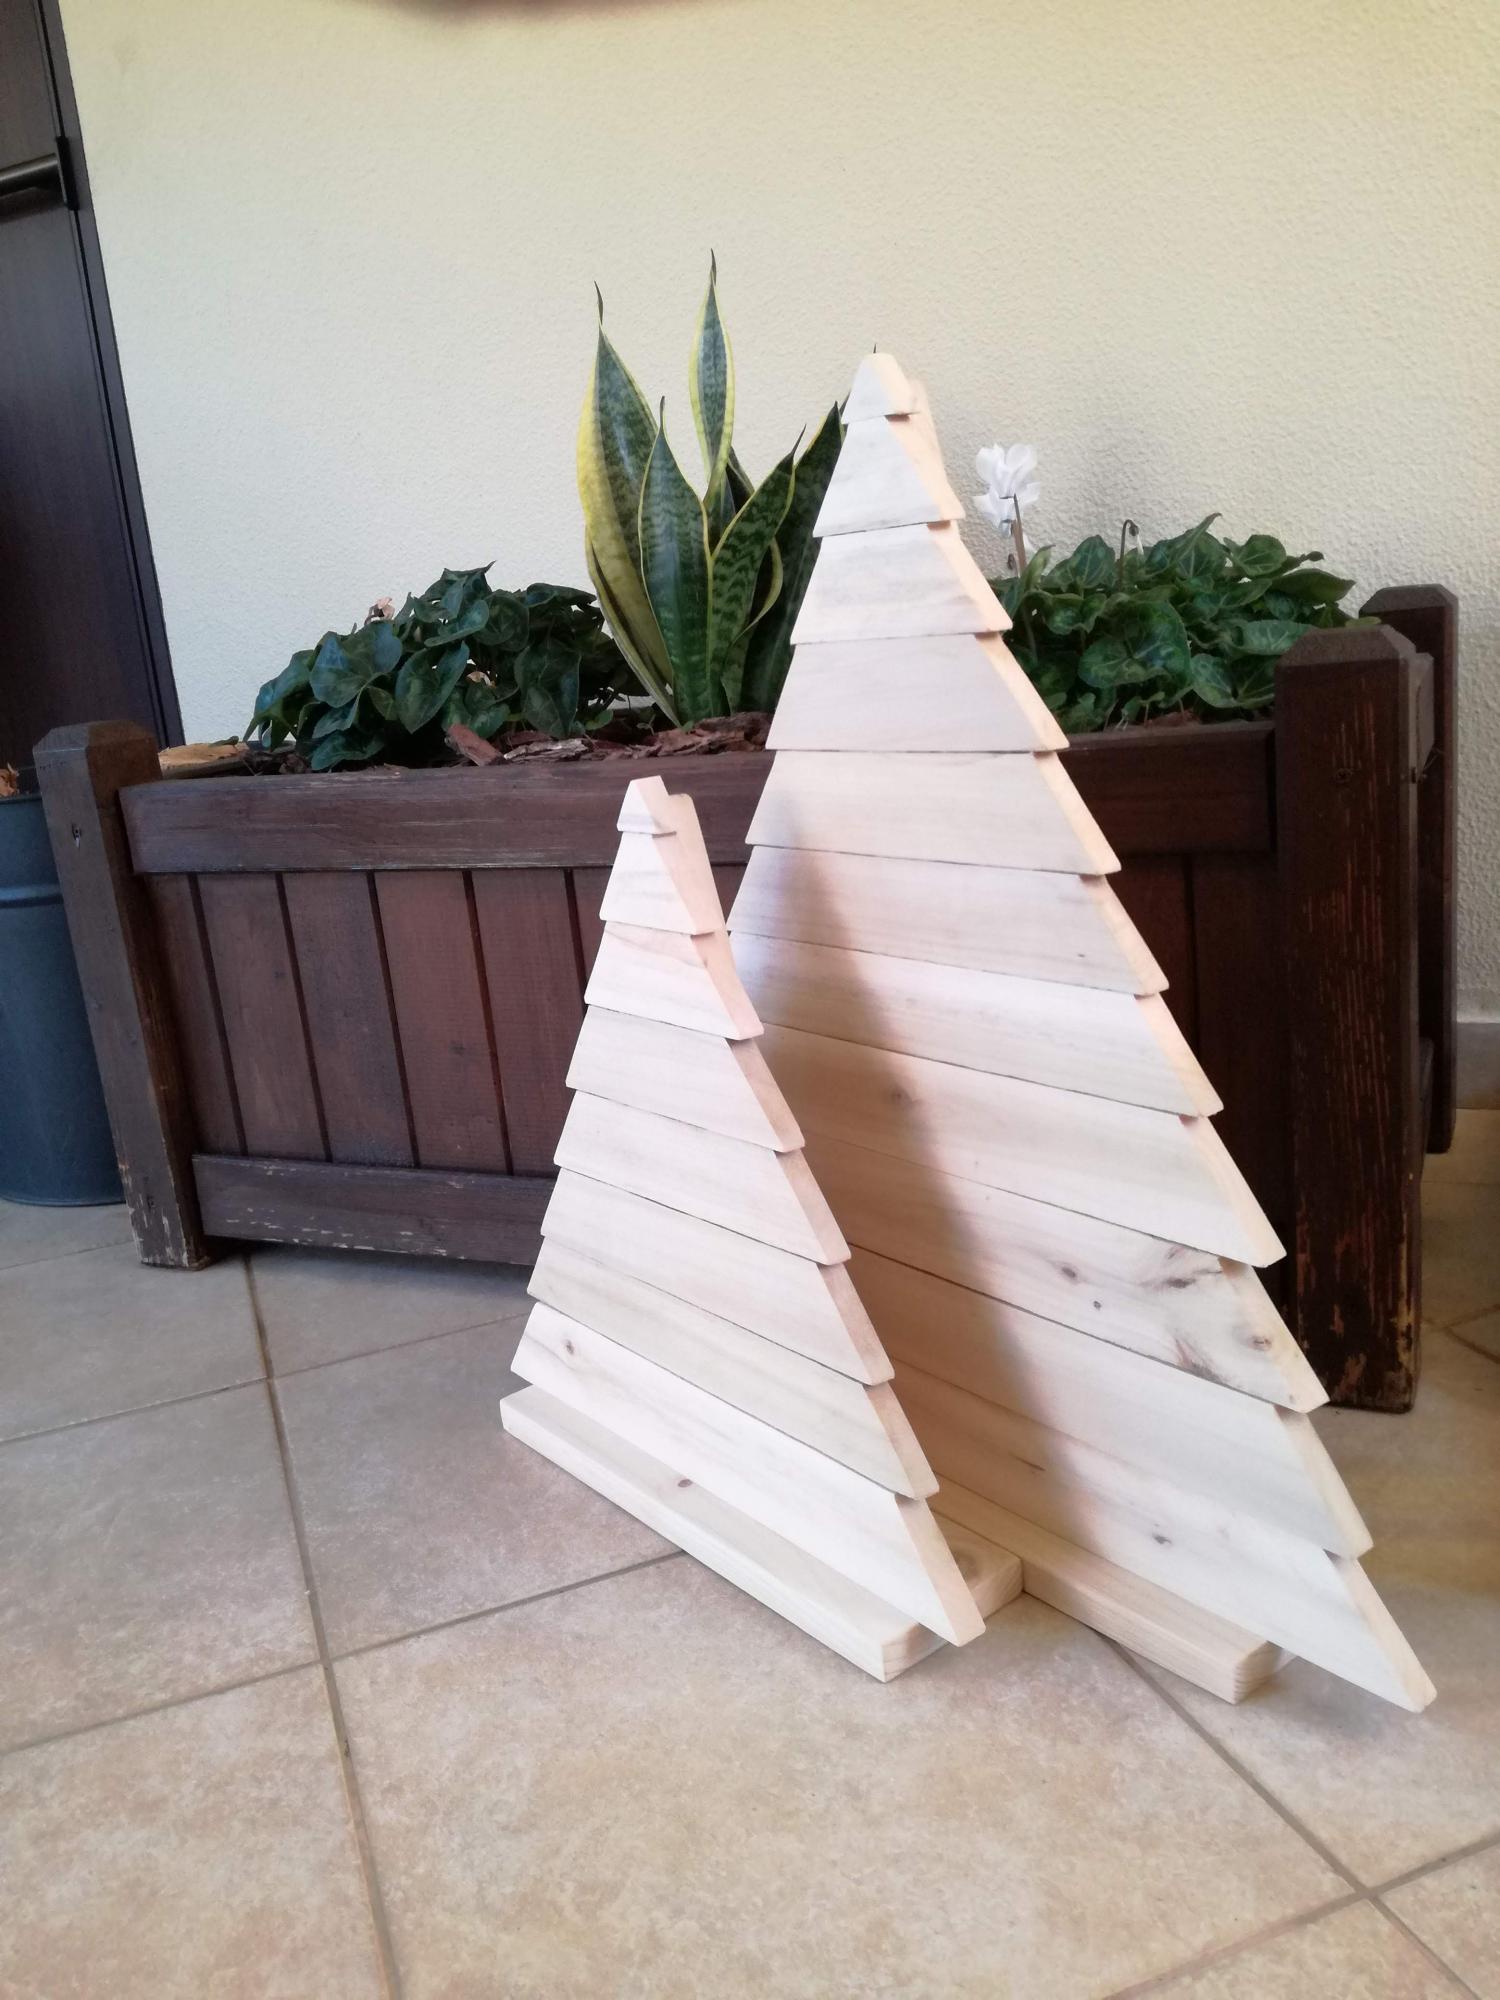
Christmas tree shelf
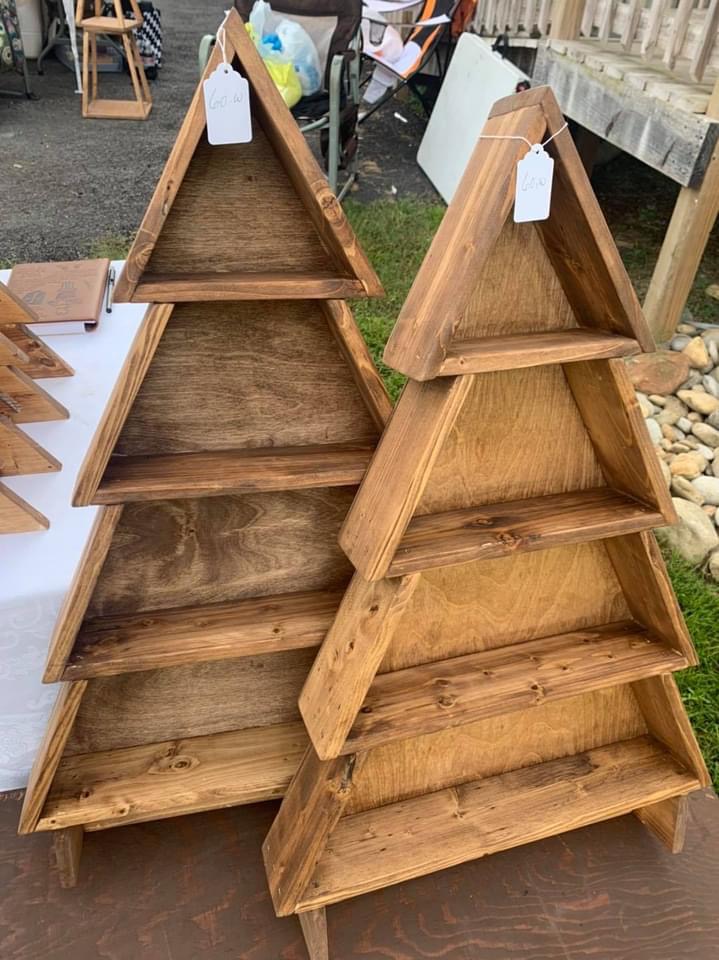
Enjoyed making these Christmas gifts
Built from Plan(s)
Enjoyed making these Christmas gifts
First I'd like to thank Ana for everything she does. Without her i would have never started building furniture, and without her I would have never picked up Google Sketchup and learned how to design my own furniture.
Ana, I can't thank you enough for the skills, hobby, and confidence you have given me. Thank you thank you thank you!
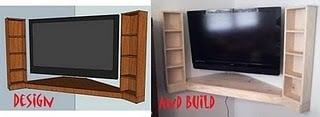
I attached this to the floating shelves plan because it is what inspired us to design this. And I chose intermediate because of figureing out the angles and for finding the studs in the wall and properly/securely mounting it so little ones don't get hurt.
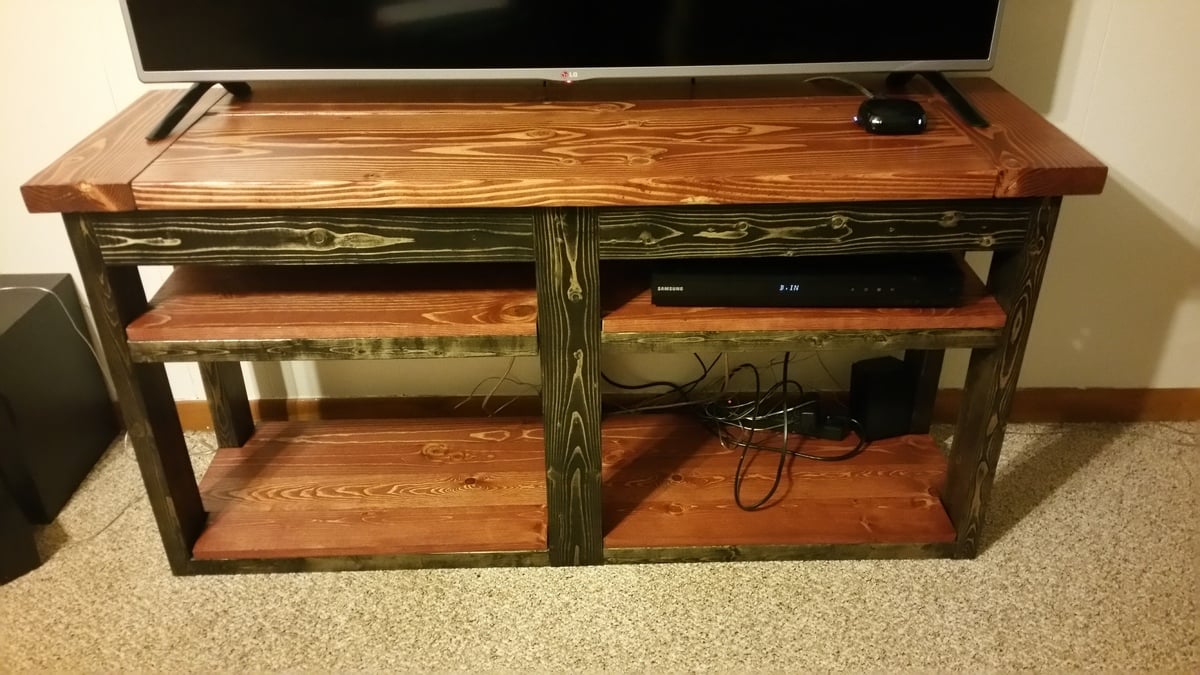
Since moving into our new home Matt and I have been using my great-grandmother's old sideboard as a tv stand. Our house (and living room) is very small so I've been wanting to mount the tv on the wall in the corner and Matt's been wanting to buy a smaller tv stand. I did not want to do it his way because we have a large hyper dog running around knocking everything over, lol.
So after recieving an extra tv wall mount from my parents and mounting the tv in the corner like I wanted, we brainstormed and created this "floating" table/shelf to hold Matt's game systems and our dvd's. Its off the floor and out of Buck's destruction path, but it also made the room look so much larger!
***This plan was not designed to hold the weight of a tv. While it is plenty strong enough to hold the movies, game systems, dvd-vcr, and the chance his 6 year old decides she's a rock climber, we have no idea its actual weight capasity.
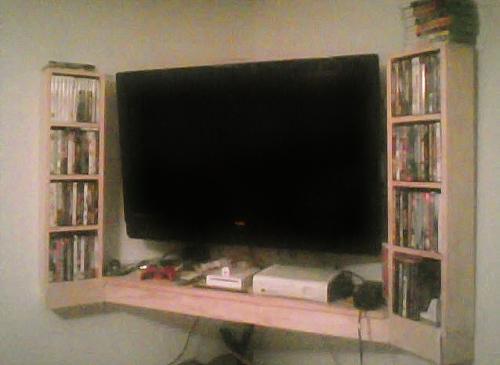
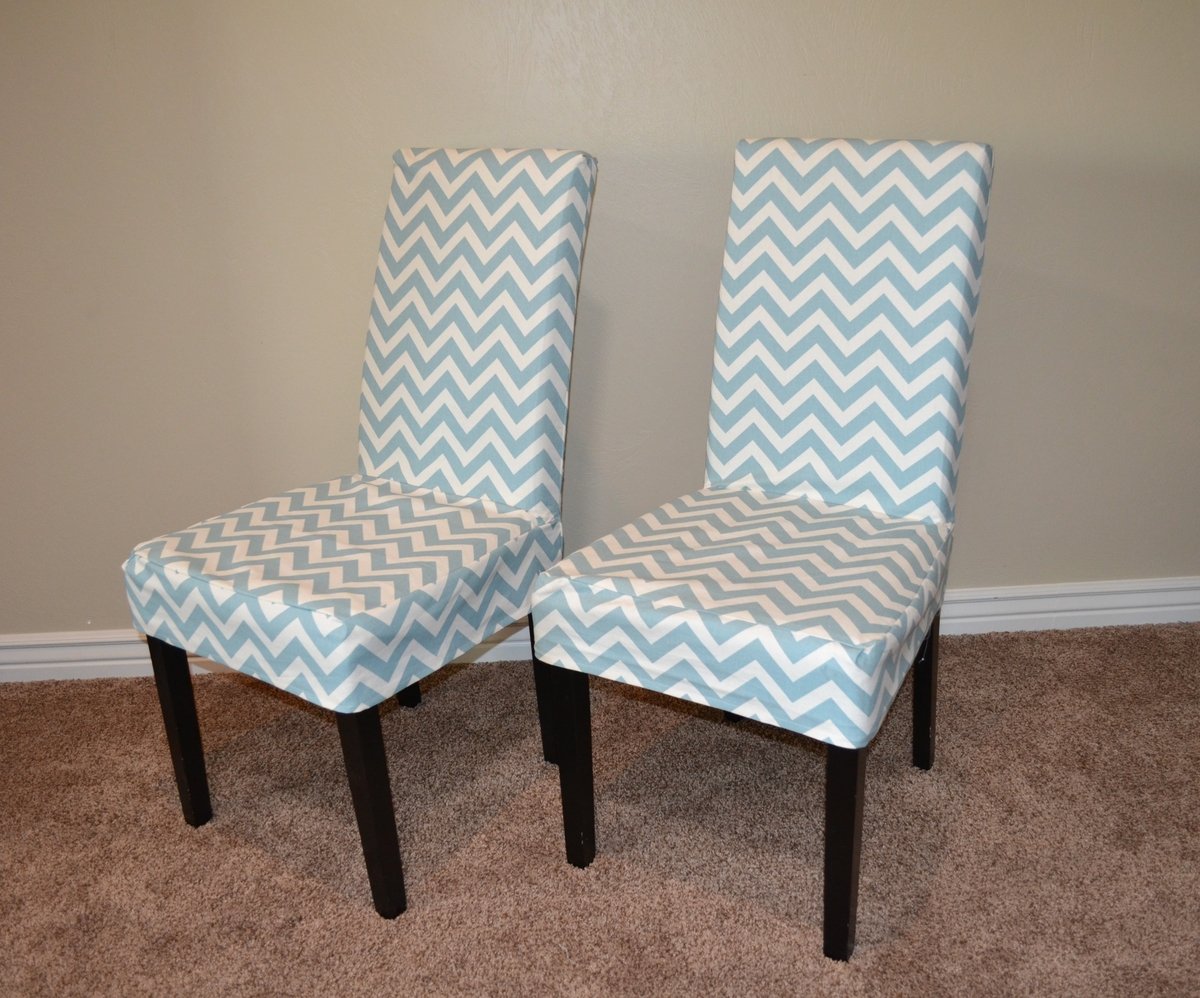
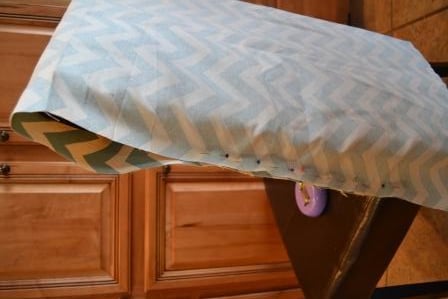
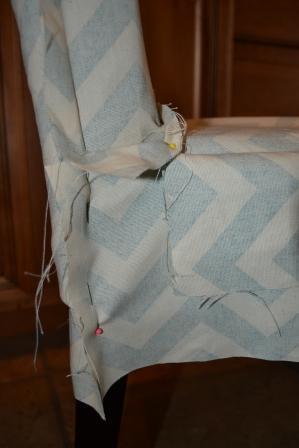
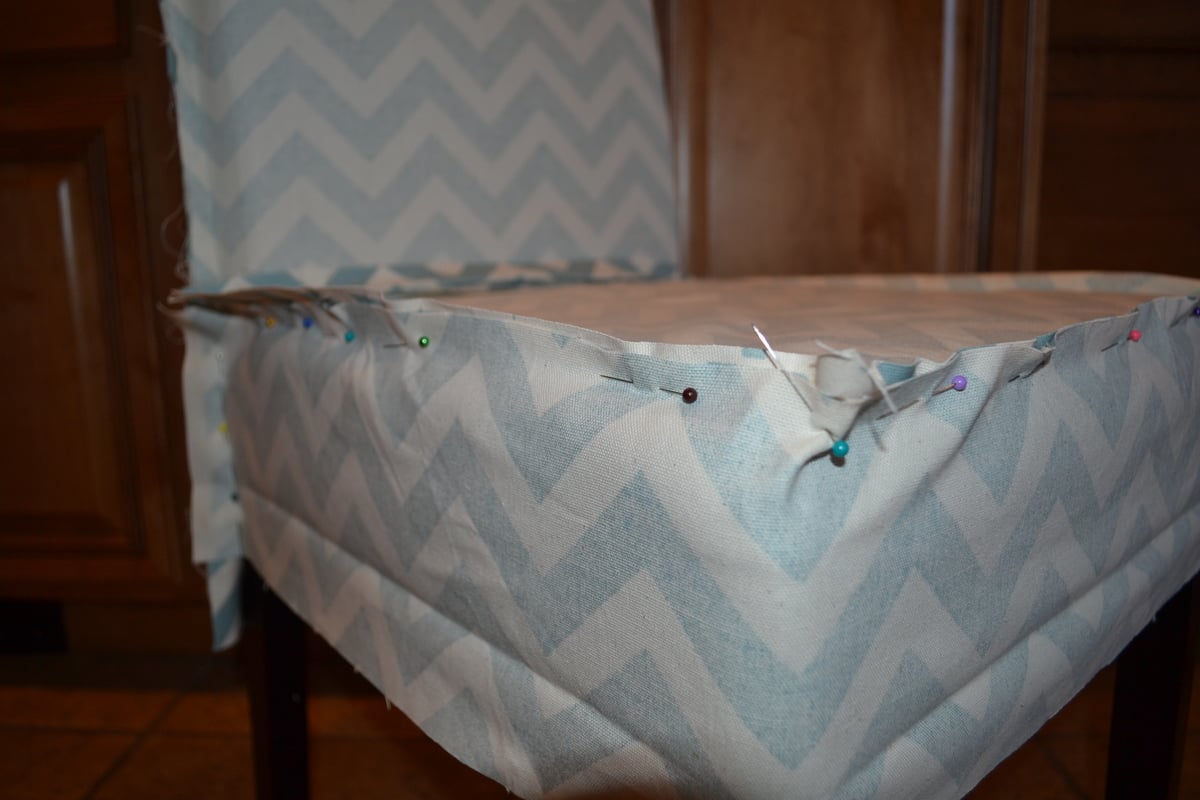
Slip Covers were easy peasy to make and really spruced up my kitchen table with some much needed color. Follow all the detailed steps on iamhardware.com.
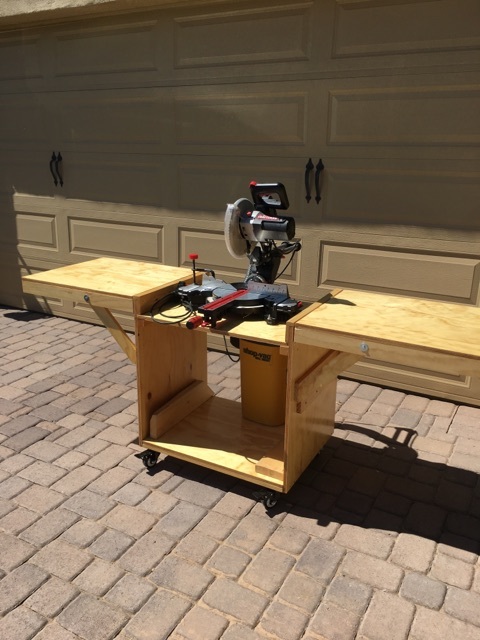
So, after seeing a project my brother in law made I got the inspiration to try my hand at woodworking. Low and behold I stumbled upon Ana's WONDERFUL site! After spending the winter, rigorously studying plans and picking different projects I could use, I was able to afford gathering up some basic woodworking tools and get to work. First project was the 2x4 workbench off of kregtool.com (on a side note I <3 my new kreg jig). That went together easypeasy and came out great. Now i wanted to try my hand at something that took finish work and went inside my house, not out in the garage. We had just purchased a new TV and needed something other than the 2 side tables from our living room that where serving as it's temporary home atm. Needless to say that is how this project was decided on. I didn't make it from any specific plans from the site, but without this site I wouldn't have even known where to begin. I took some measurements and drew up a rough (and I mean ROUGH) plans. Then started chopping away at wood and drilling pocket holes. This is the end result.
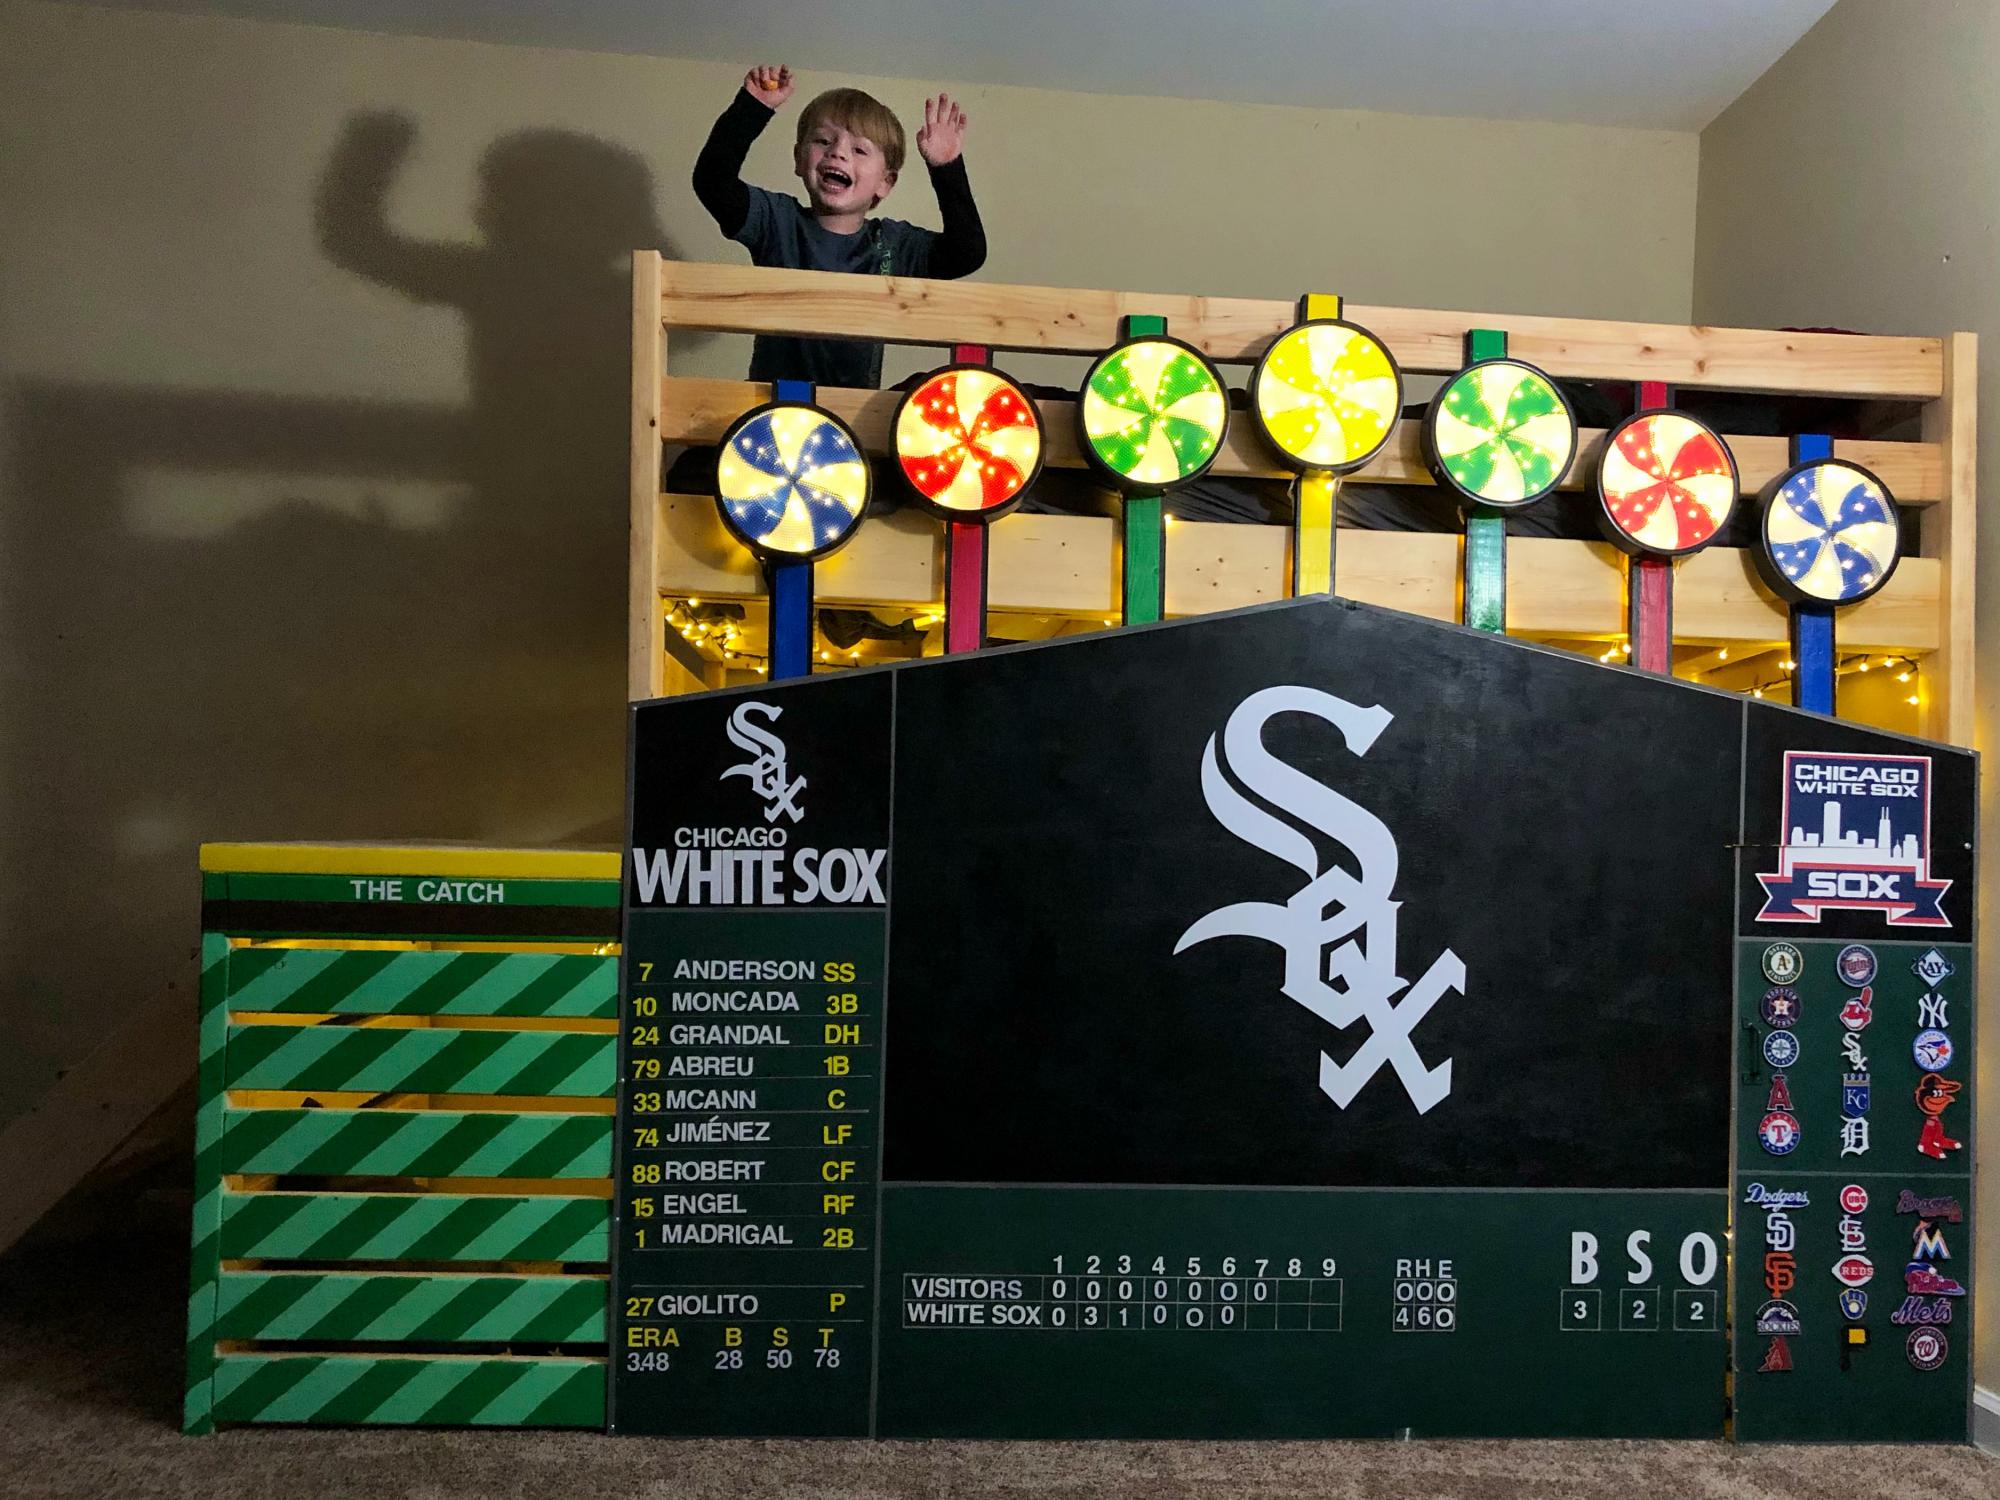
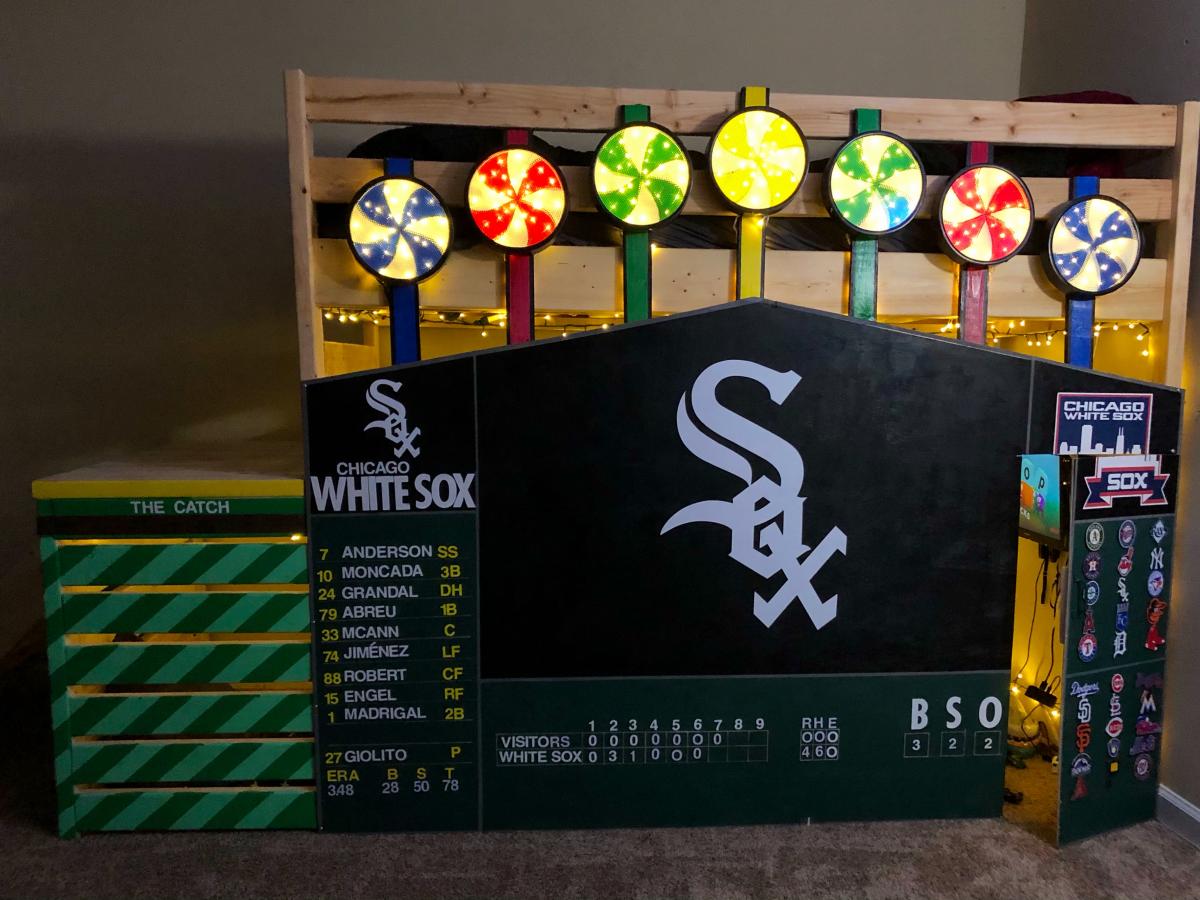
I started off building the loft bed. It was a lot of fun. I cut every single piece of this, and hand everything, other than the white sox and players decals. I made the light up pinwheel signs that light up whenever the white sox hit a home run. I had fond memories of the famous scoreboard going to games at the old comiskey park, and my 5 year old son loves the white sox, and this bed! There is a door as well that opens up and goes into the locker room. Underneath there is a rv, with a chair, and some other cool amenities good enough for a real major league player. I won’t tell the secret of how I designed the pinwheel light boxes, and the led lights. I had to get realllly creative. This was a huge project that completely consumed me for months. I love it though, and wanted to thank Ana for the great plans on the loft style bed! Thank you Ana white!!! Your the best
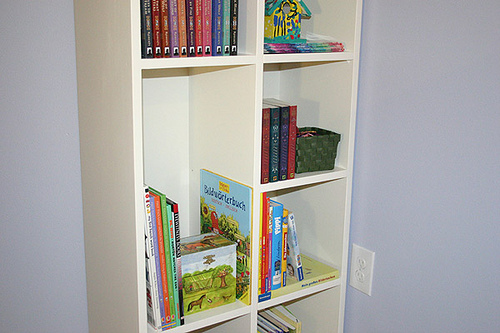
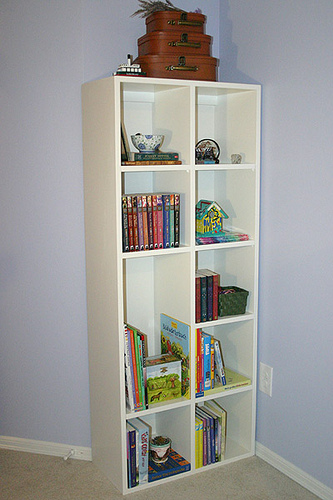
This is my very first woodworking project! My oldest daughter badly needed a bigger bookcase... I made this last year and it's already completely stuffed full of books now! Home Depot ripped the MDF for me, hubby helped me put it together and then I finished it. Since it is tall and narrow, the sides were bowing inward. I decided NOT to make ALL shelves adjustable, so I made two of them part of the bookcase. Squared things up nicely. The rest of the shelves are removable though.
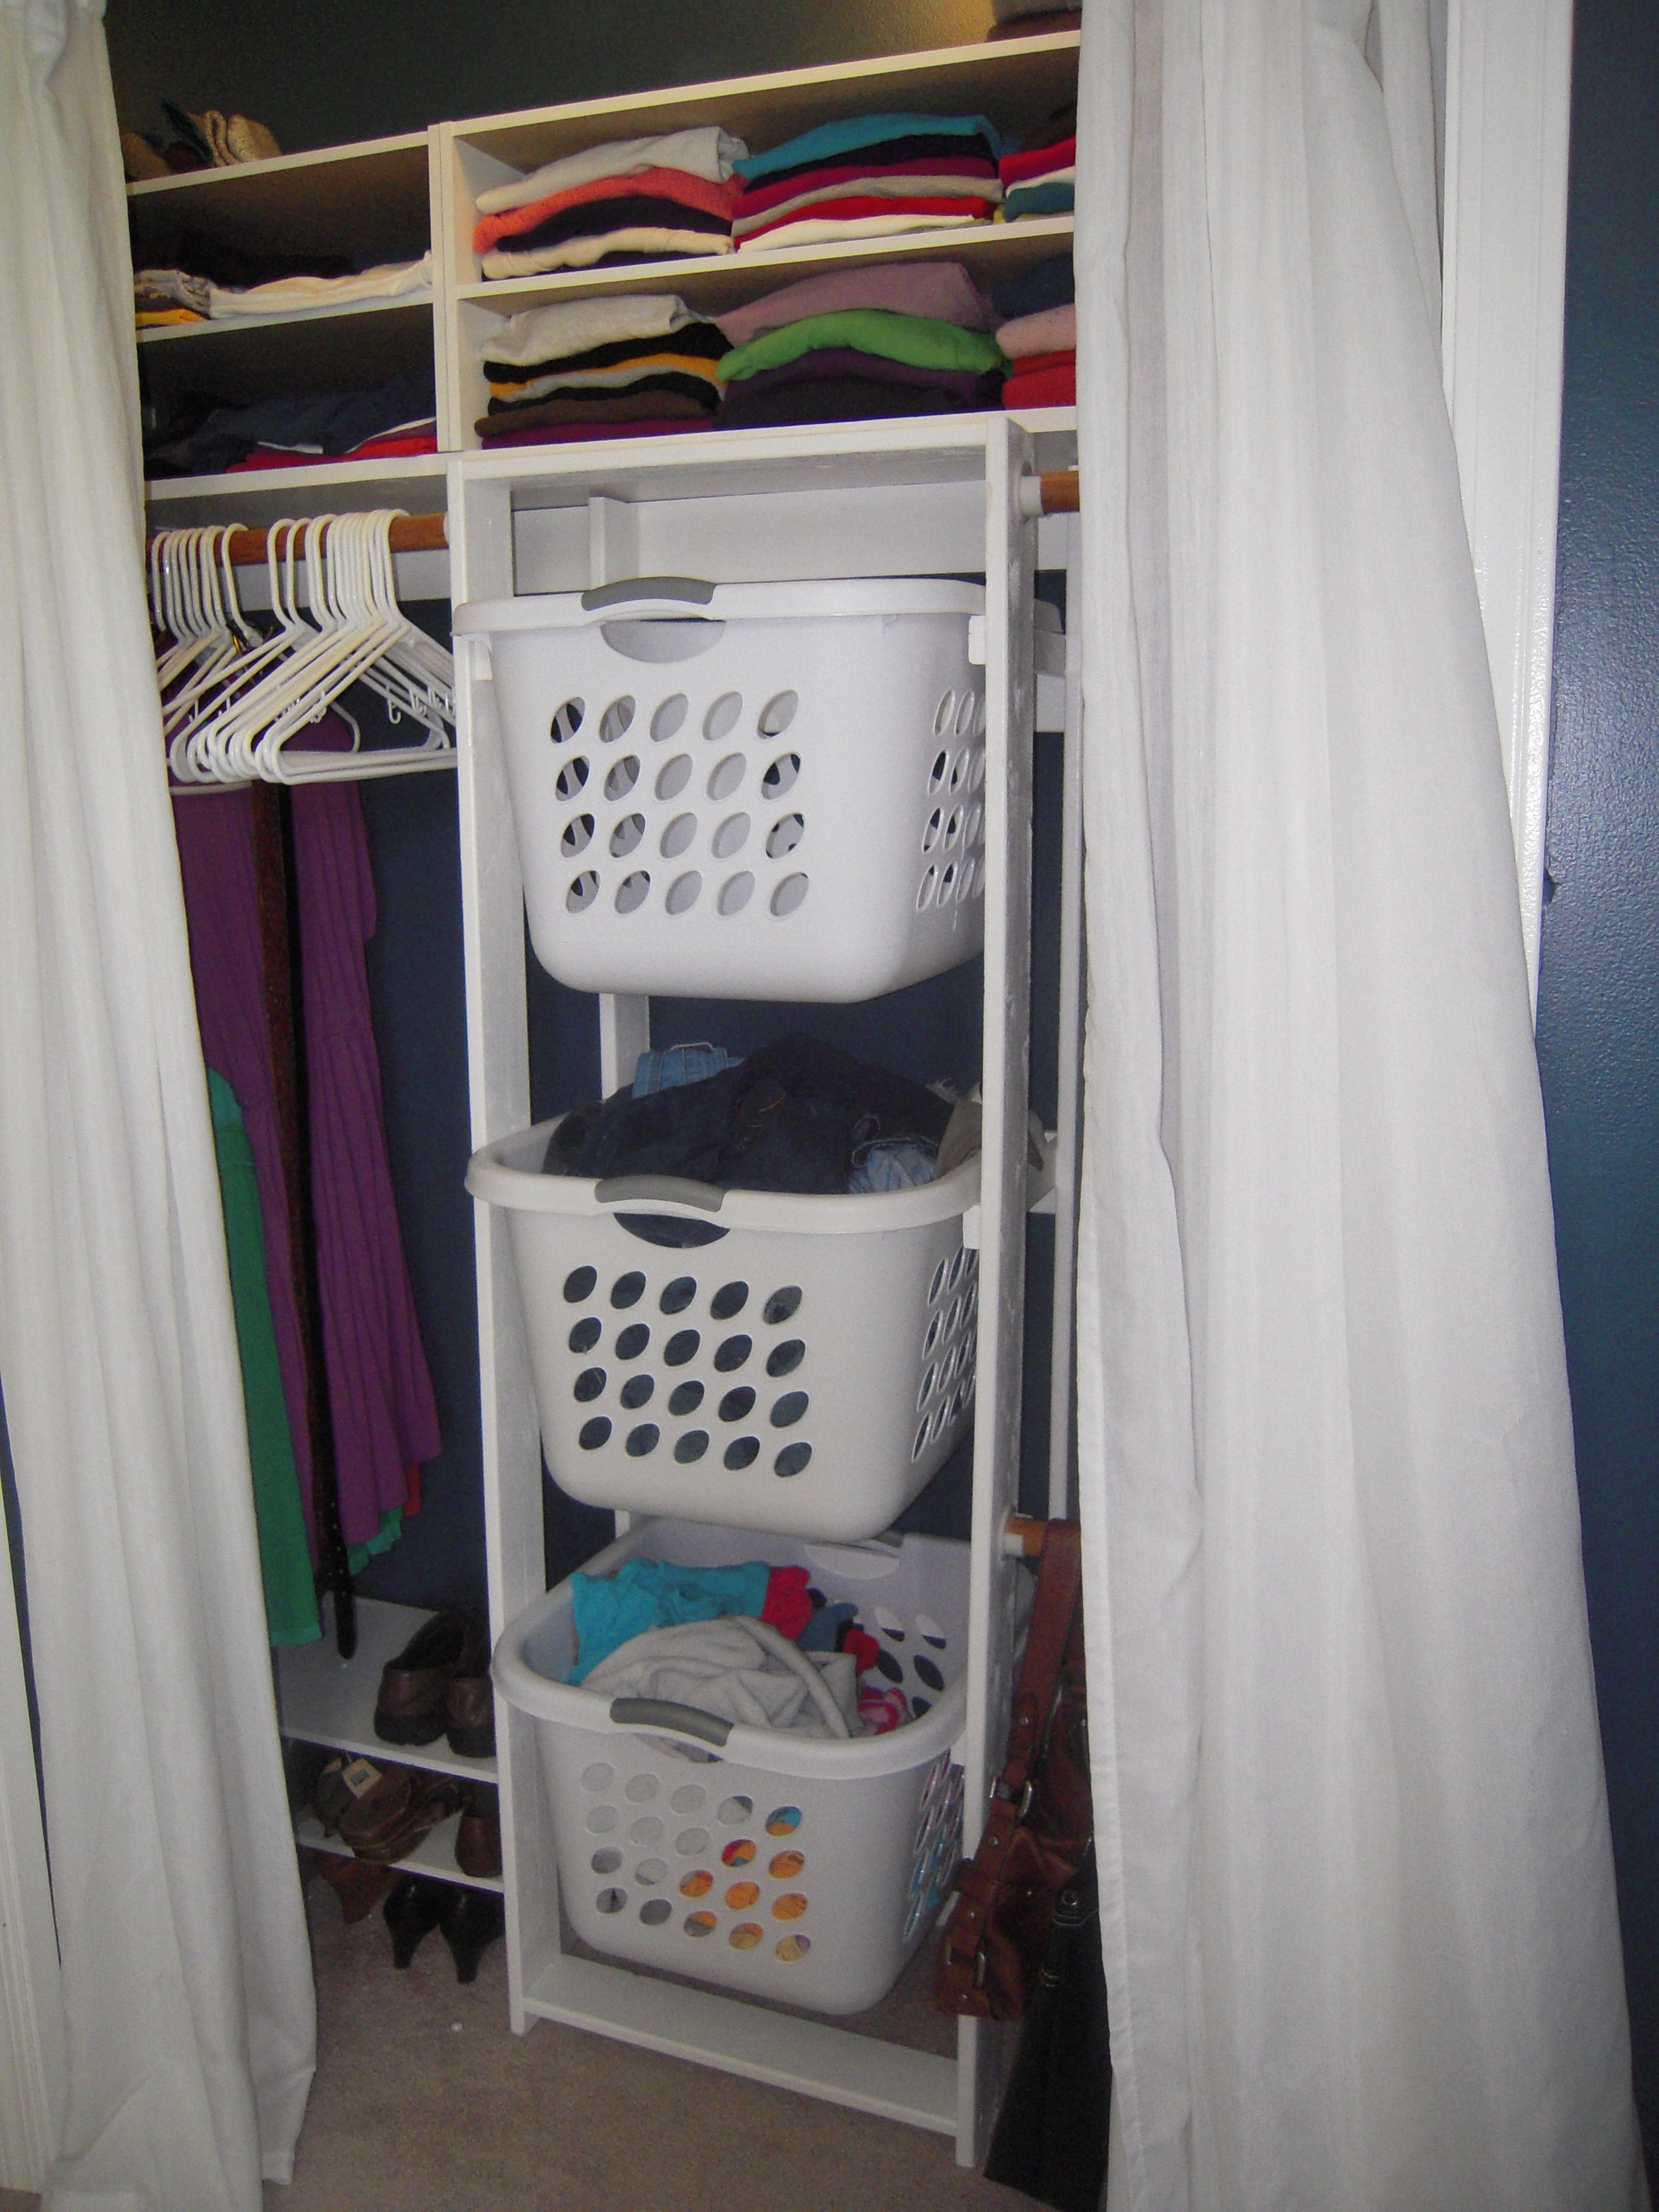
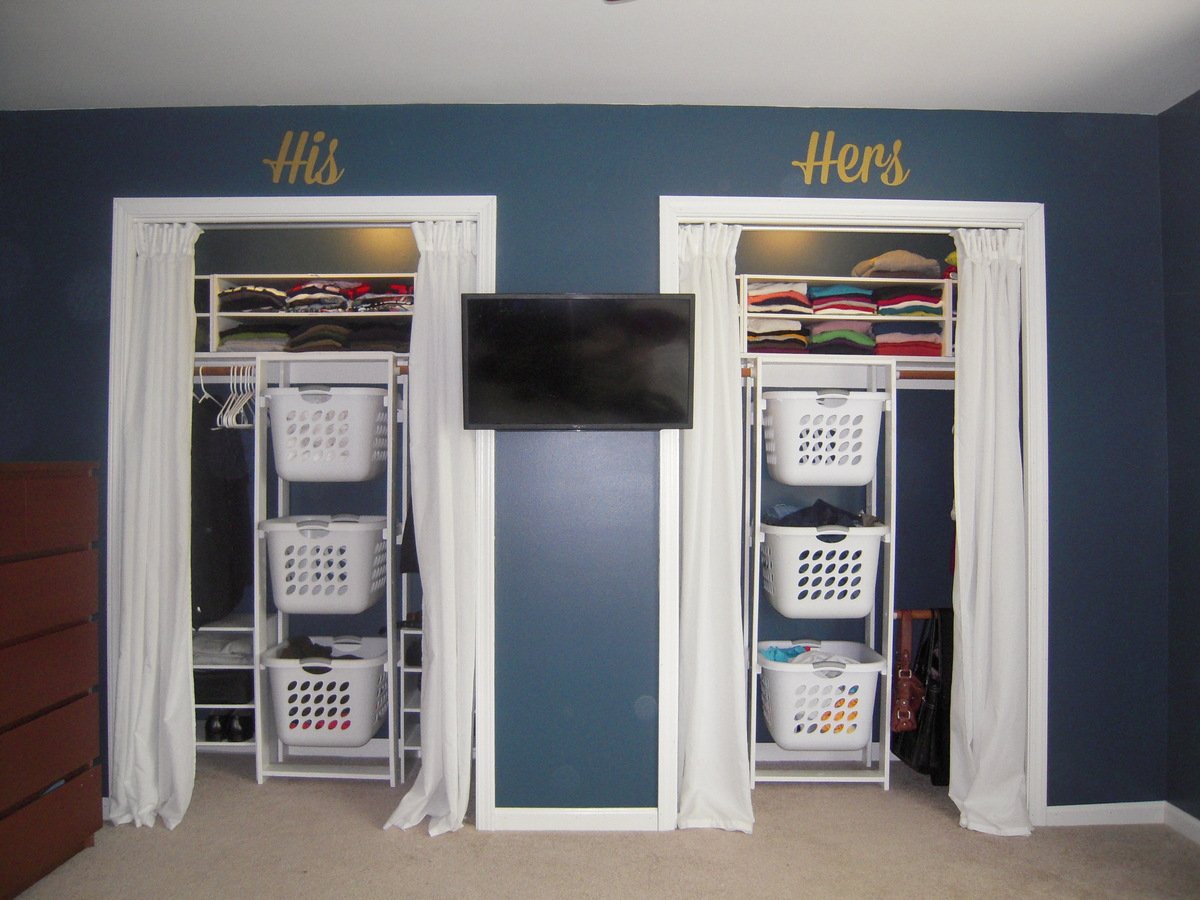
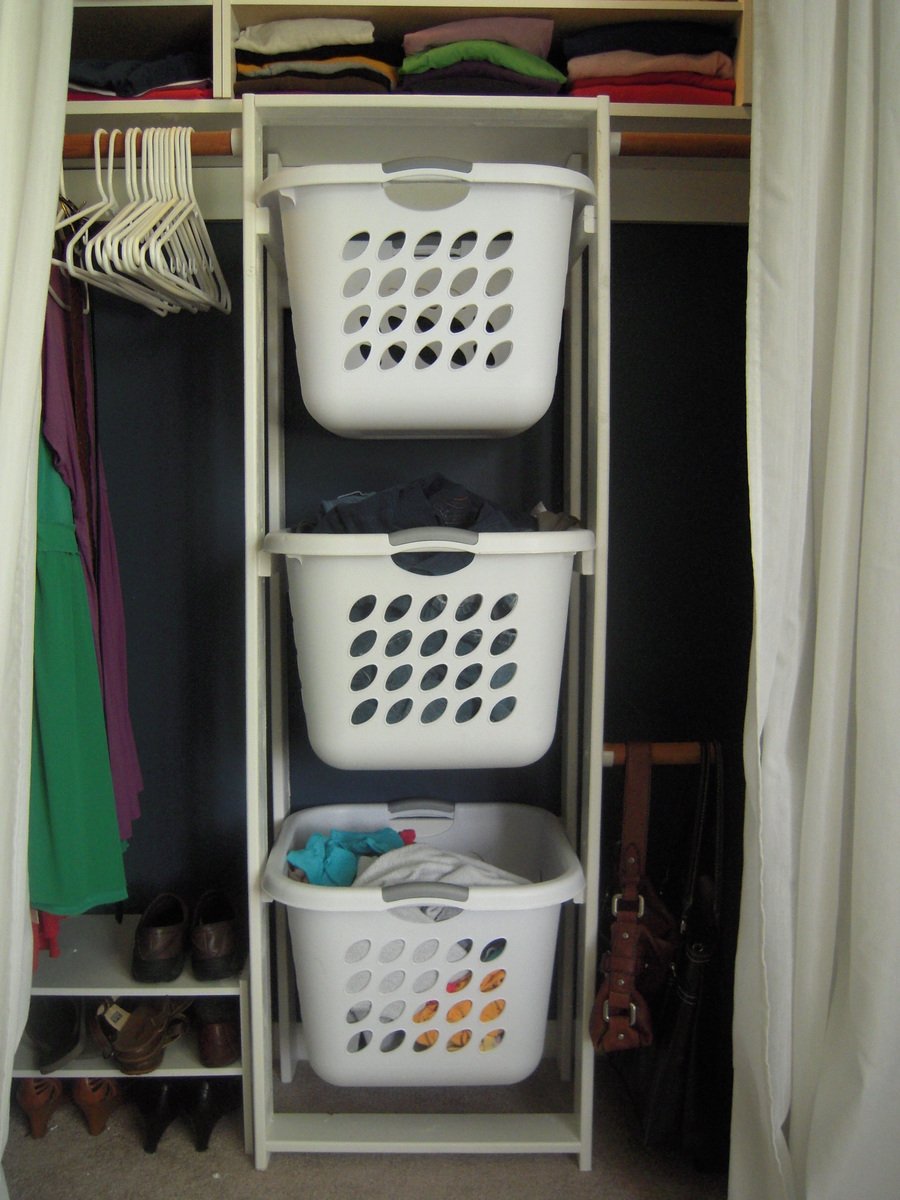
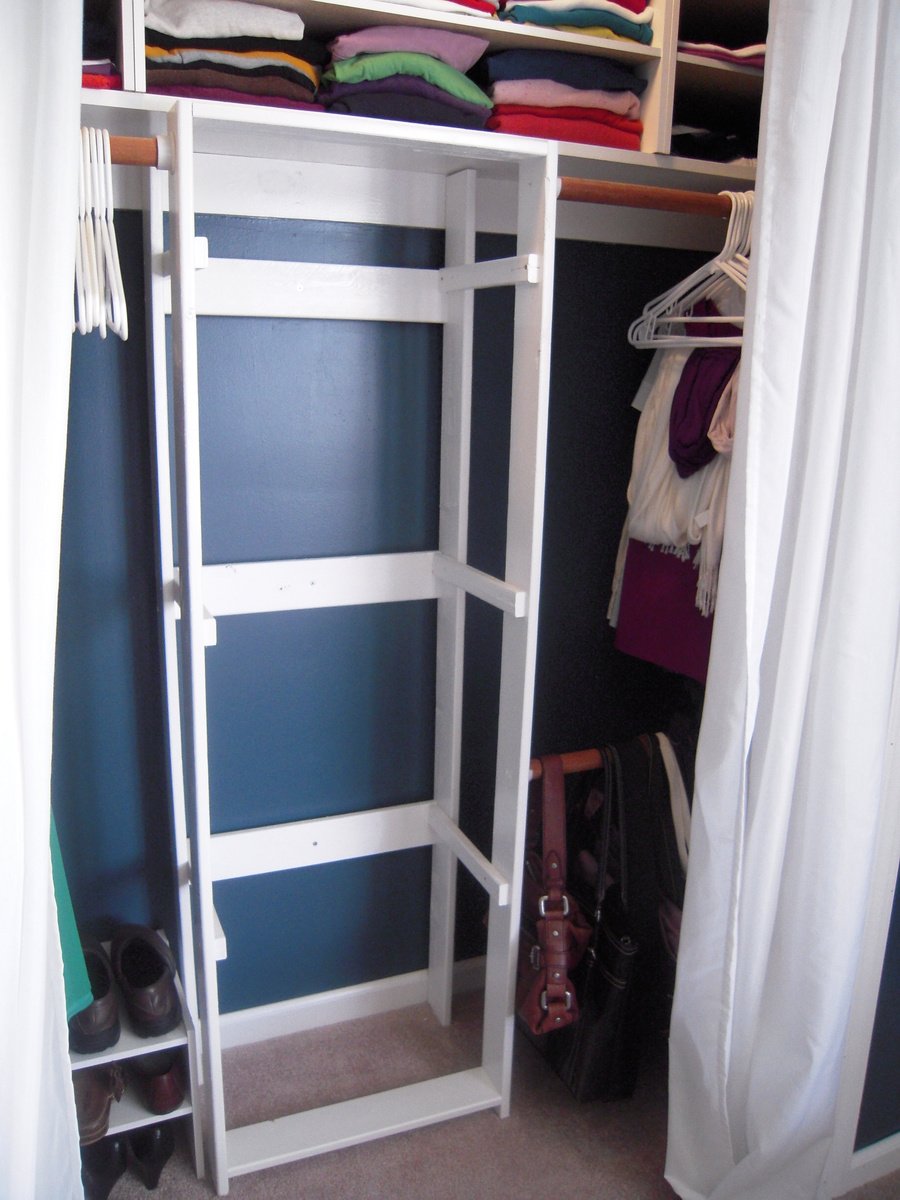
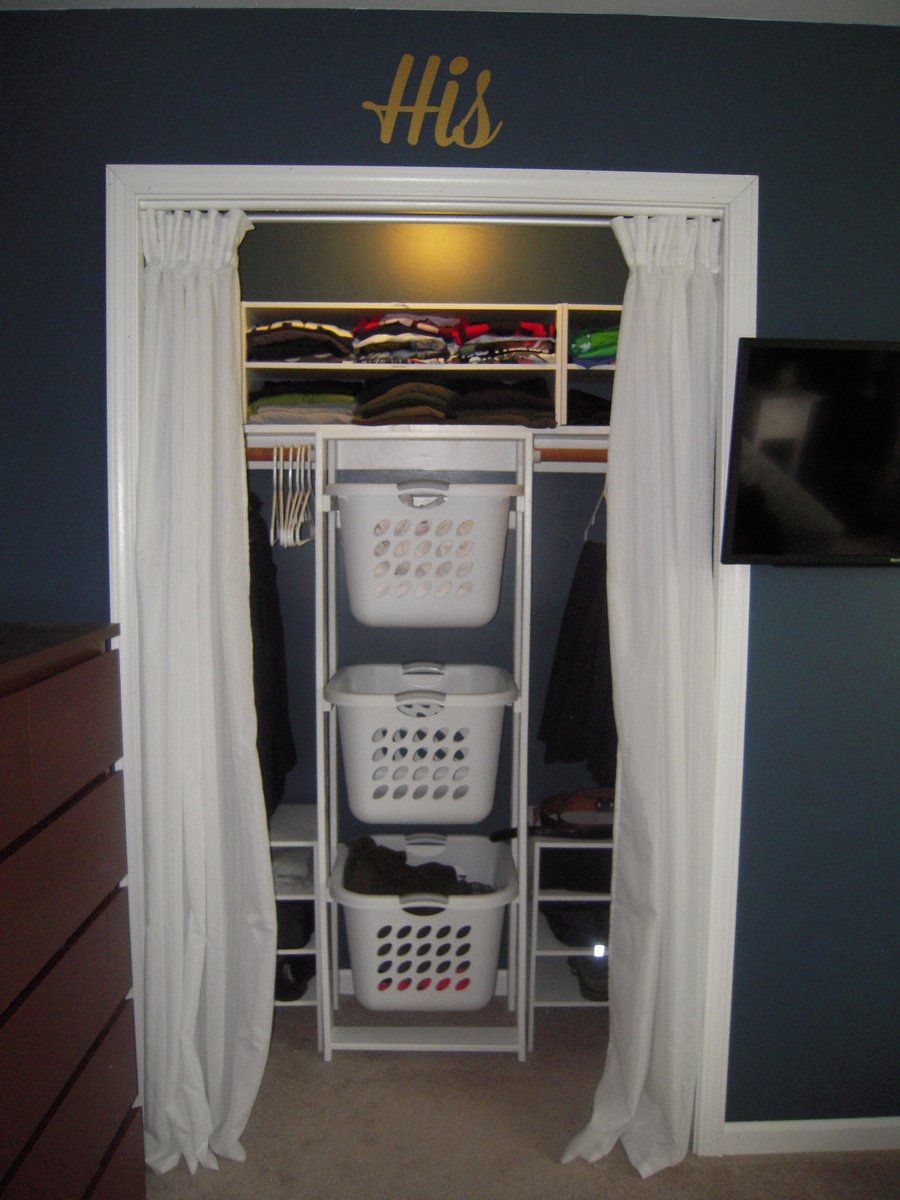
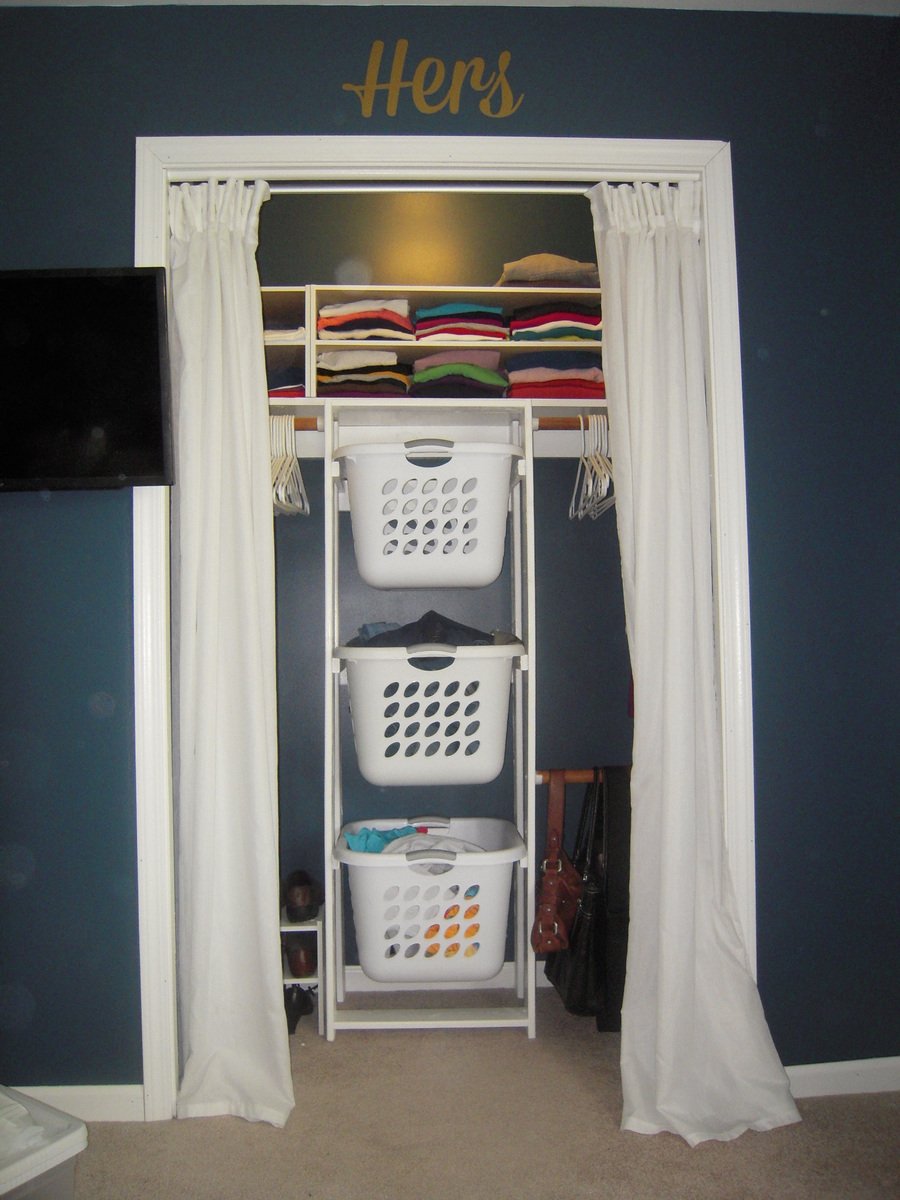
After 3 years of absolutely no closet organization, my boyfriend and I decided it was time. This was our first build together and my boyfriend was amazed that it was so easy to actually build something from wood. We already had 6 baskets that lived all around the room so they needed a home and that's when we found Ana's Laundry Basket Dresser. Knowing that we wanted to hide our dirty laundry in the closet, we found that the plywood box design in the closet made for some very dark corners and little arm room so we needed to modify the plans some. Instead of the plywood we used 1"x4" furring strips to make an open framework for our baskets. It's plenty strong enough and allows light to reach the back corners with the added bonus of looking like custom closet organization.
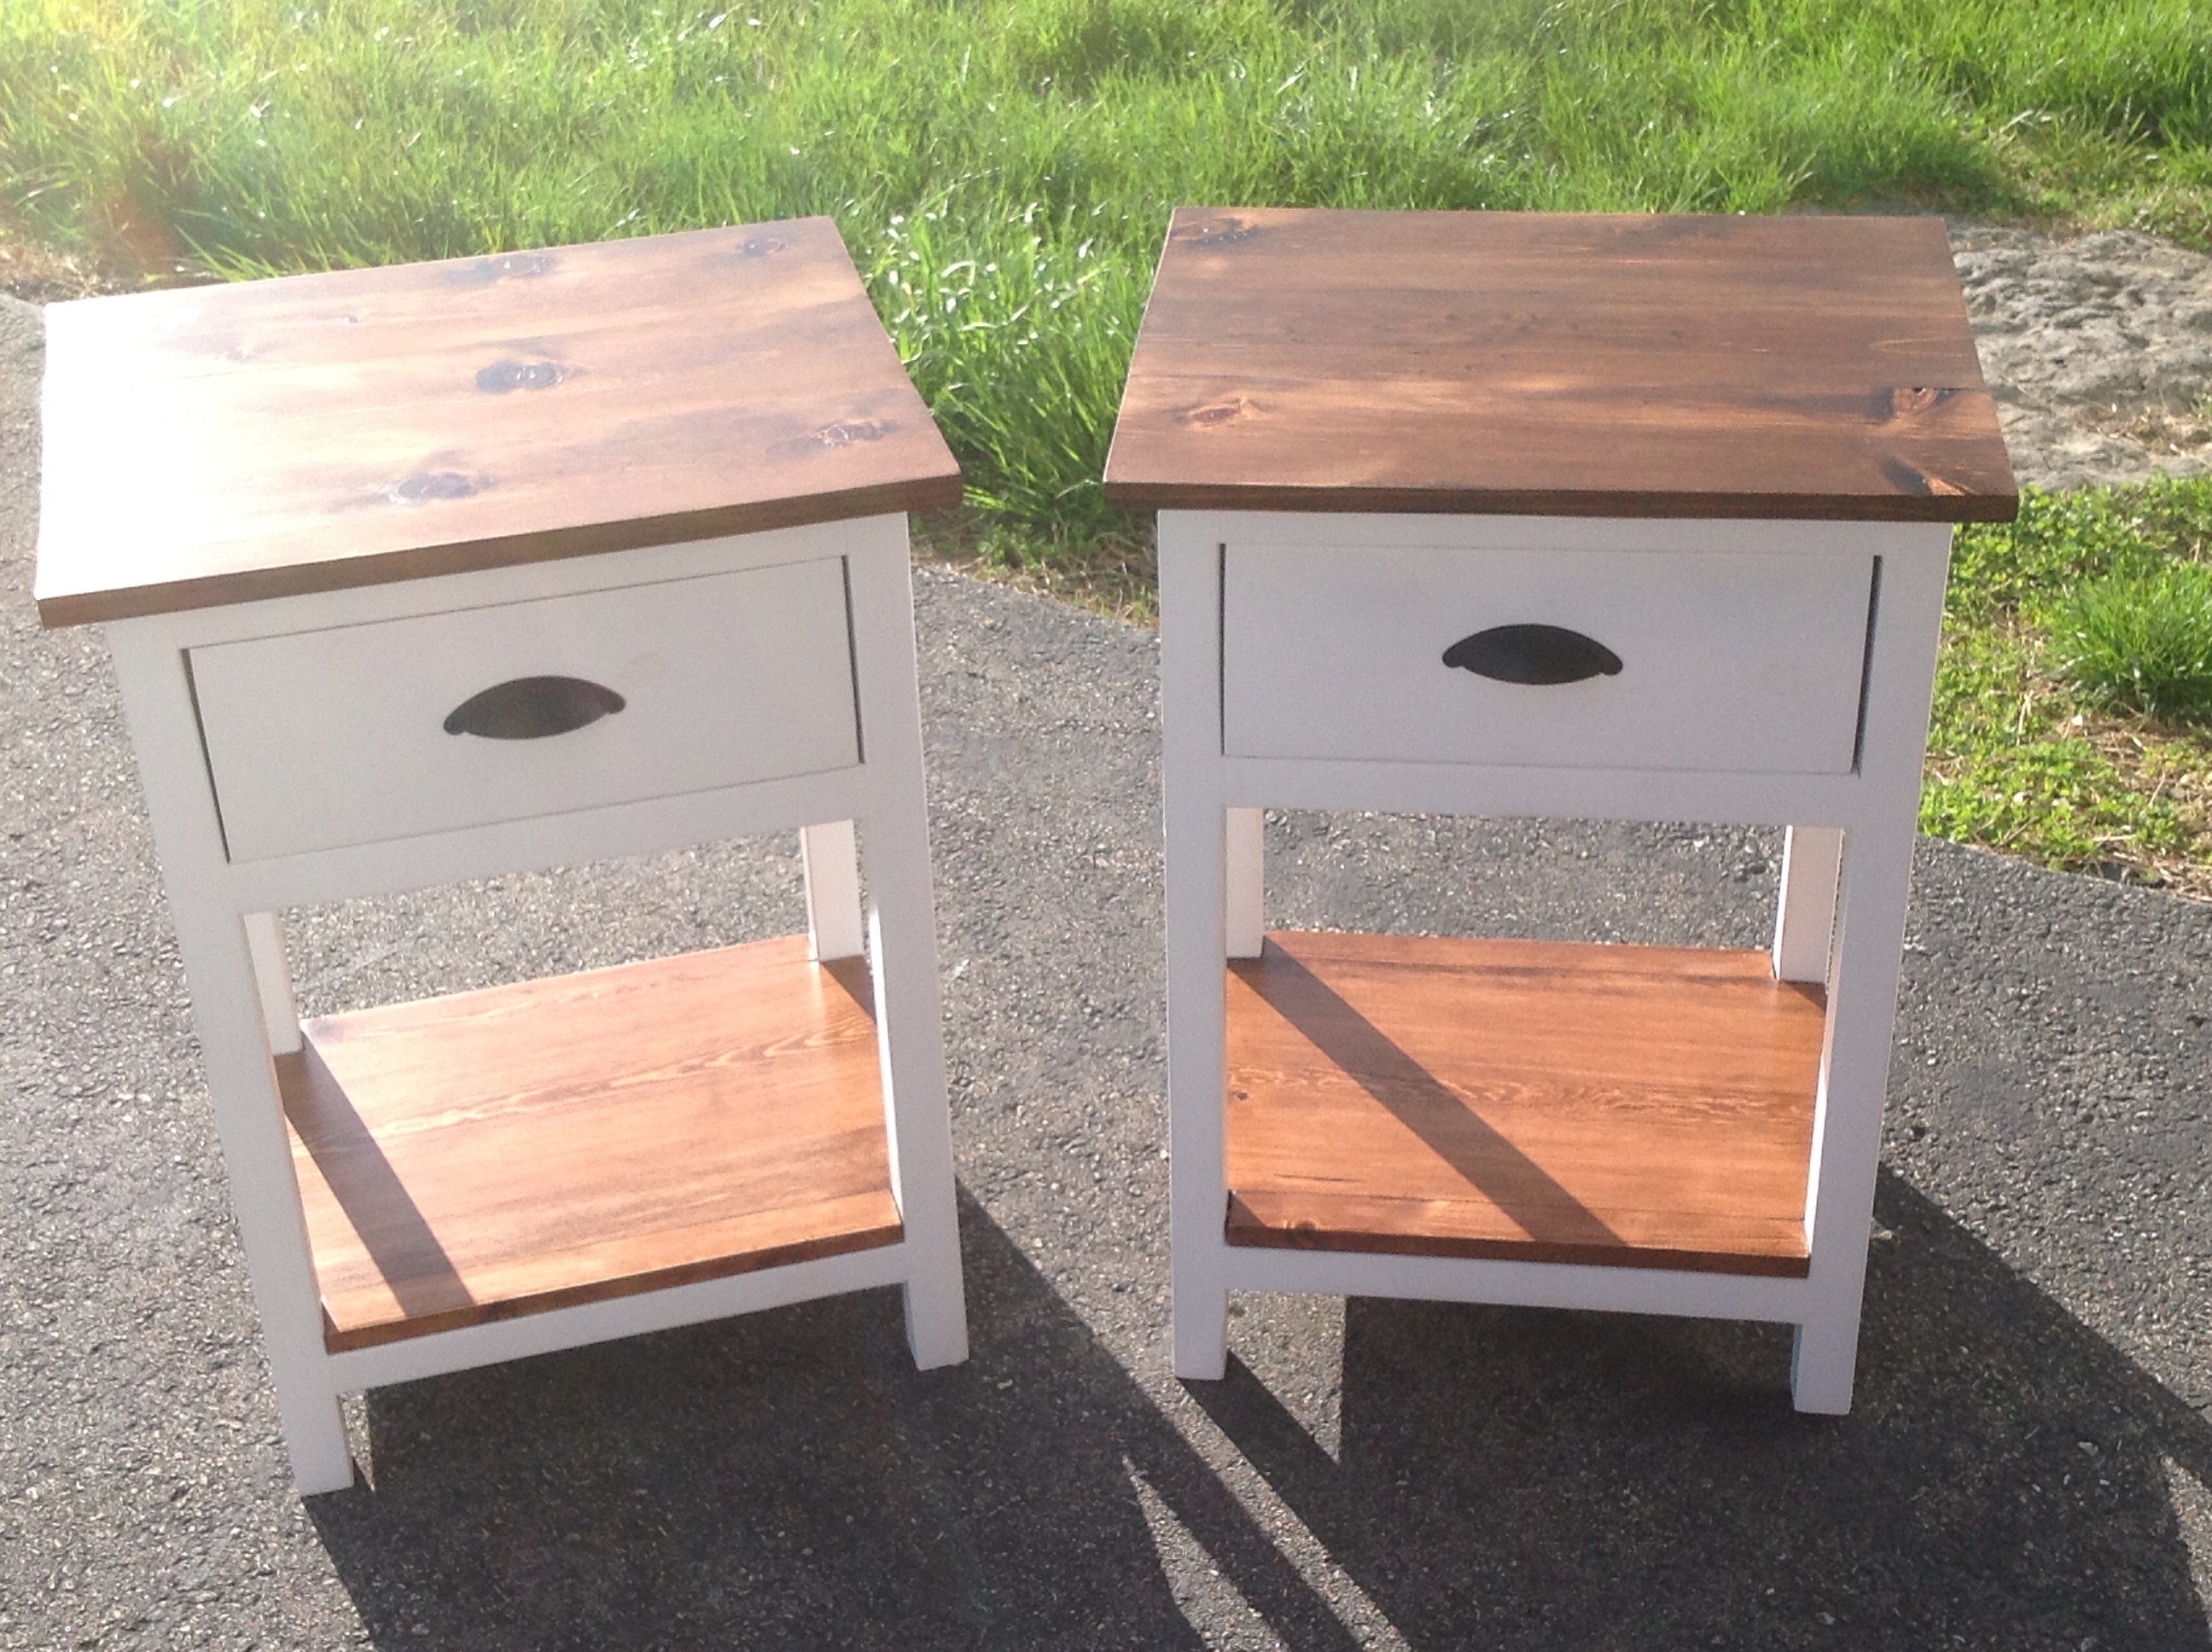
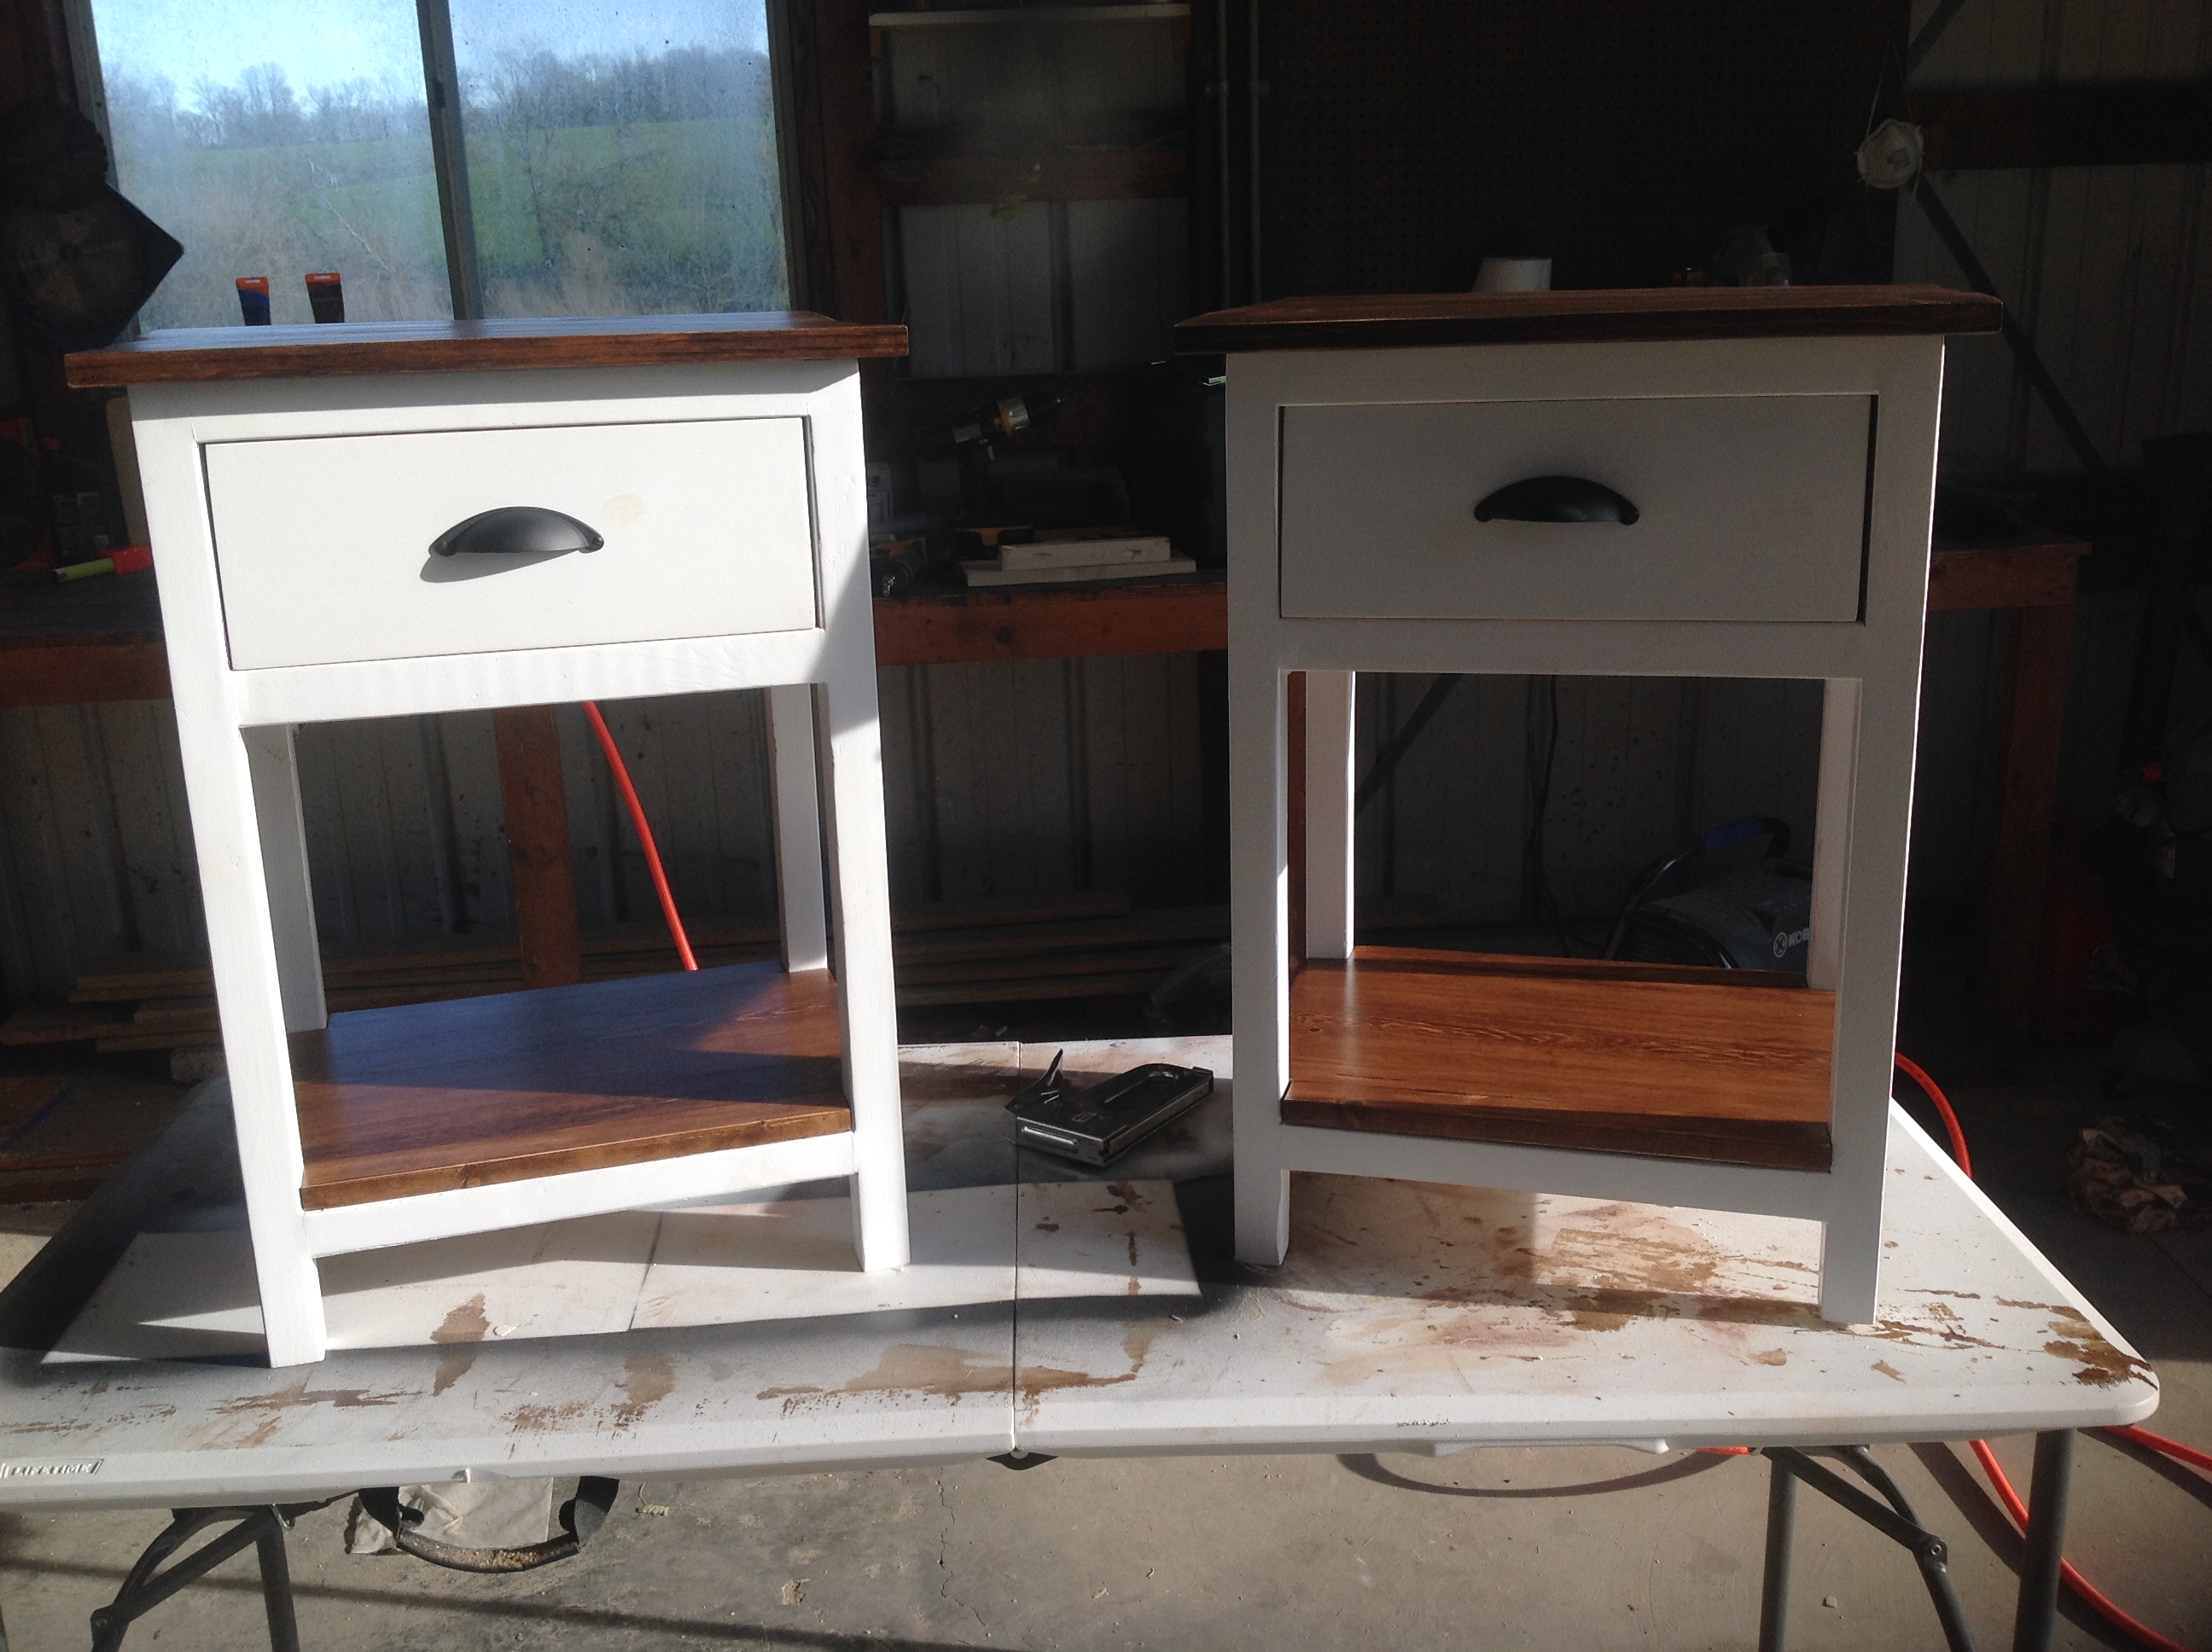
These were our second project. Again, chosen out of necessity for new bedside tables. These took a while to complete due to the finish work needed for the paint and our leaning curve. BTW, building jig templates will help ensure consistency between the two tables (drawer fronts, strechers, drawer stops, etc). Also, look through the wood on the shelf at the store for the best (and straightest) 2X2's to make the process easier. Finally, while spraying was easiest for the paint application, brushing on the poly finish coats worked best for us.
These tables are 3" wider than the plans and fit our room better, but the rest is the same.
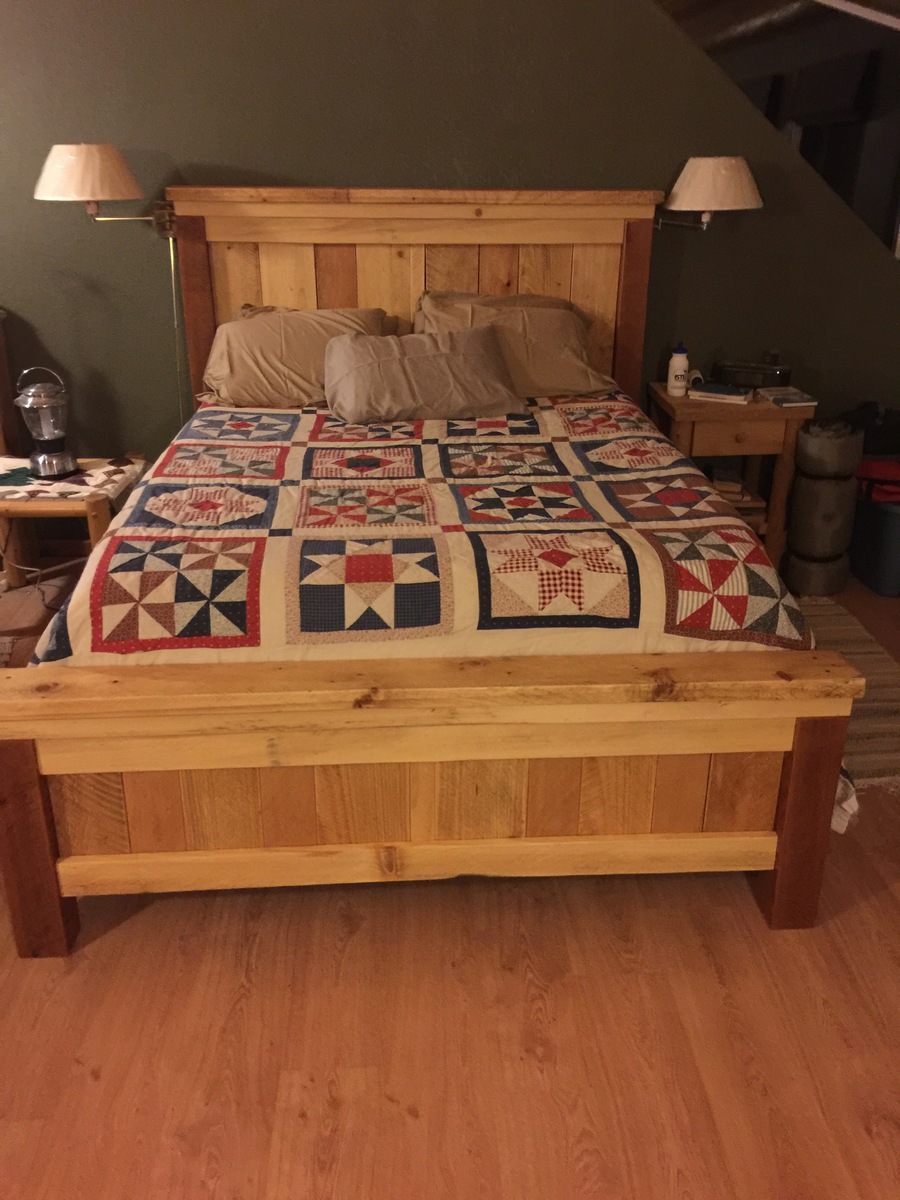
I used Ana's queen size bed plan with a few variations. I used my local red cedar and white spruce rough cut lumber scraps and lots of sandpaper. Rough cut lumber has differnt deminsions and it made for a very rustic sturdy bed with nice contrasting colors thoughour the projec. I love my new bed.
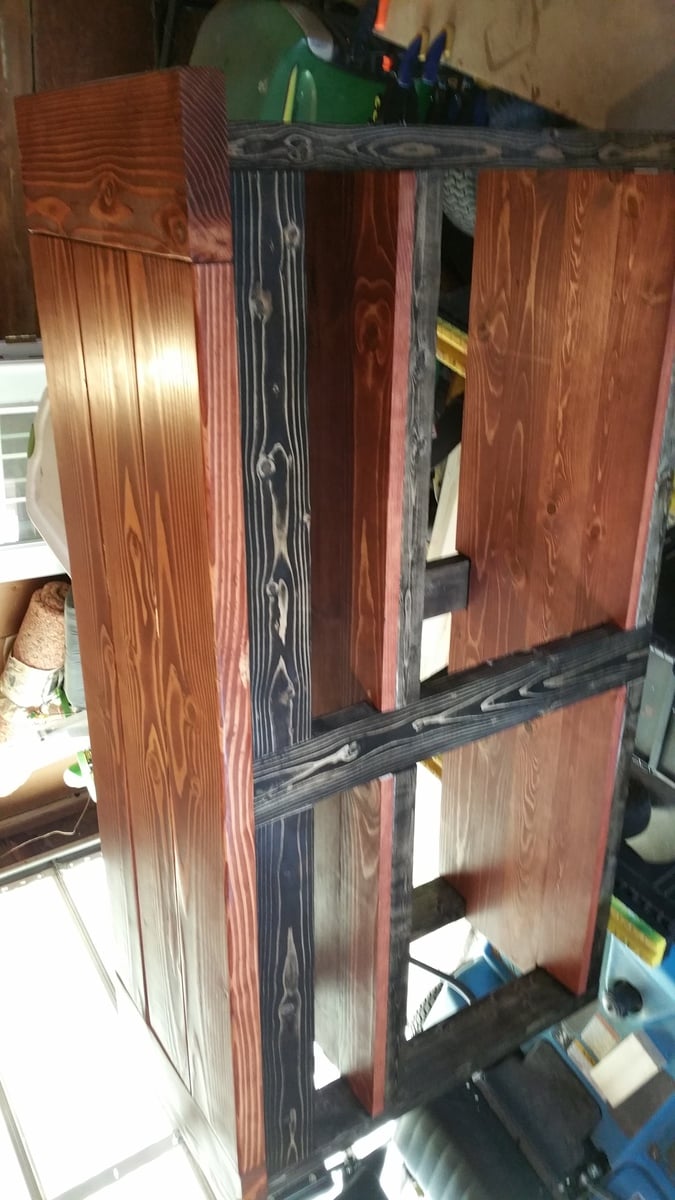
This is a piece I made out of scraps just for fun. I'm pretty happy with how it turned out and how functional it is!
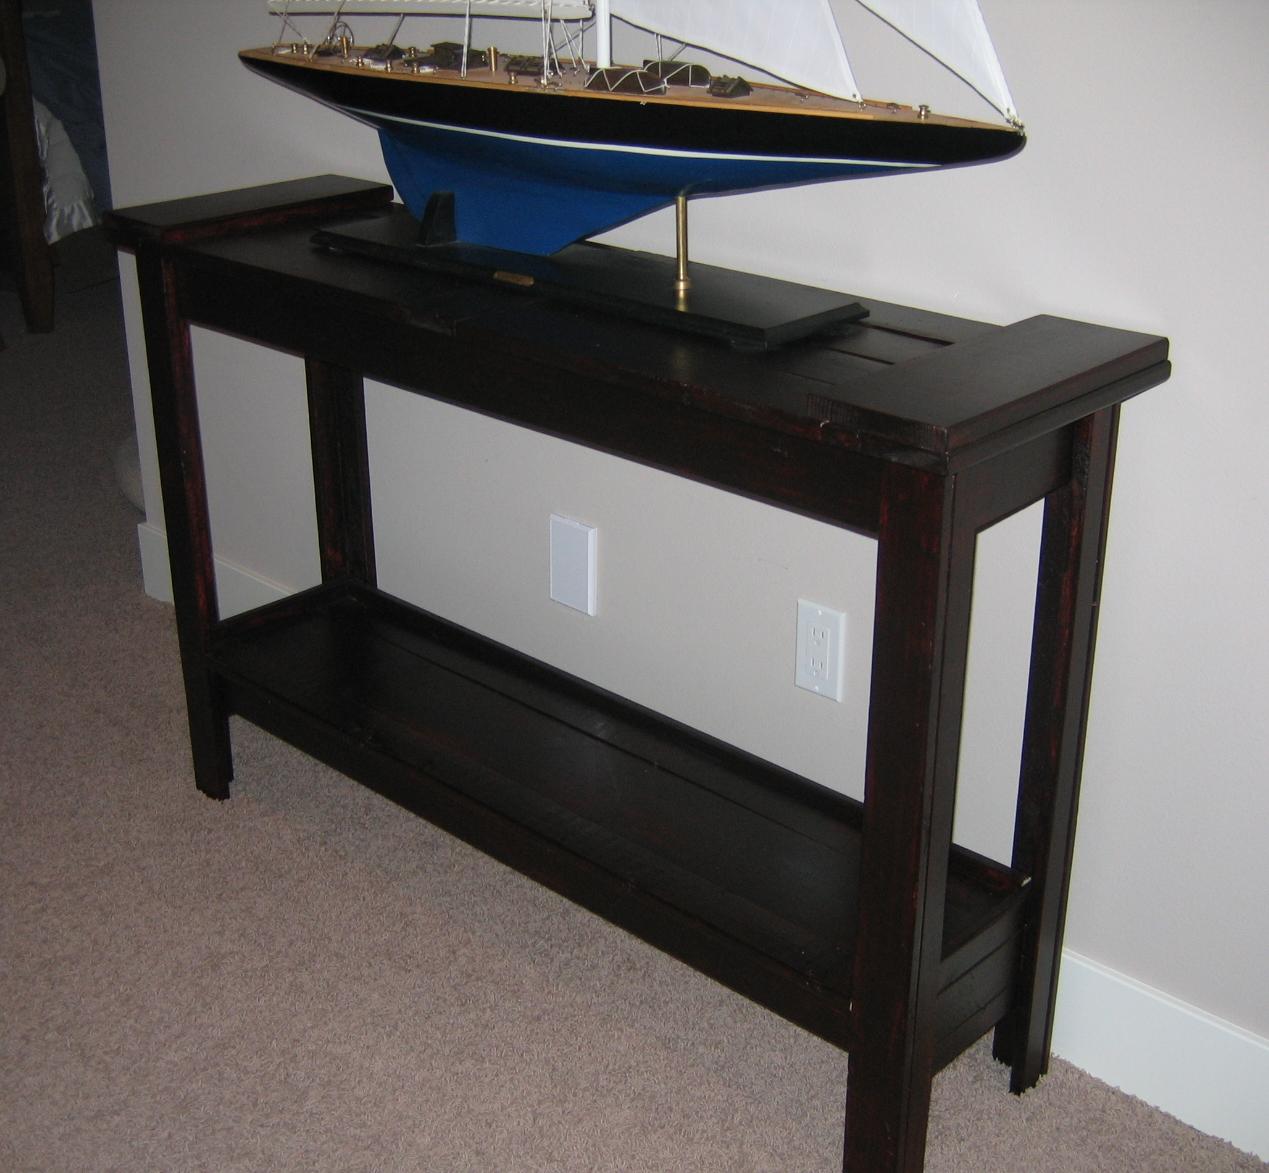
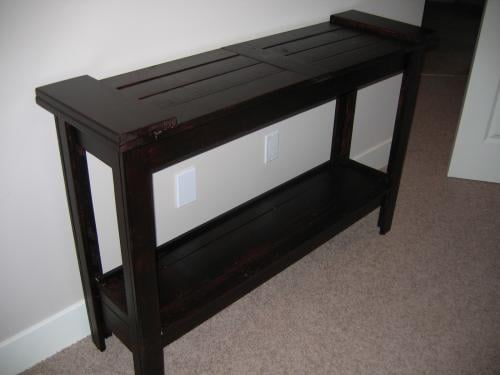
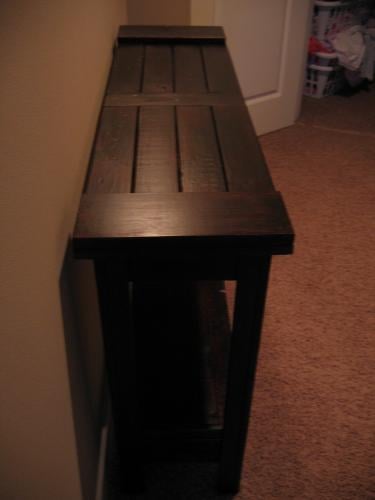
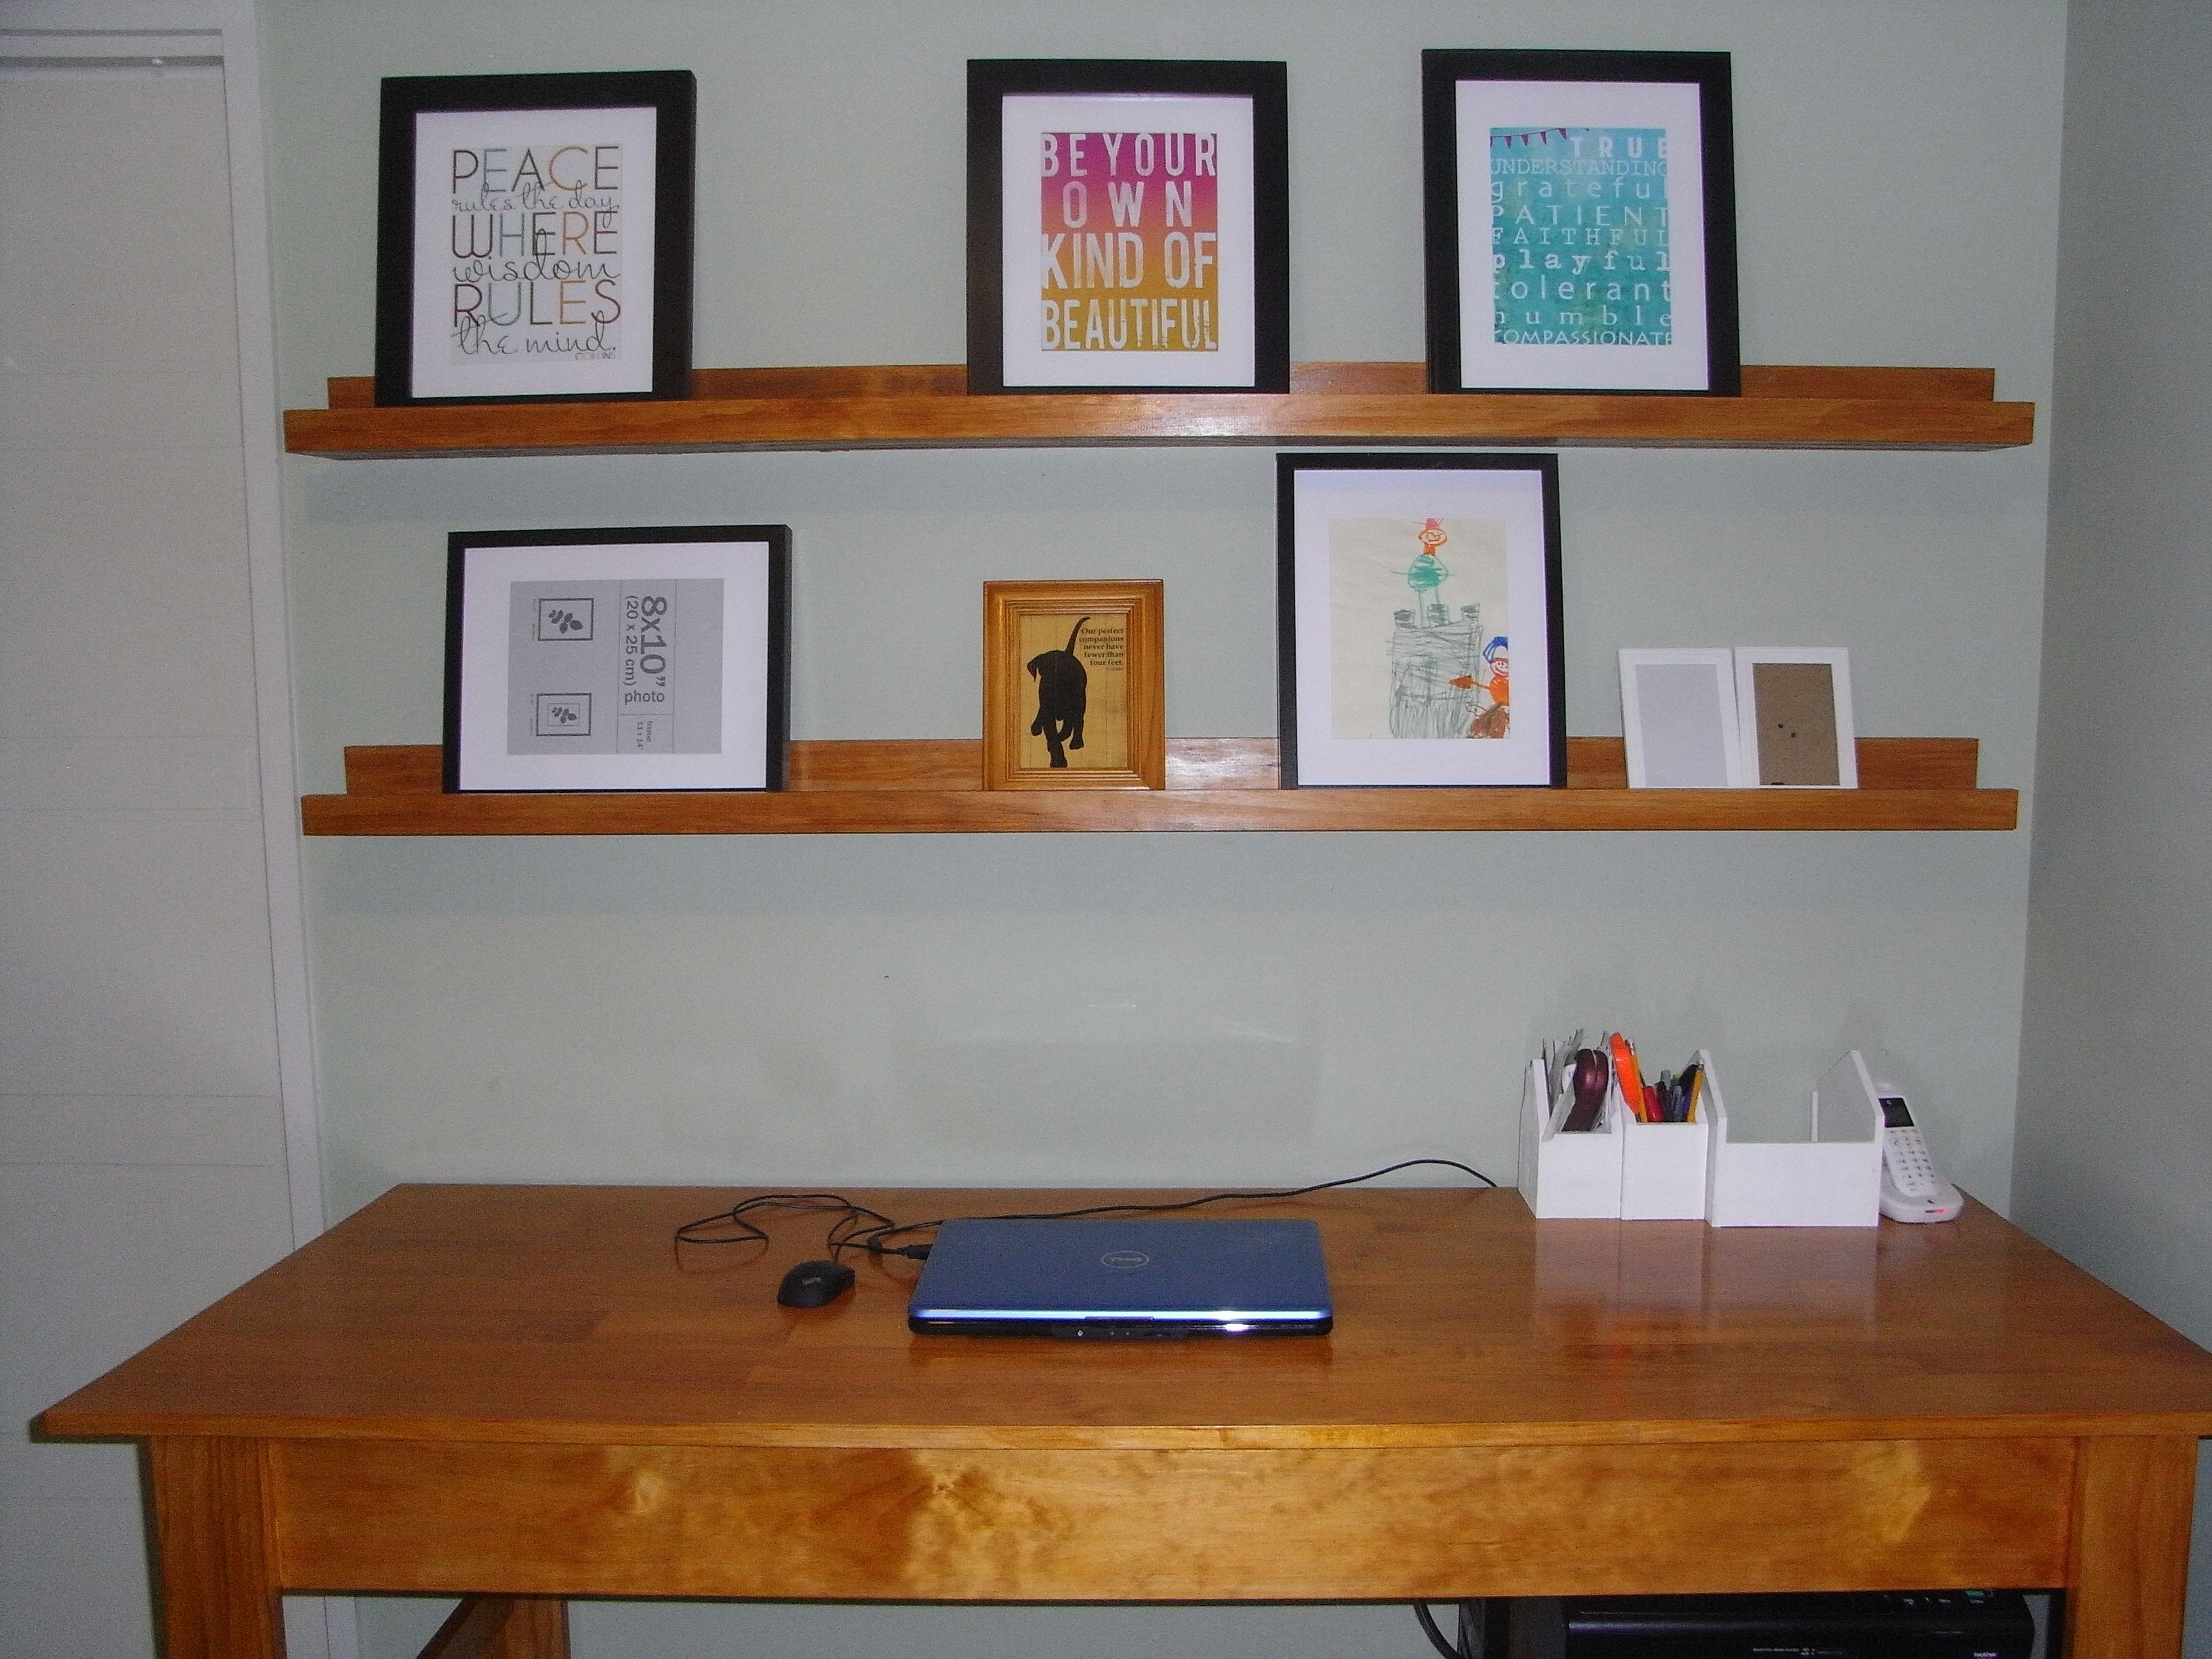
I looked on the Tryde Console Table and Simple Console Table as a reference and just figured out the dimensions from what material I had. I also added a piece of wood in the center, and winged it with the shelf on the bottom.
My very favourite thing to build, so cheap and simple.
Took a lot more wood than I thought and time, but was a nice distraction from Law School.
Mon, 04/20/2015 - 18:19
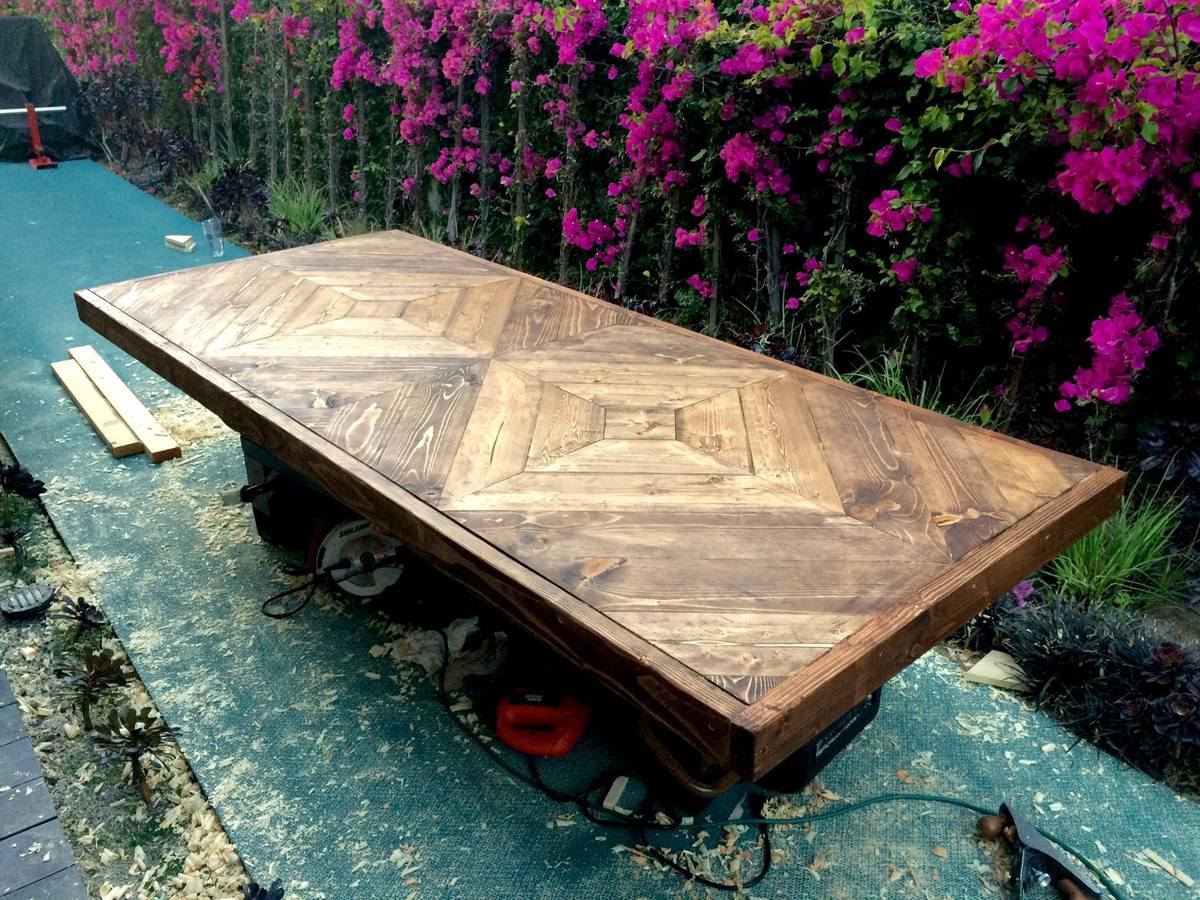
The table top is very impressive! Must have taken a very long time to cut / glue.
I copied your plans with just 2 exceptions. Instead of the shelf brackets to hold the wings up, I copied the idea from the Family Handyman Magazine. Also, the sides where the boards would rest would get all chipped up in use, so I made them 3/4" shorter and added a 1 x 2 to protect the plywood underneath.
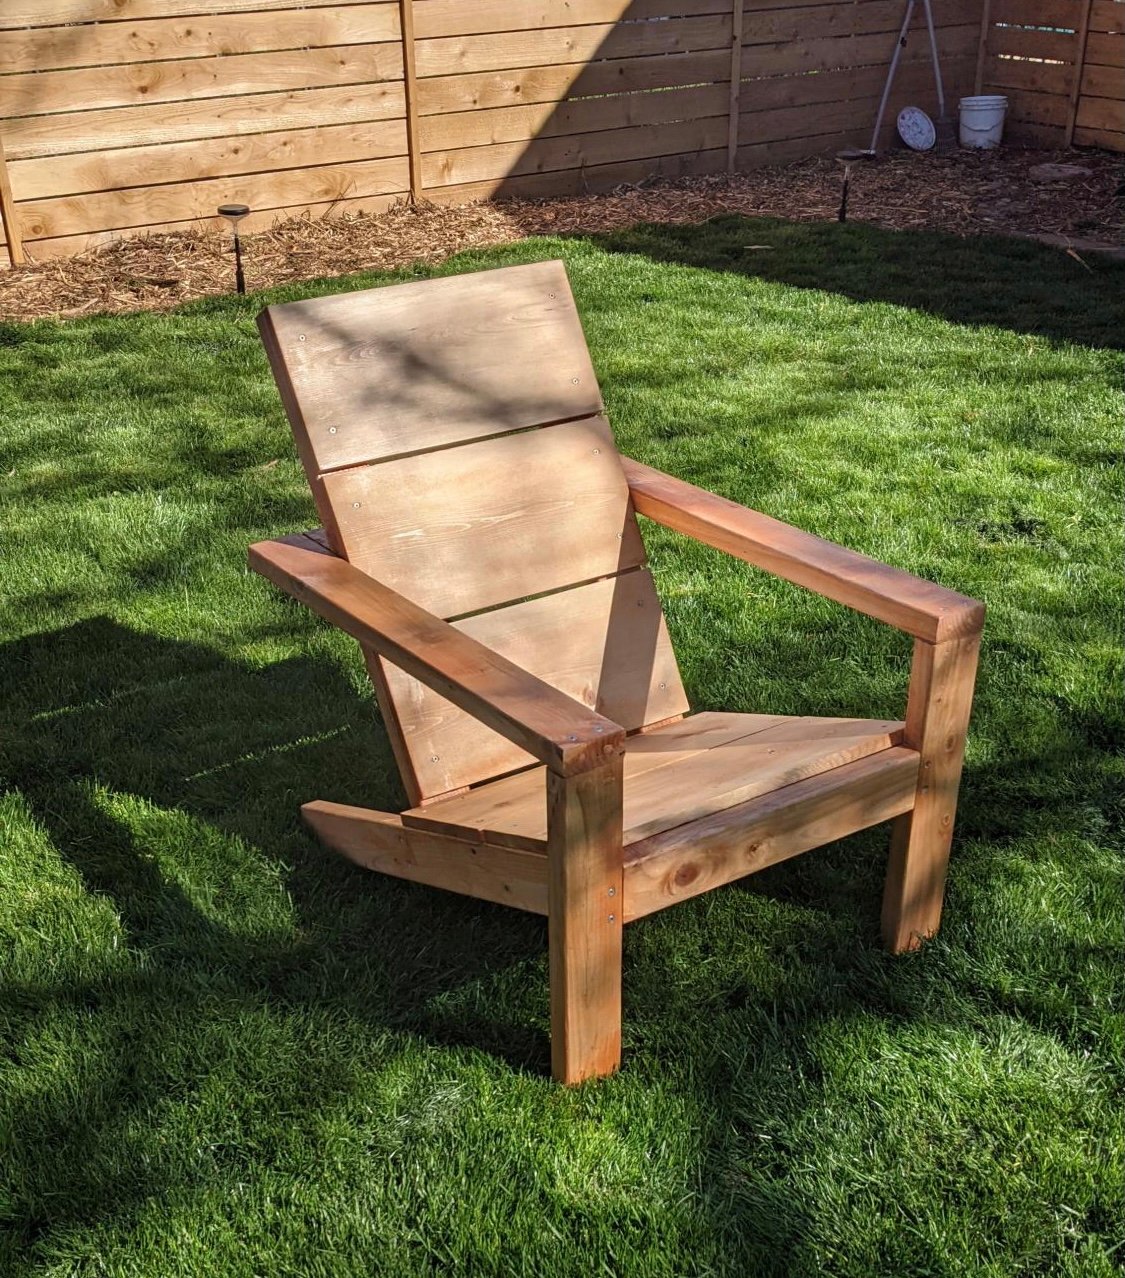
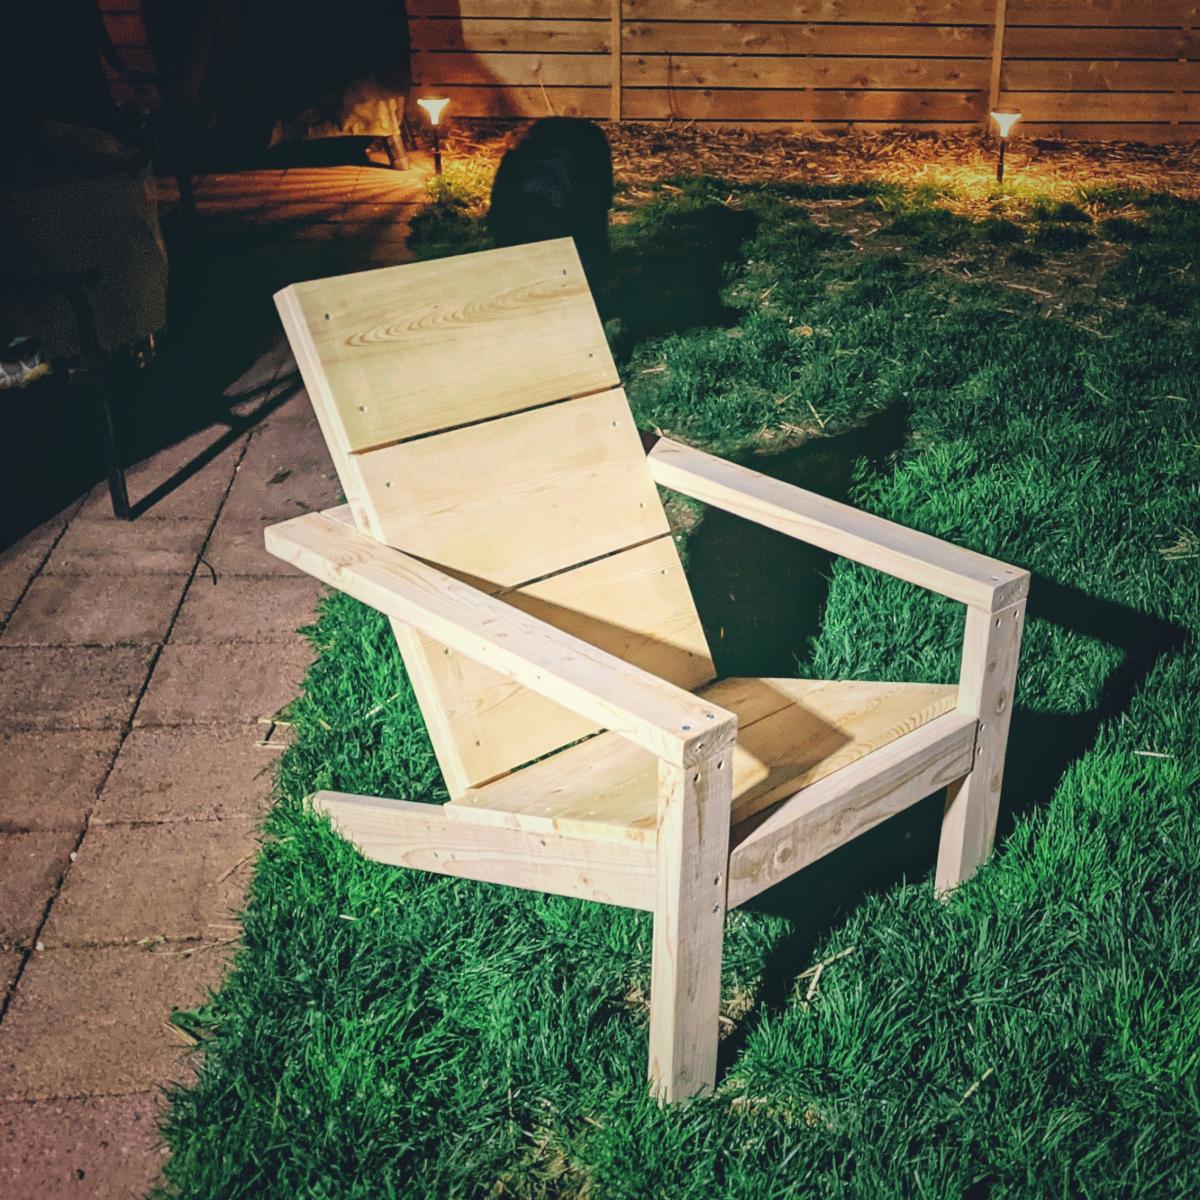
I've made 2 of the Modern adirondack chairs. Really enjoyed the plans and the video for help as I'm new to woodworking. I look for new plans all the time to see what I might build next
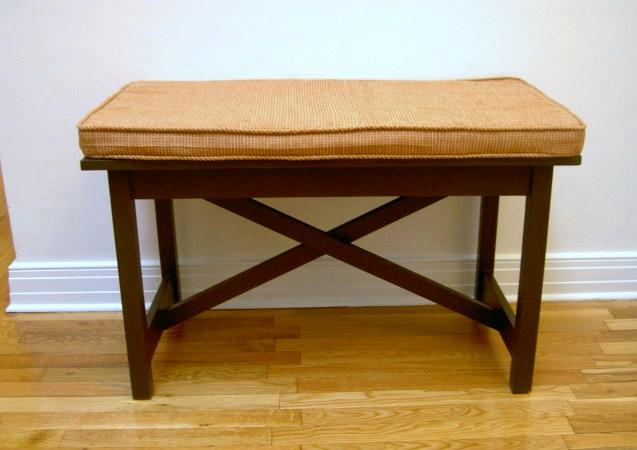
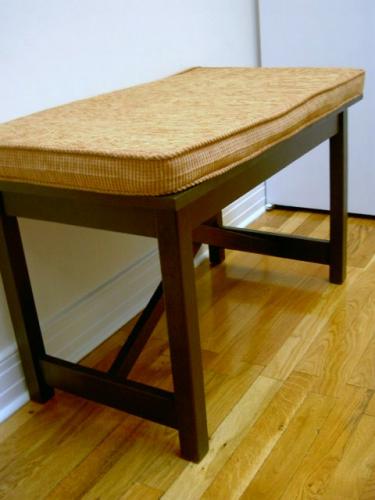
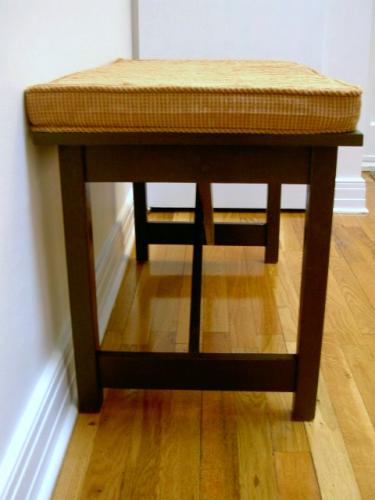
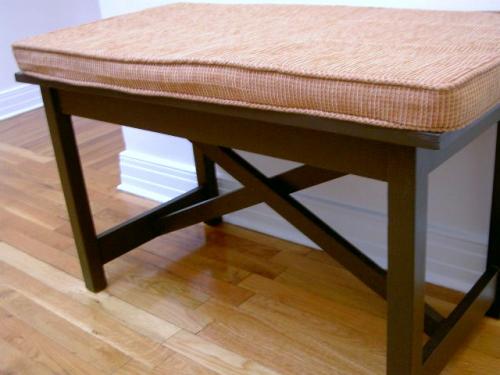
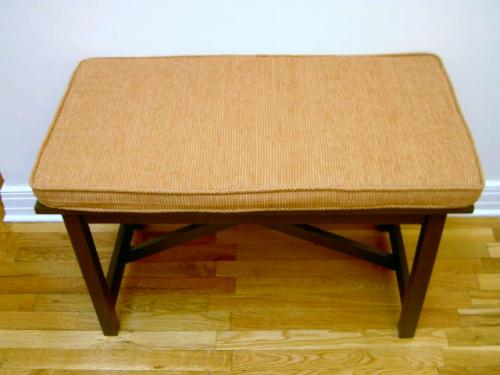
Entryway bench, modified size to fit space and added cushion. ** Cost includes foam and fabric for cushion. Bench itself cost about $60.


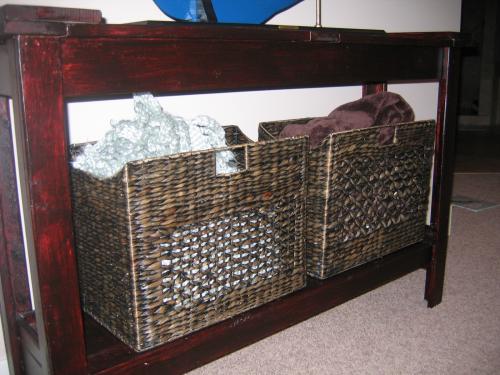
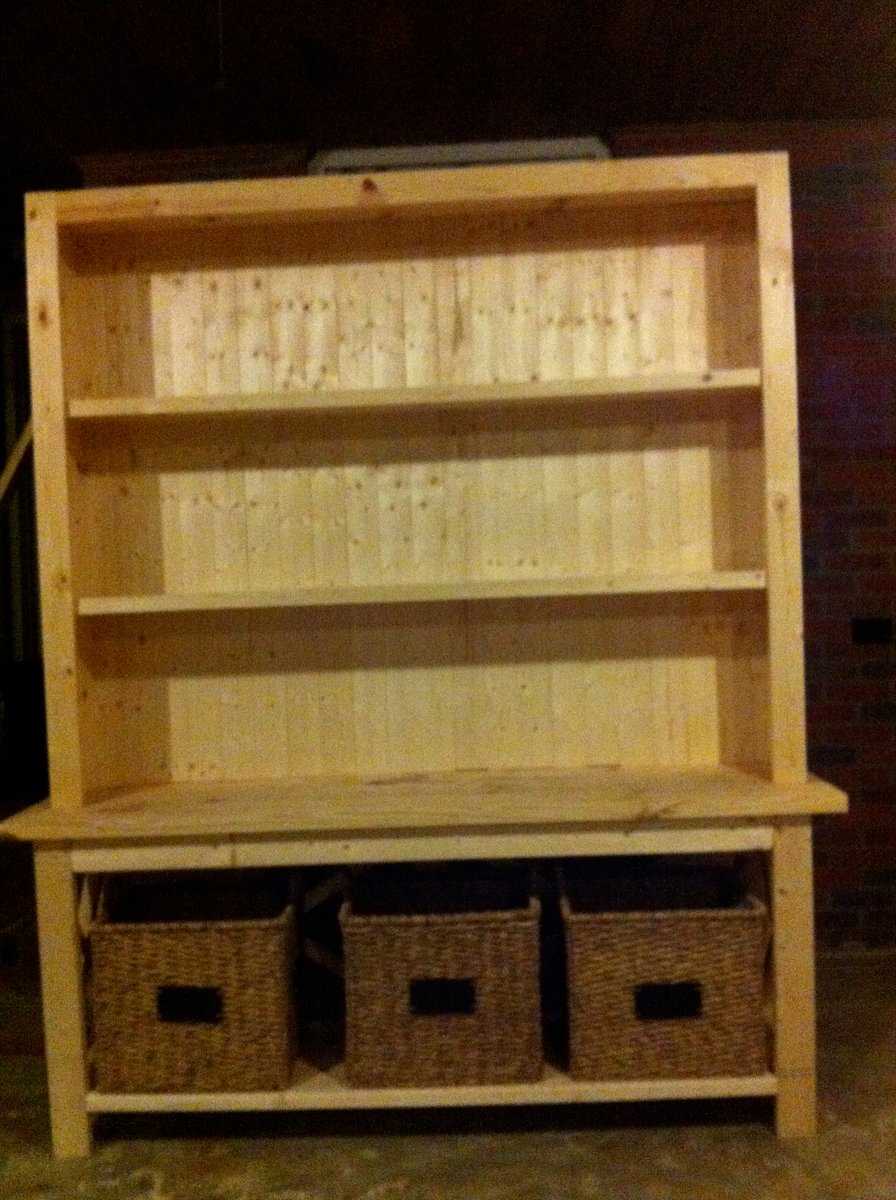
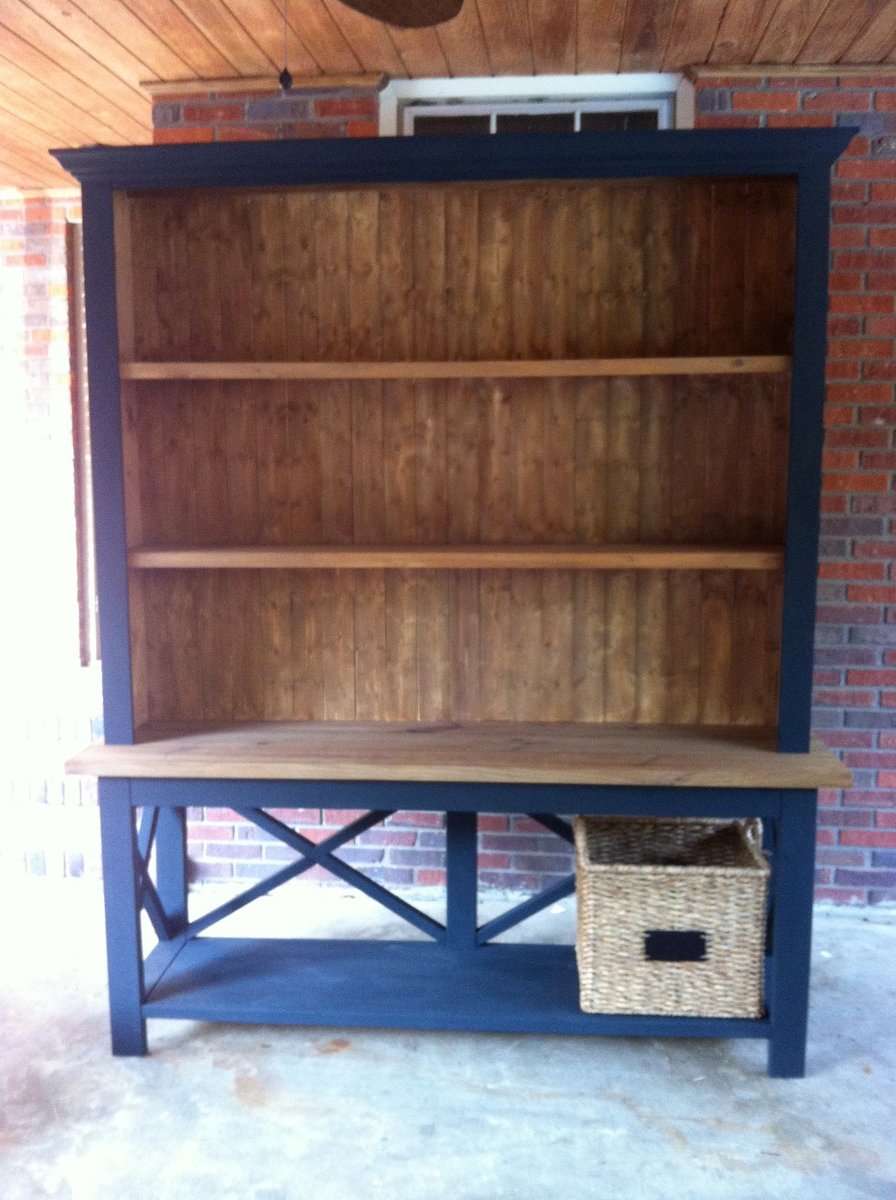
I have been dreaming about this piece of furniture for 3 yrs....I used Ana's plans for the rustic x console but took out the front middle support and made it a little deeper I also turned the 2x4 vertically and added an extra 2x4 behind it to add extra strength.....because I wanted to fit 3 baskets from Target underneath...the hutch i just winged!....Thank you so much Ana for giving me a place to start!...I am in love!......


This is such an easy and fun project! This is the second time I've made this cabinet. The first time I made it identical to the one in the plans but this one was for my 11yr old niece so I wanted it to look more girly and less rustic. I used hooks instead of nails which I really like. Thanks for such a great plan!
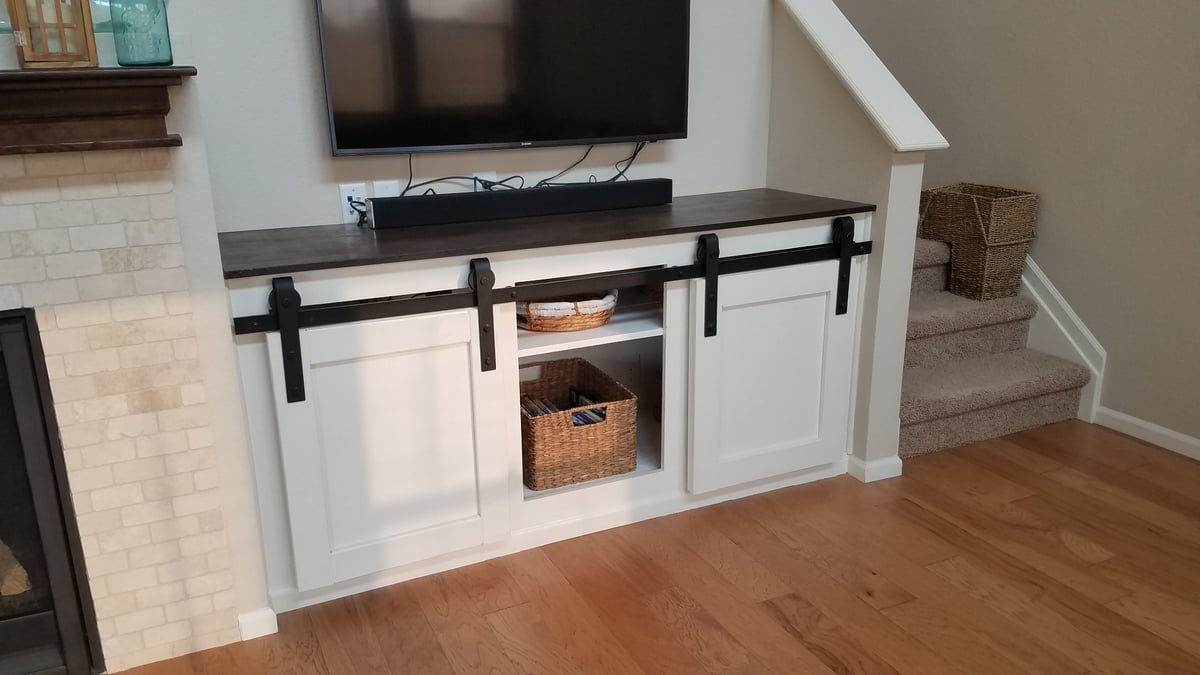
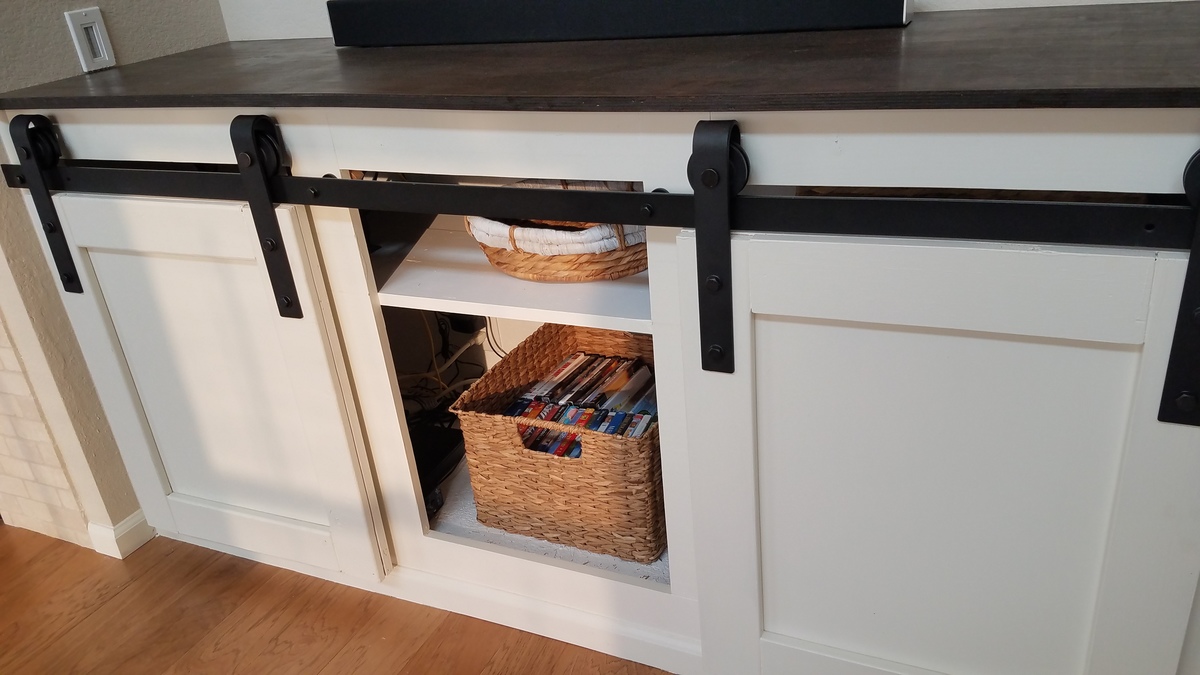
I wanted a sliding barn door concept but as a built-in piece. I had a drywall niche that the builders had made that I've always hated so I ripped that out, and used those measurements to create my version of the sliding door console from Nikki and Ana. This was a big project but so worth it! I ordered the door hardware from Amazon but had to drill my own holes because they did not line up where I needed them to be.
Love this! My husband used this project to help boys learn to use power tools and work with wood. They made one and he did the others. THANK YOU!
Wed, 10/06/2021 - 10:15
Great way to get the kids involved, it looks very nice, organized and functional! Thank you for sharing~


Comments
Ana White Admin
Tue, 10/05/2021 - 09:27
Great gifts!
Handmade gifts are the best, thank you so much for sharing!