Community Brag Posts
Hexagon Coffee Table for the patio
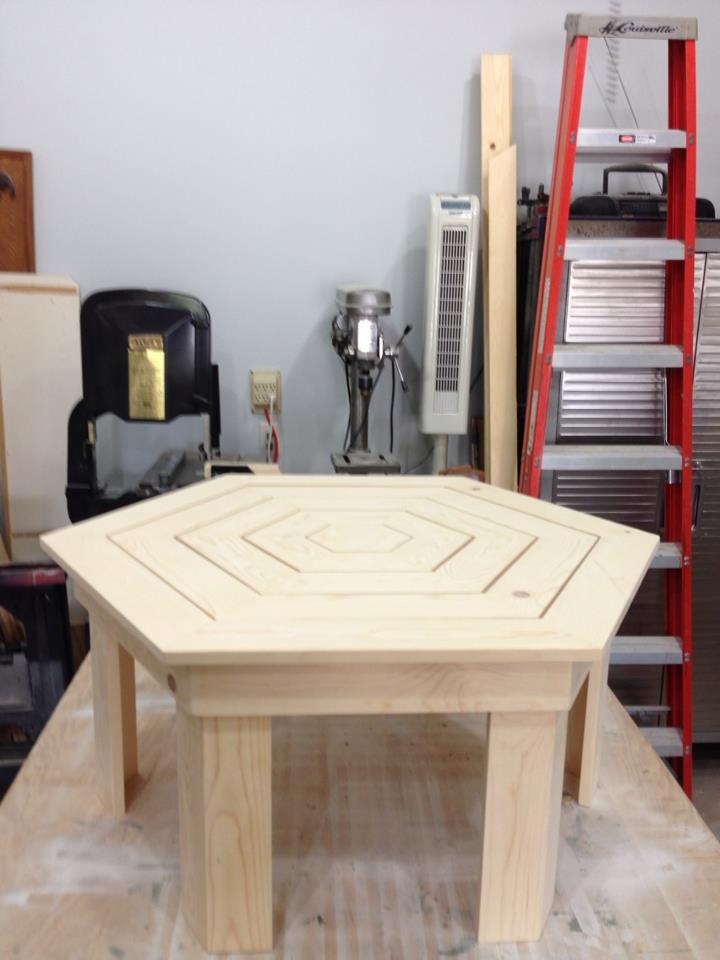
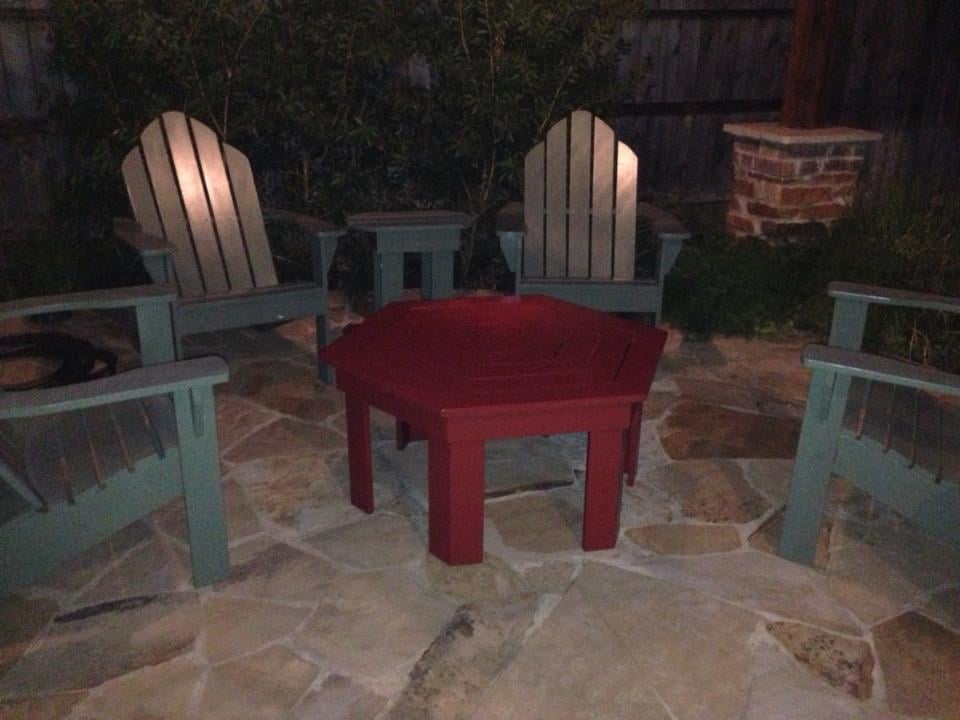
Ana, I borrowed the structure of your hexagon picnic table and created a coffee table to compliment my collection of Adirondack chairs on our patio. The rib structure using 30 degree angles is surperb, and with pocket screws on the joints plus Gorilla Glue, it is far stronger than I anticipated.
The table is first shown unpainted, then again on the patio in poor light (sorry for that.) I primed and then painted it brick red and am in the process of updating the paint on all of the chairs to match.
The 30 degree angles are probably the trickiest part. If your saw is off by even a tiny bit, the tolerance buildup will come back to bite you. For example, if each cut is off by 1/2 a degree, you have six cuts, which equals 3 degrees of error. My mistake was not calibrating the cuts made on my table saw or mitre saw. A professional woodworker buddy of mine suggested buying a cross-cut sled for my table saw. That's my next purchase.
Overall I am very happy with the final outcome despite the slight imperfections in the spacing between the slats. A little wood filler covers a multitude of sins!
Built from Plan(s)
Estimated Time Investment
Weekend Project (10-20 Hours)
Finish Used
water-based primer, then water-based semi-gloss latex enamel (three coats)
Recommended Skill Level
Advanced
Comments


Wed, 05/15/2013 - 16:21
coffee table
Really like this table. Besides a coffee table I think it would make a great picnic table for the little kids, where they could pull up their small chairs and I also think I might try building this out and up a little and use it as an addition table for dining on the deck. Now I just have to decide what kind of chairs to build to go with it. Thanks for all the additional ideas.
Tue, 05/21/2013 - 03:19
The best way to use folders
The best way to use folders for advertising is to modify them. They are rather simple to be modified and they have many variety to meet a variety of needs in style. Wholesale Pocket Folders Printing
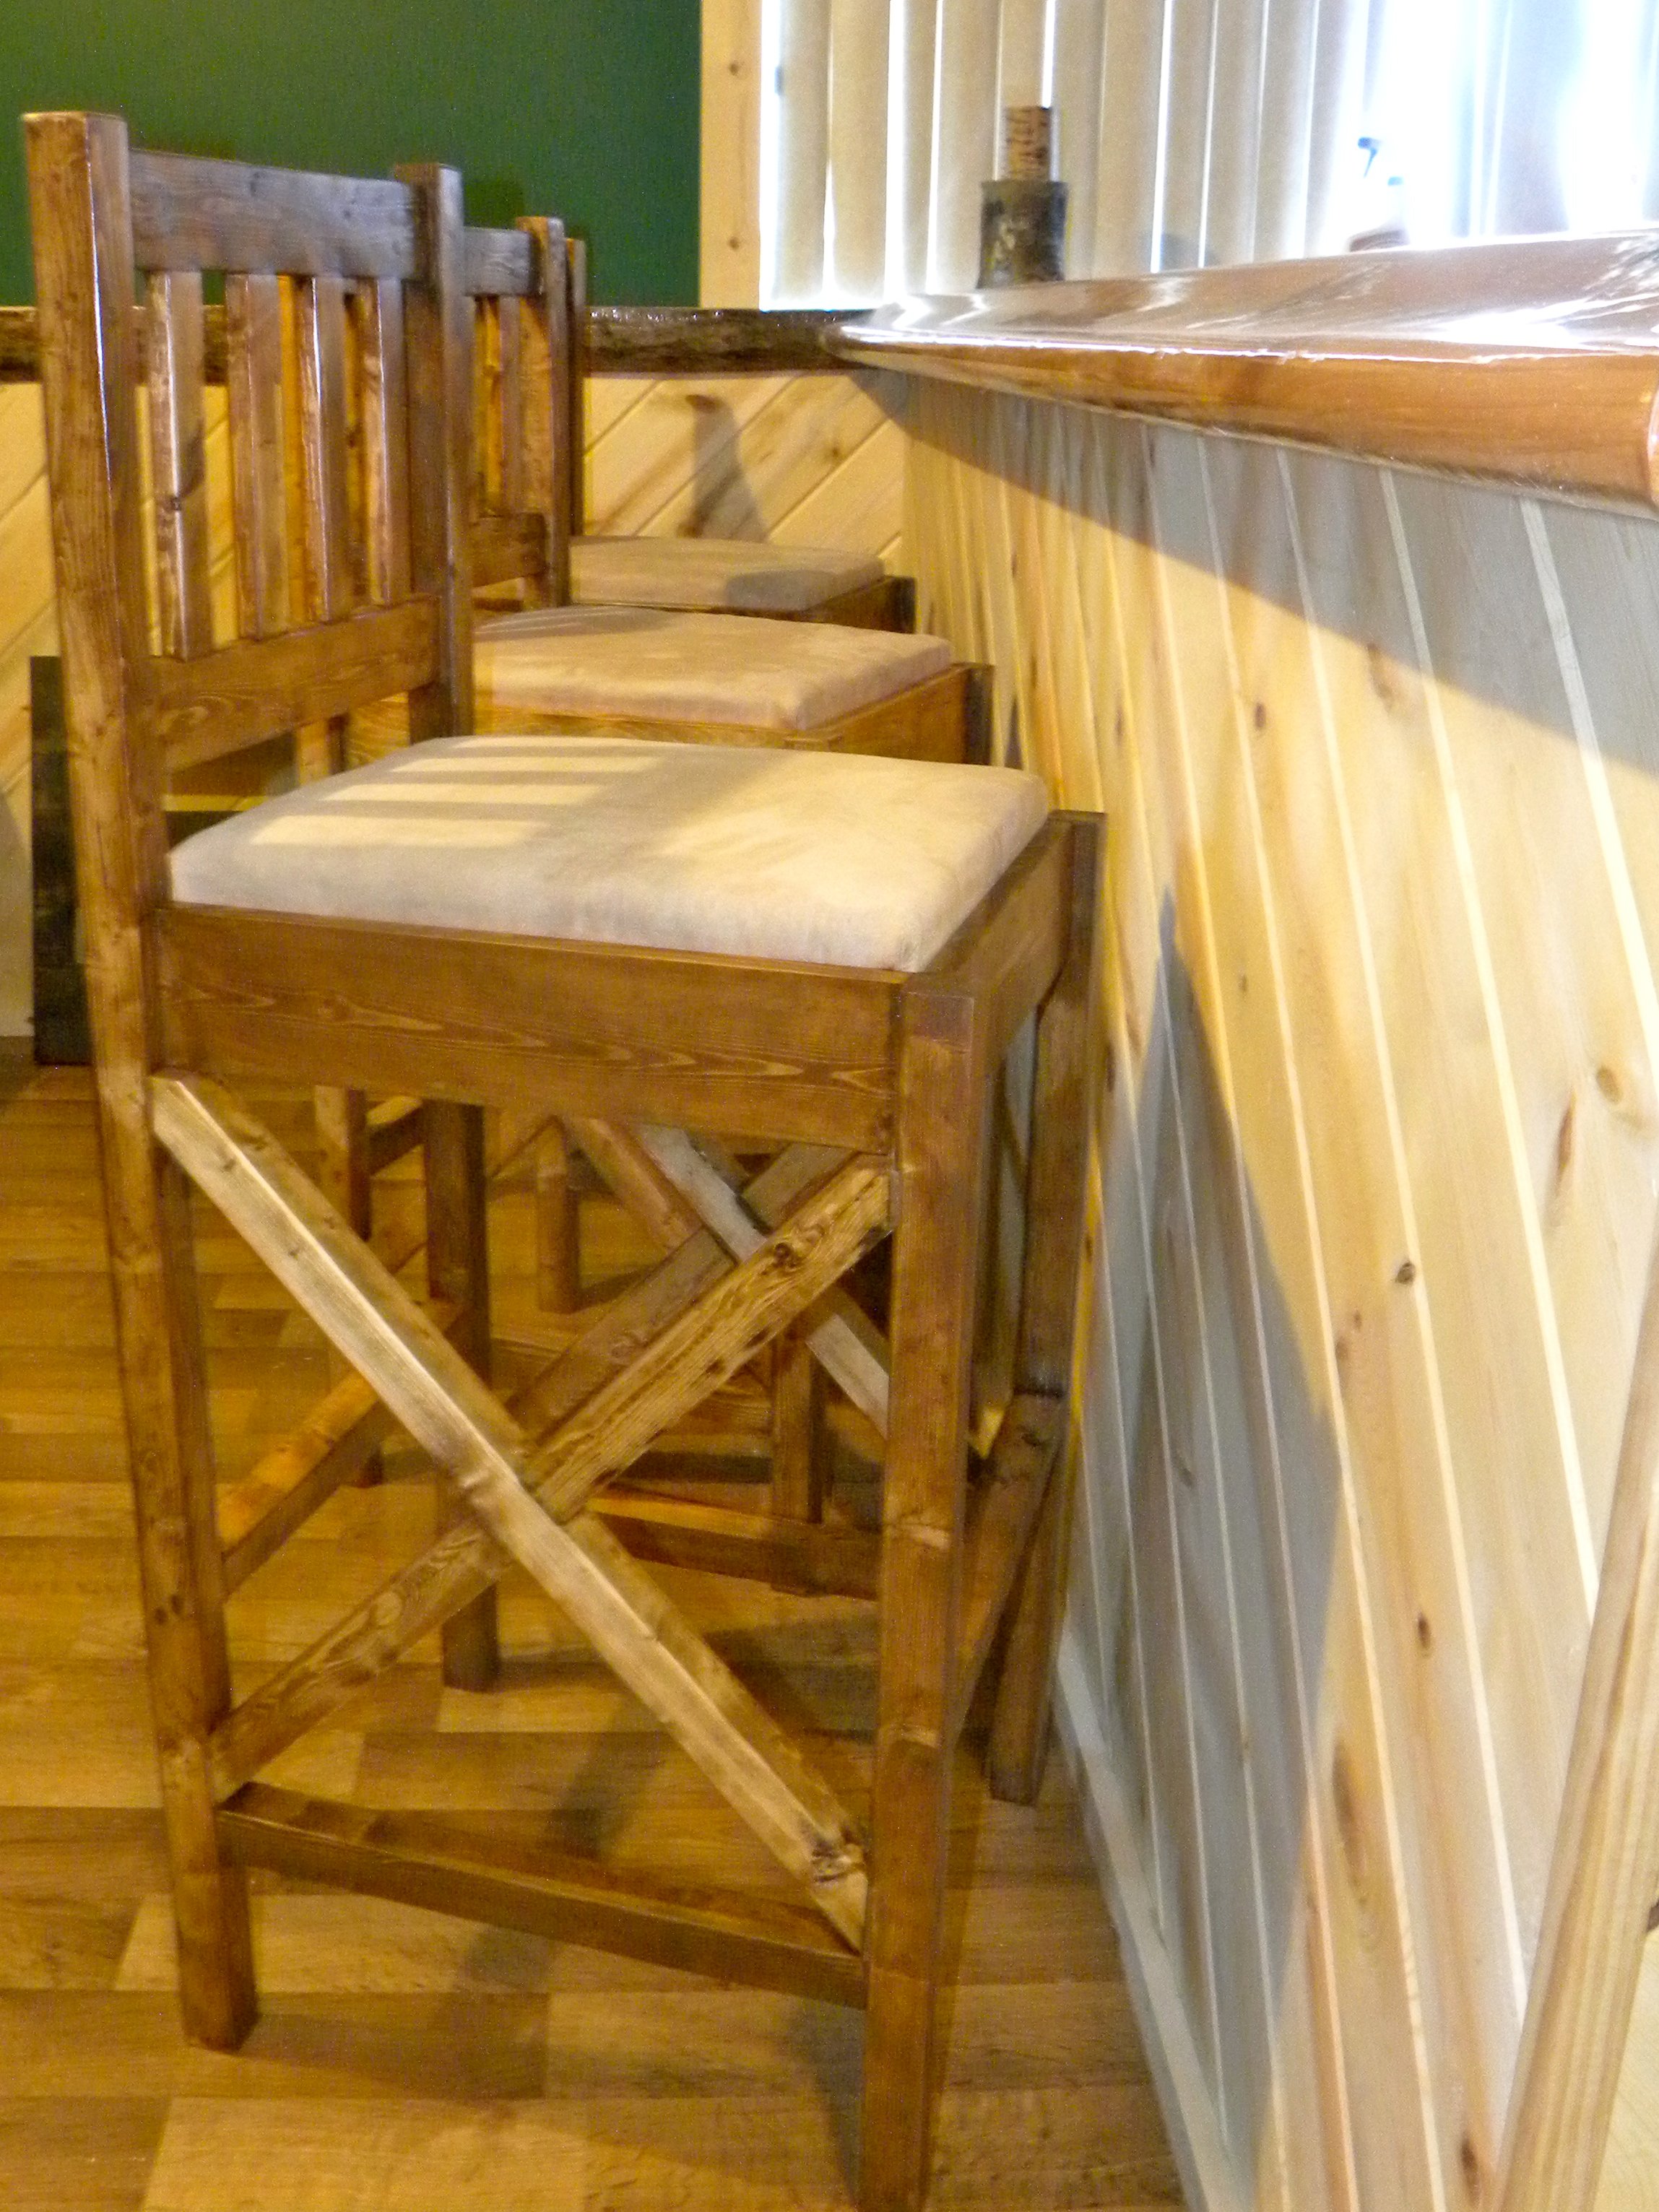
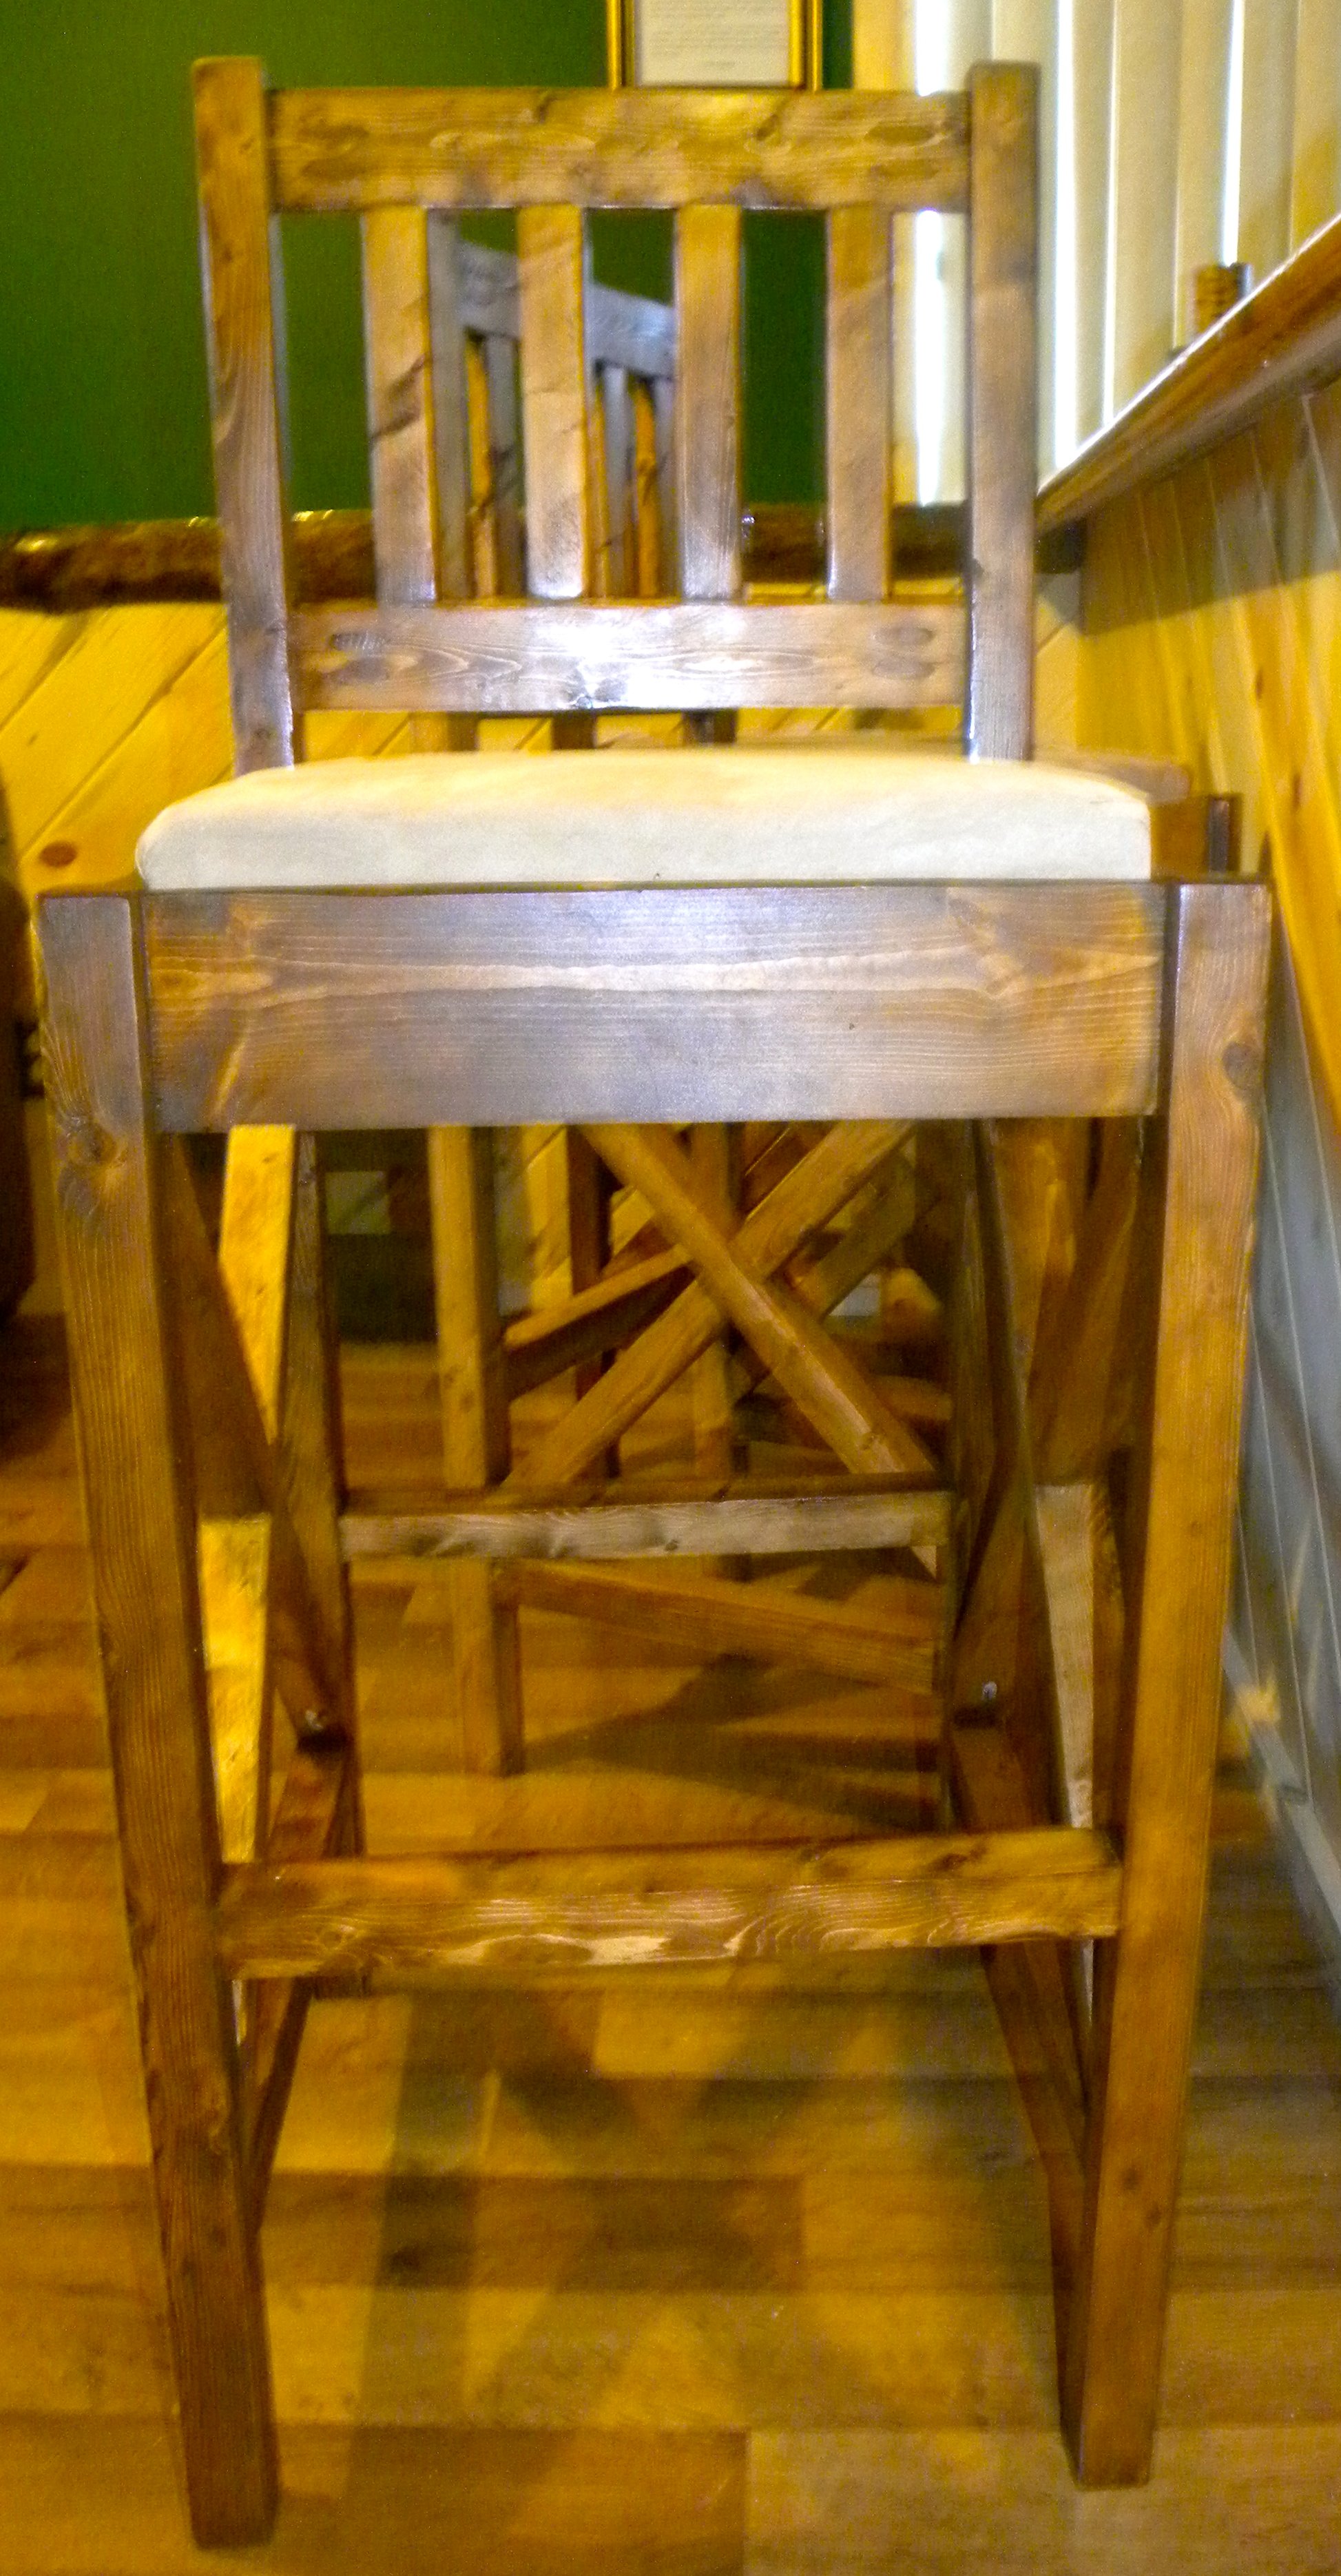
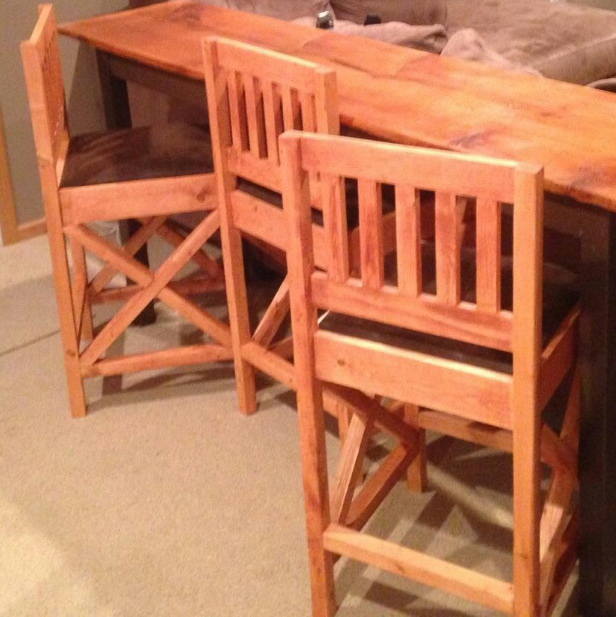
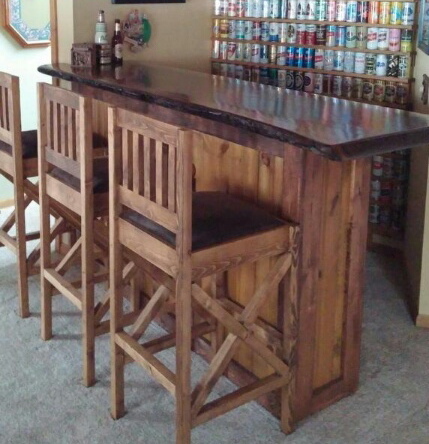
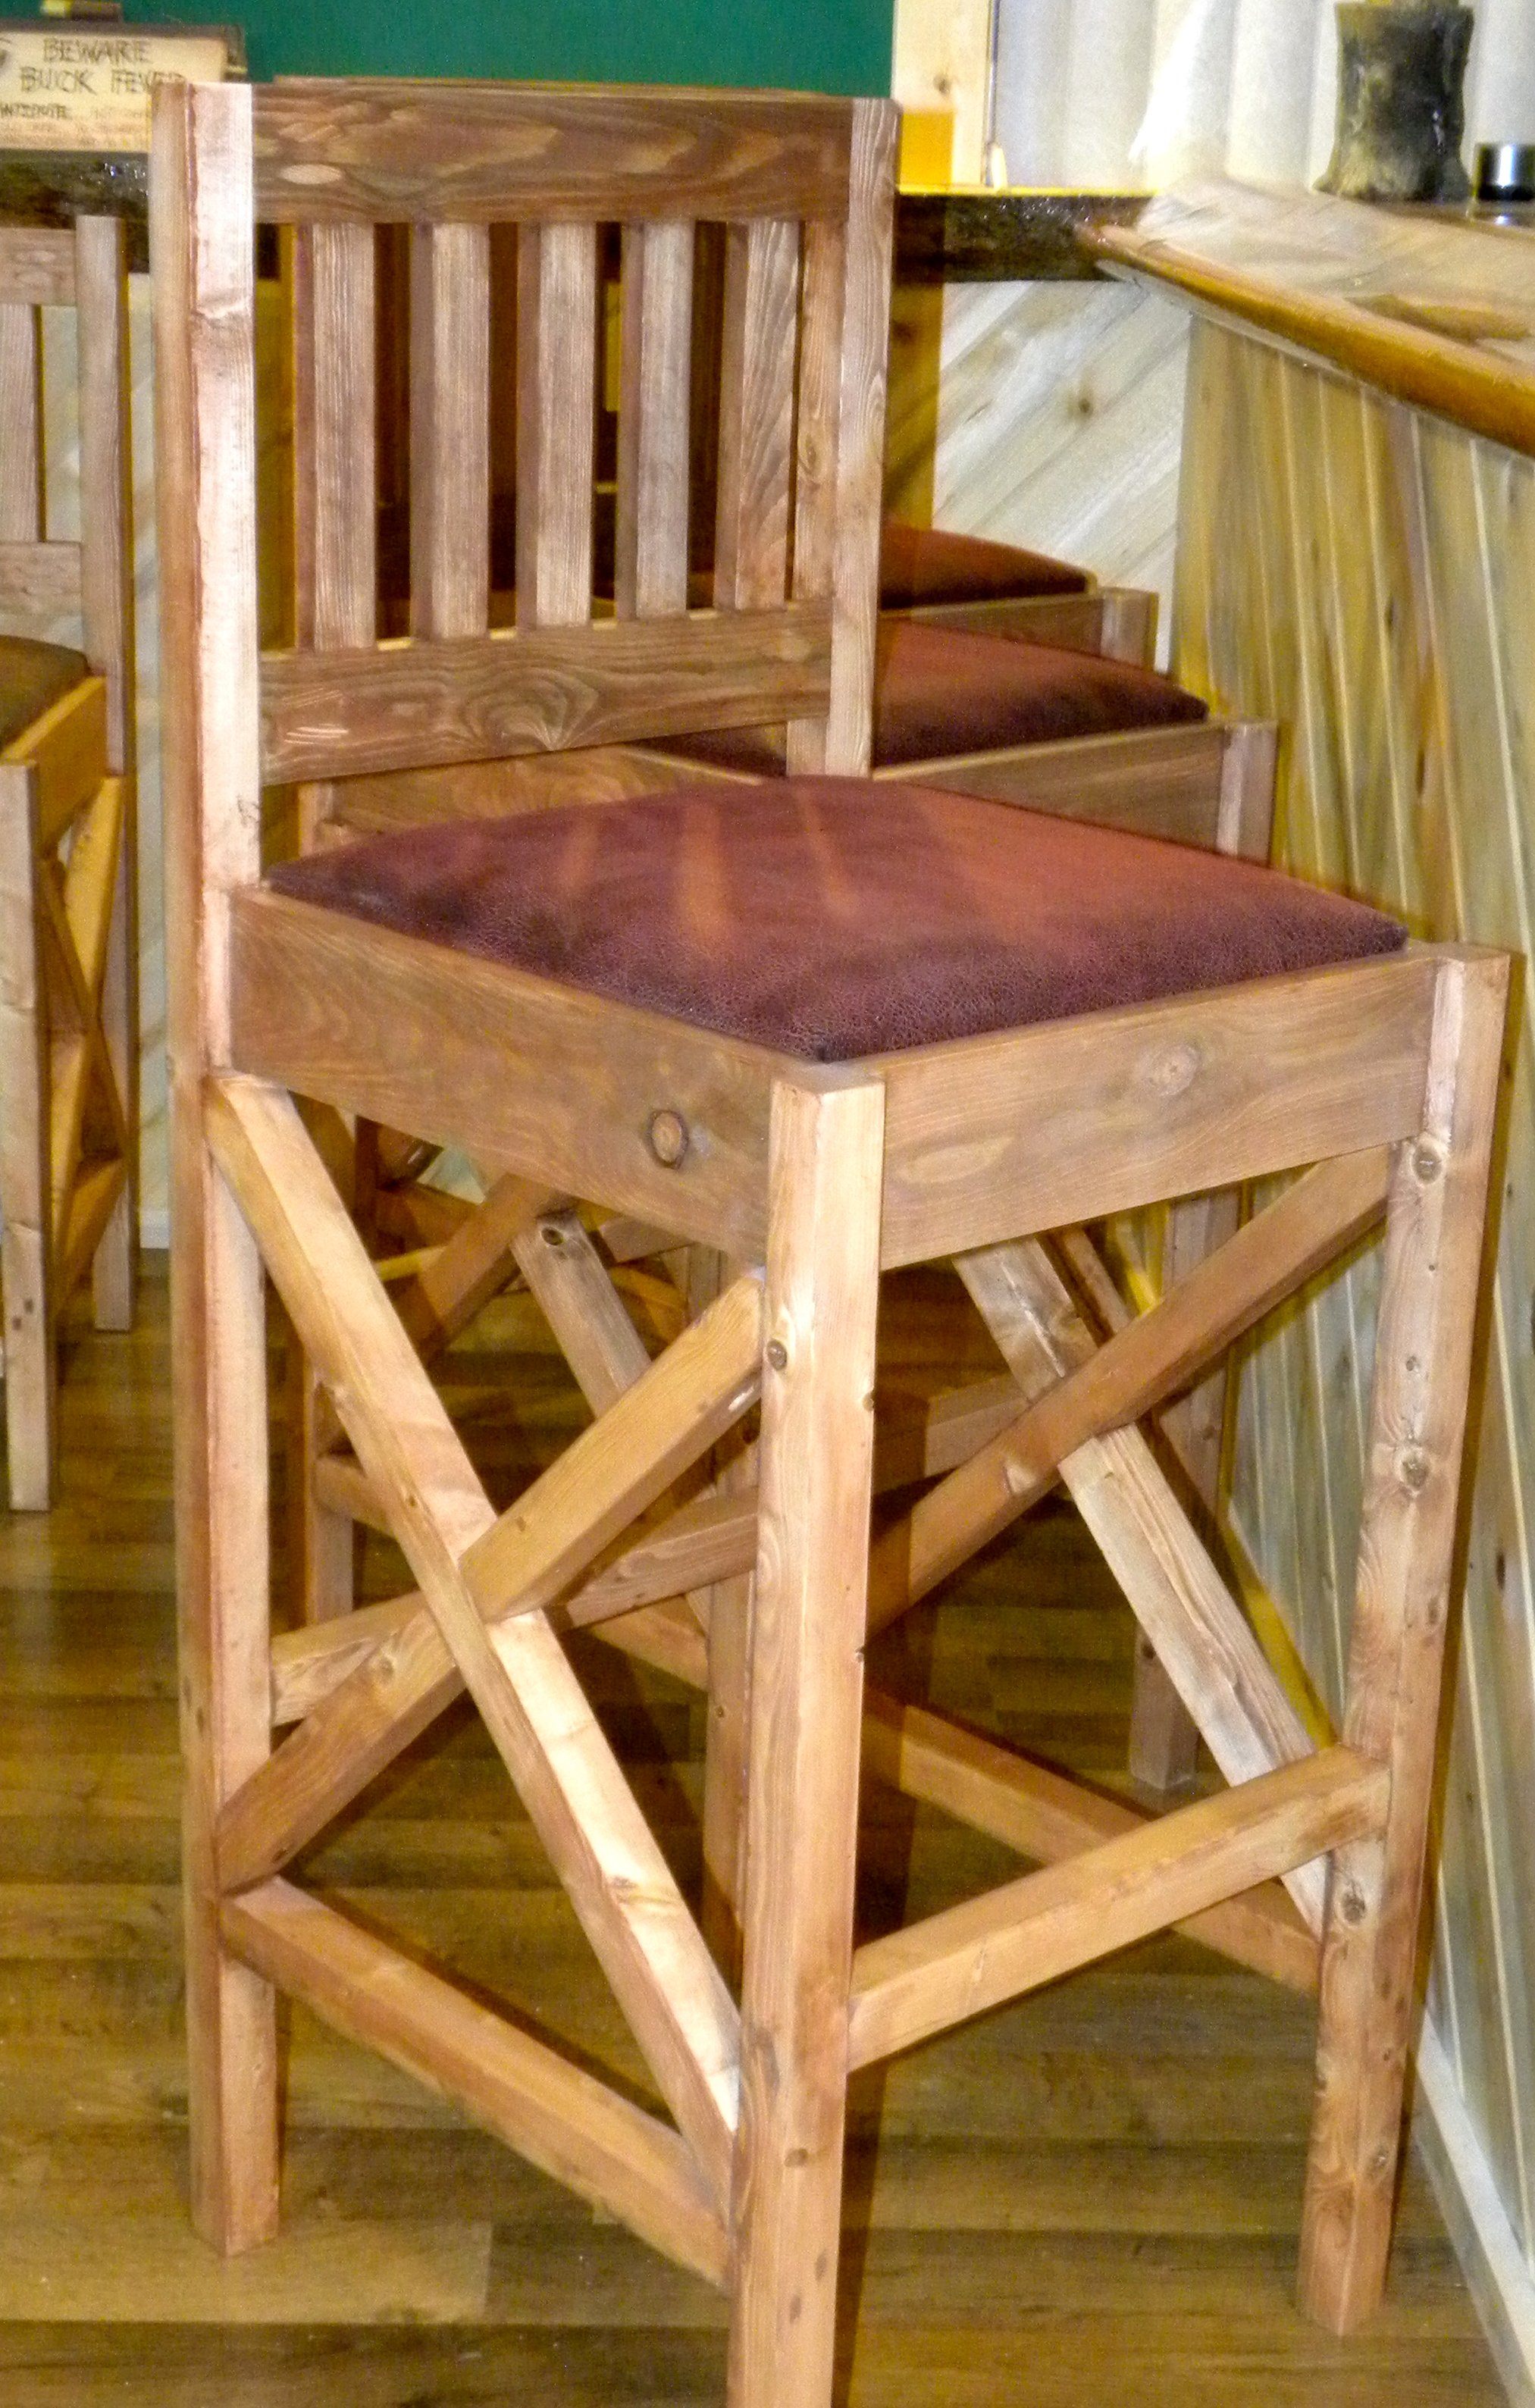
Rustic Bar Stools
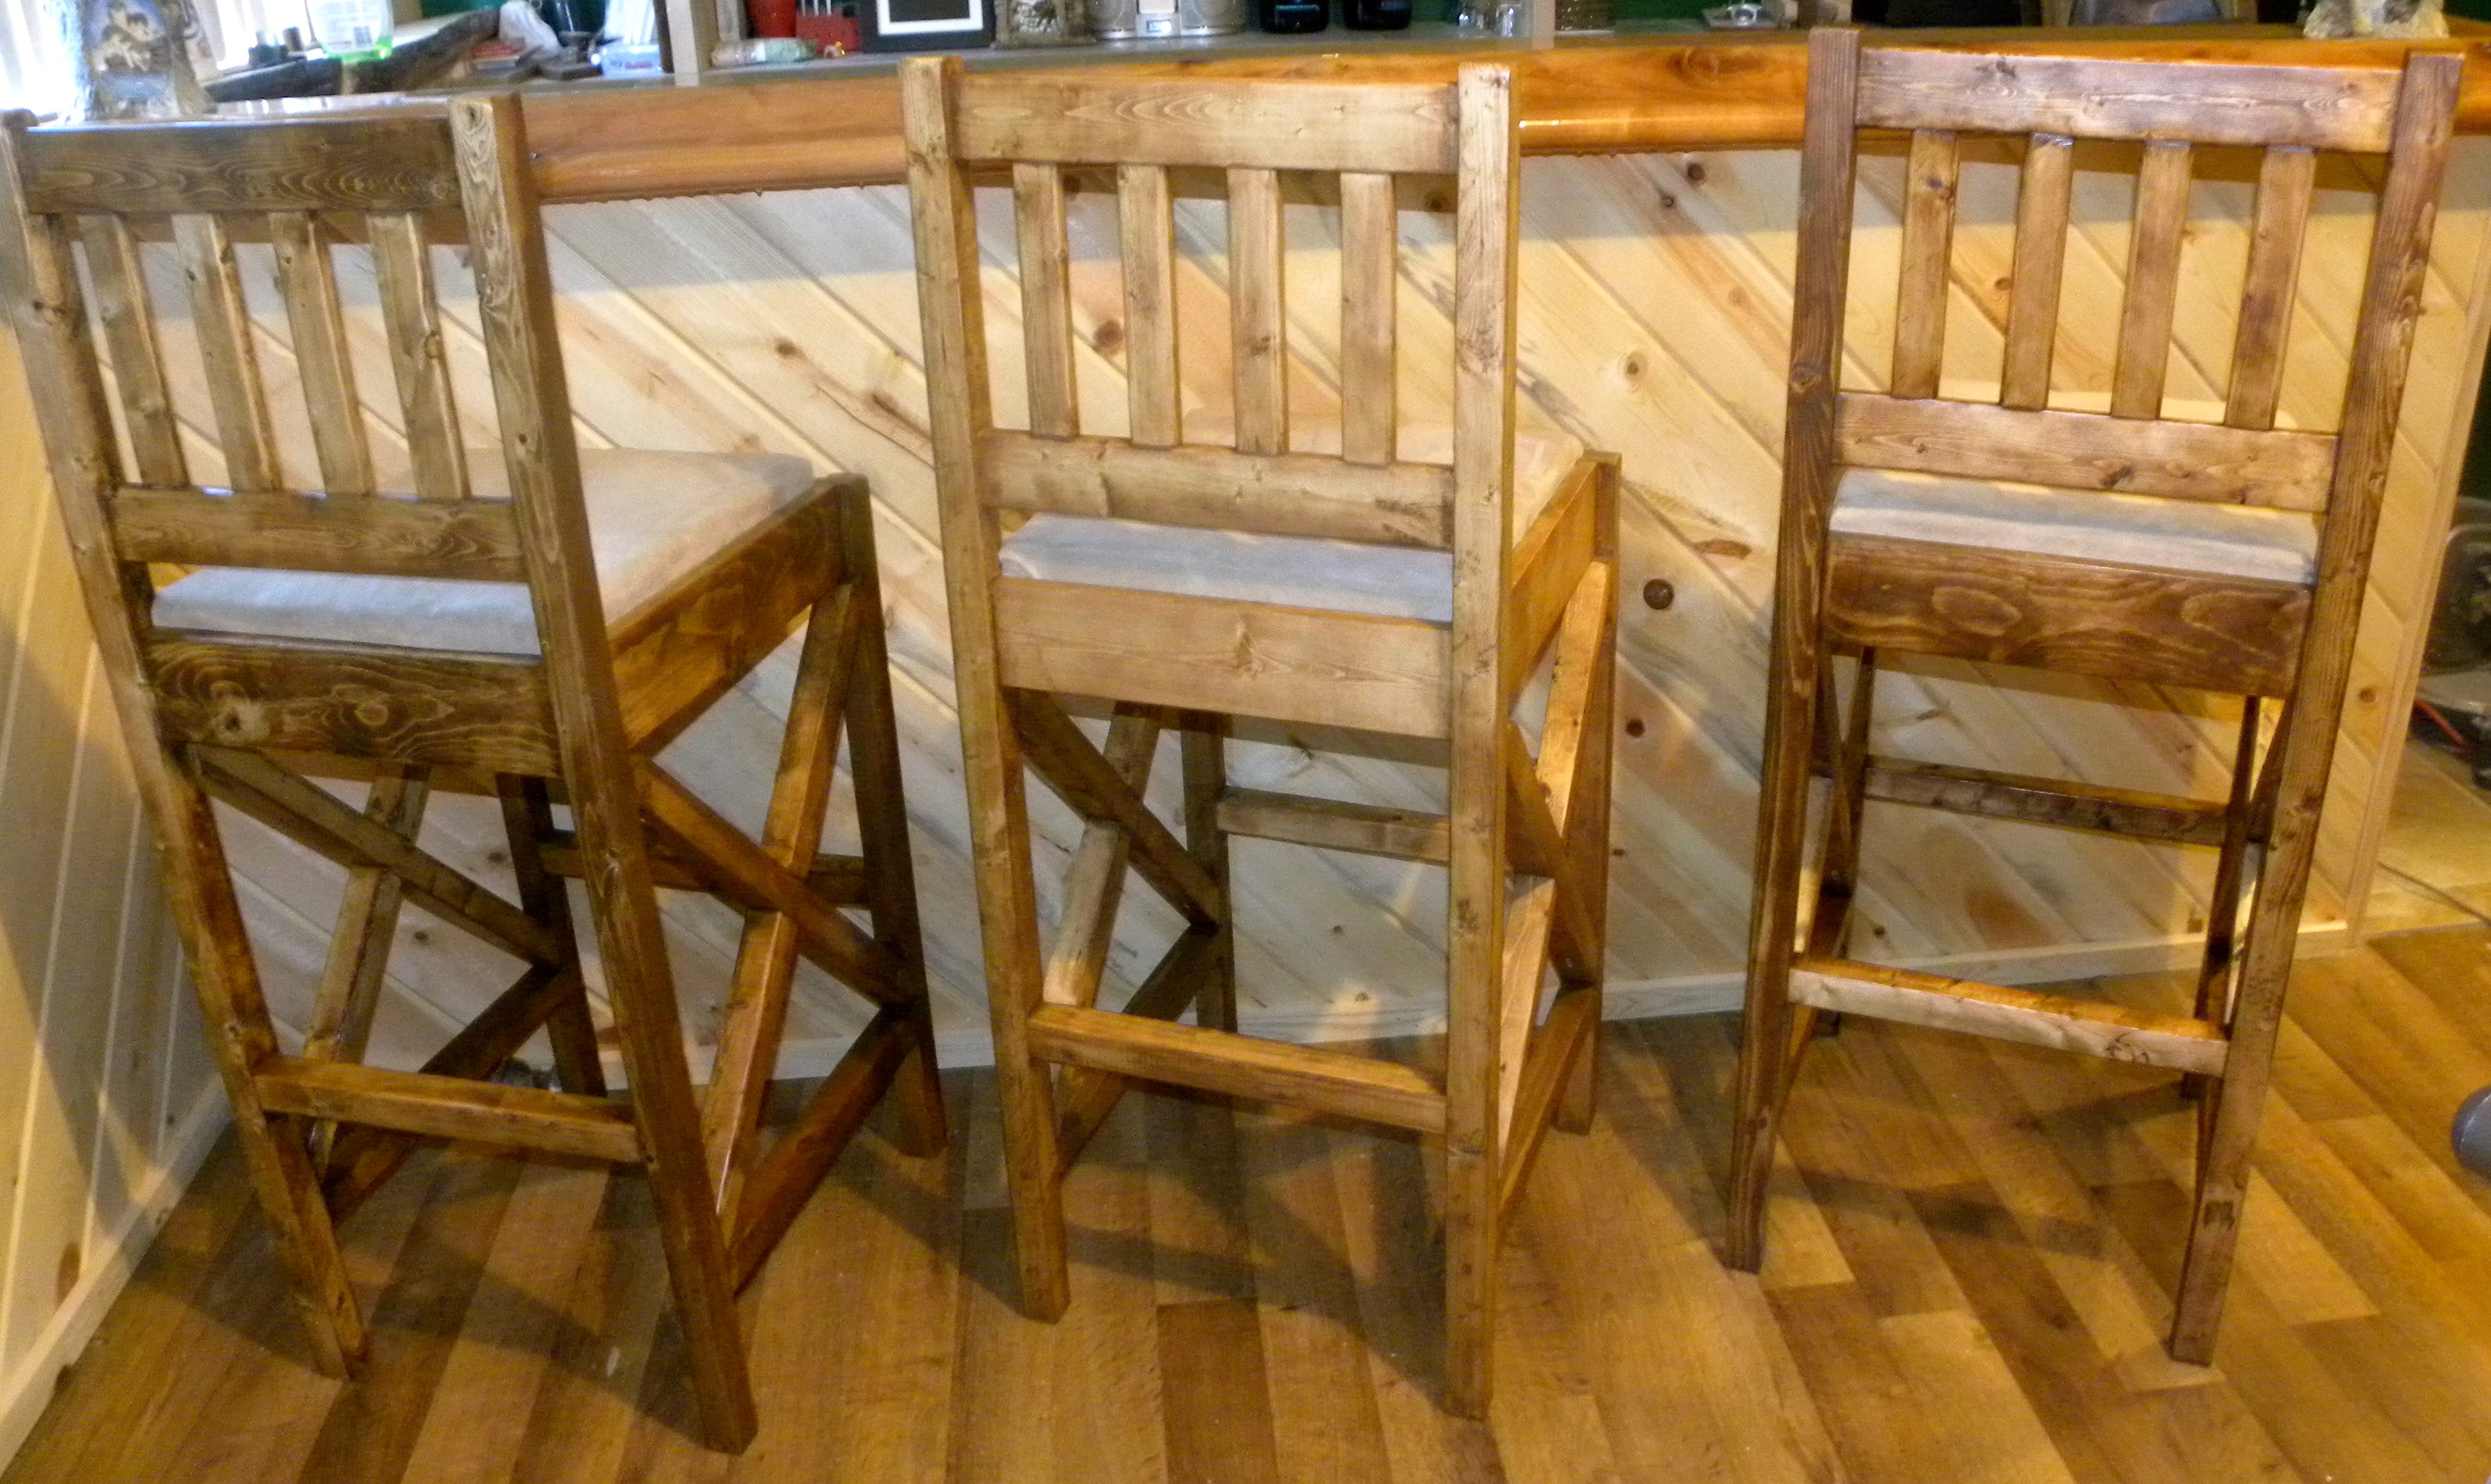
I needed new bar stools for our new bar that we designed and built in our basement family/entertaining room. Regardless of where I was looking, these things are silly expensive. I also wanted a little more of a country/rustic look that would suit my husband and my likes. I used the Vintage Bar Stool plans but my husband isn't a small guy and we have friends that aren't classified under the small frame category either, I needed more structure. After thinking about it for a few days, I liked the rustic X look and used that from so many plans. I also am all about comfort and the padded upholstered seats was a must. Can't wait for my next project. BTW. The cabinets behind the bar also came from here I simply modified for what we needed. We get compliments on it all of the time. Love this website, thank you so much for making simple to read instructions for things I actually want to do.
Built from Plan(s)
Estimated Time Investment
Week Long Project (20 Hours or More)
Finish Used
Minwax Early American
Recommended Skill Level
Starter Project
Comments
Mon, 06/26/2017 - 05:44
Rustix x bar stools
I need to build 24" bar stools with the rustic x look on the side. Do s anyone have plans to make them?

In reply to Rustix x bar stools by Daisypage
Sun, 07/01/2018 - 13:51
I am sorry. I just saw this.
I am sorry. I just saw this. Honestly I don't make any plans, I kind of fly by the seat of my pants. The X's are measured out at the end.
Thu, 12/26/2019 - 03:49
construction question???
These look great. I think that I'll add them to my build list that my wife seems to keep growing for me. How did you attach the back pieces? In the original design it showed pocket holes, but I don't see any on your work. Thanks for the help.
Tim

Sat, 06/06/2020 - 09:58
Bar stool legs notched out or not notched out
Could you please settle a discussion between myself and my husband? Are the legs notched out for the 1x4's to sink in , or are they just attached with pocket holes
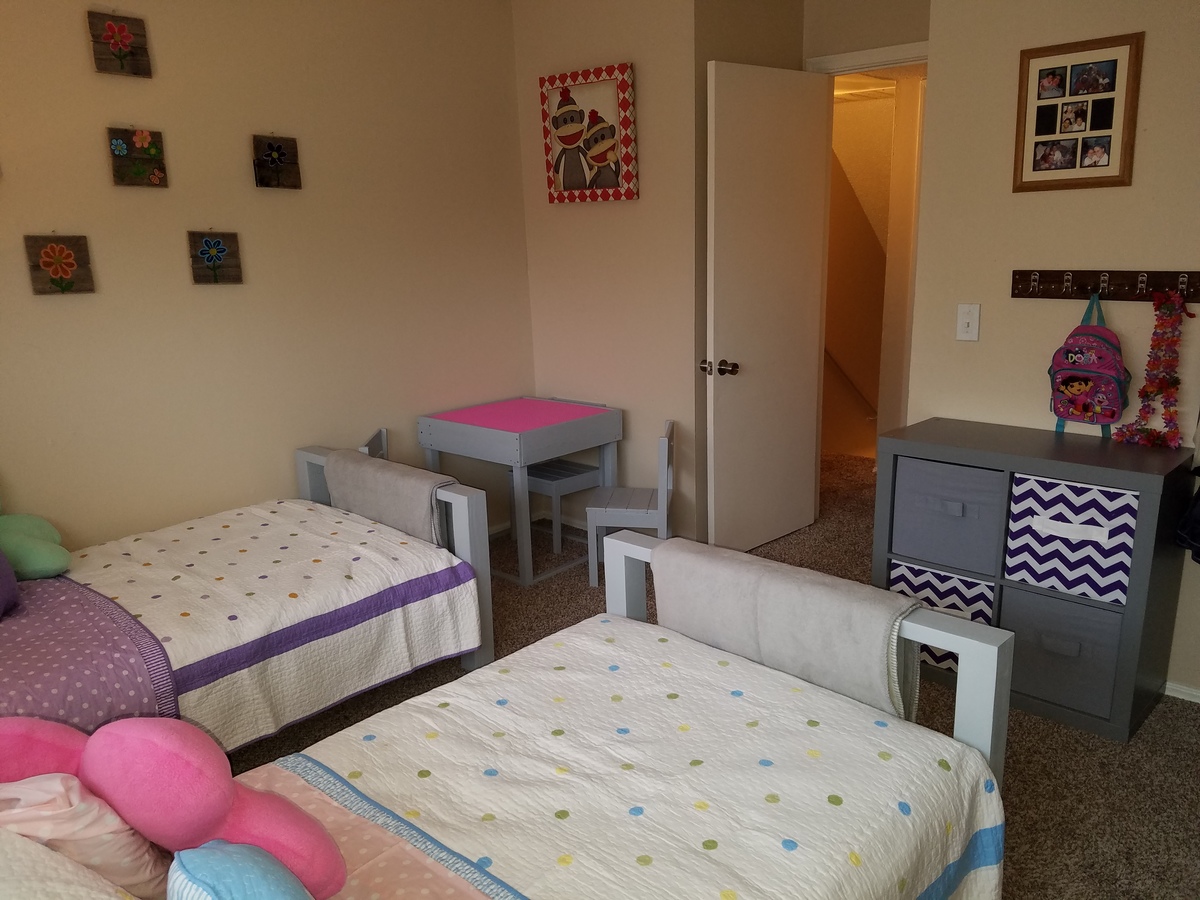
Granddaughters bedroom makeover!
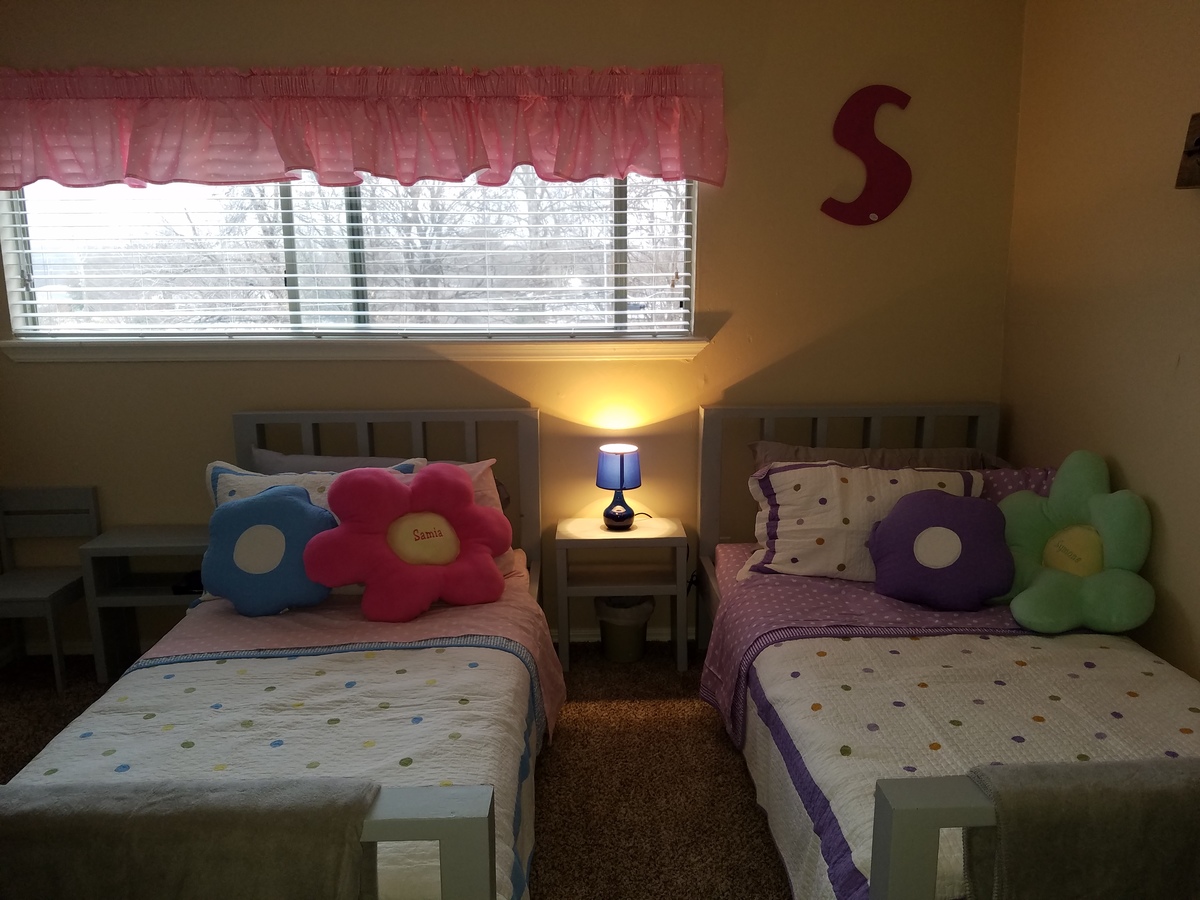
Twin beds, nightstands, play table and chairs all inspired by Ana White plans. I did a lot of improvising as I went along.
This was a Christmas gift for my granddaughter's and my second project.
My sister made the curtain, the personalized flower pillows and the bench cushion.
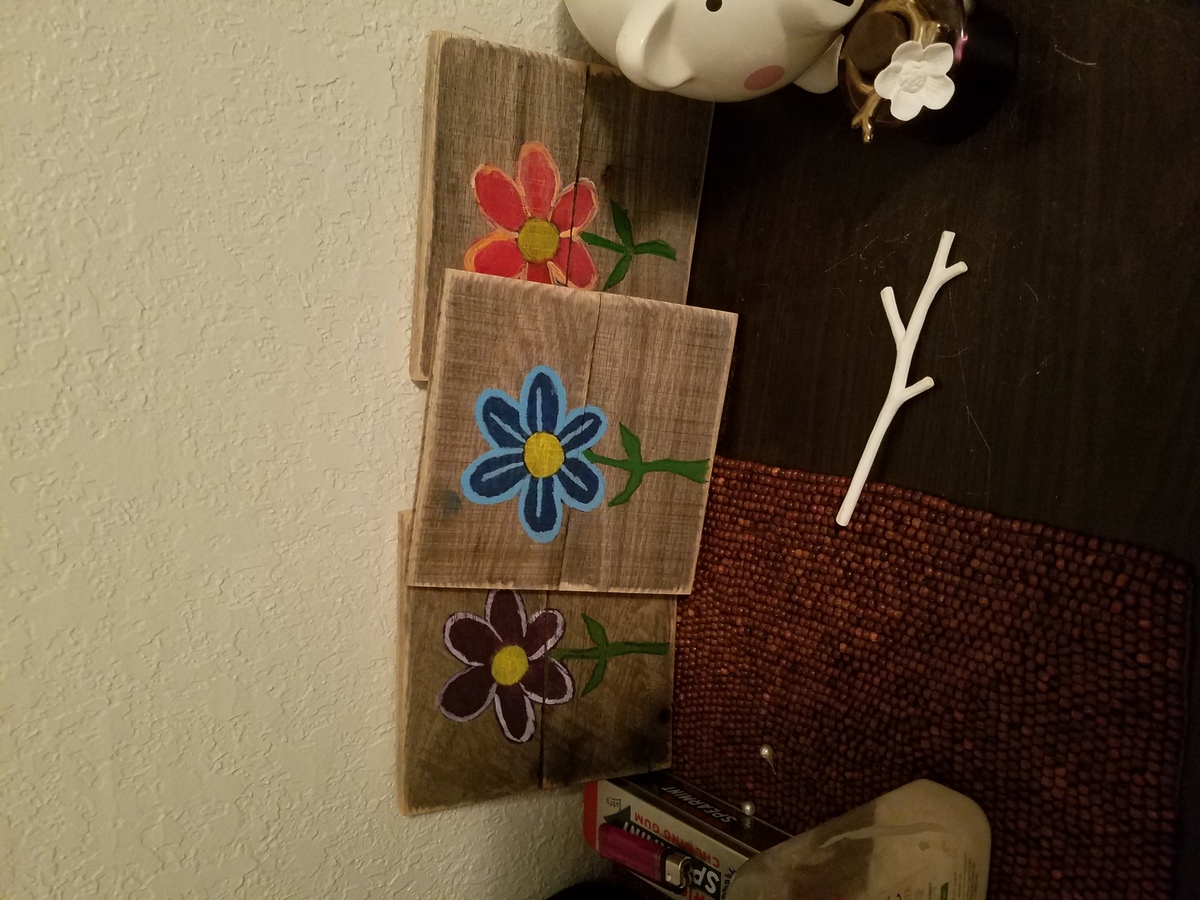
My daughter painted the flower art.

Built from Plan(s)
Estimated Cost
Honestly, I lost track! Guessing around $300. Mostly for hardware, screws, sandpaper and Lego plates.
Estimated Time Investment
Week Long Project (20 Hours or More)
Finish Used
Gray acrylic paint
Recommended Skill Level
Beginner

Custom Farmhouse Bed
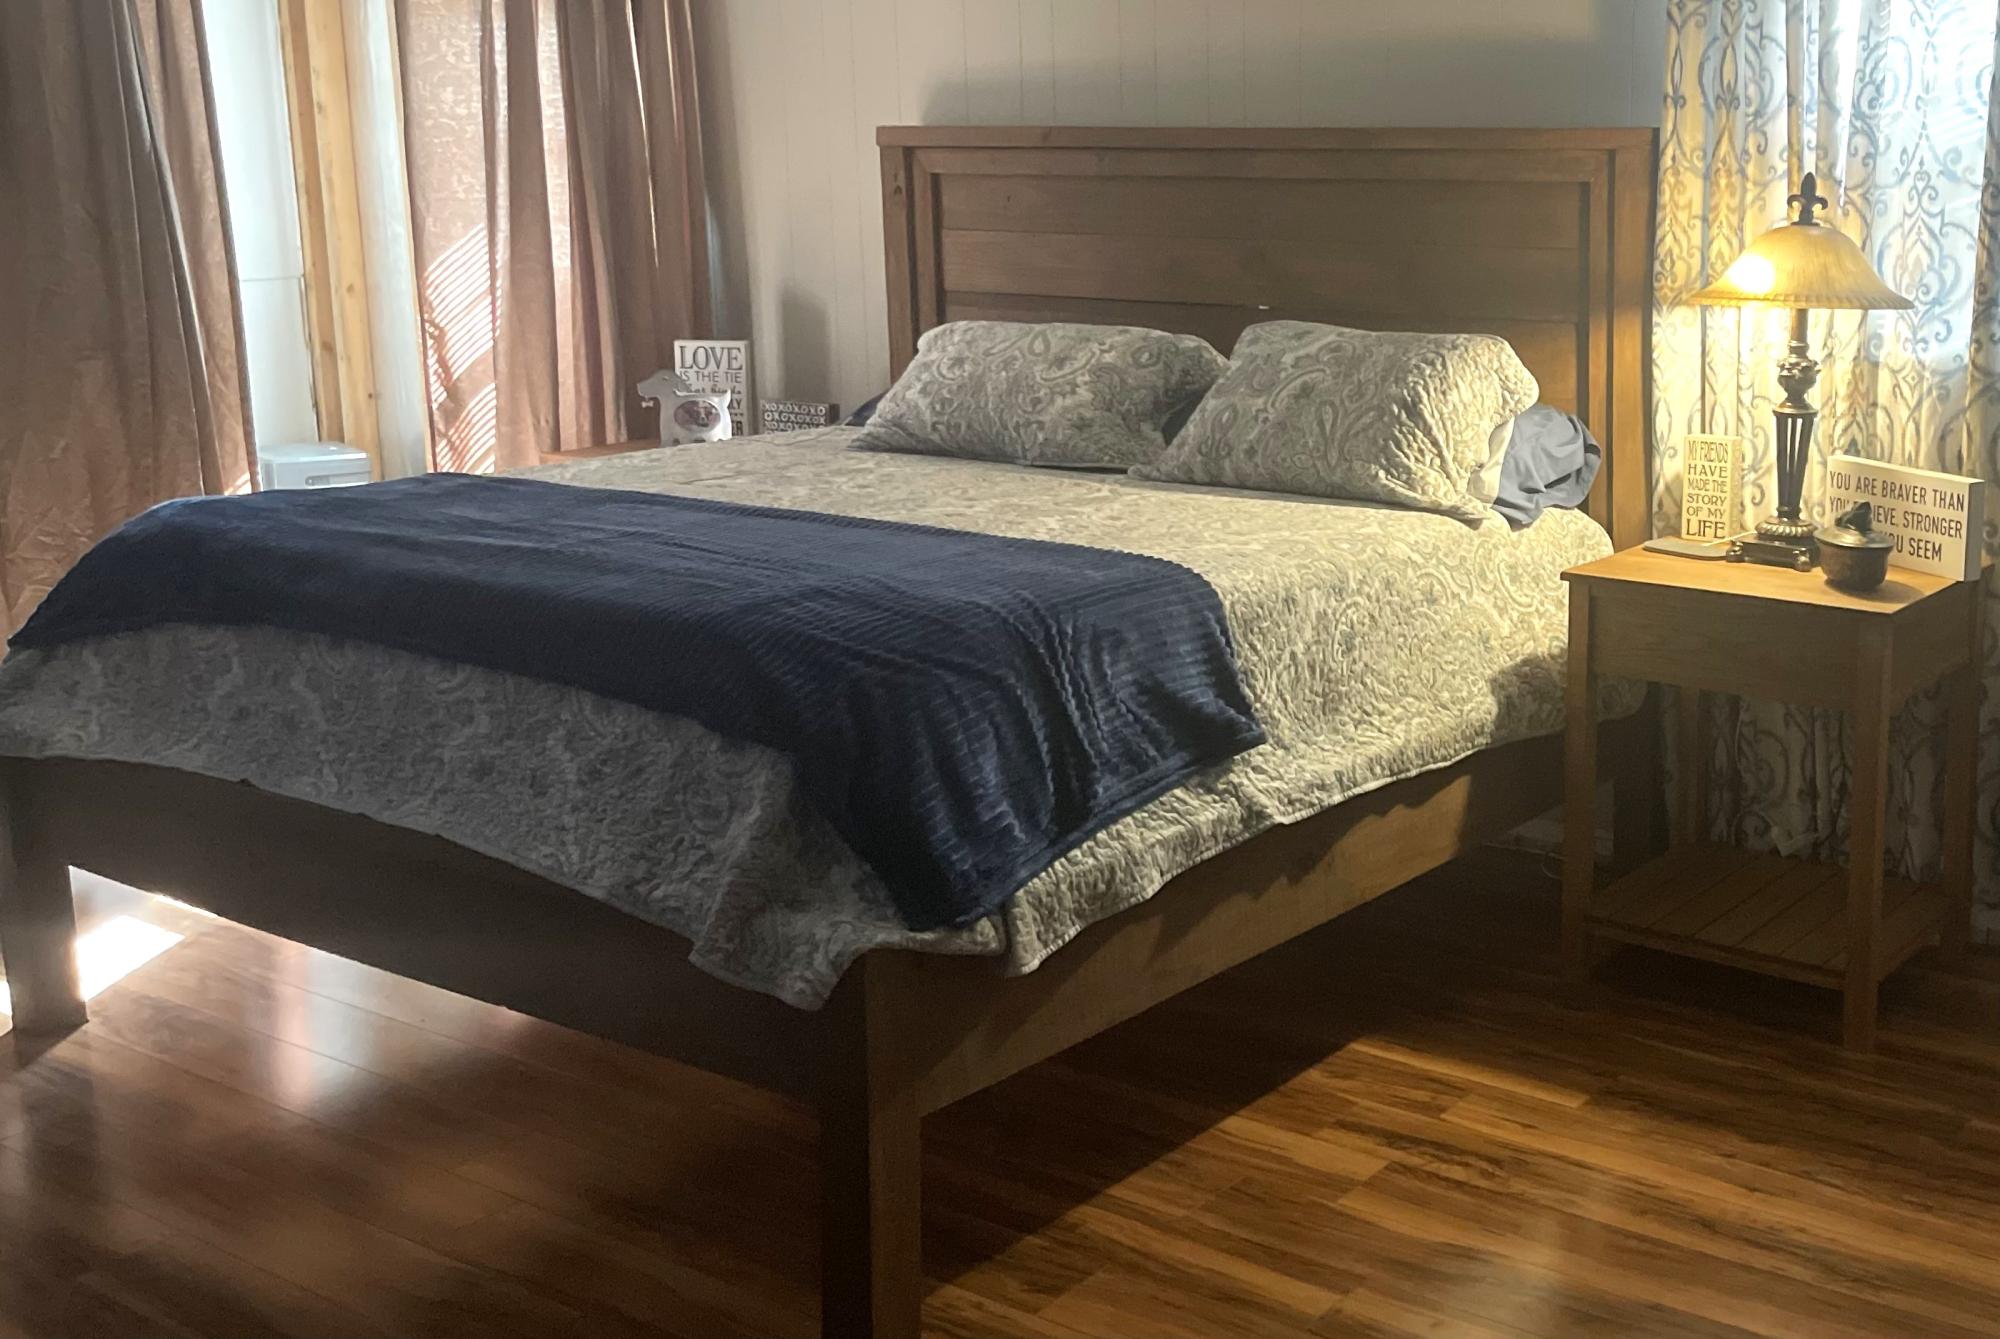
Needed a taller bed to match the tables so thought I would give it a try.
Built from Plan(s)
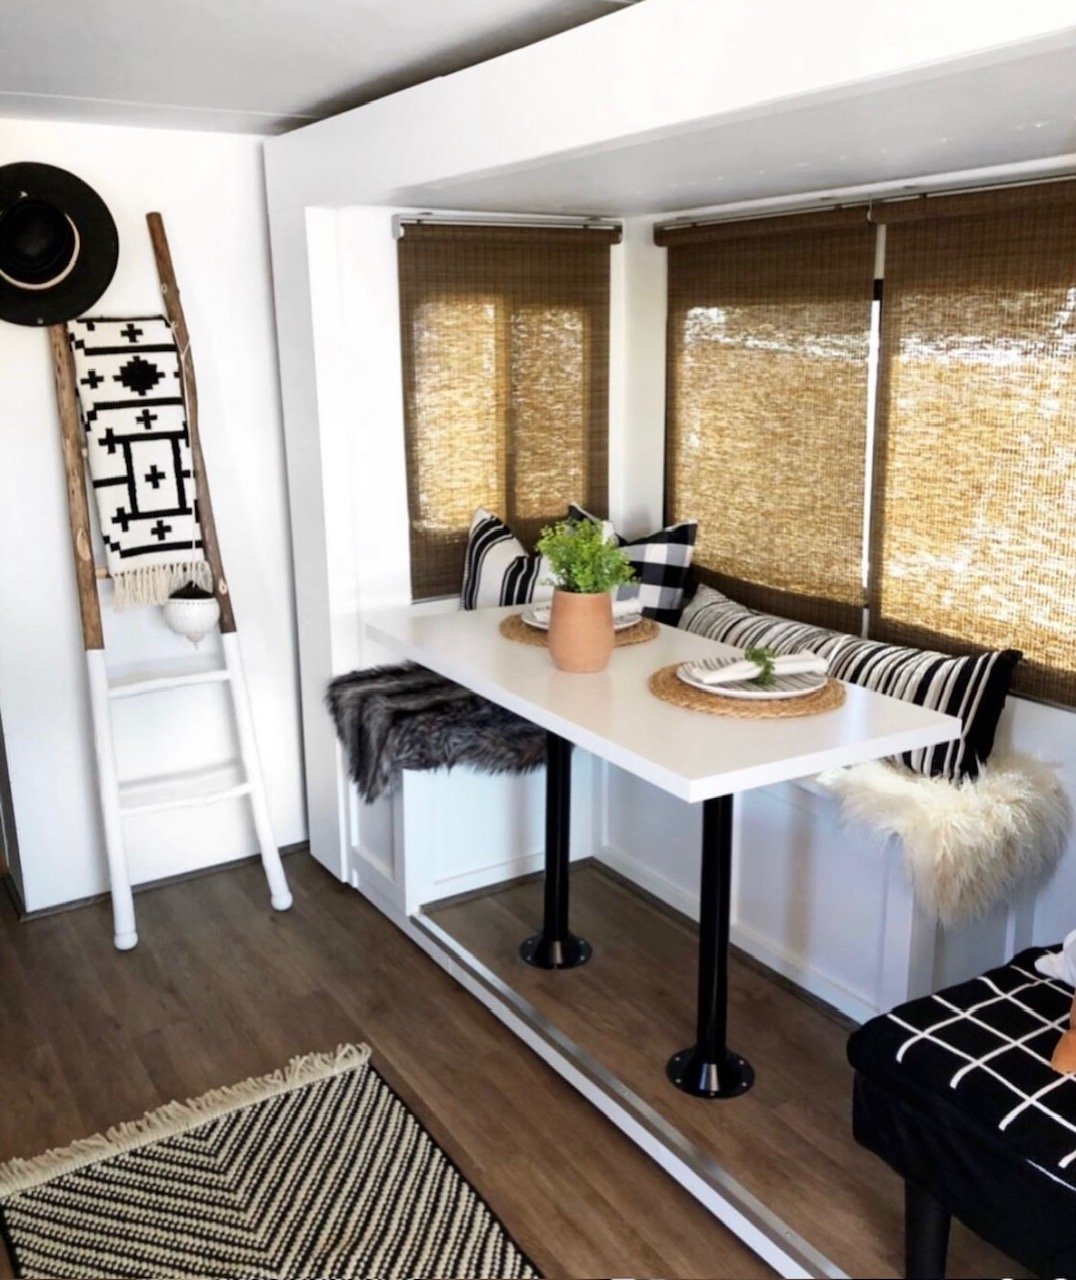
Kitchen Nook
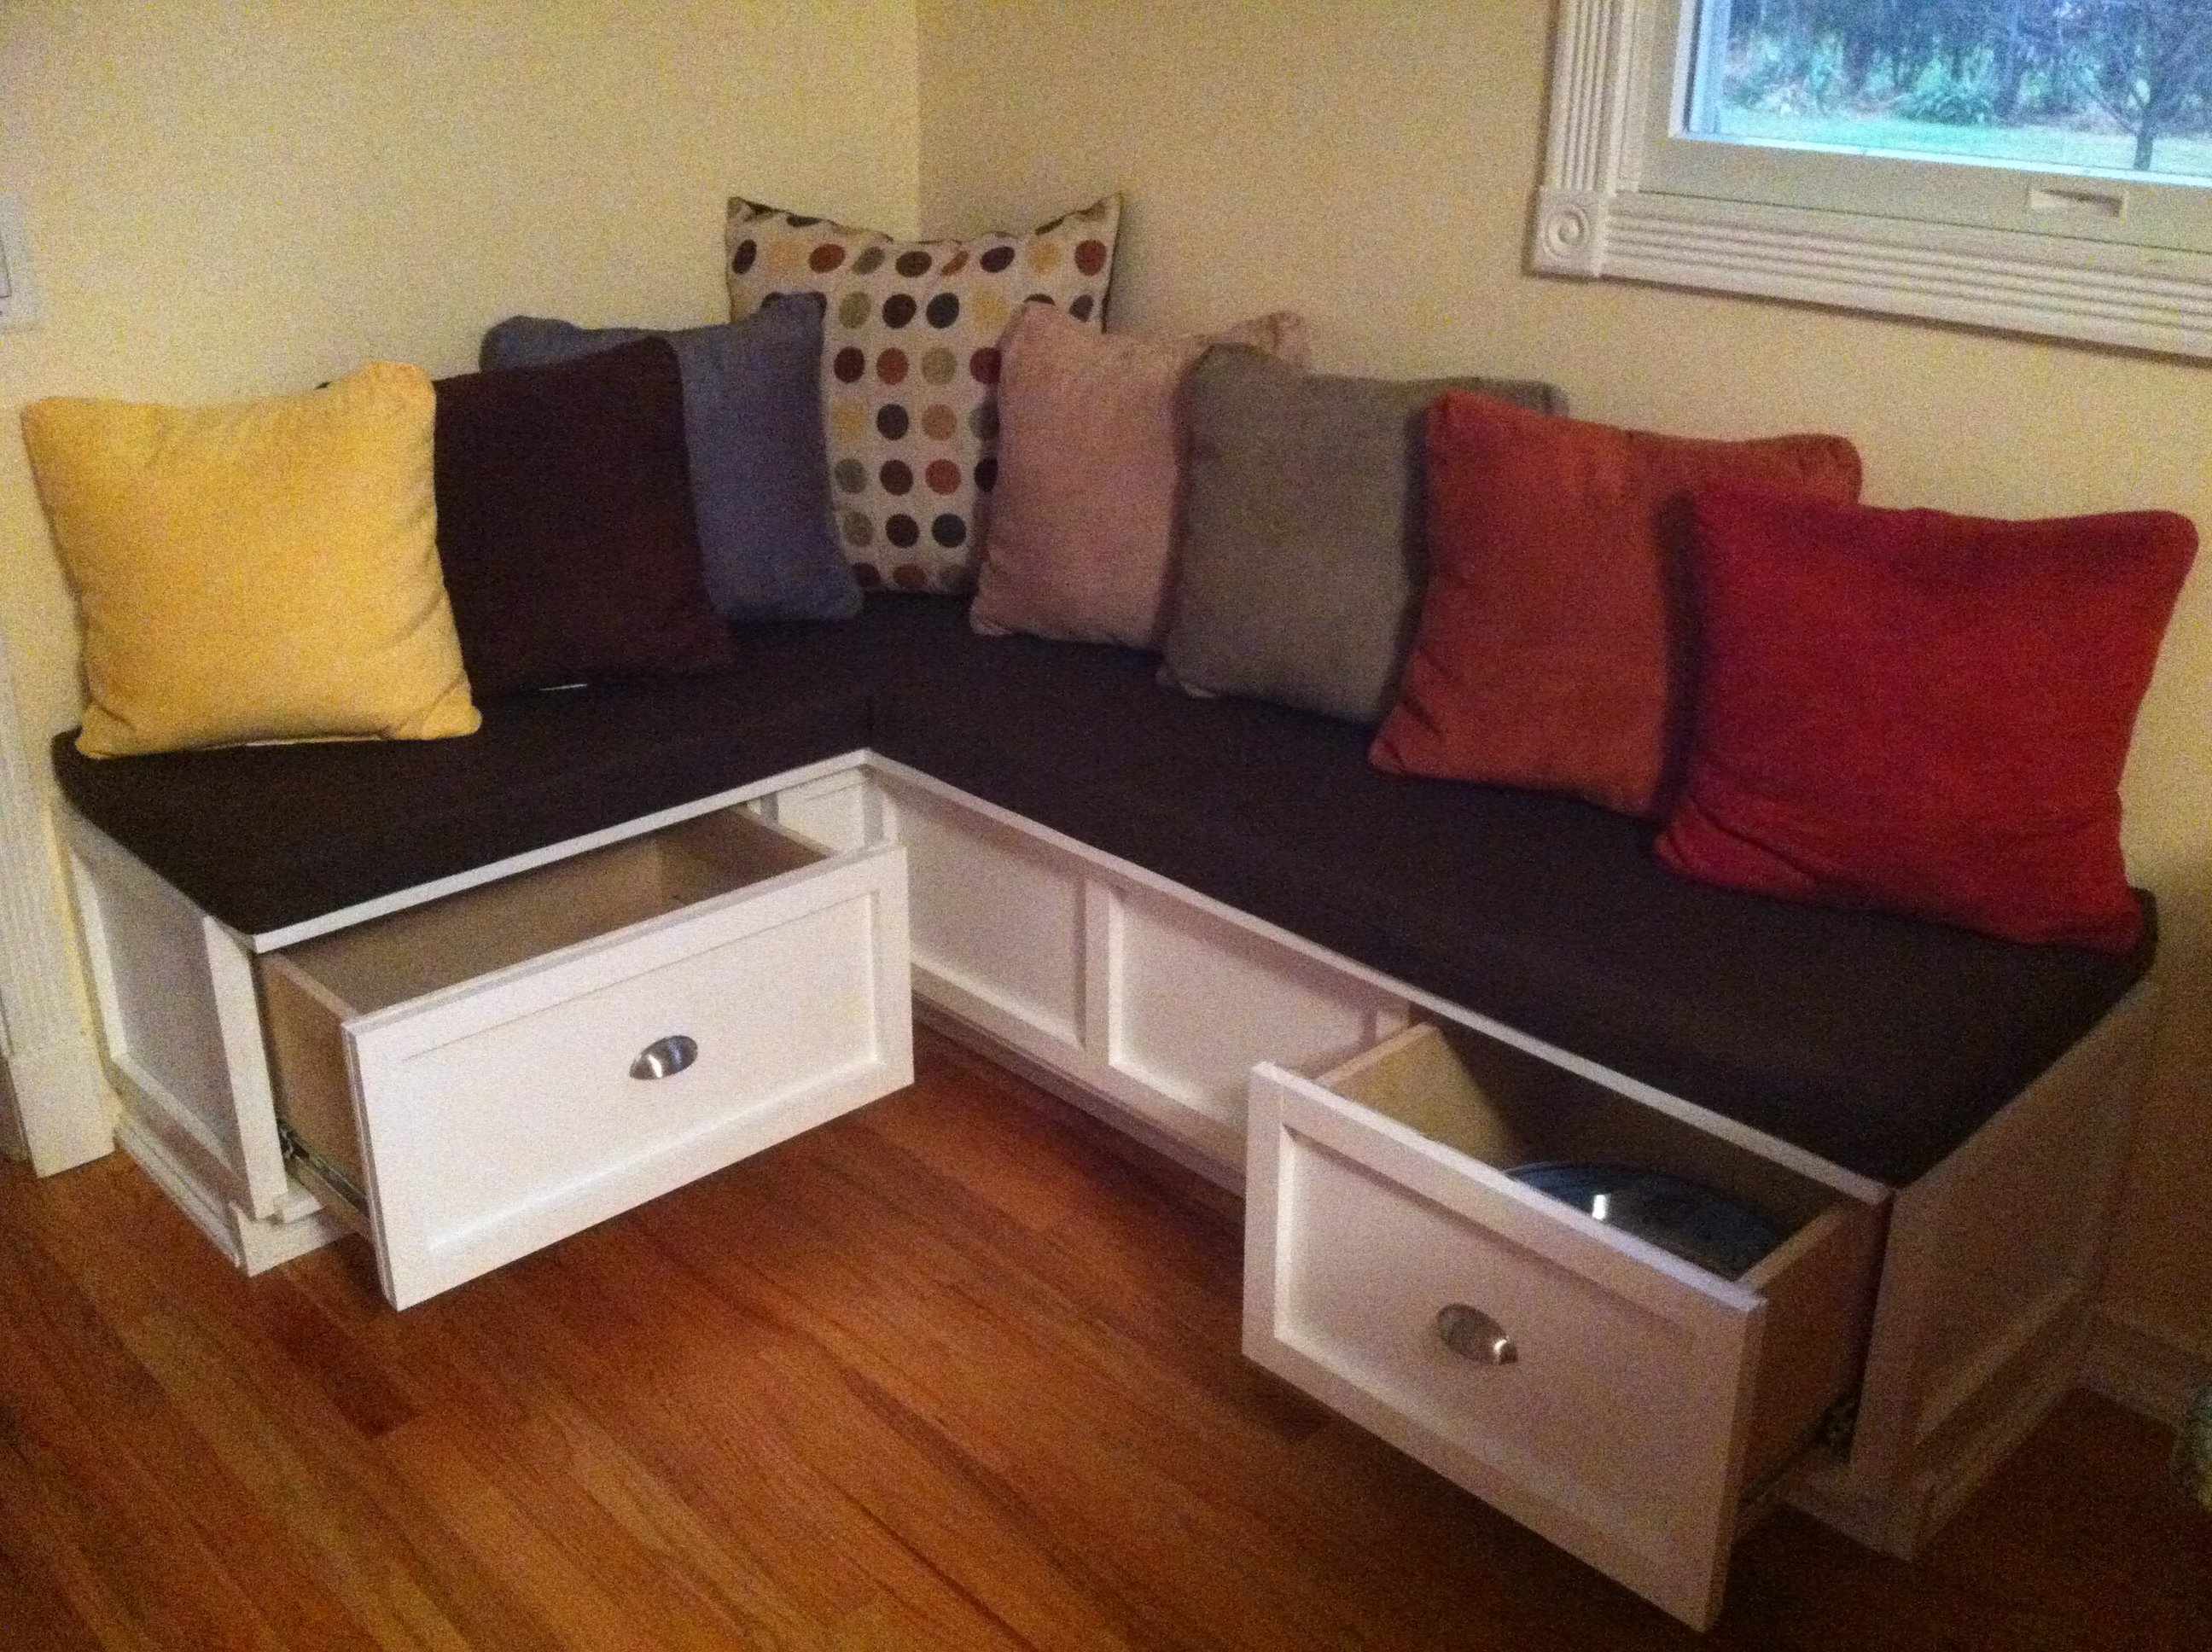
I modified the plans from the storage bed to create two benches according to the sizes I needed. The benches were arranged in an L formation and secured to the walls and to a base that I built from 2x4s. I made overlay (correct terminology?) drawers using accuride drawer slides that were super easy to install. Floor molding around the base and some 1x2s for the trim. Drawer handles from the depot. Custom cushions ordered online (I can't sew and yes this was the most expensive part of the project). Pillows from Kohl's with free ship and a 30% off coupon - whoo hoo!
Estimated Cost
$200 (not including cushions)
Estimated Time Investment
Week Long Project (20 Hours or More)
Finish Used
zinsser primer, BM semi gloss white, polycrylic spray (water based)
Recommended Skill Level
Intermediate
Comments
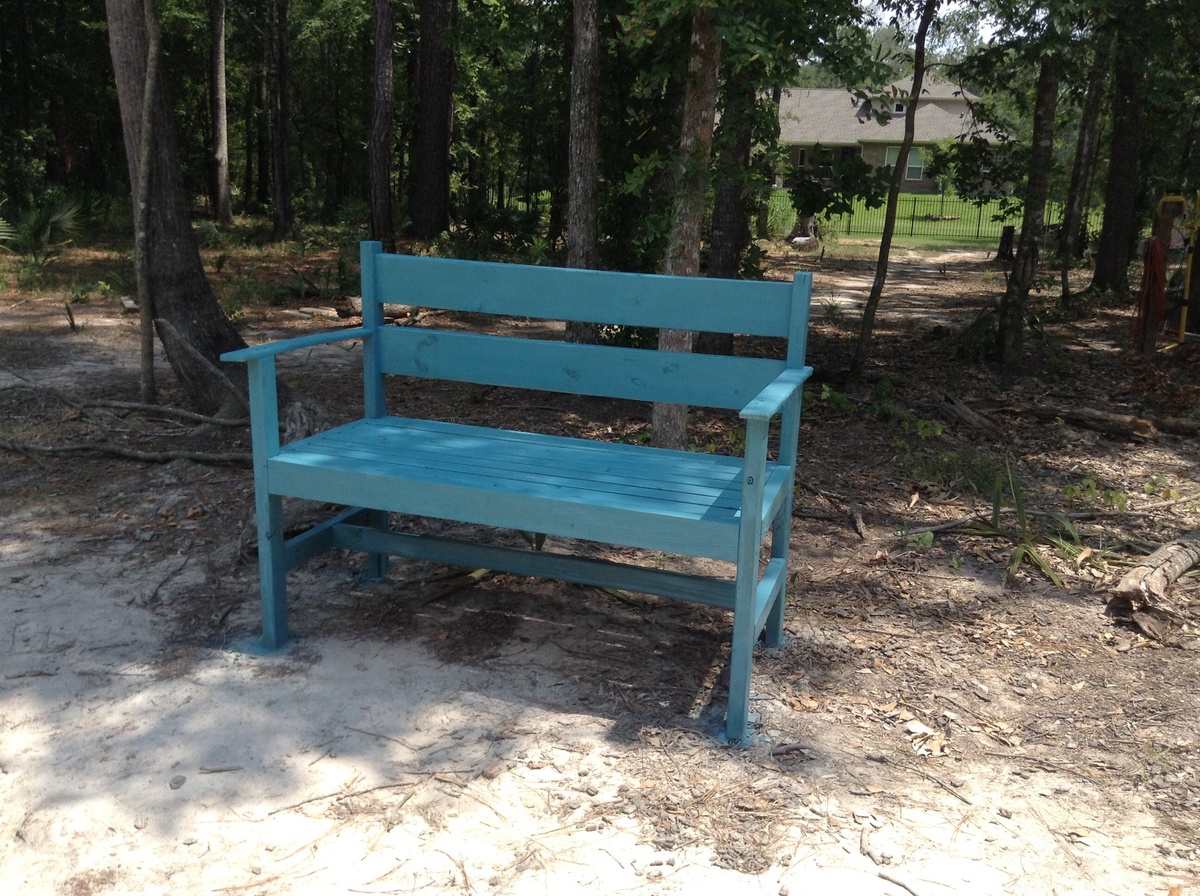
Outdoor Bench
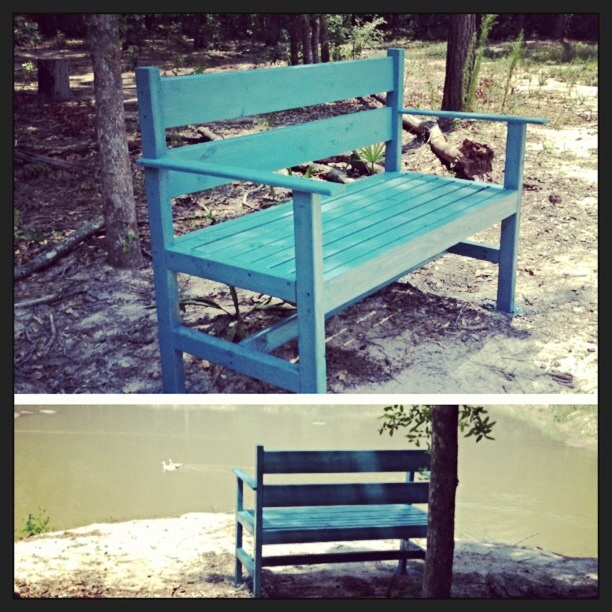
Built from Garden Bench plans. Pretty much exactly as written. I modified the arms a bit.
The seat is a little deep, but it's really great to sit out and watch the ducks by the pond. It's really heavy, so I needed help from the hubs to move it down there. On the other hand I don't worry about it floating away during occasional high water through the flood way.
It's used almost every day!

Built from Plan(s)
Estimated Time Investment
Day Project (6-9 Hours)
Recommended Skill Level
Beginner
Farmhouse Table
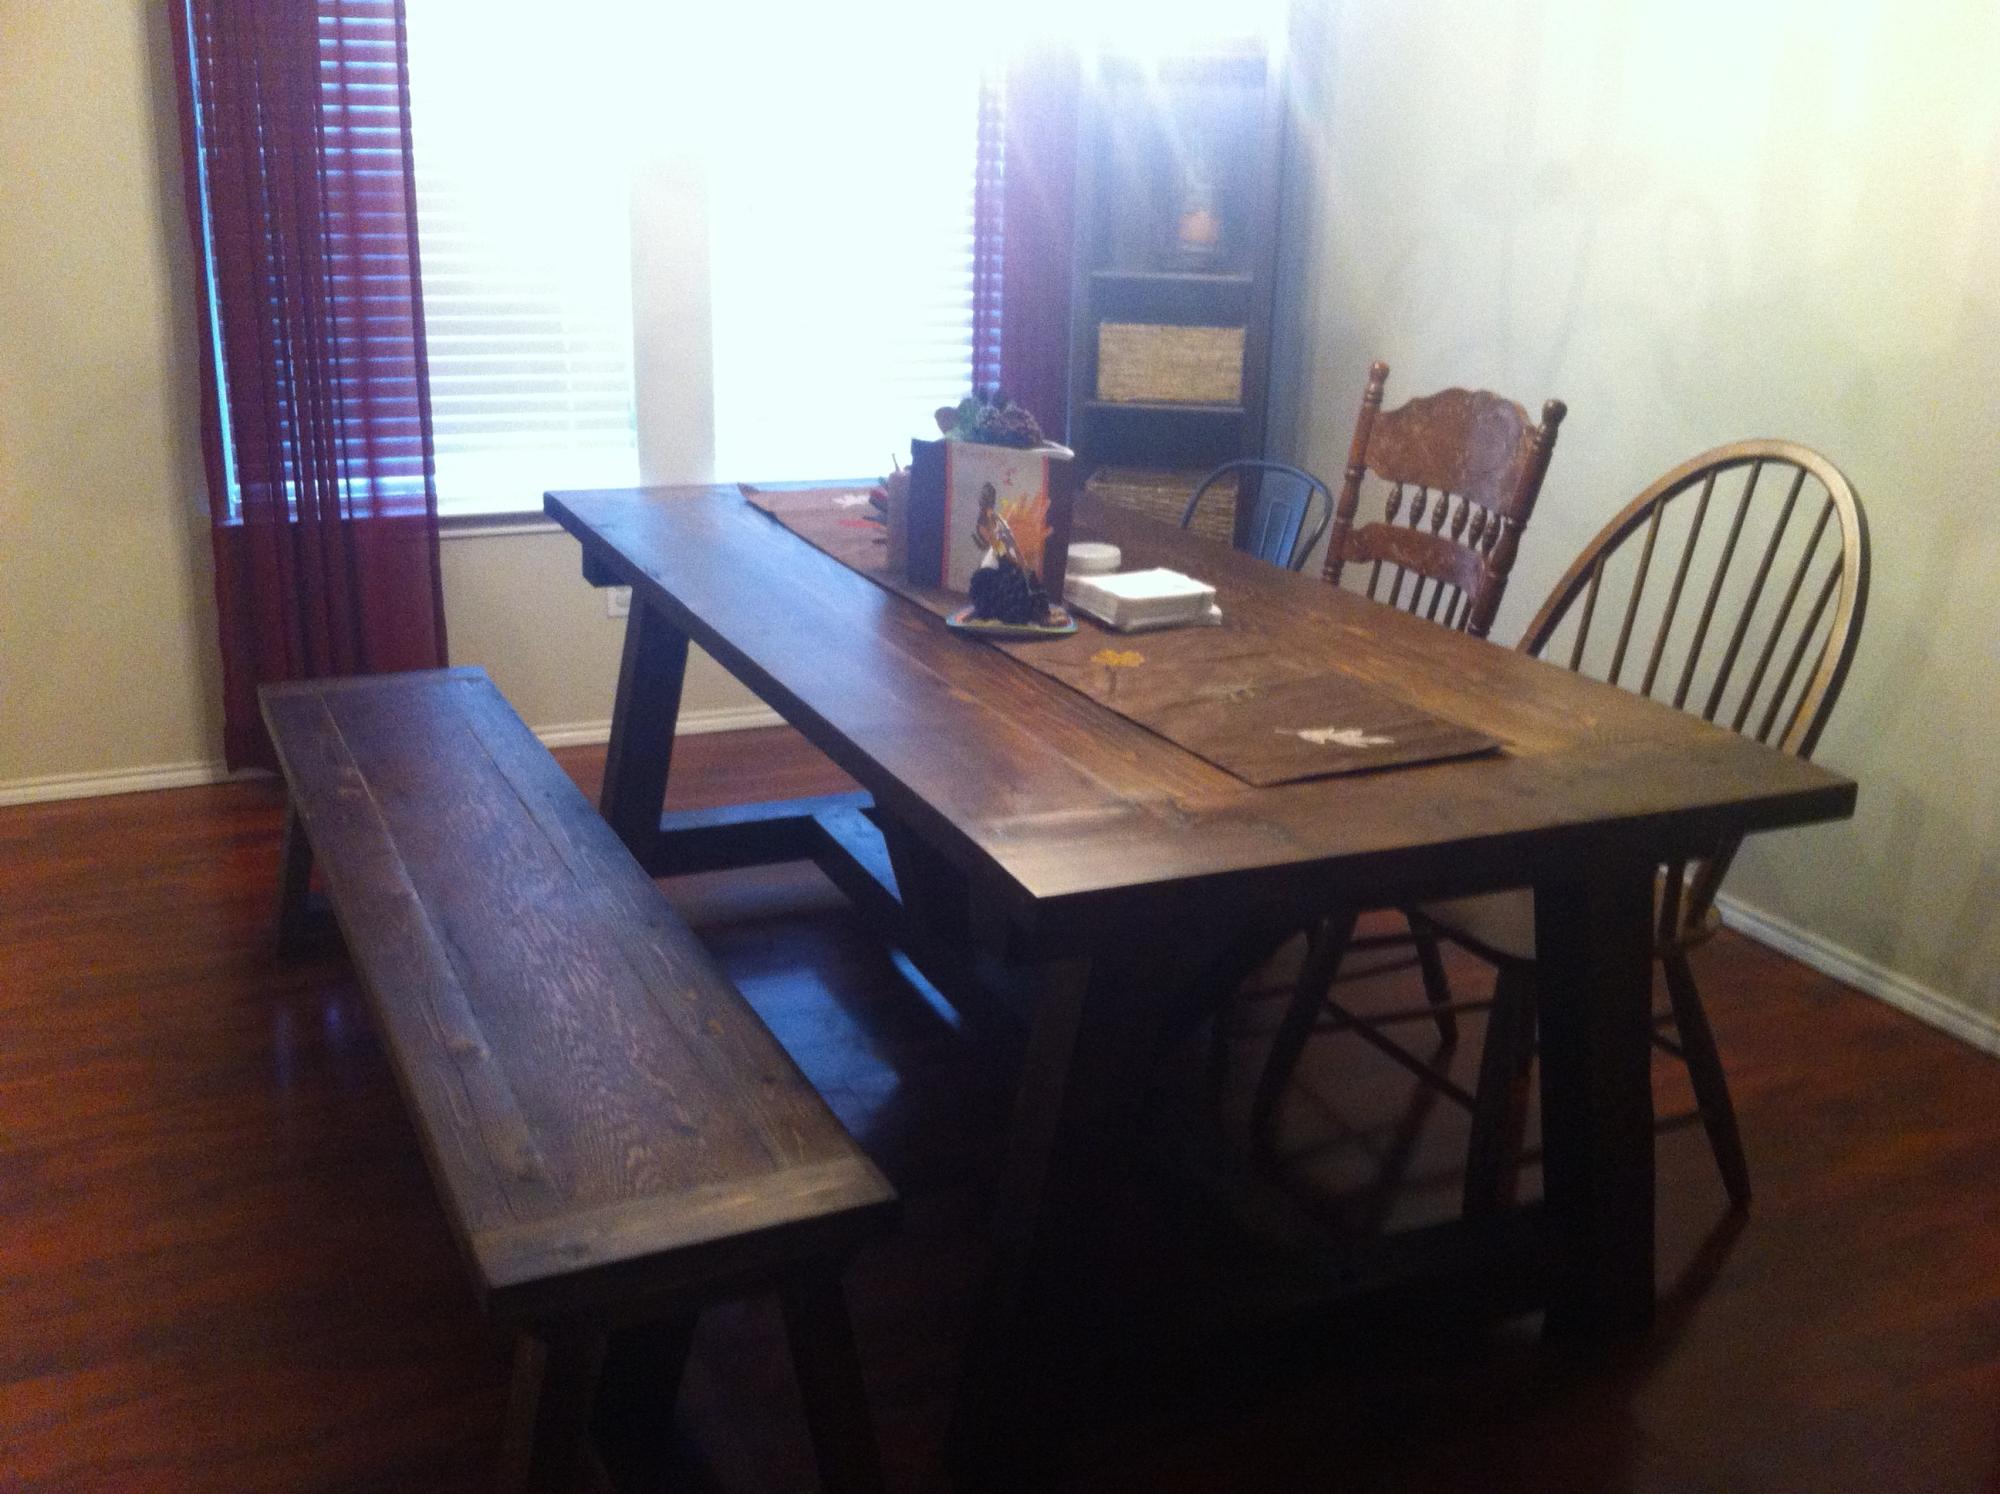
The plans provided for the table and bench were excellent. I also had help from people in the local Lowes lumber department who talked me in to using cedar. They also recommended using lag screws where possible so (for the table) I ended up using lag screws in some places where the pocket screws were recommended.
Built from Plan(s)
Estimated Time Investment
Week Long Project (20 Hours or More)
Recommended Skill Level
Beginner
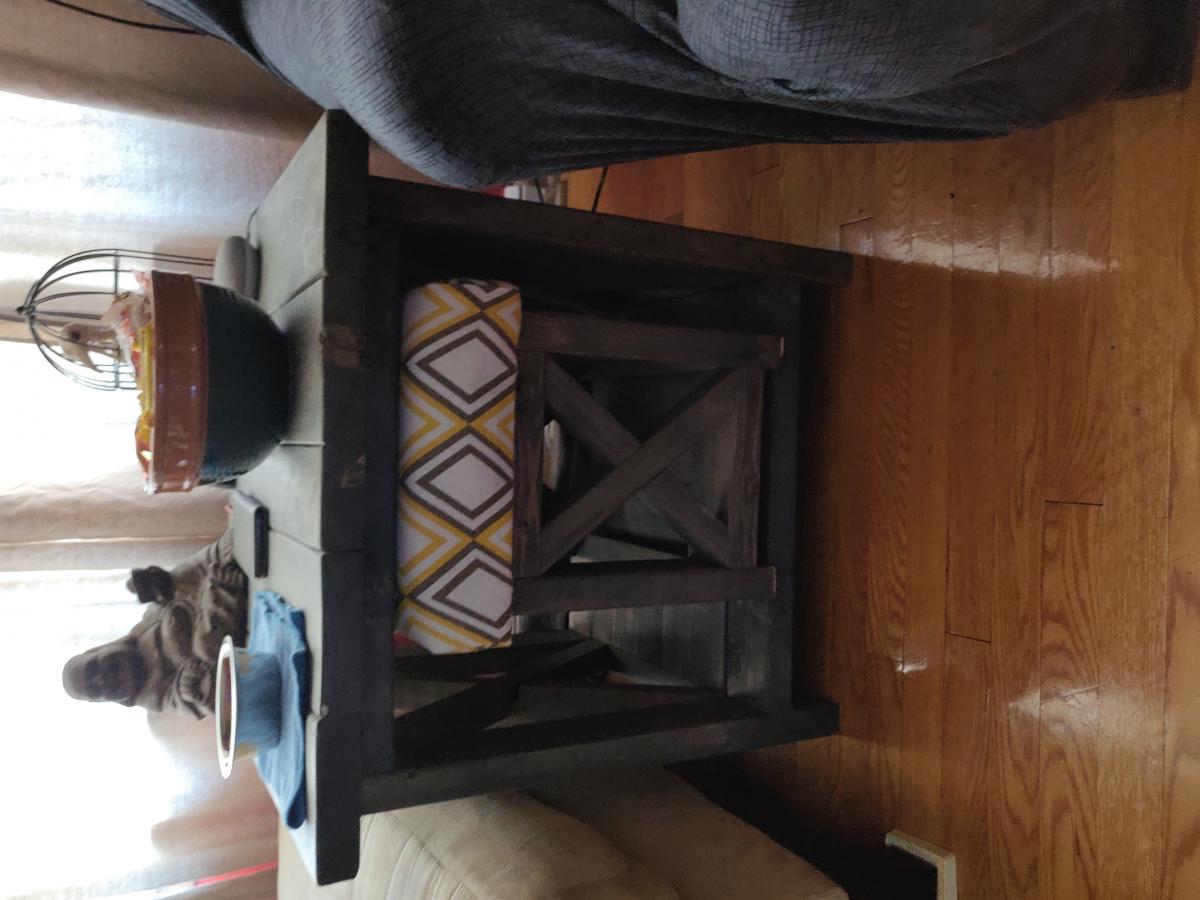
Footstool
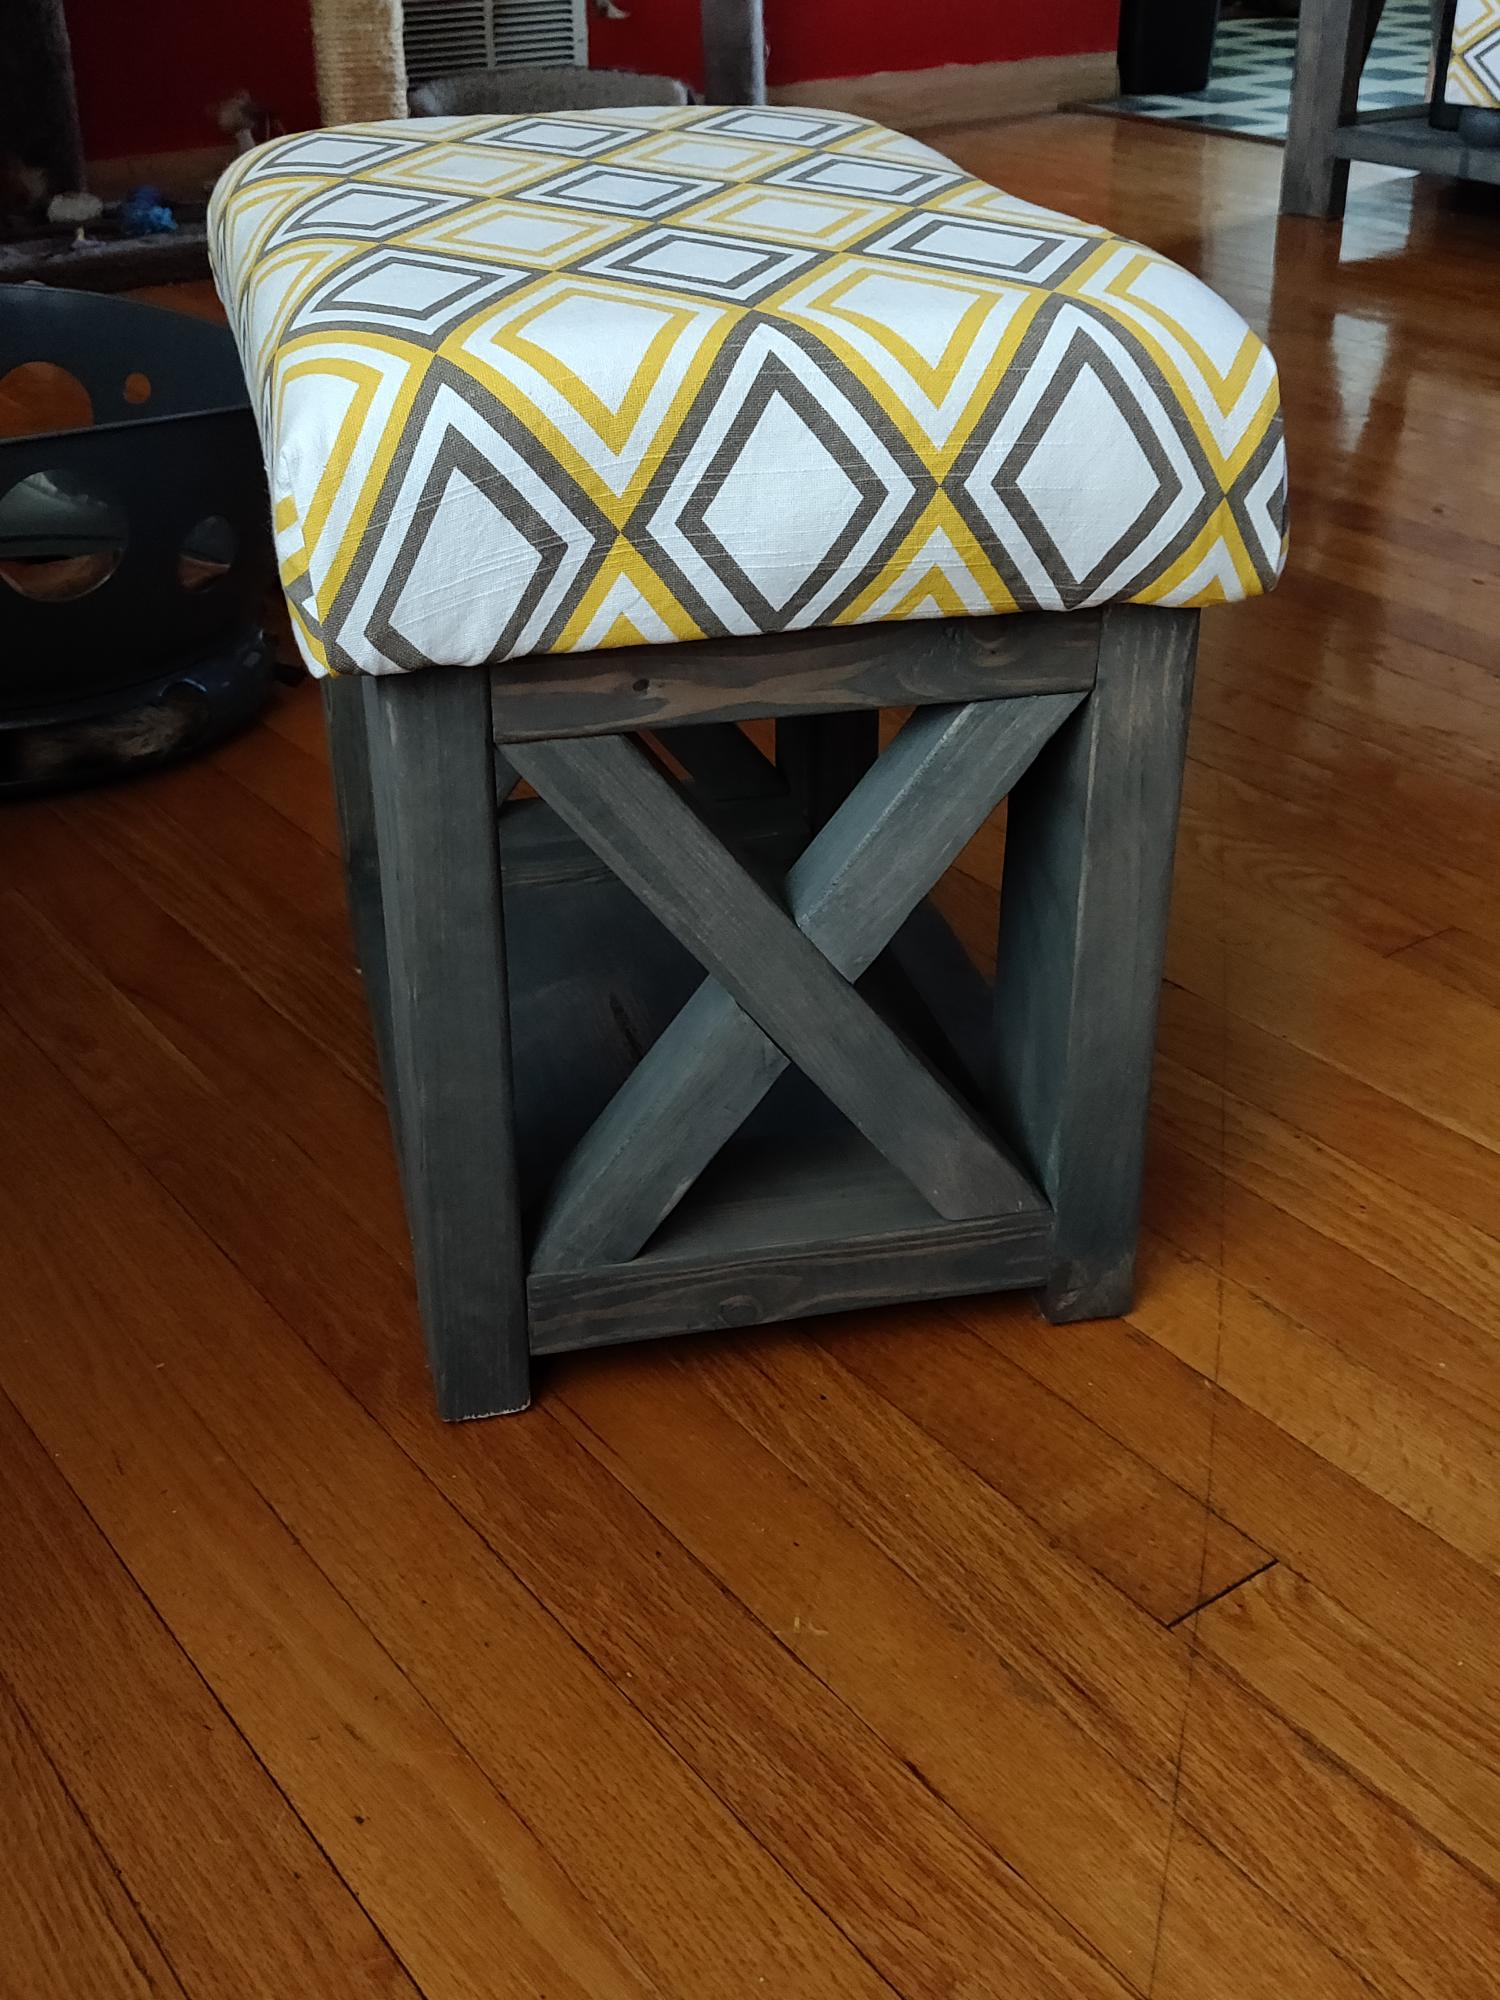
Made a footstool by modifying the rustic X end table plans. I used all scrap wood, foam, and fabric from my various stashes so this was free for me to make. Also, on all of my x tables, I use a dado blade so the exes are intact and not cut and screwed.
Built from Plan(s)
Estimated Cost
$0
Estimated Time Investment
Afternoon Project (3-6 Hours)
Finish Used
Charcoal grey stain
Comments
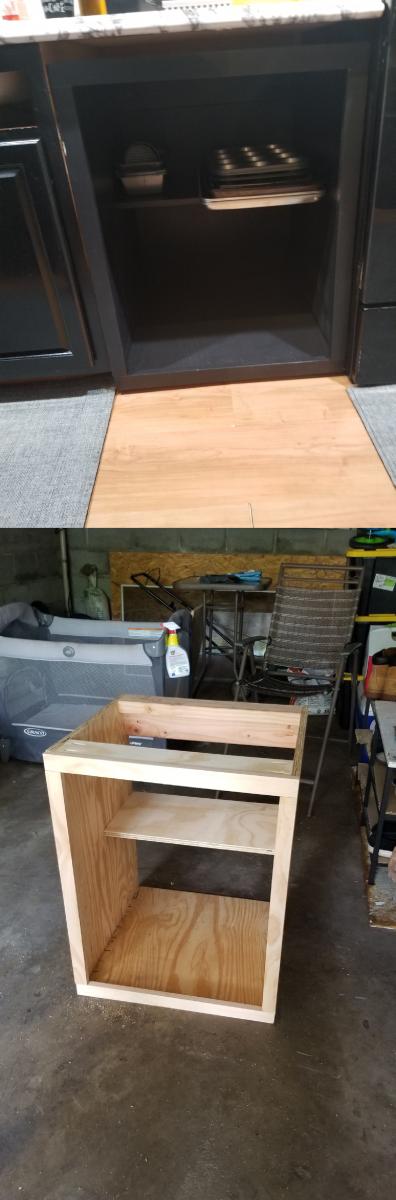
Enclosed Blackstone Storage
I bought a new Blackstone griddle earlier this summer and this was the perfect stand. The gray vinyl is the liner they put in when installing a new bathtub. I need a few pickets to do the final finish but the best part of this stand is it has been outside and survived hurricane Helene and Milton and did not move a inch. Well designed and built : ) - David, Tampa bay area, Florida
Built from Plan(s)
Chalkboard Mail Holder
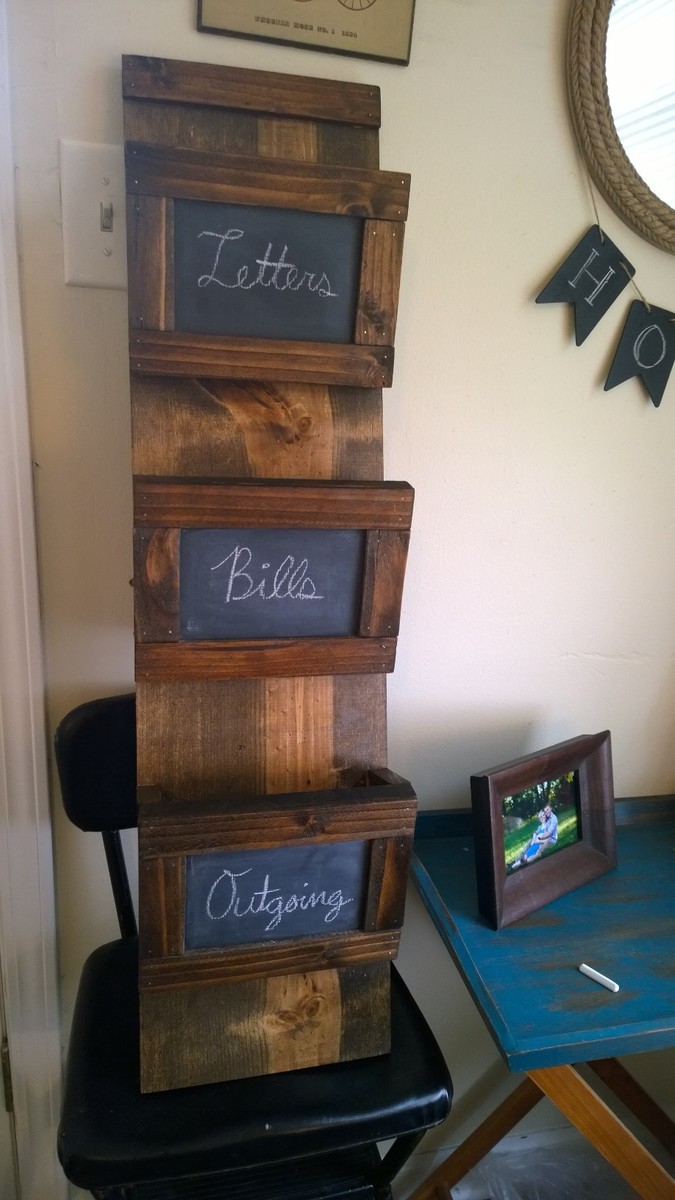
Built using the Wood Mail Holder w/ Key Hooks plan. Primed and painted the slot fronts with chalkboard paint before attaching. Stained the front lath pieces (frames around the chalkboard) before attaching. Stained with Minwax Dark Walnut. Hooks from Lowe's.
Built from Plan(s)
Estimated Cost
$17.37
Estimated Time Investment
Afternoon Project (3-6 Hours)
Finish Used
Minwax Dark Walnut, Chalkboard Paint
Recommended Skill Level
Beginner
Comments

Wed, 09/24/2014 - 10:13
Oops, just realized I had not
Oops, just realized I had not yet attached the hooks in this photo!
Pallet Chairs
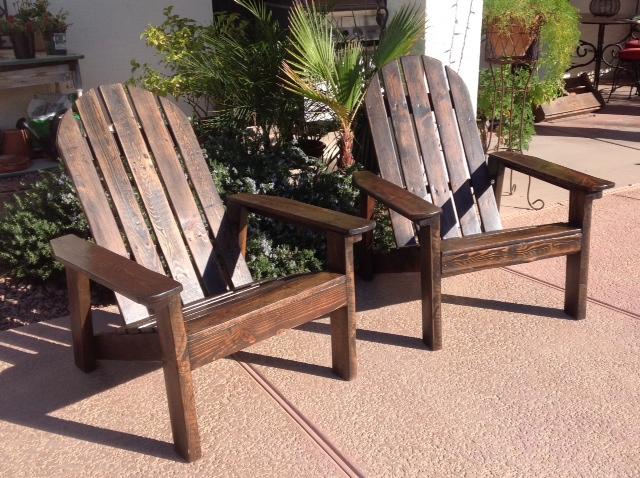
Adirondack chairs made from reclaimed pallets.
Built from Plan(s)
Estimated Cost
$20
Estimated Time Investment
Weekend Project (10-20 Hours)
Finish Used
Disassemble pallets and choose your best boards, cut to size per plan and rough sand. Assemble per plan. Stain with minwax ebony, sand again, stain with minwax chestnut. Finish 2 coats exterior poly urethane satin finish.
Recommended Skill Level
Intermediate
Comments
Mon, 01/09/2017 - 19:28
These plans were great! Have
These plans were great! Have these as a Christmas gift....they loved it!
Little bookshelf
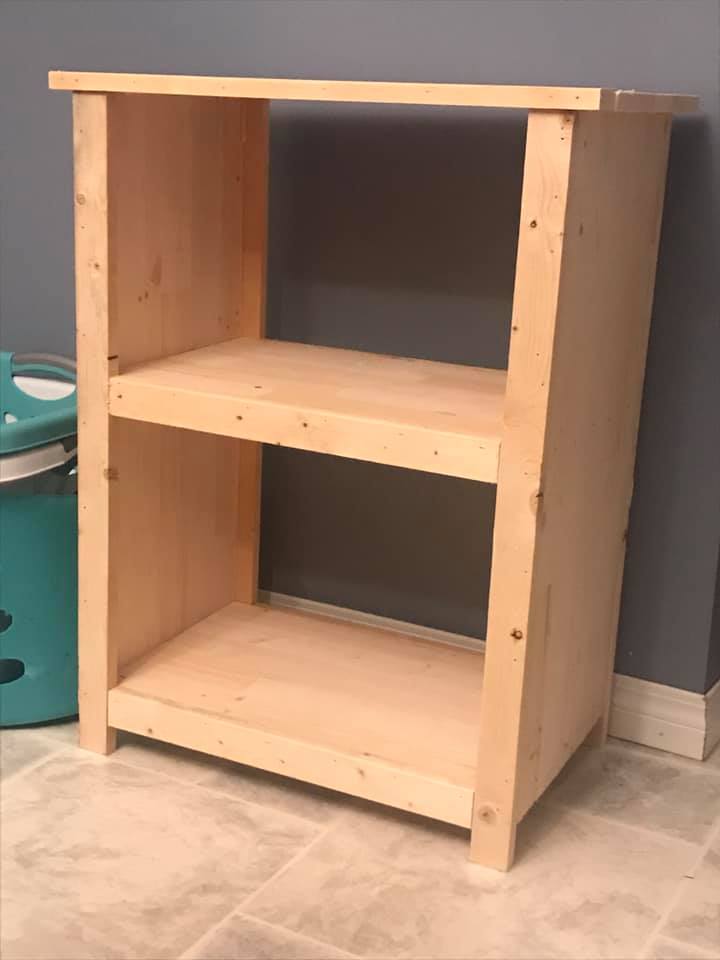
Made this little shelf upon special request from my mother for a cookbook shelf. Perfect size. Ended up staining it, but in the photo it's unfinished. Easy shelf!
Built from Plan(s)
Estimated Cost
$30
Finish Used
unfinished
Recommended Skill Level
Beginner
Sliding Laundry Hampers
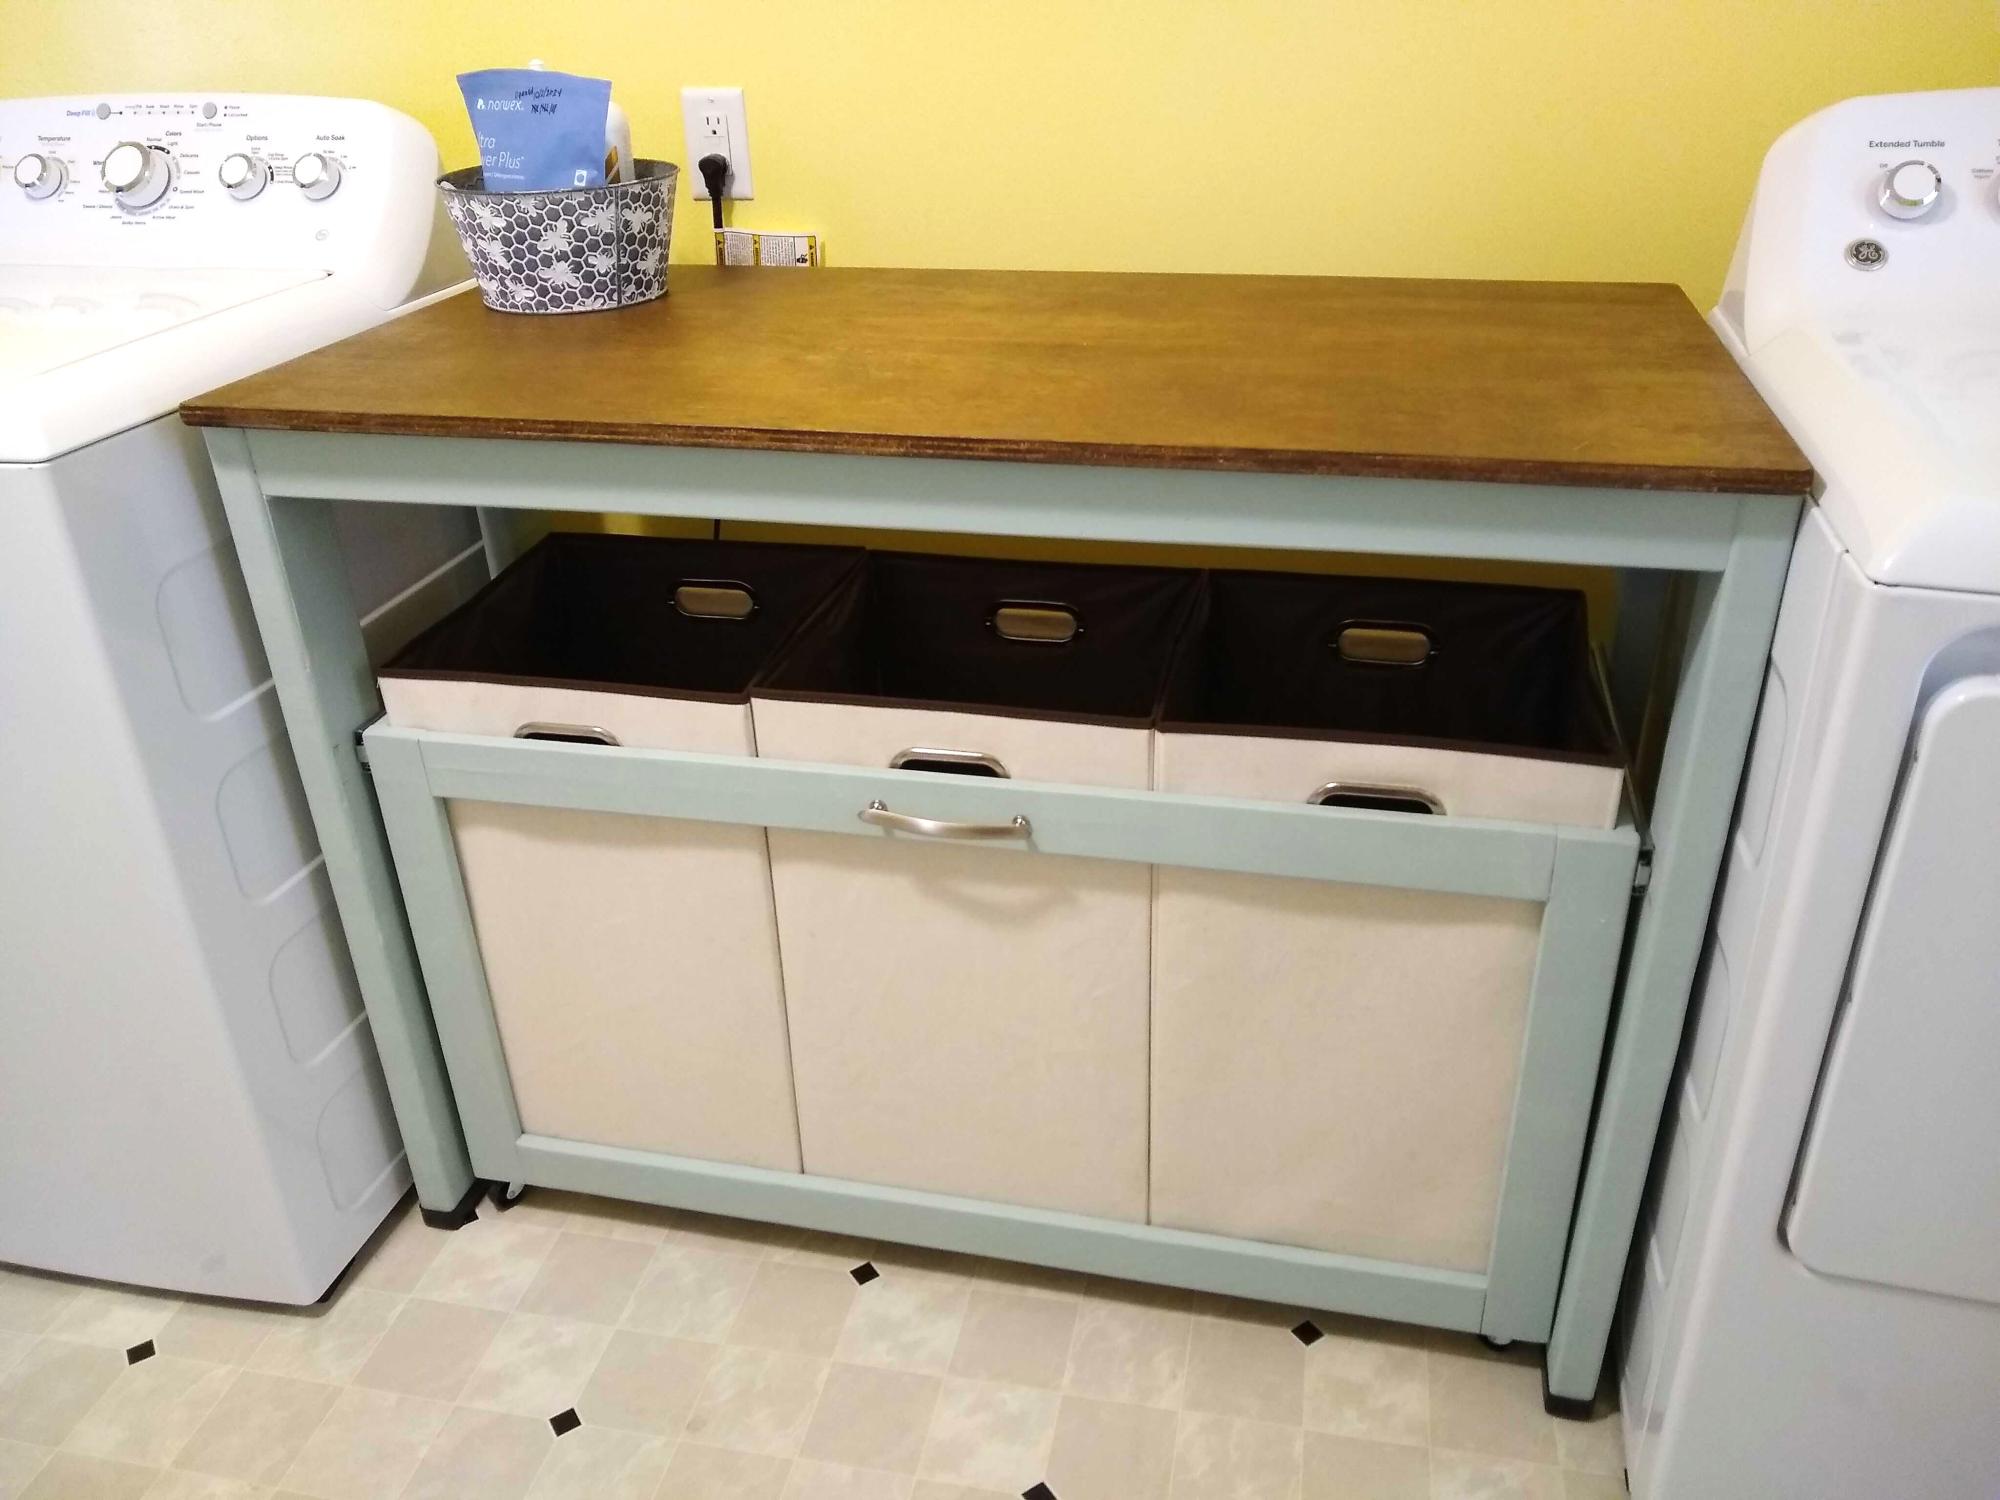
I've had my eye on the Laundry Station for years. After making a few other projects, I finally felt comfortable enough with my skills to go for it. I purchased a 2'x4' project board for the top and decided not to cut it down to fit. I left a small (~1") lip in front and let the rest hang off the back so I have a larger work area. I used a paint sample (Wythe Blue) I had laying around to paint the frame of the table and front of the sorter drawer. I used a Minwax wood finish penetrating stain (Honey) for the top, and then sealed it with a clear satin finish poly spray. - Sarah H

Built from Plan(s)
My Ayla Cabinet

I wanted to make a China Cabinet and I couldn't find a plan for one on Ana's so I used the Ayla Cabinet plan and I just made it bigger. This cabinet is 46 inches wide x 17 1/2 inches deep x 64 inches tall. I also added 4 glass doors and one large drawer in the middle. I added the bottom shelf and baskets because I felt the cabinet legs would be more secure with this option. The reason there are 4 cabinet drawers is because I added a middle shelf and a center support. I did not take into consideration the doors being inset when I added the middle support so I had to make 4 doors so that they would be inset. I also added crown molding to the top of the project. I'm not sure you can see but I also carved a Fleur de lis and scrolls onto the drawer.
This took me about 2 weeks to complete....and a lot of tears but it is complete and I am very pleased.


Estimated Cost
300.00
Finish Used
Robin Egg blue with dark ebony to antique.
Recommended Skill Level
Advanced
Comments

In reply to wow by Patrick Hosey (not verified)
Sun, 12/23/2012 - 04:42
Spindle legs
I got them at home depot. they are stair spindles, very cheap 5.00 each. I cut each one at a pleasing location on the spindle and the length I wanted then I used a double ended screw and screwed them into the leg and to the cabinet, I also used glue to make sure they were secure. I decided the legs were not safe without the bottom shelf because this piece is so large and heavy, so this is the reason there is a bottom shelf.
Sun, 01/10/2021 - 21:03
Janettx ... you did a GREAT…
Janettx ... you did a GREAT job!! I've got this project planned for the spring . We're having our annual church auction and I know it will sell high! I was considering buying furniture anchors since it will be for a child and I want to make sure it won't tip over. Did you have any issues with the project being top heavy??
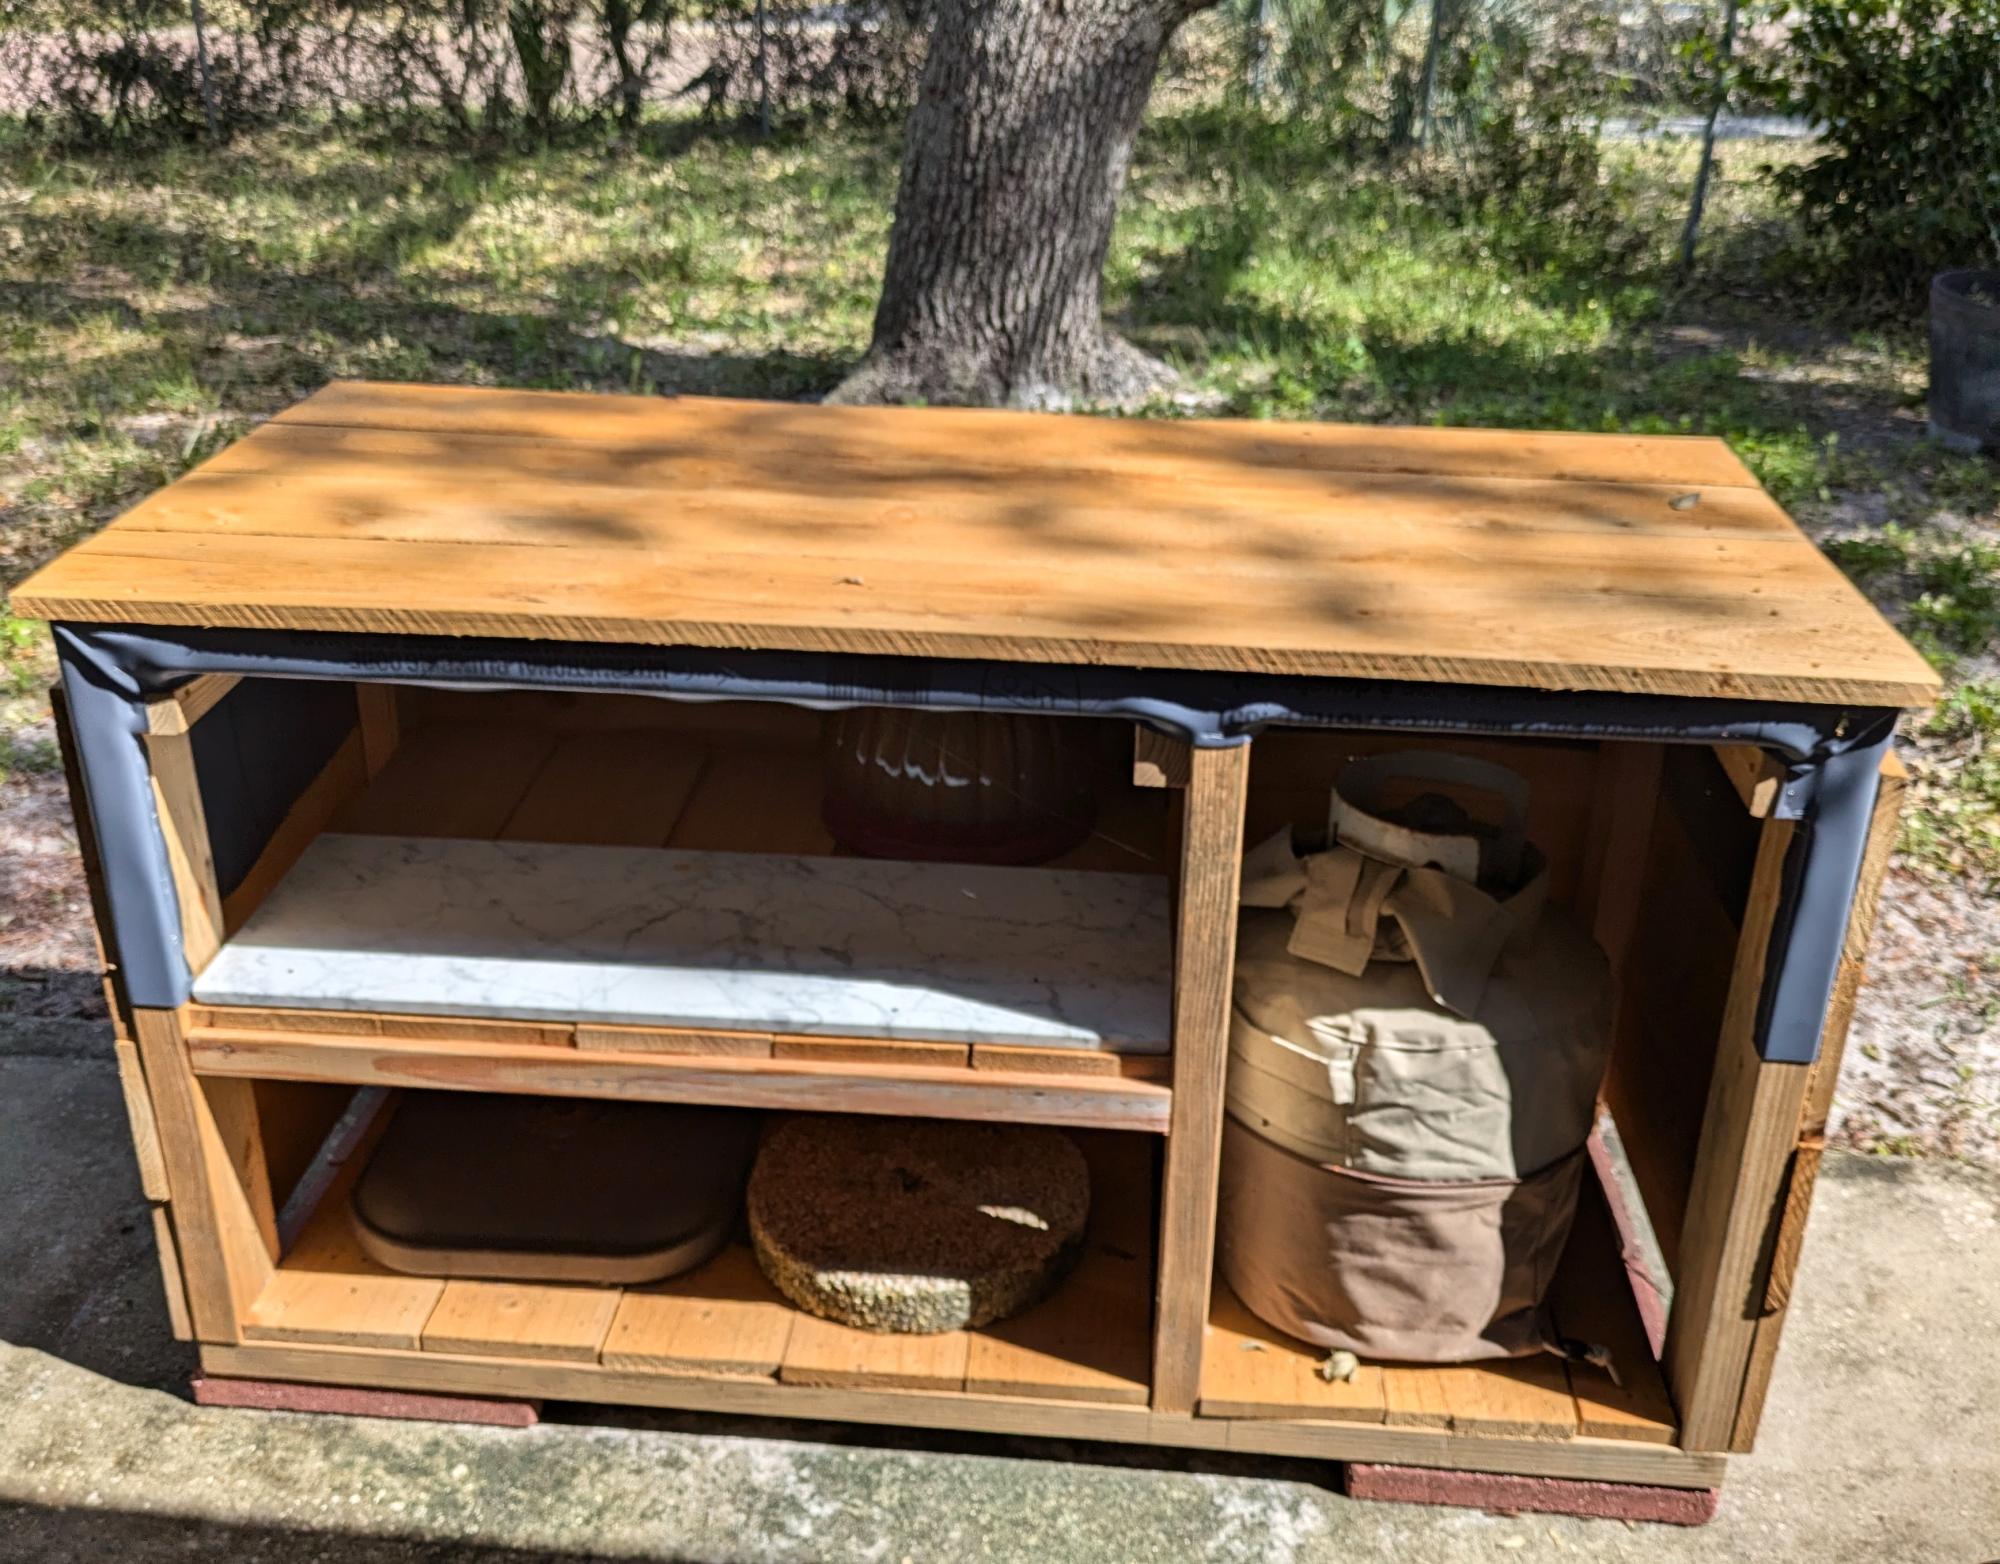
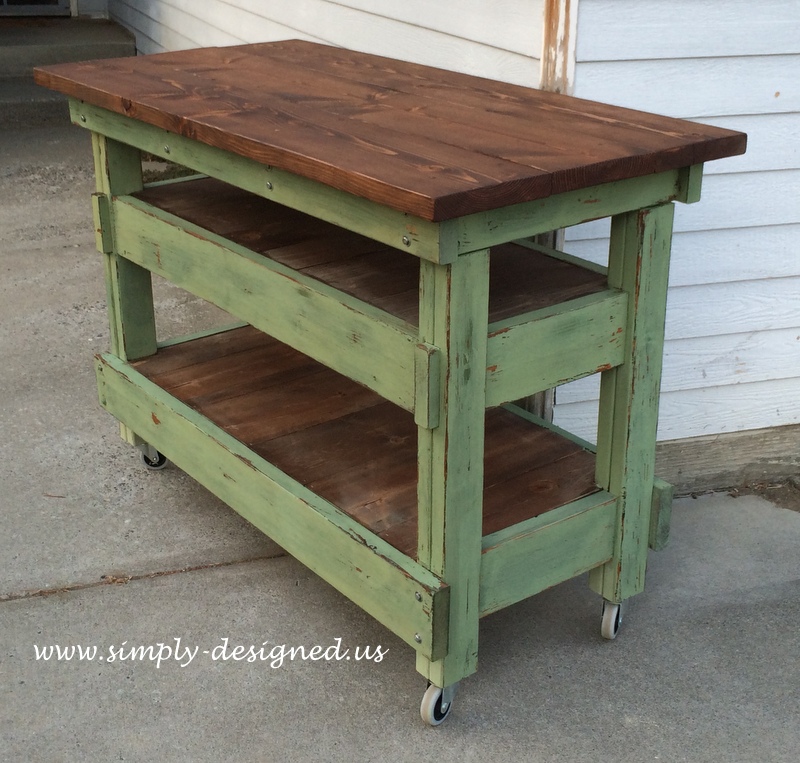
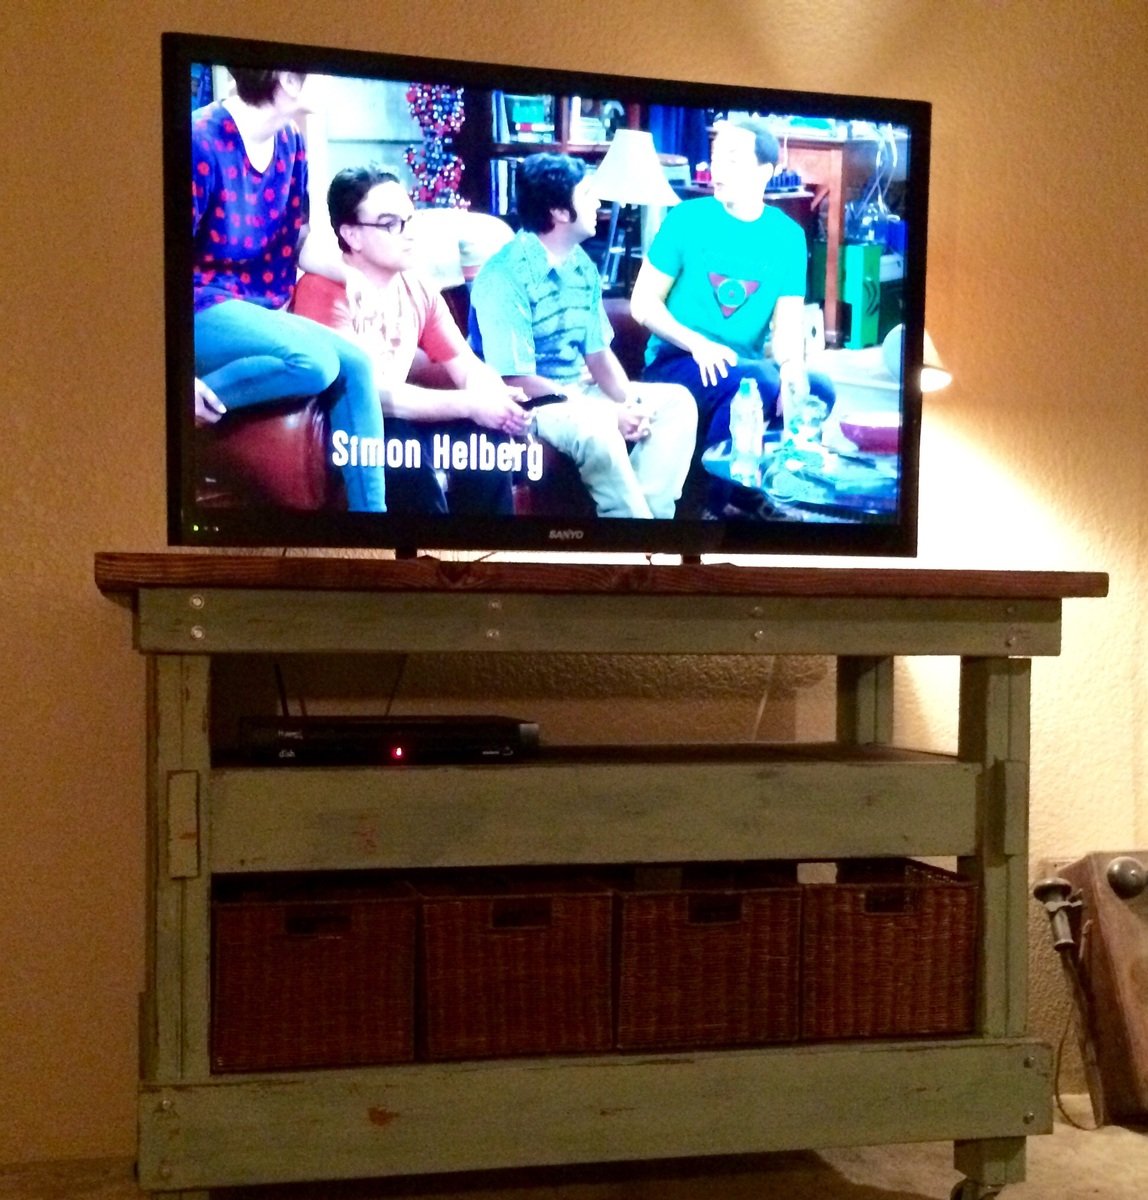
Workbench Console
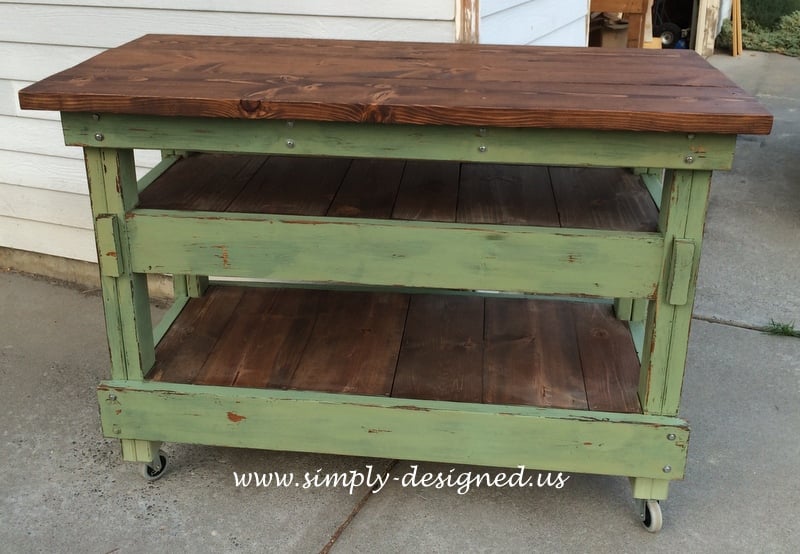
Building this was pretty fun. I've never done the type of carpentry where you would notch out a piece of wood before. I've seen it done, but never done it myself. I altered the size of this build and omitted the center divider piece as I just felt that with a 5' length, it was un-necessary and obstructed the view. Plus I wanted to use baskets underneath to have hidden storage. I also added a shelf for the TV components.
Built from Plan(s)
Estimated Cost
I used a lot of scrap material especially for the shelving as with it, it was more expensive than I wanted to spend. So, I'm estimating that it was about $60 for what I spent.
Estimated Time Investment
Weekend Project (10-20 Hours)
Finish Used
I used a Minwax mixture of stains. I used the weathered grey with chestnut. Then I covered it with a mixture of Lucketts green, Milk Paint. Used a little boxwood to have the appearance of many coats of paint and then another coat of Luckett's green. Finished off with a coat of hemp oil.
Recommended Skill Level
Intermediate
Comments

Sun, 09/28/2014 - 12:04
Beautiful Project
Tracy! This is beautiful!!!! Thanks so much for posting and also on the tip about the plan issue. Much appreciated! Ana

In reply to Beautiful Project by Ana White
Mon, 09/29/2014 - 12:52
Thank you Ana! I always geek
Thank you Ana! I always geek out a little when you respond to my work. :-)
And thank you for posting the plans! I knew this was going to be perfect for my living room cause it just fits who I am. Funny thing is now my mom wants this as a vanity in her master bath! Thanks again for all you do!
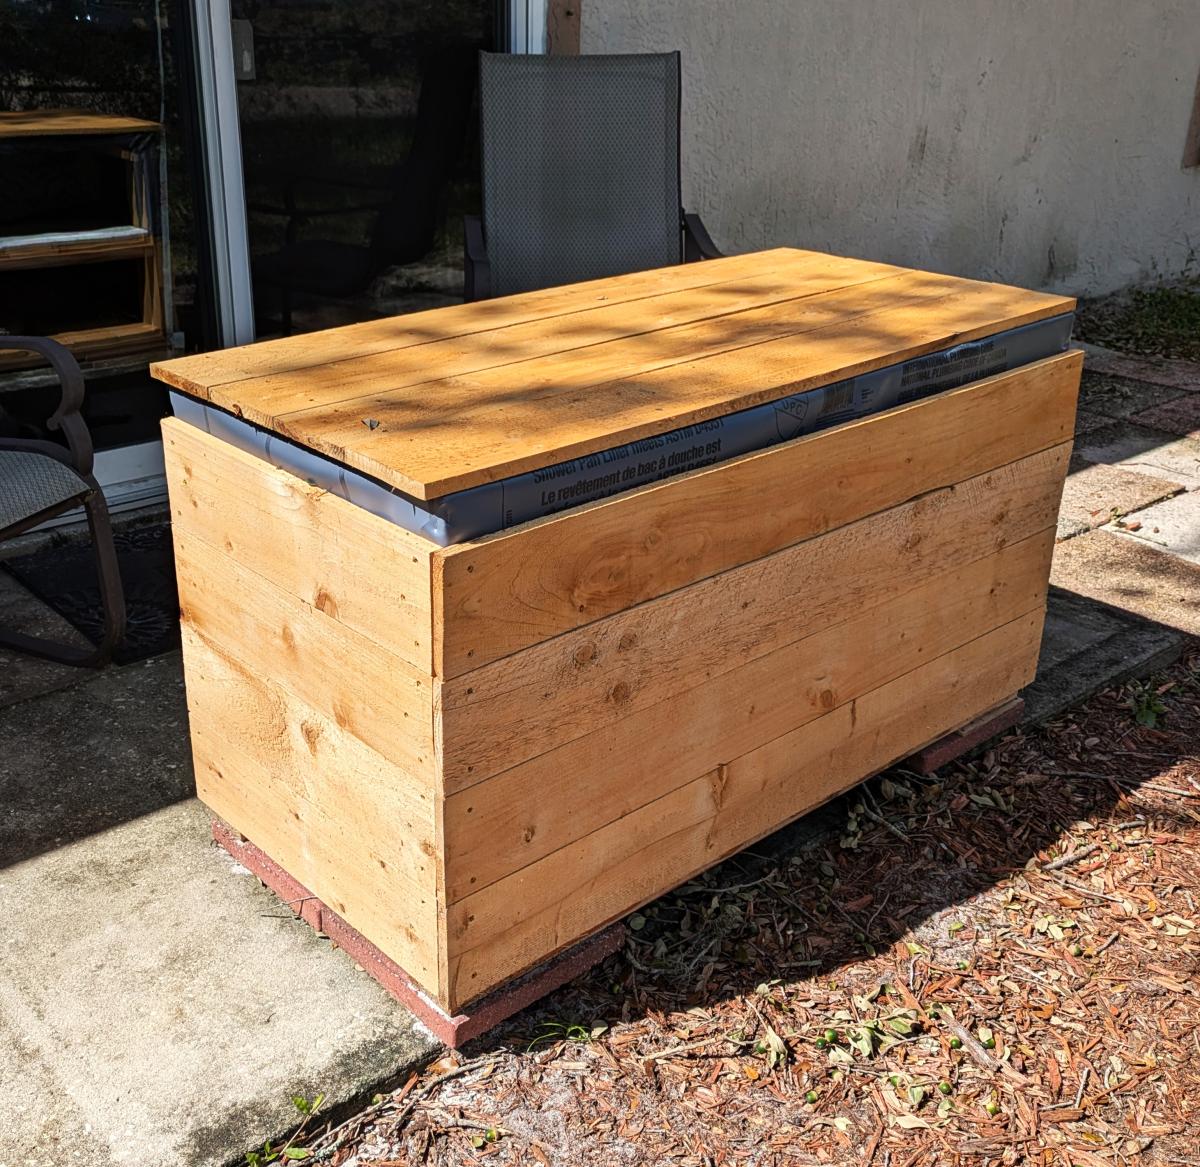
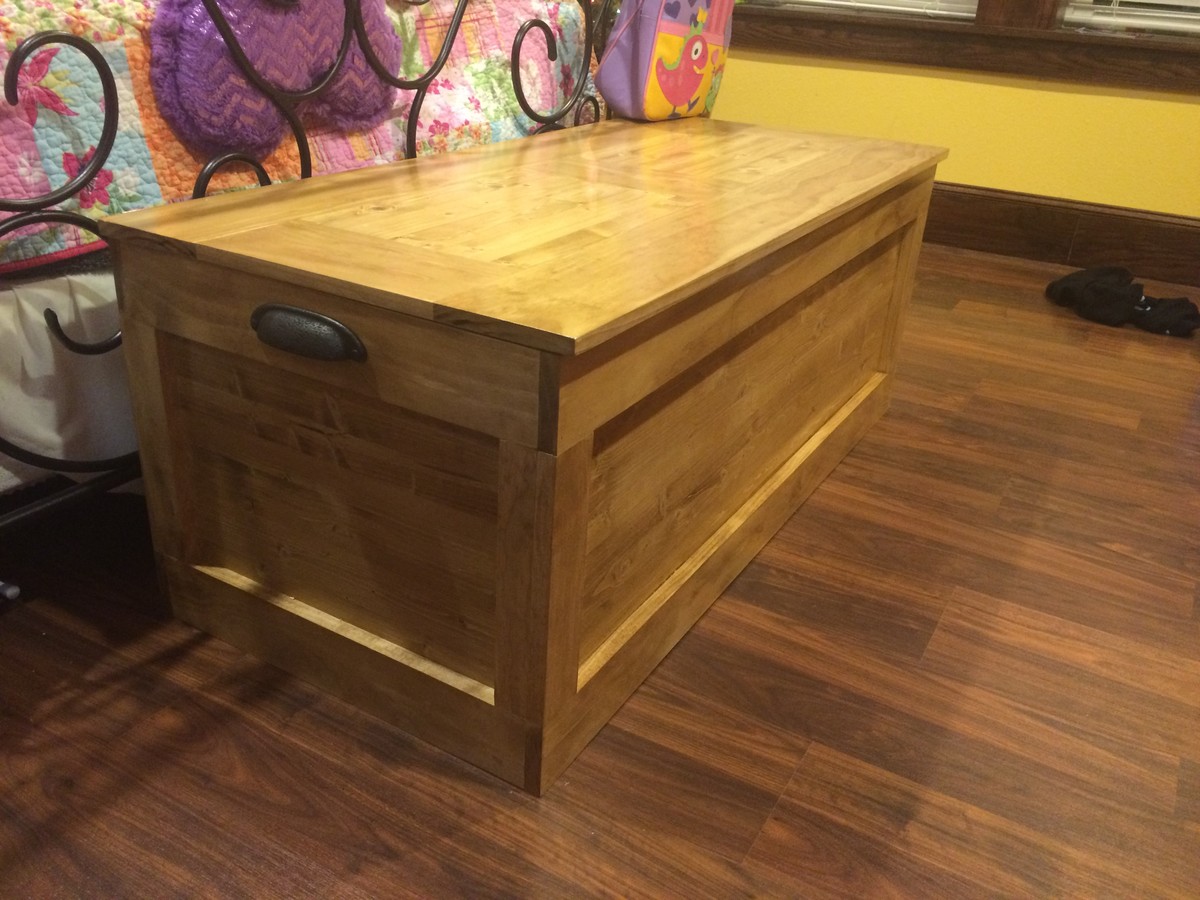
Becca Trunk slightly modified
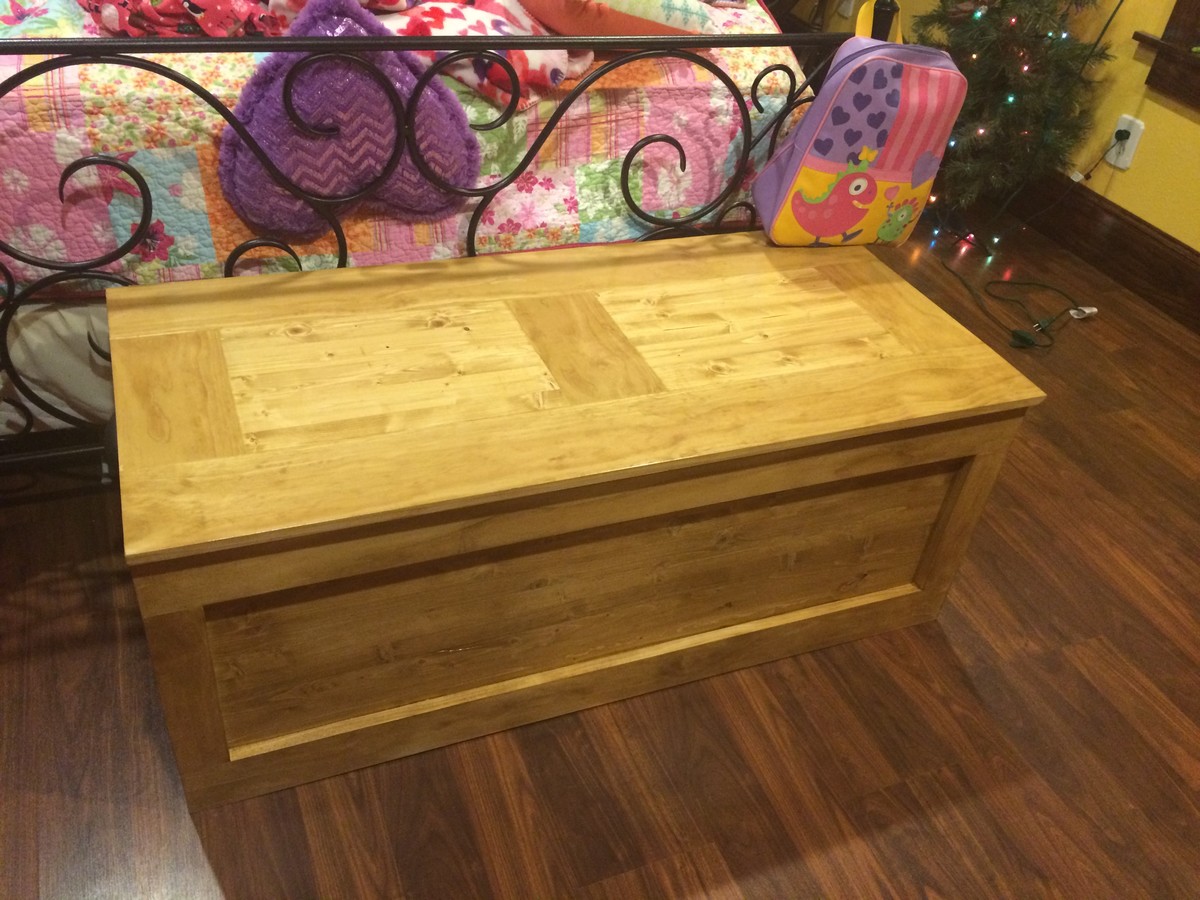
I made this Becca Trunk for my daughter for Christmas. I wanted it bigger so I made it 48" wide. I also lined it with cedar. It turned out pretty darn good!!
Built from Plan(s)
Finish Used
I believe it was a Golden Oak stain with a few coats of polyurethane over it.
Recommended Skill Level
Intermediate
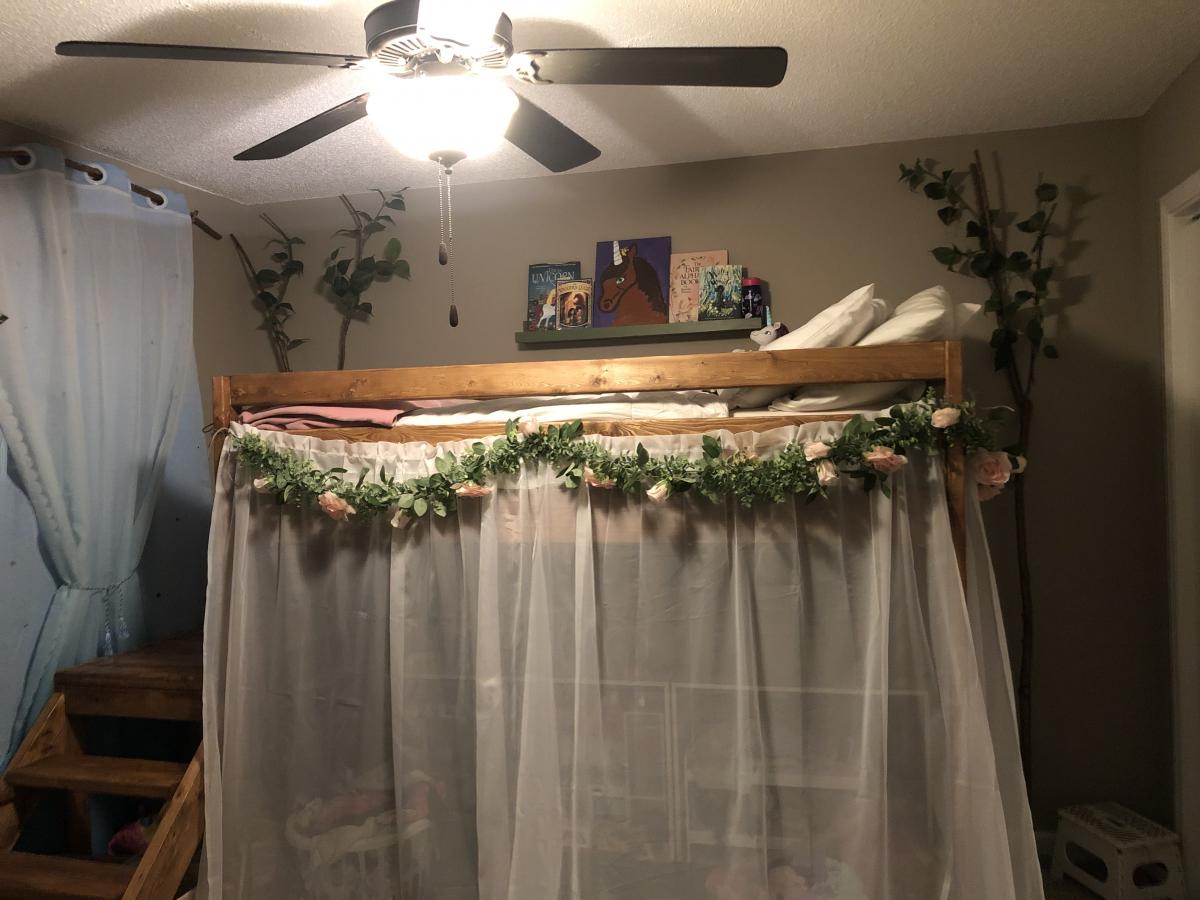
Junior loft camp bed
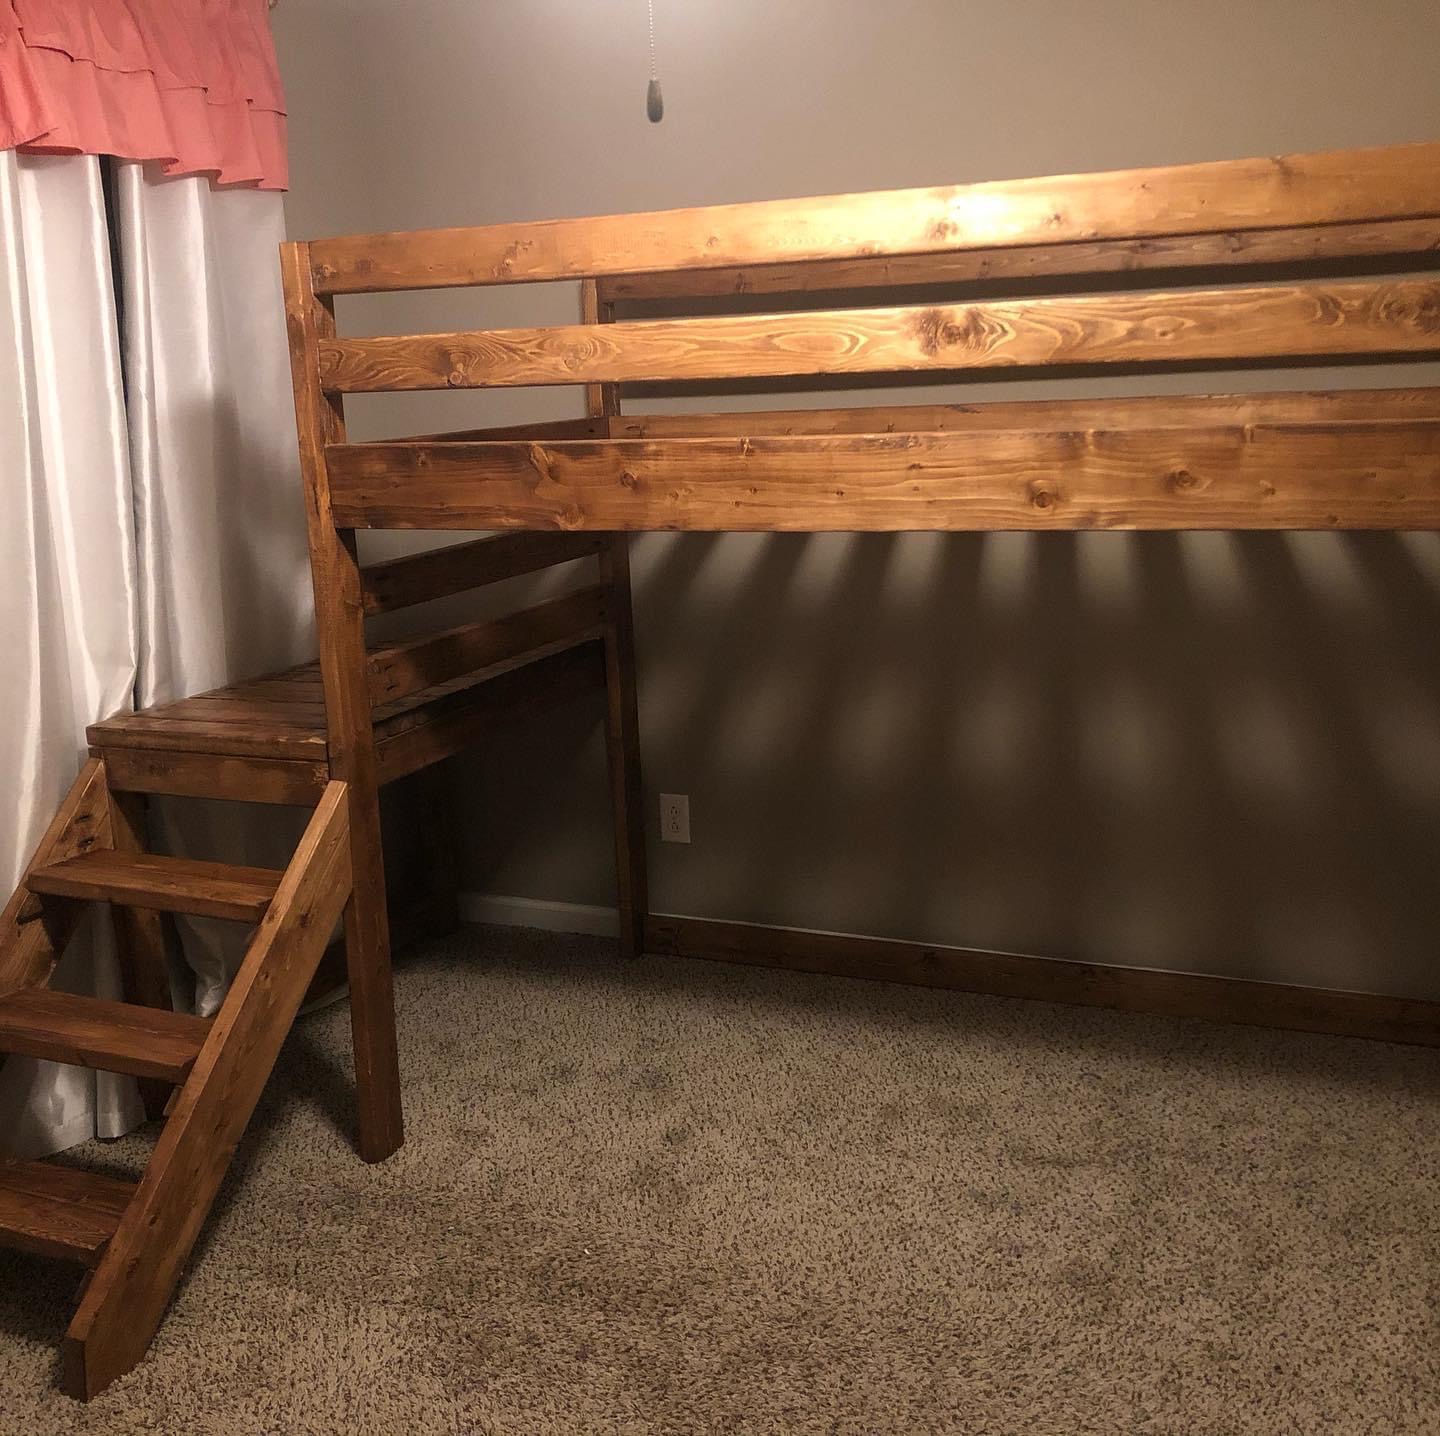
This was my first big build, previously I had only made the $10 ledges. It mostly went as expected! The hardest part, as many have said, is keeping the pieces still while drilling the pocket screws into place. The bed itself did not take much time to build, my time estimate is so high due to the finishing, and really it could’ve used a great deal more sanding and sealing. I was OK with a somewhat rough/rustic finish because it is for my daughter’s “forest” themed room.
I considered using bed hanging hardware, but all I could find used hooks or something similar, which does not seem wise for a bunk or loft bed, since someone could be underneath and accidentally lift it out of place! In the end I just use pocket hole screws to attach everything like the plans dictate.
Built from Plan(s)
Estimated Cost
about $120 for lumber and screws, maybe $30 more for stain and poly
Estimated Time Investment
Weekend Project (10-20 Hours)
Finish Used
Minwax Early American
Recommended Skill Level
Beginner
Comments
Custom Console Table
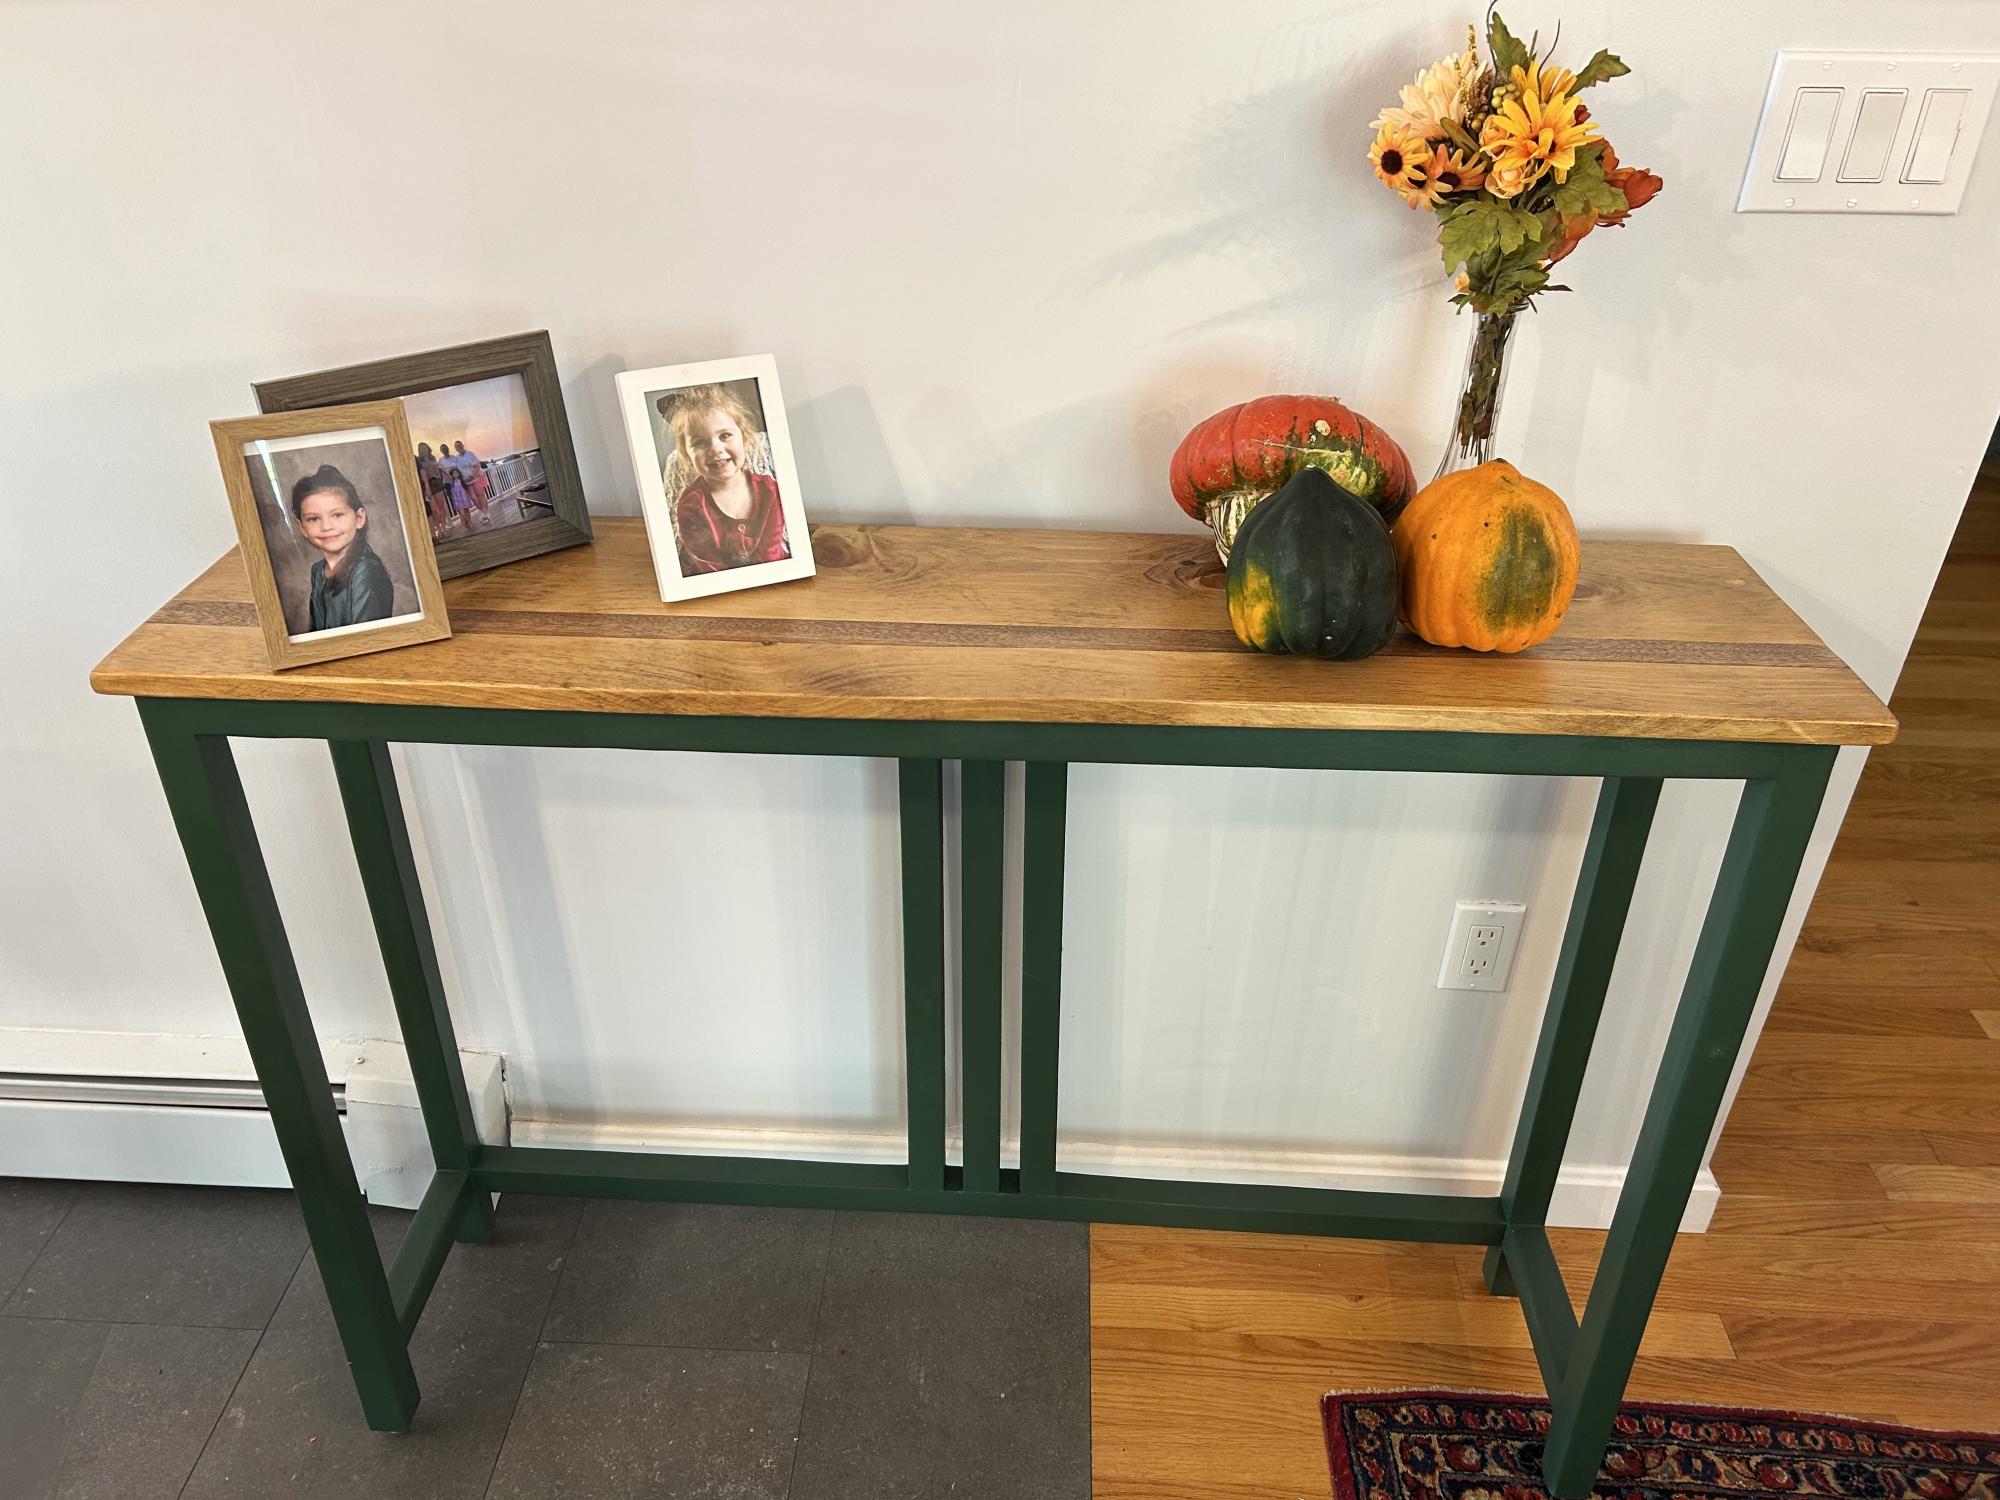
Based on your 2x4 console table. I cut 2x4s in half to make the legs and frame. And instead of putting the two slats on an angle I placed them all vertical and moved them to the back. - Larry Donnelly
Built from Plan(s)
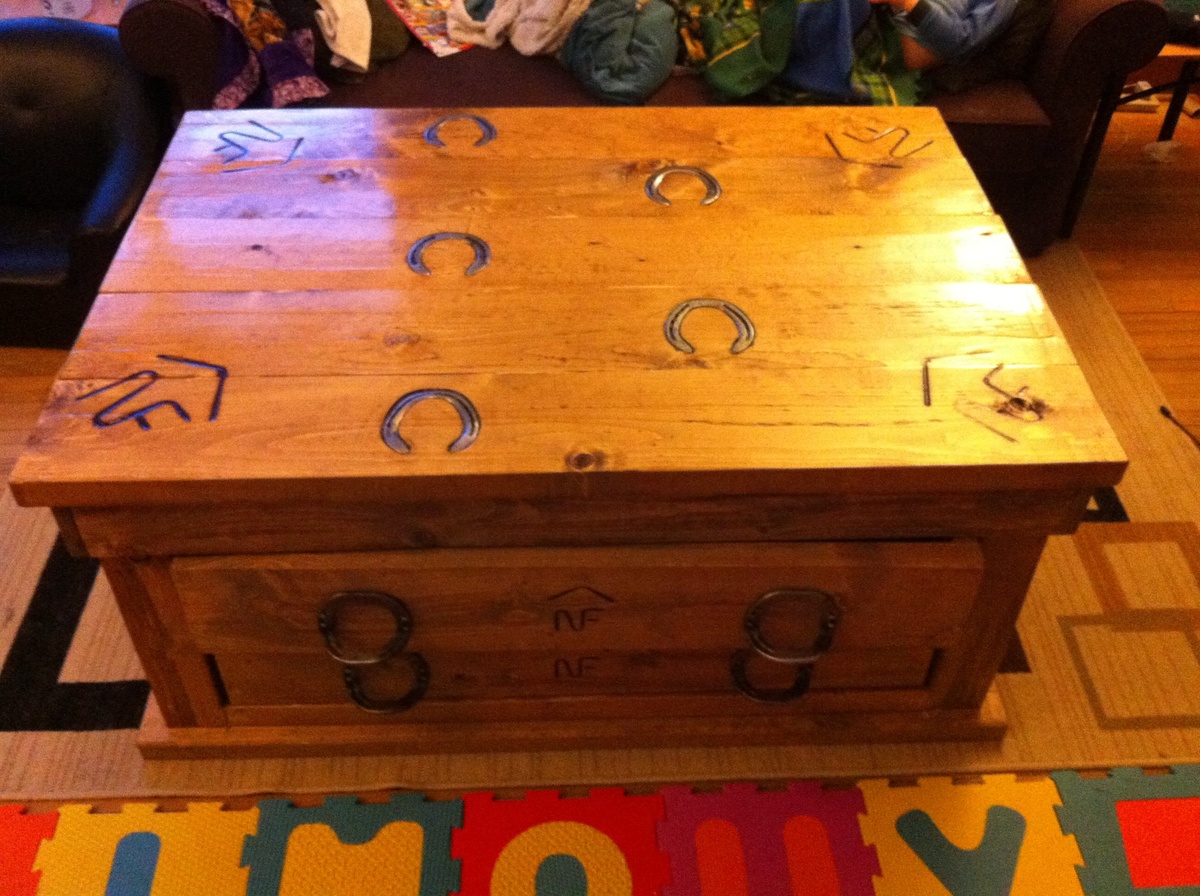
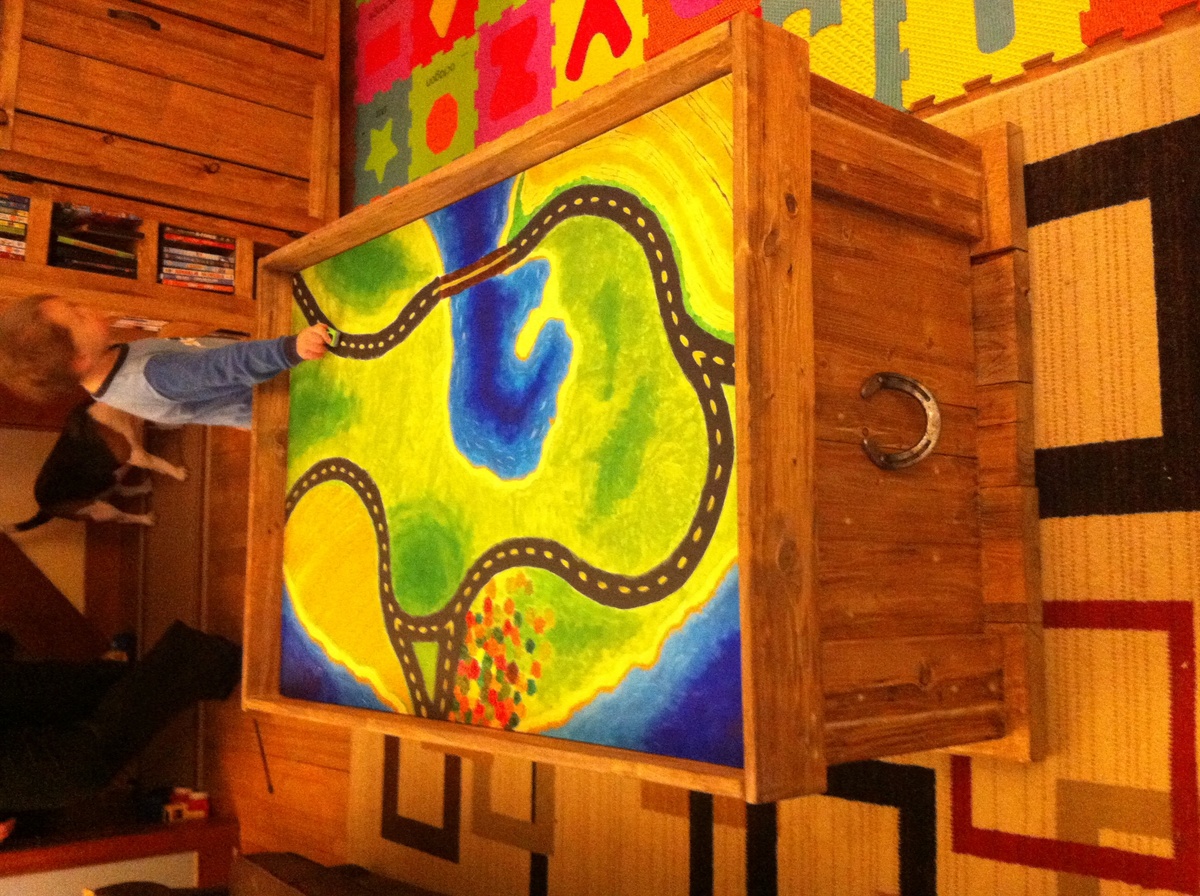
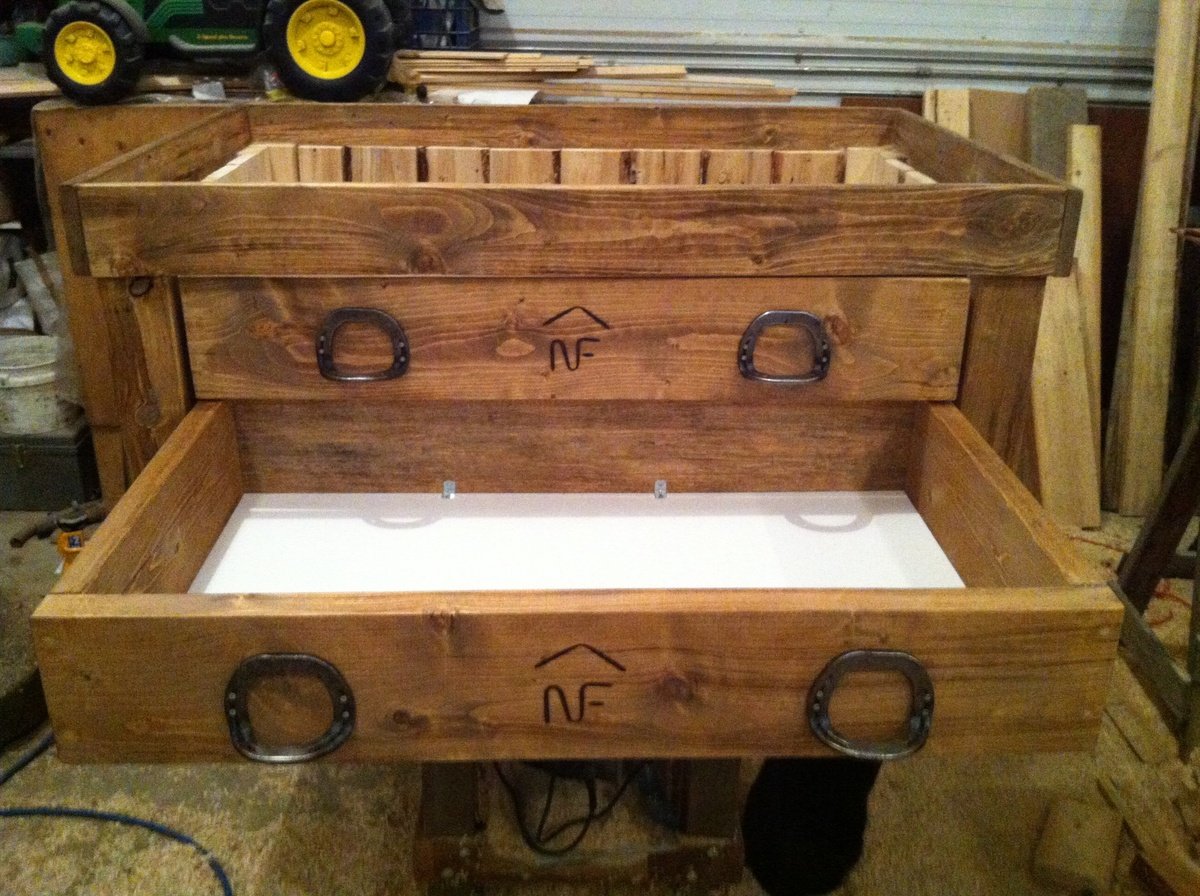
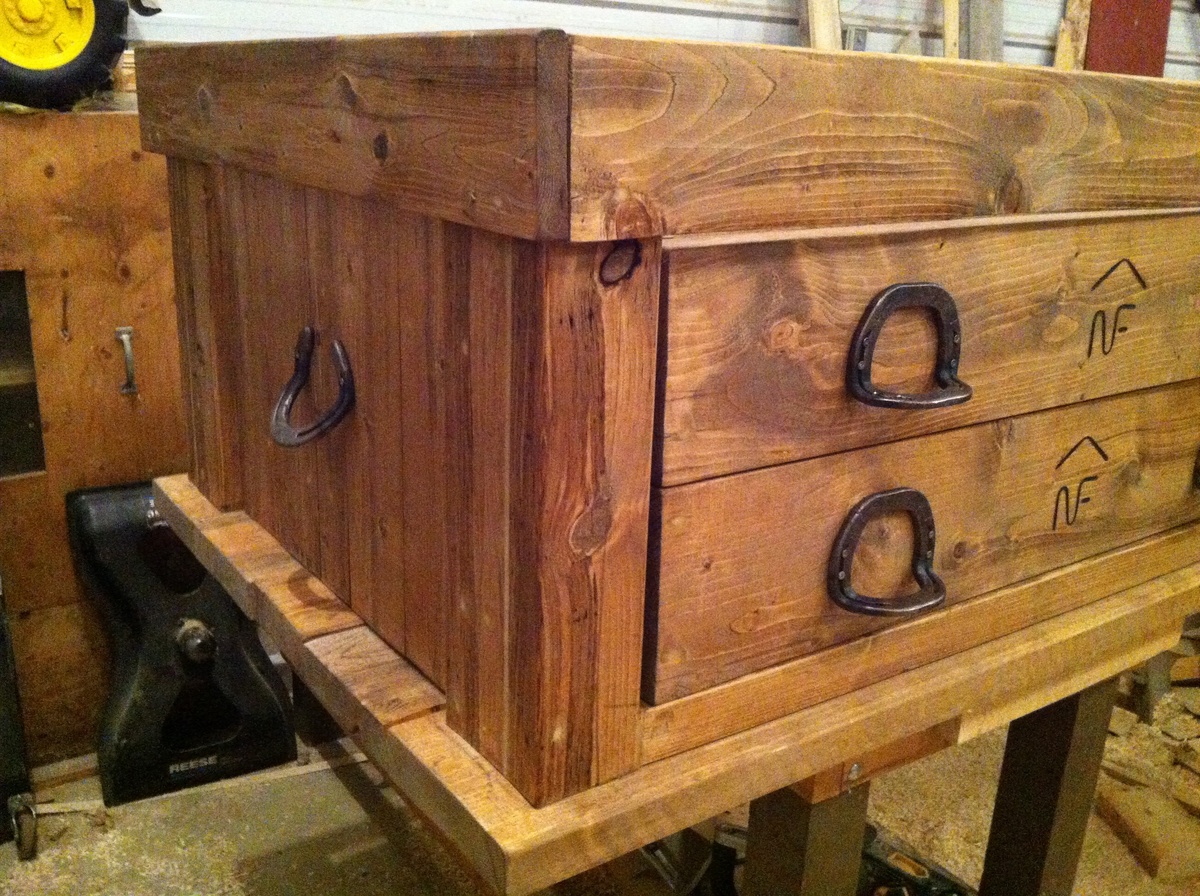
Western Train Table
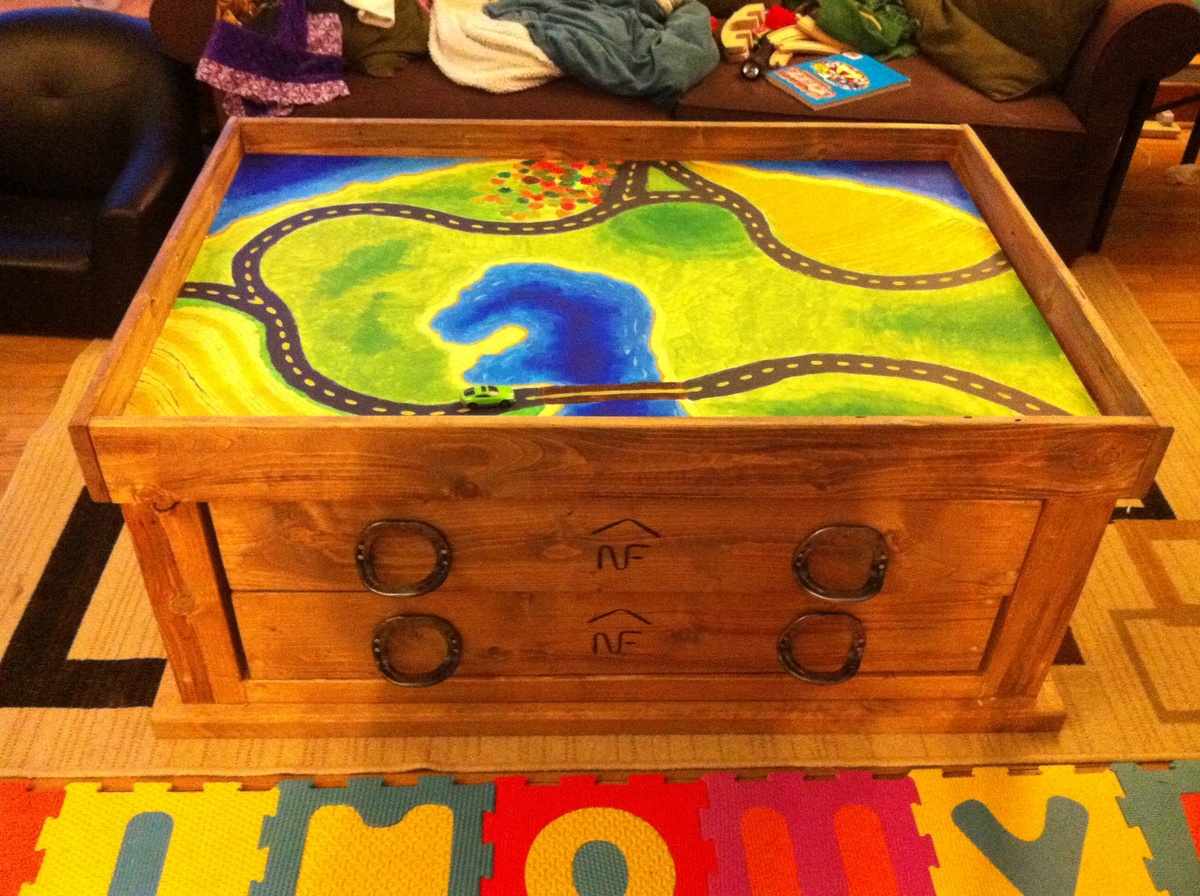
I started with Ana's "Mom's Train Table" design and added a bit of western design to it. I also added two drawers instead of the empty space to store the train set and other toys to be played with on it when the coffee table top is on. The train table top is also loose in the space, so it can be swapped out or flipped over for another design, farm, train, city, racetrack, etc.
Built from Plan(s)
Estimated Cost
$150
Estimated Time Investment
Week Long Project (20 Hours or More)
Finish Used
Danish Oil & Polyurethane
Recommended Skill Level
Intermediate