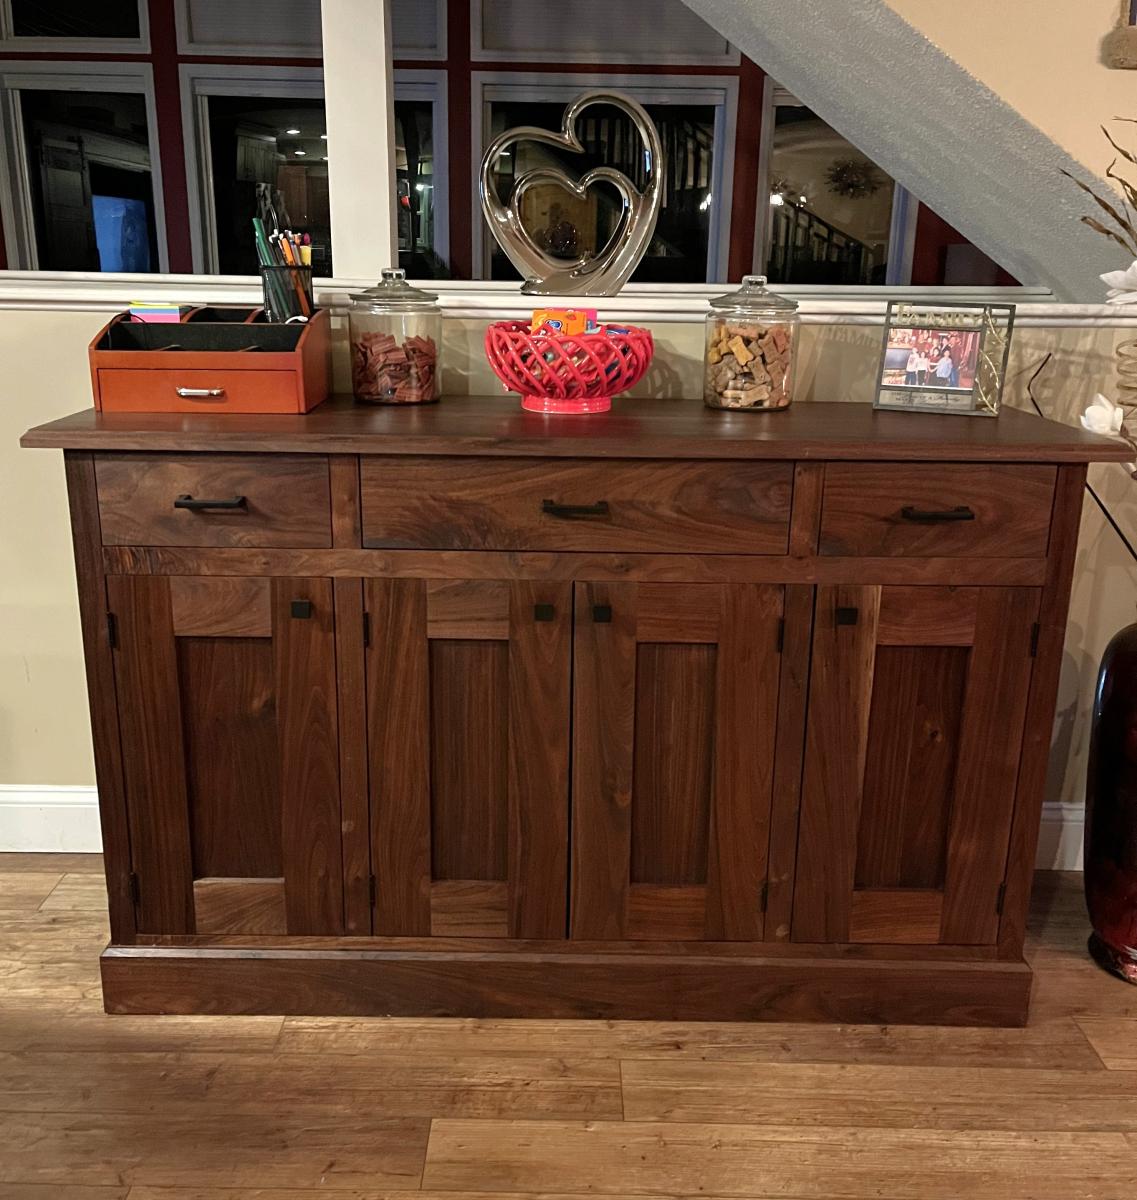
Planked Wood Sideboard
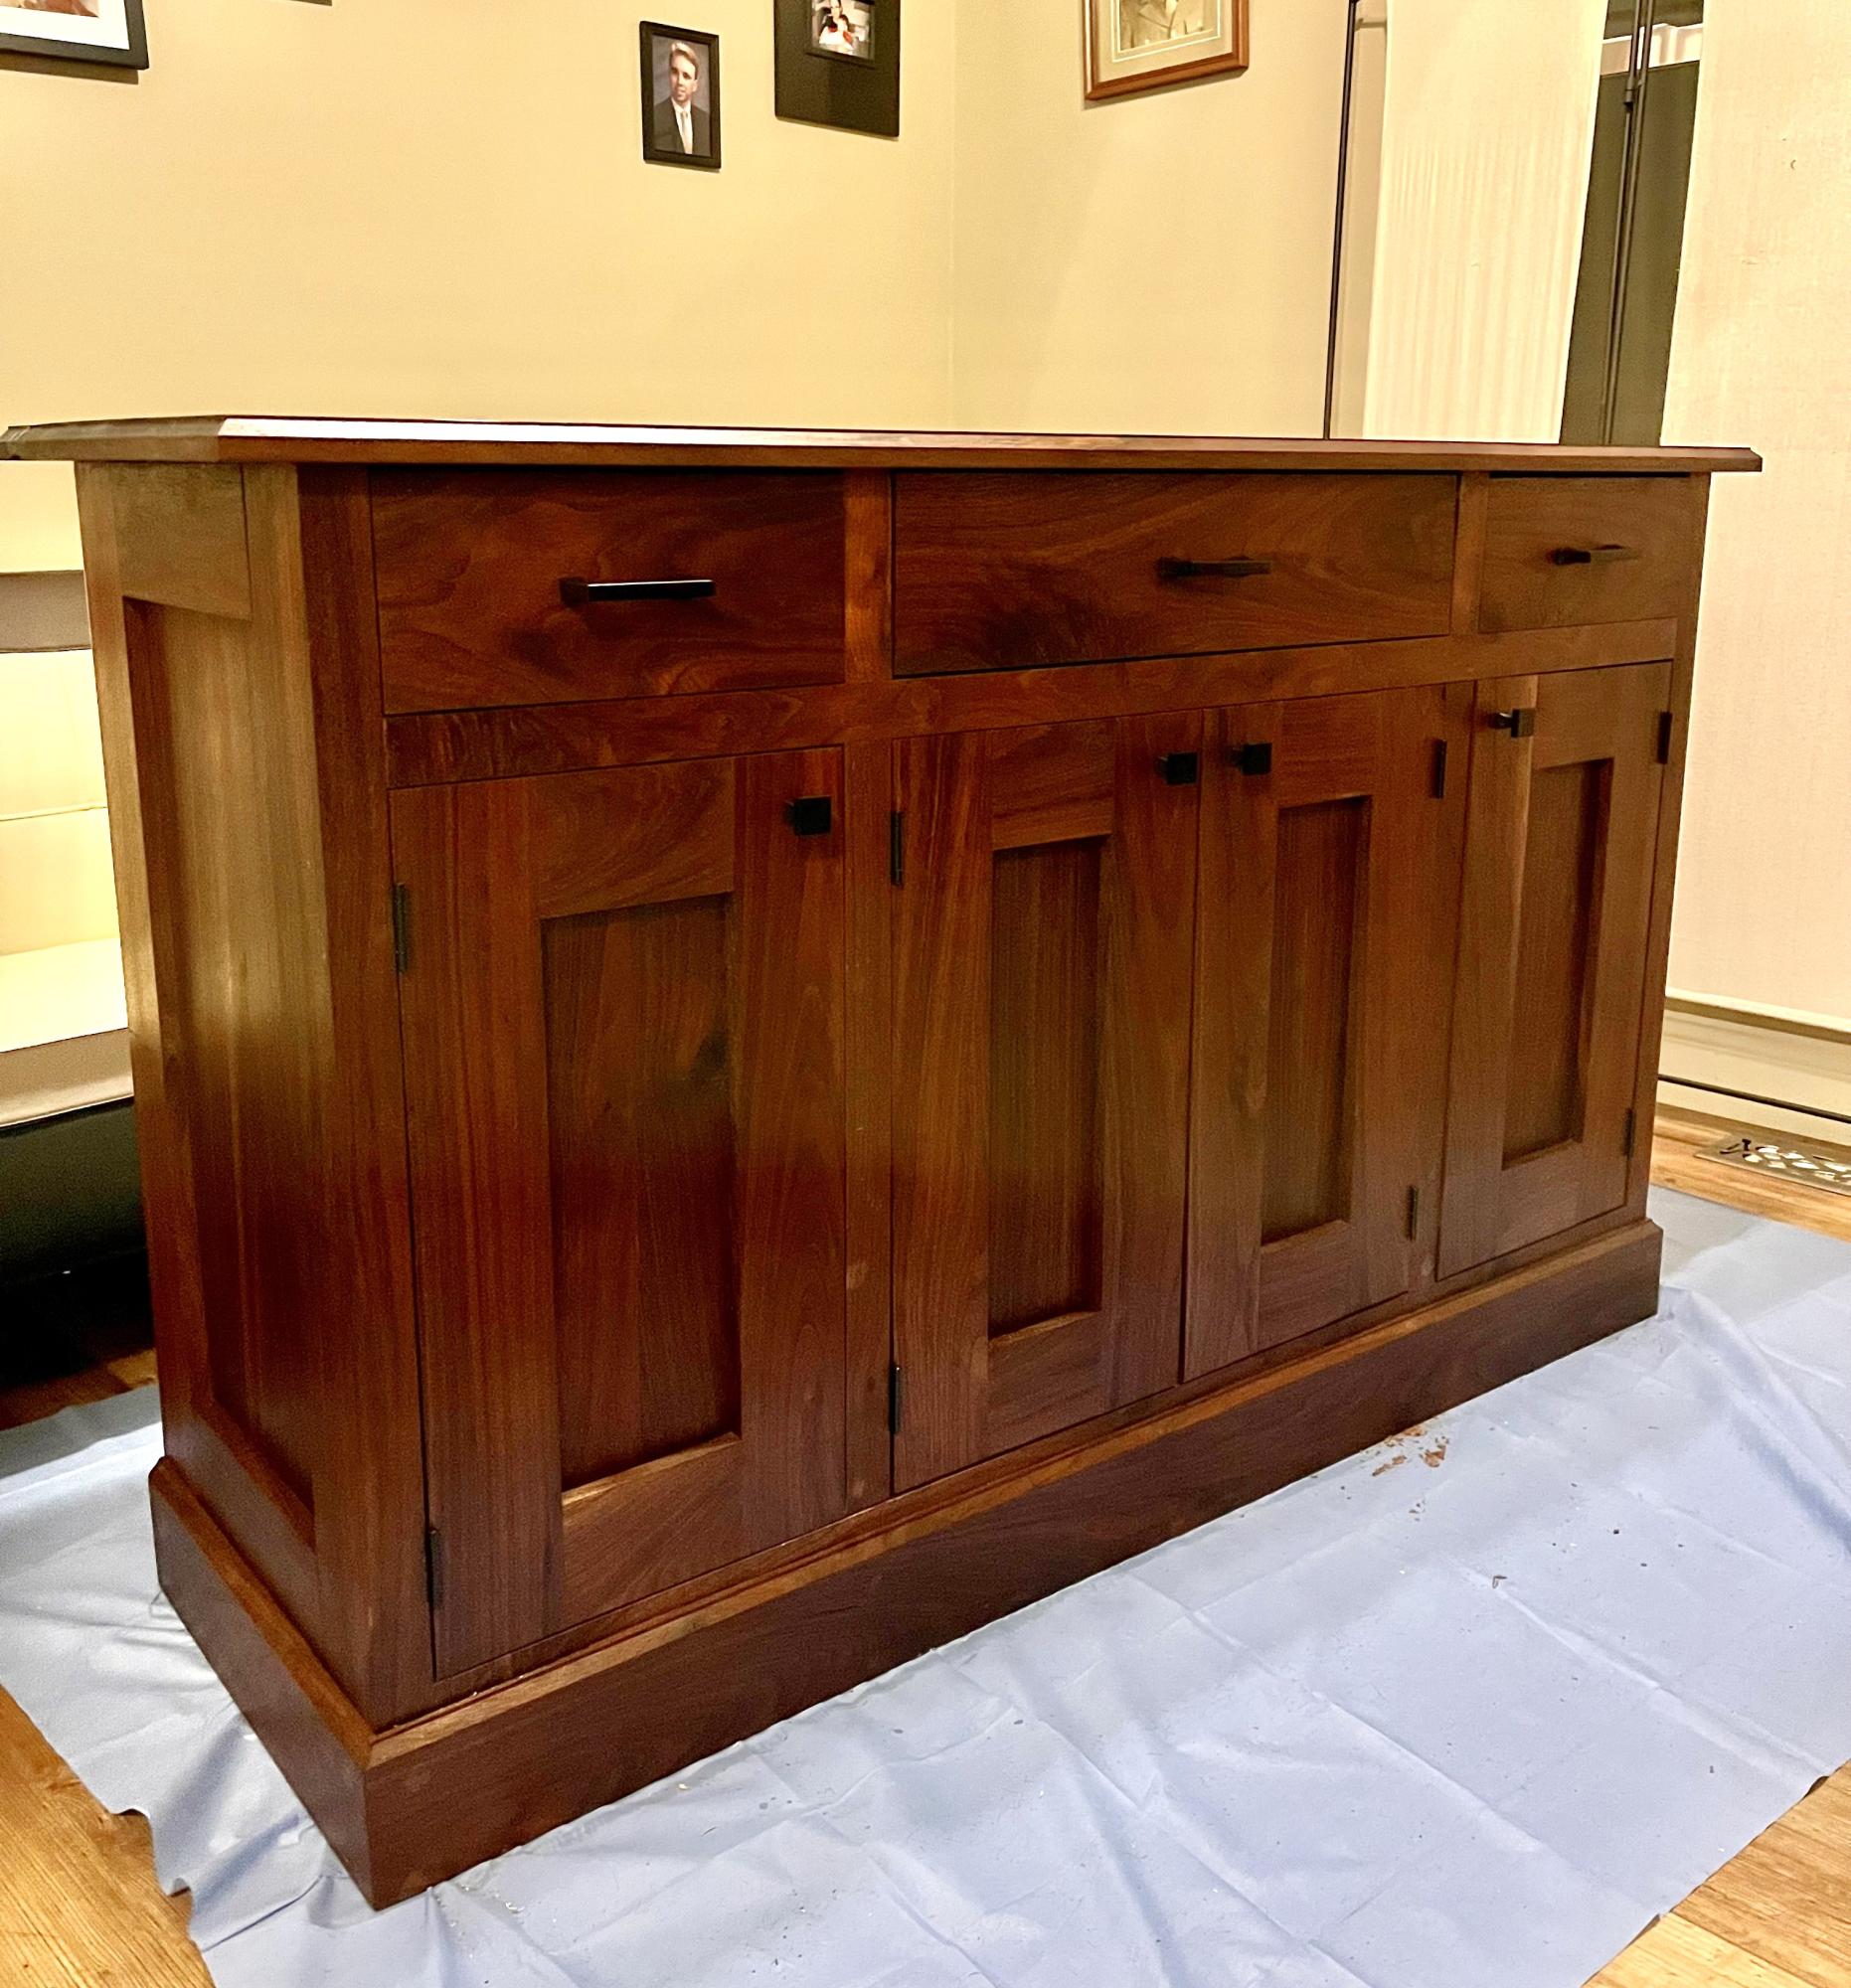
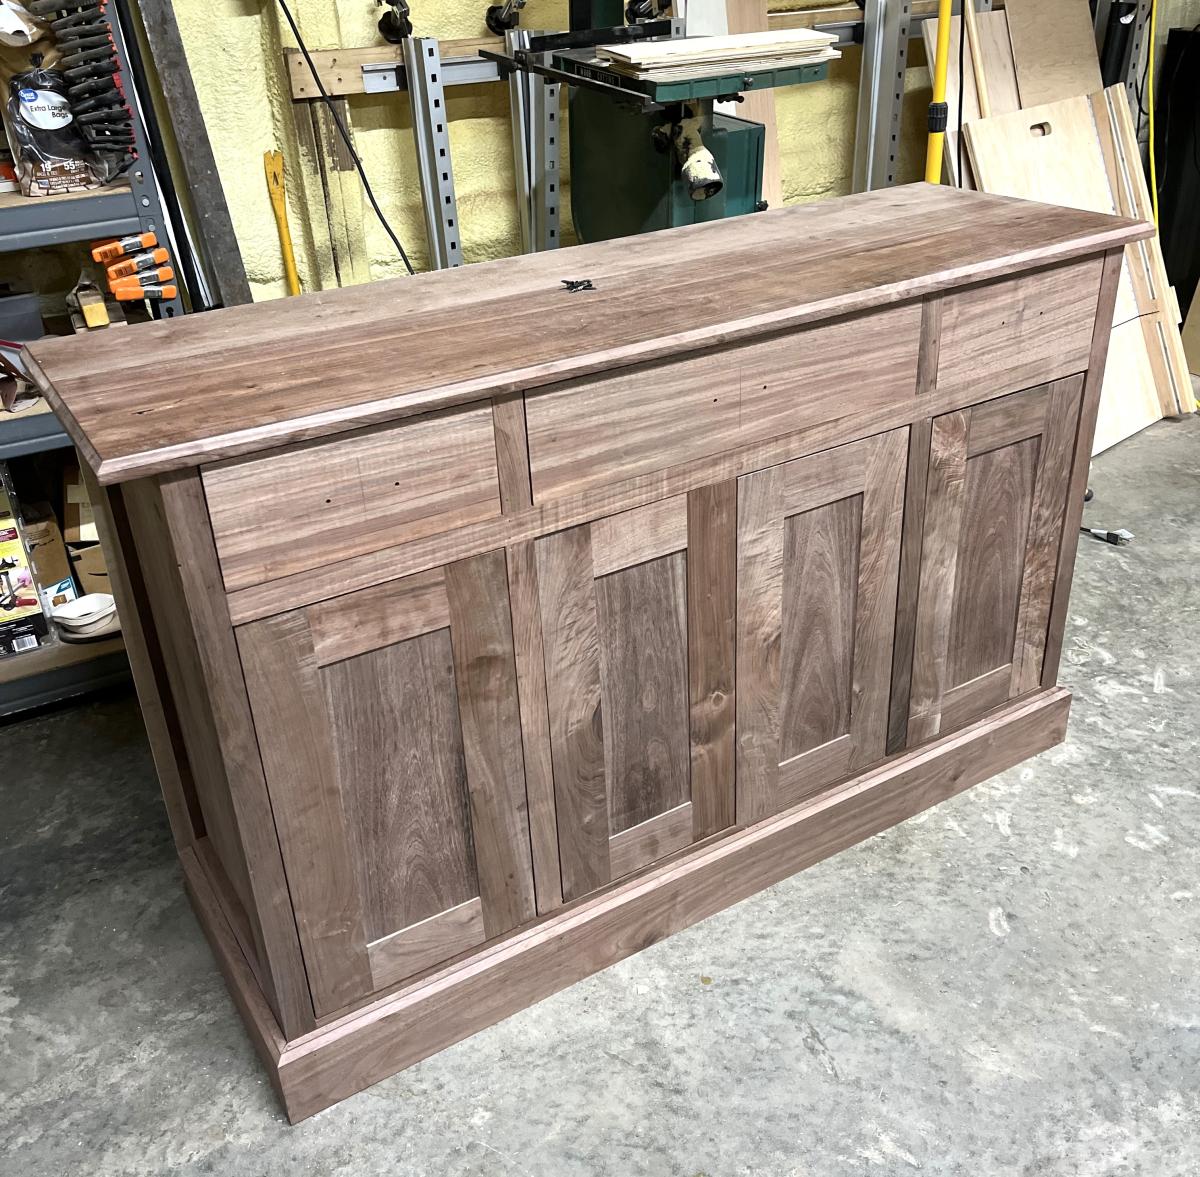
I used a modified version of the Planked Wood Sideboard to fit the space I had. With the exception of the frame, it’s made of walnut. I love the way it turned out. Thanks Ana!!
Adam Benns
Built from Plan(s)
I used a modified version of the Planked Wood Sideboard to fit the space I had. With the exception of the frame, it’s made of walnut. I love the way it turned out. Thanks Ana!!
Adam Benns
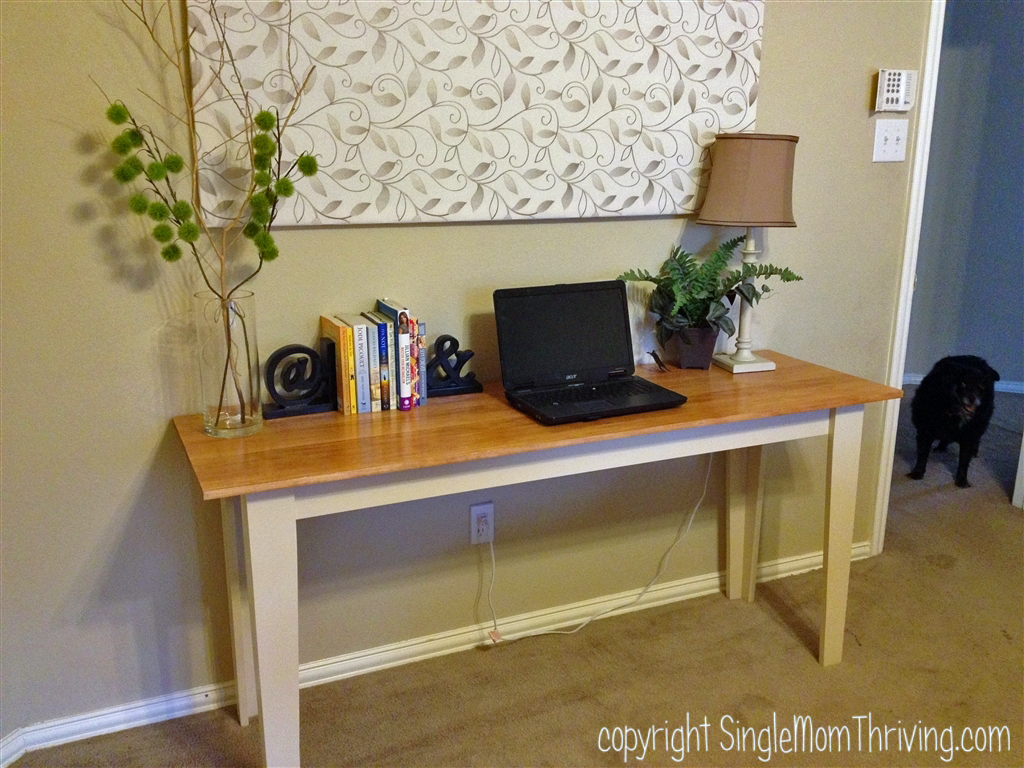
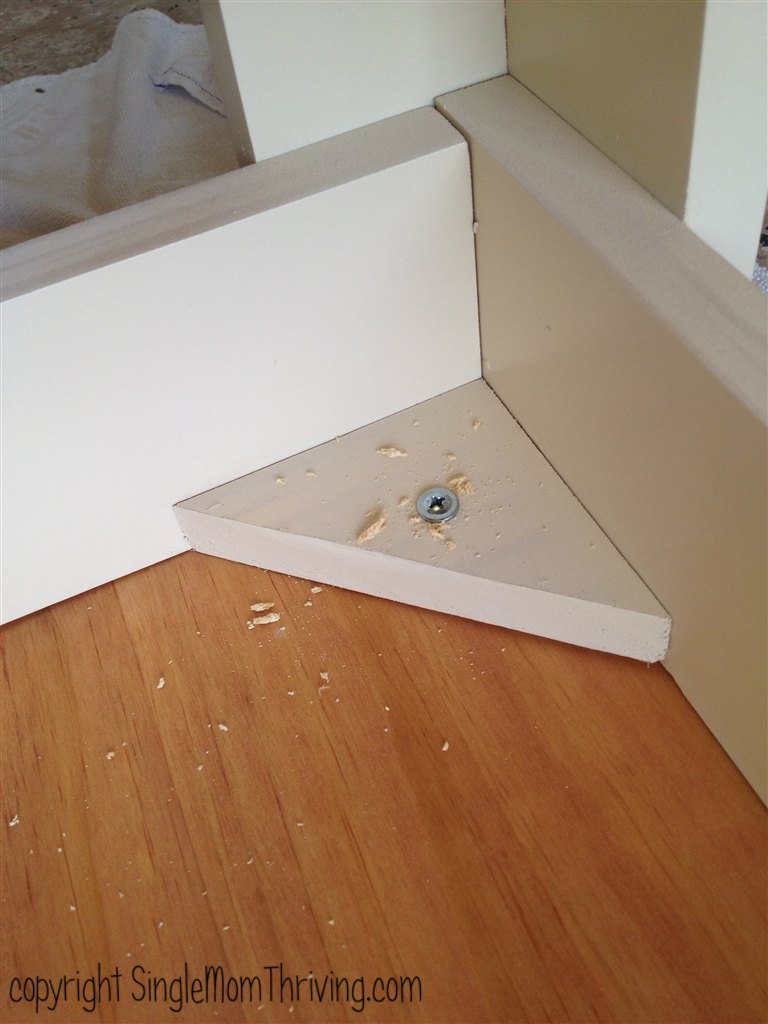
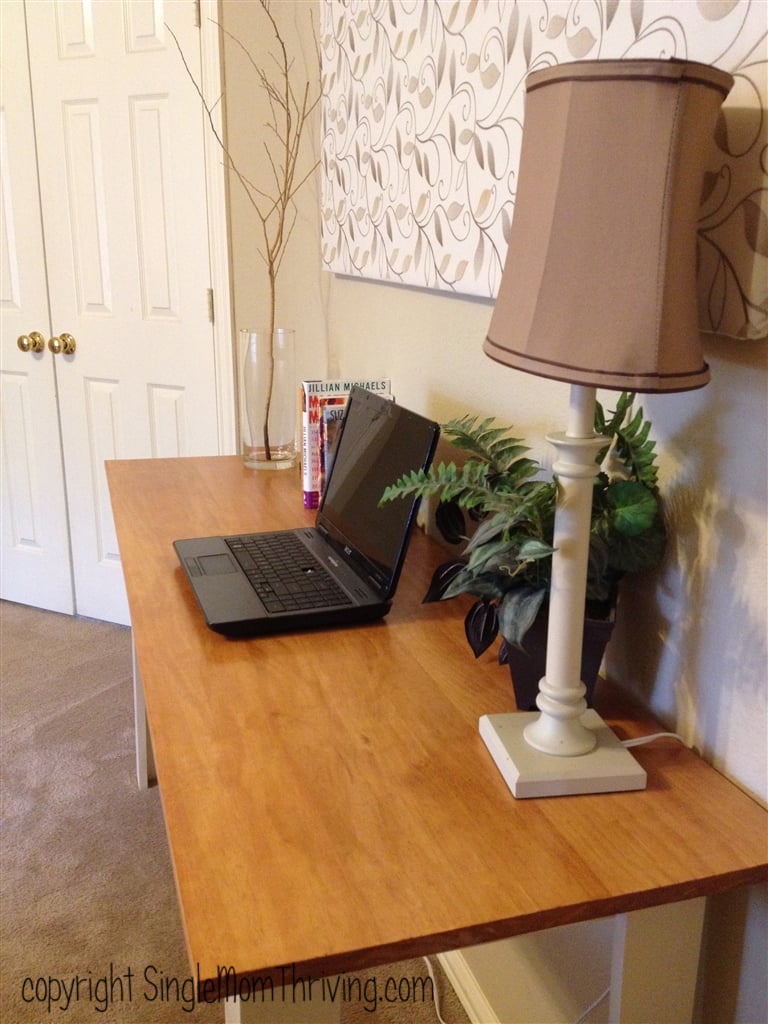
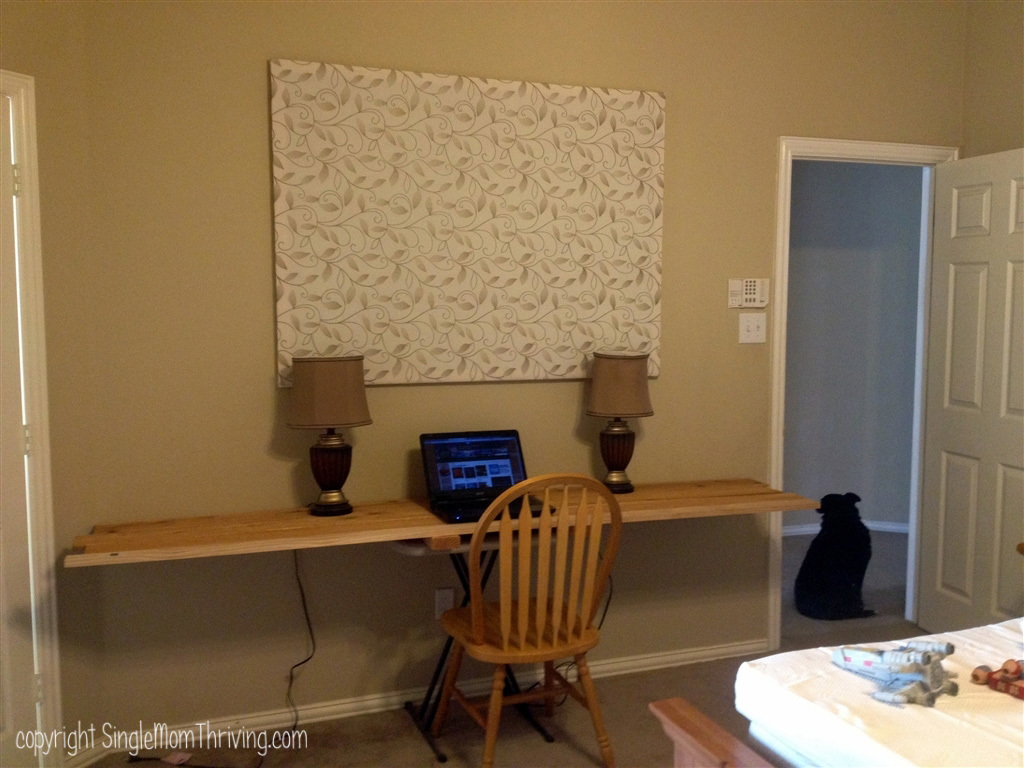
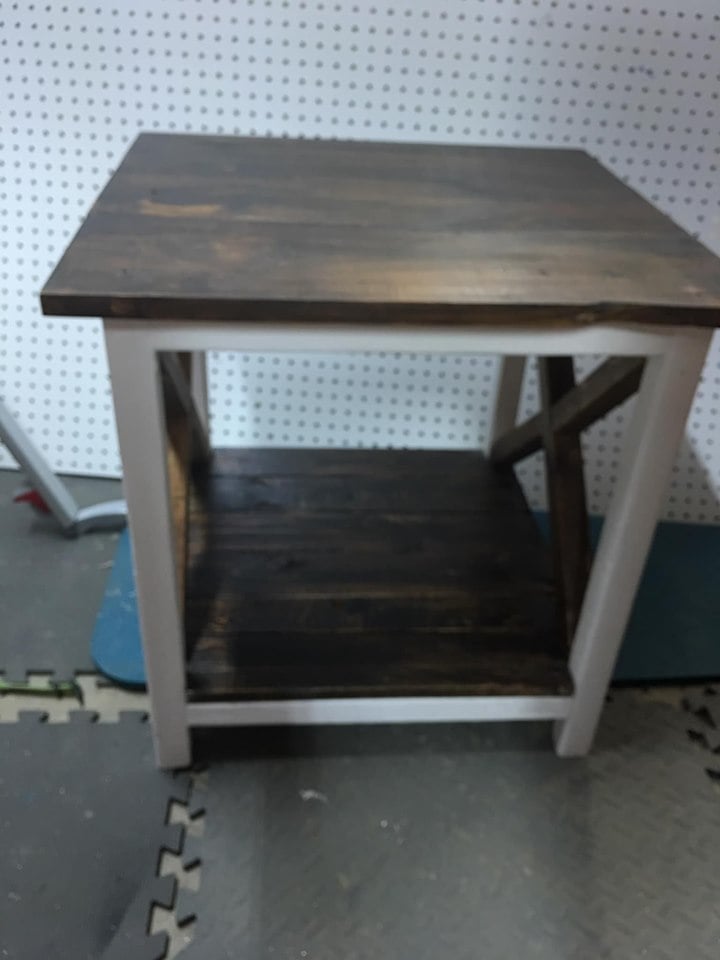
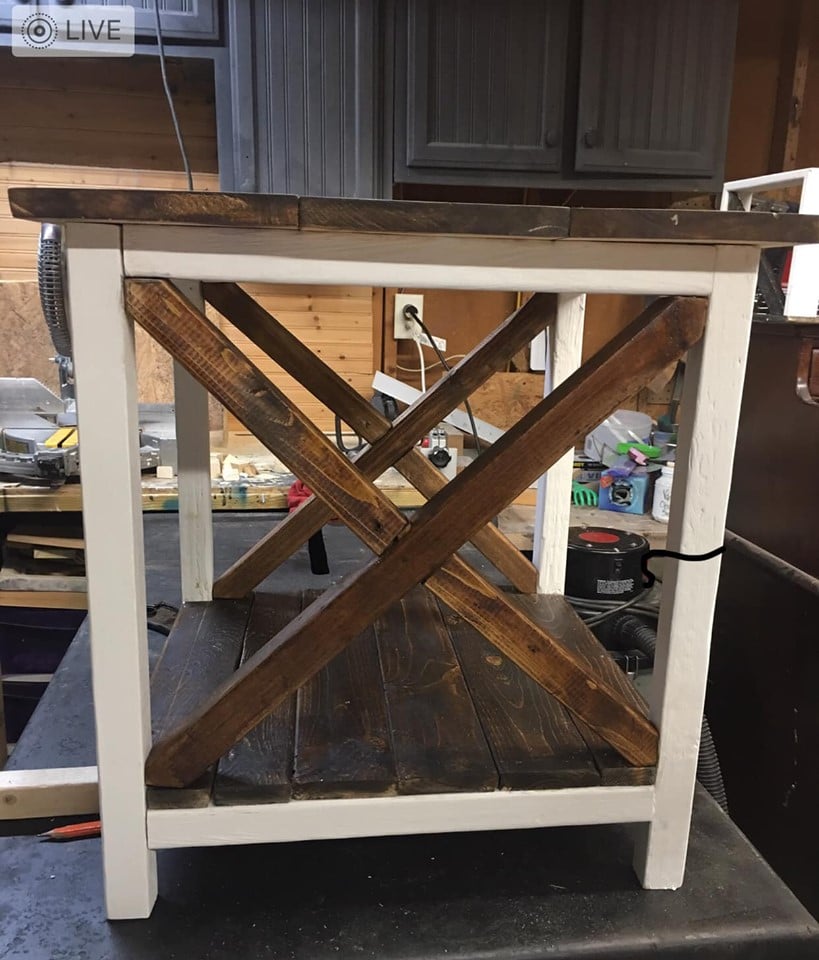
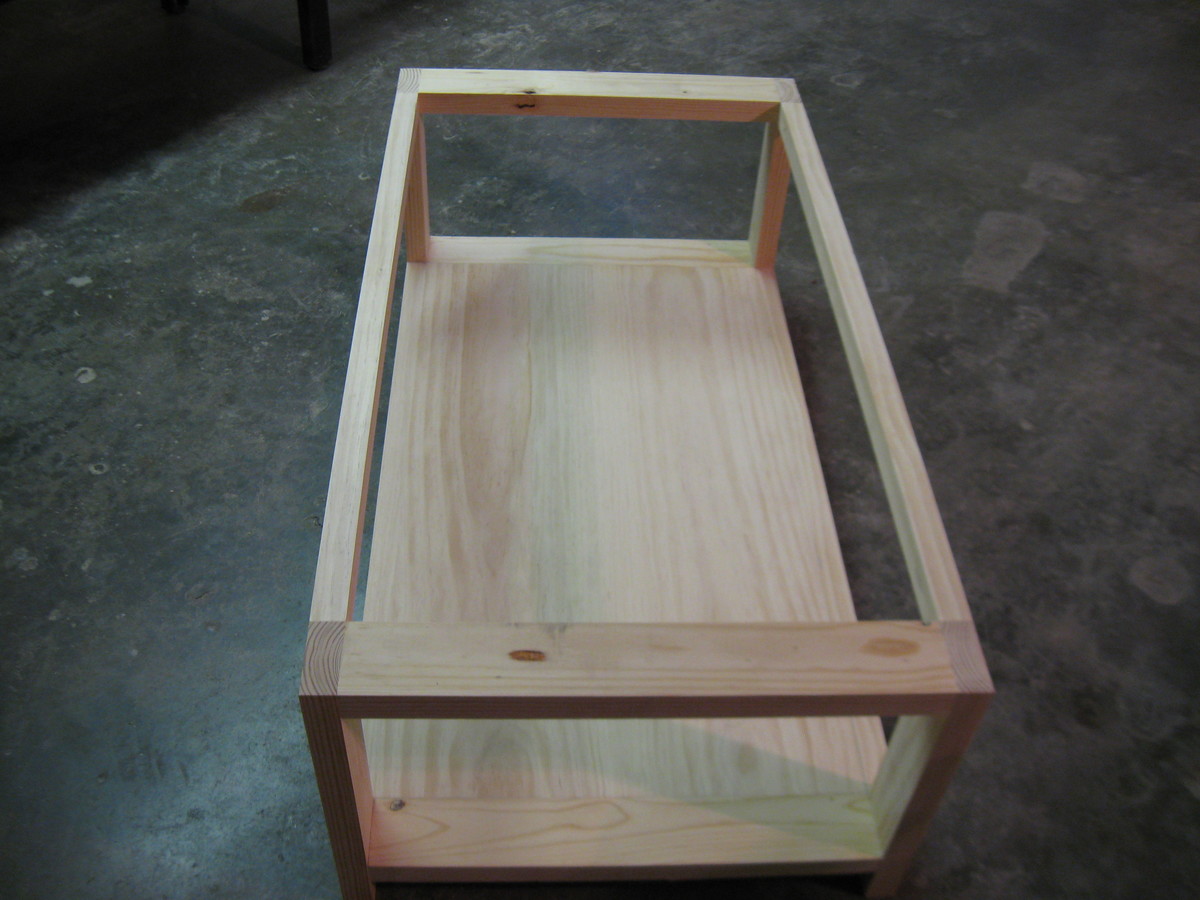
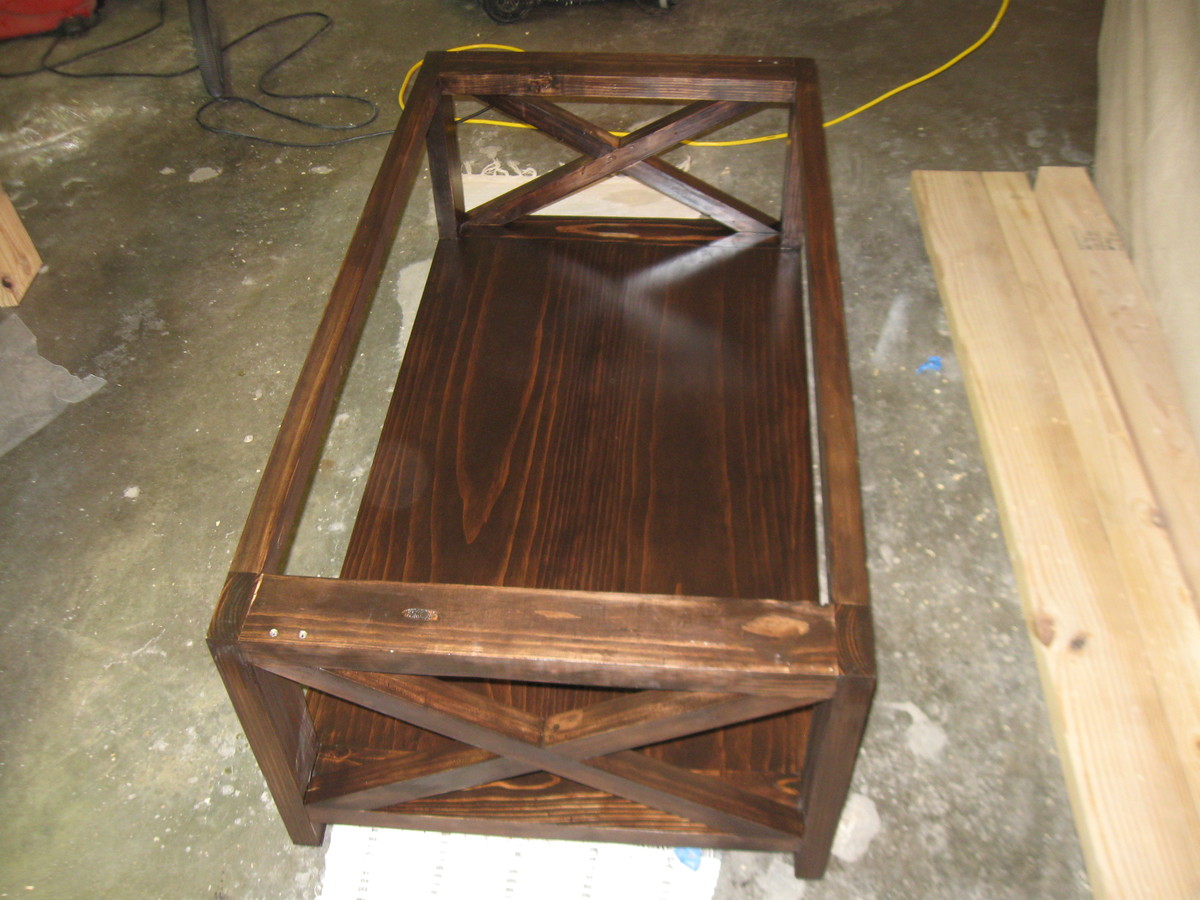
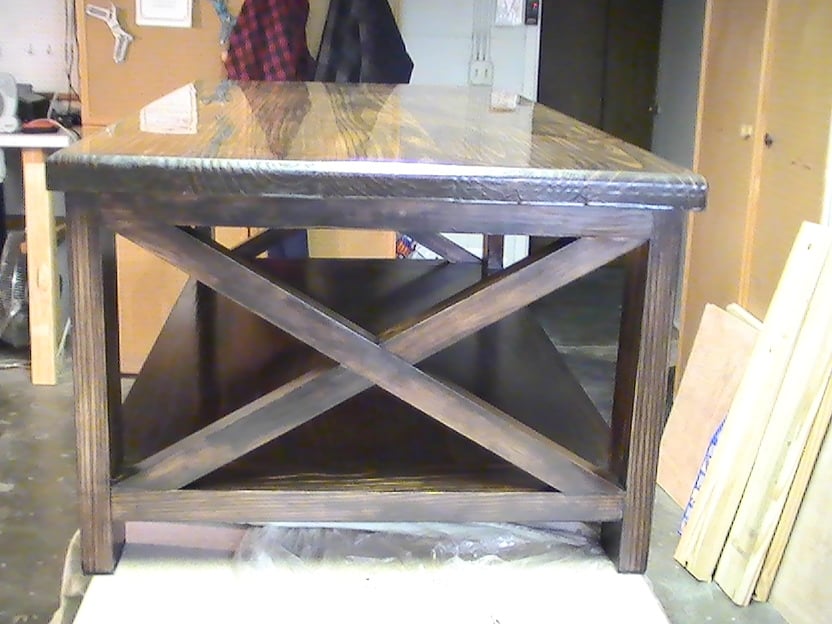
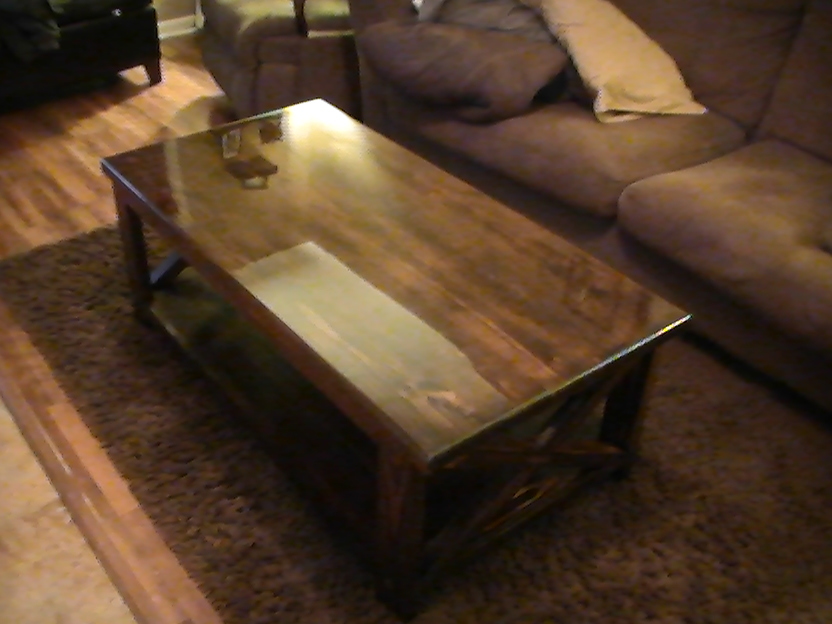
I was looking for a desk/table for a wall in my bedroom, especially after I created the wall art that was now free floating on a huge expanse of wall. I needed something to anchor it. I saw the Narrow Farmhouse Table and loved it. I knew I could modify for the space so I used some extra boards I had around the house and mocked it up so that I could take measurements and ensure the table did not block the traffic flow in my home.
I loved the way http://deuxmaison.blogspot.com/2010/07/knock-offwoodcom-narrow-farmhous… the table was done in this blog, so I used the new measurements and took a few tips from deuxmaison to make this desk/table.
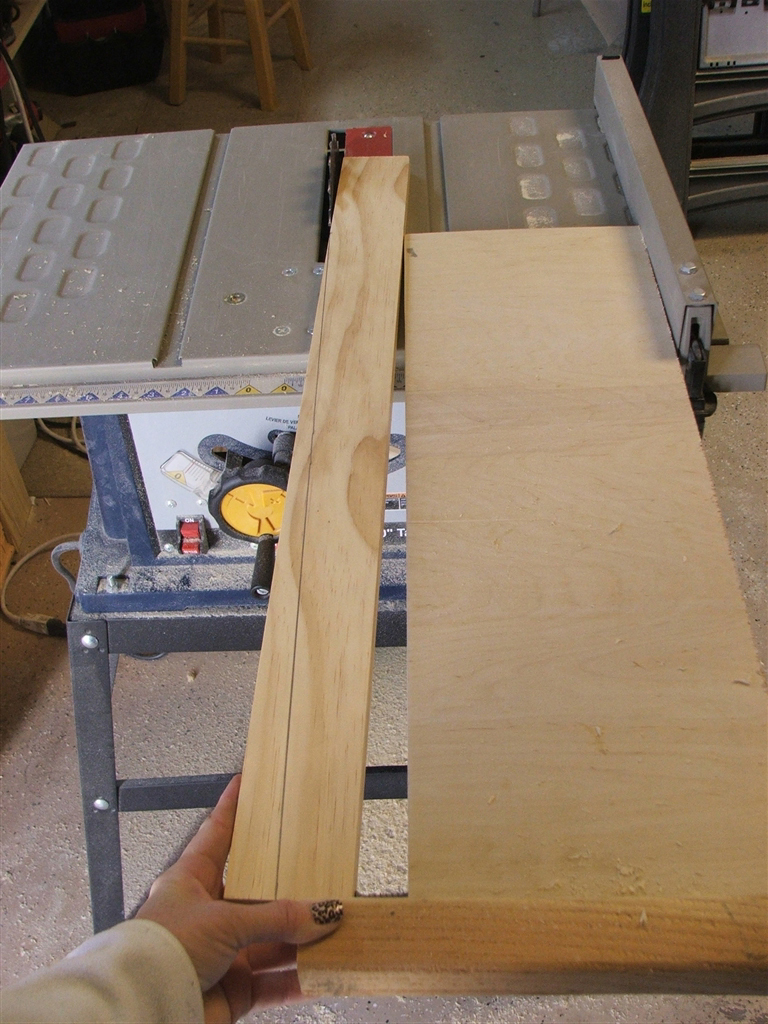
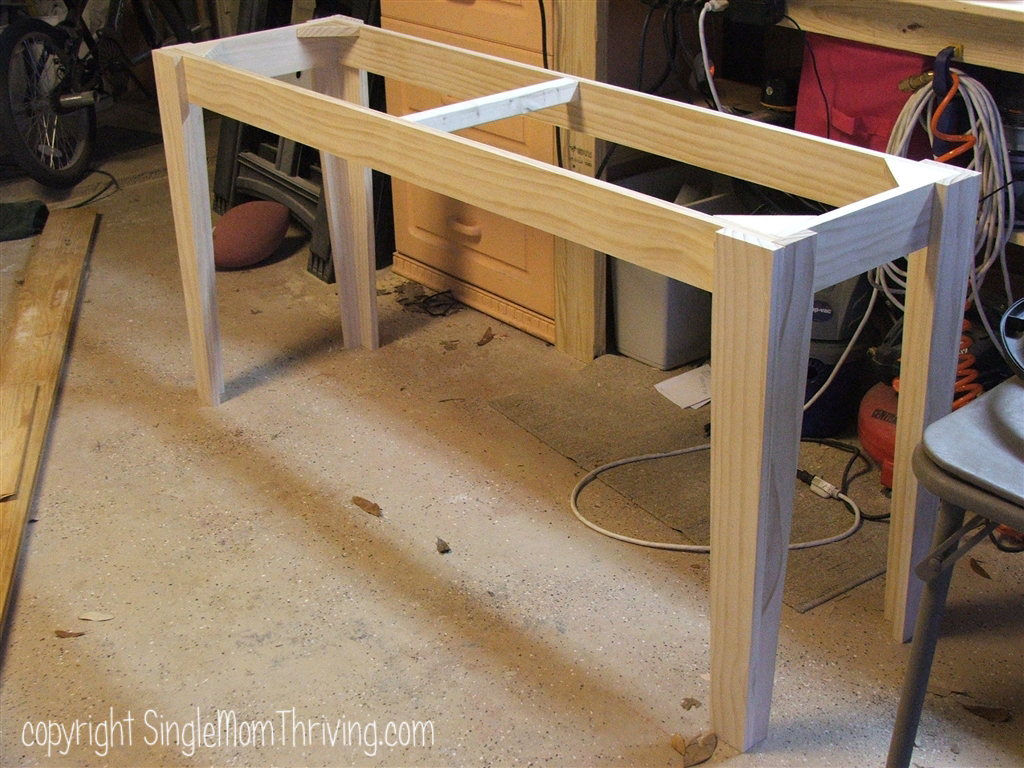
I completed the table top and the base as separate projects. Check out my blog for details and a special link on "How to Make a Tapering Jig"
http://singlemomthriving.wordpress.com/2012/03/13/adventures-in-table-m…
http://singlemomthriving.wordpress.com/2012/03/19/adventures-in-table-m…
http://singlemomthriving.wordpress.com/2012/03/21/adventures-in-table-m…
I love how this table turned out. Thanks for great plans, Ana!
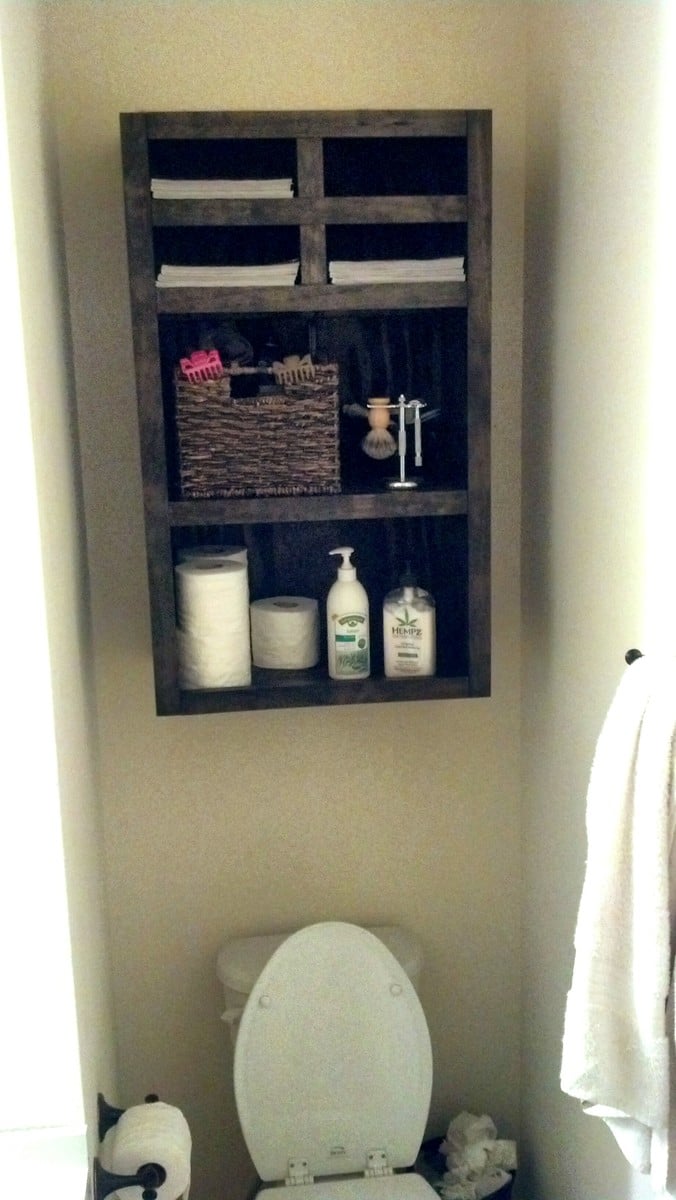
Modified to hang above the toilet for some added bathroom storage.
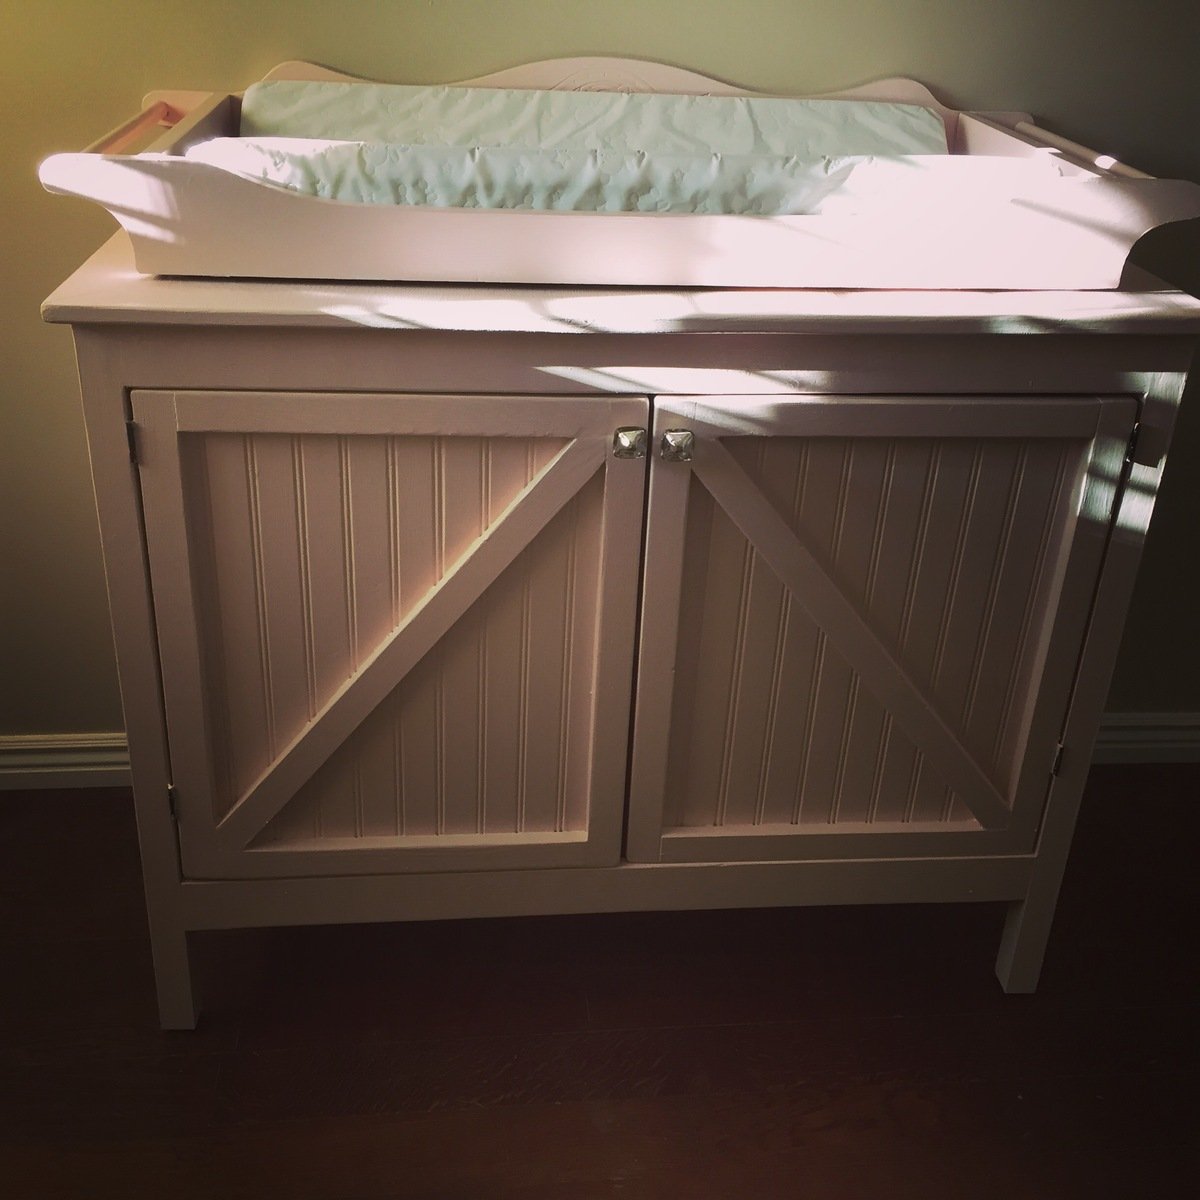
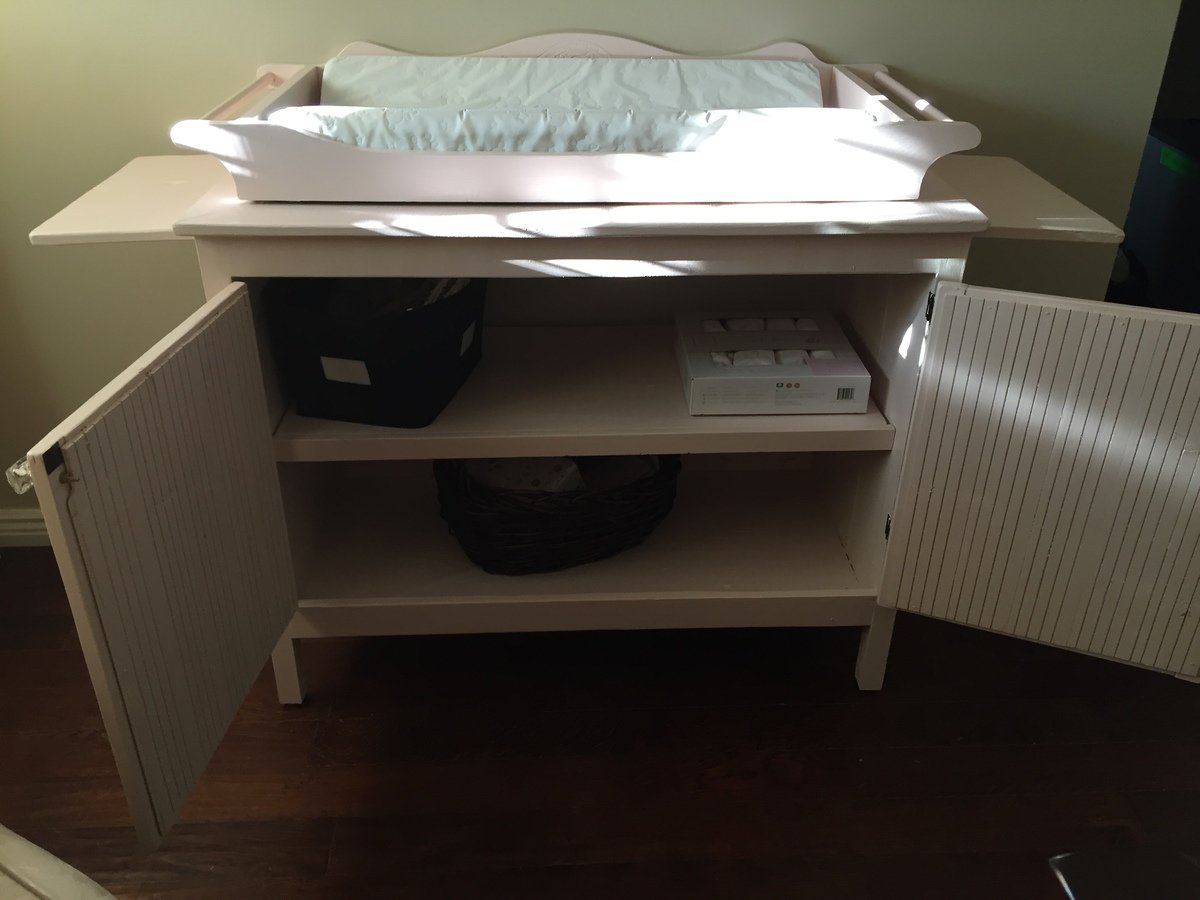
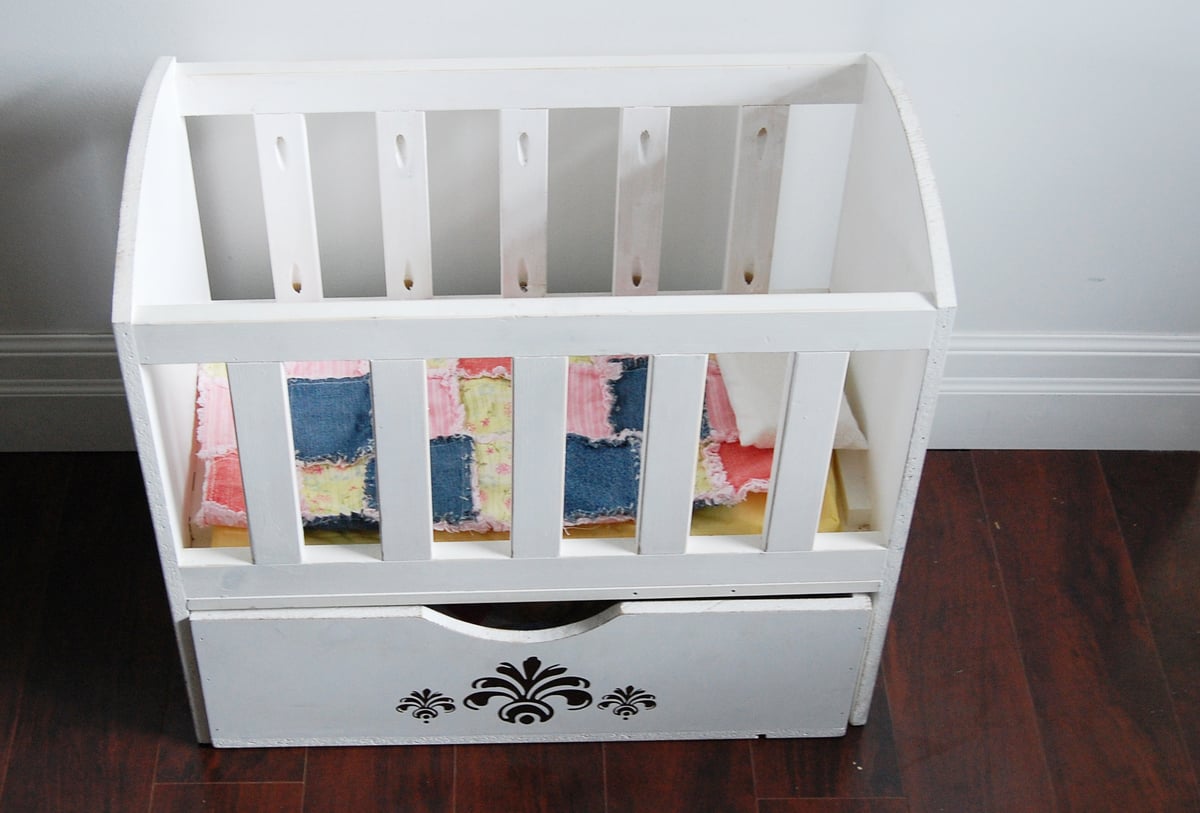
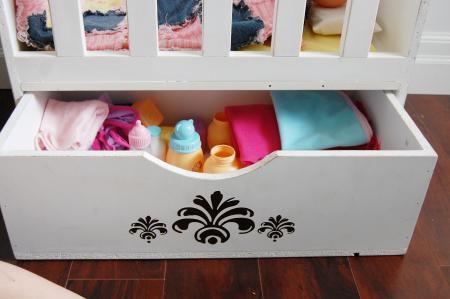
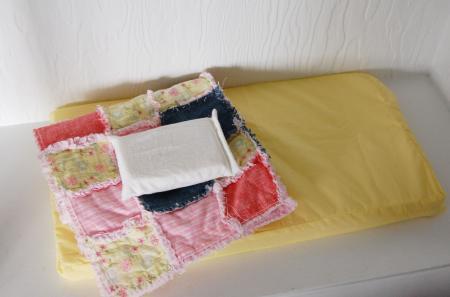
After finally getting the hang of 2 boys we just found out a baby girl is coming our way... So I decided to take the brookstone plan and make her a changing table a little less masculine. I went with the pull outs in the sides as well. Followed pretty much the way the plans layed out, replacing the drawer with a shelf. Had some issues with the doors with it being my first time making those, all in all I am pretty excited for her to have it
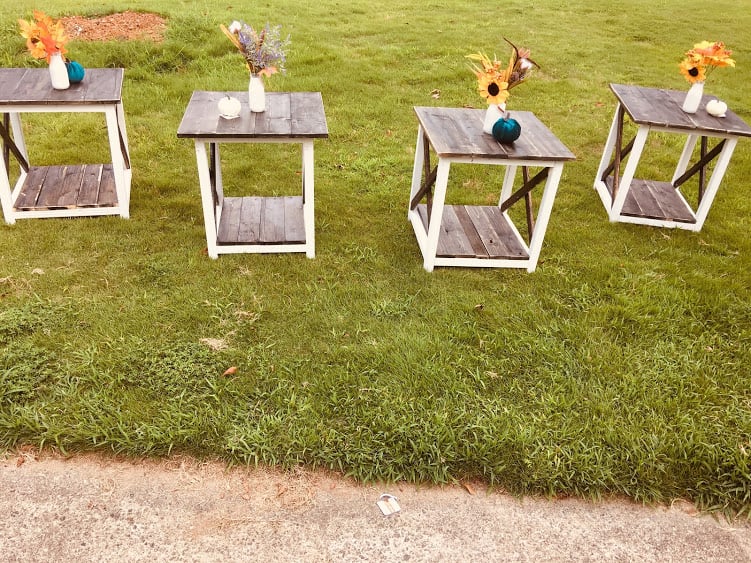
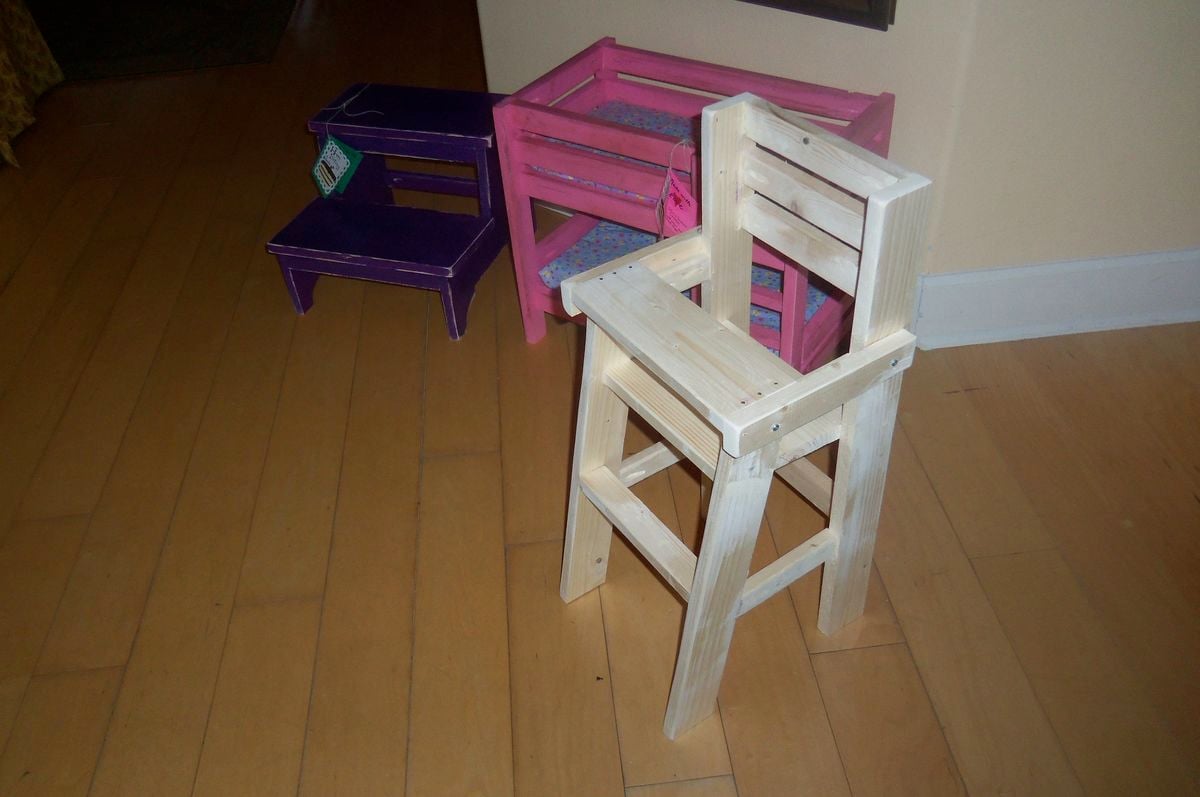
This is a simple super fun build, you can easily make several in one day and there are so many options on finish. I
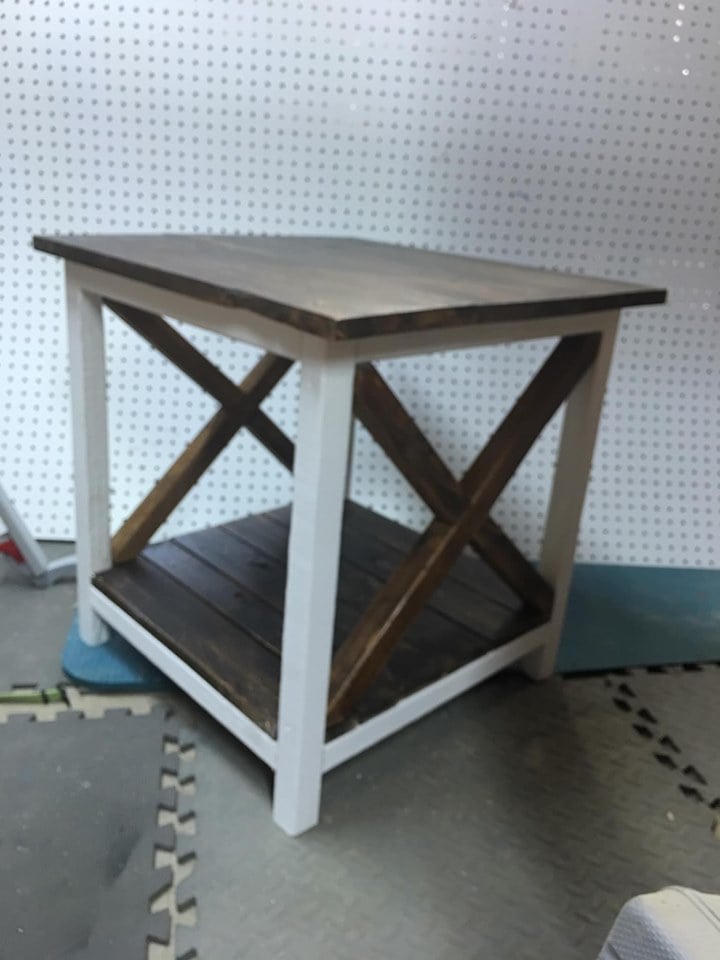
Made from RedCedar and WhitePine. All rough cuts from the local mill.
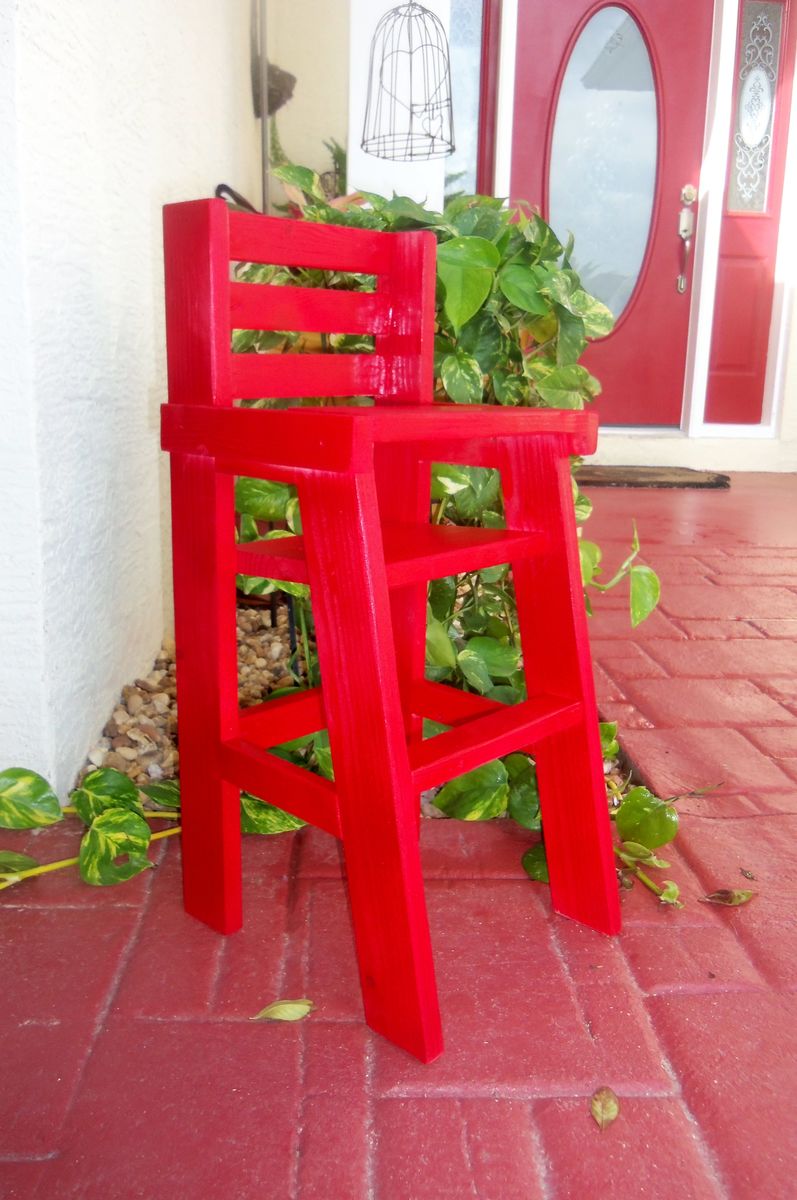
Super easy but first time using any angles in a project so I had to figure my miter saw out before I was succesful at it.

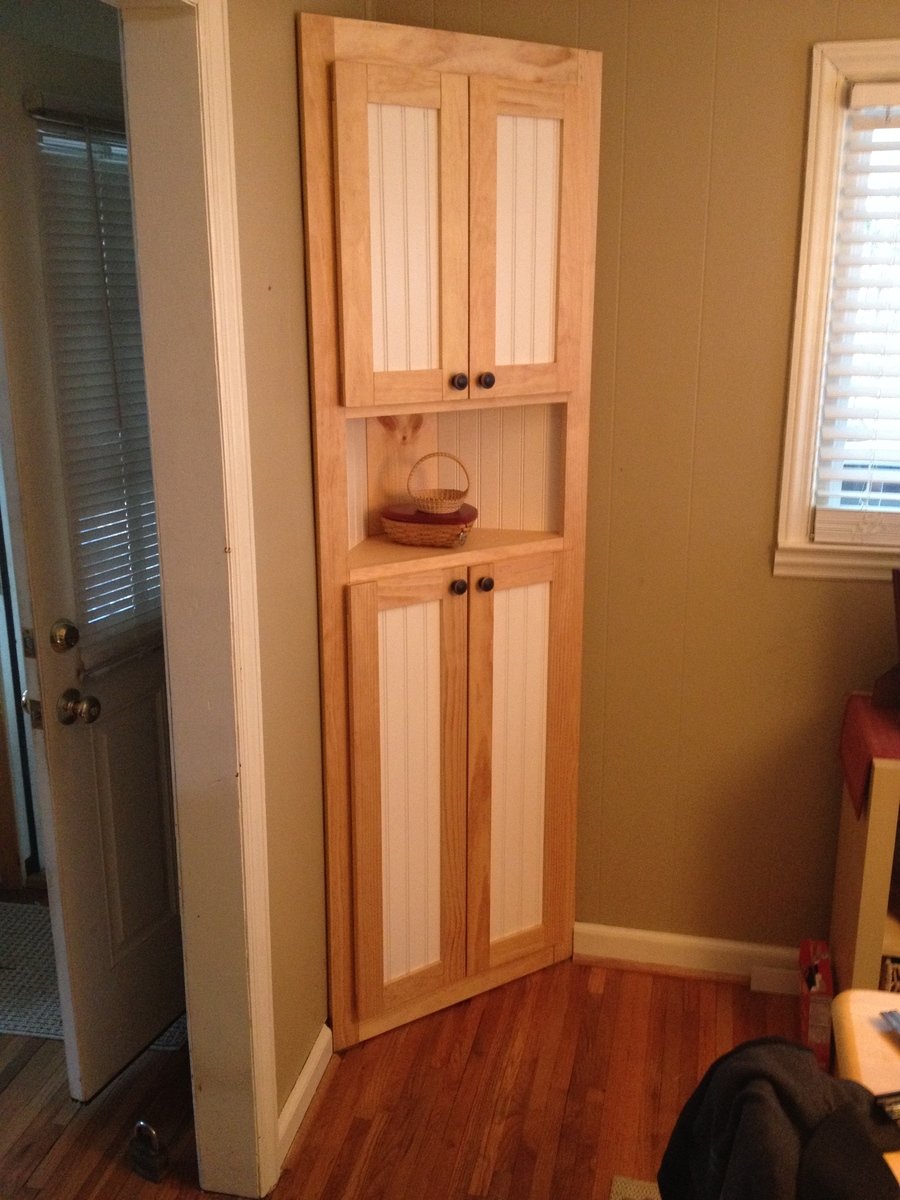
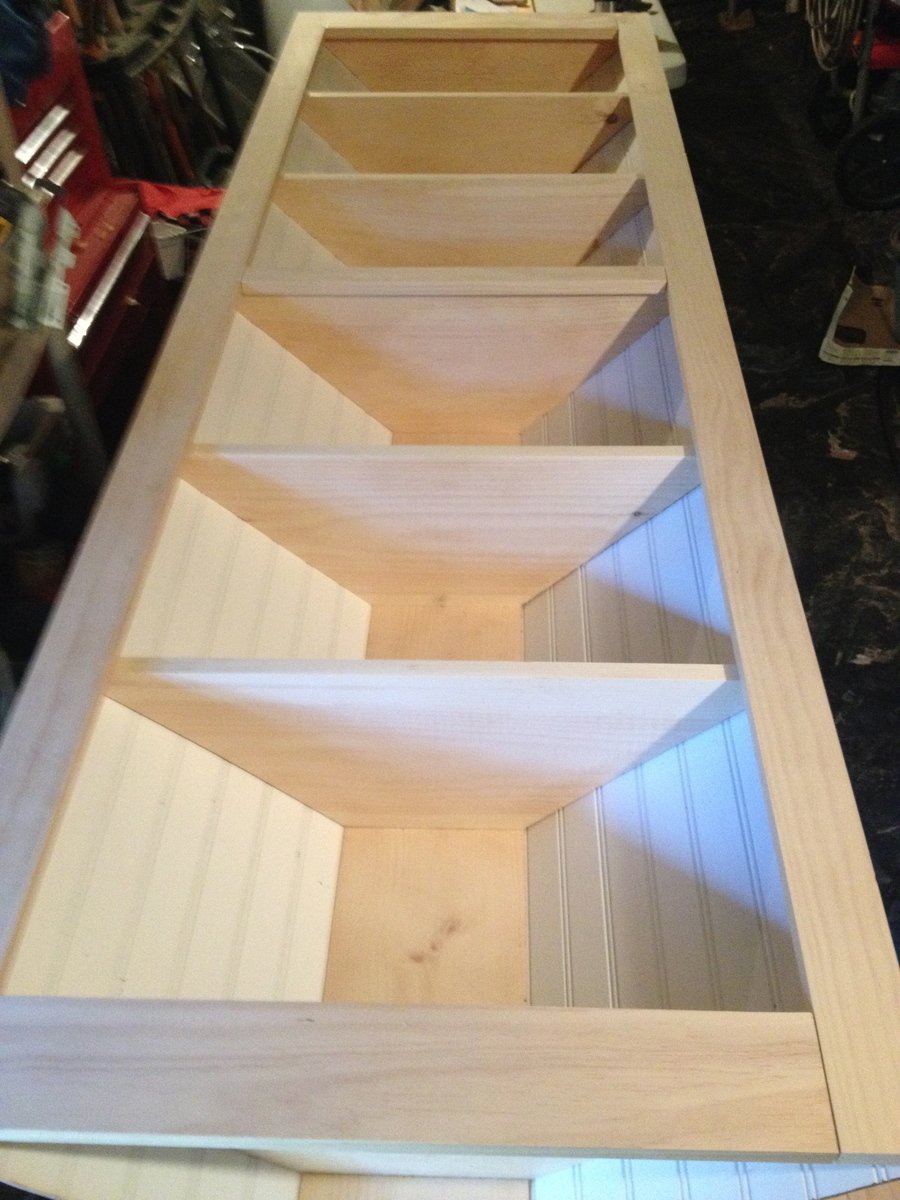
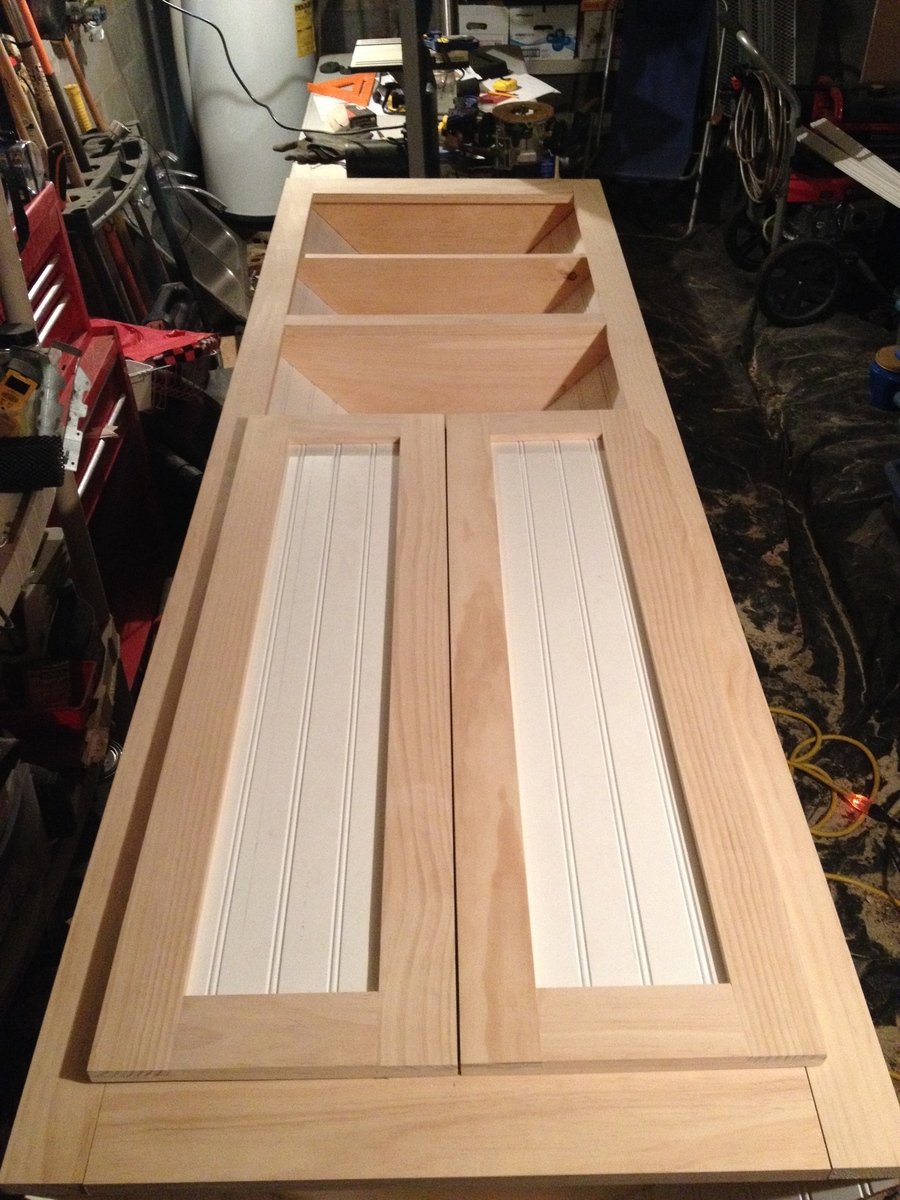
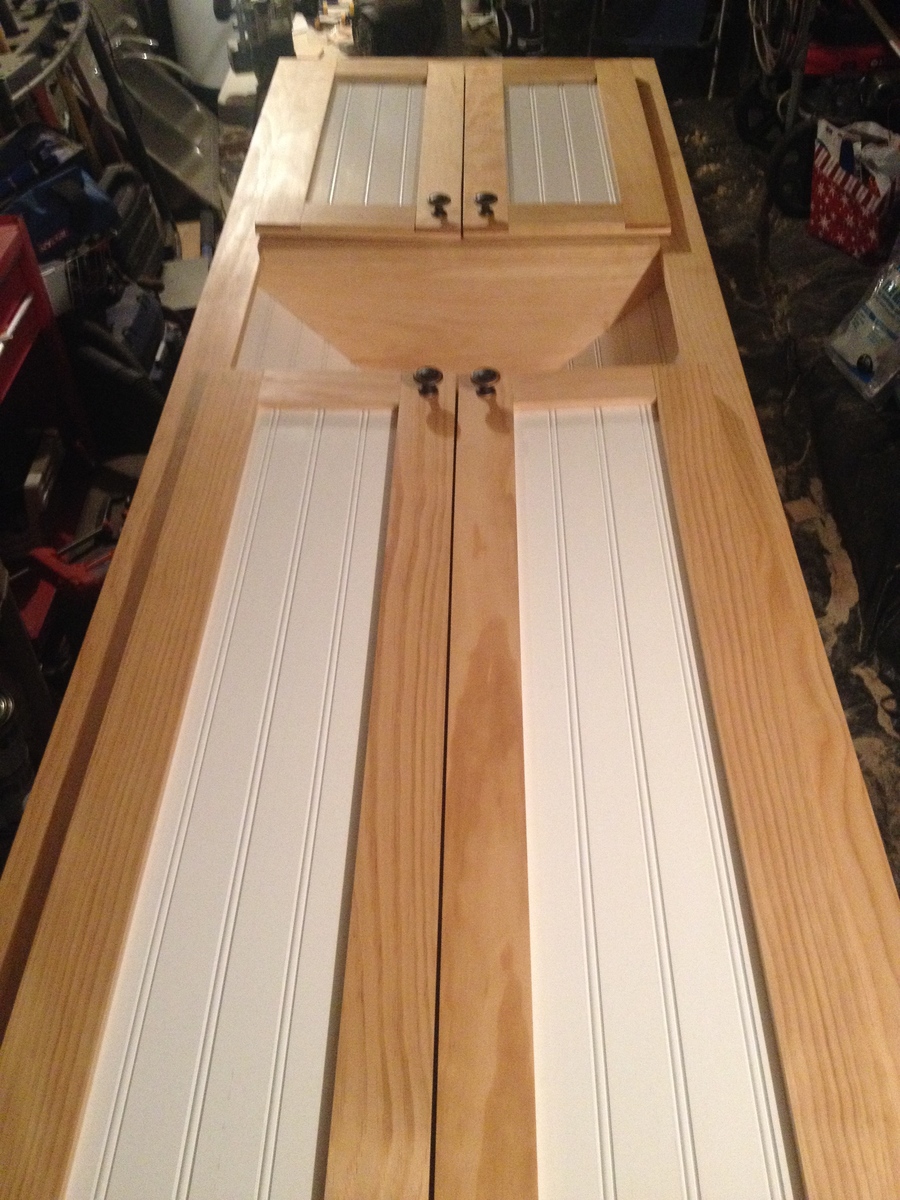
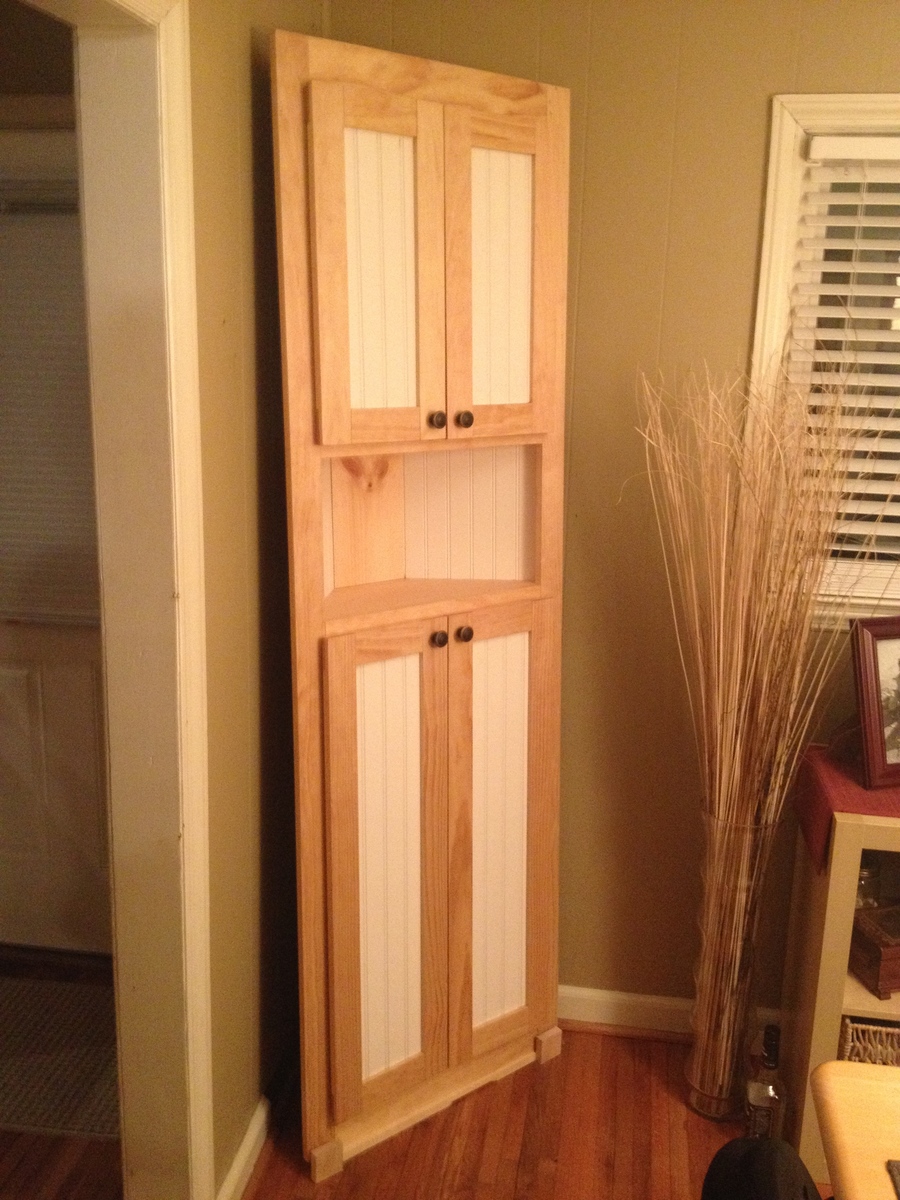
This was a corner cabinet I made. The purpose of this cabinet is to be used as a pantry. My kitchen is quite small, and in turn I was always having to sacrifice cabinet space for pantry items. Total man hours was about 20 give or take the occasional trip to HD or Lowes.
I found this project quite enjoyable. I don't have much of a workshop area so space was tight. I had to constantly move my tools around to make room for the cabinet while I built it.
The plans supplied by this website were simple and straight-forward. I didn't need any specialty tools or have to use any weird joinery. All in all I would give this project an 8 out of 10. There were a couple of areas I feel I can improve on.
After having posted this picture on several social media sites my friends took notice, Now I'm getting all kinds of requests. Not sure if I will entertain any. It's just nice to see a vision come to life.
Thanks for the taking a gander at my work.

Mon, 01/13/2014 - 15:50
I also built a corner cabinet from the same plans and yours is by far the best. You obviously have the patience it takes to get the best out of your project. Looking for more from you.
Tue, 04/08/2014 - 18:33
Thank you so much for your vision! I've been looking for the perfect corner cabinet for at least a year! All the other plans within these plans are ok and would've worked, but I just felt like I wanted something more. I am in love with your doors! They look great! I may make mine a bit larger, but will most definitely add doors the same way you did. Unfortunately, it's not on the top of my priority list, but it will be this summer!!! Great work!
Rachel
www.illjustpaintit.com
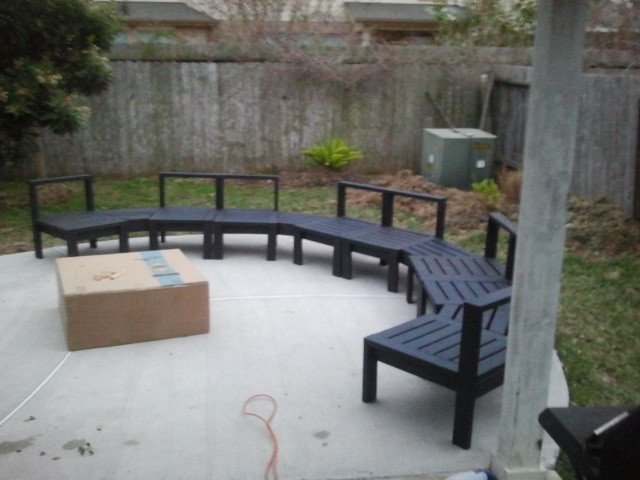
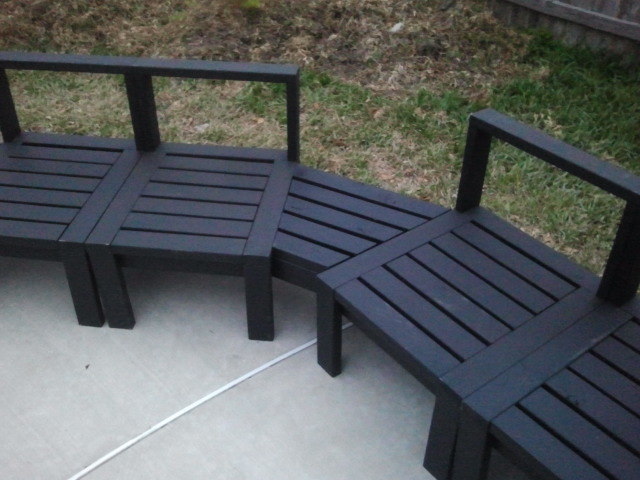
So this was a fun build. I actually finished this 2 years ago, but I never really thought to post it. It took roughly 2 weeks straight to build and stain it, Christmas holiday. I used the kreg jig alot. I also used a ebony outdoor stain. Anyway if y'all have questions let me know and I'll try to answer them as best I can. This was one of my first builds, so be gentle. :)
My wife wanted a bookcase for her office. She had an idea on what she wanted, so this is what I came up with.
Made the case with 3/4” MDF.
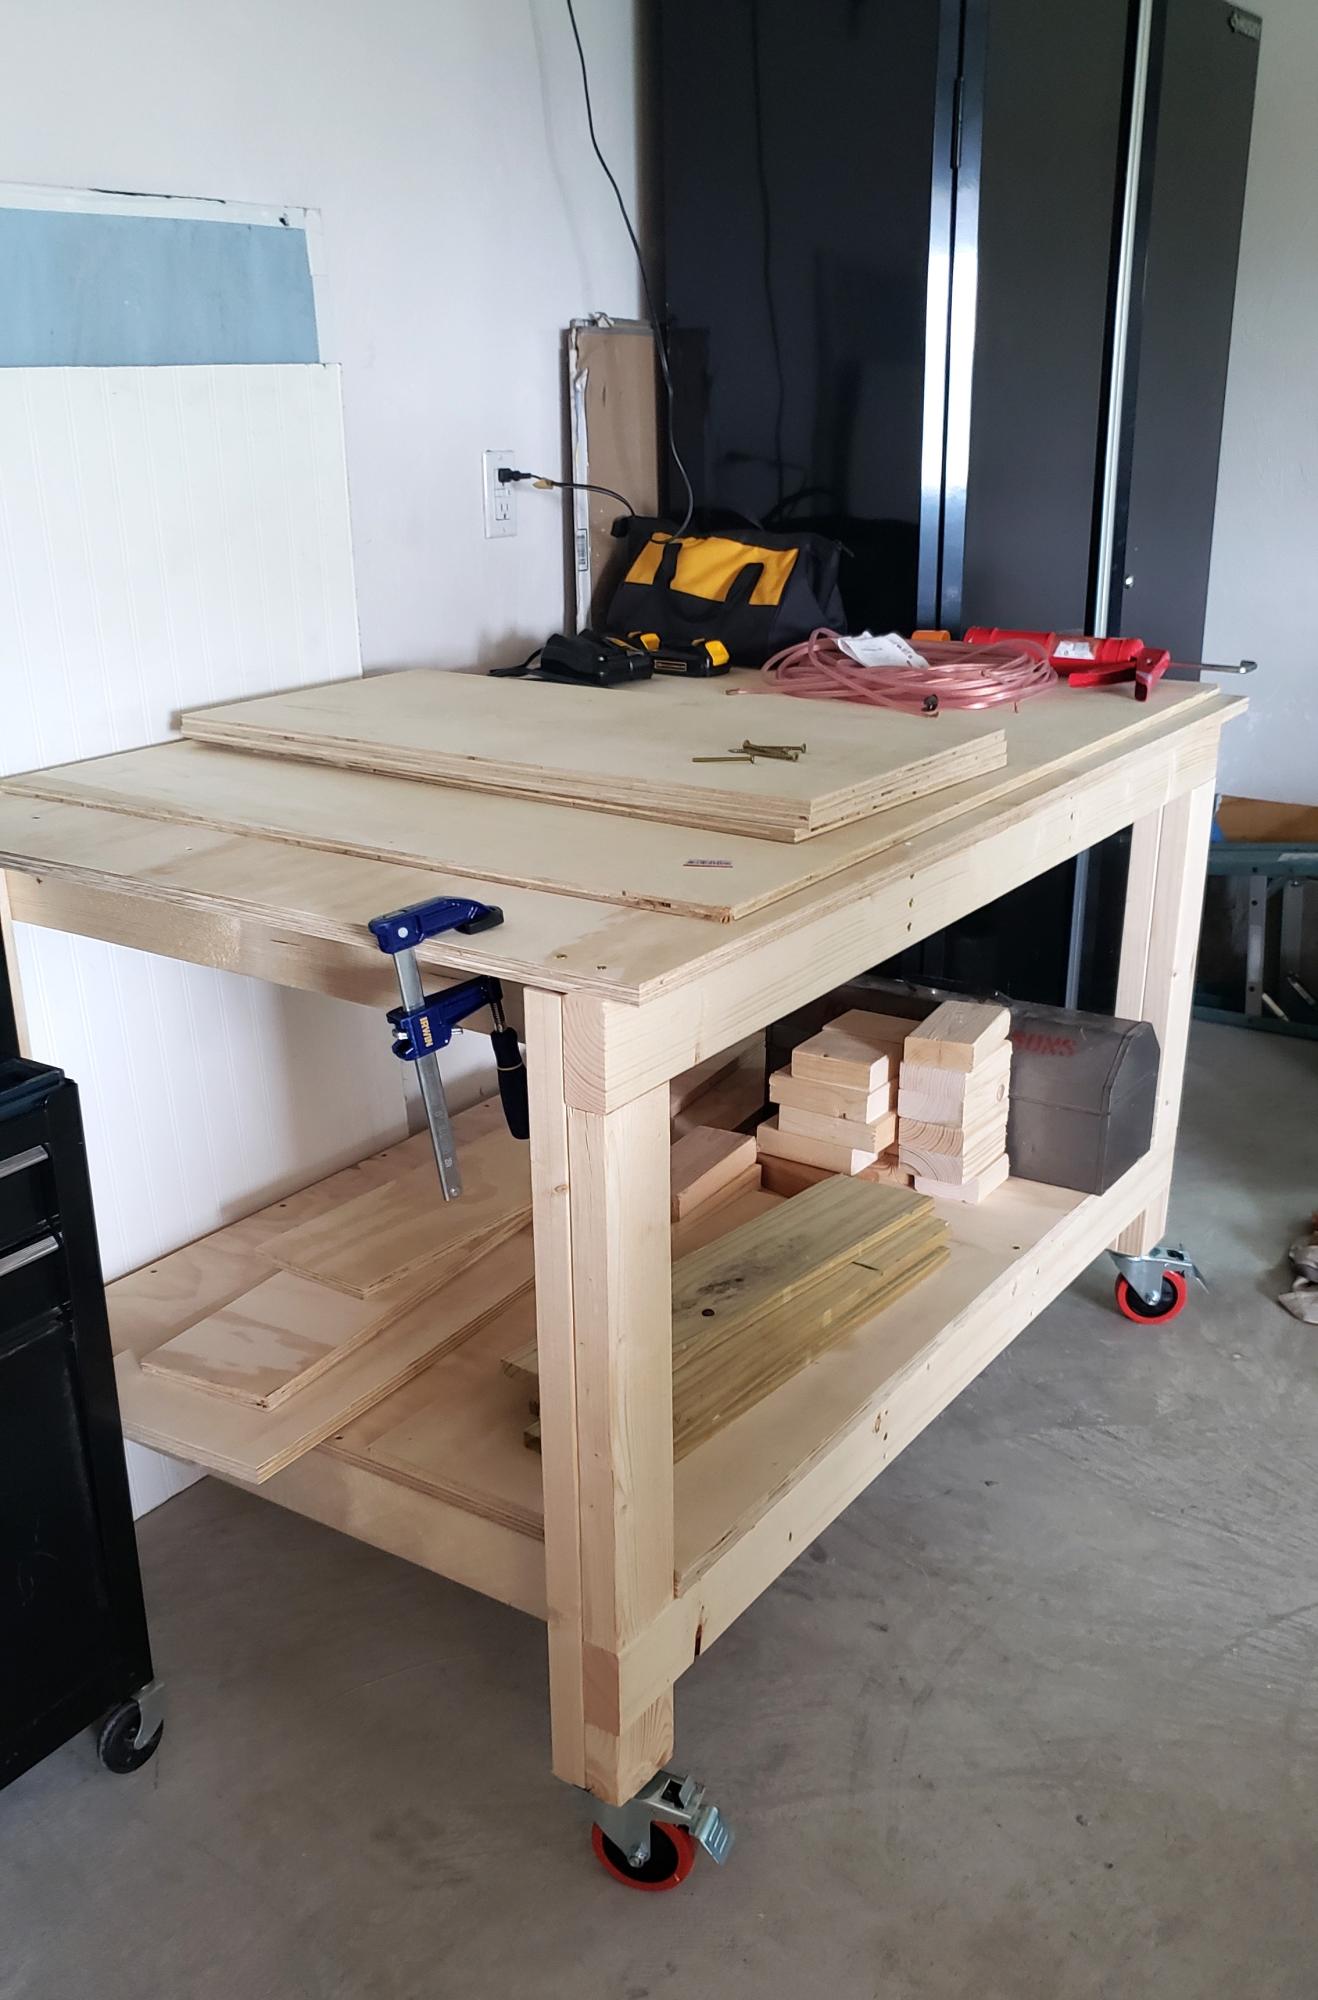
Easy to build workbench. I added an extra 2 1/2 inches (width) to the top plywood cut. This gave me a 1 1/4" lip to the front and back sides. I wanted to be able to clamp on all sides of the bench. Also added casters since I wanted to use this as an outdoor table for entertaining if needed and to simply have mobility with the bench. So far I love it!
Made this for Christmas for our 2-year old last year. The plans were easy to follow, and it turned out great. She loves it!
I chose the Southern Yellow Pine because of its strength for furniture. Also I have used the pour on finish before with good results. The wood was a special order thru Menards and took about a week to get.
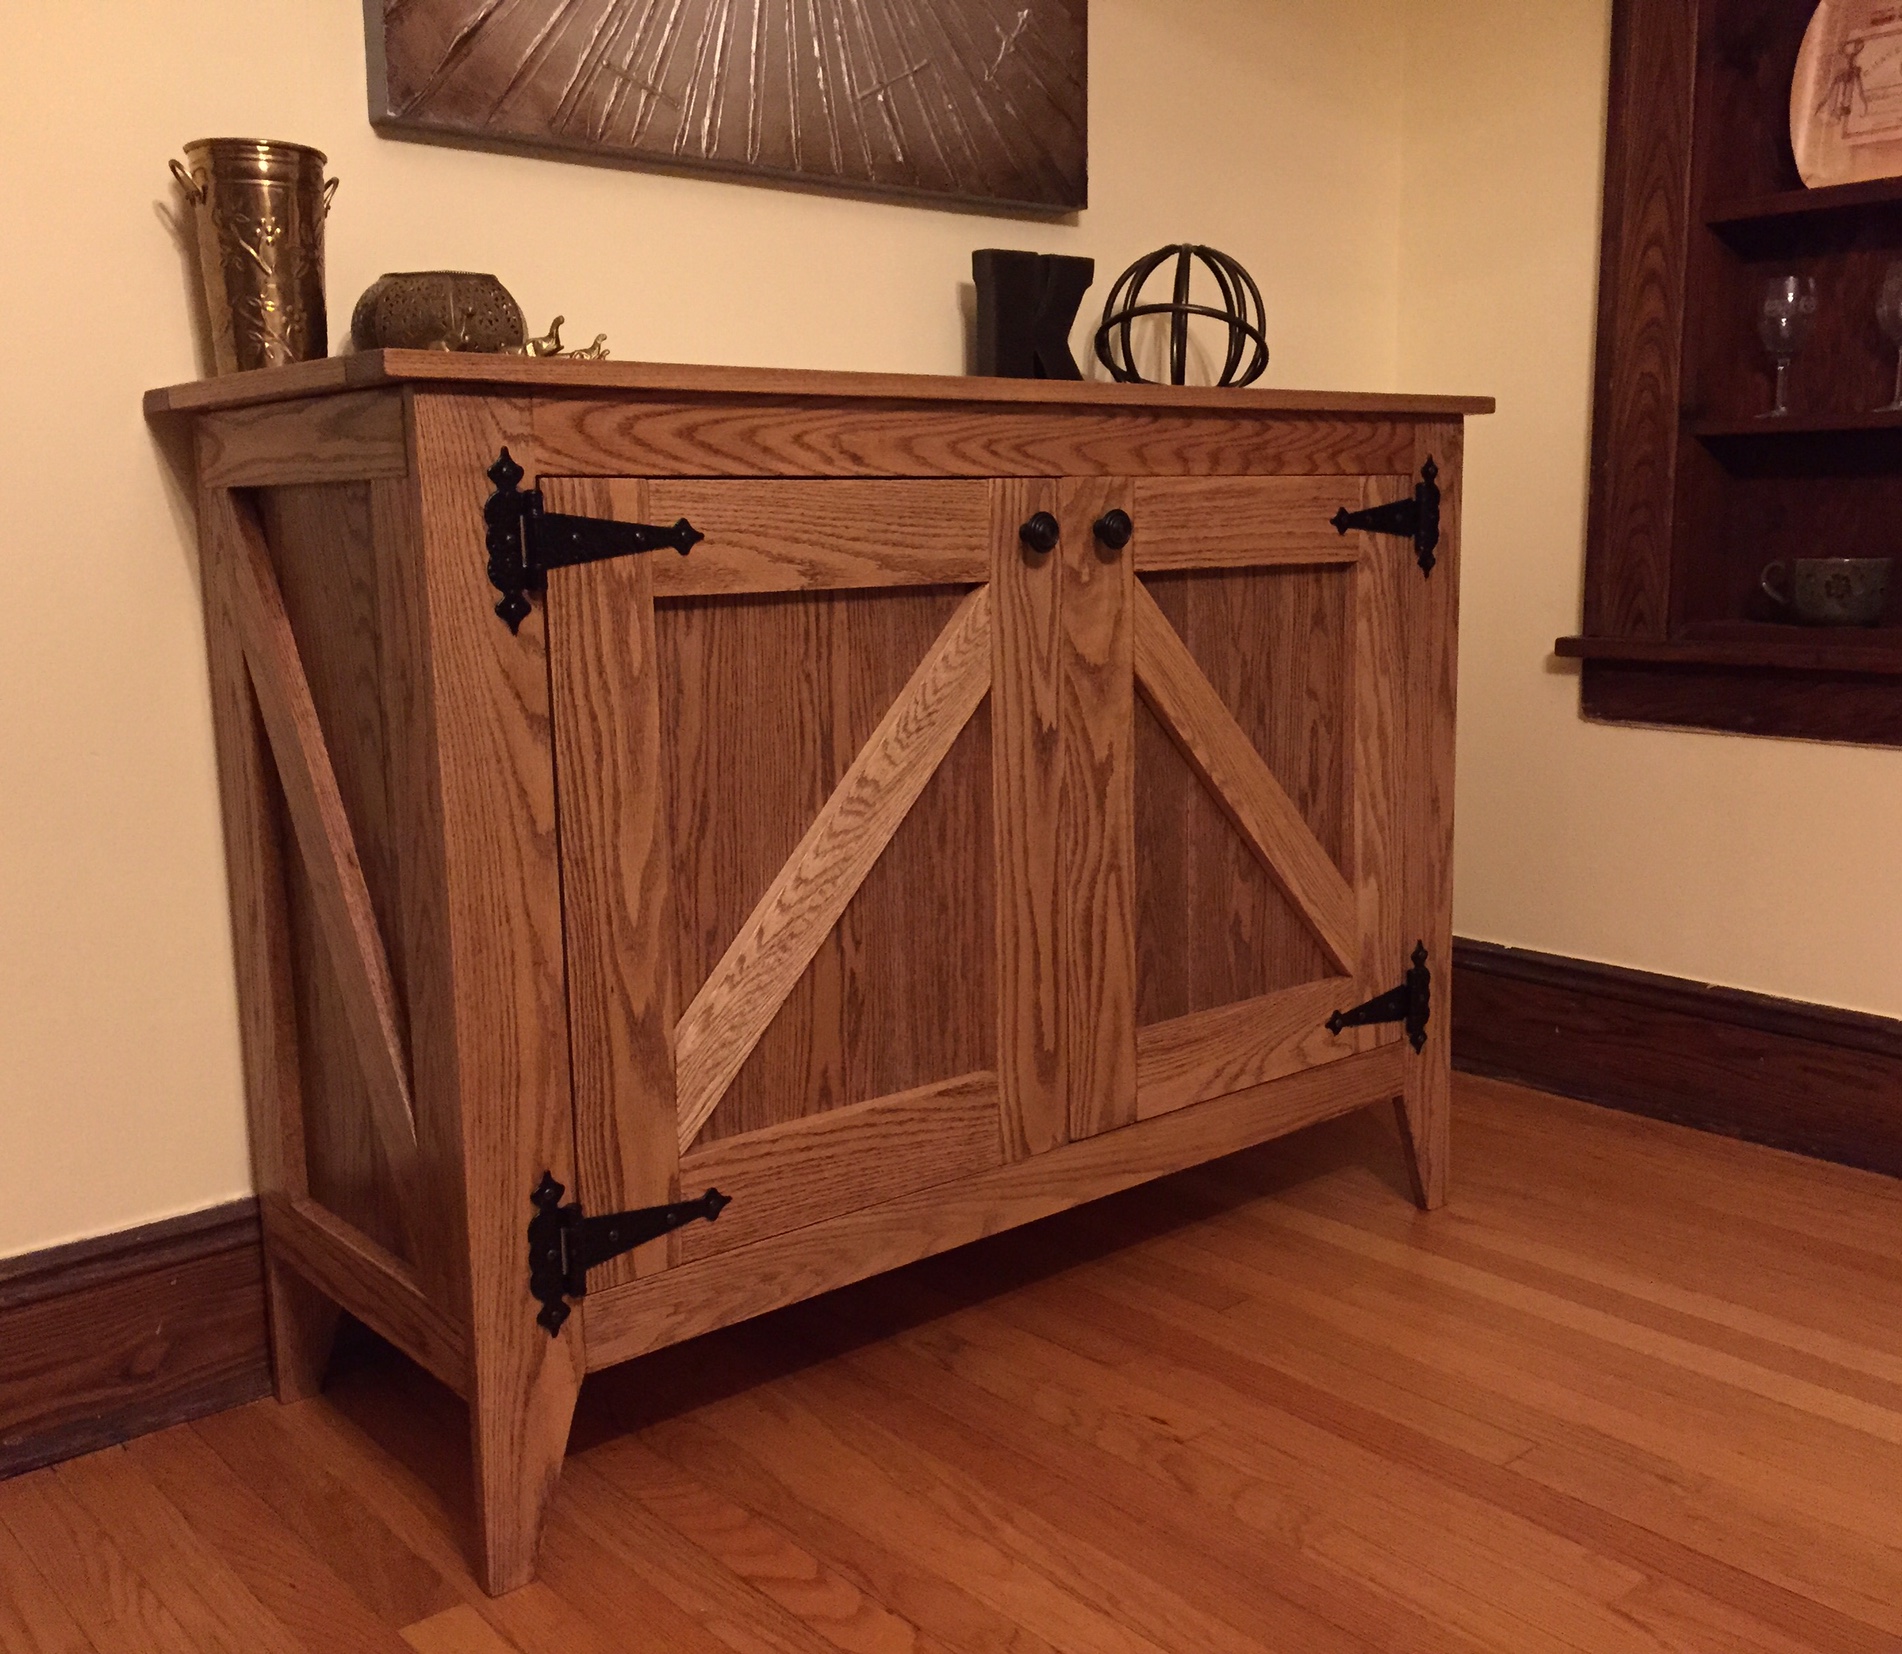
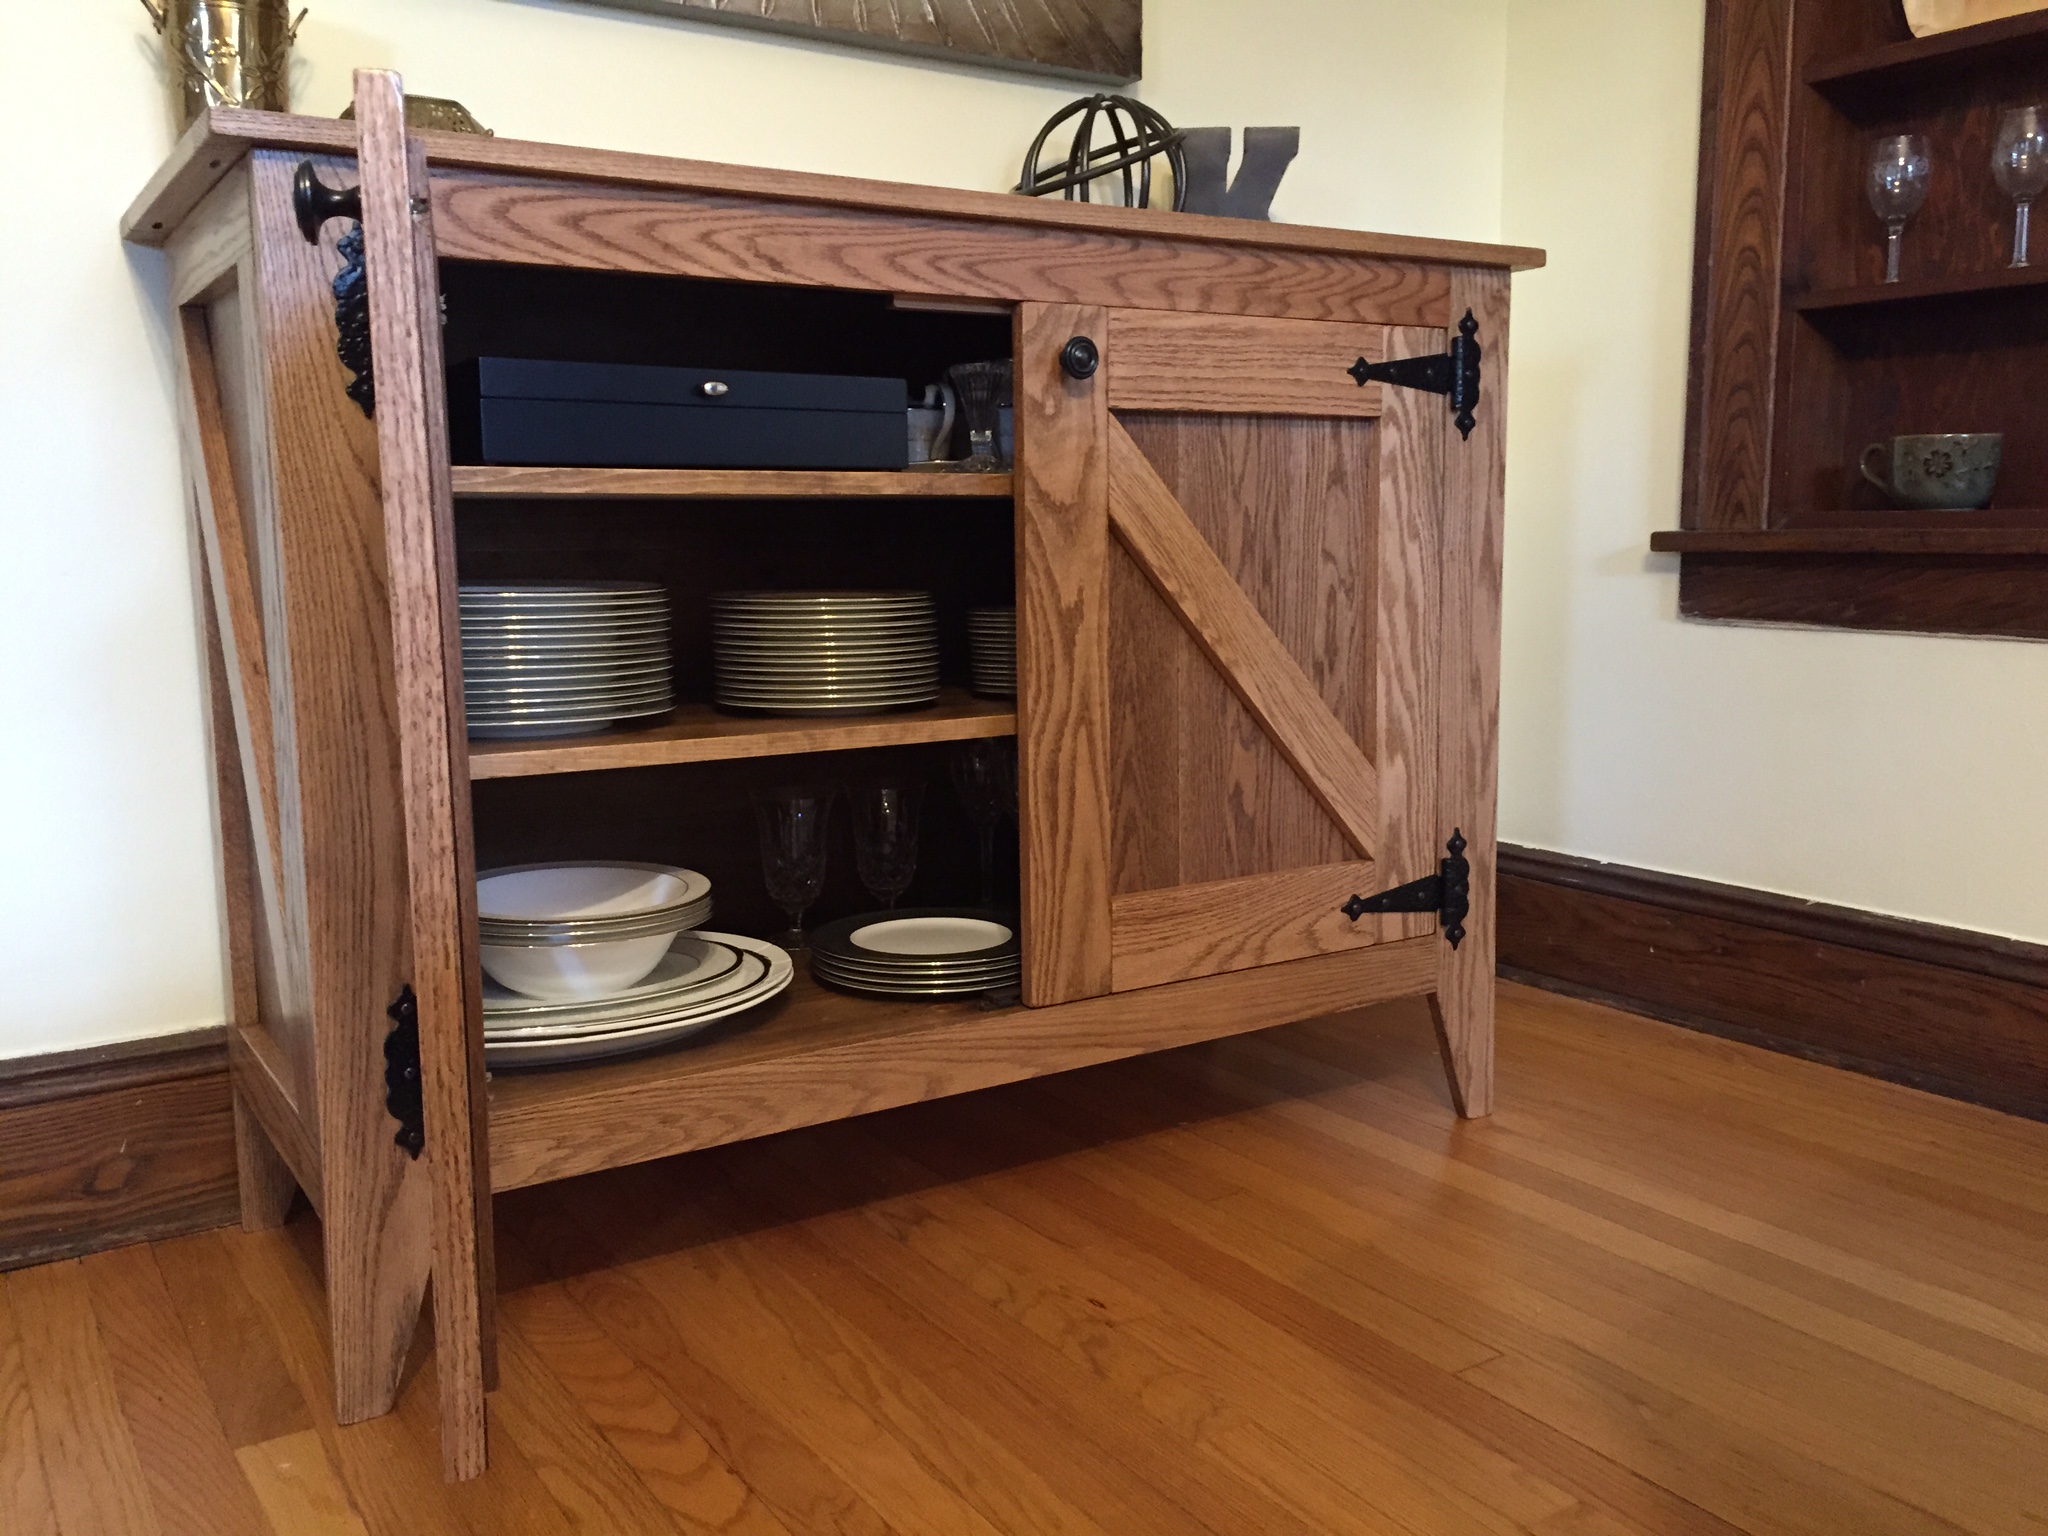
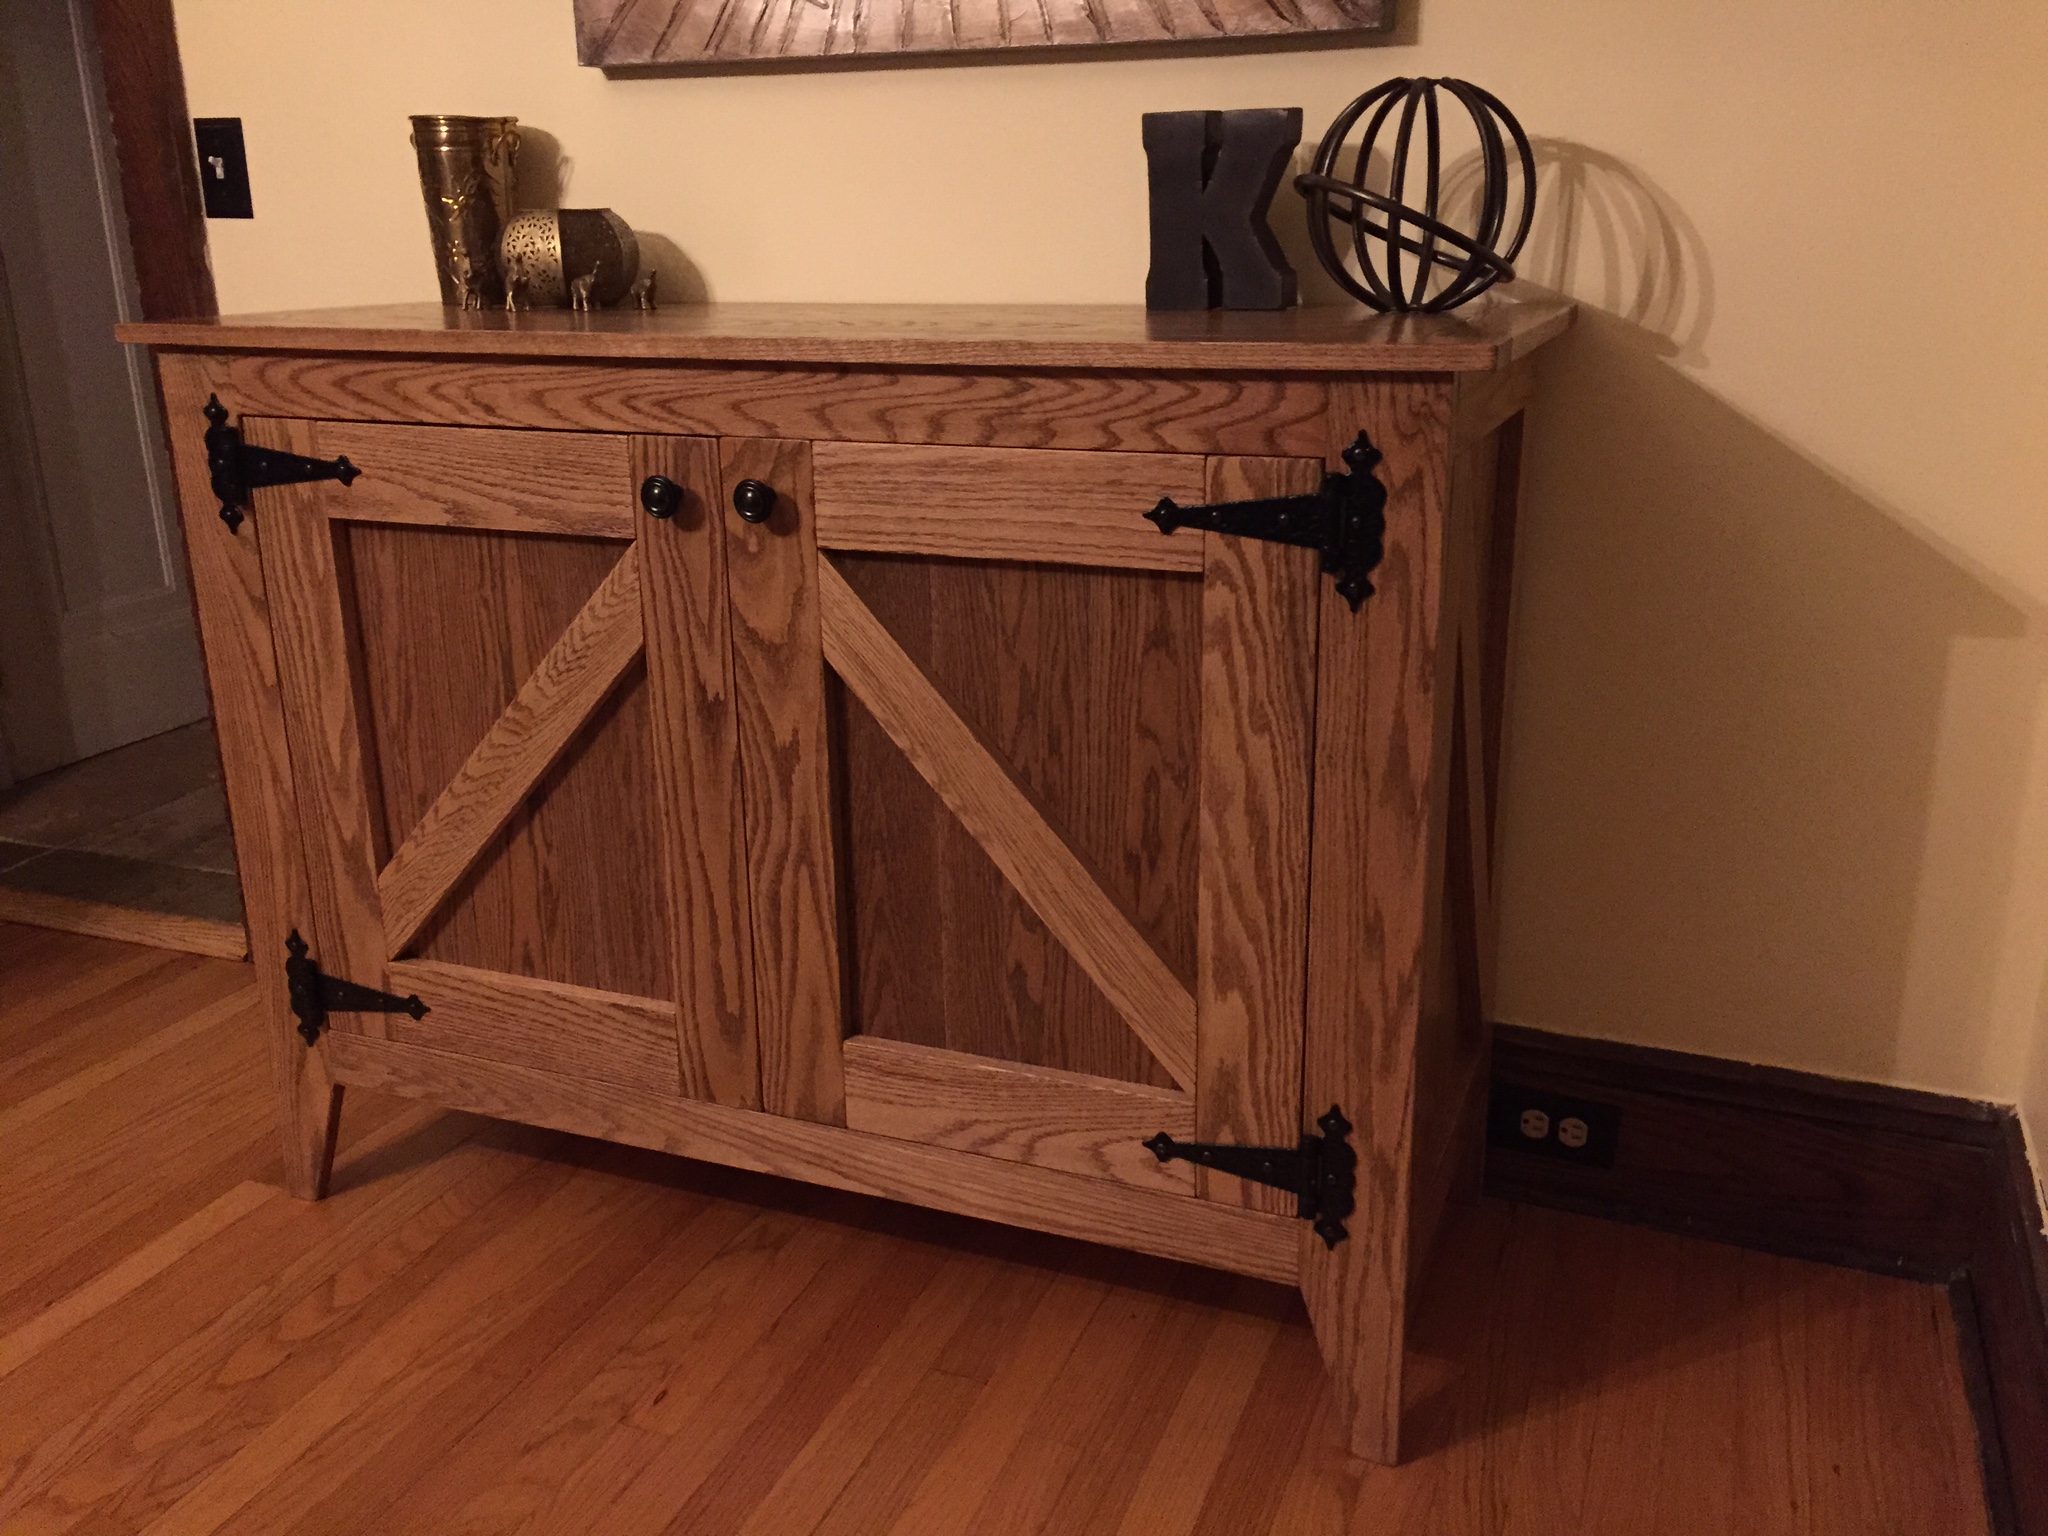
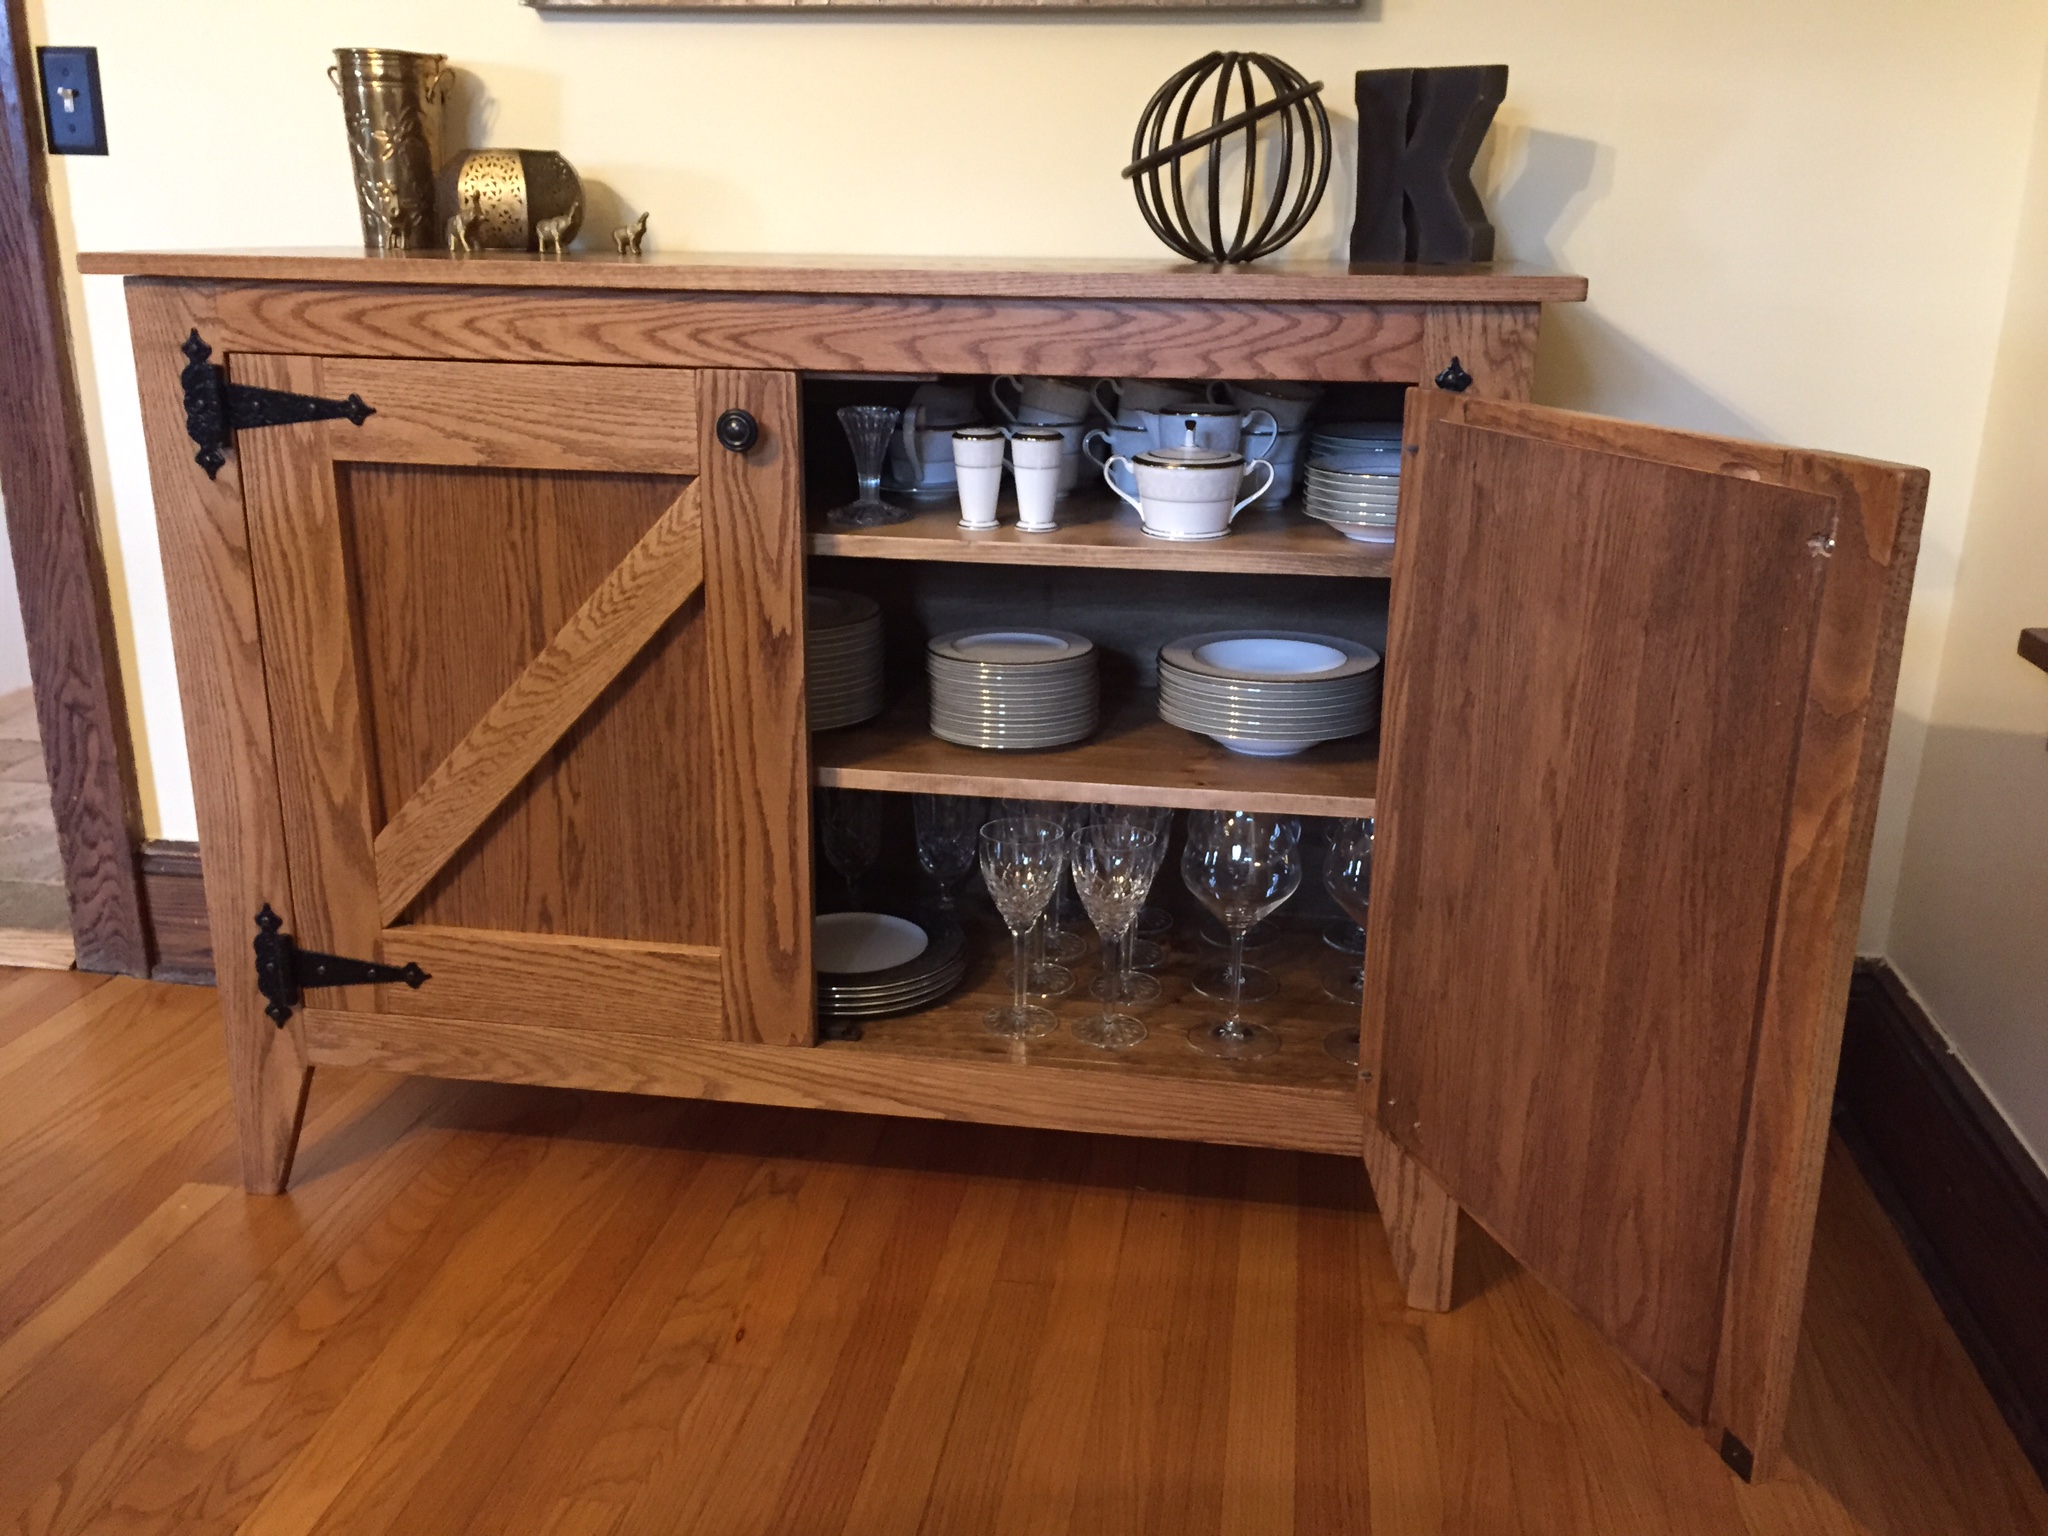
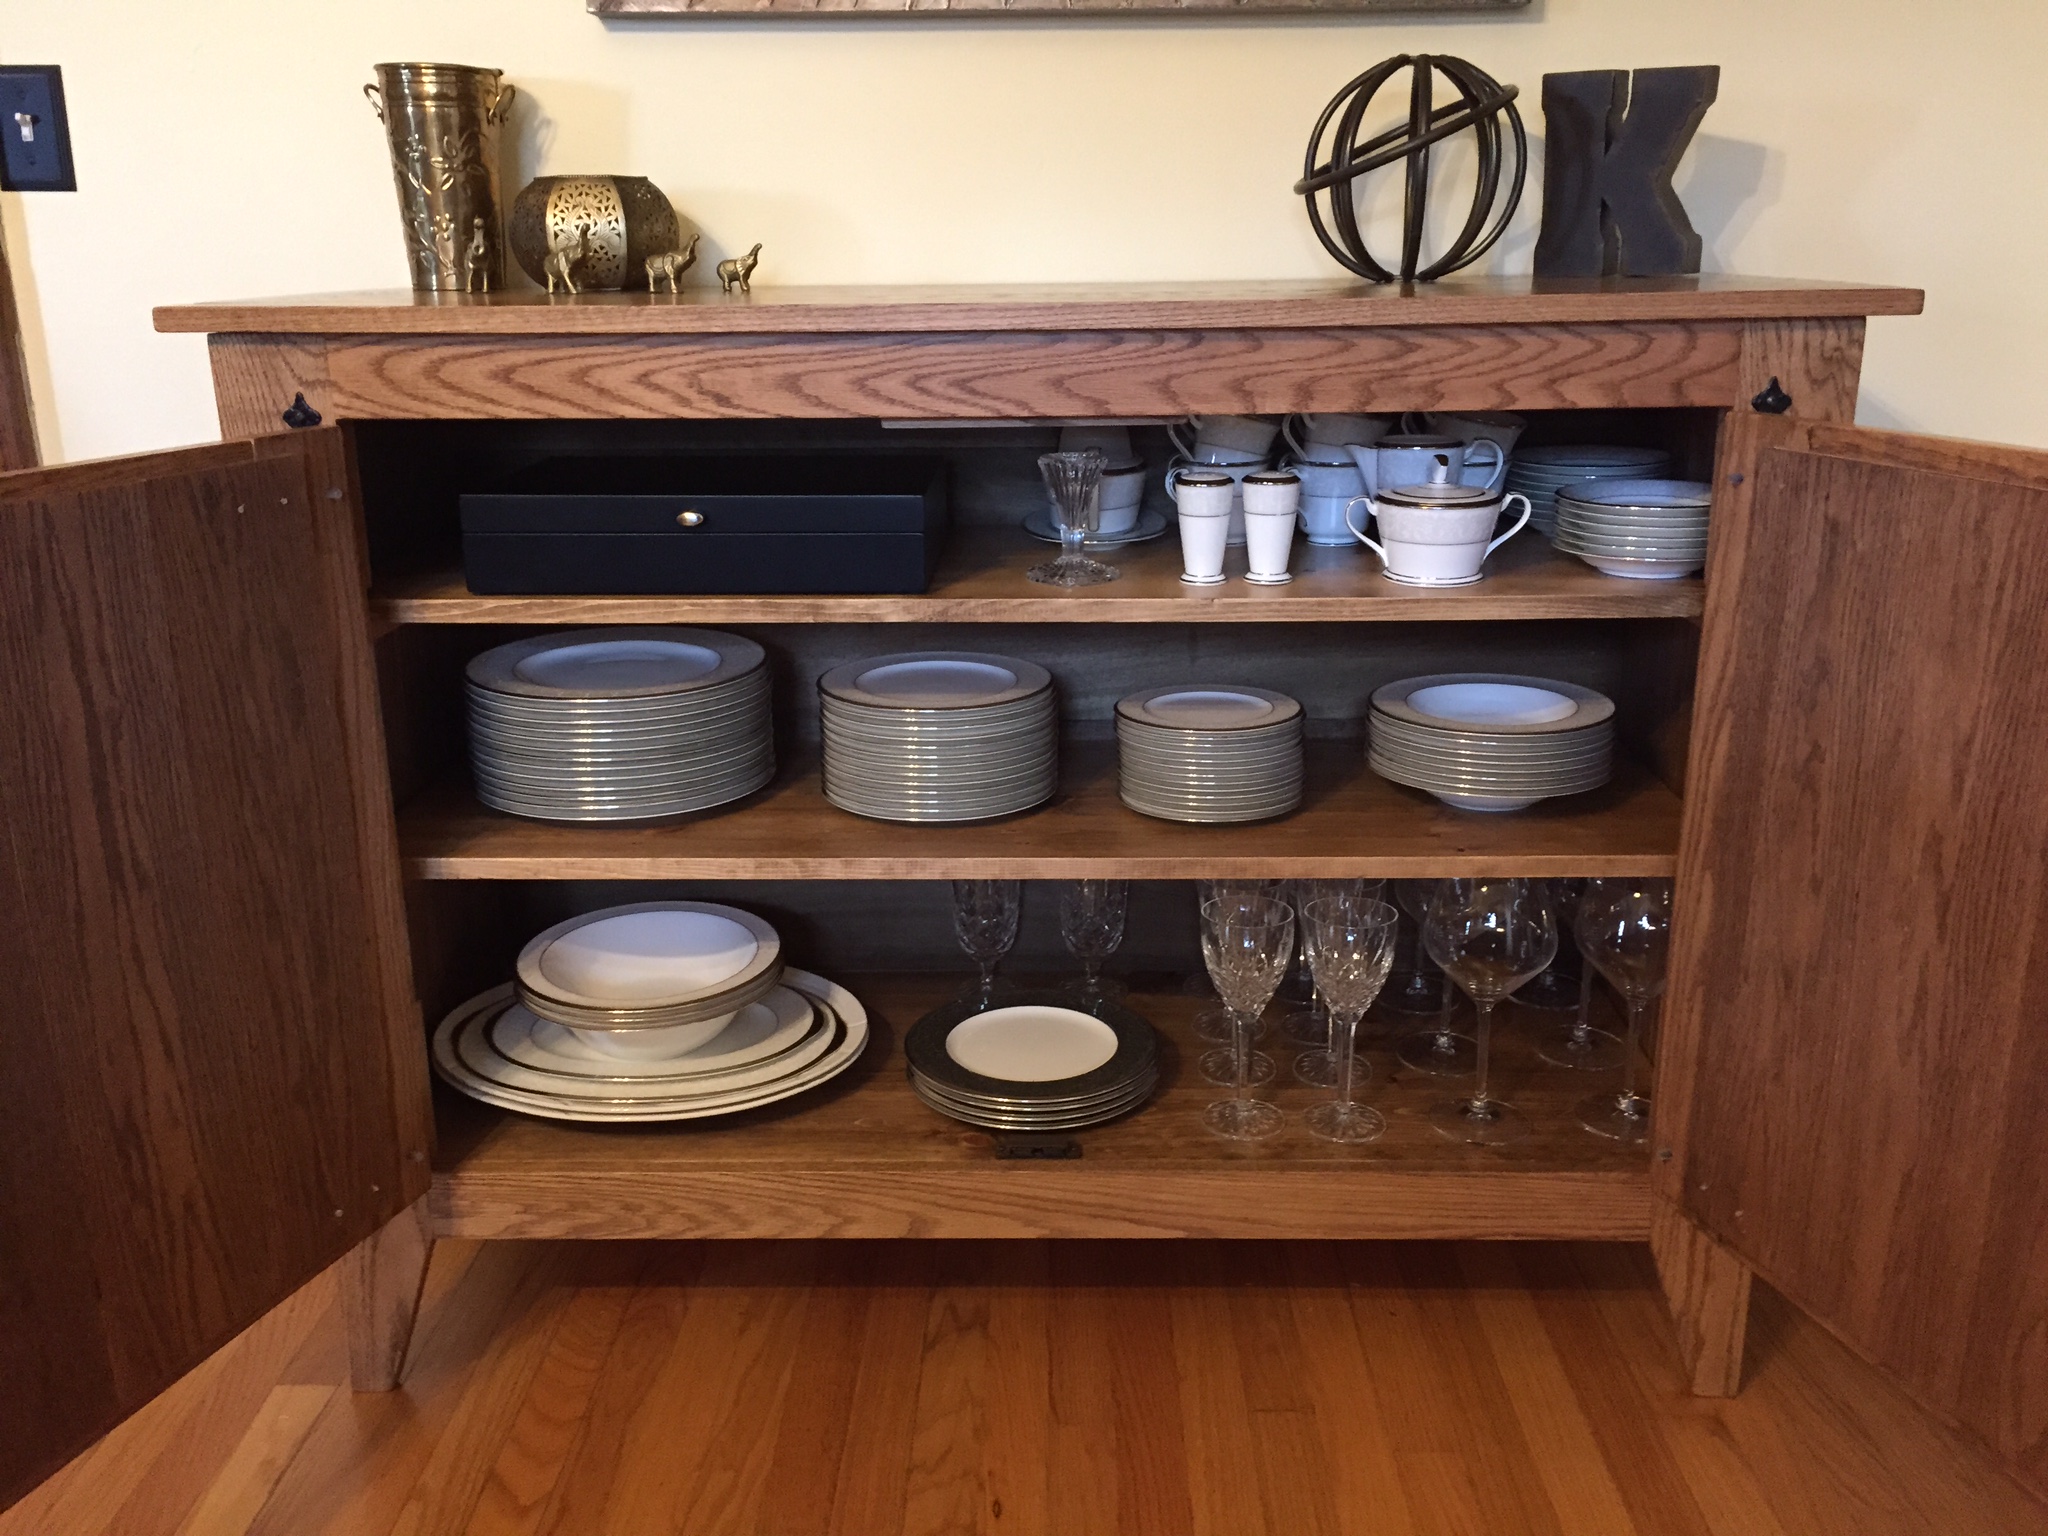
DIY Buffet Table! Our last edition to the dining room. Very happy with how this one came out! Its all Oak with Special Walnut stain and hardware from Home Depot. We needed this piece to store our fine china we received from our wedding. Still haven't eaten on them yet. . . Anyway! I was inspired by the planked sideboard plan and made it my own. My shelves are straight across and I went for the barn-styled cabinet look. Pretty much used all the tools in my arsenal for this one! Used a belt sander for the first time to make the top perfectly level. Hated using it, to be honest! It really shreds the wood. Other than that, I have another piece to be proud of. Thanks for the inspiration!

Needed a new coffee bar to fit a specific area. Changed the plans to fit my needs and this is the result. Spent a few hours a day over two weekends, probably 8-10 hours in all (paint/stain/poly included)
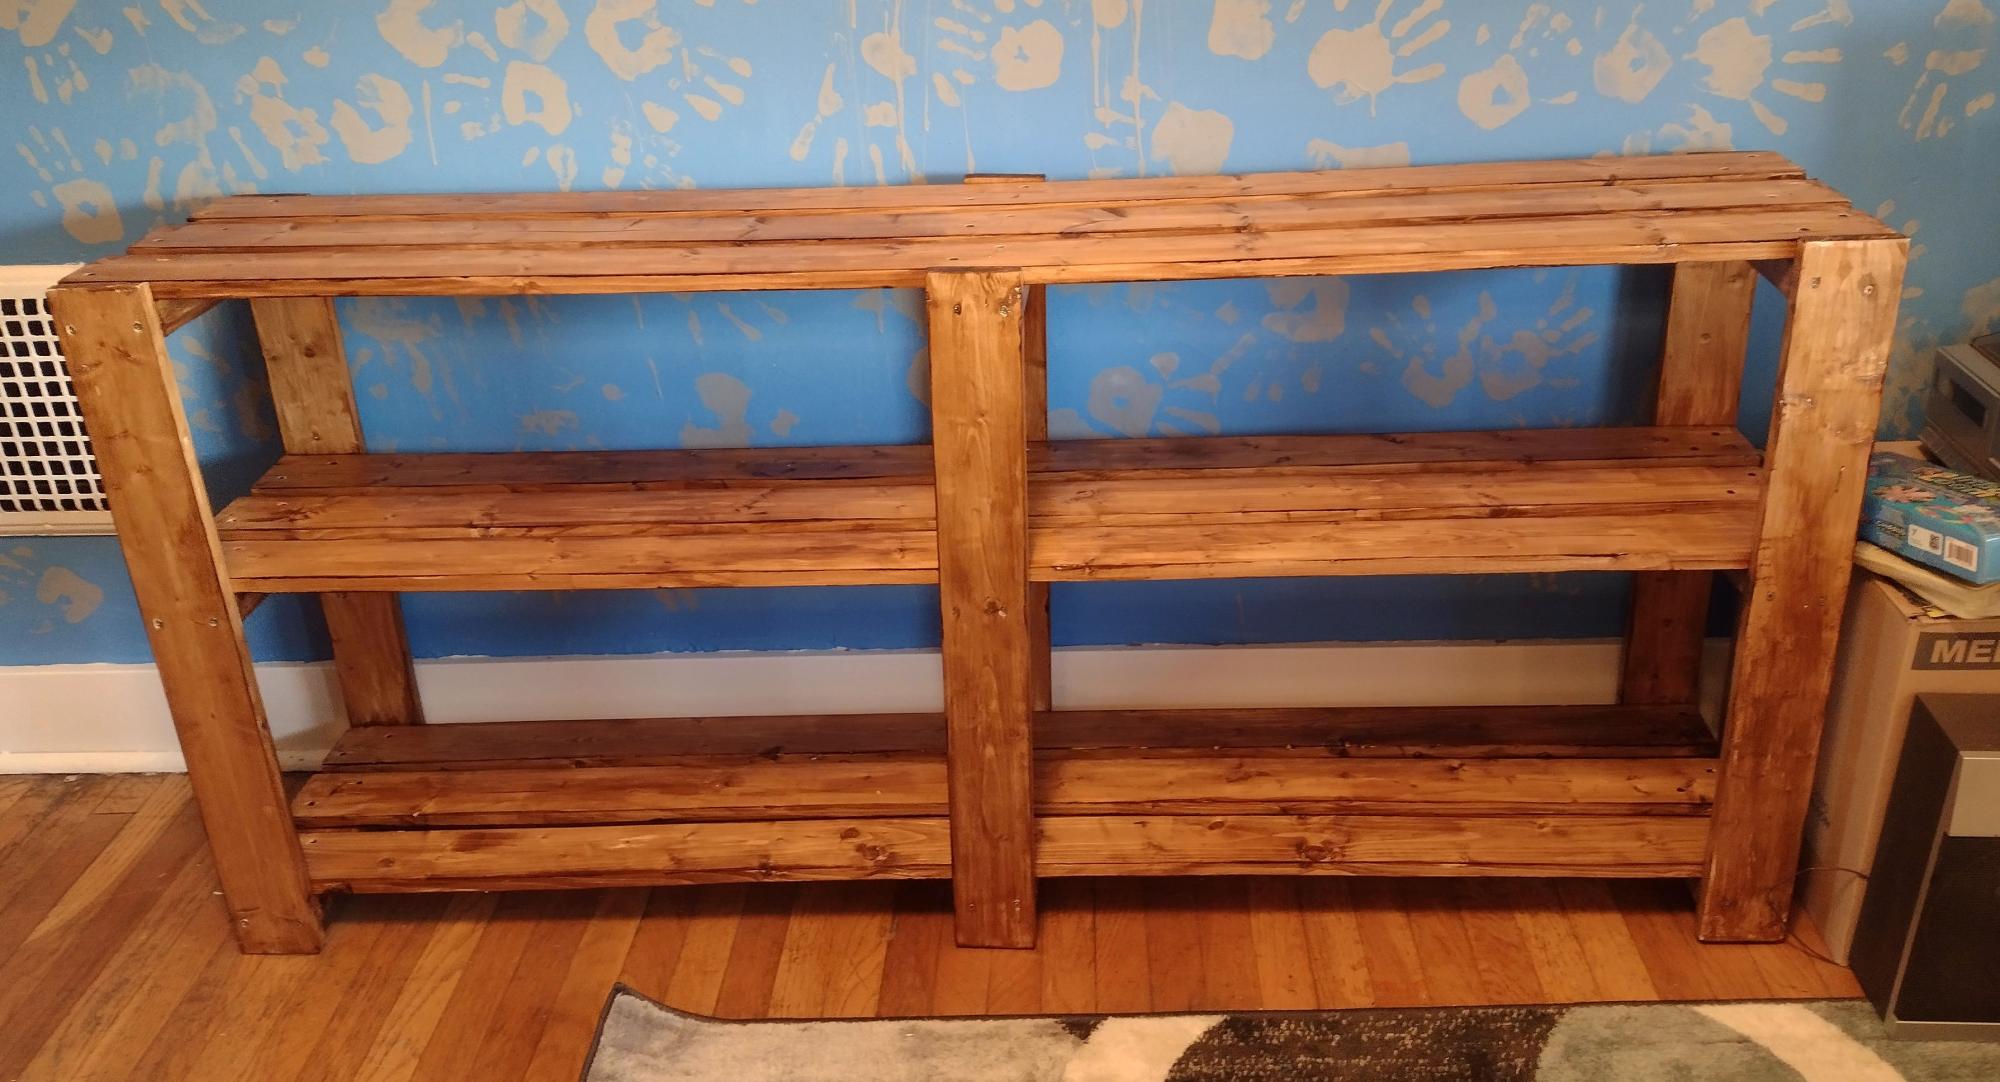
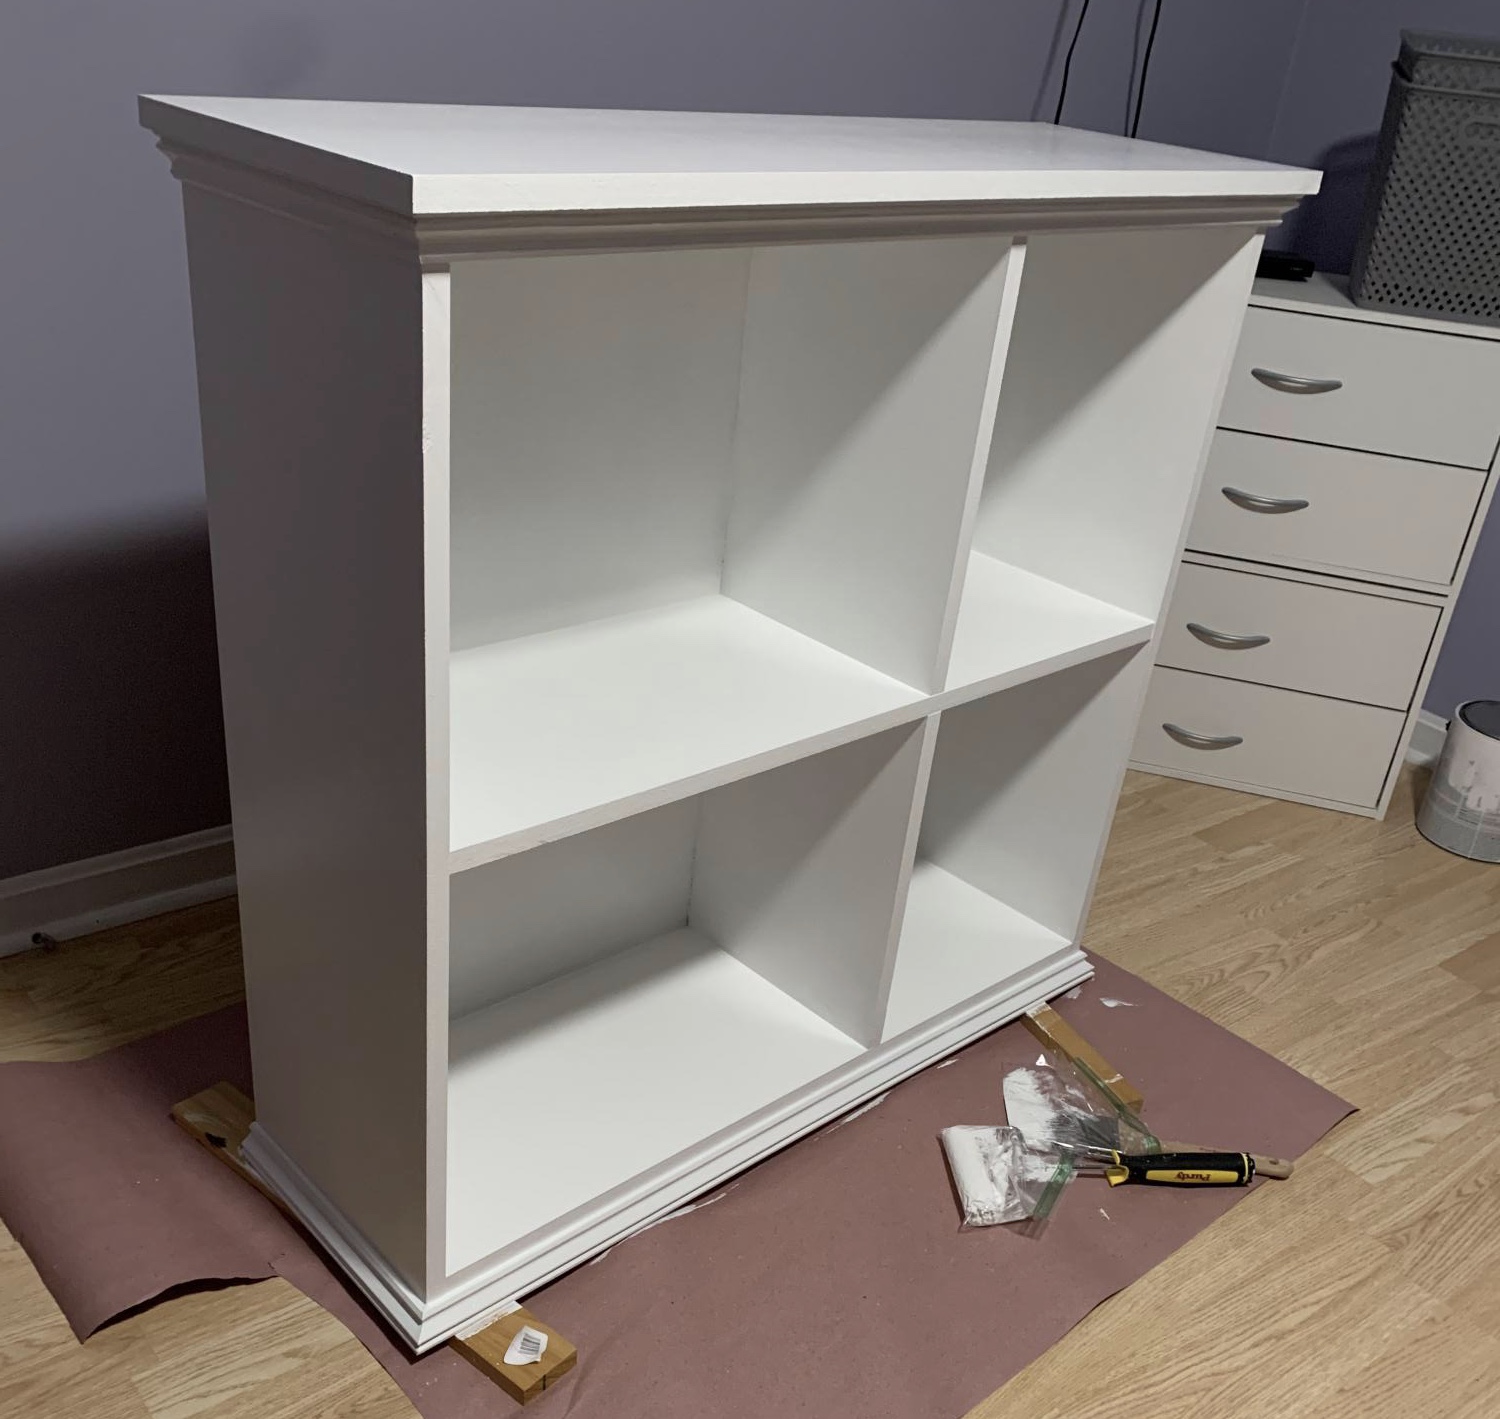
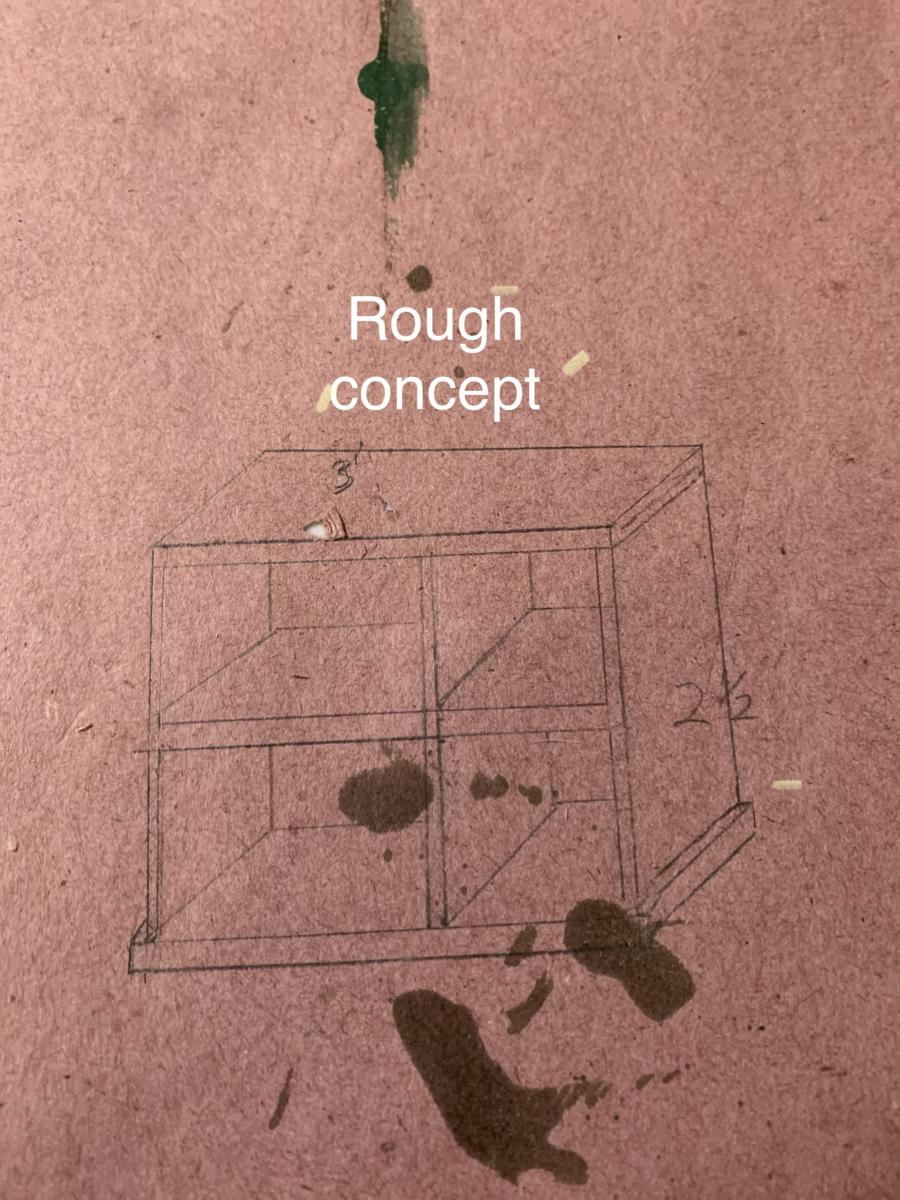
My son needed more shelves/storage in his room. Modified this a bit shorter in length and with to fit better in his space. Easy to build and love how it turned out!

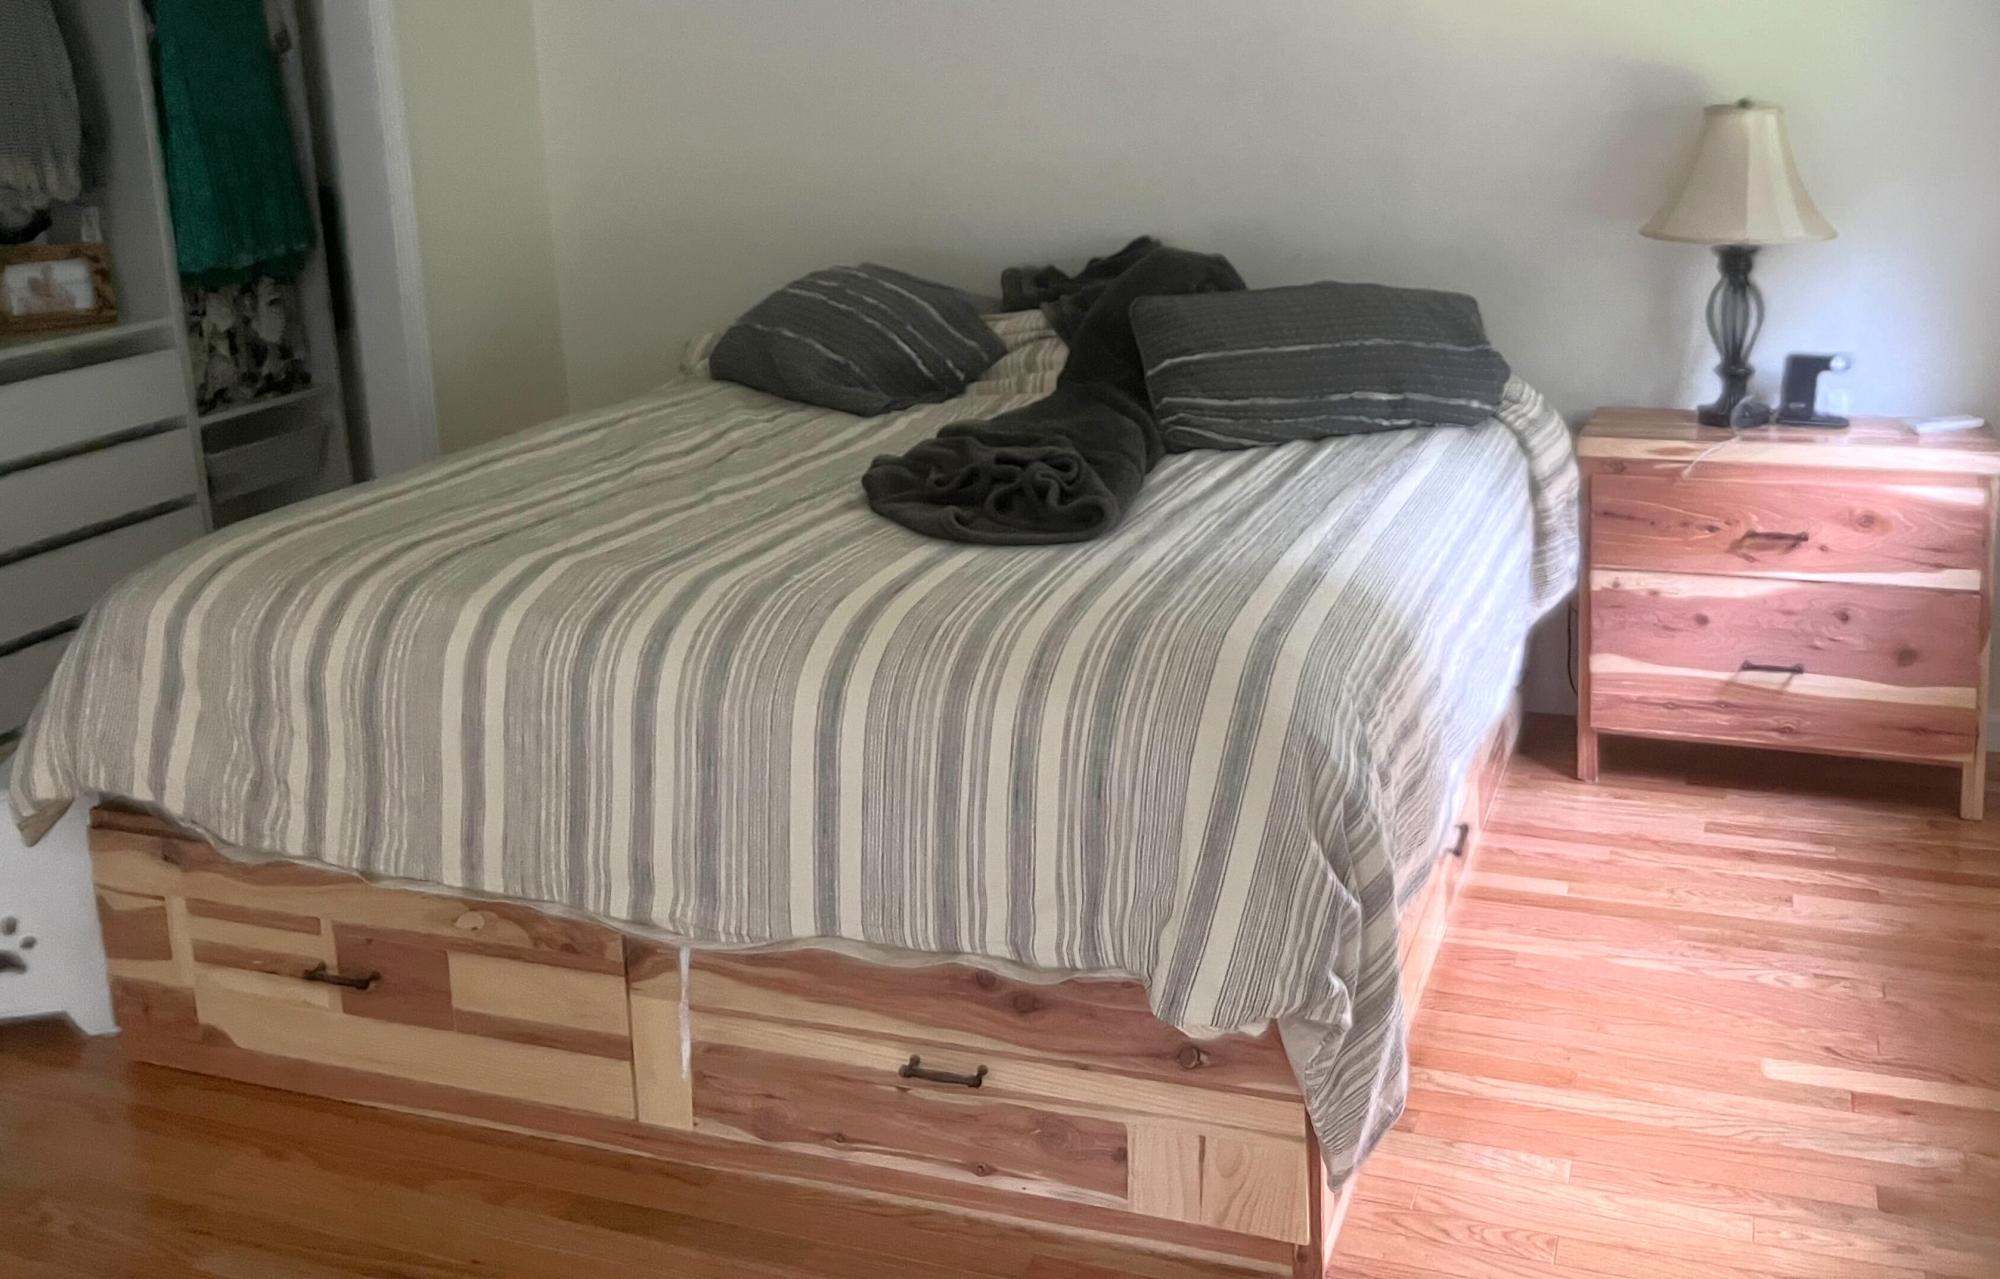
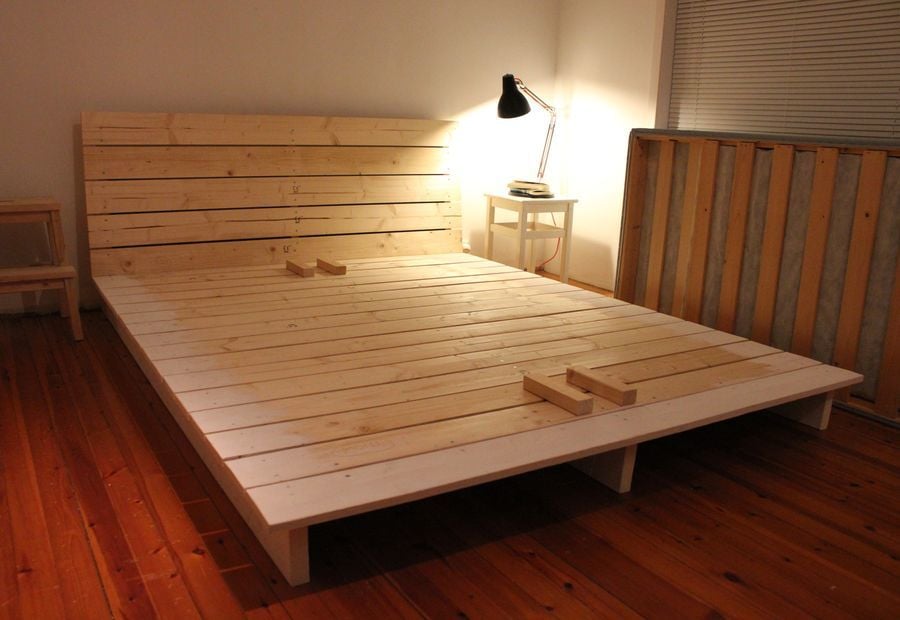
This project took me about 10 hours. I enjoyed every minute of it! I built this bed for my son. I looked at other plans but you had to pay for them and they weren't as good as these. It's good to no that there is people like Ana that is still willing to help people. Thanks for the plans


Tue, 07/05/2016 - 10:59
Hello,
I've been on this website trying to find the plans for the Simple Bed Plan. I have seen many beds made; however, I don't see the cutting list (supply list) of the materials needed. Can you please help me with the supply list? My hubby and I are going to attempt to make this over the winter for a 3rd birthday present for my son. I would really appreciate the list so that we know what materials to purchase. Thank you in advance for your help with this issue.
Sincere thanks,
The Maynors
Sat, 01/19/2019 - 12:38
I am trying to build the Twin over the full bunk beds that stack. When looking at the site it says to use the Simple Bed Plans. When I look at the simple bed plans I get 3 pictures and that is it. I don't get a supply list or any kind of dimensions for the bed. Could you please point me in the right direction. I need to build the twin over the full bunk bed for family coming to my home in early March.
Thanks
Gary Dalton

I needed a quick project that could easily be modified for my height needs and would make a good temporary base for my new water dispenser. This was perfect!
A little different take on the plans. We opened up the wall into the playroom and needed something functional yet decorative. This was the perfect addition!
Inspired by Ana!
Thu, 04/05/2012 - 14:01
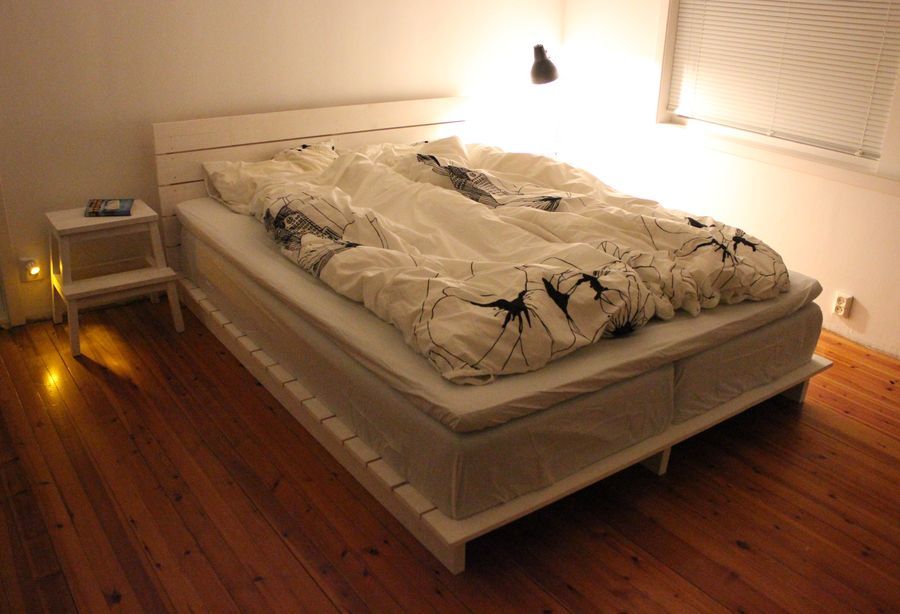
The bed has two matresses, the blocks are there to keep the matresses in place.
Tue, 04/17/2012 - 11:21
Now this is my kind of project! Looks easy but polished. Do you have plans for this?
Tue, 04/17/2012 - 12:03
Platform bed measures:
- Deck: 18x120 mm, width = matress width + 10 cm, length = matress length + 5 cm.
- Headboard: Height 80 cm, width = matress width + 10 cm.
- Beams bed: 36x150 mm, length = matress length - 5 cm.
- Beams headboard: 36x150 mm, height = headboard height - 5 cm.
Thu, 04/11/2013 - 23:04
I would love to make this but I would require plans in order to build it. So if there is any way I could get plans you would make me quite happy.
Fri, 01/15/2016 - 17:11
It looks simple enough, but the headboard looks like it may be tilted. Can you provide instructions on the attachment of that? Thank you