Front porch planters

Followed your plan but added extra 1 x 2 trim to the sides, feet made from 1 × 3 and 1x 3 trim around the top
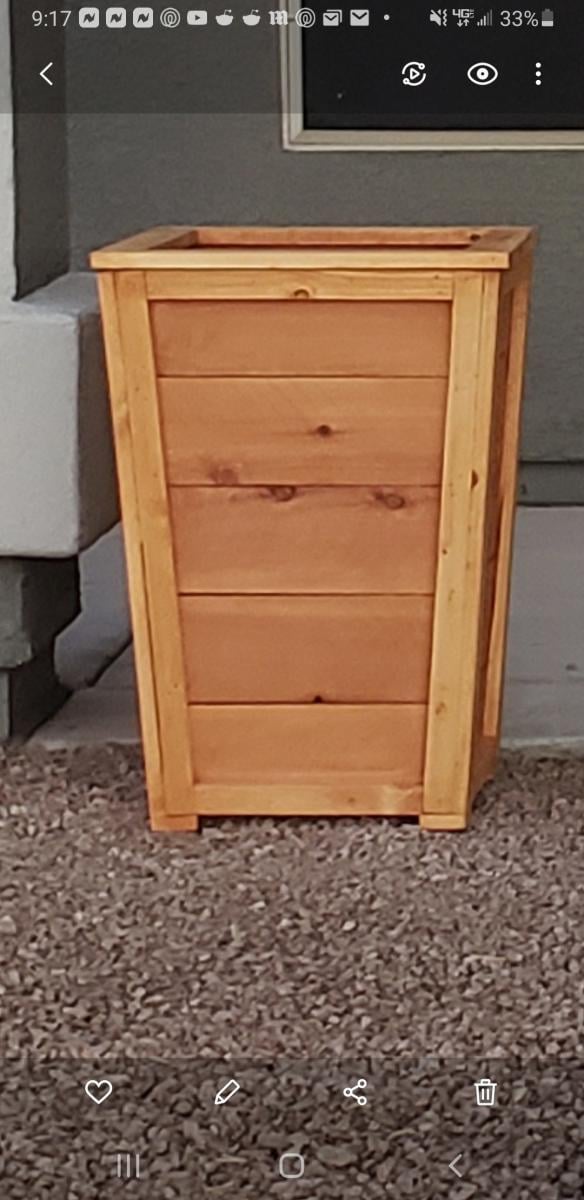


Followed your plan but added extra 1 x 2 trim to the sides, feet made from 1 × 3 and 1x 3 trim around the top


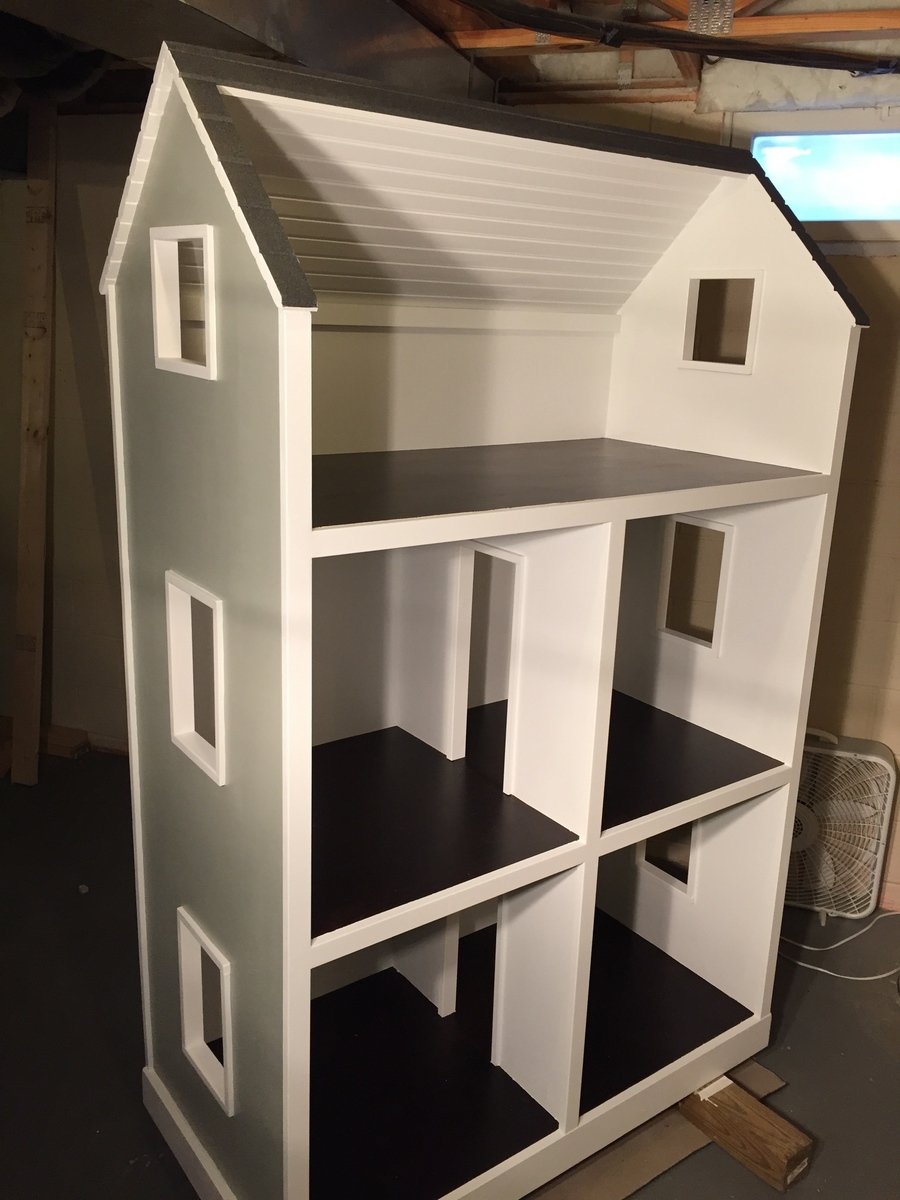
I made a few changes from the plans but the size remained the same ( which is huge!!).I used birch plywood for the frame and MDF 1x2 for the faceframe and window and door trim. I would reccommend cutting the windows and doors 1/8"-1/4" smaller and using a router with a flush trim bit with a top of bottom bearing. Clamp a straight edge along the window and door openings to trace with the bearing of the router bit. For the roof I used tougue and groove 4" beadboard made of pine. I used 10' lengths because of the 49" width. They were actually a better price than the regular 1x4 pine. The beadboard adds a little detail the the ceiling of the 3rd floor. It also gives a shingle-like appearance on the flipside with the textured spraypaint. The pieces on the front are 2.5" wide. I also filled the ends with wood putty to hide the exposed groove.
Sat, 12/27/2014 - 11:55
Hi, this dollhouse is amazing!!! Love all the mods and the building tips - the extra work really pays off big!!! Thanks for sharing, it's beautiful!
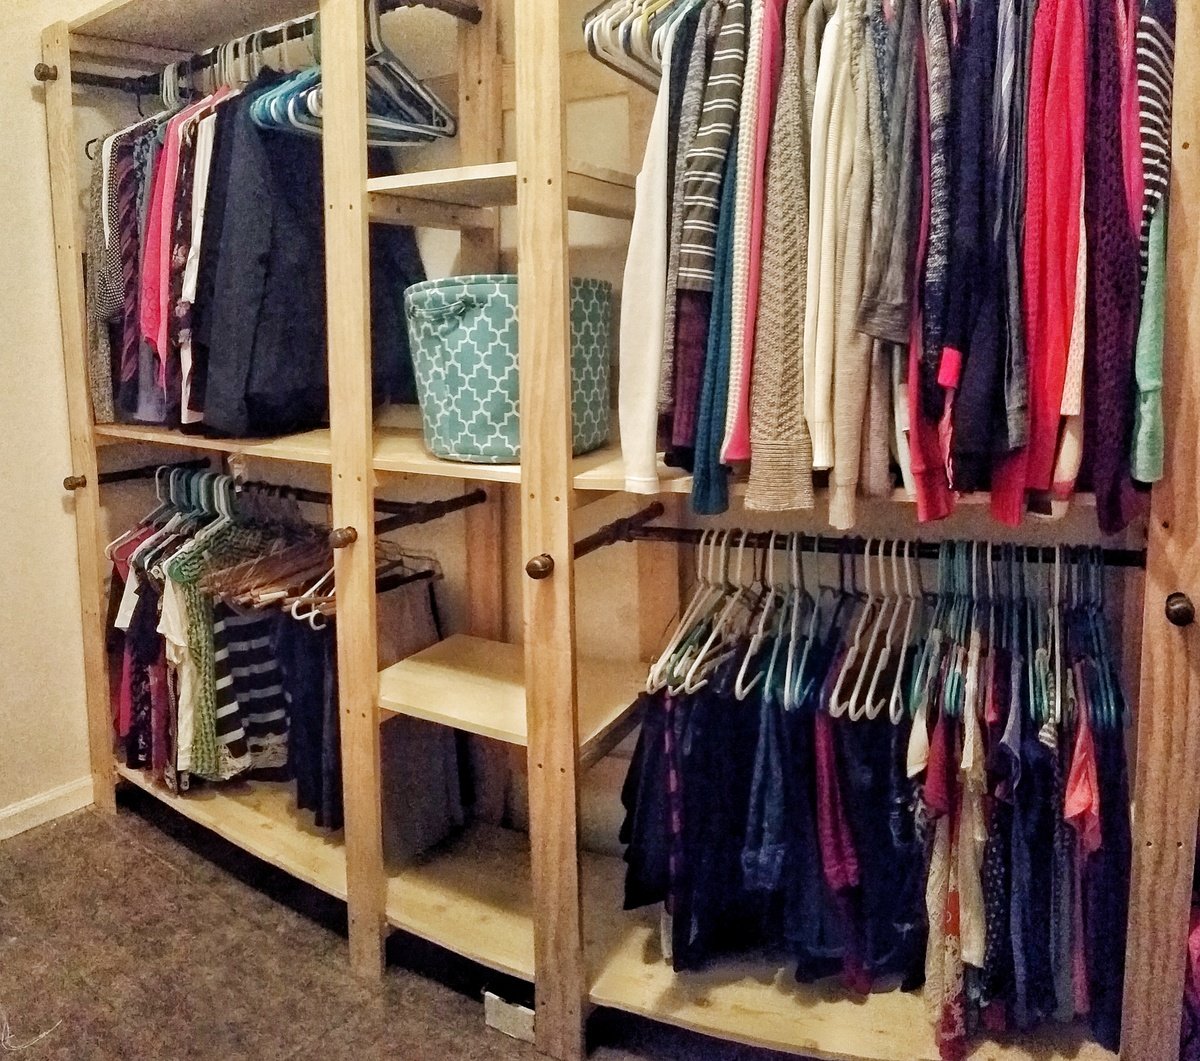
I used 8 ft precut boards for shelves and modified the design so there was enough room for two racks on each side. In addition I screwed 1x4 to the studs to secure the shelving to the wall. I have a 5 year old climber so it was best to be proactive and secure it. It was easy project took about 4 hours to complete. I plan to paint the vertical boards a medium gray and stain the shelves a dark coffee color.
This was my first EVER wood working project.
With that being said, it took me more than just an afternoon.
I used cedar, and all the materials on the cut list had to be sanded , since I didn't like the roughness of the cedar.
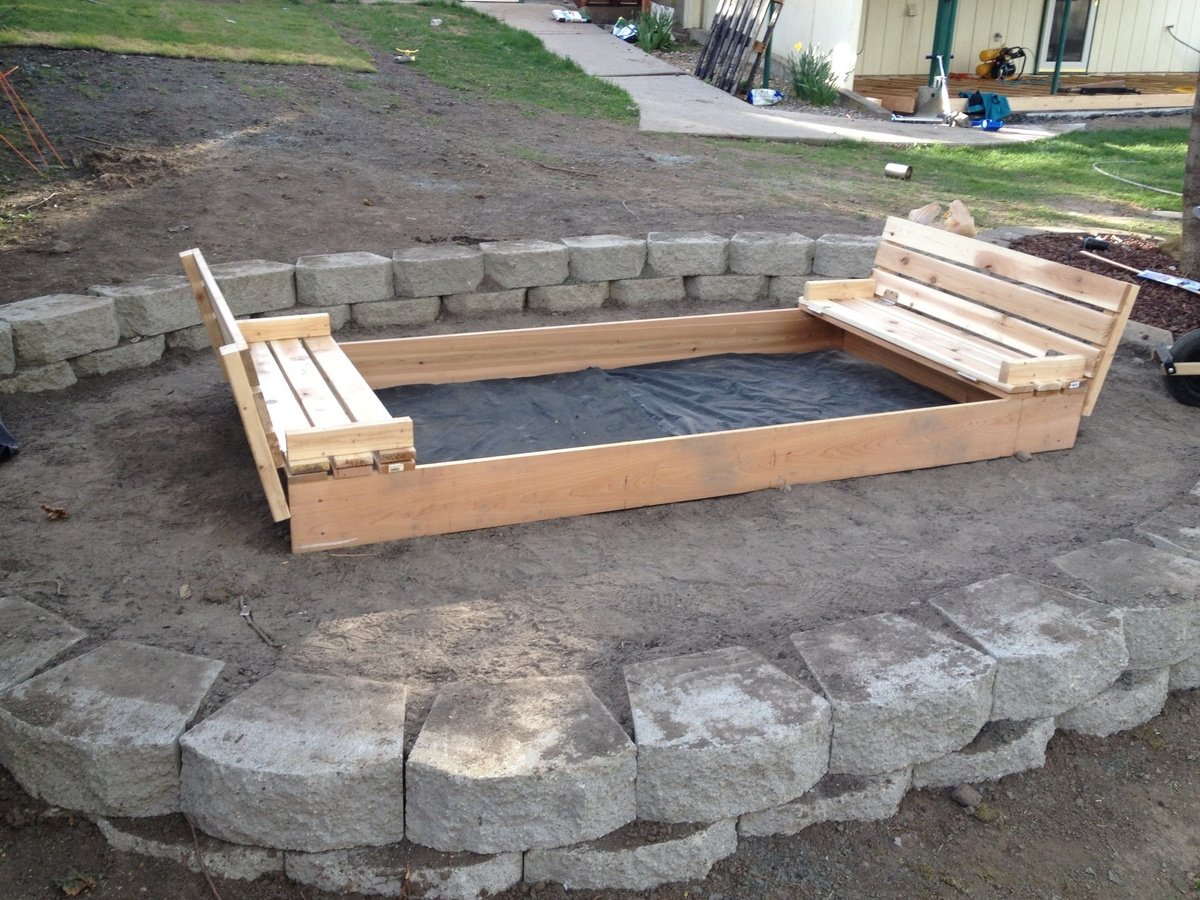
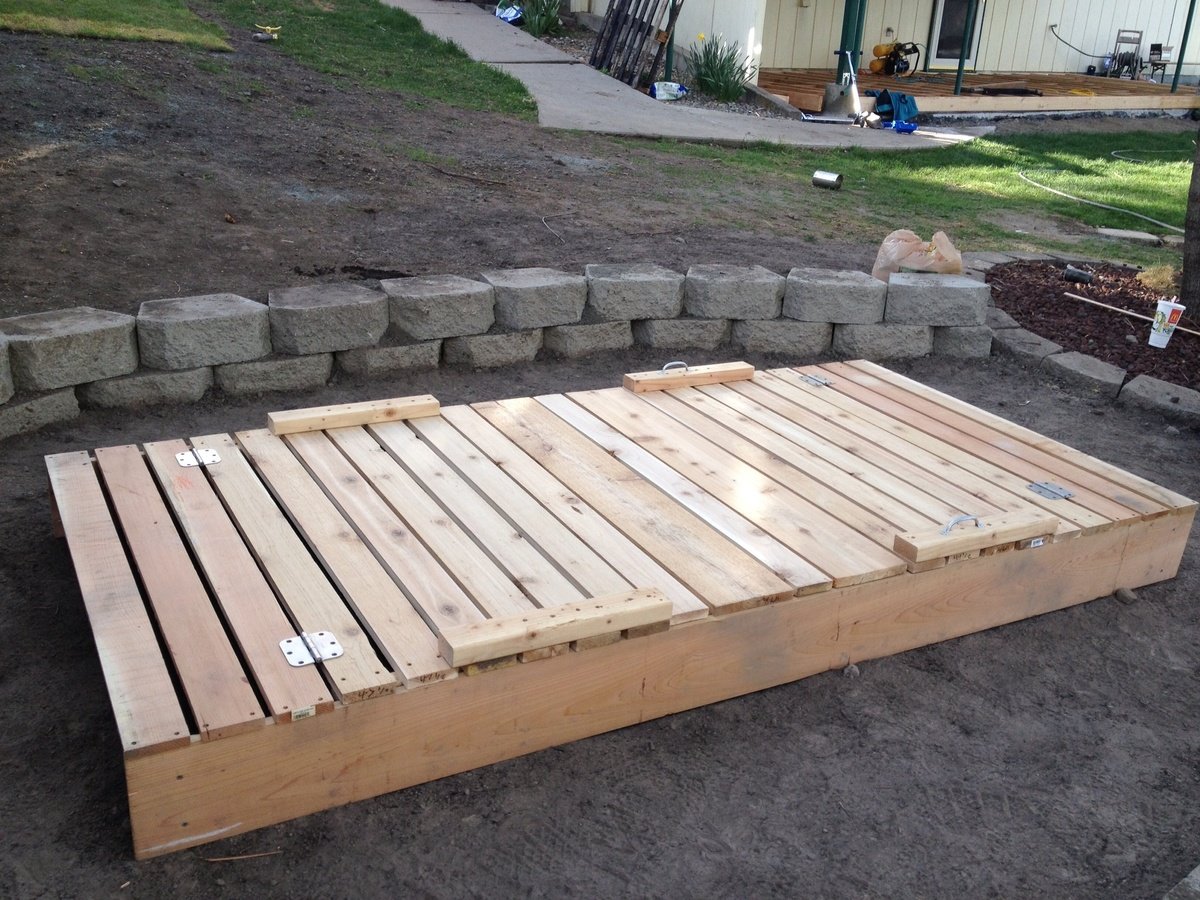
I also made the box 4x8. I didn't take into account that that would require a minimum of 48 inches for the top planks. So, some of my top planks are shorter.
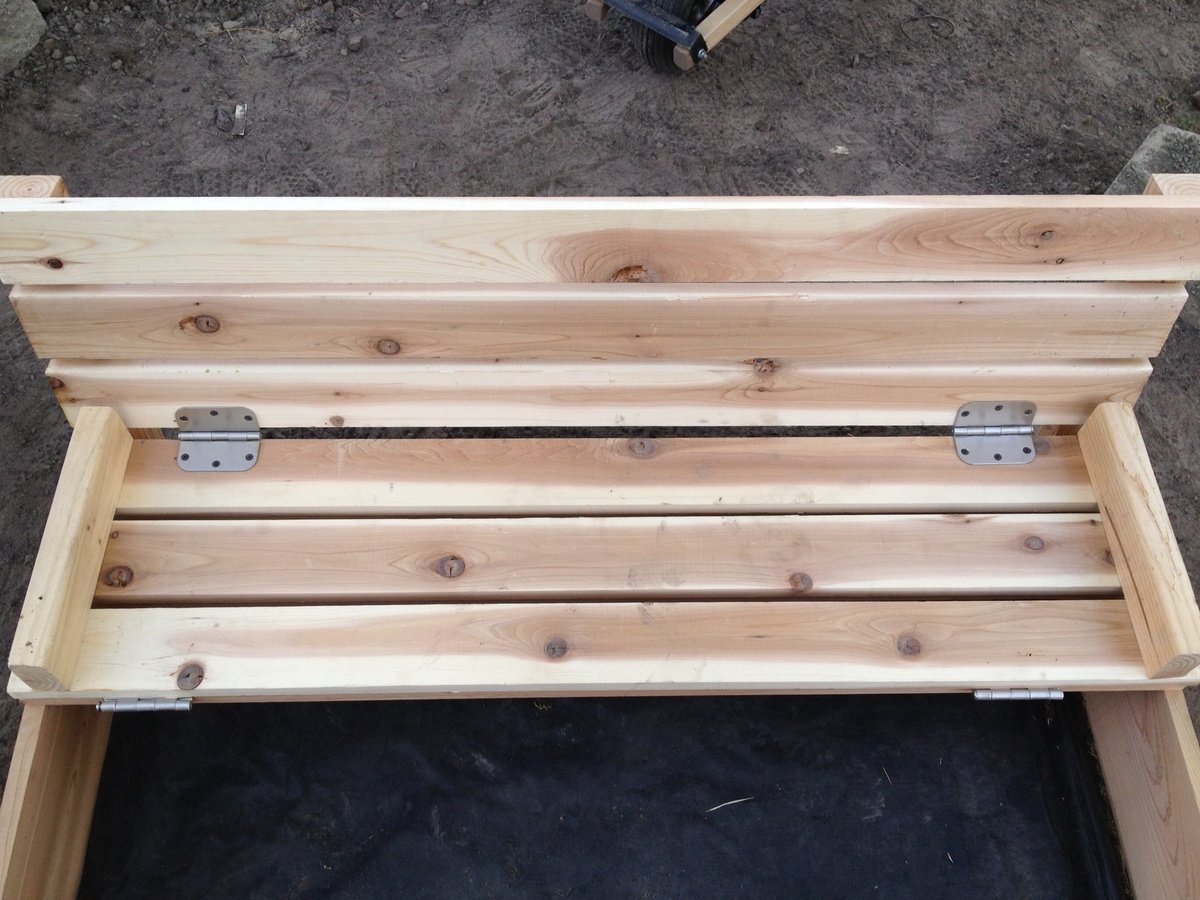
I also wished I had a little more instruction from which side to screw the screws in. May sound a little needy for some of you, but I never did anything with wood before. The instructions simply read attach top planks to arm rests (or something int that manner) and I wish it would have told me from which side to screw in (or give me a picture). Looking at some of the brag posts helped a lot.
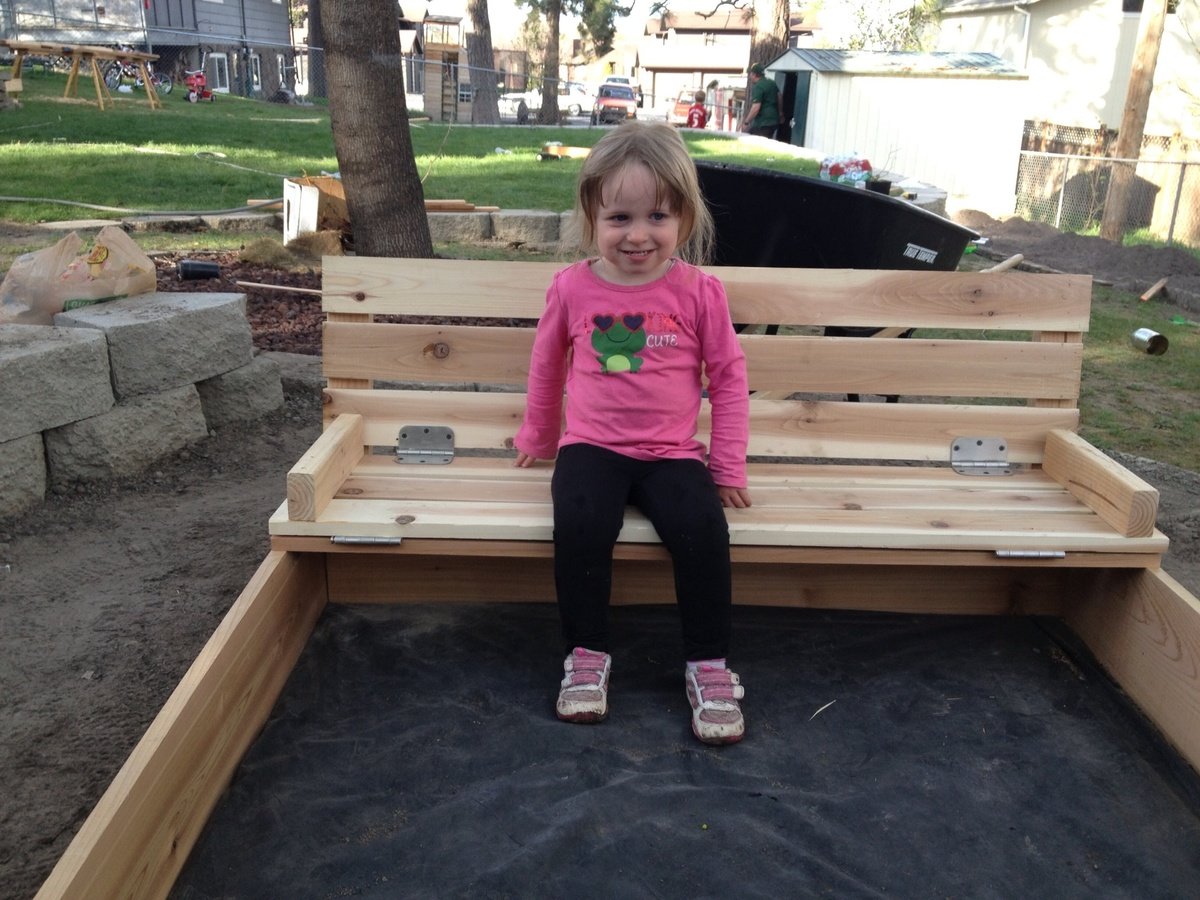
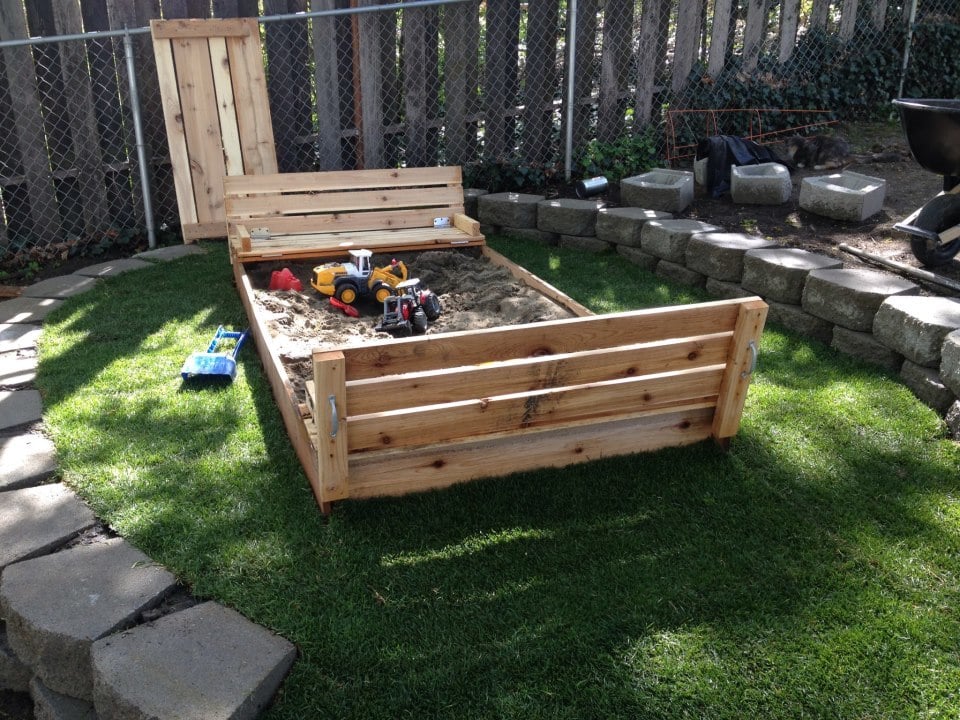
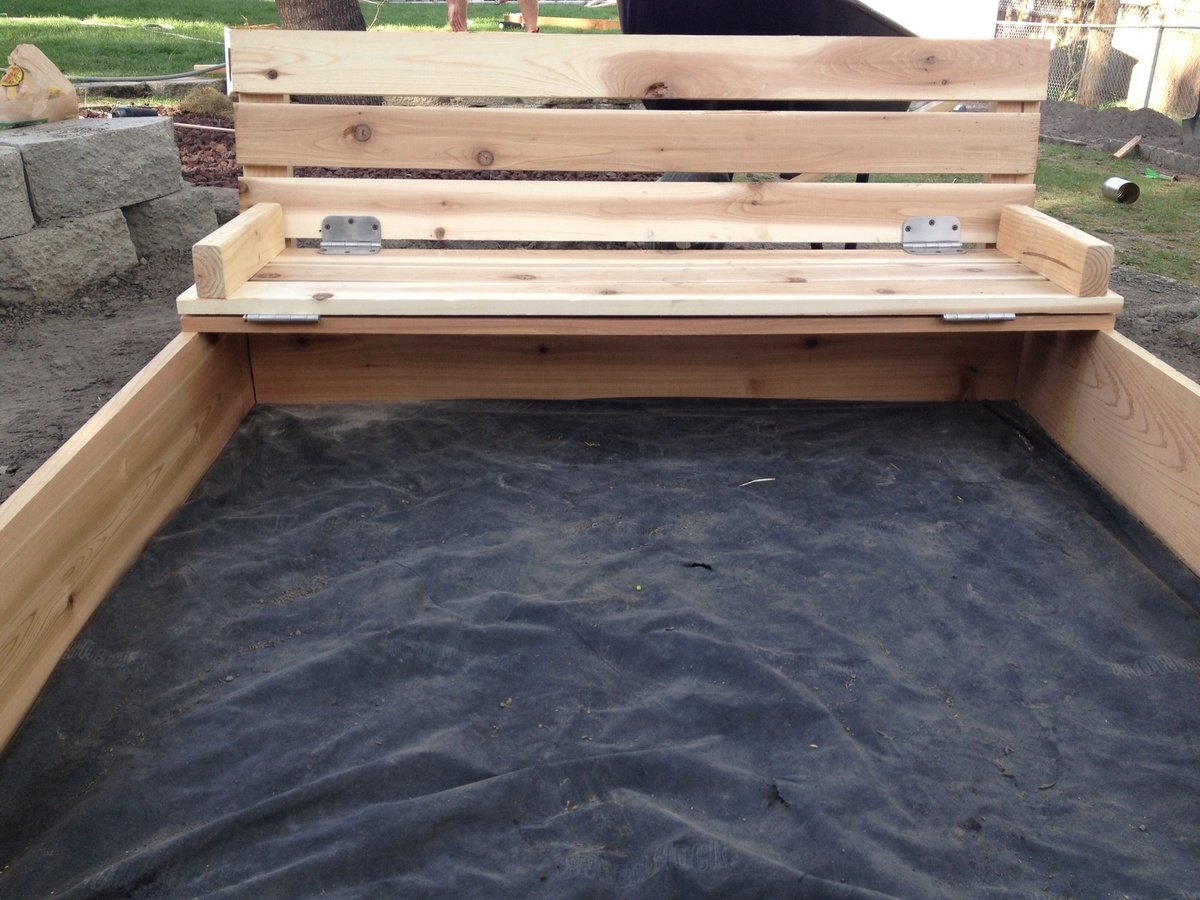
Because its larger size, I decided to make the seats 3 top planks wide (and also the back rest) and made another middle cover piece to bridge the additional gap when both seats are folded down.
Also, the cedar was VERY expensive, and all the screws, hinges, and handles almost cost me as much as the wood.
The sand to fill the box ran us another $80 (for good plays and), but that was because we made it so big.
All in all, a rather pricey sandbox, but worth it because of the large custom sizes, and the cute little seats.
Pictures show the sandbox without sand, and with some of the handles still missing. I also still need to fill the holes.
Will add a picture of finished box filled with sand when it is available.
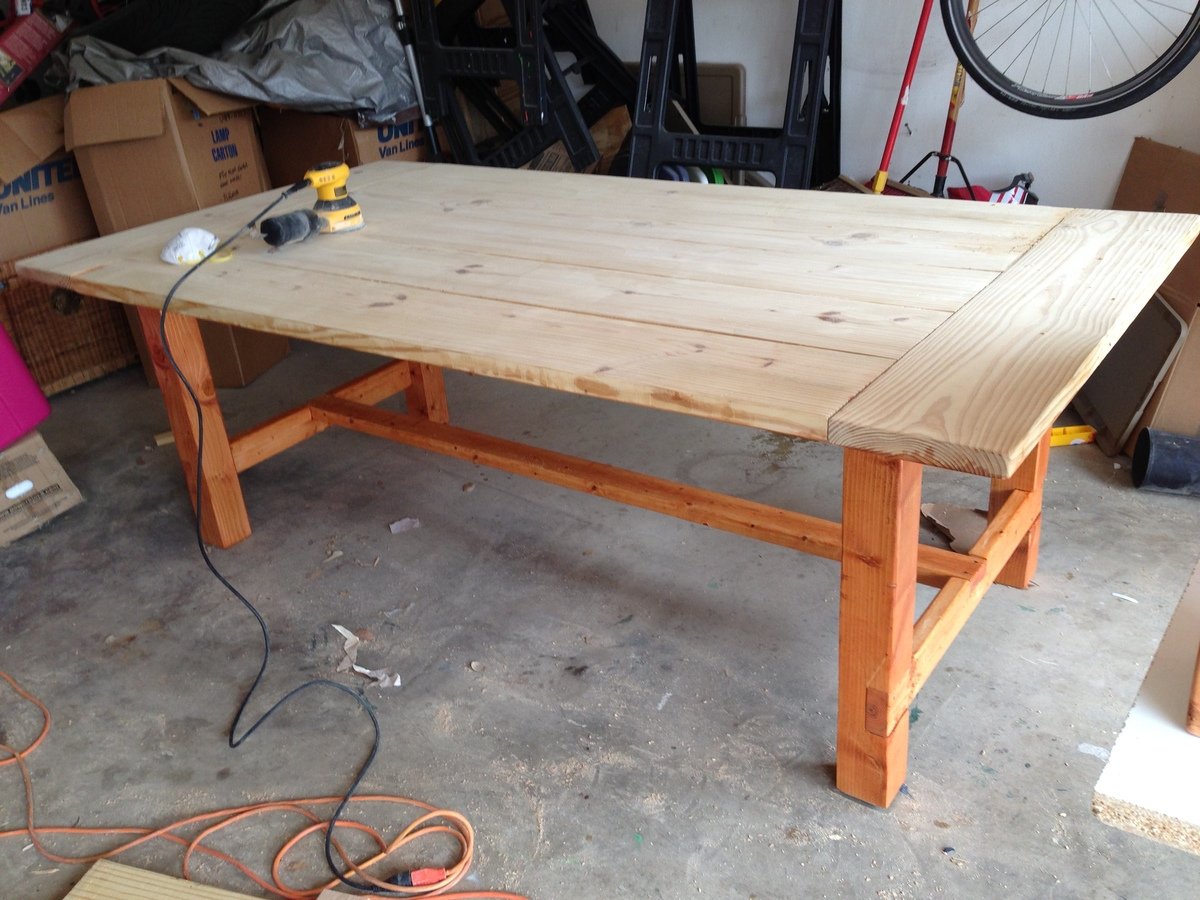
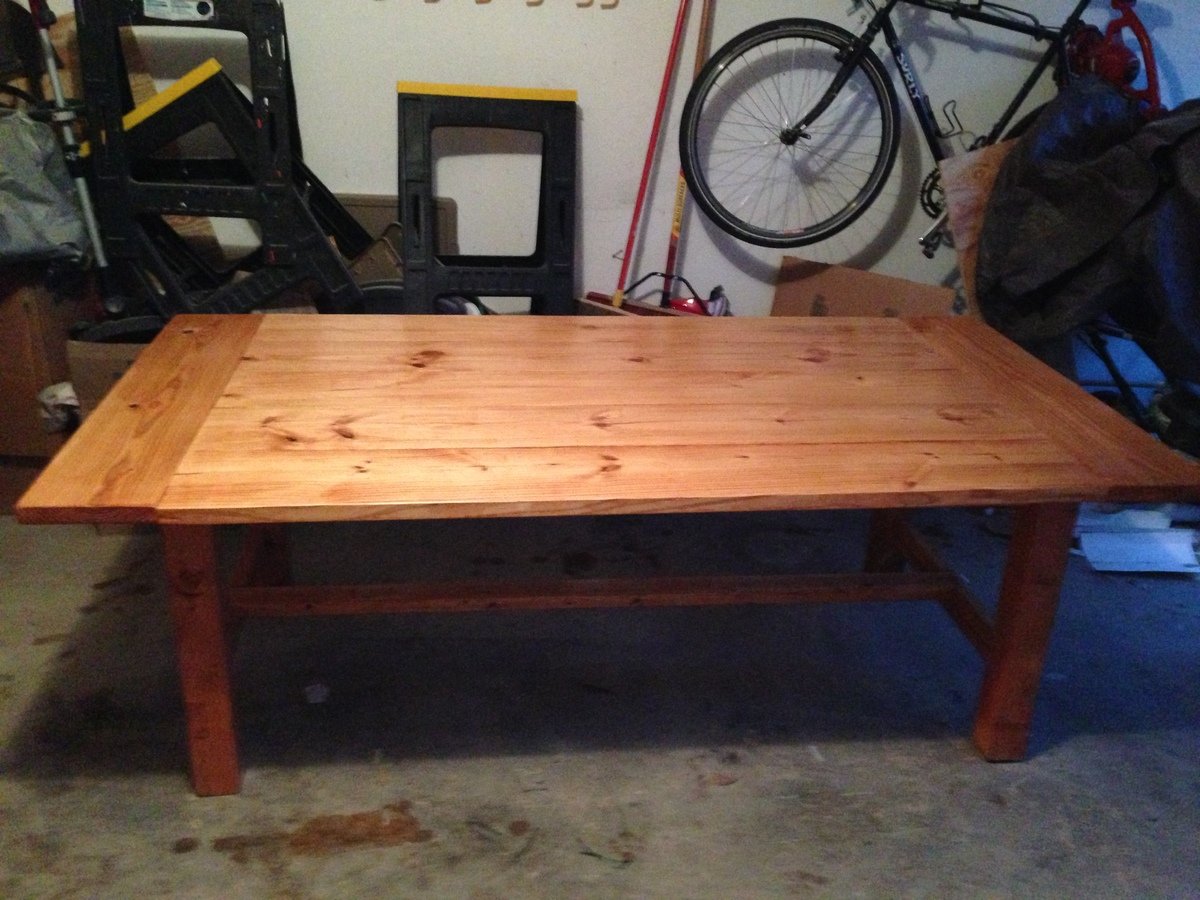
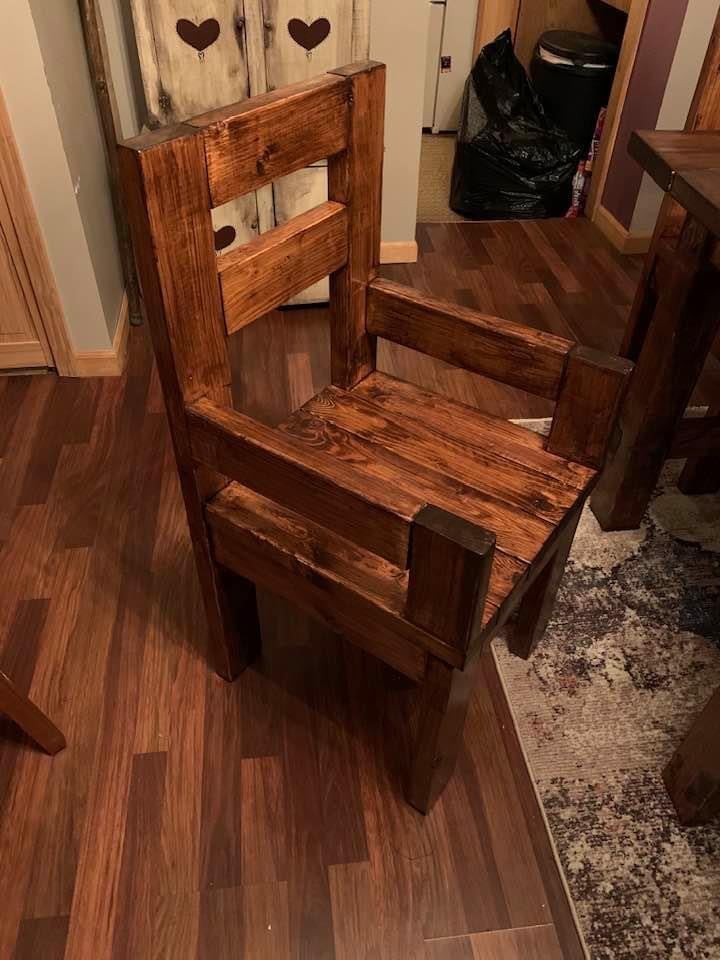
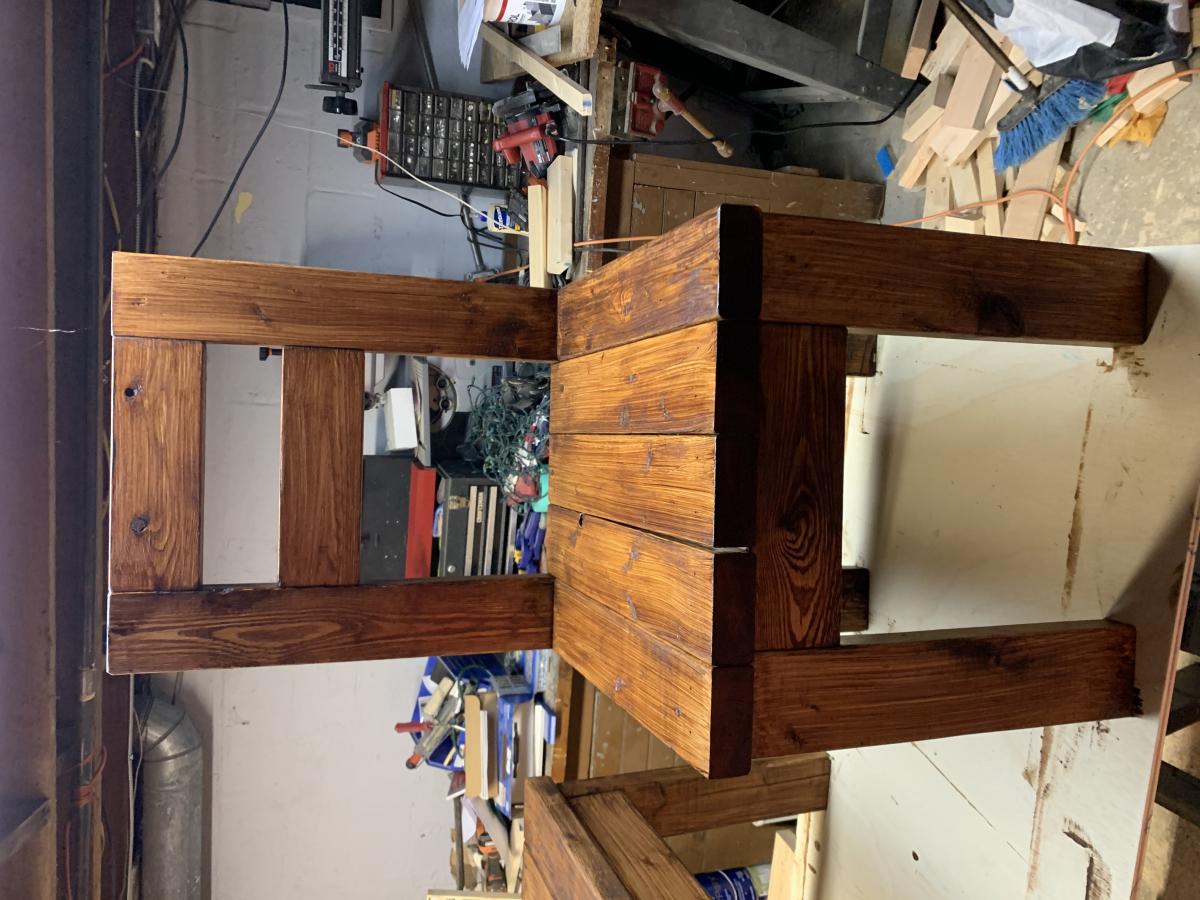
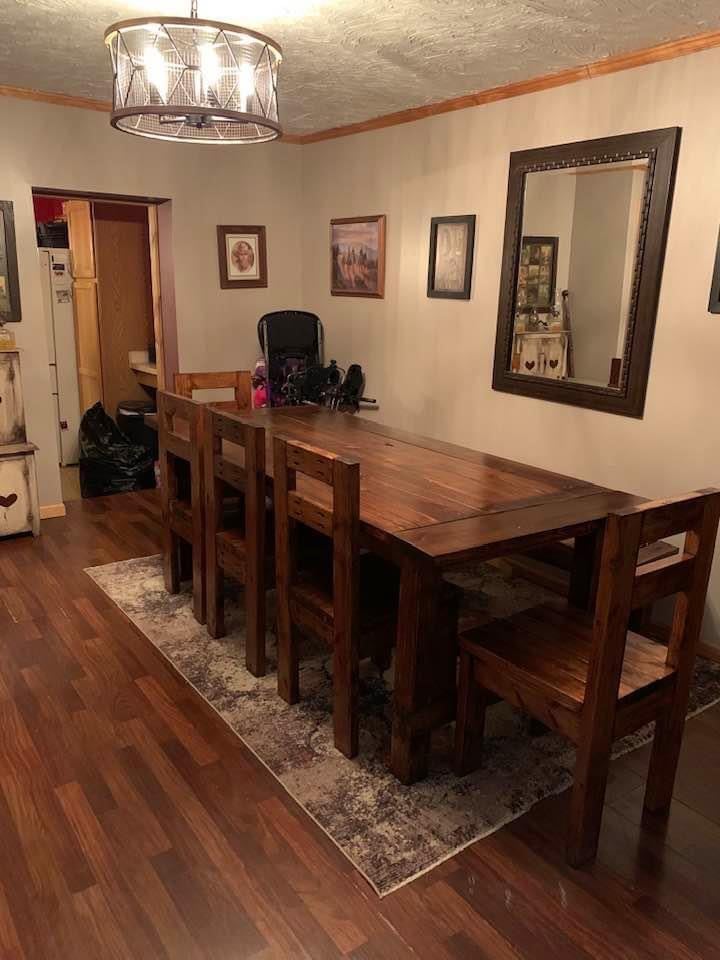
Modern Farmhouse Dining Room Table (with pocket hole) and 2x4 chairs with plans reposted from morelikehome.net.
Surfed the site for the right plans and dove right in. Thank you for the inspiration all!
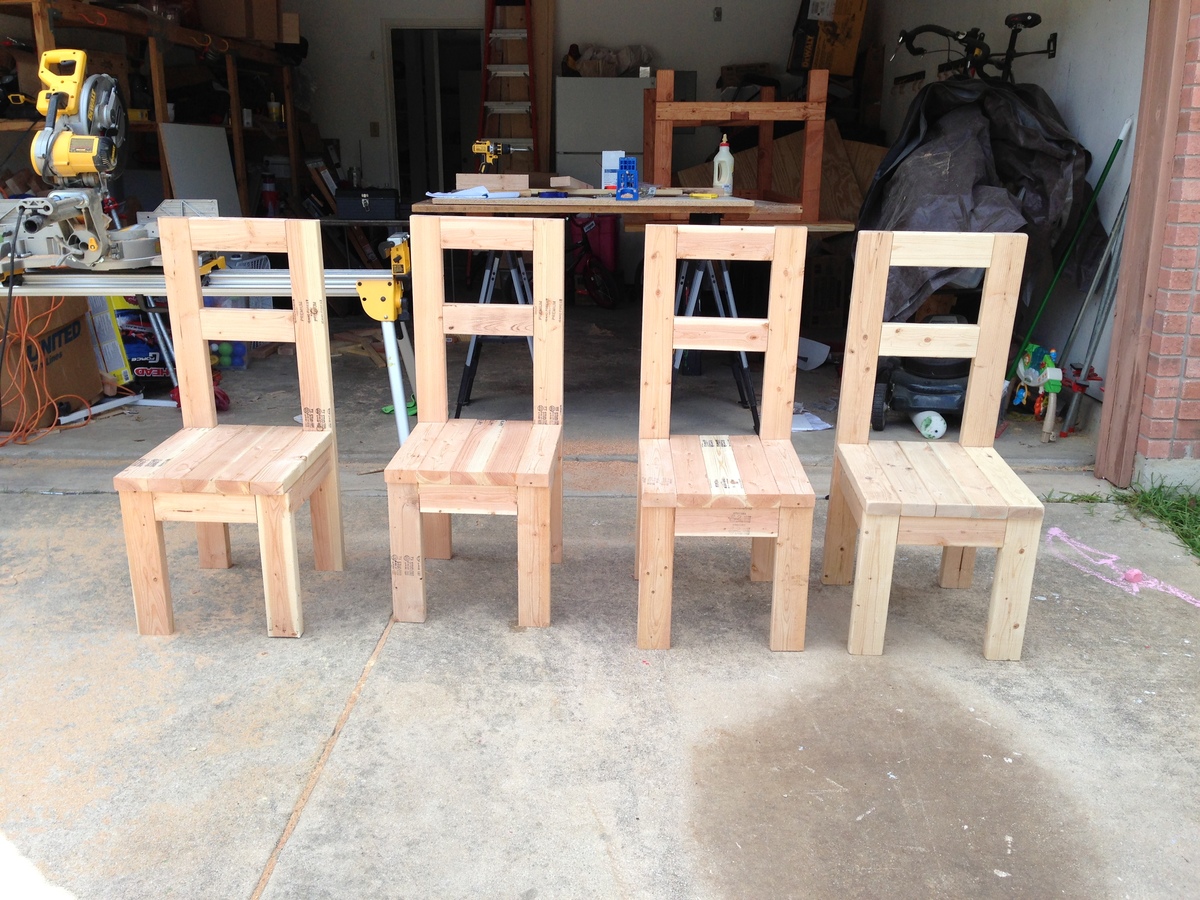
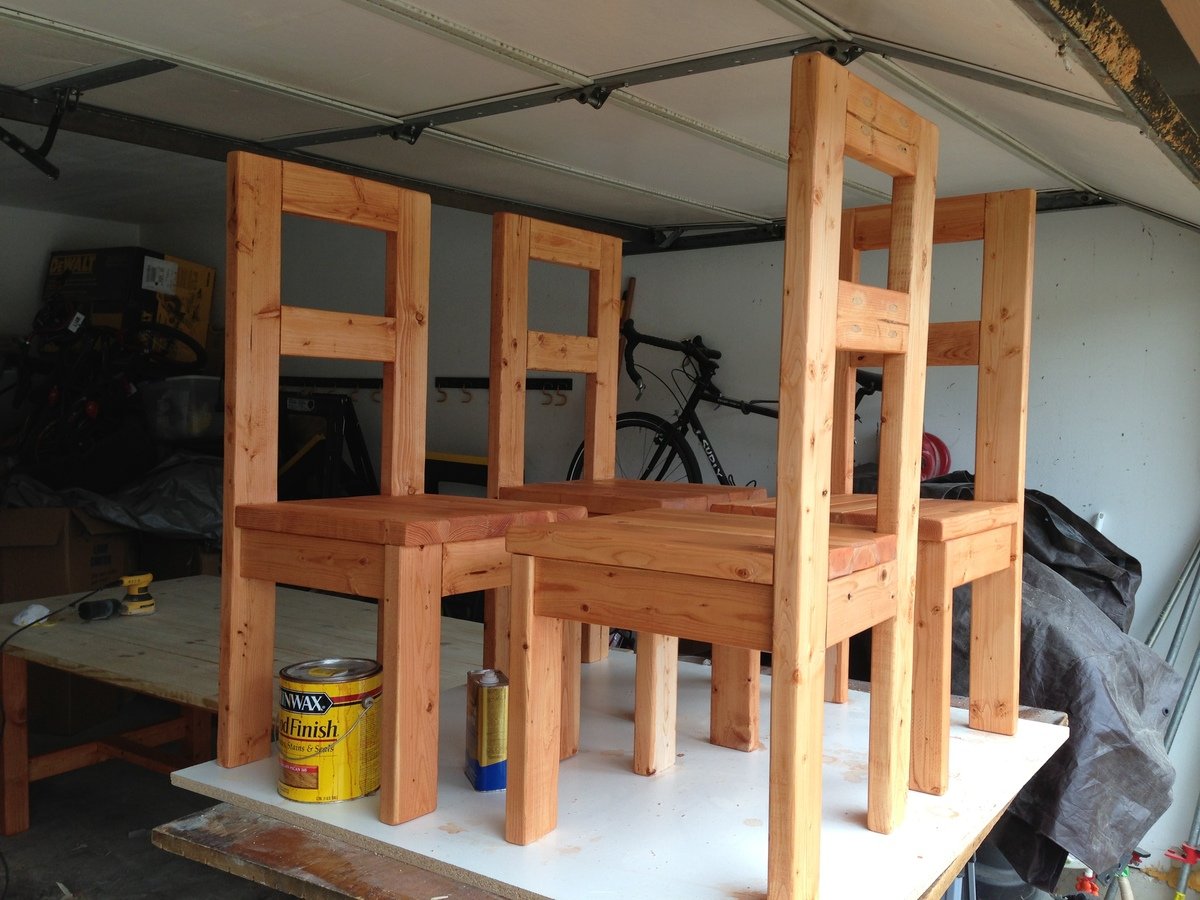
Mon, 09/10/2018 - 11:05
I have clicked on the link the plans are not there.
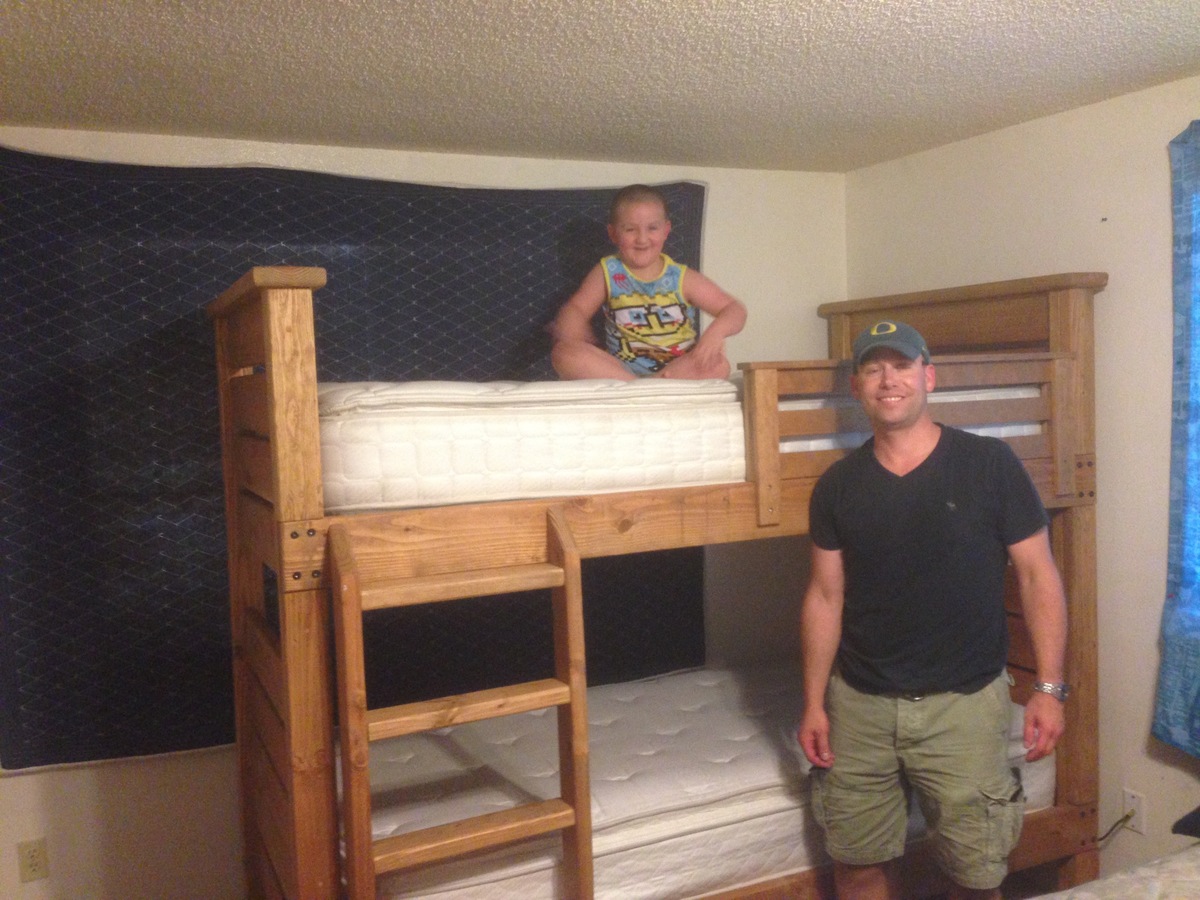
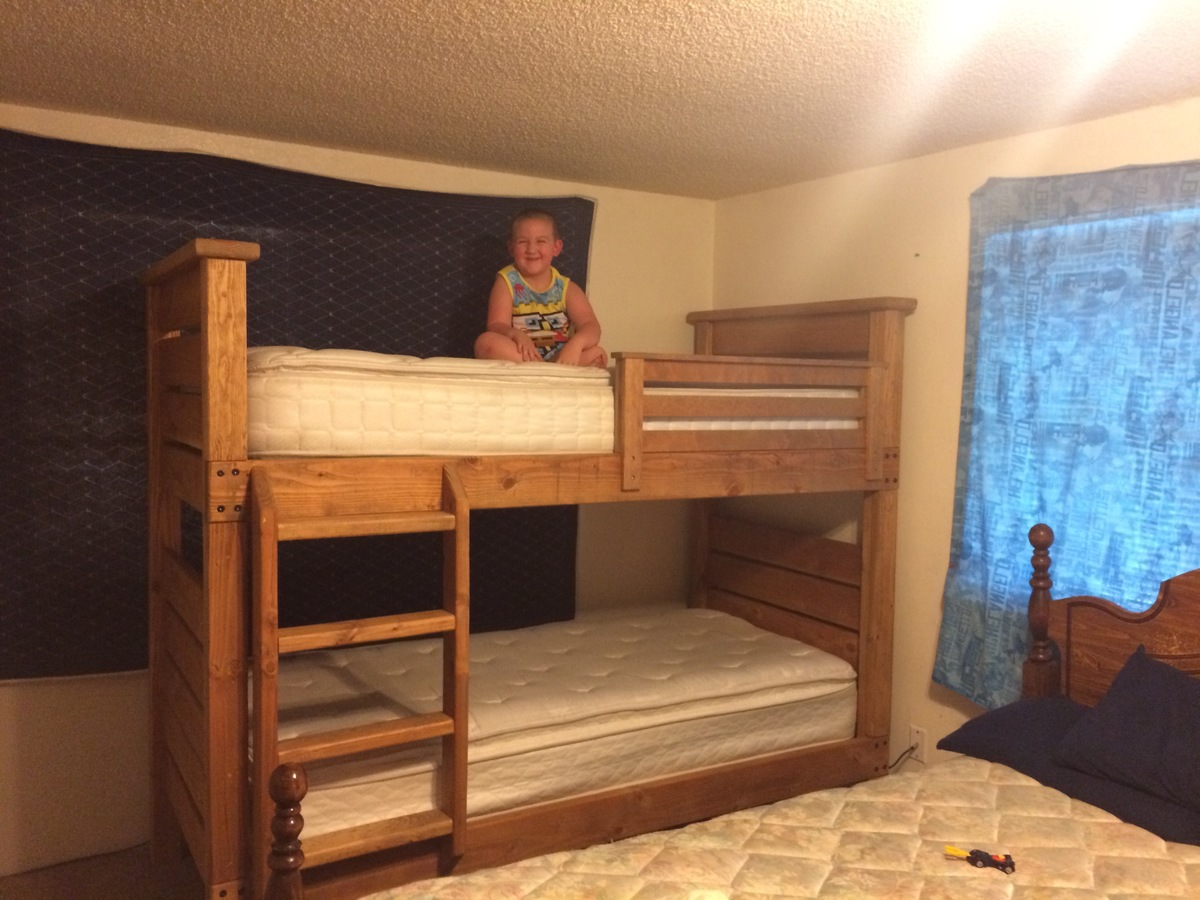
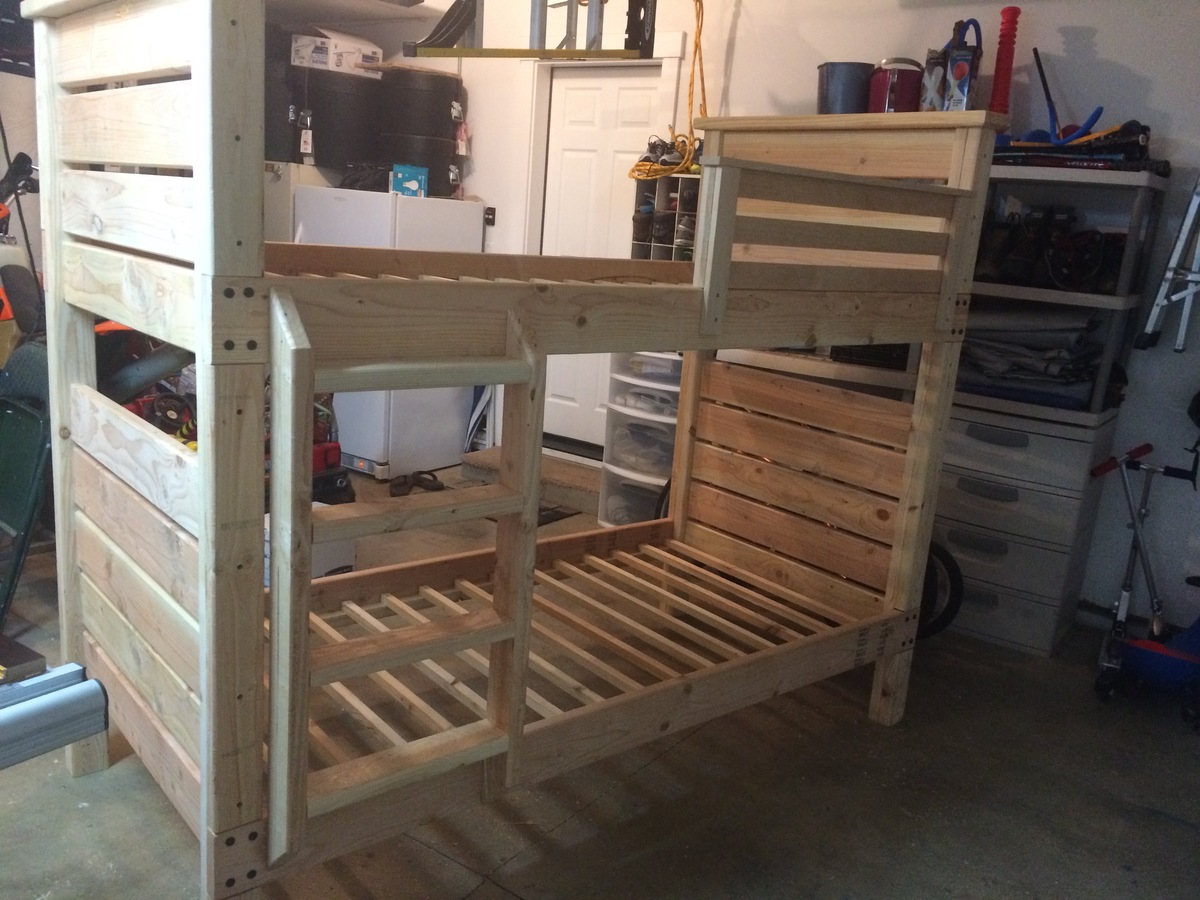
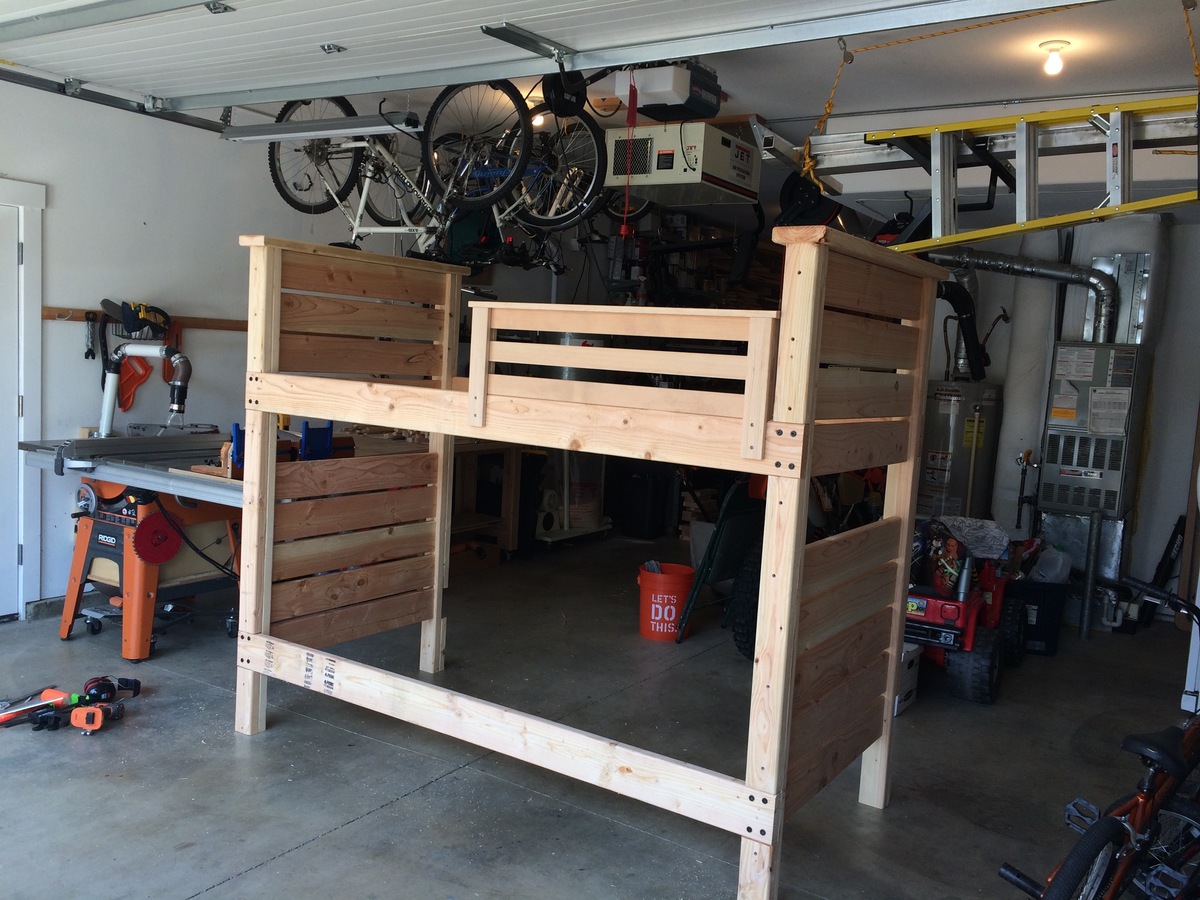
I worked with a local charity group in my area as well as Home Depot, who donated the wood to make a set of bunk beds for a family in need who all shared a room. It was great to help them out and the kiddos were super stoaked to have bunk beds and something special they could call their own!
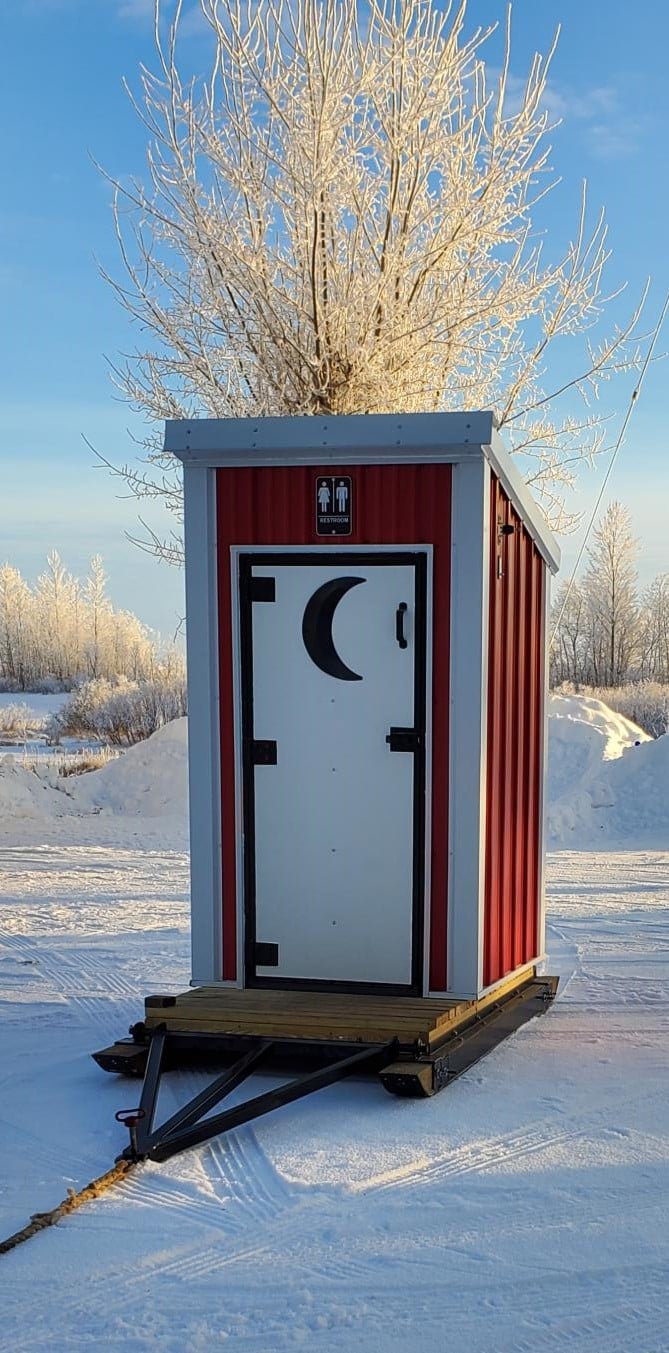
Your outhouse design was modified for a snowmobile club project as the building needs to be towed across a lake to a site next to a warming shelter. An LED light with a timer switch and solar battery charger were installed to provide light in a remote area of Lake of the Woods.
A steel hitch and skids with hyfax were added to the design.
Thank you for providing a design that allowed us to make modifications for winter outdoor recreation accommodations.
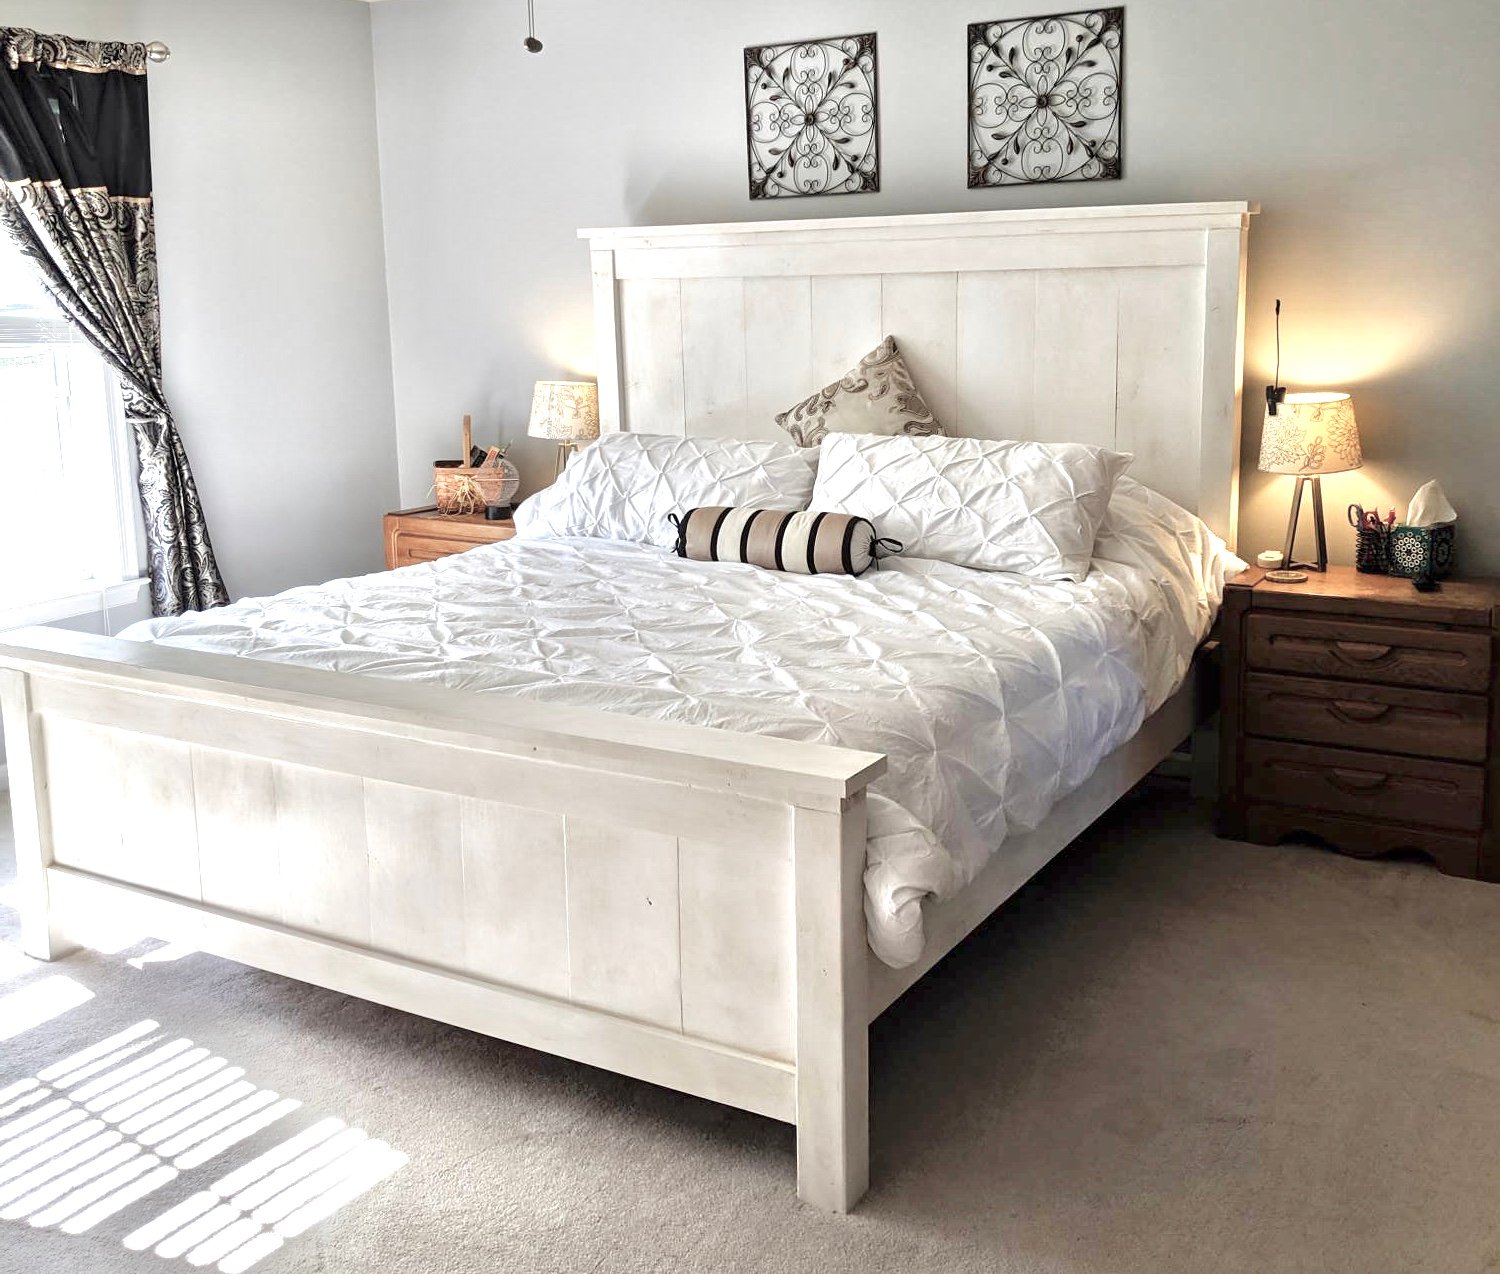
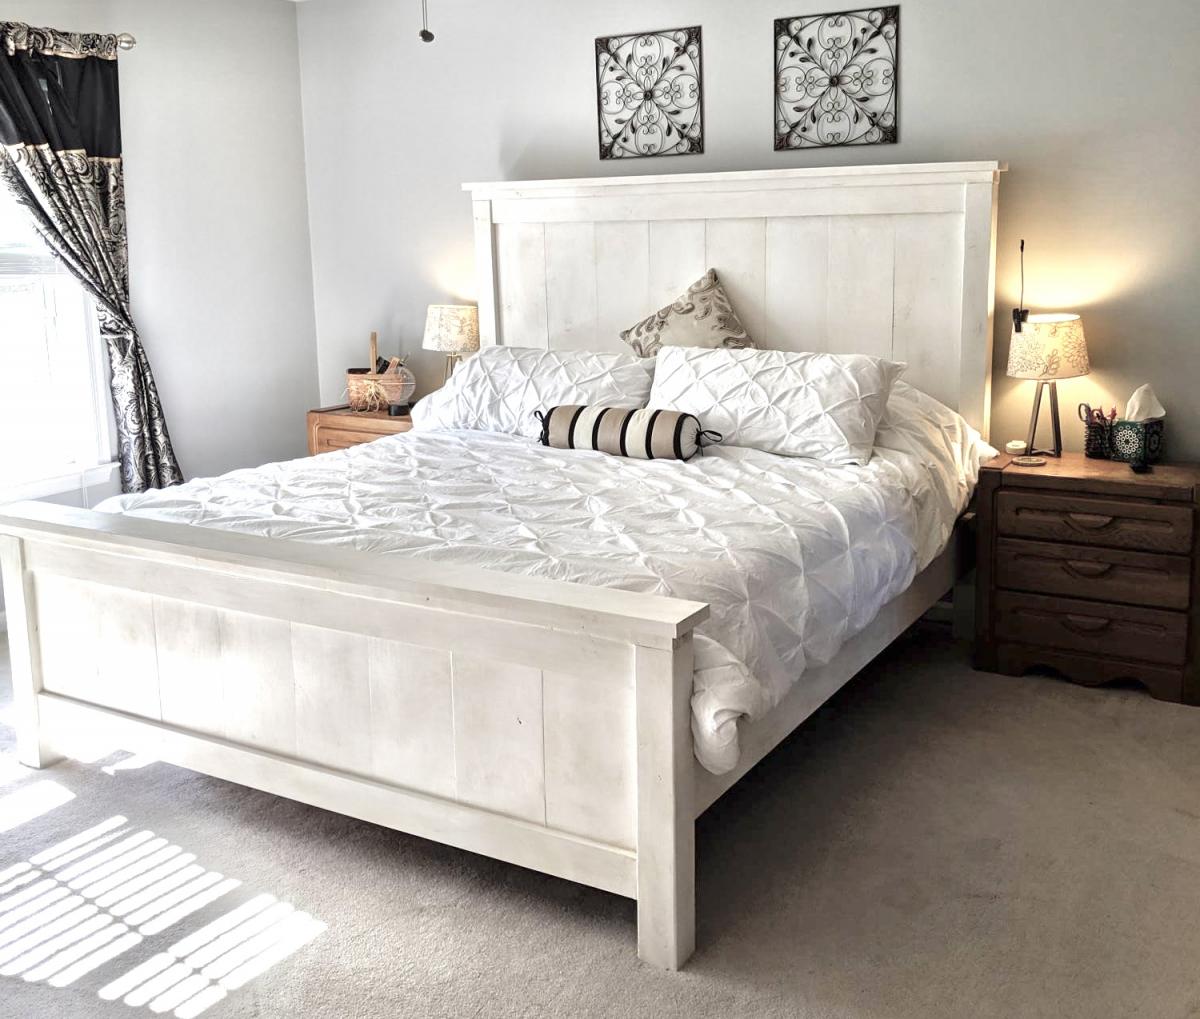
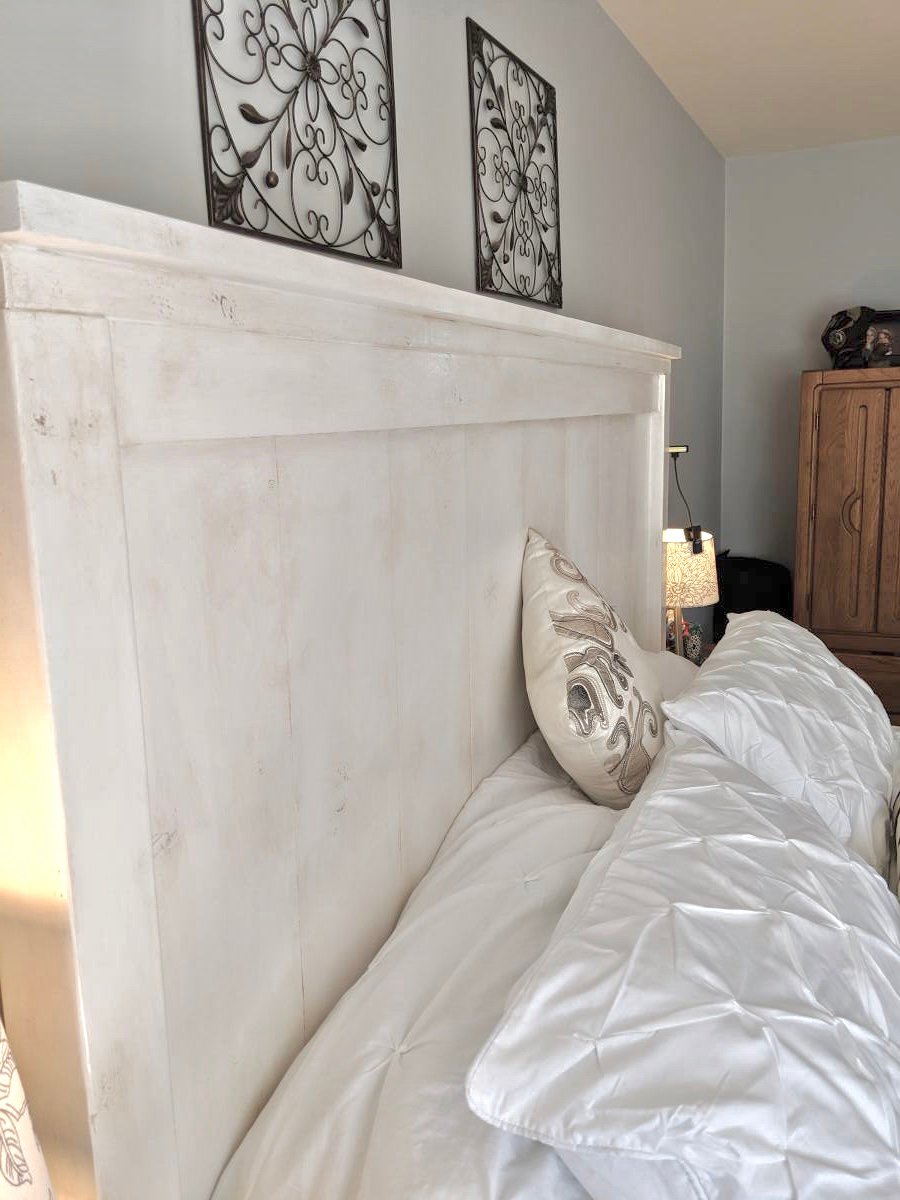
I could not find a frame which would accommodate my new adjustable king base. Modified Anna's plans by increasing the height of the headboard and footboard. Finished with chalk paint and antique finish for a rustic look. Side rails attached with mortises to allow for moving bed in 4 pieces if needed. Love my new bed

Sat, 11/30/2019 - 03:31
Hi! We are making this headboard this weekend. We want to increase the headboard height and footboard as well. Do you happen to know the cut measurements or how you adjusted the height of the 1x6 (or 1x8 as others used) to make it work? Yours looks perfect! Thank you in advance for any feedback!
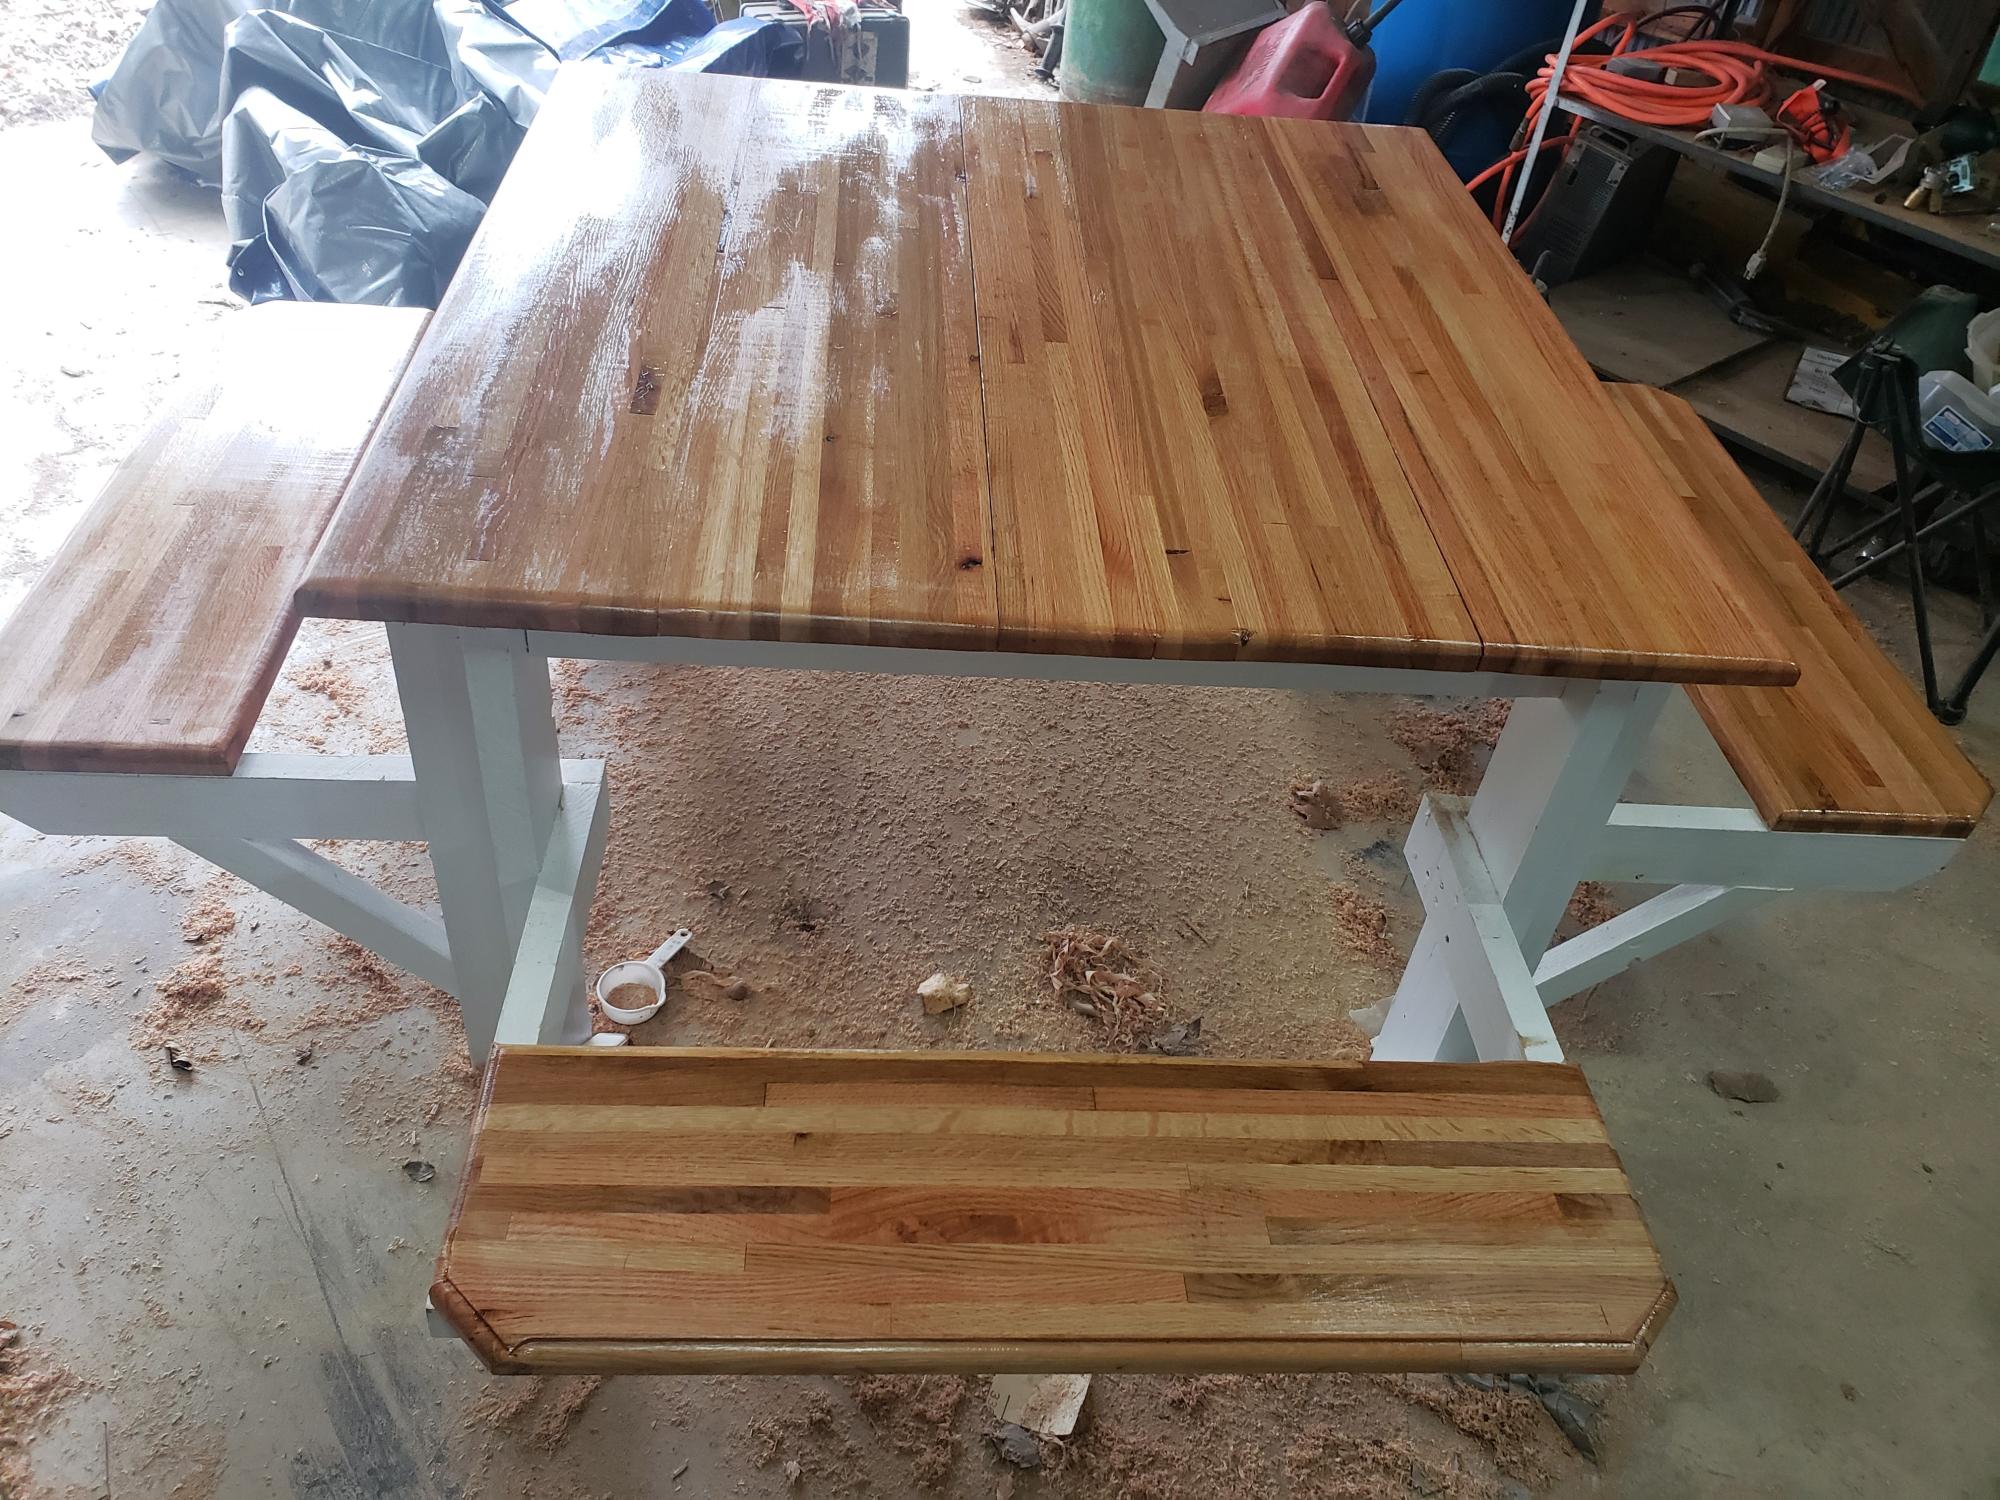
I used the picnic table plans with a minor modification for the top and seats. I used flooring for trailers that were rejects. I made this for my wife for her birthday and she loved it.
Alan Welch

I built these chairs with the plans Ana White shared on this site, they are sturdy and beautiful, but they are also heavy. Heavy is what I wanted though.
I used water putty for the screws and other blemishes, then I primed and painted them. when the Homedepot pillows arrived my wife decided she wanted higher backs, I used an idea shared on here, but that back used 2 2x6s, when I tried that I felt they were too high, so I altered it to one, and found they look and feel a lot better. the angle of the back is 15 degrees from 90 or 105 degrees. I will be altering the loveseat plans to build a concrete top bbq coffee table to use with the chairs.


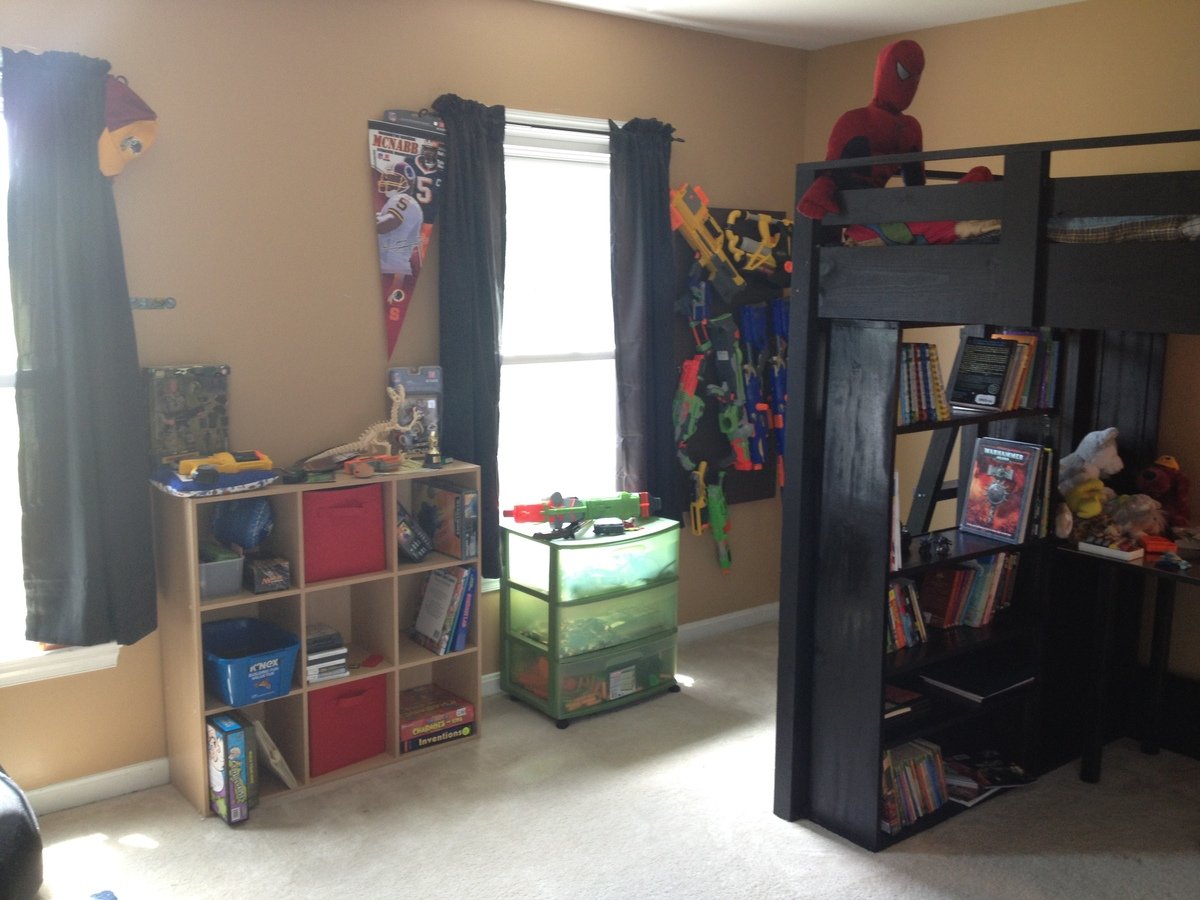
My son needed more room in his bedroom...and to be rid of the very girly furniture he inherited when he moved into his "big boy-ish" bedroom. At 10 yrs old, it was high time he got a bed that wasn't pink-tinged, white washed pine with 4 posters and enough curlicues to choke a forest. He also needed a desk which I couldn't really fit in his room with the armoire and chest of drawers that came with the Queen sized bed.
So off to Ikea we went and I saw a black loft bed for $300, but it was really, really high which meant I would have to cut it down and it was not sturdy at all. I looked at PB and saw the $1800 bed. Um, no - that wasn't happening. So, off to Ana-White I went and I'm so happy I did!
I built the full sized version of these plans and, to keep costs down, used wood I had on hand. This meant I had to work a bit at the cuts, but it all worked out.
Mods:
1) I modified the railings to have the ladder at the end of the bed to keep away from the ceiling fan.
2) Because I put the ladder at the end of the bed, I got very nervous about having a soon-to-be teen climbing on to a ladder secured to a 1x10 that was only connected to the side railings with glue and screws. So I sandwiched extra 1x3s over the bottom rails and attached them to the top railing.
3) I was very nervous about making sure that the bed was adequately supported so I put a 2x4 down the center instead of the 1x2.
4) I went a wee-bit overboard screwing things together to the point where it's a bit embarrassing and now I have to paint over the screw heads.
5) I made the ladder treads with 2x4's, modifying the inside spacer board cut lengths.
Because I had quite a bit of lumber on hand, the bed only ended up costing me about $90.
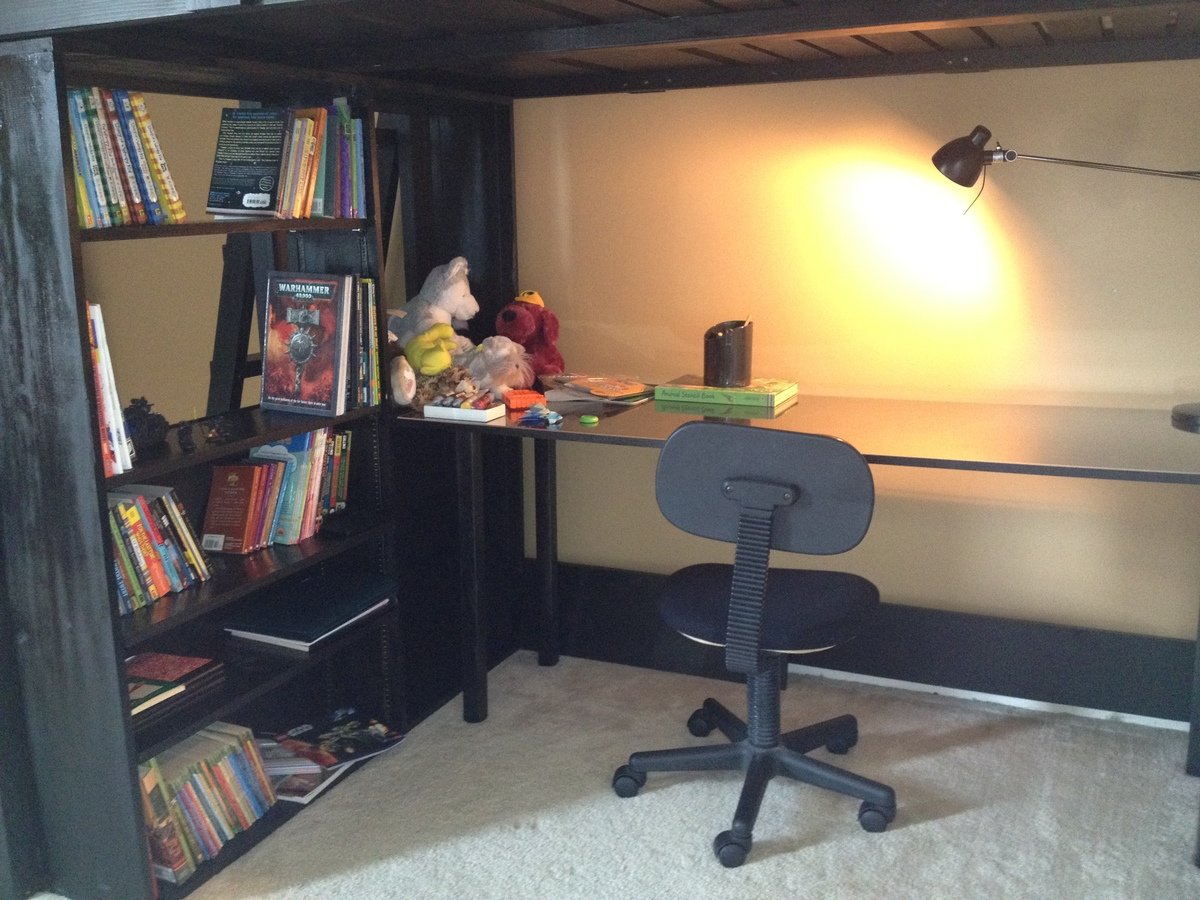
For the bookcase, I did end up buying the 1x12s and the adjustable shelf railings. I made the book shelf the entire width of of the bed and split the two sections based on width of the 1x24 board I bought for the desk. I only put the backer board up half way so that the daylight could get underneath the bed and make it not so cave-like.
The book case cost me about $70.
The desk was the easiest...but most costly item. A 1x6x24, 4 table legs and the table leg mounts ran me about $80. The plexiglass top that I had cut for the top cost me about $80.
Time wise, this would have taken me a lot less time than the 4 months it took - but I worked on it as I could and when I could, by myself. I got some friends to help me bring it upstairs and put it back together, but it was mostly done when I could fit in some time.
My son LOVES this and it really does give him so much room!!! Thanks Ana - I really appreciate it!


Thu, 01/17/2013 - 08:42
Hello,
Where might I find the modified loft bed plans that allow for a full-sized mattress and the under desk-shelves?
Thank you!
Fri, 01/18/2013 - 07:38
Hi!
To modify this to be full sized, I just added 15" to the width of the bed. Ana said this in the plans:
Cutting Instructions:
Converting to Full Size This bed can easily be converted to full size. You will simply need to add 15″ to all boards that run parallel to the ends. This includes the planks, end top pieces and the slats. Shopping list will need to be adjusted as well.
So I modified the cuts to the head and foot board parts and the full size mattress fits perfectly.
For the shelving underneath, I just looked at some of Ana's other plans for shelves and winged it.

This was a fun family project! Thank you!!
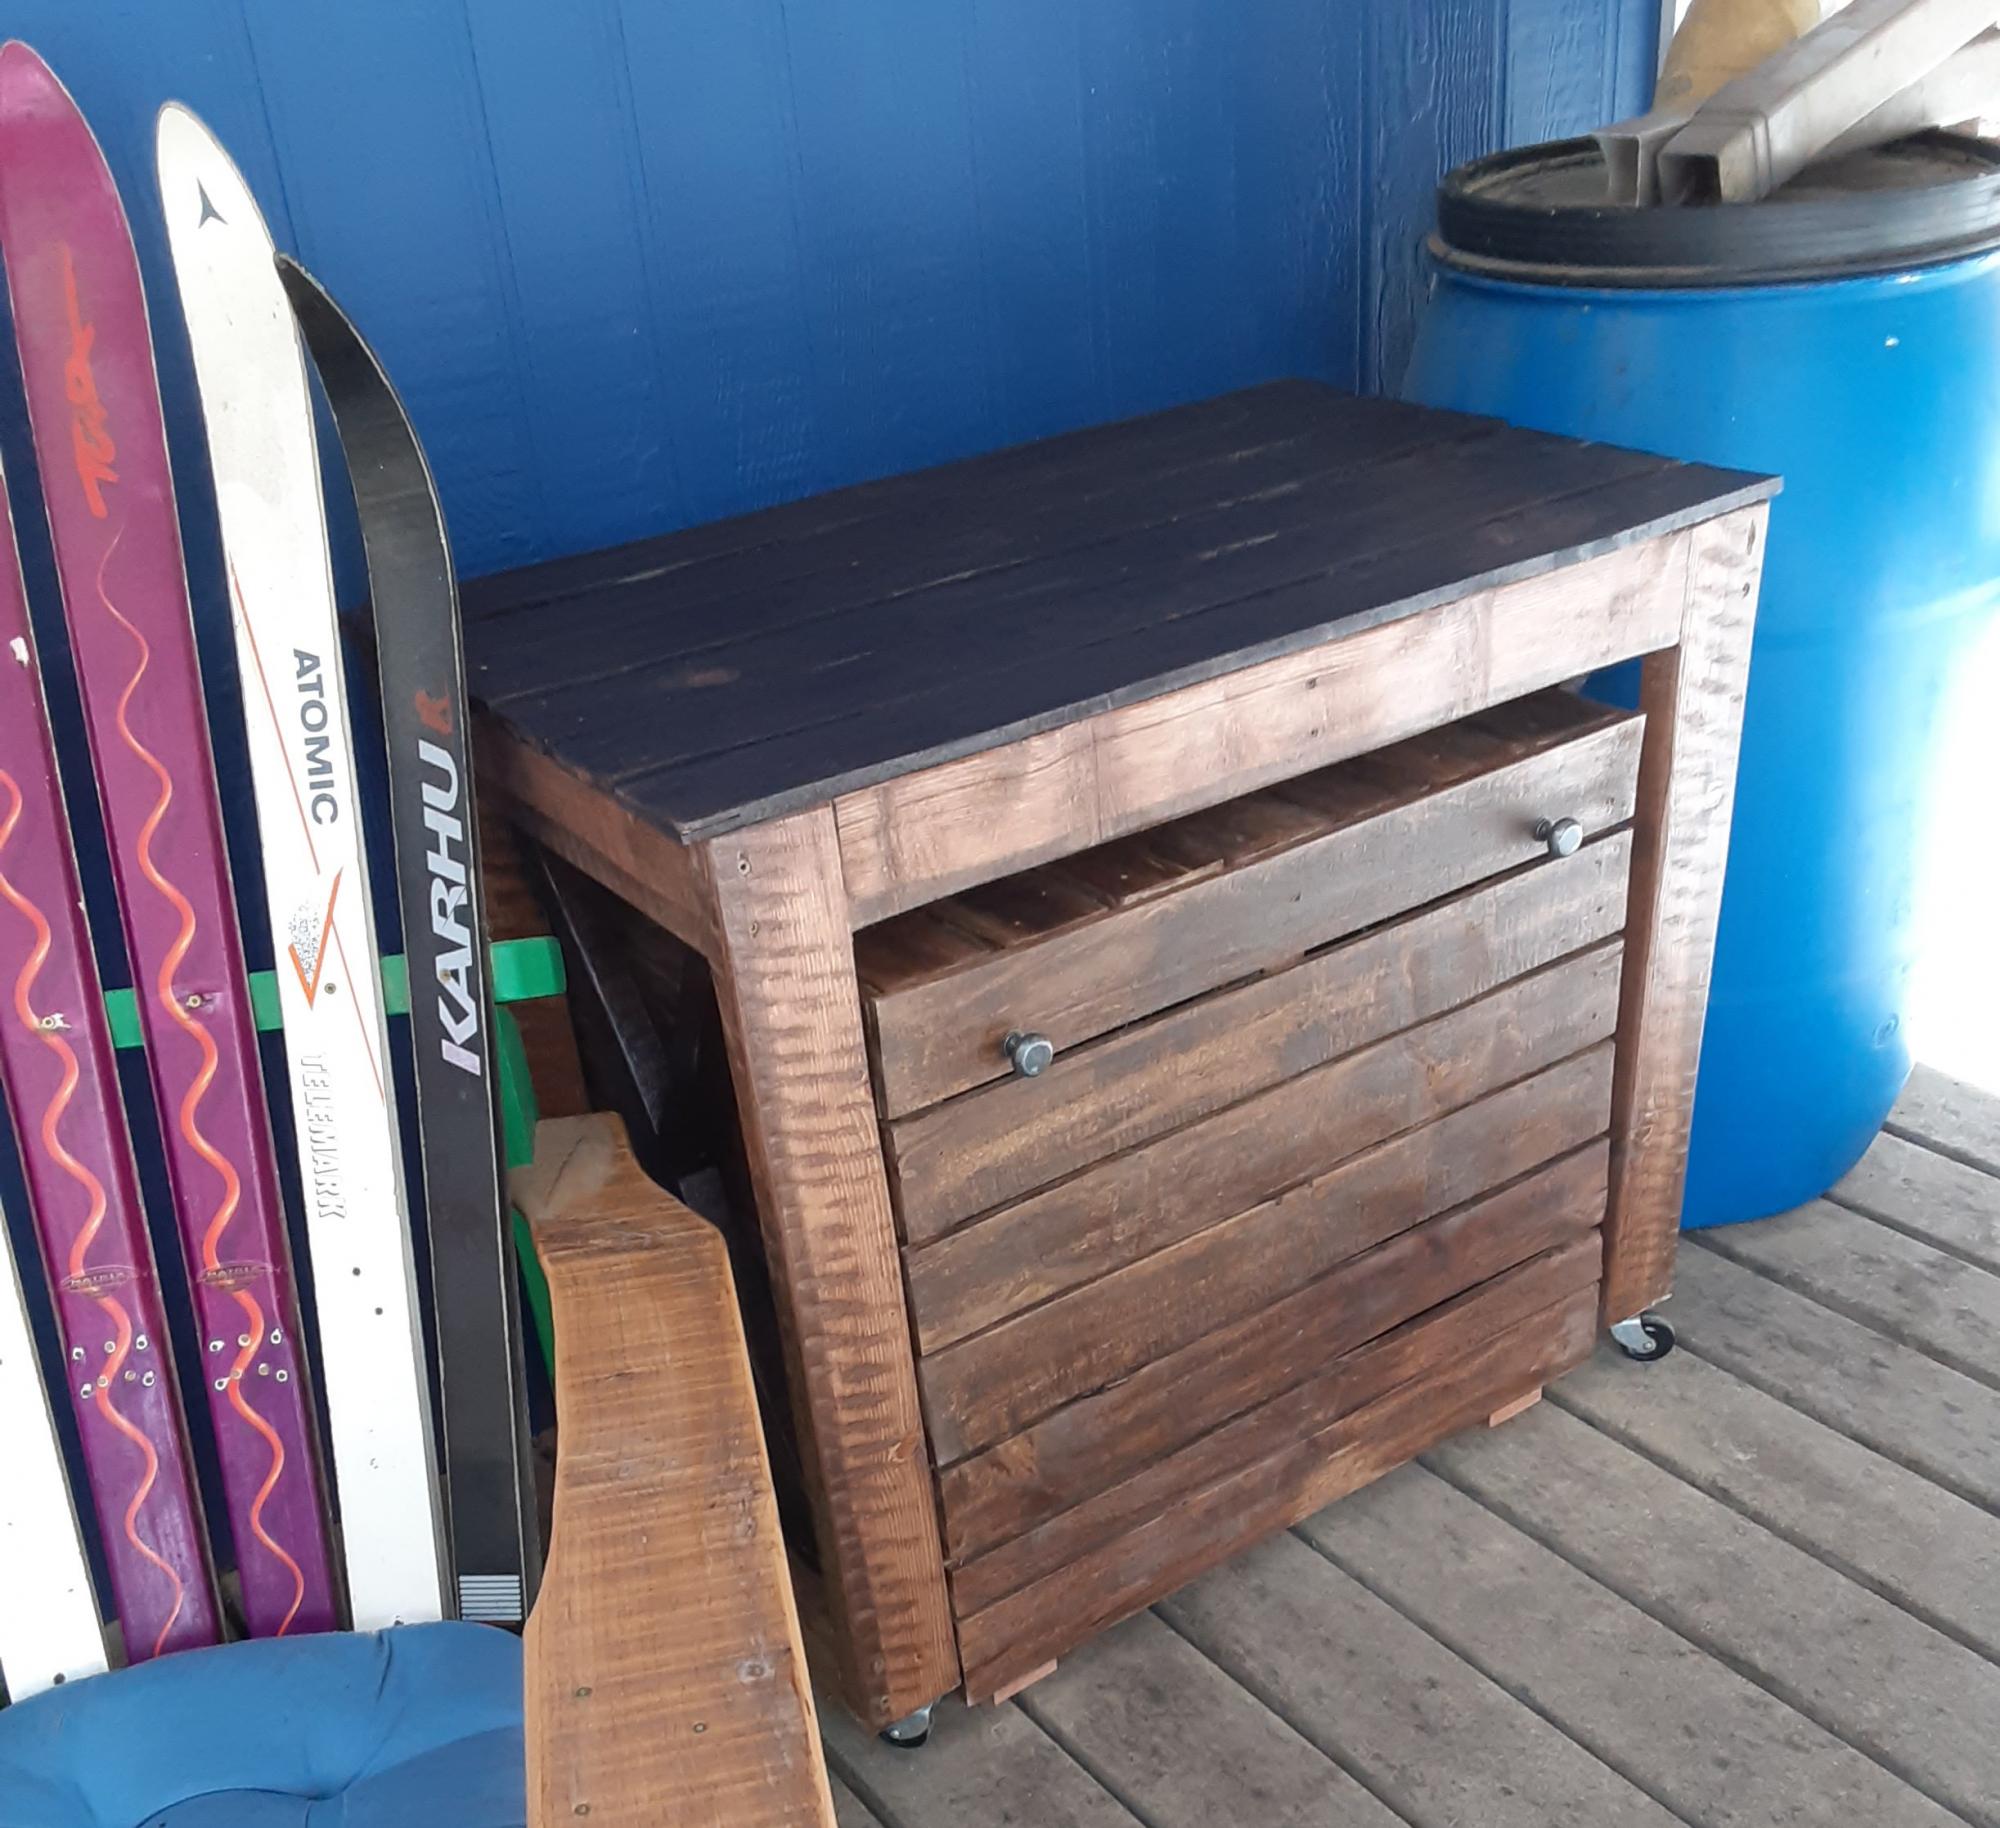
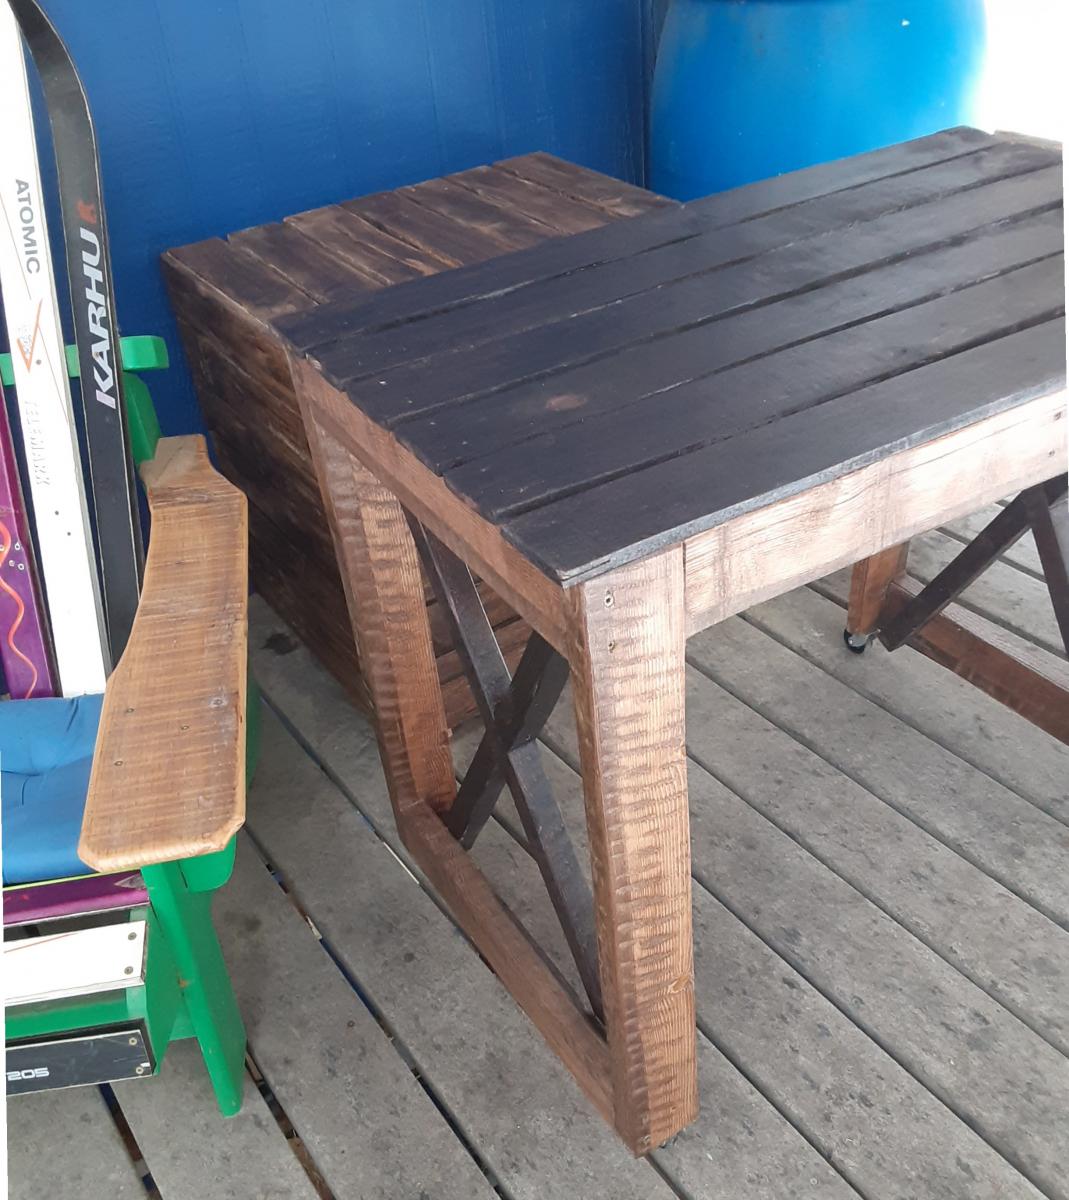
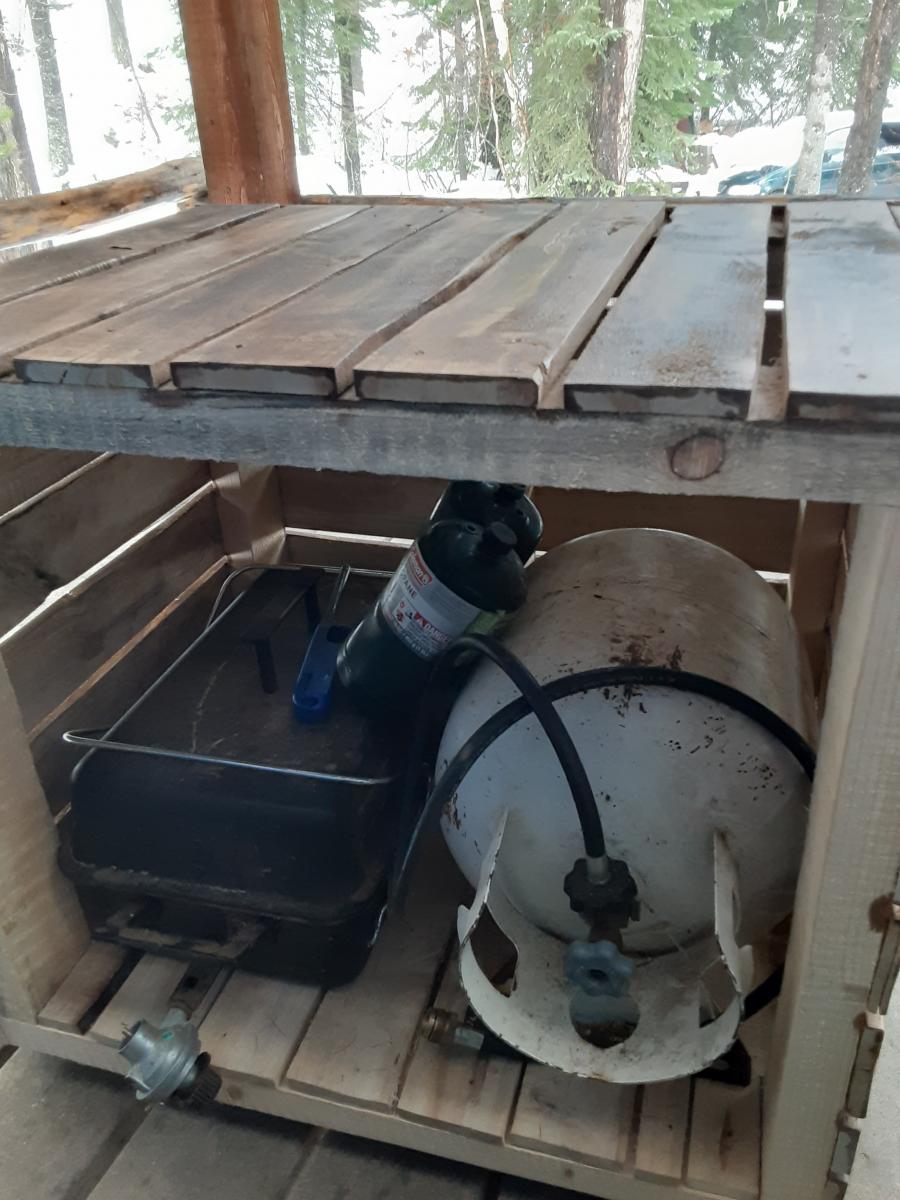
I was tired of seeing my propane bottle on the porch and this project was a perfect blending of camouflaged storage with lots of potential countertop workspace. My grill station is smaller and shorter than the original plans to better fit our family size and the porch space we have available. My husband has a bandsaw mill. When he was milling boards this fall, I asked for some 1/2" thick planks just for this project. I also had the knobs and wheels leftover from past salvaging work. I have been trying my best to use up "stock on hand" during this pandemic. Though I spent some time sanding the rough cut lumber, it still absorbed lots of stain. I wanted two tones of color, so that's good, but I still had to mix two stains together to have enough for the lighter parts.
Now we are looking forward to some cold weather BBQ meals!
Sun, 11/22/2020 - 13:05
Fire up the barbie! Thanks for sharing, it looks perfect:)
Modifications:
Rounded ends of feet with table saw.
Used 60" round tabletop, cut from a plank tabletop made of 2x6s.
Also ripped 1" off the X-supports to reduce thickness.
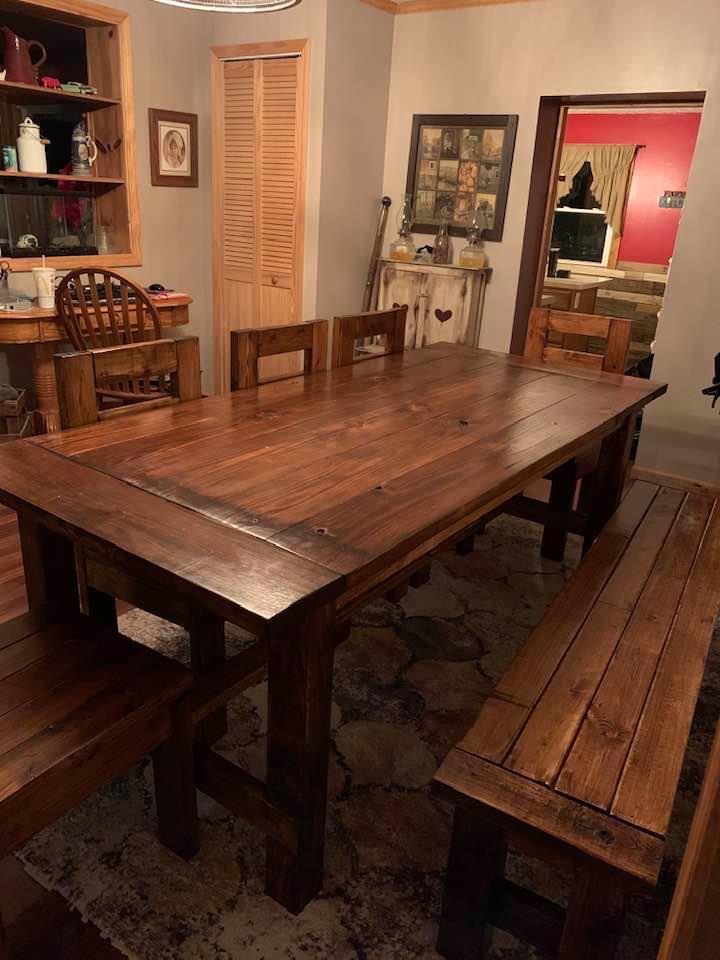
Started with building the table for our ever expanding family. We priced out a new table and chairs at the price of $3700 and was able to build the table, bench and 5 chairs for $400. The table is perfect for our big family and very solid. The bench and chairs went together fairly easily. I adapted 1 of the chairs for my son who has to have arms to keep him safe. Great for any family.
2x4 chairs are from morelikehome.net day 4 build
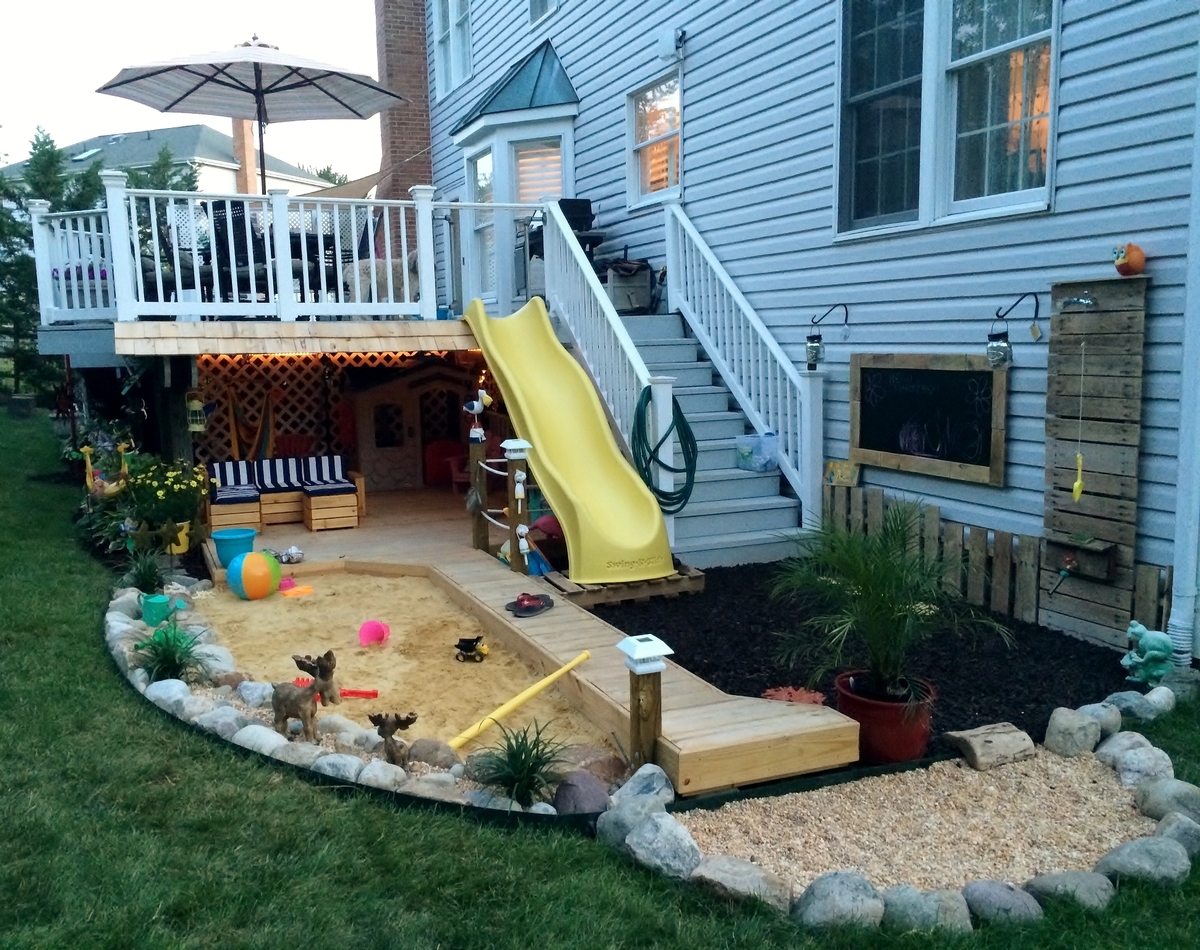
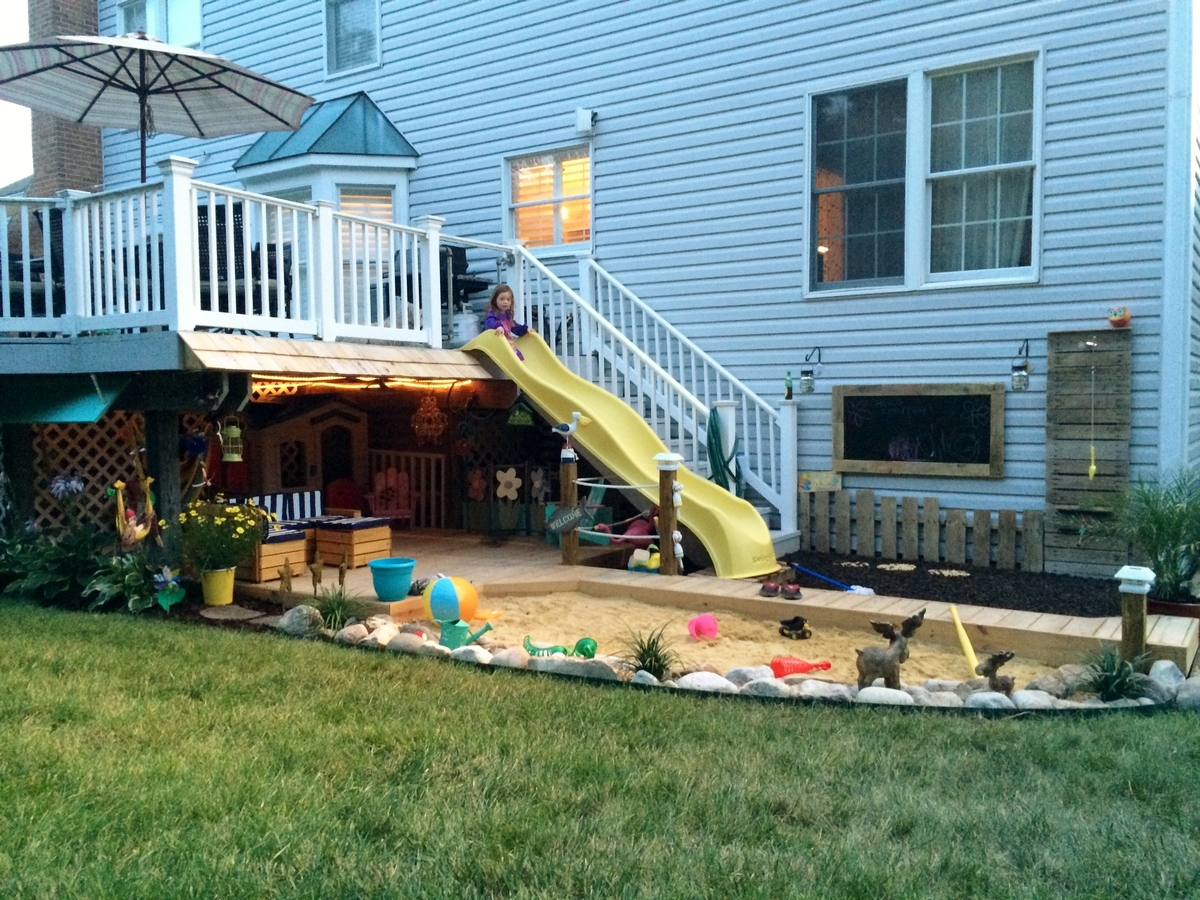
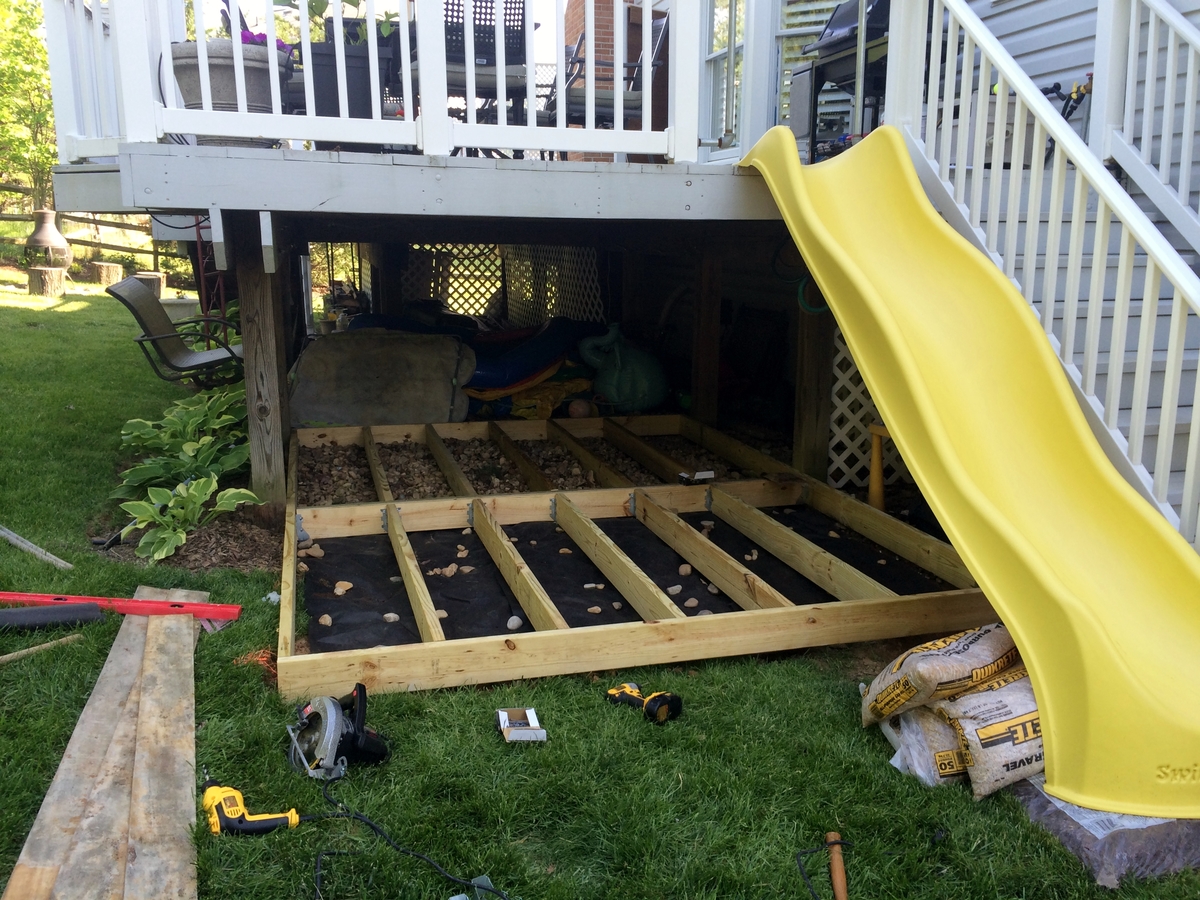
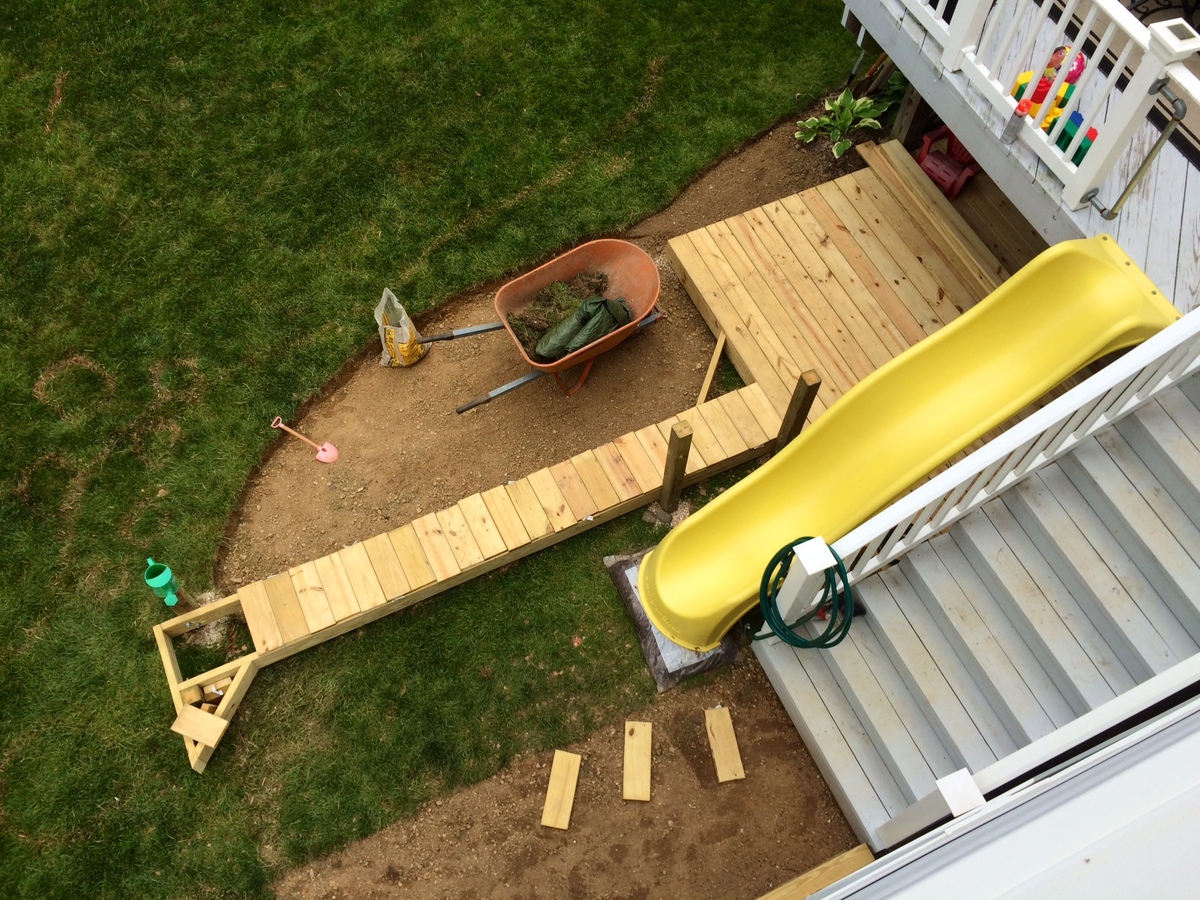
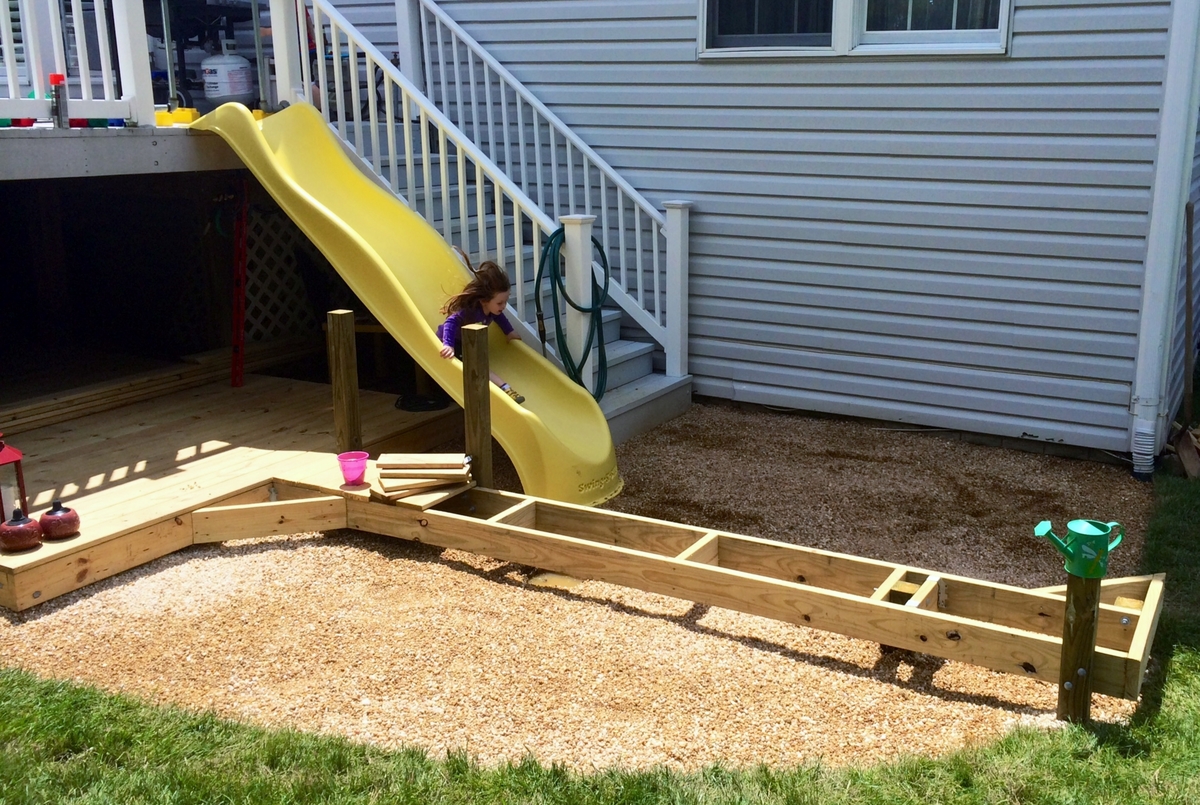
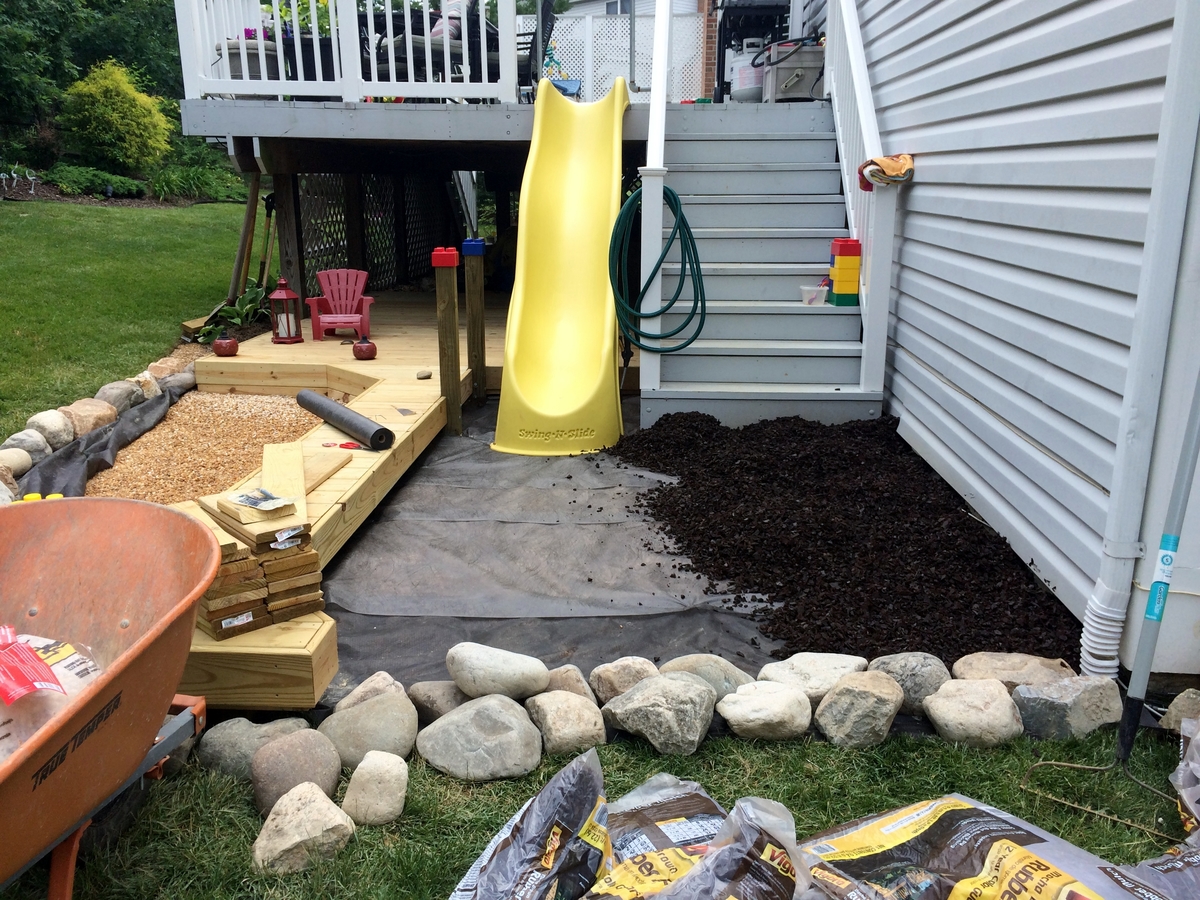
I built this outdoor play area for my kids this past summer. The area under that portion of the deck was always messy and muddy and so I wanted to make use of it. I built the deck and anchored it with lag bolts to the deck supports. On the one side I used rubber mulch and on the other there is play sand. I dug holes in various locations and filled with gravel to allow for drainage under the sand and mulch. For the awning I used plain cedar shingles. I added a shower that is just regular 1/2" metal pipe with a hose adaptor. The shower wall and fence are just old pallets that I had for a while, cut to size, which was pretty much random but they came out great. I added a misting system under the awning that works great, the kids love the cool mist on the hot days. Overall, a heavy job ripping up the grass, moving the wood, gravel, stones, sand and mulch, but a fun deck build and even better experience doing this with my kids by my side!
Tue, 01/13/2015 - 09:37
What an amazing use for a weird outdoor space ! You are genius !
Wed, 01/14/2015 - 06:21
I love it! I'm now trying to convince my husband to let me add a slide to the deck. Who wouldn't love that?!
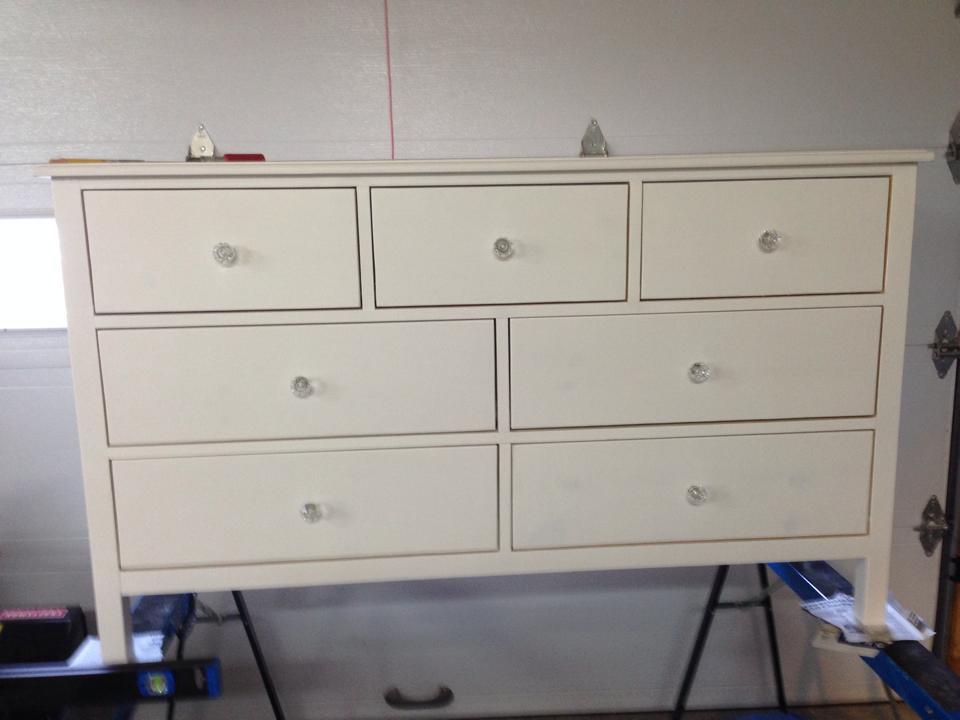
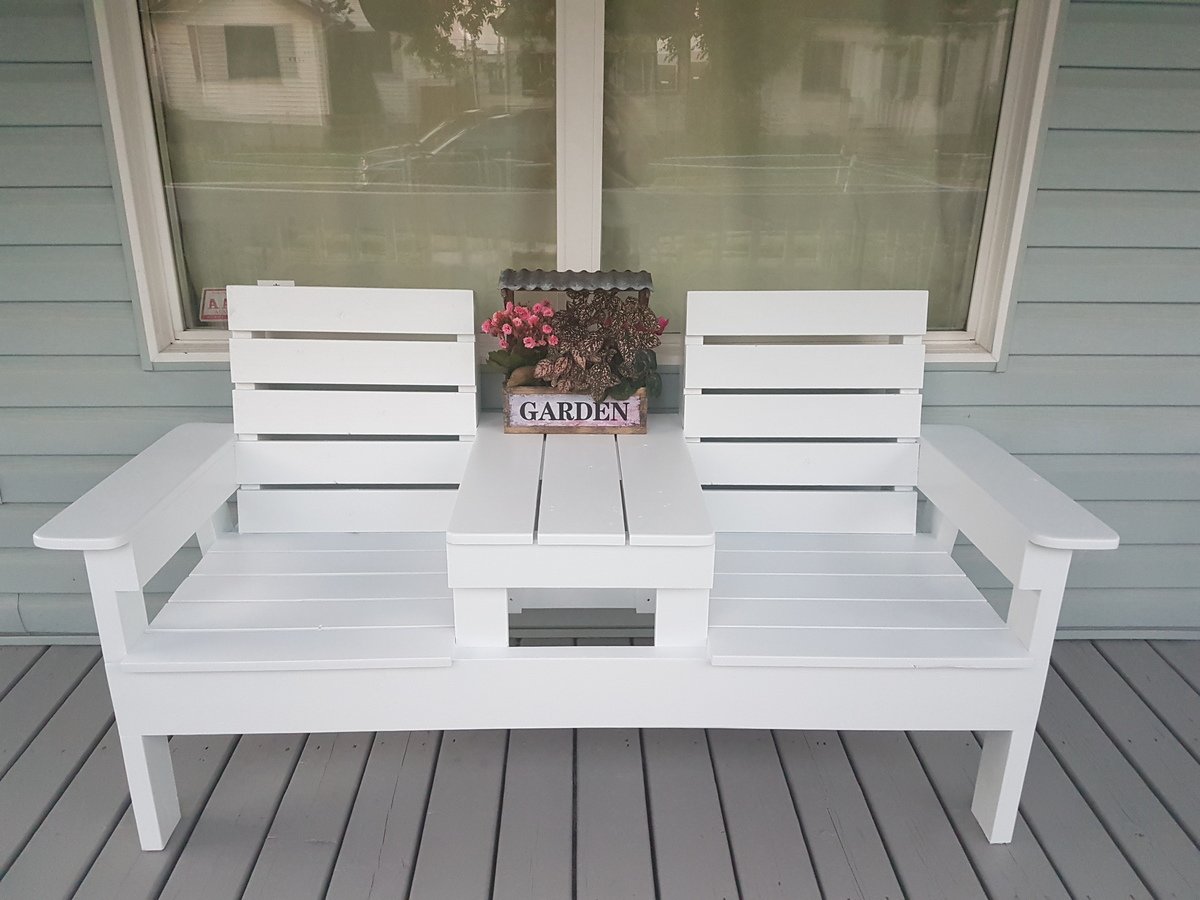
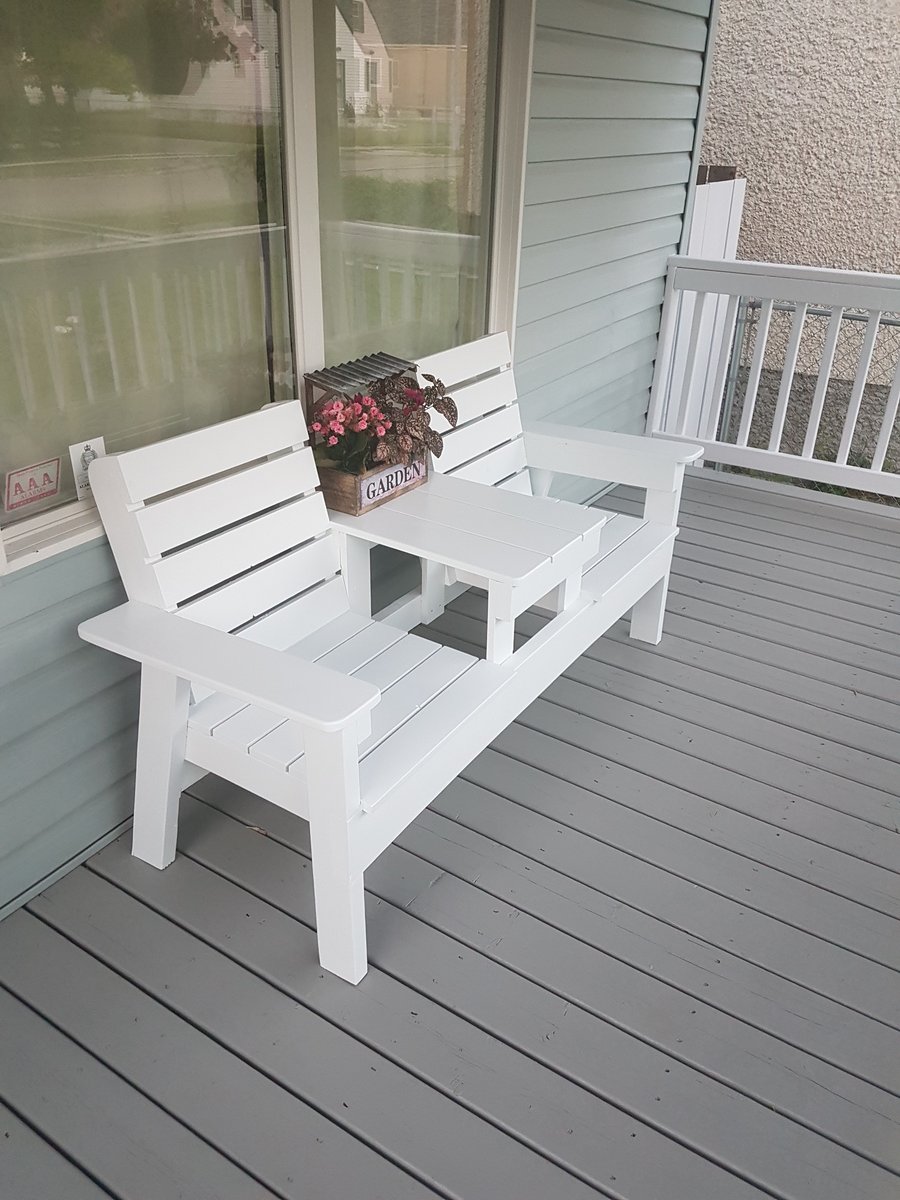
Made from pine wood painted white as my girlfriend wanted ;)
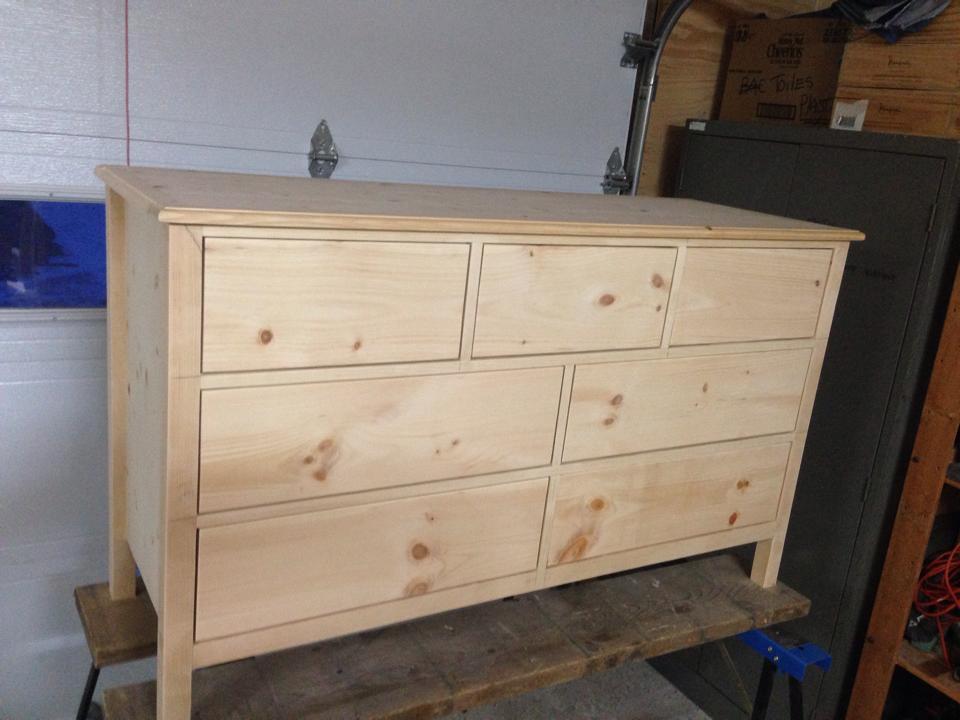
Made this coop in a weekend. $140 in material. Still a bit of work to do.
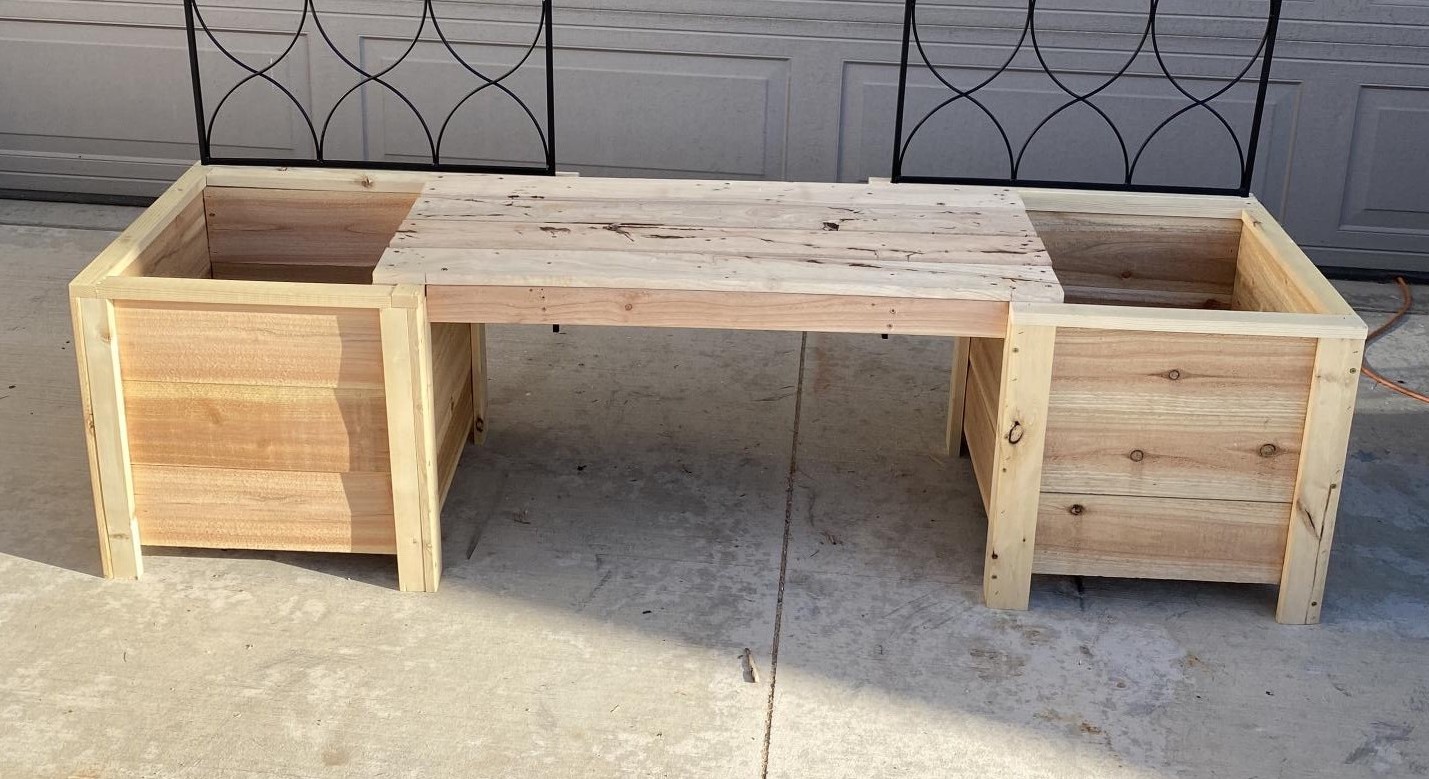
I made the boxes from plans, but added bench and trellis from my own design.
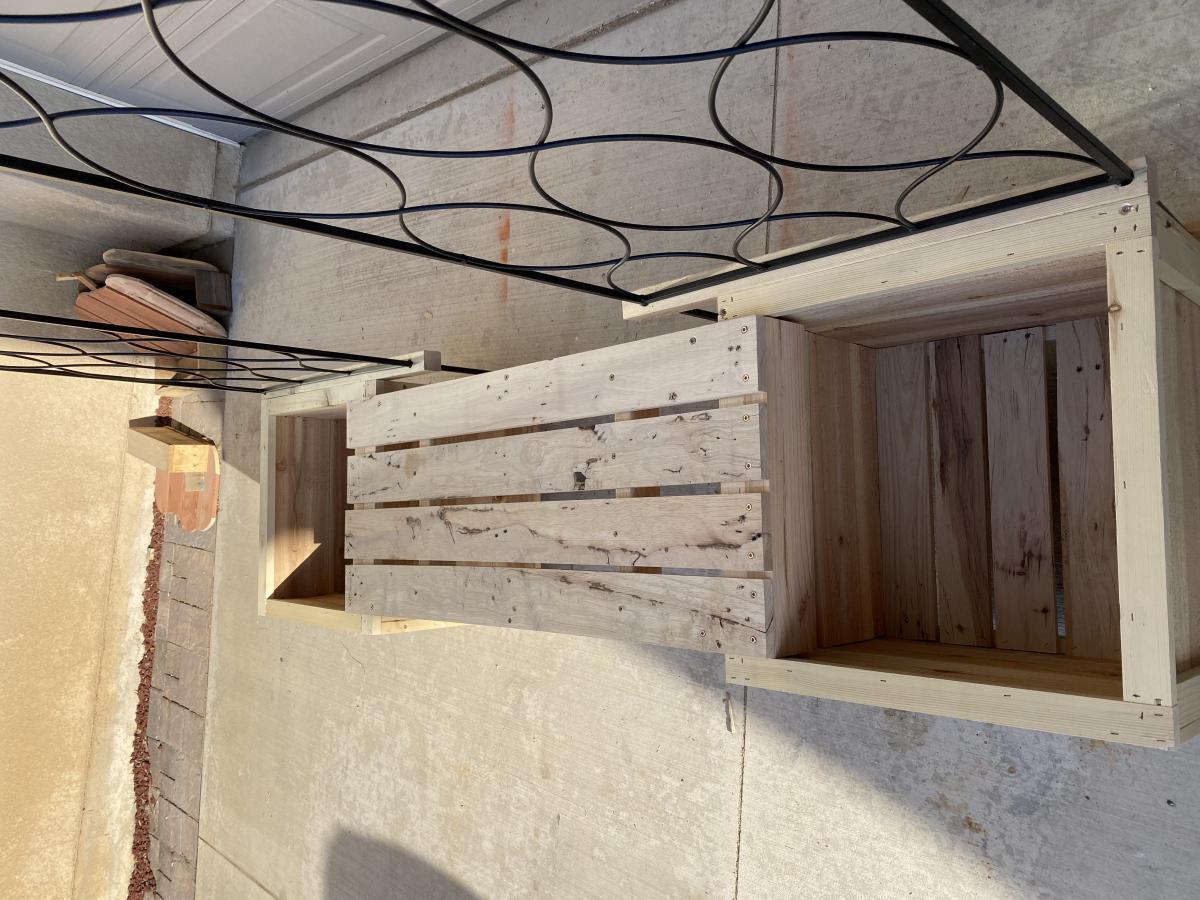
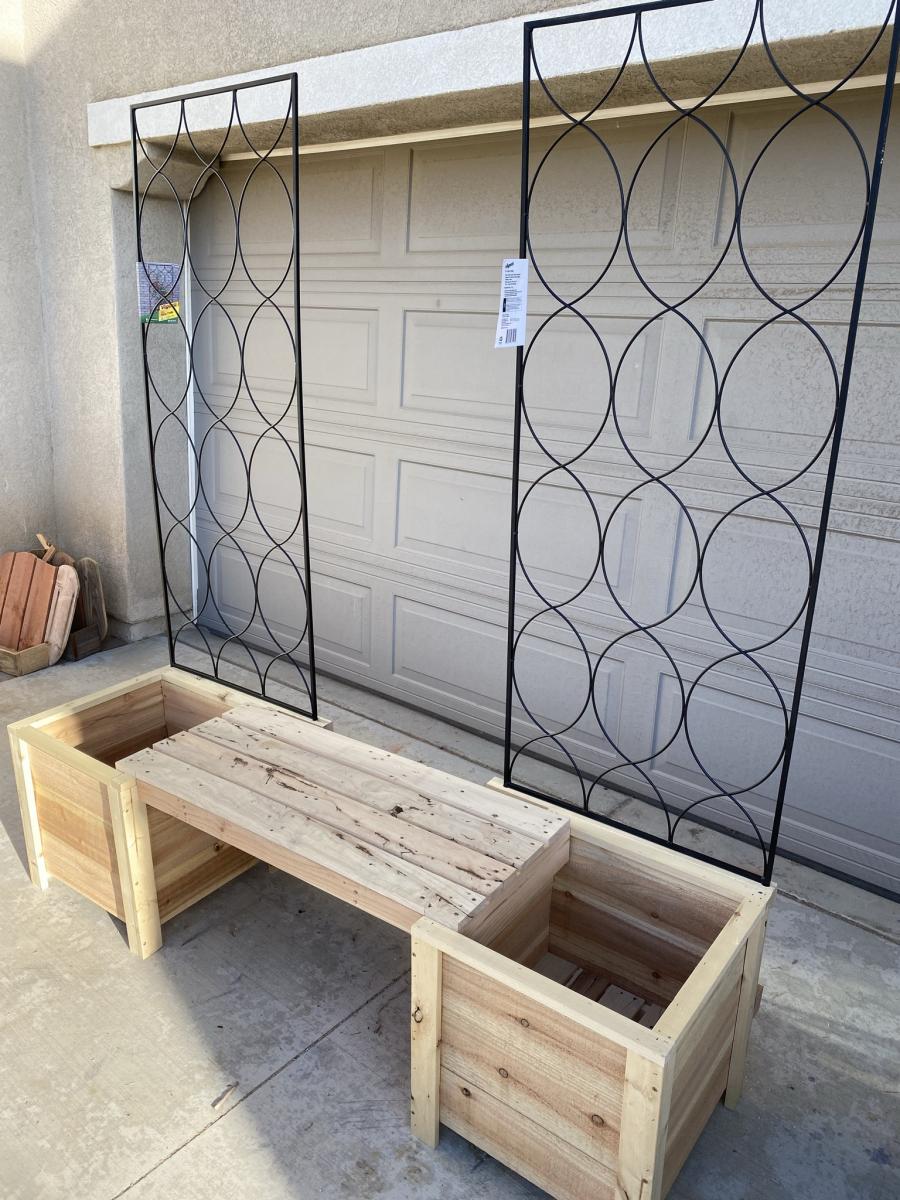
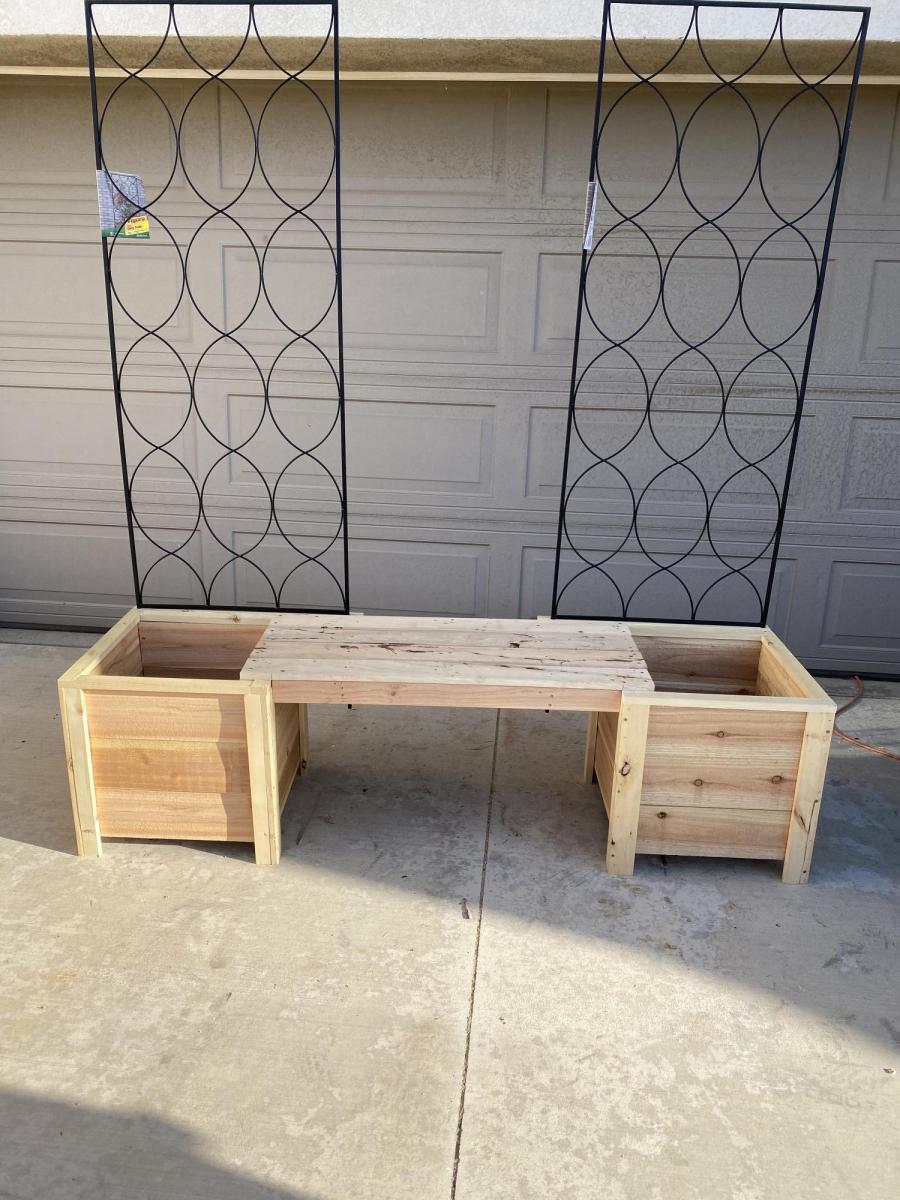
Fun build. Plans were easy to follow!

This was a great last minute Christmas gift. Took me a little over two hours. Made completely out if pallet wood.


Sun, 12/26/2021 - 13:19
It looks great, I'm sure the recipient loved it! Thanks for sharing:)
Comments
Ana White Admin
Fri, 01/08/2021 - 12:21
So Pretty!
Great job on this build, thanks for sharing!