Community Brag Posts

Daybed with Storage Trundle

Submitted by Crafty-Mom on Sat, 01/27/2018 - 10:38

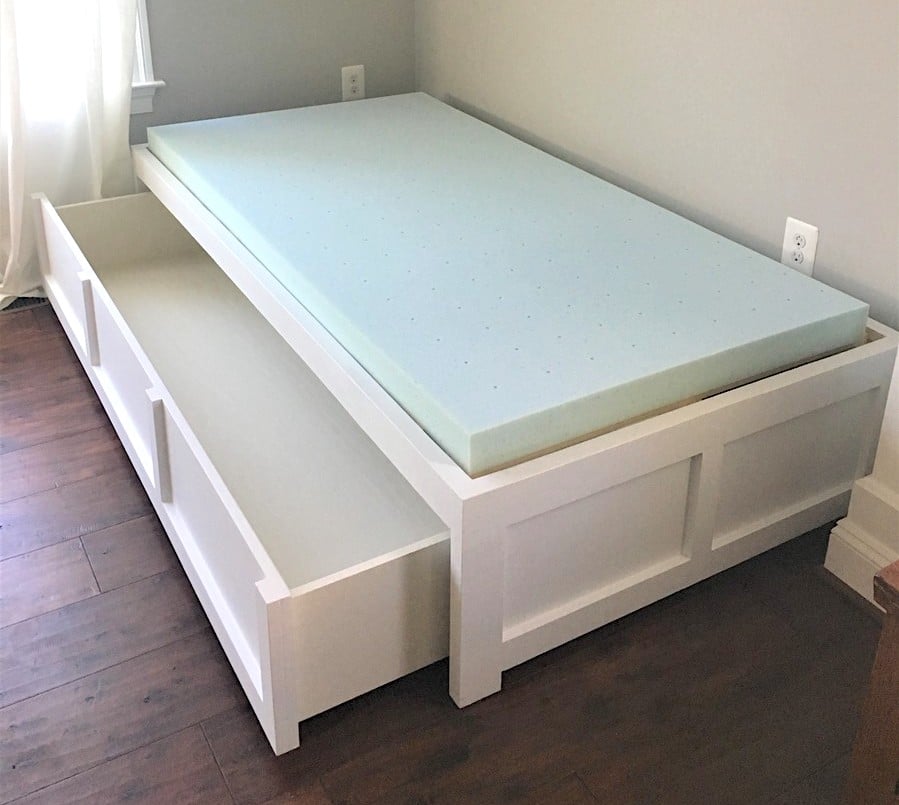
This was my first project from Ana's website and I'm hooked! I'm a beginner, but thank goodness for my Dad's help because I have a lot of learning to do!

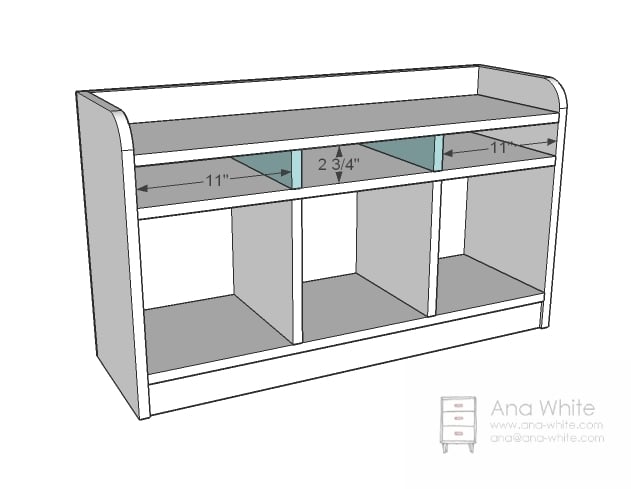
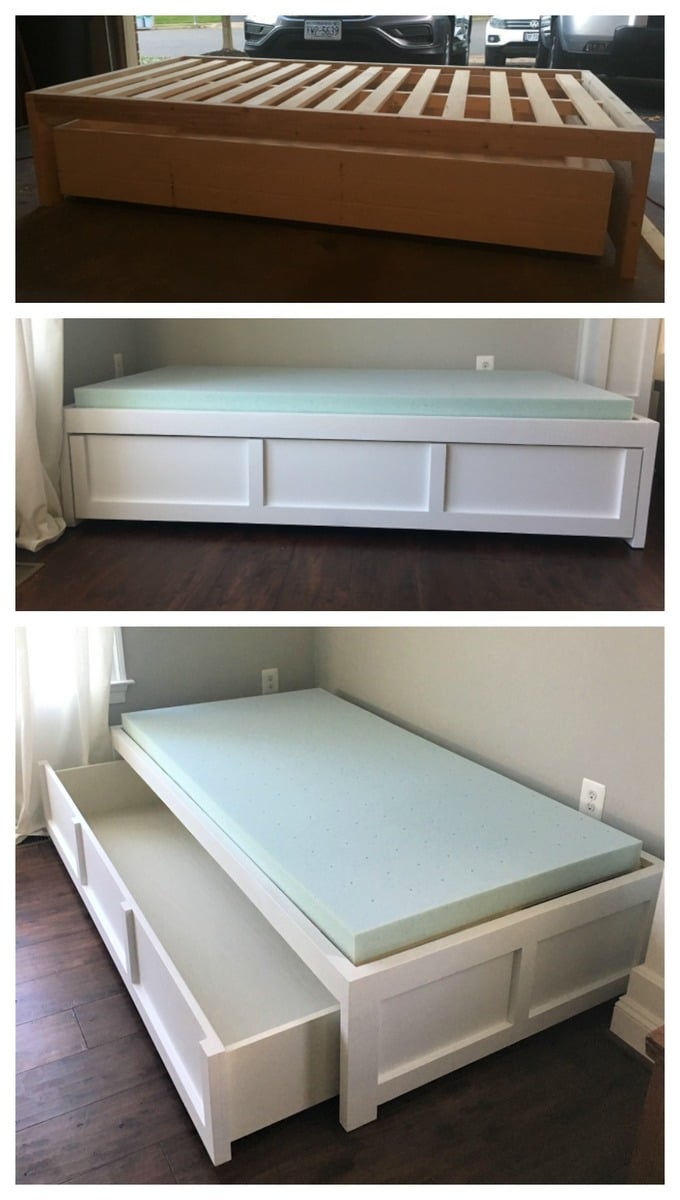
I wanted the drawer to be 1 drawer instead of 3. I feel like it looks cleaner (without having to adjust 3 drawers constantly to make it look good when you push them in). I was thinking the bed could actually be used as a trundle bed in the future too! I use this to store toys right now and it is Awesome!

I increased the bed size to fit a twin mattress and increased the height of the bed slightly so that the drawer would be a little bit deeper. We also added a back to the bed and carried around the trim to make all sides look the same. We added a bumper to the back and sides of the inside of the bed so the drawer is easy to push in and fits in snug. Finally we reinforced the bottom of the drawer with more 1x4 boards so that if a child does sleep in it, it would be more sturdy. I now have kids come over and jump into the drawer (literally) and I'm glad we reinforced it.

The changes we made did add to the cost and our time (as well as being newbies), but I think it's worth it and the bed turned out beautiful!

Estimated Cost
$180
Estimated Time Investment
Weekend Project (10-20 Hours)
Finish Used
Behr Marquee (I'll have to find the name of the white color we used). We almost went with chalk paint, but after talking to the HD guy, he talked me into this paint and I'm glad we used it! So much cheaper and turned out beautiful.
Recommended Skill Level
Beginner

Comments

Nisssc

Mon, 10/12/2020 - 07:51

This looks great! Any suggestion if I want cubbies instead of a trundle? Also, cubbies only on side as bed would be against the wall. Thanks for the inspiration!
Sandy

Outdoor Sofa and Chair with Slanted Back

Submitted by Anonymous (not verified) on Sun, 07/16/2023 - 10:22

OK, I think this build may be my biggest project yet! It is definitely the heaviest. With the strong winds we can get here in Florida we needed substantial outdoor furniture.
I did make some modifications along the way measurement-wise so the sofa would fit my front porch better. All in all, this took 2 full days. I built the sofa first, stained it the next day and then decided (due to trying to get stain in all the nooks and crannies) to stain the chair pieces first before putting it together.
I am so happy with the results and so far, almost a year later, this furniture looks great and hasn't moved an inch in any of the thunderstorms we've had! Thank you Ana!!

Teeter Totter

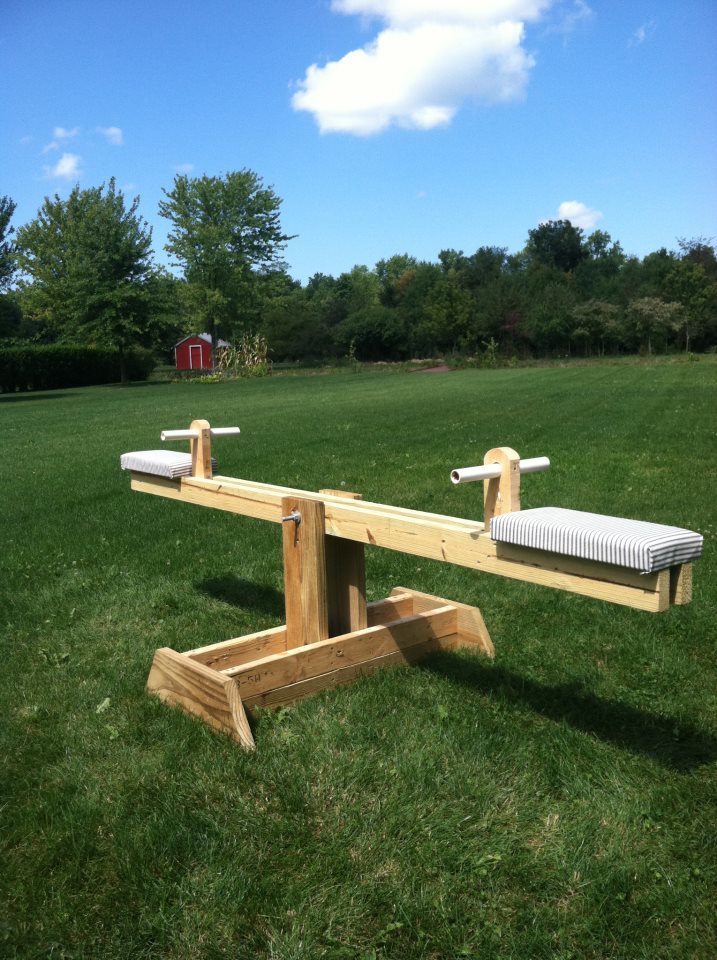
This is one of the cheapest projects for my kids I have ever completed!! And the most rewarding. I think everyone of my neighbors has been on the teeter totter...including adults :) My kids just love it and I am thinking of making a few for my nephews for Christmas. I was able to find all the wood I needed in my scrap pile. I had the PVC pipe and bolt already also so all I had to make a trip to the store for was the foam for the seats. My son helped me build this in an hour. I liked the unfinished look so I just sprayed it with a little Thompson Water Seal. Thank you Ana White!!

Built from Plan(s)
Estimated Cost
$0 Lumber (scrap wood) $5 Foam padding
Estimated Time Investment
An Hour or Two (0-2 Hours)
Finish Used
Thompson Water Seal
Recommended Skill Level
Starter Project

Comments

Seasonal And Holiday

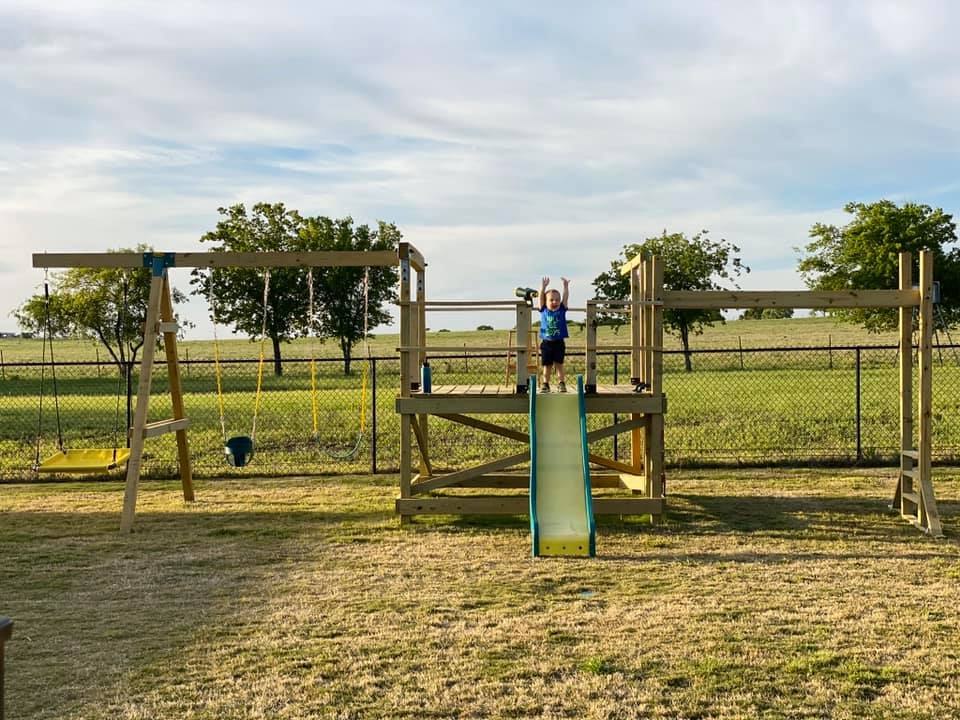
Swing Slide Playset for Grandson

Submitted by shellyward on Wed, 05/20/2020 - 09:22

We are used to seeing our grandson every weekend but during the 2020 COVID quarantine we were unable to do so. Instead, we filled our time building him a swing set for our backyard. He loved it!! We are going to add more to the swing side but the hardware I want isn't available right now (apparently there is a lot of swing set building going on during this time). I look forward to many years of playing on this with our grandson and hopefully additional grandkids in the future... Our cost was pretty high mainly because our first round of lumber came from a local lumberyard that was willing to deliver within a few days (big box was going to take several weeks) and they had what is supposed to be higher end lumber (not sure I am convinced of that)....also, i chose some pretty expensive hardware (brackets) just for the added security.....

Estimated Cost
1800-2000
Estimated Time Investment
Week Long Project (20 Hours or More)
Finish Used
not done yet but will be staining/sealing when the wood is ready
Recommended Skill Level
Intermediate

Comments

Seasonal And Holiday

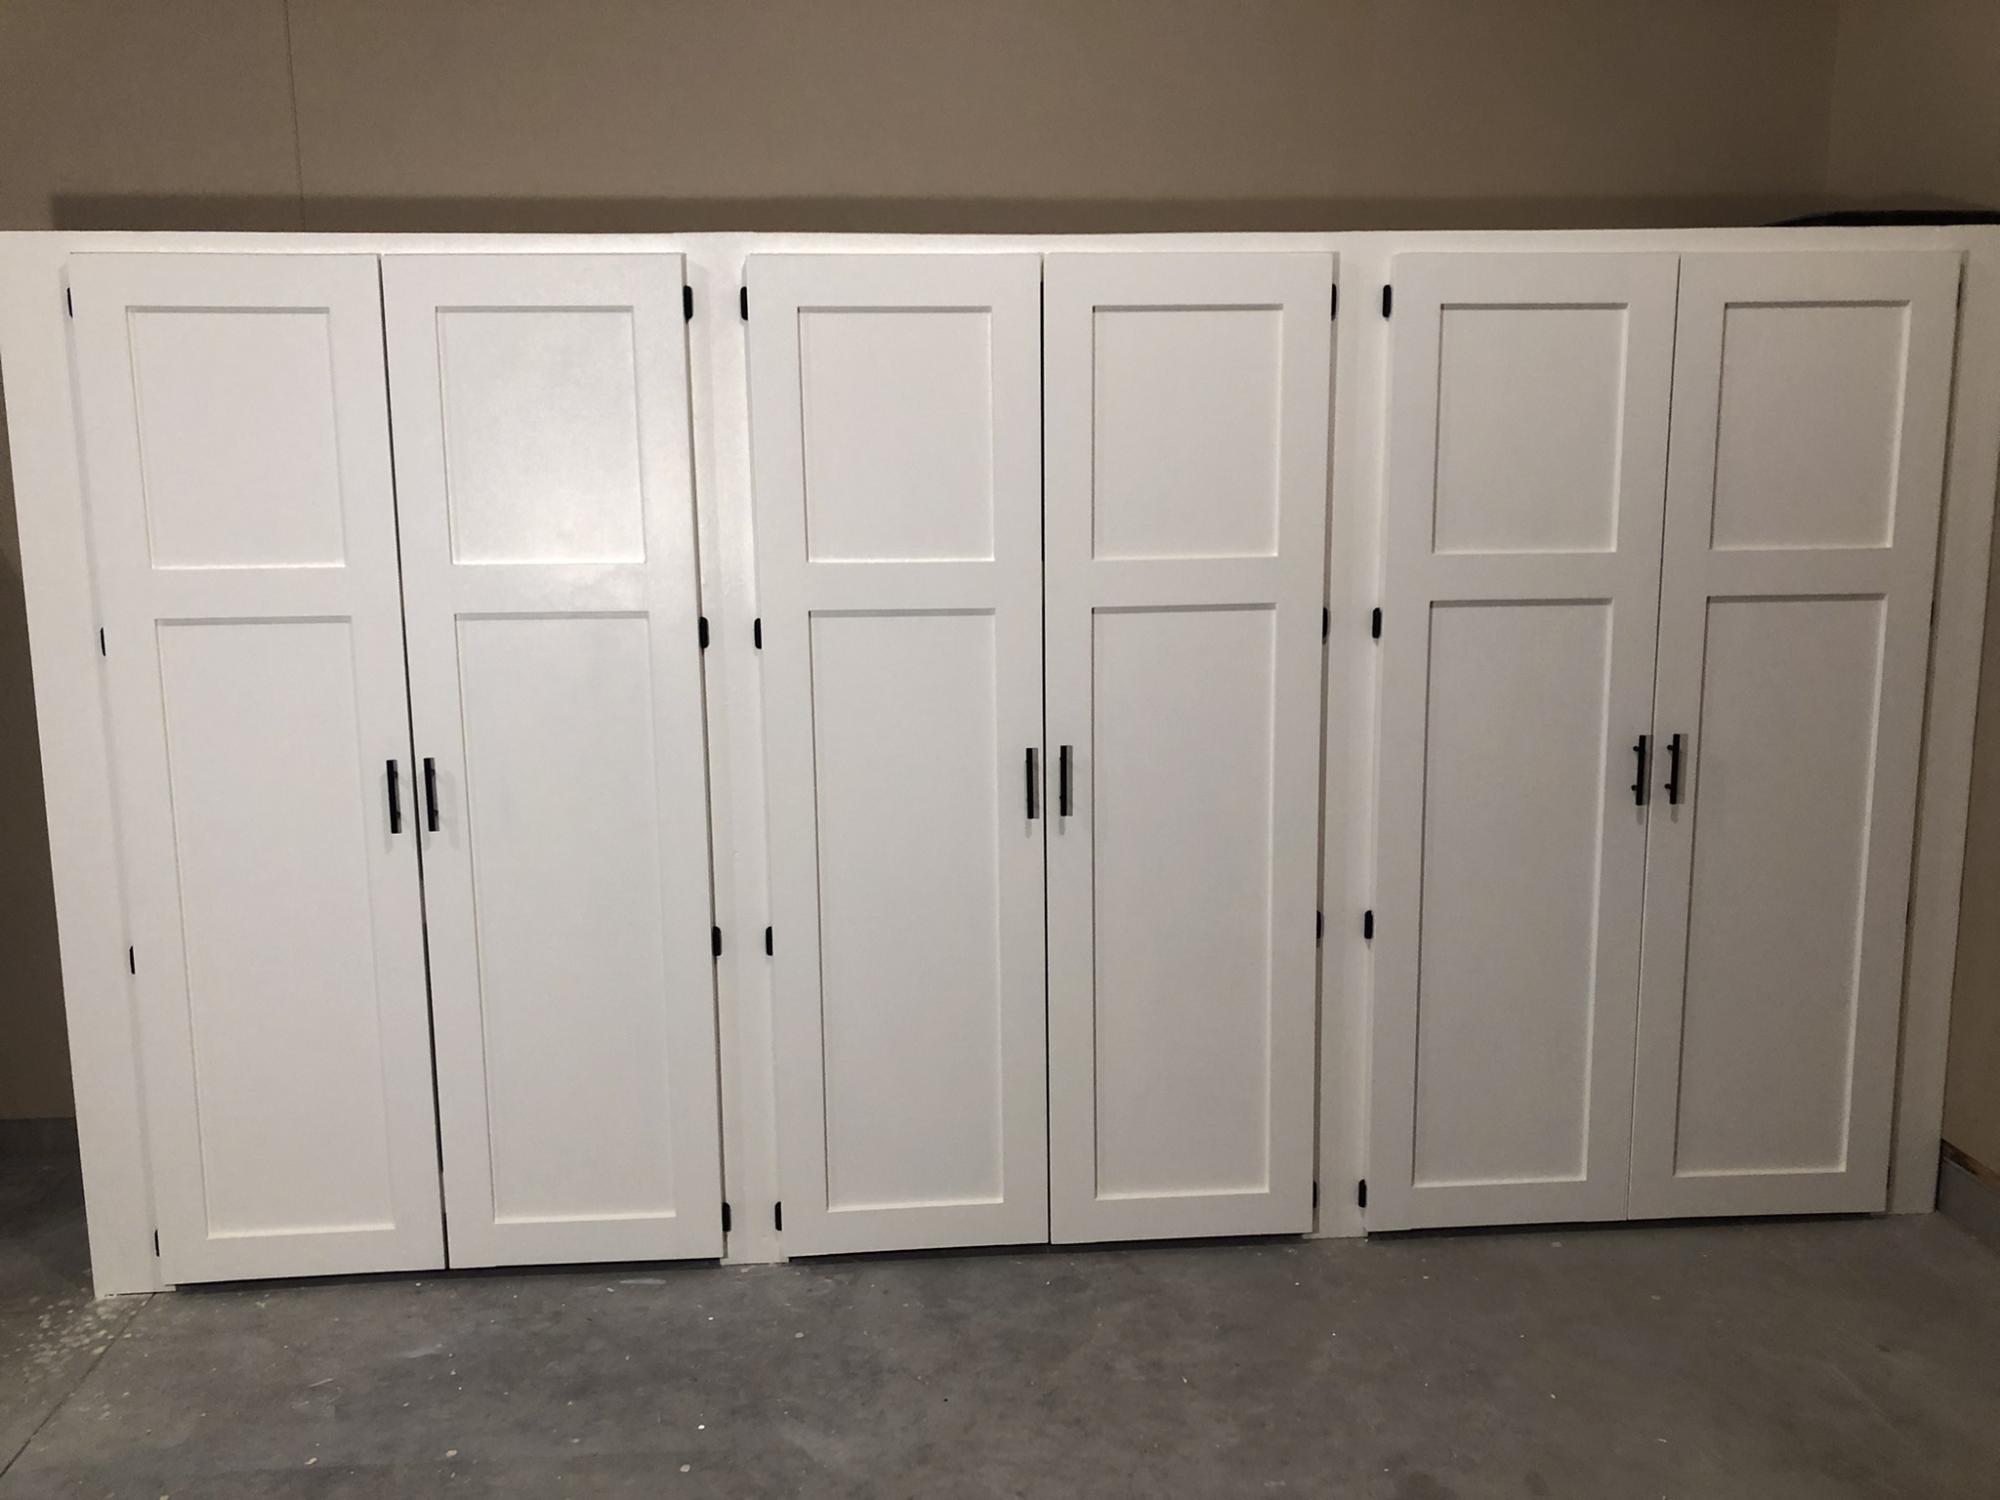
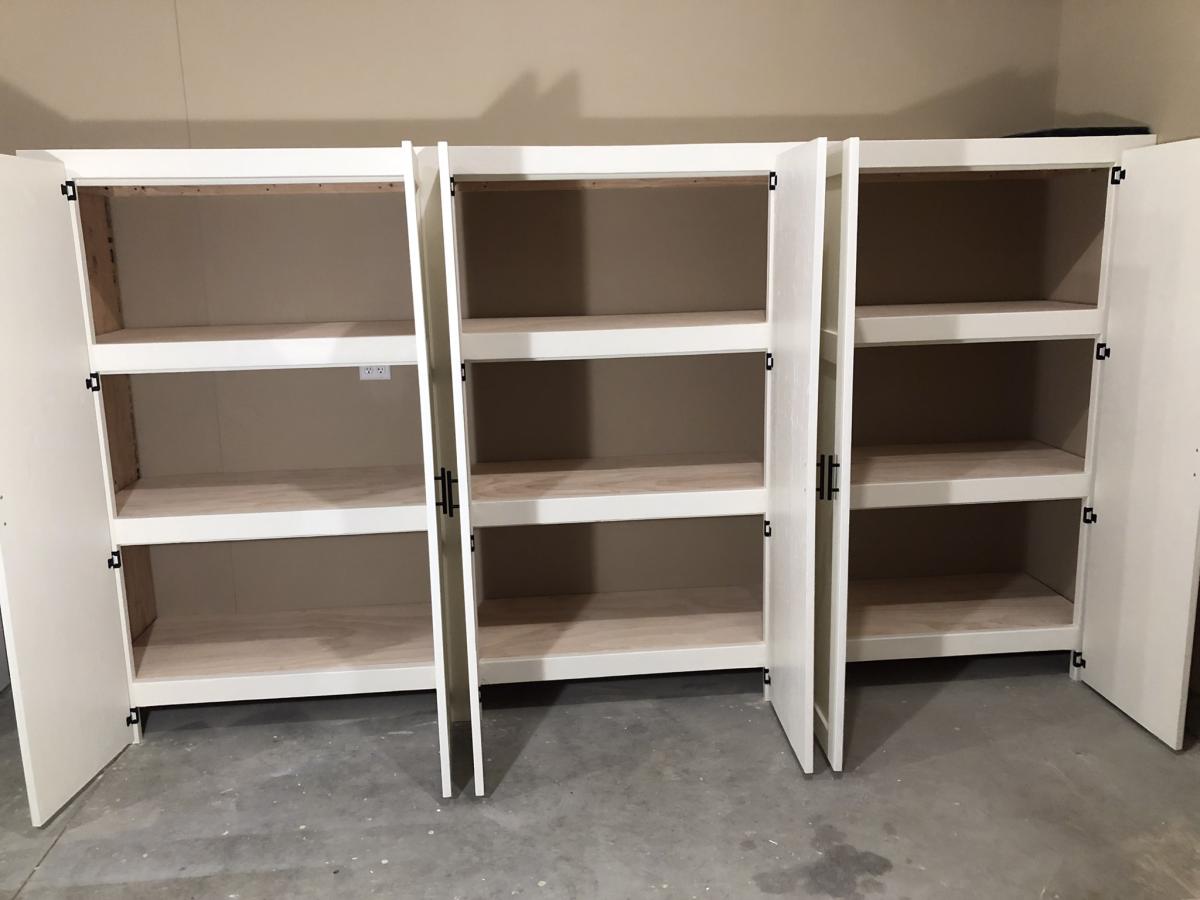
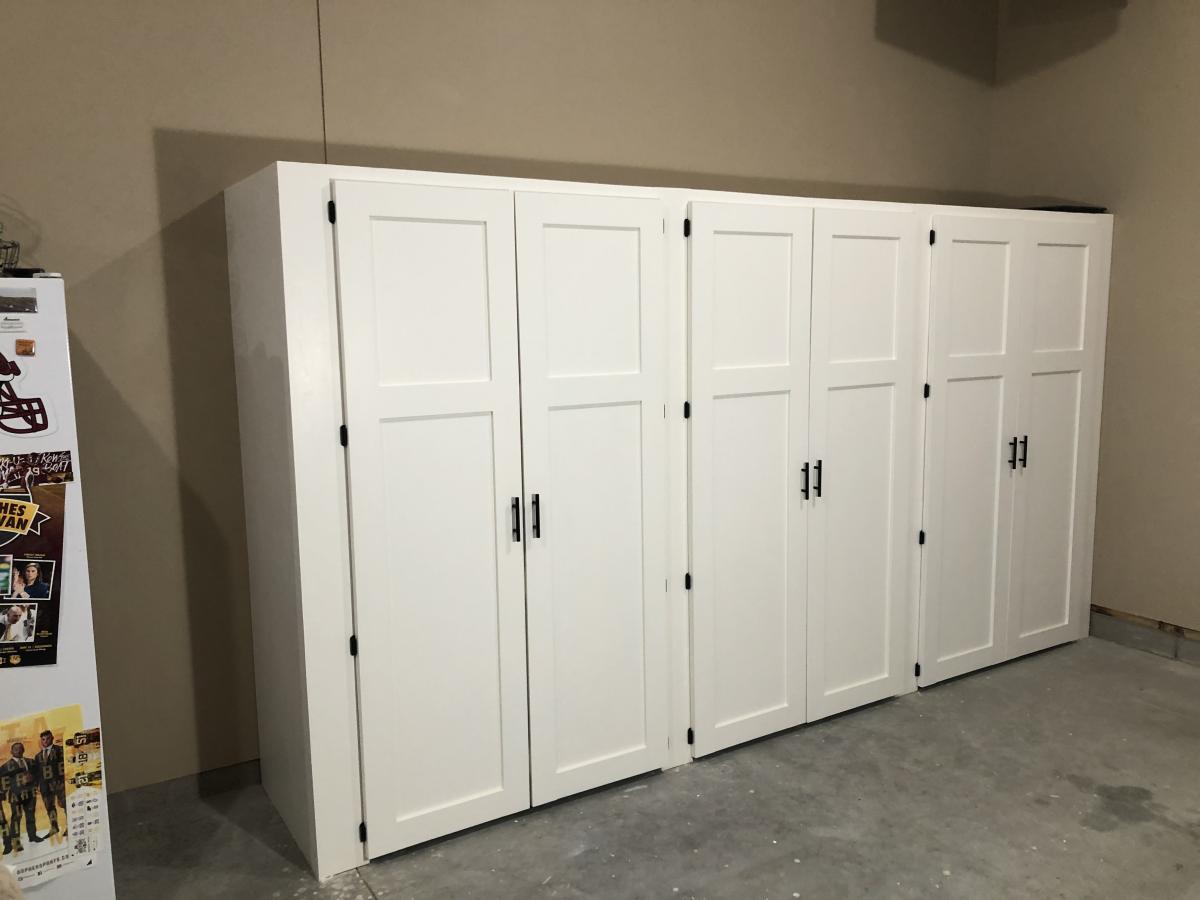
Using Ana White’s Garage Cabinet Plans

Submitted by Anonymous (not verified) on Wed, 04/20/2022 - 09:23

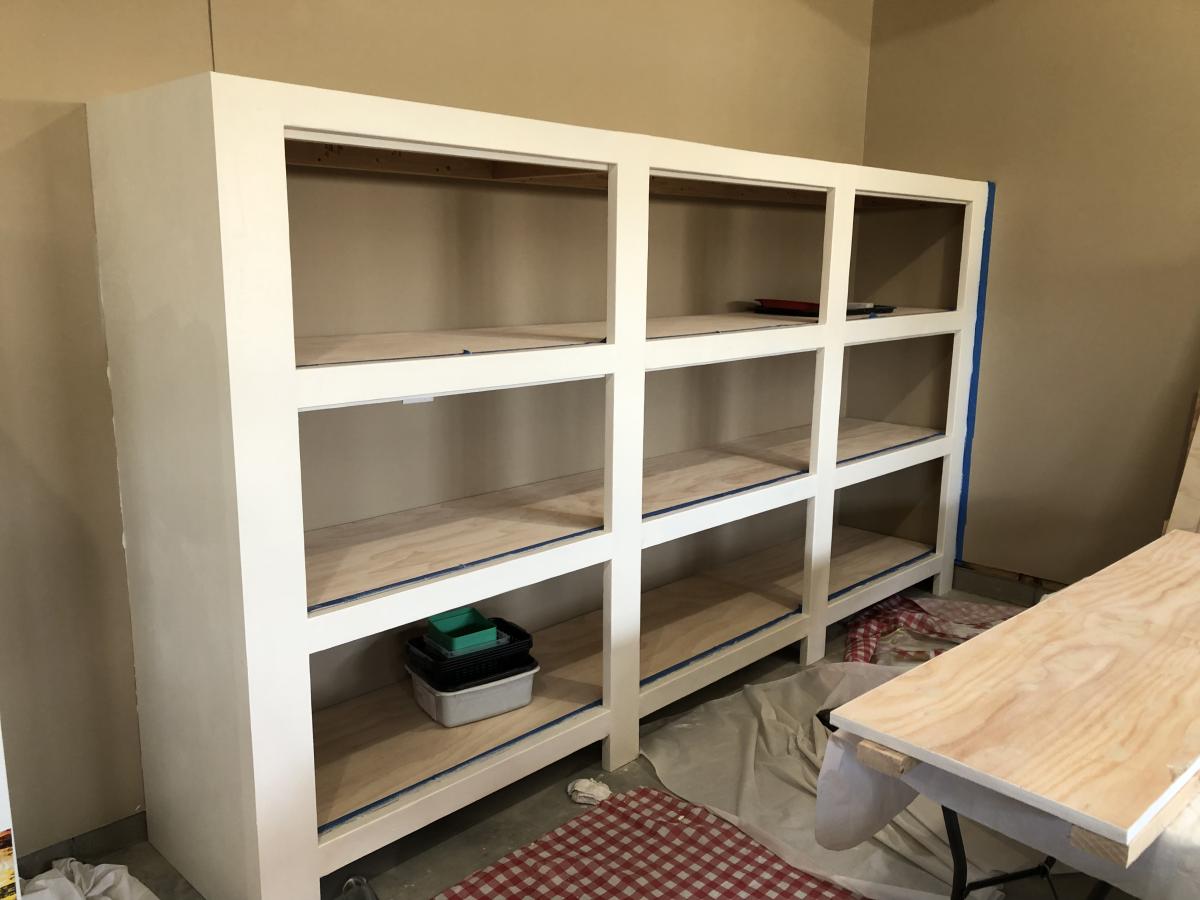
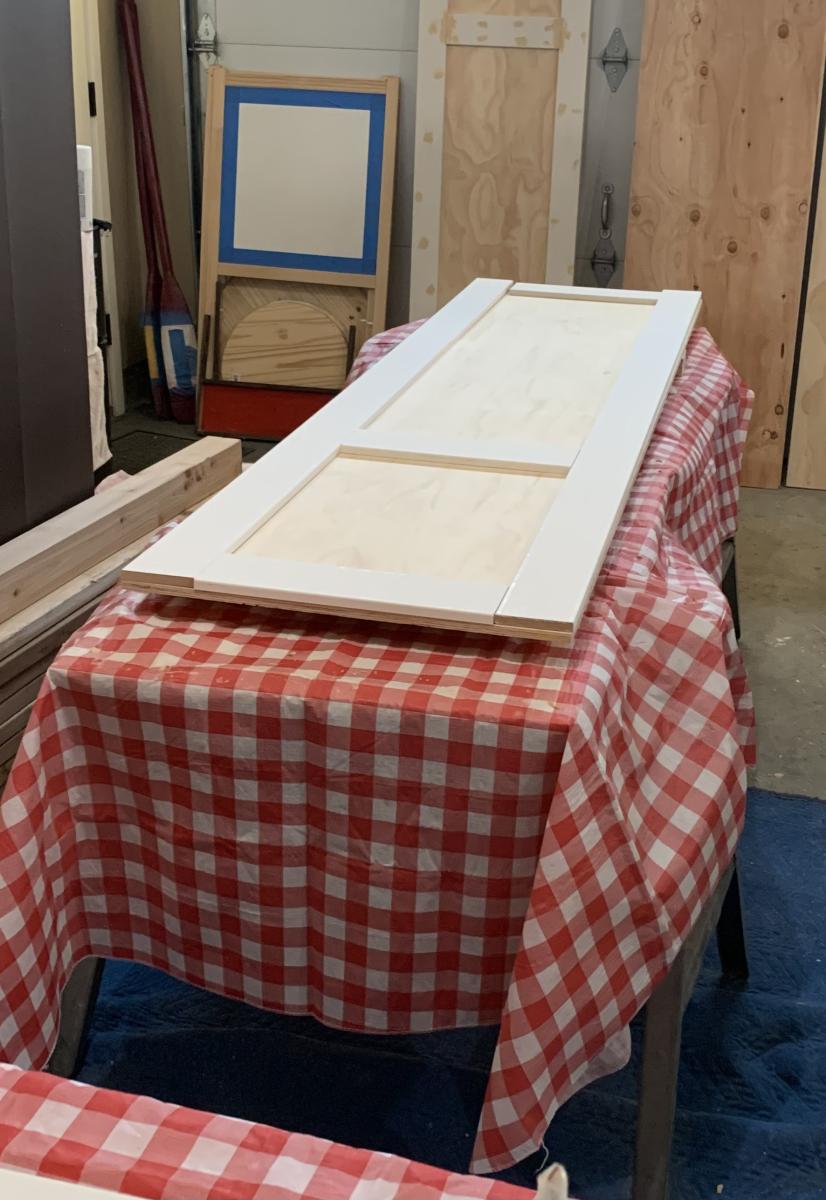
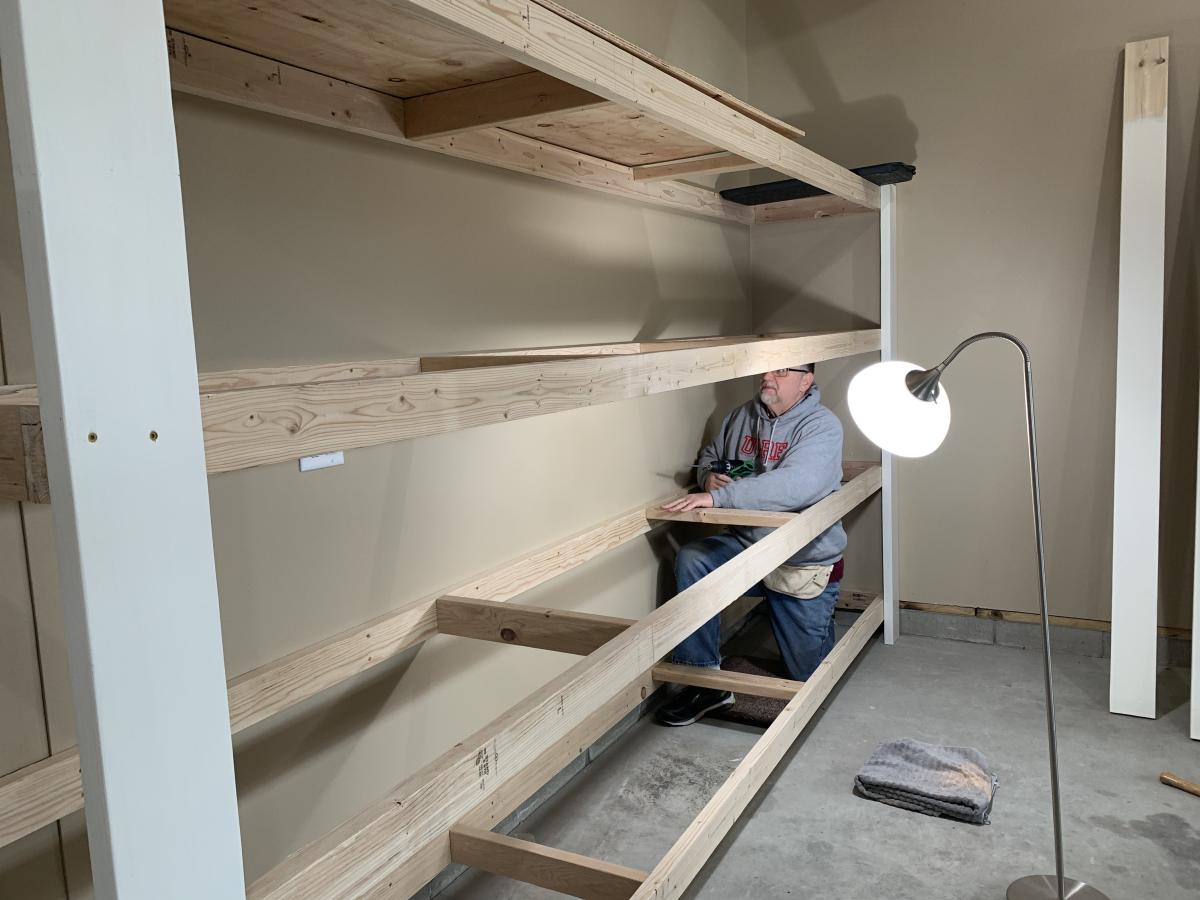
Thank you so much for the two videos we watched of you and your husband explaining and demonstrating how to build garage shelves. We used your plans as a guide. We chose to add shaker style doors to create cabinet shelves. We absolutely love them. We are not handy as you can see we had a living room lamp for a work light and a lifetime table as a work bench. Thank you!
The Paulsons

Comments

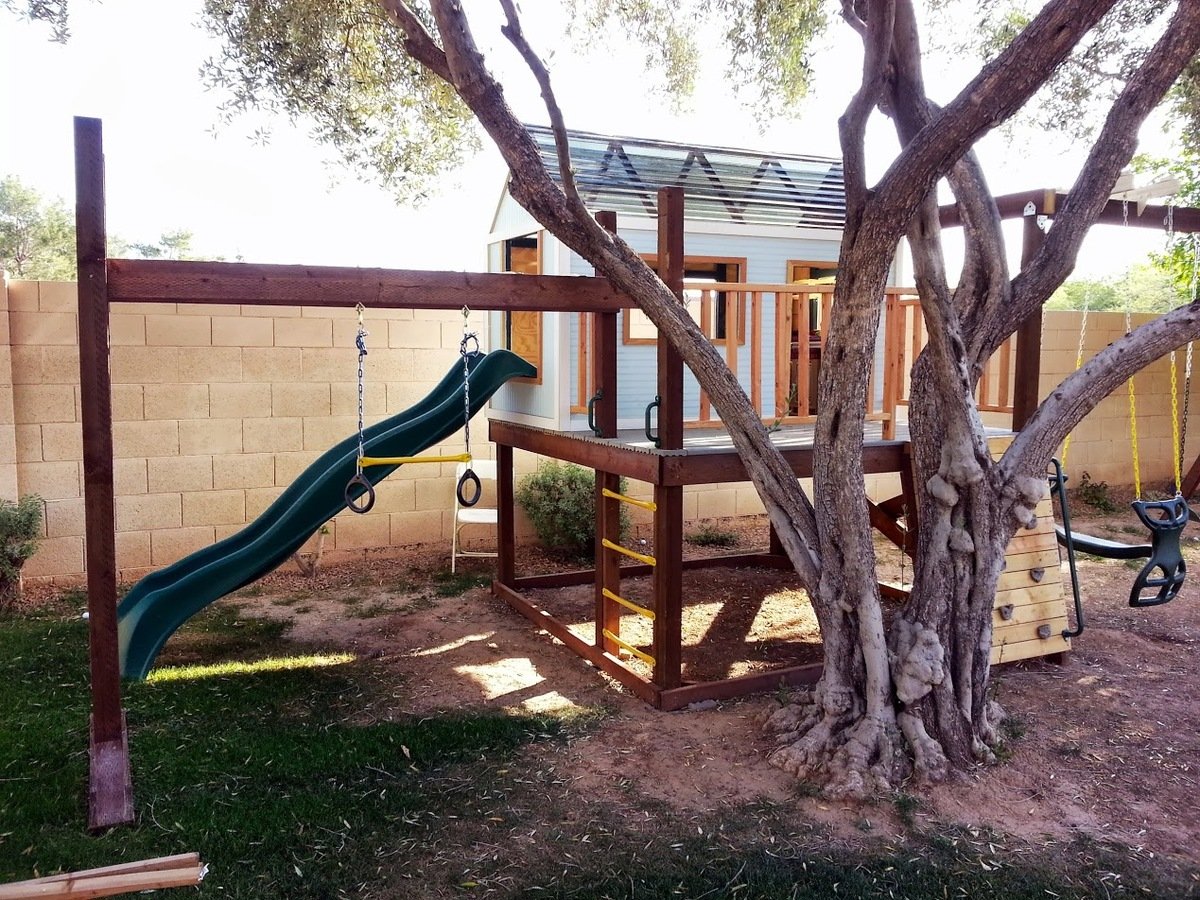
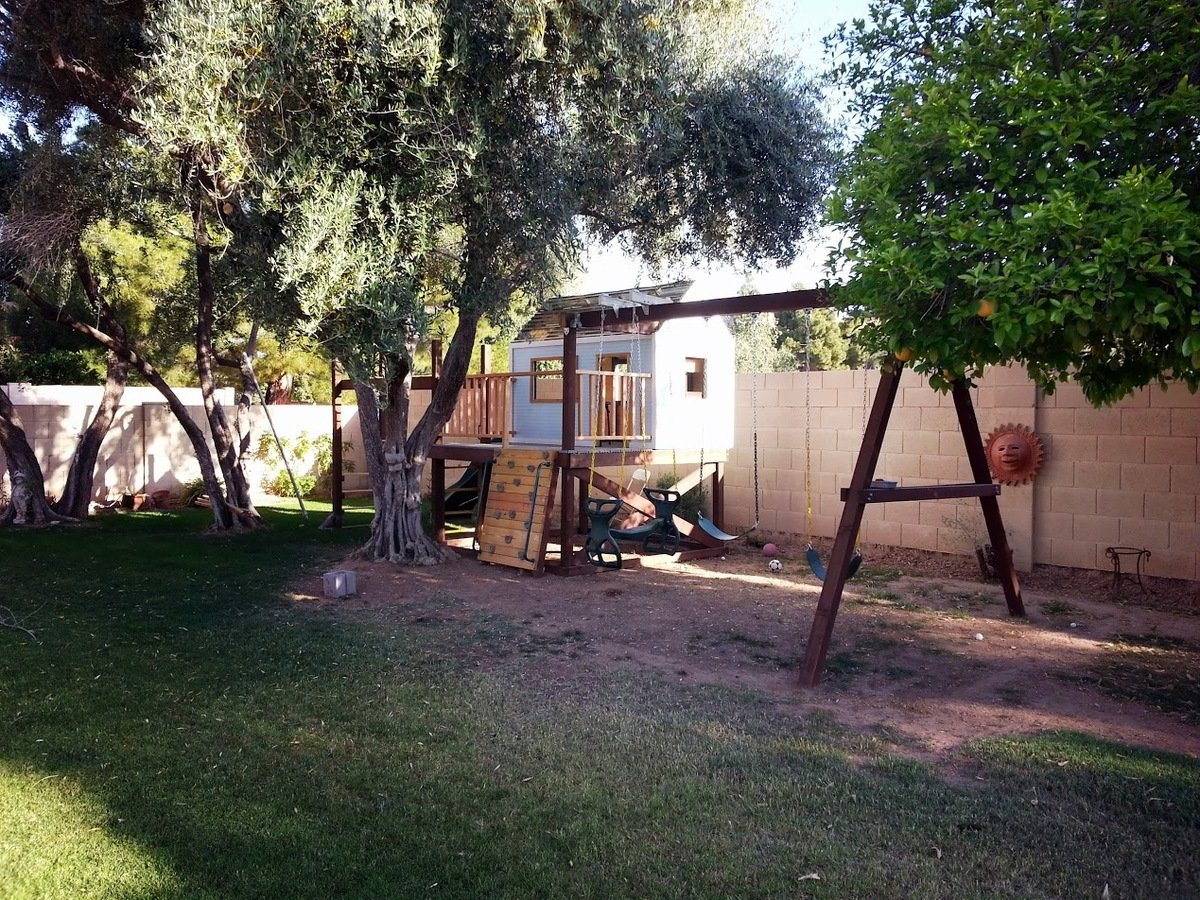
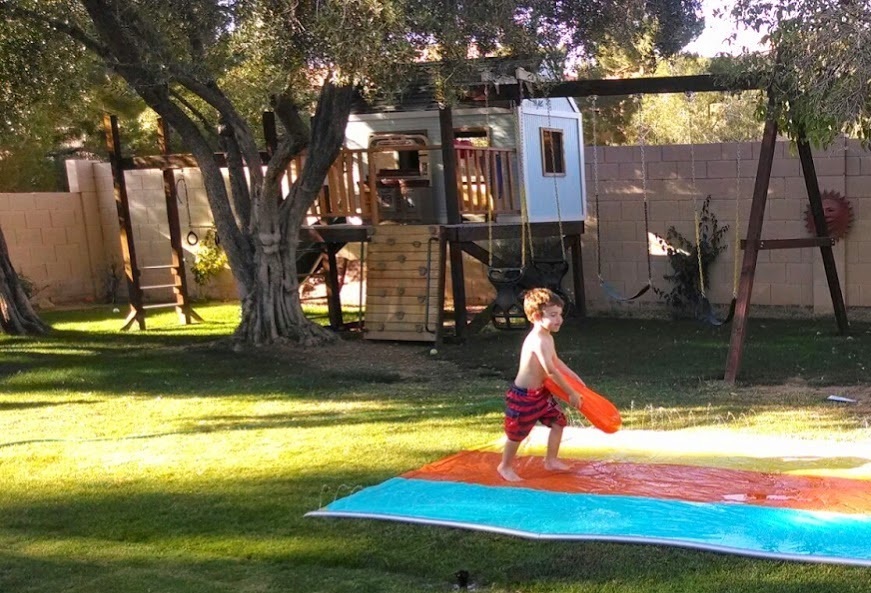
Play Structure & Swing Set

Submitted by Colby032 on Fri, 04/18/2014 - 11:52

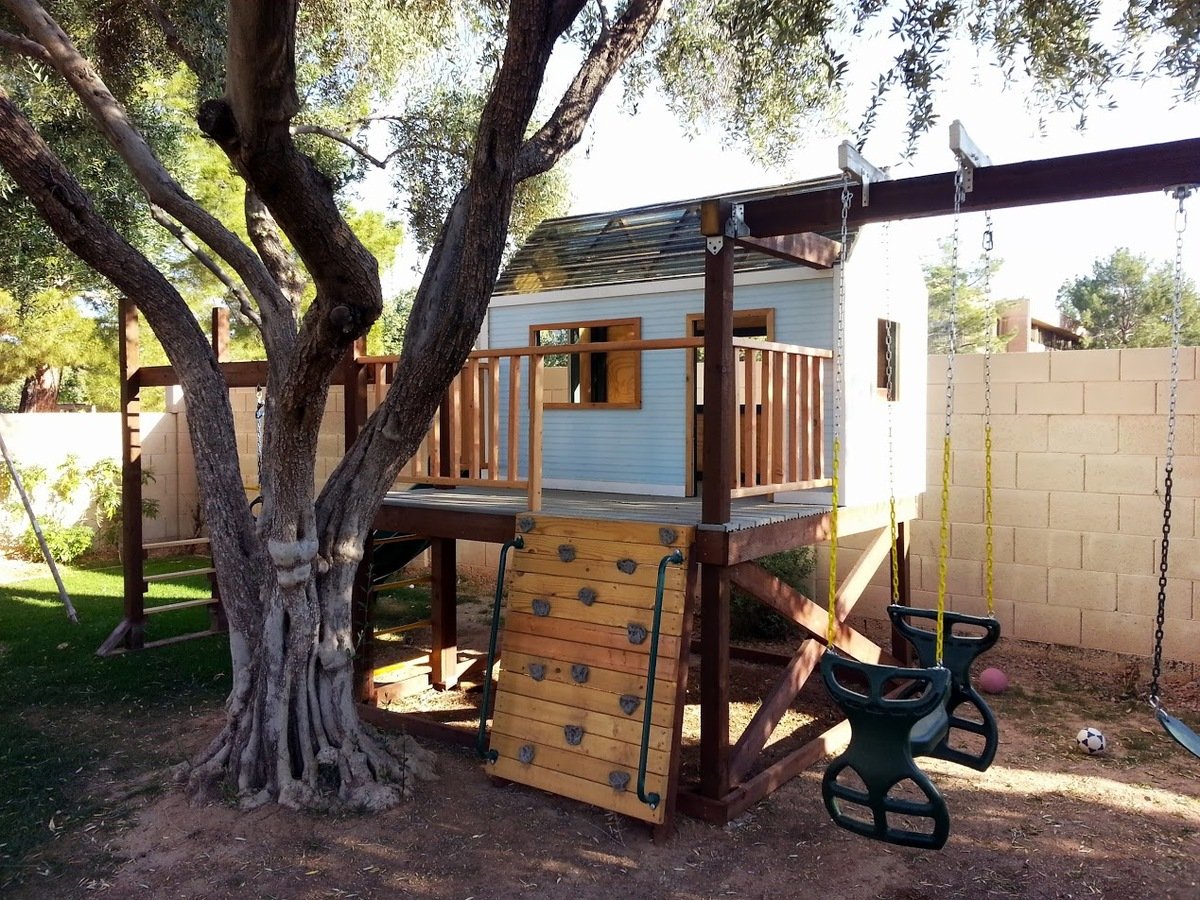
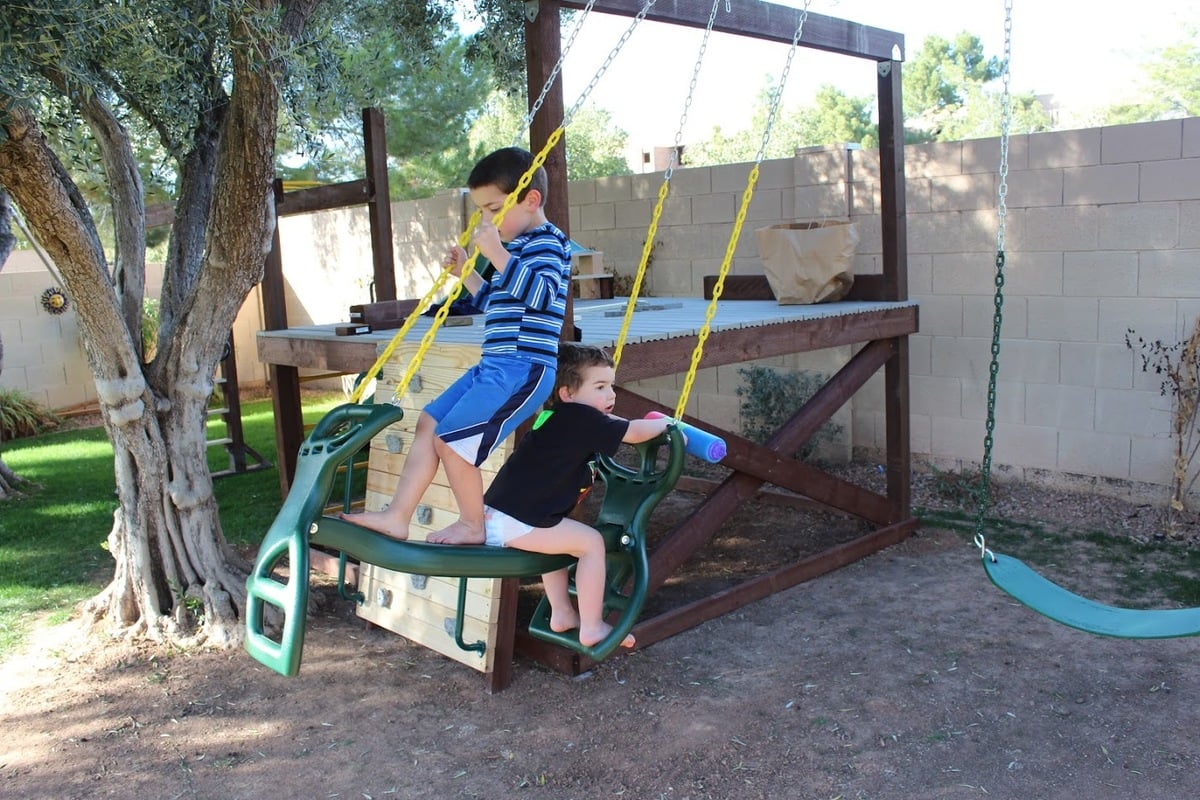
My second building project... this one took quite a while, building in the evenings after the kids went to bed.

The playhouse is based off of Ana's Playhouse Building series, with some modifications to fit the space in my backyard and accommodate climbing wall, monkey bars, and slide.

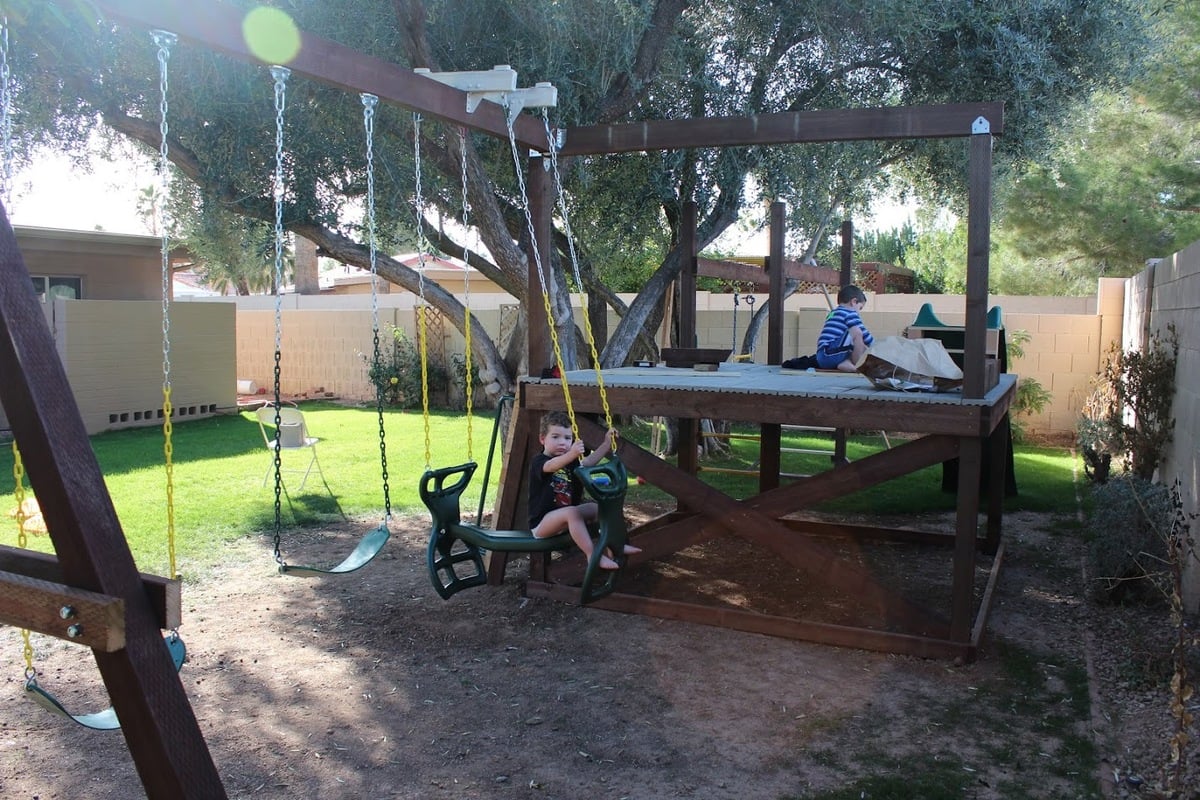
To put the main deck structure into the ground for sturdiness while protecting from moisture, I dug out 5 holes to fit single hole cinder blocks (4 corners plus an extra 4x4 for the monkey bars; you can see an leftover block on the ground in one of the pictures). I placed some brick in the holes, then the cinder blocks on top. I then partially filled the cinder blocks with sand, put the pre-built deck in the cinder block holes (with help - it's heavy!), and then filled the rest of the cinder block holes with sand. It's worked remarkably well - the deck has been up for about a year now. I also sprayed some clear waterproof sealant on the bottom part of each beam near the ground for extra protection (deck, monkey bars, climbing walls, and swingset A-frame). This has allowed me to still run sprinklers near/around the playset and even grow grass underneath the swings!

Materials used:
* Playhouse: pine, plywood, Suntuf solar grey polycarbonate corrugated roofing panels (I live in Arizona, so little rain to worry about but lots of heat - the sheeting lets light in but blocks most of the UV rays, corrugated shape also provides venting at top when placed sideways)

* Deck/Swingset/Monkey bars: treated lumber, composite decking, pine for railings, monkey bars purchased from Amazon

* Climbing wall: pine, treated lumber, handholds/railing bought off ebay/Amazon

* Swings/slide/bongos/wheel, telescope: purchased from Amazon

Modifications:
* Turned playhouse 90 degrees to be in back of the deck, with swingset coming off the side. This meant the support beam for the swingset had to pass through the playhouse - modified the frame for that wall slightly and created a notch for the beam to pass through.

* Slide comes out one end of playhouse - made the "window" on that end larger than the plans called for in order to give room for the slide.

* Monkey bars come off one side of the deck - used extra 4x4 here to create support for the bars, and used extra bars to make a ladder on this side

* Climbing wall instead of ladder for main entrance

* Put large window in back wall of the playhouse

* Added cross bracing to side of decking on swingset end to make it more solid/cut down on sway when swinging
Estimated Time Investment
Week Long Project (20 Hours or More)
Finish Used
Paint on playhouse, water seal on railings
Recommended Skill Level
Intermediate

Comments

yubbie2

Tue, 04/29/2014 - 20:41

This is phenomenal - just the plan & design we've been looking for. Can you upload a few more pictures? Any sketches you can provide? Shopping list? Really great job - I hope your kids love it. It looks awesome.

JeremyFox

Wed, 04/30/2014 - 04:53

Love it! I like the way it sits right next to a tree - I thought it was a tree house at first.

Colby032

Wed, 09/10/2014 - 14:03

Thanks! It's certainly nestled in right behind that tree - I originally was going to place it in between that tree and another one but then decided to just place it behind them in order to take better advantage of shade (critical in AZ) and fit in everything I wanted to put on it (monkey bars, swings, slide, climbing wall)

masons_momma2015

Mon, 07/08/2019 - 00:48

We've  been looking at these type of players for our son, and good grief! Prices are astronomical for playsets that are NOTHING like this. This absolutely an amazing  place for those boys to make memories. You're  amazing!  Do you mind if I ask what it cost once it was finished? I never imagined  that it would cause a tic in my eye to look at the kids from Lowe's or anywhere else for that matter.

Colby032

Tue, 08/20/2019 - 10:14

I don't remember how much it cost in the end... but probably around $900?  That may include getting some tools that I needed but didn't have at the time.  The slide was the most expensive single piece I bought - I think I got it from Amazon.

When it was all done, I remember thinking that what I got for my money was *way* beyond what I would have gotten by purchasing a kit or a pre-built play structure.  Plus, by going my own way, I was able to build it to fit my space and the needs/abilities of my kids.

While the whole thing is big and looks like an intimidating build, it really isn't bad - the platform is a fairly blank base to design everything else off of, and is incredibly sturdy.  Everything else is a discrete part that branches off of the platform and can be planned out as you need.  Adding the monkey bars required putting in a 5th upright (the first 4 are the corners), but that was an easy modification since I knew I wanted it before building the platform.  The playhouse just sat on top of the platform (screwed down, of course).


patelscope

Sat, 08/01/2020 - 20:40

Hello. This is pretty cool, probably the best modification that I am looking for from Ana's default plans. Could you please add some more detail on the right side wall, and how you incorporated the support beam through the playhouse? (with maybe a picture from inside of that wall). And secondly, if you can add the dimensions for the monkey bar setup on the left side of the deck? Thanks, much appreciated

King Farmhouse Bed

Submitted by jhavinga on Thu, 05/22/2014 - 16:31

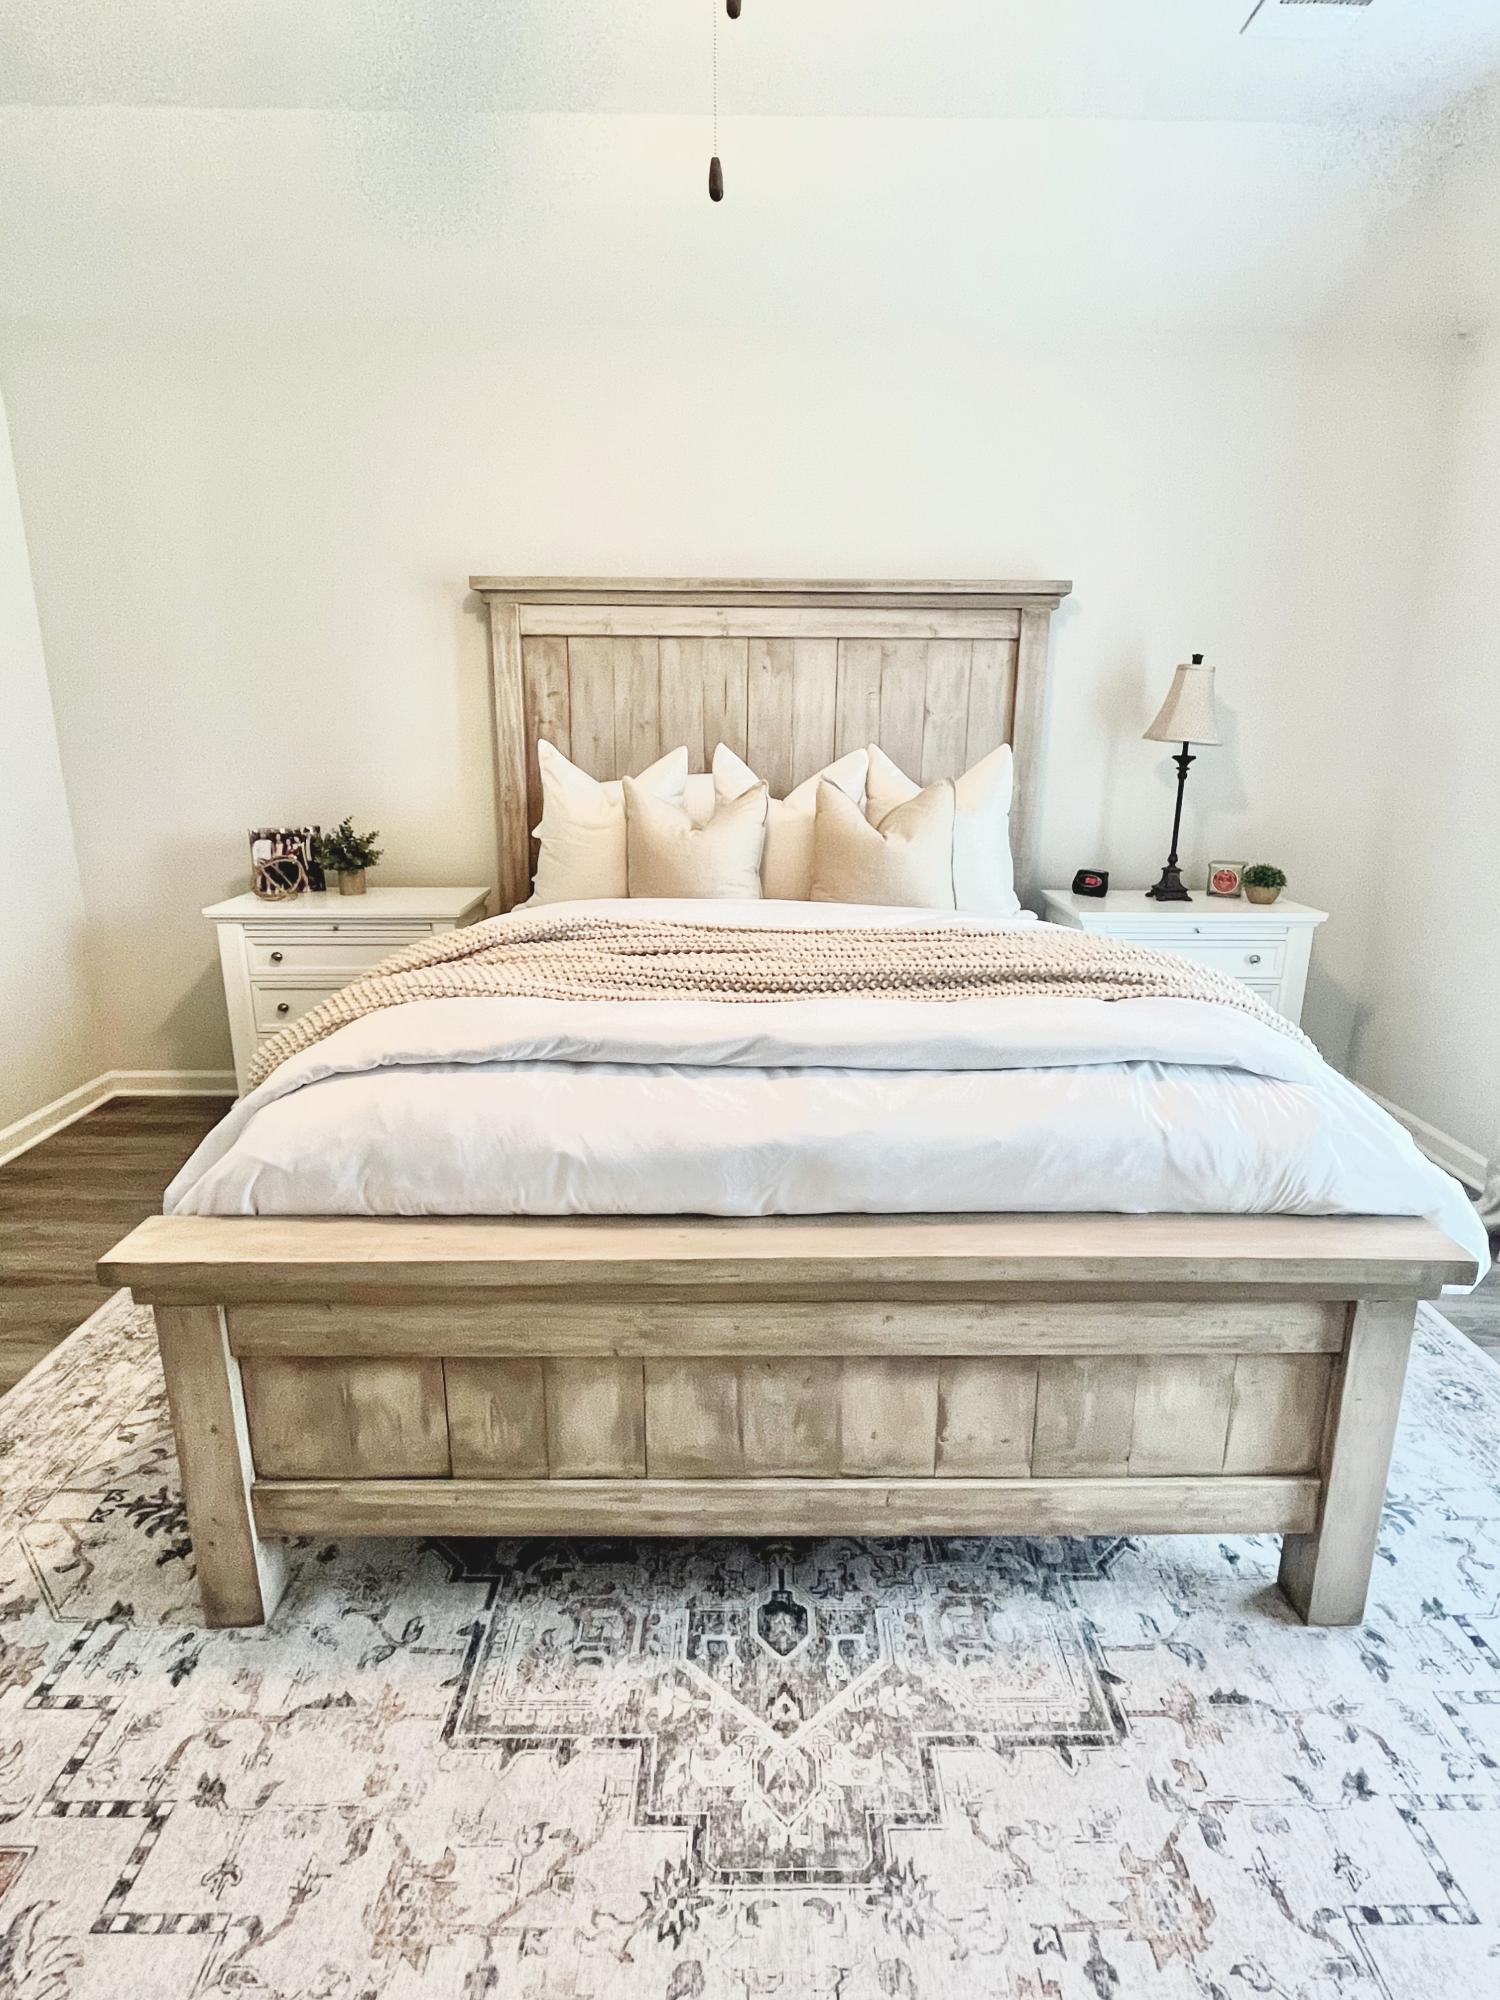
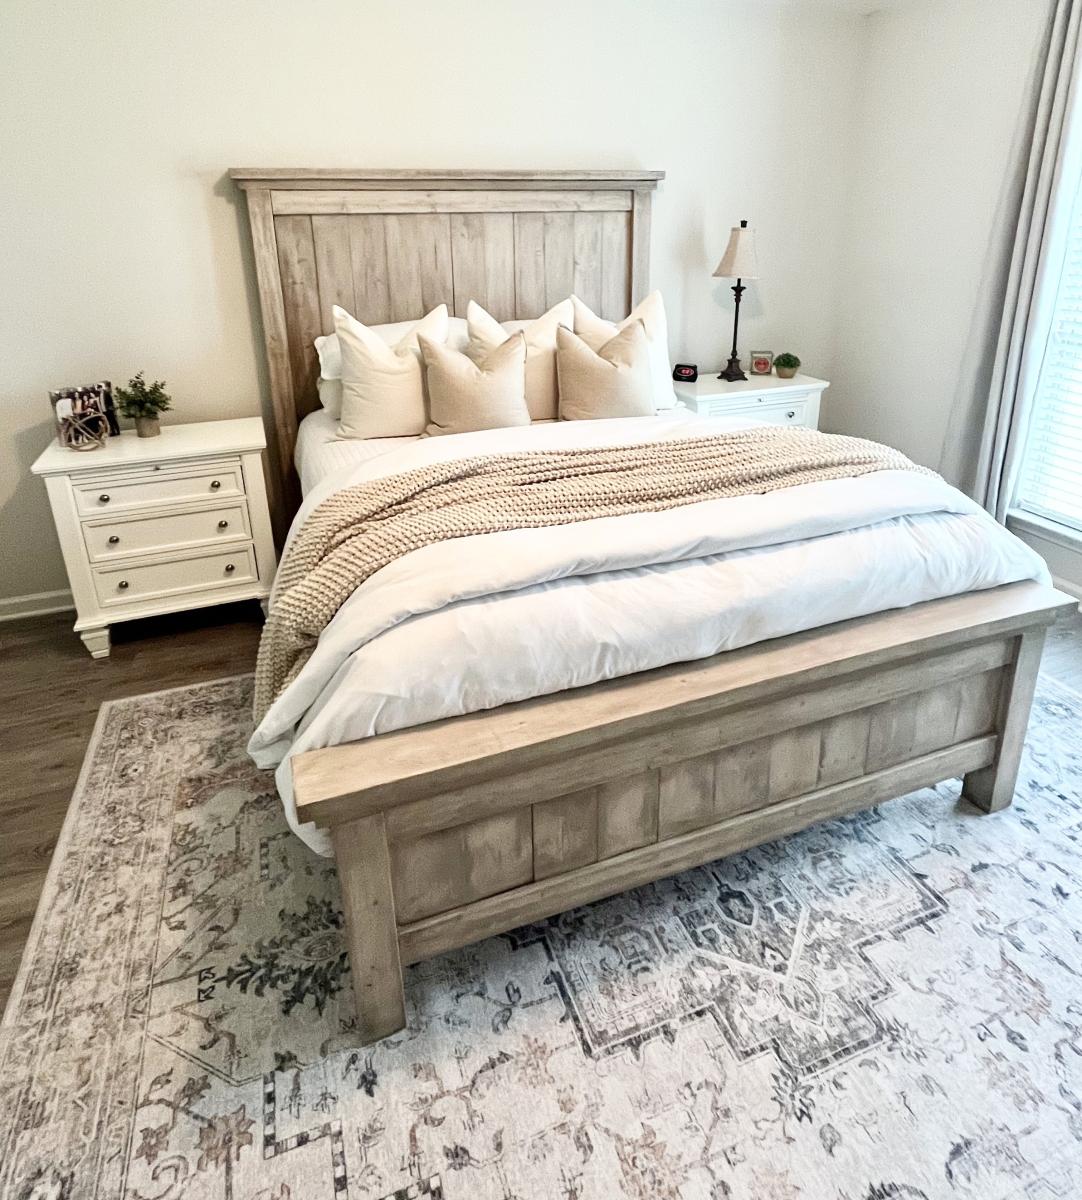
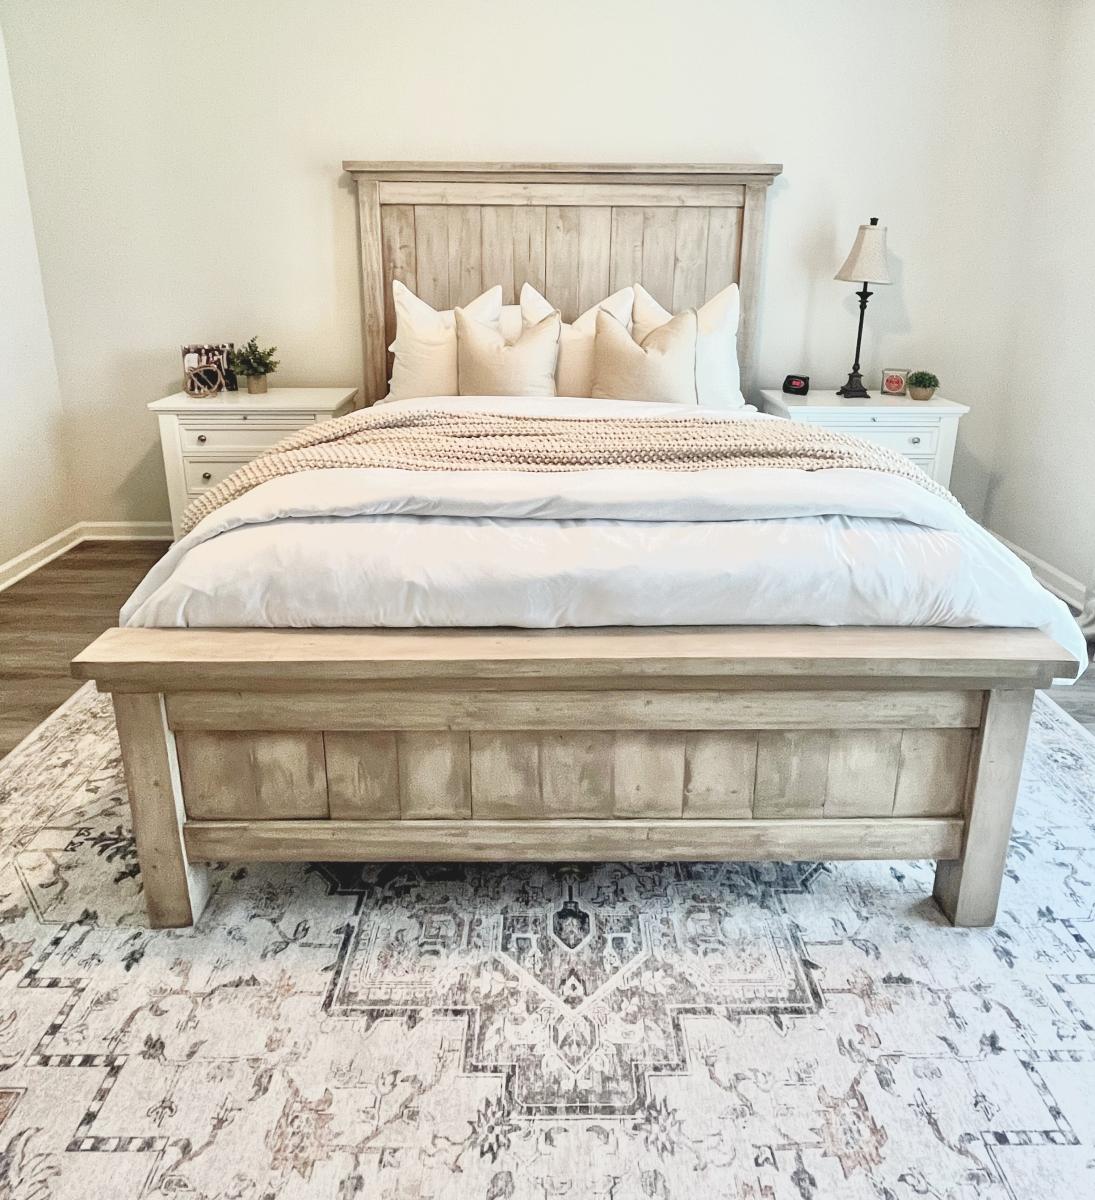
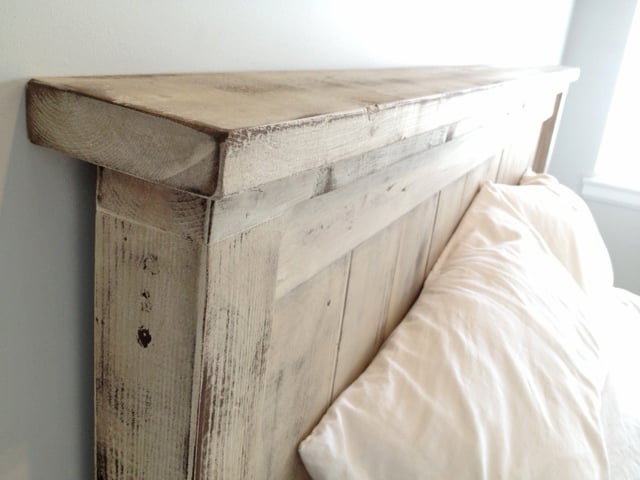
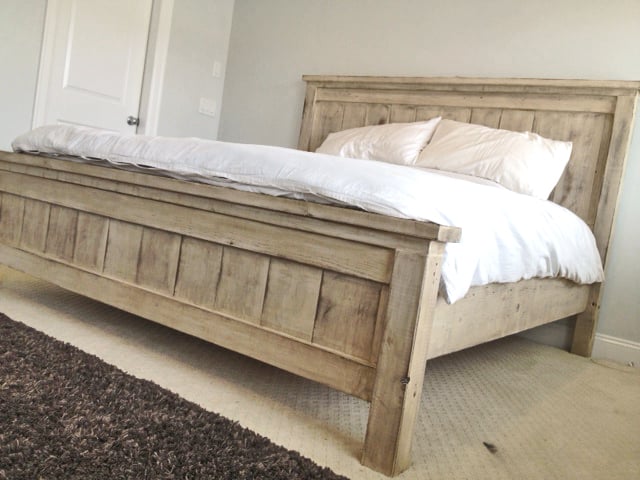
Second project ive completed from Ana White, and I am very happy with how this bed turned out! The only thing I would fix would be the finish, I wanted it a bit whiter. not so creamy. Otherwise very quick and easy fun project to do. =)

Estimated Cost
$300
Estimated Time Investment
Day Project (6-9 Hours)
Finish Used
1 coat of a basic latex white paint.
Then I sanded down just so raised grains would become exposed.
1 coat of dark walnut stain (wipe on with cloth)
Done.
Recommended Skill Level
Starter Project

Comments

jhavinga

Thu, 05/22/2014 - 16:34

Thank you for sharing all of these awesome projects. I was always hesitant when it came to wood, but now I cant seem to stop!

jhavinga

Wed, 06/11/2014 - 13:43

(You can do all this before or after your project is put together or not.)
Be sure to do a test piece before hand so you can see exactly what your getting :)

The first step I did once the head board and foot board were put together, was to sand any sharp edges or corners. I liked mine rounded and worn looking. I did not sand anything else.

Second step is to paint 1 even coat of a basic white latex paint.

Third step is to sand away some white paint. because we didnt sand it before hand the grains in the wood will be very bumpy. so the paint on the grains will sand off while the paint lower than the grain will remain. makes sense? hopefully i explained that right!

Fourth step is to now wipe on the stain of your choice. I went with Dark walnut. It stains the paint a bit bringing the white to a gray/brown tone. and stains the wood dark walnut so the grain patterns show up dark.
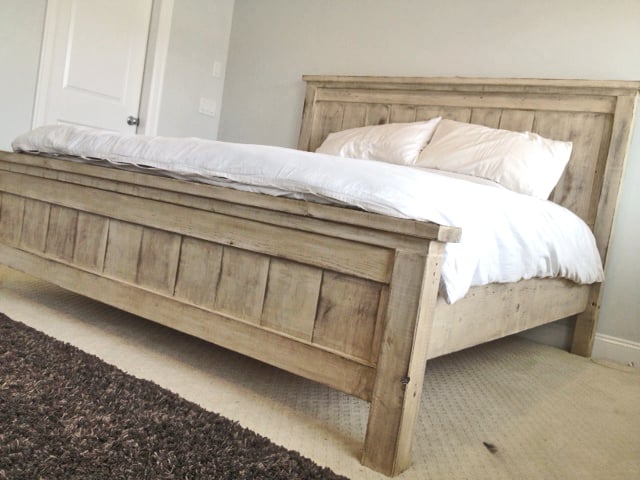
Let me know if you have any other questions and good luck!

jbogan15

Thu, 01/29/2015 - 07:49

What grit of sand paper did you use to sand off the white paint? and did you sand it by hand? Also, for the dark walnut stain, did you wipe off immediately or leave it on for a bit before wiping? Beautiful bed, I want to achieve this look!

In reply to by jbogan15

jhavinga

Fri, 02/06/2015 - 09:15

Hi jbogan15, thank you!
For sanding I used a palm sander with 120 grit to get the job done a bit quicker, than went over lightly with 220. When staining I actually just dipped a rag in the stain and would wipe the stain on. =)
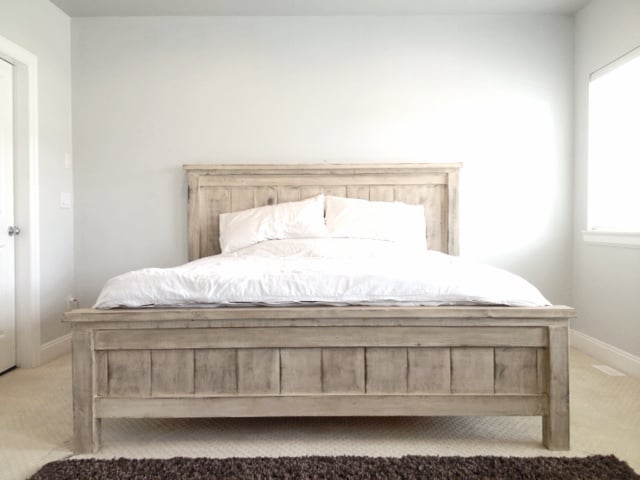
Good luck!
Justin

kosborn

Fri, 01/27/2017 - 11:05

Love this look! Exactly what I am trying to achieve...A few questions about the side rails. How high did you connect them to the 4x4 posts and exactly how did you connect them? Did you use brackets or screw right into the posts? Thank You!

barkleyl

Thu, 09/05/2019 - 15:07

I have seen several beds from Anna White. I was wondering if the frame require a box spring mattress or not. If not, are the beds lower than what a traditional mattress and box springs are. Thanks ! 

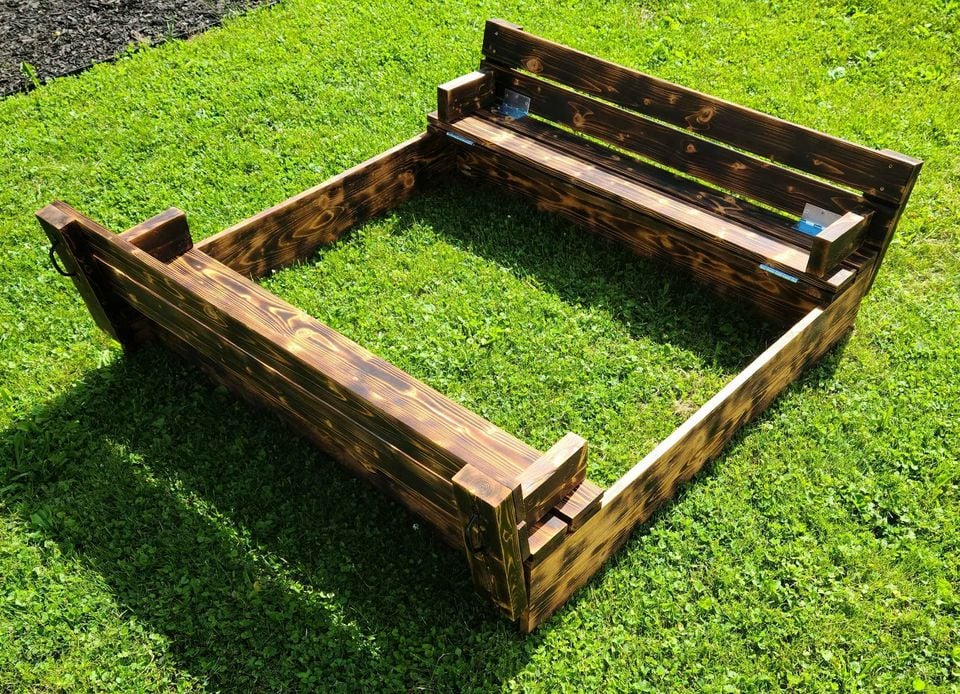
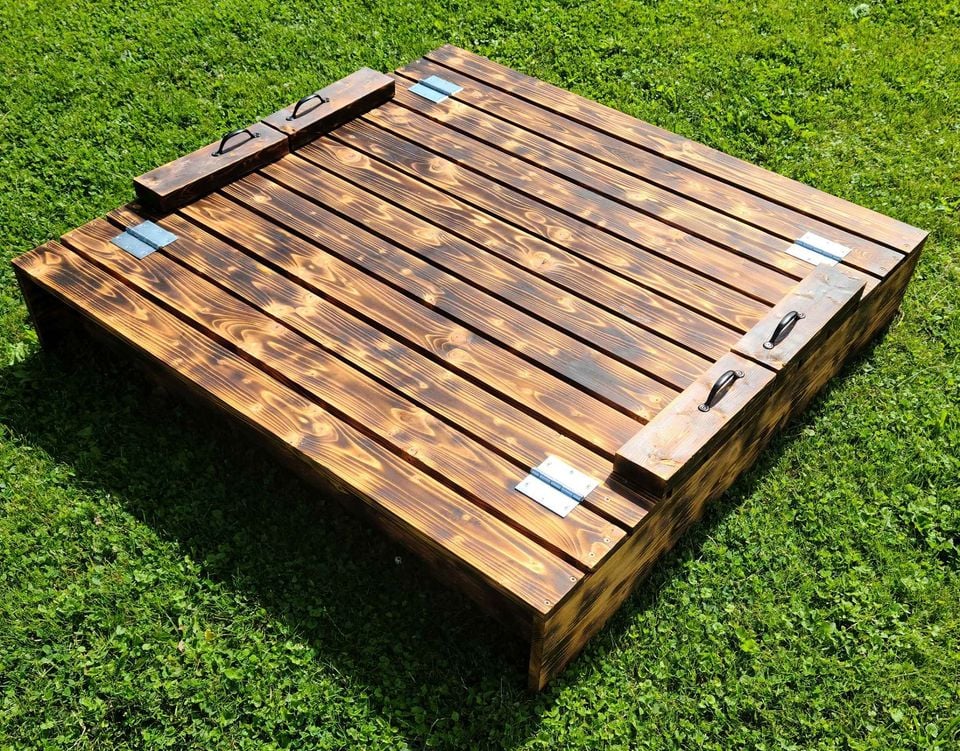
Sandbox with Benches

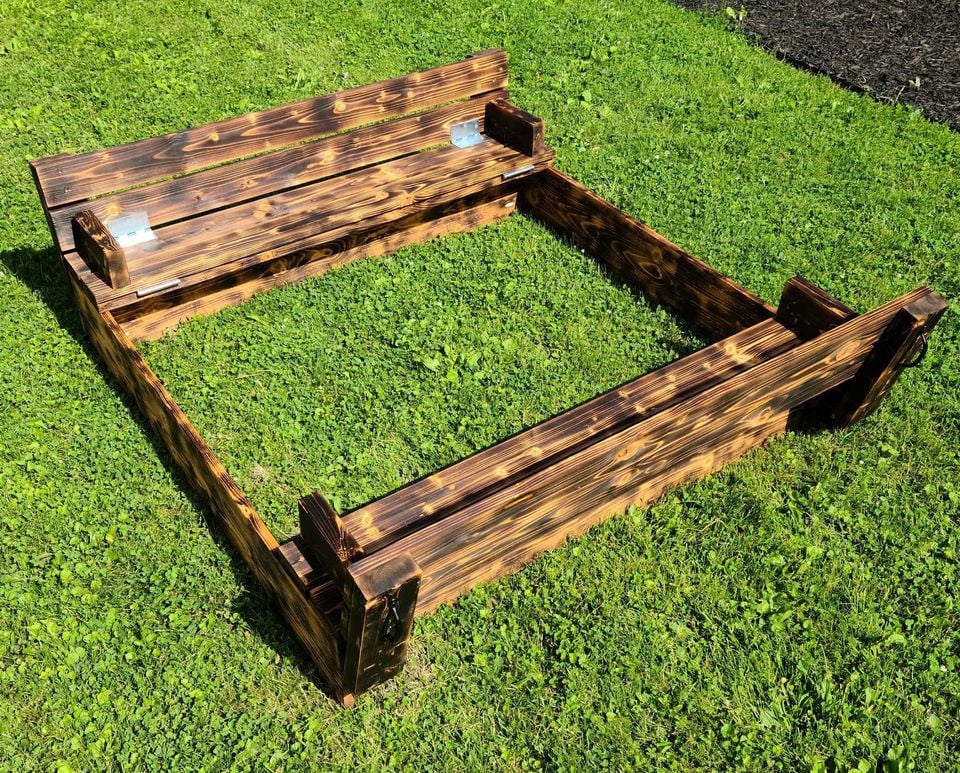
Burnt and stained with a semi transparent mahogany water sealer

Built from Plan(s)
Estimated Cost
$120
Estimated Time Investment
Afternoon Project (3-6 Hours)
Recommended Skill Level
Beginner

Comments

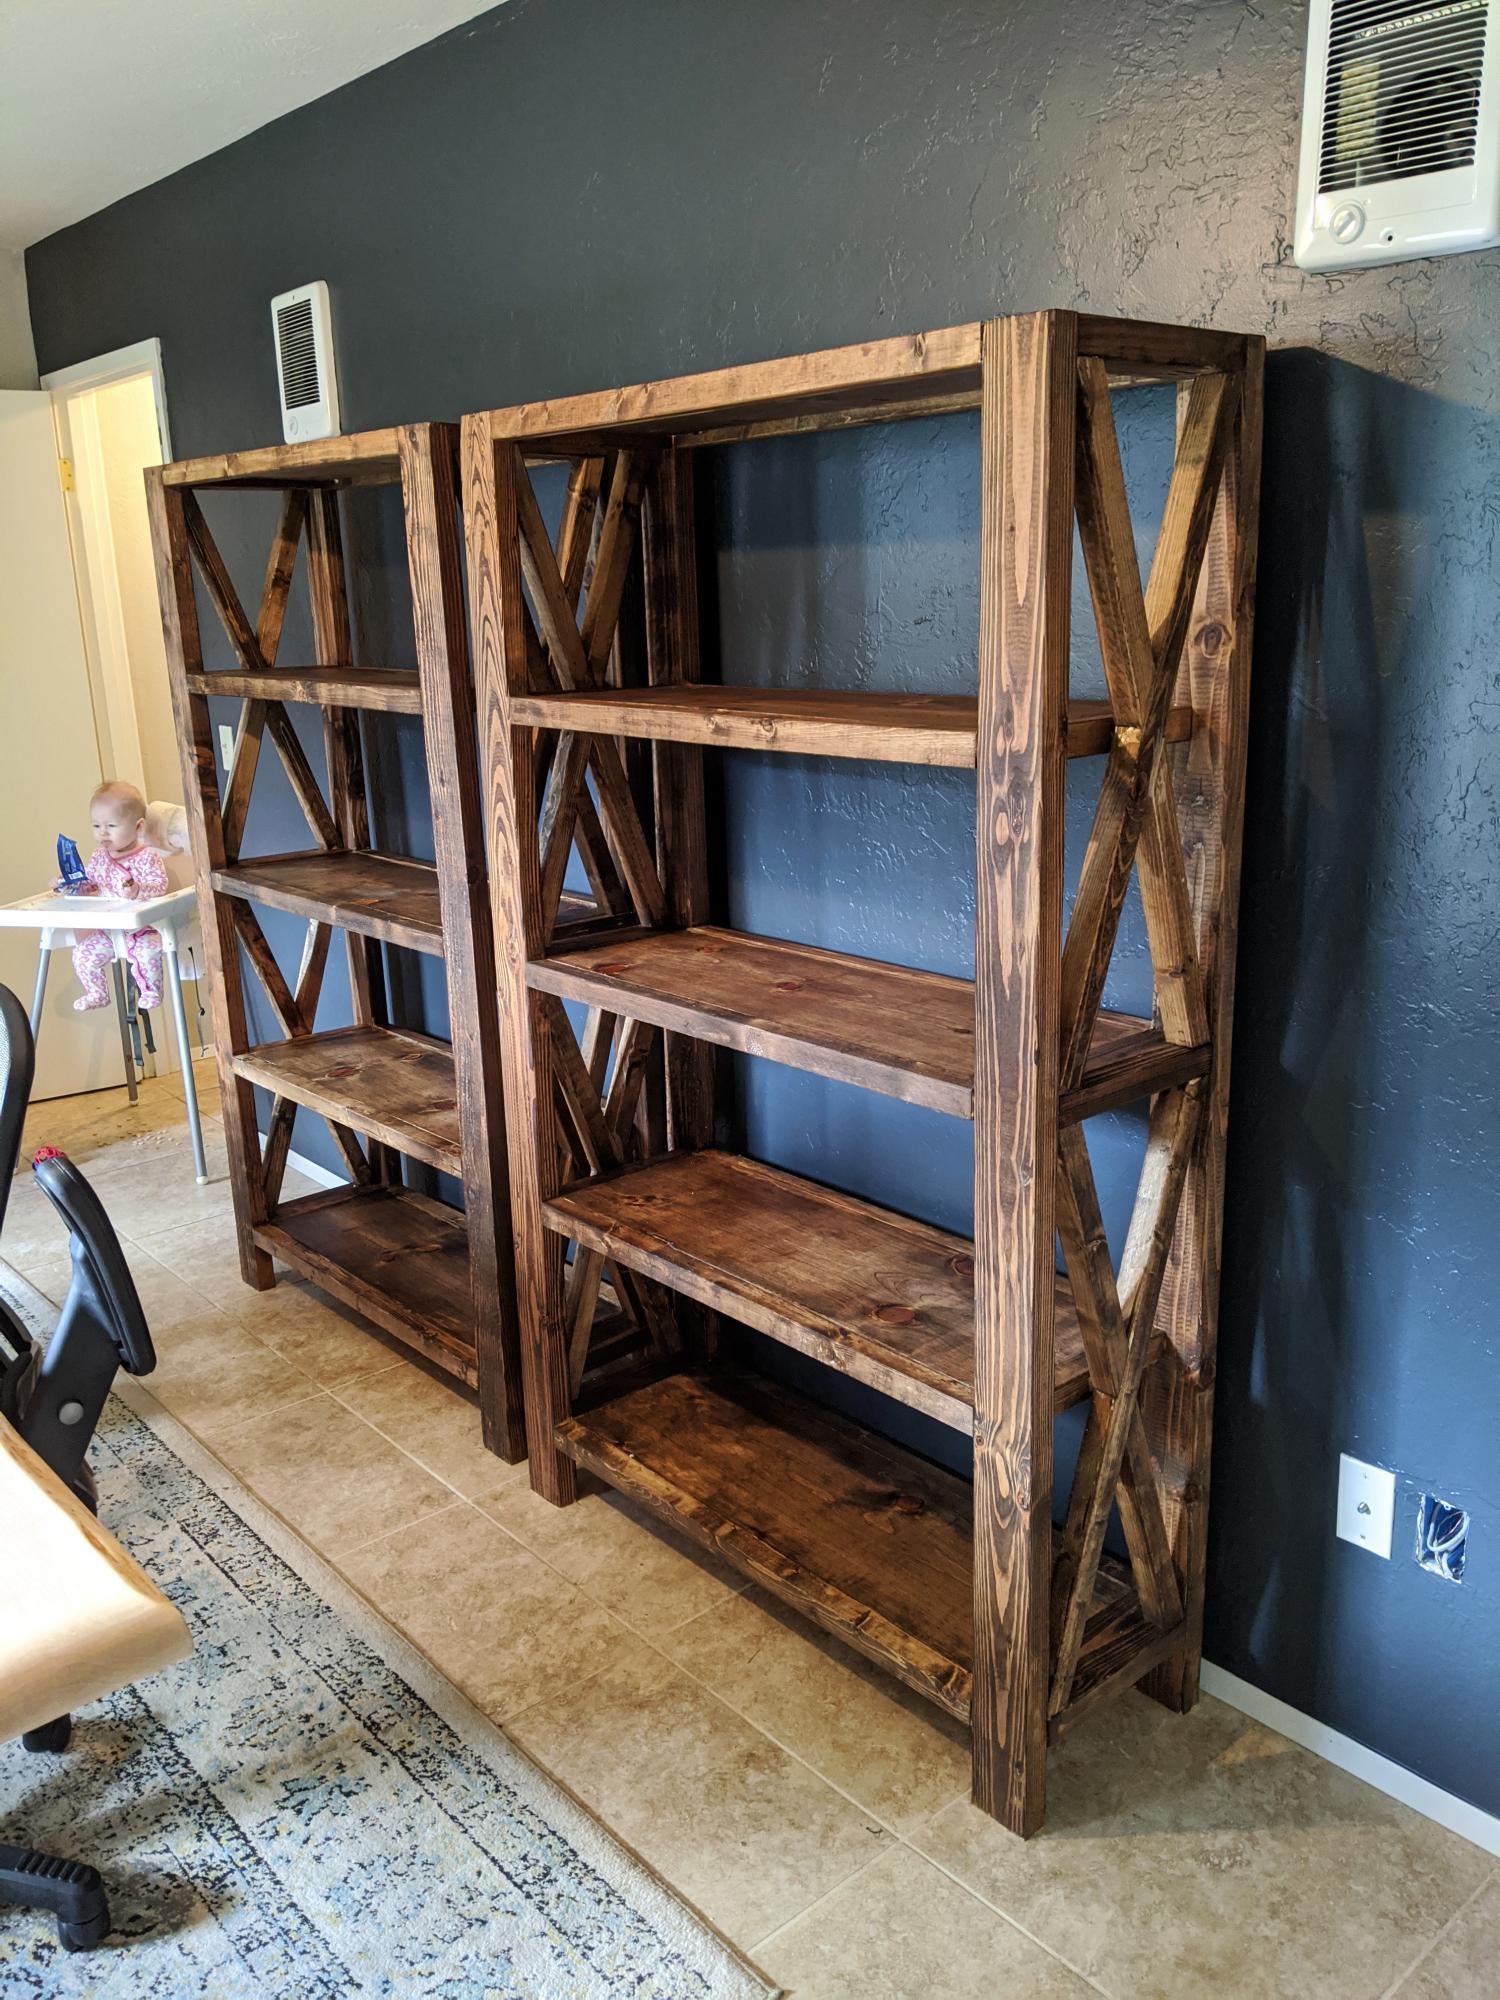
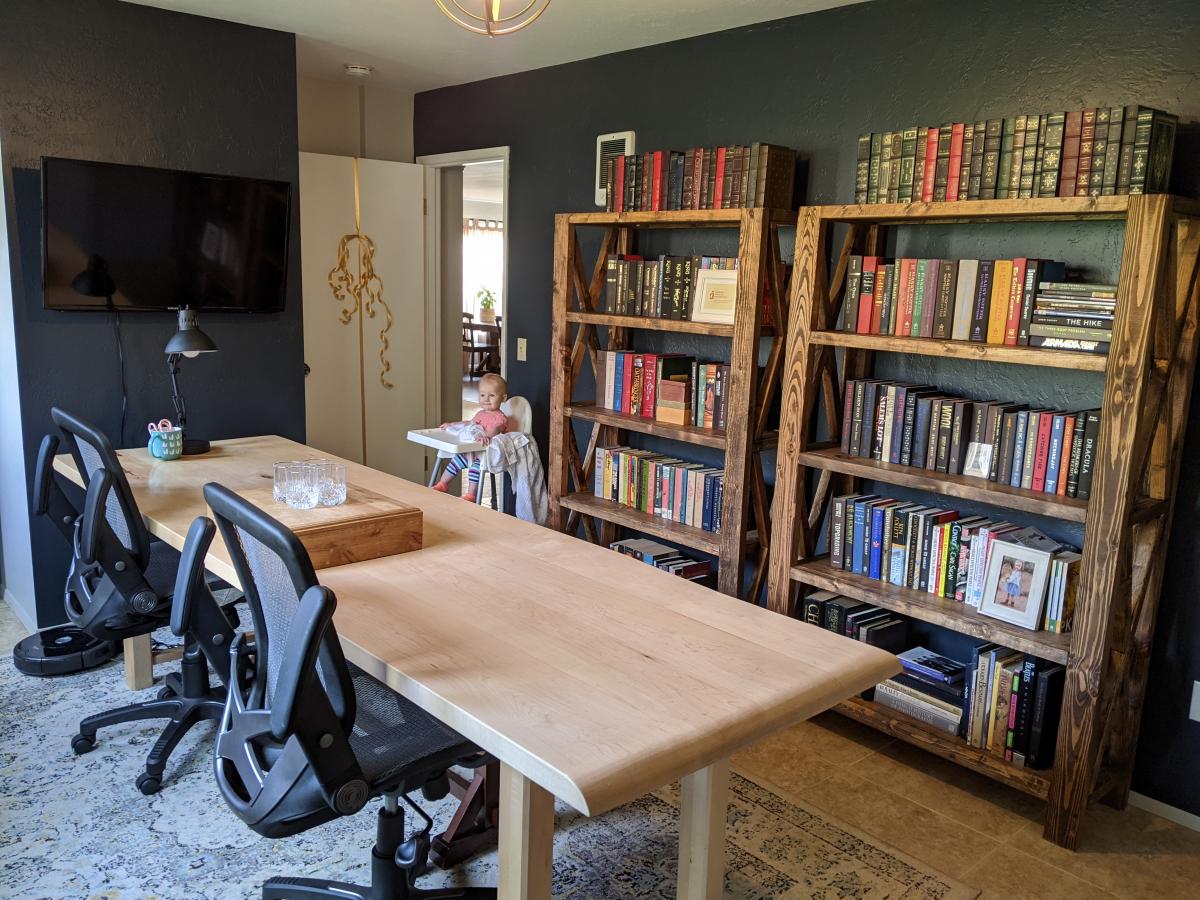
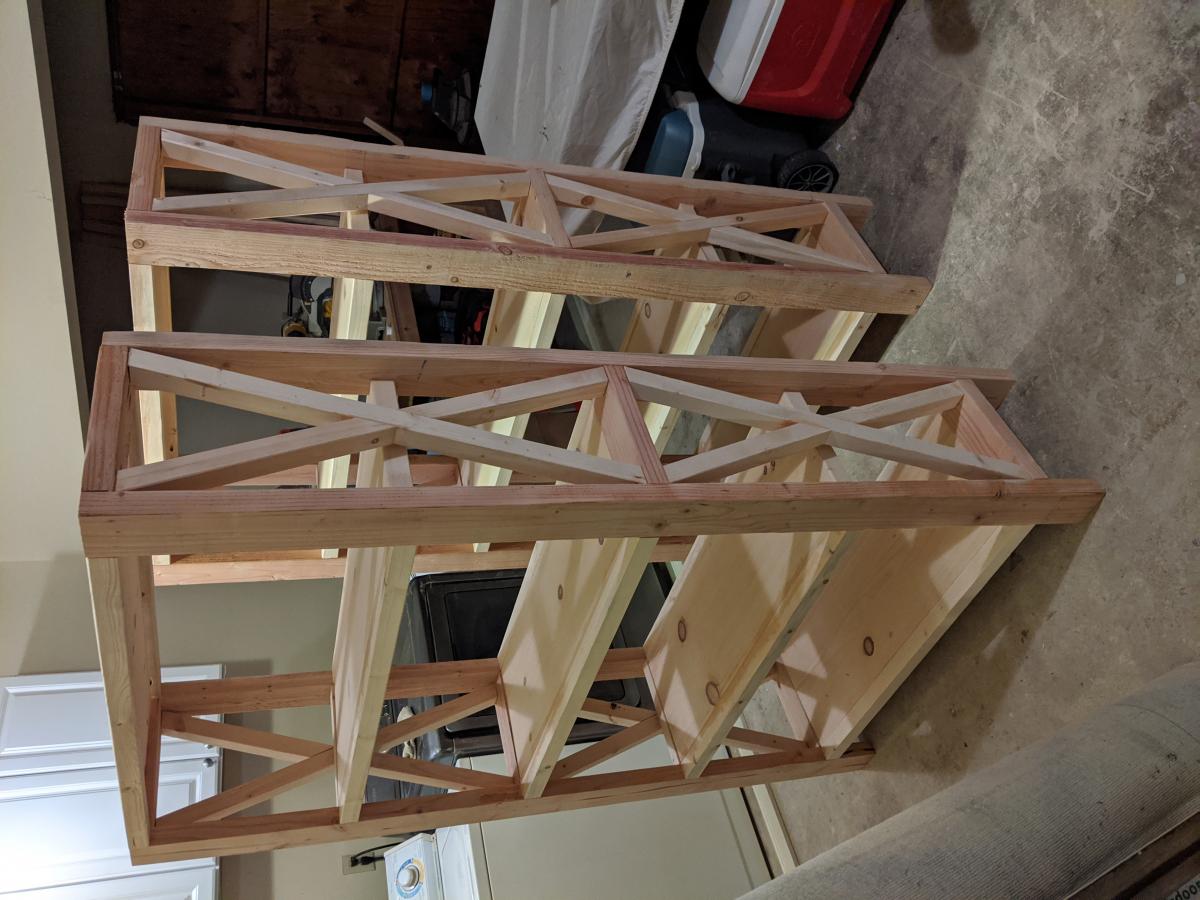
Tall Rustic X Bookshelves

I followed the Rustic X Tall Bookshelf plan to make a set of bookshelves for my husband for Christmas! It was my second ever woodworking project. The plan was really easy to follow and so fun to make! I ended up using an additional shelf piece on the very top for a more modern spin on it. I also bought a pocket hole jig to use on this project. I'm happy with how it turned out!

Built from Plan(s)
Estimated Cost
$75 per shelf
Estimated Time Investment
Weekend Project (10-20 Hours)
Finish Used
MinWax English Chesnut Wood Finish and Paste Wax
Recommended Skill Level
Intermediate

Cubby/Bookshelf/Corner Desk Combo

Submitted by Anonymous (not verified) on Wed, 01/18/2017 - 20:40

This is a mashup of several plans, combined into one big, bad ass, office desk. I've had a little experience years ago in high school woodworking classes, but haven't really built much since. This reminded me how much I enjoy working with wood. So rewarding to be typing this message at my new office desk!

Estimated Cost
$400
Estimated Time Investment
Weekend Project (10-20 Hours)
Finish Used
Minwax "Early American"
Recommended Skill Level
Intermediate

Comments

treemeagher

Wed, 08/19/2020 - 06:25

This is amazing! So amazing could I ask you to share with me what prices from the collection of plans you used and how? I’m looking at your pic trying to figure out how to incorporate the plans you used. I want to build one for myself lol fantastic job!!!!

Sandbox with lid

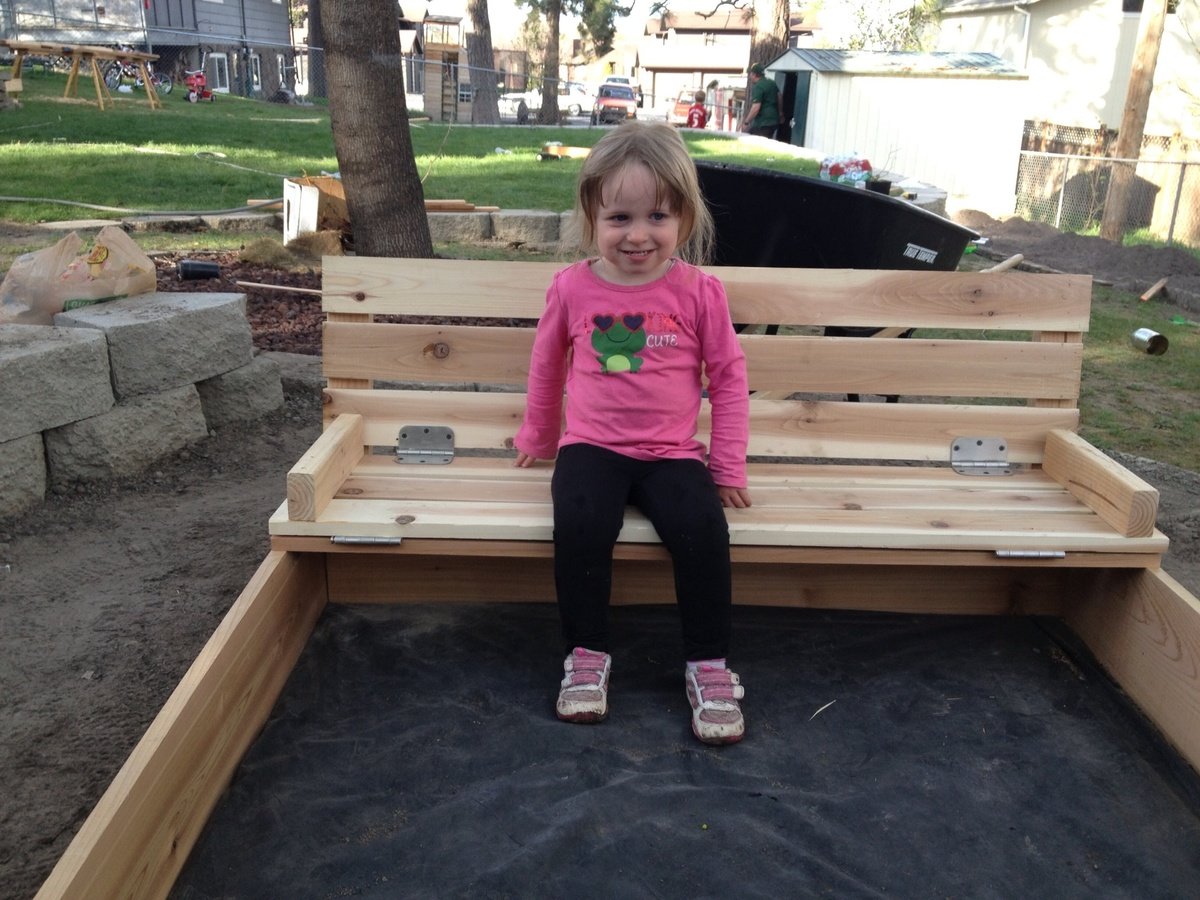
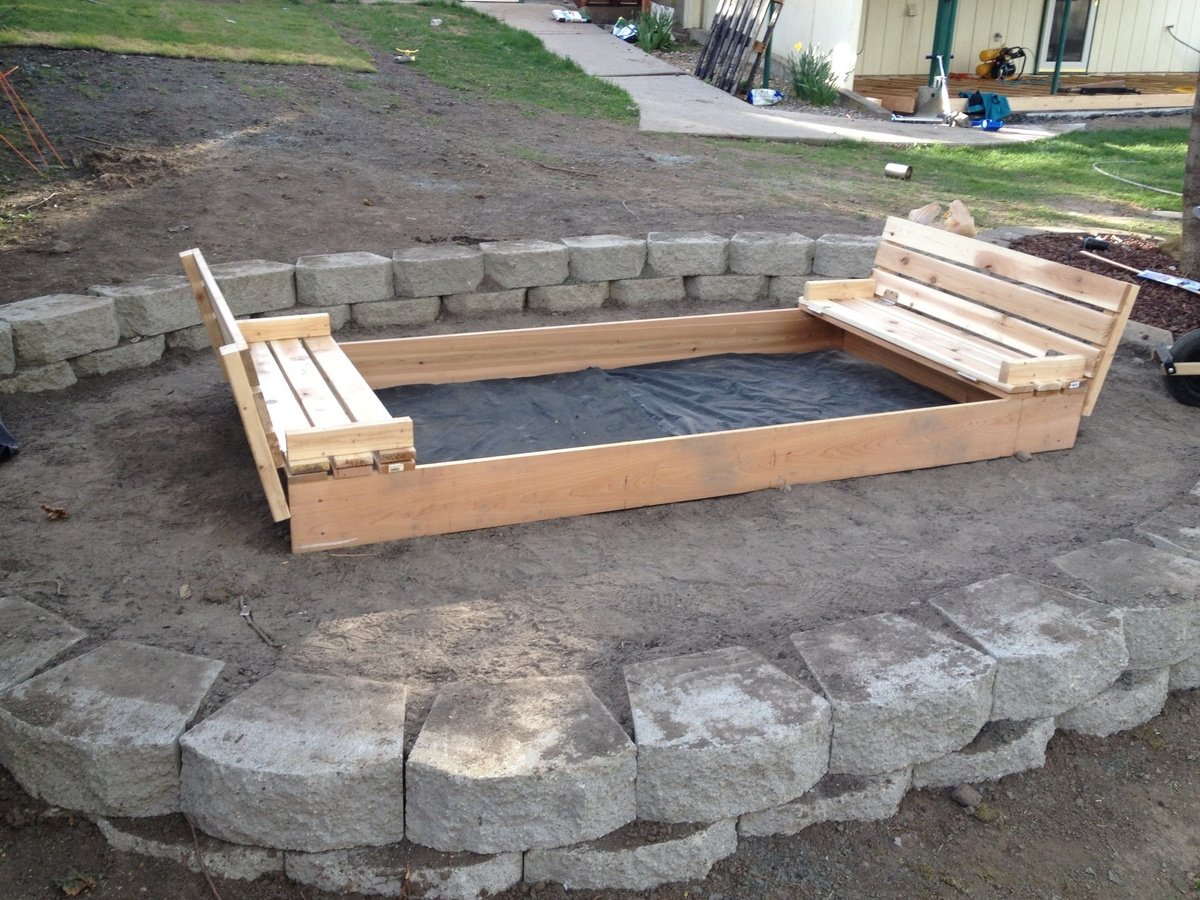
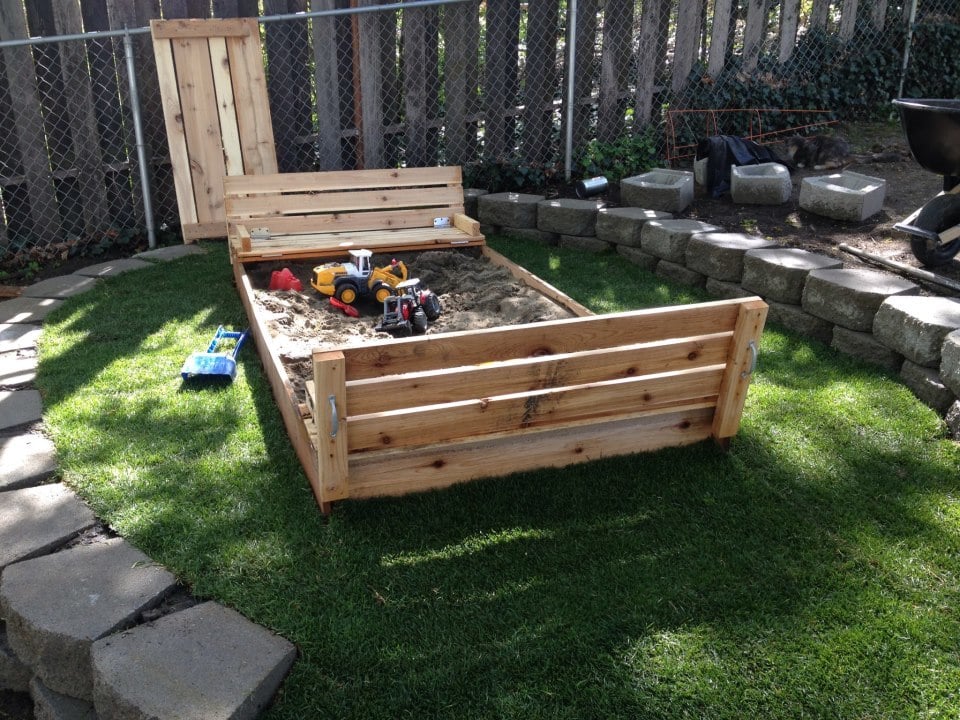
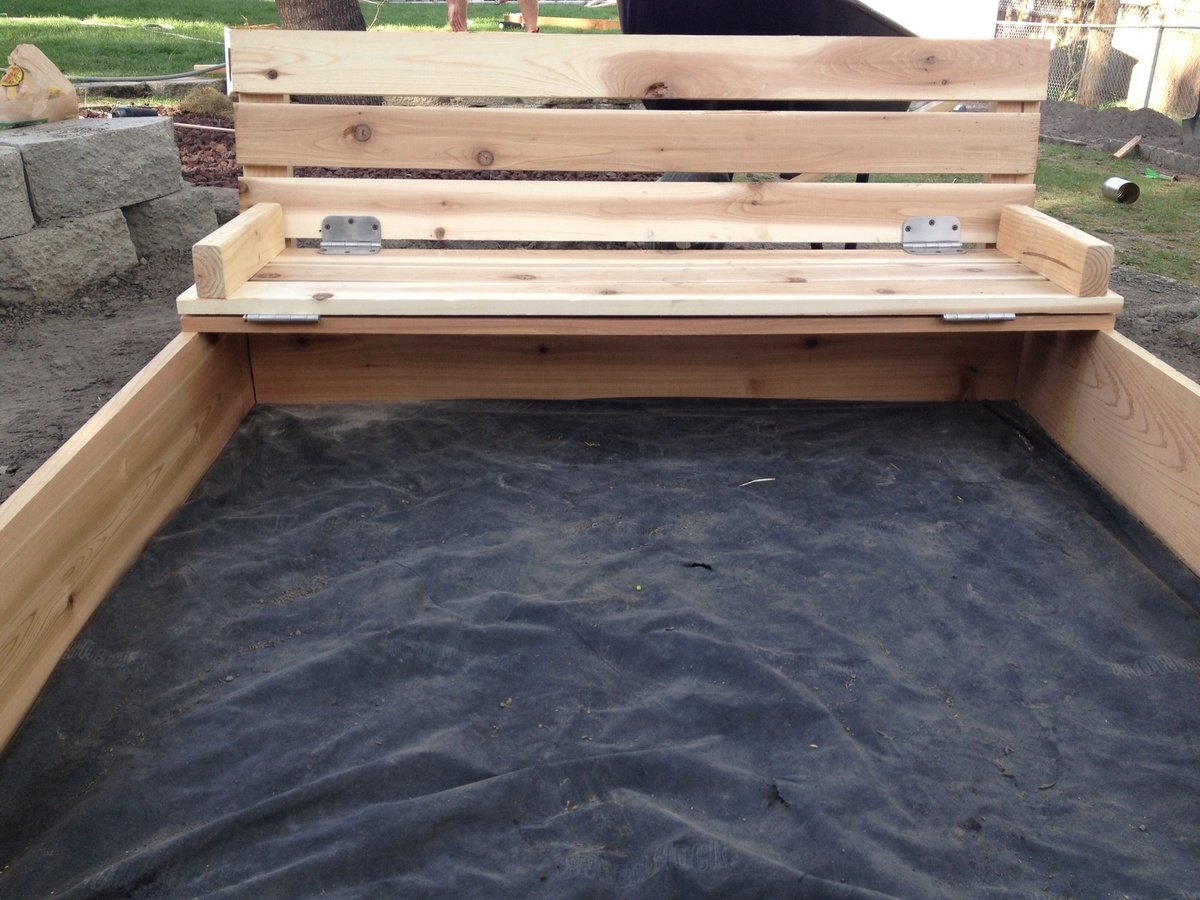
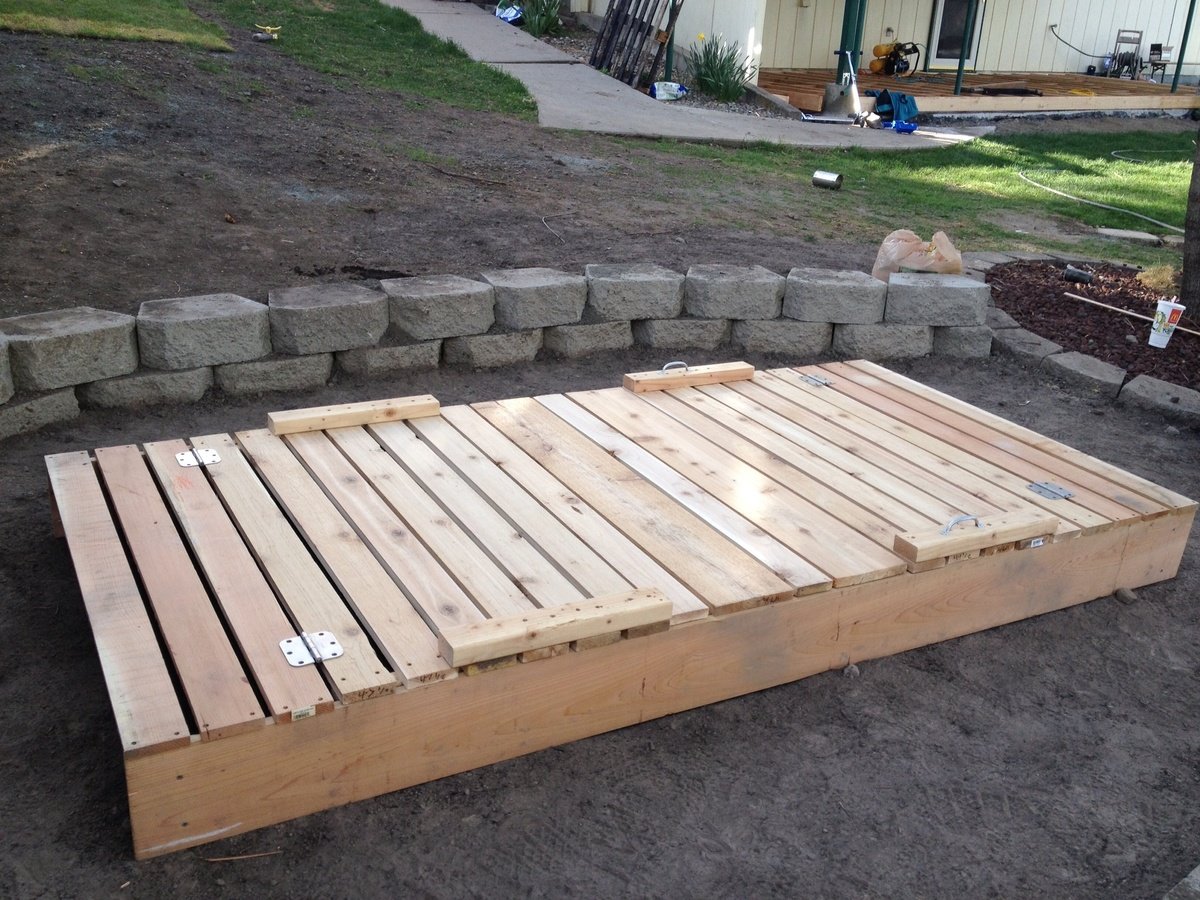
This was my first EVER wood working project.

With that being said, it took me more than just an afternoon.
I used cedar, and all the materials on the cut list had to be sanded , since I didn't like the roughness of the cedar.
I also made the box 4x8. I didn't take into account that that would require a minimum of 48 inches for the top planks. So, some of my top planks are shorter.

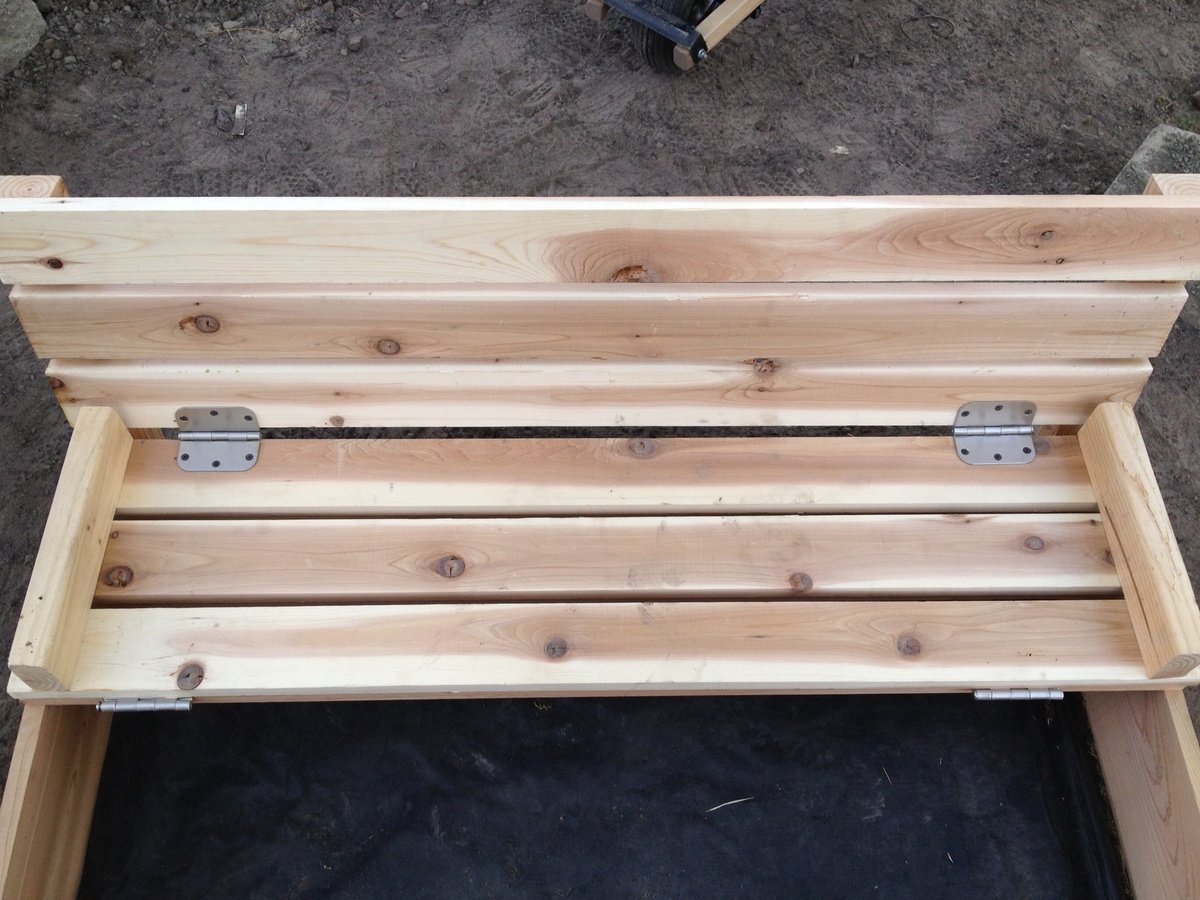
I also wished I had a little more instruction from which side to screw the screws in. May sound a little needy for some of you, but I never did anything with wood before. The instructions simply read attach top planks to arm rests (or something int that manner) and I wish it would have told me from which side to screw in (or give me a picture). Looking at some of the brag posts helped a lot.

Because its larger size, I decided to make the seats 3 top planks wide (and also the back rest) and made another middle cover piece to bridge the additional gap when both seats are folded down.

Also, the cedar was VERY expensive, and all the screws, hinges, and handles almost cost me as much as the wood.

The sand to fill the box ran us another $80 (for good plays and), but that was because we made it so big.

All in all, a rather pricey sandbox, but worth it because of the large custom sizes, and the cute little seats.

Pictures show the sandbox without sand, and with some of the handles still missing. I also still need to fill the holes.

Will add a picture of finished box filled with sand when it is available.

Built from Plan(s)
Estimated Cost
$250
Estimated Time Investment
Weekend Project (10-20 Hours)
Finish Used
None
Recommended Skill Level
Beginner

Farmhouse Toy Box

Submitted by frmoody on Thu, 08/18/2022 - 15:01

My second build from Ana's toy box plan. I had my son use his CNC machine to carve boy's name into the front. Depth of the letters is about 0.25". Looks really good.

Built from Plan(s)

Comments

Built in dry bar

Submitted by releematt on Fri, 12/28/2018 - 14:16

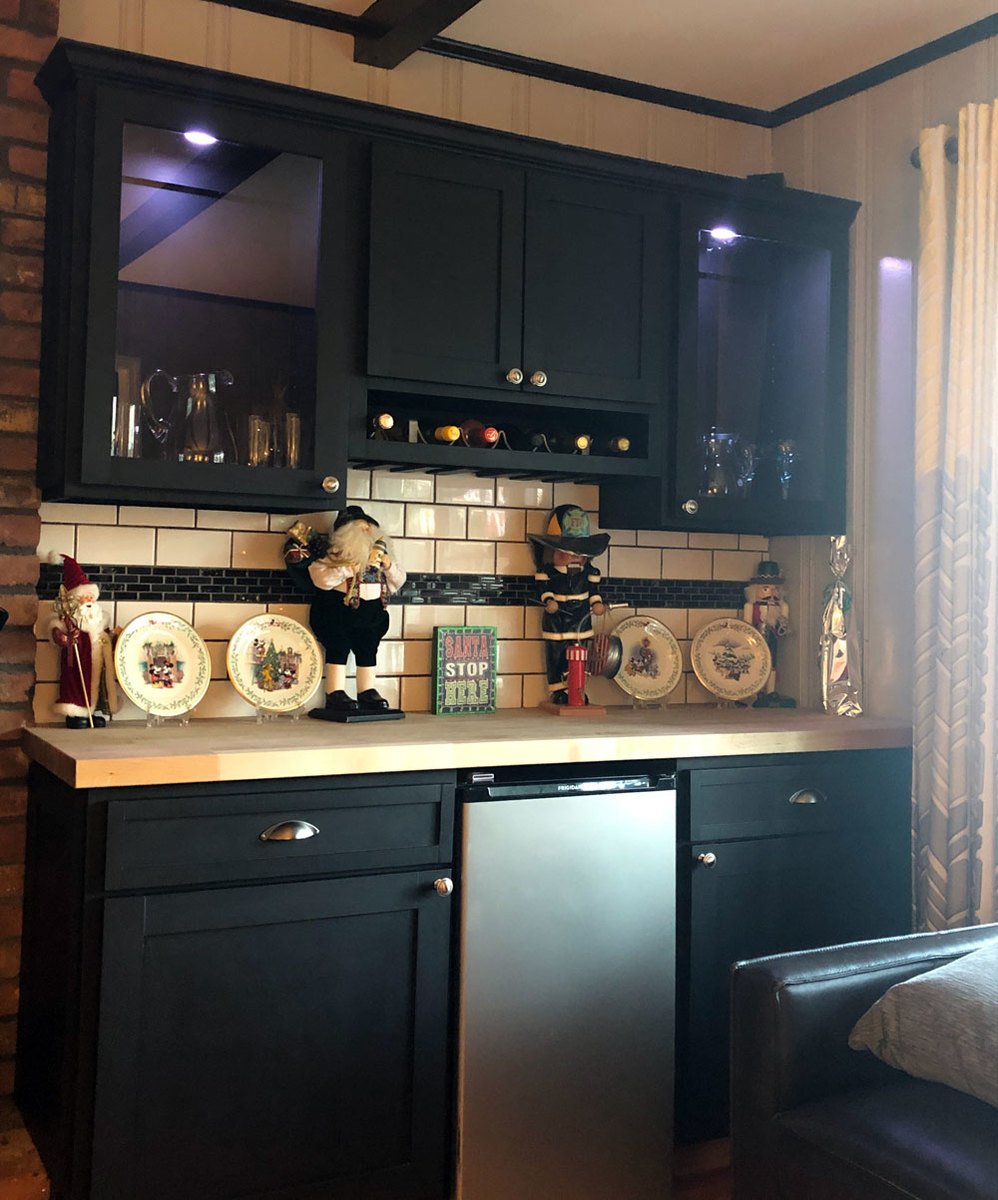
My husband and I worked on this for a few months, no rush. This is the outcome and all we need to do now is get one glass shelf for each cabinet. This is a great place to store all liquors and glassware. The drawers are a nice addition. The paint it black chalk paint with wax finish. All materials were purchased at Lowes or Home Depot. 

Estimated Cost
$800.00 including butcher block top, glass, back splash and lights.
Estimated Time Investment
Week Long Project (20 Hours or More)
Recommended Skill Level
Beginner

Murphy bed

Submitted by bpcooper14 on Wed, 05/08/2019 - 06:09

So I've always wanted to build a Murphy bed.  And by always I mean since I first came across plans here that made it look so simple.  It ended up taking me a while to do because my job has me working 6 days a week so I was only able to work on it for short chunks of time.

I ended up utilizing a few different plans and mashed them together to build a full size murphy bed.  The shelves are the support legs when the bed is down.  The "hinge" mechanism are heavy duty 360 degree seat swivels.

All-in-all it turned out WAY better than I expected with only some minor issues throughout the construction process.  

Next up is a twin xl Murphy bed with a murphy desk attachment that will serve as a craft  table when up.

Estimated Cost
3 - 4x8 sheets of 3/4" plywood ($25 each)
3 - 1x2x8 to wrap the frame ($2-3 each)
1 pack Door Hinge pins to serve as the pins to hold the bed upright ($3-5)
1 pint stain
1 pint shellac
2 - Heavy Duty 360 degree seat swivels ($20)
Screws/nails/etc.

All told, this project probably cost around $200
Estimated Time Investment
Week Long Project (20 Hours or More)
Recommended Skill Level
Intermediate

Comments

Loft Cabin Bunk Bed

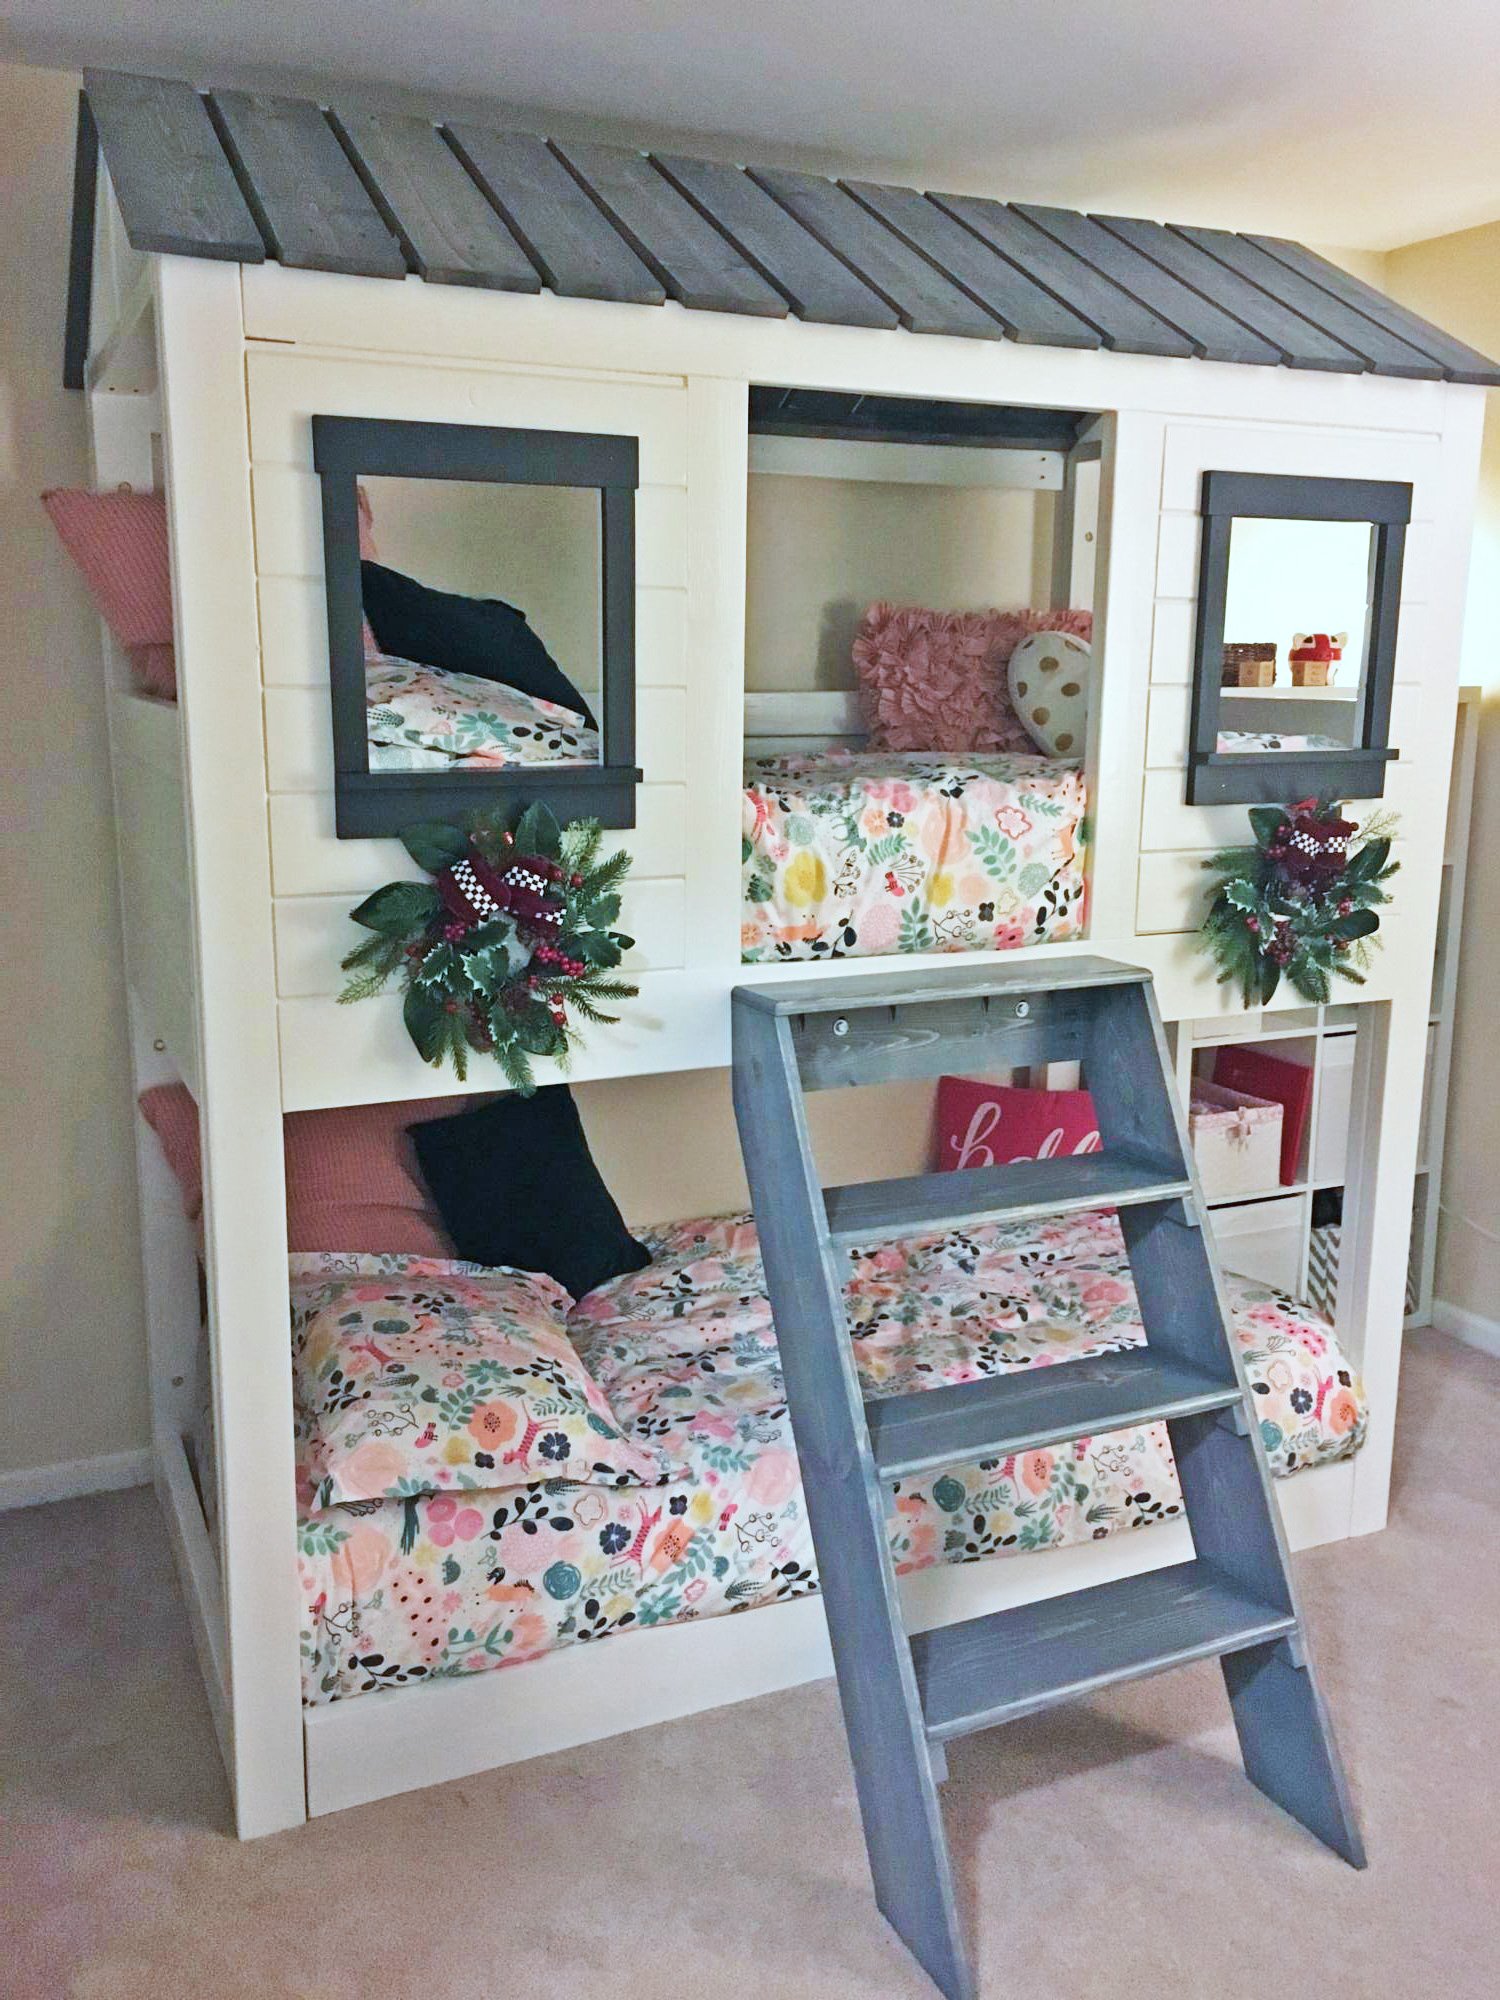
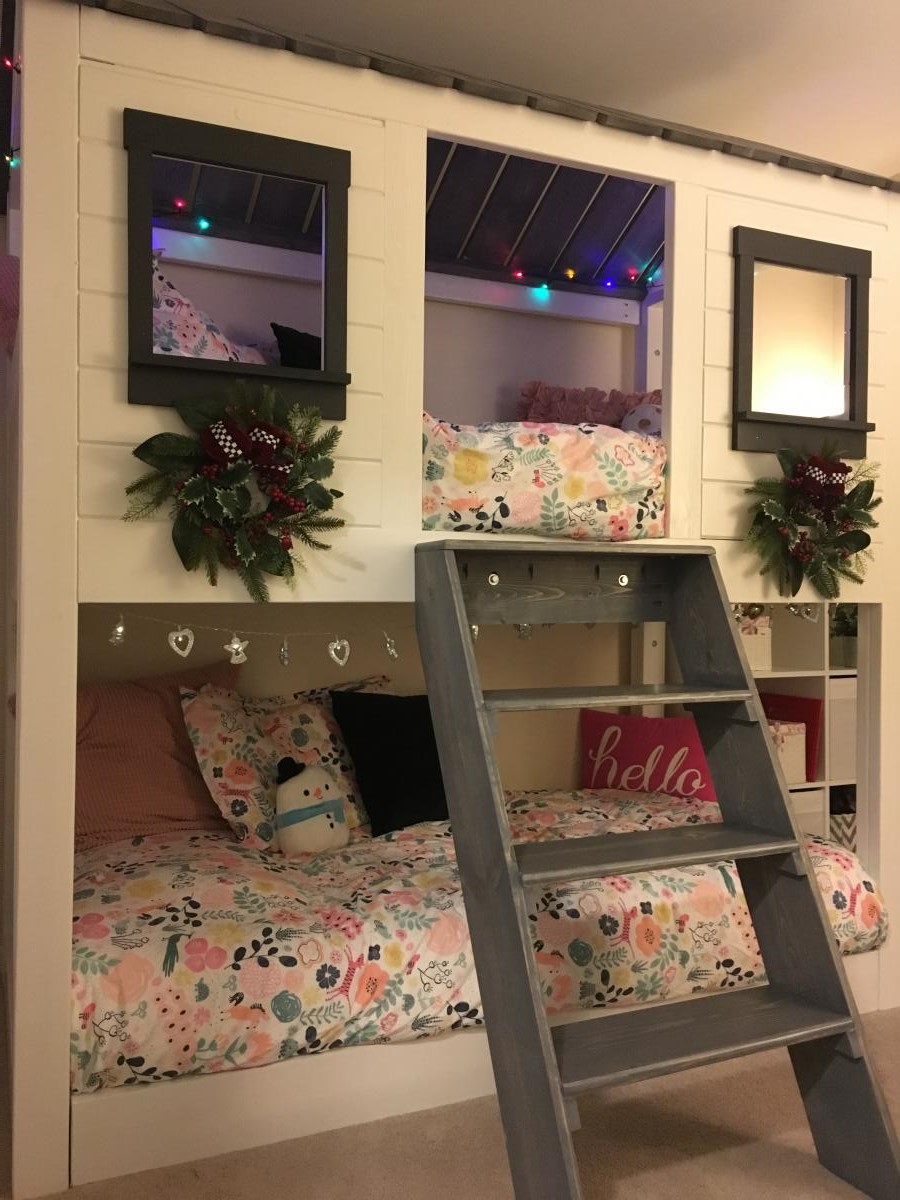
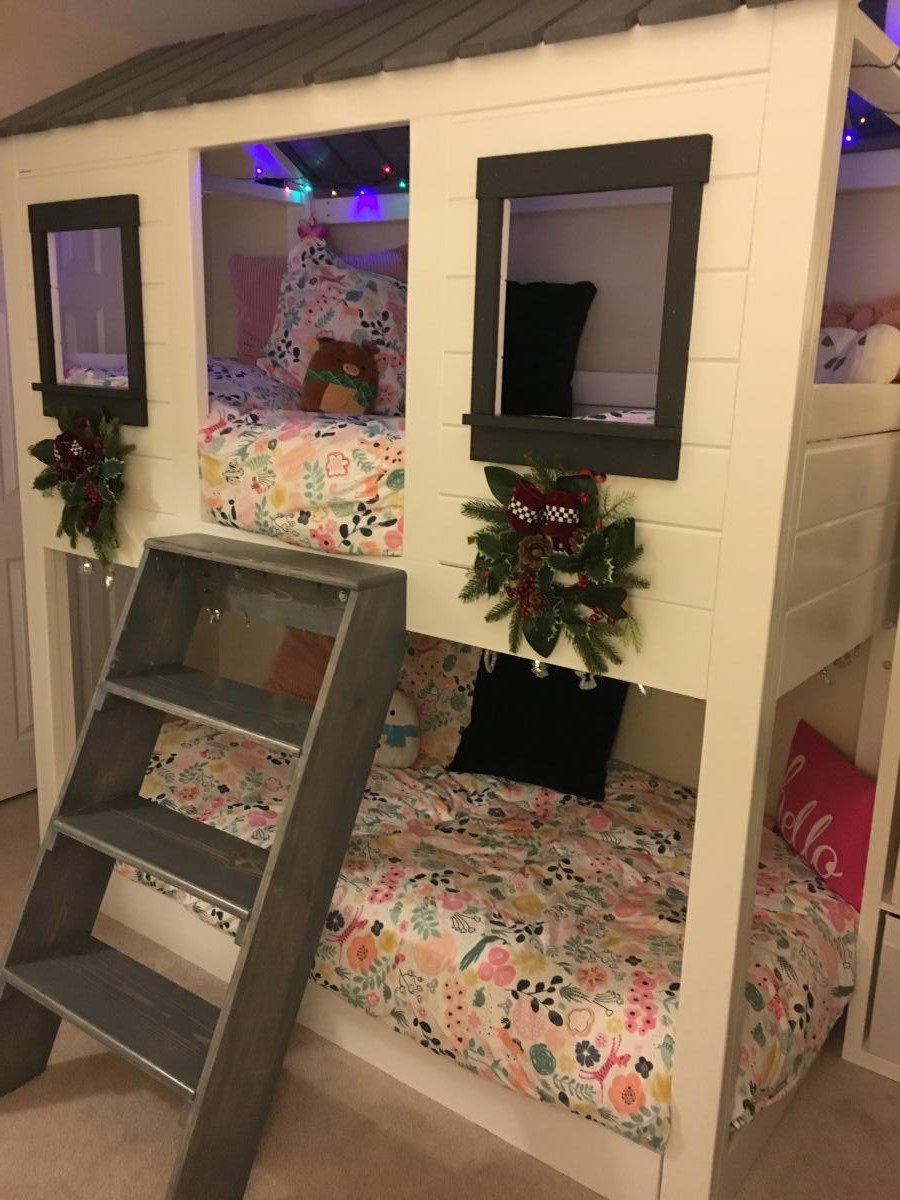
Best Christmas present according to my 4-year-old twins :)  I combined ideas from Jen Woodhouse's "cabin bed" and "loft cabin bed" after seeing another brag post from someone who had turned it into a bunk bed.  I added a separate platform for the lower mattress for uniformity and to provide some air circulation for the mattress.  I also opted for a 2x6 as the bottom weight-bearing beam because I wanted to be able to add an extra couple pocket screws since this mama likes to play in the top bunk too!  My girls took turns sleeping in the top/bottom for the first 2 nights, and have been camping out together in the top bunk ever since... and my husband and I are finally getting to sleep in on the weekends because they never want to come out of their room!  


**Side note -- I'm not sure how my pictures got flipped but I have no idea how to fix it!

Built from Plan(s)
Finish Used
3 coats of white primer + paint in satin finish for the main house
Varathane weathered grey for roof & stairs
Rustoleum "Chalked" in charcoal for window trim

Comments

Twinkies' mom

Fri, 10/02/2020 - 09:33

I am SO sorry but I haven't been on here since I posted the bunkbeds (almost 9 months ago!) I had written out all of my modified measurements on the Jen Woodhouse plans but have since lost it somewhere in my garage :( Here is what I can tell you at the moment: short side of "front" & "back" panels = 77.25" ; I kept the angles on the sides/roof the same, so the highest point of roof = 89" (I have short 8' ceilings so this leaves ~7" space up top). I used what I believe were 5" tongue & groove flooring panels instead of plywood for all sides, framed by 2x4s and 2x6 underneath for a little extra support. The height from the bottom of the top bunk to the floor is 38", and I added a 2x6 piece between the bottom legs of the 2 side pieces, flush with the outside edge. I built a rectangular frame for the bottom mattress using 2x6" on the long sides and 2x4 on the short sides -- the 2x4s are raised off the floor in order to allow for air circulation under the mattress and act as the end slats (they're flush on top with the rest of the slats, which I used 2x4s instead of the 1x in the plans)... instead of the 2x2 supports for the mattresses I used some scrap 2x3s from my kids old toddler beds which I had also built but tried to recycle as much of the wood as I could for this project, plus the 2x6 gave me a little more wiggle room -- if you use 2x4 you won't have space for 2x3 supports. The front "door" opening is 22.75", which I based on my size and me being able to get in and out easily (as mentioned above, I like to camp out with my kids sometimes!). The window openings are 12" w x 13.5" h, but the height is measured after I made a 1x3" window ledge which is flush with the inside of the wall; the rest of the windows are framed with 1x2s and 1x3s.
The full width of the side panels is 38" and the front/back are 78.5" -- I based these on the mattresses which I had already bought (Novaform twin from Costco -- since they're memory foam they're a little easier to "squeeze" in the top bunk than I would imagine a regular mattress would be).

I think that covers everything, sorry again about replying so late!

Twinkies' mom

Fri, 10/02/2020 - 09:42

2 more things:
The bottom "frame" was meant to be removable for easy assembly/disassembly as my family moves a lot! That is why I used the inner 2x4s to hold the long side rails together, and the short-side 2x6s which are attached to the side frames are merely fore the illusion that it's all one piece. I did place a couple 2.5" screws through the inside of the 2x4s right into the legs of the upper bunk to make sure it stays in place.
When building the front panels with the windows, I decided on door opening first, then window opening (based on the size of the tongue & groove flooring), then calculated the width of all the pieces to create the window opening. I used pocked holes to connect the tongue & groove flooring to the "frame" created by the 2x4 pieces, and TONS of wood glue in between the boards. Adding the window frames with glue & nails helped provide a little more stability to the windows, although once the glue was dry there was zero movement around the window but I never know with my extremely-destructive twins! Now they're able to climb all over the bunk using the window ledge for support and it's no problem.

Catio heaven

Submitted by bhoppy on Fri, 09/04/2020 - 15:43

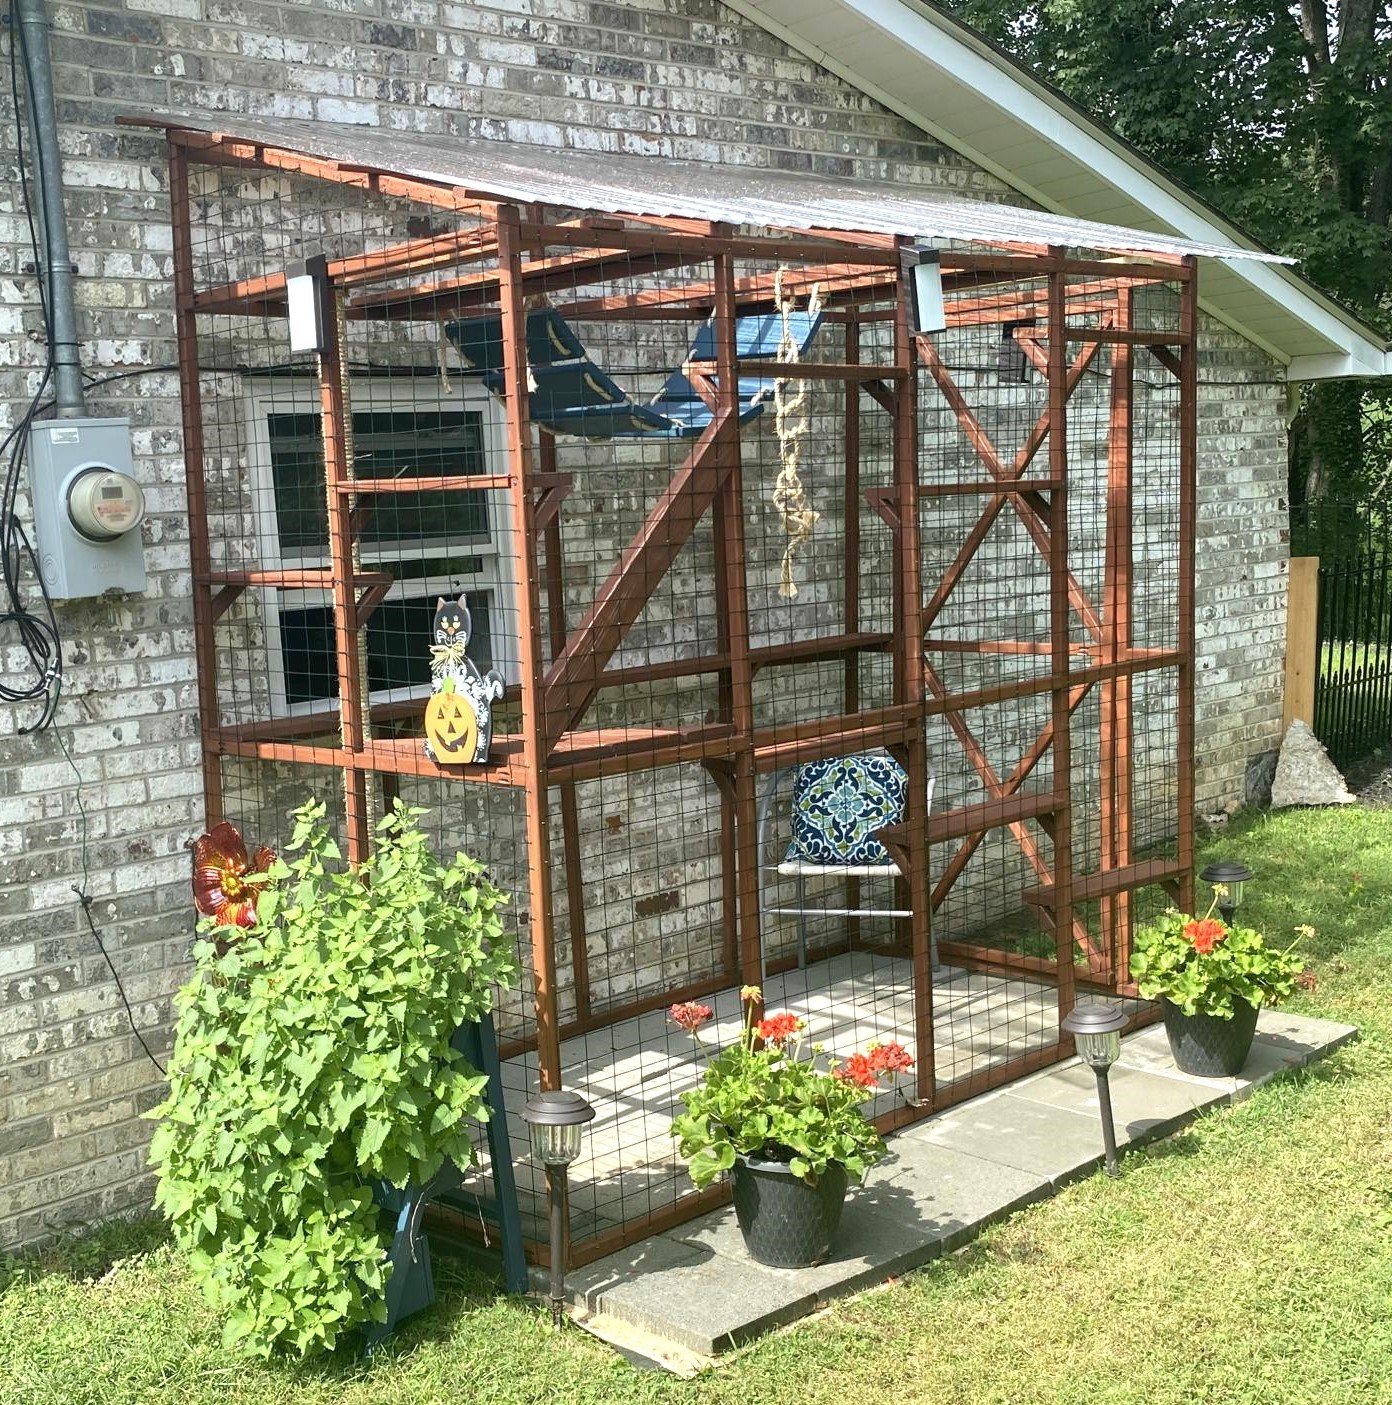
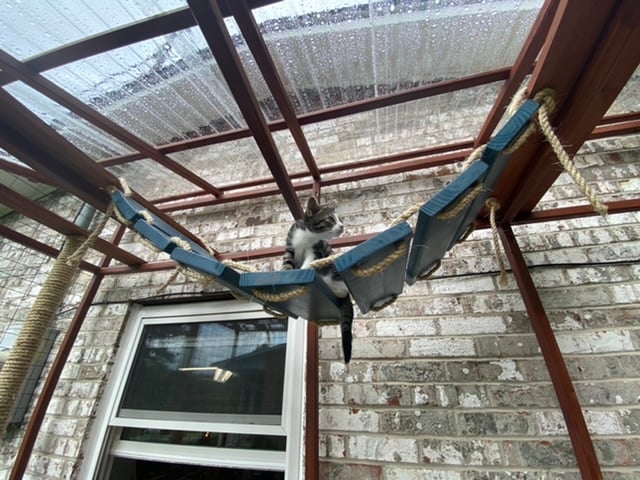
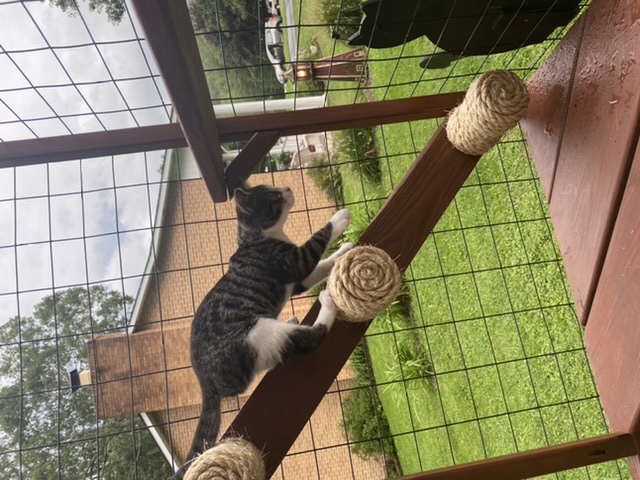
Ana doesn’t have a plan for a catio but she does for a playhouse and a cedar shed made from 2x2’s. I sort of combined my knowledge from making her plans over the last 10 years and came up with this for my cats. It was fun to make!! My baby kitten is loving it. I used garden fencing and stapled it to the outside and pocket holes for the walls. I made each wall individually like the playhouse then connected them once in place.


Estimated Cost
$250
Estimated Time Investment
Week Long Project (20 Hours or More)
Finish Used
Cabot semi transparent outdoor deck and fence stain. ($9 oops section)
Recommended Skill Level
Intermediate

Comments

Wifey

Wed, 06/09/2021 - 12:36

Thank you for sharing! My daughter wants a cat for her birthday but it can't be inside due to our son's allergies. Roaming outside isn't really an option because we have coyotes. We are going to use one of these in combination with an underground electric fence.

Seasonal And Holiday

Do-It-All Mobile Workbench

Submitted by JL Hurst on Wed, 11/28/2012 - 11:02

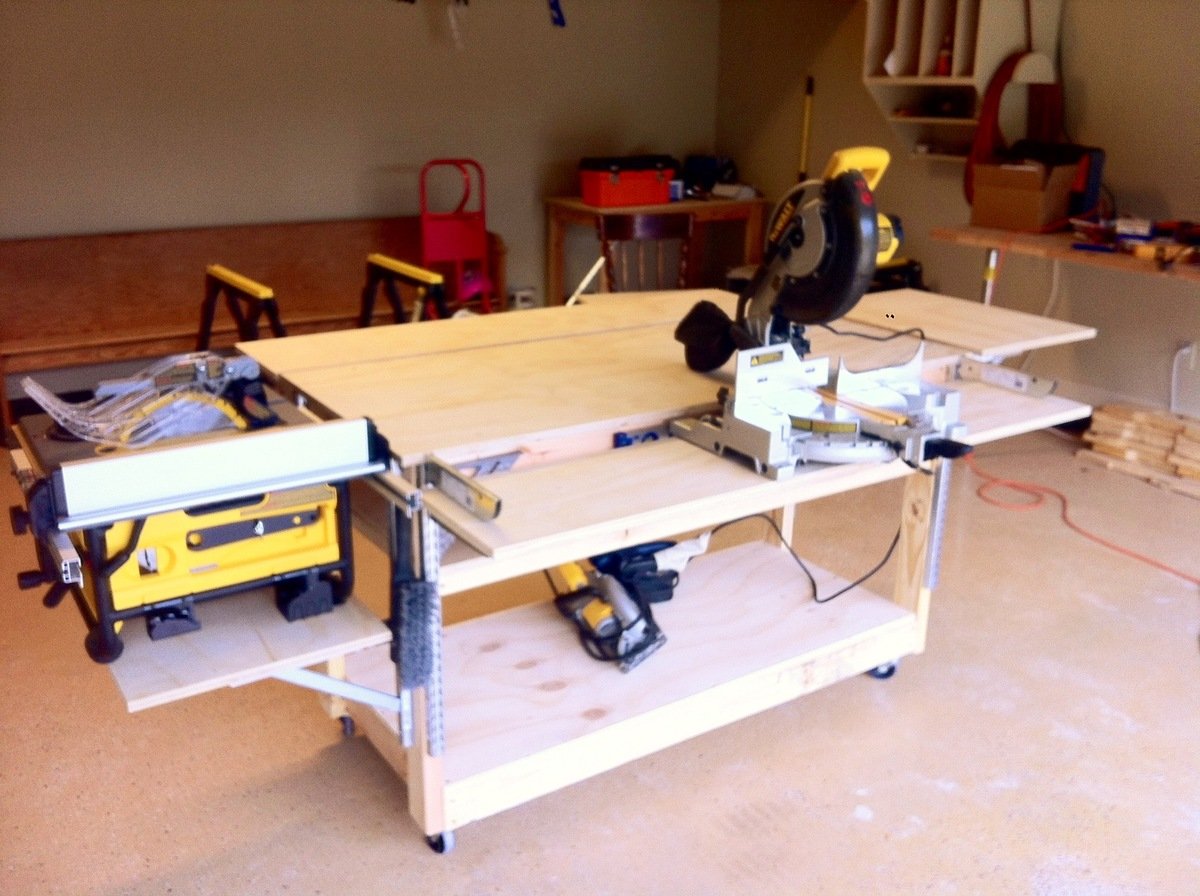
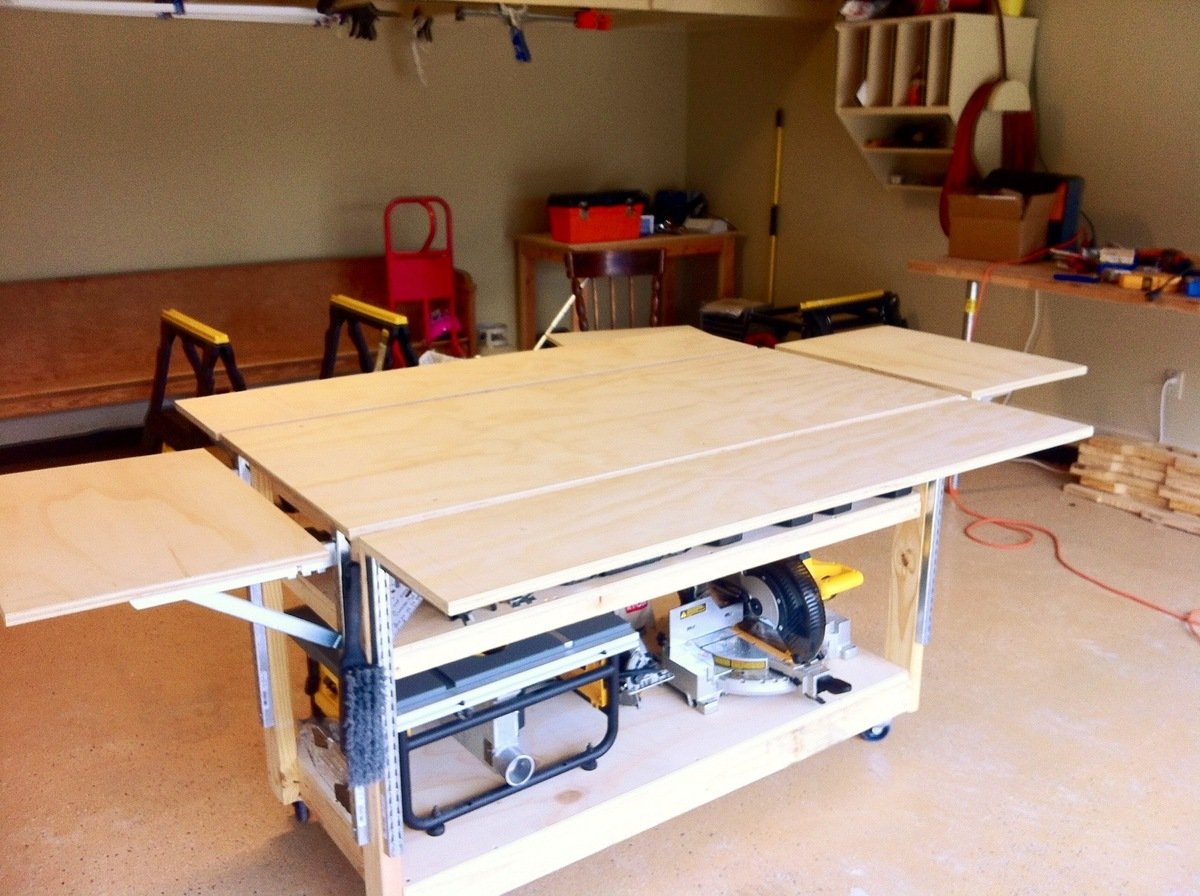
The need for a proper workbench in my garage/shop is a must, but. So is space! I already have a fold down workbench I’ve made with ¾ inch pipe & a door, but. I just need something that can handle all my tools. So, I stumbled upon these plans from the Family Handyman & couldn’t find a reason why this wouldn’t work in my shop. It has room for storage, can easily accommodate my tools & most importantly fold up to store. Easy to build too! Make sure you read all the plans first as some of the materials could be pricey, but well worth it. Technically it’s taken 2 months to build this bench, as I operate on a firefighter/teacher’s budget & during the holiday season no doubt. I ordered all the shelf standards & brackets through Amazon, $210.00 for those alone, but they hold so much weight to support your tools I figure it’s worth it. The rest materials (wood, screws) were purchased at Home Depot for around $150.00. The plans called for ¾ inch ply & it was $45.00 per sheet. However they did have a smaller thickness for $22.00 per sheet & was only a 1/32 inch thinner. I plan on topping all my surfaces with some ¼ inch tempered hardboard later on so I knew it would work. That also left me adjusting my screw size to mount my brackets. Due to the reduction in thickness of the plywood all my #8-1 inch screws needed to be adjusted to ¾ inch so to not screw through the ply. I also hit the molding isle to nab some pieces to use as furring strips to use under the shelves before attaching the brackets. This way I can sand each strip to match before mounting to make sure it lined up flat with the center top. One more thing; where it says “drill 1/8 inch hole in brackets make sure you use 1/8 inch pop rivets. I barrowed a pop rivet gun & was handed some rivets as well. Popped two & they had to be trashed because the rivet size turned out to be 5/32. So I stepped up in drill bit size & it all worked out. As I said, I’ll be topping it with some ¼ inch hardboard. I also plan to run it’s own electrical with an outlet on each post. I hope you all enjoy & this can help!

Estimated Cost
$350.00
Estimated Time Investment
Weekend Project (10-20 Hours)
Recommended Skill Level
Beginner

Comments

Rusty Cottage

Thu, 11/29/2012 - 07:03

This is by far the best workbench I have ever seen!!! Thanks for sharing. And excellent choice of table saw and miter saw.

JL Hurst

Thu, 11/29/2012 - 14:59

If I had it to do over I'd had gotten the contractor grade portable saw from Dewalt. The smaller version I have is the same 10" saw, but. It's maximum rip capasity is only 16. The other will at least rip a sheet of ply in 1/2.

Thanks for the kind words on the bench! I hope everyone that may find this valuable will. The plans came out of a 2005 issue & were hard to find on the internet.

uniquetrio2000

Thu, 07/04/2013 - 18:28

I love this work bench and would love to build it but i cant find them. Could you post them or email them to me please. uniquetrio2000 [at] gmail [dot] com

phantom1

Tue, 06/02/2015 - 05:39

I built this bench 3 years ago and I couldn't be happier. The portability, space savings and functionality make it wonderful!

StepFar

Mon, 01/08/2018 - 14:44

Am I missing the actual plans for this. I downloaded the pdf but it doesn't have the build plans apart of it.

Clubhouse based on Ana's Plan

Submitted by MattSl on Tue, 05/03/2011 - 09:18

I used Ana's plan as a base.

I changed it from 8x8 to 8x12, made the 4x4x8's to 4x4x10' for a higher main platform and swing platform, and added a 12' long monkey bar set to the other side. Also, an 8' climbing wall and a plank walkway to accompany the two slides.

For the clubhouse, I used Hardiplank 4x8 sheets for the siding and an EZ-Framer kit for the structure itself.

The slides I purchased from Lowes, monkey bars from Amazon, and the swing frame braces from Amazon as well. The swing kits I got from ebay.

Estimated Cost
1500
Estimated Time Investment
Week Long Project (20 Hours or More)
Recommended Skill Level
Intermediate
Seasonal And Holiday

Farmhouse Chairs

I found a picture of this style of chairs, and I really wanted to make them for my table. I created my own plans and adjusted them until they were perfect. I’ve since made several sets of chairs for other people including this set of 6. 

Built from Plan(s)
Estimated Cost
$25
Estimated Time Investment
Afternoon Project (3-6 Hours)
Finish Used
After sanding down the chairs, I apply a coat of Preston by minwax. To get the color I wipe on the stain gunstock by winwax. After letting it dry for about an hour, I then wipe on a coat of espresso stain. For the finish, I apply coats of a gloss polyurethane by Minwax.
Recommended Skill Level
Intermediate

Comments

Back