Outdoor Chairs and Cedar Storage Chest
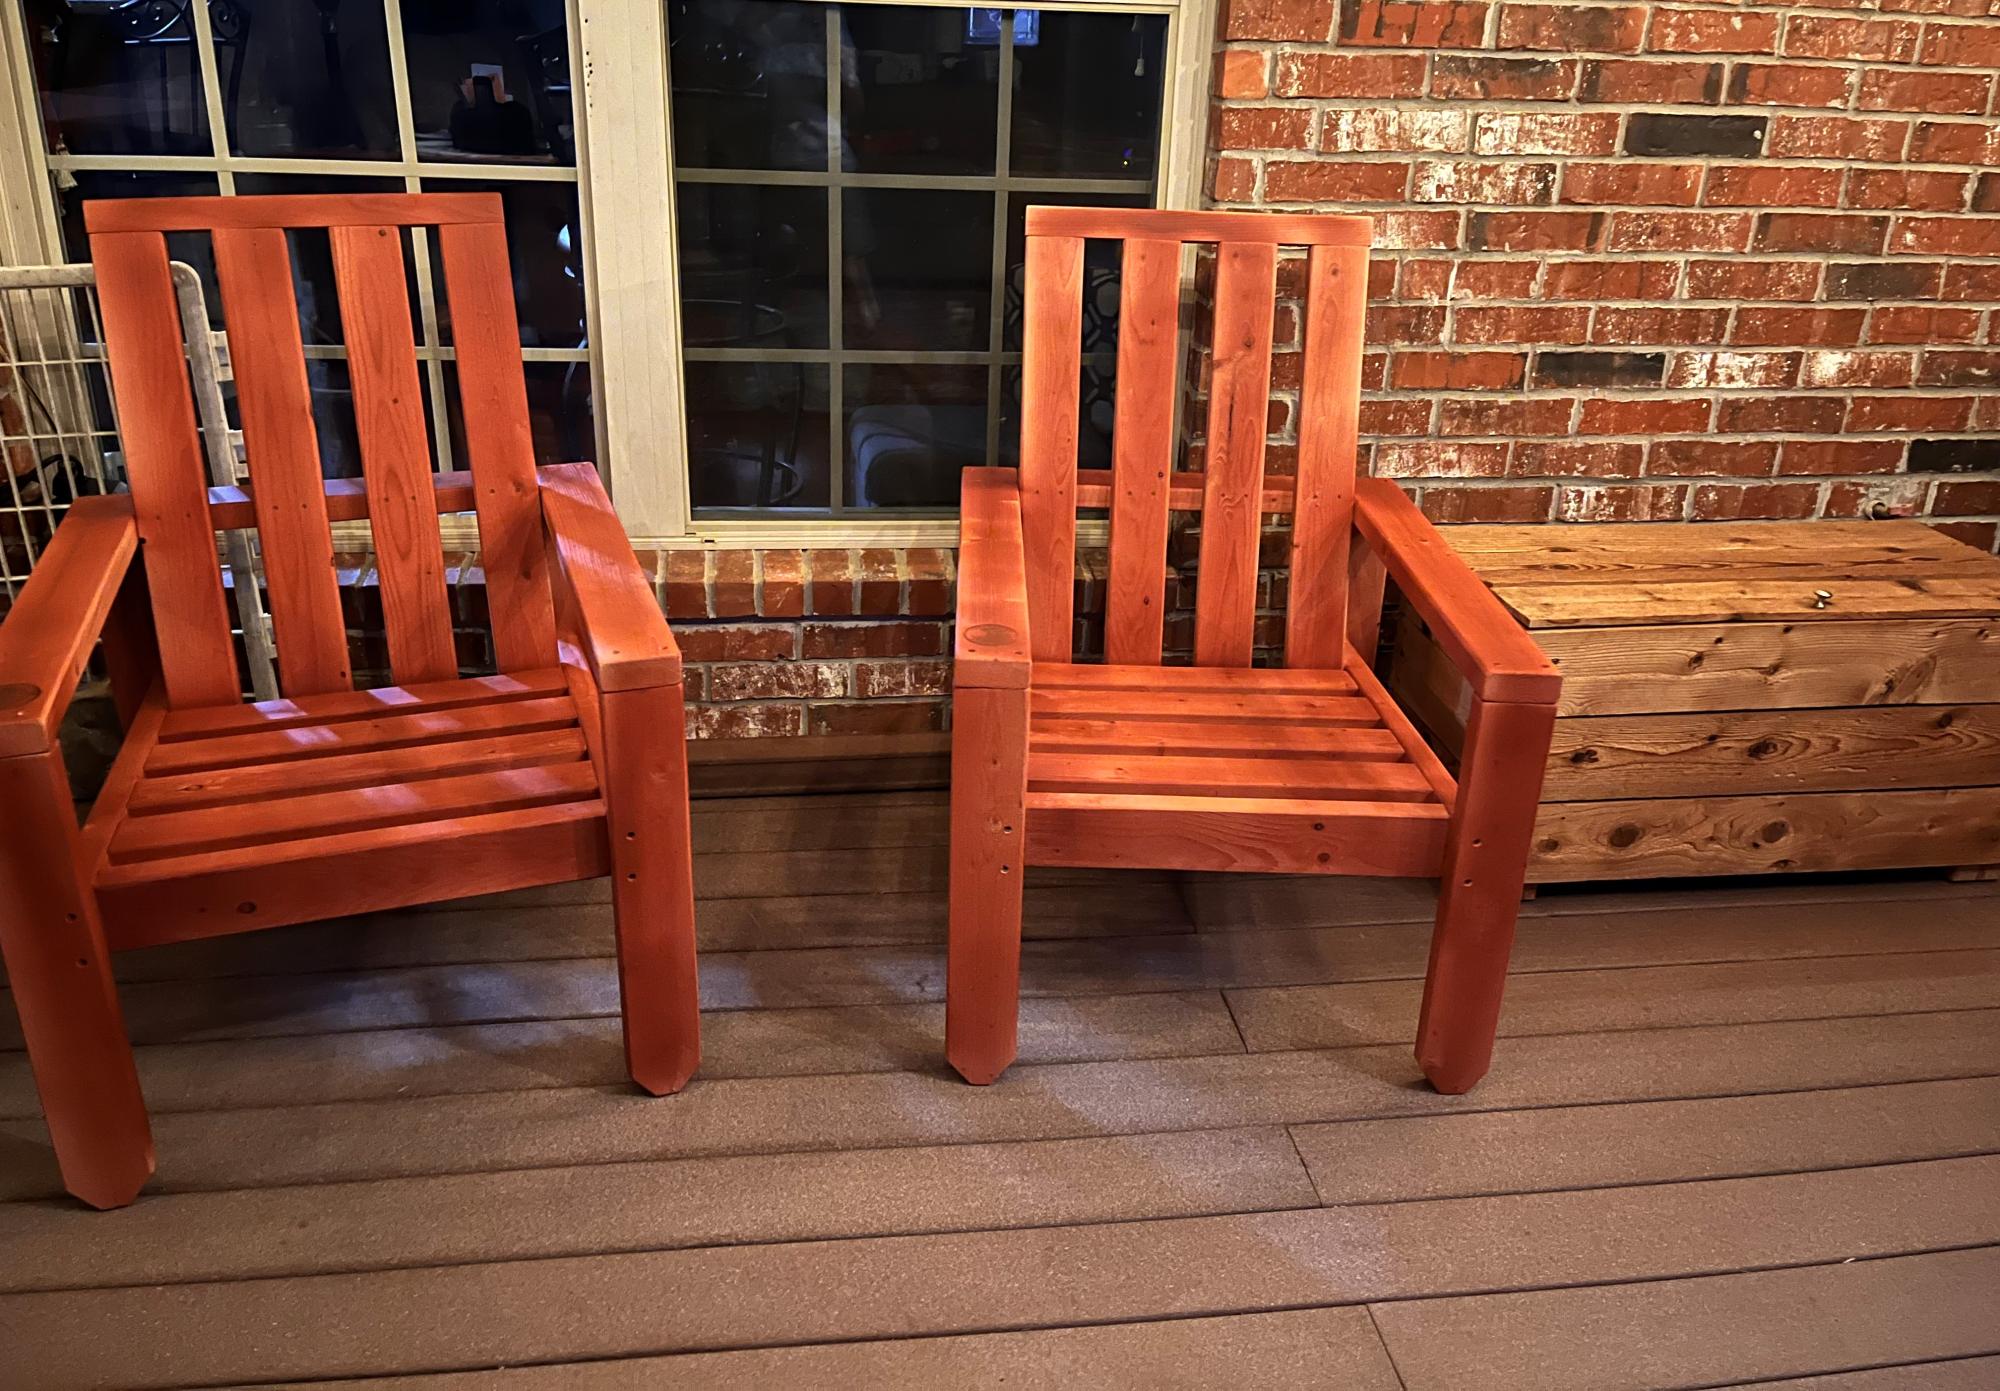
Ana White chairs along side my Ana White cedar storage chest (one of my 1st builds). Ana, thank you for the plans & for inspiring us to build!
Keith from Springdale, AR
Ana White chairs along side my Ana White cedar storage chest (one of my 1st builds). Ana, thank you for the plans & for inspiring us to build!
Keith from Springdale, AR
This was such and easy project. It went together in a few hours. The hardest (and most time consuming) part was finishing it. I detailed the build process on my blog if you'd like more info.
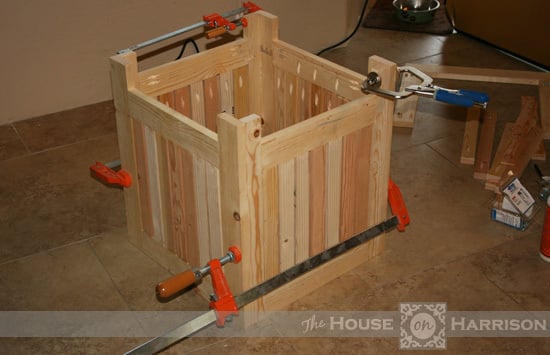
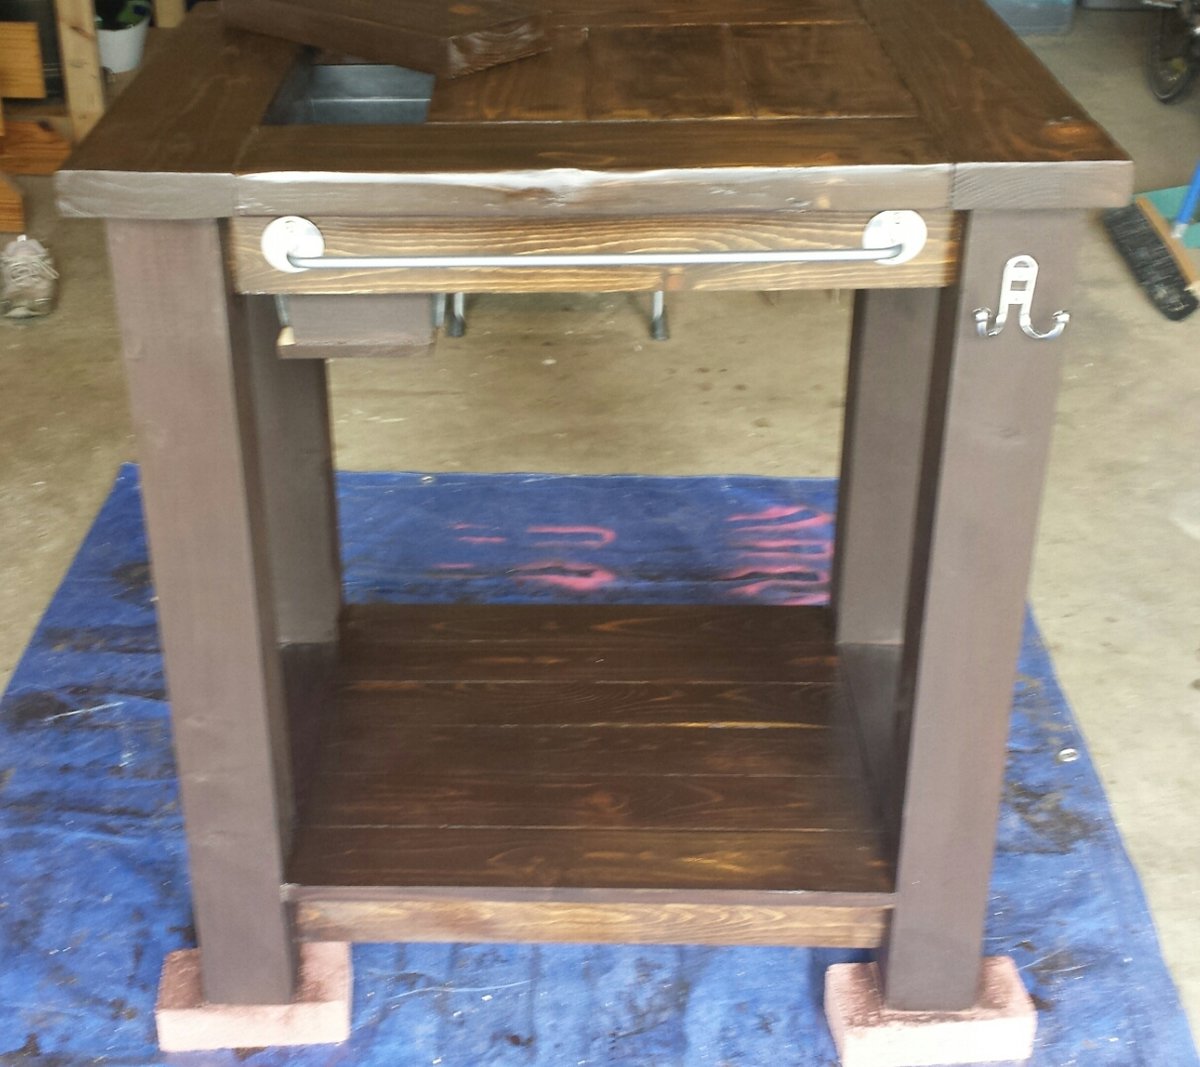
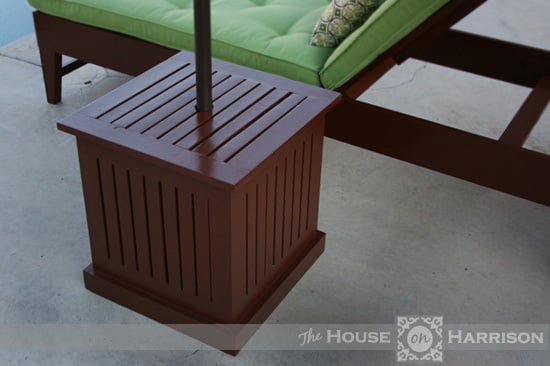
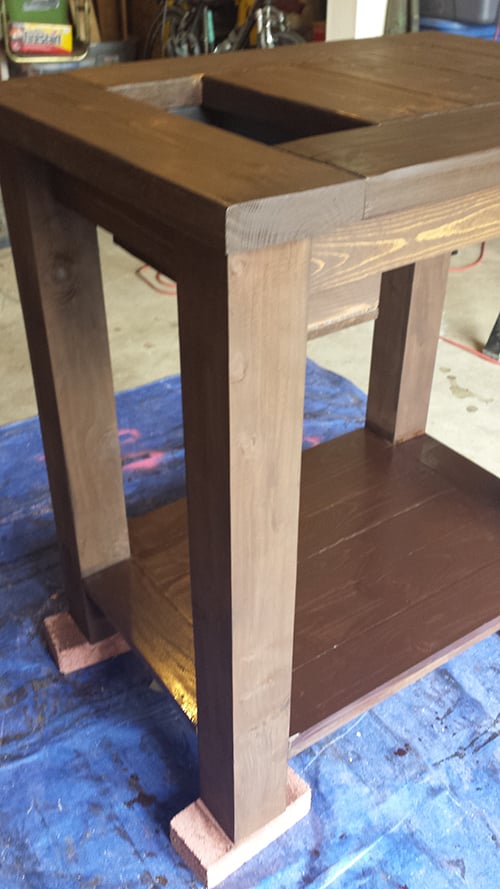
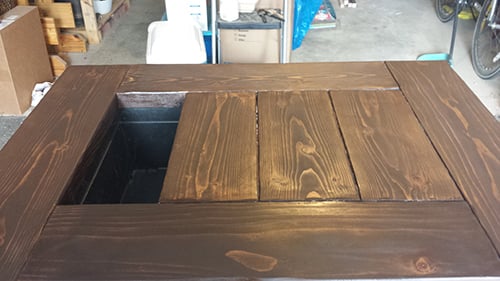
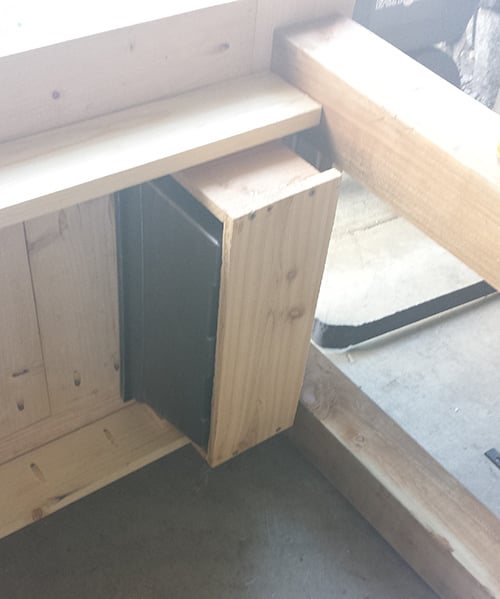
I made this for my father for Father's Day. I wanted to do a grilling prep table with a built in cooler. The cooler part is not really just for drinks but also a place to store barbeque utensils while in use.
Height is 36 inches. Made out of 2x6s, 1x4s, and 4x4s. Because the table is so short, the planter slides in and out from the side underneath the table top. I had cut the top before buying the planter which lead me to do a few changes to my initial design on the fly.
Thu, 03/12/2015 - 10:50
I love to grill and would love to build one of these. Do you have any other details on your design? Cut lengths or anything? I'm too new to building to deviate to far from plans right now haha.
Thanks!
I used dowels in the screw holes.
Mike Kimble
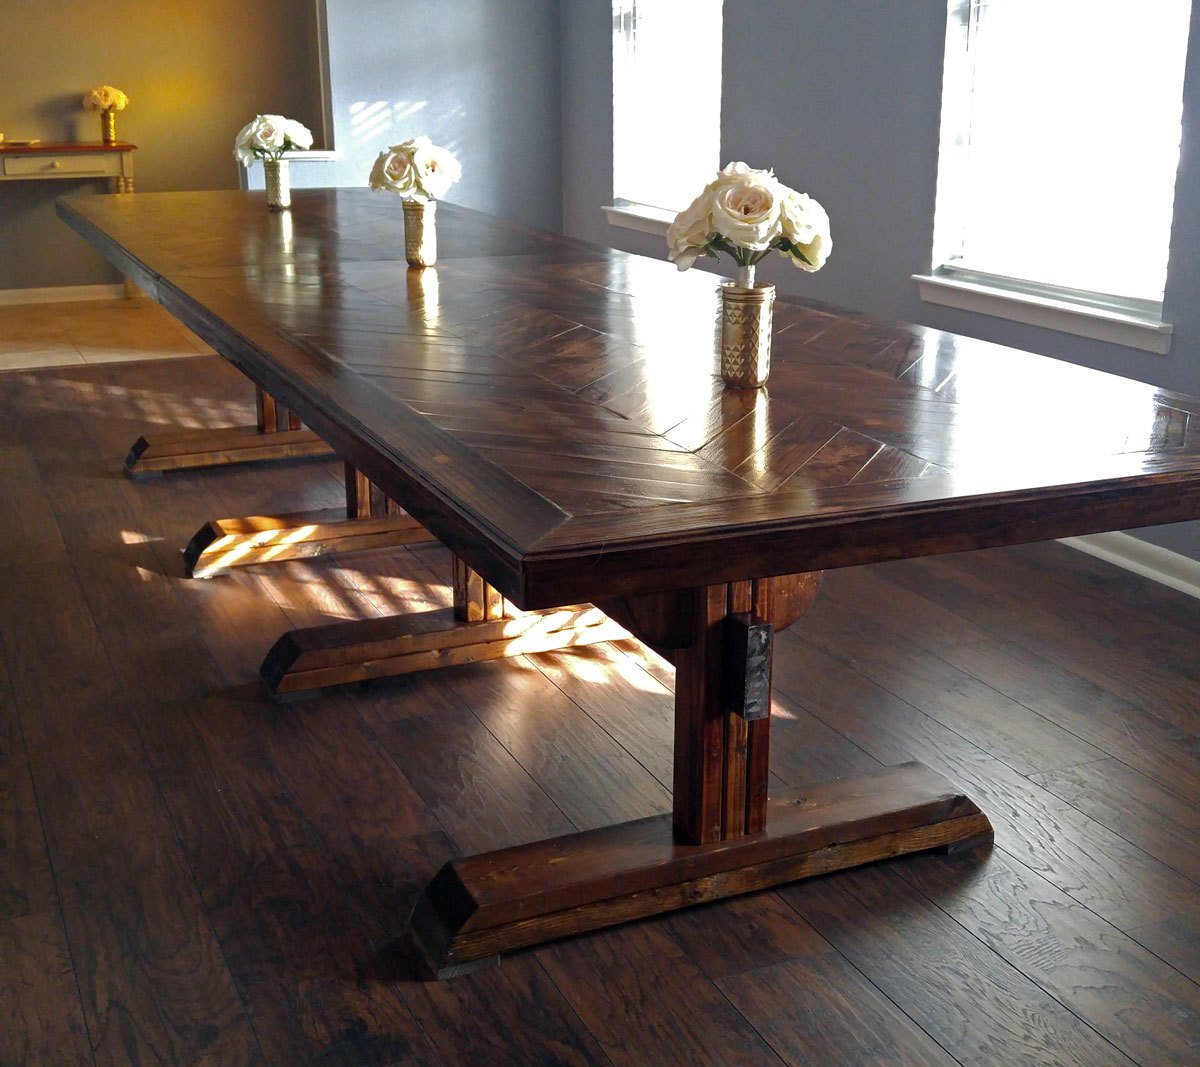
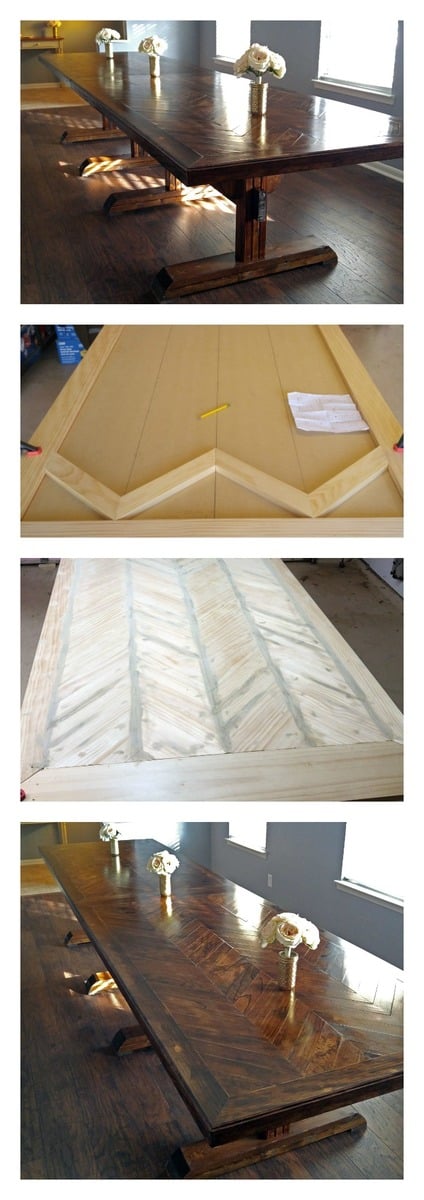
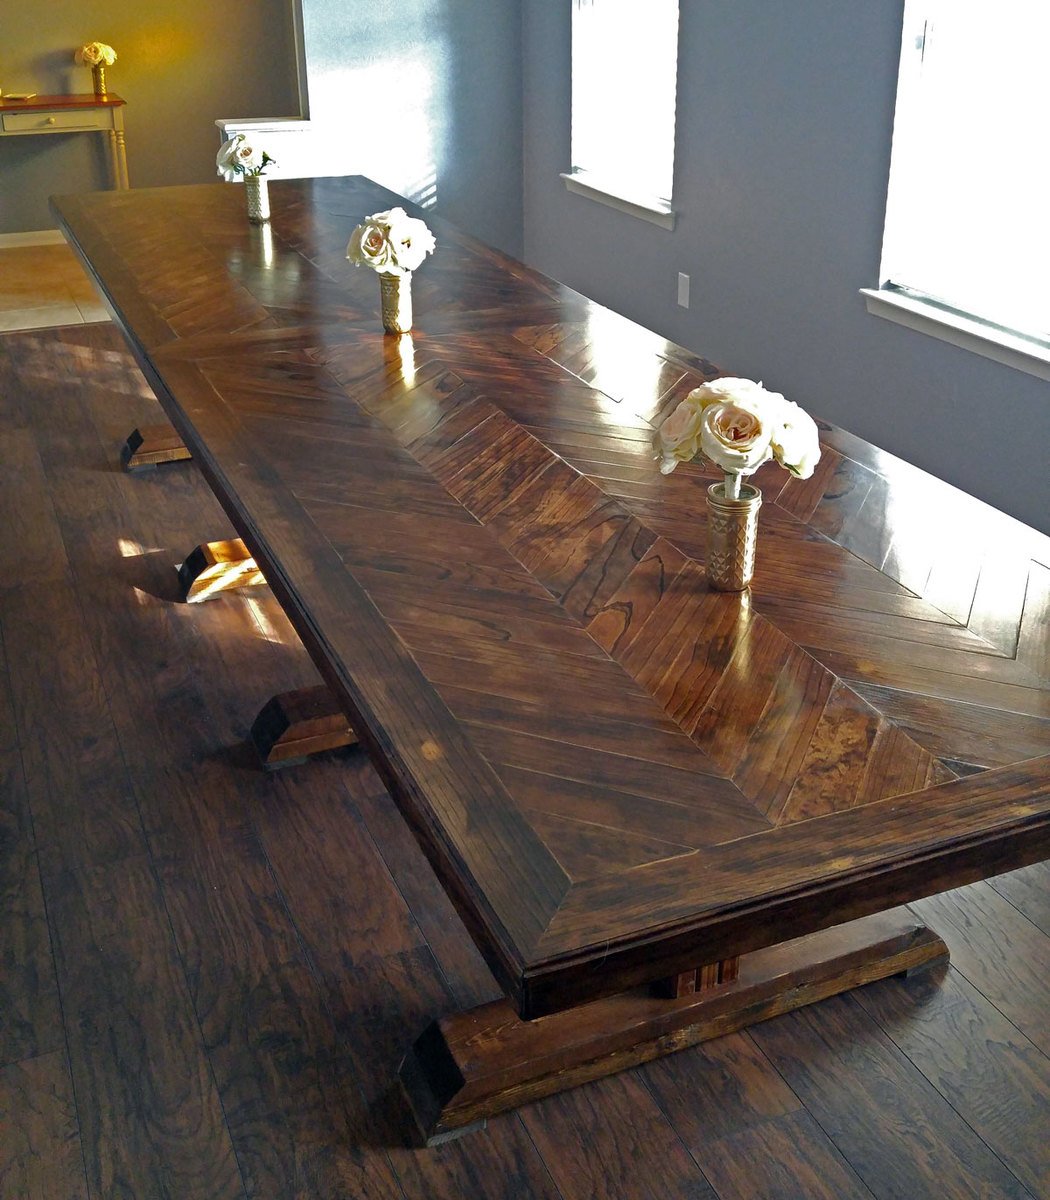
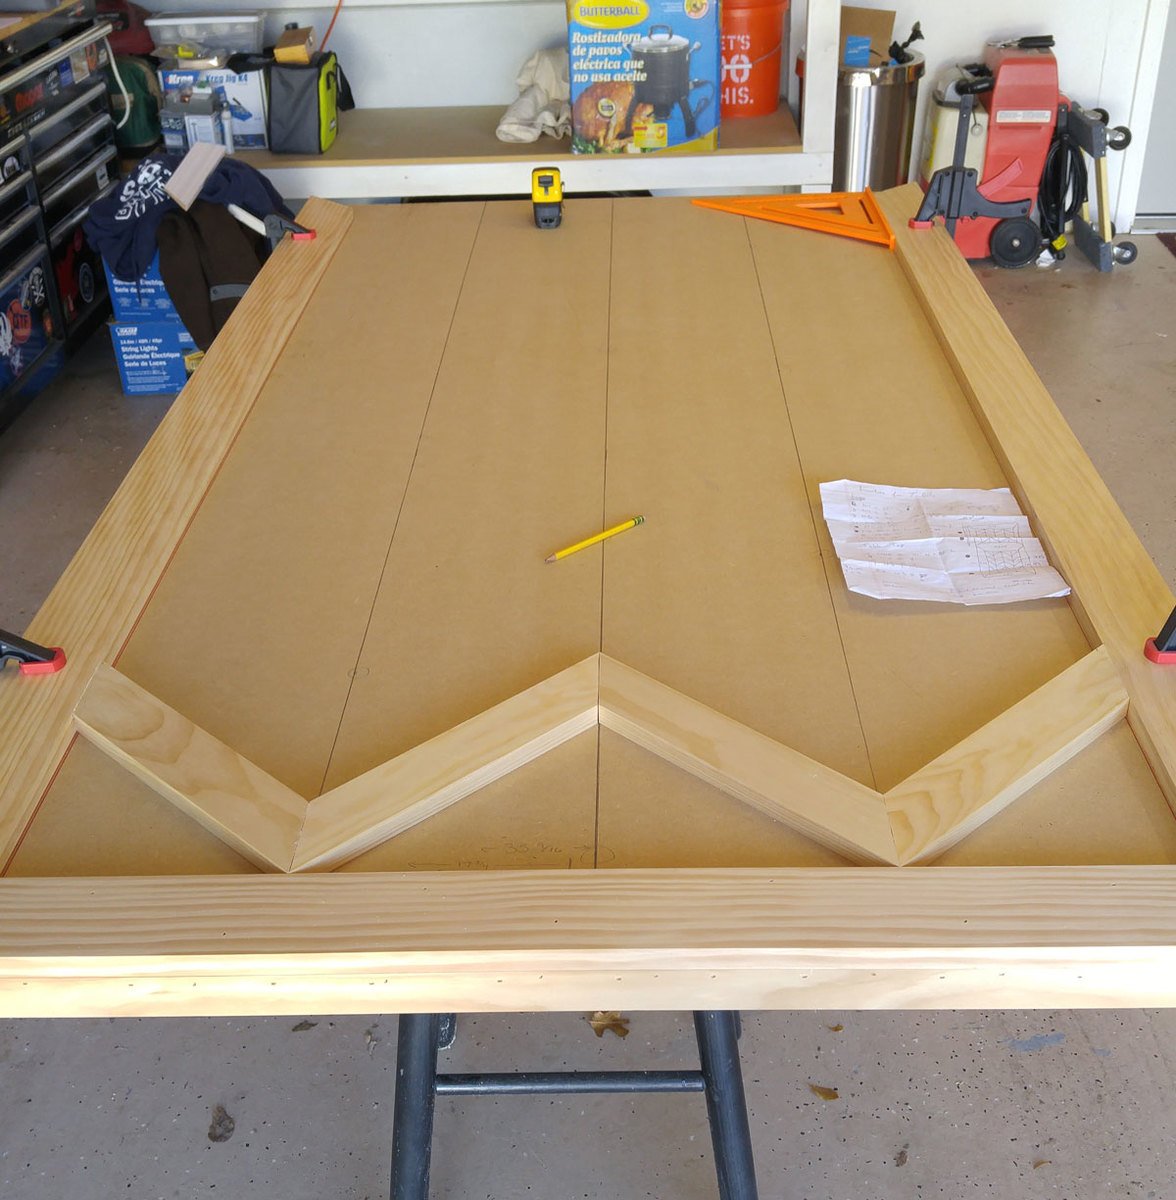
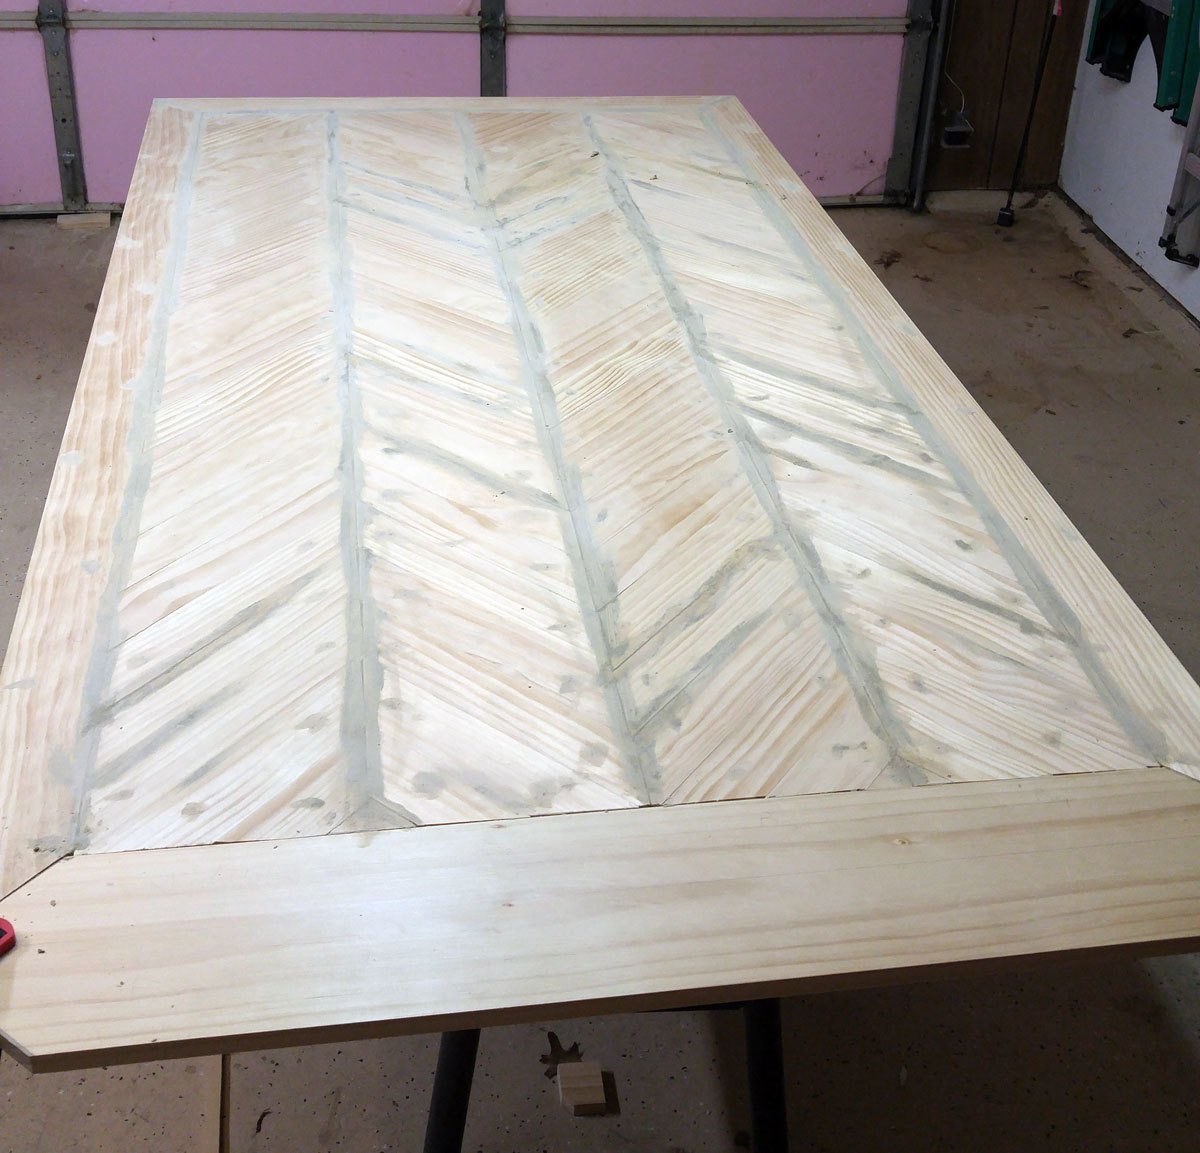
Thanks for the wonderful plans! This is my 2nd Ana White build (traditional turned leg, pottery barn desk). I used the legs from this build and then leveraged some tips from another blog for the herringbone top using 2 sheets of MDF as a base (http://www.southernrevivals.com/2014/06/tile-top-herringbone-table-make…). My herringbone table took some planning, as it is over 13' long. Now all of my family can eat together when we get together!

Wed, 04/29/2020 - 16:56
This is absolutely gorgeous! I love the unique top you did with the herringbone pattern. I've been debating on trying something similar myself 😁
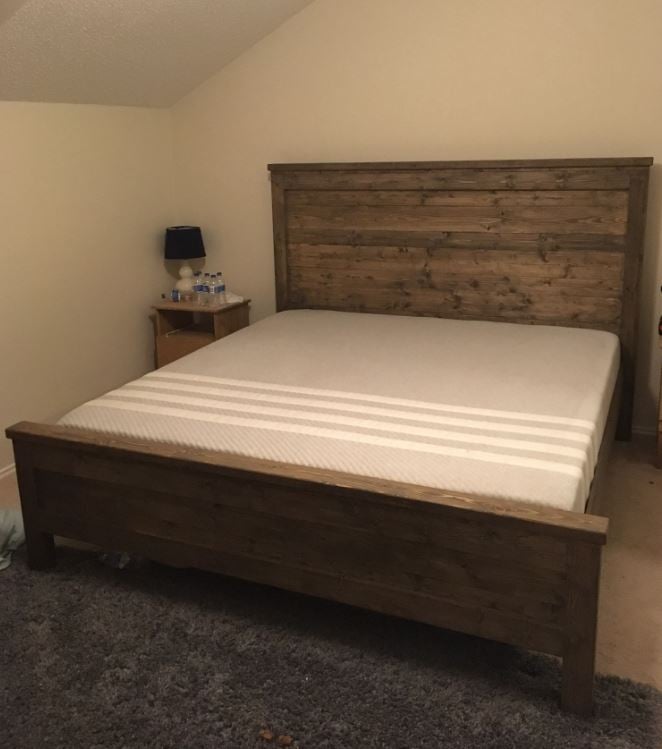
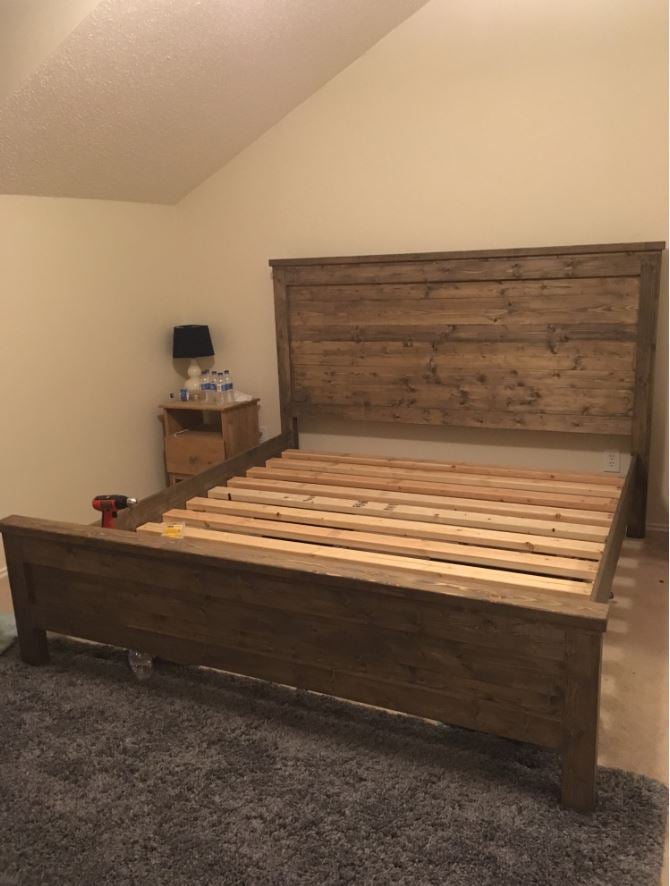
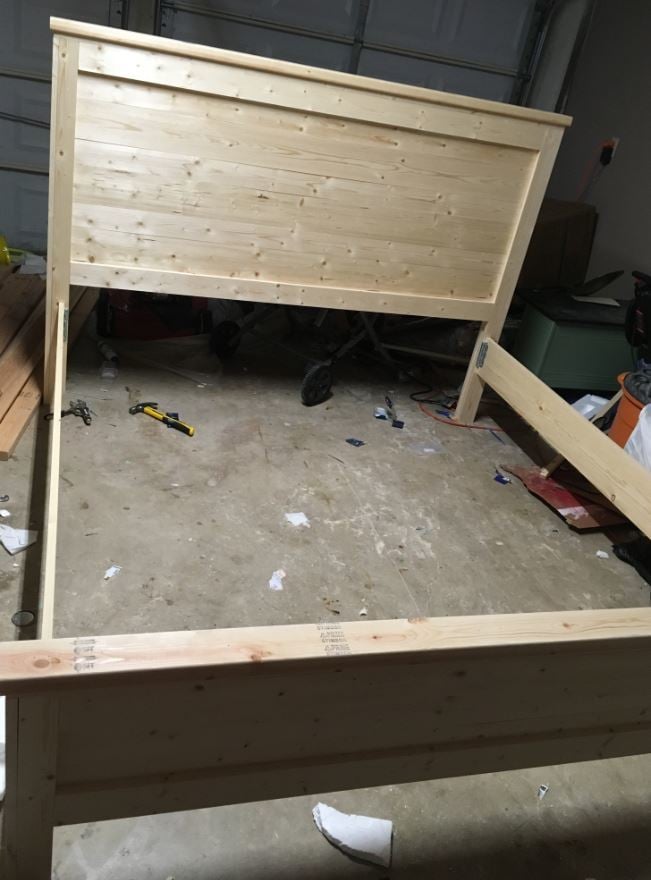
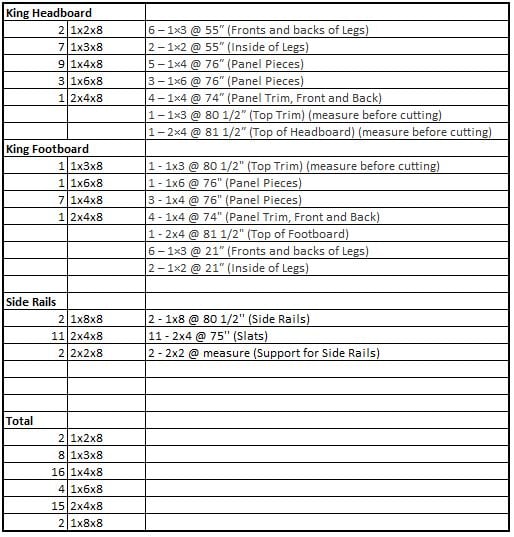
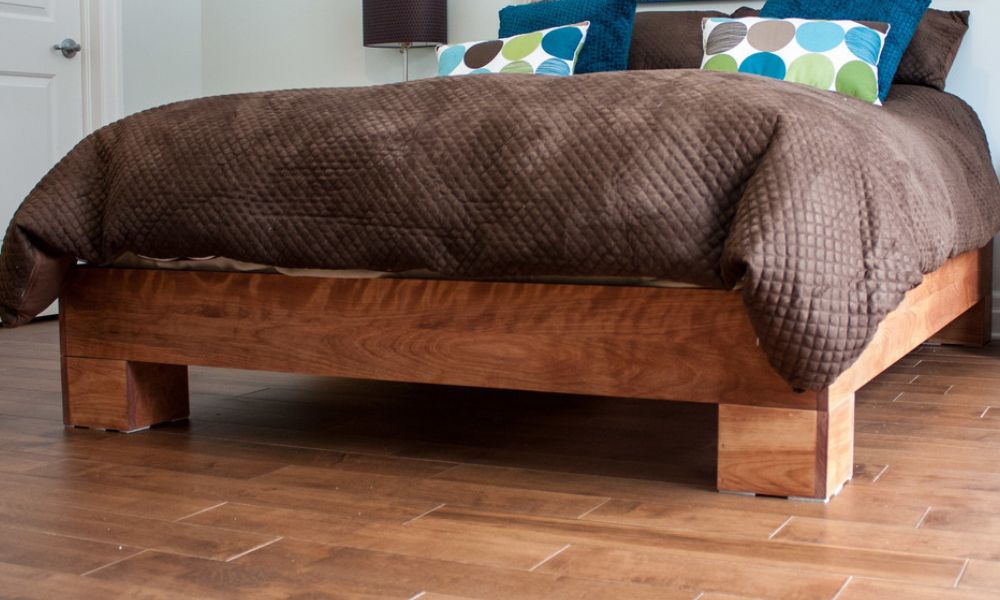
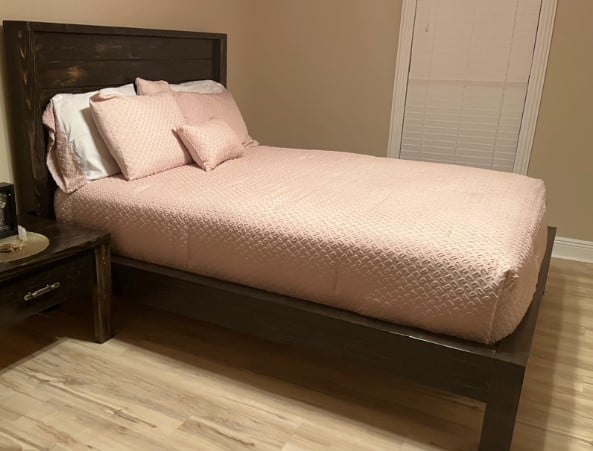
First of all, thank you to the site for this plan. The headboard specs were spot on. I was interested in making a footboard as well, and you actually will end up with a few scrap pieces that will help you build the footboard (the 1x3's and 1x2's). My footboard ended up being about 23 1/4" high. For reference, the mattress in the photo is 10". I included a picture of the total boards you will need to buy to do the headboard, footboard, and side rails (I used 8 inch boards for the side rails, not 10 inch, but those could be interchanged). One thing to note is the plan calls for pocket hole screws but these are not necessary. I used 2" brad nails, 1 1/4" brad nails, and 2" screws (for the slats and the support rails on the slats. You could use 2 1/2 inch for the slats but the support rails need 2".). Not included in the picture I included is another 2x4x8 that I bought that I placed three scrap 4x4 posts that I had under the middle of the slats for extra support. I also bought steel bed rail fasteners ($11.30 from Amazon) to attach the side rails to the headboard and footboard. They worked great and the bed is extremely sturdy. Can't budge it at all. I used the common whitewood boards from Home Depot, which are all the correct width - the fur boards are cheaper but are not the correct width, you would need to adjust the plans if you were to use those. Overall I am very pleased with the bed. Please ignore the half dozen water bottles in the photo.
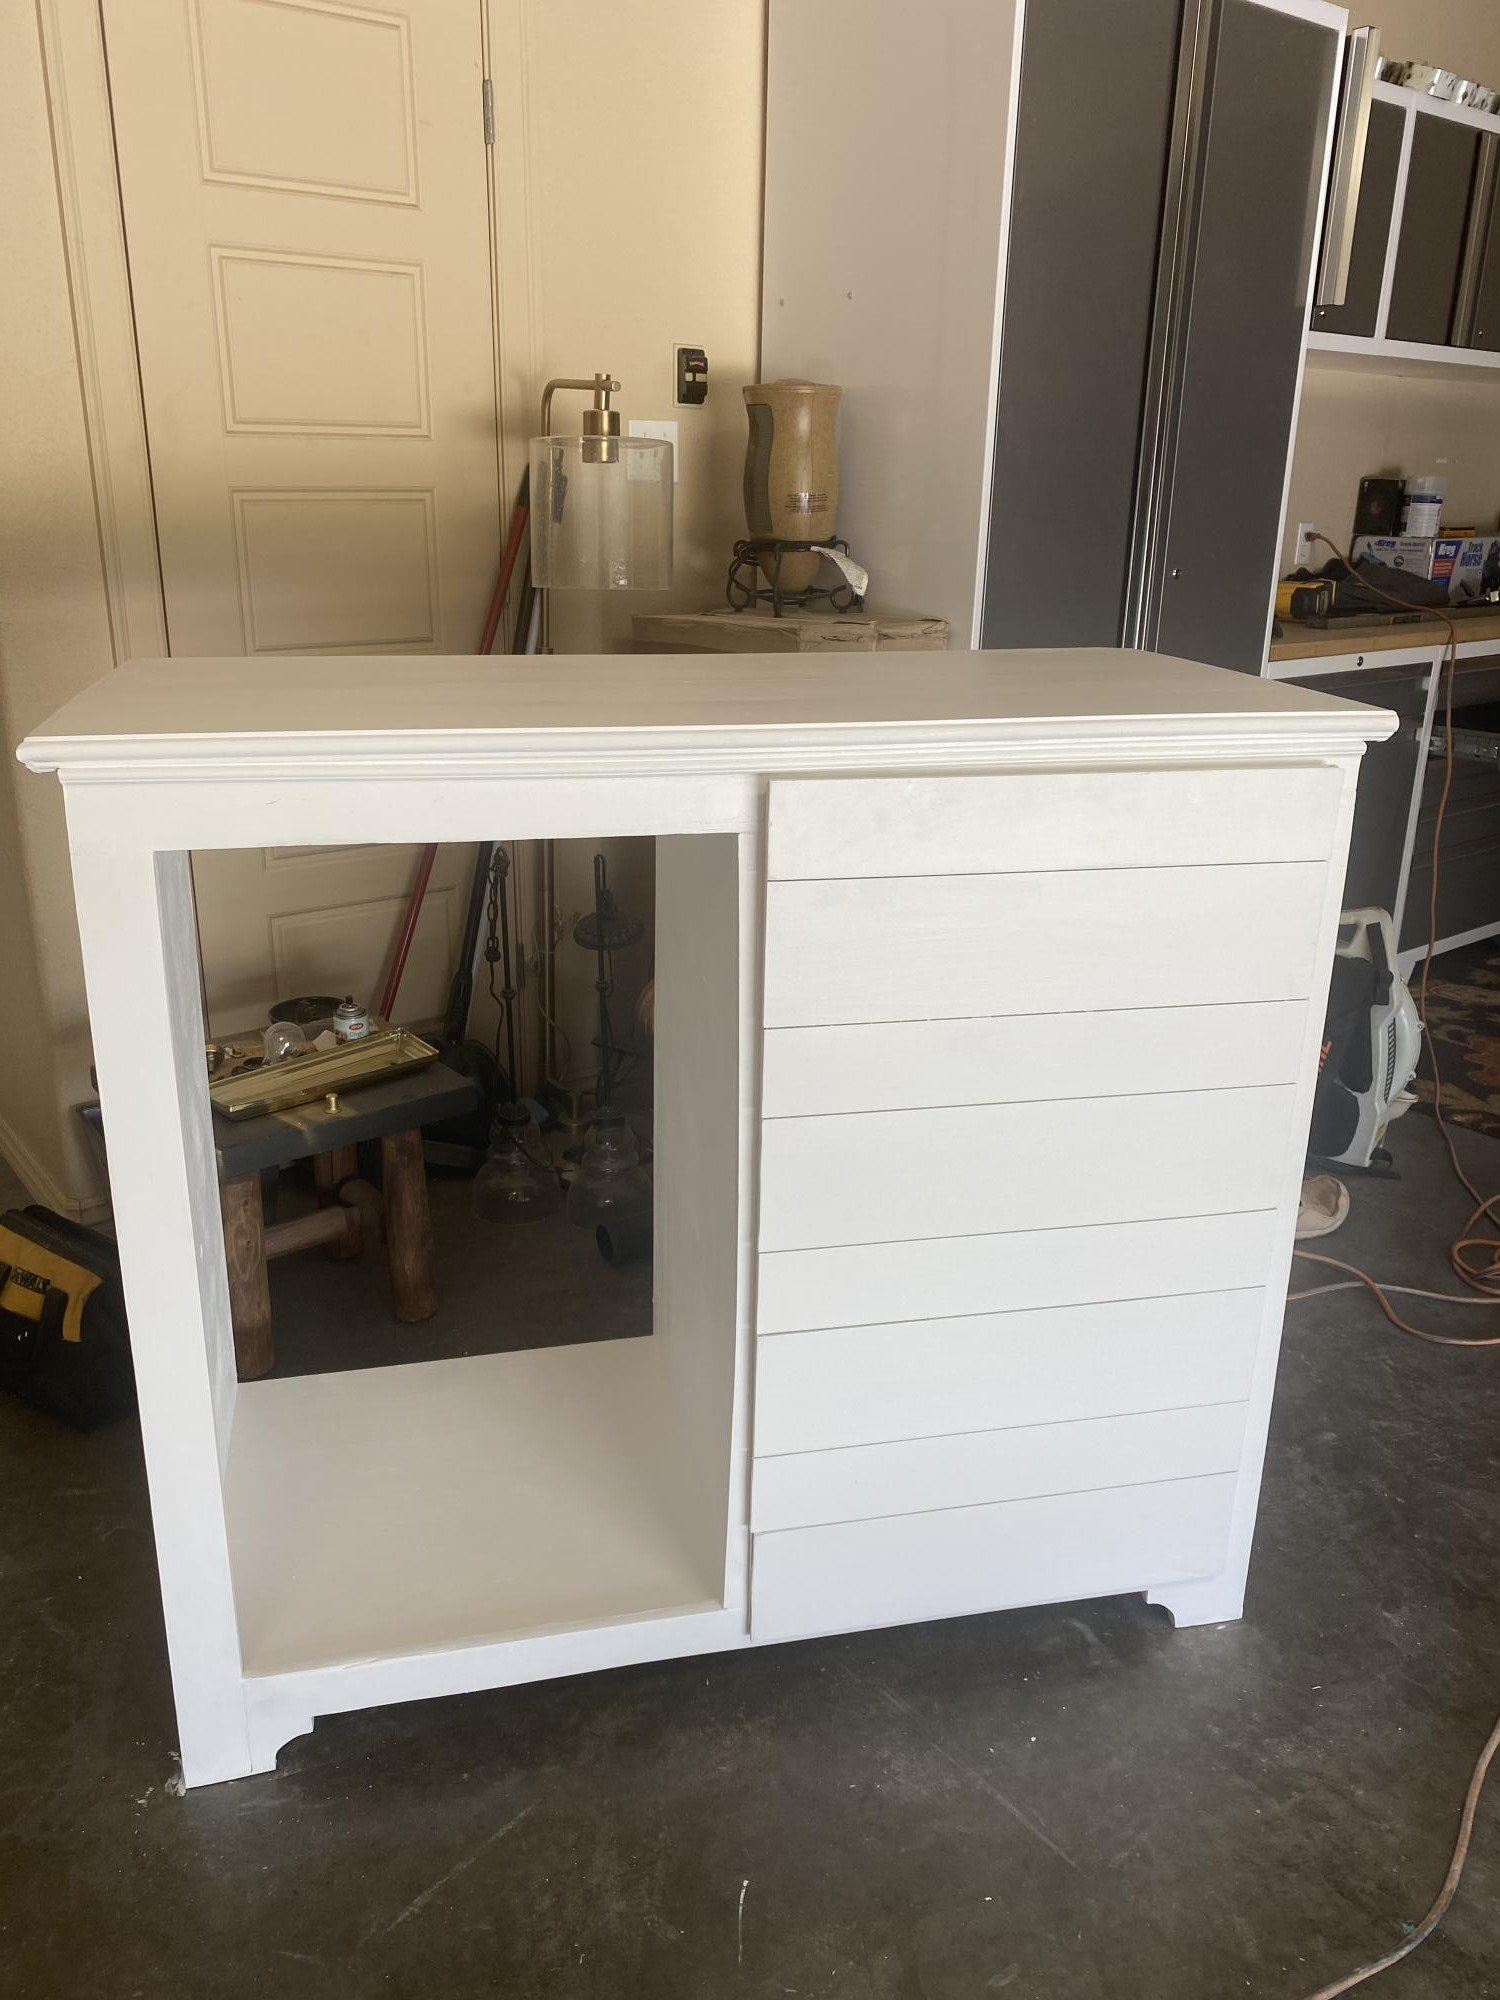
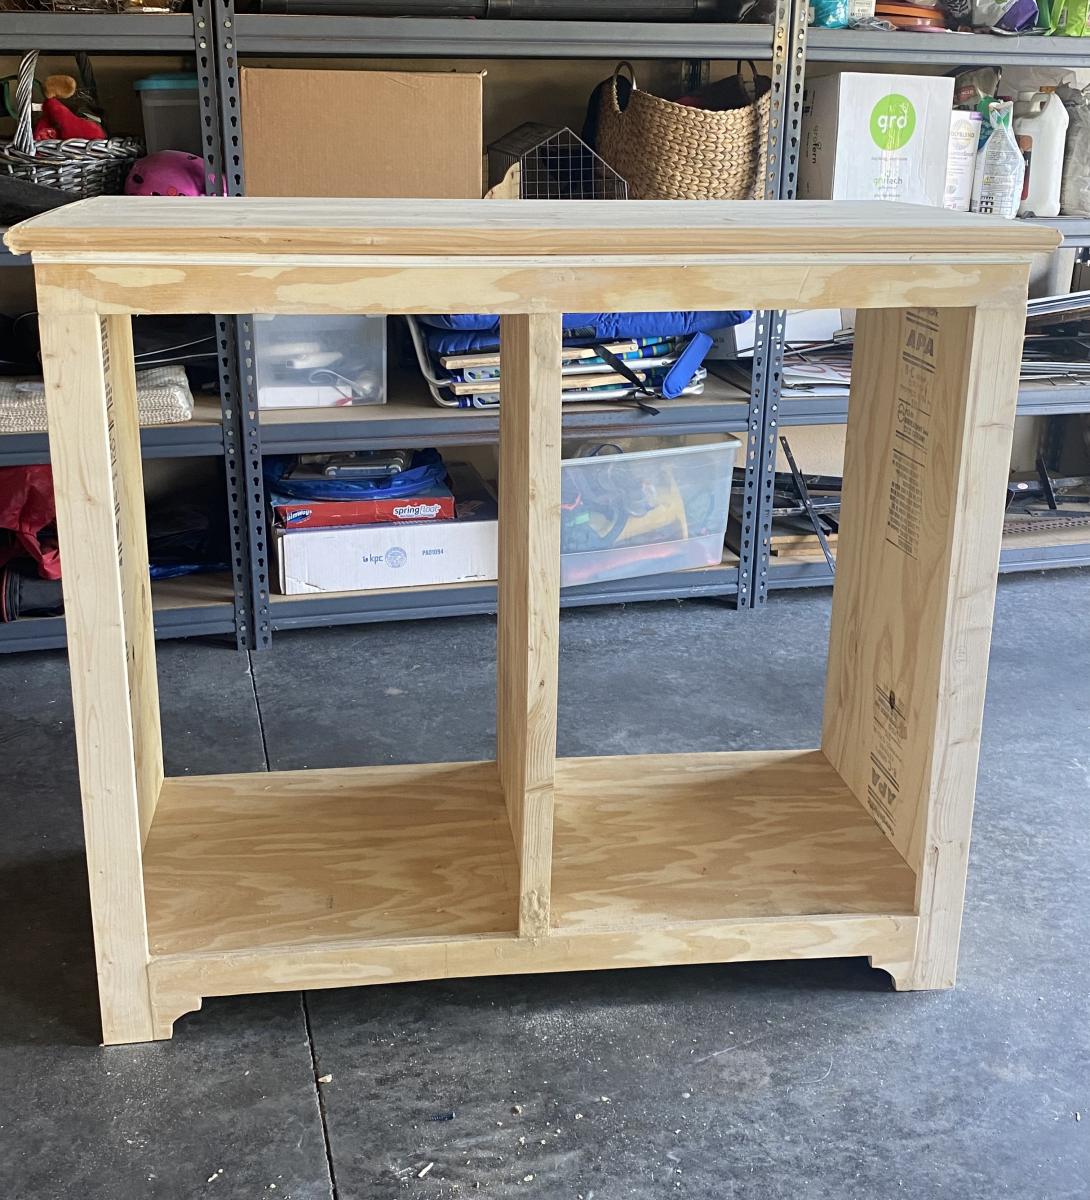
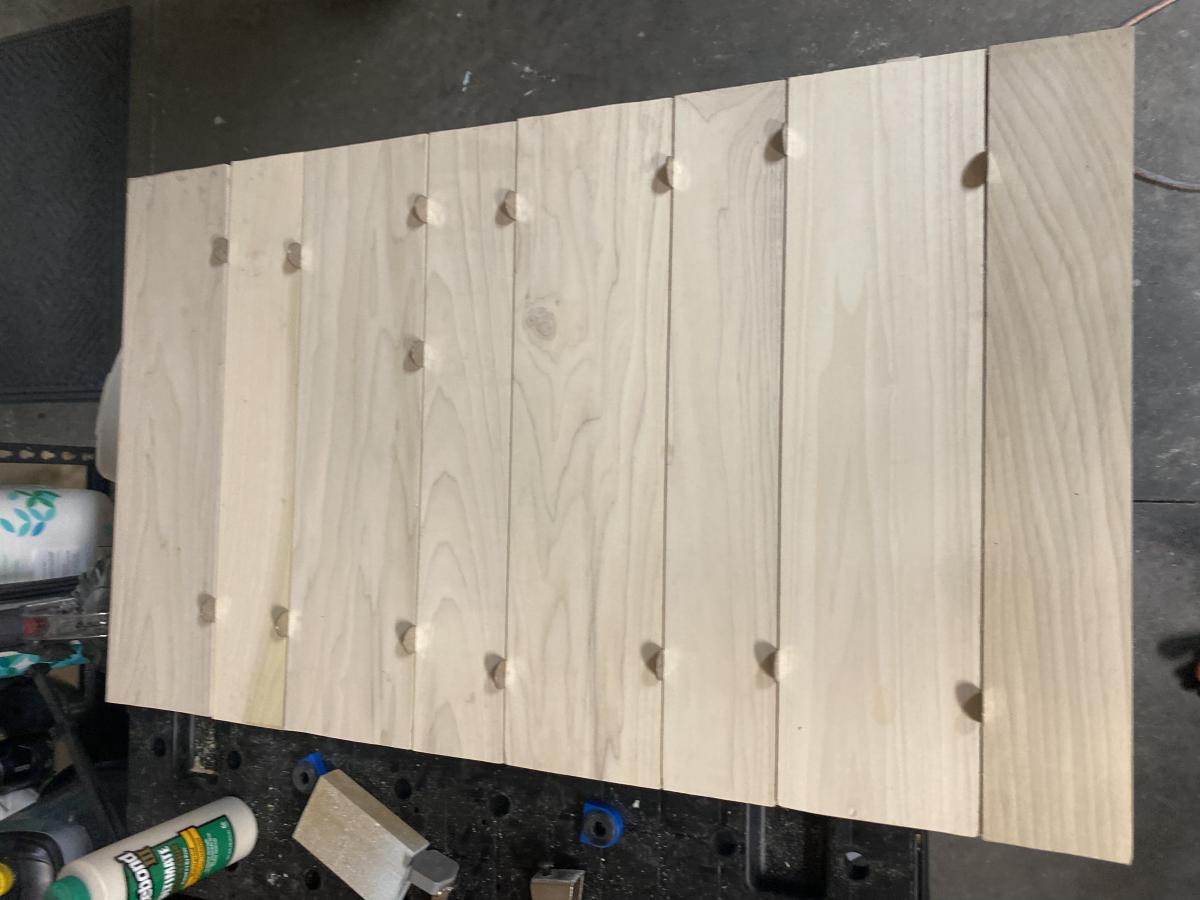
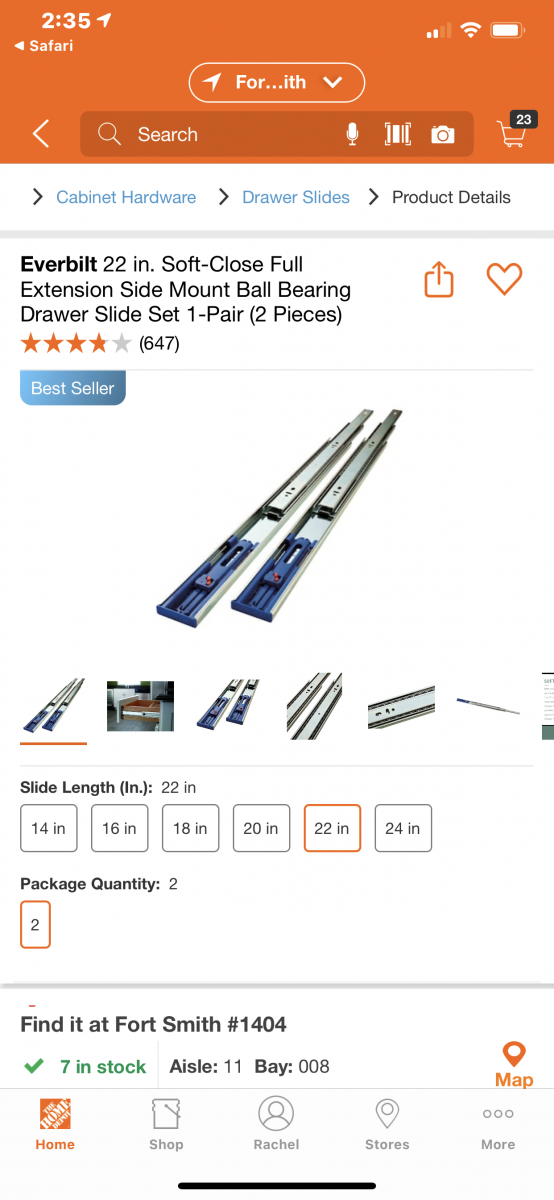
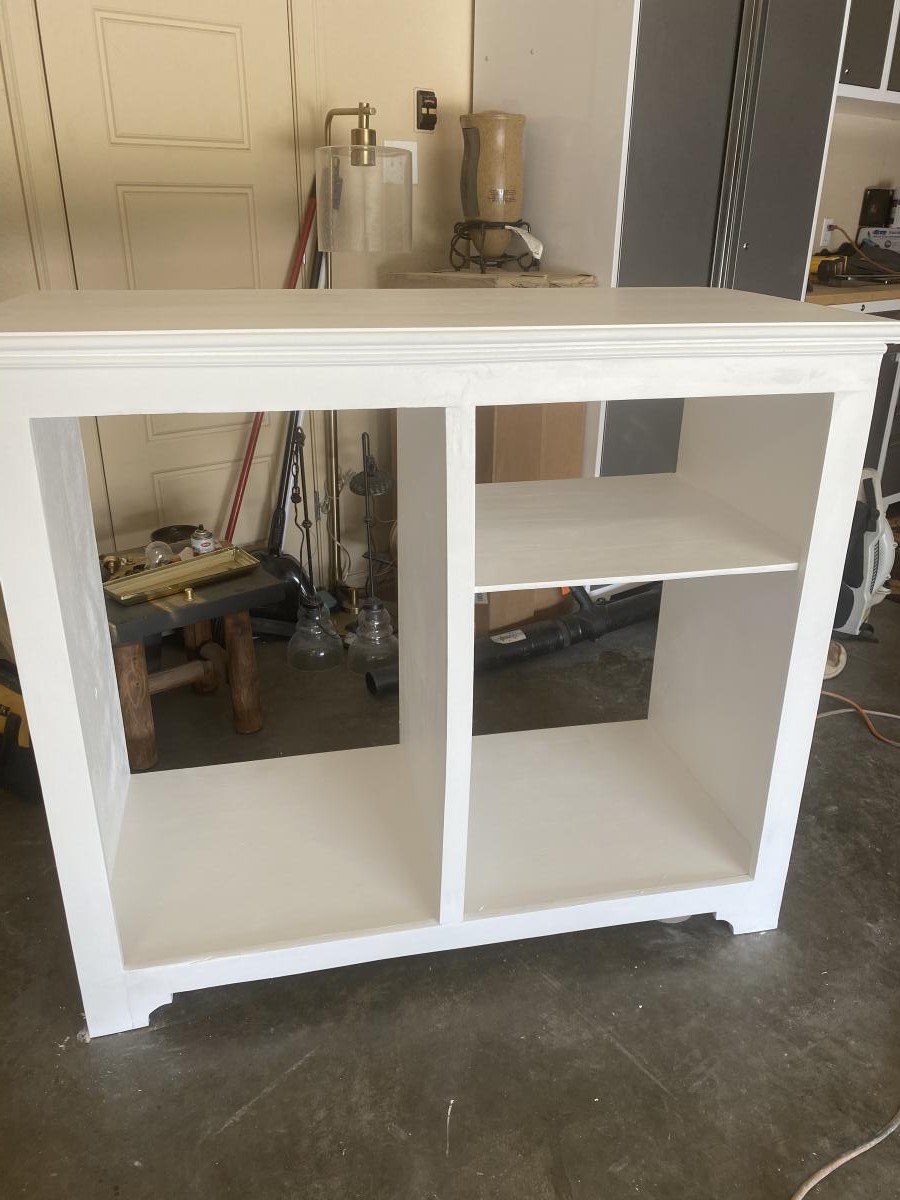
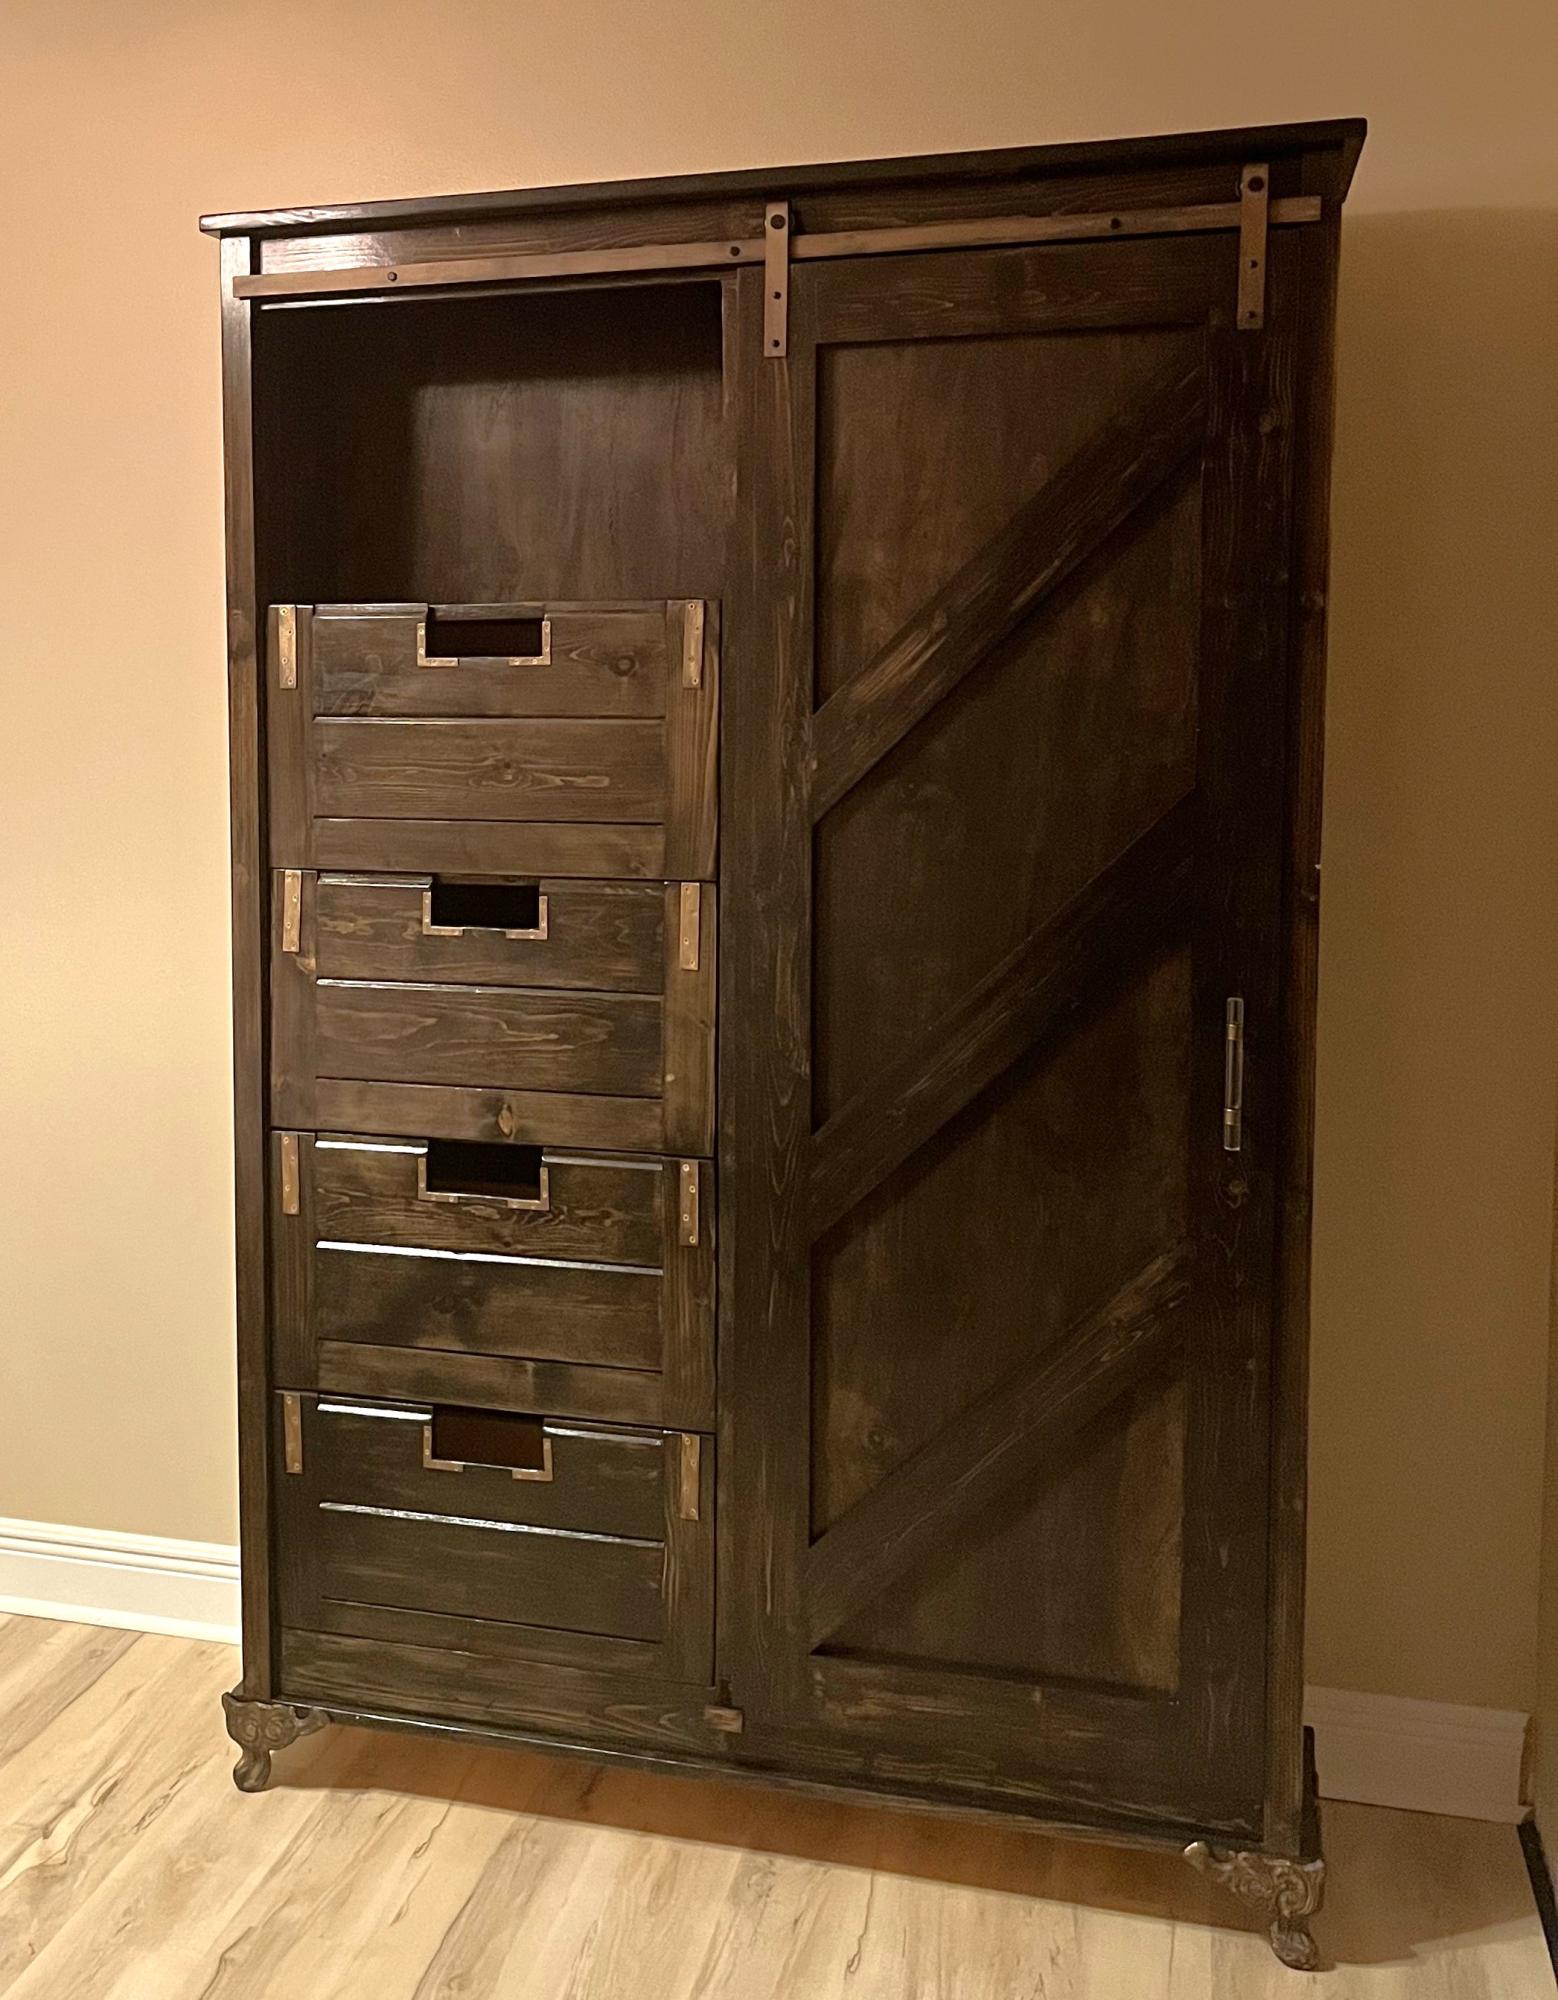
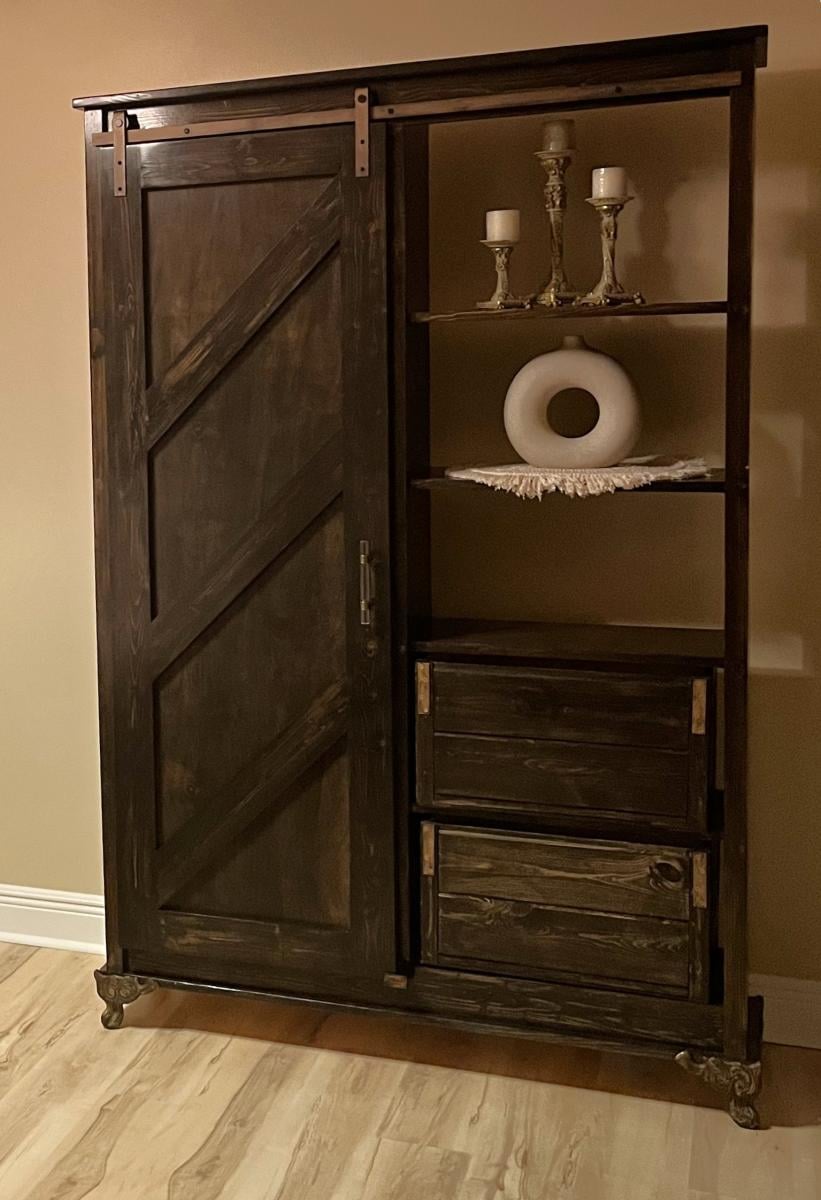
I changed plan to make deeper. I also modified the bottom trim and top. I put a ball bearing soft door drawer guide on modern door so it can slide back and forth. I feel we need more modern plans on here but with a bit of creativity and using plans you can make anything. I have never built anything before. I love General Finishes Milk Paint in Snow White and I brushed rolled it on (sanded between 3 coats). It’s basically self leveling and leaves a nice matte finish. Used door glide in picture bought from homedepot in the 24 inch and that’s how wide door was and it was 36” tall. Door glide I only used one on top of the door not on bottom as well. Door piece of fiberboard with just strips glued on and quarters spacing them correct.

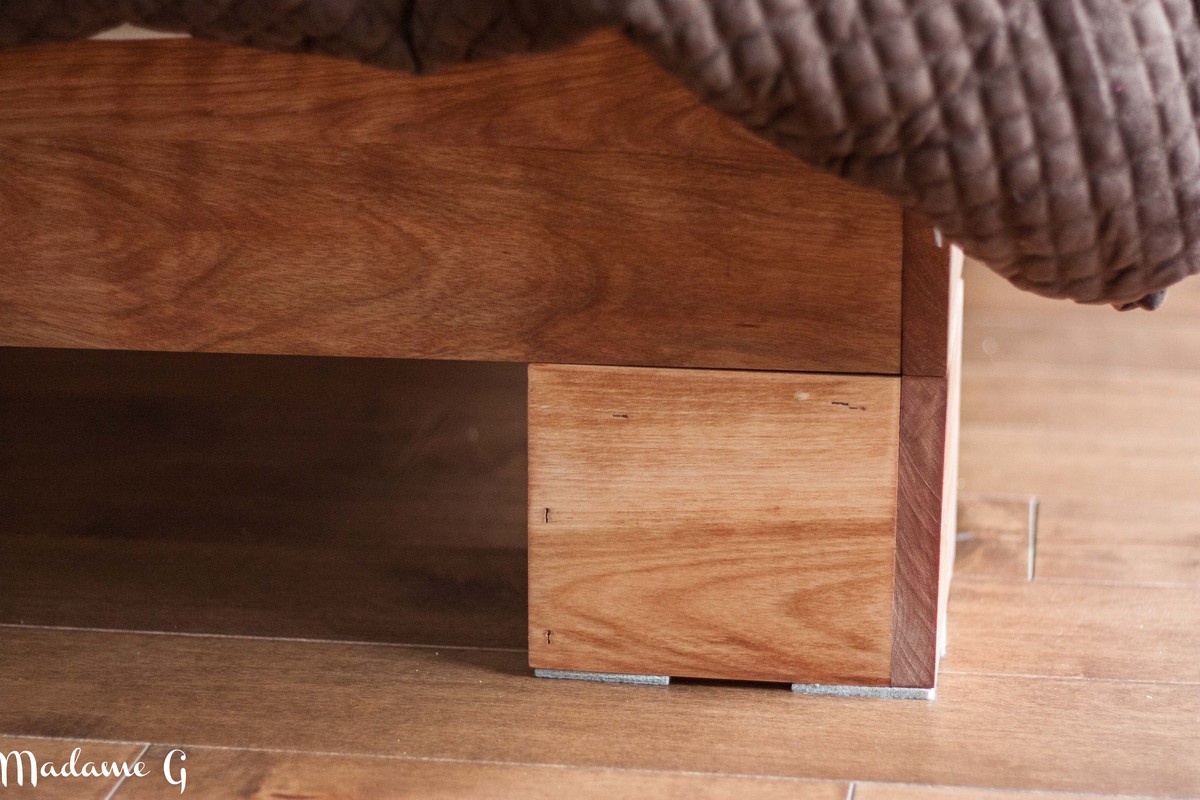
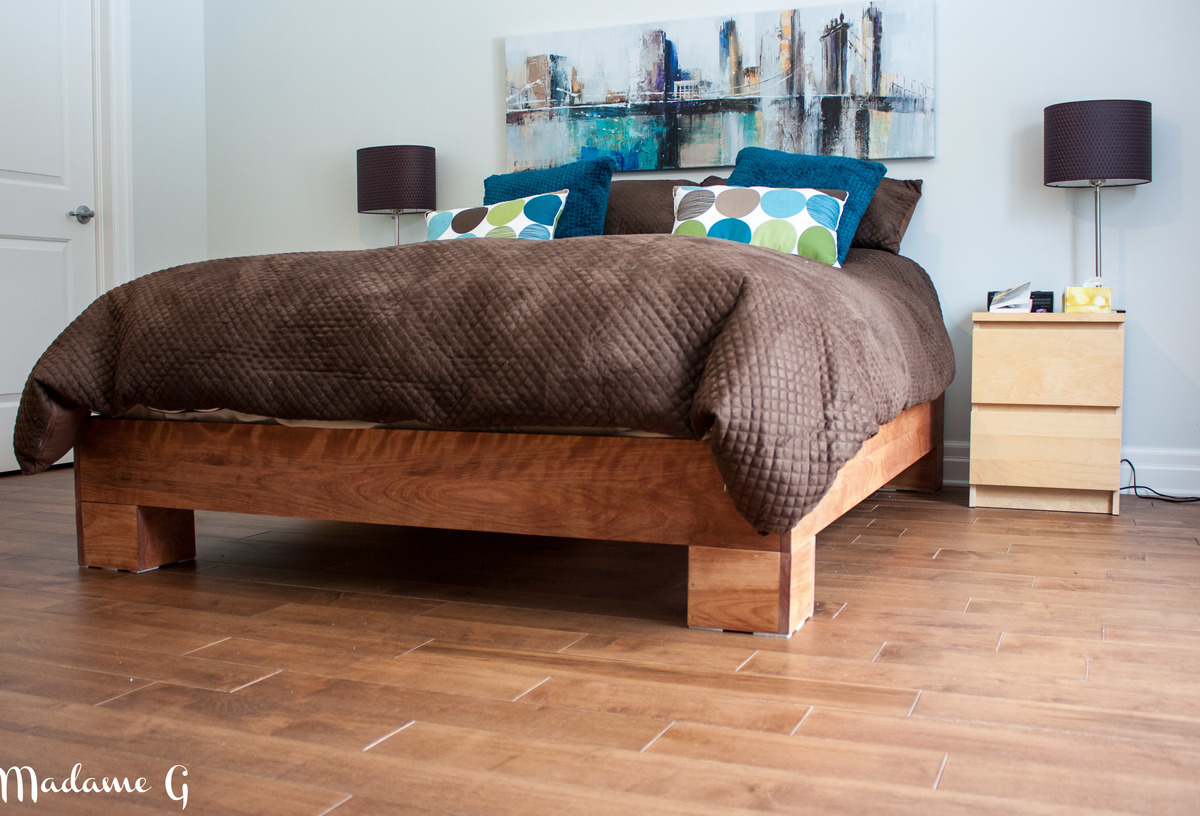
This is my first build and im really proud of it. We needed a new platform bed to fit our new matress! Yeah! a queen size bed! I discovered ana's blog and i got really inspired by all the projects in the blog! For the construction, i used birch for the showing parts, pine for side rails and center support and spruce for the slats. Actually, i haved cut de sides and builded the legs then i oiled evething before assembling. I used my Kreg Jig r3 to join the sides and i used a corner metal bracket to join the legs to the sides! Everything is attached from the inside, so no filler needed! I also decided to use 1x6 for the legs to get a taller bed. If you want your matress lower in the frame use 2x4 instead of 2x6 for the center support. Adjust de side rails to fit with the 2x4. Can't wait to build something new! FYI: I know my english is bad but its not my first language!Im french canadian!

Sat, 02/18/2012 - 08:17
Your bed looks good! It makes a nice focal piece for the room.
Your English is fun to read!
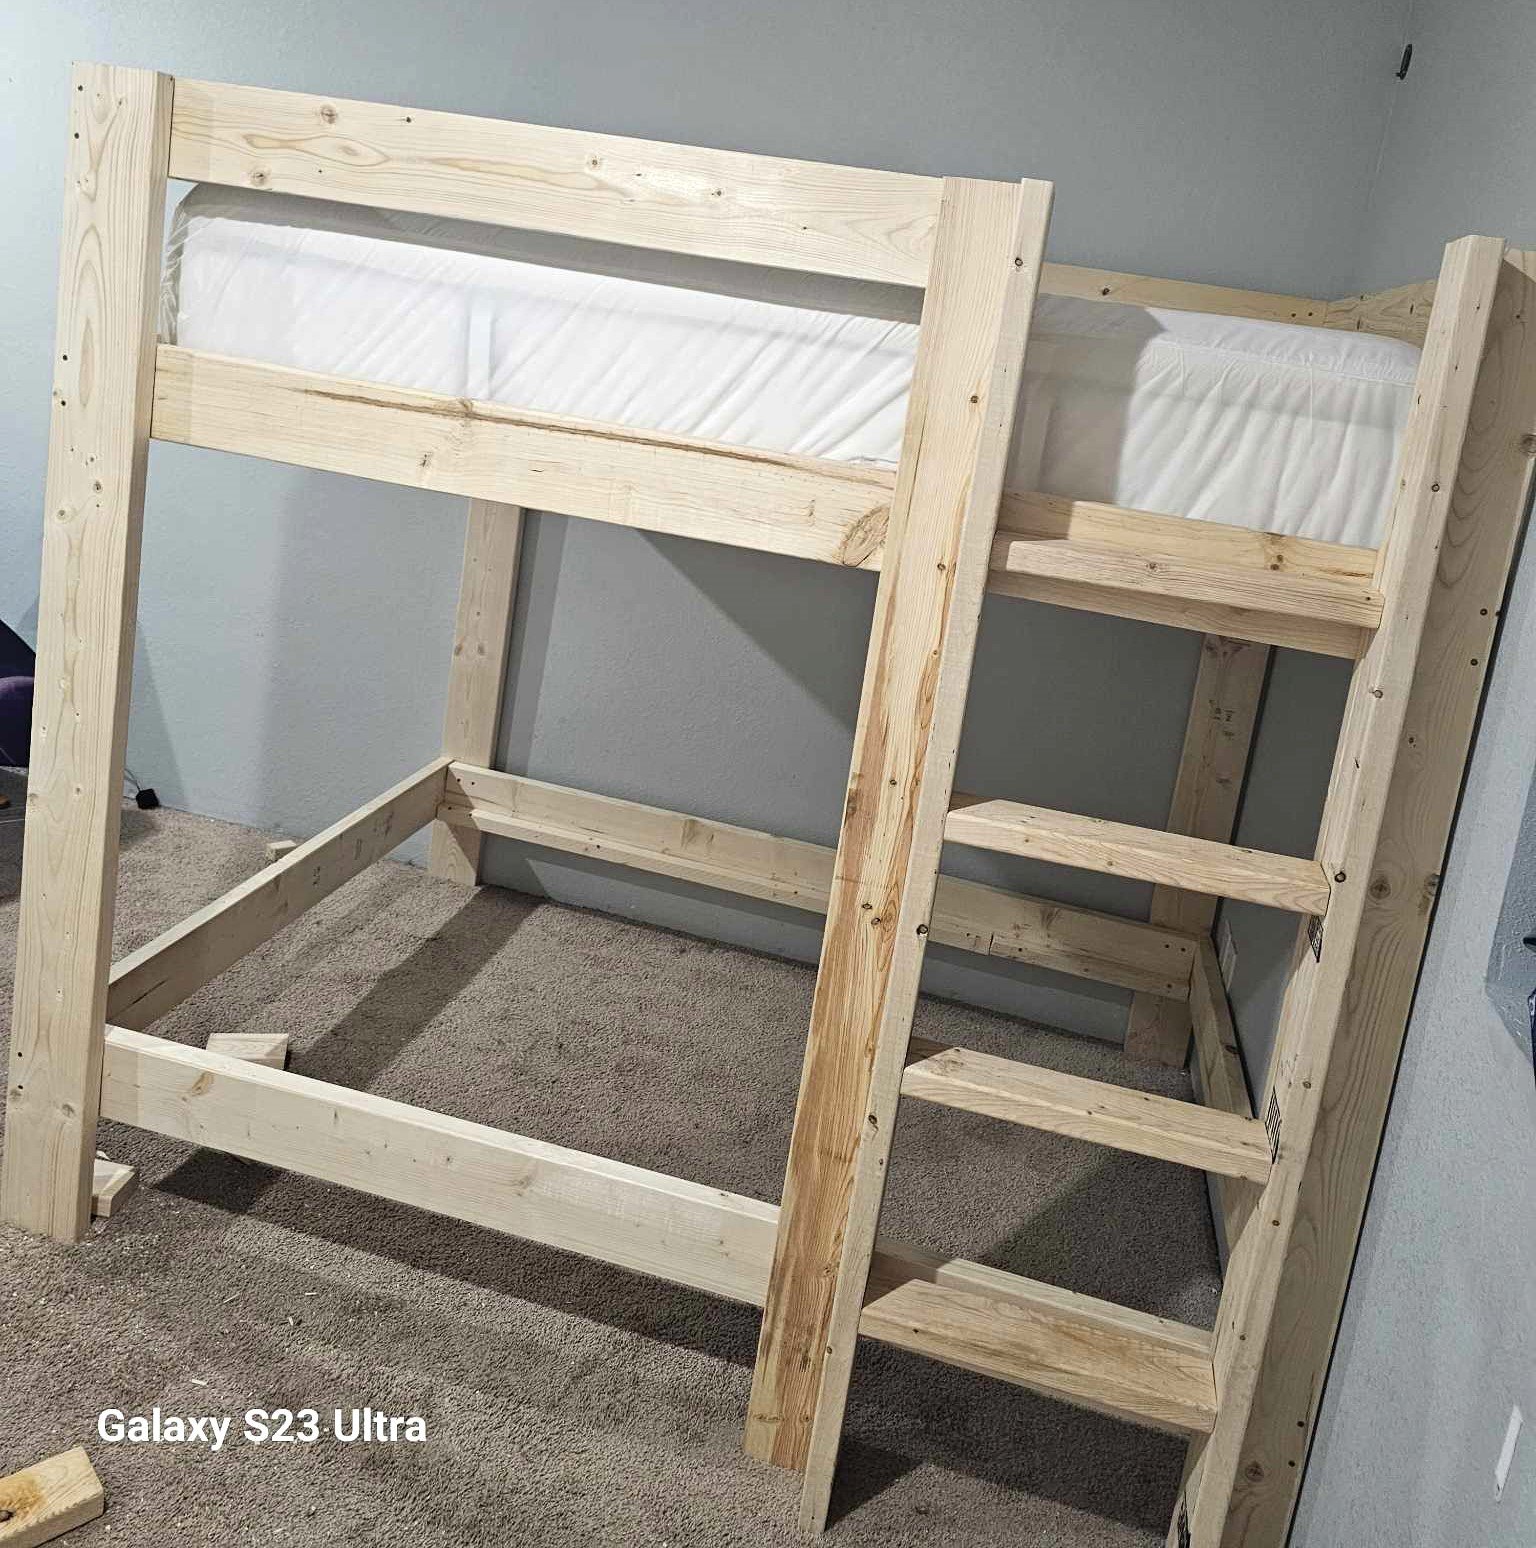
Almost finished but I managed to alter the plans into a full over full! Just use 2×4 instead of 2×1 and use 2×6 for the legs.
Antonio
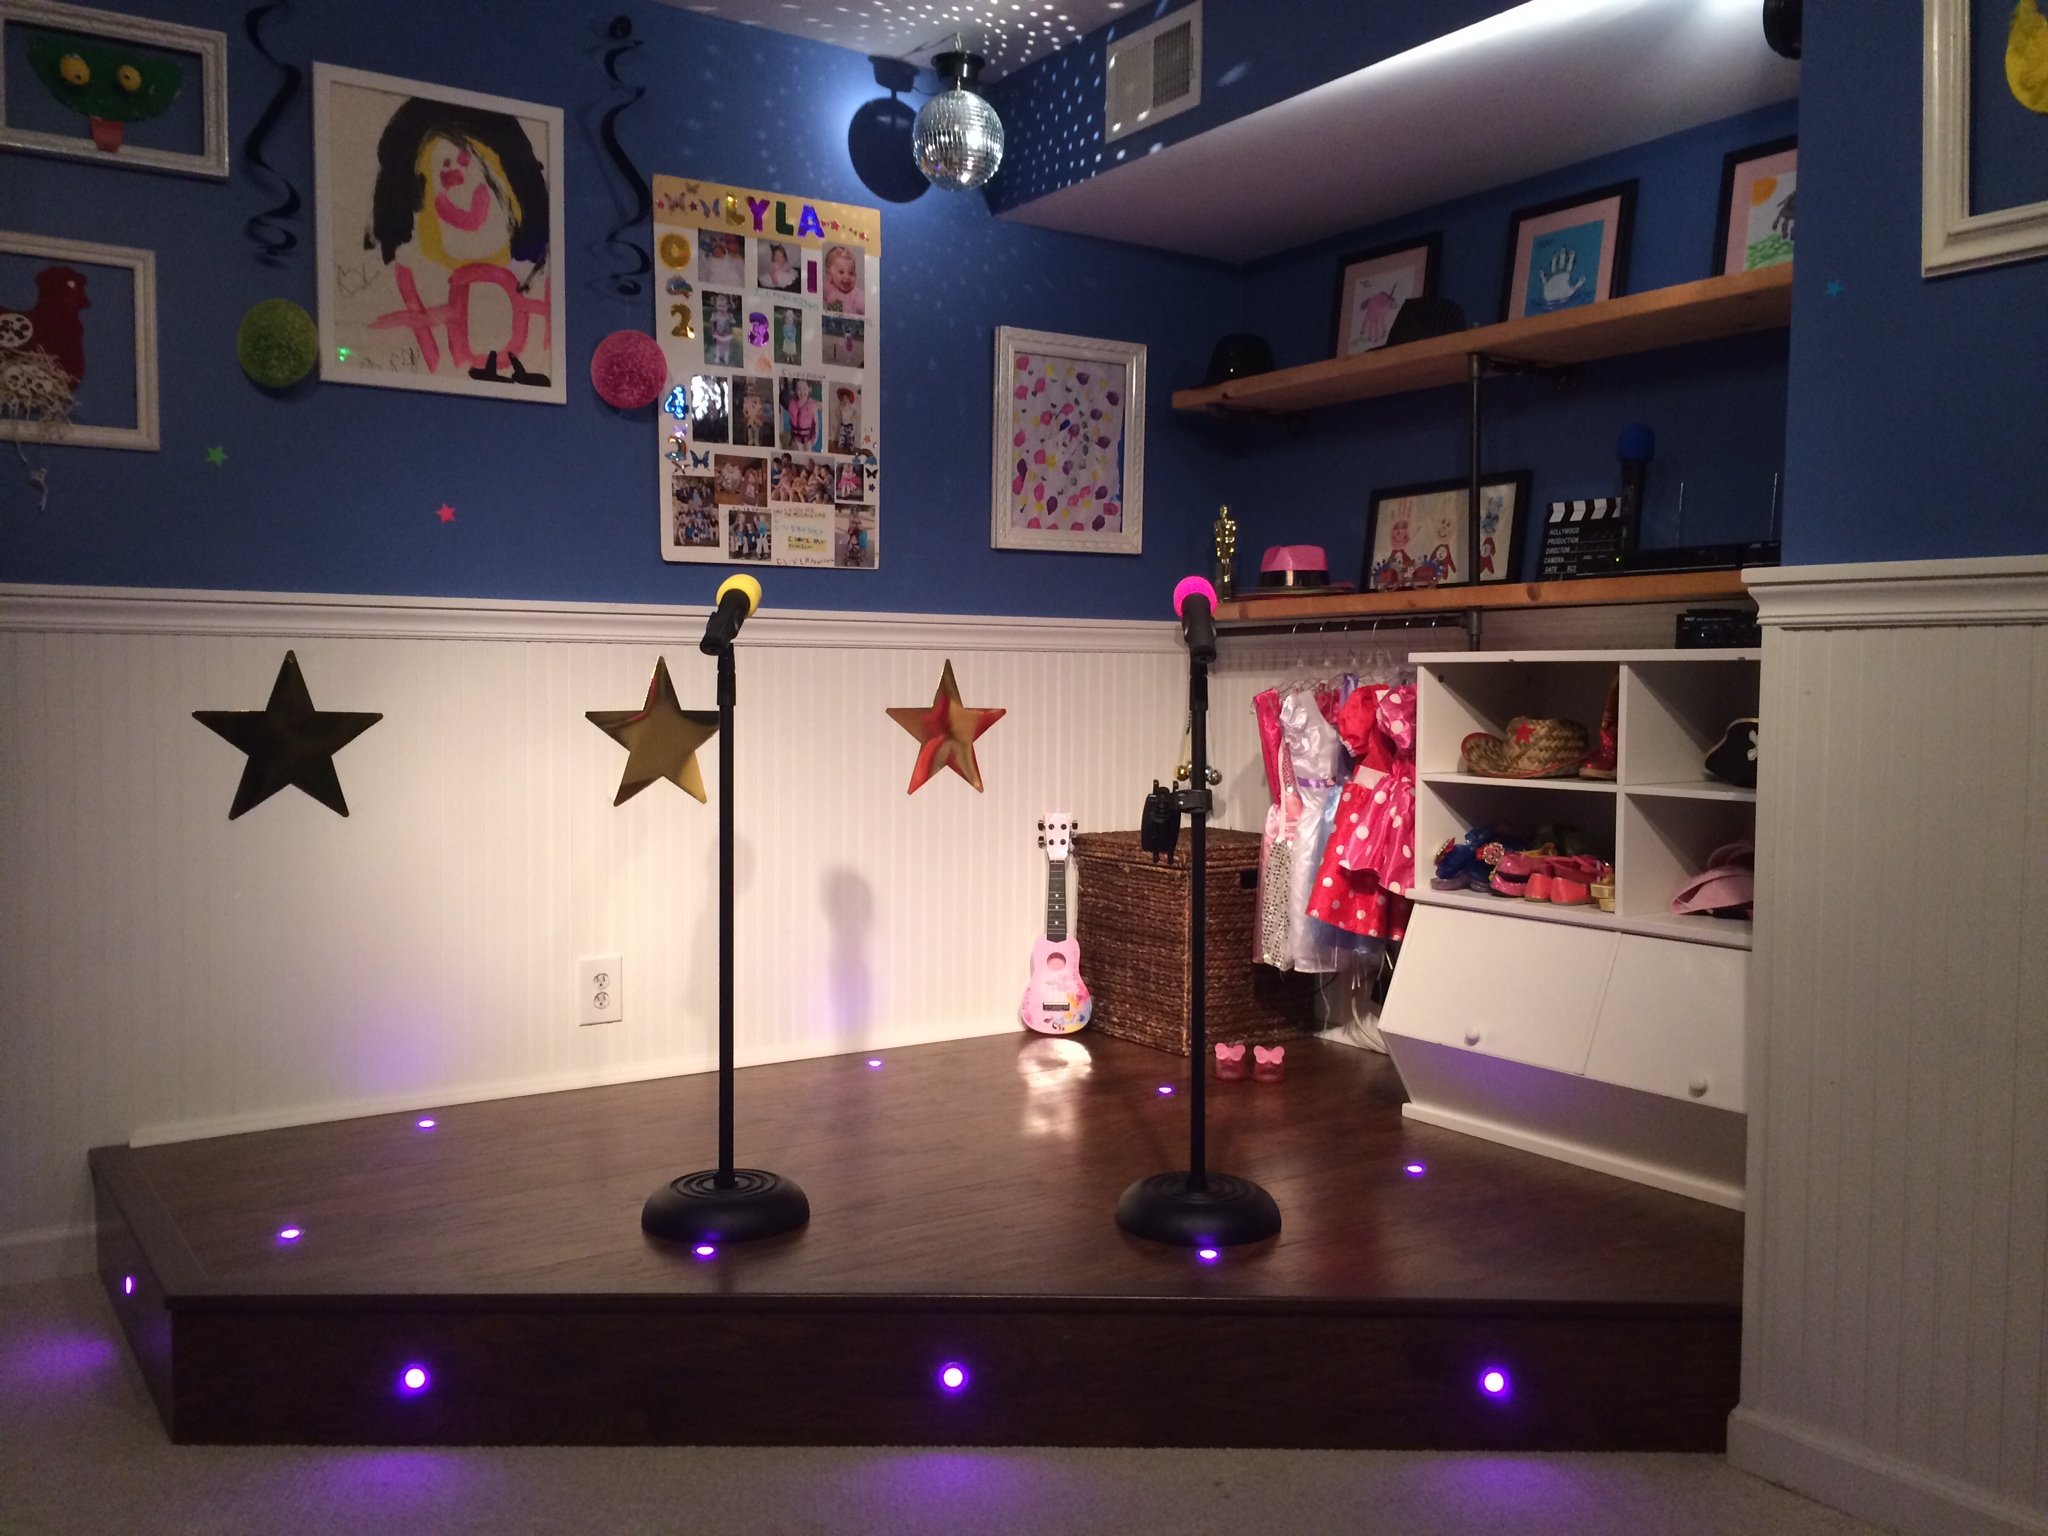
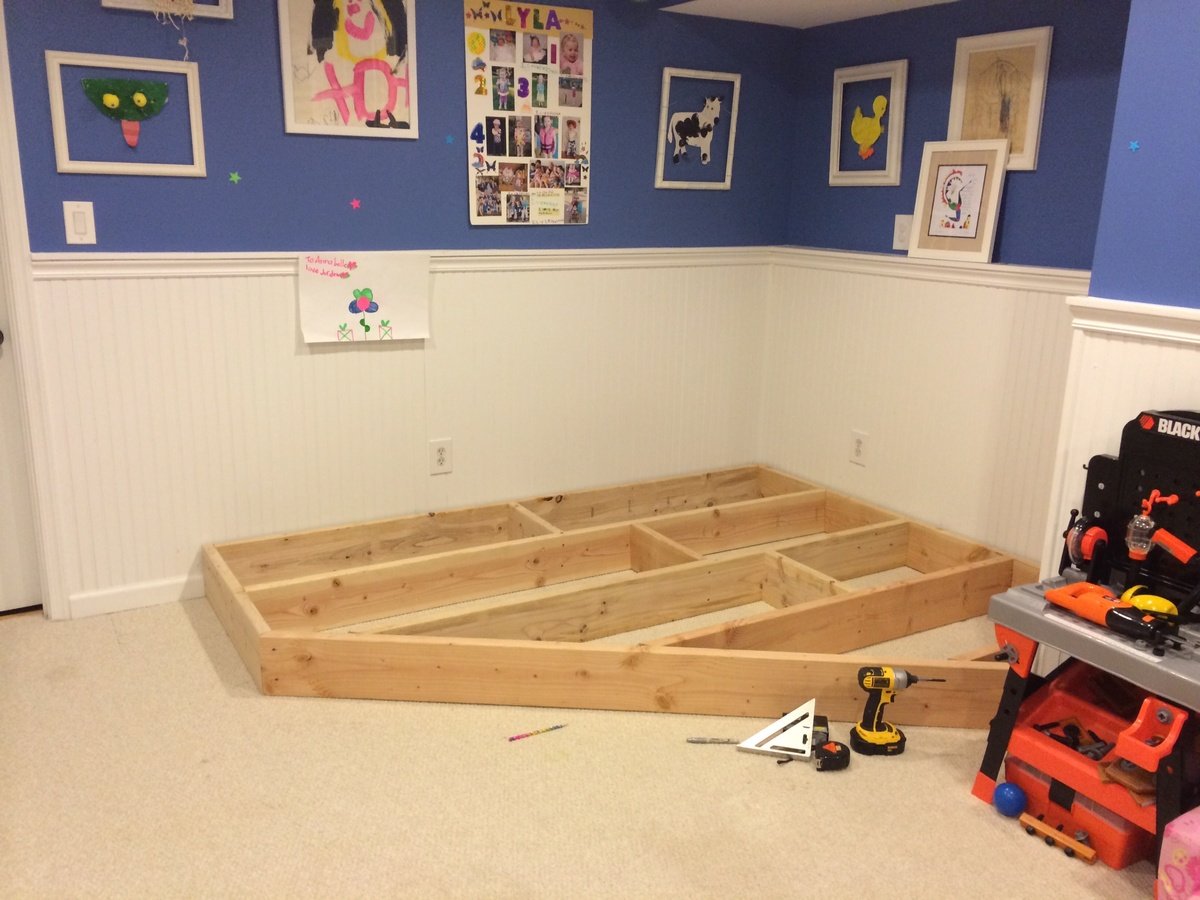
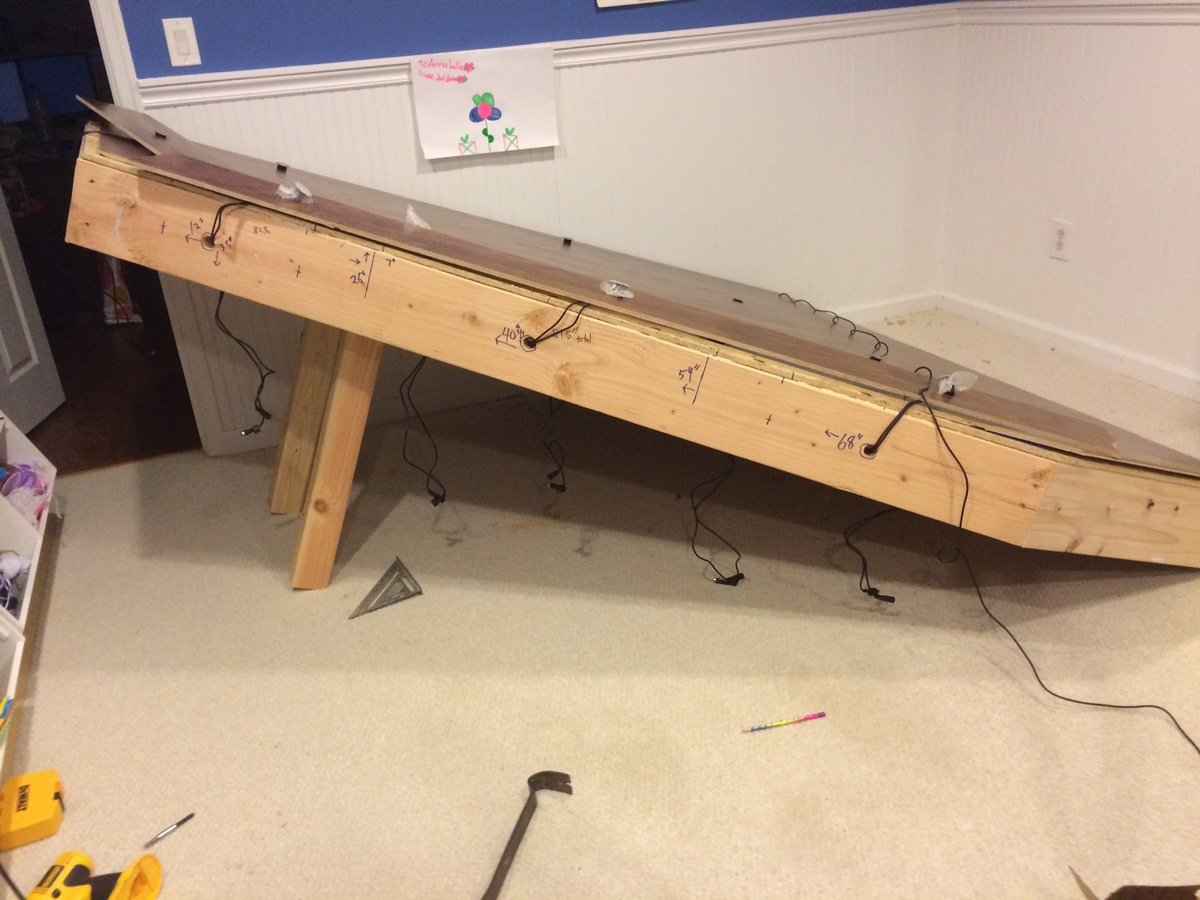
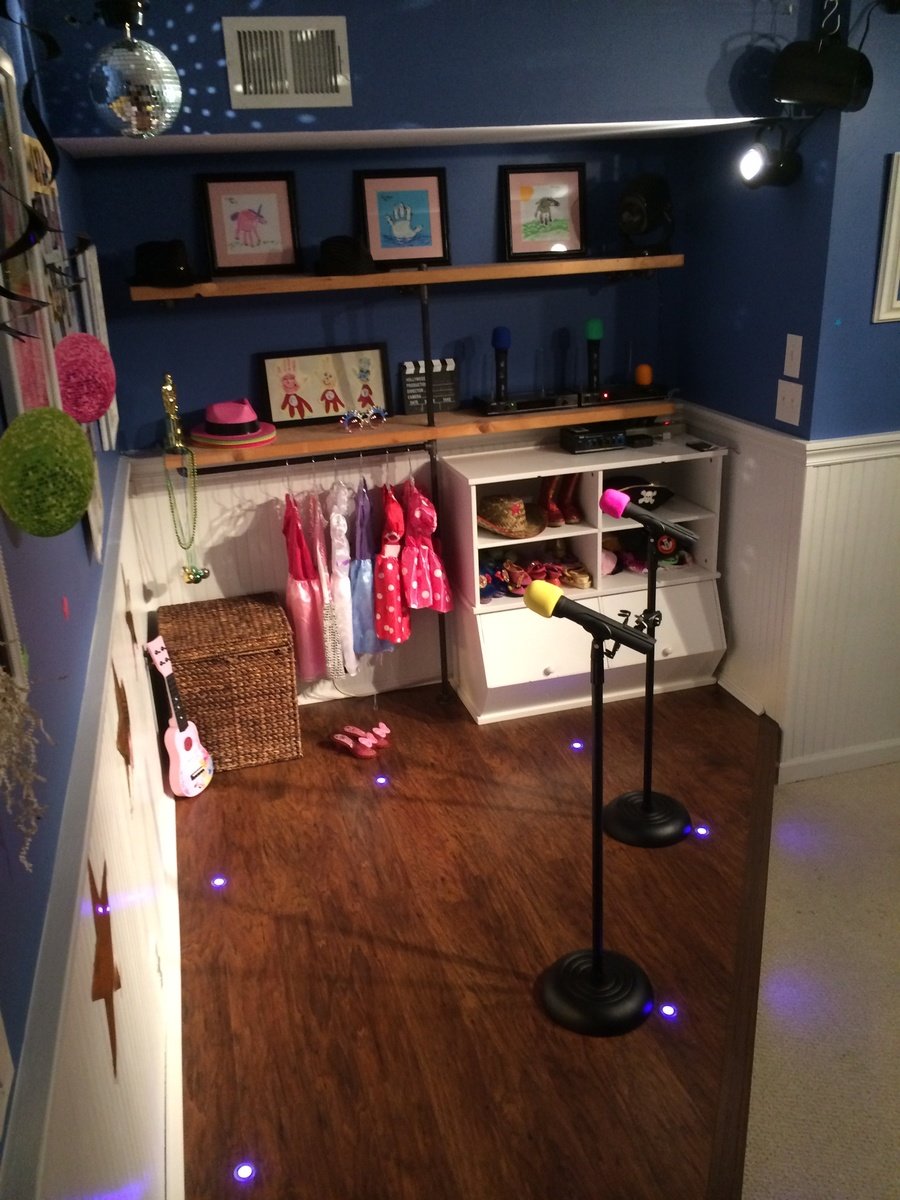
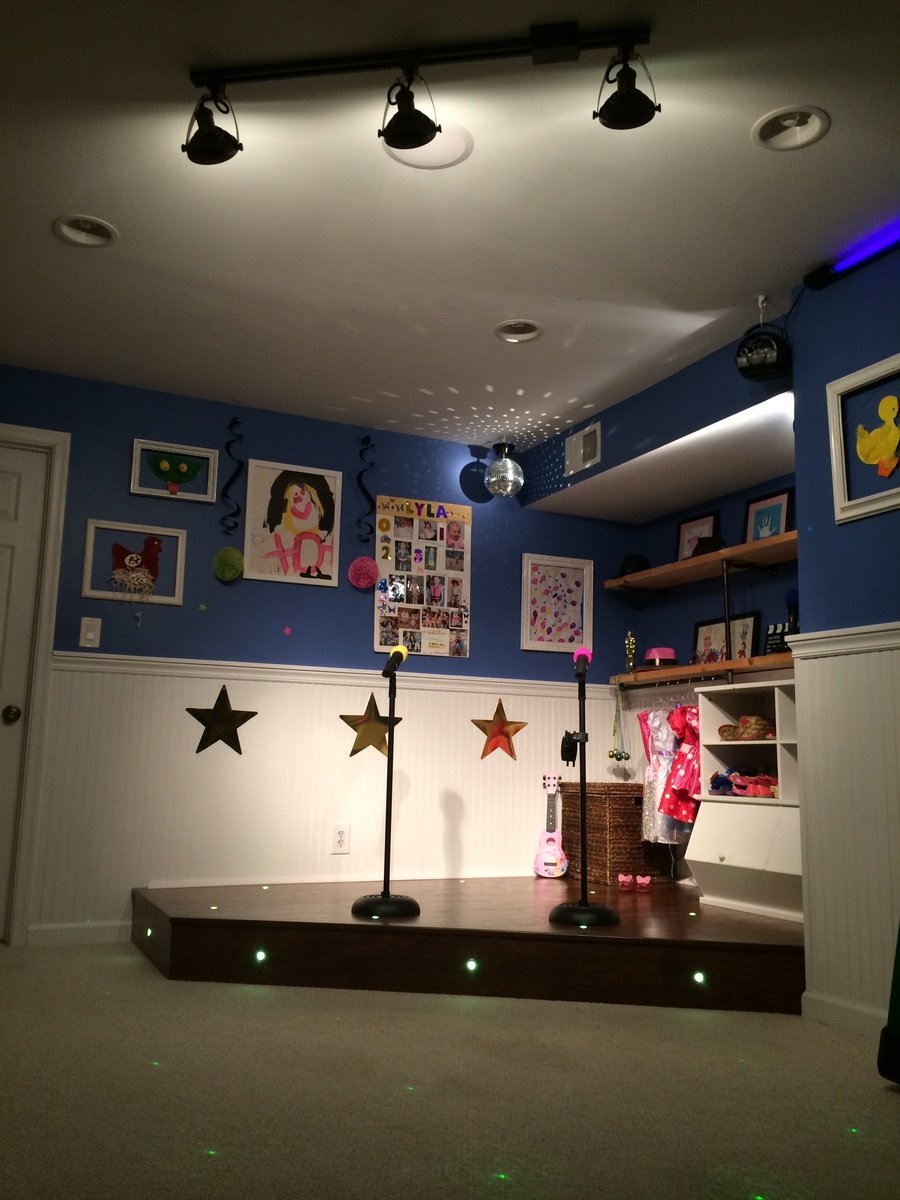
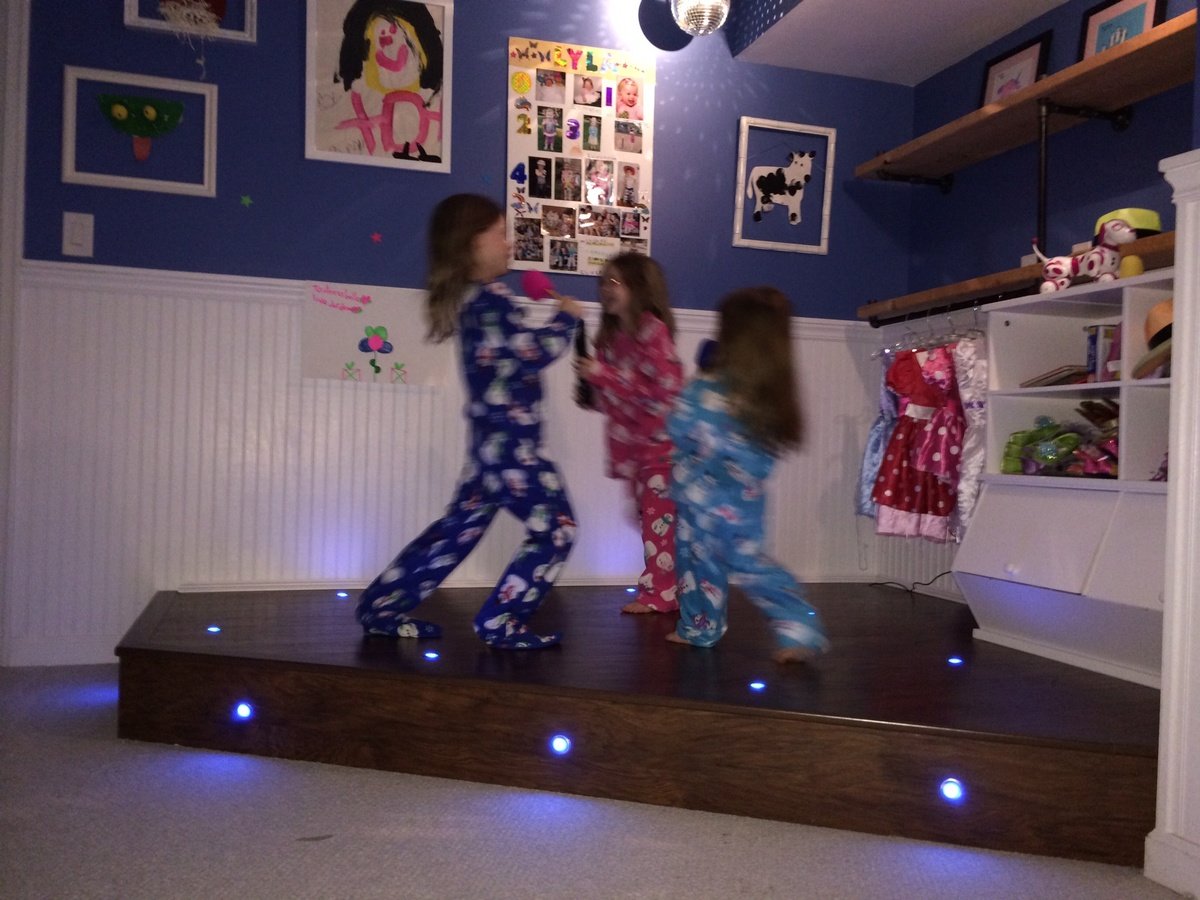
I had a perfect corner in our playroom that was reserved mostly for clutter and always wanted to do something fun with it. The base is made with 2x8"s topped with Handscraped Hickory laminate flooring. Bored holes into the floor and installed 1" diameter color-changing LED decklights. Added theatre-style tracklights, disco ball and other dance floor lighting for extra effect. Of course the stage wouldn't be complete without wireless microphones for karaoke and mic stands hooked up to a small amp and speakers in the ceiling. I made the shelving on the right side with 1/2" black pipe and used leftover 2x12" shelves from an old garage shelving install from 7 years ago! The kids were ecstatic on Christmas morning for the reveal!
Sun, 07/27/2014 - 15:52
This is great! I was just wondering what your dimensions were? I've been looking for something like this to do for my niece but have been struggling to find a plan and figure it out myself LOL.
Tue, 08/05/2014 - 05:58
Hello, the back wall is 8' and side wall is 6.5'. The stage comes out about 2.5' on each side then the front is around 7'.
Hope that helps, good luck!
Sun, 04/10/2016 - 14:44
Actually, I was wondering ,what lights did you use? I'm working on a very similar project and was curious to the lights your used please.
Sun, 12/08/2019 - 17:11
Can I ask about the lights you used or would recommend? Getting started tomorrow. A stage from Santa. Please help! 😬
Sat, 12/18/2021 - 14:09
Hello! Also wondering which lights you used. Thank you!
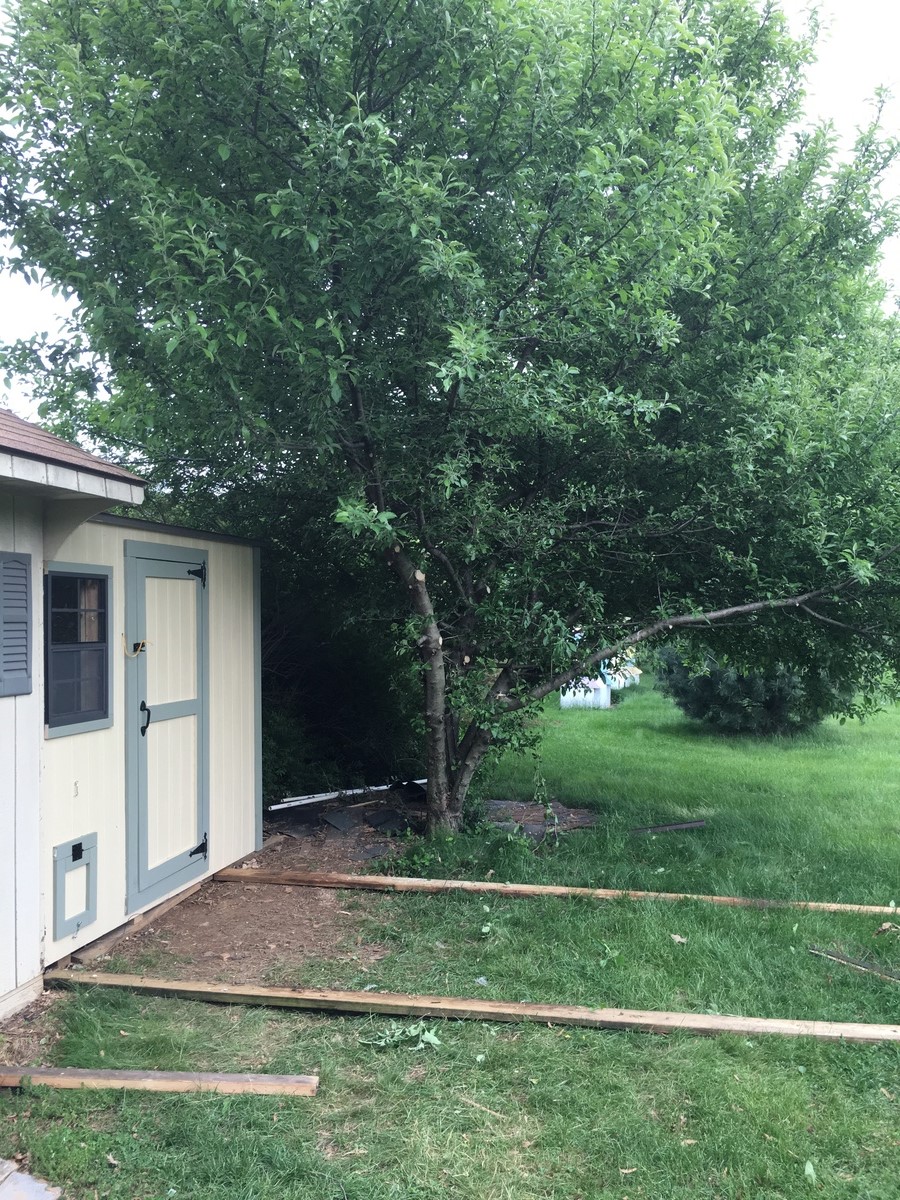
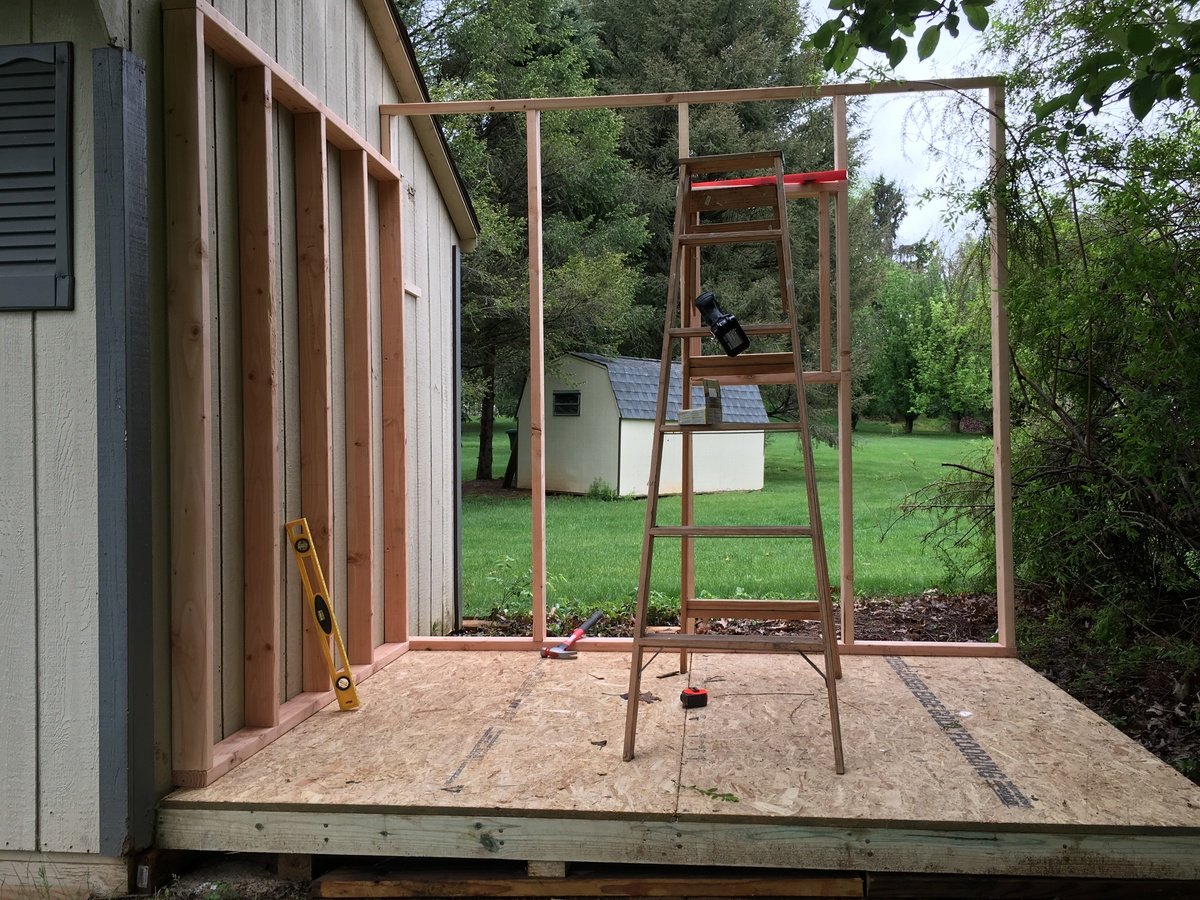
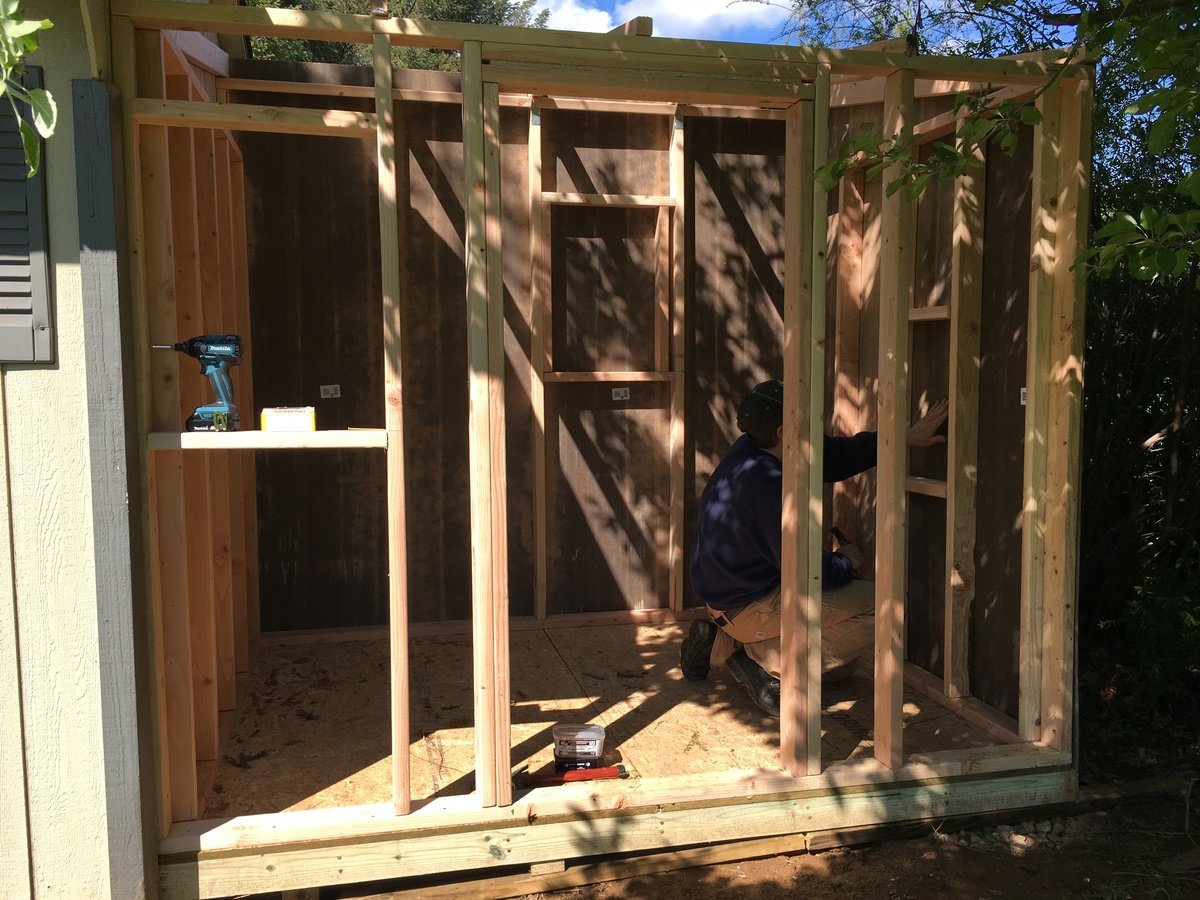
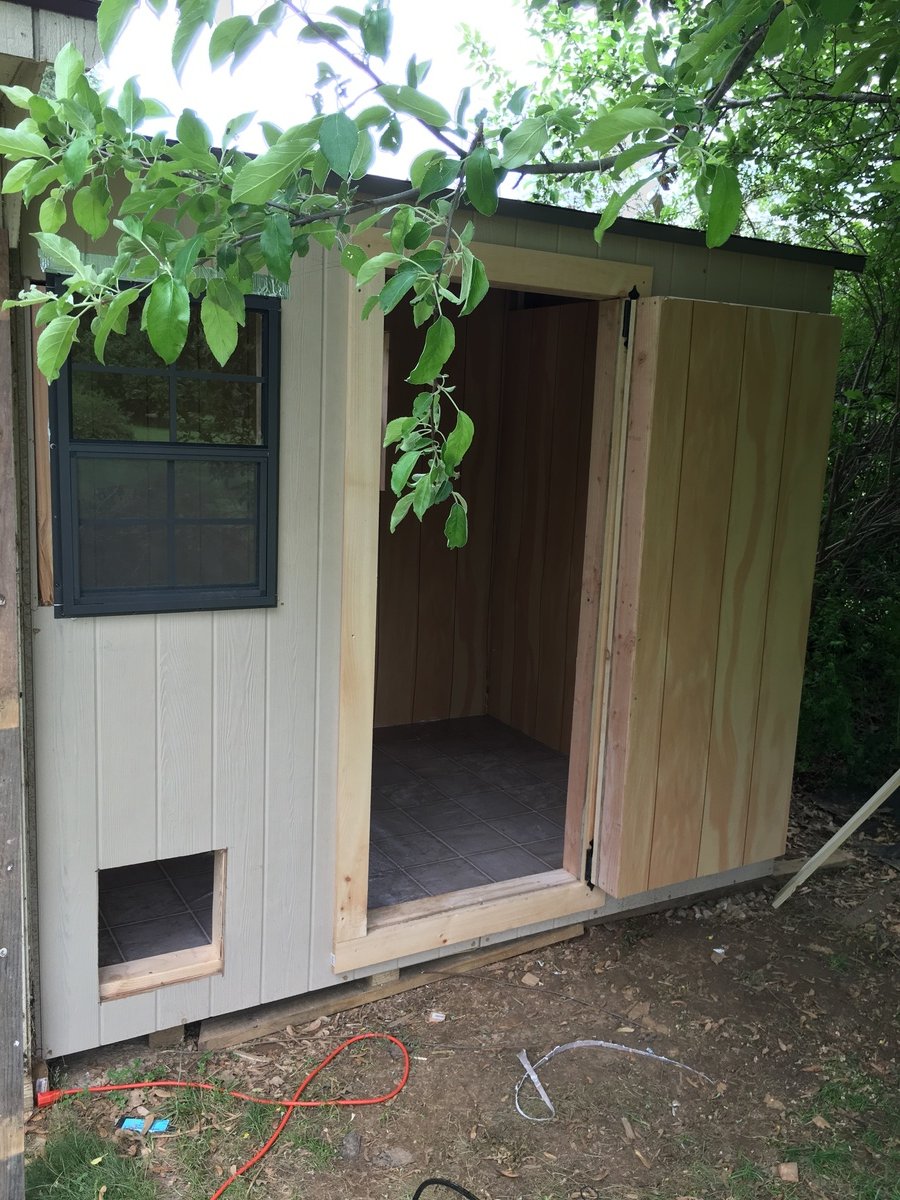
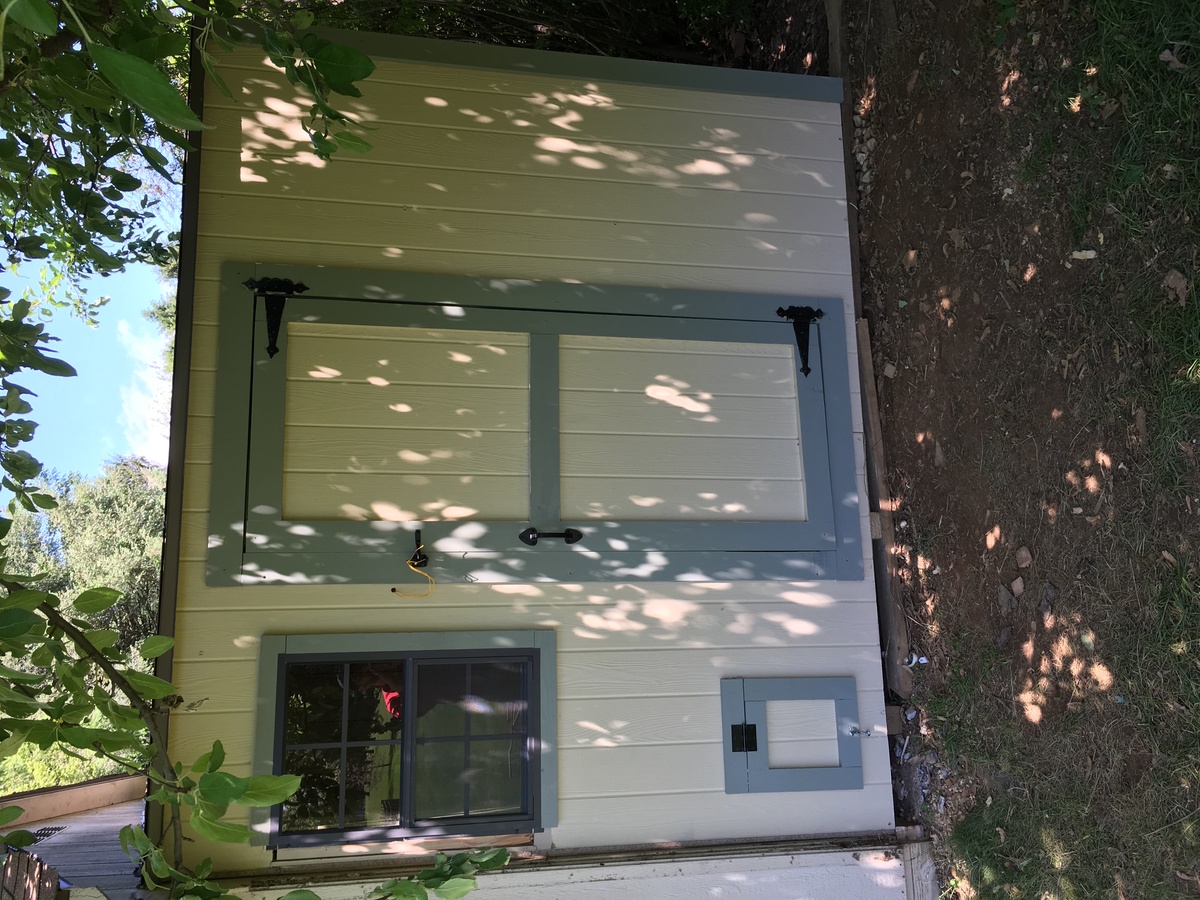
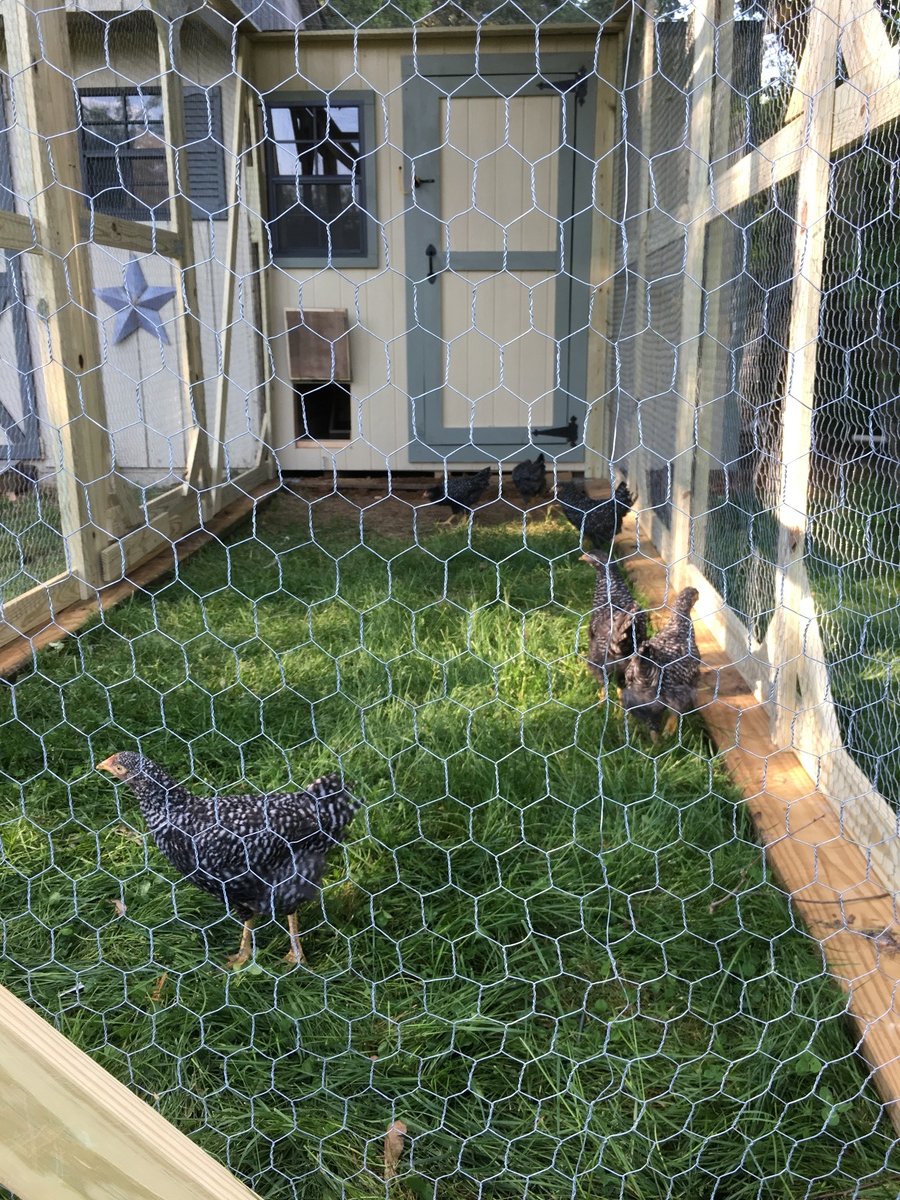
The project was used using the same plans but I extended the floor to be 6 feet wide vice 4 feet the additional 2 feet provided the perfect amount space I wanted. I also added an extra windows to get cross ventilation. I also insulated the coop and put paneling on the walls and lenolium on the floors. I dropped the back wall sheeting 1.5 inches for additional airflow since the shed doesn't have a ridge vent. The plans are easy to follow and easily adaptable.

Thu, 07/02/2020 - 11:29
Great job! We are getting ready to build a coop for our chickens which arrive in 3 weeks!
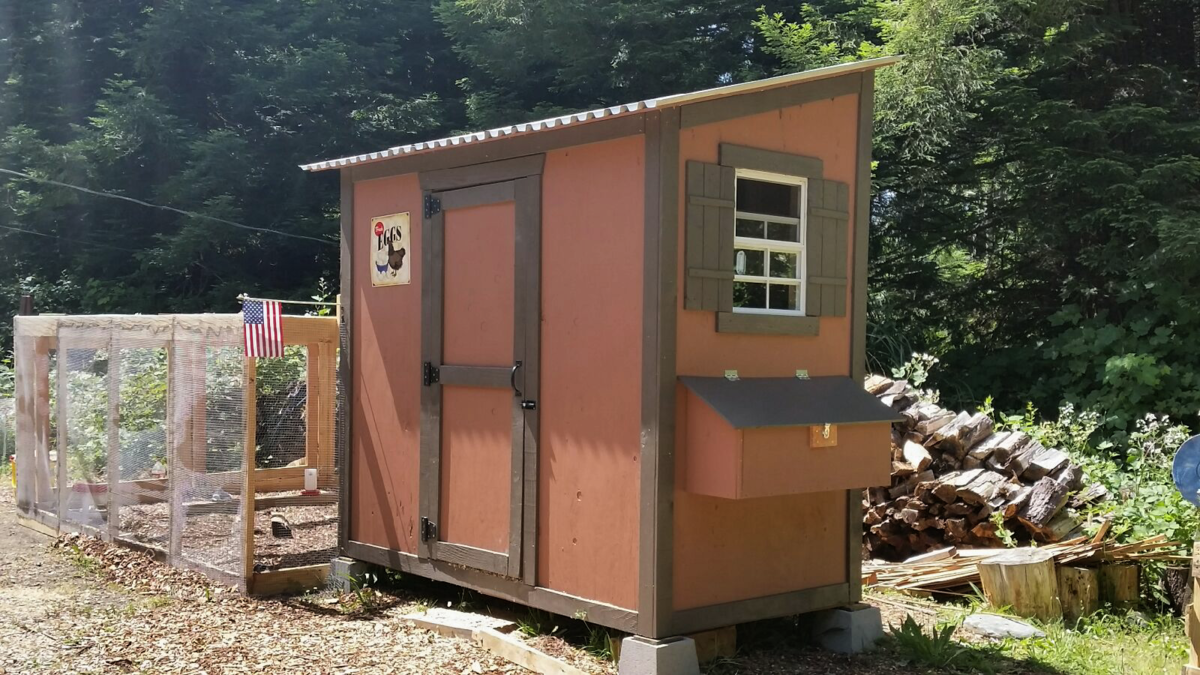
My 7 week old chicks love thier new home
I wanted something special for my Daughter’s room. I made her bed and bedside table and then I experimented with your book case plan. I was pleasantly surprised with the finished product.
Somewhere in Louisiana
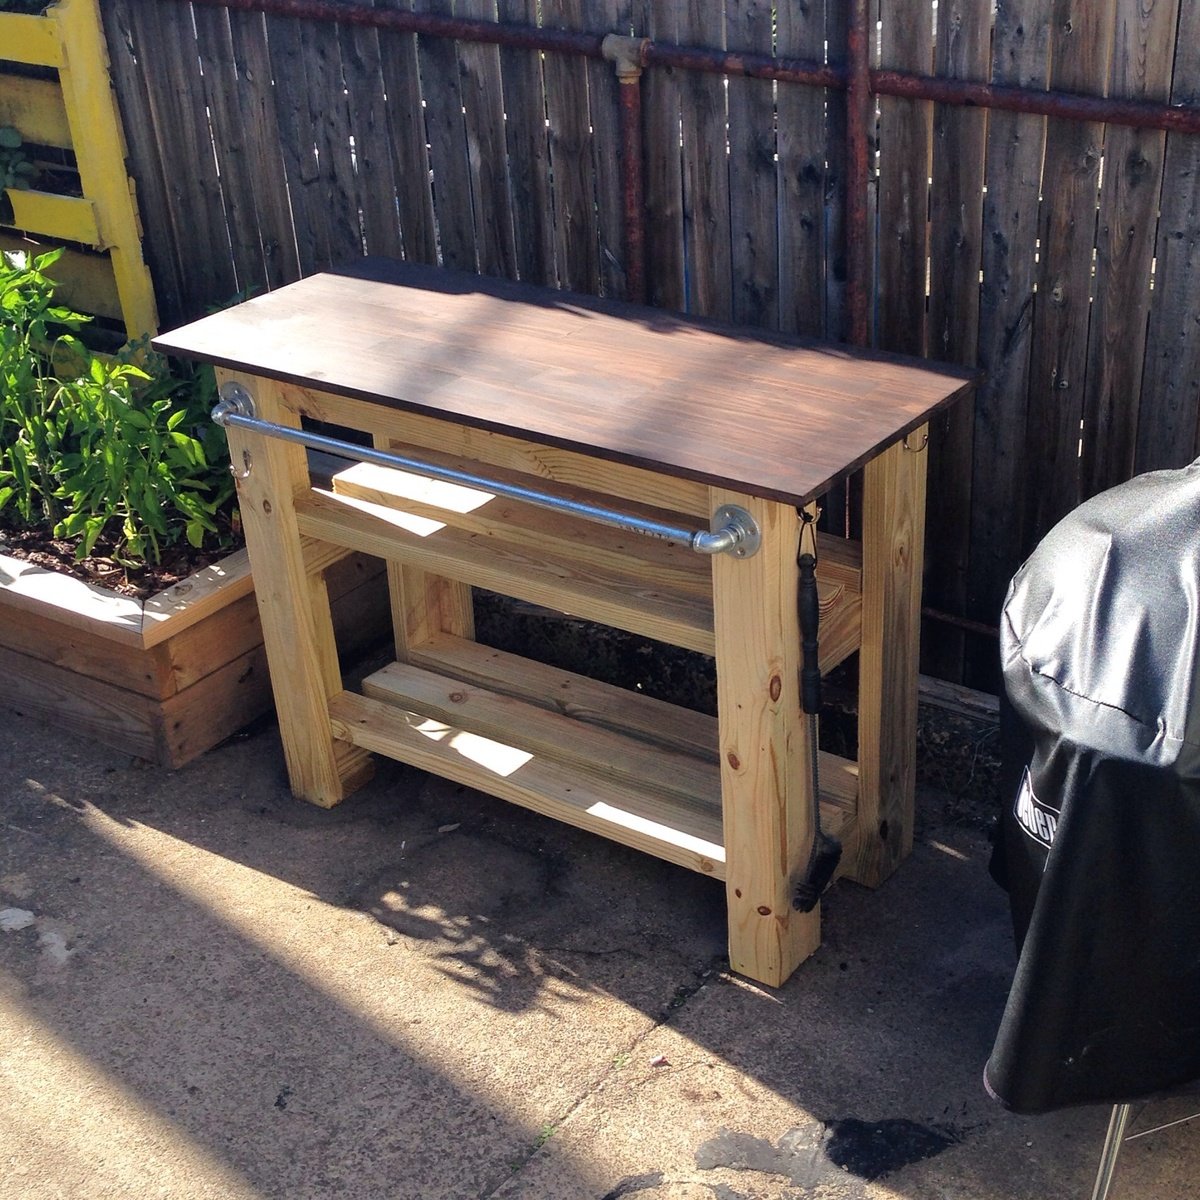
Grill station
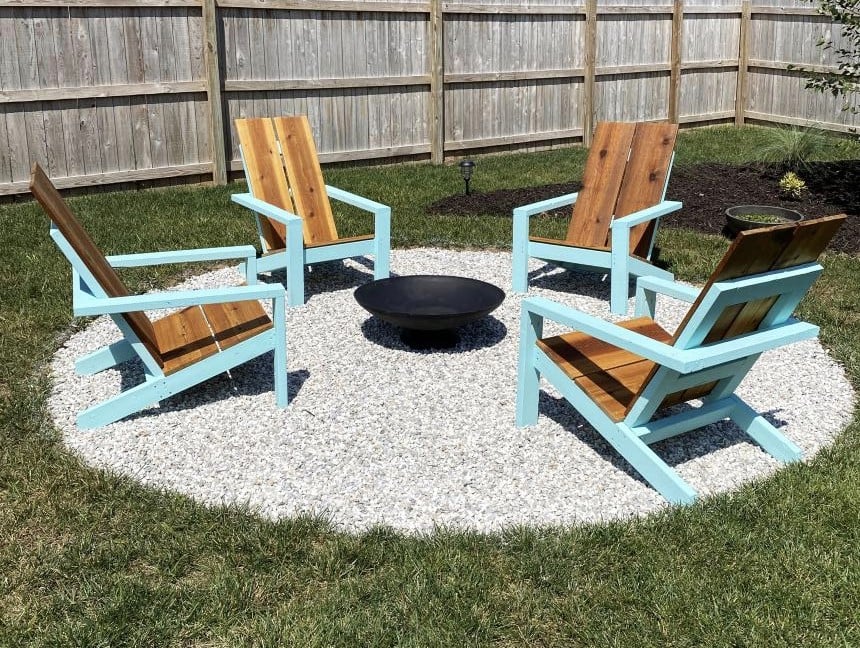
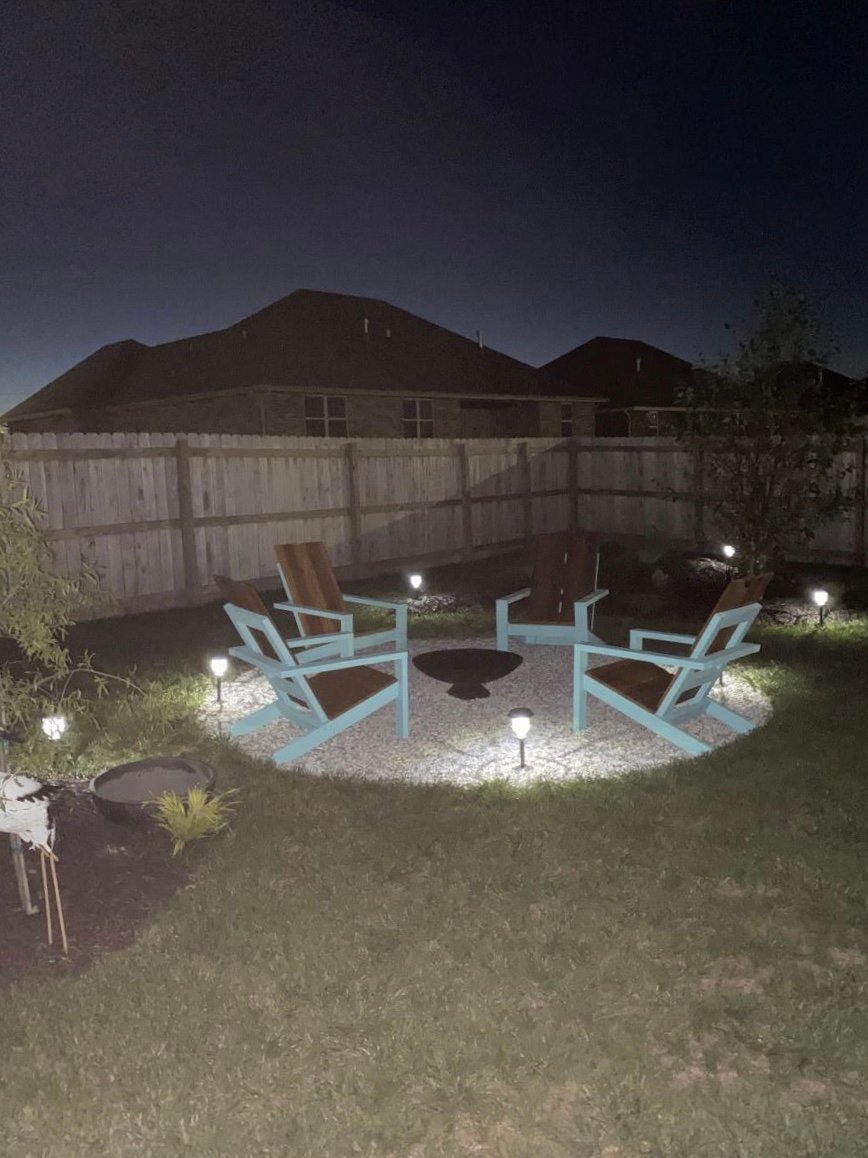
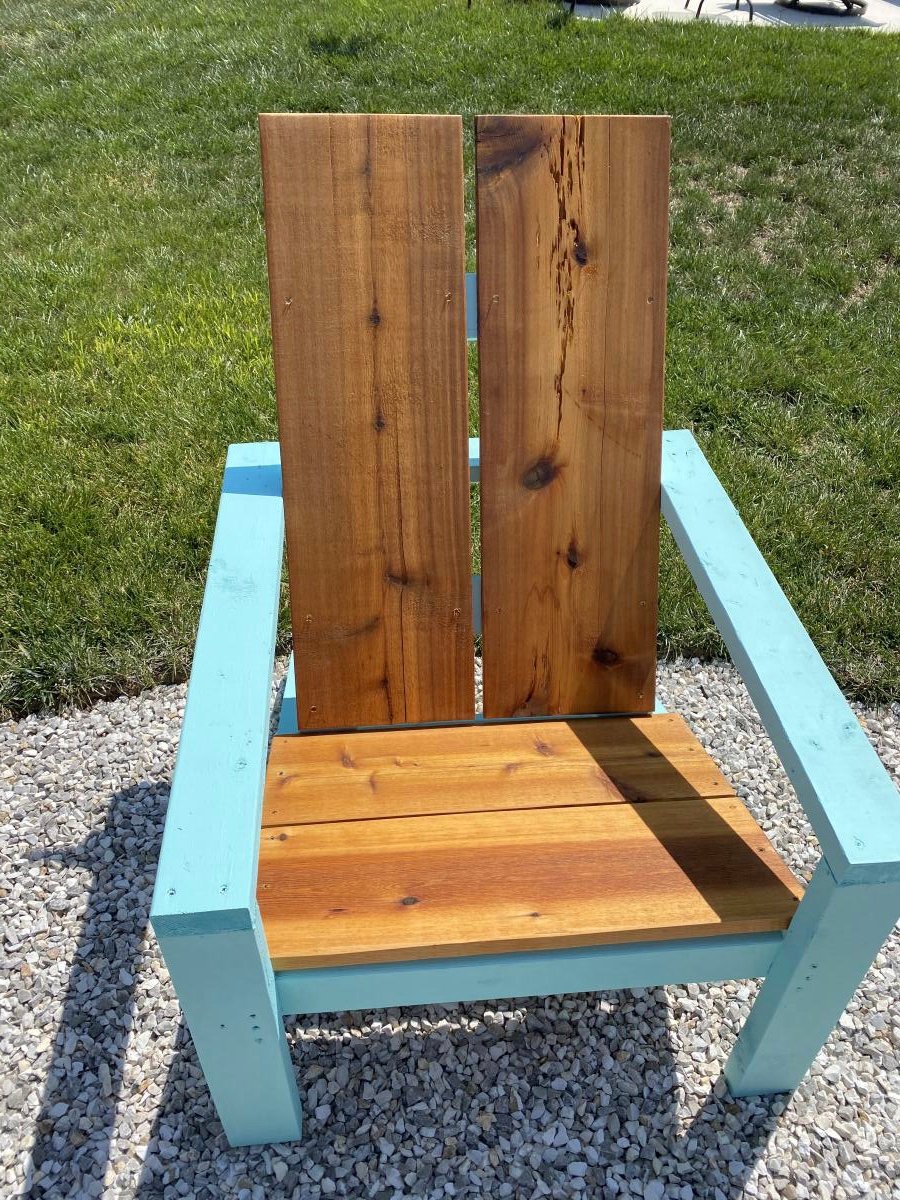
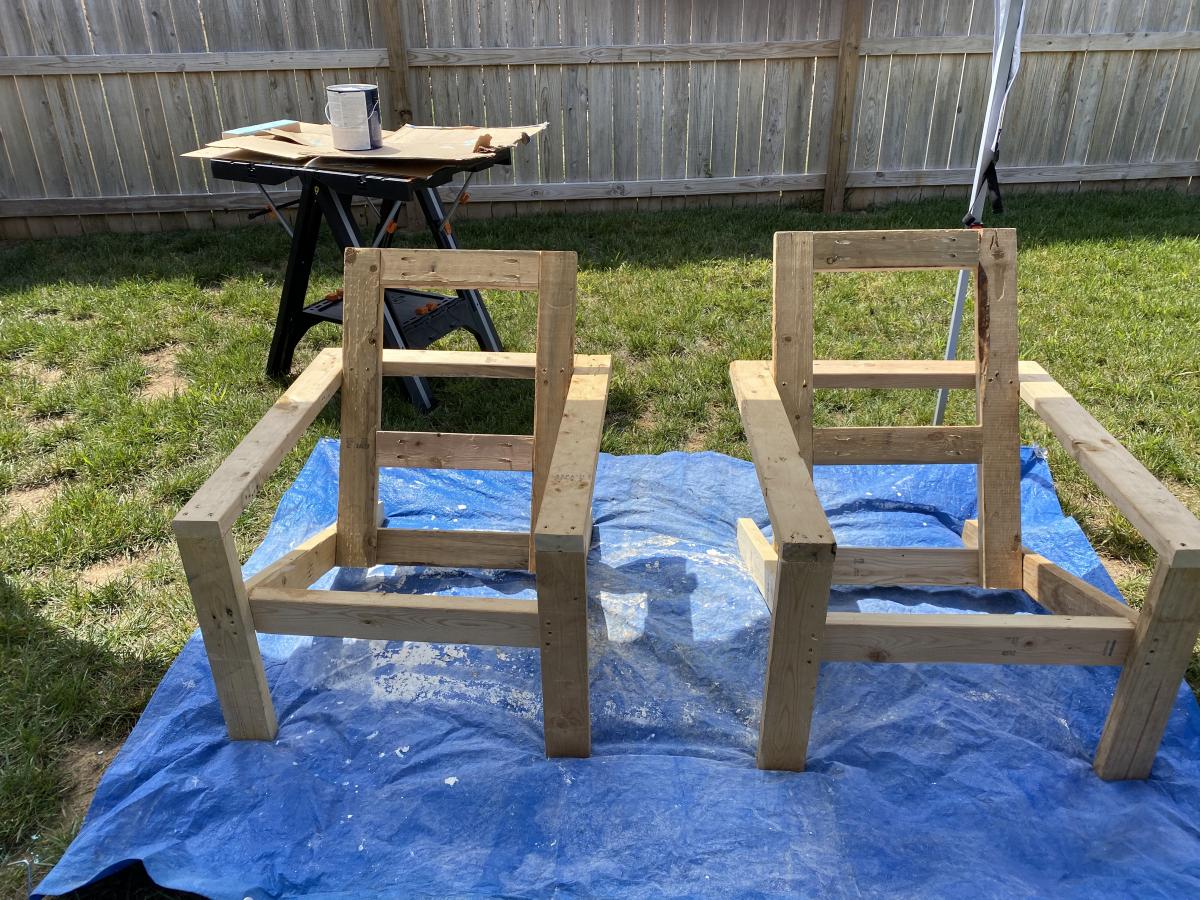
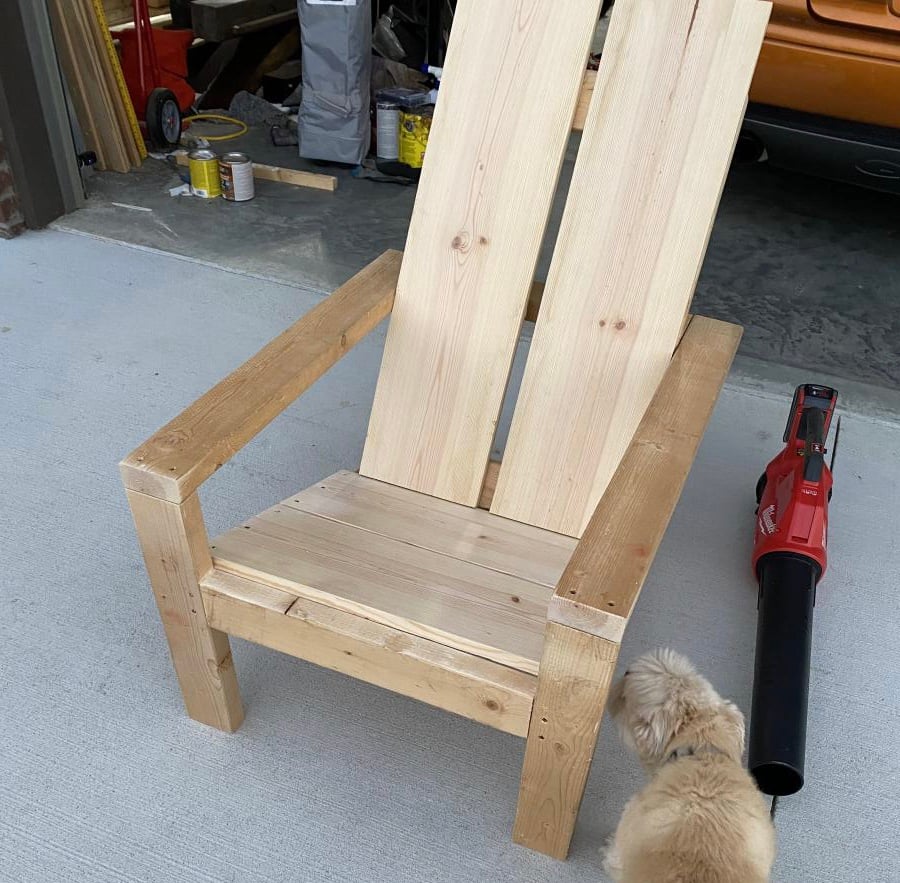
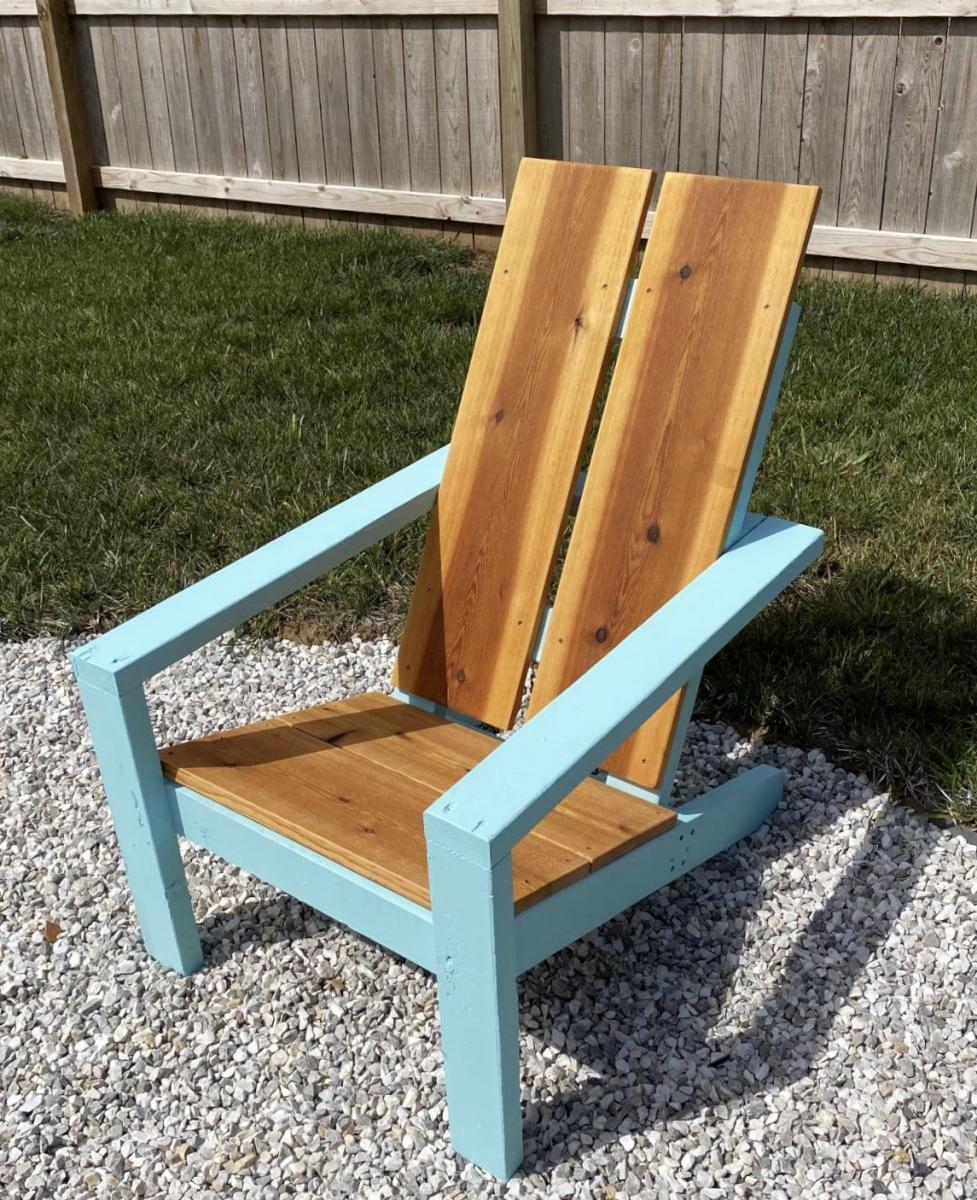
Am a big fan of Ana's work, and have used several of her plans in prior builds including the more traditional Adirondack chairs. Those stayed with my old house, and I wanted something different for my new house. Really liked her Modern Adirondack design with the floating arm rest. However, plans are like recipes to me--a guideline. I wanted the back boards to run up and down, and I am a bit more robust than the lovely and petite Ms. White, so they would need to be wider after I built the first one at 19 1/2" wide per plan. The next three I made 22" wide and that worked well without throwing off the geometry and angles of the other parts. Since I ran the backboards up and down, I needed some cross beams for stability and to give an attachment point for the middle of the boards. Cut some 2x4s at 15" wide, drilled pocket holes in both ends, and attached in between the back supports with the pockets facing up to be hidden by the back boards. All of the 2x4s were leftover cut-offs from the houses being built in my neighborhood. Since the frames were free, I splurged and went with cedar boards for the backs and bottoms. With the wider frames, I had to use 1x12s ripped down to 10 3/4" to get the right look (about a board's width in between). Needed some color, so I painted the frames Teal Seaglass from Menards. Cedar was stained with a natural deck stain from Sherwin Williams. I experimented with salt paint (mixing unsanded grout with the paint) to give a heavily textured and weathered finish but this was unecessary--the wood was distressed enough and I am a terrible painter. It also toned down the color so I skipped that step and just went with 2 coats of plain paint. It looks like outdoor furniture should up close. As always, am pleased with Ana's plans. Thank you for doing all the hard work!

Fri, 08/21/2020 - 16:59
I absolutely love how the back was done!! Thank you so much for sharing!
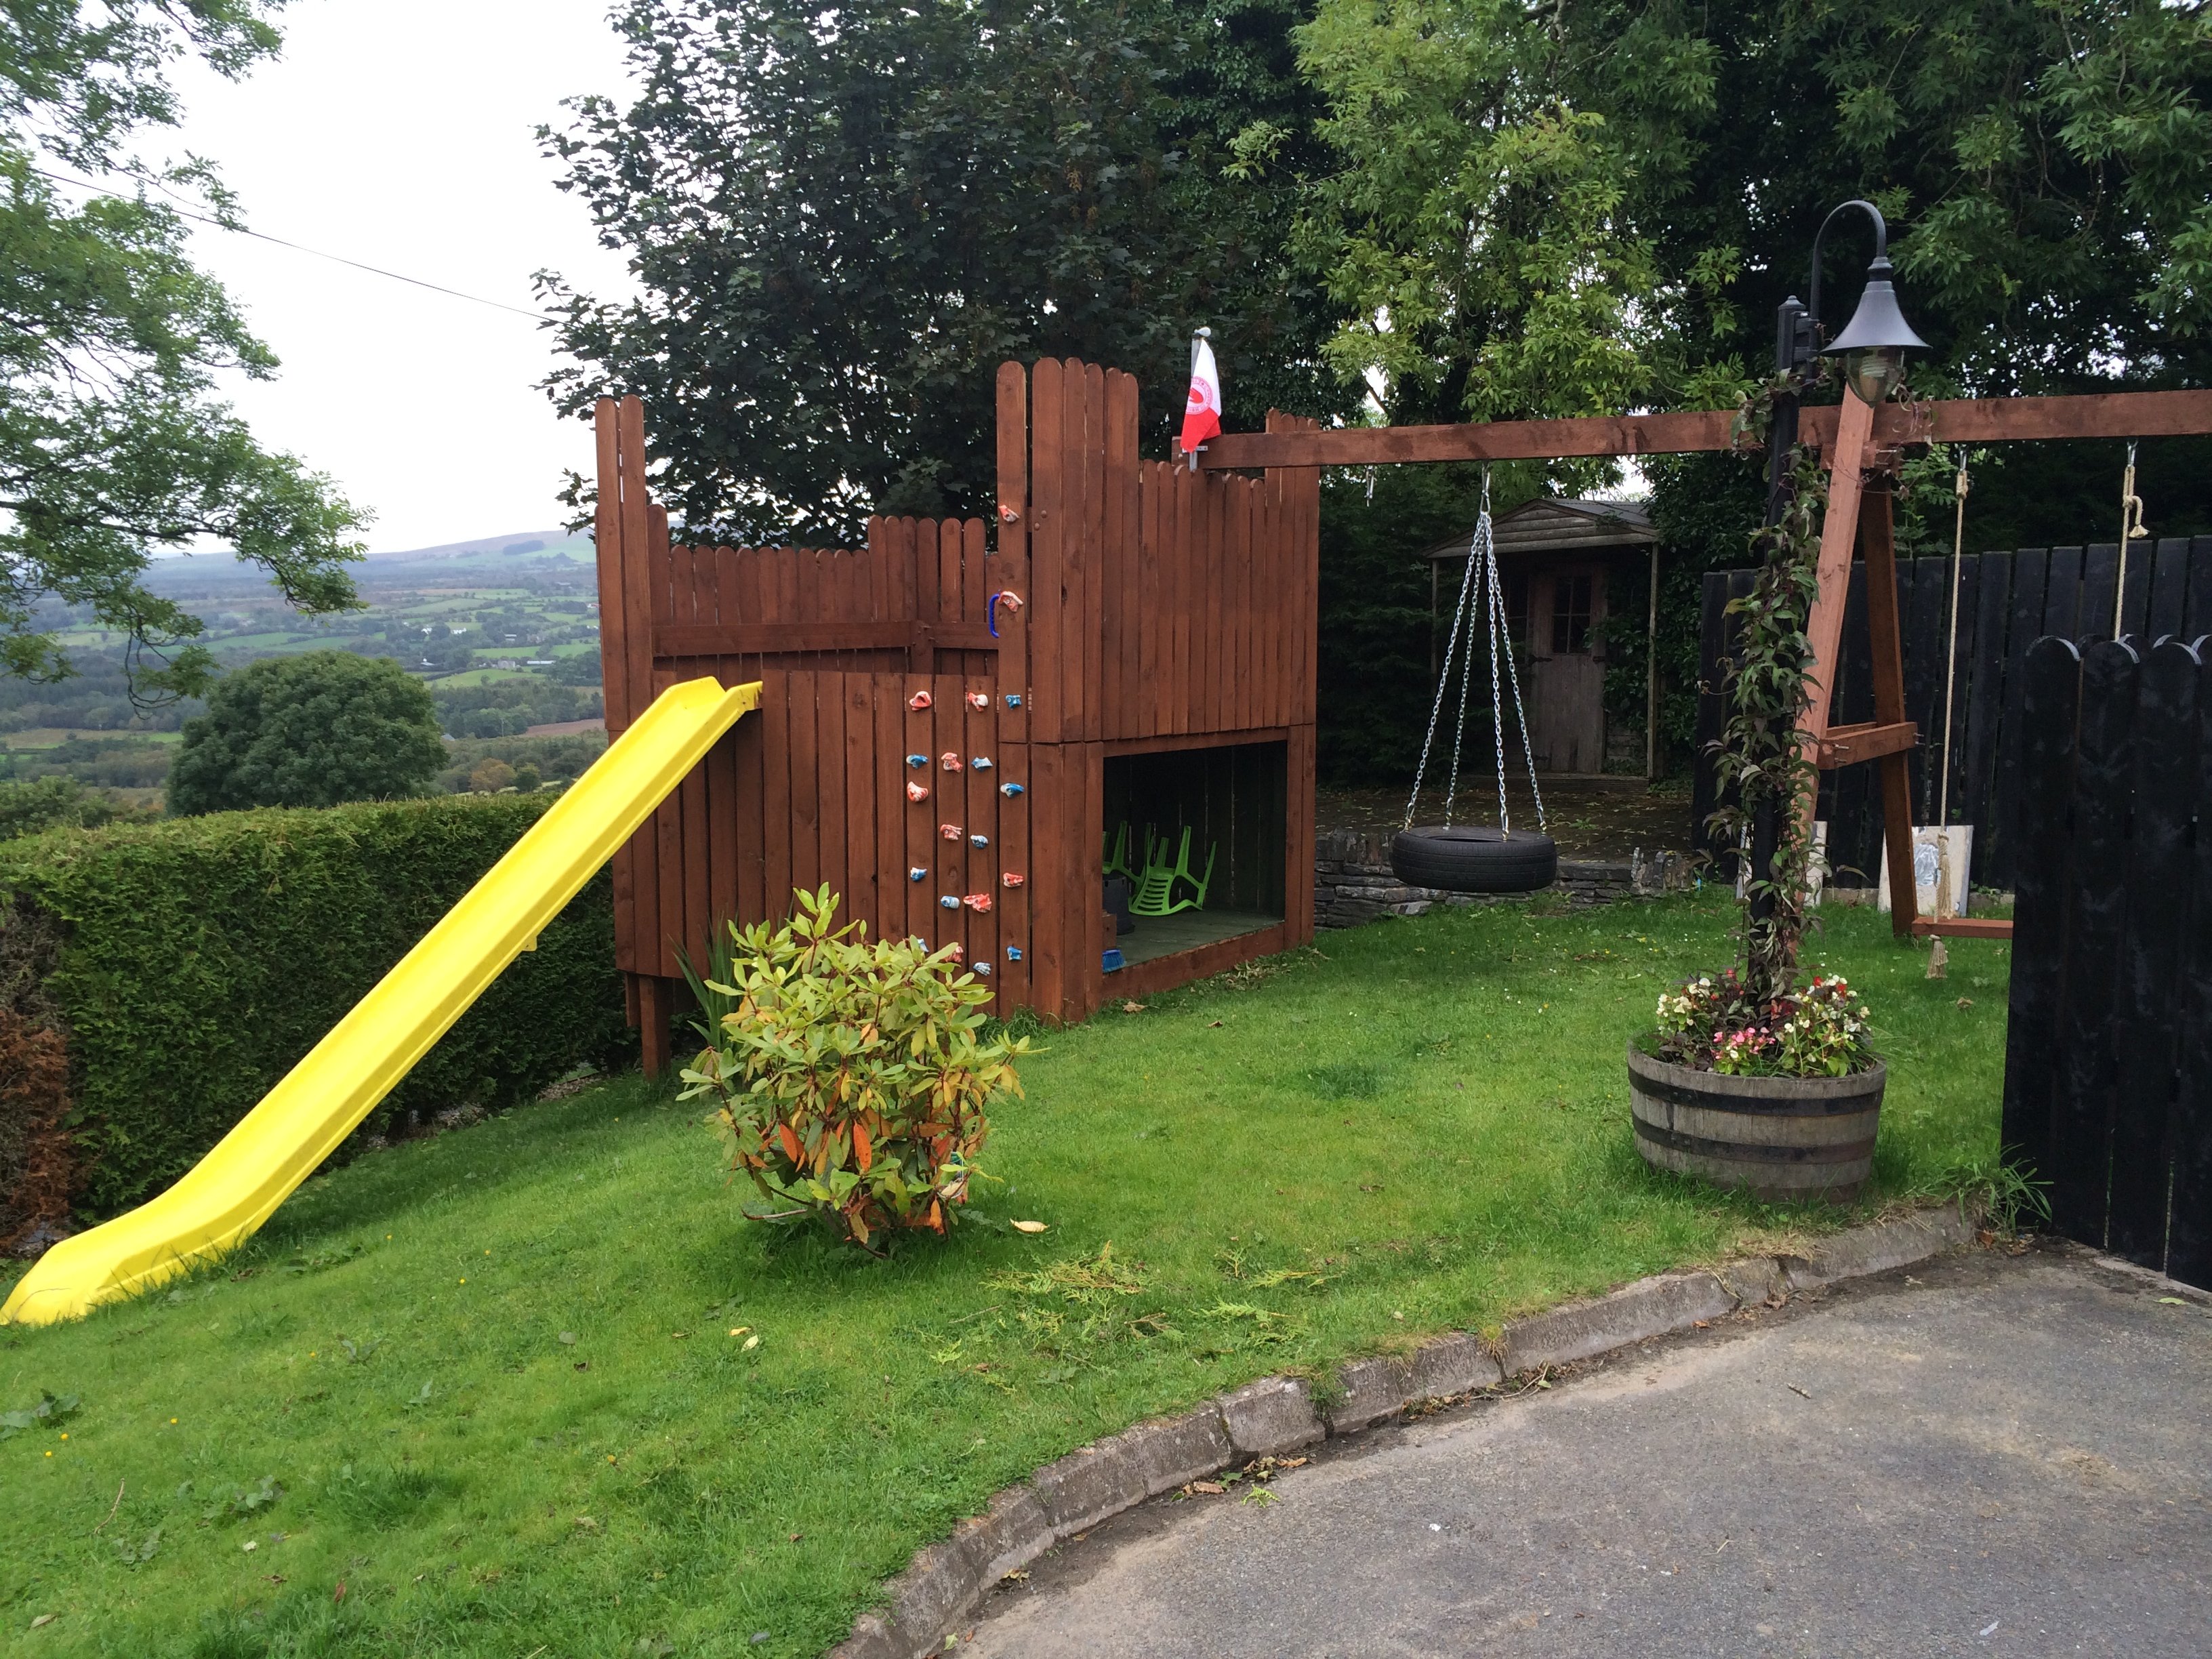
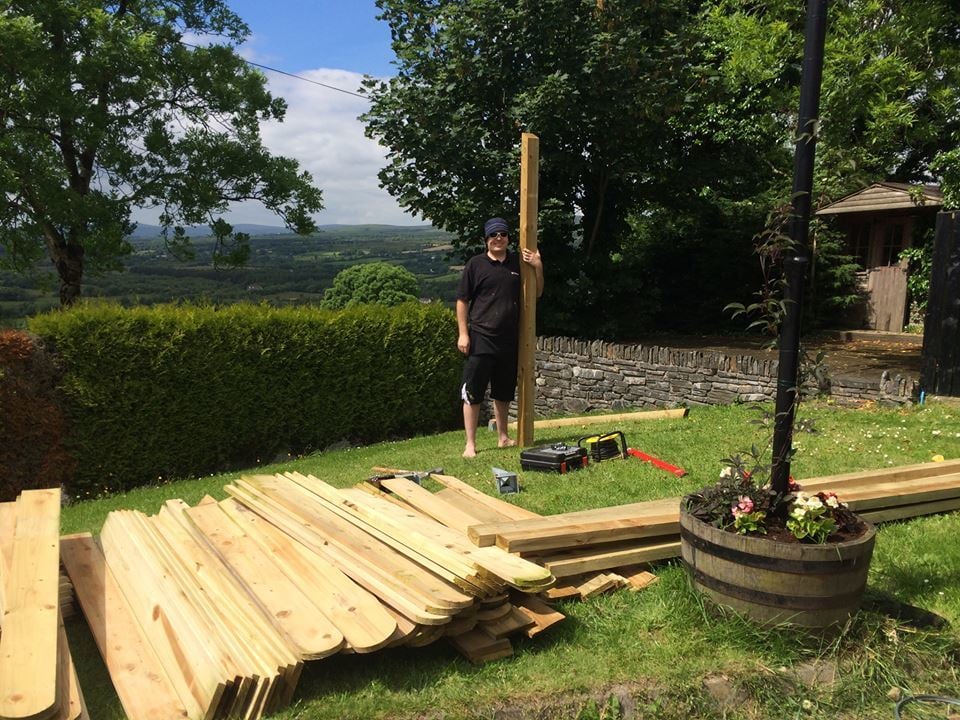
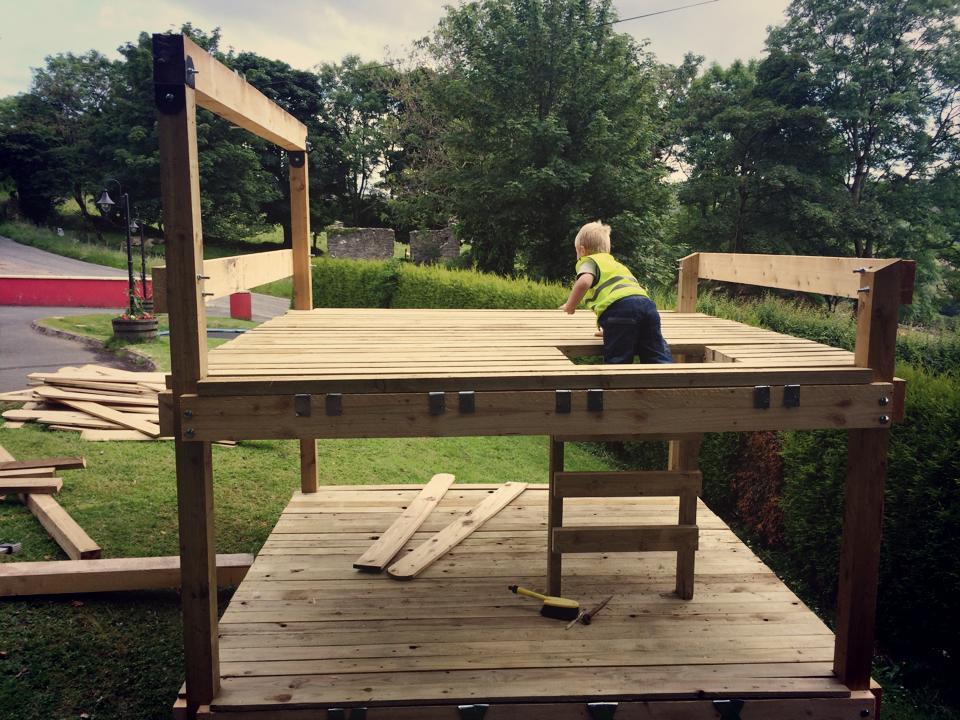
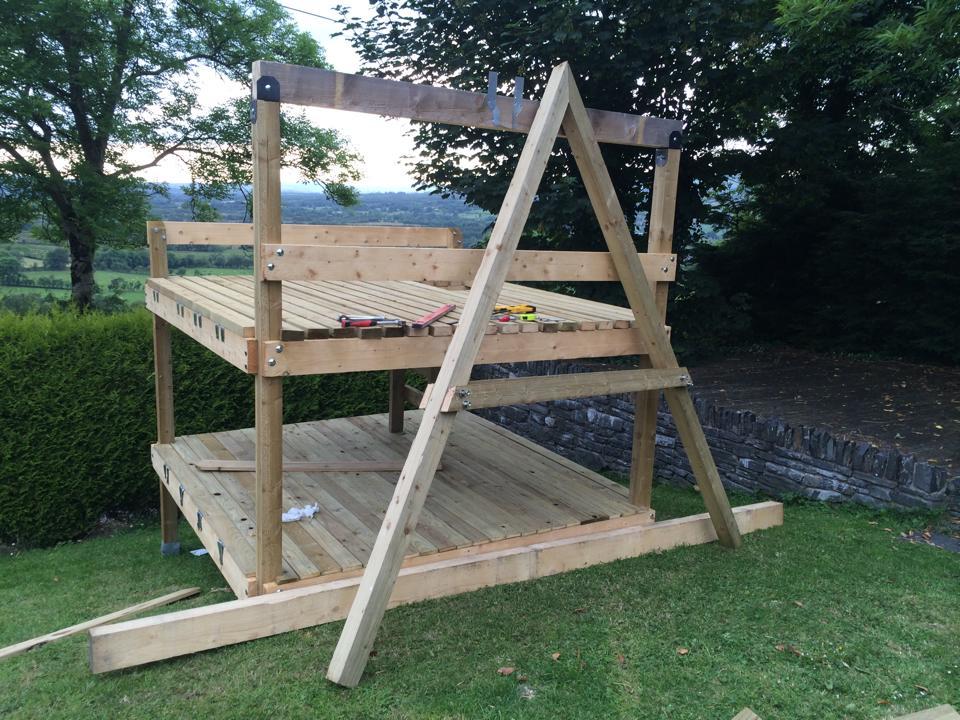
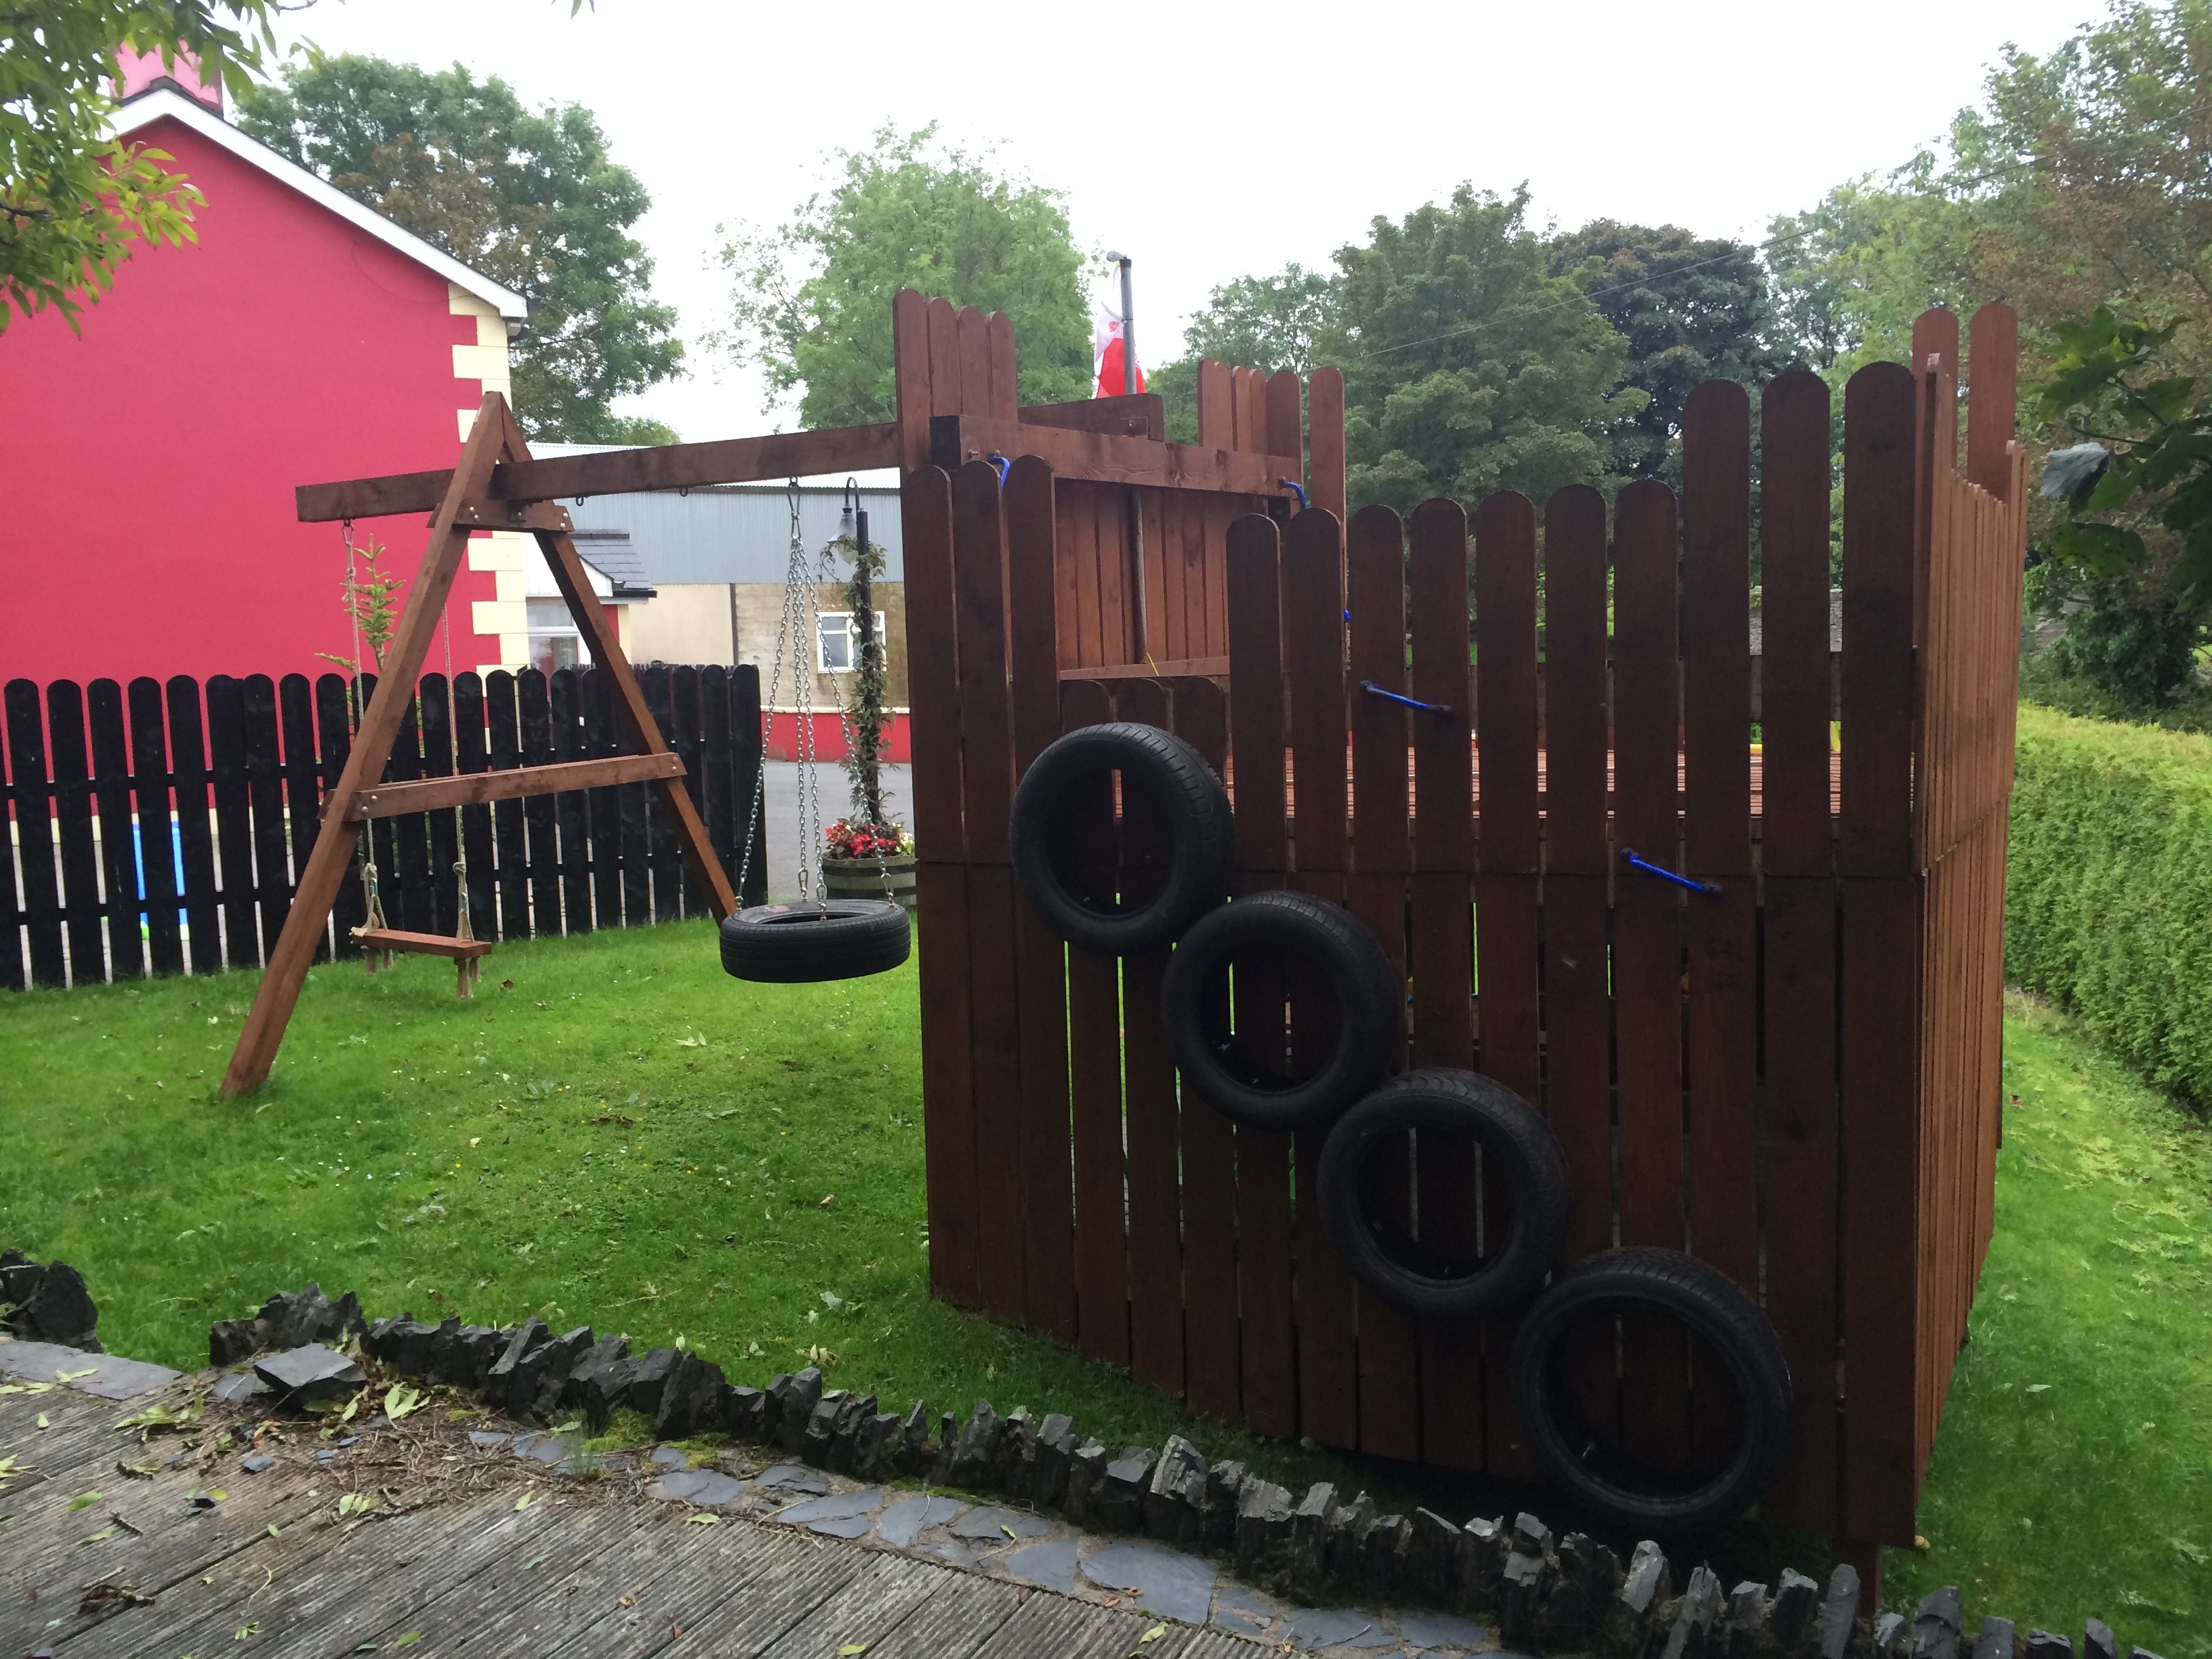
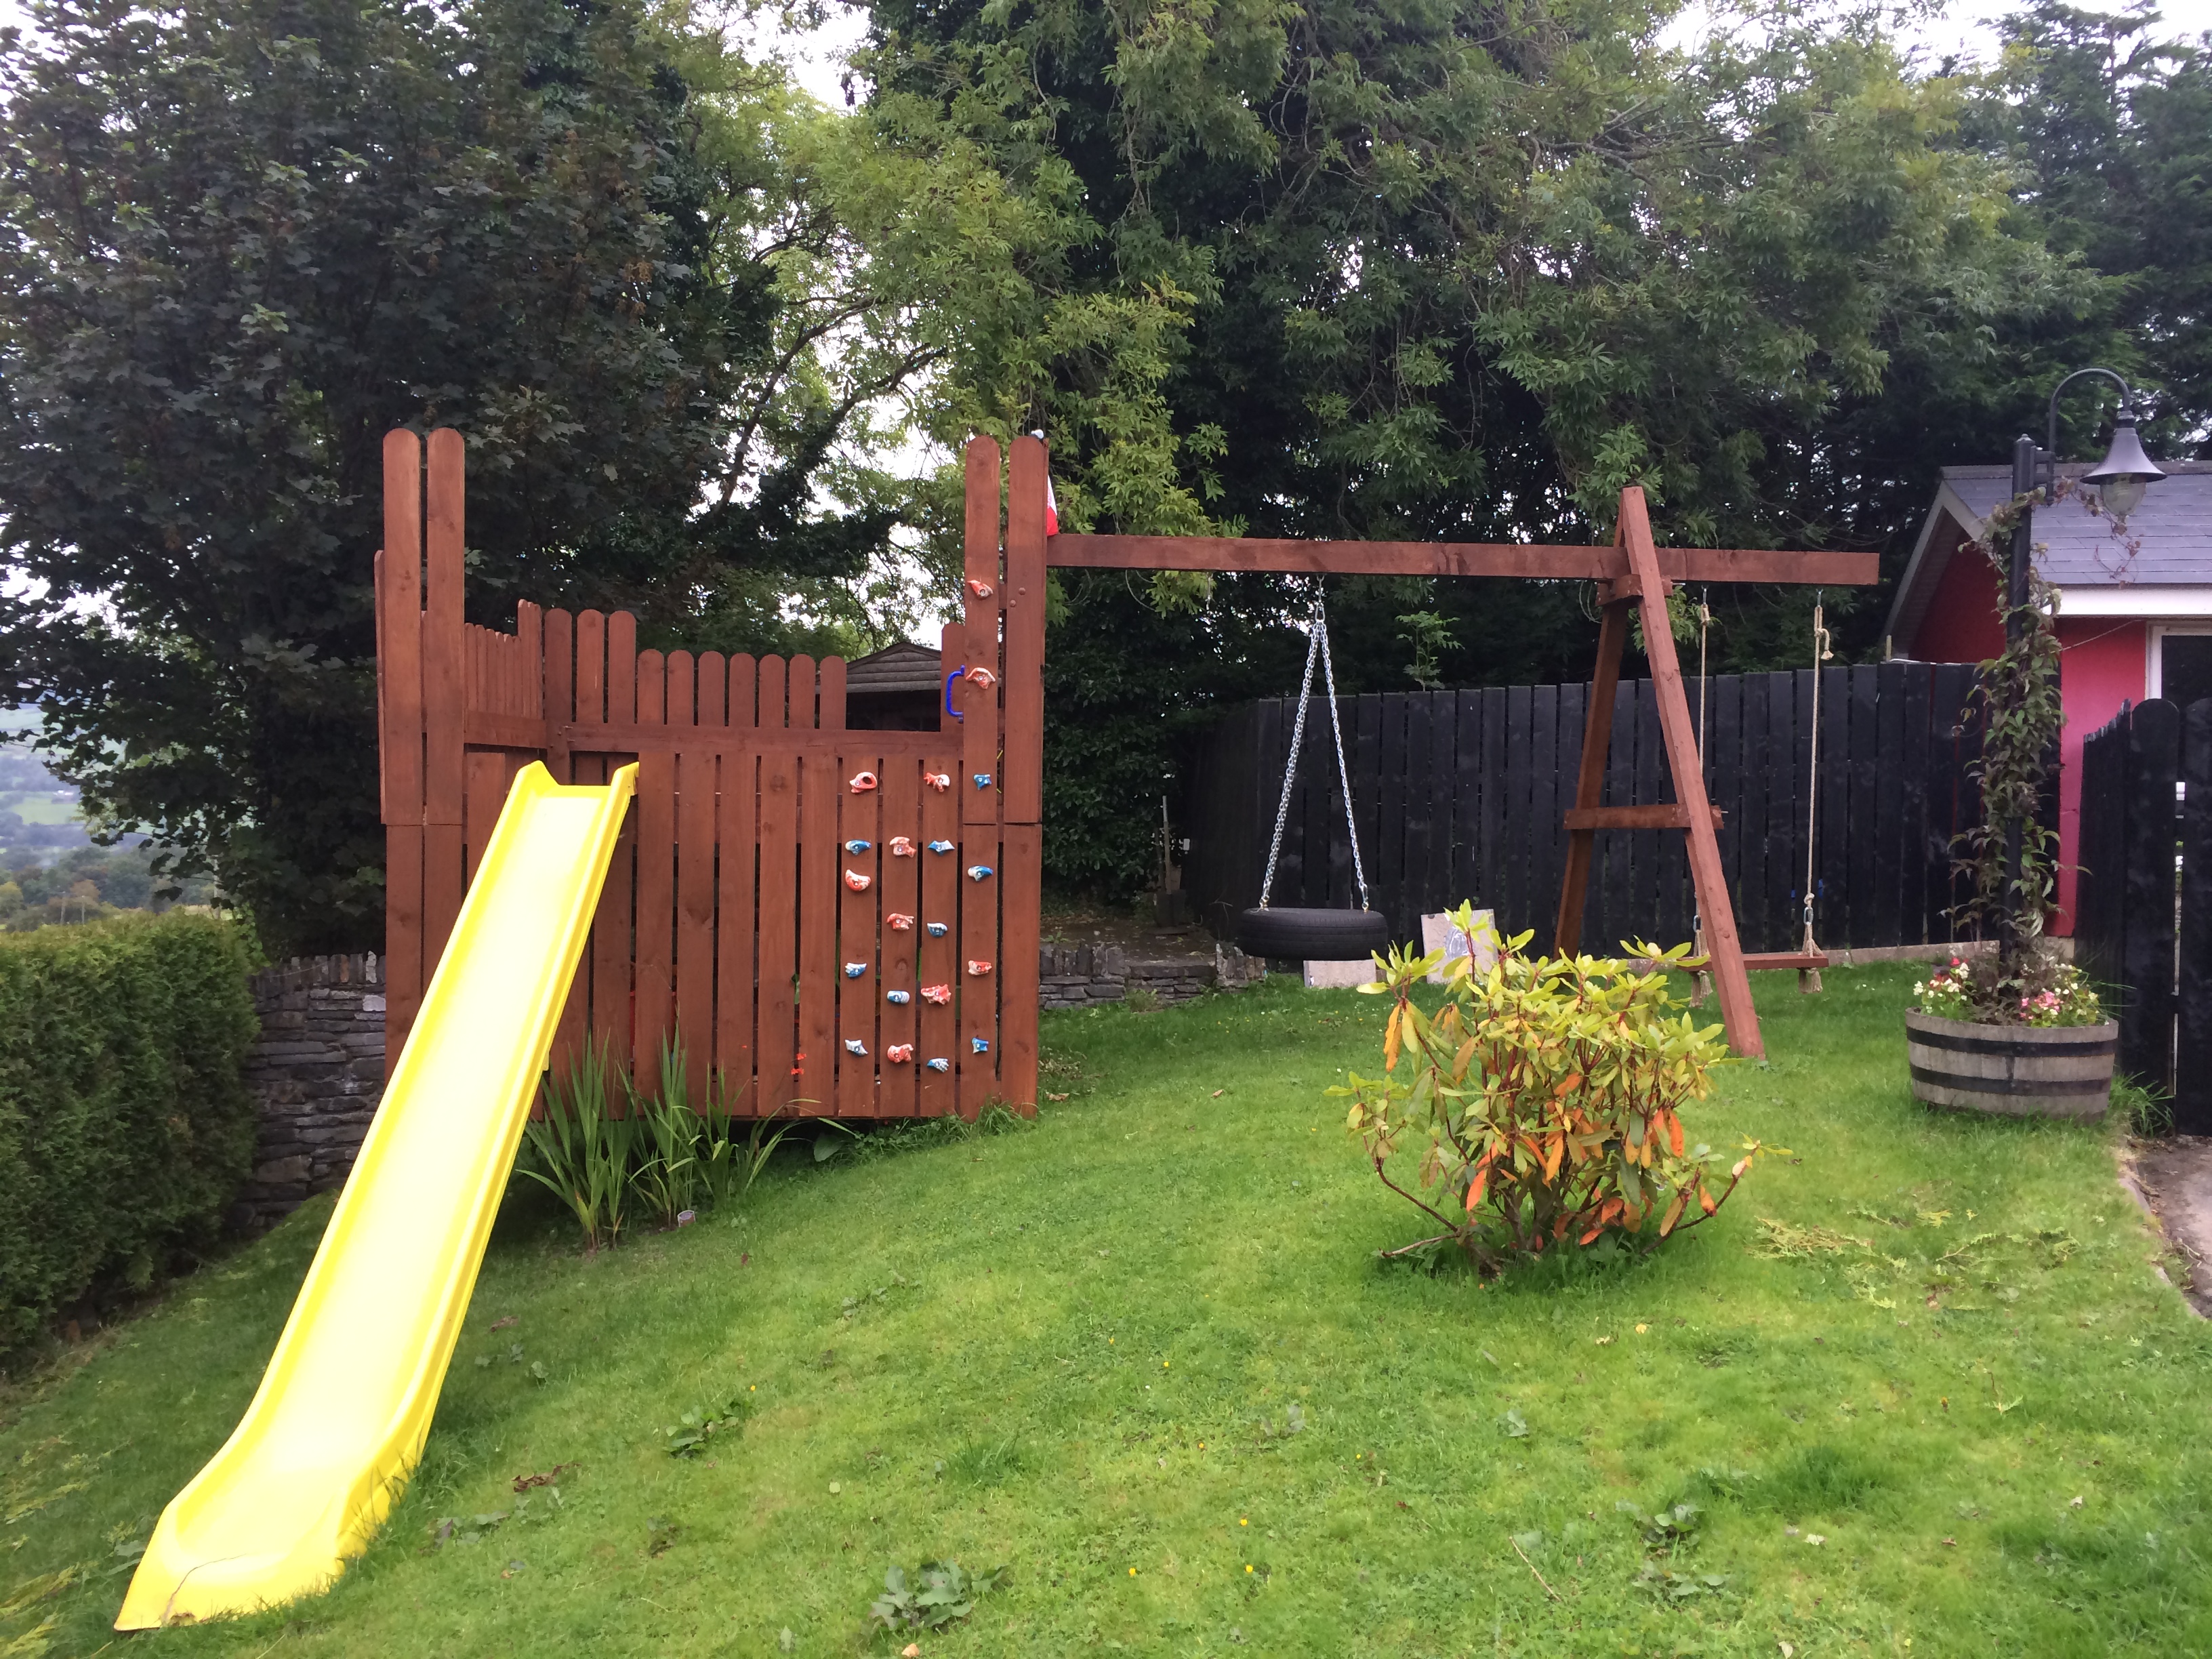
Play Deck and Swing
Wed, 09/03/2014 - 07:35
You have a BEAUTIFUL view from your yard! Just curious, where do you live? I assumed somewhere in Europe due to the currency. The play area looks fantastic. What lucky kiddos!
Wed, 09/03/2014 - 08:21
Thanks. Lovely part of the country outside Omagh, Northern Ireland

I decided to try and use the plans on Ana's site but with a twist. I wanted to limit myself to using only pallets. I think it turned out great! I can't upload all the photos because they exceed the maximum size limit. If I was able to you could see how each chair is slightly different and has a lot of character. I finished them with a waterproofing oil which I highly recommend over other finishes.


Mon, 04/10/2017 - 08:51
This is exactly what I'm looking for !! Fantastic build and re-purposing is always better.

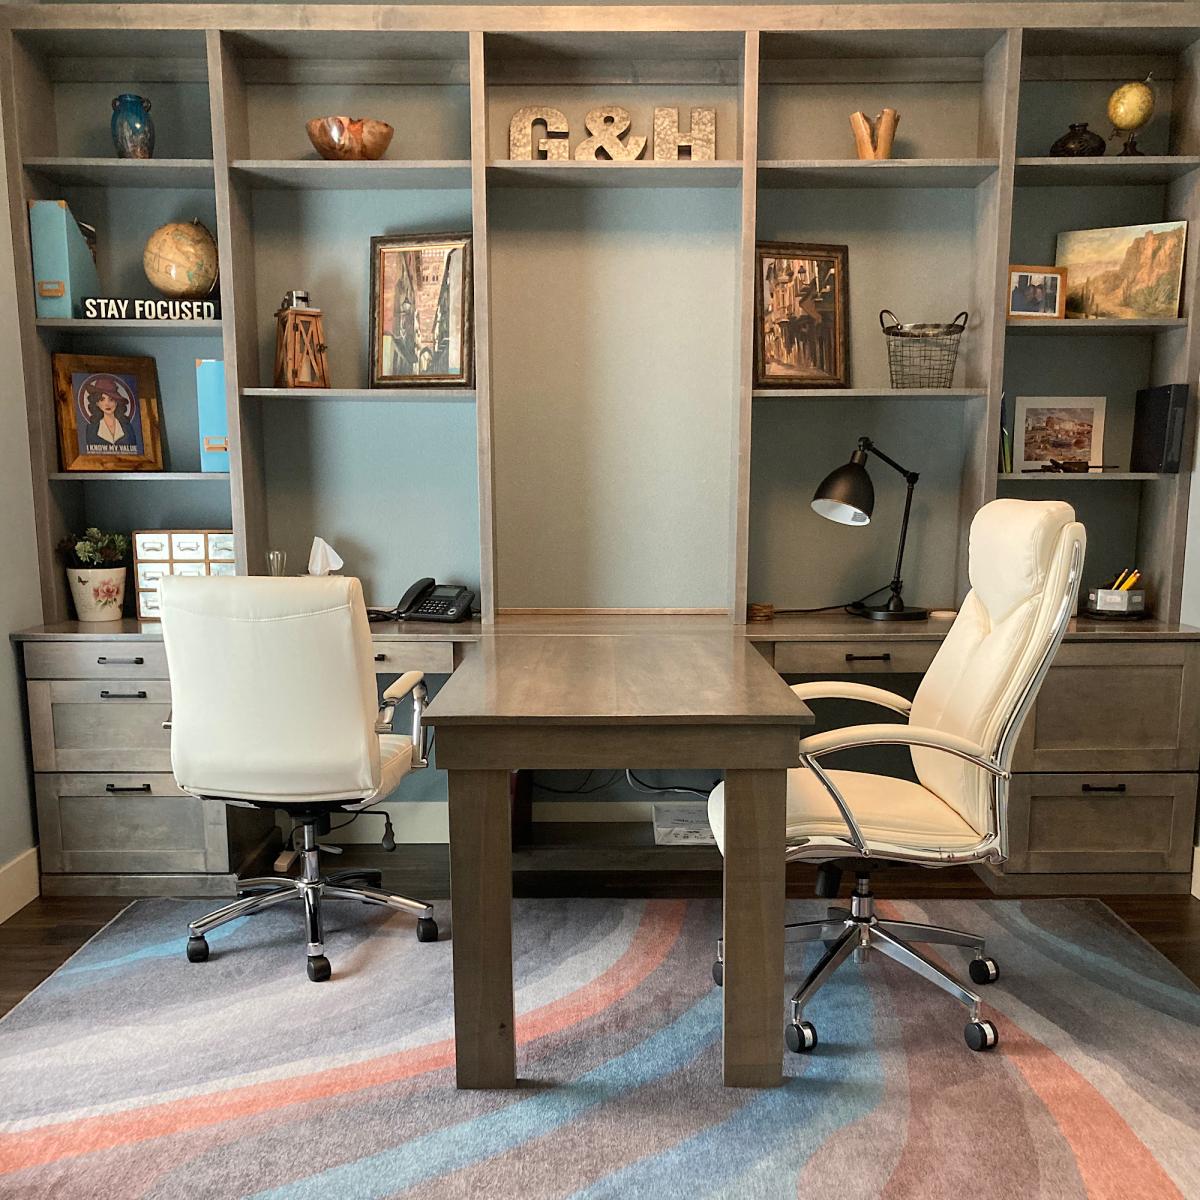
Thank you Ana for so many amazing plans and shelf help that helped me get this monster built! Now my husband has a nice office where he can work from home. I was so impressed with how easy it was to make the plans in shelf help and how quickly it all arrived. (I can’t link the drawer slide trick plans, but they were key and I based the middle table off of the foldable farmhouse idea)
Thu, 01/27/2022 - 15:52
WOW, WOW, WOW!!! This is gorgeous, thank you so much for sharing- posting to Facebook now!
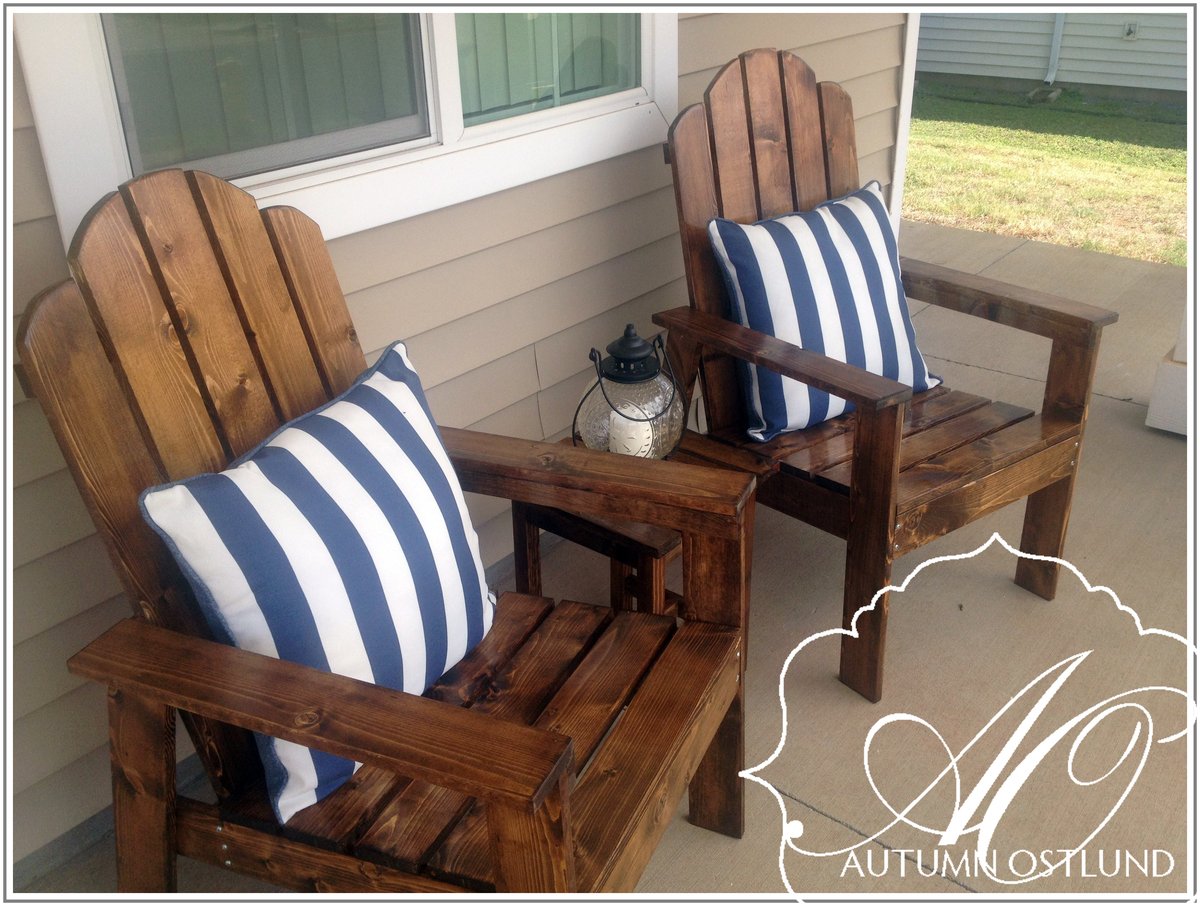
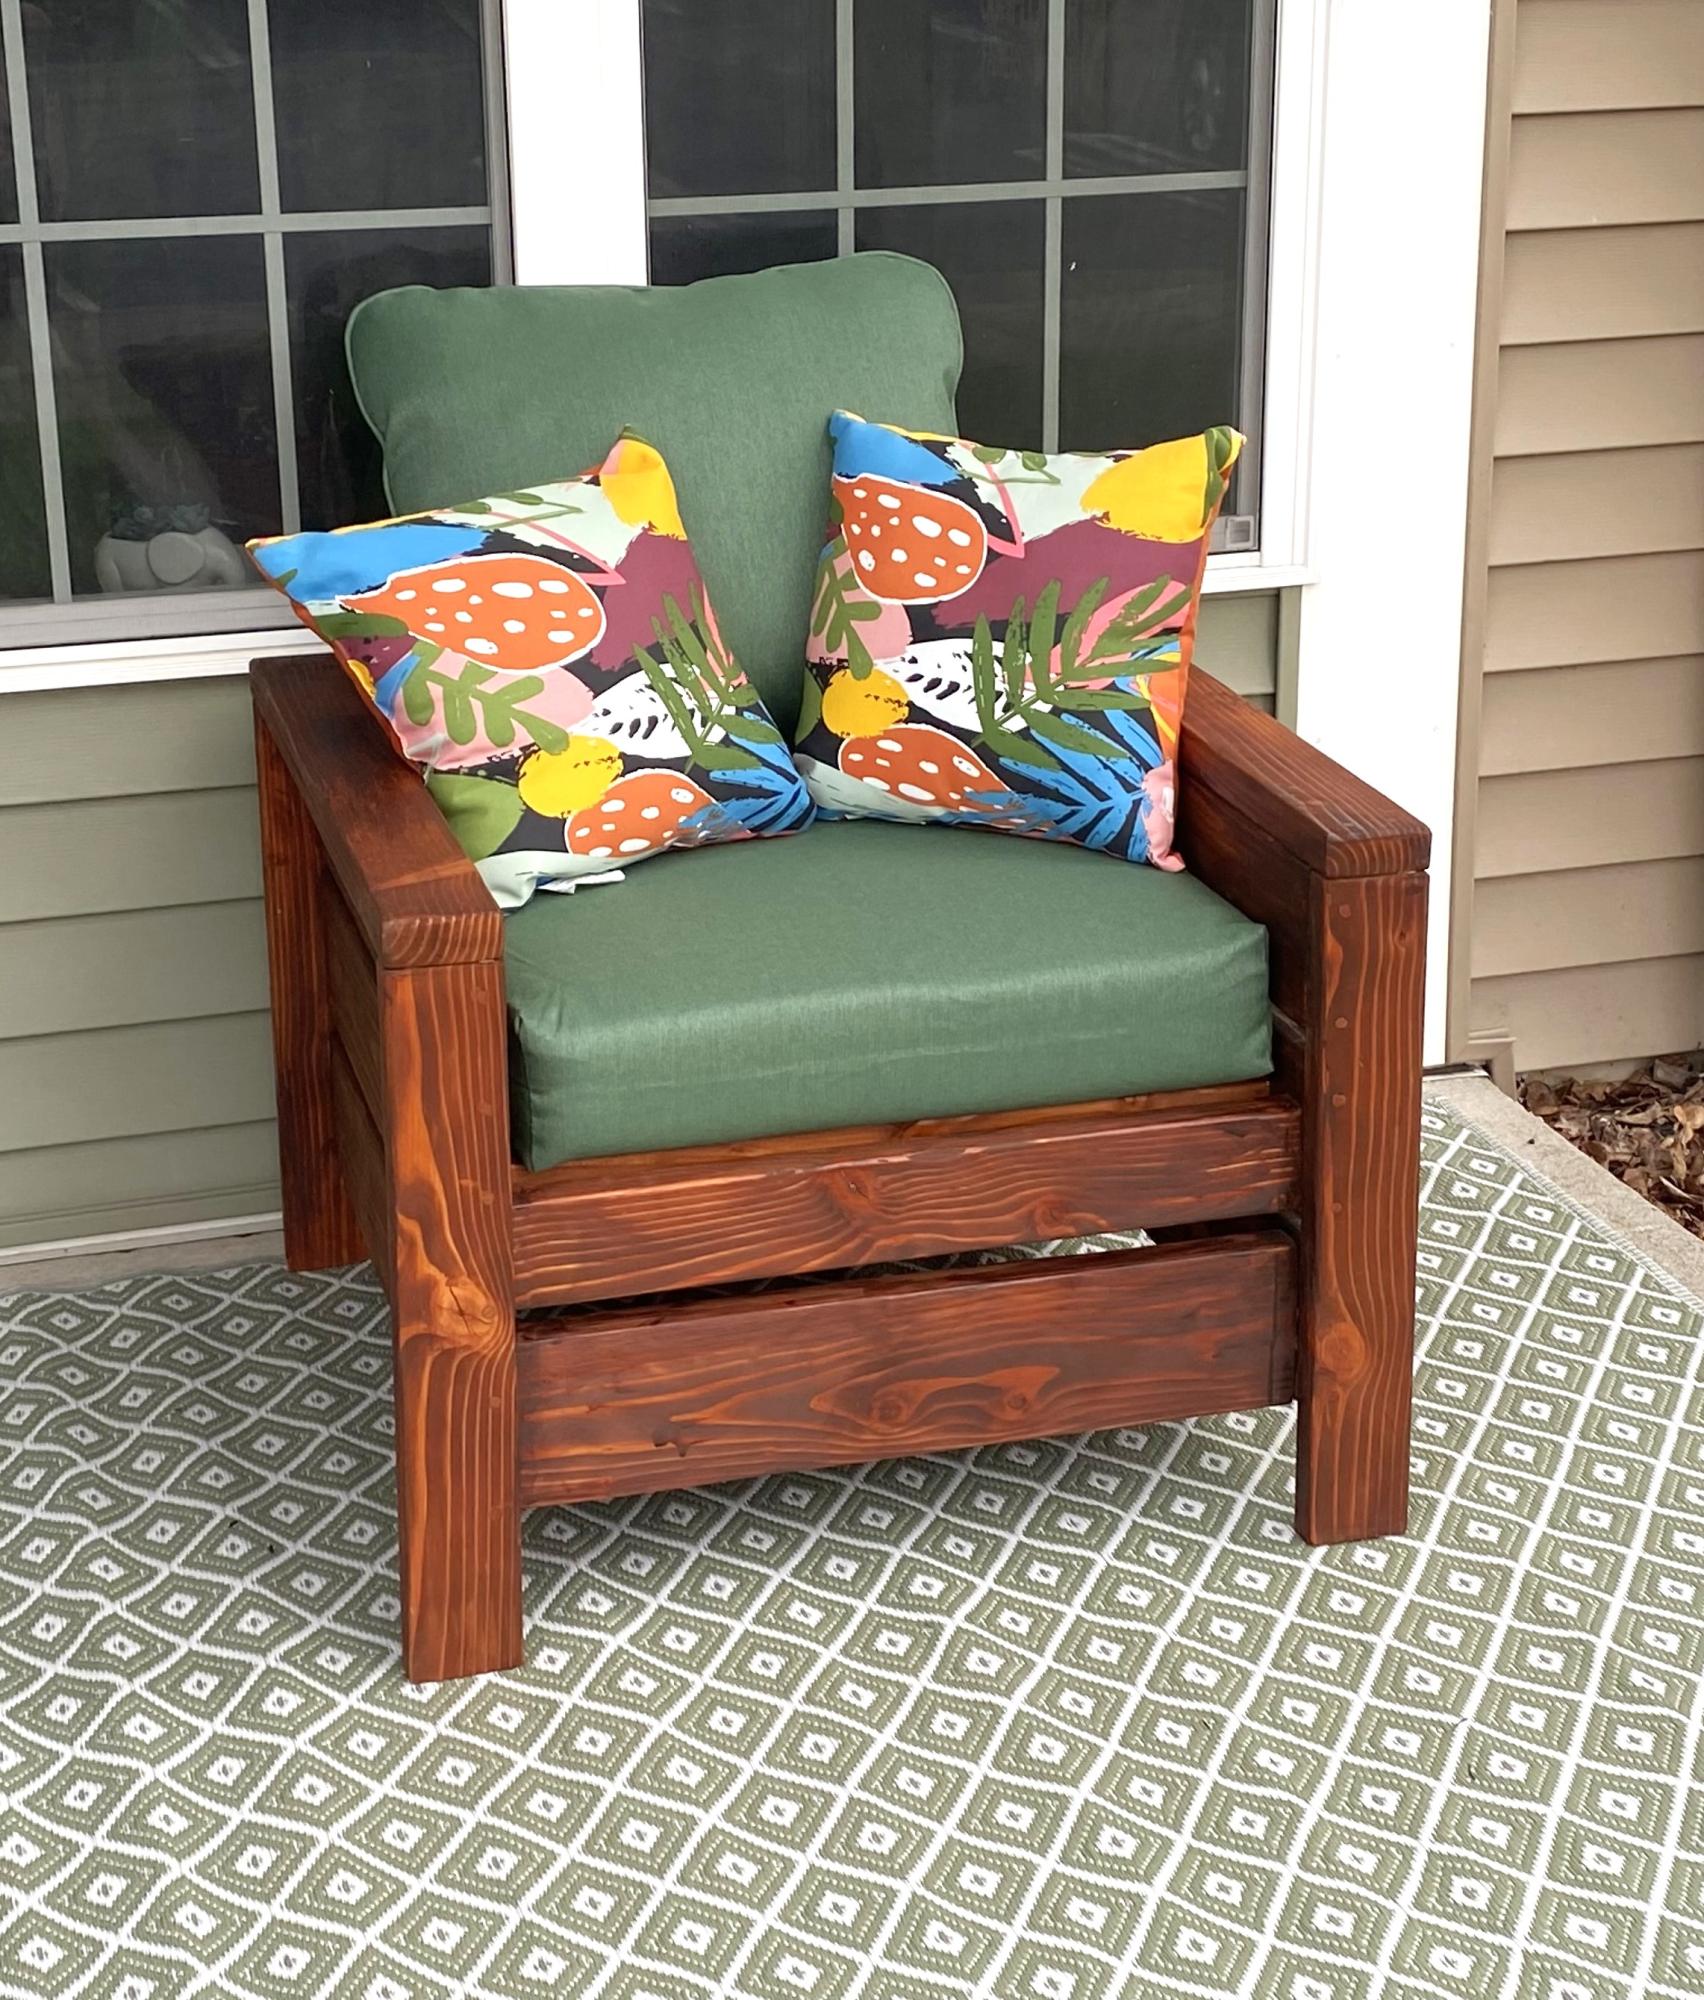
I built two of these for my front porch. Love them!
Wed, 07/17/2013 - 19:52
Great job. I really like the way the finish turned out.
Mon, 04/20/2020 - 10:03
On your chairs you made, the link is for an Adirondack but the picture has more flat seat than the plans. Please advise.
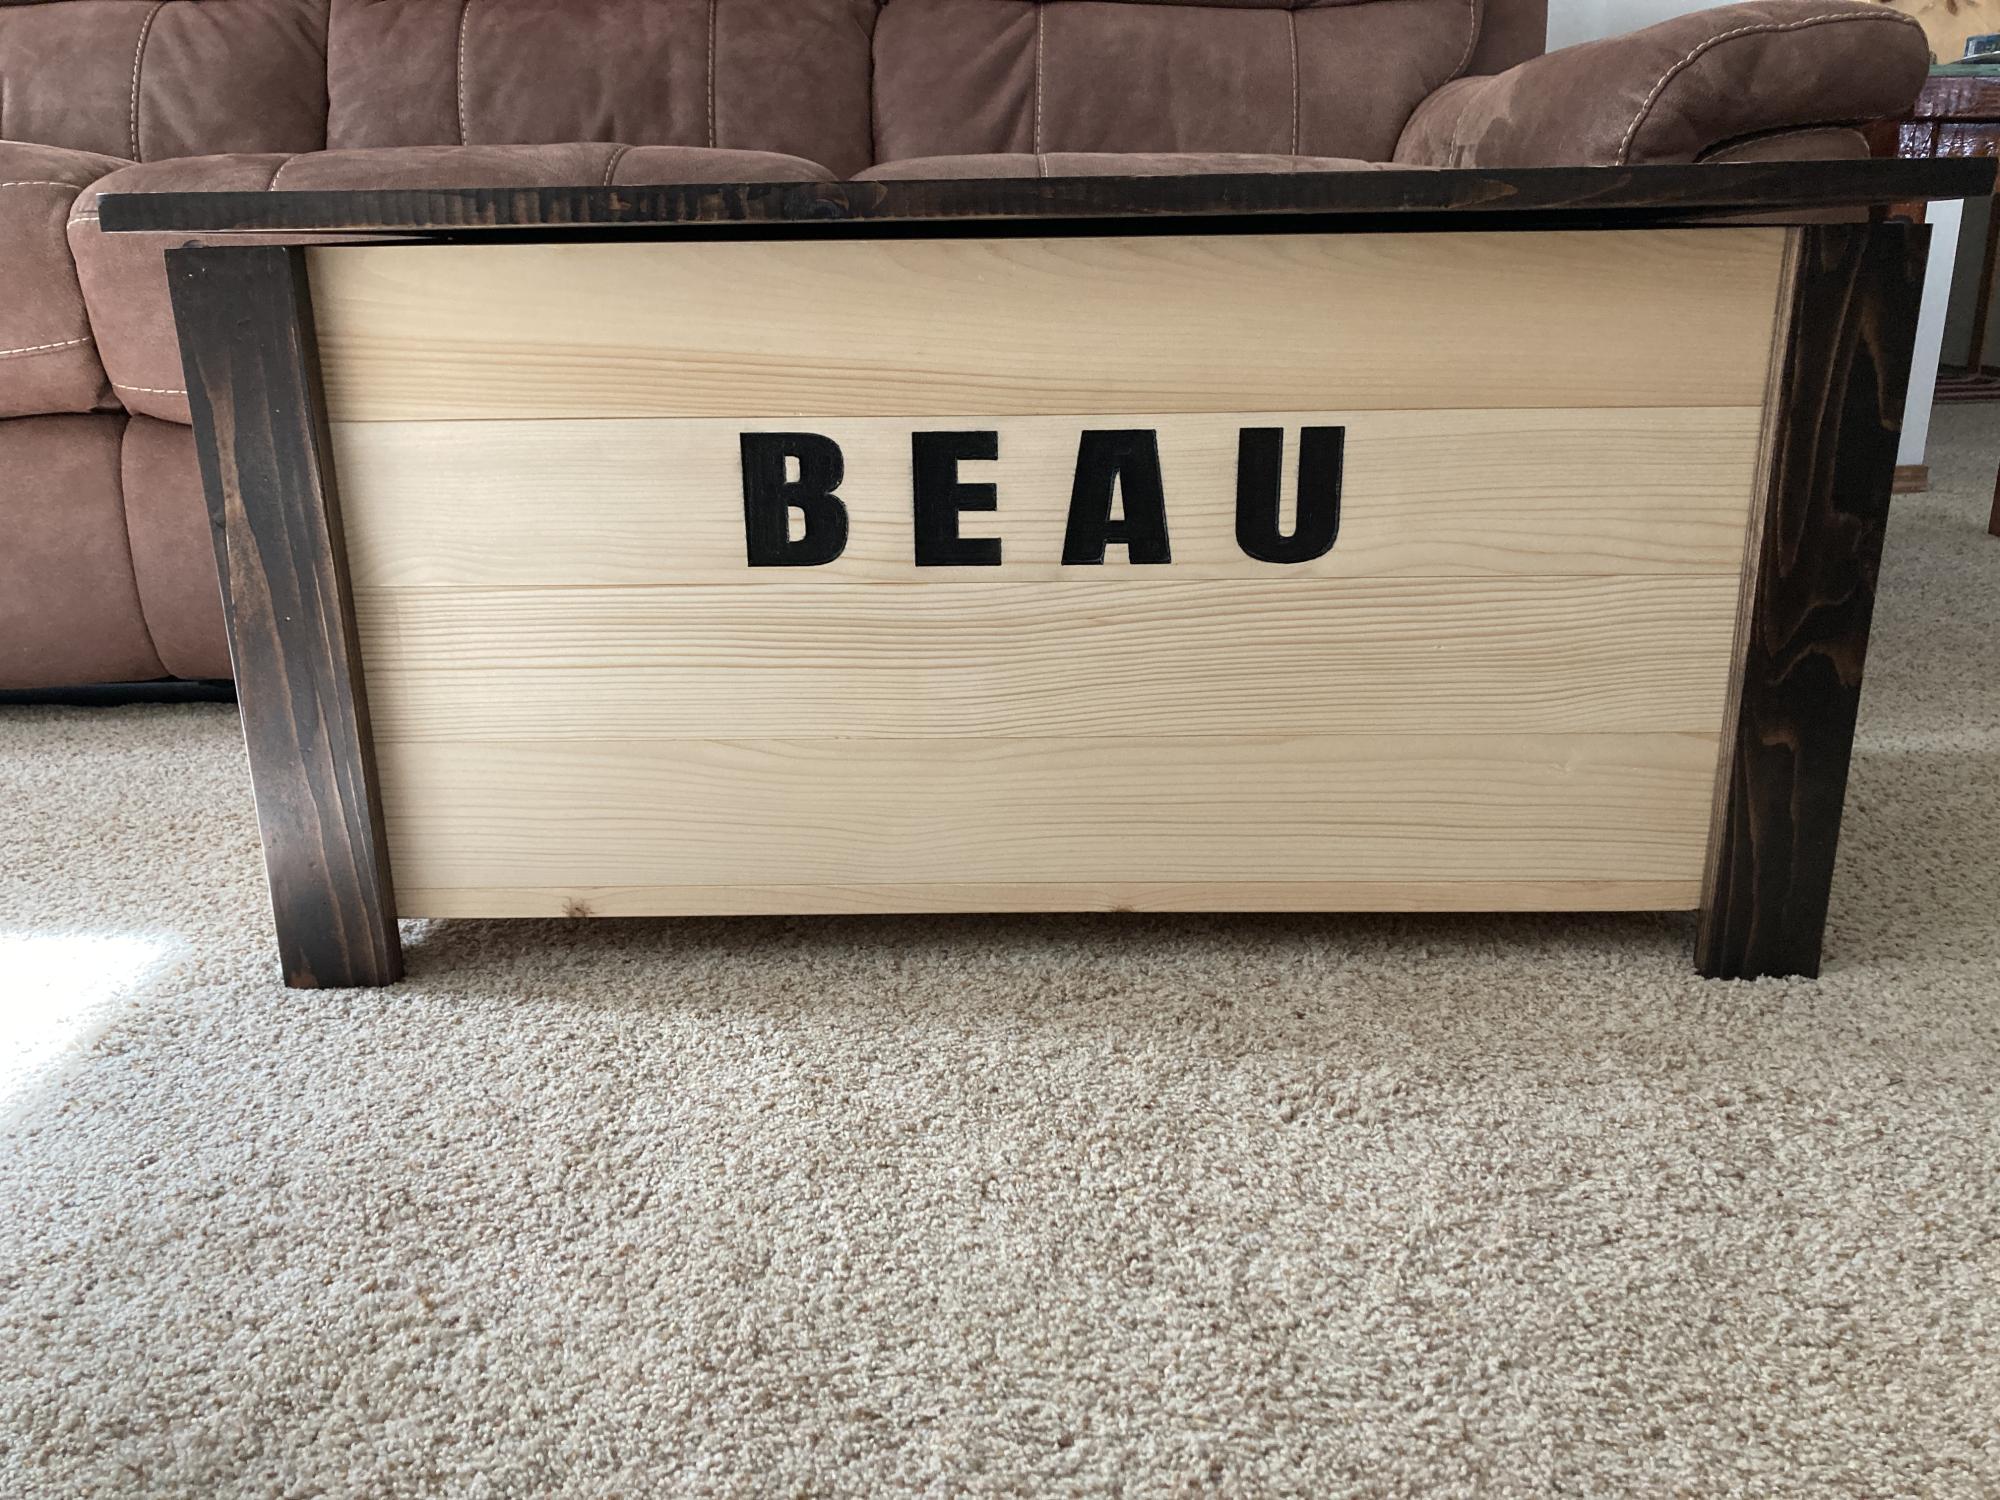
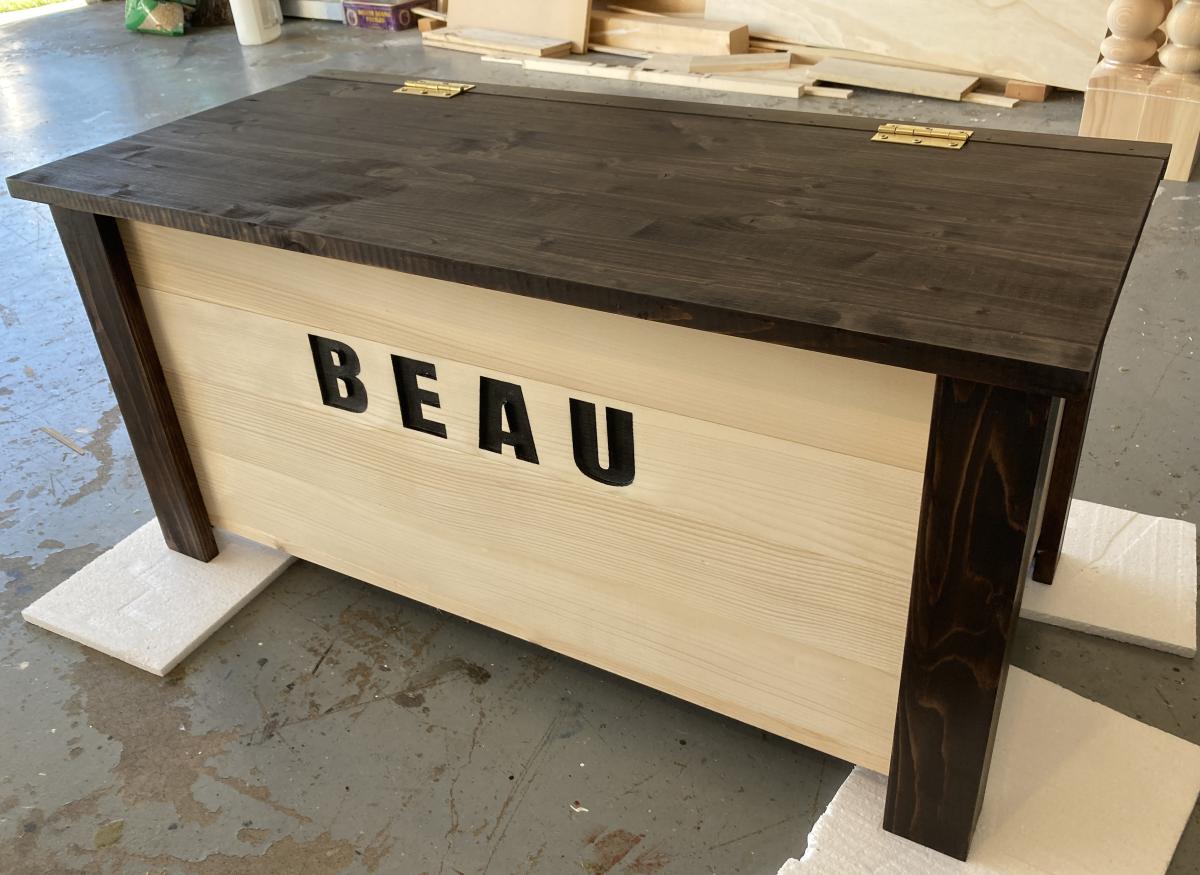
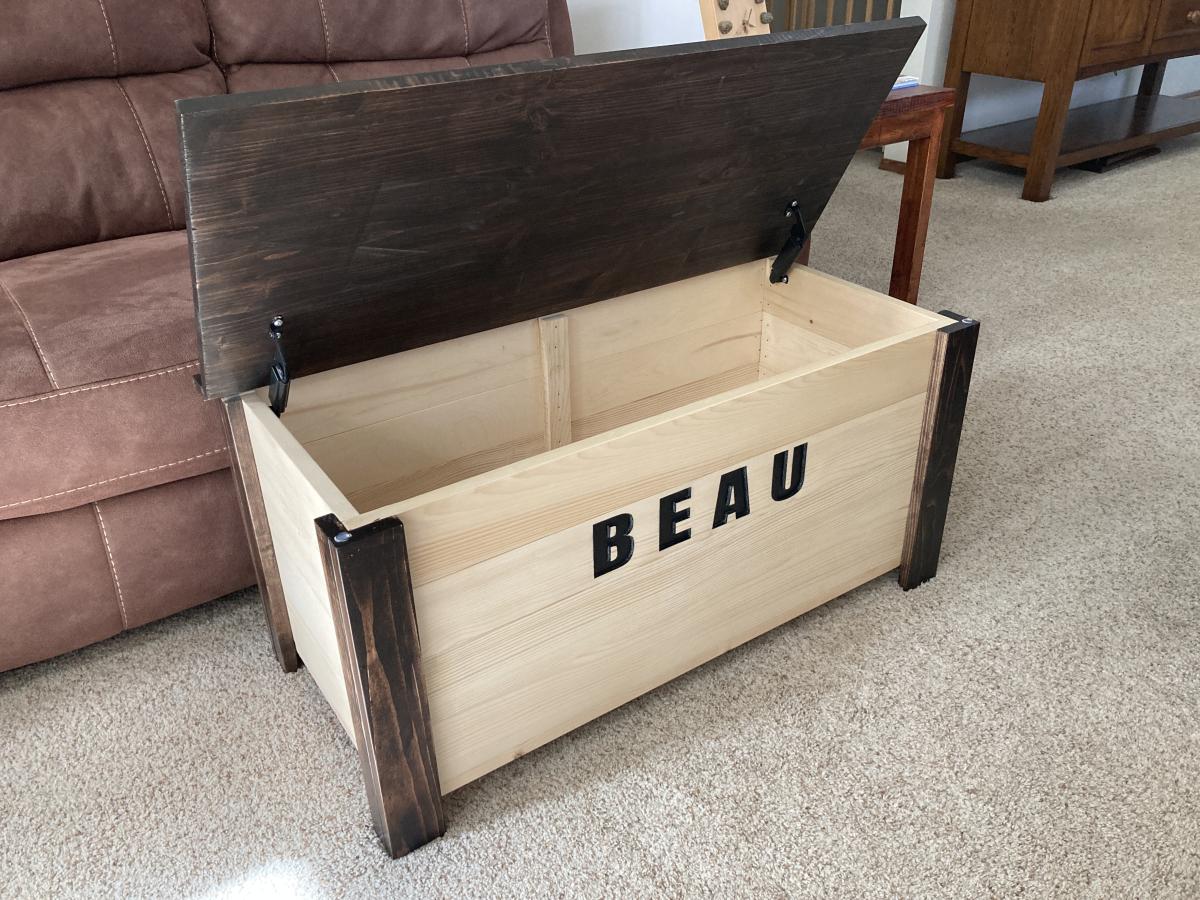
My second build from Ana's toy box plan. I had my son use his CNC machine to carve boy's name into the front. Depth of the letters is about 0.25". Looks really good.

I received you French Cleat Hanging Closet idea this last week and although a rookie wood worker, figured I’d give it a try.
The instructional video was excellent and very easy to follow. Think it came out just fine if I do say so myself.


