Community Brag Posts
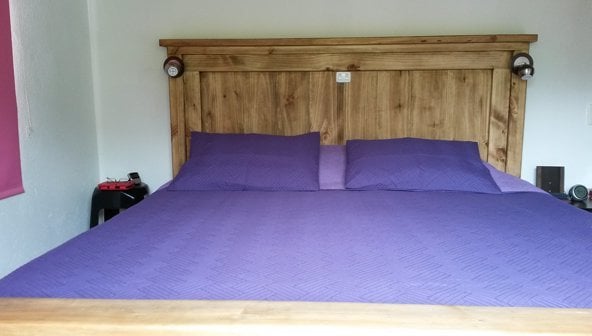
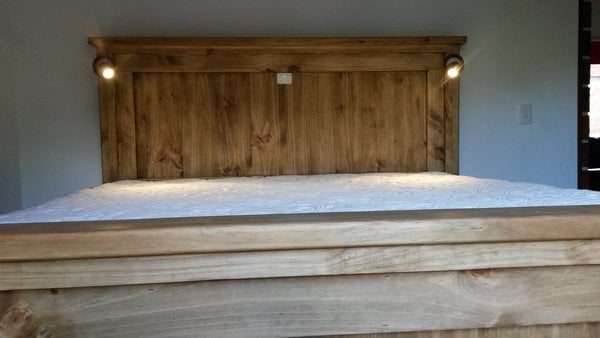
Jeffrey's Fancy Farmhouse Bed
Time: About 15 hours
$: 150 (wood, stain, sand paper)
Stain: Minwax Red Mahogany (2 coats)
Finish: Satin Polyurethane (1 coat, light sand, another coat)
We had to change a few of the measurements just slightly, but overall the directions were awesome!
The only change that we made was to the "footboard", instead of 2x2's and a 2x4, we changed it to one 4x4. We added moulding at the base of the feet and at the top of the footboard we added a routed headplate. It gave it a real "finished" look.
Sorry for the "spotty" pictures...dang camera!


Estimated Cost
150
Estimated Time Investment
Weekend Project (10-20 Hours)
Finish Used
Minwax- Red Mahogany
Recommended Skill Level
Intermediate
Comments
Sat, 01/11/2014 - 07:08
I love your version so much
I love your version so much that I am copying it as much as possible............Thanks!
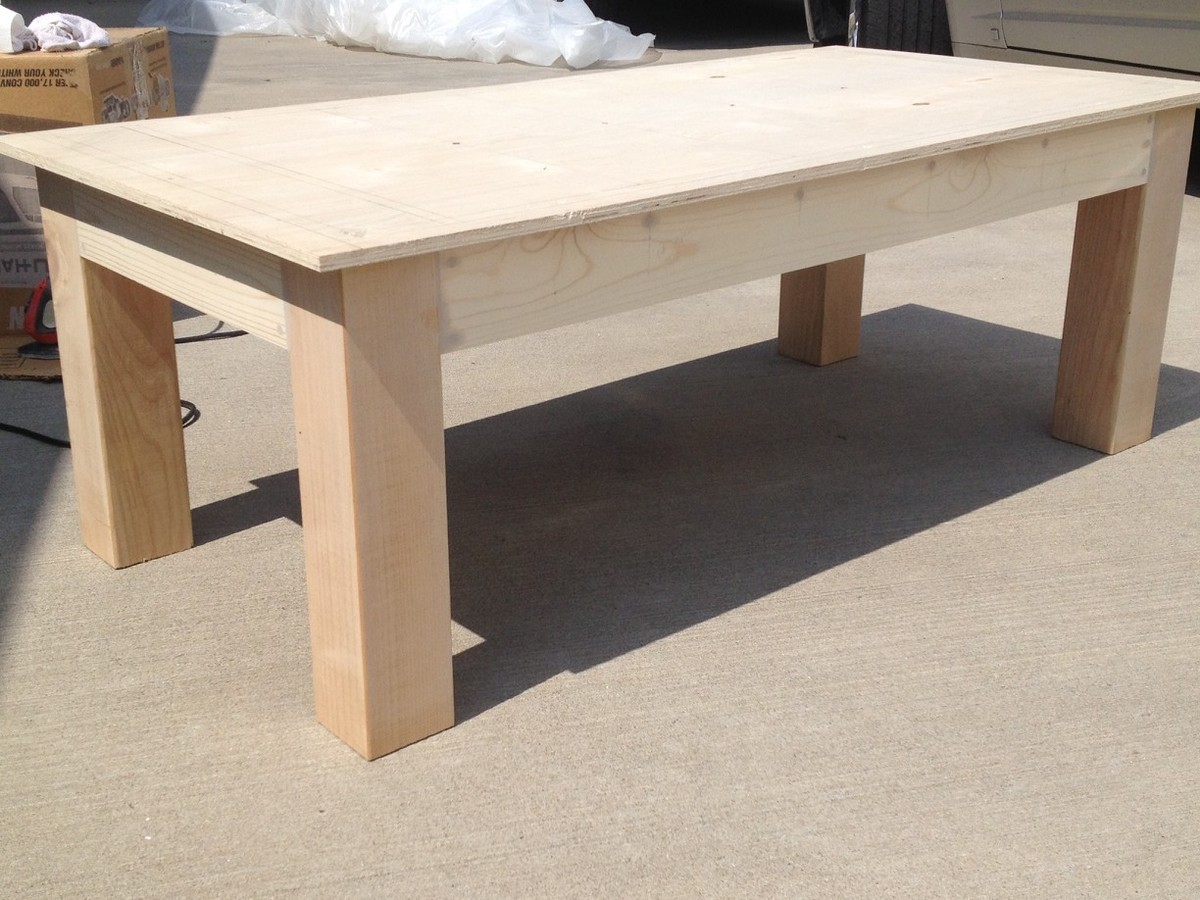
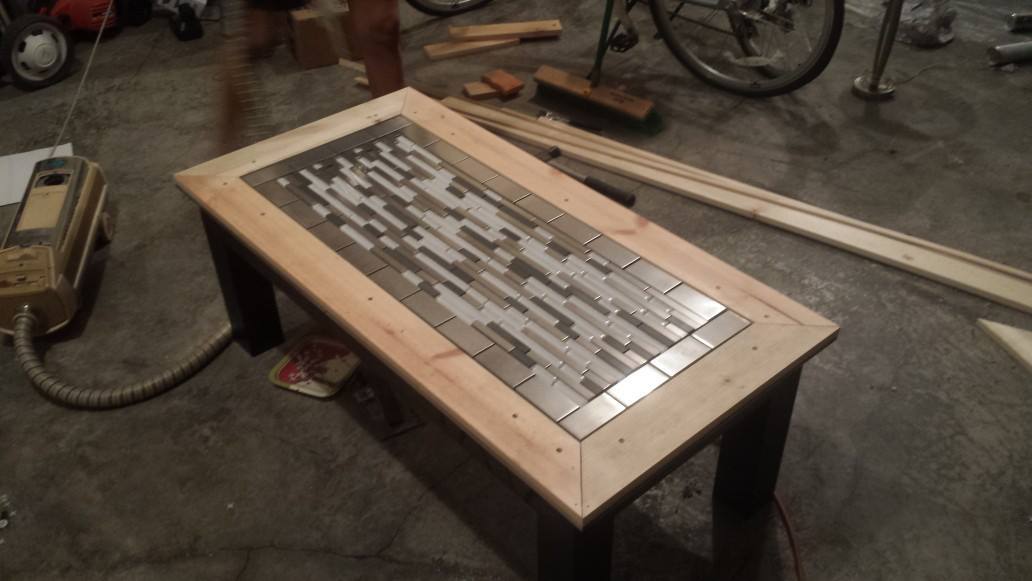
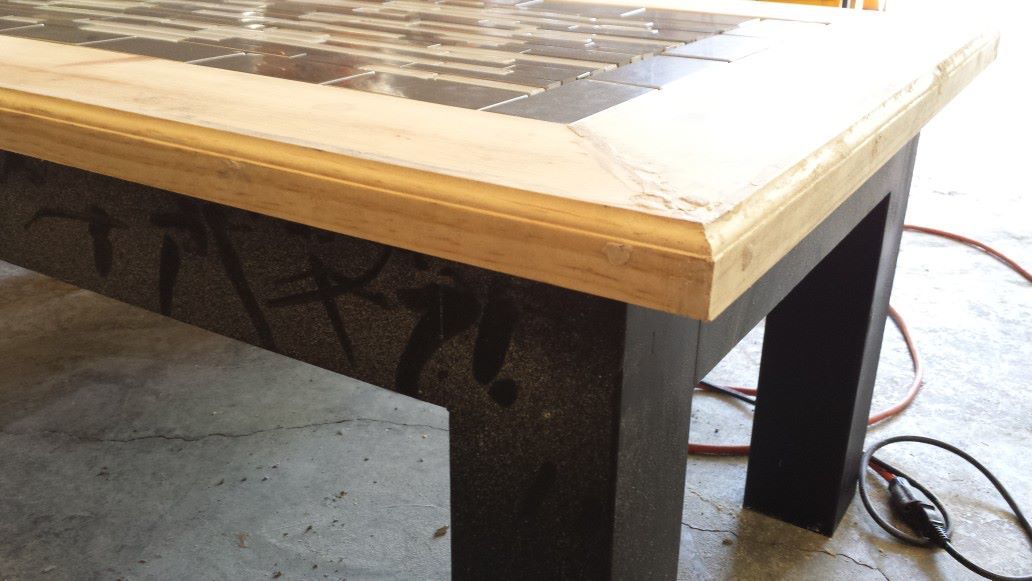
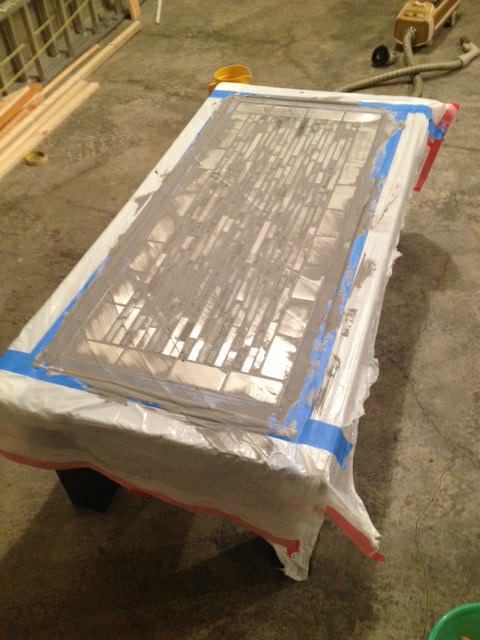
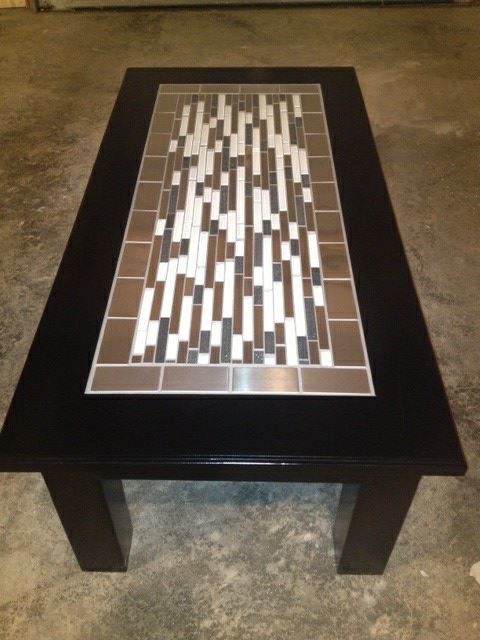
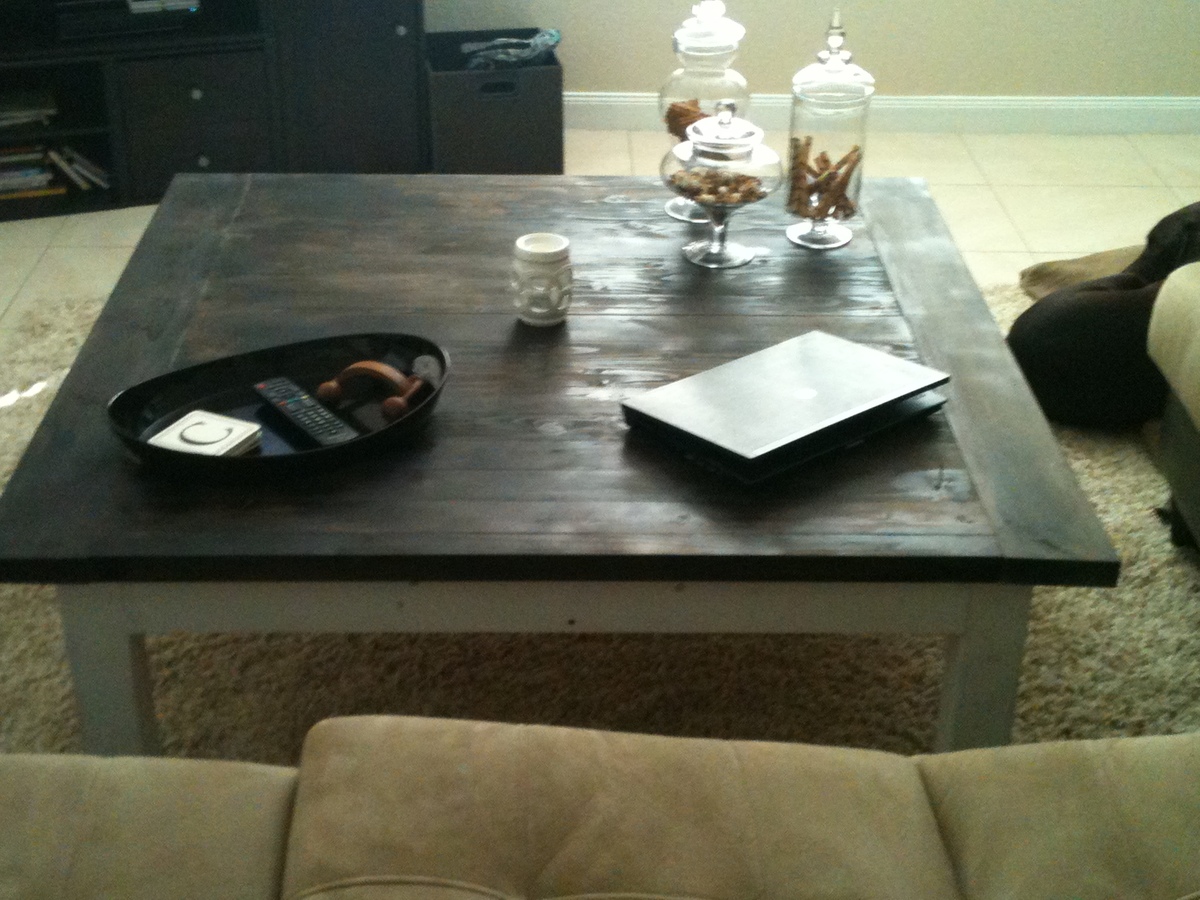
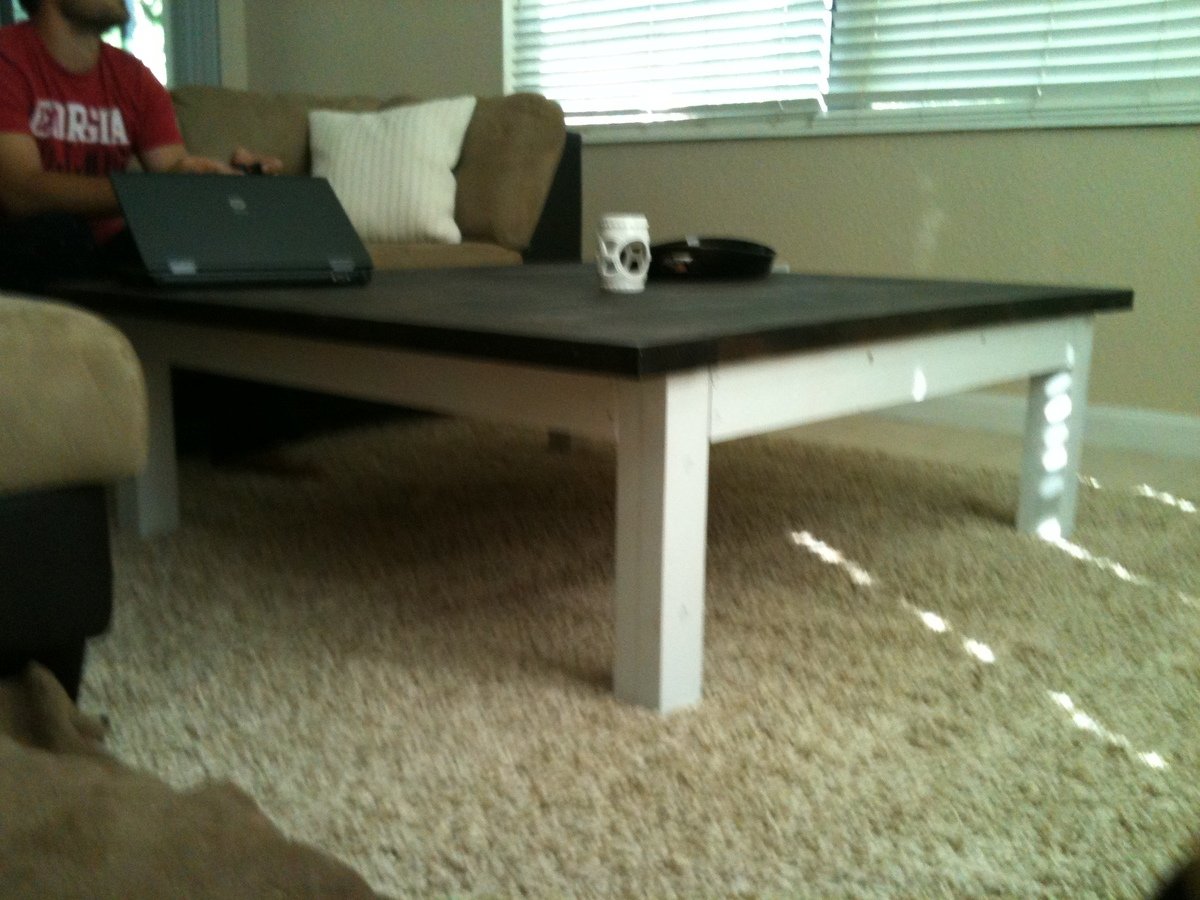
Tile Finished Tryde Coffee Table Variation
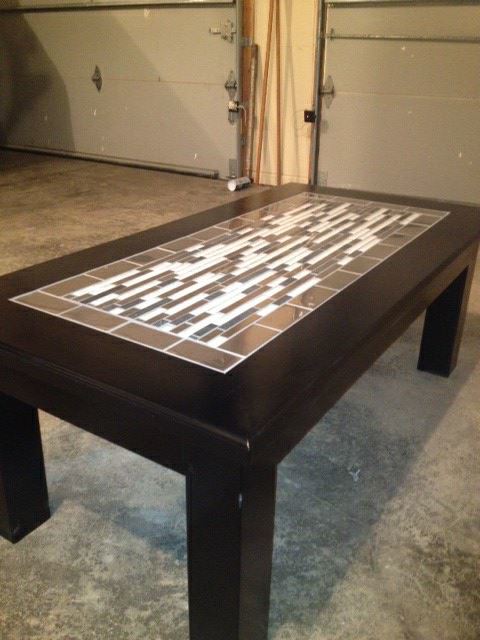
We wanted to build our own coffee table with a mosaic tile top, so we searched for plans that would give us a good, sturdy base to work with. The Tryde coffee table base with this design was simple, yet contemporary when paired with our tile table top. We tweaked the measurements slightly so that a 24"x48" piece of plywood could fit on top. Couldn't be happier with the result!
Built from Plan(s)
Estimated Cost
$200-$250
Estimated Time Investment
Week Long Project (20 Hours or More)
Finish Used
Black satin spray paint, sanded for smoothness. 3 coats total, with sanding in between for a smooth sheen.
Recommended Skill Level
Intermediate
Comments
Fri, 09/06/2013 - 08:38
Very nice job! How you were
Very nice job! How you were able to keep the tile and trim flush? What was the thickness of the wood and tiles? Thinking of doing something similar on some cabinet counter tops in my family room.
In reply to Very nice job! How you were by Lthomas
Fri, 09/06/2013 - 21:07
Email me at
Email me at [email protected] and I'll give you some more details!
Easy, Economical Garage Shelving from 2x4s
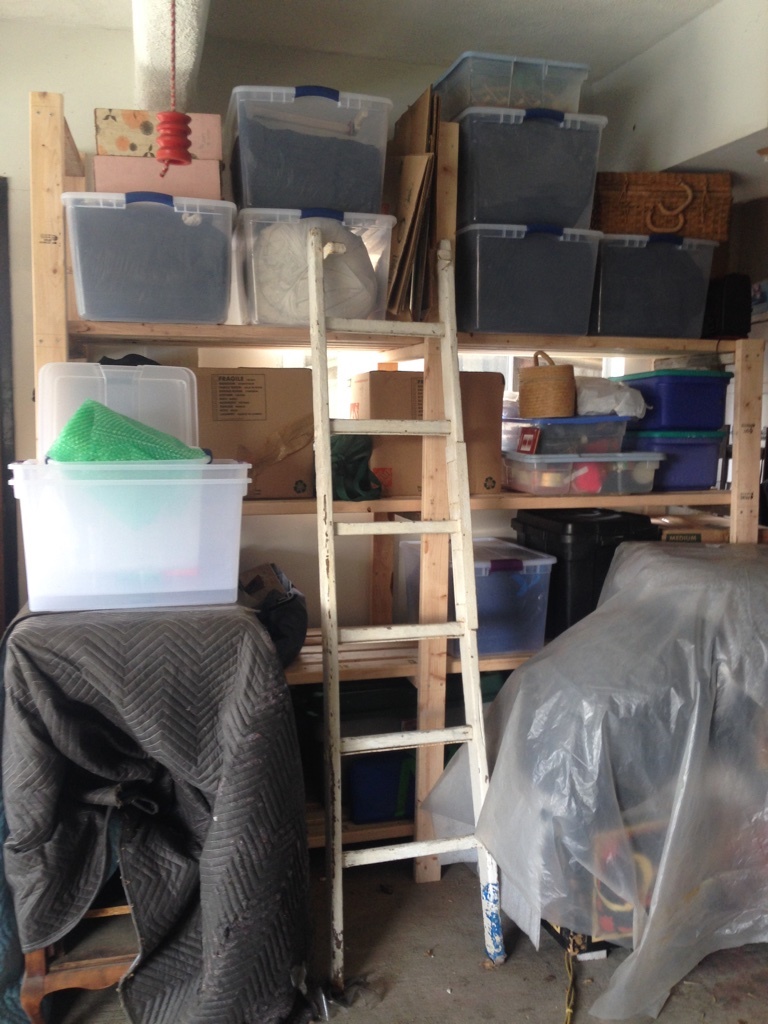
I modified the width of the shelves and as you can see from the variable height of my garage one side was made higher.
I used some scrap wook so I was able to cut expenses by about 25 dollars. The total cost was 50 dollars not including the nails. Although time is money. It took me one day to draw up the modified design, get prices and get the wood and then another day to put it together. With what I saved by doing it myself I could have made more working and buying a premade unit. However with this said, it would not be my personal accomplishment and modified to my unique needs. Besides, I had fun doing it.
Thanks for your info. It was very clear and simple. Debbie
Built from Plan(s)
Estimated Time Investment
Day Project (6-9 Hours)
Recommended Skill Level
Starter Project
Comments
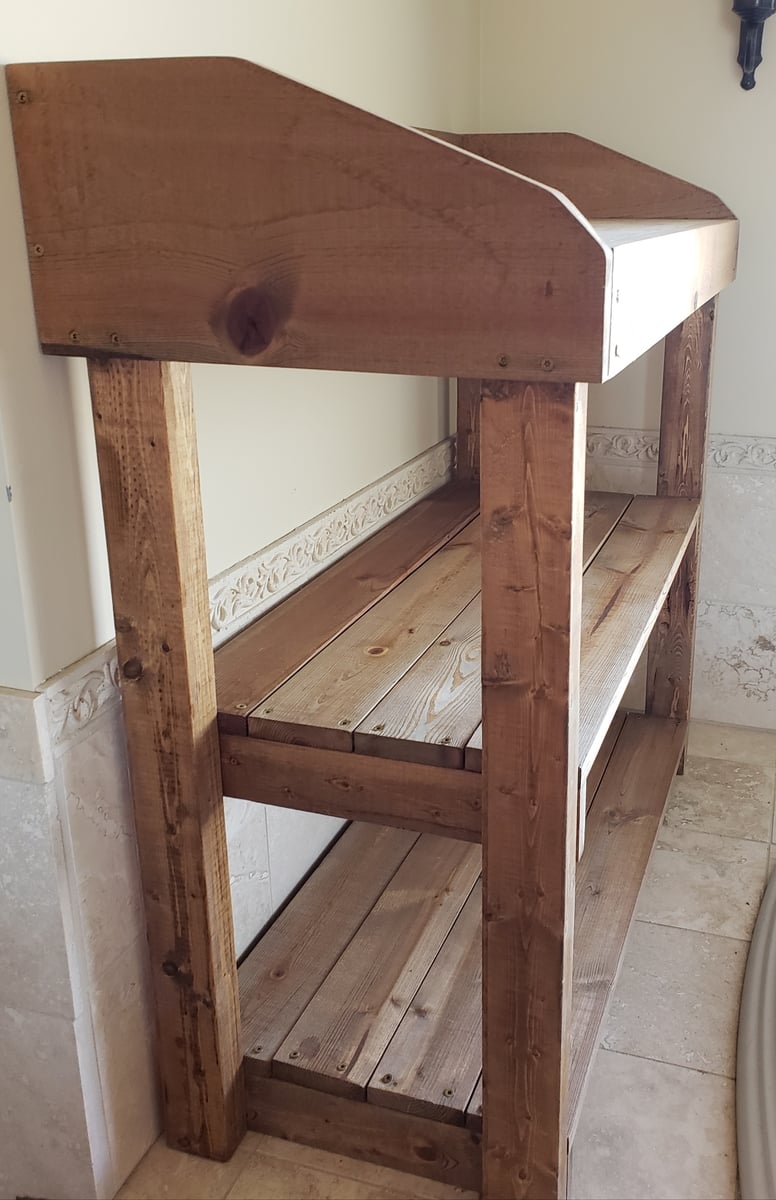
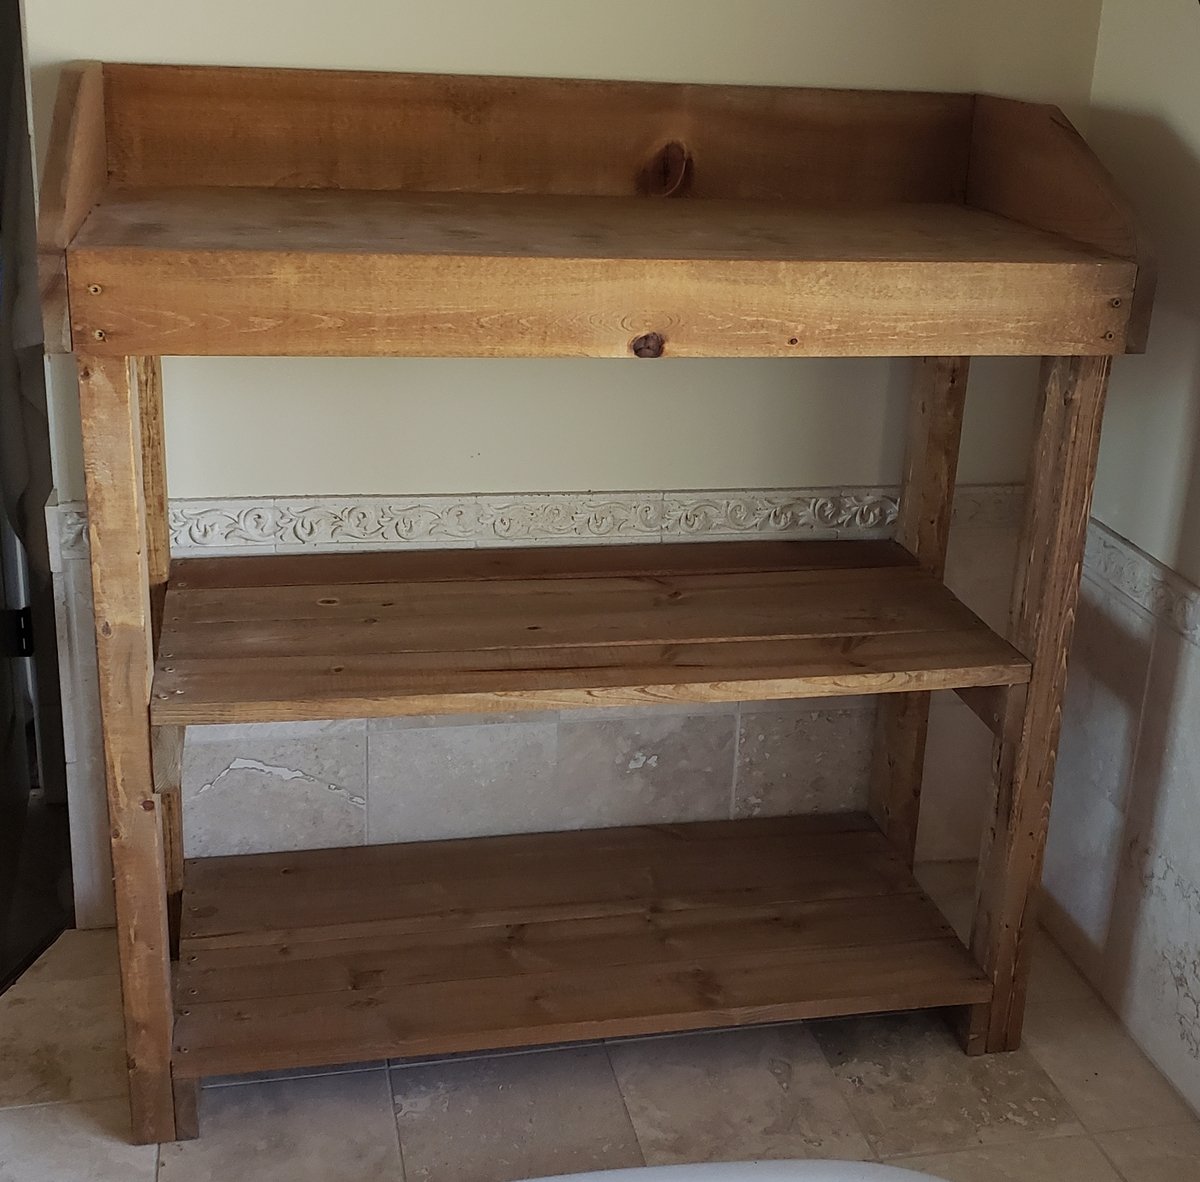
Rustic Bathroom Storage Self Dry Sink

No plan was used but I did use many techniques that I learned from this site. I took features from several different plans. I love how it turned out.
Estimated Cost
30
Estimated Time Investment
Afternoon Project (3-6 Hours)
Finish Used
Dark walnut danish oil
Recommended Skill Level
Beginner
Queen Storage Bed
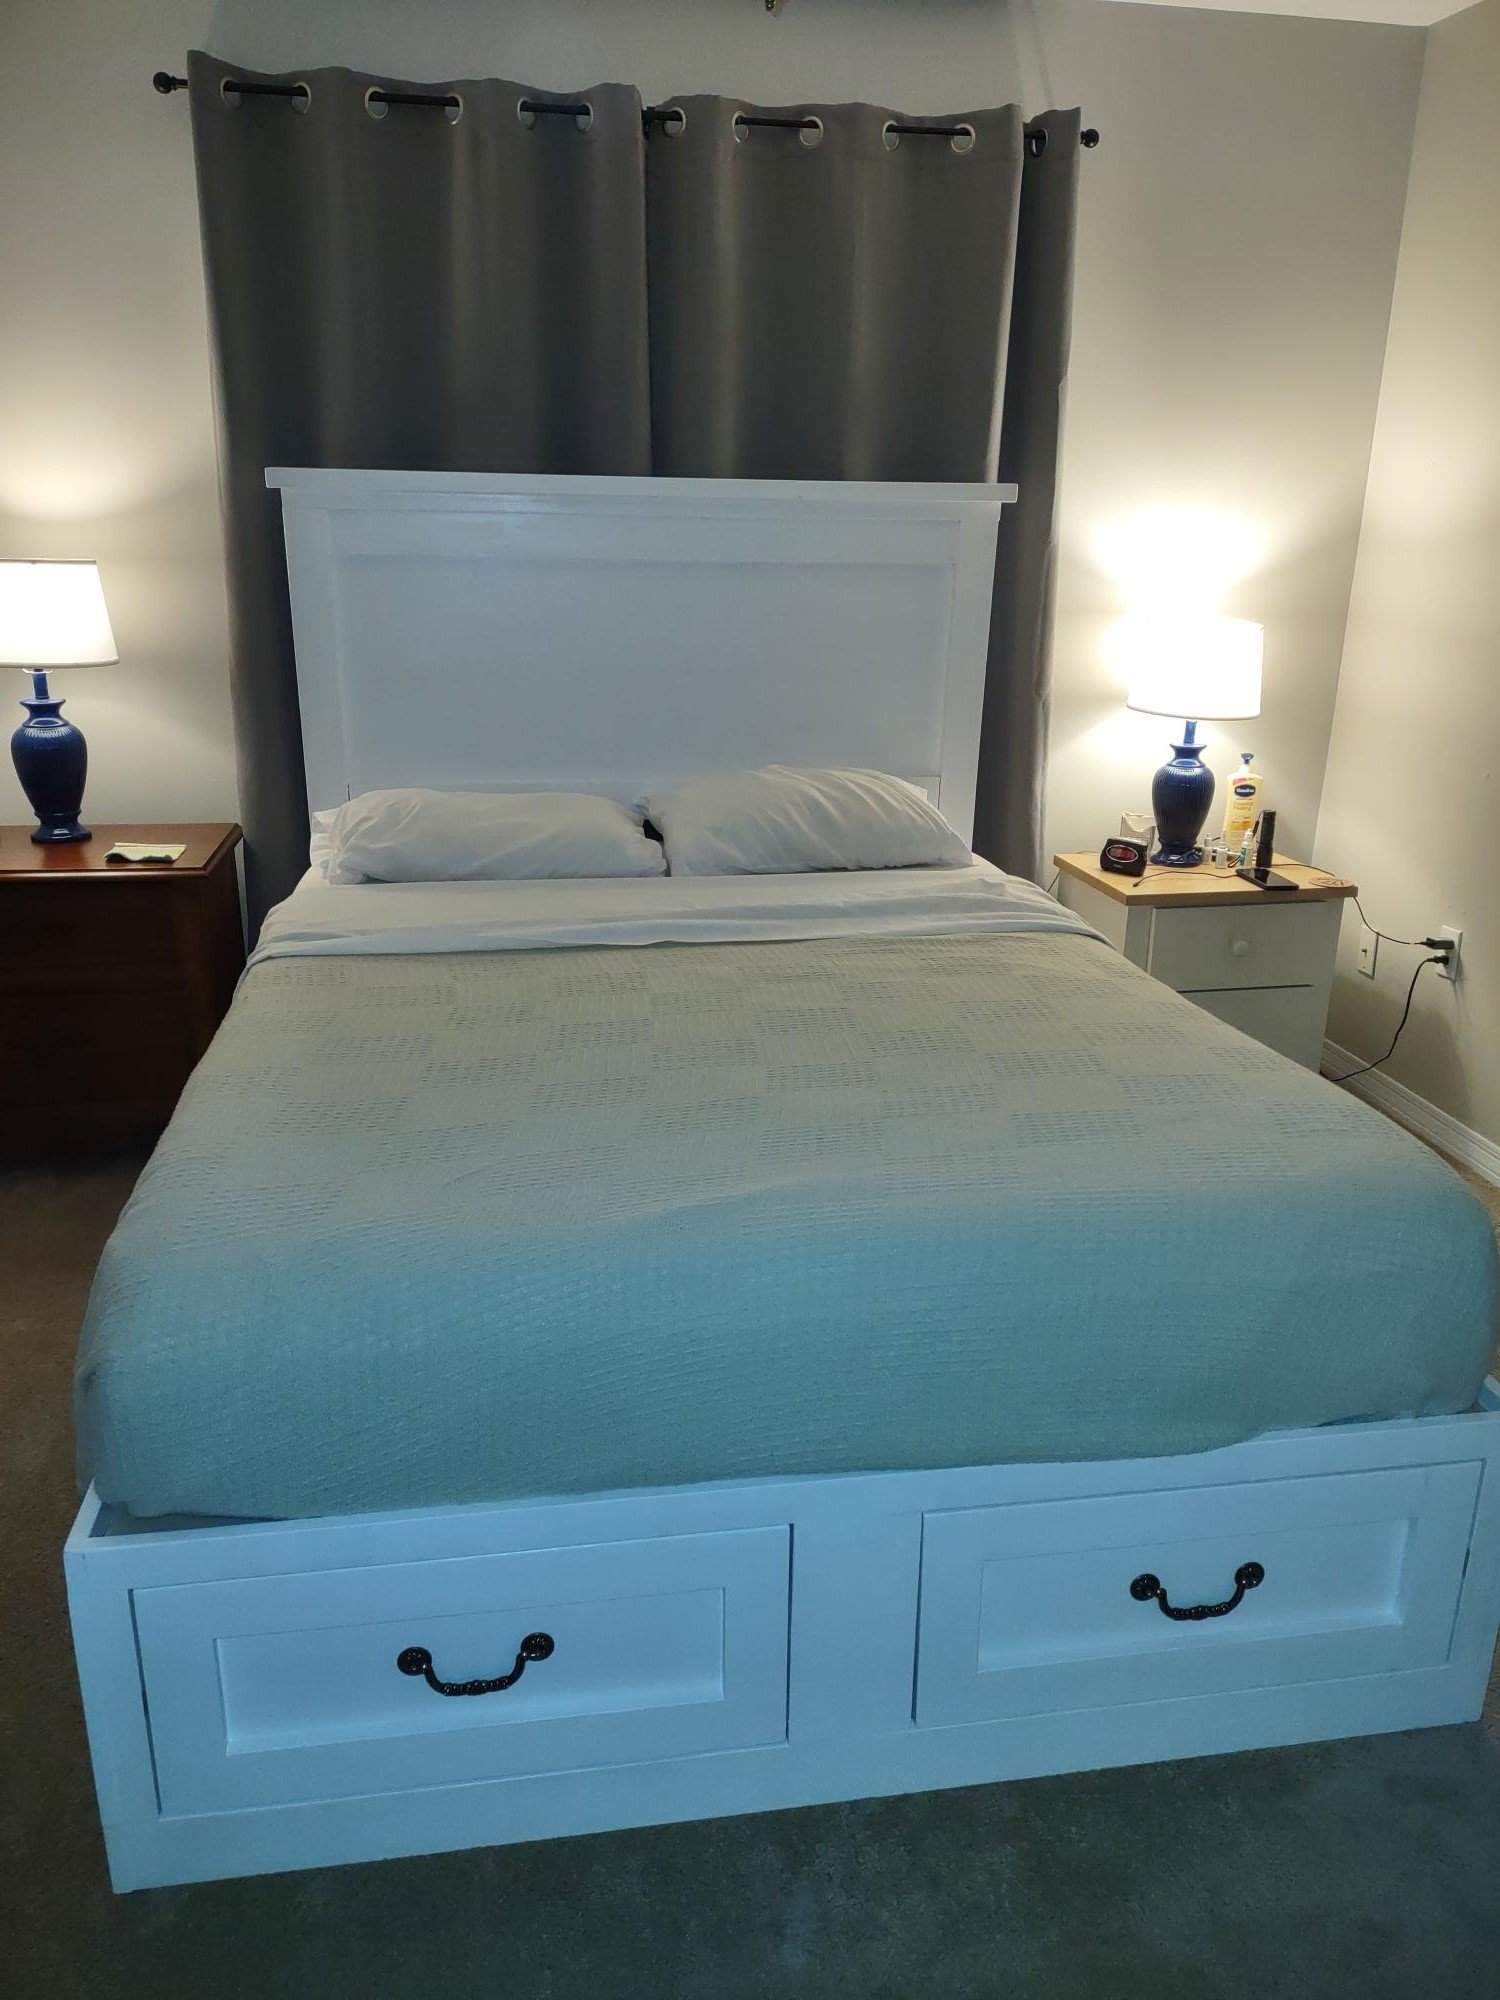
This bed has 6 drawers, 2 on each side and 2 on foot. We used Ana White pattern for Farm bed head board and storage bed for rest, while incorporating her easy and no fuss, accurate, drawer slide method.
Built from Plan(s)
Comments
My first build--LACK inspired bookcases

I decided to start with the most simple design I could for my first build. I've always wanted some big, ginormous bookcases and these seemed to fit the bill. I was surprised with how difficult it was to work with the thick 2x12 boards, but all in all I'm really happy with the results. I did modify the dimensions to make them not as wide, making the width of the shelves only 31".
Built from Plan(s)
Estimated Cost
$150 for both (wood, polyurethane, screws, and leftover paint)
Estimated Time Investment
Day Project (6-9 Hours)
Finish Used
We had leftover chocolate brown paint from an accent wall, so I sanded (all by hand as our sander went kaput in the beginning) and added 2 coats of Valspar eggshell brown paint. Covered with 2 coats of Minwax polyurethane for more shine.
Recommended Skill Level
Beginner
Comments
Tue, 07/24/2012 - 03:58
Bookcase
I agree! The 2" boards are SO difficult to work with. I am almost done building my bookcase. If I could do it all over again I would use a thinner board. This is something I thought I could quickly pull together for my husbands bday but was mistaken! Its definitely doable, just really hard to work with the thick wood.
First Build - Redwood Adirondack Chairs
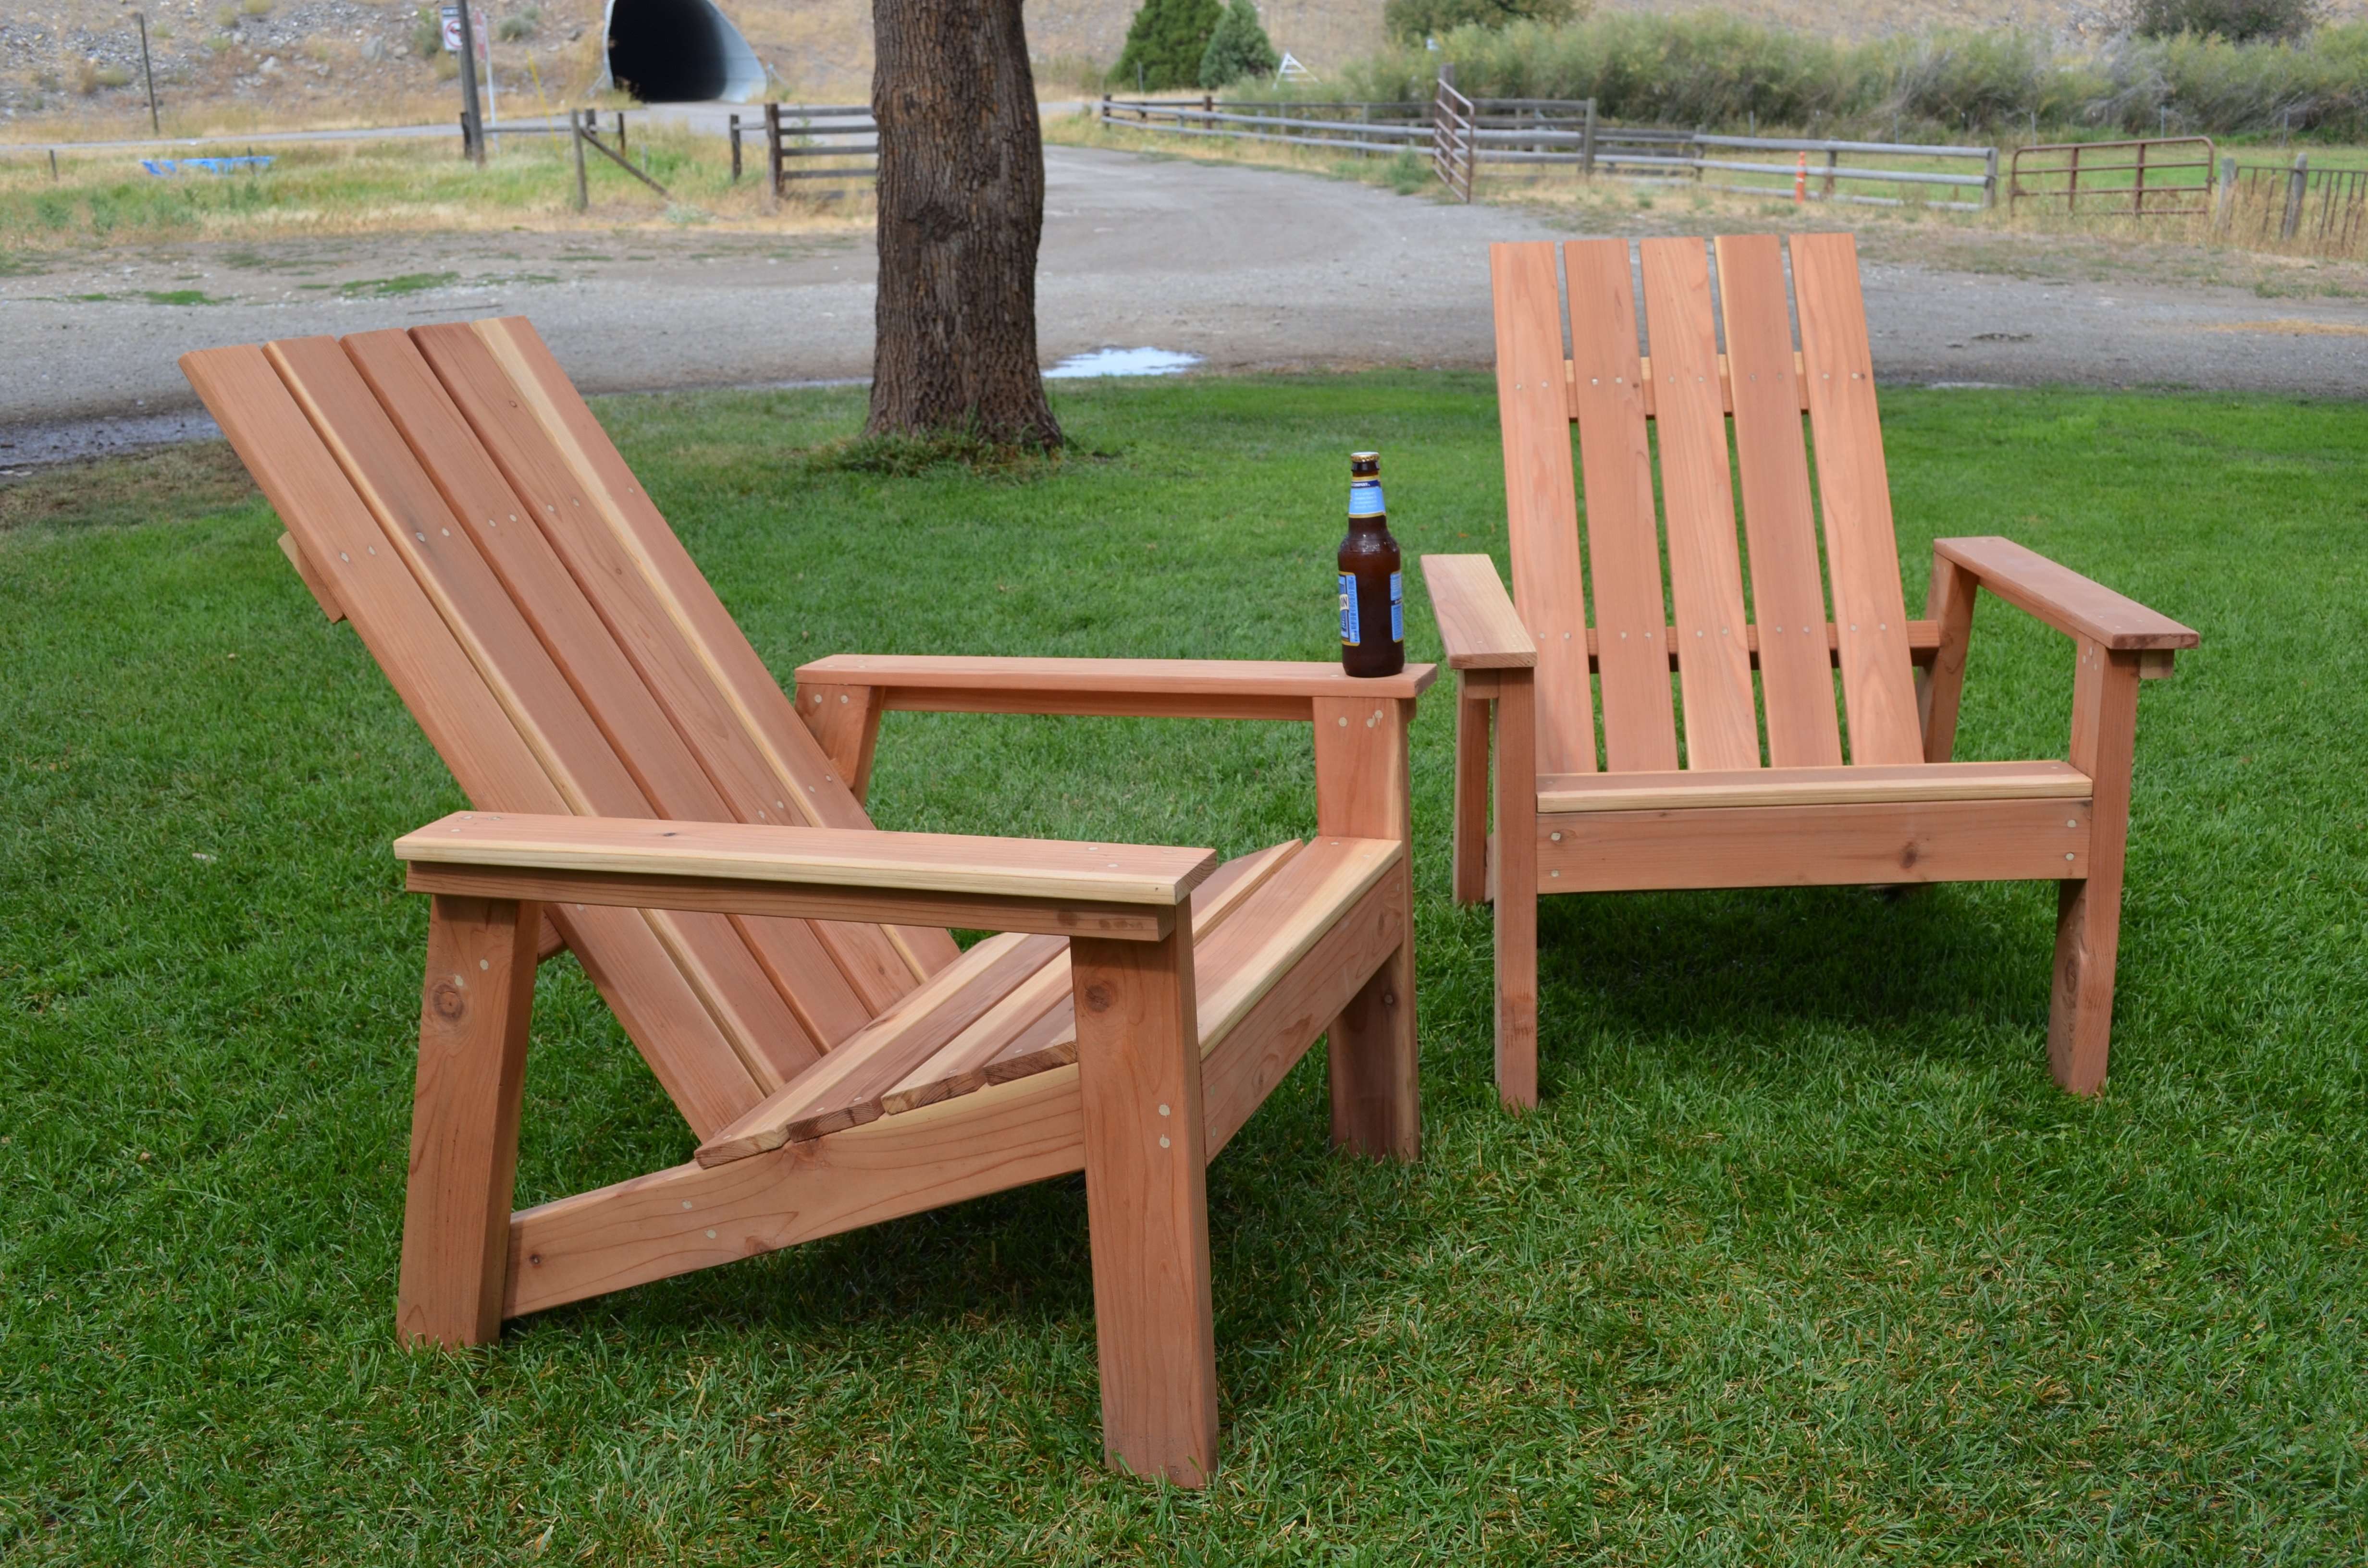
Love the results of my first building project.....a pair of redwood adirondack chairs. Angled cuts were a great way for a beginner to learn to use the miter saw.
Built from Plan(s)
Estimated Cost
$75 for redwood per chair
Estimated Time Investment
Weekend Project (10-20 Hours)
Finish Used
Discovered a non-toxic, non-flammable, water-based, environmentally friendly product called Seal-Once. Quick and easy two coat application in natural clear to protect wood outdoors for up to 10 years. Soaked right into redwood without leaving a shiny finish or residue.
Recommended Skill Level
Beginner
Comments

Sat, 09/07/2013 - 19:59
Fabulous!
Love these gorgeous redwood chairs! The color and grain on that wood is awesome, and the clear coat is perfect for it. You did a great job on this build! I popped over to your blog and I enjoyed your post on this build very much. Well done!
California King Farmhouse bed
I had to make some adjustments to the size, because our new mattress is 180 x 190cm, and I had a couple of problems with the plan, it was probably me rather than the plan, but nothing that I couldn't overcome. The bed is pino (pine) purely because I couldn't get any other dry timber in Colombia, unless I won the lottery.
The boards on the headboard panel, I pocket holed (using ordinary wood screws) as well as glued, to ensure they will not part in the future, and I used lag bolts to attach the base to the footboard.
The bed is a few inches taller than the plan, purely because my Wife wanted one of our dogs to be able to continue sleeping under the bed!
Unfortunately due to the small size of the room, the photos do not show the bed that well. The full build is on my Blog.
Now to make the night stands!
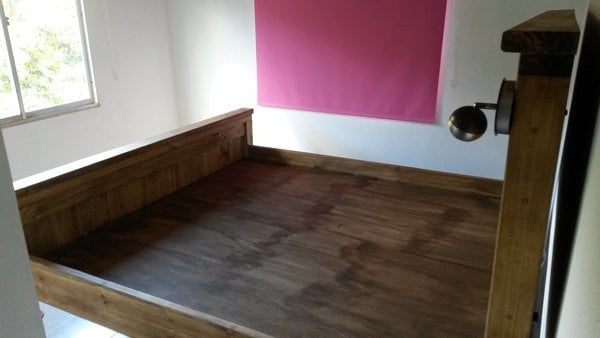
Built from Plan(s)
Estimated Cost
1256956 COP / $430 US / £282
Estimated Time Investment
Week Long Project (20 Hours or More)
Finish Used
Matt Oak Varnish, I only used one coat, because we didn't want the colour to go any darker, I used sponge 'brushes' to apply the varnish on all the visible timber, the base and MDF was just roughly brushed on.
Recommended Skill Level
Intermediate
Now Germany has the Ana White Playhouse too
Thanks for the Plans Ana. Though we had to convert every number the plans helped us a lot. Our playhouse turned out really big: 8x8 foot. We had to include our heater under the window, so our tunnel is much bigger. It took us (three people) a half day shopping and two days and one night building and cost 600-700€. The kids where amazed when they opened the door a few days after Christmas. We still think about adding some features like a slight or a bed...
Built from Plan(s)
Recommended Skill Level
Beginner
Easy to Build Twin Bed Frame

Easy build
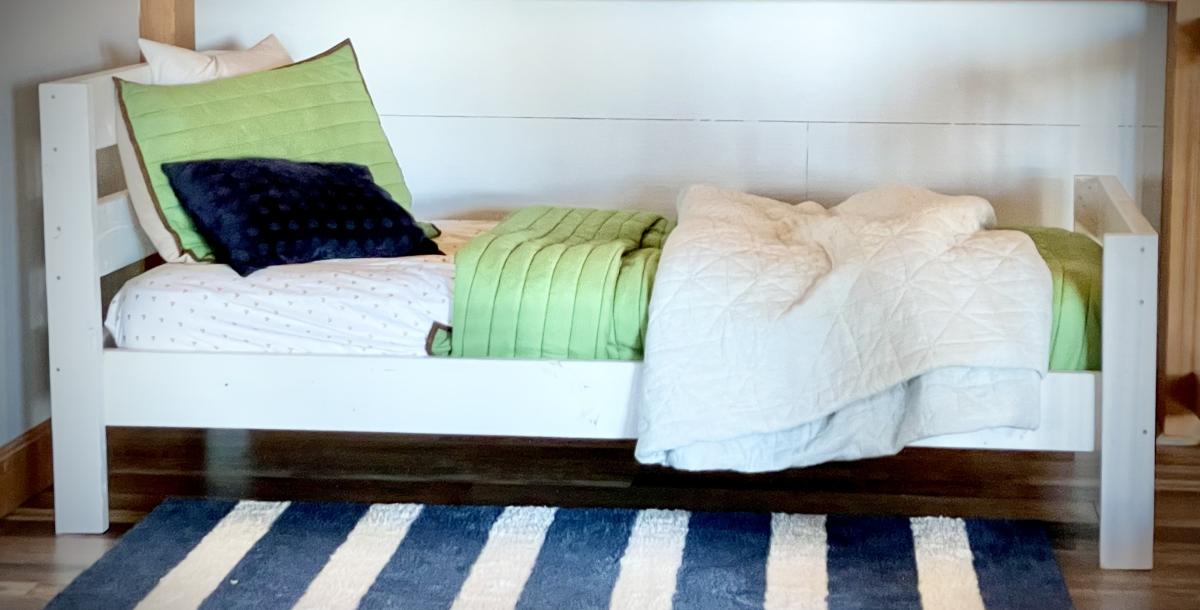
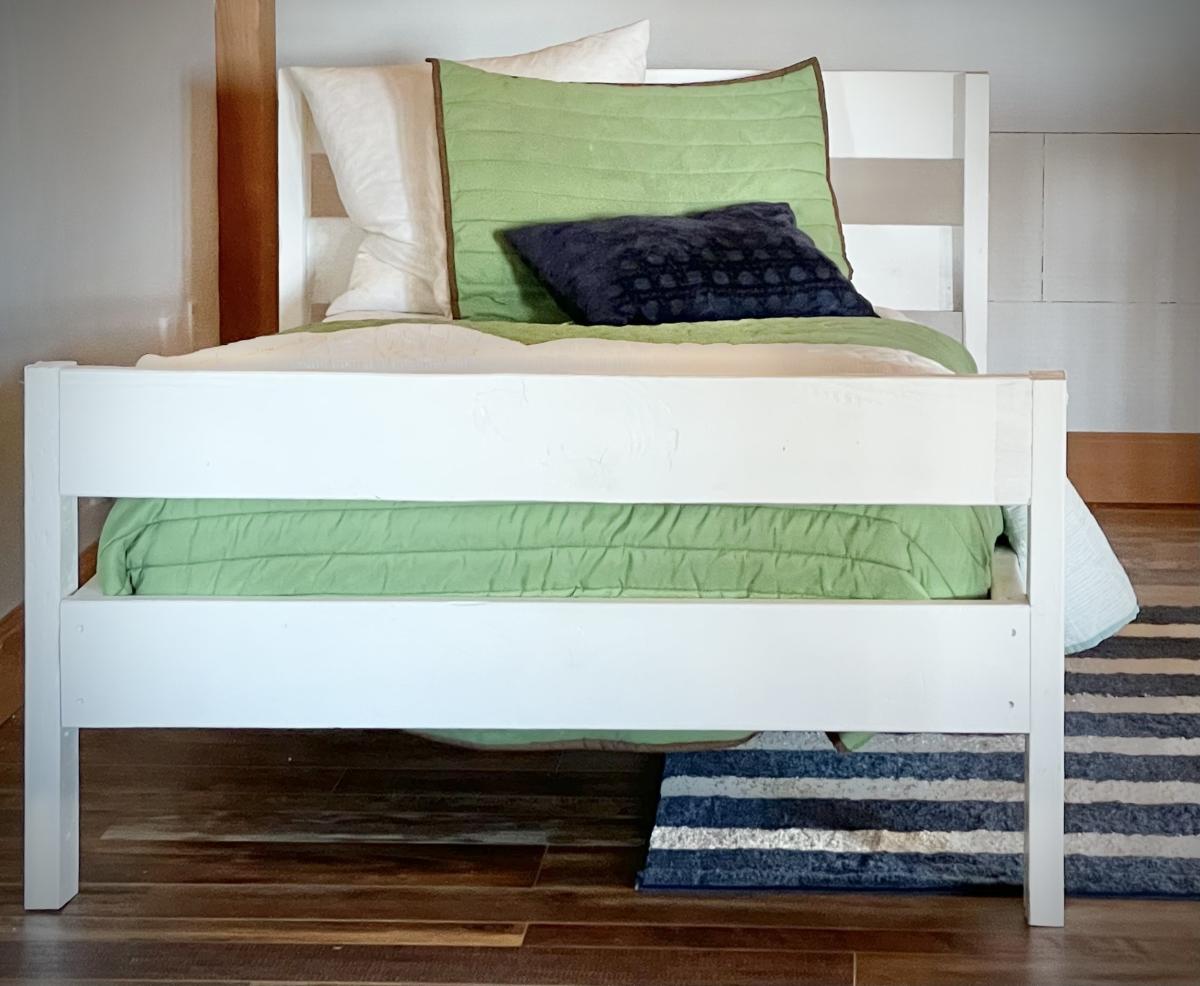
Built from Plan(s)
Yellow Sewing Table for Small Spaces
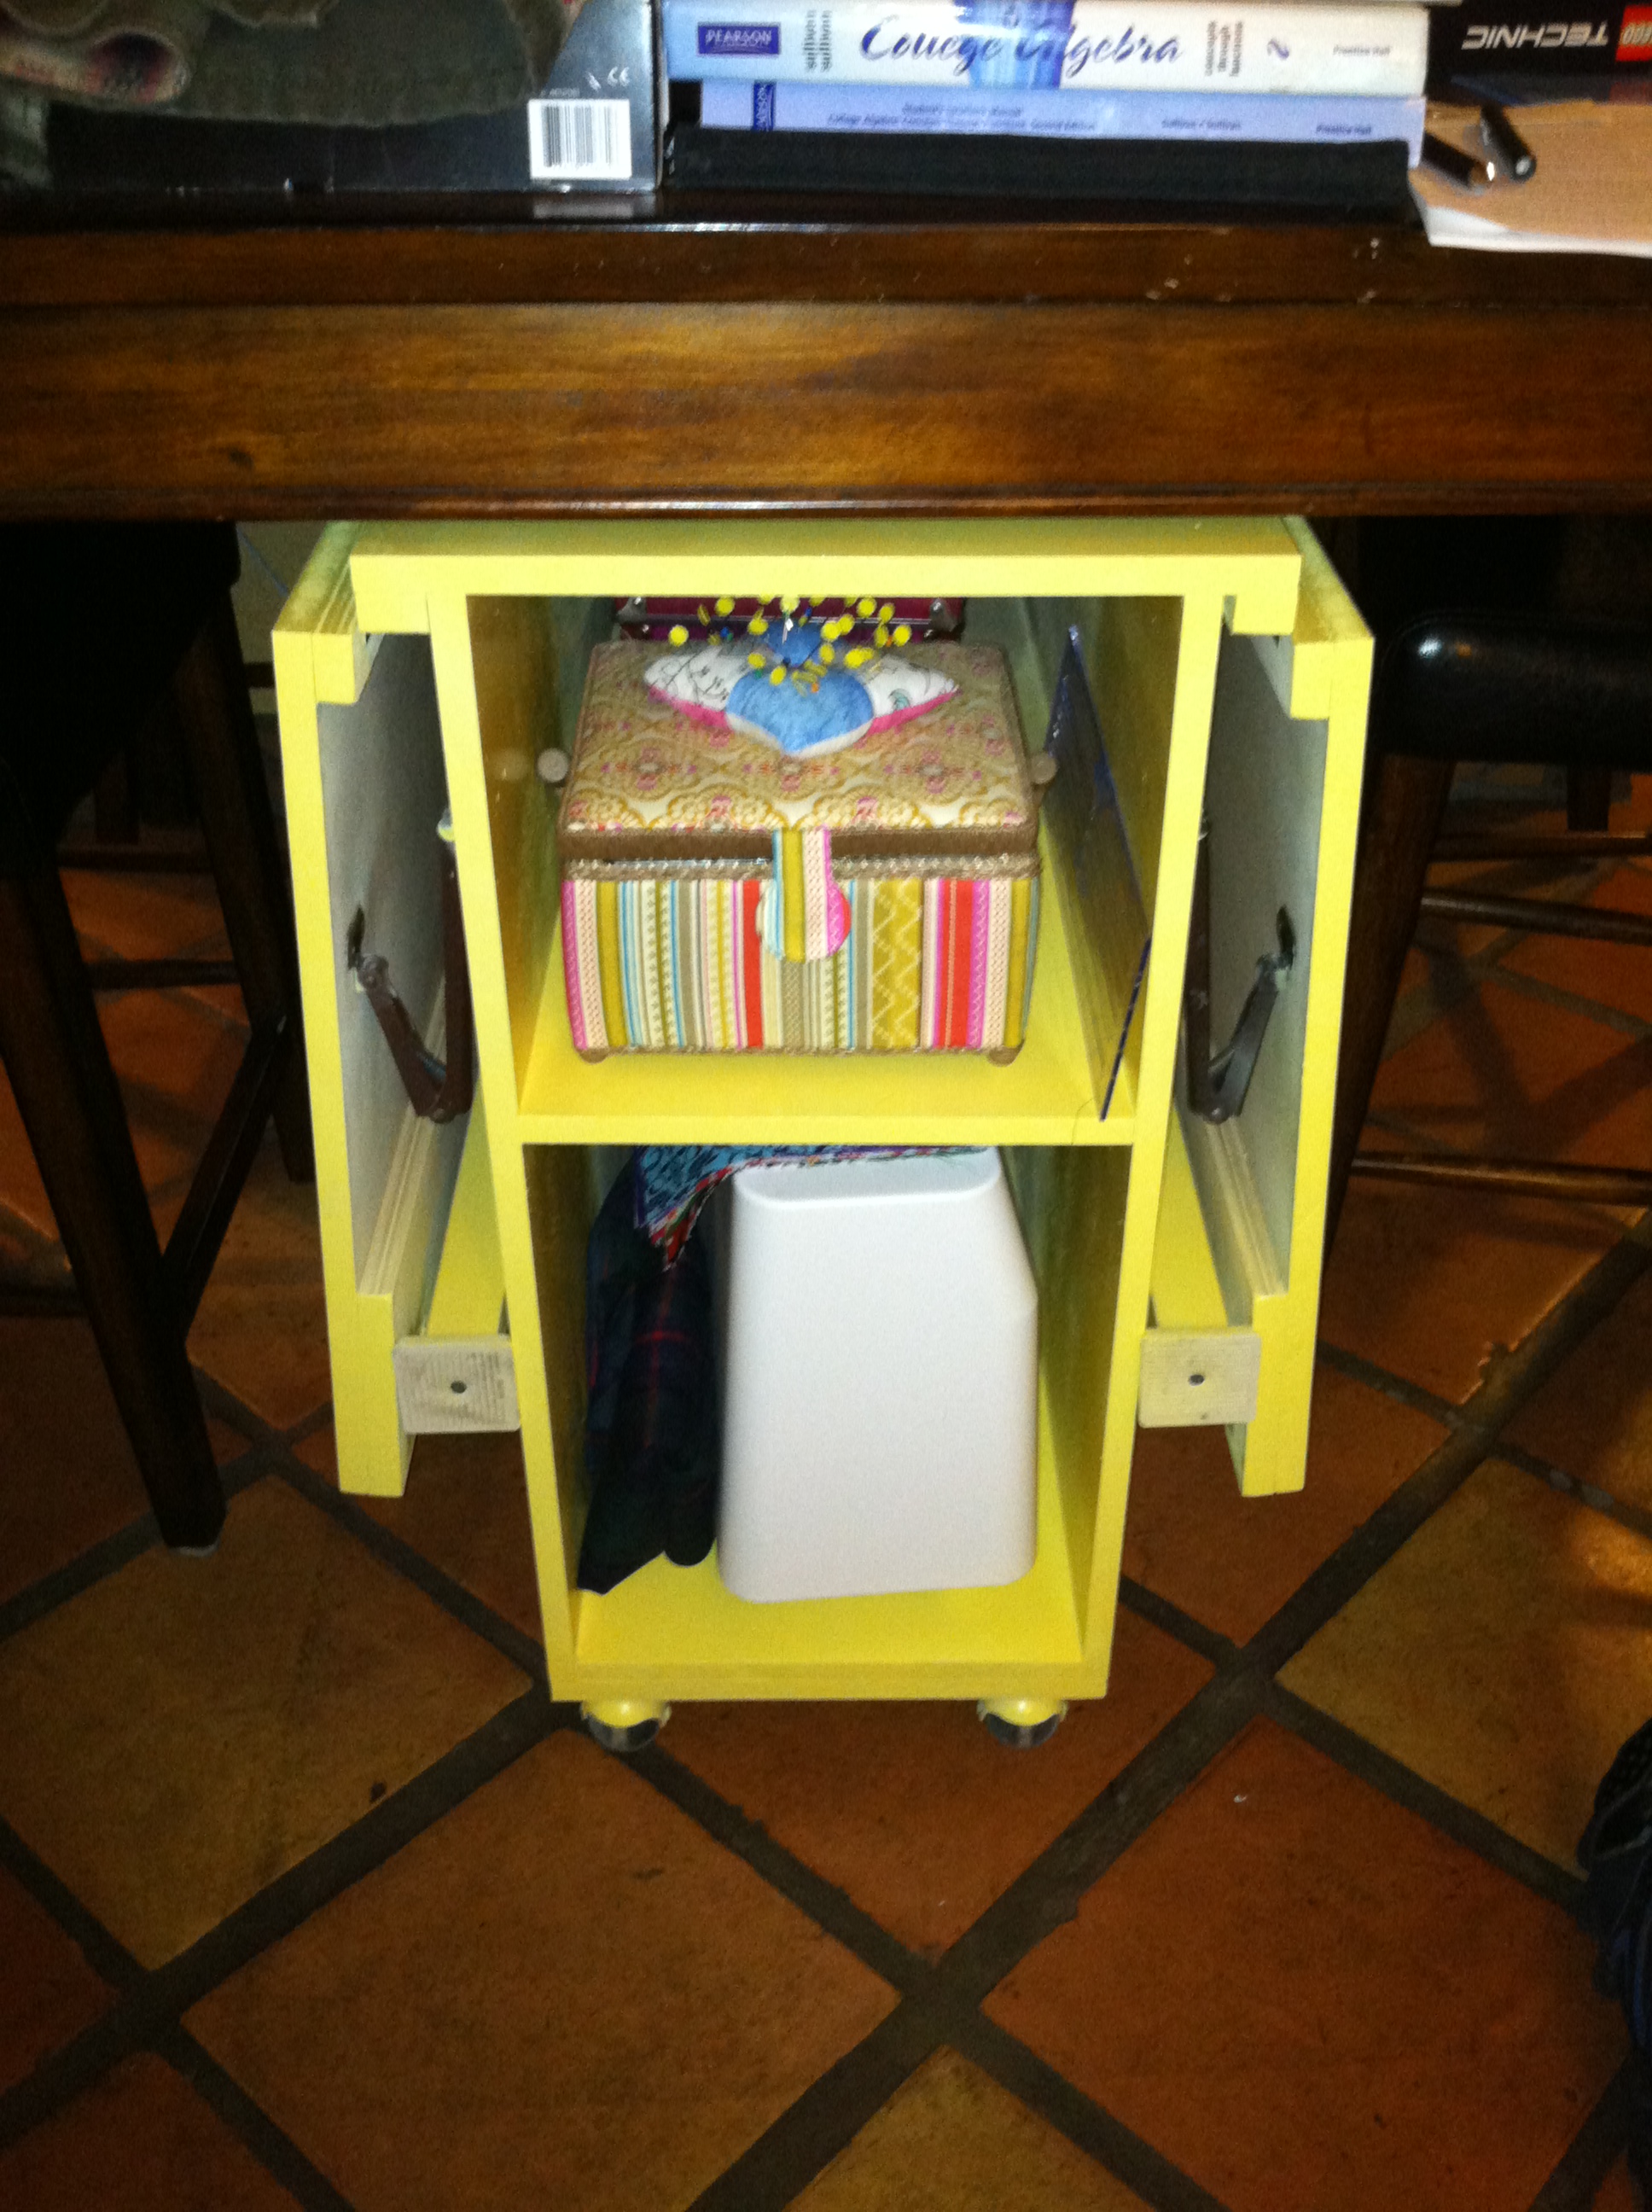
We used MDF, drop-leaf lockable hinges for the leaves, and piano hinges. I wouldn't recommend MDF because it wasn't strong enough for the screws and we ended up having to add bits of plywood to reinforce the areas for the hinges. We also put pegboard on the back to avoid things popping out the other end, and I'm planning on getting some hooks to hang crafty things like scissors and glue guns.
Despite the modifications we had to make, I love my little sewing table! It fits perfectly under our dining room table and but has tons of workspace when it's folded out. Perfect for a small, cramped house! The finished project isn't quite as bright yellow as the flash made it seem, but it is still bright and happy!

Estimated Cost
$55
Estimated Time Investment
Weekend Project (10-20 Hours)
Finish Used
Sanding, primer and spray paint. I ended up needed four cans of each - that MDF really soaked up the paint!
Recommended Skill Level
Beginner
Comments
Thu, 08/18/2011 - 20:23
cutting 60" wide fabric
Looks great! I agree that plywood just holds together better.
I noticed that there's room to add 2.5" of length (when hanging down) or width (when in table configuration) to the side pieces. If you do, then when you fully open the table, you can open up even 60" fabric completely and cut pieces such as chair backs easily.
I think it might be a modification worth making.
Thu, 01/21/2021 - 12:21
Great idea!!!!! If you did…
Great idea!!!!! If you did this it would require more than 1 piece of plywood though.... I think that's why it's the dimensions it is. I plan on making one soon. So excited!
Tue, 10/04/2011 - 19:49
Is this sturdy enough to sew on?
That's it. Can you sew on it, or does it shake too much?
Wed, 09/05/2012 - 21:24
It is sturdy enough to sew on
It is sturdy enough to sew on - I usually put it on a rug we have, which may stabilize it. The table did shake a bit, but it didn't affect the sewing very much. I'm not sure how it would do on the tile - the sewing machine might move it a bit because of the wheels. But, I also don't use it much for my sewing machine and use it more for my cutting mat and measuring since I don't have a large flat table at my house.
Rapunzel - I agree, there is room to make the table bigger. I think if/when we make another, we'll do that. It's surprisingly big now, but there's always room for more table sewing space!
My son LOVES it!!!
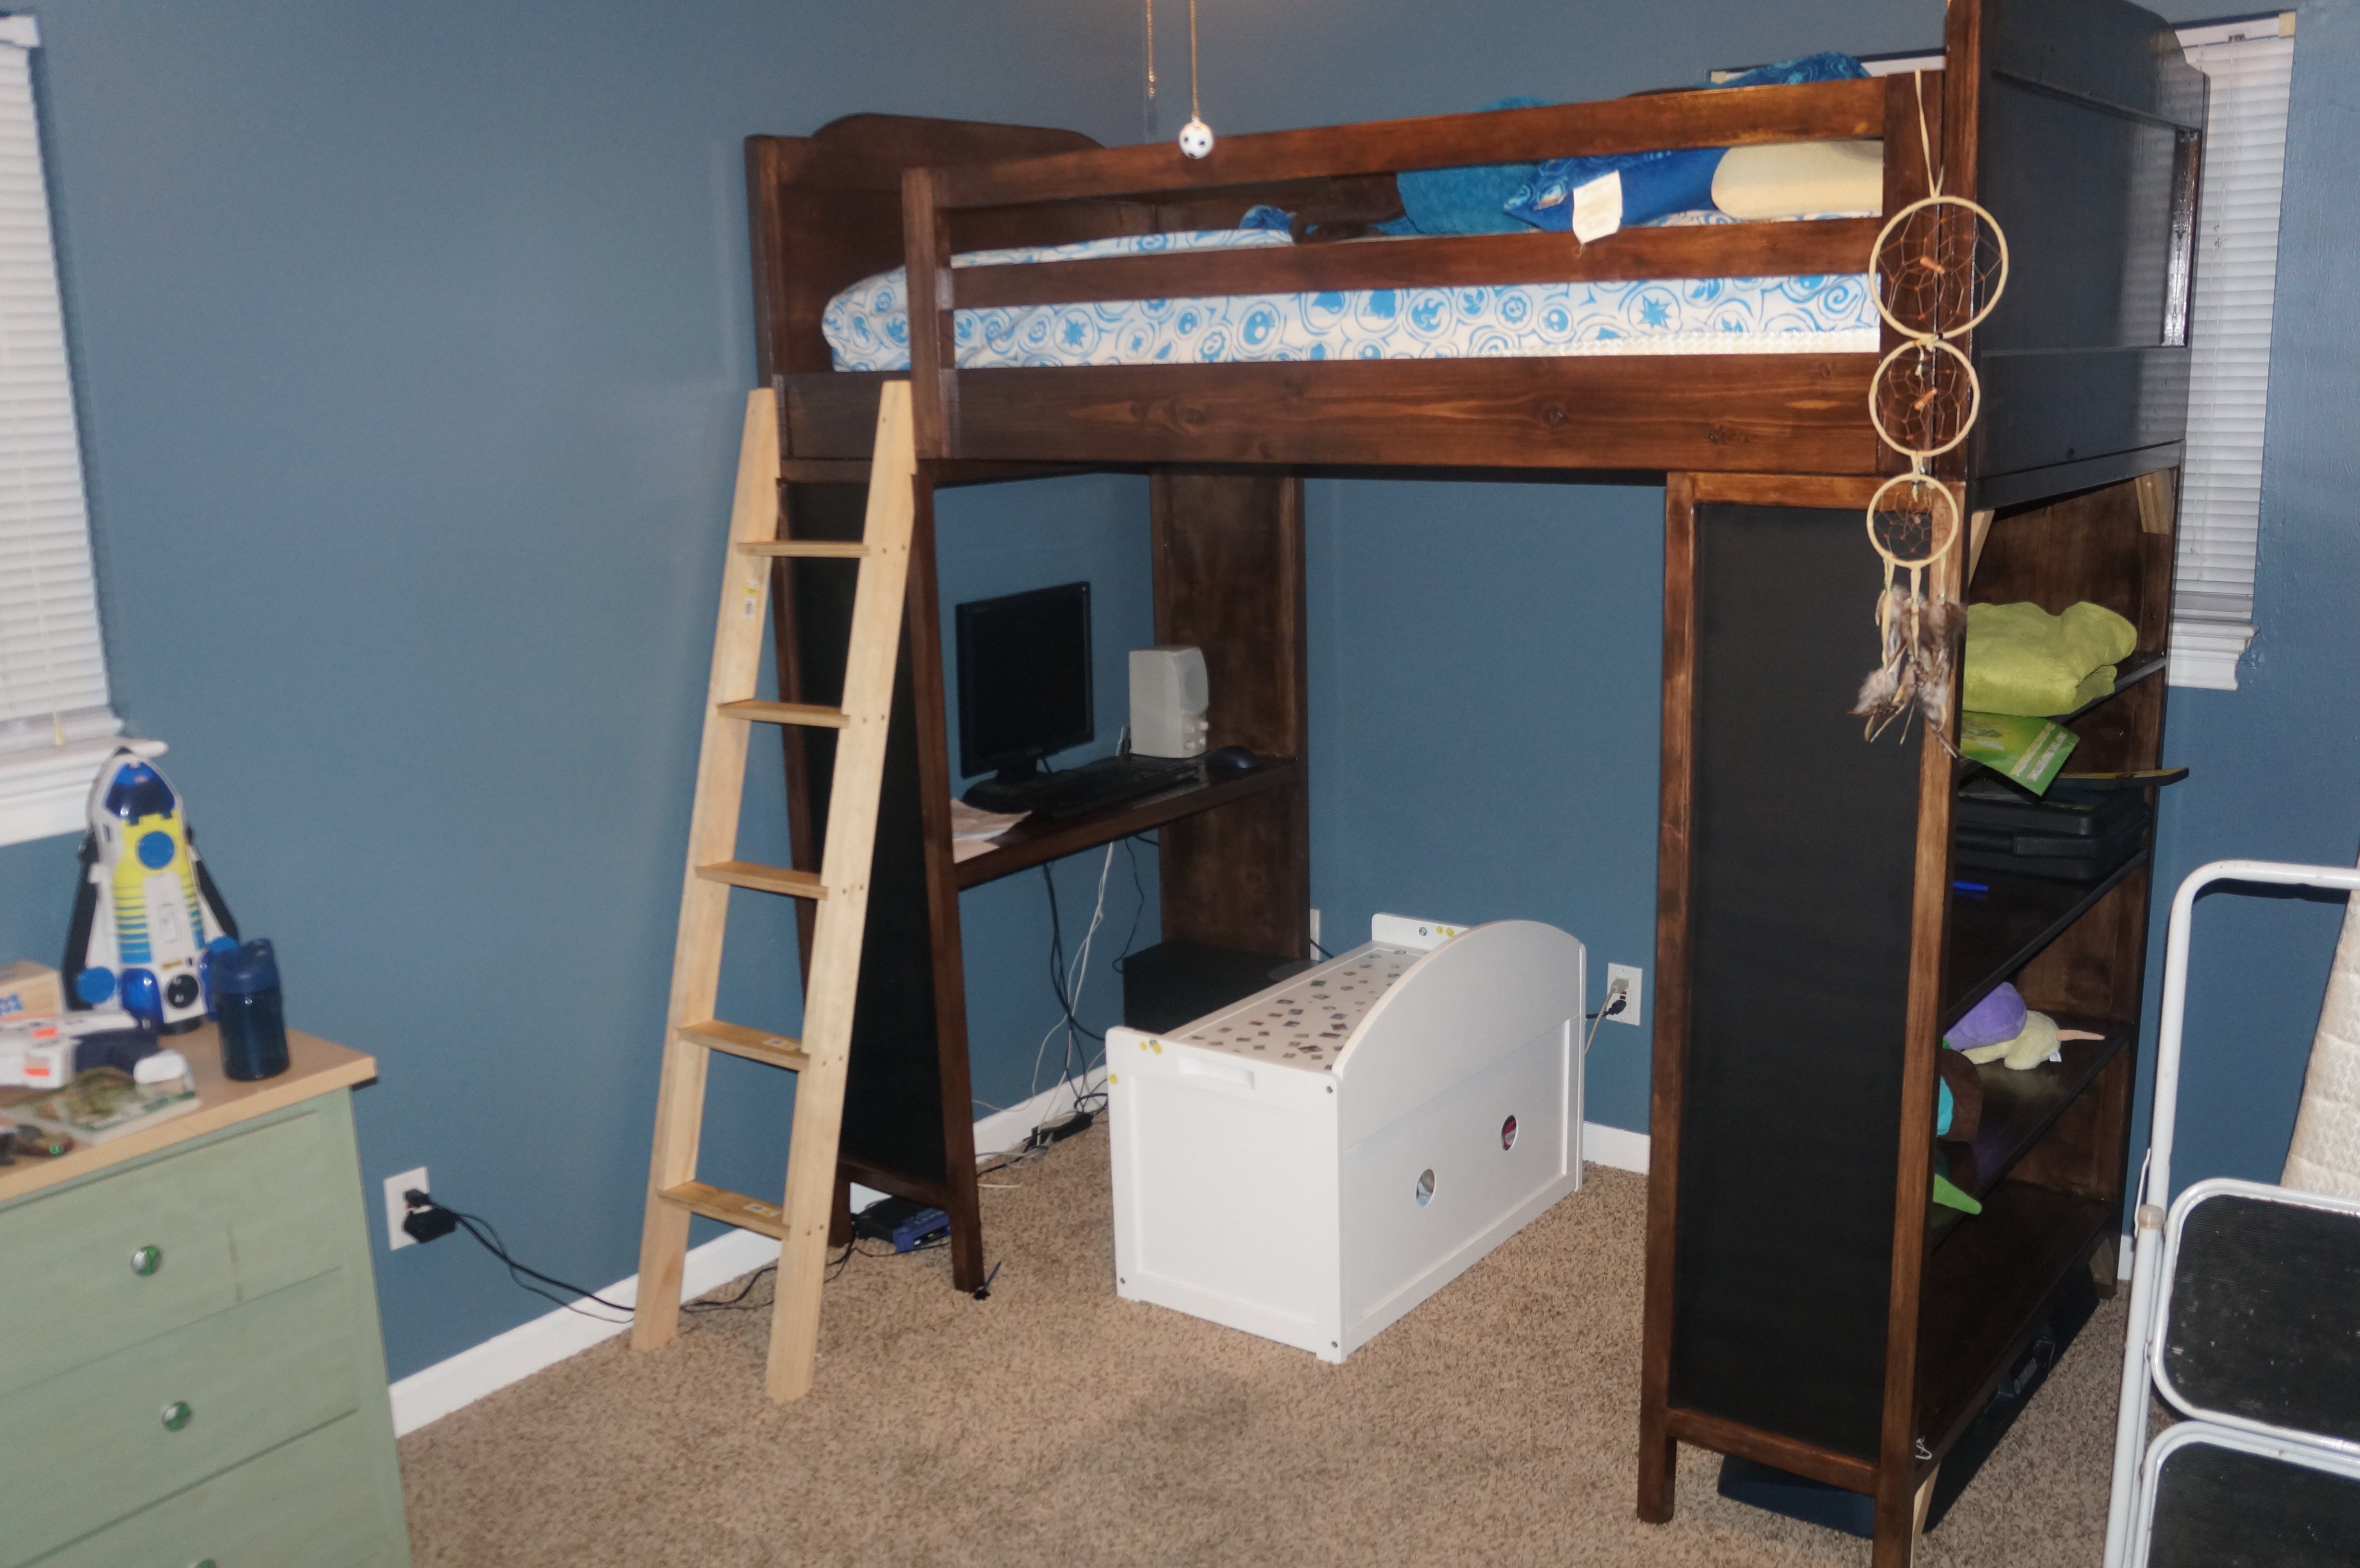
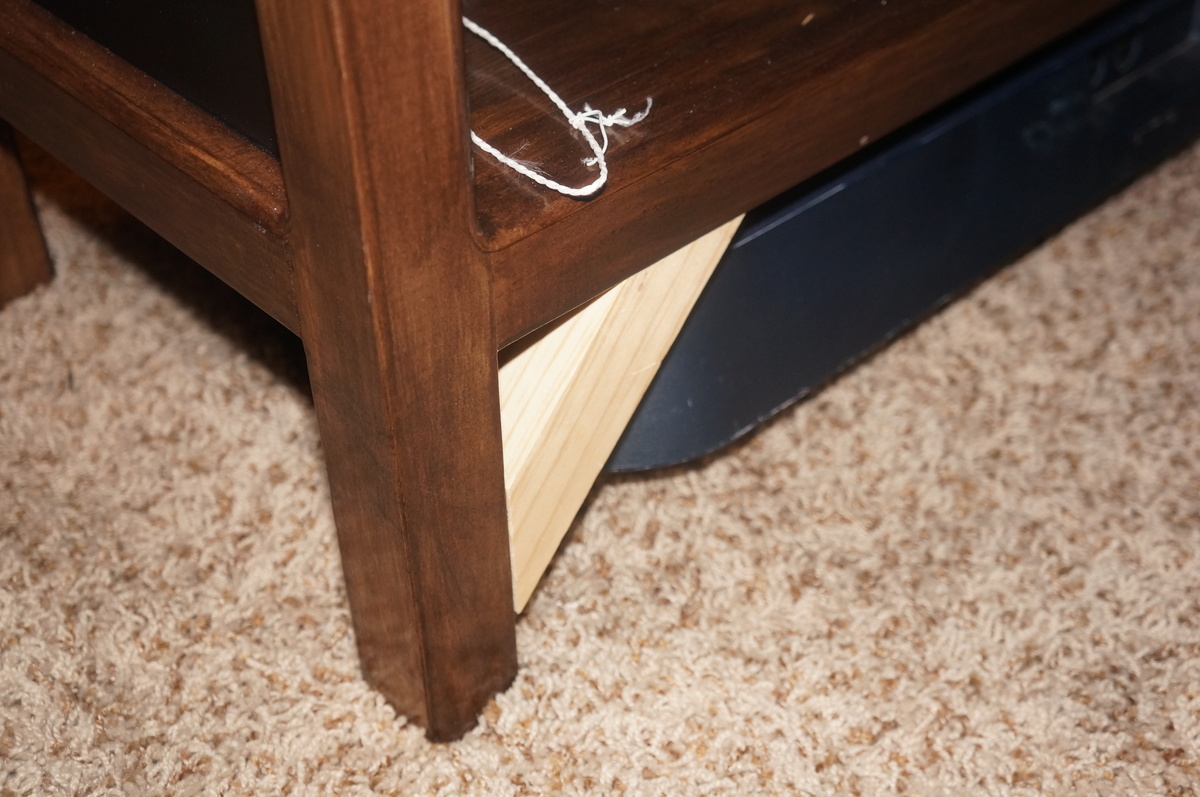
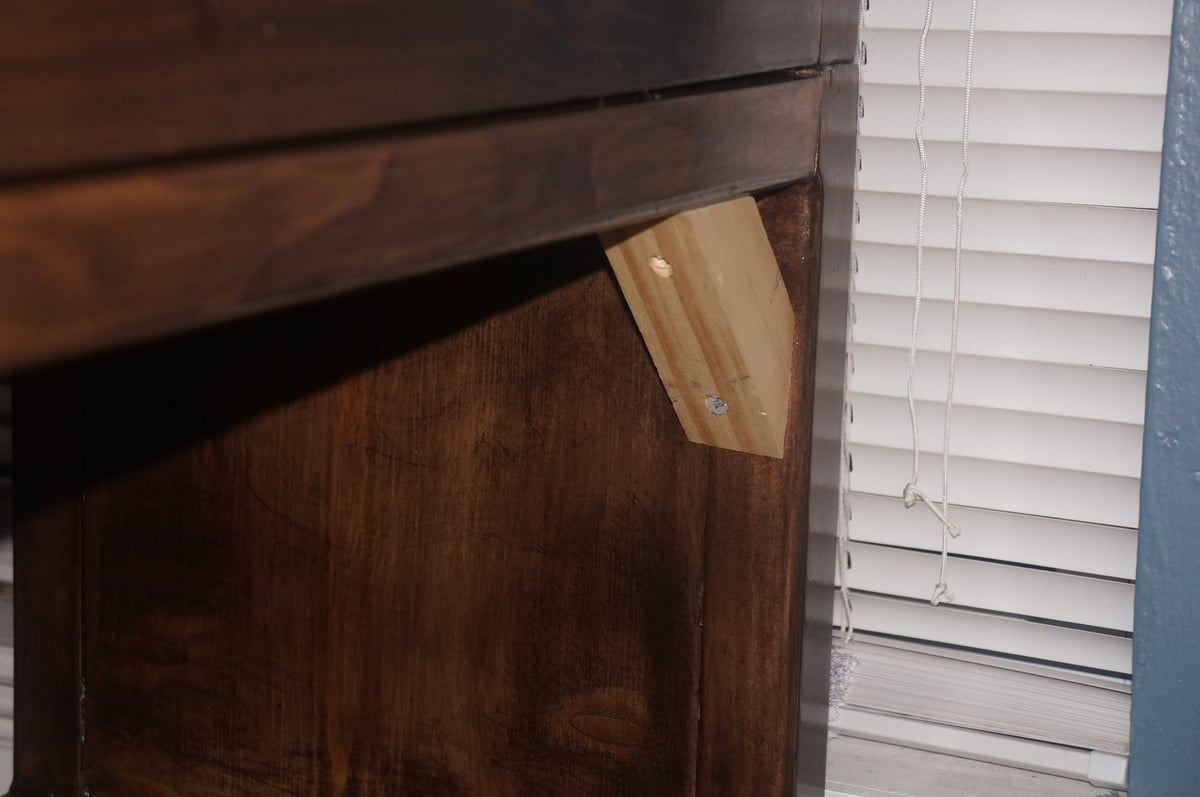
It was time that my son finally got a real bed. Additionally, he needed a desk as well. This is why I chose the Chelsea bunk system plans. I had to make some modifications that you can see in the pictures. The first modification was taken from GROOVYMOM2000, the chalkboards. I don't have any chalk at the moment so it looks like black paint from the picture but its the spray on chalkboard stuff. The subsequent modifications were made for stabilization. I added supports to the desk before I started finishing the wood with stain and polyurethane because it was WAY too unstable. I thought that the bookcase was going to be okay but once the bed was on top it had more wobble than I felt comfortable with. This is why I added the 45 degree 2x2s to the bookcase corners. I will have to remove them and add some better looking ones in the future but they REALLY made a difference; the bed is rock solid now. The ladder was thrown together last minute with a rather advantageous plan that didn't work out. I tried to incorporate hangers into the cut so it could be removed easily but my jigsaw blade was too dull and ripped the wood to pieces. At this point I just slapped the pieces together and screwed it into the side of the bed. He might have to go a couple months before I decide to build a new one the right way. This honestly turned out to be a lot bigger project than I planned at first. Building the bed was fairly quick and easy but sanding, conditioning, staining, and protecting the wood took almost a week. I am pleased with the outcome but painting the bed would have made a significant time difference. If you do go with stain then let me suggest you stain the guardrails before assembly.
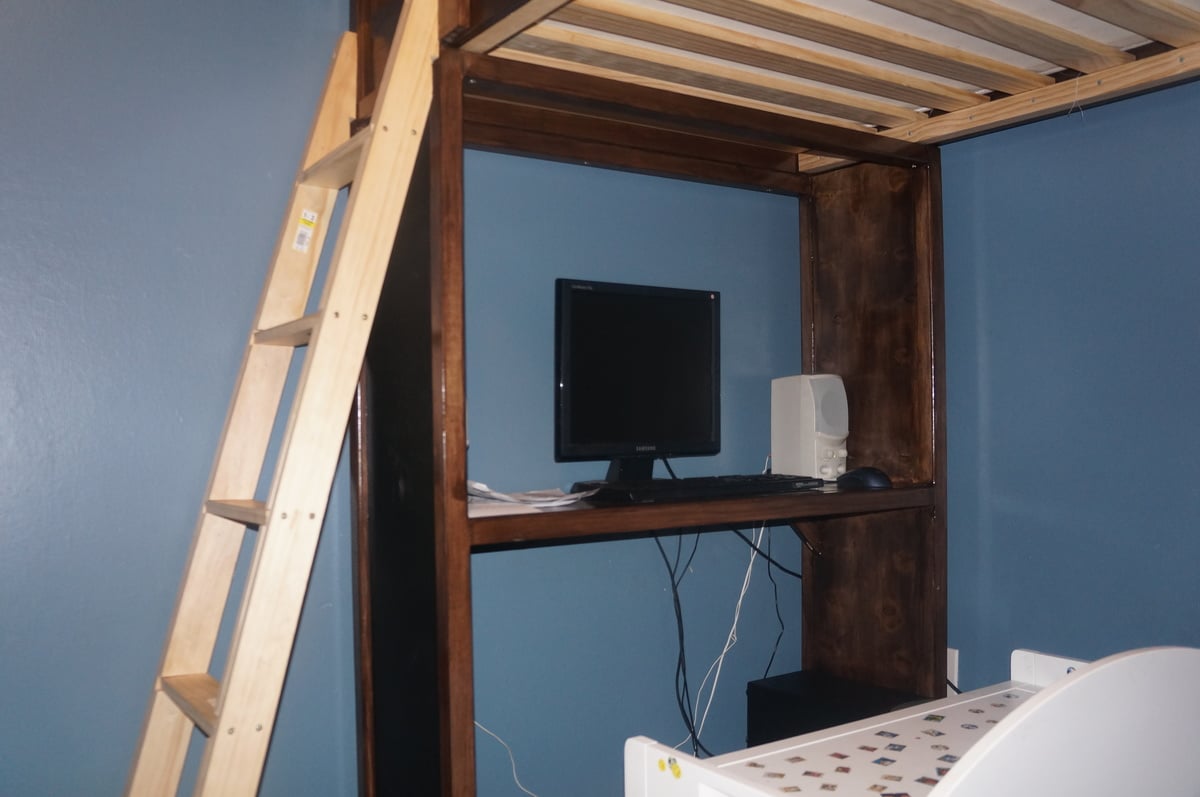
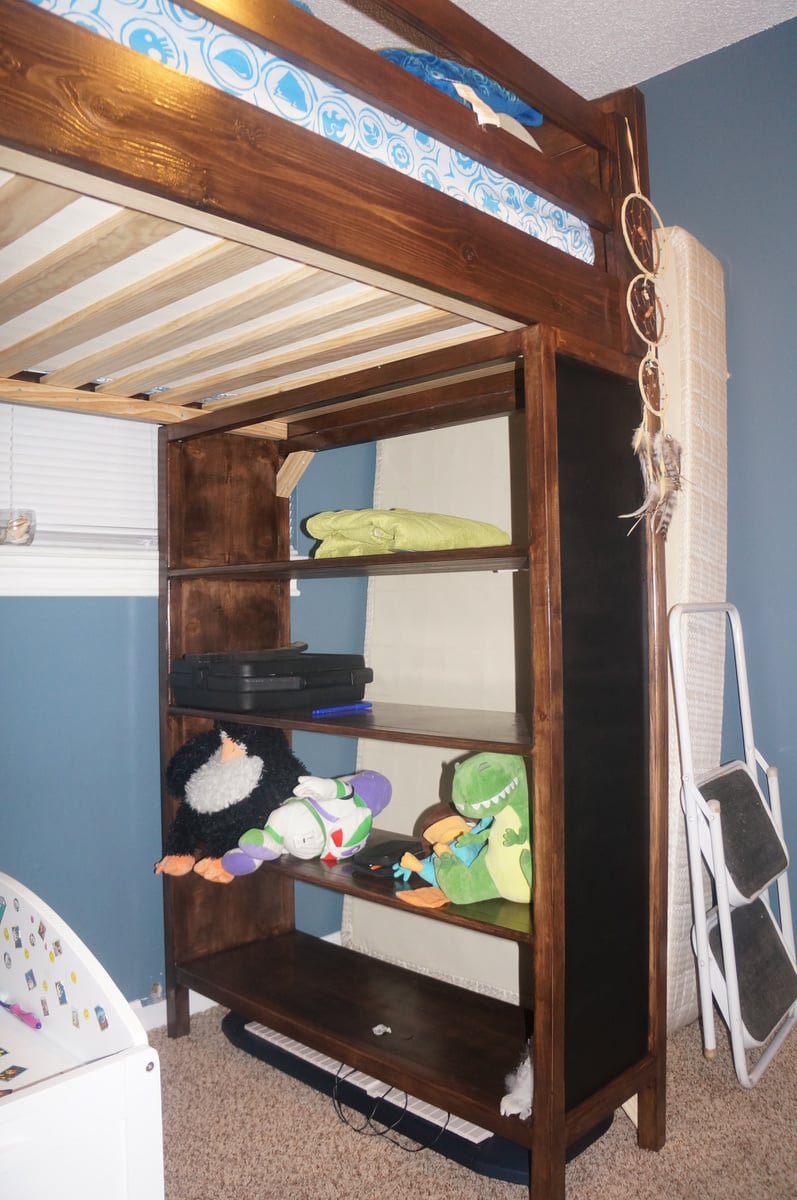
Built from Plan(s)
Estimated Cost
$450 - almost $100 was the stain/supplies
Estimated Time Investment
Week Long Project (20 Hours or More)
Finish Used
Cabot Espresso Stain for color and Polyurethane for protection/shine.
Recommended Skill Level
Intermediate
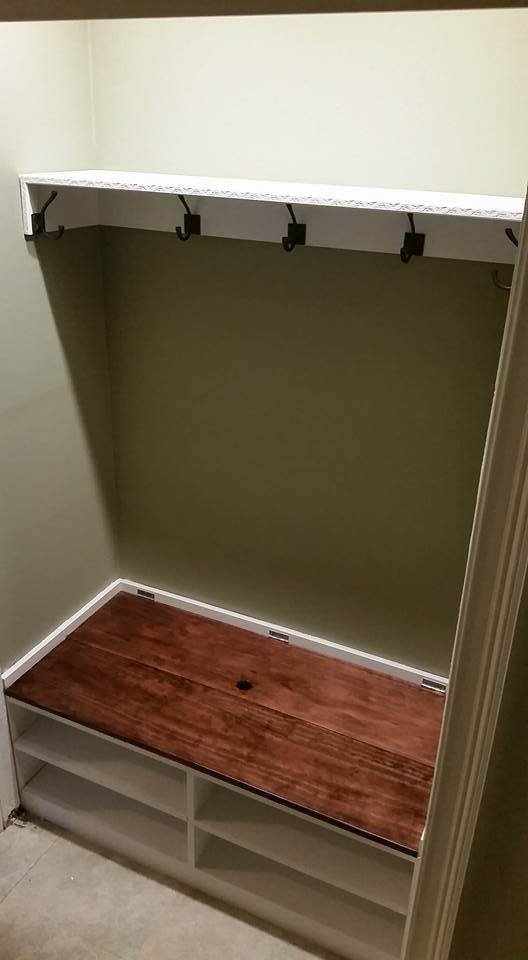
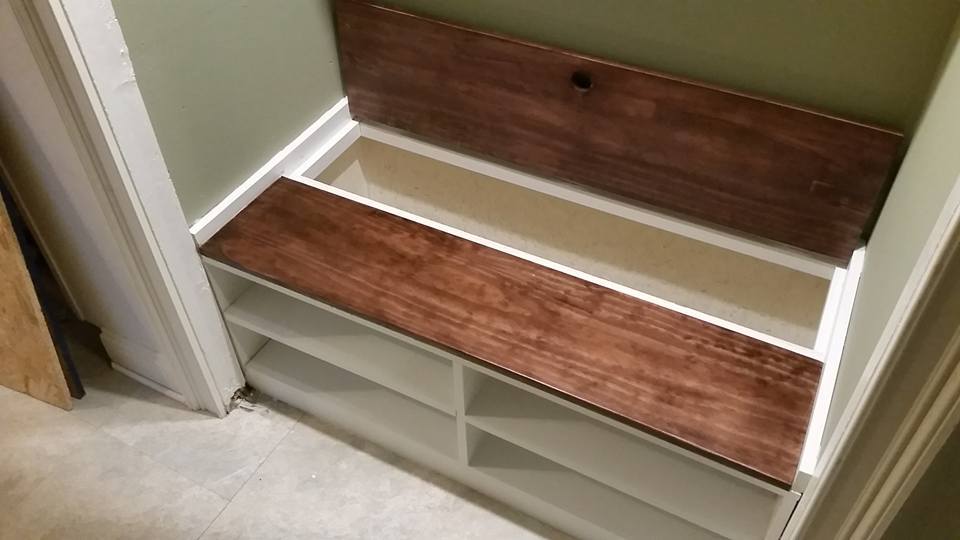
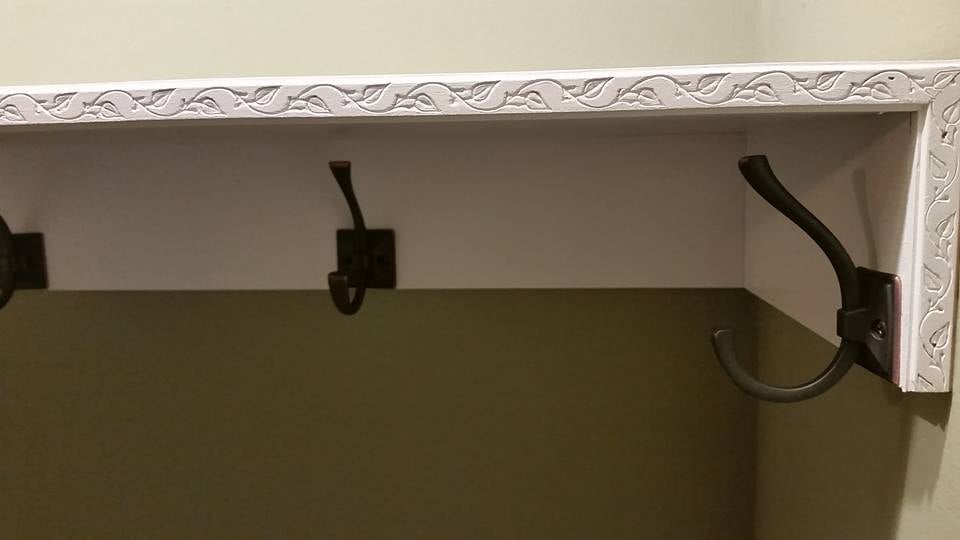
Modified shoe bench
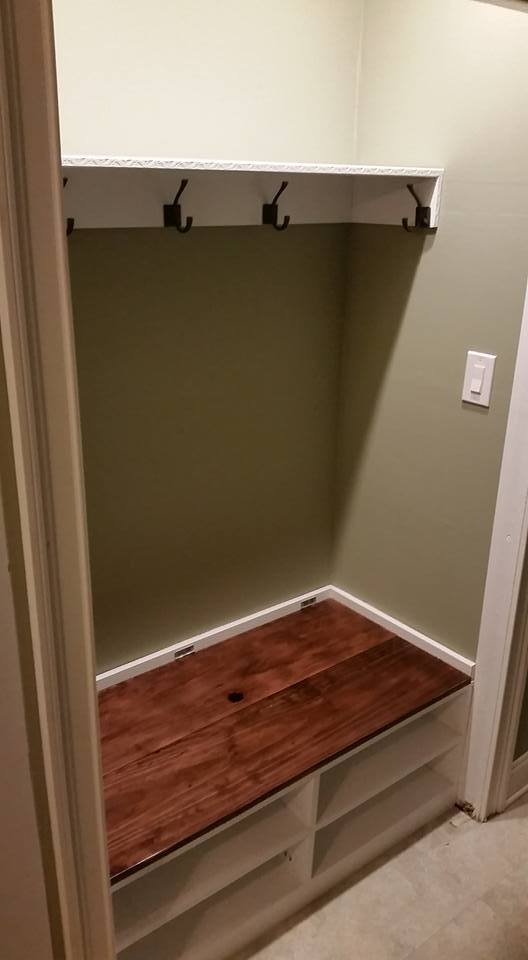
In our new home there was a 46" wide coat closet at the entrance. My wife wanted a place to sit down, take off shoes and put our coats and backpacks when we were home. I found Ana White's plans for this shoe bench and modified it to fit our space. The project took 3 days to complete due to the painting, staining and polyurethane, construction of the bench itself was quick. Previously I added a light switch and two 3" LED recessed lights in the ceiling. The project came out wonderful and I am very pleased. Thank you for the inspiration!
-Mike
Built from Plan(s)
Estimated Time Investment
Weekend Project (10-20 Hours)
Finish Used
White semigloss paint (2 coats), Minwax Red Mahogany 225, Varathane Polyurethane semi-gloss (3 coats)
Recommended Skill Level
Beginner
Comments
Rustic X Coffee table
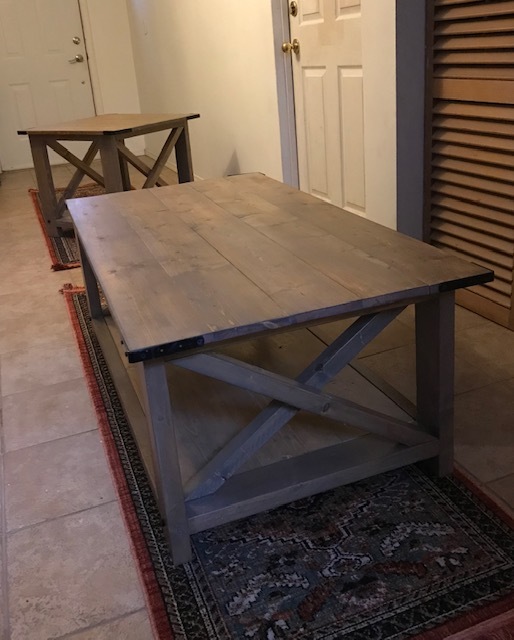
These were my first Ana White pieces of furniture. I was so pleased at how fast they came together and how clear the instructions were. These were a Christmas present for my son and after taking a look at your website, he is full of enthusiasm to start building his own pieces. Thanks Ana.
Estimated Cost
$150 for both including stains
Estimated Time Investment
Weekend Project (10-20 Hours)
Finish Used
Weathered grey stain over Walnut stain
Recommended Skill Level
Beginner
Comments

Fri, 01/04/2019 - 13:29
This is such a beautiful
This is such a beautiful first build! I bet your son was delighted! Can't wait to see more from you guys! Thank you for using my plans and sharing a photo - it is much appreciated. XO Ana
Adirondack chair
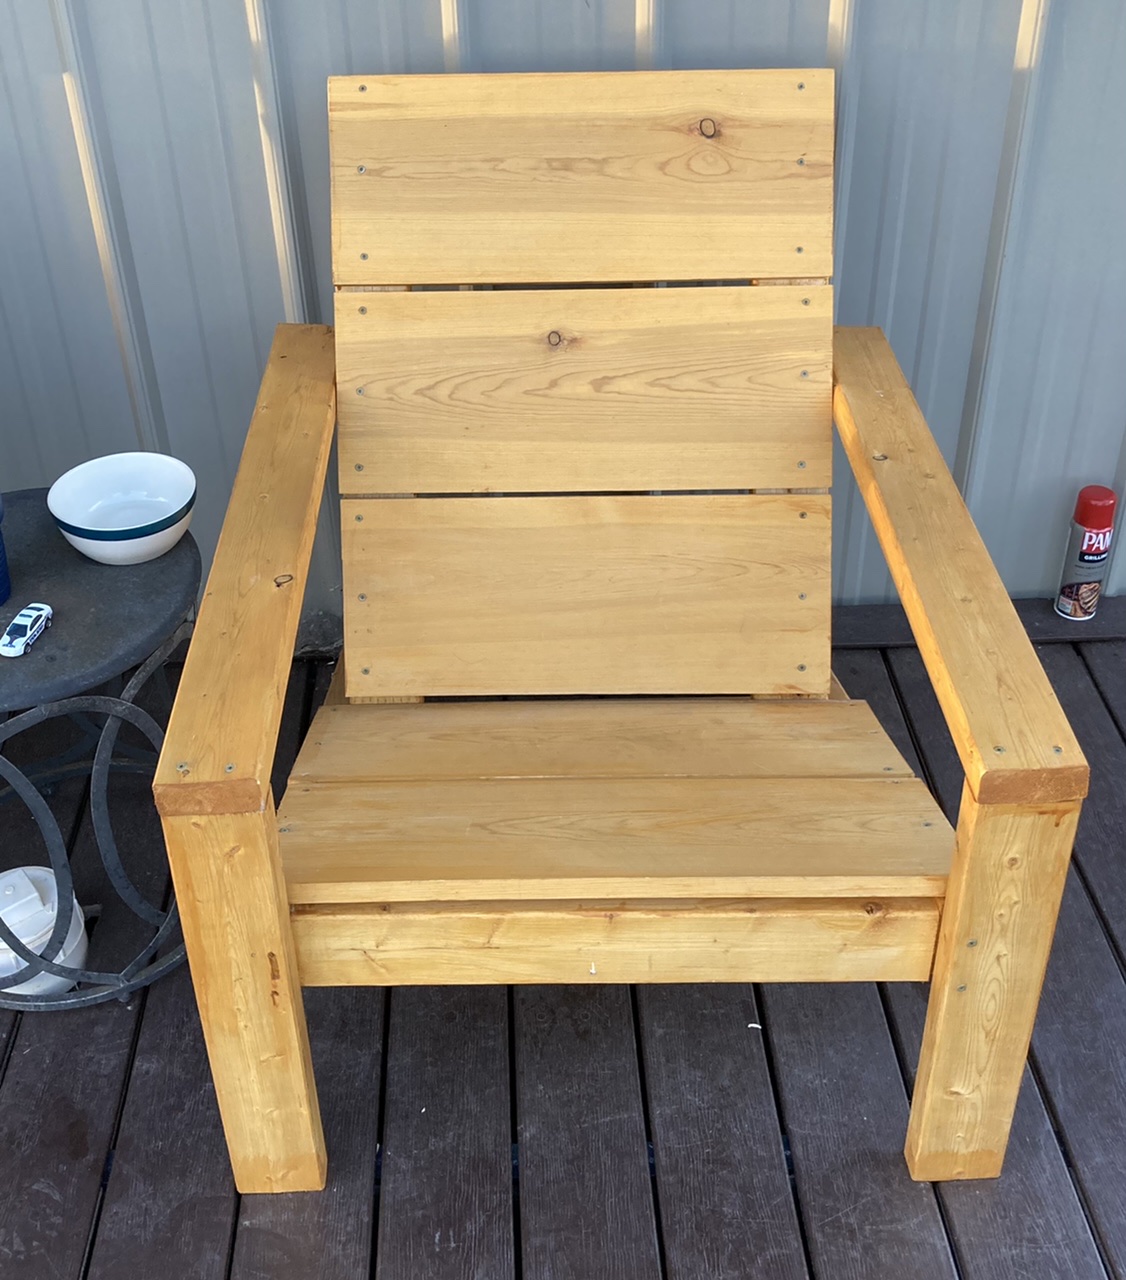
I just started building when I found Ana’s site. This chair was the second thing that I’ve built. I can’t believe how comfortable it is and how easy for a novice like me to put together.
Built from Plan(s)
Comments
Tryde Coffee Table - Large
So much fun to make & great for entertaining.
Built from Plan(s)
Estimated Cost
$50
Estimated Time Investment
Weekend Project (10-20 Hours)
Finish Used
Rustoleum White on legs, Minmax stain on top (Walnut)
Recommended Skill Level
Beginner
Simple Outdoor Dining Table

Love this project! I used cedar boards with red mahogany stain. I did adjust the gaps to a 1/4 inch.
Estimated Cost
Less than $100.
Estimated Time Investment
Weekend Project (10-20 Hours)
Finish Used
I used a pre-stain from Minwax and waited 15 minutes. I followed with one coat of red mahogany stain from Minwax. The final stage was three coats of high gloss Helmsman Spar Urethane (Minwax) with a light sanding using 220 grit sandpaper in between coats.
Recommended Skill Level
Beginner
Hose Post
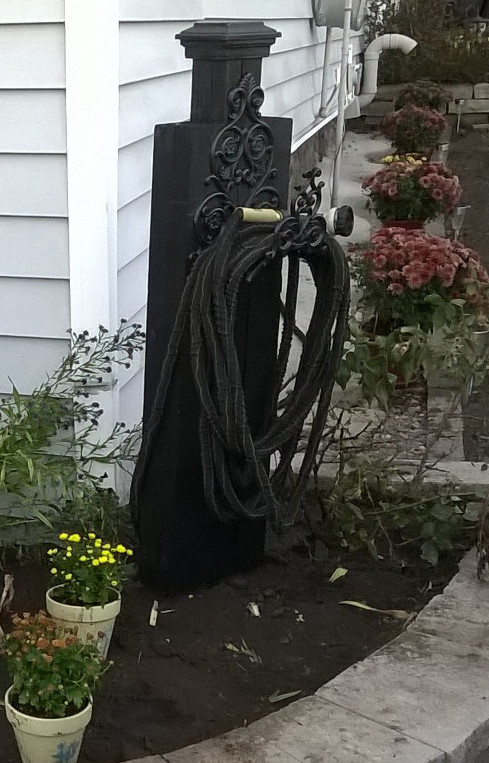
We built this from a 4 x 4 left over from another project and 2 - 4 x 4s 36" long from a pallet I rescued from work. The middle post is 78" long with 3 feet buried in the ground. The "Fancy Iron Hose Holder" was purchased from Amazon for about $20. The post cap was a used one rescued from my husband's woodshop. We layed out the 4x4s on the garage floor and screwed them together, added the hose holder and end cap, and spray painted the project black. I am going to remove the hose holder and paint it a different color so it will stand out better.
Estimated Cost
Less than $30
Estimated Time Investment
An Hour or Two (0-2 Hours)
Finish Used
Spray paint rated for outdoors, less than one can.
Recommended Skill Level
Starter Project
Farmhouse Writing Desk with Turned Legs

I modified the Small Old English Style Farmhouse Dining Table plan to build a writing desk. I used five 1x6 boards for the top for a width of 27.5 inches. I made my desk 56 inches in length. I put the drawer on the long side like a pencil drawer. I did use the legs that Ana recommended in the plan. I love how it turned out. I used dark walnut danish oil and dark wax for the finish.


Built from Plan(s)
Estimated Cost
225
Estimated Time Investment
Day Project (6-9 Hours)
Finish Used
I used Watco dark walnut danish oil and Minwax dark paste wax.
Recommended Skill Level
Intermediate
Comments
Sat, 08/31/2019 - 05:18
Beautiful! What are the…
Beautiful! What are the brands of oil and wax that you used?
Fri, 10/04/2019 - 21:46
Thank you! I used Watco…
Thank you! I used Watco Danish oil and I used Minwax dark wax. I've tried alot of different wax brands and I always come back to Minwax. It dries the hardest in my opinion.
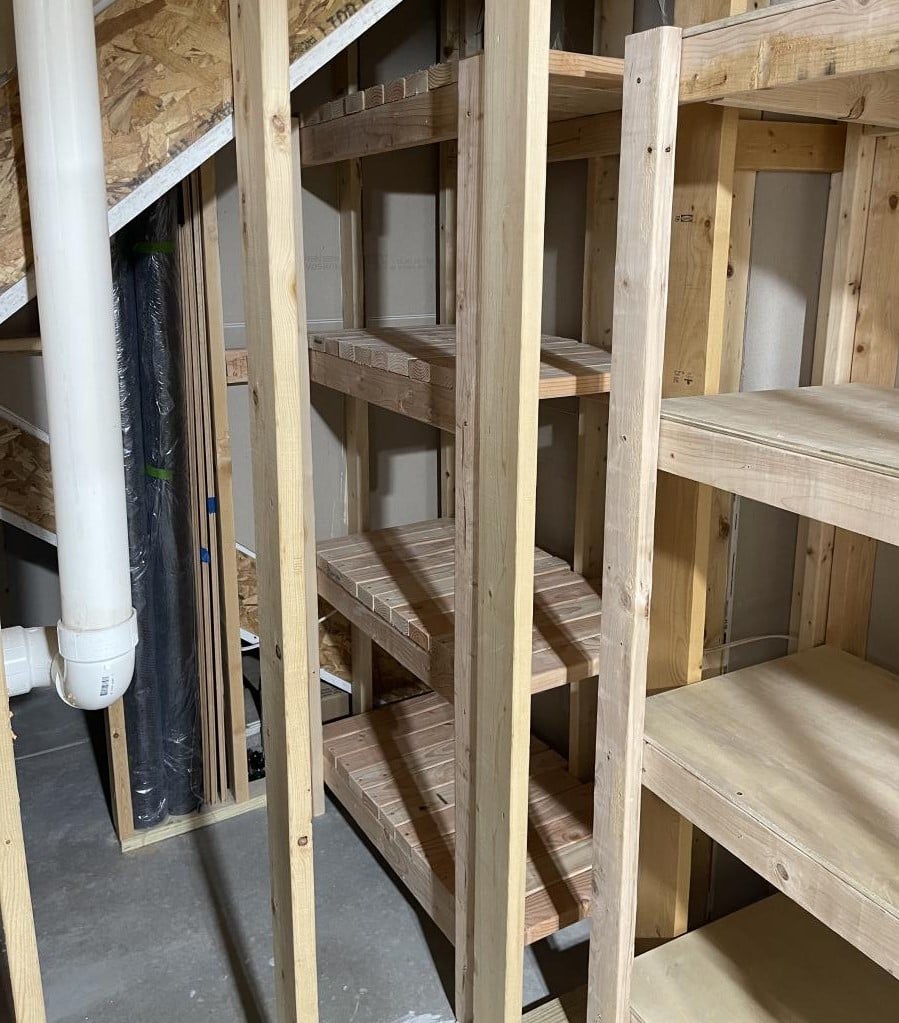
Garage / Basement Shelving + Bonus Wine/Liquor Under Stairs Storage
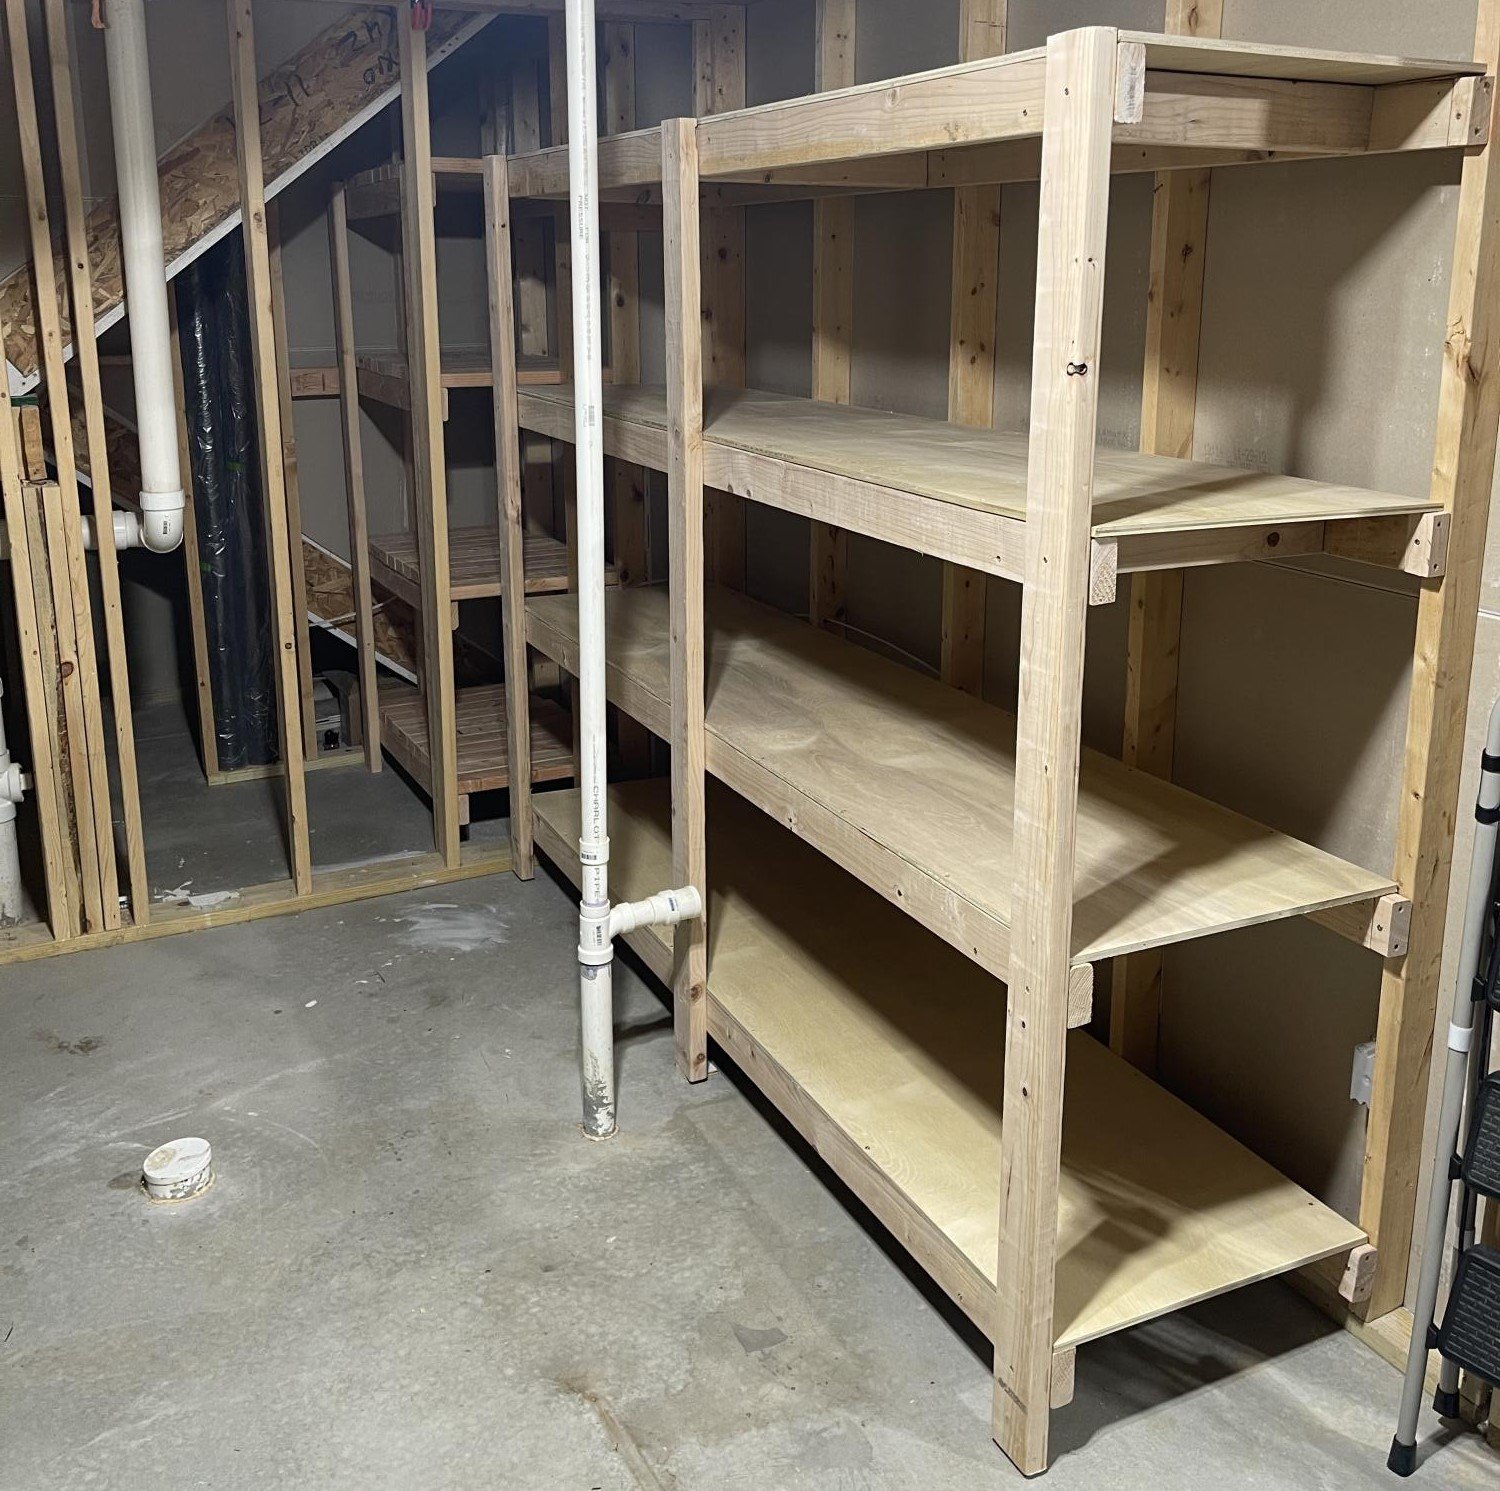
Using the guidelines for the “BEST DIY Garage Shelves (Attached to Walls), I added this to our unfinished basement area for additional storage. I plan to replicate it in our actual garage as well and build the freestanding shelves also!
As a bonus, I used this plan as inspiration and built directly beside it, which is an unused space under stairs, a wine/liquor storage shelving replacing the plywood with cut 2x4s for added weight capacity/stability.
Couldn’t have been easier!

Built from Plan(s)
Comments
Wed, 10/19/2022 - 09:14
Thank you!! I am so thankful…
Thank you!! I am so thankful for Ana White and team! These projects are helping me build a lot of confidence to continue endeavoring more challenging projects each step of the way :-)
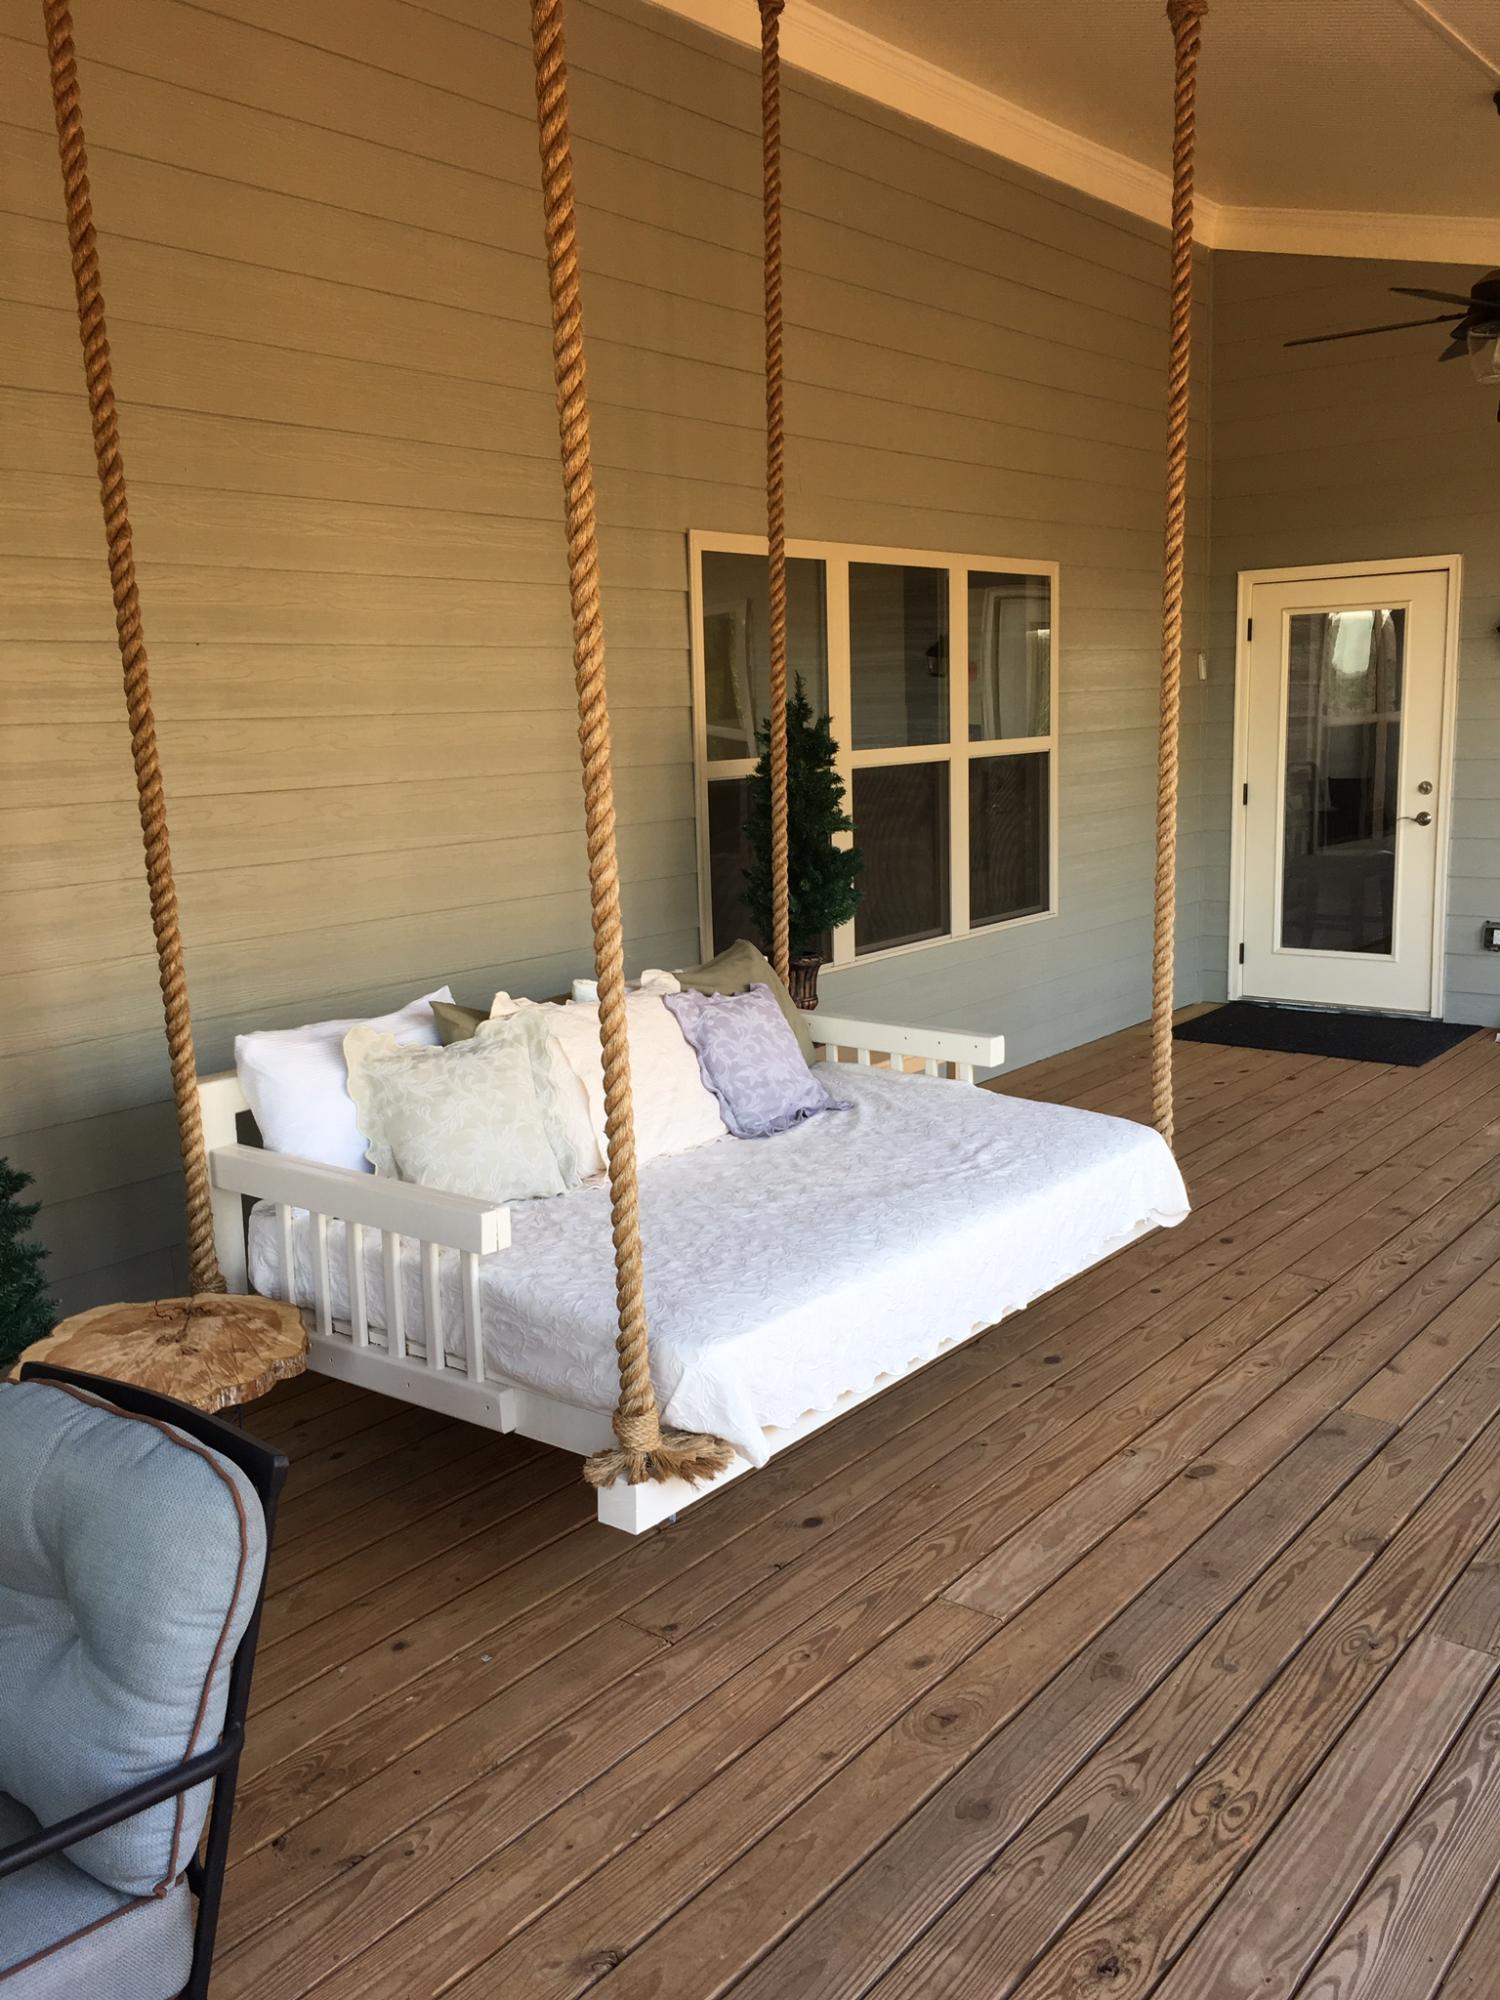
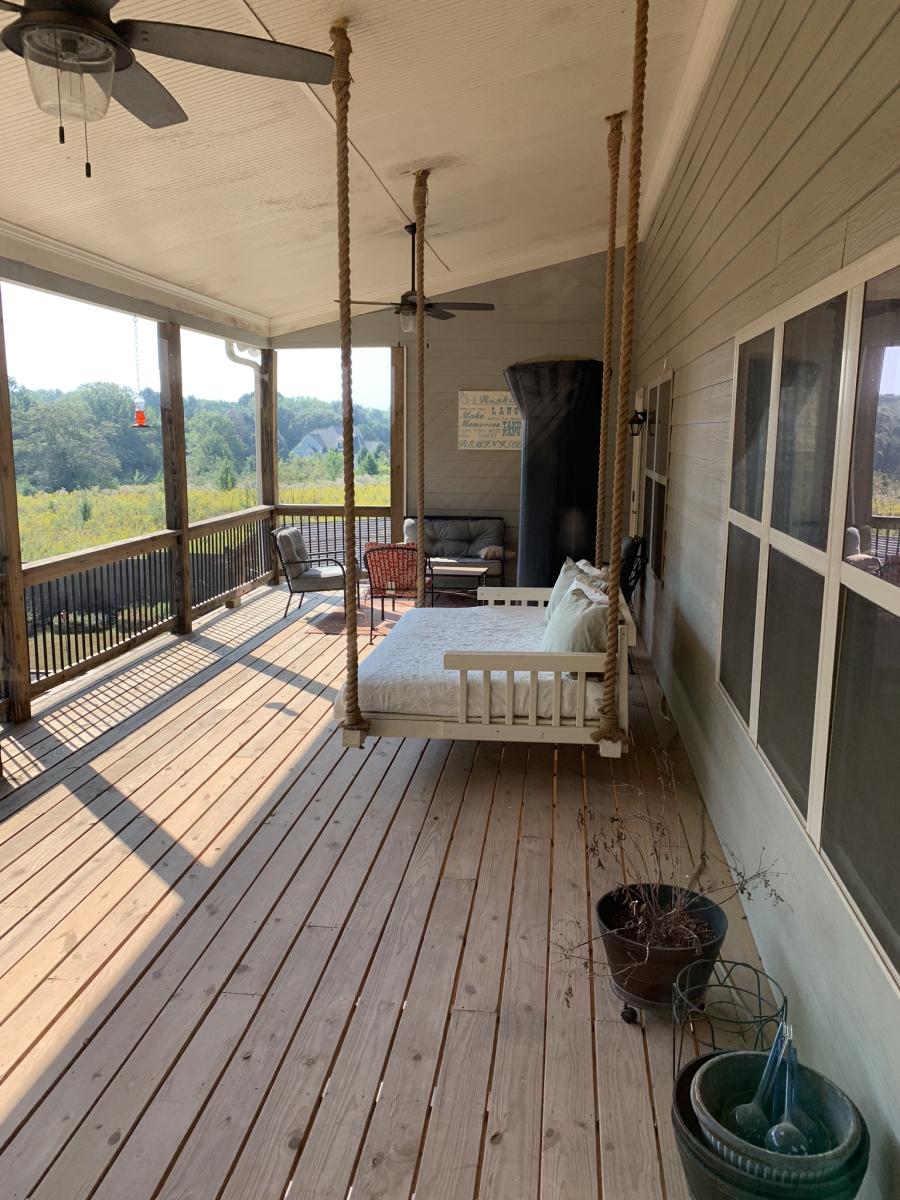
Comments
Ana White Admin
Sat, 09/03/2022 - 13:25
Beautiful porch swing!
This is amazing, great job and thank you for sharing!