Ladder shelf
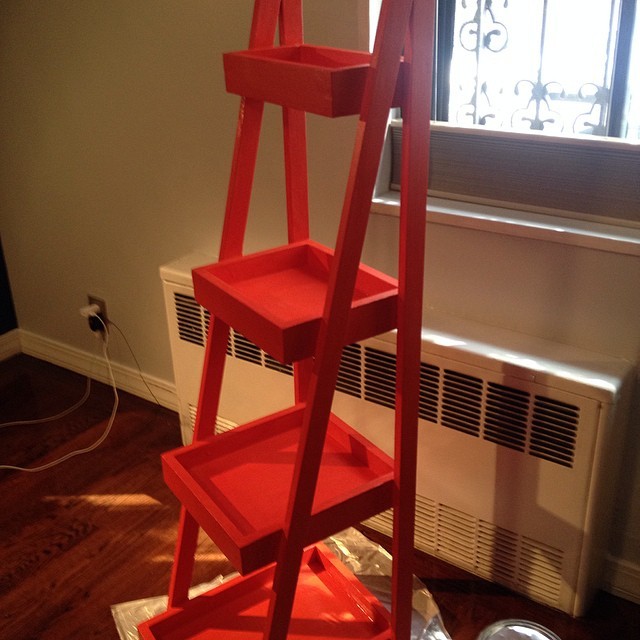
First project, so fun!
Built from Plan(s)
Estimated Time Investment
Afternoon Project (3-6 Hours)
Recommended Skill Level
Beginner
First project, so fun!
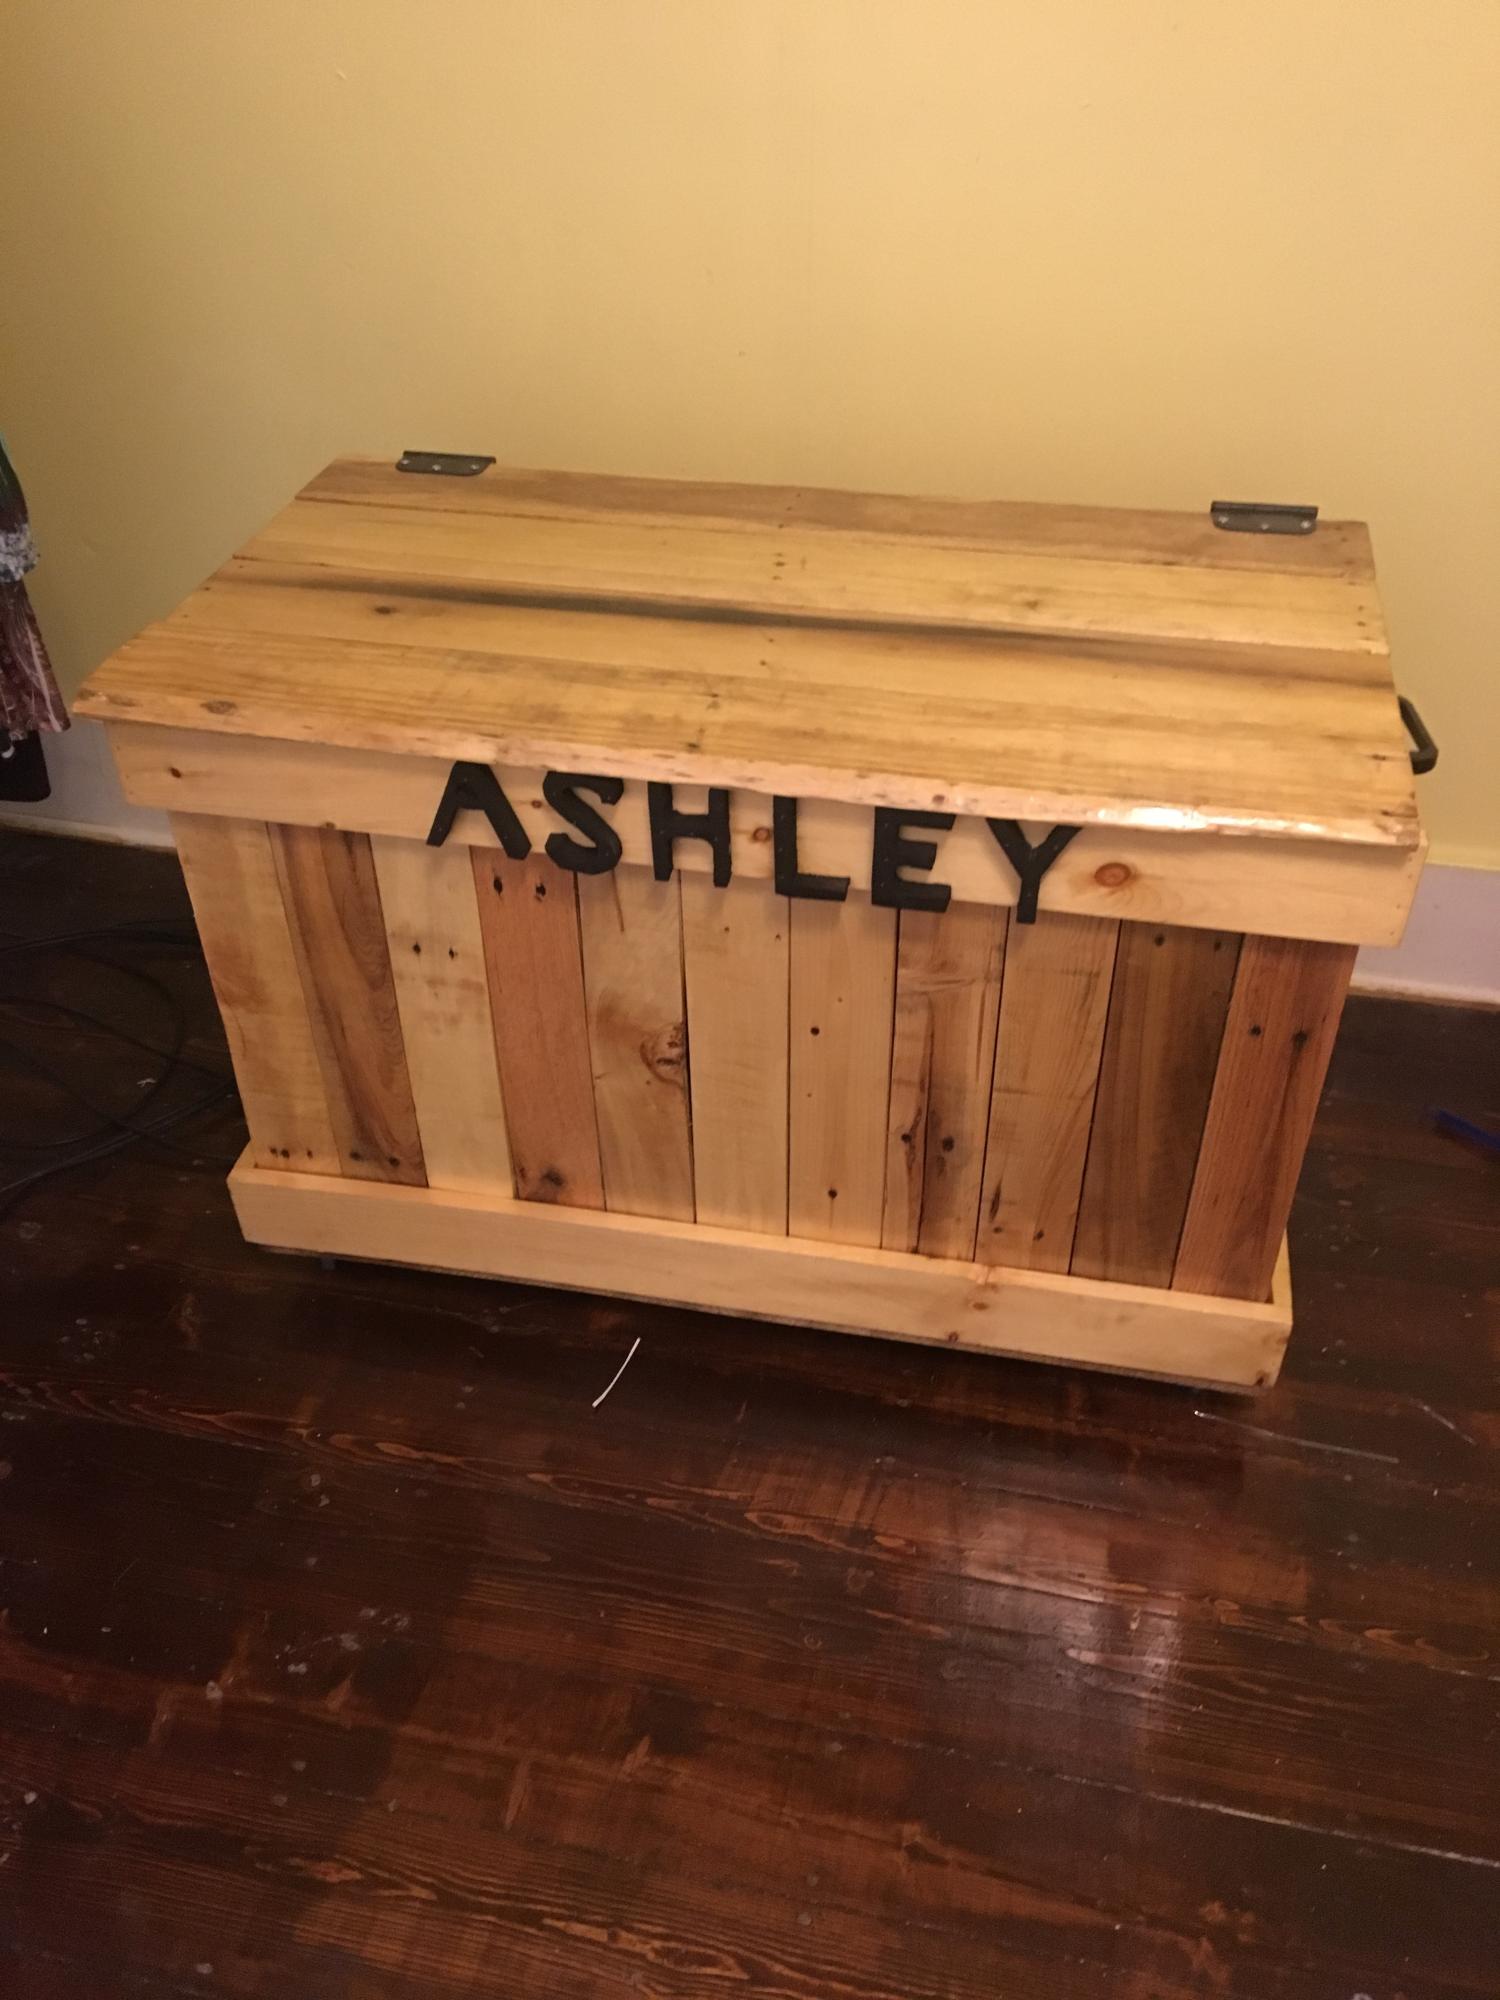
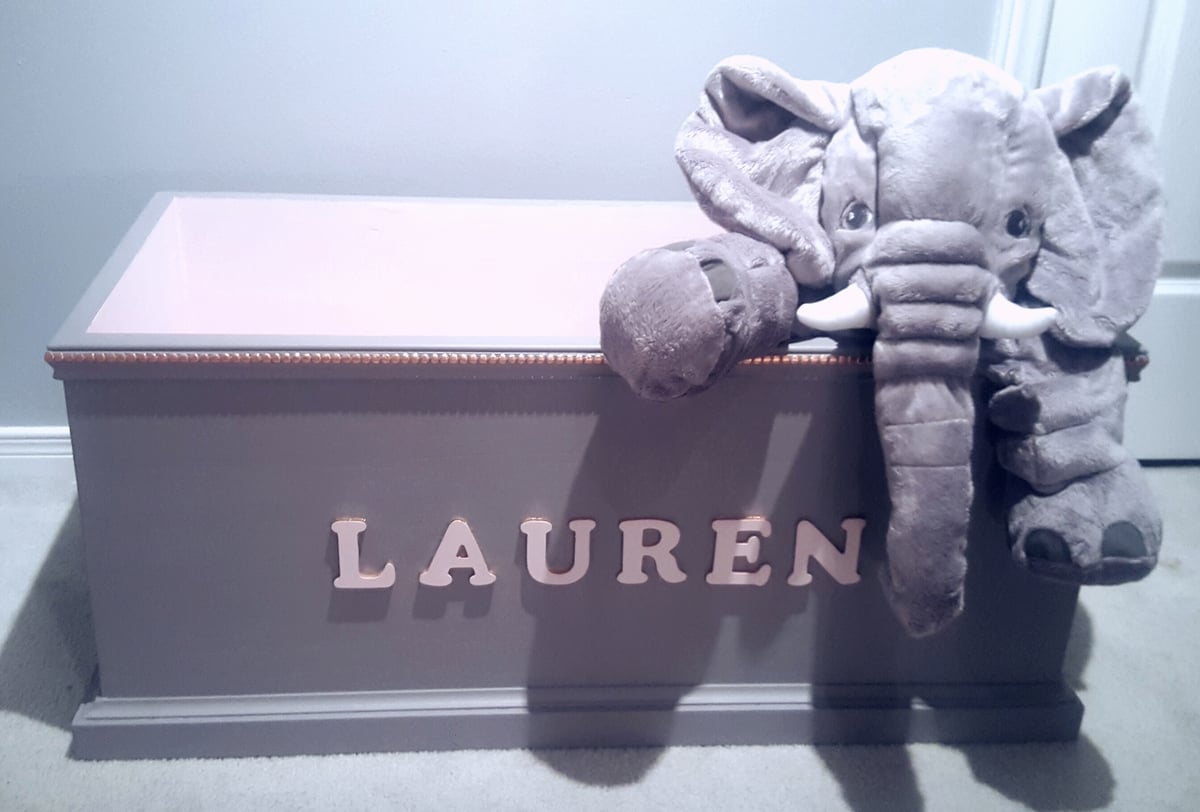
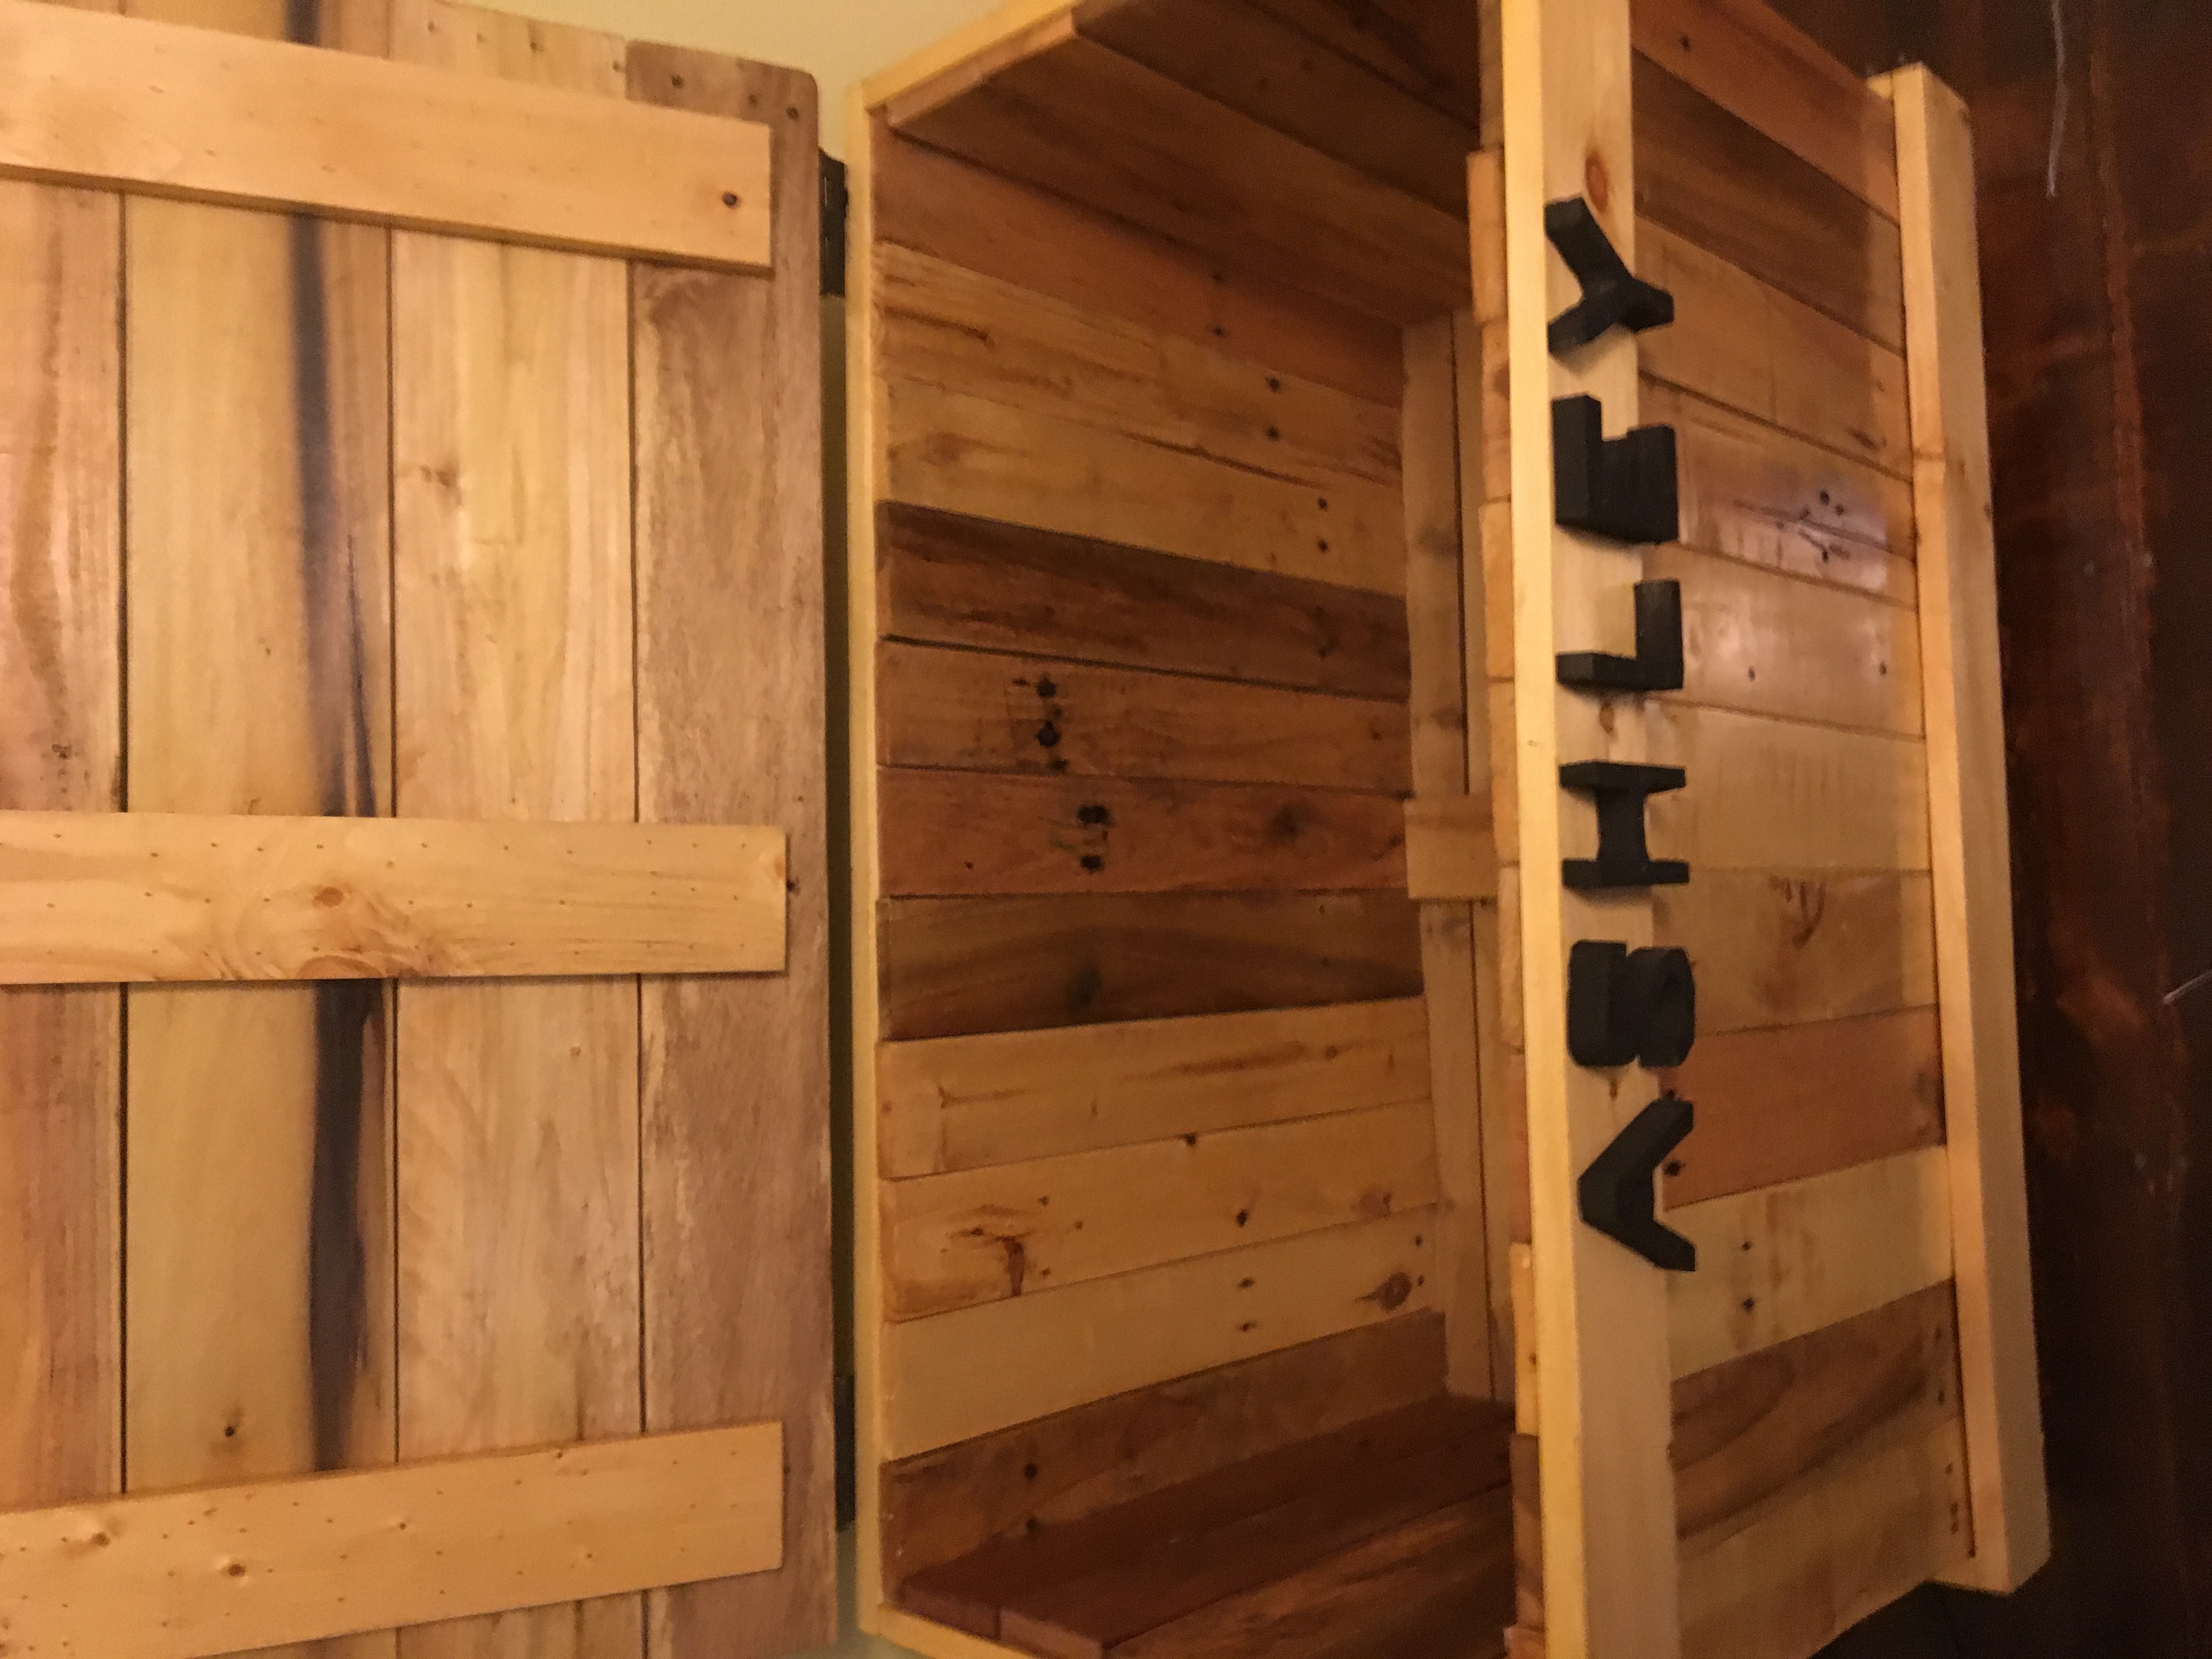
This is a hope chest I made for my step daughter this Christmas it is made intirely out of pallet wood except for the frame which I used 1by4 by 8 pine board
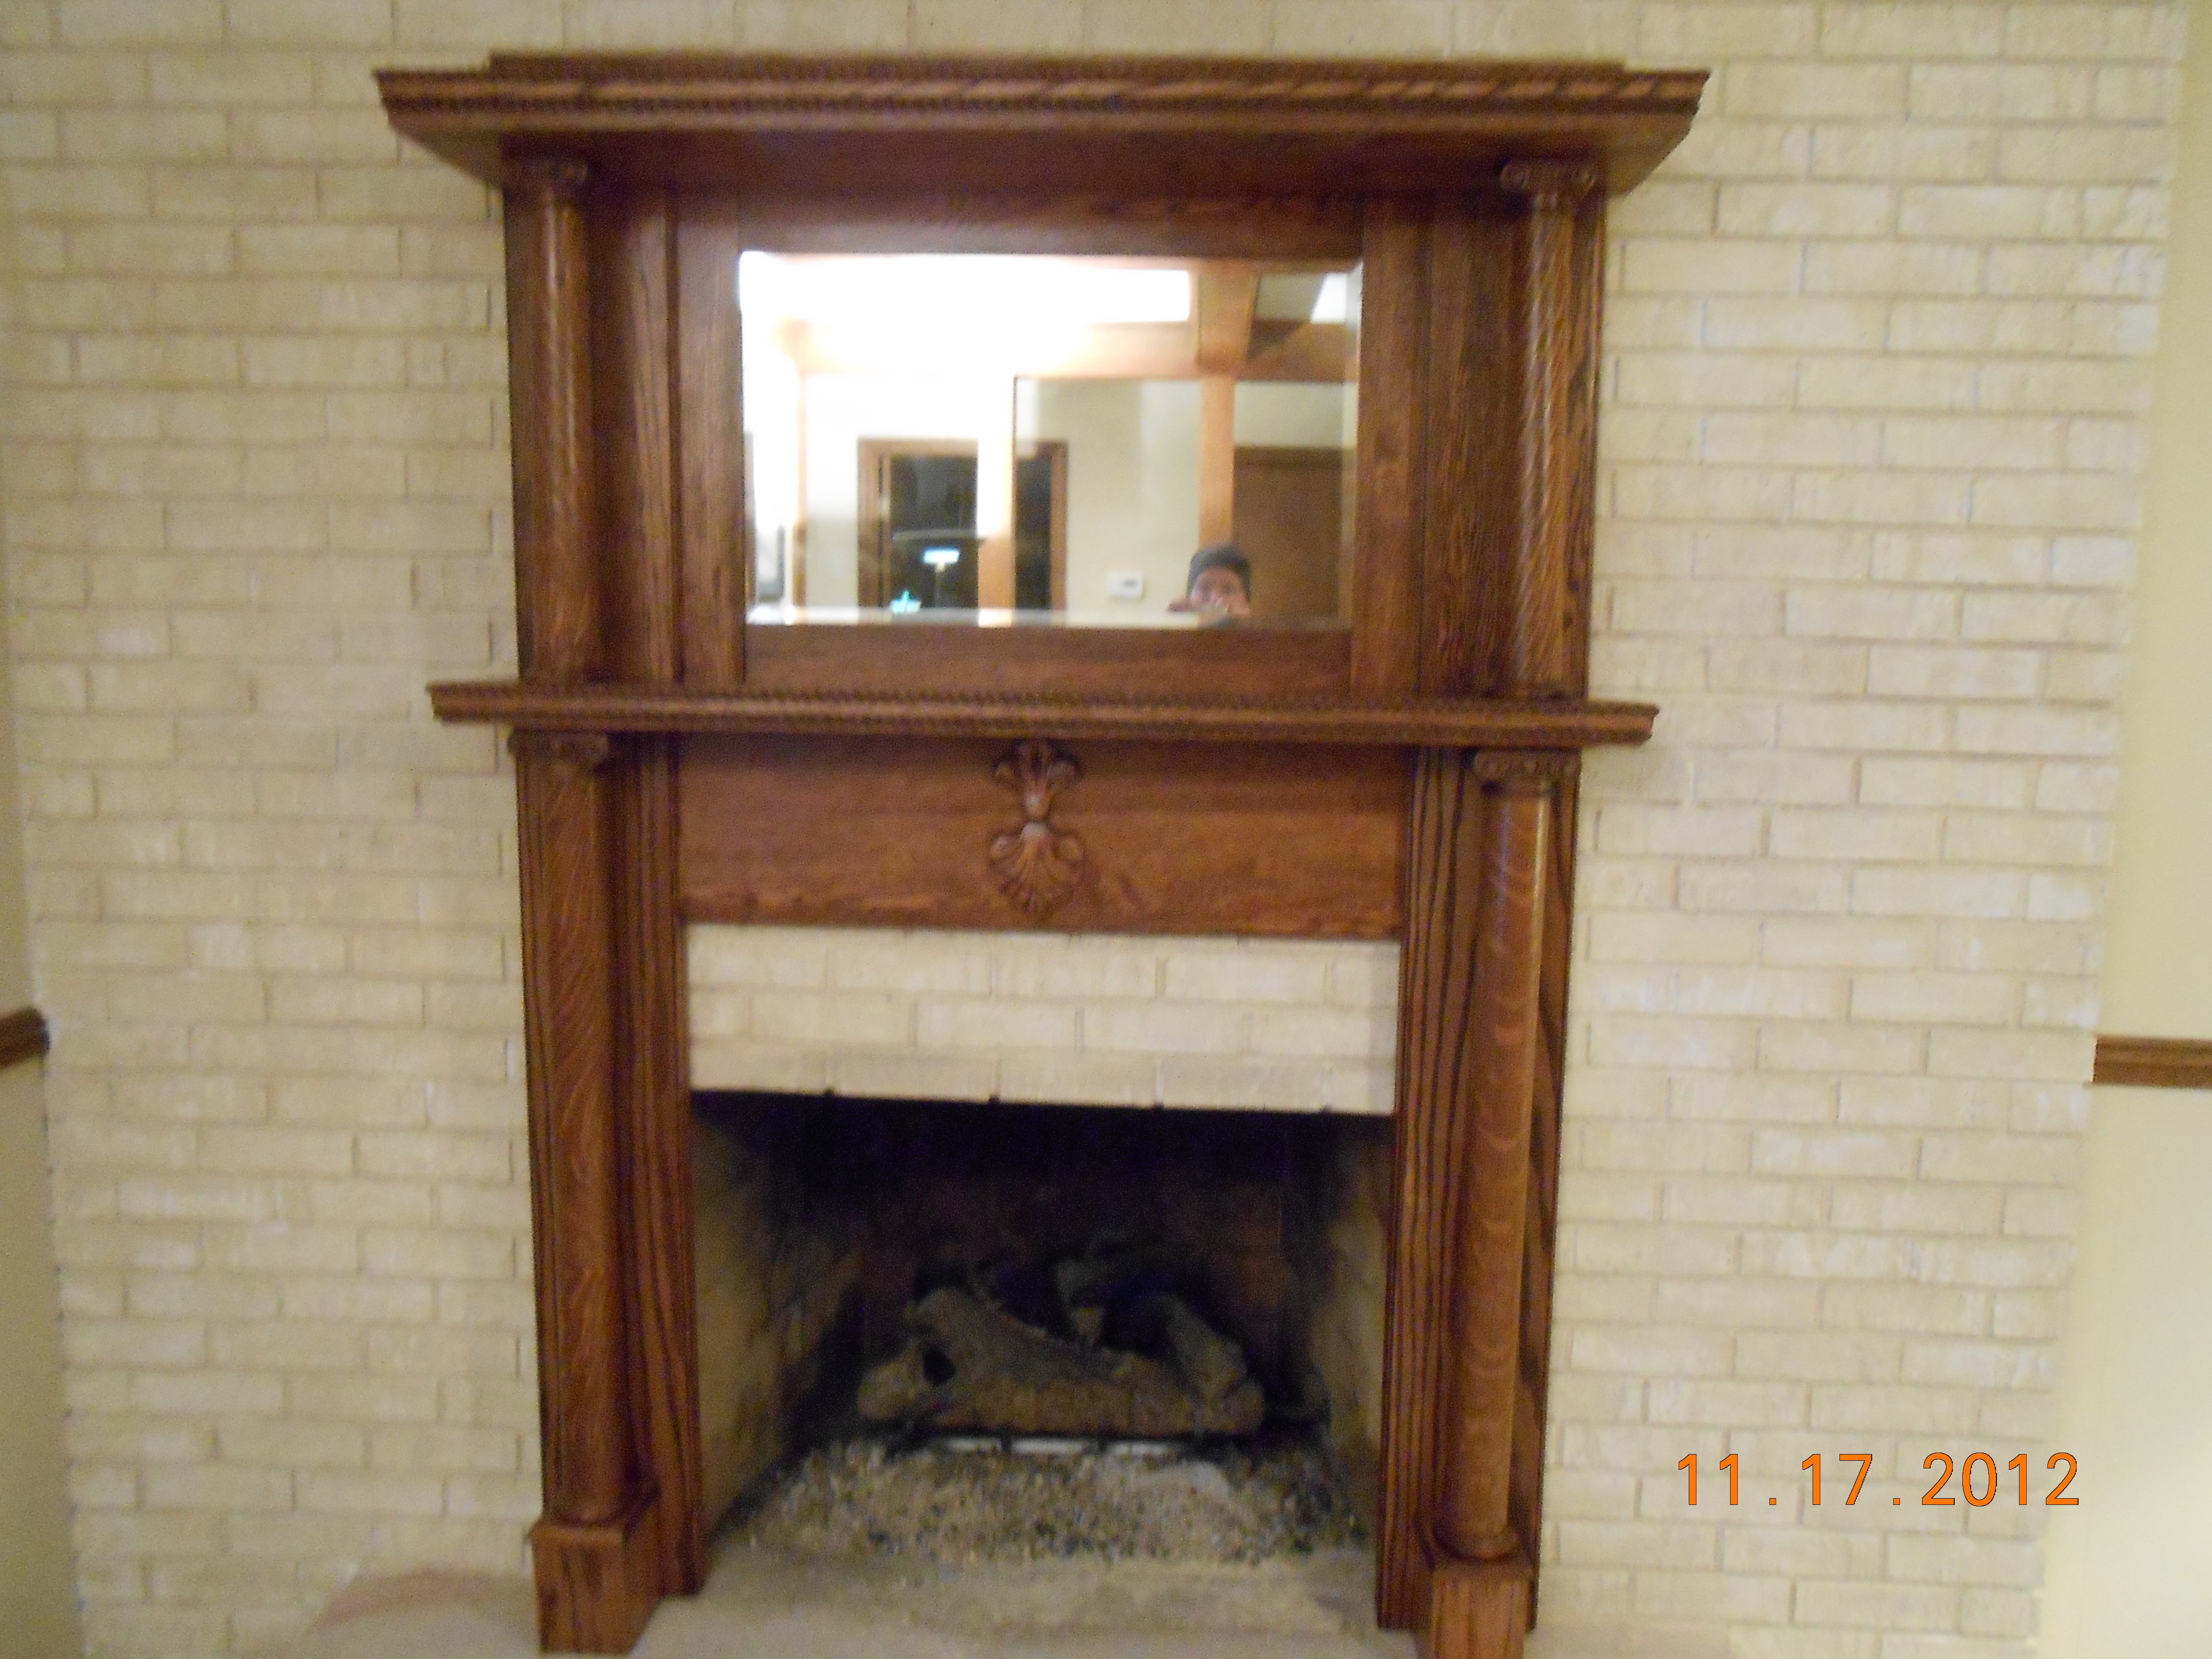
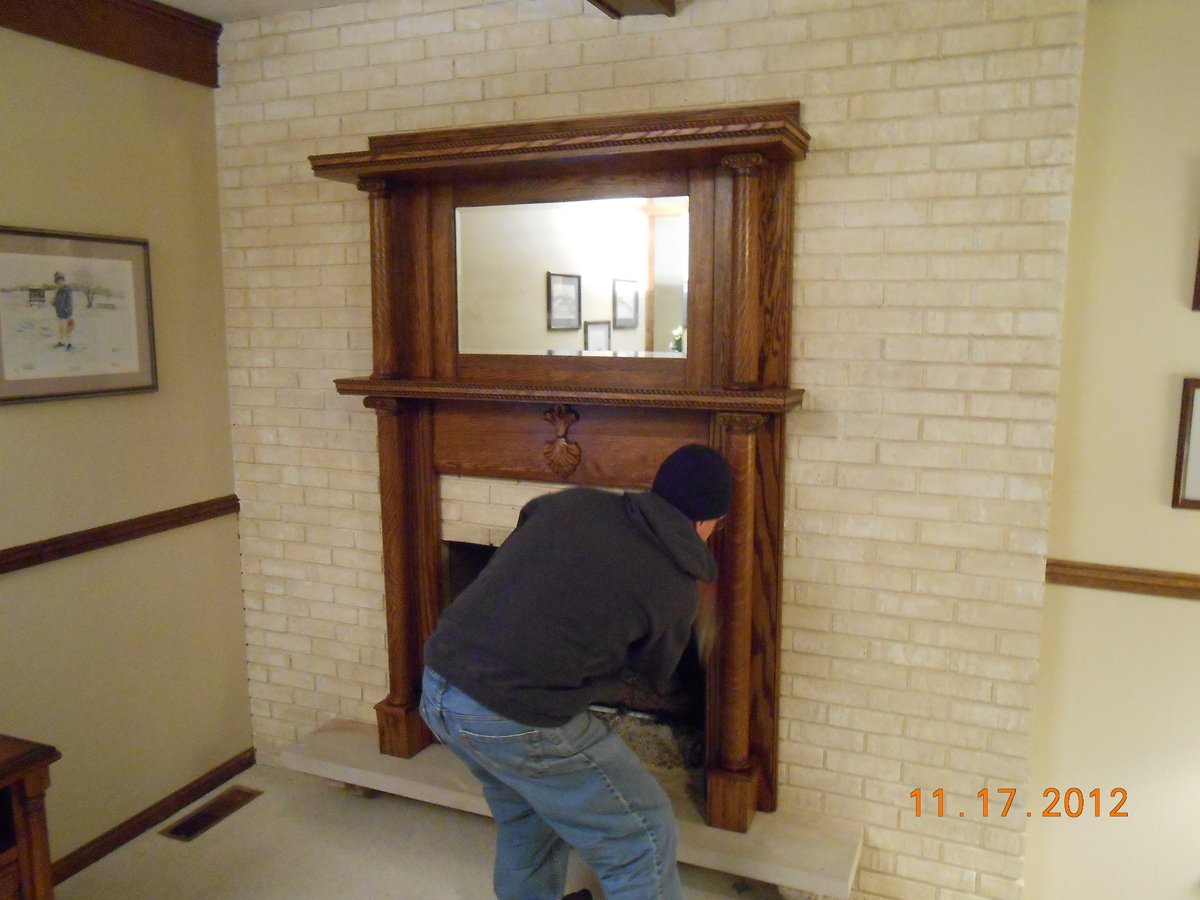
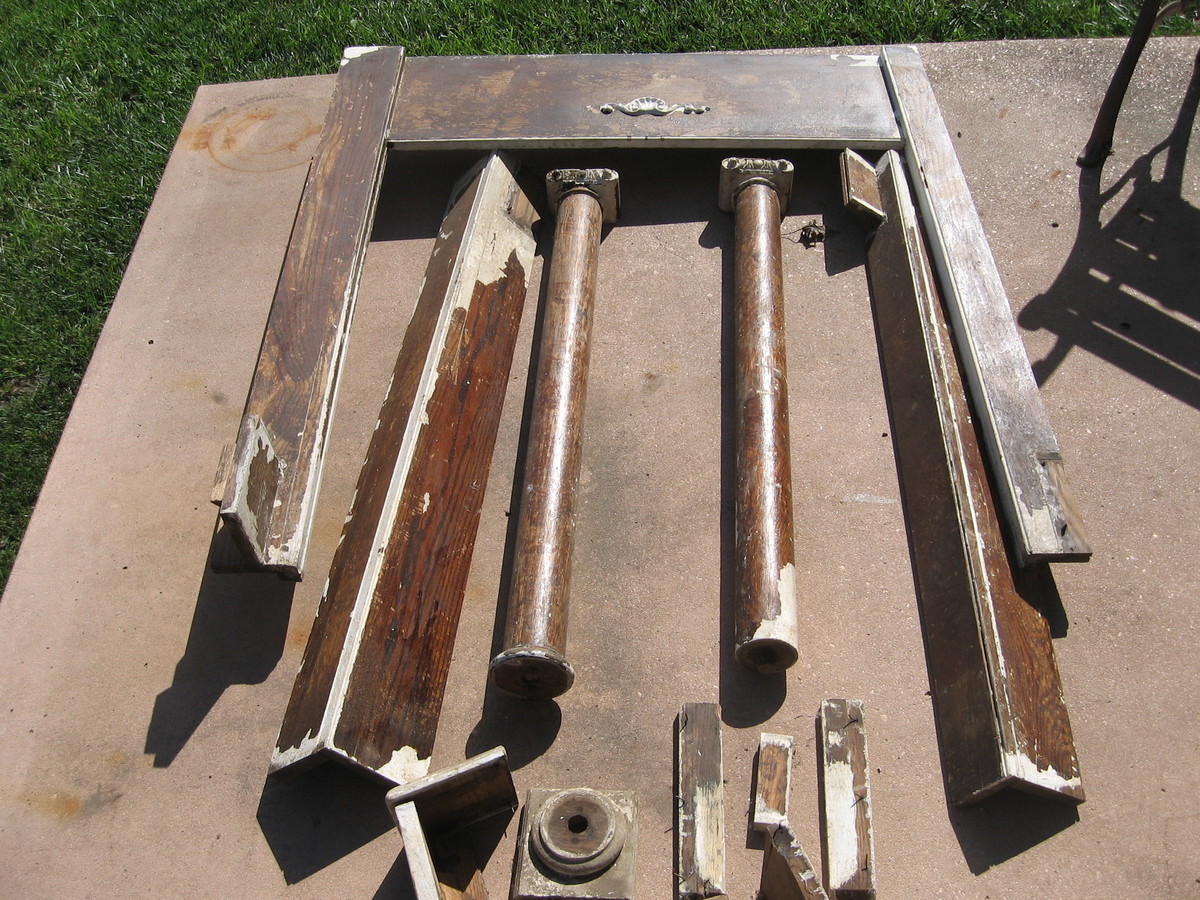
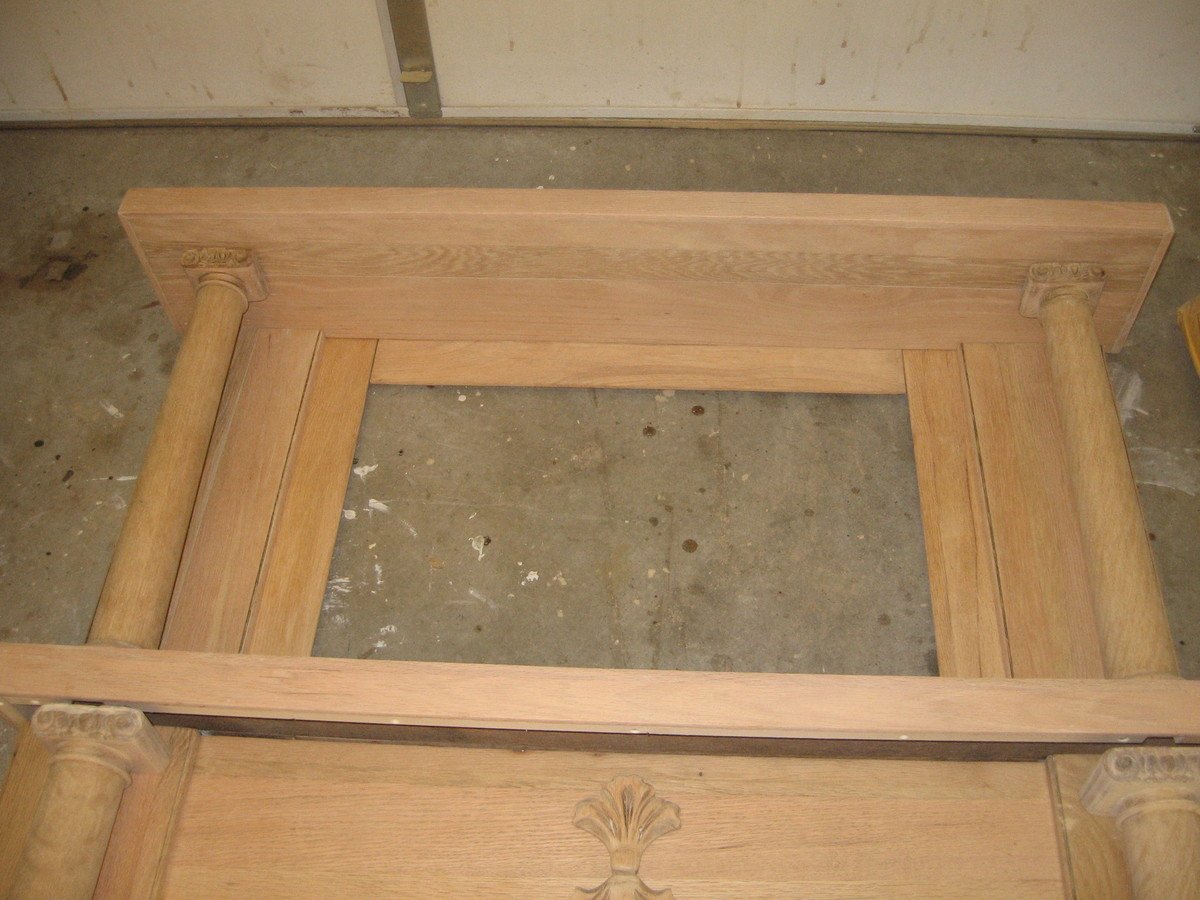
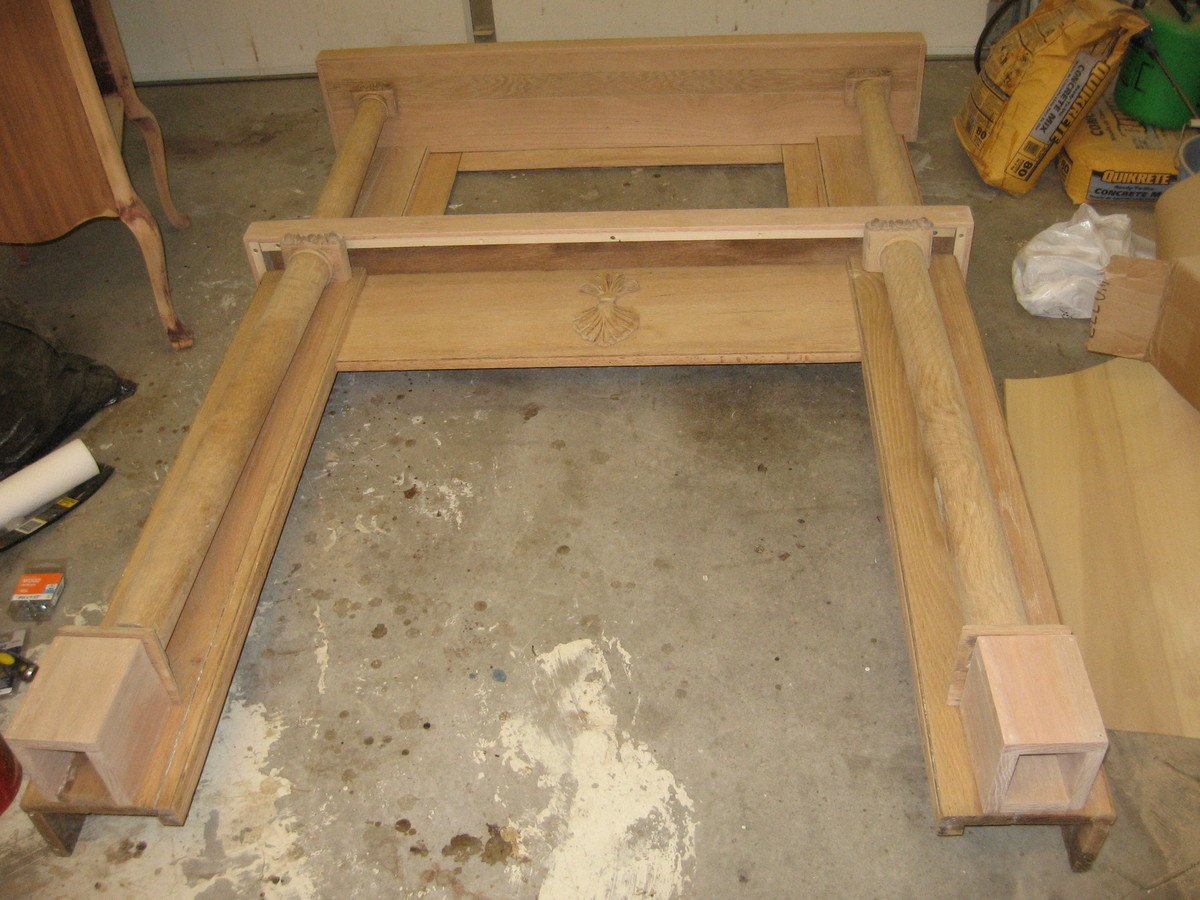
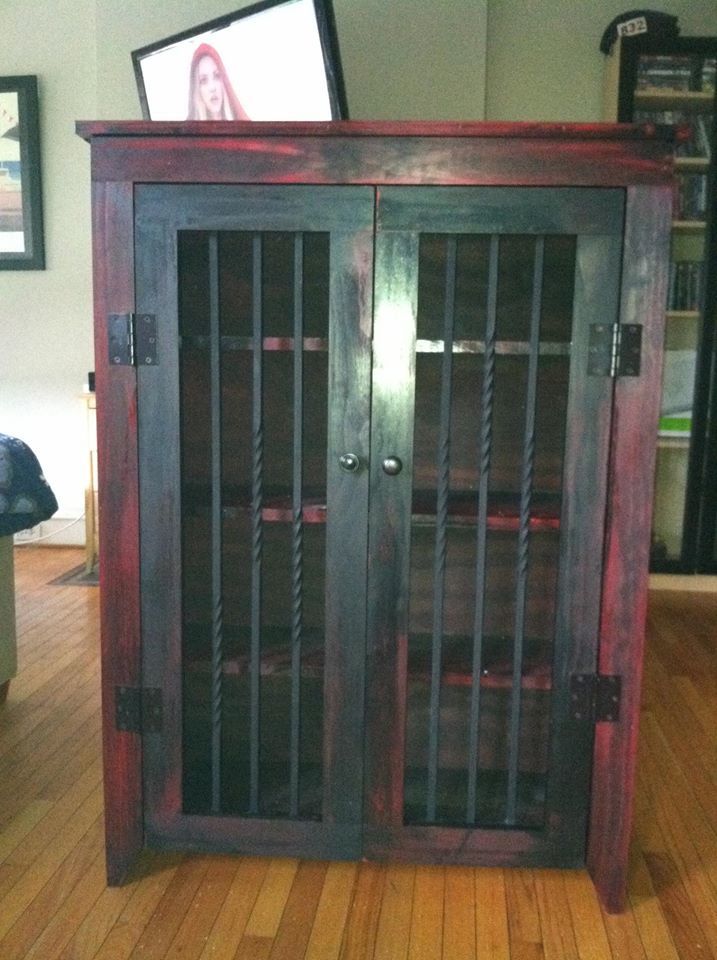
This is a century old red oak fireplace mantel I bought off of Craigslist. It came out of a home in Louisville, KY. It was in bad shape as you can see in the photos. I stripped it and replaced the veneer that needed it. I had to modify it a bit to install it to my mother-in-laws brick fireplace. The mirror is mercury glass and beveled. I did add some red oak rope trim which I beveled to give a more formal look. I countersunk some holes along the sides that I covered with some red oak trim. This allowed me to attach studs to the brick and then attach the mantel to the studs. The very top shelf was rotted so I found some beautiful spalted red oak and rebuilt this. The former onlay on the front was beyond repair and I found the current salvaged onlay on Ebay for around $10. I am really happy with how it turned out.
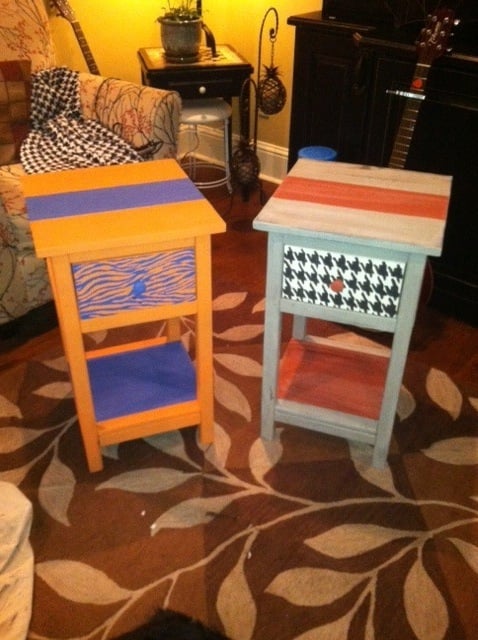
These mini farmhouse tables are great examples of a creative way to personalize plans. They both cheer for thier college team! And as fall in the south is here, college football is king. Please go to www.ourhomemadefamily.com for my thoughts on how the finish is the personality of all my custom builds.
I reduced the length by 12 inches to accomodate my space, and I ripped the boards on the table saw so they would be more flush when I assembled the tabletop. Otherwise, I followed the plan exactly. Distressed tabletop before staining.
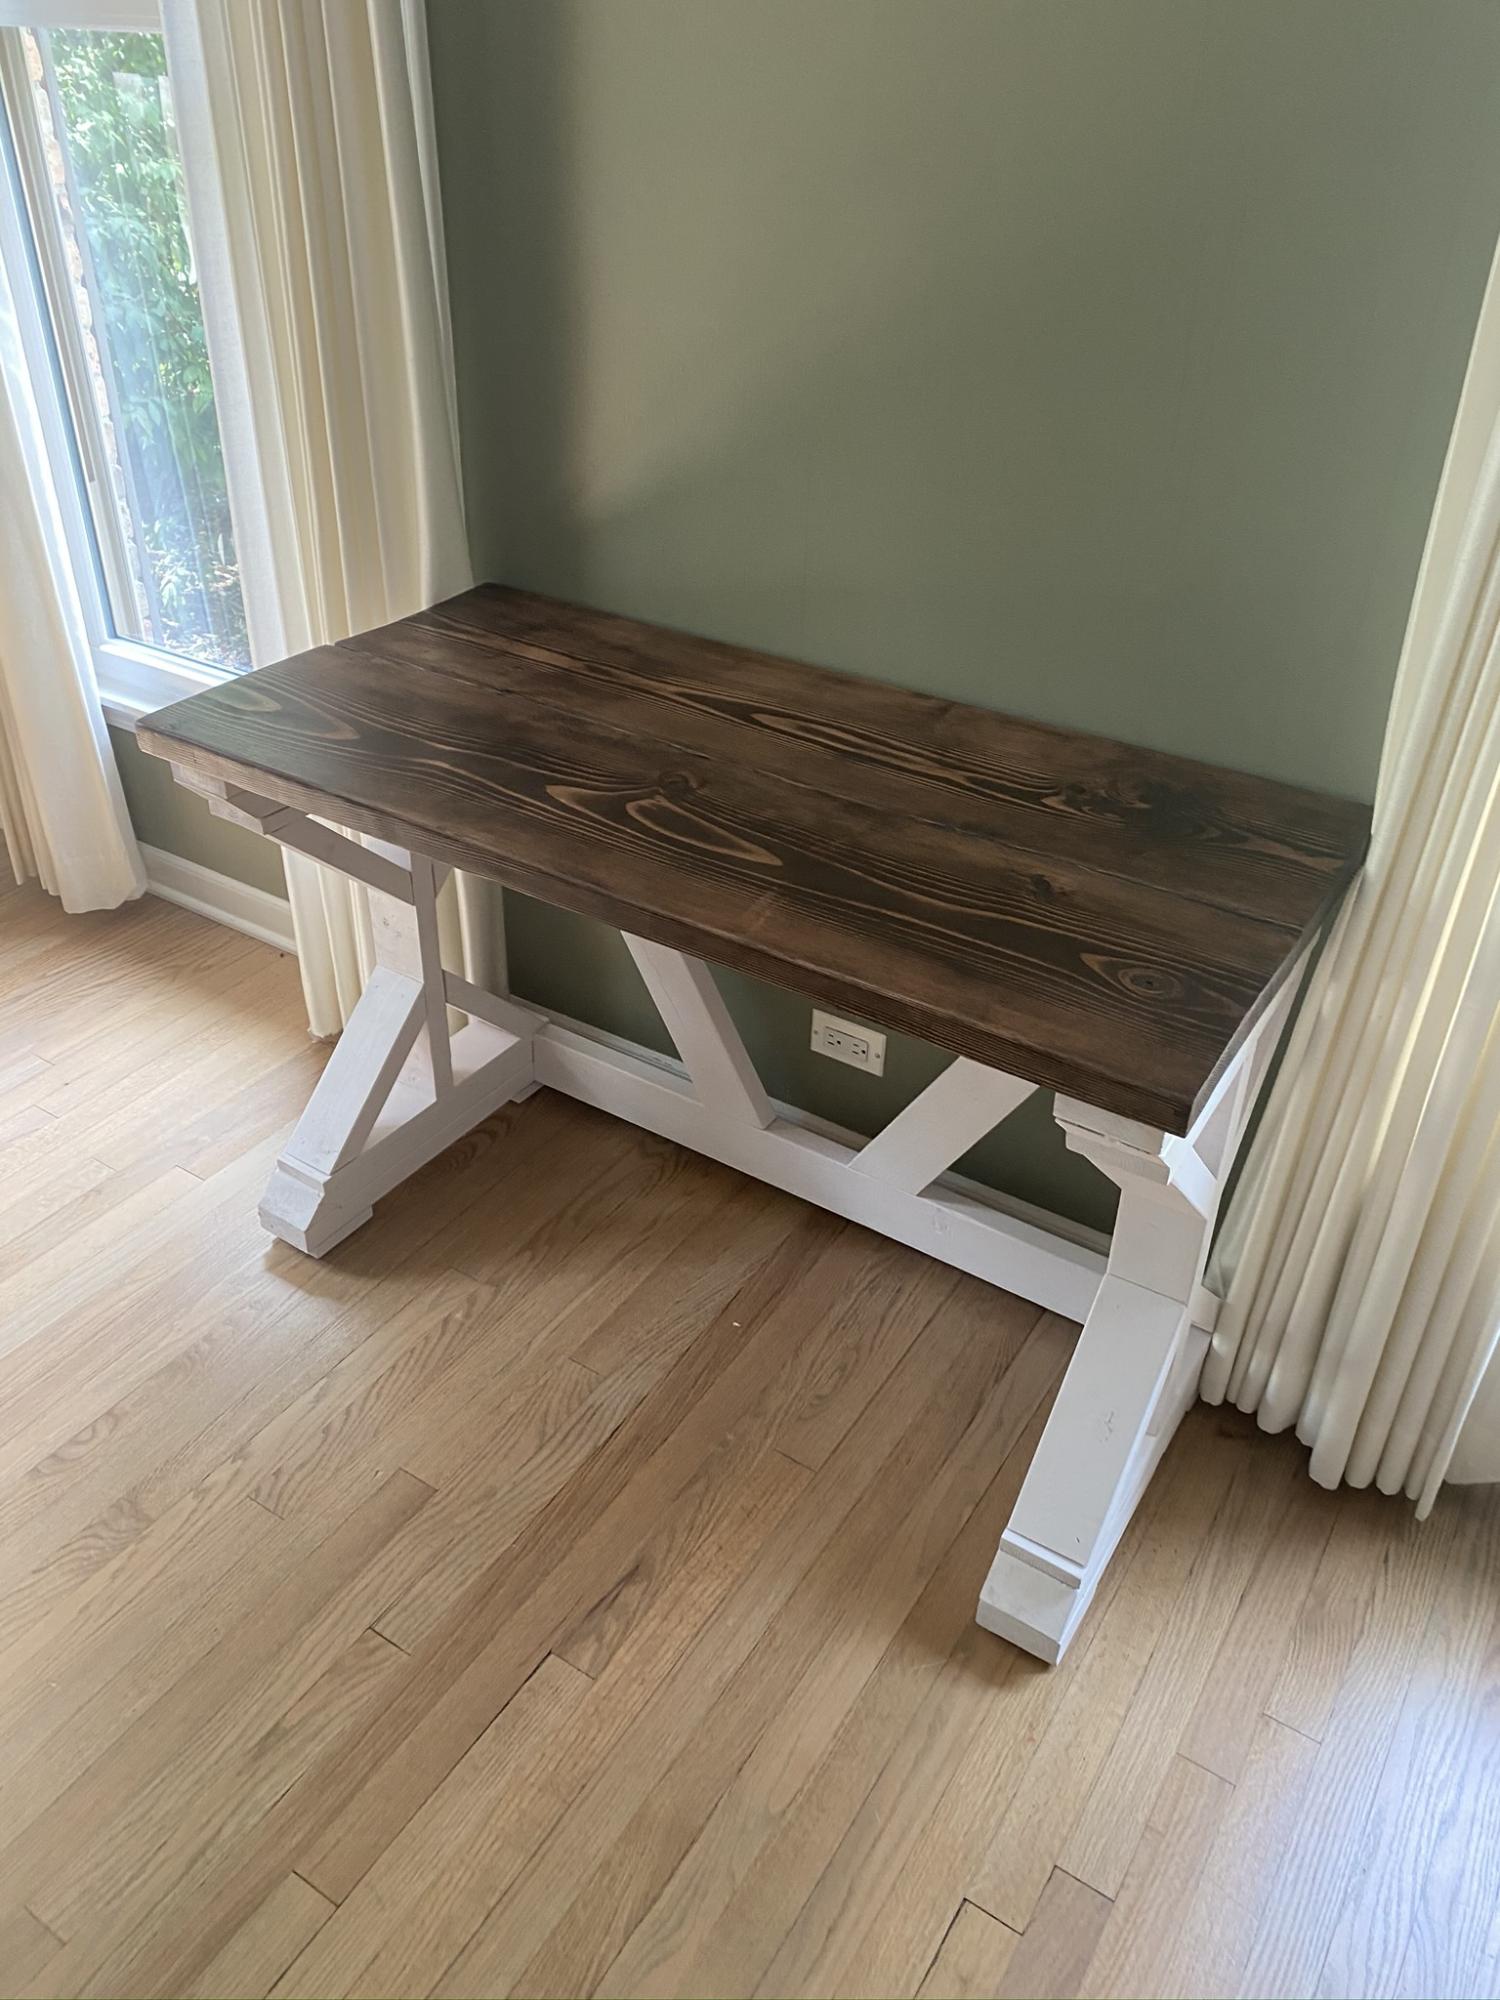
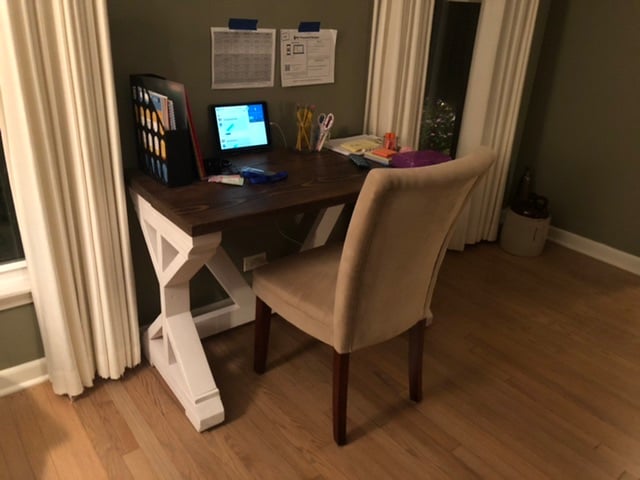
Desk was built per the plans. The only adjustment made was to the width to fit the space. Desk was easy to build and looks great! I added Gator Hide to the top to provide water resistance.
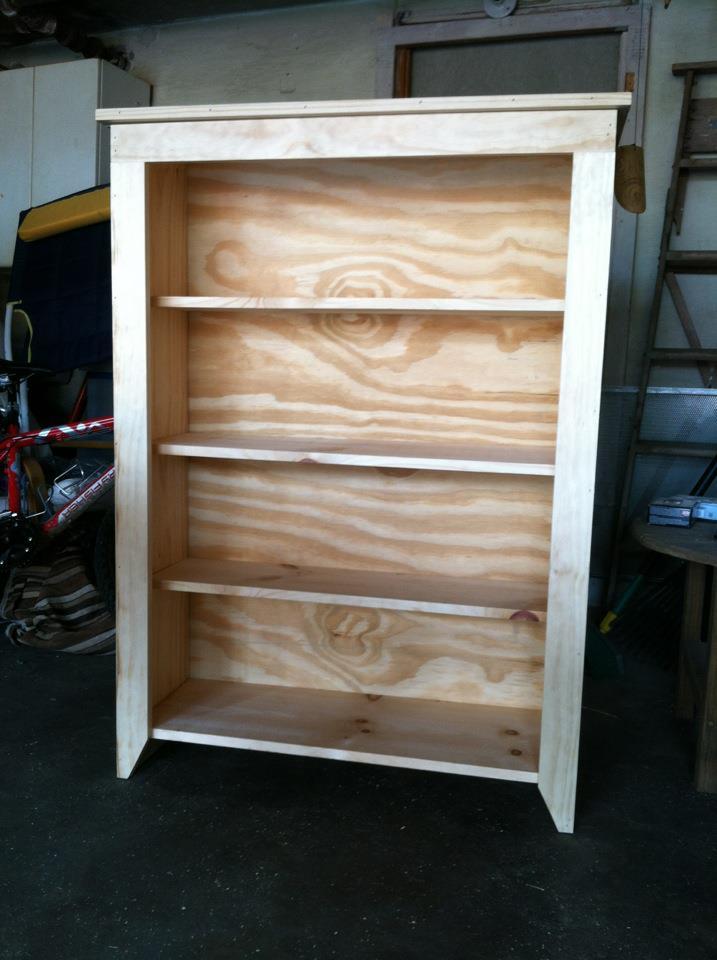
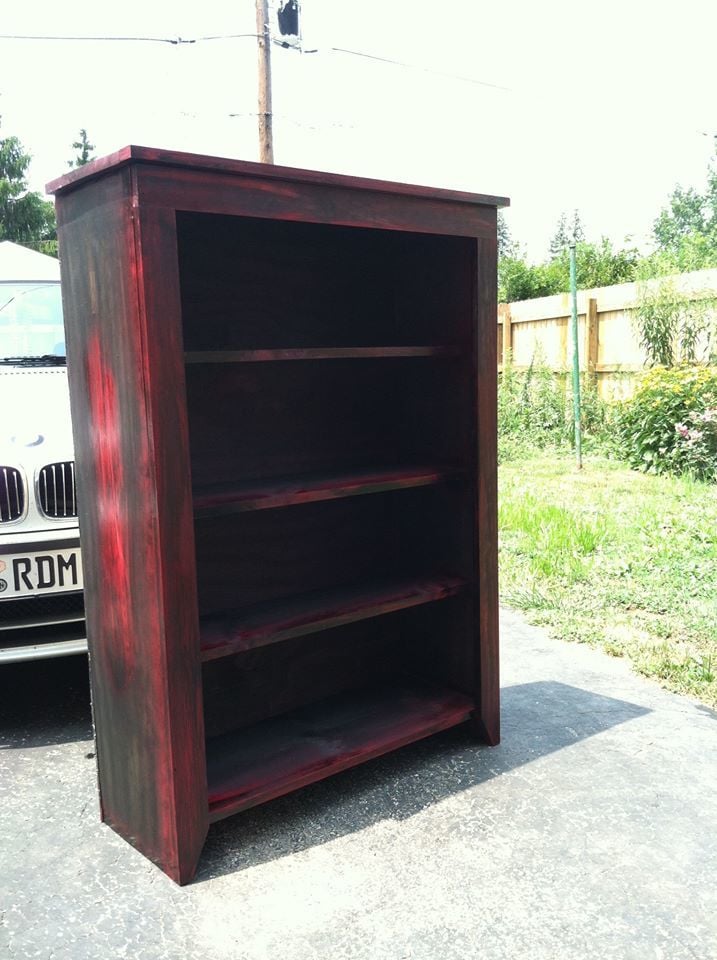
This was made from a plan I found on this site. It was made out of scrap from another project so I had to adapt the plans based on the wood I had.

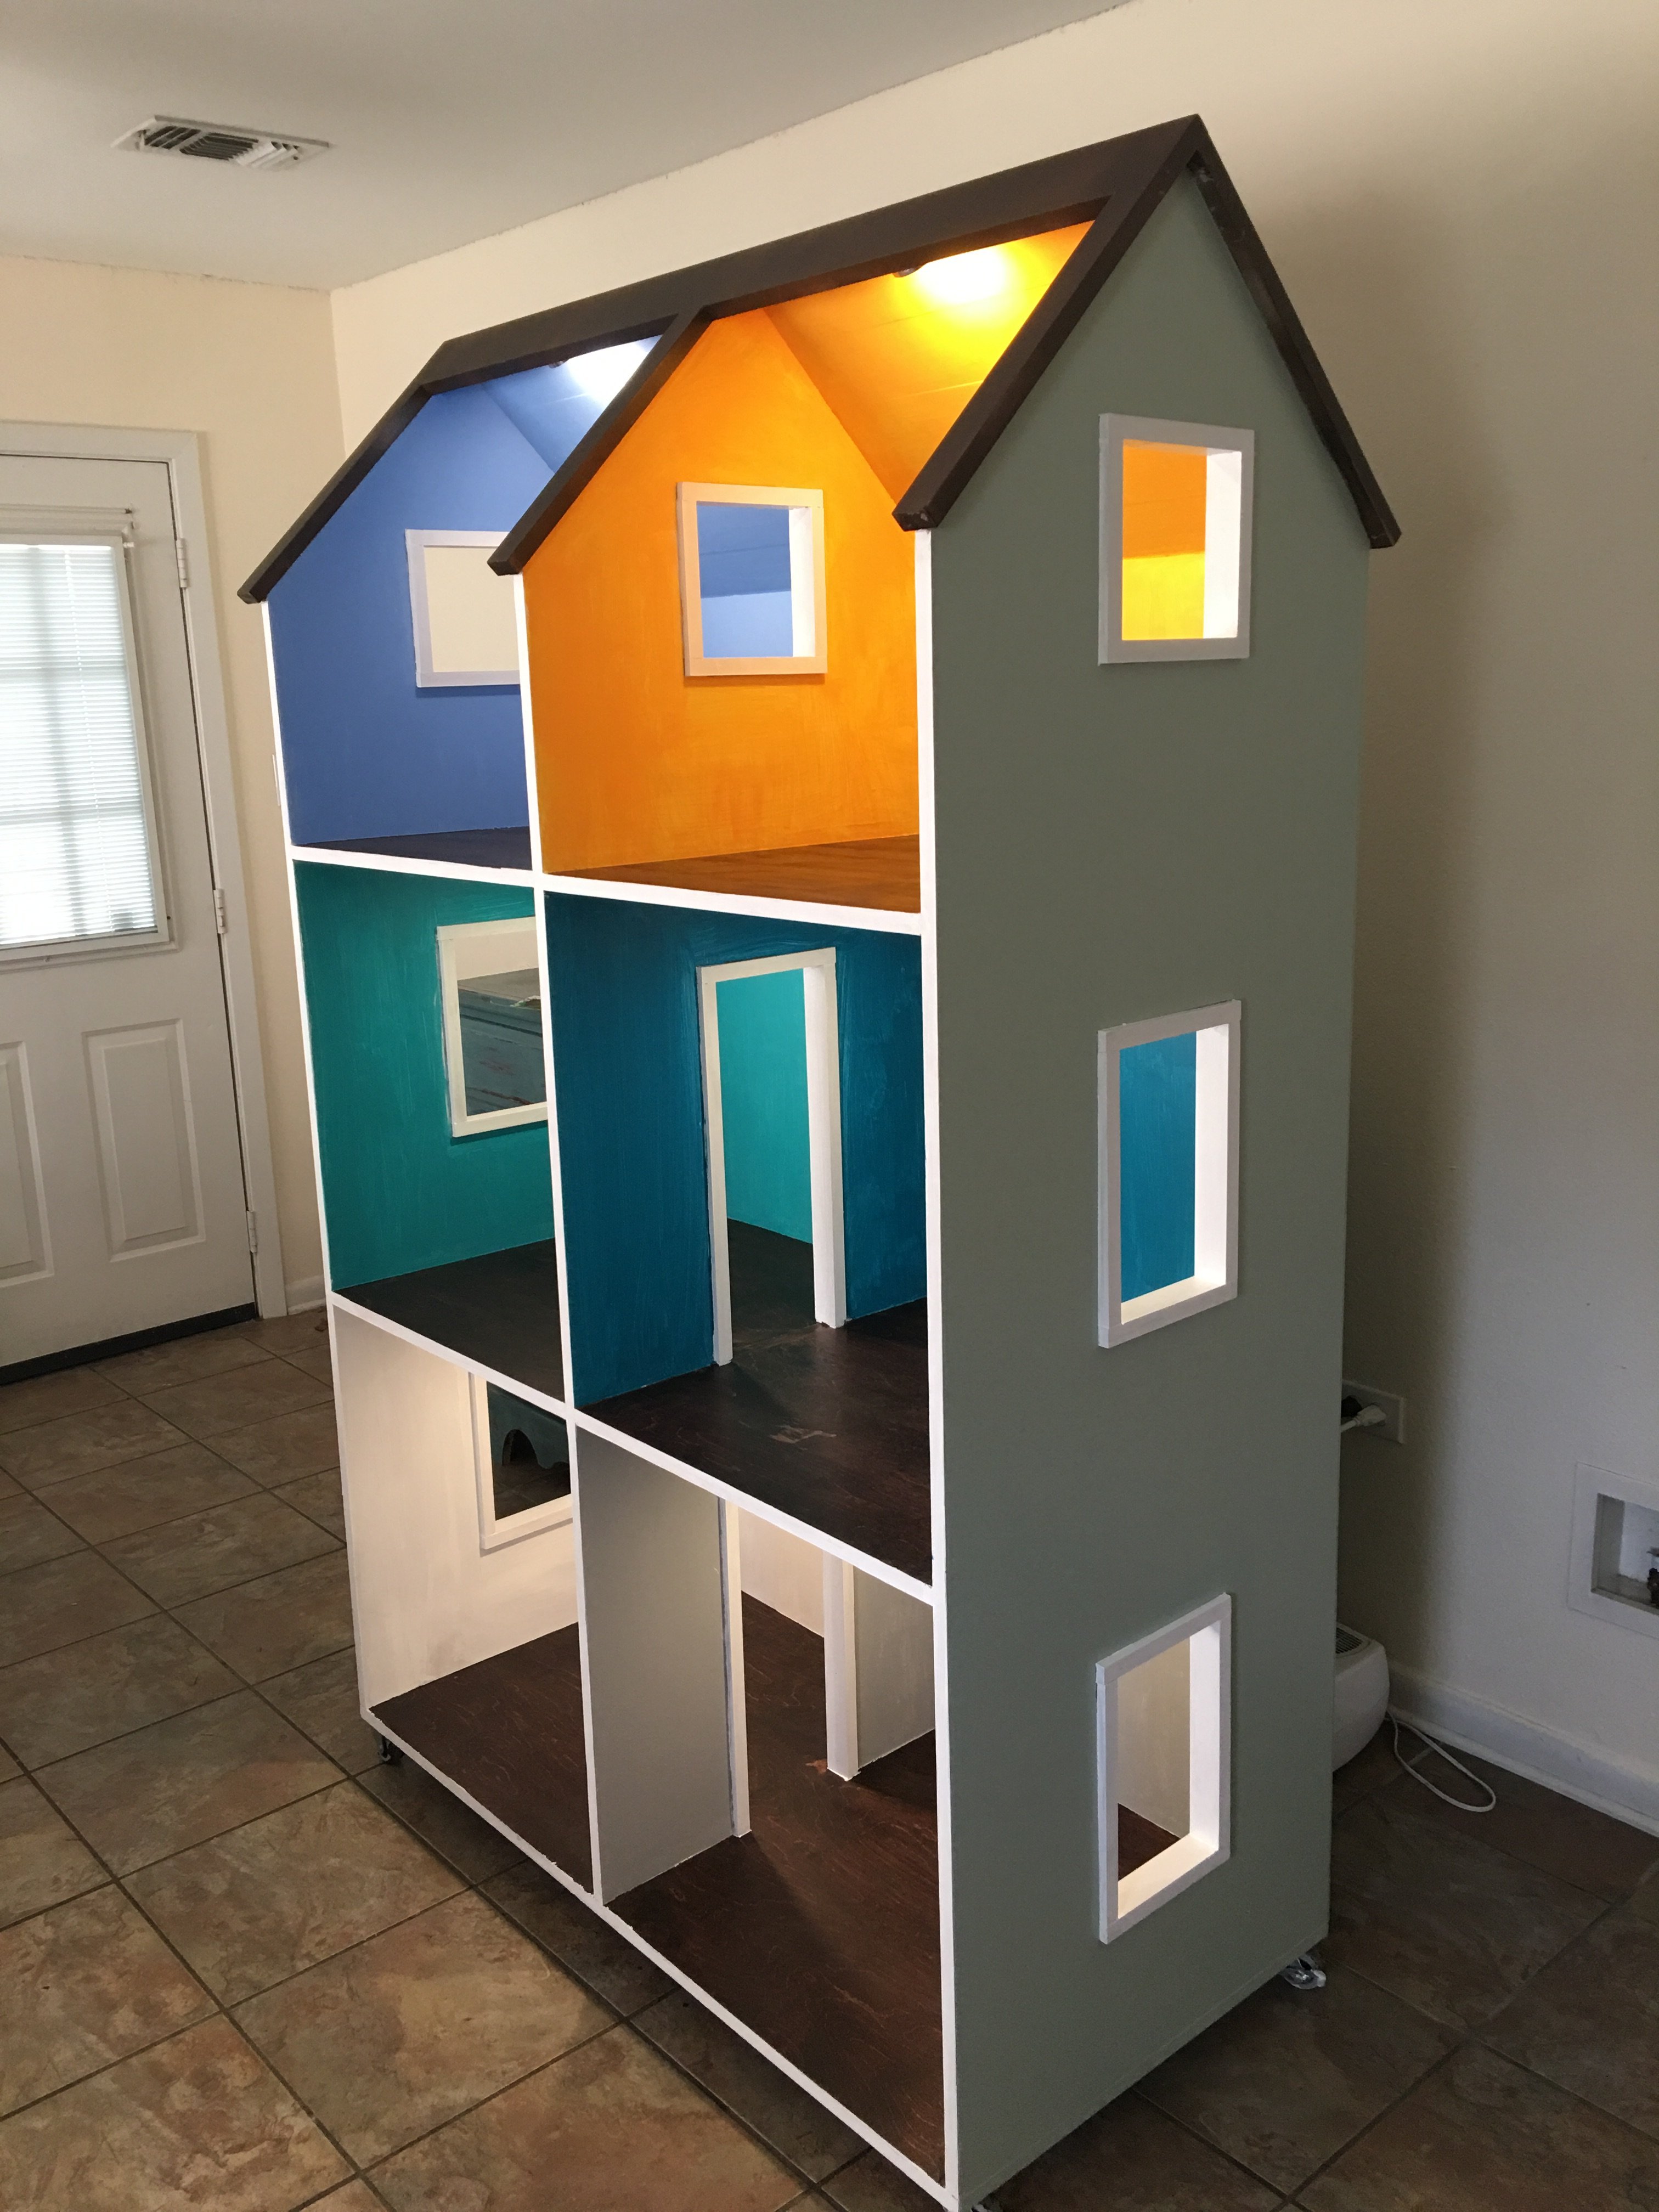
This project took us four days. The biggest job that took us awhile was sanding and painting.
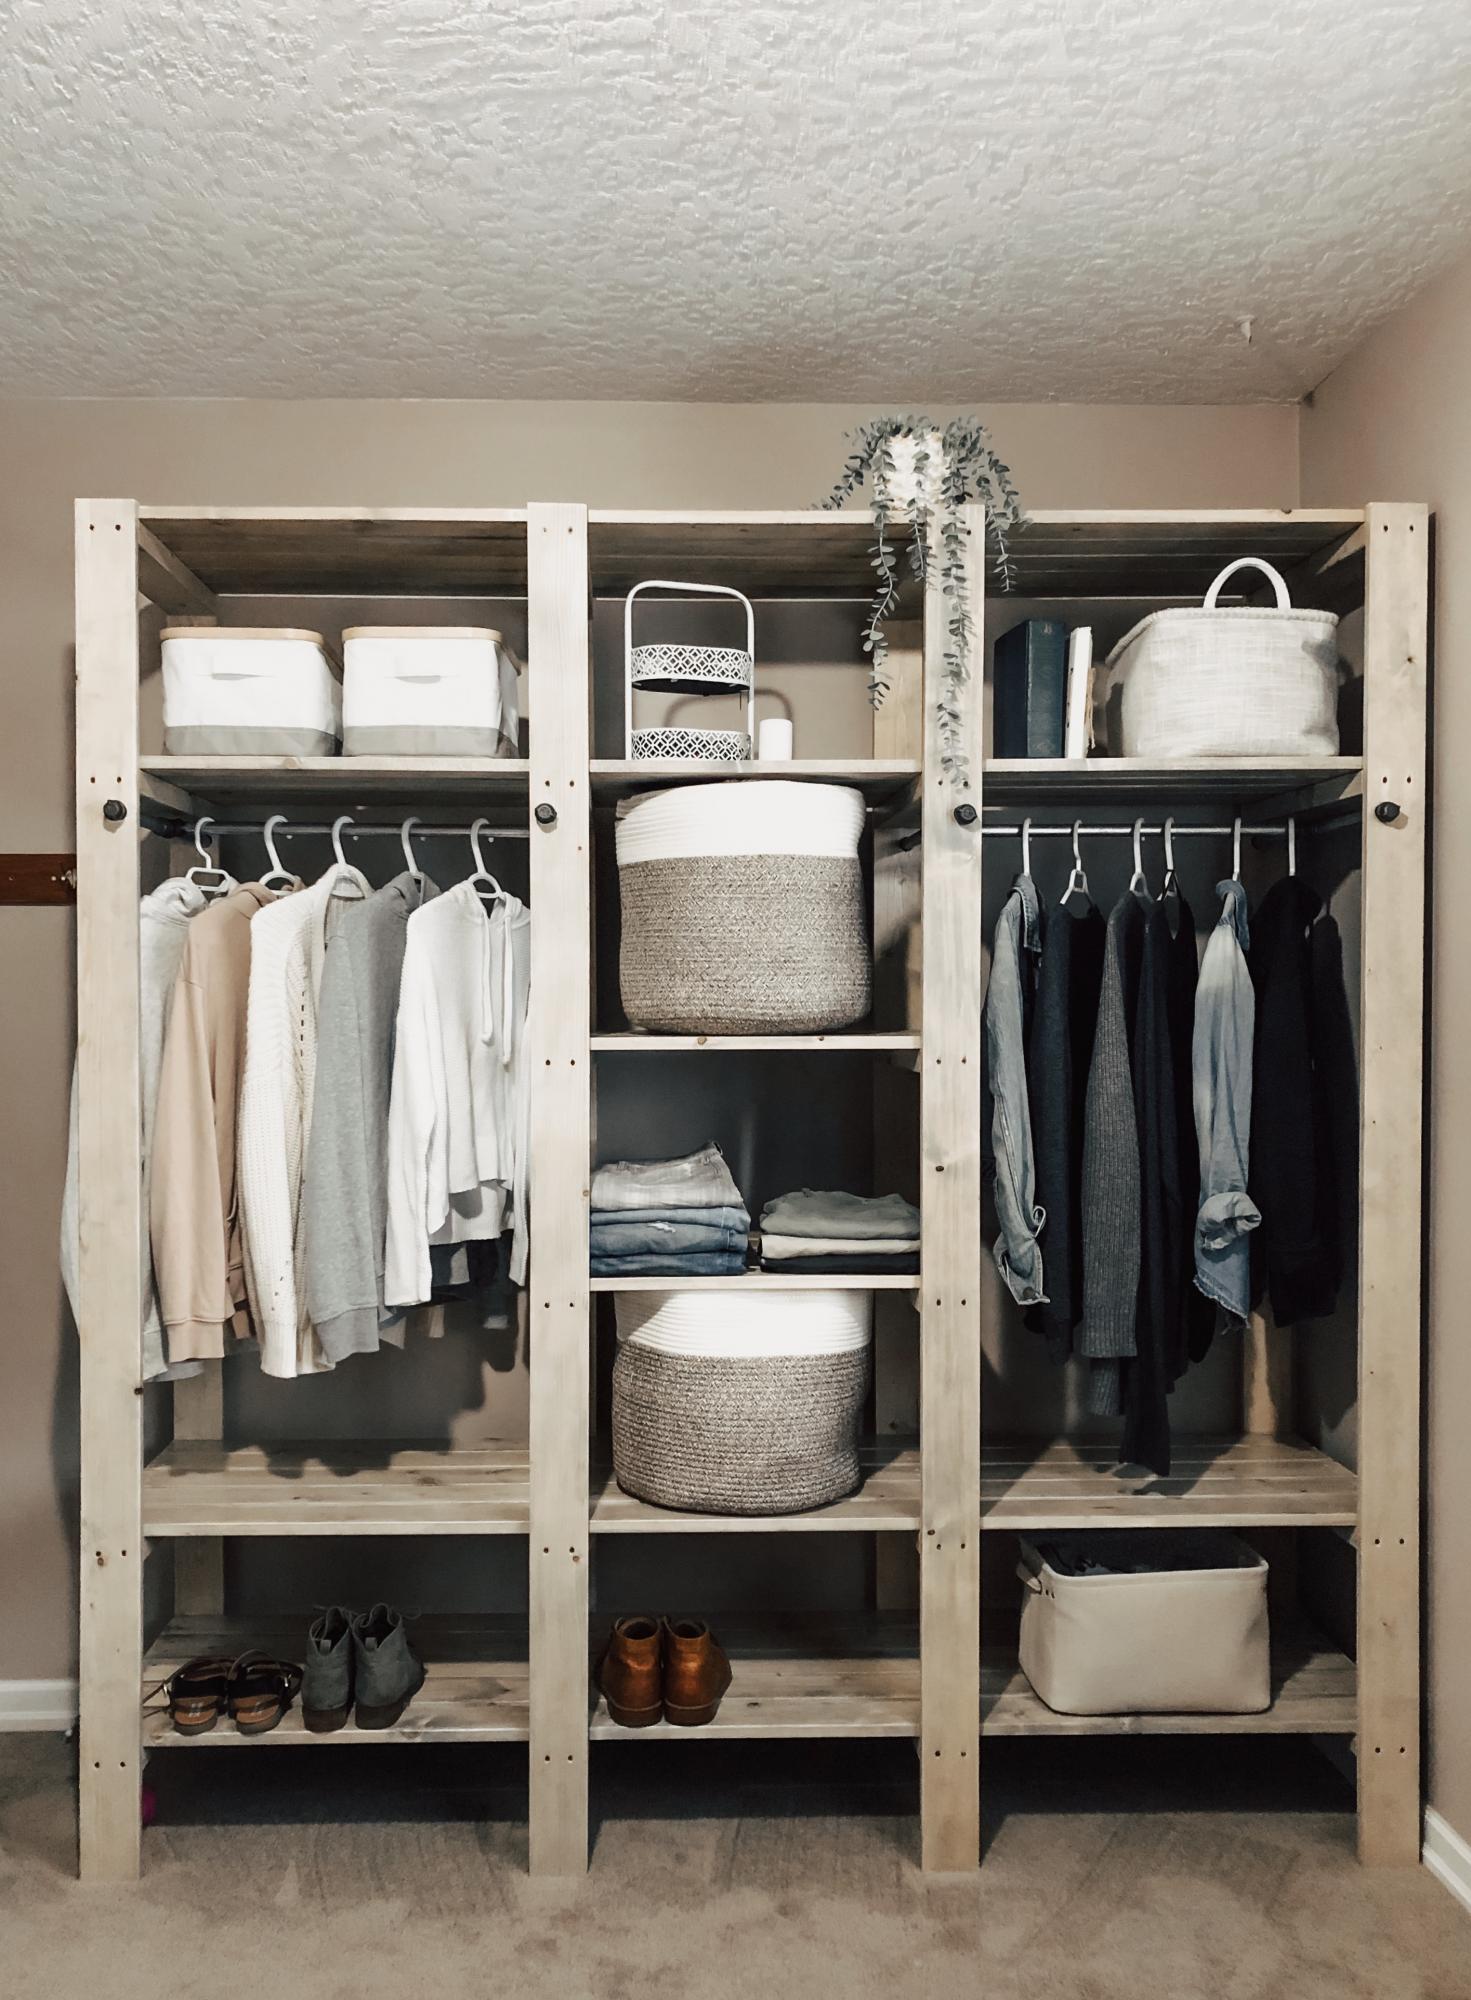
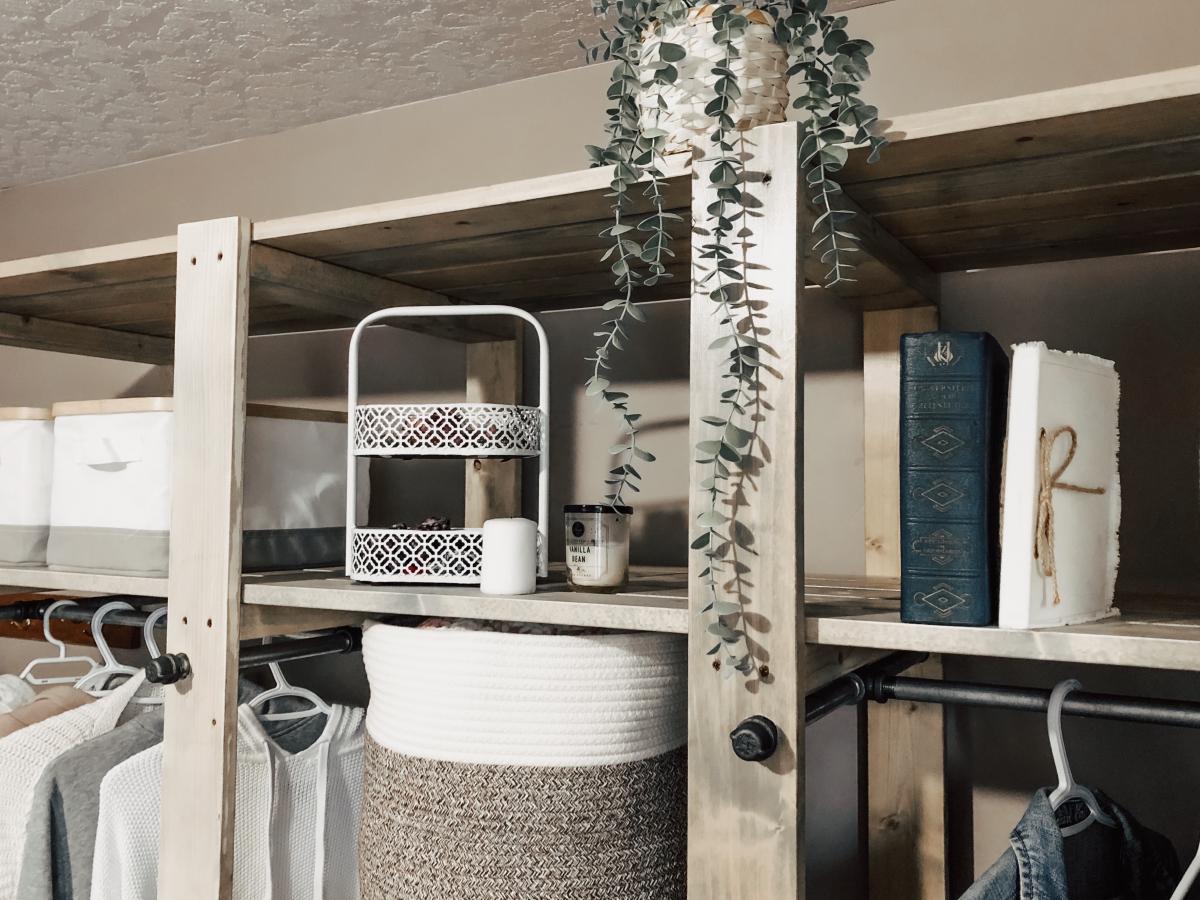
I’ve been searching for a free standing closet for so long!! I stumbled across these plans a few months ago and asked my hubby and brother if they would be up for a little project and boy, did they ever do an amazing job!! I am so happy with this. We ended up making ours a little bit shorter to fit in our room and adjusting some of the other plans. The rods were cut a little short, but everything still worked out beautifully. Thank you for these plans! <3
Sat, 09/12/2020 - 11:14
Thanks for sharing, we chose this as our Brag Post of the Day on Facebook!
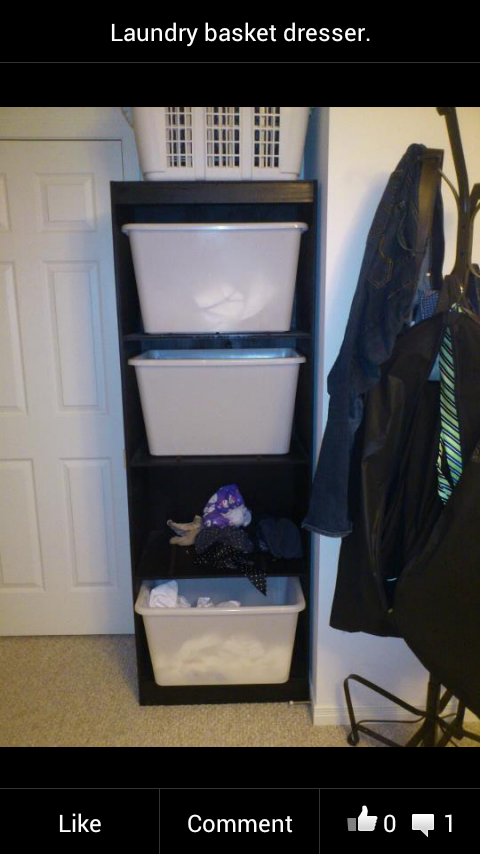
I started with the standard laundry basket dresser but went with shelves. I thought that the baskets would last liner this way. The baskets used are from IKEA and sit on felt runners to keep the noise down.
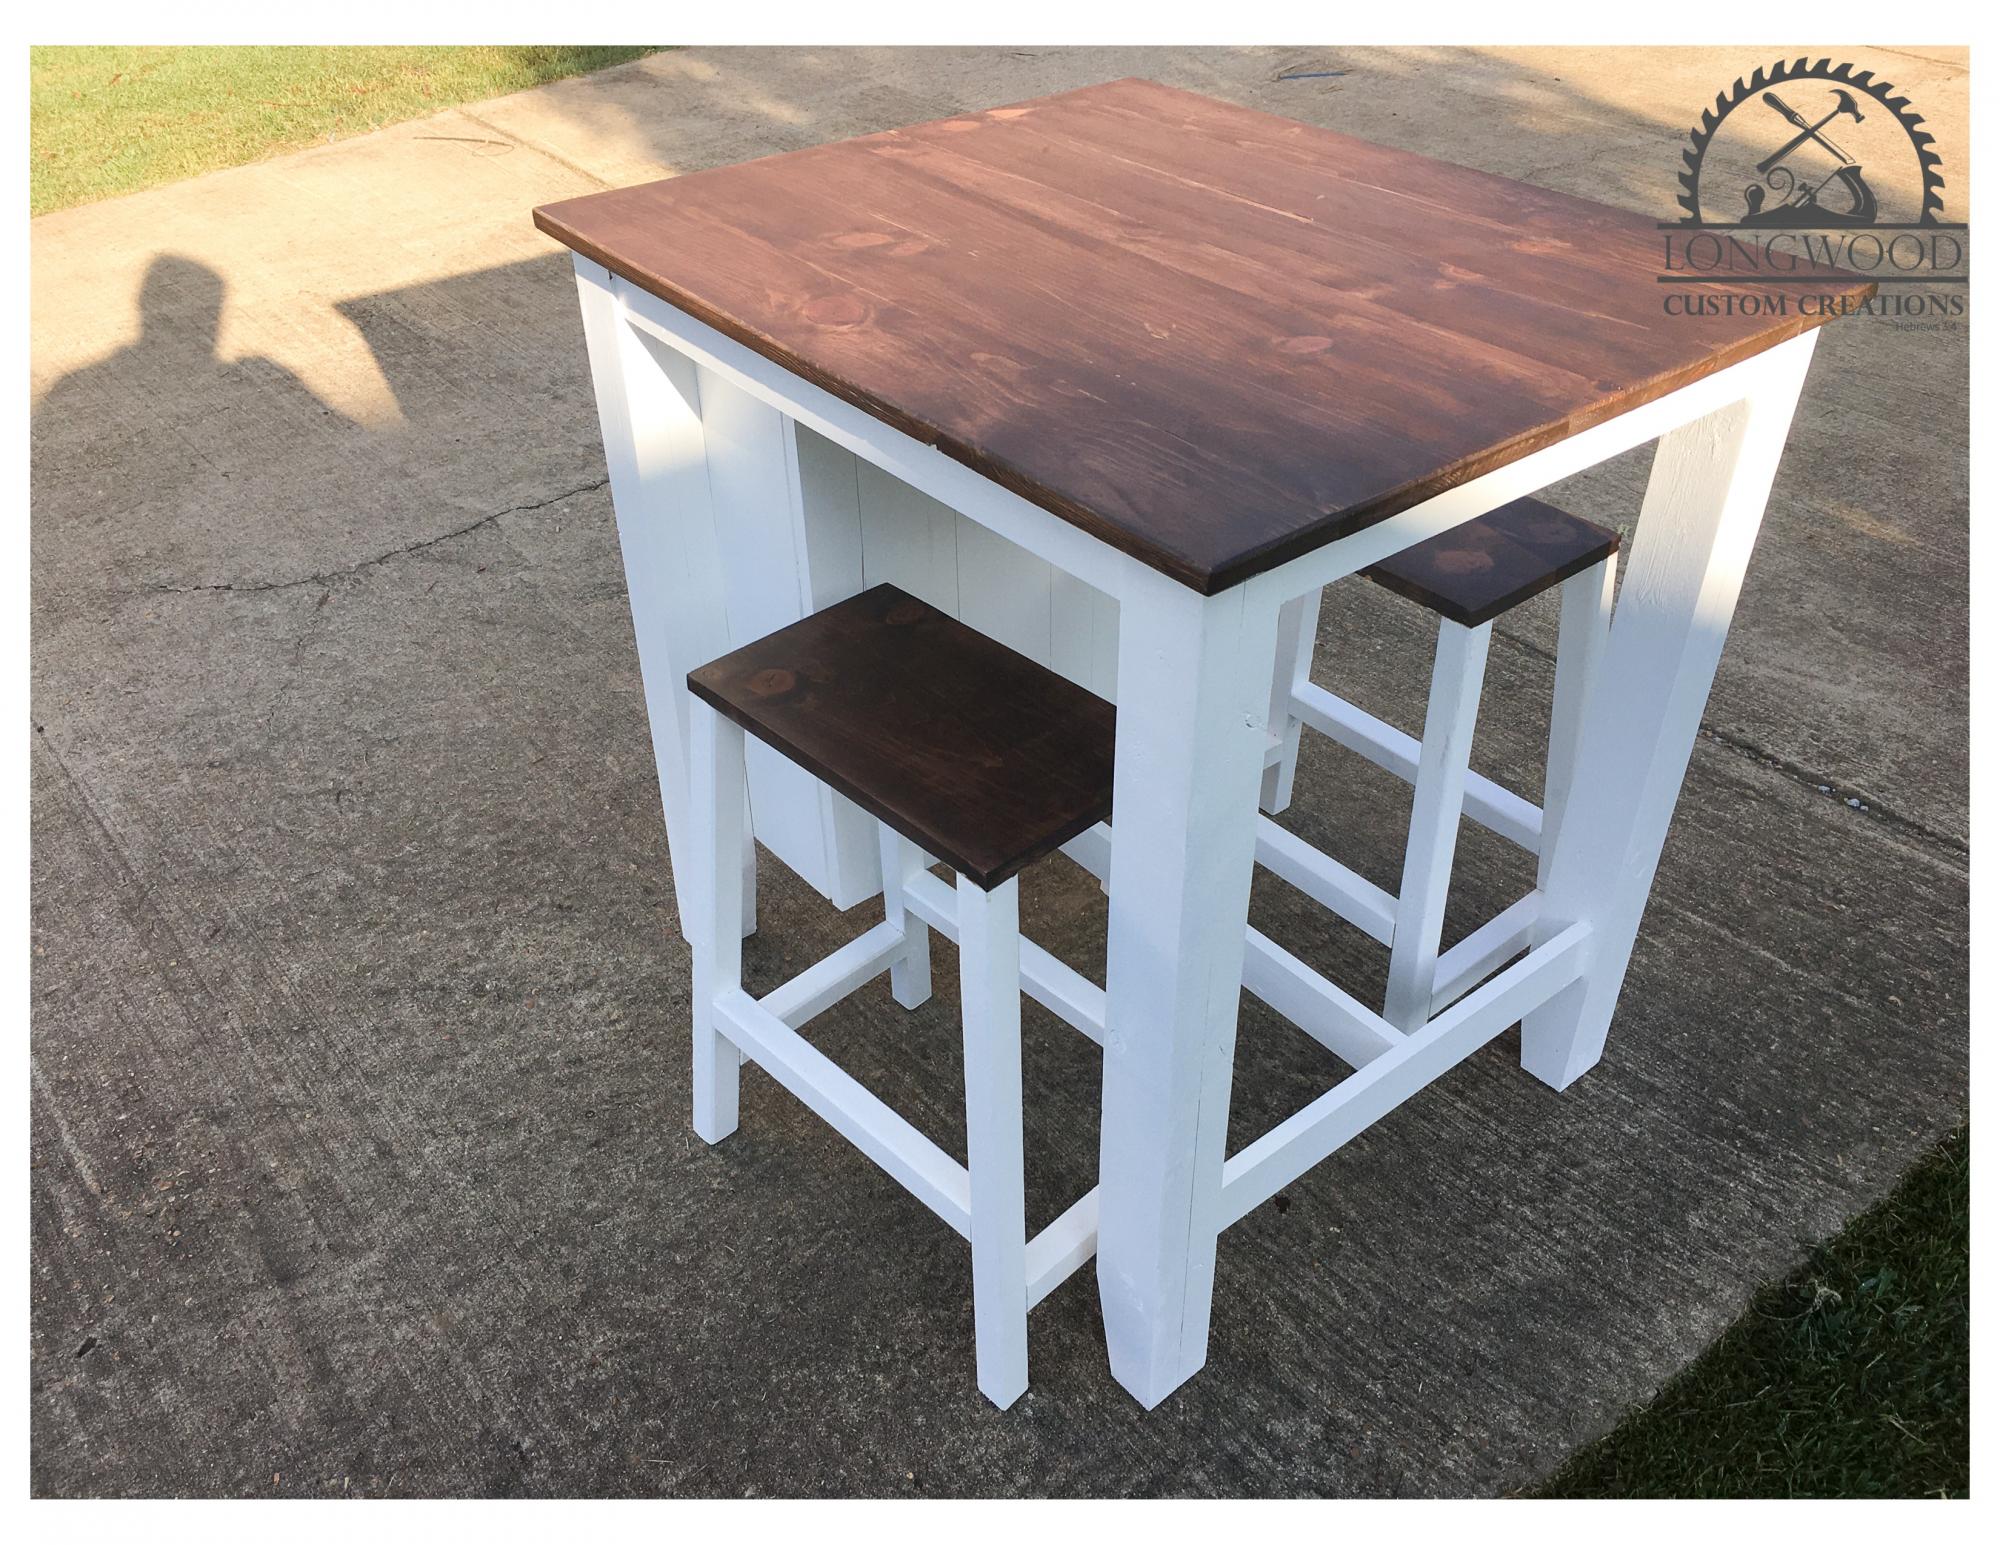
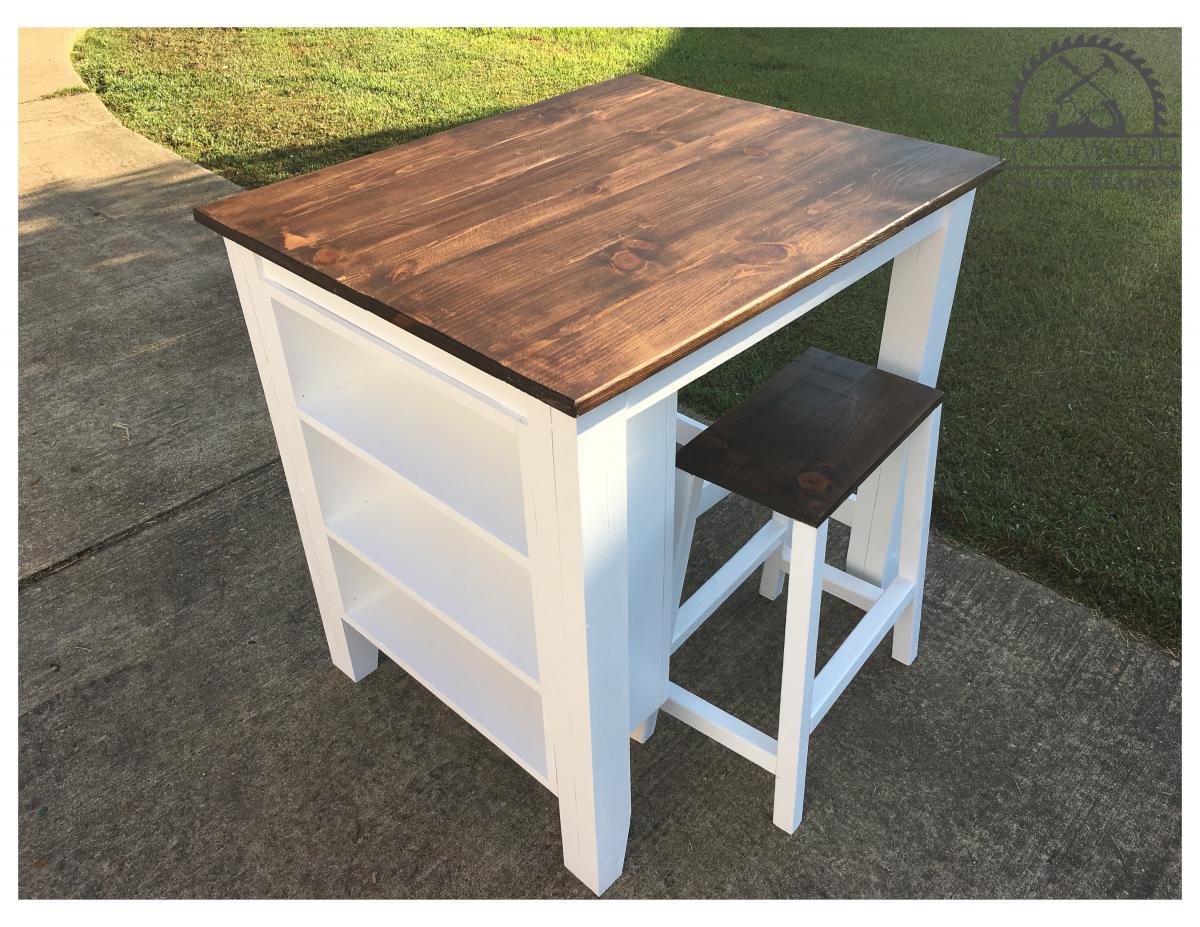
I had a friend who was interested in a small island with two stools that looked like this offered by a fancy home interior store. The reviews weren't all that great, even for the half off sale price. They needed something small to fit their space that would basically serve as a dining area for her and her husband. It is build out of spruce and whitewood lumber. White paint and dark walnut stain, with poly on top. The legs are two 2x4s glued together , then ripped each side to square it off making it an actual 3" x 3". The stools came from Ana's farmhouse counter stool plan. The island I just went with overall demensions and built it from there. Pocket hole screws and finish nails.
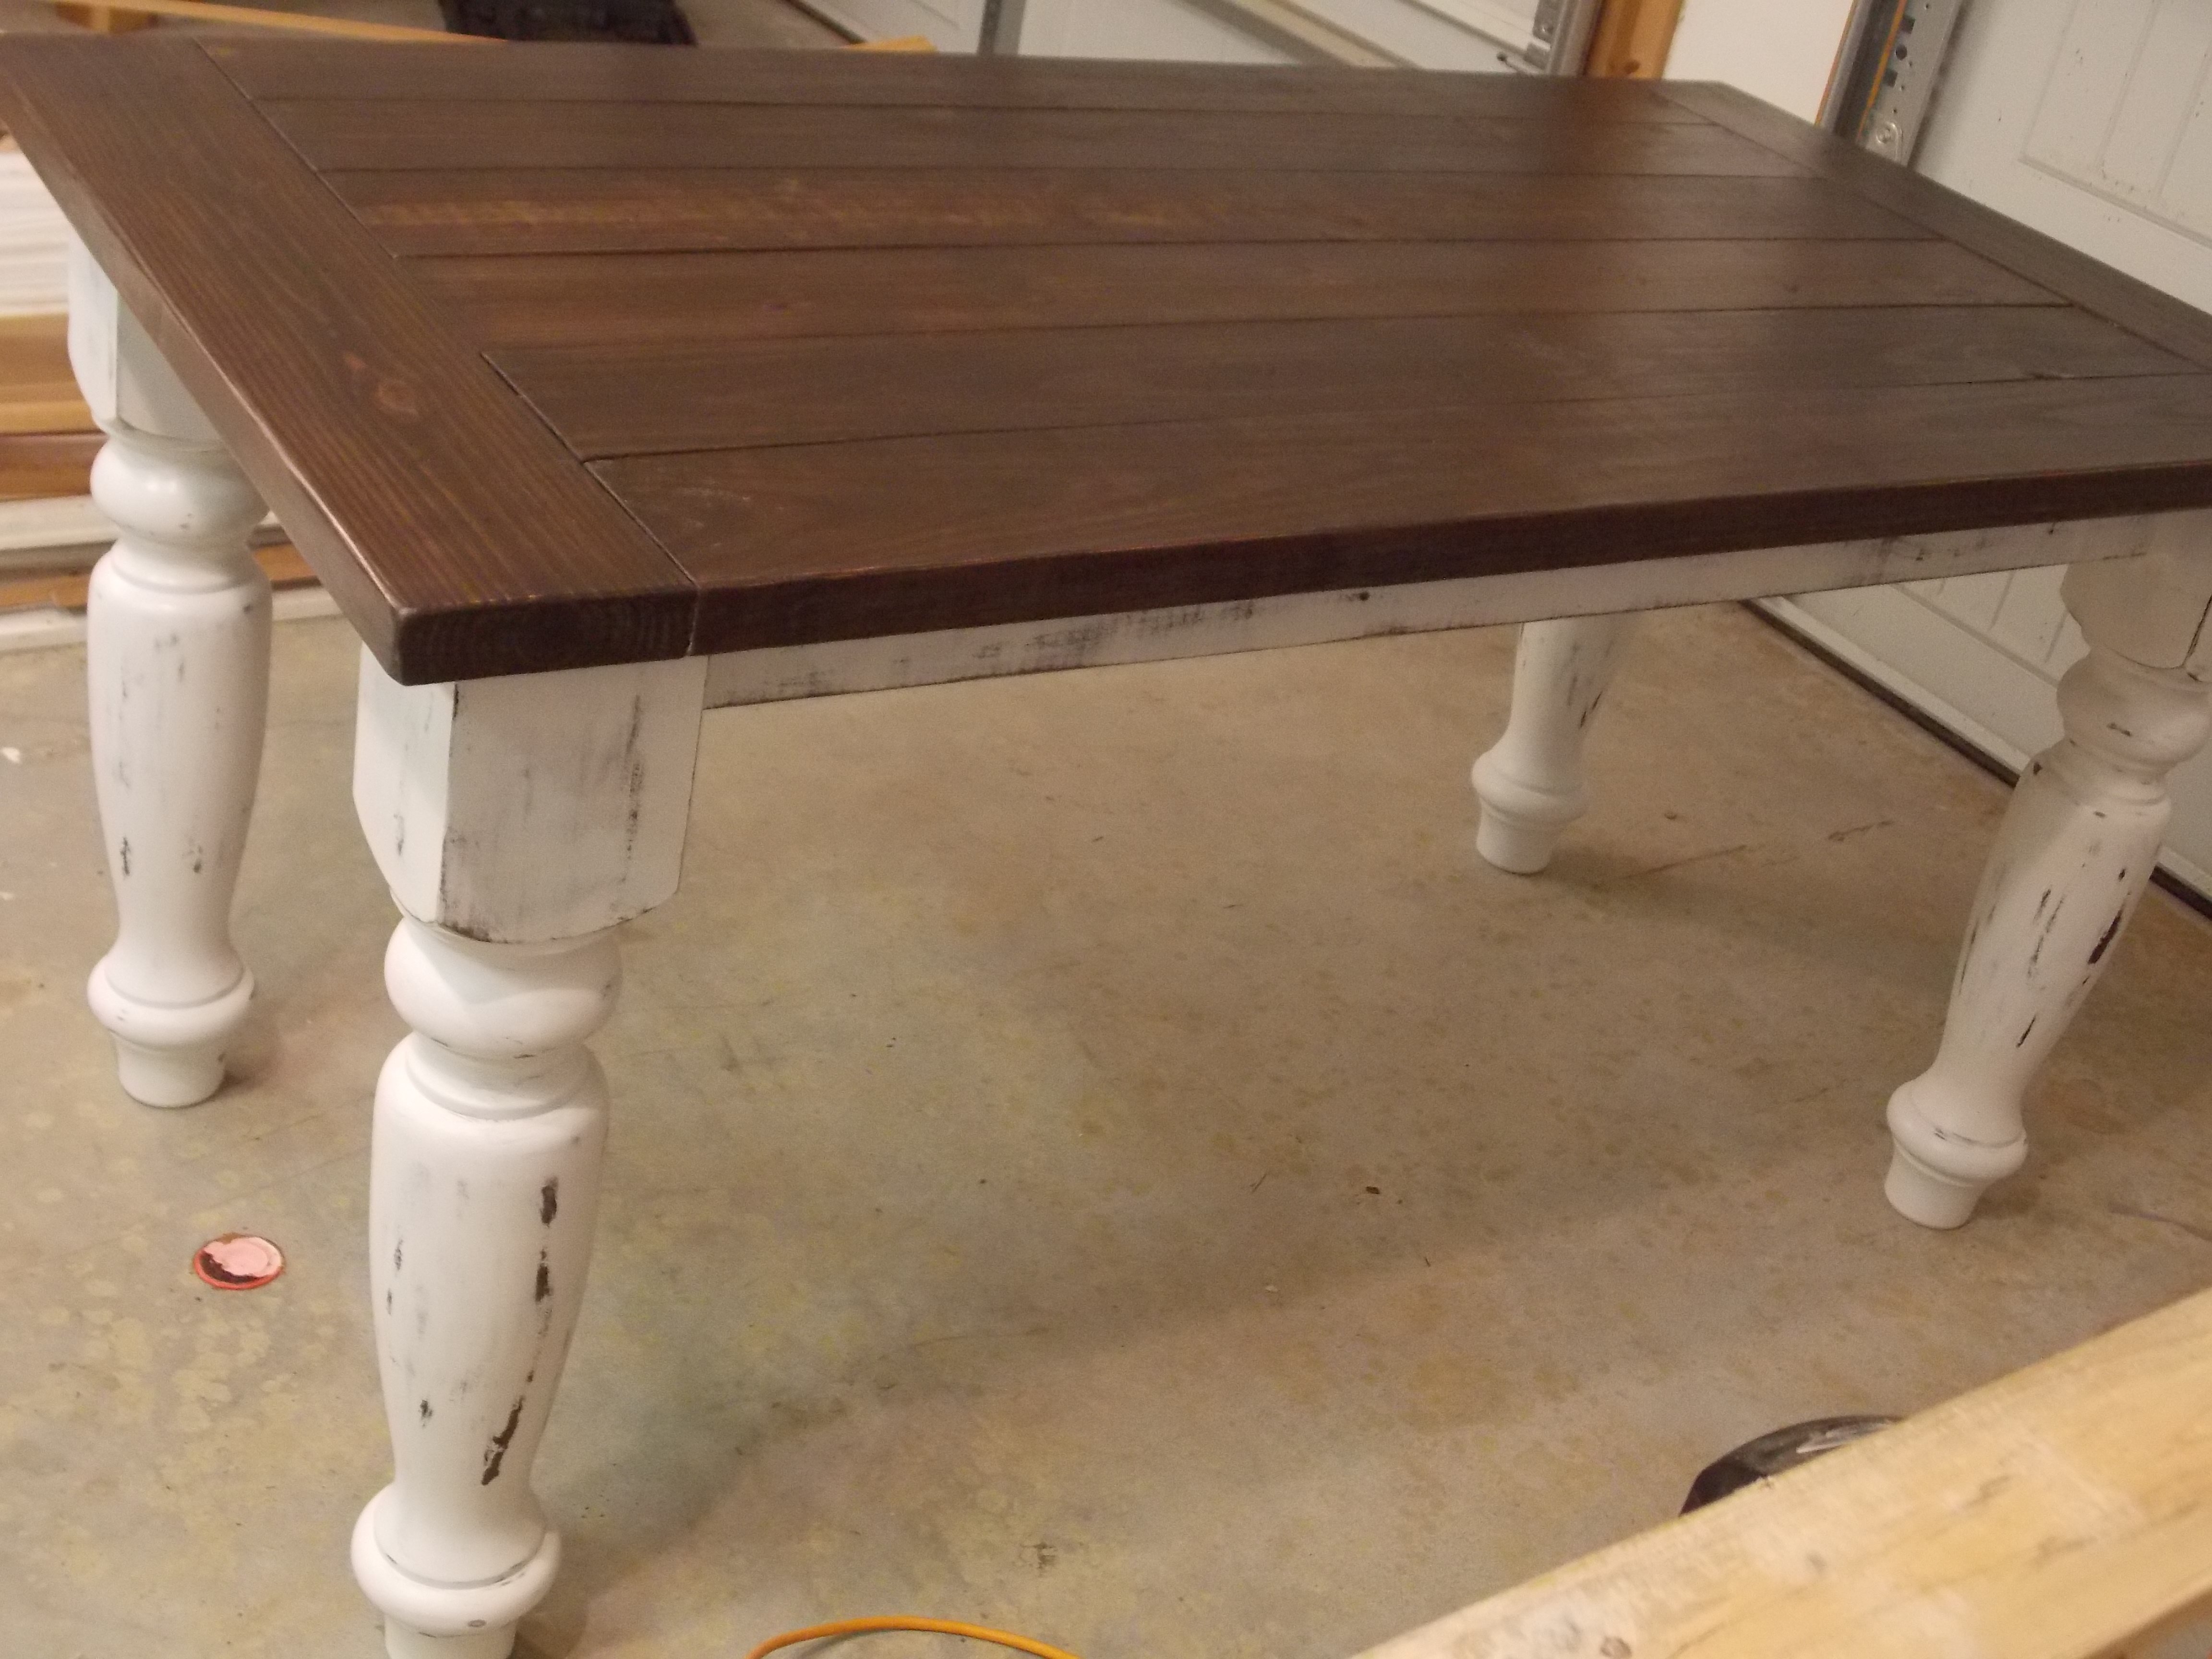
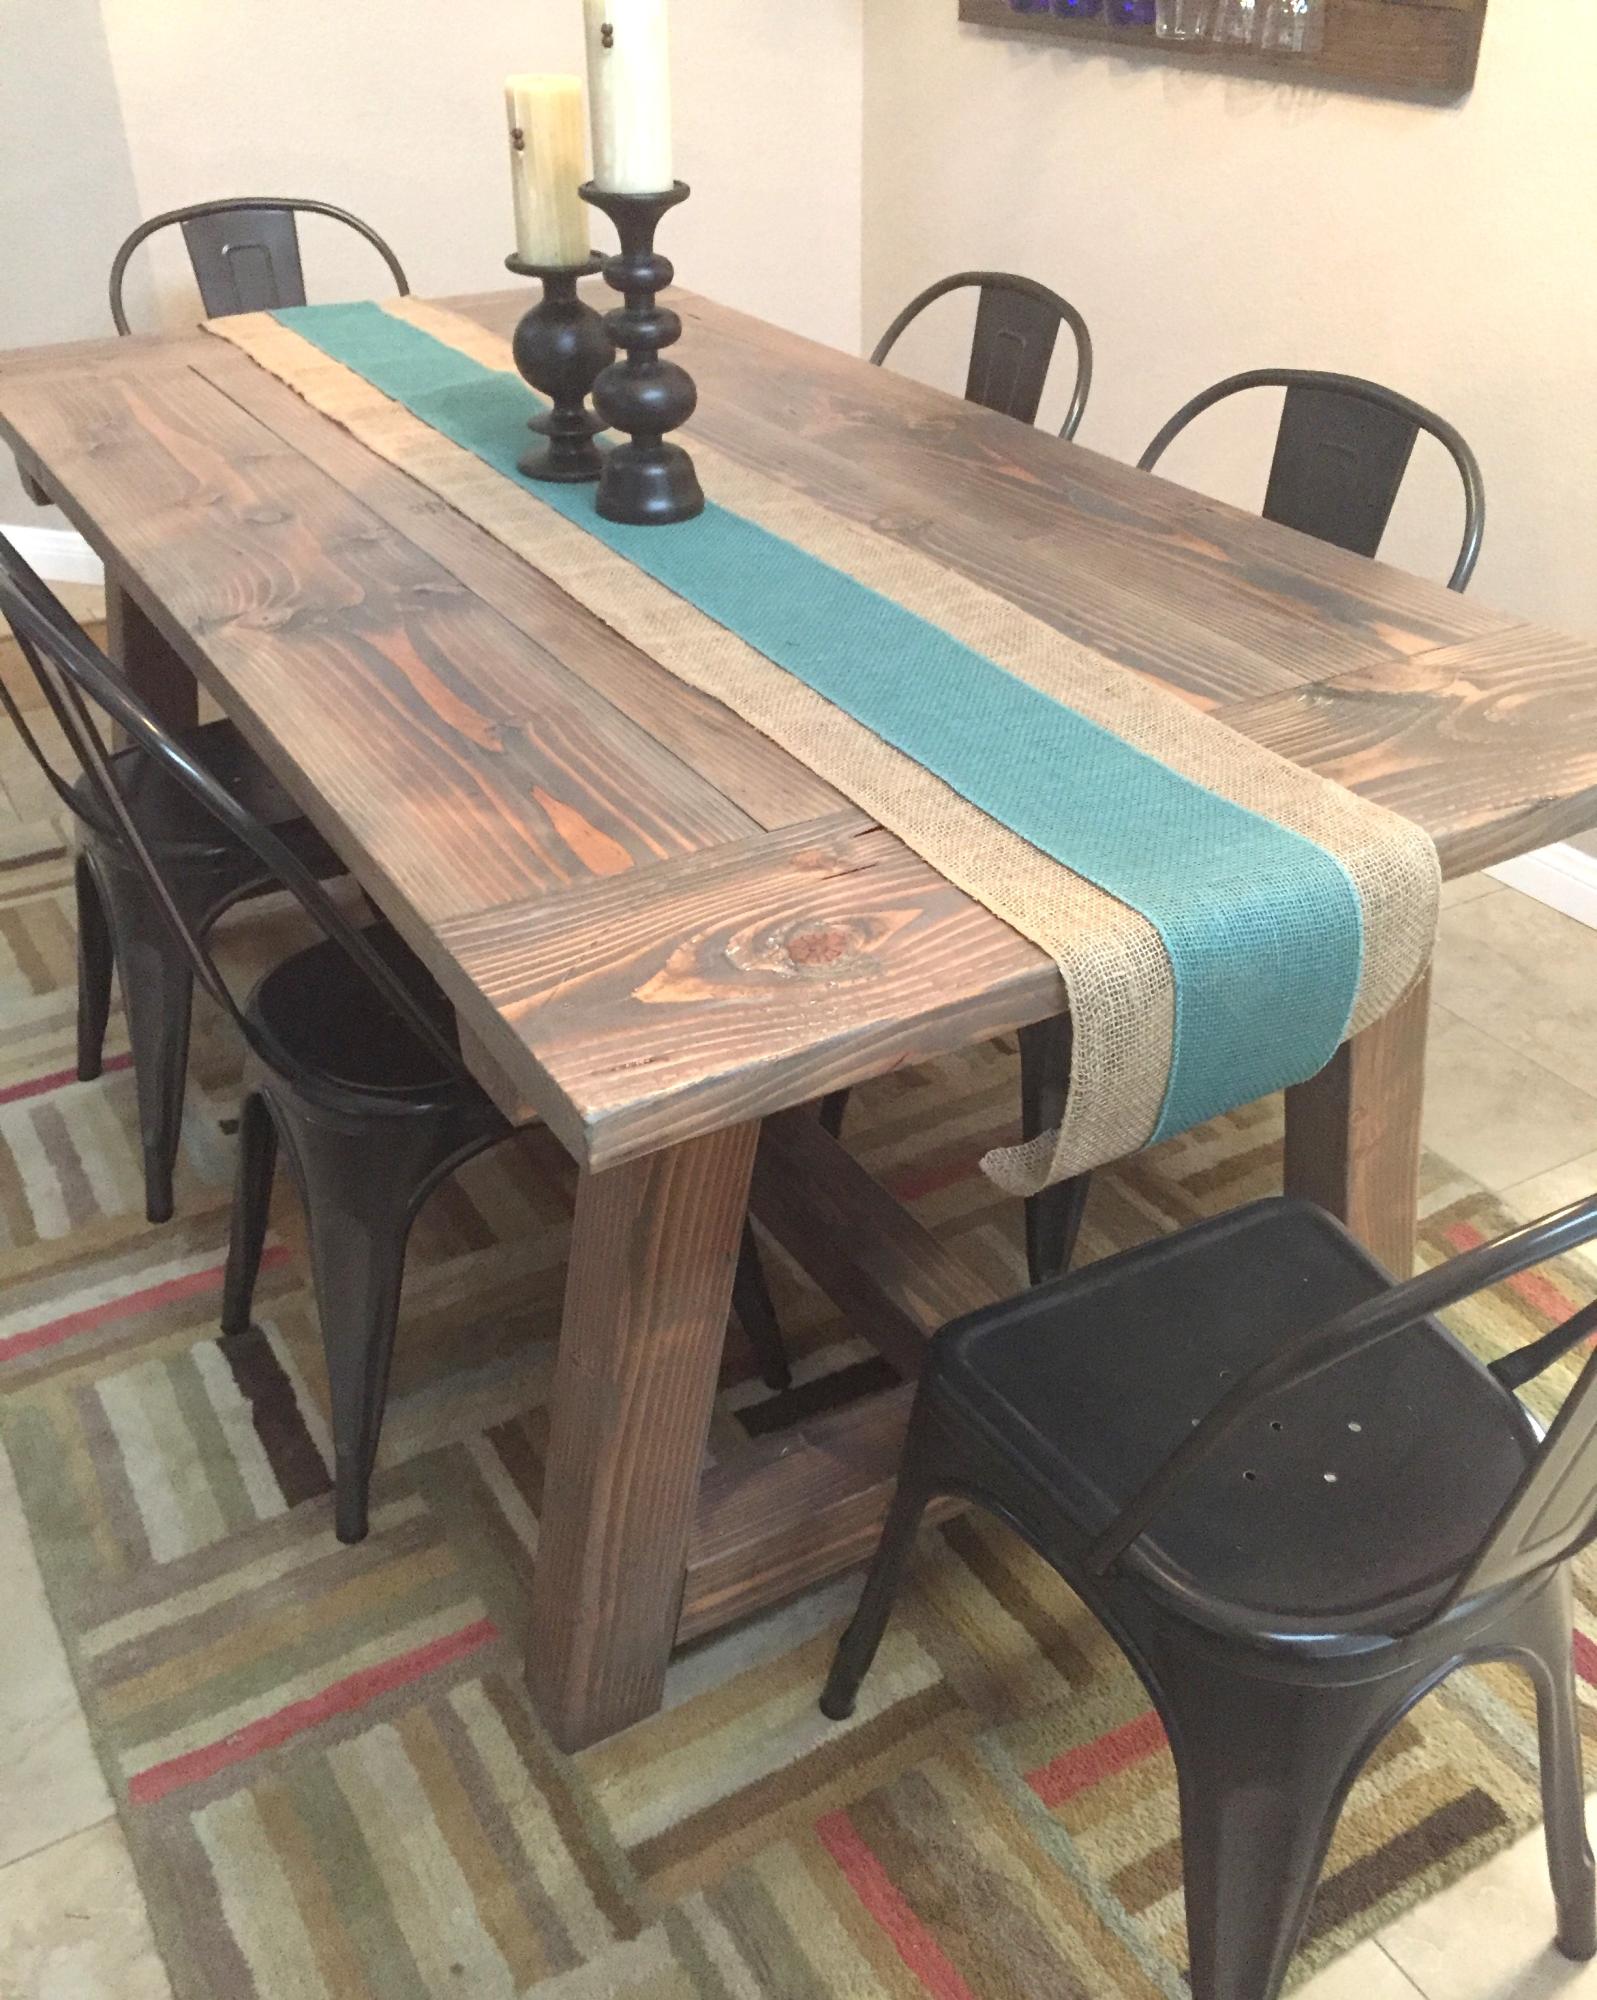
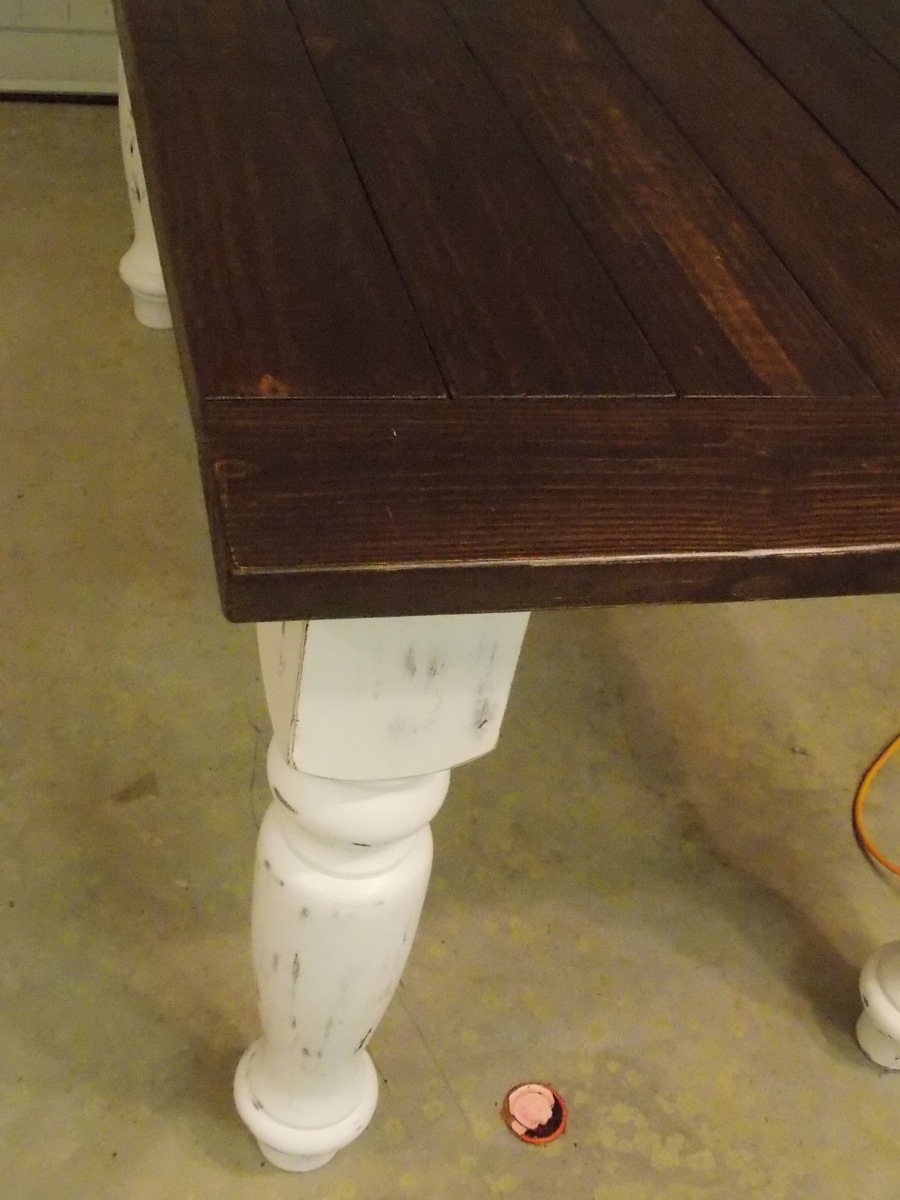
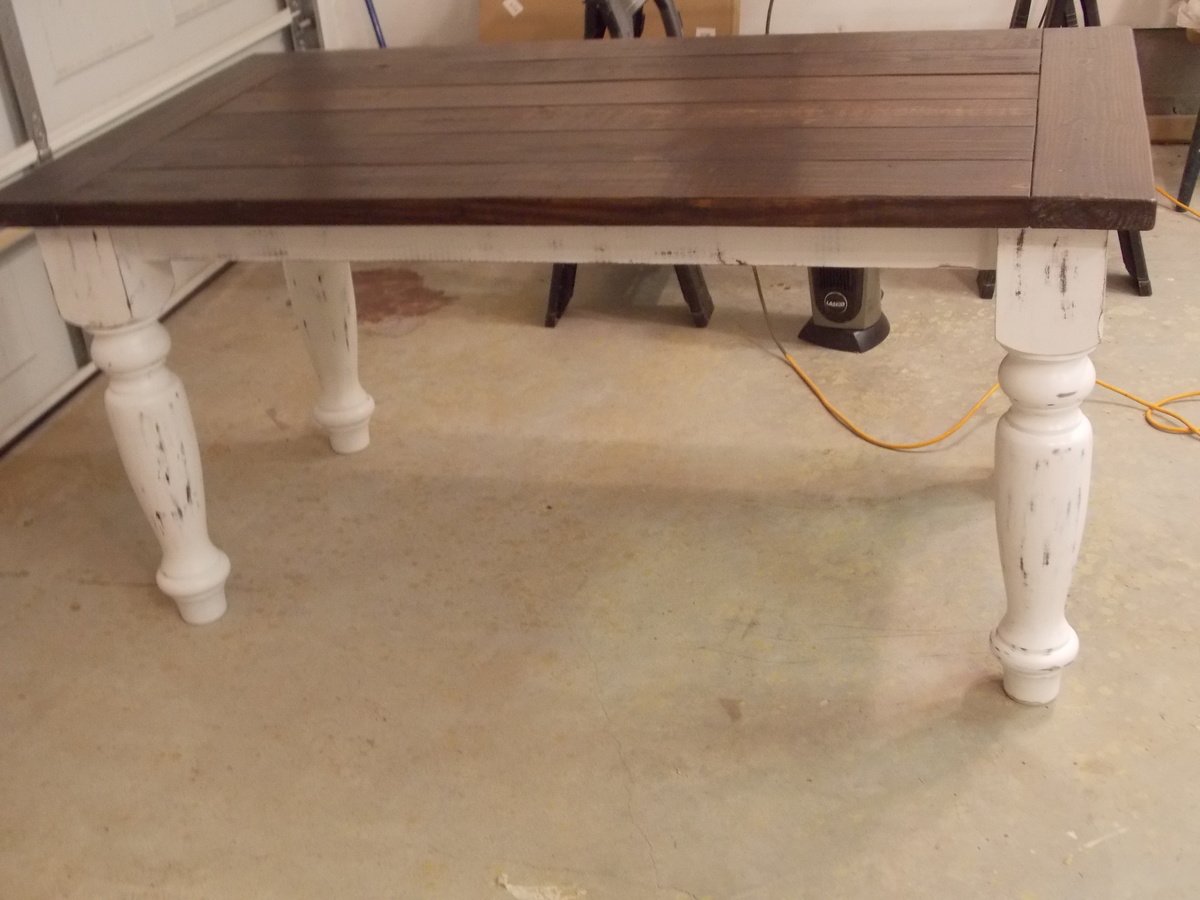
I love how this table turned out! This table was built for a friend of mine who wanted a rustic farmhouse table with "fancy" legs. The legs and apron are painted white and distressed. The table top is stained 2 x 6 pine. We love it! Thank you so much for the plans Ana! The legs are 5" turned maple legs. First, I painted the legs and apron "java brown" and then using Minwax furniture paste wax, I applied wax to the areas that I wanted to distress. After two coats of satin white paint, I distressed the legs using 220 grit sandpaper. Two coats of wax and the legs were silky smooth! The top is 2 x 6 yellow pine. I used two coats of Rustoleum dark walnut, one coat of sanding sealer, a final sanding with 220 grit sandpaper and two coats of wax. Love it!!

Tue, 12/04/2012 - 21:13
That turned out great! I love those legs and the distressed look.
Wed, 01/02/2019 - 10:25
I built this for a friend but as far as I know she is still using it and gets many complements on it.
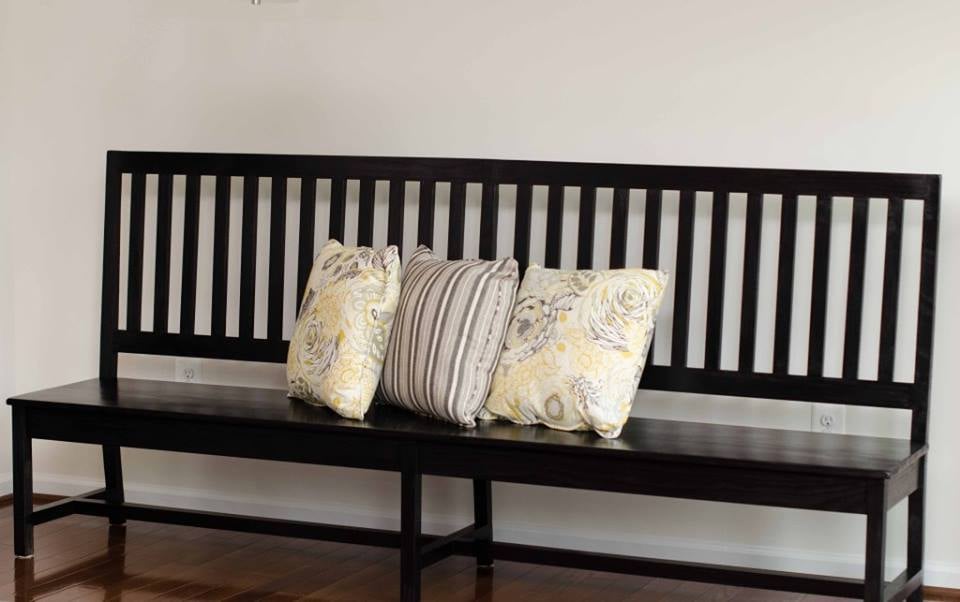
This was a custom build for a friend. It's nearly 8 feet long and I used the plans from the classic chair made simple for the back legs and support for the seat. Everything else was customized to fit her needs. =) Lots and lots and lots of pocket holes but this piece turned out better than what was pictured in my head!
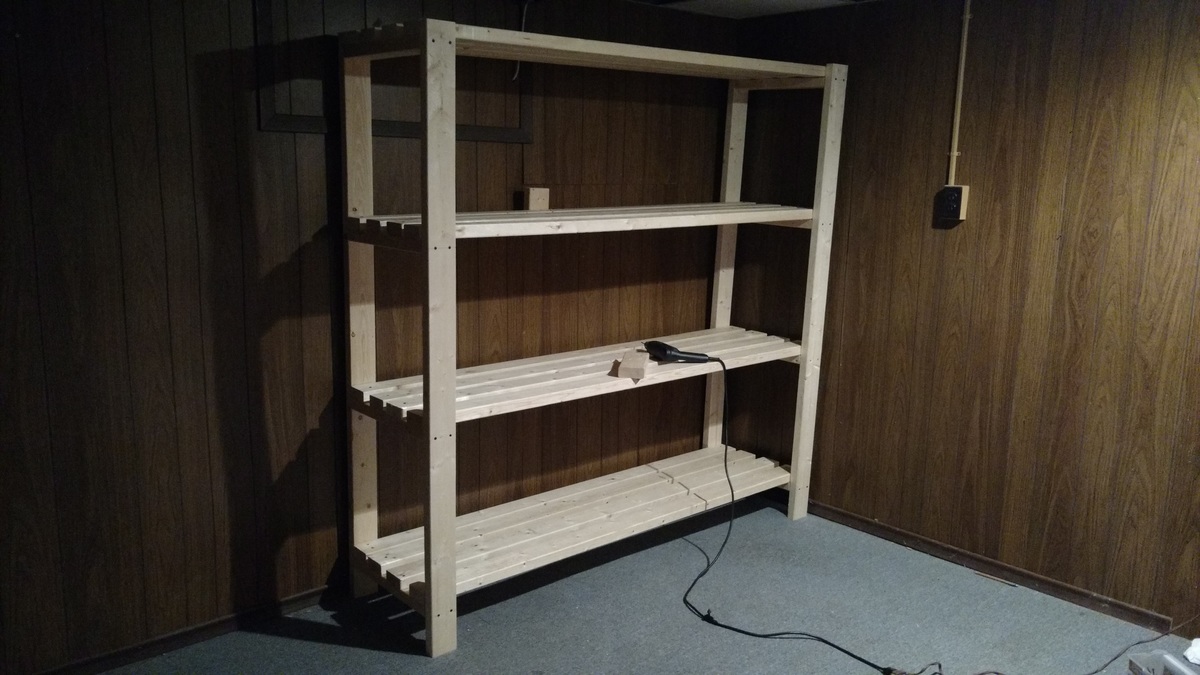
Love this shelf. We found we had to pre-drill holes since the wood we used was very dense, but in the end it was still a 1-day project (including buying wood and running other errands). It was perfect for our storage room since we really wanted a shelf to store totes, but didn't want to spend a lot on a room we never go in. In the end we spent $80 on wood, which is far less than comparable metal shelves for $160-$180 elsewhere. In addition this thing is STURDY. Thank you Ana!!
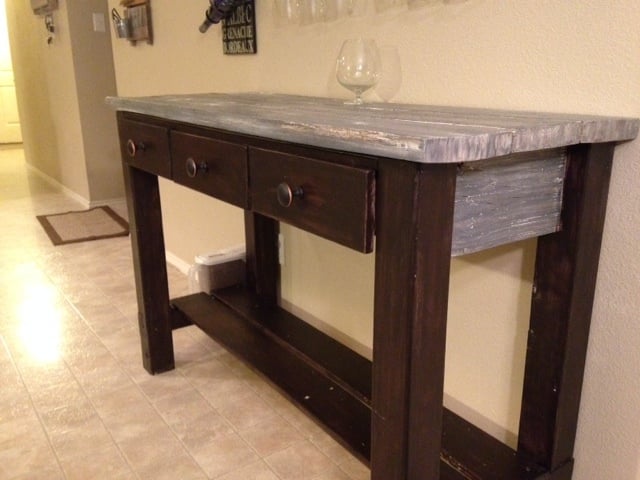
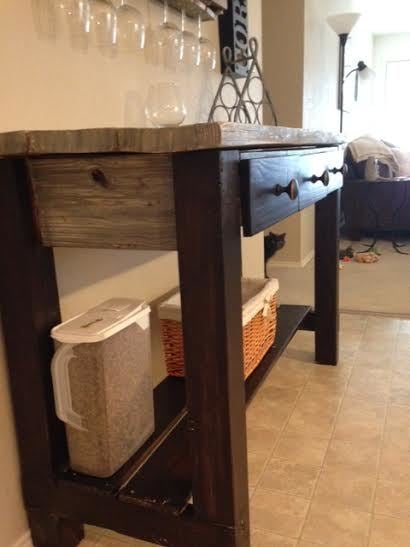
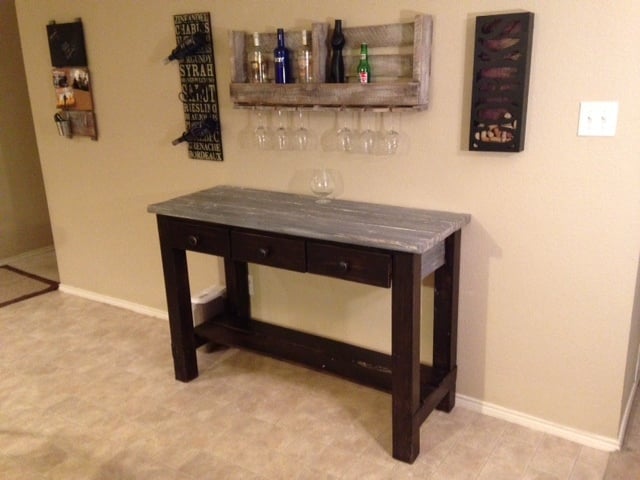
I built this buffet table for our dining room using the Gaby Kitchen Island plans. I used some reclaimed boards I salvaged from a trash pile at work for the top and side aprons. I also used old pallet wood for the bottom shelf boards. This gave it the cool, rustic look I was going for and really helped set it apart. Really fun project.

Thank you for the plans. It was a fun build and my girls love it!
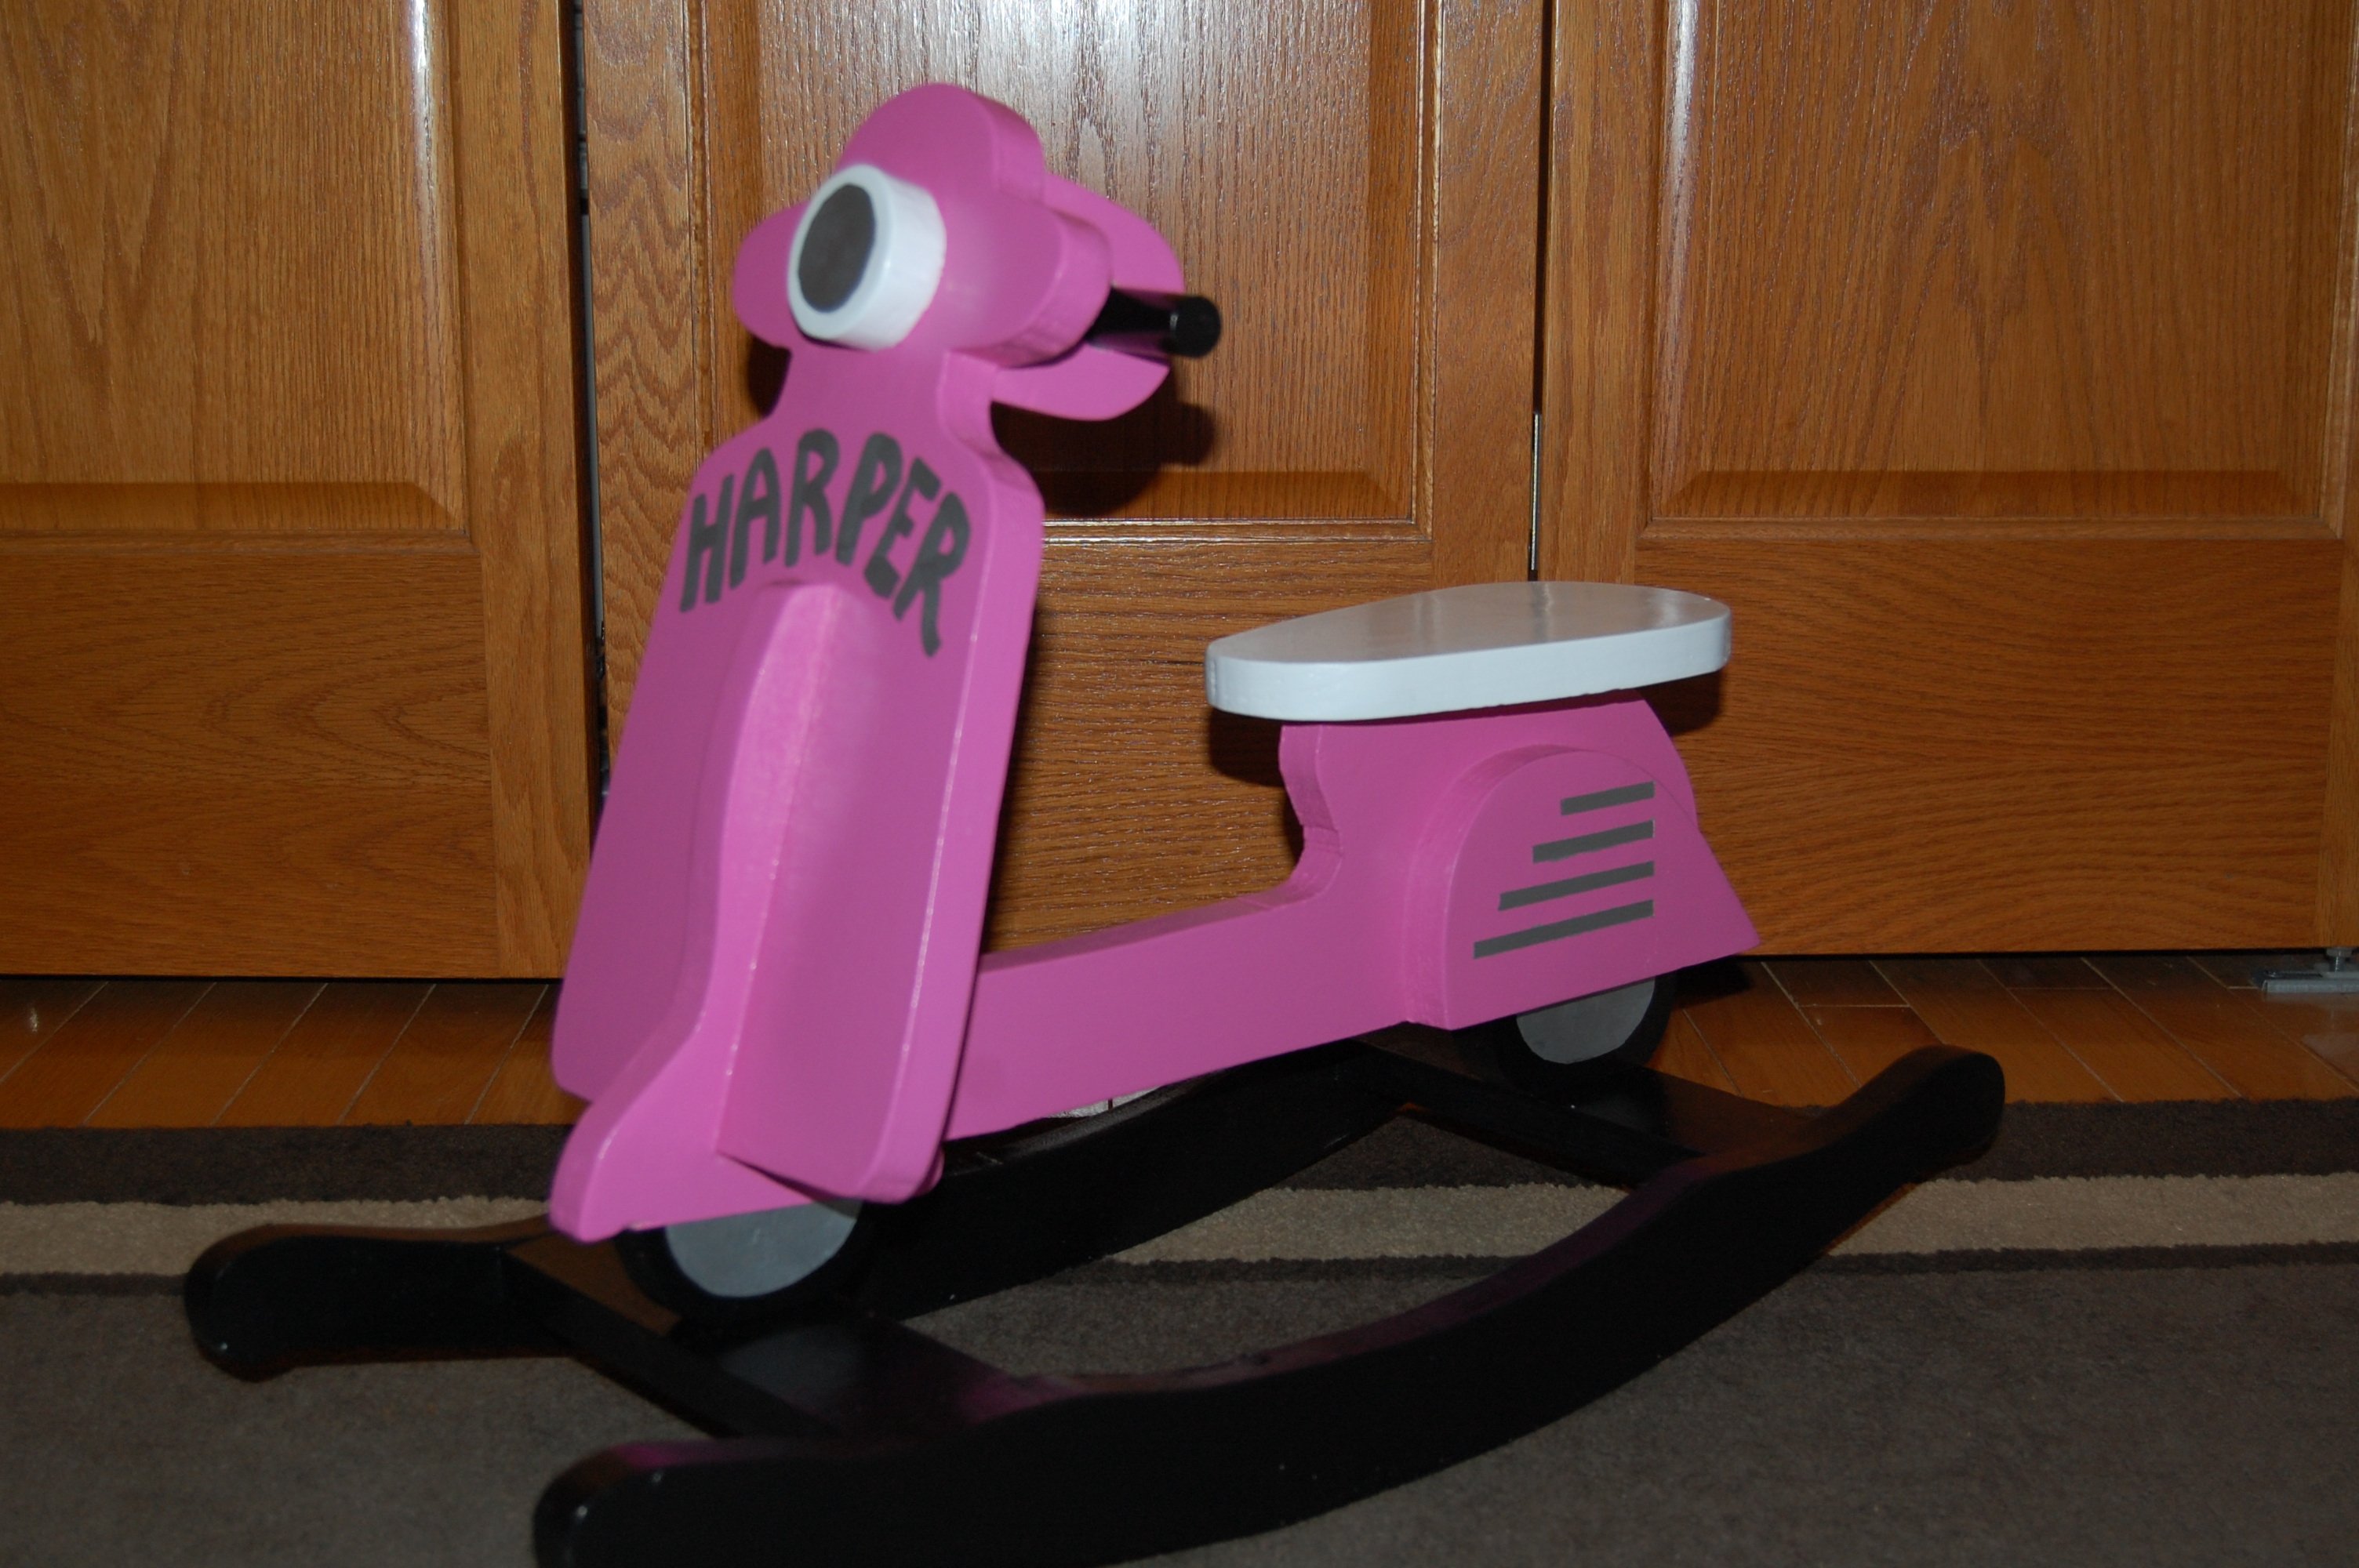
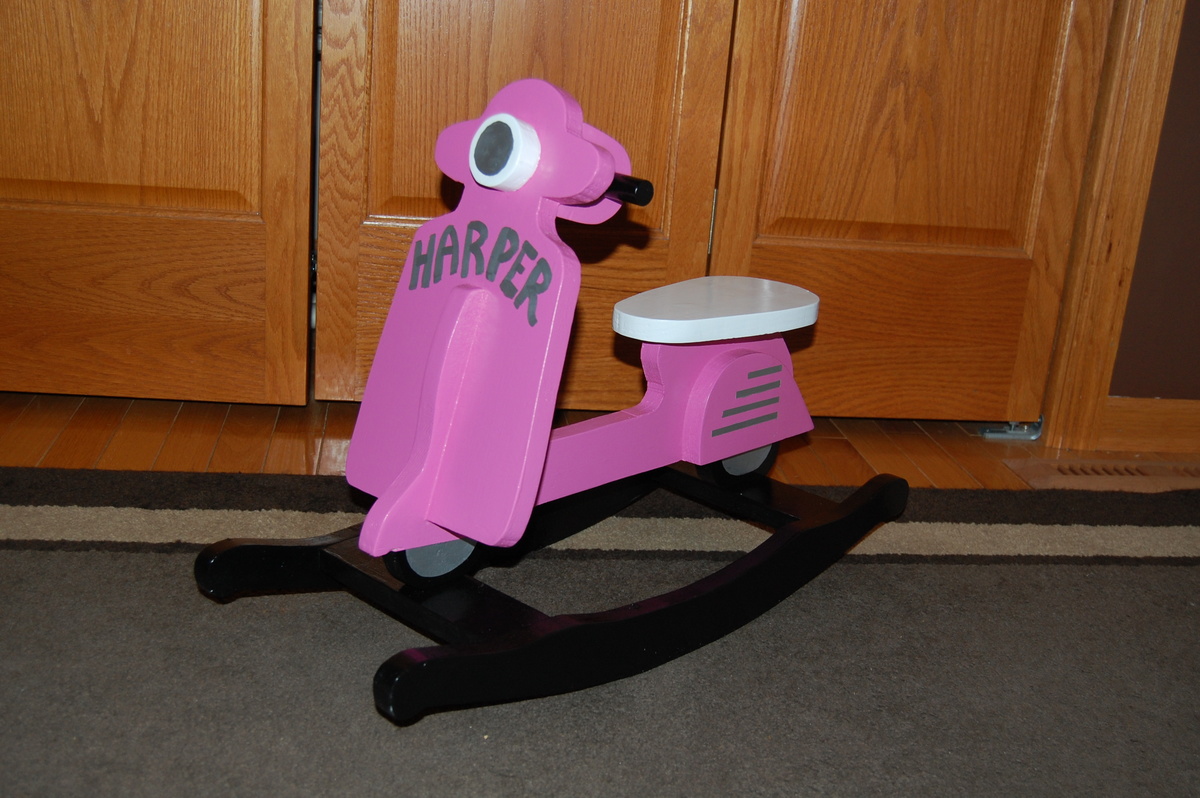
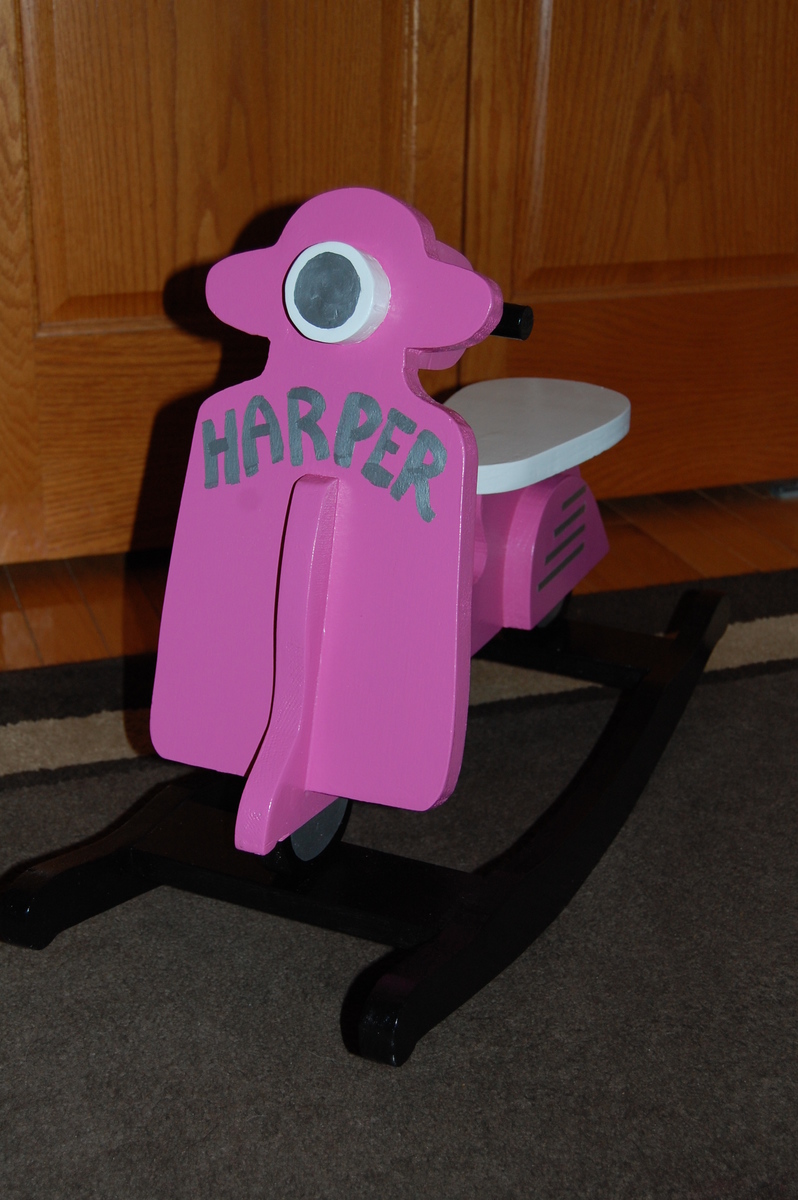
I saw this adorable scooter on Ana's website and thought it would be perfect for my godchild's 1st birthday! (my kids are a little too big for it otherwise I would have made it for them as well). I didn't read the entire post before I started so I didn't read that you should use harder wood to avoid chipping and all that but it still worked out okay, certainly not perfect but a fun gift that I was proud to give.
The multiple paint colors added time as I was always retouching one color up and then going back to another color but that was more me being sloppy than anything.
Sat, 01/19/2013 - 20:30
Where can I get the plans for this skooter. I would love to make this for my granchildren
Thu, 02/07/2013 - 11:25
Here is the link for the plan to make the scooter.
http://ana-white.com/2012/05/plans/charlie039s-scooter
Otherwise you can just search under keyword "scooter" and find the plans that way as well.
Good luck!
This was a weekend project , lots of fun !
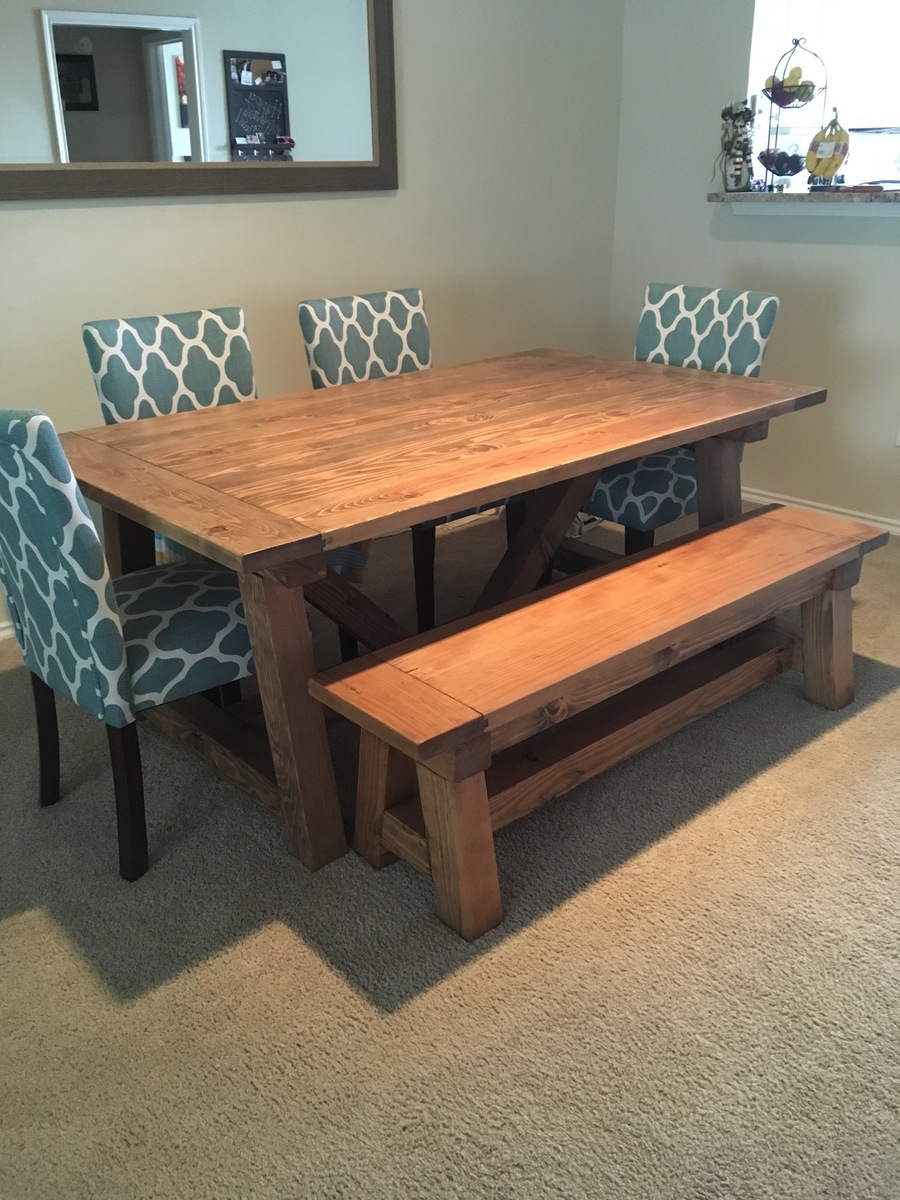
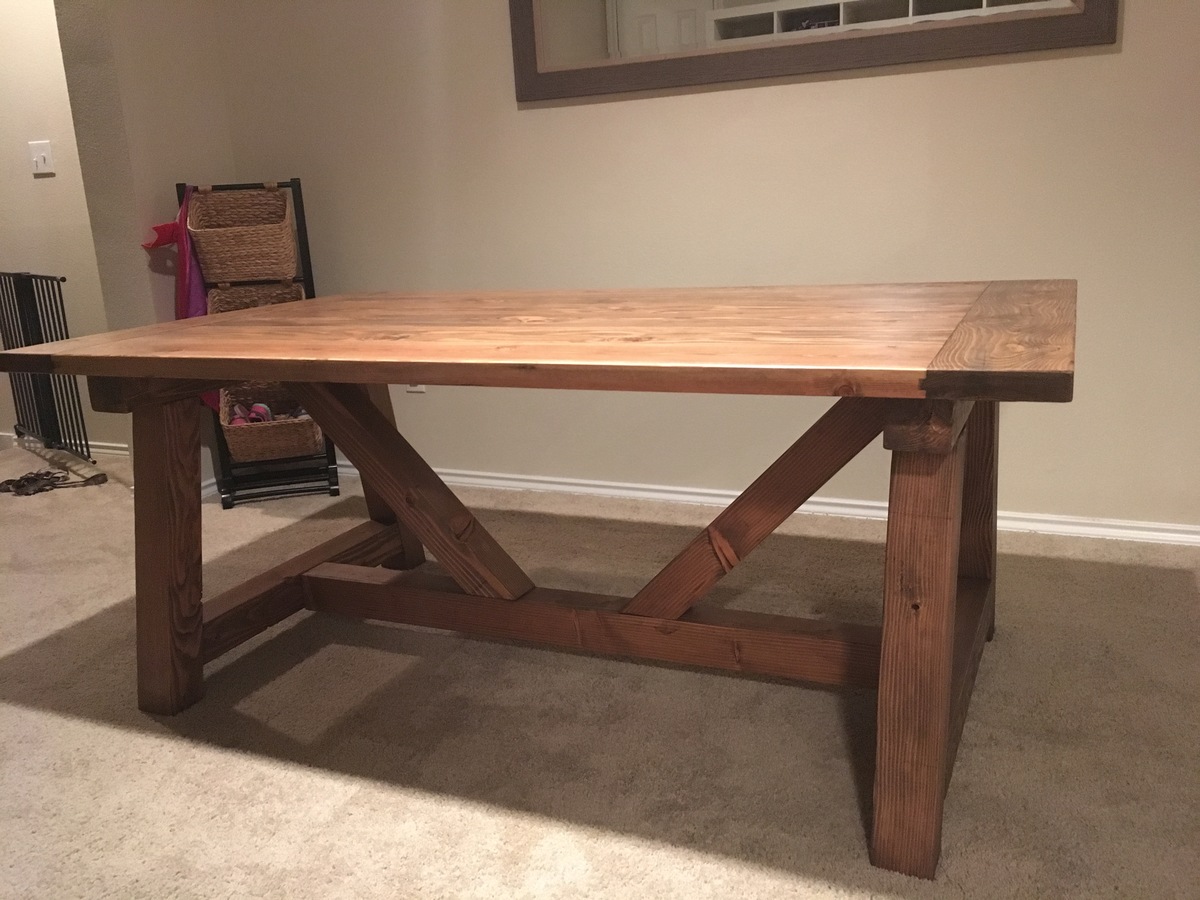
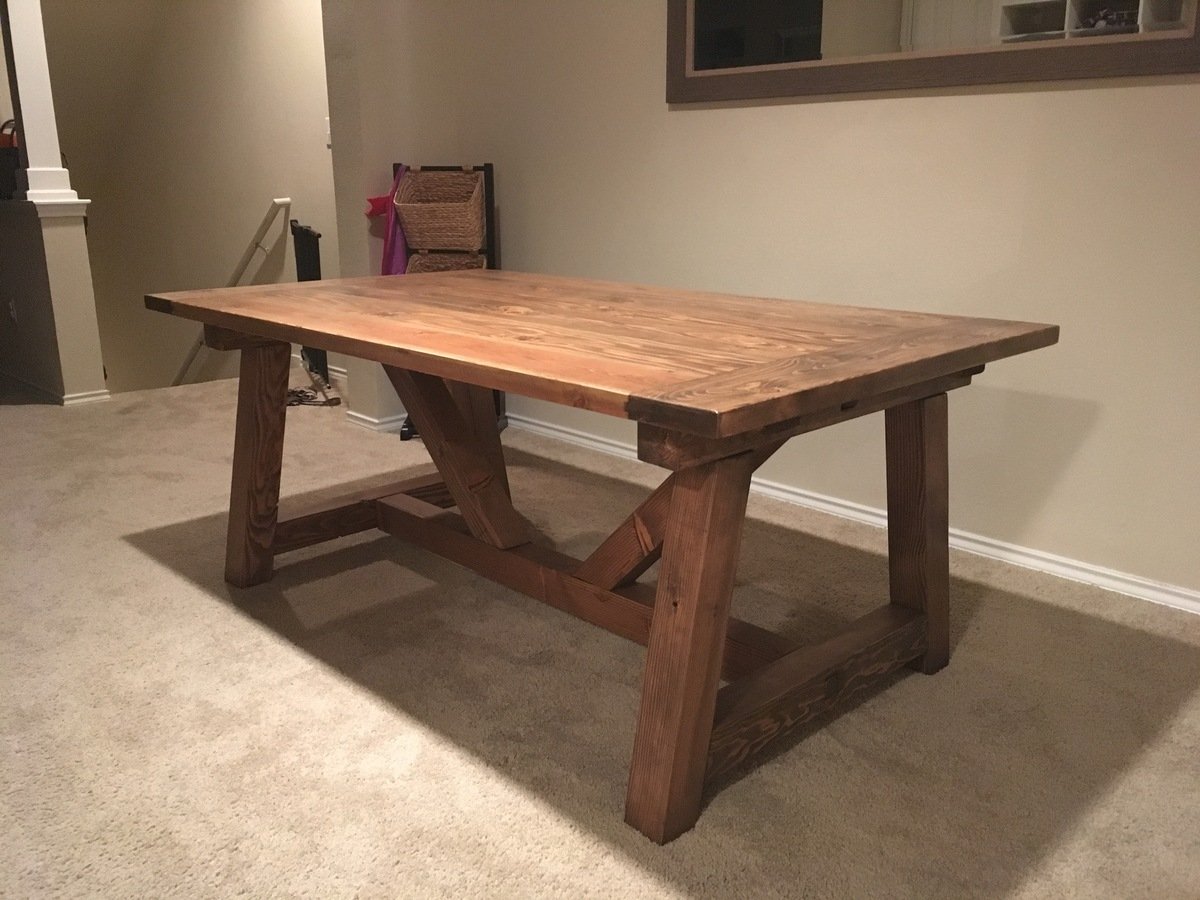
mortise and tenon joints with dado for breadboards