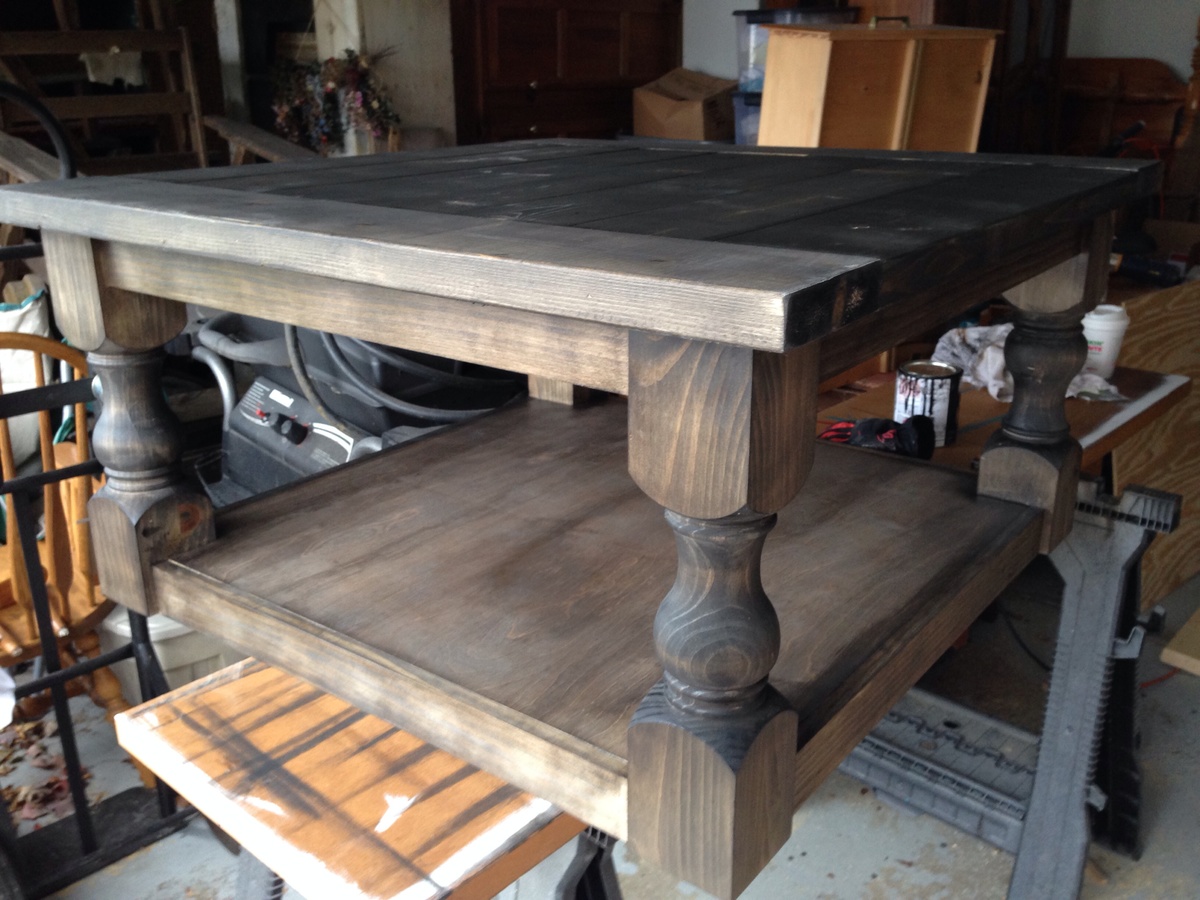
Cottage End Table

Basically the same idea, I added doors with antique hardware.
Don H.
Built from Plan(s)
Basically the same idea, I added doors with antique hardware.
Don H.
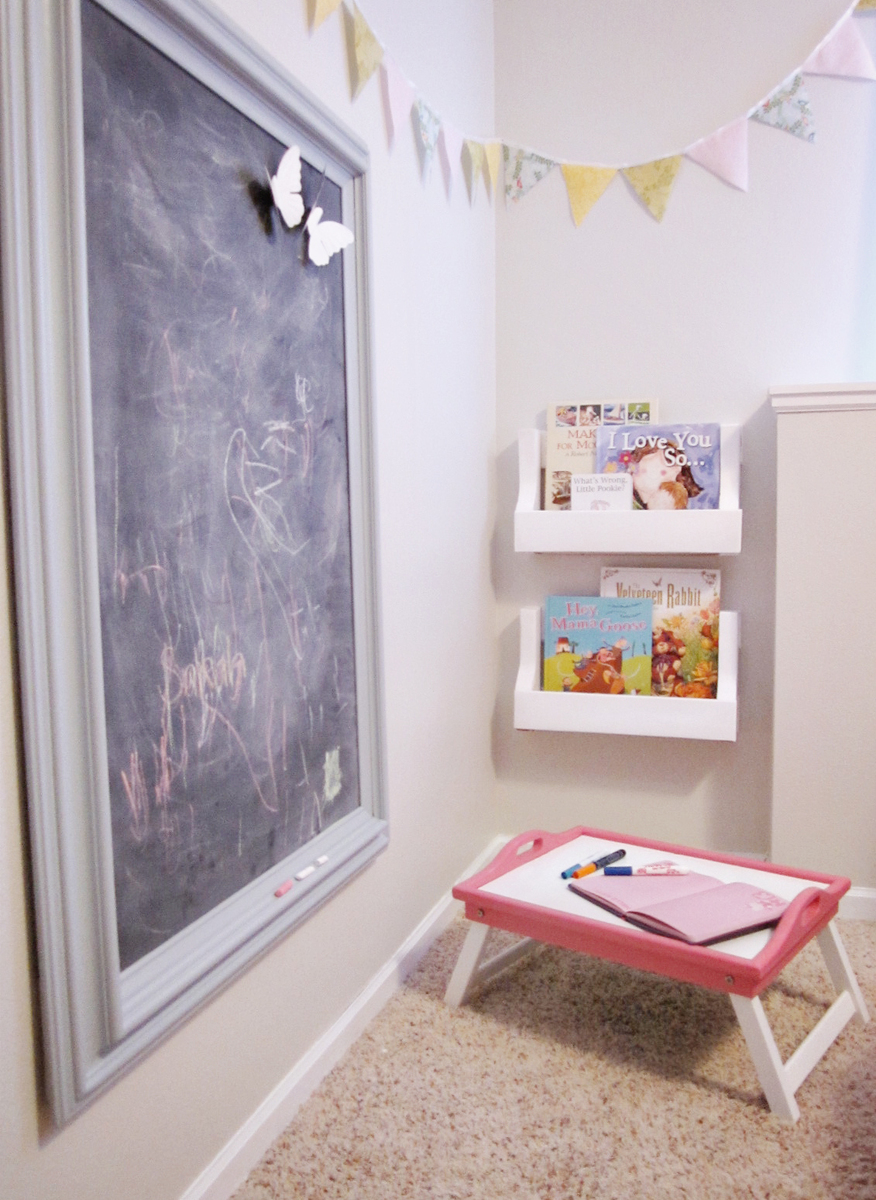
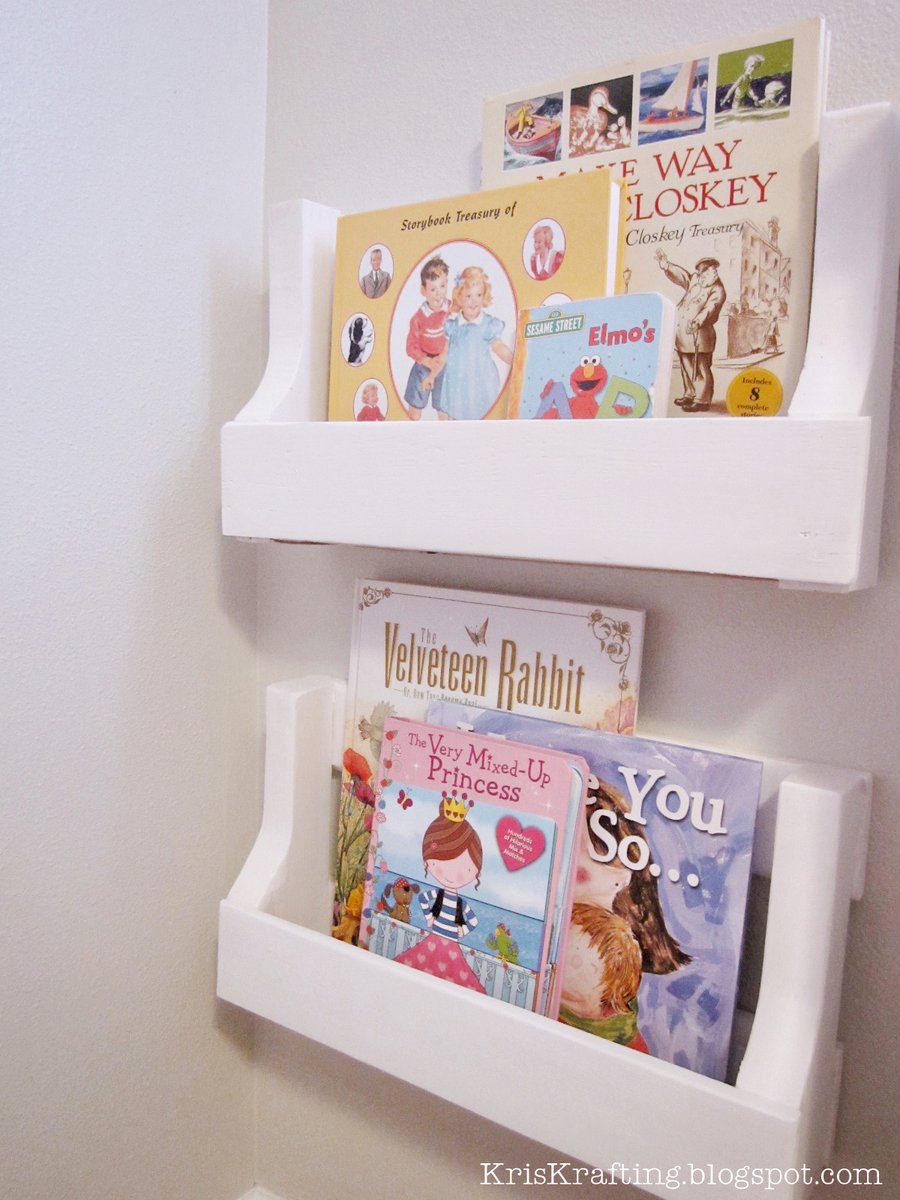
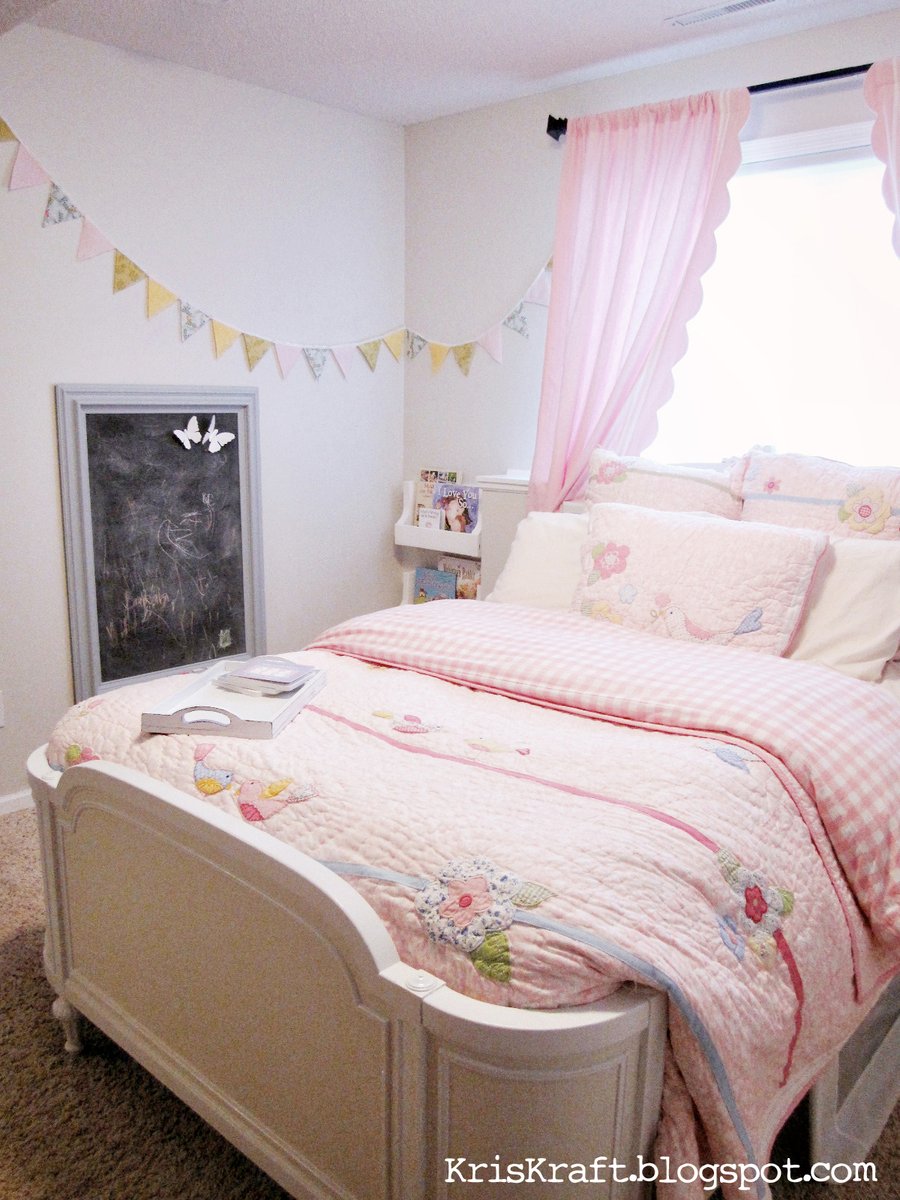
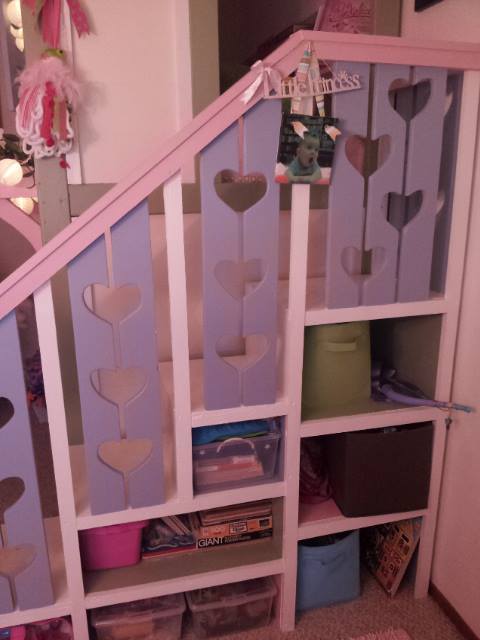
My daughter's room has a strange little cut-out section in one of its corners. We debated for a while over how to make it look like it's supposed to be there. After discussing all of our options, I remembered that we had a wood pallet in our garage. I also remembered seeing a great plan on Ana White's website for a book shelf made from a pallet, so I decided to give it a try. Fortunately cutting the pallet down in half made it the perfect size for this corner. Sarah loves books and drawing, so it makes a perfect little reading/art area. I love how it turned out, especially since it was FREE!

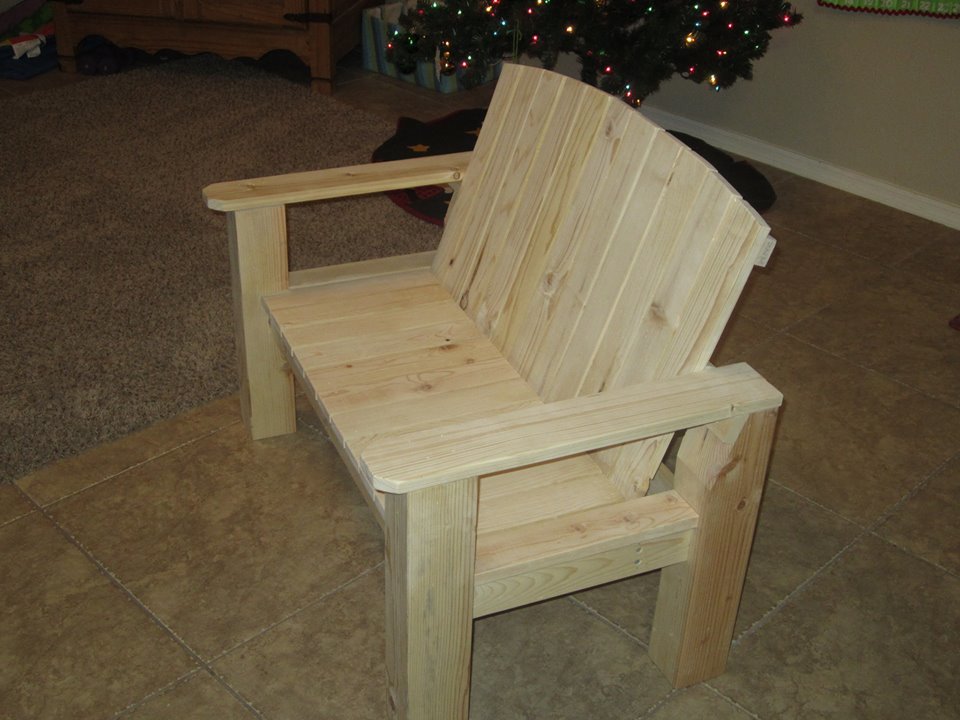
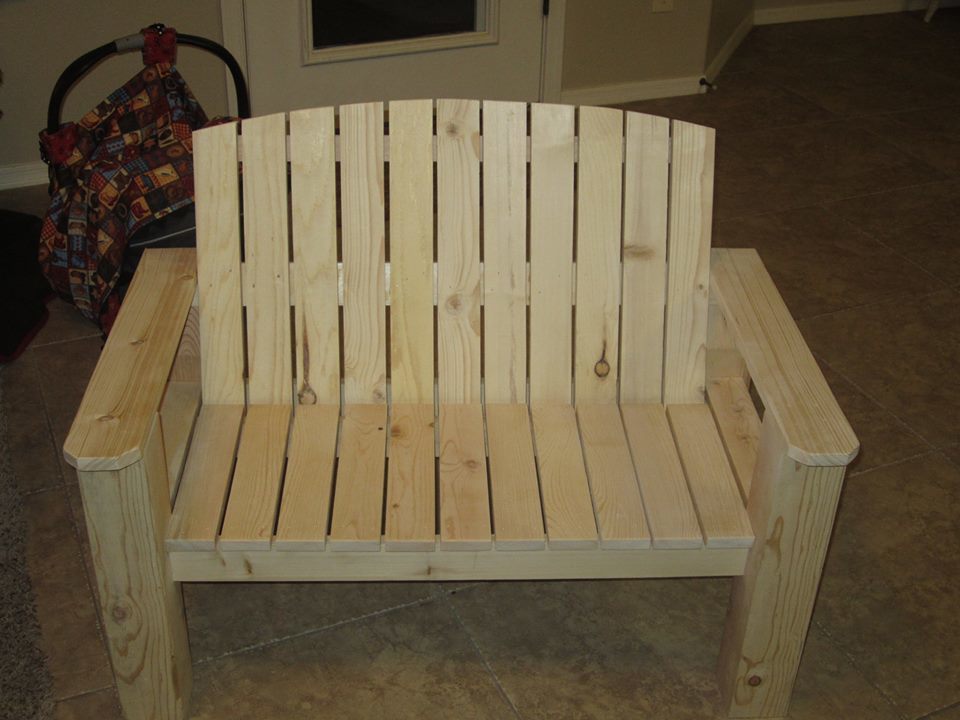
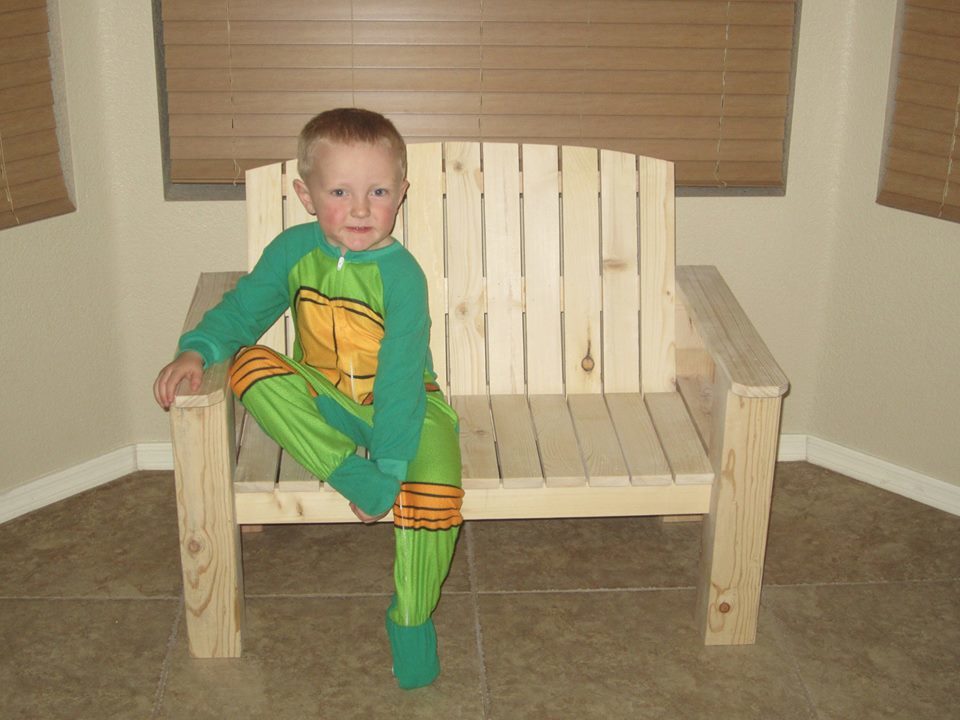
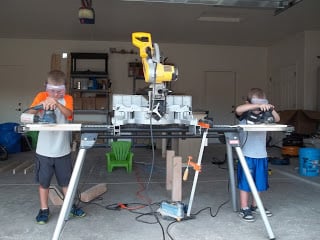
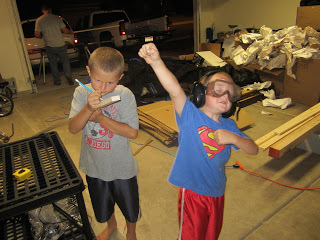
In getting my boys (ages 8, 5, and 3) started in woodworking, I decided to try this bench. We had a ton of fun building it together.
As you can see, I beefed it up a lot - using 4x4's for legs and recessing the frame into the legs themselves. The boys did all of the sanding and assembling and 80-90% of the cutting. I was just there as training wheels. It took much longer to build with the 4 of us than if I had done it myself. I estimate I could have done this in 3-4 hours. Group effort made it about 20-22 hours.
My 5 year old was the one who campaigned for the arched backrest. I think that they did a great job, and just wanted to share.
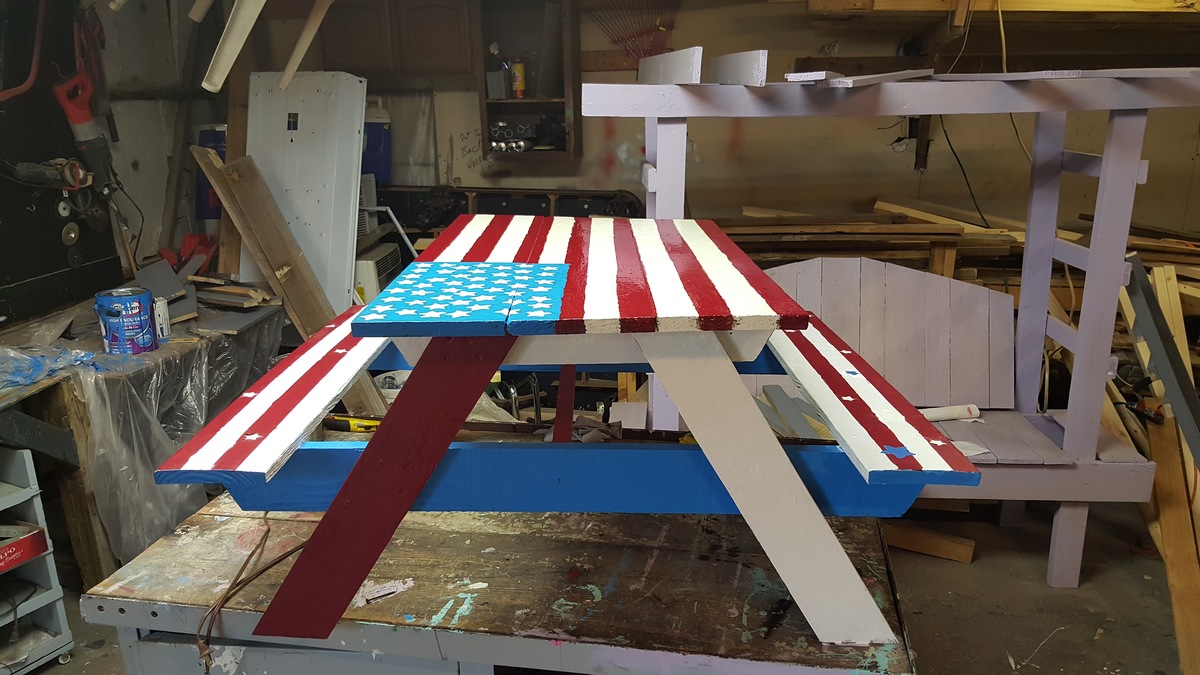
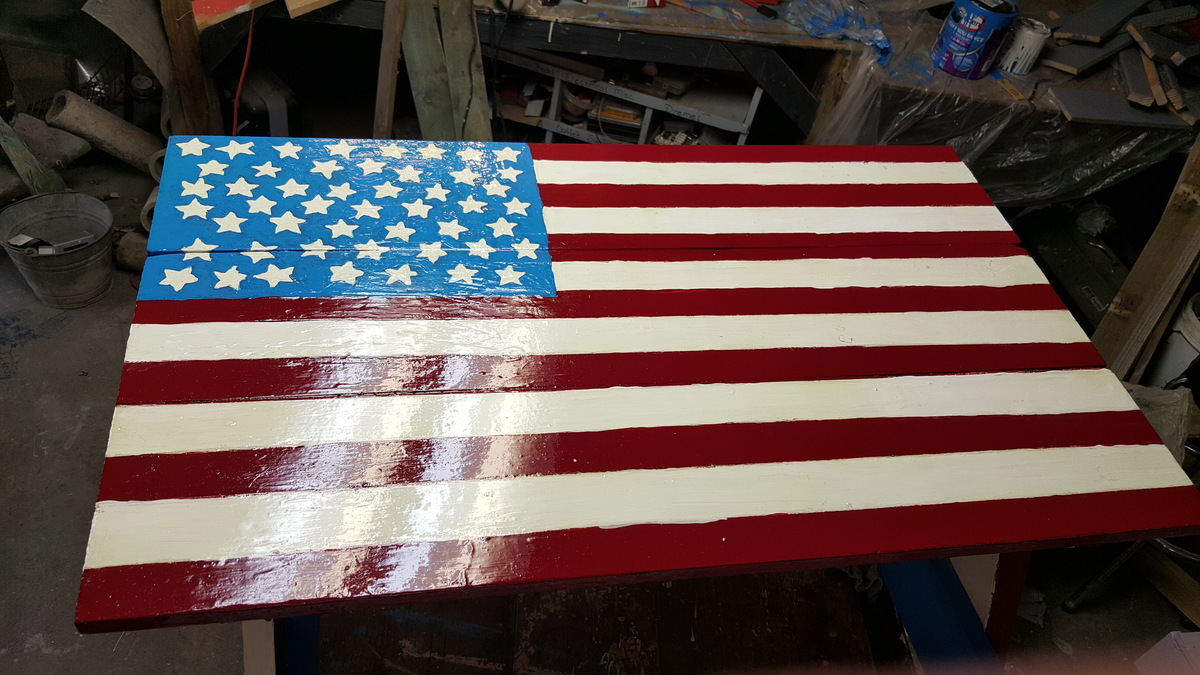
A lot of detail and time spent in painting this, but I am very happy with how it turned out. I used wider boards for the top to accommodate the hand drawn and painted flag. So glad that it is finally done!
This was a great set of plans...easy to follow and everything was available from the local home improvement store. I appreciate the time and effort that you all put in to making the plans easy to follow.
Fun project!
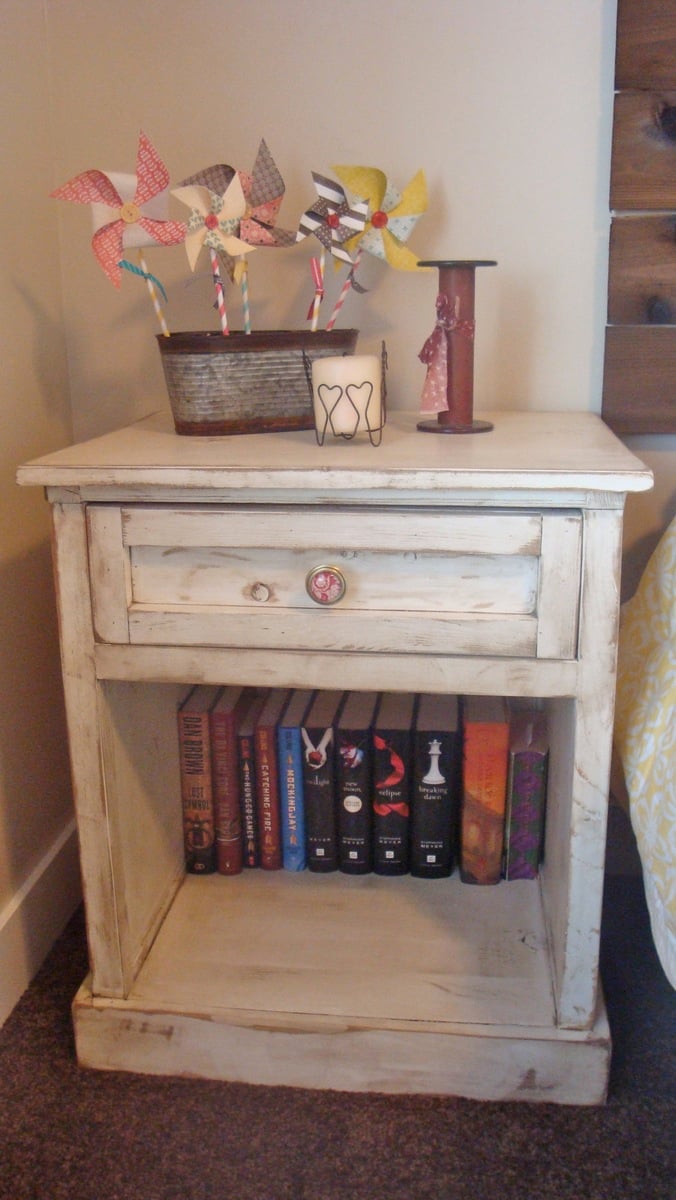
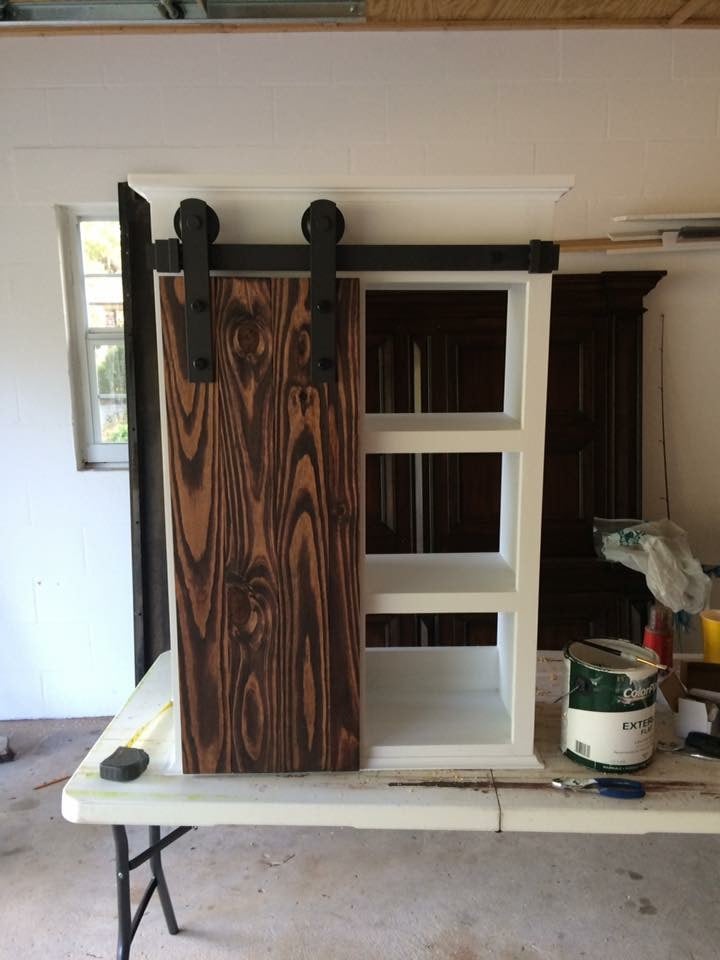
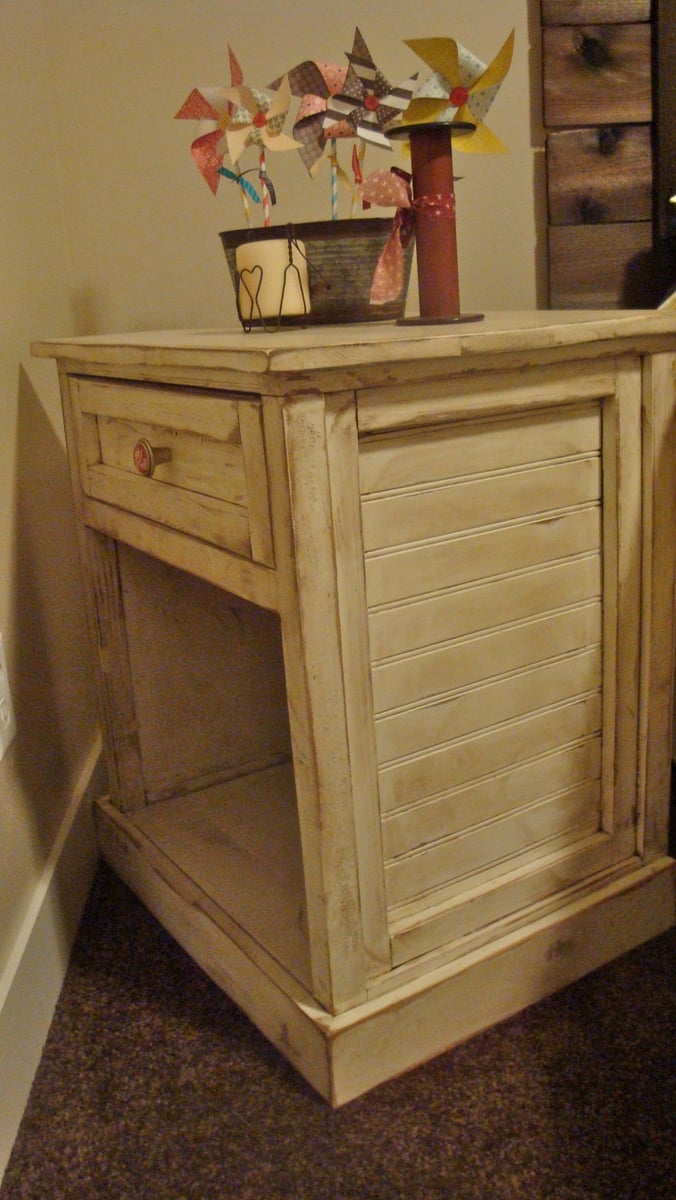
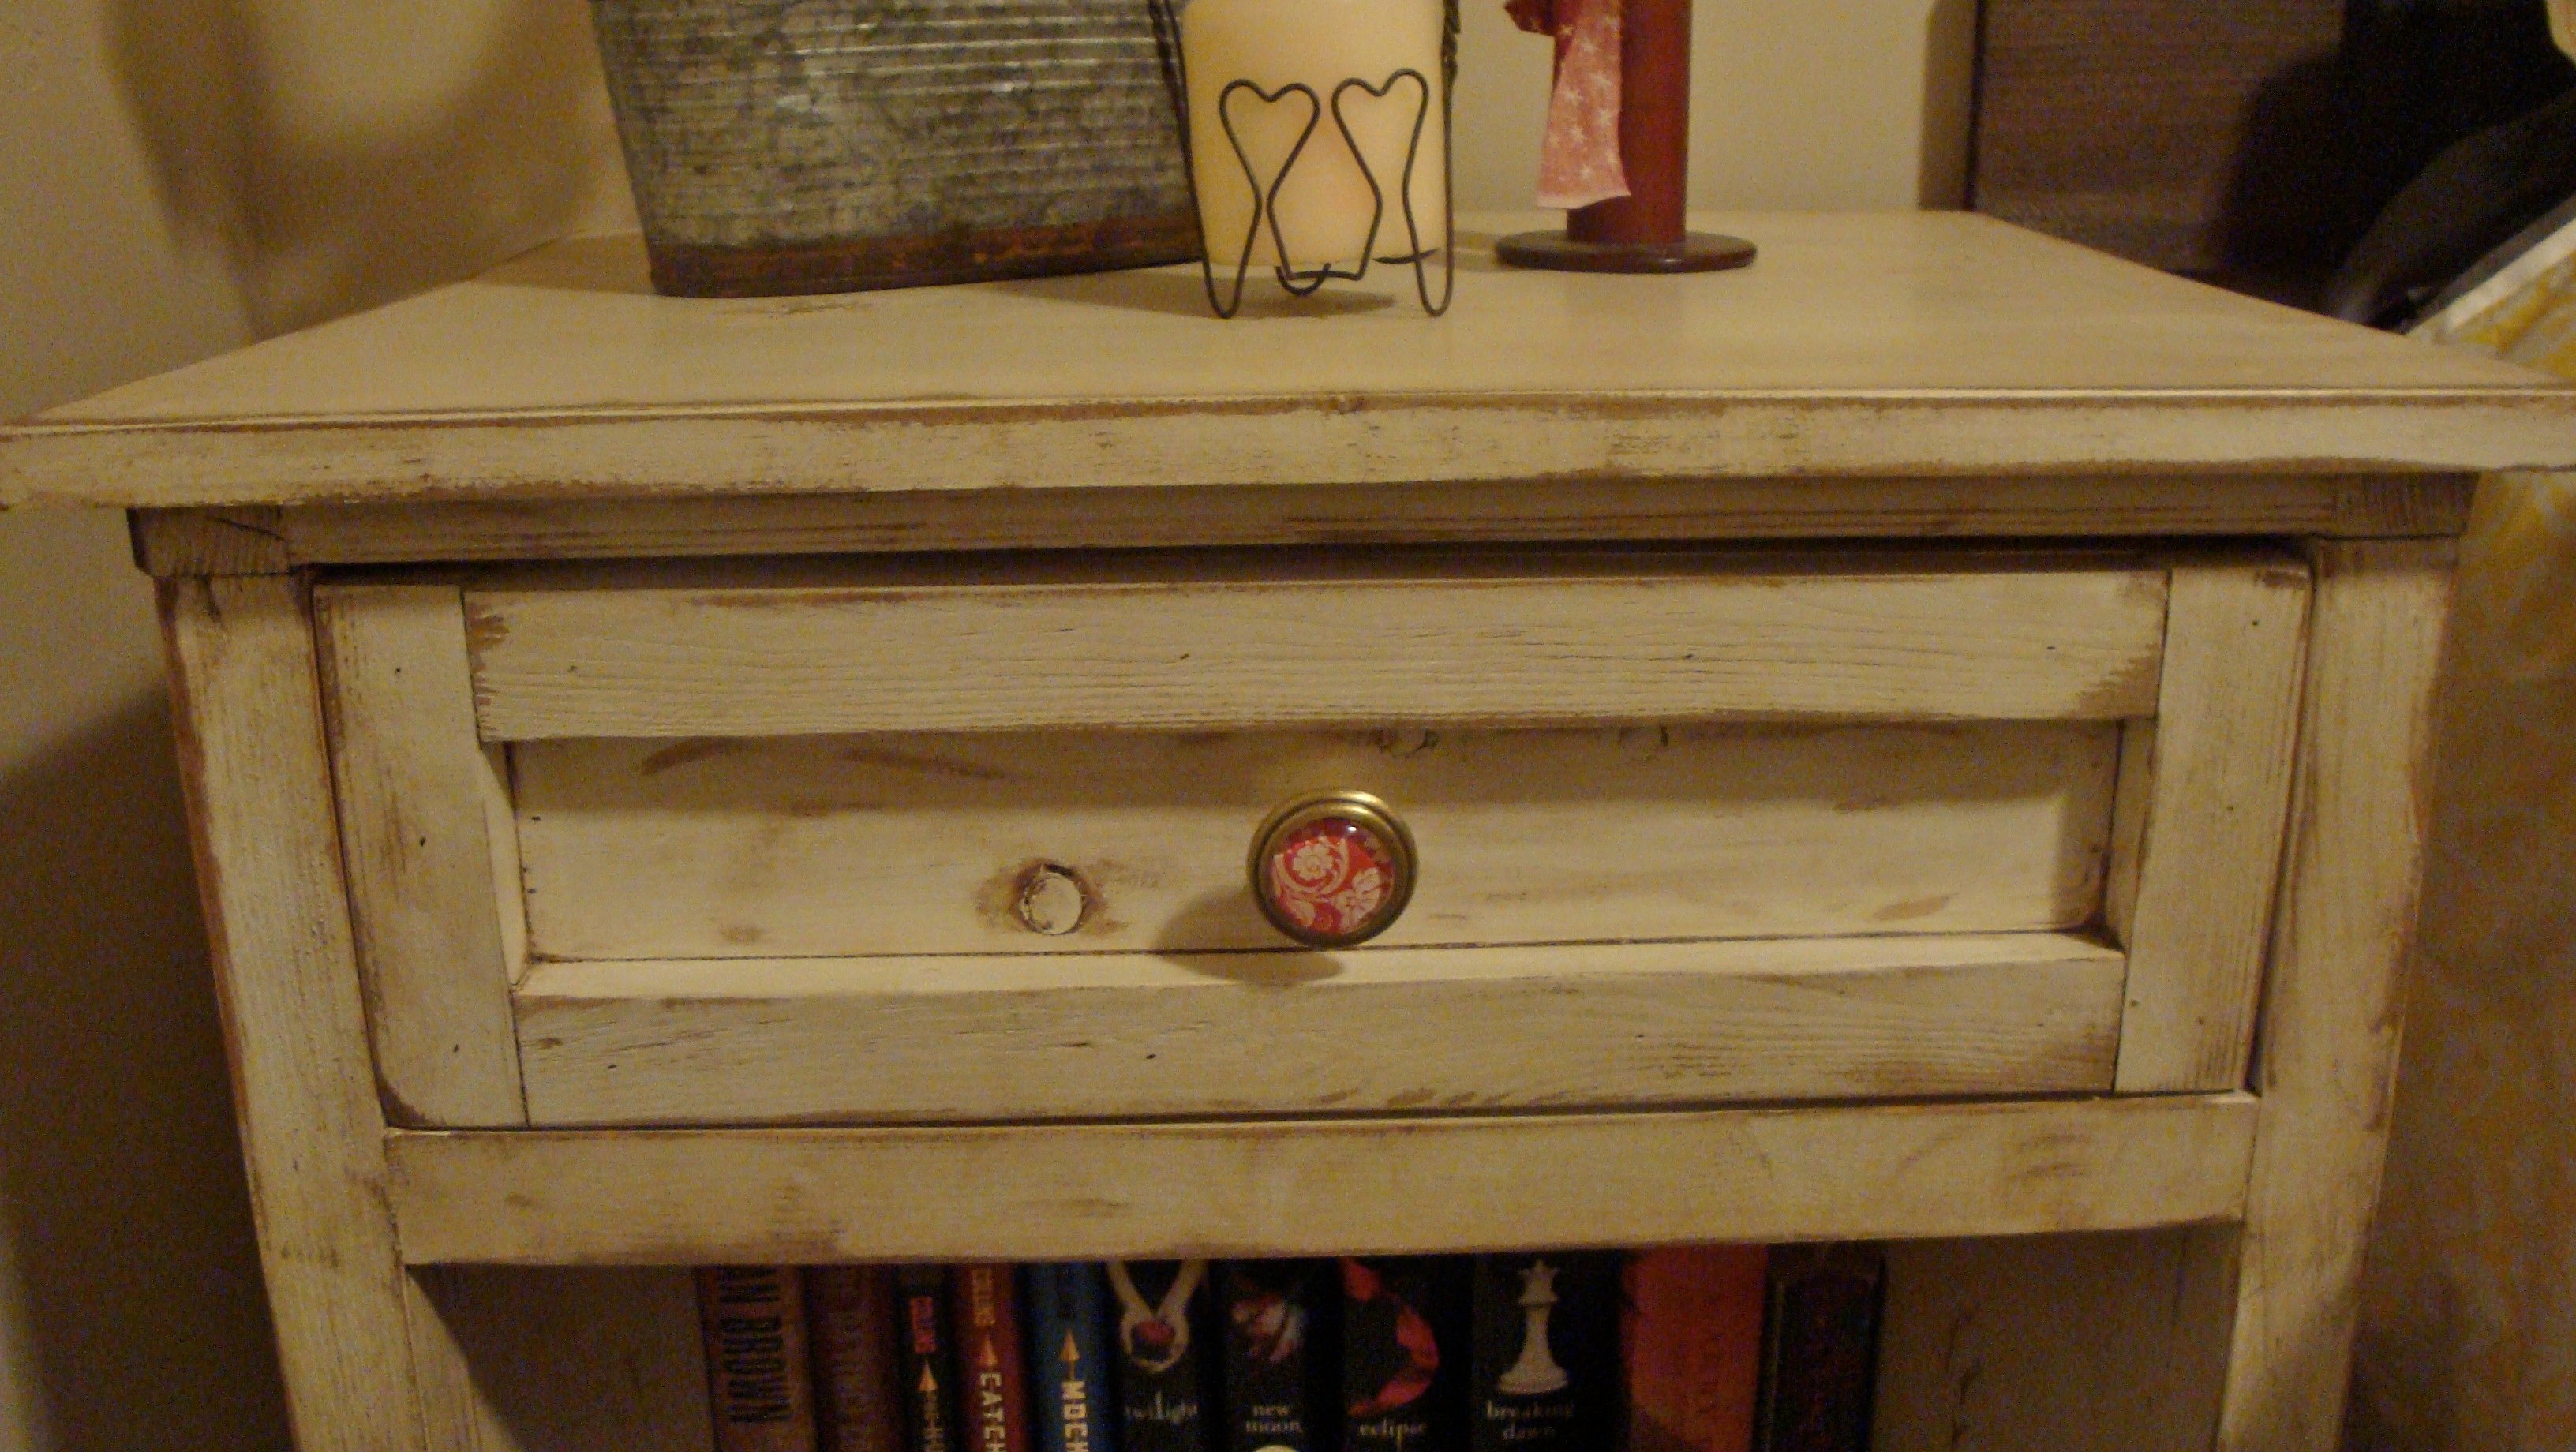
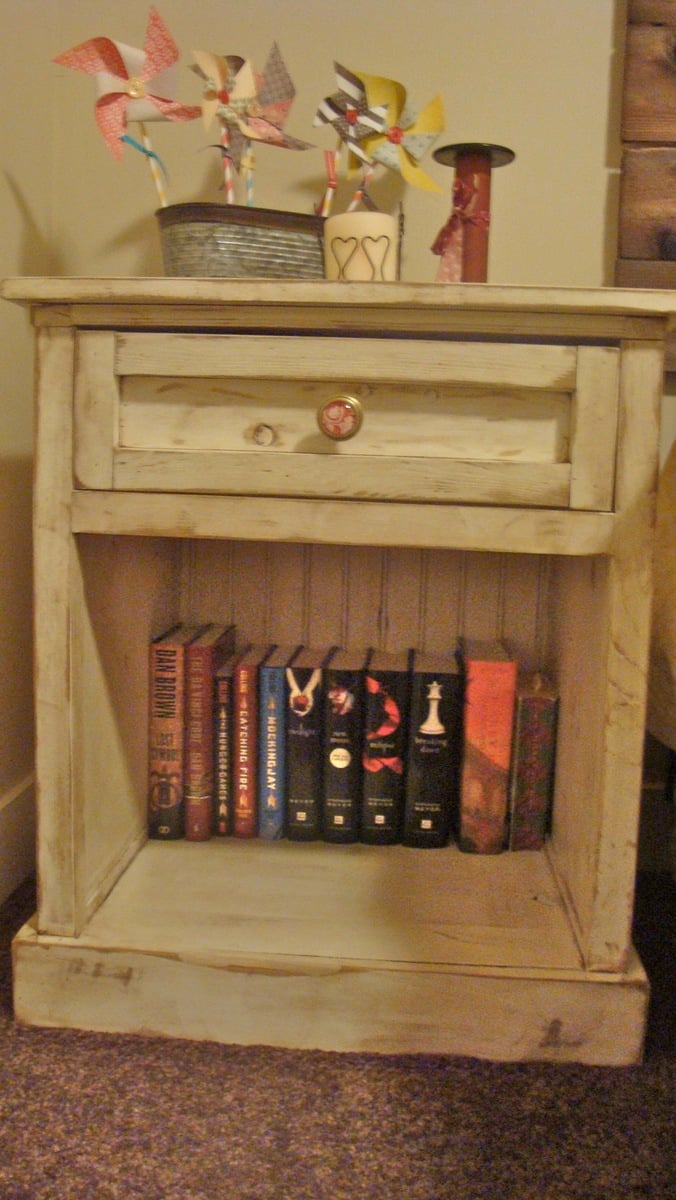
This was my first attempt at doing a project with a drawer. It definitely took time to make sure everything was level so that the drawer would side in and out smoothly. You can't see see it in these pictures but I used bead board in place of the plywood on the back and on the sides. I also used 1x8s glued and screwed together instead of the 3/4" plywood. I can't take credit for the finish on the project though. My wife is the one in charge of making my projects look great. She's the one that did the fun antiqued finish on the side table.
Wed, 02/29/2012 - 19:22
Anyway,your works Your work is very interesting, I am sure.Waiting for more of your new works, you are very popular.
Wed, 02/29/2012 - 19:26
Anyway,your works Your work is very interesting, I am sure.Waiting for more of your new works, you are very popular.
Thu, 03/08/2012 - 23:48
I enjoyed these consultation and expression onward to greasing one's palms and showing the hold. In that respect nonentity of more than worldwide sake that elevating youngsters! Devotes Pine Tree State more or less themes since emerging soundness programing.
Got the plans from this website and built the table for our family room!
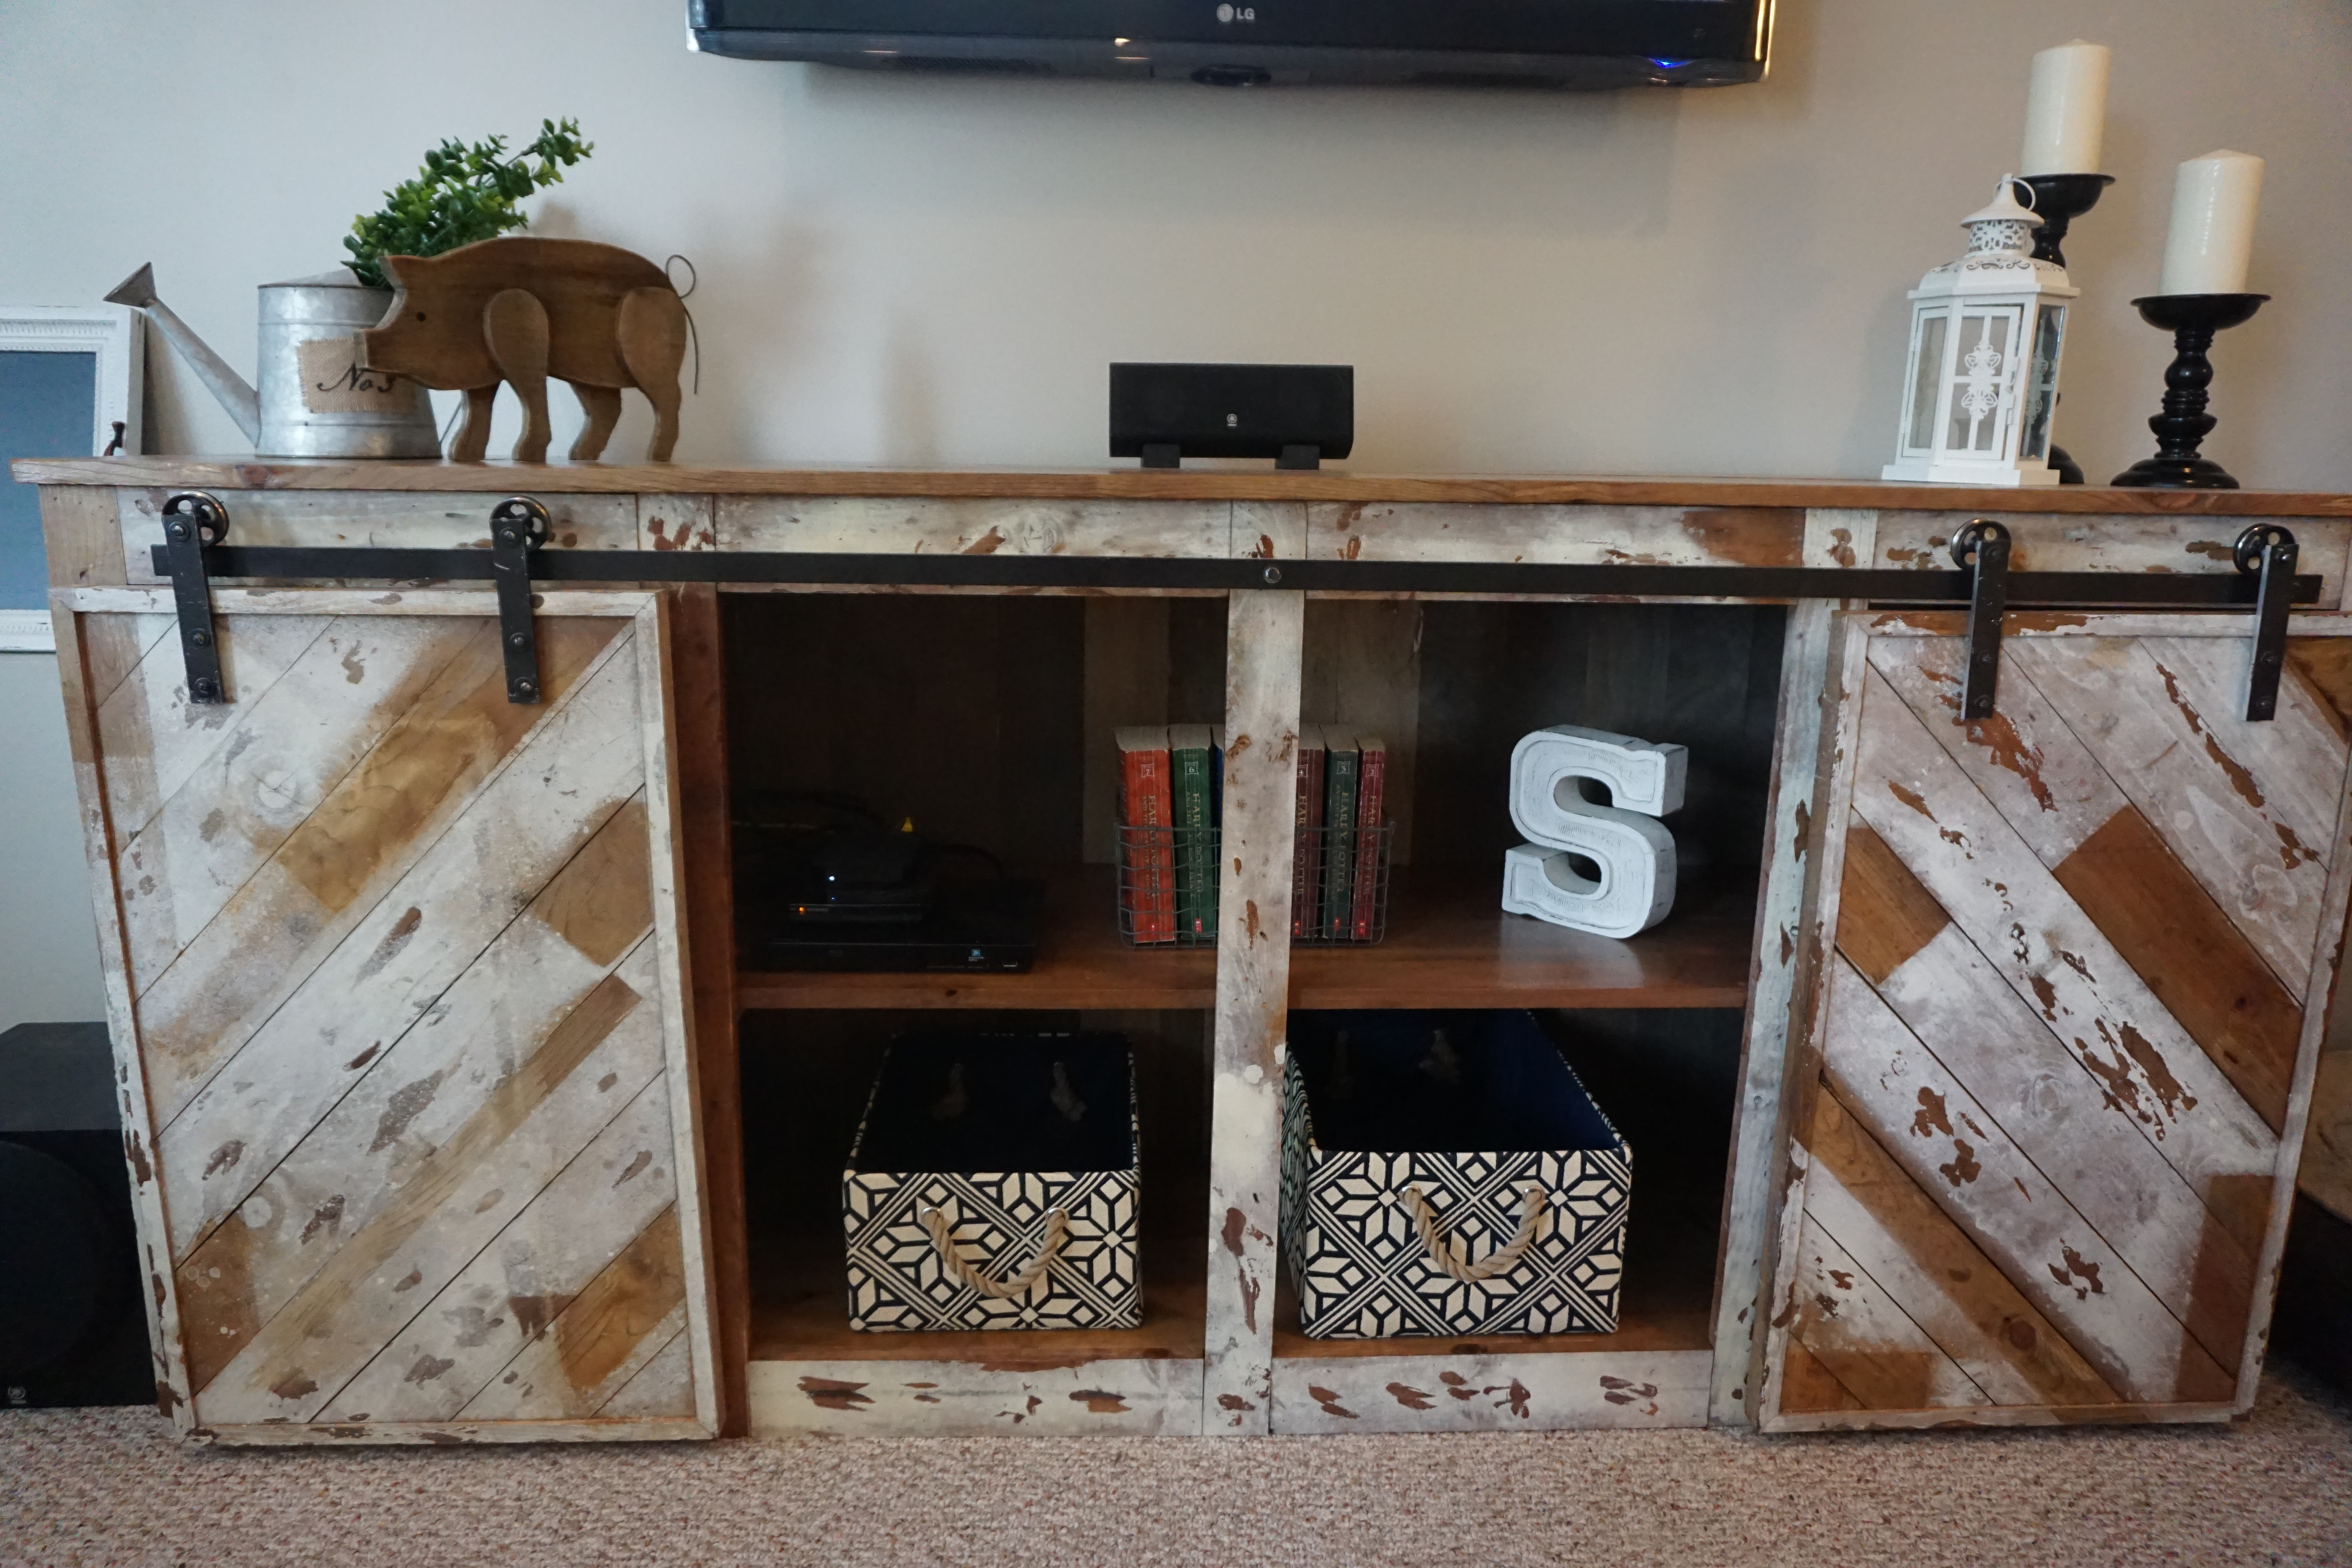
As always, we were super inspired by Ana White designs and wanted to tackle the media console project but add a little bit of our own farmhouse flare. This project was stained with apple cider & white cider vinegar and topped with ivory spray paint. Details are up on my blog, Sincerely the Smiths! Thanks for all your inspiring projects Ana White, we love getting to see all the awesome things you do!

Mon, 03/14/2016 - 21:29
This is so beautiful!!! Thank you so much for everything, I'm so honored that you use my plans and follow our projects. With much appreciation, Ana
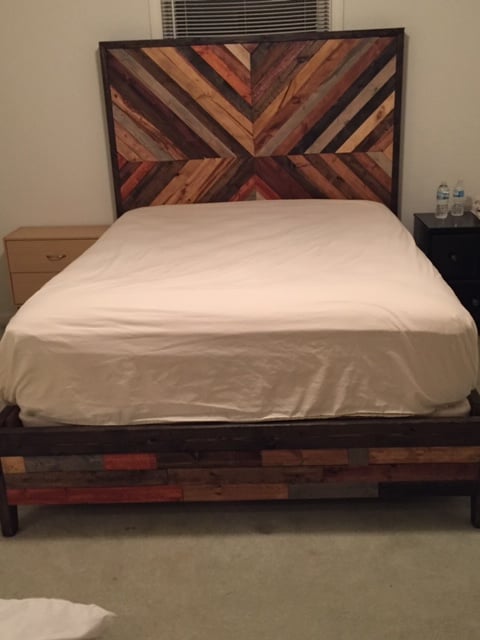
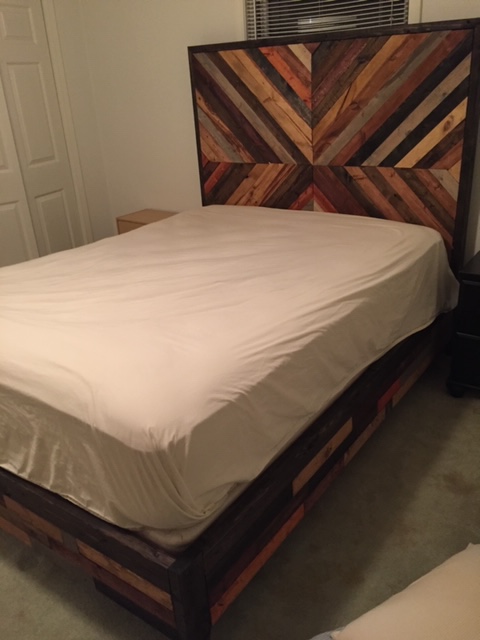
After going through tons and tons of different bed styles settled on this one because i LOVED the way the original image looked, though when it came to picking out stains I decided to do mine a bit differently! I like the look of multiple stains, it certainly allows for you to play with different wood stains on other bedroom furniture as well. This bed WEIGHS A TON, so we agreed that we will never move it unless its to the burn pile but I highly doubt that will ever happen because its incredibly sturdy! Also - Thanks Ana White family, this build introduced me to my kregg jig and it is by far my very favorite tool now!
I am slowly adding things to dress up the outside of my home. This was a fun project to do, many thanks for the plans!
Renae G
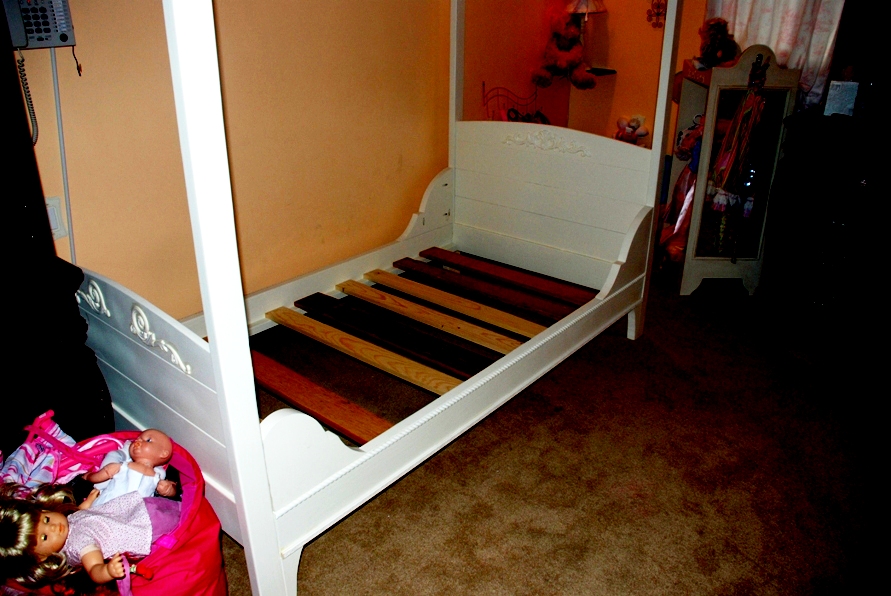
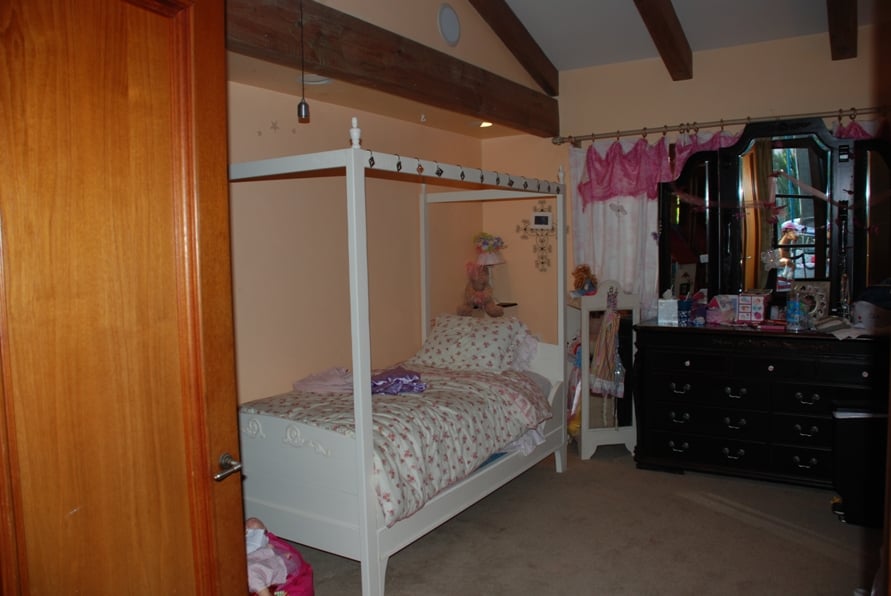
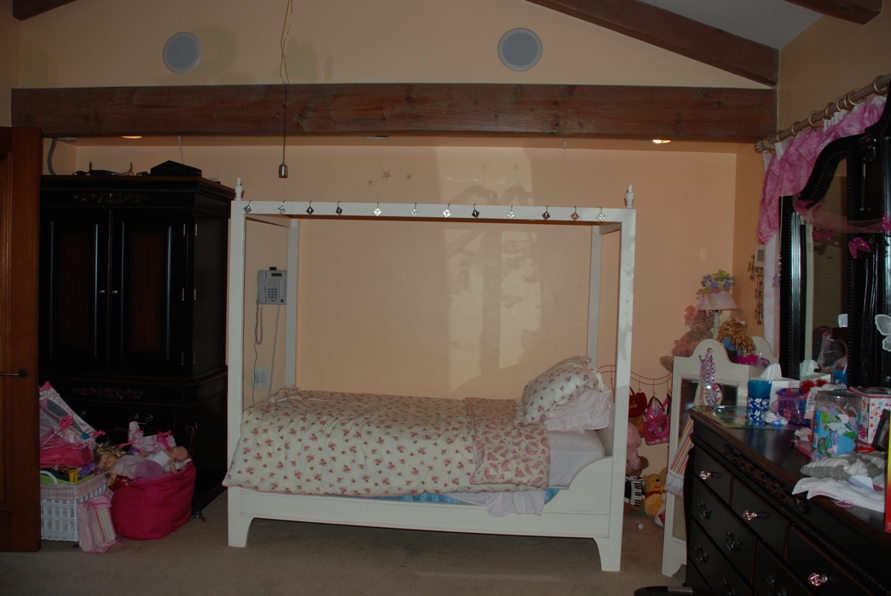
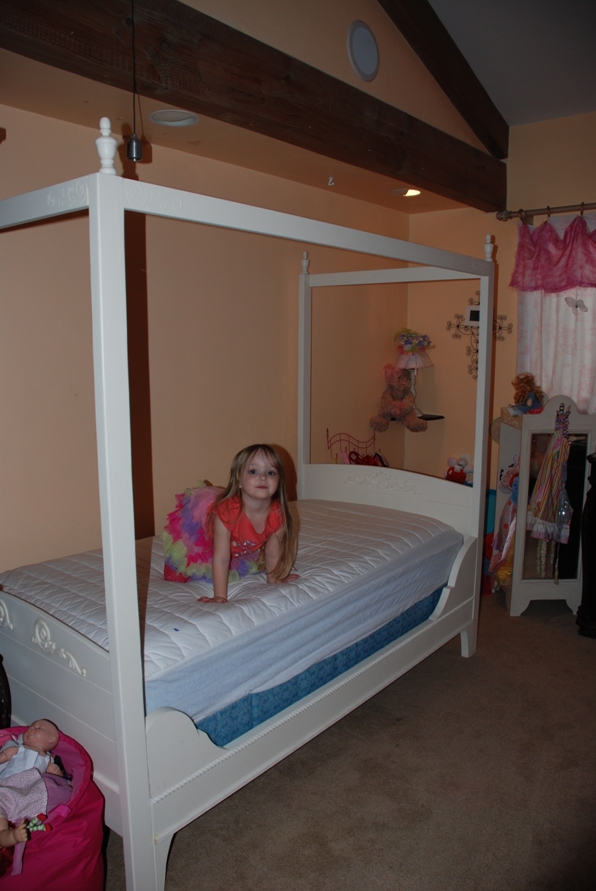
I used the Lydia Toddle Bed plans and made the adjustments to be a twin size bed.

Fri, 09/06/2013 - 16:04
I actually took mine off a bed I took apart awhile ago. But you can get them from Rockler - http://www.rockler.com/product.cfm?page=10&rrt=1
It looks like they are about $15-$16 for a set of 4
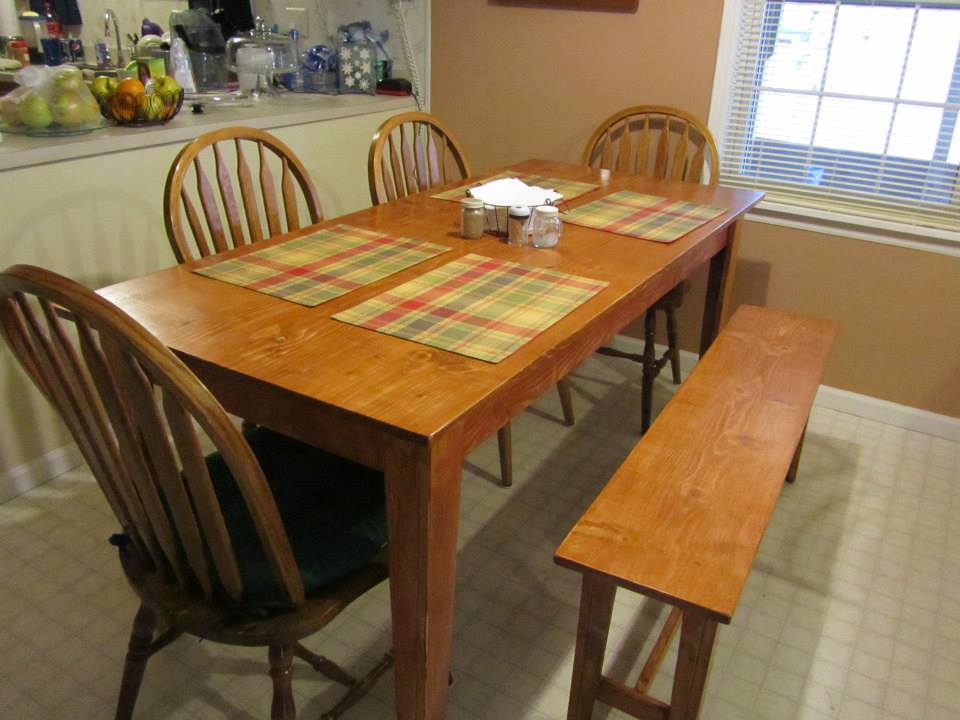
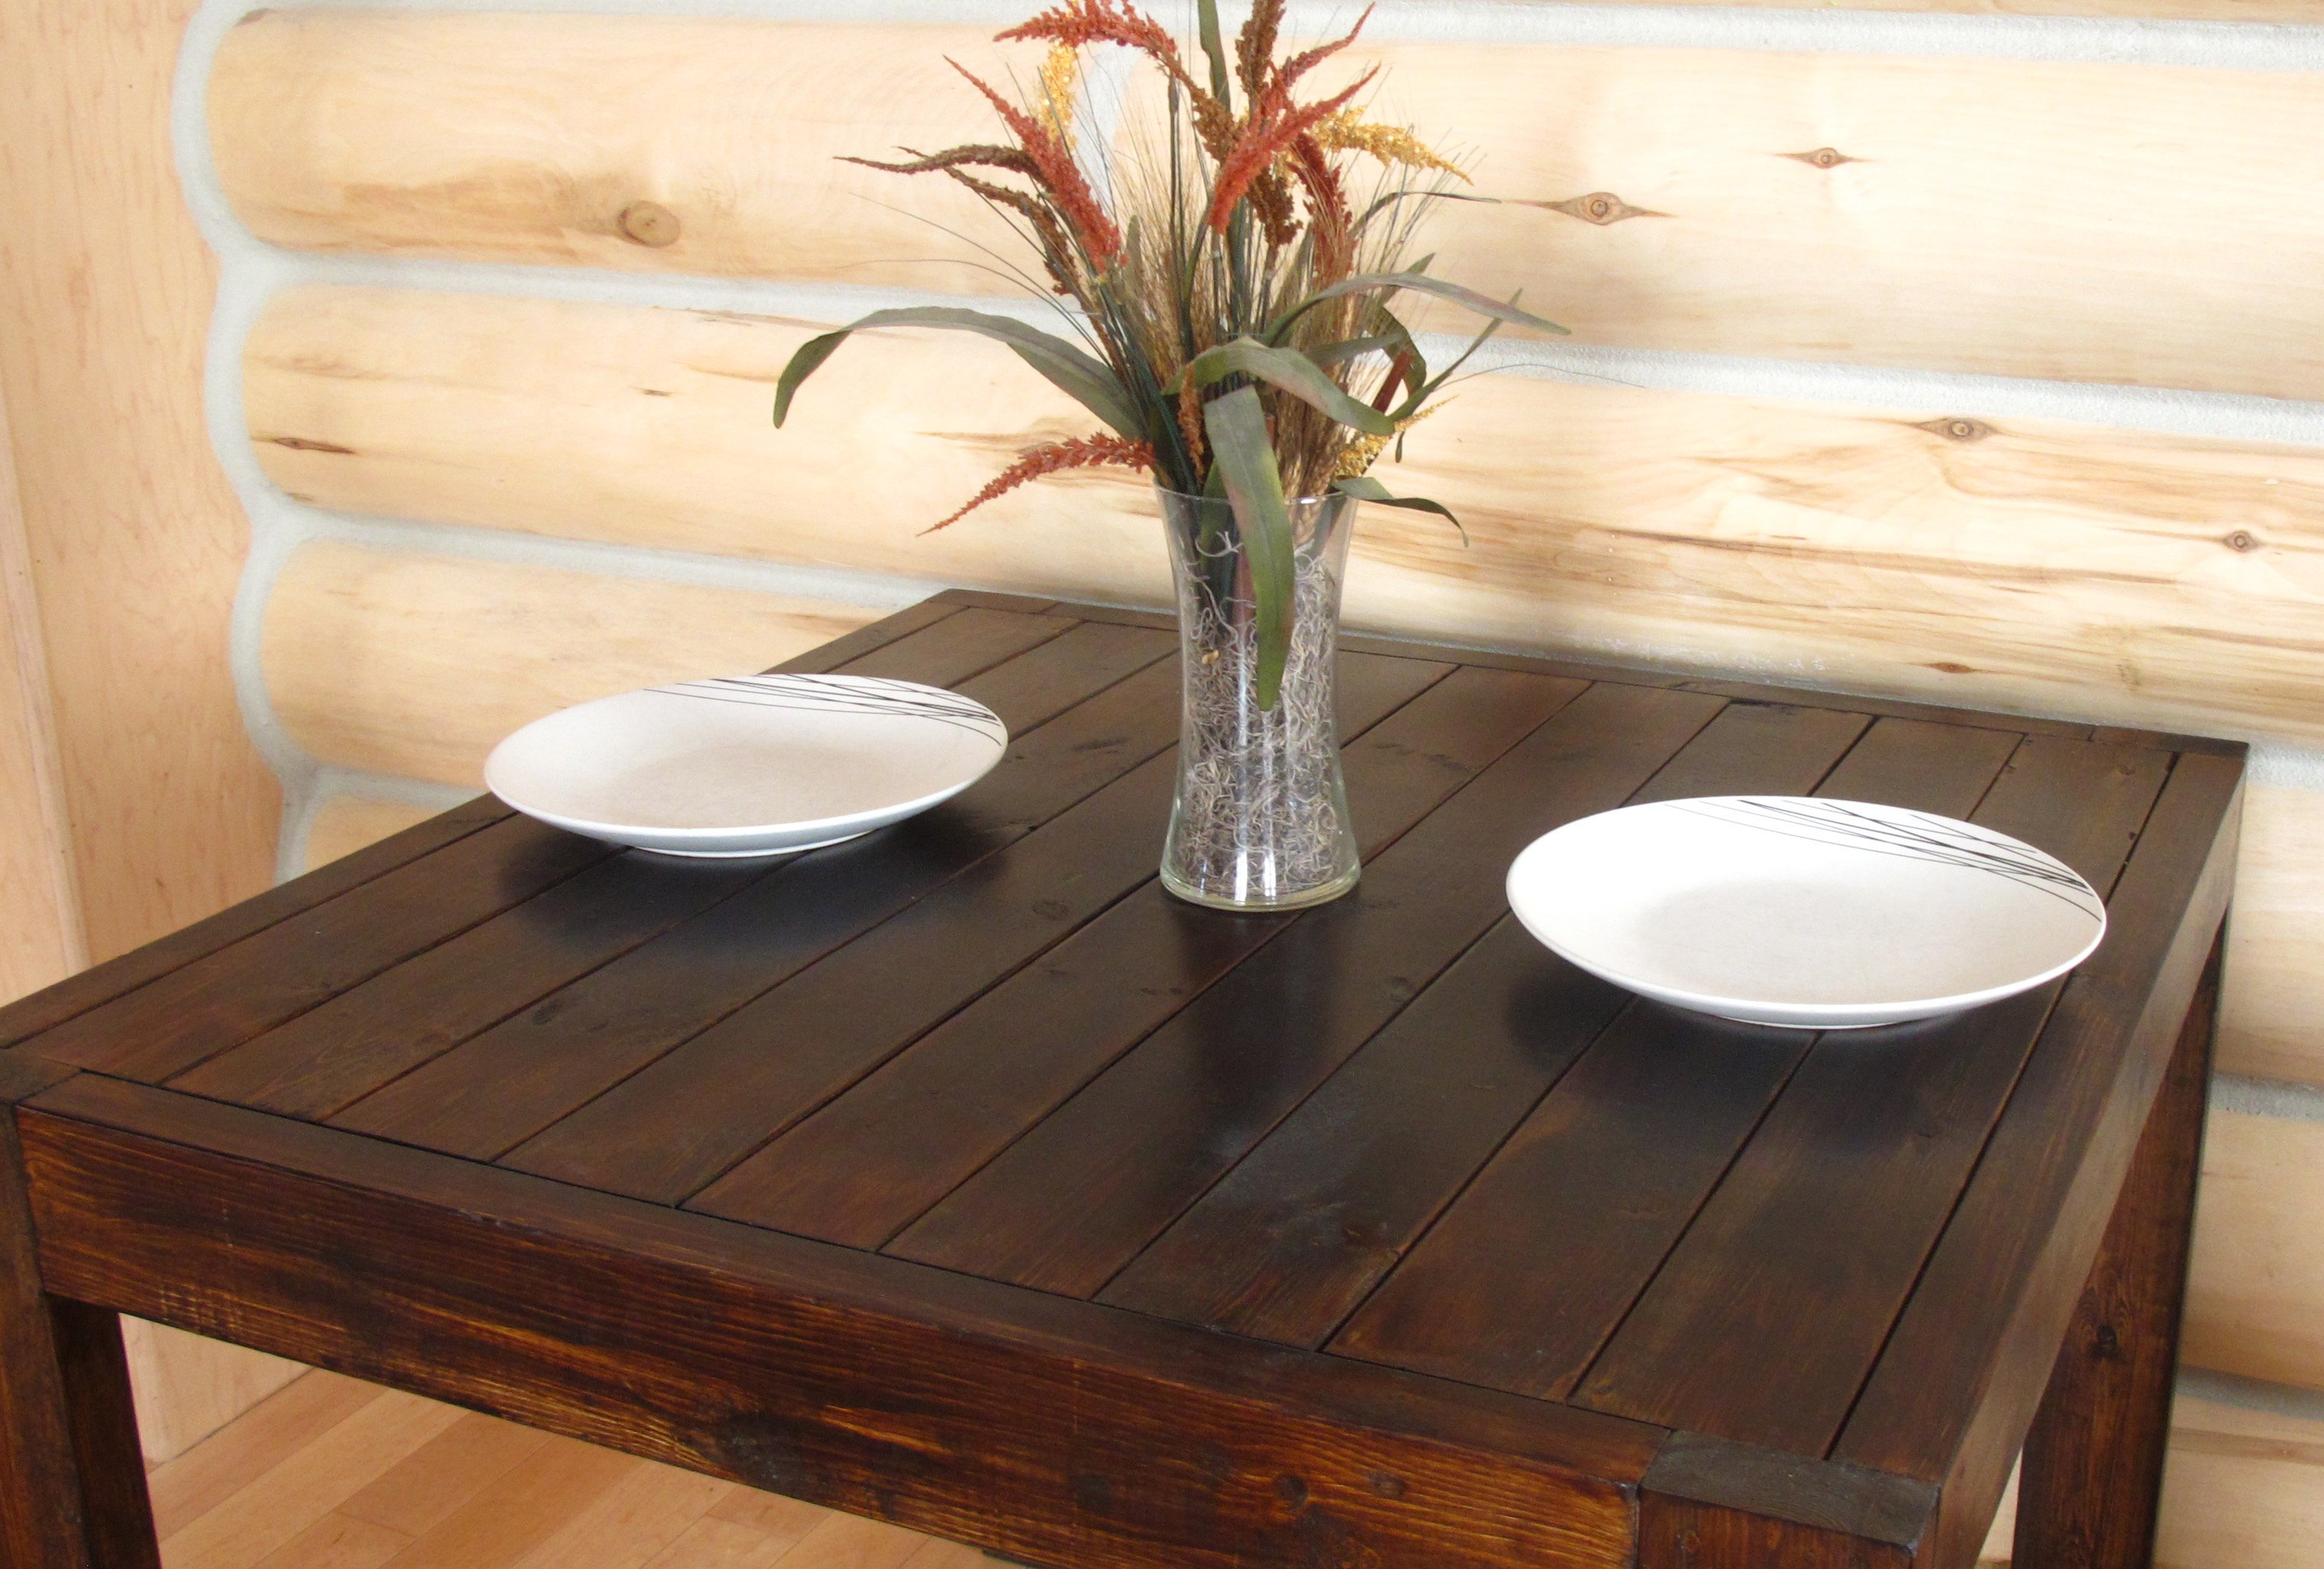
This is a narrow farmhouse table that I was asked to build for my neighbors. The plan was very easy to follow and didn't take long to do at all. I used 1x12x8' shelving board from the local home improvement center for most of the application. When mating the top together, I used a biscuit joiner, (aside to what the plans called for), for added strength. Also, I remember from years back that you should alternate the "rings" in the lumber to prevent bowing. This gave me a smooth, level table top without using a planer. Using the shelving board made this table very light, I love this table!!
Hi Ana. Just wanted to thank you for all the free plans, and inspiration you gave me to start building projects out of pallet material. The headboard and shelf were made for a guest room in our new home in South Carolina. I have since built a blue headboard and shelf for our second guest room. After seeing my work, several neighbors have asked me to build pallet projects for them.
Jeff Schaefering
Square Dining Room Table
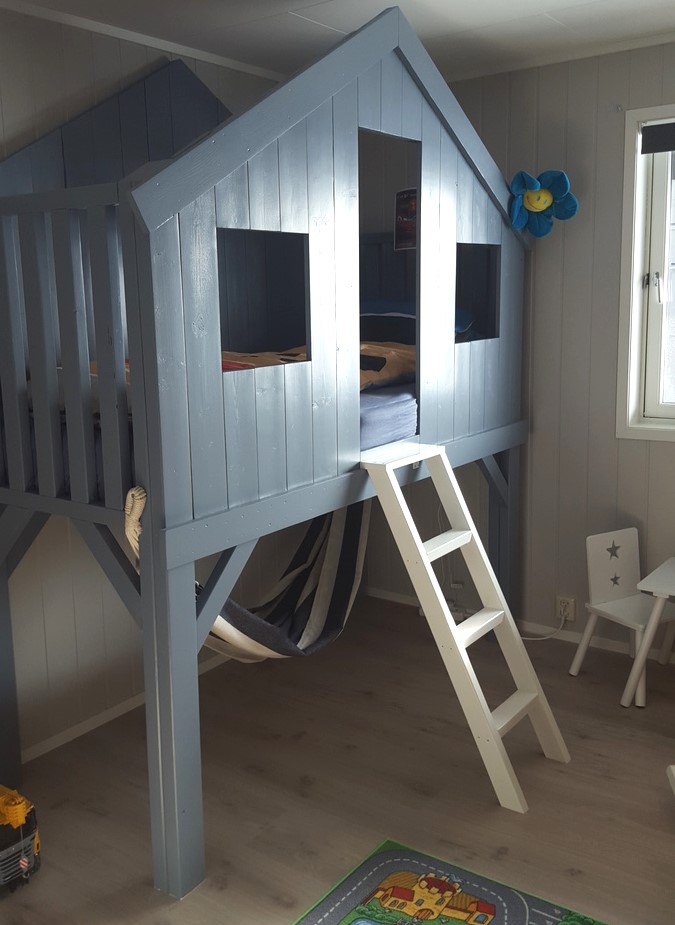
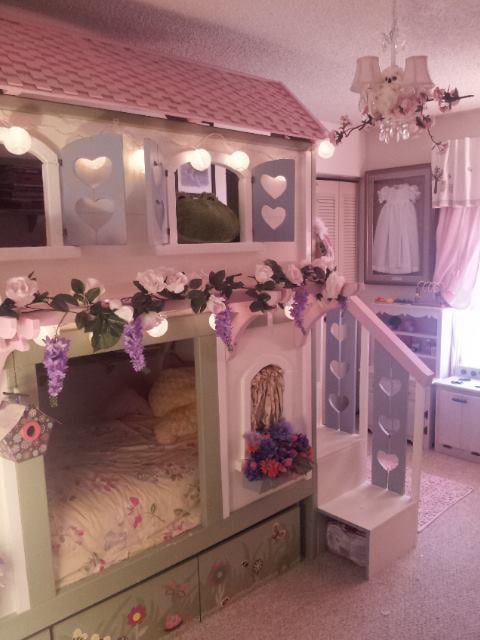
After yet another move (this time to Monterey, CA) and with a baby on the way, it was time to build the girls some big-girl beds of their very own. I was going to need to re-convert their double bed back into its original crib form by September, so in June, I started looking for plans. When I stumbled on Jenny's "Sweet Pea" bunk beds, I knew I'd found a winner! She also made it sound so easy, and I'd only assisted my dad on remodeling projects, never built anything from scratch. But I was familiar with the tools and terminology, so six months pregnant and in a serious nesting phase, I got to work. My hubs helped with the heavy lifting and I had some friends assist with sanding and priming -- many hands do indeed make light work! It took just under a month working four to six hours a day (on average), five to six days a week. I used screws for EVERYTHING, as this baby has to come apart easily for future moves (and does it ever -- Jenny's not kidding when she says you can have it up and down in ten minutes!). I'm most proud of the roof -- I had originally planned on finding real cedar shingles, but those babies are expensive! So I came up with idea of using door shims. A pack of 12-15 is only a couple bucks, and it took about 24 packs to cover the entire roof. I found some light wood trim and glued/screwed it to the edges, slathered on some pink paint, and voila! A wood shingle roof! The whole project ended up costing nearly double what I'd originally budgeted, but I'm so happy with it and my girls love it so much that I don't really care. Plus, if I'd had this baby custom made, it would probably have cost quadruple (at least!) what I paid in building materials. Let me know if you have any questions -- I'm happy to share what (little) I know :)!

Thu, 01/02/2014 - 01:16
Awww...This is so SWEET! You did such a great job- the roofing is ingenious! I wish I had thought of that! And you are right, wood shingles cost a fortune. You came up with such a clever way around it! Love how your bed turned out, I'm sure your girls feel like little princesses!
In reply to Awww...This is so SWEET! You by birdsandsoap
Thu, 01/02/2014 - 08:12
Thanks :)! And yes, they do love it -- bedtime has not been an issue since completion!
Thu, 01/02/2014 - 01:16
Awww...This is so SWEET! You did such a great job- the roofing is ingenious! I wish I had thought of that! And you are right, wood shingles cost a fortune. You came up with such a clever way around it! Love how your bed turned out, I'm sure your girls feel like little princesses!
Wed, 04/09/2014 - 15:35
hi do you happen to havea copy of the plans the pdf link is broken and id love to build thr bed for my daughter
In reply to copy of the plans? by thomen
Mon, 05/19/2014 - 16:18
So sorry this took so long -- I only just now noticed your comment! I do not have a copy of my plans, unfortunately. They were pretty much destroyed by the time I finished!
Mon, 05/19/2014 - 14:51
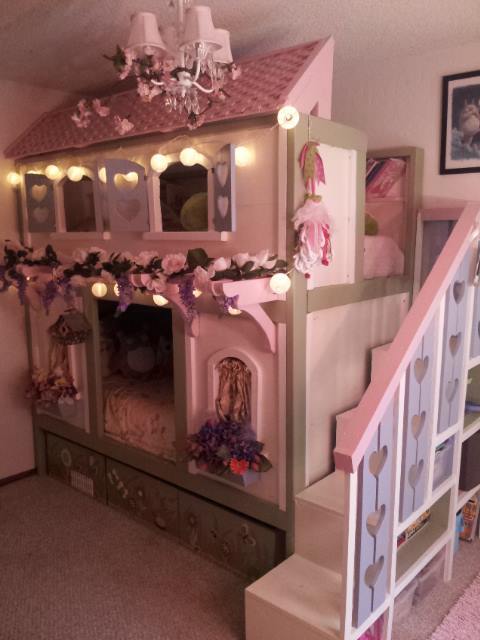
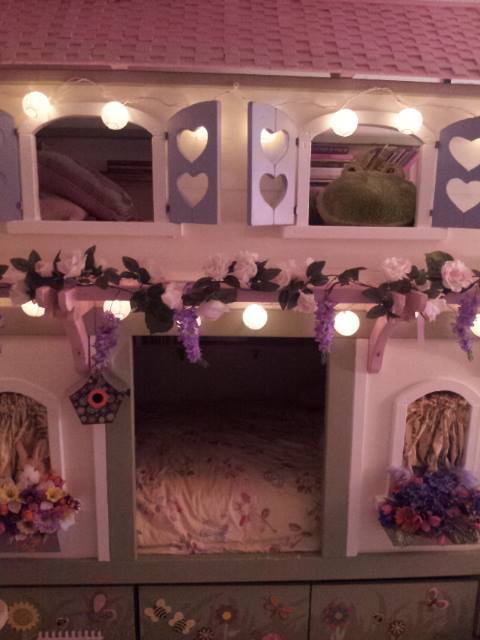
This is marvelous! My husband says this is the best he's ever seen and wants to do exactly this. You have a designer's eye. The paint pallette is very pleasant. Can you tell us the specific color names of each paint you used and where you used it?
Did you use stencils to paint the flowers, etc? If so, where did you buy them from?
Also, where did you get the lights and what are they called specifically?
Thank you so much!!!
In reply to Specific Paint Colors and Other Details? by Bountiful Acre
Mon, 05/19/2014 - 16:23
Thanks for your kind words! I do not know the exact names of the paint colors I used -- they were sample cans, by Behr. The cream color was actually a very pale yellow, though. I free-handed the green on the drawers, and the flowers are actually made of wood and came from Michael's (in the craft department, where they keep wooden letters and stencils). The lights are oriental paper lights, and I got those at Ace Hardware. Hope this helps!
Tue, 05/20/2014 - 11:20
Yes, that was helpful. Thank you for taking the time. It is appreciated!
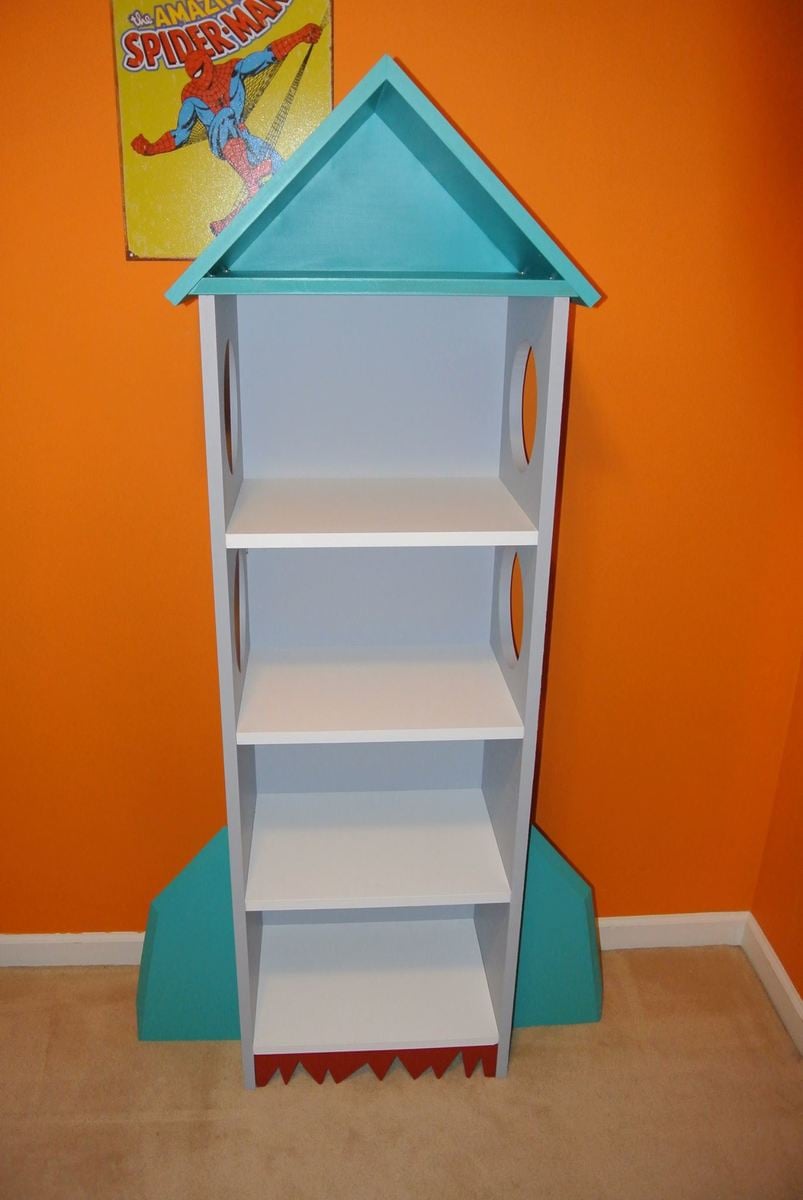
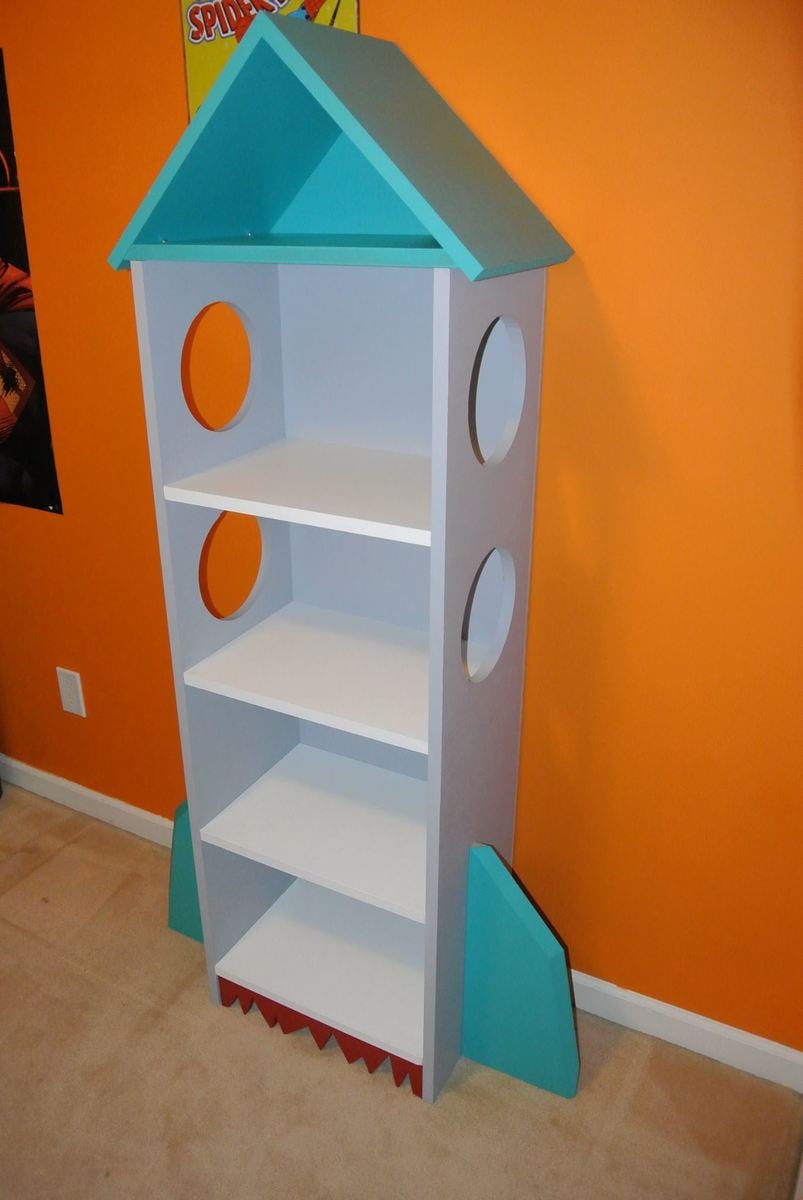
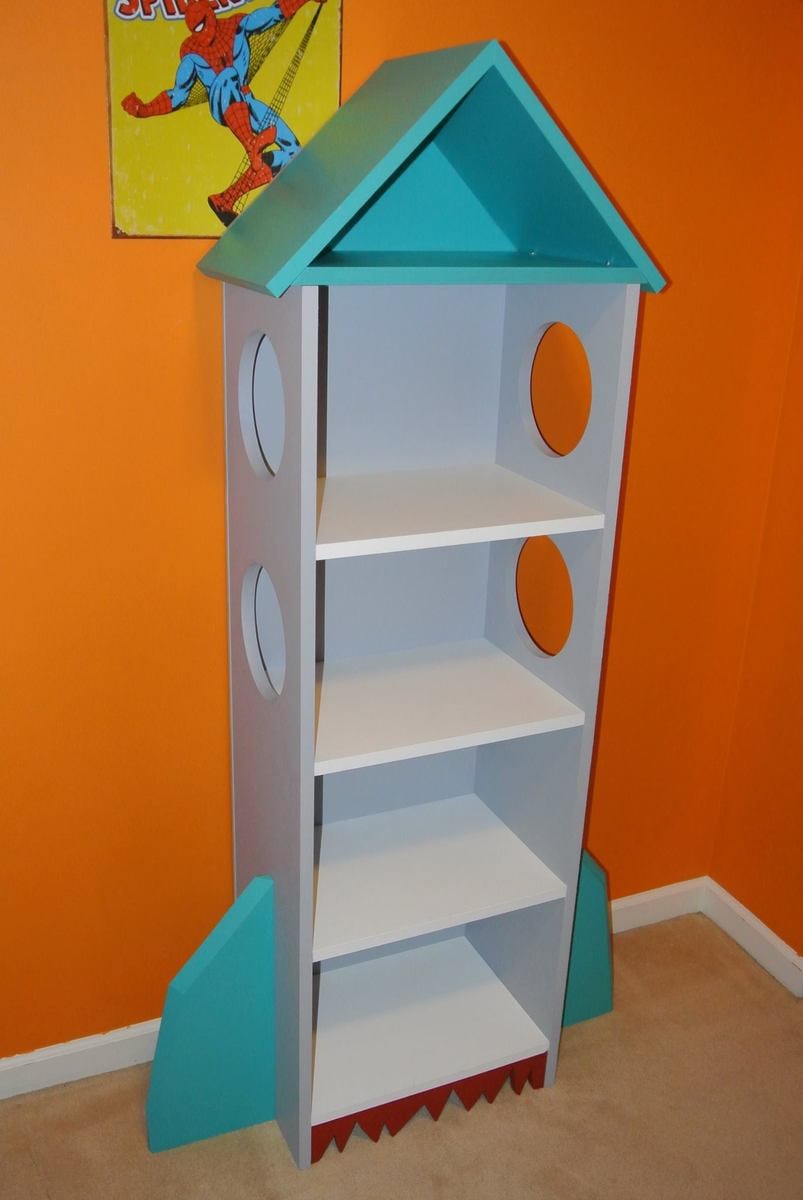
Rocket Bookcase
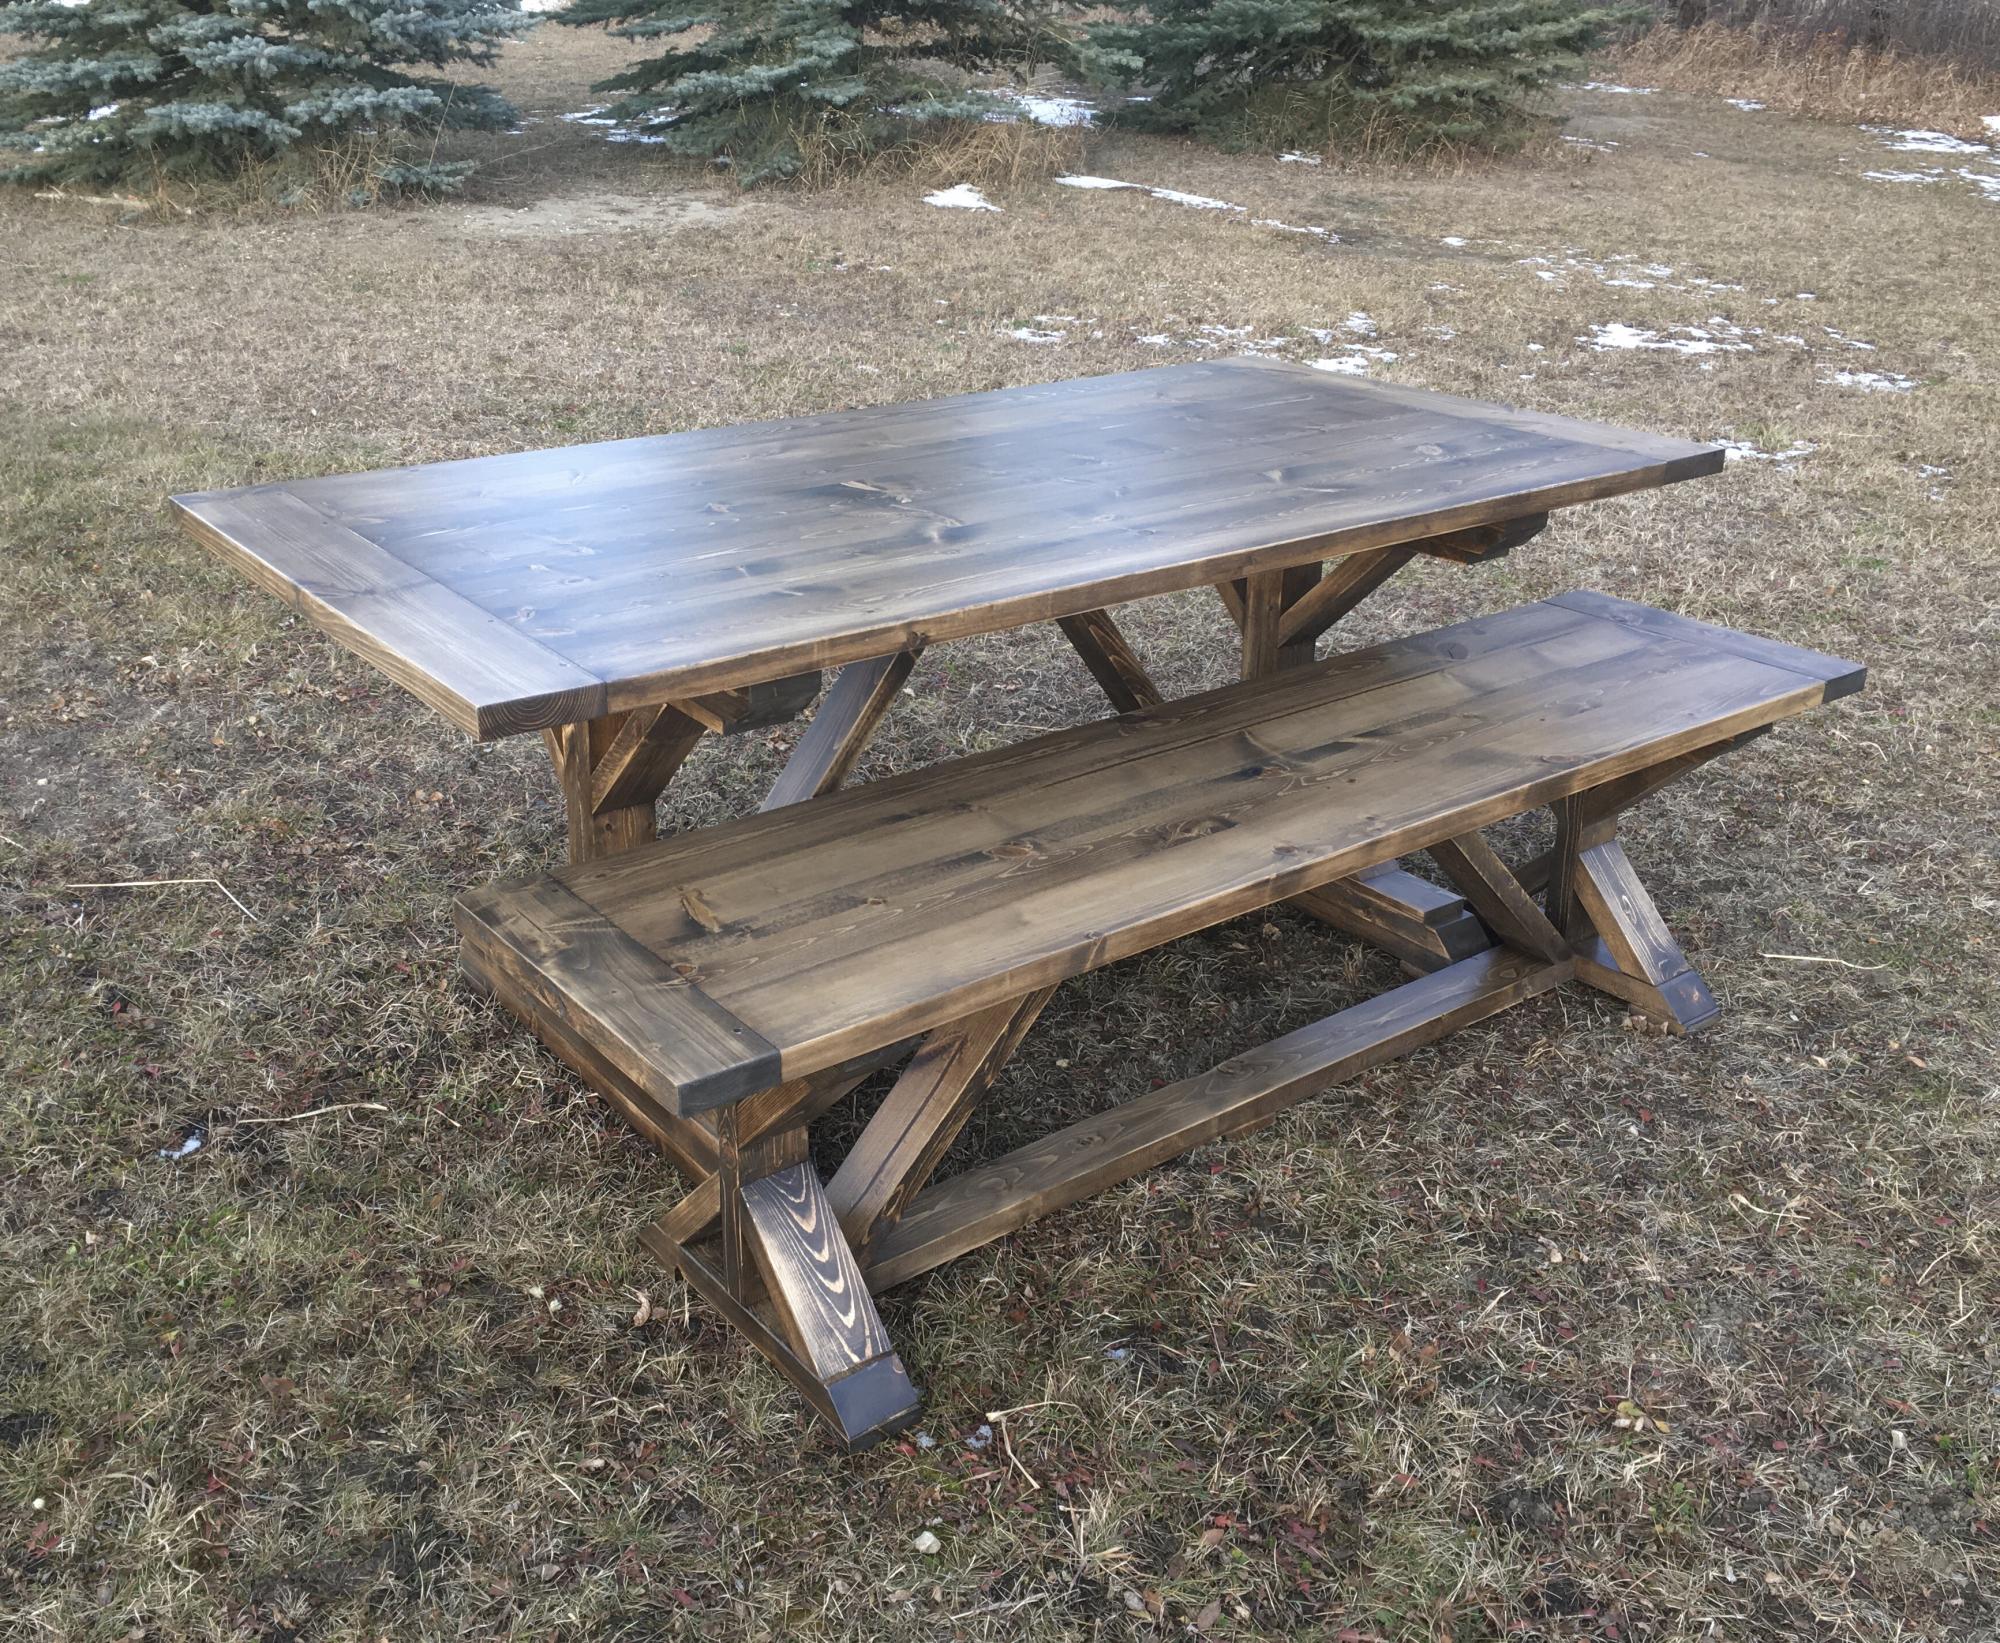
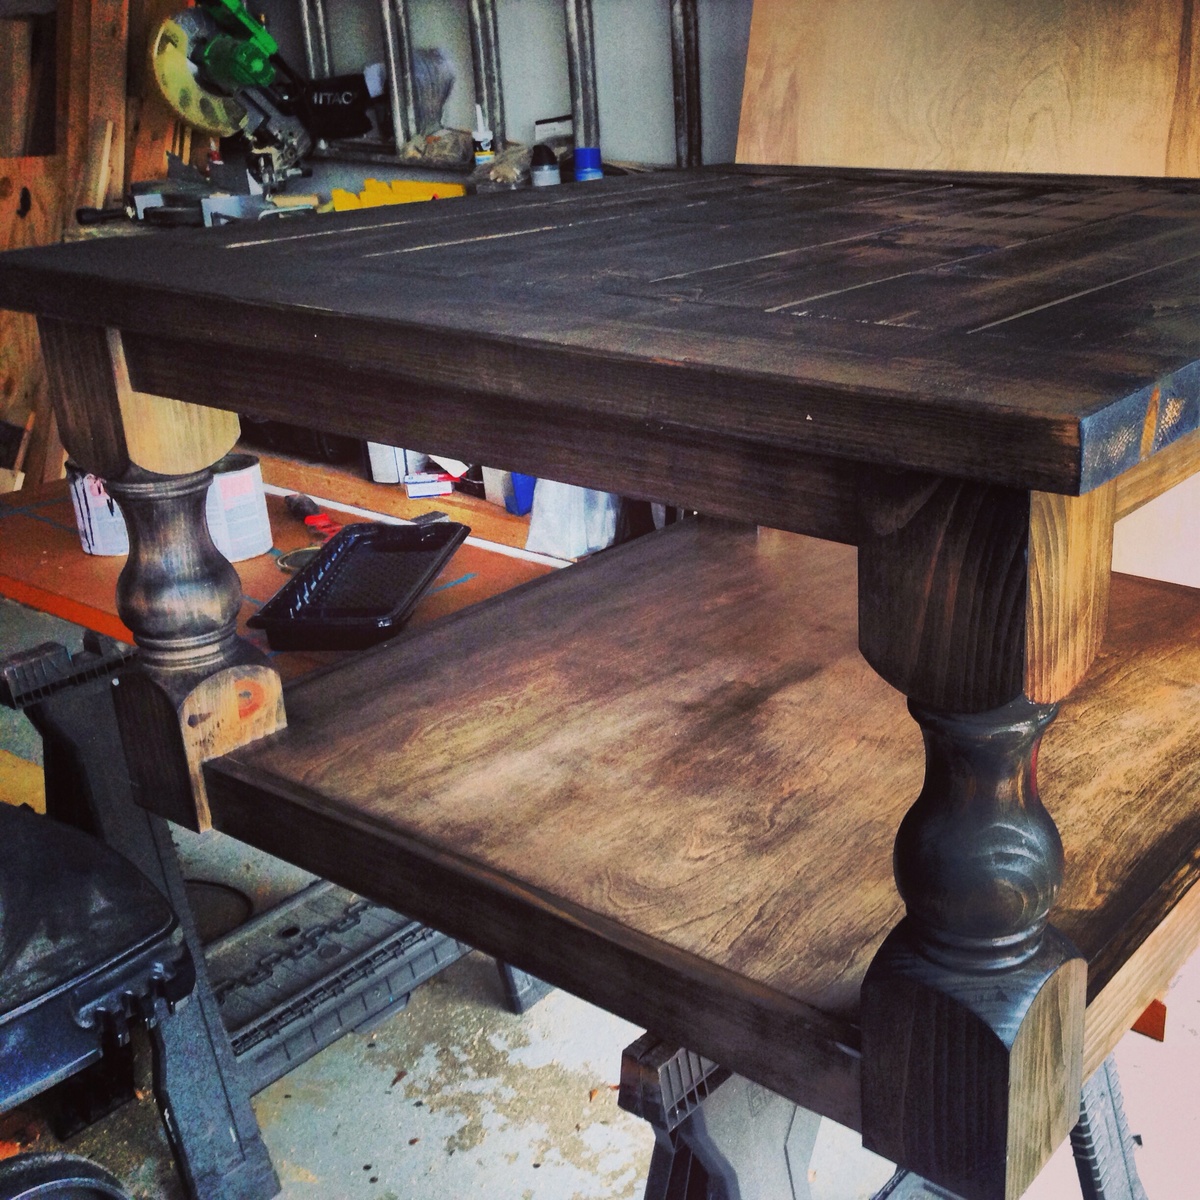
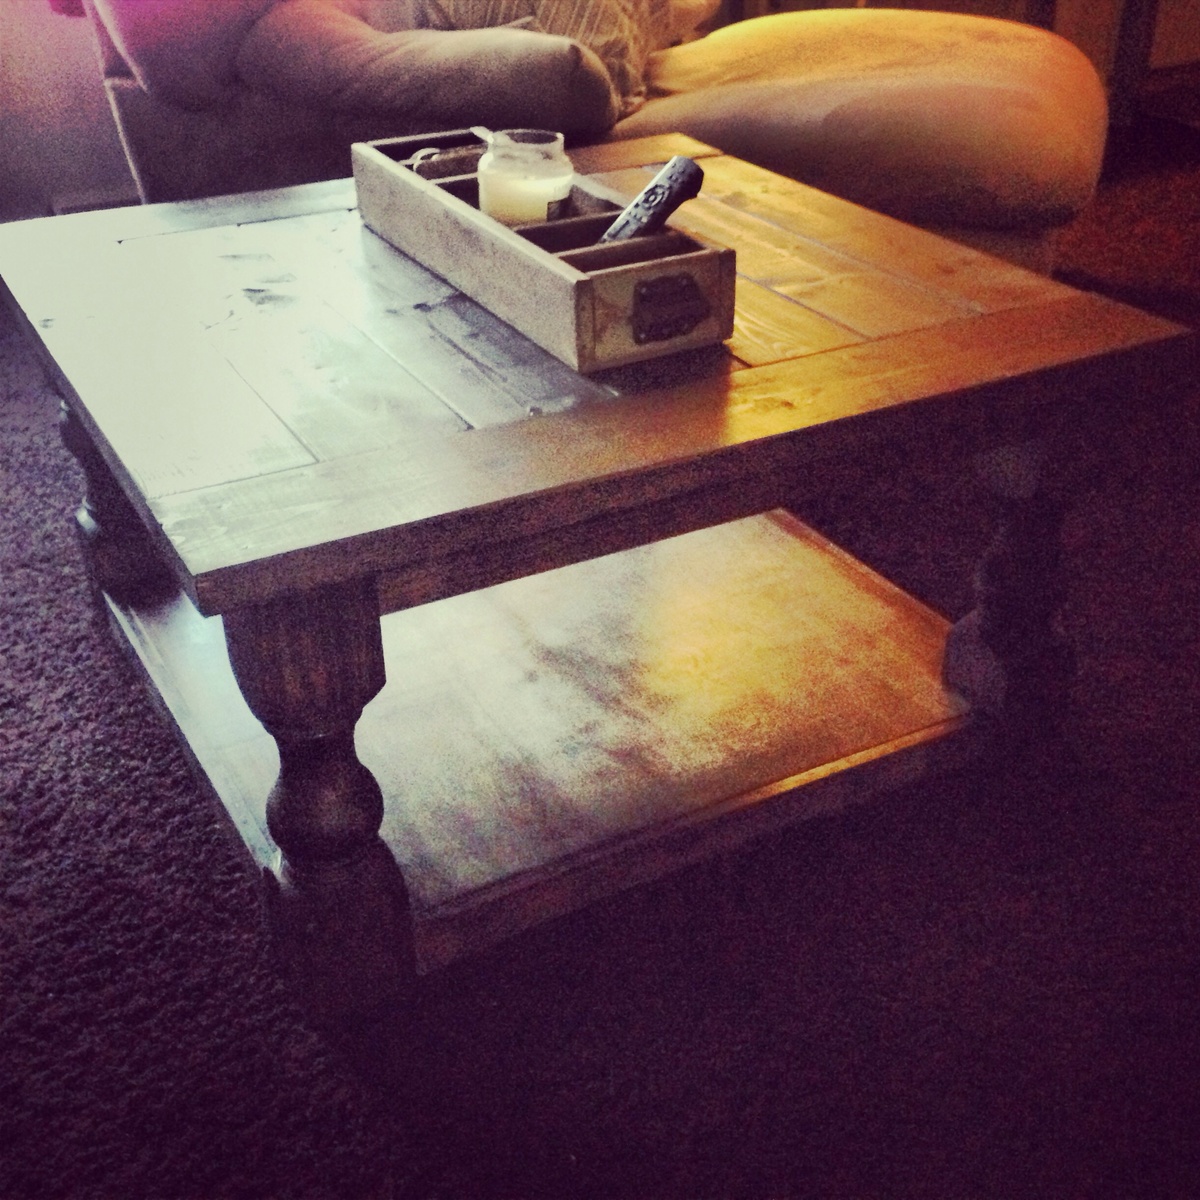
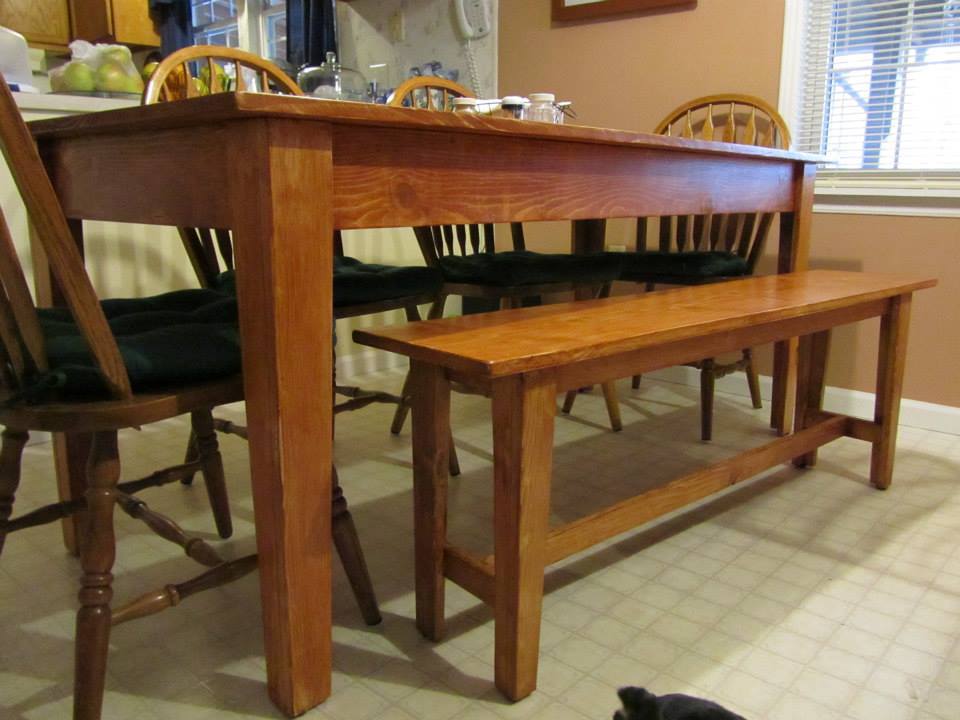
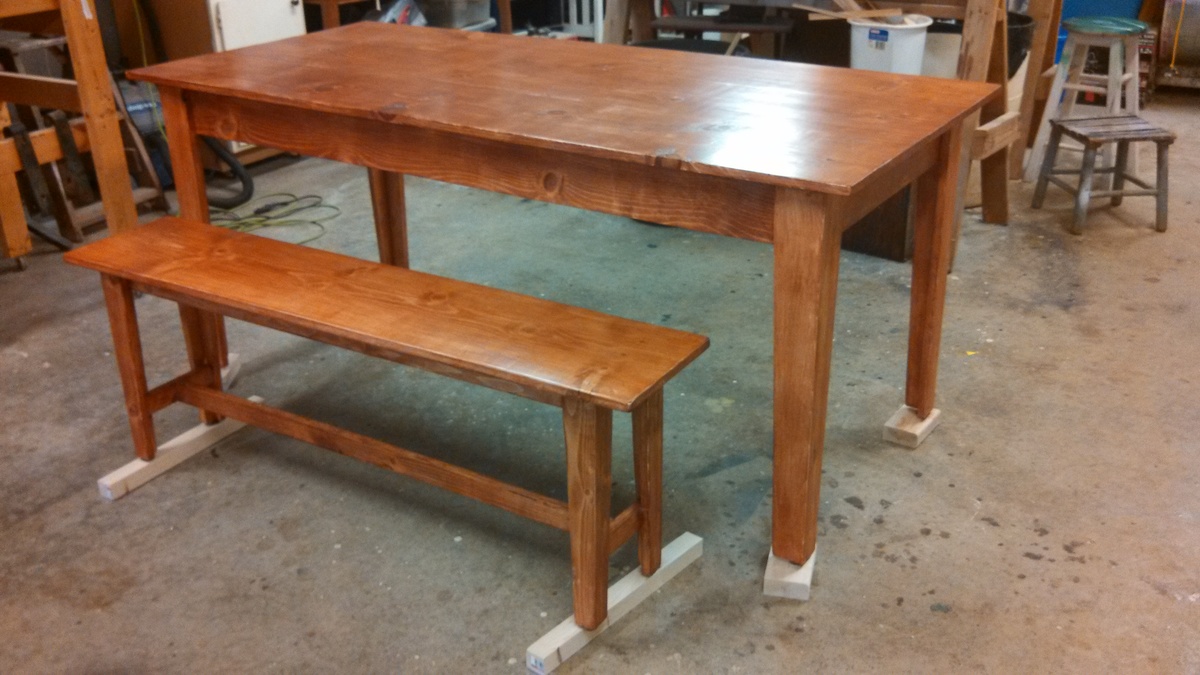
These plans were a lot of fun, easy to follow and I love all the layers!! I changed the direction of the bracing under the table and used a thicker beam along the floor. For the bench I decided to use only two legs so I did them in a thicker look to match the table.
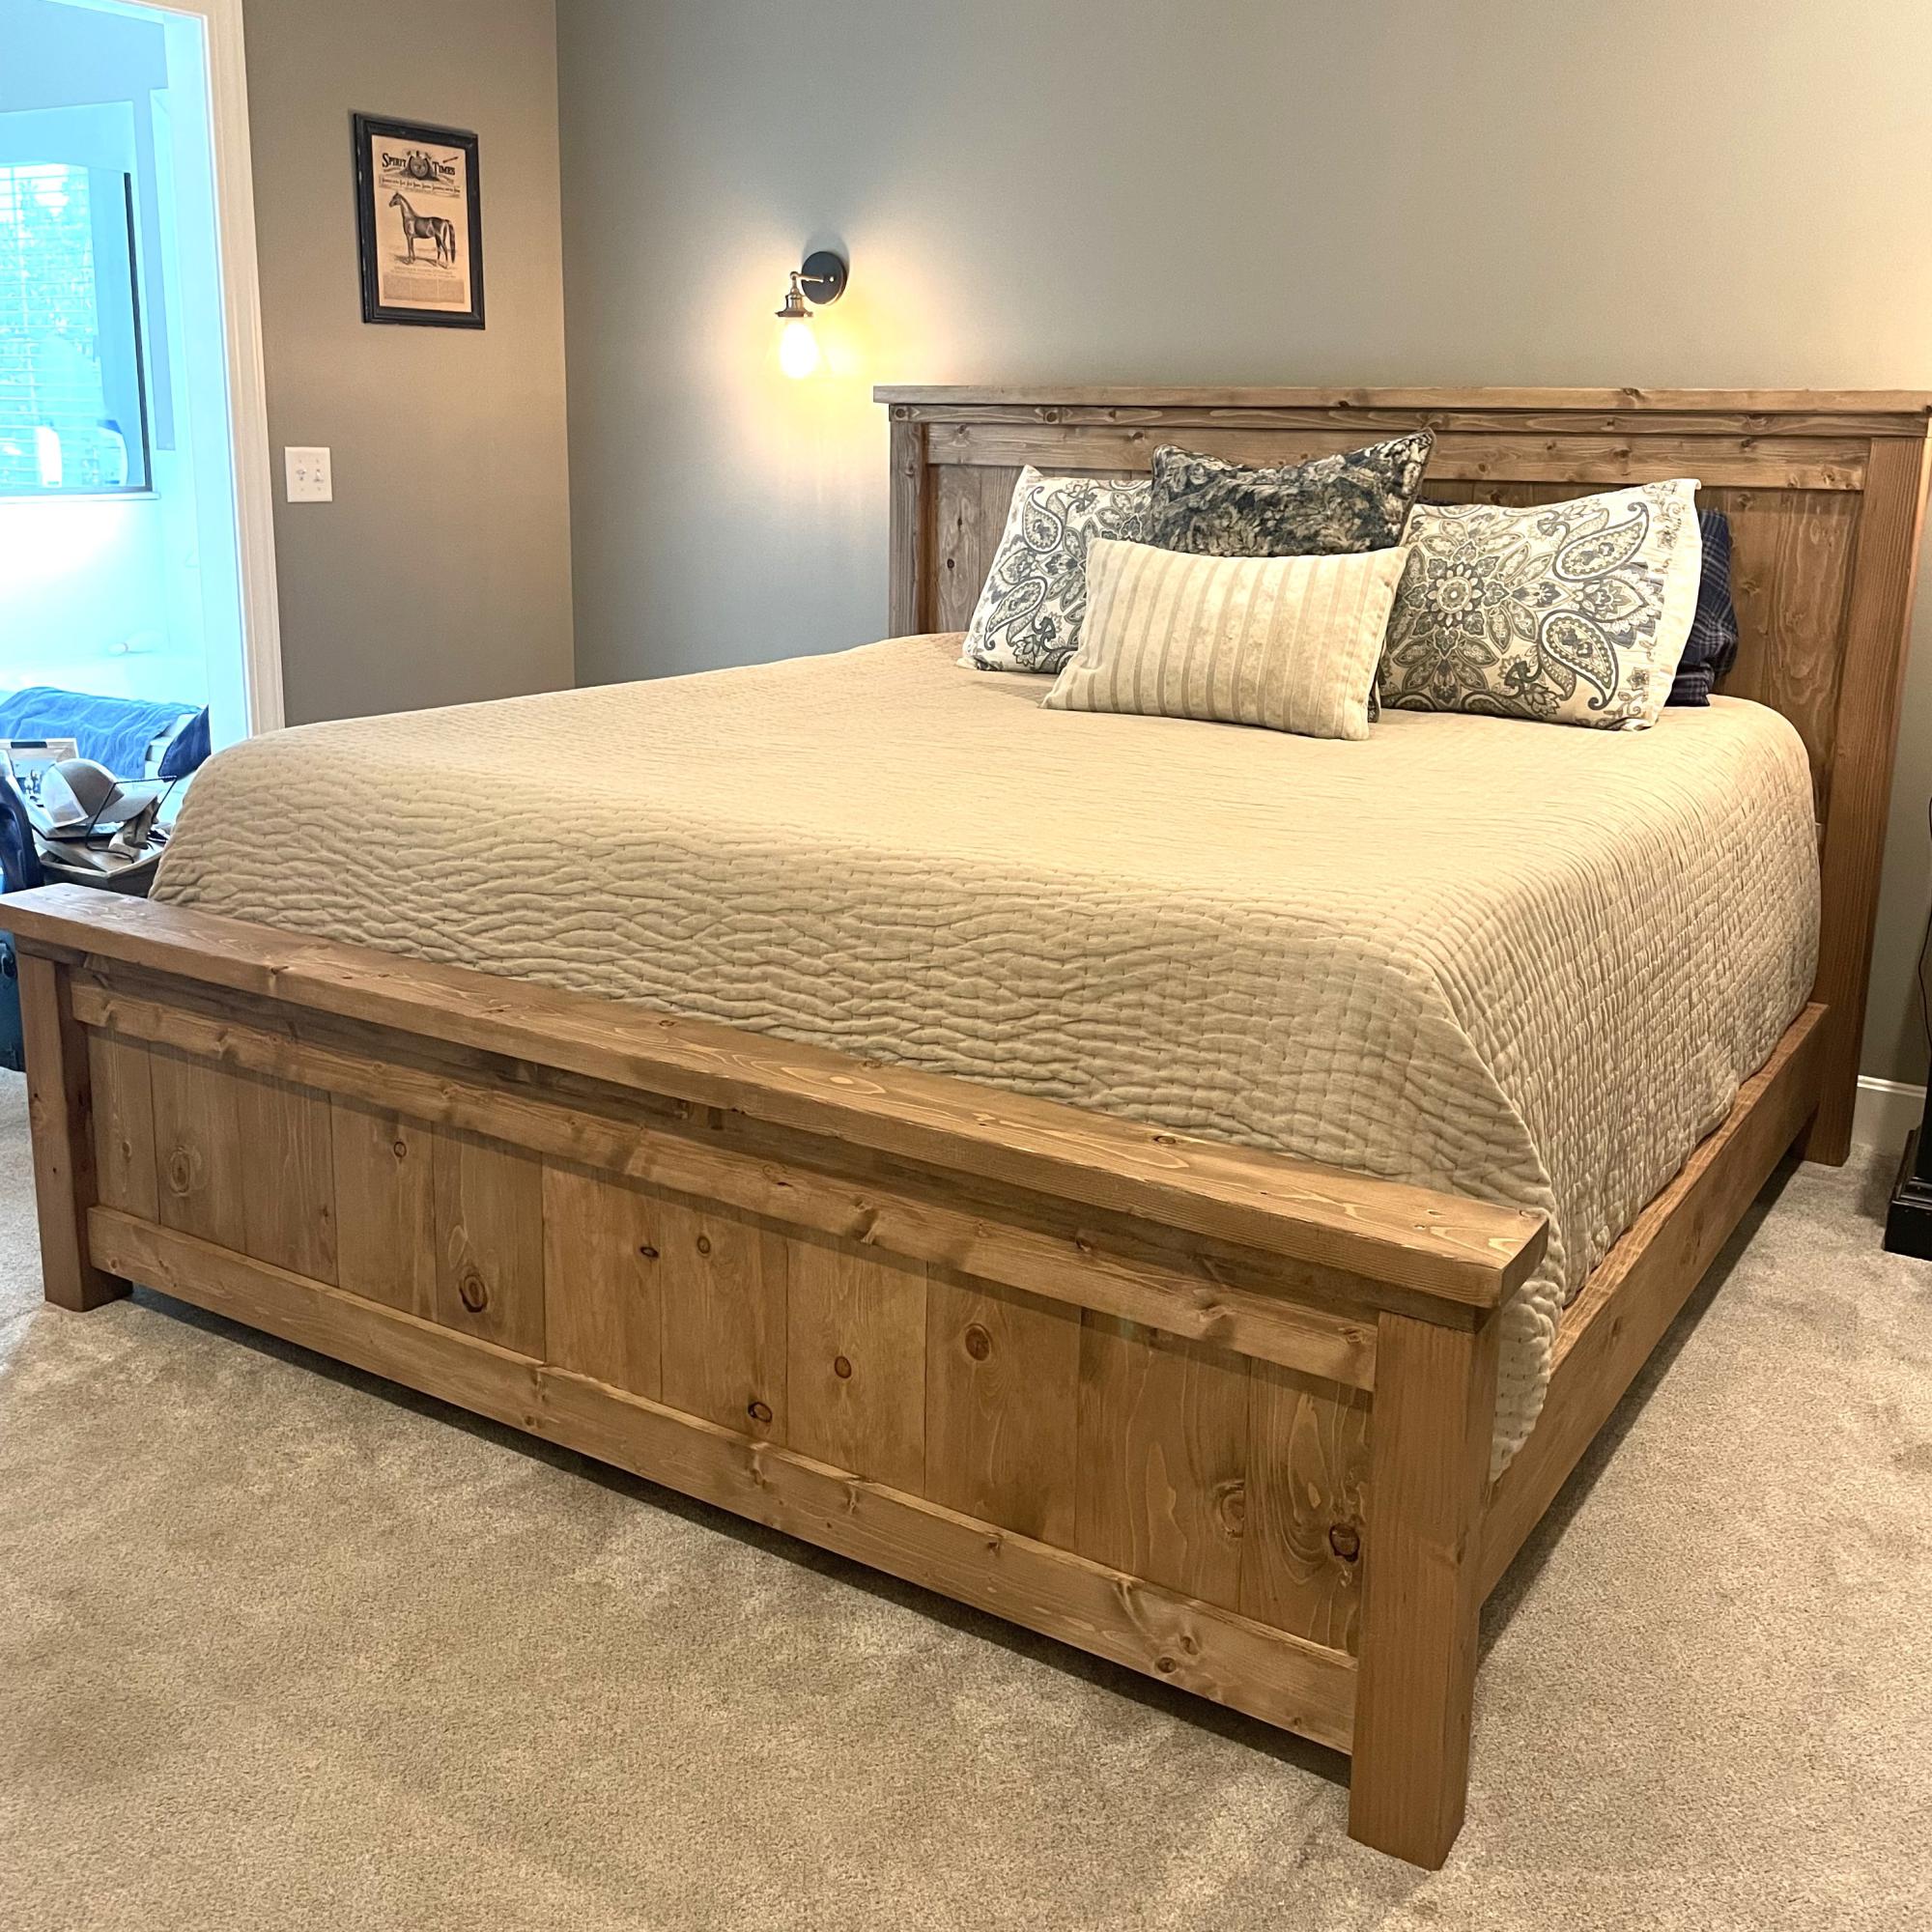
Wood = Pine
Finish = Minwax Special Walnut (after Pre-Stain)
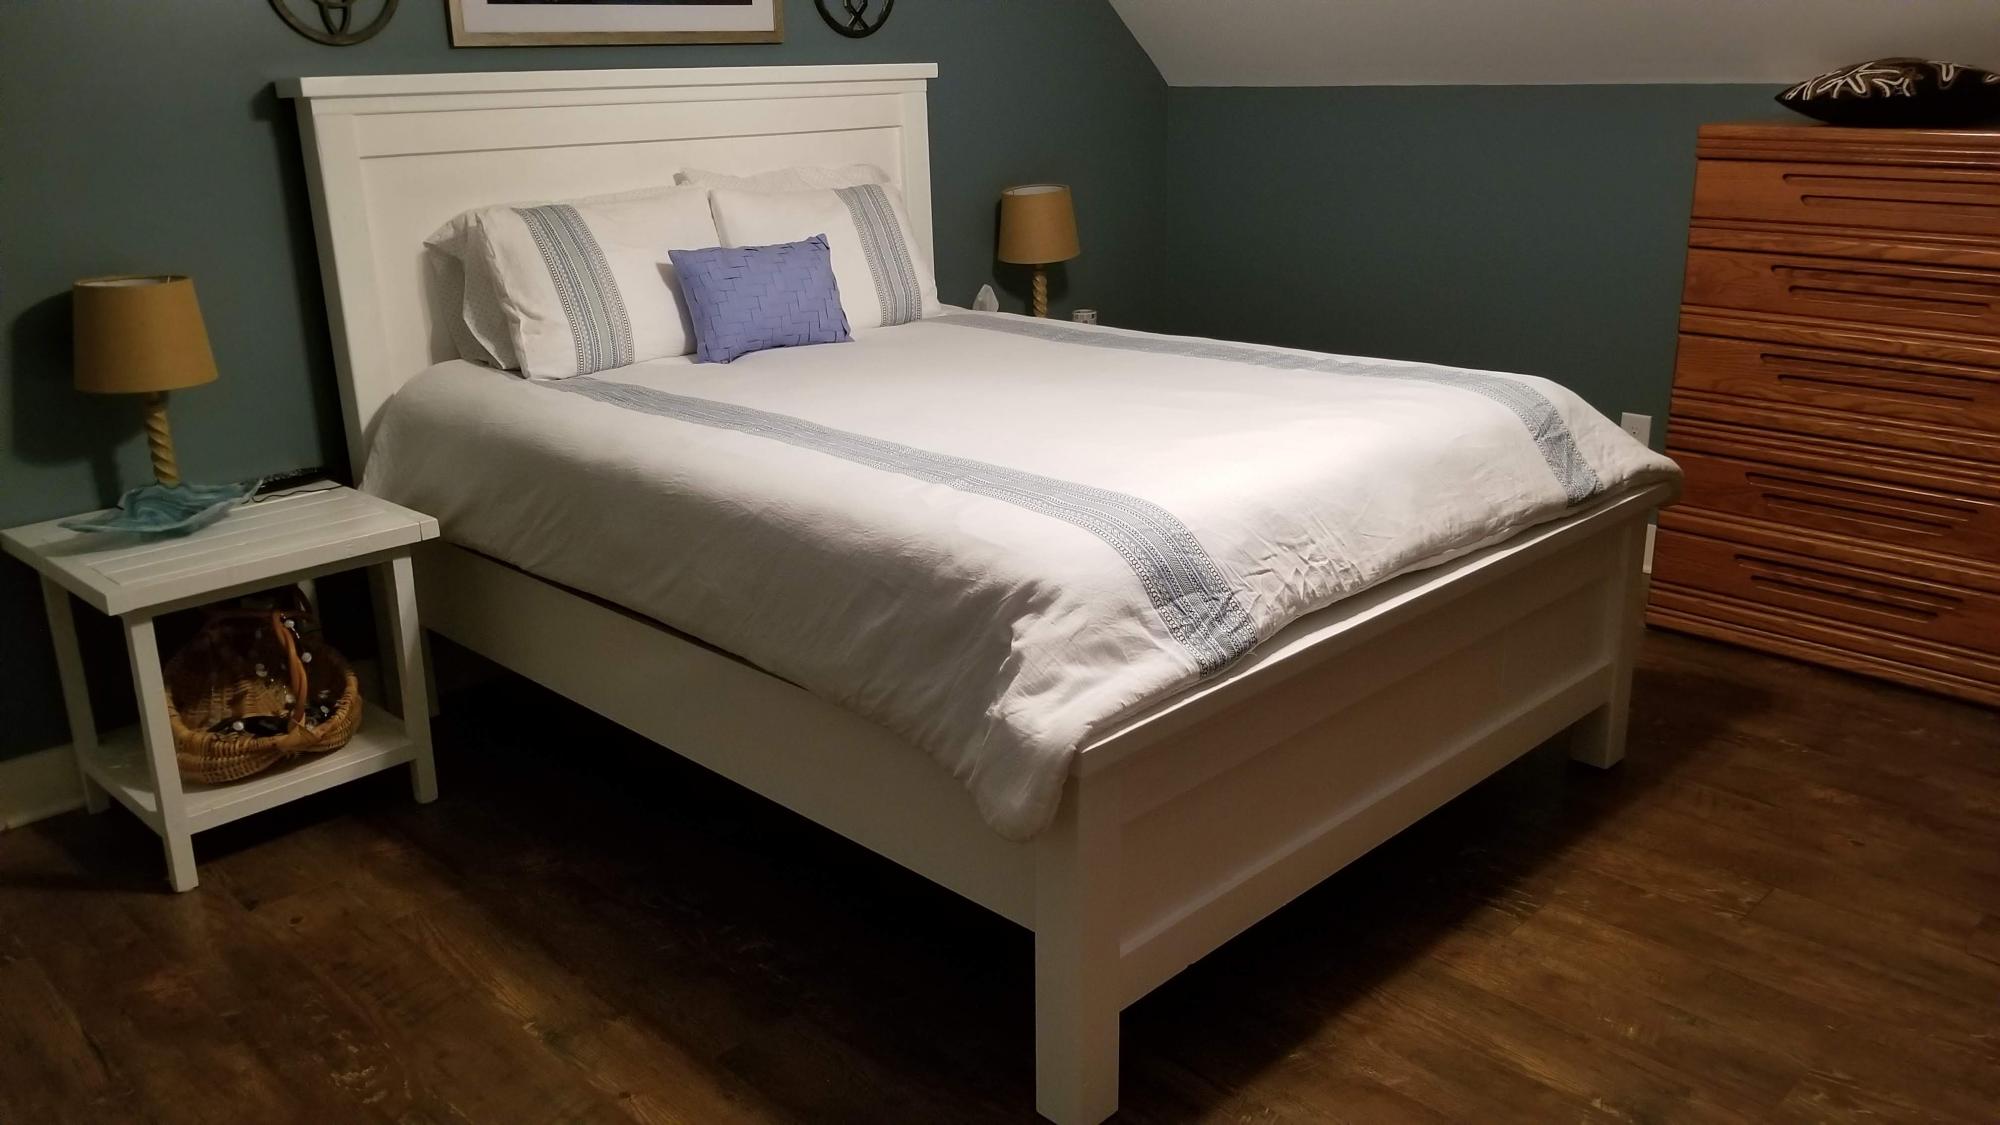
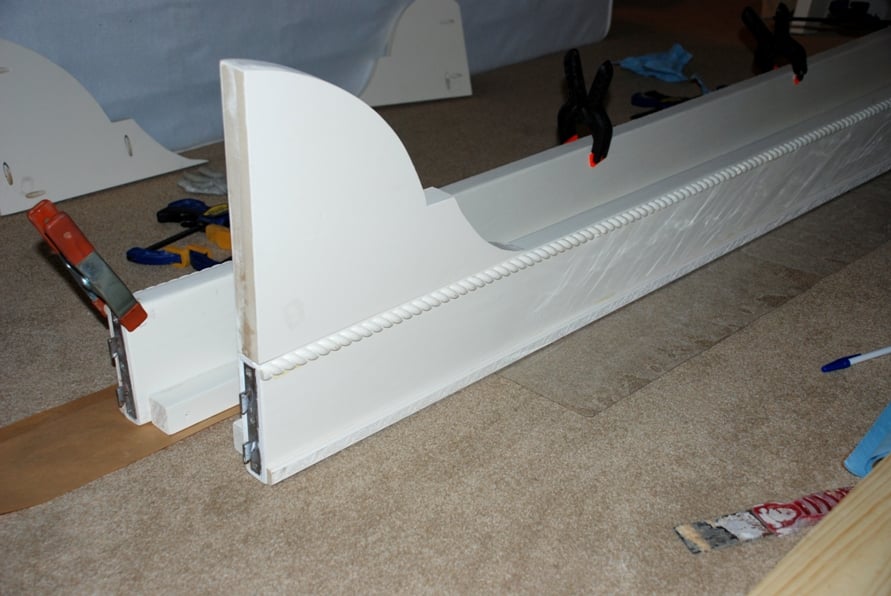
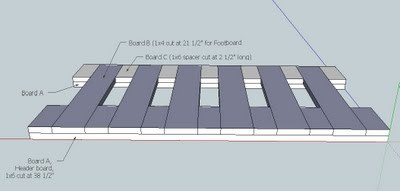
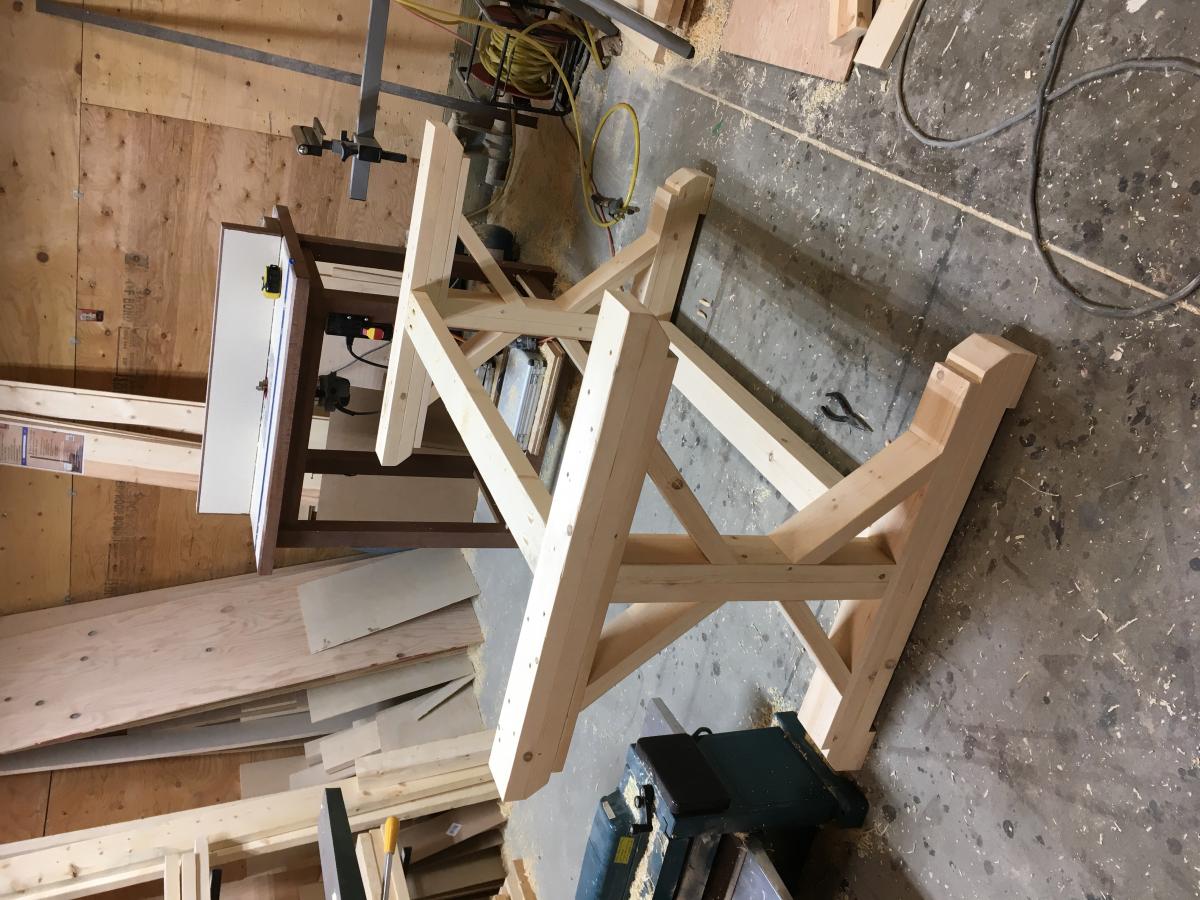
This was a pretty straight forward build, but nice to have an extra set of hands. On the top board of the head/footboard, a countersink bit was used to recess the screw heads (otherwise, all fasteners in the plan are concealed). Then a mixture of glue/sawdust was used to smooth over the countersink hole. The whole project was sanded starting with 60 working up to 220.
We followed the plan, and in the photo this is the height of the bed with box springs and mattress. The bed feels sturdy and comfortable. It was a fun project and my first shot at interior furniture.