Community Brag Posts

DIY Outdoor Sectional

Submitted by Anonymous (not verified) on Mon, 05/06/2024 - 13:25

I used the armless chair plan, and altered the one armed plans to make two chaises. Then I increased the size slightly to accommodate the 25x25 pillows I bought. This took about 12 hours with one person working. I am super proud of it! Finished today, and will eventually stain after the wood has dried out a little. Thank you, Ana, for making straightforward plans that gave me the confidence to do my first woodworking project!

Andrea in Michigan

Tapered planter

Submitted by Anonymous (not verified) on Mon, 07/13/2020 - 07:40

Next time, I will cut the 1x2 and 1x3 at the 5 degree angle to match the top and bottom planes...
Thanks for the idea! It is great

Built from Plan(s)
Estimated Cost
30.00
Estimated Time Investment
An Hour or Two (0-2 Hours)
Finish Used
Sanded with 80 grit and clear polyurethane
Recommended Skill Level
Beginner

Two-Tone X Desk with Drawer

Submitted by ethunberg on Mon, 07/20/2020 - 05:02

I'm a recent grad and made this desk during Covid-19 quarantine. Now I get to use it as my work from home desk as I enter the workforce. This was my first big project I made myself, and I had some trouble with the dimensions of the tops of the legs not matching the plans, but that could be just me. I used ball bearing slides because the drawer front was pretty heavy, but they were very difficult to install. I would recommend using the cheap slides as they give more room for error. Very happy with how it turned out! The horizontal support board between the legs makes a great footrest.

Built from Plan(s)
Estimated Cost
Don't ask
Estimated Time Investment
Week Long Project (20 Hours or More)
Finish Used
Morado had 5 coats tung oil
Cherry had 3 coats danish oil
Recommended Skill Level
Intermediate

Peg Doll House

My grandson wanted a set of peg dolls and a house to play with them in.  I wanted to build something that was gender-neutral - so many doll houses are pink and feminine!  This doll house is sized just right for his peg dolls and playmobil people.  It's made from 1/2" poplar, although it could also be cut from a sheet of 1/2" plywood.

Estimated Cost
$20
Estimated Time Investment
Day Project (6-9 Hours)
Finish Used
clear polycrylic
Recommended Skill Level
Beginner

Plant stand

I made 3 of these for a friend. 2 @ 16", 1 @ 20".

Built from Plan(s)
Estimated Cost
$40.00 for 3
Estimated Time Investment
Afternoon Project (3-6 Hours)
Finish Used
Shui sugi ban. Just burned and brushed off.
Recommended Skill Level
Beginner

Farmhouse Style Toy Box / Blanket Chest

Submitted by Anonymous (not verified) on Tue, 01/17/2017 - 11:17

I built this for my daughter after Christmas sinse she had the living room covered in toys. The dimensions are 37" x 18" x 20" 

Estimated Cost
$75
Estimated Time Investment
Weekend Project (10-20 Hours)
Finish Used
Watco Danish Oil - Medium Walnut (2 coats) with a light sanding between coats with 220 grit, I allowed 24 hours between each coat to dry. To protect the surface I used water based polyurathane matte finish (3 coats) with a light sanding - 400 grit.
Recommended Skill Level
Beginner

Comments

jwelch

Wed, 01/18/2017 - 13:06

Great job! Can you share more about how the legs were constructed and joined? Was this project based on Ana White's "Simple" toy box plan? Any info appreciated.

jgreaff

Tue, 01/09/2018 - 05:51

HI Anna, 

Can you provide more pictures or instructions on how you assembled this toy box? i want to make one just like it! 


Thanks!

apezz

Wed, 03/10/2021 - 16:31

Looking at the wall panels they look like the long edge of each panel has a small bevel cut on it. This gives each panel edge a more pronounced or well-defined edge? Is this true? Was it done with a router?

Stocking hanger with added top

Submitted by stamhow on Fri, 12/11/2020 - 20:12

Started built from https://www.ana-white.com/woodworking-projects/stocking-stand plan.
My finished product is mostly the same, except I added a little to beef it up. I added decking board size wood for the feet to give it more stability. Santa leaves heavy things in sticking sometimes. I wanted to be prepared! 😁 I made the top 2x4 flush with the top of the sides and added a 1x6 across the top like a shelf. If I get to do it in time, I'm going to add a 1x8 (or 2x8) stained a dark wood color on top and may add a little trim between it and the 1x6 to beef it up. I love it! Might be able to repurpose someway during the rest of the year. Thanks Ana White for the plans!

Built from Plan(s)
Estimated Cost
Less than $20 because I had most wood and finishing materials on hand.
Estimated Time Investment
Afternoon Project (3-6 Hours)
Finish Used
I painted it with a gray color satin wall paint I bought from the sample section and after it dried, sanded it up to distress. I then wiped on a Chestnut Minwax stain for a short time and wiped it right off. After that dried I wiped it all over with the Minwax Wipe-on satin polyurethane.
Recommended Skill Level
Beginner

Horizontal Porch Planters

Submitted by Anonymous (not verified) on Wed, 04/14/2021 - 18:11

Hi Ana! I recently got into woodworking because I saw my neighbors who had some cute horizontal planters but everywhere I looked, they were so expensive! I couldn't find plans exactly how I wanted them so I used your "Cedar Front Porch Planter Plans" and flipped them sideways so that they were shorter/longer instead of taller. Somehow I got all the measurements right and they turned out beautifully! I have made four more since then for family and friends. I was even able to get my mom to help me (see photo!). I wanted to share with you and feel free to share w/ your followers! I hope to complete some more projects...thanks to your website for giving me inspiration and also teaching me how to use power tools!

Built from: https://www.ana-white.com/woodworking-projects/frame-and-panel-planters

Estimated Cost
25
Estimated Time Investment
Afternoon Project (3-6 Hours)
Finish Used
Sanded lightly with orbital sander. Stained with Miniwax Jacobean waterbased stain and sealed with Miniwax Polyurathane.
Recommended Skill Level
Intermediate

Comments

Minnie Mouse Storage Daybed

This was my first project form this website and it was a great experience.  I used the storage daybed plans and modified them slightly so I could attach the Minnie Mouse headboard for my daughter.


Only difference form the plans is that i did not put the trim on the back of the boxes and instead build a craddle about 2 inches deep to hold the bulk of the head board.  I used 1/2 sanded plywood to create that and the bow. the mouse head is just pained black where as the bow I got a little more creative with.  I cut out the design topped it with furniture foam then fabric backing to hold it in place and create a smooth look.  After that I streched the pink fabric over it and stapled it in place on the back before attaching it to the head.  I also used some 1 x 2 pieces to run along the back to create feet for the headboard to add stability. 

All in all this project was alot of fun and my daughter loved it.

Built from Plan(s)
Estimated Cost
Around 350 - 400. I used cabinet grade pine plywood and pine wood trim so that's the reason for the cost. You can probably do the whole thing for about 250 if you use regular plywood and white wood.
Estimated Time Investment
Week Long Project (20 Hours or More)
Finish Used
Latex paint - black and white
Recommended Skill Level
Beginner

Comments

Chairs and Round Side Table for the yard!

Submitted by tbman7 on Fri, 05/03/2013 - 15:38

My dad and I built these chairs by following Ana's Adirondack plan, and then adding our own curved back. We also routed all the edges to give the entire chair a rounded feel. We also built the simple little round side table to use with the chairs.

Built from Plan(s)
Estimated Cost
$25 per chair
Estimated Time Investment
Day Project (6-9 Hours)
Finish Used
unfinished, but plan on using an outdoor finish
Recommended Skill Level
Beginner

Picnic Table

Submitted by Medickep on Mon, 05/06/2013 - 07:39

My wife started looking at expensive patio sets, which I thought were not worth the price, so I decided to build a picnic table. This is not the cheapest table out there, but it's built to last for years!! I used a high quality cedar as I got a price cut from a friend. I also used deck screws, so there would be no rusty screws!! The table top measures 7' long and looks like one you would see at a state park, notHome Depot!

Estimated Time Investment
Weekend Project (10-20 Hours)
Finish Used
Cabot Australian Timber oil: For this project I went with an oil project so I wouldn't have to sand it every year, like so many in my area with their decks. With this product, you simply clean the table and reapply!!
Recommended Skill Level
Beginner

Comments

Medickep

Thu, 09/05/2013 - 13:04

Thank your hanks for the kind words! This was my first real project and I was pleased with the results!

Gerry Czerniawski

Thu, 08/25/2016 - 09:48

Really like the picnic table - do you have plans for this? (I'm new to this site so apologies if they are here but I just could not see where?).

best wishes

Gerry

Weatherly patio sectional seats 6

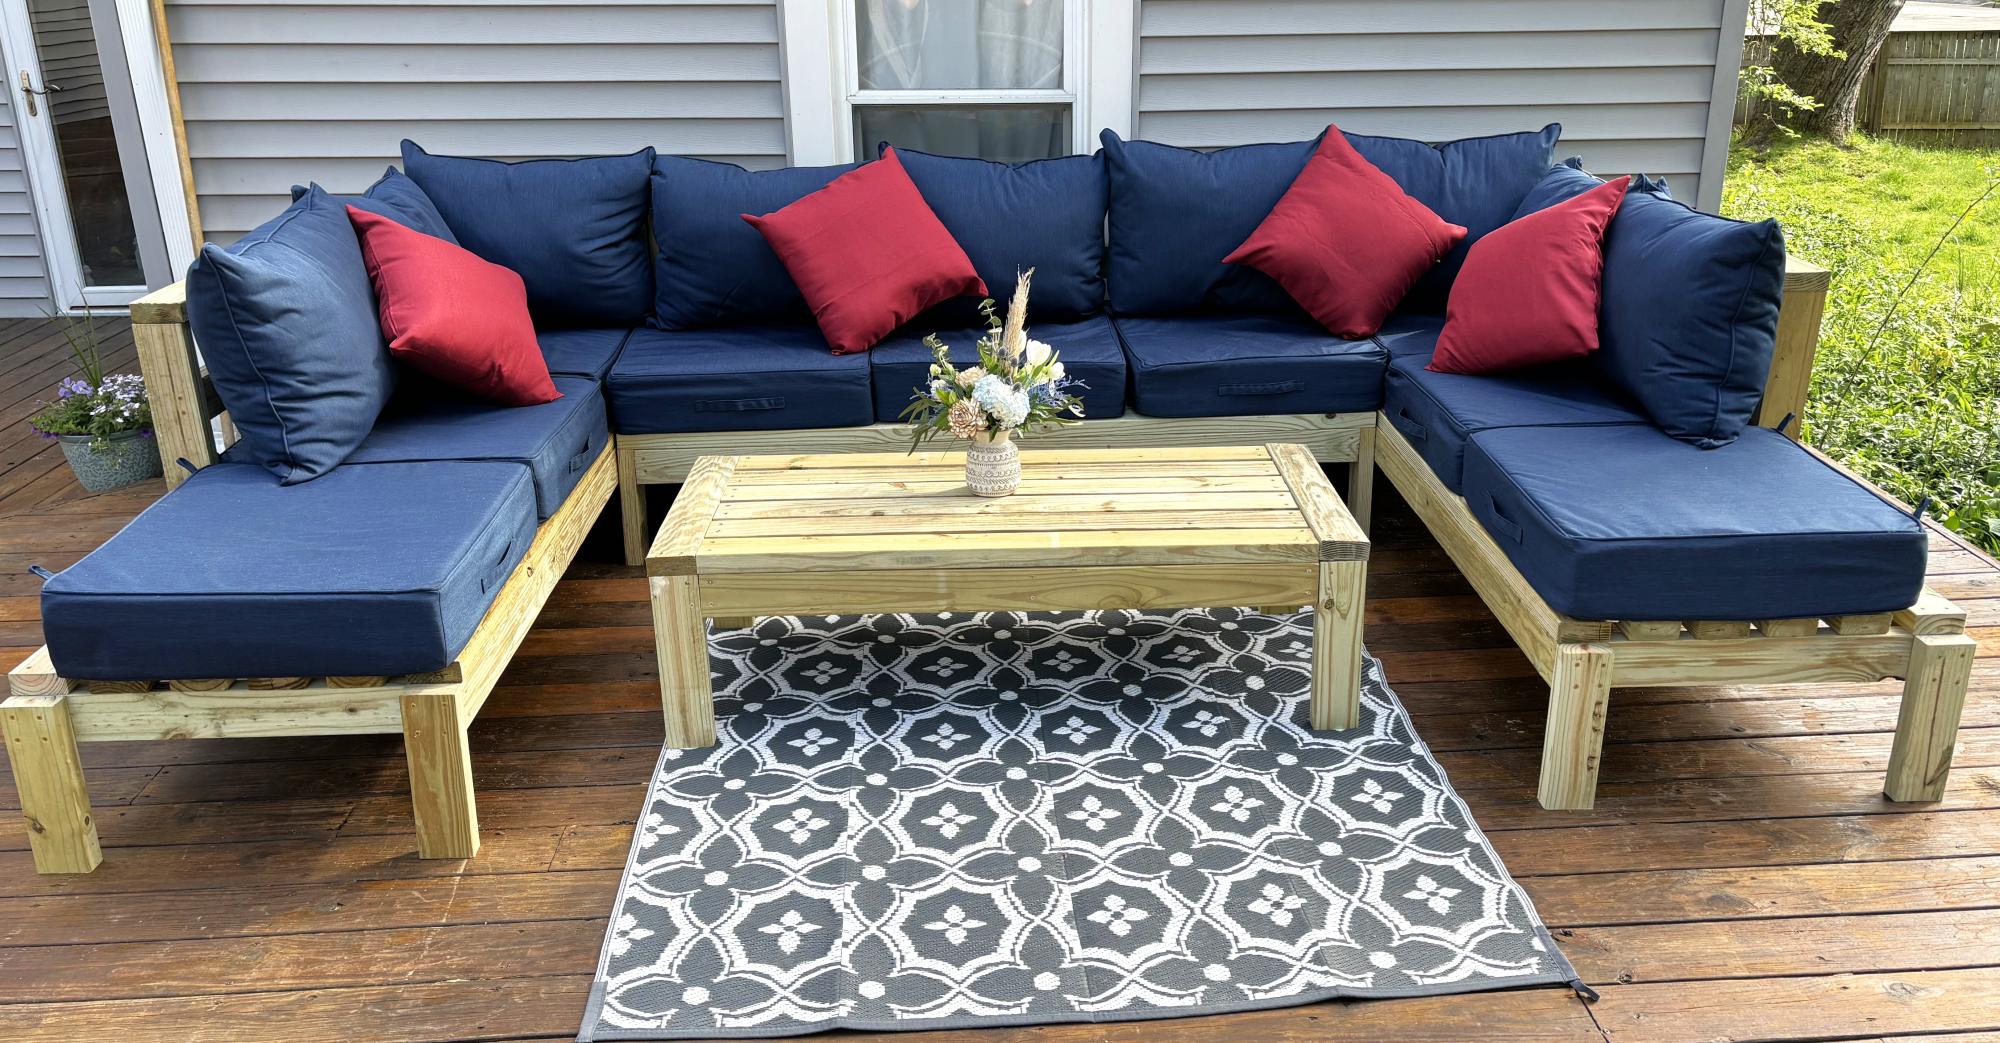
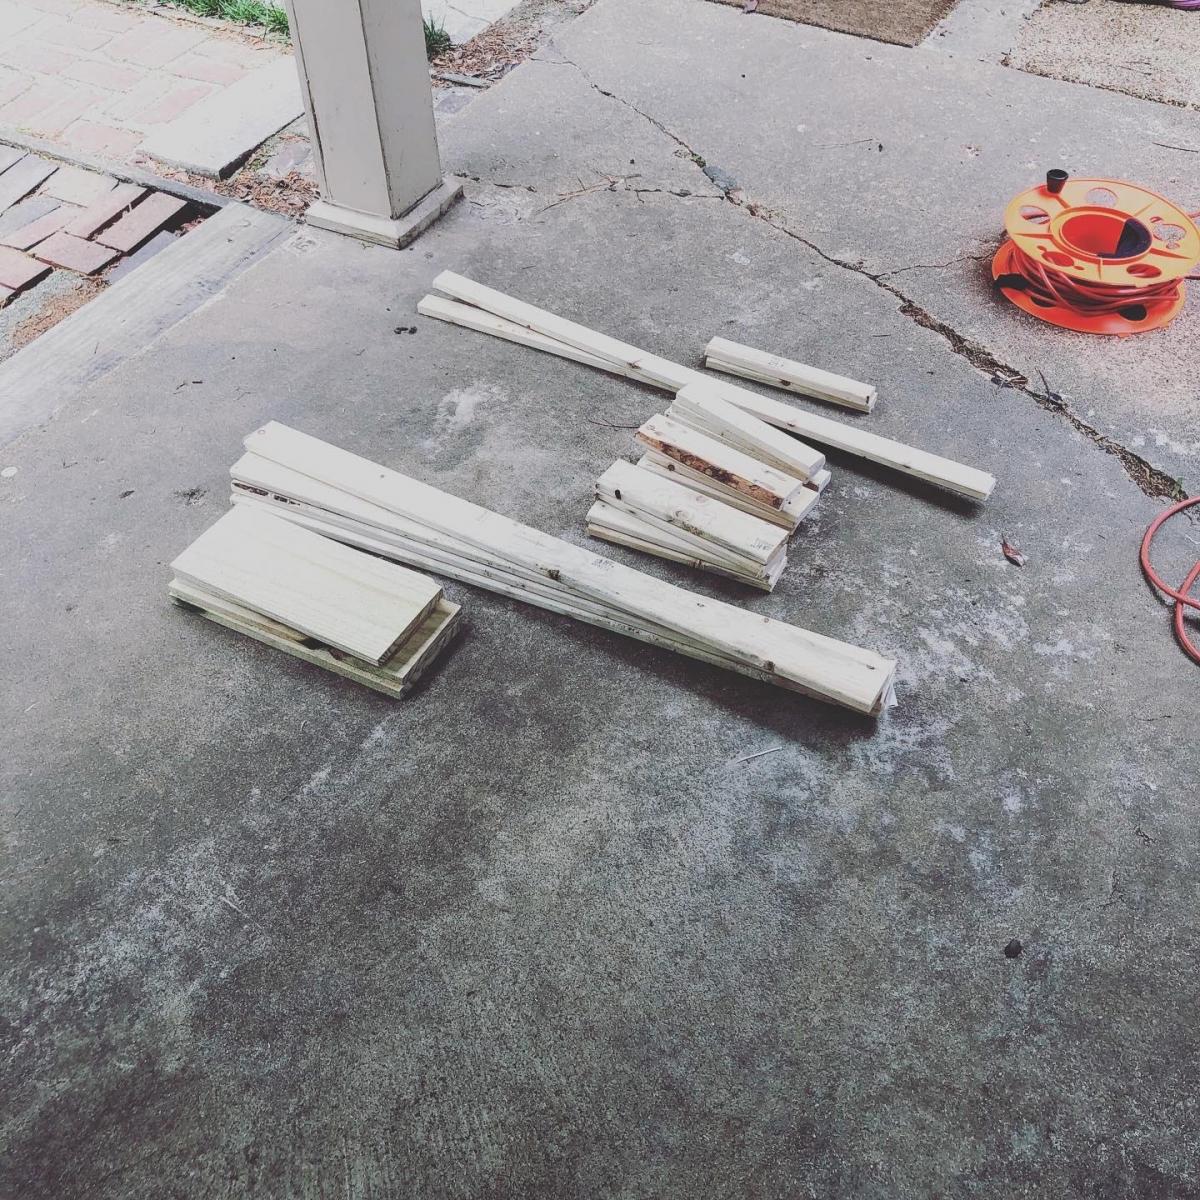
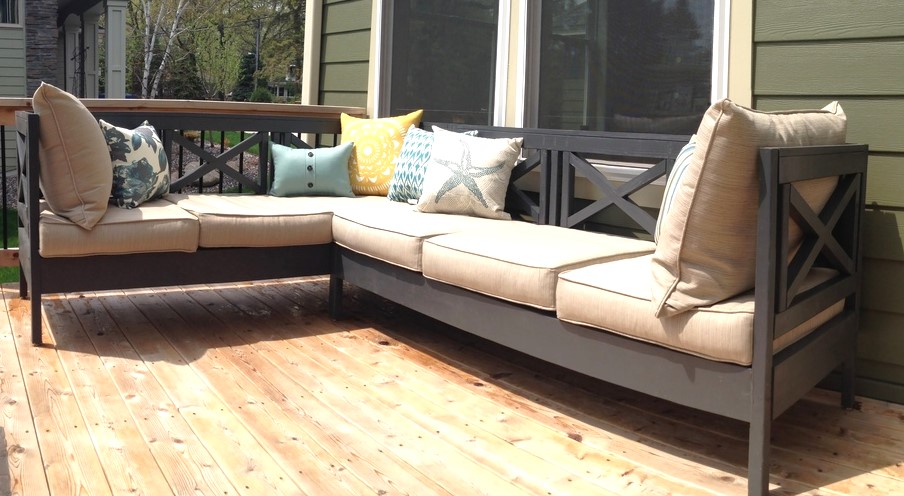
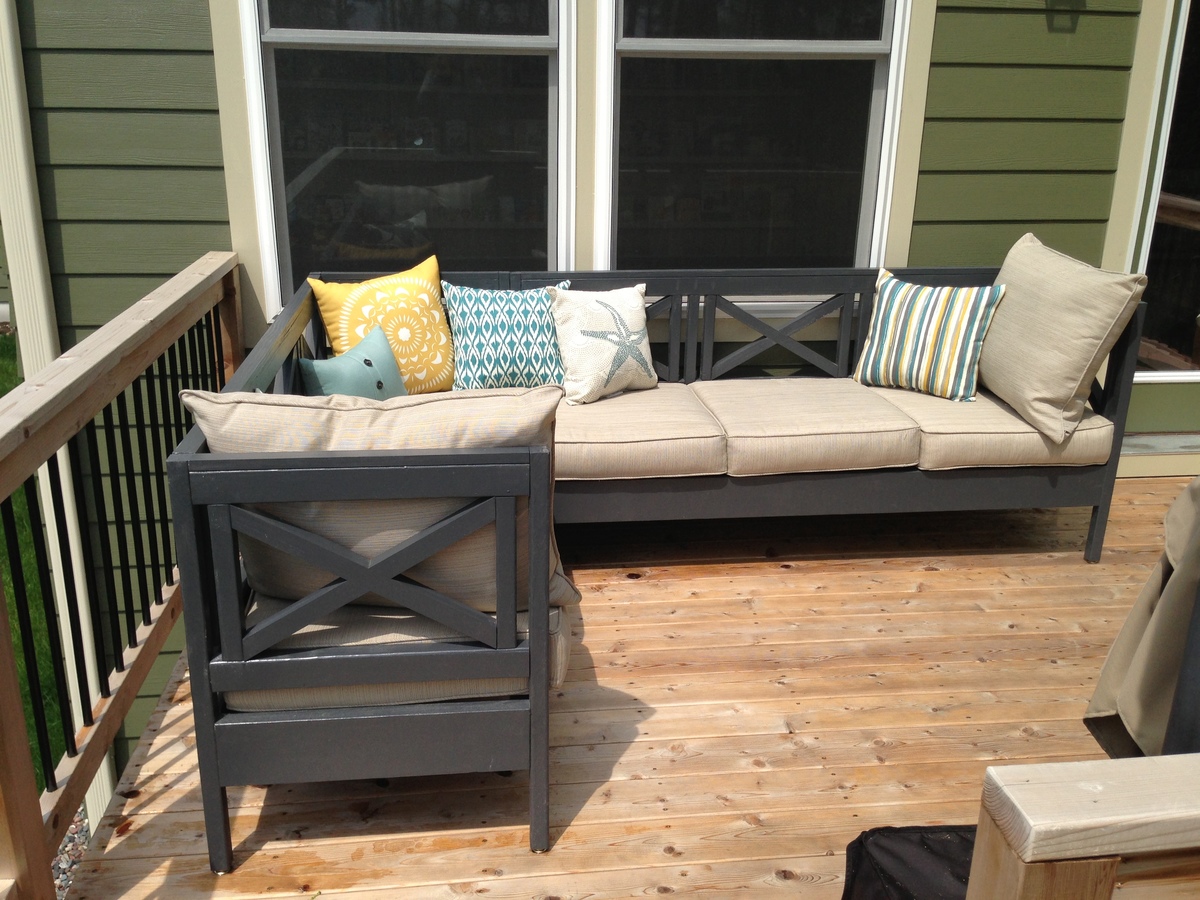
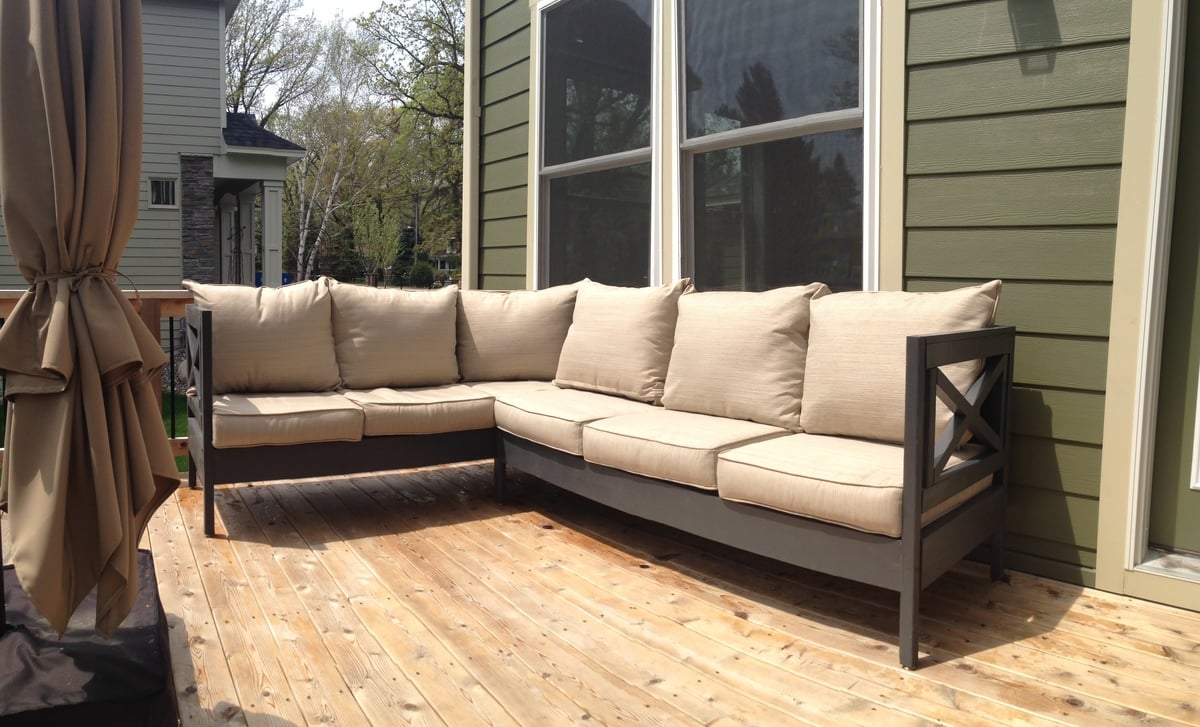
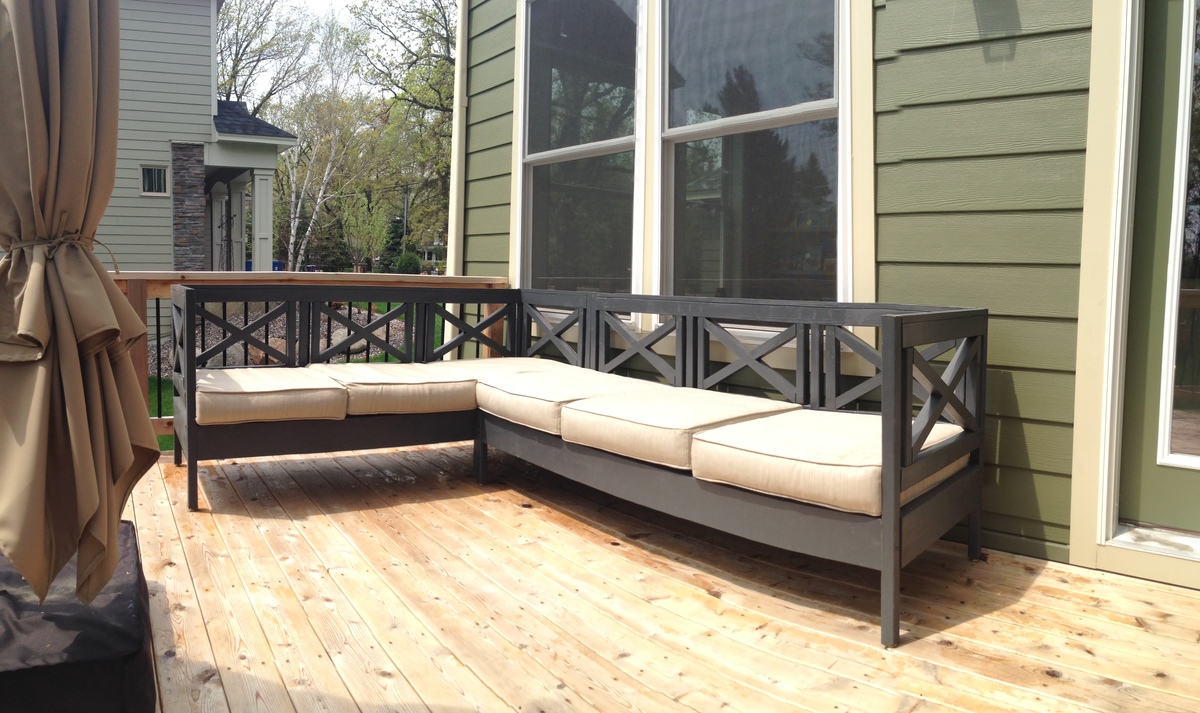
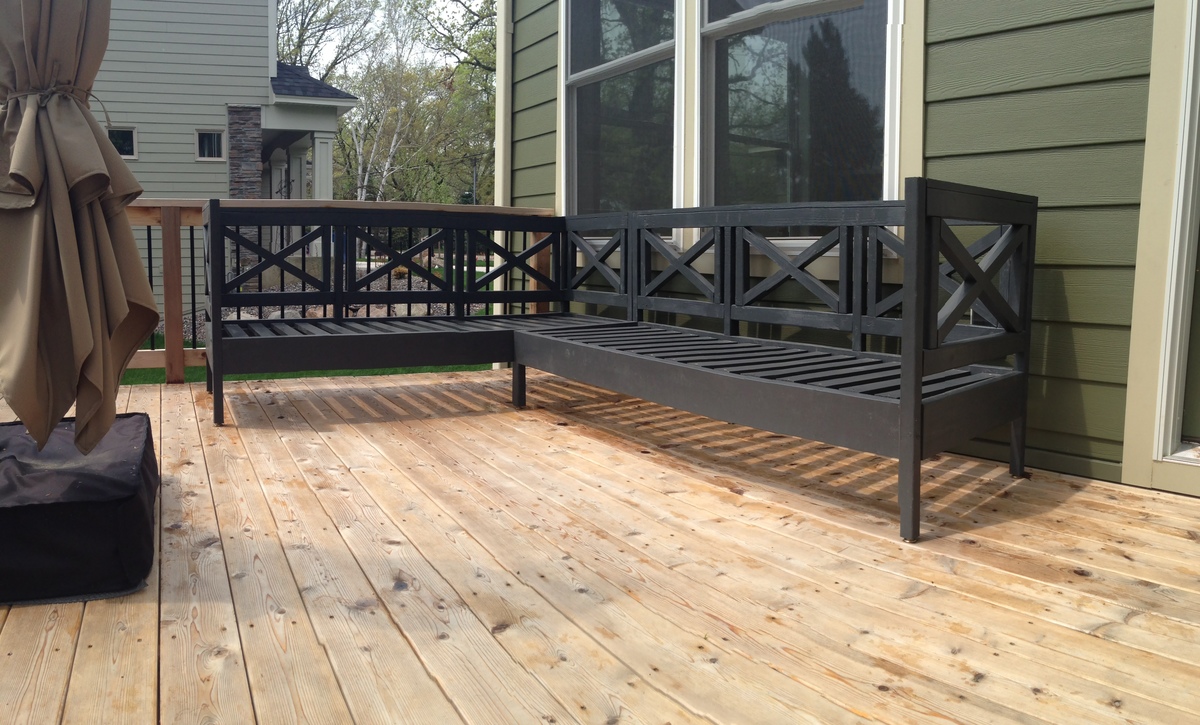
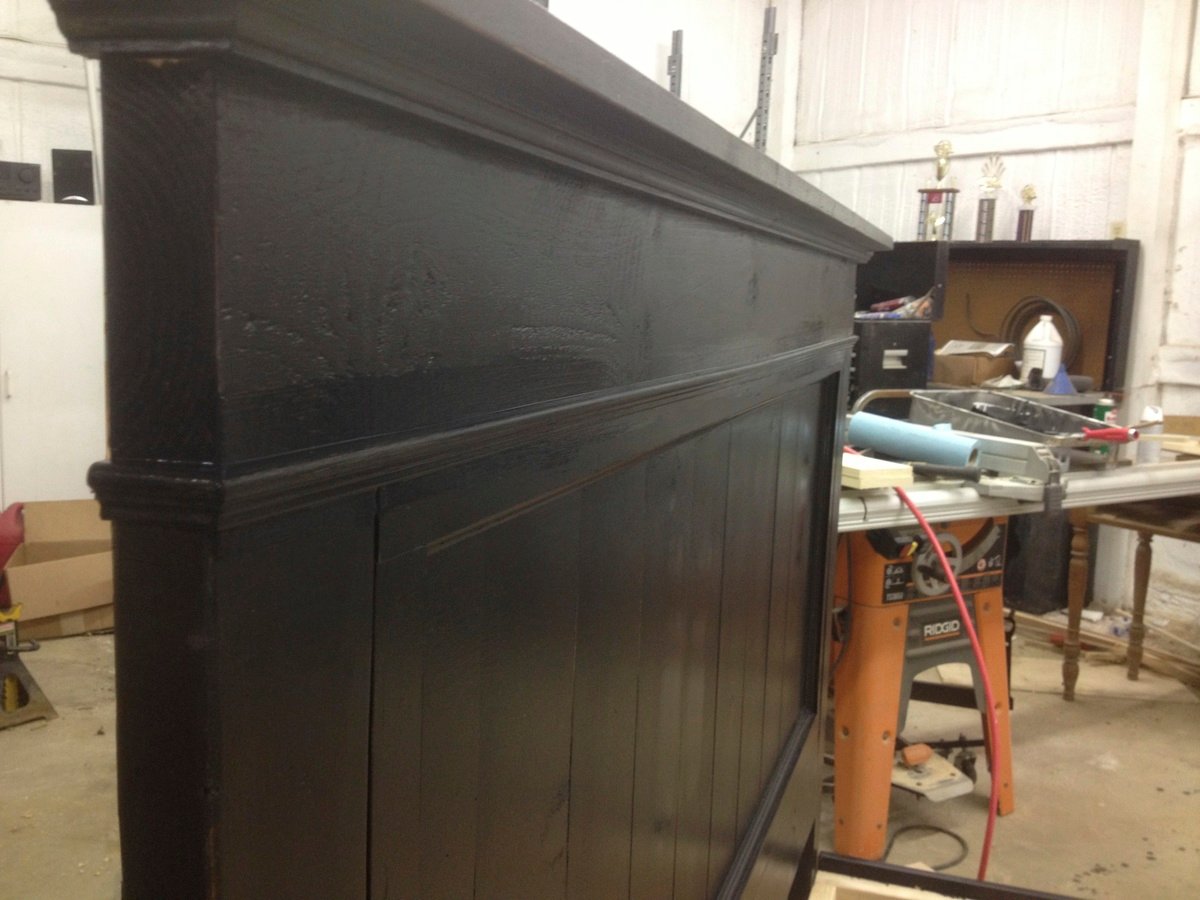
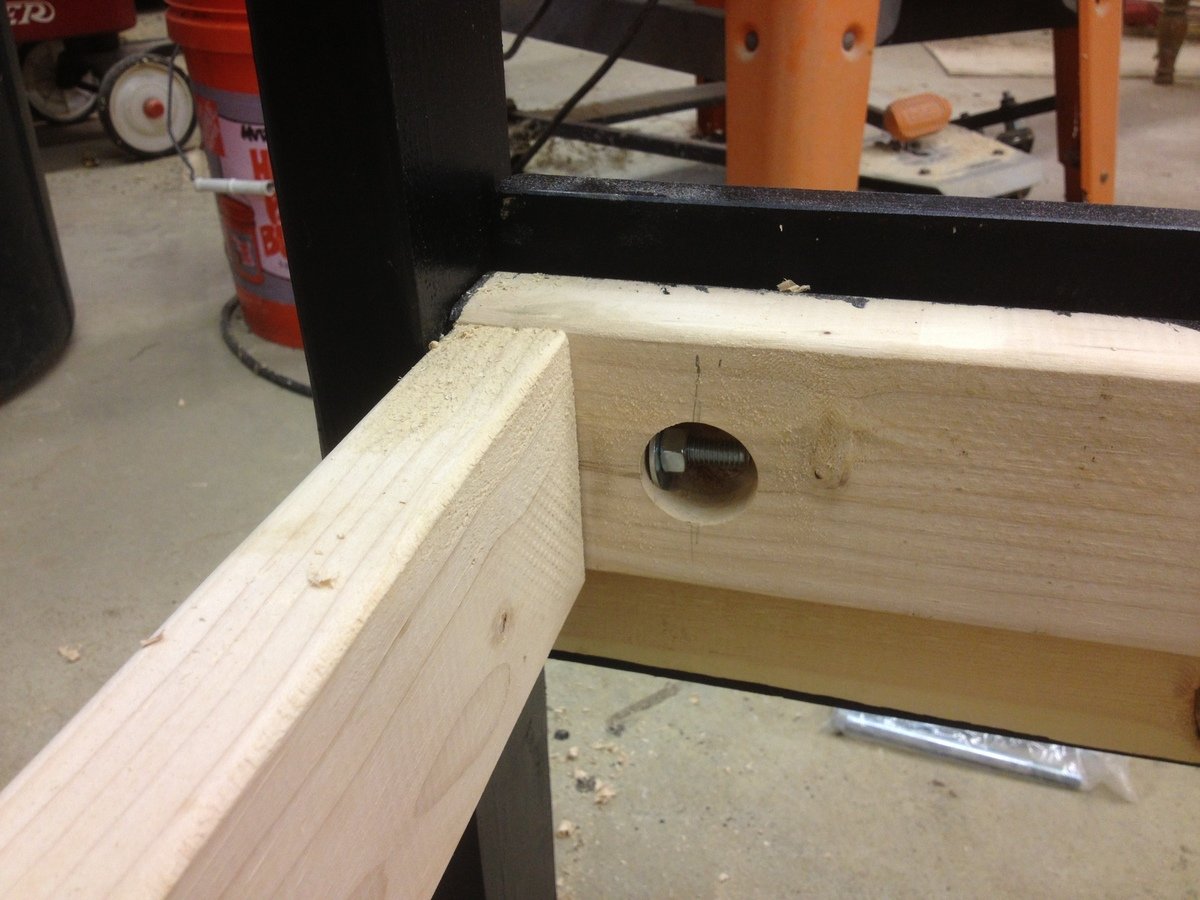
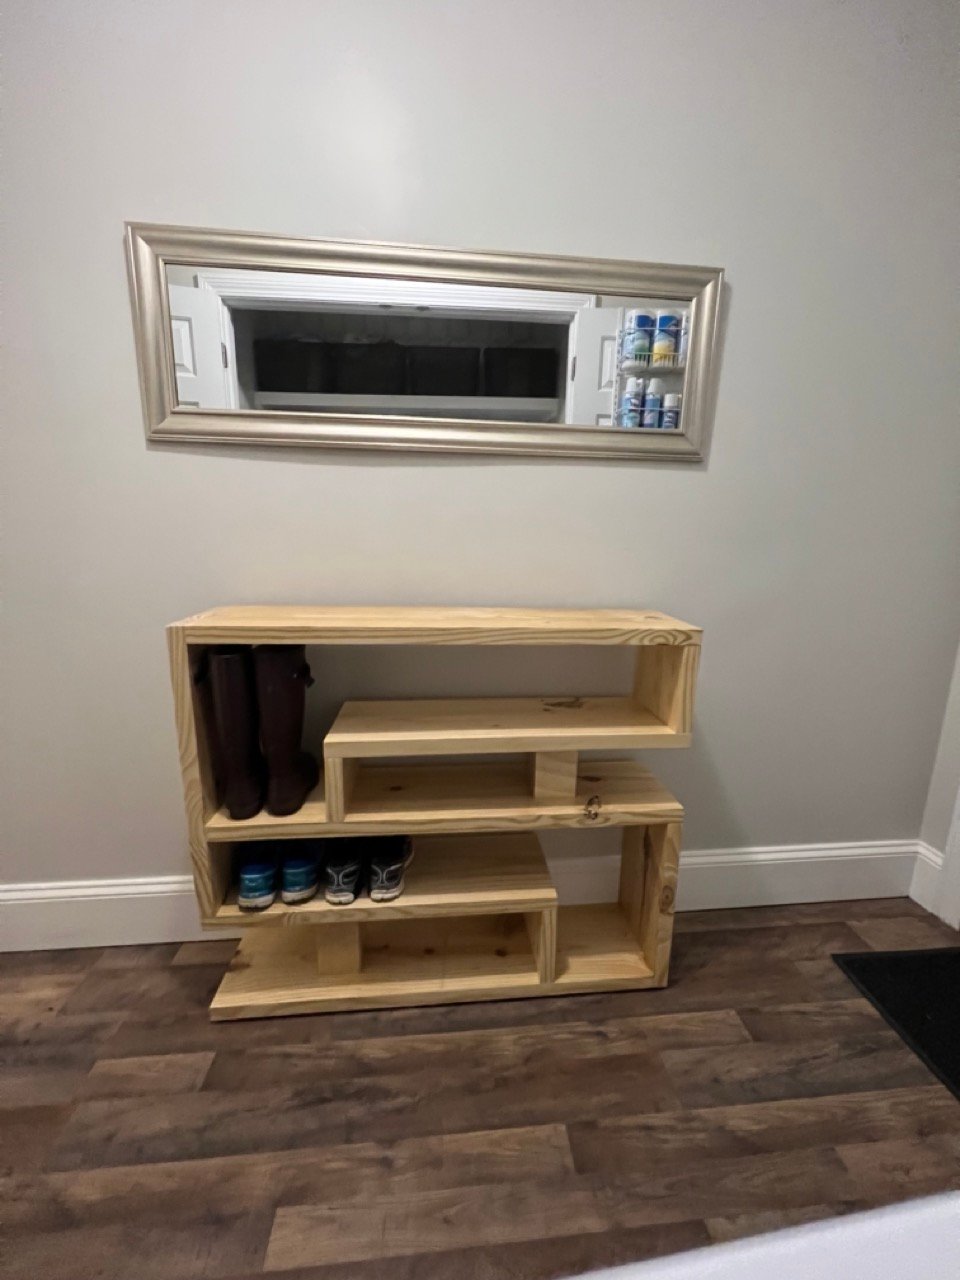
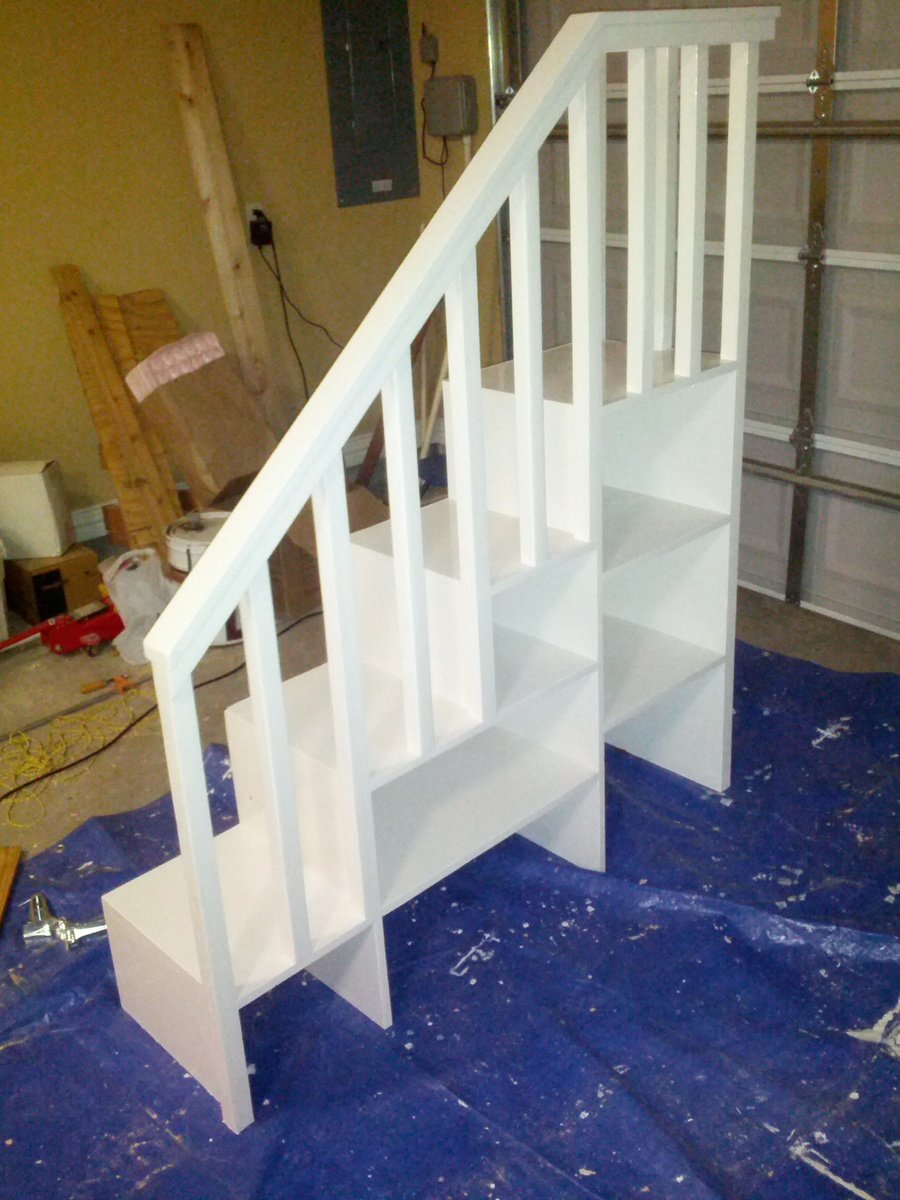
We made two Weatherly Sofas and referenced the Weatherly Loveseat instructions for making one side of one of the sectionals armless. We were able to return several pieces of wood from the original wood list, so save your receipts if you're building something similar. After we placed it on the deck, we used two 5/16" carriage bolts with disc washers and nuts through the aprons to connect the two pieces of the sectional. ***General Advice*** There are a LOT of repetitive cuts in this so make use of cutting jigs to speed up the cutting process. This will allow you to simply cut, slide the next piece into place, and cut again. On a project of this magnitude it will save you a couple of hours. Paint before assembling. You end up painting more sides than necessary, but it goes faster than painting after assembly and your finished product looks better, too. If you are using a soft wood, finish brads will work fine when constructing the x's (as opposed to the finish nails recommended in the plan). *** Price Breakdown *** Wood $162.95 Screws, Hardware, Feet $27.77 Paint $38.58 Wood filler $17.13 Seat cushions w/ matching back cushions purchased from Lowe's (allen + roth 46.5-in L x 25-in W Natural Chair Cushion) $360.31 Pillows purchased from Target and West Elm $119.24 *** Duration of Each Step *** Purchasing wood: 90 min Straight cuts: 90 min 30* cuts: 70 min Assembling Xs: 60 min Sanding: 3.5 hrs Painting: 6.5 hrs More Assembly: 3 hrs Wood Filler: 60 min Final Assembly: 6 hrs Touch-Up: 15 min

Estimated Cost
250
Estimated Time Investment
Week Long Project (20 Hours or More)
Finish Used
Premium Plus Ultra Exterior Semi-Gloss Enamel in "Evening Hush" (a charcoal grey one shade darker than the grey in my accent pillows)
Recommended Skill Level
Intermediate

Comments

Arialvetica

Sat, 05/18/2013 - 18:57

My cushions are 25 inches wide and they are wedged in there REALLY tight. 24-inch cushions would fit much better.

In one of my pictures, you can see "back rest" pillows that use the same material as the seat cushions. If you want big cushy cushions like this, you will probably want to modify the plan so the seat is deeper. The cushions look great, but I've decided to leave them off for actual use.

I have been sitting out on the patio for HOURS reading a Pride & Prejudice spin-off and it is sooo cozy. Highly recommend this project if you want a comfortable luxurious sectional for your patio without spending big bucks at Pottery Barn!

Fireplace Mantle

Submitted by Anonymous (not verified) on Mon, 12/27/2021 - 08:30

A gift for my husband! Now I’m hoping he will get me the fireplace! Ha ha!

Built from Plan(s)

Comments

Cedar Garden Shed

We needed a way to get all of the lawn & garden stuff out of our garage and organized. I found Ana's plans for the Small Cedar Shed & adjusted them to fit our space. We used 2x4s as our studs & added front walls on the sides. Our shed measures 9.5'x30". We had a concrete slab poured for our foundation. We are experienced DIYer's but had never taken on a project of this scale from scratch. This project was much easier than I was anticipating, and we were able to complete it in one weekend! Similar shed kits were way more expensive and not the size that we were looking for. Thank you so much for the inspiration!

Built from Plan(s)

Comments

Seasonal And Holiday

Fancy Farm House Bed

Submitted by jlouki01 on Sat, 08/24/2013 - 18:27

My son has been wanting a bed for a while now, We threw out his falsa-wood bed and I decided I liked this plan. I think I got the entire bed built in a few hours. There were a few details that would snag a rookie wood worker but just be creative in finding solutions. This bed is designed to be rustic.

I uploaded a very cheap assembly system that I used. I think total cost was less than 5.00 for two bolts and a couple washers.

Built from Plan(s)
Estimated Cost
150
Estimated Time Investment
Day Project (6-9 Hours)
Finish Used
Rust Oleum Black with burnished edges. Treated edges with Walnut stain.
Recommended Skill Level
Intermediate

Quilt Rack

Submitted by mtairymd on Sun, 01/17/2016 - 11:04

Build Instructions: http://www.instructables.com/id/Quilt-Rack/

This is a nice little project that can be made in an afternoon. The simple design allows for easy construction with only a few basic tools. All joints are interference fit with glue added for extra strength.

Estimated Cost
$20
Estimated Time Investment
Afternoon Project (3-6 Hours)
Finish Used
Optional
Recommended Skill Level
Starter Project

DIY Laptop Desk with Storage

How to build a simple laptop desk to use when working from the couch. This was a quick build from a woodworking plan found on the Ana White website. We added a small storage area for my blogging binder. 

Estimated Time Investment
Afternoon Project (3-6 Hours)
Finish Used
Distressing with pink paint and wood stain, poly on top.
Recommended Skill Level
Beginner

Entryway Table Shoe Rack Bench

Submitted by robinles on Tue, 05/16/2023 - 10:17

I adapted the plan for the Shoe Rack Bench to give it multiple levels and allow it to serve as an entryway table in addition to a shoe rack. I used 2 x 10's for the project.

Built from Plan(s)

Comments

Classic Bunk Bed with Sweet Pea Stairs

Submitted by e_hutch on Fri, 01/17/2014 - 19:03

I wanted a bunk bed for our daughters, it needed to be easily moveable like the "classic bunk beds." I also wanted stairs like the "Sweet Pea Garden" bunk bed because we have toddlers in the house. I modified the classic bunk bed to put the ladder on the end, then built the Sweet Pea stairs to fit to the opening (I think the only difference in dimensions was a 20" top stair. I didn't want the unfinished ends of plywood so I got 4'x16"x3/4" pine boards from lowes which happens to be the width of the stairs in the plan. Instead of using the 1x2's as trim on the ends of the shelves I put two of them together, one all of the way down the front of each stair and one resting on the top of the stair (screwed together) so I wouldn't lose lateral stability. I then spaced 2x2's in between to keep it "simple" looking instead of the heart shaped decorations from the sweet pea bed. I used some 1/4" paintable composite board to provide a backing to the stairs. I bolted the stairs on to the bed with some flat bar stock cut to size and 3/8' in hex bolts cut to length. I used pocket hole joints wherever possible and countersunk all other screws and used 3/8" dots from lowes to fill the holes. I painted it with a coat of primer and a coat of Glidden Trim and Door paint in antique white from the Easy Vintage Step Stool project.

Estimated Cost
$400
Estimated Time Investment
Week Long Project (20 Hours or More)
Finish Used
Glidden Door and Trim, Antique White
Kilz Complete Primer
Recommended Skill Level
Beginner

Comments

zaphod

Mon, 06/23/2014 - 06:39

This is absolutely beautiful! Did you modify the size for toddler mattresses?
I would love to do the same for my kiddos - is there any way you could send me your version of the plans? [email protected]

Thanks so much!

Back