Okay in all fairness to a woodworking site, I did not actually MAKE this shelf. However, I saw the plan for how to decoupage my scraps and thought hey I did something like this a few months back. I think I will take a picture and share what you can do with decoupage and some scraps.... did that make sense? Anyway, this is to give you an idea of something you can do!
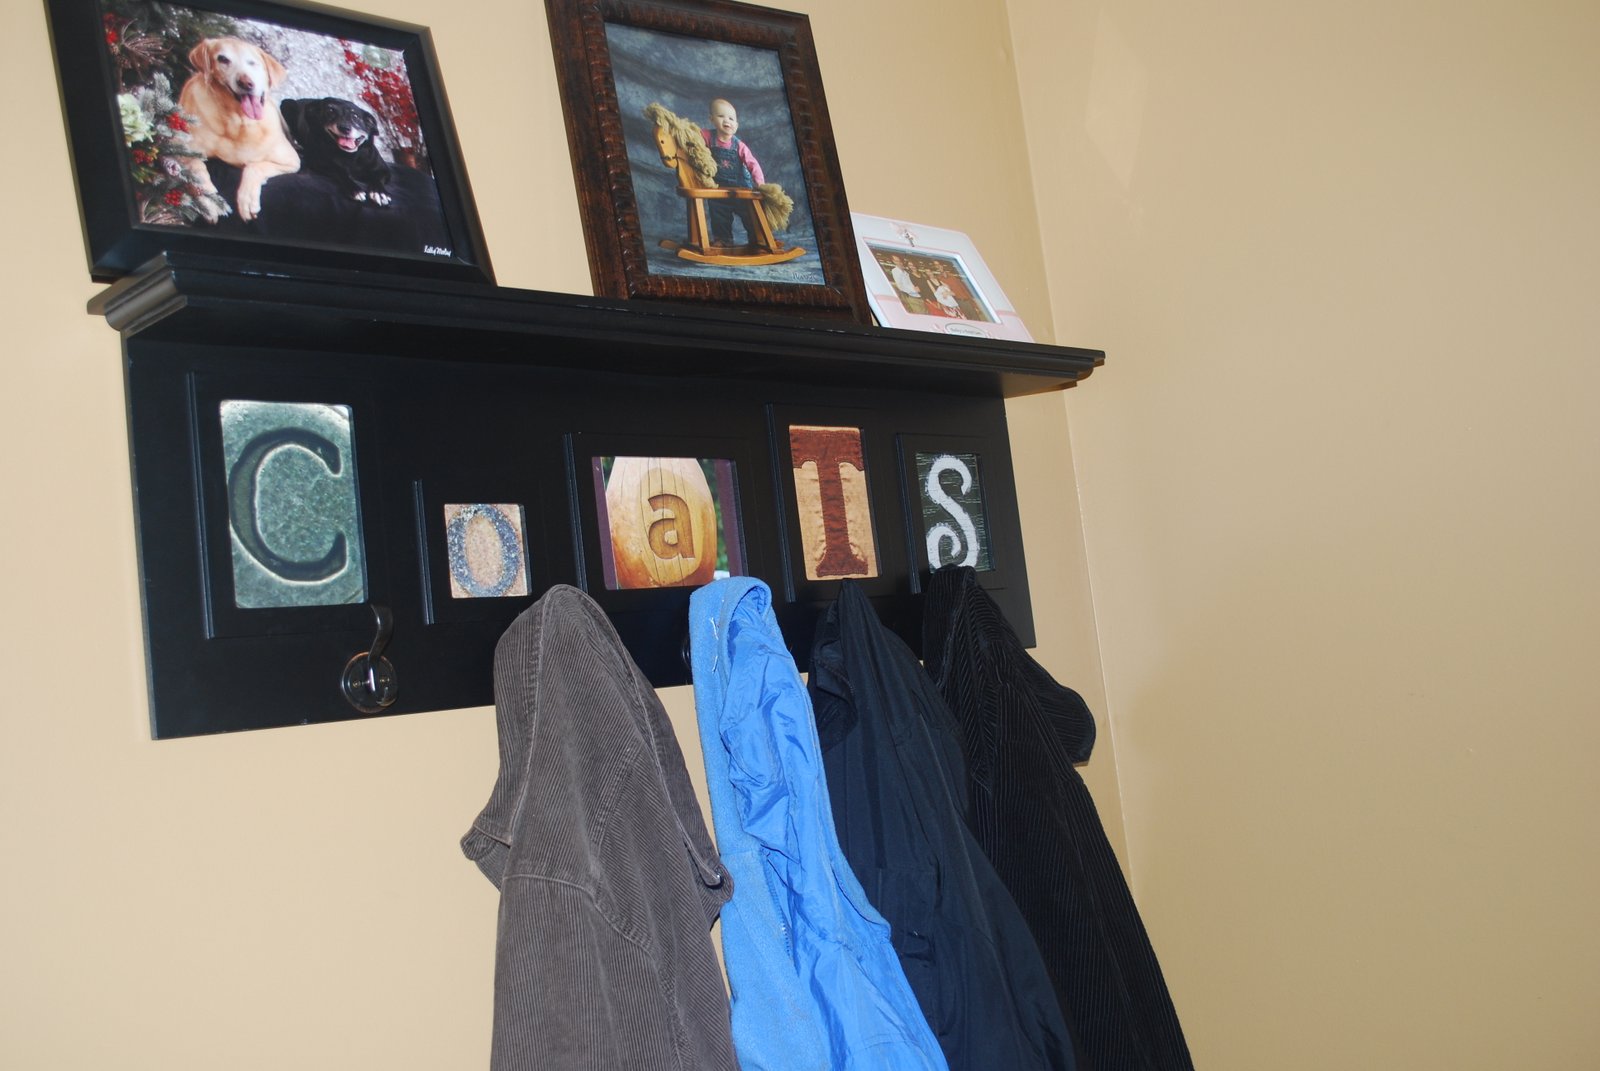
So - found this shelf on the damaged section at Hobby Lobby for less than $20 in fact I think it was about $16 or so. It was missing 2 of the glass sections, one of the backs to the picture, and one hook. It also had some small places where the paint was chipped off. So I bought it with a great place to put it but no definitive plan on how to fix it.
Here's my rehab - filled in scratched spots with a black sharpie, it looks pretty good. Instead of trying to find glass/backs, I found some copyright free letters and had prints made of them (there is a whole folder out there on flickr of copyright free letter photos for personal use). Of course, I had to agonize over which ones to use and which had the correct orientation - I ended up with a metal stamped C, a concrete O, a wood carved a, a stitiched T, and a painted s. Then I took thin scrap board, cut them to size, and decoupaged the letters on to each board. For my final decoupage coatings, I used a small brush one way and then the other to give the product a canvas like texture. When that was dry, I sprayed it with a matte clear coat (if you don't do this over mod podge it has a sticky feel to it and dust/dog hair etc will stick to it). I put these little plaques in the holes of my shelf with tape. No glass needed when the decoupage is sealed like this.
Unfortunately, I could not find hooks to match the missing ones so I just bought new ones and will save the other 4 for some other project.
Hung it up and hung coats on it!