Community Brag Posts

Mid-Century Inspired Bed

Submitted by RunRVA08 on Sun, 03/01/2015 - 07:04

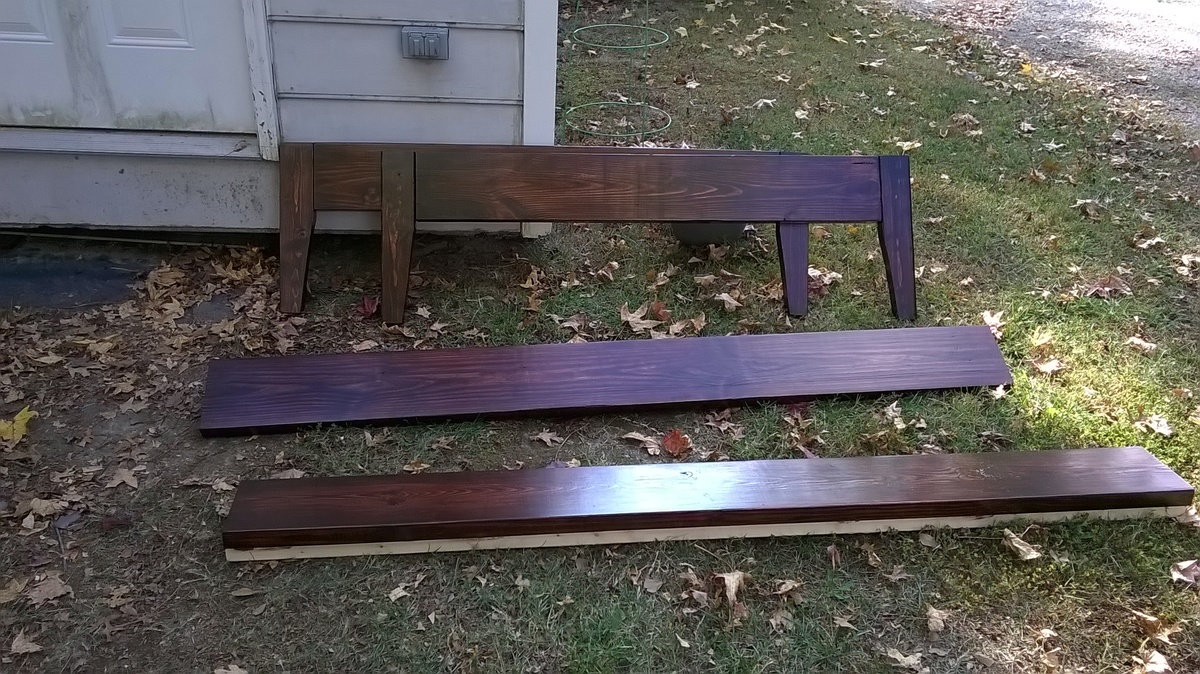
This was my first build. I modified the dimensions to fit a full sized bed and used 1x4's as the slats. Overall I am very happy with the outcome and learned a lot from the build. Of note these plans do not accommodate a box spring. This bed fits perfectly in my very small guest room and is very sturdy (and heavy!). I did not glue the corners for easier disasembly when I move.


This project took me a long time as I am a new builder. I would expect a more experienced builder could make the bed in a day.

Estimated Cost
$80-$90 including supplies. Wood was around $50.
Estimated Time Investment
Day Project (6-9 Hours)
Finish Used
Minwax Red Mahogany with Minwax Polyurethane
Recommended Skill Level
Starter Project

Comments

alexruzhyo

Fri, 09/16/2016 - 14:01

hey there! I'm interested in building this in a full size. I've never built anything before; would you be able to describe the modifications you used to make this fit a full?

2x4's Deak

Submitted by Anonymous (not verified) on Sun, 05/28/2017 - 19:36

I did an epoxy coating which took a few coats as I learned the hard way how to use it but I love the look!!  Did a custom gray and brown stain mix after sanding, weathering and conditioning the boards.  

Built from Plan(s)
Estimated Cost
$100
Estimated Time Investment
Week Long Project (20 Hours or More)
Finish Used
Epoxy topcoat and Rustoleum glossy white spray paint with primer for the bottom. Classic Gray & Kona stains mixed. Beat the top boards with nails, hammer, poked at it etc to make it look old. Sanded twice and conditioned. Painted the top with a cheap white paint then sanded lightly and stained.
Recommended Skill Level
Beginner

Comments

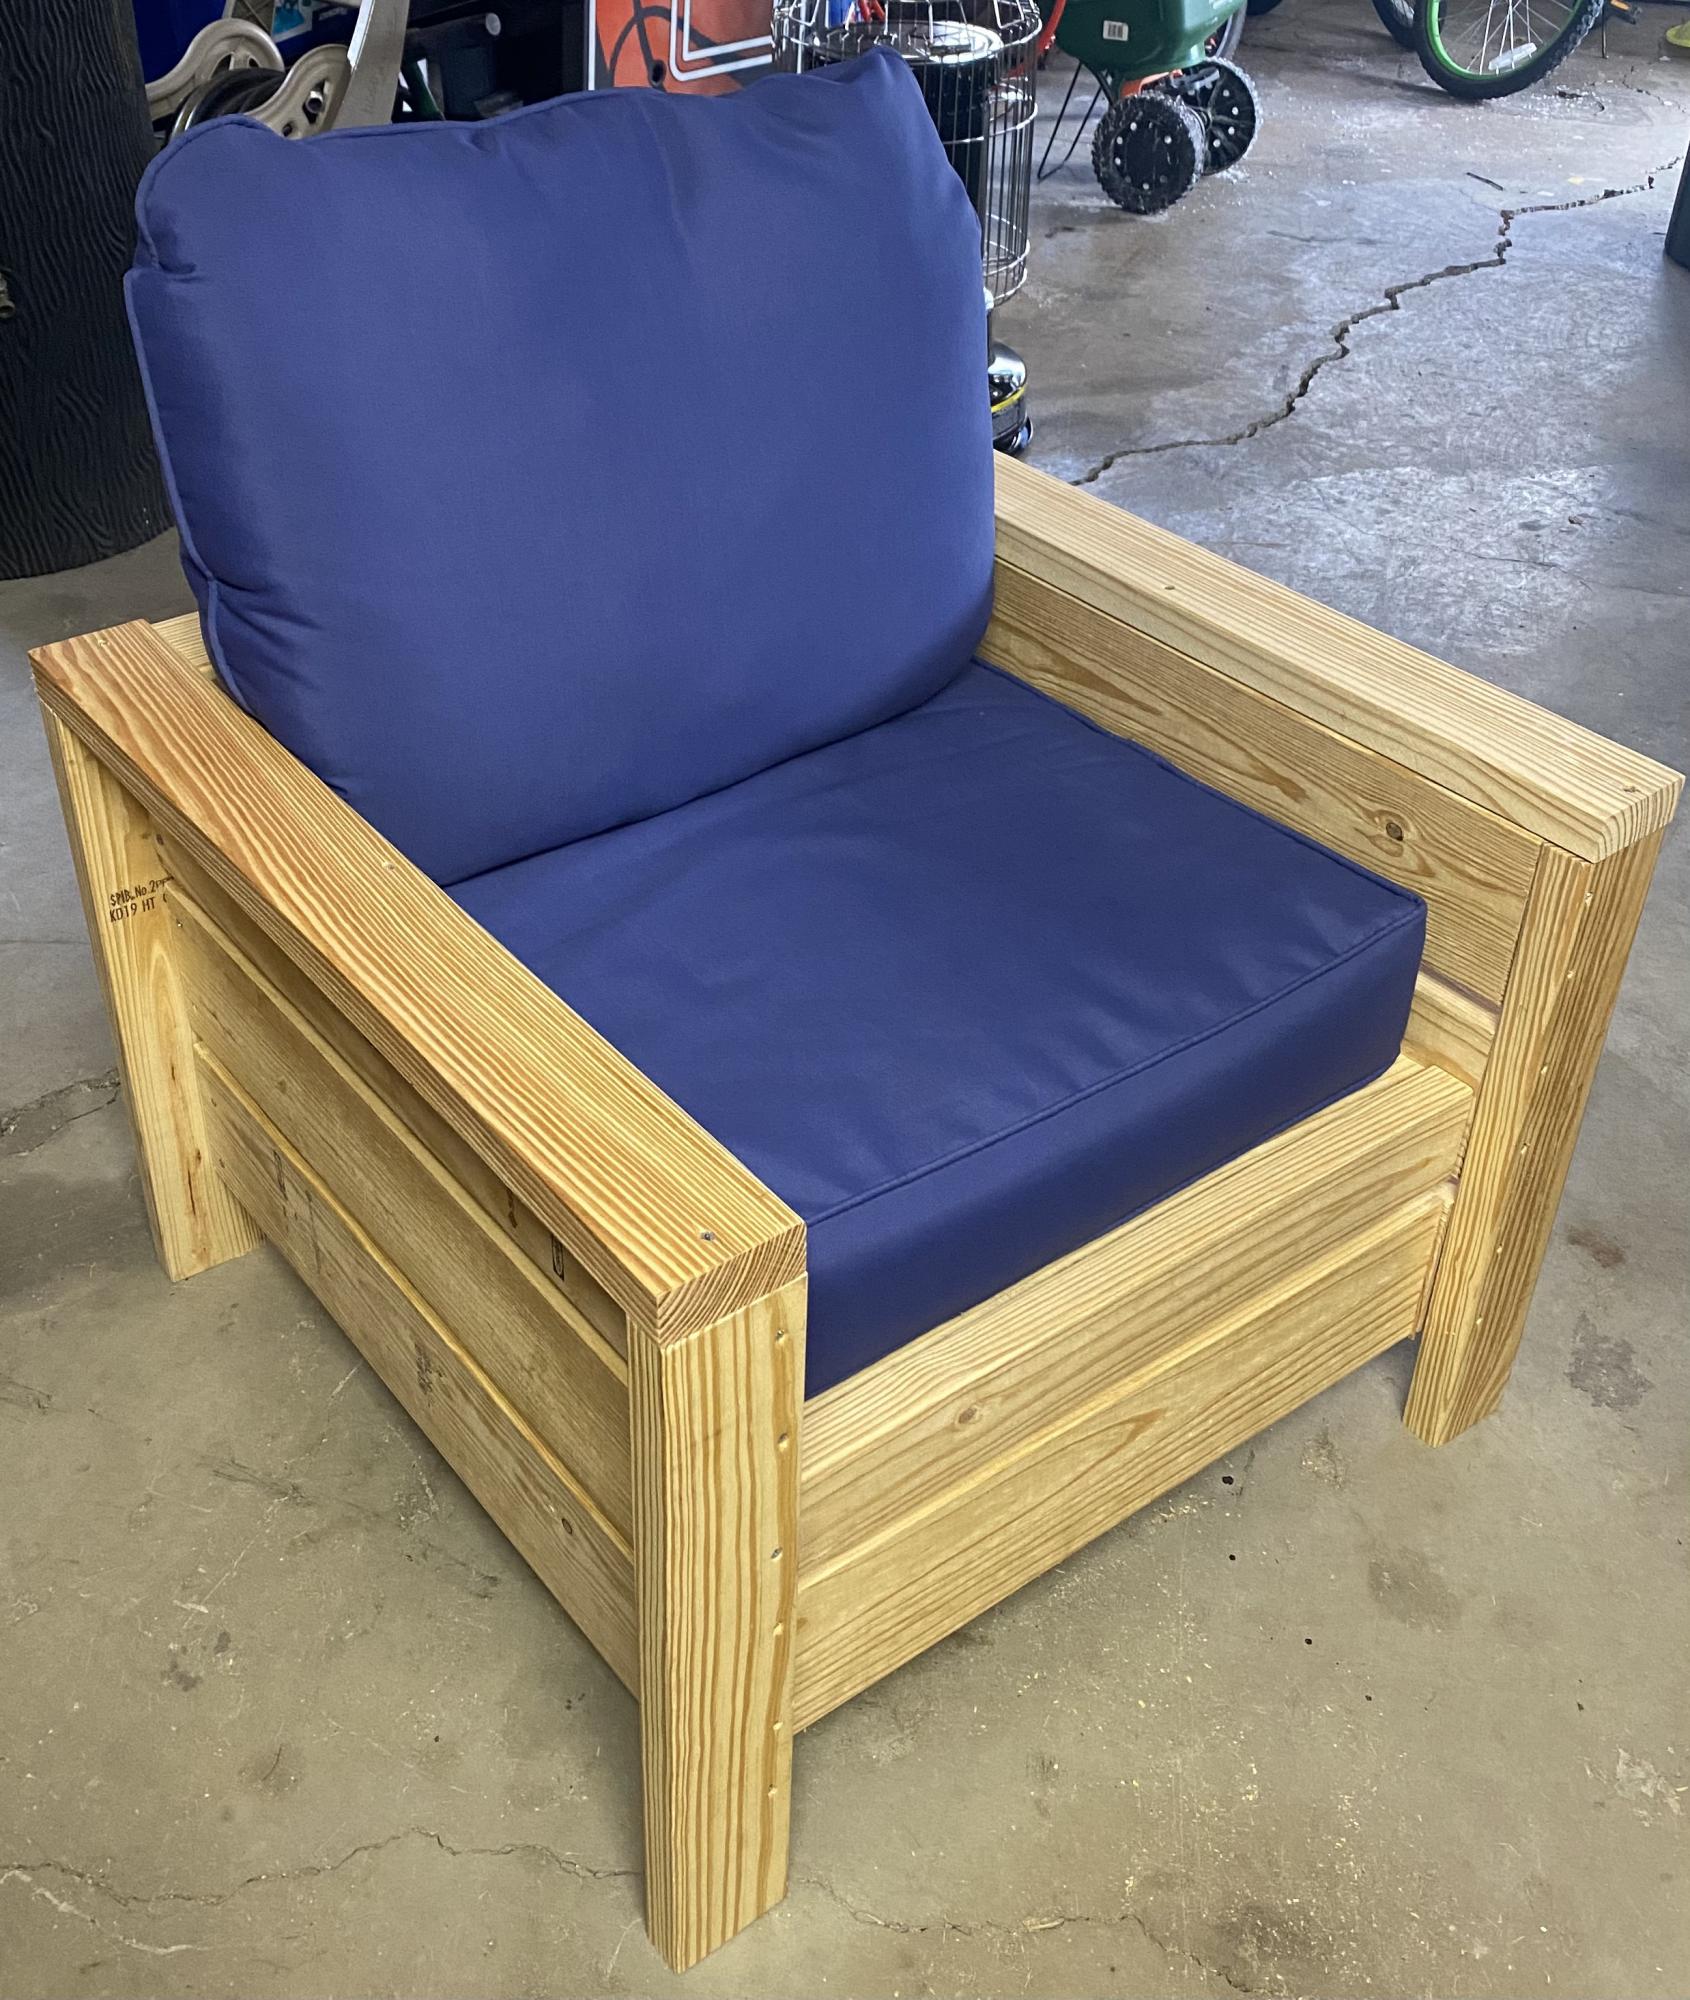
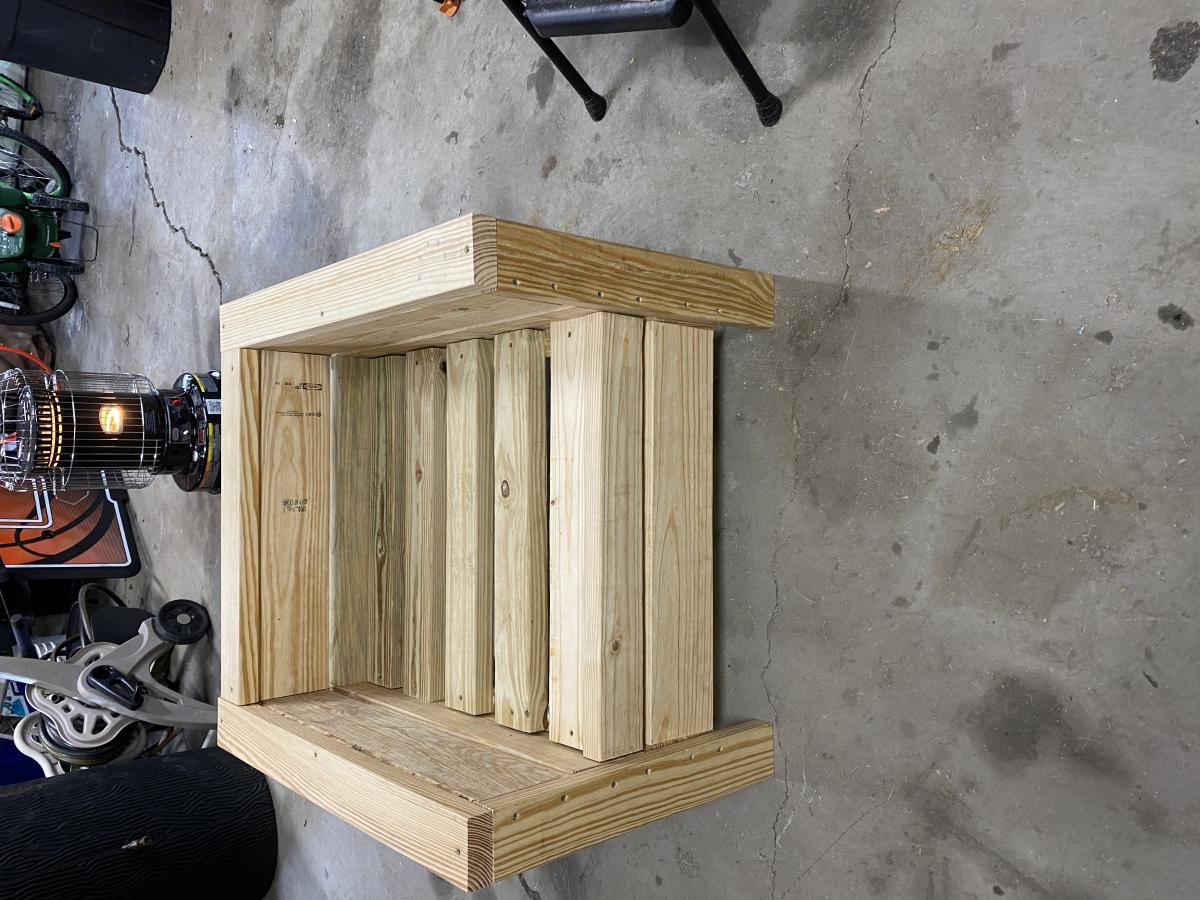
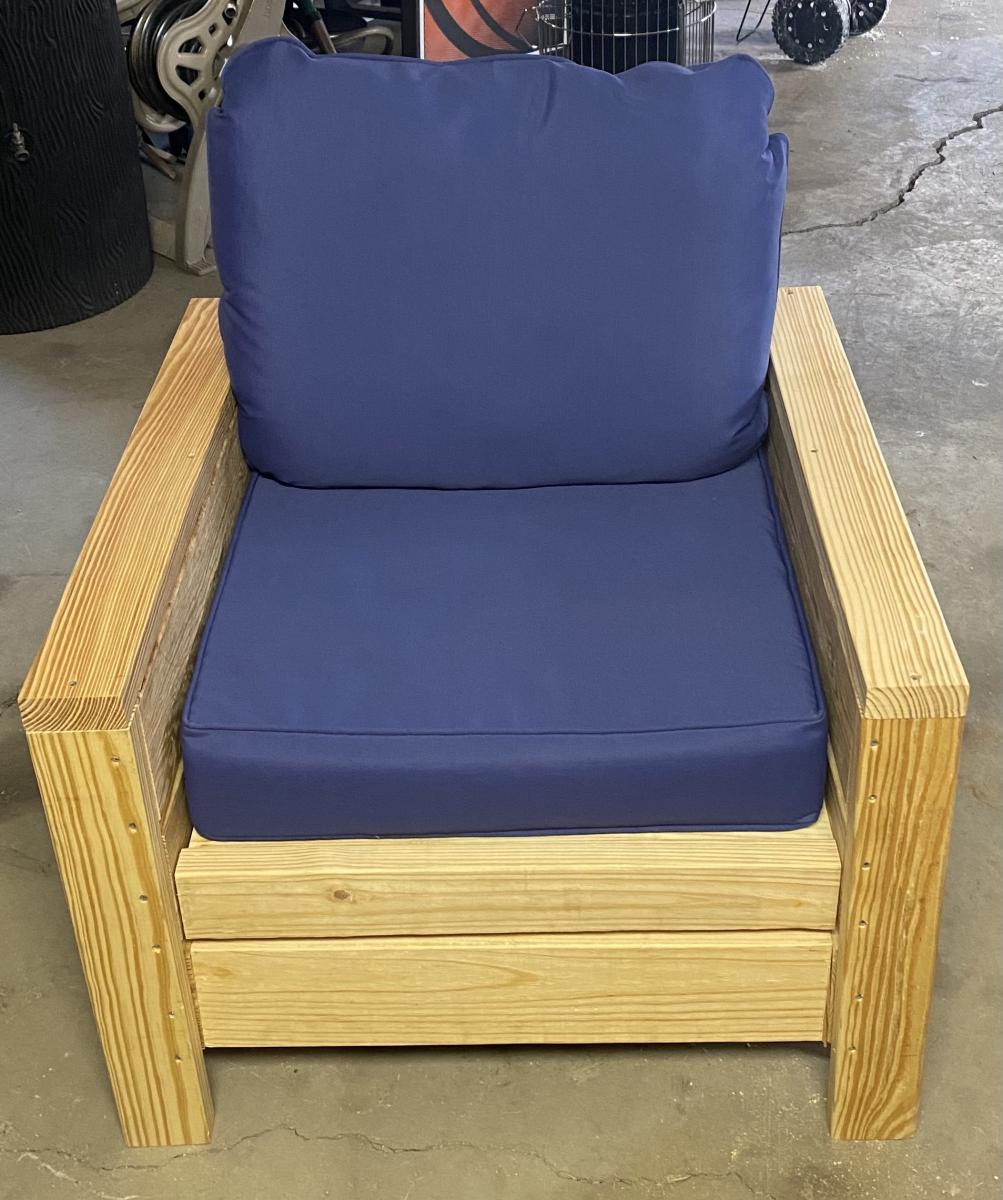
First build - started with a simple chair

Submitted by bsohl214 on Fri, 06/18/2021 - 05:19

Decided to start doing woodworking as a pandemic hobby. Given what happened with wood prices, I could have picked a. better time to start making sawdust. Quite happy with the outcome.

Estimated Time Investment
Weekend Project (10-20 Hours)
Recommended Skill Level
Beginner

Comments

Storage Bed Turned Dresser

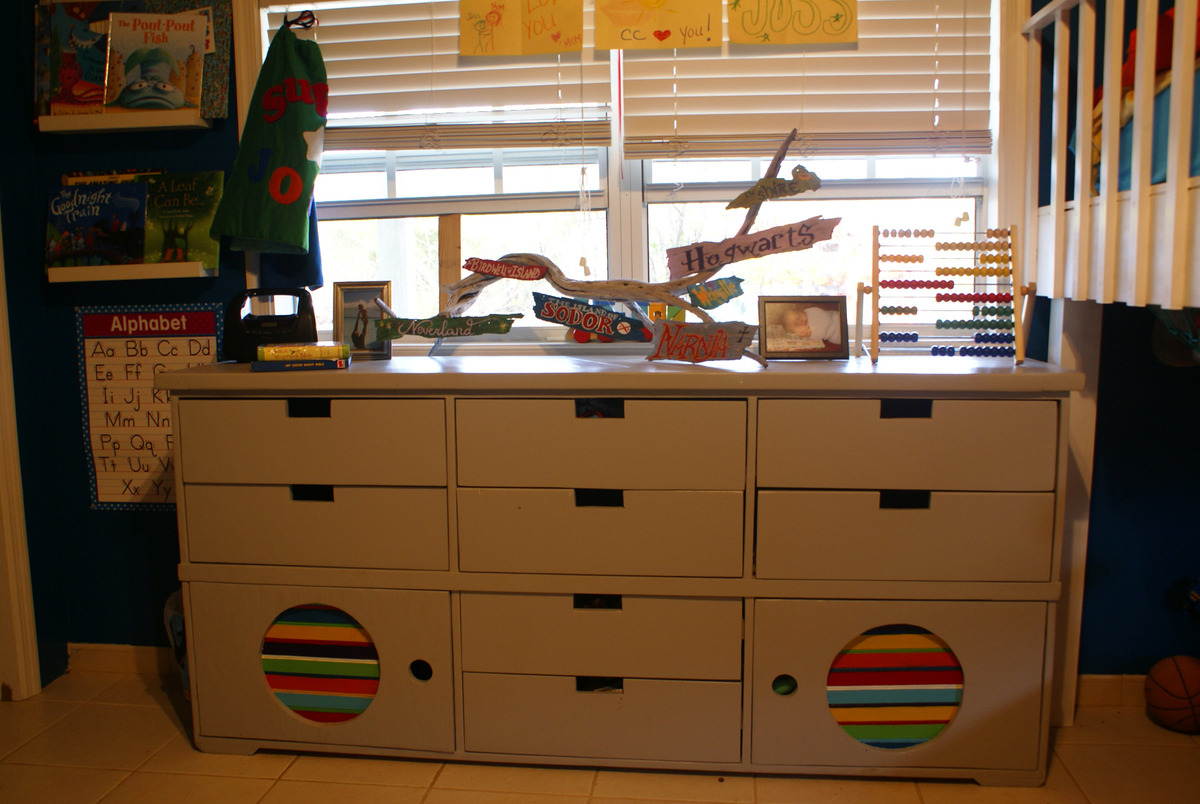
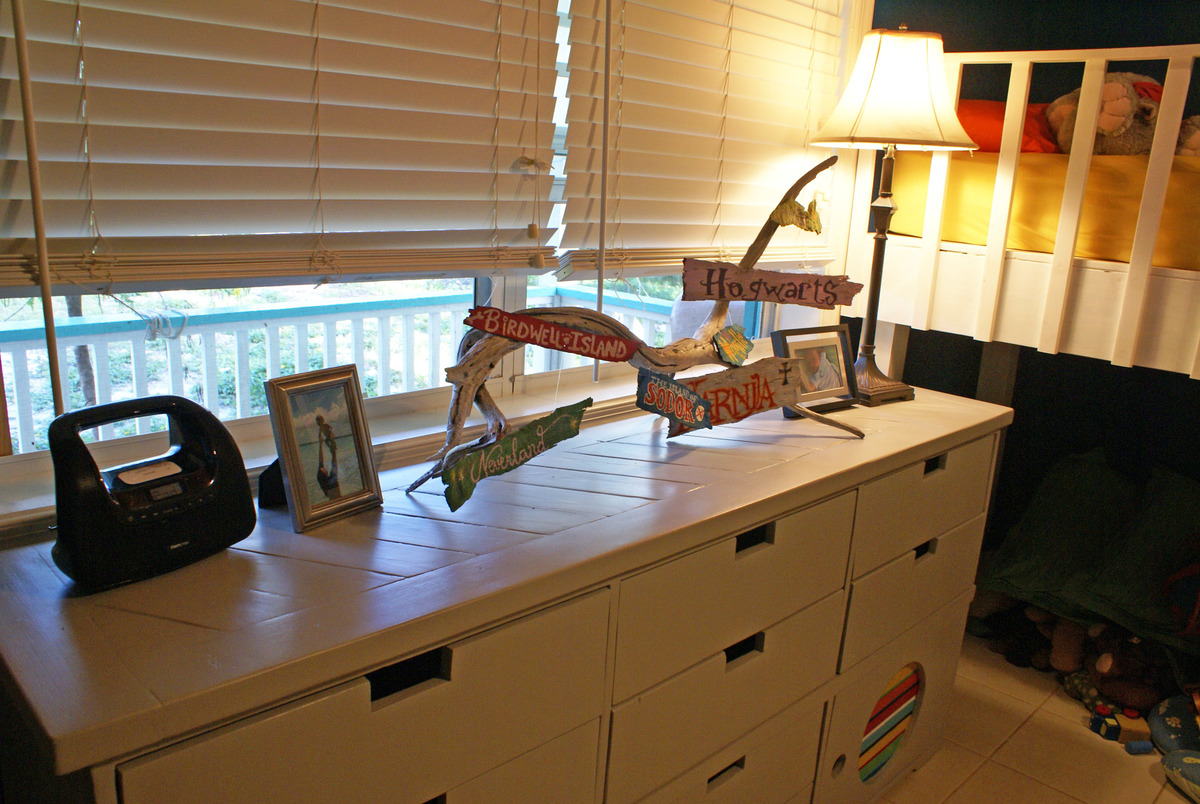
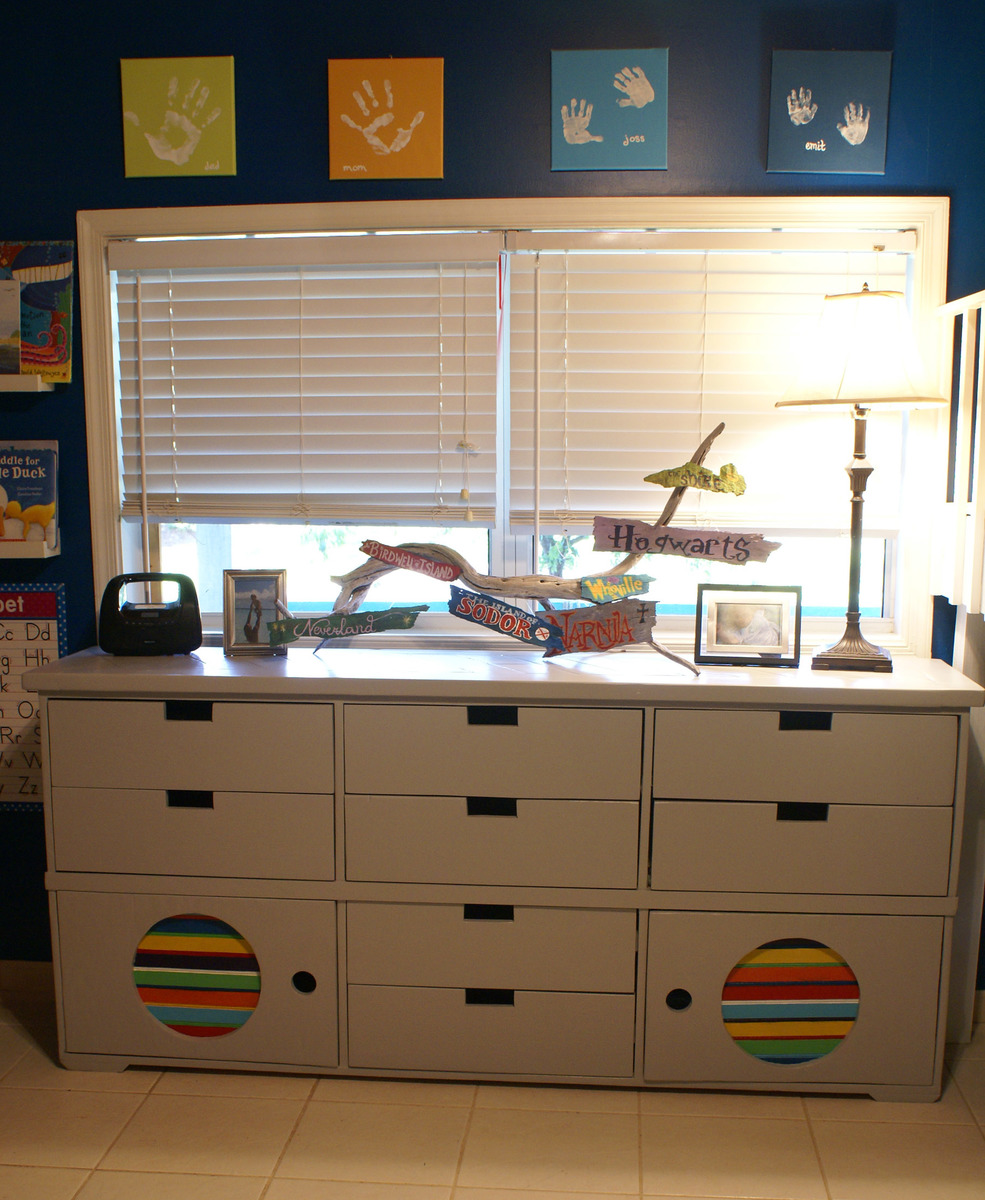
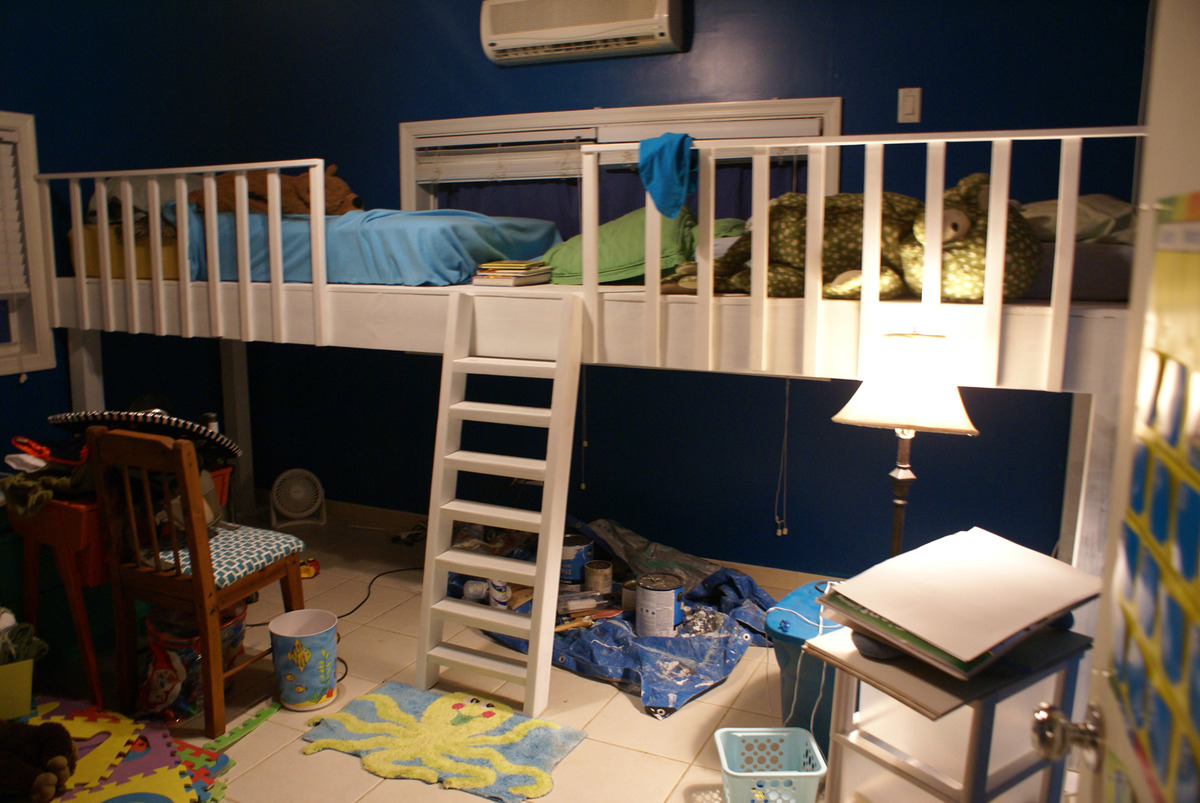
This project wasn't really a 'planned one', but just turned into something I could do fairly easily with the stuff I had on hand and some of the leg work I had already done. I did the original green bed in the Fillman Storage Bed with Drawers post. I had originally planned to do one of those beds for each of my boys in the room they share so we would have plenty of storage. We also homeschool and were in need of more room space, so we went a different route (you can see the messy picture that shows our new bed (double loft bed). WE LOVE the loft bed, but we also really love this dresser. The size is perfect and fits our needs. Thanks for checking it out. I have more specific photos showing what I did on the blog link I have on here.

Happy Building!!

Estimated Cost
$30 for paint supplies (used up scraps and pieces already built)
Estimated Time Investment
Weekend Project (10-20 Hours)
Finish Used
light gray latex paint with a polycrylic finish on top
Recommended Skill Level
Intermediate

Lewie's Loft

Submitted by Rondud on Mon, 03/02/2015 - 18:18

This loft was built with the ladder on the left end with a bookcase at either end and a desk with bookcase under the loft.

Estimated Cost
$250
Estimated Time Investment
Week Long Project (20 Hours or More)
Finish Used
Poly
Recommended Skill Level
Intermediate

Comments

Outdoor 2x4 sectional sofa

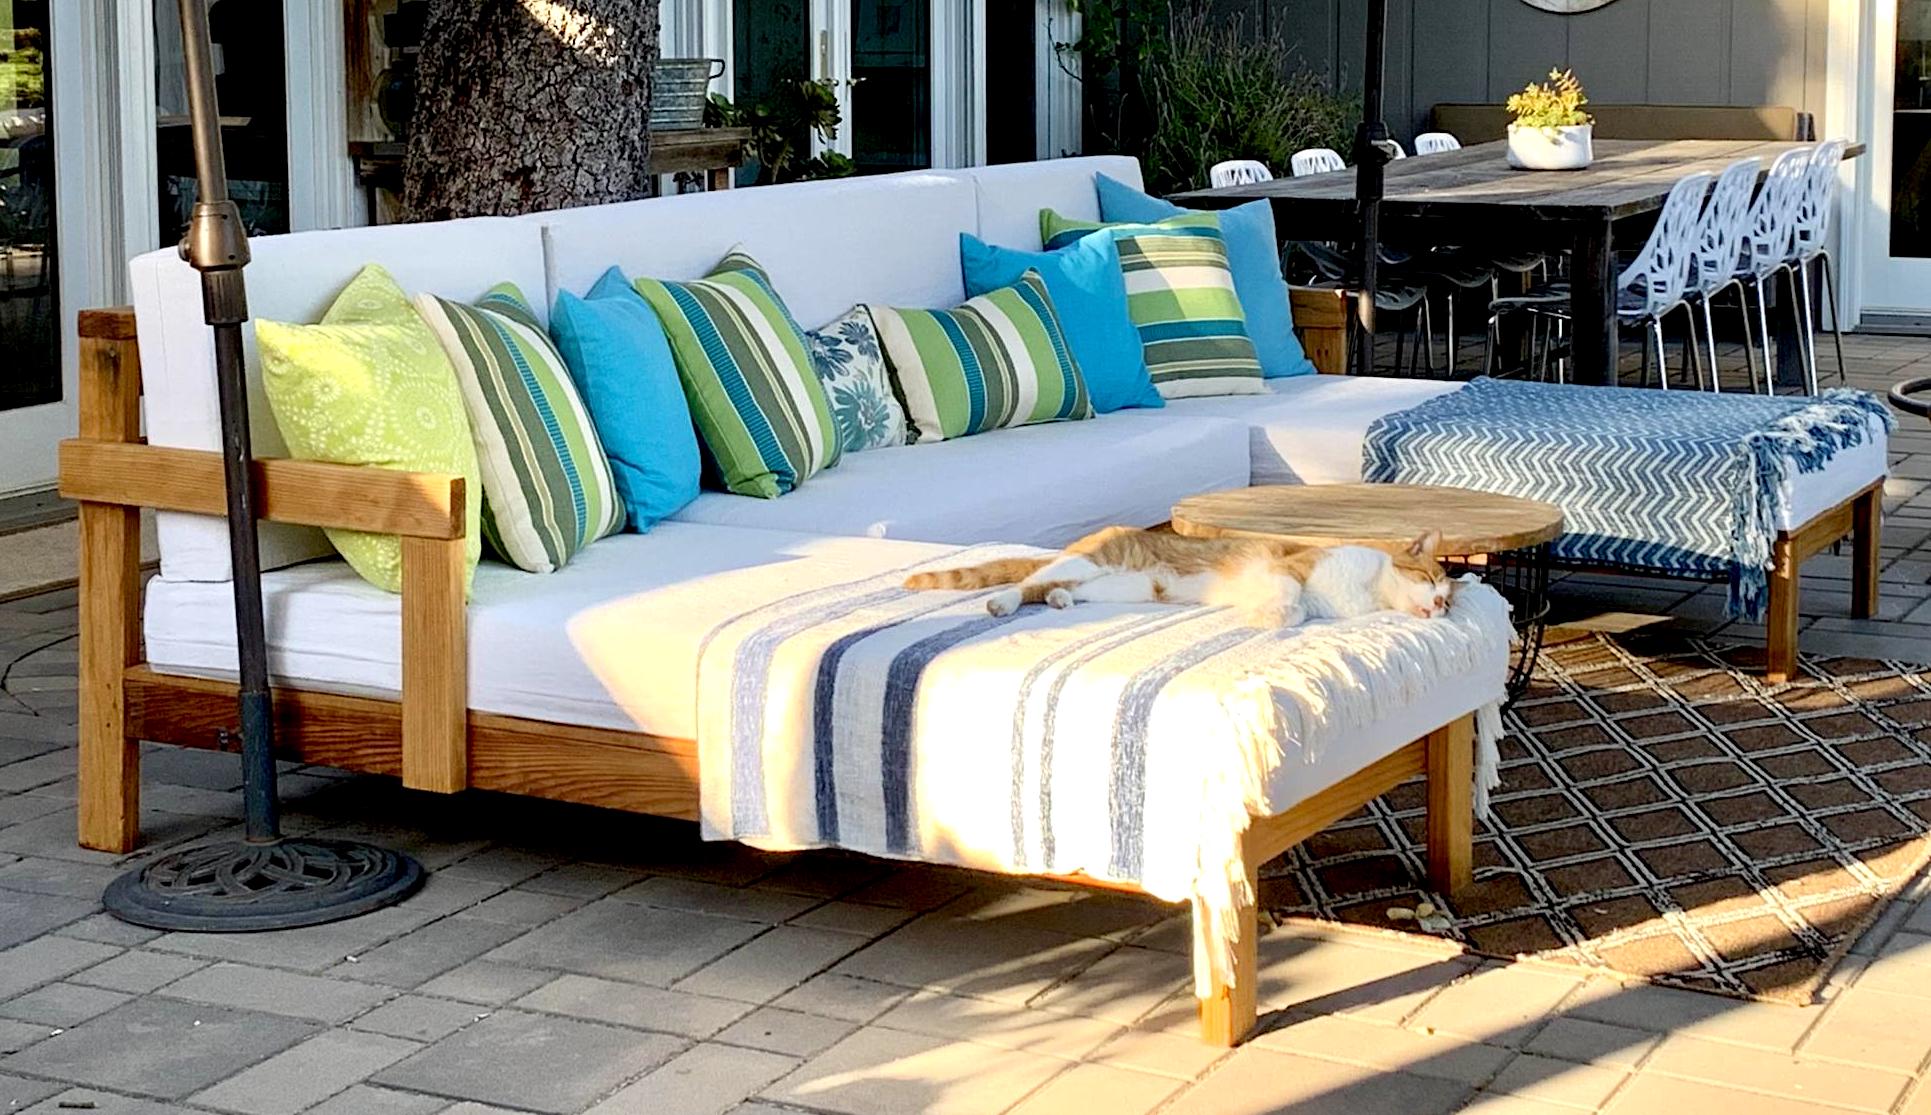
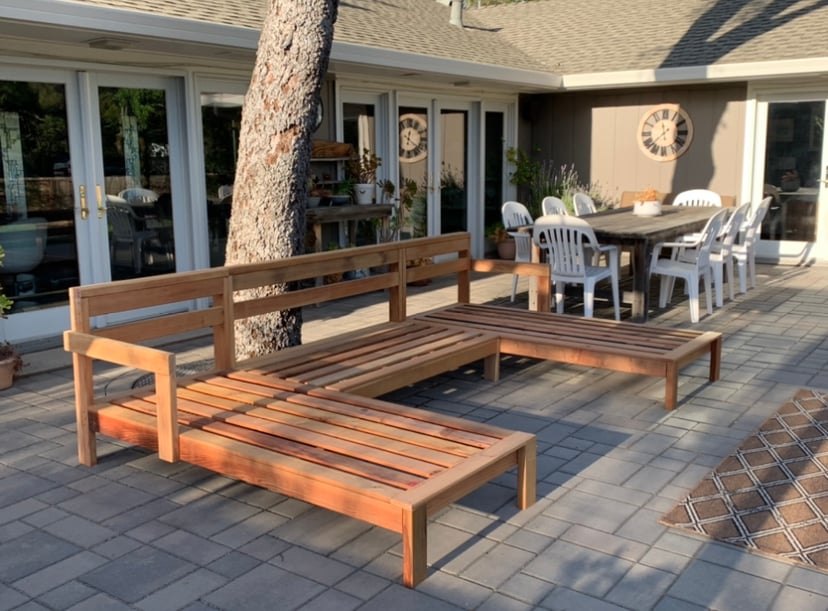
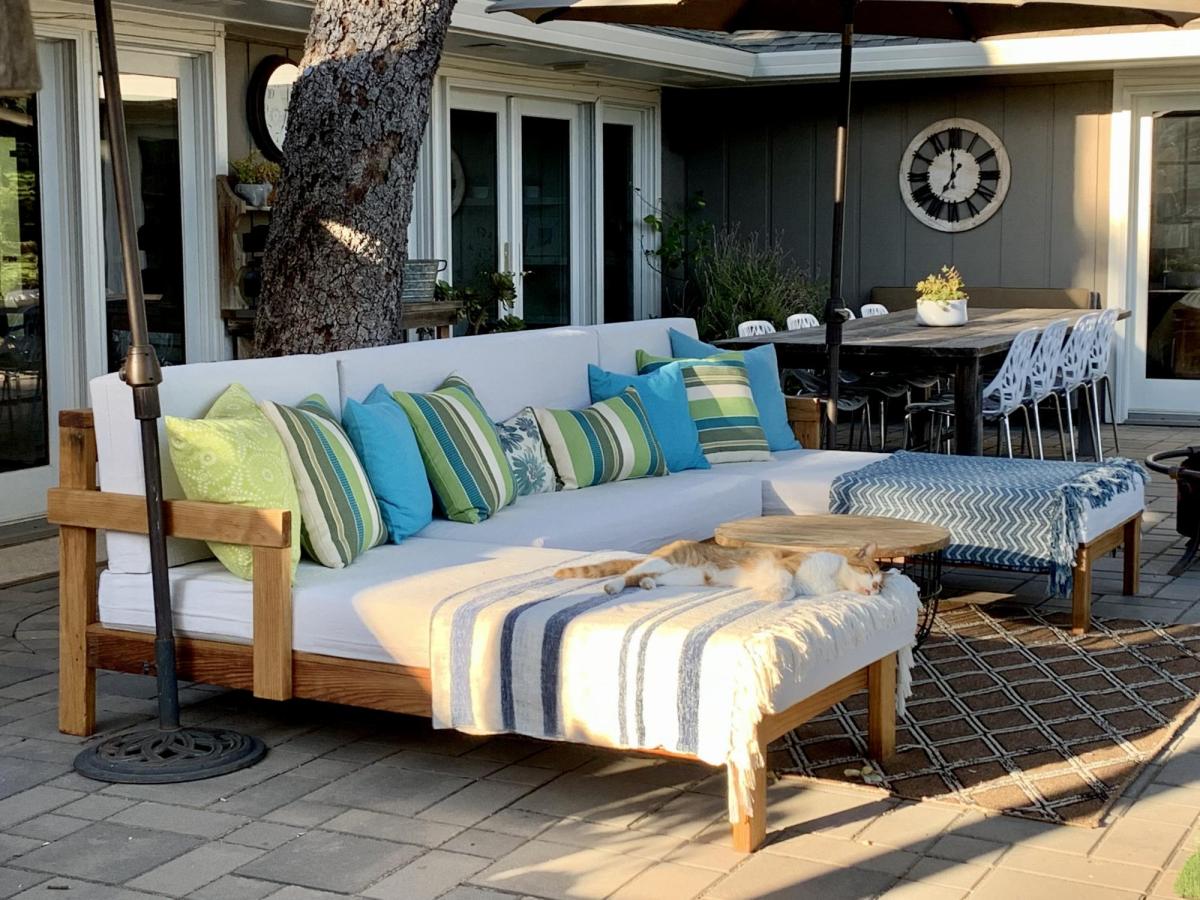
First wood project, thanks for the great plans Ana! I made the bottom cushions using 3" thick firm foam, 2" thick memory foam, and 1" thick batting (purchased in bulk and then cut to size), and covered them with outdoor fabric. The back cushions are 4" thick soft foam. I added easily removable/washable drop cloth covers on top of all the cushions. I don't have a finish on the clear redwood, but might add a clear coat to protect it. The memory foam makes this sofa very luxerious!

Estimated Cost
$1800
Estimated Time Investment
Weekend Project (10-20 Hours)
Finish Used
None
Recommended Skill Level
Intermediate

Anthropologie inspired Fancy X Farmhouse Table & Benches Part 1

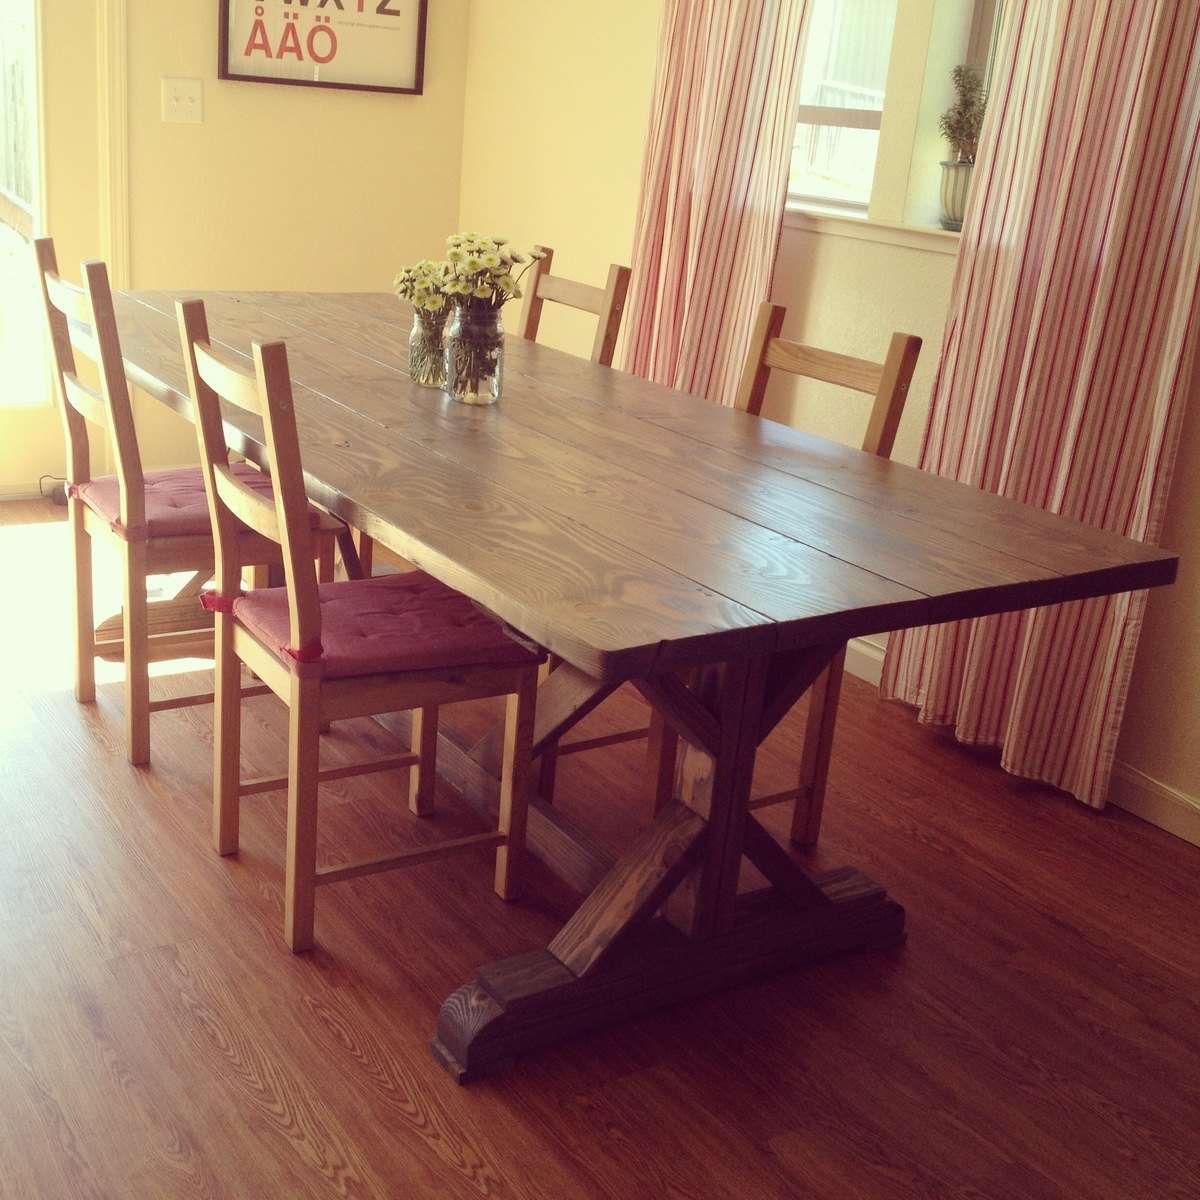
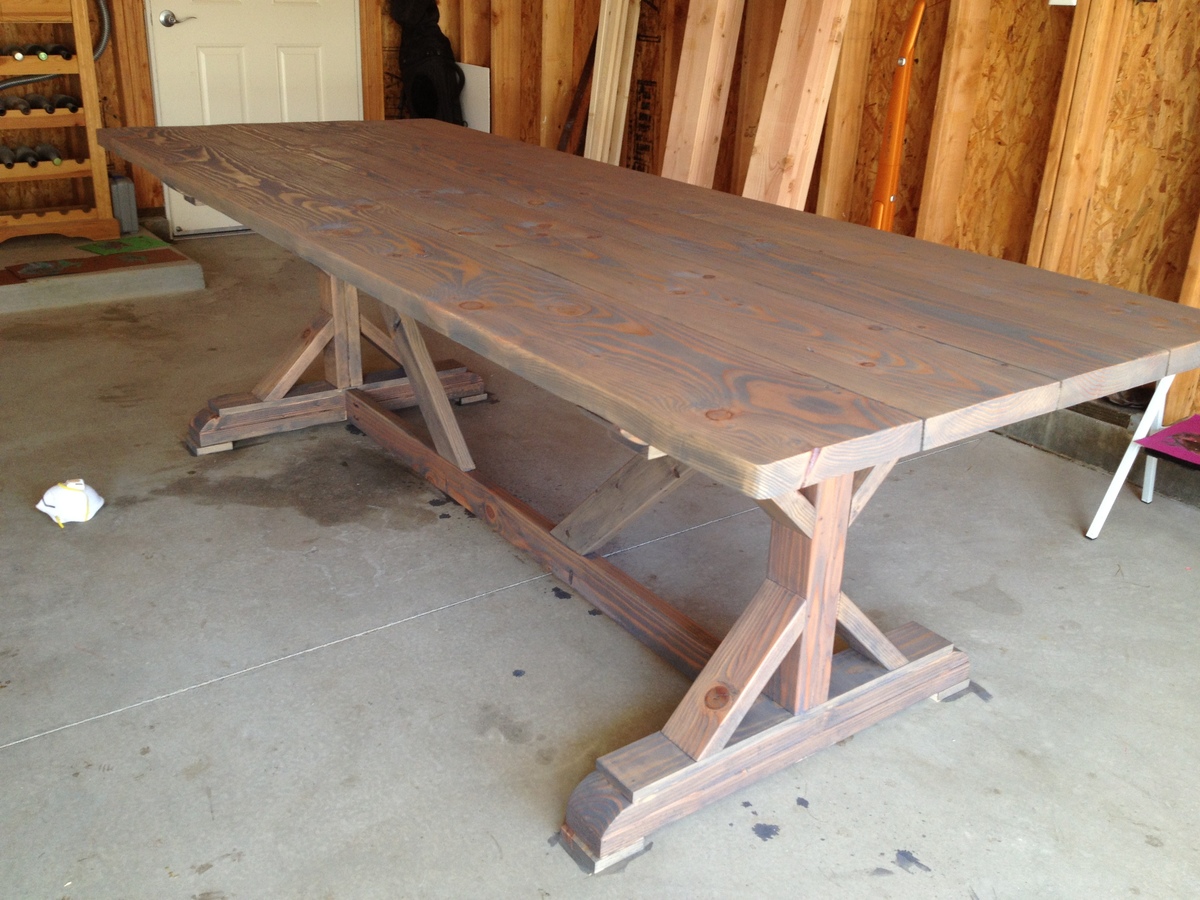
This project was super easy, my husband and I did this together while I was 9 months pregnant with our other 2 kids and dog running around the whole time! We made the table and 2 benches for $250 including lumber and finishing supplies. Check out my blog for details.

Estimated Cost
$250
Estimated Time Investment
Weekend Project (10-20 Hours)
Finish Used
Grey Stain
Recommended Skill Level
Beginner

Stair leg flip top table

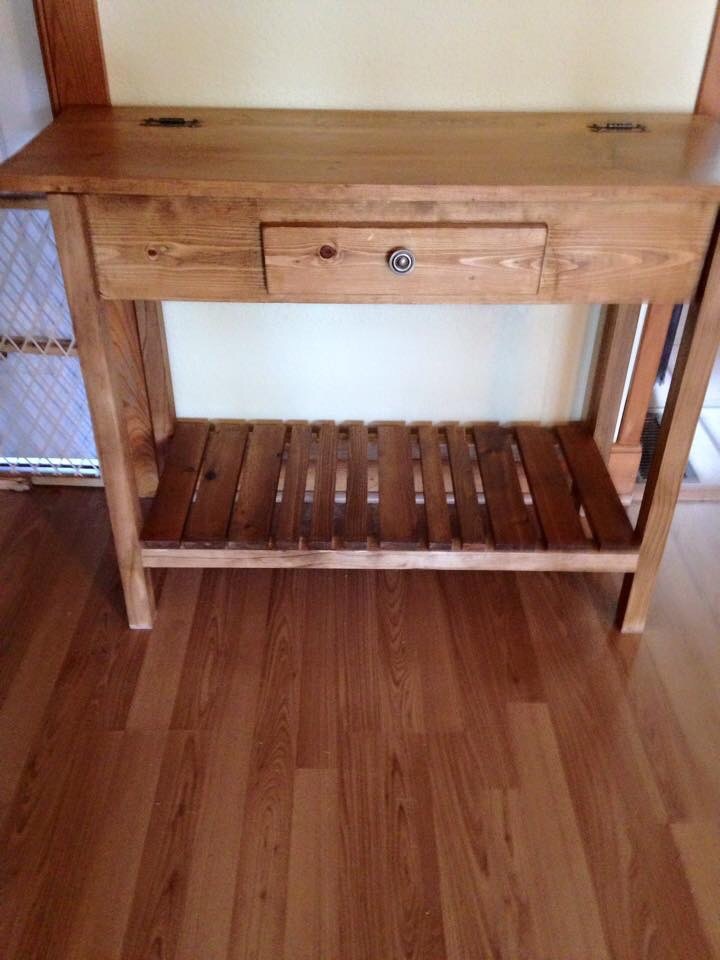
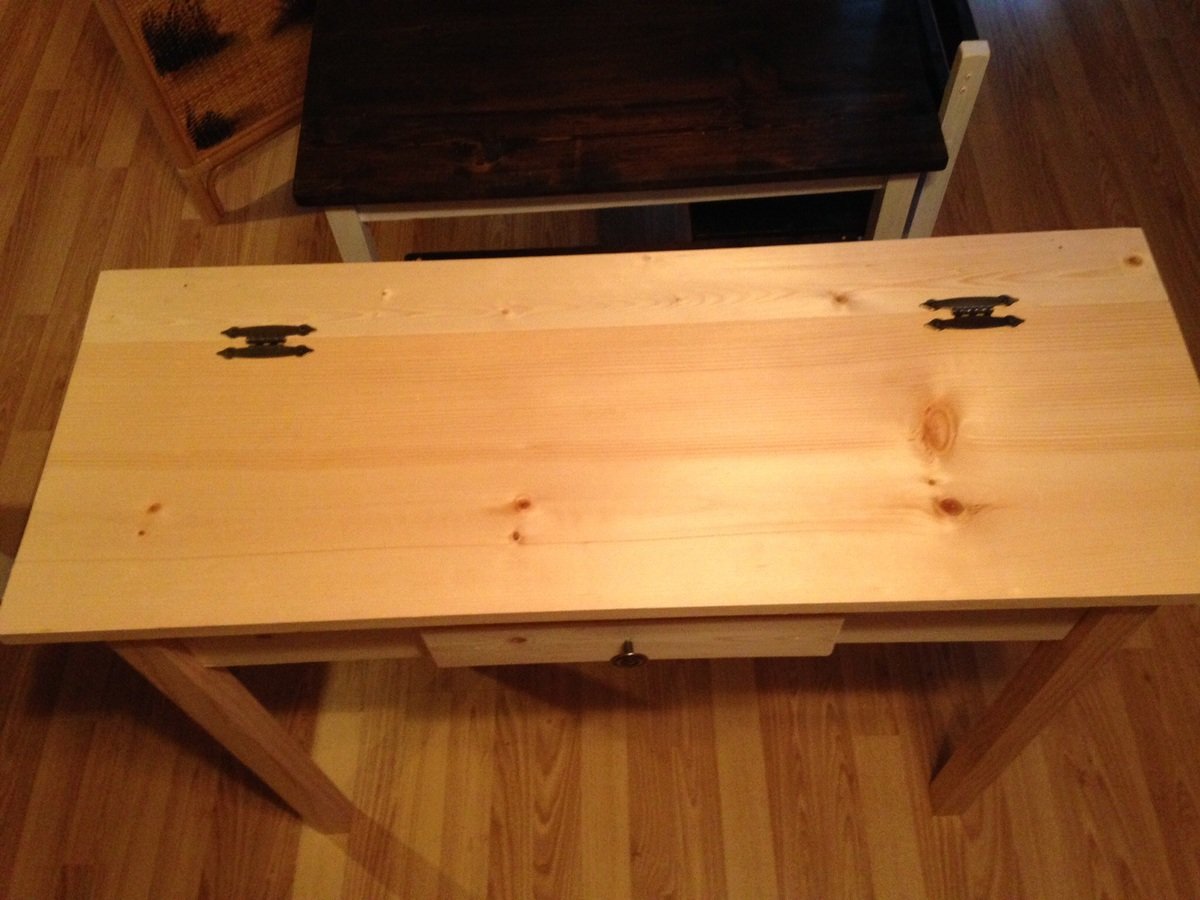
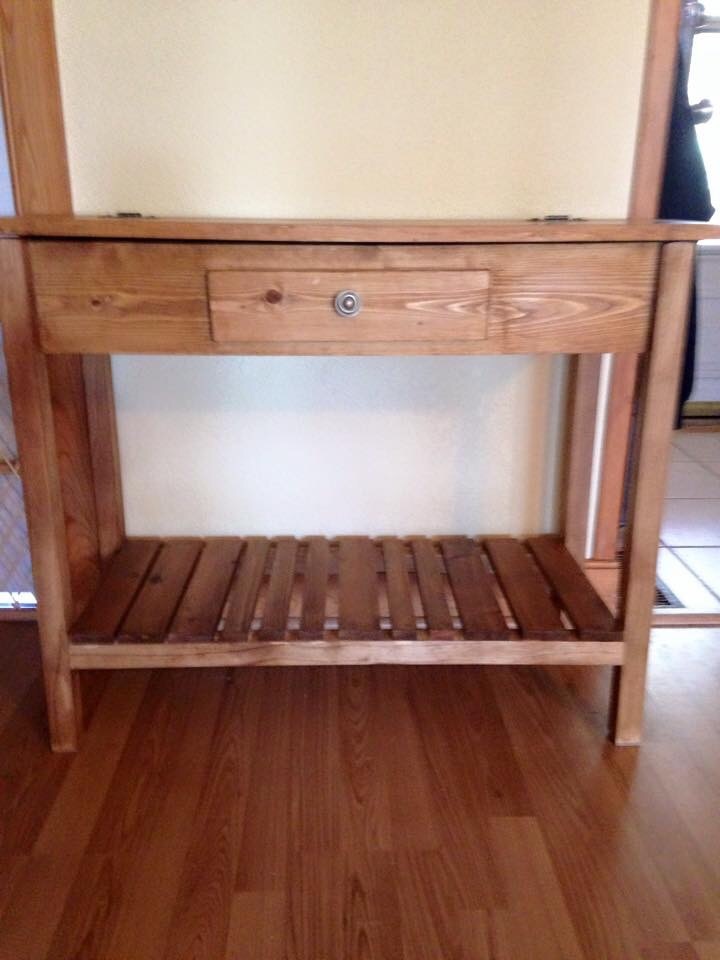
I made this smaller to fit in the space where it's going. I used 2x2 legs, and the table is 39" wide. I added the bottom shelf also. I will finish it in golden oak. 

Estimated Cost
50.00
Estimated Time Investment
Afternoon Project (3-6 Hours)
Finish Used
Will be golden oak.
Recommended Skill Level
Beginner

Rustic end table

Submitted by Anonymous (not verified) on Sun, 06/04/2017 - 17:15

Awesome project!

Thanks Ana!

Estimated Cost
$120
Estimated Time Investment
Afternoon Project (3-6 Hours)
Finish Used
Distressed vinegar and steel wool mixture with a clear coat finish.
Recommended Skill Level
Intermediate

First ever project

Submitted by sidian3 on Sun, 07/18/2021 - 08:09

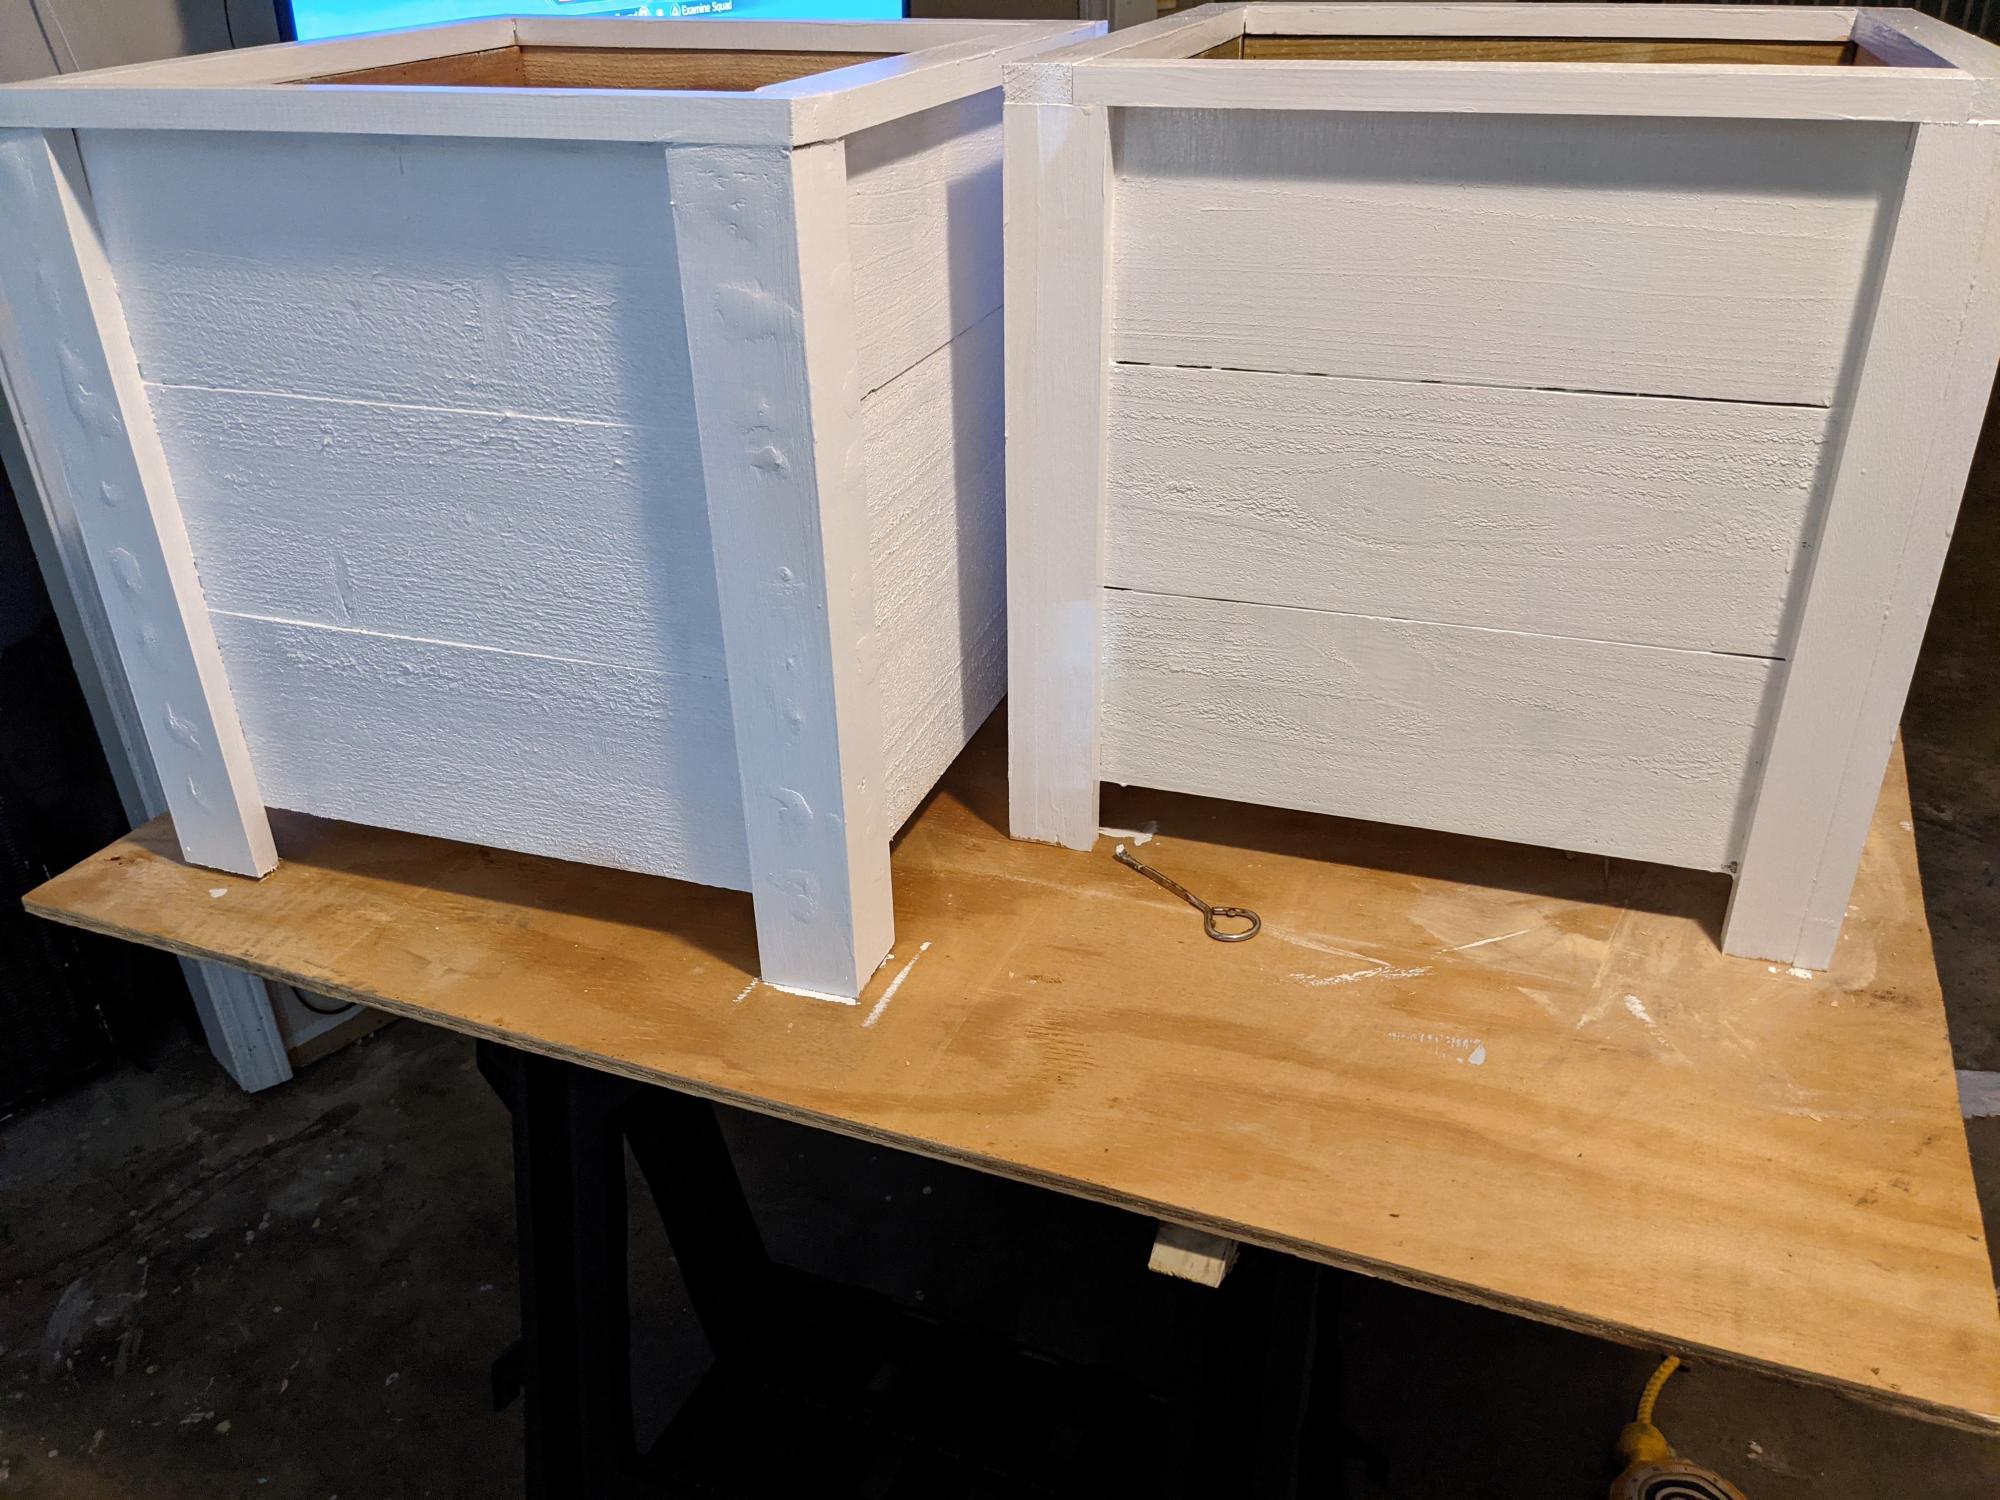
The one on the left was my first try. I had so much fun making these!

Estimated Cost
113
Estimated Time Investment
An Hour or Two (0-2 Hours)
Recommended Skill Level
Beginner

Comments

Pergola

Submitted by benfsu00 on Fri, 04/19/2013 - 01:30

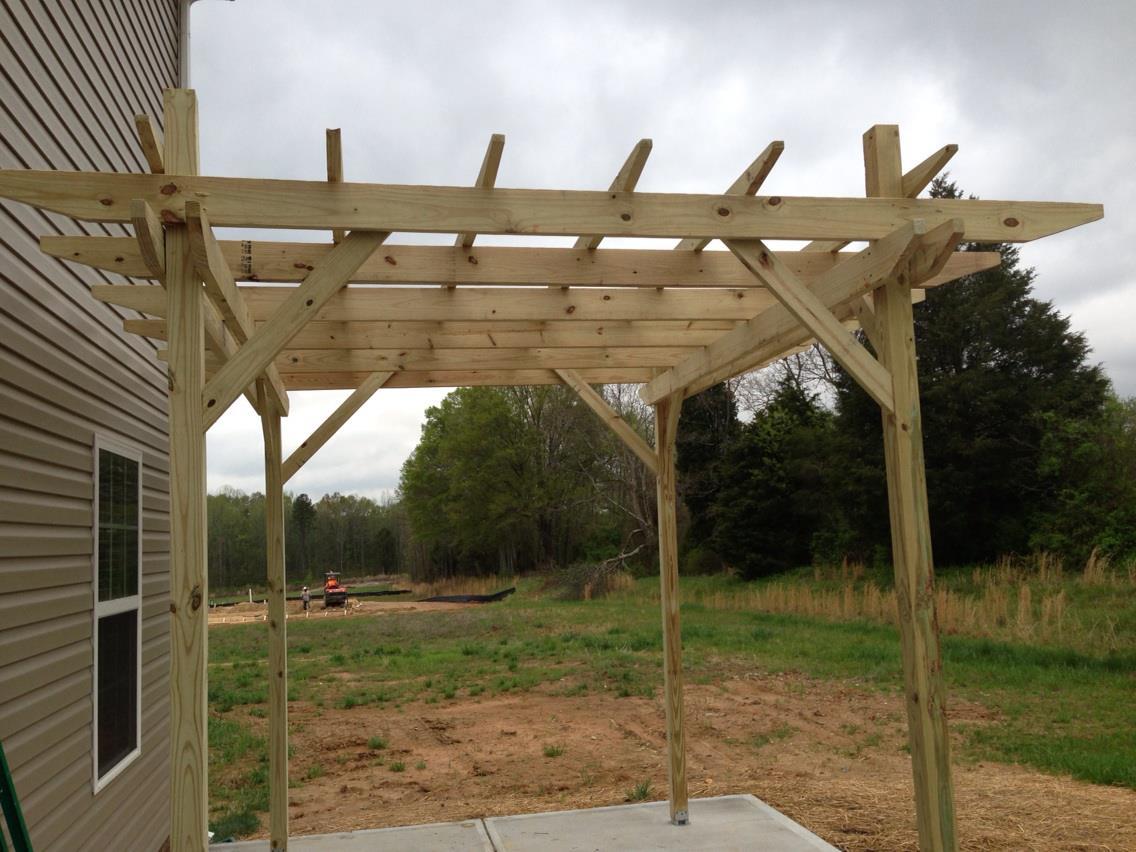
I have wanted a pergola for years and since we moved into our new construction in Dec. '12, I decided to finally go for it and add it to our new backyard plans. When I stumbled onto the plan on ana-white.com, I couldn't be more thrilled to see how simple of a project it was. I do not mean that it was an easy build by any means. I wanted a "beefier" look to it so I used 2x6 and 2x4's. The 4x4 posts are 10ft long (I was going to use 12 ft until I realized just how tall they were!). I stole the steel anchor post idea from the Popular Mechanics site and the "look" of the pergola from the Weatherly plan. I decided not to notch each beam due to time constraints and I just didn't think I need to. I did use zinc L brackets to secure the 2x6s to the support beams (also 2x6s). The top is stiff as can be but the bottom has a slight give to it since it is only four 4x4s sitting on post anchor brackets. I am planning on adding about 6 inches of concrete around the base of the posts (after my HOA "approves" the pergola) to stiffing the structure and then trim around the base for a more "custom" look to it. It will be similar style to the Weatherly except wider around the base so that I can set drinks on it. It took about 8 hours total and about an hour of that was setting the steel anchor posts (measuring and installing 2 1/4" red head screws into the 4" concrete slab patio).

I will stain it with a semi-transparent (BEHR brand) redwood-ish color in a few months after the PT pine dries.
Built from Plan(s)
Estimated Cost
$400
Estimated Time Investment
Weekend Project (10-20 Hours)
Recommended Skill Level
Intermediate

Sand box

Submitted by Woodguru on Sun, 03/08/2015 - 21:56

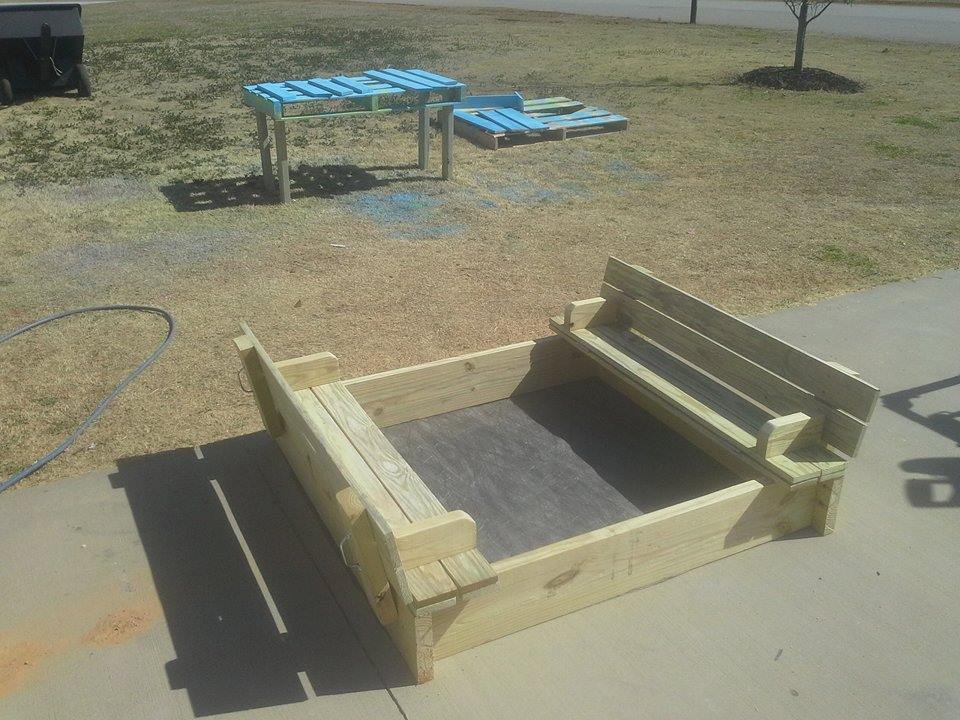
I followed this easy plan. Only thing I changed is rounding the arm rest as a safety feature. Added weed barrier on the bottom

Built from Plan(s)
Estimated Cost
$67.00
Estimated Time Investment
An Hour or Two (0-2 Hours)
Finish Used
Sanded only
Recommended Skill Level
Beginner

Comments

Rolling Barn Door Cabinet

Submitted by bill_m on Thu, 07/29/2021 - 16:22

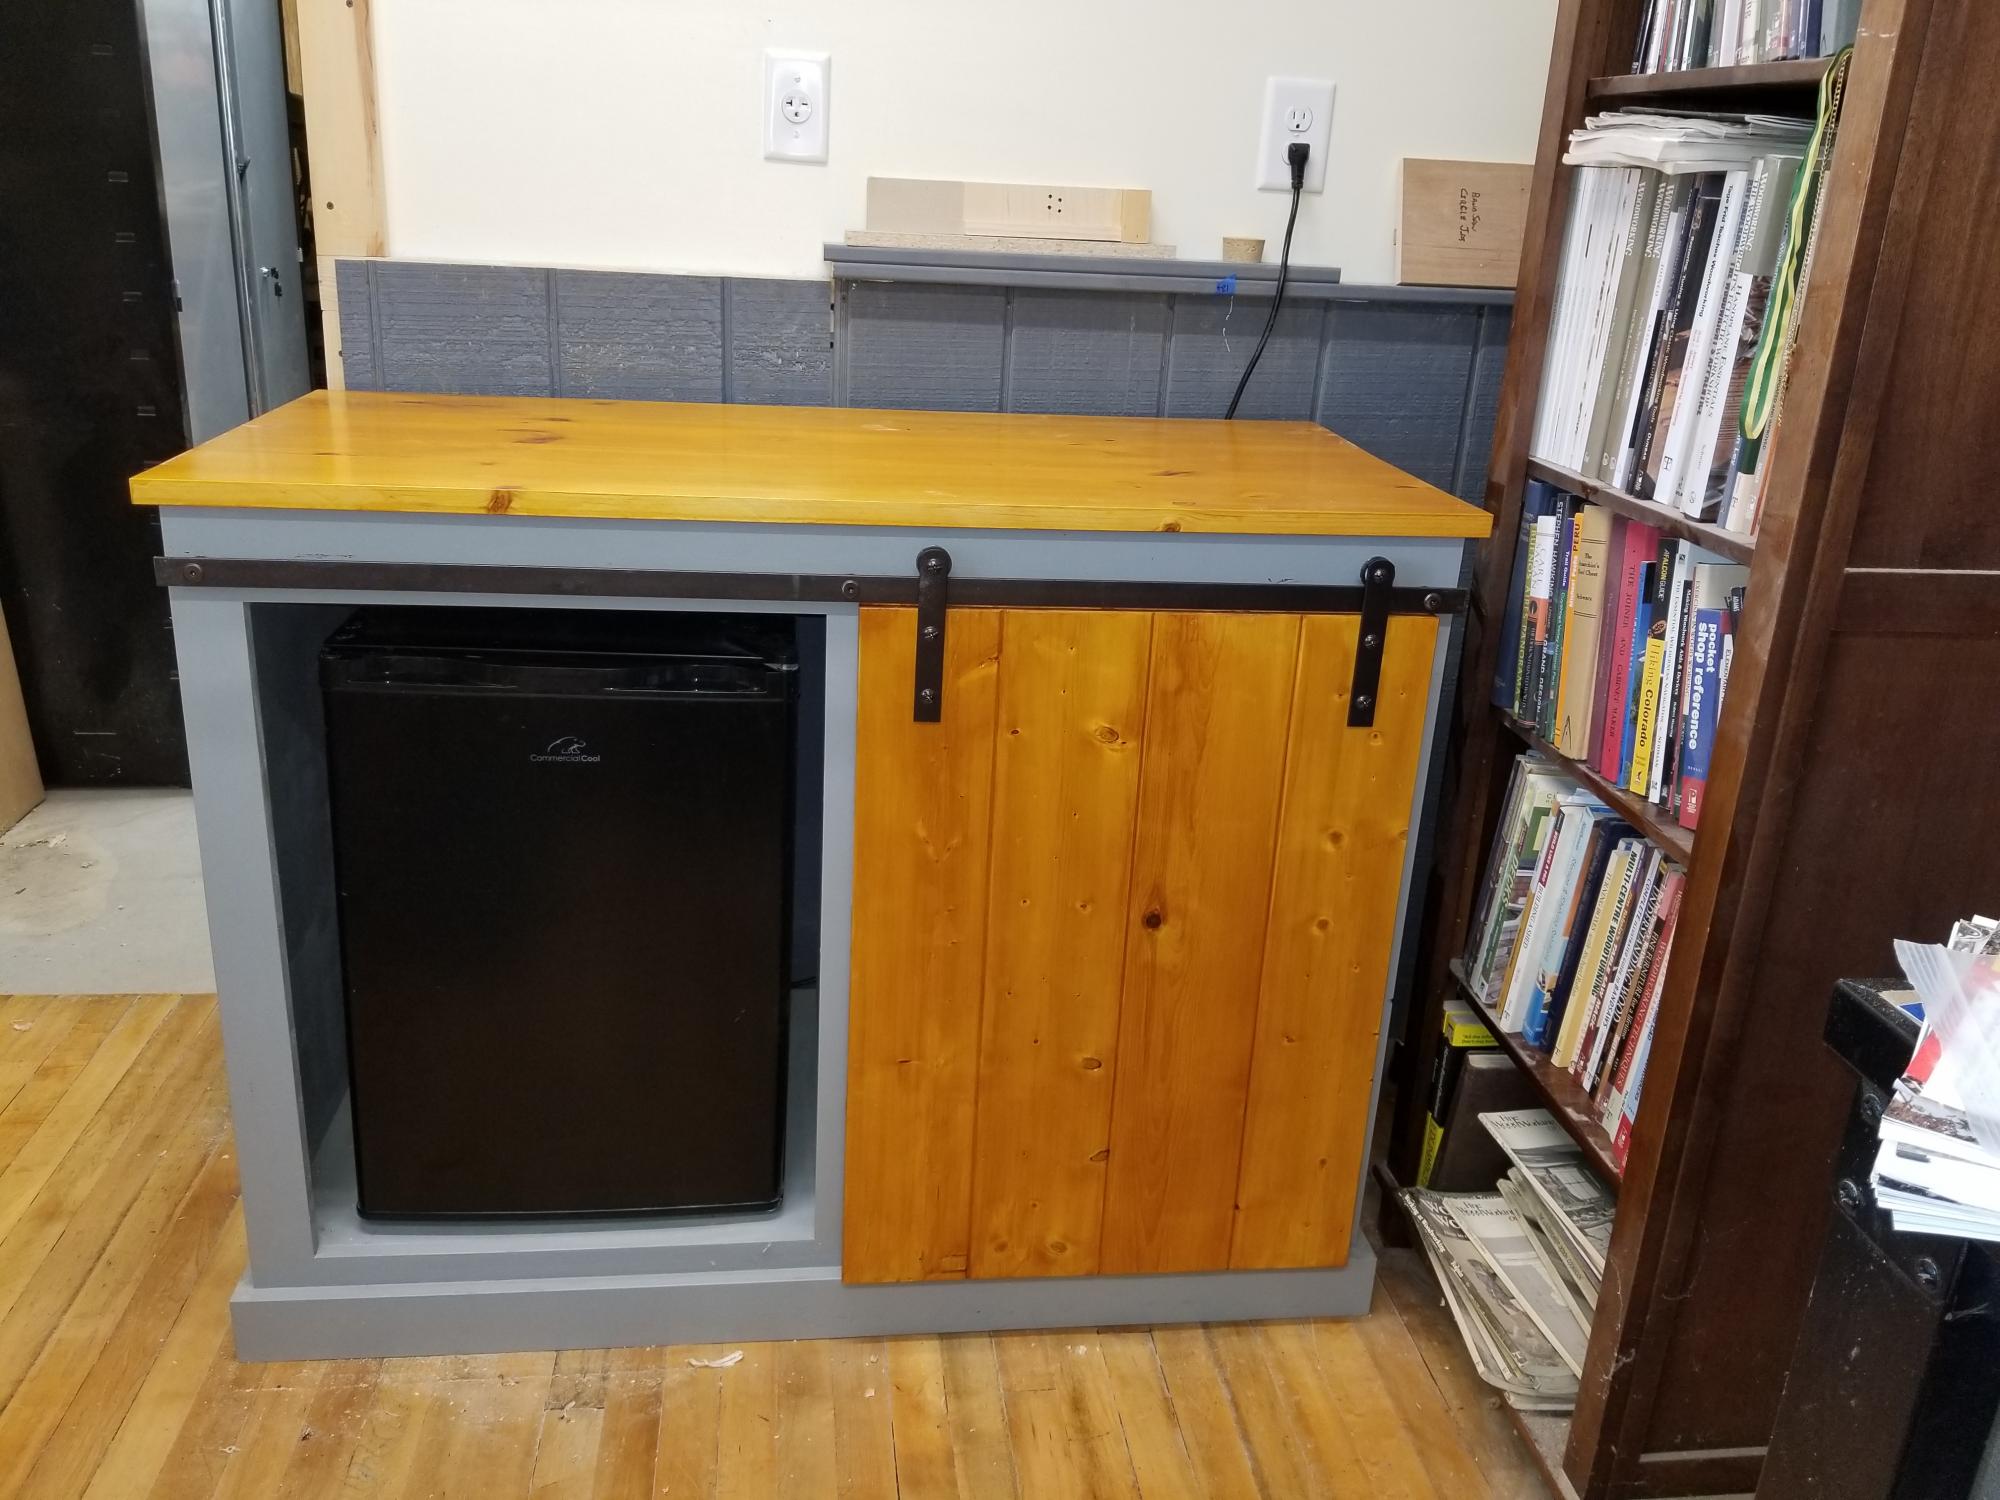
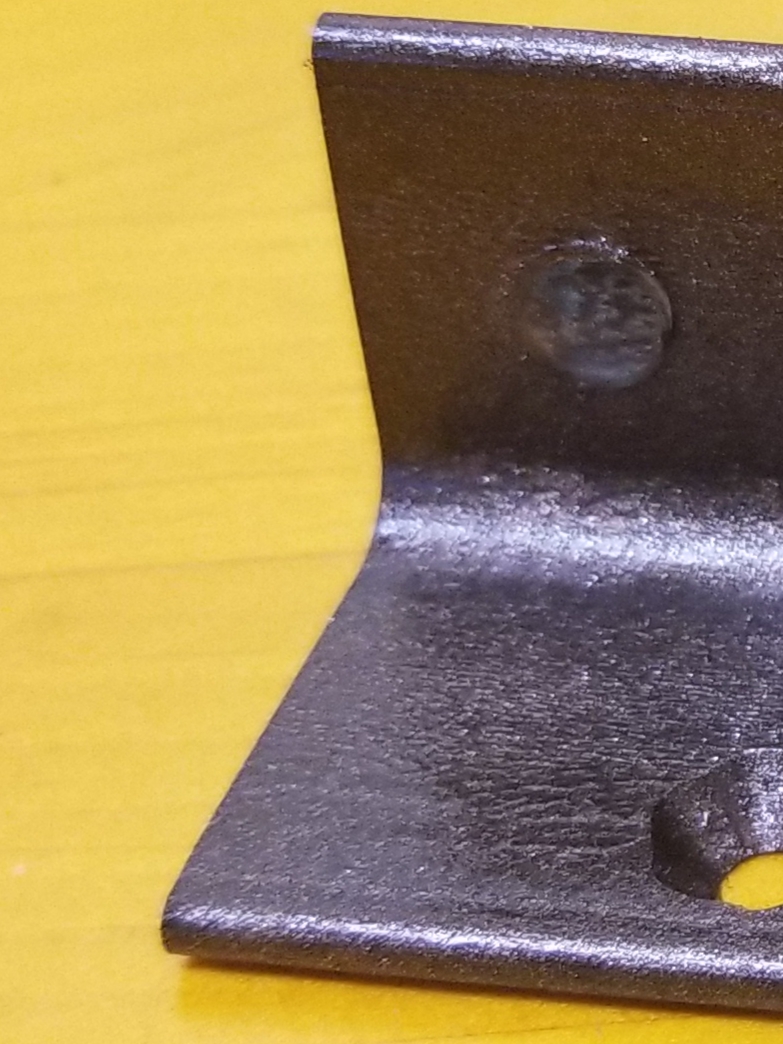
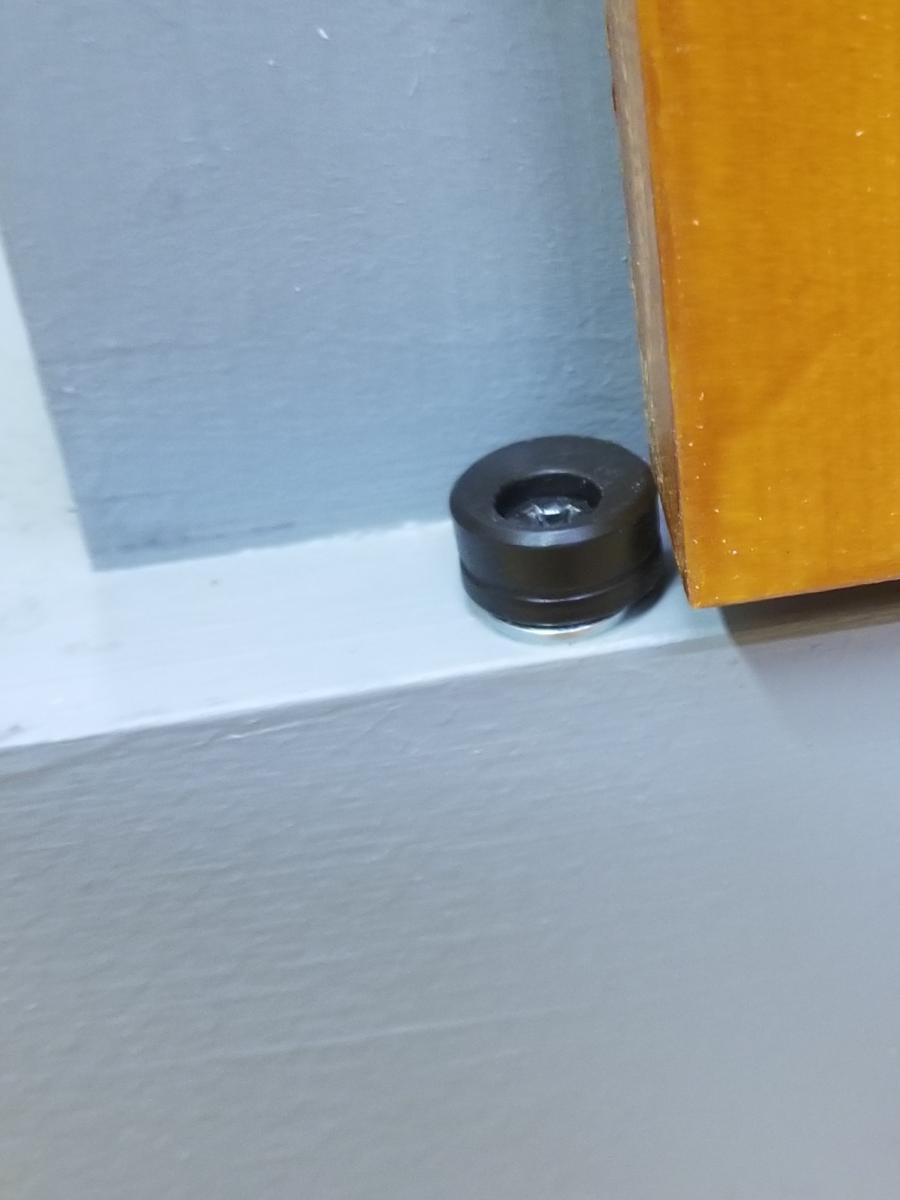
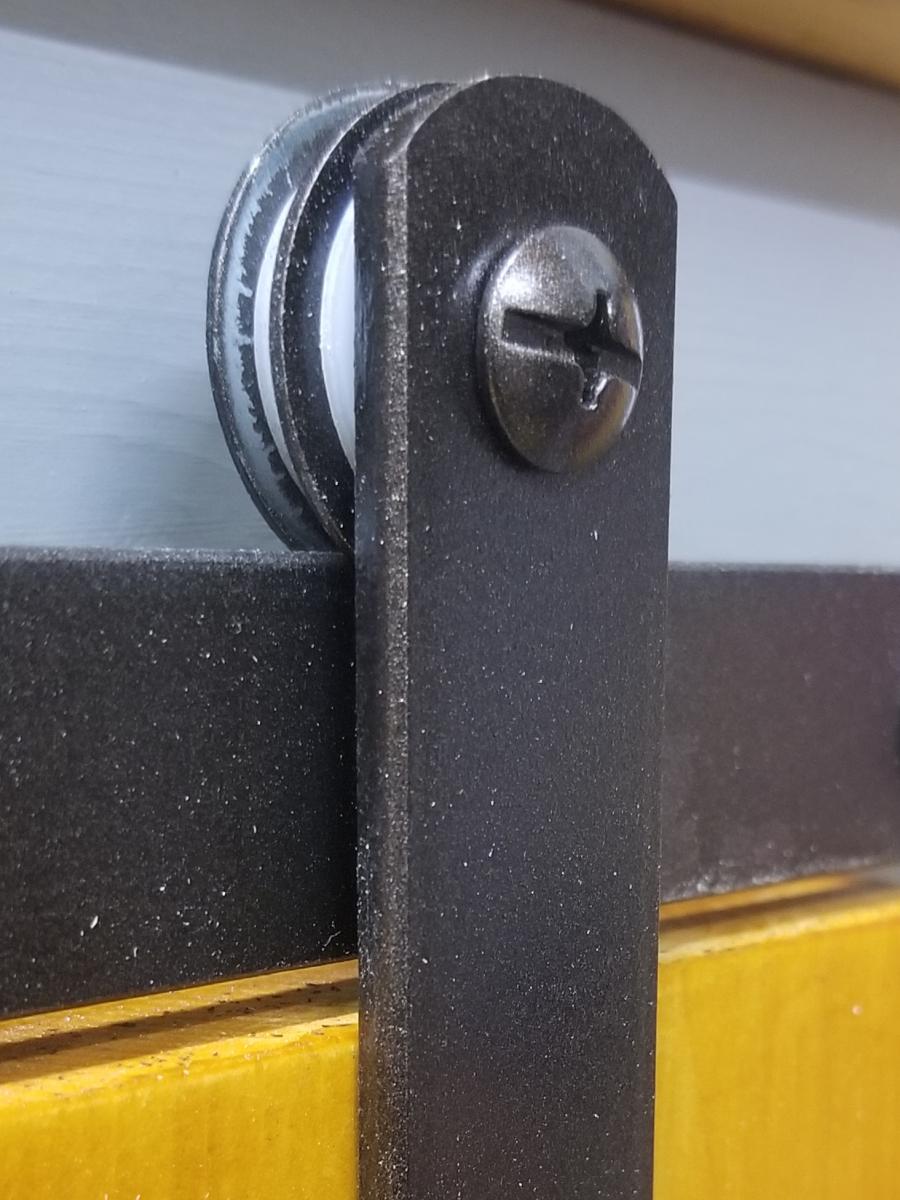
This is my version of the Barn Door Snack Cabinet. I made it for my shop/office and was just what I was looking for to add storage space. For the most part I used the published dimensions, but changed the construction method by notching the center divider and using a cutoff from the plywood panel as front and rear stretchers for attaching the top and the face frame. I also used nylon washers for the rollers to make the slide smoothly and quietly. I installed door stops to make sure the door wouldn't slide off the track, I added silicone door bumpers to the lower door guide to avoid wood to metal contact and finally, I ground a radius on the door straps to match the rollers.
Thanks Ana for the inspiration!

Estimated Cost
$200
Estimated Time Investment
Weekend Project (10-20 Hours)
Finish Used
Latex paint, amber shellac, wipe-on poly
Recommended Skill Level
Intermediate

Comments

Cubby Desk

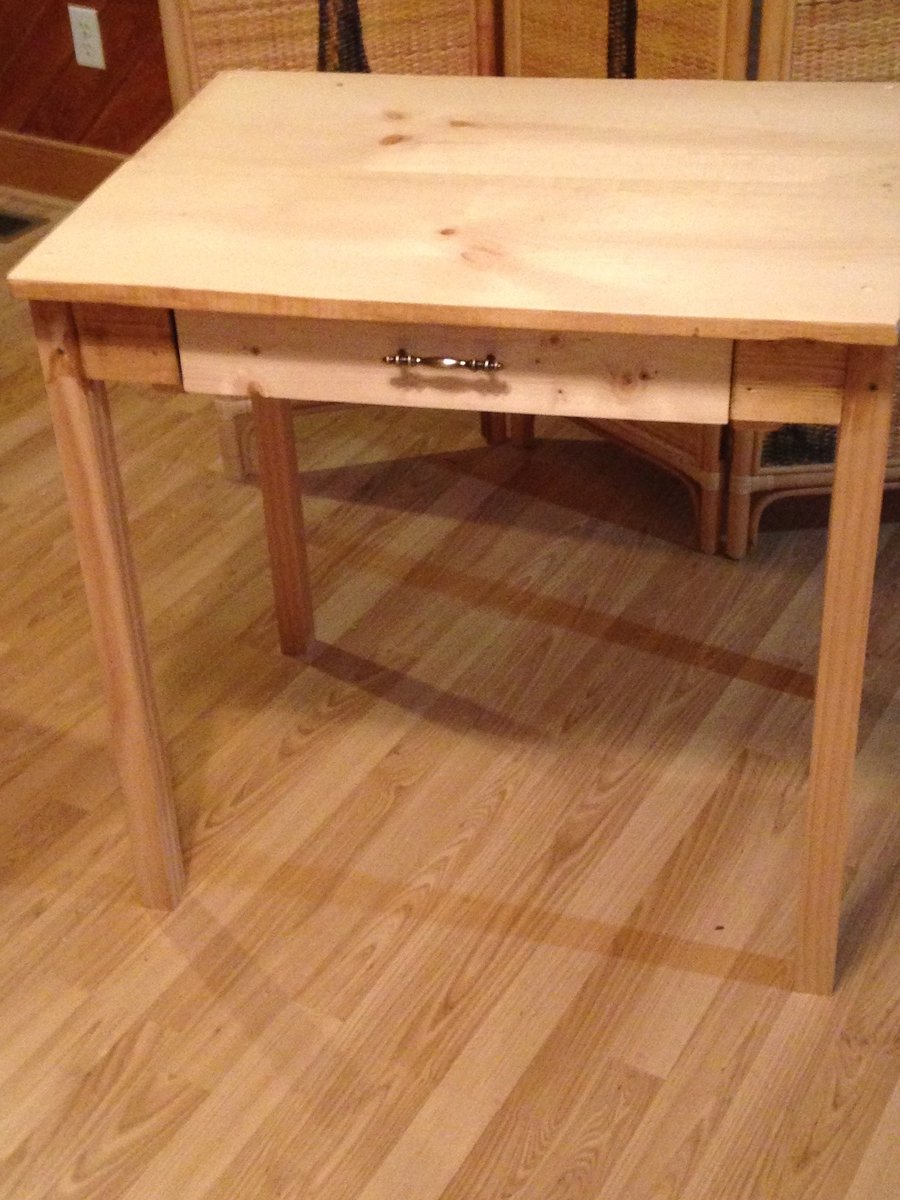
Made from pine boards. Had to add 2 2x4's underneath to hold the drawer.  
Built from Plan(s)
Estimated Cost
50.00
Estimated Time Investment
Day Project (6-9 Hours)
Finish Used
Minwax golden oak and wax.
Recommended Skill Level
Intermediate

Console Table

Submitted by wangbw on Sun, 06/11/2017 - 15:32

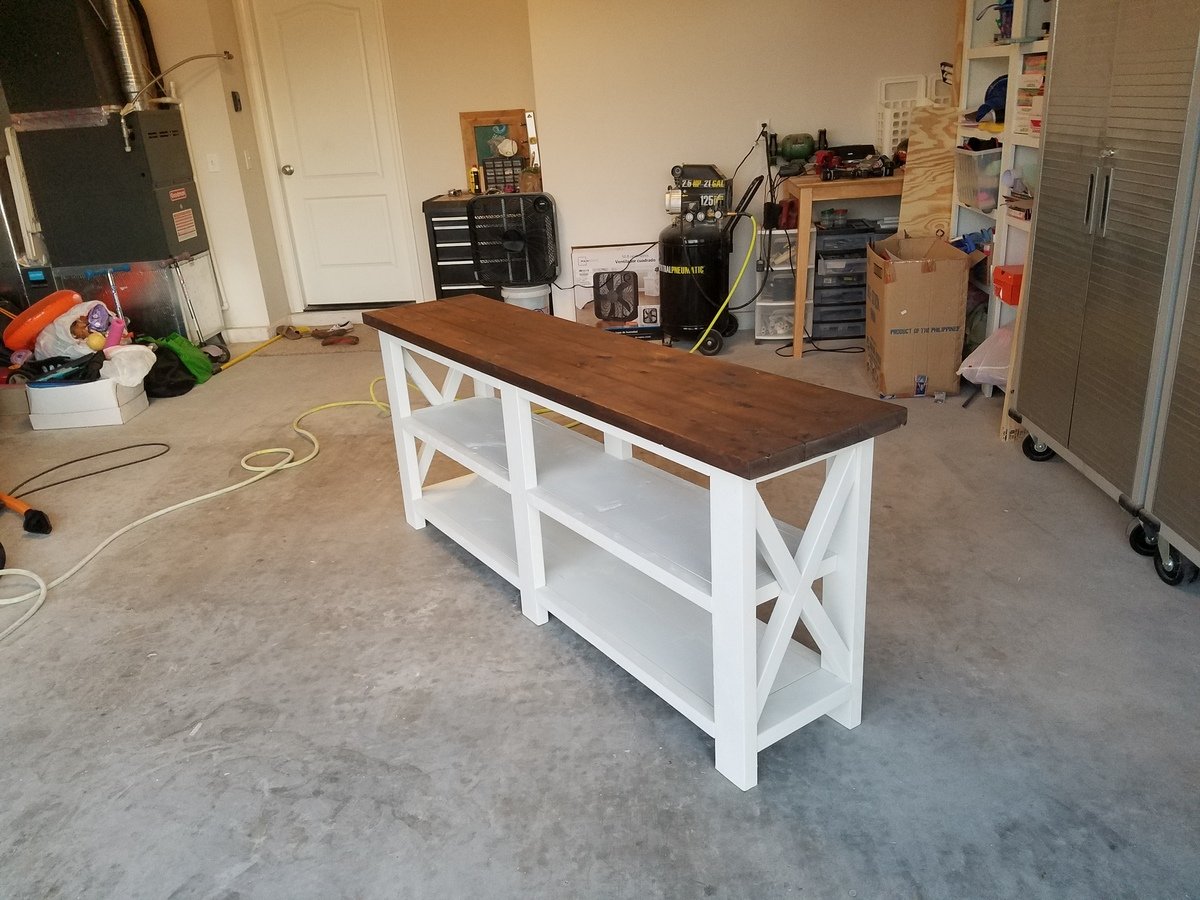
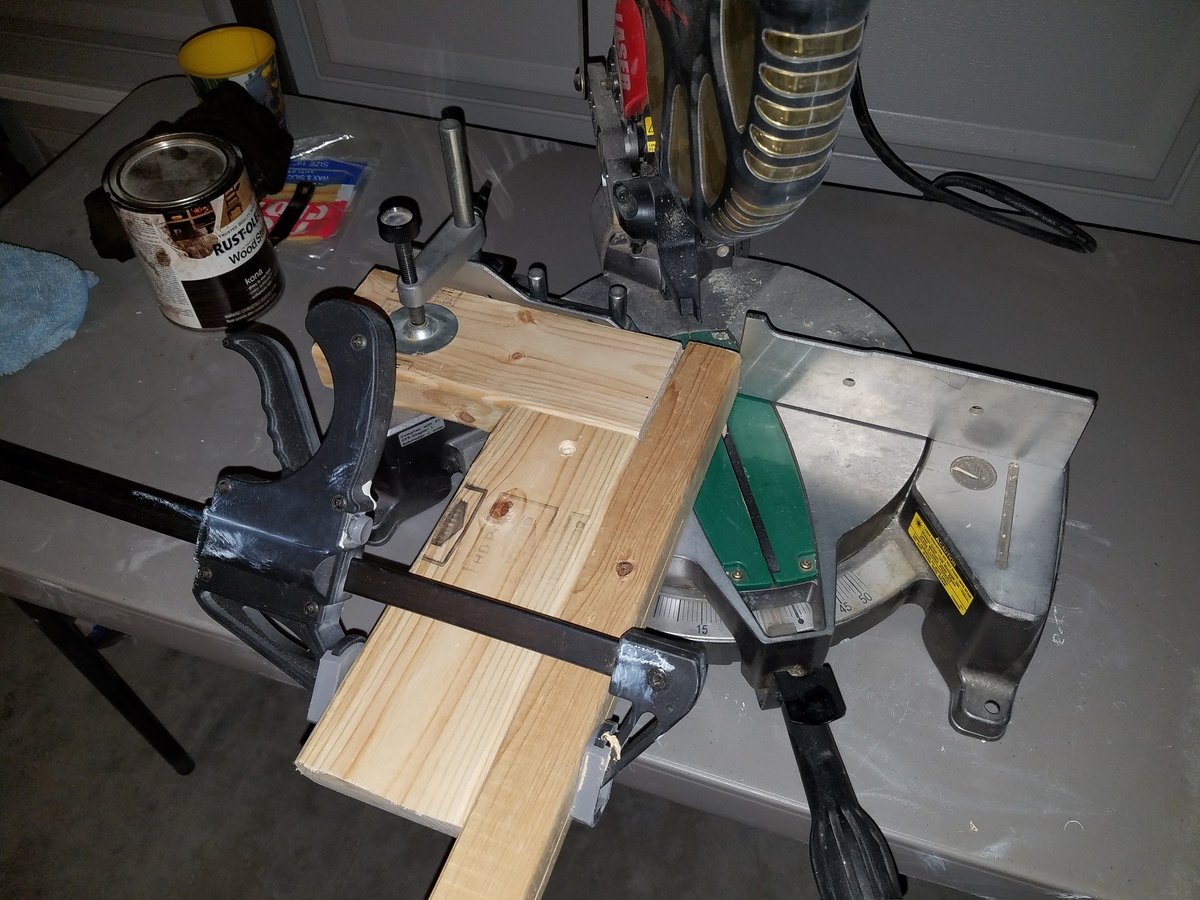
Quick and easy to follow plans.  Only issue I ran into was that my miter saw only cuts up to a 50° angle.  I set up a jig to hold the 2x2 perpendicular to the saw and set the miter to 30°.  Viola, easy 60° angles!  Pic attached for reference.


Built from Plan(s)
Estimated Cost
$80
Estimated Time Investment
Afternoon Project (3-6 Hours)
Recommended Skill Level
Beginner

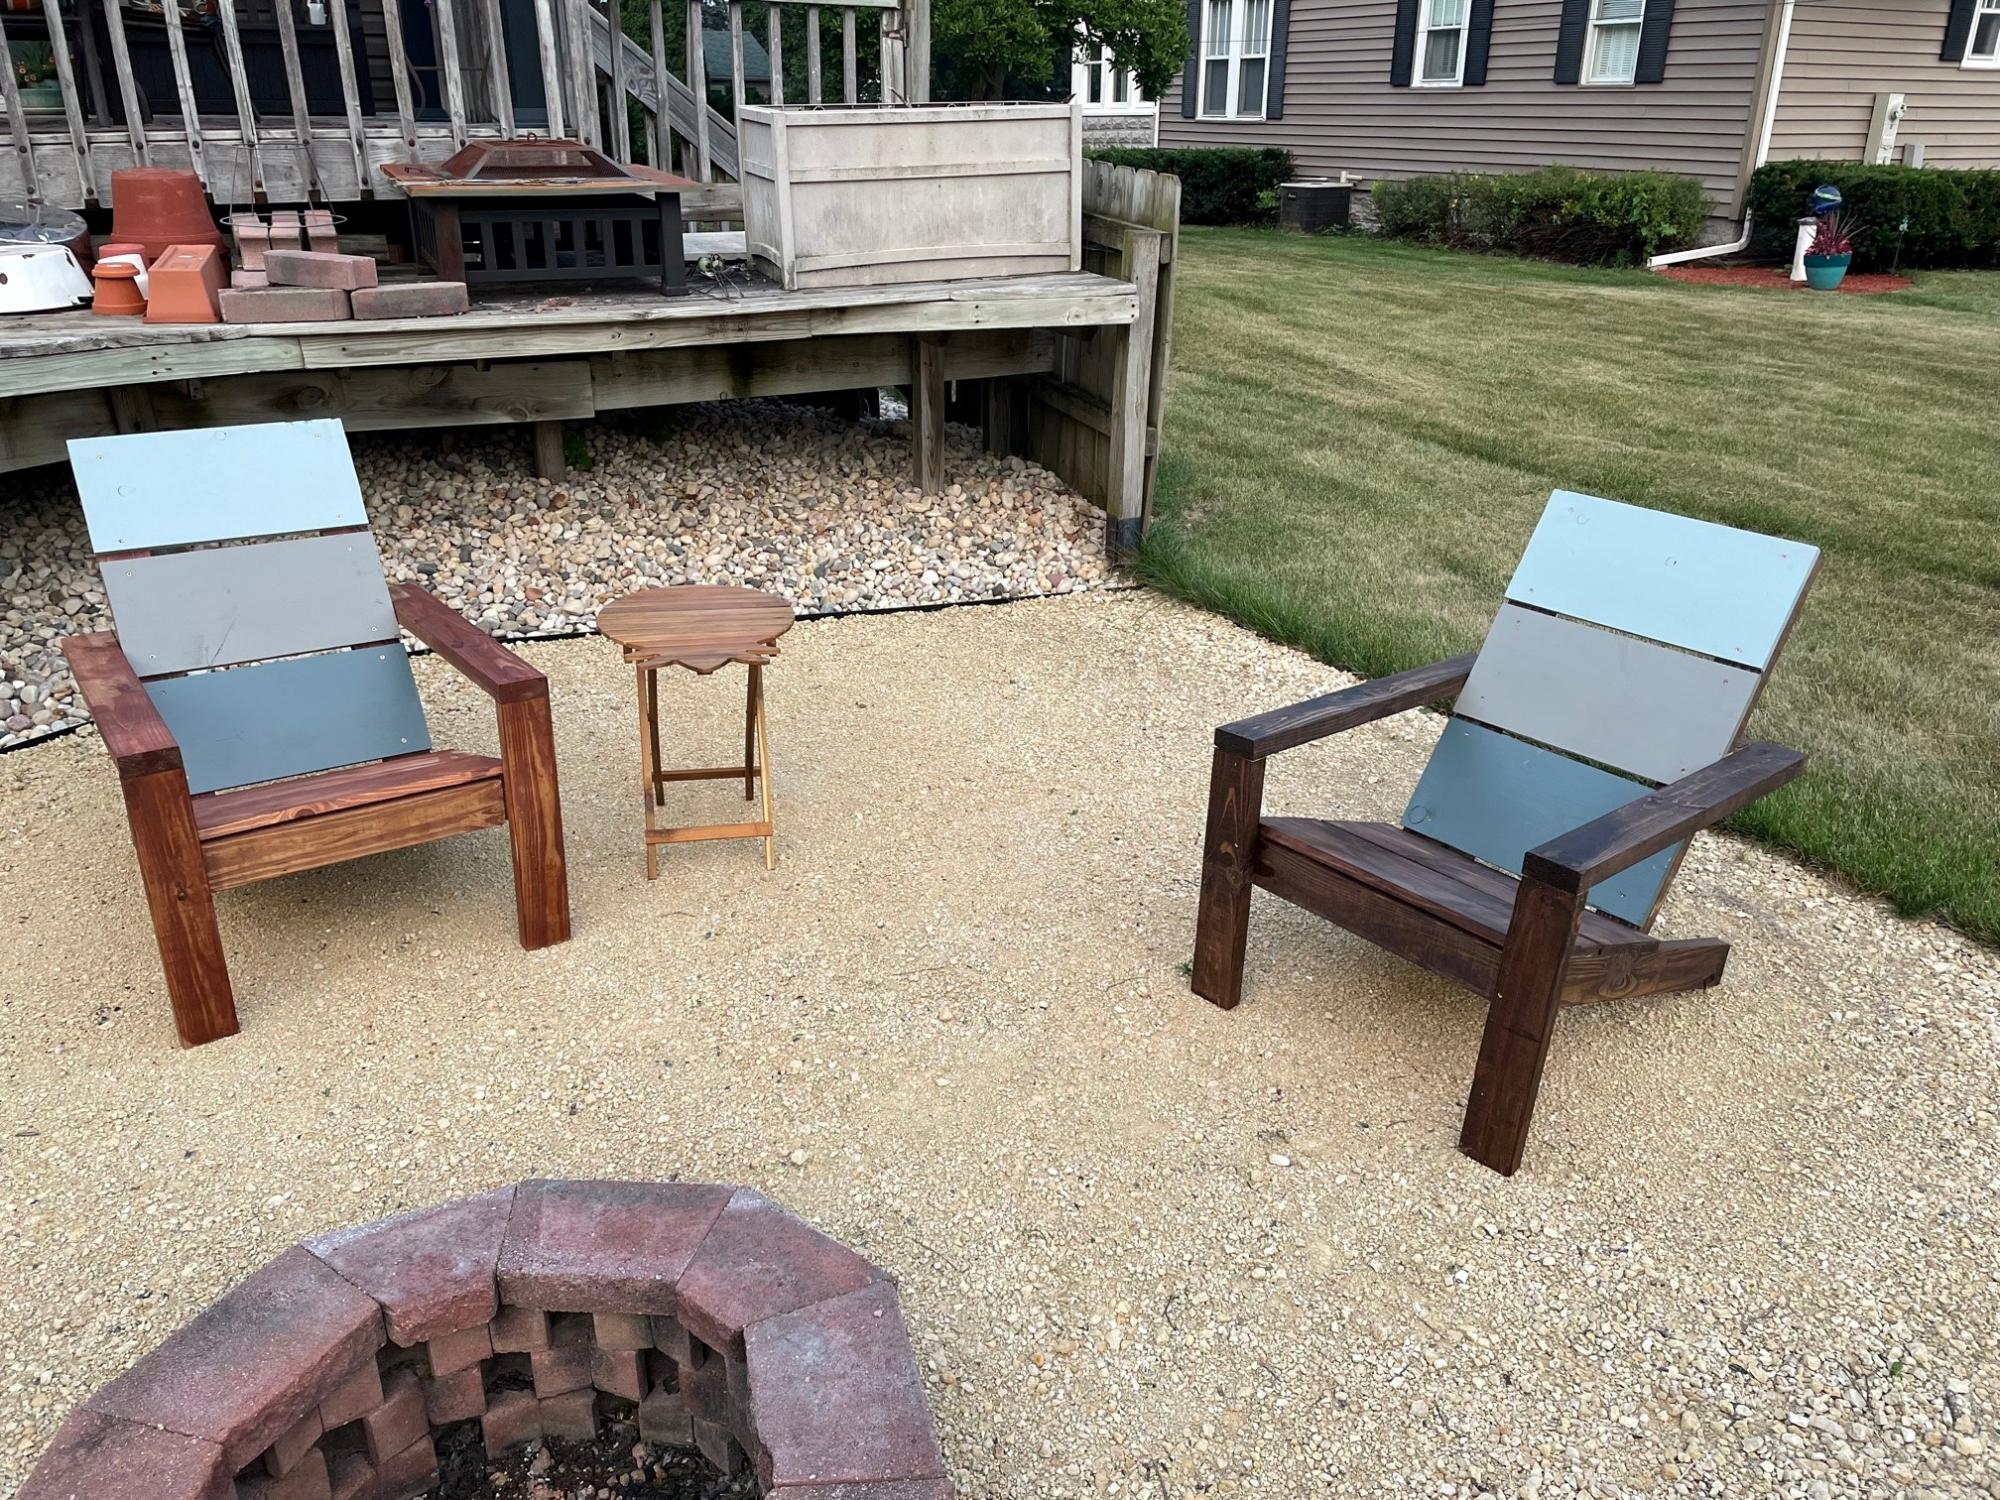
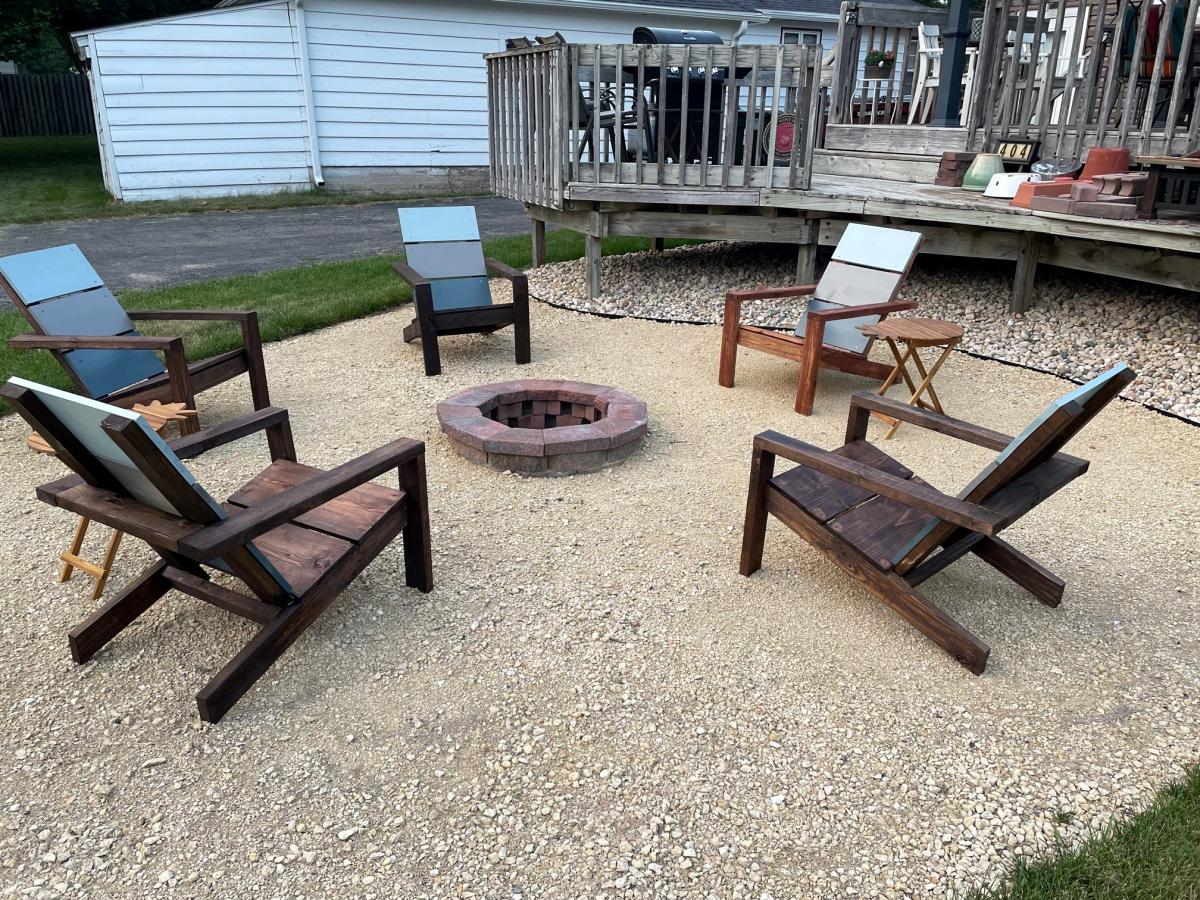
Paint and Stain 2x4 Adirondack Chairs

Submitted by Anonymous (not verified) on Thu, 08/05/2021 - 11:22

Built for our Firepit.

Estimated Cost
$40 per chair
Estimated Time Investment
Weekend Project (10-20 Hours)
Recommended Skill Level
Intermediate

Comments

Outdoor Sectional

Submitted by snoopyrsc on Wed, 04/24/2013 - 18:57

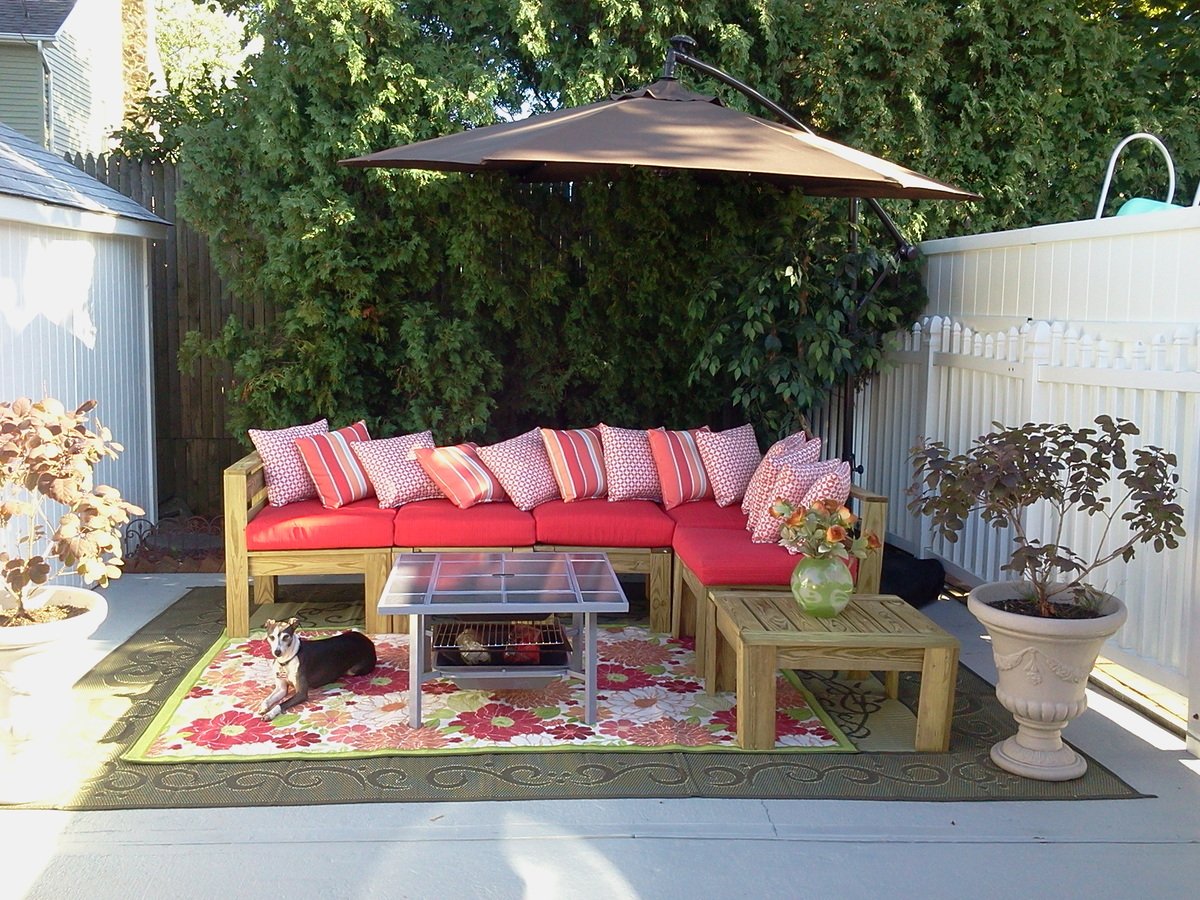
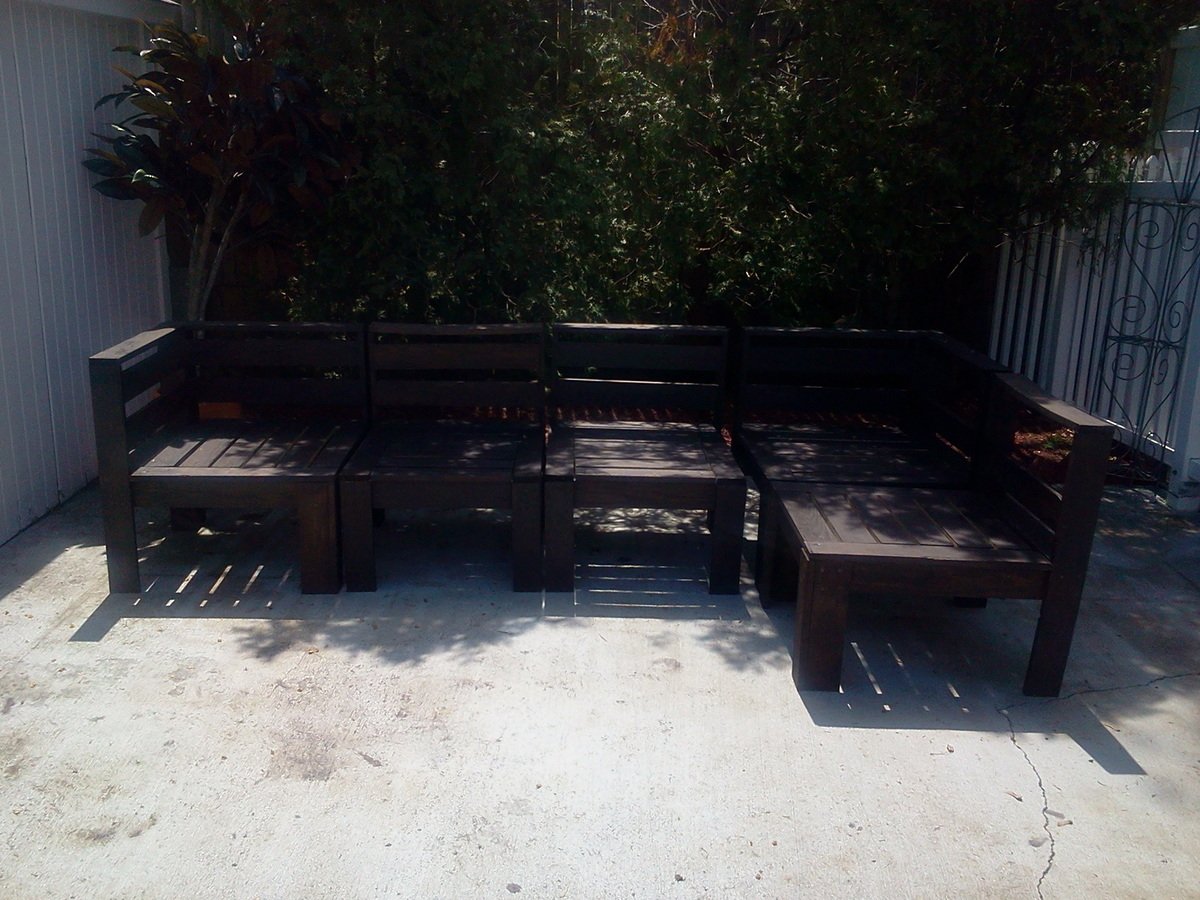
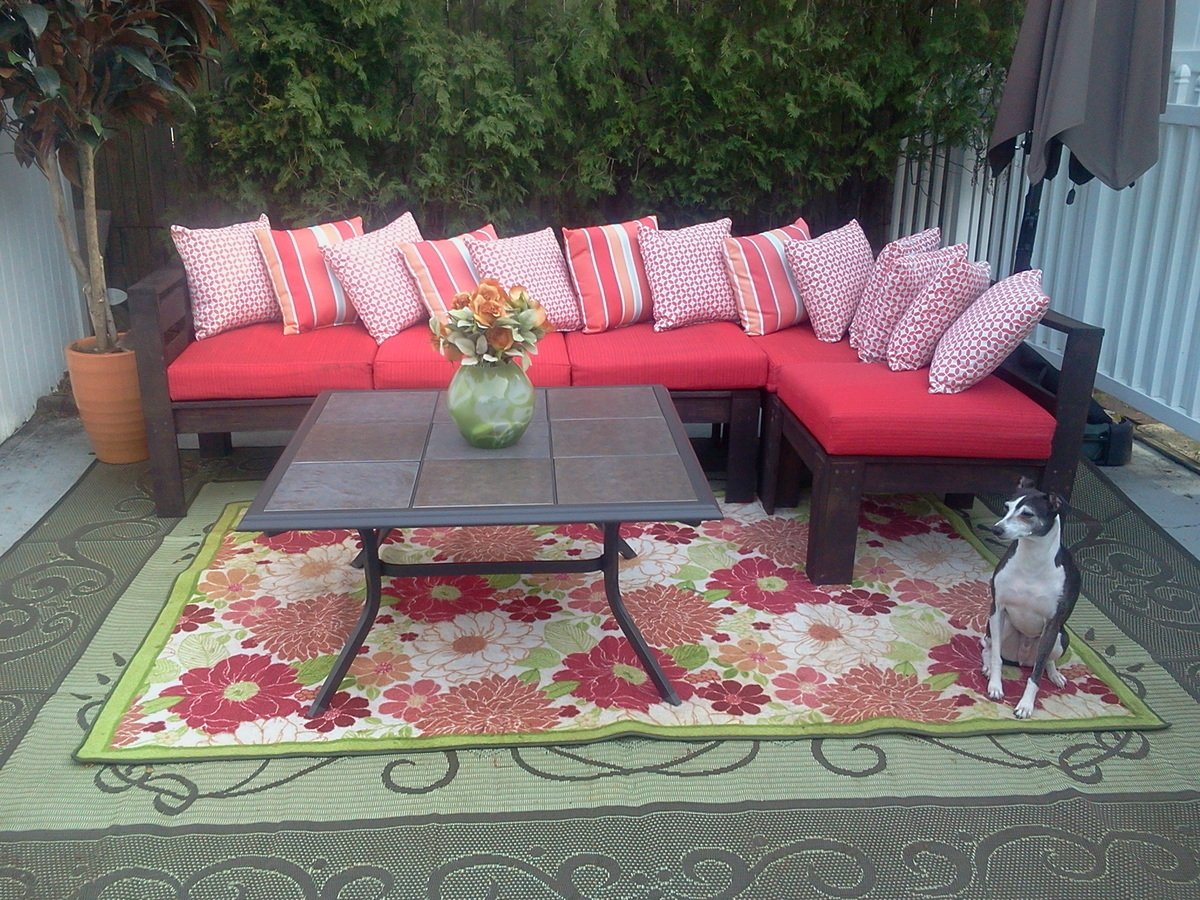
Thank you Ana White!!! This website is Awesome!!! I started my outdoor sectional project last summer and used the "Modern Outdoor Sectional" plans for my project....it really was easy....In fact, I went to Lowes and had all my sizes cut for me and all I had to do was use the kreg jig as recommended and a drill and "Wa La!"....my sectional didn't cost me more than $350! This year I am going to paint it since it is pre-treated wood, I needed to wait the season!!! So, I will upload another picture soon to show you what it looks like painted......

Estimated Time Investment
Week Long Project (20 Hours or More)
Finish Used
Nothing Yet.
Recommended Skill Level
Beginner

Comments

spiceylg

Thu, 04/25/2013 - 06:03

I did the same thing, used PT and will be staining this year. Just bought the stain in fact. Great job. Love the colors in the cushions and pretty rug, too! The whole area looks very welcoming and cozy.

snoopyrsc

Mon, 04/07/2014 - 21:58

Thank you so much! Sorry, I never knew how to check if I had any comments and I am starting a new project and seen that you commented. Thanks again!

MMTruncale2 (not verified)

Thu, 04/25/2013 - 11:19

SUCH a good job! So inspiring.

snoopyrsc

Mon, 04/07/2014 - 21:59

Thank you so much! Sorry, I never knew how to check if I had any comments and I am starting a new project and seen that you commented. Thanks again!

snoopyrsc

Mon, 04/07/2014 - 21:59

Thank you so much! Sorry, I never knew how to check if I had any comments and I am starting a new project and seen that you commented. Thanks again!

terdickison

Mon, 05/06/2013 - 11:18

I've been looking at this project to build for awhile. I love how all the colors in the area work together. This looks like something you'd spend thousands on in a store somewhere. Nice!

snoopyrsc

Mon, 04/07/2014 - 22:00

Thank you so much! Sorry, I never knew how to check if I had any comments and I am starting a new project and seen that you commented. Thanks again!

Extra Large Storage Bed with Stairs

Submitted by shellyward on Sun, 03/15/2015 - 22:22

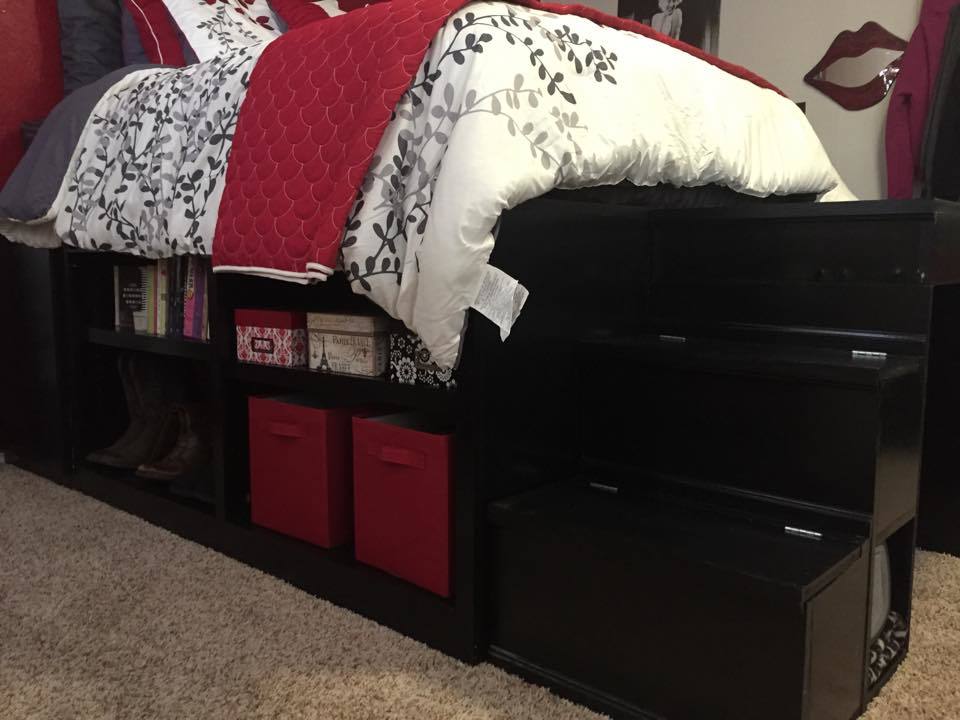
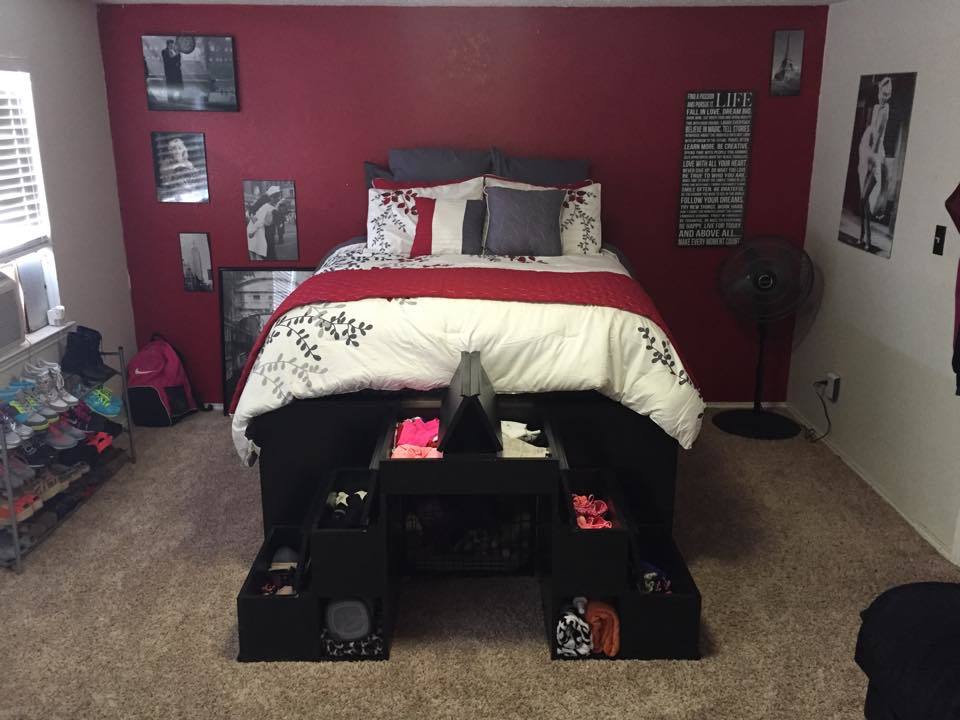
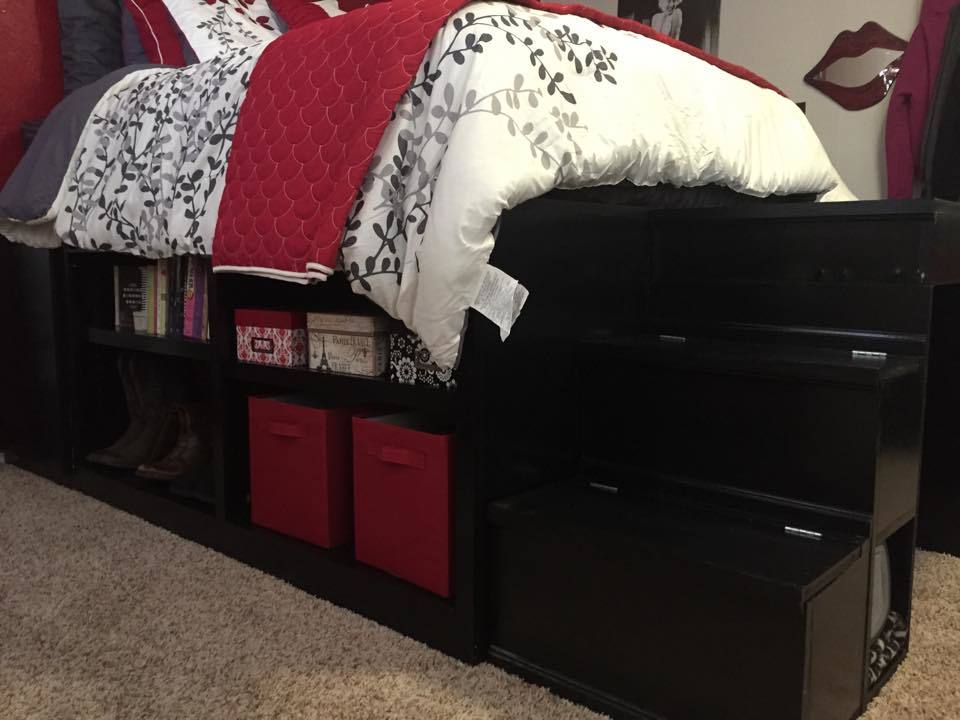
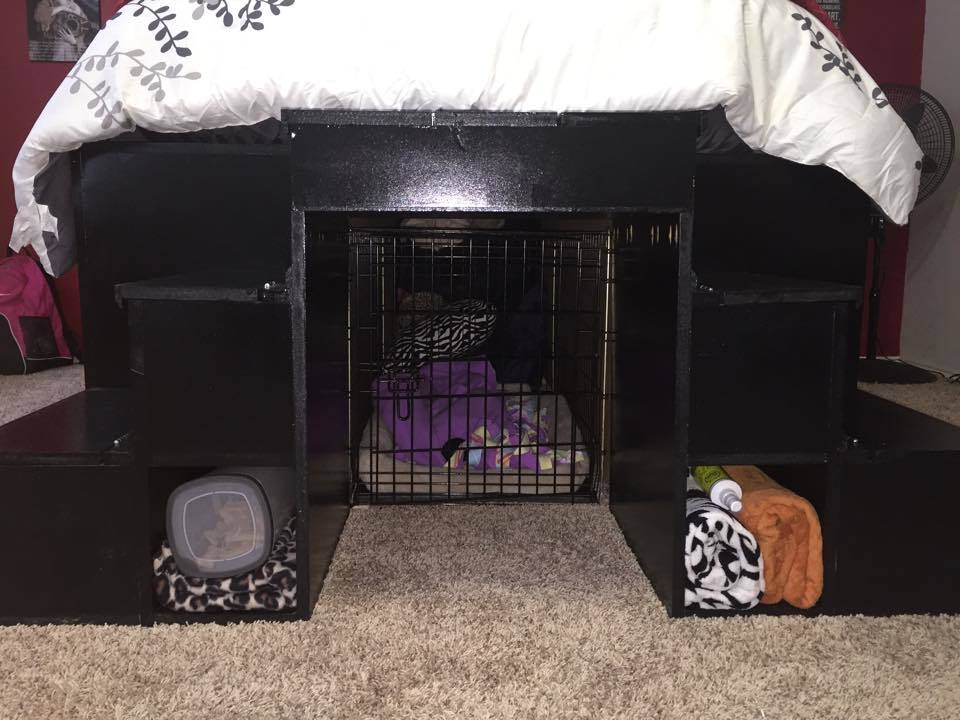
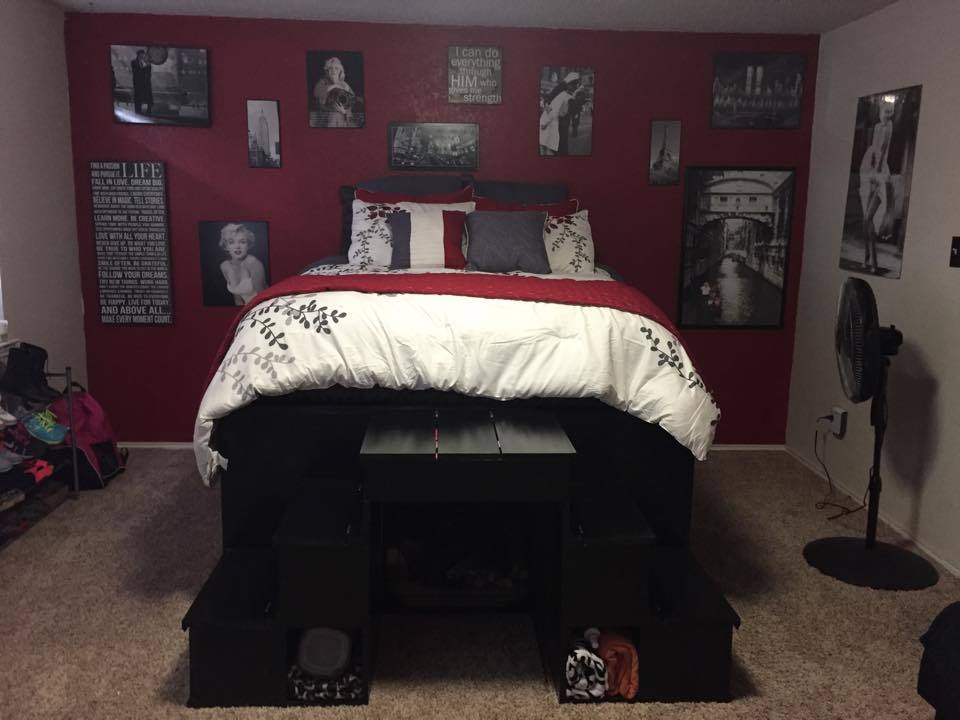
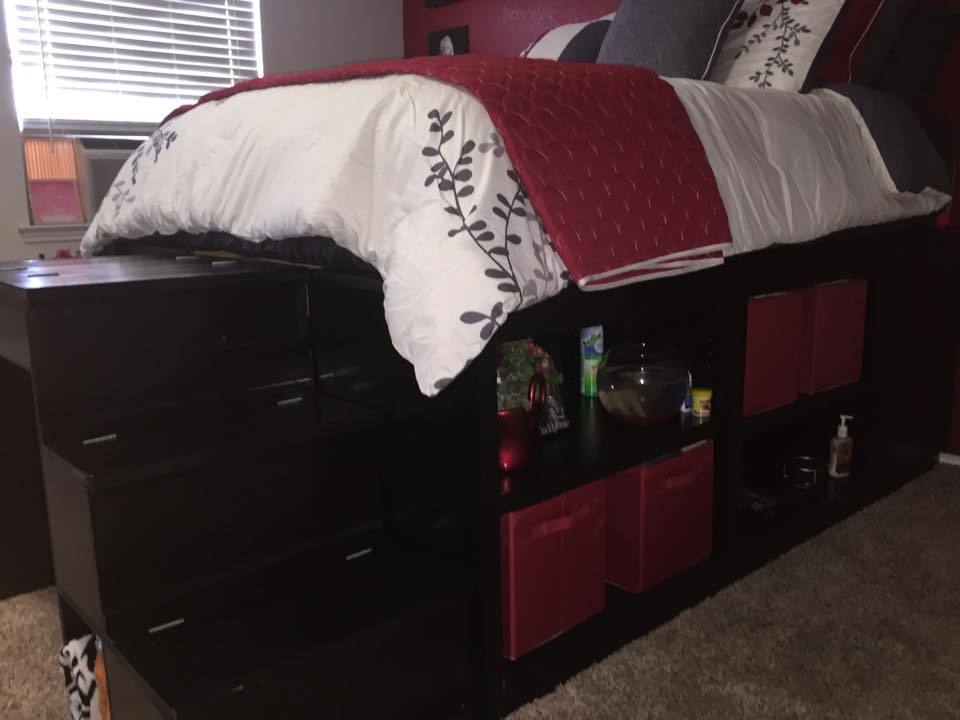
My daughter wanted a bed with lots of storage so searched on here and found the queen and king storage beds, but she wanted something taller.  So, I modifed the plans for the bed and made it slightly larger than a queen storage bed, but not quite as big as the king, and almost twice the height.  I then built a set of stairs (modified the plans for the stairs as well so she would have 2 sets that created a bridge for her dog's kennel to go under her bed hidden away slightly.  This was by far my biggest and most challenging project to date, but we were thrilled with the way it turned out.  She loves the bed and I loved the time I was able to spend with her while building (she is 20 so time like that is far and few between)

Estimated Cost
$500
Estimated Time Investment
Week Long Project (20 Hours or More)
Finish Used
high gloss black paint and polyacrylic
Recommended Skill Level
Intermediate

Comments

Cooler chest

Submitted by Anonymous (not verified) on Tue, 06/13/2017 - 09:40

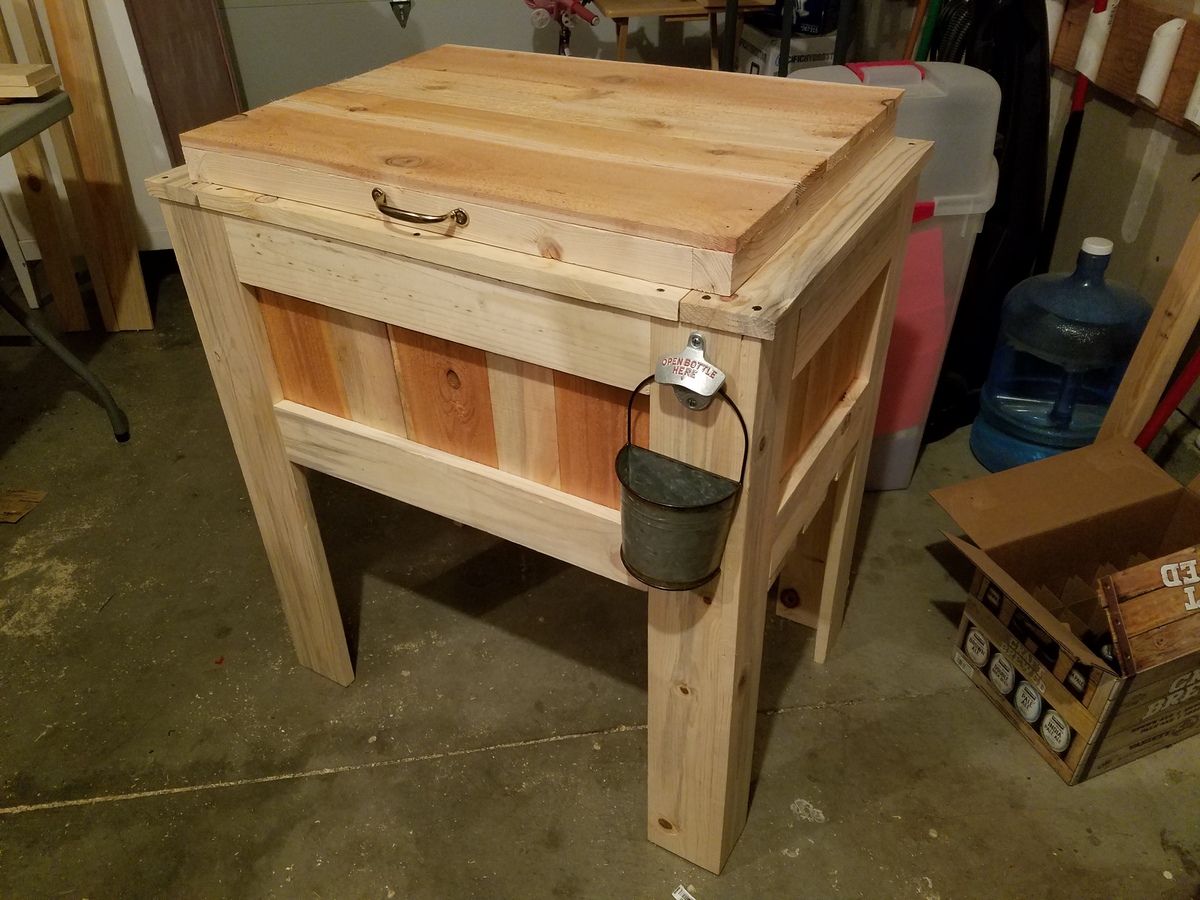
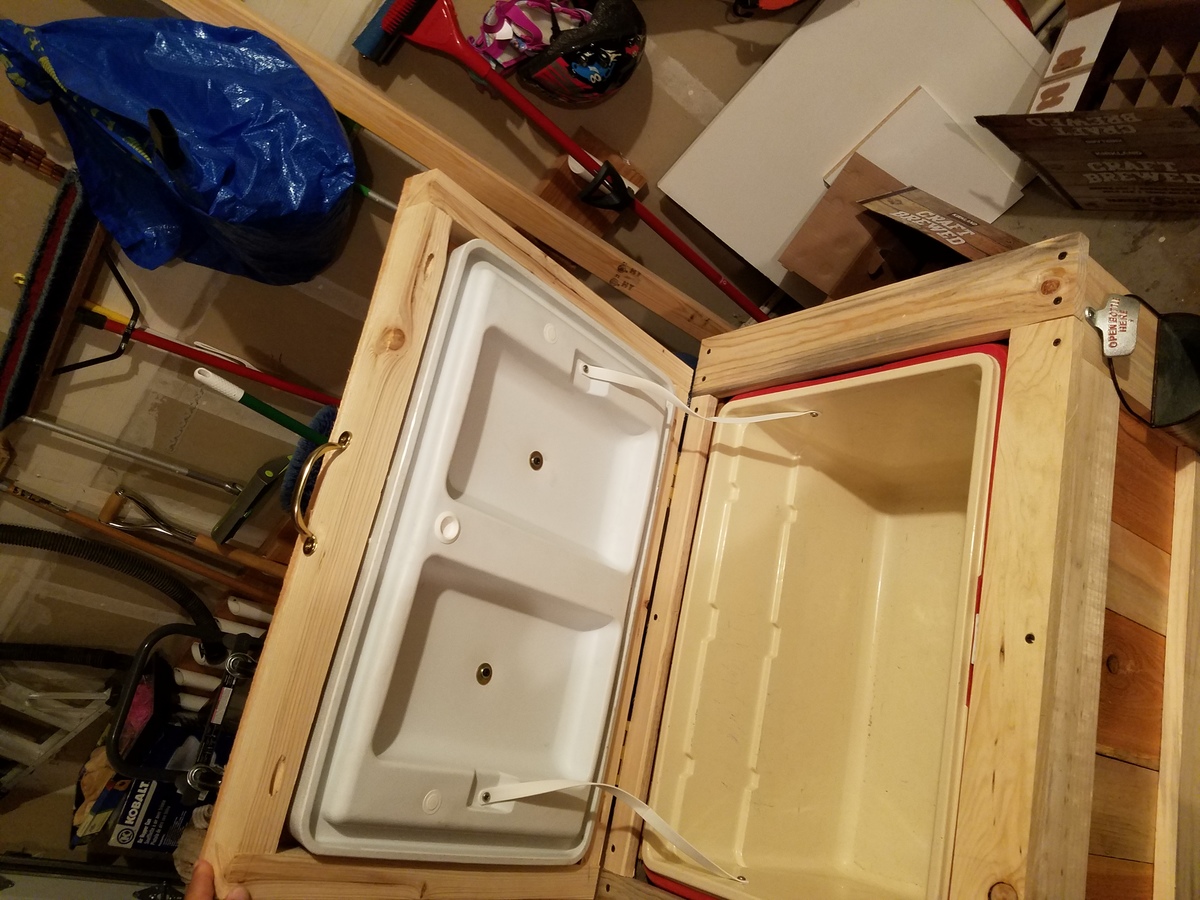
I'll be honest I didn't use these plans to build this cooler chest but this was the first place I saw the concept of building a box around a cooler to make a cooler chest so I give anna props for inspiring me I already had an old cooler to use so it helped keep the cost down I also used 1x4 blue pine and cedar fence picketts and repurposed the bottle opener from a growler carrier (in hindsight the bottle opener on a growler carrier doesnt make sense) all told this cost me about $45

Estimated Cost
$45
Estimated Time Investment
Afternoon Project (3-6 Hours)
Recommended Skill Level
Beginner

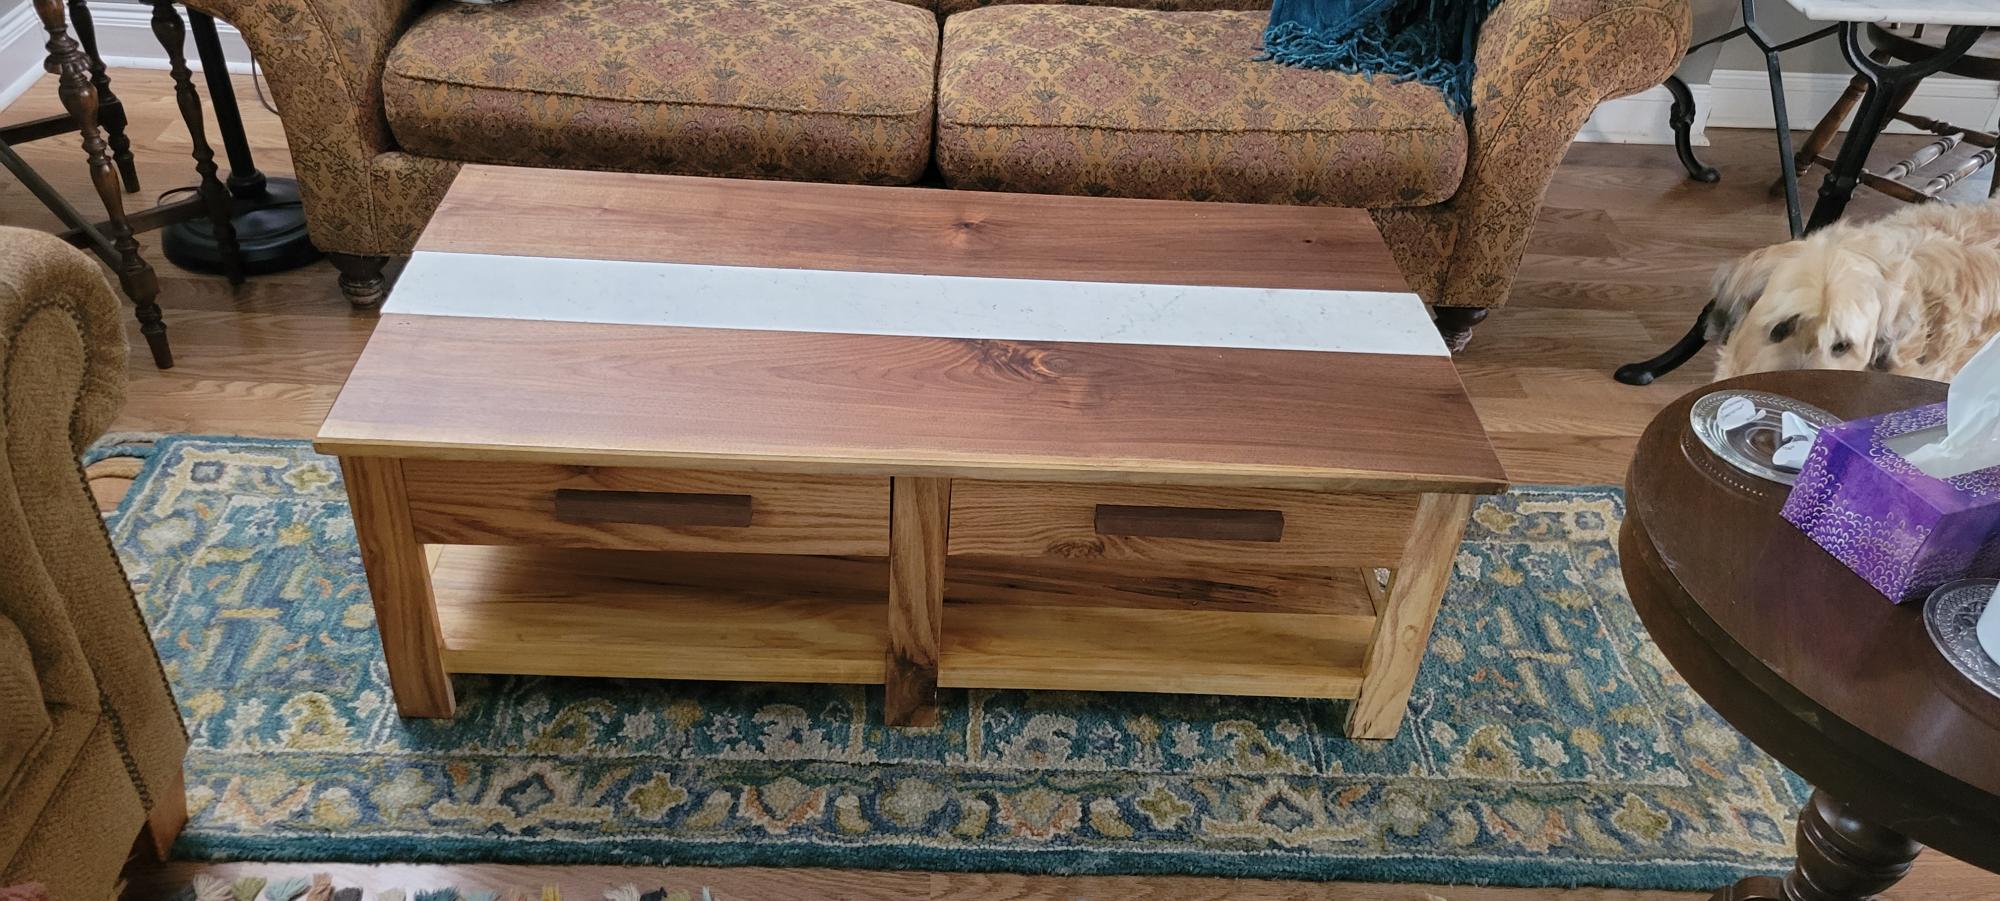
Coffee table

I modified the plans and used oak instead of pine. I used black walnut on top is guangzhou on top with white granite strip in the middle

Estimated Cost
I had all the materials in my shop except for the black walnut. That cost $100
Estimated Time Investment
Weekend Project (10-20 Hours)
Finish Used
3 coats of polyurethane
Recommended Skill Level
Advanced

Comments