Community Brag Posts

Brookstone Desk and Hutch Combination

Submitted by JLW on Mon, 08/06/2012 - 19:16

I saw this plan and knew that I had to build it for my home office. The top of the desk is the perfect size for my HP printer/scanner. I added the cork backing as suggested in the plan - works great for adding notes and papers to the back of the desk.

Because I am taller I modified the plan by not adding the middle drawer to the desk. This gave me the knee room I needed to be able to get my desk chair underneath and close enough that I could type. I also cut a hole in the desk top to place an cable grommet in so that I could run wires for my electronics through it. I added two pocket holes in the back plate to further secure it to the desk bottom.

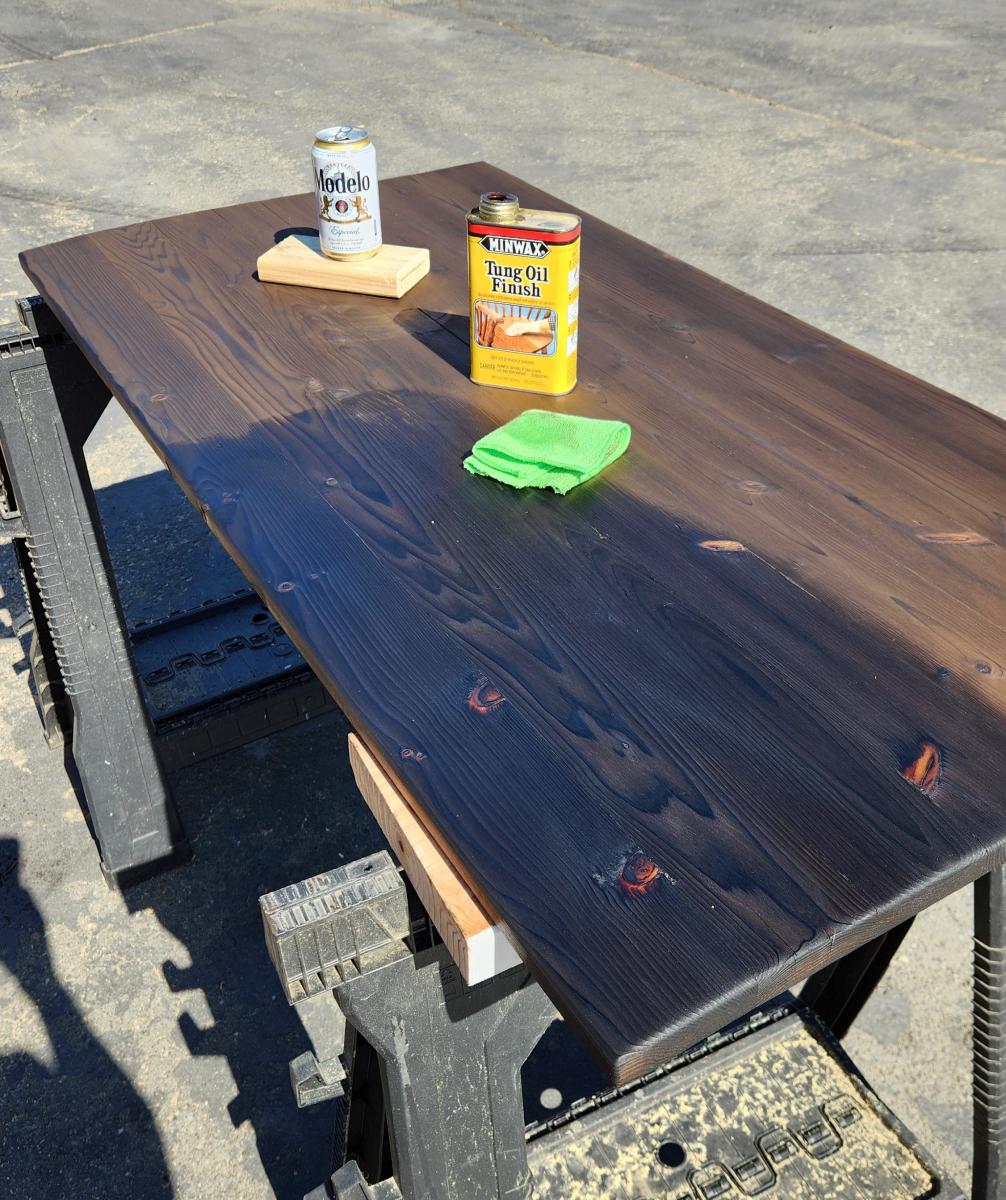
The only disappointment I had was not with the design but with the stain. While I like the color, at a distance it ends up looking like paint rather than stain. I don't know if the wood was drier than normal and soaked the stain more, or if it just stained darker than I thought it would (i.e. should have stayed with one coat rather than two). But, when I'm sitting at the desk I can see the wood coming through the stain so the dual character of the stain isn't so bad.

The design is quick, simple, and easy to follow. It came together in no time.

Estimated Cost
$80
Estimated Time Investment
Day Project (6-9 Hours)
Finish Used
Minwax River Stone tinted stain, Minwax satin wipe on poly
Recommended Skill Level
Beginner

Huge butcher block cutting board - my very first build ever!

Submitted by kendikat on Thu, 08/09/2012 - 14:37

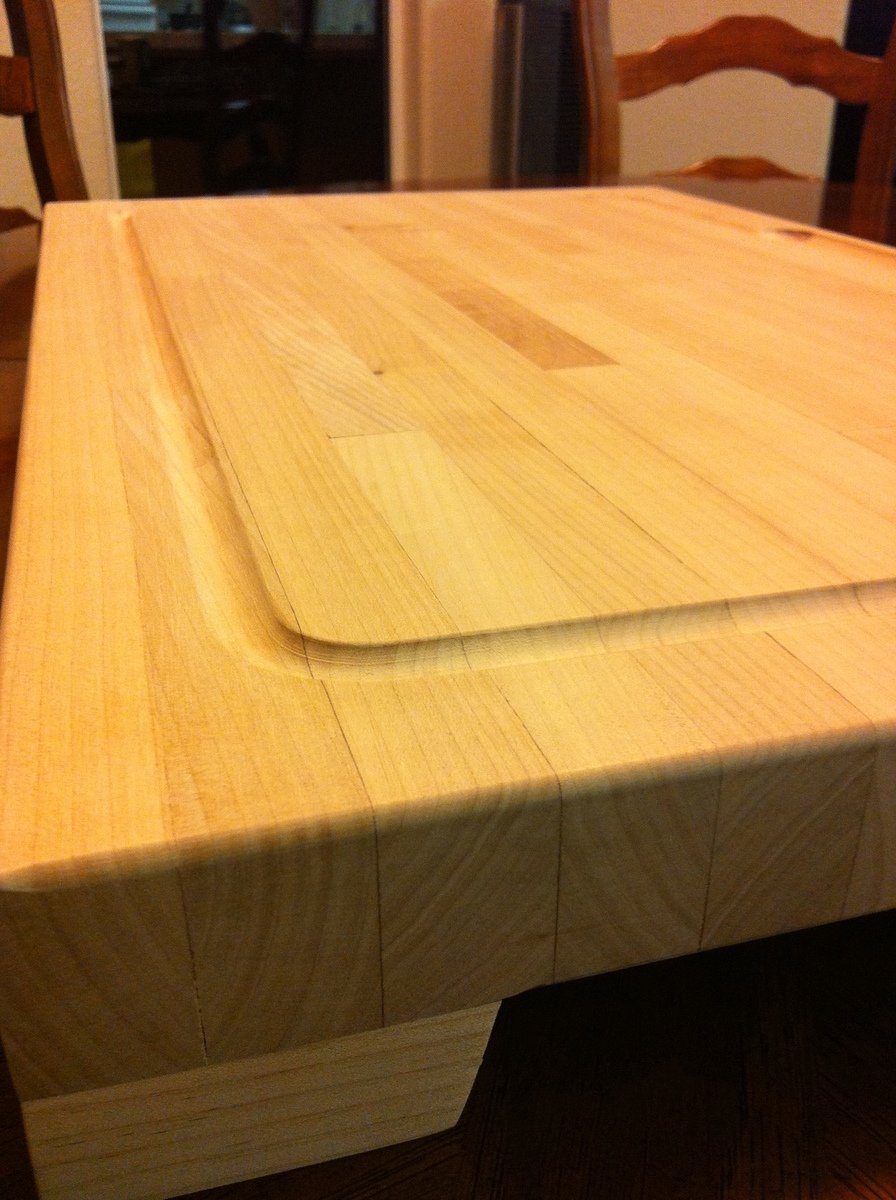
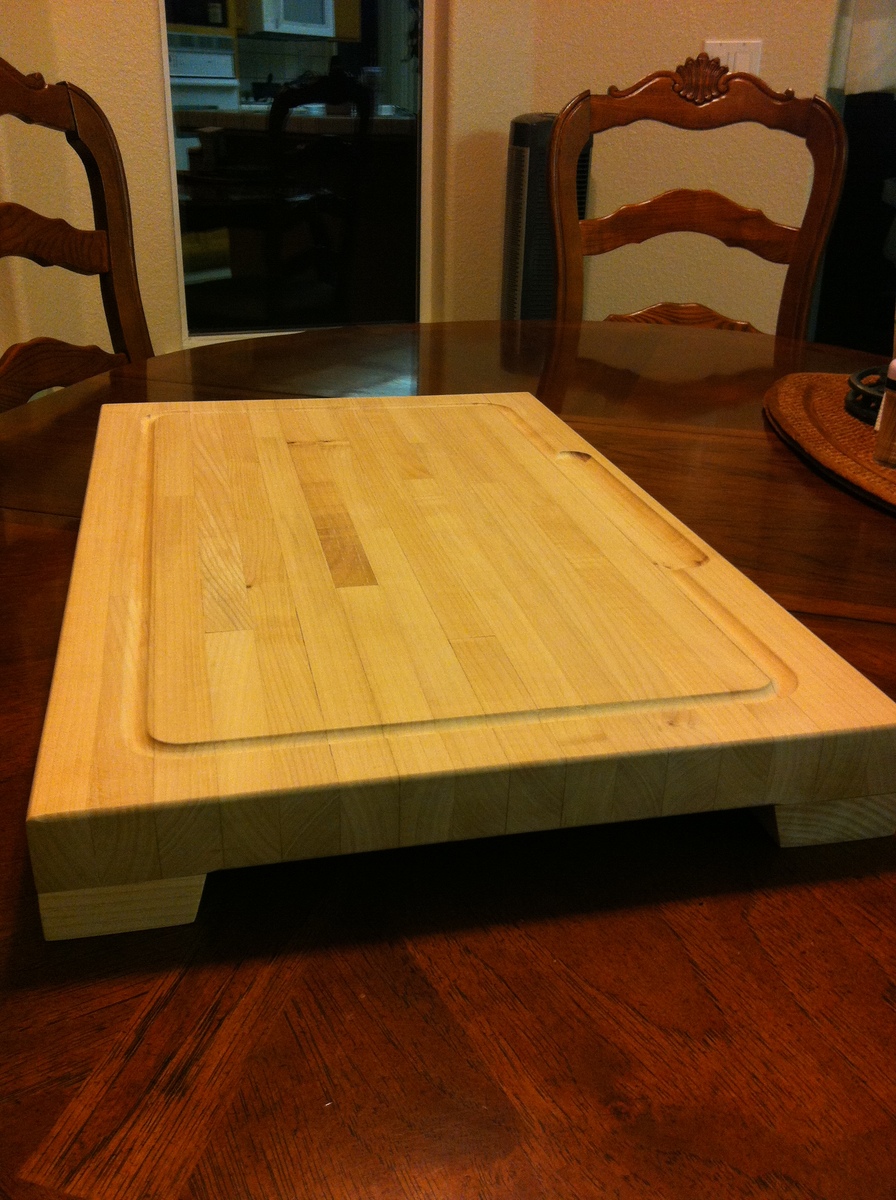
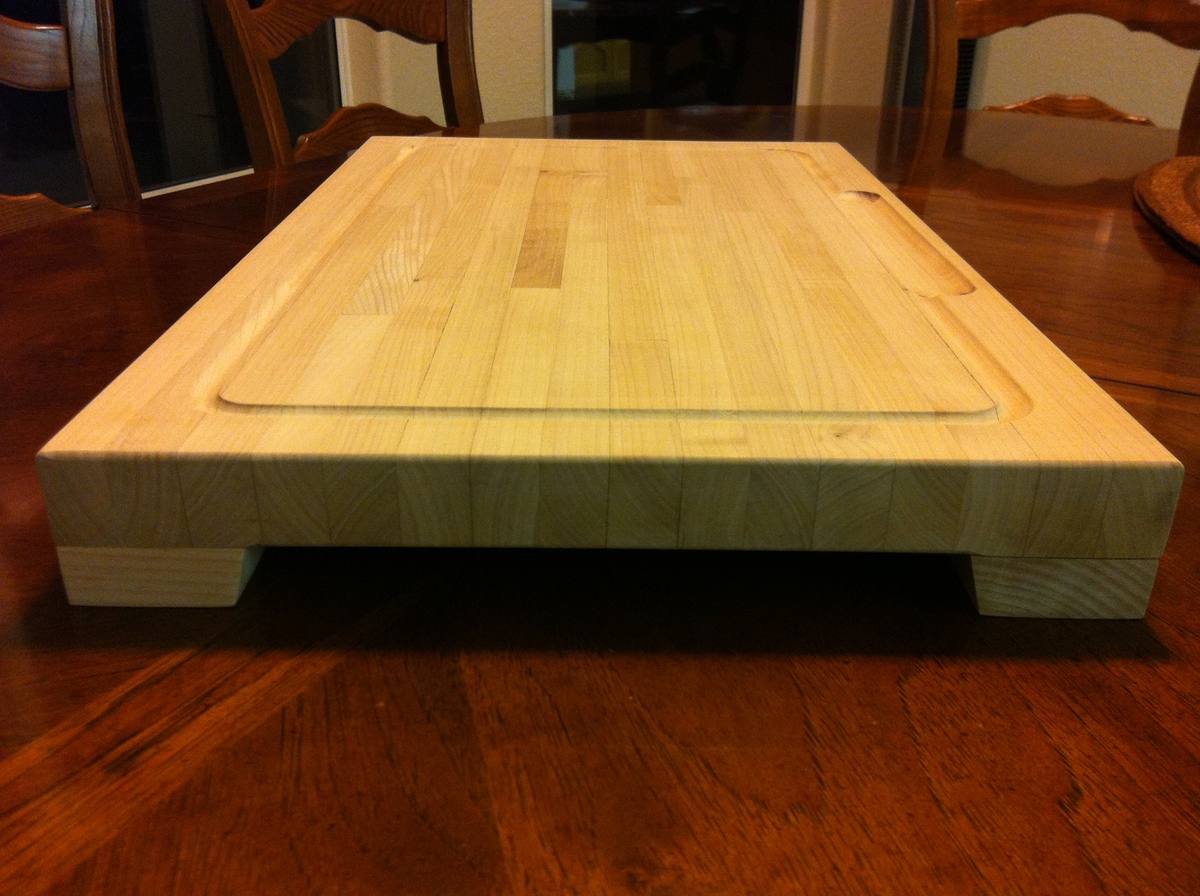
This was my very first build ever! I enrolled in a beginning woodworking class at the local community college and our first assignment was to make a cutting board. All that was required was a super simple cutting board with some wood strips glued together then cut into a shape of some sort. But I decided that if I was going to bother making a cutting board, I was going to make something awesome and useful. I wanted to make a butcher block style cutting board. My boyfriend's only input was that he wanted something "big enough to hold a tri-tip". This was the result! It's made of PC maple and measures 23-1/4" long by 14-1/2" wide and 2-1/4" tall with the feet (1-1/4" thick cutting surface). It took me way longer than most of the other people in the class, but I love it. For this project alone, I had to learn to use the table saw, the compound miter saw, the planer and jointer, the router, an assortment of machine sanders and palm sanders available in the school's shop, the glue scraper (oh goodness I hate glue squeeze-out), and how to do clamping set-ups. At the very end, I finished it with mineral oil, and we broke it in with an amazingly delicious prime rib at New Year's ;D

Estimated Cost
$20
Estimated Time Investment
Week Long Project (20 Hours or More)
Finish Used
Mineral oil, just a regular bottle from the drug store. Apply a liberal coat, allow to soak in, apply again, allow to soak in, and so on, until it goes for at least a few hours without absorbing any more, then wipe off the excess.
Recommended Skill Level
Intermediate

Old Deck Wood Laundry Crate

Submitted by dmcarwin on Mon, 06/02/2014 - 07:56

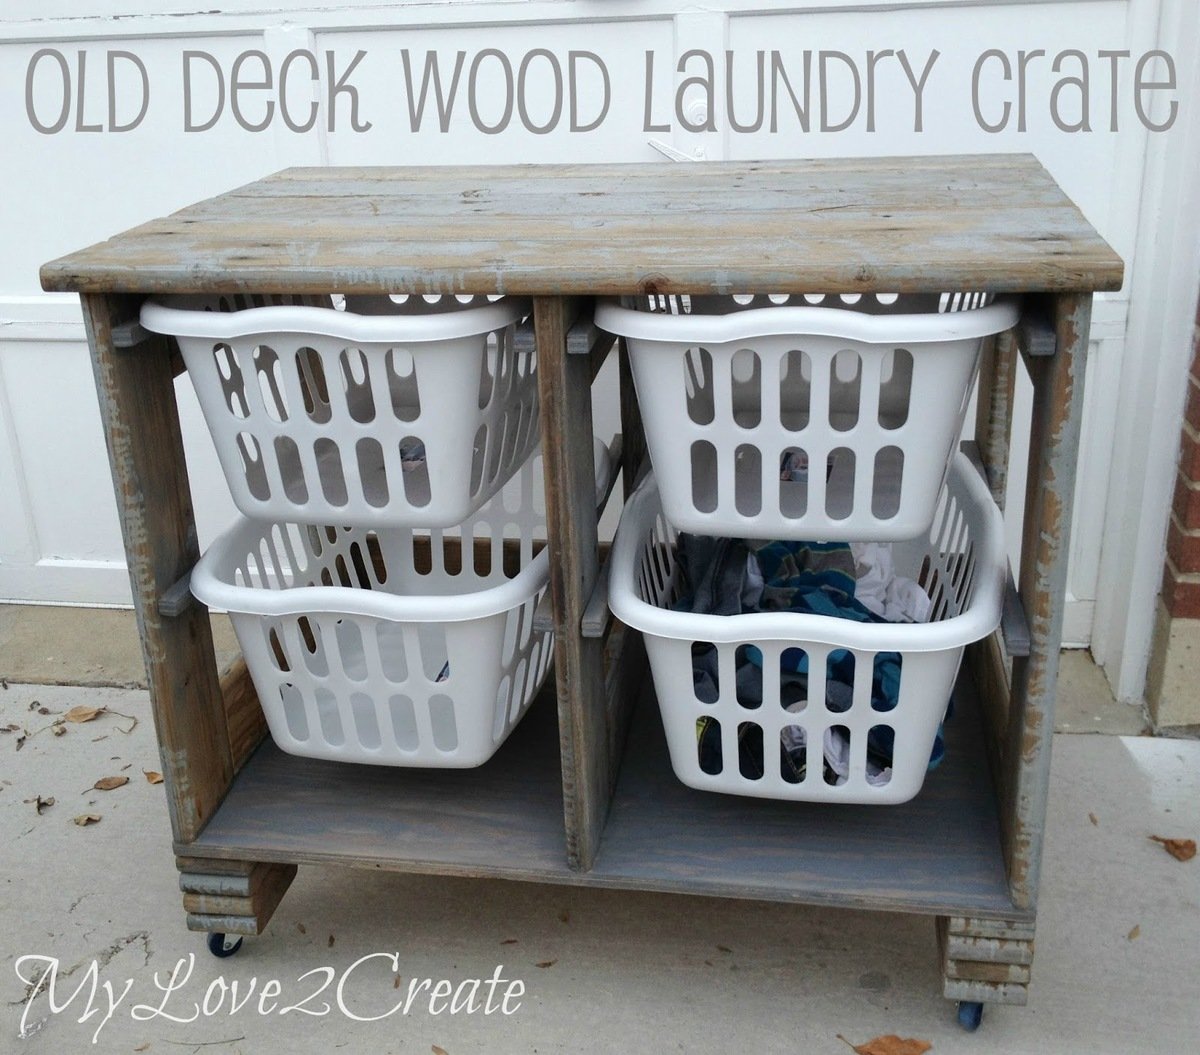
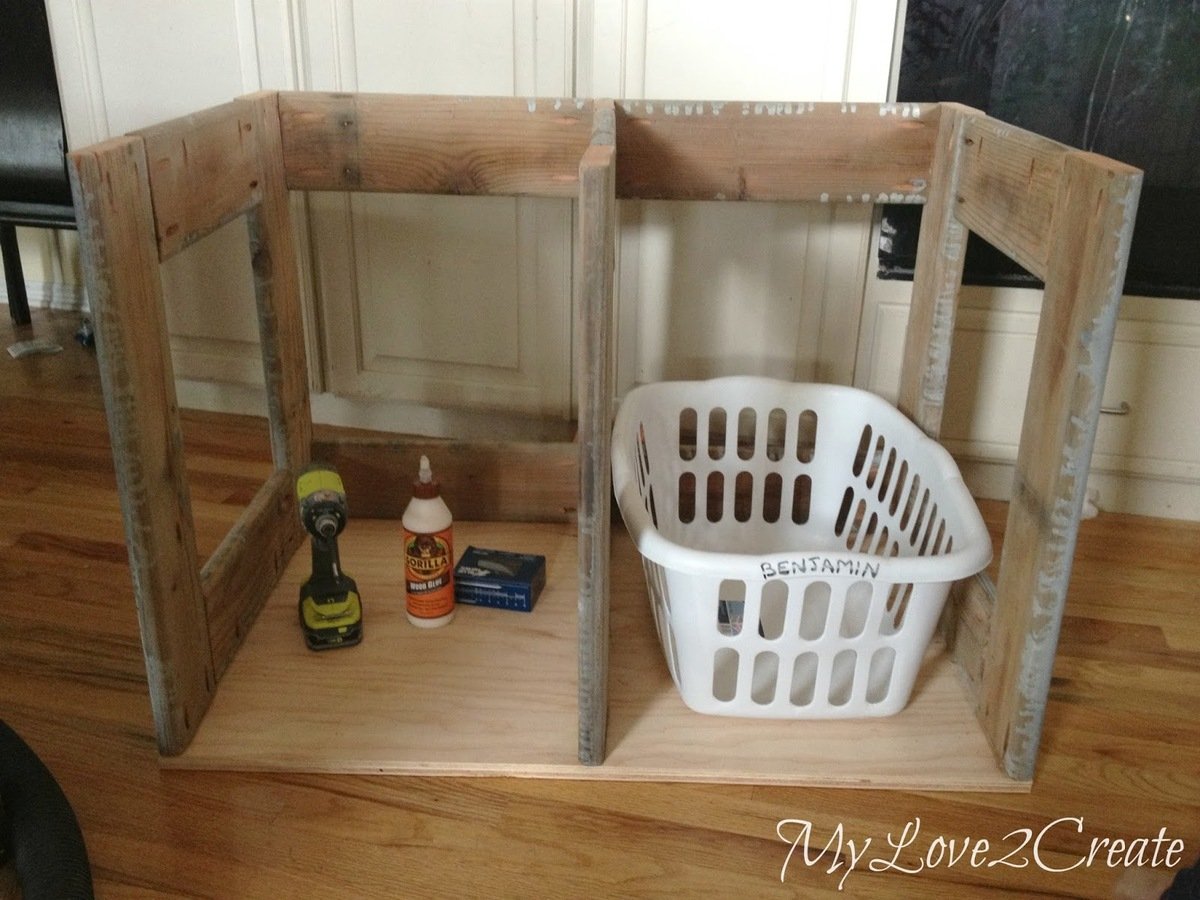
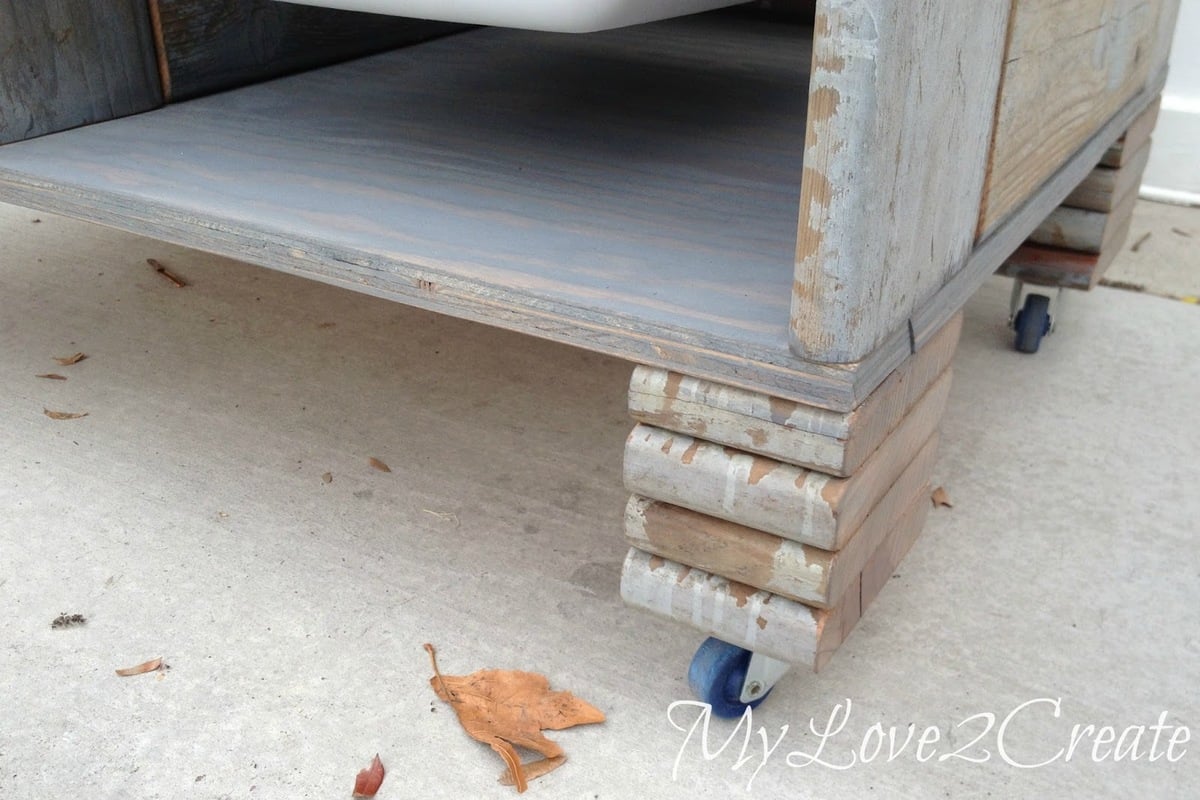
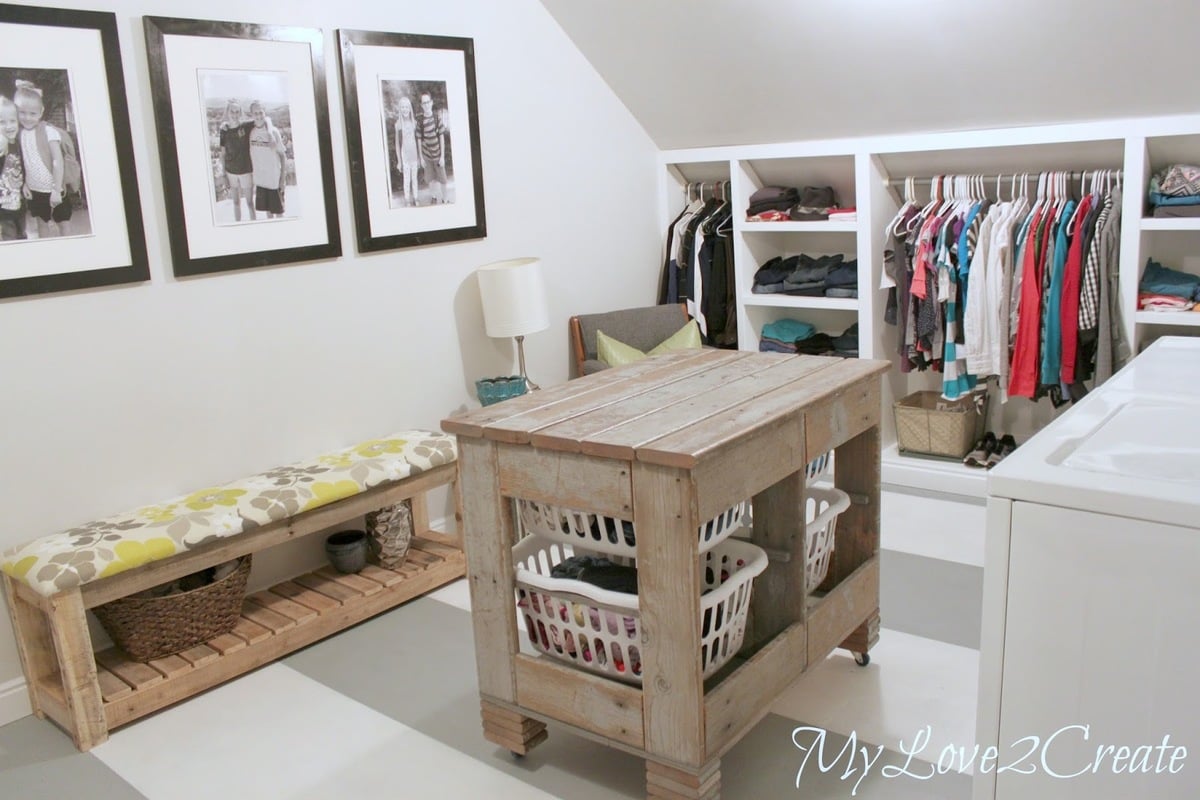
I have been in love with Ana's laundry dressers since she first posted them. When I helped makeover my sister's Closet/Laundry room I knew she had to have one! Only problem? We were out of funds. I wouldn't let that stop me!! With some free old deck wood I modified Ana's laundry dresser into a rustic awesome laundry crate! Talk about bringing cute to the laundry room, this totally fits the bill, and it is of course useful. She uses the top as a folding station too. To make it taller I cut small pieces of the deck wood and stacked them for feet, which I love! Then I added casters so she could roll it around the room. For a full tutorial check out my blog post, you won't be sorry!

Built from Plan(s)
Estimated Cost
Free! (ok, I spent $4 on casters, they were on sale at Harbor Freight)
Estimated Time Investment
Afternoon Project (3-6 Hours)
Finish Used
Three coats of poly on the top.
Recommended Skill Level
Beginner

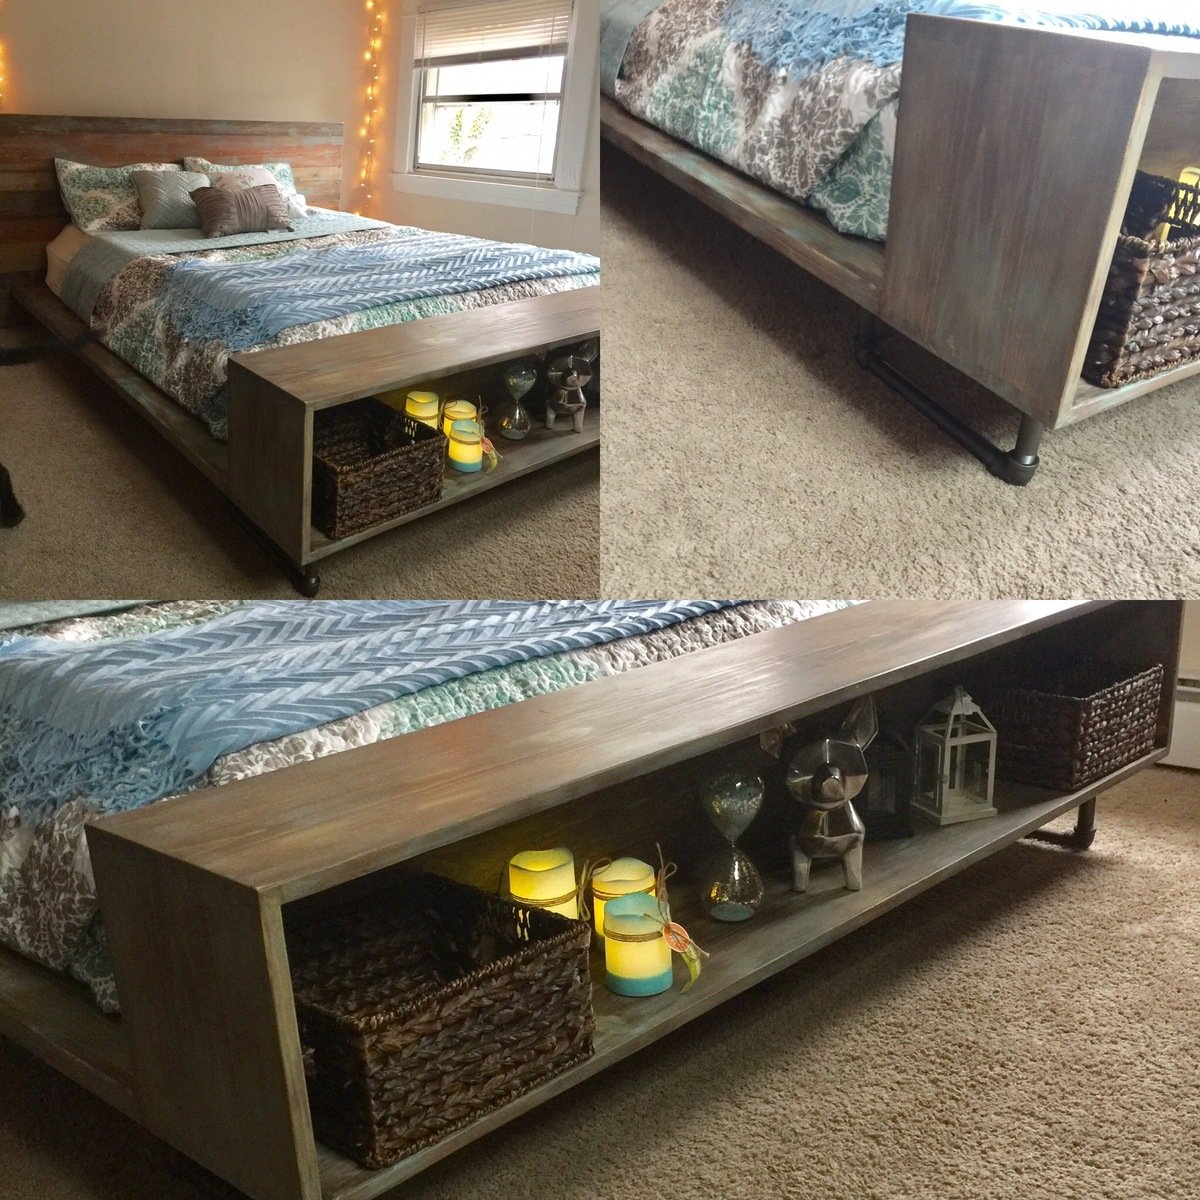
Double dog coffee table crate

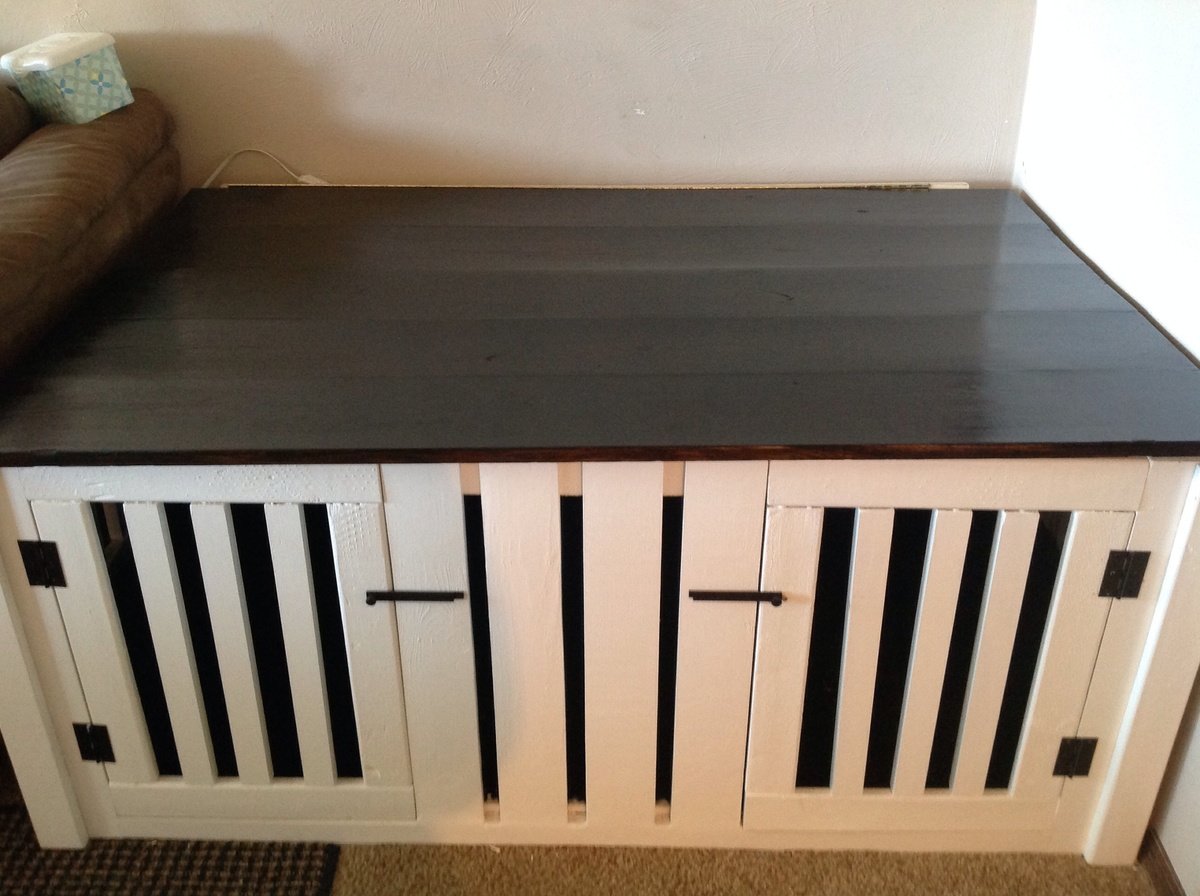
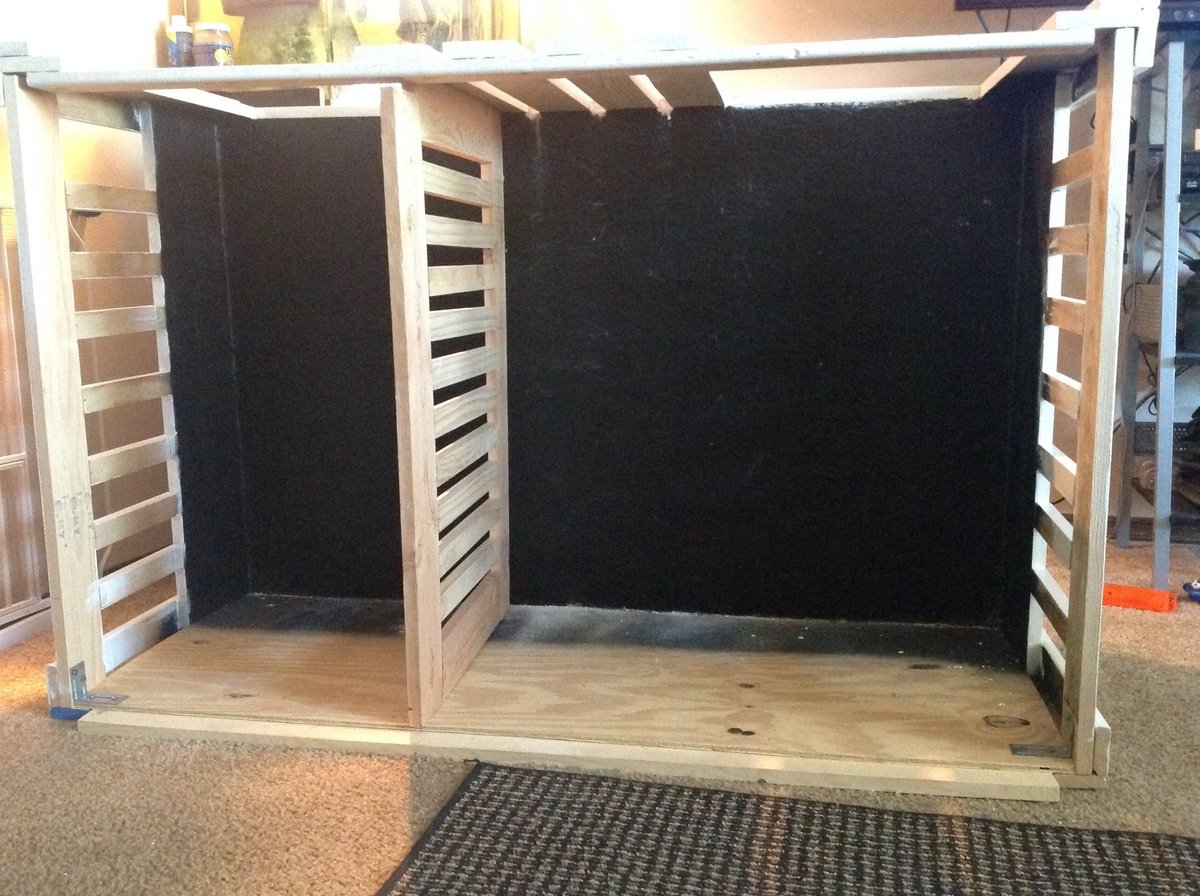
I LOVE the way this turned out! I used truck bed liner for the floor and the sides because one of the dogs is still a puppy and truck bed liner is TOUGH and waterproof (in case of accidents)! I made one side of the crate huge and one side small to match the size of our dogs. The really nice thing is that you can't tell by looking at it that it is two different sizes inside. This looks so much better than those ugly wire or plastic crates.

Built from Plan(s)
Estimated Cost
$85
Estimated Time Investment
Weekend Project (10-20 Hours)
Finish Used
I primed all of the wood except the lid. On the interior I sprayed truck bed liner over the primer. On the outside I used Beyer high gloss "parchment paper" color. (I used high gloss so dog dirt, dander and fur would be easy to wipe off). I used Minwax wood prep first and then I stained the top with Minwax espresso. It took about 3 coats of stain to get the color I wanted and 2 coats of paint after the primer.
Recommended Skill Level
Beginner

Comments

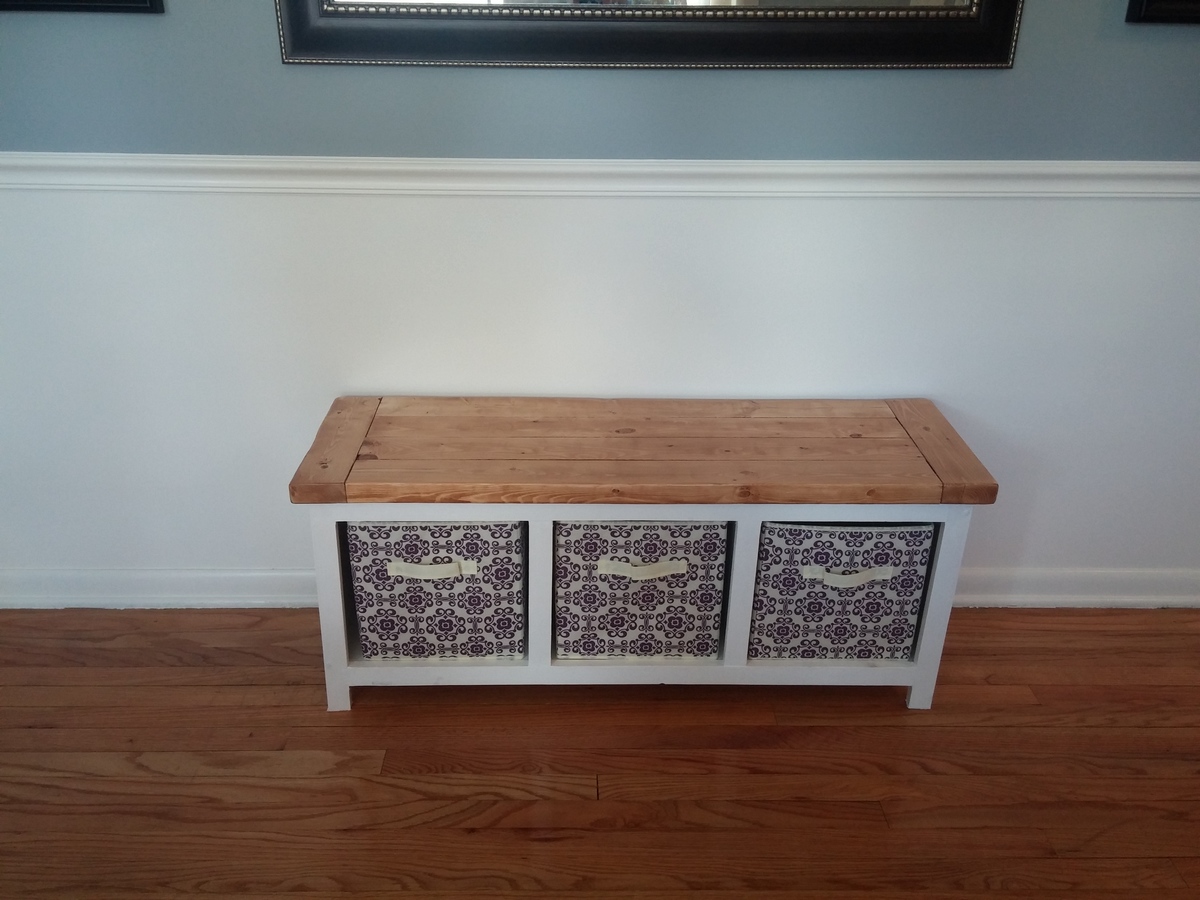
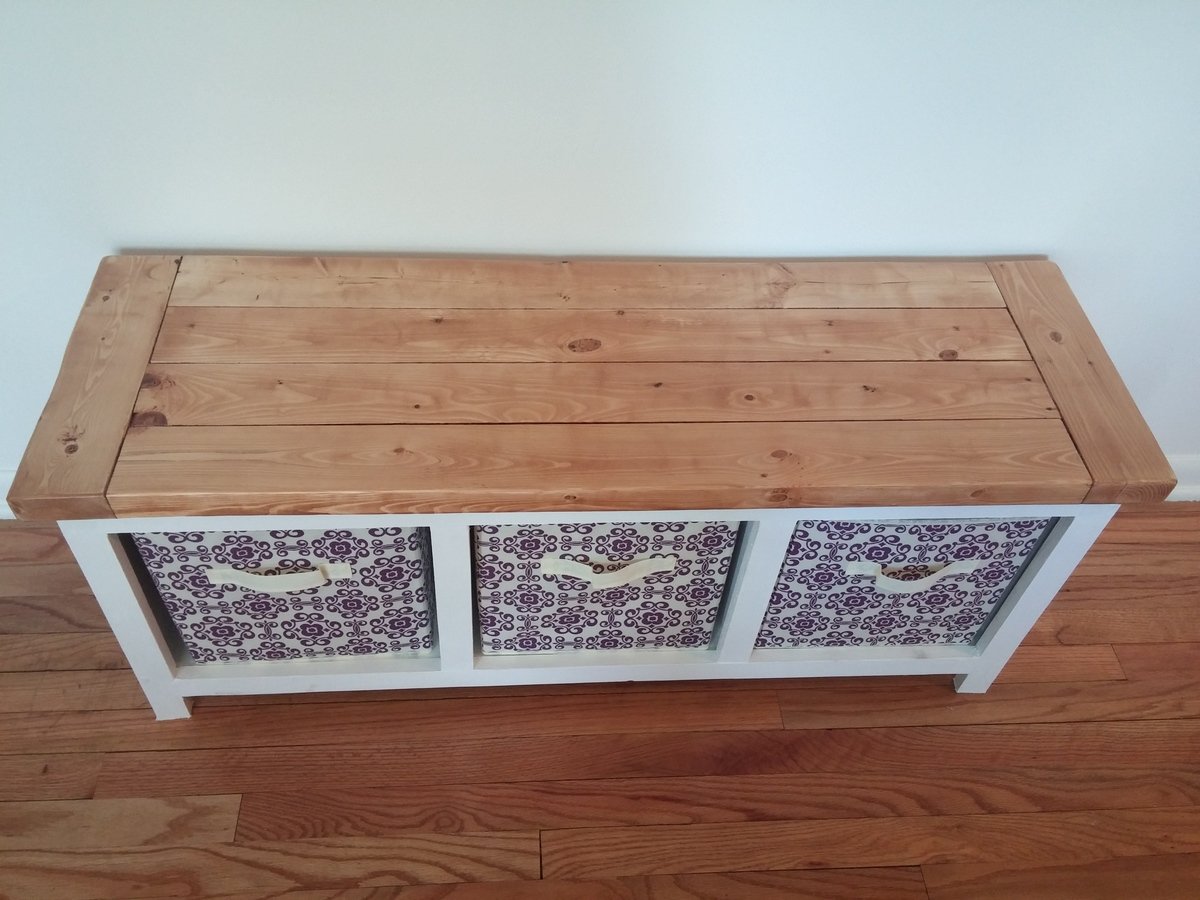
Three Cube Bench

Submitted by Anonymous (not verified) on Sun, 09/11/2016 - 07:42

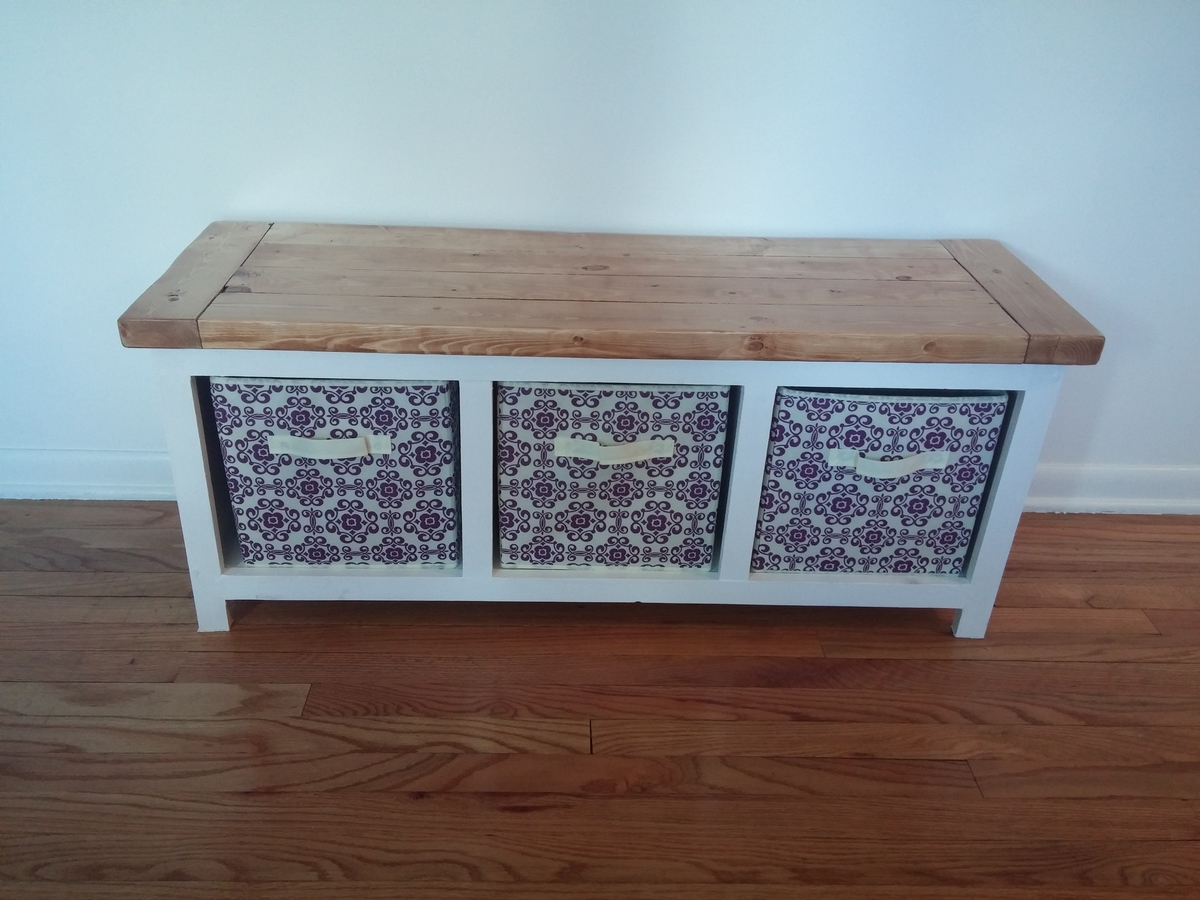
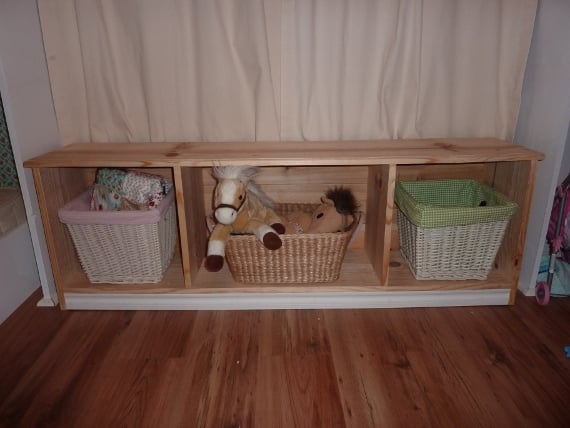
I used the bench top from Ana's Farmhouse Table and took 1.5in off the legs to compensate.  Got the baskets on Amazon.

Estimated Cost
$60
Estimated Time Investment
Weekend Project (10-20 Hours)
Finish Used
Special Walnut over Honey Oak
Recommended Skill Level
Beginner

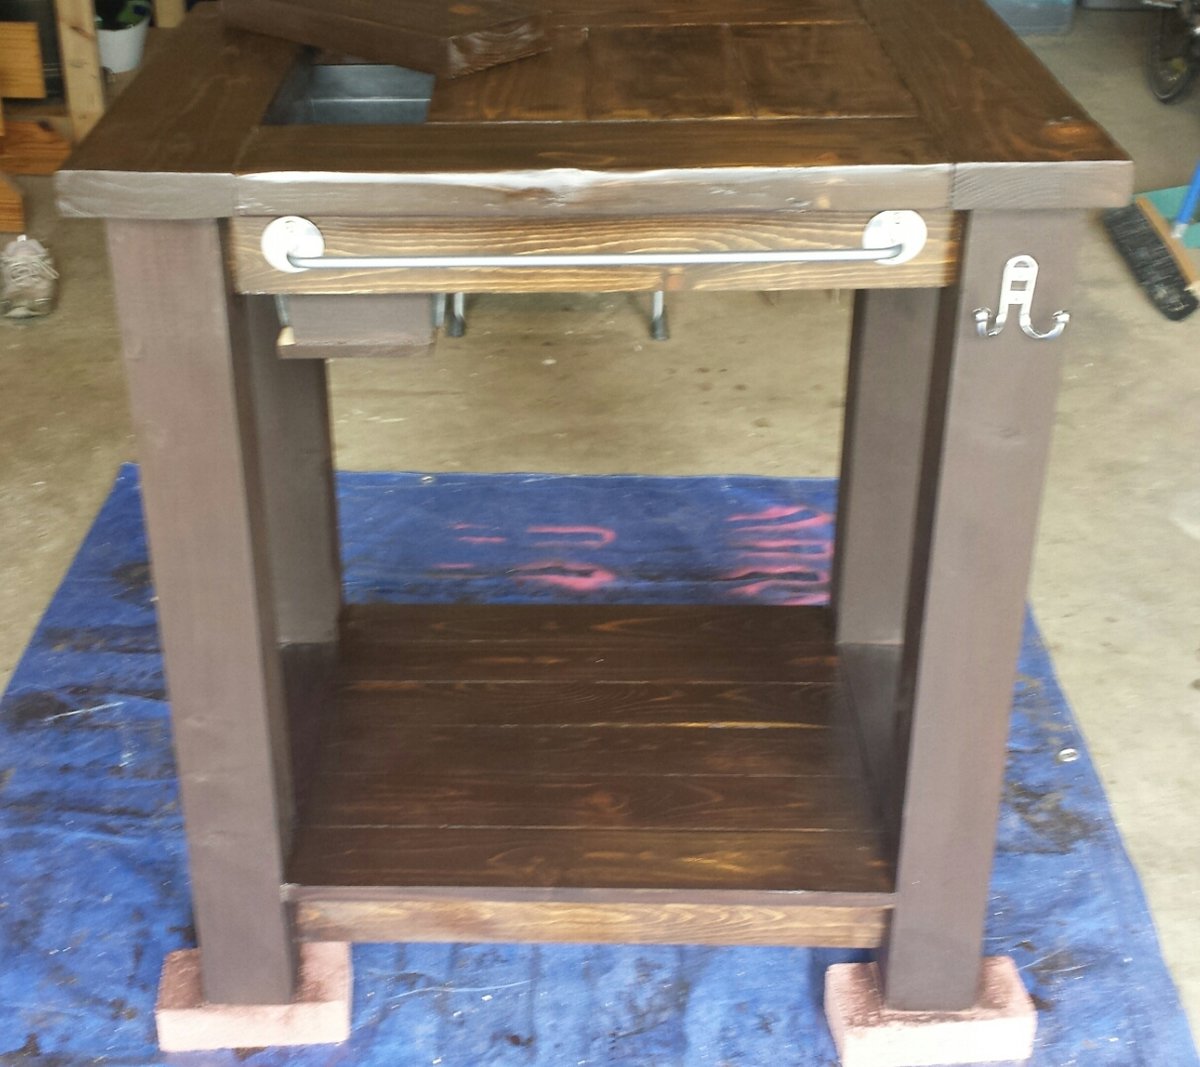
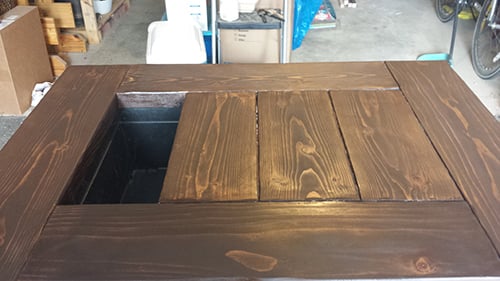
Grill Prep Table with built-in cooler

Submitted by coolove on Sun, 06/15/2014 - 18:03

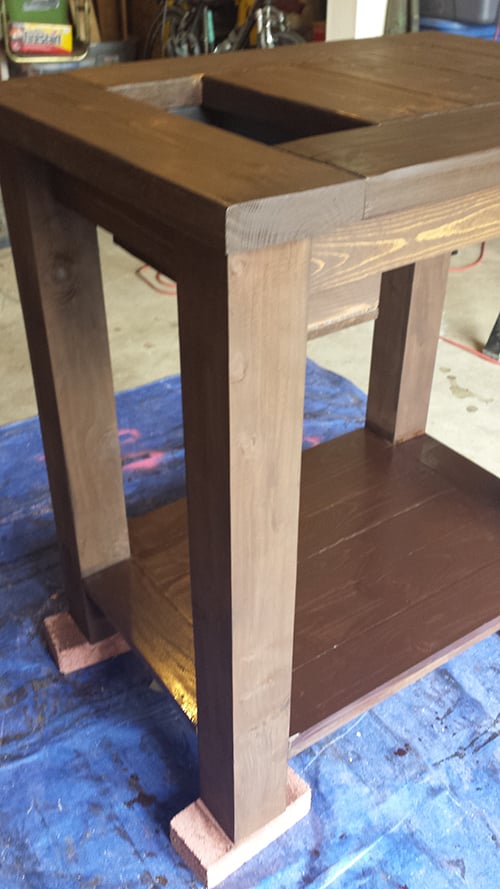
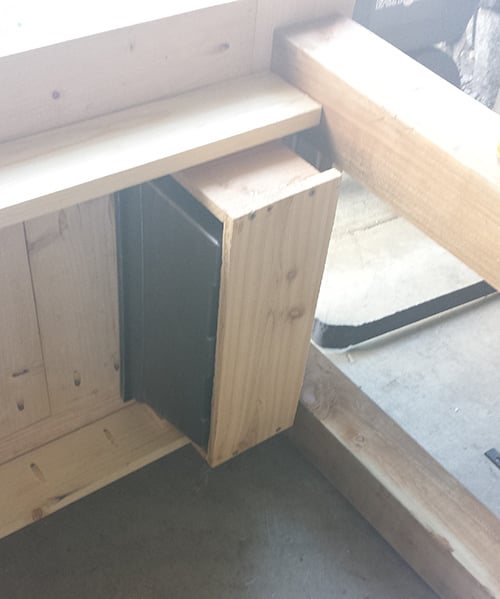
I made this for my father for Father's Day. I wanted to do a grilling prep table with a built in cooler. The cooler part is not really just for drinks but also a place to store barbeque utensils while in use.

Height is 36 inches. Made out of 2x6s, 1x4s, and 4x4s. Because the table is so short, the planter slides in and out from the side underneath the table top. I had cut the top before buying the planter which lead me to do a few changes to my initial design on the fly.

Estimated Cost
$36 for wood excluding the top. (Already had on hand), $25 for bbq accessories
Estimated Time Investment
Weekend Project (10-20 Hours)
Finish Used
Varathane Dark Walnut. Two coats. And Cabot Spar Finish Semi-gloss. Four coats for the top and three coats for the bottom shelf.
Recommended Skill Level
Beginner

Comments

Cross35

Thu, 03/12/2015 - 10:50

I love to grill and would love to build one of these. Do you have any other details on your design? Cut lengths or anything? I'm too new to building to deviate to far from plans right now haha.

Thanks!

Window Bench With Storage

Our daughter's room has built-ins on either side of the window. I always wanted a window seat to sandwich in between, but couldn't find one with the right dimensions.....THANK YOU ANA WHITE! I used her Entryway Bench plan and just changed the length and depth to fit the window. I didn't add the side and back supports on top, but I bullnosed all the edges to make it look more finished.
I built this in one afternoon and even used cedar fence planks (left over from my husband's fence project) for the backing....love the extra charm of those planks!
We also had some molding left over, so I worked that in to the bottom for a little extra detail.
Haven't painted it yet....just enjoying it's usability until I decide on a color. It's super durable. My three year old sits on it (to read), stands on it (to spy on the neighbor's cats) and tosses those baskets in and out all day long.

Estimated Cost
$35
Estimated Time Investment
Afternoon Project (3-6 Hours)
Recommended Skill Level
Beginner

Kitchen Island

Submitted by bbomer on Tue, 09/04/2012 - 18:41

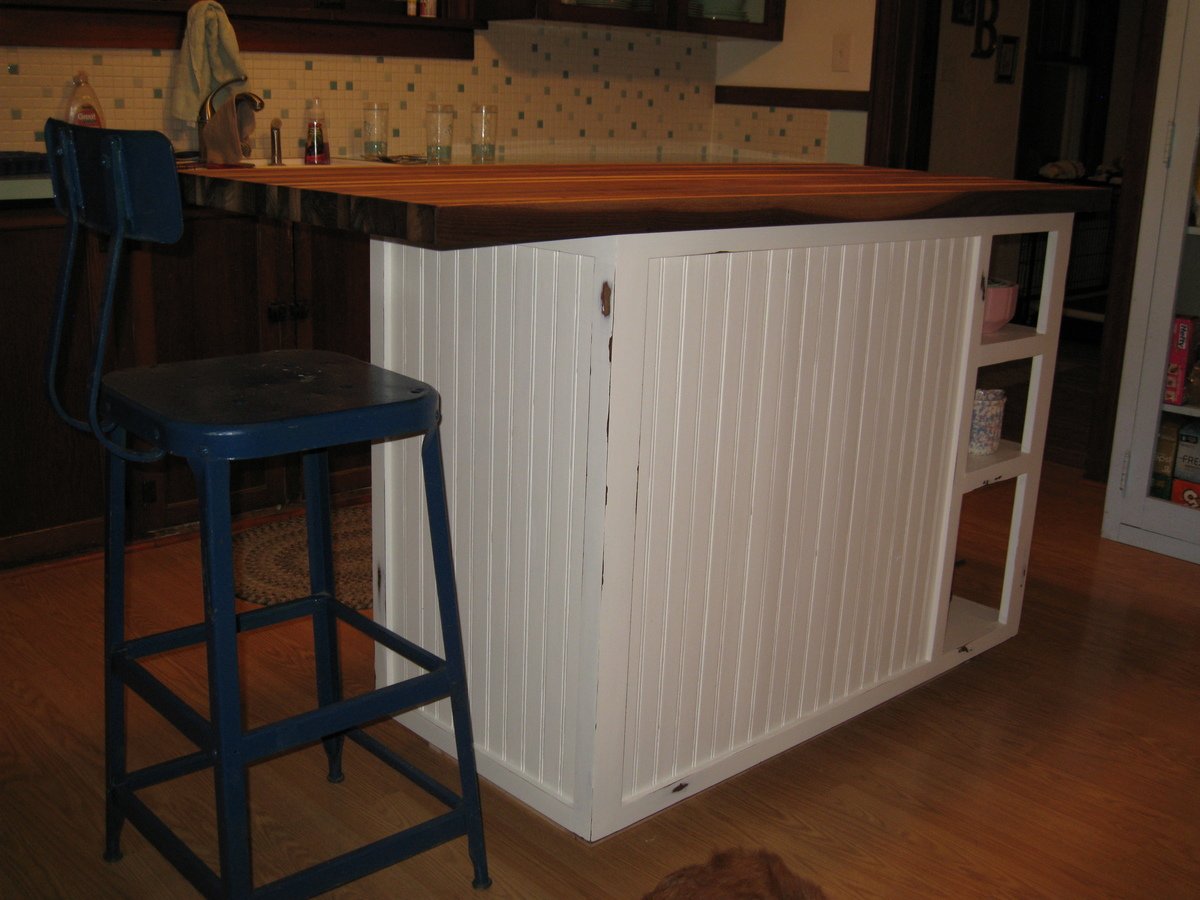
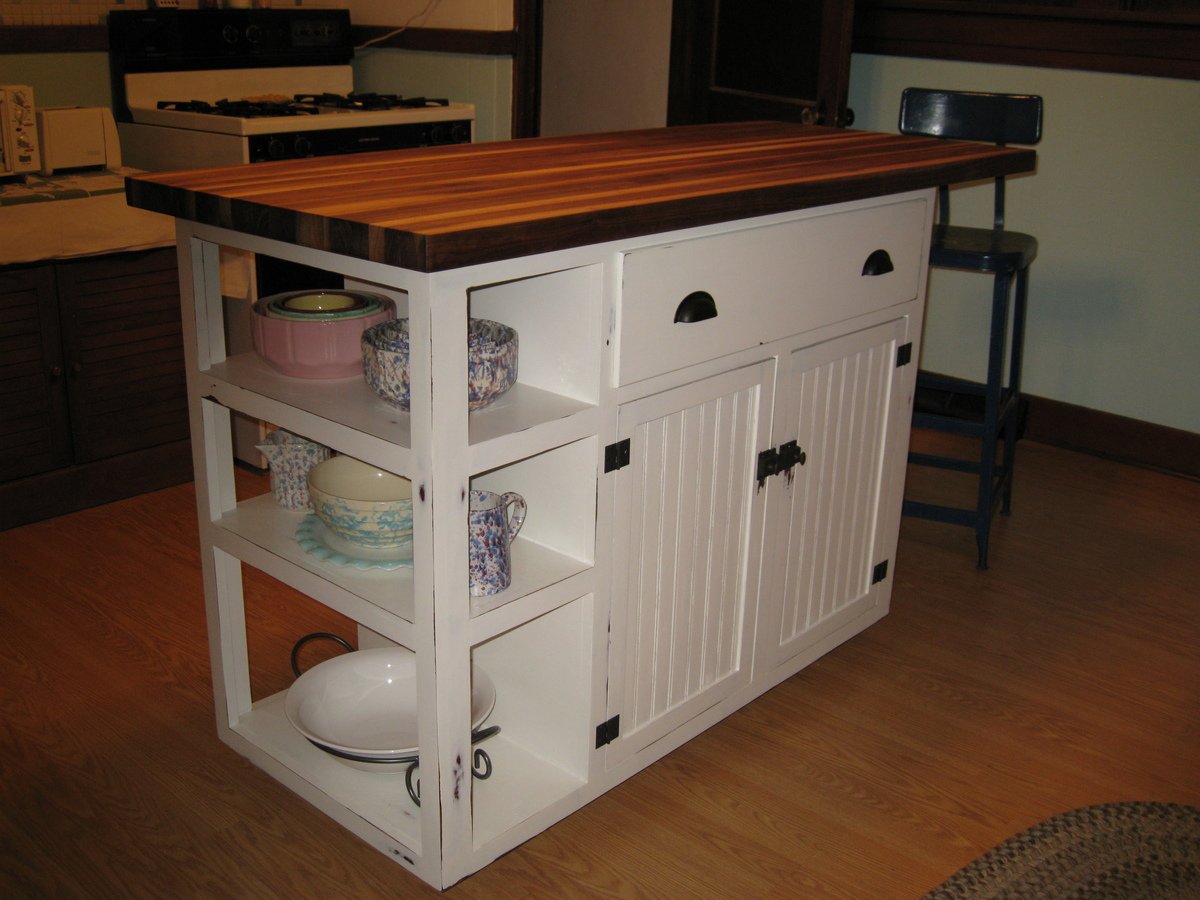
I built this island using Ana's base cabinet plans. I simply added a face frame to all the sides because they are all visible. My wife drew up the plan that includes open storage at one end and an overhang at the other to provide room for a stool. We bought the butcher block top online. It comes unfinished, so we had to sand it down smooth and treat it with mineral oil.

Estimated Cost
Approx. $500
Estimated Time Investment
Week Long Project (20 Hours or More)
Finish Used
Danish Oil + Shellac + Latex + Minwax Polycrylic
Recommended Skill Level
Intermediate

Comments

Kathy in Pittsburgh (not verified)

Wed, 09/05/2012 - 09:55

I'm in love....this is gorgeous! You both should be very proud of how it turned out. Now, if only my kitchen weren't so small that I can touch both opposite countertops with my arms spread out.....I would build this in a heartbeat! :P

Blinky114

Thu, 11/06/2014 - 09:25

As Kathy in Pittsburgh said, .."this is gorgeous!" I too would be building this if my kitchen were nearly large enough to accommodate it.

Thanks for posting this, it gives me inspiration.

Mark in Portland, OR

mpullan

Sat, 11/25/2023 - 14:23

Pretty much what my daughter wants. I’ll have to be looking at yours a bit to figure out the open shelves. Thanks for posting!

Sandpit with built in seats and lid - metric

Submitted by mrs_dt on Tue, 07/08/2014 - 01:49

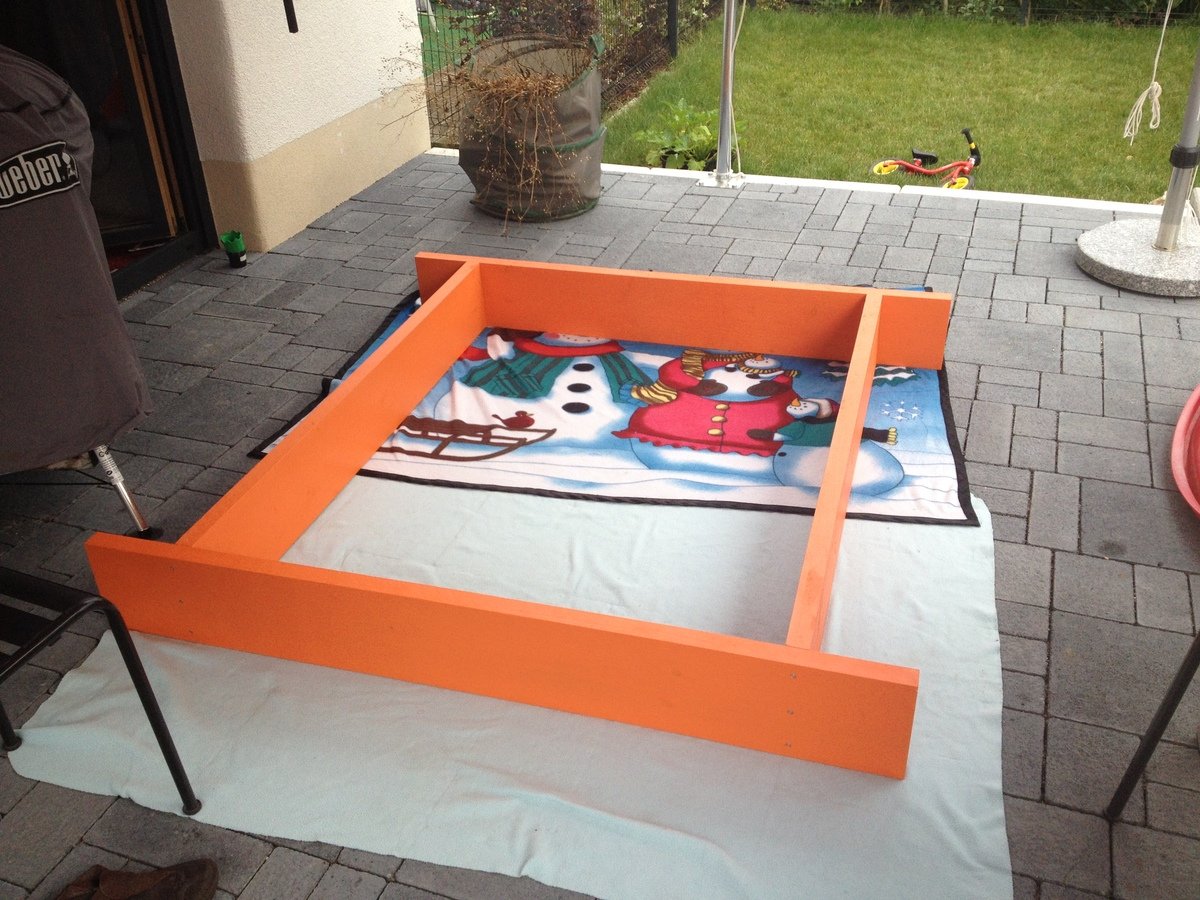
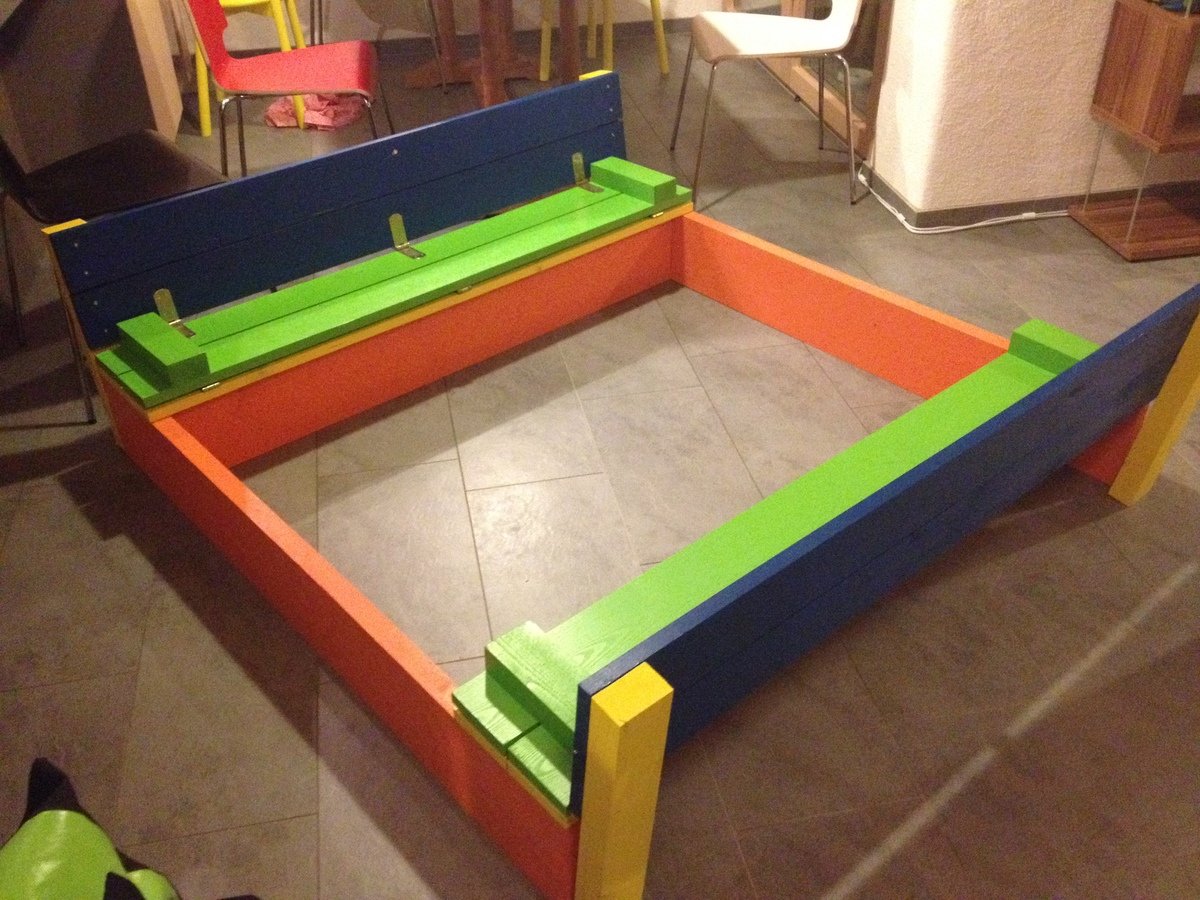
This was our first build from this website and we are so pleased! Having seen very involved plans on an Australian website for a similar sandpit, I was so pleased to come across this version, with its far simpler design!
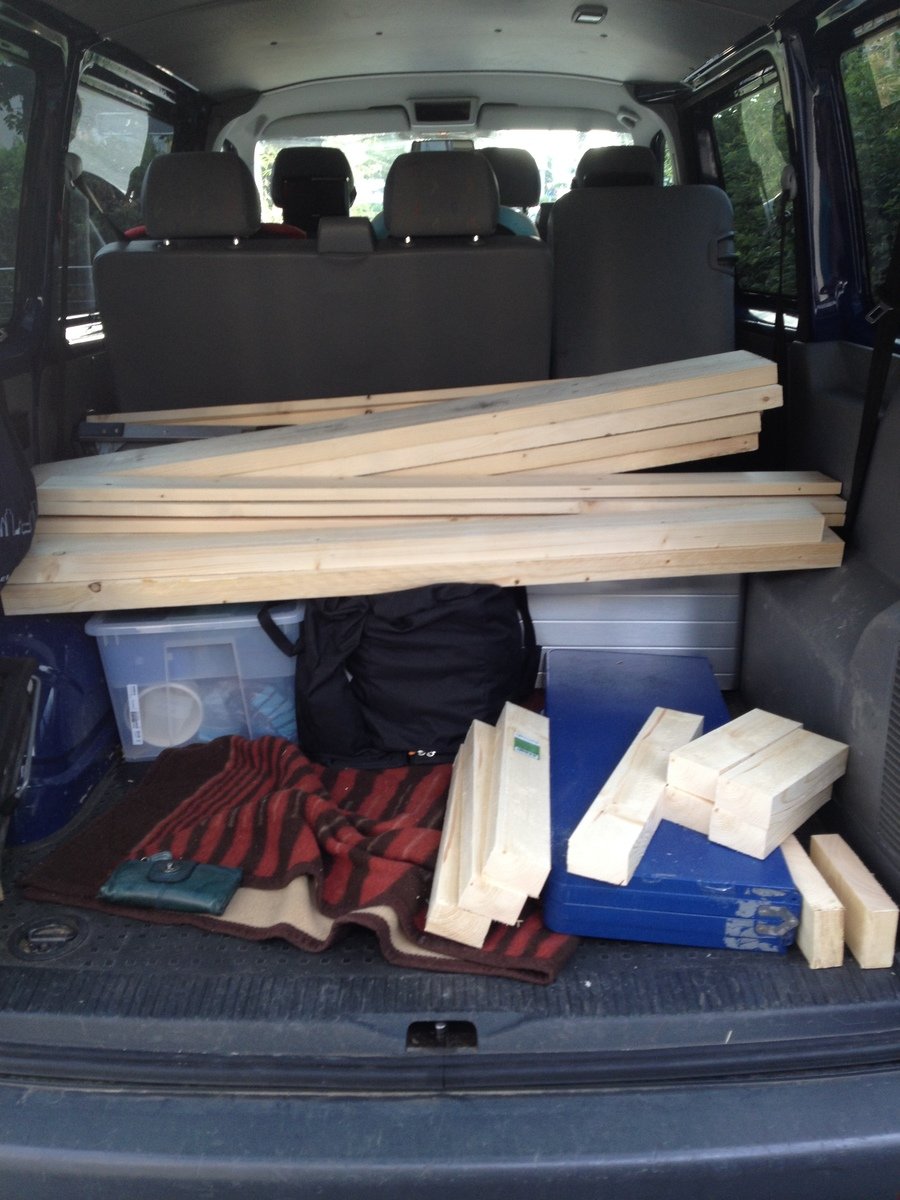
We wanted a slightly bigger sandpit, so I needed to do some modifications, and while I was enlarging it, I also converted to metric sizes, and designed specifically for the timber I knew I could buy locally (very obscure and inconsistent seeming German sizes). So the end result is a 1.5x1.5m sandpit, that has so far had 6 kids playing happily in it at once!
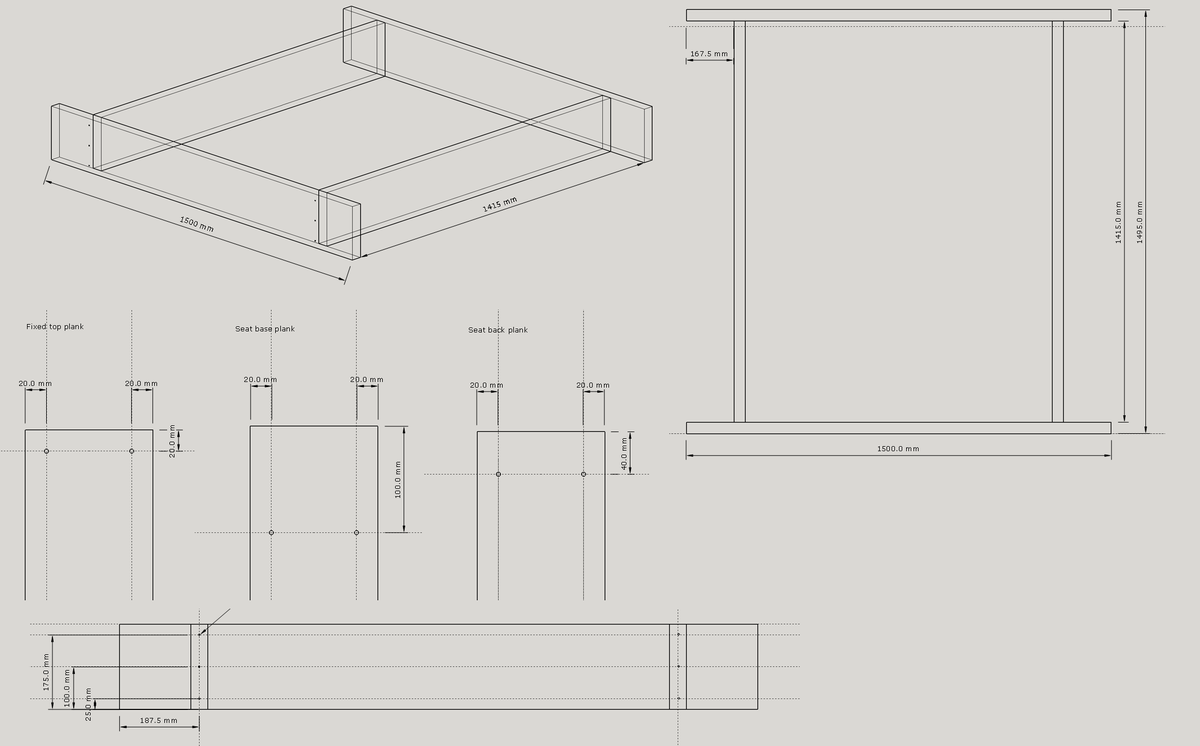
I've put in the drawings I used, and the cutting list for larger sizes in case anyone else is working in metric, or wants a bigger size!
Our other modification was to offset the shorter sections of the base to run along the front plank of the bench seat - there were two main benefits for this - we need a lot less sand, as there is none wasted under the seat, and the seat is supported and can't bow downwards!
The dimensions and layout we used are in the images.

Supplies

Timber
2 - 200 x 40 x 3000mm
6 - 120 x 24 x 3000mm
1 - 80 x 50 x 3000mm

Hinges
12 - 140mm long (the original design had 8, we went with three per edge to allow for the extra width)

Self tapping decking screws
18 - 5 x 80
48 - 5 x 50
96 - 3 x 20 (or enough for your hinges, depending on the design)

Paint
3 - 375ml PU Acrylic Paint, suitable for exterior use (top planks and seat supports)
1 - 750ml PU Acrylic Paint, suitable for exterior use (base)

Weed matting and staple gun

Sand
I calculated I would need 20 x 25kg bags - in the end we needed 11 - don't ask me where we went so wrong!

Cutting list

2 - 200 x 40 x 1500 (long sides of base)
2 - 200 x 40 x 1415 (short sides of base)

12 - 120 x 24 x 1495 (top slats - just under half a plank, to allow for waste)

4 - 80 x 50 x 245 (armrests / seat braces)
4 - 80 x 50 x 495 (back supports of seats)

I gladly paid 5 Euro for the wood to be cut in Hornbach - it should have been more than this, but the guy was generous!

12 hinges (the original design had 8, we went with three per edge to allow for the extra width)

On Sunday we had the idea, on Monday I drew up the plans, on Tuesday I went shopping! Once all our wood was home safely, we sanded it down - most edges weren't badly finished, but there were a few splinters that needed getting rid of!
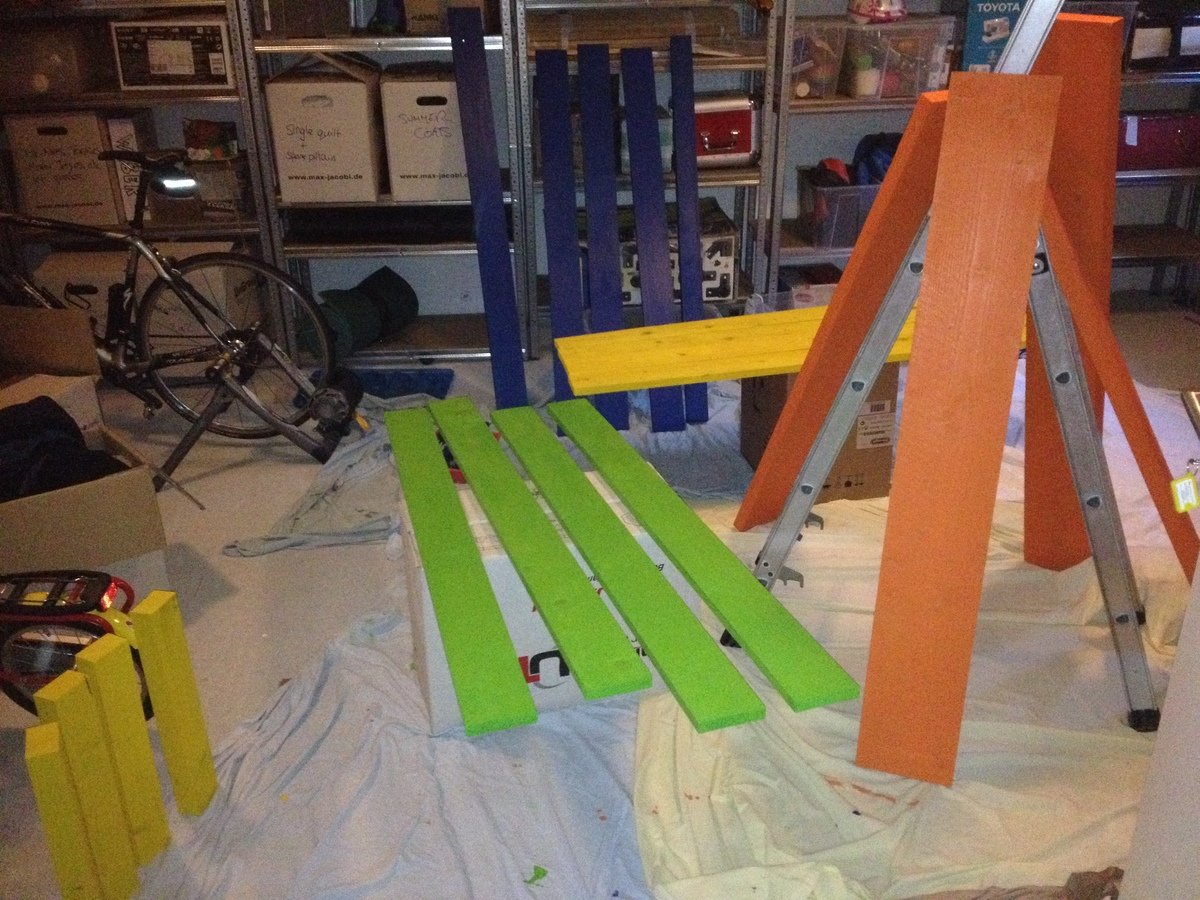
The next two nights Mr W gallantly set to work with the paint brush. After two nights, the wood all had two good coats of paint and we were ready to start assembling on Friday.
I pre-drilled the base of the bench before the second coat of paint - three holes for each butt joint - with some careful measuring this made screwing the base together really easy!
The top planks were also pre drilled, but there unfortunately my tiredness made me make mistakes, and some had to be re-drilled! Spacing the planks out took a lot of time, but I am glad I made the effort. I used cereal box, and experimented with different numbers of layers - I knew I wanted a theoretical 5.4mm gap, but it took some time to get the right number of layers of carefully creased and concertinaed card!

Having got our spacing wedge sorted, we screwed the blue planks in place at either end of the base. We then assembled the green seat section, and the blue/yellow back rest. Following a tip from the comments section, we added the hinge to the seat/back combo first, as this ends up being on the underside. Once those two hinged sections were made, they were then laid in place on the base (card wedge spacers in place) and then the final hinges added. The final assembly took about 5 hours - but this was partly because we started outside, then had to move everything inside when a huge thunderstorm rolled in!

The next morning we got busy with the staple gun and tacked weed matting over the base, then it was hauled in to position and filled up! For us getting this done and dusted was important, otherwise it could have dragged on a lot, but we are terribly proud that it was done in less than a week from being fist conceived!
I hope the metric/enlarged plans are of use to someone else too. One other idea we had, which we didn't get round to building in, was a support bar to be fitted when you close the pit, so the kids can play on top as a stage when it is not being used for a sandpit!
Built from Plan(s)
Estimated Cost
150 EUR
Estimated Time Investment
Weekend Project (10-20 Hours)
Finish Used
Painted with two coats of Polyurethane Acrylic paint
Recommended Skill Level
Beginner

Outdoor patio furniture

Submitted by Anonymous (not verified) on Fri, 07/24/2020 - 12:19

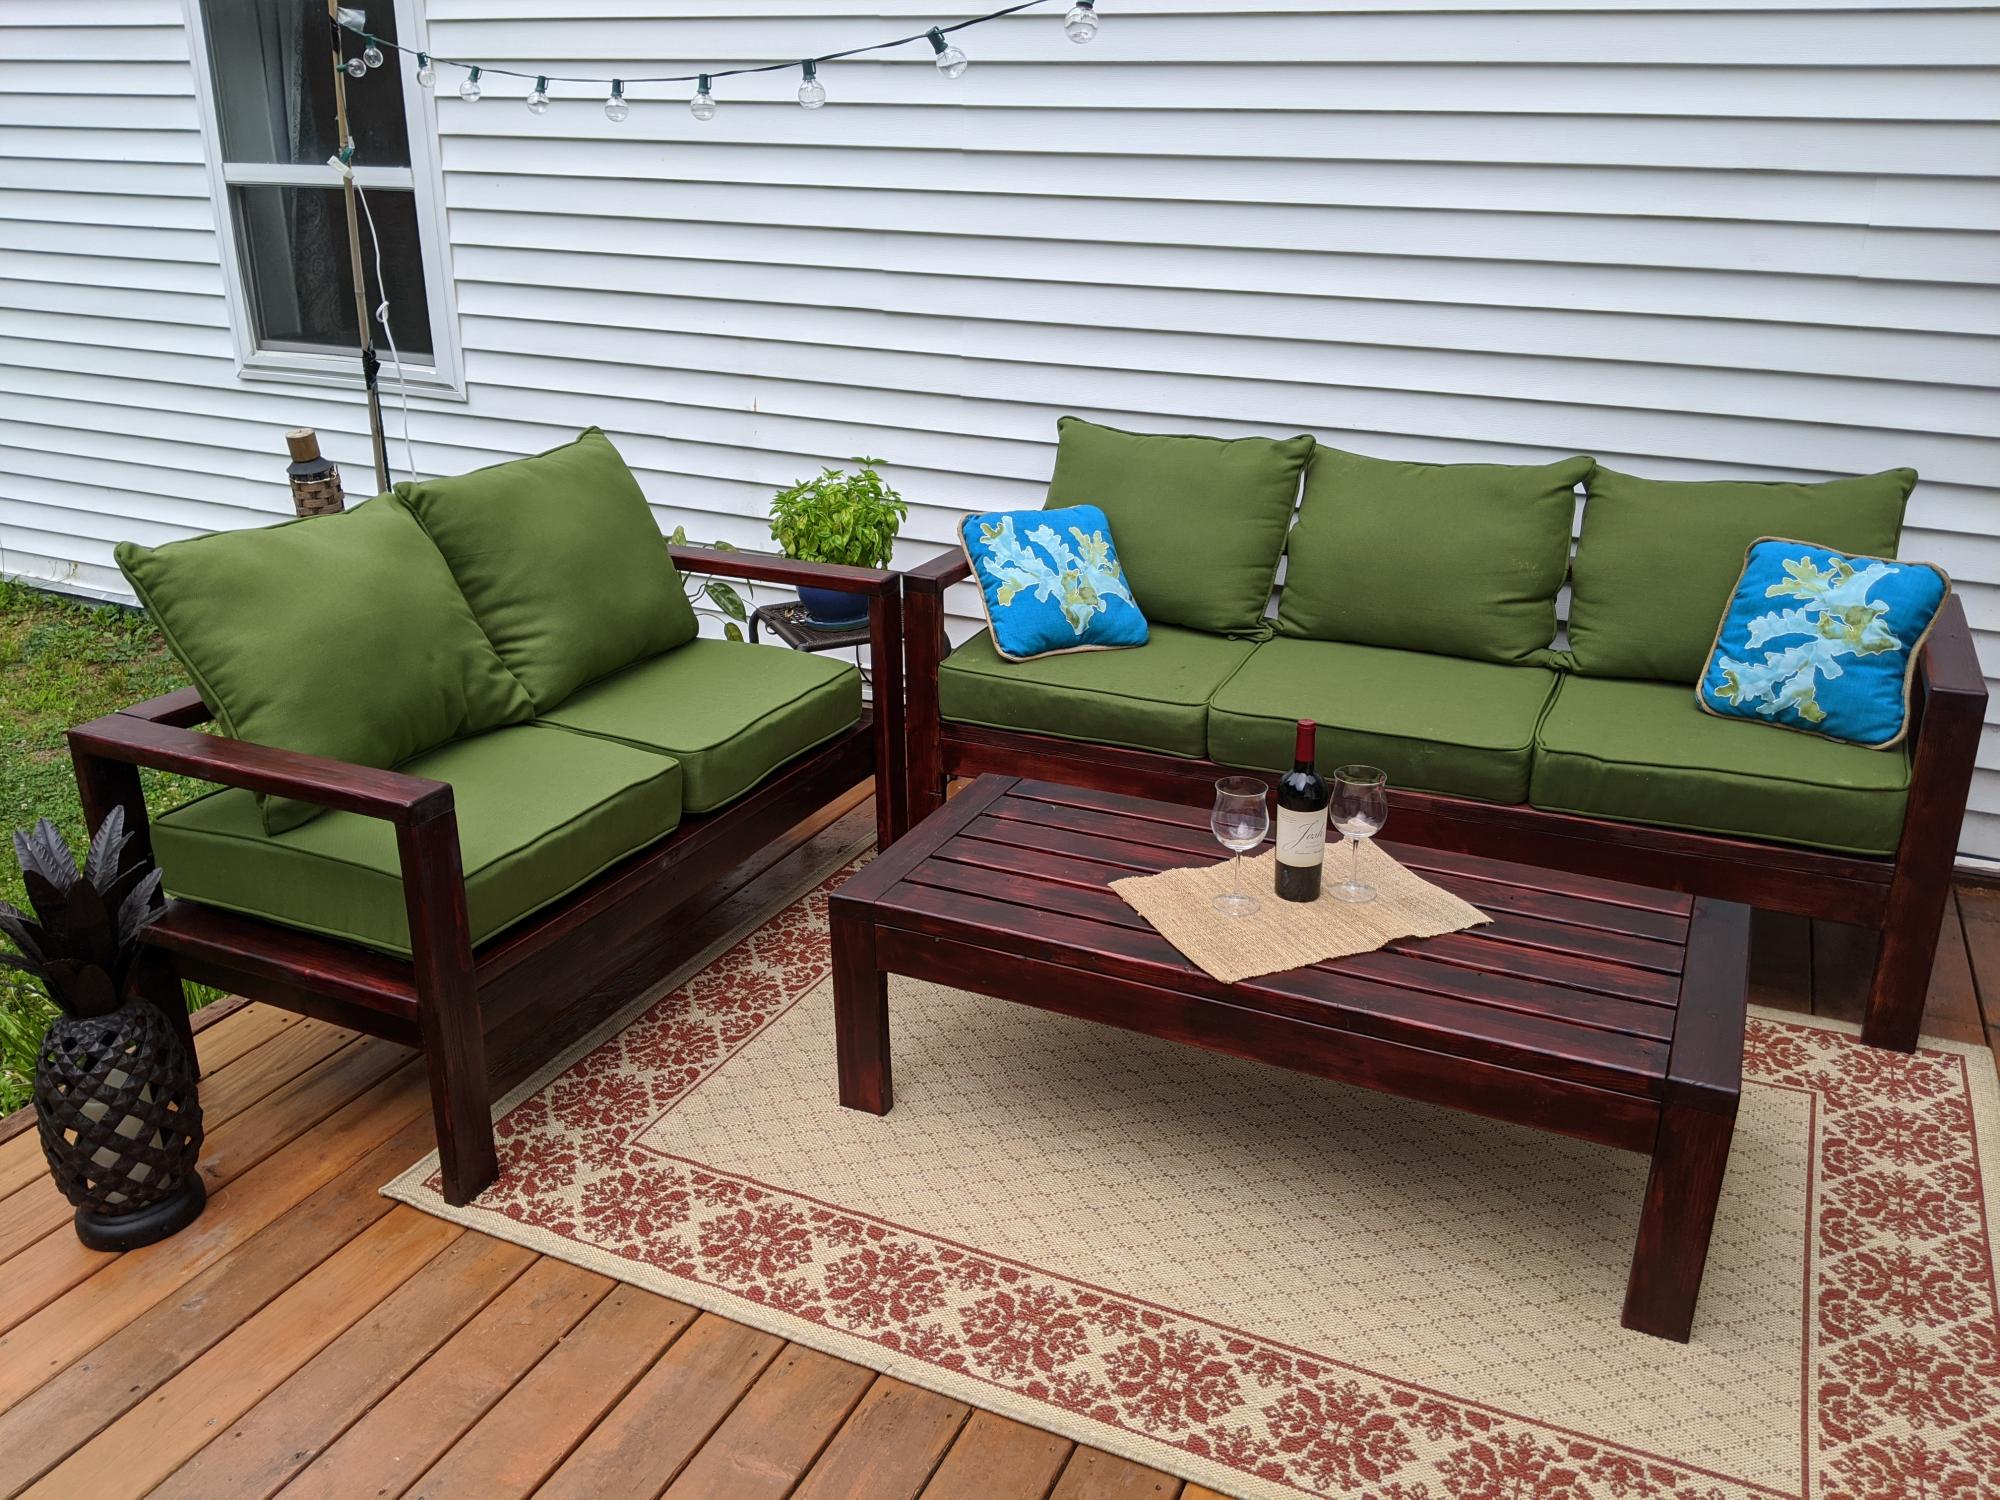
Thanks Ana, for the great plans and inspiration!
Estimated Cost
$450
Estimated Time Investment
Weekend Project (10-20 Hours)
Finish Used
Minwax stain & polyurethane ( Bombay Mahogany)
Recommended Skill Level
Beginner

Argie Bedside Table (Nightstand)

Submitted by thehallway on Sat, 10/27/2012 - 07:56

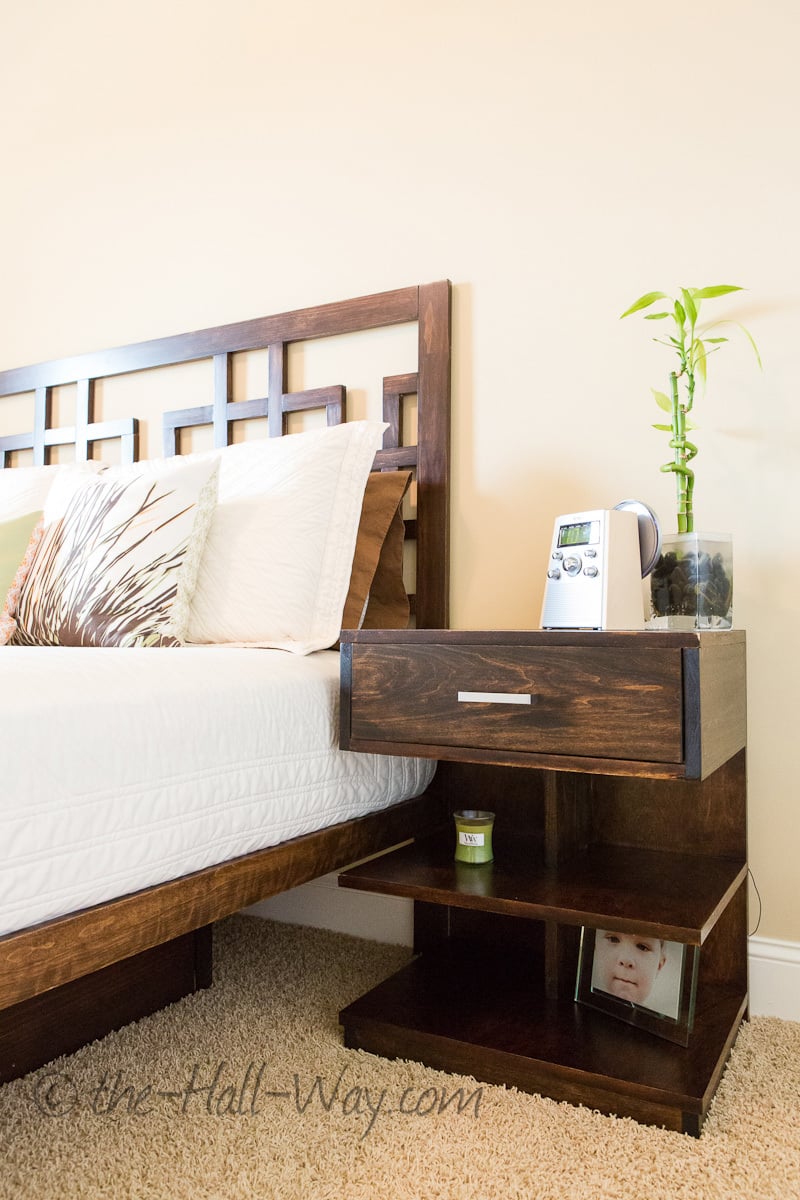
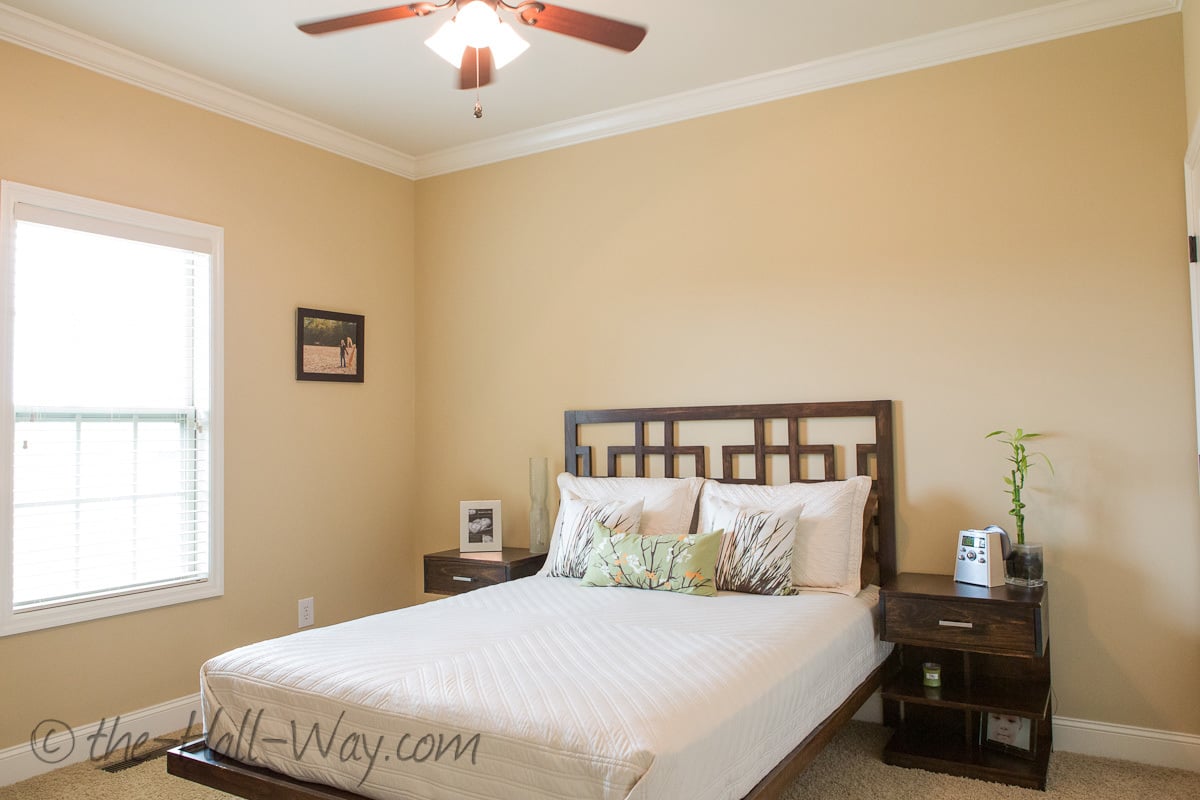
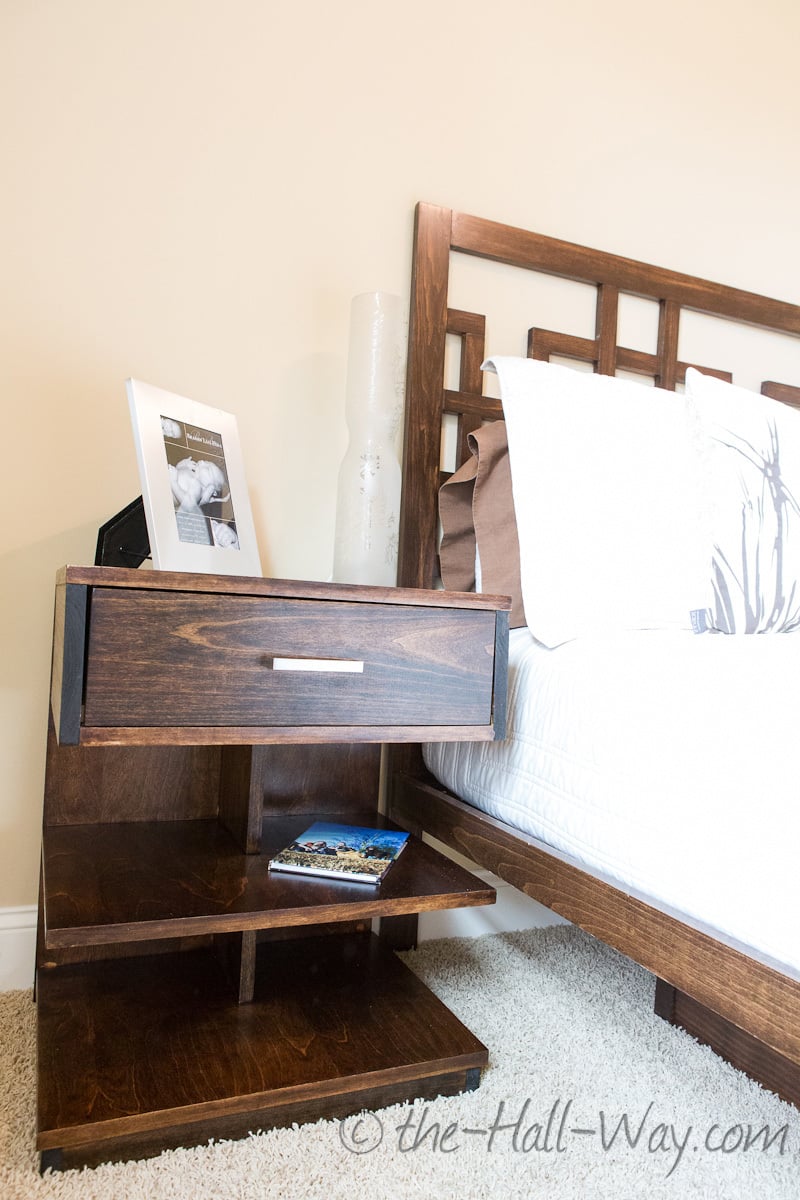
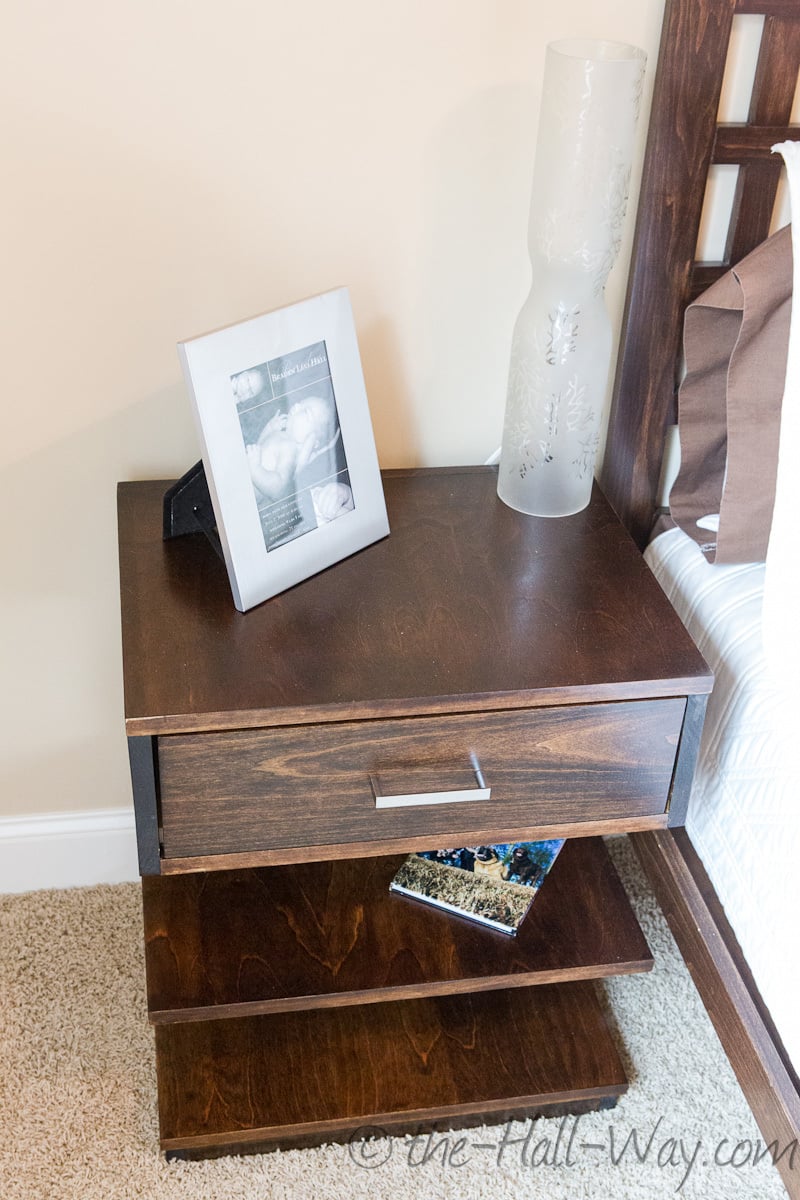
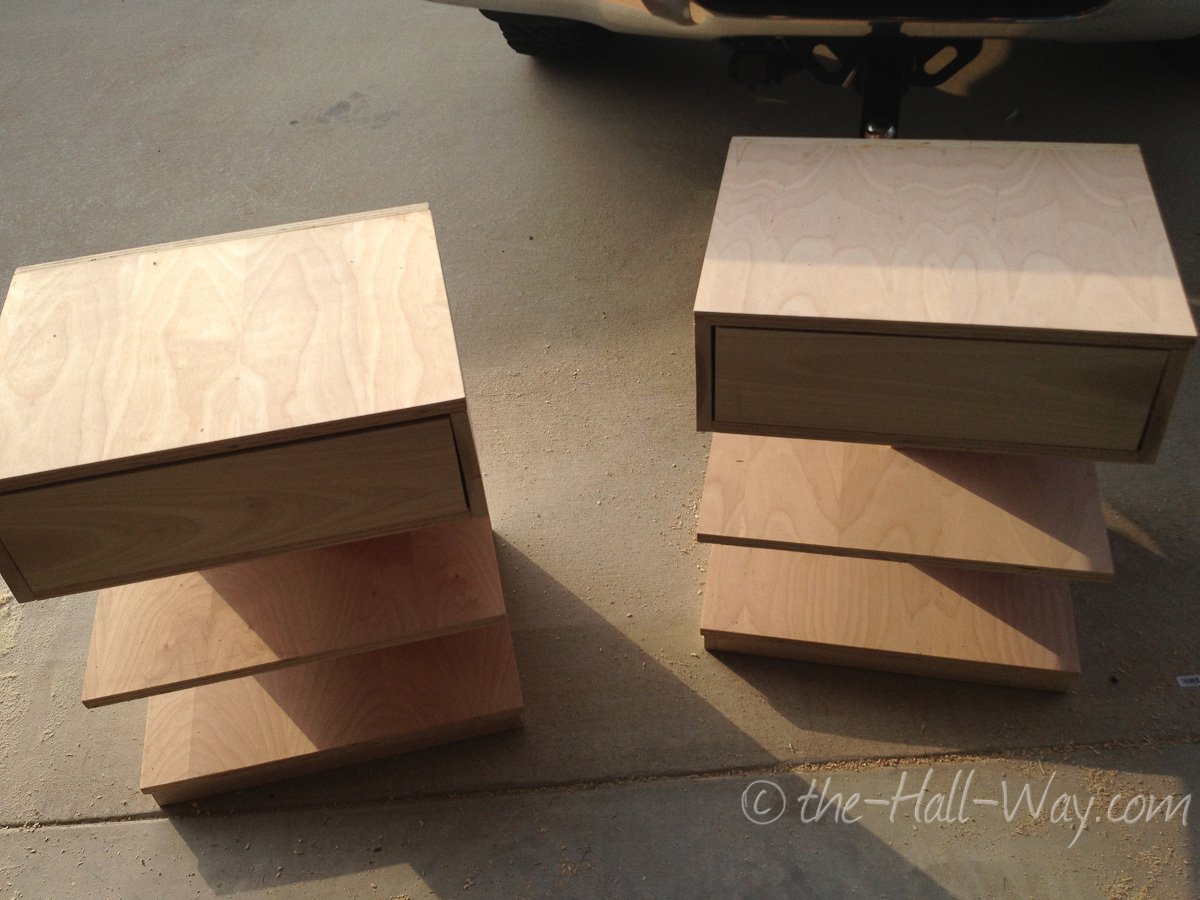
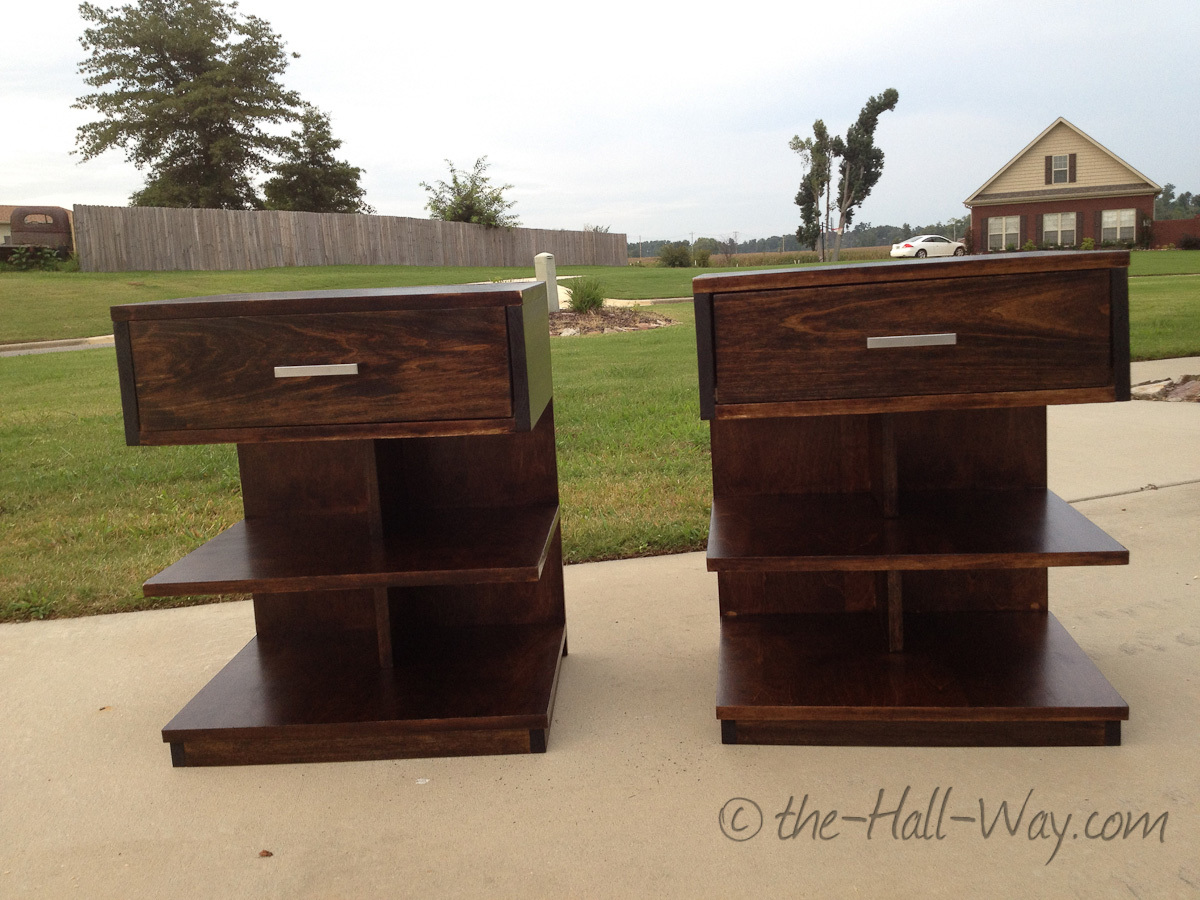
I built this bed for the guest room at our previous house. The room was small, so I made floating shelves for the nightstands to save space. We have since moved and are now renting, so we didn't want to put holes in the walls to hang the shelves. I took the opportunity to build these nightstands instead. The original design was a little too tall and wide, so I reduced those dimensions by 3". This was my first time building drawers, but they went together surprisingly well. I had used a combination of stain on the bed and was worried about matching it, but 2 coats of Minwax Dark Walnut ended up being a pretty close match.

Built from Plan(s)
Estimated Cost
$75
Estimated Time Investment
Day Project (6-9 Hours)
Finish Used
2 coats of Minwax Dark Walnut & Poly
Recommended Skill Level
Intermediate

Comments

Garden Tool Storage

Submitted by meisterx on Sun, 08/30/2020 - 12:20

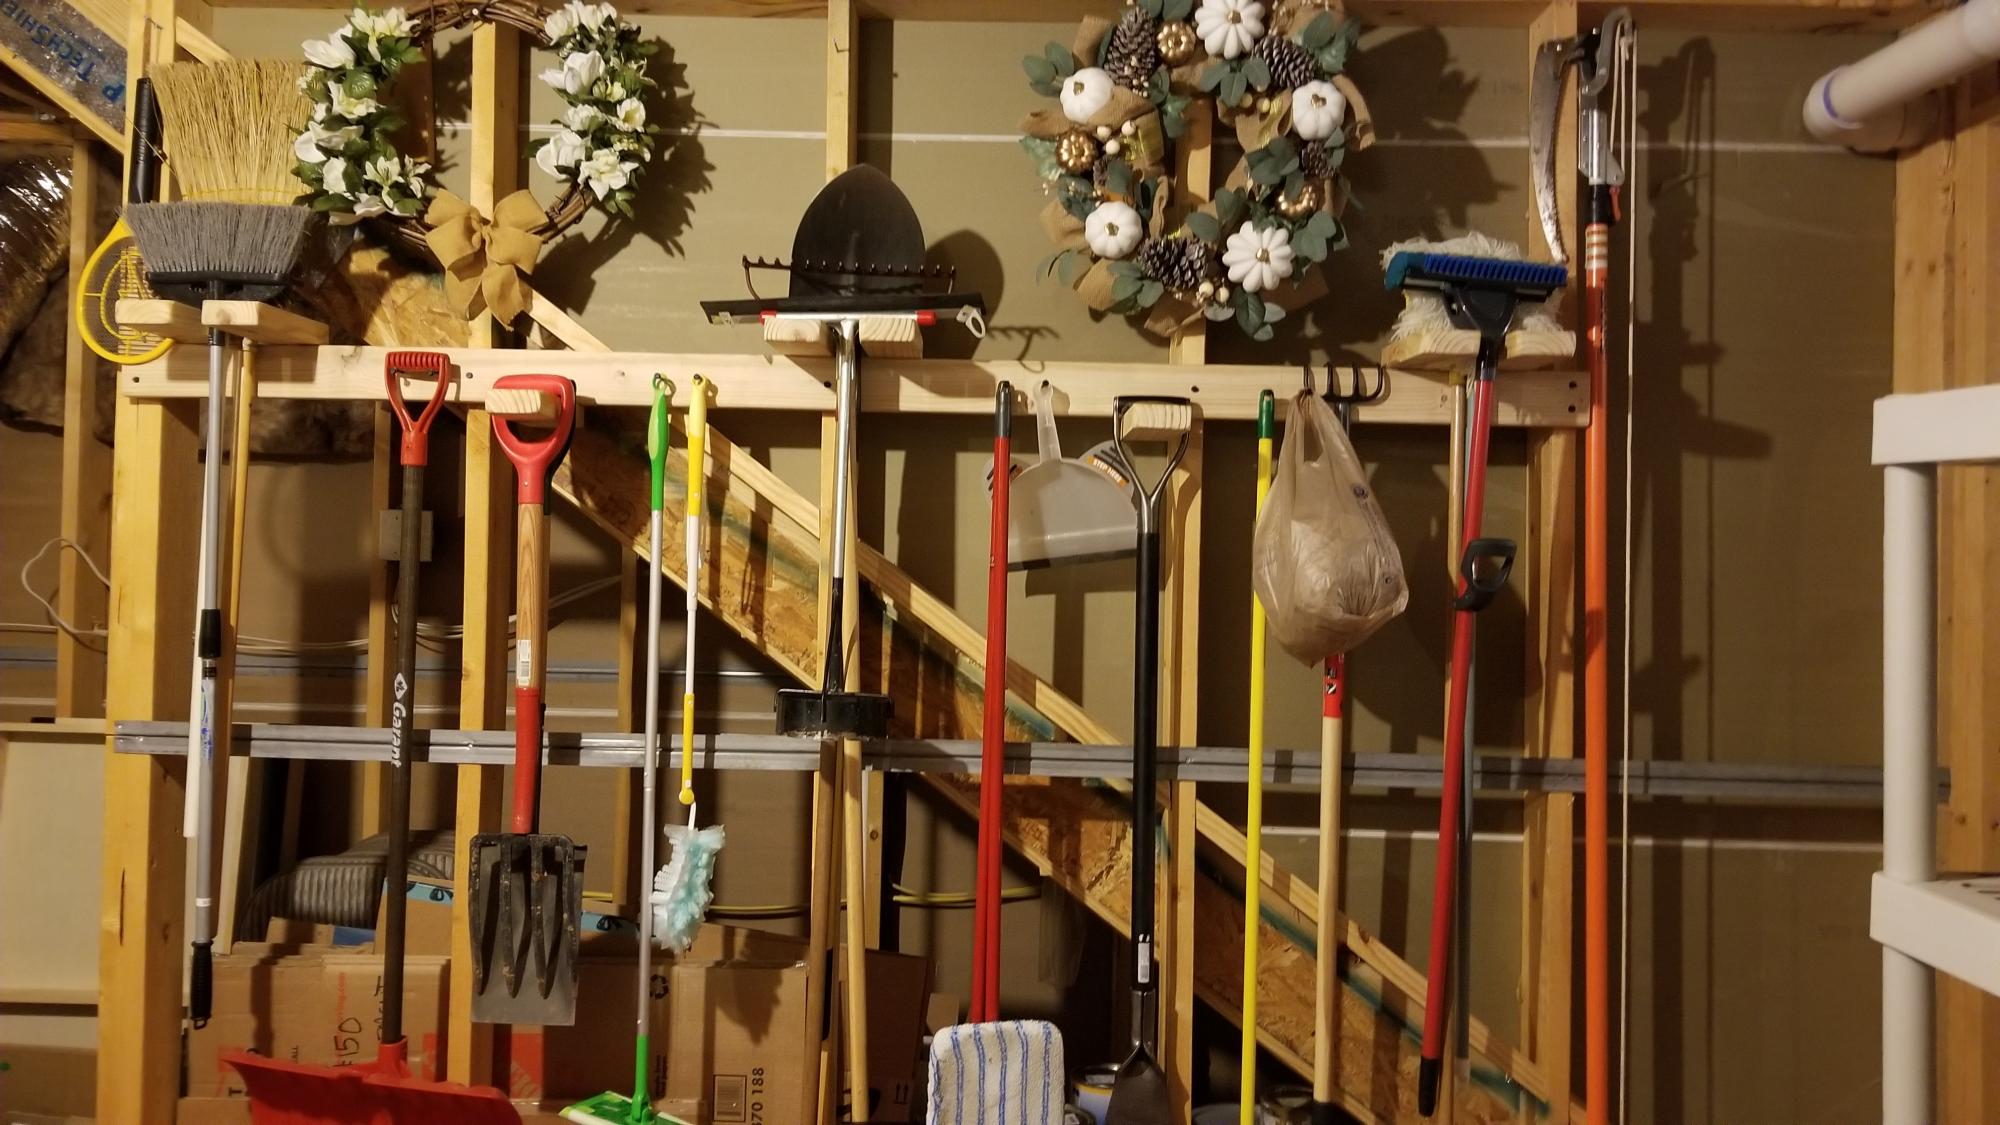
Super easy and useful project. I made mine 8 ft. long because my studs are on 24 in. centers and I had a lot of tools to hang. It was fun building it and even more fun getting all those tools and things off the floor.

Built from Plan(s)
Estimated Cost
$13.00
Estimated Time Investment
An Hour or Two (0-2 Hours)
Finish Used
None
Recommended Skill Level
Starter Project

Comments

Potting bench 2.0

Submitted by Claudiagay on Tue, 09/15/2020 - 14:38

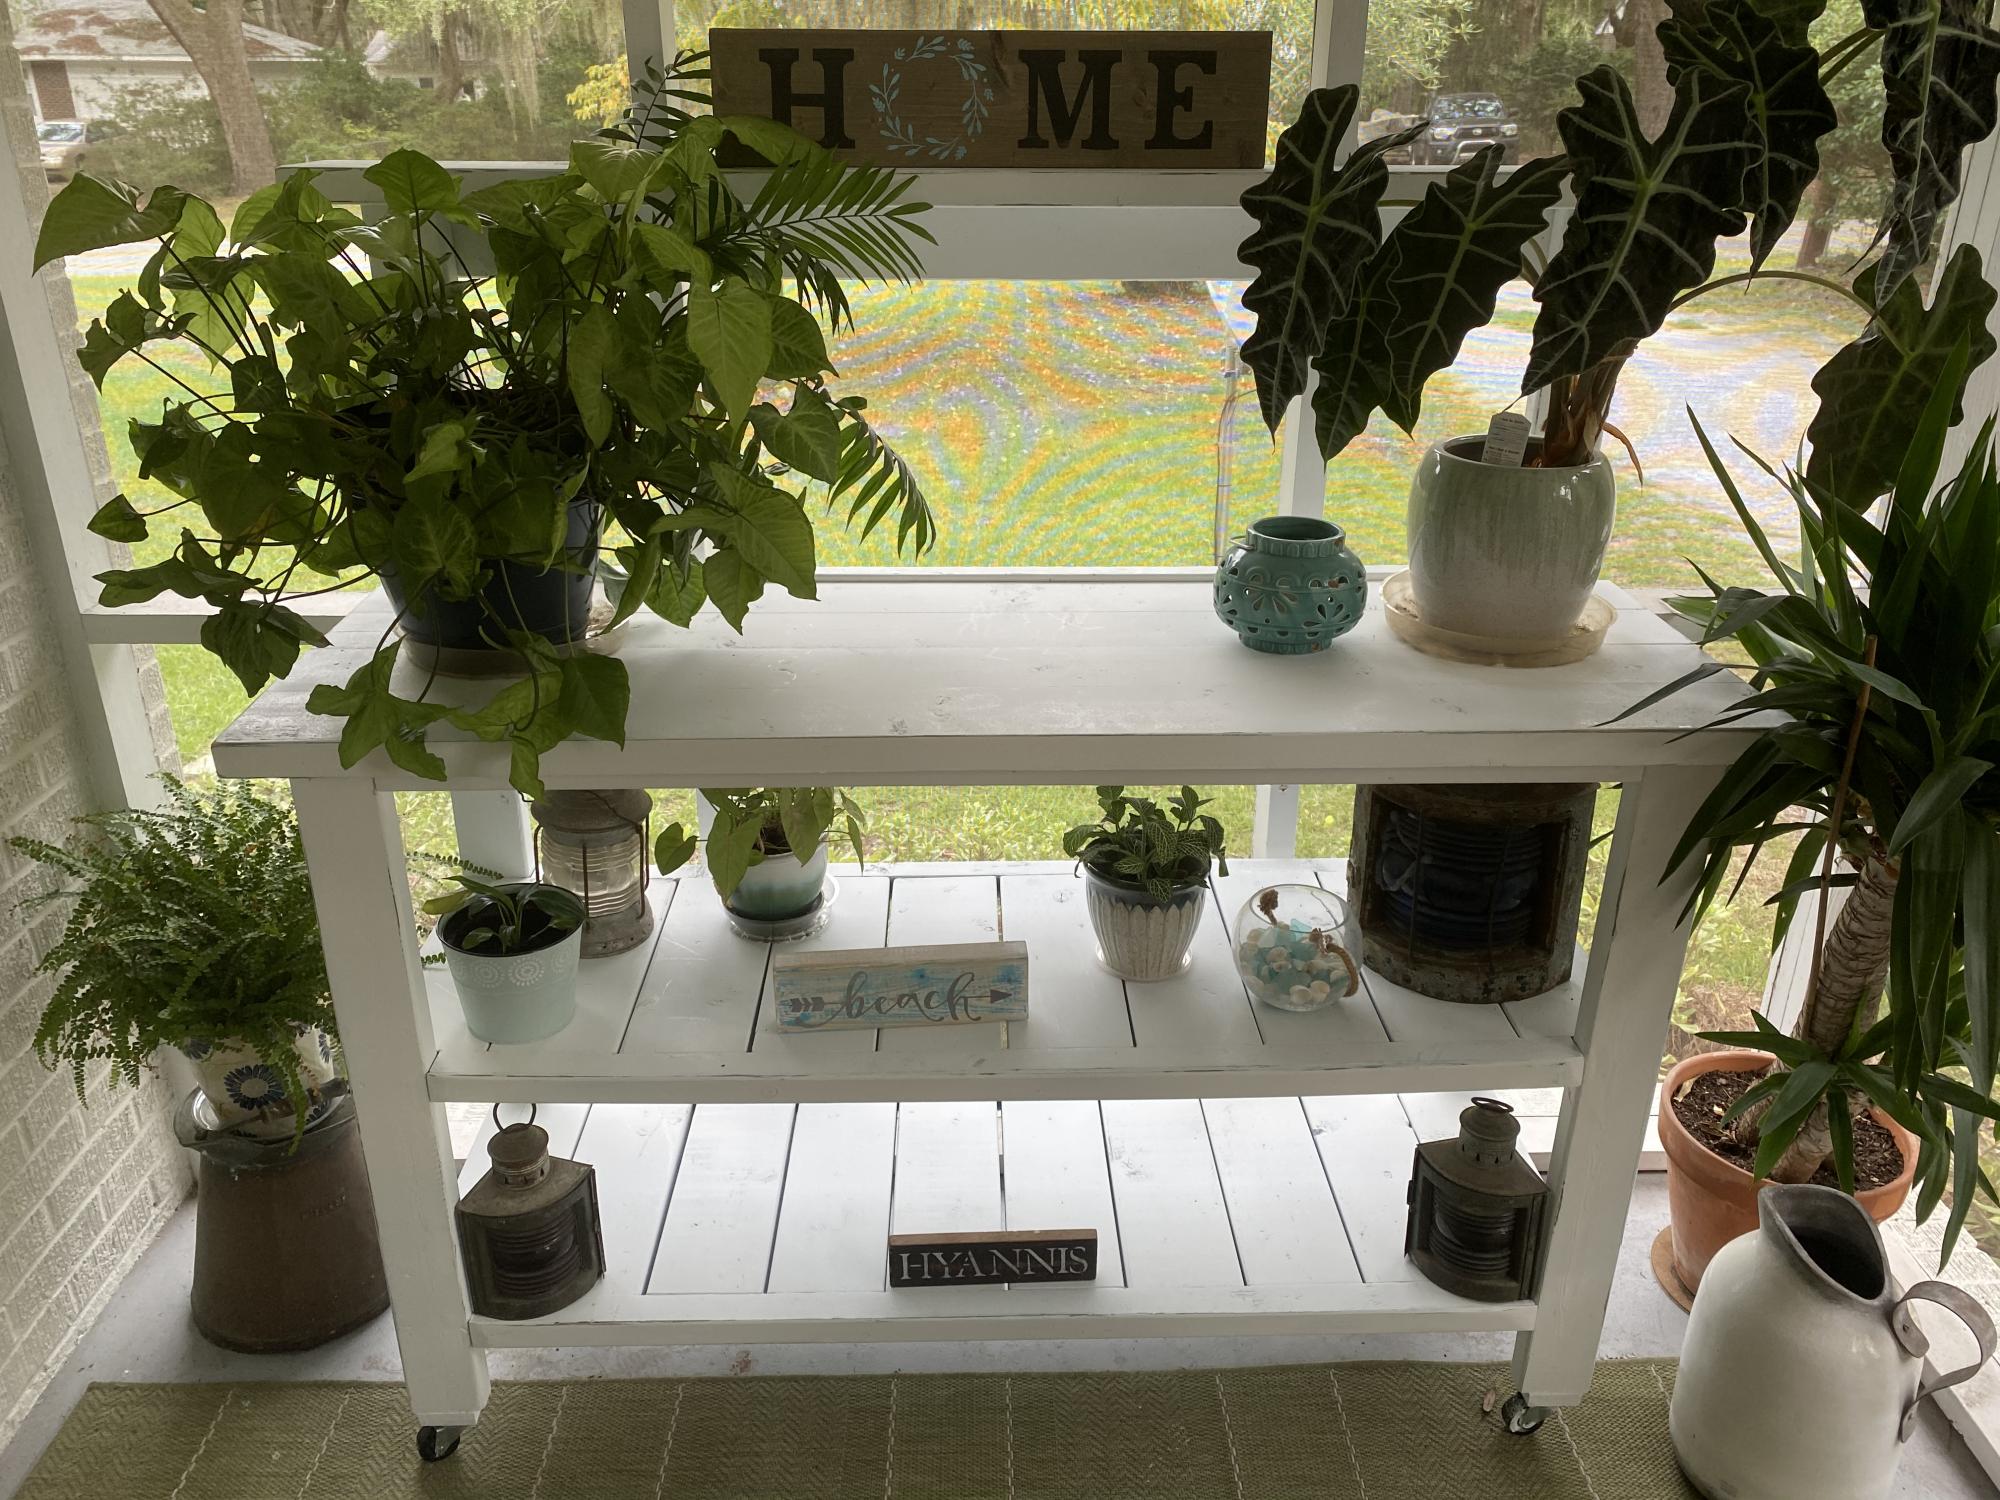
Made it a bit wider, added a shelf and wheels.

Built from Plan(s)
Estimated Cost
90.00
Estimated Time Investment
Day Project (6-9 Hours)
Finish Used
Paint over stain for distressed look.
Recommended Skill Level
Beginner

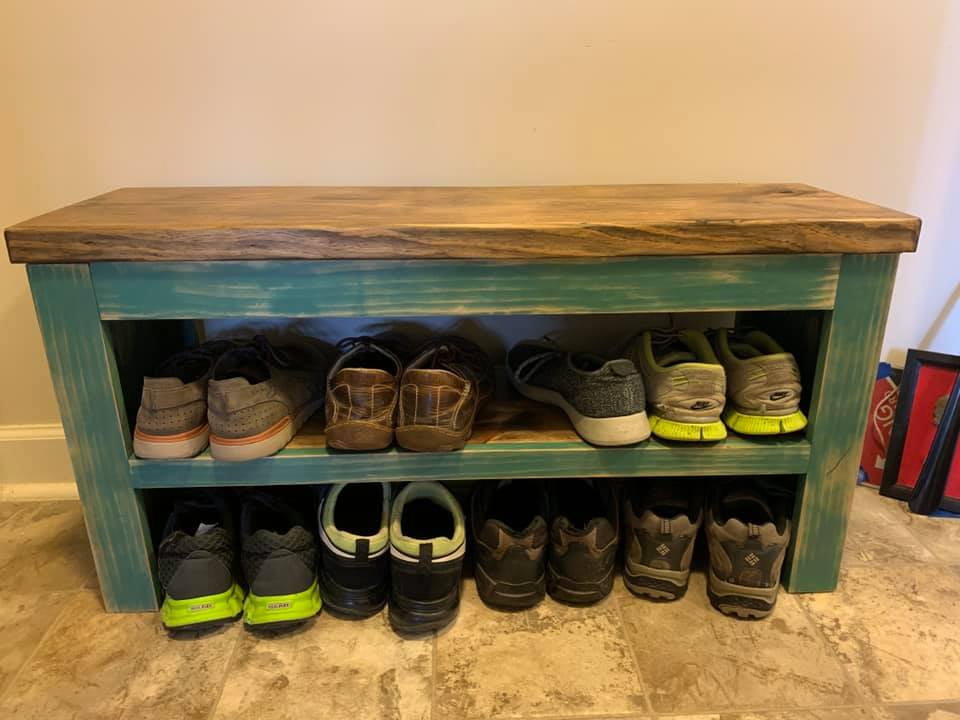
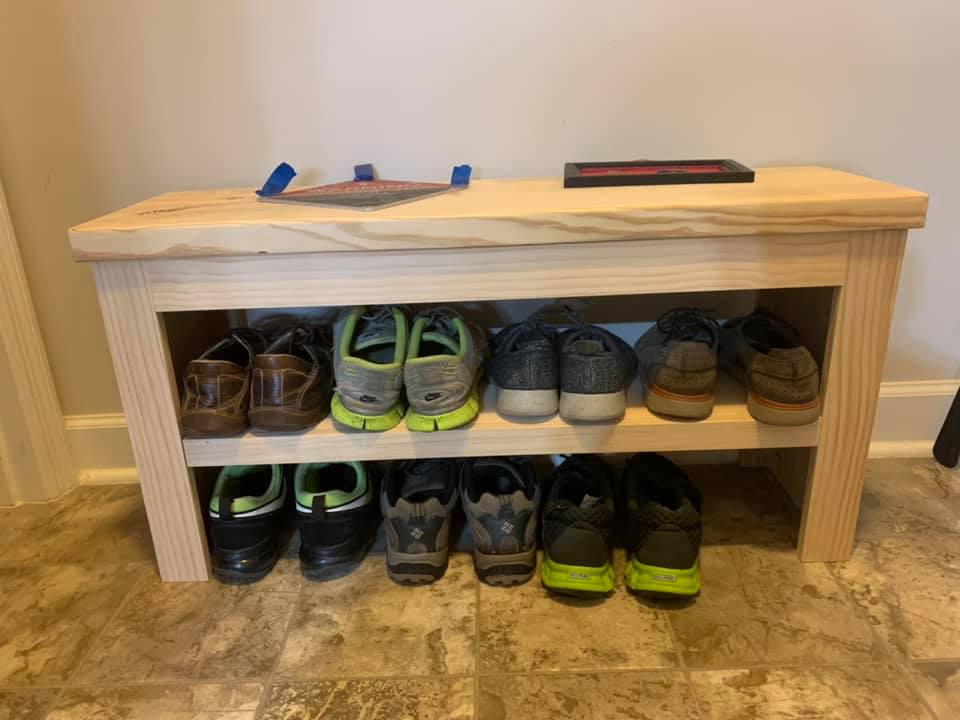
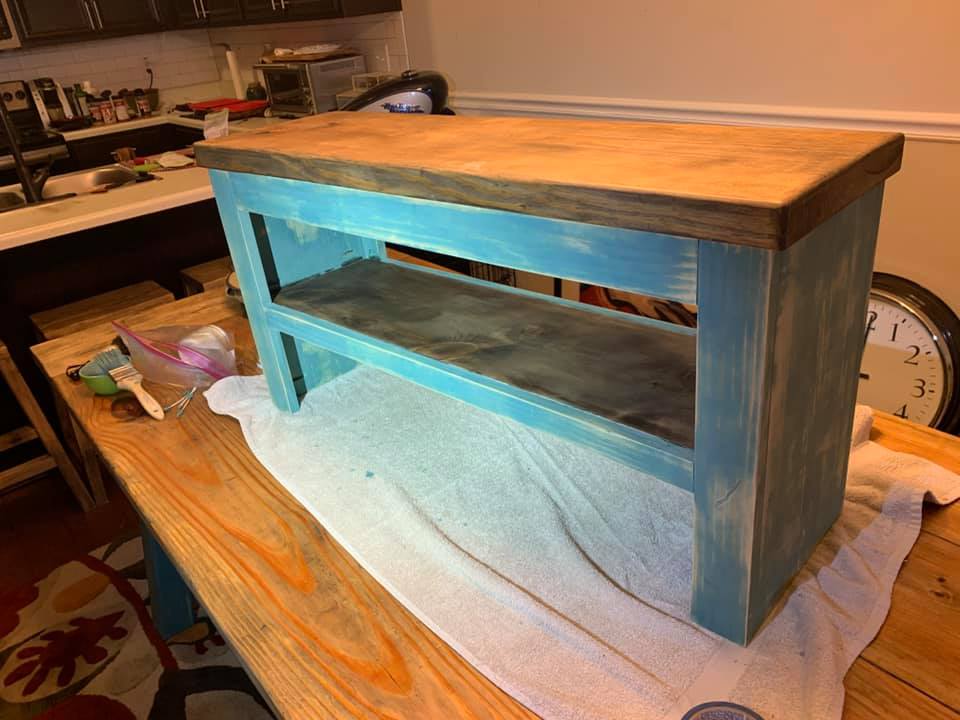
Shoe bench mod from spa bench

Submitted by wbengle77 on Wed, 09/23/2020 - 06:42

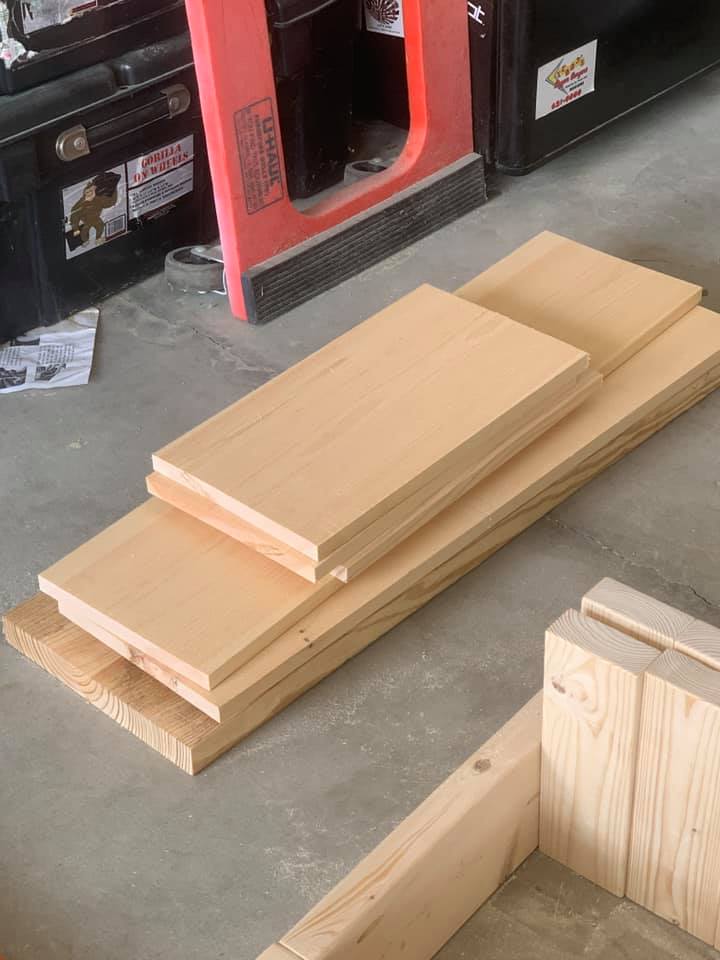
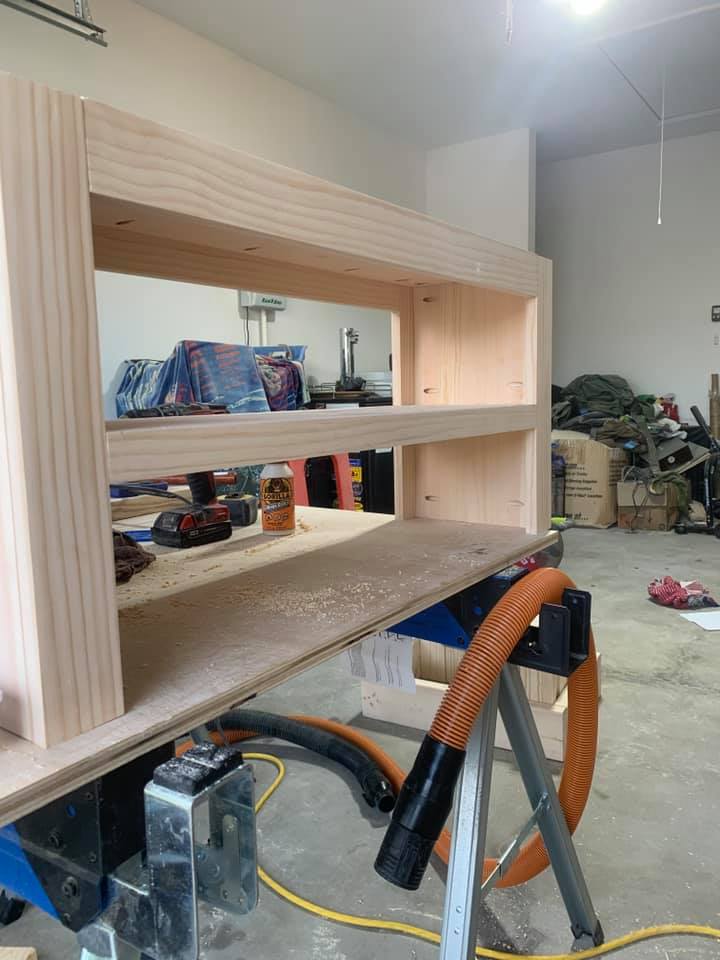
Easy project no crazy cuts or tools needed. I did change a few things on the build. I changed the top from a 1x12 to a 2x12 to match the rest of my builds. And honestly it just looks and feels better! The trim is 1×3’s but I changed the middle shelf trim to a 1×2. Add the shelf 7.5 inches up from the bottom.

Built from Plan(s)
Estimated Cost
60-80 depending on finish
Estimated Time Investment
Day Project (6-9 Hours)
Finish Used
I used an antiquing wax, milk paint for the top and sides. Then I used butcher block oil and wax to finish.
Recommended Skill Level
Starter Project

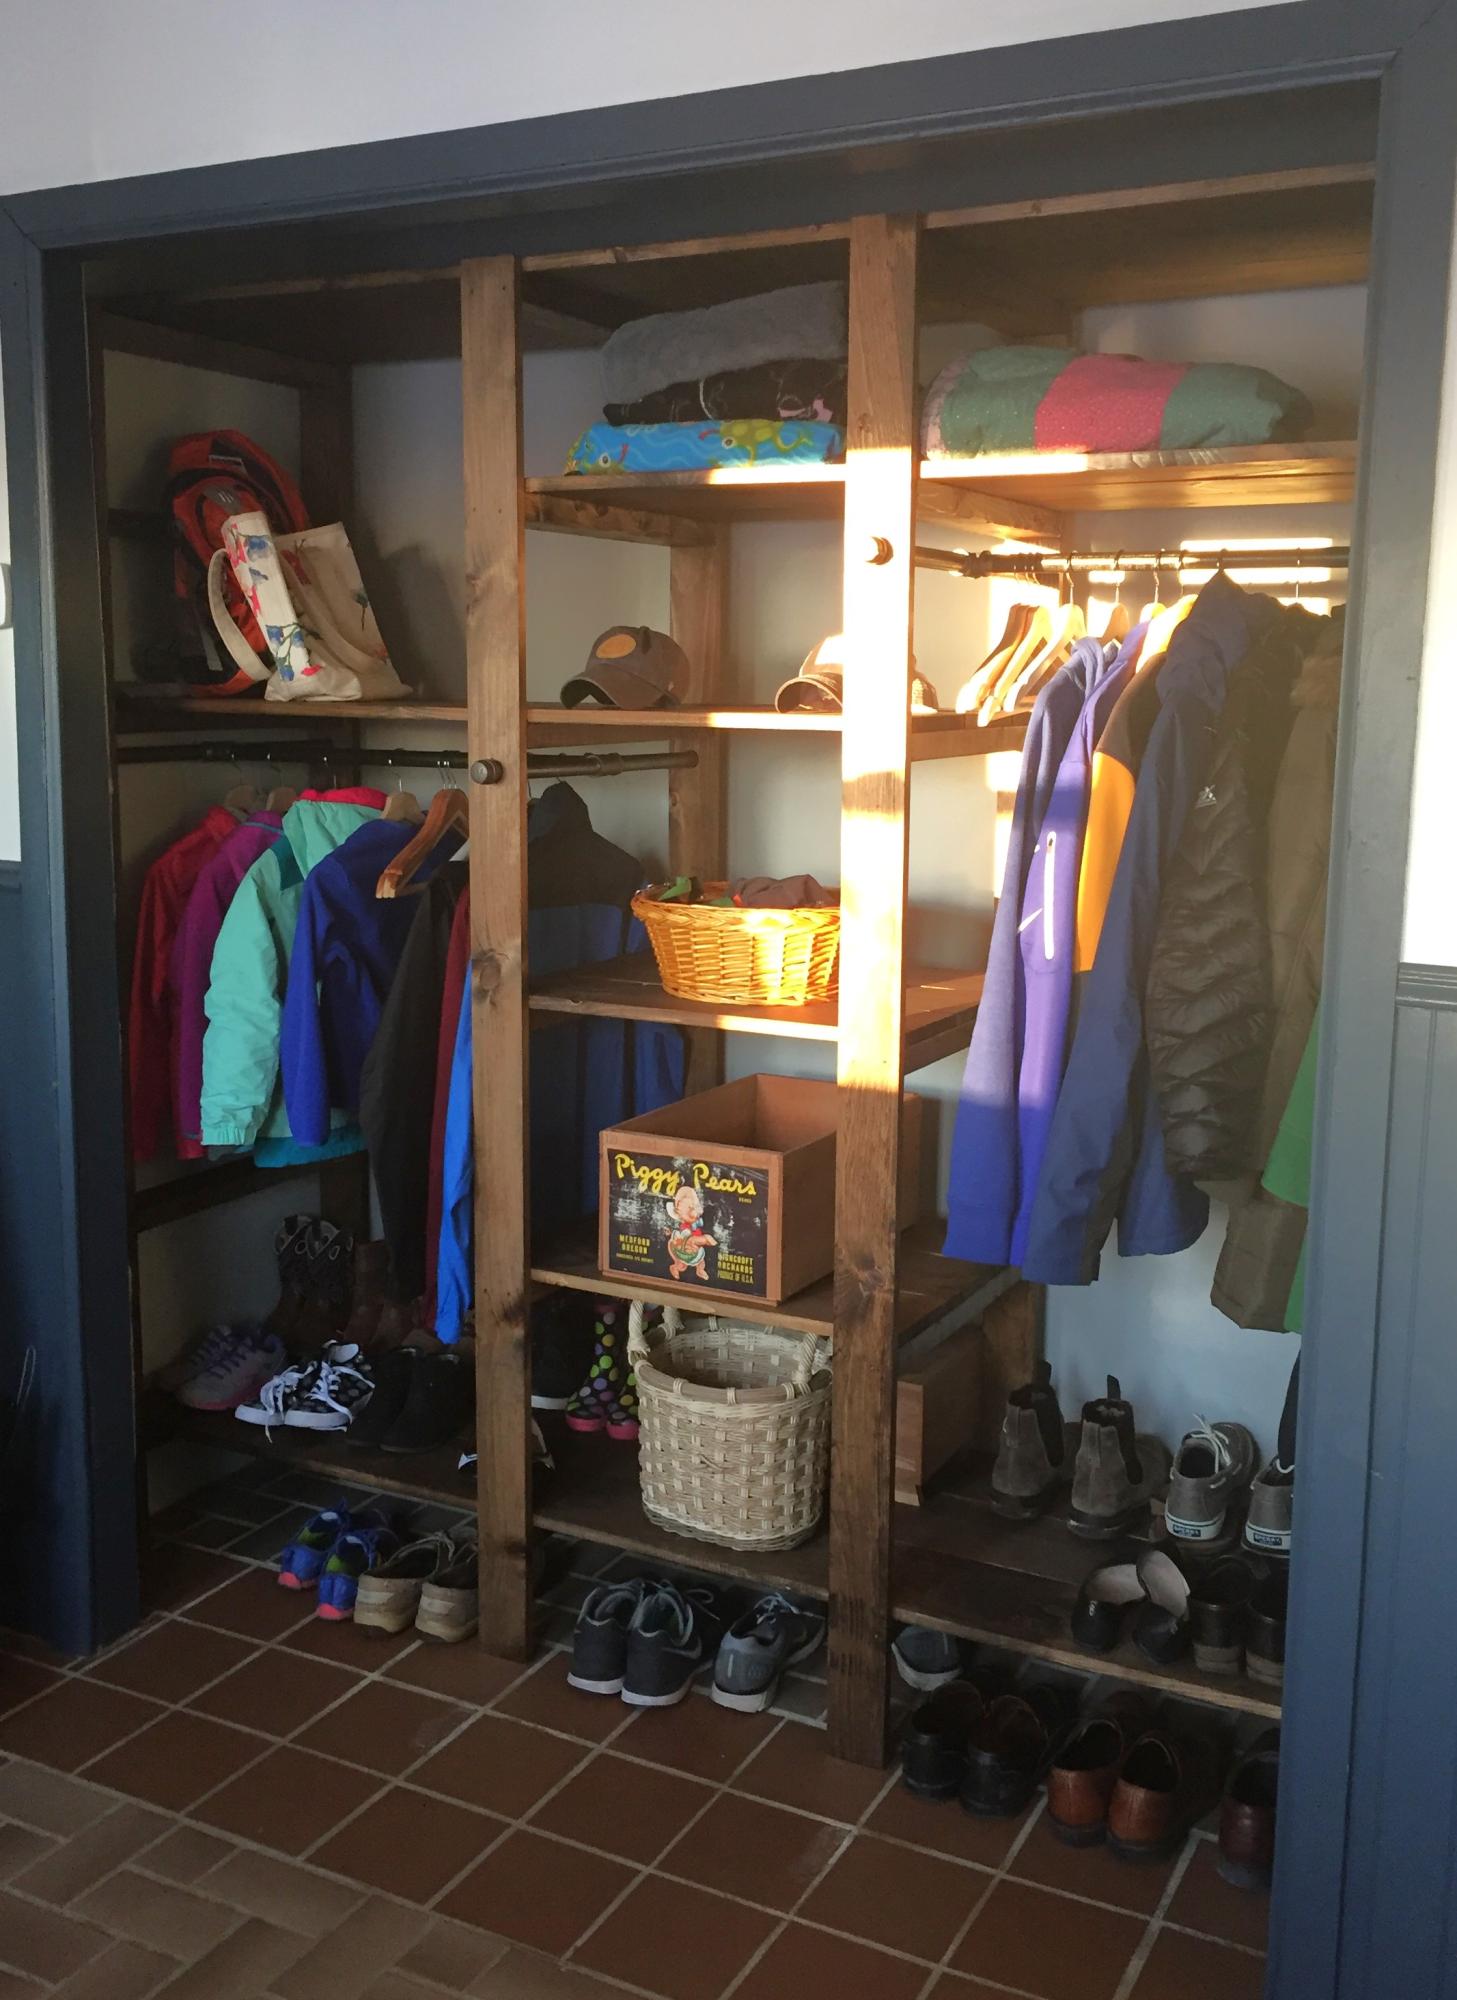
Farmhouse closet

Submitted by Anonymous (not verified) on Mon, 01/16/2017 - 04:56

I had so much trouble deciding what to do with this HUGE closet in my breezeway.  Previously it had just one bar across the top and ugly sliding doors.  I loved Ana's design, but made several changes.  Since my closet was super deep (32") I extended the depth of her design to about 25".  I also staggered the rods for longer coats, and one that my 8 year old can actually reach to hang her stuff up!  I changed the shelf design up a little bit too!  Her instructions are super easy to change to your specifications.  I did end up spending about $350 on this project, but keep in mind I was using 3 - 1x8's for each shelf instead of 1x4s.  

Built from Plan(s)
Estimated Cost
$350
Estimated Time Investment
Weekend Project (10-20 Hours)
Finish Used
Minwax Dark Walnut
Recommended Skill Level
Beginner

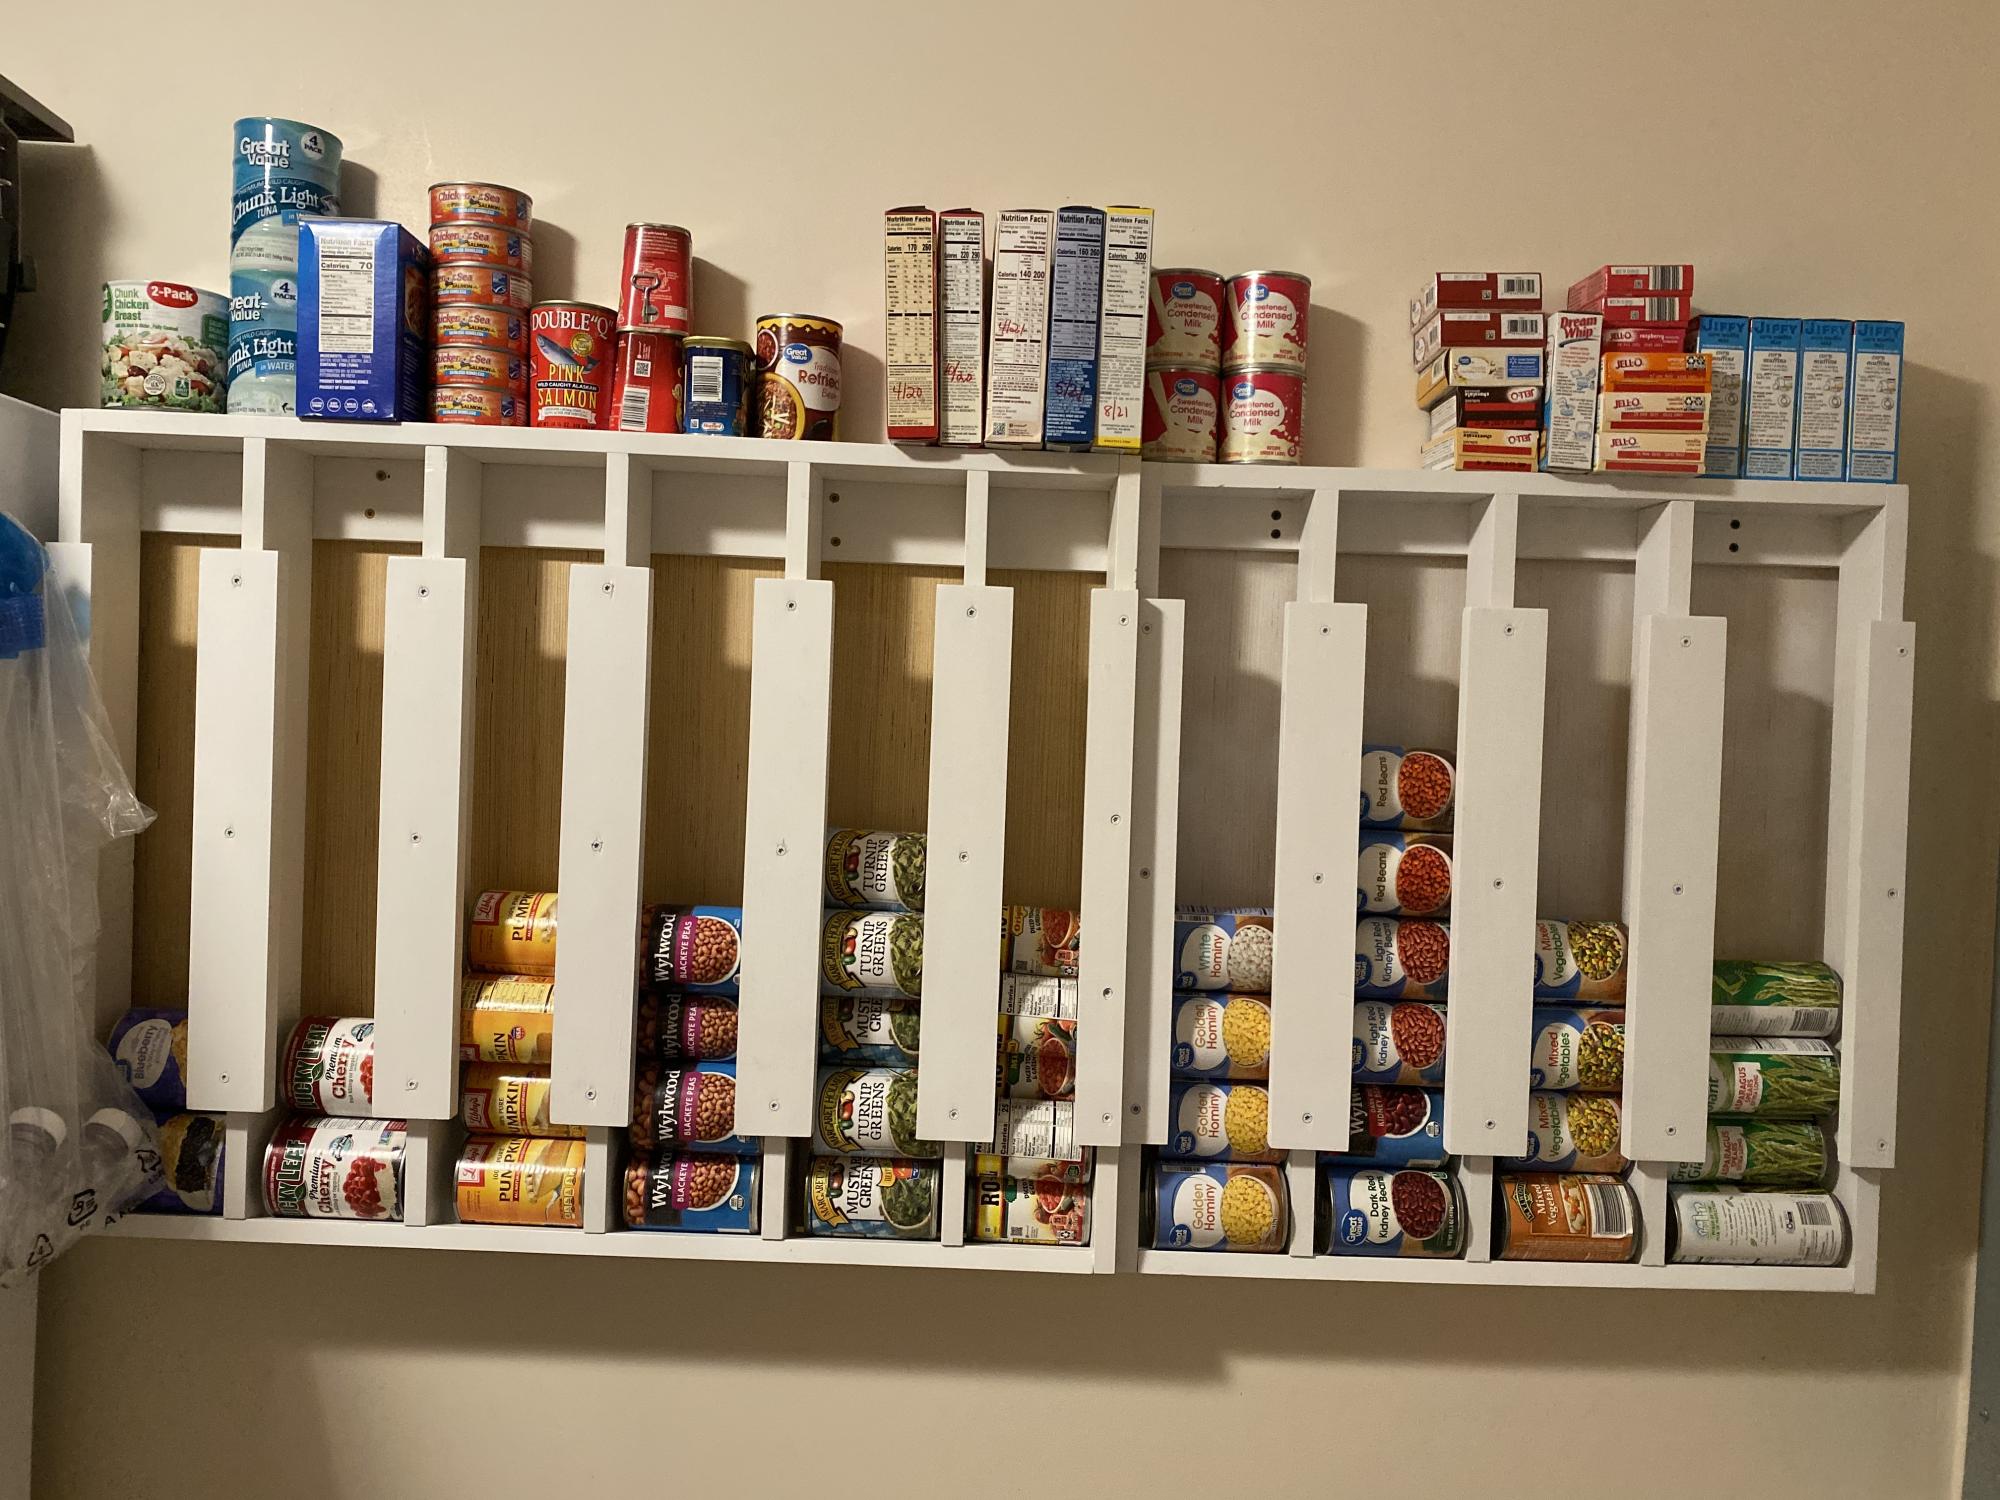
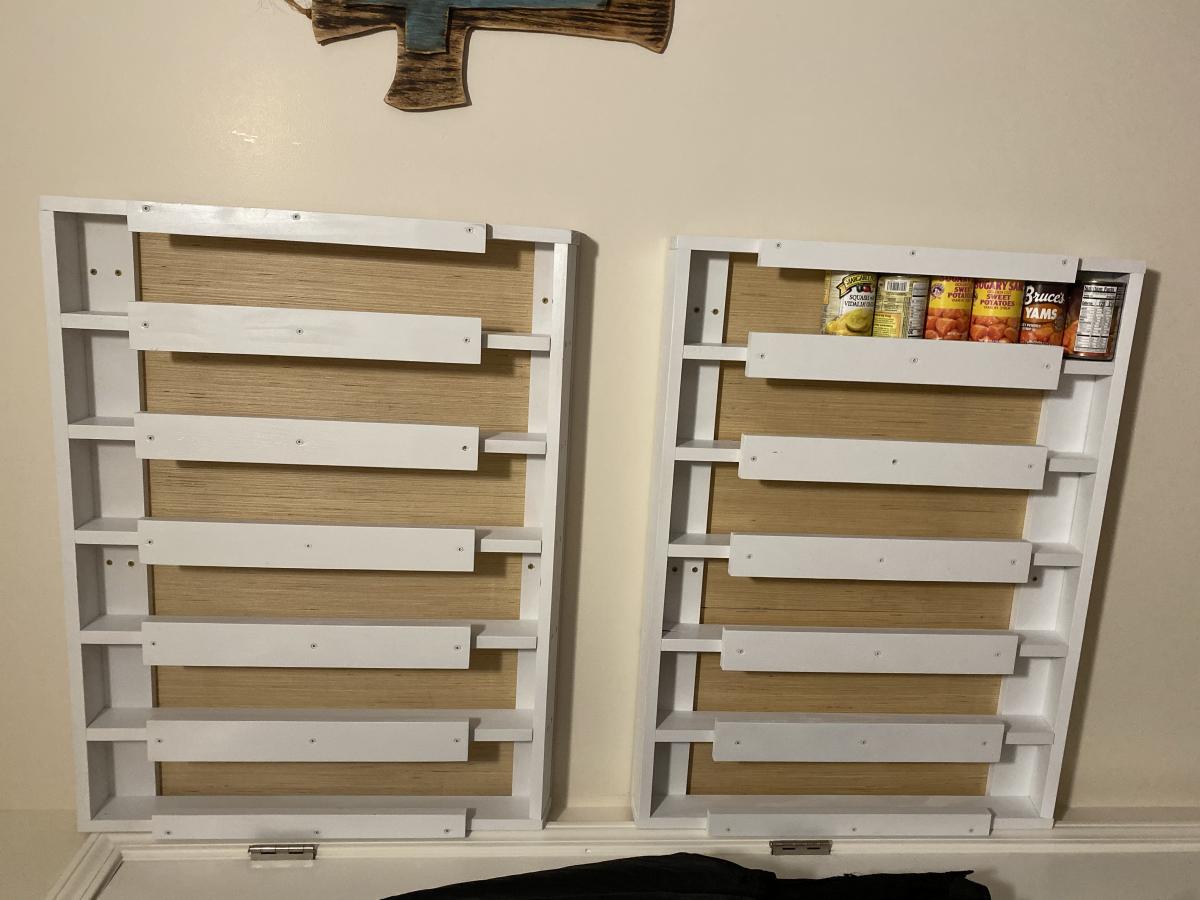
Wall mounted can organizer

Added a backing of thin plywood to prevent the cans marking up the walls. I knew how many types of canned goods I wanted this to fit and adjusted the width to meet our needs. Love how this is going to save space in the pantry and with just a glance I can see what we have on hand.
Thanks Ana for another great plan!

Built from Plan(s)
Estimated Cost
About $150.
Estimated Time Investment
Day Project (6-9 Hours)
Finish Used
Spray paint
Recommended Skill Level
Beginner

Comments

Christmas Tree Shelf

Submitted by Anonymous (not verified) on Wed, 10/21/2020 - 08:50

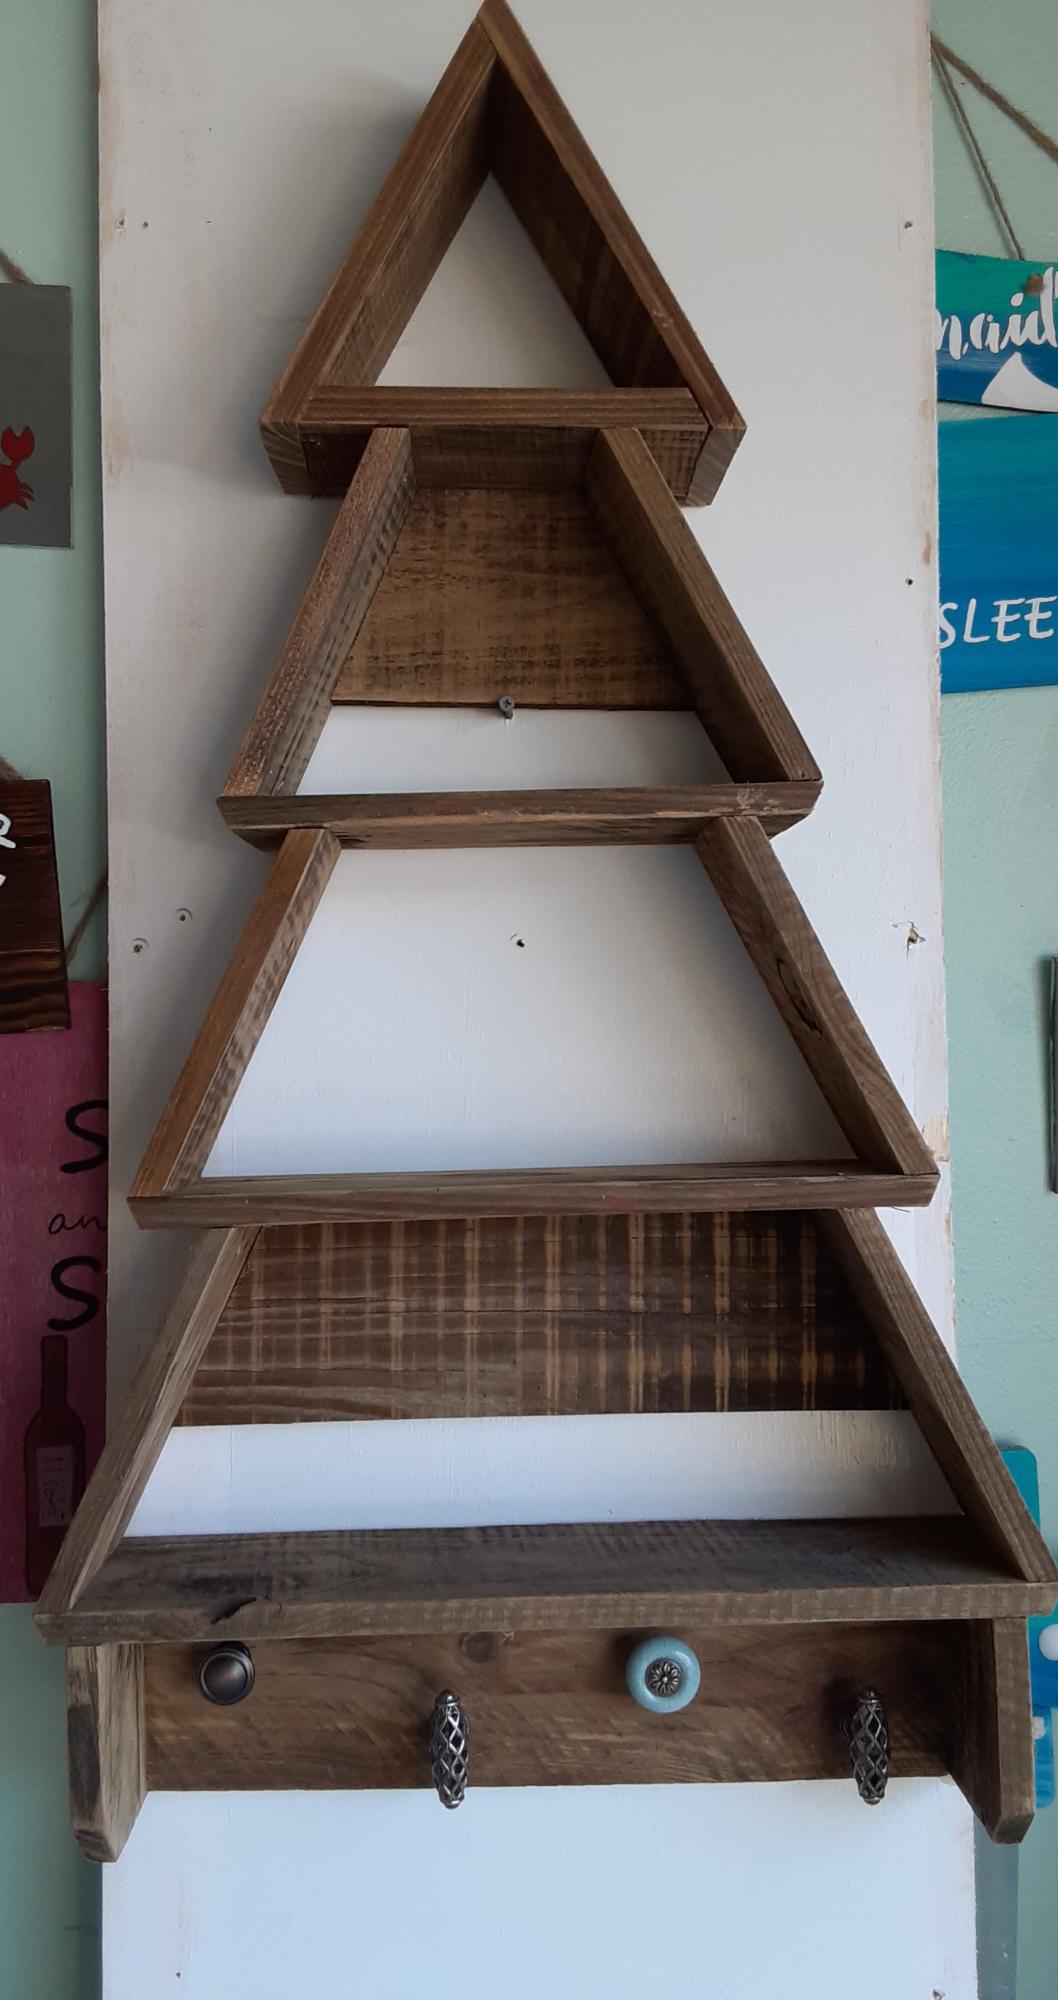
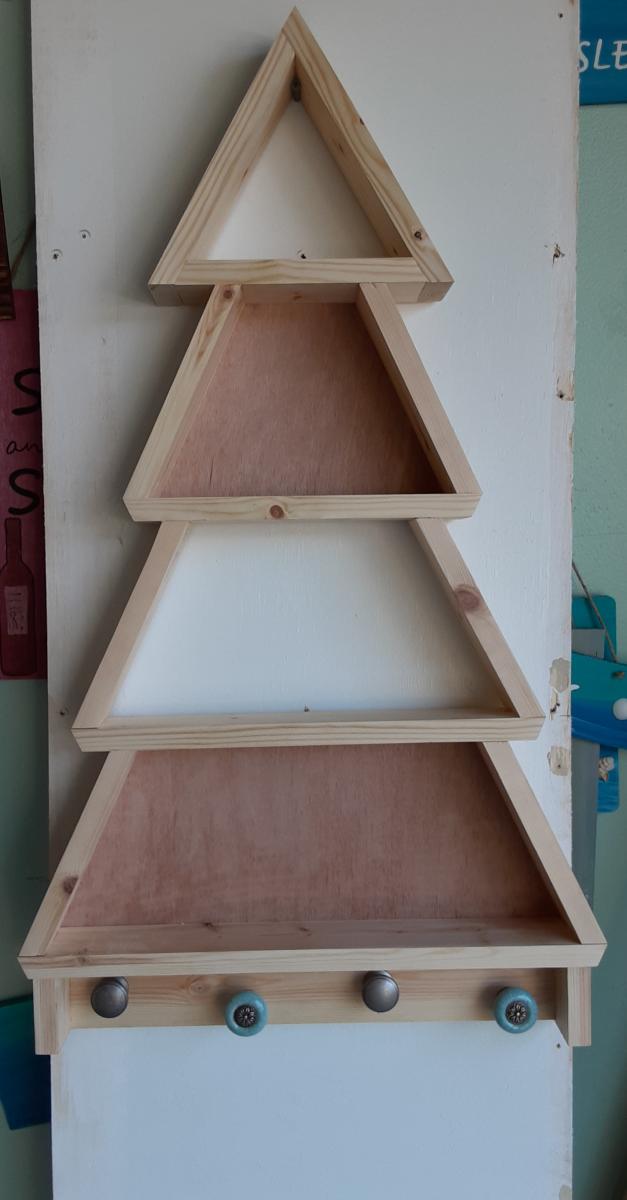
This is my first time using some of the power tools that this required, however, it came out SO CUTE! I put one together and someone bought it raw. I put one together as the video showed, and then did one out of old fence pickets that were cleaned up and planed by a neighbor. They both came out beautiful. We used knobs that we had in the shop and offset them a little to be whimsical.
Vasiliki

Built from Plan(s)
Estimated Cost
$8-12
Estimated Time Investment
An Hour or Two (0-2 Hours)
Finish Used
Entry way to home, by the front door.
Recommended Skill Level
Intermediate

Comments

My version of Crate and Barrel Atwood queen bed

Submitted by Chriss45 on Thu, 02/02/2017 - 00:51

My daughter loved Crate and Barrel Atwood bed so I built her this bed that is very similar. 

Estimated Cost
300 dollars
Estimated Time Investment
Weekend Project (10-20 Hours)
Finish Used
Walnut stain and watered down chalk paint
Recommended Skill Level
Intermediate

Comments

Fancy + Mimi's Hall Trees

Submitted by Anonymous (not verified) on Sun, 02/05/2017 - 13:28

Took the fancy hall tree bottom and added Mimi's hutch to the top. Added a little bead board to the bench and top edges to cover up the plywood, and voila! My wife's Christmas gift. 

Estimated Cost
$250-300
Estimated Time Investment
Week Long Project (20 Hours or More)
Finish Used
White paint and polyurethane
Recommended Skill Level
Intermediate