Large Tic Tac Toe Board
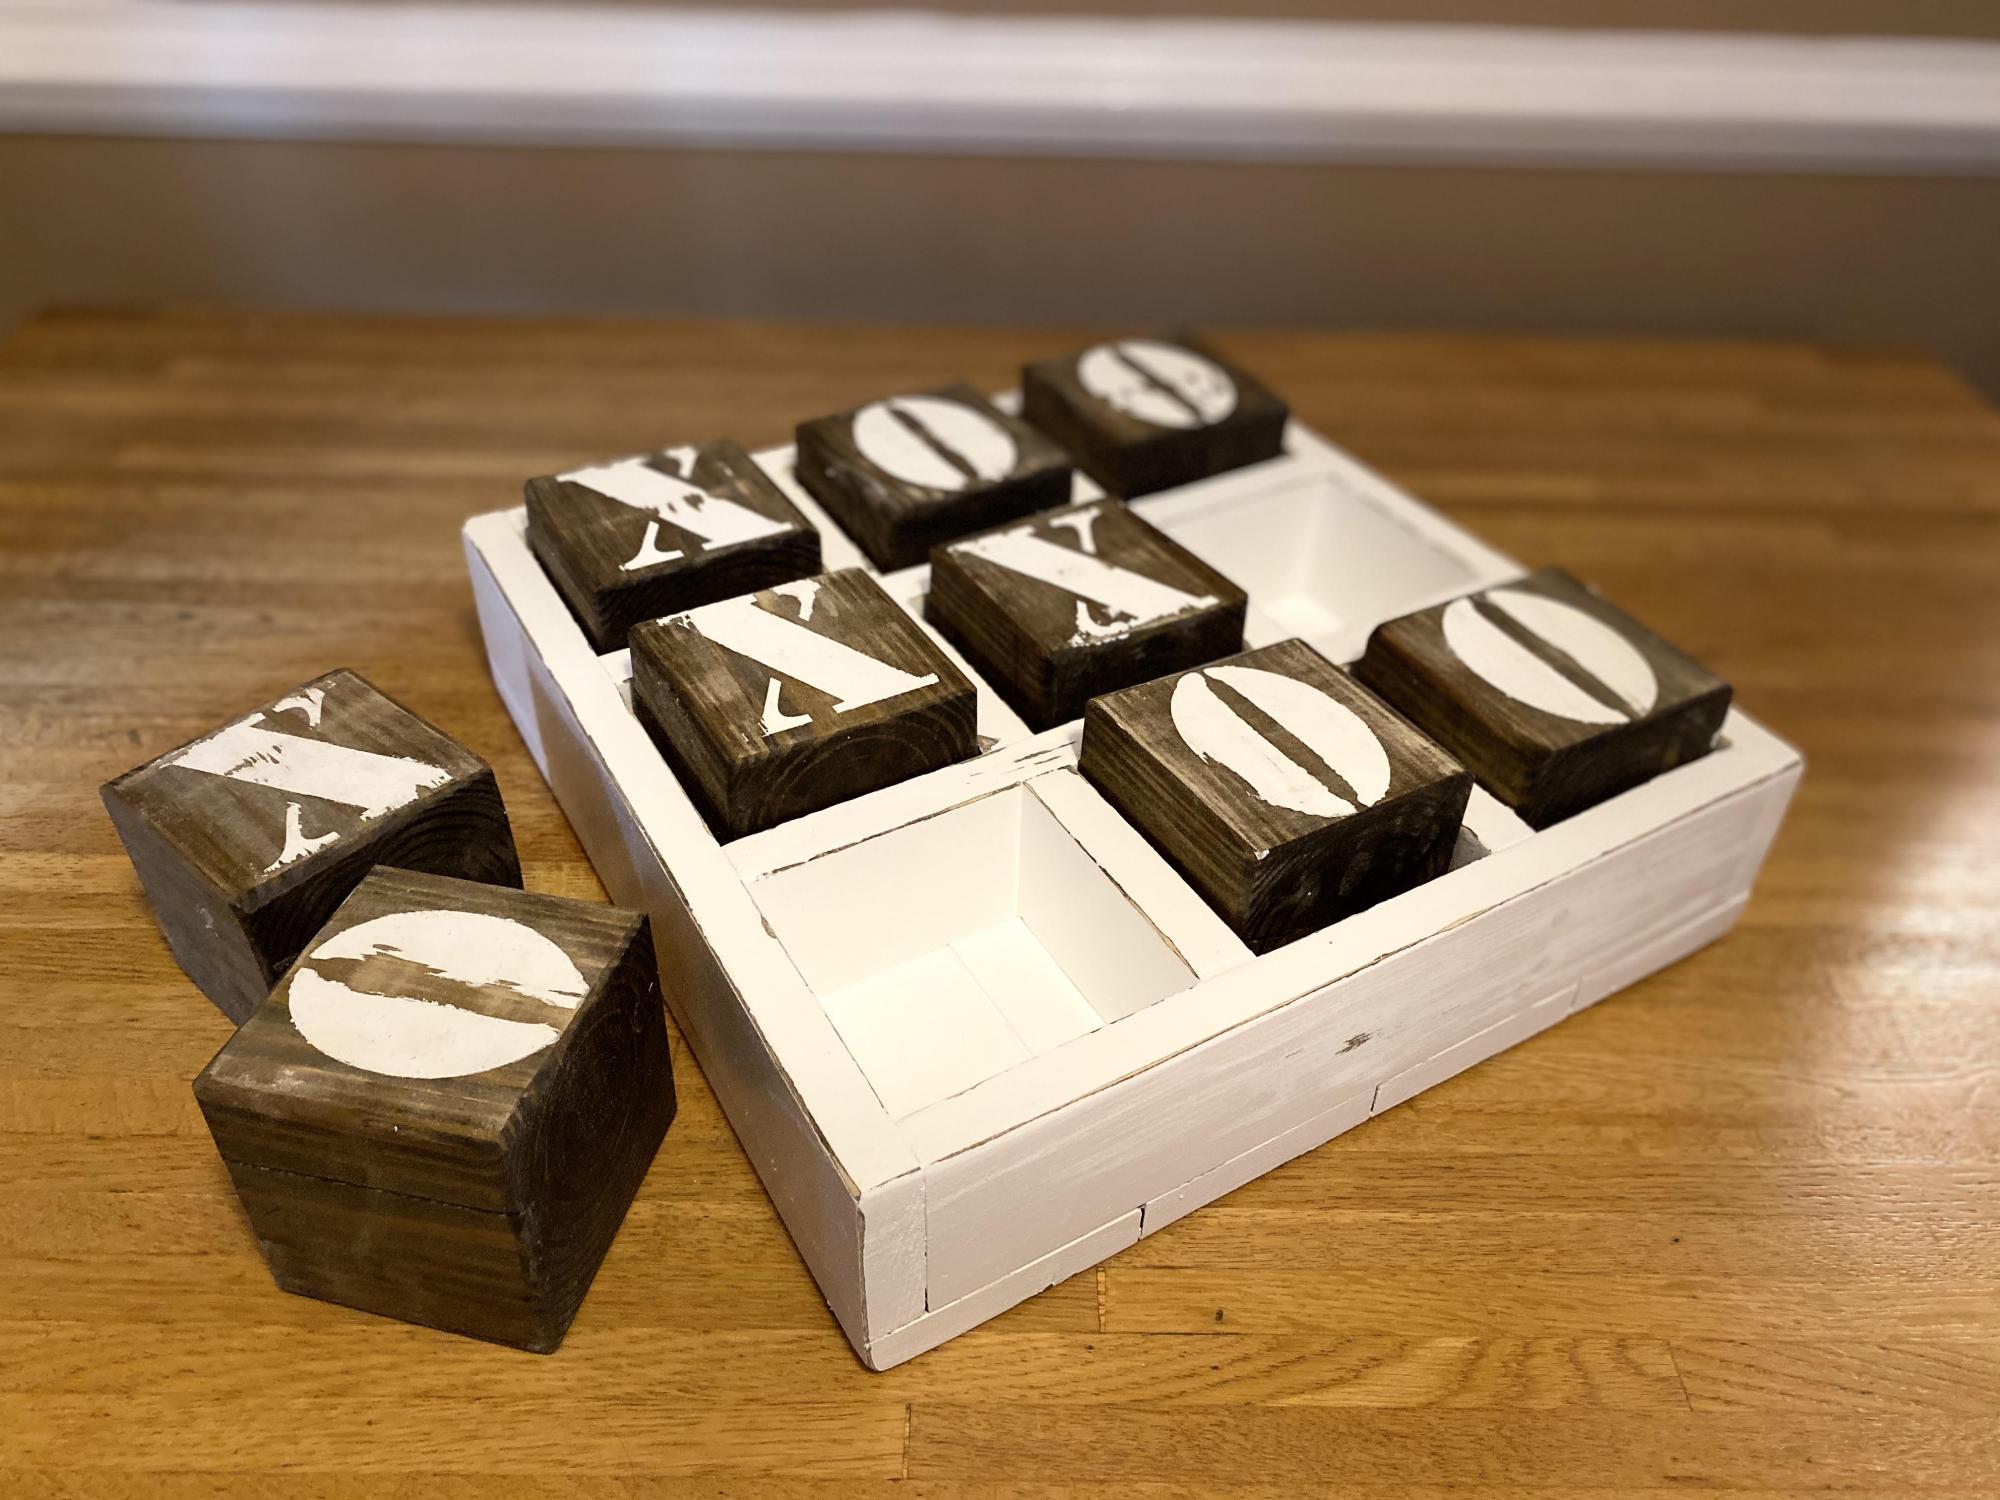
Took some liberties with this one and combined with another plan. My first stencil project.
Built from Plan(s)
Estimated Time Investment
Day Project (6-9 Hours)
Took some liberties with this one and combined with another plan. My first stencil project.
Thank you for all the wonderful plans!
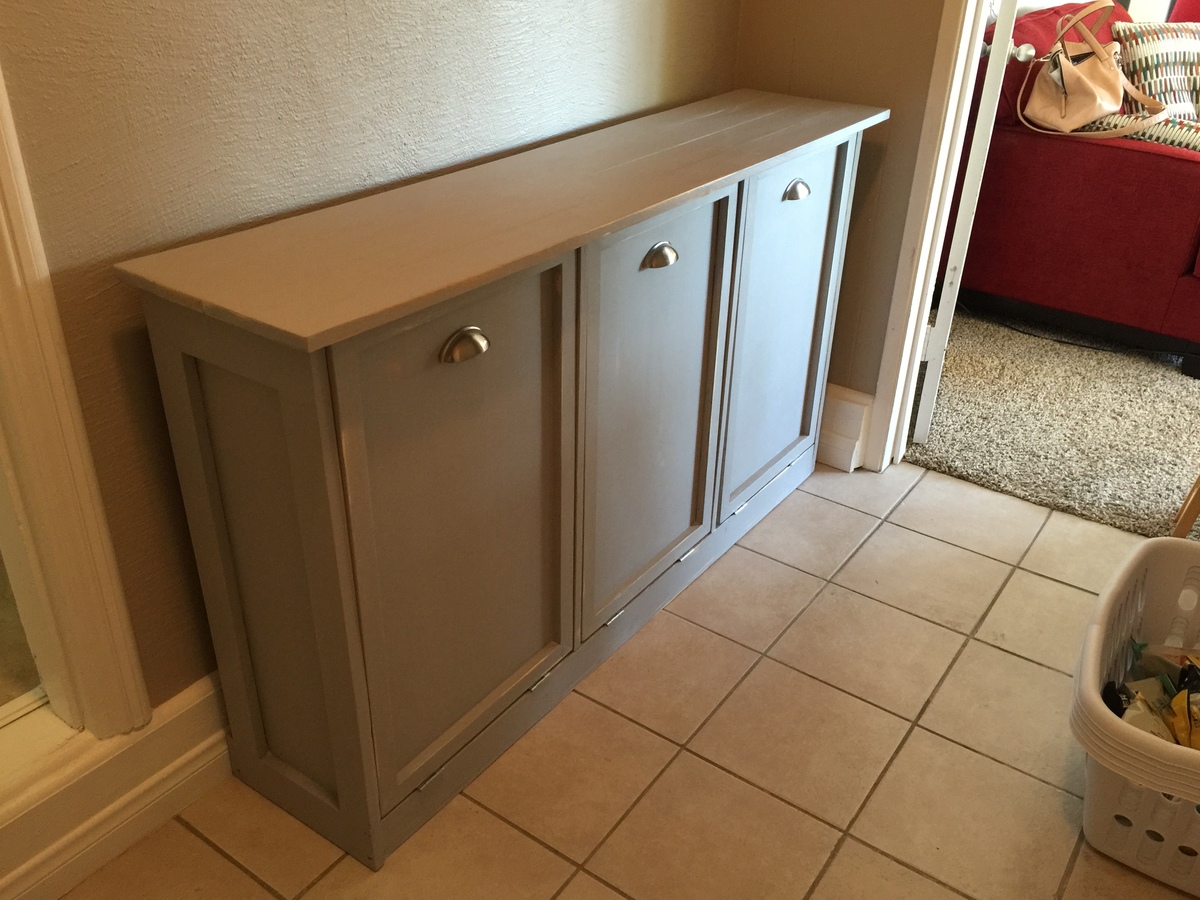
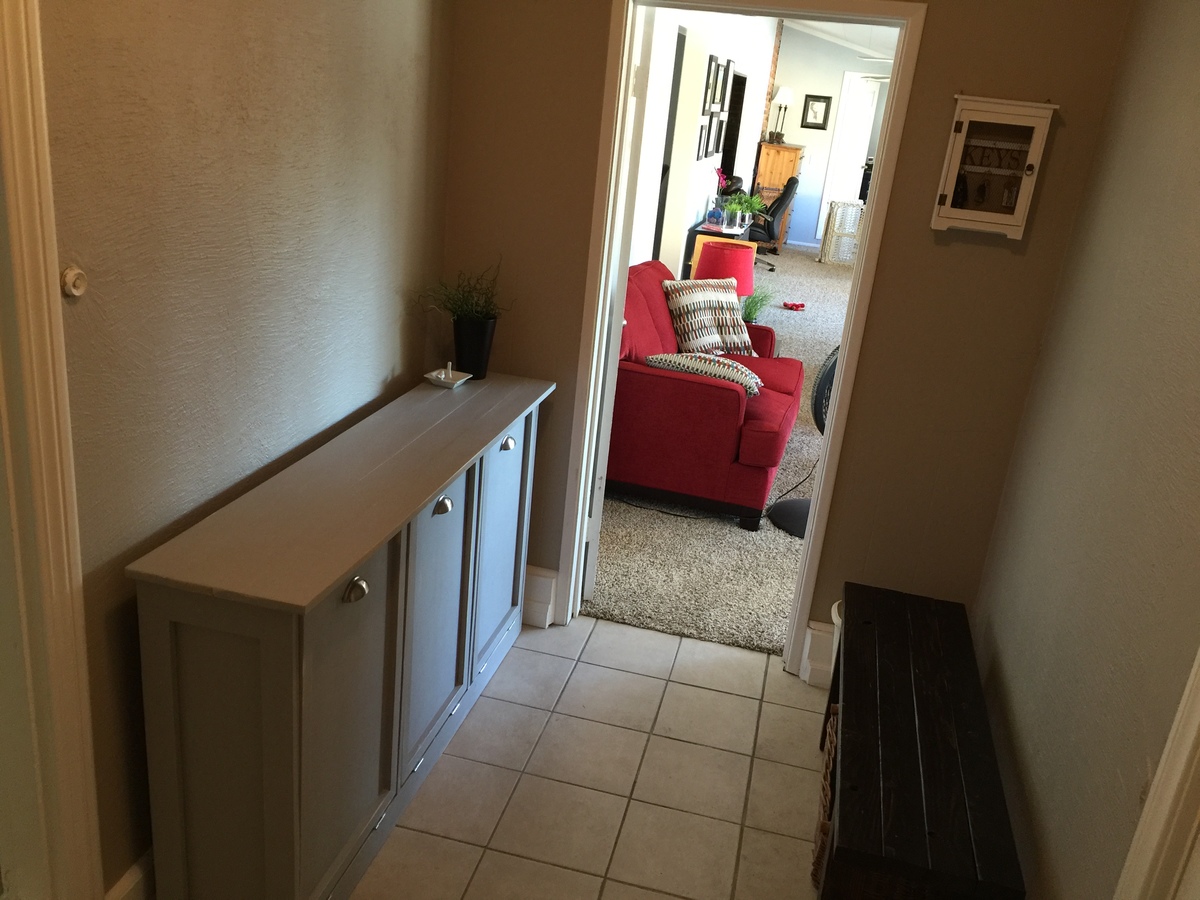
i used the modified plan of the tilt out waste bin that Shanty2chic put out as a three bin laundry sorter. It turned out great!
It is finished with chalk paint, lightly distressed.
Fri, 10/30/2020 - 10:44
Hi, you mentioned that you used the modified plan of the tilt out waste bin that Shanty2chic put out as a three bin laundry sorter. Can you share that please? Thanks!!
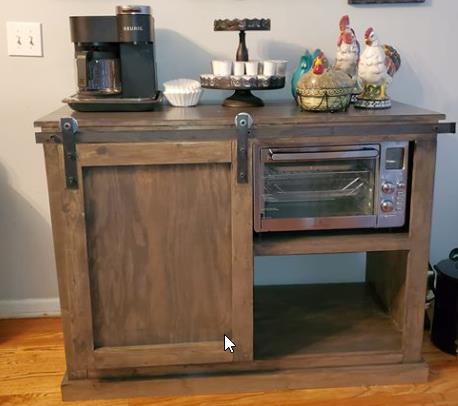
I built this from the plans on this site My wife wanted a coffee bar and I saw this plan and she fell in love with it. I love the Barn door hack and how everything came out.
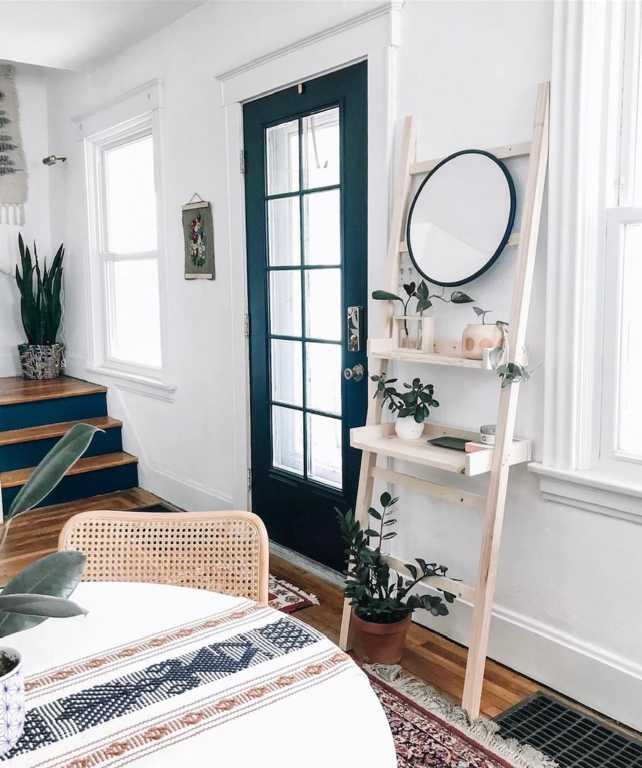
PErfect for smaller spaces or homes without mudrooms. Love the minimalist style!
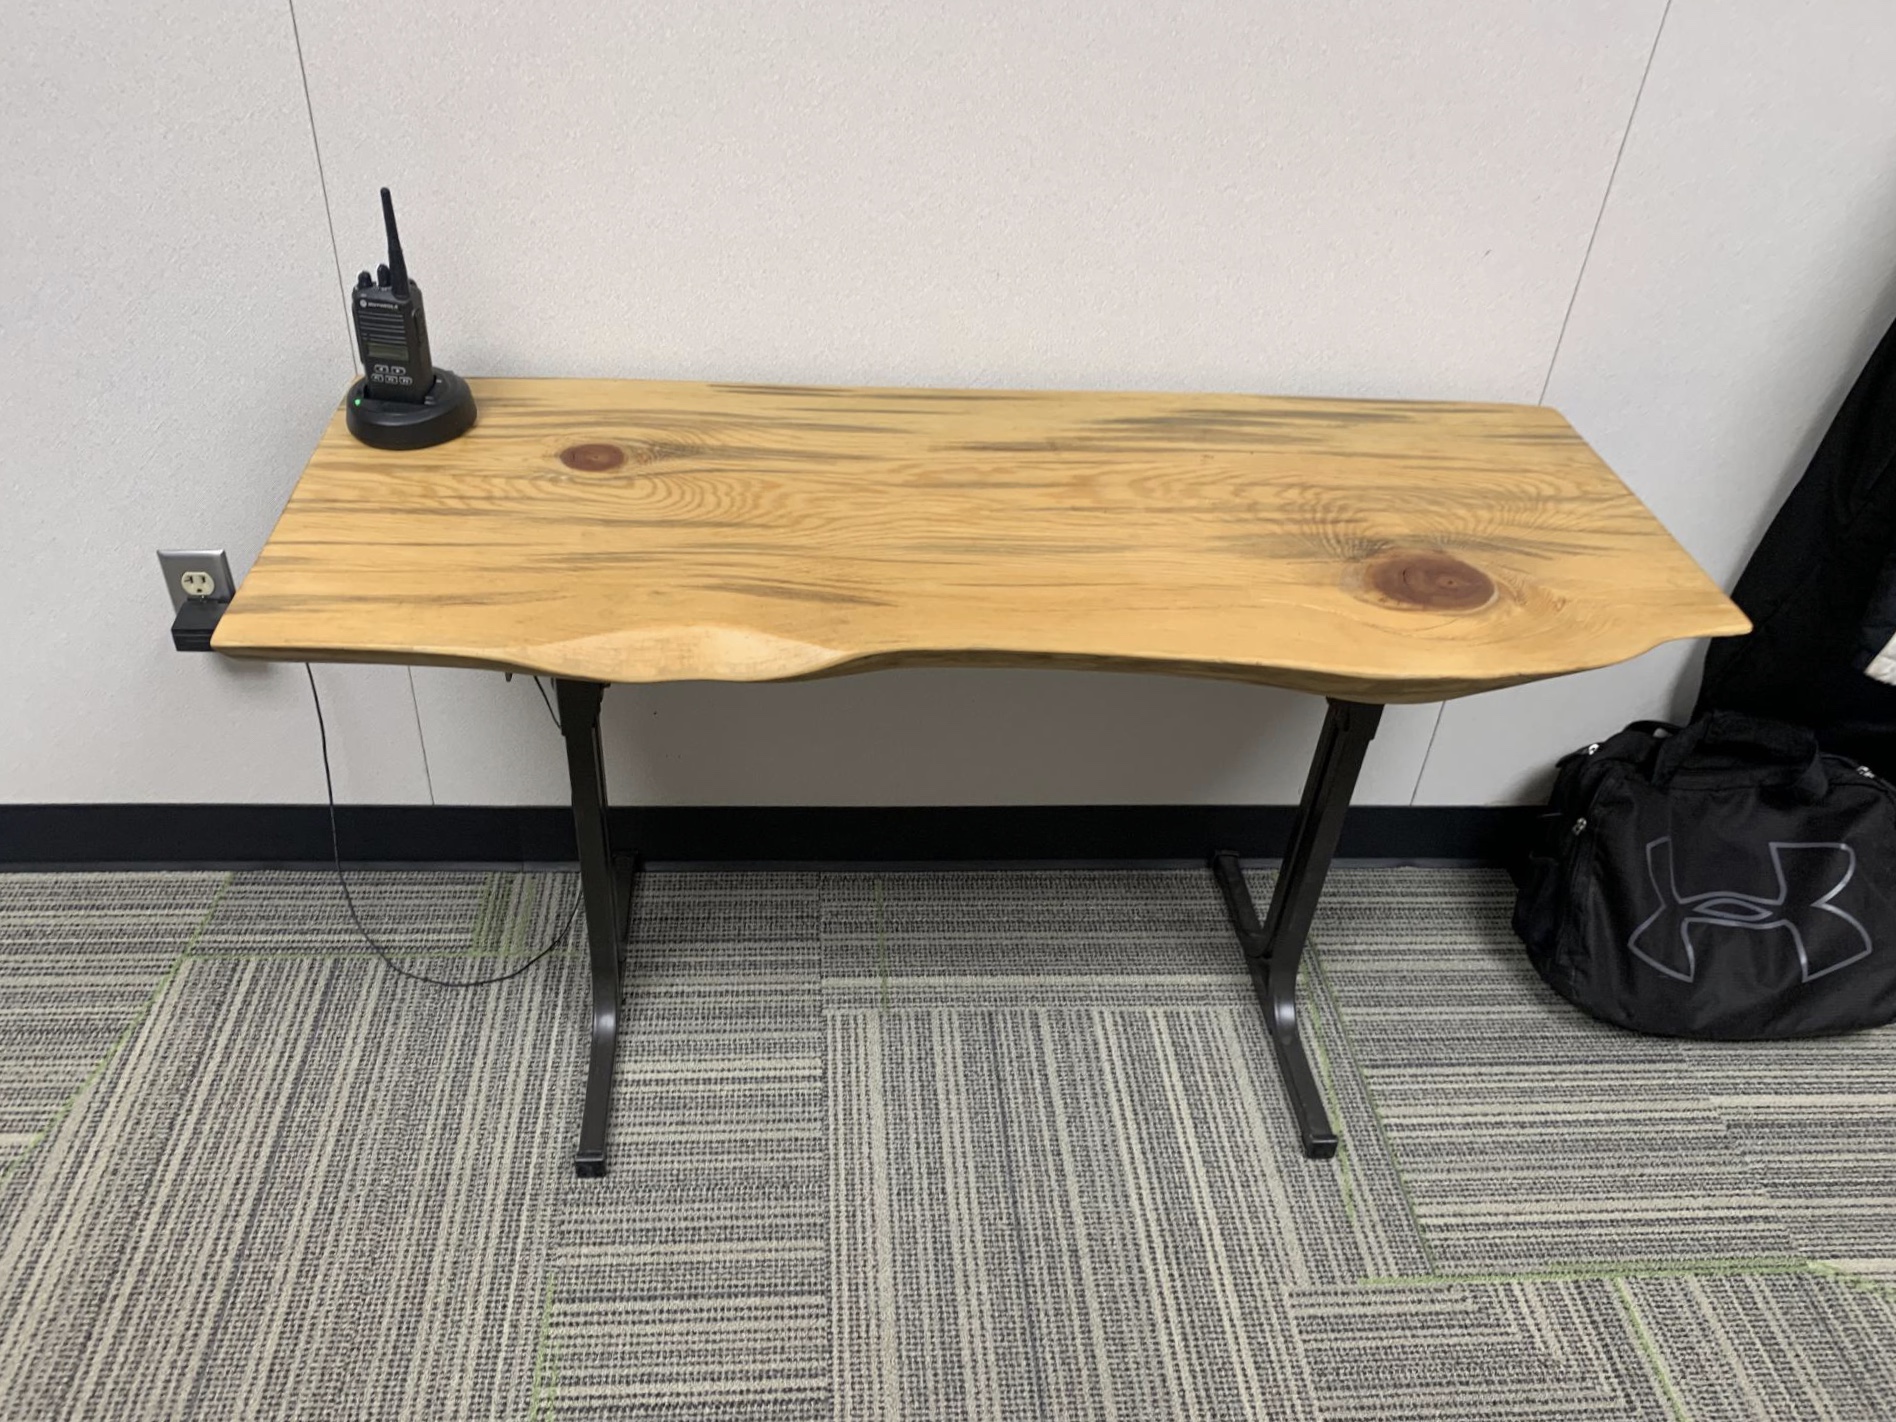
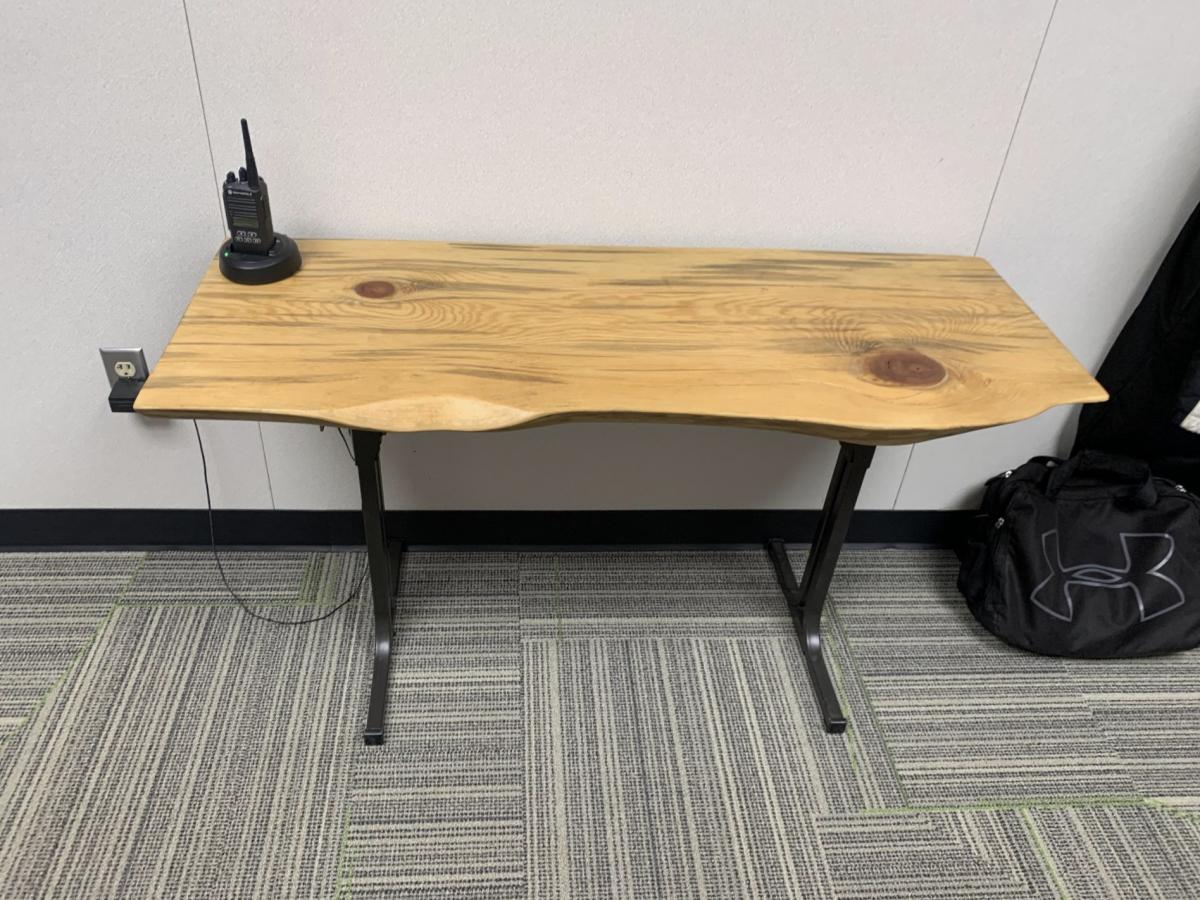
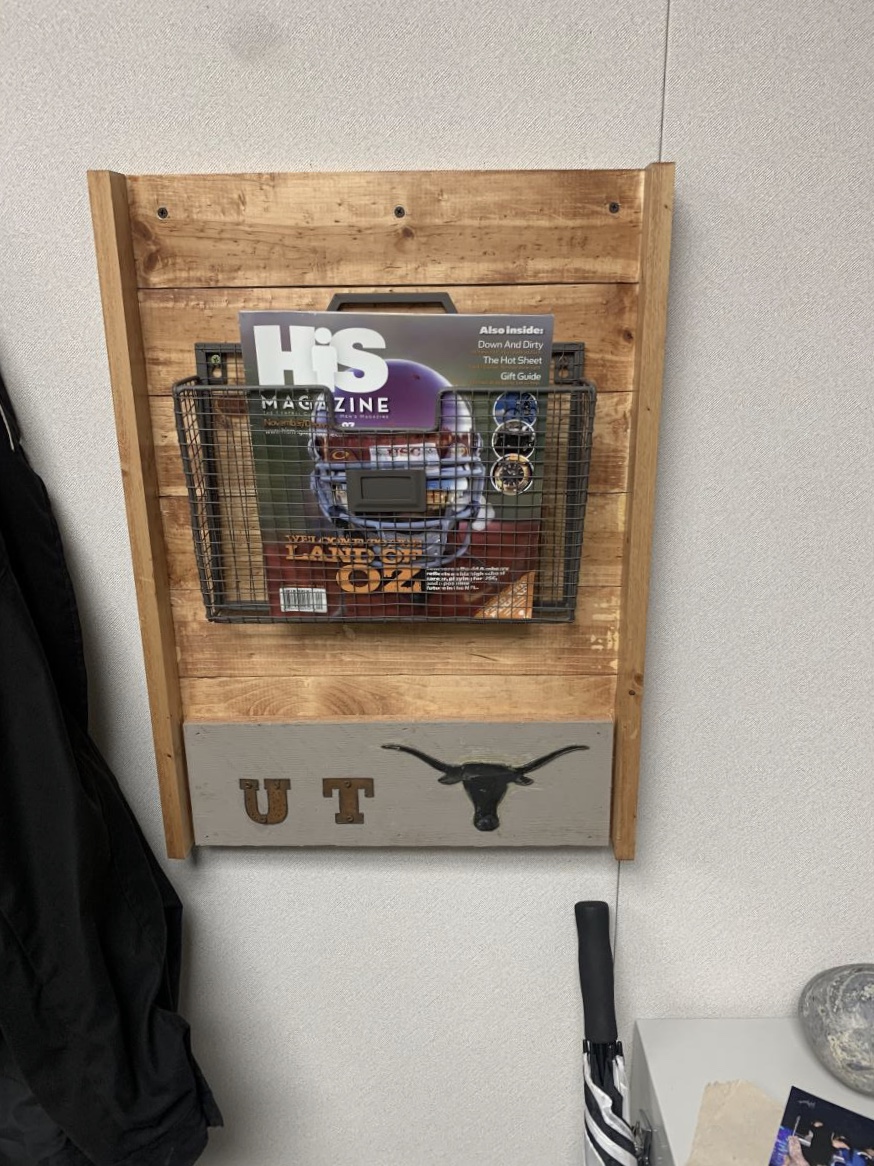
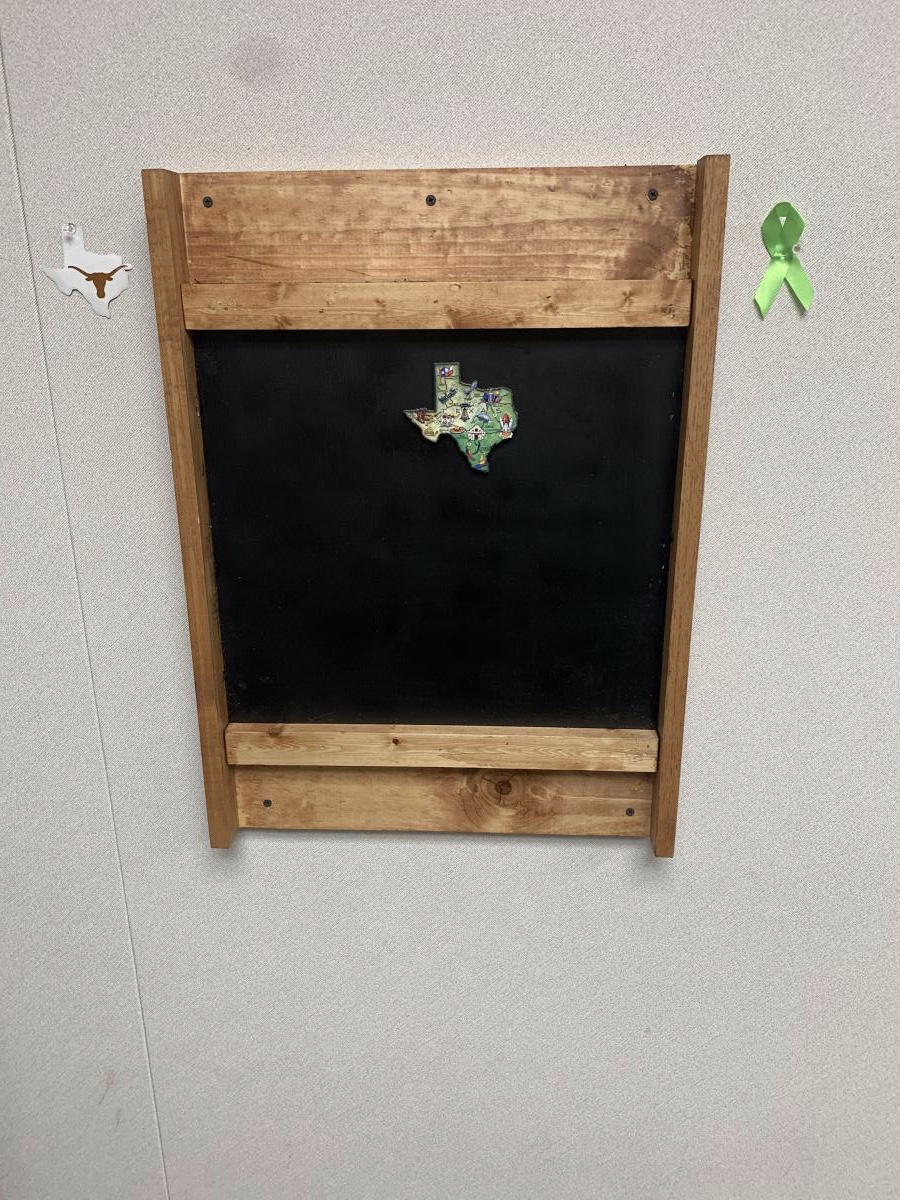
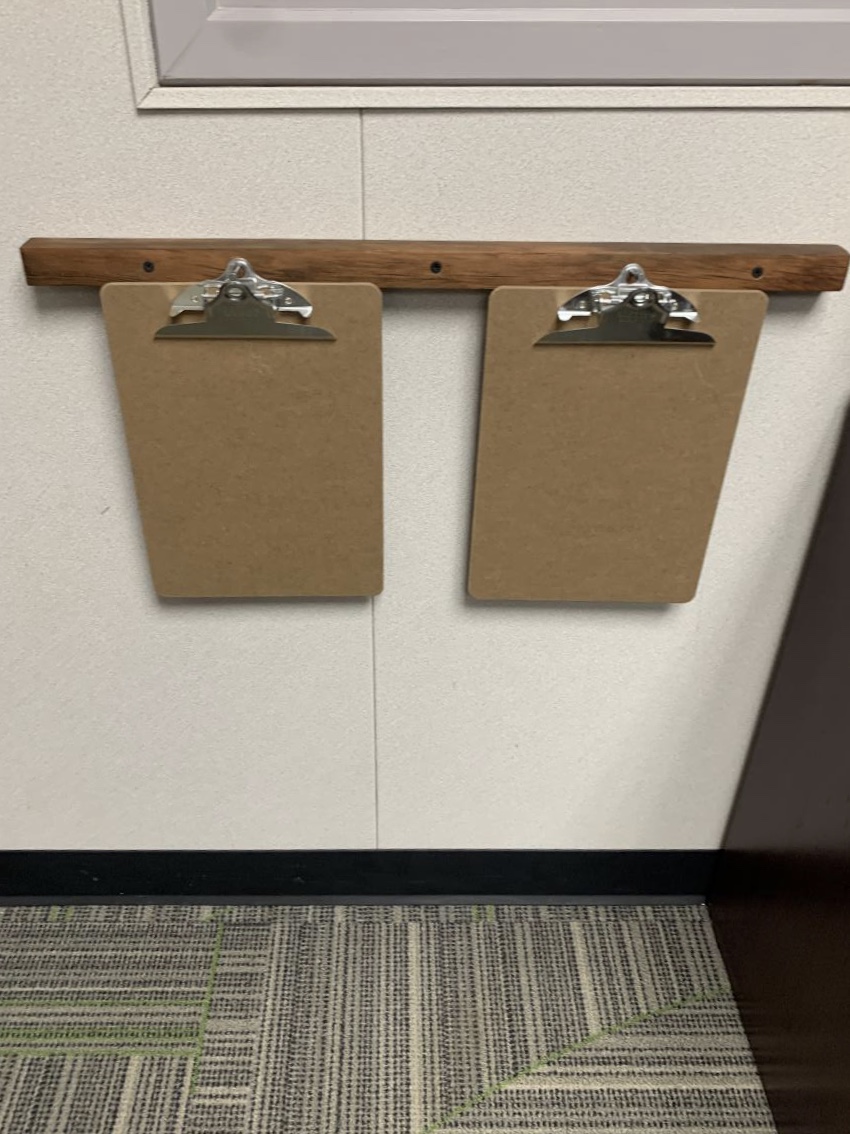
Remodeled my office at work.
1x2 and 1x1 for picture holders
1x4 and 1x1 plus old white board painted in magnetic chalk paint
Old metal desk legs that were sanded and painted and added a wooden slab to the top
1x3 and 1x1 for magazine rack. Picked up basket at Hobby Lobby and had the Univ of Texas metal pieces
1x2 and nails for the clipboard holder
Sanded all wood and used teak oil.
Easy weekend project

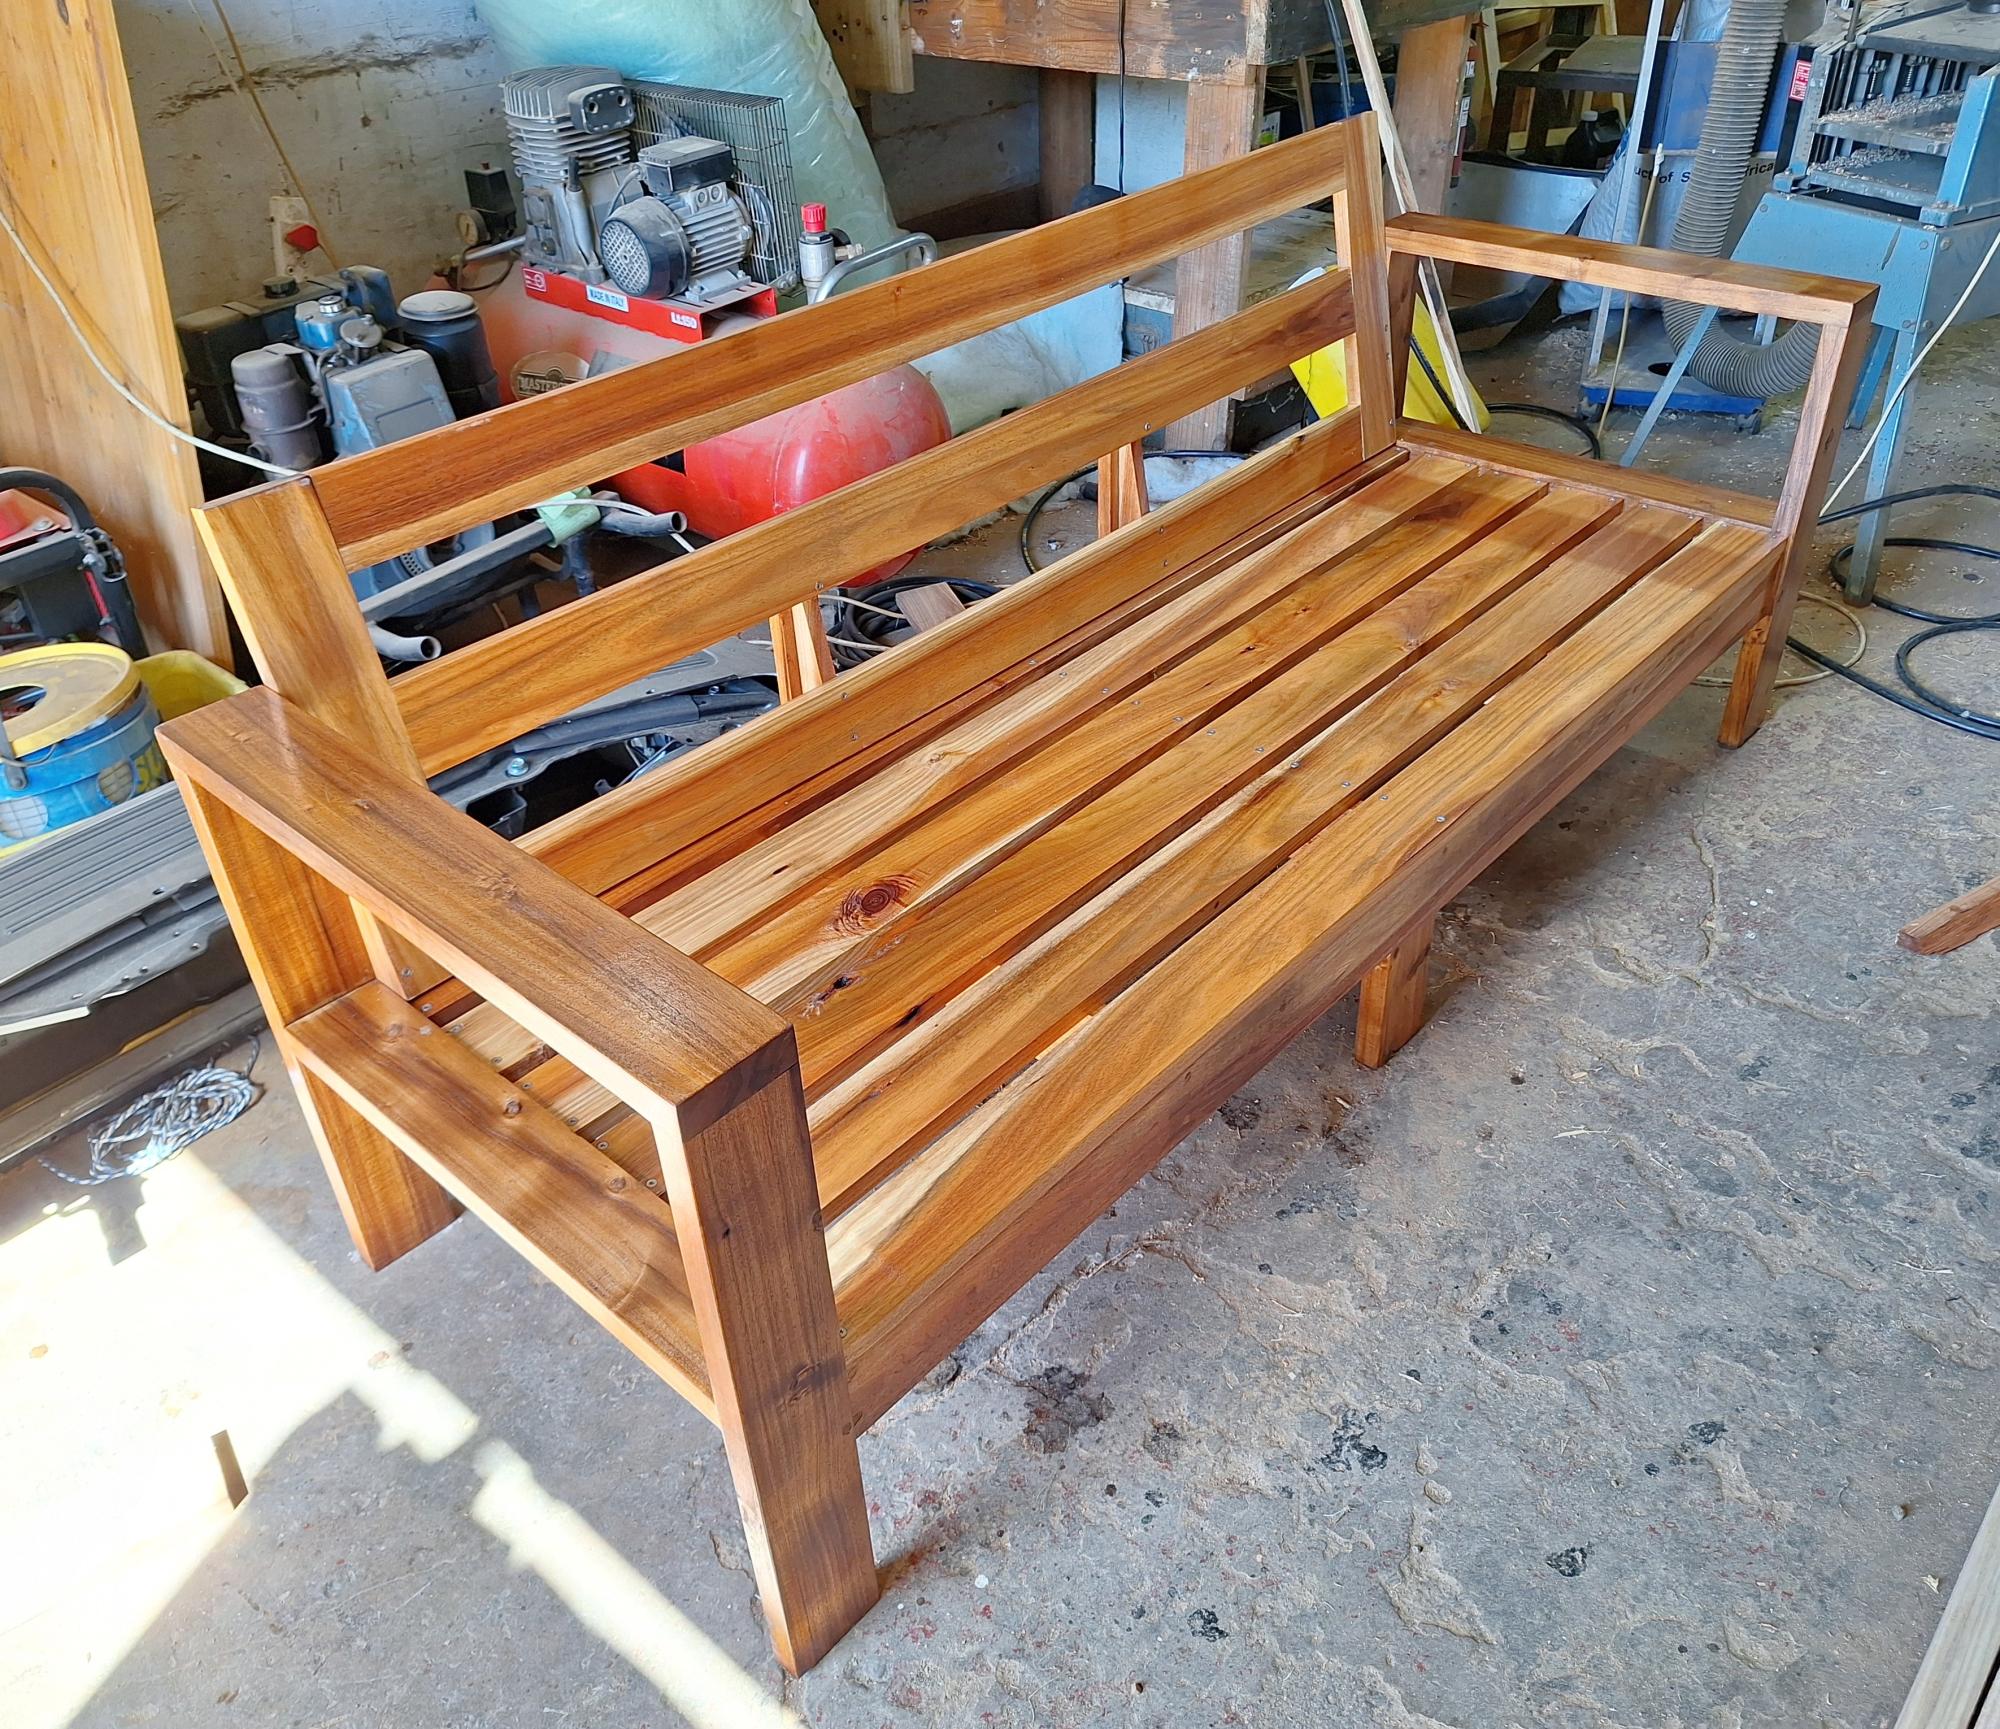
I built this outdoor sofa out of Blackwood. I tweaked Ana's plan to include a backrest and a support in the front, as my planks are only 23mm thick.
Gordon Smith
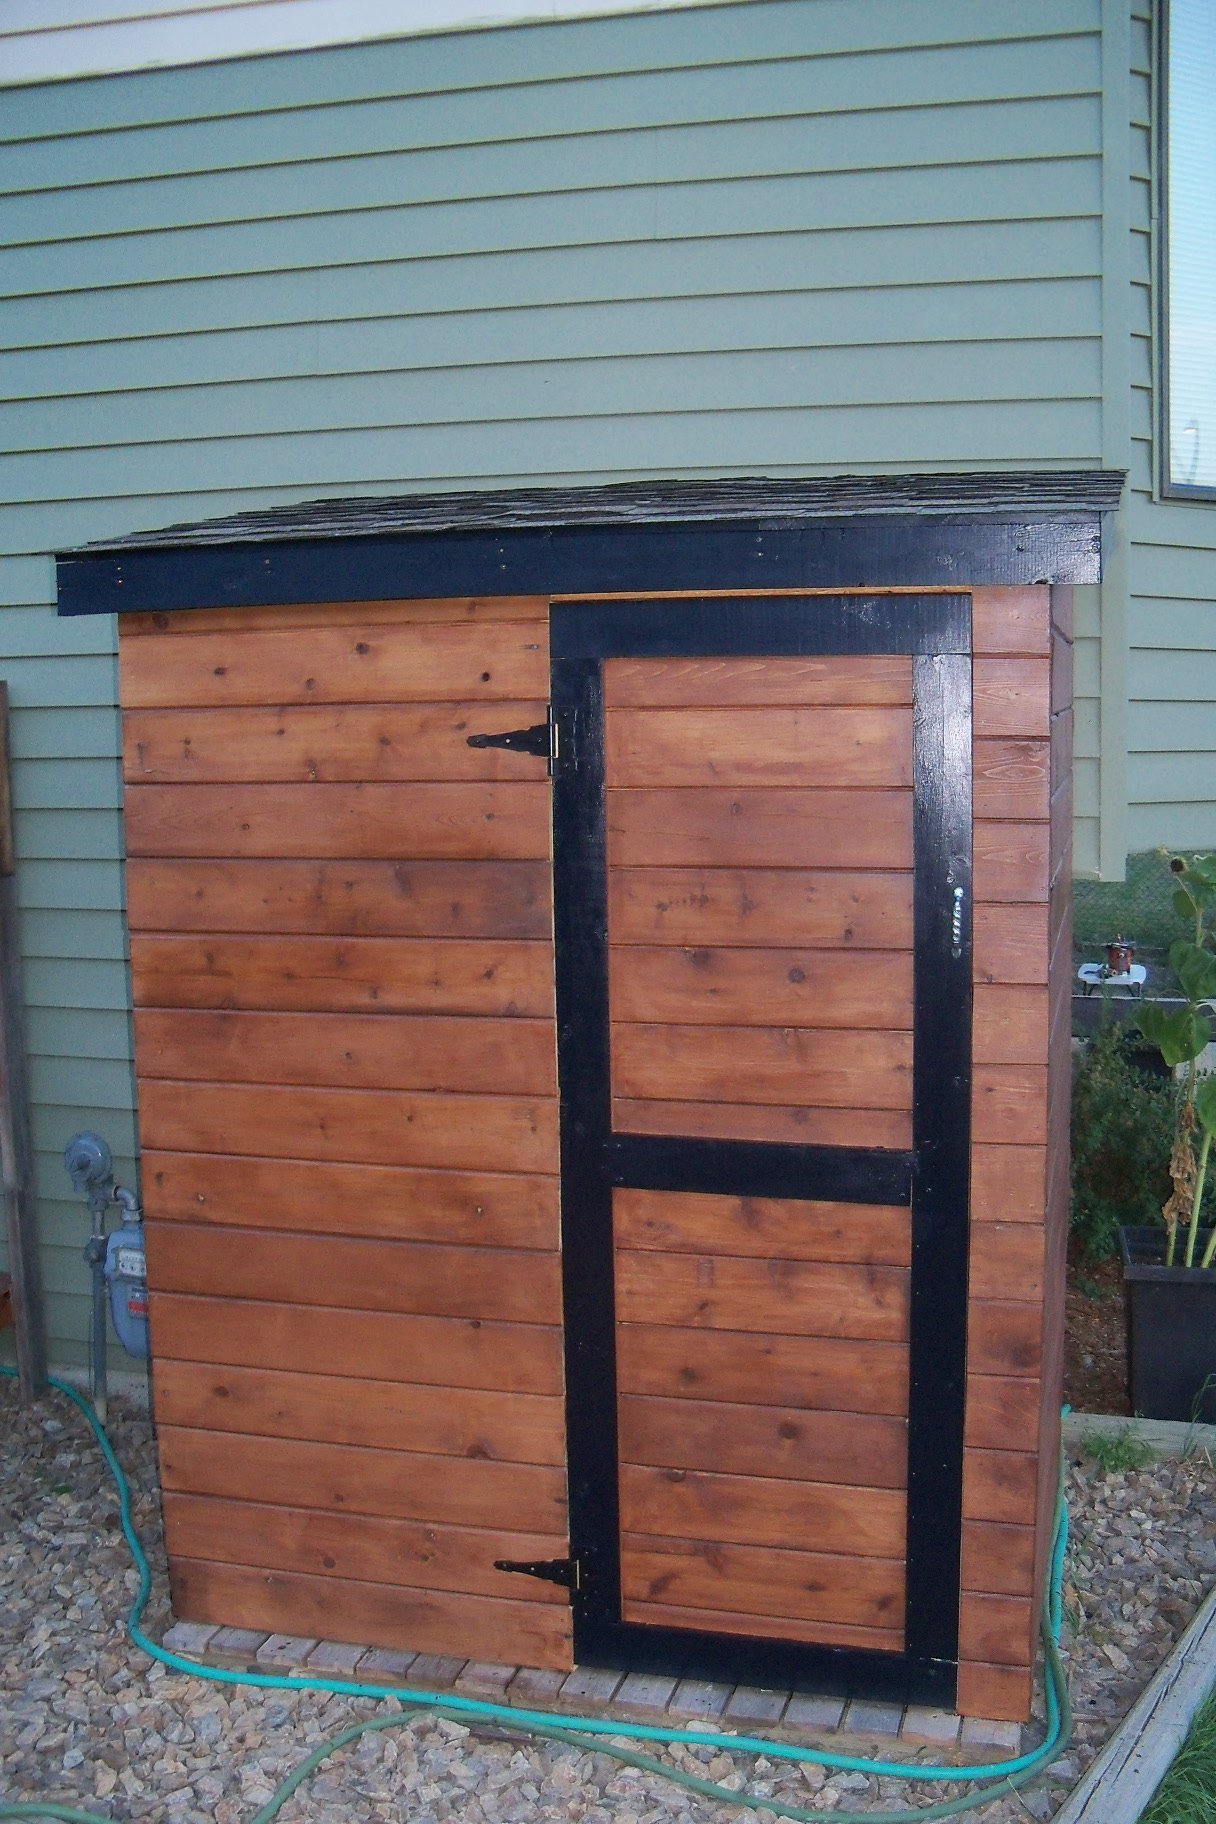
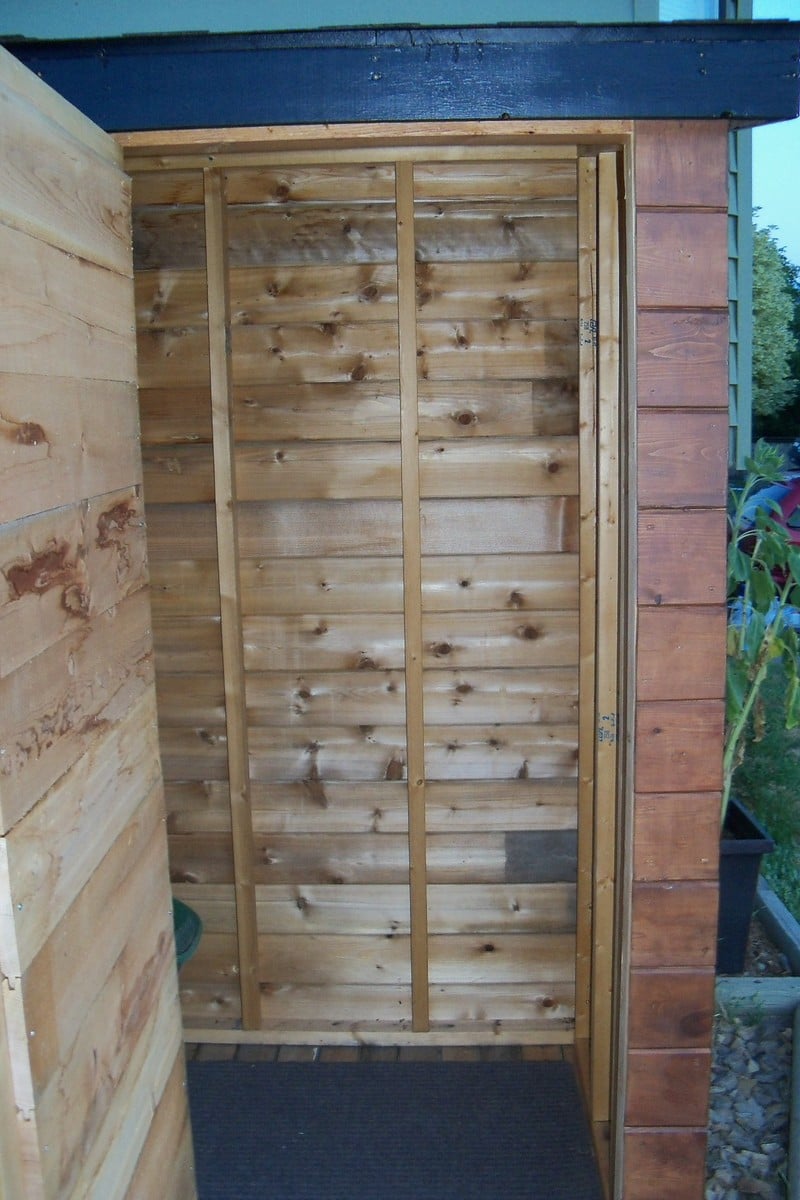
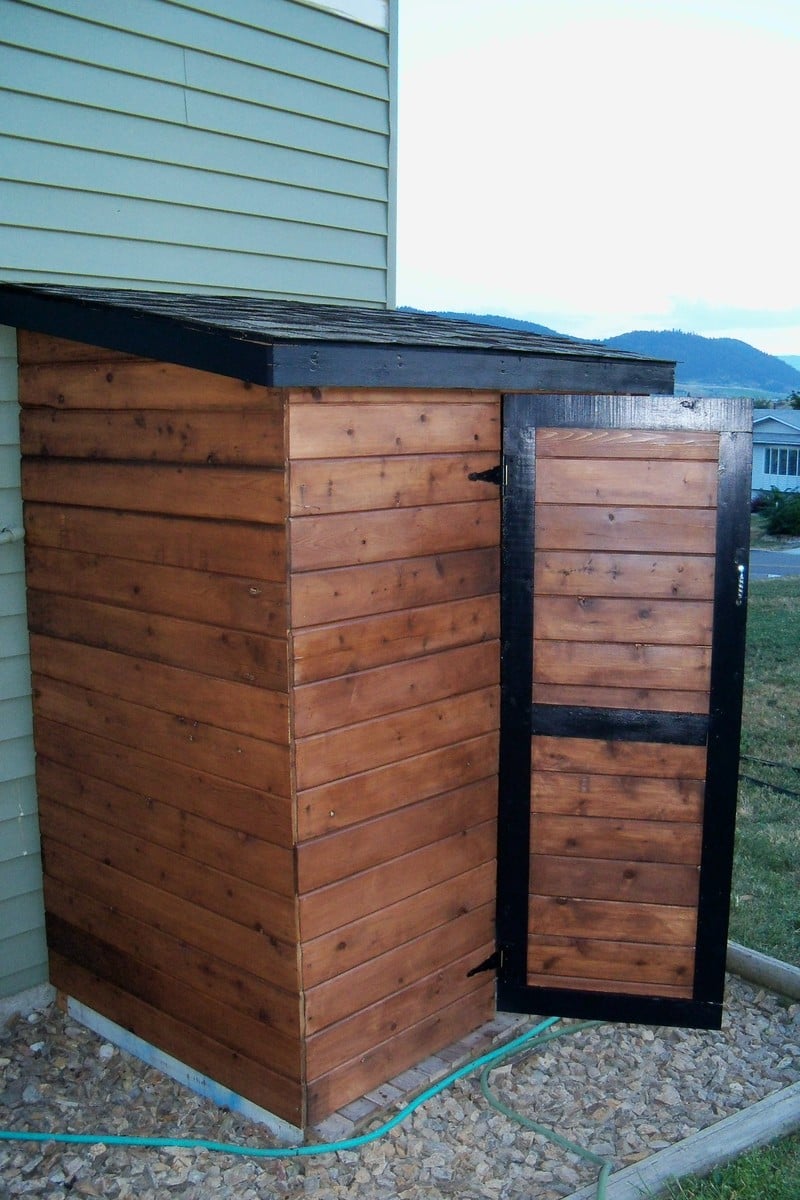
Built this as a garden shed so I had to modify the front into a small 26 inch door.
My shed size was 5 x 4 as I had limted space.
My roof is angled at 10 degrees.
I used my new Kreg jig for the door that was fun!
Frame is from 2 x 3's.
The total cost for me was under $70 as I salvaged the cedar, 1 x 4's, roof felt, and shingles.
Paint for the trim was a $5.00 oops.
I am more than pleased with the outcome.
I built the potting table first before this.
So this was my second item to build and I really enjoyed it.
Can't remember much more about how I built it as I started it a while back.
This site is really amazing.

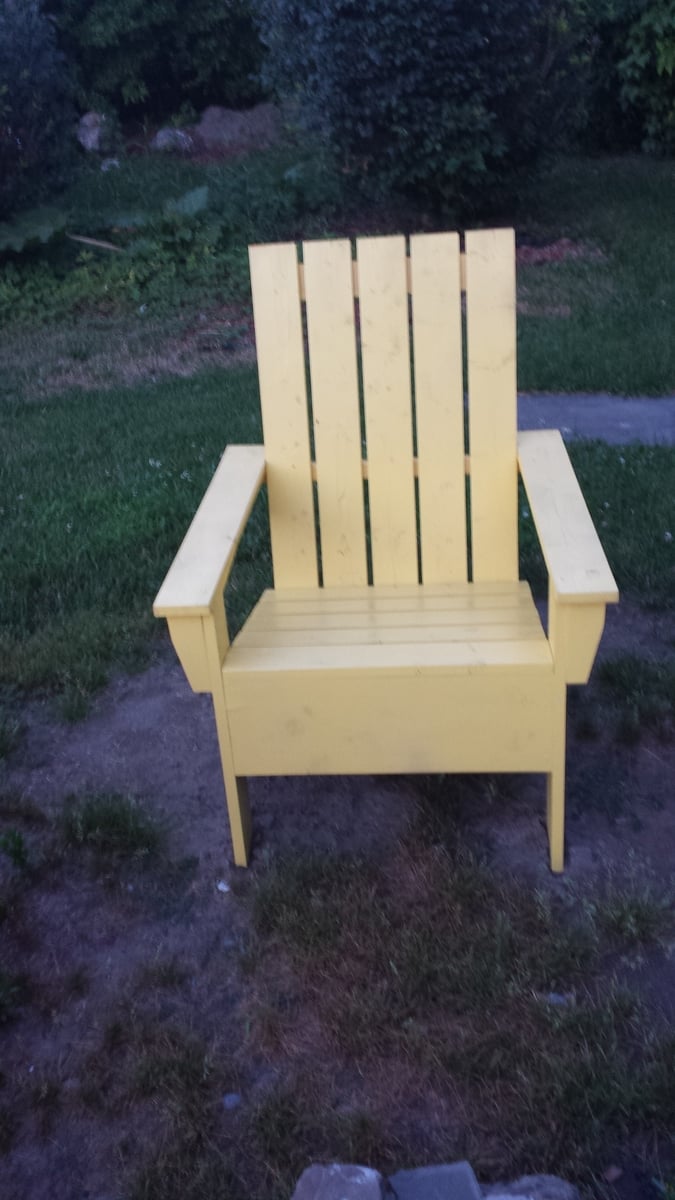
These chairs are fairly easy to make. The side boards were the hardest part.


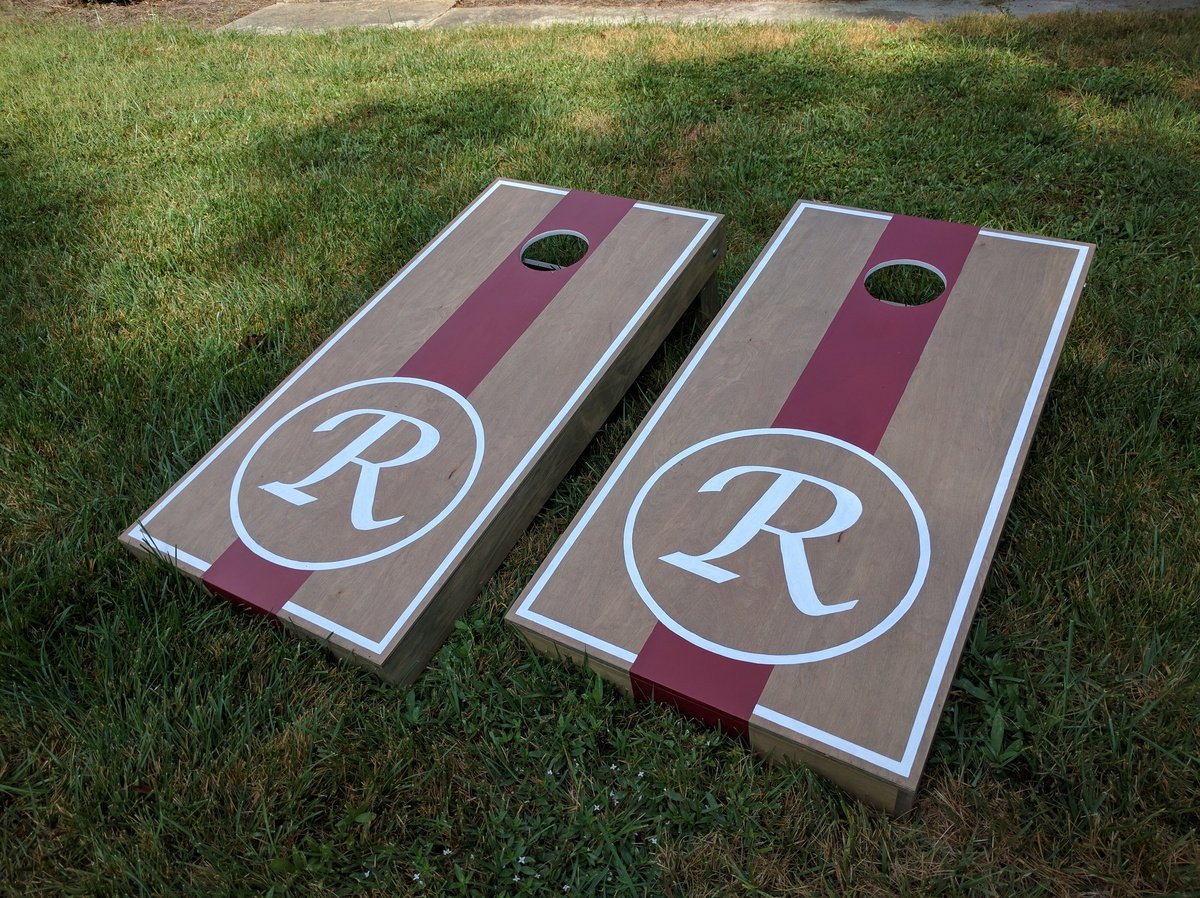
Cornhole boards for friends and family :) Used 1x4s for framing and legs, 1/2" ply for top.
"R" set: Birch plywood tops w/ (2) coats of Miniwax Weathered Oak oil stain. Red stripe is Behr 'Cherry Cola.' (3) coats of Polycrylic finish.
"AW" set: Regular plywood tops w/ (1) coat of Miniwax Special Walnut oil stain & Glidden 'Clemson Orange' stripe. (3) coats of Polycrylic finish.


Sat, 09/24/2016 - 10:16
Gorgeous! These would make such a fabulous wedding or house warming gift!
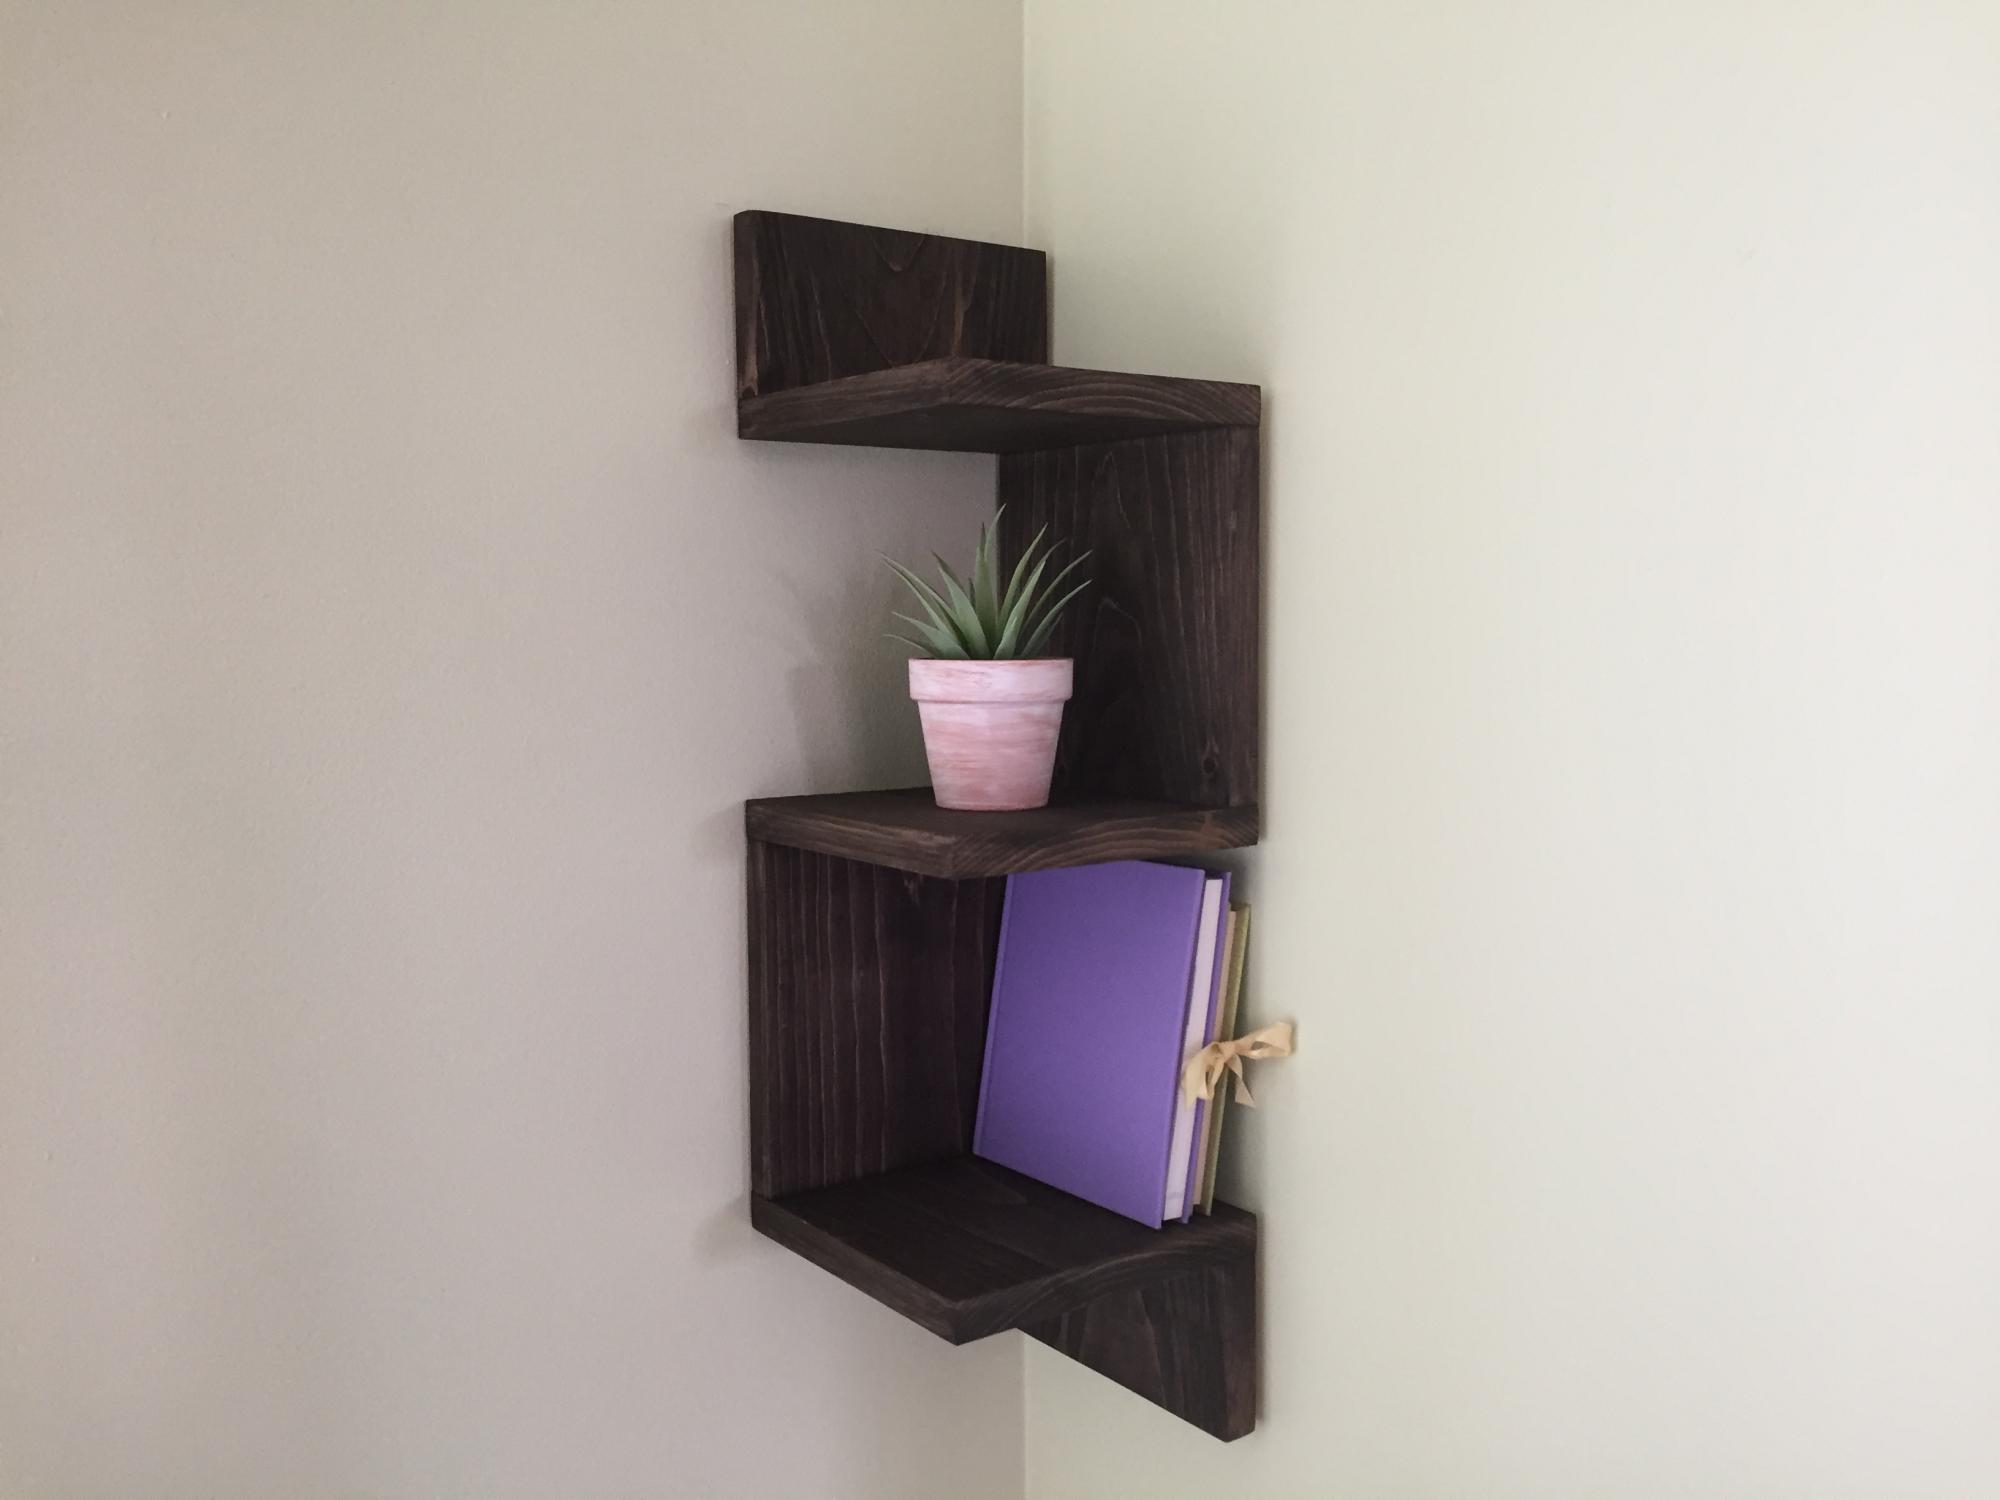
I built these beautiful corner shelves for a friend. It is a great beginner project. I used a 1x8 board but you could also use a 1x10 board. You could also build 5 shelves instead of 3. I used pocket hole joinery.
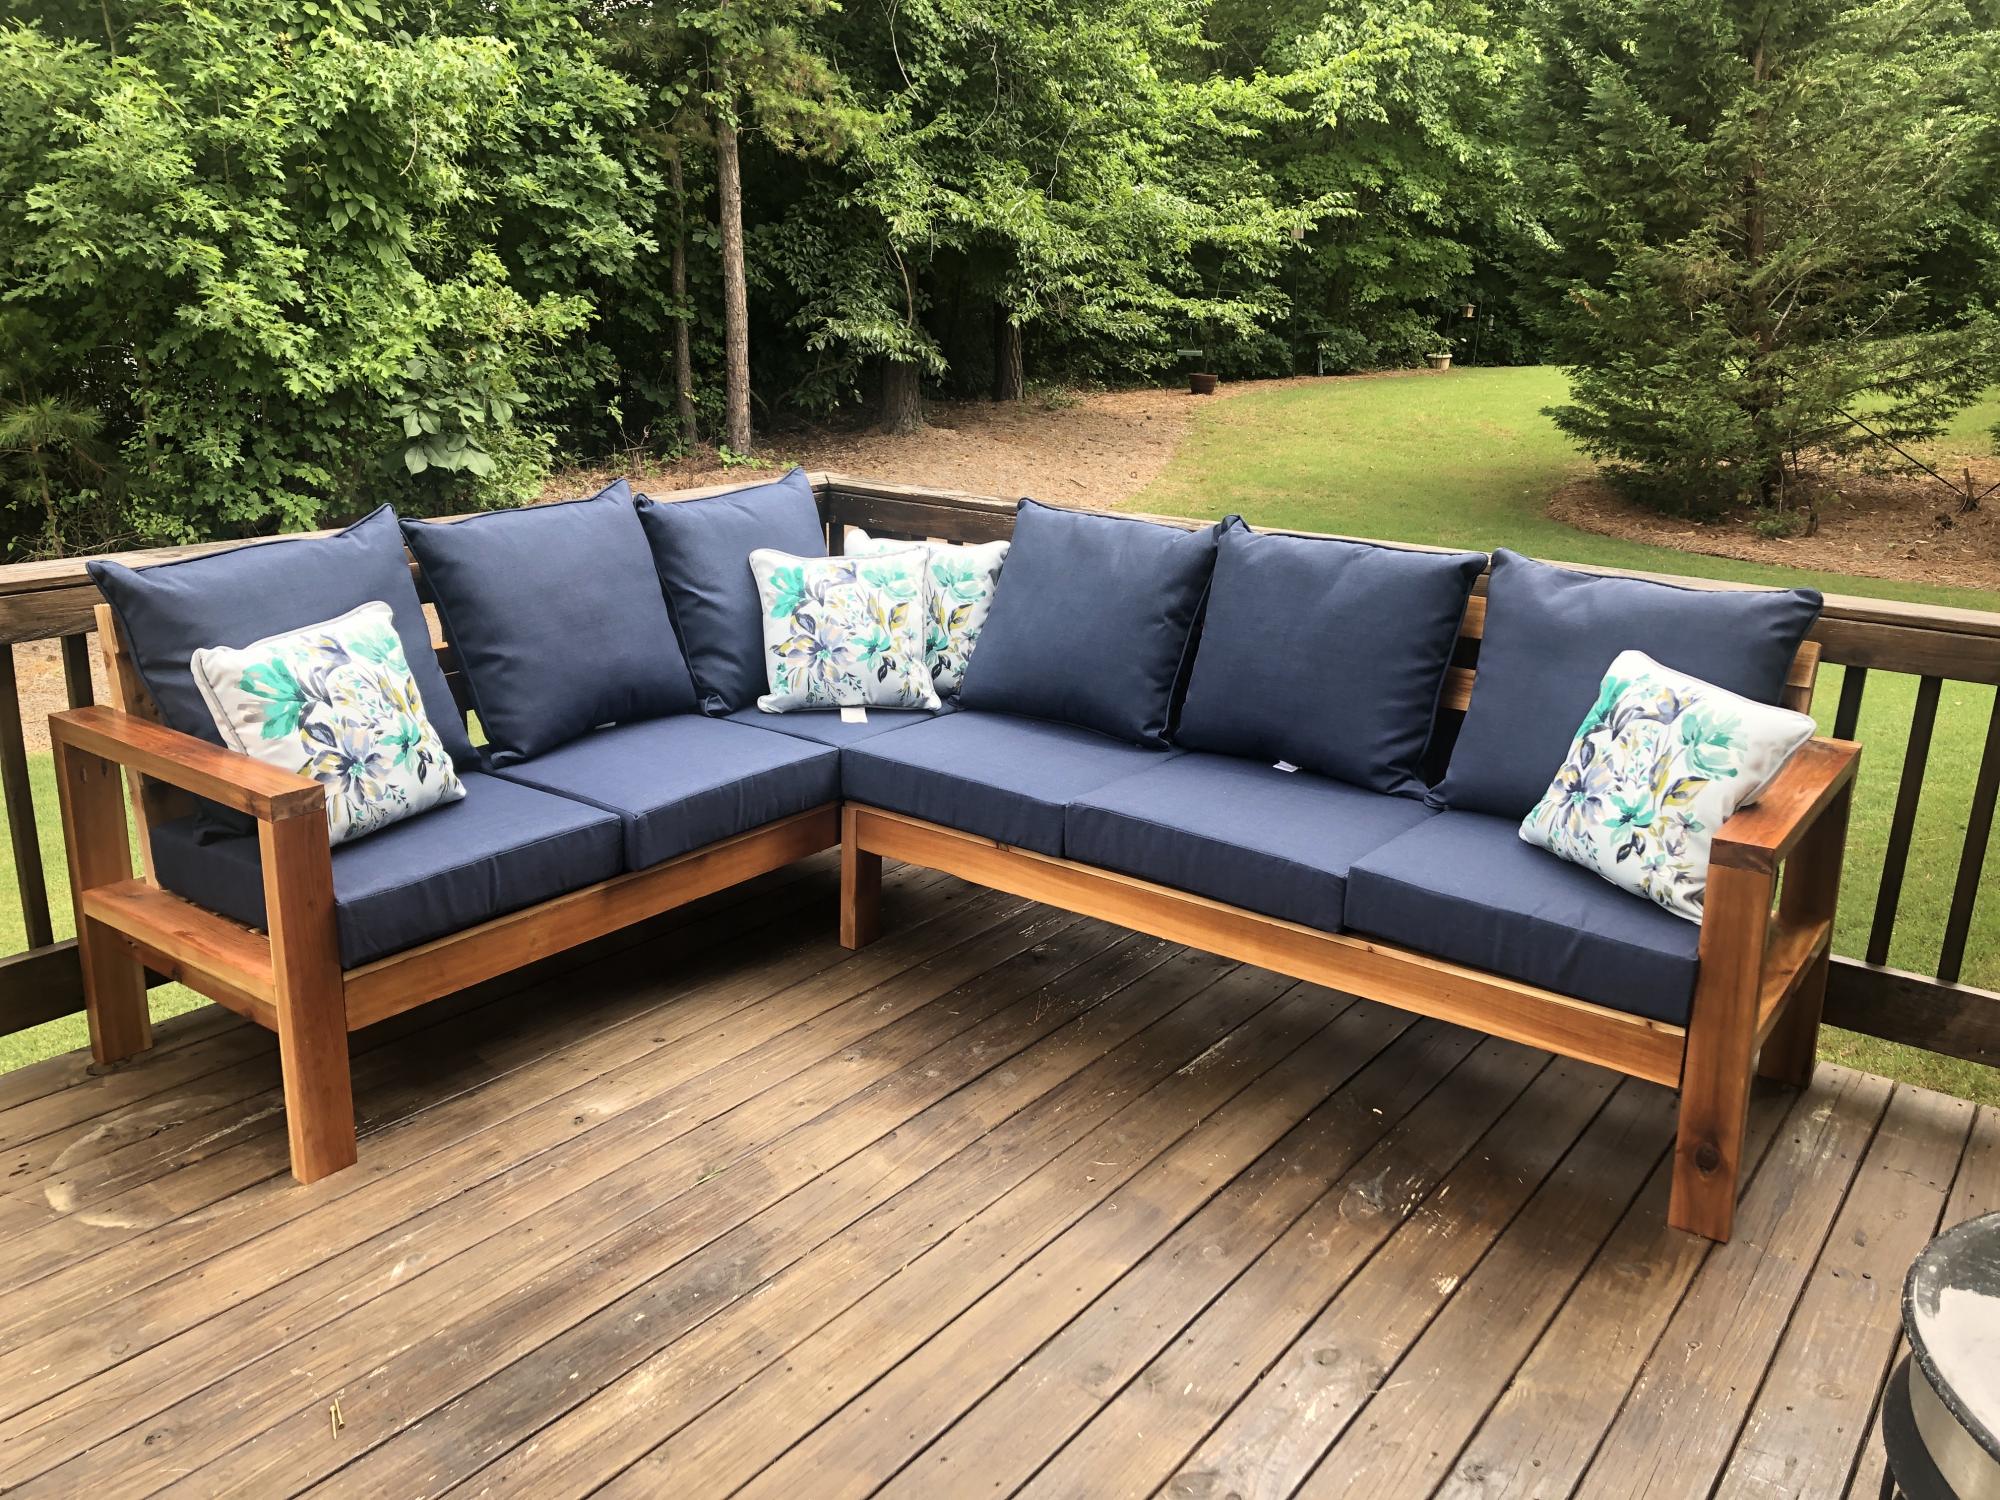
My sister needed new outdoor furniture for her deck and liked the look of the sectional. I used cedar with a clear varnish to creat this piece for her that was perfectly sized for her deck. The challenge to this one was getting it to her house about 3 hours from mine. Fully assembled it would have been tight getting it in my truck. I ended up cutting all of the boards and drilling all of the pocket holes in my shop and then assembling at her house. I have added backs to some of the pieces I have made fro others that want the extr support. I add a 1x4 laying flat across the back of the seat. The slats going up and down then have a slight angle to them which adds comfort and support. I attached the pieces to the 1x4 and the upper back rest piece in the plans.

Potting bench with a few modifications to fit our space.
Bill N
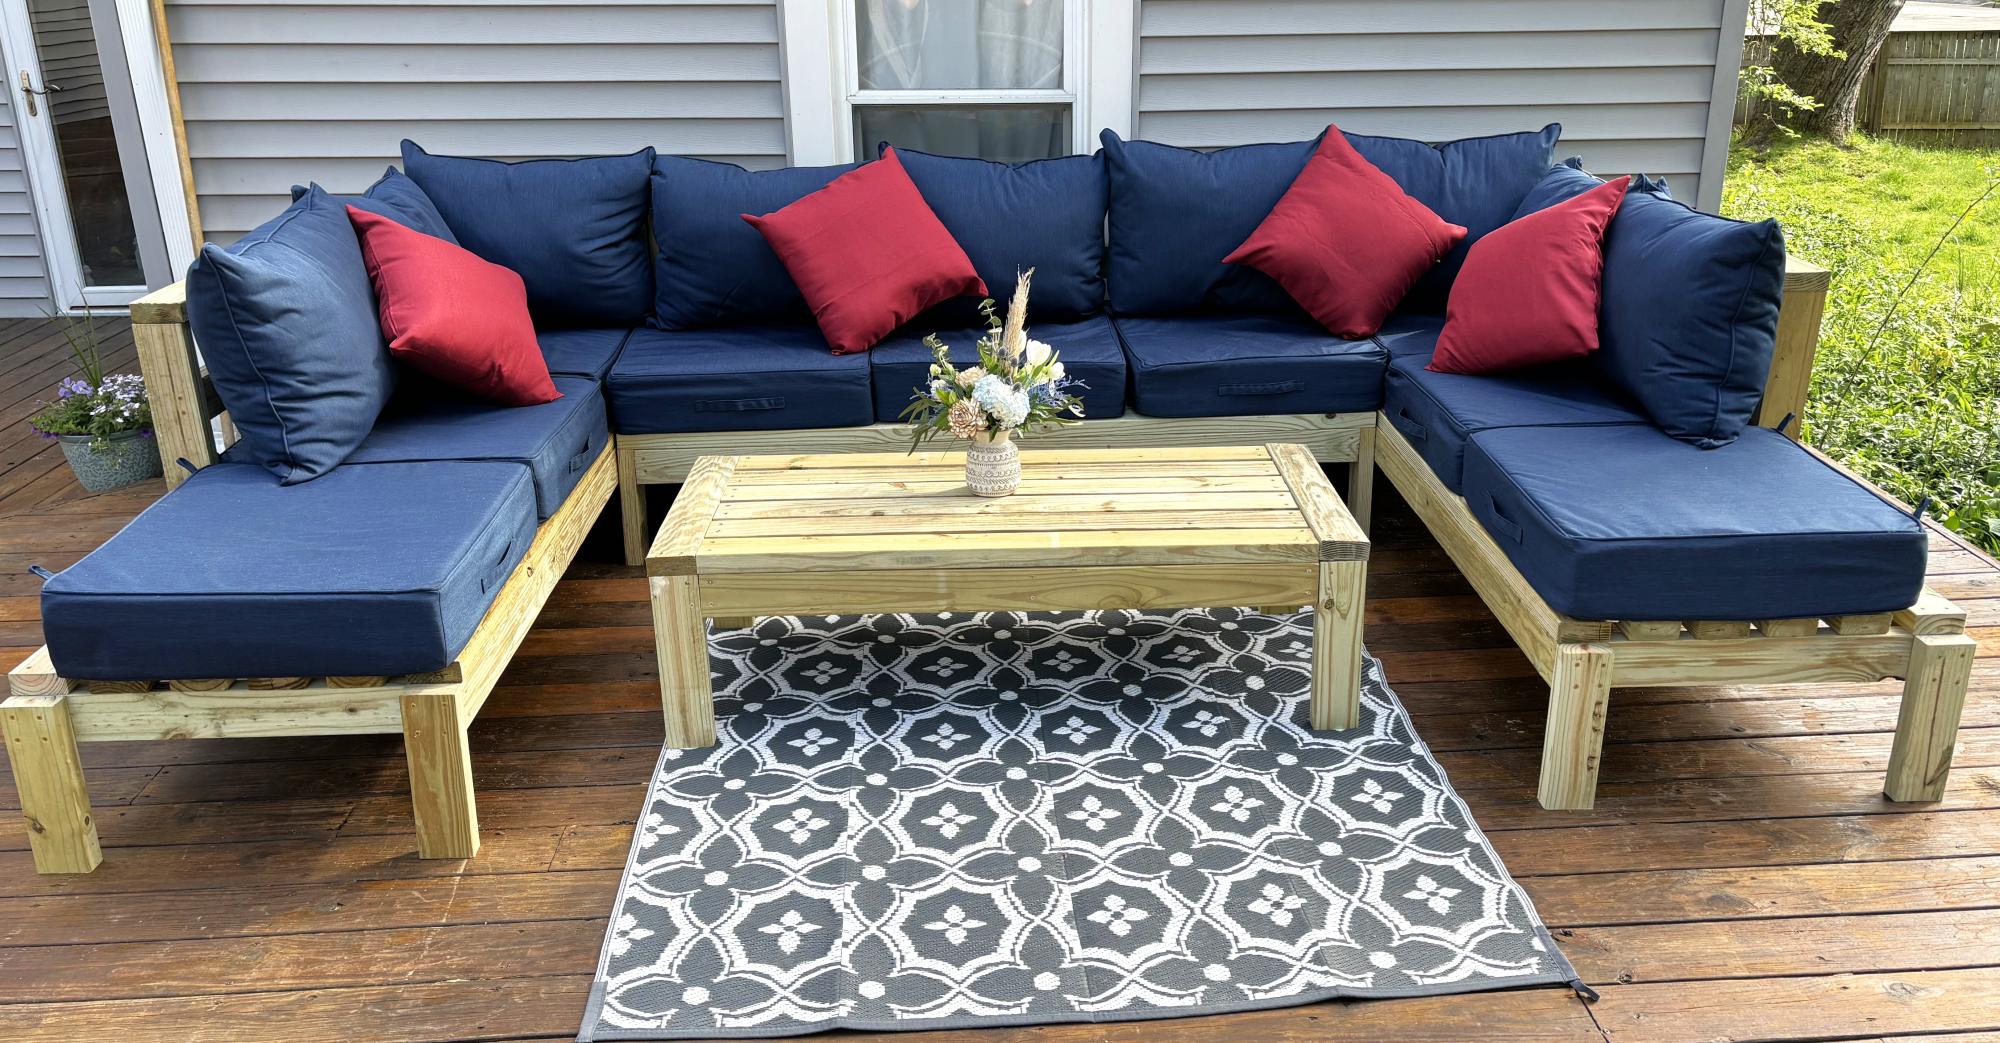
I used the armless chair plan, and altered the one armed plans to make two chaises. Then I increased the size slightly to accommodate the 25x25 pillows I bought. This took about 12 hours with one person working. I am super proud of it! Finished today, and will eventually stain after the wood has dried out a little. Thank you, Ana, for making straightforward plans that gave me the confidence to do my first woodworking project!
Andrea in Michigan
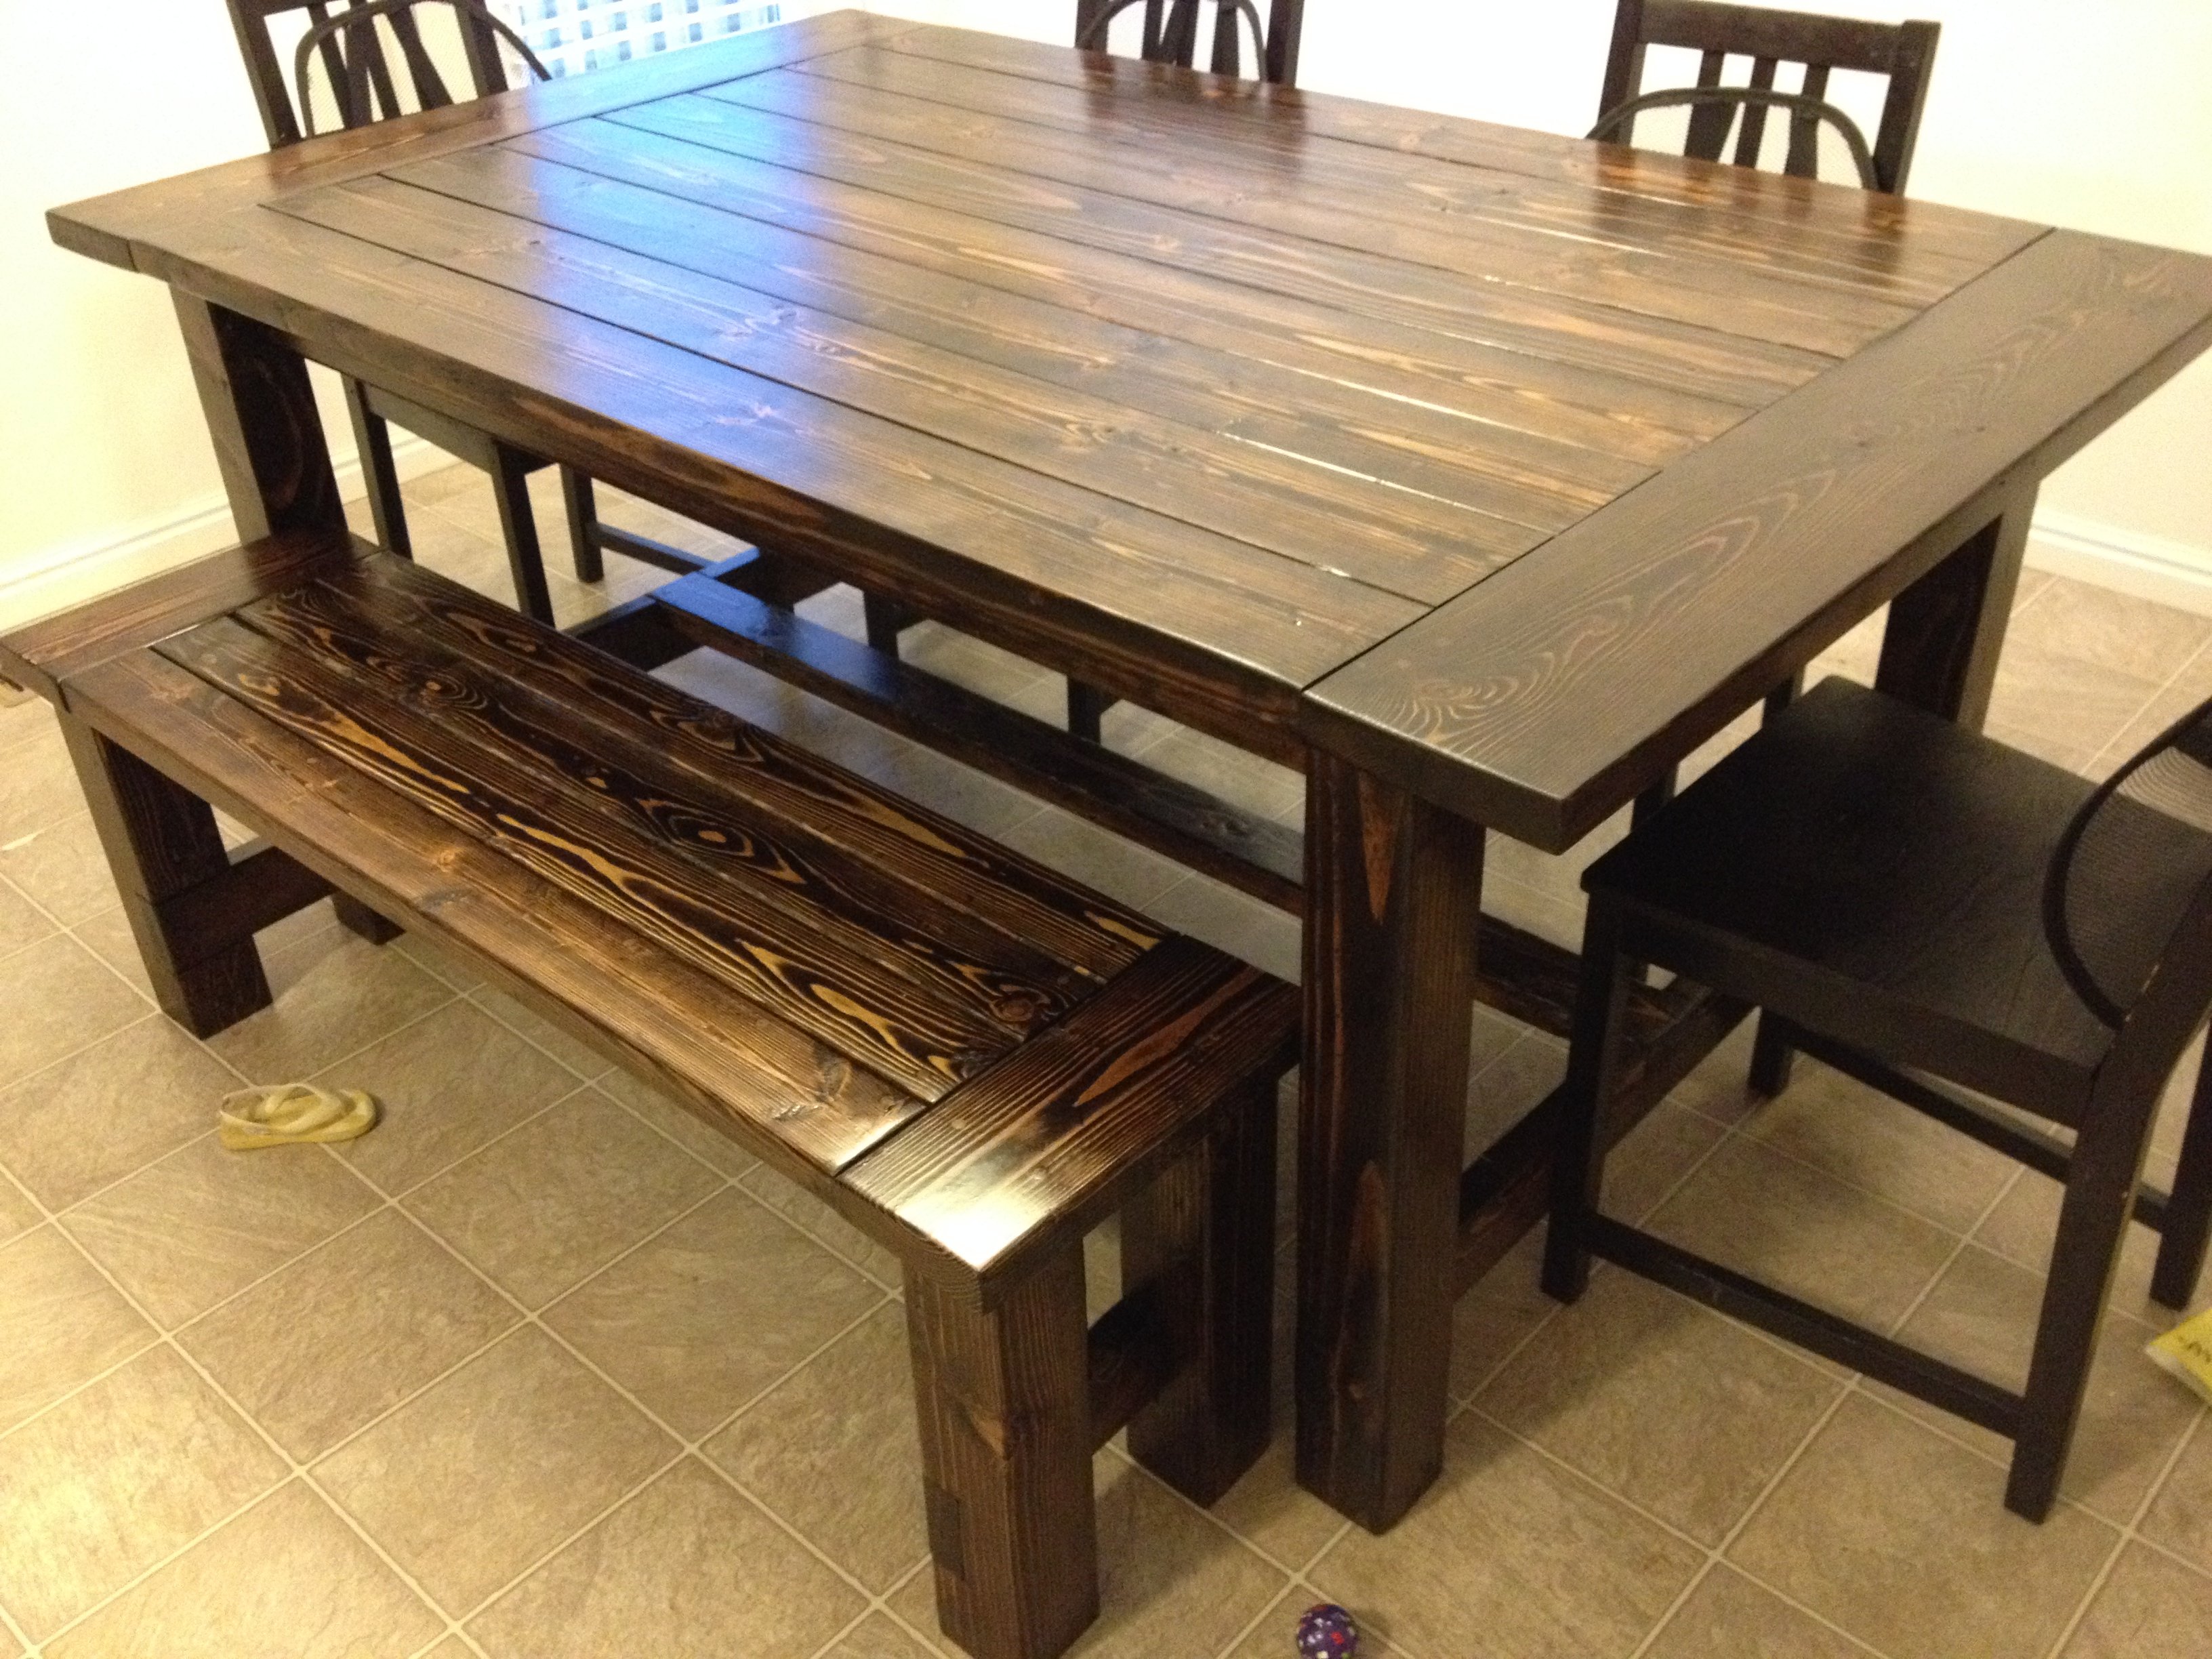
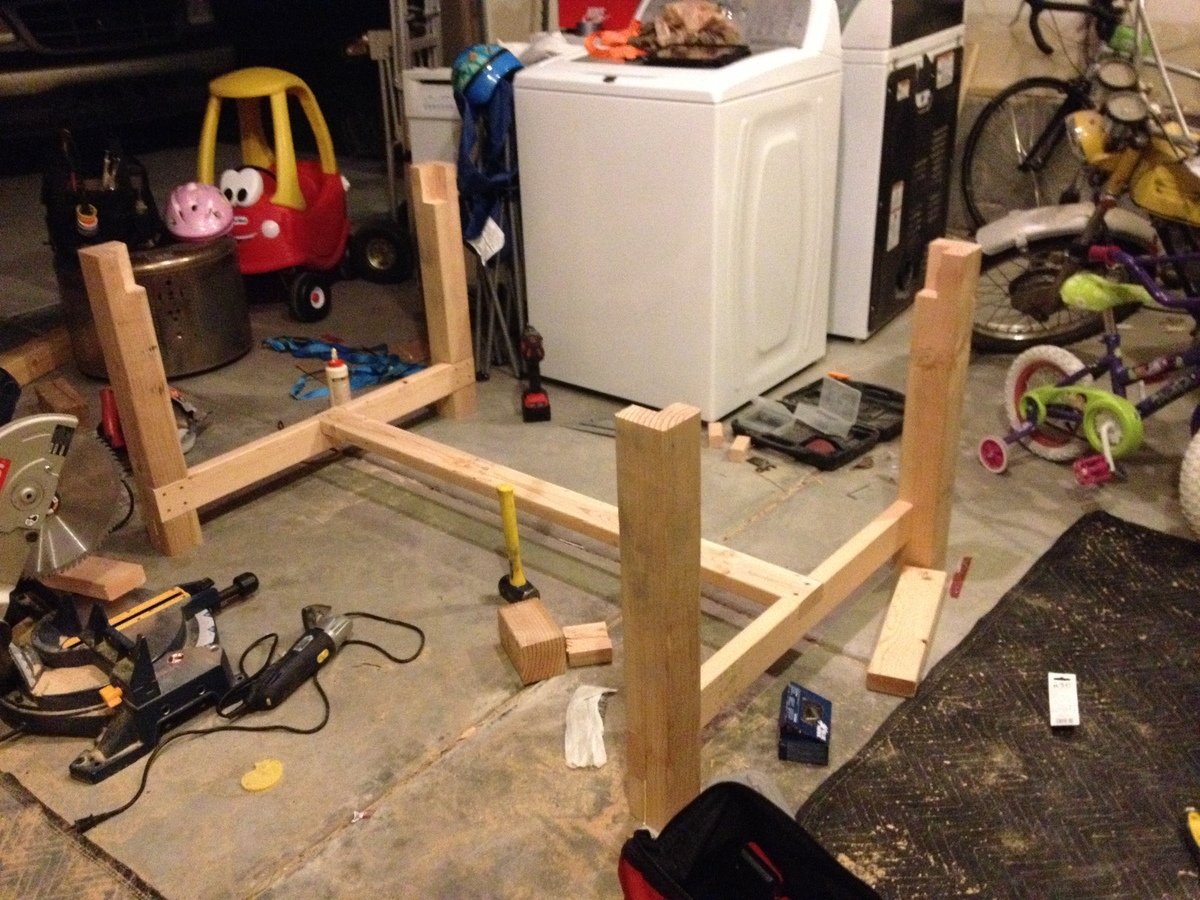
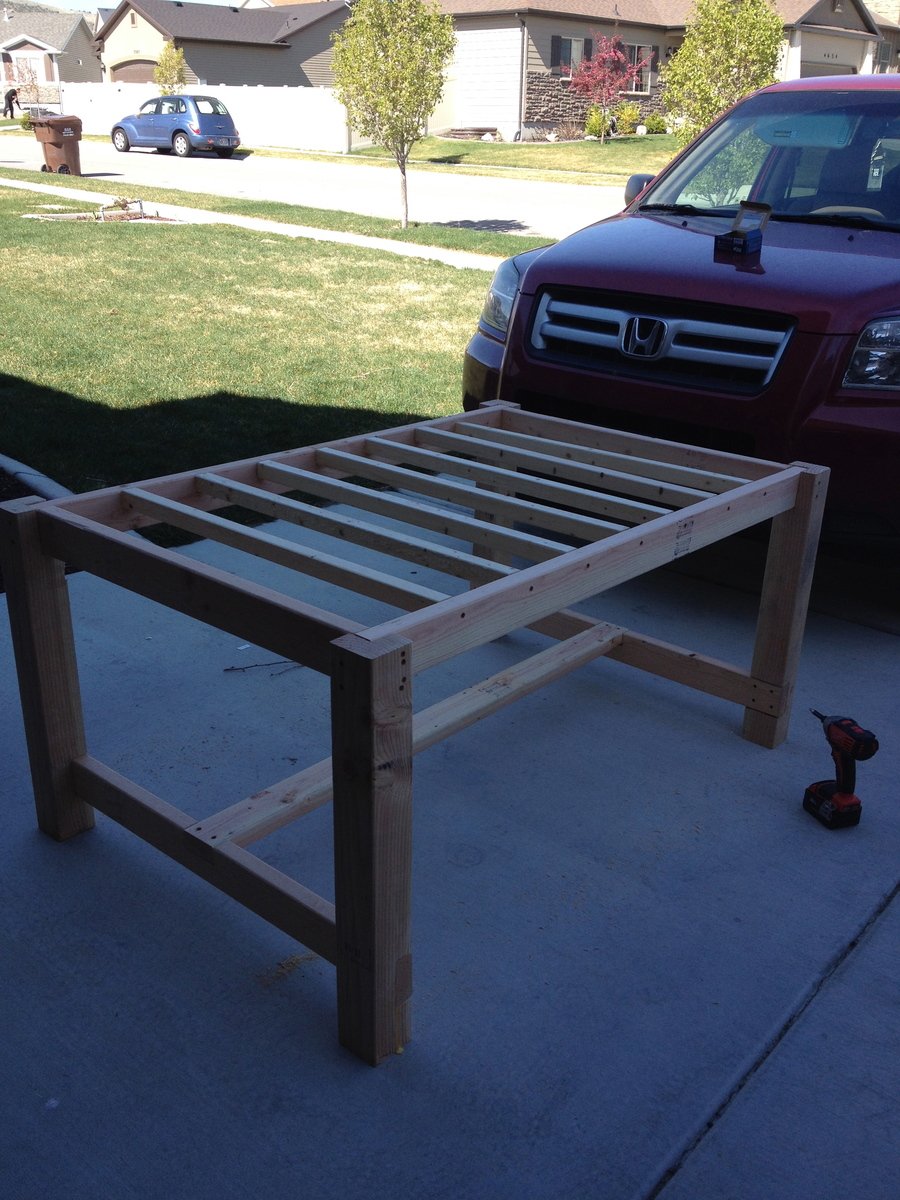
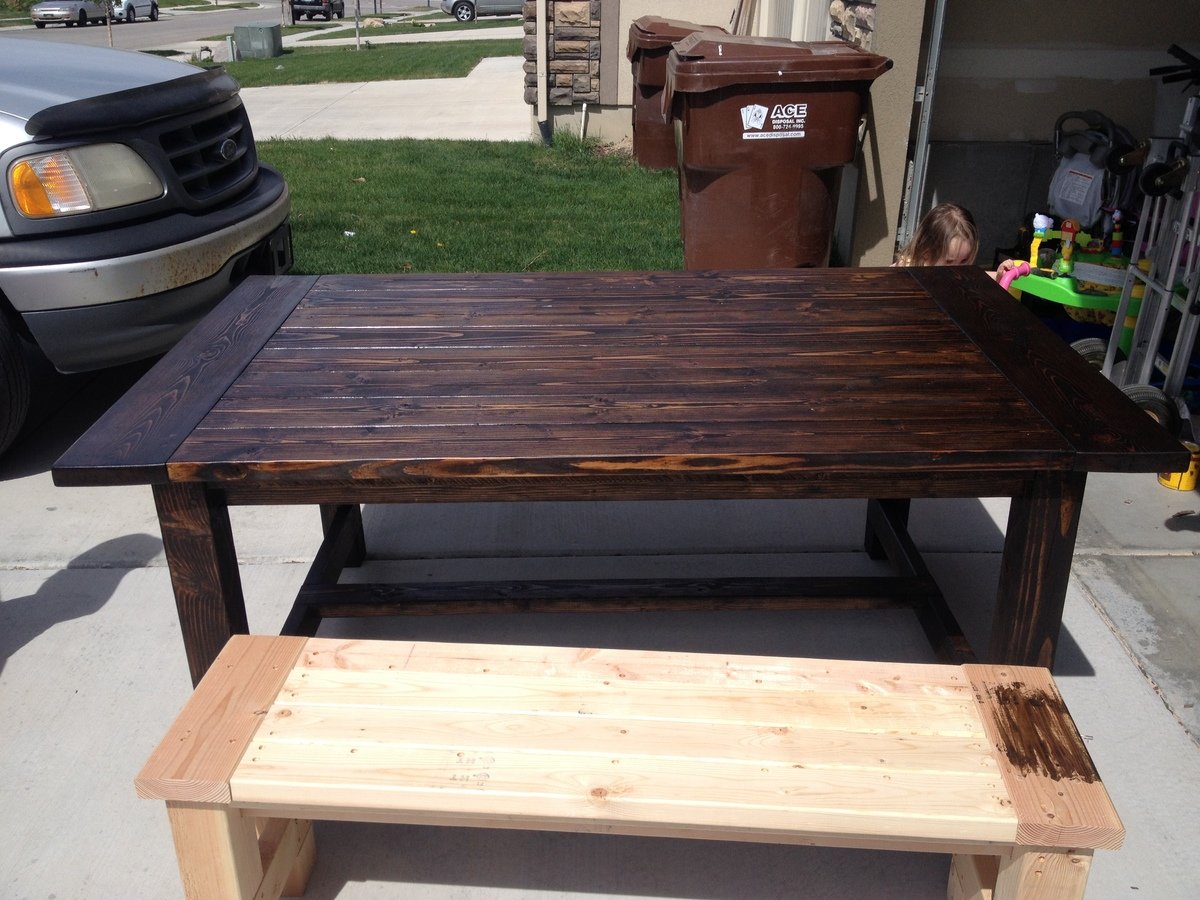
This was our first furniture building project. It took us about 20 hours to complete and we couldn't be more happy with the results. We used 4x4's instead of 2x4's for the legs. We also changed the dimensions of the table so that it was the perfect size for our kitchen. After completing the table we decided to build a bench as well. It is the same plan as the table, just miniaturized. We used Minwax Jacobean stain on the table and then topped with a clear coat. It is a very heavy, sturdy table.

I built these chairs last summer, they came out amazing! Everybody loves them! Thank you Ana. I also built the sofa for my sun room. Pictures to come.
Sat, 05/04/2019 - 08:18
My husband made 4 of these with some slight modifications like rounded arms and back.
However the best function he added were 2 wooden wheels he attached to the back legs, we now can move these chairs easily on our deck.
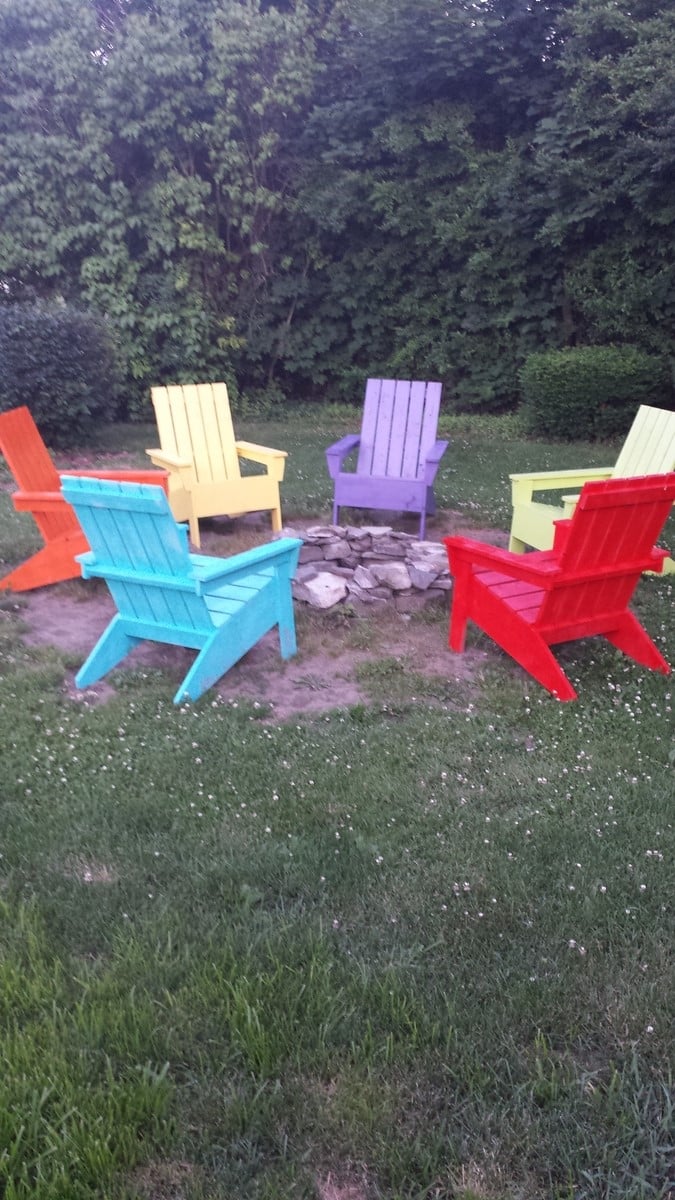
Our goal was to make them look like well worn beach chairs, we used milk paint for that effect. It still lets the grain show through.
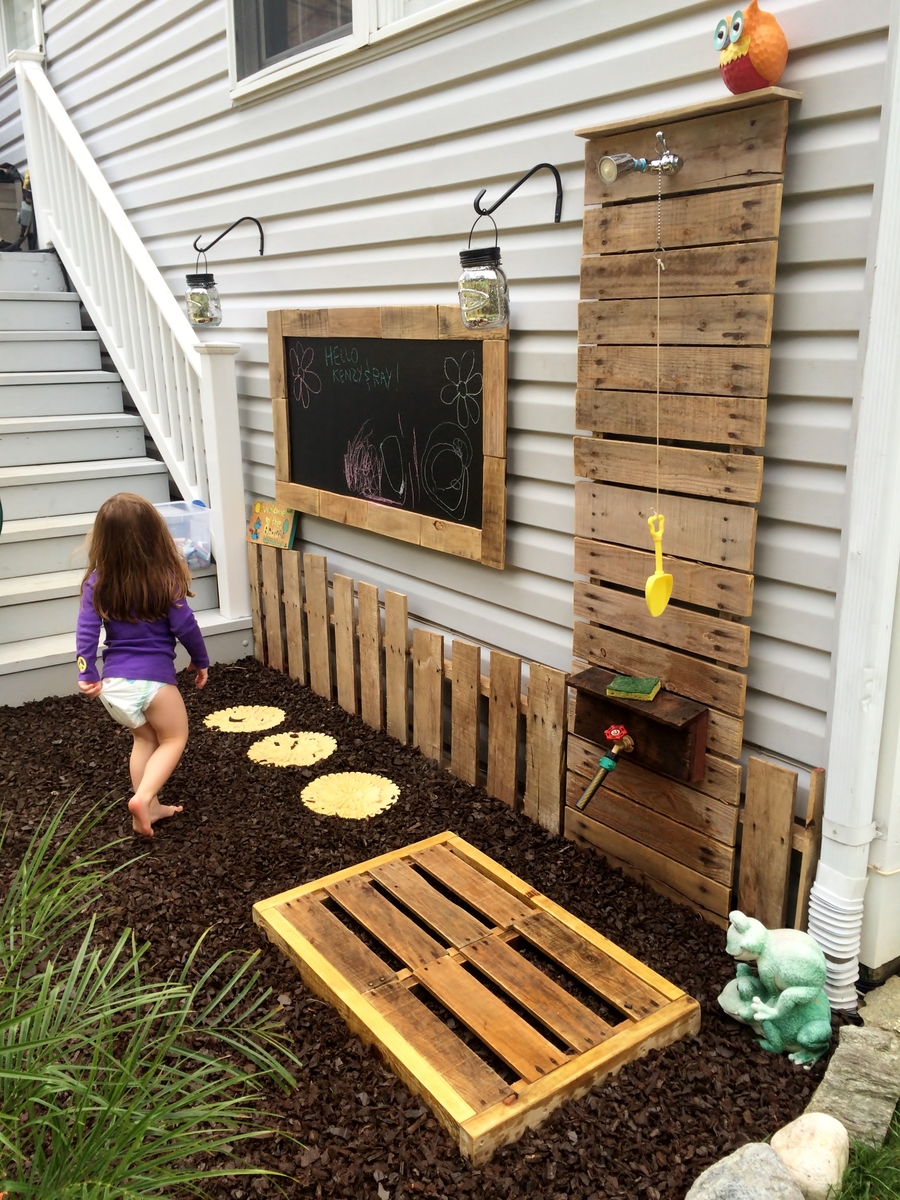
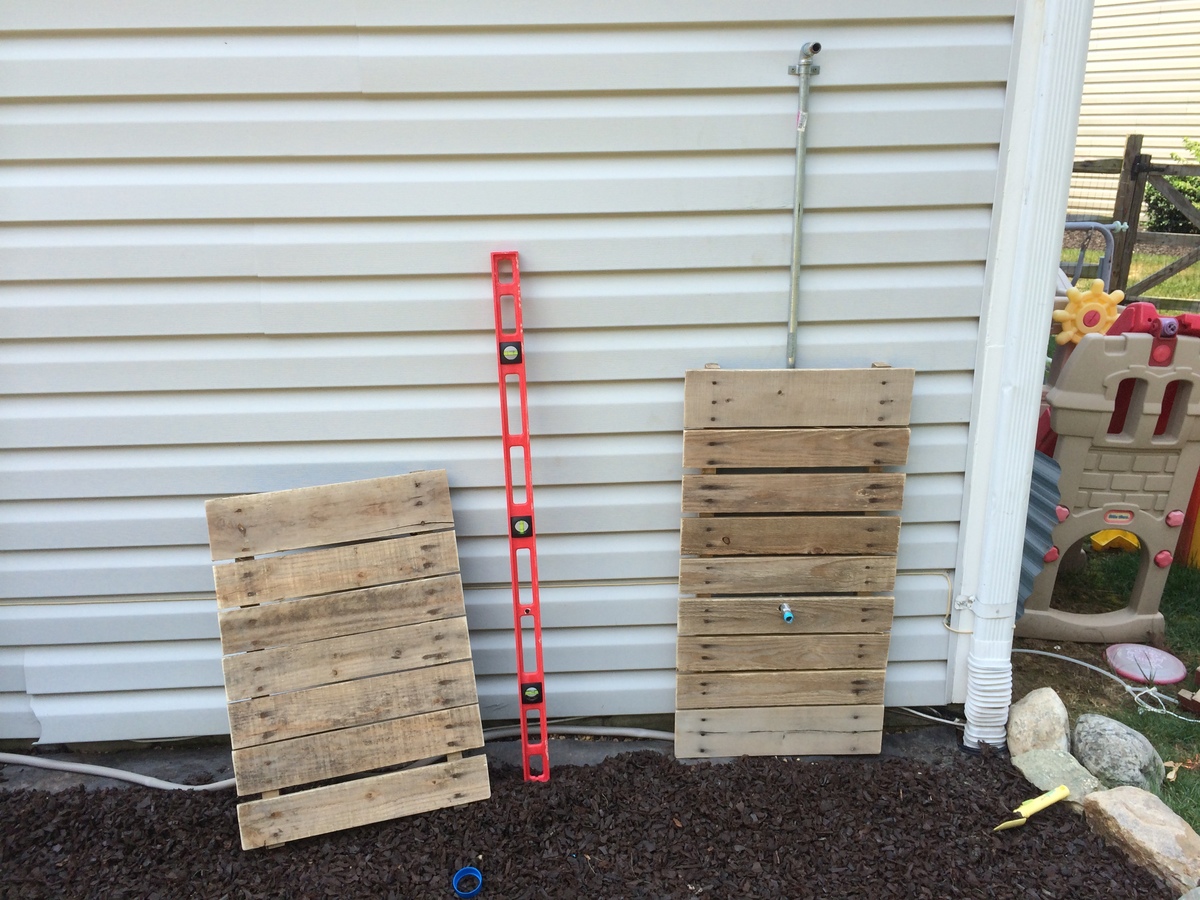
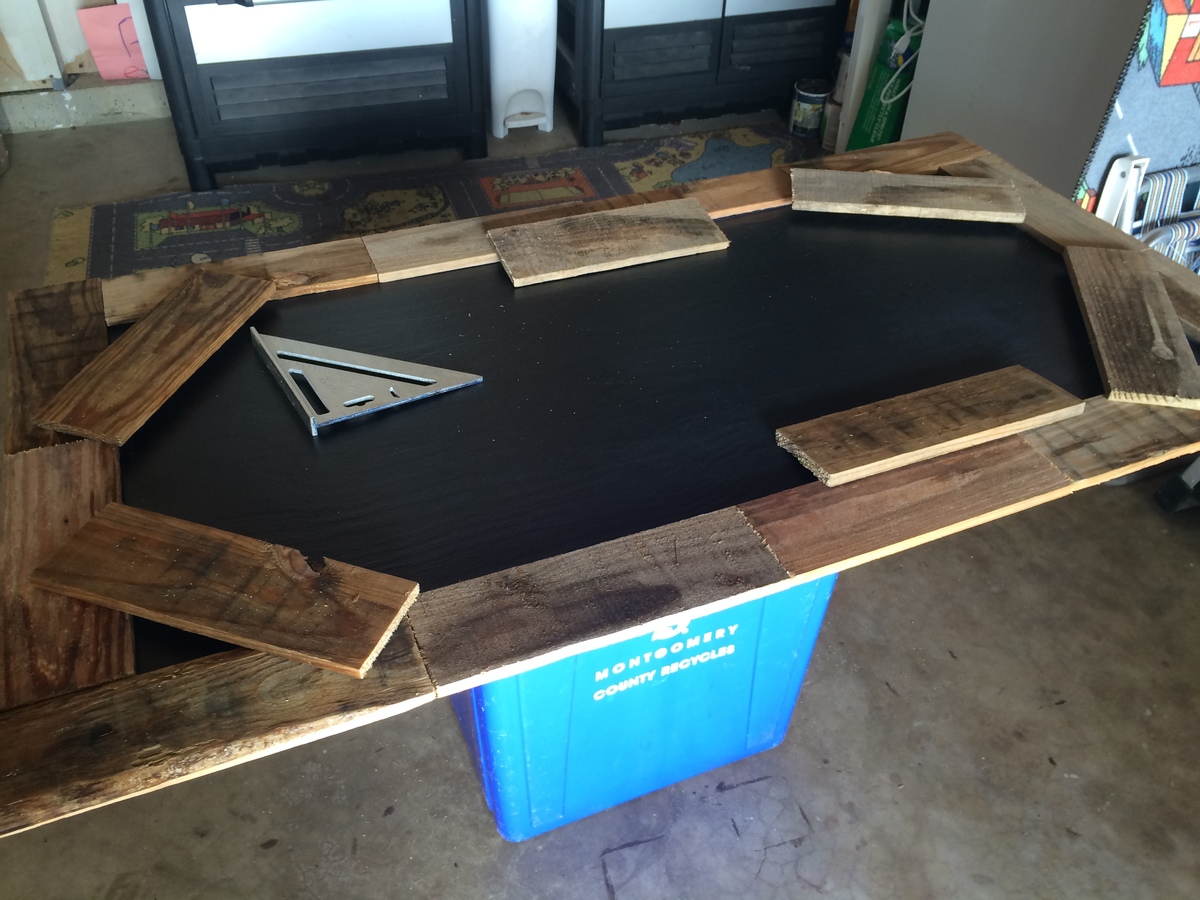
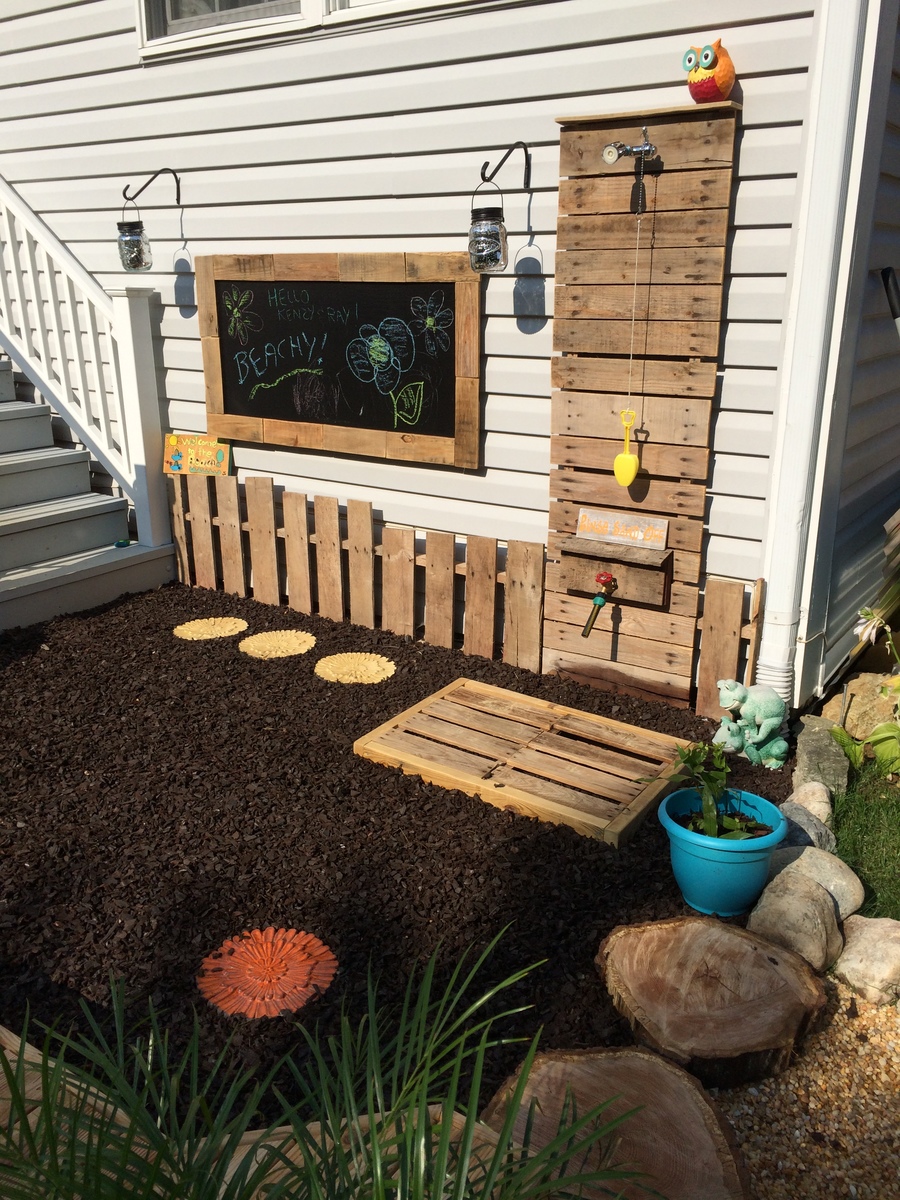
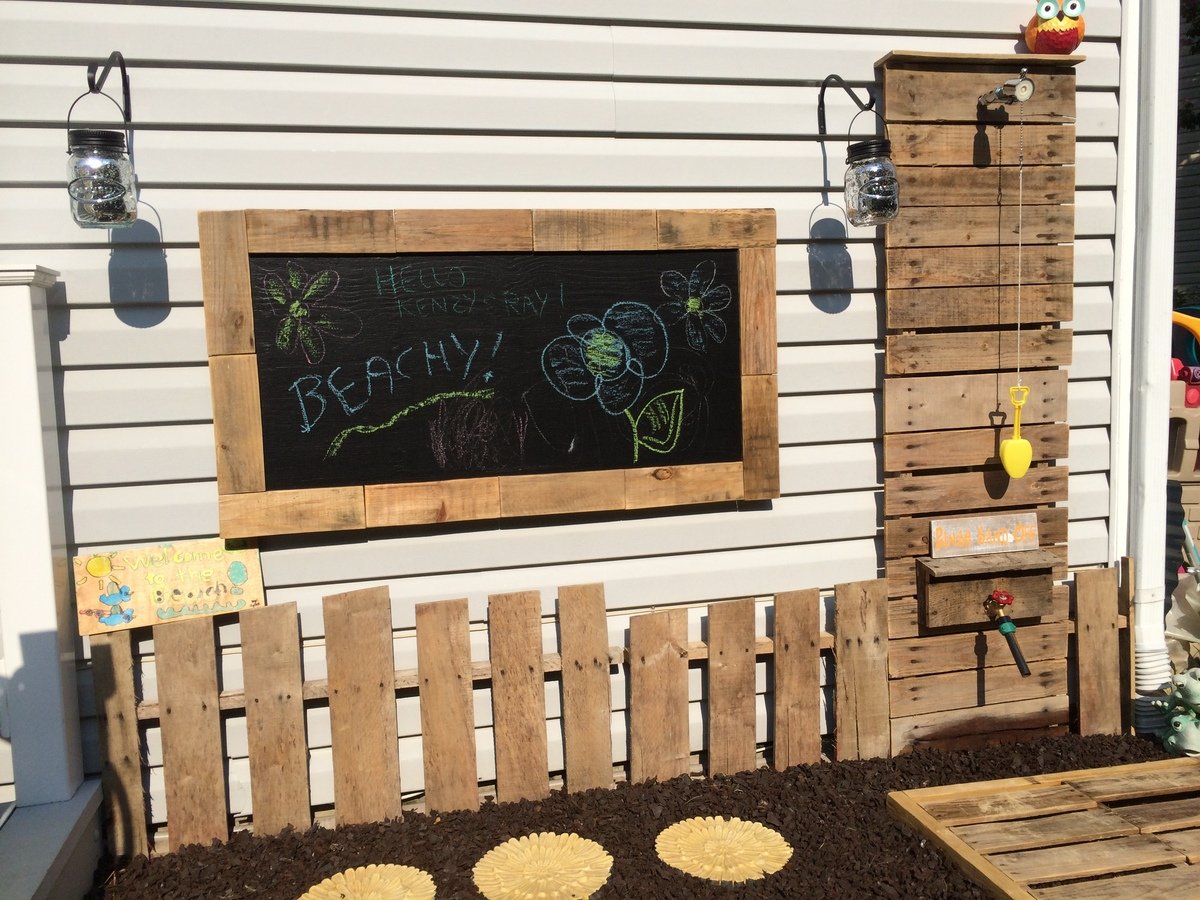
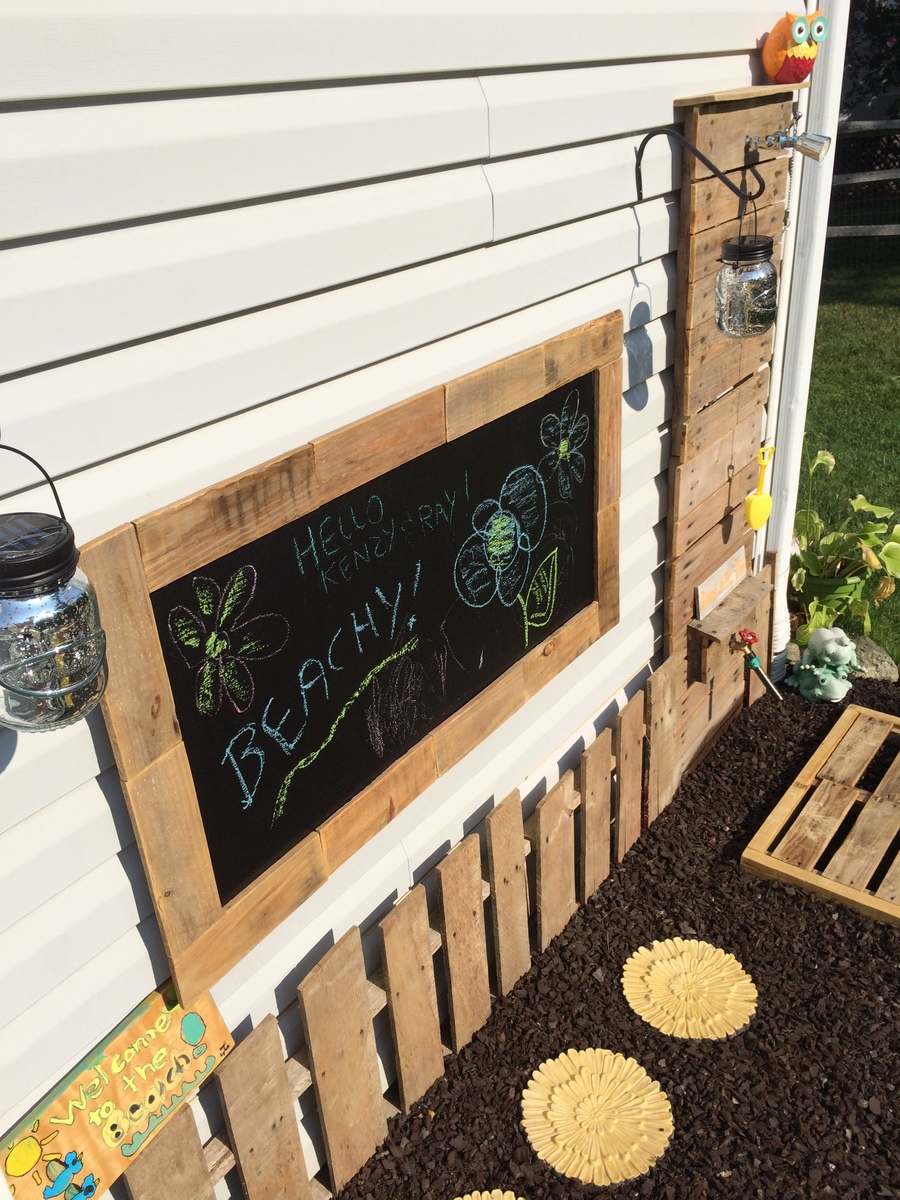
As part of my backyard overhaul I've added an outdoor shower and chalkboard against the wall of the house. There's also a small sand pit and deck area, so the shower comes in handy to wash the dirty feet. I had a few pallets sitting under the deck for years and finally put them to use. Some cuts here and there and some sanding and they look great. For the floor mat I just cut the pallet piece you can see in one of the photos in half and framed it with treated 2x4". The chalkboard is a plain sheet of 2x4' project board primed and painted several coats with flat black exterior paint. I used this over the 'chalkboard' paint because it's exterior grade. It works great, even better than chalkboard paint imo. The frame is made of the cut slats of the pallet, just glued and nailed on. The fence also is a cut pallet. I just made random cuts about half way through on varying angles which resulted in two mirrored halves of the pallet. They fit the space perfectly. I love the random look of it and may give it some paint eventually.
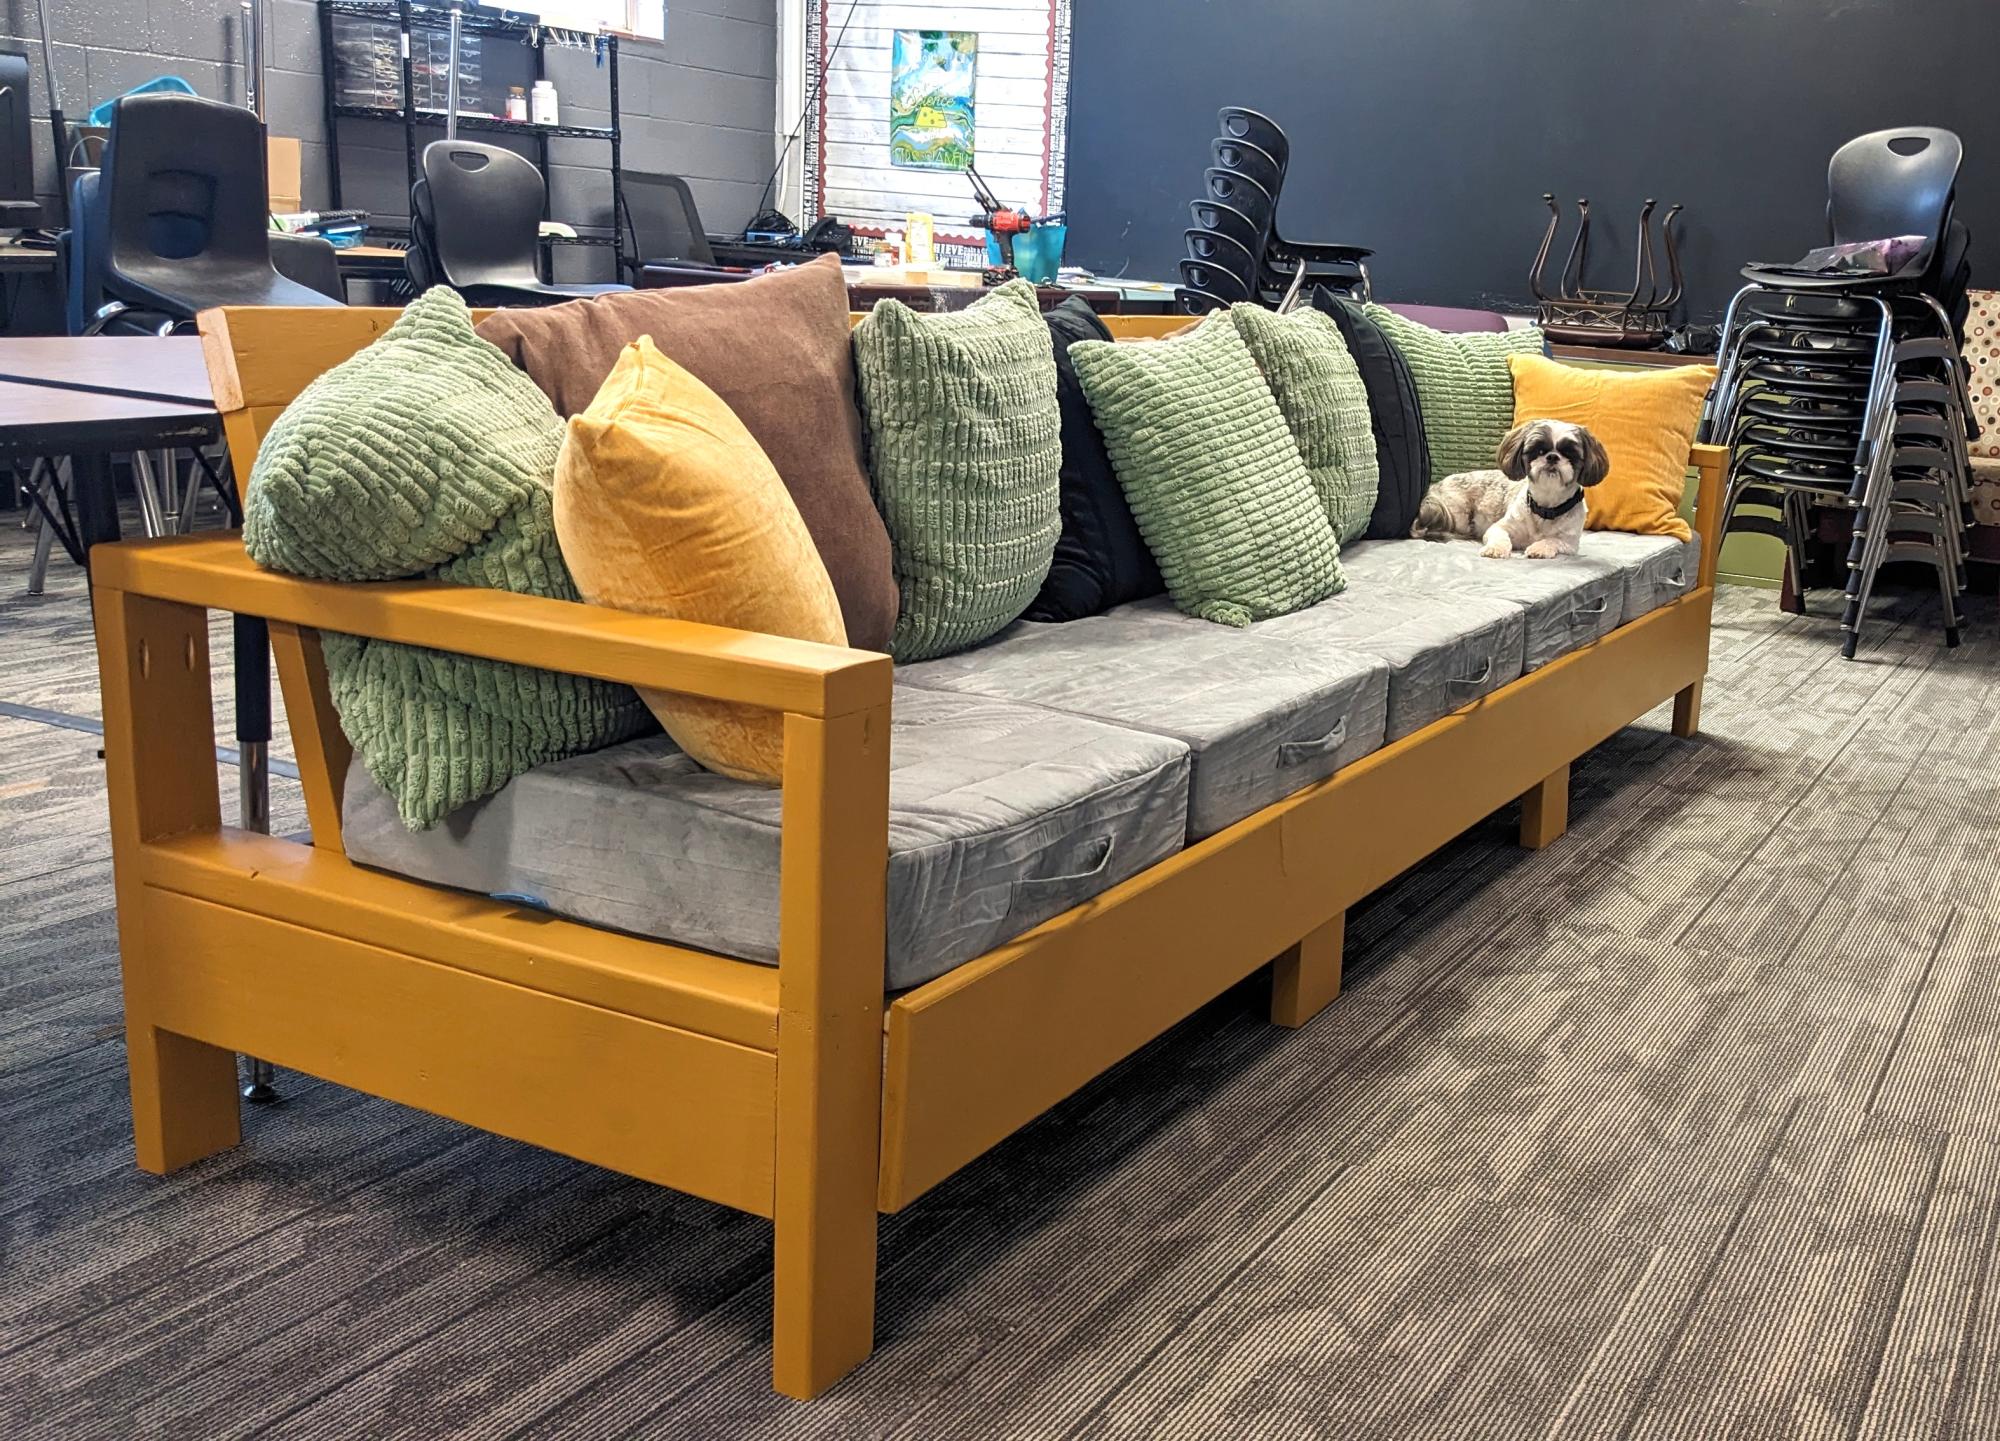
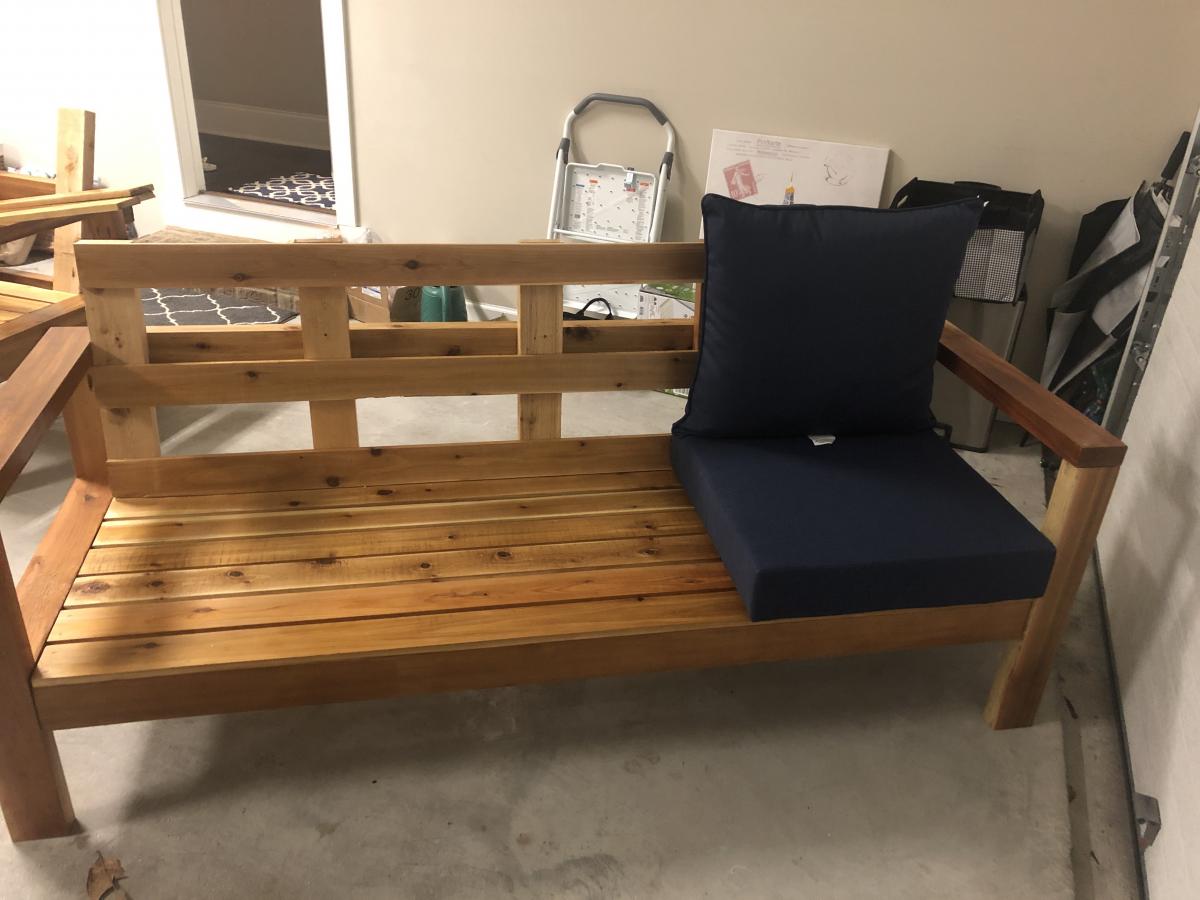
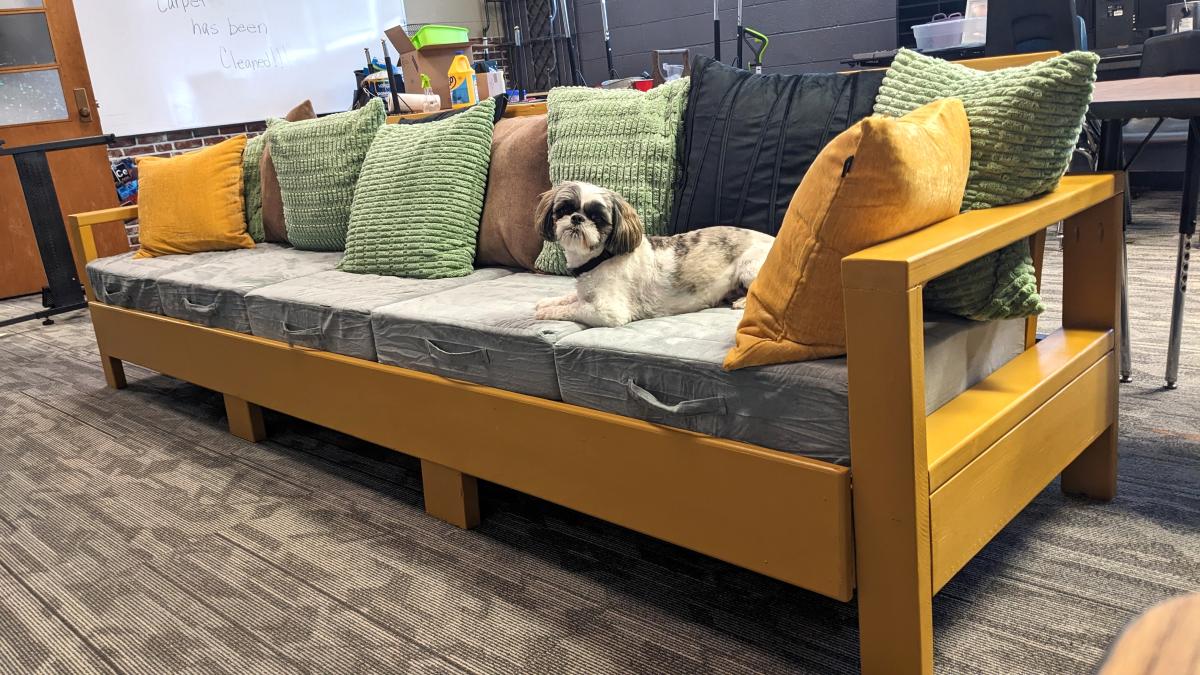
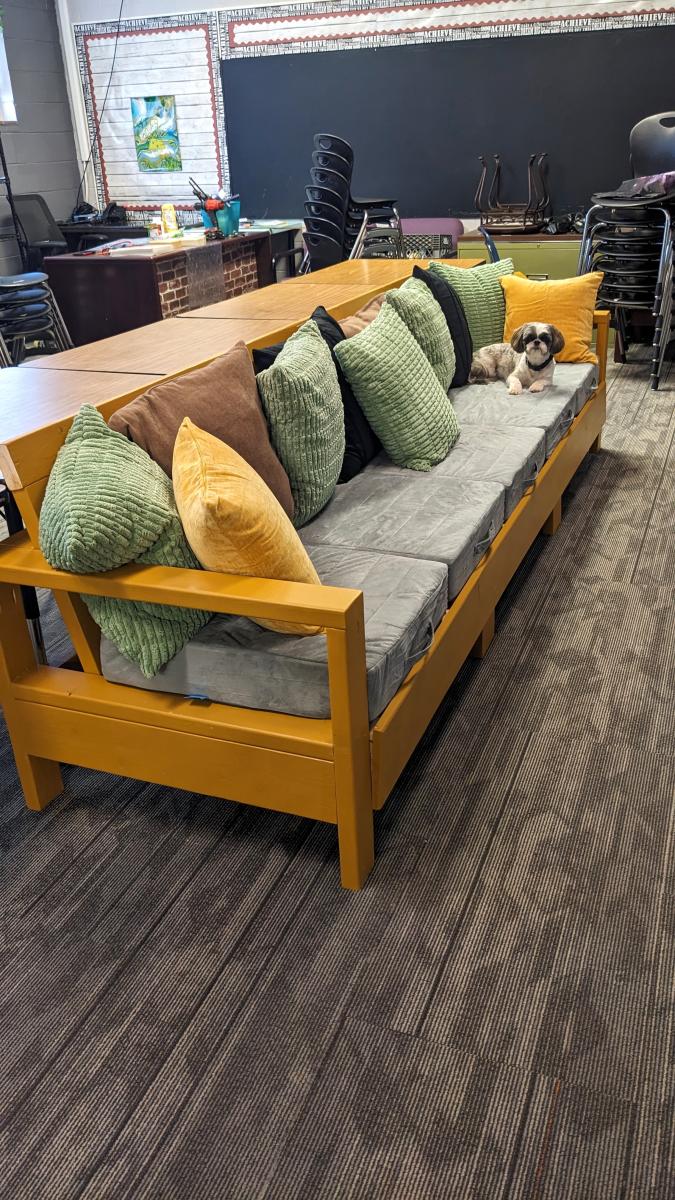
I'm a high school teacher and like flexible seating. I needed something that is very sturdy and can take a beating from teenagers. I used Ana's "2x4 Outdoor Sofa" plan, made it longer, added some extra braces, and here it is! My new classroom couch.
Julie Stanfill
Since I didn't clean off all the lumber print prior to assembling, I decided to prime and paint the chairs.
The table top is modified from Ana's farmhouse table, the base is modified from the storage table and the chairs are modified from the extra tall bar stool. This project took me the weekend to complete, because of those darn chairs!!!
In reply to Gorgeous by patrickhosey
Sun, 11/04/2012 - 06:52
For the ladder I used straight 2x2s and 2x3's. I like the look of the straight back. I didn't want pocket holes on either side, so I used 3" screws through the legs into the 2x3s. I used a scrap 2x3 as a spacer.
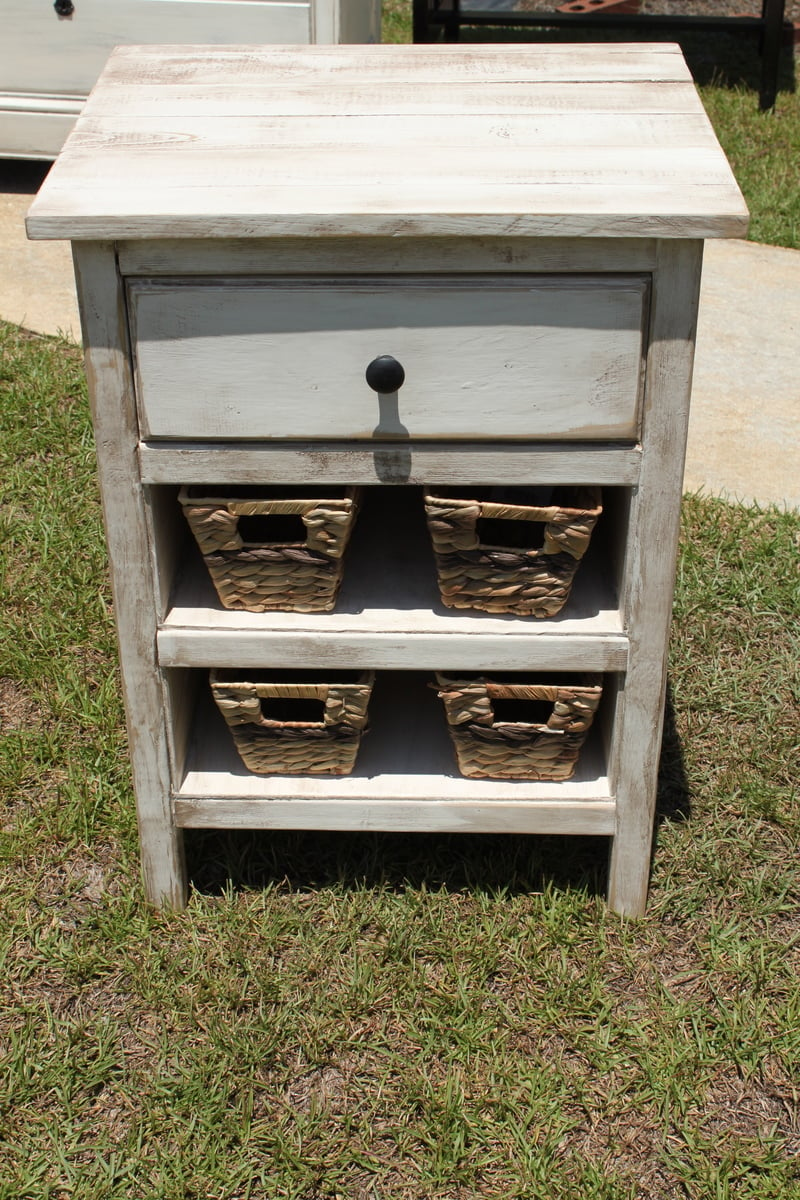
I had made this bedside table before, but this time the bottom two drawers just wouldn't work out. I fiddled with them and cut out and made 6 box drawers before I finally just decided on shelves. I used 1/4 inch plywood and 18 gauge brad nails to secure it. Once all this was done ,I found 2 basket "drawers."
12/16/14 UPDATE: Posted a plan for this project, linked in this brag post
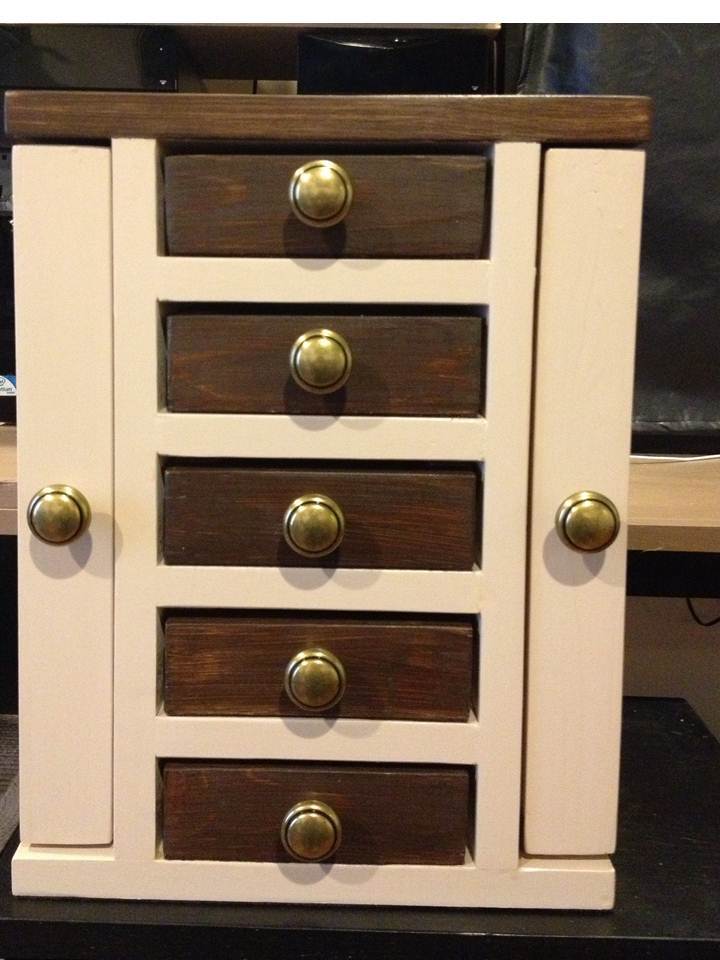
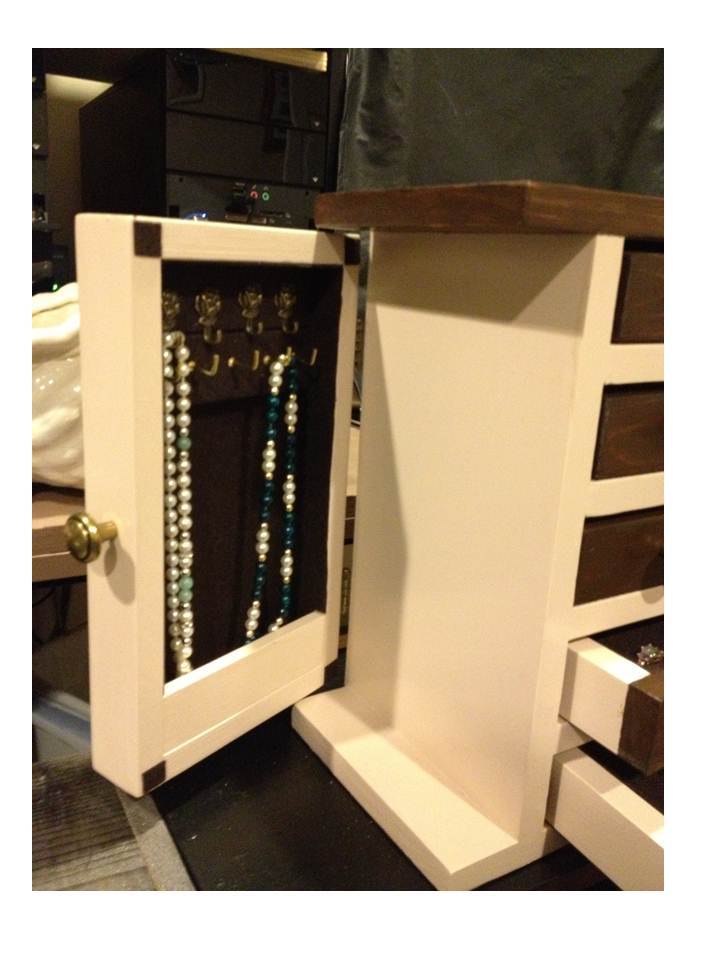
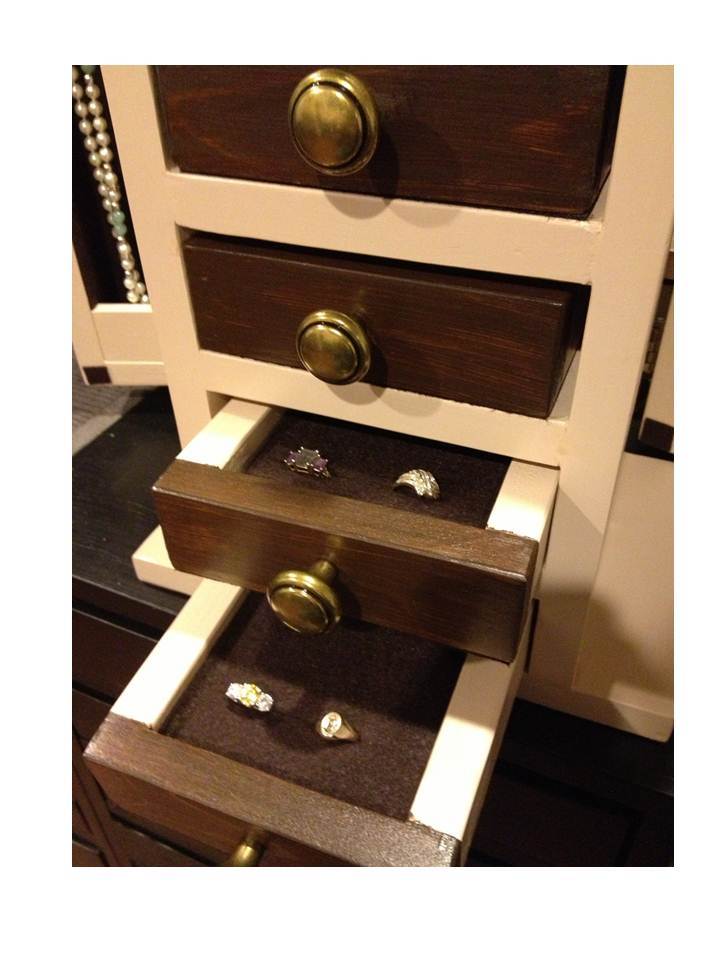
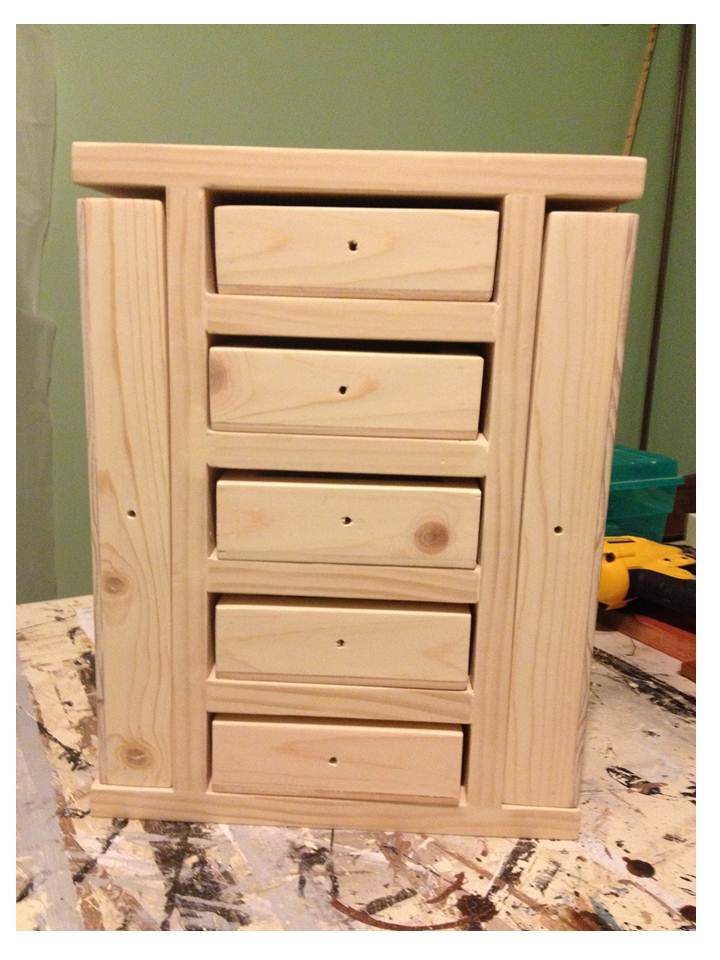
This is a variation of the Easy Jewelry Box plan. The completed measurement is 11” wide, 14 ½” high, and 7 ½” deep. This one has a center “tower” with 5 drawers 5 ½” wide, and a wide overhang on the top and bottom, which covers the 2 side doors that open out for hanging necklaces. The drawers are lined with embossed felt, and the drawer bottoms and insides of doors are covered with sticky-back felt. The 2 removable ring drawer inserts are some scraps of 1” foam, covered with scraps of the sticky-back felt, with slits cut into the foam with a utility knife (cut the slits into the felt first, attach it to the foam, then cut the slits into the foam). Cost breakdown: antique brass knobs: $28, sticky back & embossed felt: $14, hooks: $15, wood: $35, hinges: $7, paint: $5. (already on hand: finish nails, glue, sandpaper, left over stain & poly) . I worked on this a few hours a day over a long weekend, probably about 12 hours total. Finishing took most of this time, the build was actually only a couple of hours.


Tue, 12/16/2014 - 16:52
Hi jgg2006, I just posted the plan:
http://ana-white.com/node/13664
Also if you click the orange highlighted link for Fancy Jewelry Box, it will take you to the plan. The full plan is a .pdf attachment to that post, appearing just below "finish used".
:)
Joanne
Comments
Myron3
Wed, 05/27/2020 - 08:28
Great Job!
I love this. Functional but also decorative. Would you mind sharing the plan for your version?