Corner Shelf - Mom and Daughter Project
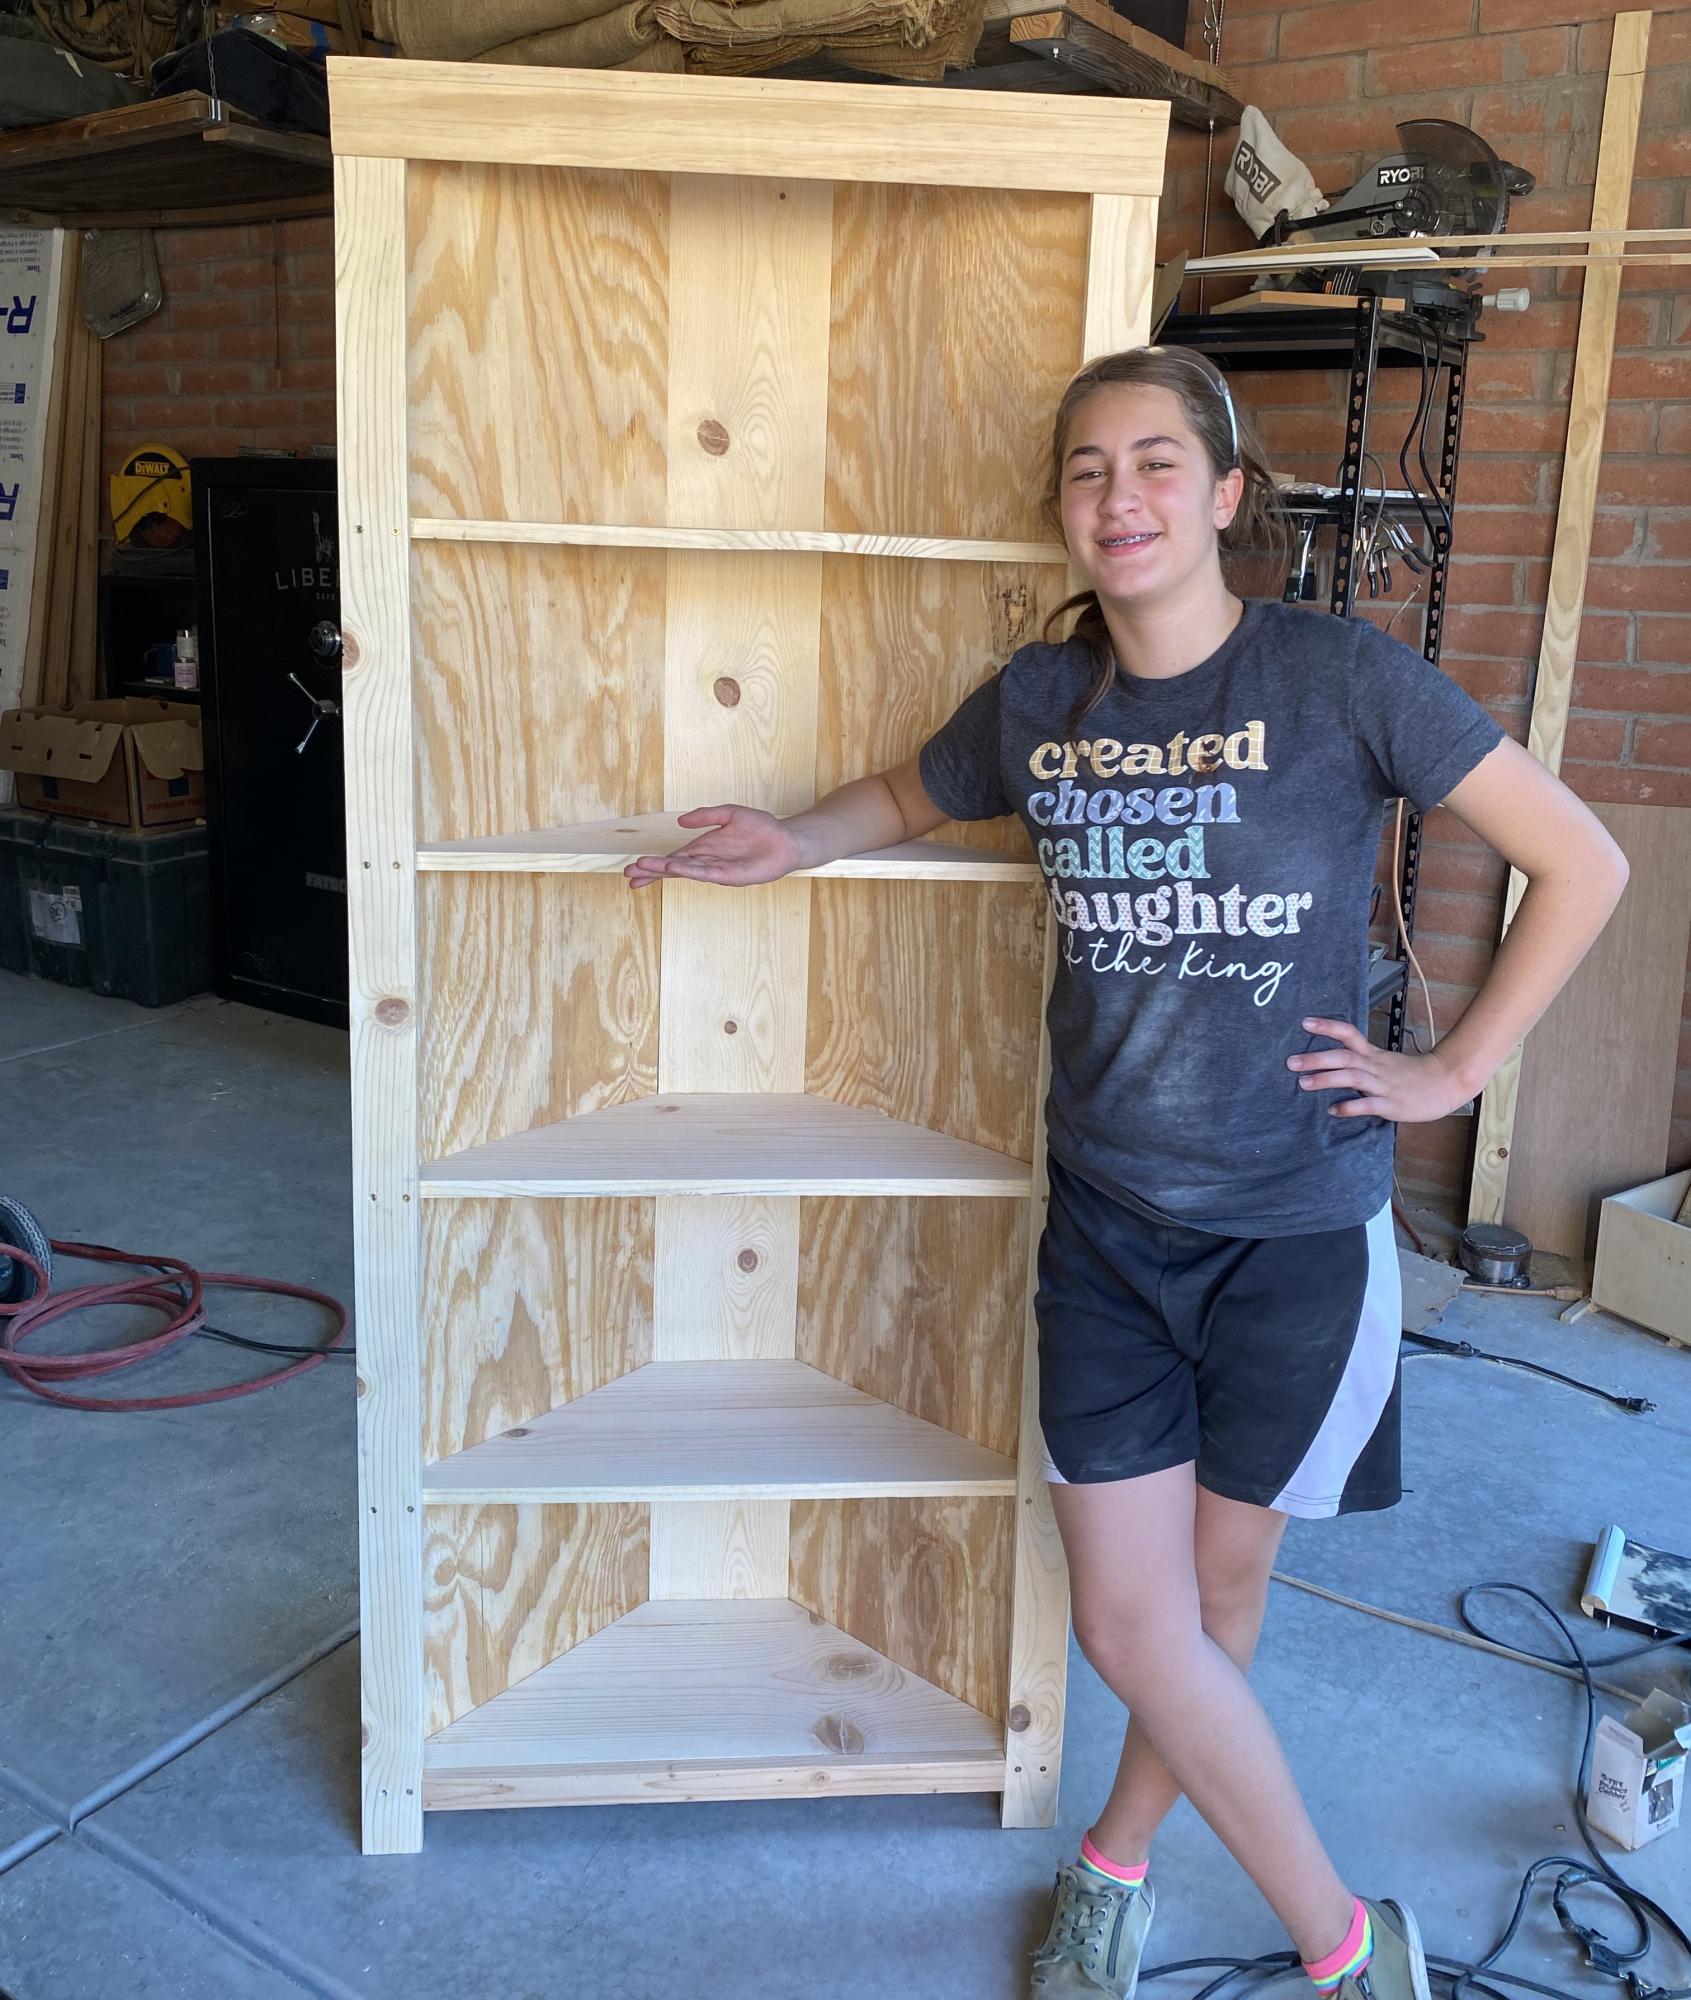
Completed the corner bookshelf (we opted to not use cupboard doors on the bottom) in two afternoons.
Beth and Jess Wegz
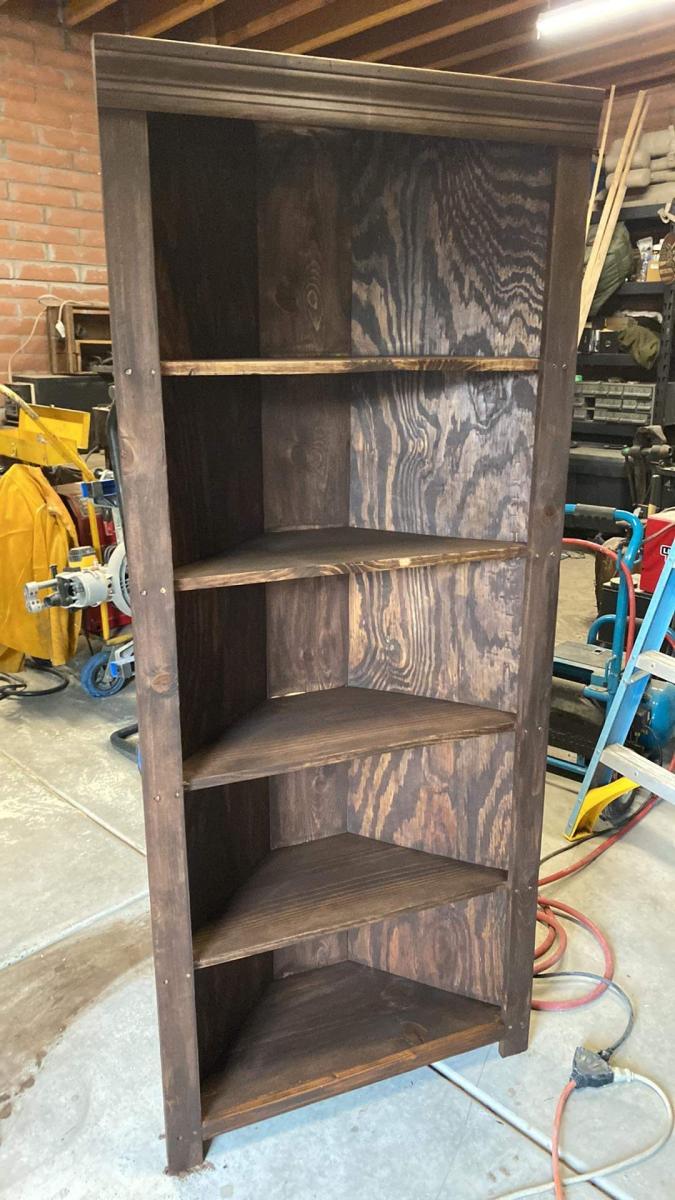
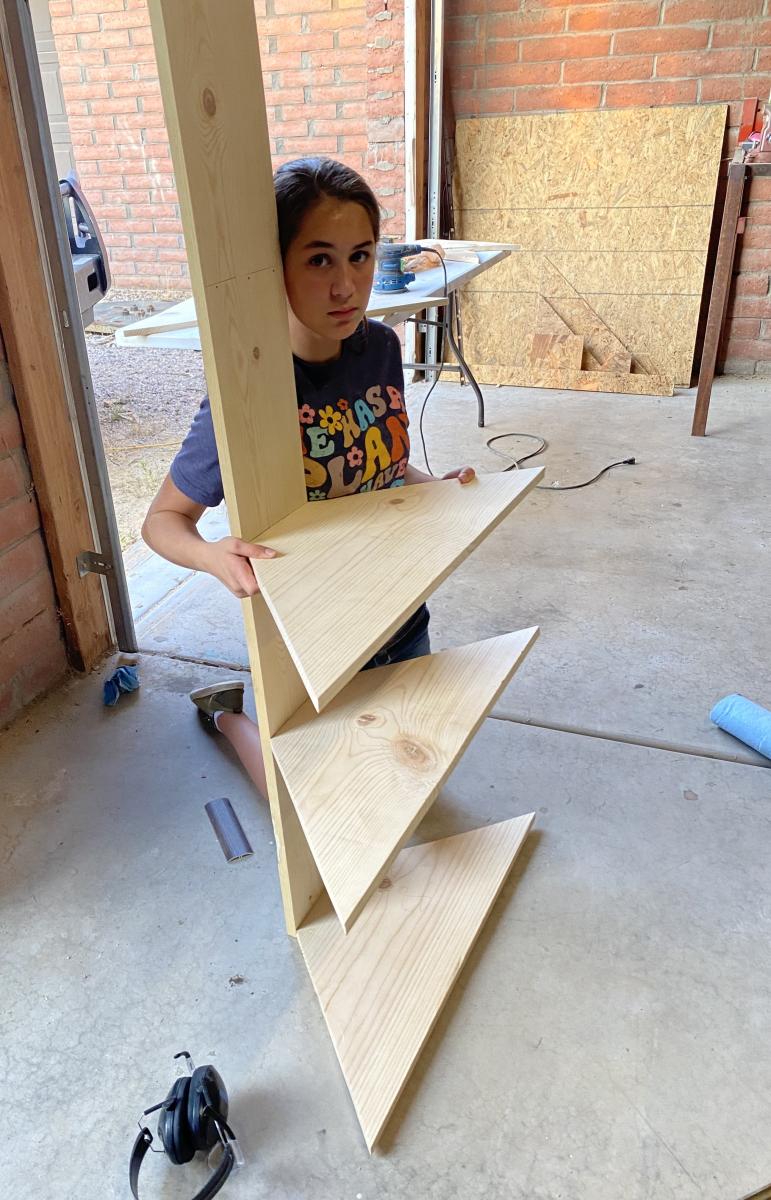
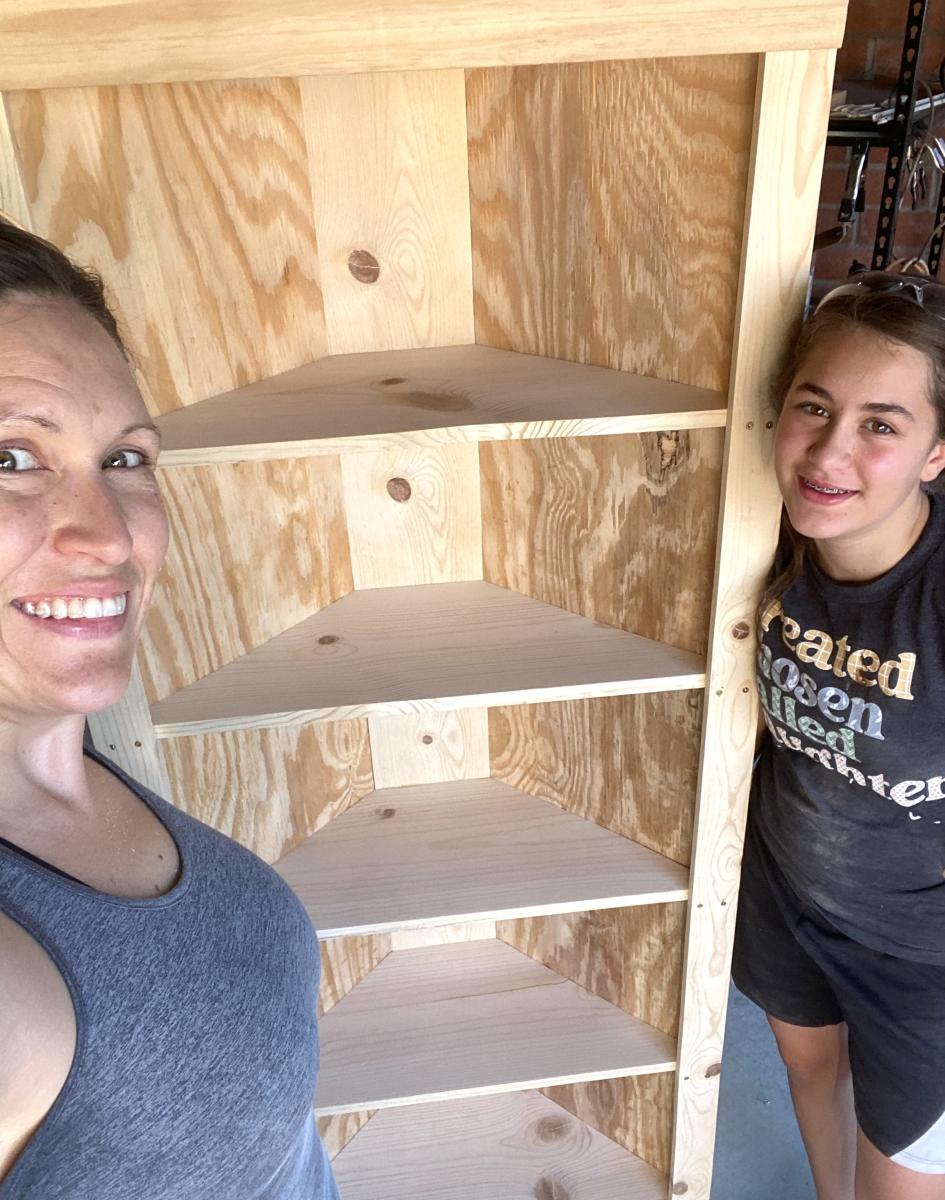
Built from Plan(s)
Completed the corner bookshelf (we opted to not use cupboard doors on the bottom) in two afternoons.
Beth and Jess Wegz
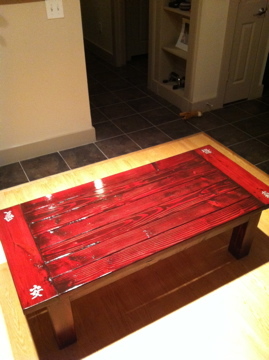
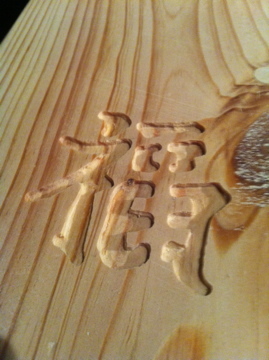
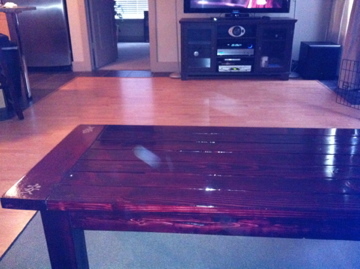
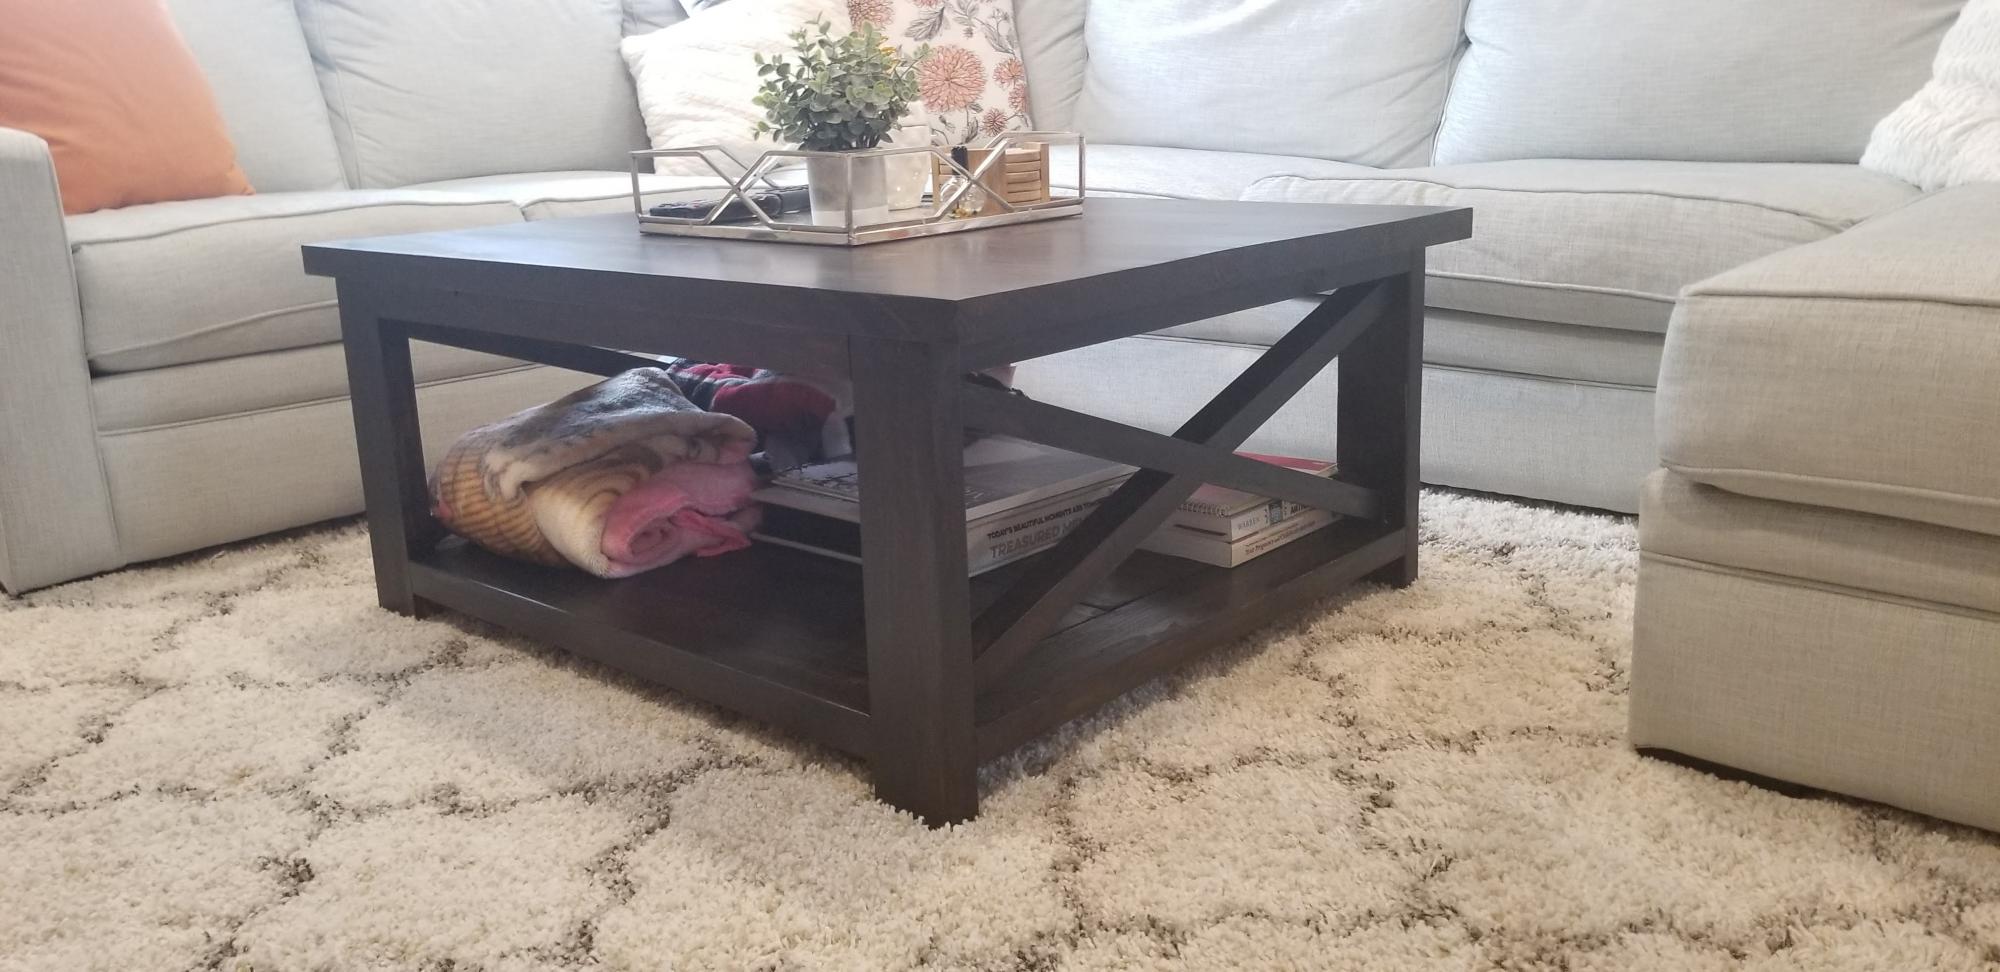
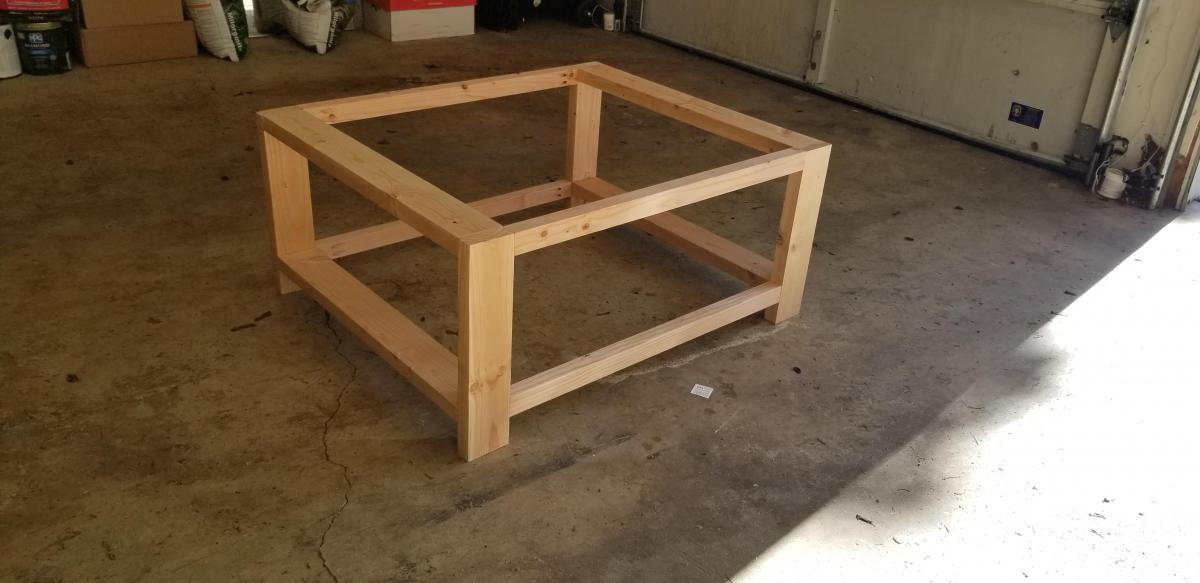
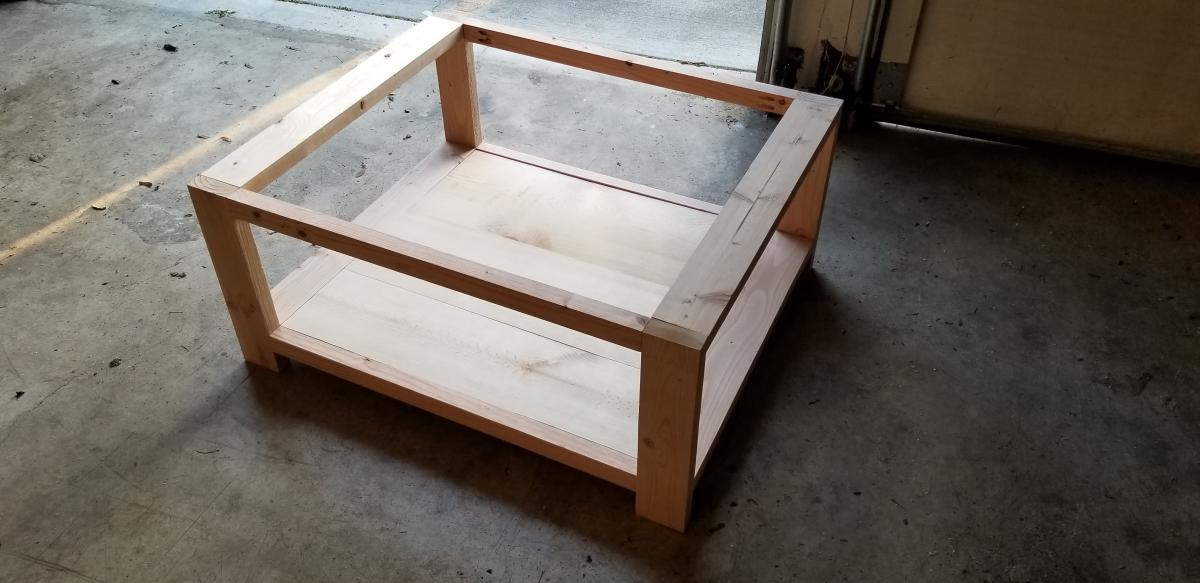
So I wanted a coffee table for my new apartment and couldn't find one I liked so I decided to build one. I wanted a zen theme for my new place so I took this plan and put a twist on it. I built it basically to plan and then carved out some Asian symbols and filled them with Woods metal. I sanded down the inlays, stained the table, distressed it, carefully cleaned up the symbols and then added a couple coats of poly. Came out pretty cool!


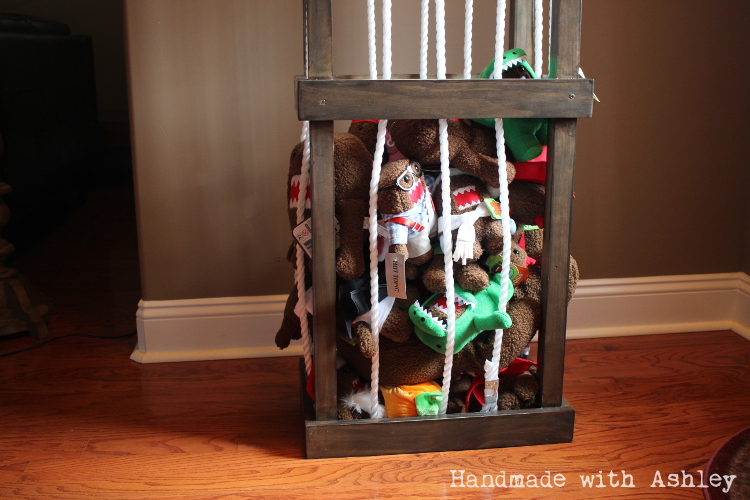
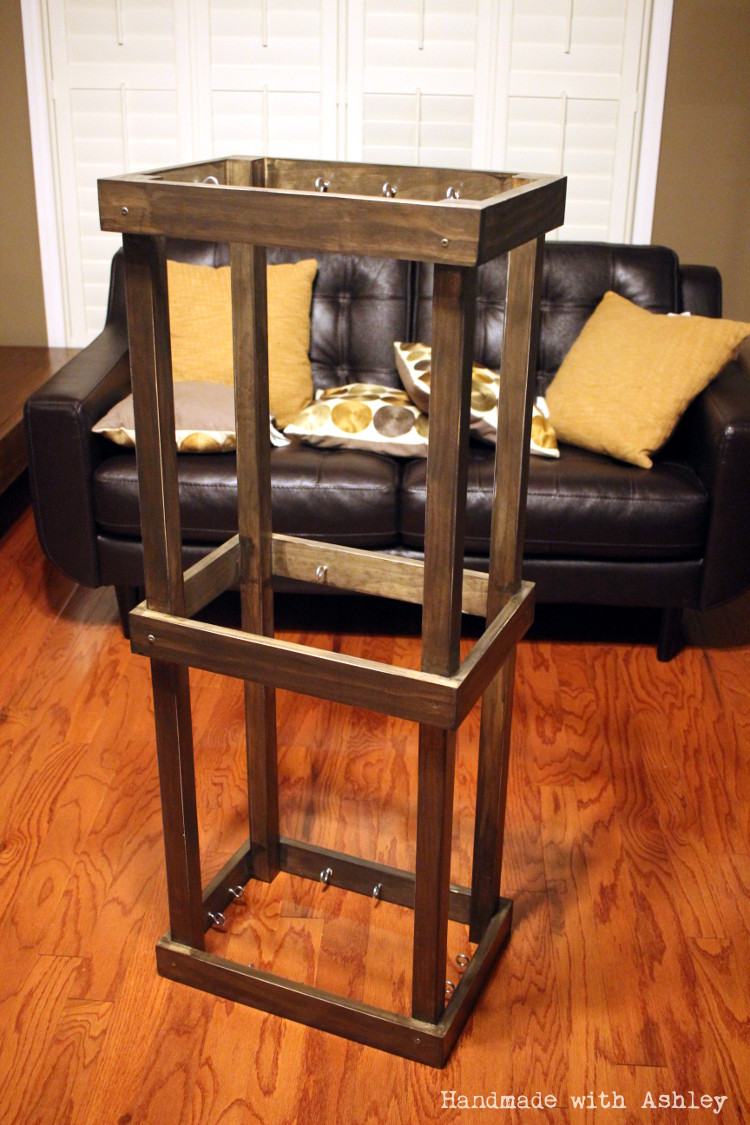
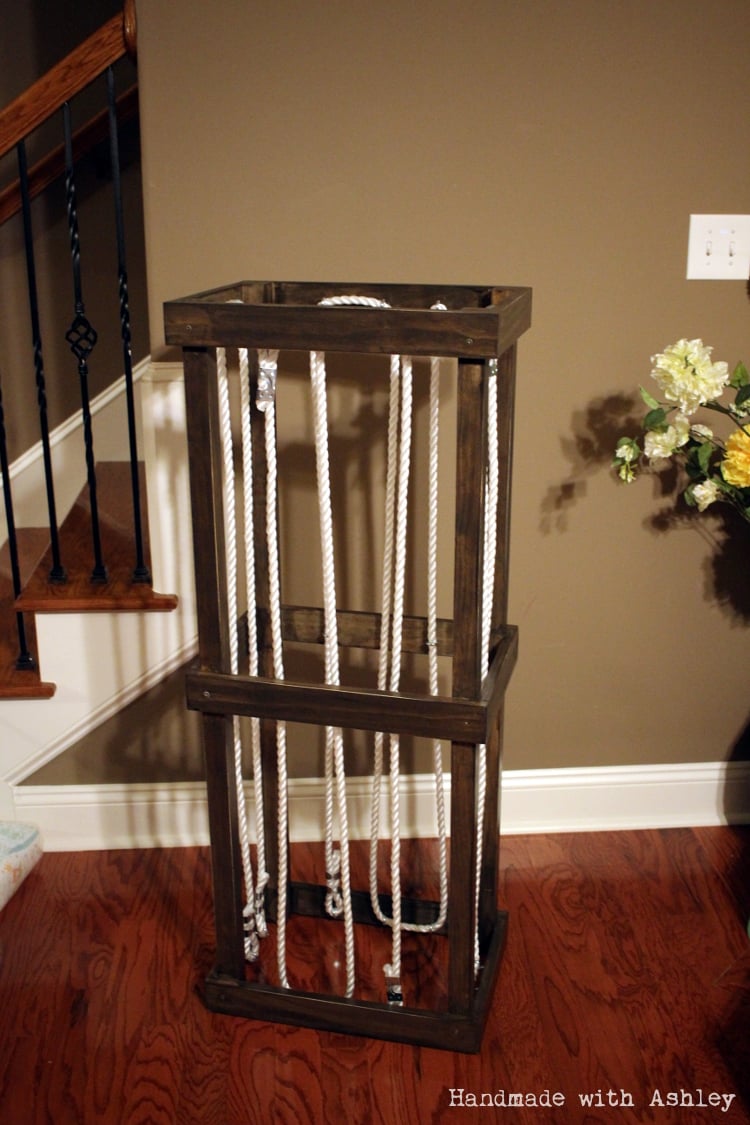
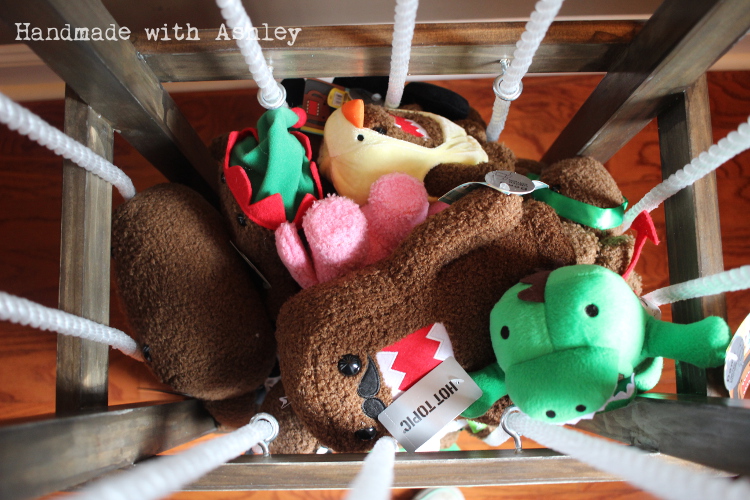
This was a really easy build and has brought much needed order to my little one's stuffed animal collection.
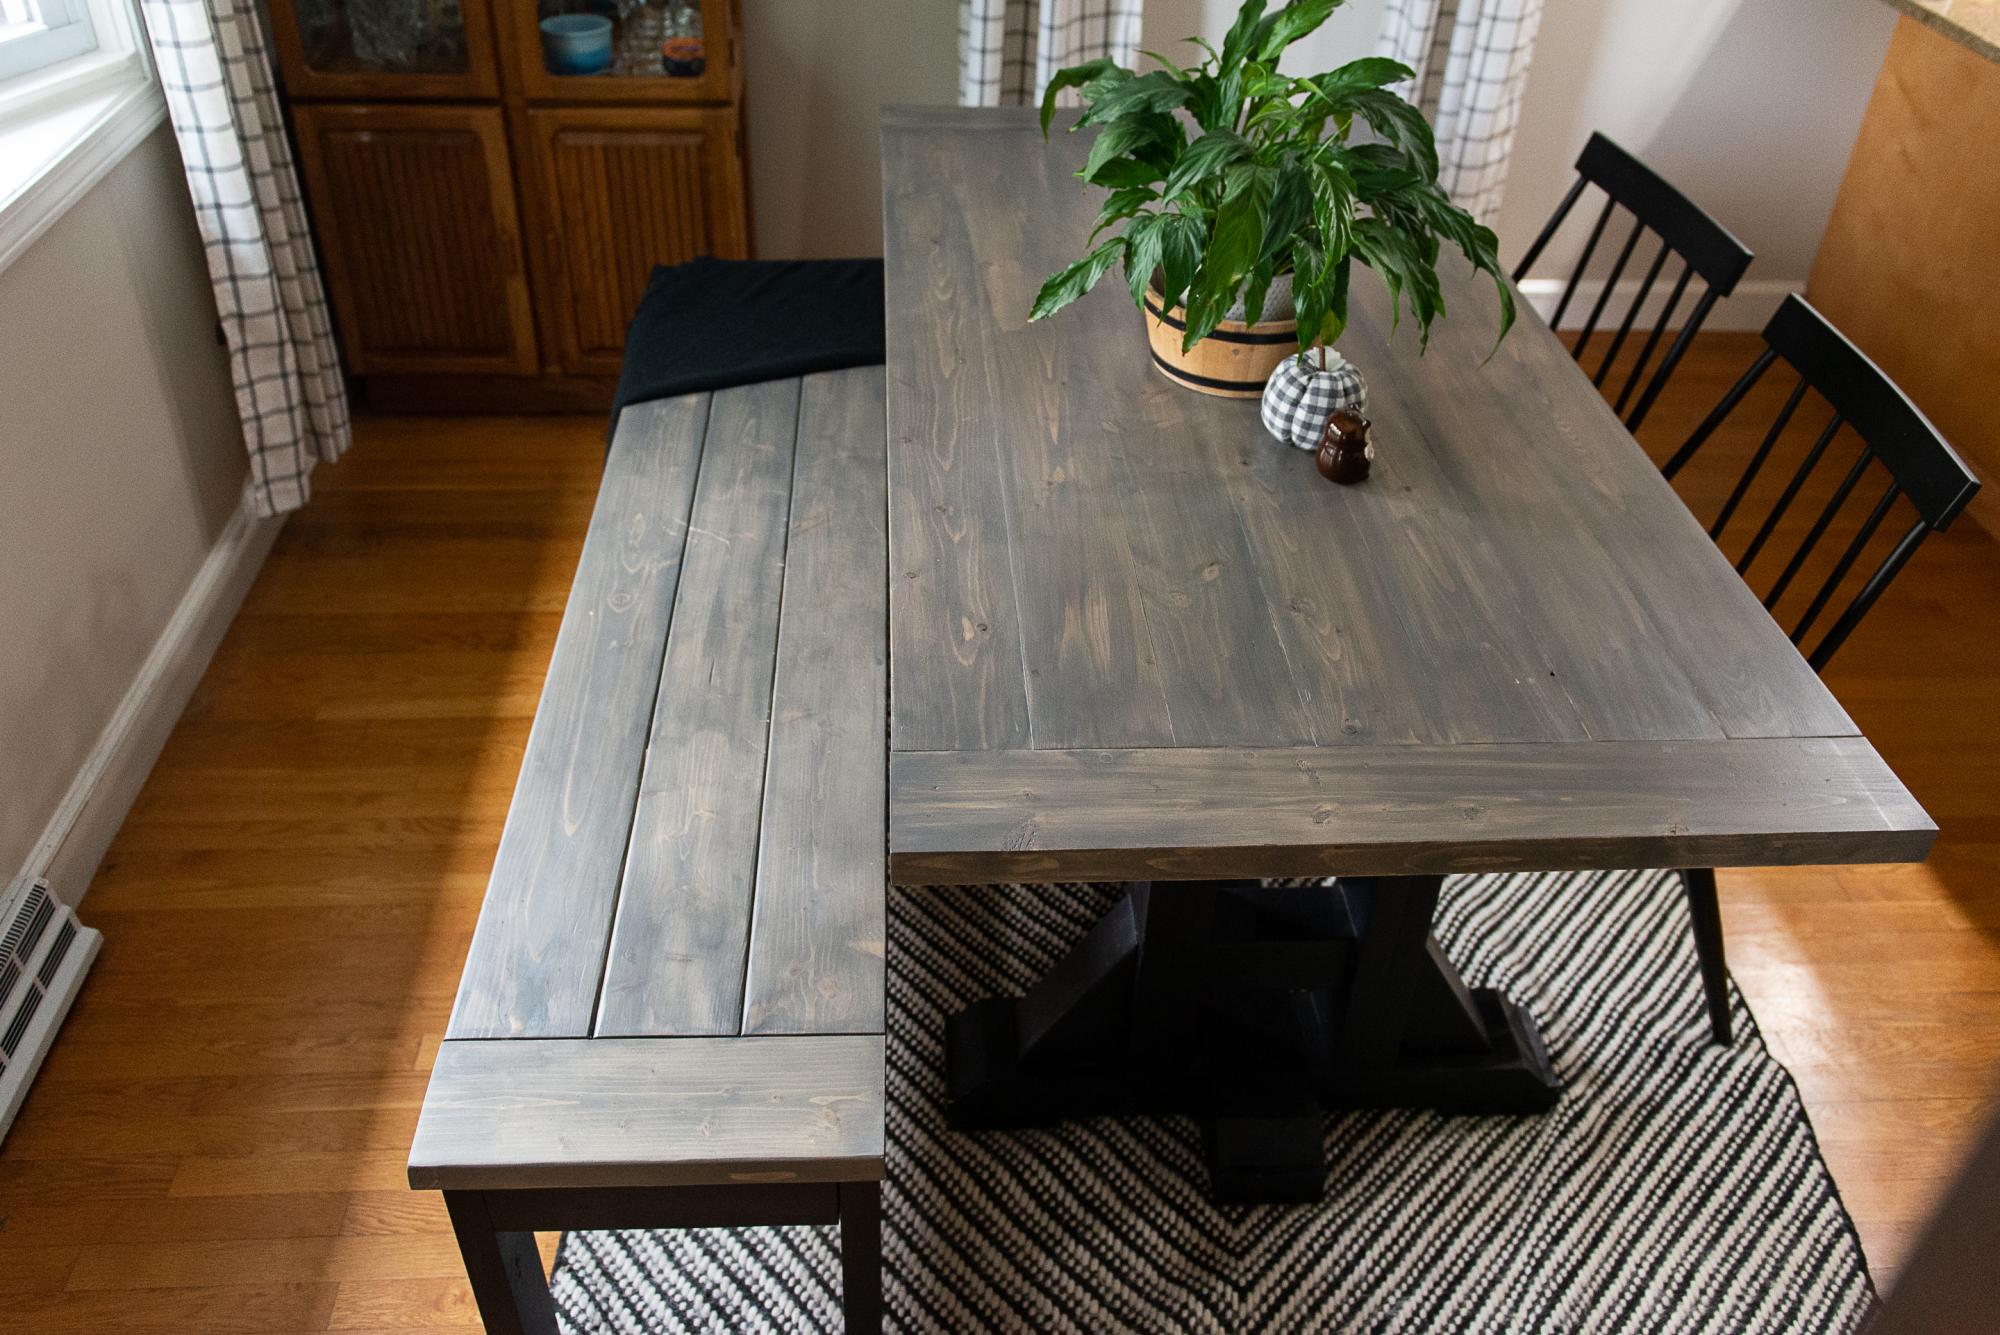
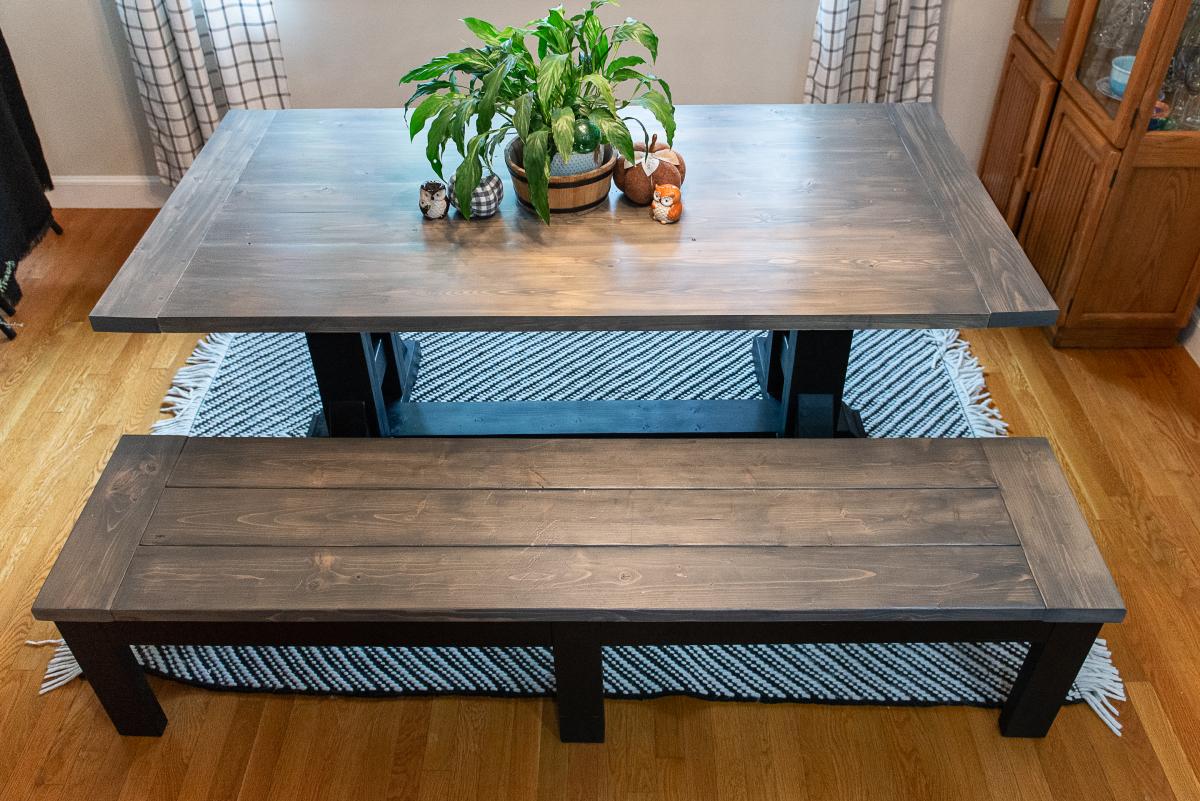
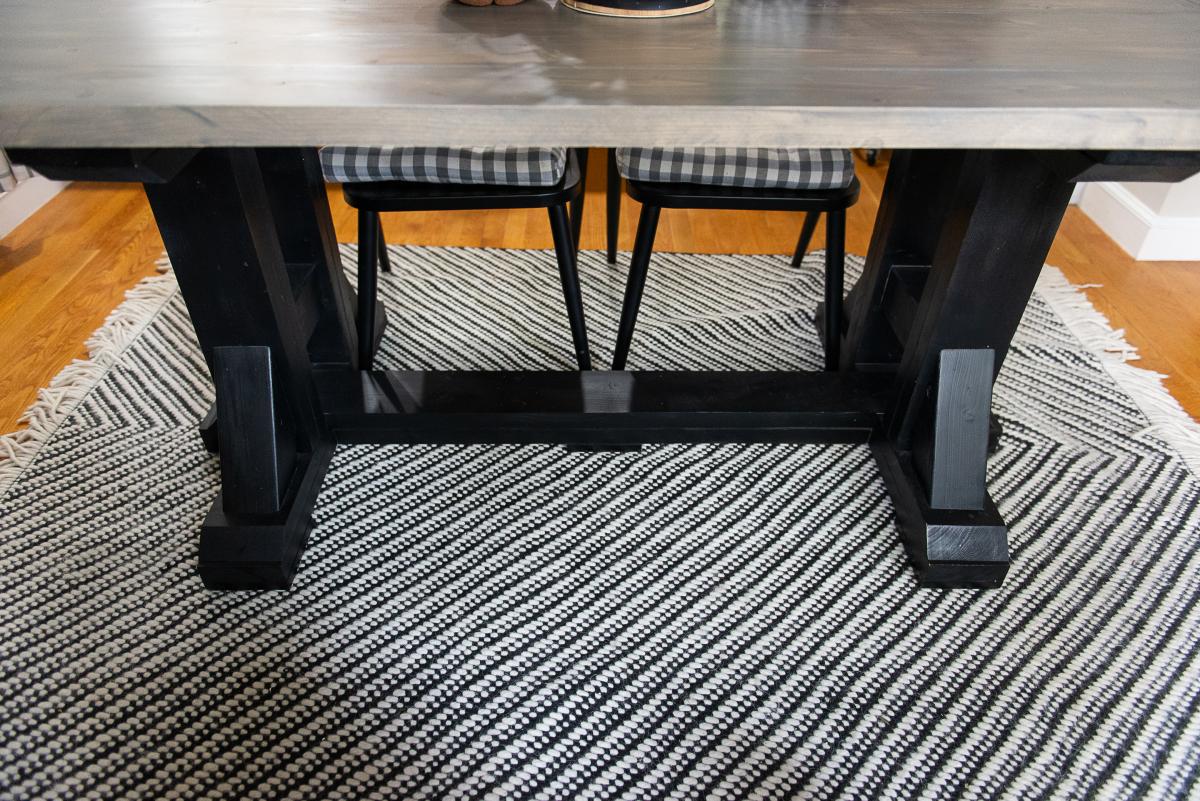
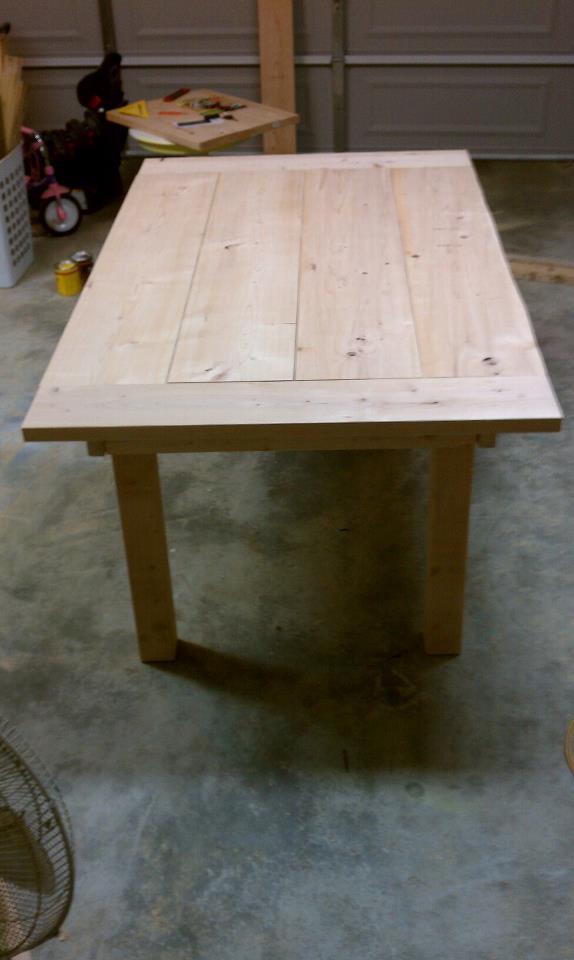
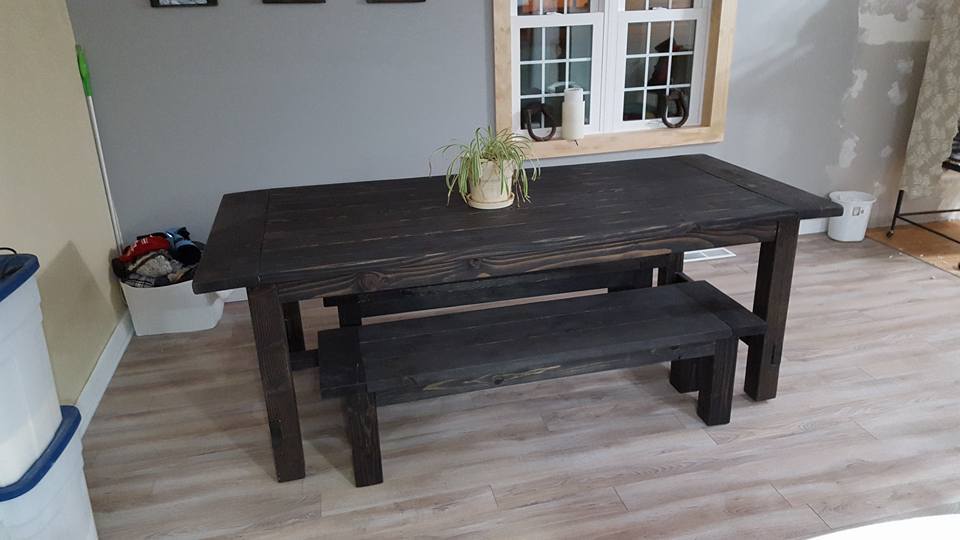
This table was modified because my dining room is really small. So the table is 71"long x 35" wide. This was actually my second attempt on the table top. The first attempt I only used kreg screws and no glue. To say that it warped is an understatement. This second attempt I used kreg screws and biscuits. For the breadboards I tried something new and used Rocklers Beadlock system. I also used Z- clips to mount it to the base so that as the wood expands and contracts it will hopefully not warp. So far it's remaining pretty flat.
Thu, 10/17/2019 - 06:16
Not sure why this posted as Anonymous but it's mine, ColleenW. Thanks for looking.
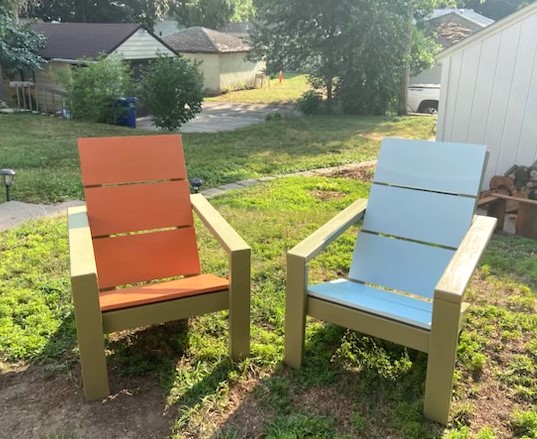
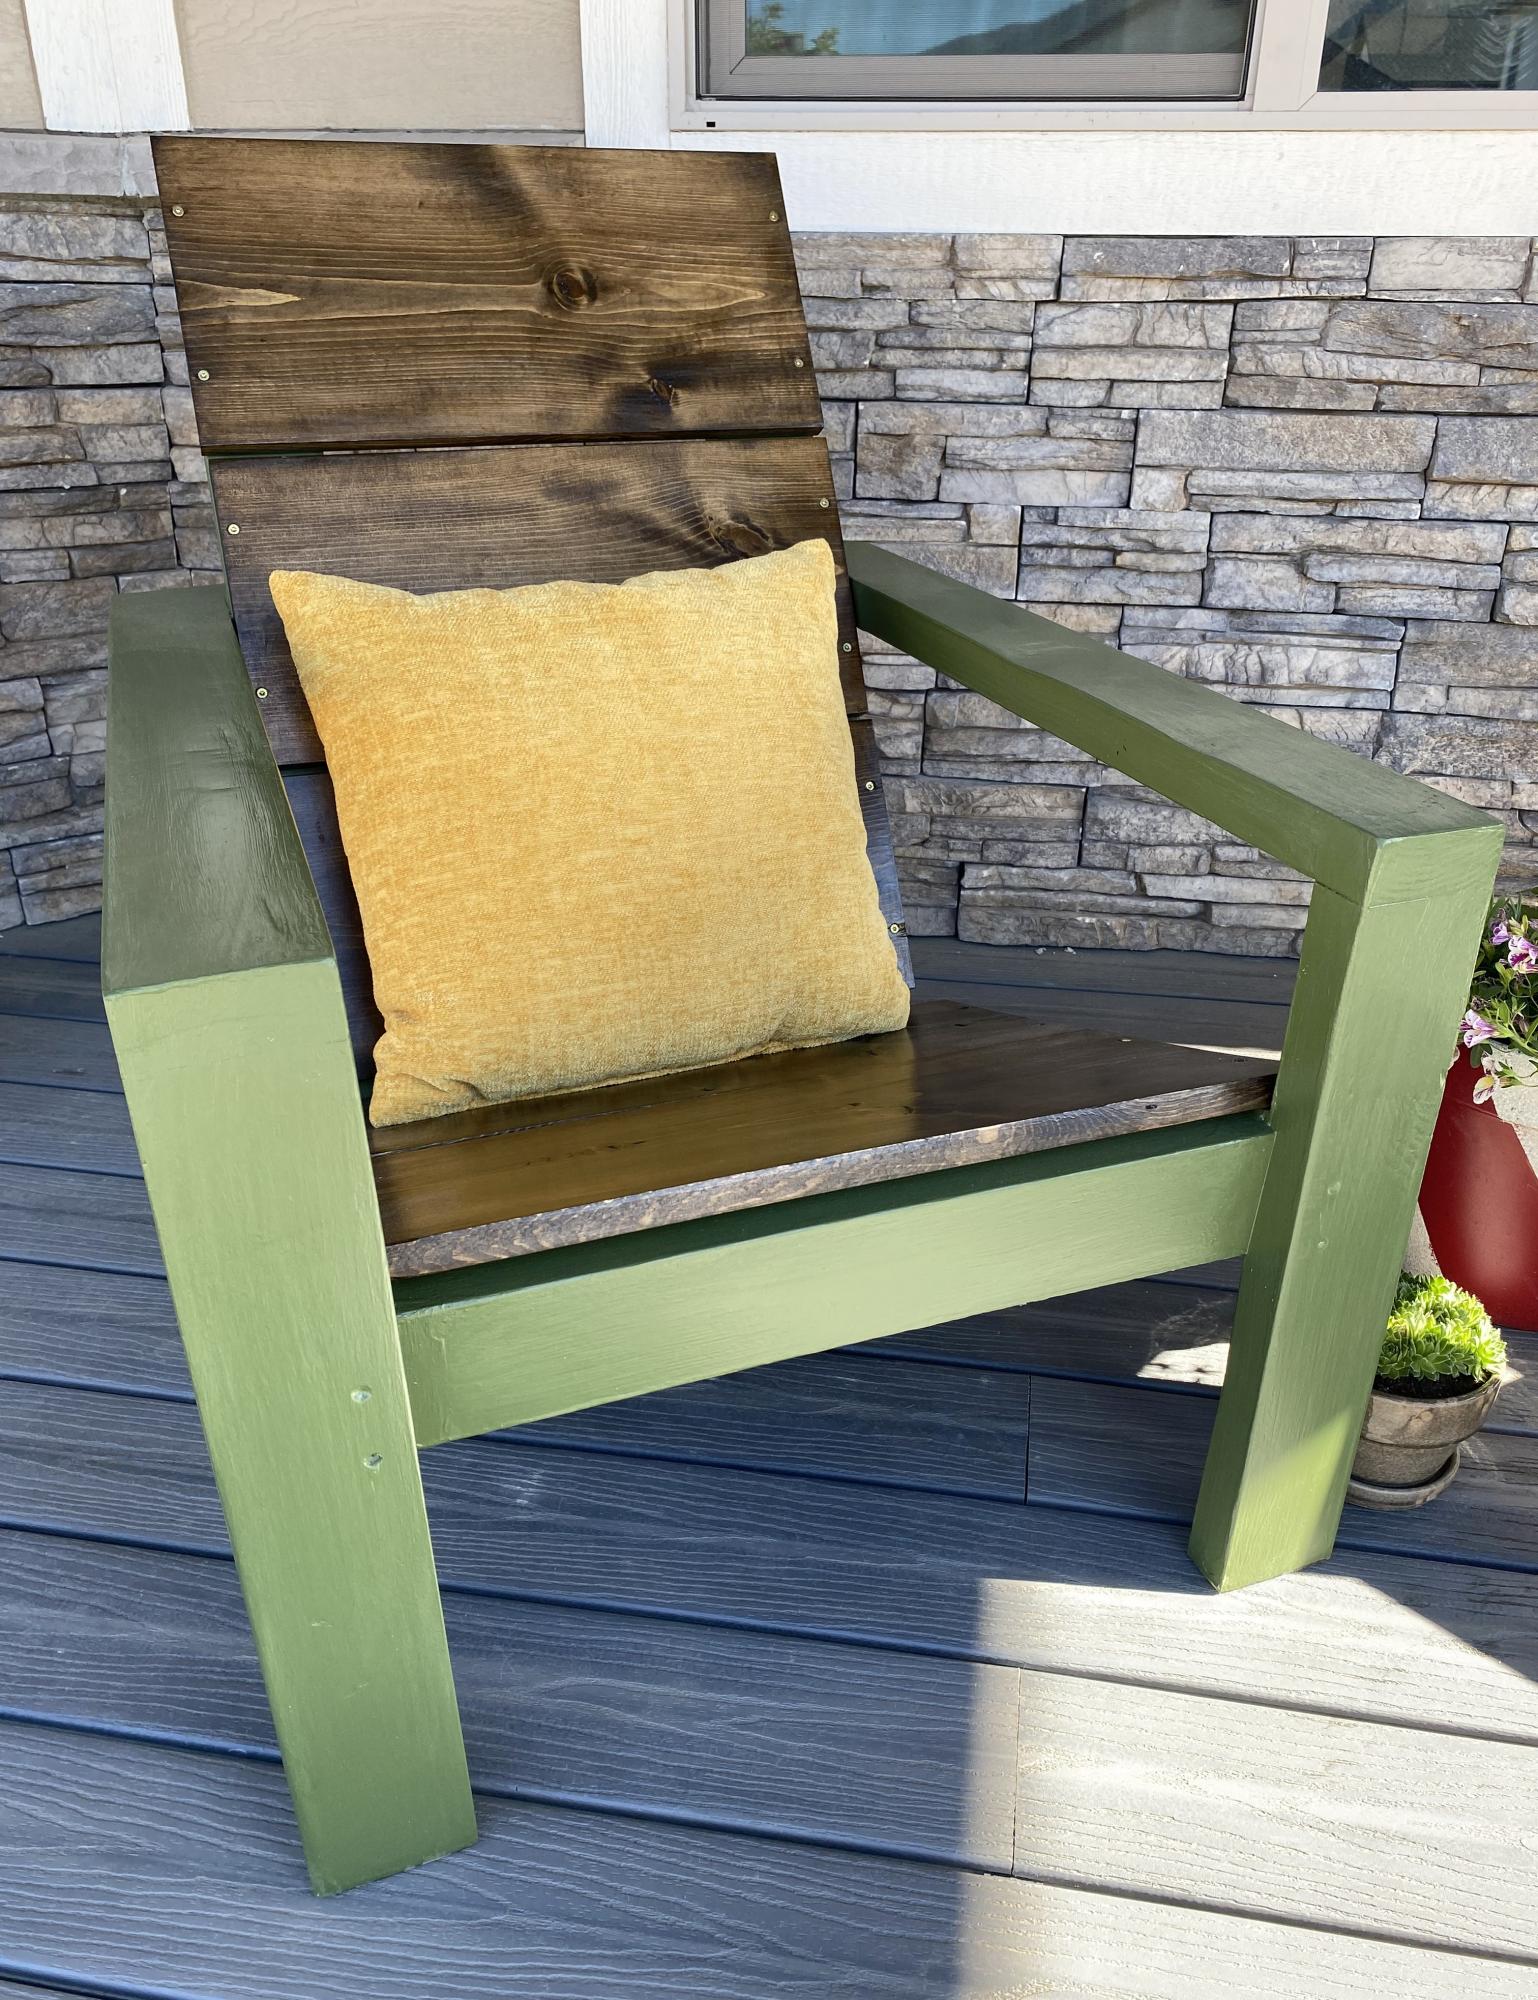
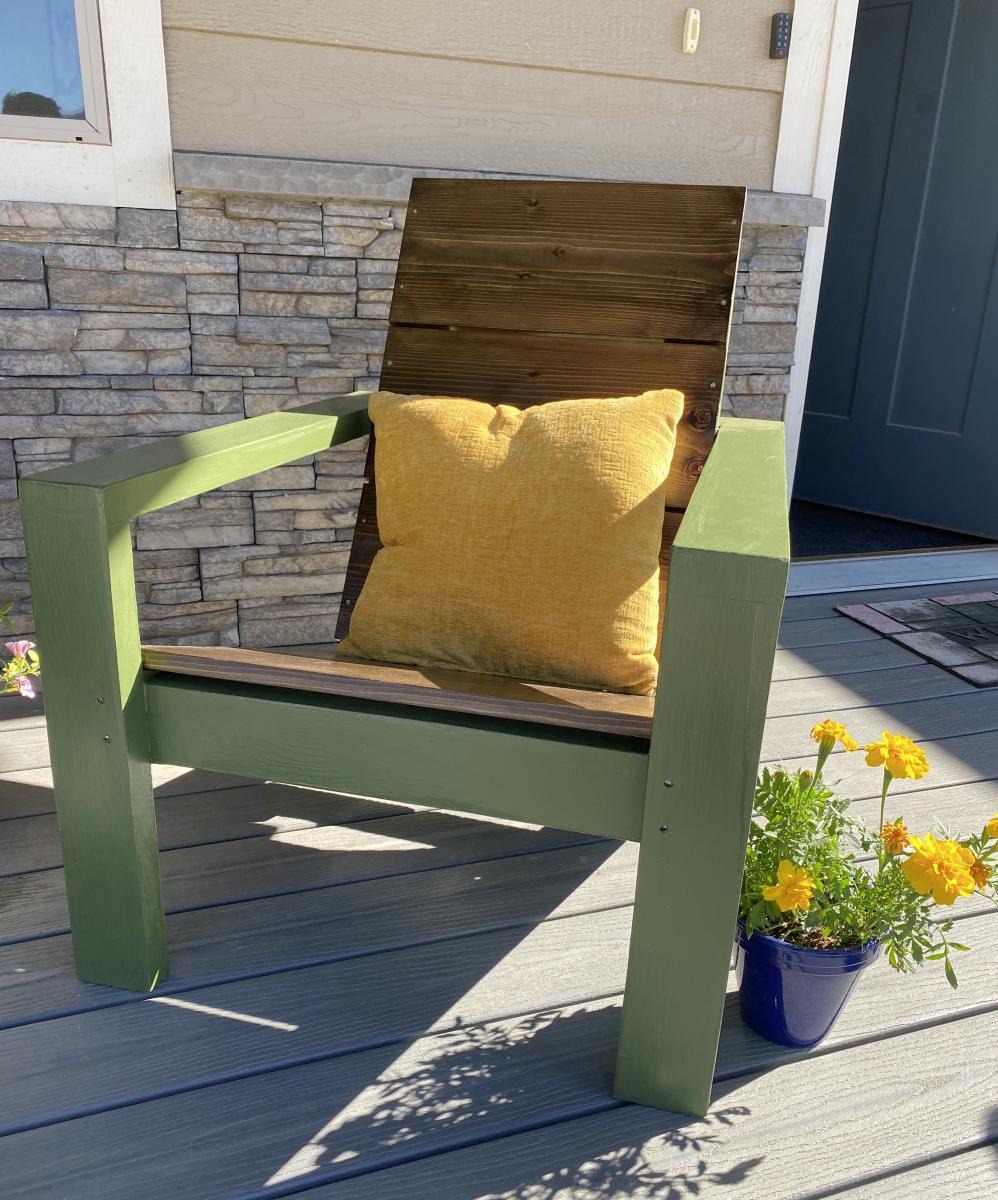
Just delivered these Adirondack chairs to my son and his GF as a housewarming gift for their first home. They selected the colors and they turned out perfect! I used a countersink for the front screws and filled with plugs so it looked very polished!

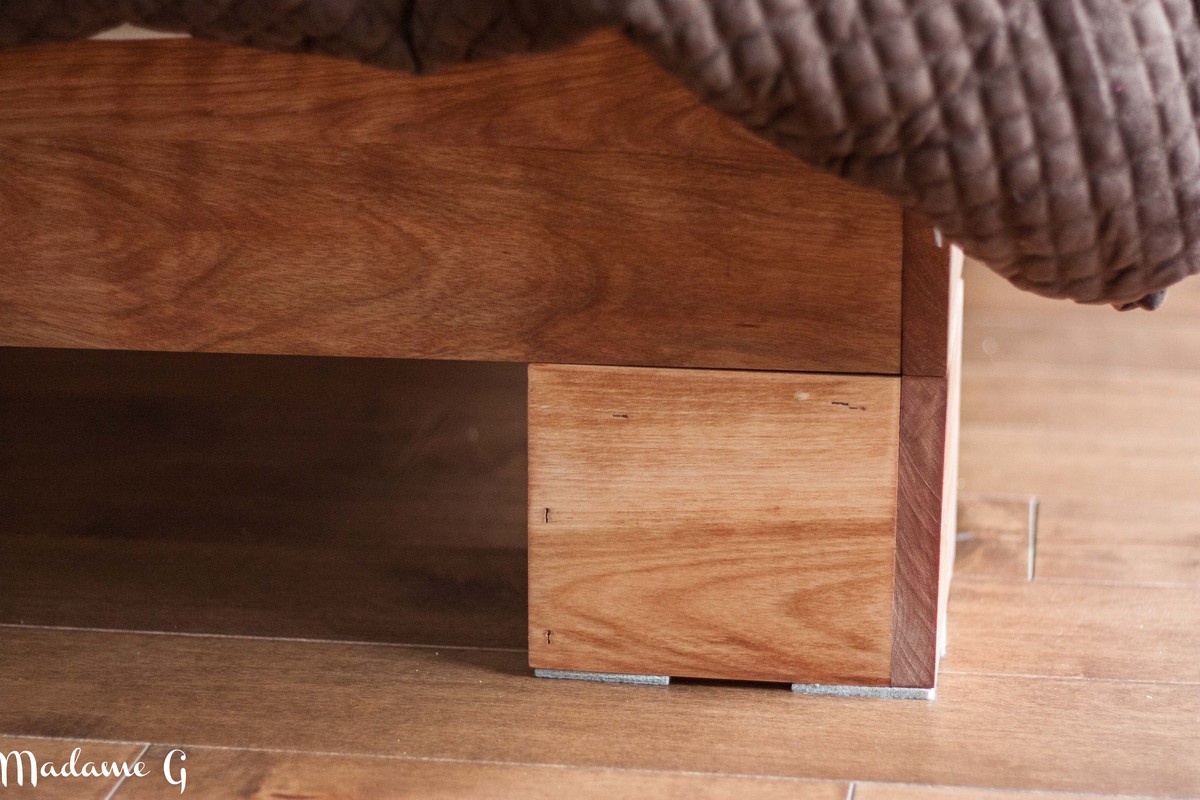
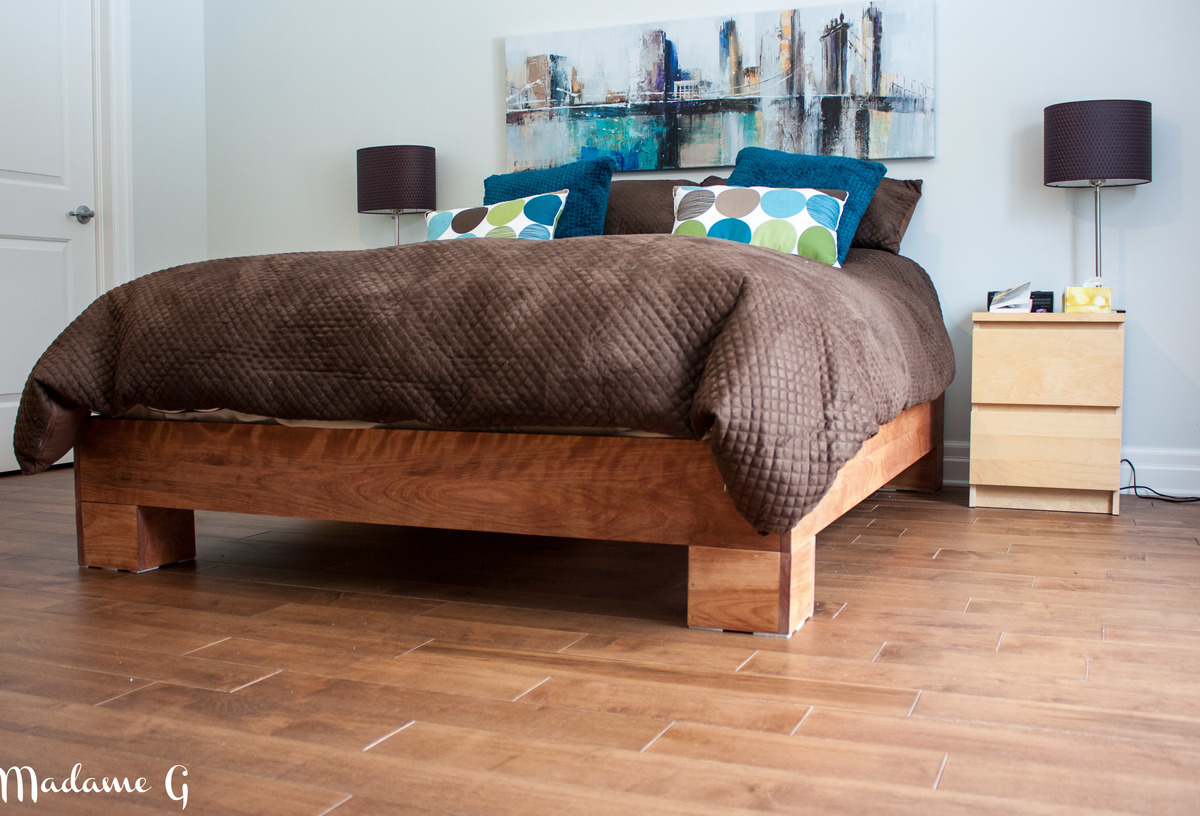
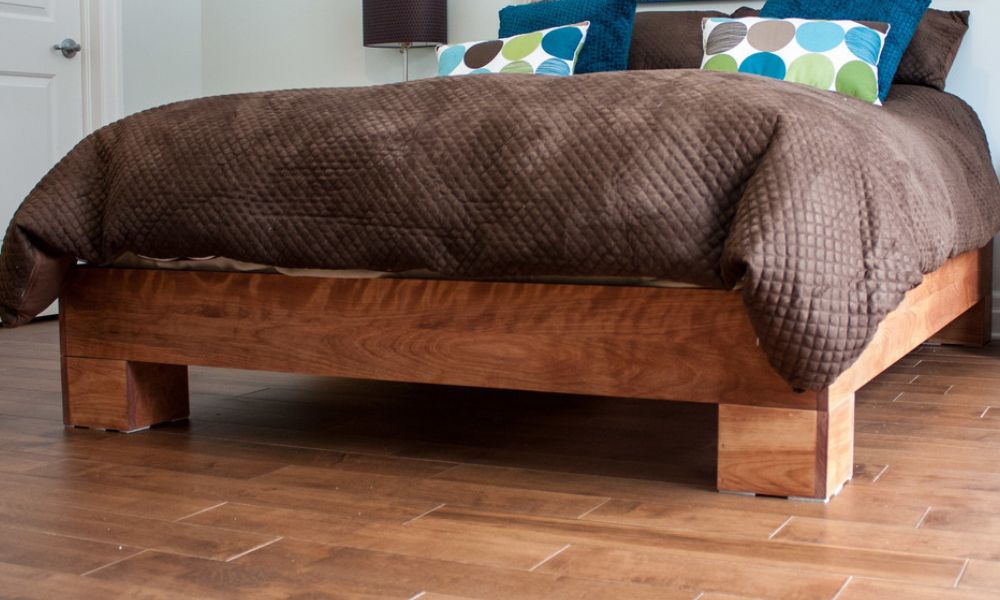
This is my first build and im really proud of it. We needed a new platform bed to fit our new matress! Yeah! a queen size bed! I discovered ana's blog and i got really inspired by all the projects in the blog! For the construction, i used birch for the showing parts, pine for side rails and center support and spruce for the slats. Actually, i haved cut de sides and builded the legs then i oiled evething before assembling. I used my Kreg Jig r3 to join the sides and i used a corner metal bracket to join the legs to the sides! Everything is attached from the inside, so no filler needed! I also decided to use 1x6 for the legs to get a taller bed. If you want your matress lower in the frame use 2x4 instead of 2x6 for the center support. Adjust de side rails to fit with the 2x4. Can't wait to build something new! FYI: I know my english is bad but its not my first language!Im french canadian!

Sat, 02/18/2012 - 08:17
Your bed looks good! It makes a nice focal piece for the room.
Your English is fun to read!

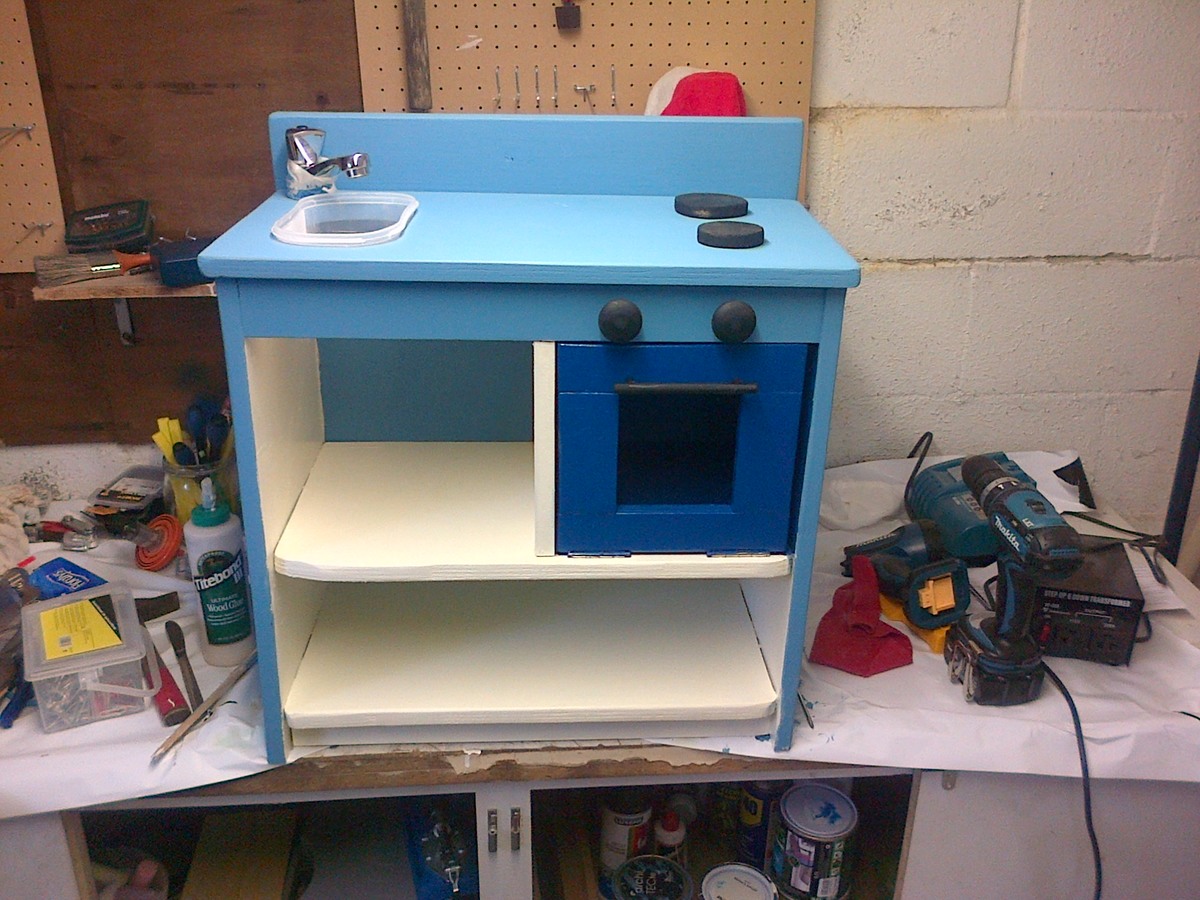
This is a play kitchen I made for my 2 year old. This was the first big wood project I have done. The instructions were easy to follow if you stay organized.

Wed, 12/25/2013 - 04:52
This kitchen is great! The details and colors are awesome, and you did a fab job on this build! Merry Christmas!
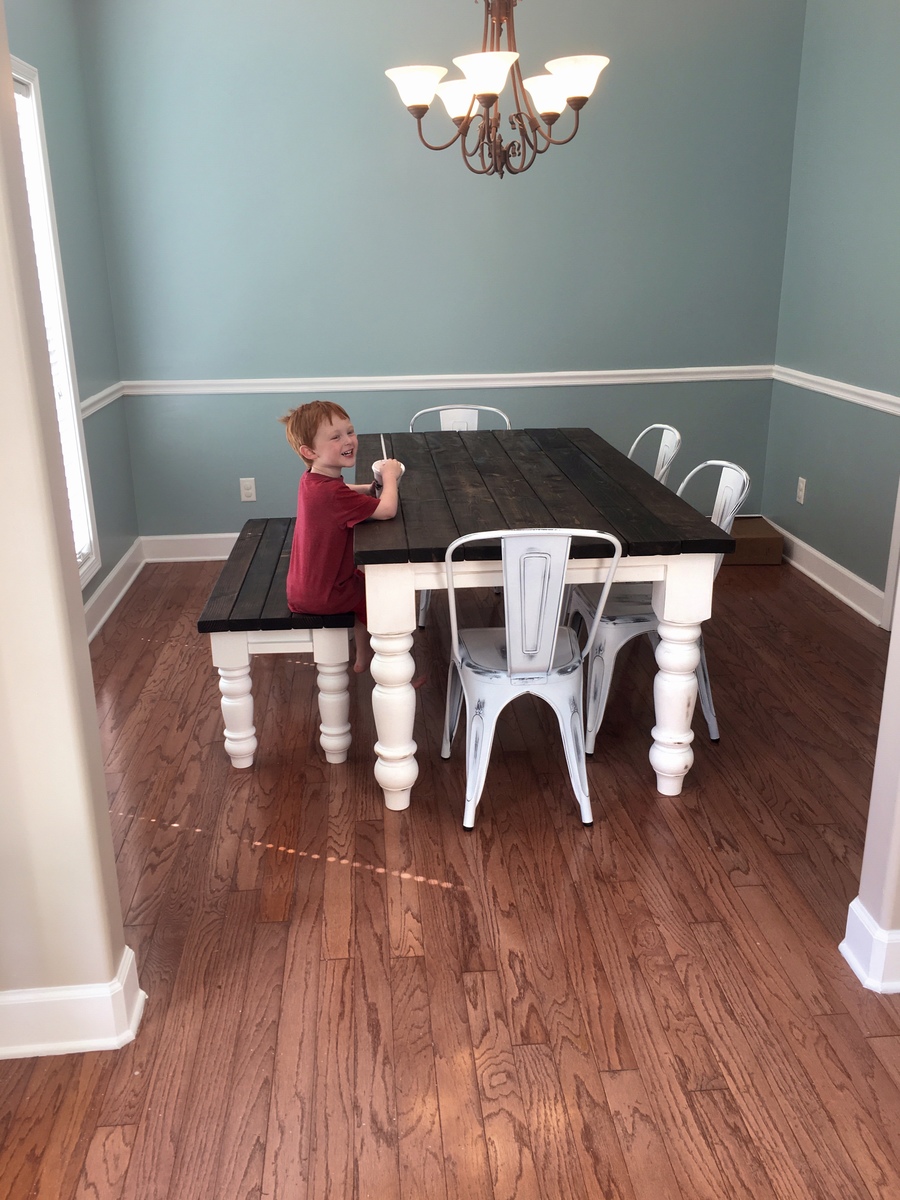
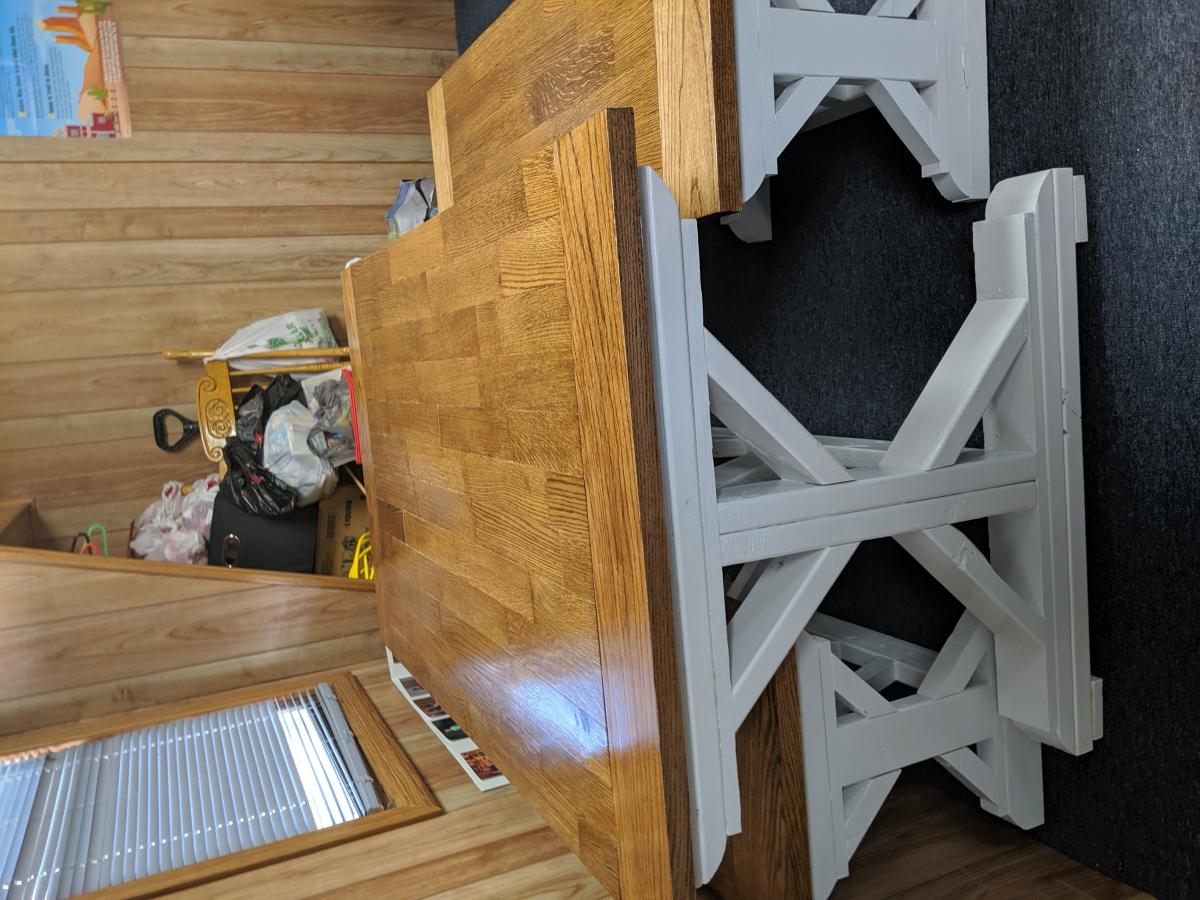
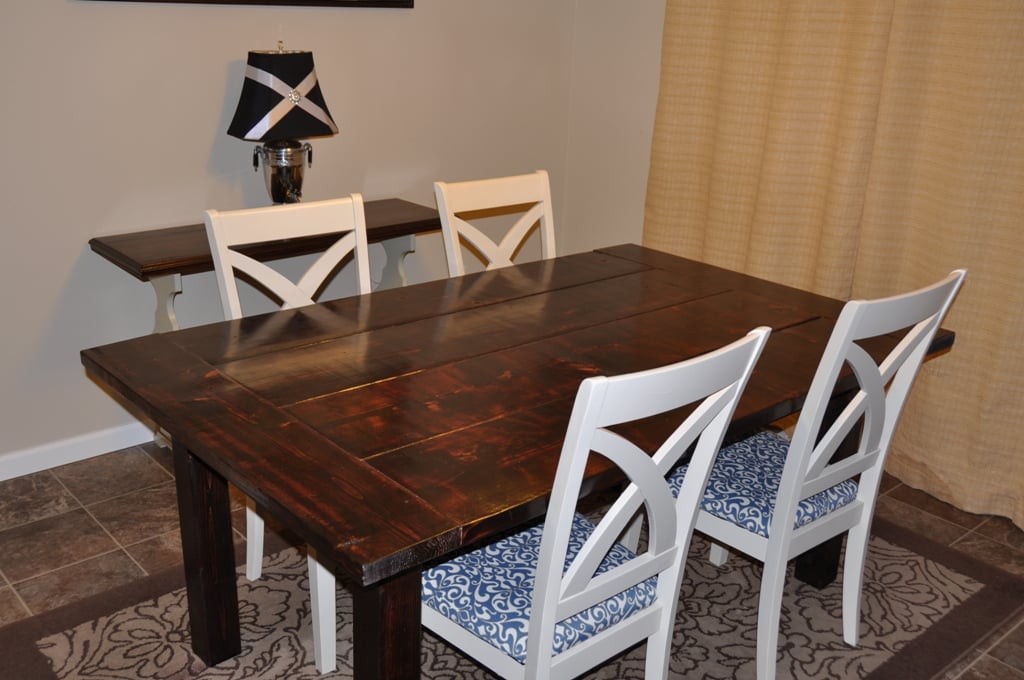
I used the Husky Dining room table plans to build this table. I also modified the plans to make a bench as well. This was a very east build and turned out gorgrous!! Thanks Ana!!
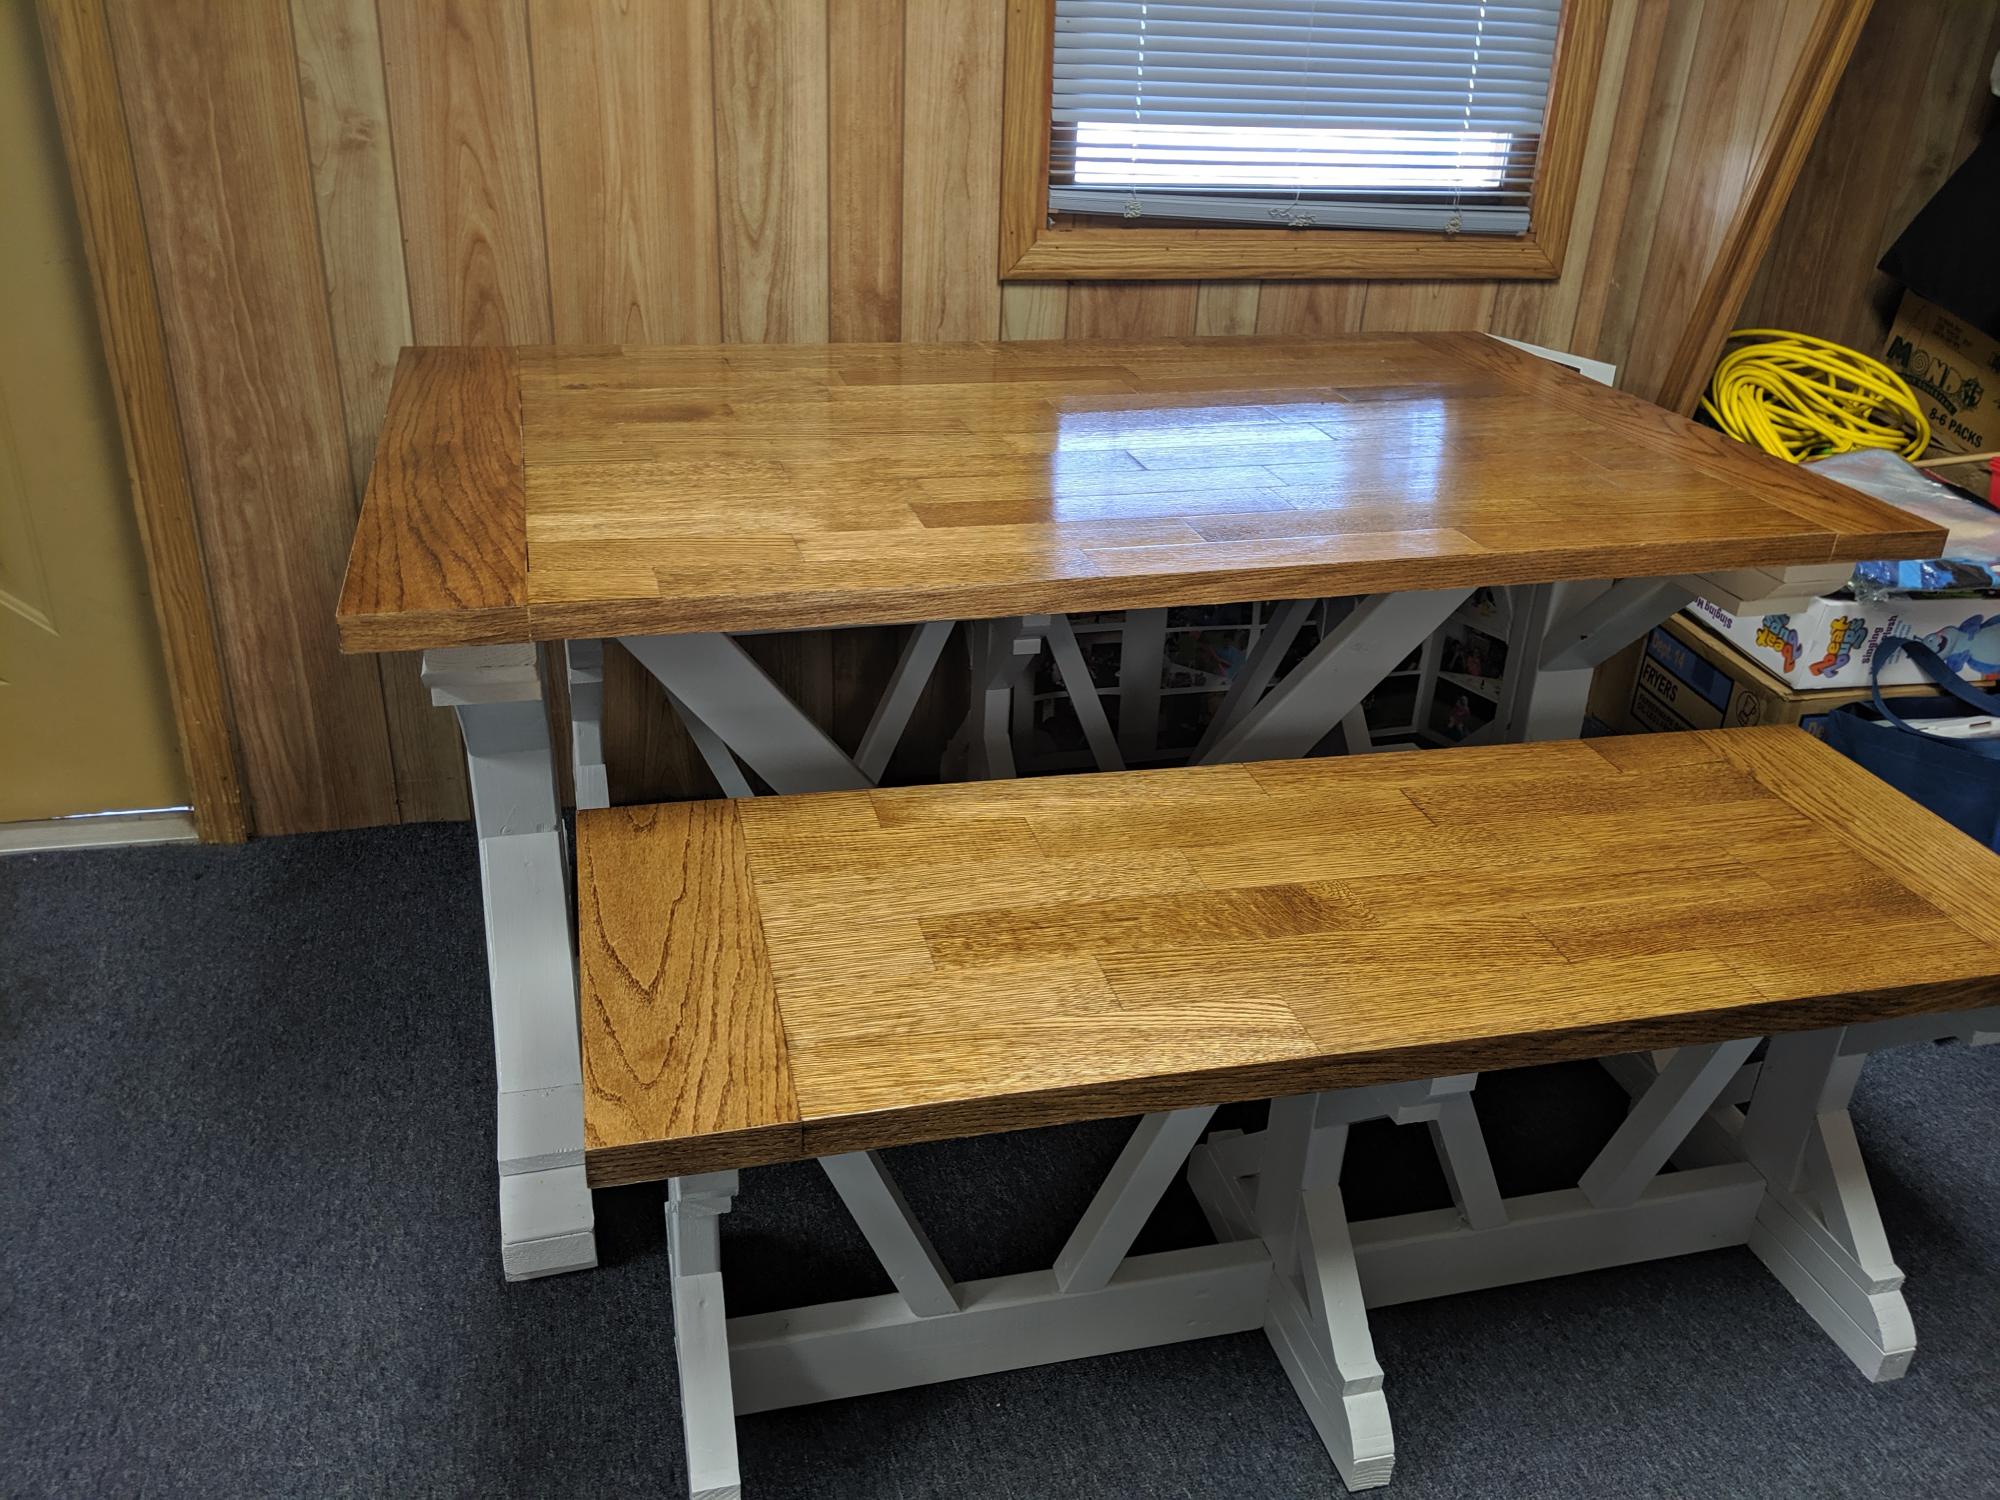
Built top from oak hardwood floor and adjusted table length and bench width to meet customers space needs.
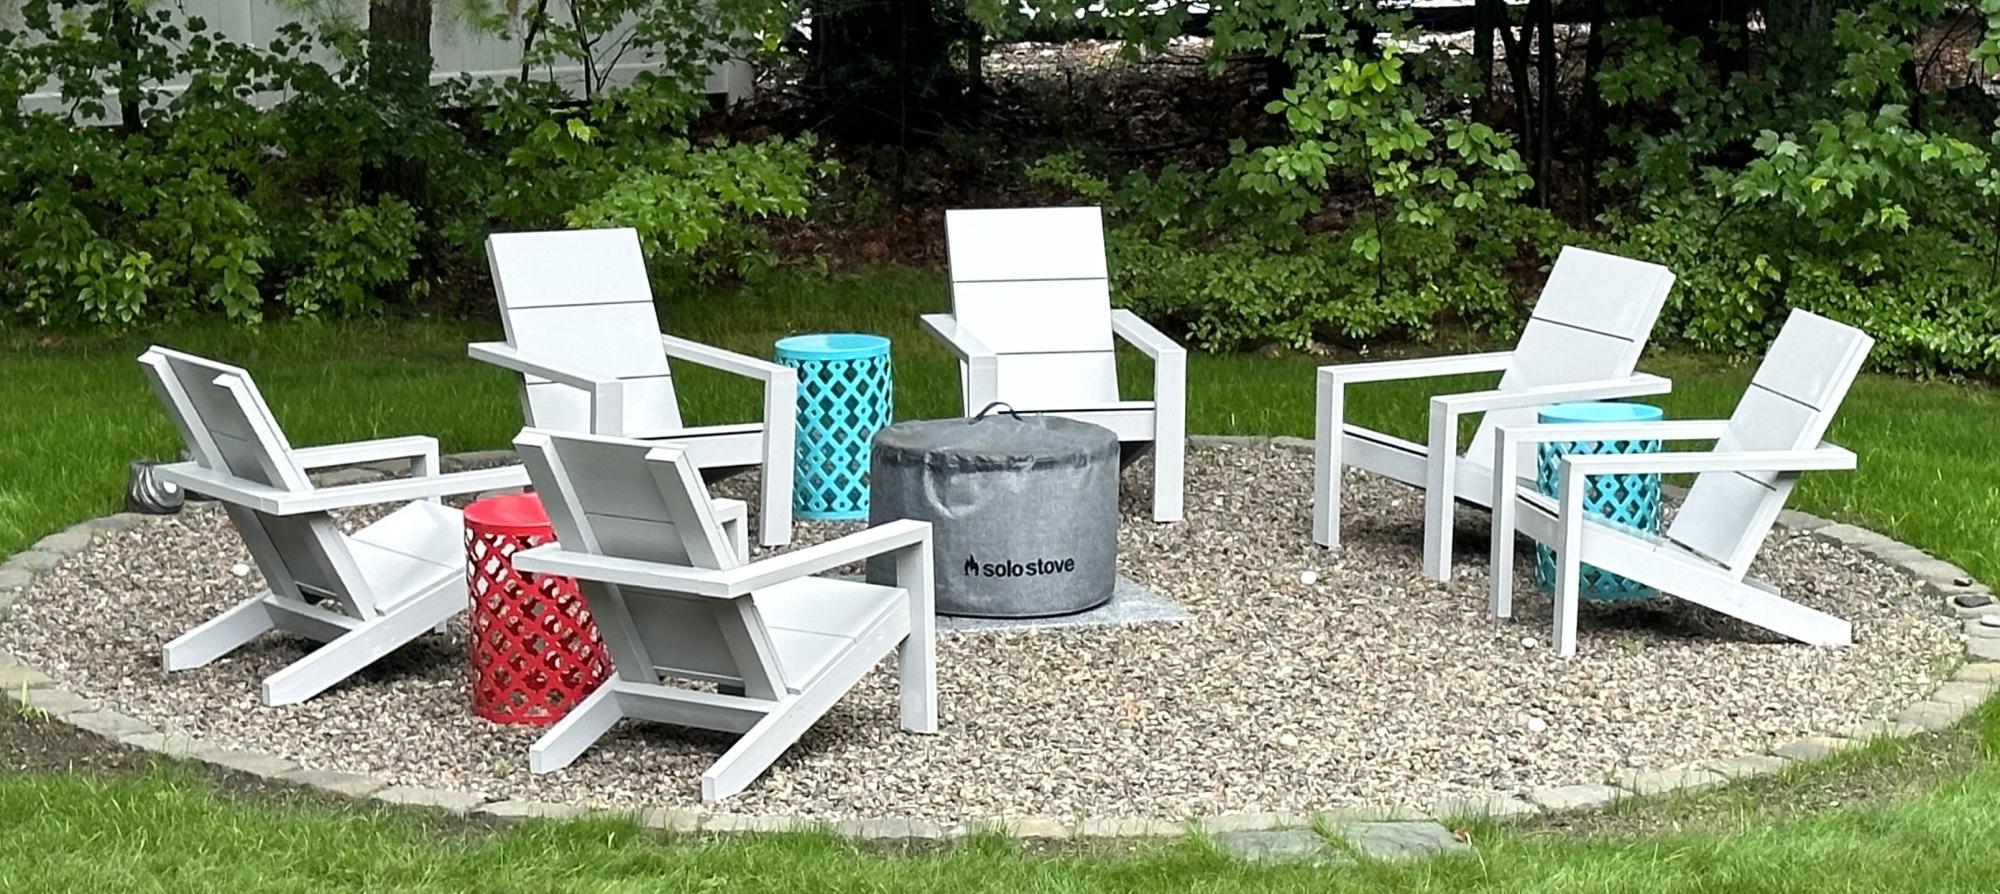
6 Ana White Adirondacks replaced 6 crappy plastic Adirondacks. I changed it up a bit by attaching the arms to the front legs with the kreg jig and filled all the screw holes with putty before I added finish coat. Neat and clean looking. Thank you Ana White!
Franko_6789

I liked Sausha's design, but I wanted a more "built in" look for the one I built. I didn't follow the plan much, but used it for ideas
This daybed was modified from the Farmhouse bed plans. I am still finishing the drawers, sanding, putty and paint.
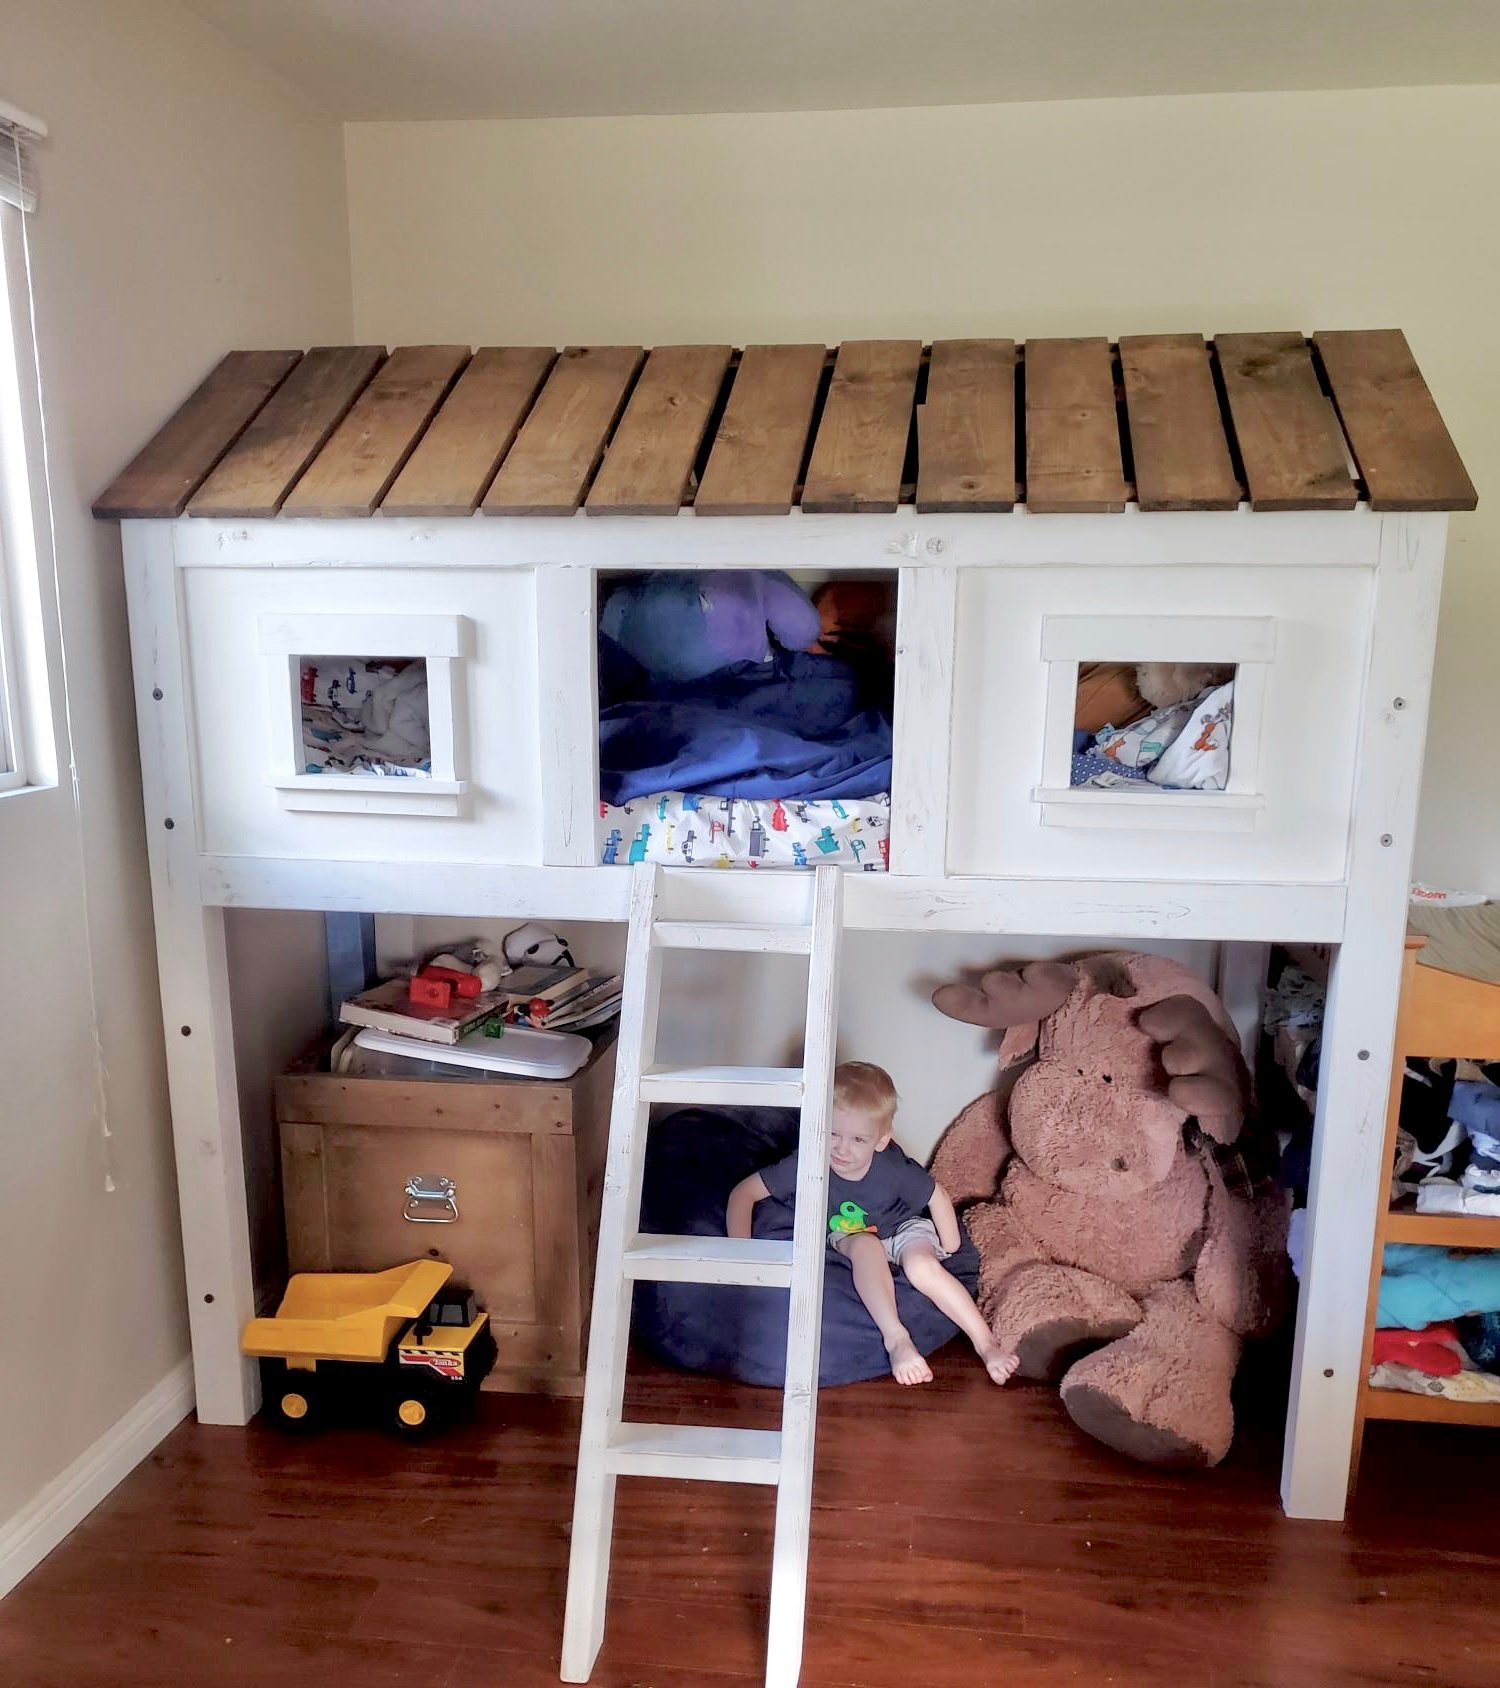
We modified the cabin bed plans to a loft bed. This created a space for little man to have all his own area. We also made the roof on a hinge so that we could open up the roof for easy bedding changes. Also used Jen's modifications so we can take the bed apart and move it easier.
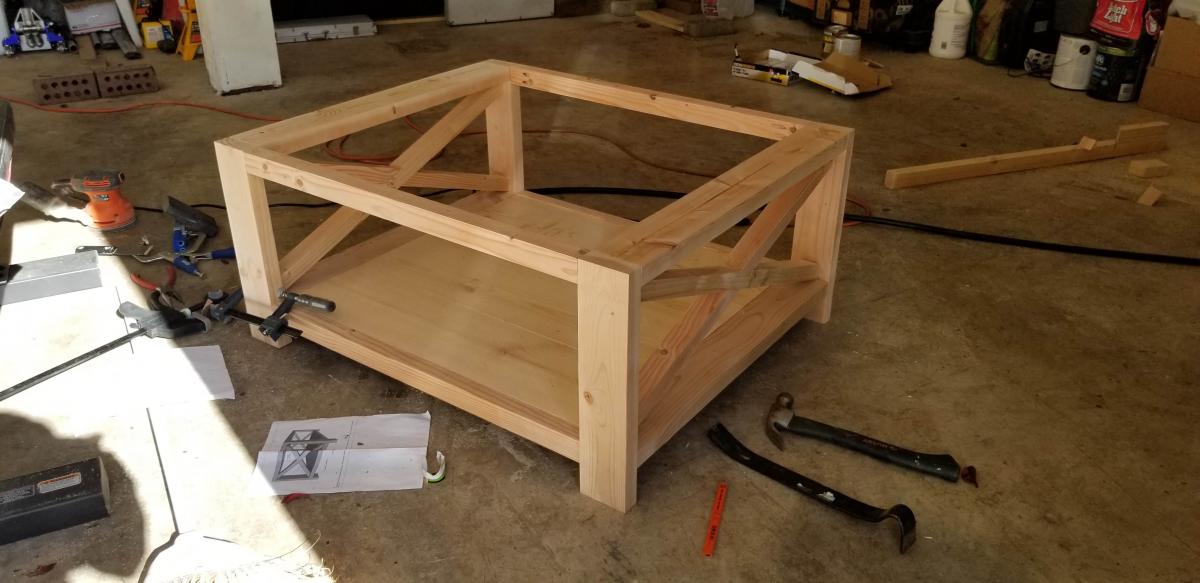
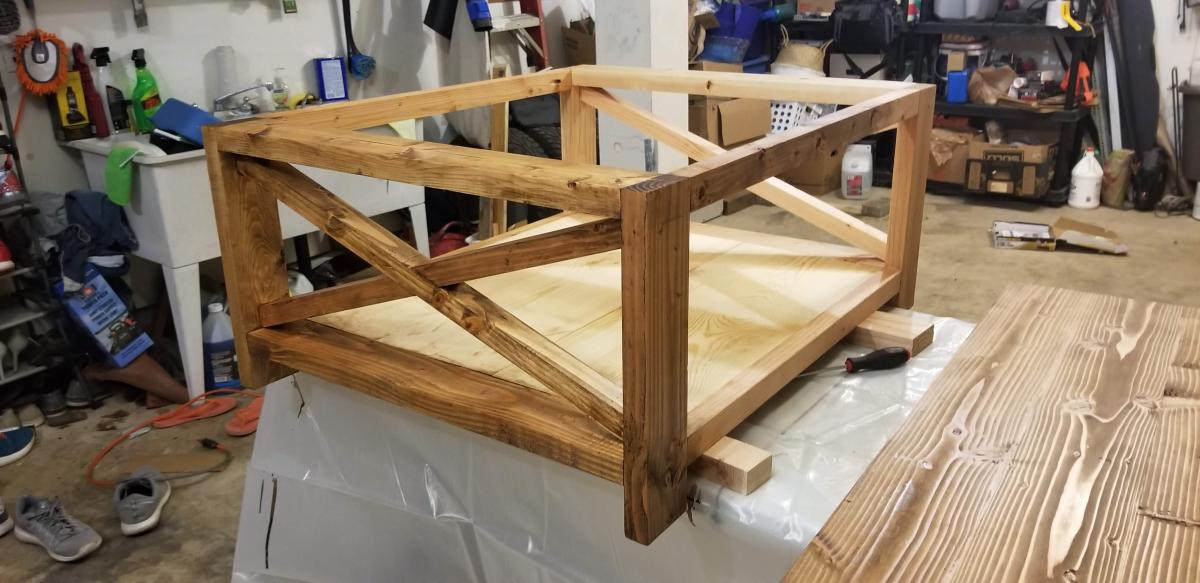
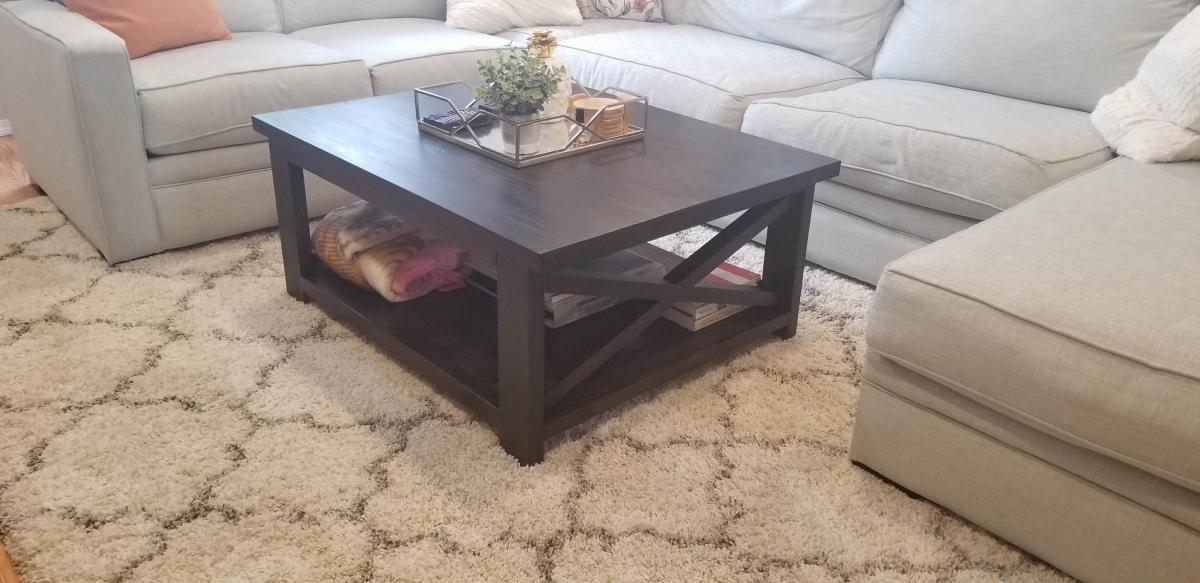
So I went off most of the specs on this table except I didn't want the brace on the bottom. Instead we braced it under the table with extra 2/4s. The longest part of this was the staining and poly due to it being cold as heck in Washington.

Sat, 04/21/2012 - 21:03
Hello,
I love you table! It is beautiful. I too would like to build this table without the brace at the bottom. could you maybe add some photos of how you did the bracing??
thanks!

In reply to details about the bracing under the table by Janelle Kay (not verified)
Fri, 04/27/2012 - 08:45
It's actually pretty easy, I took an extra 2x4 and braced it on the table top right against the table legs. It makes the table really sturdy.
Mon, 05/14/2012 - 12:32
I have been looking for a table that I like and that won't break my pocket. Haven't found one so I want to build this. Can you tell be the measurements of the wood pieces that I need. Thank you I would really appreciate it.
Fri, 05/18/2012 - 08:41
All the measurements I used are on the link below. This is a pretty easy build as long as you have the right tools. The only difference with my table I didn't use the leg braces like the plan states, I braced my legs right under the table so you wouldn't be able see the braces.
http://ana-white.com/2012/02/plans/farmhouse-dining-table
Mike

this is the little play kitchen I made for my kids for Christmas (they are 3 years old and almost 2 years old). It was my first project.
My husband has been interested in woodworking for a while and owns some tools. We watched a lot of the new yankee workshop videos together. I received the homebuilt home last Christmas and didn't get a chance to use it until this November!
I was so happy to read how Ana White and other wood workers did some projects only a couple hours a day after the kids went to bed.
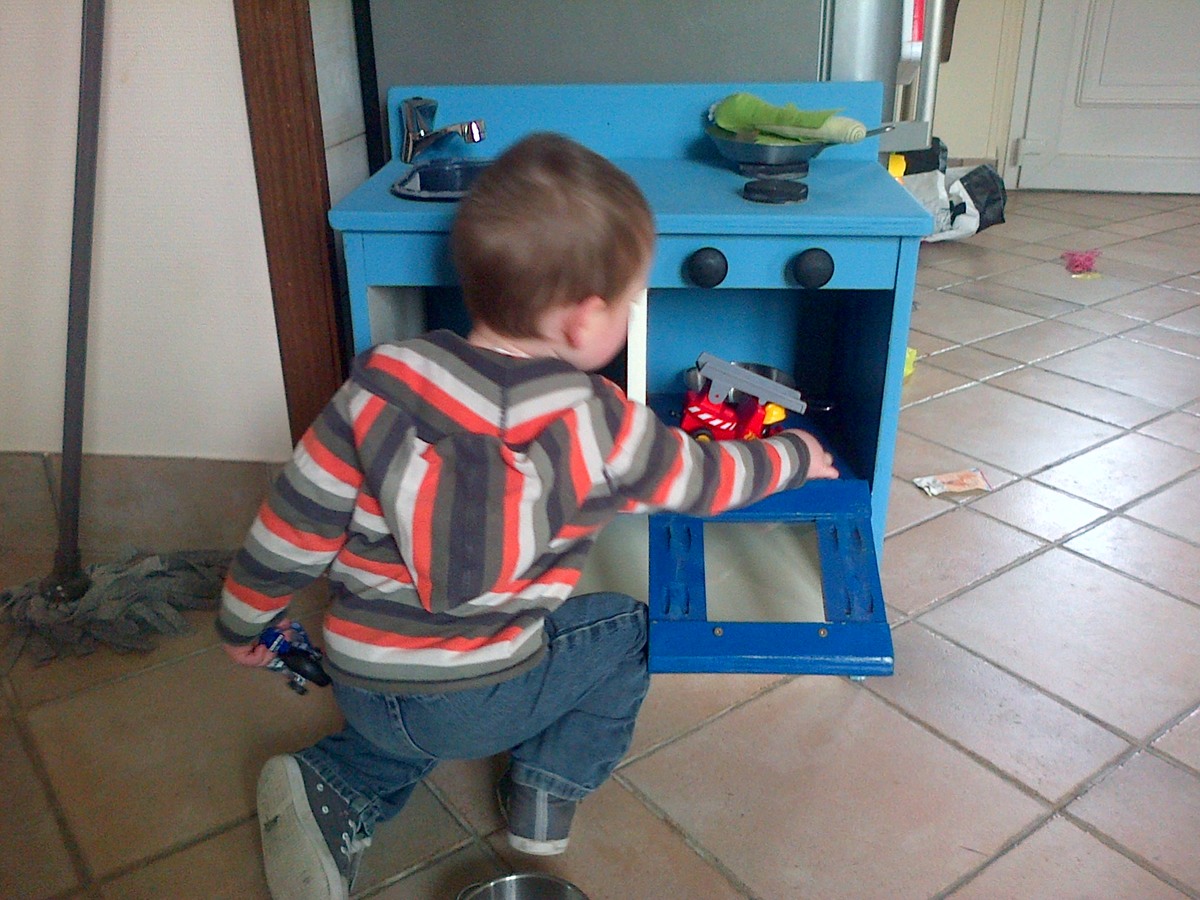
It was a little bit challenging at time and I made many beginners' errors. I also adapted the plan to fit the 2 shelves I had as leftovers from my husband's last project. (We live in France and DIY material is relatively expensive). I also wanted them to have both the oven and the sink but we didn't have enough space to put 2 kitchen modules so i added a divider in the middle of the top shelf and attached it with cleats to the countertop.
I could not find any bowl with a lip to do the sink so I used an ice cream container! and the tap is a real one because it was somehow cheaper than getting a garden tap or a fake/toy one!
I took me about 3 weeks to complete because I could go only a couple hours at a time, sometimes less after the kids were in bed, and being pregnant makes me seriously slower in decision making and acting!
I kept it as a surprise for both my kids and my husband on christmas morning. I'm really happy with the result. Like the book said, it is not perfect and I can see many little mishaps, but it's my first project and I cherish it.


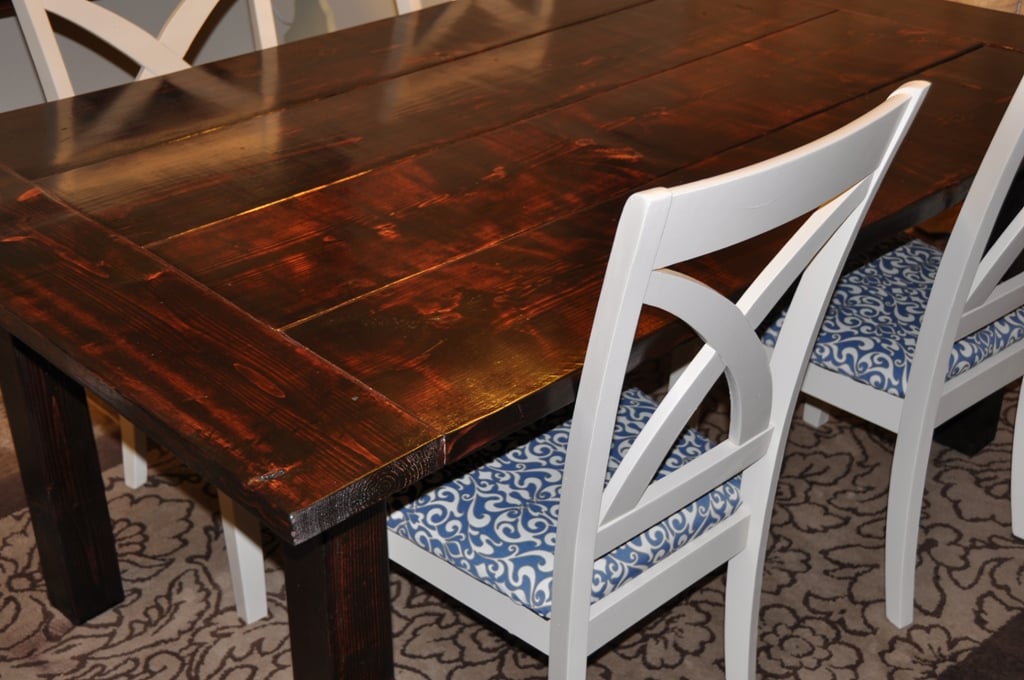
I stained the table and benches dark to match our cabinets.
I created matching benches based loosely on the table plans. The benches are made of 2x6 for the top and breadboards. I left out the stretcher on the benches as the 2x4 and 4x4 frame structure was more than sufficient.
The table was finished with a paste wax rather than poly. This gives it a smooth, water resistant finish without being overly glossy. The goal with this style, after all, is to make it look somewhat old. The wax does a great job.
Used construction pine 2x4s. I was lucky to be able to use a family members planer and table saw to cut my pieces.
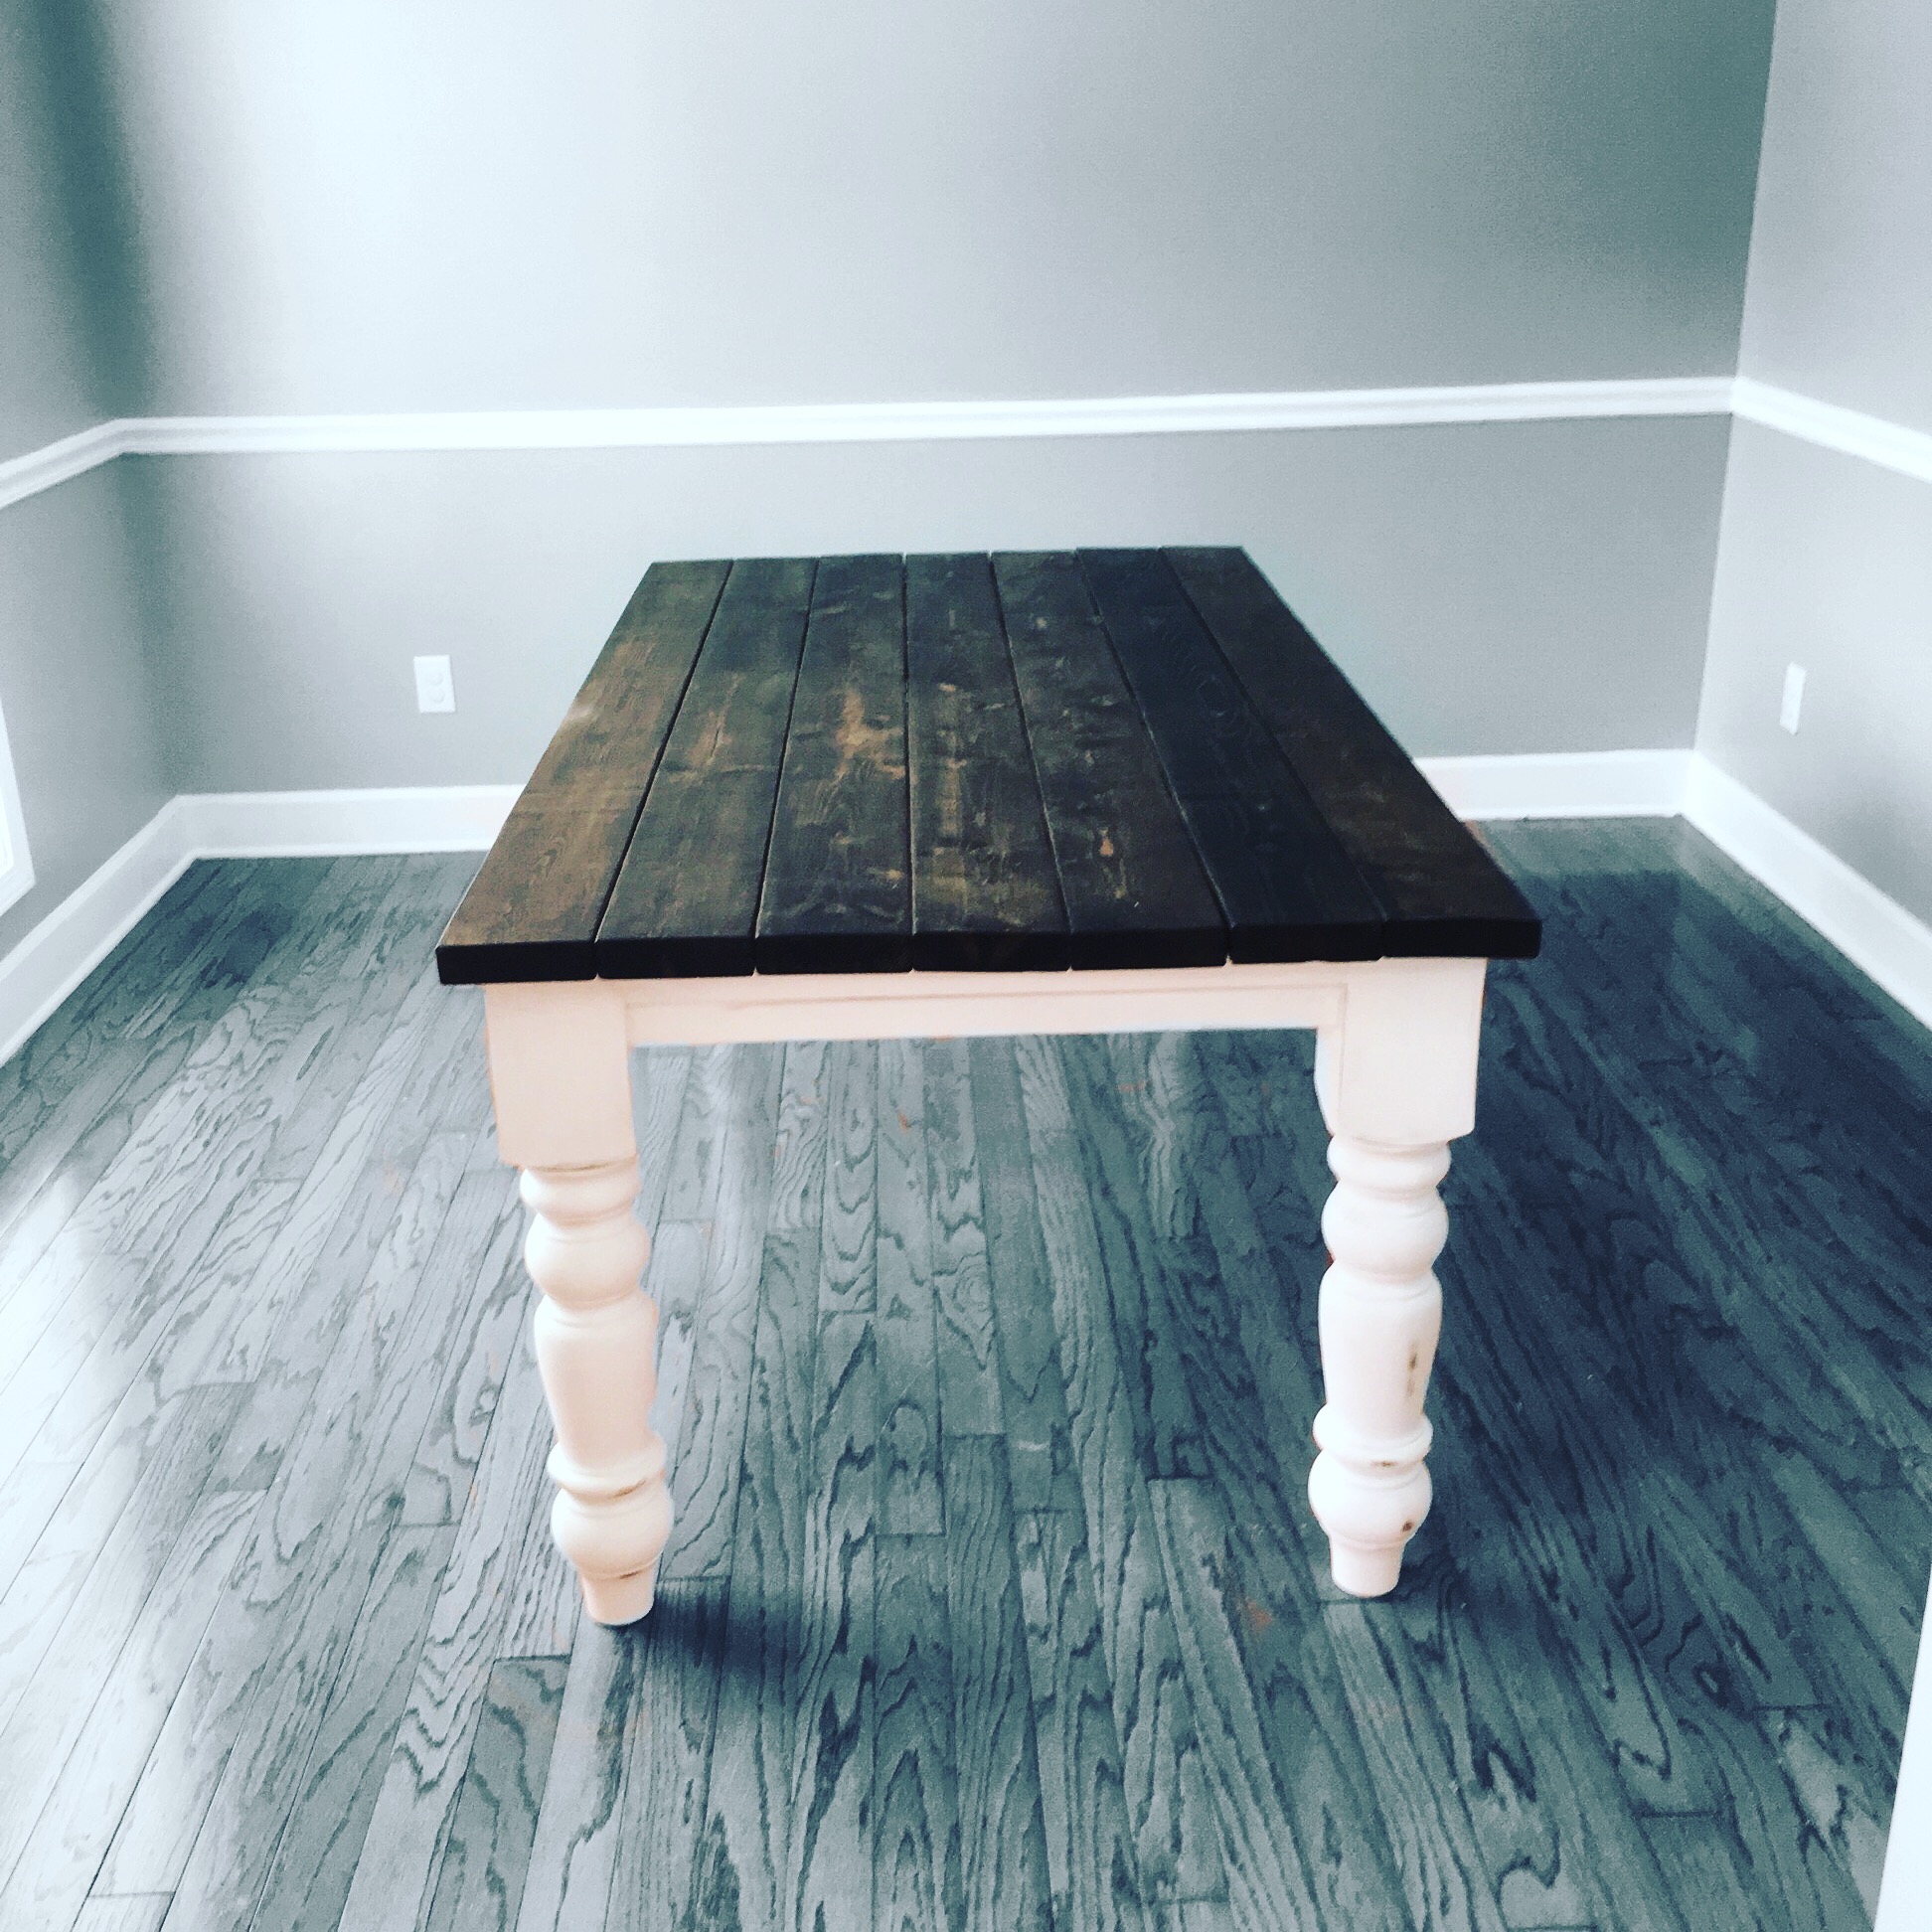
Dual tone: painted frame with stained slats! Final finish with spar varnish and epoxy packed feet. First woodworking project, thanks Ana for the plans! You rock!
Overall took a long time due to the sanding and multiple coats of paint, stain and varnish. The plans were easy to follow and cuts were easy to make. A belt sander really helped with cleaning up some of the messy 2x4s! Looking forward to my next project!
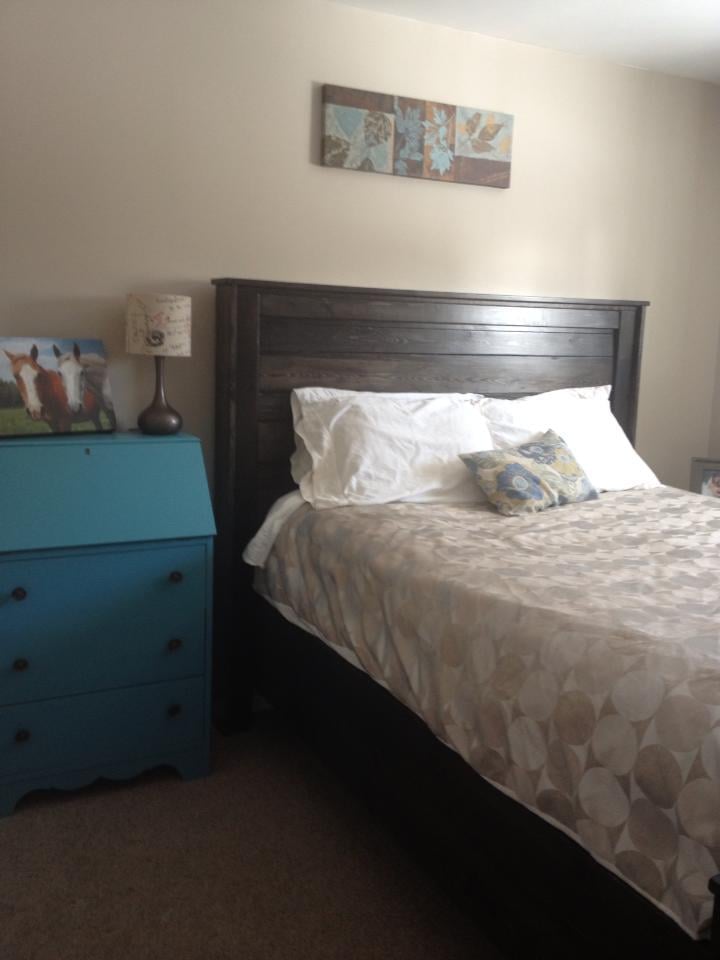
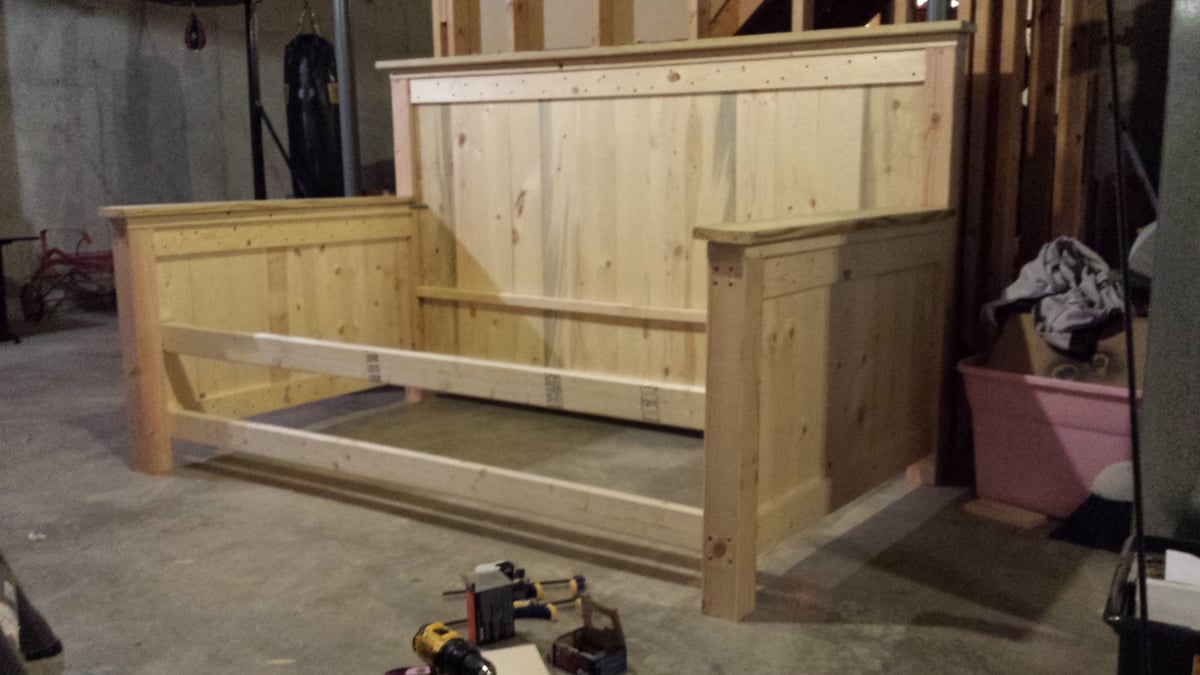
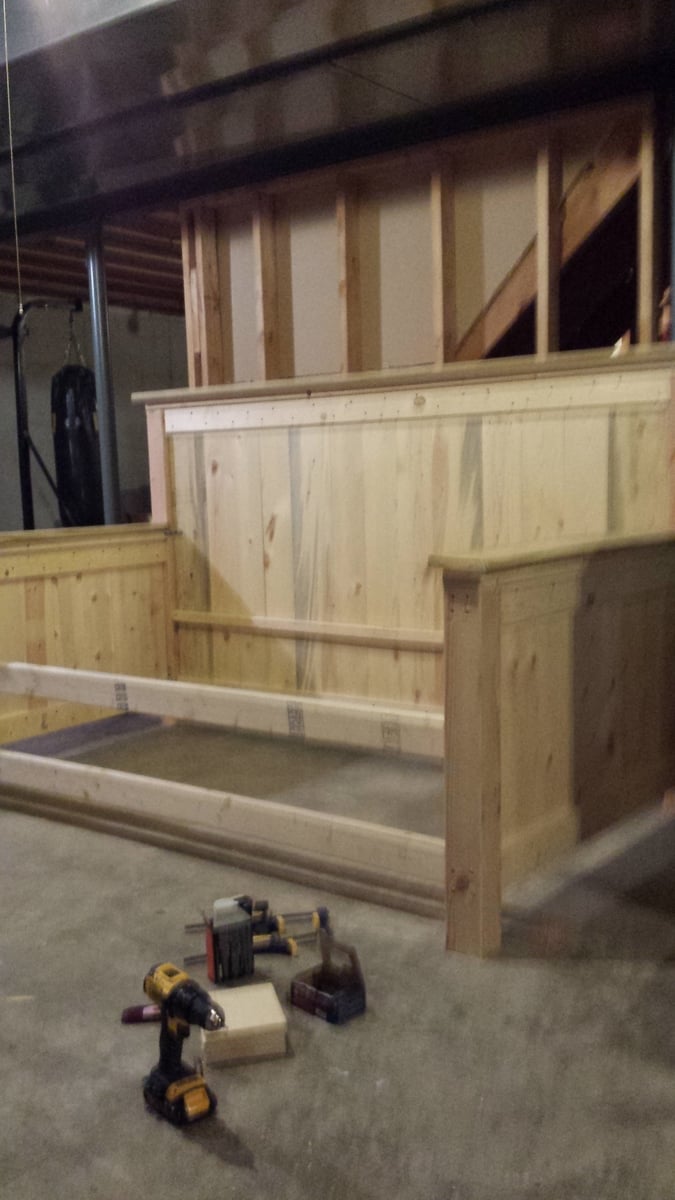
I "doctored" the plans for the reclaimed wood look headboard to using 4x4's for legs and created a footboard of the same style. I then make the siderails for my bedframe by laminating a 2x8 to a 2x6 to completely encase the box frame. I was able to put my boxframe inside by screwing and gluing 2x2's along the inside of the frame. This is a STURDY bed frame!

Mon, 02/06/2017 - 10:07
How did you go about doctoring the plans to use 4x4's instead of 1x3's and 1x2's?