Community Brag Posts

Picnic table
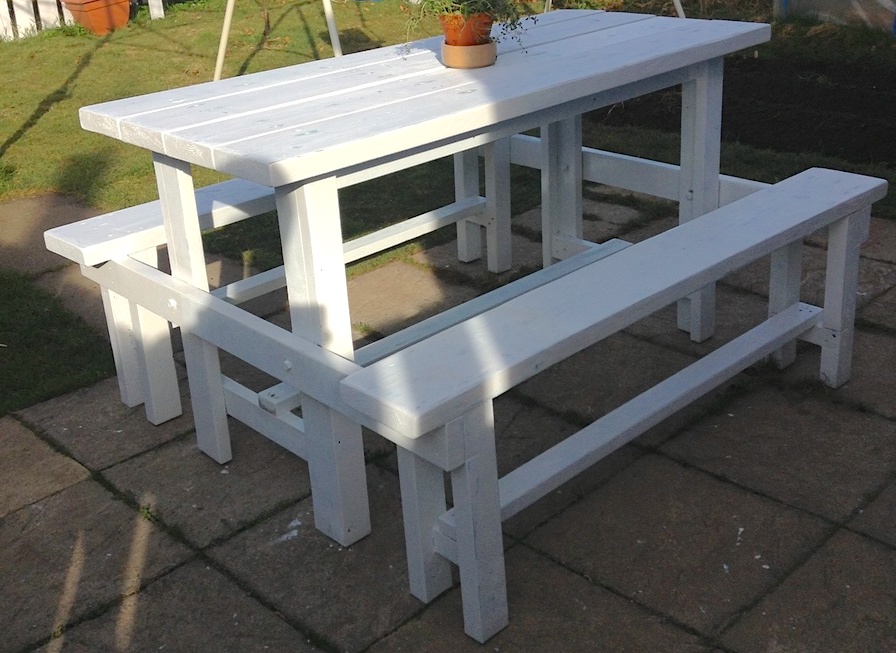
Our old picnic table was falling apart so I made a new one with it
Built from Plan(s)
Estimated Time Investment
Weekend Project (10-20 Hours)
Recommended Skill Level
Intermediate
Assembly Workstation with Storage and lockable wheels

Assembly Workstation with small drawers for tools and hardware supplies and large drawers for scrap wood storage.
Has lockable wheels so can be stored against wall when not in use and pulled out to allow easy access to move around the piece I am working on.
Drawers have 3/4 inch ply bottoms for strength and the big ones have full extension drawers.
Top is 66 inches wide by 34 inches deep to give plenty of work surface.
Total cost was about $300.
Estimated Cost
Total cost was about $300.
Estimated Time Investment
Week Long Project (20 Hours or More)
Finish Used
Minwax Classic Gray (2 costs). Varathane Satin Poly (3 coats)
Recommended Skill Level
Beginner
Bench
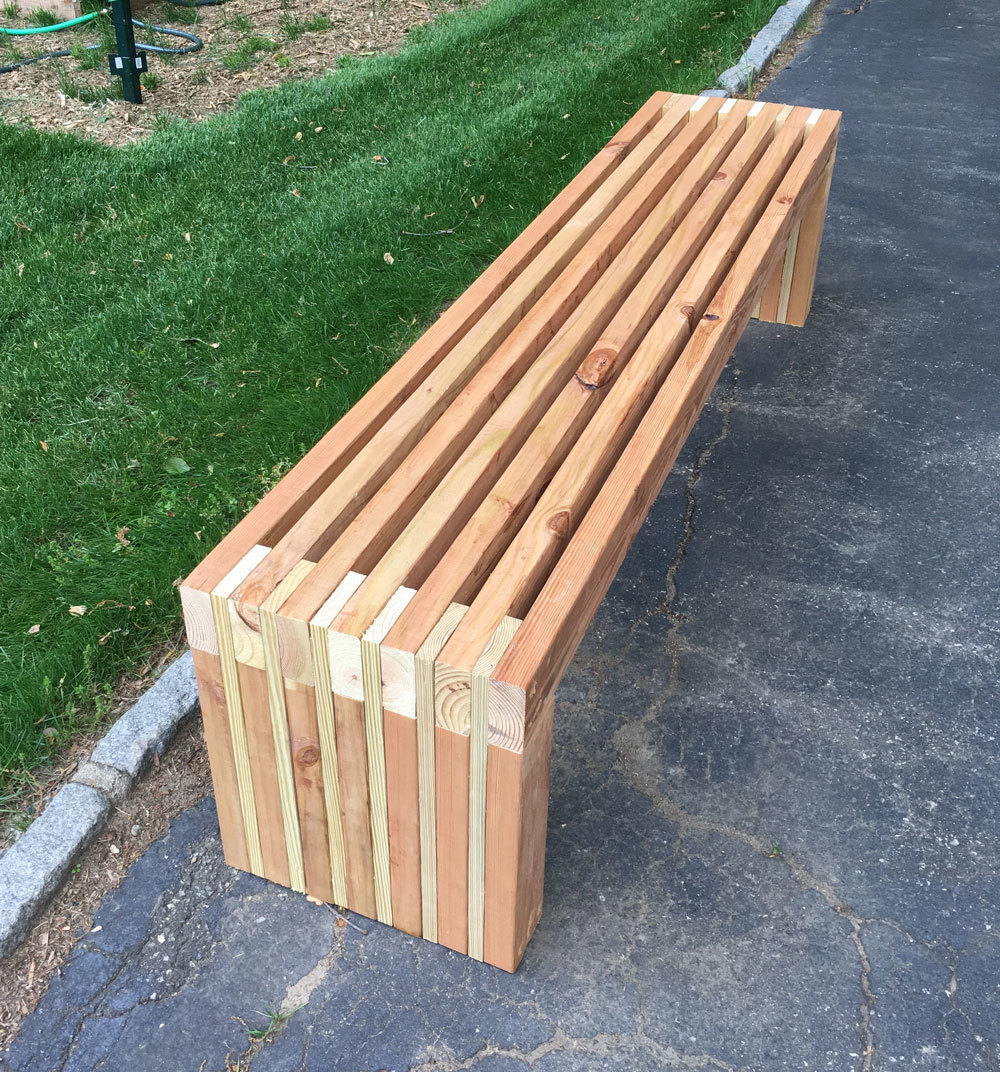
Great bench
Built from Plan(s)
Estimated Cost
$100
Estimated Time Investment
Day Project (6-9 Hours)
Recommended Skill Level
Beginner
Modified Toy / TV Armoire
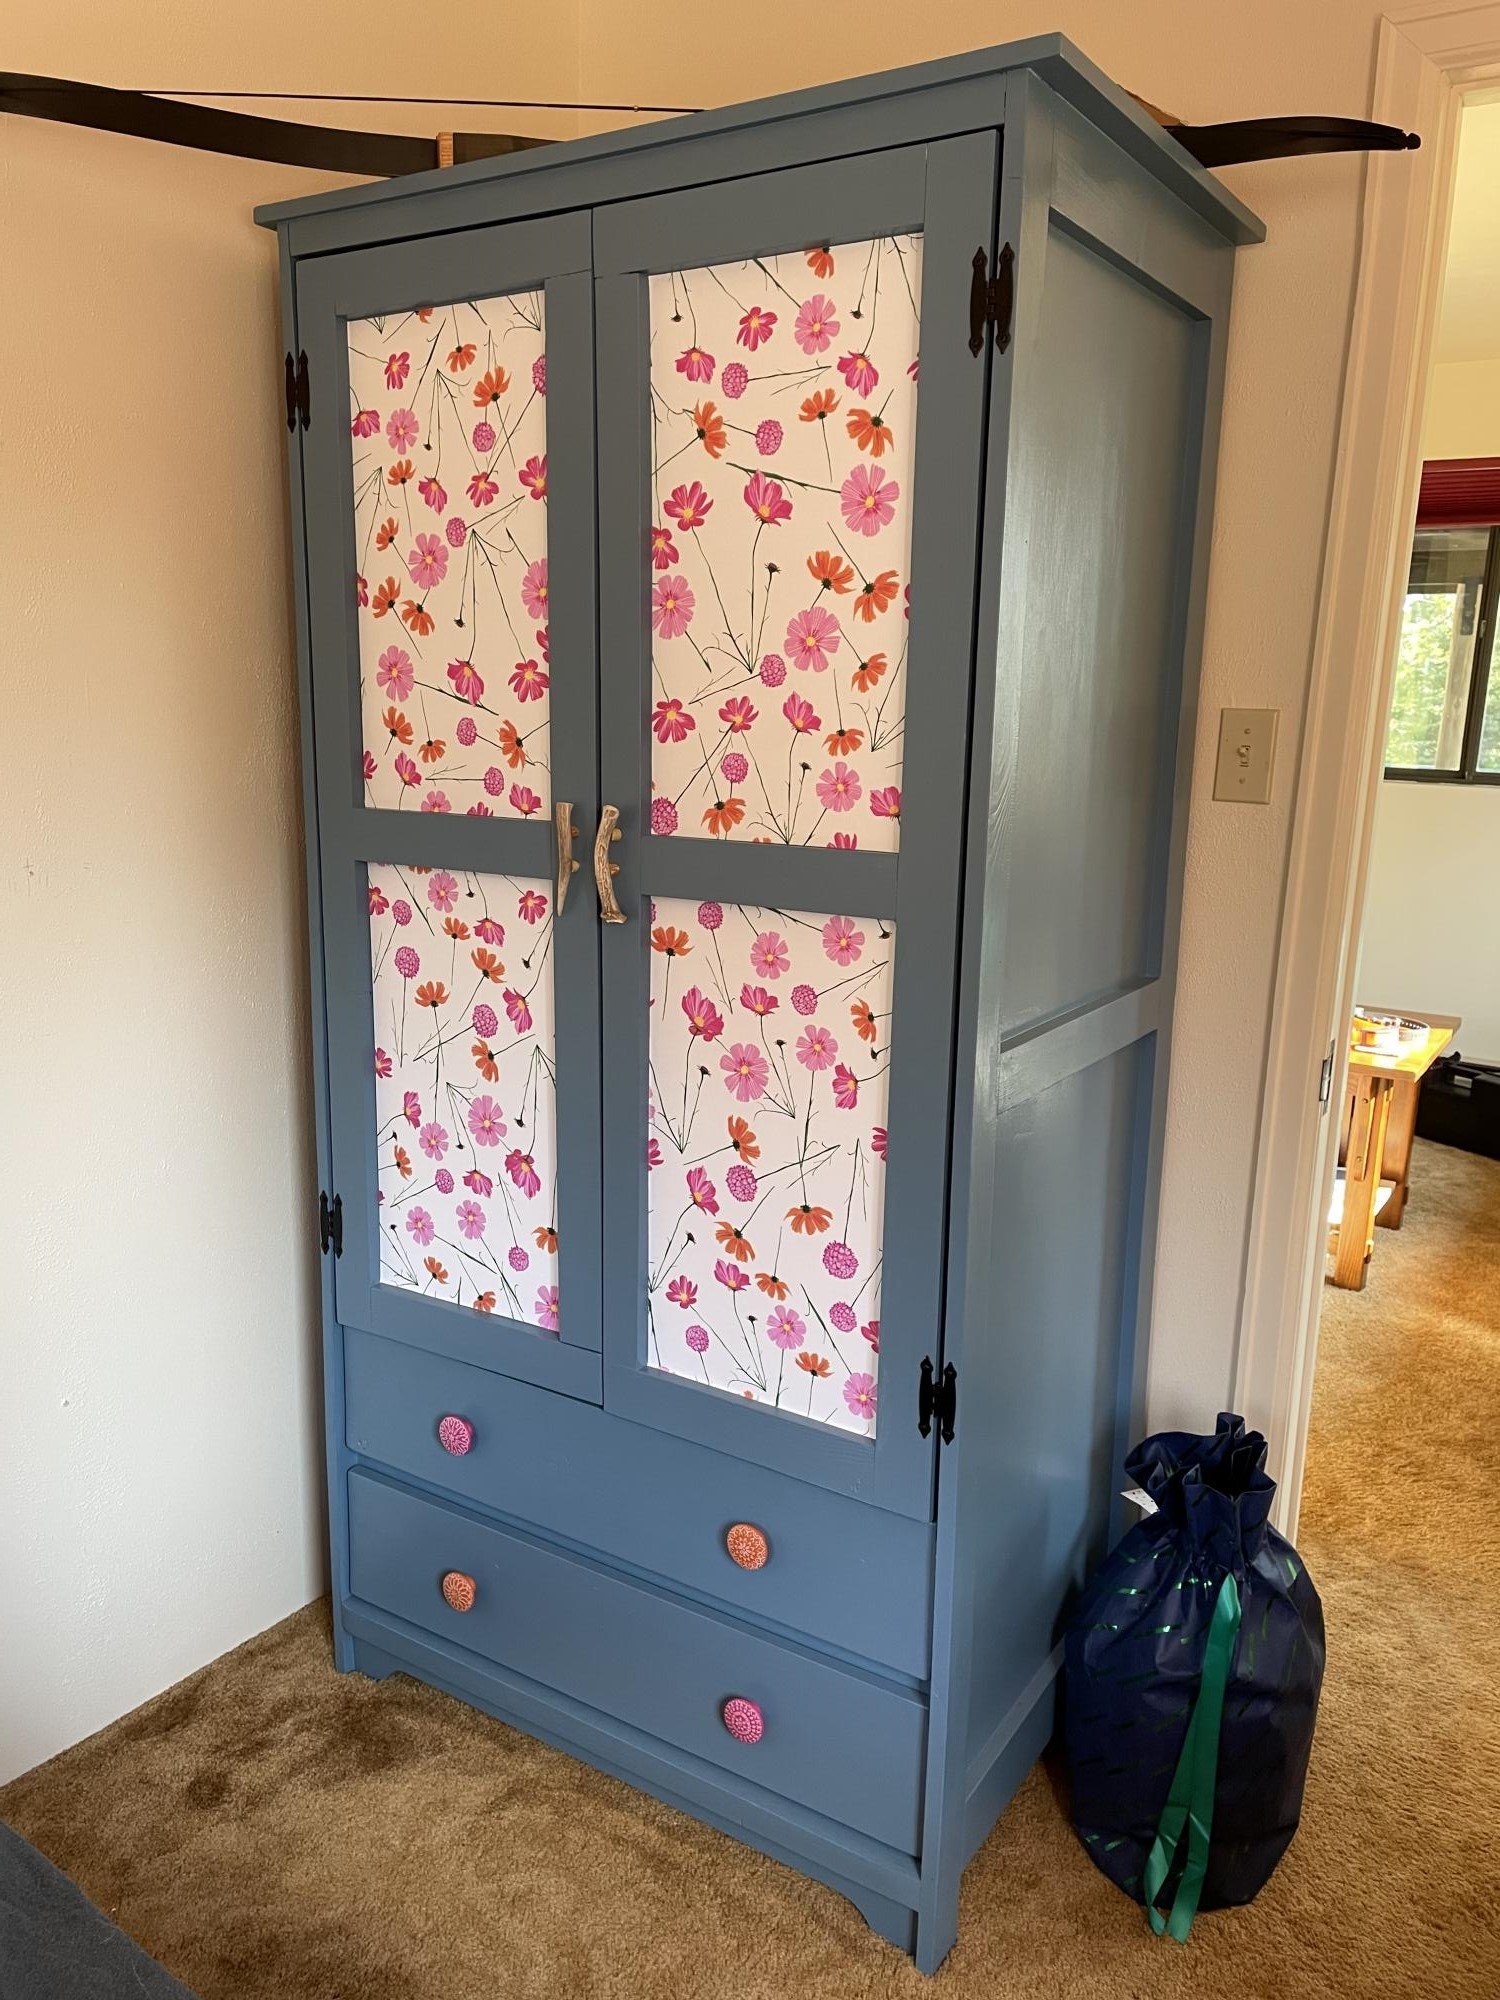
Used Ana’s Toy/TV armoire plans, tweaked the dimensions to make it a bit taller. Added drawers and a hanger rod inside. Found deer antler used for handles. Color and cosmo wallpaper thanks to my wife. Perfect for a quirky old cabin in Colorado. My first attempt at furniture. Thanks!
Built from Plan(s)
Estimated Cost
Under $200
Estimated Time Investment
Weekend Project (10-20 Hours)
Finish Used
Paint and stick on wallpaper
Recommended Skill Level
Intermediate
Comments
Fri, 07/23/2021 - 13:46
First attempt success!
It's too cute and functional too, thanks for sharing!
Fri, 07/23/2021 - 13:47
First attempt success!
It's too cute and functional too, thanks for sharing!
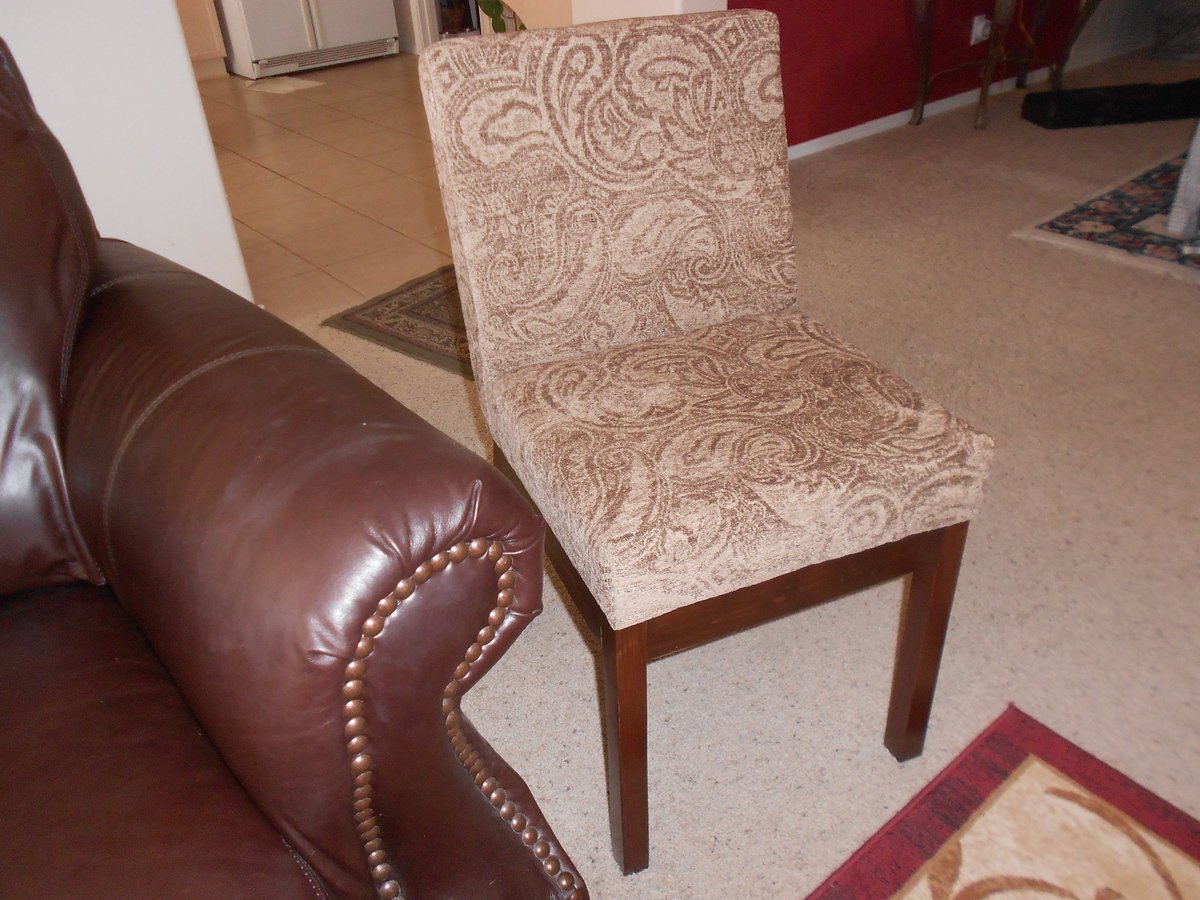
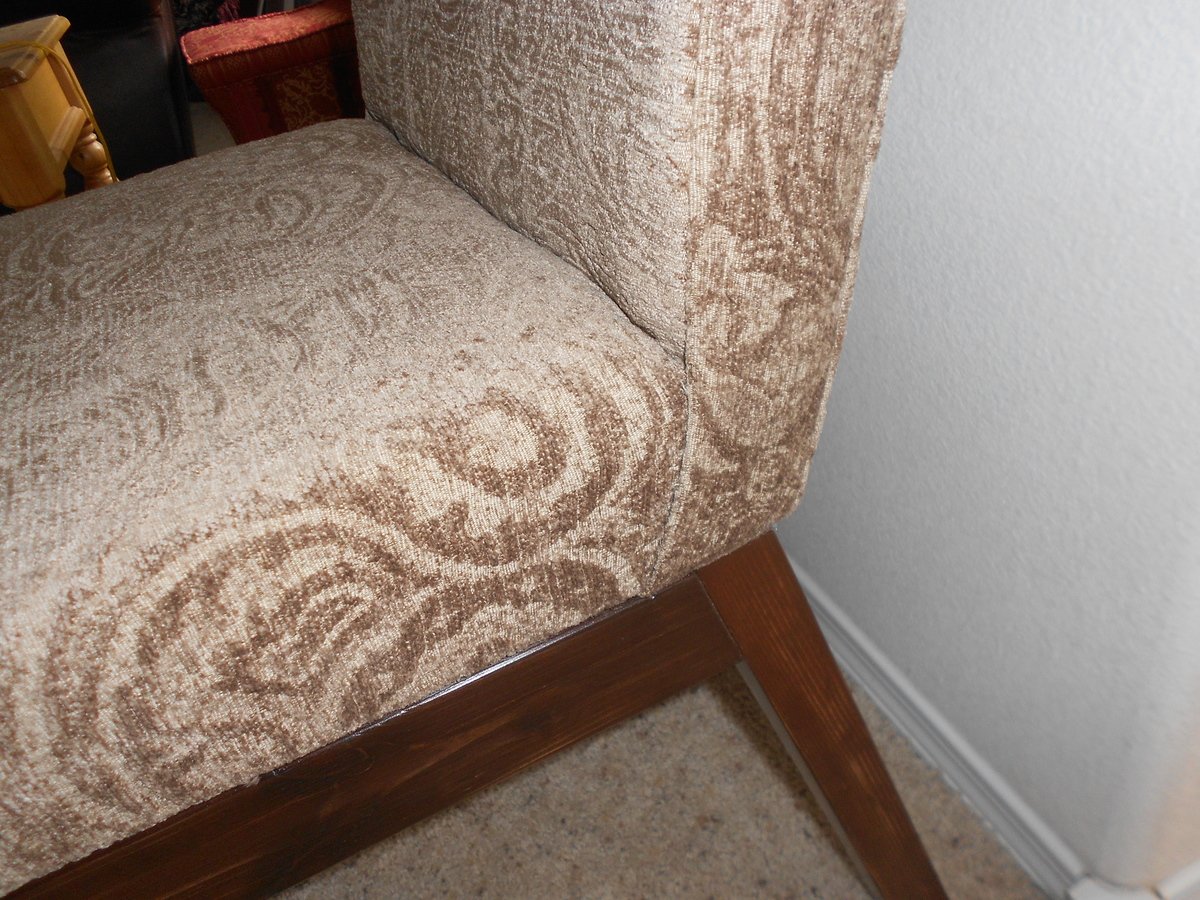
Parson Chair
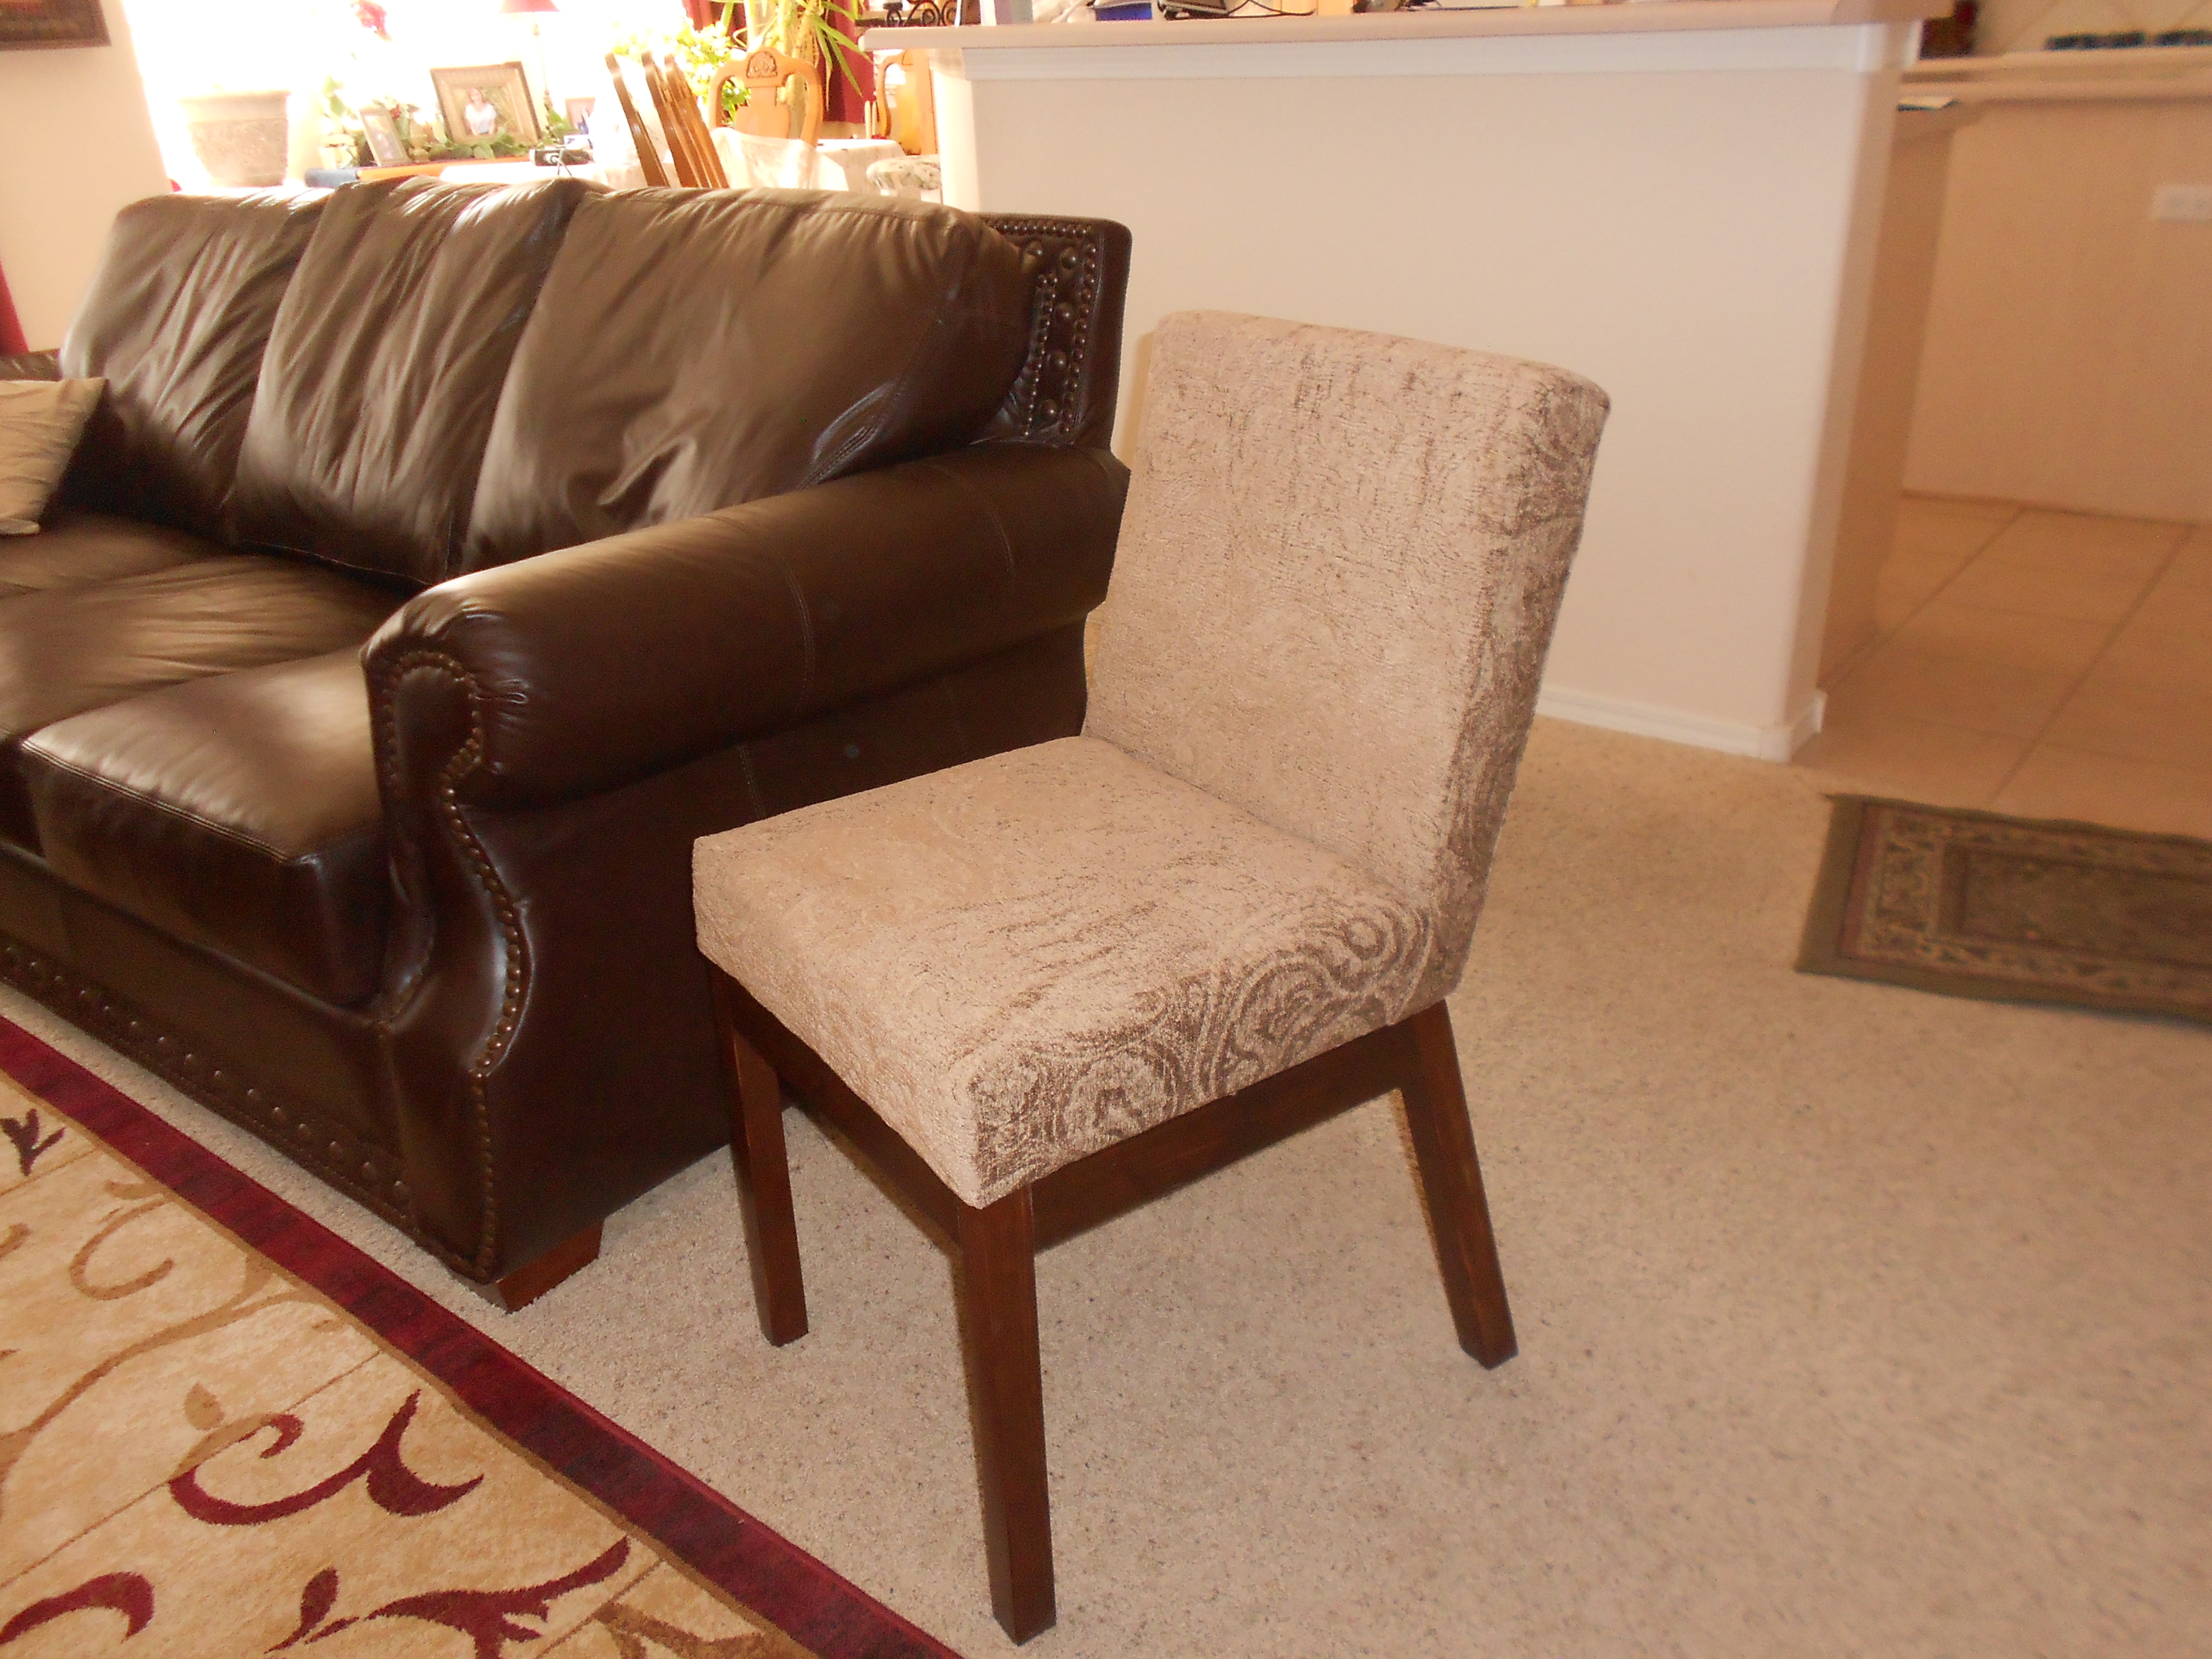
This was my first time making a chair. It was easier than I thought it would be. The instructions were very easy to follow.
Built from Plan(s)
Recommended Skill Level
Beginner
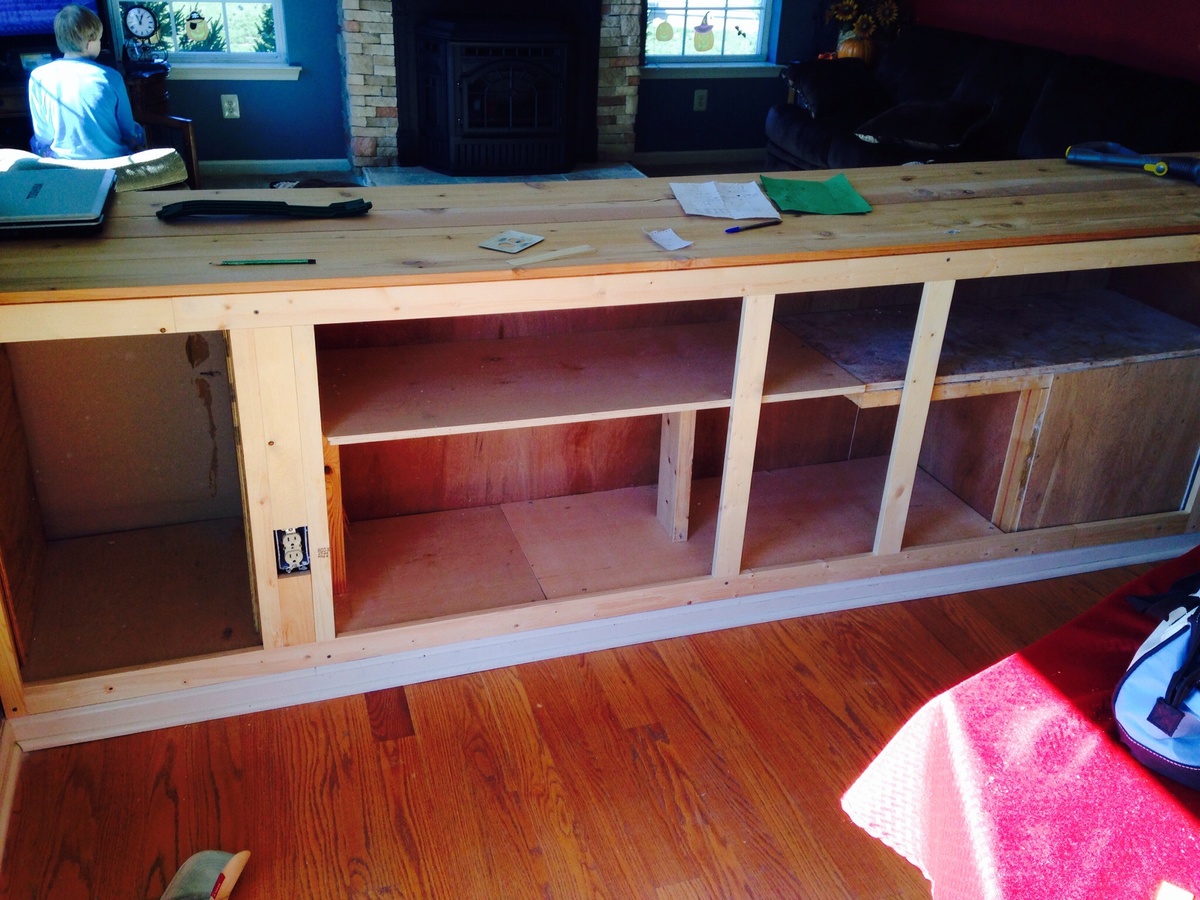
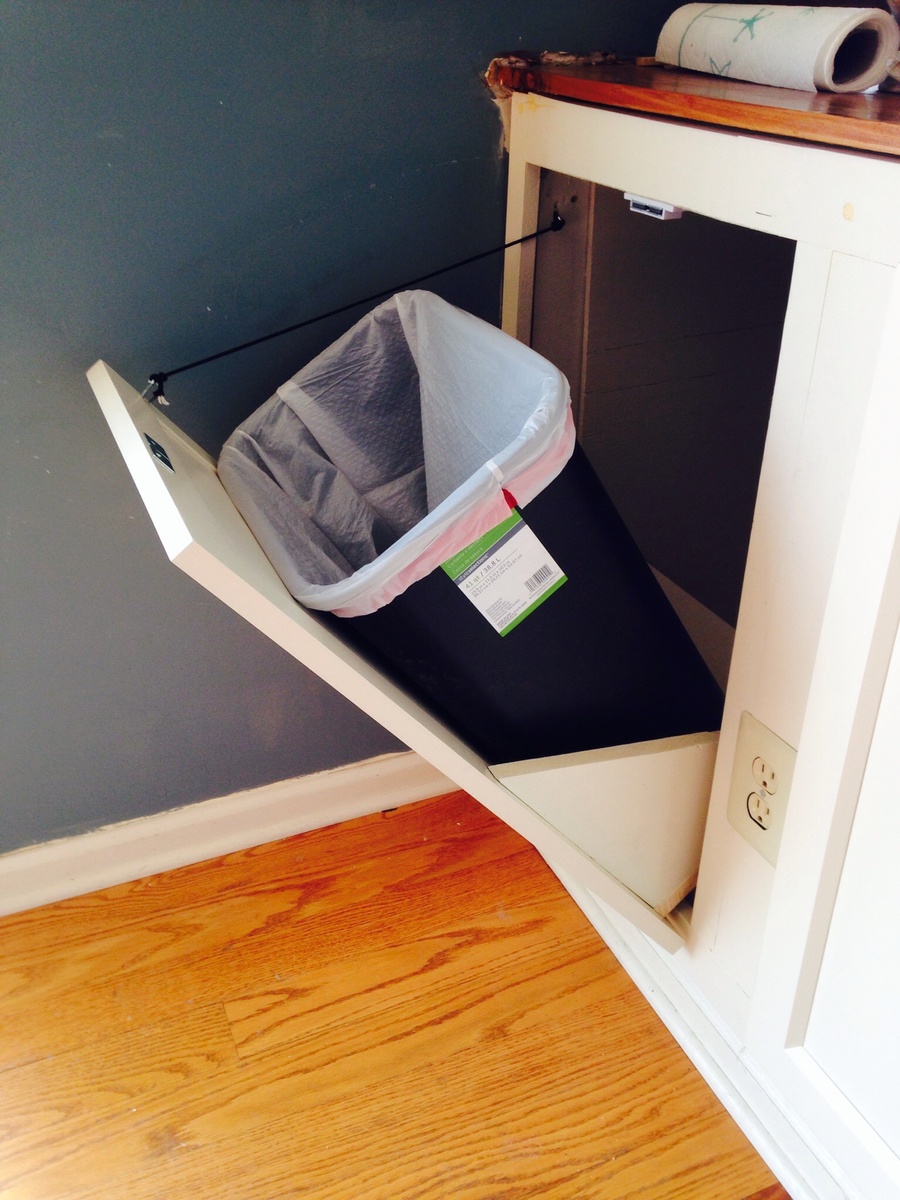
New kitchen storage including trash can, made from hollow half wall

My wife and I made loads of additional storage space by using a hollow half wall
Built from Plan(s)
Estimated Cost
$400
Estimated Time Investment
Week Long Project (20 Hours or More)
Finish Used
Sherwin Williams white satin paint
Recommended Skill Level
Intermediate
Comments

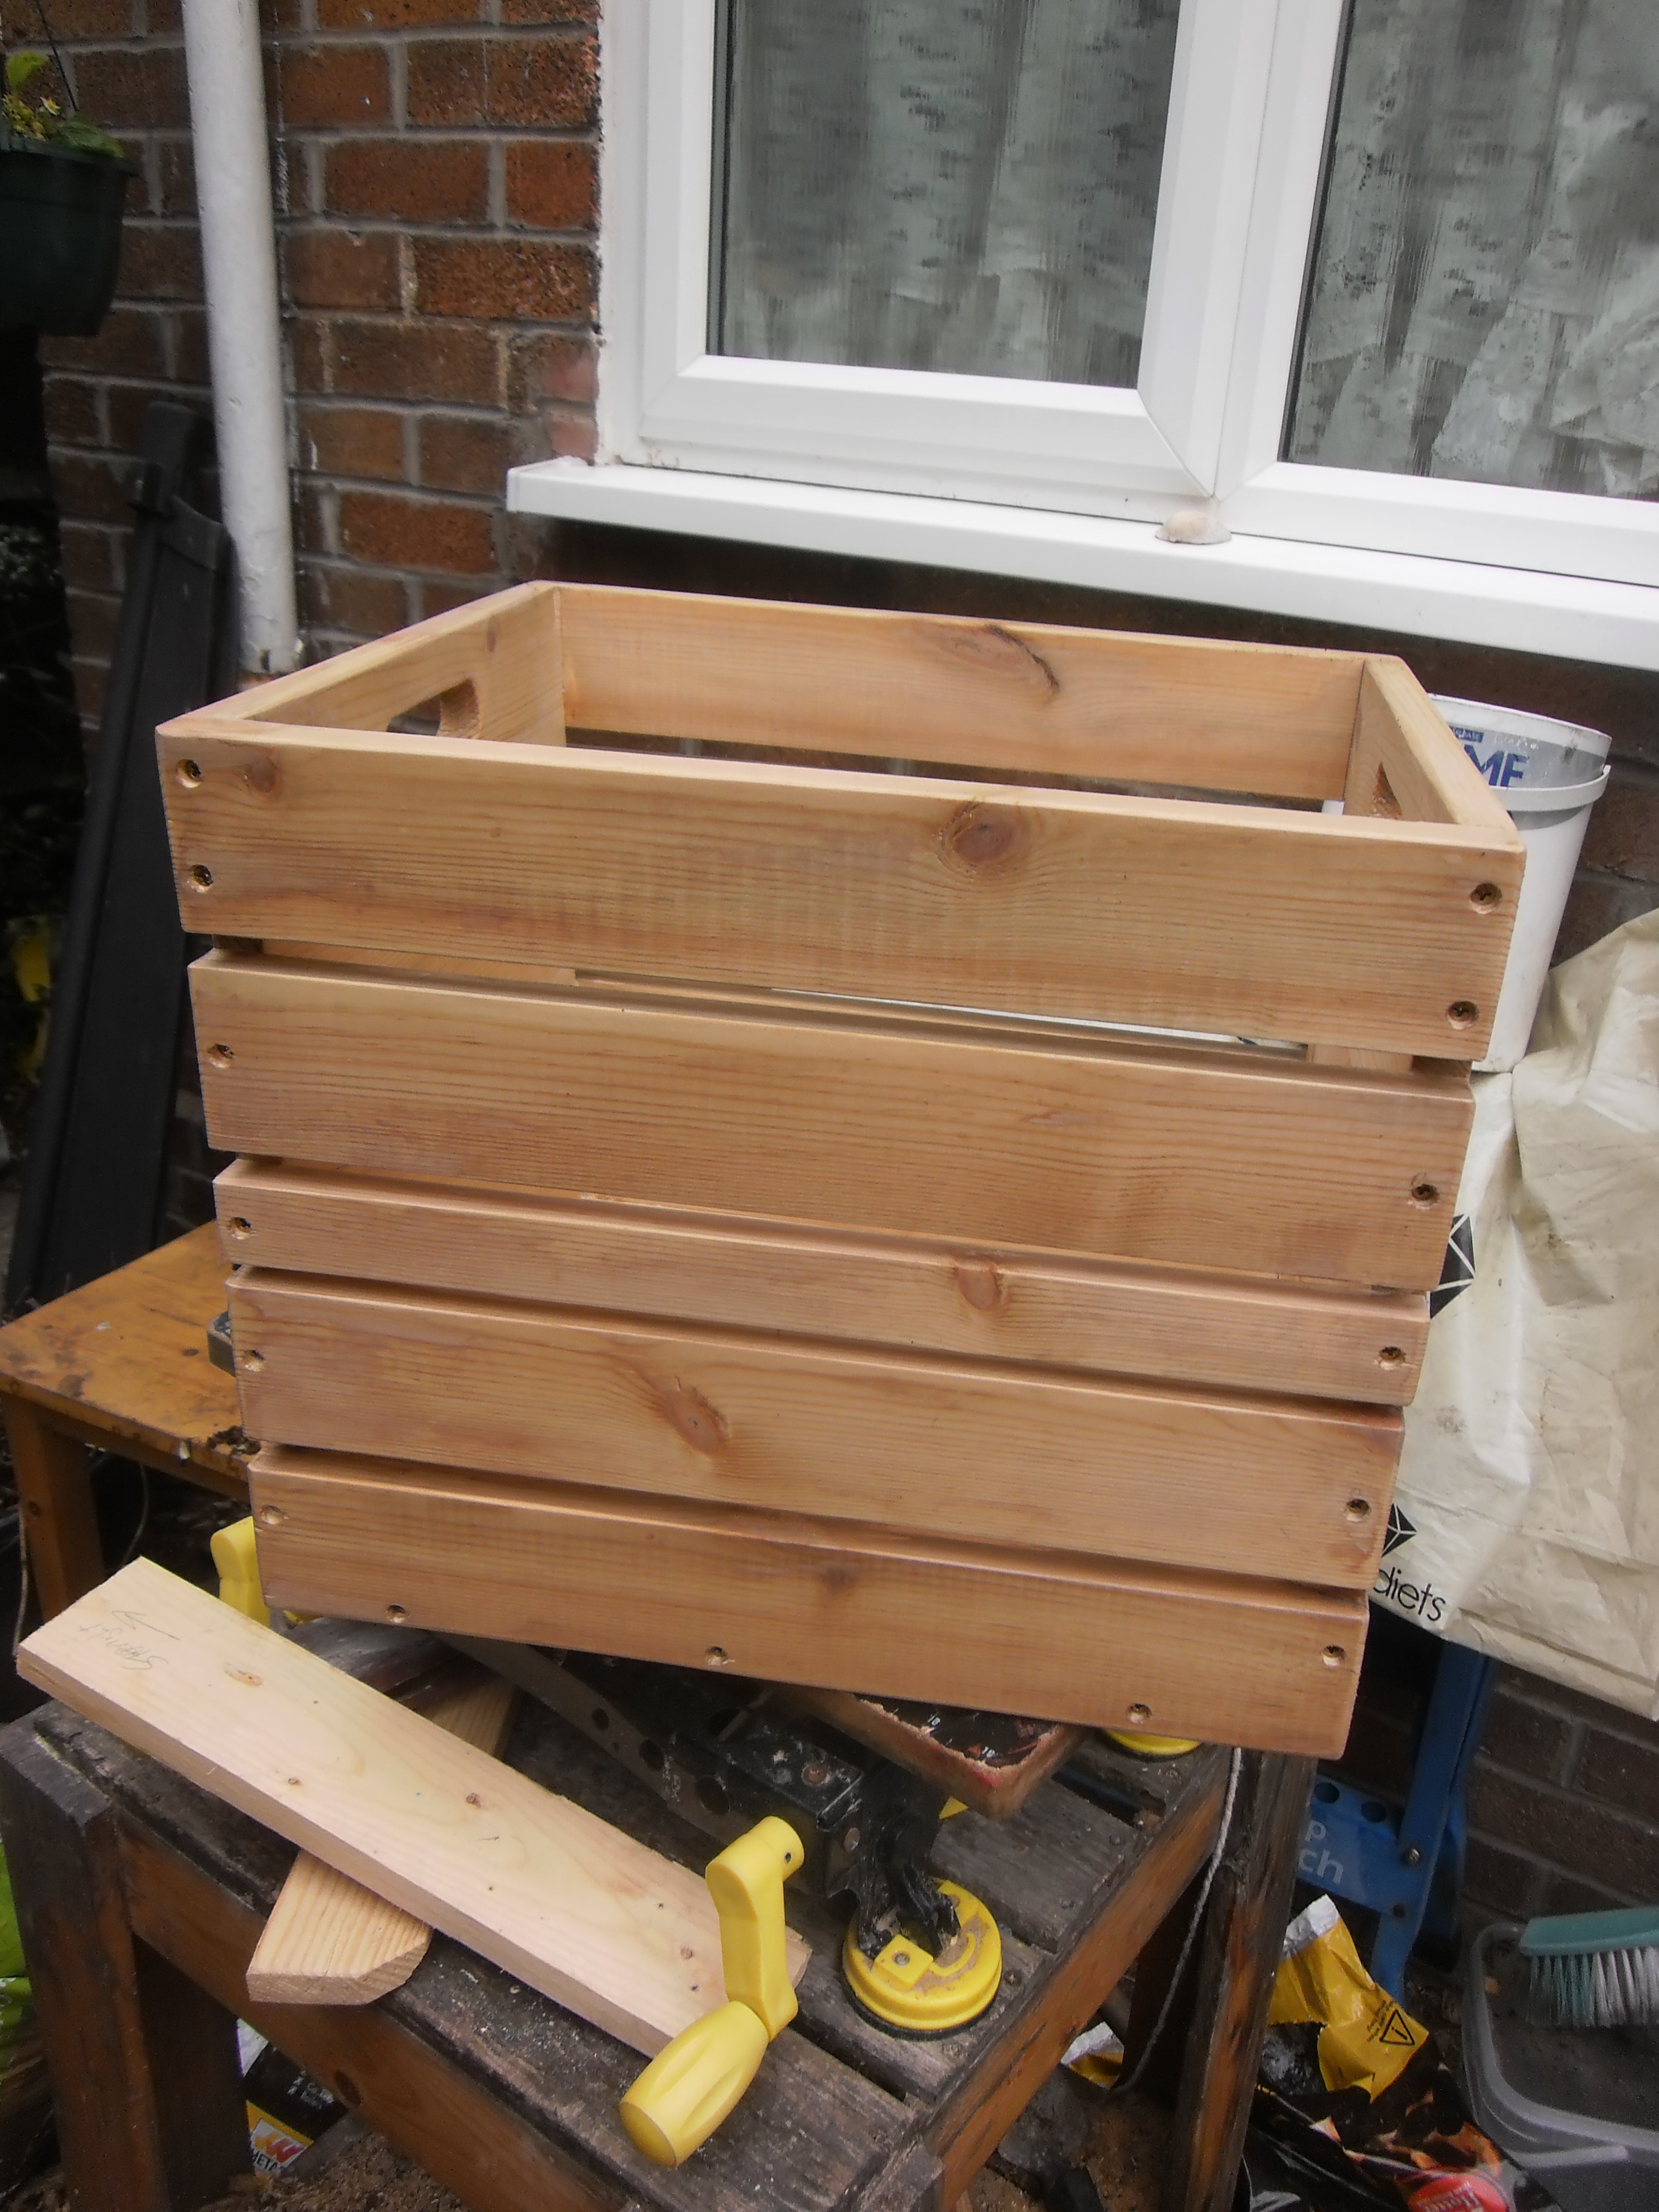
wood crate
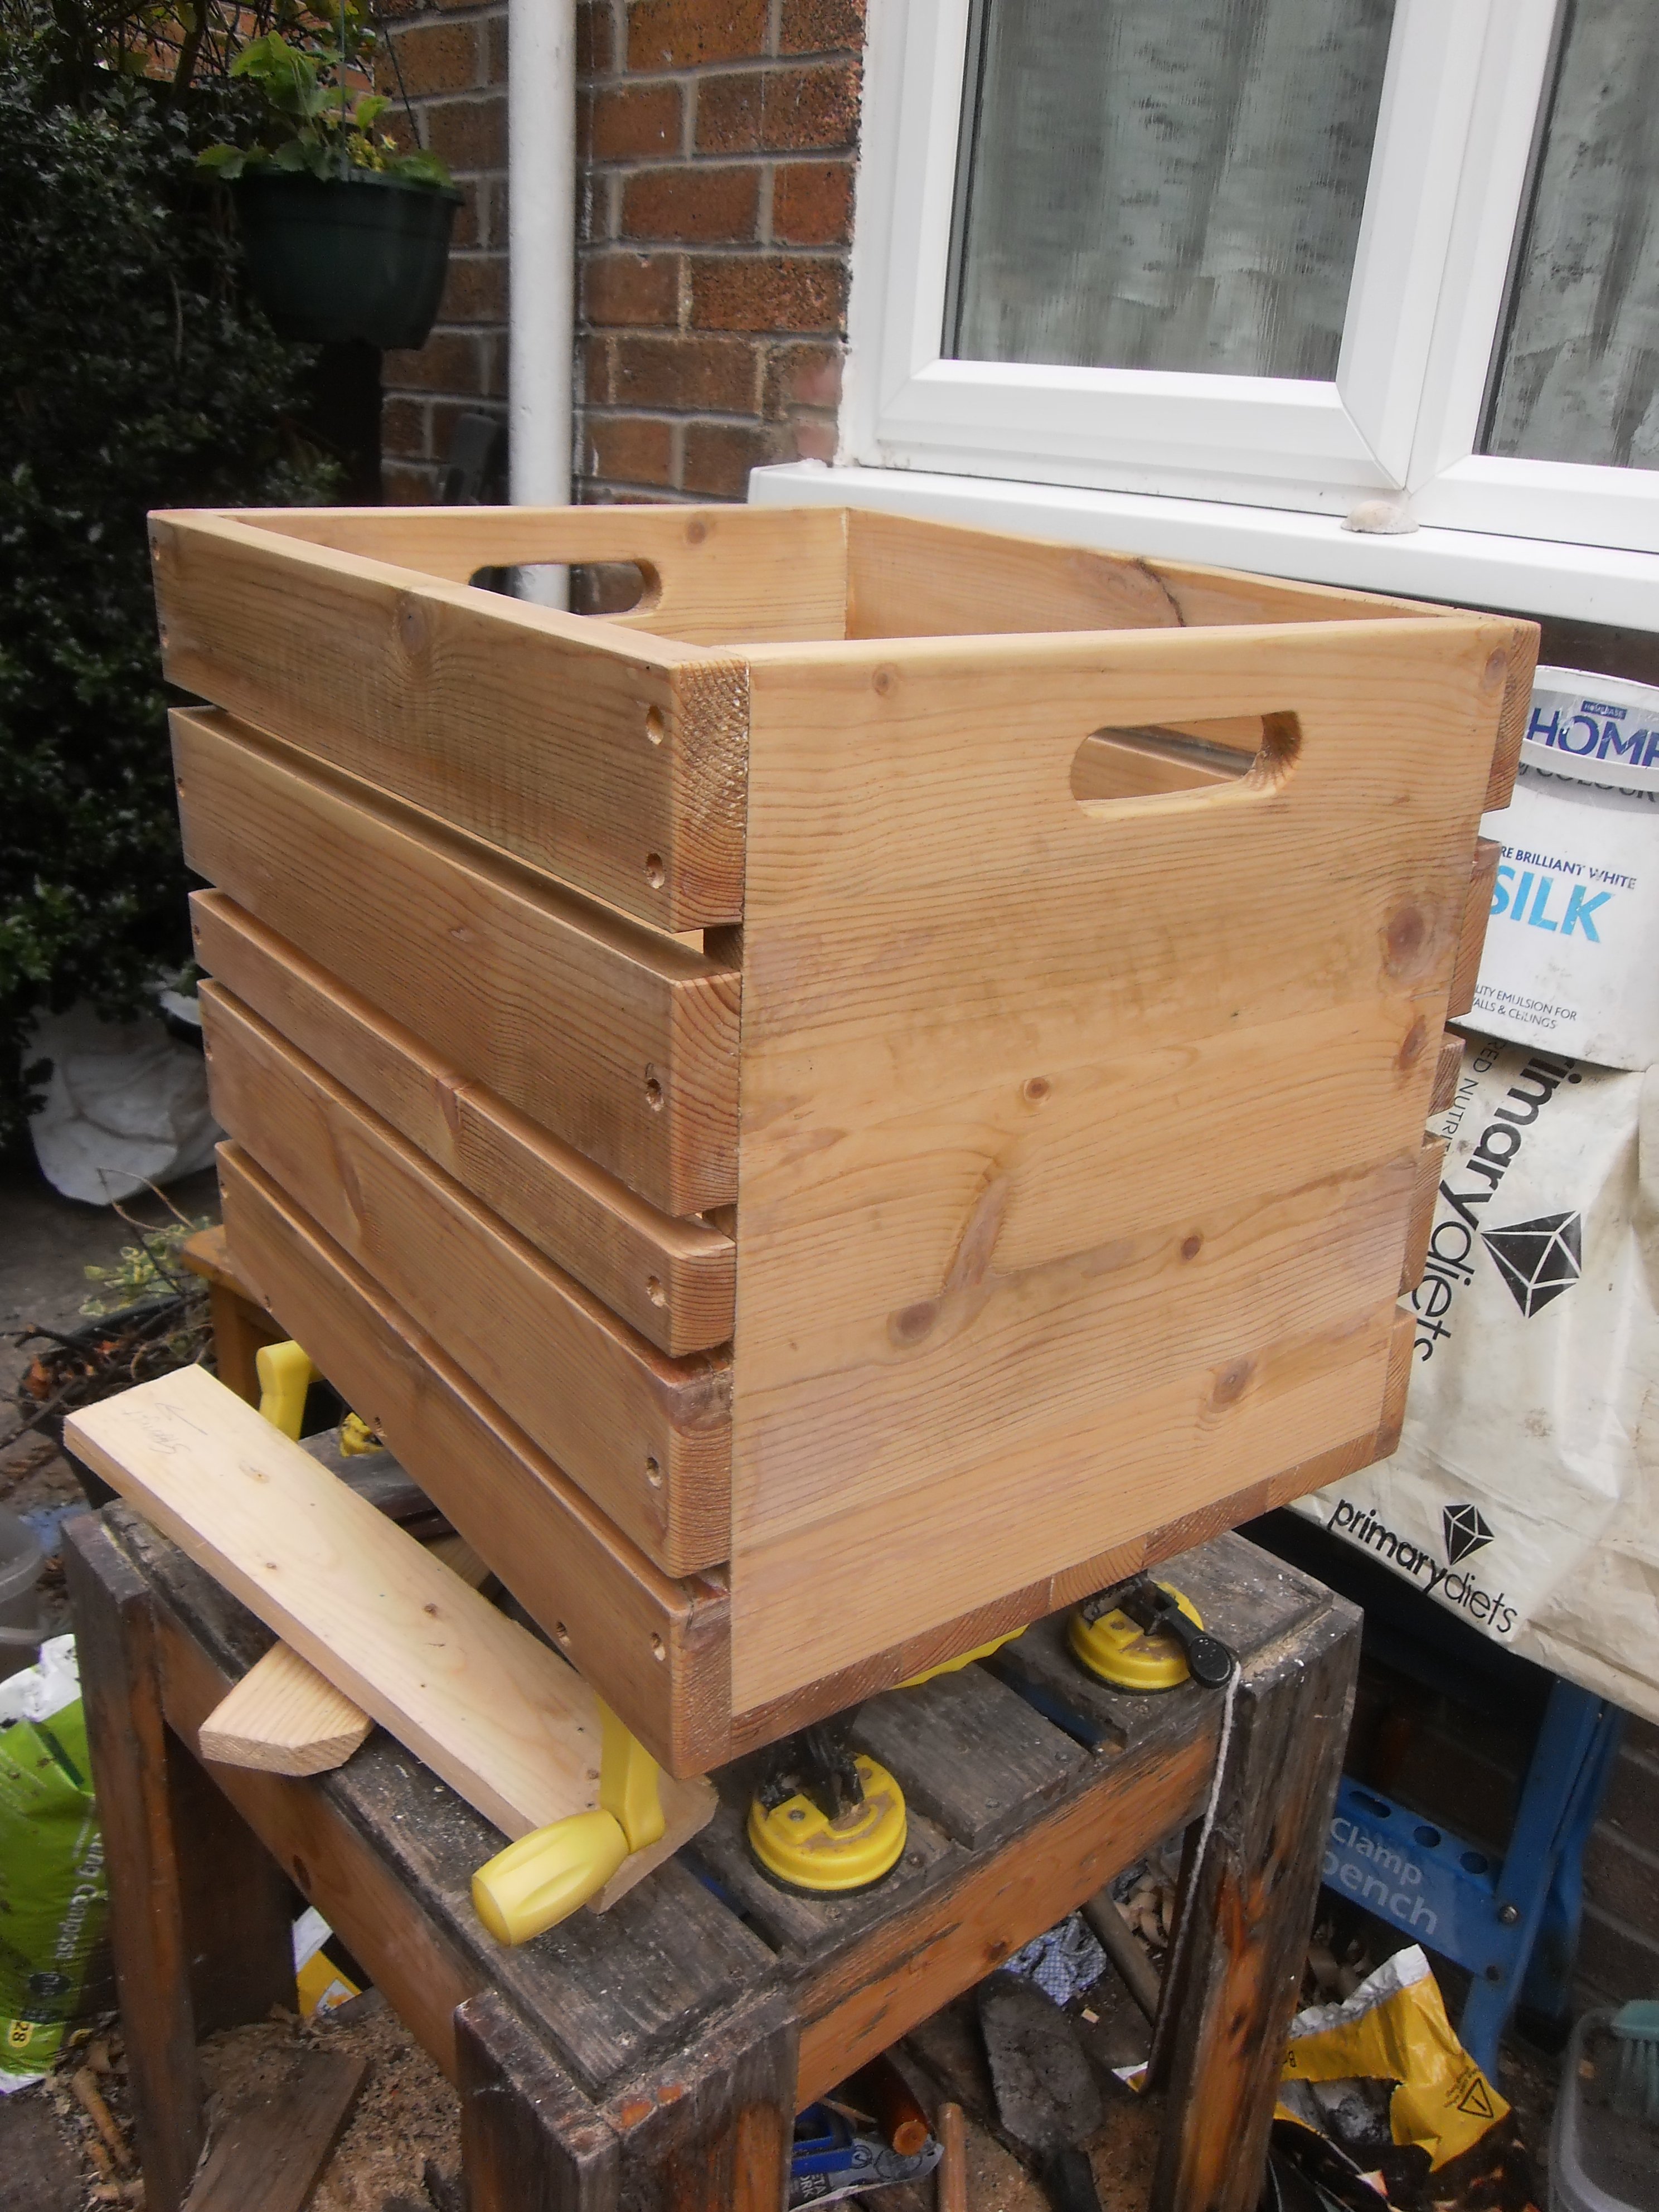
Hi Ana, found your page very informtive and very easy plans to follow. Made the crate to keep my vinly records in and was well pleased with the en result. Think I'll add some castor wheels to it once I've finished painting the crate,
Built from Plan(s)
Estimated Cost
£18
Estimated Time Investment
Weekend Project (10-20 Hours)
Finish Used
home made stain Vinegar and steel wool
Recommended Skill Level
Intermediate
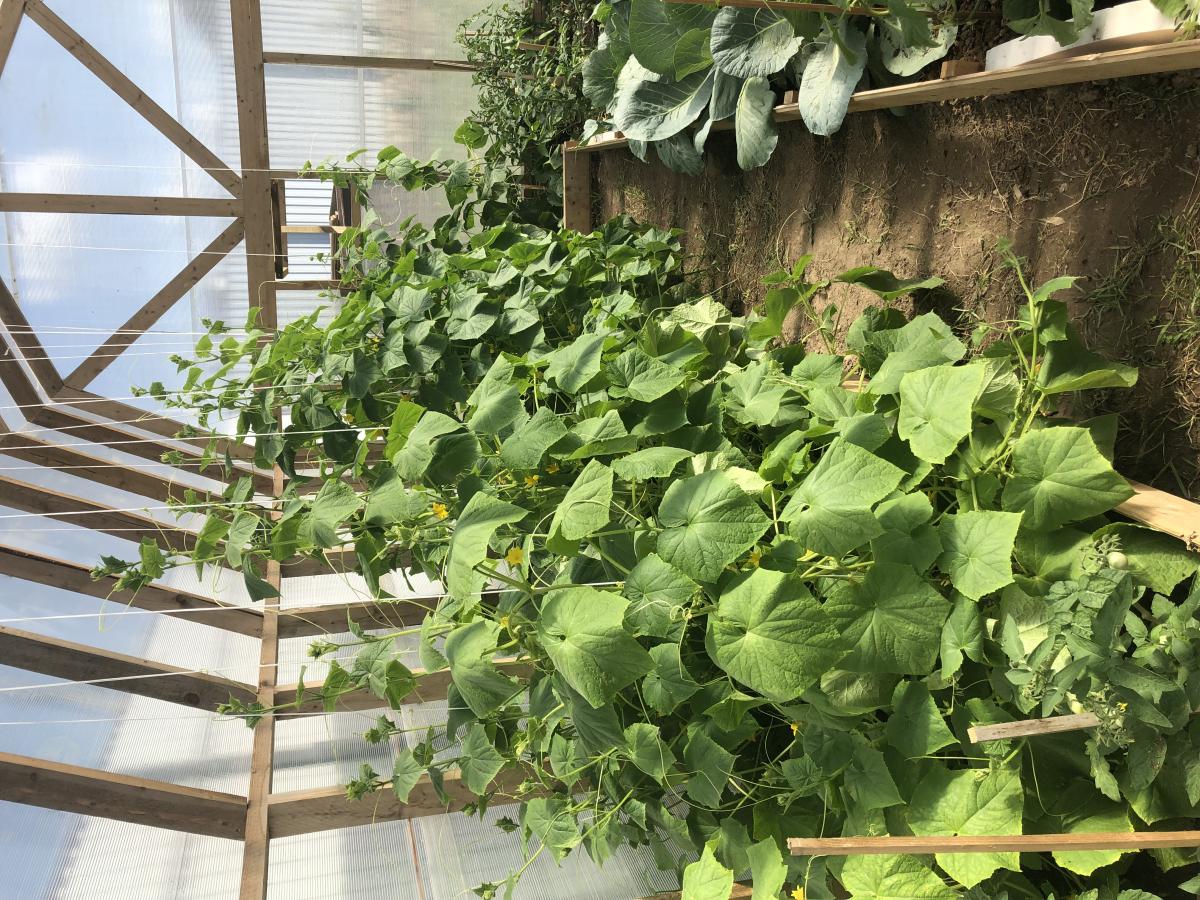
My First Greenhouse
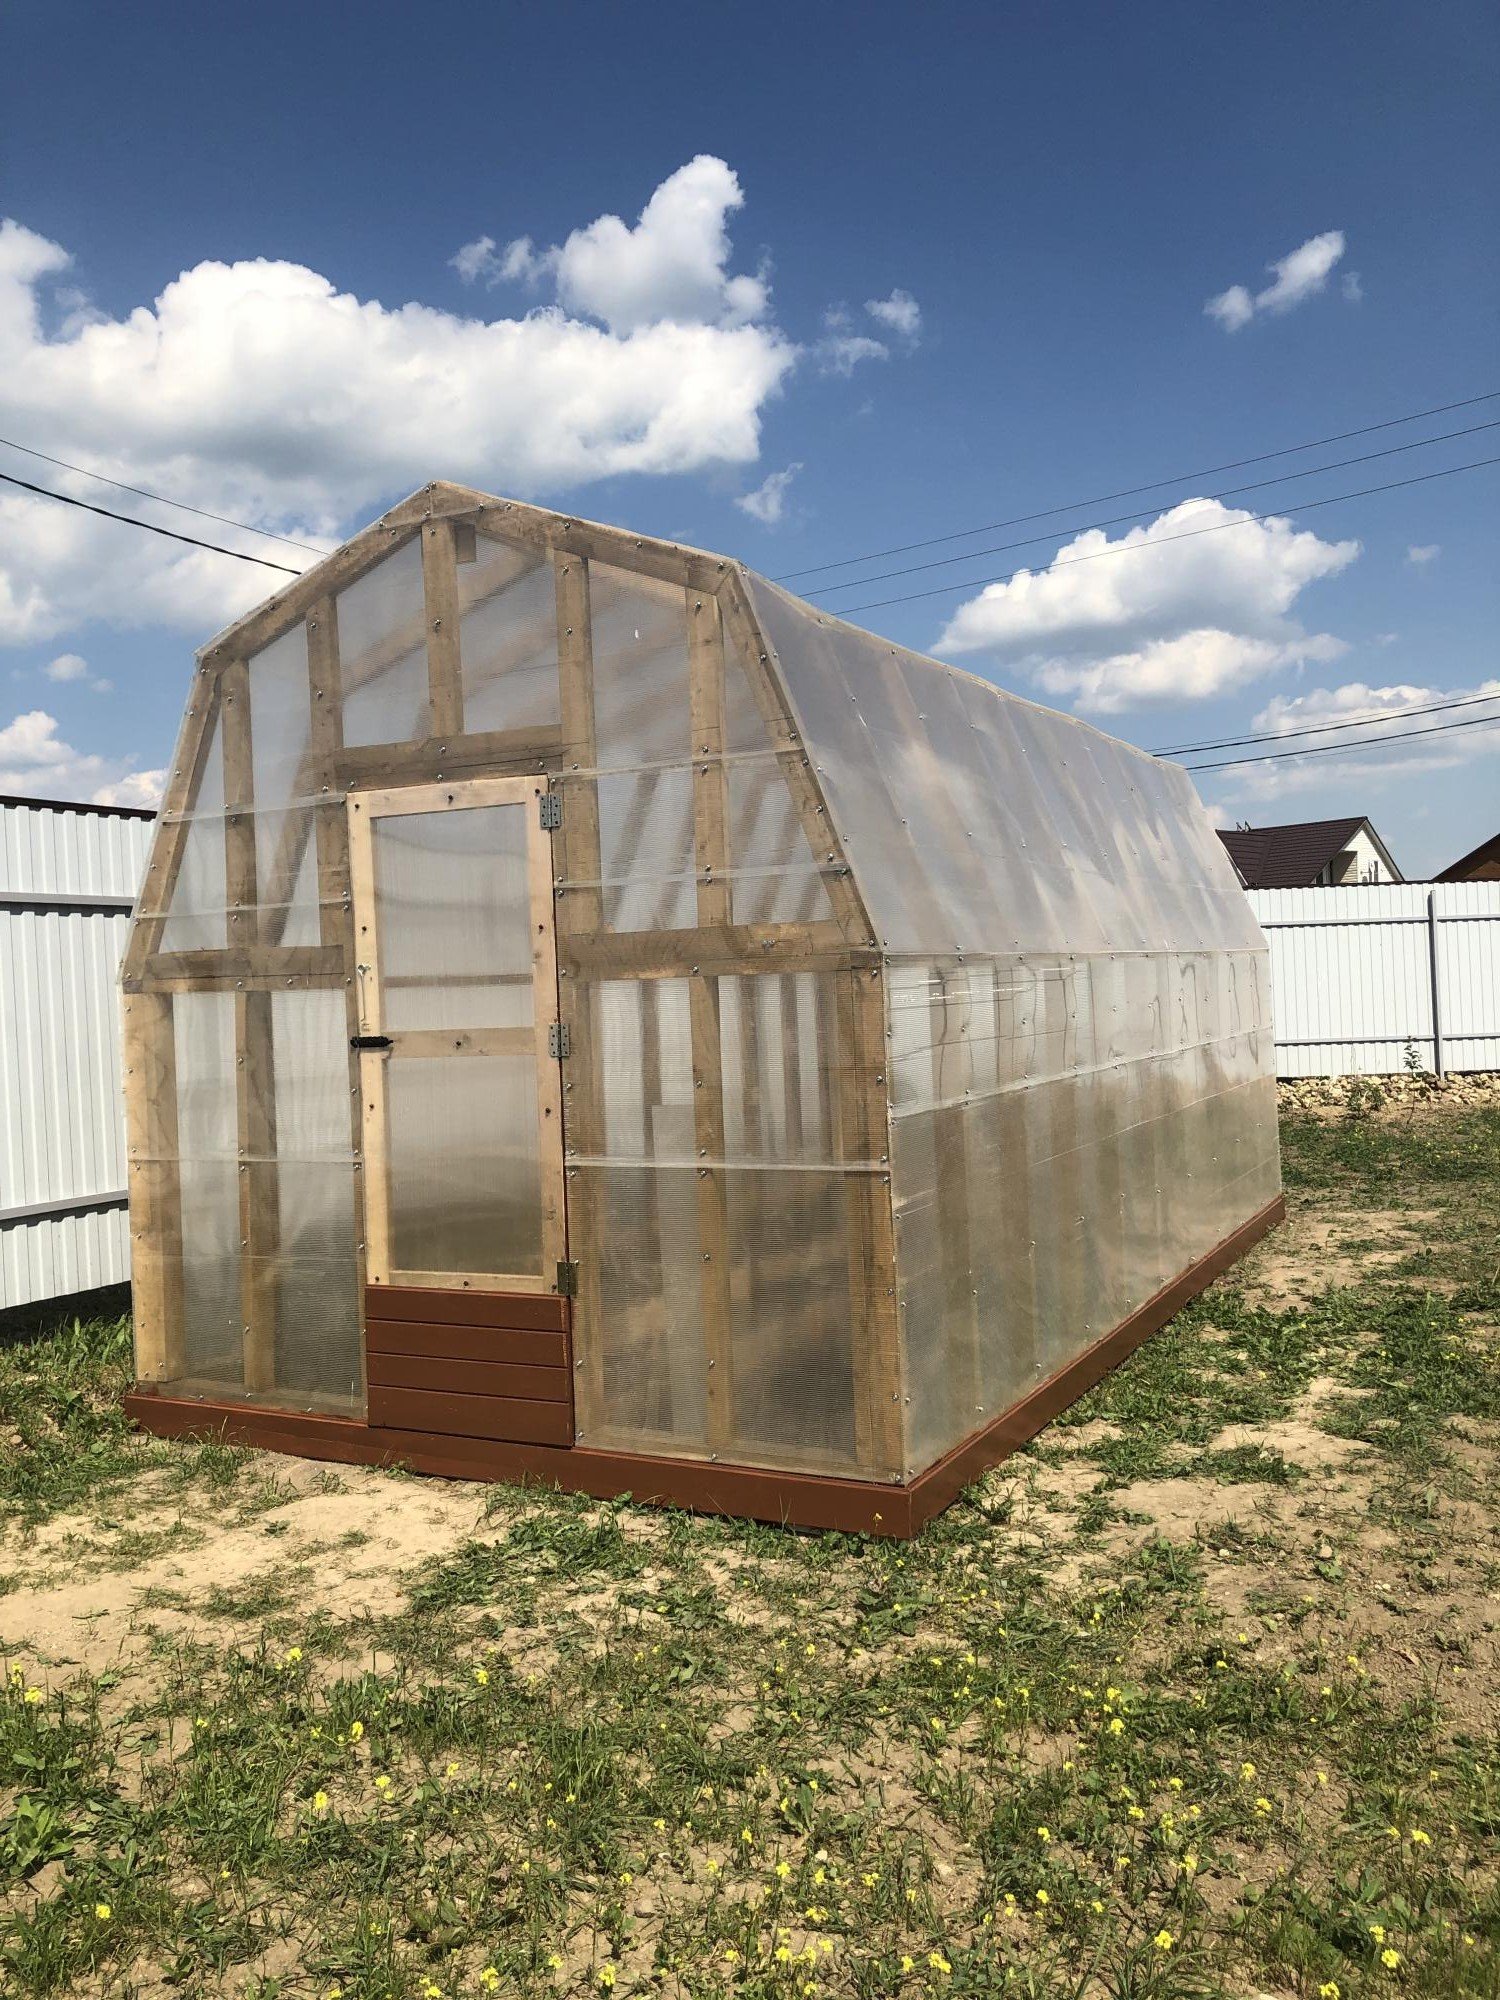
This was my first attempt at building a greenhouse. I wanted my cucumbers to be able t climb high so I made the house higher than the plans showed. It's also a little larger too. Since I am in Europe my dimensions are in meters. The overall size is 3 x 6 meters. I also built it on top of 100mm x 100mm lumber (the equivalent of 4x4's). It took 5 sheets of 6mm thick polycarbonate in 2 x 6 meters.
Built from Plan(s)
Estimated Time Investment
Week Long Project (20 Hours or More)
Recommended Skill Level
Intermediate
Comments
Sewing Table

We did it in MDF as suggested, used piano hinges, and changed the height to 36" because I'm used to work at counter height and wanted a larger surface, plus I don't mind sewing sitting on my stool. We had the store cut all the pieces, but this table is very heavy using this material. We also made the legs at 4" considering the weight. The only disadvantage of making it 36" high is that the legs will stick out once folded, unless you have the room and adjust the depth at 36" as well. I overlooked that detail but in the end, I don't mind since this table is stored away out of the view when not used. It did soak up a lot of paint... Already used it and it's great to have my space ready to use roll away, not having to clear the counter or dining table to work.

Built from Plan(s)
Estimated Cost
$144 CAD
Estimated Time Investment
Weekend Project (10-20 Hours)
Finish Used
Behr paint, satin finish.
Recommended Skill Level
Beginner
Comments
Tue, 01/28/2014 - 05:11
Cutting table --- this is exactly what I'm looking for!!!!
Do you happen to have the new measurement layout for what you did????!!
I was trying to work it out, but math isn't my strongest suit!
Also-- did you consider making it wider so the legs wouldn't stick out??
(I am planning for plywood instead of mdf)
thanks!
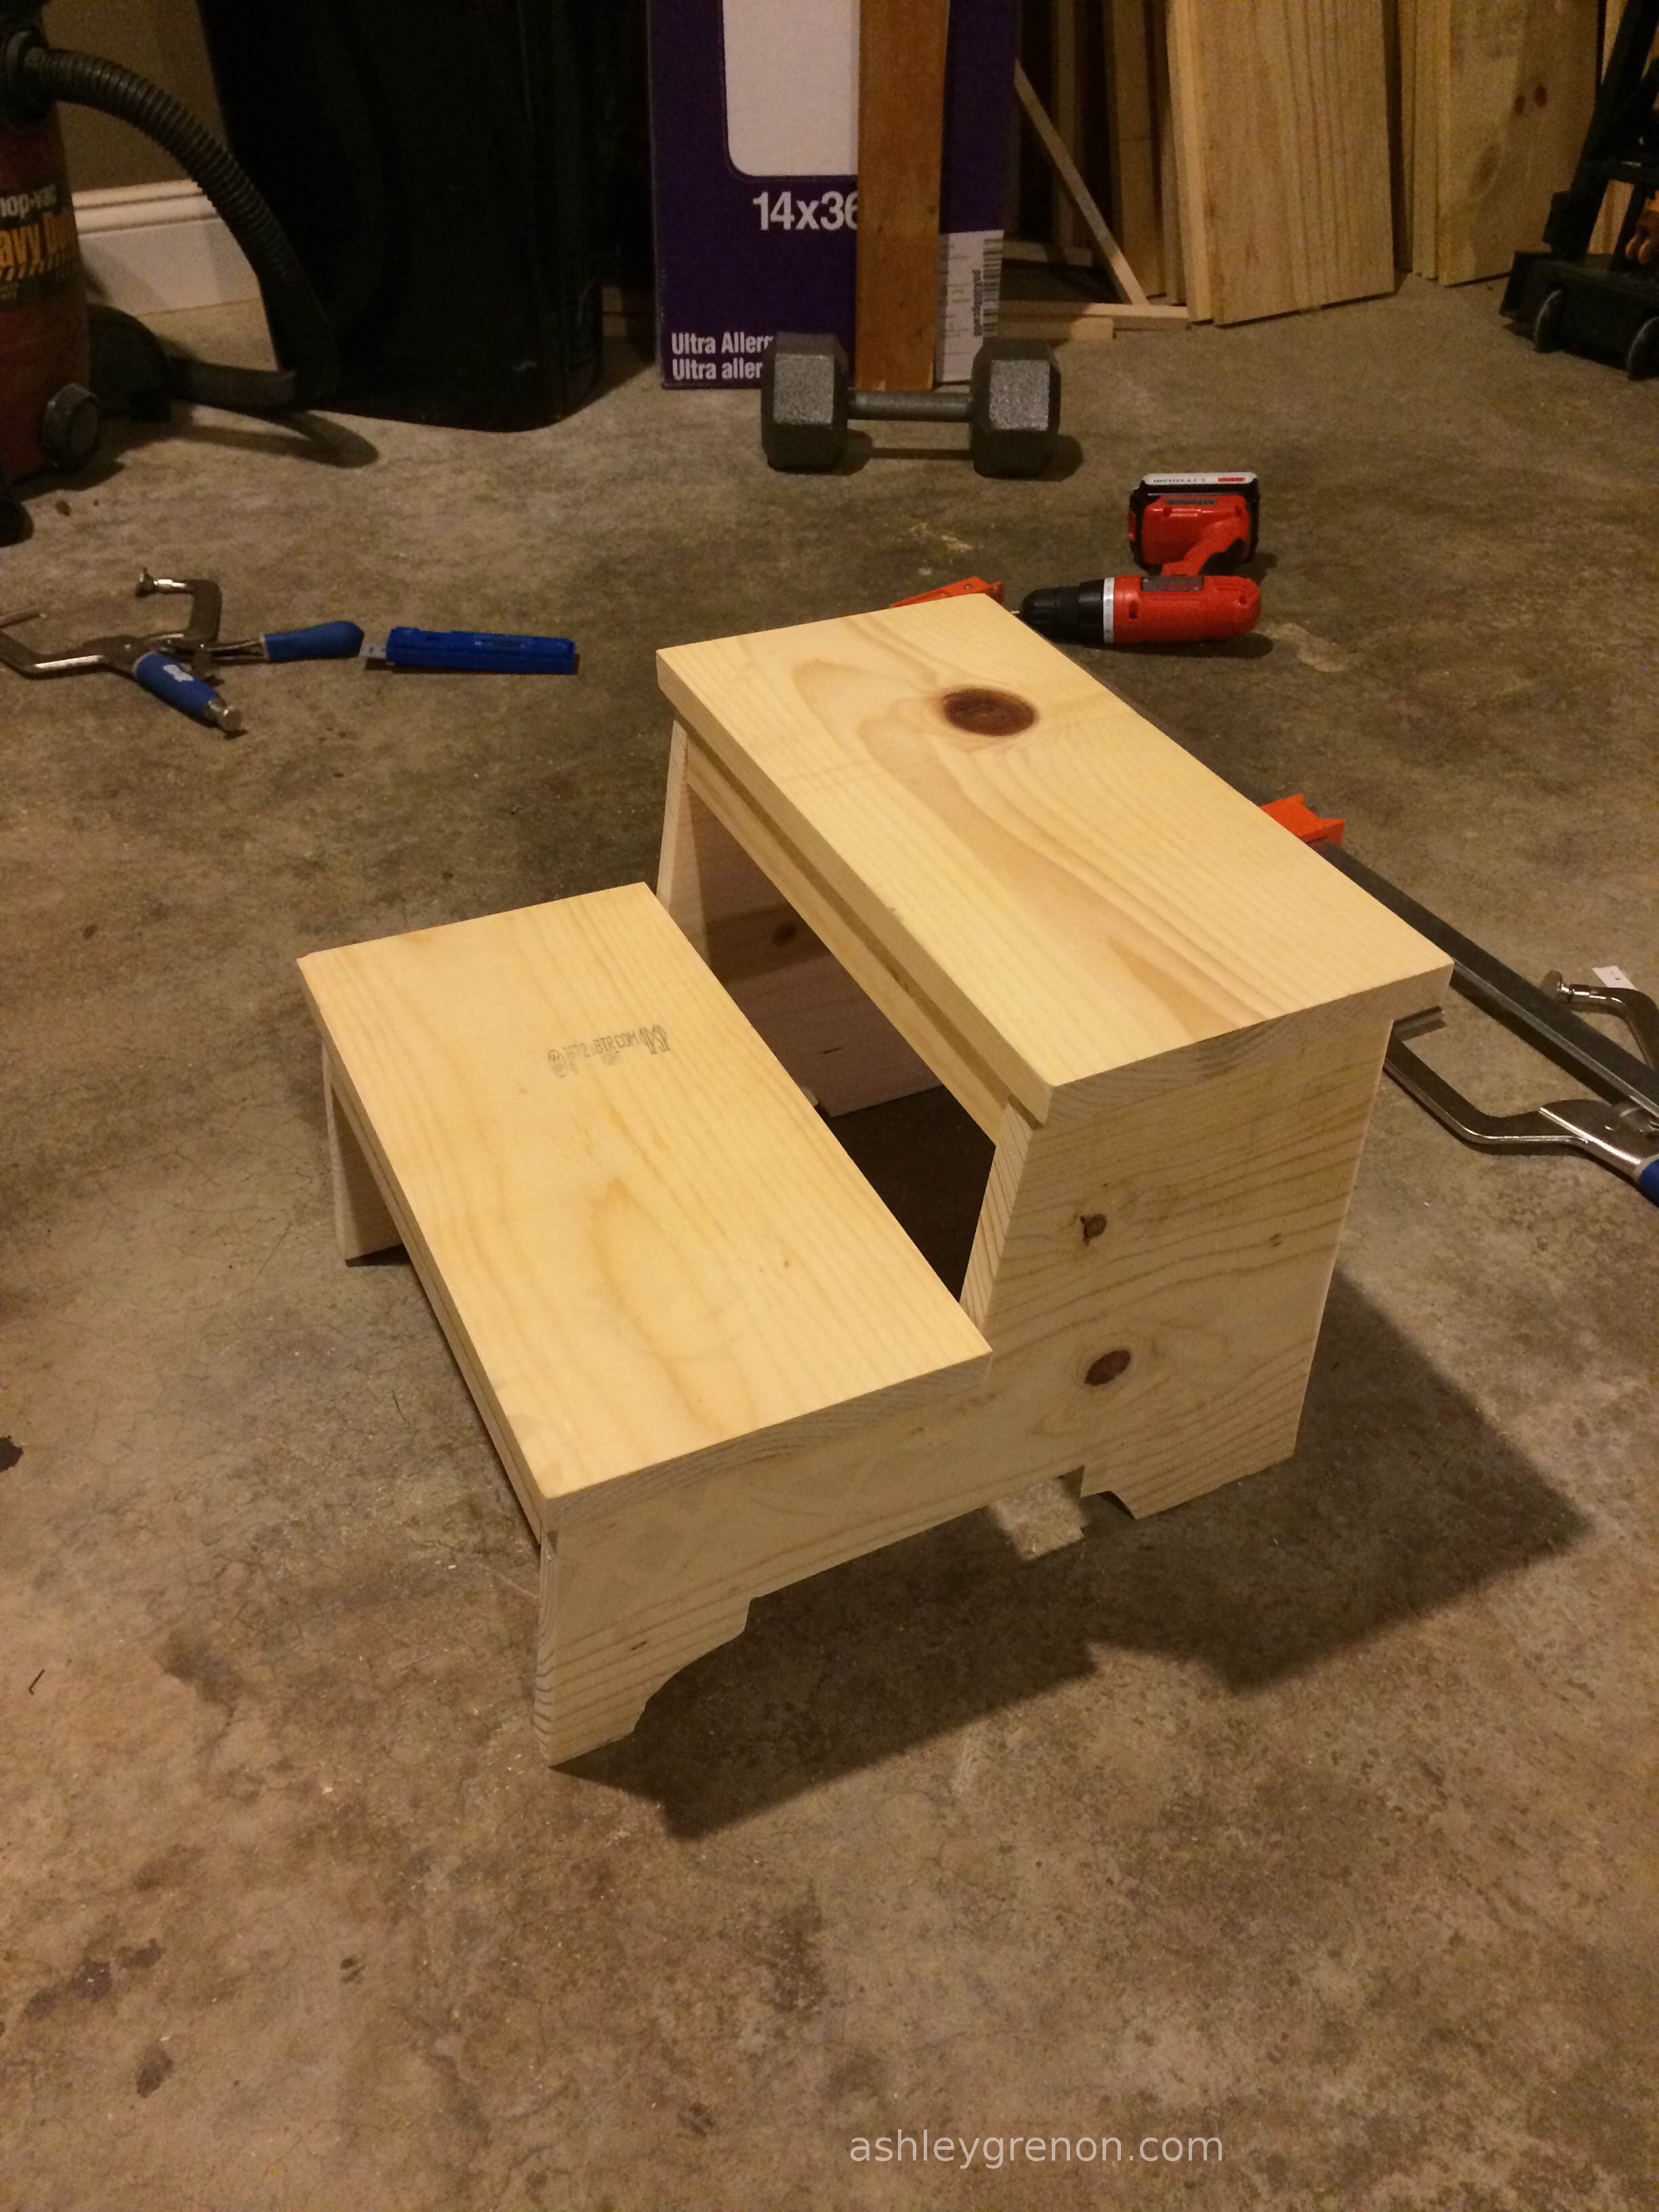
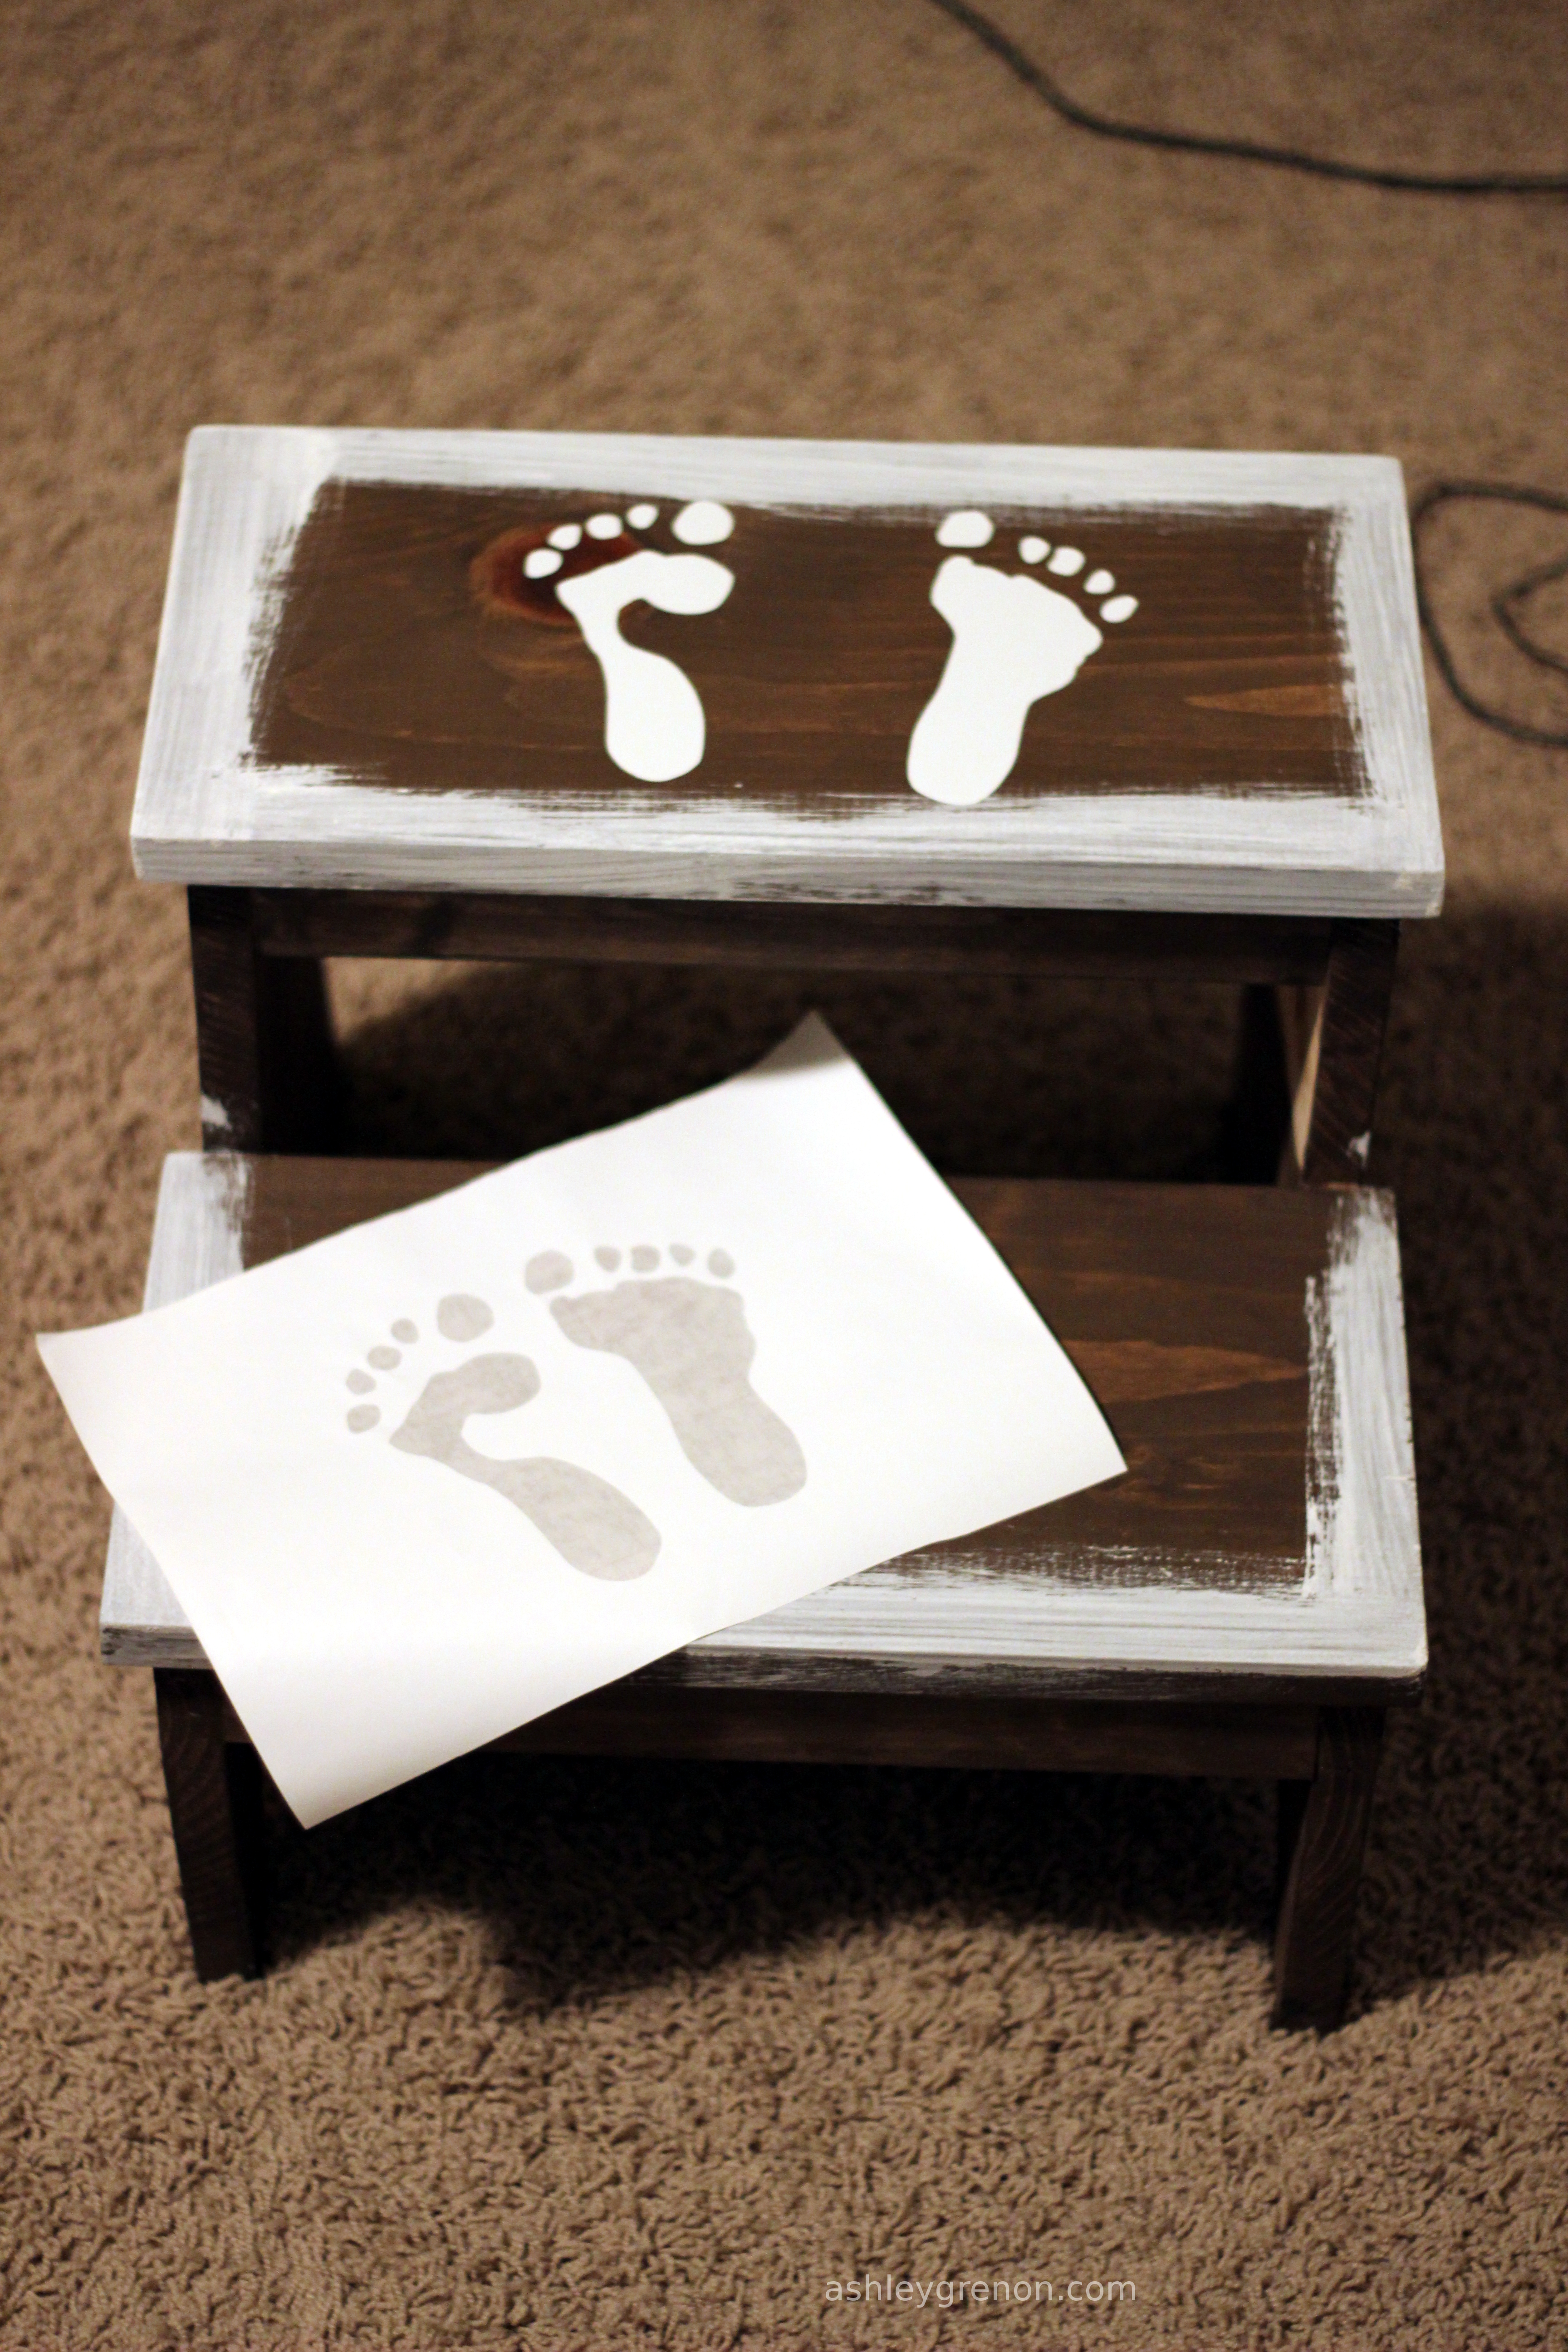
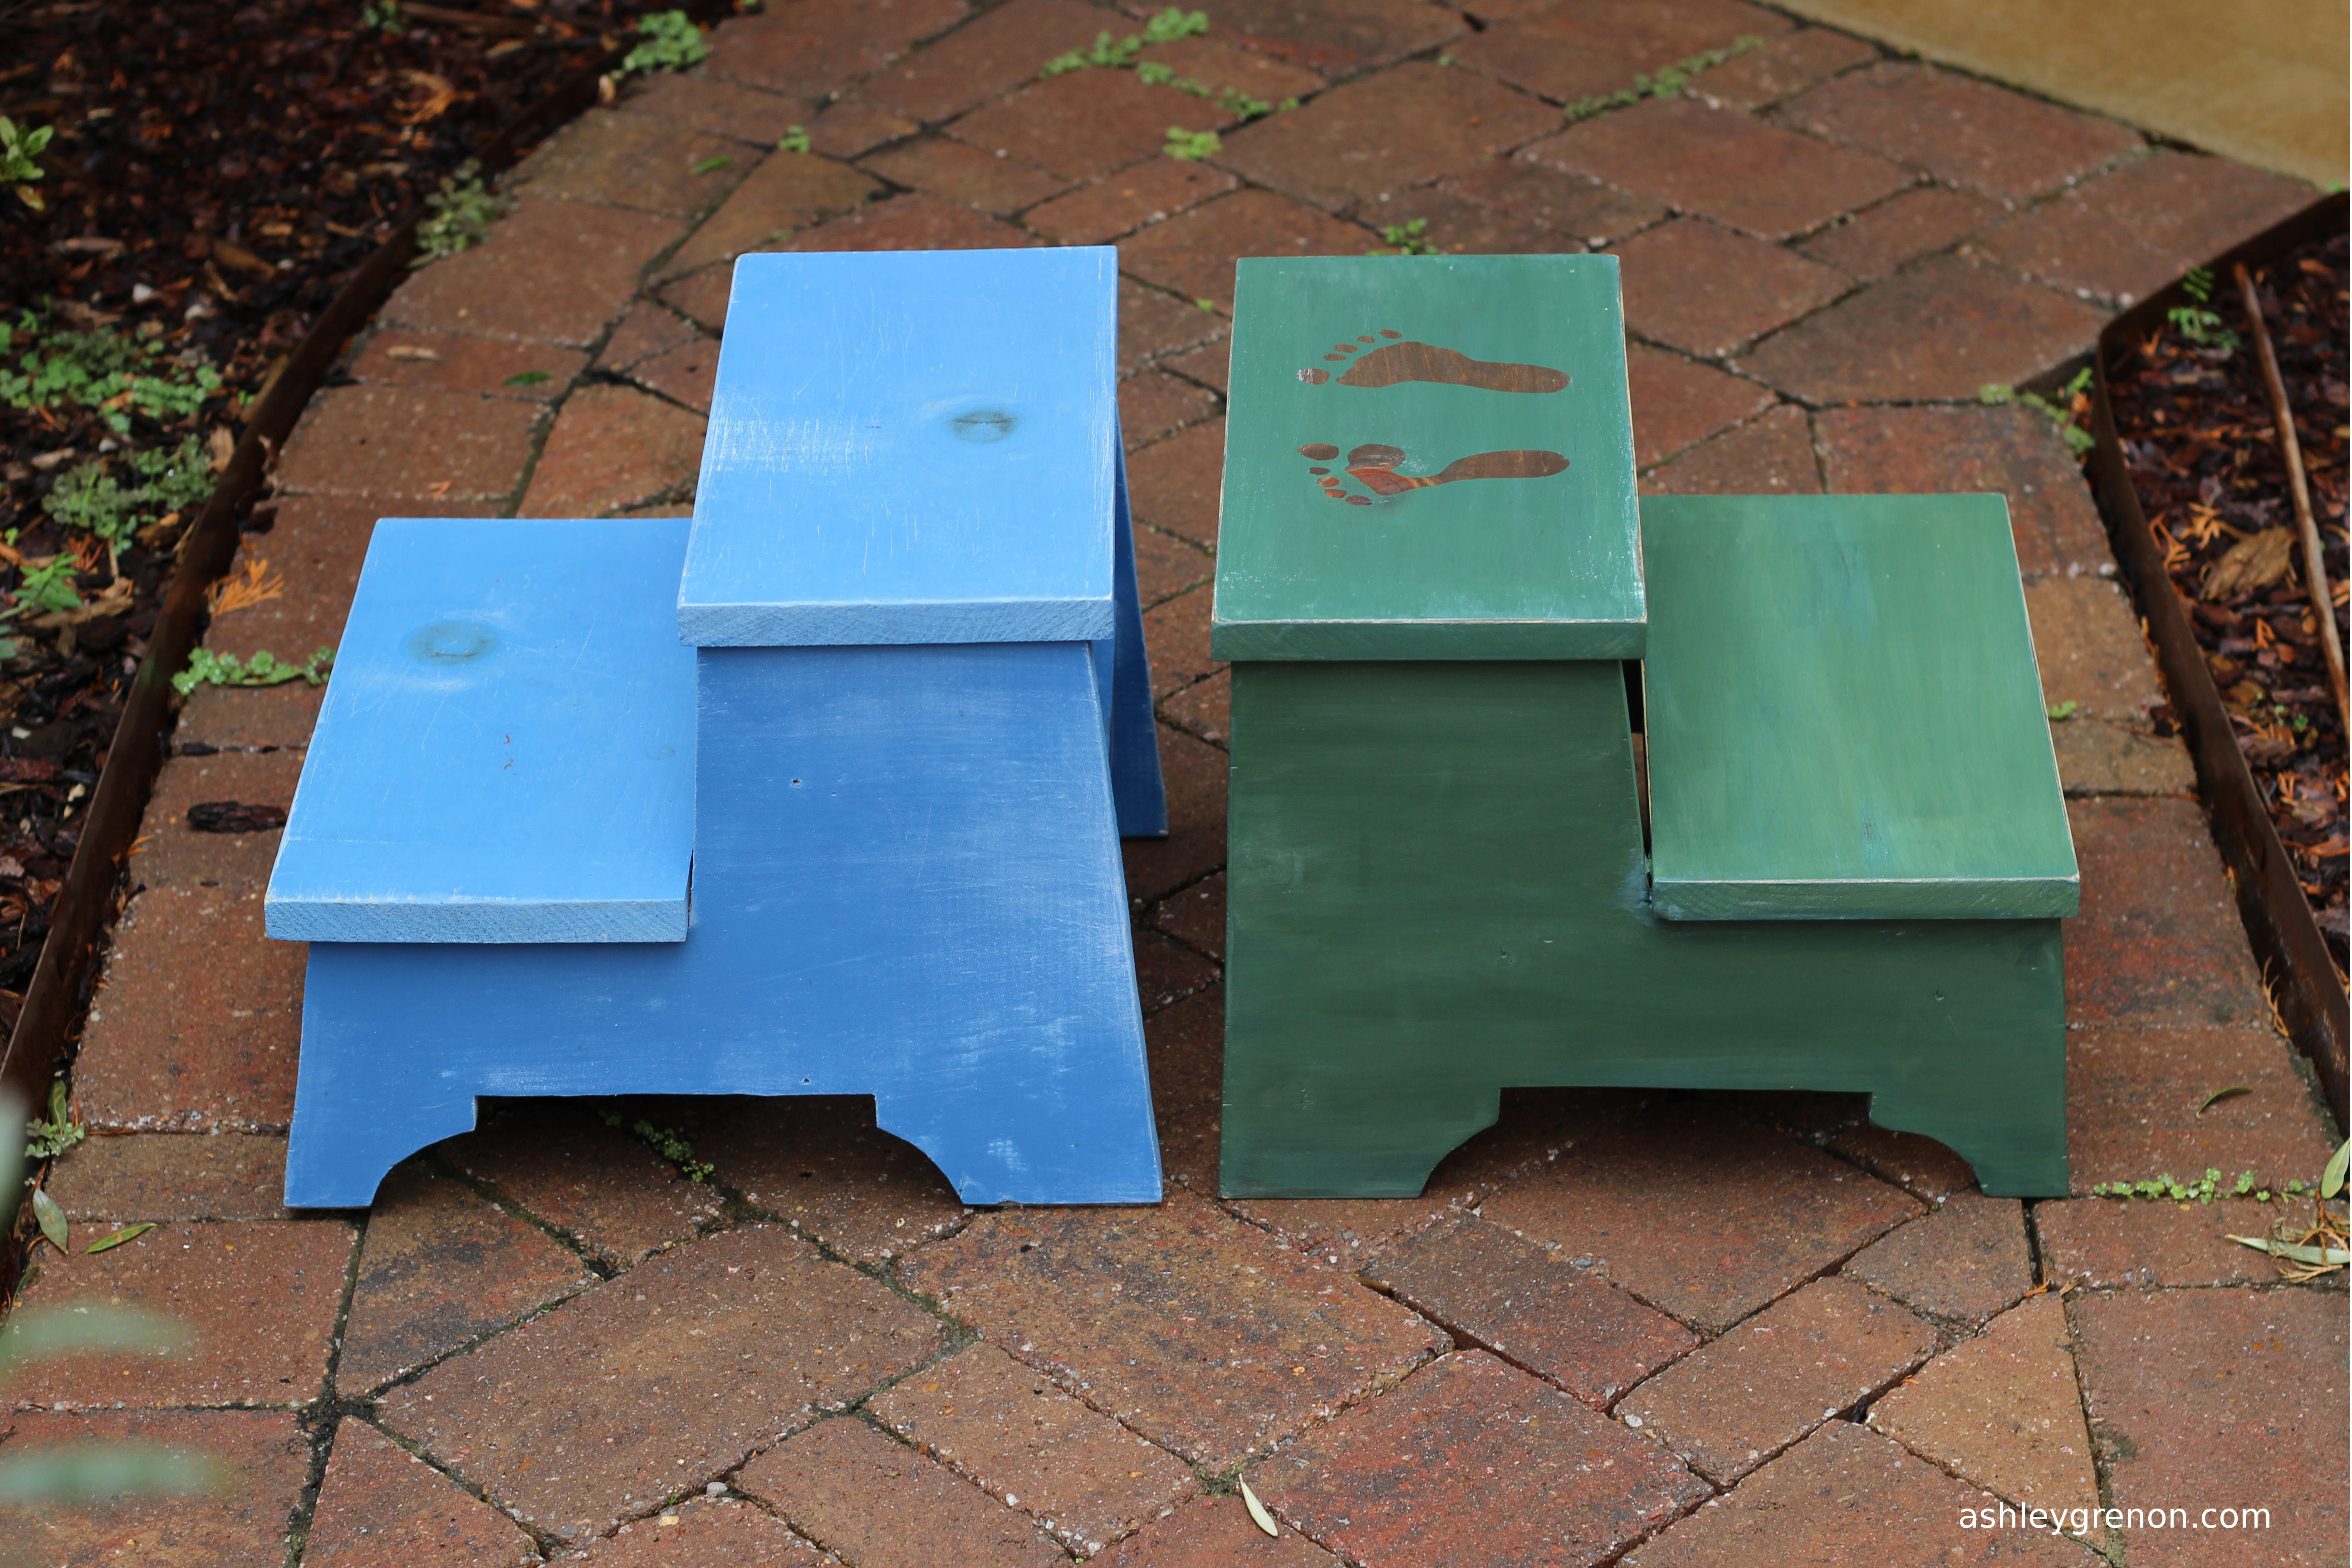
DIY Vintage Step Stool

Several years ago, the first woodworking project I finished was the Vintage Step Stool built with plans by Ana White. I use the step stool just about every day. I had some scrap lumber taking up space in my garage, so I decided to use it to build another step stool. Check out the blog link for more project details.
Built from Plan(s)
Estimated Time Investment
Day Project (6-9 Hours)
Finish Used
Miss Mustard Seed's Milk Paint in Boxwood and Ironstone, ECOS Paints WoodShield in Special Walnut and their Satin Varnish
Recommended Skill Level
Beginner
Comments
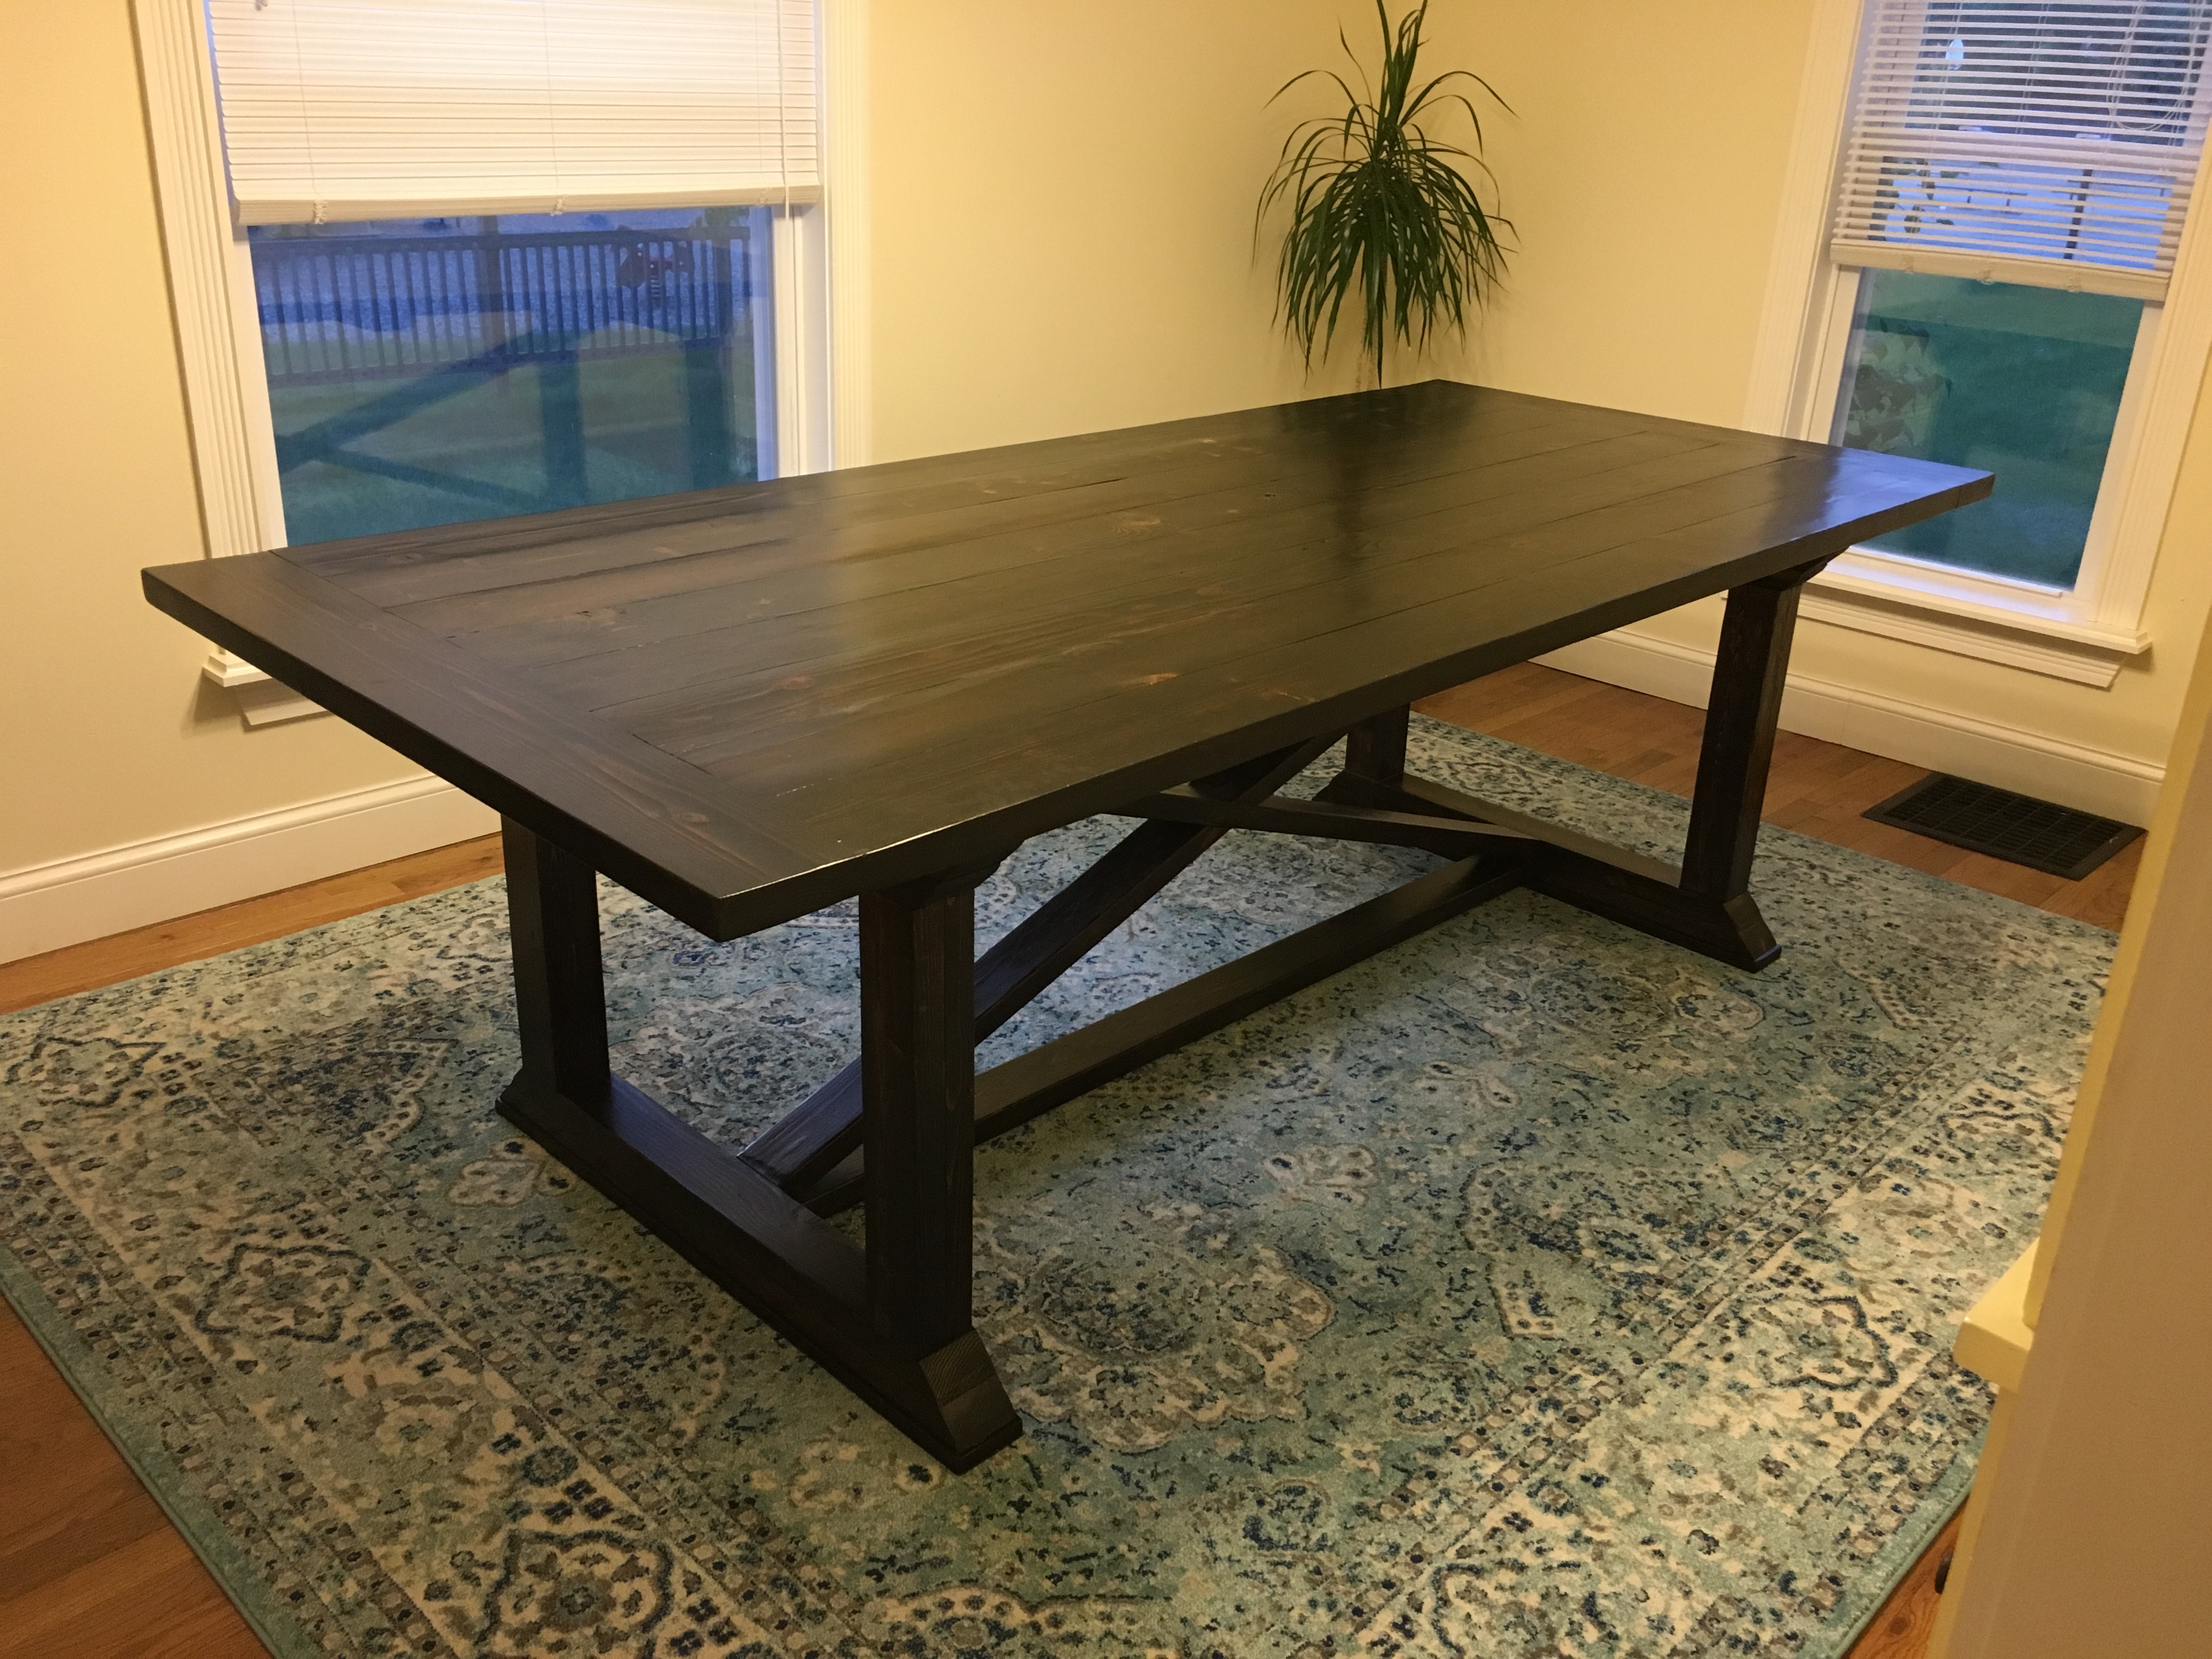
Farmhouse Table

The table came out great! I ran every board through the table saw to make sure each piece was square. On the breadboard ends I added 2 1 1/2x1 1/2 x 9 supports. I decided to take off a lot of material with 40 grit sandpaper so every top board was completely smooth. Added adhesive felt to the bottom and used minwax polycrylic finish.
Built from Plan(s)
Estimated Cost
$125 with stain, polyethylene, brushes and rags.
Estimated Time Investment
Week Long Project (20 Hours or More)
Finish Used
Minwax oil base Esspresso
Minwax polycrylic semi gloss
Minwax polycrylic semi gloss
Recommended Skill Level
Beginner
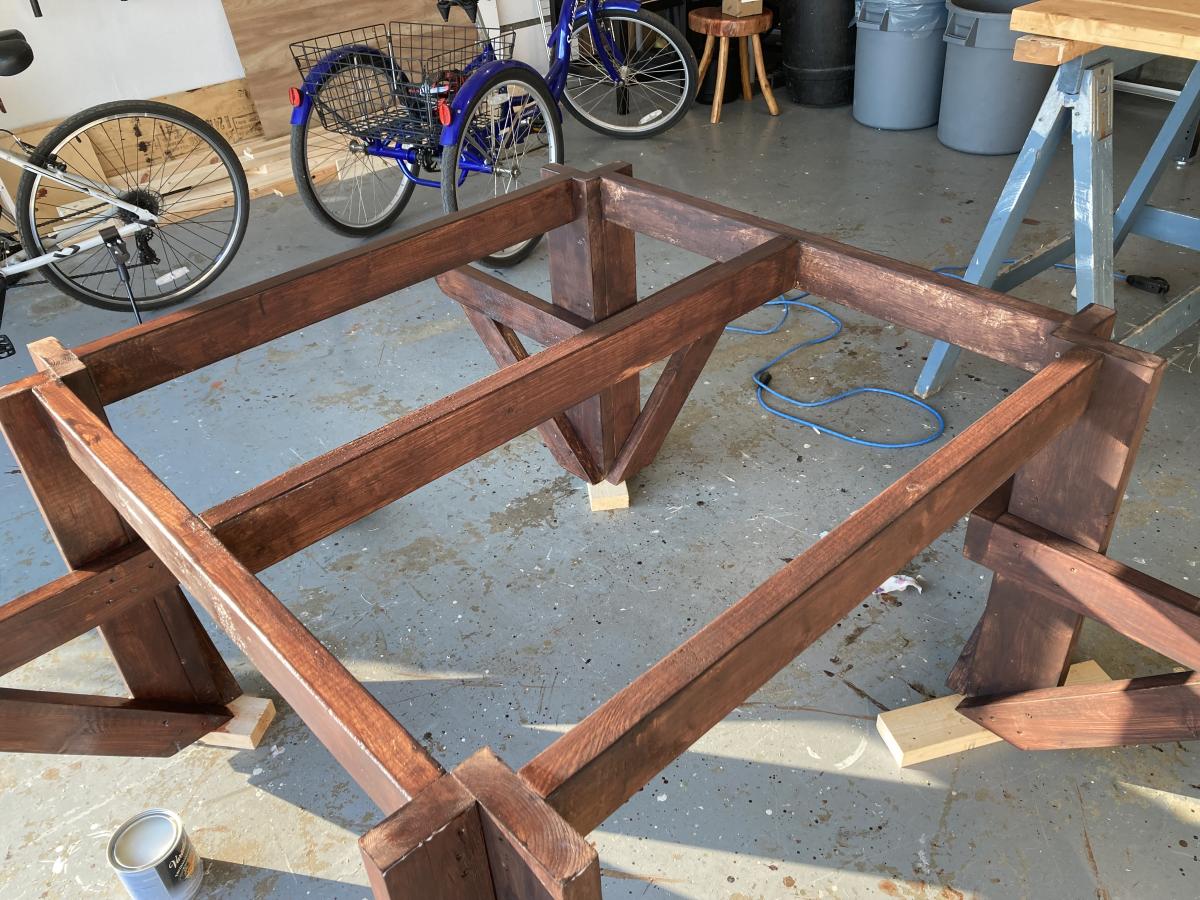
Square Picnic Table
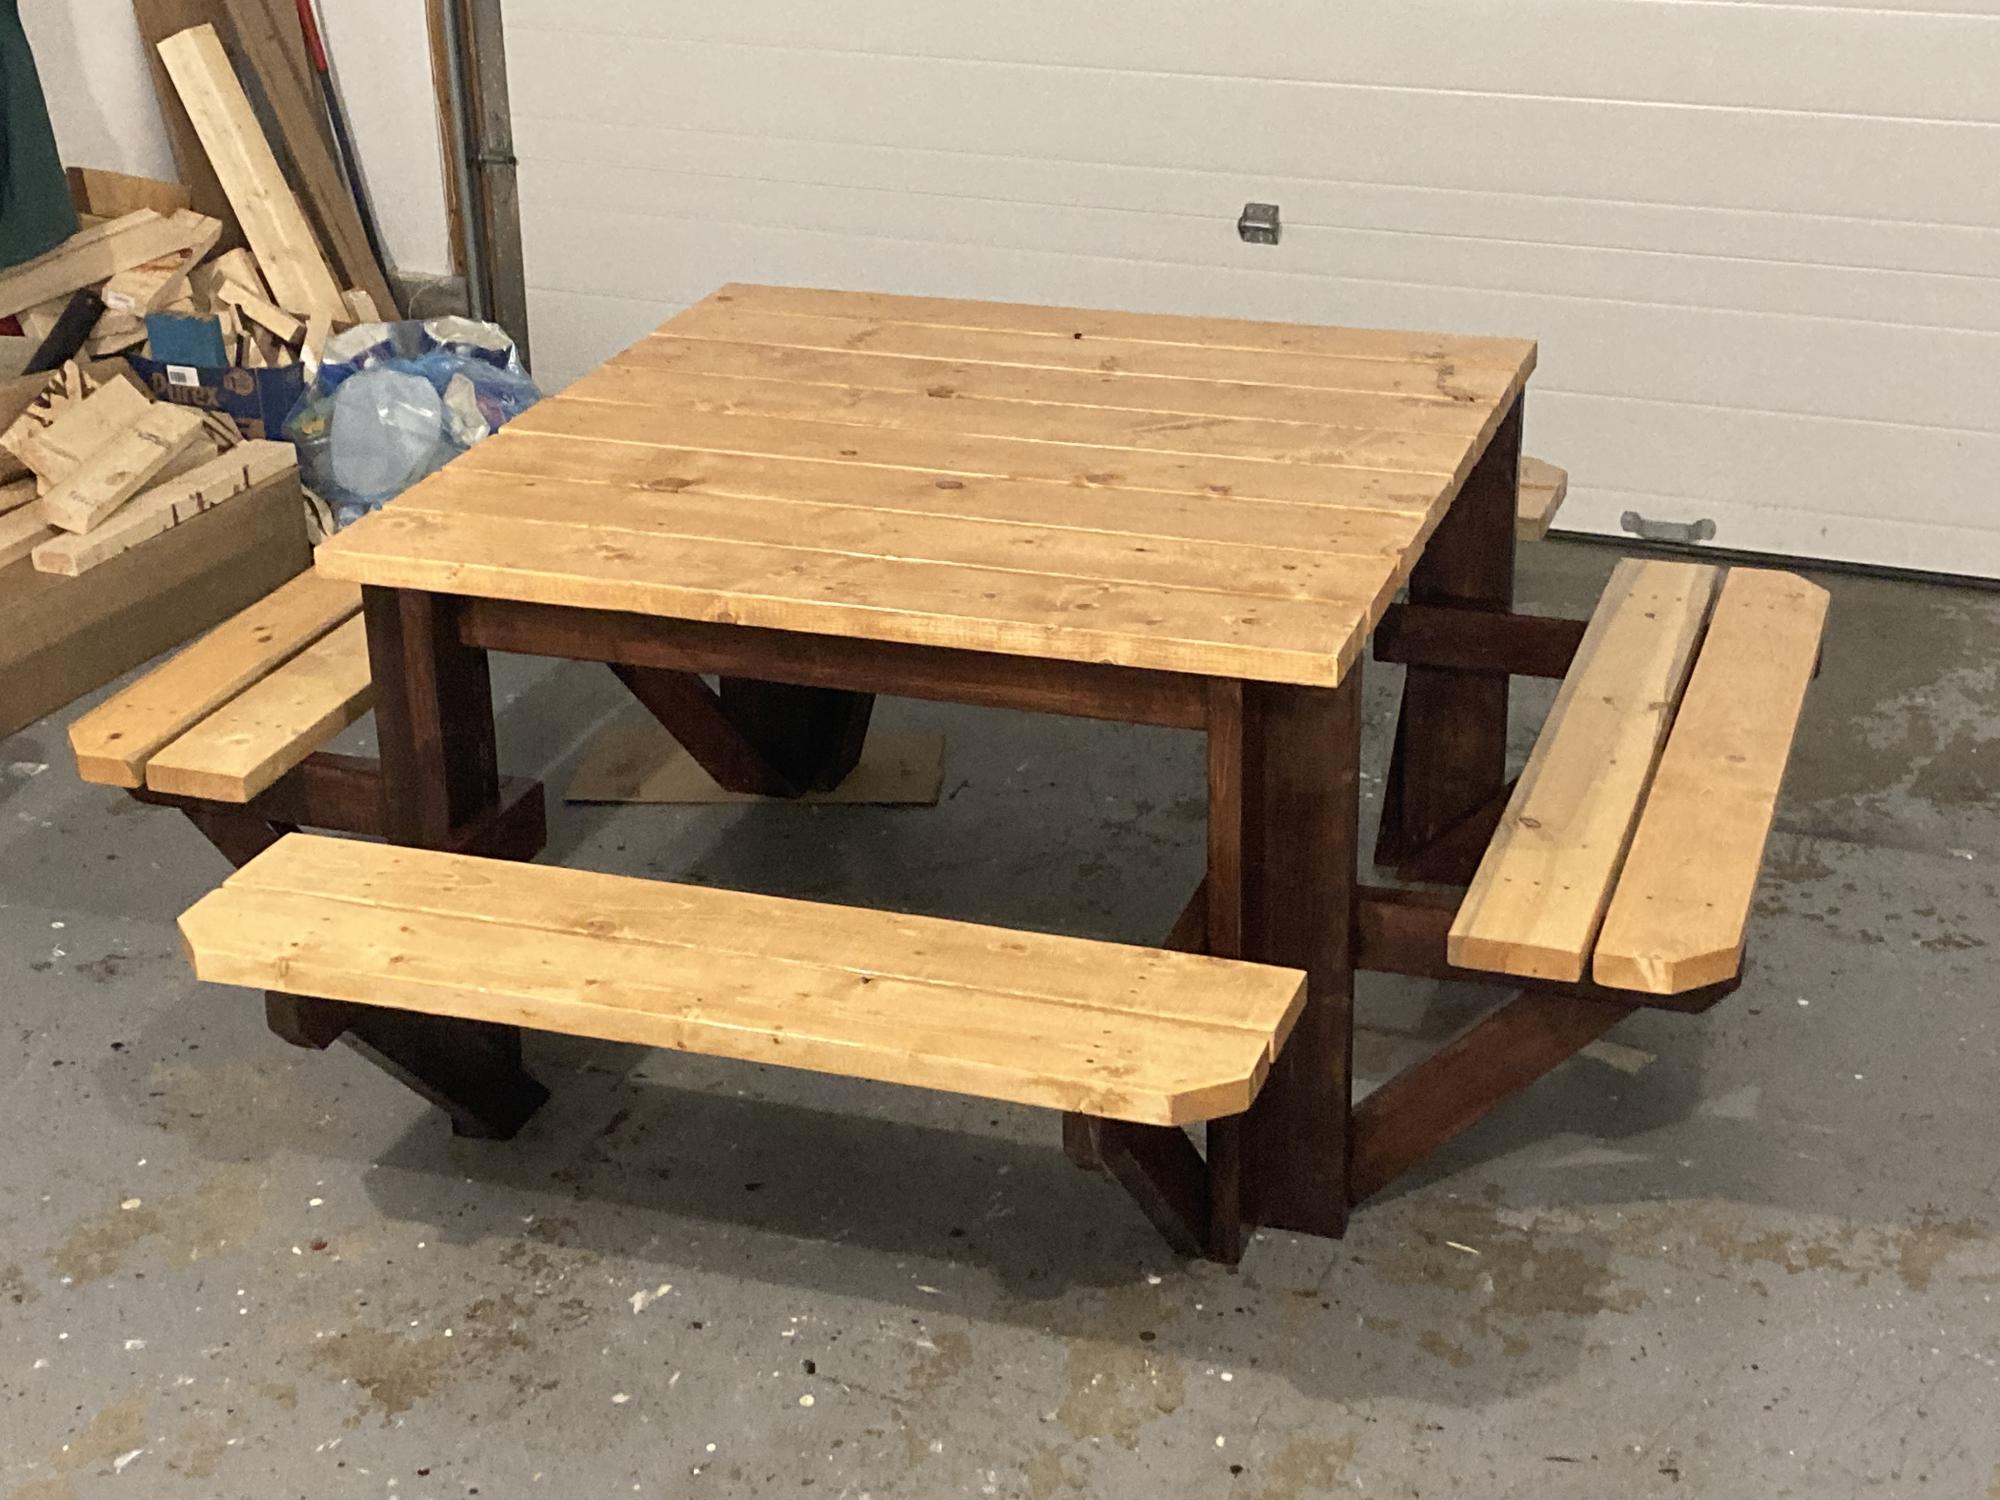
Enjoyed this project although with the price of lumber it was a little expensive to build. The only modification I made was to put a cross brace in the centre of the table top. That allowed me to attach the top boards a little more securely as some of them were a little bowed. I'll add a better photograph once I get it out of my garage and on to the back deck. It is a little heavy.
Built from Plan(s)
Estimated Cost
$240
Estimated Time Investment
Weekend Project (10-20 Hours)
Finish Used
I stained the dark part of the table with Behr water based English Chestnut and the seat and top with Minwax Ipswich Pine followed by four coats of Varathane Exterior Gloss.
Recommended Skill Level
Intermediate
Comments
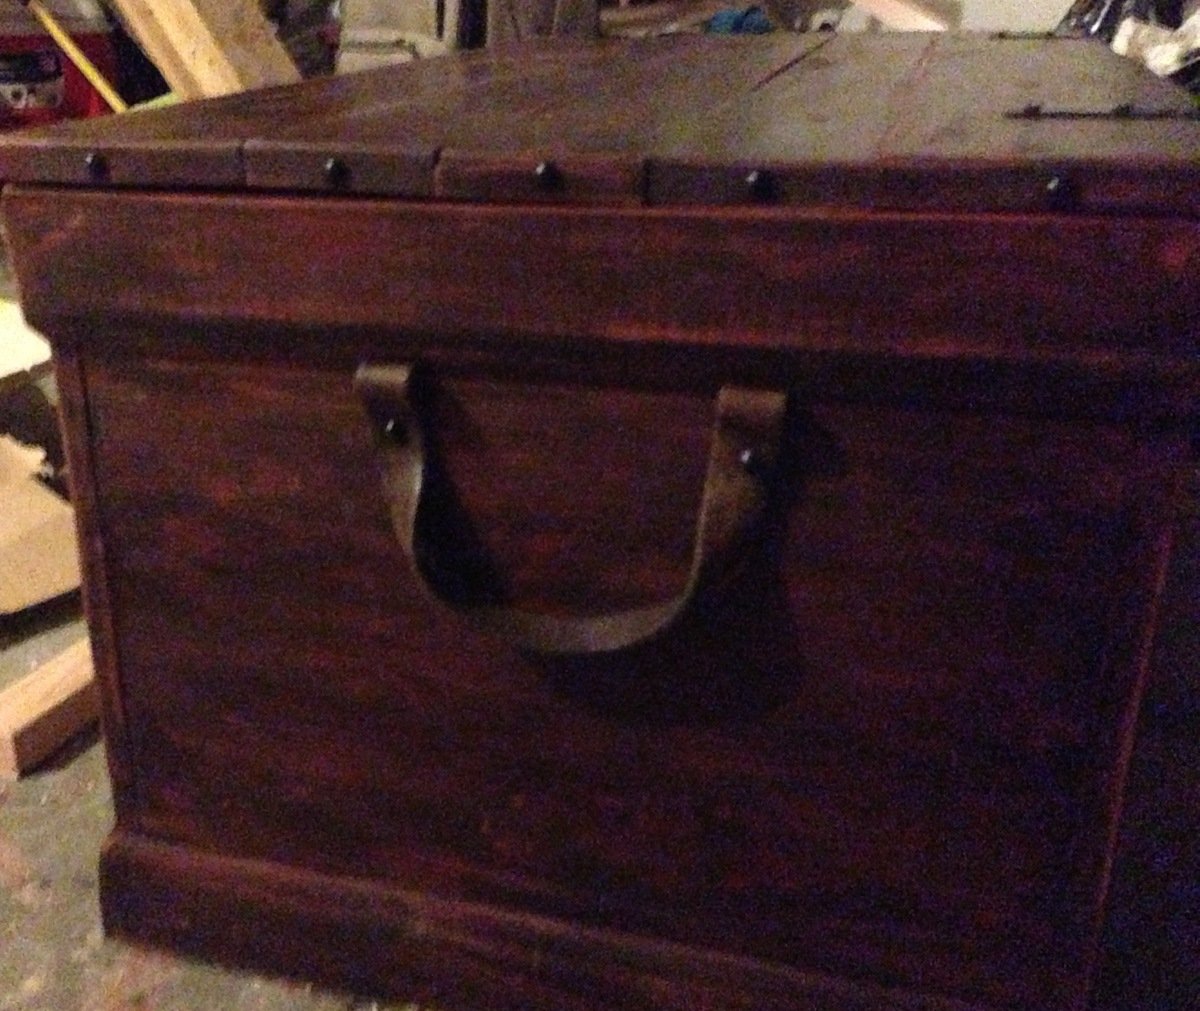
Antiqued modified becca trunk
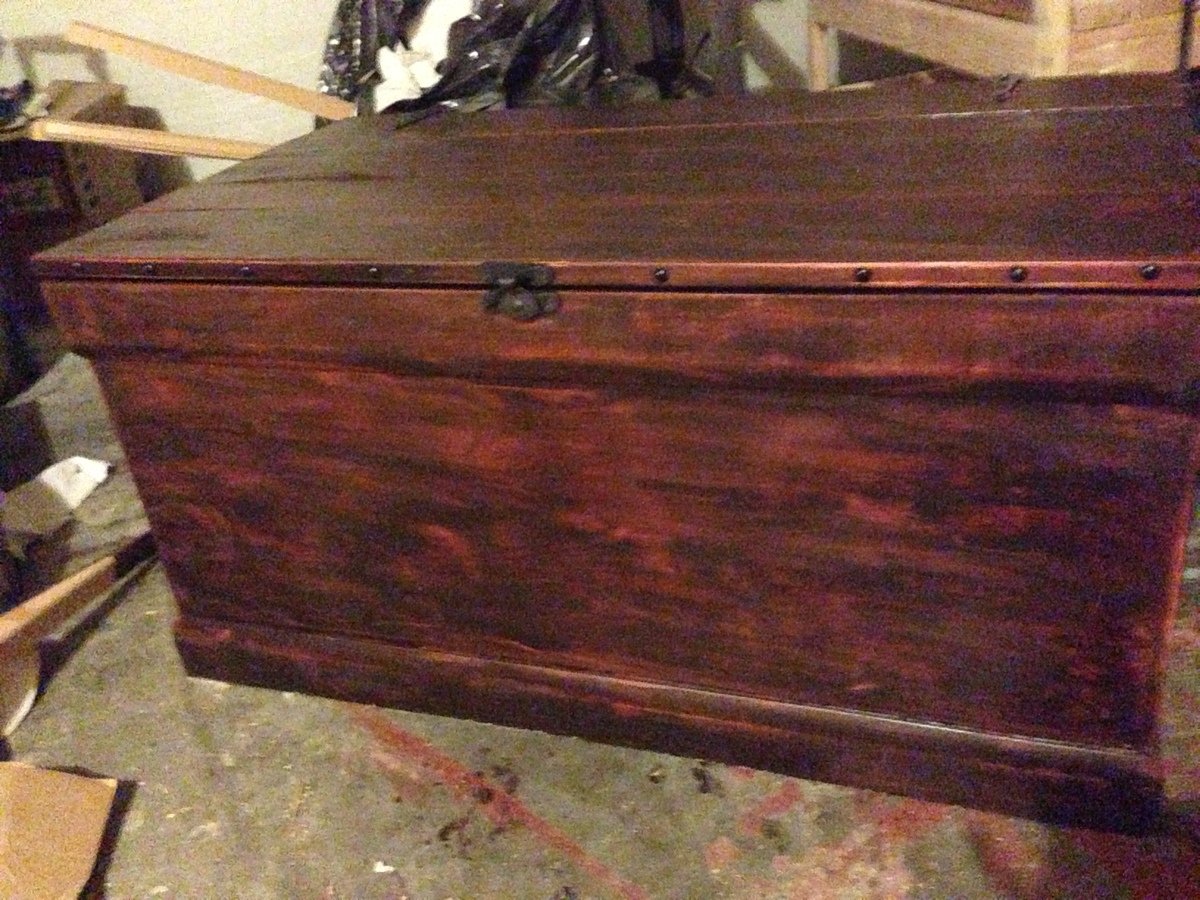
My best friend has really wanted an antiqued trunk but they were way out of her price range.
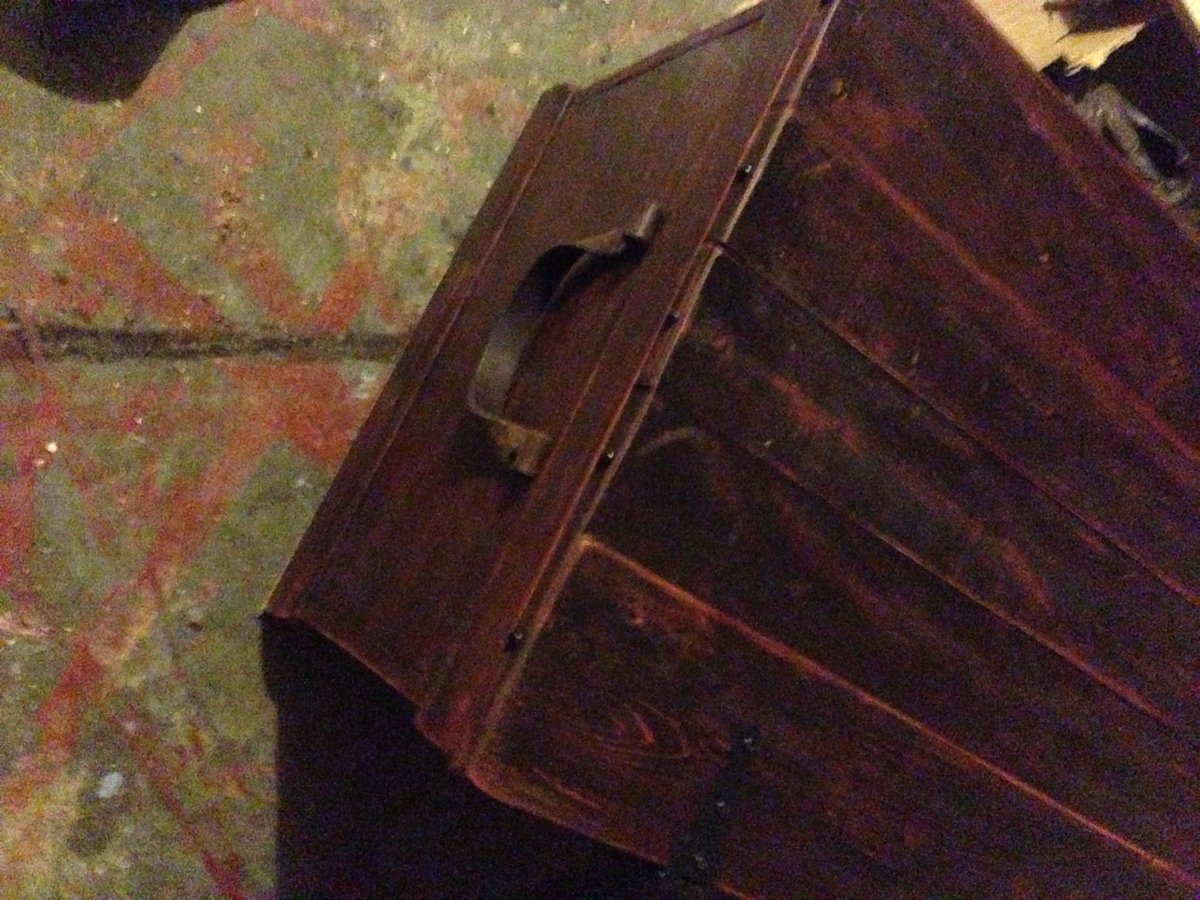
I built the becca trunk but planked the top with 1x4's and 1x6's and made the trunk just a tad deeper. Worked perfectly!
For the finish I stained it minwax china red and then added gf java gel stain over the top. distressed it and sanded it until I got the look i wanted.
I cut up an old belt we had and used that for handles, found a window sash lock, nail head trim and black strap hinges at blue. The base molding I bought was only 3 1/2 inch as it was much cheaper (82 cents a foot) than the 4 inch. worked great for me.
It was a super easy and fast build! Now I get to make one for me :)
This trunk is super sturdy and she absolutely loves it!
Price breakdown for me as I had screws and nails, scrap wood for lid and even the java stain...
40.00 for one sheet of 3/4 purebond plywood (will make another trunk with other half)
13.00 for one sheet of 1/4 ply
16.40 for base moldings
2.00 nail head trim
6.00 strap hinges
12.00 minwax china red stain.
4.00 for latch
Built from Plan(s)
Estimated Cost
65.00
Estimated Time Investment
Day Project (6-9 Hours)
Finish Used
2 coats of minwax china red stain sanded between with 220
1 coat of java gel stain
distressed and sanded till i got the look i wanted.
1 coat of java gel stain
distressed and sanded till i got the look i wanted.
Recommended Skill Level
Starter Project
Comments
Thu, 01/30/2014 - 11:06
Hinges with base molding
Hi,
I'm basically doing your modified design. however, I noticed that the black strap hinges that I got at the local hardware store are longer than the base molding on the back side. So either I would have to cut part of the hinges or bend them to contour with the molding. Or, have the strap go underneath the molding, which would look odd. I did do more online searching and saw that there are black strap hinges that have a short end, but I don't think the short end would get past the 3/4" inch of board that is my chest top thickness, or if it does, it would barely make it.
So my question to you is what specific hinge did you use, and how did you lay it out? Did you fasten the hinge to your base molding?
First Thing I've Built
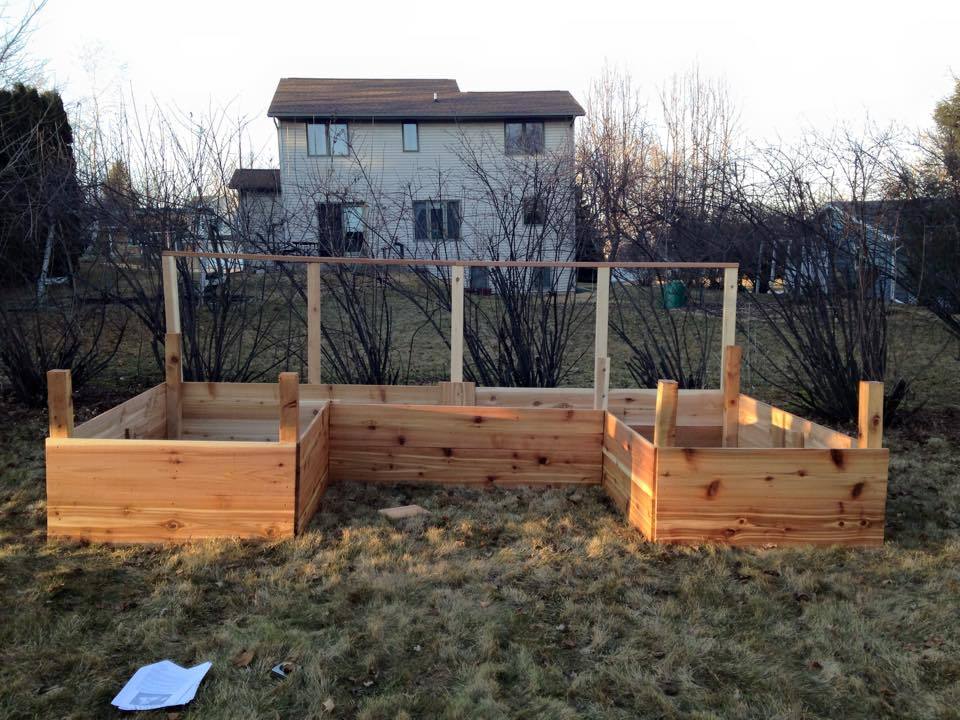
Keep in mind I am a novice at best and this took me a total of 12 hours over 2 days to construct and stain and line. Filling will be a separate project all together!
I opted to remove the top row of lumber all around to have something to attach bird netting to to keep the critters out and make it easier to reach in, also a cost consideration. The posts are still the recommended 3 ft I also changed to 12ft X1in boards instead of 12ft x2in also in the interest of cost.
Built from Plan(s)
Estimated Cost
$600
Estimated Time Investment
Weekend Project (10-20 Hours)
Finish Used
Used Clear Deck Stain from Thompson's, deck nails. Added a clear plastic lining (not shown) to bottom 1/2 of inside of bed.
Recommended Skill Level
Starter Project
Comments
Tue, 03/17/2015 - 18:33
Gorgeous! You're going to
Gorgeous! You're going to have some very happy plants!

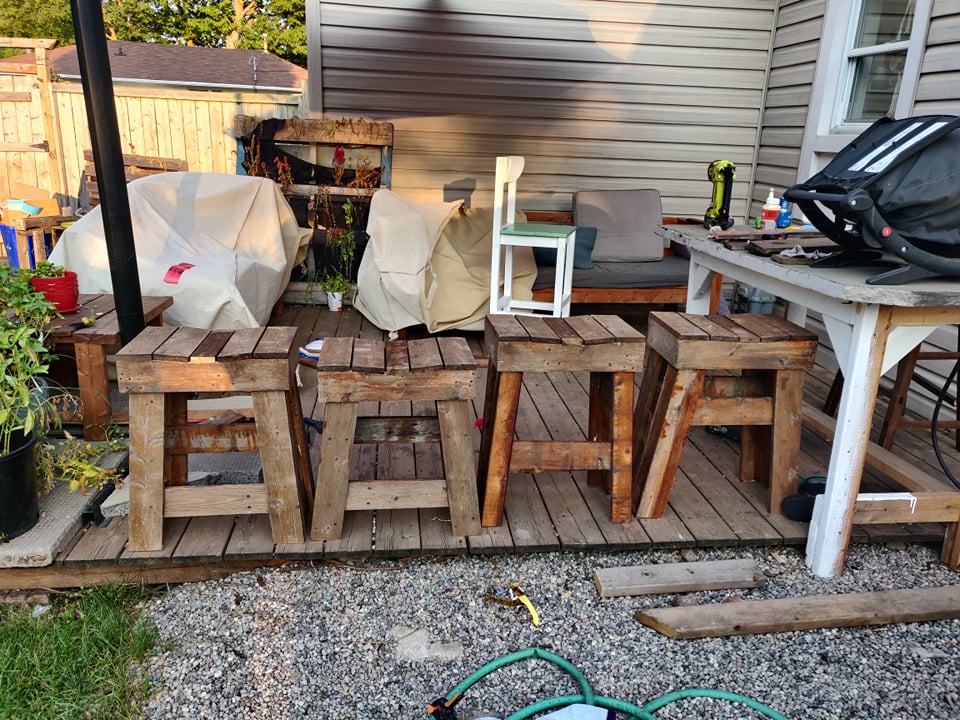
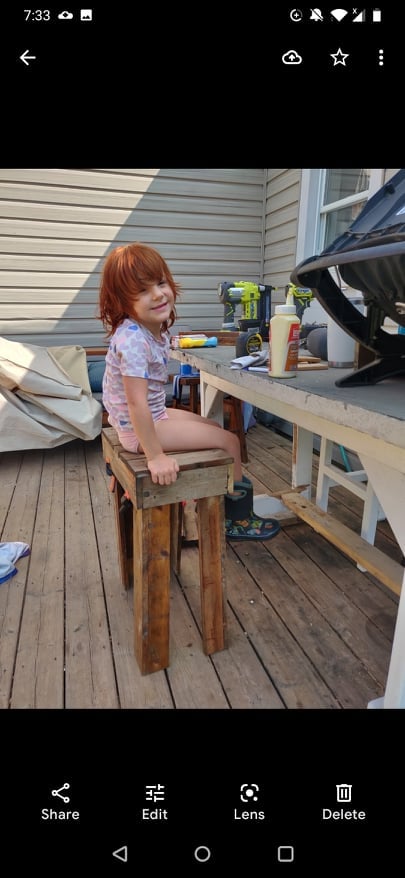
Cedar Outdoor Stools from bench
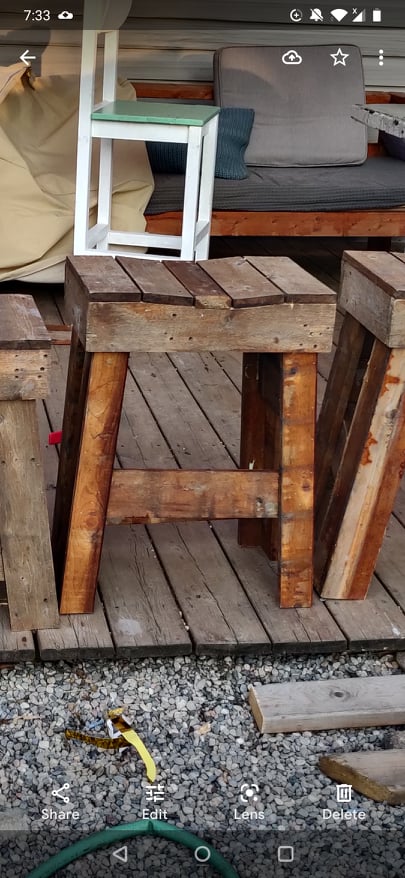
one of my first ana white plans was a cedar outdoor table and chairs that I was never 100% happy with but never the less lasted ten years before yesterday when I decided to undo all the screws (I didn't use glue on this one and it wasn't a kreg project - probably why I wasn't happy with it!).
I transformed those simple benches and table into four stools (varying heights for various members of the family) as well as a cedar planter. So the wood was 100% from the previous project so there is a lot of variance in the stain.
I sort of merged the adirondack stool and the farmhouse counter stool patterns as I didn't do both a bevel and a mitre cut I just a 5 degree mitre for the legs.
I used 1x3 and 1x4 for the legs and joined them together to make an L (I saw this on another brag post on the site) because I wanted to reuse the wood that I had leftover from the bench.
I put together the entire project using glues and brad nails but I will be adding some extra screws for longevity.
for the top, I took a 1x4 and traced a slight angle out of the top based on that of another stool I had and cut it out with a jig saw, to make the seat a bit more comfortable than the flat seat on the farmhouse stools. They are very comfortable and this was such an easy mod!
Built from Plan(s)
Comments
Outdoor Sectional
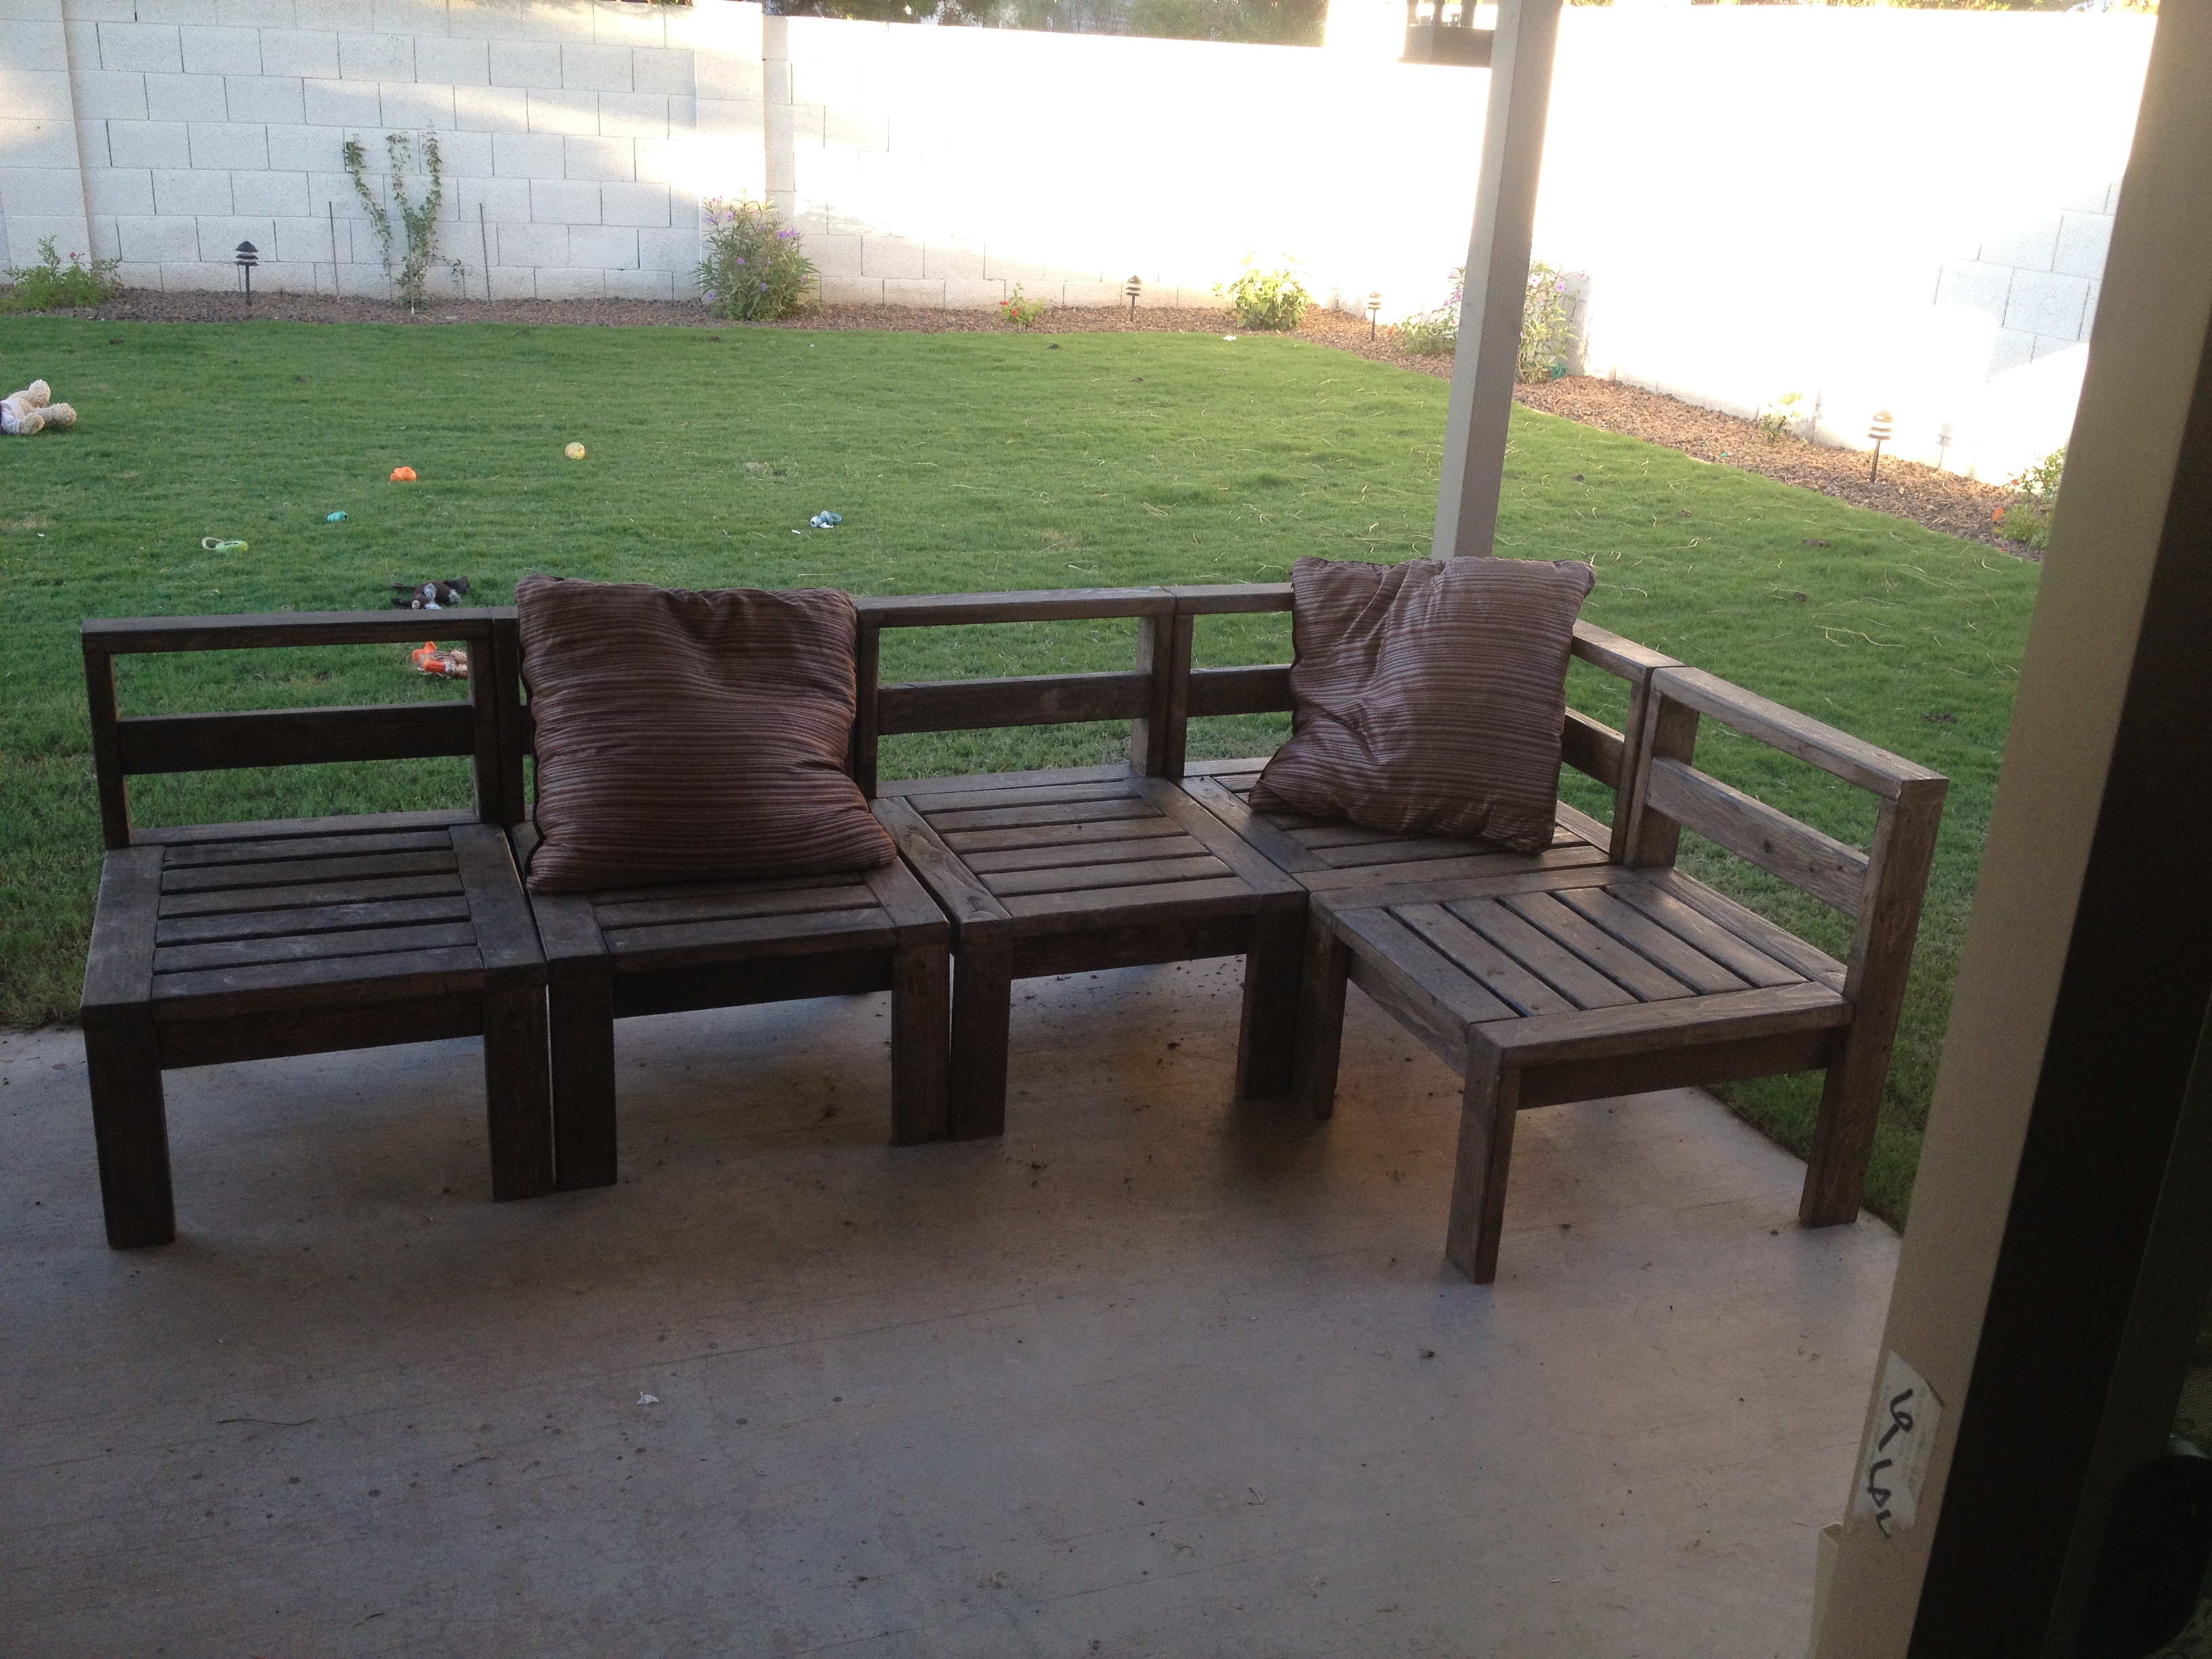
Made from only 2x4's! Much much cheaper than buying an outdoor sectional!
Estimated Time Investment
Day Project (6-9 Hours)
Recommended Skill Level
Intermediate
Comments
The Greenhouse Gets a Custom Door Window!
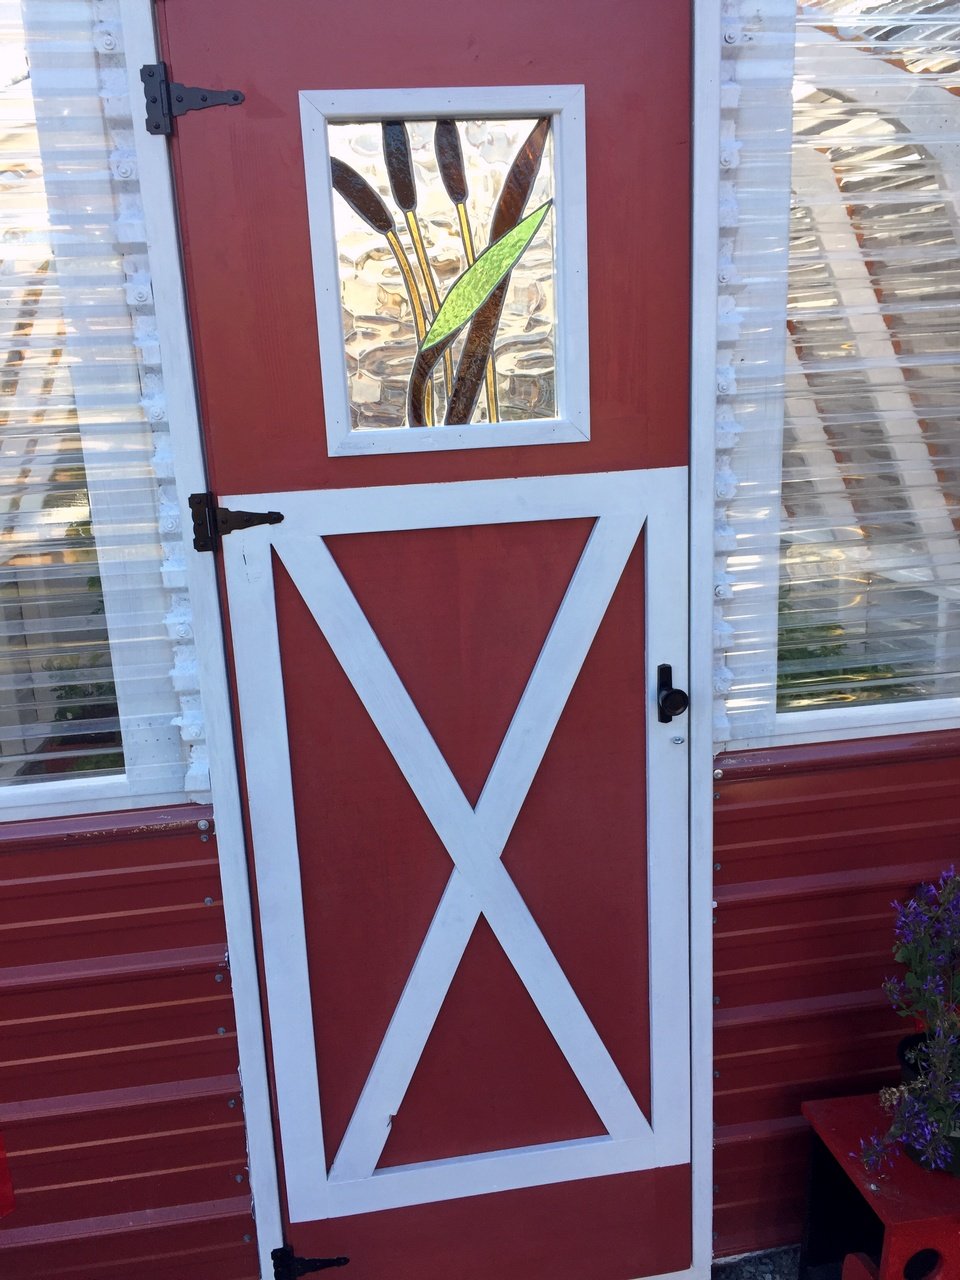
I knew I wanted an unusual window in our new greenhouse door. It took a lot of looking, but finally found what I was looking for!
Built from Plan(s)
Comments
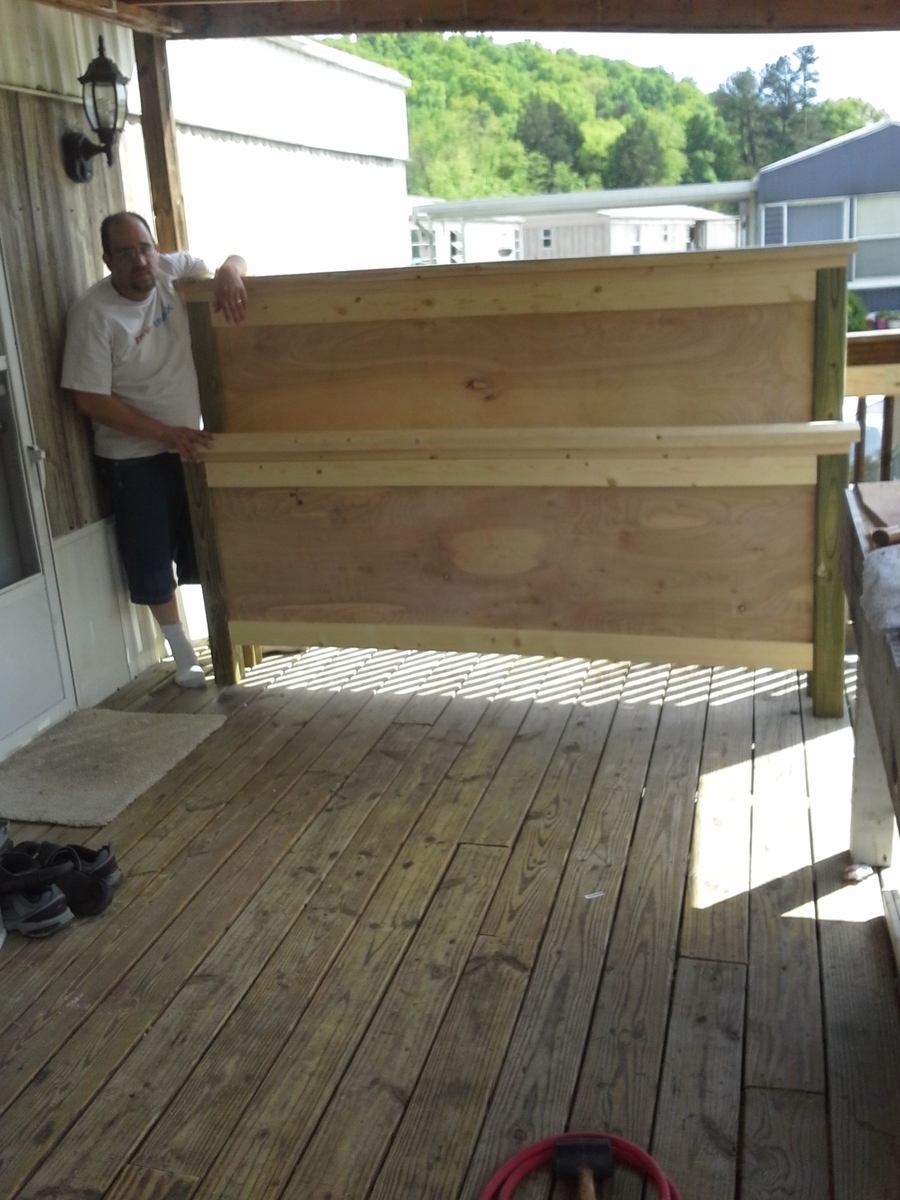
King Size Farmhouse with mods

As our very first project we decided to go big or go home as the expression goes lol and it turned out great.
Let's start first with the list of mods that we did.
1. We wanted the bed to be higher. A lot higher. Gives more room for storage under the bed also. Plus we like high beds and it serves to keep 2 out of our 3 dogs off completely since they can't reach anymore \o/
2. We raised the footboard up 12" in height. So everything on the footboard height we just added 12" to which was really simple to do.
3. We added side rails, and despite the fact I thought wife was crazy she wanted 2 x 12 used for this. 12" wide so that it would look a lot better plus cover the the box spring and help hold mattress into place. We couldn't find a reasonable sized board that wasn't pressure treated so ended up getting a 2x12 that was 16 feet long, and just had it cut down to 7' long pieces at the store.
4. We swapped out the paneled look on the headboard and footboard with sheets of hardwood plywood. If your not adjusting the footboard as much as we did you could get away with a single sheet but we went so much higher that we had to use 2 sheet and have a lot of leftover wood.
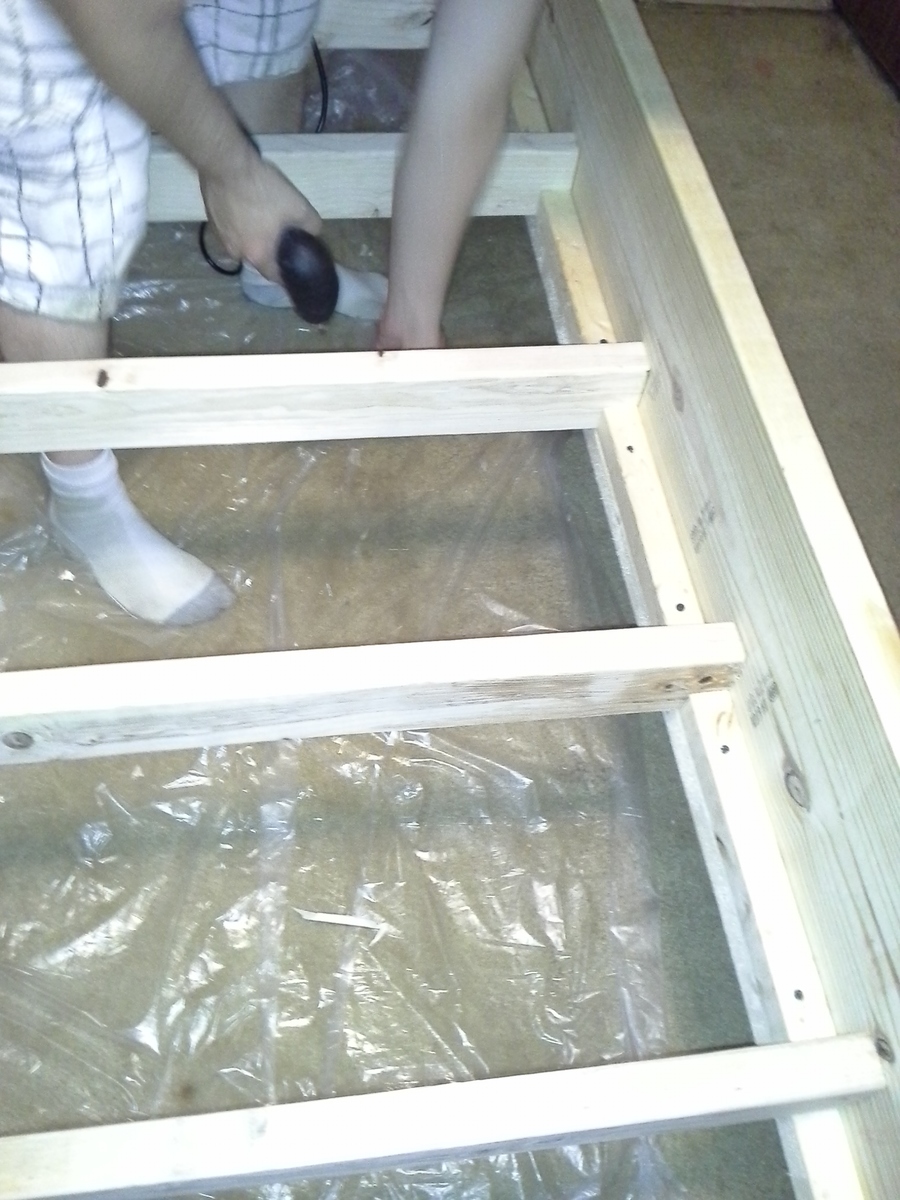
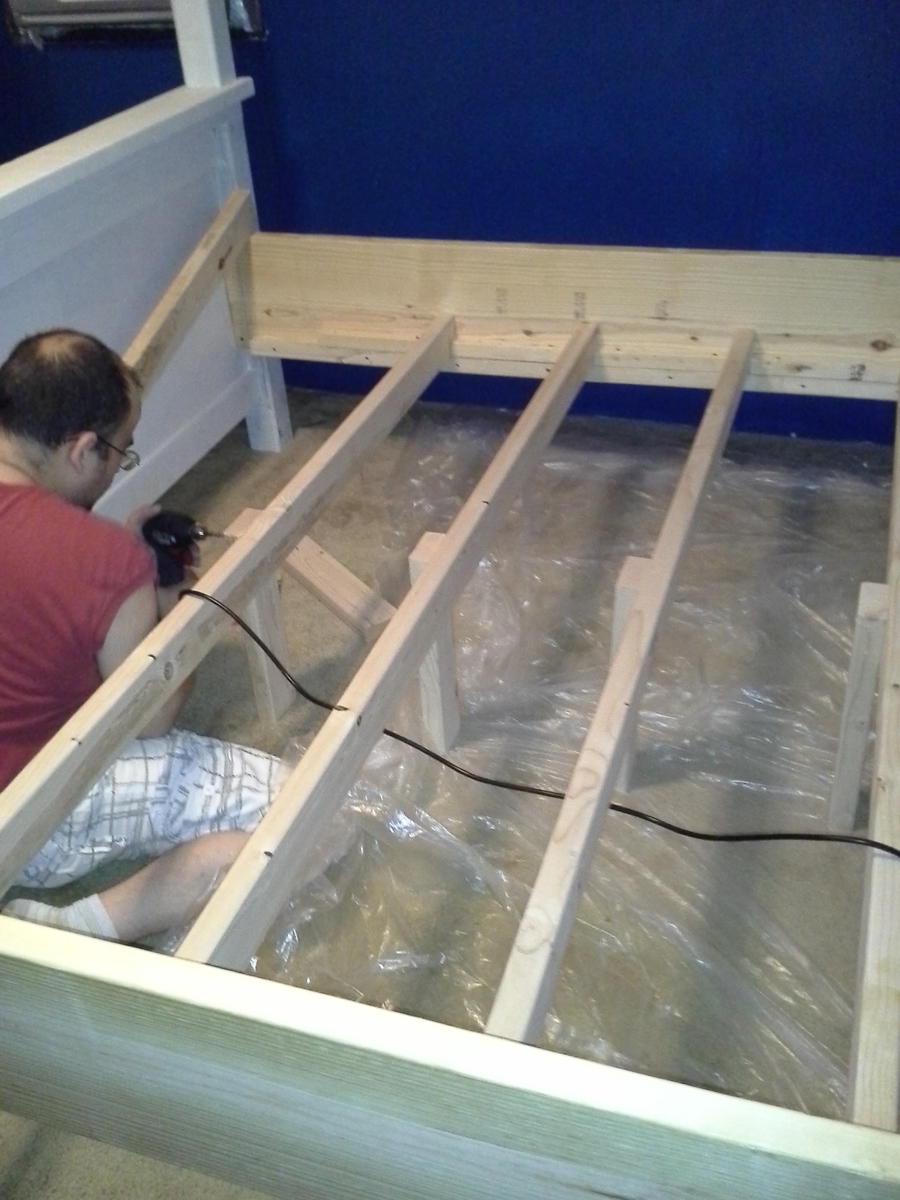
5. We did slats to support the mattress and boxspring and added small legs to them also. We just added furring strips ($1.82ish) to both side rails on the very bottom so they would be flush. Used wood glue and 3" screws to hold them onto the side rail using clamps and made sure they were thoroughly secured. From there, we just measured across and cut 2x4's to fit and slide them into place. We used the extra parts of the 2x4's to make legs that we put into the center of the boards also to help give a bit of extra support. Plus, to ensure stuff doesn't move around at all, we added an extra furring strip cut into pieces that we used to help hold the 2x4 supports into place. Only took 1 of those to do that and works out great.
Some tips:
Now, we had issues locating 4x4's at the local big box retail hardware stores. The only options there were pressure treated (ok for our usage) but if your wanting to stain the bed would need to use an actual lumber store which could get them, but the cost was approx $3 more each and had to wait for them to come in. We opted to use pressure treated since they were already available, we were planning to paint so the look difference wouldn't matter, plus we have 2 male dogs who are being difficult about marking so the pressure treated aspect helps protect against them. -.-
As for the side rails. We looked through tons of posts and saw very little about this. What we did was attach the side rails onto the insides of the 4x4's. For the footboard end there is just under 2" of space or so that you can connect to, and of course on the headboard side you have the entire area to work with. Worked out great. We initially attached them using 2 3" screws to get them into place and make sure everything was level and squared and after that was all done added in some beefy 4" bolts that we predrilled holes for a bit to make it easier to get them in.
While we were building the bed, we went ahead and did the canopy at the same time. So we just added on a few screws, 4 corner brackets, 4 hanger bolts and then the 4 2x4's. Was approximately an extra $25 or so to do and was really quick. We were planning to do the canopy to start with anyways so bought 4 of the 4x4's and ended up with very little scrap after it was all over and done with.
Total costs all said and done including the paint was just around $300 or so. However, again if your not wanting to completely change the height of your footboard could be cut by approx $50 (cost of extra sheet of hardwood plywood).
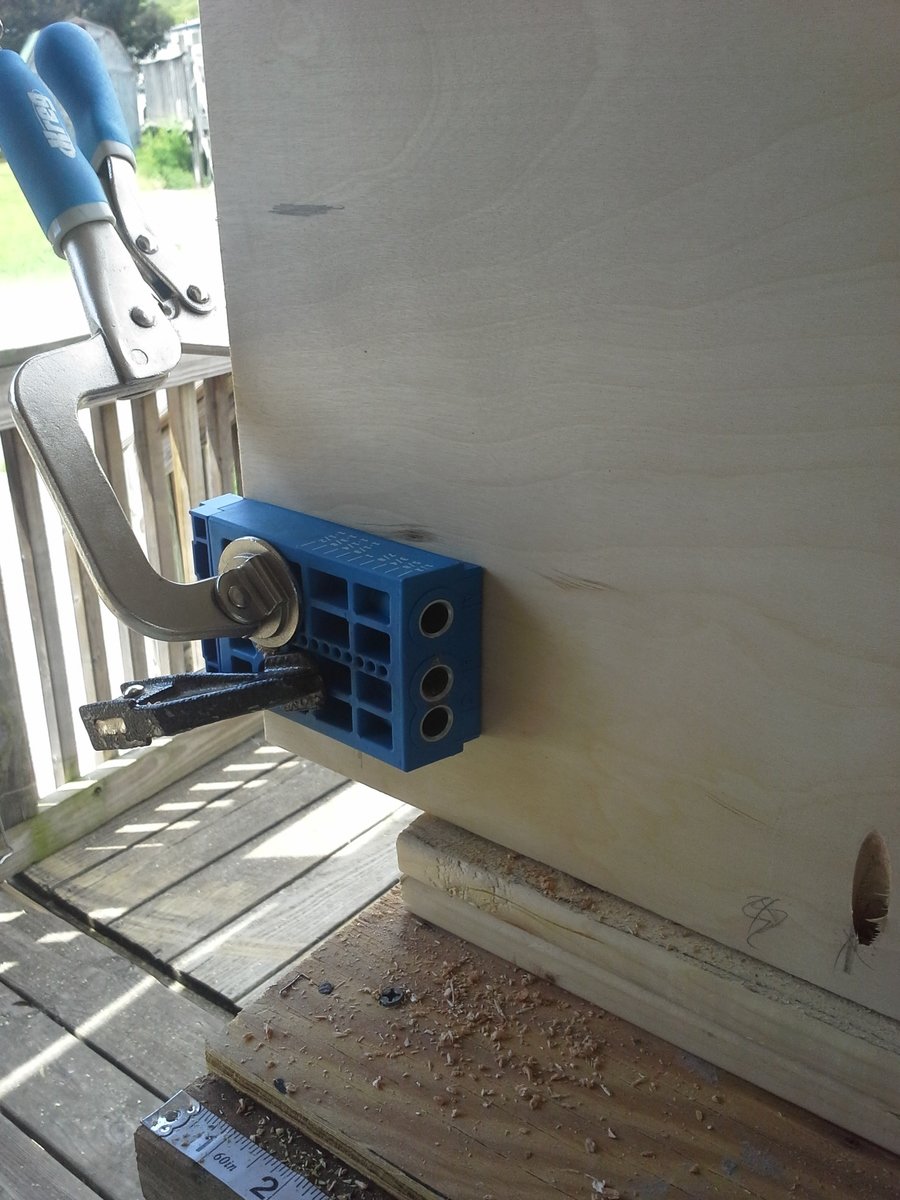
We added a pic to show how we did the pocket holes for the hardwood plywood on the sides. Since the directions themselves call for just the 1x8's to be used figured this might help some. The kreg mounted to the workbench helps loads for the top, but not so much for the sides since we were building on our covered deck and couldn't just turn it straight up on it's side.
Final piece of advice, we debated for a long time between the Harbor Freight pocket hole jig and the Kreg version. Ended up going with the Kreg Master Kit and got a great deal on it ($111 or so plus tax) so saved a bundle there which helped. HF sends out 20% off 1 item coupons all the time, we took that to Lowe's and used it for the Kreg jig set without any problems. So would definitely recommend this if your considering and trying to decide which to buy. Cost differences between them is huge, and if your scraping it can be a great way to get the costs a lot lower.
Also, seriously, seriously, seriously, get a nail gun and air compressor. Don't nail stuff in yourself. It saves a huge amount of time. We picked up an air compressor for $150 that works awesome and has great CFM and found some great air tools off CraigsList that cut the costs for a nailer down to just $10 and gives tools to use on plenty of other projects so was a really great investment for the time it saves. Definitely beats nailing by hand with a normal hammer.
Final advice, if your painting check the weather. We had problems with the primer drying to start with since we had primed the pieces outside and left them on the deck to dry and it started pouring something awful. So the pieces had to be brought inside to finish priming and fix the parts that were messed up by the rain coming in on them. Without this complication a single coat of primer might have worked but not sure. Overall still looks great though and quite happy with the results.
As for the paint, took less than 1/2 a gallon to do all 3 coats and still have enough left over to repaint the rest of the bedroom furniture to match. Hopefully this gives enough information to help anyone looking to change things up. We were really nervous about it to start with since we were shifting so much from the original plans but it came out great and my wife loves it so I'm definitely a happy guy.
We brought all of the wood home by carefully packing it all into our lil 4 door Saturn. Yes it was a super tight fit, but it was possible. We didn't have access to a truck, and none of our local stores had a truck that was available to rent. So you shouldn't stress out if you can't get your hands on a truck it's still possible to get everything home you need to do this project. Just get as many of the huge pieces cut as possible at the store.

Built from Plan(s)
Estimated Cost
$300 but could be cut significantly
Estimated Time Investment
Weekend Project (10-20 Hours)
Finish Used
Killz 2 Primer (2 coats to cover thoroughly) and then painted using Olympic Gloss (3 coats to make it super nice)
Recommended Skill Level
Beginner
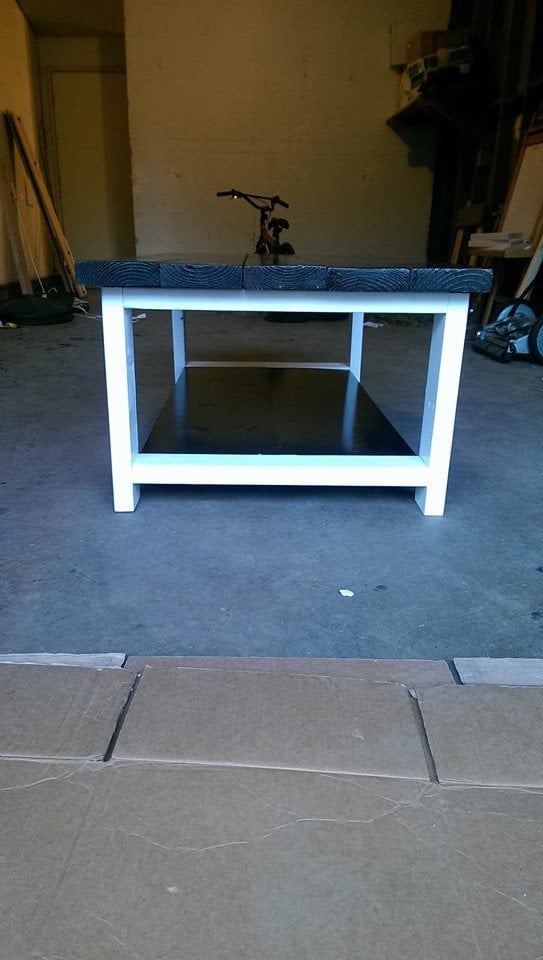
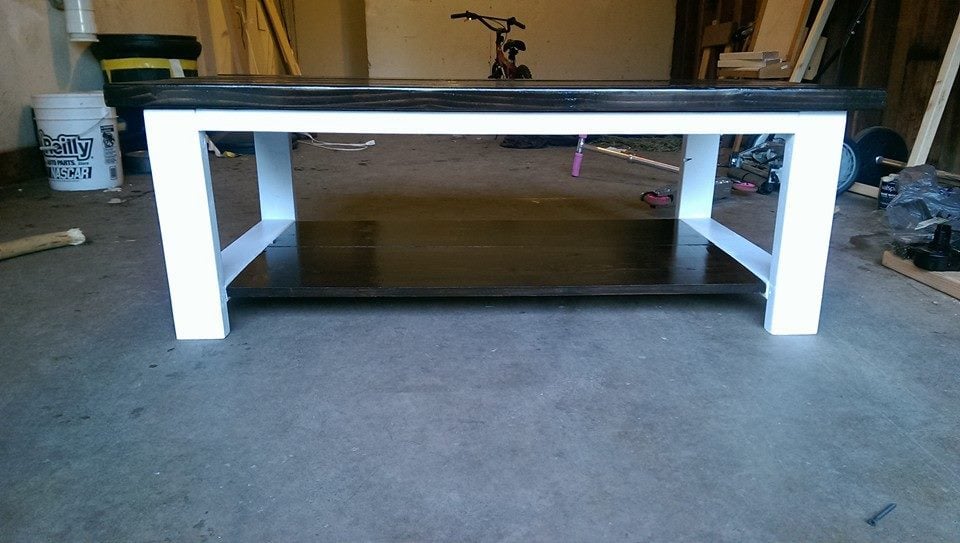
Coffee Table
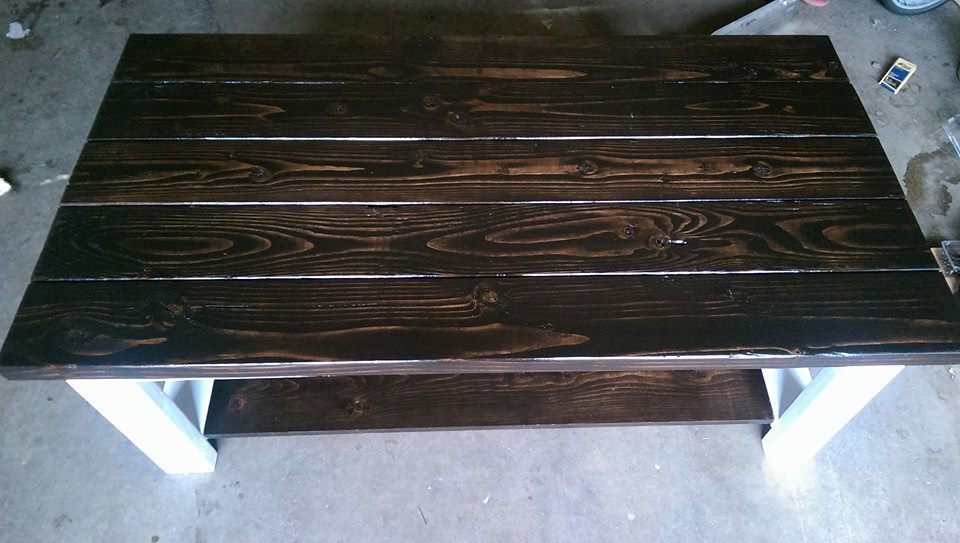
Second coffee table I made following these plans. Took me a while to complete only because I was on 12 hour shifts at work, but I tracked the time it took me to finish it and it was 5 hours.
Built from Plan(s)
Estimated Cost
$65-$75
Estimated Time Investment
Afternoon Project (3-6 Hours)
Finish Used
The base is painted with a white semigloss paint and the tabletop and bottom shelf is stained kona with polyurethane. I did multiple coats of each product.
Recommended Skill Level
Beginner
Comments
springncreations
Fri, 07/09/2021 - 15:42
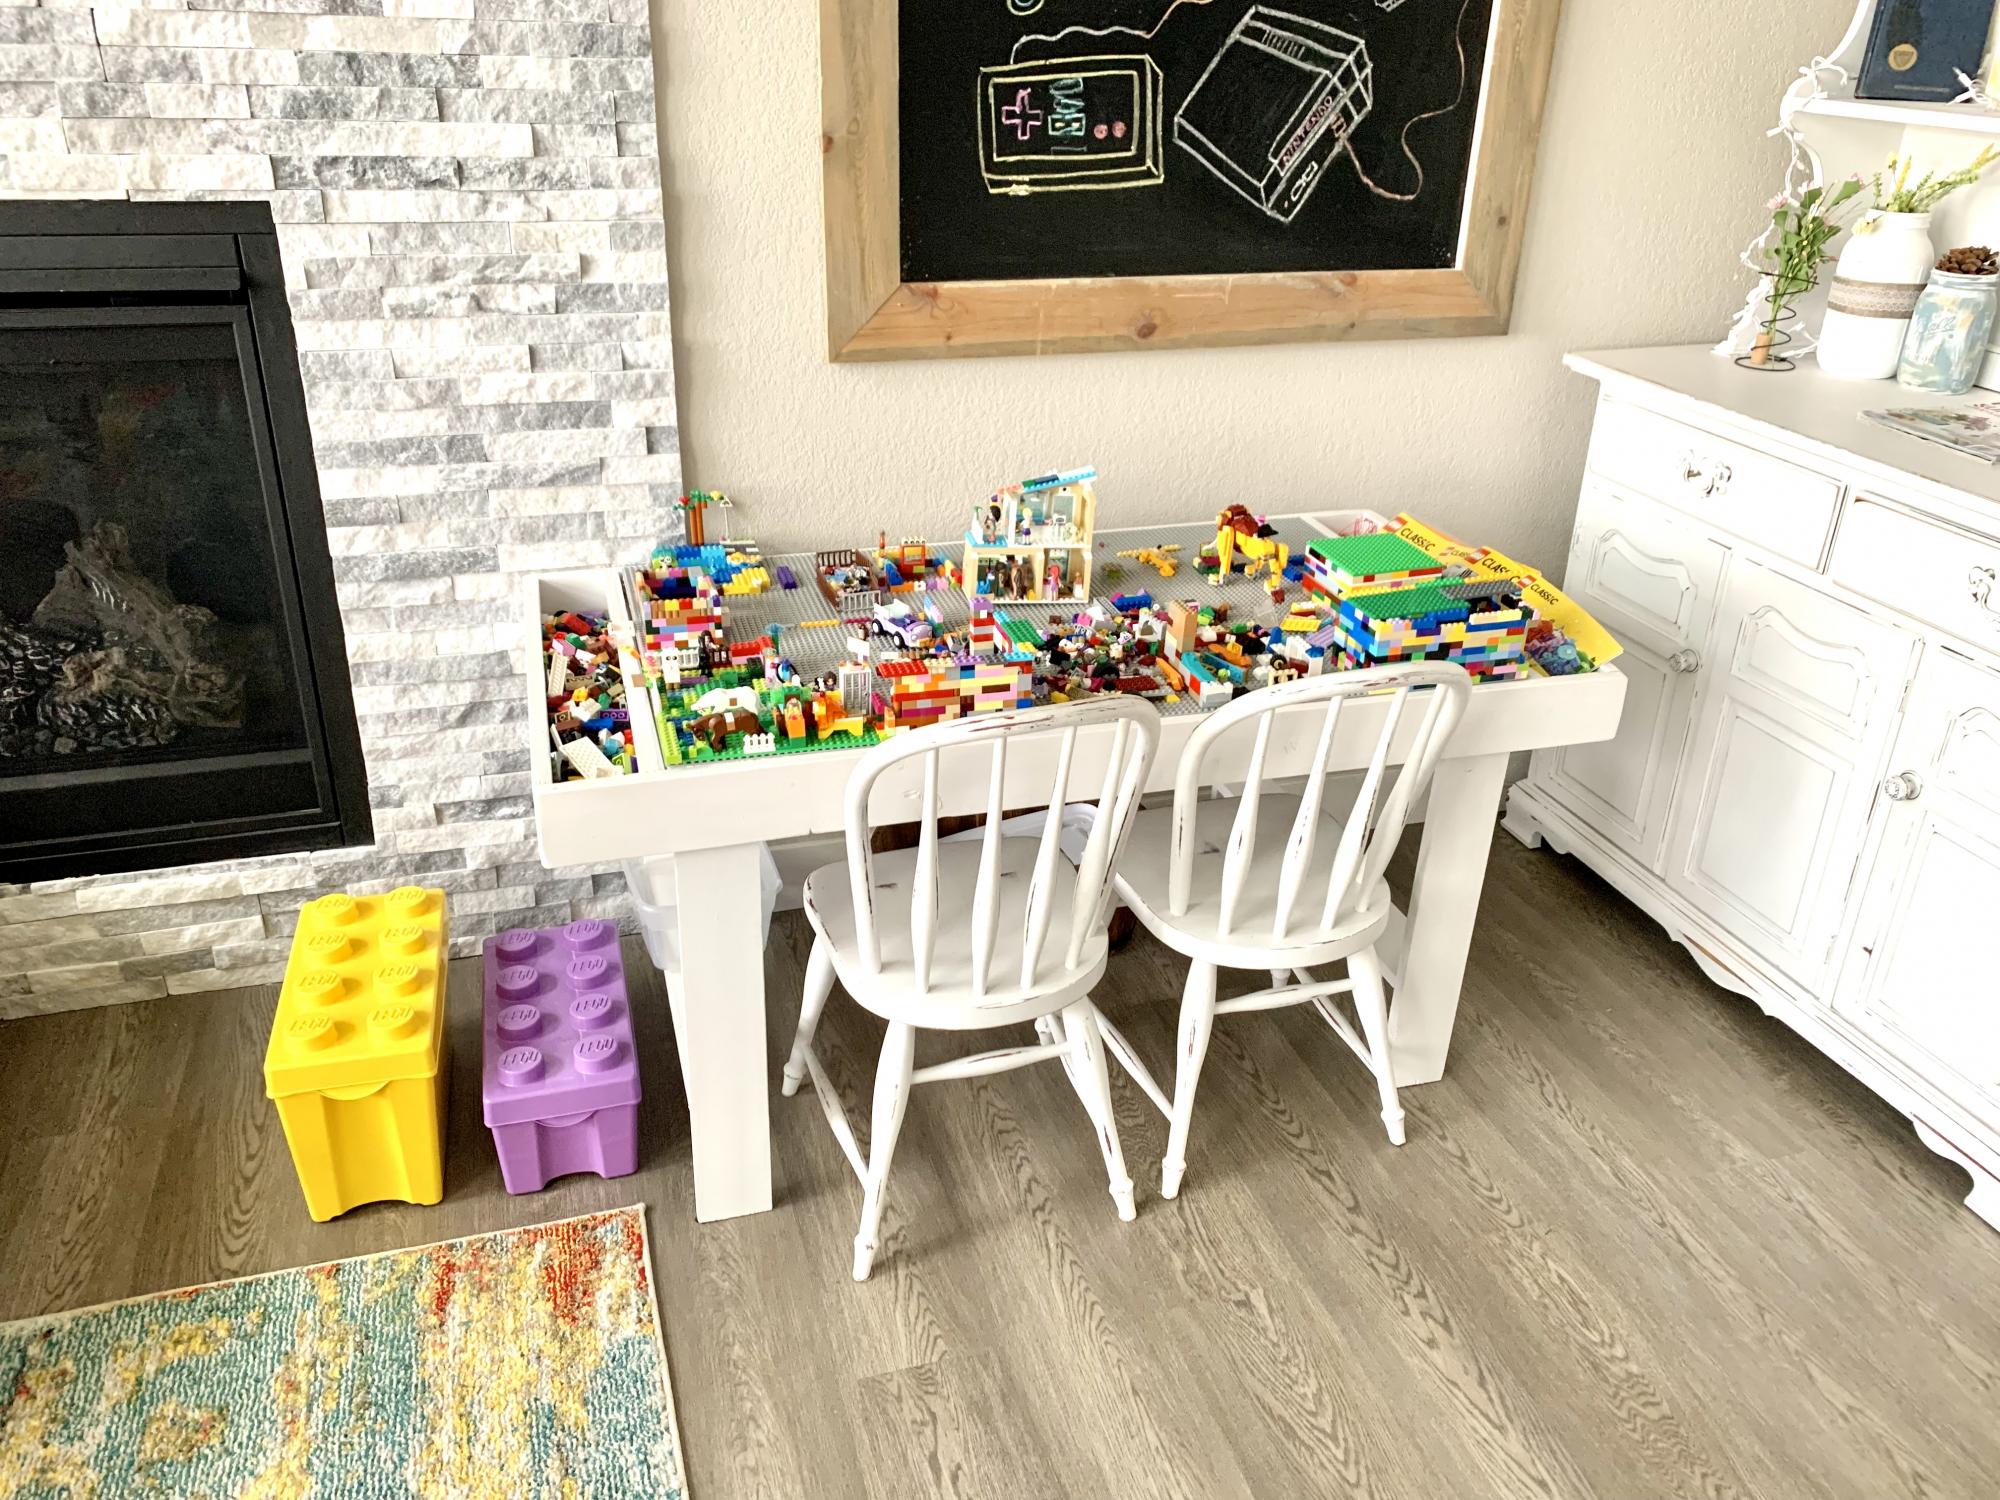
Lego table !
Nice and sturdy , I painted it in chalk paint and sealed it up …. Added 12 gray lego plates (I had to cut 4 to size with the circular saw to fit perfectly)
Ana White Admin
Fri, 07/09/2021 - 16:30
Such a great solution for all those legos!
Thank you for sharing, it looks like the kids have been busy enjoying it!