Ana White's Plans... Adirondack Chairs with center table
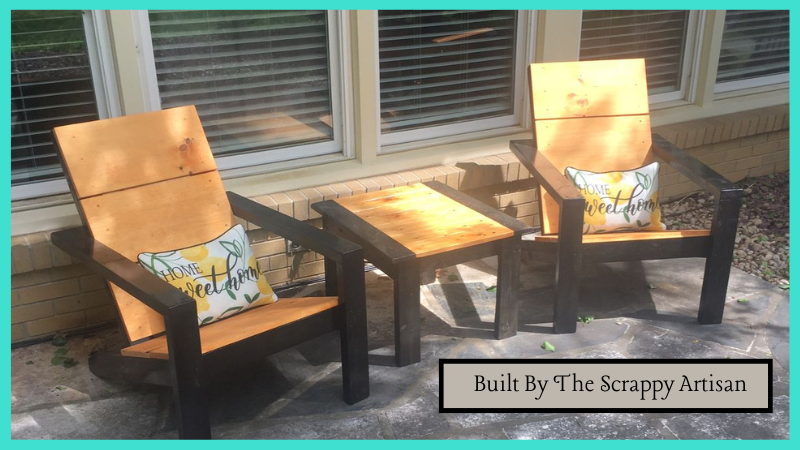
Ana is Awesome! I built these from her plans. It was super easy, lots of fun, and the compliments are non-stop.
Thank you Ana.
Built from Plan(s)
Ana is Awesome! I built these from her plans. It was super easy, lots of fun, and the compliments are non-stop.
Thank you Ana.
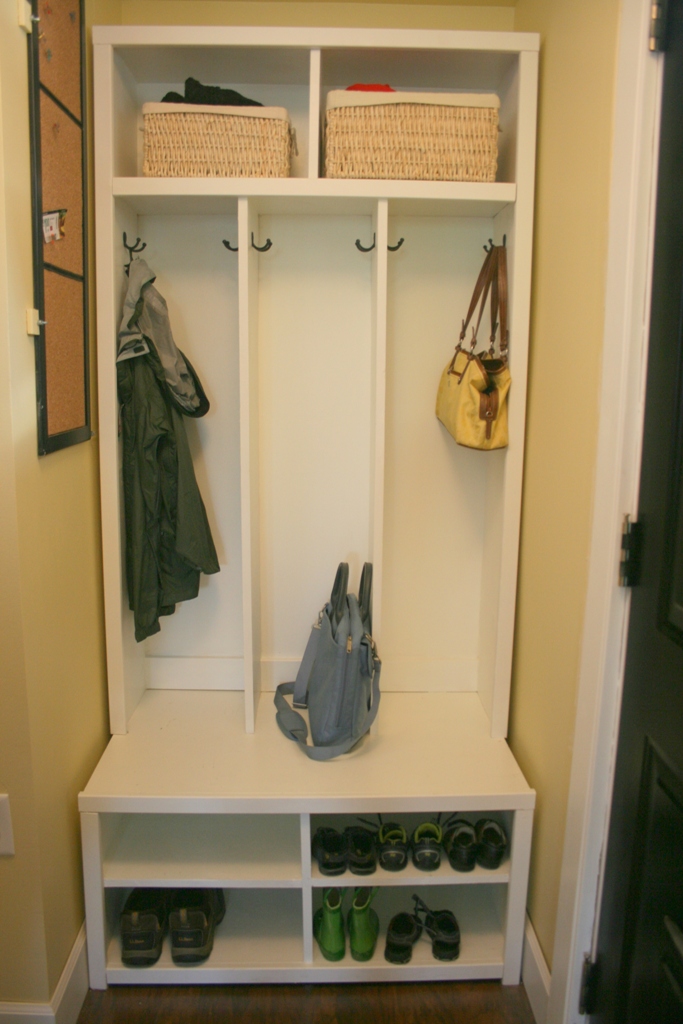
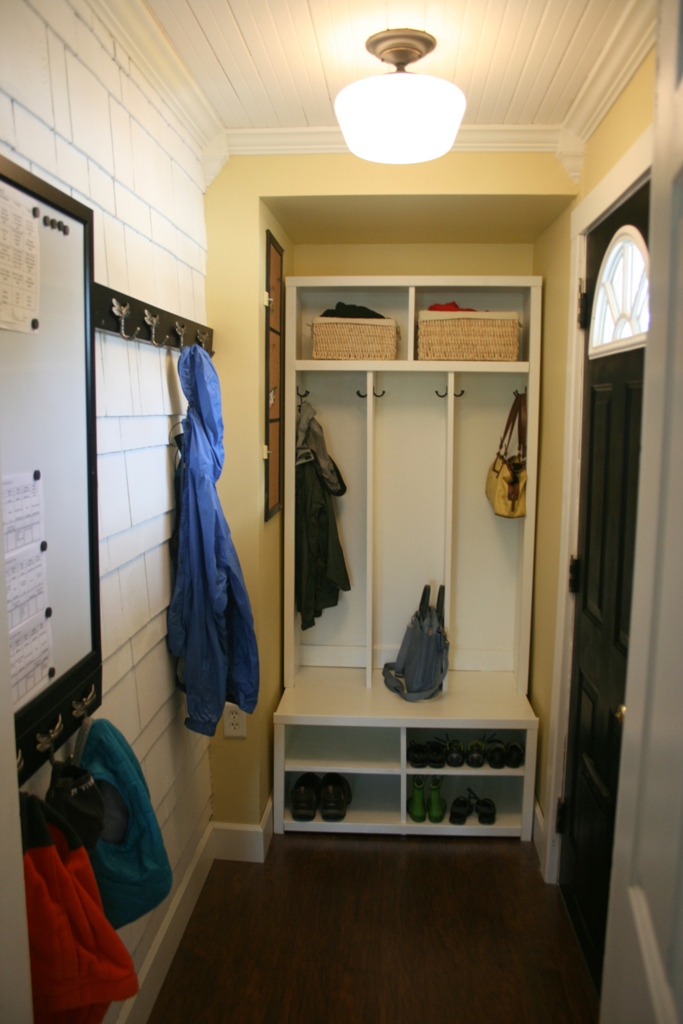
We had a small mud room off our back door that was in need of serious help! We started from scratch in this room - framing, drywall, floor, molding, etc. To complete the room, we modified the Braden Entryway Hutch and shoe bench plans to fit the dimensions of our space, and add a third cubby. It has worked wonderfully!
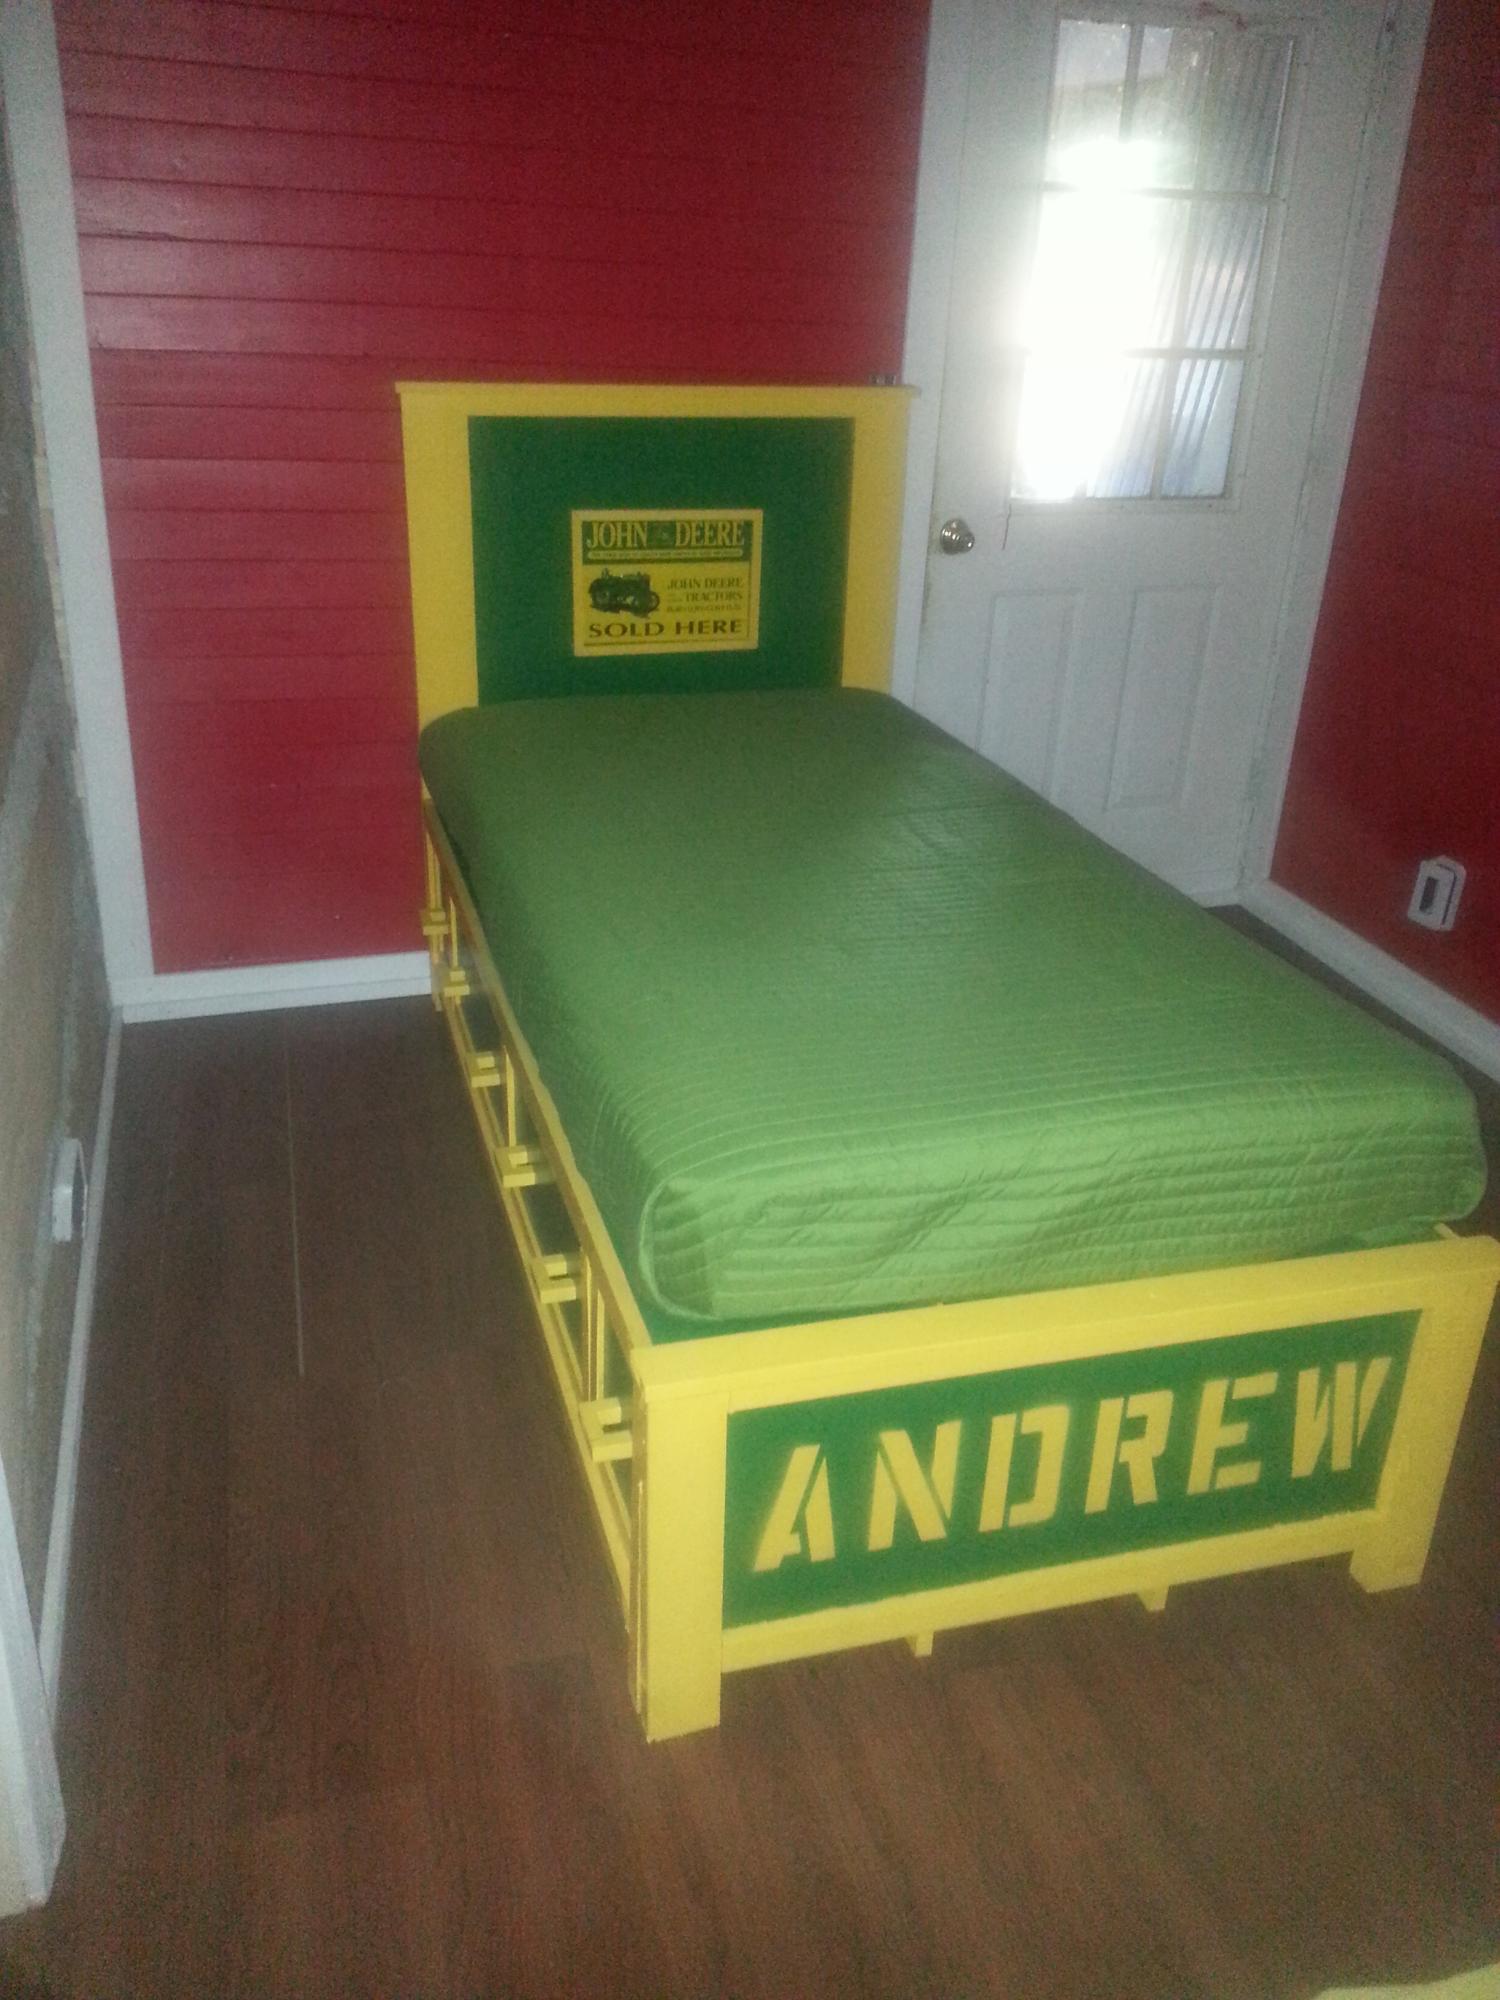
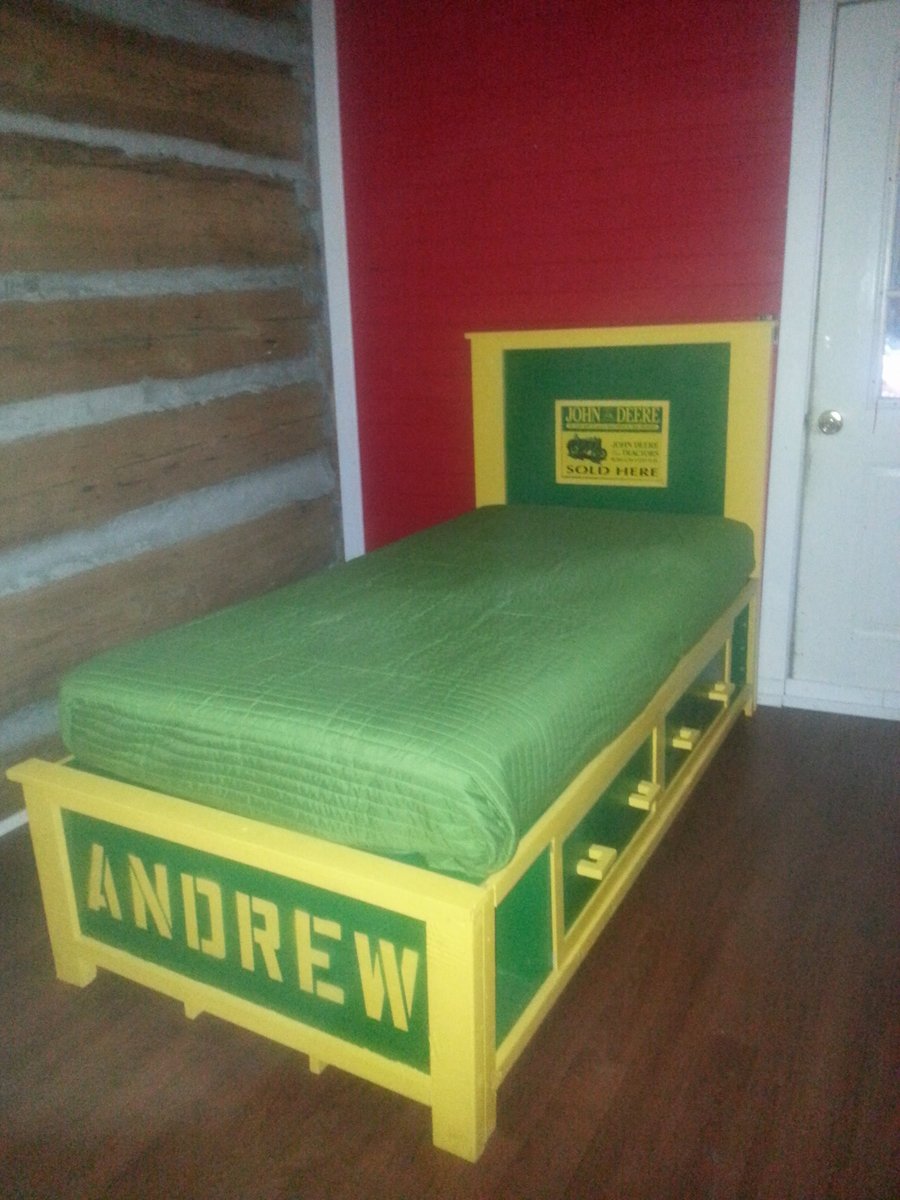
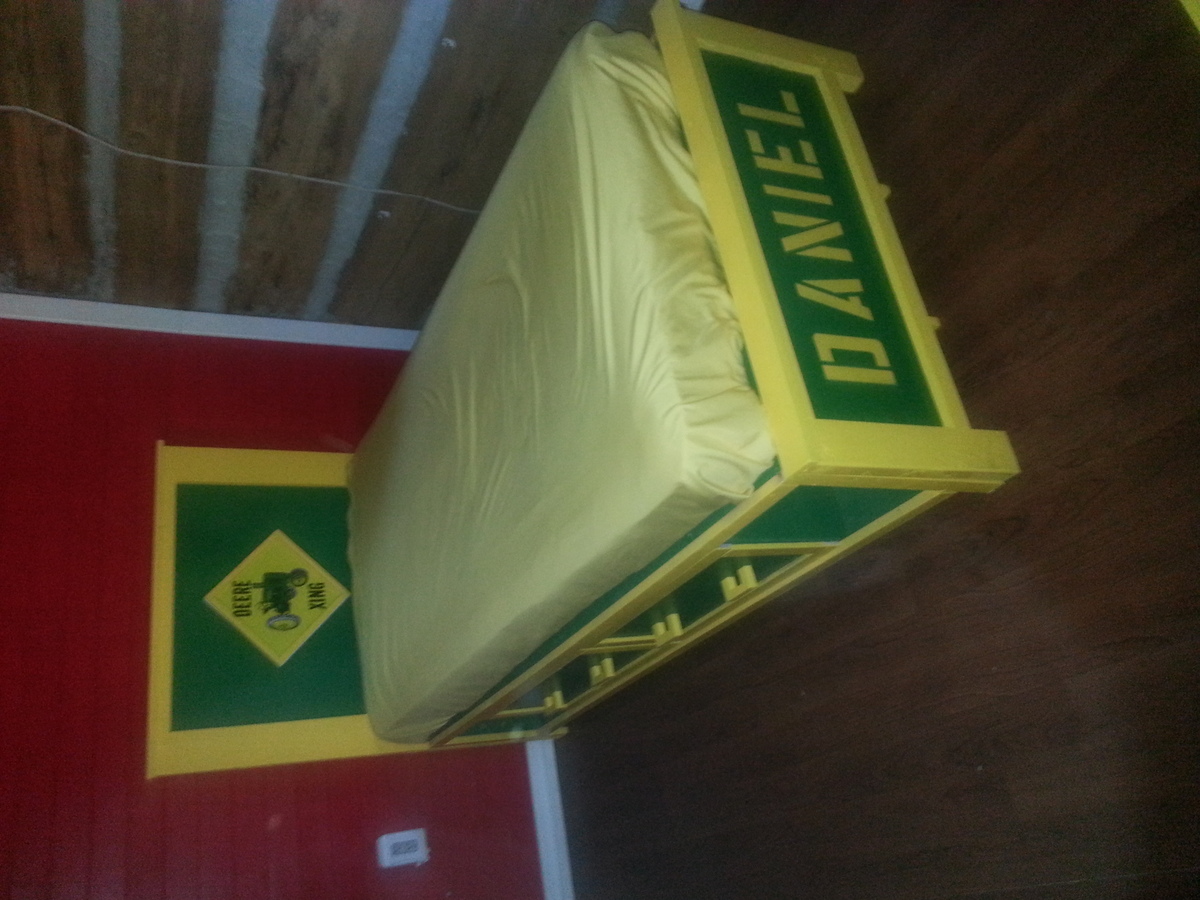
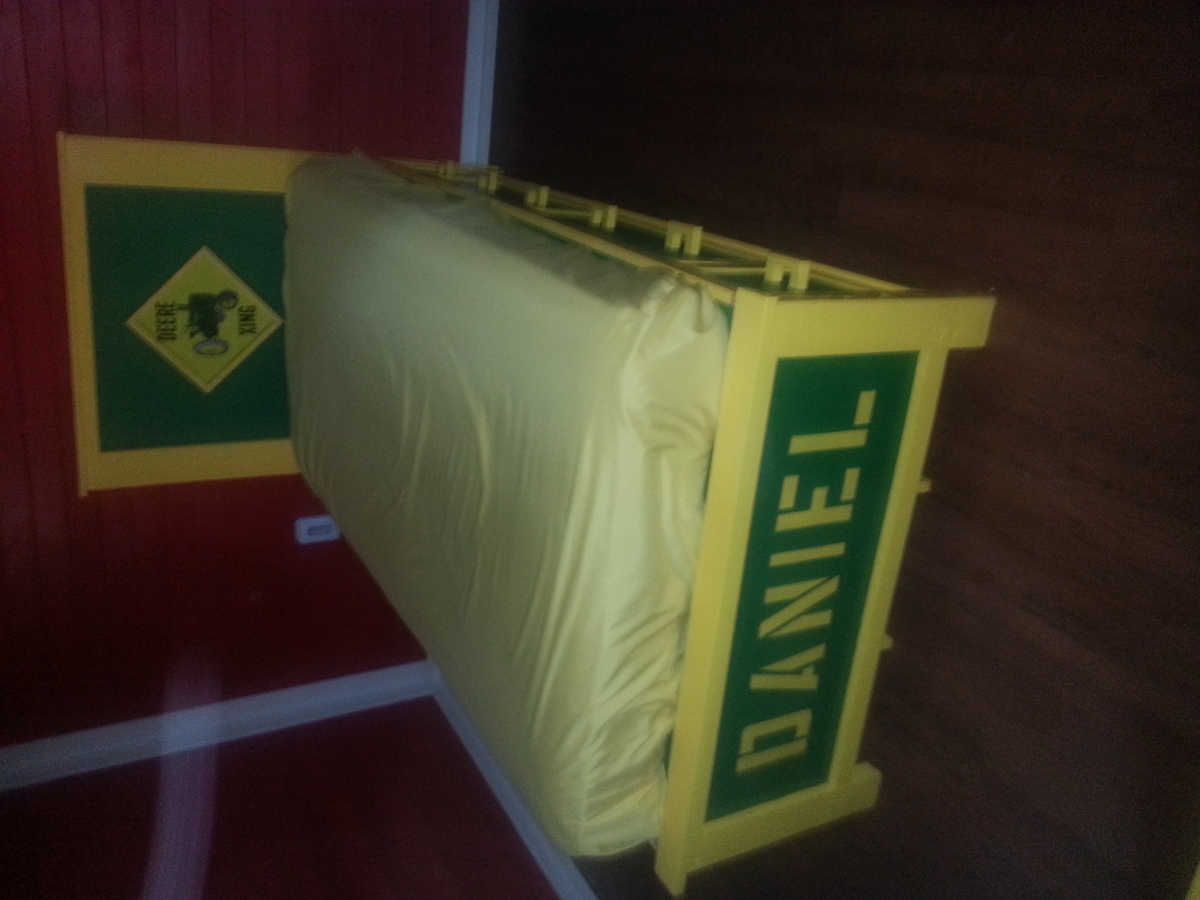
My wife and I have twin 2 1/2 year olds. We needed to get them out of their cribs and into a real bed. At the same time we needed a larger area to store their clothes, shoes, etc. I reviewed and followed Hailey Storage Bed Plan. The only alterations that I made to the plan is that I changed the color, added some decorative touches, and added 6 draws. The bed has a John Deere theme. I attached a John Deere sign on the headboard and then added trim around the sign.
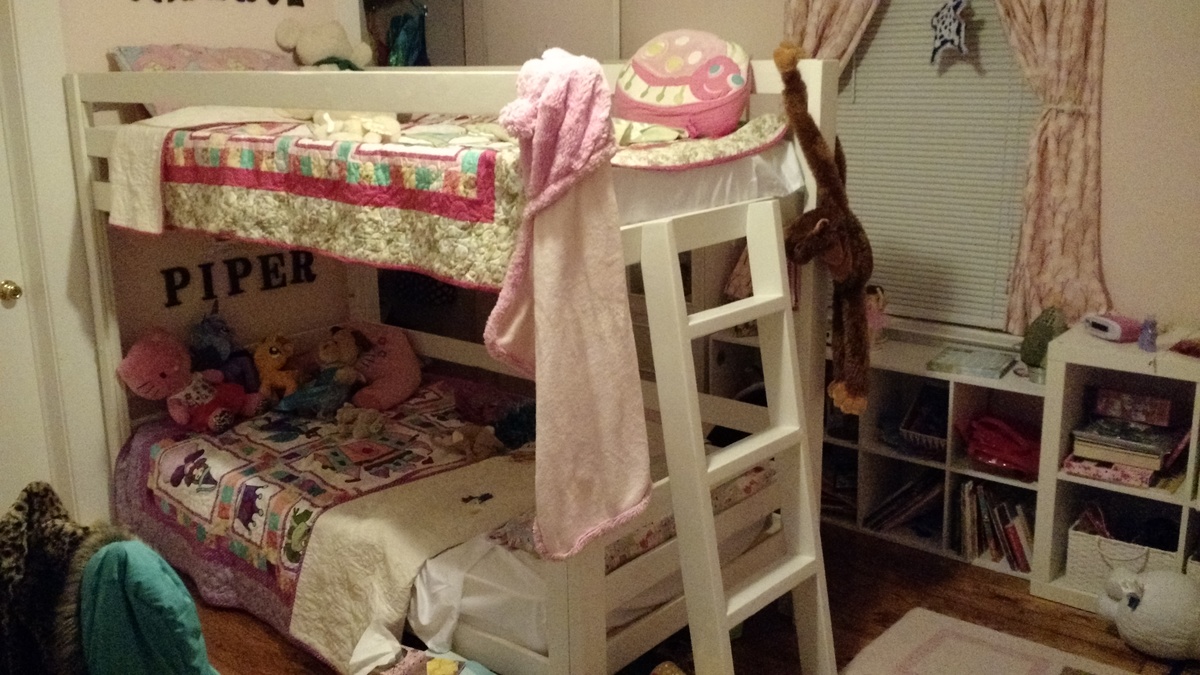
I reworked the Camp loft bed and the classic bunk bed plans to work better in this narrow room. Our kids love it!
farm house bed frame. Easy fun project

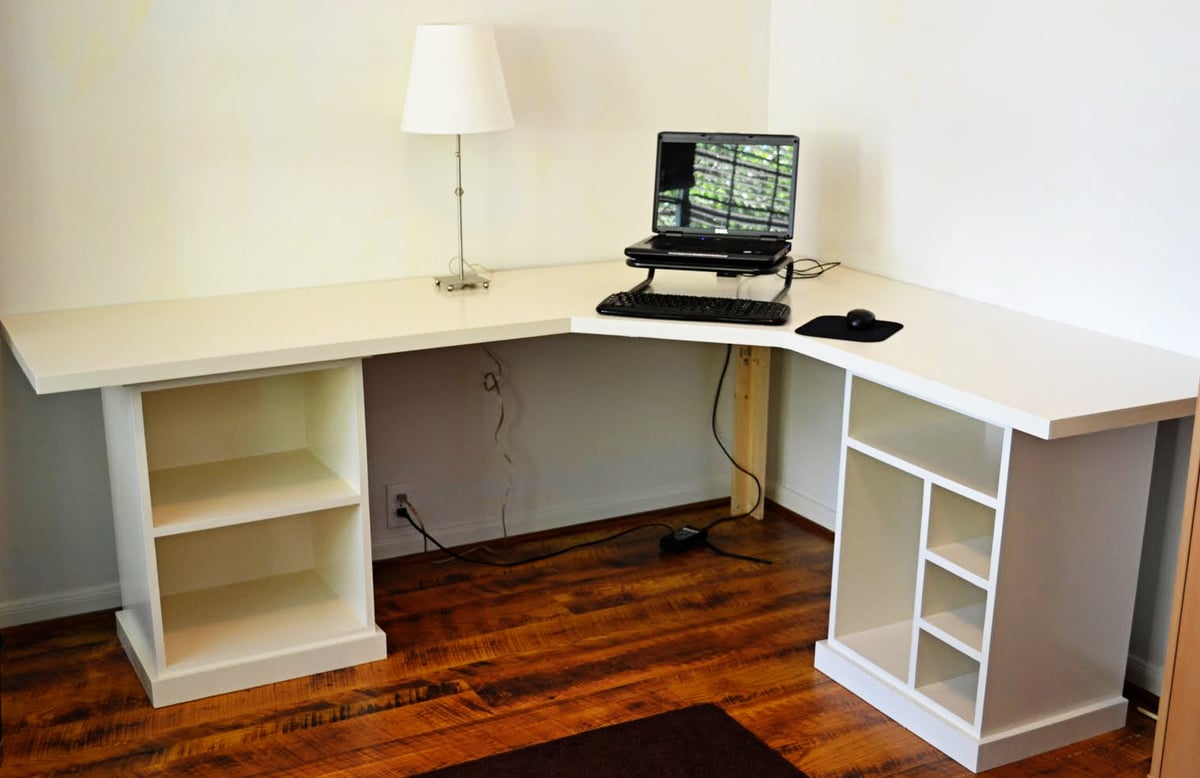
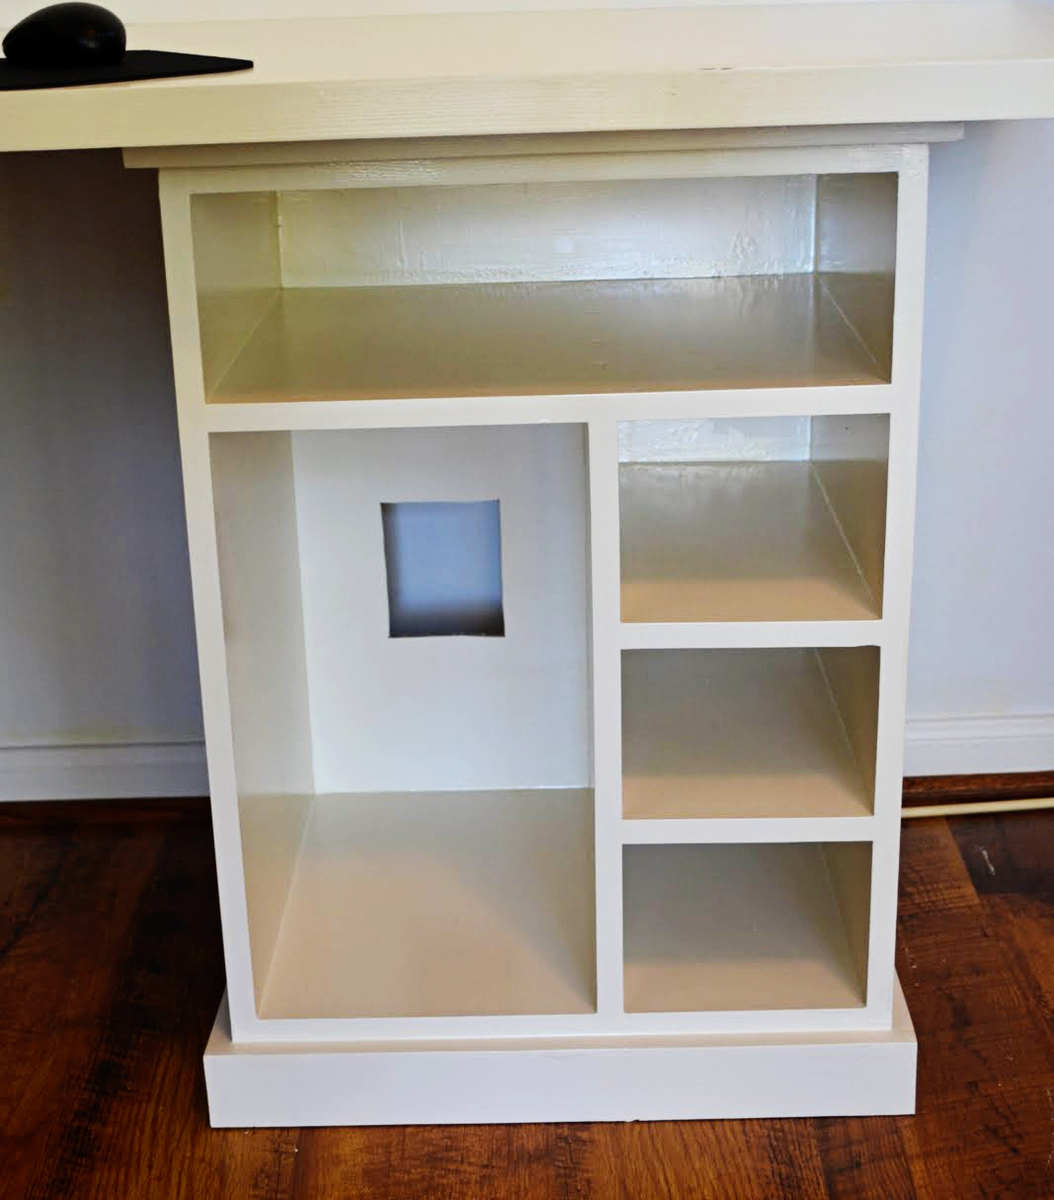
This was all my husband - he did a great job using the modular desk plans to customize (its a bit larger) this desk for our office. He finished it this past weekend so not much on it yet!


Mon, 02/06/2023 - 12:21
WOW, this is so awesome, well done! Thank you for sharing.

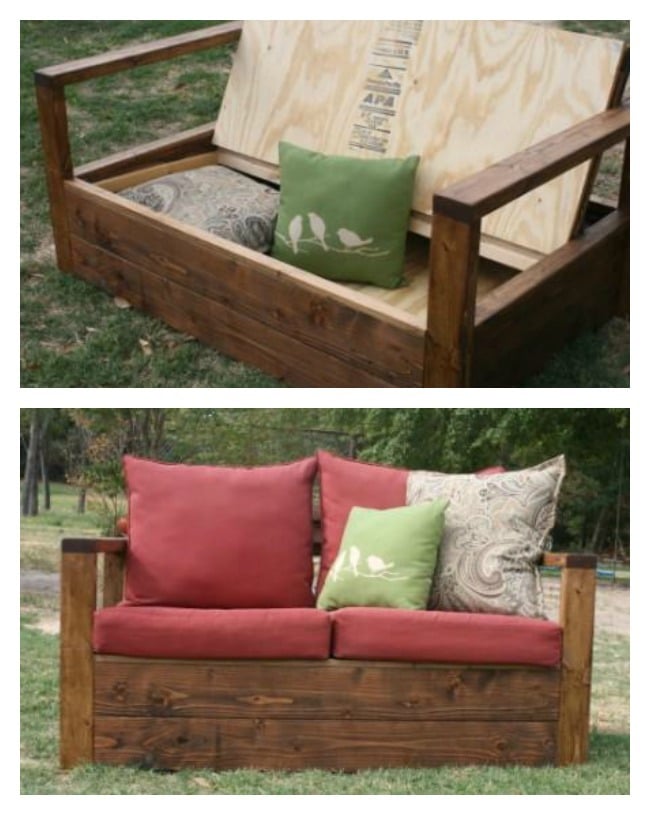
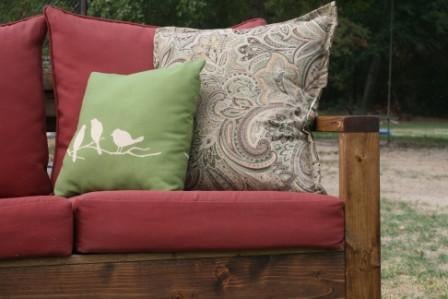
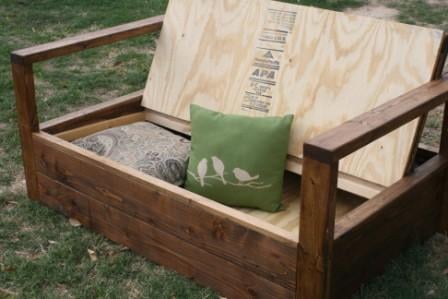
I added storage to the bottom of the simple outdoor loveseat by creating one big board from 2 2x6 boards for each of the front, back, and side aprons using my KregJig. Then I added cleats around the bottom for a sheet of plywood, extra cleats around the top edge for the seat, and put the hinge on the original seat support board.

Our very first build! I love how it turned out and I am so excited to have a great piece of furniture for a fraction of the price!
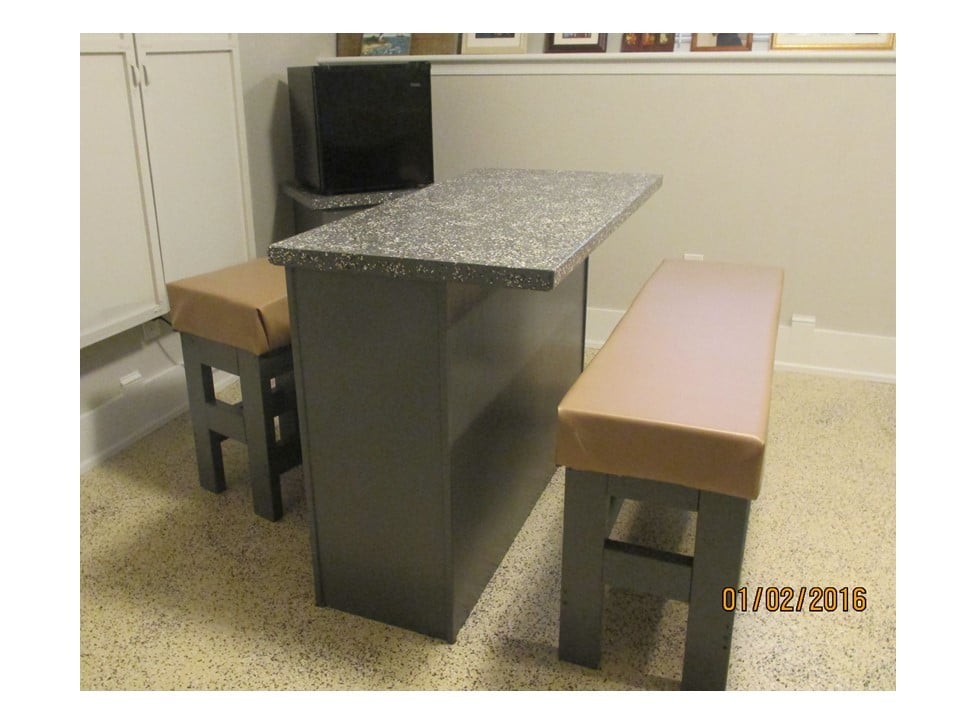
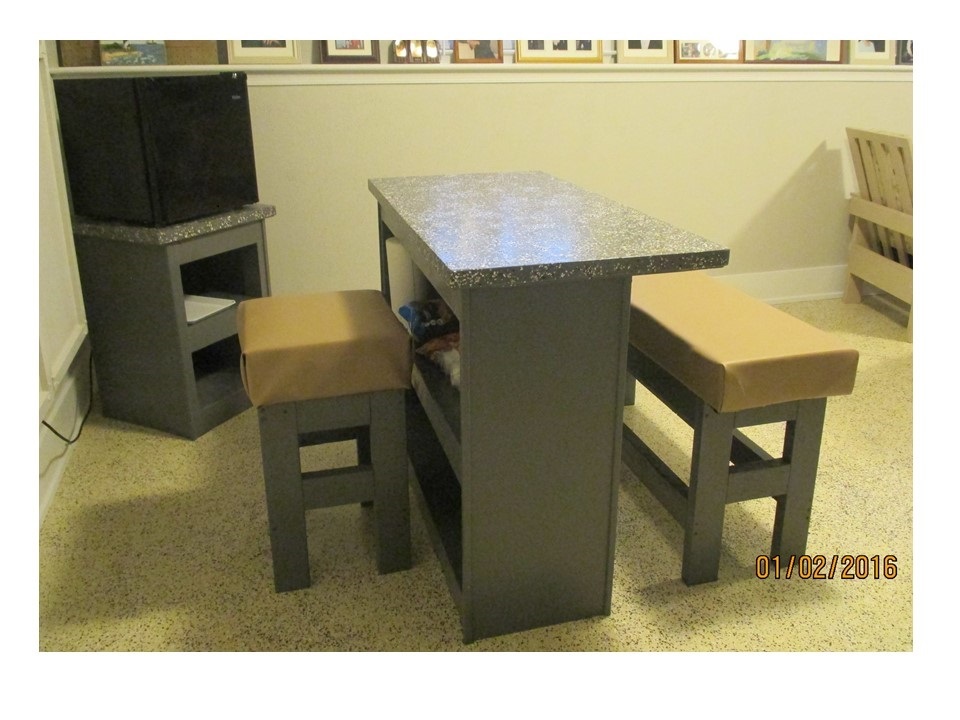
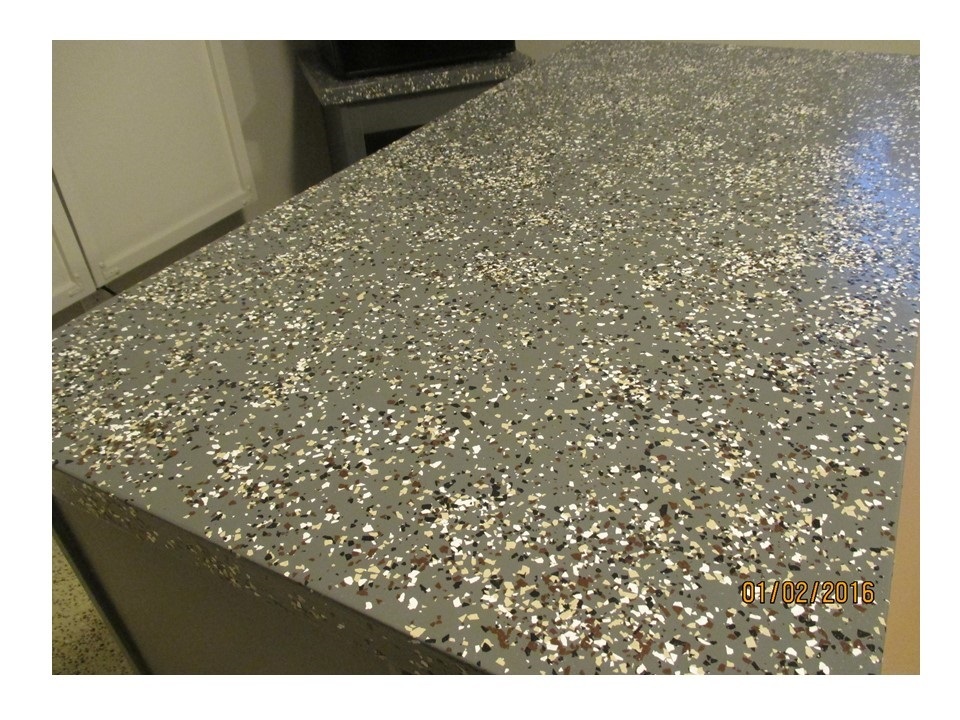
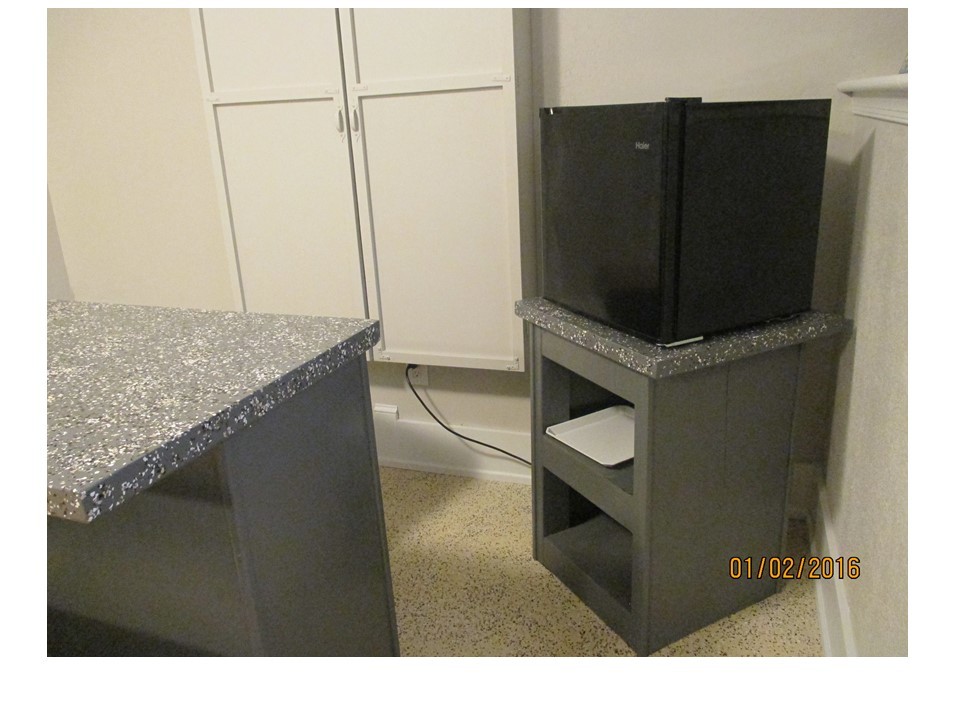
This bar ensemble for our family room was made mostly from reclaimed materials. Inspired by Ana’s plans, and modified to fit spaces and materials available. The 36” tall bar and 30” tall fridge cabinet are made from frames of 2x4, with the tops/shelves/outsides covered in ¼” plywood, and outside edges covered with corner moulding. The bar and fridge cabinet tops are edged in lattice. The frames for the counter height bench and stool are from 2x4. The padded seat for the bench is the back from another bench, re-purposed. The foam for the bar stool is scraps pieced together. Reclaimed materials used (mostly from a room we disassembled): 2x4 – formerly studs ¼” Plywood – painted plywood was formerly used as wall paneling Lattice –was used as trim to cover the wall paneling “seams” Bar stool seat – ¾” plywood from the closet, foam scraps pieced together Bar bench seat – foam and vinyl covered plywood (re-purposed back from another bench)
Picture of my own version of the Ana White Design linked here
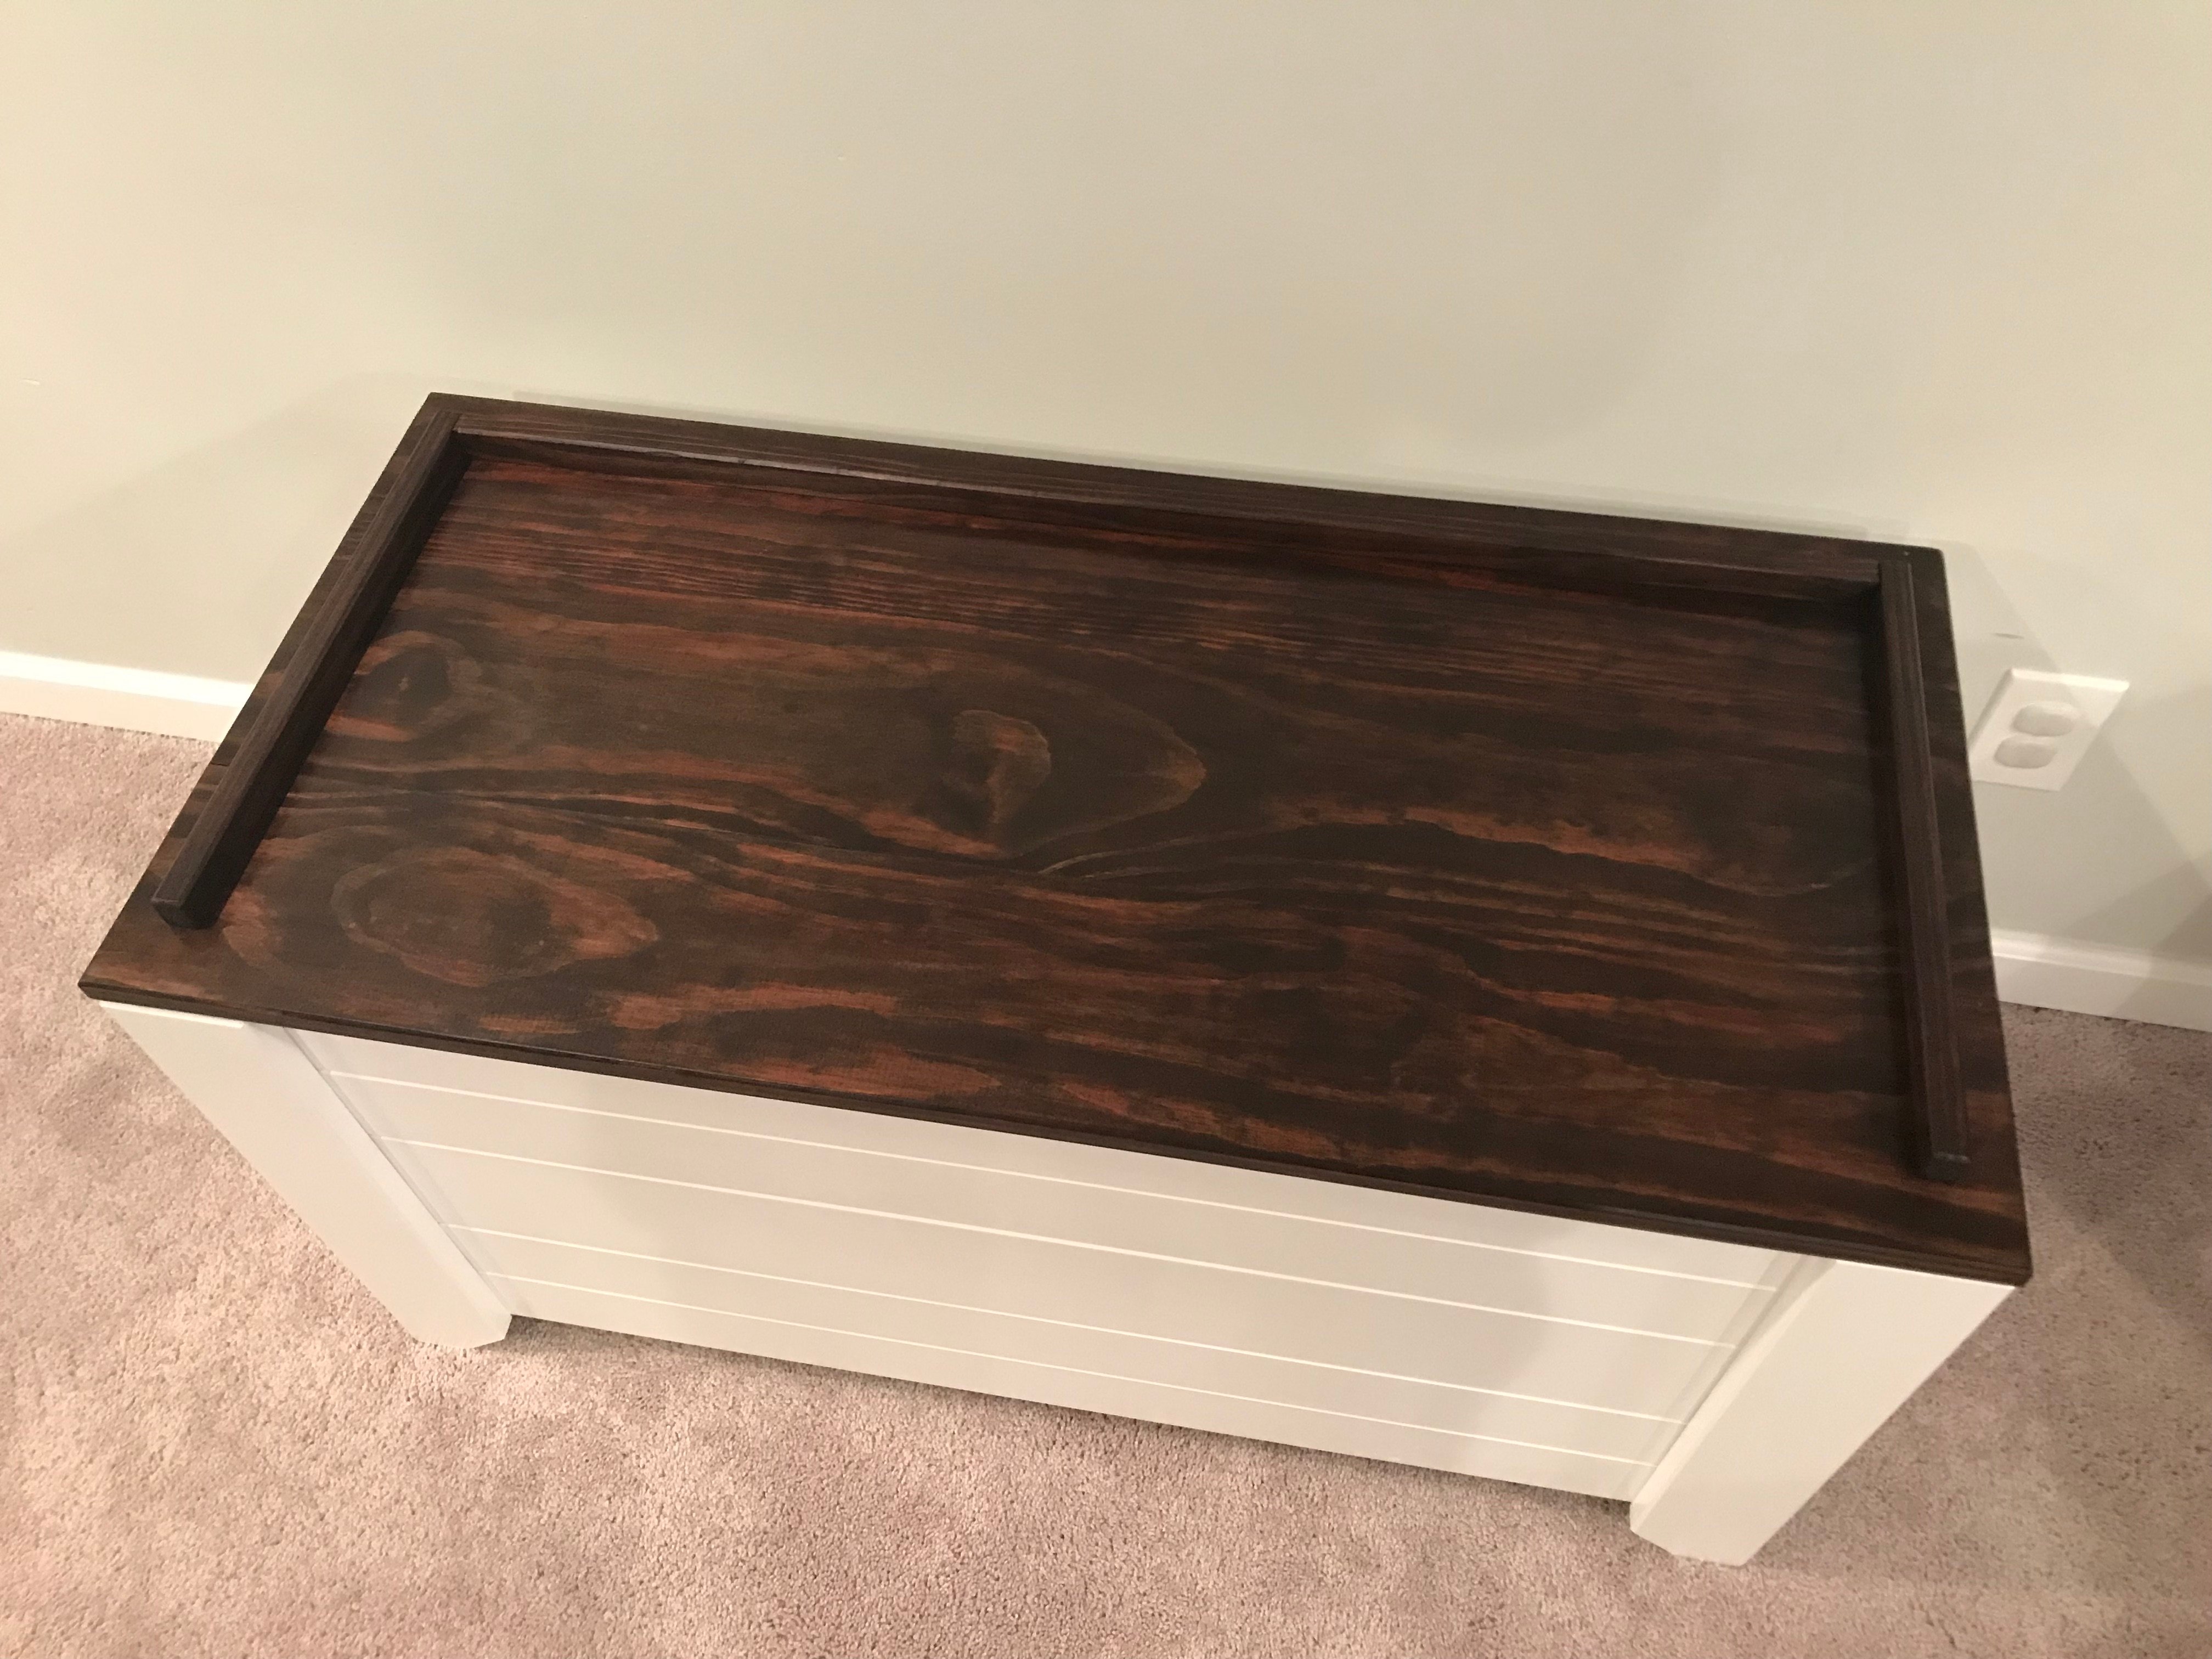
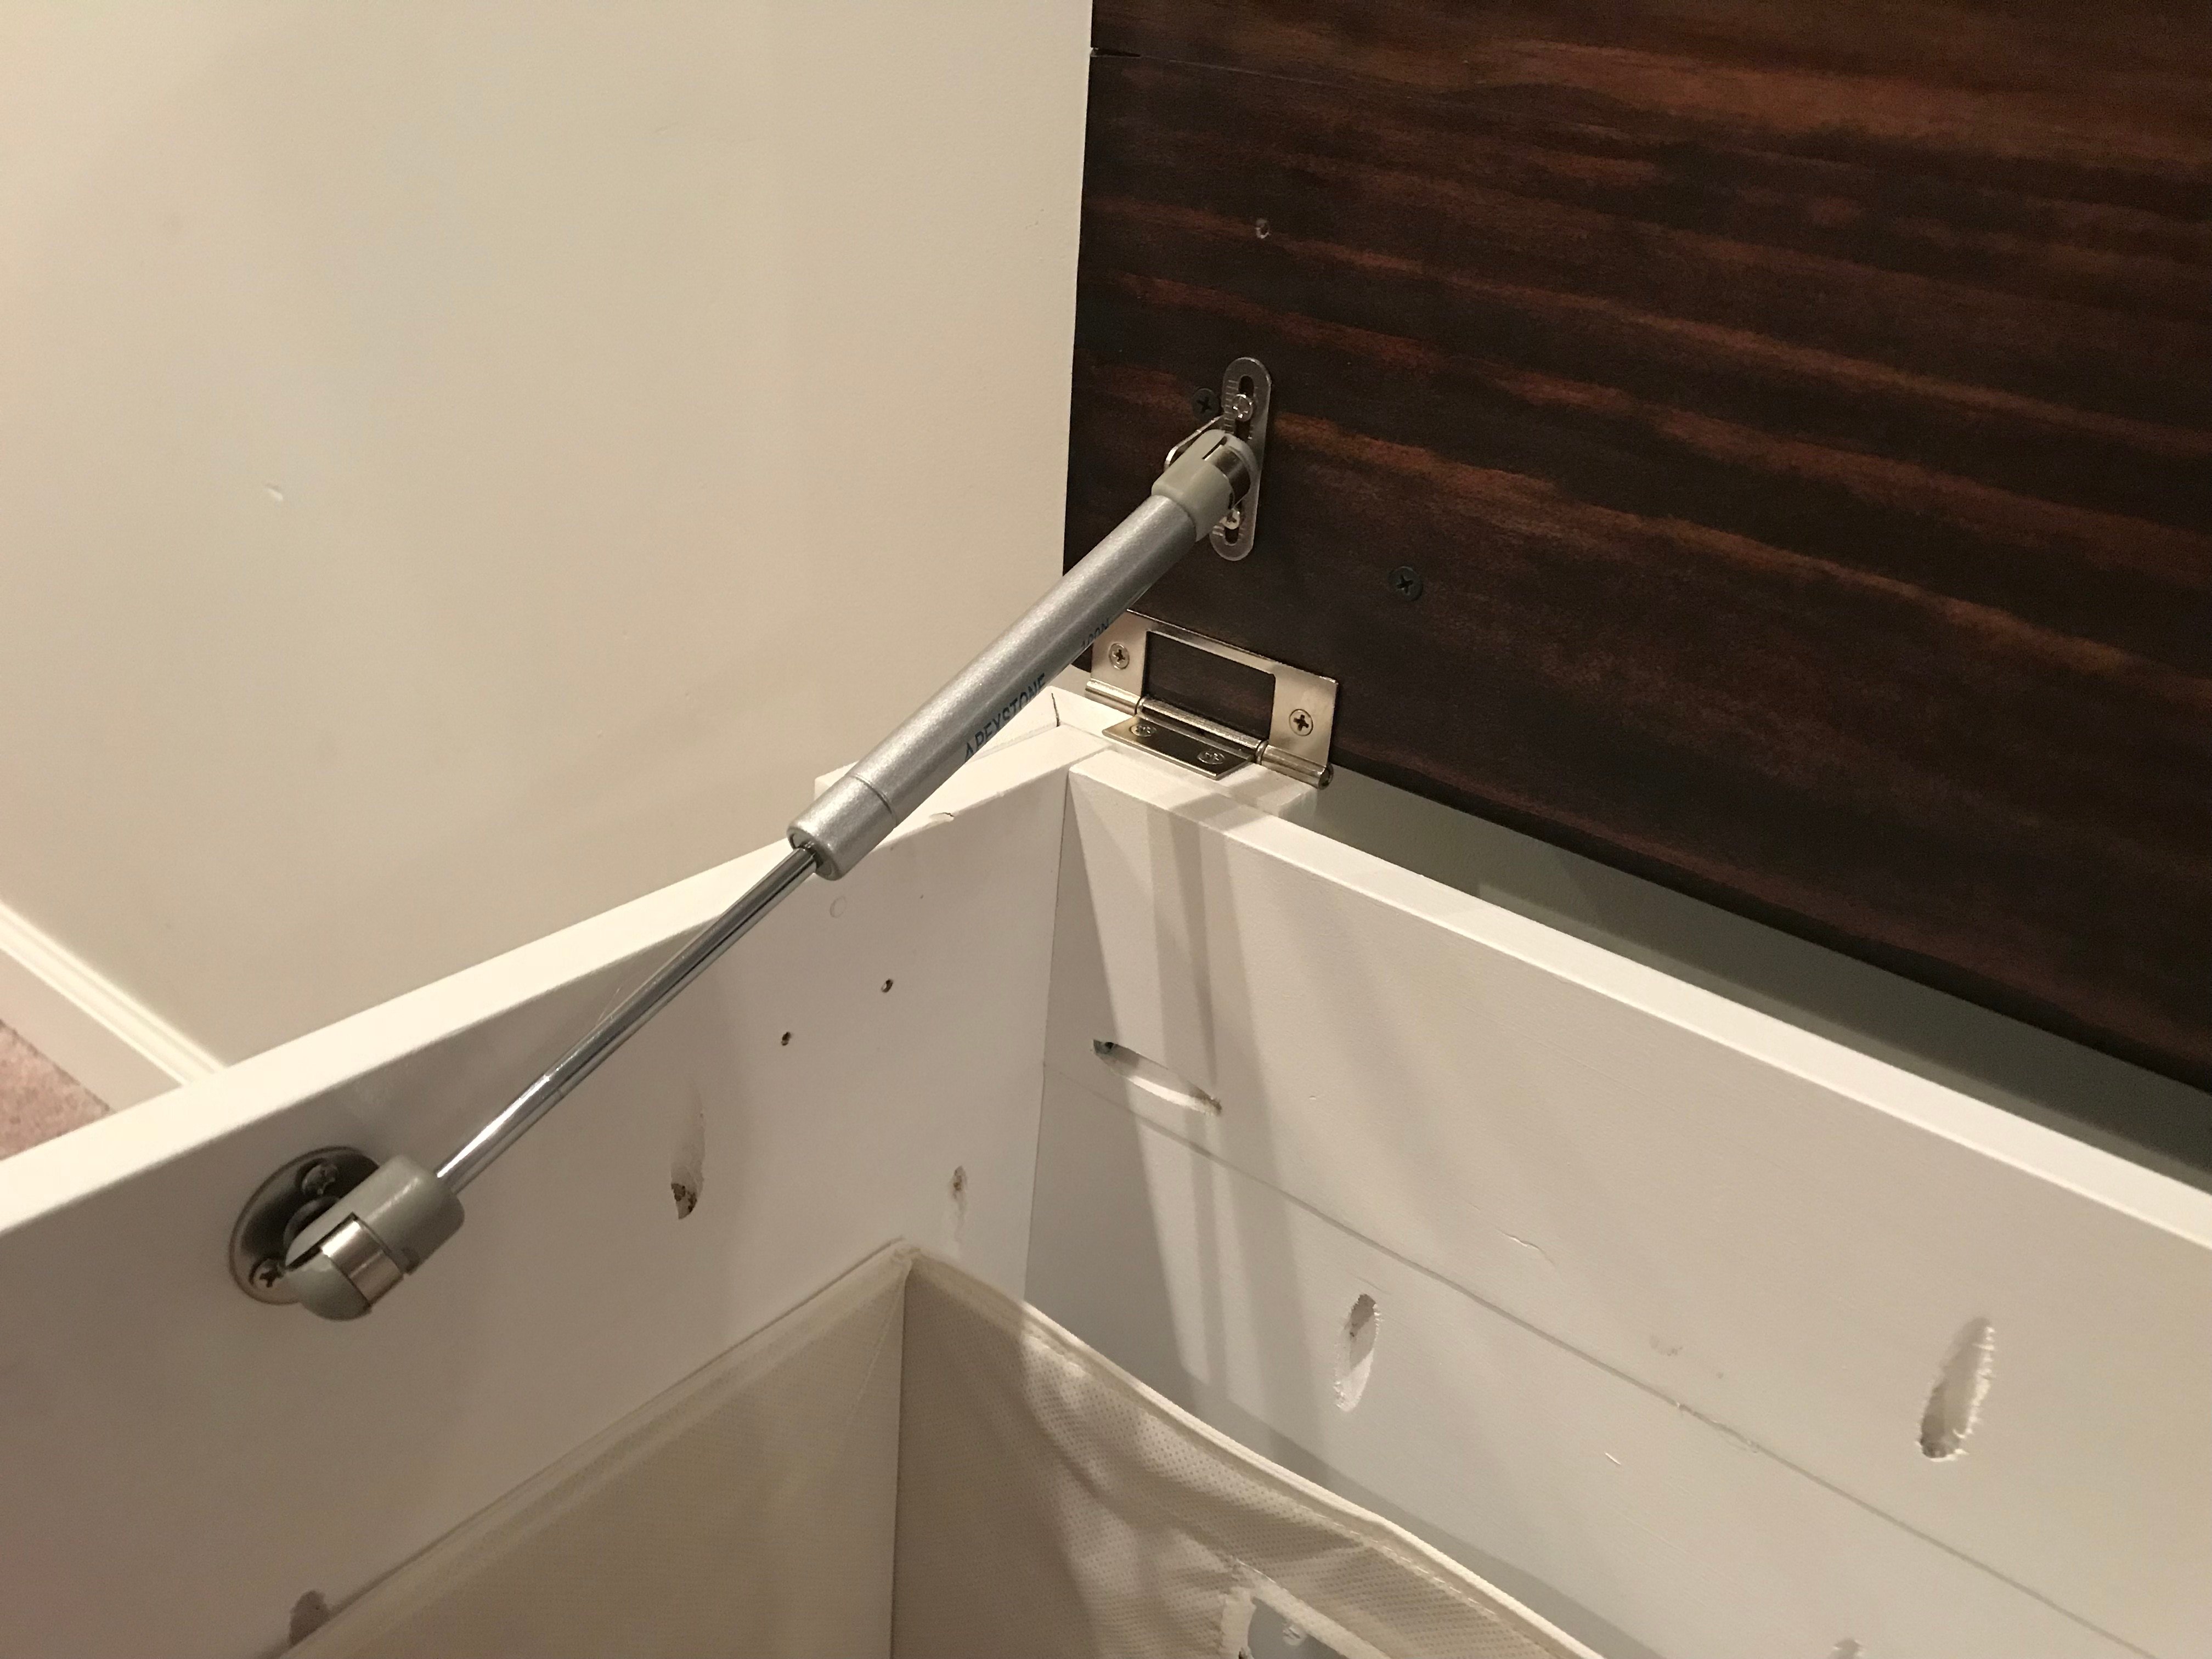
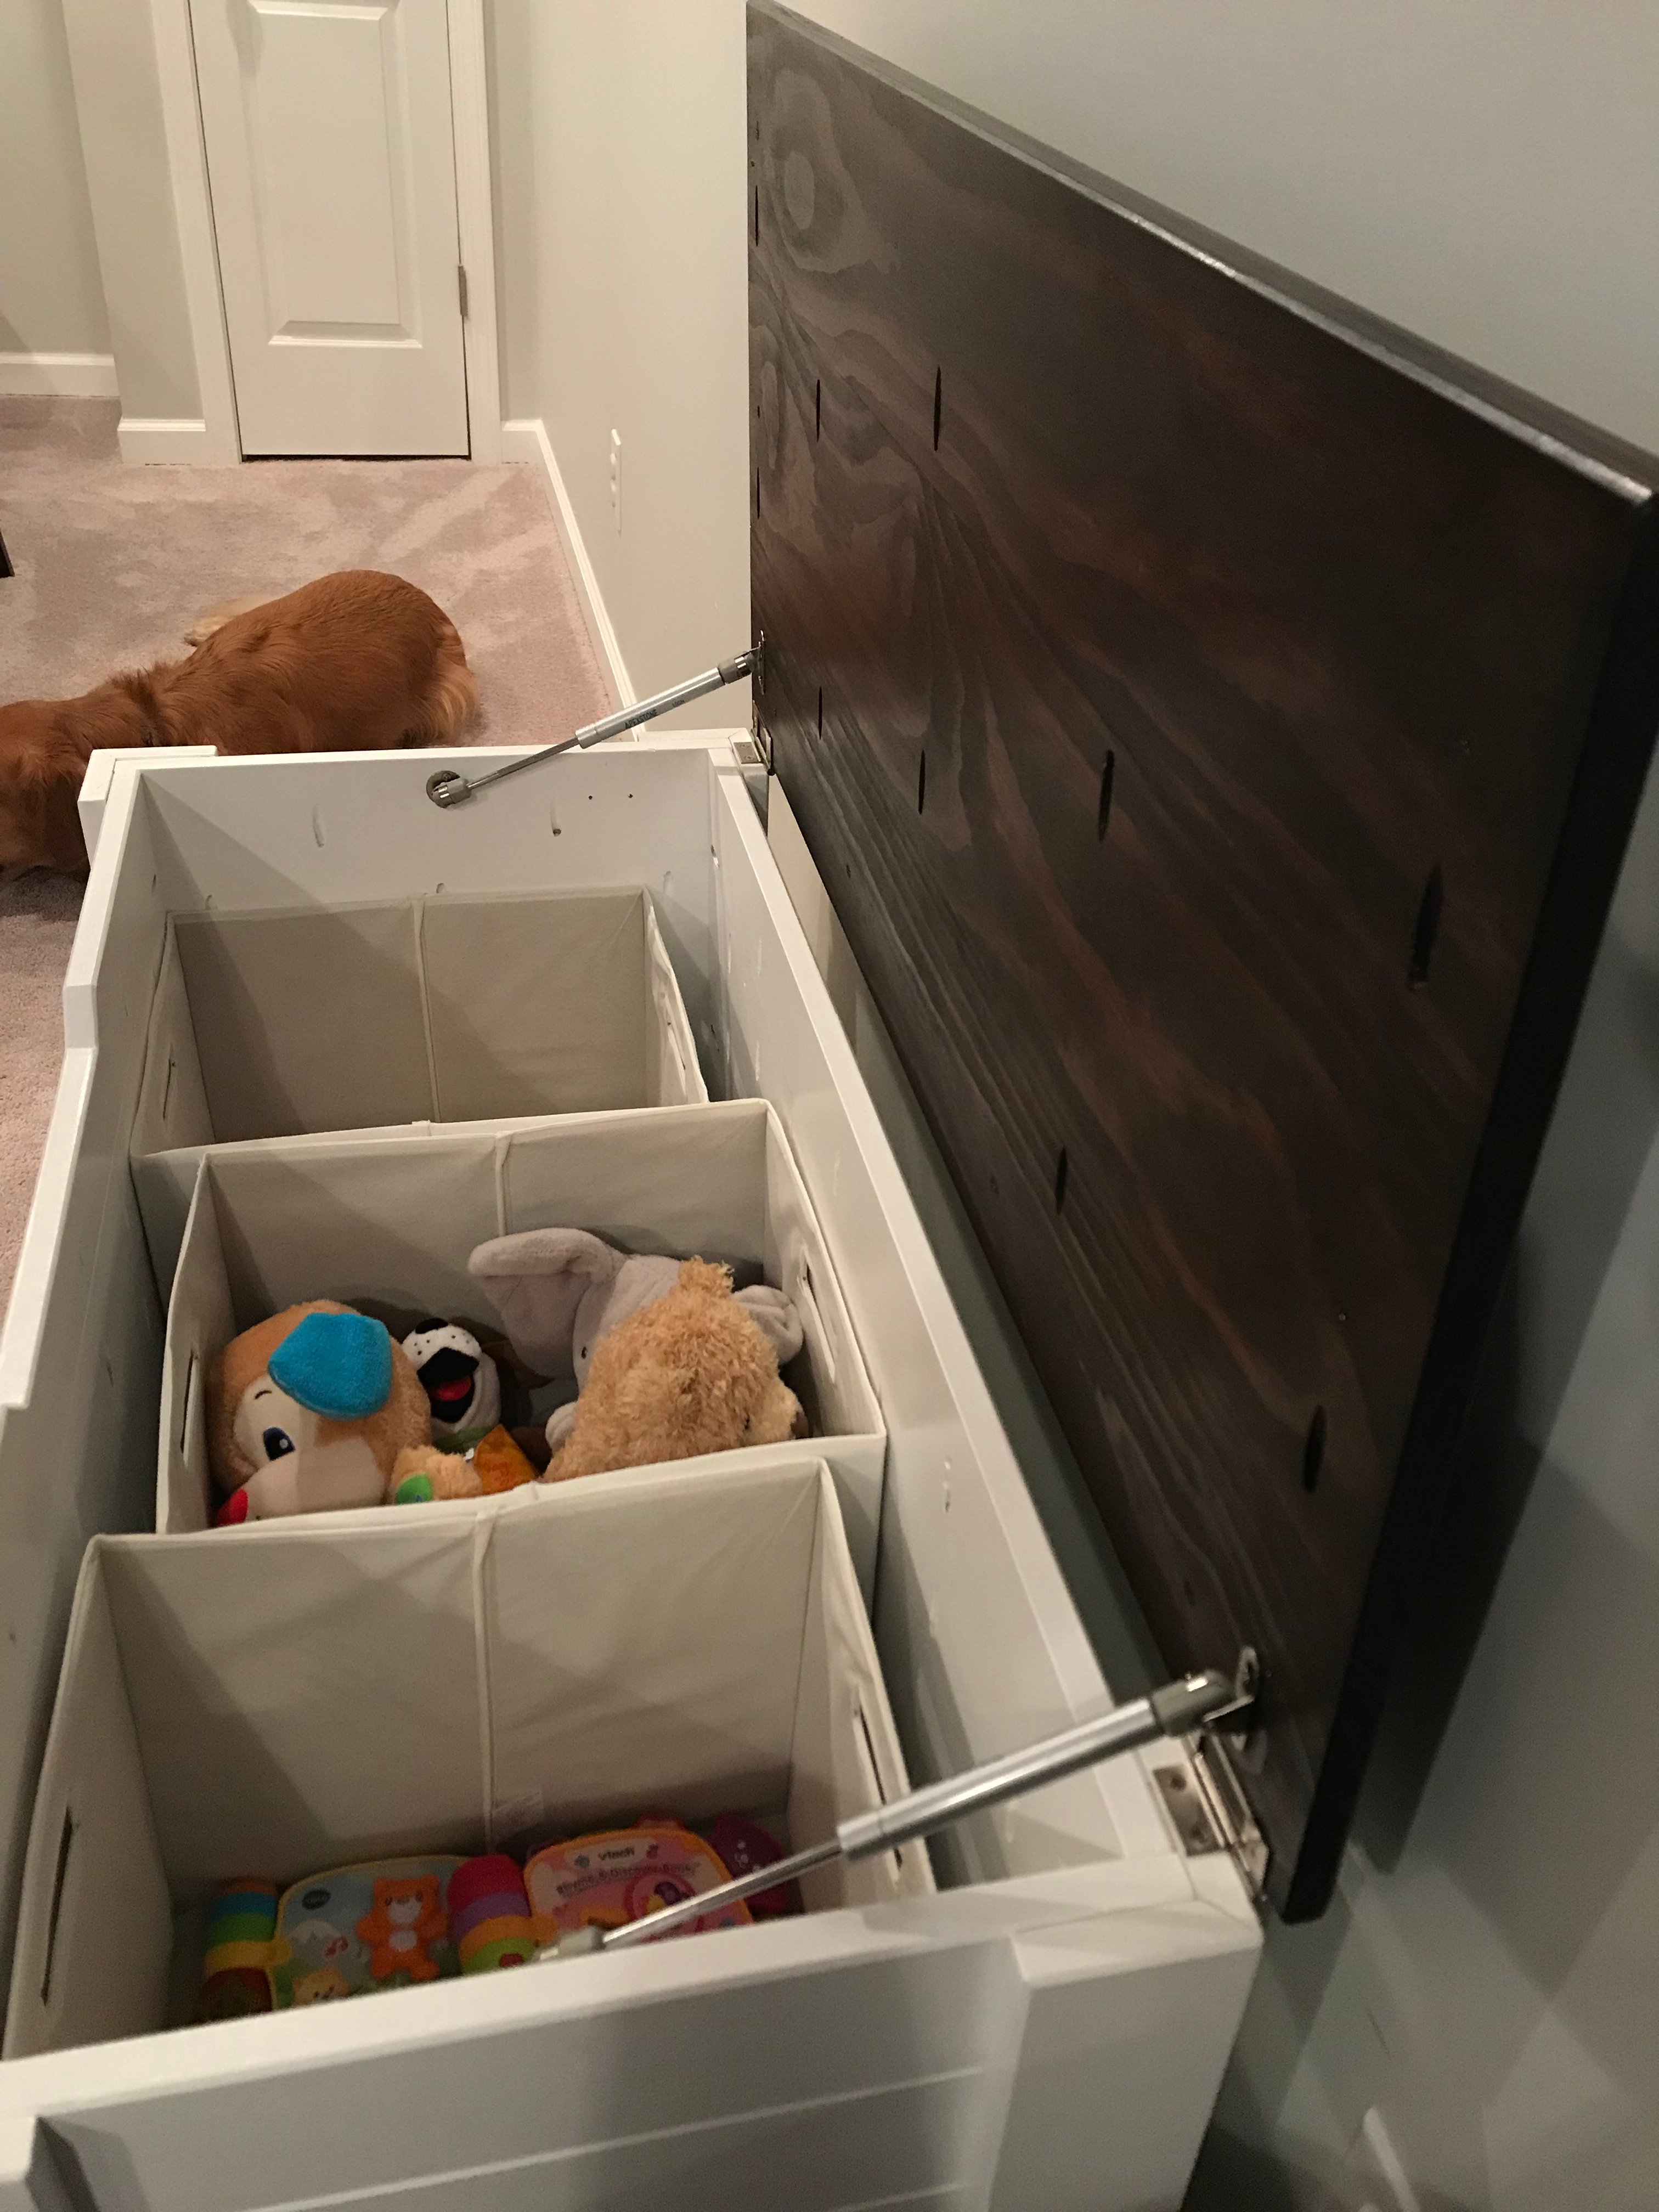
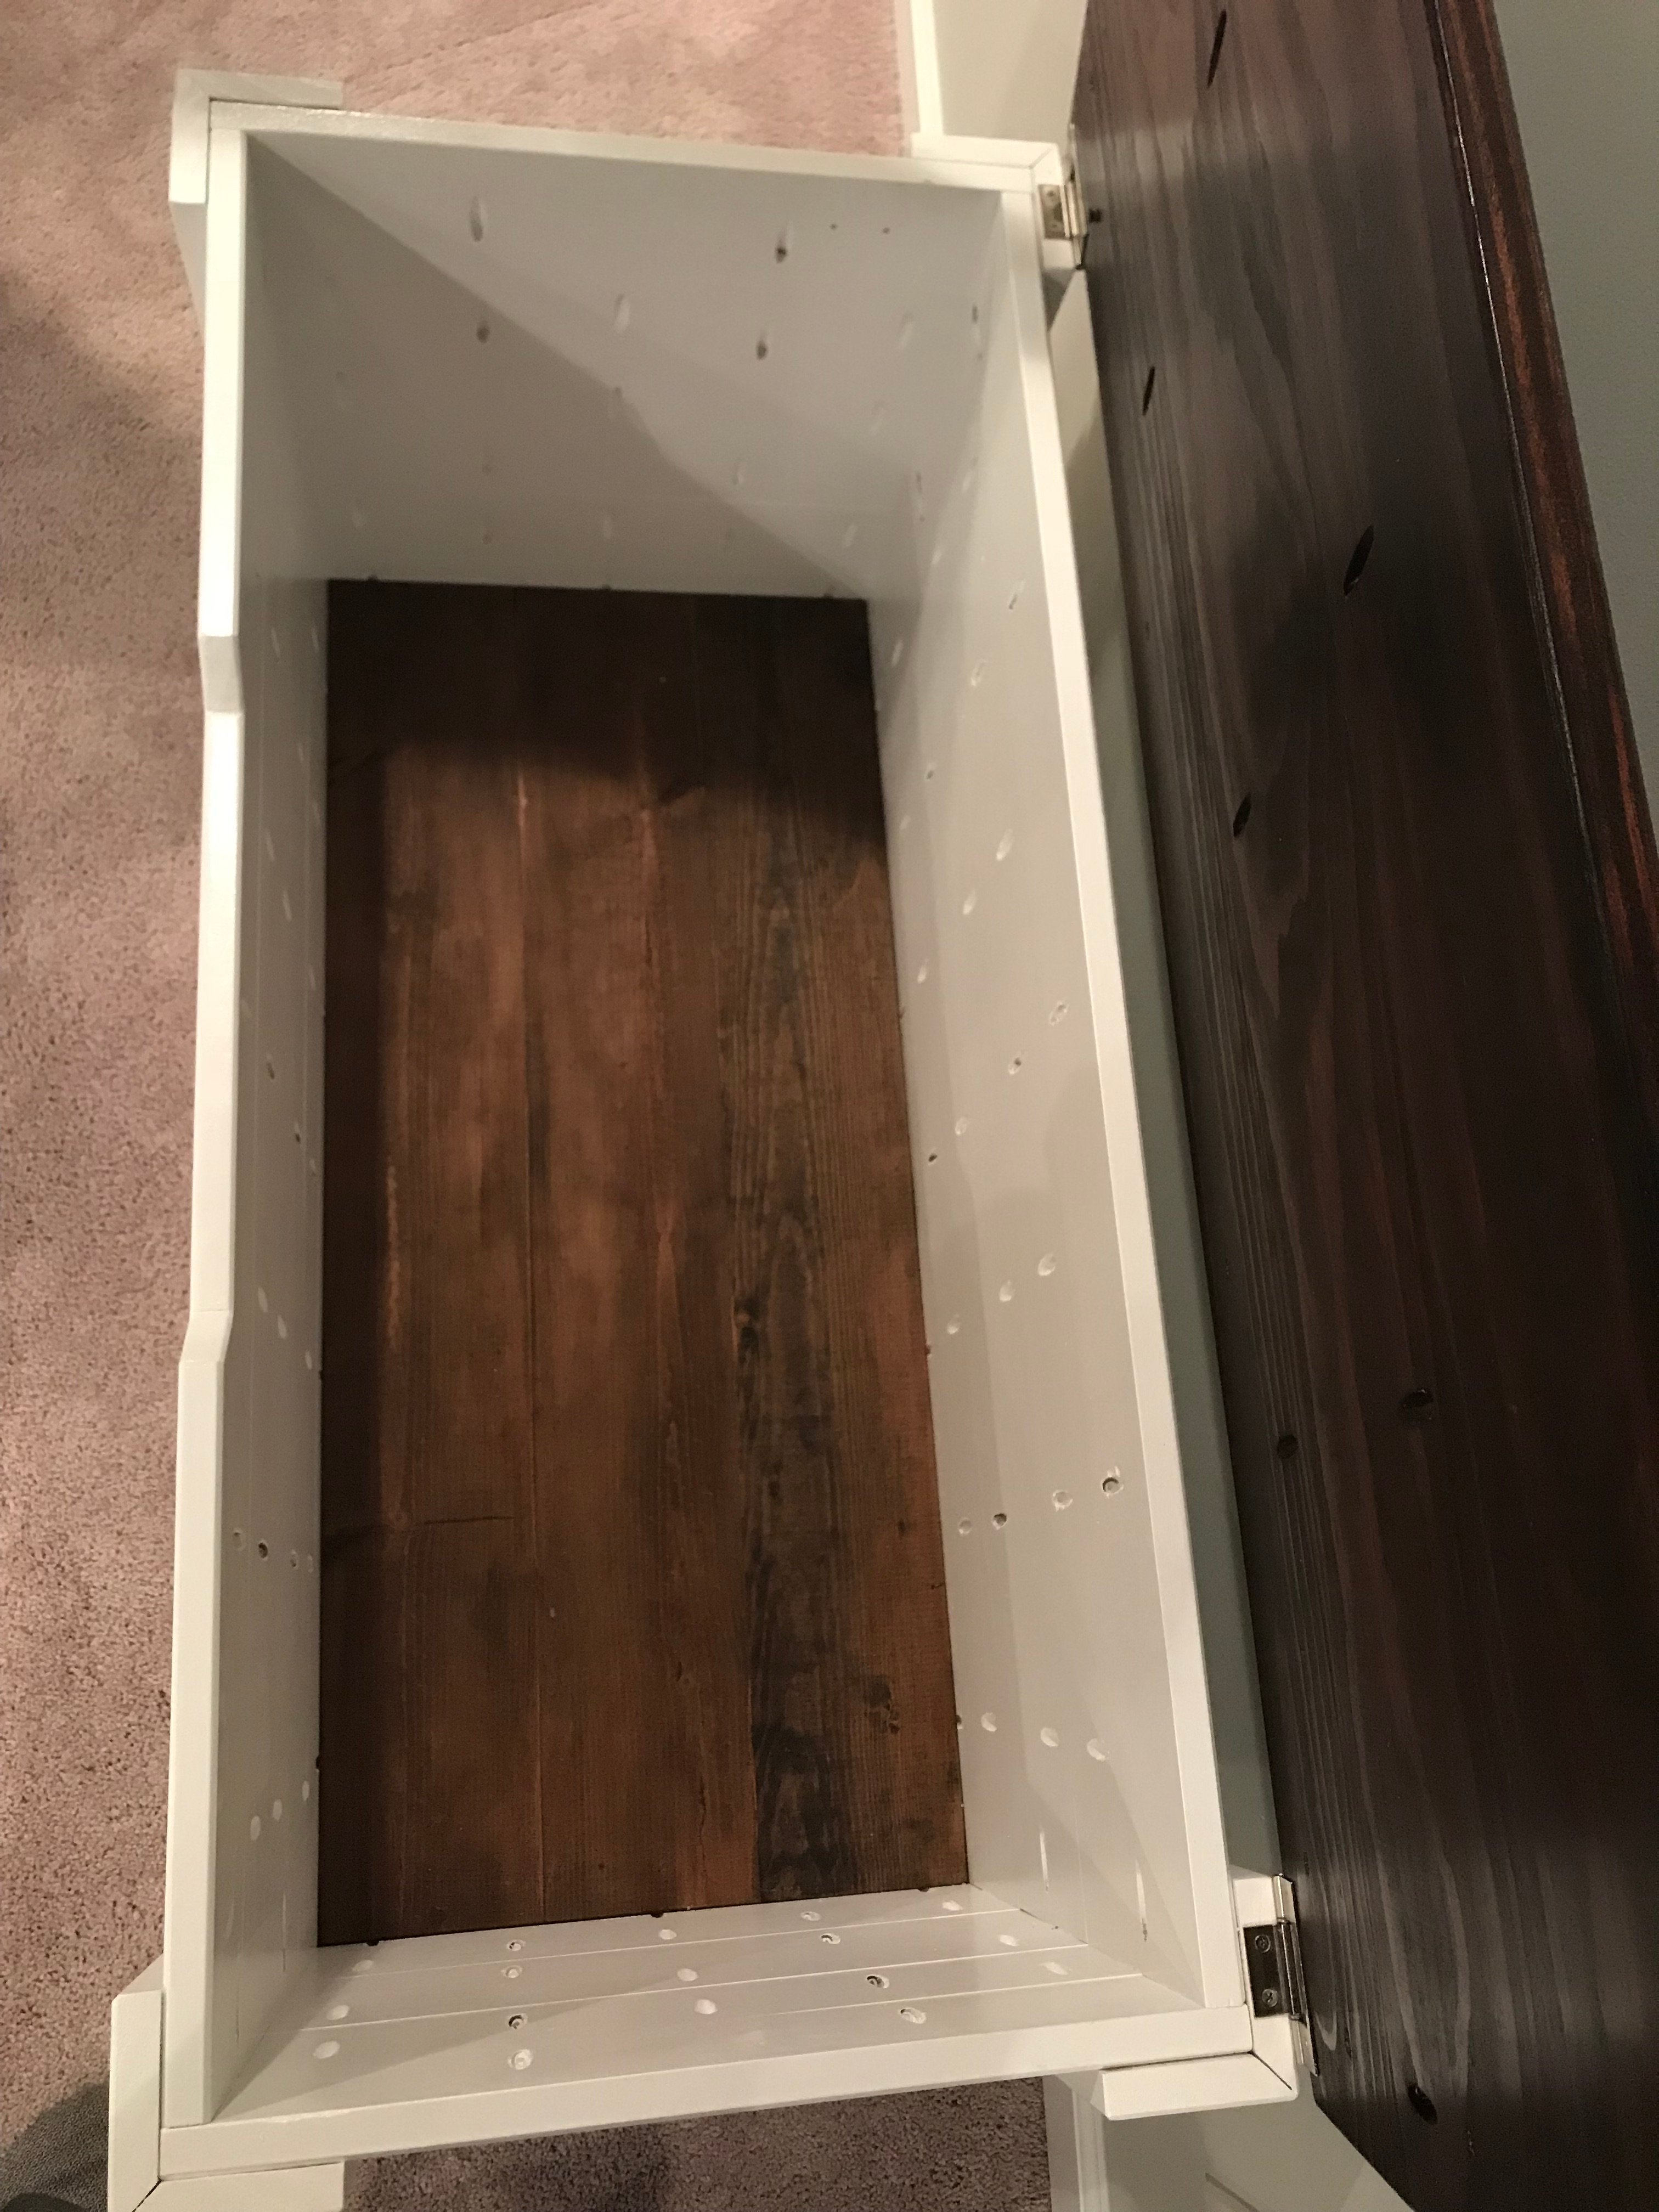
http://www.ana-white.com/2017/01/DIY_furniture/farmhouse-style-toy-box-…
Added Gas Shocks from Amazon 100N/18lbs.

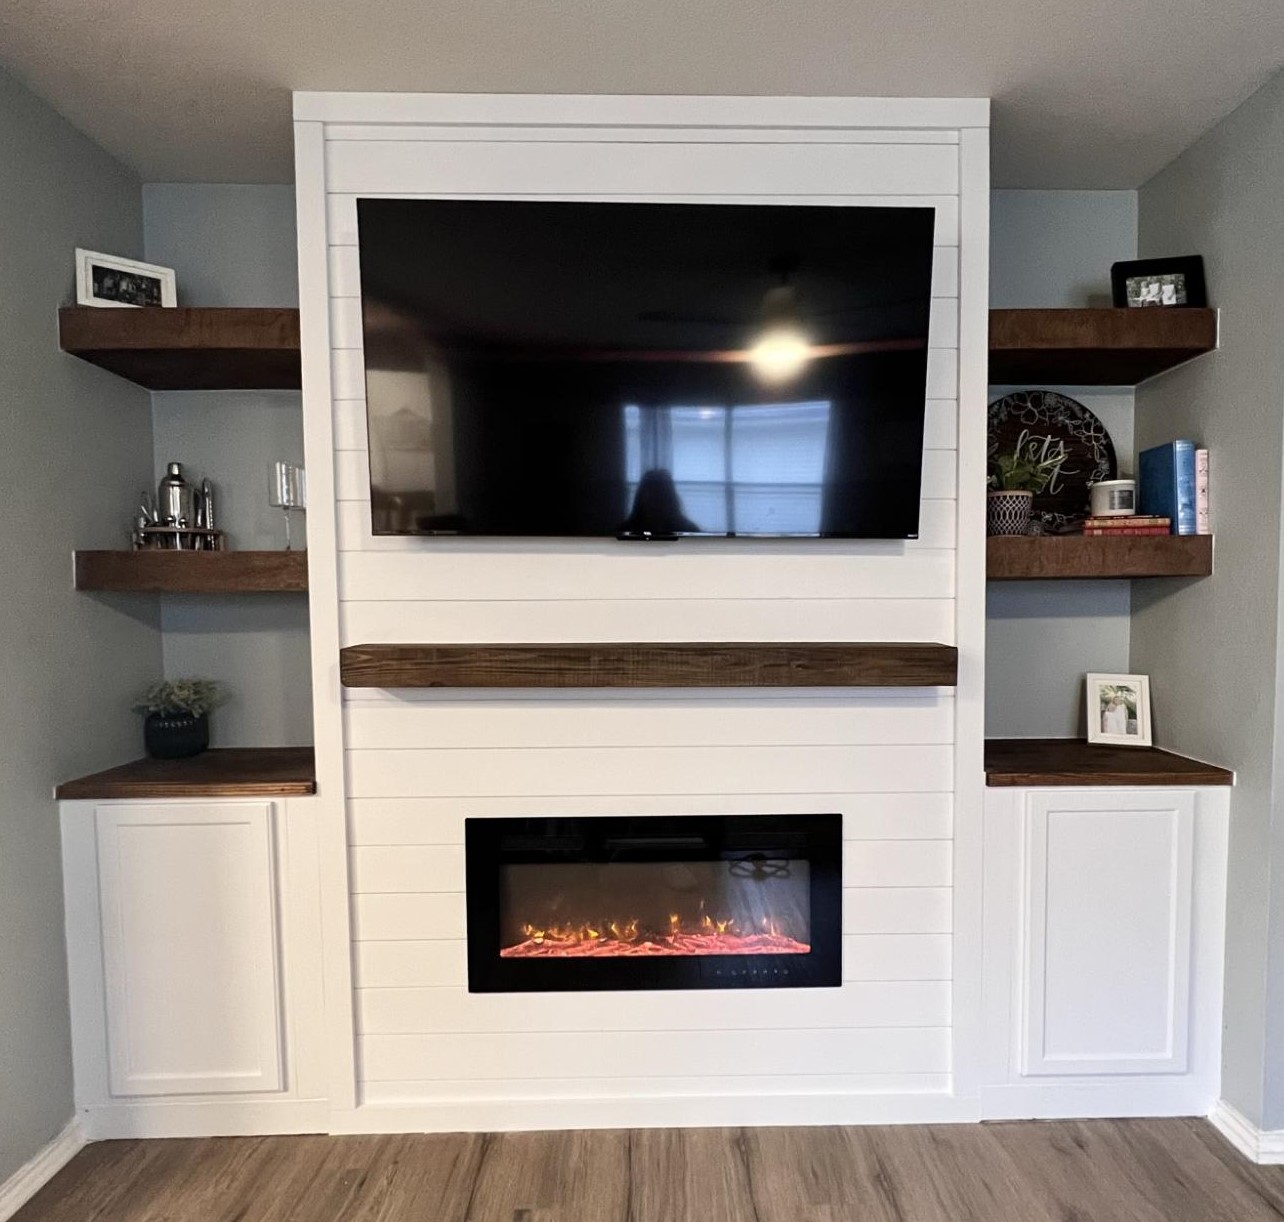
Built this fire place using Ana’s plans and bought the same insert she had. Loved the way it turned out! I added the cabinets and shelving to each side.
Mon, 02/13/2023 - 13:39
Love the open shelves and side cabinets, beautiful work! Thank you for sharing.

Christmas is coming and instead of spending huge amounts on plastic toys I decided, with the help from my wife, to create some presents for my nieces (3). I realize that all girls, young or old, have some kind of keep-sake toy and I thought this will be perfect. I made them on size for (I think it is called) 1st born babies. Thank you Ana, your project was not only easy to follow, but a real reward, once completed. I did, however, make some changes to the head-boards so the nieces don't fight over who's-who :)


Mon, 10/31/2011 - 02:51
Very nice. How did you get the different styled head- and foot-boards?
Mon, 11/21/2011 - 04:51
Great build, Cyber-7
You are going to make some kid very happy.
My little girl needed a bed and her room is really small so I wanted to make her a bed that had a lot of storage for her and that she could grow into. I decided to make her a captains bed. My wife and I used pool noodles on each side of the bed under the covers. MacKenzie (my little girl 18 month old) absolutely loved the "big kid" bed.
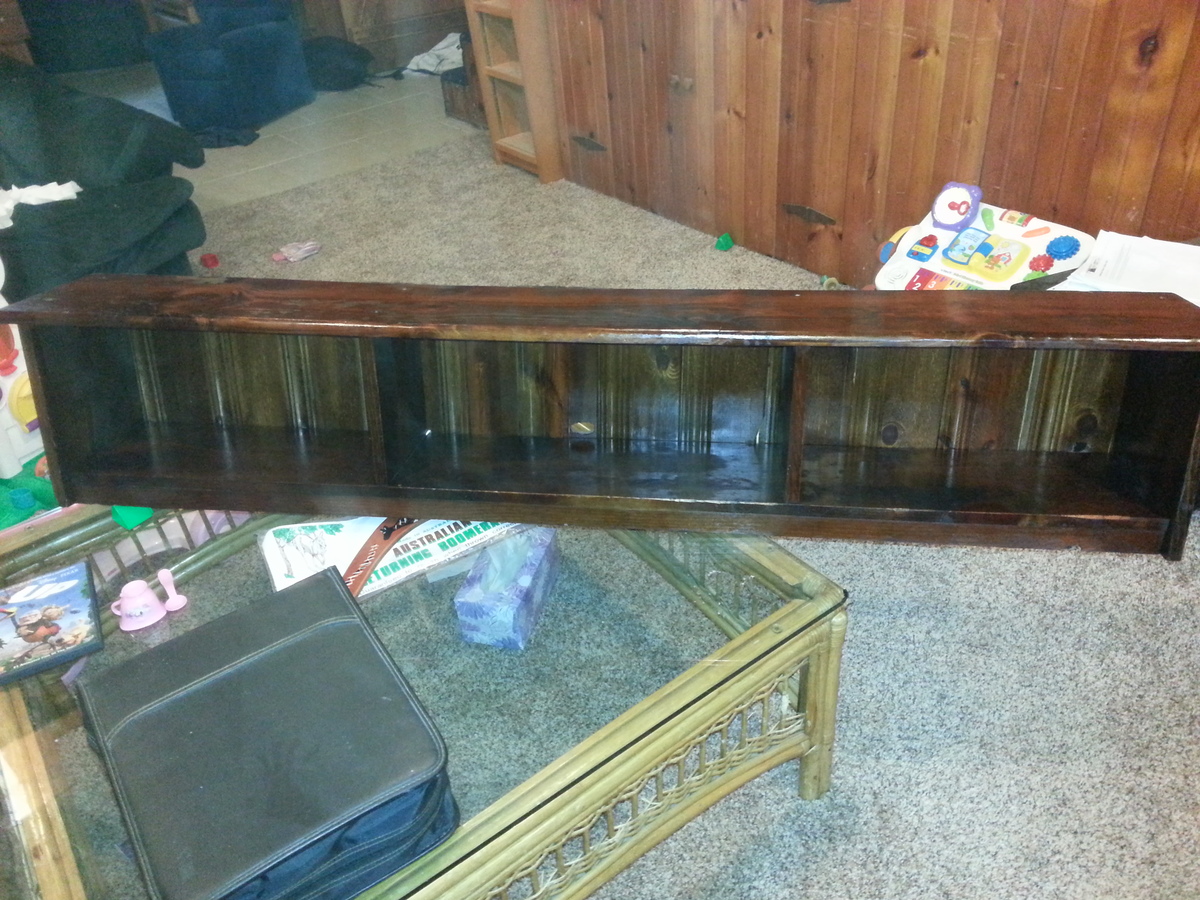

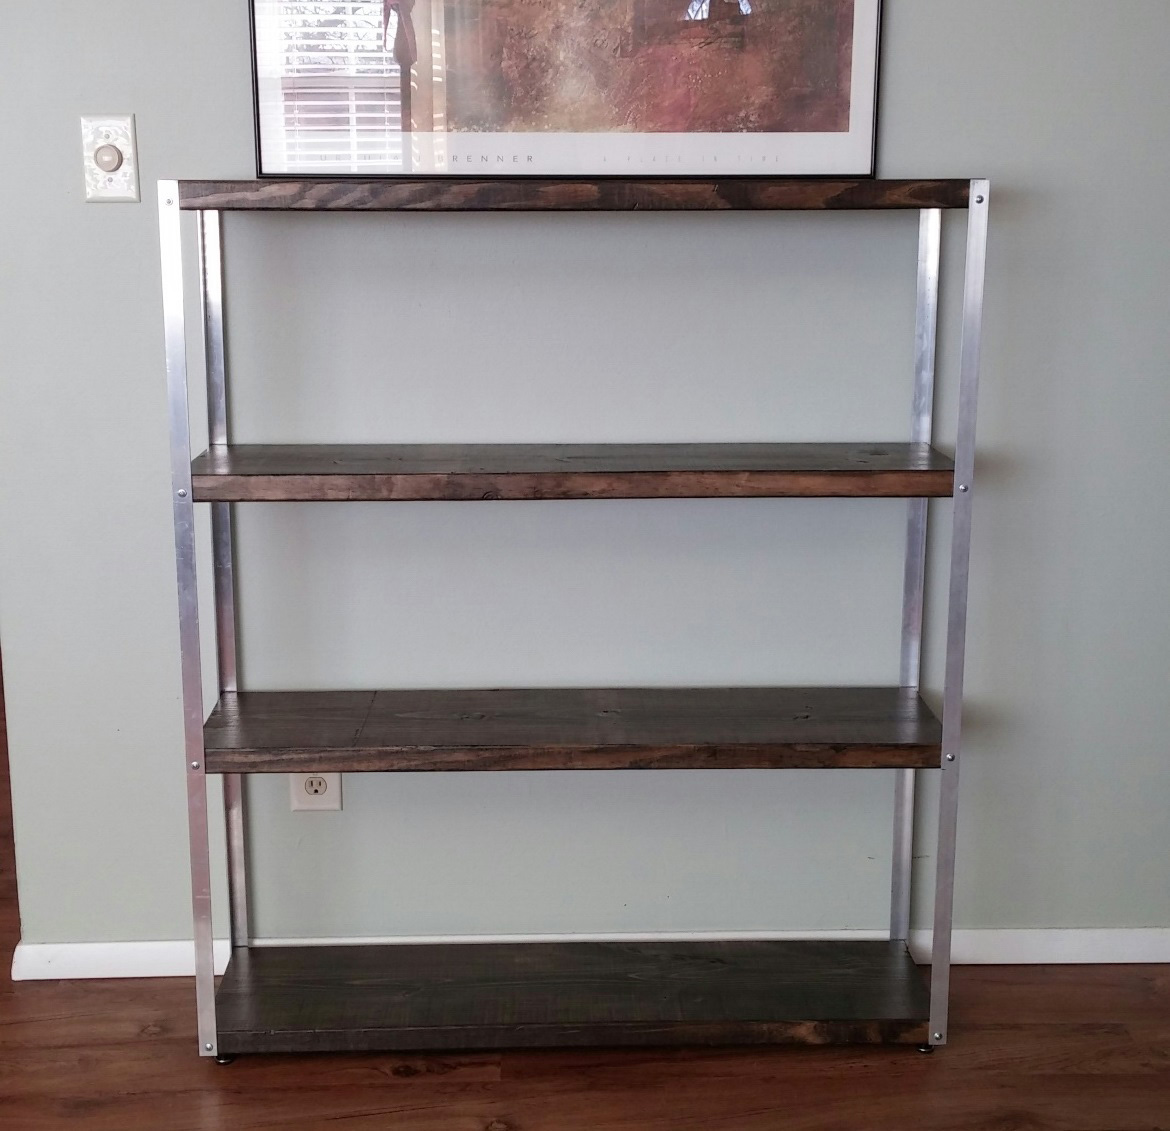
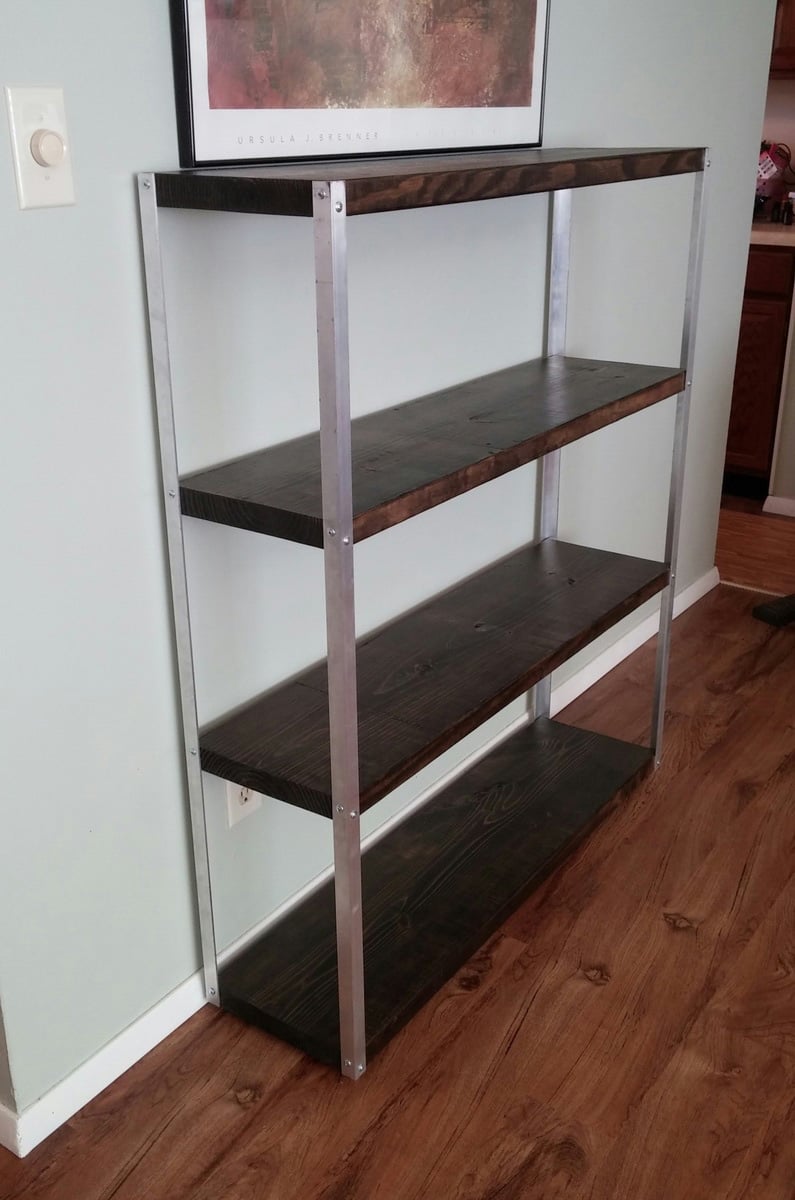
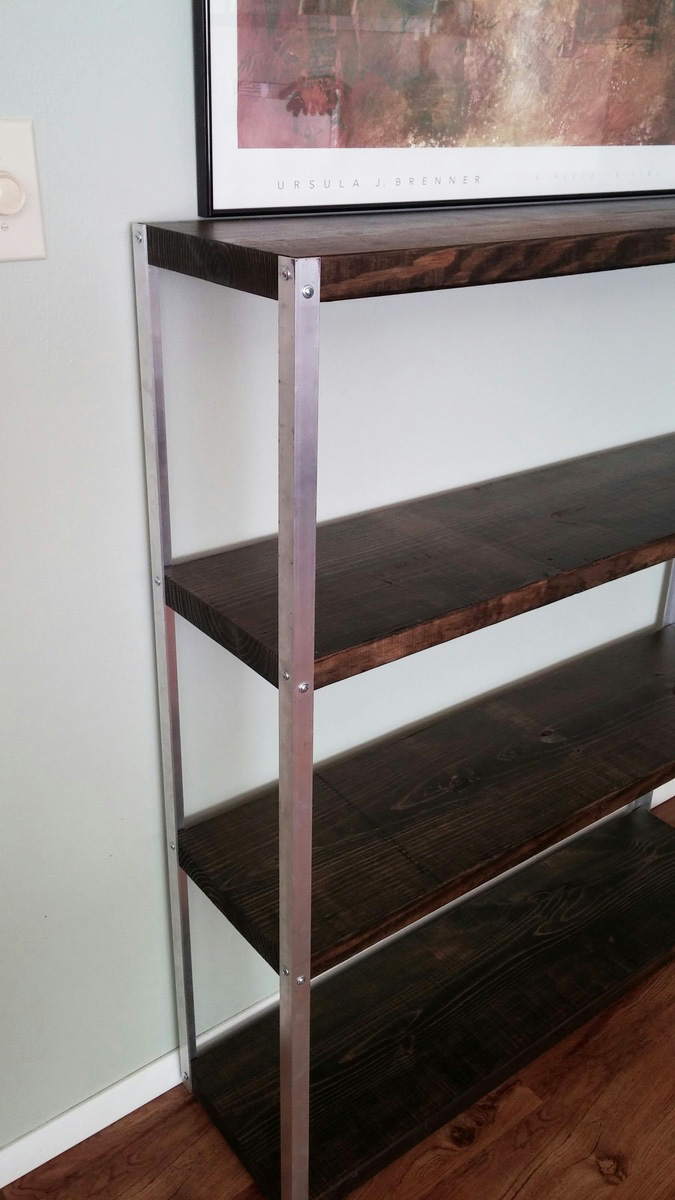
I took the plans for the indutrial cart and modified them to create a Living Room shelf. I left the casters off and I made the shelf 48 inches tall by 42 inches wide. This is one SOLID shelf! I absolutely love it! Thank you for the inspiration!
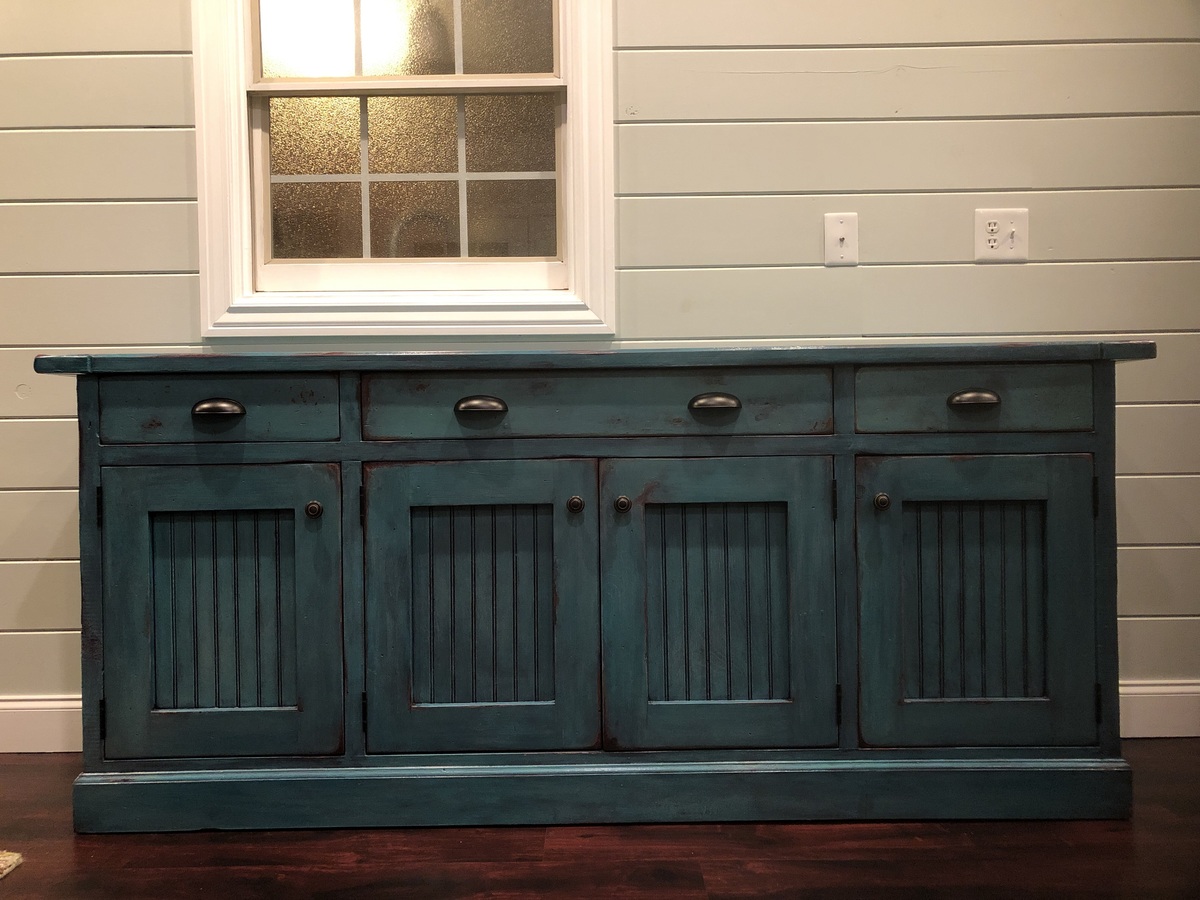
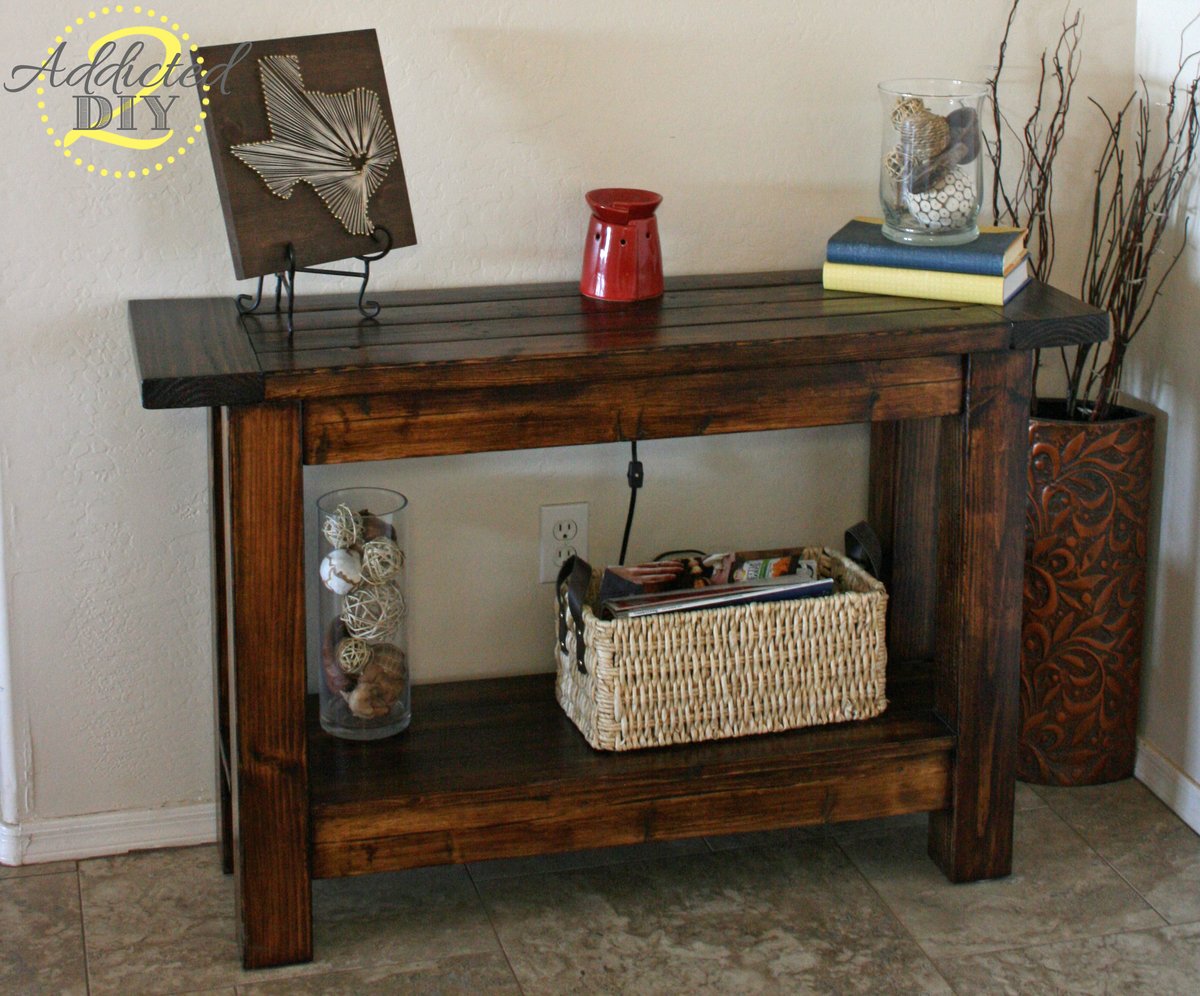
Built from planked wood sideboard plan
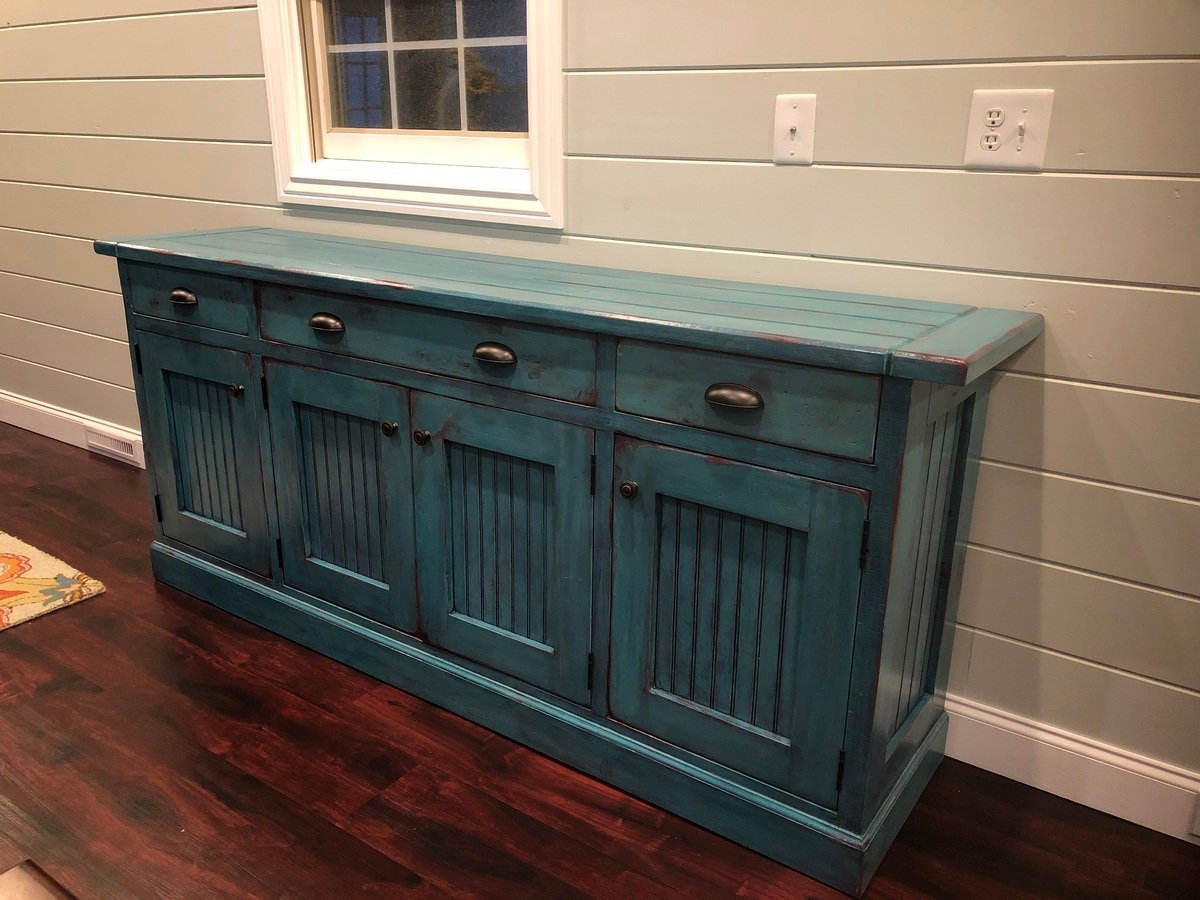
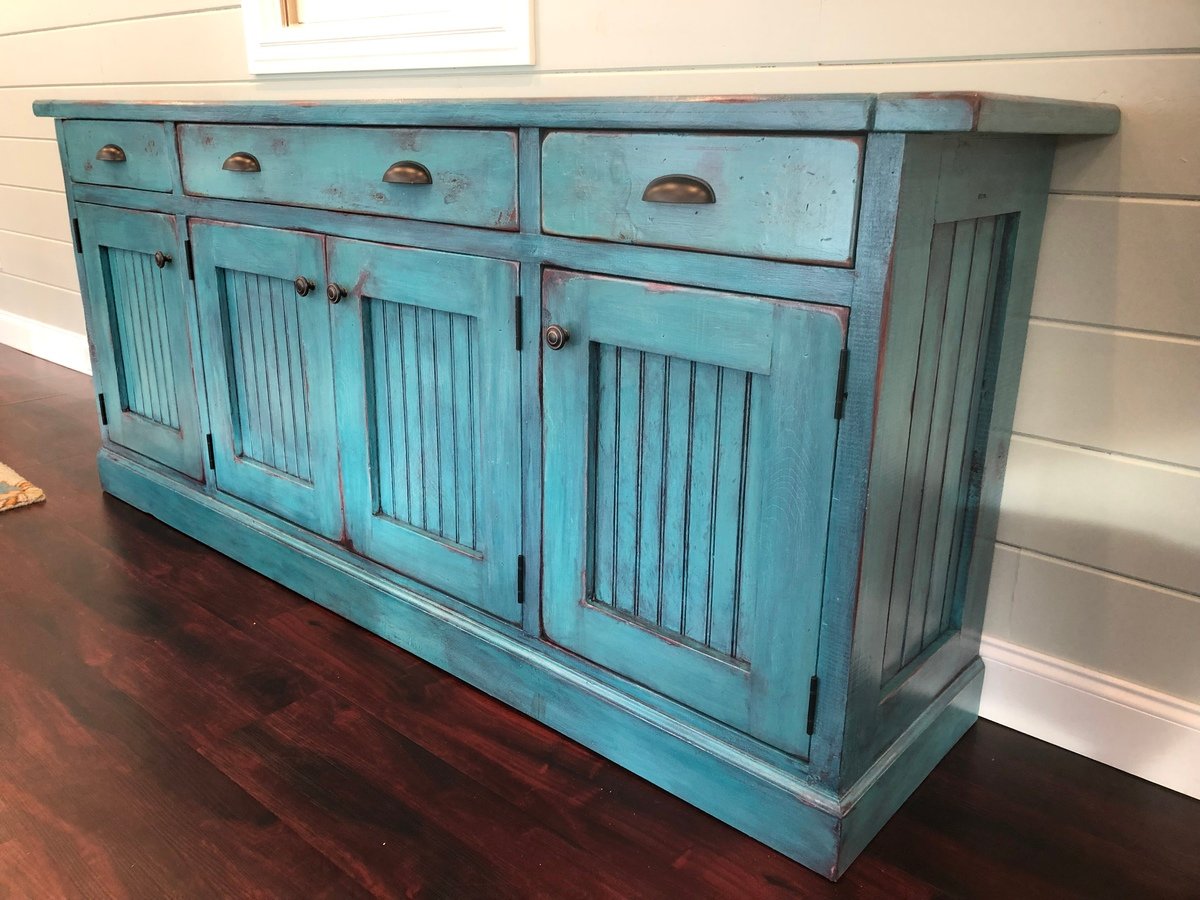
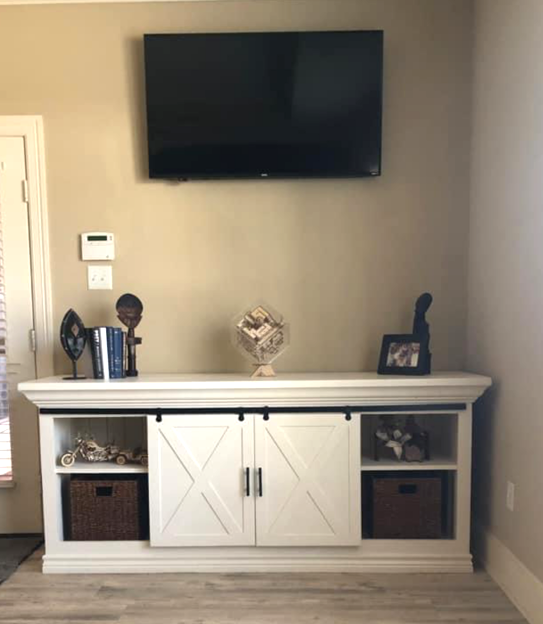
Beautiful console, added crown molding - By Cassandra Wentt
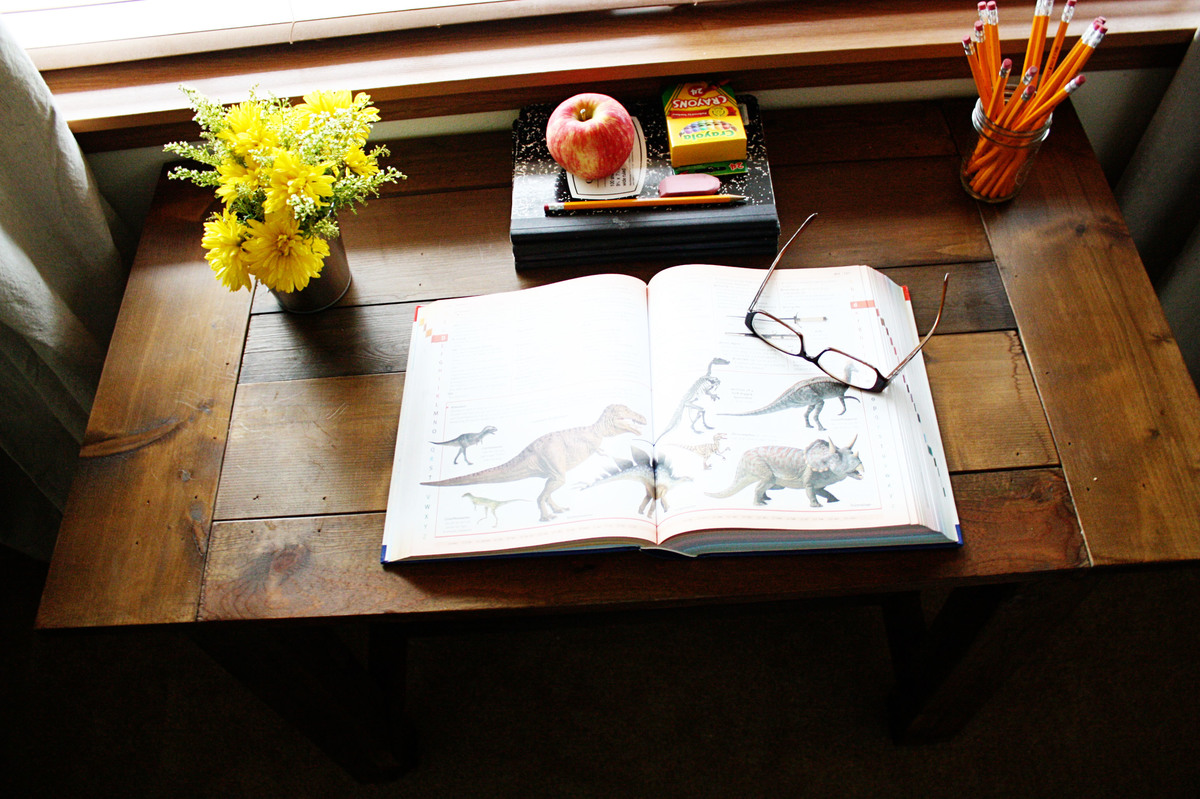
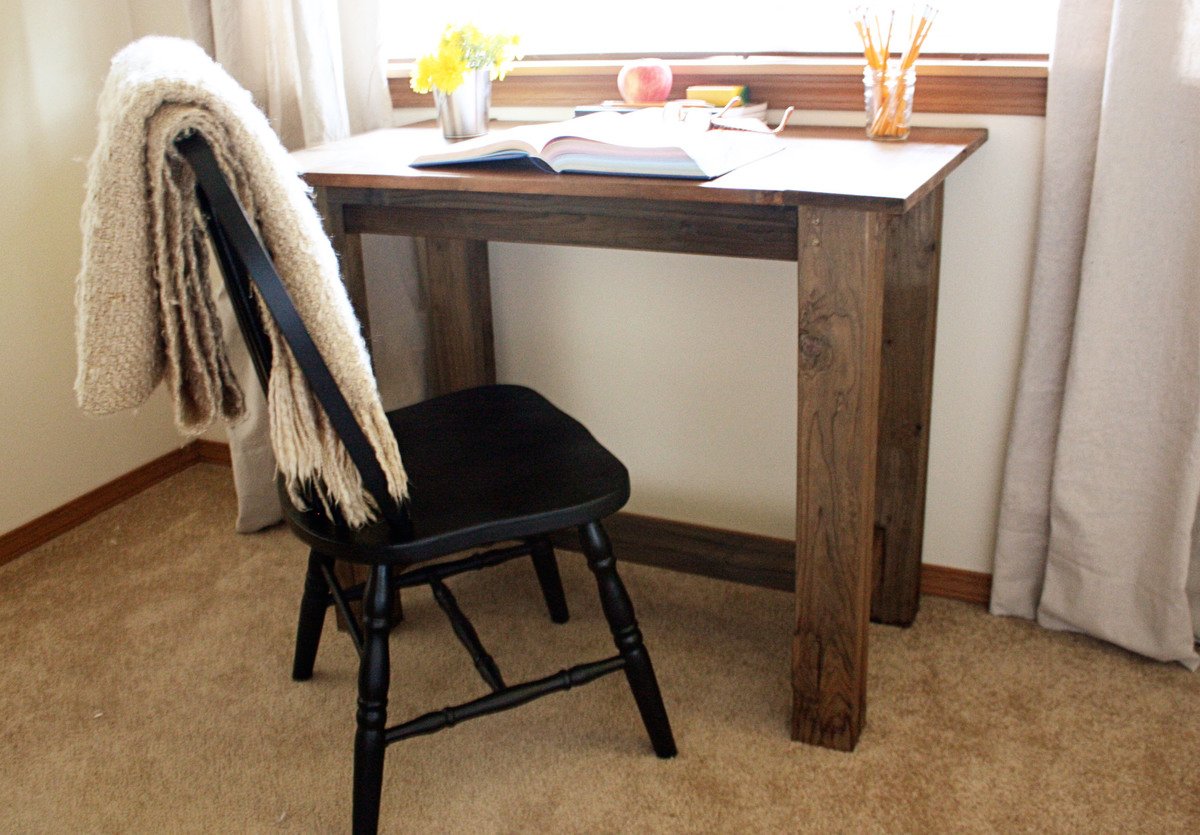
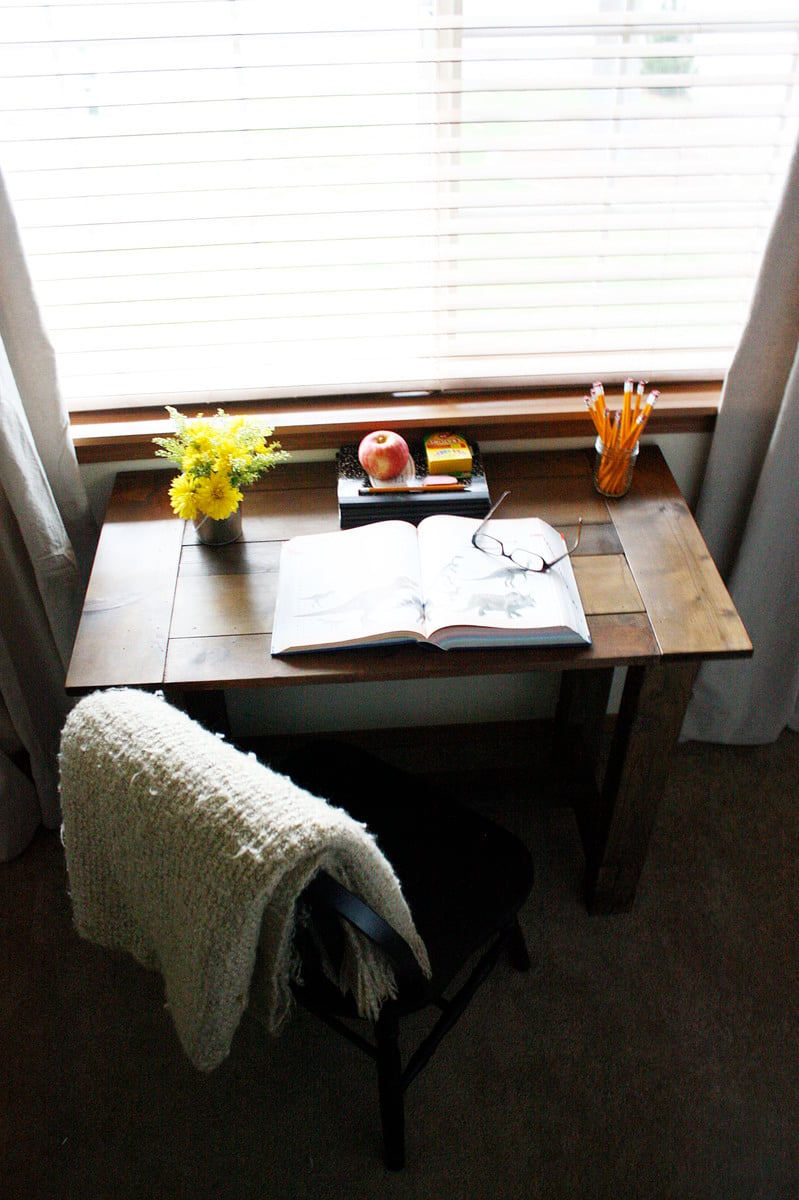
We wanted a desk for our sons bedroom and I love the farmhouse table plans. My husband modified the plans to make the table much smaller. The desk was finished with a vinegar/steel wool mixture to oxidize the wood and then clear wax was applied.
Thu, 10/27/2011 - 04:49
I really love that finish. I want to make a toddler bed for my BFF's little guy, but was wary of using stain, etc. This finish looks gorgeous and seems very organic.
Thu, 02/05/2015 - 19:35
This table is beautiful! I'd love to modify this plan to be the size that you've built. I'm a novice and would love if you'd be willing/able to share the dimensions that you used.
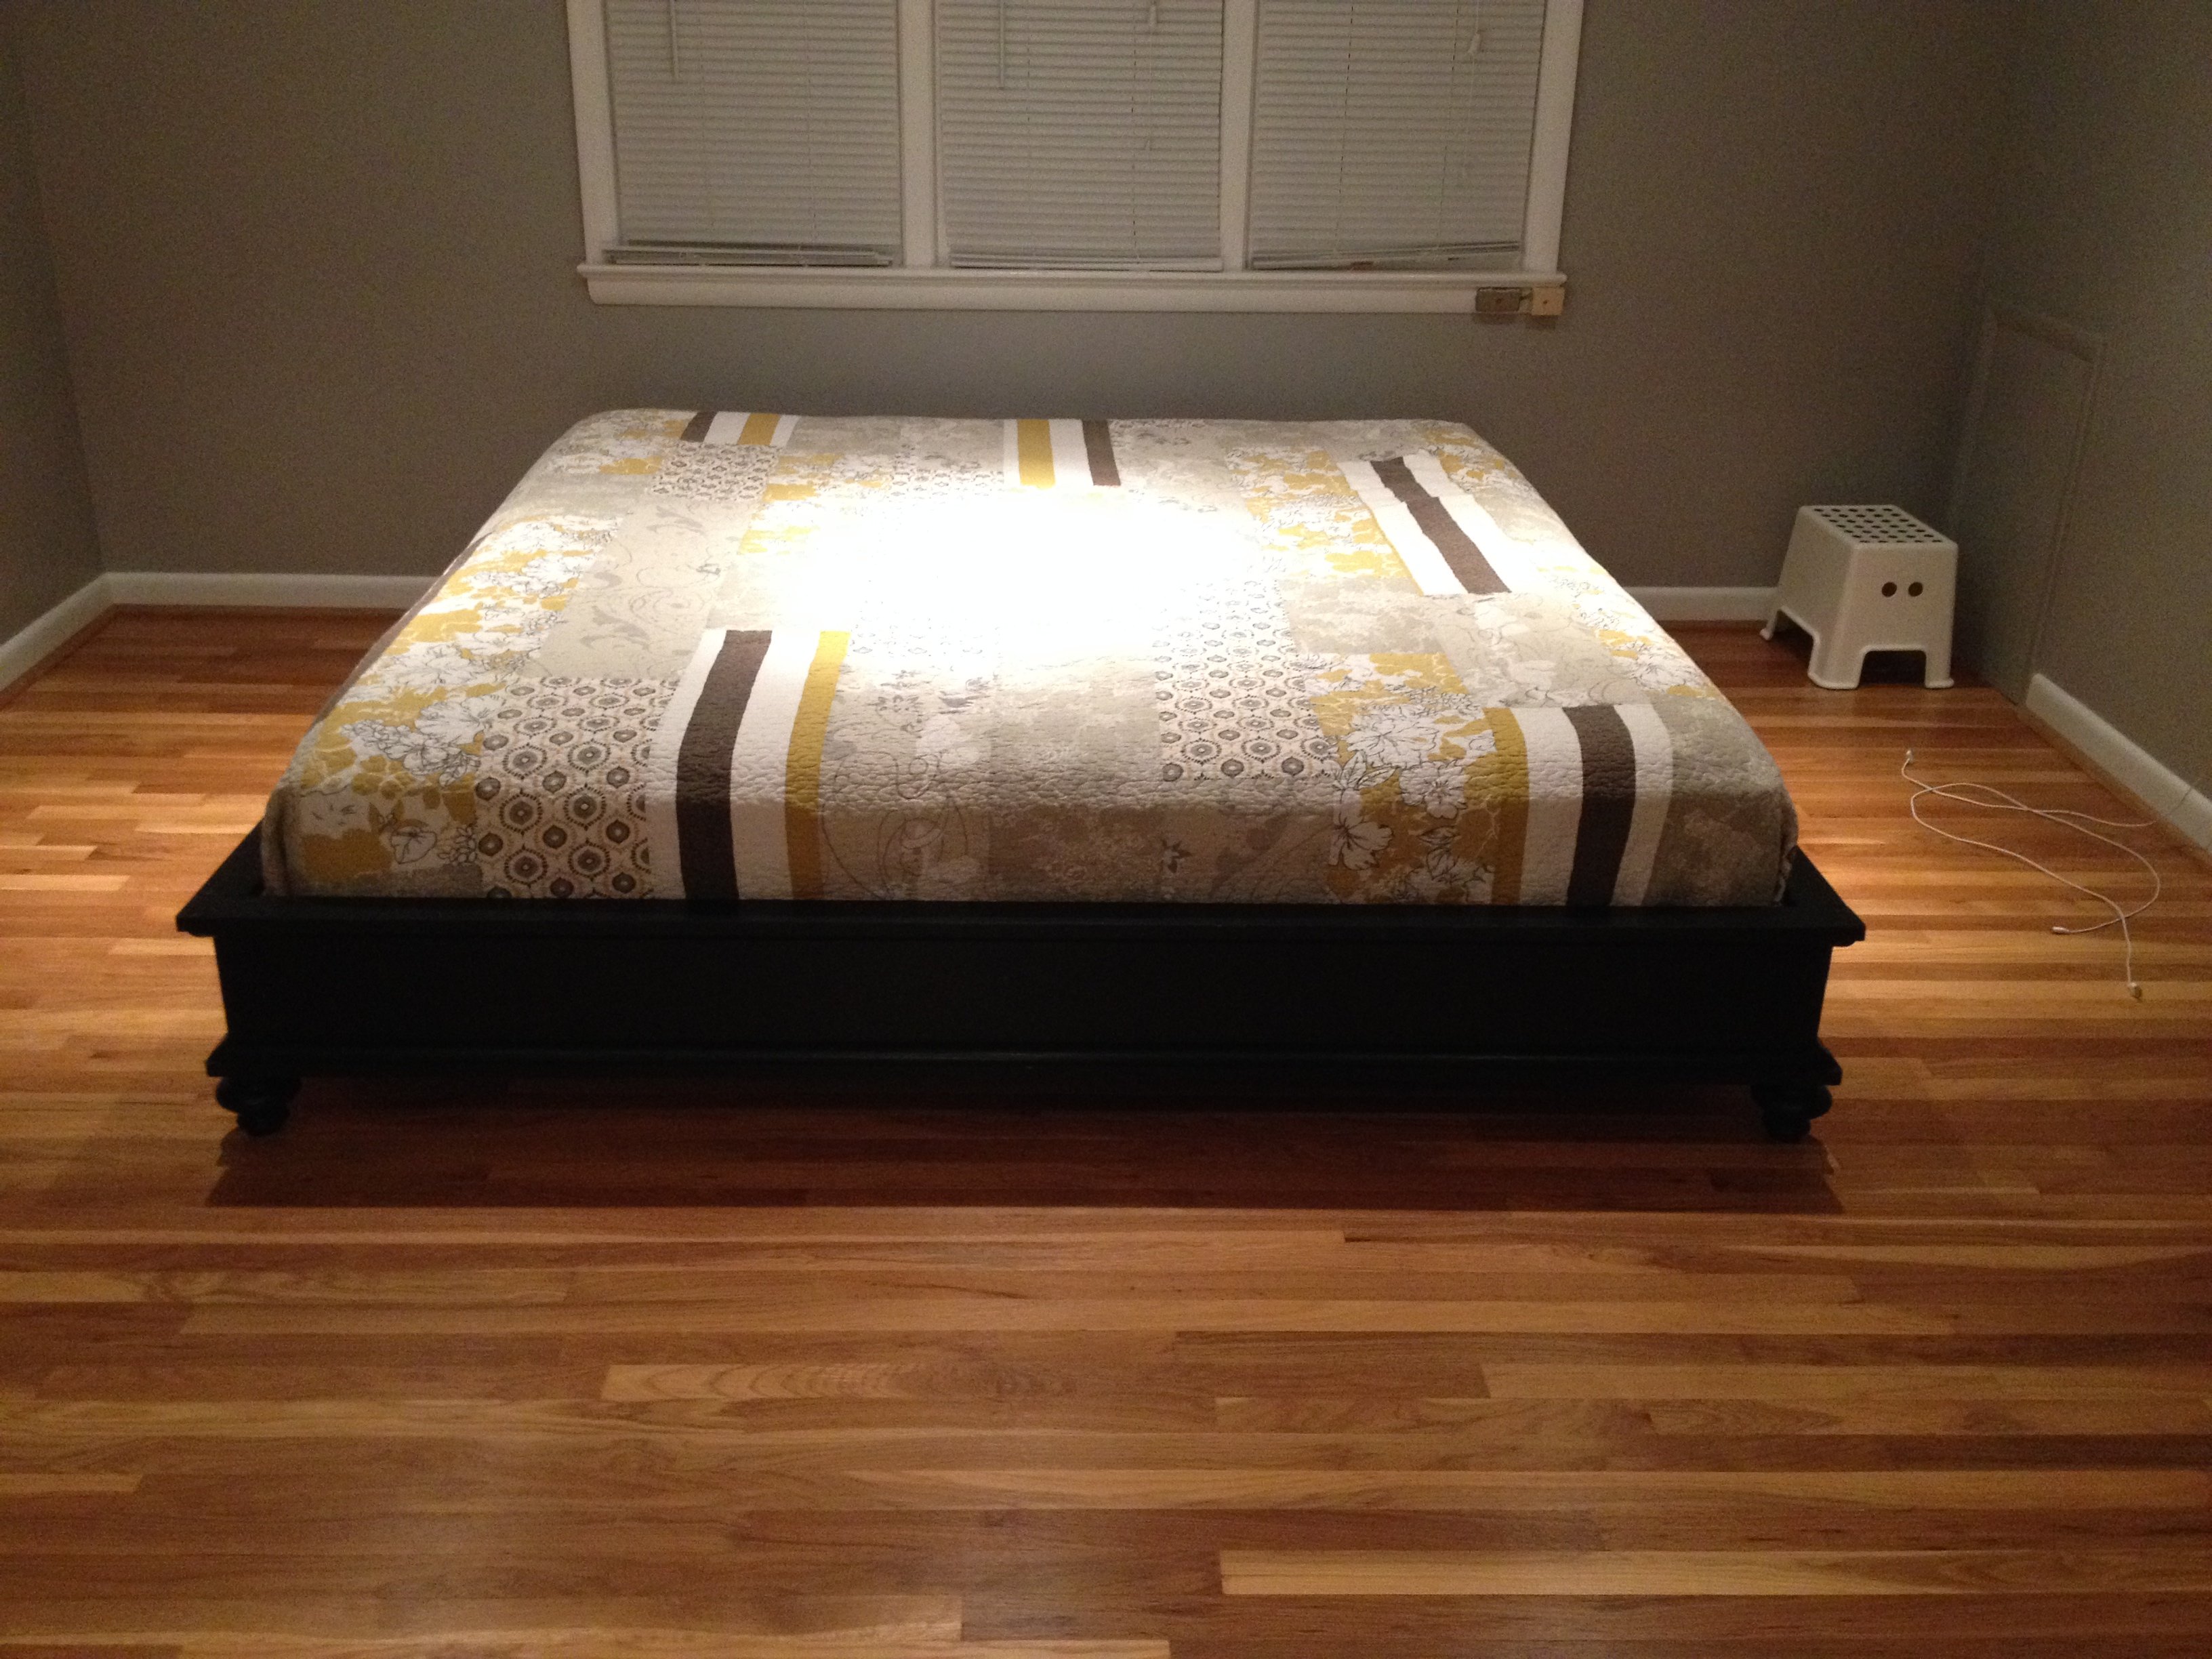
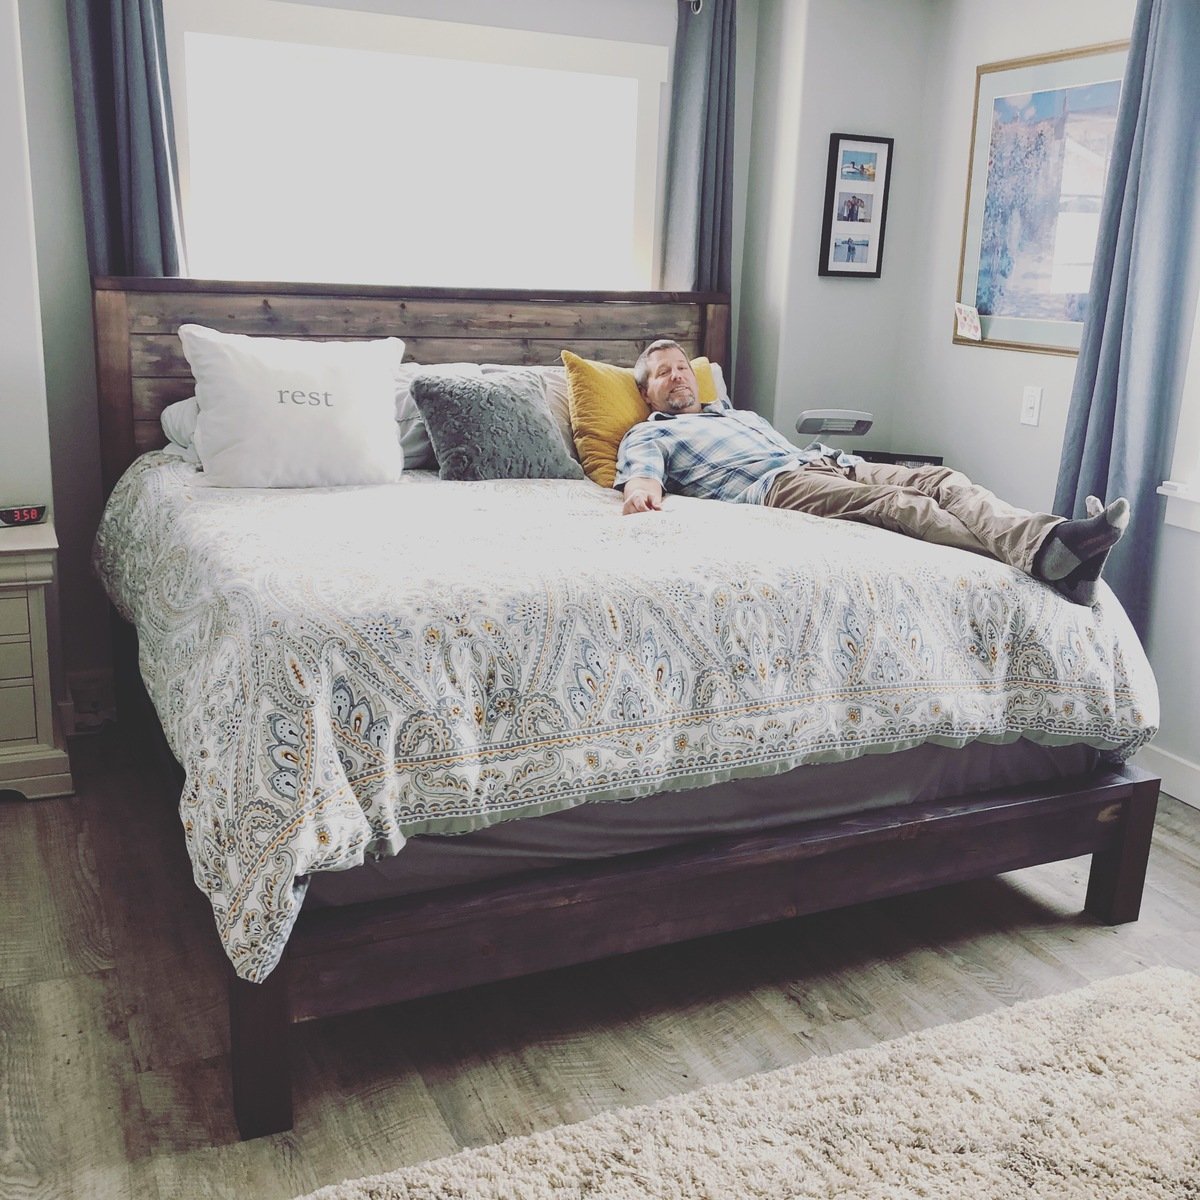
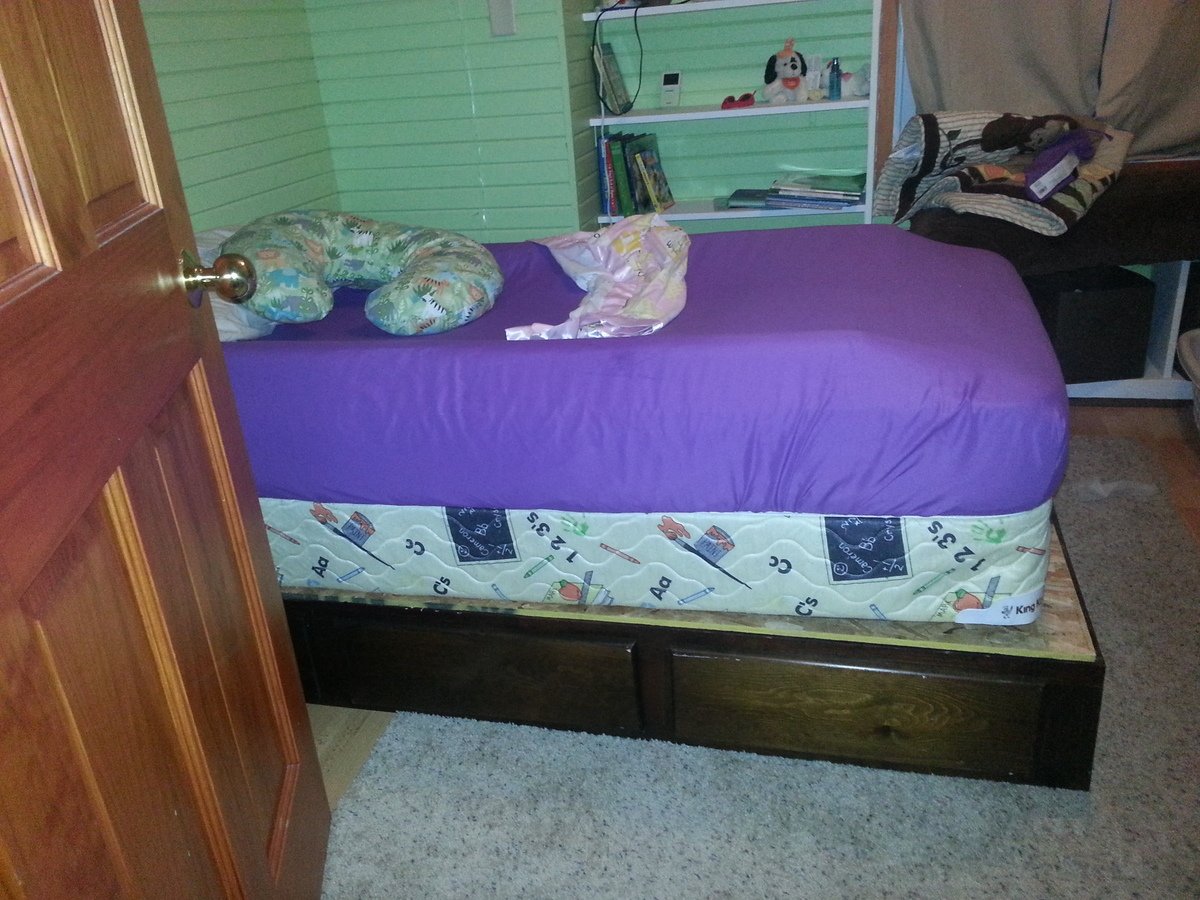
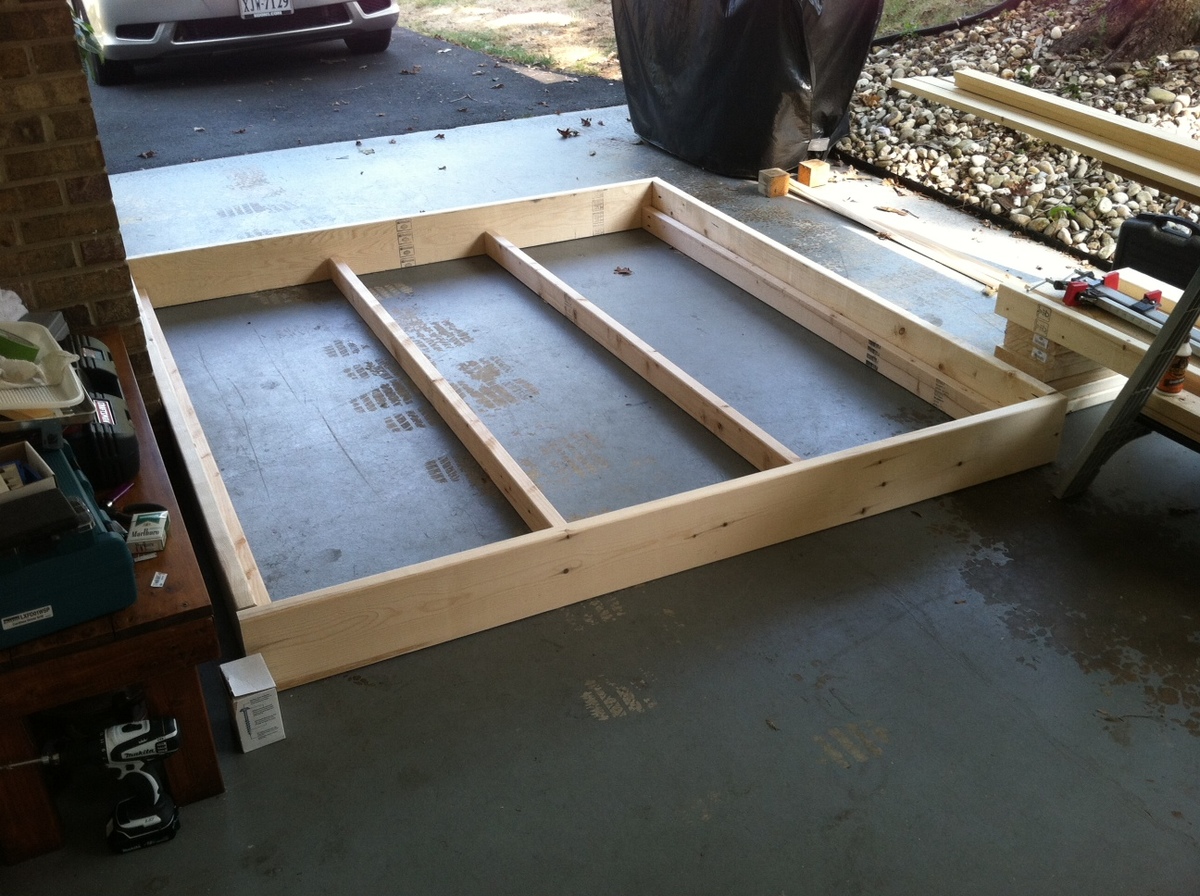
Changed the dimensions to fit a King size bed. Also lowered the 2x4 support studs so that they were flush with the bottom of the frame in order for the bed to sink in more. What should have took only a day was spread out over a week. I'm more Al Bundy than Tim Taylor. NFL break here, NFL break there.. two kids, etc etc. Anyways, I rushed the moulding part because it was Sunday and now I gotta go back and fill in gaps caused by rushed measurements. Still looks pretty good though. Thanks Ana!
-Thai

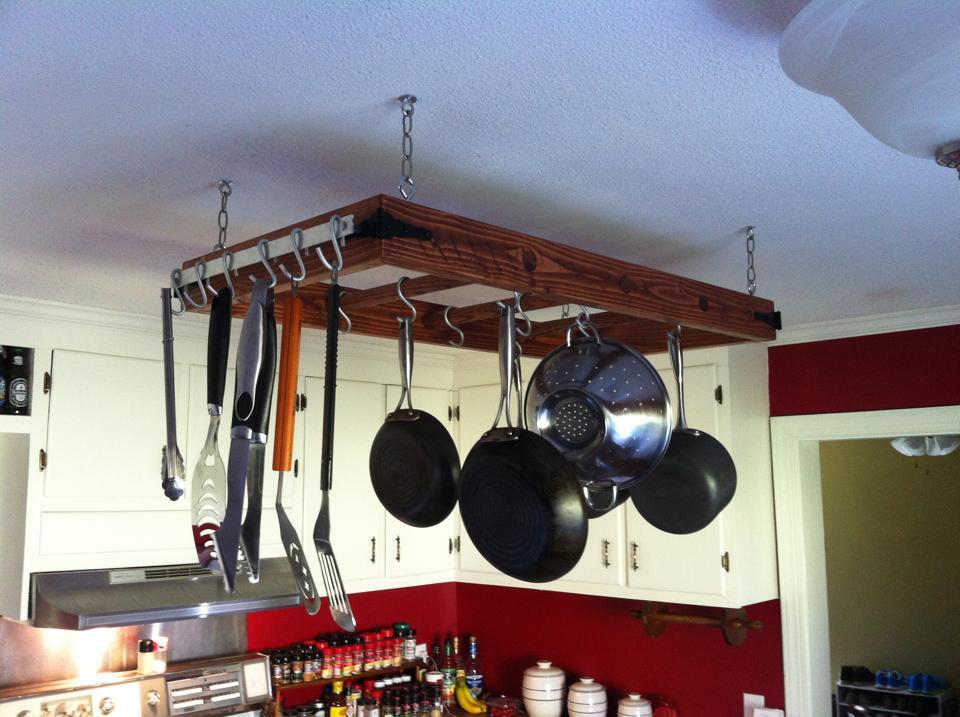
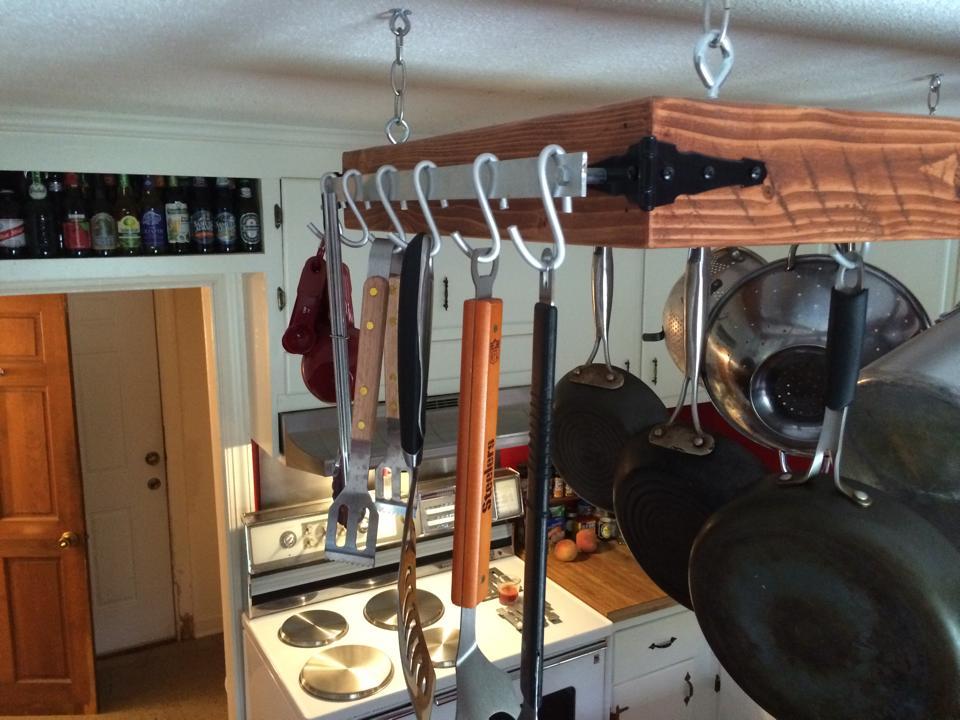
looking for a potrack all I could find were metal ones. so i came up with the plans to build one. just a 2x4 frame with 3 1"1/4 holes on each side for the oak dowels for my rungs. hooks were hard to find so i had to bend my own out of aluminum bar stock. I used to hinges for decoration on the corners. On the on end i bolted an aluminum plate with 2 1" spacers on so i cound hang my utensils. i had to bend the hooks for them as well.
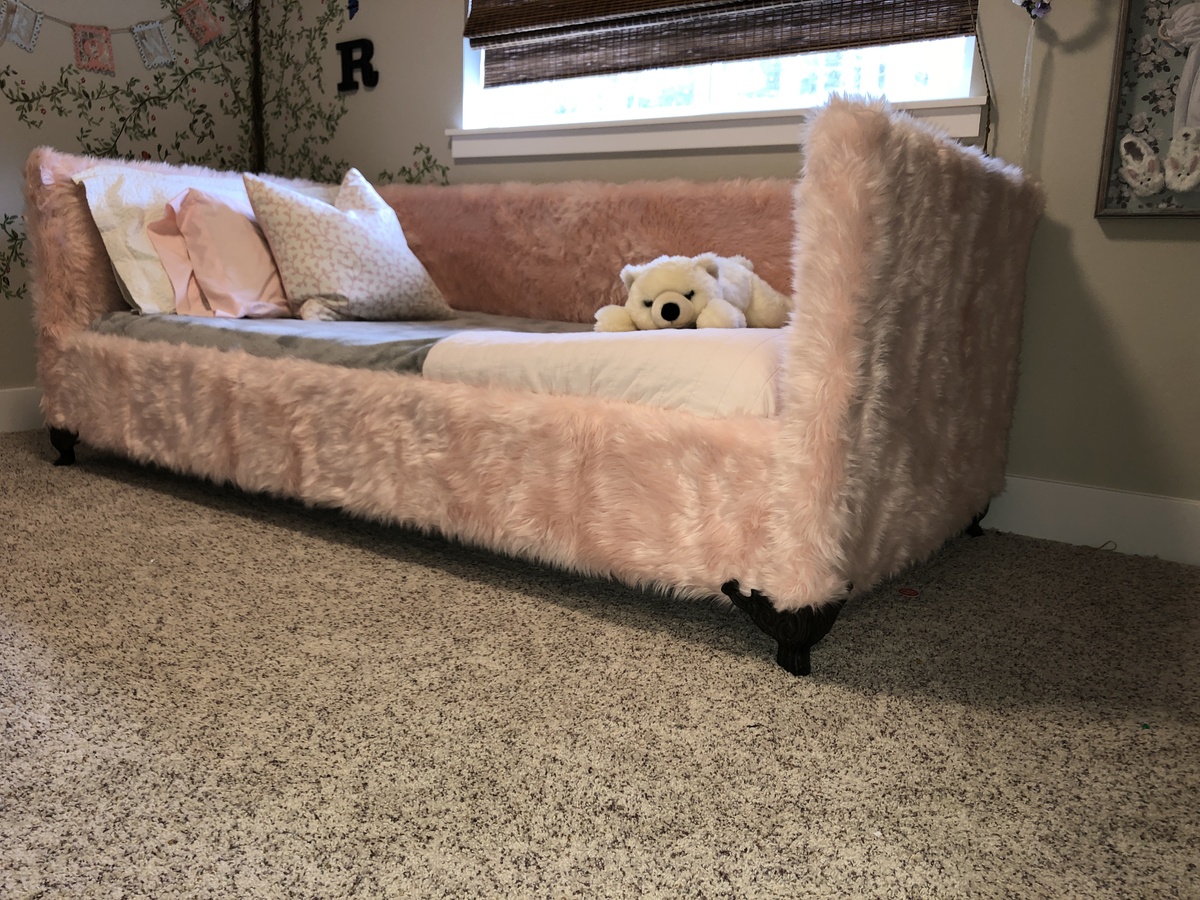
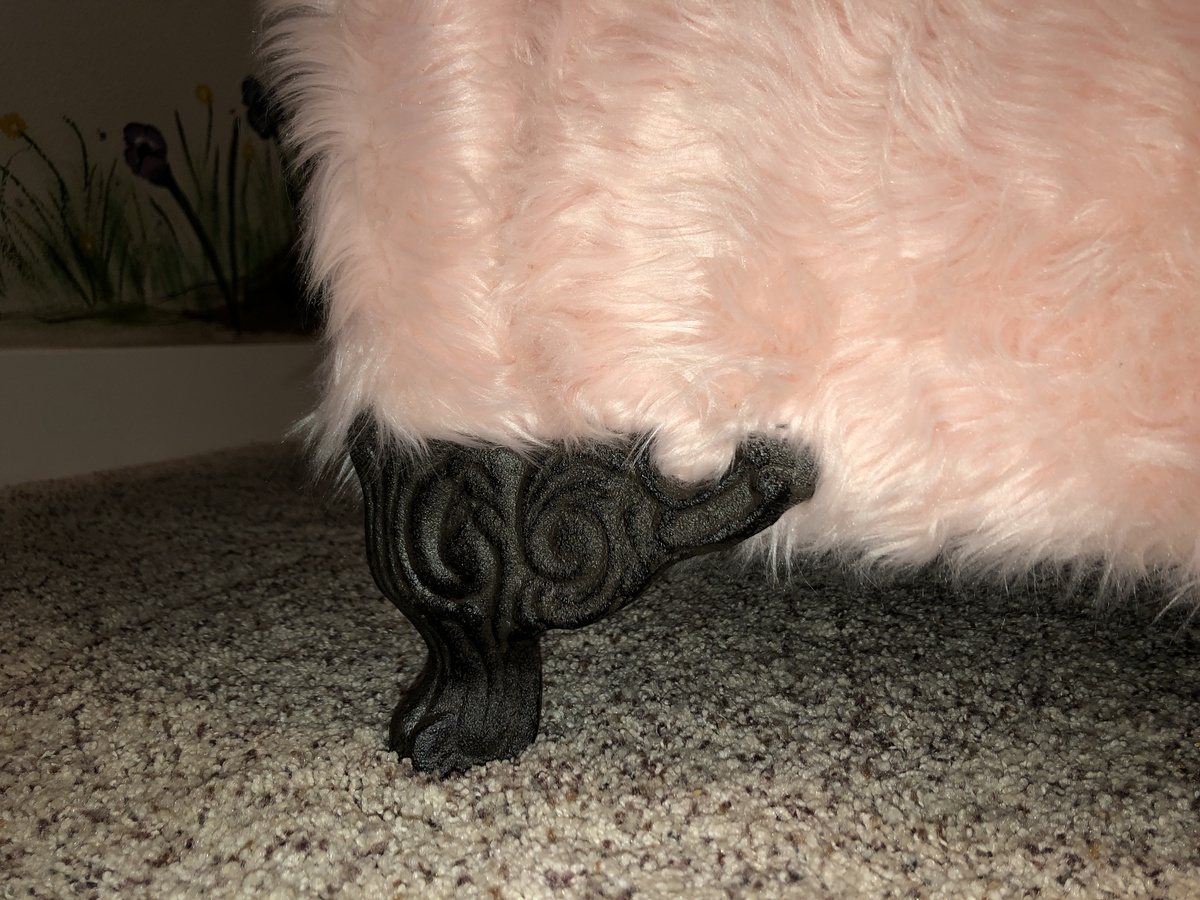
I am thrilled with how my daughter’s bed turned out. I used the basic pink fur bed idea, and tweaked the plans to meet our needs. I found iron chair feet at Hobby Lobby, and prefer them to the hairpin legs. Thanks so much for the idea, Ana!

Mon, 04/08/2019 - 12:35
You made my day by posting this!!!! Thank you so much, what a beautiful piece! Ana

I've had the Pioneer Bed bookmarked for months, waiting for the right time to build it. It was the perfect twin plan to hide a trundle beneath. We built the bed in a day with our new nail gun, it was so easy! I added 5 inches to the leg height so the pop-up trundle would fit easily. We're loving the new bed.


Comments
Ana White Admin
Wed, 02/01/2023 - 08:57
Love the set up!
These look fabulous, the two tone finish is super fresh! Thanks for sharing.