Community Brag Posts

Repurposed Rocking Chairs to Adirondacks!

Submitted by Anonymous (not verified) on Sat, 06/03/2023 - 06:31

I've done a couple of things from plans on this site but this turned out awesome. We had some old weathered rocking chairs that I dismantled and was able to use some of the wood for these Adirondack chairs.

Could have gone with a dark stain but the gray really worked well on this. Pretty simple build and very sturdy chairs. I loved this project and will certainly be making more of these.

Comments

"Big Kahuna" Sports Locker

I modified the original design to make this unit suitable for my son's room. It has basically the same dimensions as the original "Dress Up Tower." I also created a version that can be used as a bookshelf which will have 3-5 shelves (see bottom picture).

So far I have completed the SketchUp rendering and hardboard router template and am in the process of building the whole unit. I will post completed pics when finished.

If you'd like the SketchUp templates, just email I'll send them to you. Printing out the paper template at 1:1 will allow you to get the radius correct on the surfboard sides.

Mike

-----------------------------------------------------
Mike Sullivan
[email protected]

www.etsy.com/shop/BroadCoveArtisans
www.broadcoveinteriors.com
www.facebook.com/BroadCoveInteriors

Built from Plan(s)
Estimated Cost
80.00
Estimated Time Investment
Weekend Project (10-20 Hours)
Finish Used
So far, I decided upon Natural Oak stain and clear poly (sides), blue & white latex paint (stripes, inside & front)although I may change this depending upon how it looks completed.
Recommended Skill Level
Intermediate

Comments

American Girl Doll Couch

Submitted by mybartmart on Thu, 12/05/2013 - 00:51

My friend's daughter's both love American Girl Dolls. I have made them the bunk beds and the Farmhouse bed. But they really wanted a couch. I made them one using some of the elements from the Farmhouse Bed. I used a blue paint with a pickling whitewash stain on top.

I did have a hard time getting a good photo of the finished project.

Estimated Time Investment
An Hour or Two (0-2 Hours)
Finish Used
Blue wall paint, left over with Pickling white wash stain on top
Recommended Skill Level
Beginner

Grandy Barn Door Console Table

Submitted by Anonymous (not verified) on Wed, 10/02/2019 - 13:23

Tailored this to fit our space to provide us with more storage that is easy on the eyes 😍 took our time completing it and love how it turned out. First big woodworking project I’ve completed!! My furry assistant is featured in some of the pictures 🤩

Built from Plan(s)
Estimated Cost
250
Estimated Time Investment
Week Long Project (20 Hours or More)
Finish Used
White chalk paint with espresso stain top
Recommended Skill Level
Beginner

Comments

Console Table

Submitted by Anonymous (not verified) on Fri, 06/09/2023 - 11:44

Very fun! Thanks for providing the plans!

Comments

Farmhouse Bench

Submitted by kaytrishjr on Wed, 01/25/2012 - 18:27

I made the large rustic bench to go at the bottom of my bed. I am so happy at the finish product, now I'm going to build the whole table and bench set.

Estimated Time Investment
Afternoon Project (3-6 Hours)
Finish Used
For the top, I used the brown paper bag technique that everyone is using on their floors. I wanted to try it on something small before I put it on my floors. The bottom part is just black paint with satin poly.
Recommended Skill Level
Beginner

Comments

spiceylg

Thu, 01/26/2012 - 08:07

I built this and did the black bottom with wood top and love it. However, that brown bag affect is to die for! Love, love, love!!!

sueslager

Mon, 03/26/2012 - 10:29

thanks for the idea to do it as a table top

i had been planning to use the paper bagging for a stairway, but this gave me a chance to practice on a smaller project .. and i LOVE it!! how is yours holding up? i only did 4 layers of poly but for a seat i think it will be plenty.

Coffee bar with kitchen island

Submitted by Bachdenise on Sun, 12/08/2013 - 10:23

Built to be used for my coffee bar.

Estimated Time Investment
Weekend Project (10-20 Hours)
Finish Used
Followed the plan exactly. Used early american stain.
Recommended Skill Level
Intermediate

Comments

Laundry Room Mudroom

Submitted by Anonymous (not verified) on Mon, 02/22/2016 - 09:07

My space was really small (28" wide and 14" deep), so wanted to use the space to its capacity. Sorry, about the pictures being not of the full thing, not enough room for a full length picture.

Built from Plan(s)
Estimated Cost
$175.00
Estimated Time Investment
Week Long Project (20 Hours or More)
Finish Used
Benjamin Moore White Dove Semi-Gloss
Recommended Skill Level
Intermediate

Bed frame and headboard upgrade!

Submitted by Anonymous (not verified) on Thu, 10/03/2019 - 09:03

We decided to upgrade to a king sized bed and so my queen sized bed frame and headboard had to go. I based the whole idea off of Ana White’s modern headboard plans. Just using one sheet of plywood and some common board was super easy and made the geometric design fun and quick.

Built from Plan(s)
Estimated Cost
$150
Estimated Time Investment
Weekend Project (10-20 Hours)
Finish Used
I used just satin clear poly to finish the wood but it could easily be stained. I did have to rebuild the entire project and make the gap between the mattress and the wood smaller. I changed it to a 3/4 “ gap around the entire mattress which looks good and still allows you to make the bed. I just used sanded 2x4 legs but may upgrade to hairpin when my budget allows.
Recommended Skill Level
Beginner

Square (Flower) Storage Table

When I saw the plans for the flower storage table, I realized it was just what we needed for homework time.... Except our only child is a boy, so I just made the top a square instead of a flower. Also because I bought the least expensive plywood, it was too rough for a homework surface so we bought very thin plexiglass to go over it. The thick plexiglass would have cost $60 for a sheet, but the thin option was around $14.00. My son loves it so much he eats his breakfast and dinner at the table. It sits in the corner of our livingroom and is just the right size.

Built from Plan(s)
Estimated Cost
$30.00 +/-
Estimated Time Investment
Afternoon Project (3-6 Hours)
Finish Used
sanded and painted with a valspar paint sample
Recommended Skill Level
Beginner

Comments

Katie_Evans

Thu, 02/02/2012 - 17:42

I put a 1x2 trim around the table to give the cheap plywood a finished look and off-set it the width of the plexiglass with the intention of screwing the plexi down with shallow screws. However... I couldn't get the plexi cut the exact size of the table so I ended up just laying it on there. It hasn't moved an inch yet! I was a little nervous drilling into the plexi glass so this ended up working out just fine. It is really easy to clean pb&j off of too!

As a bonus the Land of N0d catalog came last week. The thumb chair is in it at a retail of $65.00!!! I LOVE Ana White!

Play Stand

Submitted by SaraD on Fri, 12/13/2013 - 06:16

Our "Grand-cousins" made this as a gift for our three girls this Christmas. We are very excited to receive it! I know our three girls will get a lot of fun, pretend playtime out of it! I especially love how they customized it for our girls. They did a TV news station instead of a puppet theater. They also added some wooden mail for the girls to play with.

Built from Plan(s)
Estimated Time Investment
Week Long Project (20 Hours or More)
Recommended Skill Level
Intermediate

Danny wood shop project

Submitted by Anonymous (not verified) on Tue, 02/23/2016 - 20:33

great project to do with the kids

Built from Plan(s)
Estimated Cost
120
Estimated Time Investment
Afternoon Project (3-6 Hours)
Finish Used
Blue &awhile paint
Recommended Skill Level
Beginner

East Fork Mailbox

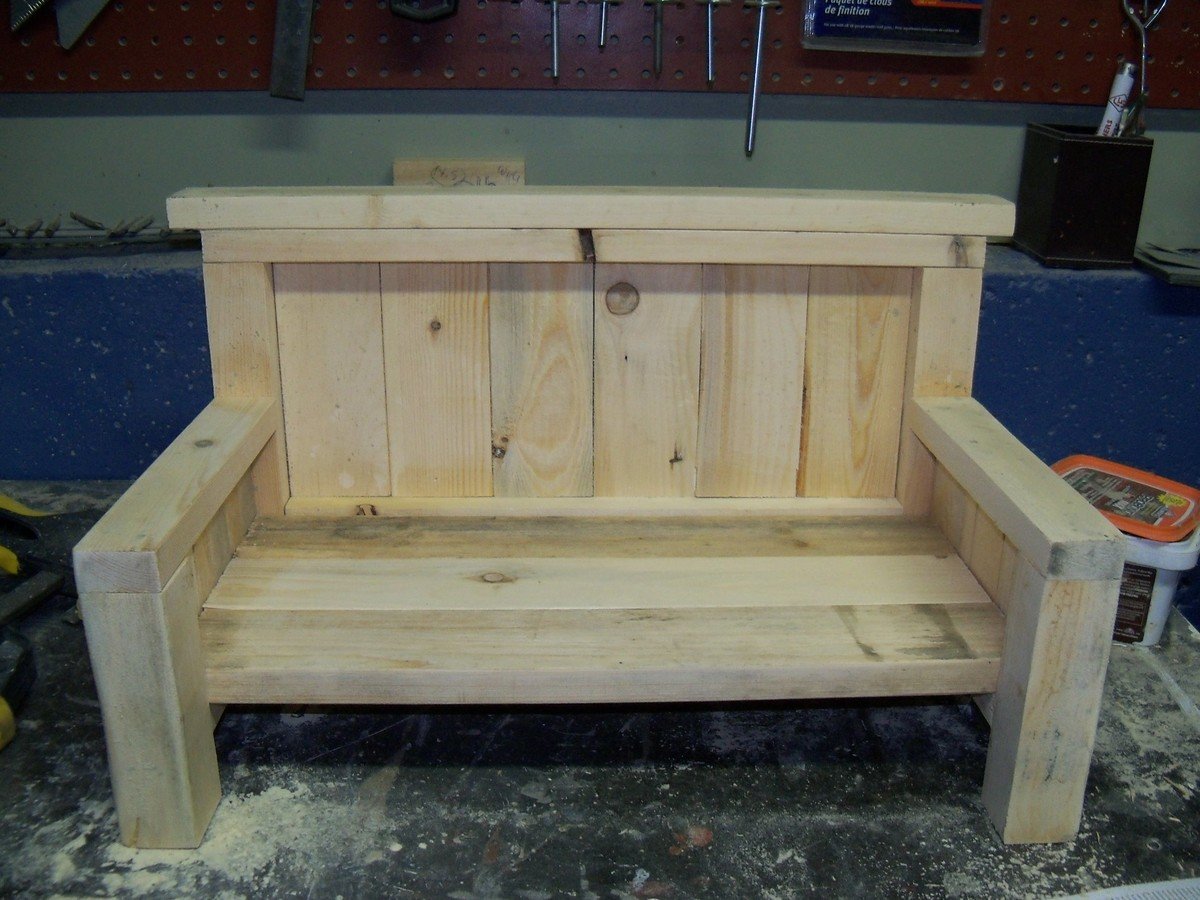
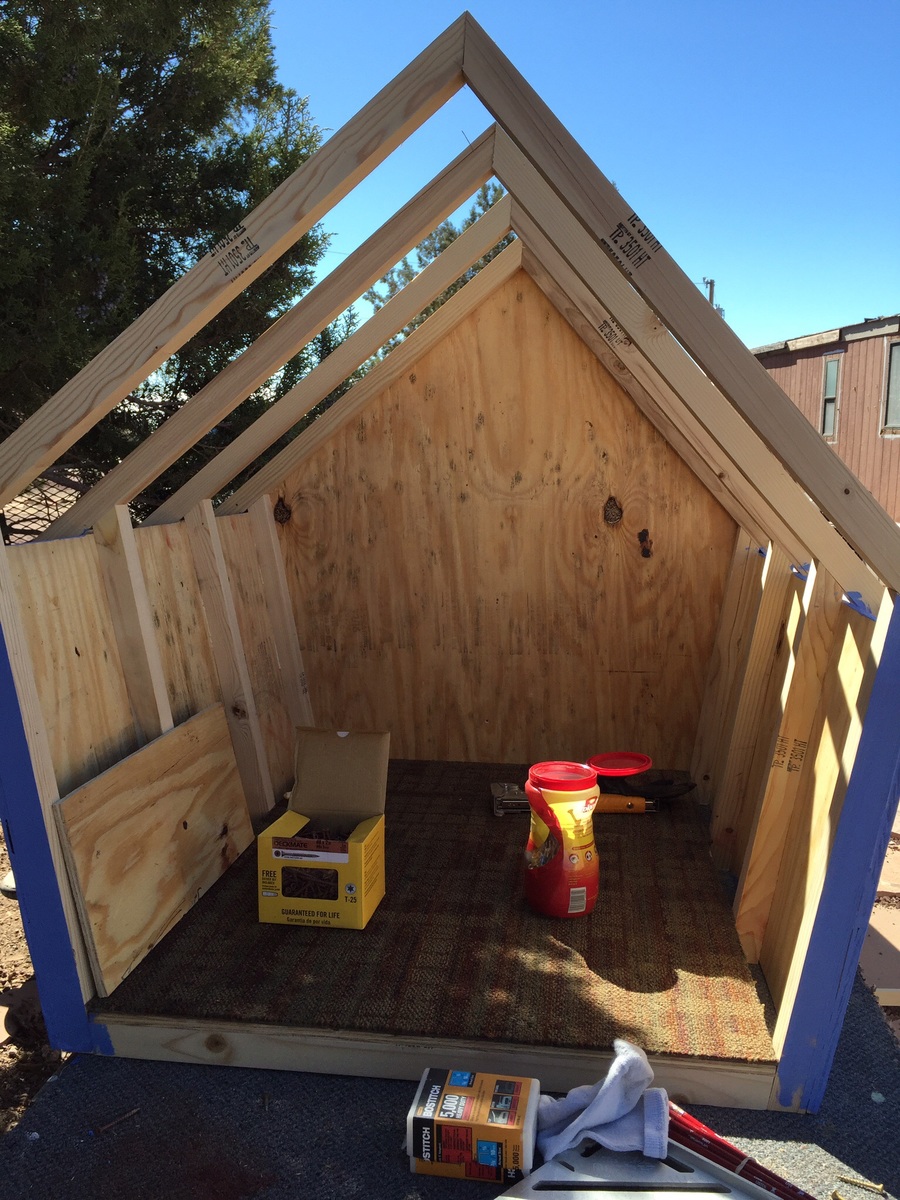
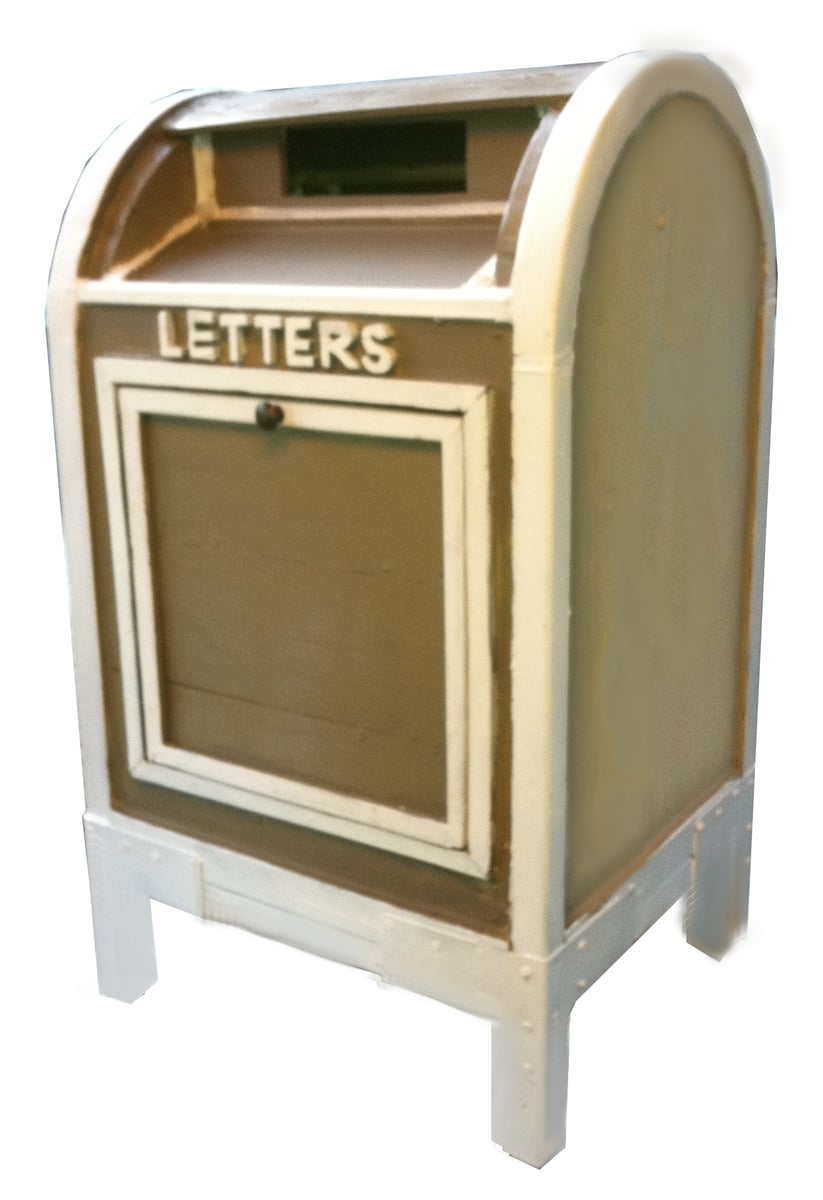
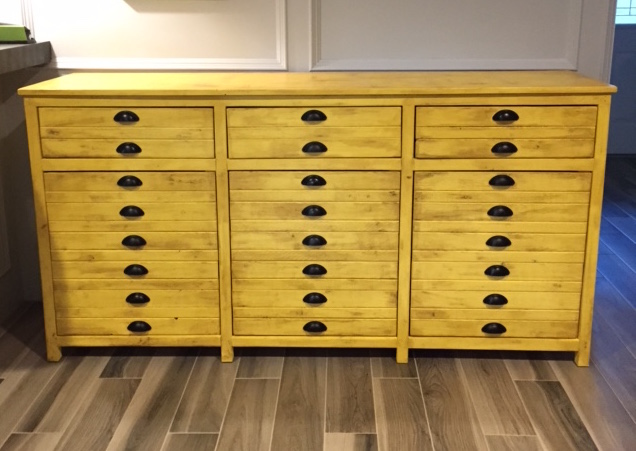
So I've always loved the old mail collection boxes. I have also always been dissatisfied having a ordinary mailbox. In steps the East Fork Mailbox. Tada! No more ordinary.

Ana posted plans for Grace's Mailbox, and that's what I'm linking this post under, but there isn't really a whole lot of similarities outside the shape.

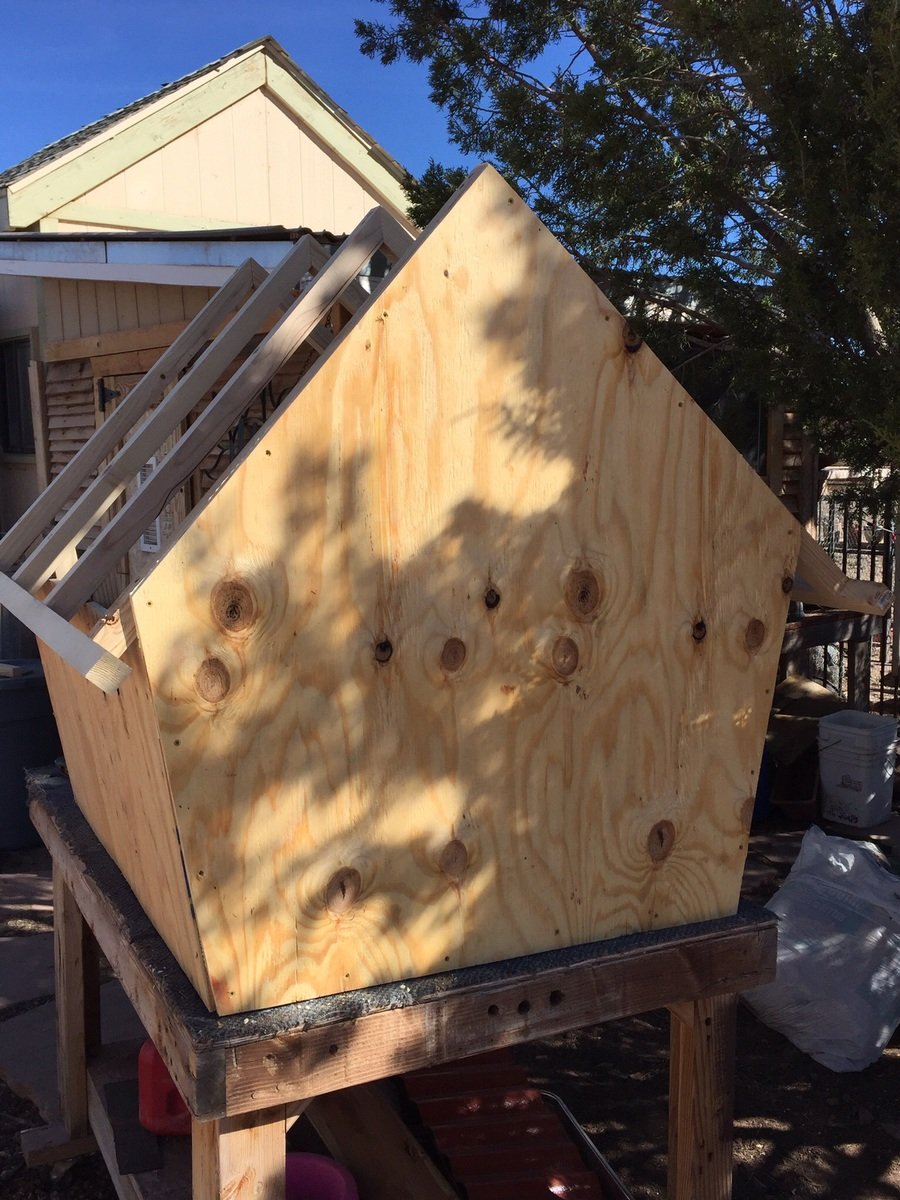
I don't know that it's really worth it to anyone for me to post actual plans. Since 100% of the materials I use are rescued/salvaged (every last board and screw), the plan shopping list would usually fall somewhere between goofy and impossible. When I build anything, the materials I have on hand dictate my plan, not the other way around.
Having said that, if anybody is ever interested in a real plan from me, let me know. I would be willing to work on a redesign in order to accomodate a more conventional materials list, just don't be surprised if I encourage you more than once to go scavenging for materials.

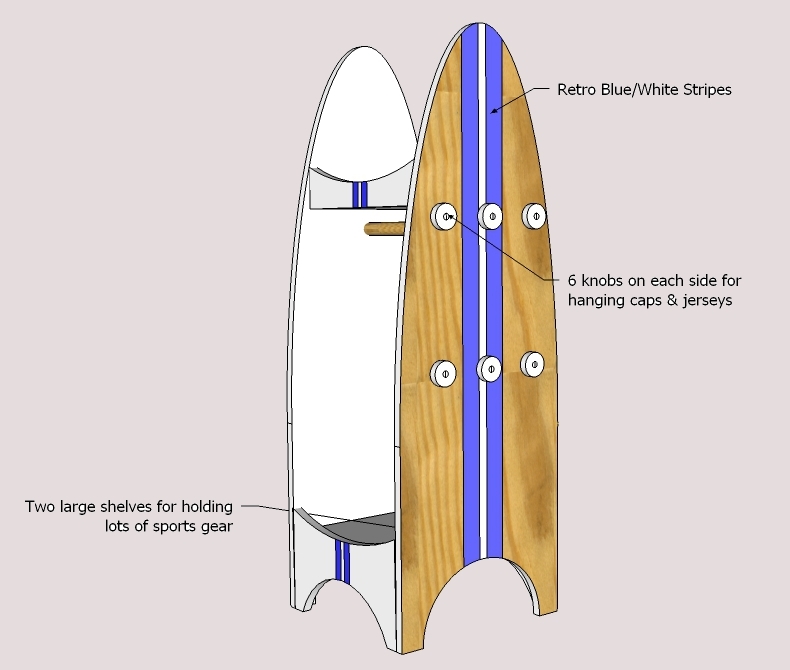
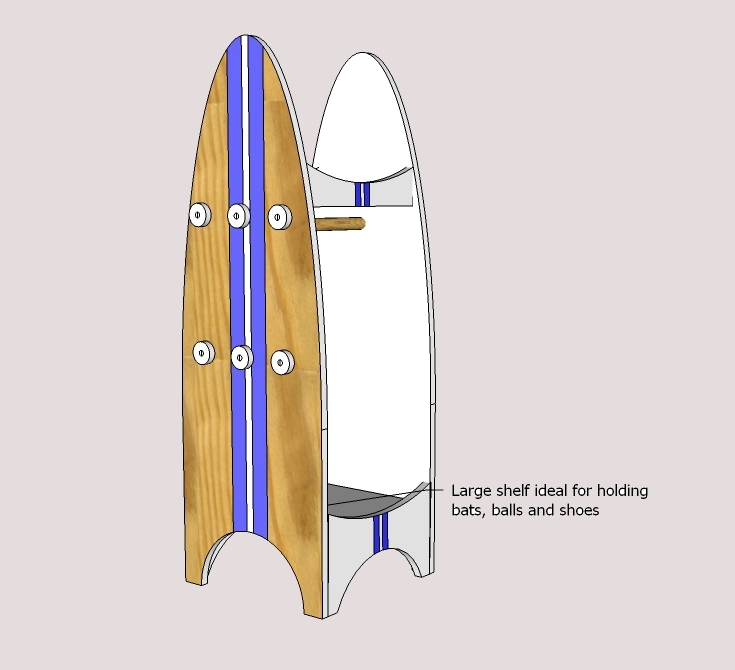
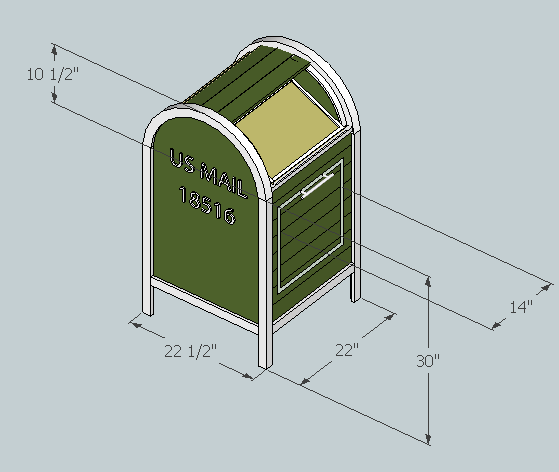
I did uplod this project to the Sketchup 3D Warehouse, but it's not perfect. I was in a hurry, so nothing is grouped as it should be. Also, the center section of my mailbox is a large drawer mounted on slides for packages and outgoing mail. The Sketchup model doesn't reflect that. Download it for a reference model if you'd like. http://sketchup.google.com/3dwarehouse/details?mid=551fcbbeb0e75c3dc2c3…

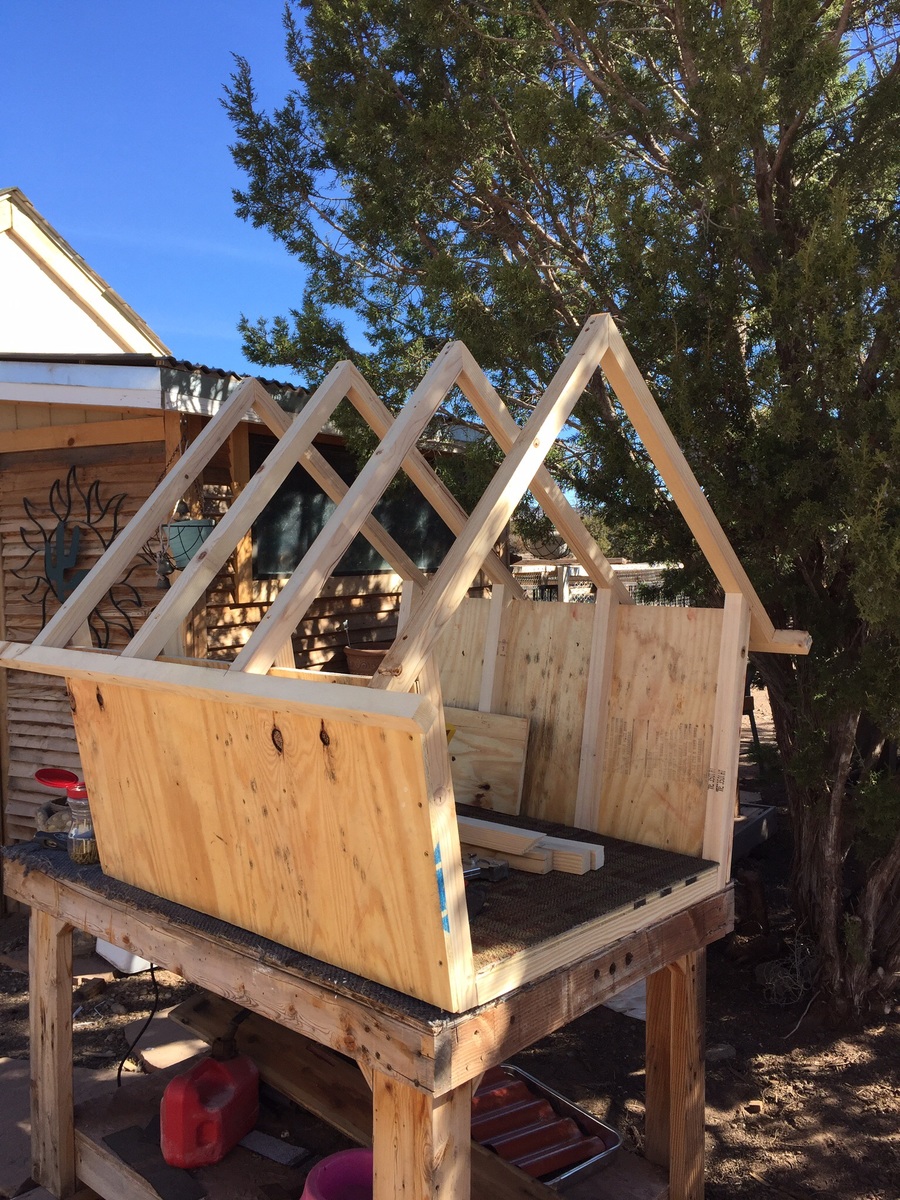
One more note: I built my mailbox 41", to take into consideration the terrain and road. USPS regulations dictate mailboxes meet certain dimensional criteria. You can find the regulations online or go chat with your postmaster.

Built from Plan(s)
Estimated Cost
maybe $5 total, I had all the material I used on hand
Estimated Time Investment
Weekend Project (10-20 Hours)
Finish Used
I wanted to paint it usps blue, but I lost the war on that one. Honey likes things to match a little better than I do. I used leftover exterior house paint instead of electric post blue so he wouldn't get worked up.
Recommended Skill Level
Intermediate

Factory cart coffee table

Obviously fell in love with Ana's plans after I had a mild heart attack at the price of refinished ones. But I still really wanted to keep the wheels looking somewhat original.

So after weeks of searching and placing wanted ads everywhere - a lovely lady contacted me to say she had an old barrow in a slough behind her house and would the wheels from that be any good!

You bet they were. (They are cast iron and weigh a ton (hauling it out and getting it in my truck was a story on it's own!)

Unbelievably (and I seriously mean this) the plans for Anas table and the dimensions of the 'axle' part of the wheels fit like a glove.

Do you love the paint pot balancers in the second pic lol I was holding out for the perfect wheels and I really am still searching for the right style to use, but for now I've attached casters (cos paint pots didn't give it that right look!!!!!) and I love this table

Thanks so much Ana x

Estimated Cost
$100
Estimated Time Investment
Weekend Project (10-20 Hours)
Finish Used
Minwax Mahogany stain and Minwax Polyurethane to finish. Standard finishing procedure, clean and condition the wood (you can use a damp cloth with water - as this opens the poers of the wood allowing the stain to take more evenly) Wait for it to dry, wipe on stain, leave for a couple minutes and then wipe off.

I wanted a really heavy sheen on mine so it has 4 topcoats on, and this was the longest step actually - waiting for all the finishes to dry before the next coat. After each coat get a sponge sanding pad and lightly sand any nibs away (these will always get stuck in your finish as dust etc floating around in the air will adhere. Don't be afraid that you are going to take any of the finish off doing this step, it's a very light sand and your work will feel like glass afterwards!
Recommended Skill Level
Beginner

Comments

Gage's Fort Bed

Submitted by Anonymous (not verified) on Sat, 02/27/2016 - 21:17

This was an all day project but we bought cheaper wood and had to do some serious sanding. The plans are missing a 44 1/2" 2x2 for the ladder. We also plan to brace the middle of the back with another 2x2  post because our 4 year old loves bouncing around. So glad we did this I stead of spending $100 extra dollars at ikea!

Estimated Cost
100
Estimated Time Investment
Day Project (6-9 Hours)
Recommended Skill Level
Beginner

Bar buffet

Submitted by Anonymous (not verified) on Sun, 10/06/2019 - 12:32

We needed a unique bar for our home, and loved the sliding bar doors on this one! It fits our house, and we get so many compliments!

Built from Plan(s)
Estimated Cost
400
Estimated Time Investment
Day Project (6-9 Hours)
Finish Used
Sanded everything, applied Kona stain, finished with a poly top!
Recommended Skill Level
Starter Project

Comments

Adirondack Chairs

Submitted by Anonymous (not verified) on Mon, 06/26/2023 - 12:25

I used treated lumber for my project. One chair took me 2 to 3 hours from start to finish and the 2nd chair went a lot faster! The plans were so easy to follow, Thanks Ana!

- Built by Kara

Comments

Perfect and solid shelf fitting Ikea Toy bins

I built this out of rough cut pine direct from the saw mill. The wood is beautiful and thick, but it took a TON of sanding! It fits 6 medium Ikea Trofast bins with a bit of room to spare.

Built from Plan(s)
Estimated Cost
$12
Estimated Time Investment
Afternoon Project (3-6 Hours)
Finish Used
mixed 1/4 quart white paint with clear coat for white washed look. Top coat with clear.
Recommended Skill Level
Beginner

Entryway Bench & Shelf

Submitted by mandy_004 on Fri, 12/20/2013 - 12:56

The hardest part about this project was figuring out how to hang the shelf on the wall. I have never made anything before and wanted to buy the Pottery Barn version of this but did not want to spend $600 + shipping so with some help from some friends and my husband, Voilà!

I spent about $100 total on this project. We did buy a jigsaw for this but plan to use it for many other things so I'm not counting that. It really doesn't require much skill and wasn't all that difficult. We put ours together with screws and since I was painting it I wasn't worried about the imperfections along the way. All that's left to do is sew a cushion! I am so happy with the results! Thank you so much Ana White for these plans!

Estimated Cost
$100
Estimated Time Investment
Weekend Project (10-20 Hours)
Finish Used
Behr Black Paint
Recommended Skill Level
Starter Project

Sunny Printers Triple Console Cabinet

Submitted by Anonymous (not verified) on Mon, 02/29/2016 - 13:32

This was my husband's first build and I think it turned out great! I was very nervous about painting it such a bold color, but after distressing it, I absolutely love it! My three kids each have a drawer and cabinet for their homeschool things.

Built from Plan(s)
Estimated Time Investment
Week Long Project (20 Hours or More)
Finish Used
I made my own chalk paint from plaster of paris, water and Behr paint in the color Fuzzy Duckling. I distressed it using Amy Howard's dark wax.
Recommended Skill Level
Intermediate

Comments

handmadewithash

Wed, 03/02/2016 - 17:13

Beautiful color! I love the look.  I'm currently building this as well.  I'm almost at the paint step.  I would like to go with a nice bold color too.  I'm inspired by the yellow color.

Ana White Admin

Wed, 03/02/2016 - 21:56

WOW, that is an amazing job all around! Can't wait to see your next project, you make a great team, thanks for sharing!