Cabinet
Here is the cabinet I built for our home office. I used the top and bottom design from the Console Table, but since I live in Texas where there is lots of humidity, I cut one piece from maple plywood.
We made this for our daughter for Christmas. We used purple spray paint and I made the mattresses and pillows from Ana's plans, too. Our son sanded it and we presented it to a very happy little girl!
There really aren't any plans for this bed. I scaled down the camp loft bed and copied the other brag post on here
Sat, 10/04/2014 - 18:10
That is a wonderful job and a very lucky child to have such a great bed.
Sun, 10/05/2014 - 08:38
I built the other tractor bed so I know how much work went into this! You did an awesome job and it turned out beautifully! Hopefully it helps your grandson have the confidence to sleep in his own bed! I'm happy to say it worked with my oldest. My three and a half year old is sleeping through the night and in his own bed for the first time in his life since building him and his brother the tractor bunk bed! Good luck!
Wed, 10/08/2014 - 20:28
I don't mind at all! I've been inspired by so many plans and brag posts on this amazing site, I'm glad my build could help inspire someone else! :)
We have been using a number of folding tables to do our builds and feeling the pain in our backs and frustrations in our brains for doing it. I found this pattern and rushed to Home Depot! A few hours later we had a workbench. Loved it so much a day later we had two!! We use them all the time. Thank you Ana for such a great pattern!
Decided to lightly char this one with a propane torch and then apply a wipe on poly.
Great Plans, I had a blast making this table for my wife! It turned out great. Thank you for sharing the plans for this beautiful piece!
-Mike
Thu, 12/27/2012 - 09:21
Your table turned out fantastic! I'm glad to see that because I am considering this table for a project in the near future :)
Thu, 12/27/2012 - 12:30
Your table turned out just beautiful!! Great job and I love the finish!!
Sun, 09/14/2014 - 13:45
Love your table!! How did you attach the 1x6s to the frame? I am stuck at that step! Thank you for your help!
Modified plans it fit our wall. Looks great and only took a few hours start to finish.
Friend needed a hutch to store some overflow kitchen stuff and I needed a first project for my new woodshop. I changed the top openings to accomadate what she needed to store and went with milled lumber because I have the tools needed to finish it out.
I think it turned out great in the end, Thanks for the plan Ana!
This was a weekend project using pocket hole screws pine wood and a regular stain and wax coating
I based my shelves on the Subway Tile Bookshelf plans. The space I needed to fill was roughly 72x108. I wanted the offset shelves so I didn't need extra supports and it also had to be lifted off the floor because of a space heater. I used 12 inch melamine boards that I had the store cut for me because I have no experience. I used a drill for the first time and it came together very quickly. I used 14 inch pre-made legs that I spray painted white.
This project was not as simple as I expected! For this little bathroom, the mirror is offset, leaving lots of wasted space above the sink so my friend asked me to build some storage. I thought this would be a great solution that could maybe move with her later on, and it turned out pretty well. My two problems were 1- I had to cut the steel pipe to fit the space and 2- my hardware store did not sell S-hooks that would fit over the steel bar. I used 1/2 in steel bar, so I cut it with my Dremel rotary cutting wheel. It was a bit slow but it worked and once I cut halfway, I could just bend the pipe to break it at the cut. The two cut ends are not threaded so I had them each end into one side of a 3/4 T fitting. For the S-hooks, I bought ones that were about the right size, then bent them open wider using a large screwdriver and a crow bar as a wedge. Two large screwdrivers might work as well. Instead of the straps, I used a thin steel bar, drilled through one side. I am happy with how it turned out, took about an afternoon not including all the time thinking it out! Finished with butcher block oil.
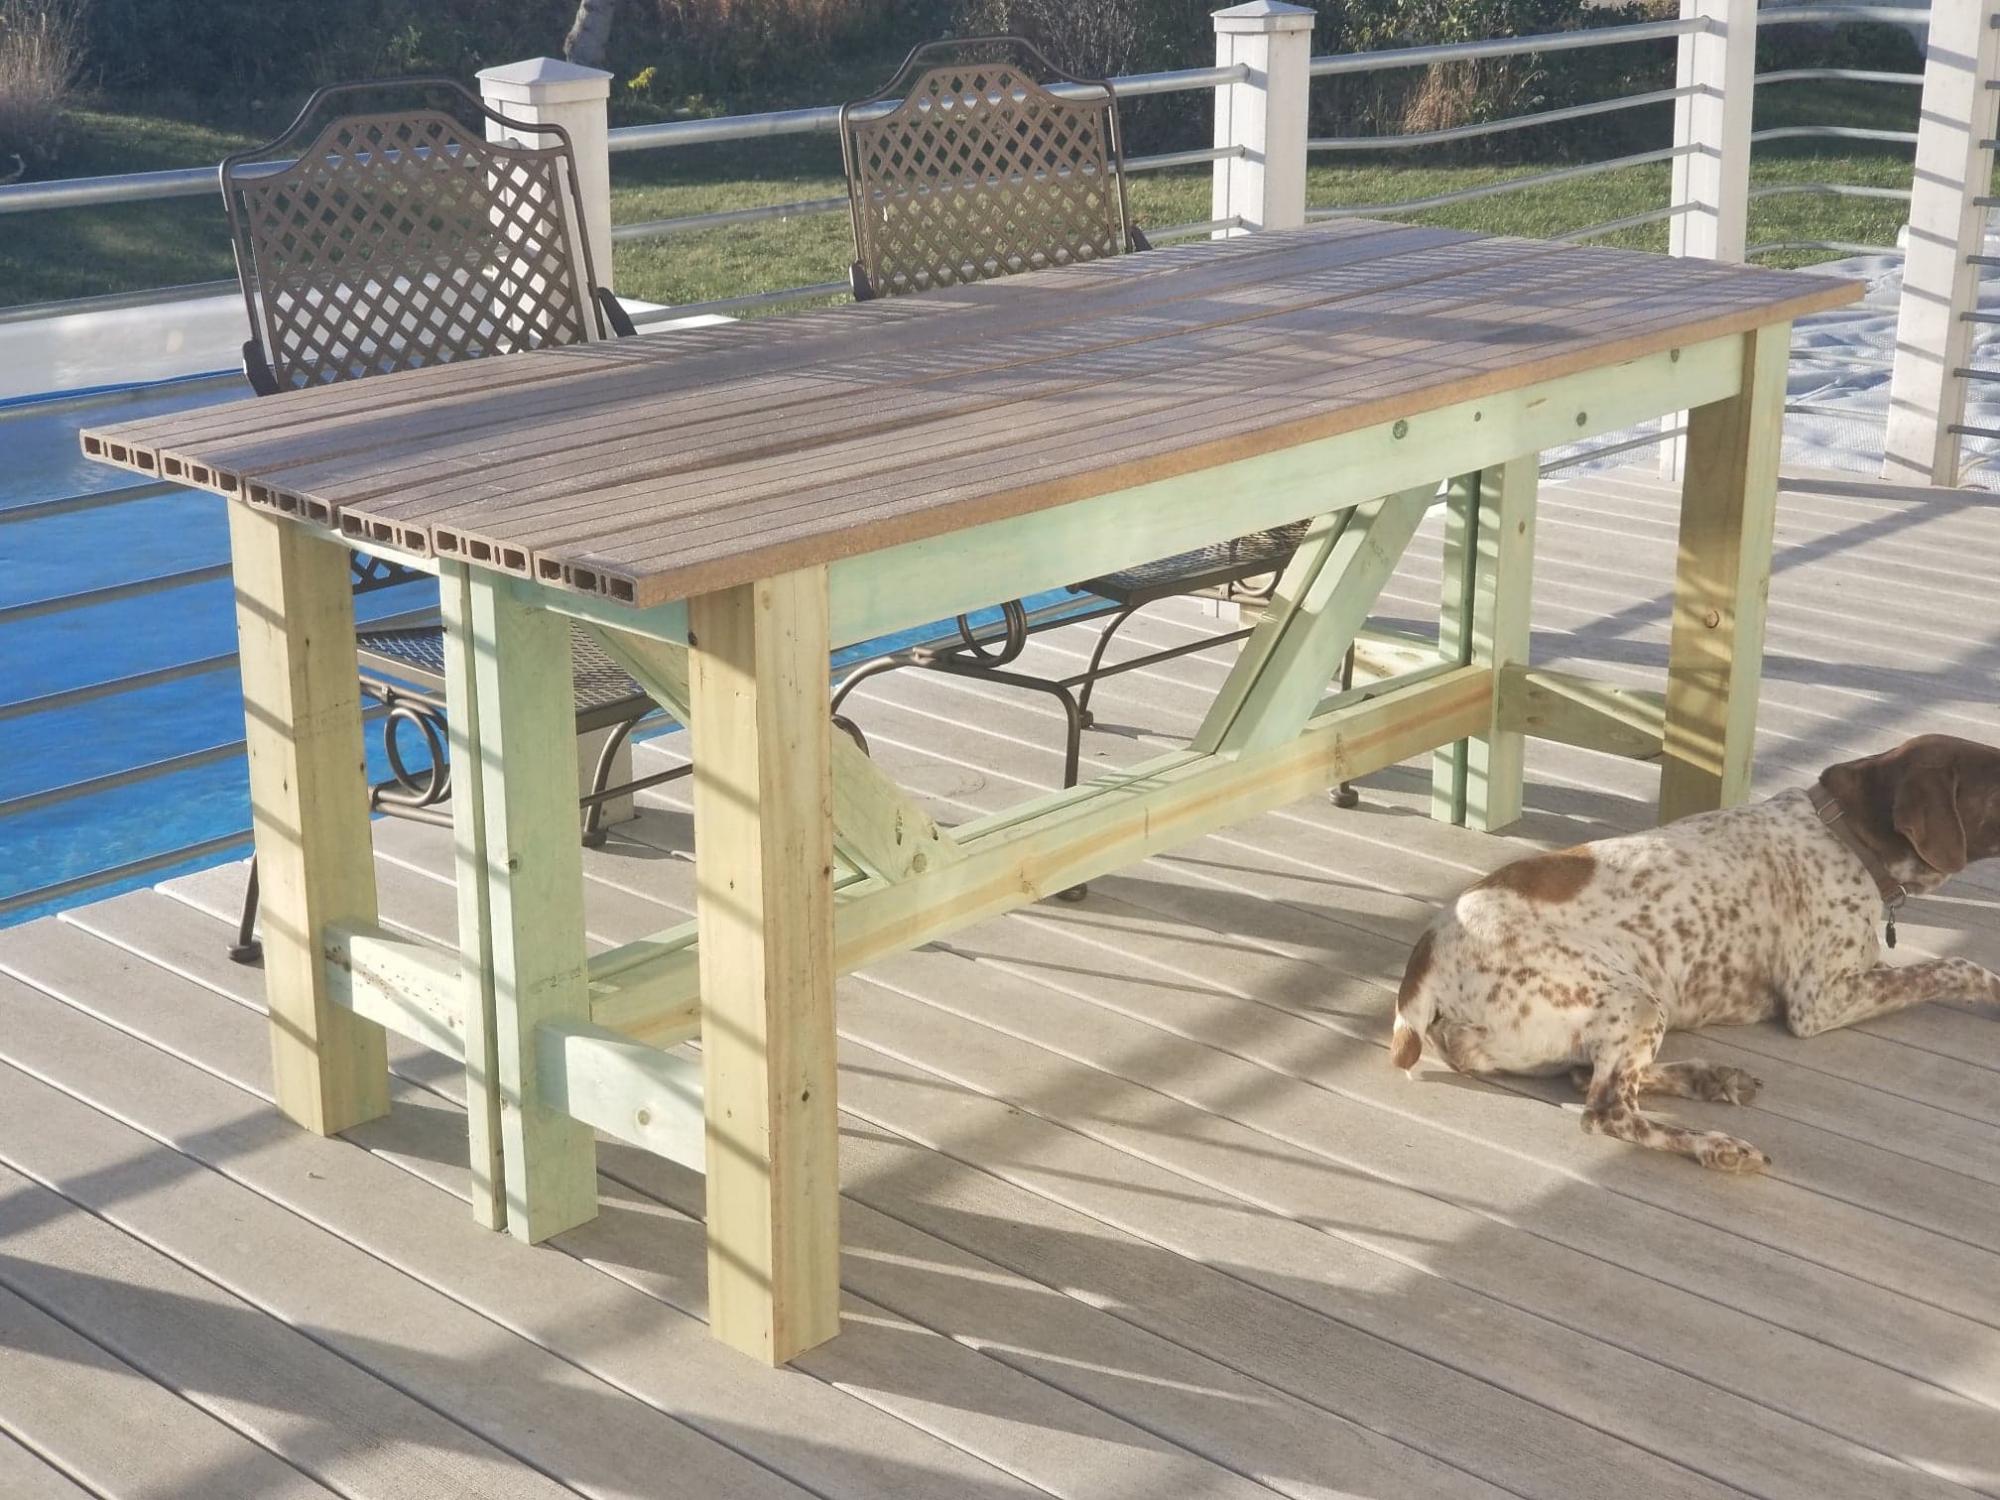
My wife and I were looking for a dining table for our deck. We looked at a few to purchase but could not decide. I wanted something that would not take up a lot of deck space. When the Facebook post for the "Outdoor Bar Table" came up, it inspired me to try to build a similar table. I already had purchased a Kreg HD pockethole jig for a project I never got to (At least yet), so I figured construction would be pretty simple.
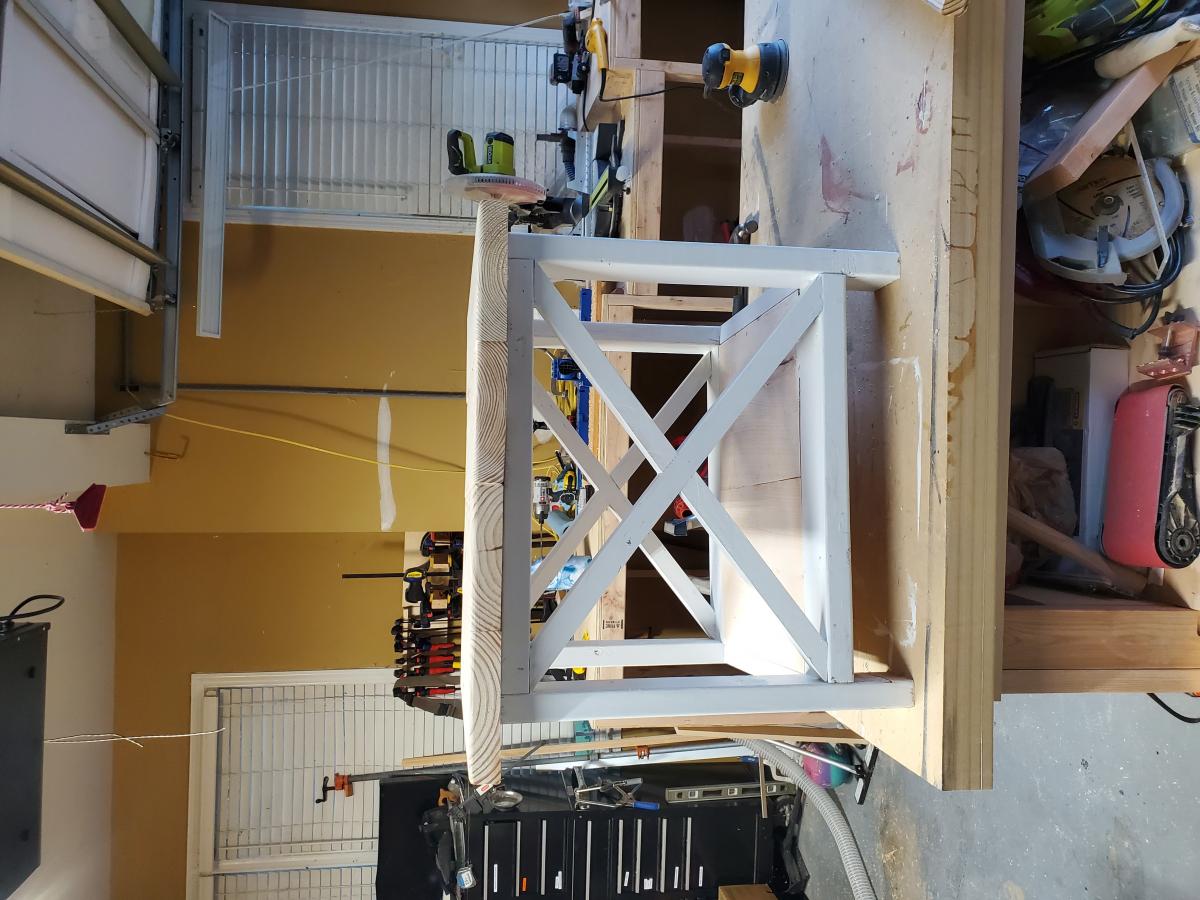
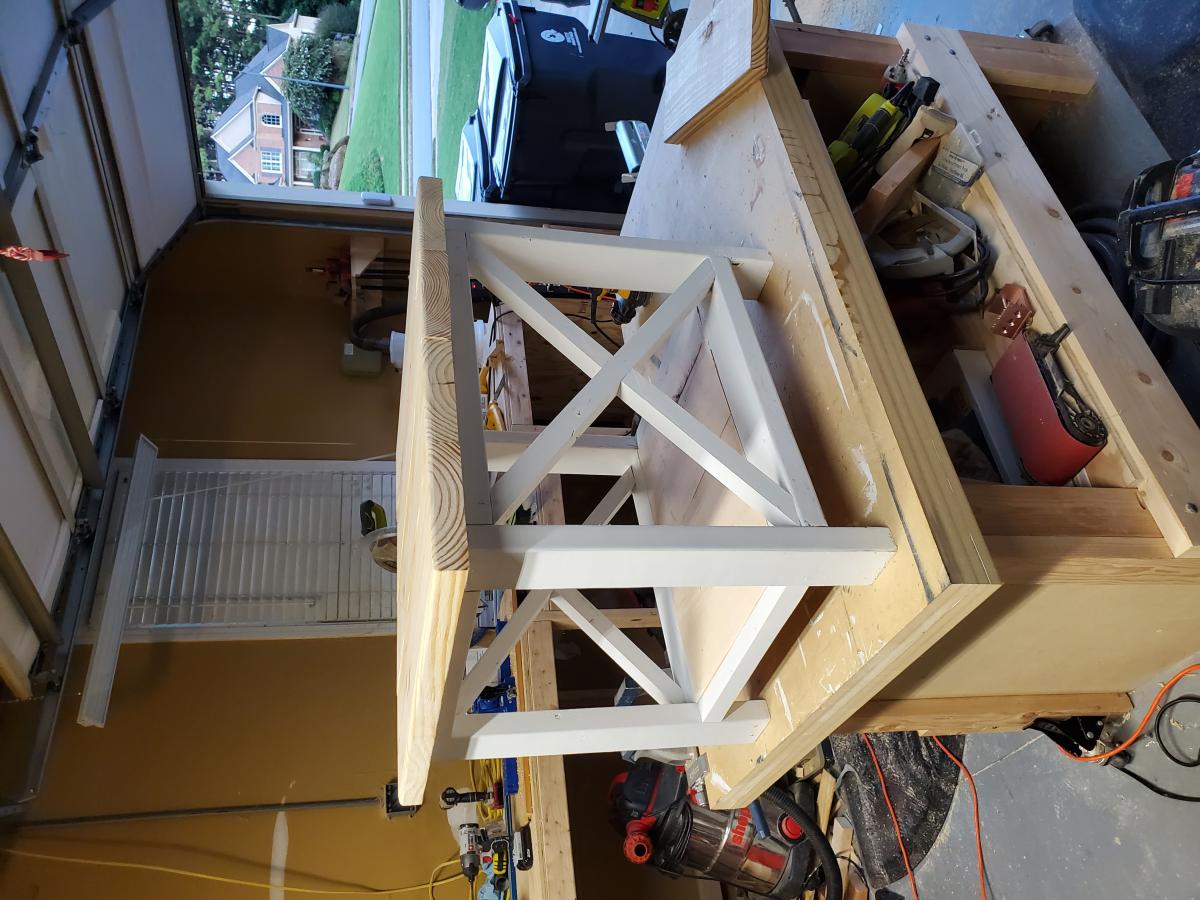
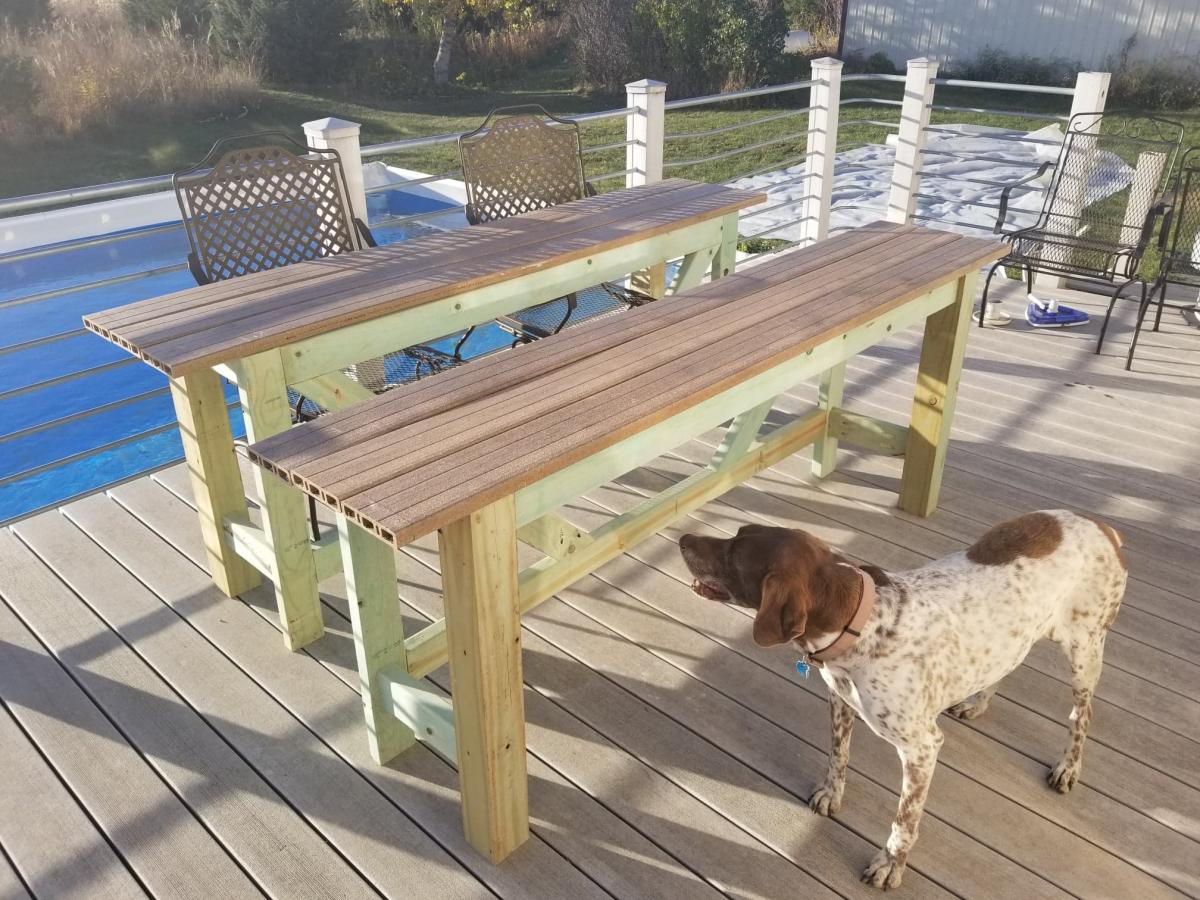
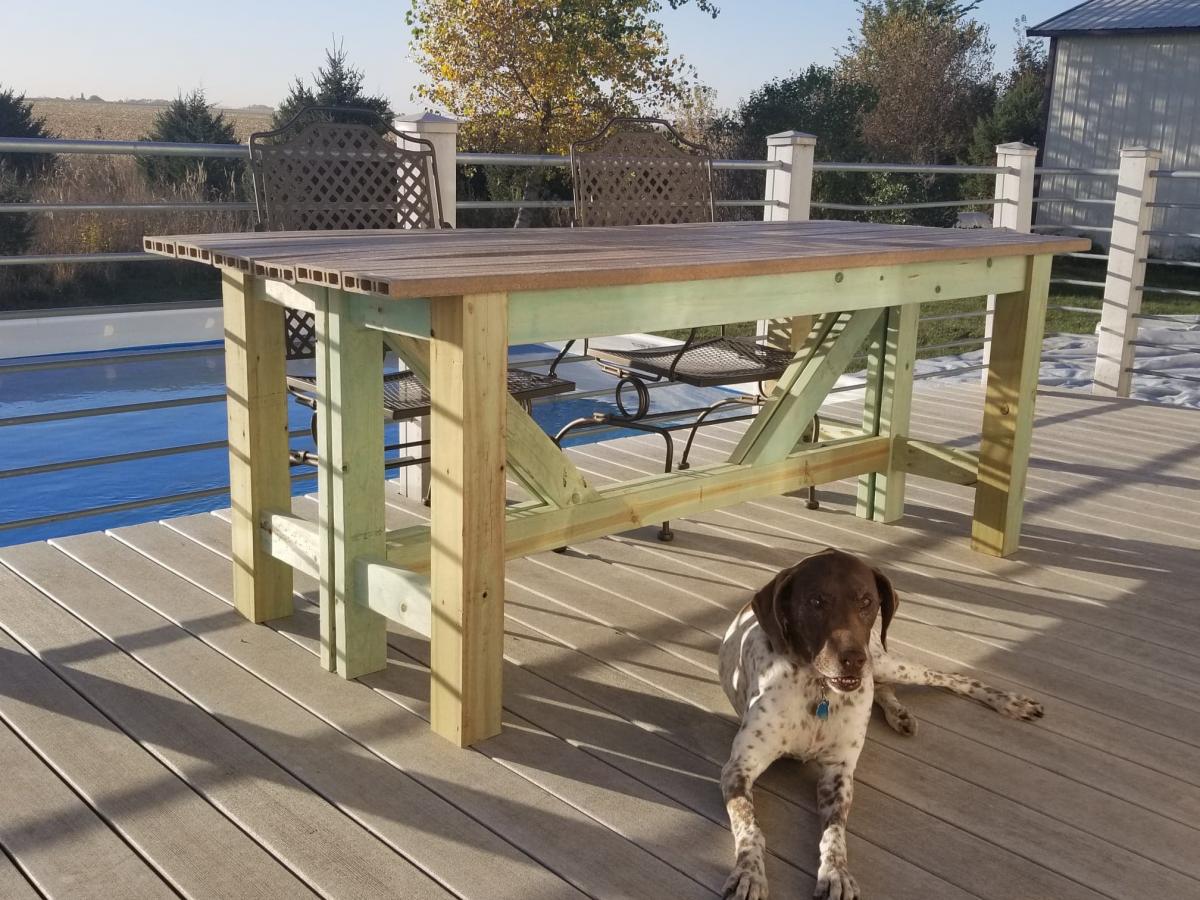
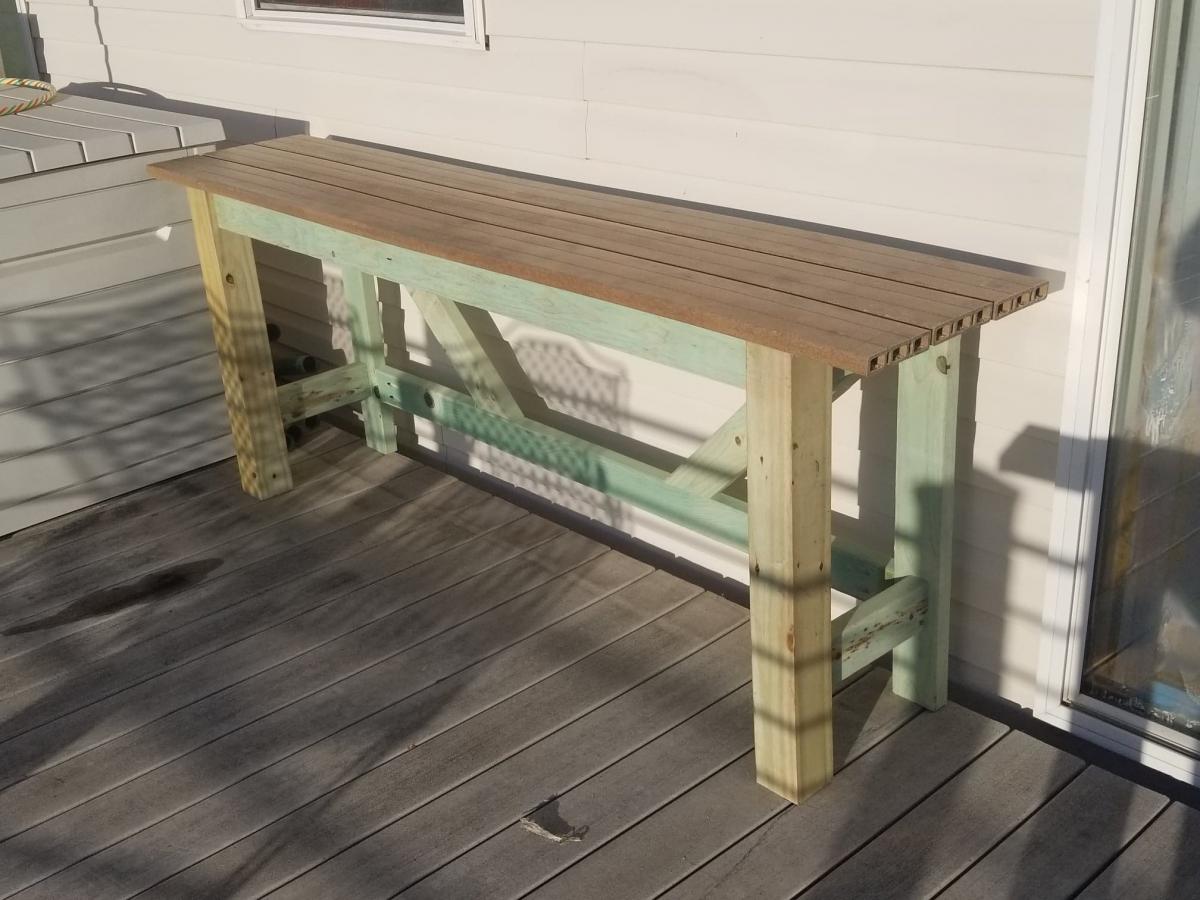
I should say my tables are loosely based off of Ana's plans, they served as a good reference. I lowered the table to 30" to match our existing deck chairs. I decided to actually build 2 half tables, so that when we were not using the table they could be set to the side of the deck. The back of each table is constructed with 2x4s so when the tables are put together it maintains the 4x4 look.
For the tabletop I had extra composite deck boards that I never used for the deck, so the depth of each half table was based on using 3 deck boards, with a 1/4" gap between each deck board. I used the same hidden fastener method I used on the original deck, so the deck boards are secured from under the table.
This being my first pocket hole project, there are a couple of small mistakes. 1) On the 45 degree trusses cut all 4 at the same time, then did the pocket holes. I missed the fact that I needed to drill 2 of the pocket holes on the opposite side. 2) I built the 2nd table back on top of the 1st table back so they matched. but I got mixed up when assembling the 2nd table so the pocket holes that should have been on the side facing the other table back, are facing the opposite side.
I did use Treated lumber for the table frame, and some of the pieces were still pretty wet, so we will wait until next year to paint the base.
We really like how they turned out, and that we still have almost all of our deck space when the tables are in the "Stored" locations.
Mon, 10/12/2020 - 09:54
I love your creation and the use of deck boards for the top, thanks for sharing!
Mon, 10/12/2020 - 20:50
I should say Thank You for all your sharing, which made this project possible!
The doll size version of PB camp bunk beds with a solid head and footboard made to mimic the real life size version. I made these bunks to match the life size version which the girls have in their ski house complete with matching quilts using the same fabric from their bedding.
My wife needed a new bookshelf in her classroom so I took this plan and customized it. She wanted three shelves and to be able to fit a three ring binder on the shelves upright. I mitered the top to have a finished edge all the way around the top. I ripped about 1/4" off the back of the two middle shelves so I could put the back planking inside and flush. I patterened 1x2's and 1x4's on the back to give a cool look.
We added a few things, like a tunnel, climbing wall and tire swing. The unveiling was quite the reaction to watch.
I built this farmhouse table for my beautiful wife for christmas using the update pocket hole plans. It was a lot of work but well worth it.
Bench in the making!
I used the Ana White "Country Kitchen Island" plans to build. The only changes I made was the table top, bead board instead of pine planks, three drawers, and mostly 3/4" plywood. For the island top, i used the top of a maple desk and applied butcher block oil. To make things easier I used plywood to keep everything square and used bead board (very easy to install) instead of having to join boards together. After putting the shelves together I just used pine boards to cover the edges of the plywood. I also installed three drawers for convenient storage.
Wed, 10/26/2016 - 13:48
Do you have more details on how you did the drawers? demensions, etc? Did you just extend the divider vertical bards that are inside all the way up? Or did you build cut 3 holes out of the front facing horizontal board? If you did that were you able to add tracks?
We built this huge 7' buffet for our living/dining room area.
Thu, 09/07/2017 - 07:39
Woud you please share what stain/finish you used on your piece? It is beautiful !
~ Denise
Thu, 04/02/2020 - 16:34
I would love to have the custom stain color if you would share it!
Tue, 04/28/2020 - 15:00
Would you share the custom stain color for your buffet that looks like the one from Restoration Hardware?
Completed this project last week off of the plans here under outdoor! I Love it and plans were soooo easy to follow!
Mon, 10/19/2020 - 18:39
That looks like a relaxing spot! Great job and thanks for sharing!
We built this bed for the lil neighbor girl as a gift for Christmas. It turned out better than I expected! The Plans were amazing and easy to follow... It is the first project that I used my Kreg Jig! I am so excited to build another one for my daughter now! We decided to pre-finish all the parts after we cut them to ensure proper sealing of all the ends, just in case of any sap or what not. Special thanks to Ana for all of these plans and Ideas! You truely rock!